
HW-C770BS - Home Theater SAMSUNG - Free user manual and instructions
Find the device manual for free HW-C770BS SAMSUNG in PDF.


| Product Type | AV Receiver / Home Theater System |
| Model | HW-C770BS |
| Dimensions (W x H x D) | 17.2 x 6.6 x 14.7 inches |
| Weight | 13.7 lbs |
| Power Supply | 120V, 60Hz |
| Power Consumption (Main Unit) | 75W |
| Power Consumption (Subwoofer) | 35W |
| Standby Power Consumption | 0.9W |
| Amplifier Output (Front, Center, Surround, Surround Back) | 120W per channel (6 Ω, 20Hz-20kHz, THD 0.9%) |
| Subwoofer Output | 150W (8 Ω) |
| Audio Decoders | Dolby Digital, Dolby Digital EX, Dolby Digital Plus, Dolby TrueHD, DTS, DTS-ES, DTS 96/24, DTS-HD Master Audio, Dolby Pro Logic IIx, Dolby Pro Logic IIz, DTS NEO:6 |
| HDMI | 3 Inputs, 1 Output (compatible with 1080p, Anynet+ CEC) |
| Video Inputs | Component (2), Composite (3), HDMI (3) |
| Video Outputs | Component (1), Composite (2), HDMI (1) |
| Audio Inputs | Digital Optical (2), Digital Coaxial (1), Analog (4 stereo pairs), 7.1 Multi-Channel Analog |
| Audio Outputs | Subwoofer Pre-out (2), VCR Audio Out, Headphone |
| Other Connections | iPod/iPhone Dock, FM Antenna, USB (firmware only), ASC Microphone |
| Speaker Configuration | Up to 7.1 channels (supports Dolby Pro Logic IIx and IIz) |
| FM Tuner | 87.5-108 MHz, 30 presets, RDS |
| Special Features | Auto Sound Calibration (ASC), Sound Field Effect (SFE), MP3 Enhancer, Smart Volume, Sleep Timer, Variable Power Save |
| Remote Control | Universal (controls TV, DVD/BD), range ~23 ft |
| Accessories Included | Remote, AAA batteries, FM antenna, iPod dock, ASC microphone, user manual |
| Safety | FCC Class B, safety warnings included, surge protection during thunderstorms |
| Repair & Spare Parts | Service by qualified personnel only; no user-serviceable parts inside |
Frequently Asked Questions - HW-C770BS SAMSUNG
User questions about HW-C770BS SAMSUNG
0 question about this device. Answer the ones you know or ask your own.
Ask a new question about this device
Download the instructions for your Home Theater in PDF format for free! Find your manual HW-C770BS - SAMSUNG and take your electronic device back in hand. On this page are published all the documents necessary for the use of your device. HW-C770BS by SAMSUNG.
USER MANUAL HW-C770BS SAMSUNG
AV Receiver System user manual
imagine the possibilities
Thank you for purchasing this Samsung product.
To receive more complete service,
please register your product at
www.samsung.com/register
SAMSUNG
Safety information
SAFETY WARNINGS
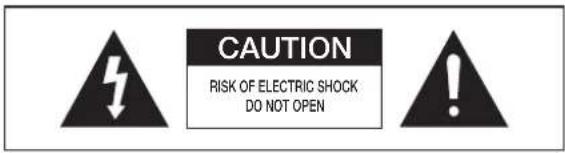
TO REDUCE THE RISK OF ELECTRIC SHOCK, DO NOT REMOVE THE COVER(OR BACK). NO USER-SERVICEABLE PARTS ARE INSIDE. REFER SERVICING TO QUALIFIED SERVICE PERSONNEL.
text_image
CAUTION RISK OF ELECTRIC SHOCK DO NOT OPENThis symbol indicates "dangerous voltage" inside the product that presents a risk of electric shock or personal injury. This symbol indicates important instructions accompanying the product.
WARNING
- To reduce the risk of fire or electric shock, do not expose this appliance to rain or moisture.
- To prevent injury, this apparatus must be securely attached to the floor/wall in accordance with the installation instructions.
CAUTION
- Apparatus shall not be exposed to dripping or splashing and no objects filled with liquids, such as vases, shall be placed on the apparatus.
- The Mains plug is used as a disconnect device and shall stay readily operable at any time.
This product satisfies FCC regulations when shielded cables and connectors are used to connect the unit to other equipment. To prevent electromagnetic interference with electric appliances, such as radios and televisions, use shielded cables and connectors for connections.
FCC NOTE (for U.S.A):
This equipment has been tested and found to comply with the limits for a Class B digital device, pursuant to Part 15 of the FCC Rules. These limits are designed to provide reasonable protection against harmful interference in a residential installation.
This equipment generates, uses and can radiate radio frequency energy and, if not installed and used in accordance with the instructions, may cause harmful interference to radio communications. However, there is no guarantee that interference will not occur in a particular installation.
If this equipment does cause harmful interference to radio or television reception, which can be determined by turning the equipment off and on, the user is encouraged to try to correct the interference by one or more of the following measures:
• Reorient or relocate the receiving antenna.
- Increase the separation between the equipment and receiver.
- Connect the equipment into an outlet on a circuit different from that to which the receiver is connected.
- Consult the dealer or an experienced radio/TV technician for help.
Caution : FCC regulations state that any unauthorized changes or modifications to this equipment may void the user's authority to operate it.
IMPORTANT SAFETY INSTRUCTIONS
This device complies with part 15 of the FCC Rules.
Operation is subject to the following two conditions: (1) This device may not cause harmful interference, and (2) this device must accept any interference received, including interference that may cause undesired operation.
IMPORTANT NOTE:
FCC Radiation Exposure Statement
This equipment complies with FCC radiation exposure limits set forth an uncontrolled environment.
This equipment should be installed and operated with minimum distance 7.9 inches between the radiator and your body. This transmitter must not be co-located or operating in conjunction with any other antenna or transmitter.
Canadian Department of Communications Radio Interference Regulations
This digital apparatus (Wireless Internet Radio) does not exceed the Class B limits for radio-noise emissions from digital apparatus as set out in the Radio Interference Regulations of the Canadian Department of Communications.
Read these operating instructions carefully before using the unit. Follow all the safety instructions listed below. Keep these operating instructions handy for future reference.
1) Read these instructions.
2) Keep these Instructions.
3) Heed all warnings.
4) Follow all instructions.
5) Do not use this apparatus near water.
6) Clean only with dry cloth.
7) Do not block any ventilation openings. Install in accordance with the manufacturer's instructions.
8) Do not install near any heat sources such as radiators, heat registers, stoves, or other apparatus (including amplifiers) that produce heat.
9) Do not defeat the safety purpose of the polarized or grounding-type plug. A polarized plug has two blades with one wider than the other. A grounding type plug has two blades and a third grounding prong. The wide blade or the third prong are provided for your safety. If the provided plug does not fit into your outlet, consult an electrician for replacement of the obsolete outlet.
10) Protect the power cord from being walked on or pinched particularly at plugs, convenience receptacles, and the point where they exit from the apparatus.
11) Only use attachment/accessories specified by the manufacturer.
12) Use only with the cart, stand, tripod, bracket, or table specified by the manufacturer, or sold with the apparatus. When a cart is used, use caution when moving the cart/ apparatus combination to avoid injury from tip-over.
13) Unplug this apparatus during lightning storms or when unused for long periods of time.
14) Refer all servicing to qualified service personnel. Servicing is required when the apparatus has been damaged in any way, such as power-supply cord or plug is damaged, liquid has been spilled or objects have fallen into the apparatus, the apparatus has been exposed to rain or moisture, does not operate normally, or has been dropped.

Safety information
PRECAUTIONS
text_image
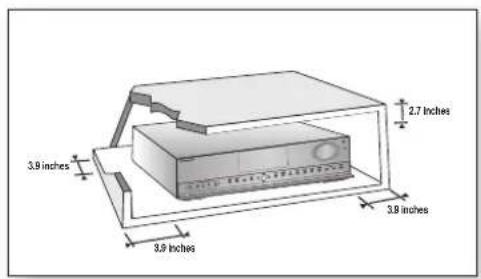
3.9 inches 2.7 inches 3.9 inches 3.9 inches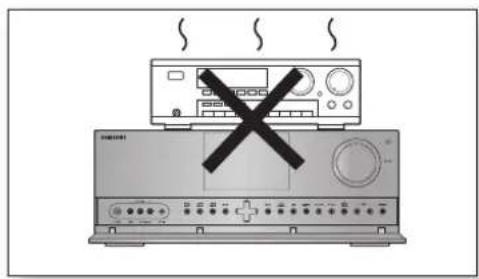
text_image
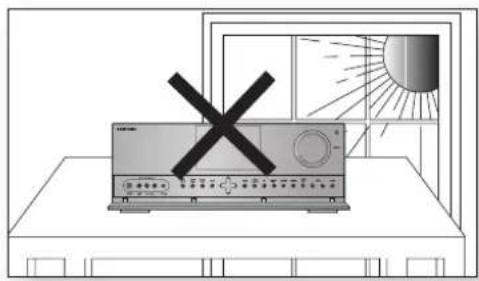
Diagram showing a device with a crossed-out black X symbol above its base, indicating a warning or prohibition.Ensure that the AC power supply in your house complies with the identification sticker located on the back of your player. Install your player horizontally, on a suitable base (furniture), with enough space around it for ventilation (3\~4 inches). Make sure the ventilation slots are not covered. Do not stack anything on top of the amplifier. In order to disconnect the player completely from the power supply, remove the AC plug from the wall outlet, especially when left unused for a long period of time.
natural_image
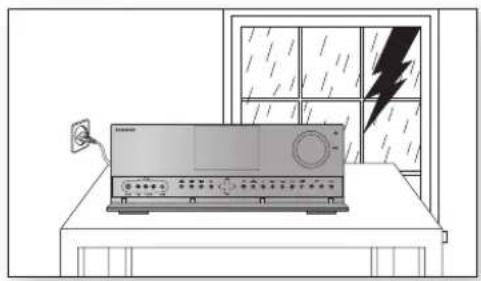
Line drawing of a kitchen appliance with a mounted device and a window showing raindrops (no text or symbols)During thunderstorms, disconnect the AC plug from the wall outlet. Voltage peaks due to lightning could damage the unit.
natural_image
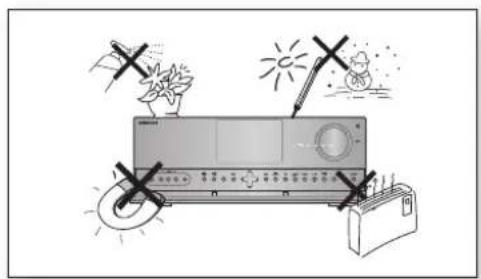
Illustration of a washing machine with a black X mark and light rays, placed on a surface (no text or symbols)Do not expose the unit to direct sunlight or other heat sources. This could lead to overheating and malfunction of the unit.
natural_image
Illustration of a washing machine with sun, windmill, and fan symbols (no text or labels)Protect the player from moisture(i.e. vases), and excess heat(e.g.fireplace) or equipment creating strong magnetic or electric fields (i.e.speakers...). Disconnect the power cable from the AC supply if the player malfunctions. Your player is not intended for industrial use. Use of this product is for personal use only. Condensation may occur if your player or disc have been stored in cold temperatures. If transporting the player during the winter, wait approximately 2 hours until the unit has reached room temperature before using.
text_image
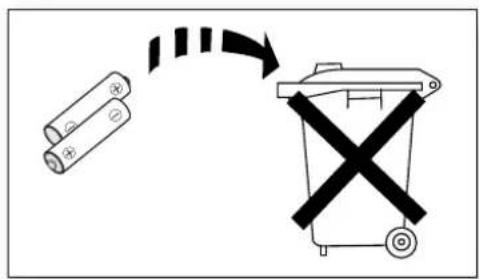
Diagram showing battery charging process with battery, battery, and recycling symbolThe batteries used with this product contain chemicals that are harmful to the environment. Do not dispose of batteries in the general household trash.
Features
Digital AV Receiver
This product is a pure digital AV receiver that performs digital signal processing to minimize signal distortion and loss.
Dolby Pro Logic Ilx
Dolby Pro Logic IIx is a new technology that provides discrete 7.1 channels out of 2 channel or multi channel sources. It also provides Music, Movie and Game modes. Dolby Pro Logic IIx is an improved surround system that is optimized to a 7.1 CH multimedia system, enabling you to maximize your entertainment experience.
Dolby Pro Logic Ilz
Dolby Pro Logic IIz adds front height channels to surround sound, creating a 7.1 playback system for video games, home music, and movies; bringing enhanced spatial effects and enveloping sound.
DTS 96/24
DTS 96/24 encodes standard 16 bit/44.1 kHz sound to 24 bit/96kHz and applies it to a 5.1 CH sound track.
DOLBY DIGITAL EX
Adds a surround back channel for more spacious sound compared to regular 5.1 channel Dolby Digital.
DTS (Digital Theater Systems)
DTS provides a discrete 5.1 CH digital audio signal for both music and movie contents and uses less compression than Dolby Digital for richer sound.
Dolby Digital Plus
Dolby Digital Plus is the next-generation audio technology for all high-definition programming and media.
Dolby True-HD
Dolby True-HD is Dolby's next-generation lossless technology developed for high-defi nition disc-based media.
DTS-HD (Master Audio, High Resolution) (Digital Theater Systems - High Definition)
DTS-HD Audio provides the highest quality multi-channel sound possible.
It delivers sound quality that matches the clear and vivid images of high-defi nition video.
DTS NE0:6

Provides a full range of 6 channels by converting a digital PCM or analog stereo signal using DTS digital matrix decoding.
iPod

You can enjoy music files by connecting your iPod/iPhone to the AV Receiver with the supplied iPod dock.
SFE (Sound Field Effect) Using 32bit Audio Digital Signal Processing
Provides more realistic surround sound with normal stereo audio sources.
Anynet+ (HDMI-CEC) Function
Anynet+ is a function that can be used to operate this AV Receiver with a Samsung TV remote control, by connecting the receiver to a SAMSUNG TV using an HDMI Cable. (This function is available only in connection with Samsung TV and DVD player supporting Anynet+(HDMI-CEC).)
DTS-ES
(Extended Surround)

The DTS-ES (Extended Surround) system is a new multi digital signal format that was developed by Digital Theater Systems Inc.
Supporting full compatibility with the conventional DTS digital surround sound format, the DTS-ES (Extended Surround) system improves the surround signal for a 360-degree surround effect.
DTS-ES adds an additional rear center surround channel for 6.1 channel sound.
ACCESSORIES
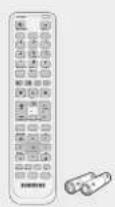
Remote Control (AH59-02307A)/ Batteries (AAA size) (4301-000116)
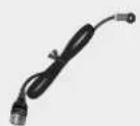
FM antenna (AH42-00017A)

User's manual (AH68-02260R)
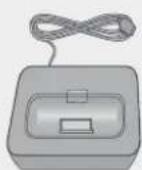
iPod Dock (AH96-00051A)
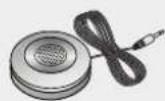
ASC microphone (AH30-00099A)
Contents
SAFETY INFORMATION

2 Safety Warnings
3 Important Safety Instructions
4 Precautions
FEATURES

5 Accessories
DESCRIPTION

8 Front Panel
10 Rear Panel
12 Display
13 Insert Remote Control Batteries
13 Operation Range of the Remote Control
14 Tour of the Remote Control
CONNECTIONS

16 Speaker Positioning
18 Connecting the Speakers
19 Connecting External Devices/Your TV via HDMI
20 HDMI Function
21 Connecting to your TV
22 Connecting a DVD or BD(Blu-ray) Player
23 Connecting a Cable, Satellite or Set-top Box
24 Connecting a VCR
25 Connecting a CD Player
26 Connecting 7.1 Channel Devices
27 Connecting an iPod
29 Connecting the FM Antenna
29 Connecting Aux Components
BASIC FUNCTIONS OF YOUR AV RECEIVER

30 Before Using the AV Receiver
30 Audio Setup
31 Selecting Digital/Analog Input
SETUP 32
32 Setup Menu Tree
36 Setting the Speaker Size
37 Setting the Speaker Listening Distance
38 Setting the Speaker Level
39 Setting the Test Tone
40 Setting Dolby Pro Logic Mode
40 Setting Dolby Pro Logic IIx
41 Setting Dolby Pro Logic IIz
41 Setting Tone Control
42 Setting NEO:6 Mode
43 Setting EX/ES Mode
44 AV SYNC
44 MP3 Enhancer
44 Smart Volume
45 ASC (Auto Sound Calibration) Setup
46 DRC Setup
46 HDMI Setup
46 Variable Set
OPERATION 47
47 Using the Surround Modes
48 Using the Subwoofer Selection Button
49 Listening to the Radio
50 Using an iPod
52 Convenient Functions
53 Software Upgrade
MISCELLANEOUS 54
54 Operating Your TV With the Remote Control
56 Operating your DVD or BD player with the remote control
TROUBLESHOOTING 57
57 Troubleshooting
APPENDIX 59
59 Specifications
Description
FRONT PANEL
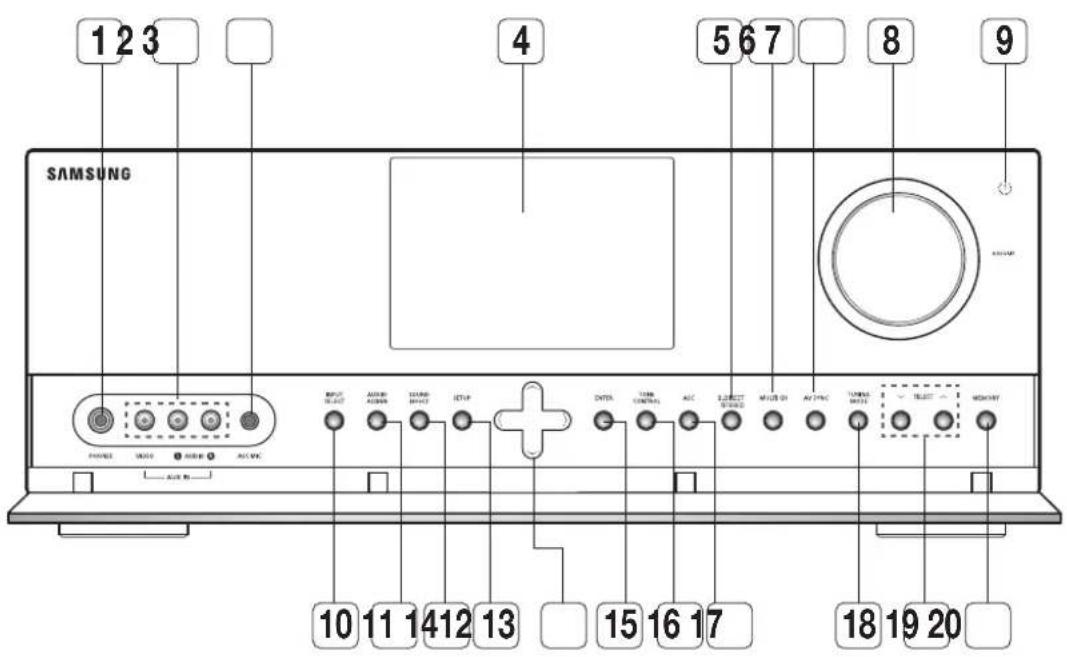
text_image
1 2 3 SAMSUNG 4 5 6 7 8 9 OUTPUT SELECT ADMIN ADMIN SECOND SECOND SETUP + ENTER TURB CONTROL ACC SUBST SYNC MUSB ON AC TINIC TURB MINT SELECT MONDAY 10 11 14 12 13 15 16 17 18 19 20| 1 | HEADPHONE JACK | Used to connect a set of headphones. |
| 2 | AUX IN JACKS | Auxiliary AV input terminals used to connect a camcorder, portable DVD player or gaming device. |
| 3 | ASC MIC JACK | Used to connect the ASC MIC for setting up ASC (Auto Sound Calibration). |
| 4 | DISPLAY | Displays the speaker/audio input status, listening mode, etc. |
| 5 | S.DIRECT/STEREO BUTTON | Used to select the S.DIRECT or STEREO mode. |
| 6 | MULTI CH BUTTON | Used to select a connected 7.1 multi channel player. |
| 7 | AV SYNC BUTTON | Used to select the Audio Delay Mode. |
| 8 | VOLUME CONTROL | Adjusts the volume level. |
| 9 | POWER | Turns the receiver on/off. |
| 10 | INPUT SELECT BUTTON | Used to select a source.(FM → BD/DVD → SAT → TV → VCR → CD → AUX → 7.1 MULTI CH → IPOD AUDIO → IPOD VIDEO). |
| 11 | AUDIO ASSIGN BUTTON | Toggles to select an input mode for the selected source. |
| 12 | SOUND EFFECT BUTTON | Toggles to select a surround sound mode. |
| 13 | SETUP BUTTON | Displays the SETUP menu. |
| 14 | UP(∧), DOWN(∨), LEFT(<), RIGHT(>) BUTTONS | Used to move the cursor up, down, left or right.Also used to select detailed options in the SOUND EFFECT mode and to change the tone level. |
| 15 | ENTER BUTTON | Used to select an item in the SETUP menu. |
| 16 | TONE CONTROL BUTTON | Used to set the bass, treble level and tone to on/off. |
| 17 | ASC BUTTON | Used to select the ASC (Auto Sound Calibration) mode. |
| 18 | TUNING MODE BUTTON | Used to select the Manual or Preset mode for FM radio. |
| 19 | SELECT BUTTON | Used to change the radio frequency. |
| 20 | MEMORY BUTTON | Used to set a preset radio frequency. |
Description
REAR PANEL
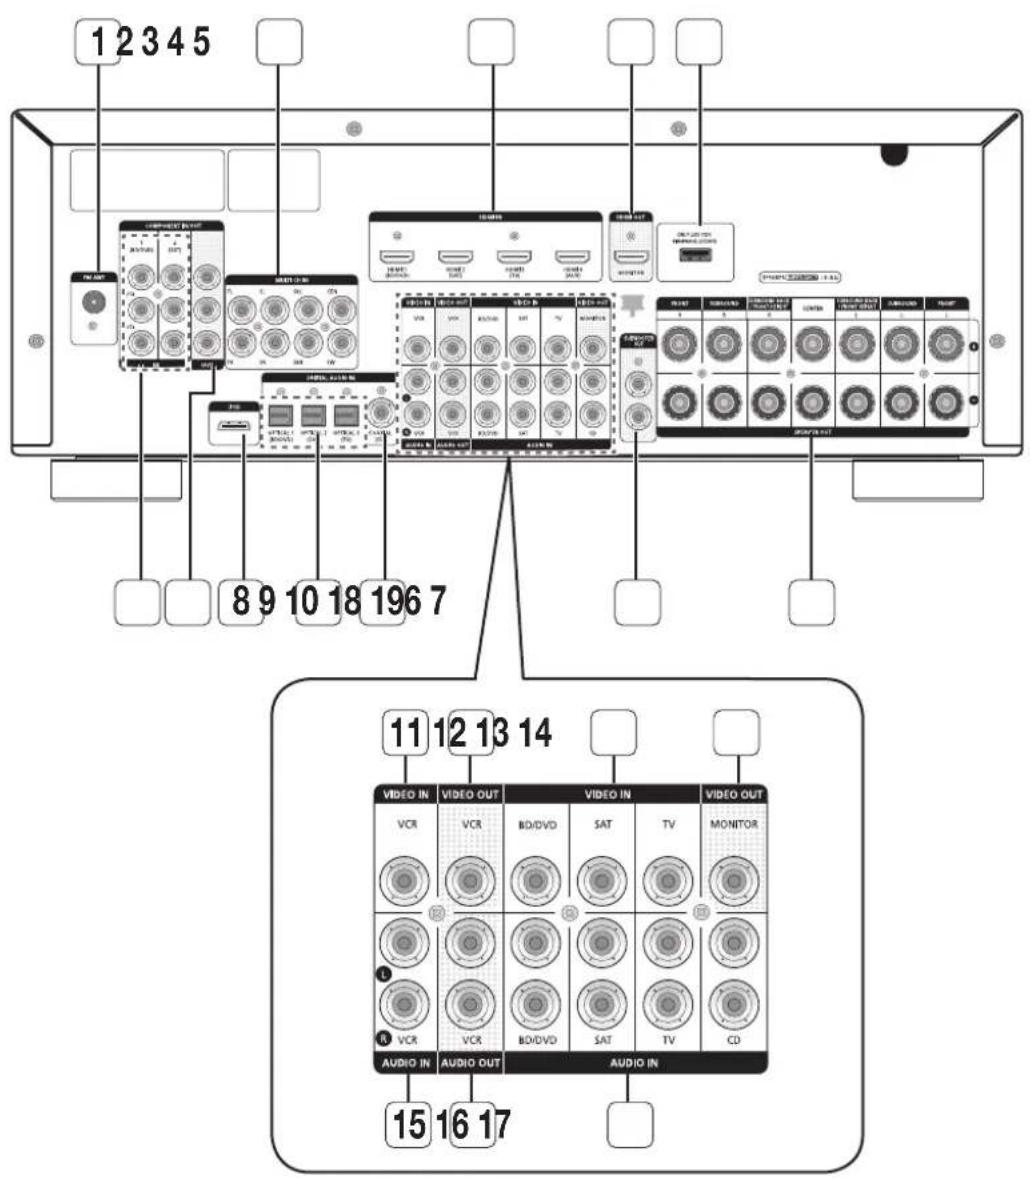
text_image
12345 8910181967 11121314 VIDEO IN VIDEO OUT VIDEO IN VIDEO OUT VCR VCR BD/DVD SAT TV MONITOR AUDIO IN AUDIO OUT AUDIO IN 15 16 17| 1 | FM ANTENNA JACK | Connect the FM Antenna here. |
| 2 | MULTI CH IN JACKS | Receives the analog audio signal from an external player with a multi-channel port. |
| 3 | HDMI IN JACKS | Receives digital video and audio signals simultaneously using an HDMI cable. |
| 4 | HDMI OUT JACK | Outputs digital video and audio signals simultaneously using an HDMI cable. |
| 5 | USB PORT | Can be only used for fi rmware upgrades. |
| 6 | COMPONENT VIDEO IN JACKS | Receives the component video signal. |
| 7 | COMPONENT VIDEO OUT JACKS | Outputs the component video signal. |
| 8 | iPod JACK | Receives the audio/video signal from an iPod. |
| 9 | OPTICAL IN JACKS (DIGITAL AUDIO IN) | Receives the digital optical audio signal. |
| 10 | COAXIAL IN JACK (DIGITAL AUDIO IN) | Receives the digital coaxial audio signal. |
| 11 | VCR VIDEO IN JACK | Receives the video signal from a VCR. |
| 12 | VCR VIDEO OUT JACK | Outputs the video signal to a VCR. |
| 13 | VIDEO IN JACKS | Receives the video signal from a video player (BD/DVD, SAT,TV). |
| 14 | VIDEO OUT JACK | Outputs the video signal to video devices (TV, Projector etc). |
| 15 | VCR AUDIO IN JACKS | Receives the audio signal from a VCR. |
| 16 | VCR AUDIO OUT JACKS | Outputs the audio signal to a VCR. |
| 17 | AUDIO IN JACKS | Receives the audio signal from a video player (BD/DVD, SAT,TV, CD). |
| 18 | SUBWOOFER AUDIO OUT JACKS | Connect the subwoofers. |
| 19 | SPEAKER OUT TERMINALS | Speaker connection terminals. |
Description
DISPLAY
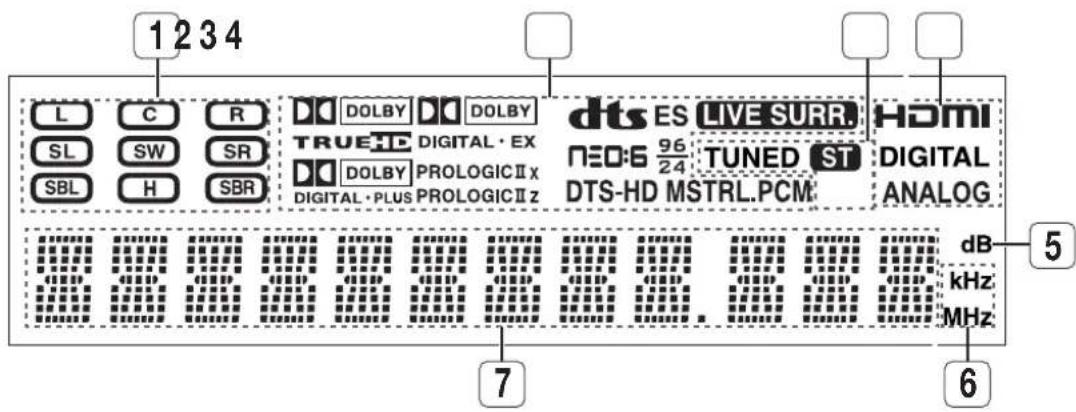
text_image
1234 L C R DOLBY DOLBY SL SW SR TRUE HD DIGITAL·EX SBL H SBR DOLBY PROLOGICⅡx DIGITAL·PLUS PROLOGICⅡz dts ES LIVE SURR. HDMI NEO:6 96 TUNED ST DIGITAL DTS-HD MSTRL.PCM ANALOG 7 dB kHz MHz 6| 1 | SPEAKER INDICATORS | Displays the connected speakers. |
| 2 | LISTENING MODE INDICATORS | Displays the current listening mode. |
| 3 | TUNING INDICATORS | Displays the status of the current radio broadcast. |
| 4 | AUDIO INPUT INDICATORS | Displays the audio input signal type of the currently connected external audio source. |
| 5 | SPEAKER LEVEL INDICATOR | Displays the speaker level. |
| 6 | RADIO FREQUENCY INDICATORS | Displays the current radio frequency range. |
| 7 | MESSAGE DISPLAY | Informs you of the status of the receiver. |
INSERT REMOTE CONTROL BATTERIES
text_image
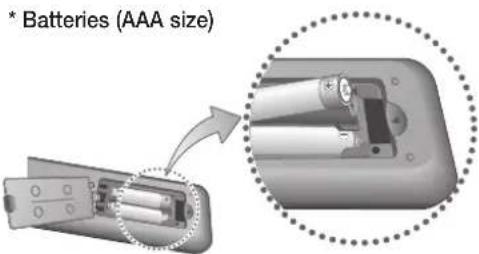
* Batteries (AAA size)
Follow these precautions to avoid leaking or cracking cells:
- Place batteries in the remote control so they match the polarity: (+) to (+) and (−) to (−).
■ Assuming typical TV usage, the batteries last for about one year.
■ Use the correct type of batteries. Batteries that look similar may differ in voltage.
■ Always replace both batteries at the same time.
■ Do not expose the batteries to heat or a flame.
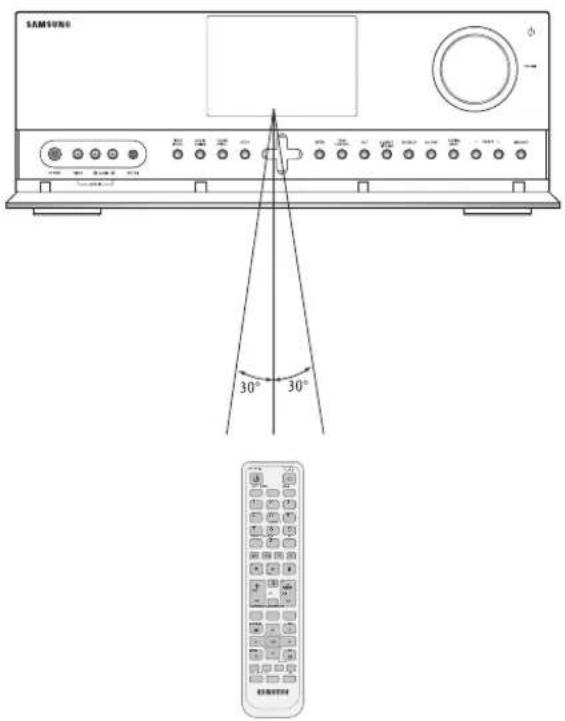
The remote control can be used up to approximately 23 feet/7 meters in a straight line. It can also be operated at a horizontal angle of up to 30^ from the remote control sensor.
text_image
SAMSUNG 30° 30°Description
TOUR OF THE REMOTE CONTROL
text_image
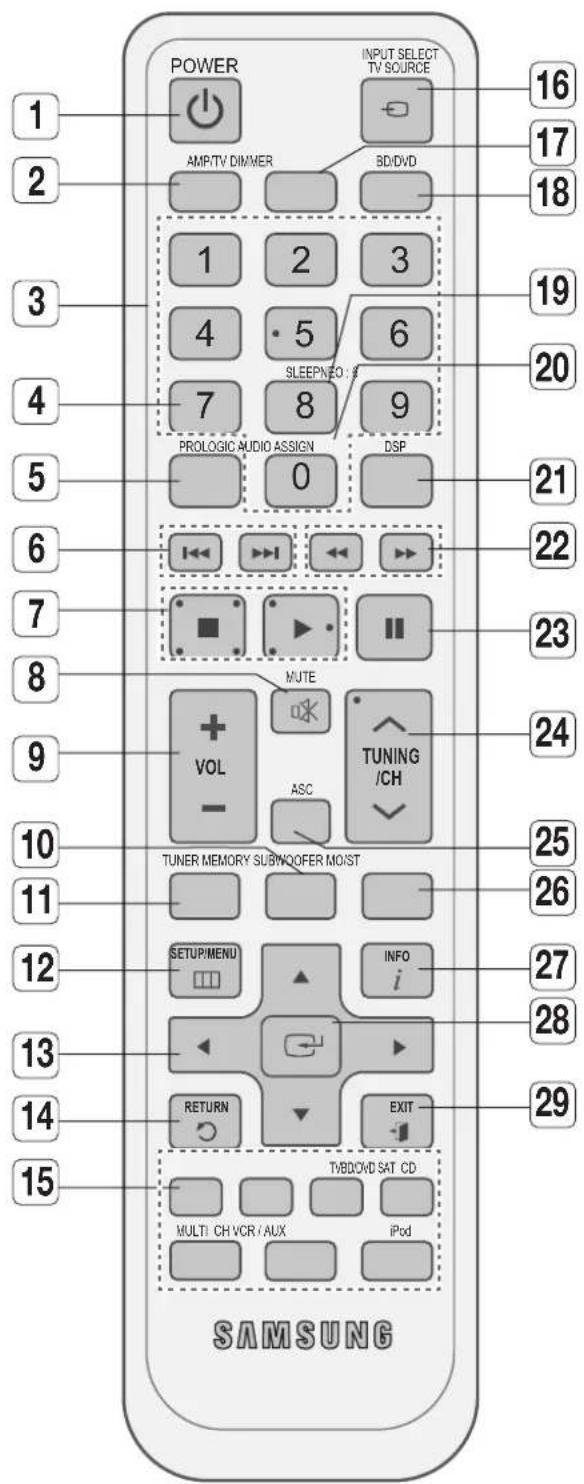
POWER INPUT SELECT TV SOURCE 16 2 AMP/TV DIMMER BD/DVD 17 3 4 5 6 SLEEPNEO 8 7 8 9 PROLOGIC AUDIO ASSIGN DSP 5 0 21 6 22 7 MUTE 23 8 9 TUNING /CH 24 9 VOL ASC TUNER MEMORY SUBWOOFER MOIST 25 10 TUNER MEMORY SUBWOOFER MOIST 26 11 SETUP/MENU INFO i 27 12 13 RETURN EXIT 28 14 15 TWBDWD SAT CD MULTI CH VCR / AUX iPod SAMSUNG| 1 | POWER BUTTON | Turns the receiver on/off. |
| 2 | AMP/TV BUTTON | Used to select the AMP/TV mode.- If you select the AMP mode, the button will fl ash orange.- If you select the TV mode, the button will fl ash green. |
| 3 | NUMBER BUTTONS | Used to select a TV channel. |
| 4 | NEO : 6 BUTTON | Select the desired NEO:6 mode. |
| 5 | PROLOGIC BUTTON | Select the desired Dolby Pro Logic audio mode. |
| 6 | SKIP BUTTONS | Press to skip backwards or forwards on a connected DVD/BD player or iPod. |
| 7 | STOP/PLAY BUTTON | Press to stop/start playback on a connected DVD/BD player or iPod. |
| 8 | MUTE BUTTON | Mutes the sound of a connected device. |
| 9 | VOLUME CONTROL BUTTONS | Adjusts the volume of the selected device. |
| 10 | SUBWOOFER BUTTON | Used to select the Subwoofer. |
| 11 | TUNER MEMORY BUTTON | Used to set a preset radio frequency. |
| 12 | SETUP/MENU BUTTON | Displays the SETUP menu. |
| 13 | UP/DOWN/LEFT/RIGHT BUTTONS | Used to navigate the menus. |
| 14 | RETURN BUTTON | Used to return to the previous menu from the SETUP menu. |
| 15 | FUNCTION SELECTOR BUTTONS | Used to select an input source. |
| 16 | INPUT SELECT, TV SOURCE BUTTON | Toggles to fi nd and select an input source.Press to select a connected TV's video source. |
| 17 | DIMMER BUTTON | Adjusts the brightness of the display. |
| 18 | BD/DVD BUTTON | Used to select the BD/DVD mode.- If you select the BD mode, the button will fl ash orange.- If you select the DVD mode, the button will fl ash green. |
| 19 | SLEEP BUTTON | Used to set the Sleep Timer. |
| 20 | AUDIO ASSIGN BUTTON | Toggles to select an input mode for the selected source. |
| 21 | DSP BUTTON | Used to select the SFE mode. |
| 22 | SEARCH BUTTON | Press to search backwards or forwards. |
| 23 | PAUSE BUTTON | Pauses playback on a connected device. |
| 24 | TUNING/CHANNEL BUTTONS | Used to change the radio broadcasting frequency or TV channel. |
| 25 | ASC BUTTON | Used to set the Auto Sound Calibration function. |
| 26 | MO/ST BUTTON | Select MONO or STEREO for radio broadcasts. |
| 27 | INFO BUTTON | Display information on the connected device currently being used. |
| 28 | ENTER BUTTON | Used to select an item in the SETUP menu. |
| 29 | EXIT BUTTON | Exits the SETUP menu. |
Connections
This section involves various methods of connecting the AV receiver to other external components. Before moving or installing the product, be sure to turn off the power and disconnect the power cord.
SPEAKER POSITIONING
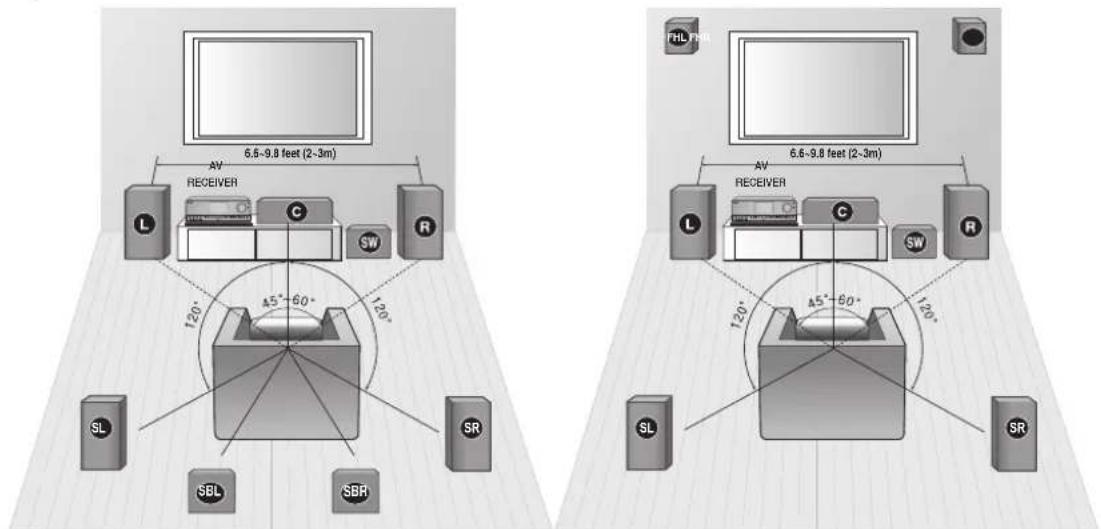
There are two methods for positioning the speakers.
When using Dolby Pro Logic IIz, place the Surround Back Speakers in the FHL, FHR position and connect them to SURROUND BACK/ FRONT HEIGHT Jack.
* Speakers are provided with model HW-C770S/HW-C770BS only. Model HW-C700/C700B does not come with speakers.
text_image
6.5-9.8 feet (2-3m) AV RECEIVER L C SW R 120° 45°-60° 120° SL SBL SBR FH L FL 6.6-9.8 feet (2-3m) AV RECEIVER L C SW R 120° 45°-60° 120° SL SRL, R, C, SW, SL, SR, SBL, SBR (Dolby Pro Logic IIx) L, R, C, SW, SL, SR, FHL, FHR (Dolby Pro Logic IIz)
Position of AV Receiver
Place the AV Receiver on a dedicated stand or rack.
Subwoofer SW
The position of the subwoofer is not so critical. Place it anywhere you like.
Subwoofer function (HW-C770S/C770BS only)
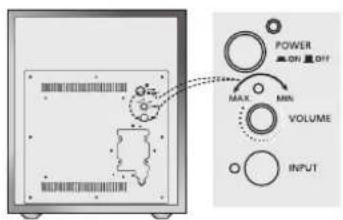
Active subwoofer with integrated 150W amplifier provides rich bass sound.
- Connect the SW OUT terminal of the amplifier to the INPUT terminal of the subwoofer speaker.
- Press the POWER button on the rear side of the subwoofer to turn the power on.
- Using the subwoofer's VOLUME control, you can set the desired bass level (See page 38 "Setting the speaker level" to set the subwoofer level in the menu).
text_image
POWER ON OFF MAX MIN VOLUME INPUTFront Speakers L R
Place these speakers in front of your listening position, facing inwards (about 45°) toward you.
Place the speakers so that their tweeters will be at the same height as your ears.
Align the front face of the front speakers with the front face of the center speaker or place them slightly in front of the center speaker.
Center speaker ©
It is best to install it at the same height as the front speakers.
You can also install it directly over or under the TV.
Surround Speakers SL SR
Place these speakers behind your listening position.
If there isn't enough room, place these speakers so they face each other.
Place them about 2 to 3 feet (60 to 90cm) above your ears, facing slightly downward.
Unlike the front and center speakers, the surround speakers are used to handle mainly sound effects and sound will not come from them all the time.
Surround Back Speakers SBL BR
If you are using two rear center speakers, place them behind the listening position.
Place the surround back speaker about 2.3-3.3 feet (70 cm to 1 m).
Front Height Speakers FHL IR (Using Dolby Pro Logic IIz)
When using Dolby Pro Logic IIz, place the Surround Back Speakers on the FHL, FHR position above the front L and front R speakers at least 3.3 feet(1 m) above each one.
- Using the Surround Back Speakers as Front Height Speakers -
-
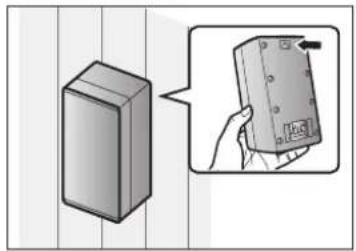
Fasten 2 screws(not supplied) for each speaker on the wall above the front L and R speakers.
-
Install the Surround Back Speakers (L, R) by fi tting the holes on the back the Surround Back Speakers to the screws on the wall.
natural_image
Illustration of a gray rectangular device next to a hand holding a small electronic device (no text or symbols visible)- When you attach the speakers to the wall, make sure to fasten them tightly so they do not fall off.
Speaker Configuration
For the best surround-sound experience, you should connect seven speakers and a powered subwoofer. The following table shows which channels you should use based on the number of speakers you have.
| 2 speakers 3 | speakers 4 | speakers 5 | speakers 6 | speakers | 7 speakers (DPL IIx) | 7 speakers (DPL IIz) | |
| L | L | L | L | L | L | L | L |
| R | R | R | R | R | R | R | R |
| C | C | C | C | C | C | ||
| SL | SL | SL | SL | SL | SL | ||
| SR | SR | SR | SR | SR | SR | ||
| SBL | ● | FHL | |||||
| SBR | FHR |
- No matter how many speakers you use, a powered subwoofer is recommended for powerful and solid bass.
- If you place a speaker near your TV set, screen color may be distorted because of the magnetic fi eld generated by the speaker. If this occurs, place the speaker away from your TV set.
Connections
CONNECTING THE SPEAKERS
flowchart
graph TD
    A["ACTIVE SUBWOOFER (BUILT-IN POWER AMPLIFIER) PS-AW730"] --> B["SW"]
    B --> C["Speaker Output"]
    C --> D["Center PS-CC770S"]
    D --> E["Speaker Output"]
    E --> F["Front PS-FC770S"]
    E --> G["SR PS-RC770S"]
    E --> H["SBR PS-BC770S"]
    E --> I["SBL PS-BC770S"]
    E --> J["SL PS-FC770S"]
    E --> K["L PS-FC770S"]
    C --> L["Speaker Output"]
    L --> M["Model HW-C700/C700B"]
    L --> N["AV Receiver HW-C700/C700B"]
    C --> O["Speaker Output"]
    O --> P["Model HW-C770S/C770BS"]
    O --> Q["AV Receiver HW-C770S/C770BS"]
    O --> R["FRONT SPEAKER PS-FC770S"]
    O --> S["CENTER SPEAKER PS-CC770S"]
    O --> T["SURROUND SPEAKER PS-RC770S"]
    O --> U["SURROUND BACK SPEAKER PS-BC770S"]
    O --> V["ACTIVE SUBWOOFER PS-AW730"]

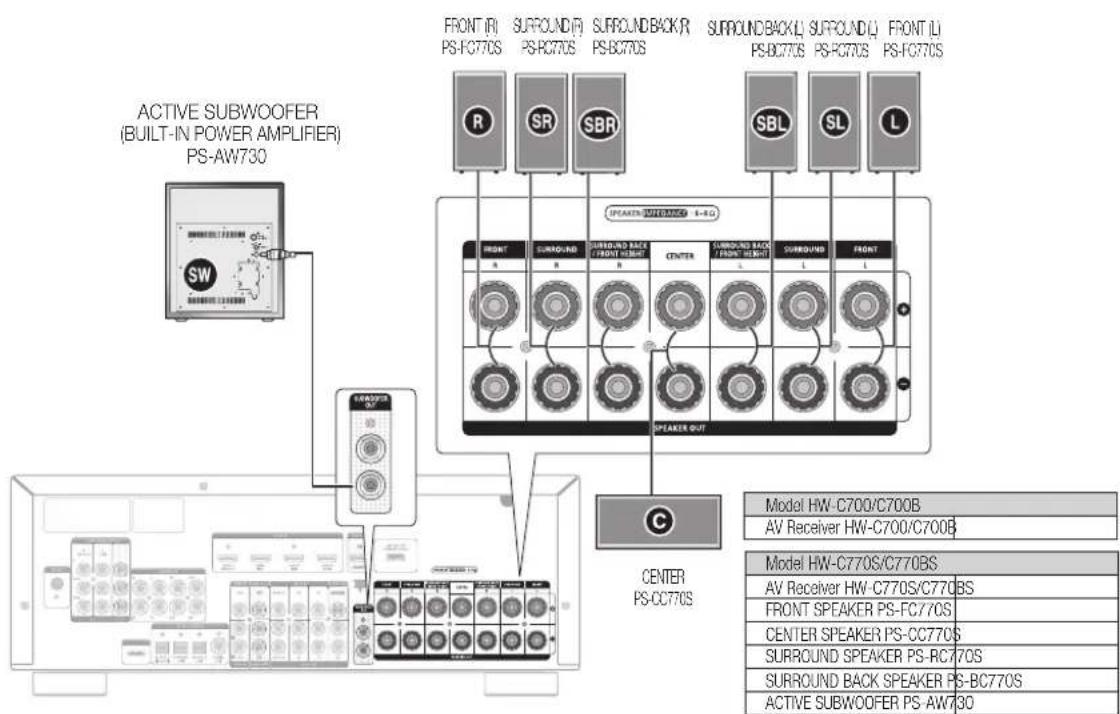
Speakers are provided with model HW-C770S/HW-C770BS only. Model HW-C700/C700B does not come with speakers.
One Active Subwoofer is provided, if you would like to use another, purchase it from the retailer where you bought the player and connect it to the other SUBWOOFER OUT Jack.
- When using Dolby Pro Logic Ilz, connect the Surround Back Speakers (FHL, FHR) to SURROUND BACK/FRONT HEIGHT Jack.
Connecting Speaker Wire
- Loosen the knob by turning counterclockwise.
- Insert the bare part of the wire into the hole in the side of each terminal.
- Tighten the knob by turning clockwise to secure the wire.



- Keep the subwoofer speaker out of reach of children to prevent them from inserting their hands or objects into the duct (hole).
■ Never touch speaker terminals while the power is on. Doing so could result in electric shock.
■ Make sure the polarities (+ and -) are correct.
Connecting the Speakers
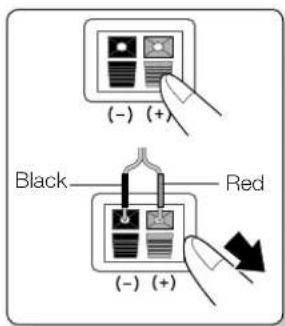
- Press down the terminal tab on the back of the speaker.
- Insert the black wire into the black terminal (−) and the red wire into the red (+) terminal, and then release the tab.
- Connect the connecting plugs to the back of the AV Receiver.
- Make sure the colors of the speaker terminals on the back of the AV receiver match the colors of the connecting plugs.
text_image
(- ) (+) Black Red (- ) (+)CONNECTING EXTERNAL DEVICES/YOUR TV VIA HDMI
HDMI is a digital standard interface for connection to such devices as a TV, projector, DVD player, Blu-ray player, set-top box and more.
HDMI removes any loss of signal from analog conversion, enabling you to enjoy video and audio sound quality as it was originally created in the digital source.
By connecting through the HDMI(High-Definition Multimedia Interface) interface, you can play back digital video and audio.
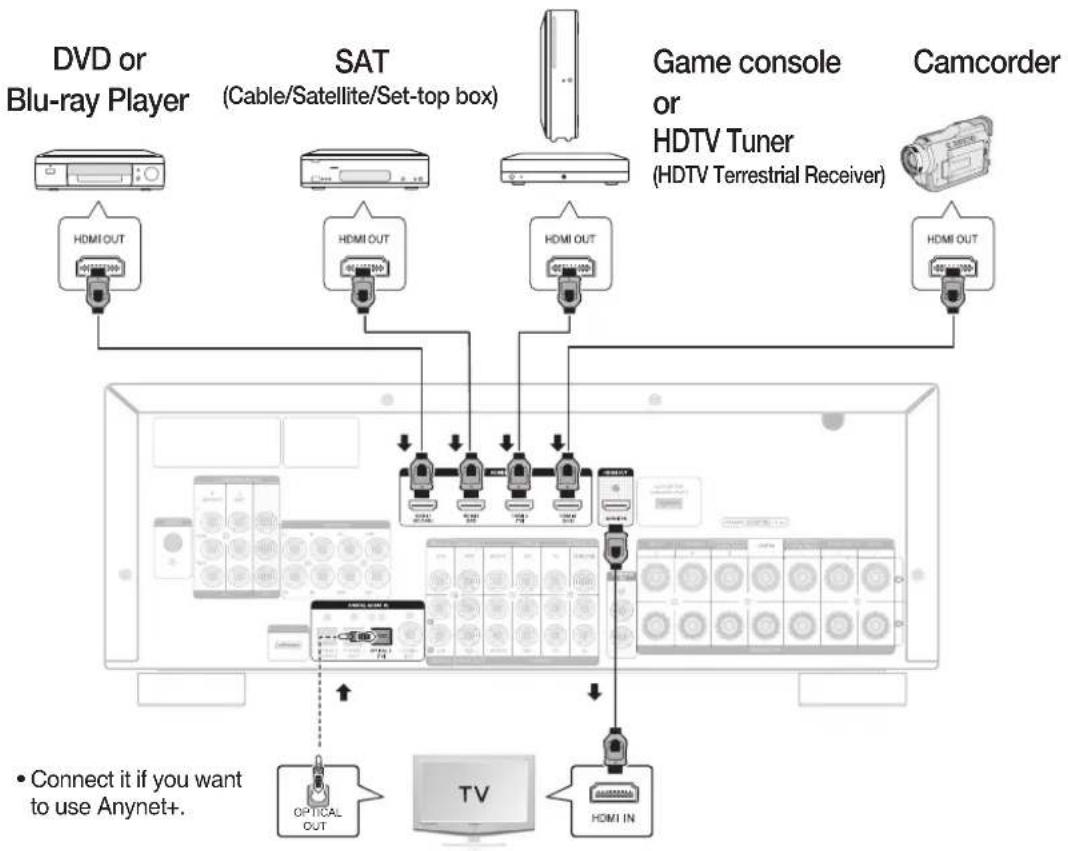
flowchart
graph TD
    A["DVD or Blu-ray Player"] --> B["HDMI OUT"]
    C["SAT (Cable/Satellite/Set-top box)"] --> D["HDMI OUT"]
    E["Game console or HDTV Tuner (HDTV Terrestrial Receiver)"] --> F["HDMI OUT"]
    G["Camcorder"] --> H["HDMI OUT"]
    B --> I["Connect it if you want to use Anynet+"]
    D --> I
    F --> I
    H --> I
    I --> J["TV"]
    J --> K["OPTICAL OUT"]
    J --> L["HDMI IN"]
High-bandwidth Digital Content Protection System (HDCP) support
To play digital contents through the HDMI connection, both the connected external device and TV must support High-bandwidth Digital Content Protection System (HDCP). This product supports HDCP.
| Compatibility with a TV Supporting HDMI | |
| A TV with an HDMI jack. Video/Audio | |
| A TV with a DVI-D jack (TV supporting HDCP) Video | |
| A TV with a DVI-D jack (TV not supporting HDCP) - | |

■ Audio from SACD discs will not be heard with this connection. To play a DVD disc whose copyright is protected by CPPM, use a player supporting CPPM.
The quality of the audio output through the HDMI jack (sampling frequency and bit rate) may be limited by the performance of the connected device.
Since HDMI connection supports both video and audio, you don't have to connect an additional audio cable.
Connections
HDMI FUNCTION
Using Anynet+(HDMI-CEC)
Anynet+ is a function that enables you to control other Samsung Devices with your Samsung TV's remote control. Anynet + can be used by connecting this AV Receiver to a SAMSUNG TV using an HDMI Cable. This is only available with SAMSUNG TVs and SAMSUNG AV Products that support Anynet+.
- Connect the AV receiver to a Samsung TV with an HDMI cable. (See page 19)
- Set the Anynet+ function on your TV.
(See the TV instructions manual for more information.)
- You can operate the volume on the AV receiver by using Volume buttons on the TV remote control.
To turn on Anynet+
- Press the SETUP/MENU button.
• Each time the button is pressed, the mode switches between SETUP ENTER and SETUP OFF. - Press the ENTER button to select SETUP ENTER.
- Press the ▲▼ buttons to select HDMI SETUP, and then press the ENTER or ▶ button.
- Press the ▲▼ buttons to select HDMI ANYNET+, and then press the ENTER or ▶ button.
- Press the ▲▼ buttons to set ANYNET+ to ON.
- To exit setup mode-
- Press the SETUP/MENU button.
SETUP OFF appears on the display and Setup Mode is exited.

If you use an HDMI cable to connect a Samsung TV to your AV Receiver, you can operate the AV receiver using the TV's remote control. This function is available only in connection with Samsung TV and DVD player supporting Anynet + (HDMI-CEC).
■ Please check your TV for the Anynet^+ logo. If your TV has an Anynet^+ logo, then it supports the Anynet+ function.
- When you are making Anynet+ connection, do not connect more than two AV receivers (Anynet+ installed). Otherwise, it can cause a malfunction.
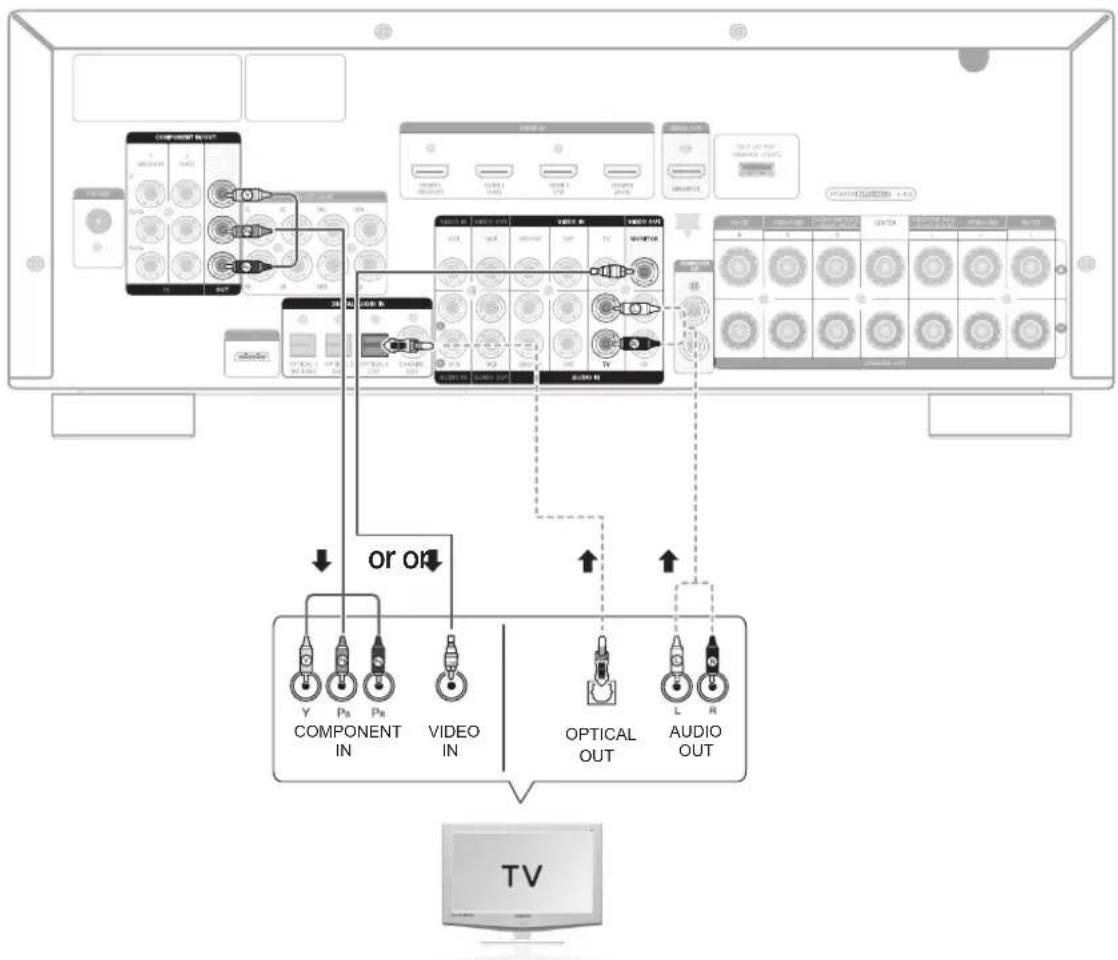
flowchart
graph TD
    A["COMPONENT INPUT"] --> B["Component Module"]
    B --> C["Video Module"]
    C --> D["TV"]
    D --> E["COMPONENT OUT"]
    E --> F["VIDEO OUT"]
    F --> G["OPTICAL OUT"]
    G --> H["AUDIO OUT"]
    H --> I["TV"]
    style A fill:#f9f,stroke:#333
    style B fill:#ccf,stroke:#333
    style C fill:#cfc,stroke:#333
    style D fill:#fcc,stroke:#333
    style E fill:#ffc,stroke:#333
    style F fill:#cfc,stroke:#333
    style G fill:#fcc,stroke:#333
    style H fill:#cfc,stroke:#333
    style I fill:#fcc,stroke:#333
Video Connection
If your television is equipped with Component Video inputs, connect a Component video cable (not supplied) from the Component Video Output ( P_A , P_B and Y) jacks on the back of your AV Receiver to the Component Video Input jacks on your TV.
OR
Connect the Video cable from the VIDEO OUT (MONITOR) jack on the back of your AV Receiver to the Video Input jack on your TV.
Audio Connection
Connect the Digital Input (OPTICAL 3) on your AV Receiver to the Digital Output of the TV.
OR
Connect AUDIO IN (TV) on your AV Receiver to the Audio Out of the TV.
Connections
CONNECTING A DVD OR BD(Blu-ray) PLAYER
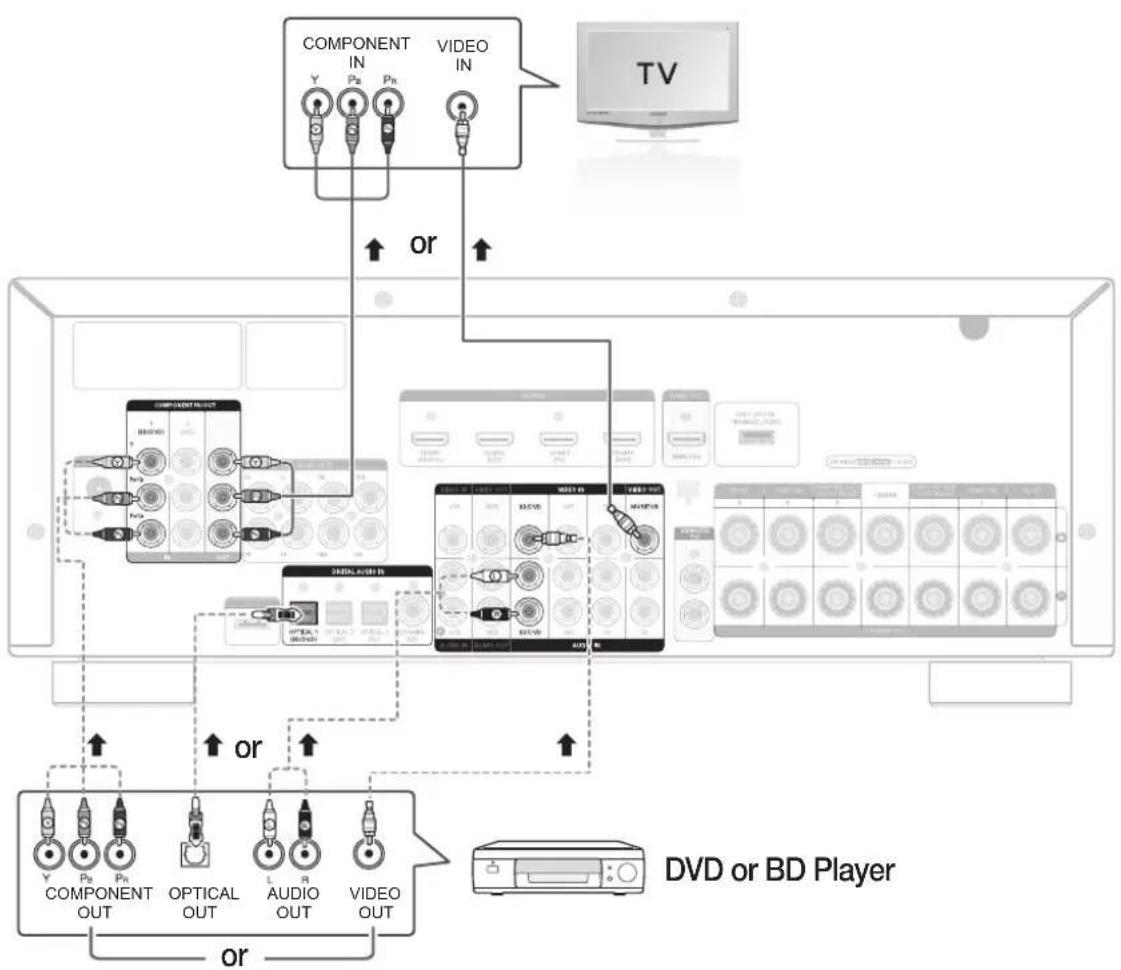
flowchart
graph TD
    TV["TV"] -->|or| Video1["VIDEO IN"]
    Video1 -->|in A,B,C,D,E,F,G,H,I,J,K,L,M,N,O,P,Q,R,Y,Y,Z,Y,Z,Y,Z,Y,Z,Y,Z,Y,Z,Y,Z,Y,Z,Y,Z,Y,Z,Y,Z,Y,Z,Y,Z,Y,Z,Y,Z,Y,Z,Y,Z,Y,Z,Y,Z,Y,Z,Y,Z,Y,Z,Y,Z,Y,Z,Y,Z,Y,Z,Y,Z,Y,Z,Y,Z,Y,Z,Y,Z,Y,Z,Y,Z,Y,Z,Y,Z,Y,Z,Y,Z,Y,Z,Y,Z,Y,Z,Y,Z,Y,Z,Y,Z,Y,Z,Y,Z,Y,Z,Y,Z,Y,Z,Y,Z,Y,Z,Y,z,y,z,y,z,y,z,y,z,y,z,y,z,y,z,y,z,y,z,y,z,y,z,y,z,y,z,y,z,y,z,y,z,y,z,y,z,y,z,y,z,y,z,y,z,y,z,y,z,y,z,y,z,y,z,y,z,y,z,y,z,y,z,y,z,y,z,y,z,y,z,y,z,y,z,y,z,y,z,y,z,y,z,y,z,y,z,y,z,y,z,y,z,y,z,y,z,y,z,y,z-y,z-y,z-y,z-y,z-y,z-y,z-y,z-y,z-y,z-y,z-y,z-y,z-y,z-y,z-y,z-y,z-y,z-y,z-y,z-y,z-y,z-y-z,y,z,y,z,y,z,y,z,y,z,y,z,y,z,y,z,y,z,y,z,y,z,y,z,y,z,y,z,y,z,y,z-y,b,c,d,e,f,g,h,i,j,k,l,m,n,o,r,v,a,v,b,v,c,v,d,v,e,v,f,v,g,v,h,v,i,j,k,l,m,n,o,r,v,a,v,b,v,c,v,d,v,e,v,f,v,g,v,h,v,i,j,k,l,m,n,o,r,v,a,v,b,v,c,v,d,v,e,v,f,v,g,v,h,v,i,j,k,l,m,n,o,r,v,a,v,b,v,c,v,d,v,e,v,f,v,g,v,h,v,i,j,k,l,m,n,o,r,v,a,v,b,v,c,v,d,v,e,v,f,v,g,v,h,\nCOMPONENT OUT\nOPTICAL OUT\nAUDIO OUT\nVIDEO OUT\nDVD or BD Player
Video Connection
Connect a Component video cable(not supplied) from the COMPONENT IN (BD/DVD) ( P_B , P_B and Y) jacks on the back of your AV Receiver to the Component Video Output jacks on your DVD/BD player. OR
Connect a Video cable from the VIDEO IN (BD/DVD) jack on the back of your AV Receiver to the Video Output jack on your DVD/BD player.
Audio Connection
Connect the Digital Input (OPTICAL 1) on your AV Receiver to the Digital Output of the DVD/BD player. OR
Connect AUDIO IN (BD/DVD) on your AV Receiver to the Audio Out of the DVD/BD player.
CONNECTING A CABLE, SATELLITE OR SET-TOP BOX
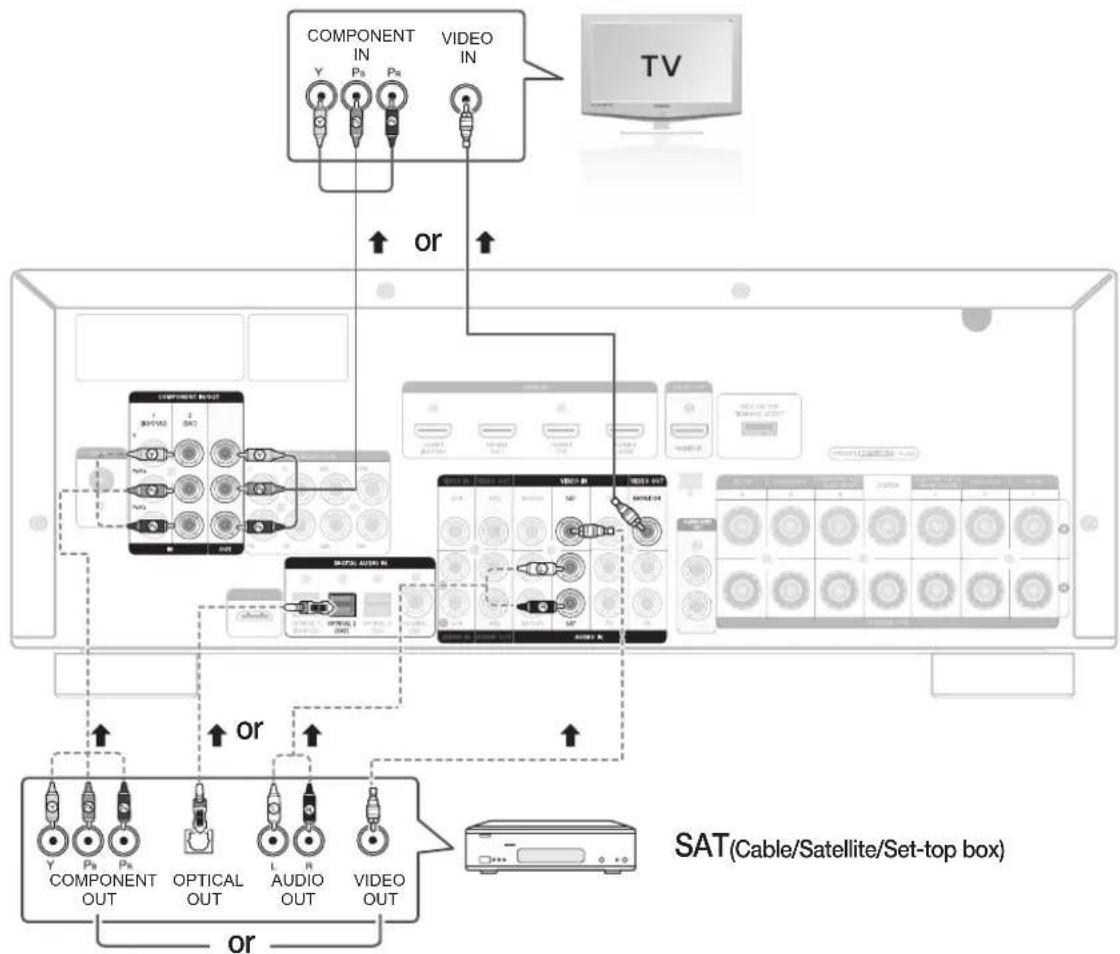
flowchart
graph TD
    A["COMPONENT IN"] -->|Y, Pn, Pn| B["TV"]
    C["VIDEO IN"] -->|Pn, Pn| B
    D["COMPONENT OUT"] -->|OPTICAL OUT, AUDIO OUT, VIDEO OUT| E["SAT(Cable/Satellite/Set-top box)"]
    F["VIDEO OUT"] -->|OPTICAL OUT, AUDIO OUT, VIDEO OUT| E
    G["COMPONENT OUT"] -->|OPTICAL OUT, AUDIO OUT, VIDEO OUT| E
    H["VIDEO OUT"] -->|OPTICAL OUT, AUDIO OUT, VIDEO OUT| E
    I["COMPONENT OUT"] -->|OPTICAL OUT, AUDIO OUT, VIDEO OUT| E
    J["VIDEO OUT"] -->|OPTICAL OUT, AUDIO OUT, VIDEO OUT| E
    K["COMPONENT OUT"] -->|OPTICAL OUT, AUDIO OUT, VIDEO OUT| E
    L["VIDEO OUT"] -->|OPTICAL OUT, AUDIO OUT, VIDEO OUT| E
    M["COMPONENT OUT"] -->|OPTICAL OUT, AUDIO OUT, VIDEO OUT| E
    N["VIDEO OUT"] -->|OPTICAL OUT, AUDIO OUT, VIDEO OUT| E
    O["COMPONENT OUT"] -->|OPTICAL OUT, AUDIO OUT, VIDEO OUT| E
    P["VIDEO OUT"] -->|OPTICAL OUT, AUDIO OUT, VIDEO OUT| E
    Q["COMPONENT OUT"] -->|OPTICAL OUT, AUDIO OUT, VIDEO OUT| E
    R["VIDEO OUT"] -->|OPTICAL OUT, AUDIO OUT, VIDEO OUT| E
    S["COMPONENT OUT"] -->|OPTICAL OUT, AUDIO OUT, VIDEO OUT| E
    T["VIDEO OUT"] -->|OPTICAL OUT, AUDIO OUT, VIDEO OUT| E
    U["COMPONENT OUT"] -->|OPTICAL OUT, AUDIO OUT, VIDEO OUT| E
    V["VIDEO OUT"] -->|OPTICAL OUT, AUDIO OUT, VIDEO OUT| E
    W["COMPONENT OUT"] -->|OPTICAL OUT, AUDIO OUT, VIDEO OUT| E
    X["VIDEO OUT"] -->|OPTICAL OUT, AUDIO OUT, VIDEO OUT| E
    Y["COMPONENT OUT"] -->|OPTICAL OUT, AUDIO OUT, VIDEO OUT| E
    Z["VIDEO OUT"] -->|OPTICAL OUT, AUDIO OUT, VIDEO OUT| E
Video Connection
Connect a Component video cable(not supplied) from the COMPONENT IN (SAT) ( P_H , P_B and Y) jacks on the back of your AV Receiver to the Component Video Output jacks on your SAT.
OR
Connect a Video cable from the VIDEO IN (SAT) jack on the back of your AV Receiver to the Video Output jack on your SAT.
Audio Connection
Connect the Digital Input (OPTICAL 2) on your AV Receiver to the Digital Output of the SAT.
OR
Connect AUDIO IN (SAT) on your AV Receiver to the Audio Out of the SAT.

- Disconnect the power plug from the outlet if you will not use this unit for a long period of time.
If the cable/set-top box has only one audio output jack, connect it to either the right or left audio input jack of the main unit. Connect the audio cable's red plug to the red jack and white cable to the white jack.
Connections
CONNECTING A VCR
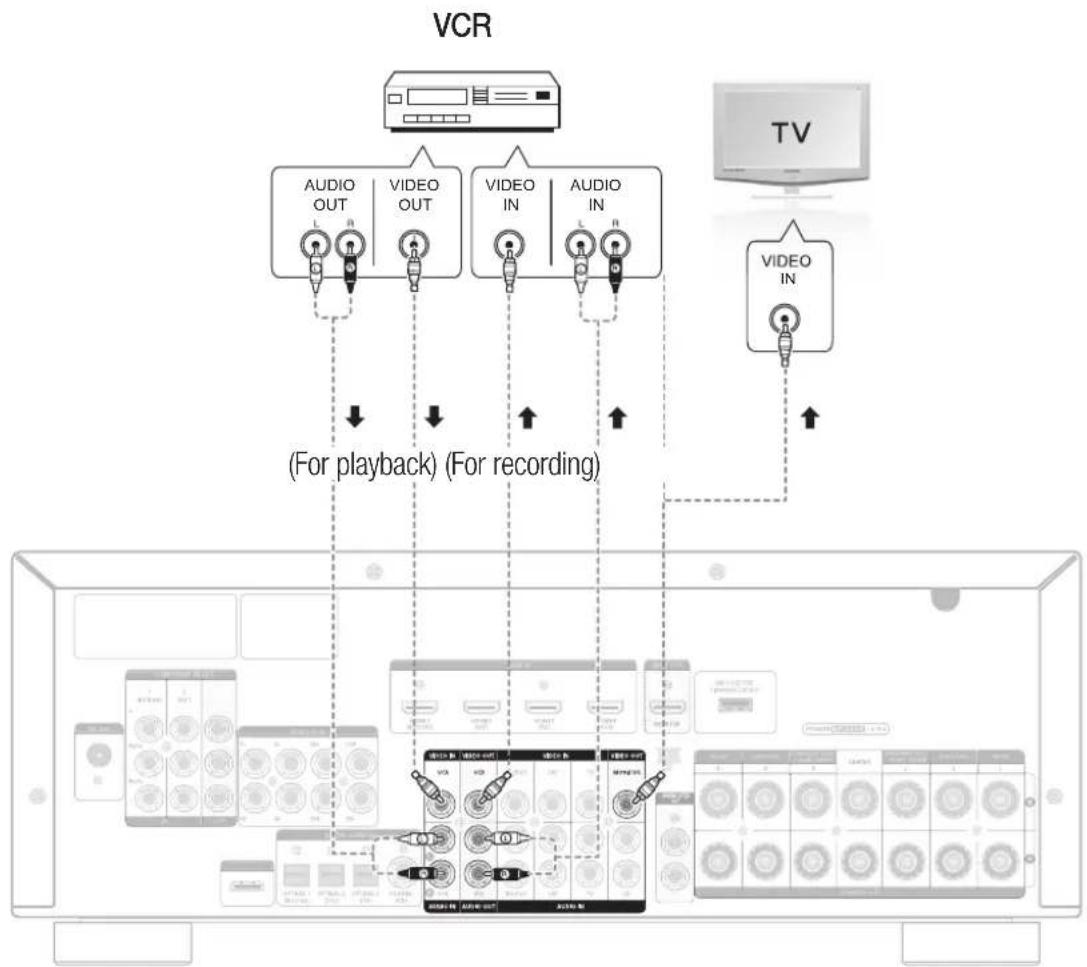
flowchart
graph TD
    A["VCR"] --> B["TV"]
    B --> C["VIDEO OUT"]
    B --> D["VIDEO IN"]
    B --> E["VIDEO OUT"]
    B --> F["VIDEO IN"]
    C --> G["(For playback) (For recording)"]
    D --> G
    E --> G
    F --> G
    G --> H["TV"]
    H --> I["VIDEO OUT"]
    H --> J["VIDEO IN"]
    H --> K["VIDEO OUT"]
    H --> L["VIDEO IN"]
Video Connection
For playback
Connect a Video cable from the VIDEO IN (VCR) jack on the back of your AV Receiver to the Video Output jack on your VCR.
For recording
Connect a Video cable from the VIDEO OUT (VCR) jack on the back of your AV Receiver to the Video Input jack on your VCR.
Audio Connection
For playback
Connect AUDIO IN (VCR) on your AV Receiver to the Audio Out of the VCR.
For recording
Connect AUDIO OUT (VCR) on your AV Receiver to the Audio In of the VCR.

- Disconnect the power plug from the outlet if you will not use this unit for a long period of time.
CONNECTING A CD PLAYER
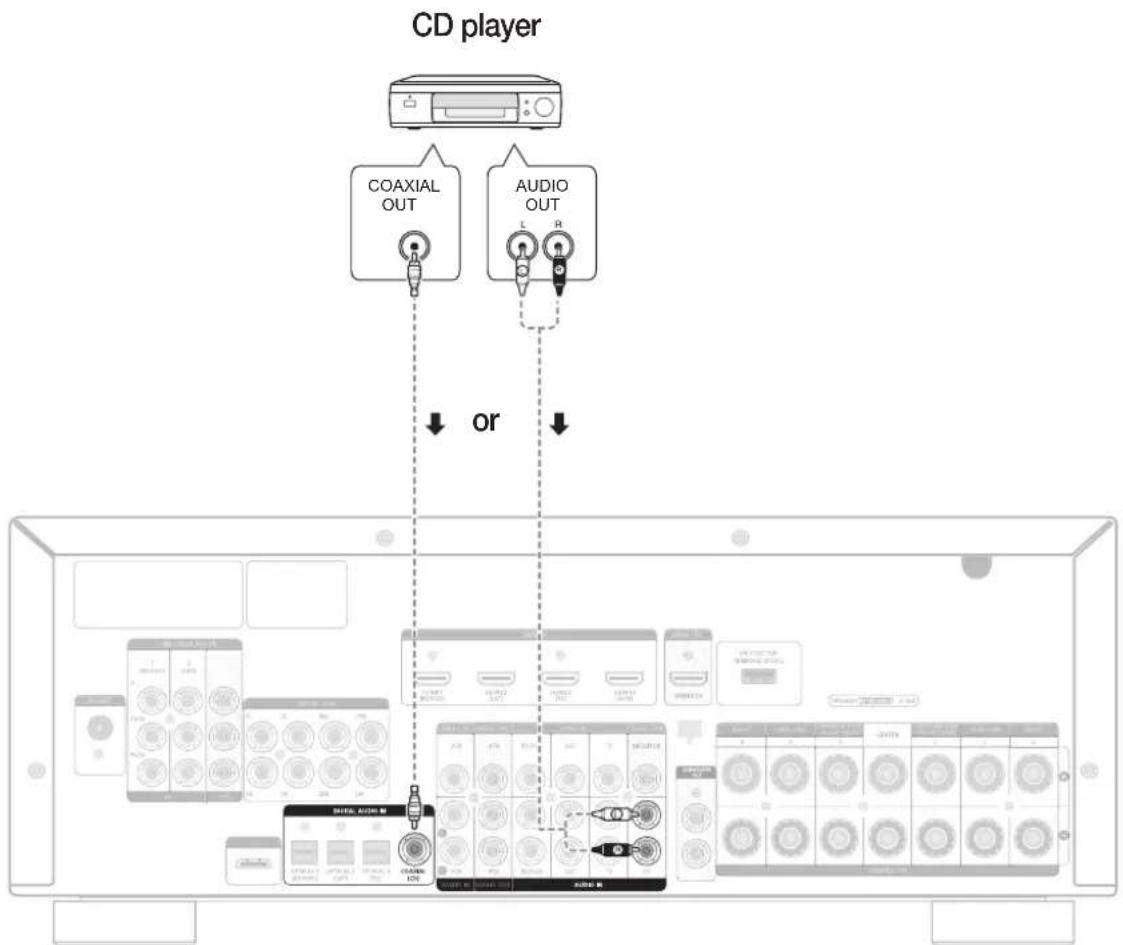
flowchart
graph TD
    A["CD player"] --> B["Coaxial OUT"]
    A --> C["AUDIO OUT"]
    B --> D["Device 1: 2.0V/45Hz"]
    C --> E["Device 2: 1.5V/45Hz"]
    D --> F["Monitor 1: 3.0V/45Hz"]
    E --> G["Monitor 2: 2.5V/45Hz"]
    F --> H["Display 1: 1.0V/45Hz"]
    G --> I["Display 2: 0.8V/45Hz"]
    H --> J["Display 3: 0.6V/45Hz"]
    I --> K["Display 4: 0.4V/45Hz"]
Audio Connection
Connect the Digital Input (COAXIAL) on your AV Receiver to the Digital Output of the CD Player.
OR
Connect AUDIO IN (CD) on your AV Receiver to the Audio Out of the CD player.

If the CD player has only one audio output jack, connect it to either the right or left audio input jack of the main unit. Connect the audio cable's red plug to the red jack and white cable to the white jack.
Connections
CONNECTING 7.1 CHANNEL DEVICES
You can connect the AV receiver to a DVD player, SUPER AUDIO CD player or other device with 7.1 channel output.
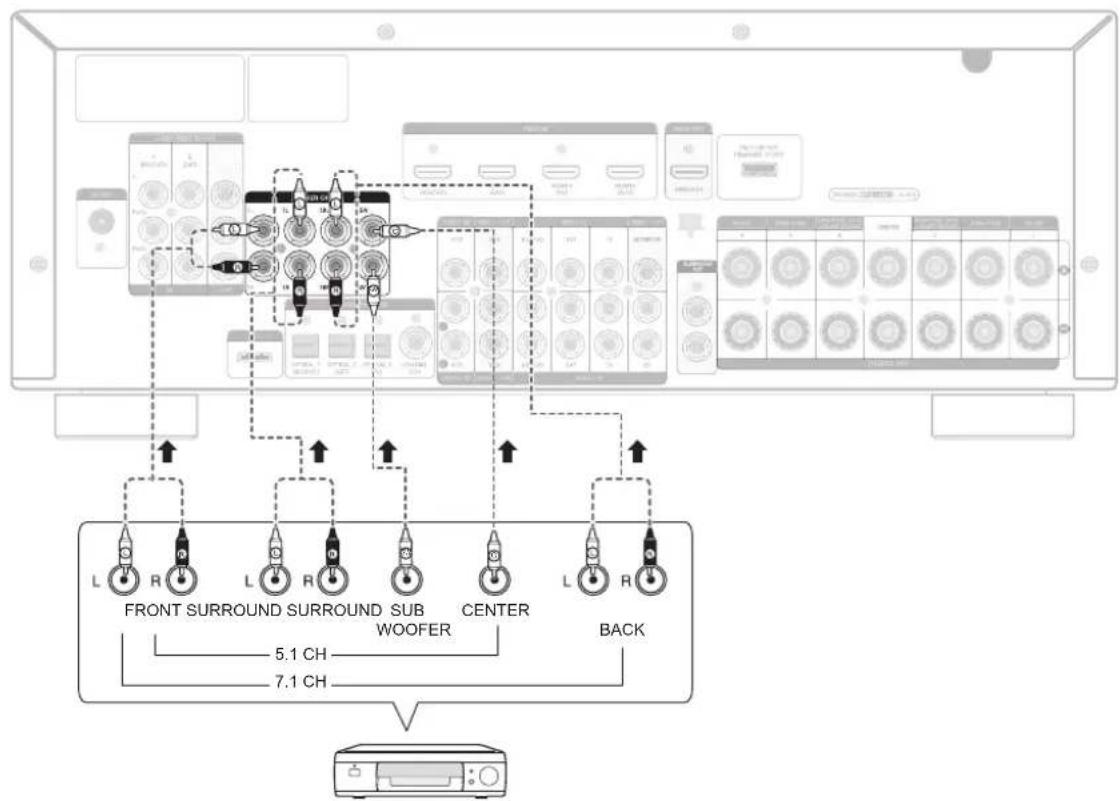
flowchart
graph TD
    A["Device Array"] --> B["Front Control"]
    A --> C["Sub Control"]
    A --> D["Back Control"]
    B --> E["5.1 CH"]
    B --> F["7.1 CH"]
    C --> G["WOOFER"]
    D --> H["CENTER"]
    style A fill:#f9f,stroke:#333
    style B fill:#ccf,stroke:#333
    style C fill:#cfc,stroke:#333
    style D fill:#fcc,stroke:#333
7.1 Channel device
CONNECTING AN iPod
You can listen to audio from an iPod through the main unit. For iPod operation with your receiver, see this page and pages 50 \~ 51.
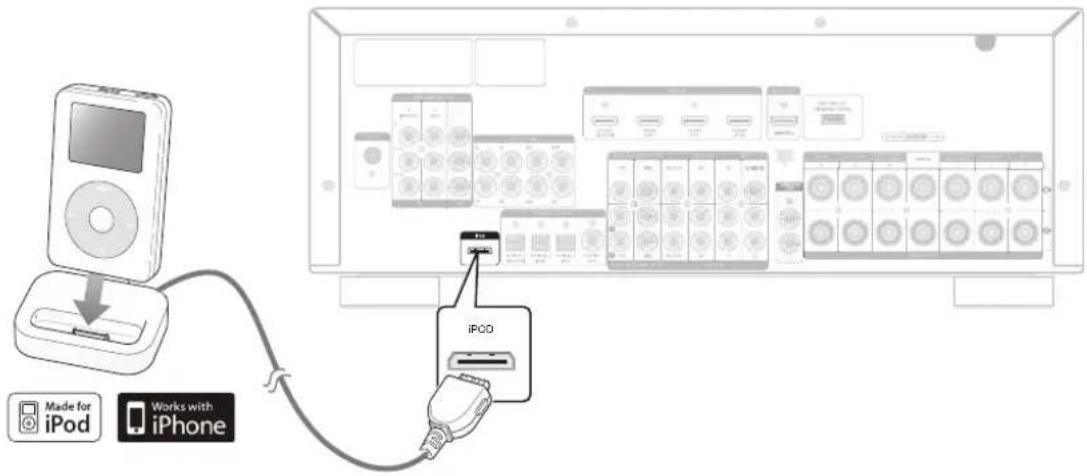
text_image
Made for iPod Works with iPhone- Connect the iPod dock connector to the iPod jack on your receiver.
- Place the iPod in the Dock.
- If you want to play a movie stored in your iPod player, you should set the player's TV Out option to On before inserting it into the dock. See page 51.
- Press the iPod button on the remote control.
- You can also use the INPUT SELECT button on the main unit.
The mode switches as follows :
FM → BD/DVD → SAT → TV → VCR → CD → AUX → 7.1 MULTI CH → IPOD AUDIO → IPOD VIDEO
Disconnecting an iPod
Follow the steps below to prevent damage to an iPod and data when disconnecting from your AV receiver.
- Press the INPUT SELECT button on the main unit to switch to a mode other than IPOD AUDIO or IPOD VIDEO.
OR
- Turn off the AV Receiver.
- Disconnect the iPod player from the iPod dock, or remove the iPod dock connector from the AV receiver.

- You must have the VIDEO (Monitor or VCR) output connected to your TV to view iPod video. See page 24.
- Adjust the volume to a moderate level before you connect your iPod and AV Receiver.
- When the unit is powered on and you connect an iPod, the unit will charge your iPod's battery.
■ Make sure to connect the dock connector so that the label "SAMSUNG" faces upward. - “Made for iPod” means that an electronic accessory has been designed to connect specifically to an iPod and has been certified by the developer to meet Apple performance standards.
- “Works with iPhone” means that an electronic accessory has been designed to connect specifi cally to an iPhone and has been certifi ed by the developer to meet Apple performance standards.
Connections
CONNECTING AN iPod (Continued)
iPod models that are compatible with HW-C700/C700B/C770S/C770BS
 | iPod 1st+2nd generation5GB 10GB 20GB |  | iPod 5th generation(video) 30GB 60GB80GB |  | iPod 3rd generation10GB 15GB 20GB 30GB40GB |
 | iPod nano 2ndgeneration(aluminum)2GB 4GB 8GB |  | iPod mini 4GB 6GB | [0TA4] | iPod 4th generation20GB 40GB |
| [DTM] | iPod nano 3rdgeneration (video)4GB 8GB |  | iPod 4th generation(color display)20GB 30GB 40GB60GB |  | iPod classic80GB 120GB 160GB |
 | iPod touch1st generation4GB 16GB 32GB |  | iPod nano4th generation(video)8GB 16GB | [0Y48] | iPod nano1st generation1GB 2GB 4GB |
 | iPod touch2nd generation8GB 16GB 32GB |  | iPhoneiPhone 3GiPhone 3GS | ||

■ "Made for iPod" means that the dock has been designed to connect specifically for the iPod and has been certified by the developer to meet Apple performance standards.
■ Apple is not responsible for the operation of this device or its compliance with safety and regulatory standards.
iPod is a trademark of Apple Inc., registered in the U.S. and other countries.
iPhone is a trademark of Apple Inc.
CONNECTING THE FM ANTENNA
- Connect the FM antenna supplied to the FM ANTENNA terminal as a temporary measure.
- Slowly move the antenna wire around until you find a location where reception is good, then fasten it to a wall or other rigid surface.

text_image
FM ANT. FM 75Ω FM antenna (supplied)
- Do not place the antenna cable close to the power cord. Keep it as far away as possible.
■ If you experience poor FM reception, use an external antenna.
CONNECTING AUX COMPONENTS
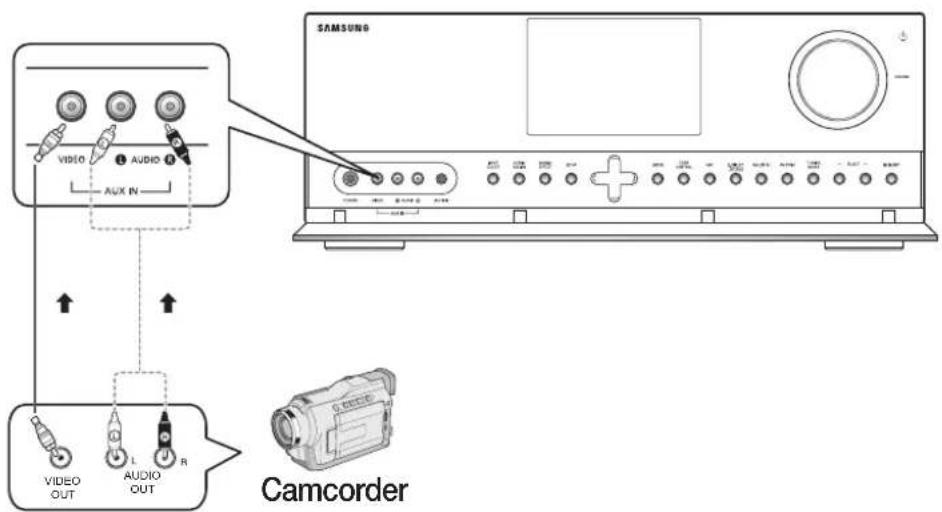
You can connect external devices you use for a short time (camcorder, game console, mobile equipment, etc.) to the front of this unit for convenience.
text_image
SAMSUNG VIDEO AUDIO AUX IN VIDEO OUT L AUDIO OUT R CamcorderBasic functions of your AV Receiver
BEFORE USING THE AV RECEIVER
Turning On/Off
Connect the power plug to the outlet.
Press the POWER button on the main unit for 2 seconds.
- This unit will be turned on or set to Standby mode.
- You can also turn the unit on/off by pressing the POWER button on the remote control.
Remote control functions
You can operate your AMP (this AV receiver)/ TV and BD(Samsung only)/DVD player with this remote control.
See pages 54 \~ 55 for more details.
To select a function
Method 1
Press the INPUT SELECT button.
• Each time you press this button, FM → BD/DVD → SAT → TV → VCR → CD → AUX → 7.1 MULTI CH → IPOD AUDIO → IPOD VIDEO will be selected in turn.
Method 2
Press the TUNING/CH, BD/DVD, SAT, TV, CD, MULTI CH, VCR/AUX or iPod button.
- You can directly select the desired function.
AUDIO SETUP
Selecting a source device and connection jack
Select the external devices you have connected to the receiver.
- Press the SETUP/MENU button.
• Each time the button is pressed, the mode switches between SETUP ENTER and SETUP OFF.
-
Press the ENTER button to select SETUP ENTER.
-
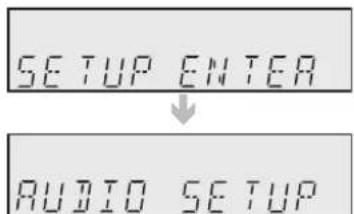
Press the ▲▼ buttons to select AUDIO SETUP, and then press the ENTER or ▶ button.
-
Press the ▲▼ buttons to select a desired jack.
• Devices switch as follows; BD/DVD, SAT, TV, CD
- To exit setup mode -
- Press the SETUP/MENU button.
SETUP OFF appears on the display and Setup Mode is exited.
text_image
SETUP ENTER ↓ AUDIO SETUP
- You can also use the SETUP, ∧, ∨, <, >, ENTER buttons on the front of your AV Receiver.
SELECTING DIGITAL/ANALOG INPUT
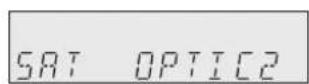
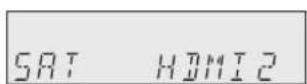
You can listen to sound in 2 channel analog, Dolby Digital or DTS using this unit.
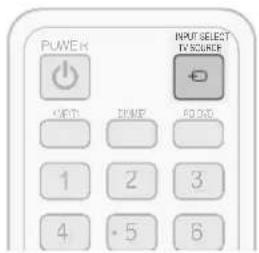
- Press the INPUT SELECT button to select a desired function (BD/DVD, SAT, TV, CD, AUX). See page 30.
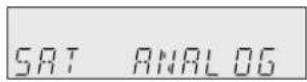
- Press the AUDIO ASSIGN button on the remote control to select the external device you have connected.
• Each time you press this button, the input mode changes as follows:
text_image
POWER OUTPUT POWER OUTPUT 1 2 3 4 5 6 INPUT SELECT TV SOURCE- For BD/DVD function
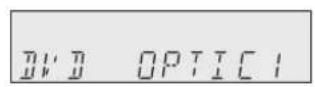

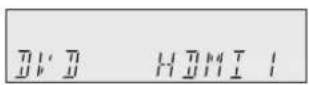

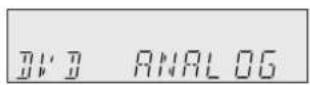
- For SAT function


- For TV function
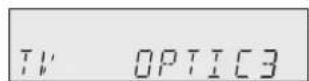

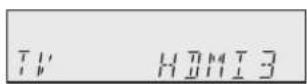

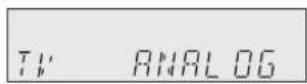
- For CD function
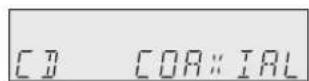

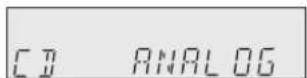
- For AUX function
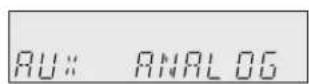

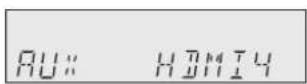

- You can also change the input mode by pressing the AUDIO ASSIGN button on the front of your AV Receiver.
- You can enjoy Dolby Digital or DTS if you connect the digital audio output jack of an external audio component to the optical or coaxial digital audio input jack on the main unit.
Setup
For your convenience, you can set this AV receiver's features for the best use.
SETUP MENU TREE
Here's a quick look at how the setup menus are organized on your AV Receiver.
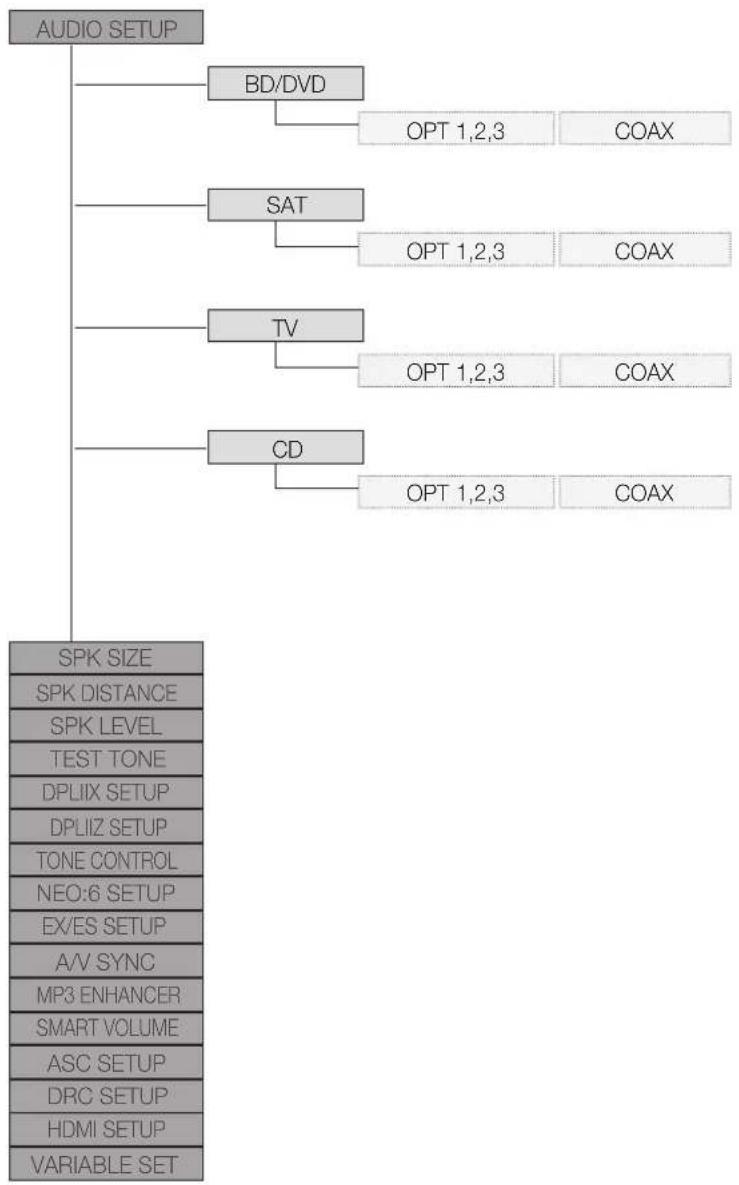
flowchart
graph TD
    A["AUDIO SETUP"] --> B["BD/DVD"]
    B --> C["OPT 1,2,3 COAX"]
    A --> D["SAT"]
    D --> E["OPT 1,2,3 COAX"]
    A --> F["TV"]
    F --> G["OPT 1,2,3 COAX"]
    A --> H["CD"]
    H --> I["OPT 1,2,3 COAX"]
    J["SPK SIZE"] --> K["SPK DISTANCE"]
    J --> L["SPK LEVEL"]
    J --> M["TEST TONE"]
    J --> N["DPLIIX SETUP"]
    J --> O["DPLIIZ SETUP"]
    J --> P["TONE CONTROL"]
    J --> Q["NEO:6 SETUP"]
    J --> R["EX/ES SETUP"]
    J --> S["A/V SYNC"]
    J --> T["MP3 ENHANCER"]
    J --> U["SMART VOLUME"]
    J --> V["ASC SETUP"]
    J --> W["DRC SETUP"]
    J --> X["HDMI SETUP"]
    J --> Y["VARIABLE SET"]
SETUP MENU TREE (Continued)
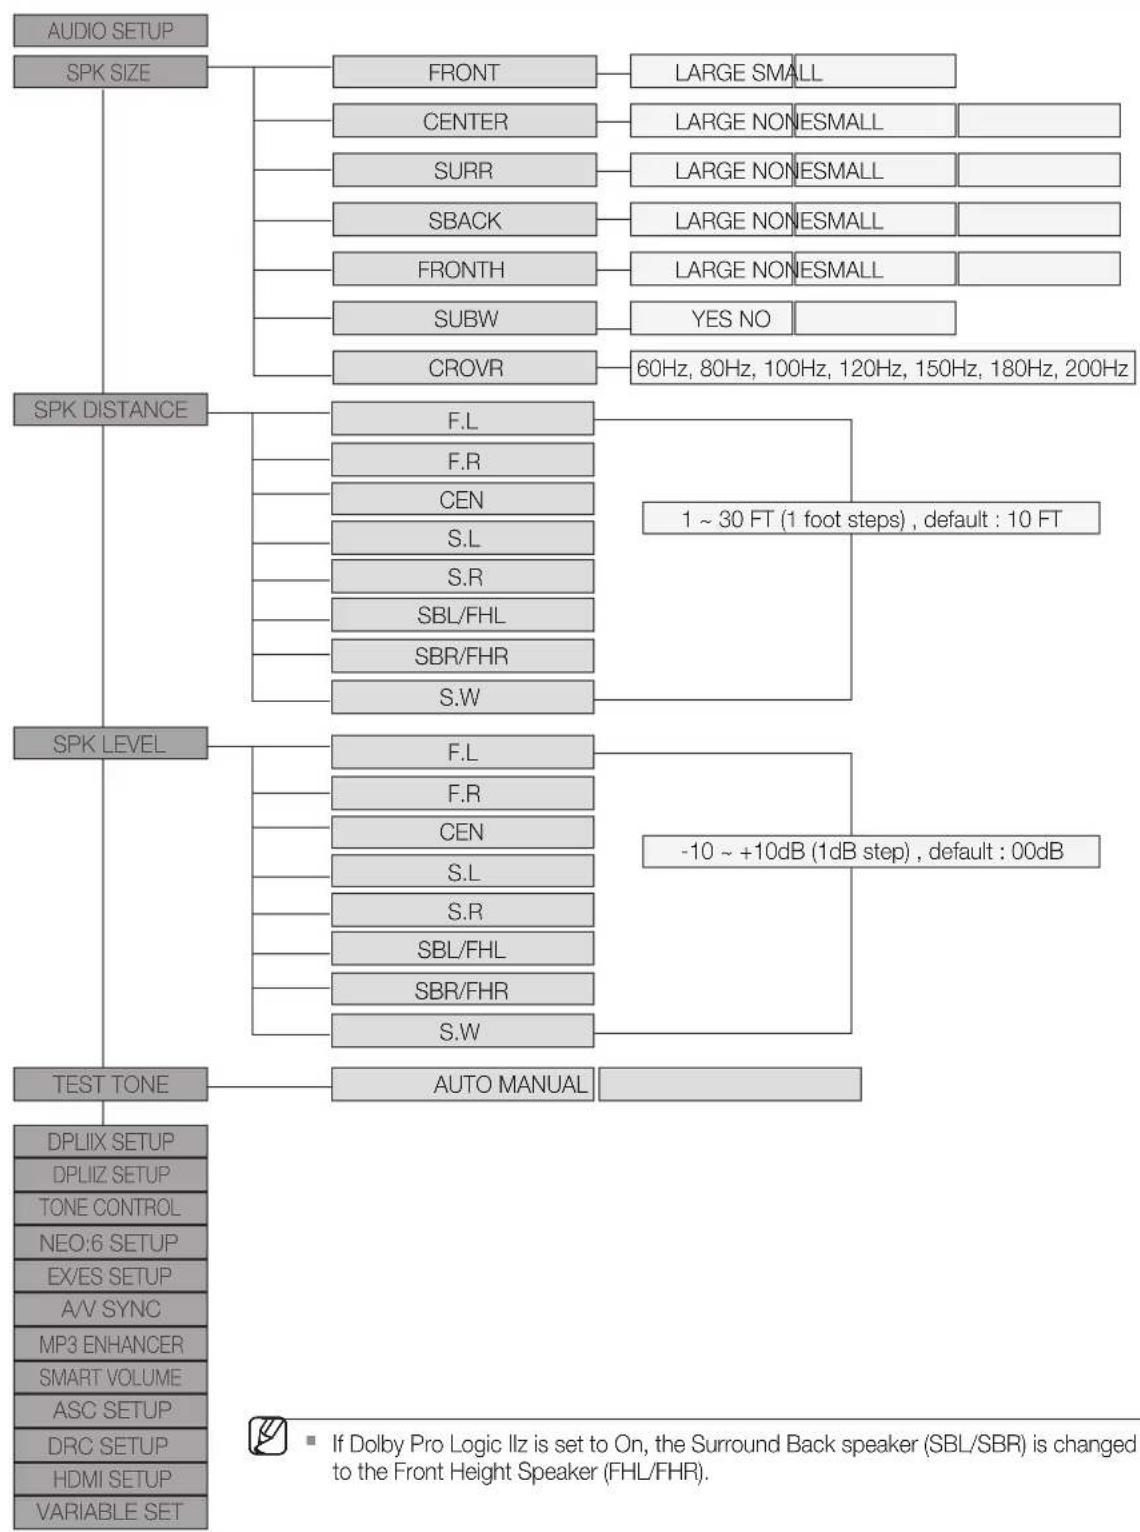
flowchart
graph TD
    A["AUDIO SETUP"] --> B["SPK SIZE"]
    B --> C["FRONT"] --> D["LARGE SMALL"]
    B --> E["CENTER"] --> F["LARGE NONESMALL"]
    B --> G["SURR"] --> H["LARGE NONESMALL"]
    B --> I["SBACK"] --> J["LARGE NONESMALL"]
    B --> K["FRONTH"] --> L["LARGE NONESMALL"]
    B --> M["SUBW"] --> N["YES NO"]
    B --> O["CROVR"] --> P["60Hz, 80Hz, 100Hz, 120Hz, 150Hz, 180Hz, 200Hz"]
    Q["SPK DISTANCE"] --> R["F.L"]
    Q --> S["F.R"]
    Q --> T["CEN"]
    Q --> U["S.L"]
    Q --> V["S.R"]
    Q --> W["SBL/FHL"]
    Q --> X["SBR/FHR"]
    Q --> Y["S.W"]
    Z["SPK LEVEL"] --> AA["F.L"]
    Z --> AB["F.R"]
    Z --> AC["CEN"]
    Z --> AD["S.L"]
    Z --> AE["S.R"]
    Z --> AF["SBL/FHL"]
    Z --> AG["SBR/FHR"]
    Z --> AH["S.W"]
    AI["TEST TONE"] --> AJ["AUTO MANUAL"]
    AK["DPLIX SETUP"] --> AL["DPLIZ SETUP"]
    AK --> AM["TONE CONTROL"]
    AK --> AN["NEO:6 SETUP"]
    AK --> AO["EX/ES SETUP"]
    AK --> AP["A/V SYNC"]
    AK --> AQ["MP3 ENHANCER"]
    AK --> AR["SMART VOLUME"]
    AK --> AS["ASC SETUP"]
    AK --> AT["DRC SETUP"]
    AK --> AU["HDMI SETUP"]
    AK --> AV["VIARIABLE SET"]

    style A fill:#f9f,stroke:#333
    style Q fill:#ccf,stroke:#333
    style Z fill:#cfc,stroke:#333
    style AI fill:#fcc,stroke:#333
Setup
SETUP MENU TREE (Continued)
SETUP MENU TREE (Continued)
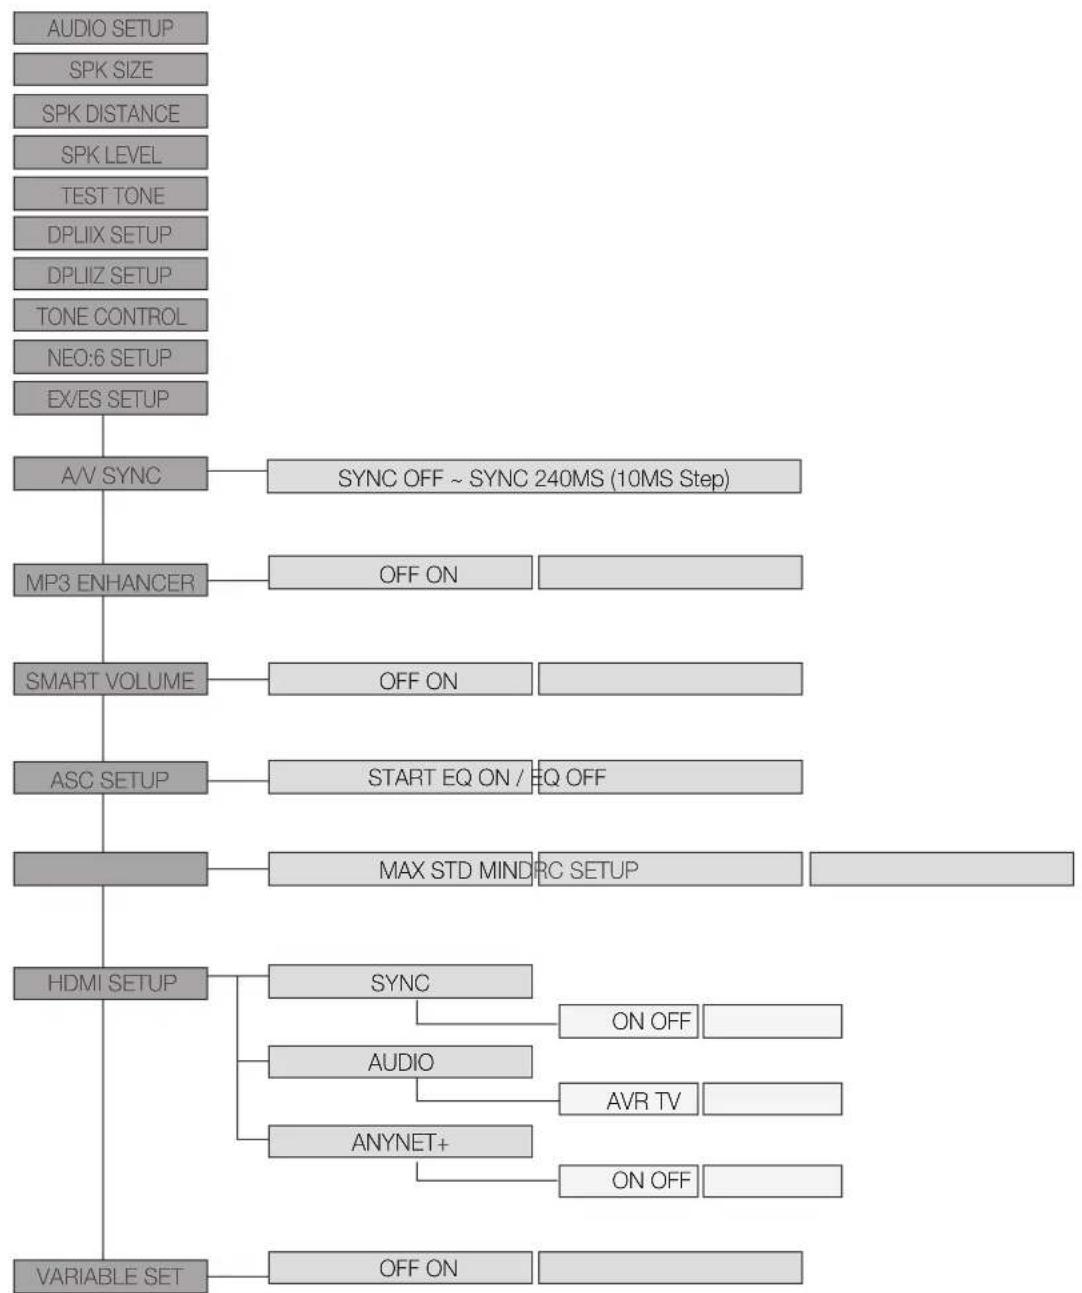
flowchart
graph TD
    A["AUDIO SETUP"] --> B["SPK SIZE"]
    B --> C["SPK DISTANCE"]
    C --> D["SPK LEVEL"]
    D --> E["TEST TONE"]
    E --> F["DPLIX SETUP"]
    F --> G["DPLIZ SETUP"]
    G --> H["TONE CONTROL"]
    H --> I["NEO:6 SETUP"]
    I --> J["EX/ES SETUP"]
    J --> K["A/V SYNC"]
    K --> L["SYNC OFF ~ SYNC 240MS (10MS Step)"]
    K --> M["MP3 ENHANCER"]
    M --> N["OFF ON"]
    K --> O["SMART VOLUME"]
    O --> P["OFF ON"]
    K --> Q["ASC SETUP"]
    Q --> R["START EQ ON / EQ OFF"]
    Q --> S["MAX STD MIND RC SETUP"]
    S --> T["..."]
    K --> U["HDMI SETUP"]
    U --> V["SYNC"]
    V --> W["ON OFF"]
    U --> X["AUDIO"]
    X --> Y["AVR TV"]
    U --> Z["ANYNET+"]
    Z --> AA["ON OFF"]
    K --> AB["VIARIABLE SET"]
    AB --> AC["OFF ON"]
Setup
SETTING THE SPEAKER SIZE
Signal outputs and frequency response from the speaker will be adjusted according to your speaker configuration and whether certain speakers are used or not.
- Press the SETUP/MENU button.
• Each time the button is pressed, the mode switches between SETUP ENTER and SETUP OFF.
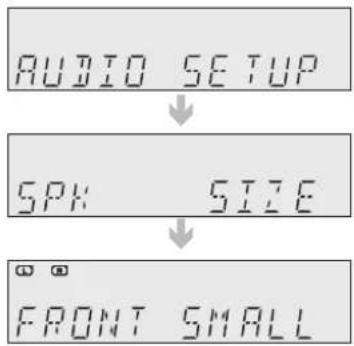
flowchart
graph TD
    A["AUDIO SETUP"] --> B["SPK SIZE"]
    B --> C["FRONT SMALL"]
-
Press the ENTER button to select SETUP ENTER.
-
Press the ▲▼ buttons to select SPK SIZE, and then press the ENTER or ▶ button.
-
Press the ▲▼ buttons to select the speaker you want, and then press the ENTER or ▶ button.
• Each time you press the ▲▼ buttons, FRONT→CENTER→SURR→SBACK→FRONTH→SUBW→CROVR will be selected in turn.
-
Press the ▲▼ buttons to set the mode (LARGE, SMALL etc.) for the selected speaker.
-
Repeat steps 3-5 to set the mode for each speaker.
- To exit setup mode -
- Press the SETUP/MENU button.
SETUP OFF appears on the display and Setup Mode is exited.
Setting the Speaker
| SPEAKER Possible Settings Default Setting | |
| FRONT (Front) LARGE, SMALL SMALL | |
| CENTER (Center) LARGE, SMALL, NONE SMALL | |
| SURR (Surround) LARGE, SMALL, NONE SMALL | |
| SBACK (Surround Back) LARGE, SMALL, NONE SMALL | |
| FRONTH (Front Height) LARGE, SMALL, NONE NONE | |
| SUBW (Subwoofer) YES, NO YES | |
| CROVR (Crossover Frequency) 60, 80, 100,120, 150, 180, 200(Hz) 100Hz |
• LARGE : Select when using large speakers. You can listen to full range sound.
- SMALL: Select this when using small speakers.
- NONE: Select when no speaker is used.
- YES (subwoofer): Select when using the subwoofer speaker.
- NO (subwoofer): Select when not using the subwoofer speaker.
• CROVR : Select the crossover frequency for the best bass response in your room.

- You can also use the SETUP, ∧, V, <, >, ENTER buttons on the front of your AV Receiver.
- When the Front speaker is only set to LARGE, you can select LARGE of other speakers.
- When the Surround speaker is only set to LARGE, you can select LARGE of SBACK (Surround Back) speaker.
SETTING THE SPEAKER LISTENING DISTANCE
If the speakers cannot be placed at equal distances from the listening position, you can adjust the delay time of the audio signals from the center and surround speakers.
- Press the SETUP/MENU button.
• Each time the button is pressed, the mode switches between SETUP ENTER and SETUP OFF.
-
Press the ENTER button to select SETUP ENTER.
-
Press the ▲▼ buttons to select SPK DISTANCE, and then press the ENTER or ▶ button.
-
Press the ▲▼ buttons to select the speaker you want, and then press the ENTER or ▶ button.
• Each time you press the ▲▼ buttons, F.L → F.R→ CEN → S.L → S.R → SBL → SBR → S.W will be selected in turn.
- Press the ▲▼ buttons to set the Speaker Distance.
- For the FRONT LEFT, FRONT RIGHT, CENTER, SURR. LEFT, SURR. RIGHT, SURRBACK.LEFT, SURRBACK.RIGHT and SUBWOOFER Speakers, you can set the distance from the speaker to listening position between 1ft \~ 30ft (0.3\~9.0m) in intervals of 1ft (0.3m).
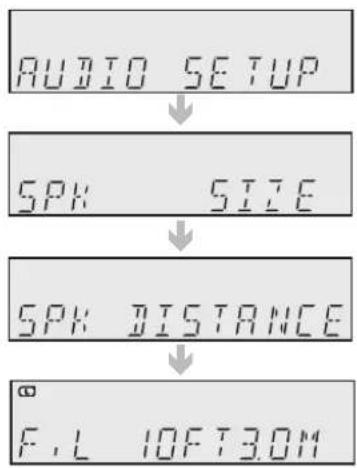
flowchart
graph TD
    A["AUDIO SETUP"] --> B["SPK SIZE"]
    B --> C["SPK DISTANCE"]
    C --> D["F.L 10FT3.0M"]
- To exit setup mode -
- Press the SETUP/MENU button.
SETUP OFF appears on the display and Setup Mode is exited.
- Setting Speaker Distance -
Set the distance from the speaker to listening position in intervals of 1ft(0.3m).
• F.L (front left) : 1ft \~ 30ft • SW (subwoofer) : 1ft \~ 30ft
• F.R (front right) : 1ft \~ 30ft • SBL (surround back left) : 1ft \~ 30ft
• S.L (surround left) : 1ft \~ 30ft • SBR (surround back right) : 1ft \~ 30ft
• S.R (surround right) : 1ft \~ 30ft • FHL (front height left) : 1ft \~ 30ft
• CEN (center) : 1ft \~ 30ft • FHR (front height right) : 1ft \~ 30ft

If the listening position is beyond the range of the speaker distance setup, set the speaker distance to the maximum.
The distance range of the overall speaker system is determined based on the F.L (front left) speaker distance from the listening position.
- If Dolby Pro Logic IIz is set to On, the Surround Back speaker (SBL/SBR) is changed to the Front Height Speaker (FHL/FHR).
Setup
SETTING THE SPEAKER LEVEL
You can set the balance and level of speakers.
- Press the SETUP/MENU button.
• Each time the button is pressed, the mode switches between SETUP ENTER and SETUP OFF.
-
Press the ENTER button to select SETUP ENTER.
-
Press the ▲▼ buttons to select SPK LEVEL, and then press the ENTER or ▶ button.
-
Press the ▲▼ buttons to select the speaker you want, and then press the ENTER or ▶ button.
• Each time you press this button, F.L → F.R → CEN → S.L → S.R → SBL → SBR → S.W will be selected in turn.
- Press the ▲▼ buttons to set the Speaker Level mode.
- You can adjust it from -10 to +10dB in 1 step increments. - The sound gets quieter at -10dB and louder at +10dB.
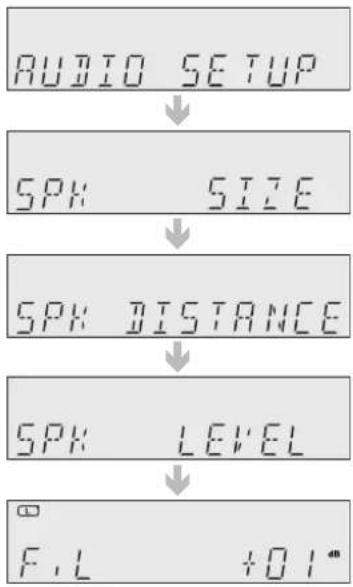
flowchart
graph TD
    A["AUDIO SETUP"] --> B["SPX SIZE"]
    B --> C["SPX DISTANCE"]
    C --> D["SPX LEVEL"]
    D --> E["F.L +01*"]
- To exit setup mode -
- Press the SETUP/MENU button.
SETUP OFF appears on the display and Setup Mode is exited.
- Setting Speaker Level -
- F.L (front left) : -10 \~ +10dB
- SW (subwoofer) : -10 \~ +10dB
• F.R (front right) : -10 \~ +10dB • SBL (surround back left) : -10 \~ +10dB
• S.L (surround left) : -10 \~ +10dB • SBR (surround back right) : -10 \~ +10dB - S.R (surround right): -10 \~ +10dB • FHL (front height left): -10 \~ +10dB
• CEN (center) : -10 \~ +10dB • FHR (front height right) : -10 \~ +10dB

- If Dolby Pro Logic IIz is set to On, the Surround Back speaker (SBL/SBR) is changed to the Front Height Speaker (FHL/FHR).
SETTING THE TEST TONE
Use the test tone to check the speaker connection status or level.
- Press the SETUP/MENU button.
• Each time the button is pressed, the mode switches between SETUP ENTER and SETUP OFF. - Press the ENTER button to select SETUP ENTER.
- Press the ▲▼ buttons to select TEST TONE, and then press the ENTER or ▶ button.
-
Press the ▲▼ buttons to select the option you want, and then press the ENTER or ▶ button.
-
AUTO : Test signal will be automatically output as follows; F.L → CEN → S.W → F.R → S.R → SBR → SBL → S.L.
- During test tone output, press the ▲▼ buttons to adjust the speaker output level from -10 to +10 dB by 1 step.
- MANUAL : Enables you to adjust the output level of the speaker manually.
1) Press the ENTER button to select the speaker you want.
Each time you press the ENTER button, F.L → CEN → S.W → F.R → S.R → SBR → SBL → S.L will be selected in turn.
2) Press the ▲▼ buttons to set the Test Tone mode you want.
You can adjust the speaker output level from -10 to +10dB by 1 step.
The sound gets quieter at -10dB and louder at +10dB.
- Test Tone Output -
• F.L (front left) : -10 \~ +10dB • CEN (center) : -10 \~ +10dB
- F.R (front right) : -10 \~ +10dB
- S.W (subwoofer) : -10 \~ +10dB
- S L (surround left) : -10 \~ +10dB • SBL (surround back left) : -10 \~ +10dB
- S.R (surround right) : -10 \~ +10dB • SBR (surround back right) : -10 \~ +10dB
- To stop test tone -
- Press the SETUP/MENU button once.
SETUP OFF appears on the display and test tone stops.

In the Dolby Pro Logic IIz mode, test signal will be automatically output as follows: F.L → FHL → CEN → S.W → FHR → F.R → S.R.
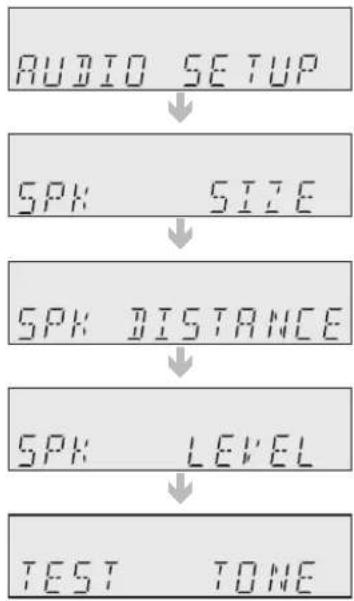
flowchart
graph TD
    A["AUDIO SETUP"] --> B["SPK SIZE"]
    B --> C["SPK DISTANCE"]
    C --> D["SPK LEVEL"]
    D --> E["TEST TONE"]
Setup
This mode provides 7.1 channel sound from 2 channel sources. Press the PROLOGIC button on the remote control.
• MOVIE : Adds realism to the movie soundtrack.
- MUSIC: Provides 7.1 channel surround sound for digital, analog or existing stereo sources.
- GAME : Enhances the excitement of the game's sound.
• MATRIX : You will hear 7.1 channel surround sound.
- PL (Pro Logic): You will experience a surround effect with 5.1 channel surround sound.
SETTING DOLBY PRO LOGIC IIx
This function works only in Dolby Pro Logic IIx MUSIC mode.
-
Press the SETUP/MENU button. • Each time the button is pressed, the mode switches between SETUP ENTER and SETUP OFF.
-
Press the ENTER button to select SETUP ENTER.
-
Press the ▲▼ buttons to select DPLIIX SETUP, and then press the ENTER or ▶ button.
-
Press the ▲▼ buttons to select the option you want, and then press the ENTER or ▶ button.
-
PANORAMA: You can set it ON or OFF. (This mode extends the front stereo image to include the surround speakers for an exciting "wraparound" effect with side wall imaging.)
- DIMENSION : You can set from -7 to +7. (Incrementally adjusts the sound fi eld (DSP)from the front or surround.)
- C- WIDTH: You can set from 0 to 7. (This sets the width of the center sound image. The higher the setting, the less sound comes from the center speaker.)
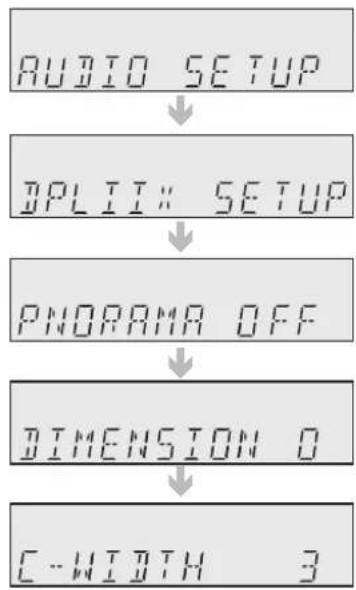
flowchart
graph TD
    A["AUDIO SETUP"] --> B["DPLII: SETUP"]
    B --> C["PNORMA OFF"]
    C --> D["DIMENSION 0"]
    D --> E["C-WIDTH 3"]

■ PANORAMA, DIMENSION and CENTER WIDTH settings are enabled only if the mode is set to MUSIC.
- You cannot use Dolby Pro Logic Ilx mode for multi channel signals such as Dolby Digital, Dolly Digital +, Dolby true HD, DTS, DTS-HD Master Audio.
■ Pro Logic works only for PCM audio signals with sampling frequencies of 32KHz, 44KHz or 48KHz.
- When Dolby Pro Logic IIz is set ON, Dolby Pro Logic IIx can not be used.
SETTING DOLBY PRO LOGIC IIz
Dolby Pro Logic IIz adds front height channels to surround sound.
- Press the SETUP/MENU button.
• Each time the button is pressed, the mode switches between SETUP ENTER and SETUP OFF.
-
Press the ENTER button to select SETUP ENTER.
-
Press the ▲▼ buttons to select DPLIIZ SETUP, and then press the ENTER or ▶ button.
-
Press the ▲▼ buttons.
• Each time you press this button, HEIGHT OFF → HEIGHT ON will be selected in turn.
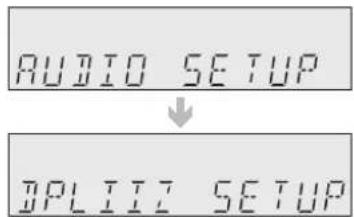
flowchart
graph TD
    A["AUDIO SETUP"] --> B["DPLII Setup"]

If Dolby Pro Logic Ilz is set to On, the Surround Back speaker in the speaker size mode is changed to NONE, the Front Height Speaker will be turned on.
If Dolby Pro Logic Ilz is set to OFF, the surround back speaker and front height speaker can't be turned to default setting.
If you change Dolby Pro Logic Ilz mode to Dolby Pro Logic Ilx mode, first Dolby Pro Logic Ilz will be turned off, second FRONTH in the speaker size mode will be turned off, lastly the Surround Back Speaker will be turned on.
If you turn Dolby Pro Logic IIz on, FRONTH in the speaker size mode and the Surround Back Speaker can not be changed to NONE.
SETTING TONE CONTROL
This will enable you to adjust the bass and treble level.
- Press the SETUP/MENU button.
• Each time the button is pressed, the mode switches between SETUP ENTER and SETUP OFF.
-
Press the ENTER button to select SETUP ENTER.
-
Press the ▲▼ buttons to select TONE CONTROL, and then press the ENTER or ▶ button.
-
Press the ▲▼ buttons to select the option you want, and then press the ENTER or ▶ button.
• Each time you press this button, TONE → BASS → TREBLE will be selected in turn.
-
Press the ▲▼ buttons to set the Tone Control mode you want.
-
If it is set to TONE OFF, the Tone Control function will be disabled.
- You can adjust it from -6 to +6dB by 1 step.
• The sound gets quieter at -6dB and louder at +6dB.
- To exit setup mode -
- Press the SETUP/MENU button.
SETUP OFF appears on the display and Setup Mode is exited.
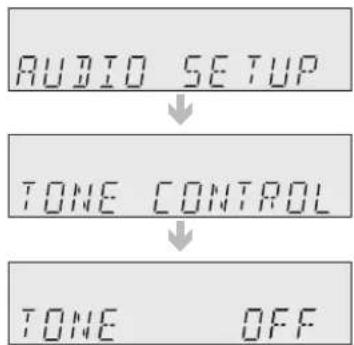
flowchart
graph TD
    A["AUDIO SETUP"] --> B["TONE CONTROL"]
    B --> C["TONE OFF"]

■ The Tone Control function can be applied to all channels except for the subwoofer.
Setup
SETTING NEO:6 MODE
You can play back 2 channel sound over 6.1 channels when enjoying music or a movie.
- Press the SETUP/MENU button.
• Each time the button is pressed, the mode switches between SETUP ENTER and SETUP OFF.
-
Press the ENTER button to select SETUP ENTER.
-
Press the ▲▼ buttons to select NEO:6 SETUP, and then press the ENTER or ▶ button.
-
Press the ▲▼ buttons to set the C-IMAGE mode you want.
You can set C-IMAGE from 0 to 5
This parameter adjusts the height of the center image through the front and center speakers.
"0" is the lowest while "5" is the highest.
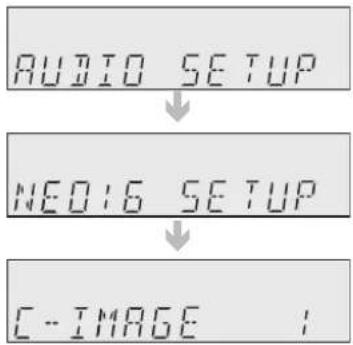
flowchart
graph TD
    A["AUDIO SETUP"] --> B["NEO16 SETUP"]
    B --> C["C-IMAGE 1"]
- To exit setup mode-
- Press the SETUP/MENU button.
SETUP OFF appears on the display and Setup Mode is exited.

■ NEO:6 mode cannot be used with Dolby Digital, Dolly Digital +, Dolby true HD, DTS, DTS-HD Master Audio.
■ Pro Logic works only for PCM audio signals with sampling frequencies of 32KHz, 44KHz or 48KHz.
SETTING EX/ES MODE
When surround back speakers are connected, you can listen to 6.1 or 7.1 multi-channel sound using the built-in Dolby Digital Surround EX or DTS ES decoder. This function works when a Dolby Digital or DTS source (such as a DVD player) is input, and does not work with L.PCM and Dolby Digital 2 channel sources.
- Press the SETUP/MENU button.
• Each time the button is pressed, the mode switches between SETUP ENTER and SETUP OFF.
-
Press the ENTER button to select SETUP ENTER.
-
Press the ▲▼ buttons to select EX/ES SETUP, and then press the ENTER or ▶ button.
-
Press the ▲▼ buttons to set the EX/ES mode you want.
-
AUTO: If the unit receives an audio signal that it can recognize, it will select an optimal decoder for playback in 6.1/7.1 channels. If the amplifier does not recognize the audio signal, it will not play in 6.1/7.1 channel automatically.
- ON : Dolby Digital or DTS signal will be played in 6.1 / 7.1 channel using Dolby Digital Surround EX / DTS ES decoder.
- OFF : Dolby Digital Surround EX / DTS ES decoder will not be used for playback.
- To exit setup mode-
- Press the SETUP/MENU button. SETUP OFF appears on the display and Setup Mode is exited.
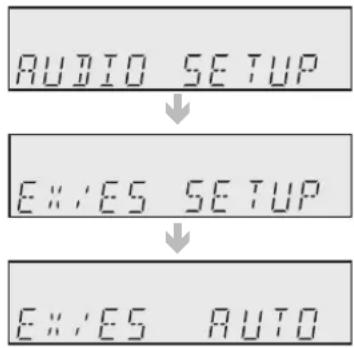
flowchart
graph TD
    A["AUDIO SETUP"] --> B["EX/ES SETUP"]
    B --> C["EX/ES AUTO"]

- You cannot use DTS-ES without surround back speakers connected.
Setup
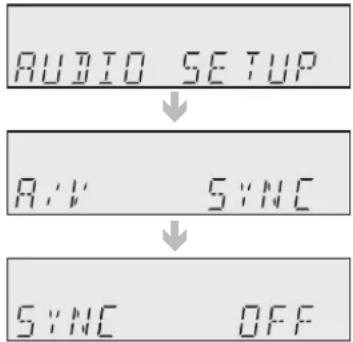
AV SYNC
Video may look slower than the audio if it is connected to a digital TV. If this occurs, adjust the audio delay time to match the video.
- Press the SETUP/MENU button.
- Each time the button is pressed, the mode switches between SETUP ENTER and SETUP OFF.
-
Press the ENTER button to select SETUP ENTER.
-
Press the ▲▼ buttons to select A/V SYNC, and then press the ENTER or ▶ button.
-
Press the ▲▼ buttons to set the A/V Sync mode you want.
- You can adjust it from OFF to 240MS in 10MS steps.
flowchart
graph TD
    A["AUDIO SETUP"] --> B["A:V SYNC"]
    B --> C["S:NC OFF"]
MP3 ENHANCER
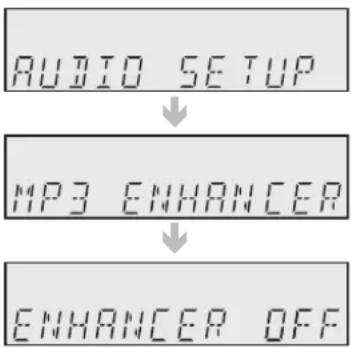
This also helps enhance your sound experience (ex. mp3 music). Use this if you want to hear better sound from a low quality mp3 source.
- Press the SETUP/MENU button.
• Each time the button is pressed, the mode switches between SETUP ENTER and SETUP OFF.
-
Press the ENTER button to select SETUP ENTER.
-
Press the ▲▼ buttons to select MP3 ENHANCER, and then press the ENTER or ▶ button.
-
Press the ▲▼ buttons to select ON or OFF.
flowchart
graph TD
    A["AUDIO SETUP"] --> B["MP3 ENHANCER"]
    B --> C["ENHANCER OFF"]
SMART VOLUME
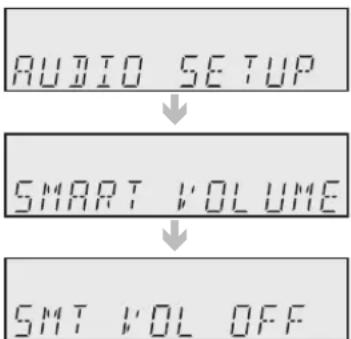
This will regulate and stabilize the volume level against a drastic volume change when changing channels or during a scene transition.
- Press the SETUP/MENU button.
- Each time the button is pressed, the mode switches between SETUP ENTER and SETUP OFF.
-
Press the ENTER button to select SETUP ENTER.
-
Press the ▲▼ buttons to select SMART VOLUME, and then press the ENTER or ▶ button.
-
Press the ▲▼ buttons to select ON or OFF.
flowchart
graph TD
    A["AUDIO SETUP"] --> B["SMART VOLUME"]
    B --> C["SMT VOL OFF"]
ASC (AUTO SOUND CALIBRATION) SETUP
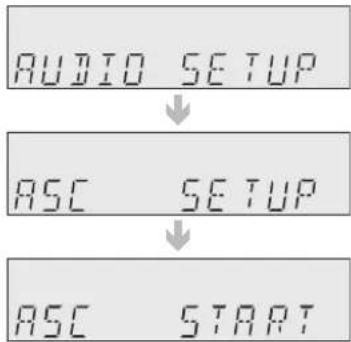
By setting the ASC function just once when you relocate or install the unit, you can have the unit automatically recognize the distance between speakers, levels between channels, and frequency characteristics to create a 7.1-channel sound fi eld optimized for your environment.
- Before Setting -
- Plug the ASC microphone into the ASC MIC jack.
- Place the ASC microphone at the listening position.
-
Press the ASC button on the front panel, and then press the ENTER button.
-
Press the SETUP/MENU button.
• Each time the button is pressed, the mode switches between SETUP ENTER and SETUP OFF.
- Press the ENTER button to select SETUP ENTER.
- Press the ▲▼ buttons to select ASC SETUP, and then press the ENTER or ▶ button.
- Press the ▲▼ buttons to select ASC START, and then press the ENTER button.
- To create the optimal 7.1 channel sound field, the selections are in the following sequence:
$$ \mathrm{L} \rightarrow \mathrm{C} \rightarrow \mathrm{R} \rightarrow \mathrm{SR} \rightarrow \mathrm{SBR} \rightarrow \mathrm{SBL} \rightarrow \mathrm{SL} \rightarrow \mathrm{SW} $$
- EQ ON: The ASC(Auto Sound Calibration) EQ mode is set to on. EQ OFF: The ASC(Auto Sound Calibration) EQ mode is set to off.
flowchart
graph TD
    A["AUDIO SETUP"] --> B["ASC SETUP"]
    B --> C["ASC START"]
- If you see a ASC READY message on the screen, press the ENTER button to apply the measurement value. And then unplug the ASC microphone.
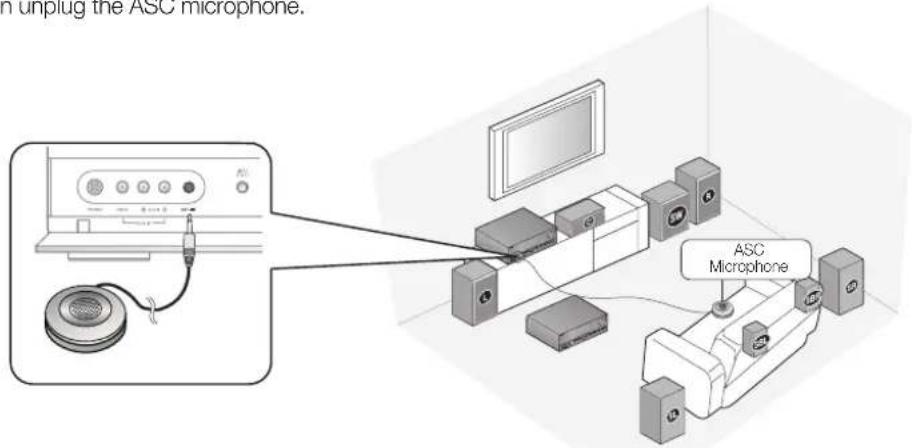
text_image
n unplug the ASC microphone. ASC MicrophoneTo cancel the ASC (Auto Sound Calibration) setup.
This will be automatically reverted if you press the RETERN button.
* If ASC error occurs, see "ASC Error List" on page 58.

SettingtheASCfunctiontakesabout3minutes.
Because the volume level of the tone is fixed during the ASC setup, you cannot adjust the volume using the volume control.
If the ASC microphone is disconnected during the ASC setup, the setup will be canceled.
- You can also press the ASC button on the remote control to use this function.
If Dolby Pro Logic Ilz is set to ON, the selection are in the following sequence: FL → CEN → FR → SR → SL → SW.
Setup
DRC SETUP
You can use this function to enjoy Dolby Digital sound when watching movies at low volume at night. DRC compresses the audio to make the loudest sounds quieter and the quietest sounds louder.
- Press the SETUP/MENU button.
- Each time the button is pressed, the mode switches between SETUP ENTER and SETUP OFF.
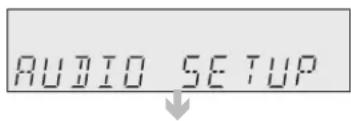
text_image
AUDIO SETUP-
Press the ENTER button to select SETUP ENTER.
-
Press the ▲▼ buttons to select DRC SETUP, and then press the ENTER or ▶ button.
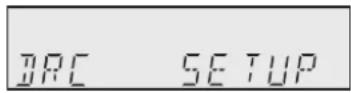
- Press the ▲▼ buttons to set the DRC Setup mode you want.
- STD : Sets DRC effect to standard. - MAX : Sets DRC effect to maximum.
• MIN : Sets DRC effect to minimum.
HDMI SETUP
Use this if you want to receive audio from HDMI connected external devices.
- Press the SETUP/MENU button.
• Each time the button is pressed, the mode switches between SETUP ENTER and SETUP OFF.
-
Press the ENTER button to select SETUP ENTER.
-
Press the ▲▼ buttons to select HDMI SETUP, and then press the ENTER or ▶ button.
-
Press the ▲▼ buttons to select the option you want, and then press the ENTER or ▶ button.
-
Press the ▲▼ buttons to set the HDMI Setup mode you want.
• HDMI AUDIO : AVR(Audio Video Receiver), TV
This preference determines whether audio received at the HDMI IN is output by the HDMI OUT. If you want to listen to audio from an HDMI connected external device through your HDMI connected TV's speakers, set it to TV. Otherwise, leave it on AVR to listen to audio from the A/V receiver.
- AVR : HDMI audio is not output - TV : HDMI audio is output
• HDMI ANYNET+ : ON, OFF
Anynet+ is a function that enables you to control other Samsung Devices with your Samsung TV's remote control. - ON : Anynet+ is enabled. - OFF : Anynet+ is disabled.
• HDMI SYNC : ON, OFF
The AV receiver can be set to automatically correct any delay between the video and the audio, based on the data from the connected TV.
- ON : HDMI Sync is enabled. - OFF : HDMI Sync is disabled.

■ HDMI Audio is enabled only if both the HDMI INPUT and HDMI OUT are connected properly and working normally.
■ This function works only if your HDMI-compatible TV supports HDMI Sync.
VARIABLE SET (Low Power Consumption SETUP)
This function enhances electric power efficiency.
- Press the SETUP/MENU button.
• Each time the button is pressed, the mode switches between SETUP ENTER and SETUP OFF.
-
Press the ENTER button to select SETUP ENTER.
-
Press the ▲▼ buttons to select VARIABLE SET, and then press the ENTER or ▶ button.
-
Press the ▲▼ buttons to select ON or OFF.
- ON: This is Samsung's electric power efficiency function, you can save about 30% for power consumption.
• OFF: Normal power efficiency function.

This function is not available after the Tone Control, Speaker Level, SFE mode or ASC is changed from the factory setting.
Using the SOUND EFFECT button on the front of the main unit
Selecting the DPLIIx mode
- Press the SOUND EFFECT button to select DPLIIX.
• Each time you press this button, DPLIIX → NEO:6 → SFE will be selected in turn.
- Press the UP/DOWN (∧,∨) button.
• Each time you press the UP/DOWN ( ∧, ∨ ) button, MUSIC → GAME → MATRIX → PL → MOVIE will be selected in turn.
- You can also select the DPLIIx mode by pressing the PROLOGIC button on the remote control.
Selecting the NEO:6 mode
- Press the SOUND EFFECT button briefly to select NEO:6.
• Each time you press this button, DPLIIX → NEO:6 → SFE will be selected in turn.
- Press the UP/DOWN ( , V ) button.
• Each time you press the UP/DOWN ( , ) button, MUSIC → CINEMA will be selected in turn.
- You can also select the NEO:6 mode by pressing the NEO : 6 button on the remote control.
Selecting the SFE mode
- Press the SOUND EFFECT button to select SFE.
• Each time you press this button, DPLIIX → NEO:6 → SFE will be selected in turn.
- Press the UP/DOWN ( , V ) button.
• Each time you press the UP/DOWN ( , ) button, STEREO → HALL 1 → HALL 2 → J.CLUB → CHURCH → ROCK → CLASSIC → LIVE → GAME → MOVIE → CONCERT → STADIUM will be selected in turn.
- You can also select the SFE mode by pressing the DSP button on the remote control.

- You cannot use Dolby Pro Logic Ilx mode for multi channel signals such as Dolby Digital and DTS.
■ Pro Logic works only for BITSTREAM audio signals with sampling frequencies of 32KHz, 44KHz or 48KHz.
If you turn Dolby Pro Logic Ilz on, the Dolby Pro Logic Ilx mode is only available MOVIE.
Using the S.DIRECT/STEREO button on the front of the main unit
Press the S.DIRECT/STEREO button.
• Each time the button is pressed, the mode switches between the S. DIRECT mode and the STEREO mode.
- S.DIRECT: Outputs 2 CH PCM audio signal without any signal processing, providing higher audio quality. This is useful for obtaining the best sound from a connected CD player.
• STEREO : Outputs sound of the selected source in 2 CH stereo.
USING THE SURROUND MODES (Continued)
Surround Mode and Input Signal Chart
o = active, -= inactive
| Surround Mode Input Signal Decoding | Output Channel Display Information | ||||||||
| L/R C | SL SR | SBL SBR | SUBW | Display Signal Format | Channel Status | ||||
| DOLBY | Dolby D Surr. EX Dolby Digital 5.1 | 0 | 0 | 0 | 0 | 0 | DIGITAL | L, C, R, SL, SR, SBL, SBR, SW | |
| Dolby D (5.1ch) Dolby Digital 5.1 | 0 | 0 | 0 | - | fDIGITAL | L, C, R, SL, SR, SW | |||
| Dolby D Surr.EX Pro Logic Ilz | 0 | 0 | 0 | 0 | 0 | DIGITAL | L, C, R, SL, SR, SBL, SBR, SW | ||
| Dolby D(5.1ch) Pro Logic Ilz | 0 | 0 | 0 | 0 | 0 | DIGITAL | L, C, R, SL, SR, SBL, SBR, SW | ||
| Dolby D (2ch) Pro Logic Ilx(z) | 0 | 0 | 0 | 0 | 0 | DIGITAL | L, C, R, SL, SR, SBL, SBR, SW | ||
| Dolby D (2ch Surr) Pro Logic Ilx(z) | 0 | 0 | 0 | 0 | 0 | DIGITAL | L, C, R, SL, SR, SBL, SBR, SW | ||
| L.PCM (Audio) Pro Logic Ilx(z) | 0 | 0 | 0 | 0 | 0 | L.PCM | L, C, R, SL, SR, SBL, SBR, SW | ||
| Analog Pro Logic Ilx(z) | 0 | 0 | 0 | 0 | 0 | Analog | L, C, R, SL, SR, SBL, SBR, SW | ||
| NEO:6 | L.PCM (Audio) Neo:6 | 0 | 0 | 0 | 0 | 0 | L.PCM | L, C, R, SL, SR, SBL, SBR, SW | |
| Analog | Neo:6 | 0 | 0 | 0 | 0 | 0 | Analog | L, C, R, SL, SR, SBL, SBR, SW | |
| Dolby D (2ch) | Neo:6 | 0 | 0 | 0 | 0 | 0 | DIGITAL | L, C, R, SL, SR, SBL, SBR, SW | |
| Dolby D (2ch Surr) | Neo:6 | 0 | 0 | 0 | 0 | 0 | DIGITAL | L, C, R, SL, SR, SBL, SBR, SW | |
| SFE | Dolby D (2ch) | DD+SFE | 0 | 0 | 0 | - | fDIGITAL | L, C, R, SL, SR, SBL, SBR, SW | |
| Dolby D (2ch Surr) DD+SFE | 0 | 0 | 0 | - | fDIGITAL | L, C, R, SL, SR, SBL, SBR, SW | |||
| L.PCM (Audio) | SFE | 0 | 0 | 0 | - | OL.PCM | L, C, R, SL, SR, SBL, SBR, SW | ||
| Analog | SFE | 0 | 0 | 0 | - | OAnalog | L, C, R, SL, SR, SBL, SBR, SW | ||
| EX/ES | Dolby D Surr. EX | Dolby Digital EX | 0 | 0 | 0 | 0 | 0 | DIGITAL | L, C, R, SL, SR, SBL, SBR, SW |
| Dolby D (5.1ch) | Dolby Digital EX | 0 | 0 | 0 | 0 | 0 | DIGITAL | L, C, R, SL, SR, SBL, SBR, SW | |
| DTS-ES | DTS-ES | 0 | 0 | 0 | 0 | 0 | dts, ES | L, C, R, SL, SR, SBL, SBR, SW | |
| DTS (5.1ch) | DTS-ES | 0 | 0 | 0 | 0 | 0 | dts | L, C, R, SL, SR, SBL, SBR, SW | |
| STEREO | Dolby D (2ch) | Stereo | 0 | - | - | - | 0 | DIGITAL | L, R, SW |
| Dolby D (2ch Surr) | Stereo | 0 | - | - | - | 0 | DIGITAL | L, R, SW | |
| L.PCM (Audio) | Stereo | 0 | - | - | - | 0 | L.PCM | L, R, SW | |
| L.PCM 96KHz | Stereo | 0 | - | - | - | 0 | L.PCM | L, R, SW | |
| Analog | Stereo | 0 | - | - | - | 0 | Analog | L, R, SW | |
| True-HD | True-HD | True-HD | 0 | 0 | 0 | 0 | 0 | True-HD | L, C, R, SL, SR, SBL, SBR, SW |
| Dolby Digital + | Dolby Digital + | Dolby Digital + | 0 | 0 | 0 | 0 | 0 | Dolby Digital + | L, C, R, SL, SR, SBL, SBR, SW |
| DTS-HD | Master Audio | Master Audio | 0 | 0 | 0 | 0 | 0 | DTS-HD | L, C, R, SL, SR, SBL, SBR, SW |
| High Resolution | High Resolution | 0 | 0 | 0 | 0 | 0 | DTS-HD | L, C, R, SL, SR, SBL, SBR, SW | |
• L/R : front speaker (left/right)
C: center speaker
SL/SR : surround speaker (left/right)
SBL/SBR : surround back speaker (left/right)
SW : subwoofer

■ Channel status displays are dependent on the speaker configuration.
■ SFE mode works with 2-ch signals.
If Dolby Pro Logic IIz is set to On, the Surround Back speaker(SBL/SBR) is changed to the Front Height Speaker(FHL/FHR), Dolby true HD, Dolby plus, DTS-HD Master Audio ,SFE and NE0:6 will be output 5.1 channel.
USING THE SUBWOOFER SELECTION BUTTON
You can set the subwoofer to on/off.
Press the SUBWOOFER button.
You can listen to the radio by using either automatic or manual tuning.
-
Press the INPUT SELECT button to select FM.
-
Select a frequency (radio broadcast).
-
Preset tuning: Press the ◀◀,▶▶I buttons on the remote control to select the preset frequency.
- Manual tuning 1 (Automatic tuning): Press and hold the TUNING/CH (V, ∧) buttons on the remote control to automatically tune in a frequency.
- Manual tuning 2: Press the TUNING/CH (V, ∧) buttons on the remote control to increase or decrease the frequency step by step.

- You can also use the SELECT (V, ∧) button on the main uint to change the radio frequency.
To Listen in mono/stereo
Press the MO/ST button on the remote control.
• Each time you press this button, STEREO or MONO will be selected in turn.
- If you select MONO in an area with weak reception, it will help to reduce noise.
• This function works only with the remote control.
Presetting radio stations
You can preset up to 30 FM stations.
E.g.: Setting station FM 89.10 in preset 2.
- Press the INPUT SELECT button to select FM.
- Press the TUNING/CH (V, ∧) buttons on the remote control to select 89.10.
- Refer to step 2 above to tune in automatically and manually.
-
Press the MEMORY button on the main unit.
-
You can also use the TUNER MEMORY button on the remote control.
-
Tuner number will blink on the display.
-
Press the TUNING/CH (V, A) buttons on the remote control to select preset 2.
- You can select from presets 1 to 30.
- Press the MEMORY button on the main unit.
- Tuner number will disappear and station 89.10 will be saved in preset 2.
- To preset other stations, repeat steps 2 to 5.
To Listen to Preset Station
- Press the TUNING MODE button to select PRESET and press the SELECT (V, ∧) buttons.
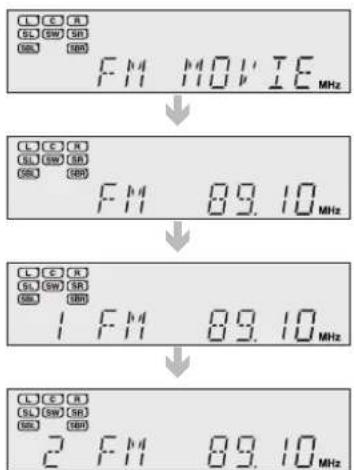
text_image
C R SL SW SR SBL SBR F M MOV I E MHz L C R SL SW SR SBL SBR F M 89.10 MHz L C R SL SW SR SBL SBR 1 F M 89.10 MHz L C R SL SW SR SBL SBR 2 F M 89.10 MHzOperation
USING AN iPod
You can enjoy playback of your iPod using the supplied remote control.
Listening to Music (iPod audio function)
You can play music files stored in the iPod player by connecting it to the AV receiver.
-
Connect the iPod dock connector to the iPod jack on the AV Receiver.
-
Place the iPod in the dock.
-
Your iPod is automatically turned on.
-
Press the INPUT SELECT button on the remote control to select IPOD AUDIO mode.
-
Press the PLAY button on the remote control to play. • The AV receiver starts playing from the first track of the iPod player.
-
You can use the remote control to control simple playback functions such as the PLAY, PAUSE, STOP, SKIP (I<<,▶▶) buttons.

natural_image
Illustration of a hand inserting a CD into a device with a downward arrow (no text or symbols)
■ See page 28 for compatible iPods.
Compatibility depends on the software version of your iPod.
- You can also select iPod by pressing the iPod button on the remote control.
Watching a Movie (iPod Video function)
You can play video files stored in the iPod player on a TV by connecting it to the AV receiver.
- Connect the iPod dock connector to the iPod jack on the AV receiver.
- In the iPod screen, move to Videos > Settings and set the TV Out option to On.
- Place the iPod in the dock.
- Press the INPUT SELECT button on the remote control to select IPOD VIDEO mode.
- Set the AV IN option of the TV connected to the AV receiver to COMPOSITE.
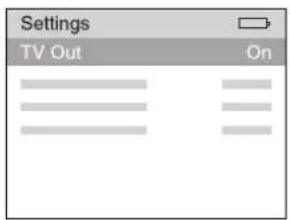
text_image
Settings TV Out On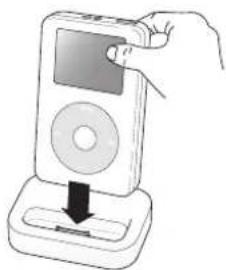
natural_image
Illustration of a hand inserting a CD into a device with a downward arrow (no text or symbols)Follow the iPod onscreen guide through the following steps.
- Press the ▲,▼ buttons on the remote control to select Videos and press the ENTER button.
- Press the ▲,▼ buttons on the remote control to select Movies and press the ENTER button.
- Press the ▲,▼ buttons to select the file to play and press the ENTER button.
- The iPod's video fi les will be played on the TV screen.
-
You can use the remote control to control simple playback functions such as the PLAY, PAUSE, STOP, SKIP (I◄◄, ►►) buttons.
-
If you press the PREV button within 3 seconds after the playback, the player will stop playing and return to the list screen. If you press the PREV button 3 seconds or later after the playback, the player will move to the start screen of the current file.
- Press the STOP button to stop playing and return to the list screen.
- Press the RETURN button to return to the previous menu.
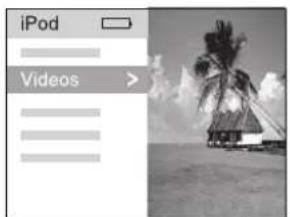
text_image
iPod Videos >
- You must have the VIDEO (Monitor or VCR) output connected to your TV to view iPod video.
- See page 28 for compatible iPods. Compatibility depends on the software version of your iPod.
- When the current fi le is played to the end, the next fi le will not be played automatically. To play the next fi le, select a fi le to play in the list screen of the iPod player.
- No other screen than the playback one will appear on the TV screen. Check other screens on the iPod player.
Operation
CONVENIENT FUNCTIONS
Sleep timer function
You can set the time that this unit will shut itself off.
Press the SLEEP button.
- SLEEP: OFF → 15 → 30 → 45 → 60 → 90 → 120 M (MIN) will be selected in turn.
text_image
4 5 6 8 9 PRO.COM. AUDIO.SOUND CTo check sleep timer
Press the SLEEP button.
- The remaining time before this unit will shut itself off is shown on the display.
- Pressing the button again changes the sleep time from what you set previously.
To cancel sleep timer
- Press the SLEEP button until SLEEP OFF appears on the display.
Mute function
This function is useful when answering a doorbell or telephone call.
Press the MUTE button.
- MUTE appears on the display.
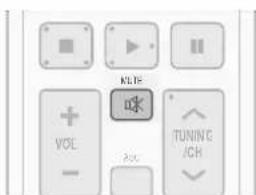
text_image
KLTF- VOL + - Pc TUNING /CHTo output sound again
Press the MUTE button again.
- MUTE will disappear and sound will output.
Adjust the display
You can adjust the brightness of the display.
Press the DIMMER button.
• Each time you press this button, the brightness changes as follows: Dark → Bright.
text_image
RUN H INPUT OUTPUT INPUT ORDER 1 2 3
■ SLEEP, Mute and the Adjust Display functions can only be operated with the remote control.
Reset function
When the Power is on,
- Press the MUTE button.
- MUTE appears on the display.
- Press the 9 button five times and then press the ENTER button.
• INITIAL : NO appears on the display. - Press the ▲▼ buttons to select YES.
- The unit will turn off after 5 seconds.
When the Power is Off,
- Press and hold the MEMORY button on the front of your AV Receiver for longer than 5 seconds.
• POWER LED will blink one time.
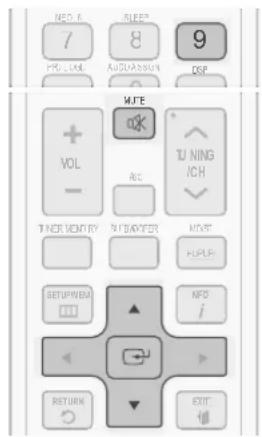
text_image
MEO & SLEEP 9 7 8 PRE-LLN AUGUSTAIN DEF MTE + VOL + TUNING - AC ICH TIMER VENTORY SWITCHER MORT HULPH SETUPWEN ▲ NFD i RETURN EXIT
■ Using the RESET function will erase all stored settings.
■ Do not use this unless necessary.
Using headphones
Use headphones (not supplied) for private listening pleasure.
Connect the headphones to the headphone (PHONES) jack and listen to music.

- Do not turn the volume up too high when you use headphones as it may damage your hearing.
SOFTWARE UPGRADE
Samsung may offer upgrades for AV Receiver's firmware in the future.
Please visit Samsung.com or contact the Samsung call center at 1-800-SAMSUNG (726-7864) to receive information about downloading upgrades and using a USB drive. Upgrades will be possible by connecting a USB drive to the USB port located on your AV Receiver.

- Insert a USB drive containing the firmware upgrade into the USB port on the back of the main unit.
- Please be careful to not disconnect the power or remove the USB drive while upgrades are being applied. The main unit will turn off automatically after completing the fi rmware upgrade.
When software is upgraded, settings you have made will return to their default (factory) settings. We recommend you write down your settings so that you can easily reset them after the upgrade.
If you failed software upgrade, it is strongly recommended whole USB data format to FAT16 and retry software upgrade.
■ The NTFS USB File System can not be supported.
■ Depending on the manufacturer, the USB may not be supported.
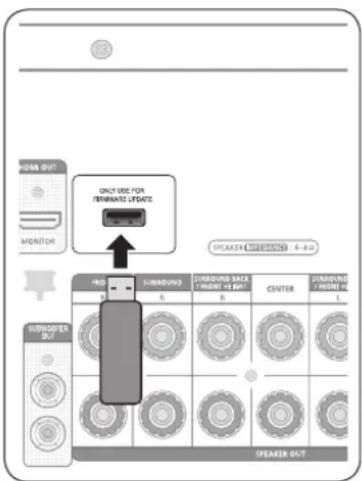
text_image
DOWN OUT MONITOR ONLY USE FOR TRIMANTS UPDATE SWEET 10.0 SPEAKER OUTPUT SWEET 10.0 SWEET 10.0 SWEET 10.0 SWEET 10.0 SWEET 10.0 SWEET 10.0 SWEET 10.0 SWEET 10.0 SWEET 10.0 SWEET 10.0 SWEET 10.0 SWEET 10.0Miscellaneous
OPERATING YOUR TV WITH THE REMOTE CONTROL
- Press the POWER button to turn on the TV.
- Press the AMP/TV button to set the remote to TV mode.
- Point the remote control toward the TV.
-
While holding down the POWER button, enter the code corresponding to your brand of TV.
-
If there is more than one code listed for your TV in the table, enter one at a time to determine which code works.
-
If the code matches the TV's code, the TV will be turned off.
-
If TV is turned on or off when you press the POWER button of the remote control, the setting is completed.
- You can use the TV POWER, VOLUME, CHANNEL, MENU and Numeric buttons (0\~9).

The remote control may not work on some brands of TVs. Also, some operations may not be possible depending on your brand of TV.
■ The remote control will work with Samsung TVs by default.
OPERATING YOUR TV WITH THE REMOTE CONTROL (Continued)
TV Brand Code List
| Brand Code | Number | Brand Code Number | Brand Code | Number | ||
| Admiral (M.Wards) 056, 057, 058 Luxman 018 Sylvania 018, 040, 048, 054, 059, | 060, 062 | |||||
| A Mark 001, 015 LXI (Sears) 019, 054, 056, 059, 060, | ||||||
| Anam 001, 002, 003, 004,005, | 062, 063, 065, 071 | Symphonic 061, 095, 096 | ||||
| Magnavox 015, 017, 018, 048, 054, 059, 060, 062, 072, 089 | Tatung 006 | |||||
| Techwood 018 | ||||||
| AOC 001, 018, 040, 048 Marantz 040, 054 Teknika | 003, 015, 018, 025 | |||||
| Bell & Howell (M.Wards) | 057, 058, 081 Matsui | 054 TMK | 018, 040 | |||
| Brocsonic | 059, 060 | MGA | 018, 040 | Toshiba | 019, 057, 063, 071, 101 | |
| Candle 018 Mitsubishi MGA | 018, 040, 054, 059, 060, | 107, 109, 110, 111, 113 | ||||
| Cetronic | 003 | 075, 101 | Vidtech | 018 | ||
| Citizen | 003, 018, 025 | MTC | 018 | Videch | 059, 060, 069 | |
| CINEMA 097 NEC | 018, 019, 020, 040, 059, | Wards | 015, 017, 018, 040, 048, | |||
| Classic | 003 | 060 | 054, 060, 064 | |||
| Concerto | 018 Nikei 003 | Yamaha 018 | ||||
| Contec | 046 Onking 003 York 040 | |||||
| Coronado 015 Omwa | 003 Yupiteru | 003 | ||||
| Craig | 003, 005, 061, 082, 083, 084 | Panasonic 006, 007, 008, 009, 054, 066, 067, 073, 074 | Zenith | 058, 079 | ||
| Zonda | 001 | |||||
| Croslex | 062 | Penney | 018 | Dongyang | 003, 054 | |
| Crown | 003 Philco 003 | 015, 017, 018, 048, | LOWE | 054 | ||
| CURTIS MATHES | 059, 061, 063 | 054, 059, 062, 069, 090 | FINLUX 054, 109, 114 | |||
| CXC | 003 Philips 015 | 017, 018, 040, 048 | YOKO 054 | |||
| Daewoo 002, 003, 004, 015,016, 017, 018, 019, 020, 021, 022, 023, 024, 025, 026, 027, 028, 029, 030, 032, 034, 035, 036, 040, 048, 059, 090, 099, 100 | 054, 062, 072, 112, 114, 117, 118 | LOEWE OPTA | 054, 114 | |||
| PHONOLA 054, 112, 114 | ||||||
| Pioneer | 063, 066, 080, 091 RADIOLA | 054, 112 | ||||
| Portland | 015, 018, 059 SCHNEIDER | 054 | ||||
| Proton | 040 AKAI 103 | |||||
| QUASAR | 006, 066, 067 GRUNDIG 108, 109, 113, 119, 120, | 121 | ||||
| Daytron | 040 Radio Shack 017 | 048, 056, 060, 061, | ||||
| Dynasty 003 | 075 BLAUPUNKT | 108 | ||||
| Emerson | 003, 015, 040, 046, 059, 061, 064, 082, 083, 084, 085 | RCA/Proscan | 018, 059, 067, 076, 077, 078, 092, 093, 094 | SIEMENS | 108 | |
| CGE | 113 | |||||
| Realistic | 003, 019 IMPERIAL 113 | |||||
| Fisher | 019, 065, 103 Sampo 040 MIVAR 113 | |||||
| Funai | 003 Samsung 000, 015, 016, 017, 040, | SABA | 114 | |||
| Futuretech | 003 | 043, 046, 047, 048, 049, 054, 059, 060, 098 | BANG&OLUFSEN | 114 | ||
| General Electric (GE) | 006, 040, 056, 059, 066, 067, 068 | BRIONMEGA | 114 | |||
| Sanyo | 019, 061, 065, 101, 102, 103, 104 METZ 114 | FORMENTI | 114 | |||
| Hall Mark 040 | ||||||
| Hitachi | 015, 018, 050, 059, 069 | Scott | 003, 040, 060, 061 | WEGA | 114 | |
| Inkel | 045 | Sears | 015, 018, 019 | RADIOMARELLI | 114 | |
| JC Penny 056, 059, 067, 086 Sharp 015, 057, 064, 101, 105, | SINGER | 114 | ||||
| JVC | 070 | 106, 115 | SINUDYNE 114 | |||
| KTV | 059, 061, 087, 088 Signature 2000 (M.Wards) | 057, 058 TELEFUNKEN | 116 | |||
| KEC 003, 015, 040 Scny 050, 051, 052, 053, 055, | ||||||
| KMC | 015 | 101 | ||||
| LG (Goldstar) | 001, 015, 016, 017, 037, 038, 039, 040, 041, 042, 043, 044, 054, 066 | Sounddesign | 003, 040 | |||
| Spectricon 001 | ||||||
| SSS 018 | ||||||
Miscellaneous
- Press the POWER button to turn on the DVD (BD) player.
- Press the BD/DVD button on the remote control to set the remote to DVD (BD) mode.
- Point the remote control toward the DVD (BD).
-
While holding down POWER button, enter the code corresponding to your brand of DVD (BD).
-
If there is more than one code listed for your DVD (BD) in the table, enter one at a time to determine which code works.
-
If the code matches the DVD (BD)'s code, the DVD (BD) will be turned off.
-
If DVD (BD) is turned on or off when you press the POWER button of the remote controller, the setting is completed.
- You can use DVD (BD) POWER, PLAY, PAUSE, STOP, SKIP, MENU and Numeric buttons (0\~9).

■ The remote control may not work on some brands of DVD.
Also, some operations may not be possible depending on your brand of DVD.
■ The remote control will work with Samsung DVD (BD) by default.
DVD Brand Code List
| Brand Code | Number | Brand Code Number | Brand Code Number | ||
| DENON 003, 032 ONKYO 004, 014 TOSHIBA 004, 018 | |||||
| DOONOON 019 OPTIMUS 011 YAMAHA 009, 033 | |||||
| DMTECH 017 PANASONIC 021 ZENITH 004, 024 | |||||
| FISHER 002 PROSCAN 006 TAEGWANG 026 | |||||
| GE 006 PHILIPS 004, 023 PS2 028 | |||||
| HARMAN/KARDON | 012 | PIONEER | 007, 011, 022, 025 | X-BOX | 029 |
| JVC 010, 013 RCA | 006 APEX | 030 | |||
| KENWOOD 008 SAMSUNG | 000, 027 Marantz | 031 | |||
| LG 001 SANYO 002 | |||||
| MAGNAVOX 004 SONY | 015, 020 | ||||
| MITSUBISHI | 005, 016 THETA DIGITAL | 011 | |||
BD player Brand Code List
■ The remote control will control Samsung BD players only.
Troubleshooting
Before requesting service, please check the following.
| Symptom Check Remedy | ||
| The unit will not turn on. | Is the power cord plugged into the outlet? | Connect the power plug to the outlet. |
| A function does not work when the button is pressed. | Is there static electricity in the air? | Disconnect the power plug and connect it again. |
| Sound is not produced. | Are the speakers and external components connected properly?Is the Mute function on?Is the volume set to minimum?Is the Speaker Size set incorrectly to NONE? | Connect them correctly.Press the MUTE button to cancel the function.Adjust the volume.Refer to pages 36 to select LARGE, SMALL or YES. |
| Picture does not appear on a TV when the function is selected. | Is the external component connected properly? | Connect it correctly. |
| Remote controller does not work. | Are the batteries drained?Is the distance between remote control and main unit too great? | Replace with new batteries.Operate at close distance. |
| The sound from the left/right channels is reversed. | Are the left/right speaker or left/right input/output cables connected properly? | Check the left/right channel and connect it/them correctly. |
| Can't receive radio broadcasts. | Is FM antenna connected properly? | Connect the antenna correctly.If the input strength of antenna signal is weak, install the FM antenna in a place with good reception. |
| There is no sound from surround speakers. | Are the surround speakers connected properly?Is SURR (surround) incorrectly set to NONE in the Speaker Size?Is surround mode set to stereo? | Refer to pages 16 ~18 to connect them properly.Refer to page 36 to select LARGE or SMALL.Refer to pages 47~48 to select proper Surround Mode. |
| There is no sound from surround back speakers | Are the surround back speakers connected properly?Is SBACK (Surround Back) set to NONE in the Speaker Size?Is Surround Mode set to EX/ES? | Refer to pages 16 ~18 to connect them properly.Refer to page 36 to select LARGE or SMALL.Refer to page 43 to set Surround Mode to EX/ES. |
| Can't select EX/ES mode. | Is SBACK (Surround Back) set to NONE in the Speaker Size?Is the input signal selected properly? | Refer to page 36 to select LARGE or SMALL.Use a 7.1 channel external component. |
Troubleshooting
| Symptom Check Remedy | ||
| Can't select Dolby Pro Logic IIx mode. | • Is the input signal selected properly? | • Only 2 channel signal can select Dolby Pro Logic IIx mode. (ex:Dolby Digital, PCM, 2 channel analog input signal.) |
| Can't select NEO:6 mode. | • Is the input signal selected properly? | • Use PCM and Analog input signal. |
| There is no sound when playing a DTS encoded DVD. | • Is Digital input selected? • Check w | whether the DVD player is properly connected and refer to page 31 to select the digital input. |
Product protection function
Heat protection
- The protection function will come on if the main unit or power transformer overheats.
"PRWill appear in the display.
This function will come on :
- If speaker terminal is shorted
- If speaker cable is shorted
If there is no problem when you turn the unit on again after turning it off, PROTECTION mark will disappear on the display and the unit will work properly.

- If PROTECTION appears on the display, check whether the speaker terminal is shorted and then turn on the unit again.
ASC Error List
| Error No. | VFD Message Action | |
| E01 | HP CONCT | Disconnect the headphones. |
| E02 | NO MIC | Connect the microphone. |
| E03 | NOISY | Take an appropriate action to reduce the surrounding noise. |
| E04 | MIC LEVL | The speaker is too close to the microphone.Check the distance between speaker and microphone. |
| E05 | NO FRONT | Check if the front speaker is connected properly. |
| E07 | LEVL OVR | Check the position of each of speaker and microphone. |
| E08 | DIST OVR | The distance between speaker and microphone exceeds the acceptable value.Check the location of microphone and each speaker. |
| E13 | TIME OVR | Unplug the power cable and plug it back.Then, perform ASC again. |
| E14 | CODE ERR | Unplug the power cable and plug it back.Then, perform ASC again. |
SPECIFICATIONS
| GENERAL | Power supply 120V, 60 Hz | ||
| Standby power consumption 0.9W | |||
| Power consumption | Main unit 75W | ||
| Subwoofer 35W | |||
| Weight | 13.7 lbs | ||
| Dimensions (W x H x D) 17.2 x 6.6 x 14.7 inches | |||
| Operating temperature range 41°F~+95°F | |||
| Operating humidity range 10%~75% | |||
| FM TUNER | Frequency response 87.5~108.0MHz | ||
| Usable sensitivity 12dBf | |||
| S/N ratio MONO/STEREO 55/55dB | |||
| Distortion MONO/STEREO 0.3/0.8% | |||
| Stereo separation 30dB | |||
| Tuner output level 1kHz, 75kHz Dev | |||
| AMPLIFIER | Rated output 20Hz~20kHz/THD = 0.9% | ||
| Front speaker (left+right) 6 Ω 120W/CH | |||
| Center speaker | 6 Ω 120W/CH | ||
| Surround speaker (left+right) | 6 Ω 120W/CH | ||
| Surround back speaker (left+right) | 6 Ω 120W/CH | ||
| Subwoofer speaker | 8 Ω 150W/CH | ||
| Input sensitivity/impedance | 450mV/47kΩ | ||
| S/N ratio (analog input) | 80dB | ||
| Separation (1kHz) 60dB | |||
| FREQUENCY RESPONSE | Analog input | 20Hz~20kHz(±3dB) | |
| Digital input/96kHz PCM | 20Hz ~44kHz(±3dB) | ||
| HDMI | Input | Compatible 1080p | |
| Output | Compatible 1080p | ||
| VIDEO OUTPUT | TV format | NTSC/PAL | |
| Input level/impedance | 1Vp-p/75 Ω | ||
| Output level/impedance | 1Vp-p/75 Ω | ||
| Video frequency response | 5Hz to 10kHz(-3dB) | ||
| S/N Ratio | 60dB | ||
* S/N Ratio, Distortion, Separation and Usable sensitivity are based on measurement using AES (Audio Engineering Society) guidelines.
- Samsung Electronics Co., Ltd reserves the right to change the specifications without notice.
- Weight and dimensions are approximate.
- Design and specifications are subject to change without prior notice.
SAMSUNG AV receiver
LIMITED WARRANTY TO ORIGINAL PURCHASER
This SAMSUNG brand product, as supplied and distributed by Samsung Electronics America, Inc. (SAMSUNG) and delivered new, in the original carton to the original consumer purchaser, is warranted by SAMSUNG against manufacturing defects in materials and workmanship for a limited warranty period of:
One (1) Year Parts and Labor\*
(*90 days Parts and Labor for Commercial Use)
This limited warranty begins on the original date of purchase, and is valid only on products purchased and used in the United States. To receive warranty service, the purchaser must contact SAMSUNG for problem determination and service procedures. Warranty service can only be performed by a SAMSUNG authorized service center. The original dated bill of sale must be presented upon request as proof of purchase to SAMSUNG or SAMSUNG's authorized service center. Transportation of the product to and from the service center is the responsibility of the purchaser.
SAMSUNG will repair or replace this product, at our option and at no charge as stipulated herein, with new or reconditioned parts or products if found to be defective during the limited warranty period specified above. All replaced parts and products become the property of SAMSUNG and must be returned to SAMSUNG. Replacement parts and products assume the remaining original warranty, or ninety (90) days, whichever is longer.
SAMSUNG's obligations with respect to software products distributed by SAMSUNG under the SAMSUNG brand name are set forth in the applicable end user license agreement. Non-SAMSUNG hardware and software products, if provided, are on an "AS IS" basis. Non-SAMSUNG manufacturers, suppliers, publishers, and service providers may provide their own warranties.
This limited warranty covers manufacturing defects in materials and workmanship encountered in normal, and except to the extent otherwise expressly provided for in this statement, noncommercial use of this product, and shall not apply to the following, including, but not limited to: damage which occurs in shipment; delivery and installation; applications and uses for which this product was not intended; altered product or serial numbers; cosmetic damage or exterior finish; accidents, abuse, neglect, fire, water, lightning or other acts of nature; use of products, equipment, systems, utilities, services, parts, supplies, accessories, applications, installations, repairs, external wiring or connectors not supplied and authorized by SAMSUNG, or which damage this product or result in service problems; incorrect electrical line voltage, fluctuations and surges; customer adjustments and failure to follow operating instructions, cleaning, maintenance and environmental instructions that are covered and prescribed in the instruction book; product removal or reinstallation; reception problems and distortion related to noise, echo, interference or other signal transmission and delivery problems. SAMSUNG does not warrant uninterrupted or error-free operation of the product.
THERE ARE NO EXPRESS WARRANTIES OTHER THAN THOSE LISTED AND DESCRIBED ABOVE, AND NO WARRANTIES WHETHER EXPRESS OR IMPLIED, INCLUDING, BUT NOT LIMITED TO, ANY IMPLIED WARRANTIES OF MERCHANTABILITY OR FITNESS FOR A PARTICULAR PURPOSE, SHALL APPLY AFTER THE EXPRESS WARRANTY PERIODS STATED ABOVE, AND NO OTHER EXPRESS WARRANTY OR GUARANTY GIVEN BY ANY PERSON, FIRM OR CORPORATION WITH RESPECT TO THIS PRODUCT SHALL BE BINDING ON SAMSUNG. SAMSUNG SHALL NOT BE LIABLE FOR LOSS OF REVENUE OR PROFITS, FAILURE TO REALIZE SAVINGS OR OTHER BENEFITS, OR ANY OTHER SPECIAL, INCIDENTAL OR CONSEQUENTIAL DAMAGES CAUSED BY THE USE, MISUSE OR INABILITY TO USE THIS PRODUCT, REGARDLESS OF THE LEGAL THEORY ON WHICH THE CLAIM IS BASED, AND EVEN IF SAMSUNG HAS BEEN ADVISED OF THE POSSIBILITY OF SUCH DAMAGES. NOR SHALL RECOVERY OF ANY KIND AGAINST SAMSUNG BE GREATER IN AMOUNT THAN THE PURCHASE PRICE OF THE PRODUCT SOLD BY SAMSUNG AND CAUSING THE ALLEGED DAMAGE. WITHOUT LIMITING THE FOREGOING, PURCHASER ASSUMES ALL RISK AND LIABILITY FOR LOSS, DAMAGE OR INJURY TO PURCHASER AND PURCHASER°∅S PROPERTY AND TO OTHERS AND THEIR PROPERTY ARISING OUT OF THE USE, MISUSE OR INABILITY TO USE THIS PRODUCT SOLD BY SAMSUNG NOT CAUSED DIRECTLY BY THE NEGLIGENCE OF SAMSUNG. THIS LIMITED WARRANTY SHALL NOT EXTEND TO ANYONE OTHER THAN THE ORIGINAL PURCHASER OF THIS PRODUCT, IS NONTRANSFERABLE AND STATES YOUR EXCLUSIVE REMEDY.
Some states do not allow limitations on how long an implied warranty lasts, or the exclusion or limitation of incidental or consequential damages, so the above limitations or exclusions may not apply to you. This warranty gives you specific legal rights, and you may also have other rights which vary from state to state.
To obtain warranty hardware service, please contact SAMSUNG at:
Samsung Electronics America, Inc.
105 Challenger Road Ridgefield Park, NJ07660-0511
1-800-SAMSUNG(726-7864) and www.samsung.com
Contact SAMSUNG WORLD WIDE
If you have any questions or comments relating to Samsung products, please contact the SAMSUNG customer care center.
| Area Contact Center | Web Site | |
| ▪ North America | ||
| Canada 1-800-SAMSUNG (726-7864) www.samsung.com | ||
| Mexico | 01-800-SAMSUNG (726-7864) | www.samsung.com |
| U.S.A 1-800-SAMSUNG (726-7864) www.samsung.com | ||
| ▪ Latin America | ||
| Argentine 0800-333-3733 www.samsung.com | ||
| Brazil | 0800-124-4214004-0000 | www.samsung.com |
| Chile 800-SAMSUNG (726-7864) www.samsung.com | ||
| Nicaragua 00-1800-5077267 www.samsung.com | ||
| Honduras | 800-7919267 | www.samsung.com |
| Costa Rica 0-800-507-7267 www.samsung.com | ||
| Ecuador 1-800-10-7267 www.samsung.com | ||
| El Salvador 800-6225 www.samsung.com | ||
| Guatemala | 1-800-299-0013 www.samsung.com | |
| Jamaica | 1-800-234-7267 www.samsung.com | |
| Panama 800-7267 www.samsung.com | ||
| Puerto Rico | 1-800-682-3180 www.samsung.com | |
| Rep. Dominica | 1-800-751-2676 www.samsung.com | |
| Trinidad & Tobago | 1-800-SAMSUNG (726-7864) www.samsung.com | |
| Venezuela 0-800-100-5303 www.samsung.com | ||
| Colombia | 01-8000112112 | www.samsung.com |
| ▪ Europe | ||
| Austria | 0810 - SAMSUNG(7267864, € 0.07/min) | www.samsung.com |
| Belgium 02-201-24-18 | www.samsung.com/be (Dutch)www.samsung.com/be_fr (French) | |
| Czech | 800 - SAMSUNG(800-726786) | www.samsung.com |
| Denmark | 70 70 19 70 | www.samsung.com |
| Finland | 030 - 6227 515 | www.samsung.com |
| France | 01 48 63 00 00 | www.samsung.com |
| Germany | 01805 - SAMSUNG(726-7864 € 0,14/Min) | www.samsung.com |
| Hungary | 06-80-SAMSUNG (726-7864) | www.samsung.com |
| Italia 800-SAMSUNG (726-7864) www.samsung.com | ||
| Luxemburg | 261 03 710 | www.samsung.com |
| Netherlands | 0900-SAMSUNG(0900-7267864) (€ 0,10/Min) | www.samsung.com |
| Norway | 815-56 480 | www.samsung.com |
| Poland | 0 801 1SAMSUNG (172678)022-607-93-33 | www.samsung.com |
| Portugal | 80820-SAMSUNG (726-7864) | www.samsung.com |
| Slovakia | 0800-SAMSUNG (726-7864) | www.samsung.com |
| Spain | 902 - 1 - SAMSUNG(902 172 678) | www.samsung.com |
| Sweden | 0771 726 7864 (SAMSUNG) | www.samsung.com |
| U.K | 0845 SAMSUNG (7267864) | www.samsung.com |
| Eire | 0818 717100 | www.samsung.com |
| Area Contact Center | Web Site | |
| Switzerland | 0848 - SAMSUNG (7267864, CHF 0.08/min) | www.samsung.com/chwww.samsung.com/ch_fr/ (French) |
| Lithuania | 8-800-77777 | www.samsung.com |
| Latvia | 8000-7267 | www.samsung.com |
| Estonia | 800-7267 www.samsung.com | |
| ▪ CIS | ||
| Russia | 8-800-555-55-55 | www.samsung.com |
| Georgia | 8-800-555-555 | |
| Armenia | 0-800-05-555 | |
| Azerbaijan | 088-55-55-555 | |
| Kazakhstan | 8-10-800-500-55-500 | |
| Uzbekistan | 8-10-800-500-55-500 | www.samsung.com |
| Kyrgyzstan | 00-800-500-55-500 | www.samsung.com |
| Tadjikistan | 8-10-800-500-55-500 | www.samsung.com |
| Ukraine 0-800-502-000 | www.samsung.uawww.samsung.com/ua_ru | |
| Belarus | 810-800-500-55-500 | |
| Moldova | 00-800-500-55-500 | |
| ▪ Asia Pacific | ||
| Australia | 1300 362 603 | www.samsung.com |
| New Zealand | 0800 SAMSUNG (0800 726 786) | www.samsung.com |
| China | 400-810-5858010-6475 1880 | www.samsung.com |
| Hong Kong | (852) 3698-4698 | www.samsung.com/hkwww.samsung.com/hk_en/ |
| India | 3030 82821800 1100111800 3000 82821800 266 8282 | www.samsung.com |
| Indonesia | 0800-112-8888021-5699-7777 | www.samsung.com |
| Japan | 0120-327-527 | www.samsung.com |
| Malaysia | 1800-88-9999 | www.samsung.com |
| Philippines | 1-800-10-SAMSUNG(726-7864)1-800-3-SAMSUNG(726-7864)1-800-8-SAMSUNG(726-7864)02-5805777 | www.samsung.com |
| Singapore 1800 | SAMSUNG (726-7864) www | samsung.com |
| Thailand | 1800-29-323202-689-3232 | www.samsung.com |
| Taiwan | 0800-329-999 | www.samsung.com |
| Vietnam 1 800 | 588 889 www.samsung.com | |
| ▪ Middle East & Africa | ||
| Turkey | 444 77 11 | www.samsung.com |
| South Africa | 0860-SAMSUNG (726-7864) | www.samsung.com |
| U.A.E | 800-SAMSUNG (726-7864) www.samsung.com | |
| Bahrain | 8000-4726 | |
| Jordan | 800-22273 | |

QUESTIONS OR COMMENTS?
| COUNTRY CALL OR VISIT US ONLINE AT WRITE | |||
| IN THE US | 1-800-SAMSUNG(7267864) | www.samsung.com/us | Samsung Electronics America, Inc.105 Challenger Road Ridgefield Park,NJ 07660-0511 |
Code No. AH68-02260R