
HT-X710T - Home Theater SAMSUNG - Free user manual and instructions
Find the device manual for free HT-X710T SAMSUNG in PDF.


User questions about HT-X710T SAMSUNG
0 question about this device. Answer the ones you know or ask your own.
Ask a new question about this device
Download the instructions for your Home Theater in PDF format for free! Find your manual HT-X710T - SAMSUNG and take your electronic device back in hand. On this page are published all the documents necessary for the use of your device. HT-X710T by SAMSUNG.
USER MANUAL HT-X710T SAMSUNG
Thank you for purchasing this Samsung product.
To receive a more complete service,
please register your product at
www.samsung.com/global/register
features
Playback of many different disc types
This Home Cinema System allows you to play back various discs, including DVD-AUDIO, DVD-VIDEO, CD, MP3-CD, WMA-CD, DivX, CD-R/RW, and DVD±R/RW.
DVD-Audio compatible
Experience the super high-quality audio performance of DVD-Audio. The on-board 24-bit/192kHz DAC enables this player to deliver exceptional sound quality in terms of dynamic range, low-level resolution and high-frequency detail.
USB Host support
You can connect and play files from external USB storage devices such as MP3 players, USB flash memory, etc. using the Home Cinema's USB HOST function.
TV Screen Saver Function
If the unit remains in Stop mode for 3 minutes, the Samsung logo appears on the TV screen.
The HT-X710 automatically switches itself into the power saving mode after 20 minutes in the Screen Saver mode.
Power Saving Function
The HT-X710 automatically shuts itself off after 20 minutes in Stop mode.
Customized TV Screen Display
The HT-X710 allows you to select your favorite image during JPEG, DVD playback and set it as your background wallpaper.
HDMI
HDMI transmits DVD video and audio signals simultaneously, and provides a clearer picture.
AV SYNC Function
Video may lag behind the audio if the unit is connected to a digital TV.
To compensate for this, you can adjust the audio delay time to sync up with the video.
Anynet+(HDMI-CEC) Function
Anynet+ is a function that can be used to operate the main unit using a Samsung TV remote control, by connecting the Home Cinema to a SAMSUNG TV using an HDMI Cable. (This is only available with SAMSUNG TVs that support Anynet+.)
Bluetooth Function
You can use a Bluetooth device to enjoy music with high quality stereo sound, all without wires!
WHAT'S INCLUDED
Check for the supplied accessories below.

text_image
Video Cable FM Antenna HDMI Cable User's Manual Remote ControlSAFETY WArNINGS
TO REDUCE THE RISK OF ELECTRIC SHOCK, DO NOT REMOVE THE COVER(OR BACK).
NO USER-SERVICEABLE PARTS ARE INSIDE. REFER SERVICING TO QUALIFIED SERVICE PERSONNEL.

CAUTION
rISK OF ELECTRIC SHOCK
DO NOT OPEN

CLASS 1 LASER PRODUCT LASER product KLASSE 1 LASER PRODUKT LUOKAN 1 LASER LAITE KLASS 1 LASER APPARAT PRODUCTO LASER CLASE 1
CAUTION :

This symbol indicates “dangerous voltage” inside the product that presents a risk of electric shock or personal injury.

This symbol indicates important instructions accompanying the product.
CLASS 1 LASER PRODUCT
This Compact Disc player is classified as a CLASS 1
Use of controls, adjustments or performance of procedures other than those specified herein may result in hazardous radiation exposure.
INVISIBLE LASER RADIATION WHEN OPEN AND INTERLOCKS DEFEATED, AVOID EXPOSURE TO BEAM.
WArNING : To reduce the risk of fire or electric shock, do not expose this appliance to rain or moisture.
CAUTION : TO PREVENT ELECTRIC SHOCK, MATCH WIDE BLADE OF PLUG TO WIDE SLOT, FULLY INSERT.
- This apparatus shall always be connected to a AC outlet with a protective grounding connection.
- To disconnect the apparatus from the mains, the plug must be pulled out from the mains socket, therefore the mains plug shall be readily operable.
CAUTION
- Apparatus shall not be exposed to dripping or splashing and no objects filled with liquids, such as vases, shall be placed on the apparatus.
- The Mains plug is used as a disconnect device and shall stay readily operable at any time.
Wiring the Main Power Supply Plug (UK Only)
IMPOrTANT NOTICE
The mains lead on this equipment is supplied with a moulded plug incorporating a fuse. The value of the fuse is indicated on the pin face of the plug and if it requires replacing, a fuse approved to BS1362 of the same rating must be used.
Never use the plug with the fuse cover removed. If the cover is detachable and a replacement is required, it must be of the same colour as the fuse fitted in the plug. Replacement covers are available from your dealer.
If the fitted plug is not suitable for the power points in your house or the cable is not long enough to reach a power point, you should obtain a suitable safety approved extension lead or consult your dealer for assistance.
However, if there is no alternative to cutting off the plug, remove the fuse and then safely dispose of the plug. Do not connect the plug to a mains socket as there is a risk of shock hazard from the bared flexible cord.
Never attempt to insert bare wires directly into a mains socket. A plug and fuse must be used at all times.
IMPOrTANT
The wires in the mains lead are coloured in accordance with the following code:– BLUE = NEUTRAL BROWN = LIVE As these colours may not correspond to the coloured markings identifying the terminals in your plug, proceed as follows:– The wire coloured BLUE must be connected to the terminal marked with the letter N or coloured BLUE or BLACK.
The wire coloured BROWN must be connected to the terminal marked with the letter L or coloured BROWN or RED.
WArNING : DO NOT CONNECT EITHER WIrE TO THE EArTH TErMINAI WHICH IS MArKED WITH THE IETTER E Or BY THE EArTH SYMBOL , Or COIOUrED GrEEN Or GrEEN AND YELLOW.
This marking shown on the product or its literature, indicates that it should not be disposed with other household wastes at the end of its working life. To prevent possible harm to the environment or human health from uncontrolled waste disposal, please separate this from other types of wastes and recycle it responsibly to promote the sustainable reuse of material resources. Household users should contact either the retailer where they purchased this product, or their local government office, for details of where and how they can take this item for environmentally safe recycling. Business users should contact their supplier and check the terms and conditions of the purchase contract. This product should not be mixed with other commercial wastes for disposal.
safety information
PrECAUTIONS
natural_image
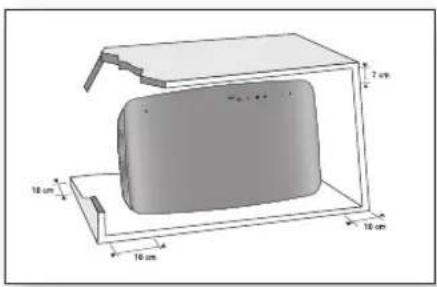
3D diagram of a rectangular device enclosed in a transparent housing, with dimension labels (7 cm, 10 cm, 16 cm) indicating internal measurements.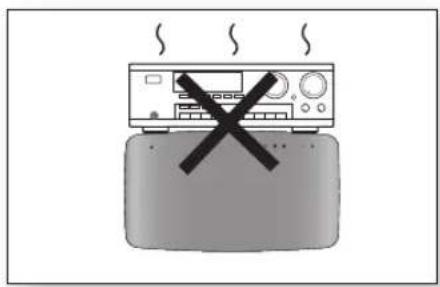
natural_image
Illustration of a washing machine with steam rising above it, crossed out by a black X (no text or symbols)Ensure that the AC power supply in your house complies with the identification sticker located on the back of your player. Install your player horizontally, on a suitable base (furniture), with enough space around it for ventilation (7.5\~10 cm). Make sure the ventilation slots are not covered. Do not stack anything on top of the player. Do not place the player on amplifiers or other equipment which may become hot. Before moving the player, ensure the disc tray is empty. This player is designed for continuous use. Switching off the DVD player to the stand-by mode does not disconnect the electrical supply. In order to disconnect the player completely from the power supply, remove the mains plug from the wall outlet, especially when left unused for a long period of time.
natural_image
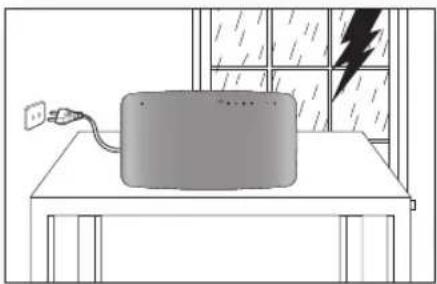
Simple line drawing of a device on a desk with a lightning bolt and raindrops in the background (no text or symbols)During thunderstorms, disconnect the AC mains plug from the wall outlet. Voltage peaks due to lightning could damage the unit.
natural_image
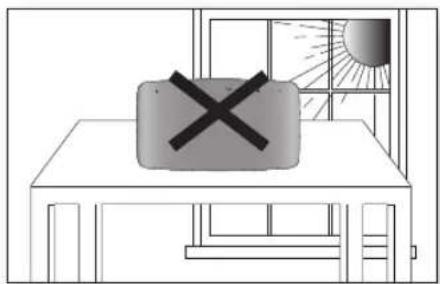
Simple line drawing of a room with a window, sun, and a cross symbol on the wall (no text or labels)Do not expose the unit to direct sunlight or other heat sources. This could lead to overheating and malfunction of the unit.
natural_image
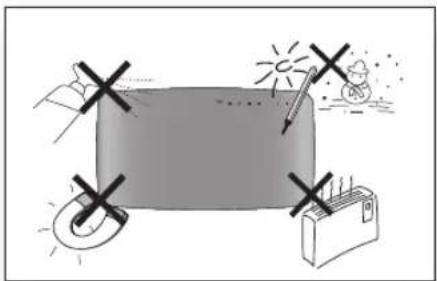
Simple line drawing of a rectangular object with cross marks and decorative elements (no text or symbols)Protect the player from moisture (i.e. vases), and excess heat (e.g.fi replace) or equipment creating strong magnetic or electric fi elds (i.e.speakers...). Disconnect the power cable from the AC supply if the player malfunctions. Your player is not intended for industrial use. Use of this product is for personal use only.
text_image
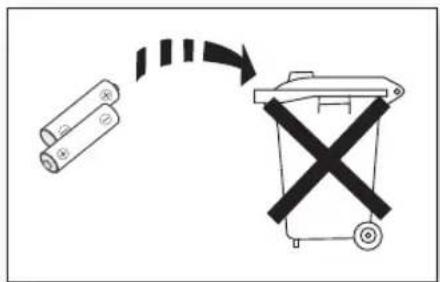
Diagram showing battery charging process with battery, battery, and switch crossed outThe batteries used with this product contain chemicals that are harmful to the environment.
Do not dispose of batteries in the general household trash.
Condensation may occur if your player or disc has been stored in cold temperatures. If transporting the player during the winter, wait approximately 2 hours until the unit has reached room temperature before using.
fFEATURES
2 What's included

SAfETy INfORMATION
3 Safety Warnings
4 Precautions

gETTING STARTED
7 Before Reading the User's Manual
8 Playable Discs
8 Do not use the following types of discs!
8 Copy Protection
9 Disc Type and Characteristics
DESCRIPTION
10 Front Panel
11 Rear Panel

REMOTE CONTROL
12 Tour of the Remote Control
14 Setting the Remote Control

CONNECTIONS
16 Connecting the Speakers
18 Connecting the Video Out to your TV
20 HDMI Function
21 Connecting Audio from External Components
23 Connecting the FM Antenna

bEfORE USINg yOUR hOME CINEMA
24 Before Using Your Home Cinema

PLAybACK
25 Disc Playback
26 MP3/WMA-CD Playback
27 JPEG File Playback
28 DivX Playback
30 Using the Playback Function
38 Using Bluetooth
40 Playing Media Files using the USB Host Feature

SySTEM SETUP
42
42 Setting the Language
43 Setting TV Screen Type
44 Setting Parental Controls (Rating Level)
44 Setting the Password
45 Setting the Wallpaper
45 To Select One of the 3 Wallpaper Settings You've Made
46 DVD Playback Mode
46 Setting the DRC (Dynamic Range Compression)
47 Setting the AV SYNC
47 Setting the HDMI Audio
47 Setting the Audio
RADIO
48
48 Listening to Radio
48 Presetting Stations
CONvENIENT fUNCTION
49
49 Mute Function
49 Sleep Timer Function
49 Adjusting Display Brightness
49 V-SOUND (Virtual Sound)
50 Virtual Headphone Function
51 S.VOL (Smart Volume)
51 P.BASS/AUDIO Upscaling
TROUbLEShOOTING
52
52 Troubleshooting
LANgUAgE CODE LIST
54
54 Language Code List
USb hOST fFEATURE SUPPORTED PRODUCTS
55
55 Digital Camera
55 USB Flash Disc
55 MP3 Player
APPENDIX
56
56 Cautions on Handling and Storing Discs
57 Specifications
BEFORE READING THE USER'S MANUAL
Make sure to check the following terms before reading the user manual.
Icons that will be used in manual
| Icon Term Definition | ||
 | DVD | This involves a function available with DVD or DVD-R/DVD-RW discs that have been recorded and finalized in Video Mode. |
 | CD This involves a function available with a data CD (CD-R or CD-RW). | |
 | MP3 This involves a function available with CD-R/-RW discs, including USB. | |
 | JPEG This involves a function available with CD-R/-RW discs, including USB. | |
| |HZ8D| | DivX | This involves a function available with MPEG4 discs.(DVD±R/RW, CD-R or CD-RW) |
 | Caution | This involves a case where a function does not operate or settings may be cancelled. |
 | Note | This involves tips or instructions on the page that help each function operate. |

In this manual, the instructions marked with "DVD (D) are applicable to DVD-VIDEO, DVD-AUDIO and DVD-R/-RW discs that have been recorded in Video Mode and then finalized. Where a particular DVD type is mentioned, it is indicated separately.
If a DVD-R/-RW disc has not been recorded properly in DVD Video format, it will not be playable.
About the use of this user's manual
1) Be sure to be familiar with Safety Instructions before using this product. (See pages 3\~4)
2) If a problem occurs, check the Troubleshooting. (See pages 52\~53)
Copyright
©2008 Samsung Electronics Co., Ltd.
All rights reserved; No part or whole of this user's manual may be reproduced or copied without the prior written permission of Samsung Electronics Co., Ltd.
getting started

DVD (Digital Versatile Disc) offers fantastic audio and video, thanks to Dolby Digital surround sound and MPEG-2 video compression technology. Now you can enjoy these realistic effects in the home, as if you were in a movie cinema or concert hall.
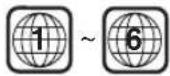
DVD players and the discs are coded by region. These regional codes must match in order for the disc to play. If the codes do not match, the disc will not play.
The Region Number for this player is given on the rear panel of the player. (Your DVD player will only play DVDs that are labeled with identical region codes.)
PLAYABLE DISCS
| Disc Type Mark (Logo) Recorded Signals Disc Size Max. Playing Time | ||||
| DVD-AUDIO DVD-VIDEO |  | AUDIO + VIDEO | 12 cm | Approx. 240 min. (single-sided) |
| Approx. 480 min. (double-sided) | ||||
| 8 cm | Approx. 80 min. (single-sided) | |||
| Approx. 160 min. (double-sided) | ||||
| AUDIO-CD |  | AUDIO | 12 cm 74 min. | |
| 8 cm 20 min. | ||||
DivX AUDIO + VIDEO  | 12 cm | — | ||
| 8 cm | — | |||
DO NOT USE THE FOLLOWING TYPES OF DISCS!
- LD, CD-G, CD-I, CD-ROM, DVD-RAM and DVD-ROM discs cannot be played on this player. If such discs are played, a
- DVD discs purchased abroad may not play on this player.
If such discs are played, a
COPY PROTECTION
- Many DVD discs are encoded with copy protection. Because of this, you should only connect your DVD player directly to your TV, not to a VCR. Connecting to a VCR results in a distorted picture from copy-protected DVD discs.
- This product incorporates copyright protection technology that is protected by methods claims of certain U.S. patents and other intellectual property rights owned by Macrovision Corporation and other rights owners. Use of this copyright protection technology must be authorized by Macrovision Corporation, and is intended for home and other limited viewing uses only unless otherwise authorized by Macrovision Corporation. Reverse engineering or disassembly is prohibited.
This product does not support Secure (DRM) Media files.
◆ CD-r Discs
- Some CD-R discs may not be playable depending on the disc recording device (CD-Recorder or PC) and the condition of the disc.
• Use a 650MB/74 minute CD-R disc.
Do not use CD-R discs over 700MB/80 minute as they may not be played back. - Some CD-RW (Rewritable) media, may not be playable.
- Only CD-Rs that are properly "closed" can be fully played. If the session is closed but the disc is left open, you may not be able to fully play the disc.
◆ CD-r MP3 Discs
- Only CD-R discs with MP3 files in ISO 9660 or Joliet format can be played.
- MP3 file names should be 8 characters or less in length and contain no blank spaces or special characters (. / = +).
- Use discs recorded with a compression/decompression data rate greater than 128Kbps.
- Only files with the ".mp3" and ".MP3" extensions can be played.
- Only a consecutively written multisession disc can be played. If there is a blank segment in the Multisession disc, the disc can be played only up to the blank segment.
- If the disc is not closed, it will take longer to begin playback and not all of the recorded files may be played.
- For files encoded in Variable Bit Rate (VBR) format, i.e. files encoded in both low bit rate and high bit rate (e.g., 32Kbps \~ 320Kbps), the sound may skip during playback.
- A maximum of 500 tracks can be played per CD.
- A maximum of 300 folders can be played per CD.
◆ CD-r JPEG Discs
- Only files with the "jpg" extensions can be played.
- If the disc is not closed, it will take longer to start playing and not all of the recorded files may be played.
- Only CD-R discs with JPEG files in ISO 9660 or Joliet format can be played.
- JPEG file names should be 8 characters or less in length and contain no blank spaces or special characters (. / = +).
- Only a consecutively written multisession disc can be played. If there is a blank segment in the multisession disc, the disc can be played only up to the blank segment.
- A maximum of 9,999 images can be stored on a single CD.
- When playing a Kodak/Fuji Picture CD, only the JPEG files in the picture folder can be played.
• Picture discs other than Kodak/Fuji Picture CDs may take longer to start playing or may not play at all.
DVD±r/rW, CD-r/rW DivX Discs
- Since this product only provides encoding formats authorized by DivX Networks, Inc., a DivX file created by the user might not play.
- Software updates for incompatible formats are not supported.
(Example : QPEL, GMC, resolution higher than 800 x 600 pixels, etc.) - Sections with a high frame rate might not be played while playing a DivX file.
- For more information about the formats authorized by DivX Networks, Inc., please visit "www.divxnetworks.net".
FrONT PANEL
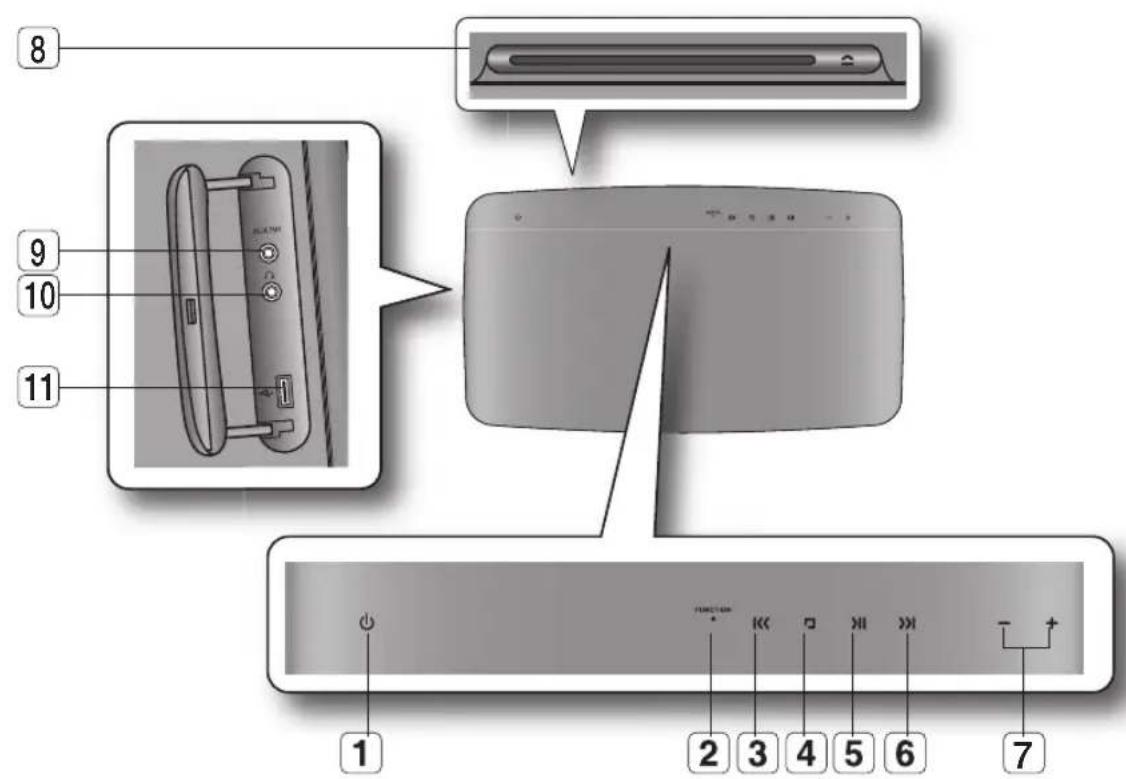
text_image
8 9 10 11 FUNCTION 1 2 3 4 5 6 7| 1 POWER( ◎ BUTTON | 5 PLAY/PAUSE ( ▶BUTTON AUX IN 1 JACK | ||
| 2 FUNCTION BUTTON | 6 TUNING UP & SKIP ( ▶BUTTON | 10 HEADPHONE JACK | |
| 3 TUNING DOWN & SKIP ( ▶BUTTON | 7 VOLUME CONTROL | 11 USB PORT | |
| 4 STOP ( □ ) BUTTON | 8 DISC TRAY | ||
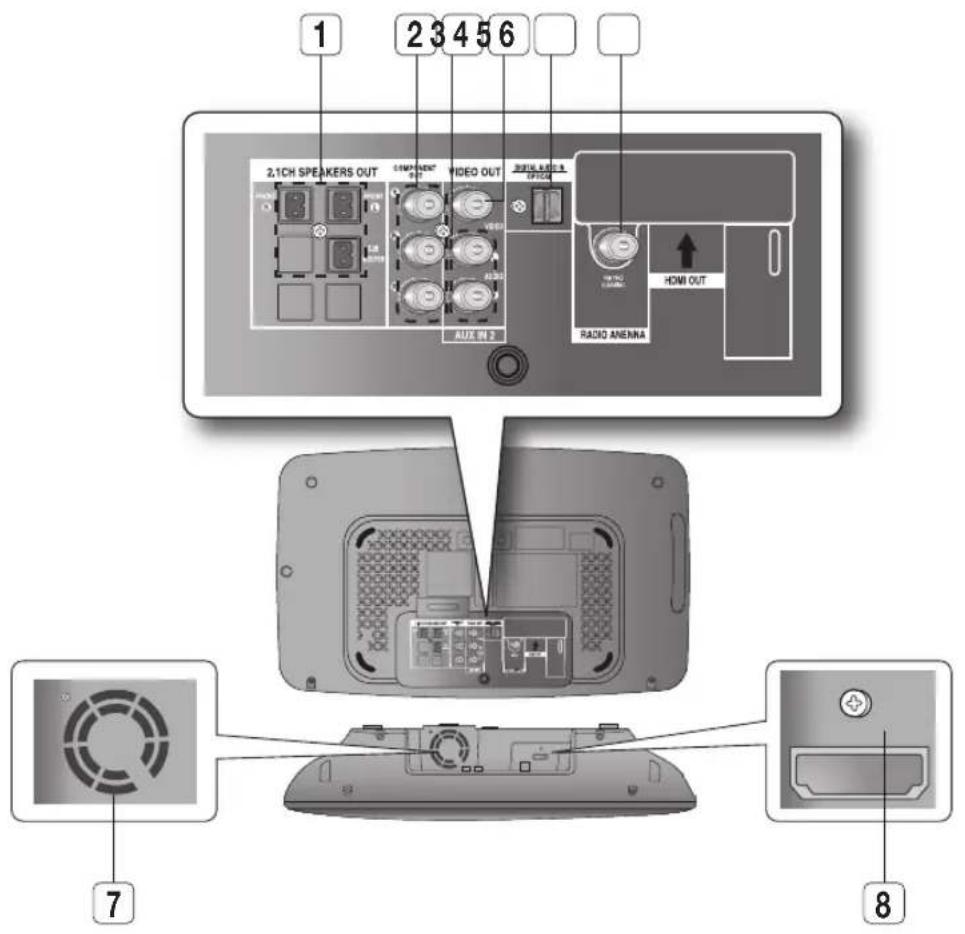
text_image
1 2 3 4 5 6 2.1CH SPEAKERS OUT COMPONENT OUT VIDEO OUT AUDIO OUT OPTION HDMI OUT RADIO ANENNA AUX IN 2 7 8| 1 | SPEAKER OUTPUT CONNECTORS | Connect the left, right and subwoofer speakers. |
| 2 | COMPONENT VIDEO OUTPUT JACKS | Connect a TV with Component video inputs to these jacks. |
| 3 | AUX IN 2 JACKS | Connect to the 2CH analog output of an external device (such as a VCR) |
| 4 | VIDEO OUTPUT JACK | Connect the TV's Video Input jack (VIDEO IN) to the VIDEO OUT jack. |
| 5 | EXTERNAL DIGITAL OPTICAL INPUT JACK | Use this to connect external equipment capable of digital output. |
| 6 | FM 75Ω COAXIAL JACK | Connect the FM antenna. |
| 7 | COOLING FAN | The fan always revolves when the power is on. Ensure a minimum of 10 cm of clear space on all sides of the fan when installing the product. |
| 8 | HDMI OUT JACK | Use the HDMI cable, connect this HDMI output terminal to the HDMI input terminal on your TV for the best quality picture. |
TOUr OF THE rEMOTE CONTROI
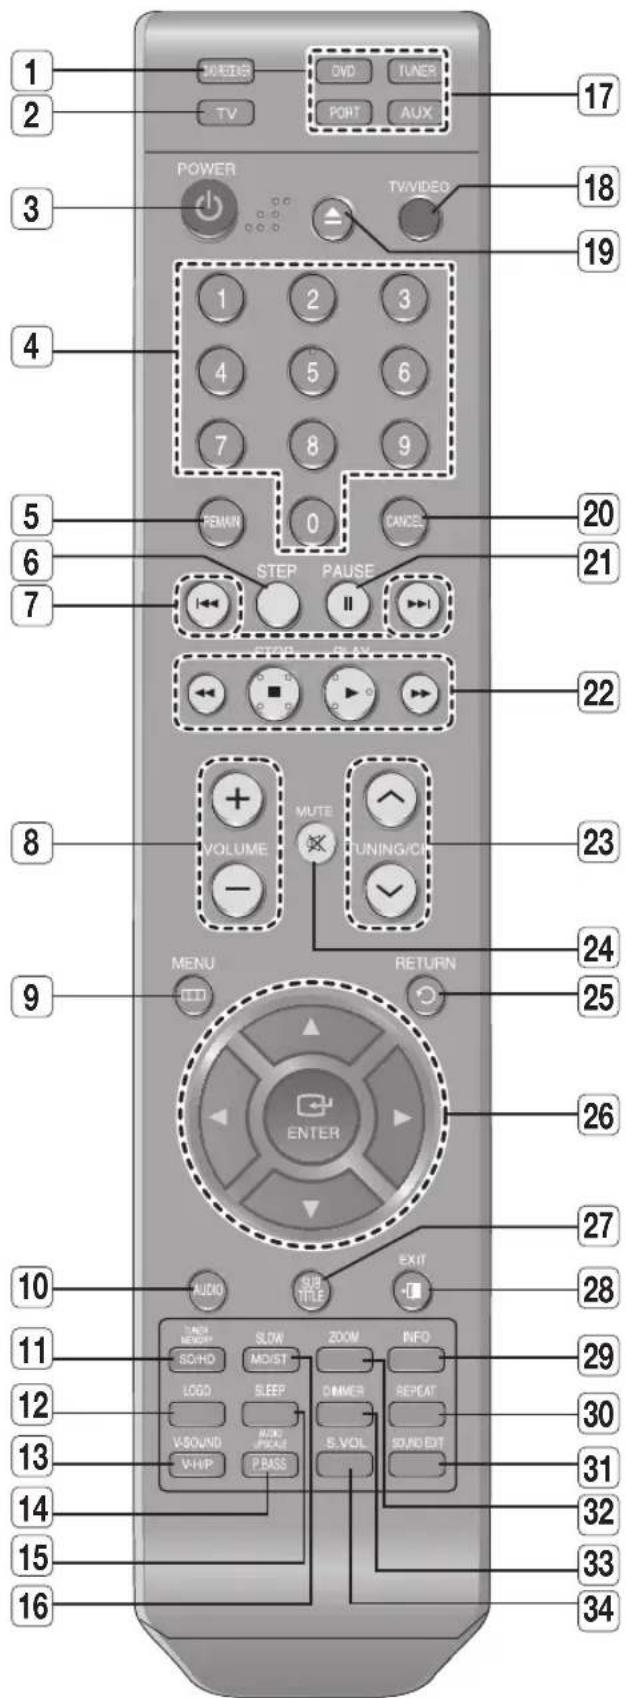
text_image
1 2 3 4 5 6 7 8 9 10 11 12 13 14 15 16 TV TV/Video DVD TUNER PORT AUX POWER STEP PAUSE STOP - 0 CANCE 20 21 22 23 24 25 26 27 28 29 30 31 32 33 34 MENU RETURN ENTER AUDIO SUB-TITLE EXIT| 1 | DVD RECEIVER button |
| 2 | TV button |
| 3 | POWER button |
| 4 | NUMBER (0~9) buttons |
| 5 | REMAIN button |
| 6 | STEP button |
| 7 | TUNING PRESET/CD SKIP buttons |
| 8 | VOLUME button |
| 9 | MENU button |
| 10 | AUDIO button |
| 11 | TUNER MEMORY, SD(Standard Definition)/HD(High Definition) button |
| 12 | LOGO button |
| 13 | V-SOUND(Virtual Sound), V-H/P(Virtual Headphone) button |
| 14 | AUDIO UPSCALE, P.BASS button |
| 15 | SLEEP button |
| 16 | SLOW, MO/ST button |
| 17 | DVD DVD buttonTUNER TUNER buttonAUX AUX buttonPORT PORT button |
| 18 | TV/VIDEO button |
| 19 | EJECT button |
| 20 | CANCEL button |
| 21 | PAUSE button |
| 22 | PLAY buttonSTOP buttonSEARCH buttons |
| 23 | TUNING/CH button |
| 24 | MUTE button |
| 25 | RETURN button |
| 26 | CURSOR/ENTER button |
| 27 | SUBTITLE button |
| 28 | EXIT button |
| 29 | INFO button |
| 30 | REPEAT button |
| 31 | SOUND EDIT button |
| 32 | ZOOM button |
| 33 | DIMMER button |
| 34 | S.VOL button |
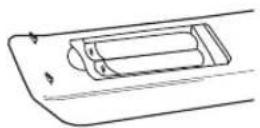
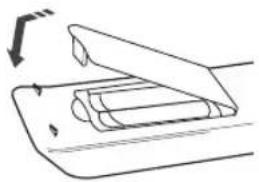
Insert Remote Batteries
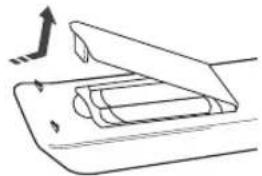
natural_image
Diagram of a folding paper or sheet being cut with an arrow indicating direction (no text or symbols)

natural_image
Diagram of a printer or printer being placed on a tray, showing paper roll and cover (no text or symbols)-
Remove the battery cover in the direction of the arrow.
-
Insert two 1.5V AAA batteries, paying attention to the correct polarities (+ and -).
-
Replace the battery cover.

Follow these precautions to avoid leaking or cracking cells:
- Place batteries in the remote control so they match the polarity: (+) to (+) and (−) to (−).
■ Use the correct type of batteries. Batteries that look similar may differ in voltage.
■ Always replace both batteries at the same time.
■ Do not expose the batteries to heat or a flame.
SETTING THE REMOTE CONTROL
You can control certain functions of your TV with this remote control.
When operating a TV with the remote control
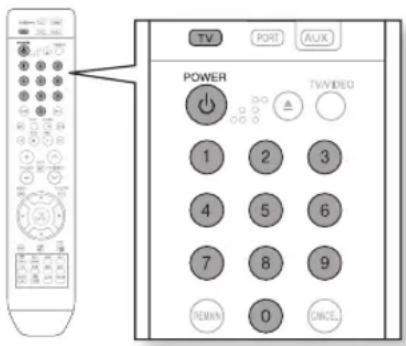
- Press the TV button to set the remote to TV mode.
- Press the POWER button to turn on the TV.
- While holding down the POWER button, enter the code corresponding to your brand of TV.
- If there is more than one code listed for your TV in the table, enter one at a time to determine which code works.
Example : For a Samsung TV
While holding down the POWER button, use the number buttons to enter 00, 15, 16, 17 and 40.
- If the TV turns off, the setting is complete.
- You can use the TV POWER, VOLUME, CHANNEL, and Numeric buttons (0\~9).
text_image
TV PORT AUX POWER 1 2 3 4 5 6 7 8 9 REMAIN 0 ONCEL
The remote control may not work on some brands of TVs. Also, some operations may not be possible depending on your brand of TV.
If you do not set the remote control with the code for your brand of TV, the remote control will work on a Samsung TV by default.
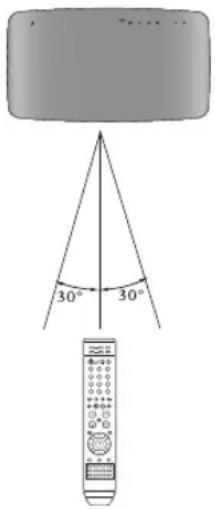
Operation Range of the Remote Control
The remote control can be used up to approximately
7 meters in a straight line. It can also be operated at a horizontal angle of up to 30^ from the remote control sensor.
text_image
30° 30°TV Brand Code List
| No. | Brand | Code | No. | Brand | Code |
| 1 | Admiral (M.Wards) | 56, 57, 58 | 44 | MTC | 18 |
| 2 | A Mark | 01, 15 | 45 | NEC | 18, 19, 20, 40, 59, 60 |
| 3 | Anam | 01, 02, 03, 04, 05, 06, 07, 08, 09, 10, 11, 12, 13, 14 | 46 | Nikei | 03 |
| 47 | Onking | 03 | |||
| 4 | AOC | 01, 18, 40, 48 | 48 | Onwa | 03 |
| 5 | Bell & Howell (M.Wards) | 57, 58, 81 | 49 | Panasonic | 06, 07, 08, 09, 54, 66, 67, 73, 74 |
| 6 | Brocsonic | 59, 60 | 50 | Penney | 18 |
| 7 | Candle | 18 | 51 | Philco | 03, 15, 17, 18, 48, 54, 59, 62, 69, 90 |
| 8 | Cetronic | 03 | 52 | Philips | 15, 17, 18, 40, 48, 54, 62, 72 |
| 9 | Citizen | 03, 18, 25 | 53 | Pioneer | 63, 66, 80, 91 |
| 10 | Theater | 97 | 54 | Portland | 15, 18, 59 |
| 11 | Classic | 03 | 55 | Proton | 40 |
| 12 | Concerto | 18 | 56 | Quasar | 06, 66, 67 |
| 13 | Contec | 46 | 57 | Radio Shack | 17, 48, 56, 60, 61, 75 |
| 14 | Coronado | 15 | 58 | RCA/Proscan | 18, 59, 67, 76, 77, 78, 92, 93, 94 |
| 15 | Craig | 03, 05, 61, 82, 83, 84 | 59 | Realistic | 03, 19 |
| 16 | Croslex | 62 | 60 | Sampo | 40 |
| 17 | Crown | 03 | 61 | Samsung | 00, 15, 16, 17, 40, 43, 46, 47, 48, 49, 59, 60, 98 |
| 18 | Curtis Mates | 59, 61, 63 | |||
| 19 | CXC | 03 | 62 | Sanyo | 19, 61, 65 |
| 20 | Daewoo | 02, 03, 04, 15, 16, 17, 18, 19, 20, 21, 22, 23, 24, 25, 26, 27, 28, 29, 30, 32, 34, 35, 36, 48, 59, 90 | 63 | Scott | 03, 40, 60, 61 |
| 64 | Sears | 15, 18, 19 | |||
| 21 | Daytron | 40 | 65 | Sharp | 15, 57, 64 |
| 22 | Dynasty | 03 | 66 | Signature 2000 (M.Wards) | 57, 58 |
| 23 | Emerson | 03, 15, 40, 46, 59, 61, 64, 82, 83, 84, 85 | 67 | Sony | 50, 51, 52, 53, 55 |
| 24 | Fisher | 19, 65 | 68 | Soundesign | 03, 40 |
| 25 | Funai | 03 | 69 | Spectricon | 01 |
| 26 | Futuretech | 03 | 70 | SSS | 18 |
| 27 | General Electric (GE) | 06, 40, 56, 59, 66, 67, 68 | 71 | Sylvania | 18, 40, 48, 54, 59, 60, 62 |
| 28 | Hall Mark | 40 | 72 | Symphonic | 61, 95, 96 |
| 29 | Hitachi | 15, 18, 50, 59, 69 | 73 | Tatung | 06 |
| 30 | Inkel | 45 | 74 | Techwood | 18 |
| 31 | JC Penny | 56, 59, 67, 86 | 75 | Teknika | 03, 15, 18, 25 |
| 32 | JVC | 70 | 76 | TMK | 18, 40 |
| 33 | KTV | 59, 61, 87, 88 | 77 | Toshiba | 19, 57, 63, 71 |
| 34 | KEC | 03, 15, 40 | 78 | Vidtech | 18 |
| 35 | KMC | 15 | 79 | Videch | 59, 60, 69 |
| 36 | LG (Goldstar) | 01, 15, 16, 17, 37, 38, 39, 40, 41, 42, 43, 44 | 80 | Wards | 15, 17, 18, 40, 48, 54, 60, 64 |
| 37 | Luxman | 18 | 81 | Yamaha | 18 |
| 38 | LXI (Sears) | 19, 54, 56, 59, 60, 62, 63, 65, 71 | 82 | York | 40 |
| 39 | Magnavox | 15, 17, 18, 48, 54, 59, 60, 62, 72, 89 | 83 | Yupiteru | 03 |
| 40 | Marantz | 40, 54 | 84 | Zenith | 58, 79 |
| 41 | Matsui | 54 | 85 | Zonda | 01 |
| 42 | MGA | 18, 40 | 86 | Dongyang | 03, 54 |
| 43 | Mitsubishi/MGA | 18, 40, 59, 60, 75 |
This section involves various methods of connecting the Digital Home Cinema to other external components.
Before moving or installing the product, be sure to turn off the power and disconnect the power cord.
CONNECTING THE SPEAKERS
text_image
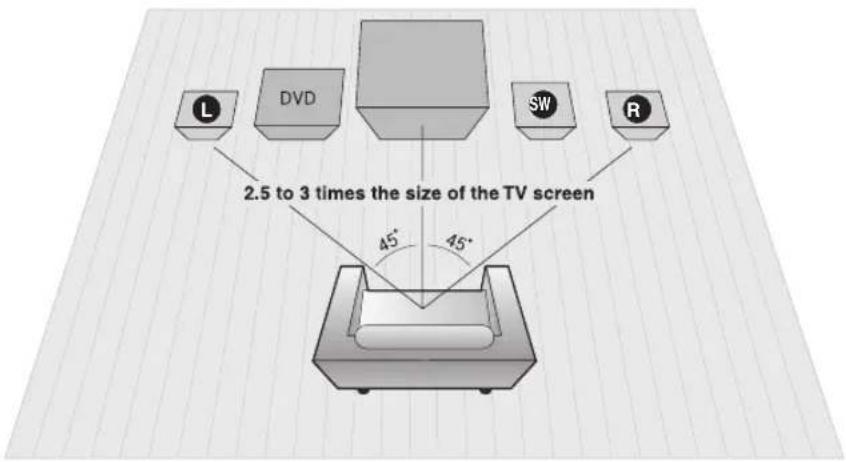
L DVD SW R 2.5 to 3 times the size of the TV screen 45° 45°Position of Digital Home Cinema
Place it on a stand or cabinet shelf, or under the TV stand.
Selecting the Listening Position
The listening position should be located about 2.5 to 3 times the distance of the TV's screen size away from the TV.
Example: For 32" TVs 2\~2.4m
For 55" TVs 3.5\~4m
Front Speakers L R
Place these speakers in front of your listening position, facing inwards (about 45°) toward you.
Place the speakers so that their tweeters will be at the same height as your ear.
Align the front face of the front speakers with the front face of the center speaker or place them slightly in front of the center speakers.
Subwoofer SW
The position of the subwoofer is not so critical. Place it anywhere you like.
Connecting The Speakers
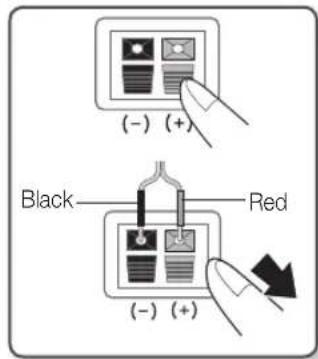
-
Press down the terminal tab on the back of the speaker.
-
Insert the black wire into the black terminal (−) and the red wire into the red (+) terminal, and then release the tab.
-
Connect the connecting plugs to the back of the Home Cinema.
• Make sure the colors of the speaker terminals match the colors of the connecting plugs.
text_image
(-) (+) Black Red (-) (+)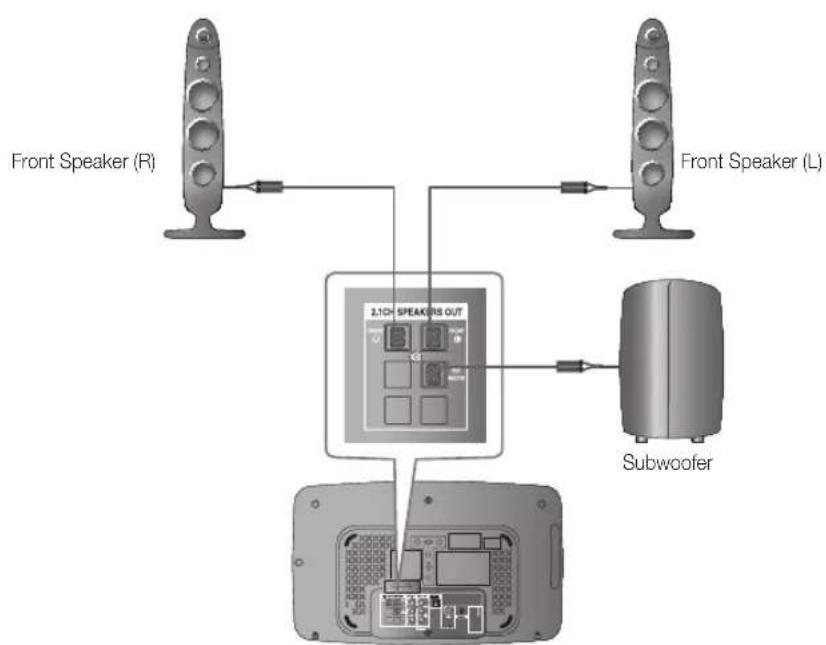
flowchart
graph TD
    A["Front Speaker (R)"] --> B["2.10H SPEAKERS OUT"]
    C["Front Speaker (L)"] --> B
    B --> D["Subwoofer"]
    D --> E["Output"]

- Do not let children play with or near the speakers. They could get hurt if a speaker falls.
- When connecting the speaker wires to the speakers, make sure that the polarity (+/−) is correct.
- Keep the subwoofer speaker out of reach of children so as to prevent children from inserting their hands or other objects into the duct (hole) of the subwoofer speaker.
■ Do not hang the subwoofer on the wall through the duct (hole).

If you place a speaker near your TV set, screen color may be distorted because of the magnetic field generated by the speaker. If this occurs, place the speaker away from your TV set.
CONNECTING THE VIDEO OUT TO YOUR TV
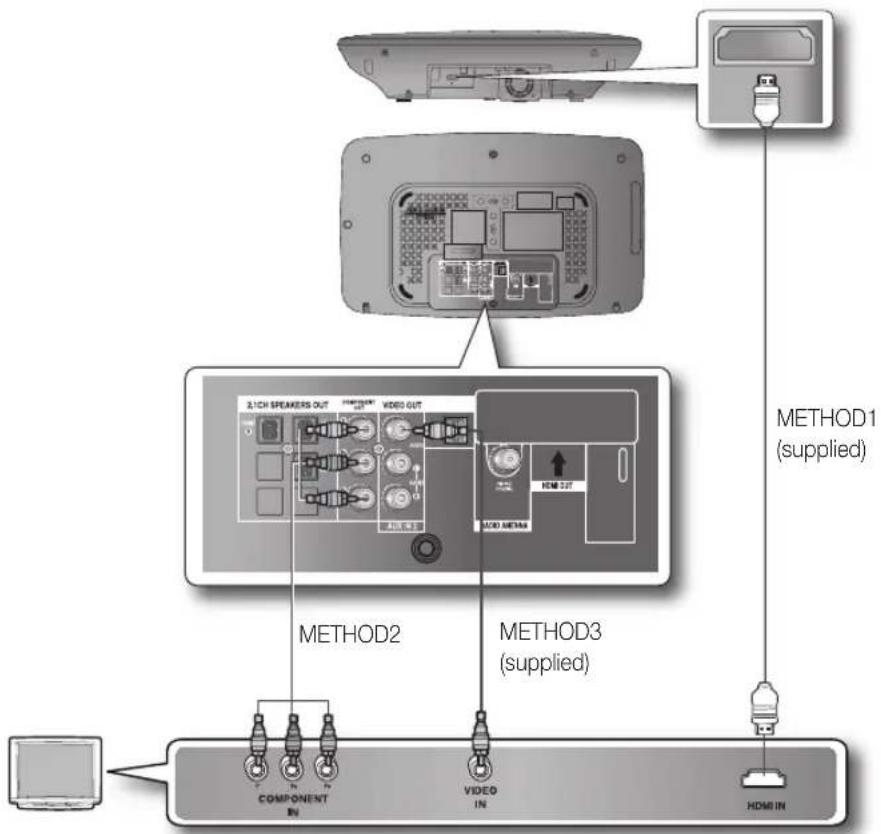
Choose one of the three methods for connecting to a TV.
flowchart
graph TD
    A["Monitor"] --> B["COMPONENT IN"]
    B --> C["VIDEO IN"]
    C --> D["METHOD1 (supplied)"]
    D --> E["METHOD2"]
    E --> F["VIDEO OUT"]
    F --> G["METHOD3 (supplied)"]
METHOD 1 : HDMI
Connect the HDMI cable (not supplied) from the HDMI OUT jack on the back of the DVD Player to the HDMI IN jack on your TV.
METHOD 2 : Component Video
If your television has Component Video inputs, connect a Component video cable(not supplied) from the Component Video Output ( P_R , P_B and Y) jacks on the back of the DVD Player to the Component Video Input jacks on your TV.
METHOD 3 : Composite Video
Connect the supplied Video cable from the VIDEO OUT jack on the back of the DVD Player to the VIDEO IN jack on your TV.

■ The resolution from the Component Output is 576i(480i).
If you use an HDMI cable to connect a Samsung TV to the DVD Player, you can operate the Home Cinema using the TV's remote control. This is only available with SAMSUNG TVs that support Anynet+(HDMI-CEC).
- Please check the _ynet^ logo (If your TV has an _ynet^ logo, then it supports the Anynet+ function.)
The player's video output will automatically change to HDMI mode when connecting an HDMI cable while power is on.
• HDMI (High Definition Multimedia Interface)
HDMI is an interface that enables the digital transmission of video and audio data with just a single connector. Using HDMI, the DVD Home Cinema transmits a digital video and audio signals and displays a vivid picture.
• HDMI connection description
HDMI connector - Supports video and digital audio data.
- HDMI outputs only a pure digital signal to the TV.
- If your TV does not support HDCP (High-bandwidth Digital Content Protection), random noise appears on the screen.
• Why does Samsung use HDMI?
Analog TVs require an analog video/audio signal. However, when playing a DVD, the data transmitted to a TV is digital. Therefore either a digital-to-analog converter (in the DVD Home Cinema) or an analog-to-digital converter (in the TV) is required. During this conversion, the picture quality is degraded due to noise and signal loss. HDMI technology is superior because it requires no D/A conversion and is a pure digital signal from the player to your TV.
• What is the HDCP?
HDCP (High-band width Digital Content Protection) is a system for protecting DVD content outputted via HDMI from being copied. It provides a secure digital link between a video source (PC, DVD, etc) and a display device (TV, projector, etc). Content is encrypted at the source device to prevent unauthorized copies from being made.
• What is Anynet+?
Anynet+ is a convenient function that offers linked operation of this unit through Samsung TVs with the Anynet+ feature.
- If your Samsung TV has an _Anynet^+ logo, then it supports the Anynet+ function.
- If you turn on the player and insert a disc, the player will start playing the disc, and the TV will turn on automatically and switch to HDMI mode.
- If you turn on the player and press the Play button with a disc already inserted, the TV will immediately turn on and switch to HDMI mode.
HDMI FUNCTION
Resolution Selection
This function allows the user to select the screen resolution for HDMI output.
In Stop mode, press and hold the SD/HD (Standard Defi nition/High Defi nition) button on the remote control for longer than 5 seconds.
- Resolutions available for the HDMI output are 576p(480p), 720p, 1080i/1080p.
- SD(Standard Definition) resolution is 576p(480p) and HD (High Definition) resolution is 720p, 1080i/1080p. The default value of HDMI output is 576p(480p).

If the TV does not support the configured resolution, you will not be able to see the picture.
- When an HDMI cable is connected, composite and component video signals are not output.
- See your TV owner's manual for more information on how to select the TV's Video Input source.

text_image
Diagram showing a remote control panel with labeled buttons including RESET, LOAD, and RESET portWhy use HDMI (High Definition Multimedia Interface)?
This device transmits a DVD video signal digitally without the process of converting to analog. You will get sharper digital pictures when using an HDMI connection.
Using Anynet+(HDMI-CEC)
Anynet+ is a function that enables you to control other Samsung Devices with your Samsung TV's remote control. Anynet + can be used by connecting this Home Cinema to a SAMSUNG TV using an HDMI Cable. This is only available with SAMSUNG TVs that support Anynet+.
- Connect the main unit of the Home Cinema to a Samsung TV with an HDMI cable. (See page 18)
- Set the Anynet+ function on your TV. (See the TV instructions manual for more information.)
- You can operate the Home Cinema by using the TV remote control. (Available TV buttons: 📋, 🙏, 🤴, 🎥)
▲,▼ and ◀,► buttons,◎ button)
If you select the TV
Set the Anynet+(HDMI-CEC) to On by pressing the Anynet+ button on your TV.
- Receiver : On :You can listen to audio through the Home Cinema.
- Receiver : Off : You can listen to audio through the TV.
If you select the THEATER
Select Theater to connector and set the option of each items below.
- View TV :If Anynet+(HDMI-CEC) is set to on and you select View TV, the Home Cinema will automatically switch to DIGITAL IN mode.
- THEATER Menu : You can access and control the Home Cinema menu.
- THEATER Operation : The Home Cinema disc playback information will be displayed. You can control the Disc operation of the Home Cinema such as title, chapter and subtitle change.
- Receiver : On : You can listen to audio through the Home Cinema.
- Receiver : Off : You can listen to audio through the TV.
With Anynet+
You can operate this unit, power on your TV, or watch a movie by pressing the Play button on your Samsung TV's remote control.
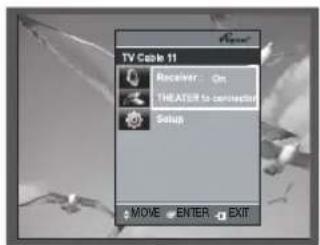
text_image
TV Cable 11 Receiver: On THEATER to connect Setup MOVE ENTER EXIT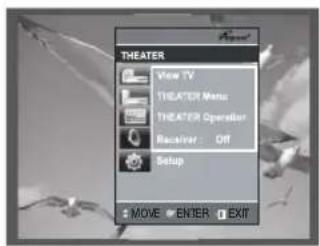
text_image
THEATER View TV THEATER Menu THEATER Operator Receiver: Off Setup MOVE ENTER EXIT
The Cinema function is available only when you listen to the audio through the Home Cinema with the digital optical cable connected.
AUX1 : Connecting an External Component/MP3 player
Components such as an MP3 Player
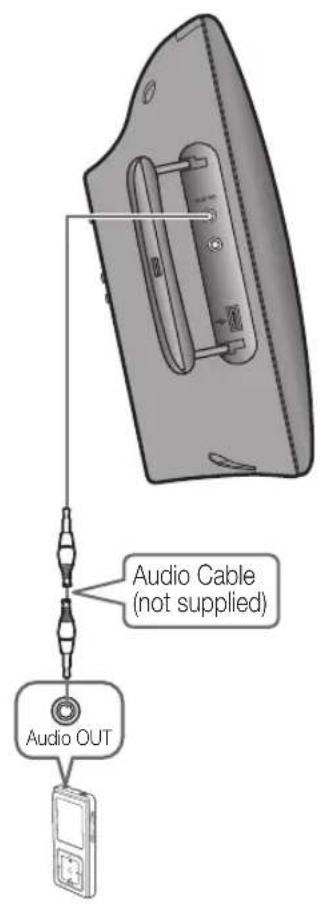
text_image
Audio Cable (not supplied) Audio OUT-
Connect AUX IN 1 (Audio) on the Home Cinema to the Audio Out of the external component/MP3 player.
-
Press the AUX button on the remote control to select AUX1 input.
- You can also use the FUNCTION button on the main unit.
The mode switches as follows :
DVD/CD → DIGITAL IN → AUX 1 → AUX 2 → USB → BT AUDIO → TUNER.
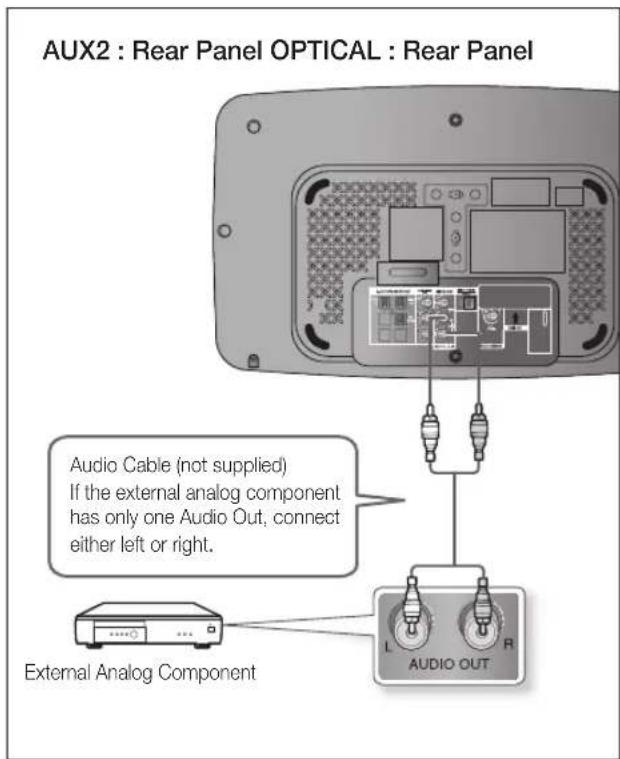
text_image
AUX2 : Rear Panel OPTICAL : Rear Panel Audio Cable (not supplied) If the external analog component has only one Audio Out, connect either left or right. External Analog Component L R AUDIO OUT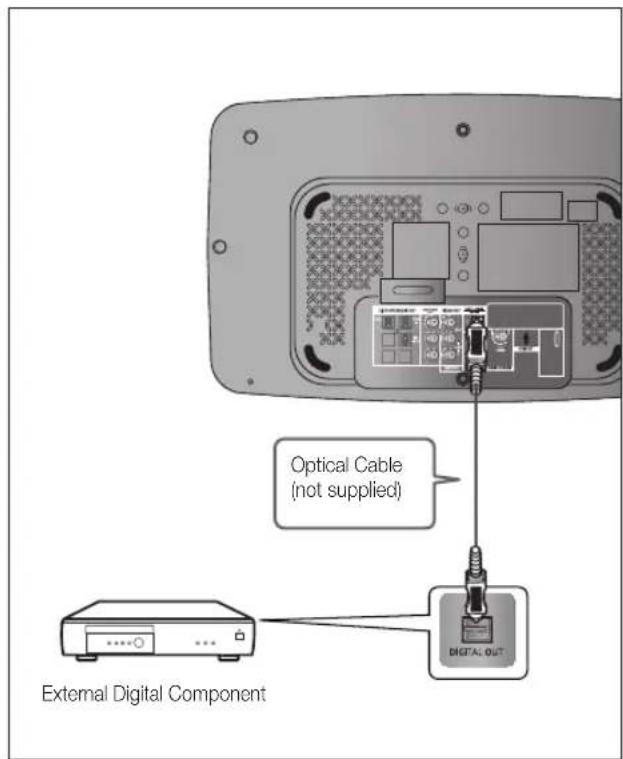
text_image
Optical Cable (not supplied) External Digital Component DIGITAL OUTAUX2 : Connecting an External Analog Component
Analog signal components such as a VCR.
- Connect AUX IN 2 (Audio) on the Home Cinema to the Audio Out of the external analog component.
- Be sure to match connector colors.
- Press the AUX button on the remote control to select AUX 2 input.
- You can also use the FUNCTION button on the main unit.
The mode switches as follows :
DVD/CD → DIGITAL IN → AUX 1 → AUX 2 → USB → BT AUDIO → TUNER.

- You can connect the Video Output jack of your VCR to the TV, and connect the Audio Output jacks of the VCR to this product.
OPTICAL : Connecting an External Digital Component
Digital signal components such as a Cable Box/Satellite receiver (Set-Top Box).
-
Connect the Digital Input (OPTICAL) on the Home Cinema to the Digital Output of the external digital component.
-
Press the AUX button on the remote control to select DIGITAL IN.
- You can also use the FUNCTION button on the main unit.
The mode switches as follows :
DVD/CD → DIGITAL IN → AUX 1 → AUX 2 → USB → BT AUDIO → TUNER.
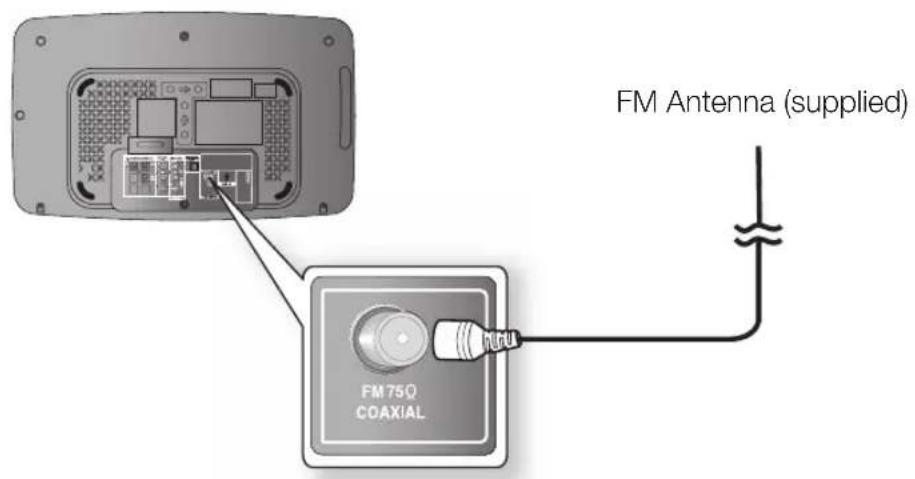
- Connect the FM antenna supplied to the FM 75Ω COAXIAL Jack.
- Slowly move the antenna wire around until you find a location where reception is good, then fasten it to a wall or other rigid surface.
text_image
FM Antenna (supplied) FM 75Q COAXIAL
This unit does not receive AM broadcasts.
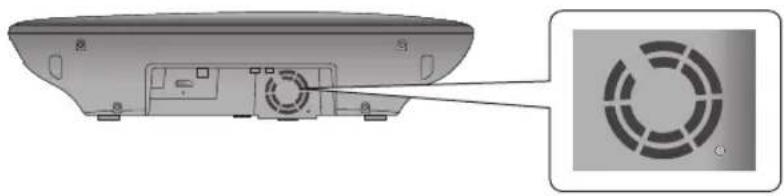
Cooling Fan
The cooling fan supplies cool air to the unit to prevent overheating. Please observe the following cautions for your safety.
- Make sure the unit is well-ventilated. If the unit has poor ventilation, the temperature inside the unit may rise and may damage it.
- Do not obstruct the cooling fan or ventilation holes. (If the cooling fan or ventilation holes are covered with a newspaper or cloth, heat may build up inside the unit and there is a danger of fi re.)
natural_image
Diagram of a device rear panel with a circular fan-like pattern on the side, showing internal components and mounting points (no text or symbols)before using your home cinema
The DVD Home Cinema's remote can be used to control Samsung TVs.
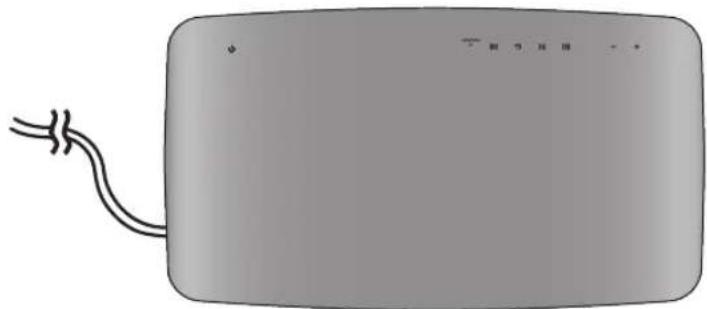
- Plug the main unit's power cord into the AC power supply.
natural_image
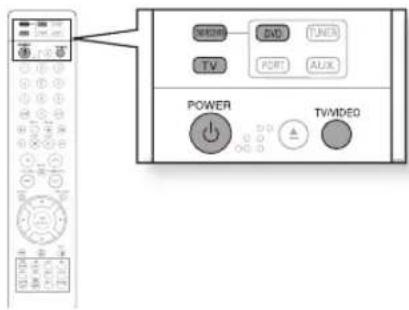
Simple line drawing of a rectangular device with a curved cable extending from its side (no text or symbols)- Press the DVD RECEIVER button to switch to DVD RECEIVER mode to operate the DVD Home Cinema.
- Press the FUNCTION button on the main unit or DVD button on the remote to enable DVD/CD playback.
- Press the TV button to set the remote to TV mode.
- Press the POWER button to turn on your Samsung TV with this remote.
- Press the TV/VIDEO button to select VIDEO mode on your TV.
text_image
NEER DVD TUNER TV PORT AUX POWER TV/MEDO
text_image
VIDEOSelecting the Video Format
Press and hold the Number 7 button on the remote controller for over 5 seconds while the power is turned off.
- By default, the video format is set to "PAL".
- "NTSC" or "PAL" will appear in the display. At this time, press the Number 7 button shortly to select between "NTSC" and "PAL".
• Each country has a different video format standard. - For normal playback, the video format of the disc must be the same as the video format of your TV.

text_image
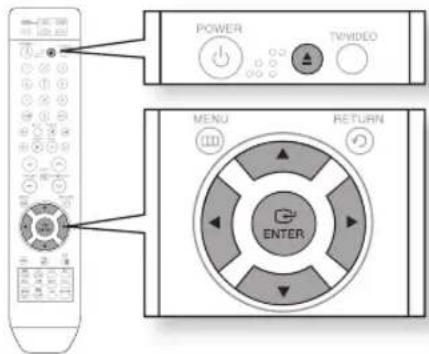
7 8 9 0 CANCEL- Load a disc vertically into the Disc Insert Hole.
- Place a disc gently into the tray with the disc's label facing up.
- Close the compartment by pressing the PLAY button.
- Playback starts automatically.

flowchart
graph TD
    A["REDACTOR"] --> B["Display"]
    C["Power"] --> D["TV VIDEO"]
    E["STEP"] --> F["PUASE"]
    G["STOP"] --> H["PLAY"]
To stop playback, press the STOP (■) button during playback.
- If pressed once, PRESS PLAY is displayed and the stop position will be stored in memory. If the PLAY (▶) button or ENTER button is pressed, playback resumes from the stop position. (This function works only with DVDs.)
- If pressed twice, STOP is displayed, and if the PLAY (☐) button is pressed, playback starts from the beginning.
To temporarily pause playback, press the PAUSE (☐) button during playback.
- To resume playback, press the PLAY button again.

- You can use the product in either vertical or horizontal position. If you select to use it either vertically or horizontally, The operation (Previous / Next) of the I◀◀ or ▶▶▶ button will be automatically adjusted to the applicable position.
■ Depending on the content of the disc, the initial screen may appear different. - Pirated discs will not run in this player because it violates the CSS (Content Scrambling System: a copy protection system) recommendations.
MP3/WMA-CD PLAYBACK
Data CDs (CD-R, CD-RW) encoded in MP3/WMA format can be played.

-
Load the MP3/WMA disc.
-
The MP3/WMA menu screen will appear and playback will start.
• The appearance of the menu depends on the MP3/WMA disc.
• WMA-DRM fi les cannot be played. -
In Stop mode, use the Cursor ▲,▼,◀,▶ button to select the album, and then press the ENTER button.
- Use the Cursor ▲, ▼ button to select the track.
-
To change the album, use the Cursor ▲,▼,◀,▶ button to select another album in Stop mode, and then press the ENTER button.
-
Press the STOP (■) button to stop playback.
text_image
POWER TVVIDEO MENU RETURN ENTER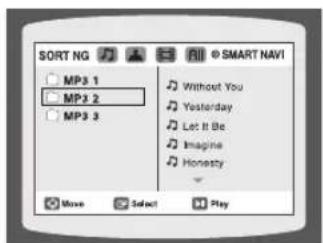
text_image
SORT NG MP3 1 MP3 2 MP3 3 Without You Yesterday Let It Be Imagine Honesty Move Select Play
■ Depending on the recording mode, some MP3/WMA-CDs may not play.
Table of contents of a MP3-CD varies depending on the MP3/WMA track format recorded on the disc.
To play a fi le icon in the screen,
- Press the Cursor ▲,▼,◀,▶ button when it is in Stop mode and select a desired icon from the top part of the menu.
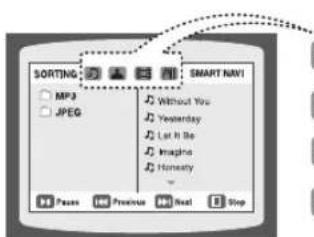
text_image
SORTING MP3 JPEG SMART NAVI Without You Yesterday Let It Be Imagine Honesty Pass Previous Next Stop
Music File Icon : To play music fi les only, select the 🎨 Icon.

Image File Icon : To view image files only, select the Icon.

Movie File Icon : To view movie files only, select the icon.

All File Icon : To view all fi les, select the All Icon.
Images captured with a digital camera or camcorder, or JPEG files on a PC can be stored on a CD and then can be played back with this Home Cinema.
Rotate/Flip Function

Press the Cursor ▲, ▼, ◀, ▶ button during playback.
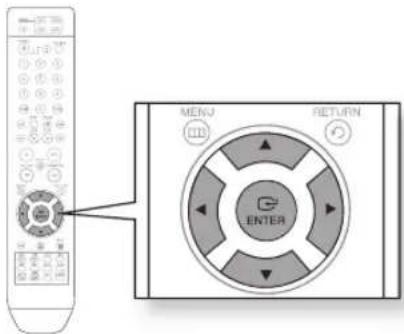
text_image
Diagram showing a remote control with labeled buttons and a central 'ENTER' button, alongside a separate remote device.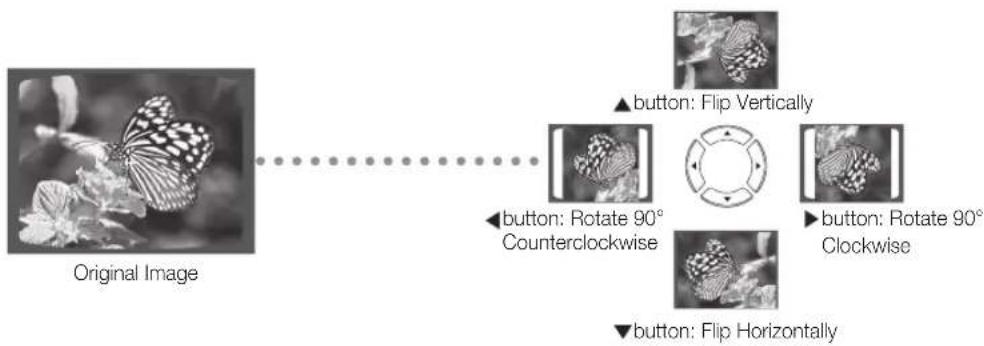
flowchart
graph LR
    A["Original Image"] --> B["button: Flip Vertically"]
    A --> C["button: Rotate 90° Counterclockwise"]
    A --> D["button: Rotate 90° Clockwise"]
    A --> E["button: Flip Horizontally"]

The maximum resolutions supported by this product are 5120 x 3480 (or 19.0 MPixel) for standard JPEG fi les and 2048 x 1536 (or 3.0 MPixel) for progressive image fi les.
If a JPEG file is played when the HDMI output resolution is 720p/1080i/1080p, the mode is automatically switched to 576p(480p).
DIVX PLAYBACK
The functions discussed on this page apply to DivX disc playback only.
Skip Forward/Back

During playback, press the ◀◀,▶▶I button.
- Goes to the next file whenever you press the ▶▶ button, if there are over 2 files on the disc.
- Goes to the previous file whenever you press the ◀◀ button, if there are over 2 files on the disc.

Fast Playback
During playback, press the ◀◀,▶▶ button.
To play back the disc at a faster speed, press the ◀ or ▶ button during playback.
• Each time you press either button, the playback speed will change as follows:
2x 4x 8x 32x Normal.

text_image
STEP PAUSE STOP PLAY ENTER
5 Minutes Skip function
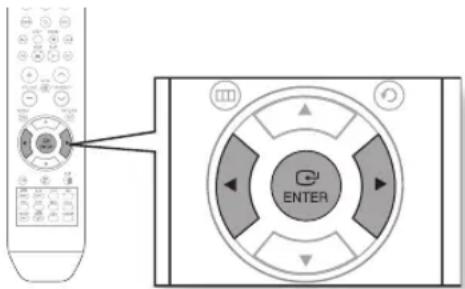
During playback, press the Cursor ◀,▶ button.
- Playback skips 5 minutes forward whenever you press the Cursor ▶ button.
- Playback skips 5 minutes back whenever you press the Cursor ◀ button.
Audio Display

Press the AUDIO button.
- If there are multiple audio tracks on a disc, you can toggle between them.
• Each time you press the button, your selection will toggle among AUDIO (1/N, 2/N ...).
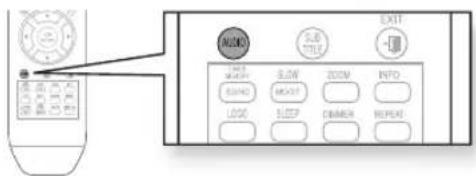
text_image
MUSO EXIT S.0 TITLE INPUT S.0 INPUT S.0 OUTPUT S.0 OUTPUT S.0 OUTPUT S.0 OUTPUT S.0 OUTPUT S.0 OUTPUT S.0 OUTPUT S.0 OUTPUT S.0 OUTPUT S.0 OUTPUT S.0 OUTPUT S.0 OUTPUT S.0 OUTPUT S.0 OUTPUT S.0 OUTPUT S.0 OUTPUT S.0 OUTPUT S.1 OUTPUT S.1 OUTPUT S.1 OUTPUT S.1 OUTPUT S.1 OUTPUT S.1 OUTPUT S.1 OUTPUT S.1 OUTPUT S.1 OUTPUT S.1 OUTPUT S.1 OUTPUT S.1 OUTPUT S.1 OUTPUT S.1 OUTPUT S.1 OUTPUT S.1


is displayed when there is one supported language on the disc.
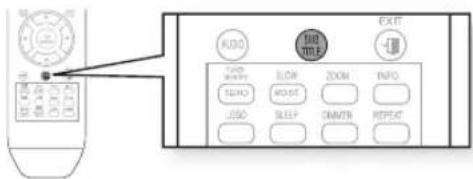
Subtitle Display

Press the SUBTITLE button.
• Each time you press the button, your selection will toggle between SUBTITLE (1/N, 2/N ...) and SUBTITLE OFF.
- If the disc has only one subtitle file, it will be played automatically.
- See number 2 (Caption Function) below for more details concerning Subtitle usage with DivX discs.
text_image
KDO DOWN ZON INFO SUNO DOWN ZON ZON SUNO SLEEP ZON ZON SLEEP ZON ZON SLEEP ZON ZON SLEEP ZON ZON SLEEP ZON ZON SLEEP ZON ZON SLEEP ZON ZON SLEEP ZON ZON SLEEP ZON ZON SLEEP ZON ZON SLEEP ZON ZON SLEEP ZON ZONIf the disc has more than one subtitle file, the default subtitle may not match the movie and you will have to select your subtitle language as follows:
-
In Stop mode, press the Cursor ▲, ▼ button, select the desired subtitle ( ) from the TV screen, and then press the ENTER button.
-
When you select the desired DivX fi le from the TV screen, the movie will be played normally.
text_image
ENTERDivX(Digital internet video eXpress)
DivX is a video file format developed by Microsoft and is based on MPEG4 compression technology. It provides audio and video data over the Internet in real-time.
MPEG4 is used for video encoding and MP3 for audio encoding so that the users can watch a movie at near DVD-quality video and audio.
1. Supported Formats
This product only supports the following media formats. If both video and audio formats are not supported, the user may experience problems such as broken images or no sound.
Supported Video Formats
| Format AVI WMV | |
| Supported Versions DivX3.11~DivX5.1, XviD V1/V2/V3/V7 | |
Supported Audio Formats
| Format MP3 WMA AC3 | |||
| Bit Rate 80~384kbps 56~128kbps | 128~384kbps | ||
| Sampling Frequency | 44.1khz | 44.1/48khz | |
- Aspect Ratio : Although the default DivX resolution is 640x480 pixels (4:3), this product supports up to 800x600 pixels (16:9). TV screen resolutions higher than 800 will not be supported.
- When you play a disc whose sampling frequency is higher than 48khz or 320kbps, you may experience shaking on the screen during playback.
2. Caption Function
- You must have some experience with video extraction and editing in order to use this feature properly.
- To use the caption function, save the caption fi le (*.smi) in the same fi le name as that of the DivX media fi le (*.avi) within the same folder.
Example. Root Samsung_007CD1.avi
Samsung_007CD1.smi
- Up to 60 alphanumeric characters or 30 East Asian characters (2 byte characters such as Korean and Chinese) for the file name.
- Offi cial DivX® Certifi ed product
- Plays all versions of DivX® video (including DivX® 6) with standard playback of DivX® media files
USING THE PLAYBACK FUNCTION
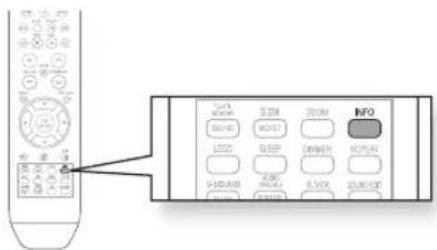
Displaying Disc Information
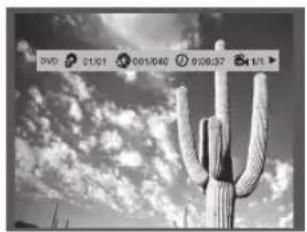
You can view disc playback information on the TV screen.
Press the INFO button.

■ Depending on the disc, the disc information display may appear different.
■ Depending on the disc, you can also select DOLBY DIGITAL, or PRO LOGIC.
text_image
Diagram showing remote control panel with labeled buttons and a zoomed-in view of the main interface.
appears on the TV screen!
If this symbol appears on the TV screen when pressing a button, that operation is not possible with the disc currently being played.
natural_image
Black-and-white photo of a desert cactus with cloud formations and sky background (no text or symbols visible)Checking the Remaining Time

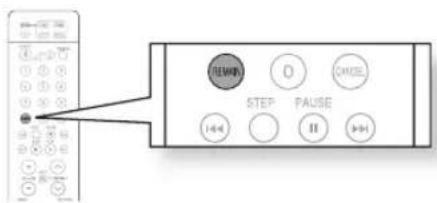
Press the REMAIN button.
- For checking the total and remaining time of a title or chapter being played.
text_image
REMAIN O CMSEL STEP PAUSE I+4 II +4Each time the Remain button is pressed

TITLE ELAPSED → TITLE REMAIN → CHAPTER ELAPSED → CHAPTER REMAIN

GROUP ELAPSED → GROUP REMAIN → TRACK ELAPSED → TRACK REMAIN

TRACK ELAPSED → TRACK REMAIN → TOTAL ELAPSED → TOTAL REMAIN

TRACK REMAIN → TRACK ELAPSED
Fast Playback

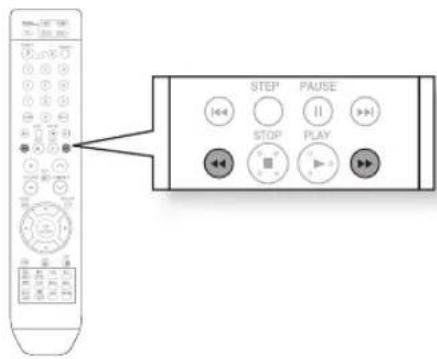
Press the ◀◀, ▶▶ button.
• Each time the button is pressed during playback, the playback speed changes as follows:

flowchart
graph LR
    A["2X"] --> B["4X"]
    B --> C["8X"]
    C --> D["32X"]
    D --> E["PLAY"]
    F["2X"] --> G["4X"]
    G --> H["8X"]
    H --> I["32X"]
    I --> J["PLAY"]
text_image
STEP PAUSE STOP PLAYDuring fast playback of a CD or MP3-CD, sound is heard only at 2x speed, and not at 4x, 8x, and 32x speeds.
Slow Playback
Press the SLOW button.
• Each time the button is pressed during playback, the playback speed changes as follows:

▶1/2→▶1/4→▶1/8→◀1/2→◀1/4→◀1/8→▶ PLAY

text_image
Diagram showing remote control panel with labeled buttons and a pointing arrow pointing to the left panel.
■ No sound is heard during slow playback.
■ Reverse slow playback does not work with DivX.
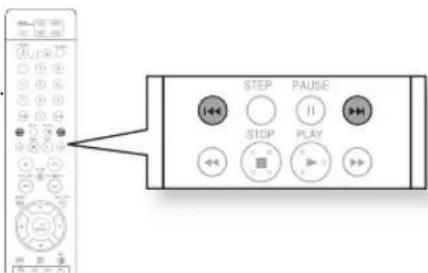
Skipping Scenes/Songs

Press the ◀◀,▶▶I button.
• Each time the button is pressed during playback, the previous or next chapter, track or directory (fi le) will be played.
- You cannot skip chapters consecutively.
text_image
STEP PAUSE STOP PLAYRepeat Playback

Repeat playback allows you to repeatedly play a chapter, title, track (song), or directory (MP3 file).
Press the REPEAT button.
- Each time the button is pressed during playback, the repeat playback mode changes as follows:

text_image
TORTS SHORT SCAND MOIST 1000 BLUEP BIMMER WINDUAD START POME SWEEL SOUND-SELF INFO REPEAT
REPEAT : CHAPTER → REPEAT : TITLE → REPEAT : OFF

REPEAT : TRACK → REPEAT : GROUP → REPEAT : OFF

REPEAT : TRACK → REPEAT : DISC → REPEAT : OFF


REPEAT : OFF → REPEAT : RANDOM → REPEAT : TRACK → REPEAT : DIR → REPEAT : DISC → REPEAT : OFF
CHAPTER : Repeatedly plays the selected chapter.
TITLE : Repeatedly plays the selected title.
GROUP : Repeatedly plays the selected group.
RANDOM : Plays tracks in random order. (A track that has already been played may be played again.)
TRACK : Repeatedly plays the selected track.
DIR : Repeatedly plays all tracks in the selected folder.
DISC : Repeatedly plays the entire disc.
OFF : Cancels Repeat Playback.
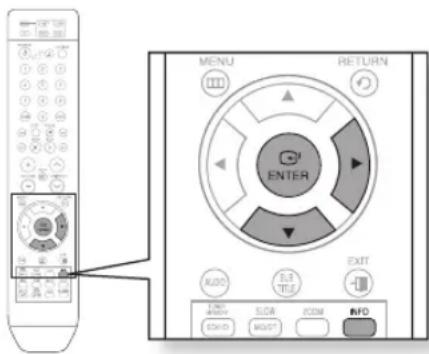
To Select a Repeat Playback Mode on the disc Information Screen

- Press the INFO button twice.
- Press the Cursor ▶ button to move to REPEAT PLAYBACK (c) display.
- Press the Cursor ▼ button to select the desired Repeat Playback mode.
- To select another album and track, repeat Steps 2 and 3 above.
- Press the ENTER button.

OFF → A- → CHAP → TITLE → OFF

OFF → A- → TRACK → DISC → OFF
text_image
MENU RETURN ENTER AUTO EXIT FIND SLAM COM INFO SOLD MOIST
- For DivX, MP3 and JPEG discs, you cannot select Repeat Play from the information display screen.
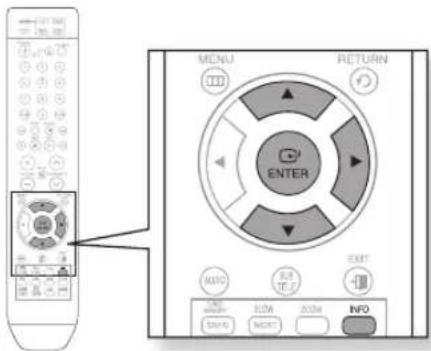
A-B Repeat Playback
You can repeatedly play back a designated section of a DVD.
- Press the INFO button twice.
- Press the Cursor ▶ button to move to REPEAT PLAYBACK (c) display.
- Press the Cursor ▲, ▼ button to select A- and then press the ENTER button.
- When the ENTER button is pressed, the selected position will be stored in memory.
- Press the ENTER button at the end of the desired segment.
- The specified segment will be played repeatedly.
text_image
MENU RETURN ENTER MAYO BOX ITEMS BOX INFO INPUT IMPORT
To return to normal playback, press the Cursor ▲, ▼ button to select ⬇ OFF.

■ The A-B Repeat function does not operate with DivX, MP3 or JPEG discs.
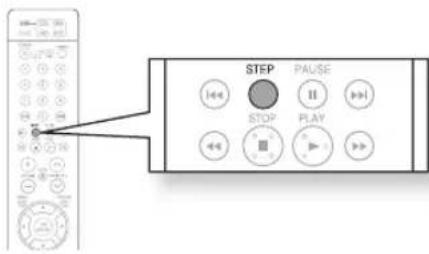
Step Function
Press the STEP button.
- The picture moves forward one frame each time the button is pressed during playback.
text_image
STEP PAUSE STOP PLAY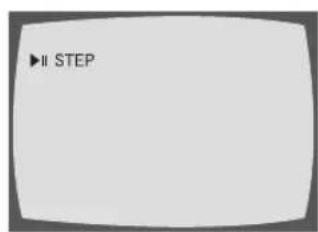
text_image
▶II STEP
■ No sound is heard during step motion playback.
Angle Function

This function allows you to view the same scene in different angles.
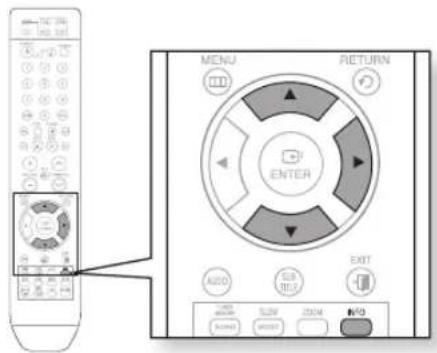
- Press the INFO button.
- Press the Cursor ▶ button to move to ANGLE ( ) display.
- Press the Cursor ▲,▼ button or numeric buttons to select the desired angle.
• Each time the button is pressed, the angle changes as follows:
1/3 → 2/3 → 3/3 → 1/3
text_image
MENU RETURN ENTER AUSO USB IEU EXIT OFF RUN ZOOM AVG SUN HOLD
■ The Angle function works only with discs on which multiple angles have been recorded.
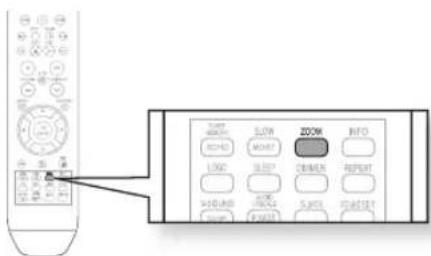
Zoom (Screen Enlarge) Function

This function allows you to enlarge a particular area of the displayed image.
- Press the ZOOM button.
- Press the Cursor ▲, ▼, ◀, ► button to move to the area you want to enlarge.
- Press the ENTER button.
• Each time the button is pressed, the zoom level changes as follows:
ZOOM X 1.5 → ZOOM X 2 → ZOOM X 3
→ZOOM OFF
text_image
Diagram showing remote control interface with labeled buttons and a zoomed-in view of the main panel.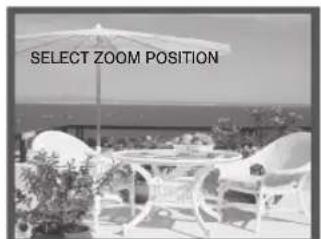
text_image
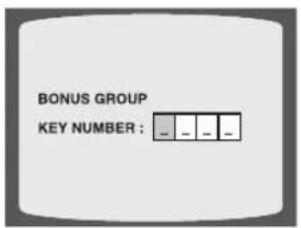
SELECT ZOOM POSITIONBonus Group
Some DVD-Audio discs have an extra 'bonus' group that requires a 4-digit key number to access. See the disc packaging for details and the key number.
text_image
BONUS GROUP KEY NUMBER : _ _ _ _ _When you play a DVD-Audio disc that has a bonus group, the key number input screen appears automatically.

If you eject the disc, switch the power off, or unplug the player, you will need to re-enter the key number.
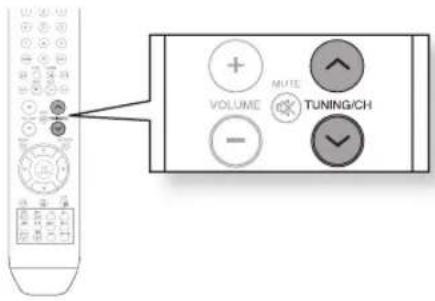
Navigating Pages

During playback, press the V,∧ button on the remote control.
- You can select the desired image from a DVD-Audio disc containing still images.
- With some discs, you may not be able to select images.
text_image
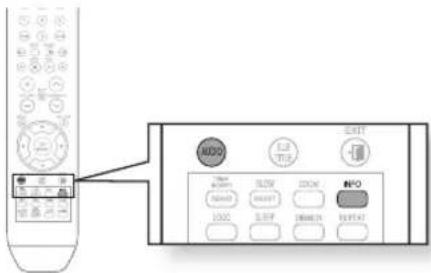
VOLUME MUTE TUNING/CHAudio Language Selection Function

- Press the INFO button twice.
- Press the Cursor ▲, ▼ button or numeric buttons to select the desired audio language.
- Depending on the number of languages on a DVD disc, a different audio language (ENGLISH, SPANISH, FRENCH, etc.) is selected each time the button is pressed.
text_image
Diagram showing remote control interface with labeled buttons and a cursor pointing to the left panel.EN 1/3 → SP 2/3 → FR 3/3 → EN 1/3

■ To operate this function, you can also press the AUDIO buttons on the remote control.
■ Depending on the disc, the Audio Language functions may not be available.
Subtitle Language Selection Function

- Press the INFO button twice.
- Press the Cursor ▶ button to move to SUBTITLE (☐) display.
- Press the Cursor ▼ button or numeric buttons to select the desired subtitle.
EN 01/03 → SP 02/03 → FR 03/03 → OFF/03 → EN 01/03
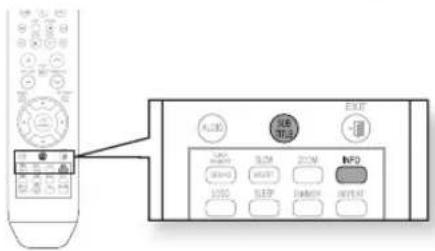
text_image
Diagram showing remote control interface with labeled buttons and a pointing arrow pointing to the left panel.
- To operate this function, you can also press the SUBTITLE buttons on the remote control.
■ Depending on the disc, the Subtitle Language functions may not be available.
Moving Directly to a Scene/Song

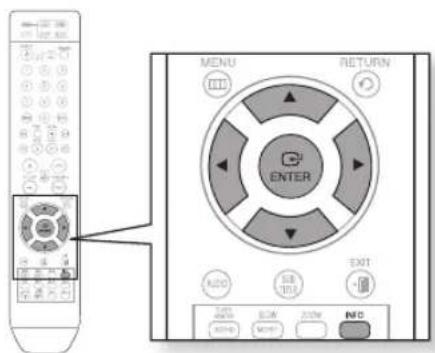
- Press the INFO button.
- Press the Cursor ▲, ▼ button or numeric buttons to select the desired title/track (a) and then press the ENTER button.
- Press the Cursor ◀,▶ button to move to the Chapter (▲) display.
- Press the Cursor ▲,▼ button or numeric buttons to select the desired chapter and then press the ENTER button.
- Press the Cursor ◀,▶ button to move to time ( Ⓤ ) display.
- Press the numeric buttons to select the desired time and then press the ENTER button.
text_image
MENU RETURN ENTER AUTO EXIT 3.0W 4.0W 5.0W 6.0W 7.0W 8.0W 9.0W 10.0W 11.0W 12.0W 13.0W 14.0W 15.0W 16.0W 17.0W 18.0W 19.0W 20.0W 21.0W 22.0W 23.0W 24.0W 25.0W 26.0W 27.0W 28.0W 29.0W 30.0W 31.0W 32.0W 33.0W 34.0W 35.0W 36.0W 37.0W 38.0W 39.0W 40.0W 41.0W 42.0W 43.0W 44.0W 45.0W 46.0W 47.0W 48.0W 49.0W 50.0W 51.0W 52.0W 53.0W 54.0W 55.0W 56.0W 57.0W 58.0W 59.0W 60.0W 61.0W 62.0W 63.0W 64.0W 65.0W 66.0W 67.0W 68.0W 69.0W 70.0W 71.0W 72.0W 73.0W 74.0W 75.0W 76.0W 77.0W 78.0W 79.0W 80.0W 81.0W 82.0W 83.0W 84.0W 85.0W 86.0W 87.0W 88.0W 89.0W 90.0W 91.0W 92.0W 93.0W 94.0W 95.0W 96.0W 97.0W 98.0W 99.0W
Press the numeric buttons.
• The selected file will be played.
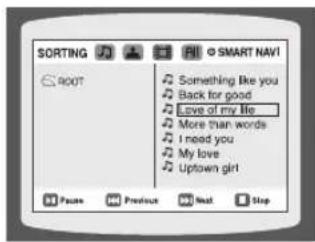
- When playing an MP3 or JPEG disc, you cannot use the Cursor ▲,▼ button to move to a folder.
To move a folder, press the STOP (■) and then press the Cursor ▲,▼ button.
text_image
SORTING ROOT Something like you Back for good love of my life More than words I need you My love Uptown girl Pause Previous Next Stop
- You can press the ◀◀,▶▶ button on the remote control to move directly to the desired title, chapter, or track.
■ Depending on the disc, you may not be able to move to the selected title or time.
Using the Disc Menu

You can use the menus for the audio language, subtitle language, profi le, etc.
DVD menu contents differ from disc to disc.
-
In Stop mode, press the MENU button.
-
Press the Cursor ▲,▼ button or numeric buttons to move to Disc Menu and then press the ENTER button.
- When you select Disc Menu and it is not supported by the disc, the "This menu is not supported" message appears on the screen.
-
Press the Cursor ▲, ▼, ◀, ▶ button to select the desired item.
-
Press the ENTER button.
➢ Press the EXIT button to exit the setup screen.
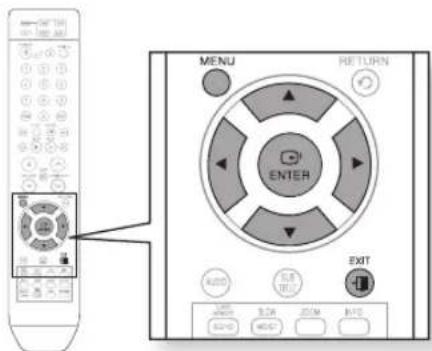
text_image
MENU RE TURN ENTER EXIT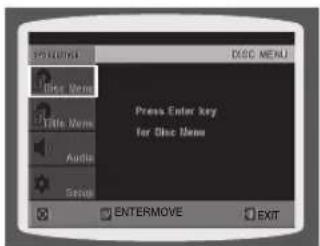
text_image
PENGLISH DISC MENU Press Enter key for disc items EnterMOVE EXIT
■ The disc menu display may be different depending on the disc.

Using the Title Menu
For DVDs containing multiple titles, you can view the title of each movie. Depending on the disc, the availability of this feature may vary.
-
In Stop mode, press the MENU button.
-
Press the Cursor ▲,▼ button to move to Title Menu.
-
Press the ENTER button.
• The title menu appears.
➢ Press the EXIT button to exit the setup screen.
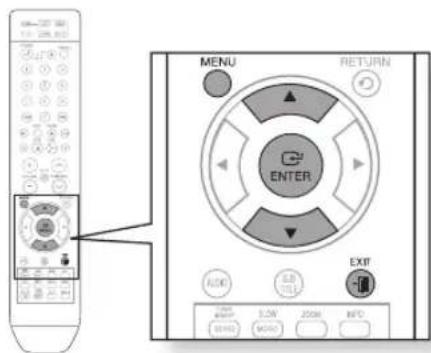
text_image
MENU RETURN ENTER EXIT AIDS USB TILL LOW 200M INFO EAMD MOYA
text_image
TITLE MENU Press Eator key for Title Menu ENTERMOVE EXIT
■ The Title menu display may be different depending on the disc.
USING BLUETOOTH
You can use a Bluetooth device to enjoy music with high quality stereo sound, all without wires!
What is Bluetooth?
Bluetooth is a new technology that enables Bluetooth-compliant devices to easily interconnect with each other using a short wireless connection.
- A Bluetooth device may cause a noise or malfunction, depending on usage.
- When a part of the body is in contact with the receiving/transmitting system of the Bluetooth device or the Home Cinema System.
- Electrical variation from obstructions caused by a wall, corner or office partitioning.
- Electrical interference from same frequency-band devices including medical equipment, microwave oven and wireless LAN.
- Pair the Home Cinema System with the Bluetooth device while maintaining a close distance.
- The further the distance is between Home Cinema System and Bluetooth device, the worse the quality is. If the distance exceeds the Bluetooth operational range, the connection is lost.
- The Home Cinema System only supports Middle Quality SBC data(up to 237kbps@48kHz), and does not support High Quality SBC data(328kbps@44.1kHz).
- In poor reception-sensitivity areas, the Bluetooth connection may not work properly.
- The Home Cinema System has an effective reception range of up to 10 meters in all directions if there are no obstacles. The connection will be automatically cut off if the distance is out of this range. Even within this range, the sound quality may be deteriorated by obstacles such as walls or doors.
To connect the Home Cinema System to a Bluetooth device
Check if the Bluetooth device supports the Bluetooth-compliant stereo headset function.
-
Press the FUNCTION button on the front panel of the home cinema system repeatedly until "BT AUDIO" appears.
-
The mode switches as follows: DVD/CD → DIGITAL IN → AUX 1 → AUX 2 → USB → BT AUDIO → TUNER.
-
You will see "WAIT" for 2 seconds and then "READY" on the front display of the Home Cinema System.
-
Select the Bluetooth menu on Bluetooth device you want to connect. (refer to Bluetooth device's user manual)
-
Select the Stereo headset menu on the Bluetooth device.
- You will see a list of scanned devices.
- Select "Samsung Home Theater" from the searched list.
- When the Home Cinema System is connected to the Bluetooth device, the Home Cinema System will display "CONNECT" on the front display, followed by the device name of the connected Bluetooth device.
- The Home Cinema System connection is complete.
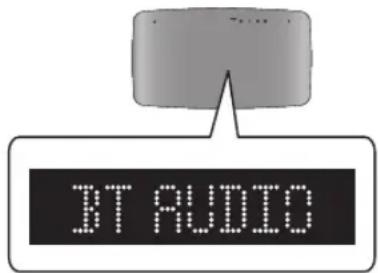
text_image
BT AUDIO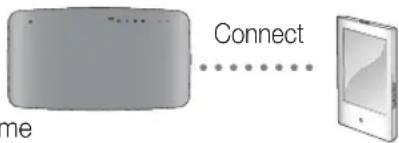
flowchart
graph LR
    A["Device"] -->|Connect| B["Smartphone"]
Bluetooth device
- Play music on the connected device.
- You can listen to the music playing on the connected Bluetooth device over the home cinema system.

- You may be required to enter a PIN code(password) when connecting the Bluetooth device to the home cinema system. If the PIN code input window appears, enter <0000>.
- The Home Cinema System may control play related function only when connected device supports the function.
The Home Cinema System only supports Middle Quality SBC data(up to 237kbps@48kHz), and does not support High Quality SBC data(328kbps@44.1kHz).
To disconnect the Bluetooth device from the Home Cinema System
You can disconnect the Home Cinema System from the Bluetooth device. (refer to Bluetooth device's user's manual)
• The Home Cinema System will be disconnected.
- When the Home Cinema System is disconnected from the Bluetooth device, the Home Cinema System will display "Disconnect" on the front display.
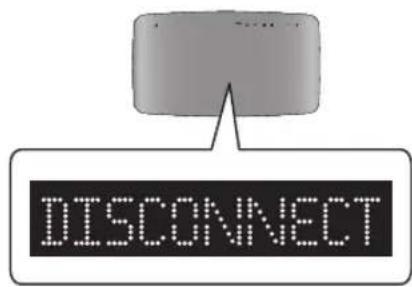
text_image
DISCONNECTTo disconnect the Home Cinema System from the Bluetooth device
Press the FUNCTION button on the front panel of the home cinema system to switch from "BT AUDIO" to another mode.
- The connected Bluetooth device will wait a certain time for response from the home cinema system before terminating the connection. (Disconnection time may differ, depending on the Bluetooth device)
• The currently connected device will be disconnected.

In Bluetooth connection mode, the Bluetooth connection will be lost if the distance between the Home Cinema System and the Bluetooth device exceeds 10 meters. If the distance is returned to the effective range or you restart the Bluetooth device, the Bluetooth connection can be restored.
■ With some Bluetooth devices, some functions may not work properly.
PLAYING MEDIA FILES USING THE USB HOST FEATURE
You can enjoy media files such as pictures, movies and music saved on an MP3 player, USB memory stick or digital camera in high quality video by connecting the storage device to the USB port of the Home Cinema.
- Connect the USB device to the USB port on the side of the unit.
-
Press the FUNCTION button on the DVD Player or the PORT button on the remote control to select the USB mode.
-
USB appears on the display screen and then disappears.
-
The USB MENU screen appears on the TV screen and the saved file is played.
-
To stop playback, press the STOP (■) button.
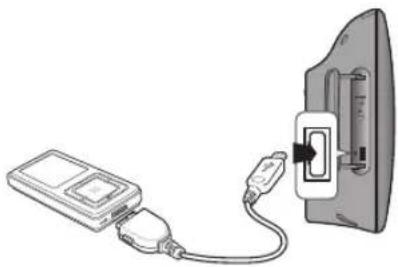
natural_image
Illustration of a portable electronic device connected to a wall-mounted power strip (no text or symbols)Safe USB Removal
To prevent damage to the data stored in the USB device, perform safe removal before disconnecting the USB cable.
- Press the STOP (■) button twice in a row. The display will show REMOVE USB.
- Remove the USB cable.
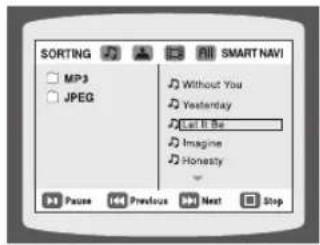
text_image
SORTING MP3 JPEG Without You Yesterday Let It Be Imagine Honesty Pause Previous Next StopSkip Forward/Back
During playback, press the ◀◀,▶▶ button.
- When there is more than one file and you press the ▶▶I button, the next file is selected.
- When there is more than one file and you press the button, the previous file is selected.
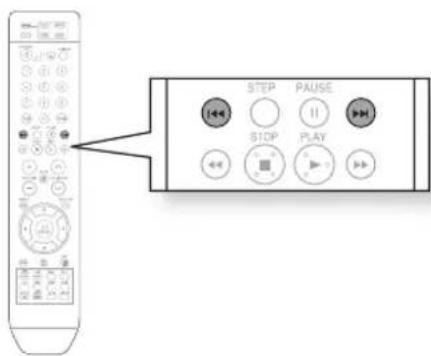
text_image
STEP STOP PLAYFast playback
During playback, press the ◀◀,▶▶ button.
• Each time you press either button, the playback speed will change as follows:
2x→4x→8x→32x→Normal.
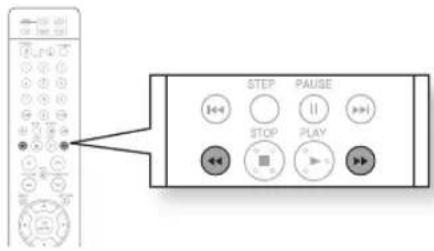
text_image
STEP PAUSE STOP PLAYCompatible Devices
-
USB devices that support USB Mass Storage v1.0. (USB devices that operate as a removable disc in Windows (2000 or later) without additional driver installation.)
-
MP3 Player: HDD and flash type MP3 players.
-
Digital camera: Cameras that support USB Mass Storage v1.0.
- Cameras that operate as a removable disc in Windows (2000 or later) without additional driver installation.
- USB HDD and USB Flash Drive: Devices that support USB2.0 or USB1.1.
- You may experience a difference in playback quality when you connect a USB1.1 device.
- For a USB HDD, make sure to connect an auxiliary power cord to the USB HDD for proper operation.
- USB card Reader: One slot USB card reader and Multi slot USB card reader.
- Depending on the manufacturer. the USB card reader may not be supported.
- If you install multiple memory devices into a multi card reader, you may experience problems.
- If you use a USB extension cable, the USB device might not be recognized.
Supported Formats
| Format File name | File extension | Bit rate Version Pixel | Sampling Frequency | |
| Still Picture | JPG JPG .JPEG -- 640x480 - | |||
| Music | MP3 .MP3 80~384kbps -- 44.1kHz | |||
| WMA .WMA 56~128kbps V8 | - 44.1kHz | |||
| Movie | WMV .WMV 4Mbps | V1,V2,V3,V7 | 720x480 | |
| DivX .AVI,.ASF | 4Mbps | DivX3.11~ DivX5.1, XviD | 720x480 |
• CBI (Control/Bulk/Interrupt) is not supported.
- Digital Cameras that use PTP protocol or require additional program installation when connected to a PC are not supported.
- A device using NTFS file system is not supported. (Only FAT 16/32 (File Allocation Table 16/32) file system is supported.)
- Some MP3 players, when connected to this product, may not operate depending on the sector size of their file systems.
- The USB host function is not supported if a product that transfers media files by its manufacturer-specific program is connected.
- Does not operate with Janus enabled MTP (Media Transfer Protocol) devices.
- The USB host function of this product does not support all USB devices. For information on the supported devices, see page 55.
For your convenience, you can set this Home Cinema's features for the best use in your home environment.
SETTING THE IANGUAGE
OSD(On-Screen Display) language is set to English by default.
- In Stop mode, press the MENU button.
- Press the Cursor ▼ button to move to Setup and then press the ENTER or ▶ button.
- Select language and then press the ENTER or ▶ button.
- Press the Cursor ▲, ▼ button to select OSD language and then press the ENTER or ▶ button.
- Press the Cursor ▲,▼ button to select the desired language and then press the ENTER button.
- Once the setup is complete, the OSD will be English if English has been selected as the language.
➢ Press the rETUrN button to return to the previous level.
➢ Press the EXIT button to exit the setup screen.
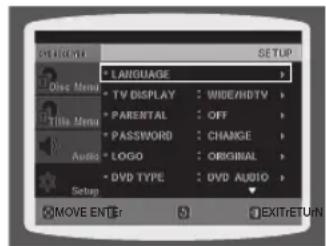
text_image
USE MENU * LANGUAGE * TV DISPLAY : WIDE/HD TV * PARENTAL : OFF * PASSWORD : CHANGE * LOGO : ORIGINAL * DVD TYPE : DVD AUDIO SETUP DOCU ME DOCU ME Title Menu Audio Setup MOVE ENTER EXITRETURN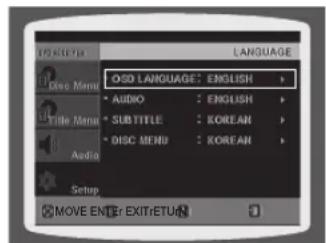
text_image
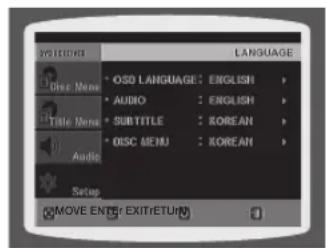
OSD LANGUAGE: ENGLISH AUDIO : ENGLISH SUBTITLE : KOREAN DISC MENU : KOREAN MOVE ENTER EXIT:RETURN- OSD LANGUAGE : Selecting the OSD Language
• AUDIO : Selecting the Audio Language (recorded on the disc) - SUBTITIE : Selecting the Subtitle Language (recorded on the disc)
• DISC MENU : Selecting the Disc Menu Language (recorded on the disc)
※ If the language you selected is not recorded on the disc, menu language will not change even if you set it to your desired language.
text_image
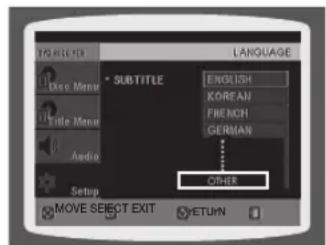
AUDIO • OSD LANGUAGE: ENGLISH • AUDIO : ENGLISH • SUBTITLE : KOREAN • DISC MENU : KOREAN AUDIO Setup MOVE ENTER EXIT/RETURN- OTHERS : To select another language, select OTHERS and enter the language code of your country (see page 54). AUDIO, SUBTITLE and DISC MENU language can be selected
text_image
LANGELIX * SUBTITLE ENGLISH KOREAN FRENCH GERMAN ... OTHER MOVE SELECT EXIT RETURNDepending on your TV type (Wide Screen or conventional 4:3), you can select the TV's aspect ratio.
- In Stop mode, press the MENU button.
- Press the Cursor ▼ button to move to Setup and then press the ENTER or ▶ button.
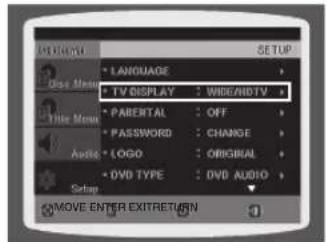
- Press the Cursor ▼ button to move to TV DISPLAY and then press the ENTER or ▶ button.
- Press the Cursor ▲, ▼ button to select the desired item and then press the ENTER button.
- Once the setup is complete, you will be taken to the previous screen.
➢ Press the RETURN button to return to the previous level.
➢ Press the EXIT button to exit the setup screen.
text_image
LAYOUT Gloss Menu • LANGUAGE • TV DISPLAY : WIDE/HDTV • PABERTAL : OFF • PASSWORD : CHANGE • LOGO : ORIGINAL • DVD TYPE : DVD AUDIO Setup MOVE ENTER EXITRETURN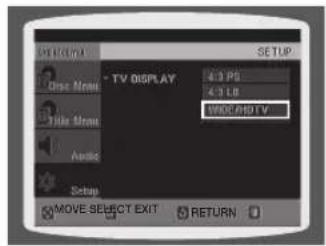
text_image
TV DISPLAY 4:0 PS 4:3 Lb VIEW/450 TV. Close Menu Title Menu Audio Setup MOVE SELECT EXIT RETURNAdjusting the TV Aspect Ratio (Screen Size)
The horizontal to vertical screen size ratio of conventional TVs is 4:3, while that of widescreen and high definition TVs is 16:9. This ratio is called the aspect ratio. When playing DVDs recorded in different screen sizes, you should adjust the aspect ratio to fit your TV or monitor.
For a standard TV, select either 4:3PS or 4:3LB option according to personal preference. Select WIDE/HDTV if you have a widescreen TV.
4:3PS (4:3 Pan&Scan)
Select this to play a 16:9 picture in the pan & scan mode on a conventional TV.
- You can see the central portion of the screen only (with the sides of the 16:9 picture cut off).
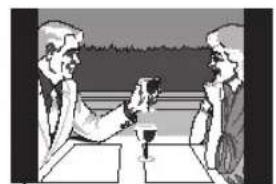
natural_image
Illustration of two men in conversation at a table, one holding a wine glass (no text or symbols visible)4:3LB (4:3 Letterbox)
Select this to play a 16:9 picture in the letter box mode on a conventional TV.
- Black bars will appear at the top and bottom of the screen.
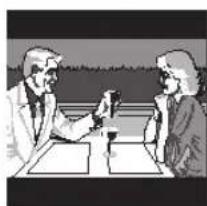
natural_image
Illustration of two people in a meeting at a table, one holding a document (no text or symbols visible)WIDE/HDTV
Select this to view a 16:9 picture in the full-screen mode on your widescreen TV.
- You can enjoy the widescreen aspect.
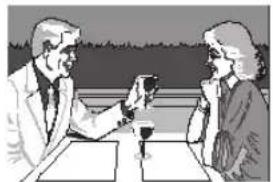
natural_image
Illustration of two people in a meeting, one holding a wine glass, with no visible text or symbols
■ If a DVD is in the 4:3 ratio, you cannot view it in widescreen.
■ Since DVD discs are recorded in various image formats, they will look different depending on the software, the type of TV, and the TV aspect ratio setting.
- When using HDMI, the screen is automatically converted to Wide mode.
SETTING PARENTAL CONTROLS (RATING LEVEL)
Use this to restrict playback of adult or violent DVDs you do not want children to view.
- In Stop mode, press the MENU button.
- Press the Cursor ▼ button to move to Setup and then press the ENTER or ▶ button.
- Press the Cursor ▼ button to move to PARENTAL and then press the ENTER or ▶ button.
- Press the Cursor ▲,▼ button to select the desired rating level and then press the ENTER button.
- If you have selected Level 6, you cannot view DVDs with Level 7 or higher.
-
The higher the level, the closer the content is to violent or adult material.
-
Enter the password and then press the ENTER button.
-
The password is set to "7890" by default.
- Once the setup is complete, you will be taken to the previous screen.
➢ Press the RETURN button to return to the previous level.
➢ Press the EXIT button to exit the setup screen.
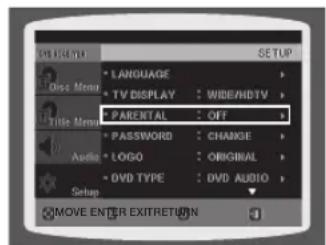
text_image
VIR KITCHEN DISC MENU LANGUAGE TV DISPLAY : WIDE/HDTV TITLE MENU PARENTAL : OFF PASSWORD : CHANGE LOGO : ORIGINAL DVD TYPE : DVD AUDIO Audio Setup MOVE ENTER EXITRETURN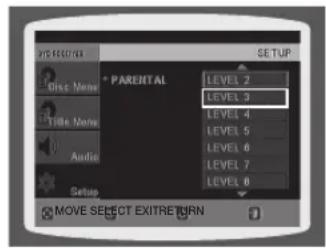
text_image
PARENTAL LEVEL 2 LEVEL 3 LEVEL 4 LEVEL 5 LEVEL 6 LEVEL 7 LEVEL 8 MOVE SELECT EXIT RETURN
■ This function works only if a DVD disc contains rating level information.
SETTING THE PASSWORD
You can set the password for the Parental (rating level) setting.
- In Stop mode, press the MENU button.
- Press the Cursor ▼ button to move to Setup and then press the ENTER or ▶ button.
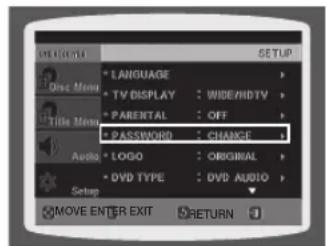
- Press the Cursor ▼ button to move to PASSWORD and then press the ENTER or ▶ button.
- Press the ENTER button.
- Enter the password and then press the ENTER button.
- Enter the old password, a new password, and confirm new password.
- The setting is complete.
text_image
LIVE ORDER SETUP • LANGUAGE • TV DISPLAY : WIDE/HD TV • PARENTAL : OFF • PASSWORD : CHANGE Audio: LOGO : ORIGINAL • DVD TYPE : DVD AUDIO Setup MOVE ENTER EXIT RETURN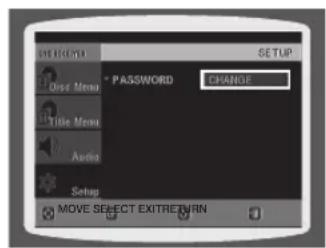
text_image
SETUP Diss Menu * PASSWORD CHANGE Title Menu Audio Setup MOVE SELECT EXITRETURN
■ The password is set to "7890" by default.
If you have forgotten the rating level password, do the following
- While the player is in No Dlsc mode, hold the DVD Players STOP (■) button for longer than 5 seconds. INITIAL appears on the display and all settings will return to the default values.
- Press the POWER button.
Using the RESET function will erase all stored settings.
Do not use this unless necessary.
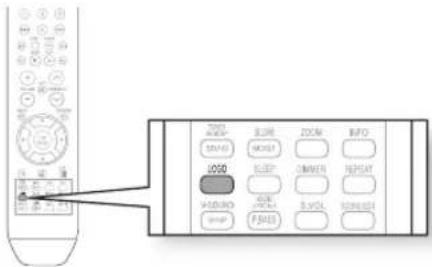
While watching a DVD or JPEG CD, you can set the image you like as background wallpaper.
- During playback, press the PAUSE Ⓞ button when an image you like appears.
- Press the IOGO button.
• COPY LOGO DATA will be displayed on the TV screen.
- The power will turn off and then back on.
• The selected wallpaper will be displayed.
- You can select up to 3 wallpaper settings.
text_image
Diagram showing remote control interface with labeled buttons and a zoomed-in view of the main panel.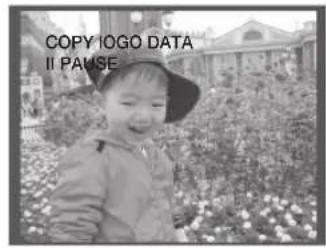
text_image
COPY LOGO DATA II PAUSE
text_image
LOGO IS COPIED II PAUSE
■ This function will not work when the HDMI output is 720p, 1080i or 1080p.
TO SELECT ONE OF THE 3 WALLPAPER SETTINGS YOU'VE MADE
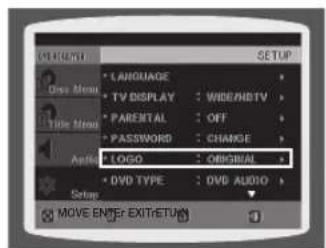
- In Stop mode, press the MENU button.
- Press the Cursor ▼ button to move to Setup and then press the ENTER or ▶ button.
- Press the Cursor ▼ button to move to LOGO and then press the ENTER or ▶ button.
- Press the Cursor ▲, ▼ button select the desired USEr, and then press the ENTER button.
• This selects one of the 3 wallpaper screens. -
Press the EXIT button to exit the setup screen.
-
OrIGINAI : Select this to set the Samsung Logo image as your wallpaper.
- USEr : Select this to set the desired image as your wallpaper.
➢ Press the rETUrN button to return to the previous level.
➢ Press the EXIT button to exit the setup screen.
text_image
OUTPUT GND MENU • LANGUAGE • TV DISPLAY : WIDE/HDTV • PARENTAL : OFF • PASSWORD : CHANGE • LOGO : ORIGINAL • DVD TYPE : DVD AUDIO SETUP MOVE ENTER EXIT/RETURN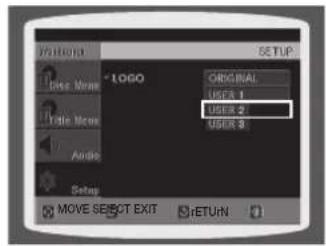
text_image
LOGO ORIGINAL USER 1 USER 2 USER 3 MOVE SELECT EXIT RETURNDVD PLAYBACK MODE
Some DVD-Audio discs contain DVD-Video as well as DVD-Audio.
To play back the DVD-Video portion of the DVD-Audio disc, set the unit to DVD-Video mode.
- Press the MENU button while the disc tray is open.
- Press the Cursor ▼ button to move to Setup and then press the ENTER or ▶ button.
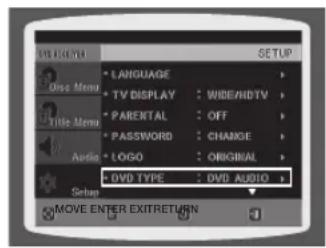
- Press the Cursor ▼ button to move to DVD TYPE and then press the ENTER or ▶ button.
- Press the Cursor ▲,▼ button to move to DVD VIDEO and then press the ENTER button.
- Set steps 1 \~ 4 again if you want to switch to DVD AUDIO Play mode.
- DVD VIDEO : Set to play the DVD video contents contained on a DVD audio disc.
• DVD AUDIO : Set to play the default DVD audio.
text_image
DVD PLAYER SETUP • LANGUAGE • TV DISPLAY : WIDE/HDTV • PARENTAL : OFF • PASSWORD : CHANGE • LOGO : ORIGINAL • DVD TYPE : DVD AUDIO • MOVE ENTER EXITRETURN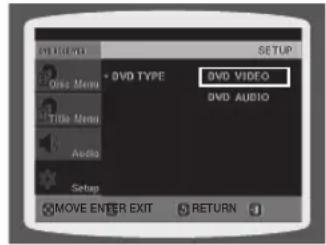
■ DVD Play mode is set to DVD Audio as factory default setting.
■ Powering off the main unit will automatically switch to the DVD Audio mode.
DviX (R) Registration
Please use the Registration code to register this player with the DivX (R) video on demand format. To learn more, go to www.divx.com/vod.
SETTING THE DRC (DYNAMIC RANGE COMPRESSION)
This feature balances the range between the loudest and quietest sounds. You can use this function to enjoy Dolby Digital sound when watching movies at low volume at night.
- In Stop mode, press the MENU button.
- Press the Cursor ▼ button to move to Audio and then press the ENTER or ▶ button.
- Press the Cursor ▼ button to move to DRC and then press the ENTER or ▶ button.
- Press the Cursor ▲, ▼ to adjust the DRC.
- When the Cursor ▲ button is pressed, the effect is greater, and when the Cursor ▼ button is pressed, the effect is smaller.
➢ Press the RETURN button to return to the previous level.
➢ Press the EXIT button to exit the setup screen.
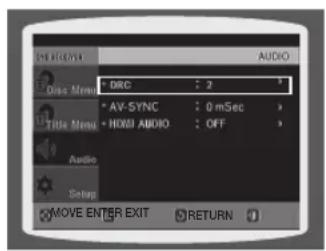
text_image
DISC Audio Disc Menu: * DRC : 2 * AV-SYNC : 0 mSec * Title Menu : HDMI AUDIO : OFF * Audio Setup MOVE ENTER EXIT RETURN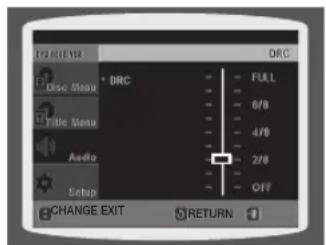
text_image
DRC Disc Menu • DRC File Menu Audio Setup CHANGE EXIT RETURN FULL 6/0 4/0 2/0 OFFSETTING THE AV SYNC
Video may look slower than the audio if it is connected to a digital TV. If this occurs, adjust the audio delay time to match the video.
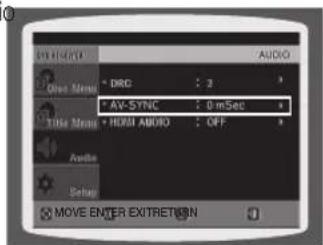
text_image
AV MOUNT AUDIO Open Menu * DRC 3 AV-SYNC 0 m5sec Title Menu HDMI ABOUD OFF Audio Setup MOVE ENTER EXITRETIREN- In Stop mode, press the MENU button.
- Press the Cursor ▼ button to move to Audio and then press the ENTER or ▶ button.
- Press the Cursor ▼ button to move to AV-SYNC and then press the ENTER or ▶ button.
- Press the Cursor ▲, ▼ button to select the AV-SYNC Delay Time and then press the ENTER button.
- You can set the audio delay time between 0 ms and 300 ms. Set it to the optimal status.
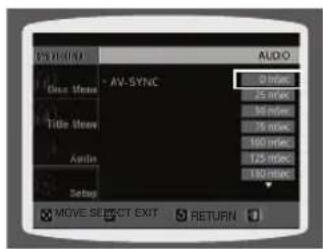
text_image
AV-SYNC Close None Title None Audio Setup 0 MHz 25 MHz 30 MHz 35 MHz 100 MHz 125 MHz 150 MHz MOVE SELECT EXIT RETURN➢ Press the RETURN button to return to the previous level.
➢ Press the EXIT button to exit the setup screen.
SETTING THE HDMI AUDIO
The audio signals transmitted over the HDMI Cable can be toggled ON/OFF.
- In Stop mode, press the MENU button.
- Press the Cursor ▼ button to move to Audio and then press the ENTER or ▶ button.
- Press the Cursor ▼ button to move to HDMI AUDIO and then press the ENTER or ▶ button.
- Press the Cursor ▲, ▼ button to select ON or OFF and then press the ENTER button.
- ON: Both video and audio signals are transmitted over the HDMI connection cable, and audio is output through your TV speakers only.
- OFF: Video is transmitted over the HDMI connection cable only, and audio is output through the home cinema speakers only.
➢ Press the RETURN button to return to the previous level.
➢ Press the EXIT button to exit the setup screen.
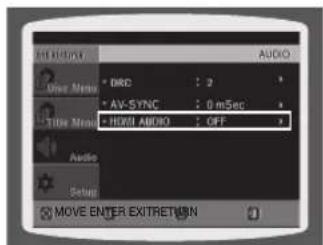
text_image
AUDIO Drive Menu * DRC : 2 * AV-SYNC : 0 mSec Title Menu * HDMI AUDIO : OFF Audio Setup MOVE ENTER EXITRETURN
text_image
AVI HOURS HDMI AUDIO OFF JOB Close Menu Title Menu Audio Setup MOVE SELECT EXIT RETURN
■ The default setting of this function is HDMI AUDIO OFF.
■ HDMI AUDIO is automatically down-mixed to 2ch for TV speakers.
SETTING THE AUDIO
Manually Adjusting the Speaker Volume and Balance with the SOUND EDIT Button.
Press the SOUND EDIT button and then press the Cursor
◀,▶ button.
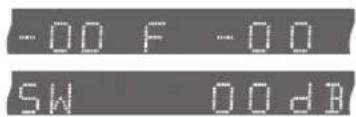
text_image
-00 F -00 SW 00 dBAdjusting Front Speaker Balance
■ You can select between 00, -06, and OFF.
■ The volume decreases as you move closer to -6.
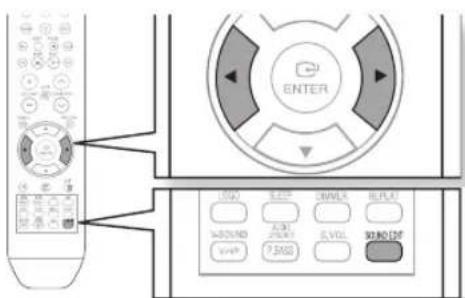
text_image
ENTER (5V) ELETT ONLIX REPLY ROUND AVG AVG AVG AVG AVG AVG AVG AVG AVG AVG AVG AVG AVG AVG AVG AVG AVG AVG AVG AVG AVG AVG AVG AVG AVG AVG AVG AVG AVG AVG AVG AVG AVG AVGAdjusting Subwoofer Speaker Level
■ The volume level can be adjusted in steps from +6dB to -6dB.
■ The sound gets louder as you move closer to +6dB and quieter as you get closer to -6dB.
LISTENING TO RADIO
Remote Control
- Press the TUNER button to select the FM band.
-
Tune in to the desired station.
-
Automatic Tuning 1: When the I◄◄,►►I button is pressed, a preset broadcast station is selected.
- Automatic Tuning 2 : Press and hold the _i V button to automatically search for active broadcasting stations.
- Manual Tuning : Briefly press the V button to increase or decrease the frequency incrementally.
Main Unit
- Press the FUNCTION button to select the FM band.
-
Select a broadcast station
-
Automatic Tuning 1 : Press the STOP (■) button to select PRESET and then press the ◀◀,▶◀ button to select the preset station.
- Automatic Tuning 2 : Press the STOP (■) button to select MANUAL and then press and hold the ◄◀,▶◀ button to automatically search the band.
- Manual Tuning : Press the STOP (■) button to select MANUAL and then briefly press the button to tune in to a lower or higher frequency.
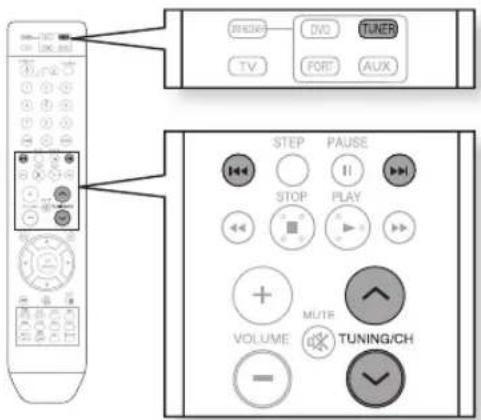
text_image
RHOSE DVD TUNER TV PORT AUX STEP PAUSE STOP PLAY VOLUME MUTE TUNING/CH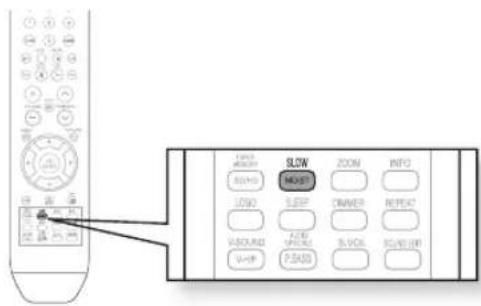
text_image
SLOW MOUST SOENO LOSO LEEP COLD ONION SLICE ONION SOENO PADD ZOOM OWNER REPEAT SLICE ONION SLICE ONIONPress the MO/ST button to listen in Mono/Stereo.
• Each time the button is pressed, the sound switches between STEREO and MONO.
- In a poor reception area, select MONO for a clear, interference-free broadcast.
PRESETTING STATIONS
Example : Presetting FM 89.10 in the memory
- Press the TUNER button to select the FM band.
- Press the ∧, ∨ button to select 89.10.
- Press the TUNER MEMORY button.
• 01 fl ashes in the display.
- Press the ◀◀,▶◀ button to select preset number.
- You can select between 1 and 15 presets.
-
Press the TUNER MEMORY button again.
-
Press the TUNER MEMORY button before Number disappears from the display.
-
Number disappears from the display and the station is stored in memory.
-
To preset another station, repeat steps 2 to 5.
- To tune in to a preset station, press the ◀◀, ▶▶ button on the remote control to select a channel.
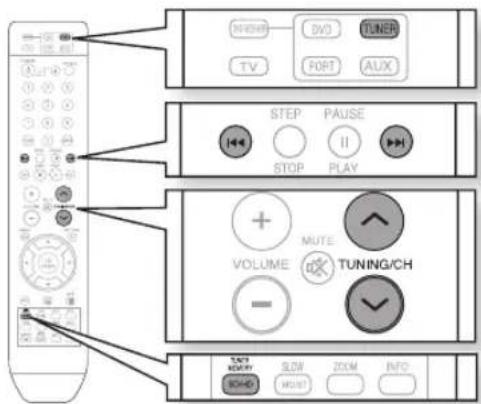
text_image
DV/SHEN DVD TUNER TV FORT AUX STEP PAUSE STOP PLAY VOLUME MUTE TUNING/CH - SODC SLOW ZOOM INFO
This unit does not receive AM broadcasts.
MUTE FUNCTION
This is useful when answering a doorbell or telephone call.
Press the MUTE button.
- MUTE appears in the display.
- To restore the sound, press the MUTE button again.
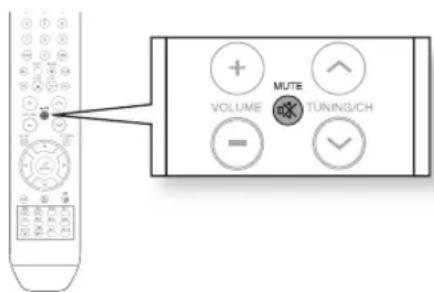
text_image
VOLUME MUTE TUNING/CHSIEEP TIMEr FUNCTION
You can set the time that the Home Cinema will shut itself off.
Press the SIEEP button.
- SIEEP will be displayed. Each time the button is pressed, the preset time changes as follows :

To confirm the sleep timer setting, press the SIEEP button.
- The remaining time before the Home Cinema will shut itself off is displayed.
- Pressing the button again changes the sleep time from what you have set earlier.
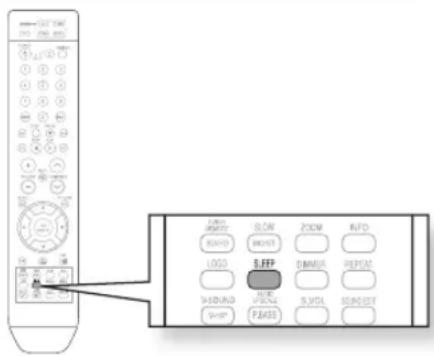
text_image
122 TMC PRO 206.850 OFF SLOW R/PD RESET LOGO 8.8FF DIMMER RESET WIND P/BASS 9 VOLT SCN/DEF SHOPTo cancel the sleep timer, press the SIEEP button until OFF appears on the display.
You can adjust the brightness of the display on the main unit so it won't interfere with your movie viewing.
Press the DIMMEr button.
- Each time the button is pressed, the front display brightness will be adjusted.
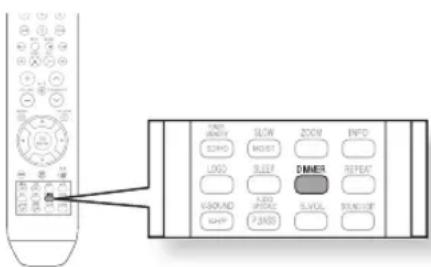
text_image
INT MINT SPEED SLOW MOIST LOGO SLEEP DINER LOAD 1.00 R/POL 5 VCC RUN/OP SAPP F3ASSProduces realistic sound through 2-channel audio with the aid of virtual effects, this gives the user the feeling like they are listening to 5.1 channel audio.
Press the V-SOUND button.
• Each time the button is pressed, the selection changes as follows :
V.SO ON → V.SO OFF
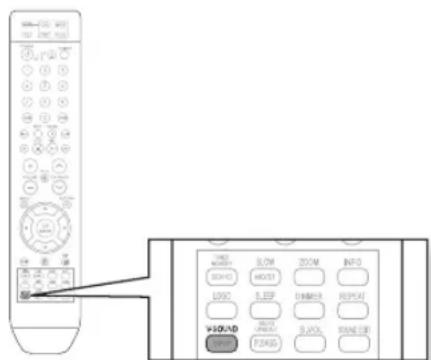
text_image
Diagram showing remote control interface with labeled buttons and a zoomed-in view of the main device.VIrTUAI HEADPHONE FUNCTION
Use headphones (3.50) (not supplied) for private listening pleasure. You can enjoy dynamic sound effects similar to that of 5.1 channel surround sound using conventional stereo headphones.
- Plug the headphones into the headphone jack.
- You can purchase headphones from most Electronics stores.
- Press the V-H/P button.
• Each time the button is pressed, the selection alternates between V.HP:ON and V.HP:OFF.
• V.HP:ON : Select to enjoy a 5.1-channel surround sound that gives the feeling of being in a stadium or concert hall.
• V.HP:OFF : Select to listen to a standard 2-channel stereo sound.
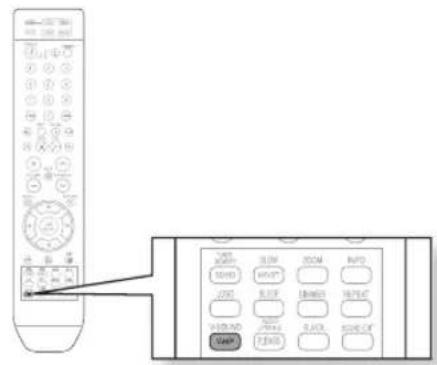
text_image
Diagram showing remote control with a hand pointing to the left panel and a right-side control panel with labeled buttons.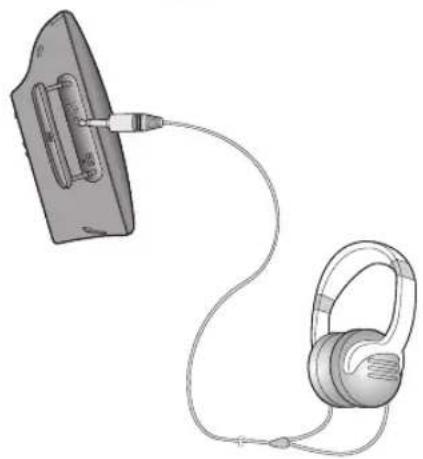
natural_image
Illustration of a charging device connected to an earphone (no text or symbols present)
- Do not listen at extremely high volume levels when using headphones. Extended, high-volume listening can lead to permanent hearing loss.
S.VOI (SMArT VOIUME)
This will regulate and stabilize the volume level against a drastic volume change in case of a channel change or scene transition.
Press the S.VOI button.
• Each time the button is pressed, the selection changes as follows :
S.VOI ON → S.VOI OFF
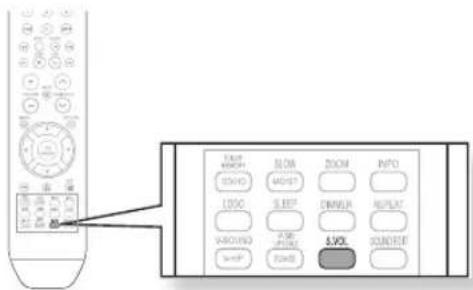
text_image
OK MUSH SLOD ONION SLEET ONION ONION SOLV ONION SLODP.BASS/AUDIO UPSCAIING
P.BASS
P.BASS function stresses low tones providing thudding sound effects.
Press the P.BASS/AUDIO UPSCAIE button to select P.BASS mode.
• Each time the button is pressed, the selection changes as follows :
P BAS ON → UPSC ON → OFF

text_image
Diagram showing remote control interface with labeled buttons and a pointing hand pointing to the left panel.AUDIO UPSCAIING
This also helps enhance your sound experience (ex. mp3 music).
You can upscale your MP3 level sound(24 kHz, 8bit) to CD level sound(44.1 kHz, 16bit).
Press the P.BASS/AUDIO UPSCAIE button to select AUDIO UPSCAIE mode.
• Each time the button is pressed, the selection changes as follows :
P BAS ON → UPSC ON → OFF
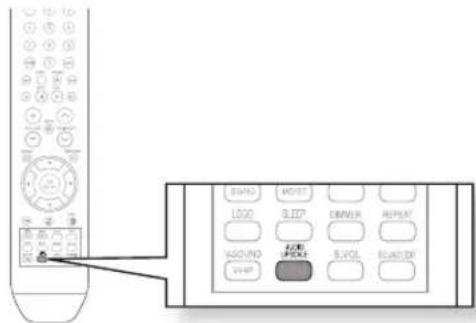
text_image
Diagram showing remote control interface with labeled buttons and a mouse pointer pointing to the left control panel.
The P.BASS function is only available with 2 channel LPCM sources such as mp3, Divx, cd and wma. Press P.BASS button and "POWER BASS ON" will be displayed on the screen.
troubleshooting
Refer to the chart below when this unit does not function properly. If the problem you are experiencing is not listed below or if the instruction below does not help, turn off the unit, disconnect the power cord, and contact the nearest authorized dealer or Samsung Electronics Service Center.
| SYMPTOM Check/Remedy | |
| I cannot eject the disc. | Is the power cord plugged securely into the outlet?Turn off the power and then turn it back on. |
| Playback does not start. | Check the region number of the DVD.DVD discs purchased from abroad may not be playable.CD-ROMs and DVD-ROMs cannot be played on this DVD player.Make sure that the rating level is correct. |
| Playback does not start immediately when the Play/Pause button is pressed. | Are you using a deformed disc or a disc with scratches on the surface?Wipe the disc clean. |
| Sound is not produced. | No sound is heard during fast playback, slow playback, and step motion playback.Are the speakers connected properly? Is the speaker setup correctly customized?Is the disc severely damaged? |
| The remote control does not work. | Is the remote control being operated within its operation range of angle and distance?Are the batteries exhausted?Have you selected the mode(TV/DVD) functions of the remote control (TV or DVD) correctly? |
| Disc is rotating but no picture is produced.Picture quality is poor and picture is shaking. | Is the TV power on?Are the video cables connected properly?Is the disc dirty or damaged?A poorly manufactured disc may not be playable. |
| Audio language and subtitles do not work. | Audio language and subtitles will not work if the disc does not contain them. |
| Menu screen does not appear even when the menu function is selected. | Are you using a disc that does not contain menus? |
| Aspect ratio cannot be changed. | You can play 16:9 DVDs in 16:9 WIDE mode, 4:3 LETTER BOX mode, or 4:3 PAN SCAN mode, but 4:3 DVDs can be seen in 4:3 ratio only. Refer to the DVD disc jacket and then select the appropriate function. |
| The main unit is not working.(Example: The power goes out or strange noise is heard.)The DVD player is not working normally. | Turn off the power and hold the STOP (■) button on the remote control for longer than 5 seconds. STAND BY RED LED blinks on the display and all settings will return to the default values.Using the RESET function will erase all stored settings.Do not use this unless it is necessary. |
| The password for rating level has been forgotten. | While “NO DISC” message appears on the display of main unit, hold the main unit's STOP (■) button for longer than 5 seconds. “INITIAL” appears on the display and all settings will return to the default values.Press the POWER button.Using the RESET function will erase all stored settings.Do not use this unless it is necessary. |
| Can't receive radio broadcast. | Is the antenna connected properly?If the antenna's input signal is weak, install an external FM antenna in an area with good reception. |
Enter the appropriate code number for the initial settings "Disc Audio", "Disc Subtitle" and/or "Disc Menu" (See page 42).
| Code language Code language Code language Code language | |||||||
| 1027 Afar | 1181 Frisian 1334 Latvian, Lettish | 1506 Slovenian | |||||
| 1028 Abkhazian 1183 Irish 1345 Malagasy | 1507 Samoan | ||||||
| 1032 Afrikaans 1186 Scots Gaelic | 1347 Maori 1508 Shona | ||||||
| 1039 Amharic 1194 Galician | 1349 Macedonian 1509 Somali | ||||||
| 1044 Arabic 1196 Guarani 1350 Malayalam 1511 Albanian | |||||||
| 1045 | Assamese | 1203 | Gujarati | 1352 | Mongolian | 1512 | Serbian |
| 1051 | Aymara | 1209 | Hausa | 1353 | Moldavian | 1513 | Siswati |
| 1052 | Azerbaijani | 1217 | Hindi | 1356 | Marathi | 1514 | Sesotho |
| 1053 | Bashkir | 1226 | Croatian | 1357 | Malay | 1515 | Sundanese |
| 1057 Byelorussian 1229 Hungarian | 1358 Maltese 1516 Swedish | ||||||
| 1059 Bulgarian 1233 Armenian 1363 Burmese 1517 Swahili | |||||||
| 1060 | Bihari | 1235 | Interlingua | 1365 | Nauru | 1521 | Tamil |
| 1069 Bislama 1239 Interlingue | 1369 Nepali 1525 Tegulu | ||||||
| 1066 | Bengali; Bangla | 1245 | Inupiak | 1376 | Dutch | 1527 | Tajik |
| 1067 | Tibetan | 1248 | Indonesian | 1379 | Norwegian | 1528 | Thai |
| 1070 | Breton | 1253 | Icelandic | 1393 | Occitan | 1529 | Tigrinya |
| 1079 | Catalan | 1254 | Italian | 1403 | (Afan) Oromo | 1531 | Turkmen |
| 1093 | Corsican | 1257 | Hebrew | 1408 | Oriya | 1532 | Tagalog |
| 1097 | Czech | 1261 | Japanese | 1417 | Punjabi | 1534 | Setswana |
| 1103 | Welsh | 1269 | Yiddish | 1428 | Polish | 1535 | Tonga |
| 1105 | Danish | 1283 | Javanese | 1435 | Pashto, Pushto | 1538 | Turkish |
| 1109 | German | 1287 | Georgian | 1436 | Portuguese | 1539 | Tsonga |
| 1130 | Bhutani | 1297 | Kazakh | 1463 | Quechua | 1540 | Tatar |
| 1142 | Greek | 1298 | Greenlandic | 1481 | Rhaeto-Romance | 1543 | Twi |
| 1144 | English | 1299 | Cambodian | 1482 | Kirundi | 1557 | Ukrainian |
| 1145 | Esperanto | 1300 | Kannada | 1483 | Romanian | 1564 | Urdu |
| 1149 | Spanish | 1301 | Korean | 1489 | Russian | 1572 | Uzbek |
| 1150 | Estonian | 1305 | Kashmiri | 1491 | Kinyarwanda | 1581 | Vietnamese |
| 1151 | Basque | 1307 | Kurdish | 1495 | Sanskrit | 1587 | Volapuk |
| 1157 | Persian | 1311 | Kirghiz | 1498 | Sindhi | 1613 | Wolof |
| 1165 | Finnish | 1313 | Latin | 1501 | Sangro | 1632 | Xhosa |
| 1166 | Fiji | 1326 | Lingala | 1502 | Serbo-Croatian | 1665 | Yoruba |
| 1171 | Faeroese | 1327 | Laothian | 1503 | Singhalese | 1684 | Chinese |
| 1174 | French | 1332 | Lithuanian | 1505 | Slovak | 1697 | Zulu |
USB host feature supported products
DIGITAL CAMERA
| Product | Company | Type | Product | Company | Type |
| Finepix-A340 Fuji Digital Camera | U300 | Olympus | Digital Camera | ||
| Finepix-F810 Fuji Digital Camera | X-350 | Olympus | Digital Camera | ||
| Finepix-F610 Fuji Digital Camera | C-760 | Olympus | Digital Camera | ||
| Finepix-f450 Fuji Digital Camera | C-5060 | Olympus | Digital Camera | ||
| Finepix S7000 Fuji Digital Camera | X1 | Olympus | Digital Camera | ||
| Finepix A310 Fuji Digital Camera | U-mini | Olympus | Digital Camera | ||
| KD-310Z Konica Digital Camera | Lumix-FZ20 | Panasonic | Digital Camera | ||
| Finecam SL300R Kyocera Digital Camera | DMC-FX7GD | Panasonic | Digital Camera | ||
| Finecam SL400R Kyocera Digital Camera | Lumix LC33 | Panasonic | Digital Camera | ||
| Finecam S5R Kyocera Digital Camera | LUMIX DMC-F1 | Panasonic | Digital Camera | ||
| Finecam Xt Kyocera Digital Camera | Optio-S40 | Pentax Digital Camera | |||
| Dimage-Z1 Minolta Digital Camera | Optio-S50 | Pentax Digital Camera | |||
| Dimage Z1 Minolta Digital Camera | Optio 33LF Pentax | Digital Camera | |||
| Dimage X21 Minolta Digital Camera | Optio MX | Pentax Digital Camera | |||
| Coolpix4200 | Nikon | Digital Camera | Digimax-420 | Samsung | Digital Camera |
| Coolpix4300 | Nikon | Digital Camera | Digimax-400 | Samsung | Digital Camera |
| Coolpix 2200 | Nikon | Digital Camera | Sora PDR-T30 | Toshiba | Digital Camera |
| Coolpix 3500 | Nikon | Digital Camera | Coolpix 5900 | Nikon | Digital Camera |
| Coolpix 3700 | Nikon | Digital Camera | Coolpix S1 | Nikon | Digital Camera |
| Coolpix 4100 | Nikon | Digital Camera | Coolpix 7600 | Nikon | Digital Camera |
| Coolpix 5200 | Nikon | Digital Camera | DMC-FX7 | Panasonic | Digital Camera |
| Stylus 410 digital Olympus Digital Camera | Dimage Xt Minolta | Digital Camera | |||
| 300-digital | Olympus | Digital Camera | AZ-1 | Olympus | Digital Camera |
| 300-digital | Olympus | Digital Camera | |||
USB FLASH DISC
| Product | Company | Type | Product | Company | Type |
| Cruzer Micro | Sandisk | USB 2.0 USB Flash Drive 128M | XTICK | LG | USB 2.0 128M |
| Cruzer Mini Sandisk | USB 2.0 128M | Micro Mini | Iomega | USB 2.0 128M | |
| Cruzer Mini Sandisk | USB 2.0 256M | iFlash | Imation | USB 2.0 64M | |
| SONY Micro Vault | Sony | USB 2.0 64MB | LG | XTICK(M) | USB 2.0 64M |
| FLEX DRIVE | Serotech | USB 2.0 32MB | RiDATA | EZDrive | USB 2.0 64M |
| AnyDrive | A.L tech | USB 2.0 128MB |
MP3 PLAYER
| Product | Company | Type | Product | Company | Type |
| Creative MuVo NX128M | Creative | 128 MB MP3 Player | YP-780 | Samsung | MP3 Player |
| Iriver H320 | Iriver | 20G HDD MP3 Player | YP-35 | Samsung | MP3 Player |
| YH-920 | Samsung | 20G HDD MP3 Player | YP-55 | Samsung | MP3 Player |
| YP-T7 | Samsung | MP3 Player | iAUDIO U2 | Cowon | MP3 Player |
| YP-MT6 | Samsung | MP3 Player | iAUDIO G3 | Cowon | MP3 Player |
| YP-T6 | Samsung | MP3 Player | iAudio M3 | Cowon | HDD MP3 Player |
| YP-53 | Samsung | MP3 Player | SI-M500L | Sharp | 256MB MP3 Player |
| YP-ST5 | Samsung | MP3 Player | H10 | Iriver | MP3 Player |
| YP-T5 | Samsung | MP3 Player | YP-T5 VB Samsung | MP3 Player | |
| YP-60 | Samsung | MP3 Player | YP-53 | Samsung | 256MB MP3 Player |
CAUTIONS ON HANDLING AND STORING DISCS
Small scratches on the disc may reduce sound and picture quality or cause skipping.
Be especially careful not to scratch discs when handling them.
Handling discs
Do not touch the playback side of the disc.
Hold the disc by the edges so that fingerprints will not get on the surface.
Do not stick paper or tape on the disc.
Disc Storage
| Do not keep in direct sunlight | Keep in a cool ventilated area | Keep in a clean Protection jacket. Store vertically. |
 | 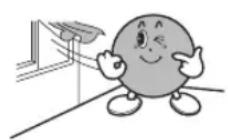 |  |

- Do not allow the discs to become contaminated with dirt.
- Do not load cracked or scratched discs.
Handling and Storing Discs
When you get fingerprints or dirt on the disc, clean it with a mild detergent diluted in water and wipe with a soft cloth.
- When cleaning, wipe gently from the inside to the outside of the disc

- Condensation may form if warm air comes into contact with cold parts inside the player. When condensation forms inside the player, the player may not operate correctly. If this occurs, remove the disc and let the player stand for 1 or 2 hours with the power on.
SPECIFICATIONS
| General | Power Consumption | 90 W | |
| Weight 4.2 kg | |||
| Dimensions 449.6 (W) x 251.5 (H) x 99.1 (D) mm | |||
| Operating Temperature Range +5°C~+35°C | |||
| Operating Humidity Range 10 % to 75 % | |||
| Disc | DVD (Digital Versatile Disc) | Reading Speed: 3.49 ~ 4.06 m/sec. | |
| Approx. Play Time (Single Sided, Single Layer Disc): 135 min. | |||
| CD: 12 cm (COMPACT DISC) | Reading Speed: 4.8 ~ 5.6 m/sec. | ||
| Maximum Play Time: 74 min. | |||
| CD: 8cm (COMPACT DISC) | Reading Speed: 4.8 ~ 5.6 m/sec. | ||
| Maximum Play Time: 20 min. | |||
| Video Output | Composite Video 1.0 Vp-p (75 Ω load) | ||
| Component Video | Y: 1.0 Vp-p (75 load) | ||
| Pr: 0.70 Vp-p (75 Ω load) | |||
| Pb: 0.70 Vp-p (75 Ω load) | |||
| HDMI Impedance: 85~115 Ω | |||
| Amplifier | Front speaker output | 133W x 2(3Ω) | |
| Subwoofer speaker output | 135W(3Ω) | ||
| Frequency range | 20Hz~20KHz | ||
| S/N Ratio 70dB | |||
| Channel separation 60dB | |||
| Input sensitivity | (AUX)400mV | ||
| Speaker | Speaker system | 2.1ch speaker system | |
| Front | Subwoofer | ||
| Impedance | 3 Ω | 3 Ω | |
| Frequency range | 140 Hz~20 KHz | 35Hz~160Hz | |
| Output sound pressure level | 86dB | 86dB | |
| Rated input | 133W | 135W | |
| Maximum input | 266W | 270W | |
| Dimensions (W x H x D) | Front: 96x537x102 mm (stand base:∅ 190) Subwoofer: 217x363.2x413.7 mm | ||
| Weights | Front: 2.2 kg Subwoofer: 6.7 kg | ||
*: Nominal specification
- Samsung Electronics Co., Ltd reserves the right to change the specifications without notice.
- Weight and dimensions are approximate.
Contact SAMSUNG WORLD WIDE
If you have any questions or comments relating to Samsung products, please contact the SAMSUNG customer care center.
| Region Country Customer Care Center Web Site | |||
| North America | CANADA 1-800-SAMSUNG(726-7864) www.samsung.com/ca | ||
| MEXICO 01-800-SAMSUNG(726-7864) www.samsung.com | |||
| U.S.A 1-800-SAMSUNG(726-7864) www.samsung.com | |||
| Latin America | ARGENTINE 0800-333-3733 www.samsung.com/ar | ||
| BRAZIL 0800-124-421, 4004-0000 www.samsung.com | |||
| CHILE 800-SAMSUNG(726-7864) www.samsung.com/cl | |||
| NICARAGUA 00-1800-5077267 | |||
| HONDURAS 800-7919267 | |||
| COSTA RICA 0-800-507-7267 www.samsung.com/latin | |||
| ECUADOR | 1-800-10-7267 | www.samsung.com/latin | |
| EL SALVADOR | 800-6225 | www.samsung.com/latin | |
| GUATEMALA | 1-800-299-0013 www.samsung.com/latin | ||
| JAMAICA | 1-800-234-7267 www.samsung.com/latin | ||
| PANAMA | 800-7267 | www.samsung.com/latin | |
| PUERTO RICO | 1-800-682-3180 www.samsung.com/latin | ||
| REP. DOMINICA | 1-800-751-2676 www.samsung.com/latin | ||
| TRINIDAD & TOBAGO | 1-800-SAMSUNG(726-7864) www.samsung.com/latin | ||
| VENEZUELA 0-800-100-5303 www.samsung.com/latin | |||
| COLOMBIA | 01-8000112112 | www.samsung.com.co | |
| Europe | BELGIUM | 0032 (0)2 201 24 18 | www.samsung.com/be |
| CZECH REPUBLIC | 844 000 844Distributor pro Českou republiku: Samsung Zrt., Česka organizační složka Vyskočilova 4, 14000 Praha 4 | www.samsung.com/cz | |
| DENMARK | 70 70 19 70 | www.samsung.com/dk | |
| FINLAND | 030-6227 515 | www.samsung.com/fi | |
| FRANCE | 3260 SAMSUNG (€ 0,15/Min), 08 25 08 65 65 (€ 0,15/Min) | www.samsung.com | |
| GERMANY | 01805 - SAMSUNG(726-7864) (€ 0,14/Min) | www.samsung.com | |
| HUNGARY | 06-80-SAMSUNG(726-7864) www.samsung.com | ||
| ITALIA 800-SAMSUNG(726-7864) www.samsung.com | |||
| LUXEMBURG | 0035 (0)2 261 03 710 | www.samsung.com/be | |
| NETHERLANDS | 0900-SAMSUNG(726-7864) (€ 0,10/Min) | www.samsung.com/nl | |
| NORWAY | 815-56 480 | www.samsung.com/no | |
| POLAND | 0 801 801 881 , 022-607-93-33 | www.samsung.com/pl | |
| PORTUGAL | 80820-SAMSUNG(726-7864) | www.samsung.com/pt | |
| SLOVAKIA | 0800-SAMSUNG(726-7864) | www.samsung.com/sk | |
| SPAIN | 902 10 11 30 | www.samsung.com | |
| SWEDEN | 0771-400 200 | www.samsung.com/se | |
| U.K | 0845 SAMSUNG (7267864) | www.samsung.com | |
| EIRE | 0818 717 100 | www.samsung.com/e | |
| AUSTRIA | 0800-SAMSUNG(726-7864) | www.samsung.com/at | |
| SWITZERLAND 0800-SAMSUNG(726-7864) www.samsung.com/ch | |||
| CIS | RUSSIA | 8-800-555-55-55 | www.samsung.com |
| KAZAHSTAN | 8-10-800-500-55-500 | www.samsung.kz | |
| UZBEKISTAN | 8-10-800-500-55-500 | www.samsung.uz | |
| KYRGYZSTAN | 00-800-500-55-500 | ||
| TADJIKISTAN | 8-10-800-500-55-500 | ||
| UKRAINE | 8-800-502-0000 www.samsung.com | ||
| LITHUANIA | 8-800-77777 | www.samsung.ll | |
| LATVIA | 800-7267 | www.samsung.com/lv | |
| ESTONIA | 800-7267 | www.samsung.ee | |
| Asia Pacific | AUSTRALIA | 1300 362 603 | www.samsung.com |
| NEW ZEALAND | 0800SAMSUNG(726-7864) | www.samsung.com/nz | |
| CHINA | 800-810-5858 , 010-6475 1880 | www.samsung.com | |
| HONG KONG 3698-4698 www.samsung.com/hk | |||
| INDIA 3030 8282 , 1800 110011 www.samsung.com | |||
| INDONESIA | 0800-112-8888 www.samsung.com | ||
| JAPAN | 0120-327-527 | www.samsung.com/jp | |
| MALAYSIA | 1800-88-9999 | www.samsung.com/my | |
| PHILIPPINES 1800-10-SAMSUNG(726-7864) www.samsung.com/ph | |||
| SINGAPORE | 1800-SAMSUNG(726-7864) | www.samsung.com | |
| THAILAND | 1800-29-3232 , 02-689-3232 www.samsung.com | ||
| TAIWAN 0800-329-999 www.samsung.com/tw | |||
| VIETNAM | 1 800 588 889 | www.samsung.com | |
| Middle East & Africa | TURKEY | 444 77 11 | www.samsung.com |
| SOUTH AFRICA | 0860-SAMSUNG(726-7864) www.samsung.com | ||
| U.A.E 800-SAMSUNG (726-7864), 8000-4726 | www.samsung.com | ||
SAMSUNG