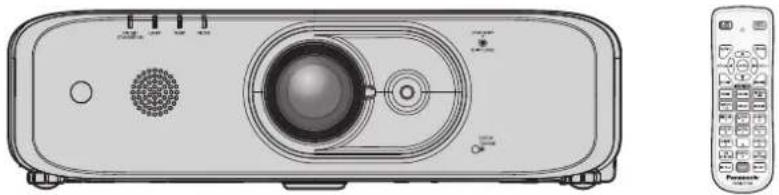
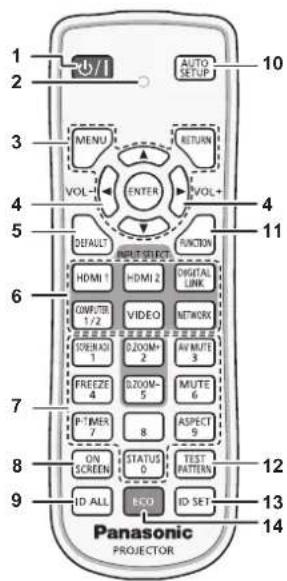
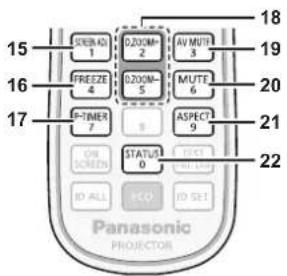
button/▲▼◀▶ buttons
Used to navigate through the menu screen. (→ page 57)
Returns to the previous menu when a sub-menu is displayed.
Also used to enter a password in [SECURITY] or enter characters.
3 button/ button
Adjusts the volume of audio output. (→ page 50)
4 button
Used when temporarily turning off the image and audio. (→ page 50)
5
Switches the input signal to project. (→ page 47)
6 button
Automatically adjusts the screen display position when projecting the image. (→ page 51)
■Connecting terminals
text_image
132456
WIRELESS
COMPUTER 1 IN
COMPUTER 2 IN/1 OUT
SERIAL IN
VIDEO IN
AUDIO IN
VARIABLE AUDIO OUT
LAN
DIGITAL LINK
LAN
7891011
1 terminal
Insert the optional wireless module (Model No.: ET-WML100) directly to this terminal when using the wireless LAN function.
2 terminal
This is the terminal to input RGB signals or YC_BC_R/YP_BP_R signals, also to output the RGB signals and YC_BC_R/YP_BP_R signals, which is input to the terminal.
3 terminal
This is the terminal to input RGB signals, YC_BC_R/YP_BP_R signals, or Y/C signals.
4 terminal/ terminal
This is the terminal to input HDMI signals.
5 terminal
This is the LAN terminal to connect to the network.
6 terminal
This is the LAN terminal to connect to the network. This is also used when connecting a video signal transmission device via the LAN terminal.
7 terminal
This is a USB terminal only for power supply. (DC 5 V, maximum 900 mA)
This can be used when power is to be supplied to a wireless display adapter, etc.
8 terminal
This is the RS-232C compatible terminal to externally control the projector by connecting a computer.
9 terminal
This is the terminal to input video signals.
10 terminal/ terminal/ terminal
This is the terminal to input audio. Left input and right input are provided for the terminal.
11 terminal
This is the terminal to output the input audio signal to the projector.
Attention
- When a LAN cable is directly connected to the projector, the network connection must be made indoors.
Preparing the remote control
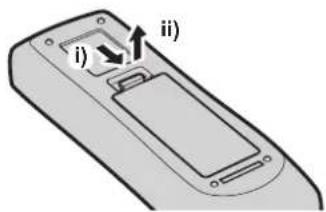
Inserting and removing the batteries
text_image
i)
ii)
Fig. 1
natural_image
Diagram of a remote control panel with two buttons and a central display (no text or symbols)
Fig. 2
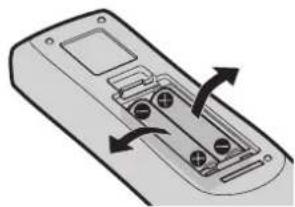
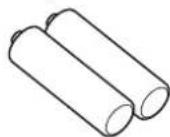
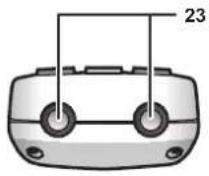
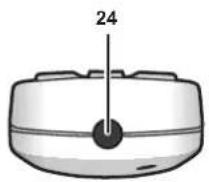
1) Open the cover. (Fig. 1)
2) Insert the batteries and close the cover (insert the ⬤ side first). (Fig. 2)
- When removing the batteries, perform the steps in reverse order.
When using the system with multiple projectors
When you use the system with multiple projectors, you can operate all the projectors simultaneously or each projector individually by using single remote control, if a unique ID number is assigned to each projector.
When you want to set the ID number, at first you need to complete the Initial setting, and then after setting the ID number of the projector, set the ID number on the remote control.
About Initial setting, please refer to "When the initial setting screen is displayed" (→ page 43).
The factory default ID number of the unit (the projector and the remote control) is set to [ALL], you can control with this setting. If necessary, please set the ID number to the remote control and the projector.
About how to set the ID number of the remote control, please refer to "Setting the ID number of the remote control" (→ page 55).
Note
- Set the ID number of the projector from the [PROJECTOR SETUP] menu → [PROJECTOR ID] (→ page 87).
Chapter 2 Getting Started
This chapter describes things you need to do before using the projector such as the setup and connections.
Setting up
Installation mode
There are four ways to set up the projector. Set the [PROJECTOR SETUP] menu → [PROJECTION METHOD] (→ page 88) depending on the installation method.
Mounting on the ceiling and projecting forward Mounting on the ceiling and projecting from rear
natural_image
Simple line drawing of a person sitting in front of a projector screen and a blank screen (no text or symbols)
(Using the translucent screen)
natural_image
Simple line drawing of a 3D box with a small human figure beside it, no text or symbols present.
Menu item Method Menu item Method
[PROJECTION METHOD] [AUTO] or [FRONT/CEILING] [PROJECTION METHOD] [REAR/CEILING]
Setting on a desk/floor and projecting forward Setting on a desk/floor and projecting from rear
natural_image
Simple line drawing of a person standing at a podium with a large screen and projection lines (no text or symbols)
(Using the translucent screen)
natural_image
Simple line drawing of a person sitting on a chair next to a transparent display case with boxes (no text or symbols)
Menu item Method Menu item Method
[PROJECTION METHOD] [AUTO] or [FRONT/DESK] [PROJECTION METHOD] [REAR/DESK]
Note
- The projector has a built-in angle sensor. When projecting in front of the screen, if set the [PROJECTOR SETUP] menu → [PROJECTION METHOD] → [AUTO], the projector's posture will be detected automatically. When projecting from rear, please set the [PROJECTION METHOD] to [REAR/DESK] or [REAR/CEILING].
■ Angle sensor
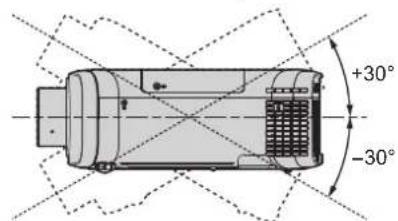
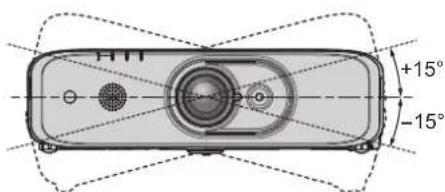
The range of installation posture detected by the projector's built-in angle sensor is as follows. In the case of [AUTO], when the projector is placed horizontally upright within ± 150^ , it will switch to [FRONT/ DESK]; when the projector is placed horizontally upside down within ± 30^ , it will switch to [FRONT/CEILING] automatically. However, the setting range for [FRONT/DESK] is horizontally upright within ± 30^ .
text_image
150°
Installation prohibited posture
30°
30°
30°
30°
[FRONT/DESK]
[FRONT/CEILING]
150°
: Projection direction
Attention
- The angle sensor cannot detect whether it is the "Installation prohibited posture" in the above picture. Please do not use the projector tilted at an angle that exceeds ± 30^ from the vertical plane. It may reduce the life of the components. (→ page 18)
Parts for ceiling mount (optional)
The projector can be installed on the ceiling by combining the optional Ceiling Mount Bracket (Model No.: ET-PKD120H (for High Ceilings), ET-PKD120S (for Low Ceilings)) and ET-PKE300B (Projector Mount Bracket).
Be sure to use the Ceiling Mount Bracket specified for this projector.
Refer to the Installation Instructions supplied with the Ceiling Mount Bracket when installing the projector with the bracket.
Attention
- To ensure projector performance and security, installation of the Ceiling Mount Bracket must be carried out by your dealer or a qualified technician.
Projected image and throw distance
Refer to the screen size and projection distances to install the projector. Image size and image position can be adjusted in accordance with the screen size and screen position.
Note
- This illustration is represented on the assumption that the size and position of the projection screen are matched to fill the screen.
(Unit: m)
L (LW/LT)† Projection distance SH Projected image height SW Projected image width H Distance from the lens center to the bottom edge of the projected image(When setting on a desk/floor, if the bottom edge of the projected image is below the lens center, the value of H is positive.) SD Projected image size
*1 LW: Minimum projection distance LT: Maximum projection distance
Attention
- Before setting up, read "Precautions for use" (→ page 17).
[SCREEN ADJUSTMENT] projection range
[VERTICAL KEYSTONE] (viewed from the side) [HORIZONTAL KEYSTONE] (viewed from above)
text_image
α
Screen
text_image
β
Screen
Vertical arc correction (viewed from the side) Horizontal arc correction (viewed from above)
text_image
L2
L2 : Projection distance
R2 : Arc radius
Screen
R2
text_image
L2
L2 : Projection distance
R2 : Arc radius
Screen
R2
text_image
Arc center
Screen
R3
L3
L3 : Projection distance
R3 : Arc radius
text_image
Arc center
Screen
R3
L3
L3 : Projection distance
R3 : Arc radius
Model No. Only [KEYSTONE] used [KEYSTONE] and [CURVED CORRECTION] used together Only [CURVED CORRECTION] used Vertical keystone correction angle α (°) Horizontal keystone correction angle β (°) Vertical keystone correction angle α (°) Horizontal keystone correction angle β (°) Min. value of R2/L2 Min. value of R3/L3 Min. value of R2/L2 Min. value of R3/L3 PT-FZ570 ±25 ±30 ±20 ±15 1.4 2.9 0.7 1.6 PT-FW530 ±35 ±35 ±35 ±35 1.0 1.0 1.0 1.0 PT-FX500 ±35 ±35 ±35 ±35 0.8 0.9 0.8 0.9
Note
When [SCREEN ADJUSTMENT] is used, the focus of the entire screen may be lost as correction increases.
Make the curved screen a circular arc shape with one part of a perfect circle removed.
Projection distance
A ± 5% error in listed projection distances may occur.
In addition, when [SCREEN ADJUSTMENT] is used, distance is corrected to become smaller than the specified screen size.
For PT-FZ570, PT-FW530
Projection screen size 16:10 aspect ratio 16:9 aspect ratio 4:3 aspect ratio Diagonal (SD) Minimum distance (LW) Maximum distance (LT) Distance from the lens center to the image's bottom edge (H) Minimum distance (LW) Maximum distance (LT) Distance from the lens center to the image's bottom edge (H) Minimum distance (LW) Maximum distance (LT) Distance from the lens center to the image's bottom edge (H) 1.02 (40") 1.03 1.94 -0.054 ~ 0.595 1.06 1.99 -0.083 ~ 0.583 1.17 2.20 -0.061 ~ 0.671 1.27 (50") 1.29 2.42 -0.067 ~ 0.740 1.33 2.49 -0.104 ~ 0.726 1.47 2.75 -0.076 ~ 0.838 1.52 (60") 1.55 2.91 -0.081 ~ 0.886 1.60 2.99 -0.124 ~ 0.869 1.76 3.30 -0.091 ~ 1.003 1.78 (70") 1.82 3.41 -0.094 ~ 1.038 1.88 3.51 -0.145 ~ 1.018 2.07 3.86 -0.107 ~ 1.175 2.03 (80") 2.09 3.89 -0.108 ~ 1.183 2.14 4.00 -0.166 ~ 1.160 2.37 4.41 -0.122 ~ 1.340 2.29 (90") 2 36 4.40 -0.121 ~ 1.335 2 42 4.52 -0.187 ~ 1.309 2 67 4.98 -0.137 ~ 1.511 2.54 (100") 2 62 4.88 -0.135 ~ 1.481 2 69 5.02 -0.207 ~ 1.452 2 97 5.53 -0.152 ~ 1.676 3.05 (120") 3 15 5.87 -0.162 ~ 1.778 3 24 6.03 -0.249 ~ 1.744 3 57 6.65 -0.183 ~ 2.013 3.81 (150") 3 94 7.34 -0.202 ~ 2.221 4 05 7.54 -0.311 ~ 2.178 4 47 8.31 -0.229 ~ 2.515 5.08 (200") 5 27 9.79 -0.269 ~ 2.962 5 42 10.07 -0.415 ~ 2.904 5 97 11.09 -0.305 ~ 3.353 6.35 (250") 6 59 12.25 -0.337 ~ 3.702 6 78 12.59 -0.519 ~ 3.630 7 47 13.87 -0.381 ~ 4.191 7.62 (300") 7 92 14.71 -0.404 ~ 4.442 8 14 15.11 -0.622 ~ 4.356 8 97 16.65 -0.457 ~ 5.029
For PT-FX500
(Unit: m)
Projection screen size 4:3 aspect ratio 16:9 aspect ratio Diagonal (SD) Minimum distance (LW) Maximum distance (LT) Distance from the lens center to the image's bottom edge (H) Minimum distance (LW) Maximum distance (LT) Distance from the lens center to the image's bottom edge (H) 1.02 (40") 1.05 1.98 0.000 ~ 0.612 1.15 2.16 -0.083 ~ 0.583 1.27 (50") 1.32 2.47 0.000 ~ 0.762 1.44 2.69 -0.104 ~ 0.726 1.52 (60") 1.58 2.96 0.000 ~ 0.912 1.73 3.23 -0.124 ~ 0.869 1.78 (70") 1.86 3.47 0.000 ~ 1.068 2.03 3.79 -0.145 ~ 1.018 2.03 (80") 2.12 3.97 0.000 ~ 1.218 2.32 4.32 -0.166 ~ 1.160 2.29 (90") 2.40 4.48 0.000 ~ 1.374 2.62 4.88 -0.187 ~ 1.309 2.54 (100") 2.67 4.97 0.000 ~ 1.524 2.91 5.42 -0.207 ~ 1.452 3.05 (120") 3.21 5.98 0.000 ~ 1.830 3.50 6.51 -0.249 ~ 1.744 3.81 (150") 4.02 7.47 0.000 ~ 2.286 4.38 8.15 -0.311 ~ 2.178 5.08 (200") 5.37 9.98 0.000 ~ 3.048 5.85 10.87 -0.415 ~ 2.904 6.35 (250") 6.72 12.48 0.000 ~ 3.810 7.32 13.60 -0.519 ~ 3.630 7.62 (300") 8.07 14.98 0.000 ~ 4.572 8.79 16.33 -0.622 ~ 4.356
To use a screen size not listed in this manual, check the screen size SD (m) and use the respective formula to calculate projection distance.
The unit of all the formulae is m. (Values obtained by the following calculation formulae contain a slight error.) When calculating a projection distance using image size designation (value in inches), multiply the value in inches by 0.0254 and substitute it into SD in the formula for calculating the projection distance.
For PT-FZ570, PT-FW530
16:10 aspect ratio 16:9 aspect ratio 4:3 aspect ratio Screen height (SH) = 0.530× SD = 0.490× SD = 0.6 × SD Screen width (SW) = 0.848× SD = 0.872× SD = 0.8× SD Minimum distance (LW) = 1.0433 × SD - 0.0326 = 1.0724 × SD - 0.0326 = 1.1811 × SD - 0.0326 Maximum distance (LT) = 1.9341 × SD - 0.0328 = 1.9878 × SD - 0.0328 = 2.1895 × SD - 0.0328
For PT-FX500
4:3 aspect ratio 16:9 aspect ratio Screen height (SH) = 0.6 × SD = 0.490× SD Screen width (SW) = 0.8× SD = 0.872× SD Minimum distance (LW) = 1.0630 × SD -0.0332 = 1.1581 × SD -0.0332 Maximum distance (LT) = 1.9706 × SD -0.0334 = 2.1469 × SD -0.0334
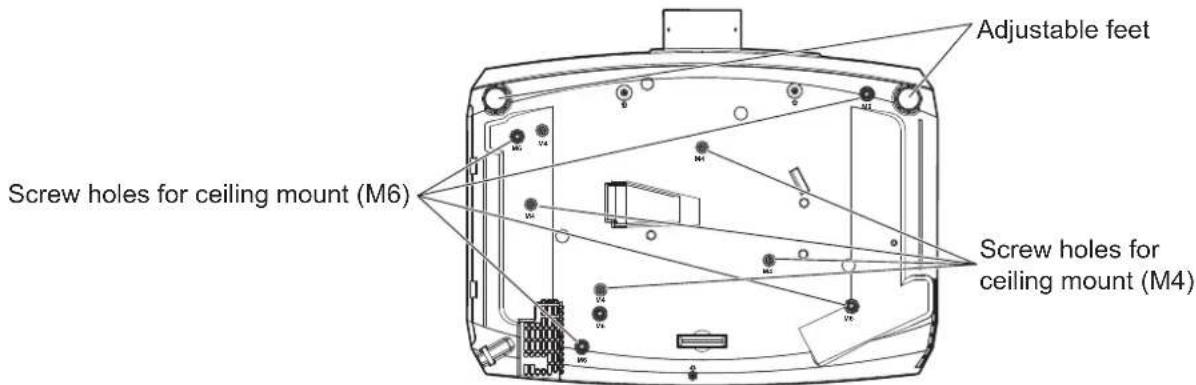
Adjusting adjustable feet
Install the projector on a flat surface so that the front of the projector is parallel to the screen surface and the projected image is rectangular.
If the screen is tilted downward, the projected image can be adjusted to be rectangular by adjusting the front adjustable feet. The adjustable feet can also be used to adjust the projector to be level when it is tilted in the horizontal direction.
Extend the adjustable feet by rotating in the direction shown in the figure and retract by rotating in the opposite direction.
natural_image
Illustration of a projector with labeled ports and control buttons (no text or symbols on the device itself)
Maximum adjustable range
Adjustable feet: 23 mm (29/32") each
Attention
- Heated air is expelled from the air exhaust port while the lamp is lit. Do not touch the air exhaust port directly when adjusting the adjustable feet. (→ page 26)
Connecting
Before connecting
Before connecting, carefully read the operating instructions for the external device to be connected.
Turn off the power of all devices before connecting cables.
Take note of the following points before connecting the cables. Failure to do so may result in malfunctions.
When connecting a cable to a device connected to the projector or the projector itself, touch any nearby metallic objects to eliminate static electricity from your body before performing work.
Do not use unnecessarily long cables to connect a device to the projector or to the projector body. The longer the cable, the more susceptible to noise it becomes. Since using a cable while it is wound makes it act like an antenna, it is more susceptible to noise.
When connecting cables, connect GND first, then insert the connecting terminal of the connecting device in a straight manner.
- Acquire any connection cable necessary to connect the external device to the system that is neither supplied with the device nor available as an option.
- If video signals from video equipment contain too much jitter, the images on the screen may wobble. In this case, a time base corrector (TBC) must be connected.
- The projector accepts video signals, Y/C signals, YC_BC_R/YP_BP_R signals, analog RGB signals (synchronization signals are TTL level), and digital signals.
- Some computer models or graphics cards are not compatible with the projector.
- Use a cable compensator when you connect devices to the projector using long cables. Otherwise the image may not display properly.
- Refer to “List of compatible signals” ( page 149) for the types of video signals that can be used with the projector.
terminal pin assignments and signal names
Outside view Pin No. Signal name Pin No. Signal name (1) R/P _R/C (9) +5 V (2) G/Y/Y (10) GND (3) B/P _B (11) GND (4) — (12) DDC data (5) GND (13) HD/SYNC (6) GND (14) VD (7) GND (15) DDC clock (8) GND
terminal pin assignments and signal names
Outside view Pin No. Signal name Pin No. Signal name (1) R/P _R (9) +5 V (2) G/Y (10) GND (3) B/P _B (11) GND (4) — (12) DDC data (5) GND (13) HD/SYNC (6) GND (14) VD (7) GND (15) DDC clock (8) GND
terminal/ terminal pin assignments and signal names
Outside view Pin No. Signal name Pin No. Signal name Even-numbered pins of (2) to (18) (1) T.M.D.S data 2+ (11) T.M.D.S clock shield (2) T.M.D.S data 2 shield (12) T.M.D.S clock - (3) T.M.D.S data 2 - (13) CEC (4) T.M.D.S data 1+ (14) — (5) T.M.D.S data 1 shield (15) SCL (6) T.M.D.S data 1 - (16) SDA (7) T.M.D.S data 0+ (17) DDC/CECGND (8) T.M.D.S data 0 shield (18) +5 V (9) T.M.D.S data 0 - (19) Hot plug detection (10) T.M.D.S clock+
Connecting example: AV equipment
flowchart
graph TD
    A["Video deck (TBC built-in)"] --> B["S-video cable"]
    B --> C["D-SUB - S Video conversion cable"]
    C --> D["Blu-ray disc player"]
    D --> E["Audio equipment"]
    E --> F["Audio in"]
    F --> G["VARIABLE AUDIO OUT"]
    G --> H["Computer 1 IN"]
    G --> I["COMPUTER 2 IN/1 OUT"]
    G --> J["OUTPUT IN"]
    G --> K["VIDEO"]
    G --> L["VIDEO"]
    style A fill:#f9f,stroke:#333
    style B fill:#ccf,stroke:#333
    style C fill:#cfc,stroke:#333
    style D fill:#fcc,stroke:#333
    style E fill:#cff,stroke:#333
    style F fill:#ffc,stroke:#333
    style G fill:#cfc,stroke:#333
    style H fill:#fcc,stroke:#333
    style I fill:#cfc,stroke:#333
    style J fill:#cfc,stroke:#333
    style K fill:#cfc,stroke:#333
    style L fill:#cfc,stroke:#333
Attention
• Always use one of the following when connecting a VCR.
- A VCR with built-in time base corrector (TBC)
- A time base corrector (TBC) between the projector and the VCR
- If nonstandard burst signals are connected, the image may be distorted. In such case, connect the time base corrector (TBC) between the projector and the external devices.
Note
For an HDMI cable, use an HDMI High Speed cable that conforms to HDMI standards. If a cable that does not conform to HDMI standards is used, images may be interrupted or may not be displayed.
The terminal/ terminal of the projector can be connected to an external device with a DVI-D terminal by using an HDMI/DVI conversion cable, but some devices may not project the image properly or function properly.
The projector does not support VIERA Link (HDMI).
If the [AUDIO IN SELECT] settings are incorrect, the projector may have malfunctions such as the absence of audio.
When Y/C signals are input to the terminal, switch the setting by using the [DISPLAY OPTION] menu → [COMPUTER IN/OUT] → [COMPUTER1 INPUT SETTING]. (→ page 77) In addition, When Y/C signals are input, please use the optional D-SUB - S Video conversion cable (Model No.:ET-ADSV).
Connecting example: Computers
flowchart
graph TD
    A["Optional wireless module (Model No.: ET-WML100)"] --> B["Control computer"]
    A --> C["Computer Computer"]
    A --> D["Computer 1 IN"]
    A --> E["COMPUTER 2 IN /1 OUT"]
    A --> F["SERIAL IN"]
    A --> G["VIDEO II"]
    A --> H["AUDIO IN"]
    A --> I["VARIABLE AUDIO OUT"]
    A --> J["LAN"]
    A --> K["Digital TBIK LAN"]
    A --> L["Control computer"]
    A --> M["Audio equipment"]
    B --> N["Wireless"]
    C --> O["AC/OUT 5V 900mA"]
    D --> P["Power Supply"]
    E --> Q["Power Supply"]
    F --> R["Power Supply"]
    G --> S["Power Supply"]
    H --> T["Power Supply"]
    I --> U["Power Supply"]
    J --> V["Power Supply"]
    K --> W["Power Supply"]
    L --> X["Power Supply"]
Attention
- When connecting the projector to a computer or an external device, use the power cord supplied with each device and commercially available shielded cables.
Note
For an HDMI cable, use an HDMI High Speed cable that conforms to HDMI standards. If a cable that does not conform to HDMI standards is used, images may be interrupted or may not be displayed.
The terminal/ terminal of the projector can be connected to an external device with a DVI-D terminal by using an HDMI/DVI conversion cable, but some devices may not project the image properly or function properly.
If you operate the projector using the computer with the resume feature (last memory), you may have to reset the resume feature to operate the projector.
If the [AUDIO IN SELECT] settings are incorrect, the projector may have malfunctions such as the absence of audio.
Connecting example using DIGITAL LINK
Twisted-pair-cable transmitters based on the communication standard HDBaseT™ such as the optional DIGITAL LINK output supported device (Model No.: ET-YFB100G, ET-YFB200G) use twisted pair cables to transmit input images, Ethernet, and serial control signals, and the projector can input those digital signals to the terminal.
flowchart
graph TD
    A["Projector connecting terminals"] --> B["Node 1: Wireless"]
    A --> C["Node 2: Computer 1 IN"]
    A --> D["Node 3: Computer 2 INT-OUT"]
    A --> E["Node 4: HDMI LINK"]
    A --> F["Node 5: Audio IN"]
    A --> G["Node 6: Audio OUT"]
    A --> H["Node 7: Audio IN"]
    A --> I["Node 8: Audio IN"]
    A --> J["Node 9: Audio IN"]
    A --> K["Node 10: Audio IN"]
    A --> L["Node 11: Audio IN"]
    A --> M["Node 12: Audio IN"]
    A --> N["Node 13: Audio IN"]
    A --> O["Node 14: Audio IN"]
    A --> P["Node 15: Audio IN"]
    A --> Q["Node 16: Audio IN"]
    A --> R["Node 17: Audio IN"]
    A --> S["Node 18: Audio IN"]
    A --> T["Node 19: Audio IN"]
    A --> U["Node 20: Audio IN"]
    A --> V["Node 21: Audio IN"]
    A --> W["Node 22: Audio IN"]
    A --> X["Node 23: Audio IN"]
    A --> Y["Node 24: Audio IN"]
    A --> Z["Node 25: Audio IN"]
    A --> AA["Node 26: Audio IN"]
    A --> AB["Node 27: Audio IN"]
    A --> AC["Node 28: Audio IN"]
    A --> AD["Node 29: Audio IN"]
    A --> AE["Node 30: Audio IN"]
    A --> AF["Node 31: Audio IN"]
    A --> AG["Node 32: Audio IN"]
    A --> AH["Node 33: Audio IN"]
    A --> AI["Node 34: Audio IN"]
    A --> AJ["Node 35: Audio IN"]
    A --> AK["Node 36: Audio IN"]
    A --> AL["Node 37: Audio IN"]
    A --> AM["Node 38: Audio IN"]
    A --> AN["Node 39: Audio IN"]
    A --> AO["Node 40: Audio IN"]
    A --> AP["Node 41: Audio IN"]
    A --> AQ["Node 42: Audio IN"]
    A --> AR["Node 43: Audio IN"]
    A --> AS["Node 44: Audio IN"]
    A --> AT["Node 45: Audio IN"]
    A --> AU["Node 46: Audio IN"]
    A --> AV["Node 47: Audio IN"]
    A --> AW["Node 48: Audio IN"]
    A --> AX["Node 49: Audio IN"]
    A --> AY["Node 50: Audio IN"]
    A --> AZ["Node 51: Audio IN"]
    A --> BA["Node 52: Audio IN"]
    A --> BB["Node 53: Audio IN"]
    A --> BC["Node 54: Audio IN"]
    A --> BD["Node 55: Audio IN"]
    A --> BE["Node 56: Audio IN"]
    A --> BF["Node 57: Audio IN"]
    A --> BG["Node 58: Audio IN"]
    A --> BH["Node 59: Audio IN"]
    A --> BI["Node 60: Audio IN"]
    A --> BJ["Node 61: Audio IN"]
    A --> BK["Node 62: Audio IN"]
    A --> BL["Node 63: Audio IN"]
    A --> BM["Node 64: Audio IN"]
    A --> BN["Node 65: Audio IN"]
    A --> BO["Node 66: Audio IN"]
    A --> BP["Node 67: Audio IN"]
    A --> BQ["Node 68: Audio IN"]
    A --> BR["Node 69: Audio IN"]
    A --> BS["Node 70: Audio IN"]
    A --> BT["Node 71: Audio IN"]
    A --> BU["Node 72: Audio IN"]
    A --> BV["Node 73: Audio IN"]
    A --> BW["Node 74: Audio IN"]
    A --> BX["Node 75: Audio IN"]
    A --> BY["Node 76: Audio IN"]
    A --> BZ["Node 77: Audio IN"]
    A --> CA["Node 78: Audio IN"]
    A --> CB["Node 79: Audio IN"]
    A --> CC["Node 80: Audio IN"]
    A --> CD["Node 81: Audio IN"]
    A --> CE["Node 82: Audio IN"]
    A --> CF["Node 83: Audio IN"]
    A --> CG["Node 84: Audio IN"]
    A --> CH["Node 85: Audio IN"]
    A --> CI["Node 86: Audio IN"]
    A --> CJ["Node 87: Audio IN"]
    A --> CK["Node 88: Audio IN"]
    A --> CL["Node 89: Audio IN"]
    A --> CM["Node 90: Audio IN"]
    A --> CN["Node 91: Audio IN"]
    A --> CO["Node 92: Audio IN"]
    A --> CP["Node 93: Audio IN"]
    A --> CQ["Node 94: Audio In"]
    A --> CR["Node 95: Audio In"]
    A --> CS["Node 96: Audio In"]
    A --> CT["Node 97: Audio In"]
    A --> CU["Node 98: Audio In"]
    A --> CV["Node 99: Audio In"]
*1 The control target will be the projector or the twisted-pair-cable transmitter. The control itself may not be possible depending on the twisted-paircable transmitter. Check the operating instructions of the device to be connected.
Attention
• Always use one of the following when connecting a VCR.
- Compatible with CAT5e or higher
Shielded type (including connectors)
Straight-through
Single wire
- When laying cables between the twisted-pair-cable transmitter and the projector, check that cable characteristics are compatible with CAT5e or higher using tools such as a cable tester or cable analyzer.
When a relay connector is used, include it in the measurement.
Do not use a hub between the twisted-pair-cable transmitter and the projector.
When connecting to the projector using a twisted-pair-cable transmitter (receiver) of other manufacturer, do not place another twisted-pair-cable transmitter between the twisted-pair-cable transmitter of other manufacturer and the projector. This may cause image and sound to be disrupted.
Do not pull cables forcefully. In addition, do not bend or fold cables unnecessarily.
To reduce the effects of noise as much as possible, stretch out the cables between the twisted-pair-cable transmitter and the projector without any loops.
Lay the cables between a twisted-pair-cable transmitter and the projector away from other cables, particularly power cables.
When laying multiple cables, run them side by side along the shortest distance possible without bundling them together.
After laying the cables, confirm that the value of [SIGNAL QUALITY] in the [NETWORK] menu → [DIGITAL LINK STATUS] is displayed in green to indicate normal quality. (→ page 101)
Note
For an HDMI cable, use an HDMI High Speed cable that conforms to HDMI standards. If a cable that does not conform to HDMI standards is used, images may be interrupted or may not be displayed.
The maximum transmission distance between the twisted-pair-cable transmitter and the projector is 100 m (328'1"). It is possible to transmit up to 150 m (492'2") if the twisted-pair-cable transmitter supports the long-reach communication method. If this distance is exceeded, image may be disrupted or a malfunction may occur in LAN communication. Please note that we do not support the use of the projector outside the maximum transmission distance. When connecting with the long reach, there may be a limitation to the video signal that can be transmitted or the distance depending on the specification of the twisted-pair-cable transmitter.
For twisted-pair-cable transmitters of other manufacturers of which the operation has been verified with the projector, refer to the Panasonic website (http://panasonic.net/avc/projector/). Note that the verification for devices of other manufacturers has been made for the items set by Panasonic Corporation, and not all the operations have been verified. For operation or performance problems caused by the devices of other manufacturers, contact the respective manufacturers.
Chapter 3 Basic Operations
This chapter describes basic operations to start with.
Switching on/off the projector
Connecting the power cord
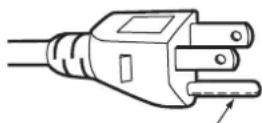
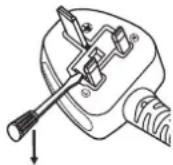
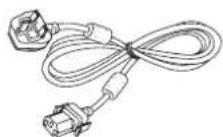
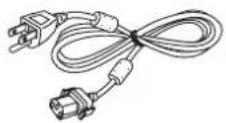
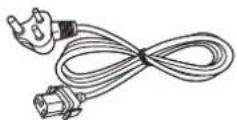
Make sure that the supplied power cord is securely fixed to the projector body to prevent it from being removed easily.
Confirm that the switch is on the side before connecting the power cord.
Use the power cord matching with the power supply voltage and the shape of the outlet.
For details of power cord handling, refer to "Read this first!" (→ page 4).
Attaching the power cord
text_image
AC IN ~
1) Check the shapes of the terminal on the rear of the projector body and the power cord connector, and insert the plug completely in the correct direction (until you hear the side tabs click in place).
Removing the power cord
1) Confirm that the switch on the rear of the projector body is on the side, and remove the power plug from the outlet. terminal of the projector body while pressing the side tabs.
Power indicator
Displays the status of the power. Check the status of the power indicator before operating the projector.
text_image
Power indicator
ON(G)/
STANDBY(R)
LAMP
TEMP
FILTER
Indicator status Projector status Off The main power is switched off. Red Lit The power is switched off (Standby mode). The [PROJECTOR SETUP] menu → [ECO MANAGEMENT] → [STANDBY MODE] is set to [ECO].Projection will start when the power button <∅/|> is pressed. • The projector may not operate when the lamp indicatoror the temperature indicatoris blinking.(⇨ page 131) Blinking*1 The power is switched off (Standby mode). The [PROJECTOR SETUP] menu → [ECO MANAGEMENT] → [STANDBY MODE] is set to [NORMAL].Projection will start when the power button <∅/|> is pressed.
Indicator status Projector status Green Lit Projecting. Blinking The power is still on while the lamp is turned off. The [PROJECTOR SETUP] menu → [ECO MANAGEMENT] → [POWER MANAGEMENT] is set to [READY]. ^12 The lamp starts work. The projector will project image after a while. ^3 Orange Lit The projector is preparing to be switched off.The power is switched off after a while. (Changes to the standby mode.)
*1 The indicator flashes in the cycle: 2.75 seconds (light) → 0.25 seconds (off).
*2 The indicator flashes in the cycle: 2.0 seconds (light) → 2.0 seconds (off).
*3 The indicator flashes in the cycle: 0.5 seconds (light) → 0.5 seconds (off).
Note
- While the power indicator is lit in orange, the fan is running to cool the projector.
- For about 90 seconds after the projector is switched off and the luminous lamp cooling is started, the luminous lamp does not light up even if the power is switched on. After the power indicator lights or blinks in red, turn on the power again.
- The projector consumes power even in standby mode (power indicator lights or blinks in red). Refer to "Power consumption" ( page 151) for the power consumption.
- The power indicator will blink if the projector receives a remote control signal.
- If the power indicator is blinking 3 times in red, consult your dealer.
Switching on the projector
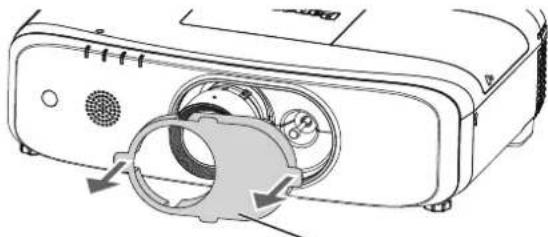
Before switching on the projector, make sure all the other devices are correctly connected (→ page 36) and remove the lens cover first.
text_image
1)
2)
3)
MAIN POWER
OFF ON
4)
MENU
INPUT SELECT
VOL-
ENTER
VOL+
AV MUTE
AUTO SETUP
Panasonic
PRODUCER
1) Connect the power cord to the projector body. side of the switch to turn on the power.
- The power indicator lights or blinks in red, and the projector enters the standby mode.
4) Press the power <|>|> button.
- The power indicator lights in green and the image is soon projected on the screen.
Attention
- Be sure to remove the lens cover before starting projection.
Note
If the [PROJECTOR SETUP] menu → [ECO MANAGEMENT] → [STANDBY MODE] is set to [ECO], it may take approx. 10 seconds longer before the projector starts projecting after the power is turned on, compared with when [NORMAL] is set.
If the [PROJECTOR SETUP] menu → [ECO MANAGEMENT] → [STANDBY MODE] is set to [NORMAL], it may take approx. 1 minute to enable the network function after connecting the power cord.
If the [PROJECTOR SETUP] menu → [INITIAL STARTUP] is set to [LAST MEMORY] and the projector was turned off by using the circuit breaker directly while projecting during the last time of use, the power indicator will light in green a while after the circuit breaker is turned on, and then projection of the image will start.
When the initial setting screen is displayed
When the projector is switched on for the first time after purchase as well as when [INITIALIZE ALL] in the [PROJECTOR SETUP] menu is executed, the [INITIAL SETTING] screen is displayed. Set them in accordance with circumstances.
In other occasions, you can change the settings by menu operations.
If you press the button or the button while the [INITIAL SETTING] screen is displayed, you can go back to the previous screen.
Note
- When the projector is used for the first time, in order to clearly display the menu screen, it is required to adjust the focus lever and the zoom lever. For details, refer to "Adjusting the image" ( page 48).
Initial setting (display language)
Select the language to show on the screen.
After the initial setting completed, you can change the display language from the [LANGUAGE] menu.
1) Press ▲▼◀▶ to select the display language.
text_image
METAL SETTING
WALYER
● ENGLISH
TOMURA
DEUTSCH
CESTINA
FRANÇAIS
PUCUMB
TAULTAND
TORRICE
ESPANDL
KARUNA
PORTUGUES
KARUNA
WEIDER LANDS
Hain thi teng Viet
EXTERNA
FOX
SUMI
ORUSK
BIJING
DANSI
TWO
POLSKI
PLEASE SELECT LANGUAGE.
SELECT ENTER
2) Press the button to proceed to the initial setting.
Initial setting (projector setting)
Set each item.
text_image
INITIAL SETTING
PROJECTION METHOD AUTO
SCREEN FORMAT 16:30
SCREEN POSITION CONTROL
STANDARD MICE NORMAL
If STANDARD MICE is set to ECO.
you cannot use network functions
when the projector is standing by.
Also, you cannot use some RS-2320
protocol commands.
SELECT RETURN
ENTER
1) Press ▲▼ to select an item.
Item Description Page [PROJECTION METHOD] Set [PROJECTION METHOD] depending on the installation mode. For details, refer to “Installation mode” (→ page 31). After the initial setting is completed, you can change the setting from the [PROJECTOR SETUP] menu → [PROJECTION METHOD]. 31, 88 [SCREEN FORMAT] Set the screen format (aspect ratio) and display position of the image. After the initial setting is completed, you can change the settings of each item from the [DISPLAY OPTION] menu → [SCREEN SETTING]. 81 [SCREEN POSITION] Set the display position of the image. After the initial setting is completed, you can change the settings of each item from the [DISPLAY OPTION] menu → [SCREEN SETTING]. 81 [STANDBY MODE] Set the operation mode during standby. The default setting is [NORMAL], you can use the network function during standby. If you want to reduce the power consumption, it can be set to [ECO]. After the initial setting is completed, you can change the setting from the [PROJECTOR SETUP] menu → [ECO MANAGEMENT] → [STANDBY MODE]. 89
2) Press ◀▶ to switch the setting. button to proceed to the initial setting.
Initial setting (time zone)
Set [TIME ZONE] according to the country or region where the projector is used.
After the initial setting completed, you can change the setting from the [PROJECTOR SETUP] menu → [DATE AND TIME]. The current settings are displayed in [LOCAL DATE] and [LOCAL TIME].
1) Press ▲▼ to switch the setting.
text_image
INITIAL SETTING
TIME ZONE
+08:00
LOCAL DATE
2005/01/01
LOCAL TIME
12:34:00
Please set up a time zone according to
the area of your country or region.
SELECT RETURN
ENTER
2) Press the button to proceed to the initial setting.
Note
- By default, the time zone of the projector is set to +09:00 (Japan and Korean Standard Time). Change the setting in the [PROJECTOR SETUP] menu → [DATE AND TIME] → [TIME ZONE] to the time zone of the region where you use the projector.
Initial setting (date and time)
Set the local date and time. After the initial setting is completed, you can change the setting from the [PROJECTOR SETUP] menu → [DATE AND TIME].
To set the date and time automatically, refer to “Setting the date and time automatically” (→ page 97).
1) Press ▲▼ to select an item.
text_image
INITIAL SETTING
YEAR 2016
MONTH 1
DAY 1
HOUR 12
MINUTE 84
SECOND 56
Please set the date and time
at the built-in clock of the projector.
SELECT RETURN
ENTER
2) Press ◀▶ to switch the setting. button.
- Confirm the setting value and complete the initial setting.
Making adjustments and selections
It is recommended that images be projected continuously for at least 30 minutes before the focus is adjusted.
1) Roughly adjust the focus of the image. (→ page 48)
- Refer to "Navigating through the menu" (→ page 57) for the operation of the menu screen.
3) Press the , , , , , ) buttons on the remote control to select the input signal. button.
Note
- When the projector is switched on for the first time after purchase as well as when [INITIALIZE ALL] in the [PROJECTOR SETUP] menu is executed, the [INITIAL SETTING] screen is displayed. Refer to "When the initial setting screen is displayed" (→ page 43).
Switching off the projector
1) Press the power <|>|> button.
- The [POWER OFF] confirmation screen is displayed.
text_image
POWER OK
POWER OK.
OK CANCEL
SELECT RETURN
ENTER
(Or press the power <∅/|> button again.)
- Projection of the image will stop, and the power indicator on the projector body lights in orange. (The fan keeps running.)
3) Wait until the power indicator lights or blinks in red.
4) Press the side of the switch to turn off the power.
Note
Do not switch on the projector and project images immediately after switching off the projector.
For about 90 seconds after the projector is switched off and the luminous lamp cooling is started, the luminous lamp will not light up even if the power is switched on. In such a case, switch on the projector again after the power indicator lights in red.
The projector consumes power even when the power <∅/|> button is pressed and the projector is switched off if the main power of the projector is on.
Direct power off function
The projector can be turned off during projection or immediately after the luminous lamp is turned off by setting the switch to . In addition, when the projector is mounted on the ceiling or installed in an environment where the switch of the projector cannot be easily turned , the power can be turned off directly using the circuit breaker. It is also safe in case a power outage occurs or the power cord is pulled out immediately after the projector is switched off.
Attention
- Do not set the switch to or turn off the power breaker switch in a short time (about 1 minute) after the lamp is lit. Doing so may cause the lamp fail to light while you powering on the projector next time, or result in premature deterioration of the lamp.
Note
If the [PROJECTOR SETUP] menu → [INITIAL STARTUP] is set to [LAST MEMORY] and the projector was turned off by using the circuit breaker directly while projecting during the last time of use, the power indicator will light in green a while after the circuit breaker is turned on, and then projection of the image will start.
If the projector is cooled with the direct power off function, it may take longer than usual to be ready for projection when the projector is switched on the next time.
Projecting
Check the external device connection ( page 36), power cord connection ( page 41), and switch on the projector ( page 42) to start projecting. Select the image for projection, and adjust appearance of the projected image.
text_image
INPUT SELECT
HDMI 1
HDMI 2
DIGITAL LINK
COMPUTER
1/2
VIDEO
NETWORK
Remote control
text_image
I
MENU
INPUT SELECT
VOL-
ENTER
VOL+
AV MUTE
AUTO SETUP
Control panel
The input for projection can be switched directly by pressing the input selection button on the remote control. , , , *1, , ) buttons.
Switches the input to HDMI1. The image of the signal being input in theterminal is projected. Switches the input to HDMI2. The image of the signal being input in theterminal is projected. Switches the input to DIGITAL LINK. The image of the signal being input in theterminal is projected. Switches the input to COMPUTER1 or COMPUTER2. If one input is already selected, it will be switched to the other input. The image of the signal being input in theterminal or theterminal is projected. Switches the input to VIDEO. The image of the signal being input in theterminal is projected. Switches the input to NETWORK.
*1 If the [DISPLAY OPTION] → [COMPUTER IN/OUT] → [COMPUTER2 SELECT] is set to [COMPUTER1 OUT], the COMPUTER2 INPUT cannot be selected.
Attention
Images may not be projected properly depending on the external device, or the Blu-ray disc or DVD disc, to be played back. Set the [PICTURE] menu → [RGB/YC_BC_R]/[RGB/YP_BP_R] . (→ page 65)
Confirm the aspect ratio of the projection screen and the image, and switch to an optimum aspect ratio from the [POSITION] menu → [ASPECT]. (→ page 73)
Note
When the optional DIGITAL LINK output supported device (Model No.: ET-YFB100G, ET-YFB200G) is connected to the terminal, the input on the DIGITAL LINK output supported device changes each time the button is pressed. The input can also be changed using the RS-232C control command.
Configure [COMPUTER1 INPUT SETTING] of the [DISPLAY OPTION] menu → [COMPUTER IN/OUT] (→ page 77) to match the signal to be input to the terminal.
If input signal to the terminal, please set [COMPUTER2 IN] of the [DISPLAY OPTION] menu → [COMPUTER IN/OUT] → [COMPUTER2 SELECT].
The input for projection can be selected by displaying the input guide with the control panel.
- The [DETAILED] input guide or the [SIMPLE] input guide is displayed. (→ page 76)
The input guide for [DETAILED]
text_image
NETWORK
1280 x 768
COMPUTER 1 IN
COMPUTER 2 IN
HOMI
VIDEO IN
COMPUTER1
1280 x 768
DIGITAL
LINK_
DIGITAL LINK
text_image
Panasonic
Ismovo / LG
SONY
EPSON
FUJITSU
NEC
HP
DELL
Apple
F2 / Samsung → F2
The input guide for [SIMPLE]
If there is no signal input ([COMPUTER1], [COMPUTER2], [HDMI1] or [HDMI2]), this screen will be displayed. Check the output settings of your computer.
Note
- The input guide for [DETAILED]/[SIMPLE], you can change the setting from the [DISPLAY OPTION] menu → [ON-SCREEN DISPLAY] → [INPUT GUIDE].
Adjusting the image
Adjust the position, size and focus of the projected image.
text_image
Lens shift lever
Fig. 1
text_image
Zoom lever
Focus lever
Fig. 2
1) Adjust the projection angle.
Install the projector on a horizontal location as the front surface of the projector is parallel to the screen surface so that the projected screen is rectangular.
If the screen is tilted downward, extend the adjustable feet and adjust the projection screen so that the projected screen is rectangular.
Refer to "Adjusting adjustable feet" (→ page 35) for details.
2) Release the lens shift lever lock by turning it counter-clockwise.
3) Adjust the lens shift. (Fig. 1)
Adjust the projection position by using the lens shift lever.
Refer to "Adjustment range by the lens position shift (optical axis shift)" (→ page 49) for details.
4) Lock the lens shift lever by turning it clockwise.
5) Adjust the zoom and focus. (Fig. 2)
Adjust the projected image size by turning the zoom lever.
Adjust the focus by turning the focus lever.
Note
- It is recommended that images be projected continuously for at least 30 minutes before the focus is adjusted.
Turning the focus lever changes the projection screen size. Make fine adjustments again to the projection screen size by turning the zoom lever.
When there is distortion, execute the [POSITION] menu → [SCREEN ADJUSTMENT].
Adjustment range by the lens position shift (optical axis shift)
Based on the standard projection position using the optical axis shift function, the projection position can be adjusted in the range shown in the following figures.
PT-FZ570 / PT-FW530 PT-FX500
text_image
Standard projection
position
0.3 H 0.3 H
Image height V
0.6 V0.6 V
Image width H
text_image
Standard projection
position
0.3 H 0.3 H
0.5V0.5 V
Image height V
Image width H
Note
- The best image can be achieved by installing the projector in front of the screen and adjusting the lens shift lever towards the center.
Operating with the remote control
text_image
Panasonic
PROYECTOR
Using the AV mute function
If the projector is not used for a certain period of time during the meeting intermission, for example, it is possible to turn off the image and the audio temporarily.
1) Press the button.
• The image and the audio disappear. button on the control panel.
2) Press the button again.
• The image and the audio reappear.
Attention
- When the [PROJECTOR SETUP] menu → [ECO MANAGEMENT] → [AV MUTE DETECTION] is set to [ON], do not switch on/off in a short time.
Using the mute function
Audio can be temporarily turned off.
1) Press the button. button again.
Adjusting the volume
The volume of the built-in speaker or audio output can be adjusted.
1) Press the button/ button.
50 - ENGLISH
Decreases the volume.
Increases the volume.
Note
- This operation can be also performed by using the button/ button on the control panel.
Using the freeze function
The projected image can be paused and the audio turned off regardless of the playback of the external device.
FREEZE 4
1) Press the button.
- The image freezes and the audio disappears.
2) Press the button again.
- Freezing of the image is canceled and the audio reappears.
Note
[FREEZE] is displayed on the screen when video is paused.
When no signal input, [KEY NOT APPLICABLE] message will appear.
Using the on-screen display function
Turn off the on-screen display function (no display) when you do not wish the viewers to see the on-screen display, such as the menu or the input terminal name.
ON SCREEN
1) Press the button. button again.
Note
- If you press the
button on the control panel for at least three seconds while the on-screen display is off (hidden), the [OSD] individual adjustment screen is displayed. Press ◀ to select [ON], then the on-screen display is turned on.
Using the automatic setup function
The automatic setup function can be used to automatically adjust the resolution, clock phase, and image position when analog RGB signals consisting of bitmap images such as computer signals are being input. Supplying images with bright white borders at the edges and high-contrast black and white characters is recommended when the system is in automatic adjustment mode. Avoid supplying images that include halftones or gradation, such as photographs and computer graphics.
AUTO SETUP
1) Press the button.
Note
The clock phase may shift even if it has completed without any incident. In such cases, adjust the [POSITION] menu → [CLOCK PHASE] (→ page 73).
Automatic adjustment may not work depending on the model of the computer and the input signal. And, it may not work properly when the input signal is a blurred-edge image or a dark image.
Images may be disrupted for a few seconds during automatic adjustment, but it is not a malfunction.
Adjustment is required for each input signal.
Automatic adjustment can be canceled by pressing the button during the automatic adjustment operation.
- If the automatic setup function is used while moving images are being input, the adjustment may not be performed properly even for an RGB signal that can use automatic setup.
The [SCREEN ADJUSTMENT] screen can be displayed.
You can correct the distortion of the projected image that occurs when the projector is installed tilted or when the screen is tilted or curved.
1) Press the button to display [KEYSTONE] individual adjustment screen.
Or press the button again to display [CORNER CORRECTION] individual adjustment screen.
Or press the button again to display [CURVED CORRECTION] individual adjustment screen.
- If you have adjusted values in any of the individual adjustment screen, the individual adjustment screen is not switched to the next screen even if you press the button.
[KEYSTONE] Adjusts when the trapezoid of the projected image is distorted. [CORNER CORRECTION] Adjusts when the four corners of the projected image are distorted. [CURVED CORRECTION] Adjusts when the linearity is not uniform or the projected image is curved distortion.
2) Press button to select an item.
- The items will switch each time you press the button.
3) Press ▲▼◀▶ to adjust the value.
Note
• One of [KEYSTONE], [CORNER CORRECTION] and [CURVED CORRECTION] setting value is valid.
Switching the aspect ratio of the image
You can switch aspect ratios according to the input signal.
1) Press the button.
- The setting will change each time you press the button.
Note
- Refer to the [POSITION] menu → [ASPECT] (→ page 73) for details.
Using the digital zoom function
(Only for still image-based RGB signals/still image-based HDMI signals/still image-based DIGITAL LINK signals input)
You can enlarge images. You can also change the location of the images to be enlarged.
1) Press the button/ button.
52 - ENGLISH
The moving screen is displayed when executing the remote control operation, and the [DIGITAL ZOOM] individual adjustment screen is not displayed.
The [DIGITAL ZOOM] individual adjustment screen is displayed when executing the menu operation. For details, refer to [DISPLAY OPTION] → [OTHER FUNCTIONS]. (→ page 85)
- The digital zoom function is canceled if the button/ is pressed for three seconds or more.
Operation menu/Buttons Operation Adjustment Press the ▲ button. Moves the image to the bottom. Press the ▼ button. Moves the image to the top. Press the ◀ button. Moves the image to the right. Press the ▶ button. Moves the image to the left. Press thebutton. Moves the image to the upper left. Press thebutton. Moves the image to the upper right. Press thebutton. Moves the image to the center. Press thebutton. Moves the image to the lower left. Press thebutton. Moves the image to the lower right. Press thebutton. Increases magnification. Press thebutton. Decreases magnification.
text_image
▲ button
ABC
◀ button
ABC
▼ button
ABC
◀ button
ABC
◀ button button
ABC
◀ ENTER> button
ABC
◀ button
ABC
◀ button
Fig. 1 Screen display position after the button operation
Note
The magnification is not displayed in the moving screen.
The digital zoom function is canceled if the input signal changes during a digital zoom.
During a digital zoom, the freeze function is disabled.
The digital zoom function may not work properly for some still image-based signals.
Using the presentation timer function
The presentation timer function can be operated.
Presentations, etc. can be performed while checking the elapsed time or time remaining in the preset time.
• The count is started.
- The count is stopped.
- The count is resumed.
Note
The presentation timer is ended by holding the button down for at least three seconds.
For details such as presentation timer function settings, refer to [DISPLAY OPTION] menu → [P-TIMER] (→ page 84).
Some operations in the menu can be assigned to the button on the remote control so that it can be used as an easy shortcut button.
1) Press the button.
To assign functions to the button
1) Press the
button on the control panel or the remote control to display the menu items (main menu, sub menu, or details menu) you want to assign.
- Refer to "Navigating through the menu" (→ page 57) for the operation of the on-screen menu.
2) Press and hold the button for three seconds or more.
Note
After settings have been completed, the assigned menu item (main menu, sub-menu, or details menu) will be displayed in [ASSIGNED FUNCTION] of the operation guide under the menu.
Assignment of the function is performed from the [PROJECTOR SETUP] menu → [FUNCTION BUTTON] (→ page 91) when deallocating functions.
Displaying internal test patterns
The projector has ten types of internal test patterns to check the condition of the projector. To display test patterns, perform the following steps.
1) Press the button.
Note
Setting is also available from the [TEST PATTERN] (→ page 93) menu.
Settings of position, size, and other factors will not be reflected in test patterns. Make sure to display the input signal before performing various adjustments.
Using the status function
You can display the status of the projector.
1) Press the button.
- The [STATUS] screen is displayed.
text_image
PI-F253B
PICTURE
POSITION
LANGUAGE
DISPLAY OPTION
PROJECTOR SETUP
SECURITY
NETWORK
STATUS
STRAW
NAME: 90.0000-3D
FREQUENCY: 74.28Hz/ 80.18Hz
RUNTING
PROJECTOR 12 H
LAMP ECO 4 H
(ET-LASF100) NORMAL 7 H
SERIAL NUMBER
PROJECTOR (DB234567)
RETURN ASSIGNED FUNCTIONA
DISABLE
Note
- This can be displayed from the [PROJECTOR SETUP] menu → [STATUS] (→ page 87).
Using the ECO management function
You can display the setting screen relating to ECO management.
Note
- Refer to the [PROJECTOR SETUP] menu → [ECO MANAGEMENT] (→ page 88) for details.
Setting the ID number of the remote control
When you use the system with multiple projectors, you can operate all the projectors simultaneously or each projector individually by using single remote control, if unique ID number is assigned to each projector.
After setting the ID number of the projector, set the same ID number to the remote control.
The factory default ID number of the projector is set to [ALL]. When using a single projector, press the button on the remote control. Also, you can control a projector by pressing the button on the remote control even if you do not know the projector ID.
1) Press the button.
If you press the button, you can control the projectors regardless of the ID number setting of the projector.
Attention
Since the ID number of the remote control can be set without the projector, do not press the button on the remote control carelessly. If the button is pressed and no number (<0> - <9>) buttons are pressed within five seconds, the ID number returns to its original value before the button was pressed.
The ID number set on the remote control will be stored unless it is set again. However, it will be erased if the remote control is left with dead batteries. Set the same ID number again when the batteries are replaced.
Note
- Set the ID number of the projector from the [PROJECTOR SETUP] menu → [PROJECTOR ID]. (→ page 87)
Chapter 4 Settings
This chapter describes the settings and the adjustments you can make using the on-screen menu.
The on-screen menu (Menu) is used to perform various settings and adjustments of the projector.
Operating procedure
1) Press the
button on the remote control or the control panel.
• The main menu screen appears.
text_image
FT-F2078
PICTURE MODE STANDARD
CONTRAIT
BRIGHTNESS
SPARNESS
COLOR TEMPERATURE DEFAULT
CANNA
JULI OFF
ADVANCED MENU
DAYLIGHT VIEW OFF
POSTATION
SELECT RETURN
CENTER
FUNCTION
ASSIGNED FUNCTION:
DISABLE
2) Press ▲▼ to select an item from the main menu.
- The selected item is highlighted in yellow.
text_image
ON SCREEN DISPLAY
COMPUTER INV/OUT
HOME IN
DIGITAL LUMP IN
CLOSED CAPTOM SETTING
SCREEN SETTING
STARTUP LOGO
DEFAULT LOGO
AUTO SETUP SETTING
AUTO
SIGNAL SEARCH
ON
STARTUP INPUT SELECT
LAST USED
BACK COLOR
BLUE
MODE MODE
AUTO
SAGA MODE
AUTO
P-TINER
SELECT RETURN
CENTER
FUNCTION
ASSISTED FUNCTION:
DISABLE
3) Press the button.
- The sub-menu items of the selected main menu are displayed.
text_image
ON SCREEN DISPLAY
COMPUTER IN OUT
HOLD IN
ROUTING LIST IN
FEATURES CAPTIN SETTING
SCREEN SETTING
STARTUP LINE
DEFAULT LOGO
RHOO SETUP SETTING
AUTO
STRAWL SEARCH
ON
STARTUP INPUT SELECT
LAST USES
BACK COLOR
BLUE
MODE MODE
AUTO
MASK MODE
AUTO
F-TIME
SELECT RETURN
CENTER
FUNCTION
ASSIGNED FUNCTION:
DISABLE
4) Press ▲▼ to select a sub-menu, and press ◀▶ or the button to change or adjust settings.
- Some items will switch in order as follows each time you press ◀.
- For some items, press ◀▶ to display an individual adjustment screen with a bar scale as shown below.
Note
Pressing the button while the menu screen is displayed to return the previous menu. You can operate in the same way by pressing the button.
Some items may not be adjusted or used for certain signal formats to be input to the projector. The menu items that cannot be adjusted or used are shown in gray characters, and they cannot be selected. [DIGITAL CINEMA REALITY] and [FRAME LOCK] may not be displayed depending on the input signal.
Some items can be adjusted even if signals are not input.
Individual adjustment screen is cleared automatically if no operation is performed for approximately five seconds.
For menu items, refer to "Main menu" (→ page 58) and "Sub menu" (→ page 58).
Resetting adjustment values to the factory default
If the button on the remote control is pressed, the values adjusted in the menu items are restored to the factory default settings.
Note
You cannot reset all the settings to the factory default at a time.
To reset all the settings adjusted in the sub-menu item to the factory default at a time, execute the [PROJECTOR SETUP] menu → [INITIALIZE ALL]. (→ page 97)
Some items cannot be reset by pressing the button. Adjust each item manually.
Main menu
The following items are in the main menu.
When a main menu item is selected, the screen changes to a sub-menu selection screen.
Main menu item Page [PICTURE] 61 [POSITION] 66 [LANGUAGE] 75 [DISPLAY OPTION] 76 [PROJECTOR SETUP] 87 [SECURITY] 98 [NETWORK] 101
The sub-menu of the selected main menu item is displayed, and you can set and adjust items in the sub-menu.
[PICTURE]
Sub-menu item Factory default Page [PICTURE MODE] [STANDARD] 61 [CONTRAST] [0] 61 [BRIGHTNESS] [0] 61 [COLOR]* ^2 [0] 62 [TINT]* ^2 [0] 62 [SHARPNESS] [+8] 62 [COLOR TEMPERATURE] [DEFAULT] 62 [GAMMA] [0] 63 [IRIS] [OFF]* ^1 63 [ADVANCED MENU] - 63 [DAYLIGHT VIEW] [AUTO]* ^1*3 64 [DIGITAL CINEMA REALITY]* ^2 [ON] 64 [NOISE REDUCTION]* ^4 [1] 64 [TV-SYSTEM]* ^4 [AUTO] 65 [RGB/YP _B P _R ]/[RGB/YC _B C _R ]* ^5 [AUTO] 65
*1 Depends on the [PICTURE MODE].
*2 Only for movie-based signals
*3 Depends on the [PROJECTION METHOD].
*4 Only when the terminal is selected
*5 Only when the terminal/ terminal/ terminal/ terminal/ terminal is selected
Note
- The factory default settings may vary depending on the picture mode.
[POSITION]
Sub-menu item Factory default Page [REALTIME KEYSTONE] [ON] 66 [SCREEN ADJUSTMENT] - 66 [SHIFT] - 72 [DOT CLOCK]^*1 [0] 72 [CLOCK PHASE]^*1 [0] 73 [OVER SCAN] - 73 [ASPECT] [NORMAL]^*2 73 [FRAME LOCK]^*1 [OFF] 74 [CLAMP POSITION] [24]^*2 74
*1 Only for still image signals
[LANGUAGE]
Details ( page 75)
[DISPLAY OPTION]
Sub-menu item Factory default Page [ON-SCREEN DISPLAY] - 76 [COMPUTER IN/OUT] - 77 [HDMI IN] - 78 [DIGITAL LINK IN] - 80 [CLOSED CAPTION SETTING] - 81 [SCREEN SETTING] - 81 [STARTUP LOGO] [DEFAULT LOGO] 82 Sub-menu item Factory default Page [AUTO SETUP SETTING] [AUTO] 83 [SIGNAL SEARCH] [ON] 83 [STARTUP INPUT SELECT] [LAST USED] 83 [BACK COLOR] [BLUE] 83 [WIDE MODE] [AUTO] 84 [SXGA MODE] [AUTO] 84 [P-TIMER] - 84 [OTHER FUNCTIONS] - 85
[PROJECTOR SETUP]
Sub-menu item Factory default Page [STATUS] - 87 [PROJECTOR ID] [ALL] 87 [INITIAL START UP] [LAST MEMORY] 87 [PROJECTION METHOD] [AUTO] 88 [LAMP POWER] [NORMAL] 88 [ECO MANAGEMENT] - 88 [RS-232C] - 90 [FUNCTION BUTTON] - 91 [AUDIO SETTING] - 91 [TEST PATTERN] - 93 [FILTER COUNTER] - 94 [SCHEDULE] [OFF] 94 [DATE AND TIME] - 96 [INITIALIZE ALL] - 97
[SECURITY]
Sub-menu item Factory Default Page [PASSWORD] [OFF] 98 [PASSWORD CHANGE] - 98 [DISPLAY SETTING] [OFF] 98 [TEXT CHANGE] - 99 [MENU LOCK] [OFF] 99 [MENU LOCK PASSWORD] - 99 [CONTROL DEVICE SETUP] - 99
[NETWORK]
Sub-menu item Factory default Page [ DIGITAL LINK MODE] [AUTO] 101 [ DIGITAL LINK STATUS] - 101 [ DIGITAL LINK MENU] - 102 [ WIRED LAN] - 102 [ PROJECTOR NAME] [Name 1234]^1 102 [ NETWORK CONTROL] - 103 [ NETWORK STATUS] - 103 [ INITIALIZE] - 104
*1 It will be different for each product.
Note
Some items may not be adjusted or used for certain signal formats to be input to the projector.
Sub-menu items and factory default settings vary depending on the selected input terminal.
On the menu screen, select [PICTURE] from the main menu, and select an item from the sub-menu. Refer to "Navigating through the menu" ( page 57) for the operation of the menu screen.
[PICTURE MODE]
You can switch to the desired picture mode suitable for the image source and the environment in which the projector is used.
1) Press ▲▼ to select [PICTURE MODE].
2) Press ◀▶ or the button.
- The [PICTURE MODE] individual adjustment screen is displayed.
3) Press ◀▶ to switch the item.
- The items will switch each time you press the button.
[STANDARD] The image becomes suitable for moving images in general. [DYNAMIC] The light output is maximized for use in bright areas. [DICOM SIM.] The image becomes similar to that of DICOM Part 14 Grayscale Standard. [BLACKBOARD] The image becomes suitable for projecting on a blackboard. [WHITE BOARD] The image becomes suitable for projecting on a white board. [CINEMA] ^1 The image becomes suitable for movie contents. [NATURAL] ^2 The image becomes suitable for using in low-light areas.
*1 Only for movie-based input signals
Note
DICOM is an abbreviation of "Digital Imaging and COmmunication in Medicine" and is a standard for medical imaging devices. Although the DICOM name is used, the projector is not a medical device, and should not be used for purposes such as diagnosis of display images.
When [PICTURE MODE] is set to [DICOM SIM.], the [DAYLIGHT VIEW] is fixed to [OFF].
When [PICTURE MODE] is set to [DICOM SIM.], the [LAMP POWER] in the [PROJECTOR SETUP] menu is fixed to [ECO].
[CONTRAST]
You can adjust the contrast of the colors.
1) Press ▲▼ to select [CONTRAST]. button.
- The [CONTRAST] individual adjustment screen is displayed.
3) Press ◀▶ to adjust the level.
Operation Adjustment Range of adjustment Press the ▶ button. Brightens the screen and makes the color of image deeper. -32 ~ +32 Press the ◀ button. Darkens the screen and makes the color of image lighter.
Attention
- Adjust [BRIGHTNESS] first when you need to adjust [BRIGHTNESS] and [CONTRAST].
[BRIGHTNESS]
You can adjust the dark (black) part of the projected image.
1) Press ▲▼ to select [BRIGHTNESS]. button.
- The [BRIGHTNESS] individual adjustment screen is displayed.
3) Press ◀▶ to adjust the level.
Operation Adjustment Range of adjustment Press the ▶ button. Increases the brightness of the dark (black) parts of the screen. -32 ~ +32 Press the ◀ button. Reduces the brightness of the dark (black) parts of the screen.
[COLOR]
(Only for movie-based signal input)
You can adjust the color saturation of the projected image.
1) Press ▲▼ to select [COLOR].
2) Press ◀▶ or the button.
- The [COLOR] individual adjustment screen is displayed.
3) Press ◀▶ to adjust the level.
Operation Adjustment Range of adjustment Press the ▶ button. Deepens colors. -32 ~ +32 Press the ◀ button. Weakens colors.
[TINT]
(Only for NTSC/NTSC4.43 signal when input movie-based signal and the terminal or the " terminal is selected)
You can adjust the skin tone in the projected image.
1) Press ▲▼ to select [TINT].
2) Press ◀▶ or the button.
- The [TINT] individual adjustment screen is displayed.
3) Press ◀▶ to adjust the level.
Operation Adjustment Range of adjustment Press the ▶ button. Adjusts skin tone toward greenish color. -32 ~ +32 Press the ◀ button. Adjusts skin tone toward reddish purple.
*1 When [COMPUTER1 INPUT SETTING] is set to [Y/C] ( → page 77)
[SHARPNESS]
You can adjust the sharpness of the projected image.
1) Press ▲▼ to select [SHARPNESS].
2) Press ◀▶ or the button.
- The [SHARPNESS] individual adjustment screen is displayed.
3) Press ◀▶ to adjust the level.
Operation Adjustment Range of adjustment Press the ▶ button. Contours become sharper. 0 ~ +15 Press the ◀ button. Contours become softer.
Note
- [SHARPNESS] will be invalid when [DAYLIGHT VIEW] is set to [AUTO]/[1]/[2]/[3].
[COLOR TEMPERATURE]
You can switch the color temperature if the white areas of the projected image are bluish or reddish.
1) Press ▲▼ to select [COLOR TEMPERATURE].
2) Press ◀▶ or the button.
- The [COLOR TEMPERATURE] individual adjustment screen is displayed.
62 - ENGLISH
3) Press ◀▶ to switch the item.
- The items will switch each time you press the button.
[DEFAULT] Factory default setting. [HIGH] Select so that images become natural. [LOW]
[GAMMA]
You can adjust contrast balance.
1) Press ▲▼ to select [GAMMA]. button.
- The [GAMMA] individual adjustment screen is displayed.
3) Press ◀▶ to adjust the level.
Operation Adjustment Range of adjustment Press the ▶ button. The midtones become brighter. -8 ~ +7 Press the ◀ button. The midtones become darker.
[IRIS]
Aperture correction is performed automatically based on the image to result in an image of optimum contrast.
1) Press ▲▼ to select [IRIS]. button.
- The [IRIS] individual adjustment screen is displayed.
3) Press ◀▶ to switch the item.
- The items will switch each time you press the button.
[OFF] No correction. [ON] Automatically corrects the aperture.
You can perform more advanced image adjustment.
1) Press ▲▼ to select [ADVANCED MENU]. button.
- The [ADVANCED MENU] screen is displayed.
3) Press ▲▼ to select one item among [CONTRAST R] \~ [BRIGHTNESS B]. button.
- The individual adjustment screen of items are displayed.
5) Press ◀▶ to adjust the value.
Items Operation Adjustment Range [CONTRAST R] Press the ▶ button. Emphasizes red in highlight areas. -32 ~ +32 Press the ◀ button. Deemphasizes red in highlight areas. [CONTRAST G] Press the ▶ button. Emphasizes green in highlight areas. -32 ~ +32 Press the ◀ button. Deemphasizes green in highlight areas. [CONTRAST B] Press the ▶ button. Emphasizes blue in highlight areas. -32 ~ +32 Press the ◀ button. Deemphasizes blue in highlight areas. [BRIGHTNESS R] Press the ▶ button. Emphasizes red in shadow areas. -32 ~ +32 Press the ◀ button. Deemphasizes red in shadow areas. [BRIGHTNESS G] Press the ▶ button. Emphasizes green in shadow areas. -32 ~ +32 Press the ◀ button. Deemphasizes green in shadow areas. [BRIGHTNESS B] Press the ▶ button. Emphasizes blue in shadow areas. -32 ~ +32 Press the ◀ button. Deemphasizes blue in shadow areas.
[DAYLIGHT VIEW]
You can correct the image to the optimal vividness even if it is projected under a bright light.
1) Press ▲▼ to select [DAYLIGHT VIEW]. button.
- The [DAYLIGHT VIEW] individual adjustment screen is displayed.
3) Press ◀▶ to switch the item.
- The items will switch each time you press the button.
[AUTO] The brightness of the installation environment is detected by the luminance sensor, and the vividness of the image is automatically corrected. [OFF] No correction. [1] Corrects the image to weaken vividness. [2] Corrects the image to medium vividness. [3] Corrects the image to high vividness.
Note
When [PROJECTION METHOD] (→ page 88) is set to [REAR/DESK] or [REAR/CEILING], [AUTO] cannot be selected.
When objects, etc. are placed on the top of the projector, the illuminance sensor enters the shadow and the [AUTO] mode may not function properly.
When [PICTURE MODE] is set to [DICOM SIM.], the factory default setting of the [DAYLIGHT VIEW] is [OFF] and the setting values in the menu screen display in gray.
When [DAYLIGHT VIEW] is set to [AUTO], [1], [2] or [3], the [SHARPNESS] cannot be adjusted.
[DIGITAL CINEMA REALITY]
You can increase the vertical resolution and enhance the image quality by performing cinema processing when the PAL (or SECAM) 576i signal, the NTSC 480i signal, and 1080/50i, 1080/60i are input.
1) Press ▲▼ to select [DIGITAL CINEMA REALITY]. button.
- The [DIGITAL CINEMA REALITY] individual adjustment screen is displayed.
3) Press ◀▶ to switch the item.
- The items will switch each time you press the button.
[ON] Performs cinema processing. [OFF] Does not perform cinema processing.
[NOISE REDUCTION]
(Only when the terminal or ^1 terminal is selected)
You can reduce noises when the input image is degraded and noise is occurring in the image signal.
1) Press ▲▼ to select [NOISE REDUCTION]. button.
- The [NOISE REDUCTION] individual adjustment screen is displayed.
3) Press ◀▶ to switch the item.
- The items will switch each time you press the button.
[OFF] No correction. [1] Slightly corrects the noise. [2] Moderately corrects the noise. [3] Strongly corrects the noise.
Attention
- When this is set for an input signal with less noise, the image may look different from what it originally was. In such a case, set it to [OFF].
[TV-SYSTEM]
(Only when the terminal or ^1 terminal is selected)
The projector will automatically detect the input signal, but you can set the color system manually when an unstable signal is input. Set the color system to match the input signal.
*1 When [COMPUTER1 INPUT SETTING] is set to [Y/C] (→ page 77)
1) Press ▲▼ to select [TV-SYSTEM].
2) Press ◀▶ or the button.
- The [TV-SYSTEM] individual adjustment screen is displayed.
3) Press ◀▶ to select the color system.
- The items will switch each time you press the button.
- Select among [AUTO], [NTSC], [NTSC4.43], [PAL], [PAL-M], [PAL-N], [PAL60] and [SECAM].
- Set it to [AUTO] normally. (Setting [AUTO] will automatically select [NTSC], [NTSC4.43], [PAL], [PAL-M], [PAL-N], [SECAM], or [PAL60].)
[RGB / YP_B P_R] / [RGB / YC_B C_R]
Set it to [AUTO] normally. If images are not displayed correctly when this is set to [AUTO], set either [RGB], [YC_BC_R] or [YP_BP_R] in accordance with the input signal.
1) Press ▲▼ to select [RGB/YP BP R ] or [RGB/YC B C R ].
2) Press ◀▶ or the button.
- The [RGB / YPBP R] or [RGB / YCBC R] individual adjustment screen is displayed.
3) Press ◀▶ to switch the item.
- The items will switch each time you press the button.
[AUTO] The sync signal automatically selects the signal [RGB]/[YP _BP_R ]/[YC _B C _R ]. [RGB] Select it for RGB signal input. [YP _B P _R ] Select it for YP _B P _R signal input. [YC _B C _R ] Select it for YC _B C _R signal input.
When the / ^*1 terminal is selected
- For 525(480)/60i, 625(576)/50i, 525(480)/60p and 625(576)/50p input
Select [AUTO], [RGB] or [YCBC R] .
- For other movie-based signal input
Select [AUTO], [RGB] or [YP_BP_R] .
*1 When [COMPUTER2 SELECT] is set to [COMPUTER2 IN].
When the // terminal is selected
- For 525(480)/60i, 625(576)/50i, 525(480)/60p and 625(576)/50p input
Select [AUTO], [RGB] or [YCBC R] .
- For other movie-based signal input
Select [AUTO], [RGB] or [YPBP R] .
Note
- Refer to "List of compatible signals" (→ page 149) for the types of video signals that can be used with the projector.
- The signal selection may not function properly depending on connected devices.
On the menu screen, select [POSITION] from the main menu, and select an item from the sub-menu. Refer to “Navigating through the menu” ( page 57) for the operation of the menu screen.
[REALTIME KEYSTONE]
The projector can correct the distortion of the projected image automatically when the projector is installed tilted.
1) Press ▲▼ to select [REALTIME KEYSTONE]. button.
- The [REALTIME KEYSTONE] individual adjustment screen is displayed.
3) Press ◀▶ to switch the item.
- The items will switch each time you press the button.
[ON] Executes the realtime keystone function automatically. [OFF] Does not execute the realtime keystone function automatically.
Note
Sometimes the realtime keystone function may not correct the image properly, the operation of the [SCREEN ADJUSTMENT] is required.
The [REALTIME KEYSTONE] function cannot work when the [FRONT/CEILING] or the [REAR/CEILING] feature is selected in [PROJECTION METHOD] in the [PROJECTOR SETUP] menu.
[SCREEN ADJUSTMENT] (For PT-FZ570)
You can correct the distortion of the projected image that occurs when the projector is installed tilted or when the screen is tilted or curved.
1) Press ▲▼ to select [SCREEN ADJUSTMENT]. button.
- The [SCREEN ADJUSTMENT] screen is displayed.
3) Press ▲▼ to select one item to adjust.
[KEYSTONE] Adjusts when the trapezoid of the projected image is distorted. [CORNER CORRECTION] Adjusts when the four corners of the projected image are distorted. [CURVED CORRECTION] Adjusts when the linearity is not uniform or the projected image is curved distortion.
Setting [KEYSTONE]
1) Press ▲▼ to select [SCREEN ADJUSTMENT]. button.
- The [SCREEN ADJUSTMENT] screen is displayed.
3) Press ▲▼ to select [KEYSTONE]. button.
- The [KEYSTONE] individual adjustment screen is displayed.
5) Press ▲▼ to select one item to adjust.
[LENS THROW RATIO] Set the throw ratio.Select an approximate value that is the actual projection distance divided by the projected image width. [KEYSTONE] Adjusts when the trapezoid of the projected image is distorted. [BALANCE] Adjusts according to the lens shift range in the horizontal or vertical direction.
Adjusting [LENS THROW RATIO]
1) Press ▲▼ to select [SCREEN ADJUSTMENT]. button.
- The [SCREEN ADJUSTMENT] screen is displayed.
3) Press ▲▼ to select [KEYSTONE]. button.
- The [KEYSTONE] screen is displayed.
5) Press ▲▼ to select [LENS THROW RATIO]. button.
- The [LENS THROW RATIO] individual adjustment screen is displayed.
7) Press ◀▶ to adjust the item.
- The adjustment values are [0.5] to [10.5].
Adjusting [KEYSTONE]
1) Press ▲▼ to select [SCREEN ADJUSTMENT]. button.
- The [SCREEN ADJUSTMENT] screen is displayed.
3) Press ▲▼ to select [KEYSTONE]. button.
- The [KEYSTONE] screen is displayed.
5) Press ▲▼ to select [KEYSTONE]. button.
- The [KEYSTONE] individual adjustment screen is displayed.
7) Press ▲▼◀▶ to adjust the item.
Items Operation Adjustment [H] Press the ◀ button. Left side will be smaller. Press the ► button. Right side will be smaller. [V] Press the ▲ button. Upper will be smaller. Press the ▼ button. Lower will be smaller.
Adjusting [BALANCE]
1) Press ▲▼ to select [SCREEN ADJUSTMENT]. button.
- The [SCREEN ADJUSTMENT] screen is displayed.
3) Press ▲▼ to select [KEYSTONE]. button.
• The [KEYSTONE] screen is displayed.
5) Press ▲▼ to select [BALANCE]. button.
- The [BALANCE] individual adjustment screen is displayed.
7) Press ▲▼◀▶ to adjust the balance.
Adjustment [VERTICAL BALANCE] [HORIZONTAL BALANCE] Adjust the setting according to the lens shift range in the vertical direction. Adjust the setting according to the lens shift range in the horizontal direction.
Setting [CORNER CORRECTION]
1) Press ▲▼ to select [SCREEN ADJUSTMENT]. button.
- The [SCREEN ADJUSTMENT] screen is displayed.
3) Press ▲▼ to select [CORNER CORRECTION]. button.
- The [CORNER CORRECTION] screen is displayed.
5) Press ▲▼ to select the item to adjust, then press the button.
- The [CORNER CORRECTION] individual adjustment screen is displayed.
6) Press ▲▼◀▶ to adjust.
[CORNER CORRECTION] [UPPER LEFT] [UPPER RIGHT] [LOWER LEFT] [LOWER RIGHT] [LINEARITY]Horizontal direction [LINEARITY]Vertical direction
Setting [CURVED CORRECTION]
1) Press ▲▼ to select [SCREEN ADJUSTMENT]. button.
- The [SCREEN ADJUSTMENT] screen is displayed.
3) Press ▲▼ to select [CURVED CORRECTION].
4) Press the button.
- The [CURVED CORRECTION] screen is displayed.
5) Press ▲▼ to select one item to adjust.
[LENS THROW RATIO] Set the throw ratio.Select an approximate value that is the actual projection distance divided by the projected image width. [KEYSTONE] Adjusts when the trapezoid of the projected image is distorted. [ARC] Adjusts when the radian of the projected image is distorted. [BALANCE] Adjusts according to the lens shift range in the horizontal or vertical direction. [MAINTAIN ASPECT RATIO] Set to [ON], maintain the aspect ratio when correct the curved distortion of the projected image.
6) Press the button.
- The individual adjustment screen of the selected function is displayed.
Adjusting [LENS THROW RATIO]
1) Press ◀▶ to adjust.
- For details, please refer to "Setting [KEYSTONE]" → "Adjusting [LENS THROW RATIO]" (→ page 67).
Adjusting [KEYSTONE]
1) Press ▲▼◀▶ to adjust.
- For details, please refer to "Setting [KEYSTONE]" → "Adjusting [KEYSTONE]" (→ page 67).
Adjusting [ARC]
1) Press ▲▼◀▶ to adjust.
Items Operation Adjustment [H] Press the ◀ button. The top and the bottom of horizontal line will be bulge. Press the ▶ button. The top and the bottom of horizontal line will be dent. [V] Press the ▲ button. The left and the right of vertical line will be dent. Press the ▼ button. The left and the right of vertical line will be bulge.
Adjusting [BALANCE]
1) Press ◀▶ to adjust.
- For details, please refer to "Setting [KEYSTONE]" → "Adjusting [BALANCE]" (→ page 67).
Note
One of [KEYSTONE], [CORNER CORRECTION] and [CURVED CORRECTION] setting value is valid. When [KEYSTONE], [CORNER CORRECTION] or [CURVED CORRECTION] adjustment is finished, you adjust the others, the adjusted value will be reset.
Press the button on the remote control when the [KEYSTONE], [CORNER CORRECTION] or [CURVED CORRECTION] screen is displaying, it will switch to the next adjustment screen.
When the [CORNER CORRECTION] individual adjustment screen is displaying, the individual adjustment screen of the next corner can also be displayed by pressing the button.
Correcting up to ± 25^ for the tilt in the vertical direction and ± 30^ for the tilt in the horizontal direction are available for adjustments with [KEYSTONE]. However, the image quality will degrade and it will get harder to focus with more correction. Install the projector so that the correction will be as small as possible.
Screen size will also change when [KEYSTONE] is used to perform various adjustments.
Aspect ratio of the image size may shift depending on the correction.
[SCREEN ADJUSTMENT] (For PT-FW530 and PT-FX500)
You can correct the distortion of the projected image that occurs when the projector is installed tilted or when the screen is tilted or curved.
1) Press ▲▼ to select [SCREEN ADJUSTMENT]. button.
- The [SCREEN ADJUSTMENT] screen is displayed.
3) Press ▲▼ to select one item to adjust.
[KEYSTONE] Adjusts when the trapezoid of the projected image is distorted. [CORNER CORRECTION] Adjusts when the four corners of the projected image are distorted. [CURVED CORRECTION] Adjusts when the linearity is not uniform or the projected image is curved distortion.
Setting [KEYSTONE]
1) Press ▲▼ to select [SCREEN ADJUSTMENT]. button.
- The [SCREEN ADJUSTMENT] screen is displayed.
3) Press ▲▼ to select [KEYSTONE]. button.
- The [KEYSTONE] individual adjustment screen is displayed.
5) Press ▲▼◀▶ to adjust the item.
Items Operation Adjustment [H] Press the ◀ button. Left side will be smaller. Press the ▶ button. Right side will be smaller. [V] Press the ▲ button. Upper will be smaller. Press the ▼ button. Lower will be smaller.
Setting [CORNER CORRECTION]
1) Press ▲▼ to select [SCREEN ADJUSTMENT]. button.
- The [SCREEN ADJUSTMENT] screen is displayed.
3) Press ▲▼ to select [CORNER CORRECTION]. button.
- The [CORNER CORRECTION] screen is displayed.
70 - ENGLISH
5) Press ▲▼ to select the item to adjust, then press the button.
6) Press ▲▼◀▶ to adjust.
[CORNER CORRECTION] [UPPER LEFT] [UPPER RIGHT] [LOWER LEFT] [LOWER RIGHT]
Setting [CURVED CORRECTION]
1) Press ▲▼ to select [SCREEN ADJUSTMENT]. button.
• The [SCREEN ADJUSTMENT] screen is displayed.
3) Press ▲▼ to select [CURVED CORRECTION].
4) Press the button.
• The [CURVED CORRECTION] screen is displayed.
5) Press ▲▼ to select one item to adjust.
[KEYSTONE] Adjusts when the trapezoid of the projected image is distorted. [ARC] Adjusts when the radian of the projected image is distorted.
6) Press the button.
• The [KEYSTONE] or the [ARC] individual adjustment screen is displayed.
Adjusting [KEYSTONE]
1) Press ▲▼◀▶ to adjust.
• For details, please refer to [KEYSTONE] in [SCREEN ADJUSTMENT] menu. (→ page 70)
Adjusting [ARC]
1) Press ▲▼◀▶ to adjust.
Items Operation Adjustment [H] Press the ◀ button. The top and the bottom of horizontal line will be bulge. Press the ▶ button. The top and the bottom of horizontal line will be dent. [V] Press the ▲ button. The left and the right of vertical line will be dent. Press the ▼ button. The left and the right of vertical line will be bulge.
Note
- One of [KEYSTONE], [CORNER CORRECTION] and [CURVED CORRECTION] setting value is valid. When [KEYSTONE], [CORNER CORRECTION] or [CURVED CORRECTION] adjustment is finished, you adjust the others, the adjusted value will be reset.
Press the button on the remote control when the [KEYSTONE], [CORNER CORRECTION] or [CURVED CORRECTION] screen is displaying, it will switch to the next adjustment screen.
When the [CORNER CORRECTION] individual adjustment screen is displaying, the individual adjustment screen of the next corner can also be displayed by pressing the button.
Correcting up to ± 35^ for the tilt in the vertical direction and ± 35^ for the tilt in the horizontal direction are available for adjustments with [KEYSTONE]. However, the image quality will degrade and it will get harder to focus with more correction. Install the projector so that the correction will be as small as possible.
Screen size will also change when [KEYSTONE] is used to perform various adjustments.
Aspect ratio of the image size may shift depending on the correction.
[SHIFT]
(Only for RGB signals and YC_B C_R / YP_B P_R signals input)
Move the image position vertically or horizontally if the image position projected on the screen is shifted even when the relative position of the projector and the screen is installed correctly.
1) Press ▲▼ to select [SHIFT].
2) Press the button.
- The [SHIFT] screen is displayed.
3) Press ▲▼◀▶ to adjust the position.
Orientation Operation Adjustment Vertical (up and down) adjustment Press the ▲ button. The image position moves up. Press the ▼ button. The image position moves down. Horizontal (right and left) adjustment Press the ▶ button. The image position moves to the right. Press the ◀ button. The image position moves to the left.
Note
- Depending on the input signal, if the adjustment of [SHIFT] exceeds the effective adjustment range of the input signal, the position of the image cannot be changed. Please adjust [SHIFT] within an effective adjustment range.
[DOT CLOCK]
(Only for RGB signals and YC_BC_R/YP_BP_R signals (except for SYNC ON GREEN) input)
Use this function to adjust and minimize the effect of interference caused by projection of patterns consisting of vertical stripes.
The projection of the striped pattern may cause cyclic patterns (noise). Adjust so that the amount of interference is at a minimum. You can adjust the dot clock of image.
1) Press ▲▼ to select [DOT CLOCK].
2) Press ◀▶ or the button.
- The [DOT CLOCK] individual adjustment screen is displayed.
3) Press ◀▶ to adjust the value.
- The adjustment values are [-32] to [+32].
72 - ENGLISH
Attention
- Set it before adjusting [CLOCK PHASE].
Note
- Depending on the input signal, if the adjustment of [DOT CLOCK] exceeds the effective adjustment range of the input signal, the position of the image cannot be changed. Please adjust [DOT CLOCK] within an effective adjustment range.
[CLOCK PHASE]
(Only for RGB signals and YC_BC_R/YP_BP_R signals input)
You can adjust to achieve an optimal image when there is a flickering image or smeared outlines.
1) Press ▲▼ to select [CLOCK PHASE].
2) Press ◀▶ or the button.
- The [CLOCK PHASE] individual adjustment screen is displayed.
3) Press ◀▶ to adjust.
- Adjustment value will change between [-16] and [+16]. Adjust so that the amount of interference is at a minimum.
Note
Certain signals may not be adjustable.
Optimal value may not be achieved if the output from the input computer is unstable.
To project a signal with dot clock frequency with 162 MHz or higher, noise may not disappear even if [CLOCK PHASE] is adjusted.
[CLOCK PHASE] cannot be adjusted when a digital signal is input.
[OVER SCAN]
(Only for movie-based RGB signals, YC_BC_R/YP_BP_R signals, movie-based HDMI signals, movie-based DIGITAL LINK signals, VIDEO signals and Y/C signals input)
Use this function when characters or pictures are cropped near the periphery of the projected image.
1) Press ▲▼ to select [OVER SCAN]. button.
- The [OVER SCAN] individual adjustment screen is displayed.
3) Press ◀▶ to adjust the level.
- The adjustment values are [0] to [+3] .
[ASPECT]
You can switch the aspect ratio of the image.
The aspect ratio is switched within the screen range selected in [SCREEN FORMAT] of [DISPLAY OPTION] menu → [SCREEN SETTING]. Set [SCREEN FORMAT] first. (→ page 81)
1) Press ▲▼ to select [ASPECT]. button.
- The [ASPECT] individual adjustment screen is displayed.
3) Press ◀▶ to switch the item.
- The items will switch each time you press the button.
[NORMAL] Displays images without changing the aspect ratio of the input signals. [AUTO]*1 The aspect ratio is automatically switched to the optimum aspect ratio when an aspect ratio identifier is included in the input signal. [WIDE] Displays images with the aspect ratio converted to 16:9 when standard signals*2 are input. Display images without changing the aspect ratio when wide-screen signals*3 are input. [H FIT] Displays images using the entire width of the screen. When signals have the aspect ratio vertically longer than the aspect ratio of the screen selected in [SCREEN FORMAT], the images are displayed with the top and the bottom parts cut off. [V FIT] Displays the height of the panel pixels vertically without changing the aspect ratio when wide-screen signals are input. When signals have the aspect ratio horizontally longer than the aspect ratio of the screen, the images are displayed with the right and the left parts cut off. [FULL] The image is projected using all the panel (screen) pixels. The input signals are converted to the aspect ratio of the panel (screen). [NATIVE] Displays images without changing the resolution of the input signals.
*1 Only for video signal (NTSC) input
Note
The image size may be switched abnormally when [AUTO] is selected, please set to [NORMAL] or [WIDE] according to the input signal.
Some size modes are not available for certain types of input signals.
If an aspect ratio which is different from the aspect ratio for the input signals is selected, the images will appear differently from the originals. Be careful of this when selecting the aspect ratio.
If using the projector in places such as cafes or hotels to display programs for a commercial purpose or for public presentation, note that adjusting the aspect ratio or using the zoom function to change the screen images may be an infringement of the rights of the original copyright owner for that program under copyright protection laws. Take care when using a function of the projector such as the aspect ratio adjustment and the zoom function.
If conventional (normal) 4:3 images which are not wide-screen images are displayed on a wide screen, the edges of the images may not be visible or they may become distorted. Such images should be viewed as with an aspect ratio of 4:3 in the original format intended by the creator of the images.
[FRAME LOCK]
(Only for still image RGB signals input)
This setting is available for specific computer signals. Set when the movie is distorted.
1) Press ▲▼ to select [FRAME LOCK]. button.
- The [FRAME LOCK] individual adjustment screen is displayed.
3) Press ◀▶ to switch the [FRAME LOCK].
- The items will switch each time you press the button.
[OFF] Disables the frame lock. [ON] Enables the frame lock.
[CLAMP POSITION]
You can adjust the optimal point when the black part of the image is blunt or it has turned green.
1) Press ▲▼ to select [CLAMP POSITION].
Status Rough guide for optimal value Range of adjustment The black part is blunt. The point where bluntness of the black part improves the most is the optimal value. 1 ~ 255 The black part is green. The point where the green part becomes black, and the bluntness has improved is the optimal value.
Note
[CLAMP POSITION] can be adjusted only when a signal is input to the terminal or the terminal.
Some signals may not be adjusted.
On the menu screen, select [LANGUAGE] from the main menu, and display the sub-menu.
Refer to "Navigating through the menu" ( page 57) for the operation of the menu screen.
Changing the display language
You can select the language of the on-screen display.
1) Press ▲▼ to select the display language and press the button.
text_image
PT-F2570
PICTURE
POSITION
LANGUAGE
DISPLAY OPTION
PROJECTOR SETUP
SECURITY
NETWORK
●ENGLISH
DEUTSCH
FRANÇAIS
ITALTANO
ESPAROL
PORTUGUES
NEBERLANDS
SVENSKA
SUWI
MORSK
DANSK
POLSKI
MAGYAR
ROMANA
SELECT RETURN
ENTER
ASSIGNED FUNCTION:
DISABLE
Various menus, settings, adjustment screens, control button names, etc., are displayed in the selected language.
The language can be changed to English, German, French, Italian, Spanish, Portuguese, Dutch, Swedish, Finnish, Norwegian, Danish, Polish, Hungarian, Romanian, Czech, Russian, Turkish, Arabic, Kazakh, Vietnamese, Chinese, Korean, Japanese and Thai.
Note
- The on-screen display language of the projector is set to English by default and when [INITIALIZE ALL] (→ page 97) in [PROJECTOR SETUP] is executed.
On the menu screen, select [DISPLAY OPTION] from the main menu, and select an item from the submenu.
Refer to "Navigating through the menu" ( page 57) for the operation of the menu screen.
[ON-SCREEN DISPLAY]
Set the on-screen display.
You can set the display method of the name of the input terminal displayed on the top right of the projection screen.
1) Press ▲▼ to select [ON-SCREEN DISPLAY]. button.
- The [ON-SCREEN DISPLAY] screen is displayed.
3) Press ▲▼ to select [INPUT GUIDE].
- The items will switch each time you press the button.
[DETAILED] Displays the name of input terminal and input signal graphically.
[OFF] Disables the input guide.
[SIMPLE] Displays the name of input terminal and input signal.
[OSD POSITION]
Set the position of the menu screen (OSD).
1) Press ▲▼ to select [ON-SCREEN DISPLAY]. button.
- The [ON-SCREEN DISPLAY] screen is displayed.
3) Press ▲▼ to select [OSD POSITION].
- The items will switch each time you press the button as following:
[CENTER] → [UPPER LEFT] → [UPPER RIGHT] → [LOWER LEFT] → [LOWER RIGHT] → [CENTER] → ...
[OSD SIZE]
(Only for PT-FZ570)
Set the size of the menu screen (OSD).
1) Press ▲▼ to select [ON-SCREEN DISPLAY]. button.
- The [ON-SCREEN DISPLAY] screen is displayed.
3) Press ▲▼ to select [OSD SIZE].
[NORMAL] Use this setting normally.
[DOUBLE] Double angle size (height and width will become two times) of [NORMAL].
[WARNING MESSAGE]
Set the display/hide of the warning message.
1) Press ▲▼ to select [ON-SCREEN DISPLAY]. button.
- The [ON-SCREEN DISPLAY] screen is displayed.
3) Press ▲▼ to select [WARNING MESSAGE].
- The items will switch each time you press the button.
[OFF] Hides the warning message.
[ON] Displays the warning message.
Note
- When [WARNING MESSAGE] is set to [OFF], the warning message will not be displayed on the projected image even if a warning status such as lamp replacement, temperature warning or air filter replacement is detected.
[COMPUTER IN/OUT]
Set to match the signal to input to the terminal and the terminal.
Switches the input for the terminal.
1) Press ▲▼ to select [COMPUTER IN/OUT]. button.
- The [COMPUTER IN/OUT] screen is displayed.
3) Press ▲▼ to select [COMPUTER1 INPUT SETTING].
- The items will switch each time you press the button.
[RGB/YP _B P _R ] Select when you want to input the RGB signal or YP _B P _R (YC _B C _R ) signal to theterminal. [Y/C] Select when you want to input a luminance signal and a color signal to theterminal by using the optional D-SUB - S Video conversion cable (Model No.:ET-ADSV).
Note
- When Y/C signals are input to the terminal, please use the optional D-SUB - S Video conversion cable (Model No.:ET-ADSV). Refer to "Connecting example: AV equipment" (▶ page 37) for connecting method.
[COMPUTER2 SELECT]
Set whether to use the terminal.
1) Press ▲▼ to select [COMPUTER IN/OUT]. button.
- The [COMPUTER IN/OUT] screen is displayed.
3) Press ▲▼ to select [COMPUTER2 SELECT].
- The items will switch each time you press the button.
[COMPUTER2 IN] Select when you want to input the RGB signal or YP_BP_R ( YC_BC_R ) signal toterminal. [COMPUTER1 OUT] Select when you want to output the RGB signal or the YP_BP_R /( YC_BC_R ) signal toterminal.
Note
- If [COMPUTER2] is selected to be input, [COMPUTER2 SELECT] cannot be selected.
Setting [COMPUTER1 EDID MODE]/[COMPUTER2 EDID MODE]
1) Press ▲▼ to select [COMPUTER IN/OUT]. button.
- The [COMPUTER IN/OUT] screen is displayed.
3) Press ▲▼ to select [COMPUTER1 EDID MODE] or [COMPUTER2 EDID MODE]. button.
- The [COMPUTER1 EDID MODE] or the [COMPUTER2 EDID MODE] screen is displayed.
5) Press ◀▶ to switch [EDID MODE].
- The items will switch each time you press the button.
[DEFAULT] Standard setting. [SCREEN FIT] Changes EDID data according to the [SCREEN FORMAT] setting. [USER] Sets the [RESOLUTION] and [VERTICAL SCAN FREQUENCY] items to EDID.
- When [DEFAULT] or [SCREEN FIT] is selected, proceed to Step 10).
6) Press the button.
- The [RESOLUTION] screen is displayed.
7) Press ▲▼ to select [RESOLUTION].
- Select [1024x768p], [1280x720p], [1280x800p], [1280x1024p], [1366x768p], [1400x1050p], [1440x900p], [1600x900p], [1600x1200p], [1680x1050p], [1920x1080p], [1920x1080i] or [1920x1200p].
8) Press the button.
- The [VERTICAL SCAN FREQUENCY] screen is displayed.
9) Press ◀▶ to select [VERTICAL SCAN FREQUENCY].
Select [60Hz], [50Hz], [30Hz], [25Hz] or [24Hz] when [1920x1080p] is selected for [RESOLUTION].
Select [60Hz], [50Hz] or [48Hz] when [1920x1080i] is selected for [RESOLUTION].
The value is fixed to [60Hz] when [1280x1024p], [1400x1050p], [1440x900p] or [1600x1200p] is selected for [RESOLUTION].
Select [60Hz] or [50Hz] when anything other than the above signals are selected for [RESOLUTION].
10) Press the button.
- The confirmation screen is displayed.
11) Press ◀▶ to select [OK], and press the button.
Note
The setting details are displayed in [RESOLUTION] and [VERTICAL SCAN FREQUENCY] below [EDID MODE].
The resolution and vertical scanning frequency settings may be required on your computer or video device.
After configuring settings, your computer or video device or the projector may be required to be restarted.
Output with resolution and vertical scanning frequency that have been set may not be performed depending on your computer or video device.
When the image is displayed incorrectly even if the format is selected in [EDID MODE], please check the settings of [WIDE MODE]
[HDMI IN]
Switch the setting when the external device is connected to the terminal or the terminal of the projector and the image is not projected correctly.
1) Press ▲▼ to select [HDMI IN]. button.
- The [HDMI IN] screen is displayed.
3) Press ▲▼ to select [SIGNAL LEVEL].
- The items will switch each time you press the button.
[AUTO] Sets the signal level automatically. [64-940] Select when the HDMI terminal of an external device (such as a blu-ray player) is connected to theterminal or theterminal. [0-1023] Select when the DVI terminal output of an external device (such as a computer) is connected to theterminal or theterminal via a conversion cable or similar cable.Select also when the HDMI terminal output of a computer or other device is connected to theterminal or theterminal.
Note
The same setting of the [SIGNAL LEVEL] is set to the terminal and terminal.
The optimal setting varies depending on the output setting of the connected external device. Refer to the operation instruction of the external device regarding the output of the external device.
The displayed signal level is assumed when the input is 30 bits.
Setting [EDID MODE]
1) Press ▲▼ to select [HDMI IN]. button.
- The [HDMI IN] screen is displayed.
3) Press ▲▼ to select [EDID MODE]. button.
- The [HDMI EDID MODE] screen is displayed.
5) Press ◀▶ to switch [EDID MODE].
- The items will switch each time you press the button.
[DEFAULT] Standard setting. [SCREEN FIT] Changes EDID data according to the [SCREEN FORMAT] setting. [USER] Sets the [RE SOLUTION] and [VERTICAL SCAN FREQUENCY] items to EDID.
- When [DEFAULT] or [SCREEN FIT] is selected, proceed to Step 10).
6) Press the button.
- The [RESOLUTION] screen is displayed.
7) Press ▲▼ to select [RESOLUTION].
- Select [1024x768p], [1280x720p], [1280x800p], [1280x1024p], [1366x768p], [1400x1050p], [1440x900p], [1600x900p], [1600x1200p], [1680x1050p], [1920x1080p], [1920x1080i] or [1920x1200p].
8) Press the button.
- The [VERTICAL SCAN FREQUENCY] screen is displayed.
9) Press ◀▶ to select [VERTICAL SCAN FREQUENCY].
Select [60Hz], [50Hz], [30Hz], [25Hz] or [24Hz] when [1920x1080p] is selected for [RESOLUTION].
Select [60Hz], [50Hz] or [48Hz] when [1920x1080i] is selected for [RESOLUTION].
The value is fixed to [60Hz] when [1280x1024p], [1400x1050p], [1440x900p] or [1600x1200p] is selected for [RESOLUTION].
Select [60Hz] or [50Hz] when anything other than the above signals are selected for [RESOLUTION].
10) Press the button.
- The confirmation screen is displayed.
11) Press ◀▶ to select [OK], and press the button.
Note
The same setting of the [EDID MODE] is set to the terminal and the terminal.
The setting details are displayed in [RESOLUTION] and [VERTICAL SCAN FREQUENCY] below [EDID MODE].
The resolution and vertical scanning frequency settings may be required on your computer or video device.
After configuring settings, your computer or video device or the projector may be required to be restarted.
Output with resolution and vertical scanning frequency that have been set may not be performed depending on your computer or video device.
[DIGITAL LINK IN]
Set the signal level when DIGITAL LINK input is selected.
1) Press ▲▼ to select [DIGITAL LINK IN].
2) Press the button.
- The [DIGITAL LINK IN] screen is displayed.
3) Press ▲▼ to select [SIGNAL LEVEL].
4) Press ◀▶ to switch the item.
- The items will switch each time you press the button.
[AUTO] Automatically sets the signal level. [64-940] Select when the HDMI terminal output of an external device (such as a Blu-ray disc player) is connected to theterminal via a twisted-pair-cable transmitter. [0-1023] Select when the DVI-D terminal output or the HDMI terminal output of an external device (such as a computer) is connected to theterminal via a twisted-pair-cable transmitter.
Note
The optimal setting varies depending on the output setting of the connected external device. Refer to the operation instruction of the external device regarding the output of the external device.
The displayed signal level is assumed when the input is 30 bits.
Setting [EDID MODE]
1) Press ▲▼ to select [DIGITAL LINK IN]. button.
- The [DIGITAL LINK IN] screen is displayed.
3) Press ▲▼ to select [EDID MODE]. button.
- The [DIGITAL LINK EDID MODE] screen is displayed.
5) Press ◀▶ to switch [EDID MODE].
- The items will switch each time you press the button.
[DEFAULT] Standard setting. [SCREEN FIT] Changes EDID data according to the [SCREEN FORMAT] setting. [USER] Sets the [RESOLUTION] and [VERTICAL SCAN FREQUENCY] items to EDID.
- When [DEFAULT] or [SCREEN FIT] is selected, proceed to Step 10).
6) Press the button.
- The [RESOLUTION] screen is displayed.
7) Press ▲▼ to select [RESOLUTION].
- Select [1024x768p], [1280x720p], [1280x800p], [1280x1024p], [1366x768p], [1400x1050p], [1440x900p], [1600x900p], [1600x1200p], [1680x1050p], [1920x1080p], [1920x1080i] or [1920x1200p].
8) Press the button.
- The [VERTICAL SCAN FREQUENCY] screen is displayed.
9) Press ◀▶ to select [VERTICAL SCAN FREQUENCY].
Select [60Hz], [50Hz], [30Hz], [25Hz] or [24Hz] when [1920x1080p] is selected for [RESOLUTION].
Select [60Hz], [50Hz] or [48Hz] when [1920x1080i] is selected for [RESOLUTION].
The value is fixed to [60Hz] when [1280x1024p], [1400x1050p], [1440x900p] or [1600x1200p] is selected for [RESOLUTION].
Select [60Hz] or [50Hz] when anything other than the above signals are selected for [RESOLUTION].
10) Press the button.
- The confirmation screen is displayed.
Note
The setting details are displayed in [RESOLUTION] and [VERTICAL SCAN FREQUENCY] below [EDID MODE].
The resolution and vertical scanning frequency settings may be required on your computer or video device.
After configuring settings, your computer or video device or the projector may be required to be restarted.
Output with resolution and vertical scanning frequency that have been set may not be performed depending on your computer or video device.
Set the closed caption.
Selecting the closed caption display
1) Press ▲▼ to select [CLOSED CAPTION SETTING]. button.
- The [CLOSED CAPTION SETTING] screen is displayed.
3) Press ▲▼ to select [CLOSED CAPTION].
- The items will switch each time you press the button.
[OFF] Closed captions are not displayed.
[ON] Closed captions are displayed.
- When [ON] is selected, proceed to Step 5).
5) When the confirmation screen is displayed, press ◀▶ to select [OK], and press the button.
Setting the closed caption mode
1) Press ▲▼ to select [CLOSED CAPTION SETTING]. button.
- The [CLOSED CAPTION SETTING] screen is displayed.
3) Press ▲▼ to select [MODE].
- When [CLOSED CAPTION] is set to [OFF], [MODE] cannot be selected.
4) Press ◀▶ to switch the item.
- The items will switch each time you press the button.
[CC1] Displays CC1 data. [CC2] Displays CC2 data. [CC3] Displays CC3 data. [CC4] Displays CC4 data.
Note
Closed caption is a function that displays text information of video signals mainly used in North America. Captions may not be displayed depending on the connected devices or contents being played back.
[CLOSED CAPTION SETTING] can only be selected if an NTSC or 480i YC B C R signal is input.
If [CLOSED CAPTION] is set to [ON], the brightness of image may be changed according to the external devices or the used content of the closed caption corresponding connection.
If a closed caption signal of the selected mode is input, the security message set in the [SECURITY] menu → [DISPLAY SETTING] (→ page 98) is not displayed.
Closed captions are not displayed when the menu screen is displayed.
[SCREEN SETTING]
Set the screen size.
Correct to the optimum image position for the set screen when changing the aspect ratio of a projected image. Set as necessary for the screen in use.
1) Press ▲▼ to select [SCREEN SETTING].
- The [SCREEN SETTING] screen is displayed.
- The items will switch each time you press the button.
■ For PT-FZ570
[SCREEN FORMAT] Description Range when [SCREEN POSITION] is selected [16:10] The projected aspect ratio is 16:10. The vertical position cannot be adjusted. [16:9] The projected aspect ratio is 16:9. Adjusts the vertical position. [4:3] The projected aspect ratio is 4:3. Adjusts the horizontal position.
■ For PT-FW530
[SCREEN FORMAT] Description Range when [SCREEN POSITION] is selected [16:10] The projected aspect ratio is 16:10. The vertical position cannot be adjusted. [16:9] The projected aspect ratio is 16:9. Adjusts the vertical position.
■ For PT-FX500
[SCREEN FORMAT] Description Range when [SCREEN POSITION] is selected [4:3] The projected aspect ratio is 4:3 The vertical position cannot be adjusted. [16:9] The projected aspect ratio is 16:9. Adjusts the vertical position.
5) Press ▲▼ to select [SCREEN POSITION].
- [SCREEN POSITION] cannot be selected or adjusted when [SCREEN FORMAT] is set to the following item.
PT-FZ570 and PT-FW530: [16:10]
PT-FX500: [4:3]
6) Press ◀▶ to adjust the [SCREEN POSITION].
- The items will switch each time you press the button.
■ When [SCREEN FORMAT] is [16:9]
[CENTER] The image which aspect ratio is 16:9 will displayed in the center. [HIGH] The image which aspect ratio is 16:9 will displayed at the top. [LOW] The image which aspect ratio is 16:9 will displayed at the bottom.
■ When [SCREEN FORMAT] is [4:3]
(Only for PT-FZ570)
[CENTER] The image which aspect ratio is 4:3 will displayed at the center. [LEFT] The image which aspect ratio is 4:3 will displayed in the left. [RIGHT] The image which aspect ratio is 4:3 will displayed at the right.
[STARTUP LOGO]
Set the logo display when the power is turned on.
1) Press ▲▼ to select [STARTUP LOGO].
2) Press ◀▶ to switch the item.
- The items will switch each time you press the button.
[DEFAULT LOGO] Displays the Panasonic logo. [USER LOGO] Displays the image registered by the user. [OFF] Disables the startup logo display.
Note
The startup logo will disappear in approximately 30 seconds.
To create/register the [USER LOGO] image, use "Logo Transfer Software" included in the supplied CD-ROM.
[AUTO SETUP SETTING]
Set the automatic execution of AUTO SETUP.
The screen display position or signal level can be adjusted automatically without pressing the button on the remote control on each occasion if you input unregistered signals frequently at meetings, etc.
1) Press ▲▼ to select [AUTO SETUP SETTING].
2) Press ◀▶ to switch the item.
- The items will switch each time you press the button.
[AUTO] Enables the auto setup function when switching signals. [BUTTON] Enables the auto setup function only when thebutton is pressed.
[SIGNAL SEARCH]
When the power is turned on, this function automatically detects the terminal which signals are input and sets the function to switch.
1) Press ▲▼ to select [SIGNAL SEARCH].
2) Press ◀▶ to switch the item.
- The items will switch each time you press the button.
[ON] Enables input detection automatically. [OFF] Disables input detection automatically.
Note
- If the [SIGNAL SEARCH] is set to [ON] when there is no signal input, press the button, this function automatically detects the terminal to which signals are input and then switches.
Set the input when the projector is switched on to start projection.
1) Press ▲▼ to select [STARTUP INPUT SELECT].
2) Press the button.
- The [STARTUP INPUT SELECT] screen is displayed.
3) Press ▲▼ to select an item.
- The items will switch each time you press the button.
[LAST USED] Keeps the input selected last. [NETWORK] Sets the input to NETWORK. [COMPUTER1] Sets the input to COMPUTER1. [COMPUTER2] Sets the input to COMPUTER2. [HDMI1] Sets the input to HDMI1. [HDMI2] Sets the input to HDMI2. [VIDEO] Sets the input to VIDEO. [DIGITAL LINK] Sets the input to DIGITAL LINK. [INPUT1] - [INPUT10]*1 Sets the input to DIGITAL LINK, and switches the input of Panasonic twisted-pair-cable transmitter to the specified input.
*1 When the optional DIGITAL LINK output supported device (Model No.: ET-YFB100G, ET-YFB200G) is connected to the projector, its input name is automatically reflected from [INPUT1] to [INPUT10]. If an item where the input name is not reflected is selected, it is disabled.
Note
- When [SIGNAL SEARCH] is set to [ON], the [STARTUP INPUT SELECT] cannot be set.
[BACK COLOR]
Set the display of the projected screen when there is no signal input.
1) Press ▲▼ to select [BACK COLOR].
2) Press ◀▶ to switch the item.
- The items will switch each time you press the button.
[BLUE] Displays the entire projection area in blue. [BLACK] Displays the entire projection area in black. [DEFAULT LOGO] Displays the Panasonic logo. [USER LOGO] Displays the image registered by the user.
Note
- To create/register the [USER LOGO] image, use "Logo Transfer Software" included in the supplied CD-ROM.
[WIDE MODE]
Using this function when the image is displayed incorrectly for the input signals.
1) Press ▲▼ to select [WIDE MODE].
2) Press ◀▶ to switch the item.
- The items will switch each time you press the button.
[AUTO] Displays by judging the signal automatically. Set to this mode normally. [ON] When input the wide signal. [OFF] When input the 4:3 signal.
[SXGA MODE]
This function is used if the whole projected image is not displayed when the resolution 1 280 x 1 024 dots of the SXGA signal is input.
1) Press ▲▼ to select [SXGA MODE].
2) Press ◀▶ to switch the item.
- The items will switch each time you press the button.
[AUTO] Displays by judging the signal automatically. Set to this mode normally. [1280x1024] Switches the item to [1280x1024] or [1400x1050] manually if the whole projected image is not displayed when SXGA signal is input. [1400x1050]
[P-TIMER]
Set and operate the presentation timer function.
Setting the mode
1) Press ▲▼ to select [P-TIMER].
2) Press the button.
- The [P-TIMER] screen is displayed.
3) Press ▲▼ to select [MODE].
4) Press ◀▶ to switch the item.
- The items will switch each time you press the button.
[COUNT UP] Displays the elapsed time since the count was started. [COUNT DOWN] Displays the remaining time of the time set by [TIMER].
Setting the countdown timer
1) Press ▲▼ to select [P-TIMER].
2) Press the button.
- The [P-TIMER] screen is displayed.
3) Press ▲▼ to select [TIMER].
84 - ENGLISH
4) Press ◀▶ to set the time.
The time can be set in 1-minute increments from 1 to 180 minutes.
The factory default value is 10 minutes.
Note
- [TIMER] is enabled when [MODE] is set to [COUNT DOWN].
Using the presentation timer
1) Press ▲▼ to select [P-TIMER]. button.
- The [P-TIMER] screen is displayed.
3) Press ▲▼ to select the item, and press the button.
[START] The count is started. [STOP] The count is stopped. [RESTART] The count is resumed. [RESET] The count is reset.
When [START] or [RESTART] is selected, the elapsed time or the remaining time is displayed at the bottom right of the projected image.
When [STOP] is selected, the elapsed time or the remaining time when the count was stopped is displayed at the bottom right of the projected image.
When [RESET] is selected, proceed to Step 4).
4) Press the
button three times, then menu screen will disappear.
- The P-TIMER function is cancelled.
Note
Presentation timer operations are also possible by the button on the remote control. (→ page 53)
The security message set in the [SECURITY] menu → [DISPLAY SETTING] (→ page 98) is not displayed when the elapsed time or remaining time is displayed.
The elapsed time or remaining time are not displayed when the menu screen is displayed.
The start time becomes "000:00" when [MODE] is set to [COUNT UP].
When [MODE] is set to [COUNT DOWN], the start time becomes the value set at [TIMER].
The time gauge turns clockwise when [COUNT UP] is set, and turns counterclockwise when [COUNT DOWN] is set.
Ending the presentation timer
1) Press ▲▼ to select [P-TIMER]. button.
- The [P-TIMER] screen is displayed.
3) Press ▲▼ to select [EXIT]. button.
[OTHER FUNCTIONS]
You can perform some of the remote control button operations by using the sub-menu.
1) Press ▲▼ to select [OTHER FUNCTIONS]. button.
- The [OTHER FUNCTIONS] screen is displayed.
3) Press ▲▼ to select the item.
[AUTO SETUP] Automatically adjust the resolution, the clock phase and the image position when analog RGB signals consisting of bitmap images such as computer signals are being input, or to automatically adjust the image position when HDMI signals are input.For details, refer to "Using the automatic setup function". (→ page 51) [FREEZE] The projected image is paused temporarily and the sound stopped regardless of the playback of the external equipment.Press thebutton on the remote control to release this function.Also press thebutton or thebutton on the remote control to release this function. [AV MUTE] Turn off audio and image when the projector is not used for a certain period of time. To release this function, press thebutton on the remote control or thebutton. [DIGITAL ZOOM] Enlarge images and move the image zoom position.For details, refer to "Using the digital zoom function". (→ page 52)
(Only for still image-based RGB signals/still image-based HDMI signals/still image-based DIGITAL LINK signals input)
1) Press ▲▼ to select [DIGITAL ZOOM]. button.
- The [DIGITAL ZOOM] individual adjustment screen is displayed.
3) Press ◀▶ to adjust the magnification.
Operation menu Operation Adjustment range Press the ▶ button. Increases magnification. 1.0 ~ 3.0 Press the ◀ button. Decreases magnification.
4) Press the button.
Note
Magnification can be set from 1.0x to 3.0x in 0.1 increments.
The digital zoom function is canceled if the button/ button is pressed for three seconds or more.
The digital zoom function is canceled if the input signal changes during a digital zoom.
During a digital zoom, the freeze function is disabled.
The digital zoom function may not work properly for some still image-based signals.
On the menu screen, select [PROJECTOR SETUP] from the main menu, and select an item from the submenu.
Refer to "Navigating through the menu" (→ page 57) for the operation of the menu screen.
[STATUS]
Display the status of the projector.
1) Press ▲▼ to select [STATUS].
2) Press the button.
- The [STATUS] screen is displayed.
[SIGNAL] [NAME] Displays the name of input signal. [FREQUENCY] Displays the scanning frequency of input signal. [RUNTIME]*1 [PROJECTOR] Displays the current usage time of projector. [LAMP (ET-LAEF100*2)] Displays the model No. of the replacement lamp unit for this projector. [ECO] Displays the lamp runtime when [LAMP POWER] is set to [ECO] by actual time. [NORMAL] Displays the lamp runtime when [LAMP POWER] is set to [NORMAL] by actual time. [SERIAL NUMBER] [PROJECTOR] Displays the serial number of the projector.
*1 The following conversion is required to calculate the rough estimate for lamp replacement.
Formula for lamp replacement time (rough estimate) A × 1 + B × 3/4A : Runtime which is displayed in [STATUS] screen → [RUNTIME] → [LAMP] → [NORMAL]B : Runtime which is displayed in [STATUS] screen → [RUNTIME] → [LAMP] → [ECO]
*2 The model No. of the optional lamp unit is subject to change without prior notice.
Note
The "RUNTIME" displayed in the [STATUS] may be different from the actual times when a lamp unit that was attached to a different projector model is installed on this projector (PT-FZ570, PT-FW530, PT-FX500), or when the lamp unit that was attached to this projector is installed on a different projector model.
The [SIGNAL] is shown in gray and the values are blank for [NETWORK] input.
[PROJECTOR ID]
The projector has an ID number setting function that can be used when multiple projectors are used side by side to enable simultaneous control or individual control via a single remote control.
1) Press ▲▼ to select [PROJECTOR ID].
2) Press ◀▶ to switch the item.
- The items will switch each time you press the button.
[ALL] Select this item to control projectors without specifying an ID number. [1] ~ [64] Select this item when specifying an ID number to control individual projector.
Note
To specify an ID number for individual control, the ID number of a remote control must match the ID number of the projector.
When the ID number is set to [ALL], the projector will operate regardless of the ID number specified during remote control or computer control.
Refer to "Setting the ID number of the remote control" (→ page 55) for how to set the ID number on the remote control.
[INITIAL START UP]
Set the method of start up when the power cord plugged into the AC outlet.
1) Press ▲▼ to select [INITIAL START UP].
- The items will switch each time you press the button.
[LAST MEMORY] Starts in the condition that before disconnected the power cord or turn off the breaker. [STANDBY] Starts up in the standby mode. [ON] Starts the projection immediately.
[PROJECTION METHOD]
Set the projection method in accordance with the installation status of the projector.
Change the projection method if the screen display is upside down or inverted.
1) Press ▲▼ to select [PROJECTION METHOD].
2) Press ◀▶ to switch the projection method.
- The items will switch each time you press the button.
[AUTO] The projector's posture can be detected automatically by the built-in angle sensor, then switch to [FRONT/DESK] or [FRONT/CEILING]. When projecting in front of the screen, please set to [AUTO]. [FRONT/DESK] When installing the projector on the desk, etc., in front of the screen. [FRONT/CEILING] When installing the projector in front of the screen with the Ceiling Mount Bracket (optional). [REAR/DESK] When installing the projector on the desk, etc., behind the screen (with a translucent screen). [REAR/CEILING] When installing the projector behind the screen (with a translucent screen) with the Ceiling Mount Bracket (optional).
Note
When set to [AUTO], front projection or rear projection cannot be detected. When projecting from rear, please set the [PROJECTION METHOD] to [REAR/DESK] or [REAR/CEILING].
As for the range of installation posture detected by the projector's built-in angle sensor, please refer to "Angle sensor". (→ page 31)
[LAMP POWER]
Switch the brightness of the lamp according to the operating environment of the projector or the purpose.
1) Press ▲▼ to select [LAMP POWER].
2) Press ◀▶ to switch the item.
- The items will switch each time you press the button.
[NORMAL] Select when high luminance is required. [ECO] Select when high luminance is not required.
Note
Set it to [ECO] rather than [NORMAL] when you want to reduce power consumption, extend the life of lamp and reduce operation noise.
The [LAMP POWER] is fixed to [ECO] when the [PICTURE] menu → [PICTURE MODE] (→ page 61) is set to [DICOM SIM.].
The [LAMP POWER] changes to [ECO] forcibly to protect the projector when the operating environment temperature becomes 35 °C (95 °F) or higher (30 °C (86 °F) or higher when used at high altitude). And, even if the [PROJECTOR SETUP] menu → [LAMP POWER] is set to [NORMAL], the [LAMP POWER] changes to [ECO] automatically.
[ECO MANAGEMENT]
This function optimizes lamp power according to the operating status to reduce power consumption.
Setting [AUTO POWER SAVE]
Set whether or not to enable the [AMBIENT LIGHT DETECTION], [SIGNAL DETECTION] and [AV MUTE DETECTION] functions.
1) Press ▲▼ to select [ECO MANAGEMENT]. button.
- The [ECO MANAGEMENT] screen is displayed.
3) Press ▲▼ to select [AUTO POWER SAVE].
4) Press ◀▶ to switch the item.
- The items will switch each time you press the button.
[ON] Enables the energy conservation setting. [OFF] Disables the energy conservation setting.
5) Press ▲▼ to select [AMBIENT LIGHT DETECTION], [SIGNAL DETECTION] or [AV MUTE DETECTION].
[AMBIENT LIGHT DETECTION] Adjusts the power of the lamp according to the brightness of the installation location. [SIGNAL DETECTION] Lowers the power of the lamp when there is no signal. [AV MUTE DETECTION] Lowers the power of the lamp when the [AV MUTE] is [ON].
6) Press ◀▶ to switch the item.
- The items will switch each time you press the button.
[ON] Enables the setting. [OFF] Disables the setting.
Note
Lamp power cannot be reduced automatically in the following cases:
When the lamp lighting is just completed or the setting of [LAMP POWER] is just completed, etc..
When [AUTO POWER SAVE] is set to [OFF], settings of [AMBIENT LIGHT DETECTION], [SIGNAL DETECTION] and [AV MUTE DETECTION] are unavailable.
When [LAMP POWER] is set to [ECO], settings of [AMBIENT LIGHT DETECTION], [SIGNAL DETECTION] and [AV MUTE DETECTION] are unavailable.
When objects, etc. are placed around the luminance sensor on the top of the projector, [AMBIENT LIGHT DETECTION] may not function properly.
Setting [POWER MANAGEMENT]
Set the operation as following if there is no signal input.
1) Press ▲▼ to select [ECO MANAGEMENT]. button.
- The [ECO MANAGEMENT] screen is displayed.
3) Press ▲▼ to select [POWER MANAGEMENT].
- The items will switch each time you press the button.
[SHUT DOWN] The countdown timer is displayed after 30 seconds without input signal. The projection lamp is turned off and cooled down when reached the set time, then the projector enter into standby status. [OFF] Power management function is off. [READY] The countdown timer is displayed after 30 seconds without input signal. The projection lamp turns off and cools down when reaching the set time, meanwhile the projector is in the power management mode. The projection lamp will be turned on if the input signal is reconnected or any button is pressed.
Setting [TIMER]
The timer can be set to 5-120 minutes. The increment is 5 minutes.
1) Press ▲▼ to select [TIMER].
- The time will switch each time you press the button.
Setting [STANDBY MODE]
Set the power consumption during standby.
1) Press ▲▼ to select [ECO MANAGEMENT]. button.
- The [ECO MANAGEMENT] screen is displayed.
3) Press ▲▼ to select [STANDBY MODE].
- The items will switch each time you press the button.
[NORMAL] Select this item to use the network function or the serial communication function during standby.
[ECO] Select this item to reduce power consumption during standby.
Note
If [STANDBY MODE] is set to [ECO], you cannot use network functions when the projector is standing by. Also, you cannot use some RS-232C protocol commands.
When set to [ECO], it may take approx. 10 seconds longer before the projector starts projecting after the power is turned on, compared with when [NORMAL] is set.
When set to [NORMAL], it may take approx. 1 minute to enable the network function after connecting the power cord.
The setting of [STANDBY MODE] cannot be returned to the factory default even if the [PROJECTOR SETUP] menu → [INITIALIZE ALL] is executed. (→ page 97)
[RS-232C]
Set the communication conditions of the terminal.
Setting the communication condition of the terminal
1) Press ▲▼ to select [RS-232C]. button.
- The [RS-232C] screen is displayed.
3) Press ▲▼ to select [INPUT SELECT].
[PROJECTOR] Use theterminal of the projector to perform RS-232C communication. [DIGITAL LINK] Performs RS-232C communication via the DIGITAL LINK output supported device (Model No.: ET-YFB100G, ET-YFB200G) and theterminal.
5) Press ▲▼ to select [BAUDRATE].
- The items will switch each time you press the button.
[9600] Select the proper speed.[19200] [38400]
7) Press ▲▼ to select [PARITY].
- The items will switch each time you press the button.
[NONE] Select the parity condition.[EVEN] [ODD]
Setting the control commands of an existing projector
When controlling the projector on a computer, set use of control commands on a previously purchased Panasonic projector. This allows the control software for an existing Panasonic projector to be inherited and used.
1) Press ▲▼ to select [RS-232C]. button.
- The [RS-232C] screen is displayed.
3) Press ▲▼ to select [EMULATE]. button.
- The [EMULATE] screen is displayed.
5) Press ▲▼ to select an item.
[DEFAULT] FZ570 series, FW530 series, FX500 series, EZ590 series, EW650 series, EW550 series, EX620 series, EX520 series, RZ570 series, VW355N series, VX425N series, VW350 series, VX420 series, VZ575N series, VW535N series, VX605N series, VZ570 series, VW530 series, VX600 series, VX60, EZ580 series, EW640 series, EX610 series, EW540 series, EX510 series, VW345N series, VX415N series, VW340Z, VX410Z, VX422, VX406EA, VX46EA, EZ770 series, EW730 series, EX800 series, RZ475 series, RZ470 series, RW430 series, RZ370 series, RW330 series [D3500] D3500 series [D4000] D4000 series [D/W5k SERIES] D5700 series, DW5100 series, D5600 series, DW5000 series, D5500 series [D/W/Z6k SERIES] DZ770 series, DW740 series, DX810 series, DZ680 series, DW640 series, DX610 series, DW730 series, DX800 series, DZ6710 series, DZ6700 series, DW6300 series, D6000 series, D5000 series, DZ570 series, DW530 series, DX500 series [L730 SERIES] L730 series, L720 series, L520 series [L780 SERIES] L780 series, L750 series [L735 SERIES] L735 series [L785 SERIES] L785 series [F/W SERIES] FW430 series, FX400 series, FW300 series, F300 series, F200 series, FW100 series, F100 series [LZ370] LZ370 series [LB/W SERIES] LB3 series, LB2 series, LB1 series, ST10 series, LB90 series, LW80NT series, LB80 series, LB78 series, LB75 series [VX500 SERIES] VW435N series, VW440 series, VW430 series, VX505N series, VX510 series, VX501U, VX405KEA, VX45KEA, VX500 series, VW330 series, VX400NT series, VX400 series, VX41 series [EZ570 SERIES] EZ570 series, EW630 series, EW530 series, EX600 series, EX500 series [VW431D] VW431D series
Note
When [INPUT SELECT] is set to [DIGITAL LINK], communication using that serial terminal is available only when the corresponding device (such as the optional DIGITAL LINK output supported device (Model No.: ET-YFB100G, ET-YFB200G)) is connected to the terminal.
When transferring logos via the optional DIGITAL LINK output supported device (Model No.: ET-YFB100G, ET-YFB200G), setting for "NO SIGNAL SLEEP" of the DIGITAL LINK output supported device should be set to "OFF" to avoid interruption of communication.
When [INPUT SELECT] is set to [DIGITAL LINK], communication speed is fixed to 9 600 bps.
The function assigned to the button of the remote control is displayed. You can also release the assigned setting.
1) Press ▲▼ to select [FUNCTION BUTTON]. button.
- The [FUNCTION BUTTON] screen is displayed.
3) Press the button. button.
Note
- You can also cancel the assigned settings by displaying the on-screen menu, selecting the menu item to be canceled (main menu, submenu, or details menu), and then pressing the button for at least 3 seconds.
[AUDIO SETTING]
You can perform more detailed setting for Audio.
Adjusting the volume
1) Press ▲▼ to select [AUDIO SETTING]. button.
- The [AUDIO SETTING] screen is displayed.
3) Press ▲▼ to select [VOLUME].
Operation Adjustment Range Press the ▶ button. Increases the volume. 0 ~ 63 Press the ◀ button. Decreases the volume.
Adjusting the left to right audio balance
1) Press ▲▼ to select [AUDIO SETTING]. button.
- The [AUDIO SETTING] screen is displayed.
3) Press ▲▼ to select [BALANCE].
Operation Adjustment Range of adjustment Press the ▶ button. Increases the volume on the right. L16 ~ R16 Press the ◀ button. Increases the volume on the left.
Setting audio output of the built-in speaker
1) Press ▲▼ to select [AUDIO SETTING]. button.
- The [AUDIO SETTING] screen is displayed.
3) Press ▲▼ to select [BUILT-IN SP].
- The items will switch each time you press the button.
[ON] Audio is output from the built-in speaker. [OFF] Audio is not output from the built-in speaker.
Note
- Audio is output from the built-in speaker even if the cable is connected to the terminal. To output audio from external audio devices connected to the terminal and not from the built-in speaker, set [BUILT-IN SP] to [OFF].
Setting the audio output during standby
1) Press ▲▼ to select [AUDIO SETTING]. button.
- The [AUDIO SETTING] screen is displayed.
3) Press ▲▼ to select [IN STANDBY MODE].
- The items will switch each time you press the button.
[OFF] Disables audio output in the standby mode. [ON] Enables audio output in the standby mode when [STANDBY MODE] is set to [NORMAL]. At this time, press thebutton/button on the remote control or the control panel to adjust the volume.
Note
When [ECO MANAGEMENT] → [STANDBY MODE] is set to [ECO] (→ page 89), even if [IN STANDBY MODE] is set to [ON], audio cannot be output during standby.
When [IN STANDBY MODE] is set to [ON] and the digital signal is input, the audio output is interrupted during the cooling period after the power is turned off, but this is not a malfunction.
92 - ENGLISH
Setting the mute
1) Press ▲▼ to select [AUDIO SETTING]. button.
- The [AUDIO SETTING] screen is displayed.
3) Press ▲▼ to select [MUTE].
- The items will switch each time you press the button.
[OFF] Audio is output. [ON] Audio is not output.
Choose the audio input terminal for each input signal.
1) Press ▲▼ to select [AUDIO SETTING]. button.
- The [AUDIO SETTING] screen is displayed.
3) Press ▲▼ to select one item of [AUDIO IN SELECT].
[COMPUTER1] Set the audio output when [COMPUTER1] input is selected. [COMPUTER2] Set the audio output when [COMPUTER2] input is selected. [VIDEO] Set the audio output when [VIDEO] input is selected. [HDMI1] Set the audio output when [HDMI1] input is selected. [HDMI2] Set the audio output when [HDMI2] input is selected. [DIGITAL LINK] Set the audio output when [DIGITAL LINK] input is selected. [NETWORK] Set the audio output when [NETWORK] input is selected.
4) Press ◀▶ to switch the item.
- The sub items will switch each time you press the button.
[COMPUTER1] Select one item among [AUDIO IN 1], [AUDIO IN 2] or [AUDIO IN 3]. [COMPUTER2] Select one item among [AUDIO IN 1], [AUDIO IN 2] or [AUDIO IN 3]. [VIDEO] Select one item among [AUDIO IN 1], [AUDIO IN 2] or [AUDIO IN 3]. [HDMI1] Select one item among [HDMI1 AUDIO IN], [AUDIO IN 1], [AUDIO IN 2] or [AUDIO IN 3]. [HDMI2] Select one item among [HDMI2 AUDIO IN], [AUDIO IN 1], [AUDIO IN 2] or [AUDIO IN 3]. [DIGITAL LINK] Select one item among [DIGITAL LINK AUDIO IN], [AUDIO IN 1], [AUDIO IN 2] or [AUDIO IN 3]. [NETWORK] Select one item among [NETWORK AUDIO IN], [AUDIO IN 1], [AUDIO IN 2] or [AUDIO IN 3].
[TEST PATTERN]
Displays the test pattern built-in to the projector.
Settings of position, size, and other factors will not be reflected in test patterns. Make sure to display the input signal before performing various adjustments.
1) Press ▲▼ to select [TEST PATTERN]. button.
- The test pattern with the [PATTERN CHANGE] individual adjustment screen is displayed.
3) Press ◀▶ to switch the test pattern.
The test pattern will switch each time you press the button.
When you press the button or the button, it will exit the test pattern and return to the sub menu of [PROJECTOR SETUP].
All white Select a test pattern so that it is easy to make various adjustments. Color bars (vertical) Color bars (horizontal) 16 gradations (vertical 1) 16 gradations (vertical 2) 16 gradations (horizontal 1) 16 gradations (horizontal 2) White cross on the black background Black cross on the white background Cross hatch
Note
The initial setting is All white. The initial screen is Cross hatch if you have assigned it to the button.
Press the button on the remote control while the test pattern is displayed to hide the menu screen.
[FILTER COUNTER]
You can check the filter usage time and set the cleaning cycle for the air filter. Also, reset the filter usage time.
1) Press ▲▼ to select [FILTER COUNTER].
2) Press the button.
- The [FILTER COUNTER] screen is displayed.
[FILTER COUNTER] Displays the using time of the filter. [TIMER] Sets the cleaning cycle (time) for the air filter. [FILTER COUNTER RESET] Resets the filter usage time.
Setting [TIMER]
Sets the cleaning cycle (time) if you want to clean the air filter periodically. When the time reaches, an alert message “FILTER COUNTER has reached the set time.” for filter cleaning is displayed on the projected screen.
1) Press ▲▼ to select [FILTER COUNTER].
2) Press the button.
- The [FILTER COUNTER] screen is displayed.
3) Press ▲▼ to select [TIMER].
4) Press ◀▶ to switch the setting of the timer.
- The items will switch each time you press the button.
[OFF] Sets when you do not want to display the set time reaching alert message. [1000 H] ~ [16000 H] Sets the timer in 1 000 hour increments from 1 000 to 16 000 hours.
Resetting [FILTER COUNTER]
1) Press ▲▼ to select [FILTER COUNTER].
2) Press the button.
- The [FILTER COUNTER] screen is displayed.
3) Press ▲▼ to select [FILTER COUNTER RESET].
4) Press the button.
- The [FILTER COUNTER RESET] screen is displayed.
5) Press ◀▶ to select [OK] and then press the button.
[SCHEDULE]
Set the command execution schedule for each day of the week.
94 - ENGLISH
Enable/Disable the schedule function
1) Press ▲▼ to select [SCHEDULE].
- The items will switch each time you press the button.
[OFF] Disables the schedule function. [ON] Enables the schedule function. Refer to “How to assign a program” (→ page 95) or “How to set a program” (→ page 95) for how to set the schedule.
Note
- When [SCHEDULE] is set to [ON], the [STANDBY MODE] setting is forcibly switched to [NORMAL], and the setting cannot be changed. Even if [SCHEDULE] is then set to [OFF] when in this state, the setting of [STANDBY MODE] remains at [NORMAL].
How to assign a program
1) Press ▲▼ to select [SCHEDULE]. button.
- The [SCHEDULE] screen is displayed.
3) Select and assign program to each day of week.
Press ▲▼ to select the day of week, and press ◀▶ to select a program number.
You can set the program from No.1 to No.7. “--” indicates that the program number has not been set.
How to set a program
Set up to 16 commands to each program.
1) Press ▲▼ to select [SCHEDULE]. button.
- The [SCHEDULE] screen is displayed.
3) Press ▲▼ to select [PROGRAM EDIT]. button. button. button.
- The projector is in the adjustment mode (where the time is blinking).
7) Press ◀▶ to select "hour" or "minute", and press ▲▼ to set a time, and then press the button. button.
- The [COMMAND] detailed screen is displayed.
10) Press ▲▼ to select a [COMMAND].
For [COMMAND] which requires detailed settings, the items of the detailed settings will switch each time you press ◀▶.
When [INPUT] is selected, press the button, and then press ▲▼ to select the input to be set.
[COMMAND] Detailed settings of [COMMAND] Description [POWER ON] — Switches on the projector. [STANDBY] — Enters standby. [AV MUTE] [OFF] Cancels the AV mute. [ON] The image and the audio disappear. [INPUT] [NETWORK] Switches the input to NETWORK. [COMPUTER1] Switches the input to COMPUTER1. [COMPUTER2] Switches the input to COMPUTER2. [HDMI1] Switches the input to HDMI1. [HDMI2] Switches the input to HDMI2. [VIDEO] Switches the input to VIDEO. [DIGITAL LINK] Switches the input to DIGITAL LINK. [INPUT1] - [INPUT10] ^1 Switches the input to DIGITAL LINK, and switch the input of the Panasonic twisted-pair-cable transmitter to the specified input. [LAMP POWER] [NORMAL] Sets the lamp brightness to high luminance. [ECO] Sets the lamp brightness to low luminance. [IN STANDBY MODE] [OFF] Audio output is stopped during standby. [ON] Audio is output during standby. [VOLUME] [0] ~ [63] Sets the volume.
*1 When the optional DIGITAL LINK output supported device (Model No.: ET-YFB100G, ET-YFB200G) is connected to the projector, its input name is automatically reflected from [INPUT1] to [INPUT10]. If an item where the input name is not reflected is selected, it is disabled.
- The command is fixed and is displayed at the left of the selected command.
Note
If you attempt to register the setting that would make the lamp turn on for a short time, an error message will be displayed on the screen. Set the time and the command again.
To delete a command that has been already set, press the button on the remote control while the screen in Step 5) is displayed, or select [DELETE] at the screen in Step 6) and press the button.
If multiple commands have been set for the same time, they are executed in chronological order starting from the smallest command number.
The operating time will be the local time. (→ page 96)
If an operation is executed with the remote control or the control panel of the projector or with a control command before the command set in [SCHEDULE] is executed, the command set with the schedule function may not be executed.
[DATE AND TIME]
Set the time zone, date, and time of the built-in clock of the projector.
Setting the time zone
1) Press ▲▼ to select [DATE AND TIME]. button.
Setting the date and time manually
1) Press ▲▼ to select [DATE AND TIME]. button. button. button.
- The setting of the date and time will be completed.
Setting the date and time automatically
1) Press ▲▼ to select [DATE AND TIME]. button.
- The [DATE AND TIME] screen is displayed.
3) Press ▲▼ to select [ADJUST CLOCK]. button.
- The [ADJUST CLOCK] screen is displayed.
5) Press ▲▼ to select [NTP SYNCHRONIZATION], and press ◀▶ to change the setting to [ON]. button.
- The setting of the date and time will be completed.
Note
To set the date and the time automatically, the projector must be connected to the network.
If synchronization with the NTP server fails just after [NTP SYNCHRONIZATION] is turned [ON], [NTP SYNCHRONIZATION] will return to [OFF]. Also if [NTP SYNCHRONIZATION] is turned [ON] while the NTP server is not set, [NTP SYNCHRONIZATION] will return to [OFF].
Access the projector via a web browser to set the NTP server. Refer to “[Adjust clock] page” (→ page 124) for details.
The [TIME ZONE] setting is reset to the factory default when [INITIALIZE ALL] is executed from the [PROJECTOR SETUP] menu (→ page 97). However, the date and the time based on the local date and the time setting (Coordinated Universal Time, UTC, Universal Time, Coordinated) will be maintained without being initialized.
[INITIALIZE ALL]
Return various setting values to their factory default settings.
1) Press ▲▼ to select [INITIALIZE ALL]. button.
- The [INITIALIZE ALL] screen is displayed.
3) When the confirmation screen is displayed, press ◀▶ to select [OK] and then press the button. button.
- The operation of other buttons is disabled.
- The initial setting (display language) screen will be displayed when the projector is switched on the next time.
Note
The projector will enter the standby status to reflect the setting values when [INITIALIZE ALL] is executed.
When [INITIALIZE ALL] is executed, [STANDBY MODE], [EMULATE], [FILTER COUNTER] and the setting values of [NETWORK] cannot be returned to the factory default values.
For details about the initialization of [NETWORK], please refer to [NETWORK] → [INITIALIZE]. (→ page 104)
On the menu screen, select [SECURITY] from the main menu, and select an item from the sub-menu. Refer to “Navigating through the menu” (→ page 57) for the operation of the menu screen.
- When the projector is used for the first time
Initial password: Press ▲▶▼◀▲▶▼◀ in order, and press the button.
Attention
When you select the [SECURITY] menu and press the button, entering a password is required. Enter the preset password and then continue operations of the [SECURITY] menu.
When the password has been changed previously, enter the changed password, and press the button.
Note
The entered password is displayed with * marks on the screen.
An error message is displayed on the screen when the entered password is incorrect. Re-enter the correct password.
[PASSWORD]
The [PASSWORD] screen is displayed when turning the switch to and turning on the power. When the entered password is incorrect, the operation will be restricted to the power <↓/|> button on the control panel and on the remote control.
1) Press ▲▼ to select [PASSWORD].
- The items will switch each time you press the button.
[OFF] Disables the security password entry.
[ON] Enables the security password entry.
Note
The [PASSWORD] setting is set to [OFF] by the factory default or when [INITIALIZE ALL] in [PROJECTOR SETUP] menu (→ page 97) is executed.
Change the password periodically that is hard to guess.
The security password is enabled after setting [PASSWORD] to [ON] and turning the switch to .
[PASSWORD CHANGE]
Change the security password.
1) Press ▲▼ to select [PASSWORD CHANGE]. button.
- The [PASSWORD CHANGE] screen is displayed.
3) Press ▲▼◀▶ and the number (<0> - <9>) buttons to set the password.
- Up to eight button operations can be set.
4) Press the button. button.
Note
The entered password is displayed with * marks on the screen.
An error message is displayed on the screen when the entered password is incorrect. Re-enter the correct password.
If numbers have been used for the security password, the security password will need to be initialized again if the remote control is lost. Consult your dealer for the initialization method.
[DISPLAY SETTING]
Overlap the security message (text or image) over the projecting image.
1) Press ▲▼ to select [DISPLAY SETTING].
- The items will switch each time you press the button.
[OFF] Hides the security message. [TEXT] Displays the text set in the [SECURITY] menu → [TEXT CHANGE]. [USER LOGO] Displays the image registered by the user.
Note
- To create/register the [USER LOGO] image, use "Logo Transfer Software" included in the supplied CD-ROM.
[TEXT CHANGE]
Edit the text to be displayed when [TEXT] is selected in [DISPLAY SETTING].
1) Press ▲▼ to select [TEXT CHANGE]. button.
- The [TEXT CHANGE] screen is displayed.
3) Press ▲▼◀▶ to select the text, and press the button to enter the text. button.
- The text is changed.
Display the menu by the
button and set whether or not to enable menu operations.
1) Press ▲▼ to select [MENU LOCK].
- The items will switch each time you press the button.
[OFF] Unlocks menu operations.
[ON] Locks menu operations.
Note
When the entered password is incorrect after setting [MENU LOCK] to [ON], the button cannot be operated.
[MENU LOCK] is set to [OFF] at the time of purchase or when [INITIALIZE ALL] is executed.
When [MENU LOCK] is set to [ON], after entering the password to release the lock, the unlock state is held until the projector enters the standby mode.
The menu lock password can be changed.
1) Press ▲▼ to select [MENU LOCK PASSWORD]. button.
- The [MENU LOCK PASSWORD] screen is displayed.
3) Press ▲▼◀▶ to select the text, and press the button to enter the text.
- Up to 16 characters can be input.
4) Press ▲▼◀▶ to select [OK], and press the button.
- To cancel, select [CANCEL].
Attention
The initial password is "AAAA" at the time of purchase or when [INITIALIZE ALL] is executed.
Change the password periodically that is hard to guess.
[CONTROL DEVICE SETUP]
Enable/disable the button operations on the control panel and the remote control.
1) Press ▲▼ to select [CONTROL DEVICE SETUP].
- The [CONTROL DEVICE SETUP] screen is displayed.
3) Press ▲▼ to select [CONTROL PANEL] or [REMOTE CONTROLLER].
[CONTROL PANEL] You can set the limitation on the control from the control panel. [REMOTE CONTROLLER] You can set the limitation on the control from the remote control.
4) Press ◀▶ to switch between [ENABLE] and [DISABLE].
- You can set the limitation on the control by the control panel or the remote control.
[ENABLE] Enable the button operations. [DISABLE] Disable the button operations.
- A confirmation screen will be displayed when you change [ENABLE] to [DISABLE], then proceed to Step 5).
Note
When a button operation is performed on the device set to [DISABLE], the [PASSWORD] screen is displayed. To continue operations, enter the security password.
The [PASSWORD] screen will disappear when there is no operation for approx. 10 seconds.
If the operations of both [CONTROL PANEL] and [REMOTE CONTROLLER] are set to [DISABLE], the projector cannot be turned off (cannot enter standby).
Even when you set button operations on the remote control to be disabled, operations of the and buttons on the remote control are enabled.
On the menu screen, select [NETWORK] from the main menu, and select an item from the sub-menu. Refer to "Navigating through the menu" (→ page 57) for the operation of the menu screen.
Note
- The on-screen menu (menu screen) of the projector has not the network setting about the wireless LAN. When the wireless module (Model No.: ET-WML100) of the optional accessories is inserted to the projector, please set the wireless LAN by accessing the projector via a computer. For detailed, please refer to "Web control function" → "[Network config] page" → "Wireless LAN" (→ page 119).
[DIGITAL LINK MODE]
Switch the communication method of the terminal of the projector.
1) Press ▲▼ to select [DIGITAL LINK MODE].
2) Press ◀▶ to switch the item.
- The items will switch each time you press the button.
[AUTO] Switches the communication method automatically to DIGITAL LINK, long reach or Ethernet. [DIGITAL LINK] Fixes the communication method to DIGITAL LINK. [LONG REACH] Fixes the communication method to long reach. [ETHERNET] Fixes the communication method to Ethernet.
Possible communication modes
√: Communication possible
—: Communication not possible
Setting Communication possible Image transmission (100 m (328'1")) Image transmission (150 m (492'2")) Ethernet RS-232C [AUTO] For DIGITAL LINK √ — √ √ For long reach — √√√ For Ethernet — — √ — [DIGITAL LINK] √ — √ √ [LONG REACH] — √√√ [ETHERNET] — — √ —
Note
The maximum transmission distance when connected with the long-reach communication method is 150 m (492'2"). However, the signal that the projector can receive is only up to 1080/60p (1 920 x 1 080 dots, dot clock frequency:148.5 MHz).
When the communication method of the twist-pair-cable transmitter is set to long reach, it will connect with long-reach communication method when [DIGITAL LINK MODE] is set to [AUTO]. To connect with the optional DIGITAL LINK Switcher (Model No.: ET-YFB200G) with the long-reach communication method, set [DIGITAL LINK MODE] to [LONG REACH].
It will not connect correctly if the twist-pair-cable transmitter is not supporting the long-reach communication method even if [DIGITAL LINK MODE] is set to [LONG REACH].
[DIGITAL LINK STATUS]
Display DIGITAL LINK connection environment.
1) Press ▲▼ to select [DIGITAL LINK STATUS].
2) Press the button.
- The [DIGITAL LINK STATUS] screen is displayed.
[LINK STATUS] Either [NO LINK], [DIGITAL LINK], [LONG REACH] or [ETHERNET] is displayed. [HDCP STATUS] Either [NO SIGNAL], [OFF], or [ON] is displayed. [SIGNAL QUALITY] [SIGNAL QUALITY] is a numerical value of the amount of error, and the display color changes to green, yellow, or red depending on that value.Check the signal quality level while receiving a signal from the twisted-pair-cable transmitter.MAX/MIN: Maximum/minimum value of the amount of error.Green ( -12 dB or lower) Normal signal quality level.Yellow ( -11 to -8 dB) Warning level where there is the possibility of noise introduced on the screen.Red ( -7 dB or higher) Abnormal level where synchronization may be interrupted or a signal may not be received.
When the optional DIGITAL LINK output supported device (Model No.: ET-YFB100G, ET-YFB200G) is connected to the terminal, the main menu of DIGITAL LINK output supported device is displayed. Refer to the Operating Instructions of the DIGITAL LINK output supported device for details.
Note
- When [NETWORK] menu → [NETWORK CONTROL] → [EXTRON XTP] is set to [ON], [DIGITAL LINK MENU] cannot be selected.
[WIRED LAN]
You can make detailed wired LAN settings.
1) Press ▲▼ to select [WIRED LAN].
2) Press the button.
- The [WIRED DETAILED SETUP] screen is displayed.
3) Press ▲▼ to select an item, and change the setting according to the instructions.
[DHCP] [ON] If a DHCP server exists in the network to which the projector is connected, the IP address will automatically be acquired. [OFF] If a DHCP server does not exist in the network to which the projector is connected, additionally set [IP ADDRESS], [SUBNET MASK] and [DEFAULT GATEWAY]. [IP ADDRESS] Enter the IP address if DHCP server is not used. [SUBNET MASK] Enter the subnet mask if DHCP server is not used. [DEFAULT GATEWAY] Enter the gateway address if DHCP server is not used. [DNS1] Enter the preferred DNS server address if DHCP server is not used. [DNS2] Enter the alternate DNS server address if DHCP server is not used.
4) Press ▲▼ to select [OK], and press the button.
■ Default settings of [WIRED LAN]
- The following settings are set before the projector leaves the factory.
[DHCP] OFF [IP ADDRESS] 192.168.10.100 [SUBNET MASK] 255.255.255.0 [DEFAULT GATEWAY] 192.168.10.1 [DNS1]/[DNS2] NONE
Note
Before using the DHCP server, make sure the DHCP server is already functioning.
Consult your network administrator regarding the IP ADDRESS, SUBNET MASK and DEFAULT GATEWAY.
The settings of network are same for both the terminal and the terminal.
[PROJECTOR NAME]
Change the name as desired in such a case as the projector needs to be identified on application software.
1) Press ▲▼ to select [PROJECTOR NAME].
- The [PROJECTOR NAME] screen is displayed.
Up to eight characters can be input.
Select [ALL DELETE] to delete all the entered characters, or press the button on the remote control to delete a character on the cursor in the entry field.
- To cancel the change of the name, press ▲▼◀▶ to select [CANCEL] and press the button.
Note
- [Name □□□□] ( □□□□ is 4-digit number) is set before the projector leaves the factory.
[NETWORK CONTROL]
Set up the control method of the network.
1) Press ▲▼ to select [NETWORK CONTROL].
- The [NETWORK CONTROL] screen is displayed.
3) Press ▲▼ to select an item, and press ◀▶ to change the setting.
[WEB CONTROL] Set to [ON] to control with the web browser. [PJLink CONTROL] Set to [ON] to control with the PJLink protocol. [COMMAND CONTROL] Set to [ON] to control with theterminal control command format (⇨ page 145). Refer to “Control commands via LAN” (⇨ page 142). [COMMAND PORT] Set the port number used for command control. [Crestron Connected(TM)] Set to [ON] to control with Crestron ConnectedTM of Crestron Electronics, Inc. [AMX D.D.] Set to [ON] to control with the controller of AMX Corporation.Setting this function to [ON] enables detection through “AMX Device Discovery”. For details, refer to the website of AMX Corporation.URL http://www.amx.com/ [EXTRON XTP] Set to [ON] when connecting the “XTP transmitter” of Extron Electronics to theterminal.The [EXTRON XTP] setting must be set to [OFF] when connecting the optional DIGITAL LINK output supported device (Model No.: ET-YFB100G, ET-YFB200G).For details of the “XTP transmitter”, refer to the website of Extron Electronics.URL http://www.extron.com/
- The current network control settings is saved.
[NETWROK STATUS]
Display the status of the projector network.
1) Press ▲▼ to select [NETWORK STATUS].
The [NETWORK STATUS] screen is displayed.
The display screen (1/2 [WIRED LAN] → 2/2 [WIRELESS LAN]/[Presenter Light]) will change each time you press ▲▼.
[WIRED LAN] [DHCP] Displays the usage state of the DHCP server. [IP ADDRESS] Displays the IP address. [SUBNET MASK] Displays the subnet mask. [DEFAULT GATEWAY] Displays the default gateway. [DNS1] Displays the address of the preferred DNS server. [DNS2] Displays the address of the alternate DNS server. [MAC ADDRESS] Displays the MAC address. [WIRELESS LAN] [SSID] ^1 Displays the character string of SSID. [IP ADDRESS] ^1 Displays the IP address. [Presenter Light] [LOGIN PASSWORD] Displays the login password for Presenter Light/VueMagic used.
*1 The [SSID]/[IP ADDRESS] of [WIRELESS LAN] will be displayed when the wireless module (Model No.: ET-WML100) of the optional accessories is inserted.
Note
The settings of network are same for both the terminal and the terminal.
The on-screen menu (menu screen) of the projector has not the network setting about the wireless LAN. When the wireless module (Model No.: ET-WML100) of the optional accessories is inserted to the projector, please set the wireless LAN by accessing the projector via a computer. For details, please refer to "Web control function" → "[Network config] page" → "Wireless LAN" (→ page 119).
[INITIALIZE]
This function is used to return various setting values of [NETWORK] to the factory default value.
1) Press ▲▼ to select [INITIALIZE]. button.
- The [INITIALIZE] screen is displayed.
3) Press ◀▶ to select [OK] and then press the button.
Chapter 5 Operation of Function
This chapter describes the operation methods of some functions.
Network connections
This projector has network function that allows the following by connecting a computer. The wireless module (Model No.: ET-WML100) of the optional accessories is required if the wireless LAN is connected.
- WEB control
By accessing the projector from a computer, you can perform setting, adjustment, status display, etc. of the projector. Refer to "Web control function" ( page 113) for details.
- Multi Monitoring & Control Software
This software allows you to monitor and control multiple displays (projector or flat panel display) connected to the LAN. For details, please refer to the operating instructions for "Multi Monitoring & Control Software" included in the supplied CD-ROM.
- Early Warning Software
The projector supports "Early Warning Software", which monitors the status of the display (projector or flat panel display) and the peripheral devices inside an intranet, and notifies of abnormality of such equipment and detects signs of possible abnormality. For details, please visit the Panasonic website (http://panasonic.net/avc/projector/pass/).
- Presenter Light
By using still image transfer application software "Presenter Light" that supports Windows computers, you can transfer images and audio to the projector via the wired LAN/wireless LAN. For details, please refer to the operating instructions for "Presenter Light" included in the supplied CD-ROM.
- VueMagic
By using still image transfer application software "VueMagic", you can transfer images to the projector when iPad/iPhone/iPod touch or Android terminals are connected to this projector through the wireless LAN. Refer to "About VueMagic" ( page 112) for details.
- PJLink
By using PJLink protocol, you can send inquiries about the operations or status of the projector from a computer. Refer to "PJLink protocol" (→ page 141) for details.
When connecting via wired LAN
The projector is equipped with a normal terminal and a terminal that can receive Ethernet signals from a twisted-pair-cable transmitter together with video and audio signals via a LAN cable.
When you do not need to connect a twisted-pair-cable transmitter, connect to the terminal or the terminal.
When you need to connect a twisted-pair-cable transmitter that does not support Ethernet signals, connect to the terminal.
When you need to receive Ethernet signals from a twisted-pair-cable transmitter, connect to the terminal.
Example of a normal network connection
text_image
Computer
LAN cable (straight)
LAN cable (straight)
Hub
Projector
Attention
- When a LAN cable is directly connected to the projector, the network connection must be made indoors.
Note
- A LAN cable is required to use the wired LAN function.
When a LAN cable is used to transmit and receive Ethernet signal, please connect it to the terminal or the terminal of the projector.
Use a LAN cable that is straight cable or cross cable and compatible with CAT5 or higher. When you need to know whether to use one or both straight/cross cable depending on the configuration of the system, please confirm with your network administrator. For this projector, it will identify the type of cable (straight/cross) automatically.
Use a LAN cable with length of 100 m (328'1") or shorter.
Example of network connections via a twisted-pair-cable transmitter
flowchart
graph TD
    A["Computer"] -->|USB| B["Hub"]
    B --> C["Projector"]
    C -->|LAN cable (straight)LAN cable (straight)LAN ca| D["Twisted-pair-cable transmitter (with LAN terminal)"]
    D -->|USB| B
Attention
- When a LAN cable is directly connected to the projector, the network connection must be made indoors.
Note
For the LAN cable between a twisted-pair-cable transmitter and the projector, use a cable that meets the following criteria:
Compatible with CAT5e or higher
Shielded type (including connectors)
Straight-through
Single wire
The maximum transmission distance between the twisted-pair-cable transmitter and the projector is 100 m (328'1"). It is possible to transmit up to 150 m (492'2") if the twisted-pair-cable transmitter supports the long-reach communication method. However, the signal that the projector can receive is only up to 1080/60p (1 920 x 1 080 dots, dot clock frequency: 148.5 MHz) when connected with the long-reach communication method. If this distance is exceeded, image may be disrupted or a malfunction may occur in LAN communication.
When laying cables between a twisted-pair-cable transmitter and the projector, check that cable characteristics are compatible with CAT5e or higher using tools such as a cable tester or cable analyzer.
Do not use a hub between a twisted-pair-cable transmitter and the projector.
Do not pull cables forcefully. Also, do not bend or fold cables unnecessarily.
To reduce the effects of noise as much as possible, stretch out the cables between the twisted-pair-cable transmitter and the projector without any loops.
Lay the cables between a twisted-pair-cable transmitter and the projector away from other cables, particularly power cables.
When installing multiple cables, run them side by side along the shortest distance possible without bundling them together.
After laying the cables, confirm that the value of [SIGNAL QUALITY] in the [NETWORK] menu → [DIGITAL LINK STATUS] is displayed in green (indicates normal quality). (→ page 101)
For twisted-pair-cable transmitter of other manufacturers of which the operation has been verified with the DIGITAL LINK compatible projector, refer to Panasonic website (http://panasonic.net/avc/projector/). Note that the verification for devices of other manufacturers has been made for the items set by Panasonic Corporation, and not all the operations have been verified. For operation or performance problems caused by the devices of other manufacturers, contact the respective manufacturers.
Projector settings
1) Use the LAN cable (Straight) to connect the projector with computer.
button to display the [NETWORK] menu, and then select [WIRED LAN], and press the button. Note
Please confirm with your network administrator before you connect to an existing network.
The following settings are set before the projector leaves the factory.
[DHCP] OFF [IP ADDRESS] 192.168. 10.100 [SUBNET MASK] 255.255. 5.255.0 [DEFAULT GATEWAY] 192. 168.10.1 [DNS1]/[DNS2] NONE
Computer setting
1) Turn on the computer.
- If the projector settings are the default settings, the computer can be used with the following network settings.
[IP ADDRESS] 192.168.10.101 [SUBNET MASK] 255.255.255.0 [DEFAULT GATEWAY] 192.168.10.1
When connecting via wireless LAN
The wireless module (Model No.: ET-WML100) of the optional accessories is required if you want to use the network function through the wireless LAN.
- Only one projector can be connected with the wireless LAN.
Connection example
text_image
IEEE802.11b/g/n
Wireless module of optional accessories
(Model No.: ET-WML100)
Preparation and confirmation of the projector
1) Turn on the projector. terminal.
Wireless module of optional accessories
(Model No.: ET-WML100)
natural_image
Illustration of a computer monitor with ports and an external cable, showing no text or symbols.
3) Press the button to switch to NETWORK input.
Network input idle screen
text_image
LOGIN PASSWORD
PROJECTOR NAME
SSID
IP ADDRESS(WIRELESS)
IP ADDRESS(WIRED)
LOGIN PASSWORD : 5678
PROJECTOR NAME : Name1234
SSID : Panasonic Projector
IP ADDRESS(WIRELESS) : 172.28.120.1
IP ADDRESS(WIRED) : 192.168.1.100
Attention
Please do not move or transport the projector while the wireless module is attached. Doing so may cause the wireless module to be damaged.
The indicator of the wireless module will be off when the projector is in standby mode, it will light in blue when the power is turned on and it will blink in blue during wireless communicating.
When the power of the projector is turned on and the indicator of the wireless module is not lighting/blinking, please insert the wireless module to the terminal again.
The [IP ADDRESS (WIRELESS)] is displayed after the power is turned on, please connect network to the projector.
Note
Wireless LAN and wired LAN cannot be used in the same segment.
The settings of the wireless module are as follows. You can access the projector from the web browser to set the values of [SSID], [CHANNEL] and [ENCRYPTION].
[SSID] NetworkDisplay [CHANNEL] 1 [IP ADDRESS] 172.28.120.1 [SUBNET MASK] 255.255.255.0 [DEFAULT GATEWAY] 0.0.0.0 [ENCRYPTION] Disable
Computer setting
1) Turn on the computer.
2) Make the network setting according to your system administrator.
- Please make the network settings for the computer and the projector according to your system administrator.
3) Connect to the network that has been set in the projector.
- If you use a computer, click on the task tray (bottom right of the computer), then select the same name as the [SSID] that has been set in the projector.
Note
- If you use any wireless LAN connection utility that meets the OS standard, follow the operation instruction of the utility to connect it.
About Presenter Light
(The wireless module (Model No.: ET-WML100) of the optional accessories is required if you want to use the network function through the wireless LAN.)
By using still image transfer application software "Presenter Light" that supports Windows computers, you can transfer images and audio to the projector via the wired LAN/wireless LAN.
Download the "Presenter Light" to your computer
1) Start up the web browser on the computer.
- The factory default setting of the user name is user1 (user rights)/admin1 (administrator rights) and the password is panasonic (lower case).
text_image
iexplore
The server 192.168.0.8 at NAME1234 requires a username and password.
Warning: This server is requesting that your username and password be sent in an insecure manner (basic authentication without a secure connection).
User name
Password
Remember my credentials
OK Cancel
4) Click [OK].
- The [Projector status] page is displayed.
text_image
Projector Control Window
Projector status Network status Access error log E-mail error log
PROJECTOR TYPE PT X1578 SERIAL NUMBER OUTPUT
MAIN VERSION 1.02
POWER ON SEANDBS LAMP POWER
AV MUTE ON OFF VOLUME 44
PICTURE MODE
INPUT COMPTO TDI (RMBtu/50Hz)
INTAKE AIR TEMPERATURE 27°C/80°F
EXHAUST AIR TEMPERATURE 50%/91°F
LAMP RUNTIME 3 H
PROJECTOR RUNTIME 6 H SELF TEST No error
Status
Projector control
Detailed set up
Change password
Crestron Connected(TM)
Download
日本語
5) Click [Download].
- The download screen of "Presenter Light" is displayed.
text_image
Projector Control Window
Download
You can download Projector Light Windows then here
Download
Status
Projector control
Detailed set up
Change password
Crestrom Connected(TM)
Download
日本語
6) Click [Download].
- The download confirmation screen of the executable file "Presenter Light.exe" is displayed.
7) Save "Presenter Light.exe" on the computer desktop.
- This software is used as the executable file format. It cannot be installed in the computer.
- Execute this file when using the software. Please save this software or make a shortcut for convenient use.
Note
For more details about how to use the software "Presenter Light", please refer to the operating instructions of "Presenter Light Software" of the supplied CD-ROM.
Download the latest versions of "Presenter Light" software from the following web site. URL http://panasonic.net/avc/projector/software/
About VueMagic
(The wireless module (Model No.: ET-WML100) of the optional accessories is required.)
By using still image transfer application software "VueMagic", you can transfer images to the projector when iPad/iPhone/iPod touch or Android terminals are connected to this projector through the wireless LAN.
Connecting with the VueMagic compatible device
1) Press the button to select [NETWORK].
2) Choose the SSID of this projector on the wireless LAN setting screen of the connected device, and then connect the wireless.
- The connection confirmation screen is displayed.
5) Choose the display position.
- The password entry screen is displayed.
6) Enter the login password and click [OK].
- The connected device screen is projected on the screen.
Note
- When connecting to the iOS device or Android device, you must install the dedicated application "VueMagic" to the device. For detailed information, refer to the following web site. (Only in English.)
URL http://vuemagic.pixelworks.com
Disconnecting with the VueMagic compatible device
Close the VueMagic mobile presenter application of the device by clicking the ✗
Web control function
(The wireless module (Model No.: ET-WML100) of the optional accessories is required if you want to use the network function through the wireless LAN.)
The projector has a network function, and the following operations are available from the computer by using the web control.
Setting and adjustment of the projector
Display of the projector status
Transmission settings of E-mail messages
The projector supports “Crestron Connected ^TM ”, and the following application software of Crestron Electronics, Inc. can be used.
RoomView Express
Fusion RV
Note
If you use the E-mail function, you need to communicate with the E-mail server. First, please make sure that you can use the E-mail.
"Crestron Connected™" is a system developed by Crestron Electronics, Inc. which collectively manage and control multiple system devices connected via the network, from a computer. This projector supports "Crestron Connected™".
For details of "Crestron Connected™", please refer to the website of Crestron Electronics, Inc.. (Only in English) URL http://www.crestron.com/
For the download of "RoomView Express", please refer to the website of Crestron Electronics, Inc.. (Only in English) URL http://www.crestron.com/getroomview
Computer that can be used
In order to use the Web control function, a Web browser is required. Confirm that the Web browser can be used beforehand.
OS Compatible web browser Windows Internet Explorer 9.0/10.0/11.0Microsoft Edge Mac OS Safari 6.0/7.0/8.0/ 9.0
Note
- Communication with an E-mail server is required to use the E-mail function. Confirm that the E-mail can be used beforehand.
Accessing from the web browser
1) Start up the web browser on the computer.
- The factory default setting of the user name is user1 (user rights)/admin1 (administrator rights) and the password is panasonic (lower case).
text_image
iexplore
The server 192.168.0.8 at NAME1234 requires a username and password.
Warning: This server is requesting that your username and password be sent in an insecure manner (basic authentication without a secure connection).
User name
Password
Remember my credentials
OK Cancel
4) Click [OK].
- The [Projector status] page is displayed.
text_image
Projector Control Window
Projector status Network status Access error log E-mail error log
PROJECTOR TYPE PT F2378 SERIAL NUMBER 00000000
MAIN VERSION LBP
POWER ON STANDOUT LAMP POWER
AV MUTE ON OFF VOLUME 44
PICTURE MODE
INPUT COMPUTED (0.0MB-0.0MB)
INTAKE AIR TEMPERATURE 27°C / 80°F
EXHAUST AIR TEMPERATURE 35°C / 90°F
LAMP RUNTIME 7 H
PROJECTOR RUNTIME 6 W SELF TEST No errors
Status
Projector control
Detailed set up
Change password
Creation Connected(TM)
Download
日志图
Note
If you use a web browser to control the projector, set [WEB CONTROL] to [ON] in [NETWORK CONTROL] (→ page 103).
Do not perform setting or control simultaneously by starting up multiple web browsers. Do not set or control the projector from multiple computers.
Change the password first. (→ page 125)
Access will be locked for few minutes when an incorrect password is entered three times consecutively.
Some items on the projector setting page use the Javascript function of the web browser. The projector may not be able to be controlled properly if it is set with a browser that does not have this function enabled.
If the screen for the web control is not displayed, consult your network administrator.
While updating the screen for the web control, the screen may become white for a moment, but it is not a malfunction.
About computer screen illustrations
Available functions per account
With the administrator rights, all functions can be used. With the user rights, available functions are restricted. Select an account according to the purpose of use.
√: The operation can be performed.
—: The operation cannot be performed.
Item Function Administrator rights*1 User rights*1 Page [Status] [Projector status] √ √ 115 Error information page √ √ 115 [Network status] √ √ 116 [Access error log] √ — 117 [Mail error log] √ — 117 [Projector control] [Basic control] √ √ 117 [Advanced control] √ √ 118 [Detailed set up] [Network config] √ — 118 [Ping test] √ — 120 [ECO management set up] √ — 120 [E-mail set up] √ — 121 [Authentication set up] √ — 122 [Adjust clock] √ — 124 [Change password] User name of [Administrator] √ — 125 User name of [User] √ — 125 Password of [Administrator] √ — 125 Password of [User] √ √ 126 [Crestron Connected(TM)] Control page √ — 126 [Tools] √ — 127 [Info] √ — 127 [Help] √ — 128 [Download] Download Presenter Light √ √ 110
Descriptions of items
text_image
Projector Control Window
Projector status Network status Access error log E-mail error log
1
PROJECTOR TYPE PT EST'S SERIAL NUMBER NAME
MAIN VERSION LBB
POWER ON STANDOT LAMP POWER
AV MUTE ON OFF VOLUME 44
PICTURE MODE
INPUT COMPETITION 0.000mA
INTAKE AIR TEMPERATURE 250 MHz
EXHAUST AIR TEMPERATURE 300 MHz
LAMP RUNTIME 7 Hz
PROJECTOR RUNTIME 4 Hz SELF TEST Save time
Projector control
Detailed set up
Change password
Crestron Connected(TM)
Downloaded
日播
1 Page tab
Pages are switched by clicking this item.
2 [Status]
The status of the projector is displayed by clicking this item.
3 [Projector control]
The [Projector control] page is displayed by clicking this item.
4 [Detailed set up]
The [Detailed set up] page is displayed by clicking this item.
5 [Change password]
The [Change password] page is displayed by clicking this item.
6 [Crestron Connected(TM)]
The control page of Crestron Connected ^TM is displayed by clicking this item.
7 [Download]
The download page of Presenter Light software is displayed by clicking this item. (→ page 110)
[Projector status] page
Click [Status] → [Projector status].
Display the status of the projector for the following items.
text_image
Projector Control Window
Projector status Network status Access error log E-mail error log
PROJECTOR TYPE PT 42750 SERIAL NUMBER MINIMUM
MAIN VERSION 1.00
POWER ON STRAWB LAMP POWER
AV MUTE ON CNT VOLUME 44
PICTURE MODE
INPUT CTAMETER (A BILK-0 MIN)
INTAKE AIR TEMPERATURE 2700 MPa
EXHAUNT AIR TEMPERATURE 2700 MPa
LAMP RUNTIME 7.8
PROJECTOR RUNTIME 6.8 SELF TEST No errors
Detailed set up
Change password
Chestron Connectd(ITM)
Download
1
2
3
4
5
6
7
8
9
10
11
12
13
14
1 [PROJECTOR TYPE]
Displays the type of the projector.
2 [MAIN VERSION]
Displays the firmware version of the projector.
3 [POWER]
Displays the status of the power.
4 [AV MUTE]
Displays the status of the AV mute.
5 [PICTURE MODE]
Displays the setting status of [PICTURE MODE].
6 [SERIAL NUMBER]
Displays the serial number of the projector.
7 [LAMP POWER]
Displays the setting status of [LAMP POWER].
8 [VOLUME]
Displays the volume status.
9 [INPUT]
Displays the status of the selected input.
10 [INTAKE AIR TEMPERATURE]
Displays the status of the air intake temperature of the projector.
11 [EXHAUST AIR TEMPERATURE]
Displays the status of the exhaust air temperature of the projector.
12 [LAMP RUNTIME]
Displays the runtime of the lamps (converted value).
13 [SELF TEST]
Displays the self-diagnosis information.
14 [PROJECTOR RUNTIME]
Displays the runtime of the projector.
Error information page
When [Error (Detail)] or [Warning (Detail)] is displayed in the self-diagnosis display of the [Projector status] screen, click it to display the error/warning details.
- The projector may go into the standby status to protect the projector depending on the contents of the error.
text_image
Projector Control Window
Projector status Network status Access error log Email error log
PROJECTOR TYPE PT 100% SERIAL NUMBER NUMBER
MAIN VERSION 1.00
POWER 100 CEANEOG LAMP POWER NORMAL
AV MUTE 10% 100% YOKIME 51
PIKTURE MODE STANDARD
INPUT NETTOVER AT 3750 (48,980)
ENTAKE AIR TEMPERATURE 20% 100%
EXHAUSE AIR TEMPERATURE 20% 100%
LAMP RUNTIME 12.0%
PROJECTOR RUNTIME 10% HELP TEST RED LED
Change password
Crashion Connected(M)
Download
84页
text_image
Projector Control Window
Projector status Network status Access error log Email error log
---- Panasonic projector clock system ----
---- check system ----
FAN [OK]
INTAKE AIR TEMPERATURE [OK]
EXHAUST AIR TEMPERATURE [OK]
LAMP REMAIN TIME [OK]
LAMP STATUS [OK]
APRUCTURE(CONTRACT MATTER) [OK]
INTAKE AIR TEMP SENSOR [OK]
EXHAUST AIR TEMP SENSOR [OK]
BATTERY [OK]
AIRFLOW SENSOR [OK]
FILTER LNT [OK] [OK]
AIR FILTER [OK]
Error code 04.00.00.00 10:00:00.00
Status
Projector control
Detailed set up
Change password
Customs Connected(M)
Download
日播
1
1 Self-diagnosis result display
Displays the item check results.
[OK]: Indicates that operation is normal.
[FAILED]: Indicates that there is a problem.
[WARNING]: Indicates that there is a warning.
■[FAILED] items displayed when a problem occurs
Item Description [FAN] Trouble has occurred in the fan or its drive circuit. Consult your dealer. [FAN(R_B)] Trouble has occurred in the R/B panel cooling fan. [FAN(G)] Trouble has occurred in the G panel cooling fan. [FAN(PBS)] Trouble has occurred in the PBS cooling fan. [FAN(LAMP)] Trouble has occurred in the lamp cooling fan. [FAN(REAR)] Trouble has occurred in the rear fan. [FAN(POWER)] Trouble has occurred in the power cooling fan. [FAN(EXHAUST)] Trouble has occurred in the exhaust fan. [INTAKE AIR TEMPERATURE] The air intake temperature is too high. The projector may be used in an operating environment where the temperature is high, such as near a heating appliance. [EXHAUST AIR TEMPERATURE] The exhaust air temperature is high. The air exhaust port may be blocked. [LAMP REMAIN TIME] The lamp runtime has exceeded the prescribed cumulative time, and it is now time to replace the lamp. [LAMP STATUS] The lamp has failed to light.Wait a short while for the lamp to cool off, and then turn on the power. [APERTURE (CONTRAST-SHUTTER)] Trouble has occurred in the contrast shutter circuitry. Consult your dealer. [INTAKE AIR TEMP.SENSOR] Trouble has occurred in the sensor used to detect intake air temperature. Consult your dealer. [EXHAUST AIR TEMP.SENSOR] Trouble has occurred in the sensor used to detect exhaust air temperature. Consult your dealer. [BATTERY] Battery replacement is required. Consult your dealer. [AIRFLOW SENSOR] Trouble has occurred in the sensor used to detect airflow. Consult your dealer. [FILTER UNIT] The air filter unit is not attached. Check the attachment of the air filter unit. (⇨ page 134) [AIR FILTER] There is too much dust accumulated in the air filter unit. Turn theswitch to⇨ page 46), and clean the air filter. (⇨ page 133)
[Network status] page
Click [Status] → [Network status].
The current network setting status is displayed.
text_image
Projector Control Window
Projector status Network status Access error log Email error log
WIRE 551.5AN
WIRE NetworkID(s) CHANNEL
1
ENCRYPTON FREEPORT IP ADDRESS 173.28.139
SCNET MARK 204.299.283.6 DEFAULT GATEWAY
MAC ADDRESS 75-88-88-88-88-88
WIRE LAY
DBCP OS IP ADDRESS 173.14.141.229
SCNET MARK 205.295.294.6 DEFAULT GATEWAY 173.14.140.127
MAC ADDRESS 88.22.74.08-23.48 BCTS Packets abs Deal
Status
Projector control
Detailed set-up
Change password
Creation Connected(TM)
Download
HKEY
1 [WIRELESS LAN]
Displays the configuration details of wireless LAN when the wireless module is attached.
2 [WIRED LAN]
Displays the configuration details of wired LAN.
[Access error log] page
Click [Status] → [Access error log].
The error log on the web server is displayed such as access to the pages that do not exist or access with unauthorized user names or passwords.
text_image
Projector Control Window
Projector status
Network status
Access error log
E-mail error log
Web server error log
Status
Projector control
Detailed set up
Change password
Creation Connected(M)
Download
B488
[Mon, Mon 17 27:46:09 2018] [user(s)] [Julius 172.38.131.97] [Client, mini selfienced web reader]
[Mon, Mon 17 27:46:39 2018] [user(s)] [Julius 172.38.131.97] [Conversion time run reading]
[Mon, Jan 17 27:46:00 2018] [user(s)] [Julius 272.38.131.97] [Conversion time run reading]
[Mon, Jan 17 27:46:45 2018] [user(s)] [Julius 272.38.131.97] [Conversion time run reading]
[Mon, Jan 17 27:46:35 2018] [user(s)] [Julius 272.38.131.97] [Conversion time run reading]
[Mon, Jan 17 27:46:49 2018] [user(s)] [Julius 272.38.131.97] [Conversion time run reading]
[Mon, Jan 17 27:46:09 2018] [user(s)] [Julius 272.38.131.97] [Conversion time run reading]
[Mon, Jan 17 27:46:00 2018] [user(s)] [Julius 272.38.131.97] [Conversion time run reading]
[Mon, Jan 17 27:46:00 2018] [user(s)] [Julius 272.38.131.97] [Conversion time run reading]
[Mon, Jan 17 27:46:05 2018] [user(s)] [Julius 272.38.131.97] [Conversion time run reading]
[Mon, Jan 17 27:46:05 2018] [user(s)] [Julius 272.38.131.97] [Conversion time run reading]
[Mon, Jan 17 27:46:00 2018] [user(s)] [Julius 272.38.131.97] [Conversion time run reading]
[Mon, Jan 17 27:46:06 2018] [user(s)] [Julius 272.38.131.97] [Conversion time run reading]
[Mon, Jan 17 27:46:06 2018] [user(s)] [Julius 272.38.131.97] [Conversion time run reading]
[Mail error log] page
Click [Status] → [Mail error log].
Display E-mail error information if failed to send periodic E-mails.
text_image
Projector Control Window
Projector status Network status Access error log E-mail error log
[See: Jia: A.03-24/04.01.17]jxssEmail@pmer.net.com/failed Commonwealth NMT Server.
Status
Projector control
Detailed set up
Change password
Crestrom Connected(TM)
Download
日志
Note
[Access error log] and [Mail error log] display the recent few hundred accesses/requests. All information may not be displayed when many accesses/requests are made at a time.
When information in [Access error log] and [Mail error log] exceeds a certain amount, older information is erased.
Check [Access error log] and [Mail error log] periodically.
[Basic control] page
Click [Projector control] → [Basic control].
text_image
Projector Control Window
Basic control Advanced control
INPUT
COMPUTER1 COMPUTER2 VIDEO
RDMI3 RSMU2 NETWORK
GLOBAL LINK
VOLUME
STANDARD DYNAMIC BLOOD/SHI
BACKBOARD WHITE/SHI NATURAL
CHINA
AV NETT OFF ON
POWER SHI ON
CLOSED CAPTOR OFF OK OK
OK OK
1 [INPUT]
Switches the input signal.
2 [VOLUME]
Adjusts the volume.
3 [PICTURE MODE]
Switches the picture mode.
4 [AV MUTE]
Switches on/off the AV mute.
5 [POWER]
Turns on/off the power.
6 [CLOSED CAPTION]
Switches the closed caption setting.
[Advanced control] page
Click [Projector control] → [Advanced control].
text_image
Projector Control Window
Basic control Advanced control
Status
Projector control
Detailed set up
Change password
Creation Connection(TM)
Download
日期表
1
2
POSITION AUTO SETUP START
H KEYSTONE << << >> > >>
V KEYSTONE << << >> > >>
H POSITION << << >> >> >>
V POSITION << << >> >> >>
PICTURE ONTRAST << << >> > >>
HEIGHTNESS << << >> > >>
COLOR << << >> > >>
TINT << << >> >> >>
SMARNESS << << >> > >>
1 [POSITION]
Operates field angle-related settings.
2 [PICTURE]
Operates picture quality settings.
[Network config] page
Click [Detailed set up] → [Network config].
1) Click [Network config].
• The [CAUTION!] screen is displayed.
text_image
Projector Control Window
E-mail set up
Authentication set up
Adjust clock
Network config
Ping test
ECO management set up
Status
Projector control
Detailed set up
Change password
Crestron Connected(TM)
Download
已删除
CAUTIONS!
Transforming to Network Settings screen.
1) You may have to change your computer's settings too with some settings
2) Incorrect settings will lead to automatically to connect to the projector.
NETWORK
WIBED LAN
WIRELESS LAN
Next
2) Select the item which you want to change the setting, then click [Next].
- The current setting is displayed.
3) Click [Change] button.
- The setting change screen is displayed.
Wired LAN
text_image
Projector Control Window
E-mail set up
Authentication set up
Adjust clock
Network config
Ping text
ECO managementset-up
Status
Projector control
Detailed set up
Change password
Crestion Connected(TM)
Download
Back
Next
SET UP
PROJECTOR NAME
Name:719
DBCP-05
DBCP OFF
IP ADDRESS 172.96.161.111 [Example: 182.168.0.160]
SUBNET MASK 255.255.255.0 [Example: 235.235.235.0]
DEFAULT GATEWAY 182.168.10.1 [Example: 192.168.0.164]
DNS
DNS1 [Example: 192.168.0.160]
DNS2 [Example: 192.168.0.160]
1
2
3
4
5
6
7
8
1 [PROJECTOR NAME]
Enters the name of the projector. Enter the host name if it is required when using a DHCP server etc.
2 [DHCP ON], [DHCP OFF]
Enables the DHCP client function, set to [DHCP ON].
3 [IP ADDRESS]
Enters the IP address when not using a DHCP server.
4 [SUBNET MASK]
Enters the subnet mask when not using a DHCP server.
5 [DEFAULT GATEWAY]
Enters the default gateway address when not using a DHCP server.
6 [DNS1]
Enters the DNS1 server address.
Permissible characters for the entry of DNS1 server address. (preferred):
Numbers (0 - 9), period (.)
(Example: 192.168.0.253)
7 [DNS2]
Enters the DNS2 server address.
Permissible characters for the entry of DNS2 server address. (alternate):
Numbers (0 - 9), period (.)
(Example: 192.168.0.254)
8 [Back], [Next]
Click the [Back] button to return to the original screen. The current settings are displayed by pressing the [Next] button. Click the [Submit] button to update the settings.
Note
When you use the "Forward" and "Back" functions of your browser, a warning message "Page has Expired" may appear. In that case, click [Network config] again since the following operation will not be guaranteed.
Changing LAN settings while connected to the LAN may cause the connection to cut out.
Wireless LAN
(Only when the wireless module is attached)
text_image
Projector Control Window
E-mail set up
Authentication set up
Adjust clock
Network config
Ping text
SCO management set up
Status
Projector control
Detailed set up
Change password
Creation ControlSet(TM)
Download
IEAIE
SET UP
WIRELESS LAN
ENABLE
DISABLE
S3DB
NetworkDisplay
CHANNEL
ENCRIPTION
ENABLE
BPA2 PSCAIES
KEY
******
Back Change
1
2
3
4
5
6
1 [WIRELESS LAN]
Selects [Enable] when you want to enable the wireless LAN function.
2 [SSID]
Sets the SSID for use.
3 [CHANNEL]
Selects the channel for use.
4 [ENCRYPTION]
Selects [WPA2-PSK(AES)] when performing encrypted communications.
5 [KEY]
Sets the key to be used when performing encrypted communications.
8 to 15 alphanumerics can be input.
6 [Back], [Change]
Click the [Back] button to return to the original screen. The setting change screen is displayed by pressing the [Change] button.
Click the [Submit] button to update the settings.
Note
Changing LAN settings while connected to the LAN may cause the connection to cut out.
The setting values of the [Network config] page will return to the factory default when the [INITIALIZE] of the [NETWORK] menu is executed (→ page 104).
The [ENCRYPTION] is set to [DISABLE] in the factory default setting. If you want to communicate with wireless LAN, it is recommended that the [ENCRYPTION] is set to [WPA2-PSK (AES)] for security.
[Ping test] page
Check whether the network is connected to the E-mail server, POP server, DNS server, etc.
Click [Detailed set up] → [Ping test].
text_image
Projector Control Window
E-mail set up
Authentication set up
Adjust clock
Network config
Ping test
ICD management setup
Status
Projector control
Detailed set up
Change password
Crestron Connected(TM)
Download
目录 IP address
Submit
1
2
Enter the IP address of the server to be tested.
2 [Submit]
Executes the connection test.
text_image
PING 192.168.10.218 (192.168.10.218): 56 data bytes
64 bytes from 192.168.10.218: seq=0 ttl=128 time=1.228 ms
64 bytes from 192.168.10.218: seq=1 ttl=128 time=0.942 ms
64 bytes from 192.168.10.218: seq=2 ttl=128 time=0.854 ms
64 bytes from 192.168.10.218: seq=3 ttl=128 time=0.962 ms
--- 192.168.10.218 ping statistics ---
4 packets transmitted, 4 packets received, 0% packet loss
round-trip min/avg/max = 0.854/0.996/1.228 ns
PING 192.168.10.217 (192.168.10.217): 56 data bytes
--- 192.168.10.217 ping statistics ---
4 packets transmitted, 0 packets received, 100% packet loss
3 Example of display when the connection has succeeded
4 Example of display when the connection has failed
[ECO management set up] page
Settings related to the ECO management function of the projector can be made.
Click [Detailed set up] → [ECO management set up].
text_image
Projector Control Window
E-mail set up
Authentication set up
Adjust clock
Network config
Ping test
LCD management set up
Status
Projector control
Detailed set up
Change password
Centrist Connected(TM)
Download
日本語
LAMP POWER
ONIEMALL
ECO
AUTO POWER SAVE
Q ON
OFF
AMBIENT LIGHT DETECTION
Q ON
OFF
MIGNAL DETECTION
Q ON
OFF
AV MUTE DETECTION
Q ON
OFF
POWER MANAGEMENT
Q OFF
READY
SHIFT DOWN
TIME
TYPE
Scheme
1
2
3
4
5
6
7
8
1 [LAMP POWER]
Selects the [LAMP POWER] setting.
2 [AUTO POWER SAVE]
Sets to [ON] when setting [AMBIENT LIGHT DETECTION], [SIGNAL DETECTION] and [AV MUTE DETECTION].
3 [AMBIENT LIGHT DETECTION]
Selects enable ([ON])/disable ([OFF]) of the environmental luminance interlock function.
4 [SIGNAL DETECTION]
Selects enable ([ON])/disable ([OFF]) of the no signal interlock function.
5 [AV MUTE DETECTION]
Selects to enable ([ON])/disable ([OFF]) of the AV MUTE detection function.
6 [POWER MANAGEMENT]
Selects the power consumption mode.
7 [TIMER]
Selects the time that the lamp is turned off when the POWER MANAGEMENT function is using.
8 [Submit]
Updates the settings.
Note
- For details of each setting item, refer to the [PROJECTOR SETUP] menu → [ECO MANAGEMENT] (→ page 88) on the projector.
[E-mail set up] page
When there is a problem or the runtime of a lamp reaches a set value, an E-mail can be sent to preset E-mail addresses (up to two addresses).
Click [Detailed set up] → [E-mail set up].
text_image
Projector Control Window
Network config Ping test ECO management setup
E-mail set up-Augustriation set up Adjust clock
Status
Projector control
Detailed set up
Change password
Creation Connected(TM)
Download
日本語
MAIL SERVER
ENABLES Enable
SMTP SERVER NAME Up to 62 characters
MAIL OPTION
MAIL FROM Up to 62 characters
MEMO No location necessary correspondence, no...
Up to 62 characters
TEMPERATURE WARNING SET UP
MINIMUM TIME 0x slower interval 70 to 999 pixels
INTAKE AIR TEMPERATURE Clean/STOCK?
E-MAIL ADDRESS 1
E-MAIL ADDRESS 1 Small to Up to 62 characters
MAIL CONTENTS NORMAL SAMPLE
ERROR Off
1 [ENABLE]
Select [Enable] to use the E-mail function.
2 [SMTP SERVER NAME]
Enter the IP address or the server name of the E-mail server (SMTP). To enter the server name, the DNS server needs to be set up.
3 [MAIL FROM]
Enter the E-mail address of the projector. (Up to 63 characters in single byte)
4 [MEMO]
Enter information such as the location of the projector that notifies the sender of the E-mail. (Up to 63 characters in single byte)
5 [MINIMUM TIME]
Change the minimum interval for the temperature warning E-mail. The default value is 60 minutes. In this case, another E-mail will not be sent for 60 minutes after sending the temperature warning E-mail even if it reaches the warning temperature.
6 [INTAKE AIR TEMPERATURE]
Change the temperature setting for the temperature warning mail. A temperature warning E-mail is sent when the temperature exceeds this value.
text_image
Projector Control Window
Network config
Ping test
ICO management set up
E-mail set up
Authentication set up
Adjust clock
Status
Projector control
Detailed set up
Change password
Crestion Connected(TM)
Download
日志器
E-MAIL ADDRESS 1
Send to
Up to 63 characters
E-MAIL ADDRESS 2
Send to
Up to 63 characters
E-MAIL CONTENTS
NORMAL
SIMPLE
ERROR
OFF
LAMP RUNTIME
OFF
REMAIN 400 H
LAMP RUNTIME
OFF
REMAIN 200 H
INTAKE AIR TEMPERATURE
OFF
PERIODIC REPORT
Monday
Monday
Tuesday
Wednesday
Thursday
Friday
Saturday
7
8
E-MAIL ADDRESS 1
Send to
Up to 63 characters
E-MAIL CONTENTS
NORMAL
SIMPLE
7 [E-MAIL ADDRESS 1], [E-MAIL ADDRESS 2]
Enter the E-mail address to be sent. Leave [E-MAIL ADDRESS 2] blank when two E-mail addresses are not to be used.
8 Settings of the conditions to send E-mail
Selects the conditions to send E-mail.
[MAIL CONTENTS]:
Selects either [NORMAL] or [SIMPLE].
[ERROR]:
Sends an E-mail when an error occurred in the self-diagnosis.
[LAMP RUNTIME]:
Sends an E-mail when the remaining time for the lamp has reached the value set at the right field.
text_image
Projector Control Window
Network config
Ping test
ICO management setup
E-mail set up
Authentication set up
Adjust clock
Status
Projector control
Detailed set up
Change password
Crestron Corrected(TM)
Download
日志
B-MAIL ADDRESS 2
Solder
Up to 63 characters
B-MAIL ADDRESS 2
Solder
Up to 63 characters
MAIL CONTENTS
NORMAL
SAMPLEL
ERROR
OFF
LAMP RUNTIMI
OFF
REMAIN 400 H
LAMP RUNTIME
OFF
REMAIN 500 H
INTAKE AIR TEMPERATURE
OFF
PERSIODIC REPORT
FF
STRAWER
STRAWER
STRAWER
STRAWER
STRAWER
STRAWER
STRAWER
STRAWER
STRAWER
STRAWER
STRAWER
STRAWER
STRAWER
STRAWER
STRAWER
STRAWER
STRAWER
STRAWER
STRAWER
STRAWER
STRAWER
STRAWER
STRAWER
STRAWER
STRAWER
STRAWR
STRAWR
STRAWR
STRAWR
STRAWR
STRAWR
STRAWR
STRAWR
STRAWR
STRAWR
STRAWR
STRAWR
STRAWR
STRAWR
STRAWR
STRAWR
STRAWR
STRAWR
STRAWR
STRAWR
STRAWR
STRAWR
STRAWR
STRAWR
STRAWR
STRAW R
[INTAKE AIR TEMPERATURE]:
Sends an E-mail when the air intake temperature has reached the value set at the above field.
[PERIODIC REPORT]:
Places a check mark on this to send an E-mail periodically. It will be sent on the days and the time with the check mark.
9 [Submit]
Updates the settings.
[Authentication set up] page
Set the authentication items when POP authentication or SMTP authentication is necessary to send an E-mail. Click [Detailed set up] → [Authentication set up].
text_image
Projector Control Window
Network config Ping test ECO management set up
E-mail set up Authentication set up Adjust clock
Status
Projector control
Detailed set up
Change password
Growth connected(TM)
Download
USB
Switch Assist START LOOP
POP serve port 100 Up to 67 characters.
Up to 67 characters.
Password Password for POP/SMTP server
SMTP server port 25 Default = 24
POP server port 110 Default = 110
Submit
1
2
3
4
5
6
7
8
1 [Auth]
Selects the authentication method specified by your Internet service provider.
2 [SMTP Auth]
Set when the SMTP authentication is selected.
3 [POP server name]
Enter the POP server name.
Allowed characters:
Alphanumerics (A - Z, a - z, 0 - 9)
Minus sign (-) and period (.)
4 [User name]
Enter the user name for the POP server or the SMTP server.
5 [Password]
Enter the password for the POP server or the SMTP server.
6 [SMTP server port]
Enter the port number of the SMTP server.
(Normally 25)
7 [POP server port]
Enter the port number of the POP server.
(Normally 110)
8 [Submit]
Updates the settings.
Contents of E-mail sent
Example of E-mail sent when E-mail is set
The following E-mail is sent when the E-mail settings have been established.
--- Panasonic projector report(CONFIGURE) ---
Projector Type    : PT-FZ570
Serial No    : SH1234567
---- E-mail setup data ----
TEMPERATURE WARNING SETUP
MINIMUM TIME    at [ 60] minutes interval
INTAKE AIR TEMPERATURE   Over [ 45 degC / 113 degF ]

ERROR    [ OFF ]
LAMP RUNTIME    [ OFF ]    at REMAIN [ 400] H
LAMP RUNTIME    [ OFF ]    at REMAIN [ 200] H
INTAKE AIR TEMPERATURE   [ OFF ]

PERIODIC REPORT
Sunday    [ OFF ] Monday [ OFF ] Tuesday [ OFF ] Wednesday [ OFF ]
Thursday    [ OFF ] Friday [ OFF ] Saturday [ OFF ]
00:00 [ OFF ] 01:00 [ OFF ] 02:00 [ OFF ] 03:00 [ OFF ]
04:00 [ OFF ] 05:00 [ OFF ] 06:00 [ OFF ] 07:00 [ OFF ]
08:00 [ OFF ] 09:00 [ OFF ] 10:00 [ OFF ] 11:00 [ OFF ]
12:00 [ OFF ] 13:00 [ OFF ] 14:00 [ OFF ] 15:00 [ OFF ]
16:00 [ OFF ] 17:00 [ OFF ] 18:00 [ OFF ] 19:00 [ OFF ]
20:00 [ OFF ] 21:00 [ OFF ] 22:00 [ OFF ] 23:00 [ OFF ]

---- check system ----
PAN    [ OK ]
INTAKE AIR TEMPERATURE    [ OK ]
EXHAUST AIR TEMPERATURE    [ OK ]
LAMP REMAIN TIME    [ OK ]
LAMP STATUS    [ OK ]
APERTURE(CONTRAST-SHUTTER)    [ OK ]
INTAKE AIR TEMP.SENSOR    [ OK ]
EXHAUST AIR TEMP.SENSOR    [ OK ]
BATTERY    [ OK ]
AIRFLOW SENSOR    [ OK ]
FILTER UNIT    [ OK ]
AIR FILTER    [ OK ]

(Error code 00 00 00 00 00 00 00 00 )

Intake air temperature    : 31 degC / 87 degF
Exhaust air temperature    : 37 degC / 98 degF

PROJECTOR RUNTIME    500 H

LAMP ECO    400 H
LAMP NORMAL    100 H
LAMP REMAIN    3600 H

---- Current status ----
MAIN VERSION    1.00
SUB VERSION    1.00
LAMP STATUS    LAMP=ON

INPUT    HDMI1
SIGNAL NAME    XGA60
SIGNAL FREQUENCY    0.30kHz / 0.3GHz
REMOTE1 STATUS    DISABLE

---- Wired Network configuration ----
DHCP Client   OFF
IP address    192.168.10.100
MAC address    04:20:9A:00:00:00

---- Wireless Network configuration ----
DHCP Client   OFF
IP address    172.28.120.1
MAC address    00:40:63:00:00:00

Tue Apr 12 10:00:00 2016
---- Memo ----
Example of the E-mail sent for an error
The following E-mail is sent when an error has occurred.
text_image
---- Panasonic projector report(ERROR) ===
Projector Type : PT-FZ570
Serial No : SH1234567
---- check system ----
FAN [ OK ]
INTAKE AIR TEMPERATURE [ OK ]
EXHAUST AIR TEMPERATURE [ OK ]
LAMP REMAIN TIME [ OK ]
LAMP STATUS [ OK ]
APERTURE(CONTRAST-SHUTTER) [ OK ]
INTAKE AIR TEMP.SENSOR [ OK ]
EXHAUST AIR TEMP.SENSOR [ OK ]
BATTERY [ OK ]
AIRFLOW SENSOR [ OK ]
FILTER UNIT [ OK ]
AIR FILTER [ FAILED ]
(Error code 00 00 00 20 00 00 00 00)
Intake air temperature : 31 degC / 87 degF
Exhaust air temperature : 37 degC / 98 degF
PROJECTOR RUNTIME 500 H
LAMP ECO 400 H
LAMP NORMAL 100 H
LAMP REMAIN 3600 H
---- Current status ----
MAIN VERSION 1.00
SUB VERSION 1.00
LAMP STATUS LAMP=OFF
INPUT HDMI1
---- Wired Network configuration ----
DHCP Client OFF
IP address 192.168.10.100
MAC address 04:20:9A:00:00:00
---- wireless Network configuration ----
DHCP Client OFF
IP address 172.28.120.1
MAC address 00:40:63:00:00:00
Tue Apr 12 10:00:00 2016
---- Memo ----
[Adjust clock] page
Click [Detailed set up] → [Adjust clock].
text_image
Projector Control Window
Network config Ping test ECO management set up
E-mail set up Authentication set up Adjust clock
Status
Projector control
Detailed M/F UP
Change password
Crestron Connected(TM)
Download
日本語
Time Zone: GMT+09:38 Select Local time now
Current time is GMT+09:38
Set time zone
Current time is set to 2016/01/17 18:42:54
NTP SYNCEBONIZATION ON QGFT
NTP SERVER NAME Up to 01 characters
Date 2016/01/17 Date type is YYYY-MM-DD
Time 18:42:51 Time type is Minionsus
Set date and time
1
2
3
4
5
6
7
1 [Time Zone]
Selects the time zone.
2 [Set time zone]
Updates the time zone setting.
3 [NTP SYNCHRONIZATION]
Sets to [ON] to adjust the date and the time automatically.
4 [NTP SERVER NAME]
Enter the IP address or server name of the NTP server when you set to adjust the date and the time manually.
(To enter the server name, the DNS server needs to be set up.)
5 [Date]
Enter the date to be changed.
6 [Time]
Enter the time to be changed.
7 [Set date and time]
Updates the date and the time settings.
Note
- The replacement of the battery inside the projector is required when the time goes out of alignment right after correcting the time. Consult your dealer.
[Change password] page
Click [Change password].
text_image
Projector Control Window
Change password
Select Account
Account
Active User
User
Next
Status
Projector control
Detailed set up
Change password
Created from Connected(TM)
Download
日本語
1
2
3
1 [Administrator]
Used to change the setting of the [Administrator].
3 [Next]
Used to display the screen for changing the password.
2 [User]
Used to change the setting of the [User].
[Administrator] account
text_image
Projector Control Window
Change password
Account Administration
1
Status
Projector control
Detailed set up
Change password
Crestron Connected(TM)
Download
OK
2
3
4
1 [Account]
Displays the account to change.
2 [Current]
[User name]:
Enter the user name before the change.
[Password]:
Enter the current password.
3 [New]
[User name]:
Enter the desired new user name. (Up to 16 characters in single byte)
[Password]:
Enter the desired new password. (Up to 16 characters in single byte)
[Password(Retype)]:
Enter the desired new password again.
4 [OK]
Determines the change of password.
[User] account
text_image
Projector Control Window
Status
Projector control
Detailed set up
Change password
Crestron Connected(TM)
Download
日本語
New
User name
Password
Password(Retype)
Change password
Account User
OK
1
2
3
1 [Account]
Displays the account to change.
3 [OK]
Determines the change of password.
2 [New]
[User name]:
Enter the desired new user name. (Up to 16 characters in single byte)
[Password]:
Enter the desired new password. (Up to 16 characters in single byte)
[Password(Retype)]:
Enter the desired new password again.
[Change password] (For user rights)
The change of password is enabled only under the user rights.
text_image
Projector Control Window
Change password
Old Password
New Password
Rupta
OK
1
2
3
4
Status
Projector control
Change password
Download
日志
1 [Old Password]
Enter the current password.
3 [Retype]
Enter the desired new password again.
2 [New Password]
Enter the desired new password. (Up to 16 characters in single byte)
4 [OK]
Determines the change of password.
Note
- To change the account of the administrator, you must enter the [User name] and the [Password] in [Current].
[Crestron Connected(TM)] page
The projector can be monitored/controlled with Crestron Connected ^TM .
To start the control page of Crestron Connected ^™ from the web control screen, you need to access with the administrator rights. (For user rights, the [Crestron Connected(TM)] button is not displayed on the web control screen.)
The control page of Crestron Connected ^TM is displayed by clicking [Crestron Connected(TM)].
It is not displayed if Adobe ^® Flash ^® Player is not installed on the computer used, or the browser used does not support Flash. In that case, click [Back] on the control page to go back to the previous page.
Control page
text_image
Tools
Help
POWER
VOL DOWN
AV MUTE
VOL UP
Input Select
COMPUTER1
COMPUTER2
VIDEO
HDMI1
HDMI2
MENU
ENTER
RETURN
Freeze
Contrast
Brightness
Color
CRESTION
OPTIONAL
Expansion Options
Back
1 [Tools], [Info], [Help]
Tabs for selecting the setting, information, or help page of the projector.
2 [POWER]
Turns off/on the power.
3 [VOL DOWN], [VOL UP]
Adjusts the volume.
[AV MUTE]
Switches on/off the AV mute function.
4 [Input Select]
Controls input selection.
Not available when the power of the projector is turned off.
5 Menu screen control buttons
Navigates the menu screen.
6 Freeze/image quality adjustment/digital zoom
Controls items related to freeze/image quality/digital zoom.
7 [Back]
Performs return to the previous page.
[Tools] page
Click [Tools] on the control page.
text_image
Control System
P Address
PID
Port 61754
Send
DHCP Enabled
IPathAddress
SummitMask
DefaultOptions
Dir&Sender
User Password
Enabled
New Password
Custom
Send
Admin Password
Enabled
New Password
Custom
Send
Exit
CREDERON
CONTROL
Back
1 [Control System]
Sets the information required for communicating with the controller to be connected with the projector.
2 [User Password]
Sets the user rights password for the Crestron Connected™ control page.
3 [Admin Password]
Sets the administrator rights password for the Crestron Connected™ control page.
4 Network status
Displays the settings of wired LAN.
[DHCP]
Displays the current setting.
[lpAddress]
Displays the current setting.
[SubnetMask]
Displays the current setting.
[DefaultGateway]
Displays the current setting.
[DNSServer]
Displays the current setting.
5 [Exit]
Returns to the control page.
[Info] page
Click [Info] on the control page.
text_image
Projector Information
Projector Status
1. Projector Name: Namw3911
2. Mac Address: 80CF218F1979
3. Lamp Hours —
4. Power Status: POWER ON
5. Status: COMPUTER
6. Lamp Status: NORMAL
7. Error Status: SLAMP STATUS ERROR
8. Exit
CREDICTION
Power Status: OFF/No
Back
1 [Projector Name]
Displays the projector name.
2 [Mac Address]
Displays the MAC address.
3 [Lamp Hours]
Displays the runtime of the lamps (converted value).
4 [Power Status]
Displays the status of the power.
5 [Source]
Displays the selected input.
6 [Lamp Mode]
Displays the setting status of [LAMP POWER].
7 [Error Status]
Displays the error status.
8 [Exit]
Returns to the control page.
[Help] page
Click [Help] on the control page.
The [Help Desk] window is displayed.
text_image
Help Desk
SpinR
POWER
VOL DOWN
AV MUTE
VOL UP
Input Select
COMPUTER1
COMPUTER2
VIDEO
HDMI1
HDMI2
MENU
ENTER
RETURN
Freeze Contrast Brightness Color
CRESTRON
C:\Users\Control\Back
Cusseren Options
1 [Help Desk]
Send/receive messages to/from an administrator who uses
Crestron Connected™.
Chapter 6 Maintenance
This chapter describes methods of inspection when there are problems, maintenance, and replacement of the units.
Lamp/temperature/filter indicators
When an indicator lights up
If a problem should occur inside the projector, the lamp indicator , the temperature indicator , and the filter indicator will inform you by lighting or blinking. Check the status of the indicators and remedy the indicated problems as follows.
Attention
- When switching off the projector to deal with problems, make sure to follow the procedure in "Switching off the projector" (→ page 45).
text_image
Lamp indicator
ON(G)/
STANDBY(R)
LAMP
TEMP
FILTER
Filter indicator
Temperature indicator
Lamp indicator
Indicator status L ghting in red Blinking in red(1 time) Blinking in red(3 times) Status Time to replace the lamp unit. (⇨ page 135) The lamp unit is not installed. A problem is detected in the lamp or the power supply for the lamp. Cause Was [REPLACE LAMP] displayed when you turned on the power?The indicator lights up when the runtime of the lamp unit reaches 5 800 hours (when [LAMP POWER] is set to [NORMAL]). Is the lamp unit installed? Have you turned on the power again immediately after turning it off? Some error has occurred in the lamp circuit. Check for fluctuation (or drop) in the source voltage. Solution Replace the lamp unit. Install the lamp unit if it is not installed.If the indicator is still blinking in red even when having installed the lamp unit, consult your dealer. Wait a while until the luminous lamp cools off, and then turn on the power. Turn theswitch to⇨ page 46), and consult your dealer.
Note
- If the lamp indicator is still lit or blinking after taking the preceding measures, ask your dealer for repair.
Temperature indicator
Indicator status L ghting in red Blinking in red(2 times) Blinking in red(3 times) Status Internal temperature is high (warning). Internal temperature is high (standby status). The cooling fan has stopped. Cause Is the air intake/exhaust port blocked?Is the room temperature high?Is the filter indicatorlit? — Solution Remove any objects that are blocking the air intake/exhaust port.Install the projector in a location with the operating environment temperature between 0 °C (32 °F) and 40 °C (104 °F)1.Do not install the projector at high altitudes of 2 700 m (8 858') or higher above sea level.Clean or replace the air filter unit. (⇨ page 132) Turn theswitch to(⇨ page 46), and consult your dealer.
*1 When using the projector at high altitudes (between 1 400 m (4 593') and 2 700 m (8 858') above sea level), the operating environment temperature should be between 0 °C (32 °F) and 35 °C (95 °F).
Note
If the temperature indicator is still lit or blinking after taking the preceding measures, ask your dealer for repair.
If the [PROJECTOR SETUP] menu → [LAMP POWER] is set to [NORMAL], [LAMP POWER] changes to [ECO] forcibly to protect the projector when the operating environment temperature becomes 35 °C (95 °F) or higher (30 °C (86 °F) or higher when using the projector at high altitudes).
Filter indicator
Indicator status L ghting in red Blinking in red Status The filter is clogged.The temperature inside or outside the projector is abnormally high. The air filter unit is not attached. Cause • Is the air filter unit dirty? • Is the air intake/exhaust port blocked? • Is the air filter unit attached? Solution • Clean or replace the air filter unit.(→ page 132) • Remove any objects that are blocking the air intake/exhaust port. • Attach the air filter unit.
Note
If the filter indicator is still lit or blinking after taking the preceding measures, ask your dealer for repair.
If the air filter case is not attached when the projector is switched on, the filter indicator blinks in red.
Maintenance/replacement
Before performing maintenance/replacement
Make sure to turn off the power before maintaining the projector or replacing the unit. (→ page 45)
When switching off the projector, make sure to follow the procedures in “Switching off the projector” ( page 45).
Maintenance
Outer case
Wipe off dirt and dust with a soft, dry cloth.
If the dirt is persistent, soak the cloth with water and wring it thoroughly before wiping. Dry off the projector with a dry cloth.
Do not use benzene, thinner, or rubbing alcohol, other solvents, or household cleaners. Doing so may deteriorate the outer case.
When using chemically treated dust cloths, follow the instructions written on its packaging.
Lens front surface
Wipe off dirt and dust from the front surface of the lens with a soft clean cloth.
Do not use a cloth that is fluffy, dusty, or soaked with oil/water.
Since the lens is fragile, do not use excessive force when wiping the lens.
Do not use benzene, thinner or rubbing alcohol, other solvents or household cleaners. Using them may cause deterioration of the lens.
Attention
- The lens is made of glass. Impacts or excessive force when wiping may scratch its surface. Handle with care.
Air filter unit
This projector is equipped with two air filter units.
- Body side: the main air filter unit
- Air filter cover side: the pre-filter
Perform maintenance of the air filter in the following case.
- The air filter is clogged with dust, causing the filter replacement message to appear on the screen and the filter indicator to light in red.
Attention
Make sure that the projector is stable, and perform the maintenance in a safe place where the unit will not be damaged even if you drop the air filter cover and the air filter unit.
Removing the air filter unit
text_image
Air filter cover
Tabs Knob
Fig. 1
Main filter unit compartment and the projector's air intake port
text_image
Main filter unit
Fig. 2
1) Turn off the power of the projector and set the switch to and disconnect the power plug from the power outlet.
Pull out the air filter cover from the hook of the projector while slightly pushing upward the tabs of the air filter cover and open it in the direction of the arrow in figure.
When pulling open the air filter cover, be sure to firmly hold the air filter cover with your hand. Opening the air filter cover quickly may result in the cover falling.
3) Remove the main filter unit.
Pull out the main filter unit from the tabs of the projector while slightly pressing the knob at the center of the frame at the connecting terminal side (rear side) inward as shown by the arrow, and remove the main filter unit. (Fig. 2)
After pulling out the main filter unit, remove foreign objects and dust from the main filter unit compartment and the projector's air intake port if there are any.
4) Remove the pre-filter from the air filter cover.
Put your finger in the groove (in the following figure) and remove the pre-filter from the claws.
text_image
Claws
Air filter cover
Pre-filter
Groove to put the finger in
Cleaning the air filter unit
Remove the main filter unit and the pre-filter beforehand according to the previously described procedure in "Removing the air filter unit".
You can wash both the main filter unit and the pre-filter.
natural_image
Diagram showing a container with a shaded interior and a 3D block structure on a surface, with no visible text or symbols.
Fig. 1 Fig. 2
1) Wash the air filter unit. (Fig. 1)
i) Soak the air filter unit in cold or warm water and then lightly rinse it.
Do not use cleaning tools such as brushes.
When rinsing, hold the frame of the main filter unit without putting strong pressure on the filter. Also, please don't put strong pressure on the pre-filter.
ii) Rinse the air filter unit two or three times by using fresh water each time.
• Insufficient rinsing may result in odors.
2) Dry the air filter unit. (Fig. 2)
Let the air filter unit naturally dry off in a well-ventilated place where there is little dust and is not exposed to direct sunlight.
Do not dry using drying devices such as dryers.
After the air filter unit is dried, proceed to "Attaching the air filter unit" (→ page 134).
Attaching the air filter unit
1) Attach the main filter unit to the projector.
Perform Step 3) in "Removing the air filter unit" in the reverse order.
Push in the main filter unit securely until it clicks into place.
2) Attach the pre-filter to the air filter cover.
There is no specification of the front and back for attaching the pre-filter.
Put the pre-filter into the claws (3 places) on one side of the air filter cover (Fig. 1), and then push each portion slowly in the direction of the arrows into the claws (3 places) on the other side (Fig. 2). Please make sure that there is no damage or deformation at the contact areas of the pre-filter with the claws when attaching it.
text_image
Claws
Pre-filter
Air filter cover
Fig. 1
text_image
Claws
Fig. 2
3) Attach the air filter cover to the projector.
Perform Step 2) in "Removing the air filter unit" in the reverse order to close the air filter cover, and push in the air filter cover securely until it clicks into place.
Make sure that the air filter cover is closed tightly.
Procedure of [FILTER COUNTER RESET]
1) Connect the power plug, set the switch to , and press the power button <∅/|> on the control panel or on the remote control to turn on the power and start projection. button to display the main menu, then press ▲▼ to select [PROJECTOR SETUP]. button. button.
- The [FILTER COUNTER] screen is displayed.
6) Press ▲▼ to select [FILTER COUNTER RESET]. button.
- The [FILTER COUNTER RESET] screen is displayed.
8) Press ◀▶ to select [OK], then press the button.
- The filter usage time is reset.
Attention
After washing the air filter unit, dry it thoroughly before attaching it back to the projector. Attaching a wet unit will cause an electric shock or malfunction.
Do not disassemble the main filter unit.
Make sure that the main filter unit and the pre-filter are properly attached before using the projector. If they are not attached, the projector will suck in dirt and dust causing a malfunction.
Do not put anything into the air vents. Doing so may result in malfunction of the projector.
Note
If you use the projector without attaching the main filter unit, the filter indicator blinks in red and the message appears on the projected image for approximately 30 seconds.
Replace the air filter unit with the new optional Replacement Filter Unit (Model No.: ET-RFF200) if it is damaged or if the dirt does not come off even after washing.
The dust-proof properties may be reduced after each cleaning.
The replacement cycle of the air filter unit varies greatly depending on the usage environment.
Replacing the unit
Lamp unit
The lamp unit is a consumable component. Refer to “When to replace the lamp unit” ( page 135) for details about the replacement cycle.
When purchasing the optional Replacement Lamp Unit (Model No.: ET-LAEF100), consult your dealer.
It is recommended that you request a qualified technician to replace the lamp unit. Consult your dealer.
WARNING
Replace the lamp unit after the lamp has cooled (after waiting at least one hour).
The high temperature inside the cover will cause burns.
Notes on the replacement of the lamp unit
Since the luminous lamp is made of glass, it may burst if dropped or hit with a hard object. Handle with care.
Do not disassemble or modify the lamp unit.
When replacing the lamp unit, be sure to hold it by the handle because its surface is pointed and its shape is protruded.
The lamp may rapture. Replace the lamp unit carefully so that the glass fragments of the lamp do not scatter. While attaching the projector to the ceiling, do not work right under the lamp unit or do not conduct work while your face is near the lamp unit.
The lamp contains mercury. When disposing of used lamp units, contact your local authorities or dealer for correct methods of disposal.
Attention
- Panasonic takes no responsibility for any damage or malfunction of the product resulting from use of lamp units which are not manufactured by Panasonic. Use only specified lamp units.
Note
The model numbers of accessories and optional accessories are subject to change without prior notice.
A Phillips screwdriver is necessary when replacing the lamp unit.
When to replace the lamp unit
The lamp unit is a consumable component. Since its brightness gradually decreases over time, it is necessary to replace the lamp unit regularly.
Time for replacement
When [LAMP POWER] is constantly set to [NORMAL] without switching to other modes = 6 000 hours
When [LAMP POWER] is constantly set to [ECO] without switching to other modes = 8 000 hours
but the lamp may go off before the time above mentioned has elapsed depending on individual lamp characteristics, usage conditions, and the installation environment. It is recommended that the Replacement lamp unit be prepared earlier.
In order to predict the lamp replacement time, please refer to the lamp runtime displayed in [STATUS] (→ page 87) → [RUNTIME] → [LAMP] → [NORMAL]/[ECO]. It also can be obtained by using the following formula. (The time which is displayed in [ECO] is the converted usage time when set to [NORMAL].)
Formula for lamp replacement time (rough estimate) = “Lamp runtime of [NORMAL]” + “Lamp runtime of [ECO]” × 3/4
If the time which is obtained by the above equation 6 000 hours has elapsed, the lamp turns off automatically after approximately 10 minutes, as it will cause malfunction of the projector.
Chapter 6 Maintenance — Maintenance/replacement
On-screen displayREPLACE LAMP Lamp indicator Over 5 800 hours The message is displayed for 30 seconds. Pressing any button on the control panel or the remote control within 30 seconds will clear the message. The indicator lights in red even during the standby mode. Over 6 000 hours The message remains displayed until you press any button.
Note
- The time which is obtained by the formula for lamp replacement time "6 000 hours" is a rough guideline, but is not a guarantee. The lamp runtime differs depending on the setting of "LAMP POWER" menu.
How to replace the lamp unit
Attention
While attaching the projector to the ceiling, do not work right under the lamp unit or do not conduct work while your face is near the lamp unit.
Do not remove or loosen the screws other than specified ones when replacing the lamp unit.
Make sure to attach the lamp unit and the lamp cover securely.
text_image
Lamp cover
Panasonic
i)
ii)
i)
Lamp unit fixing screws
Panasonic
Lamp cover fixing screw
Handles
Lamp unit
Fig. 1
1) Turn off the power of the projector and set the switch to and disconnect the power plug from the power outlet.
- Wait at least one hour and check if the lamp unit has cooled down.
2) Remove the lamp cover. (Fig. 1)
Use a Phillips screwdriver to turn the lamp cover fixing screw (x1) counterclockwise until it turns freely, and slide and pull up the lamp cover slowly in the direction of the arrow to remove it.
Opening the lamp cover quickly may result in falling.
3) Remove the lamp unit. (Fig. 2)
Use a Phillips screwdriver to turn the lamp unit fixing screws (x3) counterclockwise until they turn freely, and remove the lamp unit.
Hold the handles of the lamp unit and remove it straight.
4) Push in the new lamp unit while paying attention to the insertion position.
- If the lamp unit is not installed properly, remove it and then push it in slowly. Pushing it in quickly or forcibly may break the connector.
5) Use a Phillips screwdriver to firmly tighten the lamp unit fixing screws (x3).
- Make sure to attach the lamp unit securely.
6) Attach the lamp cover.
i) Perform Step 2) in the reverse order to attach the lamp cover.
- Make sure to attach the lamp cover slowly and securely.
Note
- When you replace the lamp unit with new one, the projector resets the runtime of the lamp unit automatically.
Air filter unit
When the dust remains after cleaning, it is time to replace the air filter.
The Replacement Filter Unit (Model No.: ET-RFF200) is an optional accessory. To purchase the product, consult your dealer.
How to replace the air filter unit
Attention
- Make sure that the projector is stable, and perform the replacement in a safe place where the unit will not be damaged even if you drop the air filter cover or the air filter unit.
1) Turn off the power of the projector and set the switch to and disconnect the power plug from the power outlet.
- Step 2) \~ step 4), refer to "Removing the air filter unit" (→ page 132).
3) Remove the main filter unit.
- Step 5) \~ step 7), refer to "Attaching the air filter unit" (→ page 134).
6) Attach the pre-filter of the optional Replacement Filter Unit (Model No.: ET-RFF200) to the air filter cover.
- Refer to "Procedure of [FILTER COUNTER RESET]" (→ page 134).
Attention
- When using the projector, be sure to attach the air filter unit. If it is not attached, the projector will suck in dirt and dust which may cause a malfunction. The air filter unit to replace the old one should be an unused product.
Note
- If you use the projector without attaching the air filter unit, the message appears on the projected image for approximately 30 seconds.
Troubleshooting
Review the following points. For details, see the corresponding pages.
Problems Points to be checked Page Power does not turn on. Is the power plug firmly inserted into the outlet?Is theswitch set to?Is the wall outlet supplying electricity?Have the circuit breakers tripped?Is the lamp indicatoror the temperature indicatorlit or blinking?Is the lamp cover attached securely? —46——130136 No image appears. Are connections to external devices correctly performed?Is the input selection setting correct?Is the [BRIGHTNESS] adjustment setting at a minimum?Is the external device that is connected to the projector working properly?Is the AV mute function in use?Is the lens cover still attached to the lens? 364761——50, 8542 Image is fuzzy. Is the lens focus set correctly?Is the projection distance appropriate?Is the lens dirty?Is the projector installed perpendicular to the screen? 483222—— Color is pale or grayish. Is [COLOR] or [TINT] adjusted correctly?Is the external device connected to the projector adjusted correctly?Is the RGB cable damaged? 62—— Audio is not output. Is the external device connected correctly to the audio input terminal?Is [MUTE] in [AUDIO SETTING] set to [ON]?Is the audio input selection in [AUDIO SETTING] set correctly? 289393 Audio is not output from the built-in speaker. Is [BUILT-IN SP] in [AUDIO SETTING] set to [OFF]?Is the audio input selection in [AUDIO SETTING] set correctly? 9293 Remote control does not respond. Are the batteries depleted?Is the polarity of the batteries set correctly?Are there any obstructions between the remote control and the remote control signal receiver of the projector?Is the remote control being used beyond its effective operation range?Are other forms of light, such as fluorescent light, affecting the projection?Is the [REMOTE CONTROLLER] setting in [CONTROL DEVICE SETUP] set to [DISABLE]?Is the ID number setting operation correct? ——292626269955 Menu screen does not appear. Is the on-screen display function turned off (hidden)? 51 Buttons on the control panel do not operate. Is the [CONTROL PANEL] setting in [CONTROL DEVICE SETUP] set to [DISABLE]? 99 Image does not display correctly. Is the [TV-SYSTEM], [RGB/YCBr]/[RGB/YPBrP] selection set correctly?Is there a problem with the video tape or other image sources?Is a signal which is not compatible with the projector being input? 65——149 Image from a computer does not appear. Is the cable too long? (For D-Sub cables, the cable length should be 10 m (32'10") or shorter.)Is the external video output on the laptop computer set correctly? (Ex.: The external output settings may be switched by pressing the "Fn" + "F3" or "Fn" + "F10" simultaneously. Since the method varies depending on the computer type, refer to the user manual provided with your computer.) —— Video from HDMI compatible device does not appear or it appears jumbled. Is the HDMI cable connected securely?Turn off and on the power of the projector and the external device.Is a signal which is not compatible with the projector being input? 36——149
Chapter 6 Maintenance — Troubleshooting
Problems Points to be checked Page Audio from HDMI compatible device does not appear. Set to the linear PCM audio for the connected devices. — The DIGITAL LINK input image or sound is not output. Are the connections between the twisted-pair-cable transmitter and the projector or an external device correctly done?Is [DIGITAL LINK MODE] set to [AUTO], [DIGITAL LINK] or [LONG REACH]?Is a signal which is not compatible with a twisted-pair-cable transmitter being input? 101—
Attention
- If problems persist even after checking the preceding points, consult your dealer.
Chapter 7 Appendix
This chapter describes specifications for the projector.
PJLink protocol
The network function of this projector supports the PJLink class 1, and the PJLink protocol can be used to perform projector setting and projector status query operations from a computer.
Control commands
The following table lists the PJLink protocol commands that can be used to control the projector.
- x characters in tables are non-specific characters.
Command Control details Parameter return string Remark POWR Power supply control 0 Standby1 Power on POWR? Power supply status query 0 Standby1 Power on2 Preparing for switching off the 3 Warm-up projector INPT Input selection 11 COMPUTER112 COMPUTER221 VIDEO31 HDMI132 HDMI233 DIGITAL LINK51 NETWORK INPT? Input selection query AVMT AV mute control *1 30 AV mute function off AVMT? AV mute status query 31 AV mute function on ERST? Error status query xxxxxx 1st byte Indicates fan errors, and returns 0 - 2. 0 = No error is detected1 = Warning2 = Error 2nd byte Indicates lamp errors, and returns 0 - 2. 3rd byte Indicates temperature errors, and returns 0 - 2. 4th byte Indicates cover open errors, and returns 0 or 2. 5th byte Indicates filter errors, and returns 0 - 2. 6th byte Indicates other errors, and returns 0 - 2. LAMP? Lamp status query xxxxxx 1st digit (1 - 5 digits): Lamp runtime2nd digit: 0 = Lamp off, 1 = Lamp on INST? Input selection list query 11 12 21 31 32 33 51 NAME? Projector name query xxxxx Returns the name set in [PROJECTOR NAME] of [NETWORK]. INF1? Manufacturer name query Panasonic Returns manufacturer name. INF2? Model name query FZ570FW530FX500 Returns model name. INF0? Other information queries xxxxx Returns information such as version number. CLSS? Class information query 1 Returns class for PJLink.
*1 When the [PROJECTOR SETUP] menu → [ECO MANAGEMENT] → [AV MUTE DETECTION] is set to [ON], do not switch on/off in a short time.
PJLink security authentication
The password used for PJLink is the same as that of the password set for web control.
When using the projector without security authentication, do not set a password for web control.
- For specifications related to PJLink, refer to the website of Japan Business Machine and Information System Industries Association.
URL http://pjlink.jbmia.or.jp/english/
Control commands via LAN
When web control administrator rights password is set (Protect mode)
Connecting
1) Obtain the IP address and the port number (Initial set value = 1024) of the projector and request for a connection to the projector.
- You can obtain both the IP address and the port number from the menu screen of the projector.
IP address Obtain from the main menu → [NETWORK] menu → [NETWORK STATUS] Port number Obtain from the main menu → [NETWORK] menu → [NETWORK CONTROL] → [COMMAND PORT]
2) Check the response from the projector.
Data section Blank Mode Blank Random number section Termination symbol Command example “NTCONTROL” (ASCII string) ‘’ 0x20 ‘1’ 0x31 ‘’ 0x20 “zzzzzzzz” (ASCII code hex number) (CR) 0x0d Data length 9 bytes 1 byte 1 byte 1 byte 8 bytes 1 byte
- Mode: 1 = Protect mode
3) Generate a 32-byte hash value from the following data using MD5 algorithm.
- "xxxxxx:yyyyMMddy:zzzzzzzzz"
xxxxxx Administrator rights user name for the web control (default user name is “admin1”) yyyy Password of above administrator rights user (default password is “panasonic”) zzzzzzzz 8-byte random number obtained in Step 2)
Command transmission method
Transmit using the following command formats.
■Transmitted data
Header Data section Termination symbol Command example Hash value(Refer to “Connecting” above) ‘0’0x30 ‘0’0x30 Control command(ASCII string) (CR)0x0d Data length 32 bytes 1 byte 1 byte Undefined length 1 byte
■Received data
Header Data section Termination symbol Command example ‘0’0x30 ‘0’0x30 Control command (ASCII string) (CR)0x0d Data length 1 byte 1 byte Undefined length 1 byte
■Error response
String Details Termination symbol Message “ERR1” Undefined control command (CR)0x0d “ERR2” Out of parameter range “ERR3” Busy state or no-acceptable period “ERR4” Timeout or no-acceptable period “ERR5” Wrong data length “ERRA” Password mismatch Data length 4 bytes — 1 byte
When web control administrator rights password is not set (Non-protect mode)
Connecting
1) Obtain the IP address and the port number (Initial set value = 1024) of the projector and request for a connection to the projector.
- You can obtain both the IP address and the port number from the menu screen of the projector.
IP address Obtain from the main menu → [NETWORK] menu → [NETWORK STATUS] Port number Obtain from the main menu → [NETWORK] menu → [NETWORK CONTROL] → [COMMAND PORT]
2) Check the response from the projector.
Data section Blank Mode Termination symbol Command example “NTCONTROL” (ASCII string) ‘’0x20 ‘0’0x30 (CR)0x0d Data length 9 bytes 1 byte 1 byte 1 byte
- Mode: 0 = Non-protect mode
Command transmission method
Transmit using the following command formats.
■Transmitted data
Header Data section Termination symbol Command example ‘0’0x30 ‘0’0x30 Control command(ASCII string) (CR)0x0d Data length 1 byte 1 byte Undefined length 1 byte
■Received data
Header Data section Termination symbol Command example ‘0’0x30 ‘0’0x30 Control command(ASCII string) (CR)0x0d Data length 1 byte 1 byte Undefined length 1 byte
■Error response
String Details Termination symbol Message “ERR1” Undefined control command (CR)0x0d “ERR2” Out of parameter range “ERR3” Busy state or no-acceptable period “ERR4” Timeout or no-acceptable period “ERR5” Wrong data length “ERRA” Password mismatch Data length 4 bytes — 1 byte
terminal The terminal of the projector conforms with RS-232C so that the projector can be connected to and controlled from a computer.
Connection
- When connecting directly
flowchart
graph LR
    A["Projector connecting terminals"] --> B["D-Sub 9p (female)"]
    B --> C["D-Sub 9p (male)"]
    C --> D["Computer"]
    D --> E["Communication cable (straight)"]
- When connecting with DIGITAL LINK compatible devices
flowchart
graph LR
    A["Computer"] --> B["D-Sub 9p (male)"]
    B --> C["Digital LINKDIGITAL LINKD-Sub 9p (female)"]
    C --> D["Digital LINK compatible deviceProjector connecting terminals"]
    D --> E["Node 1"]
    D --> F["Node 2"]
    D --> G["Node 3"]
LAN cable (straight) Communication cable (straight)
Note
The destination of [RS-232C] (→ page 90) must be set according to the connection method.
When connecting by a DIGITAL LINK compatible device, set the [PROJECTOR SETUP] menu [ECO MANAGEMENT] [STANDBY MODE] (→ page 89) to [NORMAL] to control the projector in standby mode.
Pin assignments and signal names
D-Sub 9-pin (female) Outside view Pin No. Signal name Details (1) — NC (2) TXD Transmitted data (3) RXD Received data (4) — NC (5) GND Earth (6) — NC (7) CTS Connected internally (8) RTS (9) — NC
Communication conditions (Factory default)
Signal level RS-232C-compliant Sync. method Asynchronous Baud rate 9 600 bps Parity None Character length 8 bits Stop bit 1 bit X parameter None S parameter None
Transmission from the computer starts with STX, then the ID, command, parameter, and ETX are sent in this order. Add parameters according to the details of control.
text_image
ID designate
ZZ, 01 to 64
STX A D I1 I2 : C1 C2 C3 : P1 P2 ~ Pn ETX
(2 bytes) (2 bytes) Semi-colon (1 byte) 3 command characters (3 bytes)
Start (1 byte) Parameter (undefined length) End (1 byte)
flowchart
graph TD
    A["STX"] --> B["S1"]
    C["A D"] --> D["S2"]
    E["I1 I2"] --> F["S3"]
    G["C1 C2 C3"] --> H["S4"]
    I["ETX"] --> J["S5"]
    K["E"] --> L["P1 P2 P3 P4 P5 P6"]
    M["Sub command (5 bytes)"] --> N["Operation (1 byte)'"]
    O["Parameter (6 bytes)'"] --> P[""=" (Set the value specified using parameter)"]
    Q["Symbol "+" or "-" (1 byte) and setting or adjustment value (5 bytes)"] --> R["Operation (1 byte)'"]
    S["Operation (1 byte)'"] --> T[""=" (Set the value specified using parameter)"]
    U["Same as the basic format"] --> V["STX"]
    U --> W["ETX"]
*1 When transmitting a command which does not need a parameter, an operation (E) and parameter are not necessary.
Attention
If a command is transmitted after the lamp starts illuminating, there may be a delay in response or the command may not be executed. Try sending or receiving any command after 60 seconds.
When transmitting multiple commands, be sure to wait until 0.5 seconds has elapsed after receiving the response from the projector before sending the next command. When transmitting a command which does not need a parameter, a colon (:) is not necessary.
Note
If a command cannot be executed, the "ER401" response is sent from the projector to the computer.
If an invalid parameter is sent, the "ER402" response is sent from the projector to the computer.
If a command is sent with a specified ID, a response will be sent to the computer only in the following cases.
It matches the projector ID
When [PROJECTOR ID] (→ page 87) on the projector is [ALL]
STX and ETX are character codes. STX shown in hexadecimal is 02, and ETX shown in hexadecimal is 03.
Cable specification
When connected to a computer
text_image
Projector
( terminal)
1NC NC 1
2
3
4NC NC 4
5
6NC NC 6
7
8
9NC NC 9
Computer
(DTE specifications)
Control command
The following table lists the commands that can be used to control the projector using a computer.
■Projector control command
Command Details Parameter/response string Remark (parameter) PON Power on — To check if the power is on, use the “Power query” command. POF Power standby QPW Power query 000001 STANDBYPower on IIS Switching the input signal VID VIDEORG1 COMPUTER1RG2 COMPUTER2HD1 HDMI1HD2 HDMI2DL1 DIGITAL LINKNWP NETWORK AUU Volume up AUD Volume down QL Lamp cumulative runtime query 1 Returned with 0 to 99999 OSH AV mute control 0 AV mute function off QSH AV mute status query 1 AV mute function on Q$Lamp condition query 0123 Stand-byLamp ON control activeLamp ONLamp OFF control active VSE Aspect ratio switch 01256910 AUTONORMALWIDENATIVFULLH FITV FIT QS1 Aspect ratio settings query
■Projector control command (with sub command)
Command Sub command Details Remark VXX RYCI1 COMPUTER1 input setting +00000=RGB/YP _B P _R , +00001=Y/C
To initialize your password, consult your distributor.
List of compatible signals
The following table specifies the video signals compatible with the projector.
- Symbols that indicate formats are as follows.
V: VIDEO, Y/C
R: RGB
Y: YC_BC_R/YP_BP_R
H: HDMI/DIGITAL LINK
Mode Display resolution (dots) Scanning frequency Dot clock frequency (MHz) Format Plug and play*1 Horizontal (kHz) Vertical (Hz) COMPUTER1/ COMPUTER2 HDMI/ DIGITAL LINK NTSC/NTSC4.43/ PAL-M/PAL60 720 x 480i 15.7 59.9 — V — — PAL/PAL-N/SECAM 720 x 576i 15.6 50.0 — V — — 525 (480) /60i 712 x 483i 15.7 59.9 13.5 R/Y — — 625 (576) /50i 702 x 575i 15.6 50.0 13.5 R/Y — — 525 (480) /60i 720 (1 440) x 480i ^2 15.7 59.9 27.0 H — — 625 (576) /50i 720 (1 440) x 576i ^2 15.6 50.0 27.0 H — — 525 (480) /60p 720 x 480 31.5 59.9 27.0 R/Y/H — √ 625 (576) /50p 720 x 576 31.3 50.0 27.0 R/Y/H — √ 750 (720) /60p 1 280 x 720 45.0 60.0 74.3 R/Y/H — √ 750 (720) /50p 1 280 x 720 37.5 50.0 74.3 R/Y/H — √ 1125 (1080) /60i ^3 1 920 x 1 080i 33.8 60.0 74.3 R/Y/H — √ 1125 (1080) /50i 1 920 x 1 080i 28.1 50.0 74.3 R/Y/H — √ 1125 (1080) /24p 1 920 x 1 080 27.0 24.0 74.3 R/Y/H — √ 1125 (1080) /24sF 1 920 x 1 080i 27.0 48.0 74.3 R/Y/H — — 1125 (1080) /25p 1 920 x 1 080 28.1 25.0 74.3 R/Y/H — — 1125 (1080) /30p 1 920 x 1 080 33.8 30.0 74.3 R/Y/H — — 1125 (1080) /60p 1 920 x 1 080 67.5 60.0 148.5 R/Y/H — √ 1125 (1080) /50p 1 920 x 1 080 56.3 50.0 148.5 R/Y/H — √ 640 x 400 640 x 400 31.5 70.1 25.2 R/H — — 640 x 400 37.9 85.1 31.5 R/H — — 640 x 480 640 x 480 31.5 59.9 25.2 R/H √ √ 640 x 480 35.0 66.7 30.2 R/H — — 640 x 480 37.9 72.8 31.5 R/H √ √ 640 x 480 37.5 75.0 31.5 R/H √ √ 640 x 480 43.3 85.0 36.0 R/H — — 800 x 600 800 x 600 35.2 56.3 36.0 R/H √ √ 800 x 600 37.9 60.3 40.0 R/H √ √ 800 x 600 48.1 72.2 50.0 R/H √ √ 800 x 600 46.9 75.0 49.5 R/H √ √ 800 x 600 53.7 85.1 56.3 R/H — — 832 x 624 832 x 624 49.7 74.6 57.3 R/H √ √ 1024 x 768 1 024 x 768 39.6 50.0 51.9 R/H — — 1 024 x 768 48.4 60.0 65.0 R/H — — 1 024 x 768 56.5 70.1 75.0 R/H √ √ 1 024 x 768 60.0 75.0 78.8 R/H √ √ 1 024 x 768 68.7 85.0 94.5 R/H — — 1 024 x 768 81.4 100.0 113.3 R/H — —
Chapter 7 Appendix — Technical information
Mode Display resolution (dots) Scanning frequency Dot clock frequency (MHz) Format Plug and play*1 Horizontal (kHz) Vertical (Hz) COMPUTER1/ COMPUTER2 HDMI/ DIGITAL LINK 1152 x 864 1 152 x 864 53.7 60.0 81.6 R/H — — 1 152 x 864 67.5 75.0 108.0 R/H — — 1 152 x 864 77.1 85.0 119.7 R/H — — 1152 x 870 1 152 x 870 68.7 75.1 100.0 R/H √ √ 1280 x 720 1 280 x 720 37.1 49.8 60.5 R/H — — 1 280 x 720 44.8 59.9 74.5 R/H — — 1280 x 768 1 280 x 768 60.3 74.9 102.3 R/H — — 1 280 x 768 68.6 84.8 117.5 R/H — — 1280 x 800 1 280 x 800 41.3 50.0 68.0 R/H — — 1 280 x 800 49.7 59.8 83.5 R/H *_5 *_5 1 280 x 800 62.8 74.9 106.5 R/H — — 1 280 x 800 71.6 84.9 122.5 R/H — — 1280 x 960 1 280 x 960 60.0 60.0 108.0 R/H — — 1280 x 1024 1 280 x 1 024 64.0 60.0 108.0 R/H — — 1 280 x 1 024 80.0 75.0 135.0 R/H — — 1 280 x 1 024 91.1 85.0 157.5 R/H — — 1366 x 768 1 366 x 768 39.6 49.9 69.0 R/H — — 1 366 x 768 47.7 59.8 85.5 R/H — — 1400 x 1050 1 400 x 1 050 65.2 60.0 122.6 R/H — — 1 400 x 1 050 65.3 60.0 121.8 R/H — — 1 400 x 1 050 82.3 74.9 156.0 R/H — — 1440 x 900 1 440 x 900 55.9 59.9 106.5 R/H — — 1600 x 900 1 600 x 900 46.4 49.9 96.5 R/H — — 1 600 x 900 55.9 60.0 119.0 R/H — — 1600 x 1200 1 600 x 1 200 75.0 60.0 162.0 R/H √ √ 1680 x 1050 1 680 x 1 050 54.1 50.0 119.5 R/H — — 1 680 x 1 050 65.3 60.0 146.3 R/H — — 1920 x 1080 1 920 x 1 080 55.6 49.9 141.5 R/H — — 1 920 x 1 080*4 66.6 59.9 138.5 R/H — — 1920 x 1200 1 920 x 1 200 61.8 49.9 158.3 R/H — — 1 920 x 1 200*4 74.0 60.0 154.0 R/H *_6 *_6
*1 Signals with √ in the Plug and play columns are signals described in EDID (extended display identification data) of the projector. A signal, which has no √ in the Plug and play columns but has an entry in the Format column, can be input. For signals without √ in the Plug and play columns, resolution may not be selected in the computer even though the projector supports them.
Note
The number of display dots for PT-FZ570 is 1920 x 1200. The number of display dots for PT-FW530 is 1280 x 800. The number of display dots for PT-FX500 is 1024 x 768. A signal with a different resolution is converted to the number of display dots.
The "i" at the end of the resolution indicates an interlaced signal.
When interlaced signals are connected, flickering may occur on the projected image.
DIGITAL LINK input compatible signal is the same as HDMI input compatible signal.
When the communication method of the DIGITAL LINK is set to [LONG REACH], the signals that the projector can receive are up to 1080/60p(148.5MHz).
Even the above signals exist, some image signals that are recorded in special method may not be displayed.
Specifications
The specifications of the projector are as follows.
Power supply 100 V - 240 V (100 V - 240 V alternating current), 50 Hz/60 Hz Power consumption Projecting PT-FZ570 413 W (4.7 A - 1.9 A) PT-FW530, PT-FX500 400 W (4.5 A - 1.8 A) In standby mode When [STANDBY MODE] of [ECO MANAGEMENT] is set to [ECO]: 0.5 WWhen [STANDBY MODE] of [ECO MANAGEMENT] is set to [NORMAL]: 12 WWhen [STANDBY MODE] of [ECO MANAGEMENT] is set to [NORMAL], and [IN STANDBY MODE] in [AUDIO SETTING] is set to [ON]: 30 W LCD panel Size PT-FZ570, PT-FW530 1.63 cm (0.64") (aspect ratio 16:10) PT-FX500 1.60 cm (0.63") (aspect ratio 4:3) Display system Translucent screen LCD panel 3 panels, 3 primary color system Drive system Active matrix Number of pixels PT-FZ570 2 304 000 pixels (1 920 x 1 200 dots) x 3 panels PT-FW530 1 024 000 pixels (1 280 x 800 dots) x 3 panels PT-FX500 786 432 pixels (1 024 x 768 dots) x 3 panels Lens Zoom PT-FZ570, PT-FW530 1.22 ~ 2.26:1 PT-FX500 1.32 ~ 2.44:1 Focus F = 1.6 ~ 2.2f = 17.1 mm ~ 31.7 mm Luminous lamp 270 W, UHM lamp Light output ^1 PT-FZ570, PT-FW530 4 500 lm PT-FX500 5 000 lm Contrast ratio ^1 10 000:1 (when [PICTURE MODE] is set to [DYNAMIC], [LAMP POWER] is set to [NORMAL], [IRIS] is set to [ON], [DAYLIGHT VIEW] is set to [OFF] and [AUTO POWER SAVE] is set to [OFF]) Color system 7 standards (NTSC/NTSC4.43/PAL/PAL-N/PAL-M/SECAM/PAL60) Projected image size 1.02 m (40") - 7.62 m (300") Screen aspect ratio PT-FZ570, PT-FW530 16:10 PT-FX500 4:3 Projection method [FRONT/CEILING], [FRONT/DESK], [REAR/CEILING], [REAR/DESK] Speaker 4.0 cm, round, x 1 Max. effective audio output 10 W (monaural) Power cord length 2.0 m (78-3/4") Outer case Molded plastic Dimensions Width 498 mm (19-19/32") Height 145 mm (5-11/16") (with legs at shortest position) Depth 398.3 mm (15-11/16") Weight Approx. 7.9 kg (17.42 lbs.) ^2 Noise level ^1 33 dB when [LAMP POWER] is set to [NORMAL]29 dB when [LAMP POWER] is set to [ECO] Operating environment Operating environment temperature ^3 0 °C (32 °F) - 40 °C (104 °F) (Elevation: below 1 400 m (4 593'))0 °C (32 °F) - 35 °C (95 °F) (Elevation: 1 400 m (4 593') ~ 2 700 m (8 858')) Operating environment humidity 20 % - 80 % (No condensation) Remote control Power supply DC 3 V (AAA/R03/LR03 battery x 2) Operating range Within approx.30 m (98'5") (when operated directly in front of signal receiver) Weight 102 g (3.6 ozs.) (including batteries) Dimensions Width: 48 mm (1-7/8"), Height: 145 mm (5-23/32"), Depth: 27 mm (1-1/16")
*1 Measurement, measuring conditions and method of notation all comply with ISO/IEC 21118:2012 international standards.
*2 Average value. Weight varies for each product.
*3 If the [PROJECTOR SETUP] menu → [LAMP POWER] is set to [NORMAL], [LAMP POWER] changes to [ECO] forcibly to protect the projector when the operating environment temperature becomes 35 °C (95 °F) or higher (30 °C (86 °F) or higher when using the projector at high altitudes).
Note
- The model numbers of accessories and optional accessories are subject to change without prior notice.
Terminal
terminal 1 set high-density D-Sub 15 p (female)RGB signal 0.7 V [p-p] 75 Ω (SYNC ON GREEN: 1.0 V [p-p] 75 Ω)SYNC/HD TTL high impedance, automatic positive/negative polarity compatibleVD TTL high impedance, automatic positive/negative polarity compatible(The SYNC/HD and VD terminals do not support 3 value SYNC.) YP_BP_R signal Y: 1.0 V [p-p] including synchronization signal, P_BP_R: 0.7 V [p-p] 75 Ω Y/C signal Y: 1.0 V [p-p], C: 0.286 V [p-p] 75 Ω terminal 1 set, high-density D-Sub 15 p (female)RGB signal 0.7 V [p-p] 75 Ω (SYNC ON GREEN: 1.0 V [p-p] 75 Ω)SYNC/HD TTL high impedance, automatic positive/negative polarity compatibleVD TTL high impedance, automatic positive/negative polarity compatible(The SYNC/HD and VD terminals do not support 3 value SYNC.) YP_BP_R signalY: 1.0 V [p-p] including synchronization signal, P_BP_R: 0.7 V [p-p] 75 Ω terminal 2 sets, HDMI 19 pin, HDCP compatible, Deep Color compatibleAudio signal Linear PCM (Sampling frequency: 48 kHz/44.1 kHz/32 kHz) terminal 2 sets, M3 stereo mini jack 0.5 V [rms], input impedance 22 kΩ or more terminal 1 set, pin jack x 2 (L-R) 0.5 V [rms], input impedance 22 kΩ or more terminal 1 set, M3 stereo mini jack (monitor output, stereo compatible)0 V [rms] to 2.0 V [rms] (variable), output impedance 2.2 kΩ or less terminal 1 set, RJ-45, for network, DIGITAL LINK connection, PJLink compatible, 100Base-TX terminal 1 set, RJ-45, for network connection, PJLink compatible, 10Base-T/100Base-TX terminal USB connector (type A) x 1, for the Wireless module (Model No.: ET-WML100) only terminal USB connector (type A) x 1, for power supply only (DC 5 V, maximum 900 mA)
■Applicable scanning frequency
Refer to “List of compatible signals” ( page 149) for the types of video signals that can be used with the projector.
For video signal Horizontal : 15.73 kHz Vertical : 59.94 Hz, Horizontal : 15.63 kHz Vertical : 50 Hz For Y/C signal Horizontal : 15.73 kHz Vertical : 59.94 Hz, Horizontal : 15.63 kHz Vertical : 50 Hz For RGB signal Displayable resolution: 640 x 400 to 1 920 x 1 200Dot clock frequency: 162 MHz or less For YC_BC_R/YP_BP_R signal Displayable resolution: 480i/576i to 1 920 x 1 080Dot clock frequency: 148.5 MHz or less For HDMI signal Displayable resolution for movie-based signals: 480i/576i ^11 to 1 920 x 1 080Displayable resolution for still image signals: 640 x 400 to 1 920 x 1 200 (non-interlaced)Dot clock frequency: 25 MHz - 162 MHz
*1 Pixel-Repetition signal (dot clock frequency 27.0 MHz) only
Note
- DIGITAL LINK input compatible signal is the same as HDMI input compatible signal.
Dimensions
Unit: mm
text_image
Panasonic
358 (14-3/32")
40.3 (1-19/32"
text_image
73.5 (2-7/8")
78.5 (3-3/32")
218.5 (8-19/32")
249 (9-13/16")
437 (17-3/16")
498 (19-19/32)
text_image
256.5 (10-3/32")
140 (5-1/2")
145 (5-11/16)
* Actual dimensions may differ depending on the product.
Precautions for Attaching Ceiling Mount Bracket
- When installing the projector to a ceiling, be sure to use the specified optional Ceiling Mount Bracket as the following combinations:
① ET-PKD120H (for High Ceilings) and ET-PKE300B (Projector Mount Bracket)
Other combination is not available.
When installing the projector, attach the drop-prevention wire supplied with the Projector Mount Bracket.
Ask a qualified technician to do the installation work such as mounting the projector on the ceiling.
Panasonic takes no responsibility for any accident, damage, damages to the projector resulting from use of a ceiling mount bracket not manufactured by Panasonic, optional Ceiling Mount Bracket combinations not specified, installation method not described in installation manual, optional accessories not specified or the inappropriate choice of location for installation, even if the warranty period of the projector has not expired.
Unused products must be removed promptly by a qualified technician.
Use a torque screwdriver or Allen torque wrench to tighten bolts to their specified tightening torques. Do not use electric screwdrivers or impact screwdrivers.
Read the Installation Instructions for the Ceiling Mount Bracket for details.
The model numbers of accessories and optional accessories are subject to change without prior notice.
Bottom view
text_image
① ET-PKD120H (for High Ceilings)
ET-PKE300B (Projector Mount Bracket)
② ET-PKD120S (for Low Ceilings)
ET-PKE300B (Projector Mount Bracket)
M6
M4
M4
M4
M6
M4
M6
M6
12 mm
(15/32")
Torque: (M6) 4 ± 0.5 N·m
Model No. of Ceiling Mount Bracket:
① ET-PKD120H (for High Ceilings)
ET-PKE300B (Projector Mount Bracket)
② ET-PKD120S (for Low Ceilings)
ET-PKE300B (Projector Mount Bracket)
Note
- You can also use the existing ceiling mount bracket ET-PKF110H (for High Ceilings) or ET-PKF110S (for Low Ceilings).
Model No. of Ceiling Mount Bracket (Supplement): ③ ET-PKF110H (for High Ceilings)
④ ET-PKF110S (for Low Ceilings)
Bottom view
text_image
③ ET-PKF110H (for High Ceilings)
④ ET-PKF110S (for Low Ceilings)
M4
M6
M4
M4
M4
M6
M4
M6
M4
8 mm
(5/16")
Torque: (M4) 1.25 ± 0.2 N·m
Model No. of Ceiling Mount Bracket:
③ ET-PKF110H (for High Ceilings)
④ ET-PKF110S (for Low Ceilings)
Index
A
About Presenter Light .....110
About VueMagic 112
Accessories 23
terminal 27,41
Adjusting adjustable feet 35
Adjusting the volume 50
[ADVANCED MENU] 63
Air filter unit 132
[ASPECT] 73
button
Remote control 25, 52
button
Remote control 25, 51
[AUTO SETUP SETTING] 83
button
Projector body 27
Remote control 25,50
B
[BACK COLOR] 83
[BRIGHTNESS] 61
C
Cautions on use 22
Cautions when installing .....17
Cautions when transporting 17
CD-ROM 24
[CLAMP POSITION] 74
[CLOCK PHASE] 73
[CLOSED CAPTION SETTING] 81
[COLOR] 62
[COLOR TEMPERATURE] 62
button
Remote control .....25, 47
[COMPUTER IN/OUT] 77
Connection 36
[CONTRAST] 61
[CONTROL DEVICE SETUP] .....99
Crestron Connected 126
D
[DATE AND TIME] 96
[DAYLIGHT VIEW] 64
button
Remote control 25,58
[DIGITAL CINEMA REALITY] 64
DIGITAL LINK 19
button
Remote control .....25, 47
[DIGITAL LINK IN] 80
[DIGITAL LINK MENU] 102
[DIGITAL LINK MODE] 101
[DIGITAL LINK STATUS] 101
Dimensions 153
Display language 75
[DISPLAY OPTION] 76
[DISPLAY SETTING] 98
Disposal 22
[DOT CLOCK] 72
button
Remote control .....25, 53
E
Early Warning Software 21
button
Remote control 25, 55
[ECO MANAGEMENT] 88
button
Projector body 27
Remote control .....25
F
[FILTER COUNTER] 94
Filter indicator 130
[FRAME LOCK] 74
button
Remote control 25, 51
button
Remote control .....25, 54
[FUNCTION BUTTON] 91
G
[GAMMA] 63
H
button
Remote control 25,47
button
Remote control 25,47
[HDMI IN] 78
|
button
Remote control .....25, 55
button
Remote control 25, 55
[INITIALIZE] 104
[INITIALIZE ALL] 97
Initial setting 42
[INITIAL START UP] 87
Projector body 27,47
Installation mode 31,43
L
Lamp cover 27
Lamp indicator 130
[LAMP POWER] 88
List of compatible signals 149
M
Main menu 58
Main power switch 27,42
Maintenance/replacement 132
button
Projector body 27, 57
Remote control .....25
Menu item 58
[MENU LOCK] 99
[MENU LOCK PASSWORD] 99
button
Remote control 25, 50
N
Navigating through the menu 57
[NETWORK] 101
button
Remote control 25,47
Network connections 106
[NETWORK CONTROL] 103
[NETWORK STATUS] 103
[NOISE REDUCTION] 64
O
button
Remote control .....25, 51
[ON-SCREEN DISPLAY] 76
On-screen menu ....57
Optional accessories 24
[OTHER FUNCTIONS] 85
[OVER SCAN] 73
P
[PASSWORD] 98
[PASSWORD CHANGE] 98
[PICTURE] 61
[PICTURE MODE] 61
PJLink protocol 141
[POSITION] 66
Power button
Projector body 27
Remote control .....25
Power cord 41
Power indicator 41
Precautions for attaching Ceiling
Mount Bracket 154
Precautions for use 17
Projecting 47
[PROJECTION METHOD] 88
Projector body 26
[PROJECTOR ID] 87
[PROJECTOR NAME] 102
[PROJECTOR SETUP] 87
[P-TIMER] 84
button
Remote control .....25, 53
R
Read this first! 4
[REALTIME KEYSTONE] 66
Remote control 25
Remote control operations 50
Replacing the air filter unit ..... 137
Replacing the lamp unit 135
Replacing the unit .....135
Resetting adjustment values to the
factory default .....58
[RGB / YP_BP_R] / [RGB / YC_BC_R] 65
[RS-232C] 90
S
[SCHEDULE] 94
button
Remote control .....25, 52
[SCREEN ADJUSTMENT] 66,70
[SCREEN SETTING] 81
Security 19
[SECURITY] 98
Selecting the input signal 47
terminal 145
Setting up 31
[SHARPNESS] 62
[SHIFT] 72
[SIGNAL SEARCH] 83
Specifications 151
[STARTUP INPUT SELECT] 83
[STARTUP LOGO] 82
[STATUS] 87
button
Remote control .....25, 54
Sub-menu 58
Switching off the projector 45
Switching on the projector 42
[SXGA MODE] 84
T
Temperature indicator .....130
[TEST PATTERN] 93
button
Remote control .....25, 54
[TEXT CHANGE] 99
[TINT] 62
Troubleshooting 138
[TV-SYSTEM] 65
V
button
Remote control .....25, 47
/ button
Projector body 27
Remote control .....25, 51
W
[WIDE MODE] 84
[WIRED LAN] 102

These symbols on the products, packaging, and/or accompanying documents mean that used electrical and electronic products and batteries should not be mixed with general household waste. For proper treatment, recovery and recycling of old products and used batteries, please take them to applicable collection points, in accordance with your national legislation and the Directives 2002/96/EC and 2006/66/EC.

By disposing of these products and batteries correctly, you will help to save valuable resources and prevent any potential negative effects on human health and the environment which could otherwise arise from inappropriate waste handling.

For more information about collection and recycling of old products and batteries, please contact your local municipality, your waste disposal service or the point of sale where you purchased the items.
Penalties may be applicable for incorrect disposal of this waste, in accordance with national legislation.
For business users in the European Union
If you wish to discard electrical and electronic equipment, please contact your dealer or supplier for further information.
These symbols are only valid in the European Union. If you wish to discard these items, please contact your local authorities or dealer and ask for the correct method of disposal.
Note for the battery symbol (bottom two symbol examples):
This symbol might be used in combination with a chemical symbol. In this case it complies with the requirement set by the Directive for the chemical involved.
AEEE Yönetmeliğine Uygundur.
Eski Ekipman ve Bataryaların İşlenmesi.
Sadece geri dönüşüm sistemleri olan Avrupa Birliği ve ülkeleri için geçerlidir.

Ürünler, ambalaj ve/veya ekli belgeler üzerindeki bu semboller kullanılmış elektrik ve elektronik ürünlerin ve pillerin genel ev atığı ile karıştırılmaması gerektiğini ifade eder.
Eski ürünlerin ve pillerin toplanması ve geri kazanılması için bu atıkları lütfen yasayla belirlenmiş olan uygun toplama merkezlerine teslim ediniz.
Bu atıkların doğru işlenmesiyle, değerli kaynakların korunmasına ve insan sağlığı ve çevreye olası negatif etkilerinin engellenmesine yardımcı olabilirsiniz.
Atıkların toplanması ve geri dönüşümü için detaylı bilgi için lütfen bağlı olduğunu yerel yönetimlerle iletişime geçiniz.
Atıkların atılmasıyla ilgili yanlış uygulamalar yasayla belirlenmiş olan cezalara sebebiyet verebilir.

Panasonic Corporation
Web Site : http://panasonic.net/avc/projector/
© Panasonic Corporation 2016
Panasonic Systems Communications Company of North America
5th Floor, Two Riverfront Plaza, Newark, NJ 07102-5490
TEL: (877) 803 - 8492
Panasonic Canada Inc.
5770 Ambler Drive, Mississauga, Ontario L4W 2T3
TEL: (905) 624 - 5010