
AS-H126PML1 - Air-conditioner LG - Free user manual and instructions
Find the device manual for free AS-H126PML1 LG in PDF.


User questions about AS-H126PML1 LG
0 question about this device. Answer the ones you know or ask your own.
Ask a new question about this device
Download the instructions for your Air-conditioner in PDF format for free! Find your manual AS-H126PML1 - LG and take your electronic device back in hand. On this page are published all the documents necessary for the use of your device. AS-H126PML1 by LG.
USER MANUAL AS-H126PML1 LG
Prior to installation, this air-conditioning unit must be submitted for approval by the utility service which provides electricity (EN 61000-2, EN 61000-3 Norm).
text_image
conditioning unit must be submitted for approval by the utility service which provides electricity (EN 61000-2, EN 61000-3 Norm). IMPORTANT Power's management is fully and thoroughly and operation of a custom air conditioner. It's owner of the future reference after throughout. It will be required to provide the utility service. The utility service is currently approved by the AIR conditioning unit.TABLE OF CONTENTS
FOR YOUR RECORDS
Write the model and serial numbers here:
Model #
Serial #
You can find them on a label on the side of each unit.
Dealer's Name
Date Purchased
■ Staple your receipt to this page in the event you need it to prove date of purchase or for warranty issues.

READ THIS MANUAL
Inside you will find many helpful hints on how to use and maintain your air conditioner properly. Just a little preventive care on your part can save you a great deal of time and money over the life of your air conditioner.
You'll find many answers to common problems in the chart of troubleshooting tips. If you review our chart of
Troubleshooting Tips first, you may not need to call for service at all.

PRECAUTION
- Contact the authorized service technician for repair or maintenance of this unit.
- Contact the installer for installation of this unit.
• The air conditioner is not intended for use by young children or invalids without supervision. - Young children should be supervised to ensure that they do not play with the air conditioner.
- When the power cord is to be replaced, replacement work shall be performed by authorized personnel only using only genuine replacement parts.
• Installation work must be performed in accordance with the National Electric Code by qualified and authorized personnel only.
natural_image
Simple line drawing of a family enjoying a picnic with sun, palm trees, and plates (no text or symbols)To prevent the injury of the user or other people and property damage, the following instructions must be followed.
■ Incorrect operation due to ignoring instruction will cause harm or damage. The seriousness is classified by the following indications.

WARNING
This symbol indicates the possibility of death or serious injury.

CAUTION
This symbol indicates the possibility of injury or damage to properties only.
■ The meanings of the symbols used in this manual are as shown below.
 | Be sure not to do. |
 | Be sure to follow the instruction. |

WARNING
Installation
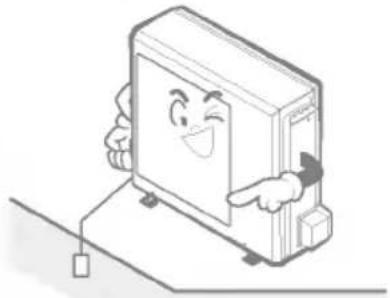
- Otherwise, it may cause electrical shock.
natural_image
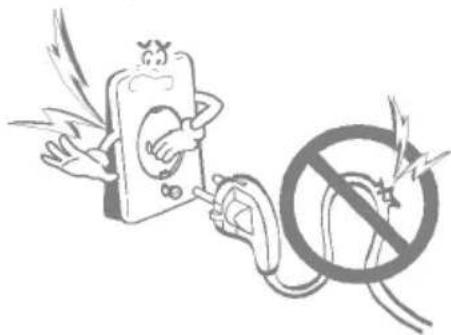
Cartoon illustration of a smiling computer monitor character pointing at its screen, connected to a small resistor (no text or symbols present)Don't use a power cord, a plug or a loose socket which is damaged.
- Otherwise, it may cause a fire or electrical shock.
natural_image
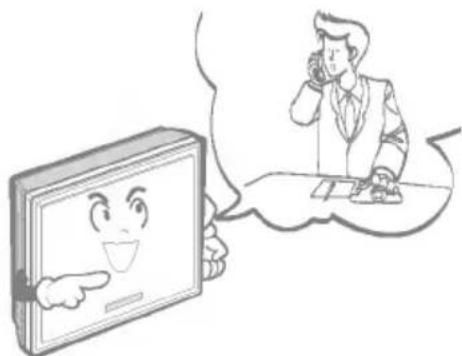
Cartoon illustration of a phone charging plug with a 'no power' symbol, no text or labels presentFor installation of the product, always contact the service center or a professional installation agency.
- Otherwise, it may cause a fire, electrical shock, explosion or injury.
natural_image
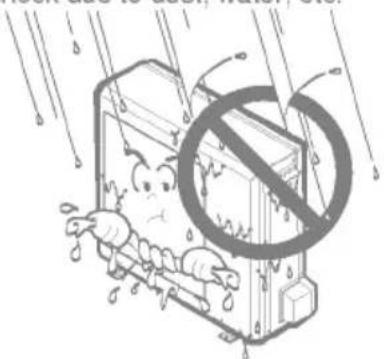
Illustration of a smiling computer monitor with a pointing gesture and a person sitting at a desk, no text or symbols present.Securely attach the electrical part cover to the indoor unit and the service panel to the outdoor unit.
- If the electrical part cover of the indoor unit and the service panel of the outdoor unit are not attached securely, it could result in a fire or electric shock due to dust, water, etc.
natural_image
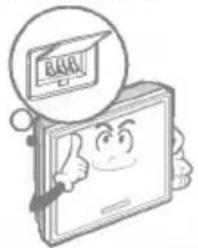
Illustration of a distressed air conditioner unit with raindrops and a no-smoking symbol (no text or symbols present)Always install an air leakage breaker and a dedicated switching board.
- No installation may cause a fire and electrical shock.
natural_image
Cartoon illustration of a smiling computer monitor with a speech bubble showing 'BAR!' (no text or symbols on the device itself)Do not disassemble or repair the product randomly.
- It will cause a fire or electrical shock.
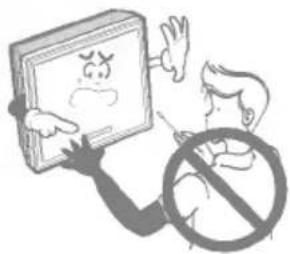
text_image
Cartoon illustration showing a person holding a computer monitor with a sad face and a 'no' symbol, implying no attention or rejection.Do not keep or use flammable gases or combustibles near the air conditioner.
• Otherwise, it may cause a fire or the failure of product.
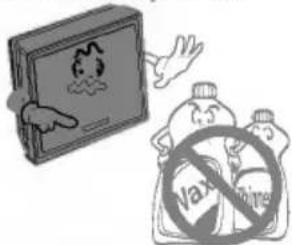
text_image
Illustration showing a hand pointing at a computer screen and a cartoon-style 'Vax/vaccine' with a prohibition symbol.Do not install the product at a place that ther is concern of falling down.
• Otherwise, it may result in personal injury.
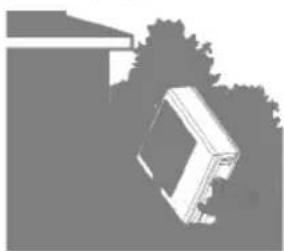
natural_image
Silhouette of a building with trees and a rectangular structure, no visible text or symbolsEnsure that an installation frame of the outdoor unit is not damaged due to use for a long time.
• It may cause injury or an accident.
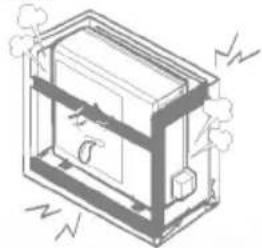
natural_image
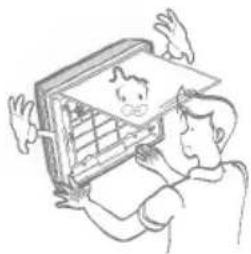
Isometric line drawing of a rectangular enclosure with internal components and smoke-like patterns (no text or symbols)Use caution when unpacking and installing.
• Sharp edges may cause injury.
natural_image
Illustration of a person holding up an open computer with a cartoon face on the screen (no text or symbols)Operation
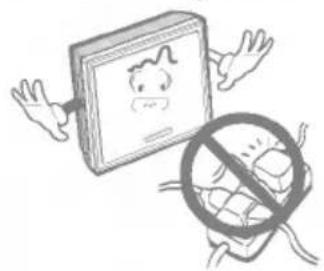
Do not share the outlet with other appliances.
• It will cause an electric shock or a fire due to heat generation.
natural_image
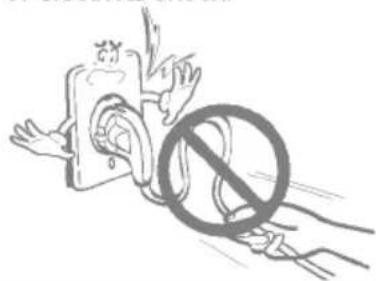
Illustration of a computer monitor with a cartoon face and a prohibition symbol (no text or symbols present)Take care so that the power cord may not be pulled during operation.
• Otherwise, it may cause a fire or electrical shock.
natural_image
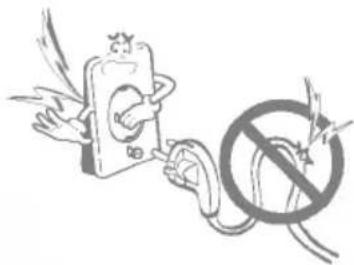
Illustration of hands using a device to stop a circular object with a diagonal line (no text or symbols)Do not use the damaged power cord.
• Otherwise, it may cause a fire or electrical shock.
natural_image
Cartoon illustration of a person using a plug to connect a plug into a circle, with a no-smoking symbol nearby (no text or symbols present)Unplug the unit if strange sounds, smell, or smoke comes from it.
• Otherwise, it may cause electrical shock or a fire.

natural_image
Illustration of a person talking on the phone while reacting to a document with a warning symbol (no text or symbols present)Do not modify or extend the power cord randomly.
• Otherwise, it may cause a fire or electrical shock.
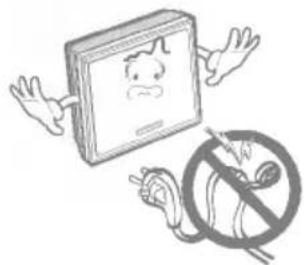
natural_image
Illustration of a cartoon book character with a sad face and a crossed-out circle containing a broken tool (no text or symbols)• Otherwise, it may cause a fire.
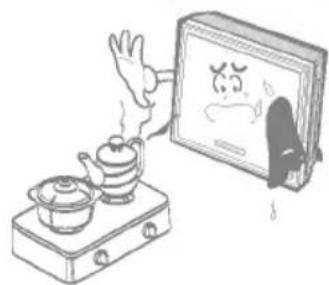
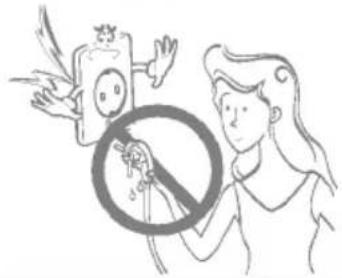
natural_image
Illustration of a steaming hot pot next to a TV with a sad face, no text or symbols presentTake the power plug out if necessary, holding the head of the plug and do not touch it with wet hands.
- Otherwise, it may cause a fire or electrical shock.
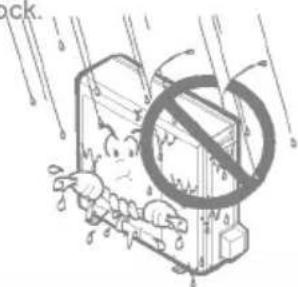
text_image
Illustration showing a person holding a prohibition sign with a bottle and wings, symbolizing food safety or health restrictions.Do not allow water to run into electrical parts.
• Otherwise, it may cause the failure of machine or electrical shock.
natural_image
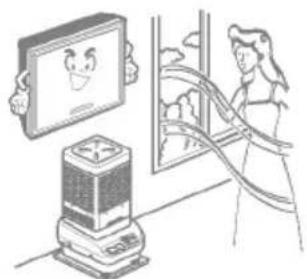
Cartoon illustration of a distressed character standing beside a box with a large 'no' symbol, under rain falling (no text or symbols present)Ventilate the room well when using this appliance together with a stove, etc.
• An oxygen shortage may occur.
natural_image
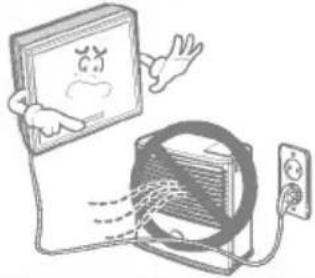
Illustration of a person interacting with a computer monitor and a digital device (no text or symbols present)Do not use the power cord near the heating tools.
• Otherwise, it may cause a fire and electrical shock.
natural_image
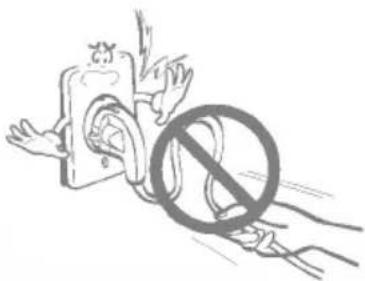
Cartoon illustration of a computer monitor with a sad face and connected to a keyboard and power plug (no text or symbols)Hold the plug by the head when taking it out.
- It may cause electric shock and damage.
natural_image
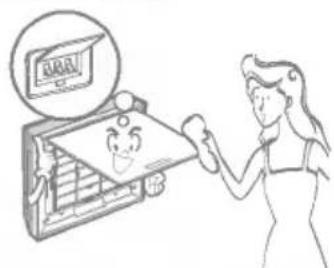
Illustration of a hand holding a device with a large 'no' symbol, no text or symbols presentWhen cleaning the unit, first make sure the power and breaker are turned off.
• Otherwise, it may cause electrical shock.
natural_image
Illustration of a woman using a computer with a smiling face, no text or symbols presentDo not open the suction inlet of the indoor/outdoor unit during operation.
- Otherwise, it may electrical shock and failure.
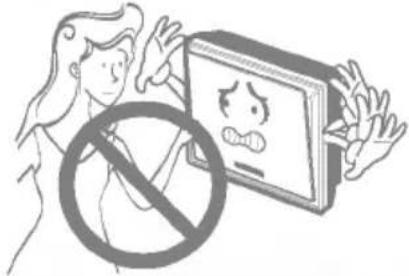
natural_image
Illustration of a person reacting to a computer screen displaying a sad face, with a no-smoking symbol nearby (no text or symbols present)Never touch the metal parts of the unit when removing the filter.
• They are sharp and may cause injury.
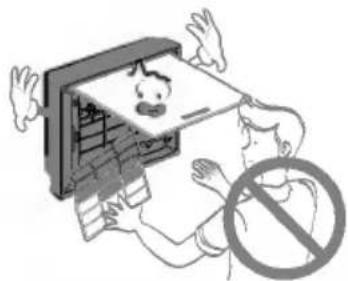
text_image
Illustration showing a person with a document and a 'no' symbol, indicating no restrictions or prohibition.Turn off the main power switch when not using the product for a long time.
• Otherwise, it may cause the failure of product or a fire.
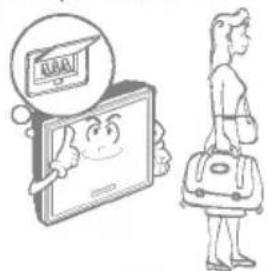
natural_image
Illustration of a person standing beside a smiling computer screen and a backpack, with no visible text or symbols.Do not step on the indoor/outdoor unit and do not put anything on it.
- It may cause an injury through dropping of the unit or falling down.
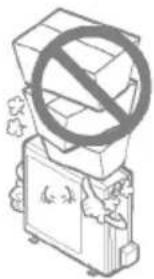
natural_image
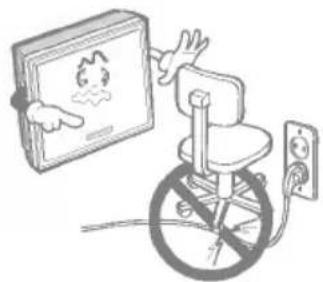
Illustration of a box with a prohibition symbol, no text or symbols presentDo not place a heavy object on the power cord.
- Otherwise, it may cause a fire or electrical shock.
natural_image
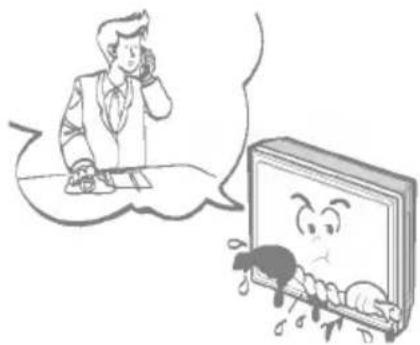
Illustration of a bicycle with a no-drawn wheel and a hand pointing at a monitor displaying a flame symbol (no text or labels)When the product is submerged into water, always contact the service center.
- Otherwise, it may cause a fire or electrical shock.
natural_image
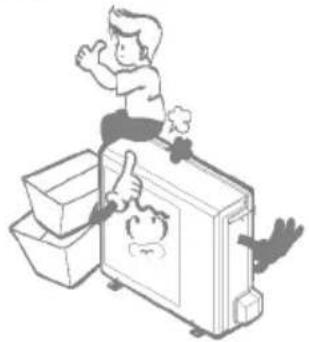
Cartoon illustration of a man talking on the phone while a bug appears to be trapped in a book (no text or symbols present)Take care so that children may not step on the outdoor unit.
- Otherwise, children may be seriously injured due to falling down.
natural_image
Illustration of a person climbing a large electronic device with a thumbs-up gesture, surrounded by boxes (no text or symbols)CAUTION
Installation
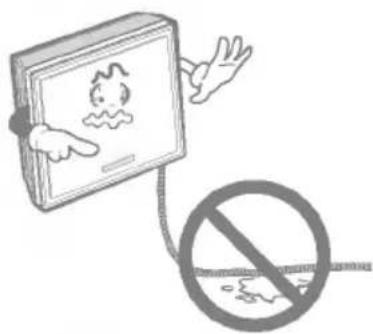
Install the drain hose to ensure that drain can be securely done.
• Otherwise, it may cause water leakage.
natural_image
Illustration of a book with a cartoon character and a prohibition symbol (no text or labels)Install the product so that the noise or hot wind from the outdoor unit may not cause any damage to the neighbors.
- Otherwise, it may cause dispute with the neighbors.
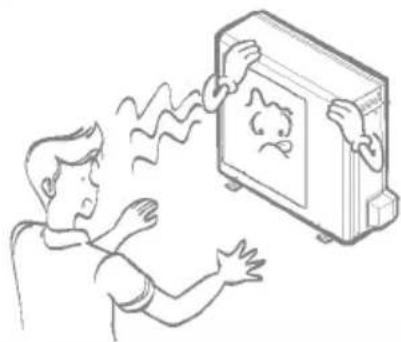
natural_image
Illustration of a person reacting to a wall-mounted monitor displaying a cartoon face (no text or symbols present)Always inspect gas leakage after the installation and repair of product.
- Otherwise, it may cause the failure of product.
Keep level parallel in installing the product.
- Otherwise, it may cause vibration or water leakage.
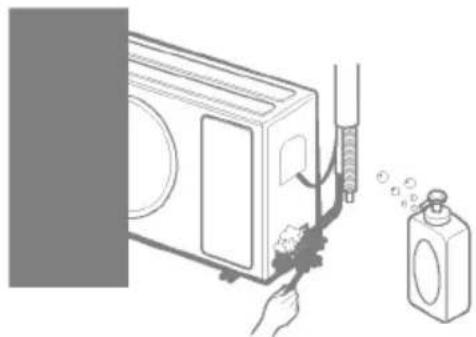
natural_image
Illustration of a hand cleaning a washing machine with a spray bottle nearby (no text or symbols)
natural_image
Illustration of stacked cardboard boxes with a face drawn inside, accompanied by a hand gesture (no text or symbols)Operation
Avoid excessive cooling and perform ventilation sometimes.
• Otherwise, it may do harm to your health.
natural_image
Illustration of a woman holding a smiling screen with clouds, next to a window (no text or symbols)Use a soft cloth to clean. Do not use wax, thinner, or a strong detergent.
• The appearance of the air conditioner may deteriorate, change color, or develop surface flaws.
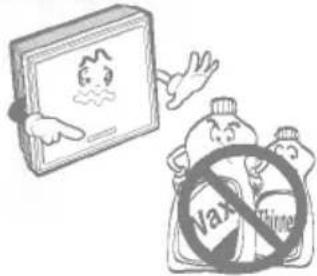
text_image
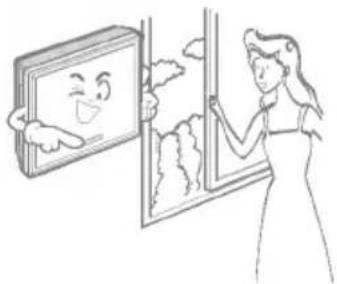
Vax ChineseWhen gas leaks, open the window for ventilation before operating the unit.
• Otherwise, it may cause explosion, and a fire.
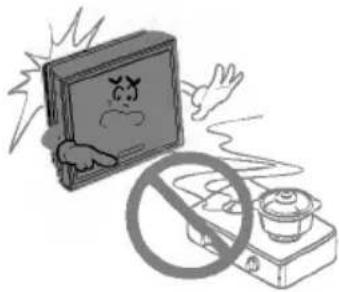
natural_image
Illustration of a TV with a distressed emoji and a crossed-out no-smoking sign, next to a portable stove (no text or symbols)Do not use an appliance for special purposes such as preserving animals vegetables, precision machine, or art articles.
- Otherwise, it may damage your properties.
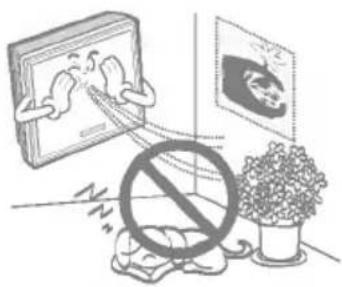
text_image
Illustration showing a book with a crying face and a crossed-out no-smoking sign, alongside a photo of a smiling face and a potted plant.Do not place obstacles around the flow inlet or outlet.
• Otherwise, it may cause the failure of appliance or an accident.
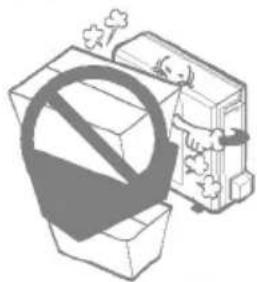
natural_image
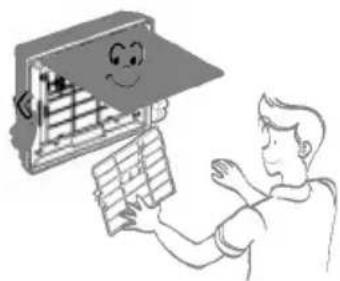
Illustration of a crossed-out box with a large 'no' symbol overlay, no text or symbols presentAlways insert the filter securely. Clean it every two weeks.
• Operation without the filter will cause failure.
natural_image
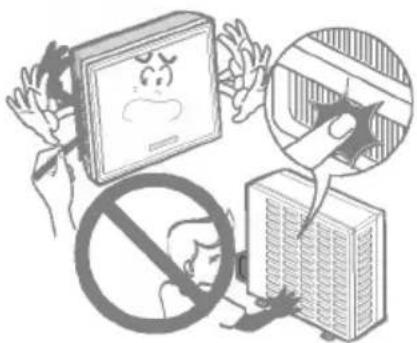
Illustration of a person using a computer with a smiling face on the screen (no text or symbols present)Do not insert the hands or bars through the air inlet or outlet during operation.
• Otherwise, it may cause personal injury.
Do not drink water coming out of the air conditioner.
- Otherwise, it may cause stomachache.
natural_image
Illustration of prohibited items including a document, prohibition sign, and buildings (no text or symbols)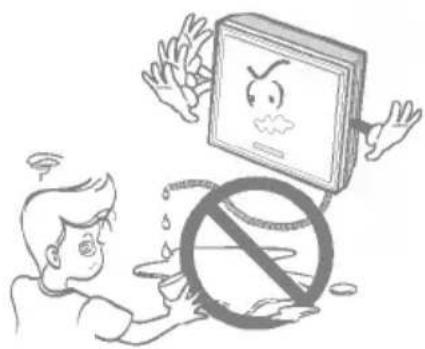
natural_image
Illustration of a person reacting to a computer screen displaying a sad face, with a large 'no' symbol below (no text or symbols present)- Contact an installation specialist for installation.
- Plug in the power plug properly.
- Use a dedicated circuit.
- Do not use an extension cord.
- Do not start/stop operation by plugging/unplugging the power cord.
-
If the cord/plug is damaged, replace it with only an authorized replacement part.
-
Being exposed to direct airflow for a long time may be hazardous to your health. Do not expose occupants, pets, or plants to direct airflow for a long time.
- Due to the possibility of oxygen deficiency, ventilate the room when using the appliance together with stoves or other heating devices.
-
Do not use this air conditioner for non-specified special purpose (e.g. preserving precision devices, food, pets, plants, or art objects). Such use may damage your properties.
-
Do not touch the metal parts of the unit when removing the filter. Injury can occur.
- Do not use water to clean inside the air conditioner. Exposure to water can destroy the insulation, leading to electric shock.
- When cleaning the unit, first make sure that the power and breaker are turned off. The fan rotates at a very high speed during operation. There is a possibility of injury if the unit's power is triggered while cleaning inner parts of the unit.
For repair and maintenance, contact your authorized service dealer.

This symbol alerts you to the risk of electric shock.

This symbol alerts you to hazards that may cause harm to the air conditioner.
This symbol indicates special notes.

WARNING: This appliance should be installed in accordance with national wiring regulations. This guide acts as a guide to help to explain product features.
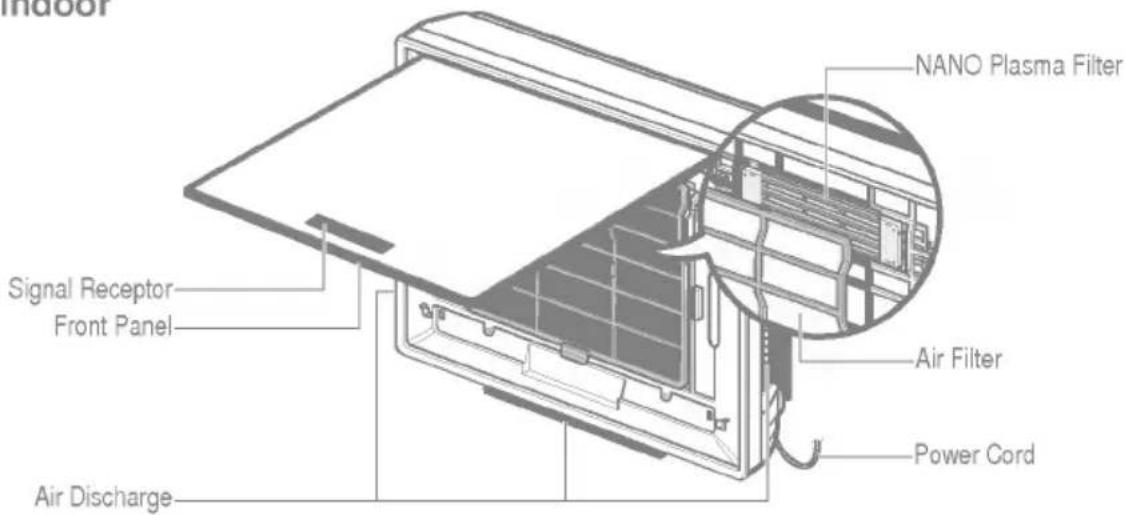
Indoor
text_image
indoor NANO Plasma Filter Signal Receptor Front Panel Air Discharge Air Filter Power CordOutdoor
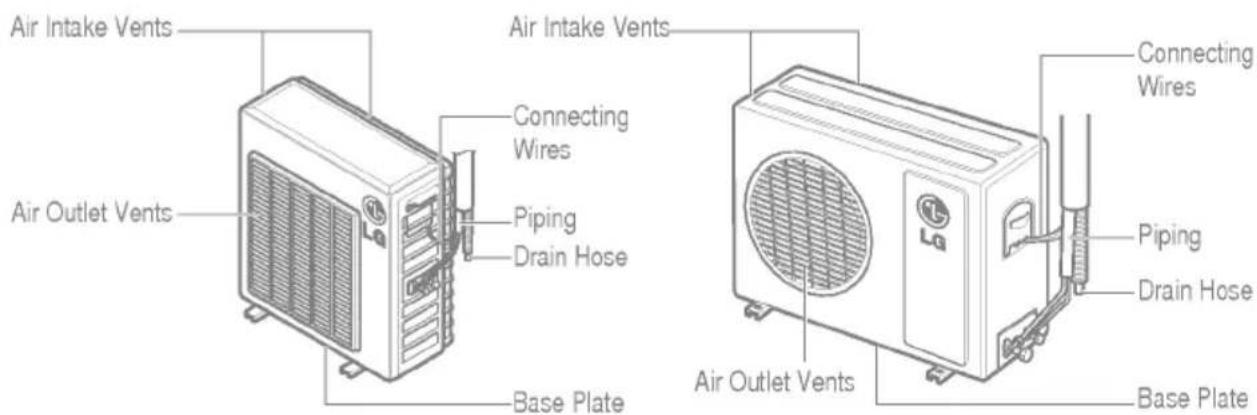
text_image
Air Intake Vents Air Outlet Vents Connecting Wires Piping Drain Hose Base Plate Air Intake Vents Connecting Wires Piping Drain Hose Air Outlet Vents Base Plate
WARNING: This appliance must be properly grounded.
To minimize the risk of electric shock, you must alway plug into a grounded outlet.
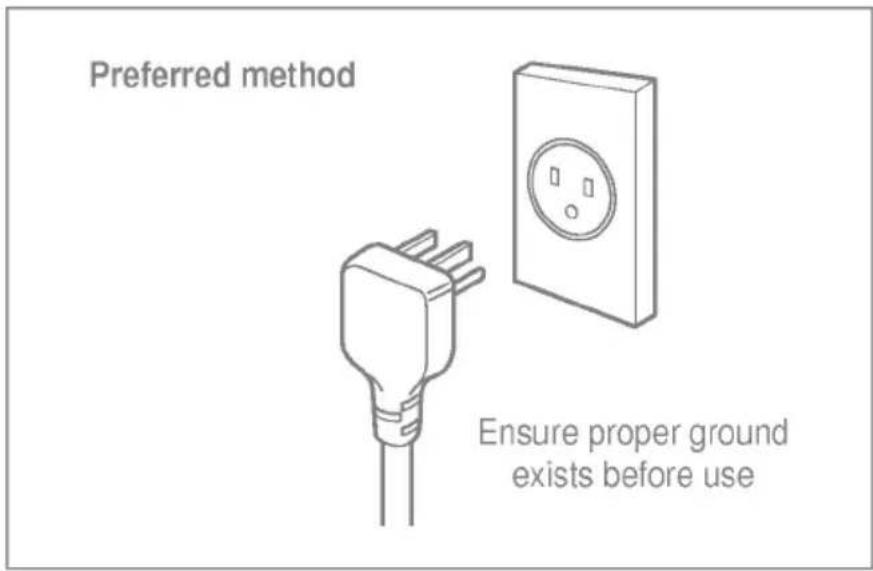
text_image
Preferred method Ensure proper ground exists before use
WARNING: Do not cut or remove the grounding prong from the power plug.

WARNING: Attaching the adapter ground terminal to the wall receptacle cover screw does not ground the appliance unless the cover screw is metal and not insulated, and the wall receptacle is grounded through the house wiring.

WARNING: If you have any doubt whether the air conditioner is properly grounded, have the wall receptacle and circuit checked by a qualified electrician.
We strongly discourage the use of an adapter due to potential safety hazards. For temporary connections, use only a UL-listed adapter, available from most local hardware stores. Ensure that the large slot in the adapter is aligned with the large slot in the receptacle for a proper polarity connection. To disconnect the power cord from the adapter, use one hand on each to avoid damaging the ground terminal. Avoid frequently unplugging the power cord as this can lead to eventual ground terminal damage.
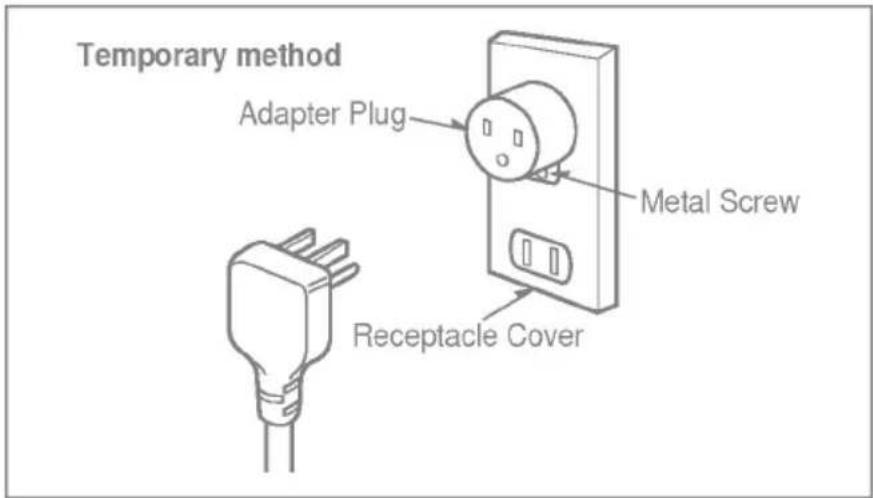
text_image
Temporary method Adapter Plug Metal Screw Receptacle Cover
WARNING: Never use the appliance with a broken adapter.
We strongly discourage the use of an extension cord due to potential safety hazards. For temporary situations, use only CSA certified and UL listed 3-wire grounded extension cords, rated 15 A, 125 V.
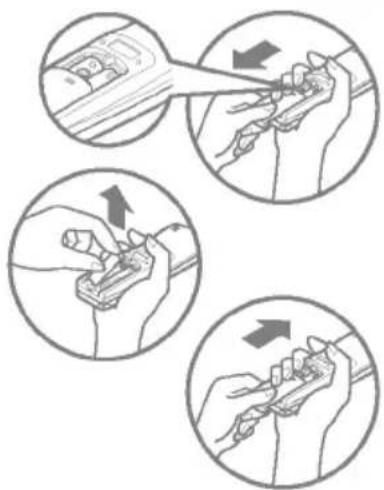
- Remove the battery cover by pulling it according to the arrow direction.
- Insert new batteries making sure that the (+) and (-) of battery are installed correctly.
- Reattach the cover by sliding it back into position.
Use 2 AAA(1.5volt) batteries. Do not use rechargeable batteries.
natural_image
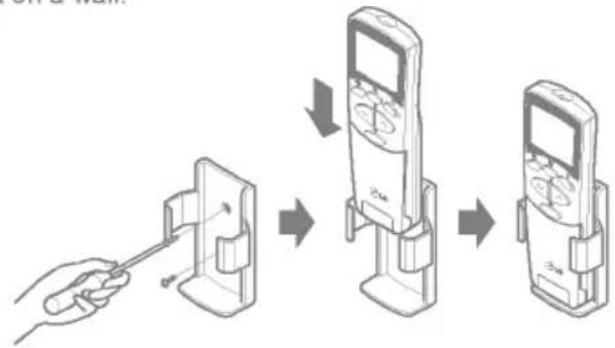
Illustration showing four hand positions (top, middle, bottom) of a tool being inserted or moving, with arrows indicating direction (no text or symbols present)- The remote controller may be stored by mounting it on a wall.
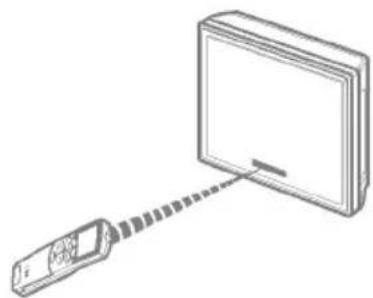
• To operate the room air conditioner, aim the remote controller at the signal receptor.
flowchart
graph TD
    A["Hand Tool Application"] --> B["Device Shift"]
    B --> C["Device Shifter"]
    C --> D["Final Shipment"]
natural_image
Diagram showing a device emitting a signal from a screen (no text or symbols present)Signal receptor
Receives the signals from the remote controller. (Signal receiving sound: two short beeps or one long beep.)
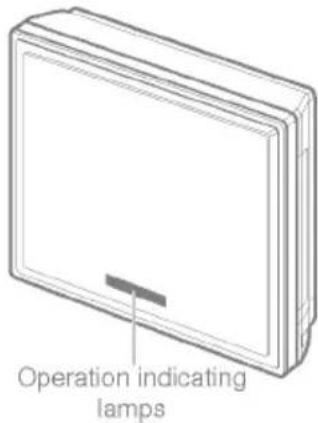
Operation indicating lamps

On/Off : Lights up during the system operation.

Sleep Mode : Lights up during Sleep Mode Auto operation.

Timer : Lights up during Timer operation.

Defrost Mode : Lights up during Defrost Mode or Hot Start operation (Heat pump model only)

Outdoor Unit : Lights up during outdoor unit operation. Operation (Cooling model only)

text_image
Operation indicating lampsThe controls will look like the following.
Controls
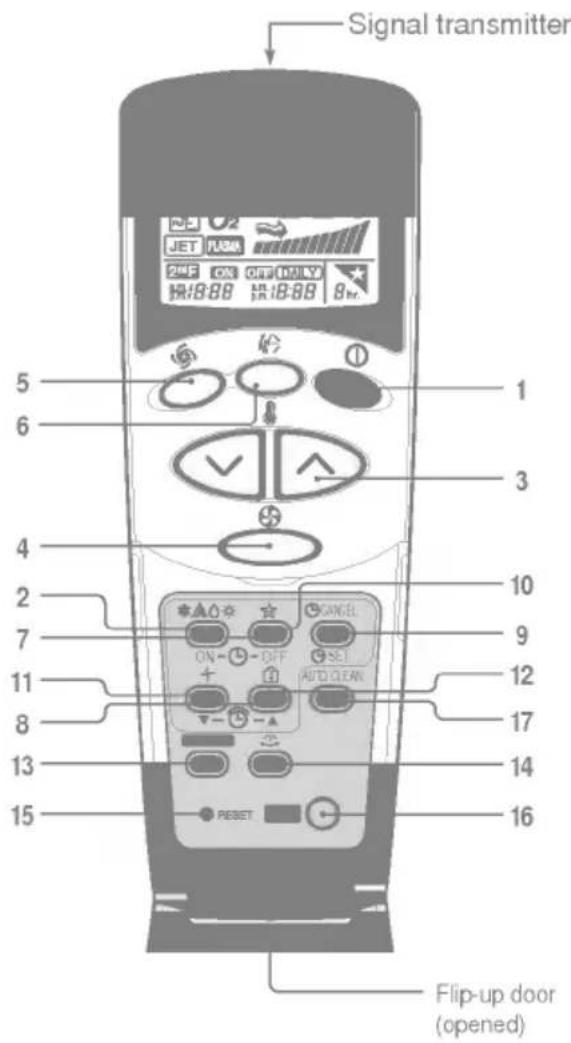
text_image
Signal transmitter 5 6 1 3 4 2 7 10 9 11 8 12 17 13 14 15 16 GANCEL ON- OFF SEI AUTO CLEAN RESET Flip-up door (opened)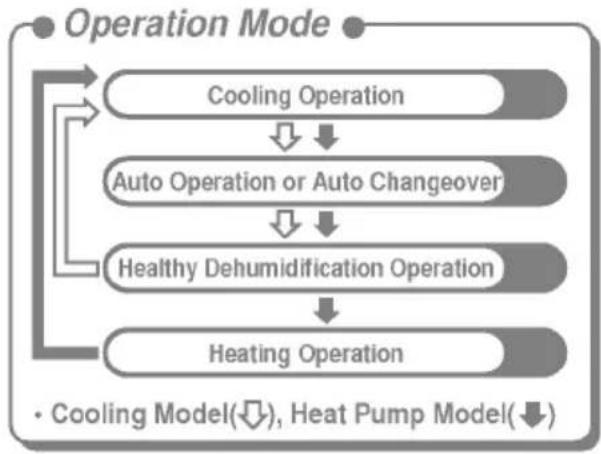
flowchart
graph TD
    A["Operation Mode"] --> B["Cooling Operation"]
    B --> C["Auto Operation or Auto Changeover"]
    C --> D["Healthy Dehumidification Operation"]
    D --> E["Heating Operation"]
    style A fill:#f9f,stroke:#333
    style B fill:#ccf,stroke:#333
    style C fill:#cfc,stroke:#333
    style D fill:#fcc,stroke:#333
    style E fill:#cff,stroke:#333
1. START/STOP BUTTON
Operation starts when this button is pressed and stops when the button is pressed again.
2. OPERATION MODE SELECTION BUTTON
Used to select the operation mode.
3. ROOM TEMPERATURE SETTING BUTTONS
Used to select the room temperature.
4. INDOOR FAN SPEED SELECTOR
Used to select fan speed in four steps low, medium, high and CHAOS.
5. JET COOL/HEATING(OPTIONAL)
Used to start or stop the speed cooling/heating (speed cooling/heating operates super high fan speed in cooling/heatig mode.)
6. CHAOS SWING BUTTON
Used to stop or start louver movement and set the desired up/down airflow direction.
7. ON/OFF TIMER BUTTONS
Used to set the time of starting and stopping operation. (See page 23)
8. TIME SETTING BUTTONS
Used to adjust the time. (See page 23)
9. TIMER SET/CANCEL BUTTON
Used to set the timer when the desired time is obtained and to cancel the Timer operation. (See page 23)
10. SLEEP MODE AUTO BUTTON
Used to set Sleep Mode Auto operation. (See page 23)
11. AIR CIRCULATION BUTTON
Used to circulate the room air without cooling or heating. (See page 24)
12. ROOM TEMPERATURE CHECKING BUTTON
Used to check the room temperature.
13. NANO PLASMA(OPTIONAL)
Used to start or stop the plasma-purification function. (See page 21)
14. HORIZONTAL AIRFLOW DIRECTION CONTROL BUTTON (OPTIONAL)
Used to set the desired vertical airflow direction.
15. RESET BUTTON
Used prior to resetting time.
16. 2nd F Button
Used prior to using modes printed in blue at the bottom of buttons. (See page 22)
17. AUTO CLEAN (OPTIONAL)
Used to set Auto Clean mode.



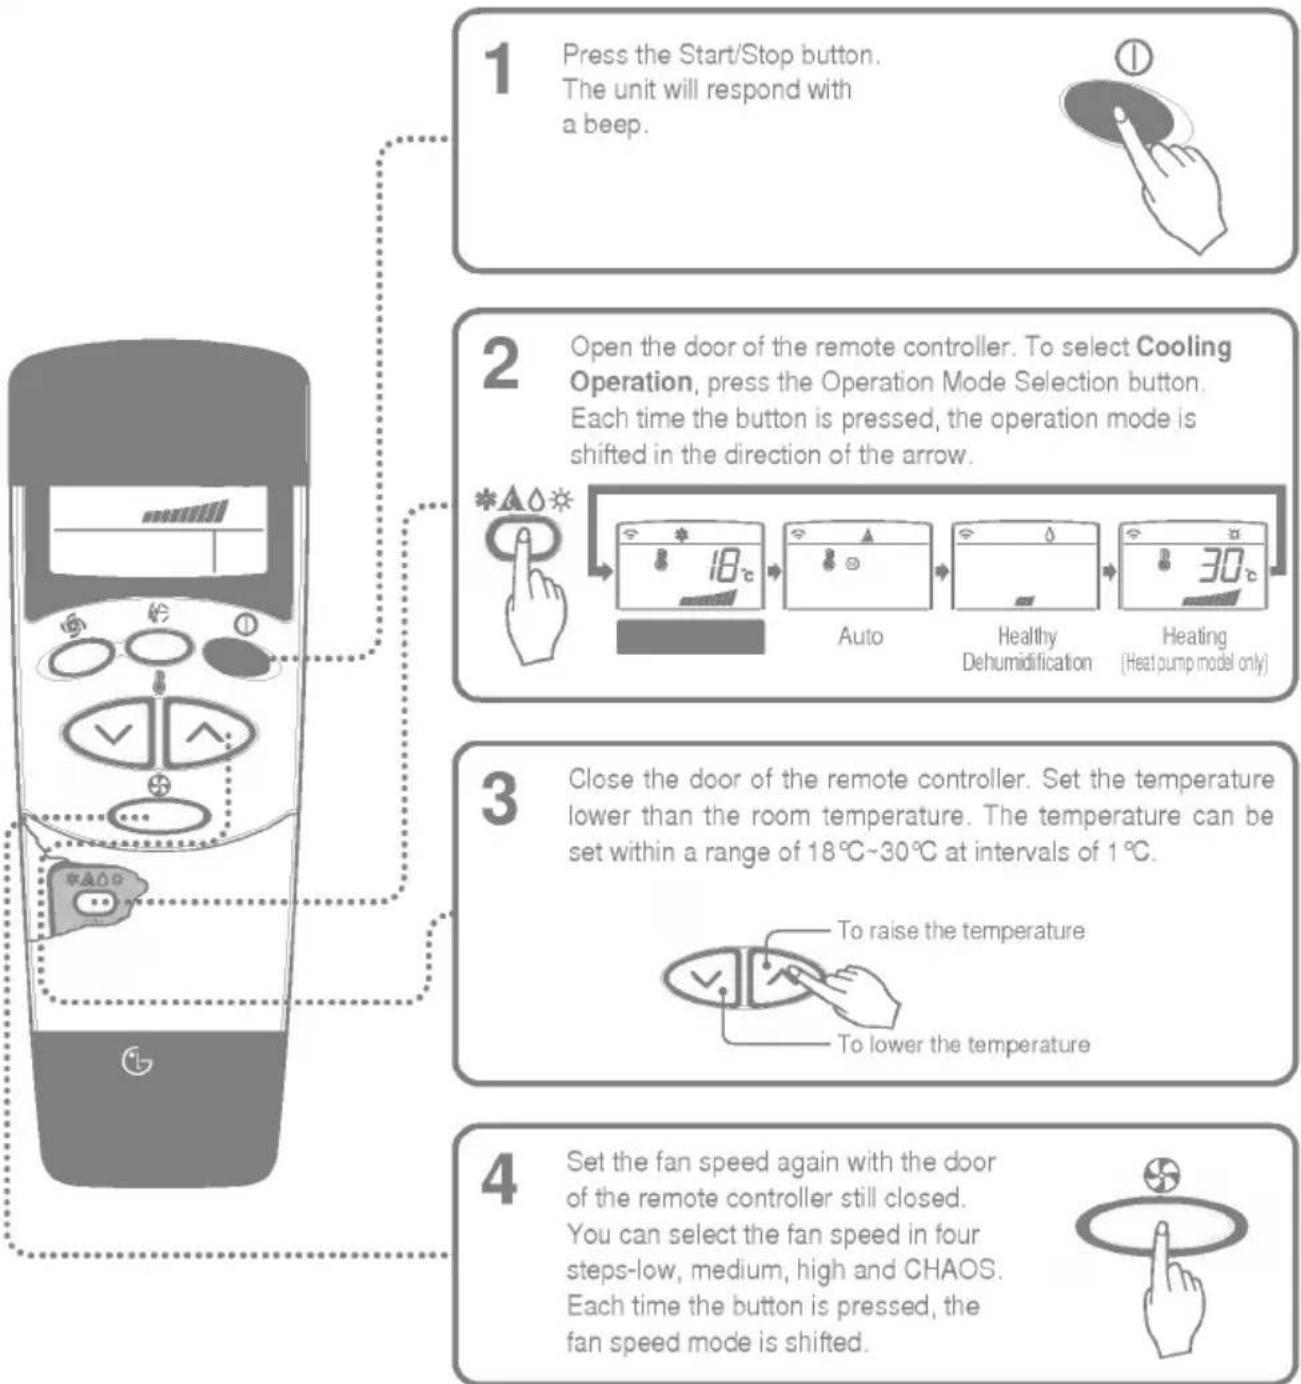
Cooling operation
flowchart
graph TD
    A["1 Press the Start/Stop button.<br>The unit will respond with a beep."] --> B["2 Open the door of the remote controller. To select Cooling Operation, press the Operation Mode Selection button.<br>Each time the button is pressed, the operation mode is shifted in the direction of the arrow."]
    B --> C["3 Close the door of the remote controller. Set the temperature lower than the room temperature. The temperature can be set within a range of 18°C~30°C at intervals of 1°C."]
    C --> D["4 Set the fan speed again with the door of the remote controller still closed.<br>You can select the fan speed in four steps-low, medium, high and CHAOS.<br>Each time the button is pressed, the fan speed mode is shifted."]
Natural wind by the CHAOS logic
☐ For fresher feeling, press the Indoor fan speed selector and set to CHAOS mode. In this mode, the wind blows like a natural breeze by automatically changing fan speed according to the CHAOS logic.
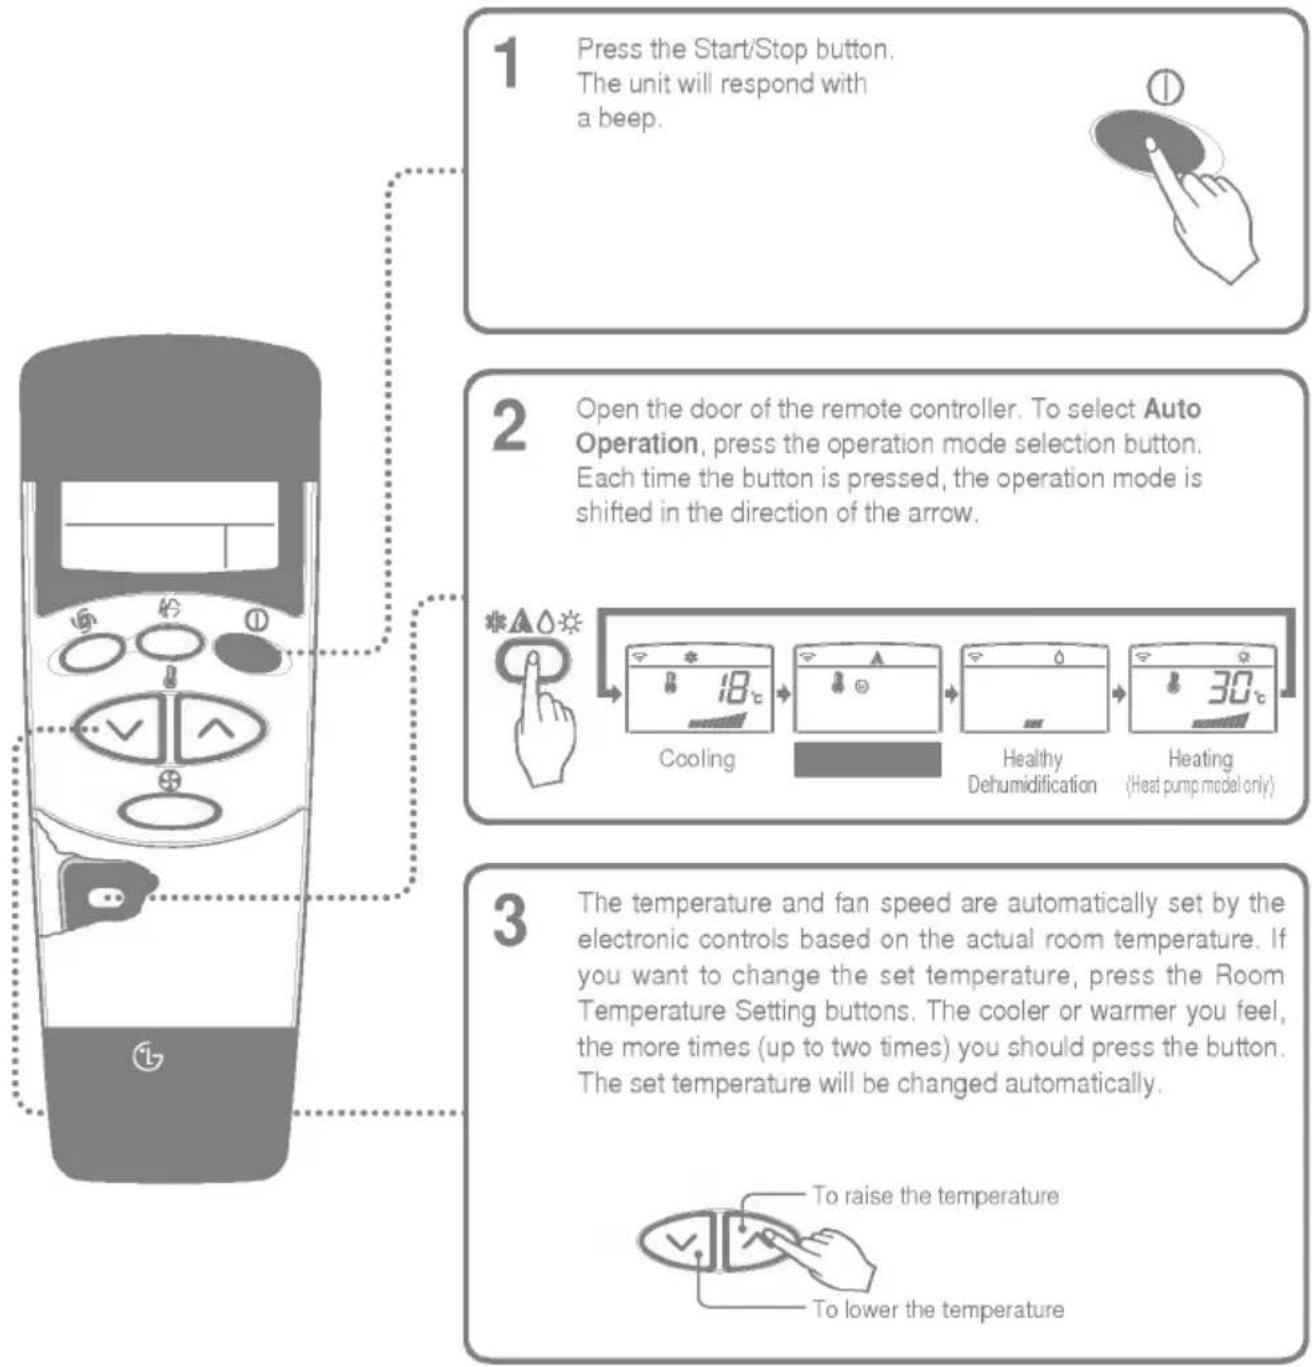
Auto operation (Cooling model only)
flowchart
graph TD
    A["1 Press the Start/Stop button.<br>The unit will respond with a beep."] --> B["2 Open the door of the remote controller. To select Auto Operation, press the operation mode selection button.<br>Each time the button is pressed, the operation mode is shifted in the direction of the arrow."]
    B --> C["3 The temperature and fan speed are automatically set by the electronic controls based on the actual room temperature. If you want to change the set temperature, press the Room Temperature Setting buttons. The cooler or warmer you feel, the more times (up to two times) you should press the button. The set temperature will be changed automatically."]
    C --> D["4 Cooling (18°C)"]
    D --> E["5 Healthy Dehumidification (30°C)"]
    E --> F["6 Heating (Heat pump model only)."]
    F --> G["To raise the temperature"]
    F --> H["To lower the temperature"]
During Auto Operation
☐ You cannot control the indoor fan speed. It has already been set by the Fuzzy rule.
☐ If the system is not operating as desired, manually switch to another mode. The system will not automatically switch from the cooling mode to the heating mode, or from heating mode to cooling mode, it must be done by manually resetting.
During Auto Operation, pressing the chaos swing button makes the horizontal louvers swing up and down automatically. If you want to stop auto-swing, press the chaos swing button again.
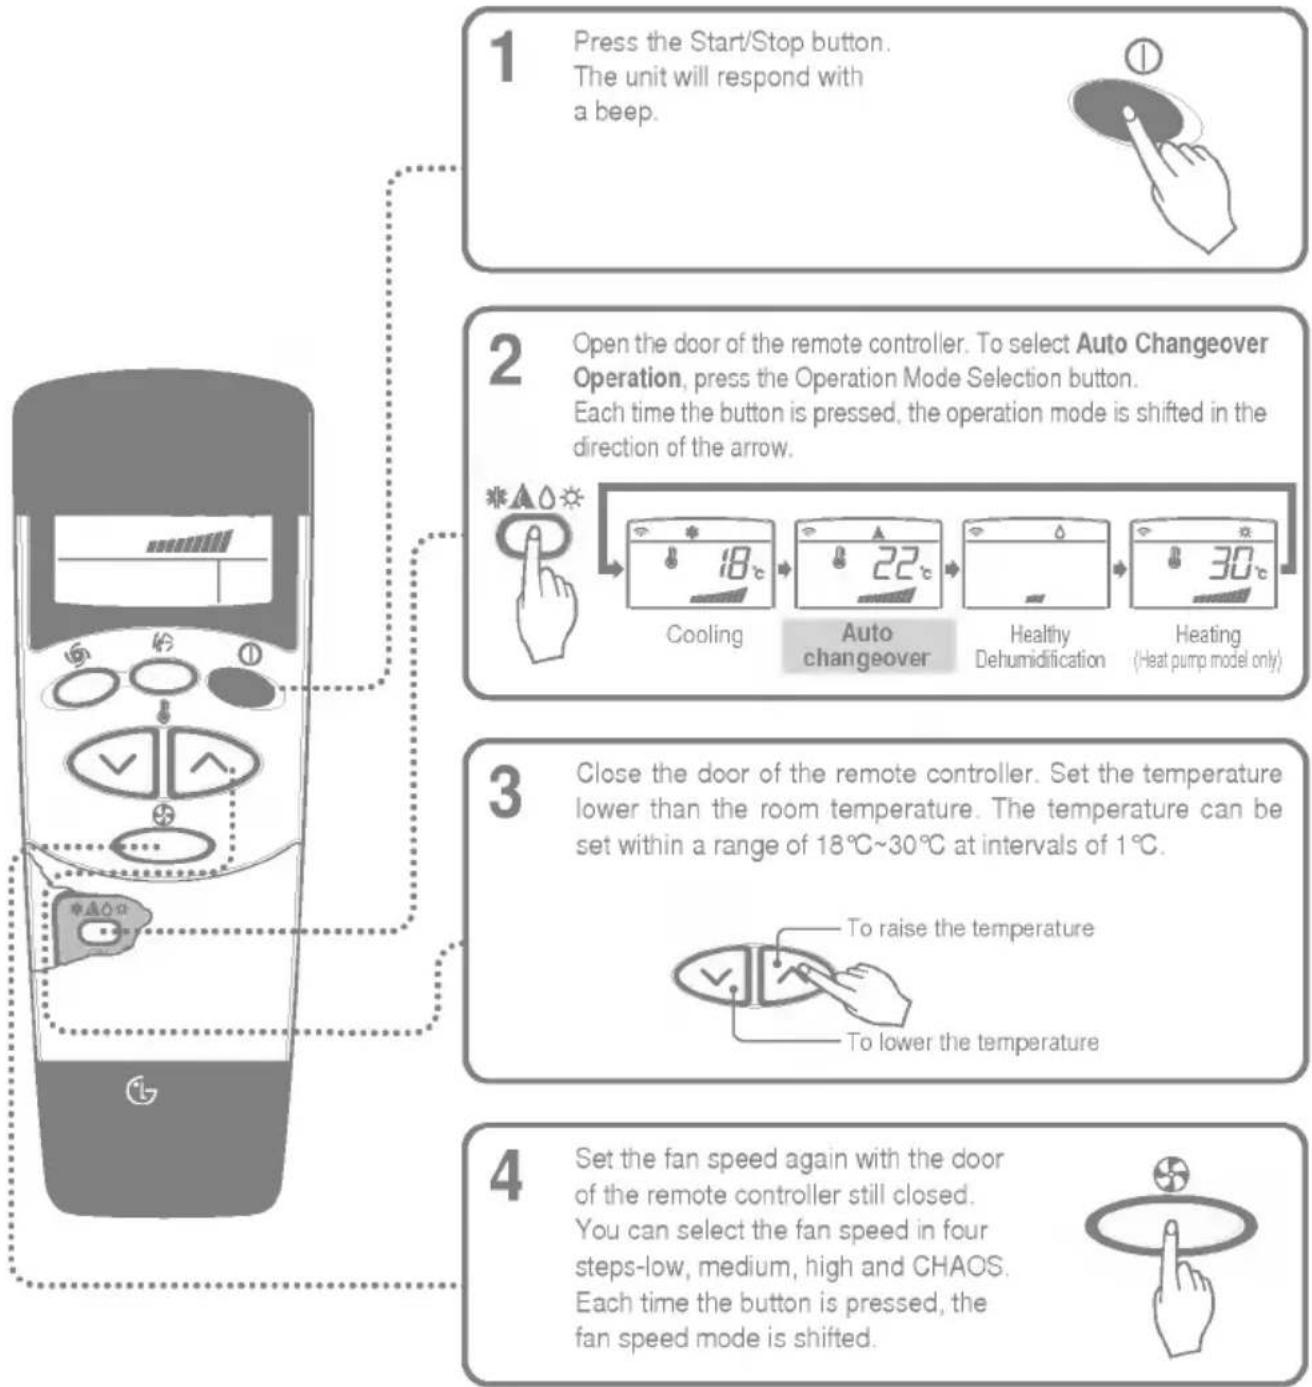
Auto changeover operation(Heat pump model only)
flowchart
graph TD
    A["1 Press the Start/Stop button.<br>The unit will respond with a beep."] --> B["2 Open the door of the remote controller. To select Auto Changeover Operation, press the Operation Mode Selection button.<br>Each time the button is pressed, the operation mode is shifted in the direction of the arrow."]
    B --> C["3 Close the door of the remote controller. Set the temperature lower than the room temperature. The temperature can be set within a range of 18°C~30°C at intervals of 1°C."]
    C --> D["4 Set the fan speed again with the door of the remote controller still closed.<br>You can select the fan speed in four steps-low, medium, high and CHAOS. Each time the button is pressed, the fan speed mode is shifted."]
During Auto changeover Operation
The air conditioner changes the operation mode automatically to keep indoor temperature. When room temperature vary over ±2^ with respect to setting temperature, air conditioner keeps the room temperature within ±2^ with respect to setting temperature by auto changeover mode.
Healthy dehumidification operation
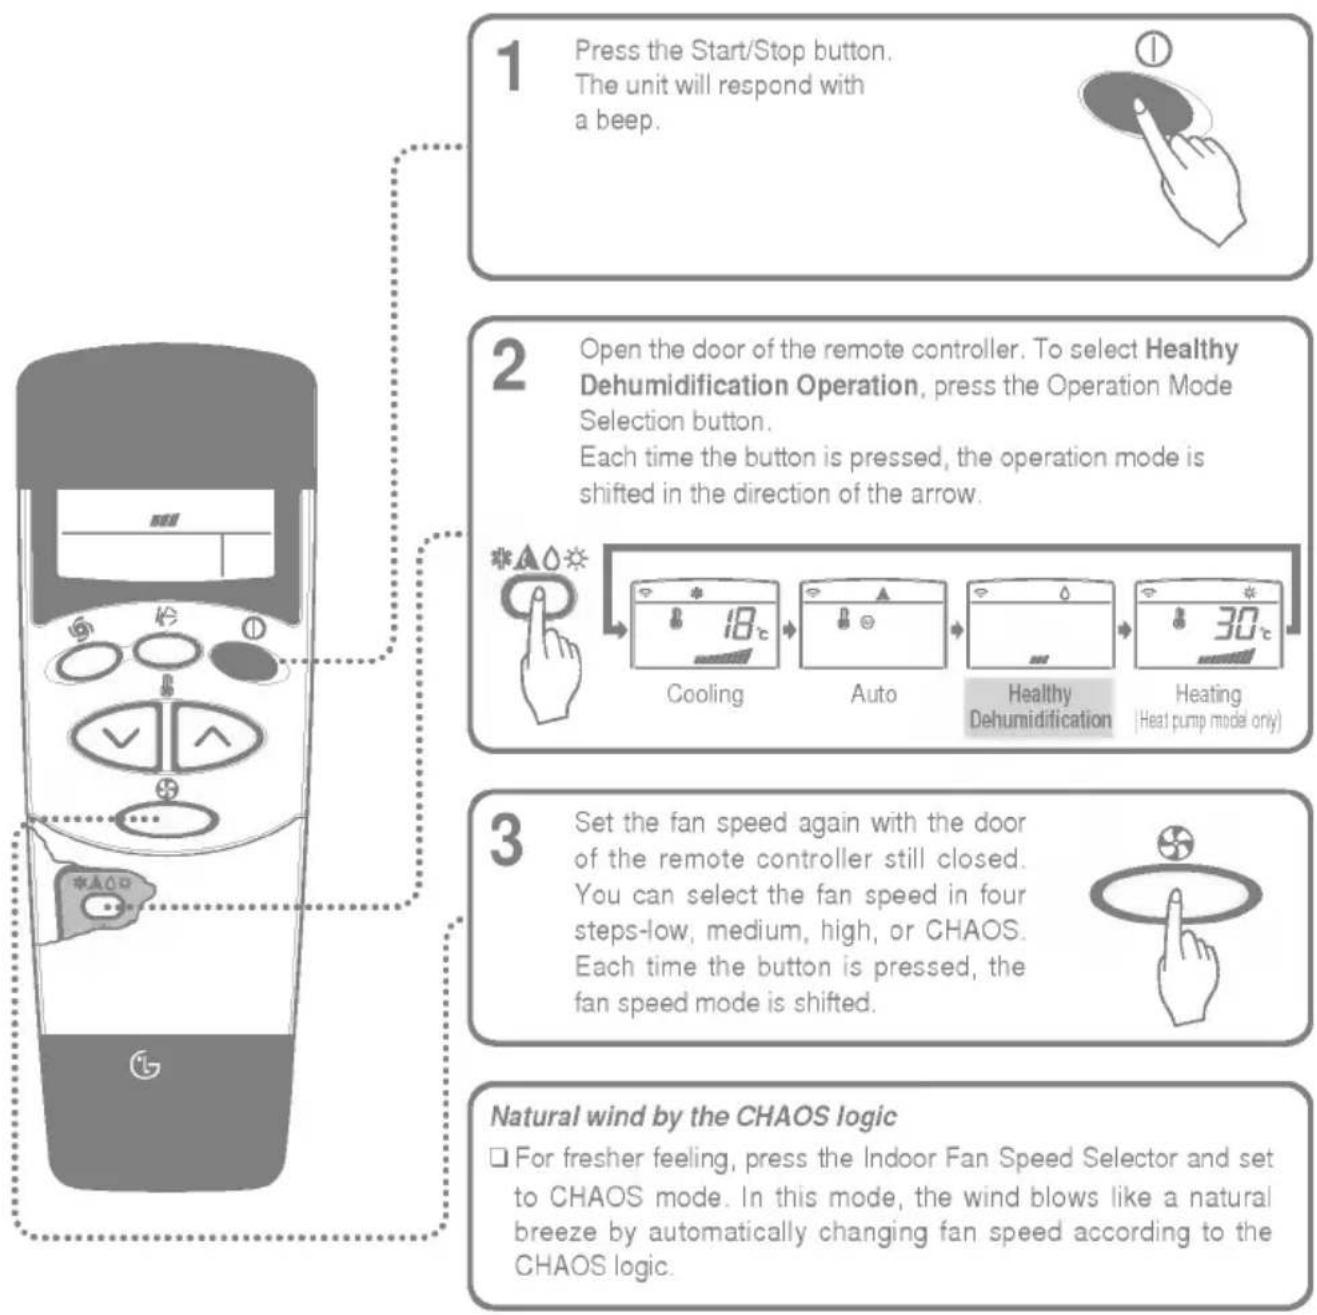
flowchart
graph TD
    A["1 Press the Start/Stop button.<br>The unit will respond with a beep."] --> B["2 Open the door of the remote controller. To select Healthy Dehumidification Operation, press the Operation Mode Selection button.<br>Each time the button is pressed, the operation mode is shifted in the direction of the arrow."]
    B --> C["3 Set the fan speed again with the door of the remote controller still closed.<br>You can select the fan speed in four steps-low, medium, high, or CHAOS. Each time the button is pressed, the fan speed mode is shifted."]
    C --> D["Natural wind by the CHAOS logic<br>☐ For fresher feeling, press the Indoor Fan Speed Selector and set to CHAOS mode. In this mode, the wind blows like a natural breeze by automatically changing fan speed according to the CHAOS logic."]
During Healthy Dehumidification Operation
☐ If you select the dehumidification mode on the operation selection button, the A/C starts to run the dehumidification function. It automatically sets the room temp. and airflow volume to the best condition for dehumidification, based on the sensed current room temp.
In this case, however, the setting temp. is not displayed on the remote controller and you are not able to control the room temp. either.
During the healthy dehumidification function, the airflow volume is automatically set according to the optimization algorithm responding to the current room temp. status, so that the room condition is kept healthy and comfortable even in the very humid season.

Heating operation (Heat pump model only)
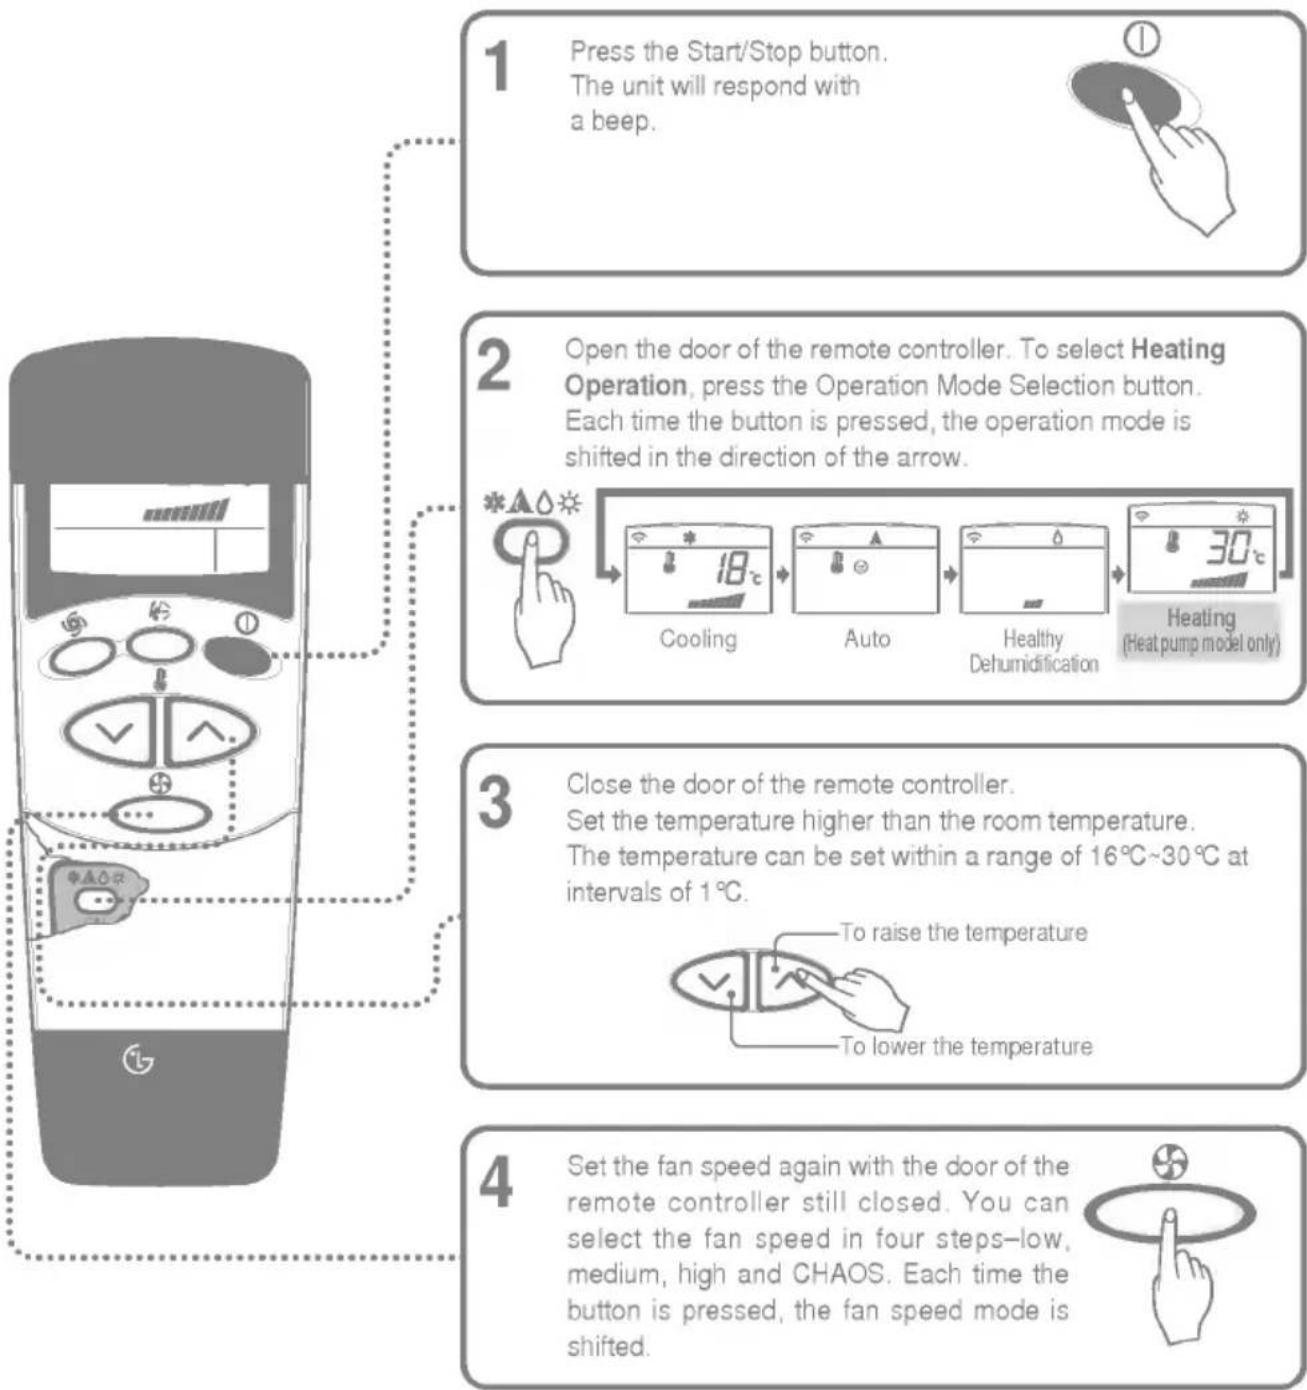
flowchart
graph TD
    A["1 Press the Start/Stop button.<br>The unit will respond with a beep."] --> B["2 Open the door of the remote controller. To select Heating Operation, press the Operation Mode Selection button.<br>Each time the button is pressed, the operation mode is shifted in the direction of the arrow."]
    B --> C["3 Close the door of the remote controller.<br>Set the temperature higher than the room temperature.<br>The temperature can be set within a range of 16°C~30°C at intervals of 1°C."]
    C --> D["4 Set the fan speed again with the door of the remote controller still closed. You can select the fan speed in four steps-low, medium, high and CHAOS. Each time the button is pressed, the fan speed mode is shifted."]
Natural wind by the CHAOS logic
☐ For fresher feeling, press the Indoor Fan Speed Selector and set to CHAOS mode. In this mode, the wind blows like a natural breeze by automatically changing fan speed according to the CHAOS logic.

Jet cool operation
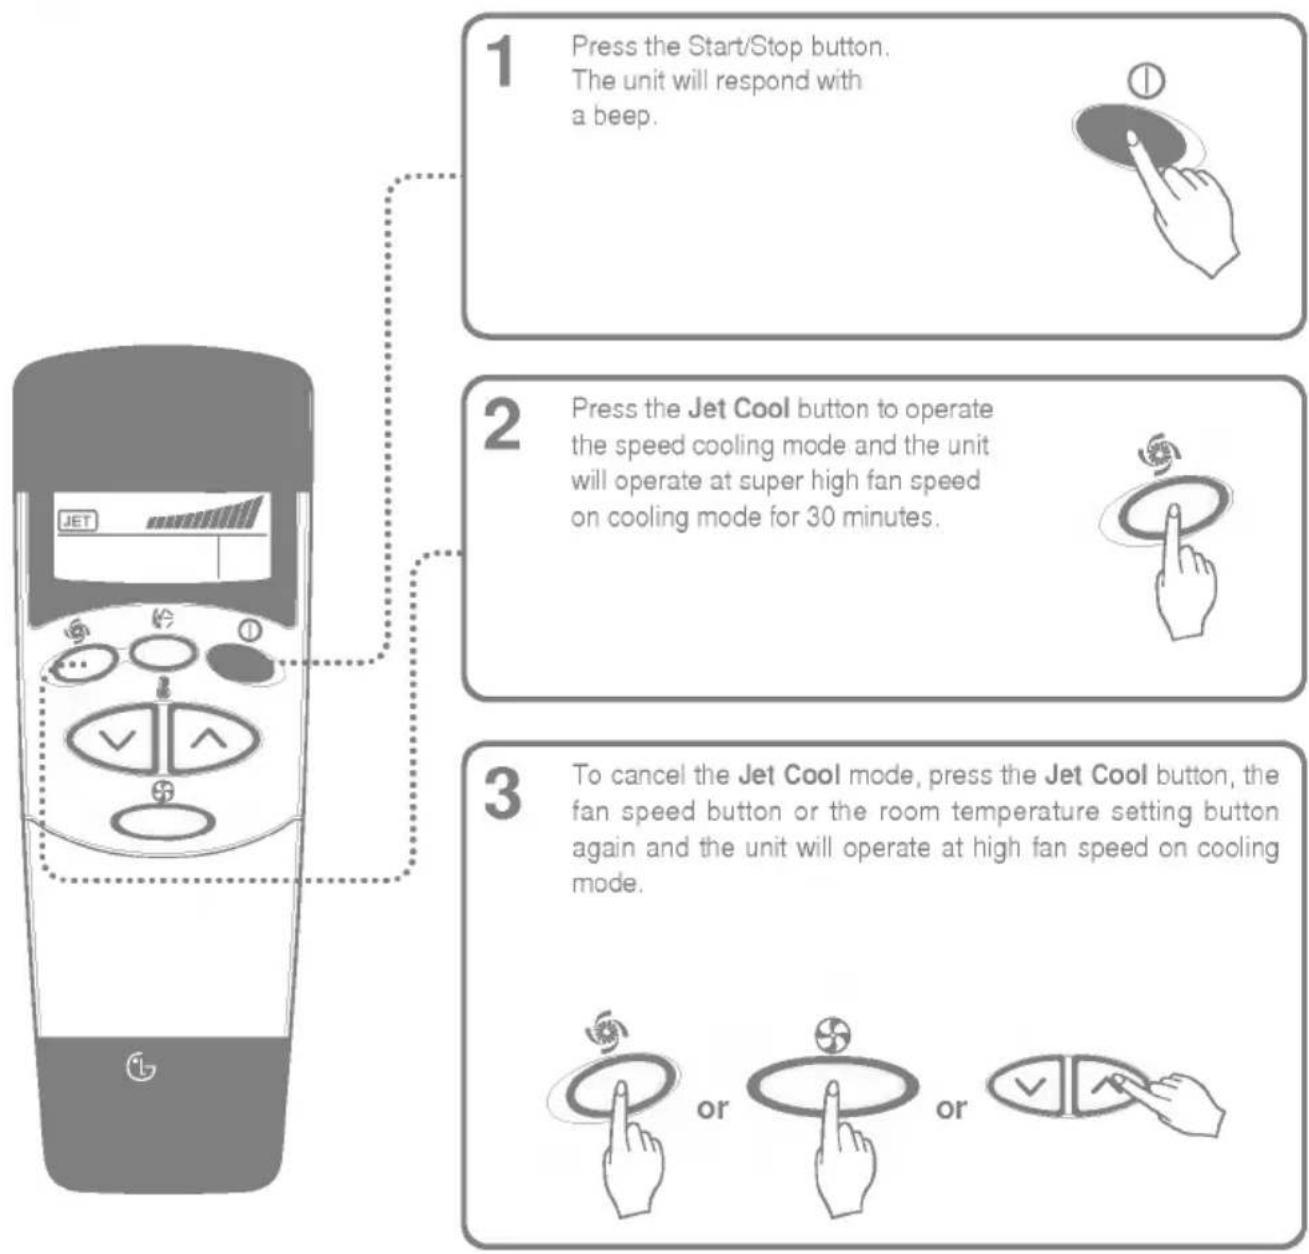
flowchart
graph TD
    A["1 Press the Start/Stop button.<br>The unit will respond with a beep."] --> B["2 Press the Jet Cool button to operate the speed cooling mode and the unit will operate at super high fan speed on cooling mode for 30 minutes."]
    B --> C["3 To cancel the Jet Cool mode, press the Jet Cool button, the fan speed button or the room temperature setting button again and the unit will operate at high fan speed on cooling mode."]
☐ During the JET COOL function at any moment, the A/C starts to blow the cool air at extremely high speed for 30 minutes setting the room temp. automatically to 18°C. It is especially used to cool the room temp. quickly in a hot summer.
In heat pump mode, neuro fuzzy mode, or auto changeover mode however, the JET COOL function is not available.
☐ In order to return to the normal cooling mode from the JET COOL mode, just press the operation mode selection button, airflow volume selection, temp. setting button or the JET COOL button again.

Jet heat operation (Optional)
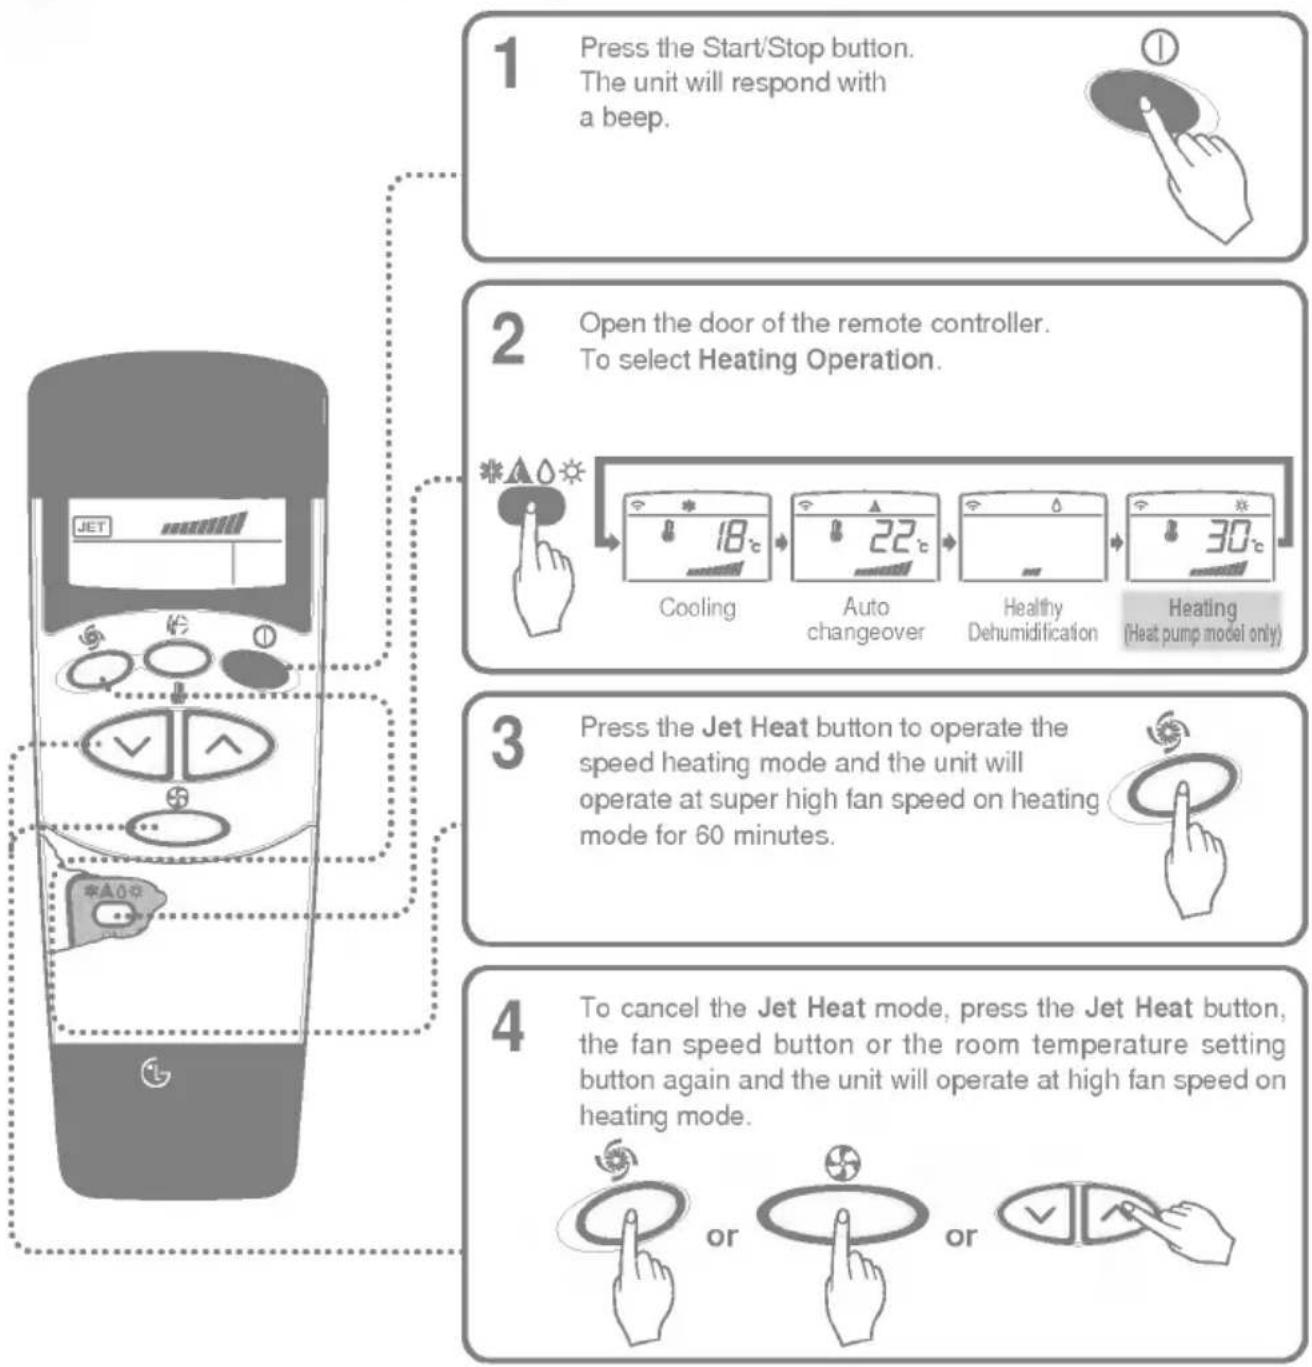
flowchart
graph TD
    A["1 Press the Start/Stop button. The unit will respond with a beep."] --> B["2 Open the door of the remote controller. To select Heating Operation."]
    B --> C["3 Press the Jet Heat button to operate the speed heating mode and the unit will operate at super high fan speed on heating mode for 60 minutes."]
    C --> D["4 To cancel the Jet Heat mode, press the Jet Heat button, the fan speed button or the room temperature setting button again and the unit will operate at high fan speed on heating mode."]
☐ During the JET HEAT function at any moment, the A/C starts to blow the heat air at extremely high speed for 60 minutes setting the room temp. automatically to 30°C. It is especially used to heat the room temp. quickly in a cool winter.
On cooling, healthy dehumidification mode or auto changeover mode, however, the JET HEAT function is not available.
☐ In order to return to the normal heating mode from the JET HEAT mode, just press the operation mode selection button, airflow volume selection, temp. setting button or the JET HEAT button again.

NANO PLASMA purification operation(Optional)
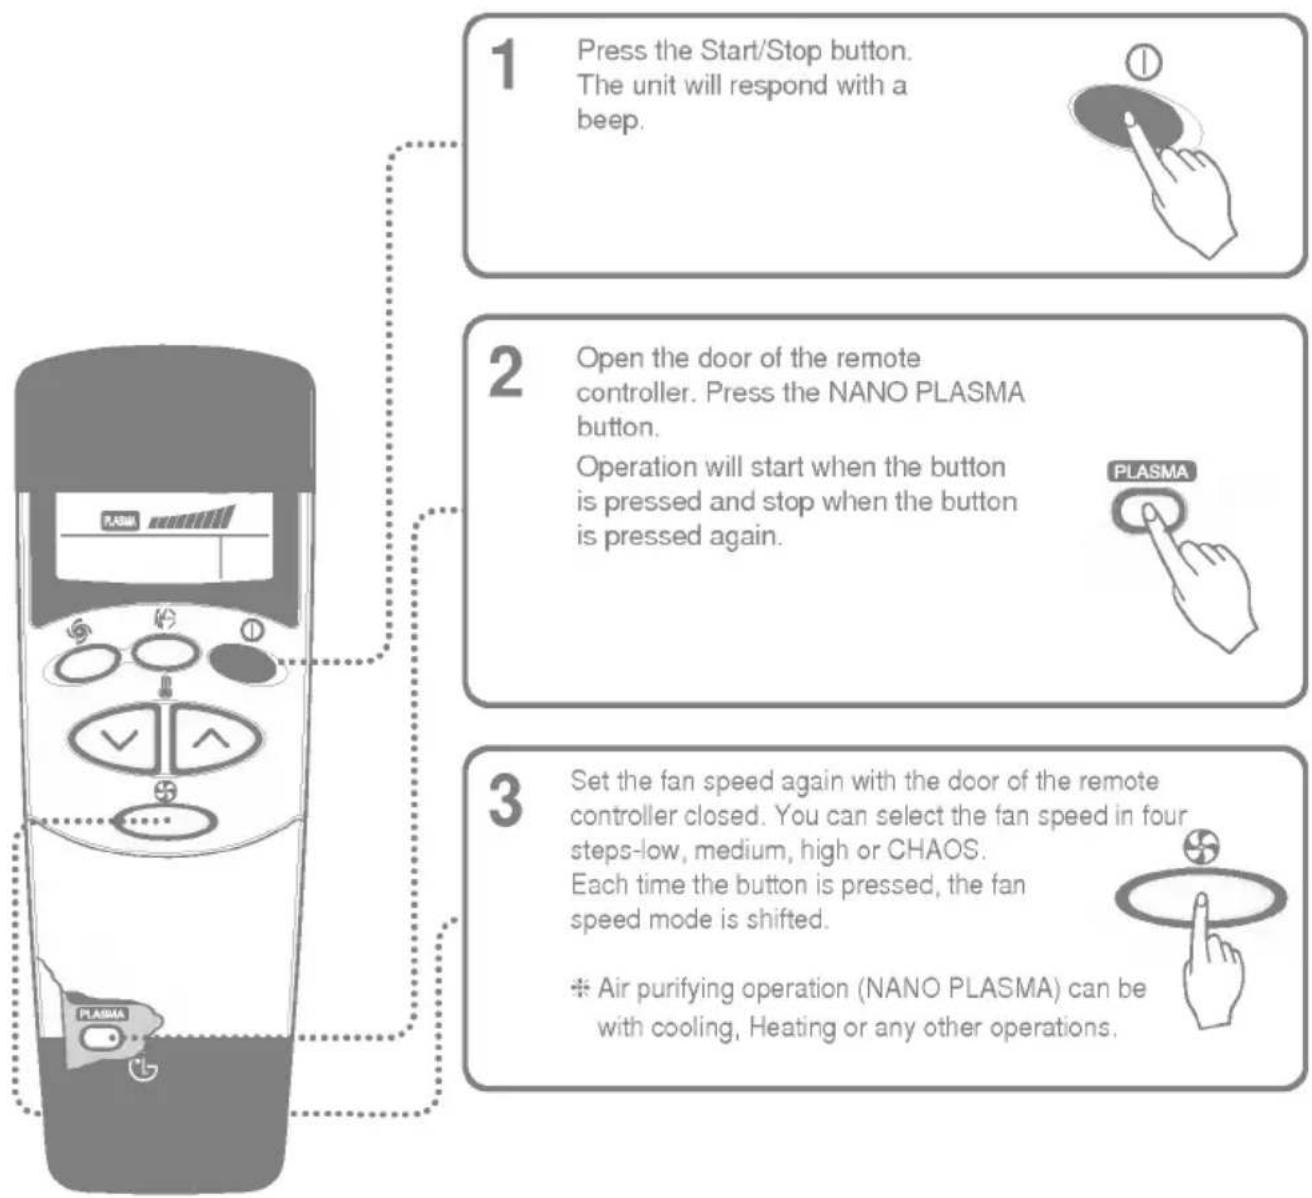
flowchart
graph TD
    A["1 Press the Start/Stop button.<br>The unit will respond with a beep."] --> B["2 Open the door of the remote controller.<br>Press the NANO PLASMA button.<br>Operation will start when the button is pressed and stop when the button is pressed again."]
    B --> C["3 Set the fan speed again with the door of the remote controller closed. You can select the fan speed in four steps-low, medium, high or CHAOS.<br>Each time the button is pressed, the fan speed mode is shifted.<br>※ Air purifying operation (NANO PLASMA) can be with cooling, Heating or any other operations."]
NANO PLASMA Air Purifying Operation only
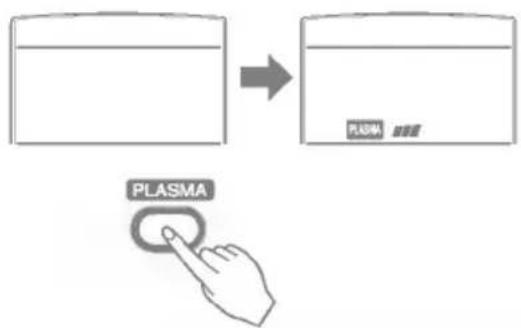
text_image
PLASMA PLASMAIf you press the only NANO PLASMA button, only NANO PLASMA purification function operates.
Then, fan speed is low. You can select the fan speed in four steps-low, medium, high or CHAOS.
Each time the button (☐) is pressed, the fan speed mode is shifted.

2nd F operation
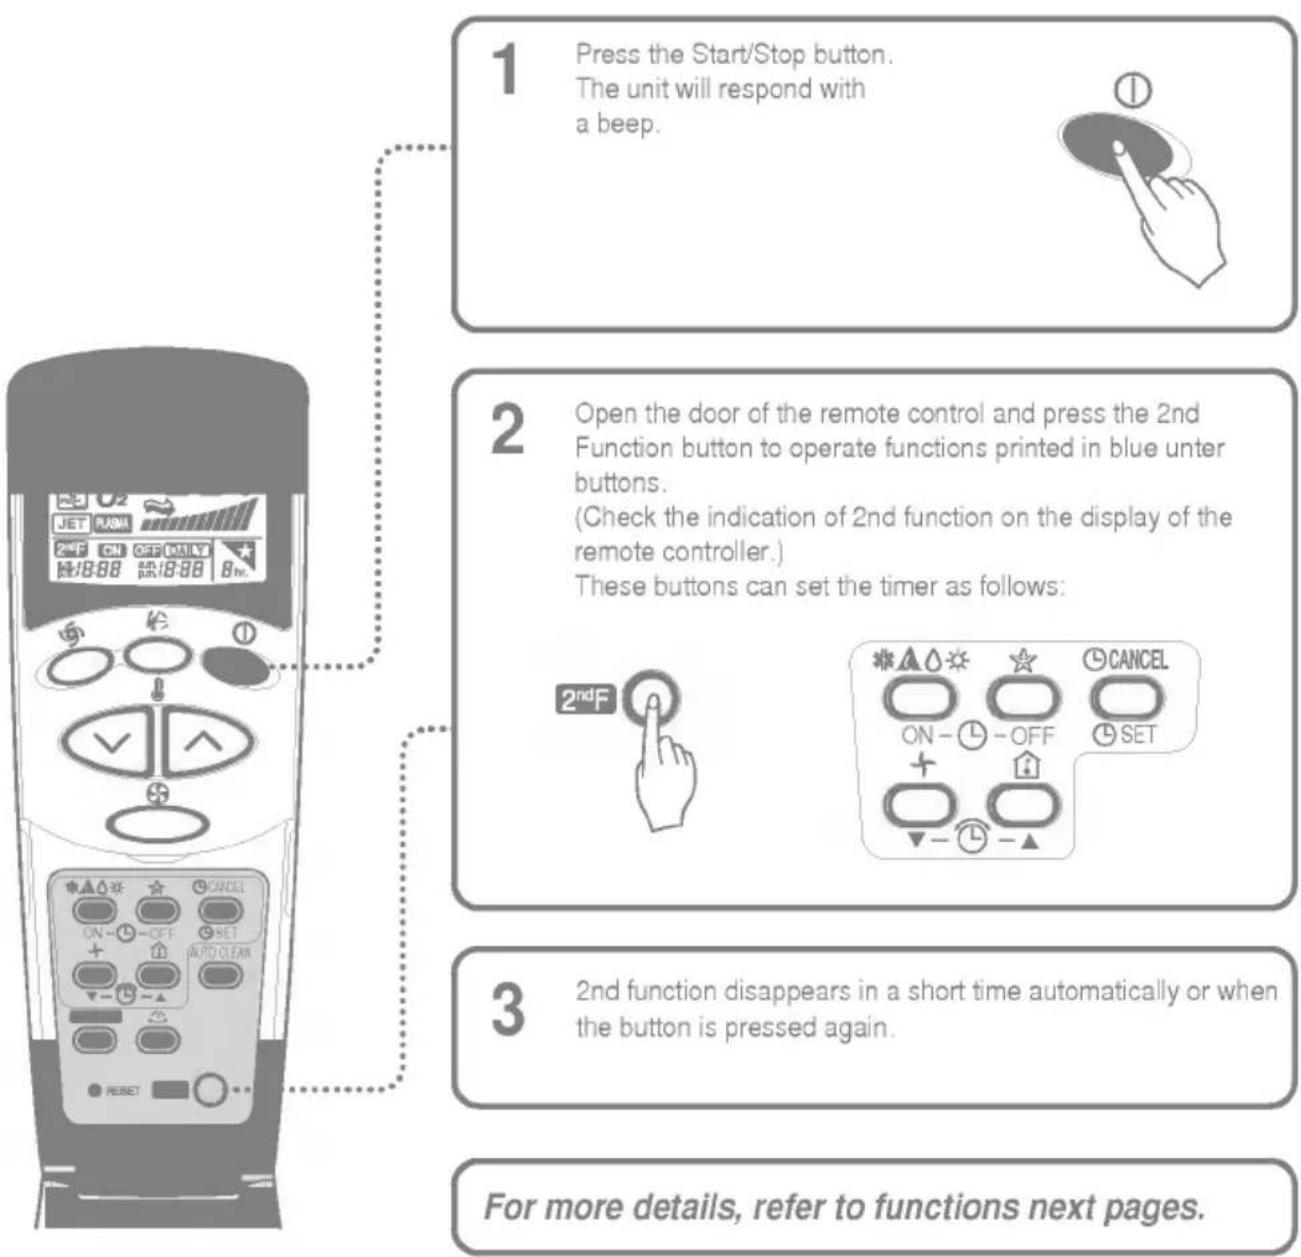
flowchart
graph TD
    A["1 Press the Start/Stop button.<br>The unit will respond with a beep."] --> B["2 Open the door of the remote control and press the 2nd Function button to operate functions printed in blue unter buttons.<br>(Check the indication of 2nd function on the display of the remote controller.)<br>These buttons can set the timer as follows:"]
    B --> C["3 2nd function disappears in a short time automatically or when the button is pressed again."]
    C --> D["For more details, refer to functions next pages."]

Sleep mode
- Press the Sleep Mode Auto button to set the time you want the unit to stop automatically.
- The Timer is programmed in one-hour increments by pressing the Sleep Mode Auto button 1 to 7 times. The sleep mode is available for 1 to 7 times. To alter the time period in steps of 1 hour, press the Sleep Mode Button while aiming at air conditioner.
- Make sure the Sleep Mode Auto LED lights up. To cancel the Sleep Mode, press the sleep Mode Auto button several times until the star (✗) disappears from the operation display.
The Sleep Mode will be operated at slow fan speed (cooling) or medium fan speed (heat pump only) for a comfortable sleep.
In sleep mode: Chaos Swing function does not operate.
In cooling mode or healthydehumidification mode:
The temperature will automatically rise by 1°C over the next 30 minutes and by 2°C in 1 hour for a comfortable sleep.

Setting the time
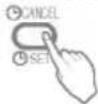
- Time can be set only when you press the Reset button. Having replacing the batteries, you should press the reset buttons to reset the time. Press the Start/Stop button.
- Press 2nd F button and check if 2nd F icon is on.
- Press the Time Setting buttons until the desired time is set.
- Press the Timer SET button
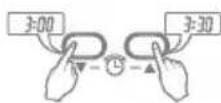
Check the indicator for A.M. and P.M.

Delay start/Pre-set stop
- Make sure the time is set correctly on the display of the remote controller.
- Press 2nd F button.
- Press the ON/OFF Timer buttons to turn Timer on or off.
- Press the Time Setting buttons until the desired time is set.
- To set the selected time, press the Timer setting button aiming the remote controller at the signal receptor.
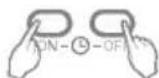
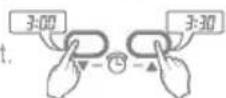
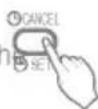
To cancel the timer setting
Check if 2nd F icon is off.
Press the Timer Cancel button aiming the remote controller at the signal receptor. (The timer lamp on the air conditioner and the display will go out.)
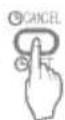
Select one of the following four types of operation.
with the unit running
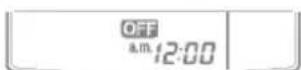
Delay OFF Timer
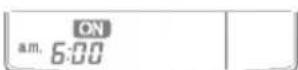
Delay ON Timer
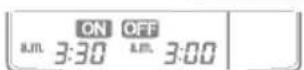
Delay OFF and ON Timer
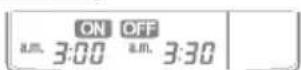
Delay ON and OFF Timer
Airflow direction control
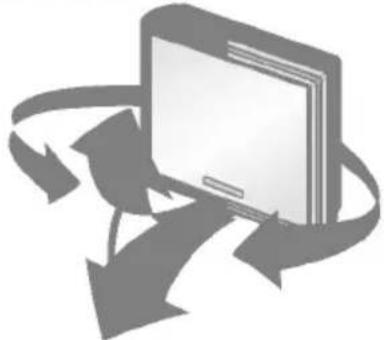
The up/down and right/left airflow can be adjusted by using the remote control.
natural_image
Illustration of a laptop with arrows indicating data flow or interaction (no text or symbols)Press the Start/Stop button to start the unit.
Press Chaos Swing button and the louvers will swing.
Press the button again and the louvers will stop. After 30 minutes, the louvers return to the maximum airflow position automatically.
Air circulation mode
Circulates the room air without cooling or heating.
- Press the Start/Stop button, the unit will respond with a beep.
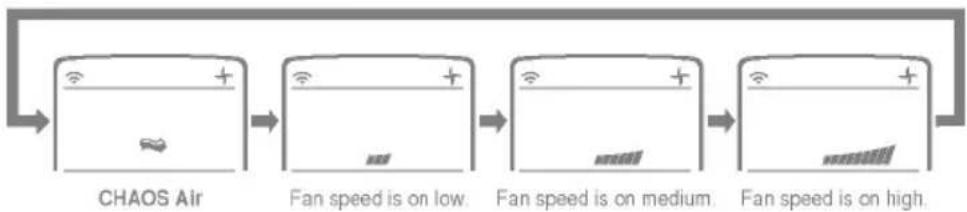
- Open the door on the remote control. Press the Air Circulation button. Close the door on the remote control. Now each time that you press the Indoor Fan Speed Selector, the fan speed is shifted from low to CHAOS and back to low again.
flowchart
graph LR
    A["CHAOS Air"] --> B["Fan speed is on low"]
    B --> C["Fan speed is on medium"]
    C --> D["Fan speed is on high"]
CHAOS Air economizes power consumption and prevents overcooling. The fan speed is automatically changed from high to low or vice versa, depending on the ambient temperature.
Auto clean
AUTO CLEAN
- Whenever you press the Auto Clean button, Auto Clean Function will be reserved and cancelled.
- Auto Clean function works before and after cooling or dehumidification mode. For details, refer to the below points.
- When the unit is started after the reservation of Auto Clean, the Cool Start function operates and indoor Fan is started after 20 seconds.
- When you press Start/Stop button to turn off the unit after the you have reserved Auto Clean function, the air-conditioner circulates the indoor air in the Auto Clean mode with no more Cooling or Dehumidification operation. For Cooling only model, it lasts for 30 minutes for Heat pump model, for 16 minutes.
- If you press the auto clean button again during the product operation, Auto Clean function will be cancelled.
☐ During Auto Clean function, moistures left in indoor units after Cooling Operation or Healthy Dehumidification Operation can be removed.
☐ During Auto Clean function, only Start/Stop button, Plasma button and Auto Clean button are available.

Forced operation
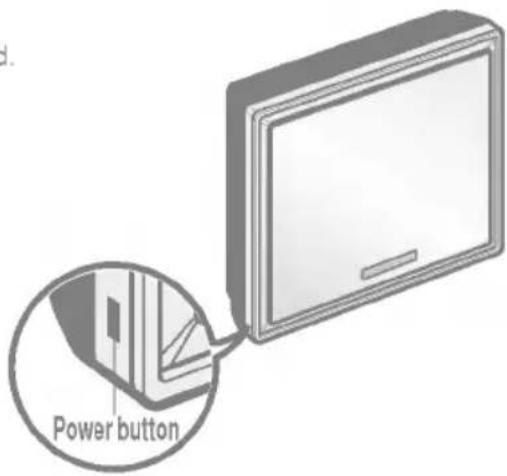
Operation procedures when the remote control can't be used. The operation will be started if the power button is pressed. If you want to stop operation, re-press the button.
text_image
Power button| Cooling Model | Heat pump Model | |||
| Room Temp. ≥ 24°C | 21°C ≤ Room Temp. < 24°C | Room Temp. < 21°C | ||
| Operating mode | Cooling | Cooling | Healthy Dehumidification | Heating |
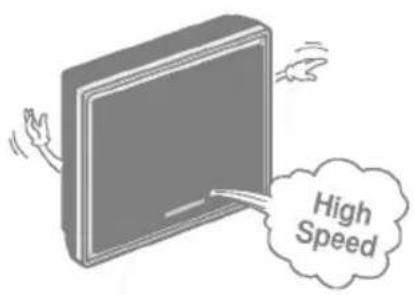
| Indoor FAN Speed | High | High | High | High |
| Setting Temperature | 22°C | 22°C | 23°C | 24°C |
Test operation
During the TEST OPERATION, the unit operates in cooling mode at high speed fan, regardless of room temperature and resets in 18 minutes.
During test operation, if remote controller signal is received, the unit operates as remote controller sets.
If you want to use this operation, open the front panel upward and Press the power button let it be pressed for about 3 seconds.
If you want to stop the operation, re-press the button.

Auto restart
In case the power comes on again after a power failure, Auto Restarting Operation is the function to operate procedures automatically to the previous operating conditions.
So there is no need of activating this function by pressing any key or button.
In the initial mode, the fan operates at a low speed and the compressor starts 2.5\~3 minutes later.
As the compressor starts, the fan speed also resumes its previous setting mode.
text_image
High SpeedHelpful information
Fan speed and cooling capacity.
The cooling capacity indicated in the specification is the value when the fan speed is set to high, and the capacity will be lower at low or medium fan speed.
High fan speed is recommended when you wish to cool the room quickly.

WARNING: Turn the system off before cleaning. To clean, wipe with a soft, dry cloth. Do not use bleach or abrasives.
Supply power must be disconnected before cleaning the indoor unit.
Air filter
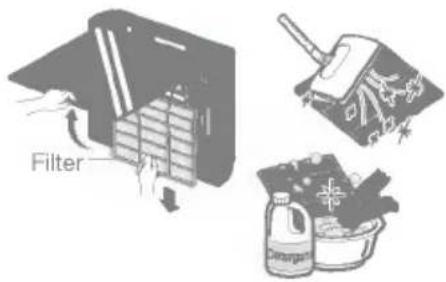
The air filters behind the front grill should be checked and cleaned once every 2 weeks or more often if necessary.
- Lift the front panel. After lifting up the filter tab a bit, take the filter out slowly
Clean the filter after stopping the product.
-
Clean the filter with a vacuum or warm, soapy water.
-
If dirt is conspicuous, wash with a solution of detergent in lukewarm water.
-
If hot water (40°C or more) is used, it may be deformed.
-
After washing with water, dry well in the shade.
-
Re-install the air filter.
Never use any of the followings:
• Water hotter than 40°C.
Could cause deformation and/or discoloration.
• Volatile substances
Could damage the surfaces of the air conditioner.
text_image
Filter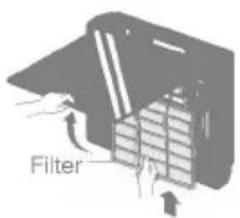
text_image
Filter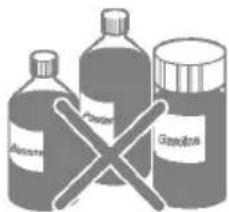
text_image
Alstom Pavlovir GazoliraThe heat exchanger coils and panel vents of the outdoor unit should be checked regularly. If clogged with dirt or soot, the heat exchanger and panel vents may be professionally steam cleaned.
Dirty or clogged coils will reduce the operating efficiency of the system and cause higher operating costs.
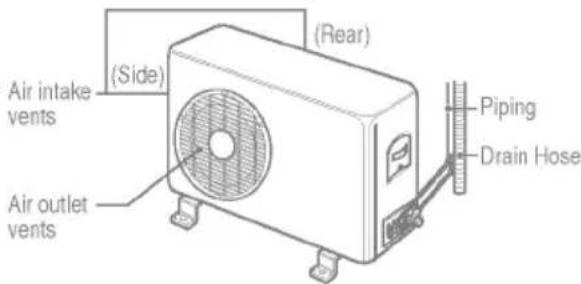
text_image
Air intake vents (Side) (Air outlet vents) (Rear) Piping Drain Hose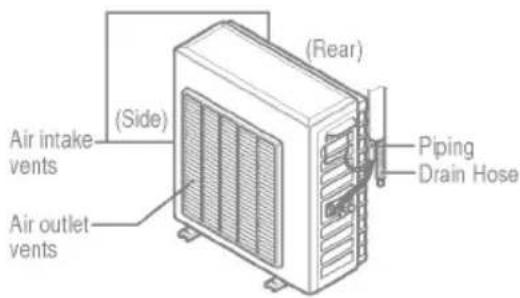
text_image
Air intake vents (Side) Air outlet vents (Rear) Piping Drain Hose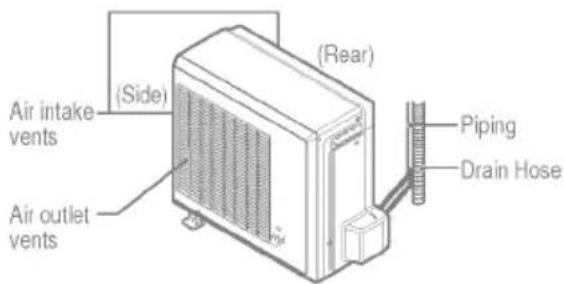
text_image
Air intake vents (Side) (Air outlet vents) (Rear) Piping Drain Hose• Recommended use period : About 3 months
-
Lift the front panel, hold it up and pull the Air filter.
-
Remove the Plasma Filter.

WARNING: Don't touch the PLASMA Filter within 10 seconds after opening the inlet grille, it may cause electric shock.
-
Put the Plasma Filter into the neutral detergent for 1\~2 hours and then raise it.
-
Insert the Plasma Filter after perfectly drying it in shade. Now insert Air Filter and close the front panel completely by matching the hook.
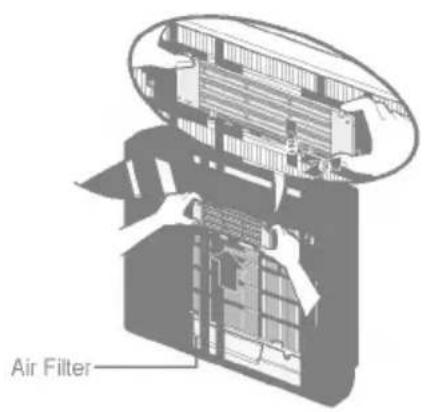
text_image
Air Filter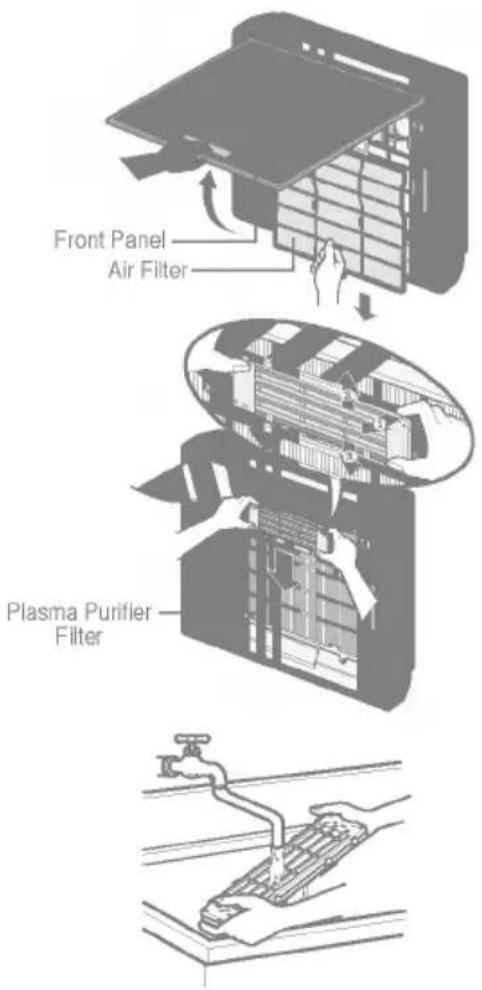
text_image
Front Panel Air Filter Plasma Purifier Filter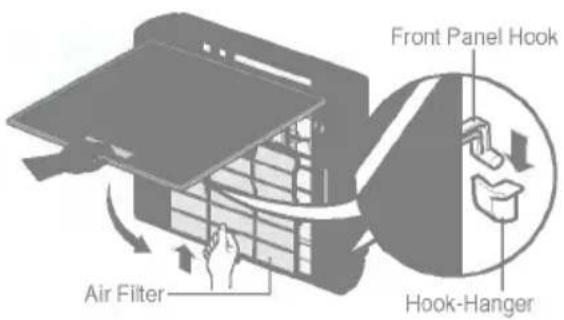
text_image
Front Panel Hook Hook-Hanger Air FilterBefore calling for service
If you have problems with your air conditioner, read the following information and try to solve the problem. If you cannot find a solution, turn off the air conditioner and contact your dealer.
Air conditioner does not operate
- Ensure that the air conditioner is plugged into a proper outlet.
- Check the fuse or circuit breaker.
- Check whether the voltage is unusually high or low.
Air does not feel cold enough on the cooling setting
- Ensure that the temperature settings are correct.
- Check to see if the air filter is clogged with dust. If so, replace the filter.
- Ensure that the air flow from the outside is not obstructed and that there is a clearance of over 20" between the back of the air conditioner and the wall or fence behind it.
- Close all doors and windows and check for any source of heat in the room.
Before calling for service, please review the following list of common problems and solutions.
The air conditioner is operating normally when:
- You hear a pinging noise. This is caused by water being picked up by the fan on rainy days or in highly humid conditions. This feature is designed to help remove moisture in the air and improve cooling efficiency.
- You hear the thermostat click. This is caused by the compressor cycle starting and stopping.
- You see water dripping from the rear of the unit. Water may be collected in the base pan in highly humid conditions or on rainy days. This water overflows and drips from the rear of the unit.
- You hear the fan running while the compressor is silent. This is a normal operational feature.
The air conditioner may be operating abnormally when:
| Air conditioner does not start | ■ The air conditioner is unplugged. | · Make sure the air conditioner plug is pushed completely into the outlet. |
| ■ The fuse is blown/circuit breaker is tripped. | · Check the house fuse/circuit breaker box and replace the fuse or reset the breaker. | |
| ■ Power failure. | · If power failure occurs, turn the mode control to Off.When power is restored, wait 3 minutes to restart the air conditioner to prevent tripping of the compressor overload. | |
| Air conditioner does not cool as it should | ■ Airflow is restricted. | · Make sure there are no curtains, blinds, or furniture blocking the front of the air conditioner. |
| ■ The thermostat may not be set high enough. | · Turn the knob to a higher number.The highest setting provides maximum cooling. | |
| ■ The air filter is dirty. | · Clean the filter at least every 2 weeks.See the care and Maintenance section. | |
| ■ The room may have been hot. | · When the air conditioner is first turned on, you need to allow time for the room to cool down. | |
| ■ Cold air is escaping. | · Check for open furnace floor registers and cold air returns. | |
| ■ Cooling coils have iced up. | · See Air Conditioner Freezing Up below. | |
| Air conditioner freezing up | ■ Ice blocks the air flow and stops the air conditioner from cooling the room. | · Set the mode control at High Fan or High Cool with thermostat at 1 or 2. |
* You can refer to the Energy Star program in detail at www.energystar.gov.