
LS-P0960CL - Air-conditioner LG - Free user manual and instructions
Find the device manual for free LS-P0960CL LG in PDF.


User questions about LS-P0960CL LG
0 question about this device. Answer the ones you know or ask your own.
Ask a new question about this device
Download the instructions for your Air-conditioner in PDF format for free! Find your manual LS-P0960CL - LG and take your electronic device back in hand. On this page are published all the documents necessary for the use of your device. LS-P0960CL by LG.
USER MANUAL LS-P0960CL LG
ROOM AIR CONDITIONER OWNER'S MANUAL
SPLIT TYPE ROOM AIR CONDITIONER
Please read carefully and thoroughly this manual
before operating this unit.
- Contact the authorized SVC man for repair or
maintenance of this unit. - Contact the installer for installation of this unit.

natural_image
Solid pink rectangular background with no text, symbols, or patternsCONTENTS
PRODUCT COMPONENT IDENTIFICATION 3
(1) Feature 3
(2) Indoor Unit, Outdoor Unit 4
(3) Name and Function-Remote Controller 5
(4) Remote Controller Preparation 6
AIR CONDITIONER OPERATION 7
(1) Operation Mode 7
(2) Operation Procedure 7
(3) Fan Operation 12
(4) Sleep Mode Auto-Control Setting 13
(5) Airflow Direction Procedure 14
(6) Setting the Present Time 15
(7) Timer Setting 16
(8) Operation Details 18
FORCED OPERATION 19
CARE AND MAINTENANCE 20
OPERATION TIPS 22
CAUTION 23
BEFORE CALLING FOR SERVICE 24
(1) Feature
A Soft Dry Operation Mode
page 9
This mode is designed to dehumidify without overcooling.
/B Natural wind by CHAOS logic
page 18
This mode automatically controls the indoor fan speed and creates the feeling of a pleasant breeze like a natural wind by CHAOS logic.
C Auto Operation
page 12
In selecting this mode of operation, the setting temperature, indoor fan speed, and the desired operation mode are automatically set by Fuzzy rule on the basis of sensing the room temperature. During Auto Operation, vertical the louver swings up and down automatically in according to 1/f rhythm. Pressing the Airflow Direction Control Button will set the louvers as the desired position. If you want to go on with the 1/f swing of vertical the louver, press again the Airflow Direction Control Button.
/D ON/OFF Dual Timer Setting
page 16
You can program the room air conditioner to turn itself on or off so as to ensure you maximum comfort when you return from being away.
E Sleep Mode Auto Control
page 13
A touch of the Sleep Mode Button automatically programs the room air conditioner to turn off controls the indoor fan speed, and adjusts the setting temperature to create a more comfortable sleep.
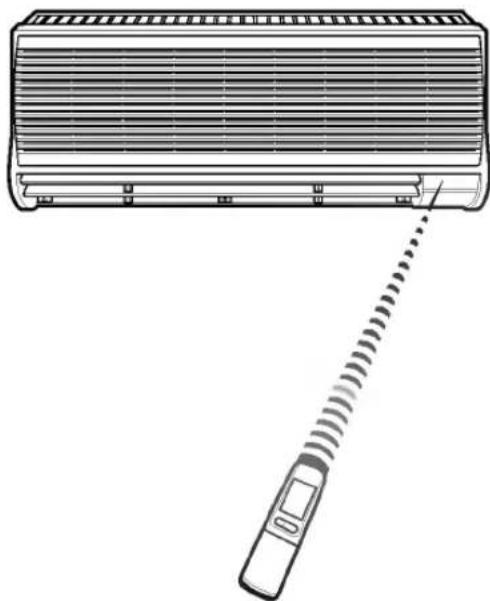
natural_image
Line drawing of a wall-mounted air conditioner with a digital thermometer inserted (no text or symbols)Wireless Remote Controller puts all functions at your fingertips.
CAUTION
of handling the Remote Controller
fUAim at the signal receptor on the room air conditioner so as to operate.
fUThe remote control signal can be received at a distance of up to about 7m.
fUBe sure that there are no obstructions between the remote controller and the signal receptor.
fuDo not drop or throw the remote controller.
Do not place the remote controller in a location exposed to direct sunlight, or near the heating unit, or any other heat source.
f uBlock a strong light over the signal receptor with a curtain or etc. so as to prevent the abnormal operation.
(ex: electronic quick start, ELBA, inverter type fluorescent lamp)
(2) Indoor Unit, outdoor Unit
Indoor Unit
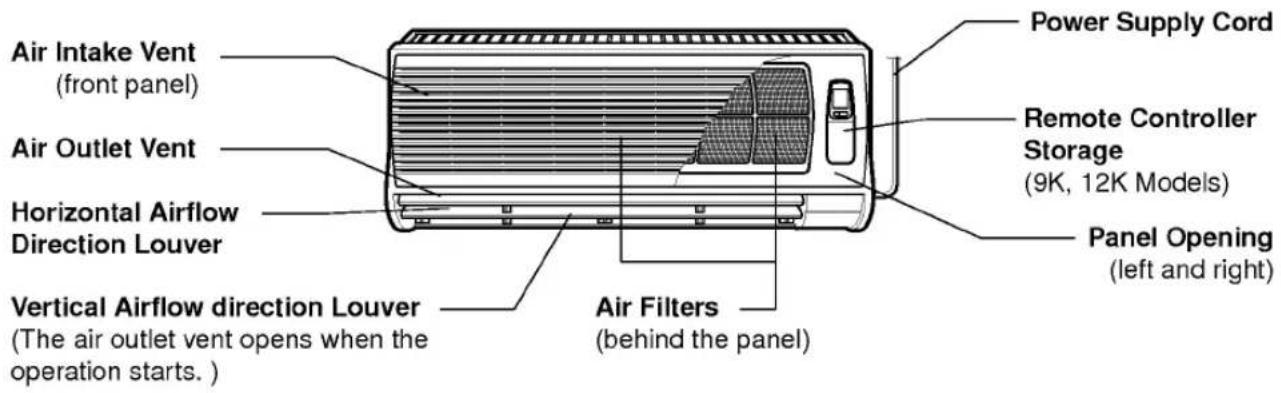
text_image
Air Intake Vent (front panel) Air Outlet Vent Horizontal Airflow Direction Louver Vertical Airflow direction Louver (The air outlet vent opens when the operation starts. ) Power Supply Cord Remote Controller Storage (9K, 12K Models) Panel Opening (left and right) Air Filters (behind the panel)Indoor unit controls and indicators
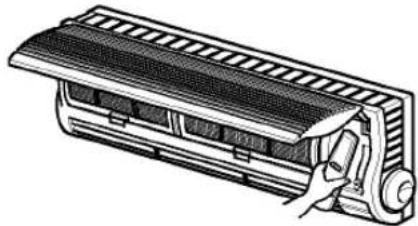
Open the front panel
Press the panel to open (left and right side of front panel) and open the panel upward.
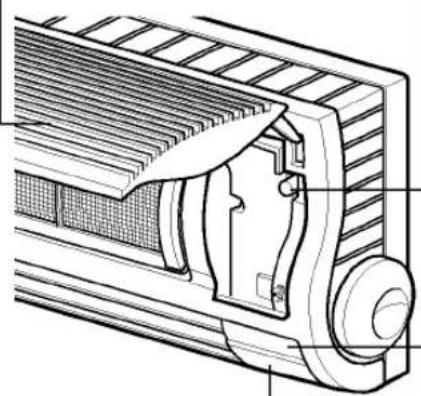
natural_image
Technical line drawing of a mechanical component with no visible text or symbolsForced Operation Button
Used for operation when the remote controller cannot be used.
(When operation is stopped by the remote controller without removing power plug, the room air conditioner consumes approximately 2W of electricity.)
Signal Receptor
Receives the signals from the remote controller.
(Signal received sound: two short beeps or one long beep.)
Operation Indication Lamps
① On : Lights up during the air conditioner operation.
Sleep Mode : Lights up during Sleep Mode Auto operation.
Timer : Lights up during timer operation.
* Deice Mode : Light up during Deice Mode operation. (Blinks on and off during hot start) (Heat Pump Only)
OUTDOOR : Light up during compressor operation.(Cooling Only)
Outdoor Unit
Air Intake Vents
Air Outlet Vent
(Side)
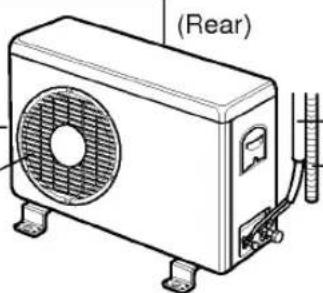
natural_image
Line drawing of a front-mounted air conditioner unit with fan and cooling elements (no text or symbols)Piping
Drain Hose
(3) Name and Function-Remote Controller
Remote Controller
Signal transmitter.
Transmits the signals to the room air conditioner.
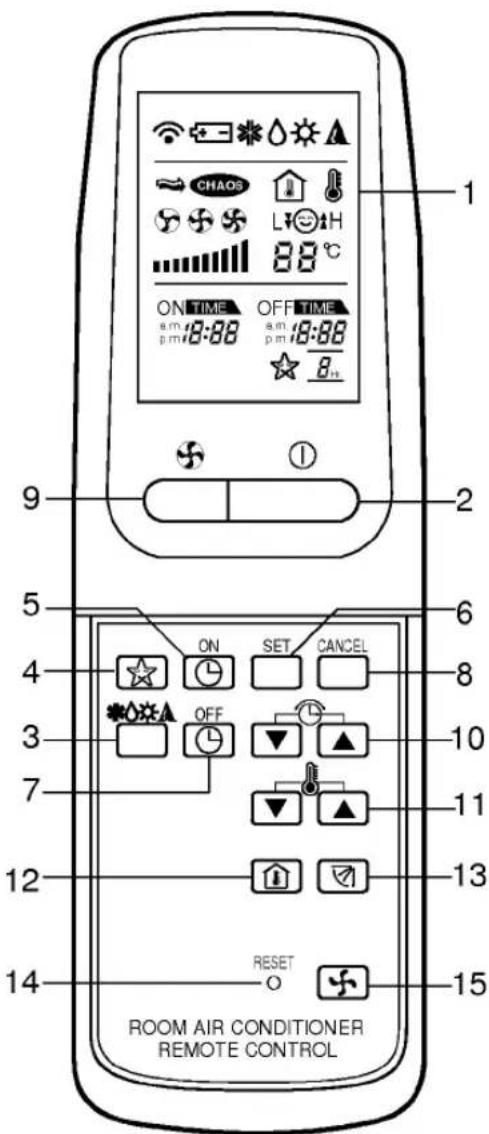
text_image
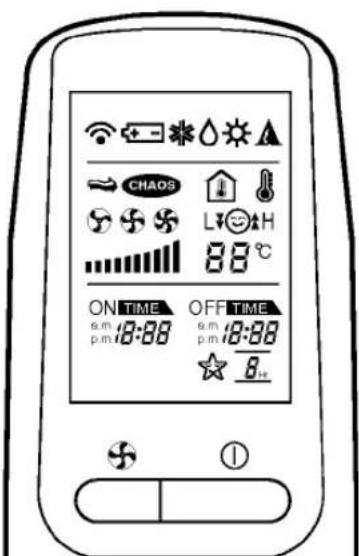
1 CHAOS L H 88 °C ON TIME OFF TIME a.m. 8:88 a.m. 18:88 p.m. p.m. p.m. p.m. p.m. p.m. p.m. p.m. p.m. p.m. p.m. p.m. p.m. p.m. p.m. p.m. p.m. p.m. p.m. p.m. p.m. p.m. p.m. p.m. p.m. p.m. p.m. p.m. p.m. p.m. p.m. p.m. p.m. p.m. p/m. 2 9 5 6 4 8 3 10 7 11 12 13 14 RESET 15 ROOM AIR CONDITIONER REMOTE CONTROLA Operation Display
Displays the operation conditions.
/B Start/Stop Button
Operation starts when this button is pressed, and stops when the button is pressed again.
√C Operation Mode Selection Button
Used to select the operation mode.
fuCooling Operation Mode.
ftSoft Dry Operation Mode.
ftHeating Operation Mode. (Heat Pump Only)
fuAuto Operation Mode.
D Sleep Mode Auto Button
Used to set Sleep Mode Auto Operation.
E ON Timer Button
Used to set the time of starting operation.
/F Timer Set Button
Used to set the timer until the desired time is obtained.
/G OFF Timer Button
Used to set the time of stopping operation.
H Timer CANCEL Button
Used to cancel the timer operation.
/ I Indoor Fan Speed Selector
Used to select the desired fan speed.
/J Time Setting Button
Used to adjust the time.
K Room Temperature Setting Button
Used to adjust the room temperature.
√L Room Temperature Checking Button
Used to check the room temperature.
/M Airflow Direction Control Button
Used to set the desired airflow direction.
N Reset Button
○ Fan Operation Button (Cooling Only)
Used to operate the indoor fan only.
(4) Remote Controller Preparation
How to store the remote controller
(9K, 12K Models)
How to mount onto a wall
(All models)
1 Press the left and the right side to open the front panel upward.
natural_image
Diagram of a heat exchanger with cooling fins and air flow arrows (no text or labels)1 Use the screws to secure the holder to the wall.
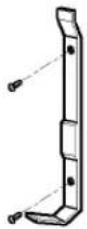
Confirm that the remote control signals can be received from this location.
2 Store the remote controller.
natural_image
Technical line drawing of a mechanical component with a hand inserting a tool (no text or symbols)(Remove it when using.)
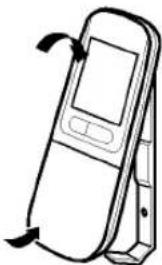
2 To Attach the remote controller to the holder.
(1) Hook
natural_image
Line drawing of a mobile phone with scroll and keypad (no text or symbols)(2) Press
3 Press the left and the right side to close the front panel.
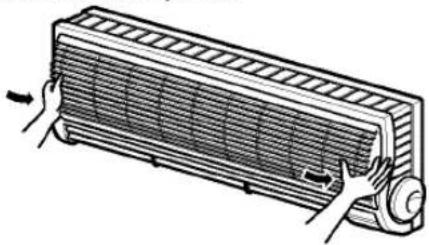
natural_image
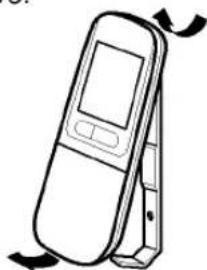
Illustration of a heat exchanger with hands pulling the air gap (no text or symbols)3 To remove.
(1) Pull
natural_image
Line drawing of a handheld electronic device with scroll and buttons, showing rotational arrows (no text or symbols)(2) Unhook
How to insert batteries
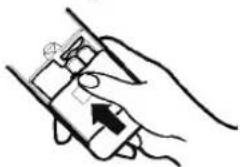
1 Remove the cover from the back of the remote controller.
fuSlide the cover according to the arrow direction.
2 Insert the two batteries.
fUBe sure that the (+) and (-) directions are correct.
fuBe sure that both batteries are new.
3 Re-attach the cover.
fUSlide it back into position.
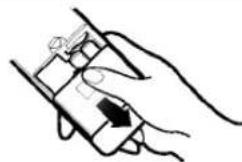
natural_image
Line drawing of a hand holding a small electronic device (no text or symbols)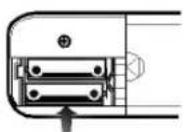
natural_image
Hand holding a handheld device with an arrow pointing to the screen (no text or symbols visible)fDo not use rechargeable batteries, such batteries differ from standard dry cells in shape, dimensions, and performance.
fuRemove the batteries from the remote controller if the air conditioner is not going to be used for some long time.
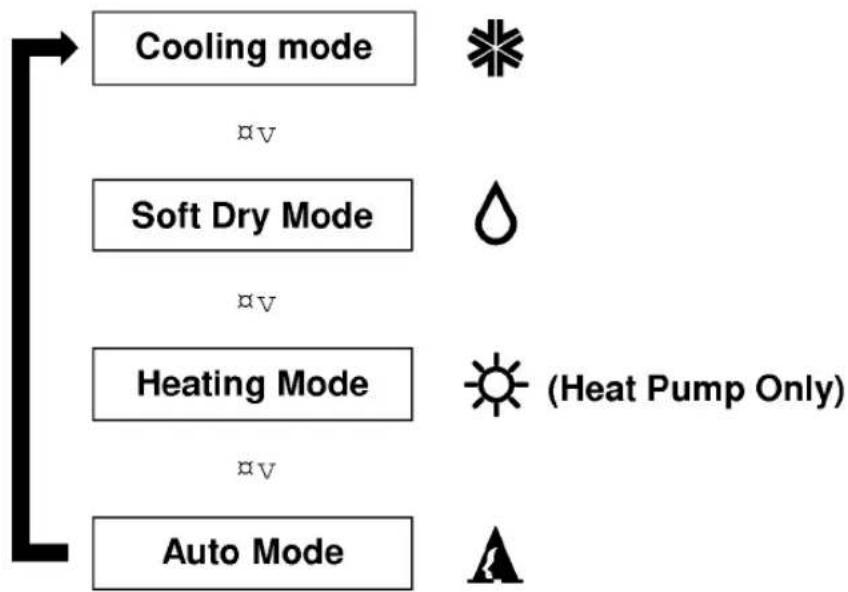
(1) Operation Mode
flowchart
graph TD
    A["Auto Mode"] --> B["Heating Mode"]
    B --> C["Soft Dry Mode"]
    C --> D["Cooling mode"]
    style A fill:#f9f,stroke:#333
    style B fill:#ccf,stroke:#333
    style C fill:#cfc,stroke:#333
    style D fill:#fcc,stroke:#333
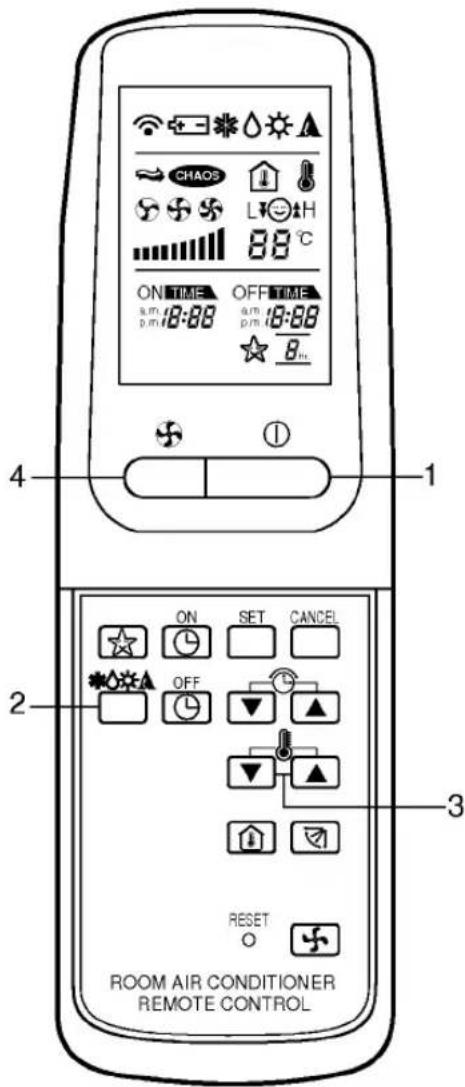
(2) Operation Procedure
1st Start/Stop Button
2nd Operation Mode Selection Button
3rd Room Temperature Setting Button
4th Indoor Fan Speed Selector
text_image
CHAOS L H 88 °C ON TIME OFF TIME s.m. 18:00 s.m. 18:00 p.m. p.m. p.m. p.m. ★ 8 m. 4 ① ② ON SET CANCEL ★ OFF ▼ ▲ ○ ○ ▲ RESET ROOM AIR CONDITIONER REMOTE CONTROL/A Cooling Operation Mode
(① LED lamp ON)
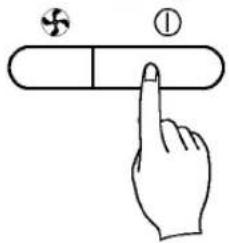
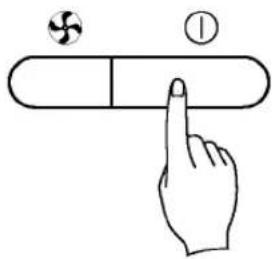
1
Press the Start/Stop Button.
text_image
Diagram showing a hand pointing at a segmented object with a small symbol above it, labeled with the number ①.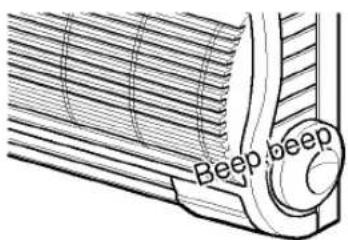
text_image
Beep,beepf\uTwo short beep will sound and the operation lamp will light up.
2
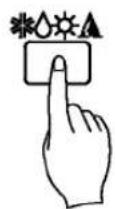
Select Cooling Operation.
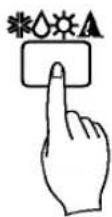
Press the Operation Mode Selection Button.
Each time the button is pressed, the operation mode is shifted in the arrow direction.
Operation Display
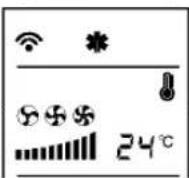
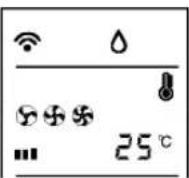

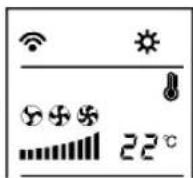

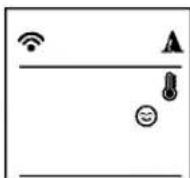
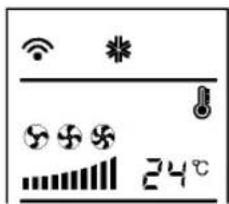
Cooling Operation
Soft Dry Operation
Heating Operation (Heat Pump Only)
Auto Operation
3
Set the temperature.
text_image
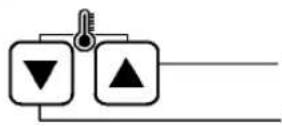
24°CfUThe temperature can be set within a range of 20°C\~30°C by 1°C.
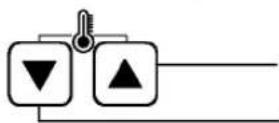
To raise the Temperature To lower the Temperature
4
Set the fan speed.
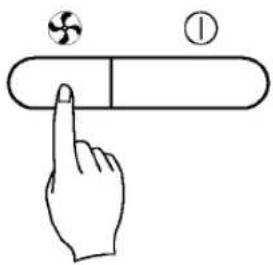
text_image
Diagram showing a hand pointing at a segmented object with a labeled circle and a small leaf symbol above it.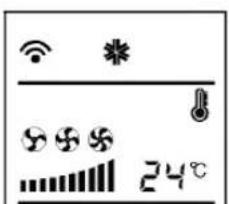
text_image
Weather and temperature icons with symbols for solar, weather, temperature, and grid displayfUSelect the fan speed in four steps fU- low, medium, high, CHAOS. fU fUThe display shows high fan fUspeed.
fEach time the button is pressed, the fan speed mode is shifted.
/B Soft Dry Operation Mode
This mode dehumidifies without overcooling.
(① LED lamp ON)
1
Press the Start/Stop Button.
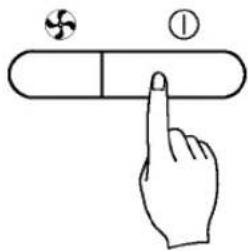
text_image
Diagram showing a hand pointing at a segmented object with a small symbol and an arrow, possibly illustrating a concept or concept.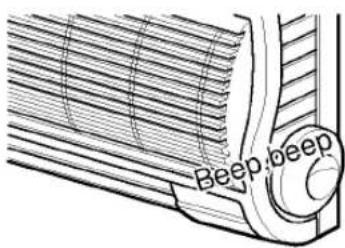
natural_image
Technical line drawing of a mechanical component with ribbed texture and a curved pipe (no text or symbols)fùTwo short beep will sound and the operation lamp will light up.
2
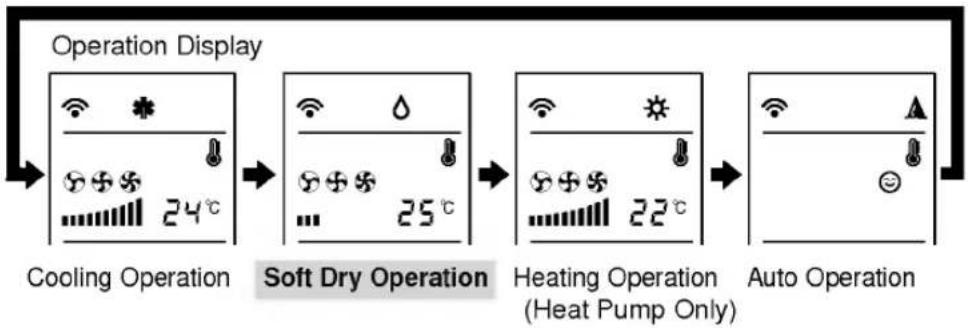
Select Soft Dry Operation.
Press the operation Mode Selection Button.
Each time the button is pressed, the operation mode is shifted in the arrow direction.
flowchart
graph LR
    A["Operation Display"] --> B["Cooling Operation"]
    B --> C["Soft Dry Operation"]
    C --> D["Heating Operation (Heat Pump Only)"]
    D --> E["Auto Operation"]
3
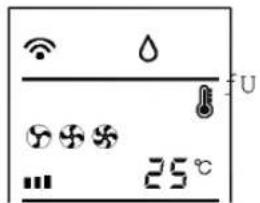
Set the temperature lower than the room temperature.
text_image
Wi-Fi Water U 30+5 25°CfUThe temperature can be set within a range of 20°C\~30°C by 1°C.
To raise the Temperature
To lower the Temperature
4
During Dry Operation.
fùThe indoor fan speed is automatically set to the low, so the shift of the indoor fan speed is impossible because of already being set to the best speed for Dry Operation by Micom Control.
fuThe indoor fan may be stopped not so as to be the room overcooling.
√C Heating Operation Mode
(① LED lamp ON)
1
Press the Start/Stop Button.
text_image
Diagram showing a hand pointing at a segmented rectangle with a small circular symbol above it, likely illustrating a basic electrical or mechanical concept.
text_image
Beep:beepfU Two short beep will sound and the operation lamp will light up.
2
Select Heating Operation.
Press the Operation Mode Selection Button.
Each time the button is pressed, the operation mode is shifted in the arrow direction.
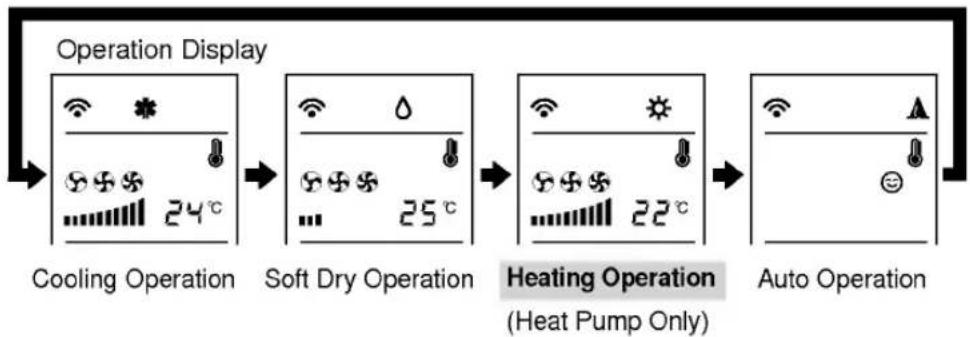
flowchart
graph LR
    A["Operation Display"] --> B["Cooling Operation"]
    B --> C["Soft Dry Operation"]
    C --> D["Heating Operation\n(Heat Pump Only)"]
    D --> E["Auto Operation"]
3
Set the temperature.
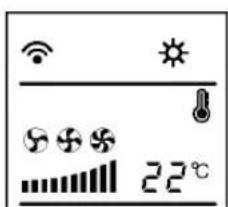
text_image
22℃fùThe temperature can be set within a range of 16°C\~30°C by 1°C.
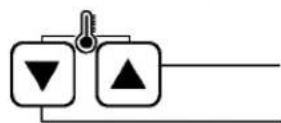
To raise the Temperature To lower the Temperature
4
Set the fan speed.
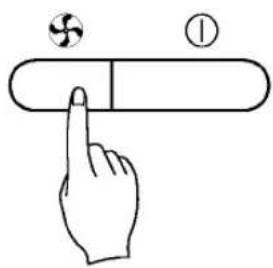
text_image
Diagram showing a hand pointing at a button with a small circular symbol above and an arrow pointing to it, labeled with circled and circled symbols.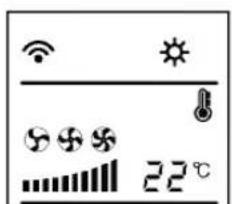
text_image
22℃fUSelect the fan speed in four steps fU- low, medium, high, CHAOS. fU fUThe display shows high fan fUspeed.
fEach time the button is pressed, the fan speed mode is shifted.
/D Auto Operation Mode
(① LED lamp ON)
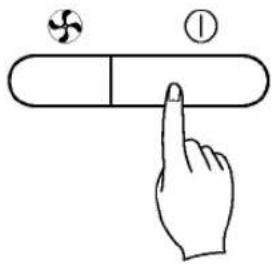
1
Press the Start/Stop Button.
text_image
Diagram showing a hand pointing at a segmented object with a small circular symbol above it and an arrow pointing to it, labeled with the number ①.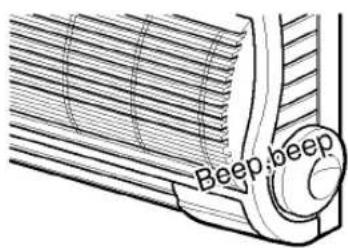
natural_image
Technical line drawing of a corrugated metal component with a curved pipe and circular base (no text or symbols)fUTwo short beep will sound and the operation lamp will light up.
2
Select Auto Operation.
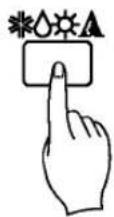
Press the Operation Mode Selection Button.
Each time the button is pressed, the operation mode is shifted in the arrow direction.
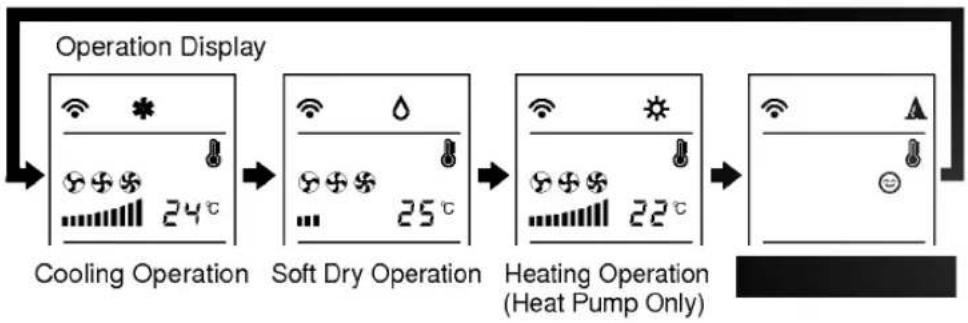
flowchart
graph LR
    A["Operation Display"] --> B["Cooling Operation"]
    B --> C["Soft Dry Operation"]
    C --> D["Heating Operation (Heat Pump Only)"]
    D --> E["End"]
3
Set the temperature.
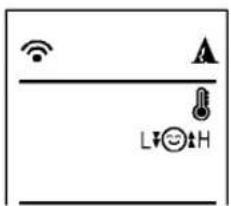
text_image
Diagram showing Wi-Fi signal icons and a temperature indicator with L and H symbolsfùThe desired operation mode and the setting temperature and the fan speed are automatically set by Fuzzy rule on the basis of sensing the room temperature.
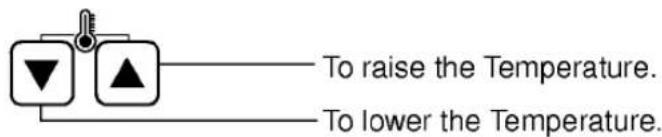
text_image
To raise the Temperature. To lower the Temperature.4
During Auto Operation.
fult is impossible to switch the indoor fan speed during Auto Operation because of being already set to the best position by Fuzzy rule.
fult is possible to press the room temperature setting button only two times so as to change the automatically setting temperature.
ful the room air conditioner is not operating as desired, switch to cooling mode or other mode.
(3) Fan Operation (Cooling Only)
(① LED lamp ON)
1 Press the Start/Stop Button.
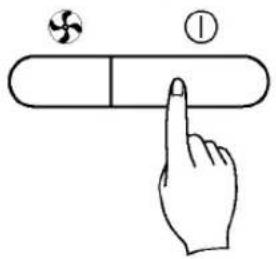
text_image
Diagram showing a hand pointing at a segmented object with a small circular symbol above it, labeled with circled and circled numbers.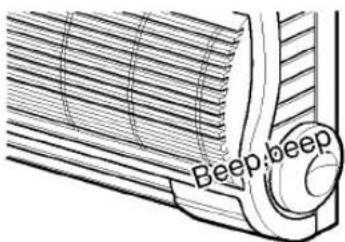
text_image
Beep:beepfùTwo short beep will sound and the operation lamp will light up.
2 Select Fan Operation Button.
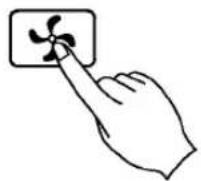
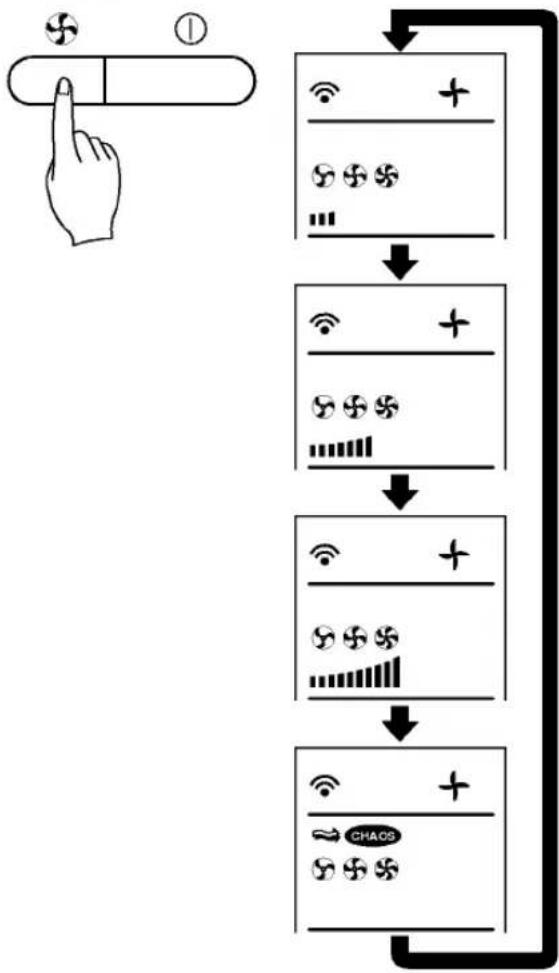
3 Each time the Fan Speed Selector is pressed, the fan speed mode is shifted in the arrow direction.
flowchart
graph TD
    A["Hand press icon"] --> B["Arrow pointing to a button"]
    B --> C["Multipliers: Wi-Fi, +/-, S/×, *"]
    C --> D["Downward arrow to next step"]
    D --> E["Multipliers: Wi-Fi, +/-, S/×, *"]
    E --> F["Downward arrow to next step"]
    F --> G["Multipliers: Wi-Fi, +/-, S/×, *"]
    G --> H["Downward arrow to next step"]
fUFan speed is low.
fUFan speed is medium.
fUFan speed is high.
fUNatural wind by CHAOS logic:
The indoor fan speed is automatically changed from the high to the low, or reversely by CHAOS logic.
(4) Sleep Mode Auto Control Setting
(★ LED lamp ON)
Remote Controller
text_image
ON TIME OFF TIME s.m. 18:00 s.m. 18:00 p.m. p.m. p.m. p.m.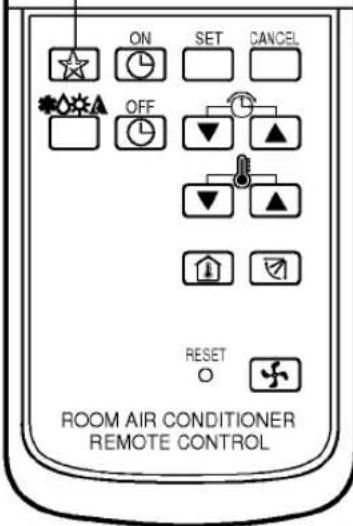
text_image
ON SET CANCEL OFF L ▼ ▲ ▼ ▲ Reset ○ ROOM AIR CONDITIONER REMOTE CONTROL
fUThe Sleep Mode will be operated at a low fan speed (Cooling) or a med. Fan speed prevent the room from being too cold (Cooling) or too hot (Heating) by automatically the setting temperature being raised (Cooling) or being decreased (Heating) for comfortable sleeping.
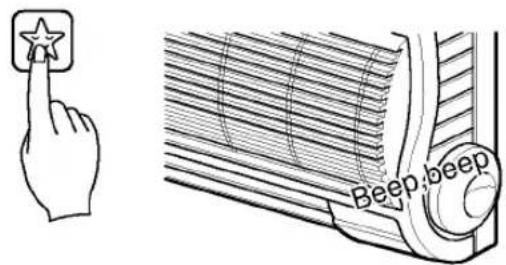
Press the Sleep Mode Auto Button.
text_image
Beep beep- Press the Sleep Mode Auto Button and set the time to turn off.
- Check the Sleep Mode Auto LED of the room air conditioner to light up.
- The Timer is programmed by 1 hour each pressing the sleep mode auto button from 1 hour to 7 hours.
- The indoor fan is switched to a low speed.
fUThe setting temperature will be automatically raised by 1°C 30 minutes later and by 2°C 1 hour later(Cooling) or continued without any change(Heating).
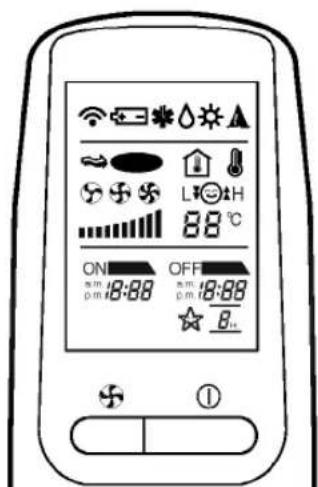
fUSo as to cancel the Sleep Mode, press the CANCEL button several times until disappear the Sleep Mode. (Star pictograph)
(5) Airflow Direction Procedure
A Vertical Airflow Direction Control
Airflow Direction Control
The airflow direction can be adjusted as desired by using the remote controller. This is effective when you want to cool yourself directly, such as after taking a bath.

text_image
Horizontal DownwardRemote Controller
text_image
ON 18:88 OFF 18:88 ★ B+
text_image
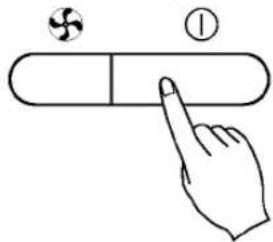
ON SET CANCEL OFF RESET ROOM AIR CONDITIONER REMOTE CONTROL1 Press the Start/Stop Button. (Confirm the unit on operation.)
text_image
Diagram showing a hand pointing at a capsule-shaped object with a small circular symbol above it, labeled with the number ①.2 Press the Airflow Direction Control Button for the vertical louver's swinging up and down automatically.
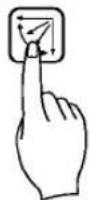
3 Press again the Airflow Direction Control Button to set the vertical louver at the desired airflow direction.
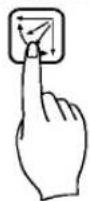
Airflow Direction Control Button
Caution
fuAlways use the remote controller to adjust the airflow direction. Manually moving the vertical airflow direction louver by hand could cause operation errors.
When air conditioner operation is stopped, the vertical airflow direction louver will close the air conditioner's air outlet vent.
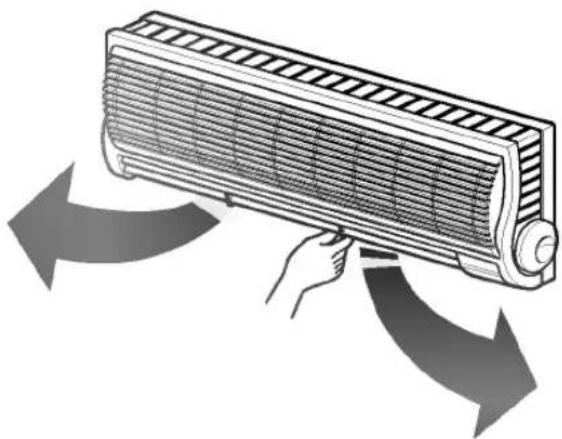
/B Horizontal Airflow Direction Control
fUAdjust the horizontal airflow direction by manually moving the horizontal airflow direction louver by hand.
natural_image
Illustration of a hand pressing down on a wall-mounted air conditioner with directional arrows indicating airflow (no text or symbols)(6) Setting the Present Time
The present time can be set only when pressing the reset button or when replacing batteries for the remote controller.
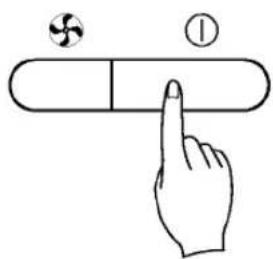
1 Press the Start/Stop Button after pressing the RESET Button or changing batteries for Remote Controller.
text_image
Diagram showing a hand pointing at a pill-shaped object with a valve icon above it, labeled with the number ①.2 Press the Time Setting Button until being set the desired time.
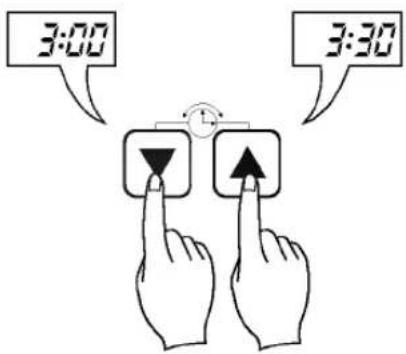
text_image
3:00 3:303 Press the Time SET Button.

NOTE: Check a.m. and p.m. Indicator in setting time.
(7) Timer Setting
(② LED lamp ON)
Remote Controller
/A ON Timer Button or OFF Timer Button
/B Time Setting Button
√C Timer SET Button
/D Timer CANCEL Button
1 Press the ON Timer Button or OFF Timer Button.
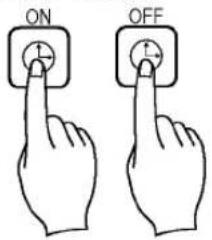
text_image
ON OFFThe timer setting will be displayed.
2 Change the Time Setting and press the Timer Set Button.
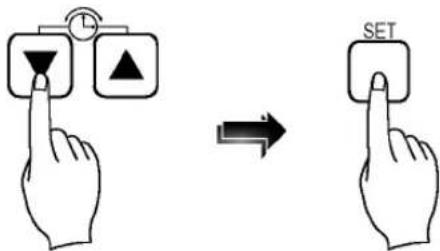
text_image
Diagram showing hand press icons and SET button transformation, illustrating left-hand rule for keyboard state change.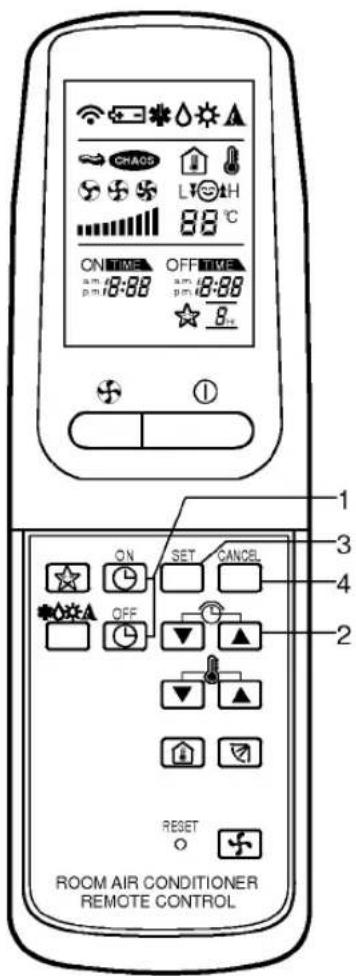
text_image
ON TIME OFF TIME p.m. 18:88 p.m. 18:88 p.m. 18:88 P.M. ★ ① ON SET CANCEL ★ OFF ▼ ▲ RESET 0 ROOM AIR CONDITIONER REMOTE CONTROLTo cancel the settings
Press the Timer Cancel Button.
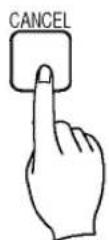
(The timer lamp on the air conditioner and the display will go out.)
If the settings are cancelled by a power failure
Press the Start/Stop Button, and then set the timer again as desired time in according to Timer Setting Procedure.
Timer Setting Procedure
1 Confirm the present time. (Refer page 15)
2 Press ON Timer Button or OFF Timer Button.
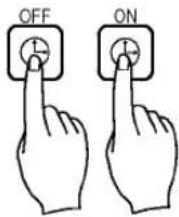
text_image
OFF ONDelay OFF Timer
Delay ON Timer
Delay OFF and ON Timer
Delay ON and OFF Timer
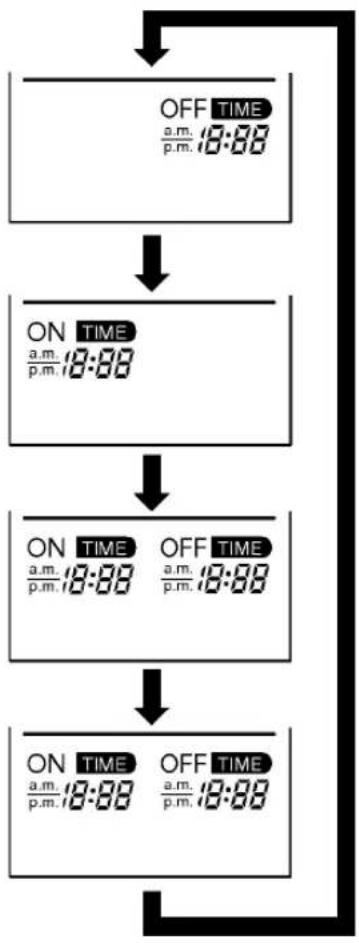
flowchart
graph TD
    A["OFF TIME\na.m./p.m. 18:88"] --> B["ON TIME\na.m./p.m. 18:88"]
    B --> C["ON TIME\na.m./p.m. 18:88"]
    C --> D["ON TIME\na.m./p.m. 18:88"]
    D --> E["ON TIME\na.m./p.m. 18:88"]
    E --> F["OFF TIME\na.m./p.m. 18:88"]
fUSelect one of the following four types of operation.
fUEach time the button is pressed, the operation mode is shifted to the arrow direction.
Operation stops at OFF Timer Setting.
Operation starts at ON Timer Setting.
Operation stops at OFF Timer Setting and starts at ON Timer Setting.
Operation starts at ON Timer Setting and stops at OFF Timer Setting.
NOTE: Check a.m. and p.m. Indicator in setting time.
3 Press the Time Setting Button until being set the desired time.
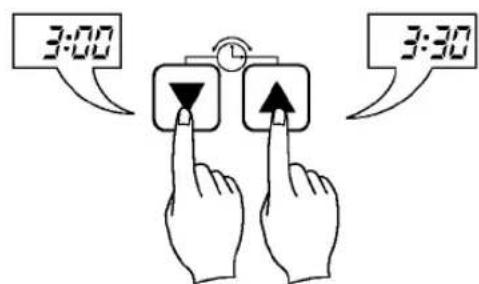
text_image
3:00 3:304 Press the Timer SET Button.
(8) Operation Details
fUSoft Dry Operation Mode
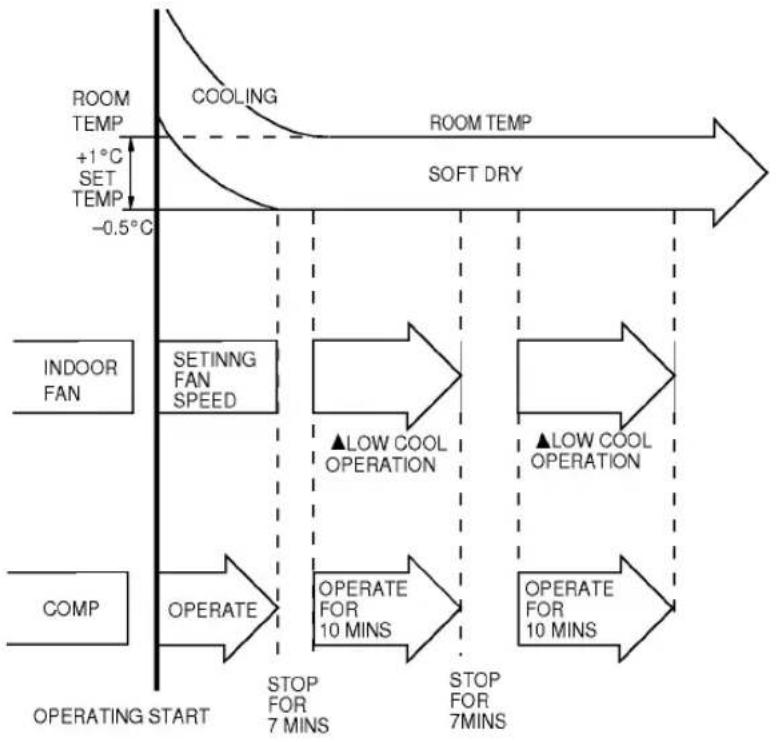
When the room temp. is higher than the setting temperature, it operates cooling mode as the setting temperature, the setting fan speed (if CHAOS mode, then med.), and then it will be switched to Soft Dry Operation Mode when the room temperature reaches the setting temperature.
In Soft Dry Operation Mode, the indoor fan speed is automatically switched to the low.
flowchart
graph TD
    A["ROOM TEMP"] --> B["COOLING"]
    B --> C["ROOM TEMP"]
    C --> D["SOFT DRY"]
    D --> E["INDOOR FAN"]
    E --> F["SETTING FAN SPEED"]
    F --> G["▲LOW COOL OPERATION"]
    G --> H["▲LOW COOL OPERATION"]
    H --> I["COMP"]
    I --> J["OPERATE"]
    J --> K["OPERATE FOR 10 MINS"]
    K --> L["OPERATE FOR 10 MINS"]
    L --> M["OPERATING START"]
    M --> N["STOP FOR 7 MINS"]
    N --> O["STOP FOR 7MINS"]
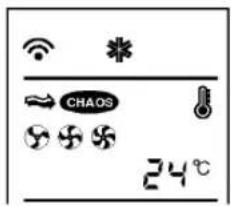
fUNatural wind by the CHAOS logic
For more fresh feeling than other fan speed mode, press the indoor fan Speed Selector and set to CHAOS mode.
In this mode, the wind blows like natural breeze by automatically fan speed switching from the high to the low, or reversely in according to the CHAOS logic.
text_image
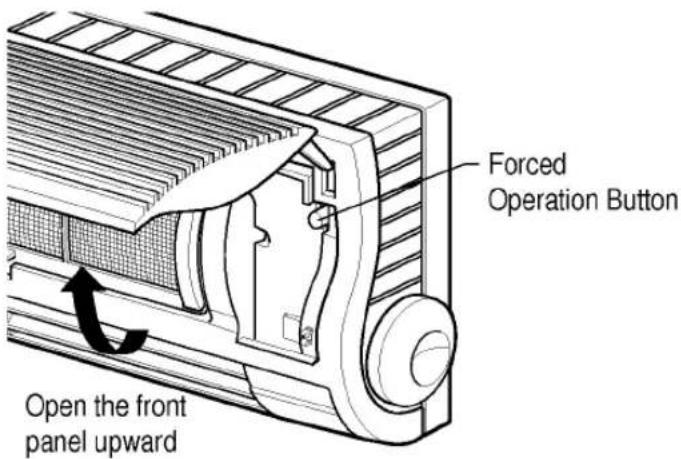
W * CHAOS 24°COperation procedures when the remote controller can't be used.
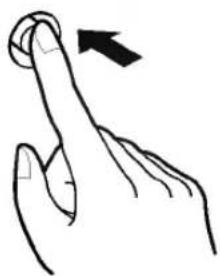
Open the front panel upward and press the Forced Operation Button.
If want to stop operation, press again.
During Forced operation, the operating conditions are automatically set as the following.
natural_image
Illustration of a woman using an air conditioner to lift a car, with a smaller hand emerging from the air (no text or symbols present)| Room temperature | below 21°C | 21°C~24°C | over 24°C |
| Operating mode | Heating | Soft dry | Cooling |
| Setting temperature | 22°C | Room temperature | 24°C |
| Indoor fan speed | High | by soft dry rule | High |
text_image
Forced Operation Button Open the front panel upwardPress the Forced Operation Button.
natural_image
Line drawing of a hand index finger with a circular button, showing finger movement and a black arrow indicating rotation (no text or symbols)fUPress the Forced Operation Button once again to stop operation.
Helpful information
Airflow speed and cooling capacity
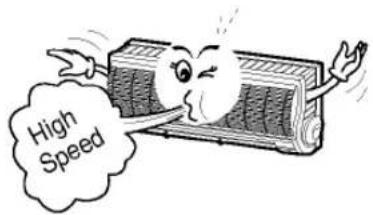
The cooling capacity indicated in the specification is the value when the fan speed is set to high, and the capacity will be lower at low or medium fan speed.
High fan speed is recommended when you wish to cool the room quickly.
text_image
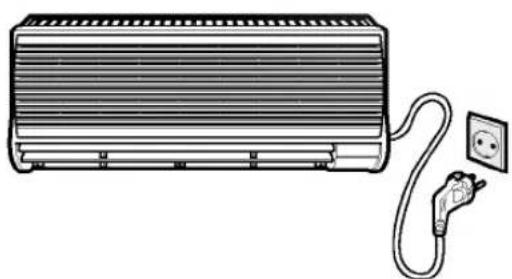
High SpeedBefore performing any maintenance procedure
Remove power plug.
natural_image
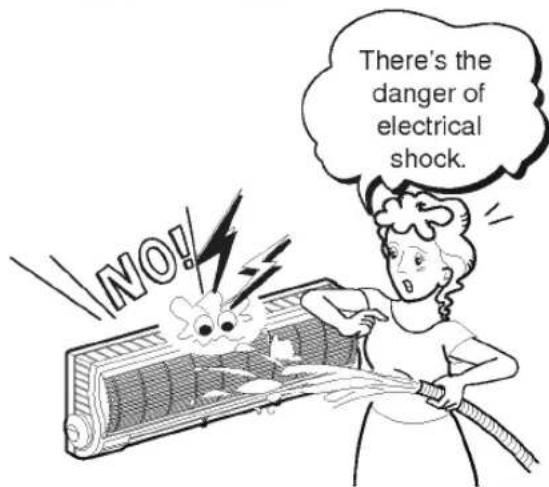
Line drawing of an air conditioner unit connected to a power outlet (no text or symbols)Don't wash with water.
text_image
NO! There's the danger of electrical shock.Never use any of the follwings.
fuWater hotter than 40°C.
Could cause deformation and/or discoloration.
fUVolatile substances.
Could damage the surfaces of the air conditioner.

text_image
PENZENE WINN SOURING CLAREERCleaning of the air filters.
Recommended about once every two weeks.
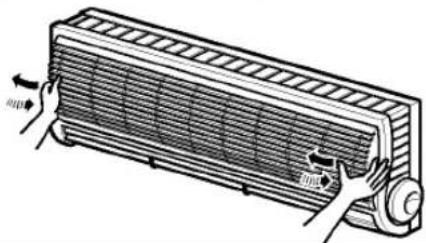
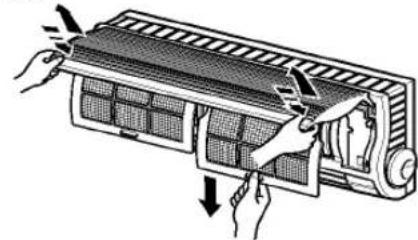
1 Remove the Air Filters.
Take hold of the tab and pull slightly forward to remove the filter.
natural_image
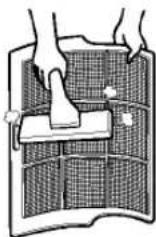
Illustration of hands installing or adjusting a panel inside a refrigerated air conditioner (no text or symbols visible)2 Clean. fuTo re
fuTo remove the dust adhering to the filters, either use a vacuum cleaner, or wash them in water and dry in the shade.
fuRe-insert the filter into the original position.
If the Air Filters become damaged.
fuPurchase new filters from your air conditioner dealer.
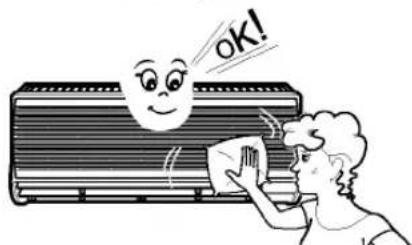
Cleaning of the air conditioner and the remote controller.
fùWipe with a soft, dry cloth.
text_image
OK!At the end of the season
1 Operate the air conditioner at the following settings for 2 to 3 hours. (Summer)
fUType of operation: Cooling. fUTemperature setting: 30°C.
This will dry out the internal mechanisms.
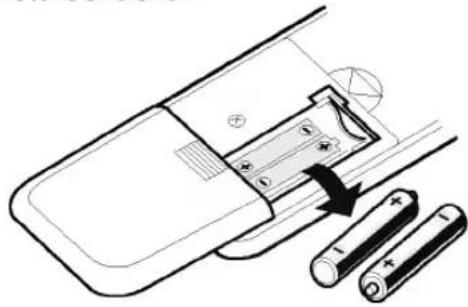
2 Remove the batteries from the Remote Controller.
natural_image
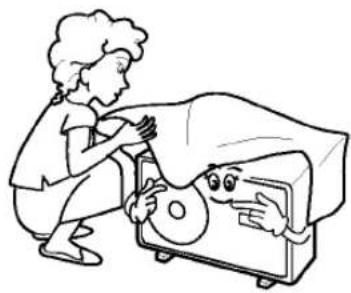
Diagram of a remote control panel with batteries and an arrow indicating rotation (no text or symbols)3 Cover the outdoor unit with the protective cover.

natural_image
Illustration of a person peeking from behind a cardboard box (no text or symbols)At the start of the season
1 Remove the protective cover from the outdoor unit.
natural_image
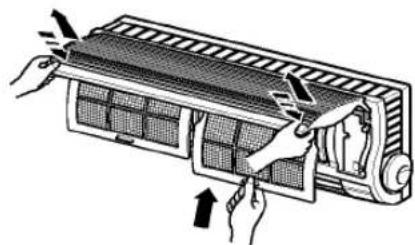
Illustration of a person operating a computer with a magnifying glass (no text or symbols)2 Clean the air filters, re-insert then, and operate the air conditioner.
natural_image
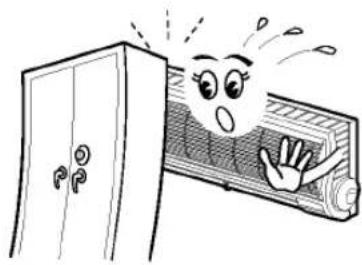
Diagram of a car air conditioner unit being adjusted for a panel, showing hand placement and motion arrows (no text or symbols)3 Be sure that nothing obstructs the air outlet and intake vents.
natural_image
Cartoon illustration of a surprised window with a character waving, next to a cabinet (no text or symbols)Helpful information
The air filters and your electric bill
If the air filters become clogged with dust, the cooling capacity will drop, and 6% of the electricity used to operate the air conditioner will be wasted.

text_image
6% Wasted!Do not overcool the room.This is not good for the health and wastes electricity.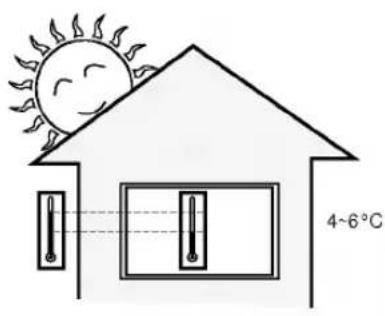 | Keep blinds or curtains closed.Do not let direct sunshine enter the room when the air conditioner is in operation.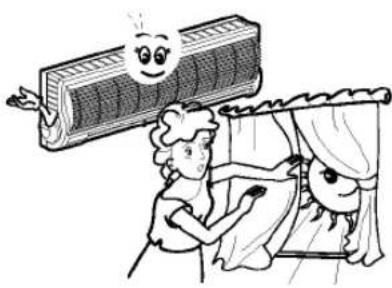 | Keep the room temperature uniform.Adjust the vertical and horizontal airflow direction to ensure a uniform temperature in the room. |
Make sure that the doors and windows are shut tight.Avoid opening doors and windows as much as possible to keep the cool air in the room.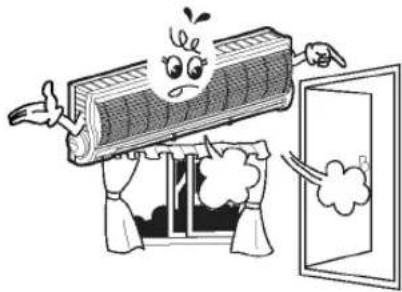 | Clean the air filter regularly.Blockages in the air filter reduce the airflow and lower cooling and duhumidifying effects. Clean at least once every two weeks.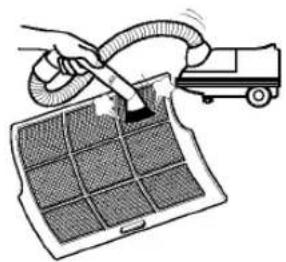 | Ventilate the room occasionally.Since windows are kept closed, it is a good idea to open them and ventilate the room now and then.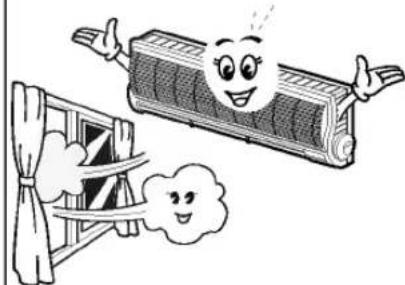 |
Do not pull out the power cord.Damage to the cord may result in serious electrical shocks. | Do not use the air conditioner for purposes other than cooling the room.Do not use the air conditioner for other purposes, such as drying clothes, preserving foods, keeping animals, or cultivating vegetables. | Do not block the air intake and outlet vents.This causes lowered performance and irregular operation. Do not insert sticks or other objects into these vents as it is dangerous to touch the electric components and the fan. |
Select the most appropriate temperature.Take care to adjust the temperature to suit the conditions. Rooms occupied by young infants, the elderly, or invalids should be kept at an appropriate temperature.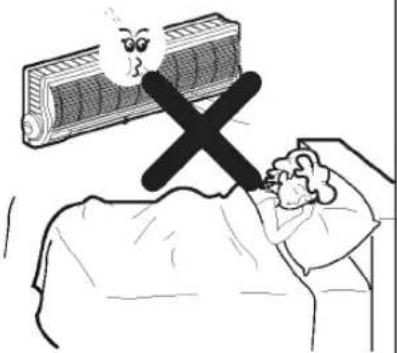 | Do not use heating apparatuses in the vicinity.The air conditioner's plastic parts may melt if expos-ed to excessive heat.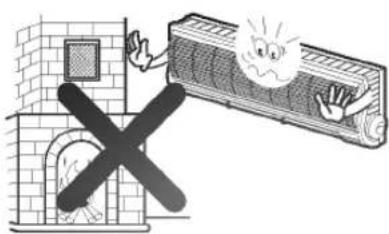 | Avoid exposing the body directly to a continuous unidirectional cool airflow for long periods.This is not good for your health.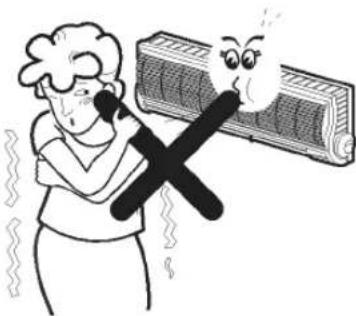 |
Check the following points before requesting repairs or service . . . If the malfunction persist, please contact your dealer.
| Faults | Cause |
| Does not operate. | f Has the fuse blown or has the circuit breaker been tripped?f Have you made a mistake in timer operation? |
| Does not cool or heat effectively. | f Is the air filter dirty? See air filter cleaning instructions.f The room may have been very hot when the room air conditioner was first turned on. Allow time for it to cool down.f Has the temperature been set incorrectly?f Are the indoor unit's air inlet or outlet vents obstructed? |
| The room has a peculiar odor. | f Check that this is not a damp smell exuded by the walls, carpet, furniture or cloth items in the room. |
| The air conditioner operation is noisy. | f For a noise that sounds like water flowing.—This is the sound of freon flowing inside the air conditioner unit.f For a noise that sounds like the compressed air releasing into atmosphere.—This is the sound of the dehumidifying water being processed inside the air conditioning unit. |
| It seems that condensation is leaking from air conditioner. | f Condensation occurs when the airflow from the air conditioner cools the warm room air. |
| Air conditioner does not operate for about 3 minutes when restart. | f This is the protector of the mechanism.f Wait about three minutes and operation will begin. |
| Remote controller display is faint, or no display at all. | f Are the batteries depleted?f Are the batteries inserted in the opposite (+) and (-) directions? |
NOTE
SPLASH PROOF: The outdoor side of this appliance is SPLASH PROOF and the indoor side is ordinary.
This is not malfunction
It may happen some noise the same as "Tig" "Tig" from the indoor unit when the unit operate or after the unit stop, which is due to plastic body's shrinkage or expansion by temperature fluctuation.

text_image
"Tig" "Tig"
LG Electronics Inc.
P/NO:3HOS770W
Printed in Korea