
MULTI V PREMTA000A - Water pump LG - Free user manual and instructions
Find the device manual for free MULTI V PREMTA000A LG in PDF.


User questions about MULTI V PREMTA000A LG
0 question about this device. Answer the ones you know or ask your own.
Ask a new question about this device
Download the instructions for your Water pump in PDF format for free! Find your manual MULTI V PREMTA000A - LG and take your electronic device back in hand. On this page are published all the documents necessary for the use of your device. MULTI V PREMTA000A by LG.
USER MANUAL MULTI V PREMTA000A LG
text_image
OWNER'S & INSTALLATION MANUAL AIR CONDITIONERPlease read this installation manual completely before installing the product.
Installation work must be performed in accordance with the national wiring standards by authorized personnel only.
Please retain this installation manual for future reference after reading it thoroughly.
Premium Wired Remote Controller PREMTA000A
MFL62129218
Rev.02_041922

www.lg.com
Copyright © 2014 - 2022 LG Electronics Inc. All Rights Reserved.
TIPS FOR SAVING ENERGY
Here are some tips that will help you minimize the power consumption when you use the air conditioner. You can use your air conditioner more efficiently by referring to the instructions below:
- Do not cool excessively indoors. This may consume more electricity
- Block sunlight with blinds or curtains while you are operating the air conditioner.
- Keep doors or windows closed tightly while you are operating the air conditioner.
- Adjust the direction of the air flow vertically or horizontally to circulate indoor air.
- Speed up the fan to cool or warm indoor air quickly, in a short period of time.
- Clean the air filter once every 2 weeks. Dust and impurities collected in the air filter may block the air flow or reduce the cooling / dehumidifying functions.
For your records
Staple your receipt to this page in case you need it to prove the date of purchase or for warranty purposes. Write the model number and the serial number here:
Model number :
Serial number :
You can find them on a label on the side of each unit.
Dealer's name
Date of purchase :
IMPORTANT SAFETY INSTRUCTIONS
READ ALL INSTRUCTIONS BEFORE USING THE APPLIANCE.
Always comply with the following precautions to avoid dangerous situations and ensure peak performance of your product

WARNING
This symbol indicates potentially hazardous situation which, if not avoided could result in death or serious injury.

CAUTION
This symbol indicates a potentially hazardous situation which, if not avoided, may result in minor or moderate injury.

WARNING
Installation
- For electrical work, contact the dealer, seller, a qualified electrician, or an authorized service Center.
- Do not disassemble or repair the product. There is risk of fire, electric shock, explosion, equipment malfunction, or injury.
- Request to the service center or installation specialty store when reinstalling the installed product.
- There is risk of fire, electric shock, explosion, equipment malfunction, or injury.
- Do not disassemble, fix, and modify products randomly.
There is risk of fire, electric shock, explosion, equipment malfunction, or injury. - The product shall be installed according to the national standards and local code.
- Apply totally enclosed noncombustible conduit in case of local building code requiring plenum.
- Use appropriate unit mounting procedures.
- Avoid direct sunlight.
- Avoid moist areas.
In-Use
- Do not place flammable objects close to the product.
There is risk of fire, electric shock, explosion, equipment malfunction or injury. - Do not allow product to get wet.
- There is risk of fire, electric shock, explosion, equipment malfunction or injury.
- Avoid dropping the product.
- There is risk of fire, electric shock, explosion, equipment malfunction or injury.
- If product gets wet, contact your dealer or authorized service center.
- There is risk of fire, electric shock, explosion, equipment malfunction, or injury. If the instructions are not followed, it may cause death or severe injury of the user.
- Do not use sharp or pointed objects on product.
- There is risk of fire, electric shock, explosion, equipment malfunction or injury.
- Do not touch or pull the lead wire with wet hands.
There is risk of product breakdown or electric shock.

CAUTION
Installation
- If anyone other than a licensed Professional installs, repairs, or alters LG Electronics air conditioning products, the warranty is voided.
All costs associated with repair are then the full responsibility of the owner.
- Do not install the unit in potentially explosive atmospheres
In-use
- Do not clean using powerful detergents like solvent but use soft cloths.
There is risk of fire, electric shock, explosion, equipment malfunction or deformation.
- Do not press the screen using powerful pressure. There is risk of product break-down or malfunction.
TABLE OF CONTENTS
2 TIPS FOR SAVING EN-ERGY
3 IMPORTANT SAFETY IN-STRUCTIONS
8 PART DESCRIPTION
9 OPERATION SETTING - Standard Mode
9 On/Off
10 General Cooling Operation
11 Power Cooling
13 Heating Operation
14 Dehumidification Operation
15 Monsoon Dehumidifying Mode
16 Fan Only Operation
17 Artificial Intelligence / Automatic Operation
19 Z set point auto operation (North America Only)
20 TEMPERATURE SETTING - Standard Mode
20 Controlling Desired Temperature
22 WIND SETTING - Standard Mode
22 Fan speed Control
23 Airflow Control
24 OPERATION SETTING - Advanced Mode
24 On/Off
25 General Cooling Operation
27 Power Cooling
2B Heating Operation
30 Dehumidification Operation
31 Monsoon Dehumidifying Made
32 Fan Only Operation
33 Artificial Intelligence / Automatic Operation
35 2 set point auto operation (North America Only)
36 Override control
39 Hold
40 Zone Control
42 TEMPERATURE SETTING - Advanced Mod
42 Controlling Desired Temperature
43 Check Room Temperature
44 WIND SETTING - Advanced Mode
44 Fan speed Control
45 Airflow Control
46 SUB FUNCTION SETTING
46 Up/Down Vane Angle Setting
49 Plasma Purification Setting
51 Energy-Saving Cooling Selling
53 Heater Setting
55 Fan Auto Setting
57 Robot Cleaning Selling
59 Ventilation kit Setting
61 Humidifier Setting
63 Mosquito Away
65 Himalaya Cooling
67 Comfort cooling
69 OPERATION SETTING - Ventilator
69 Air conditioner - Ventilation Control Switching
70 General Ventilation Operation Mode
71 Ventilator with DX(Direct eXchanger) Operation Mode
72 FAN SPEED SETTING - Ventilator
72 Fan speed
73 ADDITIONAL MODE SETTING - Ventilator
73 Fast Mode
73 Energy-Saving Mode
74 TIMER & PROGRAM
74 Simple Reservation
77 Sleep Reservation
80 Turn-On Reservation
83 Turn-Off Reservation
86 Create and Edit 7 Days Pattern
91 7-Days Pattern Deletion
93 7-Days Pattern - Day of Week Event Copy/Paste
94 Weekly Schedule
96 Yearly Schedule
98 Delete Yearly Schedule
99 Holiday
99 Add Holiday
102 Delete Holiday
104 ENERGY
104 Check Energy Usage
107 Target Energy Consumption
109 Operation Time Limit
111 Time Limit Control
113 Alarm Popup
115 Initialization Usage Data
117 FUNCTION SETTING
117 Lock Setting - All Lock, On/Off Lock, Mode Lock
118 Lock Setting - Temperature Lock
121 Filter Sign Check
123 Elevation Grill Setting
125 Robot Cleaning
126 Auto Dry
127 Change Temperature
128 Example of using the change temperature function
129 Wireless Module AP mode
130 Zone Name Setting
132 Override Set Time
133 Home Leave Set Temperature
134 Dead Band
136 Smart Load Control(SLC)
138 Comfort cooling setting
140 ODU Refrigerant Noise Reduction setting
142 Low noise mode time selling
144 Defrost mode setting
146 Advanced fan speed "Auto" setting
147 Delay Time Ventilator
149 USER SETTING
149 Date Sellin
151 Time Setting
153 Password Setting
154 Change Password
156 Main Screen Display Setting
158 LCD brightness in idle
160 Screen Saver Timer Setting
162 Schedule Initialization
164 Touch Bee
168 Home theme
168 Temperature Unit Setting
170 Language Setting
172 Control Type Setting(North America Only)
174 Summer Time Setting
176 SERVICE SETTING
176 Service Contact
177 Service number registration and change
179 Model Information
181 Remocon version information
183 Self-diagnosis for Trouble Mode
184 INSTALLATION
184 Installation of Remote Controller
186 Group Control
1BB Air conditioner and ventilation interface
189 INSTALLER'S SETTING OPTIONS
189 How to enter installer setting mode
190 Installer setting code table
194 Test Run Operation (air conditioner / DX type ventilator)
195 Central control address (air conditioner /General, DX type ventilator)
196 ESP setting (air conditioner / General, DX type ventilator)
197 indoor temperature detection sensor setting (air conditioner)
199 Ceiling height selection (air conditioner)
200 Static pressure setting (air conditioner)
202 Remote controller master / slave setting (air conditioner / General, DX type ventilator)
203 Operation master / slave setting (air conditioner / General, DX type ventilator)
205 Dry contact mode setting (air condi tioner / DX type ventilator)
206 Fan speed fixing (air conditioner / DX type ventilator)
207 Celsius / Fahrenheit Switching (air conditioner)
208 Zone Type Setting(air conditioner)
209 Zone Number Setting(air conditioner)
210 Celsius control unit setting (air conditioner)
211 Emergency Heater Setting(air conditioner)
213 Setting of Function control during group control (air conditioner)
214 External Devices Of Indoor Unit Setting (air conditioner)
215 Indoor unit address verification (air conditioner)
216 Selling temperature range (air conditioner)
218 Static Pressure Step Setting(air condi-
tioner
219 Guard timer(air conditioner)
220 Fan operation in the cooling mode and thermal off conditions (air conditioner)
221 Primary Heater control setting(air conditioner)
222 Air conditioner Fan operation interlocked with ventilation (air conditioner)
223 Indoor unit Auto-Start setting (air conditioner)
224 Occupancy Duration Time Setting (air conditioner)
225 Setting for Simple Dry contact unit (air conditioner)
227 Fan continuous operation setting (air conditioner)
228 Outdoor unit function master setting (air conditioner)
230 CN EXT selling (air conditioner)
231 Low Noise Mode Priority setting (air conditioner)
232 Humidity detection location (air conditioner)
233 Product direction (General ventilator)
234 Express ventilation priority (General, DX type ventilator)
235 Humidification of Stand-alone Ventilation mode (General, DX type ventilator)
236 Humidification Of Ventilation With Heating Operation (DX type ventilator)
237 Ventilator Fan Speed Alignment (General ventilator)
PART DESCRIPTION
LG Premium Wired remote controller
text_image
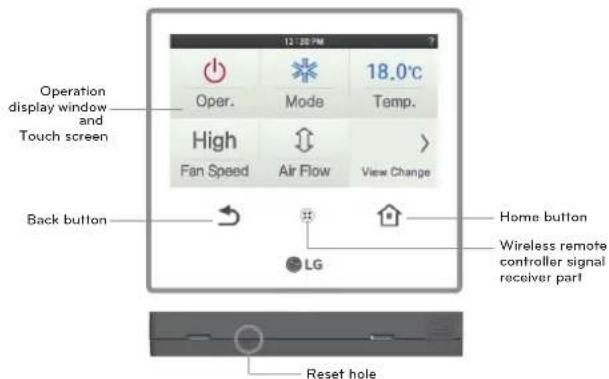
Operation display window and Touch screen Oper. Mode 18.0°C Temp. High Fan Speed Air Flow View Change Back button Home button Wireless remote controller signal receiver part LG Reset holeOperation display window: Displays operation and setting status
Touch screen: Control of product operation and setting status
*If user presses in many places of touch screen at the same time, touch panel can't response
Back button: Move to the previous setting screen
Home button: Move to the default screen
Wireless remote controller signal receiver part; Receives wireless remote controller signal
- This feature may be disabled depending on the indoor products.
Reset button: Reset wired remote controller
- If you press the reset hole with a sharp object, the power will be reset. *If you press it too hard, it may cause failure.
Accessories
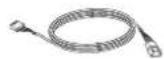
Connecting cable (1 EA)

Remote controller fixing screws (4 EA)
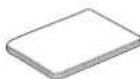
User/Installation Manual
OPERATION SETTING - Standard Mode
On/Off
Air conditioner and ventilator will be turned on or off.
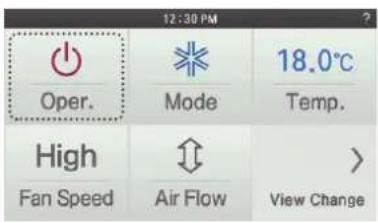
● Press remote controller screen 1 time to turn on.
- If remote controller operation is not used, screen will go into energy savings mode.
● Press On/Off button in the screen.
- If the product is in operation, Go Back button and Home button will be illuminated.
- If the product is in stop, Co Back button's backlight and Home button's backlight will be off.
text_image
12:30 PM Oper. Mode 18.0°C Temp. High Fan Speed Air Flow View Change

- If you press On/Off button during the use, product operation will stop.
General Cooling Operation
Maintains proper cooling comfort
- Press remote controller screen 1 time to turn on.
- If remote controller operation is not used, screen will go into energy savings mode.
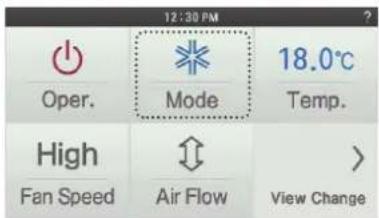
● During the operation of the product, press the mode button on the screen. - The operation mode selection screen is displayed.
text_image
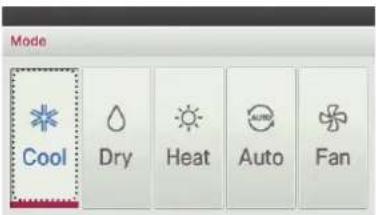
12:30 PM Oper. Mode 18.0°C Temp. High Fan Speed Air Flow View Change- In operation mode selection screen, press the 'Cool' button. - The initial temperature set for cooling operation is 18°C (64°F).
text_image
Mode Cool Dry Heat Auto Fan- If you press On/Off button during the use, product operation will stop.
Power Cooling
It performs a strong cooling in a short period of time
- Press remote controller screen 1 time to turn on.
- If remote controller operation is not used, screen will go into energy savings mode.
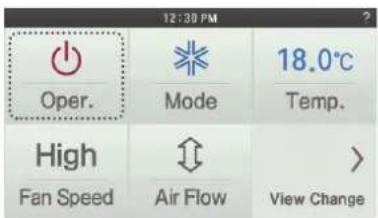
● During the operation of the product, press the fan speed button on the screen. - The fan speed selection screen is displayed.
text_image
12:30 PM Oper. Mode 18.0°C Temp. High Fan Speed Air Flow View Change- During the cooling operation, if you press fan speed '+' button, power cooling is performed after fan speed 'HIGH'.
- For some indoor units products, according to whether there is a wind amount function, power cooling is performed after fan speed 'POWER'.
- During the cooling operation, if you press fan speed '1' button, power cooling is performed after fan speed 'AUTO'. * For some indoor units products, according to whether there is a fan speed function, power cooling is performed after fan speed 'LOW' or 'SLOW'.
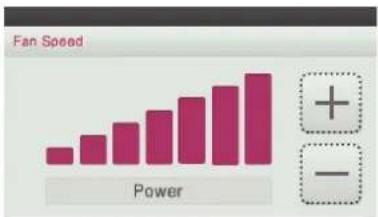
bar
| Fan Speed | | :--- | | 1 | | 2 | | 3 | | 4 | | 5 | | 6 | | 7 | | 8 | | 9 |- If you press 'Go Back', or 'Home' button, it will exit from the setting menu. - If there is no button input for about 60 seconds, it automatically exits from the setting menu.
| 12:30 PM | ||
| 18.0°C | ||
| Oper. | Mode | Temp. |
| PowerFan Speed | >View Change | |
| Air Flow | ||
- If you operate the fan speed control button during the usage, power cooling is turned off and fan speed and set temperature returns to the setting before the power cooling.
What is power cooling?
• Desired temperature: 18°C (64°F)
• Fan Speed: 'POWER'
• Fan direction: fixed to cooling operation position
These operations quickly decrease the indoor temperature.
* Some products do not have the power cooling function.
Heating Operation
Provides warm air to the space.
- Press remote controller screen 1 time to turn on.
- If remote controller operation is not used, screen will go into energy savings mode.
● During the operation of the product, press the mode button on the screen - The operation mode selection screen is displayed.
| 12:30 PM | ||
| Oper. | Mode | 18.0°CTemp. |
| HighFan Speed | Air Flow | >View Change |
- In operation mode selection screen, press the 'Heat' button. - The initial temperature set for Heating operation is 30°C (86°F). - Depending on the indoor unit type, the desired temperature can be controlled in increments 1°C or 0.5°C(2°F or 1°F)
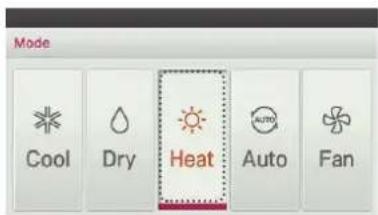
text_image
Mode Cool Dry Heat Auto Fan- If you press On/Off button during the use, product operation will stop.
Dehumidification Operation
Removes moisture from the air
- Press remote controller screen 1 time to turn on.
- If remote controller operation is not used, screen will go into energy savings mode.
● During the operation of the product, press the mode button on the screen. - It moves to the operation mode selection screen.
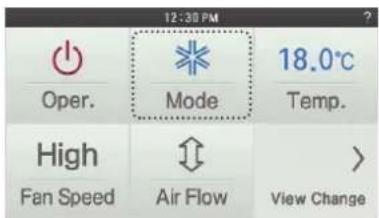
text_image
12:30 PM Oper. Mode 18.0°C Temp. High Fan Speed Air Flow View Change- In operation mode selection screen, press the 'Dry' button. - Dehumidification operation's initial fan speed is 'LOW'. - Desired temperature setting is disabled when the dehumidifying operation.
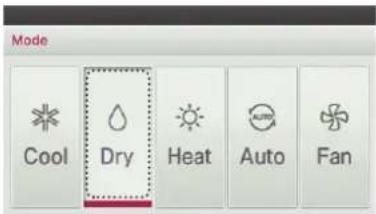
text_image
Mode Cool Dry Heat Auto Fan- If you press On/Off button during the use, product operation will stop.
NOTE
You can effectively remove moisture and perform cooling operation at the same time if you use this function during rainy season or when the humidity is high.
Monsoon Dehumidifying Mode
This is monsoon region-specific dehumidification function.
- Press remote controller screen 1 time to turn on.
- If remote controller operation is not used, screen will go into energy savings mode.
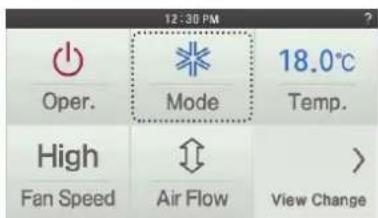
● During the operation of the product, press the mode button on the screen. - It moves to the operation mode selection screen.
text_image
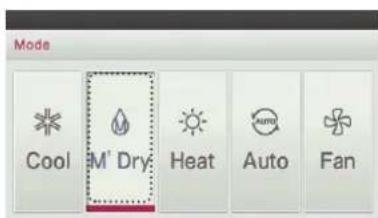
12:30 PM Oper. Mode 18.0°C Temp. High Fan Speed Air Flow View Change- In operation mode selection screen, press the 'M'Dry' button. - Dehumidification operation's initial fan speed is 'LOW'. - Desired temperature setting is disabled when the Monsoon dehumidifying operation.
text_image
Mode Cool M' Dry Heat Auto Fan- If you press On/Off button during the use, product operation will stop.
NOTE
Using this function in the rainy season or high humidity, you can operate simultaneously de-humidifier and cooling mode to remove humidity effectively.
Fan Only Operation
Only fan will circulate air.
- Press remote controller screen 1 time to turn on.
- If remote controller operation is not used, screen will go into energy savings mode.
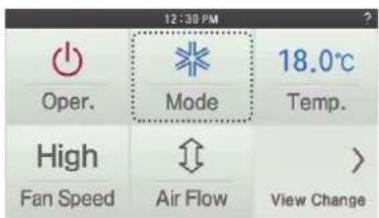
● During the operation of the product, press the mode button on the screen. - It moves to the operation mode selection screen.
text_image
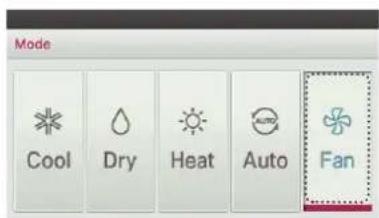
12:30 PM Oper. Mode 18.0°C Temp. High Fan Speed Air Flow View Change- In operation mode selection screen, press the 'Fan' button.
text_image
Mode Cool Dry Heat Auto Fan- If you press On/Off button during the use, product operation will stop.
NOTE
It only circulates indoor air
Artificial Intelligence / Automatic Operation
Operation provides heating and cooling to satisfy space requirements.
- Press remote controller screen 1 time to turn on.
- If remote controller operation is not used, screen will go into energy savings mode.
● During the operation of the product, press the mode button on the screen. - It moves to the operation mode selection screen.
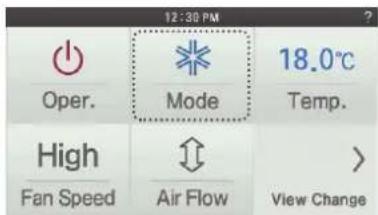
text_image
12:30 PM Oper. Mode 18.0°C Temp. High Fan Speed Air Flow View Change- In operation mode selection screen, press the 'AUTO' button.
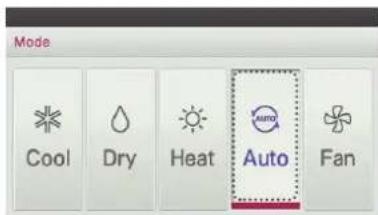
text_image
Mode Cool Dry Heat Auto Fan- If it is cooling/heating model, you can control the desired temperature.
- Indoor temperature is displayed on the remote controller default screen.(As below the picture)
According to the indoor unit type, the desired temperature can be controlled in the units of 1°C or 0.5°C(2°F or 1°F)
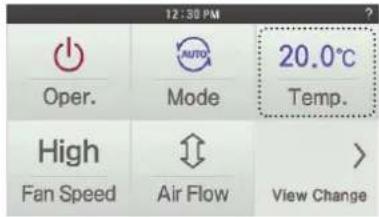
text_image
12:30 PM Oper. Mode 20.0°C Temp. High Fan Speed Air Flow View Change- If it is cooling only model, you can control the stages from 'hot' to 'cold' with values of '-2' to '-2' based on '0'.
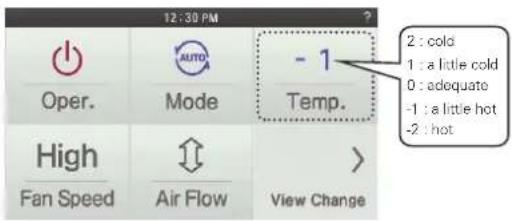
text_image
12:30 PM Oper. Mode High Fan Speed Air Flow View Change - 1 Temp. 2 : cold 1 : a little cold 0 : adequate -1 : a little hot -2 : hotex) If you feel cold, select '2'.
If you feel a little cold, select '1'.
If you want to keep the current state to select "0".
If you feel a little quite warm and select '-1'.
If you feel quite warm and select '2'.
- If you press On/Off button during use, product operation will stop.

NOTE
If it does not work as desired, select another operation mode.
2 set point auto operation (North America Only)
The indoor unit automatically manages room temperature with heating and cooling with extended setting temperature ranges.
2 set point auto mode can operate in 2 set point control mode.
● Press remote controller screen 1 time to turn on.
- If remote controller operation is not used, screen will go into energy savings mode.
● During the operation of the indoor unit, press the mode button on the screen.
- It moves to the operation mode selection screen
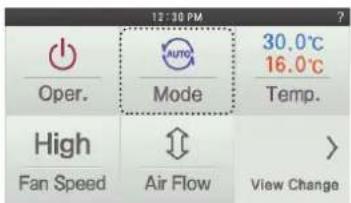
text_image
12:30 PM Oper. Mode 30.0°C 16.0°C Temp. High Fan Speed Air Flow View Change● In operation mode selection screen, press the 'AUTO' button.
- 'AUTO' when the operation mode is selected, desired temperature is indicated cooling and heating temperature is desired.
- 'COOL' operation mode when selected, displays only the desired cooling temperature (cooling only the desired temperature control available)
- 'HEAT' only when the operation mode selection, Heating desired temperature is displayed (only heating temperature control can hope)
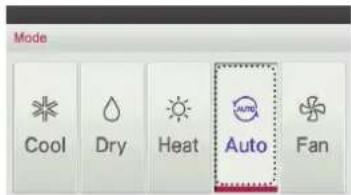
text_image
Mode Cool Dry Heat Auto Fan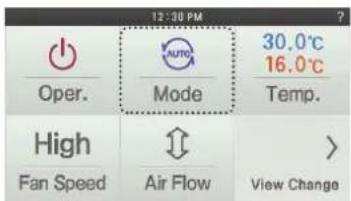
text_image
12:00 PM Oper. Mode 30.0°C 16.0°C Temp. High Fan Speed Air Flow View ChangeTEMPERATURE SETTING - Standard Mode
Controlling Desired Temperature
- During the indoor unit operation, press the temperature button on the screen. - It moves to the temperature selection screen.
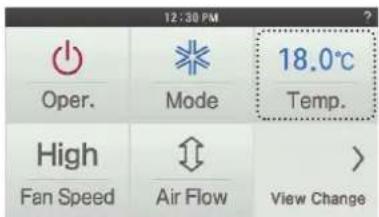
text_image
12:30 PM Oper. Mode 18.0°C Temp. High Fan Speed Air Flow View Change- Press the remote controller screen's temperature setting button to set the desired temperature. - In cooling, heating, and artificial intelligence And 2setpoint auto mode, you can control the desired temperature.
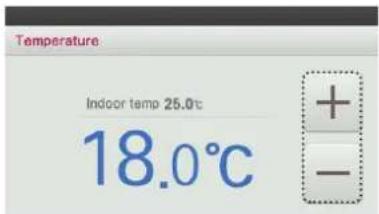
text_image
Temperature Indoor temp 25.0°C 18.0°CDuring the cooling operation
- If the desired temperature is higher than the indoor temperature, cooling is not performed
- Set the desired temperature below the indoor temperature.
During the heating operation
- If the desired temperature is lower than the indoor temperature, heating is not performed.
- Set the desired temperature higher than the indoor temperature.

NOTE
According to Control type setting value
- 1 Set points
- You can select the desired temperature from 18 °C \~ 30 °C(64\~86 °F) / 6 °C \~ 30 °C(60\~86 °F) for cooling operation and 16 °C\~30 °C(60\~86 °F) for heating operation.
- 2Set points
- You can select the desired temperature from 18 °C \~ 30 °C (64\~86 °F) for cooling operation and 16 °C - 30 °C (60\~86 °F) for heating operation.
* A temperature area of extended range can be selected through desired temperature range setting option.
- Cooling : 16\~37.5 °C (64\~99 °F) / Heating : 4\~30 °C (40\~86 °F)
- The temperature difference between the indoor temperature and the outdoor temperature is recommended to be 5 °C.(B6 °F)
WIND SETTING - Standard Mode
Fan speed Control
● During the indoor unit operation, press the fan speed button on the screen. - It moves to the fan speed selection screen.
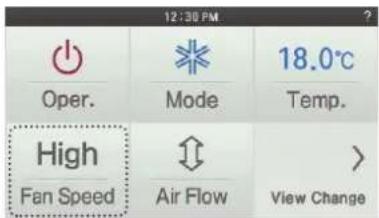
text_image
12:30 PM Oper. Mode 18.0°C Temp. High Fan Speed Air Flow View Change- Press the fan speed button to set the desired fan speed.
- Every time you press the fan speed button You can select the fan speed in the order of 'SLOW' → 'LOW' → 'MED' → 'HIGH' → 'POWER' → 'AUTO'.
- Depending on the product function, some fan speed may not be selected.
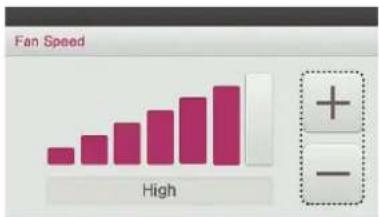
bar
| Fan Speed | | :--- | | Low | | Medium | | High | | Medium |Airflow Control
- During the indoor unit operation, press the screen's 'Air flow' button. - It moves to the direction of air flow selection screen.
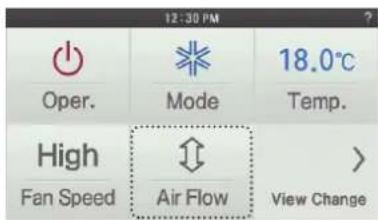
text_image
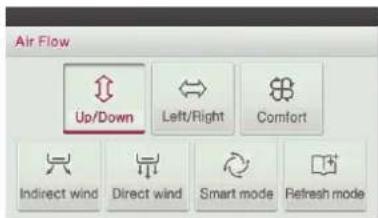
12:30 PM Oper. Mode 18.0°C Temp. High Air Flow > Fan Speed View Change- In the airflow selection screen, press the button in the desired air flow direction. - Some Air Flow options may not be available due to the of indoor unit selected.
text_image
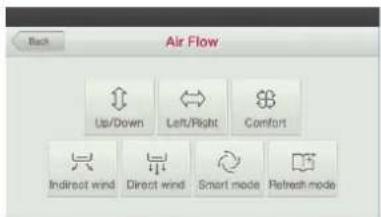
Air Flow Up/Down Left/Right Comfort Indirect wind Direct wind Smart mode Refresh mode| Figure Description | |
| Automatically changes the airflow to up and down. | |
| Automatically changes the airflow to left and right | |
| If it is connected to a indoor unit with 4 vanes, air moves by crossing over and swinging 1,3 and 2,4 vanes | |
| Provides air flow that blow away from user for comfort. | |
| Provides air flow that blows directly onto user for cooling and heating. Especially suitable for high ceiling. | |
| Smartly keeps set temperature by adjusting the wind direction automatically. | |
| Adjust the temperature of the direct and indirect wind to create a comfortable and efficiency working environment. | |
OPERATION SETTING - Advanced Mode
On/Off
Air conditioner and ventilator will be turned on or off.
- Press remote controller screen 1 time to turn on.
- If remote controller operation is not used, screen will go into energy savings mode.
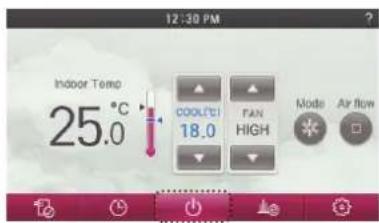
- Press On/Off button in the screen.
- If the product is in operation, Go Back button and Home button will be illuminated.
- If the product is in stop, Go Back button's backlight and Home button's backlight will be off.
text_image
12:30 PM Indoor Temp 25.0°C COOLUTI 18.0 FAN HIGH Mode Air flow

- If you press On/Off button during the use, product operation will stop.
General Cooling Operation
Maintains proper cooling comfort.
- Press remote controller screen 1 time to turn on.
- If remote controller operation is not used, screen will go into energy savings mode.
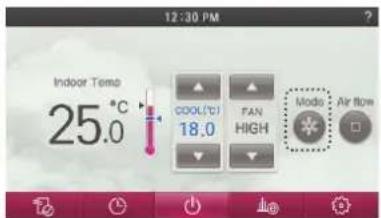
● During the operation of the product, press the mode button on the screen. - The operation mode selection screen is displayed.
text_image
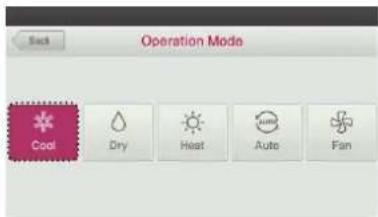
12:30 PM Indoor Temo 25.0°C COOL/°C FAN HIGH Mode Air flow- In operation mode selection screen, press the 'Cool' button. - The initial temperature set for cooling operation is 18°C (64°F).
text_image
Operation Mode Cool Dry Heat Auto Fan- Press the temperature control button to adjust the desired Indoor temperature.
- Indoor temperature is displayed on the remote controller default screen.(As below the picture)
Depending on the indoor unit type, the desired temperature can be controlled in increments 1°C or 0.5°C (2°F or 1°F)
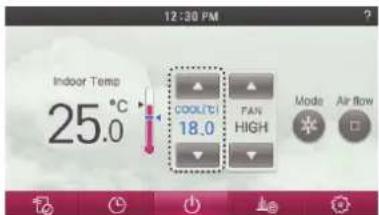
text_image
12:30 PM Indoor Temp 25.0°C COOLICI 18.0 FAN HIGH Mode Air FlowIf the desired temperature is set higher thermal cooling does not turn on and only the fan will operate.
- If you press On/Off button during the use, product operation will stop.
What is a 3 minute delay function?
If the indoor unit is operated right after stopping the cooling, no thermal cooling is allowed. This function protects the compressor from malfunctioning. Compressor starts 3 minutes after and the fan starts.

NOTE
- Setting temperature range
Option 1. 64-86 °F (18-30 °C) (default setting)
Option 2.64\~99 °F (18\~37.5 °C)
Option 3. 50\~99 °F (10\~37.5 °C) (if connecting to indoor unit with 2set point function)
- The difference between the indoor temperature and the outdoor temperature is recommended to be 5^ .
Power Cooling
It performs a strong cooling in a short period of time.
● Press remote controller screen 1 time to turn on.
- If remote controller operation is not used, screen will go into energy savings mode.
- During the cooling operation, if you press fan speed '▲' button, power cooling is performed after fan speed 'HIGH'.
For some indoor units products, according to whether there is a wind amount function, power cooling is performed after fan speed 'POWER'.
● During the cooling operation, if you press fan speed '▼' button, power cooling is performed after fan speed 'AUTO'.
* For some indoor units products, according to whether there is a fan speed function, power cooling is performed after fan speed 'LOW' or 'SLOW'.
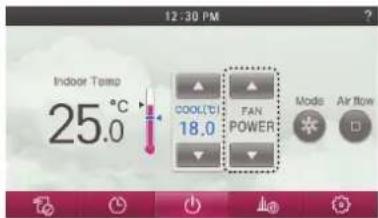
text_image
12:30 PM Indoor Temp 25.0°C COOL(°C) 18.0 FAN POWER Mode Air flow- If you operate the fan speed control button during the usage, power cooling is turned off and fan speed and set temperature returns to the setting before the power cooling.
What is power cooling?
• Desired temperature: 18°C (64°F)
• Fan Speed: 'POWER'
• Fan direction: fixed to cooling operation position
These operations quickly decrease the indoor temperature.
* Some products do not have the power cooling function.
Heating Operation
Provides warm air to the space.
- Press remote controller screen 1 time to turn on. - If remote controller operation is not used, screen will go into energy savings mode.
● During the operation of the product, press the mode button on the screen. - It moves to the operation mode selection screen.
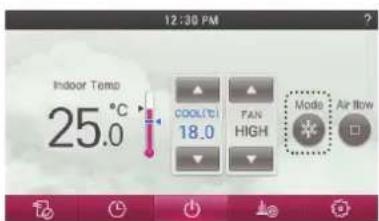
text_image
12:30 PM Indoor Temp 25.0°C COOL(°C) 18.0 FAN HIGH Mode Air Flow- In operation mode selection screen, press the 'Heat' button.
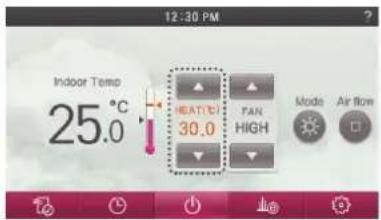
- The heating operation's initial set temperature is 30°C (86°F). - Depending on the indoor unit type, the desired temperature can be controlled in increments 1°C or 0.5°C (2°F or 1°F)
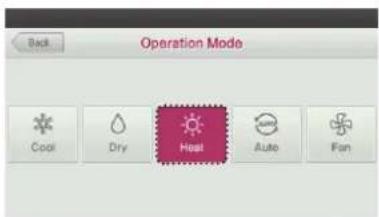
text_image
Back Operation Mode Cool Dry Heat Auto Fan- Press the temperature control button to set the desired temperature higher than the indoor temperature.
- Indoor temperature is displayed on the remote controller default screen.(As below the picture)
- According to the indoor unit type, the desired temperature can be controlled in the units of 1°C or 0.5°C (2°F or 1°F)
text_image
12:30 PM Indoor Temp 25.0 °C HEATCO 30.0 FAN HIGH Mode Air flowIf the desired temperature is set lower than the indoor temperature, heating mode is disabled.
- Pressing the On/Off button during the use, product operation will stop.

NOTE
- Setting temperature range
Option 1. 60\~86 °F (16\~30 °C) (default setting)
Option 2. 40\~86 °F (4\~30 °C)
Option 3. 40-90 °F (10-32 °C) (if connecting to indoor unit with 2set point function) - For cooling-only model can not be selected heating.
Dehumidification Operation
Removes moisture from the air
- Press remote controller screen 1 time to turn on.
- If remote controller operation is not used, screen will go into energy savings mode.
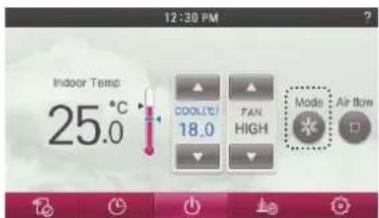
● During the operation of the product, press the mode button on the screen. - It moves to the operation mode selection screen.
text_image
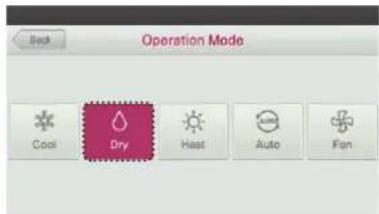
12:30 PM Indoor Temp 25.0°C COOLTC 18.0 FAN HIGH Mode Air flow- In operation mode selection screen, press the 'Dry' button. - The dehumidification operation's initial fan speed is 'LOW'. - Desired temperature setting is disabled when the dehumidifying operation.
text_image
Operation Mode Cool Dry Heat Auto Fan- If you press On/Off button during the use, product operation will stop.

NOTE
You can effectively remove moisture and perform cooling operation at the same time if you use this function during rainy season or when the humidity is high.
Monsoon Dehumidifying Mode
This is monsoon region-specific dehumidification function.
- Press remote controller screen 1 time to turn on.
- If remote controller operation is not used, screen will go into energy savings mode.
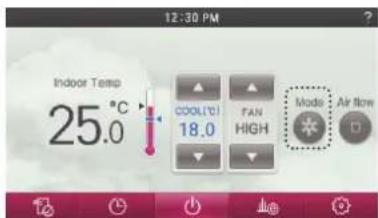
● During the operation of the product, press the mode button on the screen. - It moves to the operation mode selection screen.
text_image
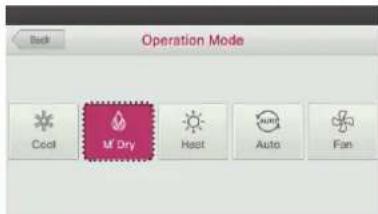
12:30 PM Indoor Temp 25.0°C COOL/°C 18.0 FAN HIGH Made Air flow- In operation mode selection screen, press the 'M'Dry' button. - Dehumidification operation's initial fan speed is 'LOW'. - Desired temperature setting is disabled when the Monsoon dehumidifying operation.
text_image
Operation Mode Cool M Dry Heat Auto Fan- If you press On/Off button during the use, product operation will stop.

NOTE
Using this function in the rainy season or high humidity, you can operate simultaneously de-humidifier and cooling mode to remove humidity effectively.
Fan Only Operation
Only fan will circulate air.
- Press remote controller screen 1 time to turn on.
- If remote controller operation is not used, screen will go into energy savings mode.
● During the operation of the product, press the mode button on the screen. - It moves to the operation mode selection screen.
text_image
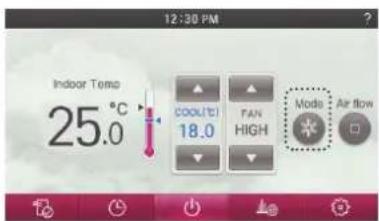
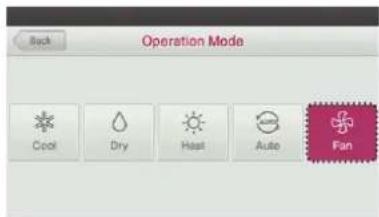
12:30 PM Indoor Temp 25.0°C COOLUTI 18.0 FAN HIGH Mode Air flow- In operation mode selection screen, press the 'Fan' button.
text_image
Back Operation Mode Cool Dry Heat Auto Fan- If you press On/Off button during the use, product operation will stop.
NOTE
It only circulates indoor air
Artificial Intelligence / Automatic Operation
Operation provides heating and cooling to satisfy space requirements.
- Press remote controller screen 1 time to turn on.
- If remote controller operation is not used, screen will go into energy savings mode.
● During the operation of the product, press the mode button on the screen. - It moves to the operation mode selection screen.
text_image
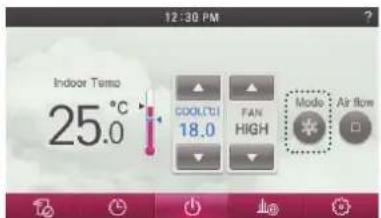
12:30 PM Indoor Temo 25.0°C COOLTCI 18.0 FAN HIGH Mode Air flow- In operation mode selection screen, press the 'AUTO' button.
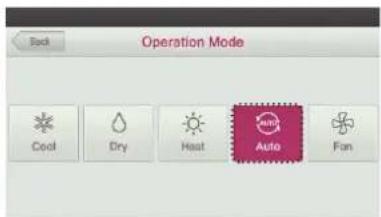
text_image
Operation Mode Cool Dry Heat Auto Fan- If it is cooling/heating model, you can control the desired temperature.
- Indoor temperature is displayed on the remote controller default screen.(As below the picture)
According to the indoor unit type, the desired temperature can be controlled in the units of 1°C or 0.5°C(2°F or 1°F)
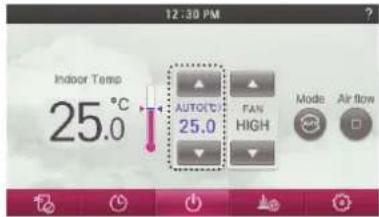
text_image
12:30 PM Indoor Temp 25.0°C AUTO/°C 25.0 FAN HIGH Mode Air flow- If it is cooling only model, you can control the stages from 'hot' to 'cold' with values of '-2' to '-2' based on '0'.
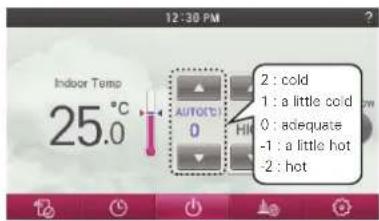
text_image
12:30 PM Indoor Temp 25.0 °C AUTO: 0 2 : cold 1 : a little cold 0 : adequate -1 : a little hot -2 : hotex) If you feel cold, select '2'.
If you feel a little cold, select '1'.
If you want to keep the current state to select "0".
If you feel a little quite warm and select '-1'.
If you feel quite warm and select '2'
- If you press On/Off button during use, product operation will stop.

NOTE
If it does not work as desired, select another operation mode.
2 set point auto operation (North America Only)
The indoor unit automatically manages room temperature with heating and cooling with extended setting temperature ranges.
2 set point auto mode can operate in 2 set point control mode.
● Press remote controller screen 1 time to turn on.
- If remote controller operation is not used, screen will go into energy savings mode.
● During the operation of the indoor unit, press the mode button on the screen.
- It moves to the operation mode selection screen
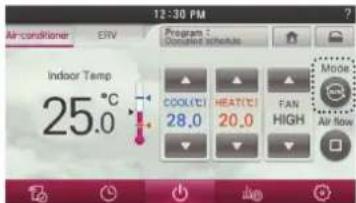
text_image
12:30 PM Air-conditioner EBV Program C Scheduled Schedule Indoor Temp 25.0°C COOL(1) 28.0 HEAT(1) 20.0 FAN HIGH Mode Air flow- In operation mode selection screen, press the 'AUTO' button.
- 'AUTO' when the operation mode is selected, desired temperature is indicated cooling and heating temperature is desired.
- 'COOL' operation mode when selected, displays only the desired cooling temperature (cooling only the desired temperature control available)
- 'HEAT' only when the operation mode selection, Heating desired temperature is displayed (only heating temperature control can hope)
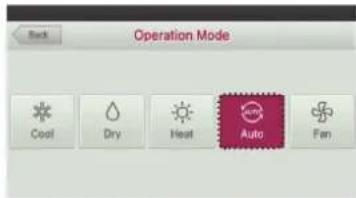
text_image
Operation Mode Cool Dry Heat Auto Fan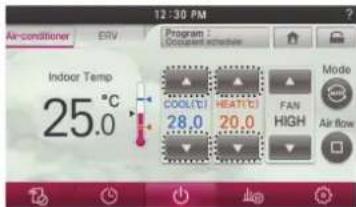
text_image
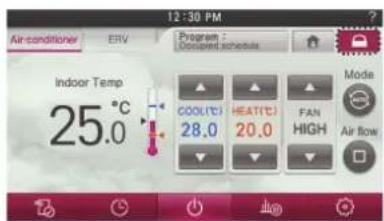
12:30 PM Air-conditioner ERV Program: Document includes Indoor Temp 25.0°C COOLTDI HEATTDI FAN HIGH Mode Air flowOverride control
The wired remote controller manages indoor unit status based on programmed control events. User can set timer option at override function and return to original schedule event.
The ability to switch temporarily to the current occupancy status Override function.
- If the current 'occupied' state, the transition to the 'absence' status when 'Override' action.
- If you are a 'member' status, 'Override' switch to "occupied" state during operation.
- Changes to the current reservation status before the close time and basically, (Find based on occupancy status will be changed by the 'Override').
- Please refer to "Note" for other details.
- Press remote controller screen 1 time to turn on.
If remote controller operation is not used, screen will go into energy savings mode.
● Press the Program button on the screen
- It moves to schedule operation mode selection screen.
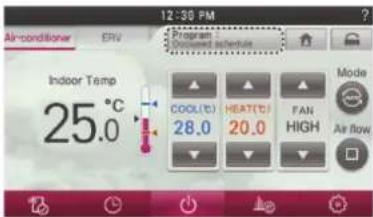
text_image
12:30 PM Air-conditioner ERV Program 2ndweek schedule Indoor Temp 25.0°C COOL(°C) HEAT(°C) FAN 28.0 20.0 HIGH Air flow- In schedule operation mode selection screen, press the 'Override' button.
- Press the Override button 'Override' menu will be displayed for setting the end time. - You can default value set 'Override time' by 'Function setting – Override set time'
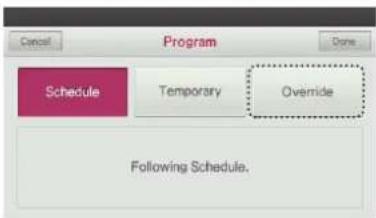
text_image
Program Schedule Temporary Override Following Schedule.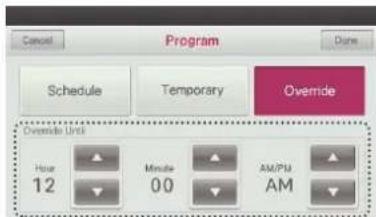
text_image
Program Schedule Temporary Override Override Until Hour 12 Minute 00 AM/PM AM
NOTE
- It revert to default operation setting if Thermostat doesn't have last occupied schedule in unoccupied override.
- default operation setting: Auto operation mode / set temperature : 86 °F(30 °C)(cool), 60 °F(16 °C)(heat)
- It revert to set back operation setting if Thermostat doesn't have last unoccupied schedule in occupied override.
- set back operation setting : Auto operation mode / set back setting temperature: function setting – set back temperature.
- It can be canceled, if Thermostat receive command from other controller.
- When changes occur in the setting by a daytime reservation operation, the schedule override mode gets deactivated.
Home leave (Unoccupied Mode)
The "Home Leave" function enables proper operation of indoor unit when a space is left for a period of time.
This feature can only be used when Control type setting is set to the 2 setpoint control mode ^4
● Press remote controller screen 1 time to turn on.
- If remote controller operation is not used, screen will go into energy savings mode.
● Press the home leave button on the screen.
Change to 'home leave set temperature' setting value.
- Home leave operation setting : Setting / Function / Home Leave Set Temperature.
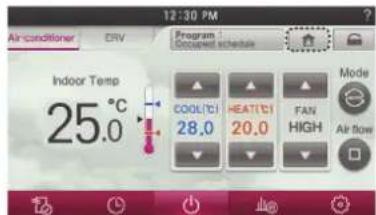
text_image
12:30 PM Air conditioner CRV Program Connected schedule Indoor Temp 25.0°C COOL(C) HEAT(C) FAN HIGH Mode Air flow● Touch panel is locked until you release the 'Home Leave' mode.
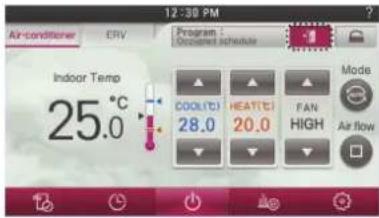
text_image
12:30 PM Air-conditioner ERV Program Document schedule Indoor Temp 25.0°C COOLTD HEATTD FAN 28.0 20.0 HIGH Mode Air flow
NOTE
- You can't change setting in home leave mode except cancel the set back mode.
- lock popup is displayed on the window.
- It can be canceled, if remote controller receive command from other controller.
- When commands are received by other controllers, the home leave mode gets deactivated.
- When the home leave mode is deactivated, the following takes place.
- The set points shall go to the current schedule set points.
- If there are no weekly schedule, the set point shall go to the last set points before the home leave operation.
- If there are no set point before the setback operation, the set points will go to the default if the values have not been adjusted.
- Default setting will be auto. (heat 60 °F(16 °C), cool 86 °F(30 °C))
Hold
It is a function that holds the current mode of operation.
If it is on hold, weekly or yearly or holiday schedule cannot be operation.
- Press the hold button on the screen.
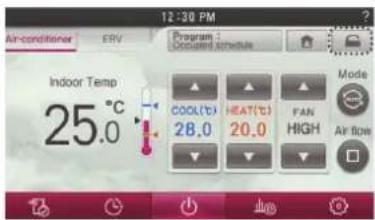
text_image
12:30 PM Air-conditioner ERV Program : Circuit Schedule Indoor Temp 25.0°C COOL(°C) 28.0 HEAT(°C) 20.0 FAN HIGH Mode Air Top● Touch panel is locked until you release the "Hold" mode while driving in the "Hold" mode.
text_image
12:30 PM Air conditioner ERV Program : Downward schedule Indoor Temp 25.0°C COOL(℃) HEAT(℃) FAN 28.0 20.0 HIGH Mode Air flow
NOTE
You can You can't change setting in 'Hold' except cancel the 'Hold'
- It can be canceled, if Thermostat receive command from other controller.
- When commands are received by other controllers, the Hold mode gets deactivated.
Zone Control
A function to control zone with duct type indoor units. Wired Remote controller can control maximum 8 zones
● During the product operation, press the screen's 'Zone' button. - It moves to the direction of Zone open / close screen.
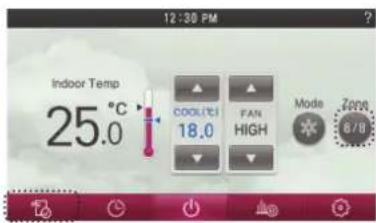
text_image
12:30 PM Indoor Temp 25.0°C COOLUTO 18.0 FAN HIGH Mode Zona 6/8- Select zone button that you want to control.
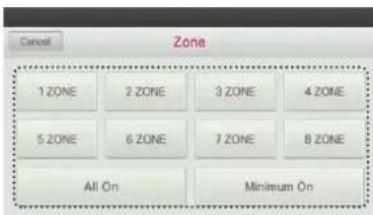
text_image
Zone 1 ZONE 2 ZONE 3 ZONE 4 ZONE 5 ZONE 6 ZONE 7 ZONE 8 ZONE All On Minimum On- If you press 'Go Back' or 'Home' button, it will exit from the setting menu.
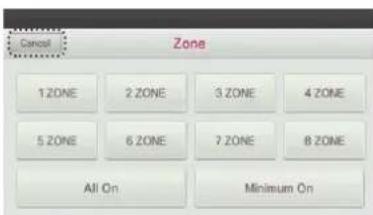
text_image
Cancel Zone 1 ZONE 2 ZONE 3 ZONE 4 ZONE 5 ZONE 6 ZONE 7 ZONE 8 ZONE All On Minimum On


NOTE
according to installation setting value
- If no function is supported
- This entry can not function.
- old type
- Zone control is currently only available to monitor.
- new type(4zone or 8Zone)
- Any number of zones is installed is displayed on the screen can be controlled.
TEMPERATURE SETTING - Advanced Mode
Controlling Desired Temperature
- Press the remote controller screen's temperature setting button to set the desired temperature.
- In cooling, heating, and artificial intelligence And 2 setpoint auto mode, you can control the desired temperature.
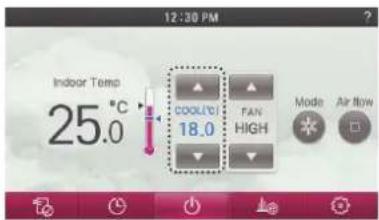
text_image
12:30 PM Indoor Temp 25.0°C COOLICE 18.0 FAN HIGH Mode Air flowDuring the cooling operation
- If the desired temperature is higher than the indoor temperature, cooling is not performed
- Set the desired temperature below the indoor temperature.
During the heating operation
- If the desired temperature is lower than the indoor temperature, heating is not performed.
- Set the desired temperature higher than the indoor temperature.
NOTE
According to Control type setting value
- 1Set points
- You can select the desired temperature from 18 °C \~ 30 °C/64\~86 °F / 16 °C \~ 30 °C/60\~86 °F for cooling operation and 16 °C \~ 30 °C/60\~86 °F for heating operation.
- 2Set points
- You can select the desired temperature from 18 °C \~ 30 °C(64\~86 °F) for cooling operation and 16 °C \~ 30 °C(60\~86 °F) for heating operation.
A temperature area of extended range can be selected through desired temperature range setting option.
Cooling: 16\~37.5 °C (64\~99 °F) / Heating: 4\~30 °C (40\~86 °F)
- The temperature difference between the indoor temperature and the outdoor temperature is recommended to be 5 °C. (196 °F)
Check Room Temperature
- Press remote controller screen 1 time to turn on.
- If remote controller operation is not used, screen will go into energy savings mode.
● On the remote controller main screen, you can check the room temperature.
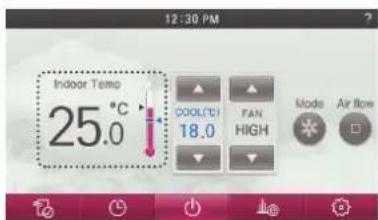
text_image
12:30 PM Indoor Temp 25.0°C COOL/TCI 18.0 FAN HIGH Mode Air FlowNOTE
The temperature distribution in the remote controller installation space is not uniform, so there can be a little difference between the temperature you actually feel and the remote controller's room temperature display
According to Control type setting value
- 1Set points
For indoor temperature below 50 °F (10 °C), the value perceived by the Thermostat(with cable) is displayed.
- Because of location of Temperature sensing, the real room temperature and
the this displayed value can be different.
WIND SETTING - Advanced Mode
Fan speed Control
- Press the fan speed button to set the desired fan speed.
- Every time you press the fan speed button
You can select the fan speed in the order of 'SLOW' → 'LOW' → 'MED' → 'HIGH' → 'POWER' → 'AUTO'. - Depending on the product function, some fan speed may not be selected.
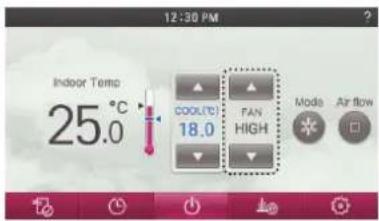
text_image
12:30 PM Indoor Temp 25.0°C COOL(TE) 18.0 FAN HIGH Mode Air flowAirflow Control
- During the indoor unit operation, press the screen's 'Air flow' button. - It moves to the direction of air flow selection screen.
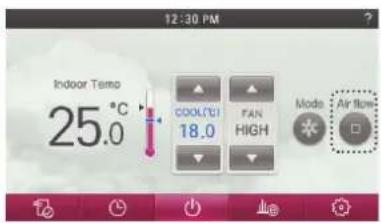
text_image
12:30 PM Indoor Temp 25.0°C COOL/CI 18.0 FAN HIGH Mode Air Flow- In the airflow selection screen, press the button in the desired air flow direction. - Some Air Flow options may not be available due to the of indoor unit selected.
text_image
Air Flow Up/Down Left/Right Comfort Indirect wind Direct wind Smart mode Refresh modeSUB FUNCTION SETTING
Up/Down Vane Angle Setting
- During the indoor unit operation, press screen's 'additional function menu' button. - It moves to additional function selection screen.
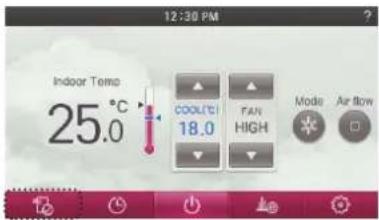
text_image
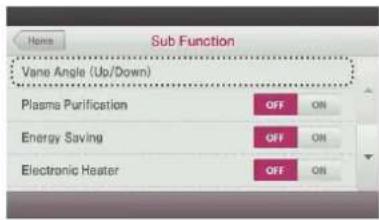
12:30 PM Indoor Temp 25.0°C COOL(°C) 18.0 FAN HIGH Mode Air flow- In the setting menu list, press 'Vane Angle(Up/Down)' - It moves to Vane Angle (Up/Down) Setting screen.
text_image
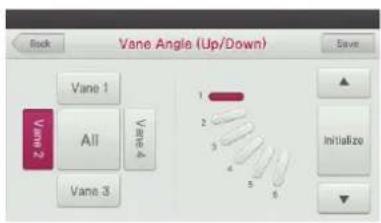
Sub Function Vane Angle (Up/Down) Plasma Purification OFF ON Energy Saving OFF ON Electronic Heater OFF ON- In Vane Angle (Up/Down) Setting screen, press the button of the vane to control the air flow angle. - Up and down button and check the moving vane. - To set the angles of all the vanes at the same time, select 'All' button.
text_image
Vane Angle (Up/Down) Rock Vane 1 Vane 2 All Vane 3 Vane 4 Save Initialize 1 2 3 4 5 6- Press '▲' and '▼' button to select the vane angle of the selected one. - Vane angles of movement are offered 5 stages or 6 stages according to each indoor unit. - To reset to the initial factory default setting state, press 'Initialize' button. - 'Initialize' is selected, and select all the vanes are fixed to the initial value (vane angle
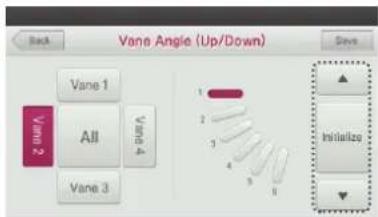
text_image
Vane Angle (Up/Down) Back Says Vane 1 All Vane 4 Vane 3 1 2 3 4 5 6 Initialize ✓ Varmo 2- Press 'Save' button to save the vane angle setting.
- If you exit without pressing the Save button, changed value will not be applied.
- When you press the Save button, only the values currently displayed on the screen will be ap-
plied. Example1 Select vane 1 → Change angle → Save → Select vane 3 → Save
- Verify by sight that the new vane angle setting has been applied. If the vane angle stays at
the original (pre-setting change) angle, your changes were not saved through the screen display.
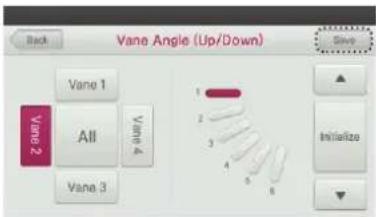
text_image
Back Vane Angle (Up/Down) Vane 1 Vane 2 All Vane 3 Vane 4 Vane 5 Initialize Save- Set the vane angles of the remaining vanes using the same procedure as above.
- Depending on the model of your indoor unit, you may only have 1 or 2 vane settings that can be applied (i.e., 1-way or 2-way cassettes).
- If you press 'Back', 'Go Back', or 'Home' button, it will exit from the setting menu.
- If there is no button input for about 60 seconds, it automatically exits from the setting menu.
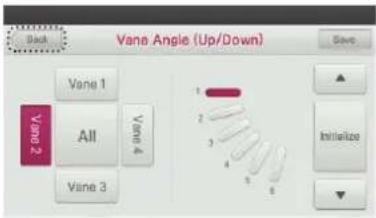
text_image
Back Vane Angle (Up/Down) Save Vane 1 All Vane 2 Vane 4 Vane 3 1 2 3 4 5 6 InitializePlasma Purification Setting
Improves indoor air quality
- During the product operation, press the screen's 'additional function menu' button. - It moves to additional function selection screen.
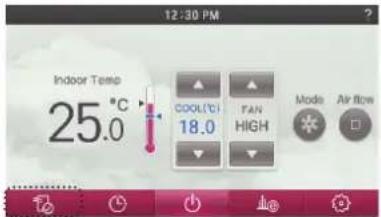
text_image
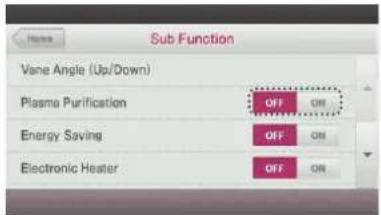
12:30 PM Indoor Temp 25.0°C COOL(°C) 18.0 FAN HIGH Mode Air Flow- In Additional Function Setting screen, press 'Plasma Purification', 'OFF/ON' button to activate or turn off the desired function.
text_image
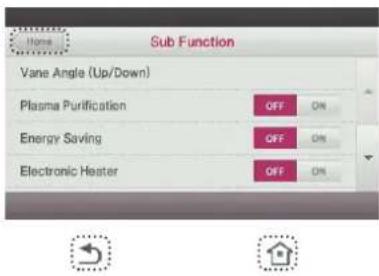
Sub Function Vane Angle (Up/Down) Plasma Purification OFF ON Energy Saving OFF ON Electronic Heater OFF ON- If you press 'Go Back' or 'Home' button, it will exit from the setting menu.
- If no buttons are pressed within 60 seconds after setting functions, it automatically exits from the setting menu.
text_image
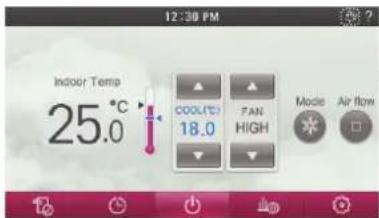
Home Sub Function Vane Angle (Up/Down) Plasma Purification OFF ON Energy Saving OFF ON Electronic Heater OFF ON● The set additional operation symbol is displayed at the top right of the remote controller main screen.
text_image
12:30 PM Indoor Temp 25.0 °C COOLIC 18.0 FAN HIGH Mode Air flowNOTE
- Plasma Purification is an additional function, and it may not be displayed or performed in some indoor unit models.
• Air cleaning function can only work when indoor unit is in operation. - If you want to operate purification only, set the plasma purification in fan mode.
Energy-Saving Cooling Setting
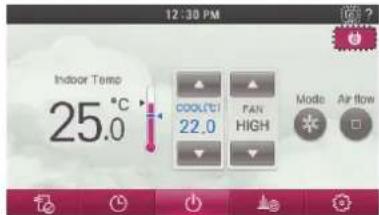
Energy-Saving cooling function enhances the comfort of the user and to improve the Energy-Saving performance by controlling the desired temperature during the cooling operation. This function is only available during the cooling operation.
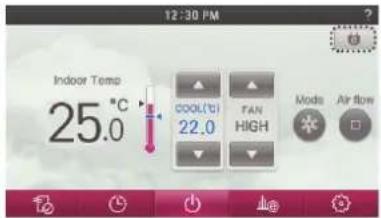
- During the indoor unit operation, press "Energy Saving" button at the top right of the screen. - The Energy-Saving cooling is set.
text_image
12:30 PM Indoor Temp 25.0 °C COOL(°C) 22.0 FAN HIGH Mode Air flow- The set additional operation is displayed at the top right of the main screen. - If you press 'Energy Saving' button one more time, it will be turned off.
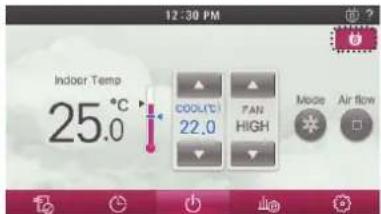
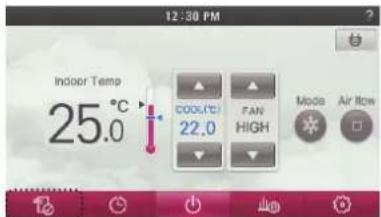
text_image
12:30 PM Indoor Temp 25.0°C COOL(°C) 22.0 FAN HIGH Mode Air flow- You can also set or turn off the Energy-Saving cooling through the additional operation menu. - During the indoor unit operation, press the screen's 'additional function menu' button. - It moves to the additional function selection screen.
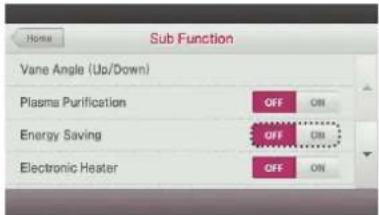
text_image
12:30 PM Indoor Temp 25.0°C COOL(°C) 22.0 FAN HIGH Mode Air Flow- In additional function setting screen, press 'Energy Saving' category's 'OFF/ON' button to set or turn off the desired state.
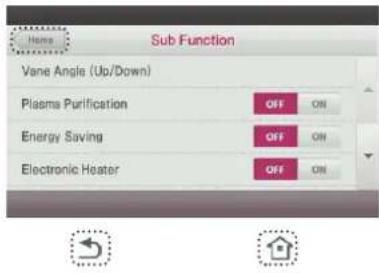
text_image
Home Sub Function Vane Angle (Up/Down) Plasma Purification OFF ON Energy Saving OFF ON Electronic Heater OFF ON- If you press 'Go Back' or 'Home' button, it will exit from the setting menu. - If no buttons are pressed for 60 seconds, it automatically exits from the setting menu.
text_image
Home Sub Function Vane Angle (Up/Down) Plasma Purification OFF ON Energy Saving OFF ON Electronic Heater OFF ON● The set additional operation is displayed at the top right of the main screen.
text_image
12:30 PM Indoor Temp 25.0°C COOLTCI 22.0 FAN HIGH Mode Air flowNOTE
- You can set the Energy-Saving function only during the cooling operation.
• Energy-Saving function may not work in some indoor unit products.
Heater Setting
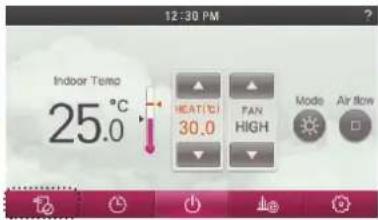
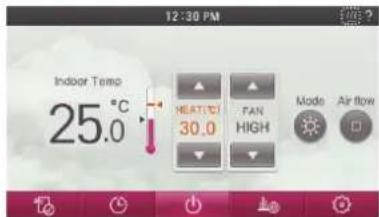
It is the function to reinforce the heating performance by turning on the electric heater during the heating operation. It can be set only during heating operation.
- During the indoor unit operation, press the screen's 'additional function menu' button. - It moves to additional function selection screen.
text_image
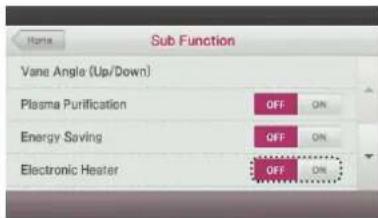
12:30 PM Indoor Temp 25.0°C HEAT(°C) 30.0 FAN HIGH Mode Airflow- In additional function setting screen, press 'Electric Heater' category's 'OFF/ON' button to set or turn off the desired state.
text_image
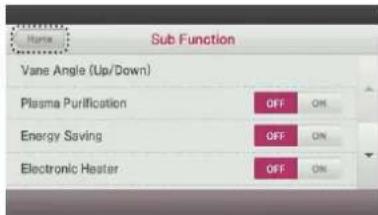
Home Sub Function Vane Angle (Up/Down) Plasma Purification OFF ON Energy Saving OFF ON Electronic Heater OFF ON- If you press 'Go Back' or 'Home' button, it will exit from the setting menu. - If no buttons are pressed for 60 seconds, it automatically exits from the setting menu.
text_image
Home Sub Function Vane Angle (Up/Down) Plasma Purification OFF ON Energy Saving OFF ON Electronic Heater OFF ON

● The set additional operation is displayed at the top right of the default screen.
text_image
12:30 PM Indoor Temp 25.0 °C HEAT/CO 30.0 FAN HIGH Mode Air flowNOTE
Heater function may not work in some indoor unit products.
Fan Auto Setting
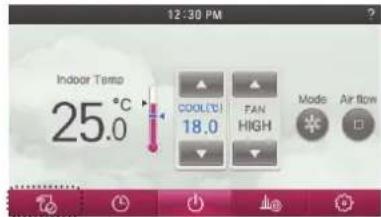
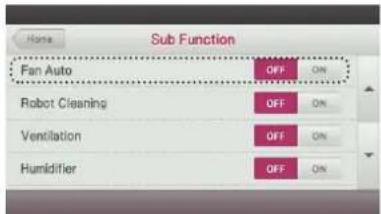
Select fan operation after performing thermal control of indoor units. If set to 'ON', fan operation keeps on after thermal operation of indoor units.
- During the indoor unit operation, press the screen's 'additional function menu' button. - It moves to additional function selection screen.
text_image
12:30 PM Indoor Temp 25.0°C COOLTCI 18.0 FAN HIGH Mode Air flow- In additional function setting screen, press 'Fan Auto' category's 'OFF/ON' button to set or turn off the desired state.
text_image
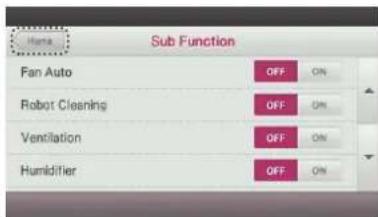
Home Sub Function Fan Auto OFF ON Robot Cleaning OFF ON Ventilation OFF ON Humidifier OFF ON- If you press 'Go Back' or 'Home' button, it will exit from the setting mode. - If there is no button input for about 60 seconds, it automatically exits from the setting mode.
text_image
Home Sub Function Fan Auto OFF ON Robot Cleaning OFF ON Ventilation OFF ON Humidifier OFF ON

● The set additional operation is displayed at the top right of the default screen.
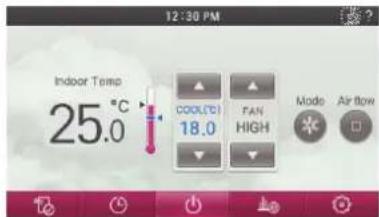
text_image
12:30 PM Indoor Temp 25.0°C COOL(°C) 18.0 FAN HIGH Mode Air flowNOTE
Fan auto function may not work in some indoor unit products.
Robot Cleaning Setting
The robot cleaning function is a function to automatically clean the filter with the cleaner installed in the product after using the air conditioner for certain time period. It can be set 30 seconds after stopping the operation.
- During the indoor unit operation, press the screen's 'additional function menu' button. - It moves to additional function selection screen.
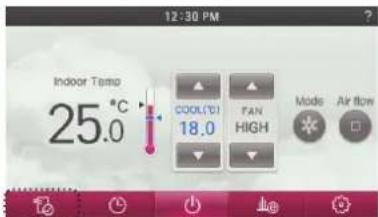
text_image
12:30 PM Indoor Tensp 25.0°C COOL/TI 18.0 FAN HIGH Made Air flow- In additional function setting screen, press the 'Robot Cleaning', 'OFF/ON' button to set or turn off the desired state.
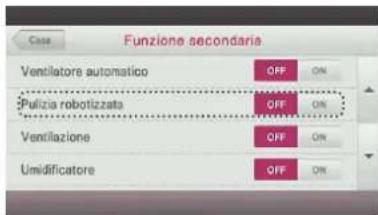
- If you press 'Go Back' or 'Home' button, it will exit from the setting menu. - If no buttons are pressed for 60 seconds, it automatically exits from the setting menu.
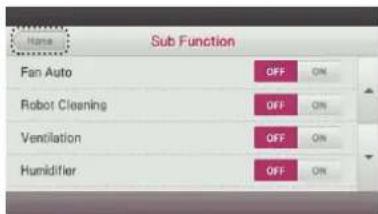
text_image
Sub Function Fan Auto OFF ON Robot Cleaning OFF ON Ventilation OFF ON Humidifier OFF ON

● The set additional operation is displayed at the top right of the default screen.
text_image
12:30 PM Indoor Temp 25.0 °C COOL/COI 18.0 FAN HIGH Mode Air flowNOTE
Robot cleaning setting function may not work ins sce indoor unit products.
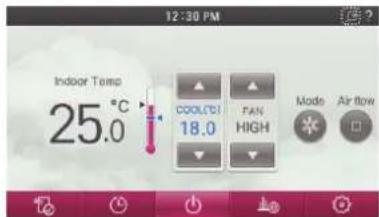
Ventilation kit Setting
Function enables operation of an optional ventilation kit with indoor units
- During the indoor unit operation, press the screen's 'additional function menu' button. - It moves to additional function selection screen.
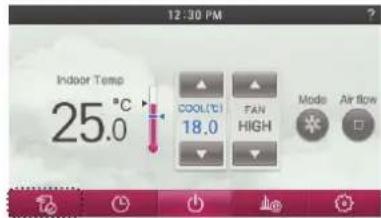
text_image
12:30 PM Indoor Temp 25.0°C COOL(°C) 18.0 FAN HIGH Mode Air flow- In additional function setting screen, press 'Ventilation' category's 'OFF/ON' button to set or turn off the desired state.
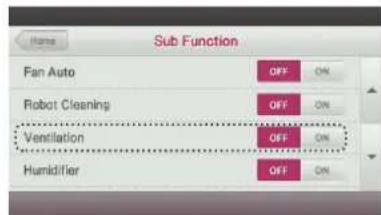
text_image
Sub Function Fan Auto OFF ON Robot Cleaning OFF ON Ventilation OFF ON Humidifier OFF ON- If you press 'Go Back' or 'Home' button, it will exit from the setting menu. - If no buttons are pressed for 60 seconds after the setting, it will automatically exit from the setting menu.
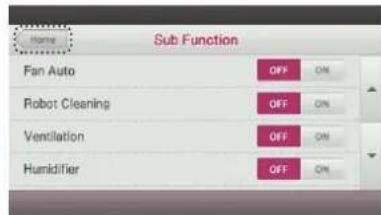
text_image
Sub Function Fan Auto OFF ON Robot Cleaning OFF ON Ventilation OFF ON Humidifier OFF ON

● The set additional operation is displayed at the top right of the default screen.
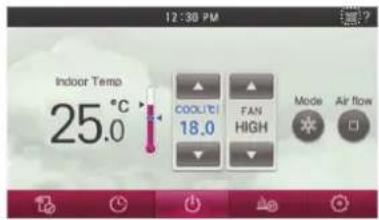
text_image
12:30 PM Indoor Temp 25.0°C COOLICI 18.0 FAN HIGH Mode Air flowNOTE
Ventilation kit control function may not work in some indoor unit products.
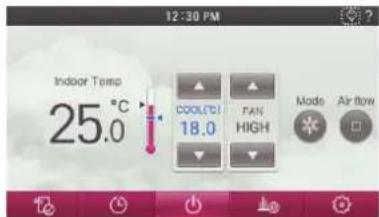
Humidifier Setting
Function enables a humidifier if one is installed to maintain space comfort.
- During the product operation, press the screen's 'additional function menu' button. - It moves to additional function selection screen.
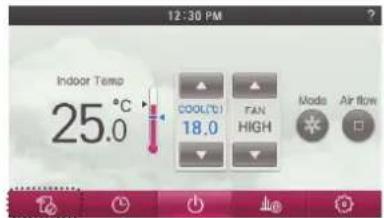
text_image
12:30 PM Indoor Temp 25.0°C COOL(°C) 18.0 FAN HIGH Mode Air flow- In additional function setting screen, press 'Humidifier', 'OFF/ON' button to set or turn off the desired state.
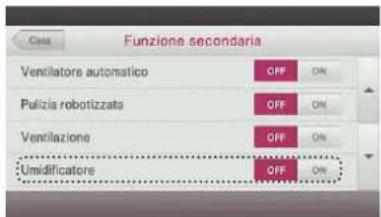
- If you press 'Go Back' or 'Home' button, it will exit from the setting menu. - If no buttons are pressed for 60 seconds it automatically exits from the setting menu.
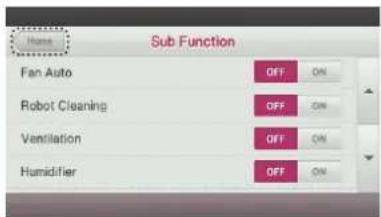
text_image
Sub Function Fan Auto OFF ON Robot Cleaning OFF ON Ventilation OFF ON Humidifier OFF ON

● The set additional operation is displayed at the top right of the default screen.
text_image
12:30 PM Indoor Temp 25.0 °C COOL/CO 18.0 FAN HIGH Mode Air flowNOTE
Humidification function may not work in some indoor unit products.
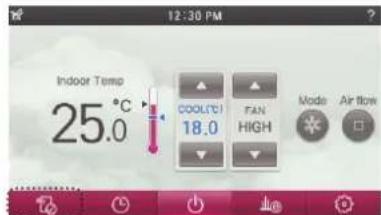
Mosquito Away
Mosquito Away is a device to radiate frequency which mosquitoes don't like.
- During the indoor unit operation, press the screen's 'additional function menu' button. - It moves to additional function selection screen.
text_image
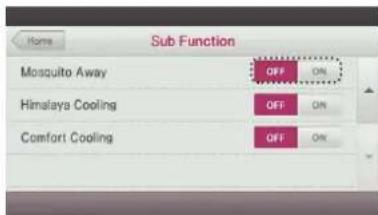
12:30 PM Indoor Temp 25.0°C COOL(°C) 18.0 FAN HIGH Mode Air flow- In additional function setting screen, press the 'Mosquito Away', 'OFF/ON' button to set or turn off the desired state.
text_image
Home Sub Function Mosquito Away OFF ON Himalaya Cooling OFF ON Comfort Cooling OFF ON- If you press 'Go Back' or 'Home' button, it will exit from the setting menu. - If no buttons are pressed for 60 seconds after the setting, it will automatically exit from the setting menu.
text_image
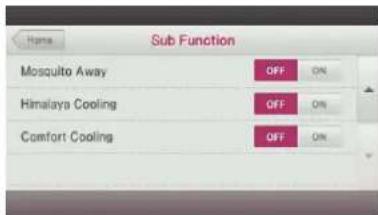
Home Sub Function Mosquito Away OFF ON Himalaya Cooling OFF ON Comfort Cooling OFF ON

● The set additional operation is displayed at the top right of the default screen.
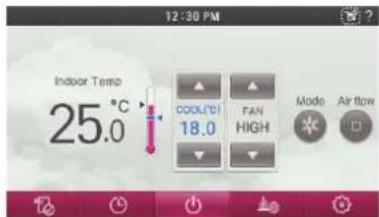
text_image
12:30 PM Indoor Temp 25.0 °C COOL/COI 18.0 FAN HIGH Mode Air flowNOTE
Mosquito away function may not work in some indoor unit products.
Himalaya Cooling
Mosquito Away is a device to radiate frequency which mosquitoes don't like.
- During the indoor unit operation, press the screen's 'additional function menu' button. - It moves to additional function selection screen.
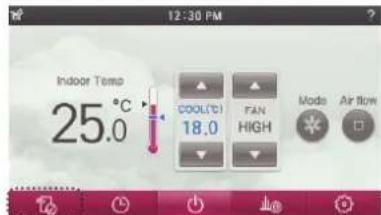
text_image
12:30 PM Indoor Temp 25.0°C COOL(°C) 18.0 FAN HIGH Mode Air Flow- In additional function setting screen, press the 'Himalaya Cooling', 'OFF/ON' button to set or turn off the desired state.
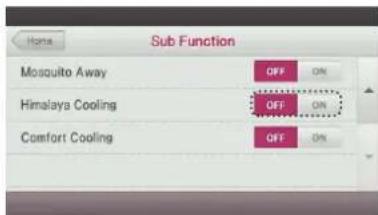
text_image
Home Sub Function Mosquito Away OFF ON Himalaya Cooling OFF ON Comfort Cooling OFF ON- If you press 'Go Back' or 'Home' button, it will exit from the setting menu. - If no buttons are pressed for 60 seconds after the setting, it will automatically exit from the setting menu.
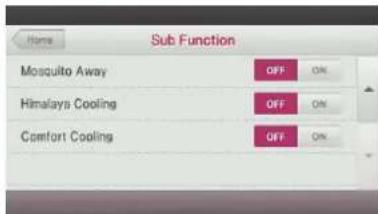
text_image
Home Sub Function Mosquito Away OFF ON Himalays Cooling OFF ON Comfort Cooling OFF ON

● The set additional operation is displayed at the top right of the default screen.
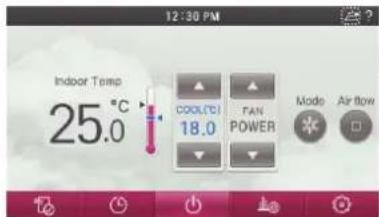
text_image
12:30 PM Indoor Temp 25.0 °C COOL(°C) 18.0 FAN POWER Mode Air flowNOTE
Himalaya cooling function may not work in some indoor unit products.
Comfort cooling
Only products with Comfort Cooling function can use this.
- During the indoor unit operation, press the screen's 'additional function menu' button. - It moves to additional function selection screen.
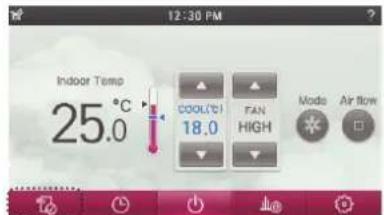
text_image
12:30 PM Indoor Temp 25.0°C COOL(°C) 18.0 FAN HIGH Mode Air flow- In additional function setting screen, press the 'Comfort Cooling', 'OFF/ON' button to set or turn off the desired state.
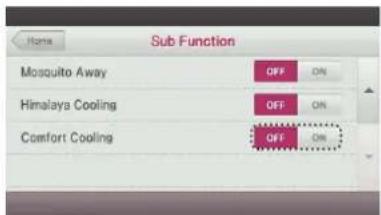
text_image
Home Sub Function Mosquito Away OFF ON Himalaya Cooling OFF ON Comfort Cooling OFF ON- If you press 'Go Back' or 'Home' button, it will exit from the setting menu. - If no buttons are pressed for 60 seconds after the setting, it will automatically exit from the setting menu.
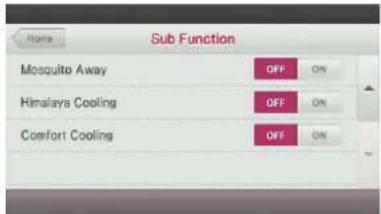
text_image
Home Sub Function Mosquito Away OFF ON Himalaya Cooling OFF ON Comfort Cooling OFF ON

● The set additional operation is displayed at the top right of the default screen.
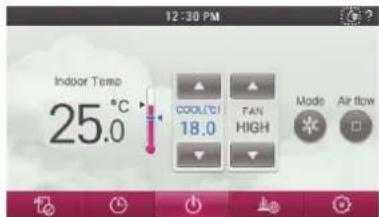
text_image
12:30 PM Indoor Temp 25.0°C COOLTCI 18.0 FAN HIGH Mode Air flowNOTE
Comfort saving function may not work in some indoor unit products.
OPERATION SETTING - Ventilator
Air conditioner - Ventilation Control Switching
This function is only used when air conditioner and ventilator are connected to one remote controller.
The function operates to use thermal cooling along with ventilation to provide space comfort.
● Press remote controller screen 1 time to turn on.
- If remote controller operation is not used, screen will go into energy savings mode.
● During the product operation, press the 'ERV' tab.
- It switches from the air conditioner mode to the ventilation mode.
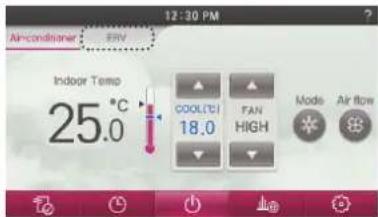
text_image
12:30 PM Air Conditioner INDoor Temp 25.0°C COOL(°C) 18.0 FAN HIGH Mode Air flow● How to switch to the air conditioner mode
- Automatic switching: If no buttons are pressed for 15 seconds or longer in ventilation mode, it automatically switches to the air conditioner control/monitoring interface.
- Manual switching: If you press the air conditioner Tab in ERV interface, it manually switches.

text_image
12:30 PM Air-conditioning ERV Ventilation Mode Auto Recovery Breakout Sub Operation Fast Energy Fan Speed Auto Low High PowerGeneral Ventilation Operation Mode
You can select the ventilation mode when it is connected to a ventilation product.
- Press remote controller screen 1 time to turn on. - If remote controller operation is not used, screen will go into energy savings mode.
● During the indoor unit operation, press the desired ventilation mode button.
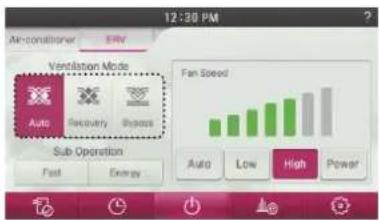
text_image
12:30 PM Air-conditioner ENV Ventilation Mode Auto Recovery Bypass Fan Speed Sub Operation Fast Energy Auto Low High Power| Ventilation mode Function Description | |
 | It measures the ventilation system's indoor temperature and outdoor temperature to automatically operate in the optimal ventilation mode. |
 | Perform both air supply/discharge ventilation through the heat exchanger. Suitable for use in Summer/Winter during large temperature differences between indoor/outdoor. |
 | Used to keep discharged air from entering the heat exchanger. Used during the Spring/Fall seasons to keep allergens or pollutant from entering the room. |
Ventilator with DX(Direct eXchanger) Operation Mode
It uses the heat exchanger inside the ventilation product to perform the ventilation operation function at the same time of cooling or heating operation.
- Press remote controller screen 1 time to turn on. - If remote controller operation is not used, screen will go into energy savings mode.
● During the indoor unit operation, press the desired ventilation mode button. - You can select Auto, Recovery, or Bypass mode.
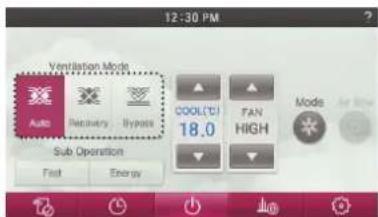
text_image
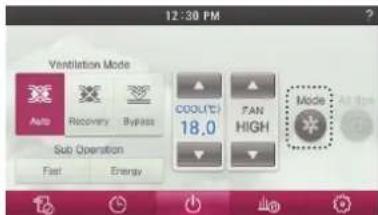
12:30 PM Ventilation Mode Auto Recovery Bypass COOL(T) FAN Mode Air Max 18.0 HIGH Sub Operation Fast Energy- During the operation of the indoor unit, press the mode button on the screen. - You can select Auto, Recovery, or Bypass mode.
text_image
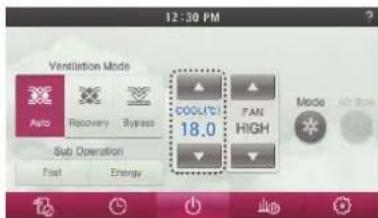
12:30 PM Ventilation Mode Auto Recovery Bypass COOL(℃) 18.0 FAN HIGH Mode Sub Operation Fast Energy- Press the remote controller screen's temperature control button to set the desired temperature. - In cooling, heating, and automatic mode, you can control the desired temperature.
text_image
12:30 PM Ventilation Mode COOLIC 18.0 FAN HIGH Sub Operation Fast Energy Mode Air AirFAN SPEED SETTING - Ventilator
Fan speed Control
Remove sentence.
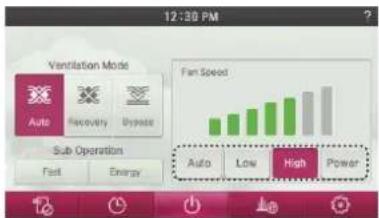
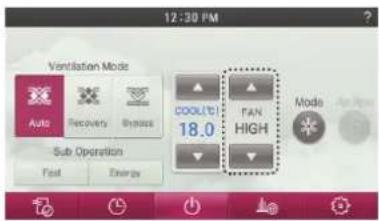
- Choose a fan speed button to set the desired Fan speed.
- You can select the fan speed among Auto, Low, High, or Power.
- For direct ventilation, press the fan speed button to select the fan speed in the order of 'Low' * 'High' * 'Power' * 'Auto'.
- You can set and use the automatic fan speed after installing the air pollution (CO2) sensor.
text_image
12:30 PM Ventilation Mode Auto Recovery Update Sub Operation Fast Energy Fan Speed Auto Low High Power< General ventilation >
text_image
12:30 PM Ventilation Mode Auto Recover Inbox COOLUTS 18.0 FAN HIGH Sub Operation Fast Energy Mode Air< Ventilation unit with DX>
ADDITIONAL MODE SETTING - Ventilator
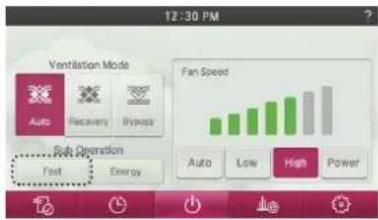
Fast Mode
It quickly performs ventilation in a short period of time. It is a function for more efficient operation of the ventilation function through the fast mode, which is an additional function of the ventilation product.
● During operation, press the 'Fast' button.
- Every time you press the 'Fast' button, it switches between express mode 'setting' turned off' states.
text_image
12:30 PM Ventilation Mode Auto Recovery Bypass Sub Operation Fast Energy Fan Speed Auto Low High PowerEnergy-Saving Mode
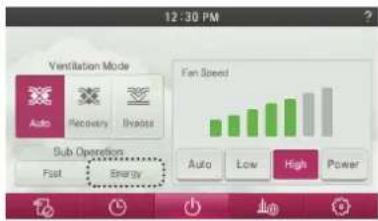
It performs Energy-Saving function at the same time of efficient ventilation.
● During operation, press the 'Energy' button.
- Event time you press the 'Energy' button, it switches between Fast mode 'setting' × turned off' states.
text_image
12:30 PM Ventilation Mode Auto Recovery Investor Sub Operation Fast Energy Fan Speed Auto Low High Power
NOTE
- General ventilator and the direct expenditure type ventilator have same additional operations (Fast mode, Energy-Saving mode).
- The additional operation setting method of the air cleaning/heater/humidifier, etc. are the same as the air conditioner.
TIMER & PROGRAM
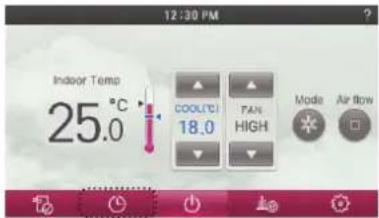
Simple Reservation
*Setting has the option to be set between 1-7 hours in 1 hour increments.
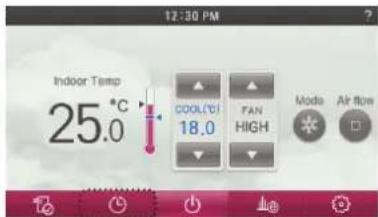
- Press the remote controller screen's 'Timer Setting menu' button. - It moves to the Timer Setting menu screen.
text_image
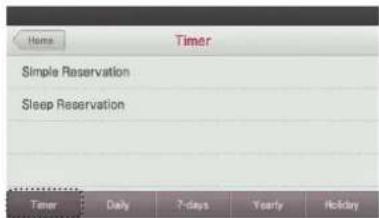
12:30 PM Indoor Temps 25.0 °C COOL(°C) 18.0 TAN HIGH Mode Air flow- In the Timer Setting menu screen, press 'Timer' button. - It moves to the timer setting screen.
text_image
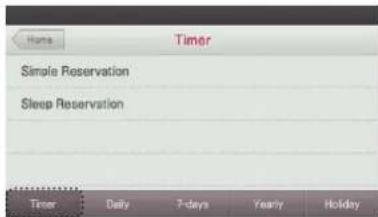
Home Timer Simple Reservation Sleep Reservation Timer Daily 7-days Yearly Holiday- In the timer setting menu screen, press 'Simple Reservation' category. - It moves to the easy timer setting screen.
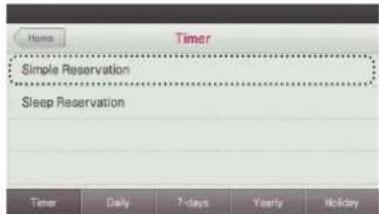
text_image
Home Timer Simple Reservation Sleep Reservation Timer Daily 7 days Yearly Holiday- In the easy timer setting menu screen, press 'Disable/Enable' button to set or turn off the easy timer.
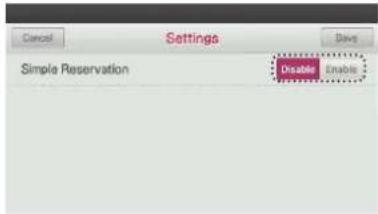
text_image
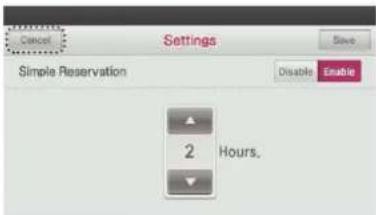
Cancel Settings Save Simple Reservation Disable Enable- During the Simple Reservation setting, press '▲', '▼' button to set the simple reservation time. - You can select from 1–7 hours.
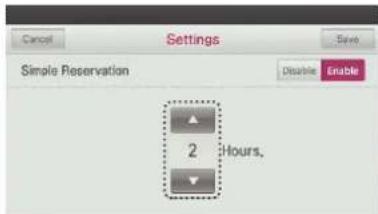
text_image
Cancel Settings Save Simple Reservation Disable Enable 2 Hours.- Press the Save button when done. - If you exit without pressing the Save button, your settings will not be saved.
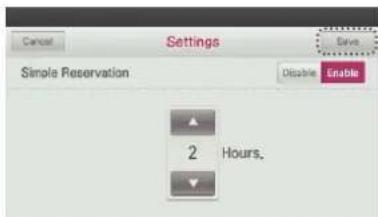
text_image
Cancel Settings Save Simple Reservation Disable Enable 2 Hours.- If you press 'Cancel' or 'Home' button, it will exit from the setting menu.
- If no buttons are pressed for 60 seconds, it will automatically exit from the setting menu.
text_image
Cancel Settings Save Simple Reservation Disable Enable 2 Hours.

Sleep Reservation
Sleep Reservation Places the unit into sleep mode or lets the unit know to stop at a certain time. After connection with ventilation product, During the Sleep Reservation Setting, The system operations in Sleep mode, and when it passes the set time, only the Sleep Reservation is turned off.
- Press the remote controller screen's 'Timer Setting menu' button.
- It moves to the Timer Setting menu screen.
text_image
12:30 PM Indoor Temp 25.0 °C COOL(°C) 18.0 FAN HIGH Mode Air flow- In the Timer Setting menu screen, press the 'Timer' button.
- It moves to the timer setting screen.
text_image
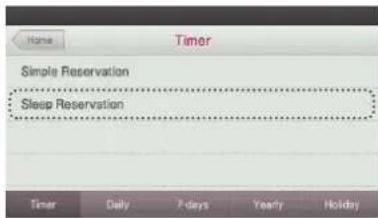
Home Timer Simple Reservation Sleep Reservation Timer Daily 7-days Yearly Holiday- In the timer setting menu screen, press the 'Sleep Reservation'.
- It moves to the Sleep Reservation Setting screen.
- Sleep Reservation can be activated when the indoor unit is in operation.
text_image
Home Timer Simple Reservation Sleep Reservation Timer Daily 7 days Yearly Holiday- In the Sleep Reservation Setting menu screen, press 'Disable/Enable' button to set or turn off this function.
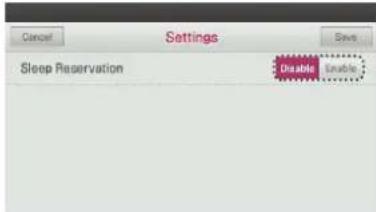
text_image
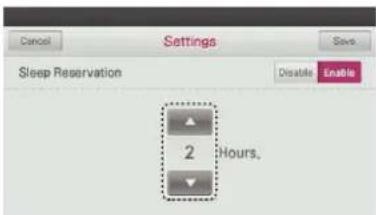
Cancel Settings Sleep Reservation Disable Enable● During the Sleep Reservation setting, press '▲', '▼' button to set the sleep activation time.
Air conditioner: You can select from 1\~7 hours.
- Ventilation: You can select from 1–12 hours.
text_image
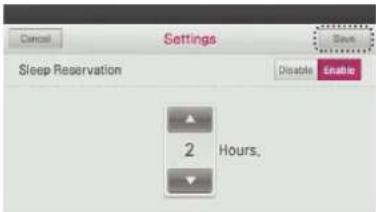
Cancel Settings Save Sleep Reservation Disable Enable 2 Hours.● Press the Save button when you are done to save all changes.
- If you exit without pressing the Save button, your setting charges will not be applied.
text_image
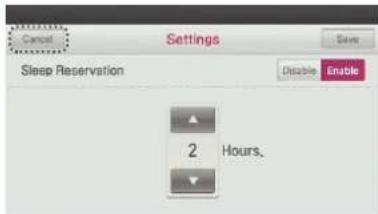
Cancel Settings Save Sleep Reservation Disable Enable 2 Hours,- If you press 'Cancel' or 'Home' button, it will exit from the setting menu.
- If no buttons are pressed for 60 seconds, it will automatically exit from the setting menu.
text_image
Cancel Settings Sleep Reservation Disable Enable 2 Hours.

Turn-On Reservation
The unit is instructed to turn on at a set time automatically.
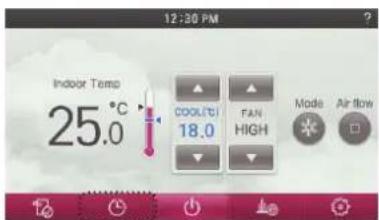
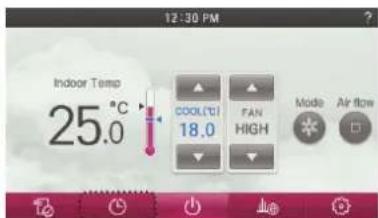
- Press the remote controller screen's 'Timer Setting menu' button. - It moves to the Timer Setting menu screen.
text_image
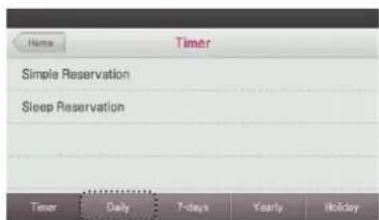
12:30 PM Indoor Temp 25.0°C COOLICI 18.0 FAN HIGH Made Air flow- In the Timer Setting menu screen, press 'Daily' button. - It moves to the Daily Timer Setting screen.
text_image
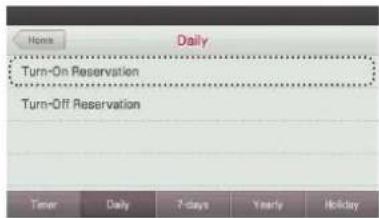
Home Timer Simple Reservation Sleep Reservation Timer Daily 7-days Yearly Holiday- In Daily Timer Setting menu screen, press 'Turn-On Reservation' category. - It moves to ON Timer Setting screen.
text_image
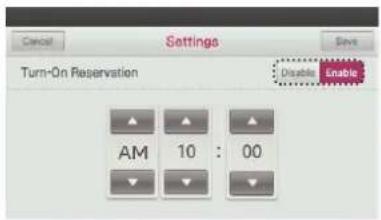
Home Daily Turn-On Reservation Turn-Off Reservation Timer Daily 7 days Yearly Holiday- In the Turn-On Reservation Setting menu screen, press 'Disable/Enable' button to set or turn off 'Turn-On Reservation'.
text_image
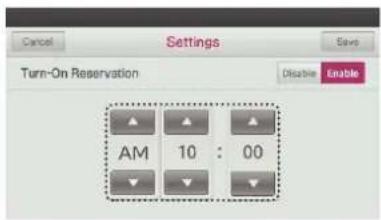
Cancel Settings Turn-On Reservation Disable Enable AM 10 : 00- Press '▲', '▼' button to set to turn on time.
text_image
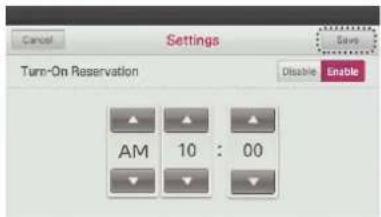
Settings Turn-On Reservation Disable Enable AM 10 : 00- Press the Save button well done. - If you exit without pressing the Save button, your changes will not be applied.
text_image
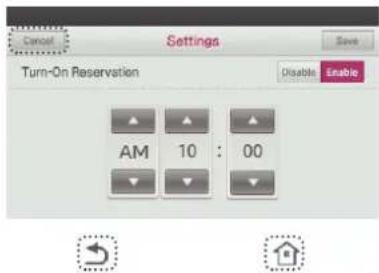
Cancel Settings Save Turn-On Reservation Disable Enable AM 10 : 00- If you press 'Cancel' or 'Home' button, it will exit from the setting menu.
- If no buttons are pressed for 60 seconds, it will automatically exit from the setting menu.
text_image
Cancel Settings Save Turn-On Reservation Disable Enable AM 10 : 00Turn-Off Reservation
The indoor unit is automatically turned off at the a set time.
- Press the remote controller screen's 'Timer Setting menu' button. - It moves to the Timer Setting menu screen.
text_image
12:30 PM Indoor Temp 25.0°C COOL(T) 18.0 FAN HIGH Mode Air flow- In the Timer Setting menu screen, press 'Daily' button. - It moves to the Daily Reservation Setting screen.
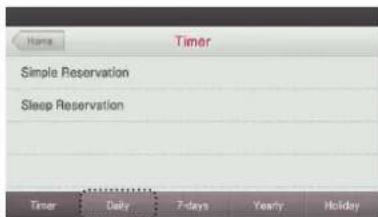
text_image
Home Timer Simple Reservation Sleep Reservation Timer Daily 7-days Yearly Holiday- In the Daily Timer Setting menu screen, press 'Turn-Off Reservation' category. - It moves to the OFF Timer setting screen.
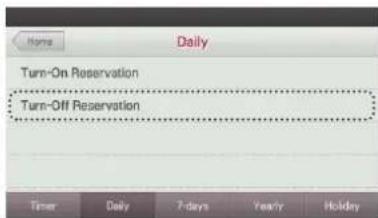
text_image
Turn-On Reservation Turn-Off Reservation Timer Daily 7-days Yearly Holiday- In the OFF Timer Setting menu screen, press 'Disable/Enable' button to set or turn off the OFF Timer.
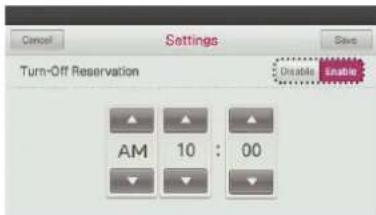
text_image
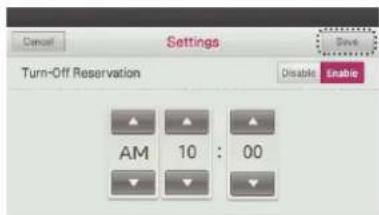
Cancel Settings Save Turn-Off Reservation Disable Status AM 10 : 00- Press '▲', '▼' button to set to turn off time.
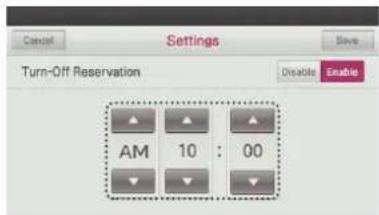
text_image
Cancel Settings Save Turn-Off Reservation Disable Enable AM 10 : 00● Press the Save button well done.
- If you exit without pressing the Save button, your changes will not be applied.
text_image
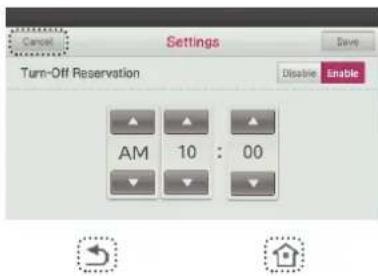
Cancel Settings Save Turn-Off Reservation Disable Enable AM 10 : 00- If you press 'Cancel' or 'Home' button, it will exit from the setting menu.
- If no buttons are pressed for 60 seconds, it will automatically exit from the setting menu.
text_image
Cancel Settings Save Turn-Off Reservation Disable Enable AM 10 : 00Create and Edit 7-Days Pattern
You can create and edit 7-day patterns that can be applied to weekly and yearly schedules
● Create a new pattern
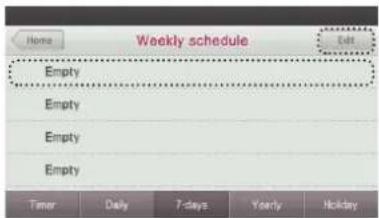
- In the 7-Days schedule screen, press 'Edit' button, to edit patterns.
- Select one from the pattern list marked as 'Empty'.
text_image
Home Weekly schedule Edit Empty Empty Empty Empty Timer Daily 7-days Yearly Holiday- Edit the existing patterns
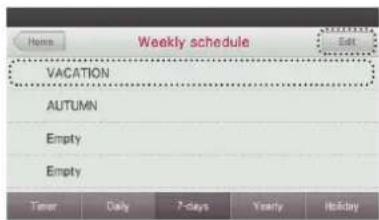
- In the 7-Days schedule screen, press 'Edit' button, enter to edit patterns.
- Select a pattern to edit among the existing registered patterns.
text_image
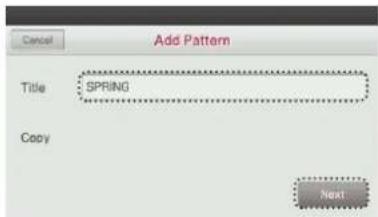
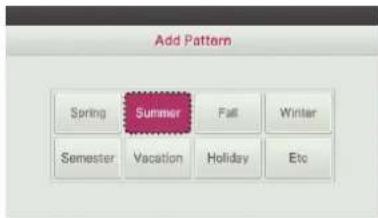
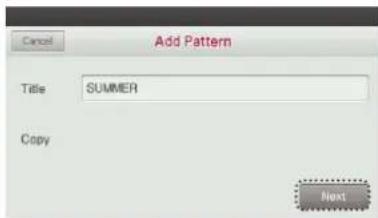
Weekly schedule VACATION AUTUMN Empty Empty Timer Caily 7-days Yearly Holiday● Naming of the 7-Days pattern.
- You can select the name according to the desired usage among the pattern name list by selecting the pattern name edit box.
- Select the pattern name and select 'Next' button, then you can set the detail event setting.
- When editing, if you do not need to change the pattern name, you can move directly to the next step.
text_image
Add Pattern Title SPRING Copy Next
text_image
Add Pattern Spring Summer Fall Winter Semester Vacation Holiday Etc
text_image
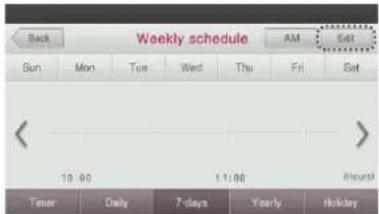
Add Pattern Title SUMMER Copy Next● Through the event edit, set the desired controls.
- The Edit button will change to Save, so you can save your control settings.
text_image
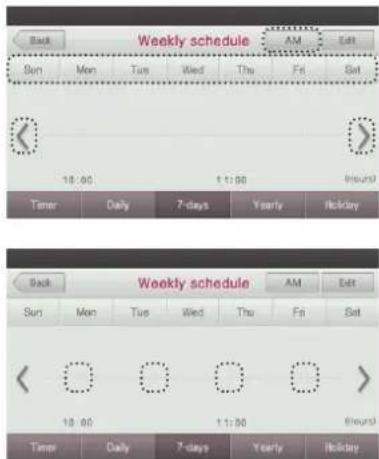
Back Weekly schedule Sun Mon Tue Wed Thu Fri Sat 10:00 11:00 Hourd Timer Daily 7-days Yearly Holiday- Select the day of week and time to set the desired control event.
- Choose the desired day off week, by pressing one of the days of the week buttons. Note that you can choose only one day of the week at a time. - Press the left or right arrow keys on the display to scroll the timer. You can also press the AM/PM button at the top of the screen to switch to morning or evening hours. - When choosing a time period, you can make choices in half and hour increments (30 minute time unitst).
text_image
Back Sun Mon Tue Wed Thu Fri Sat Weekly schedule AM Edit 18:00 1:00 Iround Timer Daily 7-days Yearly Holiday Weekly schedule AM Edit Sun Mon Tue Wed Thu Fri Sat 18:00 1:00 Iround Timer Daily 7-days Yearly Holiday- Set the detail event.
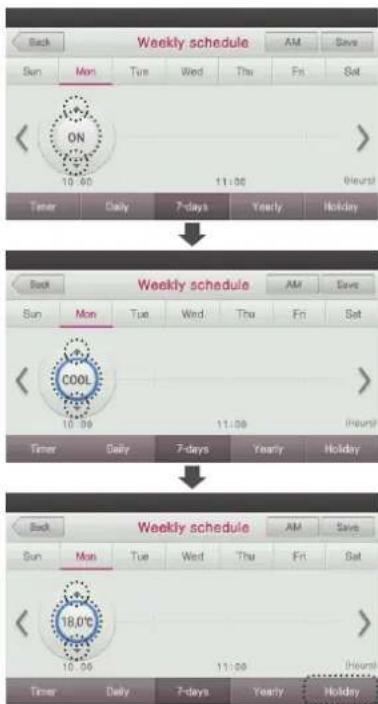
- When setting up a specific time through the weekly schedule screen, start by pressing the up or down smaller arrows located above and below the "ON" circle as shown below. - Pressing the center area of the circle, toggles the time On or Off and advances to the next event (example: mode, temperature, fan speed) as outlined in the flow setting below.
Indoor unit event setting flow : On/Off > mode > temperature > fan speed
On/Off → occupancy → mode → temperature → fanspeedlin 2set control model
* If you select Auto mode in 2set control operating mode increases the desired temperature setting step (cooling temperature → heating temperature)
Ventilation event setting flow: On/Off → mode → fan speed
text_image
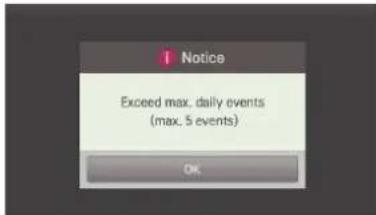
Back Sun Mon Tue Wed Thu Fri Sat ON 10:00 11:00 0th Timer Daily 7-days Yearly Holiday Weekly schedule AM Save Back Sun Mon Tue Wed Thu Fri Sat COOL 10:30 11:00 (hours) Timer Daily 7-days Yearly Holiday Weekly schedule AM Save Back Sun Mon Tue Wed Thu Fri Sat 18.0°C 10:00 11:00 (hours) Timer Daily 7-days Yearly Holiday● You can register up to 5 events per day of week.
- The following warning display will pop up on the screen if you try to schedule over 5 events.
text_image
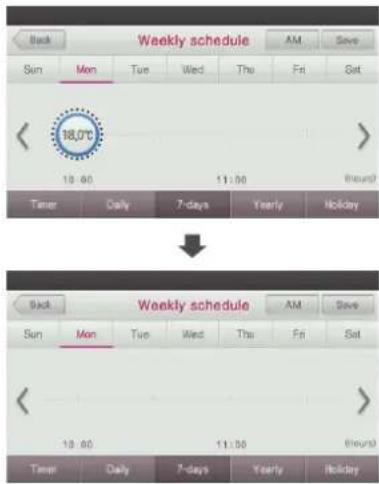
Notice Exceed max. daily events (max. 5 events) OK- Delete a detail event.
- To delete an event, press and hold for 2 seconds, a message to confirm whether to delete the event is displayed on the screen.
text_image
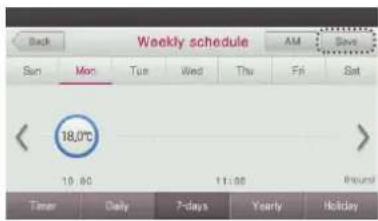
Back Sun Mon Tue Wed Thu Fri Sat 18.0°C 19:00 11:50 Hourd Timer Daily 7-days Yearly Holiday Weekly schedule AM Save Back Sun Mon Tue Wed Thu Fri Sat 19:00 11:50 Hourd Timer Daily 7-days Yearly Holiday● Press Save, once the event has been deleted
- If you exit without pressing the Save button, the changes will not be applied.
text_image
Back Weekly schedule AM Save Sun Mon Tue Wed Thu Fri Sat 18.0°C 10:00 11:00 Hour Timer Daily 7-days Yearly Holiday7-Days Pattern Deletion
- In the weekly timer setting menu screen, press 'Edit' button. - It switches to the weekly timer edit state.
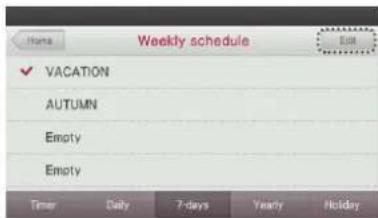
text_image
Home Weekly schedule Add ✓ VACATION AUTUMN Empty Empty Timer Daily 7-days Yearly Holiday- Press 'Delete' button next to the pattern name to delete.
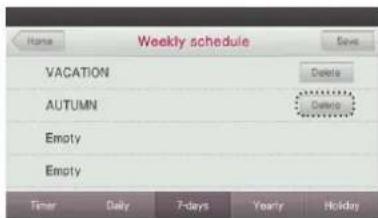
text_image
Weekly schedule VACATION Autumn Empty Empty Timer Daily 7-days Yearly Holiday● The following confirmation message window is displayed. - Press 'OK' button to delete.
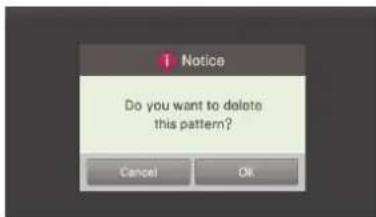
text_image
1 Notice Do you want to delete this pattern? Cancel OK7-Days Pattern - Day of Week Event Copy/Paste
- In the weekly timer setting screen, press 'Edit'. - It enters the weekly timer edit mode.
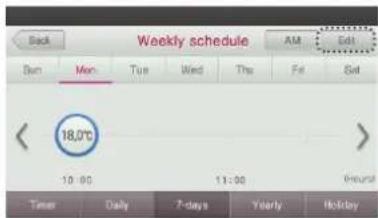
text_image
Back Mon Tue Wed Thu Fri Sat Weekly schedule AM Edit 18:00 10:00 11:00 09:00 Time Daily 7-days Yearly Holiday- In the weekly timer setting - timer event setting screen, press and hold the day of week button for 3 seconds to 'copy'. - The timer copied day of week button will have a frame mark.
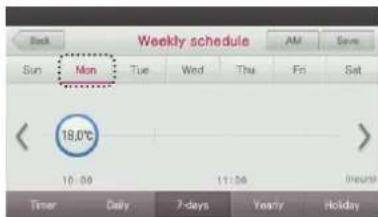
text_image
Weekly schedule Sun Mon Tue Wed Thu Fri Sat 18.0°C 10:00 11:00 Inno Timer Daily 7-days Yearly Holiday● The screen to select day of week will be displayed. - The day of week to copy.
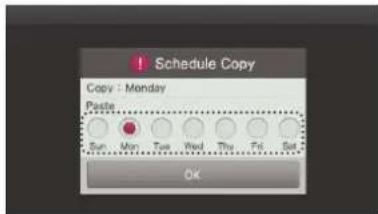
text_image
! Schedule Copy Copy : Monday Paste Sun Mon Tue Wed Thu Fri Sat OkWeekly Schedule
You can set the weekly schedule events in the unit of a week.
Note: Once you set the weekly schedule, the function will continue until it is cancelled.
- Press the remote controller screen's 'Timer Setting menu' button.
- It moves to the Timer Setting menu screen.
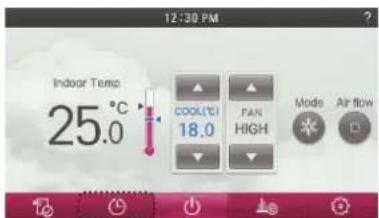
text_image
12:30 PM Indoor Temp 25.0°C COOLICI 18.0 FAN HIGH Mode Airflow● In the Timer Setting menu screen, press '7-Days' button.
- It moves to the Weekly Timer Setting screen.

text_image
Home Timer Simple Reservation Sleep Reservation Timer Daily 7-days Yearly Holiday- In the weekly timer pattern list, select the pattern to apply to the weekly timer.
- When you select the desired pattern among the weekly schedule, a confirmation message window is displayed.
- If you select Confirm in the confirm message window, it is immediately applied, and the selection check will be marked next to the corresponding pattern name.
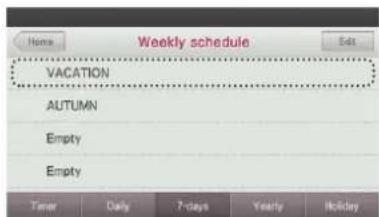
text_image
Home Weekly schedule VACATION AUTUMN Empty Empty Timer Daily 7 days Yearly Holiday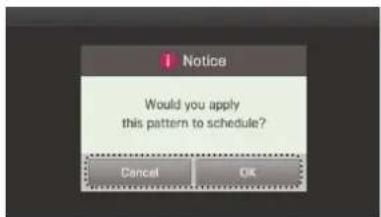
text_image
Notice Would you apply this pattern to schedule? Cancel OK● Turning off the application of the pattern applied to the weekly schedule, hauls weekly scheduled operation.
- If you select the pattern applied to the weekly timer one more time, turn off confirmation window is displayed.
- The weekly schedule will be cleared of the checkmark indicating that no schedule is associated to it.
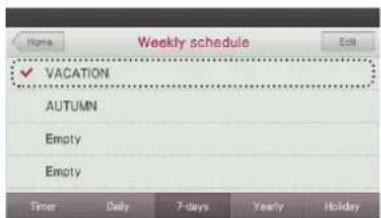
text_image
Weekly schedule VACATION AUTUMN Empty Empty Timer Daily 7-days Yearly Holiday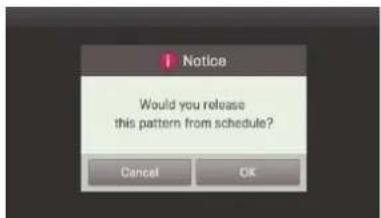
text_image
Notice Would you release this pattern from schedule? Cancel OKYearly Schedule
You can set yearly schedules that can be applied by month. It uses the weekly schedule to perform the Yearly schedule function.
- Press the remote controller screen's 'Timer Setting menu' button. - It moves to the Timer Setting menu screen.
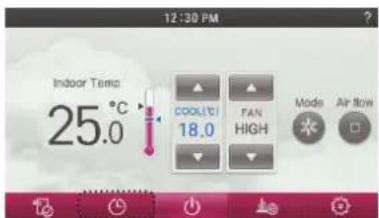
text_image
12:30 PM Indoor Temp 25.0°C COOLUTI 18.0 FAN HIGH Mode Air flow- In the Timer Setting menu screen, press 'Yearly' button. - It moves to the Yearly schedule Setting screen.
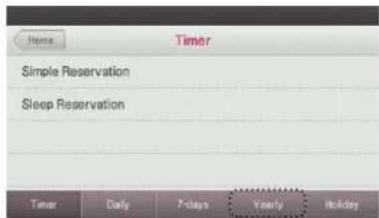
text_image
Home Timer Simple Reservation Sleep Reservation Timer Daily 7-days Yearly Holiday- Press '<', '>' button to advance through each month's numerical equivalent (1=Jan, 2=Feb, etc.) - You can adjust in the units of 'month'. - Example) June, July, August
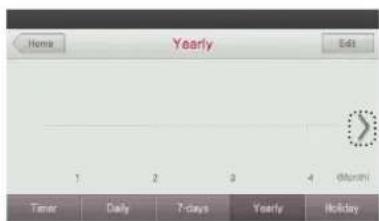
text_image
Home Yearly Edit 1 2 3 4 Monthly Timer Daily 7 days Yearly Holiday- In the yearly schedule screen, press the desired time area. - Yearly Timer event is created.
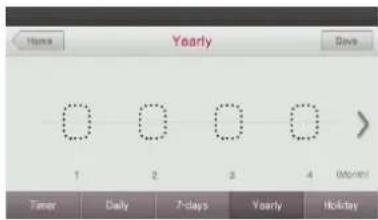
text_image
Yearly Tuner Daily 7-days Yoarly Holiday- Press ▲, ▼ button to select the weekly schedule pattern to use in the yearly schedule operation. - You can set the Yearly schedule setting only when the weekly timer pattern is created.
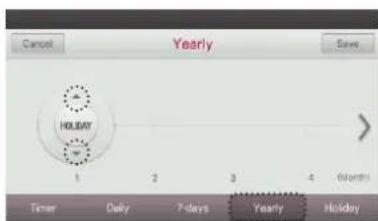
text_image
Yearly HOLIDAY 1 2 3 4 Months Timer Daily 7-days Yearly Holiday● After selecting the yearly schedule, set by pressing the center circle.
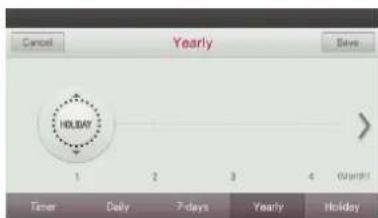
text_image
Yearly HOLIDAY 1 2 3 4 Month! Timer Daily 7-days Yearly Holiday- Press the 'Save' button to save the set desired reservation.
- If you exit this screen before pressing the Save button, the changes will not be applied.
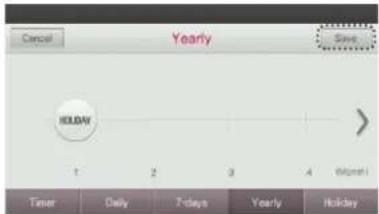
text_image
Cancel Yearly Save HOLDAY 1 2 3 4 Finish! Timer Daily 7-days Yearly HolidayDelete Yearly Schedule
- In the yearly schedule screen, press 'Edit' button.
- The yearly schedule screen will be placed into edit mode.
text_image
Cancel Yearly Edit HOLIDAY 1 2 3 4 Monday Timer Daily 7-days Yearly Holiday- Press the yearly event for 2 seconds or longer to delete.
- Yearly schedule event will be deleted.
- Verify the deletion, and press 'Save' button to apply the change.
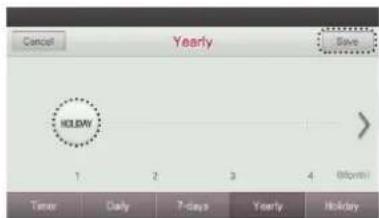
text_image
Cancel Yearly Save HOLDAY 1 2 3 4 5(Mon) Timer Daily 7-days Yearly HolidayHoliday
It automatically stops on the set date.
If the operation is set, the operation stops at every o'clock.
- Press the remote controller screen's 'Timer' button.
- It moves to the Timer Setting screen.
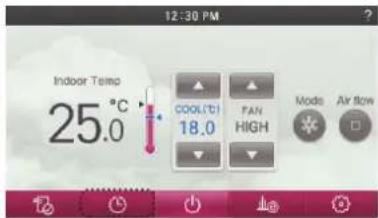
text_image
12:30 PM Indoor Temp 25.0°C COOL(T) 18.0 FAN HIGH Mode Air flow● In the Timer Setting screen, press 'Holiday' button.
- It moves to the Holiday Setting screen.
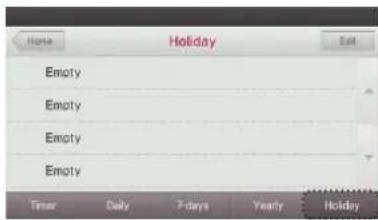
text_image
Home Holiday Exit Empty Empty Empty Empty Empty Timer Daily 7-days Yearly HolidayAdd Holiday
● In the Holiday Timer Setting screen, press 'Edit'.
- It changes to a state that you can add scheduled holiday.
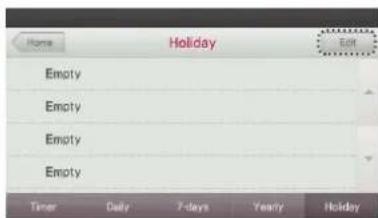
text_image
Home Holiday Empty Empty Empty Empty Timer Daily 7-days Yearly Holiday Exit100 TIMER & PROGRAM
TIMER & PROGRAM 101
- Press empty to add a scheduled Holiday event.
- It moves to Add Holiday screen.
- You can make any changes to an already set timer for that Holiday.
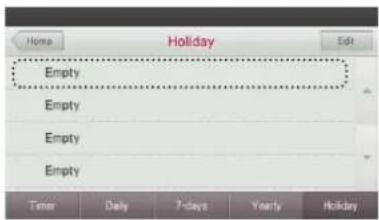
text_image
Home Holiday Edit Empty Empty Empty Empty Empty Timer Daily 7-days Yearly Holiday- Press '▲', '▼' button to set the date for a scheduled holiday.
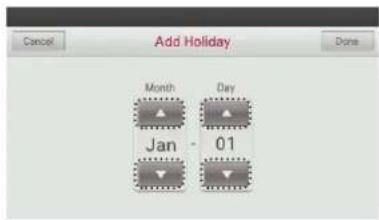
text_image
Add Holiday Month Day Jan 01● Press Done to commit any date changes.
- If you exit without pressing the Finish button, your changes will not be applied.
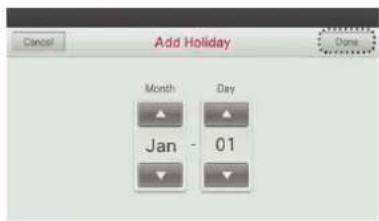
text_image
Add Holiday Month Day Jan 01- In the Holiday Timer screen, press 'Done' button one more time to complete the addition of Holiday.
- If you exit without pressing the 'Done' button, your changes will not be applied.
- Pressing Done will close the edit mode of this screen.
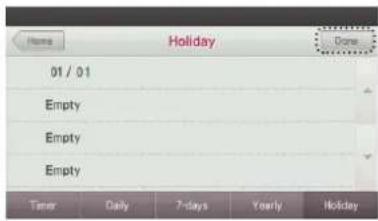
text_image
Home Holiday Done 01 / 01 Empty Empty Empty Timer Daily 7-days Yearly Holiday- Press 'Home', Go Back', or 'Home' button to exit from the setting screen.
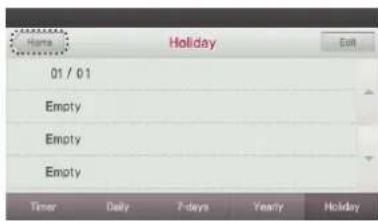
text_image
Home Holiday Exit 01 / 01 Empty Empty Empty Timer Daily 7-days Yearly Holiday

Delete Holiday
● In the Holiday screen, press 'Edit'.
- It is changed to the state that you can delete a Holiday.
- 'Delete' button is displayed on the right side of the section set as a holiday.
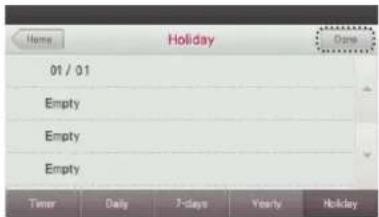
text_image
Home Holiday Done 01 / 01 Empty Empty Empty Timer Daily 7-days Yearly Holiday- Press the Holiday you want to delete and then press the Delete button to the right of that Holiday.
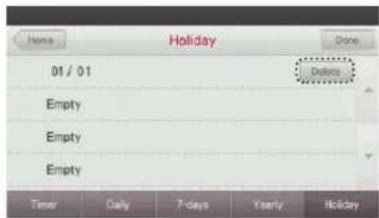
text_image
Home Holiday Done 01 / 01 Empty Empty Empty Timer Caily 7-days Yearly Holiday● After the deletion, press 'Done'.
- If you exit without pressing the 'Done' button, your changes will not be applied.
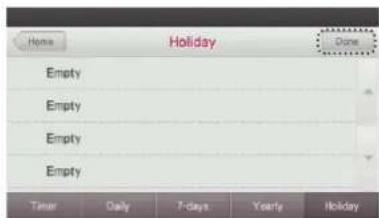
text_image
Home Holiday Done Empty Empty Empty Empty Empty Timer Daily 7-days Yearly Holiday- Press 'Home', 'Go Back', or 'Home' button to exit from the setting screen.
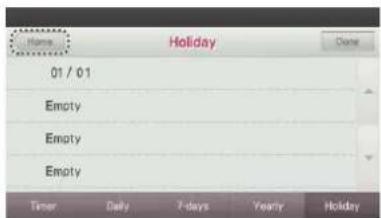
text_image
Name: Holiday Date 01 / 01 Empty Empty Empty Timer Daily 7-days Yearly Holiday

ENERGY
Check Energy Usage
You can check energy usage (operation time, power consumption).
- Press the remote controller screen's 'Energy Saving menu' button. - It moves to the Energy Saving setting menu screen.
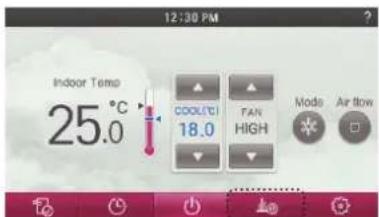
text_image
12:30 PM Indoor Temp 25.0°C COOLUTI 18.0 FAN HIGH Mode Airflow- From the Energy Saving setting screen, you can view the energy usage. - Unit operation will be shown in total hours, while power consumption units will be shown in total KWh. - The power consumption can be verified only when it is connected to the indoor unit that supports the power consumption information display function.
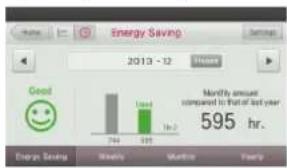
bar
Energy Saving | Category | Value | |---|---| | Good | 740 | | Good | 915 | | Low | 162 | | Low | 182 | | Monthly amount compared to that of last year 595 hr.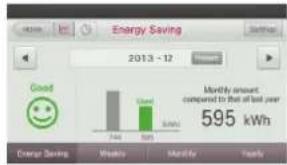
bar
| Category | Energy Saving (kWh) | |---|---| | Good | 744 | | Poor | 595 |- Press '◀', '▶' button to move between the energy usage display 'month'.
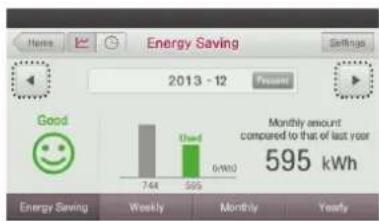
bar
| Category | Value | |---|---| | Good | 744 | | Chad | 595 | Monthly amount compared to that of last year 595 kWh- In the Energy Saving menu screen, press 'Weekly' button to view the weekly energy usage goal and the usage amount.
- The energy usage is displayed as a bar graph for each day of the week. The bars are color coded to indicate if the usage is under (green), near (yellow) or over (red) the target/goal energy setpoint.

bar
Weekly Energy | Day | Target 6. Mr. | |---|---| | 1 | 42 hr. | | 2 | 6 hr. | | 3 | 42 hr. | | 4 | 5 hr. | | 5 | 2 hr. | | 6 | 1 hr. | | 7 | 38 hr. |- In the Energy Saving menu screen, press 'Monthly' button to check the monthly energy usage goal and the usage amount.
- The energy usage is displayed in the units of 'week' for the indicated month. - The bars are color coded to indicate if the usage is under (green), near (yellow) or over (red) the target/goal energy setpoint.
- Note: Depending on the specific month, you might see 4 or 5 week bars.
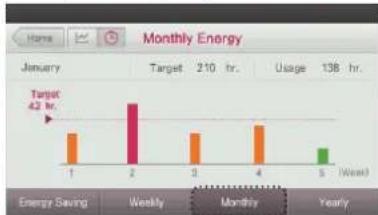
bar
Monthly Energy | Period | Value | |---|---| | Target | 42 hr. | | Week | 100 | | Weekly | 100 | | Monthly | 100 | | Yearly | 50 |- In the Energy Saving menu screen, press 'Yearly' button to check the yearly energy usage goal and the usage amount. The bars are color coded to indicate if the usage is under (green), near (yellow) or over (red) the target/goal energy setpoint.
- The energy usage is displayed in the units of 'month'.
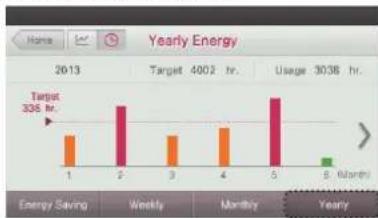
bar
Yearly Energy | Time Period | Value | |---|---| | 2013 | Target 336 hr. | | Weekly | | | Monthly | | | Yearly | 5 Month |● The guide to the energy consumption display is as follows.
It is displayed in 3 stages (good, normal, bad) compared to the previous year's information.
- The display compares each year at the same month (year over year). The three screens below, show each energy savings scenario. Green indicates a significant energy savings. Yellow is a normal or on target energy savings. Red indicates that there was a higher energy usage than the previous year of the same month.
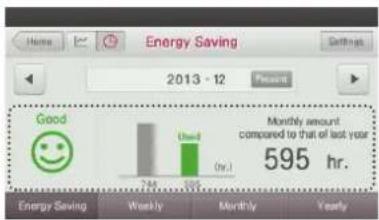
text_image
Home Energy Saving 2013 - 12 Present Good Used Monthly amount compared to that of last year 595 hr. Energy Saving Weekly Monthly Yearly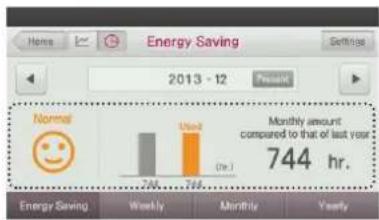
bar
| Metric | Value | | :--- | :--- | | Energy Saving (2013 - 12) | Normal | | Monthly amount compared to that of last year (744 hr.) | | | Energy Saving (Weekly) | | | Energy Saving (Monthly) | | | Energy Saving (Yearly) | |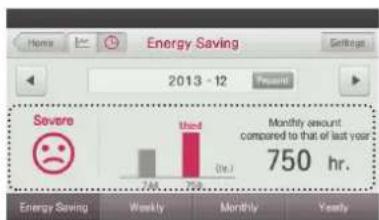
bar
| Category | Value | |---|---| | Severe | 750 hr. | | Used | 750 hr. |Target Energy Consumption
This function is that user can set daily amount target usage.
After setting the daily target value, weekly and monthly targets will be calculated and applied automatically. (Please refer to the "check energy usage" section of this manual.)
The daily target value is used as the reference value in the graph displays of each period (weekly, monthly, yearly). (Please refer to the 'Alarm Popup' section of this manual.)
- Press the remote controller screen's 'Energy menu' button. - It moves to the Energy Saving screen.
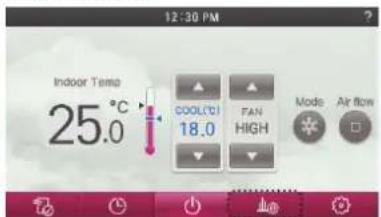
text_image
12:30 PM Indoor Temp 25.0°C COOL/CCI 18.0 FAN HIGH Mode Air flow- In the Energy Saving screen, press 'Settings' button. - It moves to the Energy saving setting screen.
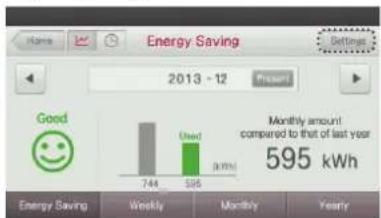
bar
| Metric | Weekly (kWh) | Monthly (kWh) | | :--- | :--- | :--- | | Energy Saving | 744 | 595 | | Used | 306 | 595 | | Monthly amount compared to that of last year | 595 | 595 | Settings: 2013 - 12 Present- In the Energy Saving setting screen, press 'Energy Usage Limit' menu. - It moves to the Target Energy Consumption setting screen.
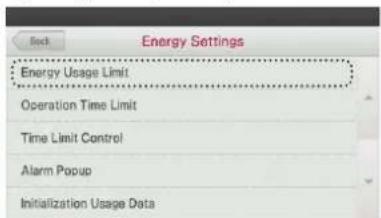
text_image
Energy Settings Energy Usage Limit Operation Time Limit Time Limit Control Alarm Popup Initialization Usage Data● In the Target Energy Consumption setting screen, press Disable/Enable button to select whether to set the target amount.
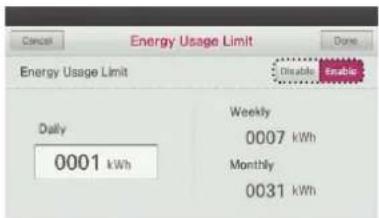
text_image
Energy Usage Limit Energy Usage Limit Daily 0001 kWh Weekly 0007 kWh Monthly 0031 kWh- Set the energy usage.
- If you touch the box at the bottom of the daily target amount, you can set the energy usage using the umeric keypad.
- During the daily target amount setting, the weekly target amount and the monthly target amount are automatically calculated and displayed.
* Weekly target amount: Daily target amount x 7
* Monthly target amount: Daily target amount x 31
text_image
Energy Usage Limit Daily 0001 kWh Weekly 0007 kWh Monthly 0031 kWh→
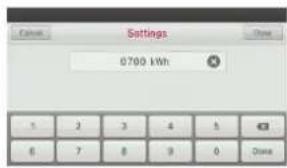
text_image
Settings 0700 kWh 1 2 3 4 5 6 7 8 9 0 Close- Press the Done button to save the set Target Energy Consumption setting.
- If you exit without pressing the Done button, your changes will not be applied.
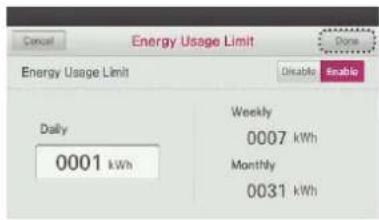
text_image
Energy Usage Limit Done Energy Usage Limit Disable Enable Daily 0001 kWh Weekly 0007 kWh Monthly 0031 kWhOperation Time Limit
This function is that user can set daily amount target usage.
After setting the daily target value, weekly and monthly targets will be calculated and applied automatically. (Please refer to the "check energy usage" section of this manual.)
The daily target value is used as the reference value in the graph displays of each period (weekly, monthly, yearly). (Please refer to the 'Alarm Popup' section of this manual.)
- Press the remote controller screen's 'Energy menu' button. - It moves to the Energy screen.
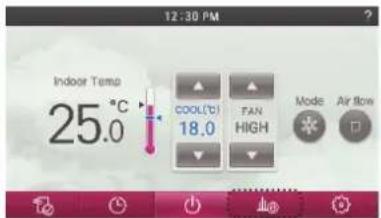
text_image
12:30 PM Indoor Temp 25.0 °C COOL(°C) 18.0 FAN HIGH Mode Air flow● In the Energy Saving screen, press 'Settings' button.
- It moves to the Energy setting screen.
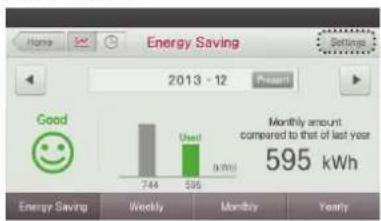
bar
| Metric | Value | | :--- | :--- | | Energy Saving | 744 | | Weekly | 595 | | Monthly | 0 kWh | | Yearly | 0 kWh | | Current | Present (not labeled) | | Monthly amount compared to that of last year | 595 kWh |- In the Energy Saving setting screen, press 'Operation Time Limit' from the menu. - It moves to the Operation Time Limit setting screen.
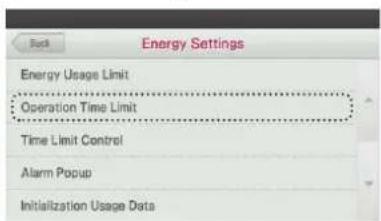
text_image
Back Energy Settings Energy Usage Limit Operation Time Limit Time Limit Control Alarm Popup Initialization Usage Data- In the Operation Time Limit setting screen, press Disable/Enable button to select whether to set the target amount.
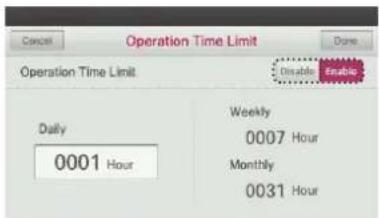
text_image
Operation Time Limit Operation Time Limit Daily 0001 Hour Weekly 0007 Hour Monthly 0031 Hour- Set the operation hours.
- If you touch the box at the bottom of the daily target amount, you can set the operation hours using the umeric keypad.
- During the daily target amount setting, the weekly target amount and the monthly target amount are automatically calculated and displayed.
* Weekly target amount: Daily target amount x 7
* Monthly target amount: Daily target amount x 31
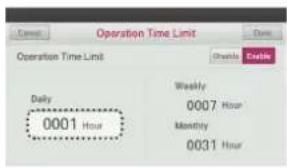
text_image
Operation Time Limit Operation Time Limit Daily 0001 Hour Weekly 0007 Hour Monthly 0031 Hour
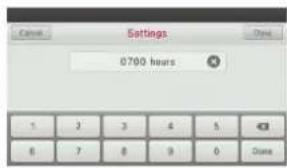
text_image
Settings 0700 hours 1 2 3 4 5 6 7 8 9 0 Date● Press the Done button to save the set Target Operation Hours.
- If you exit without pressing the Done button, your changes will not be applied.
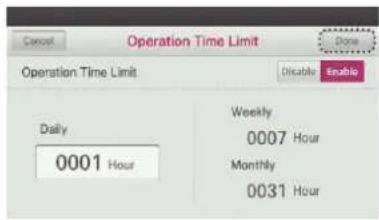
text_image
Cancel Operation Time Limit Done Operation Time Limit Disable Enable Daily 0001 Hour Weekly 0007 Hour Monthly 0031 HourTime Limit Control
It is the function to save energy by operating the product only for the set time and automatically stopping the operation after starting the product operation.
- Press the remote controller screen's 'Energy Saving menu' button. - It moves to the Energy Saving setting menu screen.
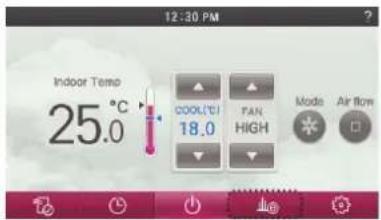
text_image
12:30 PM Indoor Temp 25.0°C COOL/COI 18.0 FAN HIGH Made Air Flow- In the Energy Saving setting screen, press 'Settings' button. - It moves to the Energy Saving setting screen.
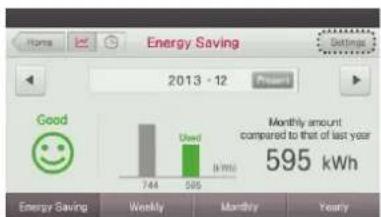
bar
| Metric | Value (kWh) | | :--- | :--- | | Energy Saving | 744 | | Weekly | 595 | | Monthly | 595 | | Yearly | 595 |- In the Energy Saving setting screen, press 'Time Limit Control' from the menu. - It moves to the Time Restriction Operation Setting screen.
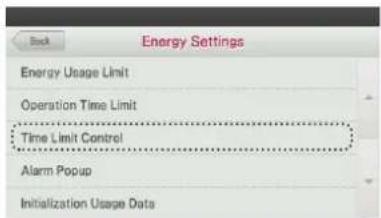
text_image
Energy Settings Energy Usage Limit Operation Time Limit Time Limit Control Alarm Popup Initialization Usage Data- In the Time Limit Control Setting screen, press the Enable button to begin setting a time limit.
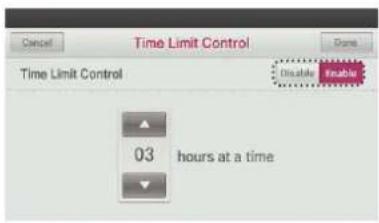
text_image
Cancel Time Limit Control Done Time Limit Control Disable Ready 03 hours at a time- Press '▲', '▼' button to set the operation hours.

text_image
Cancel Time Limit Control Time Limit Control Disable Enable 03 hours at a time- Press the Done button to save the set time value.
- If you exit without pressing the Done button, your changes will not be applied.
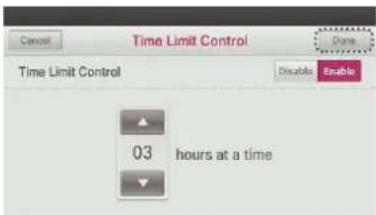
text_image
Cancel Time Limit Control Done Time Limit Control Disable Enable 03 hours at a timeWhen the operation stops, the calculated time value will reset to its initial value.
Example: If the Time Limit Control is set to operate for 1 hour, but the unit is prematurely stopped after 25 minutes, the time will reset back to the full 1 hour control limit. The next time the unit begins operation, it will again start at the 1 hour limit mark to countdown.
Alarm Popup
This function allows you to set up a popup notice message for the Power Consumption and Operation Time Restriction feature. It will be displayed on the remote controller once a percentage threshold is reached (i.e., 80%, 90% etc. of power consumption or time target).
- Press the remote controller screen's 'Energy' button.
It moves to the Energy screen.
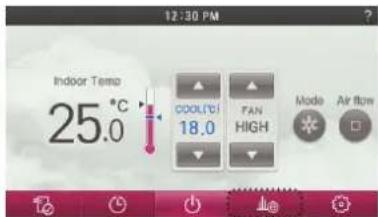
text_image
12:30 PM Indoor Temp 25.0°C COOL/CI 18.0 FAN HIGH Mode Air flow● In the Energy Saving screen, press 'Settings' button.
- It moves to the Energy setting screen.
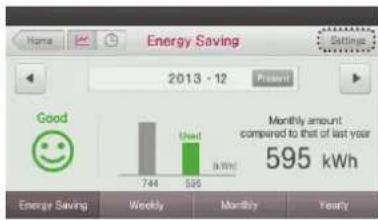
bar
| Metric | Weekly (kWh) | Monthly (kWh) | | :--- | :--- | :--- | | Energy Saving | 744 | 595 | | Used | 596 | 595 | | Monthly amount compared to that of last year | 595 | 595 | Settings: 2013 - 12 Present- In the Energy setting screen, Press 'Alarm Popup' button.
- It moves to the Alarm Popup setting screen.
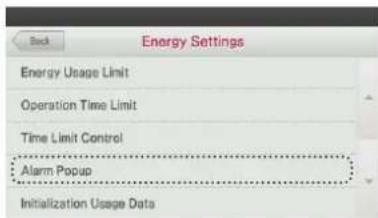
text_image
Back Energy Settings Energy Usage Limit Operation Time Limit Time Limit Control Alarm Popup Initialization Usage Data- Press Disable/Enable button to set or turn off the category to use.
- Once you press Enable, the notice determination period (daily/weekly/month/y) will be displayed on the screen. Choose the notice determination period.
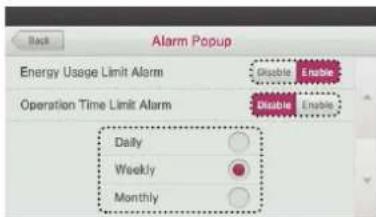
text_image
Back Alarm Popup Energy Usage Limit Alarm Enable Enable Operation Time Limit Alarm Enable Enable Daily Weekly Monthly● After setting the alarm or notice display setting, you can press 'Back', 'Go Back', or 'Home' button, to exit from the screen.
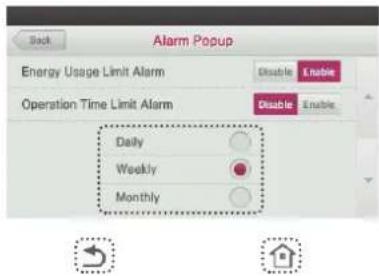
text_image
Alarm Popup Energy Usage Limit Alarm Operation Time Limit Alarm Daily Weekly Monthly Disable Enable Disable Enable- For the categories with Alarm Popup setting, the popup is displayed on the remote controller screen when it reaches 80%, 90%, 95%, and 100% of the target usage amount. Example) Display when it reaches 80% of the target usage amount
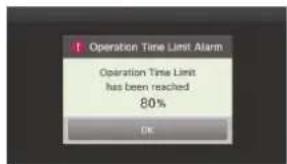
text_image
Operation Time Limit Alarm Operation Time Limit has been reached 80% OK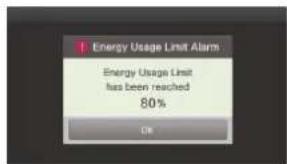
text_image
Energy Usage Limit Alarm Energy Usage Limit has been reached 80% OKInitialization Usage Data
This function is used to initialize energy and time usage information. Once you initialize the data, all the usage information will be reset and all the usage data will be deleted.
- Press the remote controller screen's 'Energy' button. - It moves to the Energy screen.
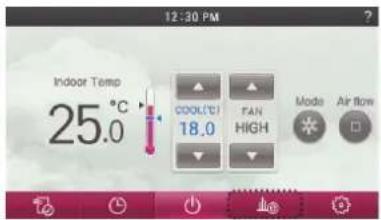
text_image
12:30 PM Indoor Temp 25.0°C COOL/°C 18.0 FAN HIGH Mode Air flow- In the Energy Saving screen, press 'Set' button. - It moves to the Energy setting screen.
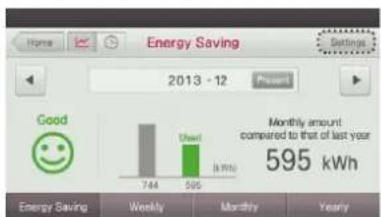
bar
| Period | Energy Saving (kWh) | |---|---| | Weekly | 744 | | Monthly | 505 | | Yearly | 595 |- In the Energy setting screen, press 'Initialization Usage Data' button. - It moves to the Energy information initialization screen.
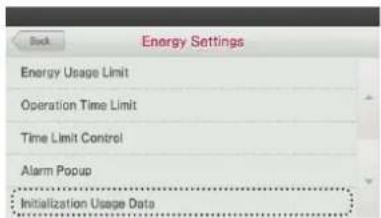
text_image
Back Energy Settings Energy Usage Limit Operation Time Limit Time Limit Control Alarm Popup Initialization Usage Data- Select the checkbox to the left of 'Initialization Usage Data'.
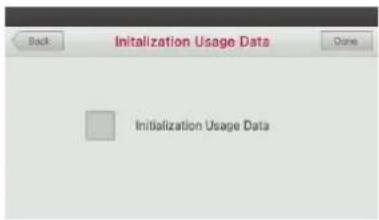
text_image
Initialization Usage Data Initialization Usage Data- If you press 'Done' button, it will start to delete the data.
- The Notice popup message will display until the deletion process has completed.
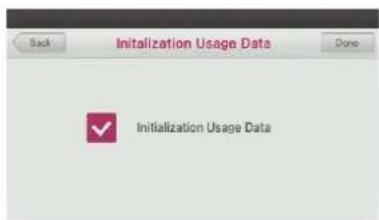
text_image
Initialization Usage Data Done Initialization Usage Data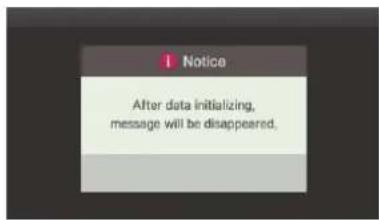
text_image
1 Notice After data initializing, message will be disappeared.FUNCTION SETTING
Lock Setting - All Lock, On/Off Lock, Mode Lock
This function locks the remote controller's button operation to prevent the unauthorized operation by children or others.
● While unit is in operation, press 'Set' button.
- It moves to the 'settings' screen.
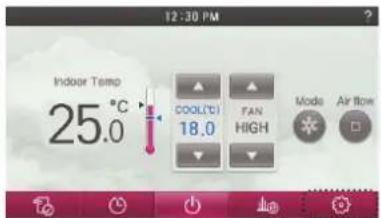
text_image
12:30 PM Indoor Temp 25.0°C COOL/CI 18.0 FAN HIGH Mode Air flow● In the setting menu list, press 'Lock' button.
- It moves to the 'Lock' setting screen.
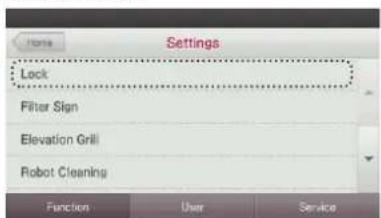
text_image
Settings Lock Filter Sign Elevation Grill Robot Cleaning Function User Service- From the Release/Lock button choices, press Lock to activate the lock function, and press 'Done' button to save the setting.
- If you exit without pressing the 'Done' button, your changes will not be applied.
- Once you press the 'Done' button, the setting screen will close.
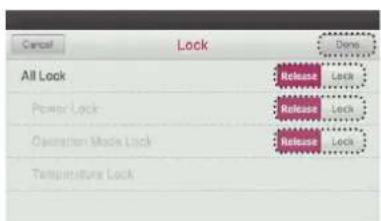
text_image
Cancel Lock All Lock Release Lock Power Lock Release Lock Operation Mode Lock Release Lock Temperature LockLock Setting - Temperature Lock
The Temperature Lock function locks the ability to set the temperature beyond a preset value setting.
The changes to the desired temperature by external equipments(Central Controller, Dry contact, Wireless Remote Controller) will not be affected the wired remote controller's desired temperature range lock.
If the temperature range lock is set from the central controller, the desired temperature range lock setting of the wired remote controller is released.
- In the Lock setting screen, press 'Temperature Lock' button.
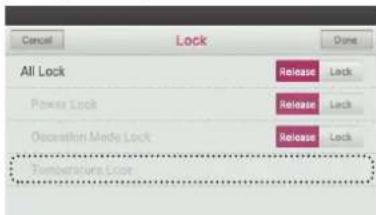
text_image
Cancel Lock Done All Lock Release Lock Power Lock Release Lock Operation Made Lock Release Lock Temperature Lock● (In 1 Set Point Control type) In the Temperature Range Lock setting menu, press
'Release/Lock' button to activate the lock function, and press 'Done' to complete the temperature range lock setting
- If you press the 'Done' button, it will exit from the setting screen.
- Press the up and down arrow buttons from the Minimum and Maximum settings to adjust the temperature range as needed. Be sure that the Lock button is set once your temperature adjustments are made. Press Done to commit the changes.
| Lower Limit Upper Limit | ||
| Possible setting boundary | 16~30°C(60~86°F) | 18~30°C(64~86°F) |
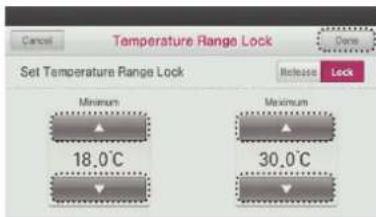
text_image
Cancel Temperature Range Lock Done Set Temperature Range Lock Release Lock Minimum 18.0°C Maximum 30.0°C- In 1Set Point Control type Press 'Cancel', 'Go Back', or 'Home' button to exit from the setting screen.
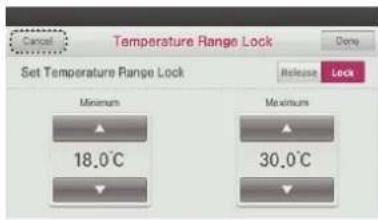
text_image
Temperature Range Lock Set Temperature Range Lock Minimum 18.0°C Maximum 30.0°C Release Lock Done● (In 2Set Point Control type) In the Temperature Range Lock setting menu, press 'Release/Lock' button to set the lock function, and press 'Done' button to complete the temperature range lock setting.
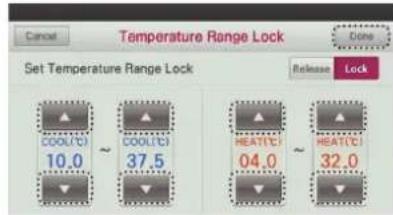
text_image
Cancel Temperature Range Lock Done Set Temperature Range Lock Release Lock COOL(℃) 10.0 COOL(℃) 37.5 HEAT(℃) 04.0 HEAT(℃) 32.0| Indoor unit Control Method | Option (Installer code No.31) | Cooling Set point range | Heating Set point range |
| 1set point 31:000 | 64~86 °F (18~30 °C) 60 | -86 °F (16~30 °C) | |
| 31:000 64~99 °F | (18~37.5 °C) 40~86 °F | 14~30 °C | |
| 2set point - 50~99 °F (10~37.5 °C) 40~90 °F (4~32 °C) | |||
● (In 2Set Point Control type) Press 'Cancel', 'Go Back', or 'Home' button to exit from the setting screen.
- If you press 'Cancel', 'Go Back', or 'Home' button, it will exit from the setting screen.
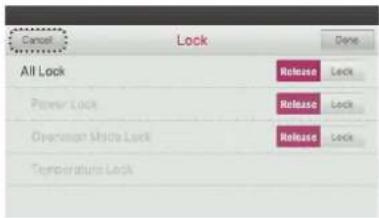
text_image
Cancel Lock All Lock Release Lock Power Lock Release Lock Operation Mode Lock Release Lock Temperature Lock

| Lock Category Description | |
| All Lock Locks operations of all the buttons of the remote controller. | |
| On/Off Lock Locks the remote controller's On/Off button. | |
| Mode Lock Locks the remote controller's operation mode button. | |
| Temperature Range Lock | Sets the remote controller's desired temperature range which can be changed only within the set boundary. |
Filter Sign Check
This function gives you the option to view a 'Filter Sign' message so that you can check the status of the condition of the filter and gauge when it should be changed.
- Press 'Set' button.
- It moves to the 'settings' screen.
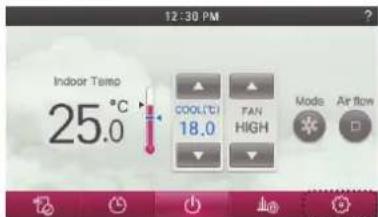
text_image
12:30 PM Indoor Temp 25.0 °C COOLICI 18.0 FAN HIGH Mode Air flow- In the setting menu list, press 'Filter Sign' button.
- It moves to the 'Filter Sign' setting screen.
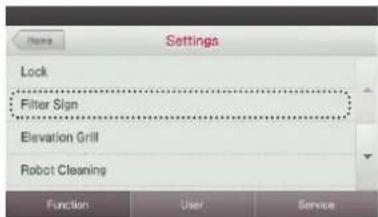
text_image
Settings Lock Filter Sign Elevation Grill Robot Cleaning Function User Service- When the filter cleaning indicator is displayed on the top right side of the screen, you can initialize the filter status by pressing the 'Reset' button in the Filter Sign menu.
- When it is the time to clean the filter, the filter icon appears on the top right side of the screen, and you can enter the Filter Sign menu.
If your units functionality allows it to display time remaining until the filter cleaning, you can enter the Filter Sign menu even if the filter cleaning alarm icon is not displayed.
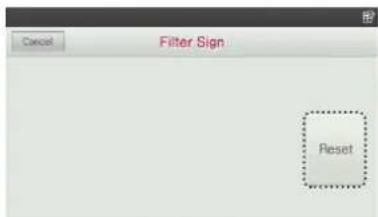
text_image
Cancel Filter Sign ResetExample) If indoor unit has a function to display the remaining time,
- If you unit has the capability to display the remaining time until the filter cleaning alarm, the following screen below is displayed in the current time display area.
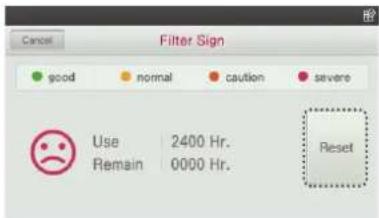
text_image
Cancel Filter Sign good normal caution severe Use 2400 Hr. Remain 0000 Hr. Reset- If there is time remaining until the next filter cleaning alarm, you can enter the 'Filter Sign' menu even if the filter cleaning alarm icon has not displayed as yet.
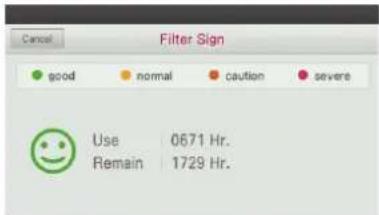
text_image
Filter Sign good normal caution severe Use 0671 Hr. Remain 1729 Hr.- If you press 'Cancel', 'Go Back', or 'Home' button, the system will exist out of this screen.
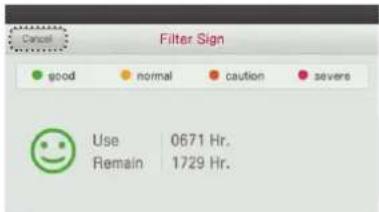
text_image
Cancel Filter Sign good normal caution severs Use 0671 Hr. Remain 1729 Hr.


NOTE
- If dust is accumulated in the filter, cooling/heating ability is degraded, and the electricity bill will increase, so make sure to clean the filter when it becomes the time to clean the filter.
- Filter cleaning alarm icon will be disappeared after certain time.
Elevation Grill Setting
This function allows you to operate the elevation grill for indoor unit filter cleaning.
● While unit is in operation, press 'Set' button.
- It moves to the 'settings' screen.
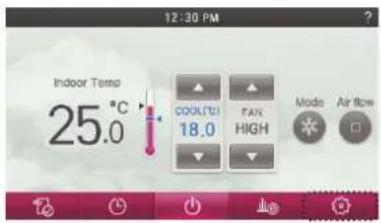
text_image
12:30 PM Indoor Temp 25.0°C COOLTDI 18.0 FAN HIGH Mode Air flow- In the setting menu list, press 'Elevation Grill' button.
- It moves to the 'Elevation Grill' setting screen.
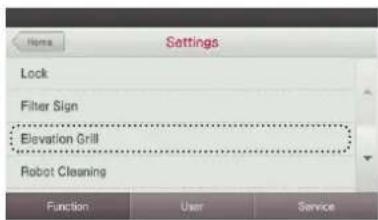
text_image
Settings Lock Filter Sign Elevation Grill Robot Cleaning Function User Service- Press 'Up/Stop/Down' button to set the elevation grill's movement.
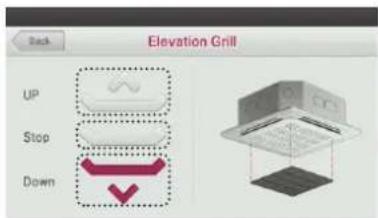
text_image
Back Elevation Grill UP Stop Down- Press 'Back', 'Go Back' or 'Home' button to exit from the setting menu.
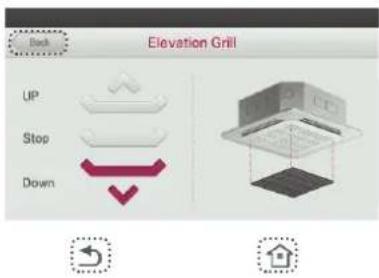
text_image
Elevation Grill Up Stop DownRobot Cleaning
Robot cleaning is the function for the cleaner attached to the product to perform automatic filter cleaning after certain time of the air conditioner usage. Set the robot cleaning to operate manually or automatically. It can be set 30 seconds after indoor unit turn off.
- Press the screen's 'Set' button.
- It moves to the settings menu.
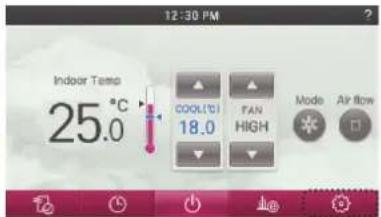
text_image
12:30 PM Indoor Temo 25.0°C COOL(°C) 18.0 FAN HIGH Mode Air flow- In the settings menu, press 'Robot Cleaning' button.
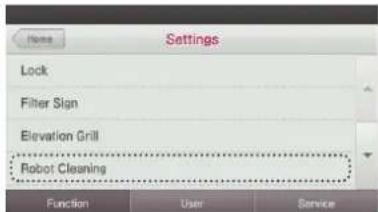
text_image
Settings Lock Filter Sign Elevation Grill Robot Cleaning Function User Service- Press 'Auto/Manual' button to set the desired state, and if you press 'Back', 'Go Back', or 'Home' button, it will exit from the setting screen.
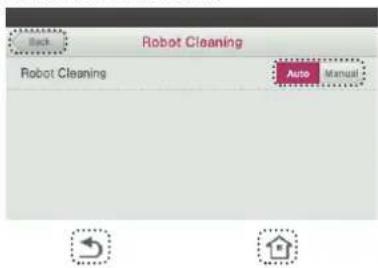
text_image
Back Robot Cleaning Robot Cleaning Auto Manual
NOTE
Robot cleaning function may not work in some indoor unit products.
Auto Dry
Auto dry removes moisture by drying the inside of the indoor unit after cooling operation once the indoor unit is turned OFF.
- Press the screen's 'Set' button. - It moves to the settings menu.
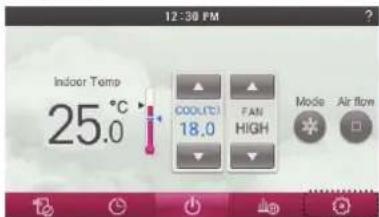
text_image
12:30 PM Indoor Temp 25.0 °C COOLICI 18.0 FAN HIGH Mode Air flow- In the settings menu, press 'Auto Dry' button.
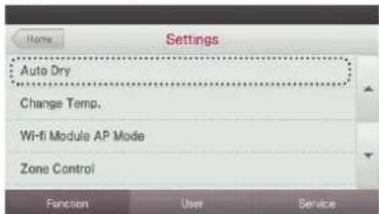
text_image
Settings Auto Dry Change Temp. Wi-fi Module AP Mode Zone Control Function User Service- Press 'Disable/Enable' button to set the desired state, and if you press 'Back', 'Go Back', or 'Home' button, it will exit from the setting screen.
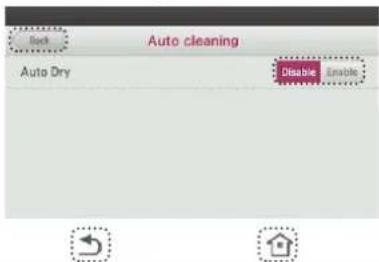
text_image
Auto cleaning Auto Dry Disable DisableNOTE
Auto dry function may not work in some indoor unit products.
Change Temperature
This function allows you to set the temperature to automatically switch between cooling and heating operation as setup in the artificial intelligence operation mode.
- Press the screen's 'Set' button, - It moves to the settings menu.
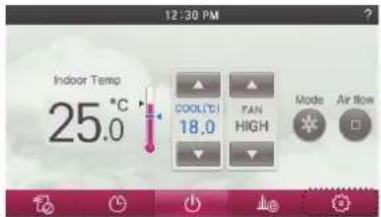
text_image
12:30 PM Indoor Temp 25.0°C COOL/CCI 18.0 FAN HIGH Mode Air flow- In the settings menu, press 'Change Temp.' button.
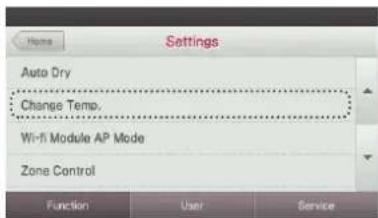
text_image
Settings Auto Dry Change Temp. Wi-fi Module AP Mode Zone Control Function User Service- Press '▲', '▼' buttons to set the switching temperature value, and press 'Save' button to save the setting.
- Switching temperature boundary: It can be set from 1–7.
- If you exit without pressing the Save button, your settings will not be applied.
- If you press the Save button the changes will be applied and, it will exit from the setting screen.
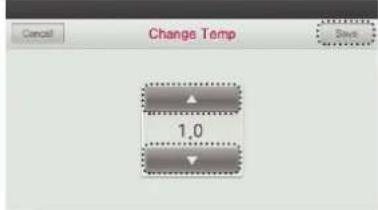
text_image
Cancel Change Temp 1,0 Save- Press 'Cancel', 'Go Back' or 'Home' button to exit from the setting screen.
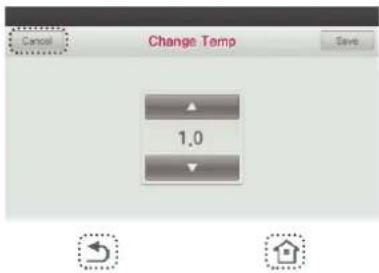
text_image
Cancel Change Temp Save 1.0It is the function that can be used only in cooling/heating product.
Example of using the change temperature function
- Conditions
11 Mode: artificial intelligence mode
21 Desired temperature: 22 °C
3) Change temperature: 3
→ Difference of change temperature is 3 °C
● The illustration in this section shows the example of operation as set through the conditions in the example above.
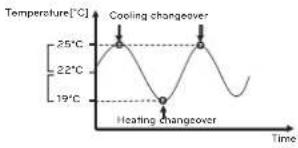
line
| Time (°) | Temperature (°C) | | :--- | :--- | | 25 | 25 | | 22 | 22 | | 19 | 19 | The chart displays a single line representing the temperature variation over time. The x-axis is labeled 'Time' and the y-axis is labeled 'Temperature(°C)'. The labels indicate 'Cooling changeover' at 25°C and 'Heating changeover' at 19°C.Wireless Module AP mode
Wireless Module AP mode function that wireless module change to AP mode.
- Press the screen's 'Set' button.
- It moves to the settings menu.
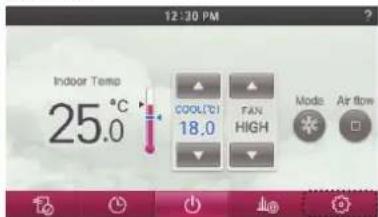
text_image
12:30 PM Indoor Temp 25.0°C COOL(C) 18.0 FAN HIGH Mode Air flow- In the settings menu, press 'Wi-Fi Module AP Mode' button.
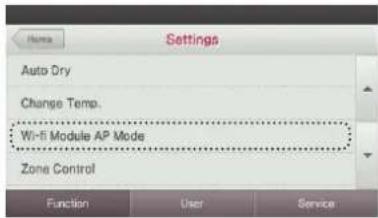
text_image
Auto Dry Change Temp. Wi-Fi Module AP Mode Zone Control Function User Service- Press 'Apply' button to set the desired state, and then press 'Back', 'Go Back', or 'Home' button, then exit from the setting screen.
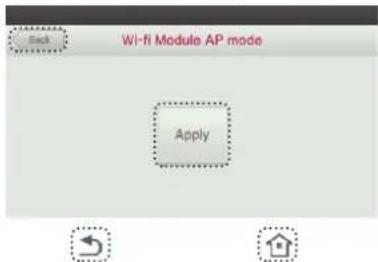
text_image
Back Wi-fi Module AP mode Apply
NOTE
Wireless module AP mode function may not work in some indoor unit products.
Zone Name Setting
Zone Control settings allow you to select zone name.
- Press the screen's 'Set' button. - It moves to the settings menu.
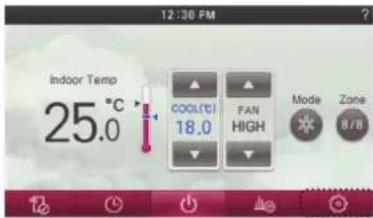
text_image
12:30 PM Indoor Temp 25.0°C COOL(°C) 18.0 FAN HIGH Mode Zone 8/8- In the settings menu, press 'Zone Control' button.

text_image
Settings Auto Dry Change Temp. Wi-Fi Module AP Mode Zone Control- Push each zone button, then select a desired zone name.
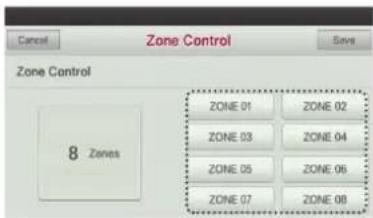
text_image
Zone Control Zone Control 8 Zones ZONE 01 ZONE 02 ZONE 03 ZONE 04 ZONE 05 ZONE 06 ZONE 07 ZONE 08- Select zone name and then press the "Done" button.
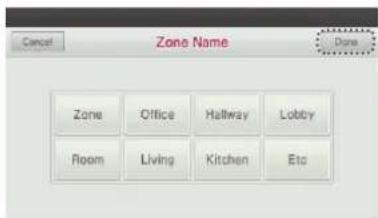
text_image
Cancel Zone Name Done Zone Office Hallway Lobby Room Living Kitchen Etc
NOTE
Zone Control setting function may not work in some indoor unit products.
Override Set Time
Override Set Time function can only be used in 2 Set Control mode. When timed override is used, the set time will be a default value.
- Press the screen's 'Set' button. - It moves to the settings menu.
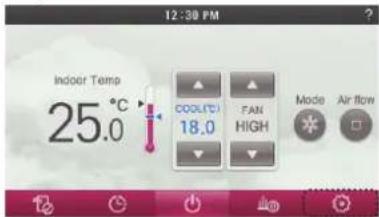
text_image
12:30 PM Indoor Temp 25.0 °C COOLICI 18.0 FAN HIGH Mode Air flow- In the settings menu, press 'Override Set Time' button.
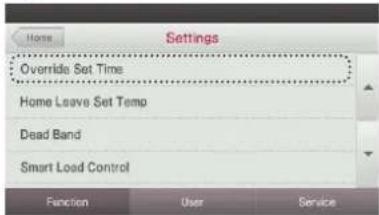
text_image
Home Settings Override Set Time Home Leave Set Temp Dead Band Smart Load Control Function User Service- Select time increment using '▲', '▼' buttons, and then press 'Save'. If you press 'Cancel', 'Go Back', or 'Home' button, before pressing 'Save', you will exit the screen and your changes will not be applied.
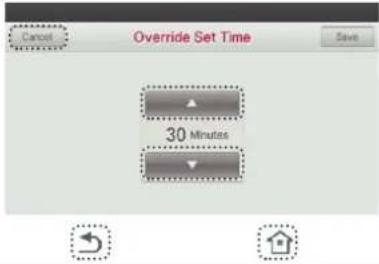
text_image
Cancel Override Set Time Save 30 Minutes
NOTE
Override Set Time function can only be used in a 2 set control mode.
Home Leave Set Temperature
Home Leave Set Temperature function is used in 2 Set control mode. When customer operate as home leave mode, this setting temperature value will be applied.
- Press the screen's 'Set' button. - It moves to the settings menu.
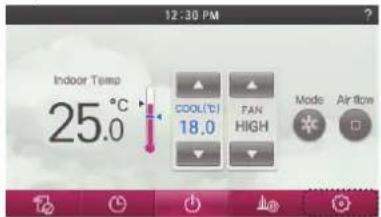
text_image
12:30 PM Indoor Temp 25.0 °C COOL(°C) 18.0 FAN HIGH Mode Air flow- In the settings menu, press 'Home Leave Set Temp' button.
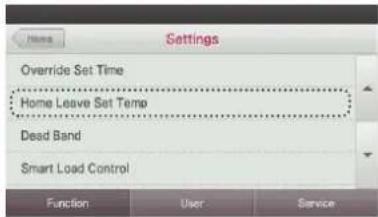
text_image
Home Settings Override Set Time Home Leave Set Temp Dead Band Smart Load Control Function User Service- Select temperature using '▲', '▼' buttons, and then press 'Save'. If you press 'Cancel', 'Go Back', or 'Home' button, without pressing 'Save', you will exit the setting screen and you changes will not be applied.
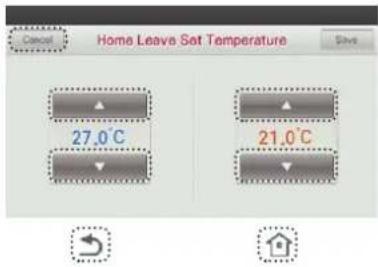
text_image
Cancel Home Leave Set Temperature Save 27.0°C 21.0°C
NOTE
Home Leave Set Temperature function can only be used in a 2 set control mode.
Dead Band
Dead Band function is used with a 2 Set control mode.
When heating and cooling desired temperatures have been changed, the set value will maintain a difference between the heating and cooling desired temperature.
- Press the screen's 'Set' button. - It moves to the settings menu
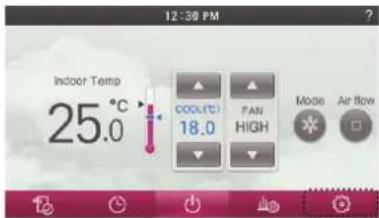
text_image
12:30 PM Indoor Temp 25.0 °C COOLUTI 18.0 FAN HIGH Mode Air flow● In the settings menu, press 'Dead Band' button.
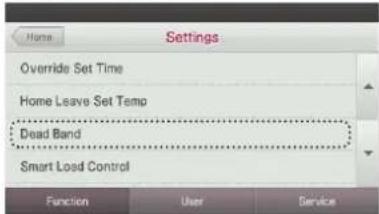
text_image
Home Settings Override Set Time Home Leave Set Temp Dead Band Smart Load Control Function User Service- Select degrees of separation using '▲', '▼' buttons, and then press 'Save'.
If you press 'Cancel', 'Go Back', or 'Home' button, without pressing 'Save', you will exit the setting screen and you changes will not be applied.
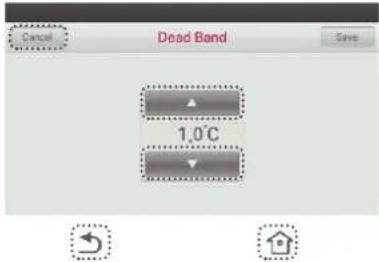
text_image
Cancel Dead Band Save 1.0°Cavailable setting range : 0\~10°F(0\~5°C)

NOTE
Dead Band function only can use in 2 set control mode.
- When changing the desired cooling temperature, in case of that the difference with the heating temperature becomes lesser than its minimal value of difference, it lowers the desired heating temperature automatically.
- When changing the desired heating temperature, in case of that the difference with the heating temperature becomes lesser than its minimal value of difference, it raises the desired cooling temperature automatically.
Smart Load Control(SLC)
Change the outdoor unit's Smart Load Control stage value. (Smart load control is the function to operate effectively using the indoor air temperature, outdoor air temperature, and humidity.)
- Press the screen's 'Set' button. - It moves to the settings menu.
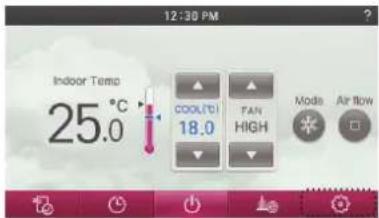
text_image
12:30 PM Indoor Temp 25.0°C COOLTD 18.0 FAN HIGH Mode Air flow- In the settings menu, press 'Smart Load Control' button.
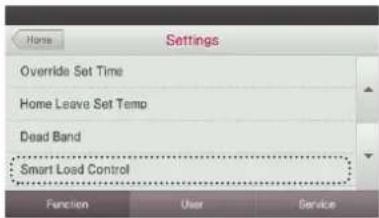
text_image
Home Settings Override Set Time Home Leave Set Temp Dead Band Smart Load Control Function User Service- Select 'OFF/ON' button.
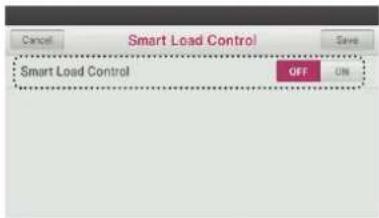
text_image
Smart Load Control Smart Load Control OFF ON- Select value increment using '▲', '▼' buttons, and then press 'Save'. If you press 'Cancel', 'Go Back', or 'Home' button, before pressing 'Save', you will exit the screen and your changes will not be applied.
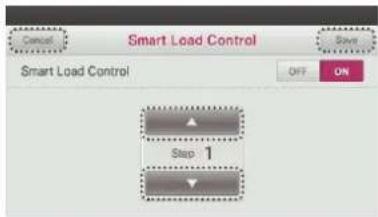
text_image
Smart Load Control Smart Load Control OFF ON Step 1| Value | OFF Step 0 | |
| ON | Step 1 | |
| Step 2 | ||
| Step 3 |

NOTE
Smart load control function can be set only when the installer setting's outdoor unit function master setting is set to "Master". Smart load control function is only available in some products.
Comfort cooling setting
It is the function to set the outdoor unit comfort cooling operation value.
- Press the screen's 'Set' button. - It moves to the settings menu
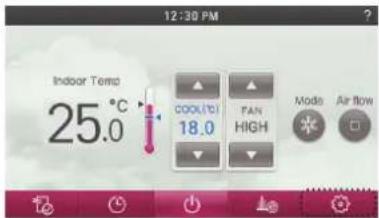
text_image
12:30 PM Indoor Temo 25.0°C COOLUTI 18.0 FAN HIGH Mode Air flow- In the settings menu, press 'Comfort cooling' button.
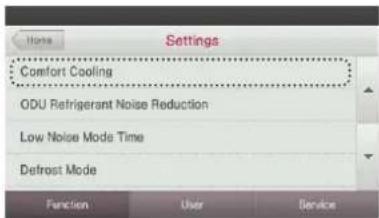
text_image
Settings Comfort Cooling ODU Refrigerant Noise Reduction Low Noise Mode Time Defrost Mode Function User Service- Select value increment using '▲', '▼' buttons, and then press 'Save'. If you press 'Cancel', 'Go Back', or 'Home' button, before pressing 'Save', you will exit the screen and your changes will not be applied.
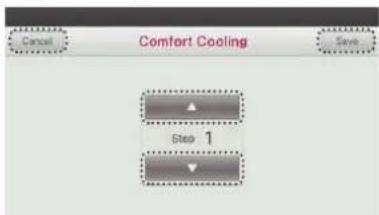
text_image
Comfort Cooling Cancel Save Step 1| Value |
| Step 1 |
| Step 2 |
| Step 3 |

NOTE
The Comfort cooling function does not work in the group control. Comfort cooling setting function is only available in some products.
ODU Refrigerant Noise Reduction setting
It is the function to set the outdoor unit's refrigerant noise reduction function.
- Press the screen's 'Set' button. - It moves to the settings menu.
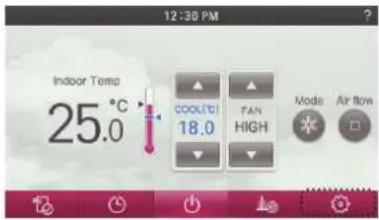
text_image
12:30 PM Indoor Temp 25.0°C COOLTDI 18.0 FAN HIGH Mode Air flow- In the settings menu, press 'ODU Refrigerant Noise Reduction' button.
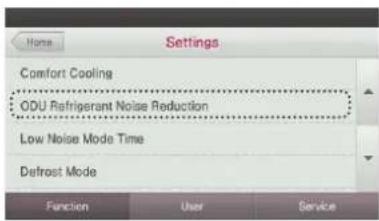
text_image
Settings Comfort Cooling ODU Refrigerant Noise Reduction Low Noise Mode Time Defrost Mode Function User Service- Select value increment using '▲', '▼' buttons, and then press 'Save'. If you press 'Cancel', 'Go Back', or 'Home' button, before pressing 'Save', you will exit the screen and your changes will not be applied.
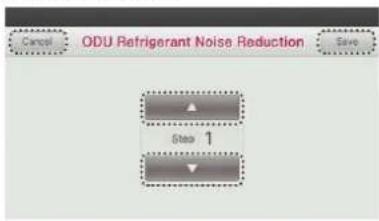
text_image
Cancel ODU Refrigerant Noise Reduction Save Step 1| Value Description | |
| Stop 0 Not use | |
| Step 1 Outdoor unit | noise mode 1 |
| Step 2 Outdoor unit | noise mode 2 |

NOTE
The ODU Refrigerant Noise Reduction function can be set only when the installer setting's outdoor unit function master setting is set to "Master".
ODU Refrigerant Noise Reduction function is only available in some products.
Low noise mode time setting
It is the function to set the start and end time of the outdoor unit's low noise mode operation.
- Press the screen's 'Set' button. - It moves to the settings menu.
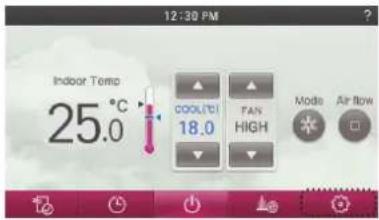
text_image
12:30 PM Indoor Temp 25.0°C COOLIC 18.0 FAN HIGH Mode Air flow- In the settings menu, press 'Low noise mode time' button.
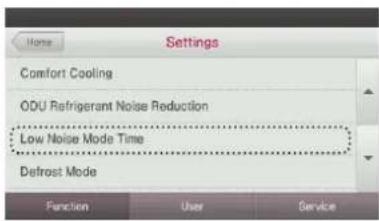
text_image
Settings Comfort Cooling ODU Refrigerant Noise Reduction Low Noise Mode Time Defrost Mode Function User Service- Select value increment using '▲', '▼' buttons, and then press 'Save'. If you press 'Cancel', 'Go Back', or 'Home' button, before pressing 'Save', you will exit the screen and your changes will not be applied.
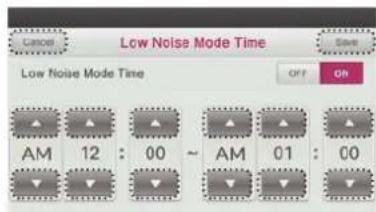
text_image
Cancel Low Noise Mode Time Save OFF On Low Noise Mode Time AM 12 : 00 ~ AM 01 : 00● After setting the start time and the end time, press (Save) button to move to the upper level list.
- If the start time and the current time are the same, it enters the outdoor unit low noise operation mode
- If the end time and the current time are the same, the outdoor unit low noise operation mode is cleared.
- If the start time and the current time are the same, it enters the outdoor unit low noise operation mode
- If the end time and the current time are the same, the outdoor unit low noise operation mode is cleared.

NOTE
Low noise mode time setting function can be set only when the installer setting's outdoor unit function master setting is set to "Master".
Low noise mode time setting function is only available in some products.
Defrost mode setting
Change the outdoor unit's defrost mode operation.
- Press the screen's 'Set' button. - It moves to the settings menu
text_image
12:30 PM Indoor Temp 25.0°C COOLUTI 18.0 FAN HIGH Mode Air flow- In the settings menu, press 'Defrost mode' button.
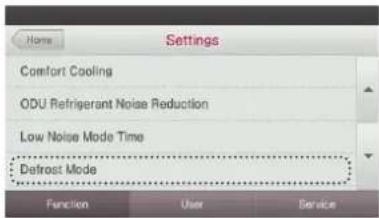
text_image
Settings Comfort Cooling ODU Refrigerant Noise Reduction Low Noise Mode Time Defrost Mode Function User Service- Select value increment using '▲', '▼' buttons, and then press 'Save'. If you press 'Cancel', 'Go Back', or 'Home' button, before pressing 'Save', you will exit the screen and your changes will not be applied.
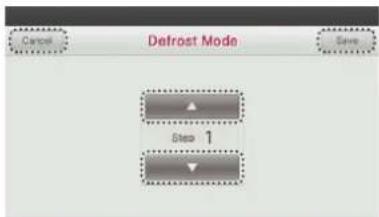
text_image
Cancel Defrost Mode Save Step 1| Value | Step 0 Not use | |
| Step 1 Forced snow removal | ||
| Step 2 Quick defrost | ||
| Step 3 Forced snow removal + quick defrost | ||

NOTE
The Defrost mode setting function can be set only when the installer setting's outdoor unit function master setting is set to "Master". Defrost mode setting function is only available in some products.
Advanced fan speed "Auto" setting
It is the function to automatically change the fan speed according to the difference between the indoor temperature and the desired temperature.
- Press the screen's 'Set' button.
- It moves to the settings menu.
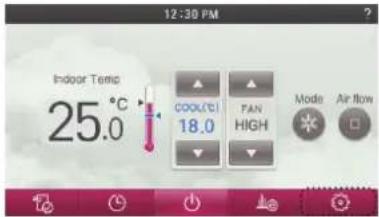
text_image
12:30 PM Indoor Temp 25.0°C COOL(°C) 18.0 FAN HIGH Mode Air flow- In the settings menu, press 'Advanced fan speed "Auto"' button.
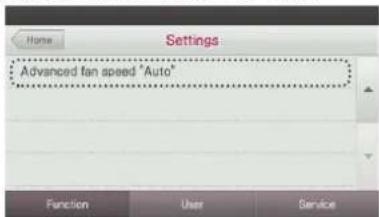
text_image
Home Settings Advanced fan speed "Auto" Function User Service- Select value and then press 'Save'. If you press 'Cancel', 'Go Back', or 'Home' button, before pressing 'Save', you will exit the screen and your changes will not be applied.
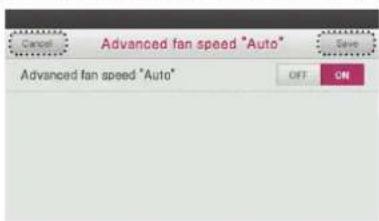
text_image
Advanced fan speed "Auto" Advanced fan speed "Auto" OFF ON
NOTE
"Advanced fan speed Auto" setting function is only available in some products.
Delay Time - Ventilator
Ventilation mode is activated after the preset delay time.
- Press the screen's 'Set' button. - It moves to the settings menu.
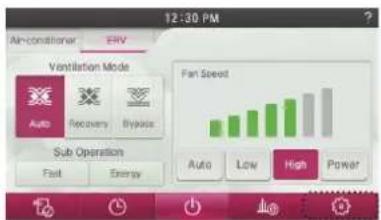
text_image
12:30 PM Air-conditioner FRV Ventilation Mode Auto Recovery Bypass Fan Speed Sub Operation Fast Energy Auto Low High Power- In the settings menu, press 'Delay Time' button.
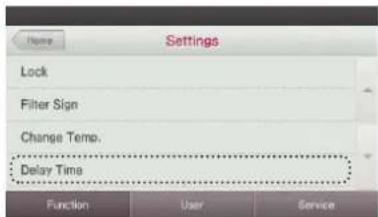
text_image
Settings Lock Filter Sign Change Temp. Delay Time Function User Service- Select delay time 'OFF/ON' button. - If you select ON, the number key pad and edit box are displayed at the bottom.
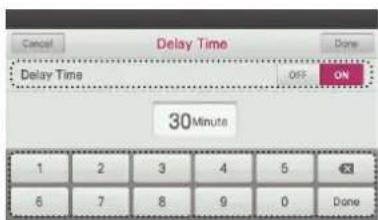
text_image
Cancel Delay Time Done Delay Time OFF ON 30Minute 1 2 3 4 5 6 7 8 9 0 Done- Press 'Done' button to save the changed Delay Time.
- If you exit without pressing 'Done' button, your changes will not be applied.
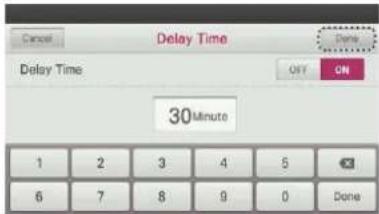
text_image
Cancel Delay Time Done Delay Time OFF ON 30Minute 1 2 3 4 5 6 7 8 9 0 Done- If you press 'Cancel' or 'Home' button, without pressing 'Save', you will exit the setting screen and you changes will not be applied.
- If no buttons are pressed after 60 seconds, it will automatically exit from the edit menu.
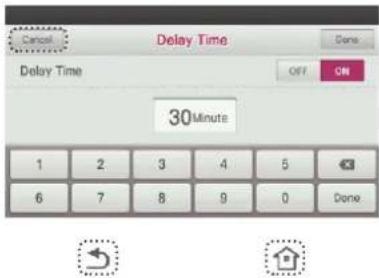
text_image
Cancel Delay Time Done Delay Time OFF ON 30Minute 1 2 3 4 5 6 7 8 9 0 DoneUSER SETTING
Date Setting
This functions allows you to set the current date to be displayed on the remote controller.
- Press the screen's Set' button.
- It moves to the settings menu screen.
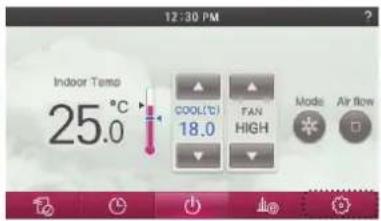
text_image
12:30 PM Indoor Temo 25.0°C COOL(°C) 18.0 FAN HIGH Mode Air Flow- In setting screen, press 'User' button at the bottom of the screen.
- It moves to the User Setting screen.
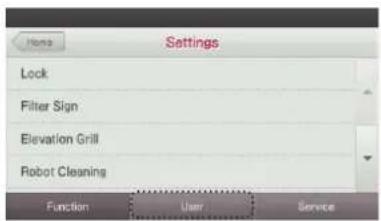
text_image
Settings Lock Filter Sign Elevation Grill Robot Cleaning Function User Service● In User Setting screen, press 'Date' button.
- It moves to the Date Setting screen.
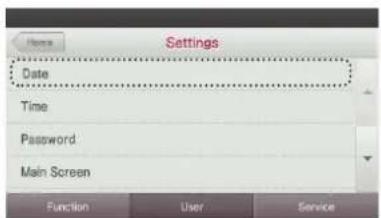
text_image
Settings Date Time Password Main Screen Function User Service- After setting the year, month, day, and day of week, press 'Save' button to save the settings. - If you exit without pressing the Save button, your changes will not be applied. - If you press the Save button, it will exit from the setting screen with your changes applied.
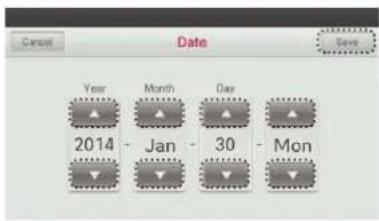
text_image
Cancel Date Year Month Day 2014 - Jan - 30 - Mon Save- If you press 'Cancel', 'Go Back', or 'Home' button, without pressing 'Save', you will exit the setting screen and you changes will not be applied.
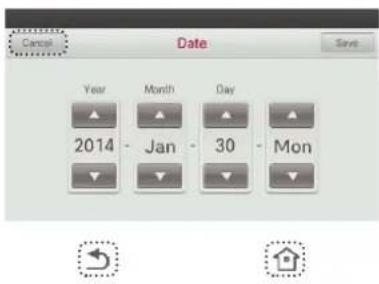
text_image
Cancel Date Year Month Day 2014 Jan 30 Mon SaveTime Setting
This functions allows you to set the current time to be displayed on the remote controller.
- Press the screen's Set' button.
- It moves to the settings menu screen.
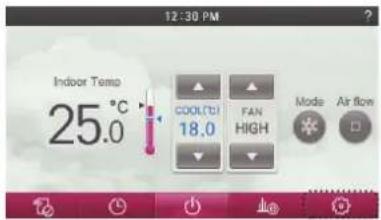
text_image
12:30 PM Indoor Temp 25.0°C COOLTCI 18.0 FAN HIGH Mode Air flow- In setting screen, press 'User' button. - It moves to the User Setting screen.
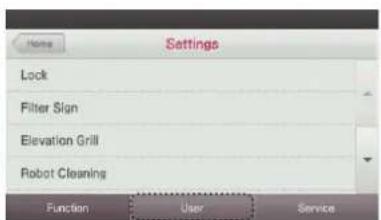
text_image
Settings Lock Filter Sign Elevation Grill Robot Cleaning Function User Service- In User Setting screen, press 'Time' button. - It moves to the Time Setting screen.
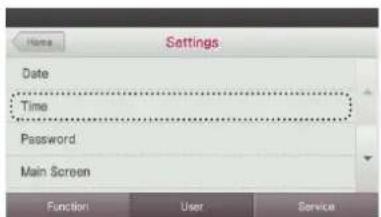
text_image
Settings Date Time Password Main Screen Function User Service- Press '▲', '▼' buttons to set 'AM/PM', hour, and minute, and then press the 'Save' button to apply the settings.
- If you exit without pressing the Save button, your changes will not be applied. - If you press the Save button, it will exit from the setting screen.
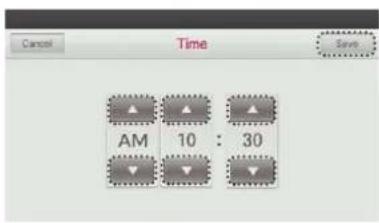
text_image
Cancel Time Save AM 10 : 30- If you press 'Cancel', 'Go Back', or 'Home' button, without pressing 'Save', you will exit the setting screen and your changes will not be applied.
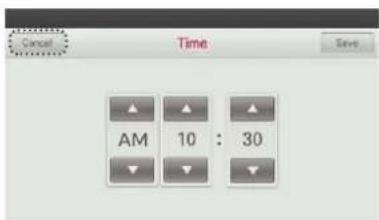
text_image
Cancel Time Save AM 10 : 30

Password Setting
This function allows you to set a password so that children or others cannot change the remote controller setting without permission.
- DPress the screen's Set' button.
- It moves to the settings menu screen.
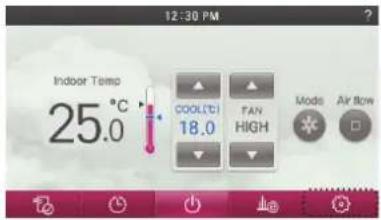
text_image
12:30 PM Indoor Temp 25.0°C COOL(C) 18.0 FAN HIGH Mode Air Flow- In setting screen, press 'User' button.
- It moves to the User Setting screen.
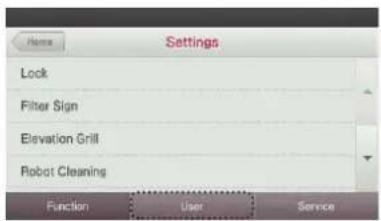
text_image
Settings Lock Filter Sign Elevation Grill Robot Cleaning Function User Service● In User Setting screen, press 'Password' button.
It moves to the Password Setting screen.
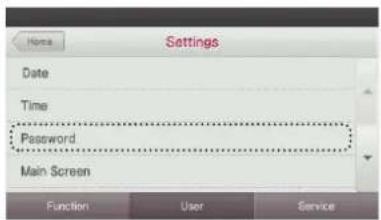
text_image
Settings Date Time Password Main Screen Function User Service- Press 'OFF/ON' button to set whether to apply the password.
- Pressing 'ON' will display 4 numeric boxes in order to enter your 4 digit code.
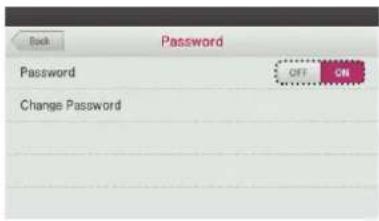
text_image
Password Password OFF ON Change Password- Enter the 4 digit code for your password into the fields as shown and press Done when completed. The numeric keypad will disappear when done.
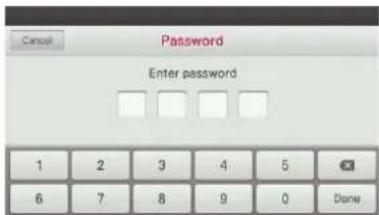
text_image
Password Enter password 1 2 3 4 5 6 7 8 9 0 DoneChange Password
- In the Password Setting screen, press 'Change Password' button. - It moves to the password change screen.
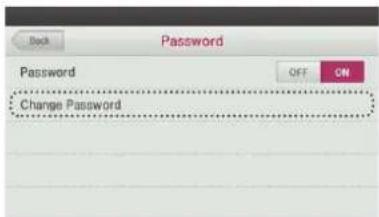
text_image
Password Password OFF ON Change Password- In order to change the password, you will be asked to input the current password as verification. When done, move to entering the new password code in the 'Input New Password' screen. Then you will be asked to reenter (to confirm) the new password in the 'Re-enter the password' fields as shown below.
- Enter each password, and you need to press 'Done' button to proceed to the next step.
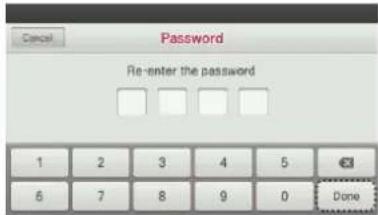
text_image
Password Re-enter the password 1 2 3 4 5 6 7 8 9 0 Done- If you press 'Back', 'Go Back', or 'Home' button, without pressing 'Done', you will exit the setting screen and your changes will not be applied.
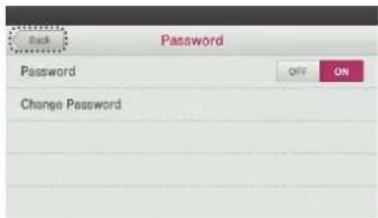
text_image
Back Password Password OFF ON Change Password

Main Screen Display Setting
This function allows you to show or hide certain elements on the remote controller's default screen.
- Press the screen's Set' button.
- It moves to the settings menu screen.
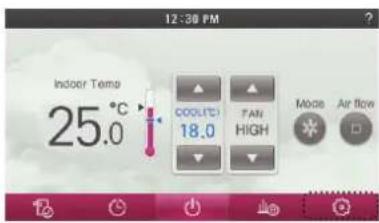
text_image
12:30 PM Indoor Temp 25.0°C COOLUTI 18.0 FAN HIGH Mode Air flow- In setting screen, press 'User' button.
- It moves to the User Setting screen.
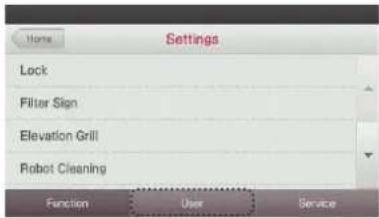
text_image
Home Settings Lock Filter Sign Elevation Grill Robot Cleaning Function User Service- In User Setting screen, press 'Main Screen' button.
It moves to the main screen setting screen.
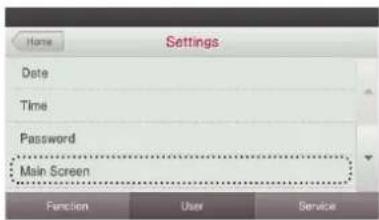
text_image
Home Settings Date Time Password Main Screen Function User Service- Press 'Hide/Show' button to set the which elements should display on the default screen. Note that the elements are dependant on the type of unit in operation.
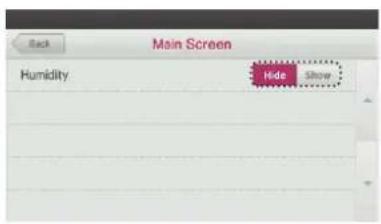
text_image
Back Main Screen Humidity Hide Show- If you press 'Back', 'Go Back', or 'Home' button, it will exit from the main screen setting screen.
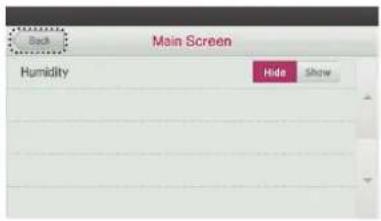
text_image
Back Main Screen Humidity Hide Show

LCD brightness in idle
This function allows you to adjust the brightness of the remote controller's standby screen.
- Press the screen's Set' button. - It moves to the settings menu screen.
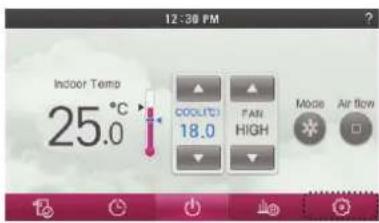
text_image
12:30 PM Indoor Temp 25.0°C COOLITE 18.0 FAN HIGH Mode Air flow- In setting screen, press 'User' button. - It moves to the User Setting screen.
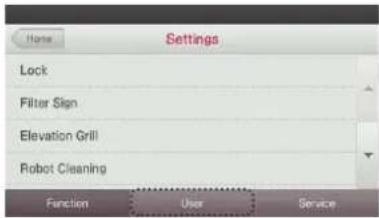
text_image
Settings Lock Filter Sign Elevation Grill Robot Cleaning Function User Service- In User Setting screen, press 'LCD Brightness In Idle' button. - It moves to the Brightness Setting screen.
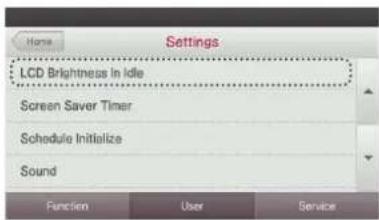
text_image
Settings LCD Brightness In Idle Screen Saver Timer Schedule Initialize Sound Function User Service- Set the desired screen brightness percentage by and press 'Save' button to save the setting. - If you exit without pressing the Save button, your changes will not be applied. - Your choices are: 0% / 10% / 20% / 30%. - Once you press the Save button, the screen will exit.

text_image
Cancel LCD Brightness in idle Save 0% 10%(Standard) 20% 30%- If you press 'Cancel', 'Go Back', or 'Home' button, without pressing 'Save', your changes will not be applied and the screen will exit.
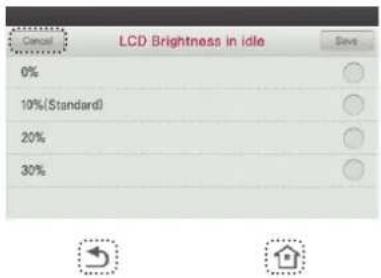
text_image
Cancel LCD Brightness in idle Save 0% 10%(Standard) 20% 30%NOTE
Setting the standby screen brightness to '30%', may degrade LCD's illumination function.
Screen Saver Timer Setting
This function adjusts the length of time that the screen will stay on before turning off (sleep mode).
- Press the screen's Set' button.
- It moves to the settings menu screen.
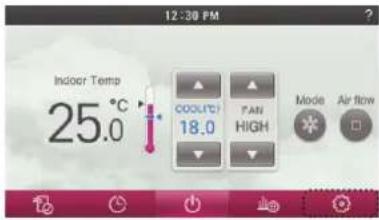
text_image
12:30 PM Indoor Temp 25.0°C COOLIC 18.0 PAN HIGH Mode Air flow- In setting screen, press 'User' button.
- It moves to the User Setting screen.
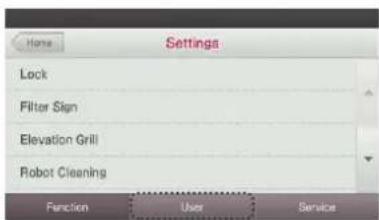
text_image
Home Settings Lock Filter Sign Elevation Grill Robot Cleaning Function User Service- In User Setting screen, press 'Screen Saver Timer' button.
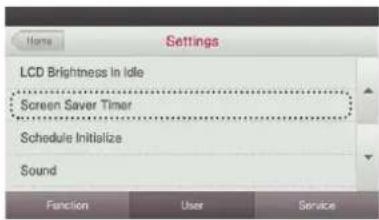
text_image
LCD Brightness In Idle Screen Saver Timer Schedule Initialize Sound Function User Service- In the setting screen, choose the amount of time screen will stay on before it goes into sleep mode and then press 'Save' button to save the setting.
- If you exit without pressing the Save button, your changes will not be applied.
- Your choices are: 15 seconds / 30 seconds / 1 minute / not used.
- Once you press the Save button, it will exit from the setting screen.
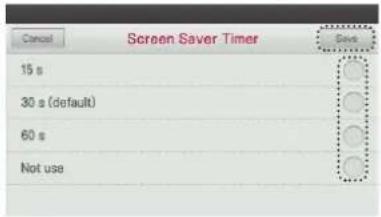
text_image
Cancel Screen Saver Timer Save 15 s 30 s (default) 60 s Not use- If you press 'Cancel', 'Go Back', or 'Home' button, without pressing 'Save', your changes will not be applied and the screen will exit.
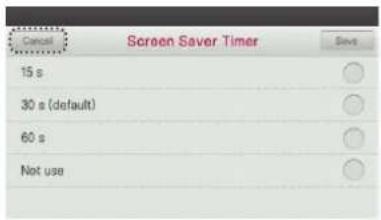
text_image
Cancel Screen Saver Timer Save 15 s 30 s (default) 60 s Not use


NOTE
If you choose 'not used' as your Screen Saver Timer choice, the LCD will remain on at all times (will not dim) which will shorten your LCD display lifespan.
Schedule Initialization
It is the function to initialize all timer settings of the remote controller.
- Press the screen's Set' button.
- It moves to the settings menu screen.
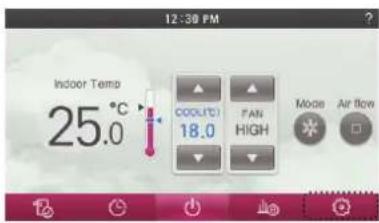
text_image
12:30 PM Indoor Temp 25.0°C COOLUTI 18.0 FAN HIGH Mode Air flow- In setting screen, press 'User' button.
- It moves to the User Setting screen.
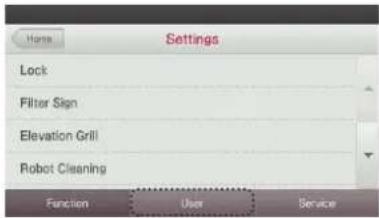
text_image
Settings Lock Filter Sign Elevation Grill Robot Cleaning Function User Service- In User Setting screen, press 'Schedule Initialization' button.
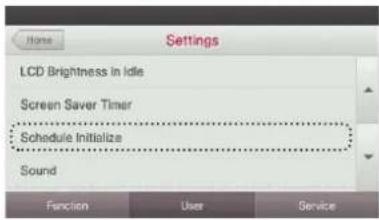
text_image
Settings LCD Brightness in Idle Screen Saver Timer Schedule Initialize Sound Function User Service- Press the check box, and press 'Done' button to initialize all timer settings of the remote controller. - Pressing the Done button, it will exit from the setting screen.
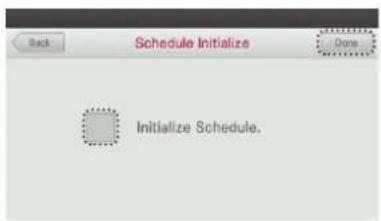
text_image
Schedule Initialize Done Initialize Schedule.- If you press 'Back', 'Go Back', or 'Home' button without pressing done, you will be returned to the previous screen and your changes will not be applied.
text_image
Back Schedule Initialize Done Initialize Schedule.Touch Beep
This function allows you to choose whether or not you would like a touch screen sound effect.
- Press the screen's Set' button.
- It moves to the settings menu screen.
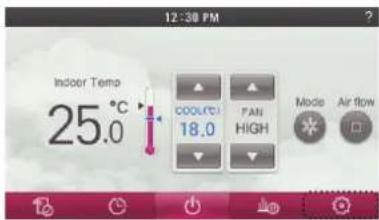
text_image
12:30 PM Indoor Temp 25.0°C COOLIC 18.0 FAN HIGH Mode Air flow- In setting screen, press 'User' button.
- It moves to the User Setting screen.
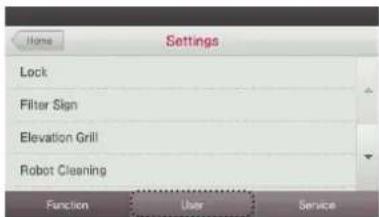
text_image
Settings Lock Filter Sign Elevation Grill Robot Cleaning Function User Service● In User Setting screen, press 'Sound' button.
- It moves to the touch beep setting screen.
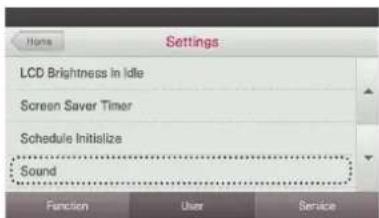
text_image
Settings LCD Brightness in Idle Screen Saver Timer Schedule Initialize Sound Function User Service- Press 'Sound' category's 'Disable/Enable' button to set whether to use the touch beep.
- If you select 'Disable', no sound effect will occur when you press the keypad display.
- If you select 'Enable', you will have an audible beep for key presses on the display.
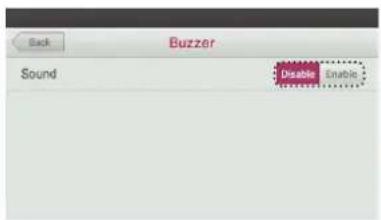
text_image
Back Buzzer Sound Disable Enable Disable Enable- Press 'Back', 'Go Back', or 'Home' button to exit from the setting screen.
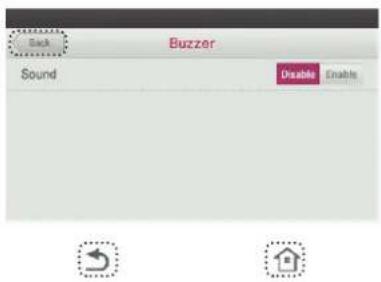
text_image
Back Buzzer Sound Disable EnableHome theme
You can change the amount of information you would like displayed on the home screen. There are two modes. Standard mode and simple mode.
- Press the screen's Set' button.
- It moves to the settings menu screen.
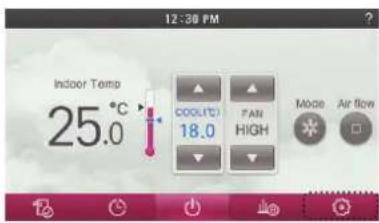
text_image
12:30 PM Indoor Temp 25.0°C COOLUTI 18.0 FAN HIGH Mode Air flow- In setting screen, press 'User' button.
- It moves to the User Setting screen.
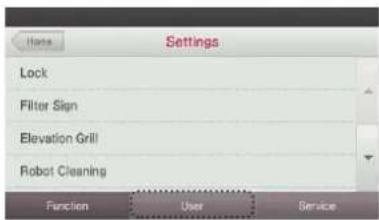
text_image
Settings Lock Filter Sign Elevation Grill Robot Cleaning Function User Service● In User Setting screen, press 'Home Theme' button.

text_image
Home Settings Home Theme Temperature Unit Language Control Type Function User Service- Select the desired Screen Mode and press the Save button.
Standard mode displays only the frequently used functions in the main screen.
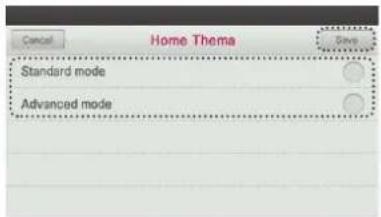
text_image
Home Theme Standard mode Advanced mode- If you press 'Cancel', 'Go Back', or 'Home' button, without pressing 'Save', the Home Theme screen will be closed and your changes will not be applied.
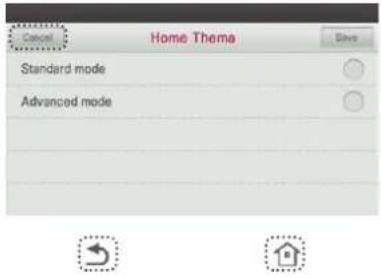
text_image
Cancel Home Theme Standard mode Advanced mode- If you choose the Advanced mode theme, you will see the following screen as your main screen.
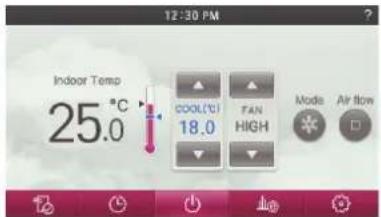
text_image
12:30 PM Indoor Temp 25.0 °C COOL/COI 18.0 FAN HIGH Mode Air flow168 USER SETTING
USER SETTING 169
Temperature Unit Setting
This function allows you to set your unit of measure in whole or half degree increments.
- Press the screen's Set' button.
- It moves to the settings menu screen.
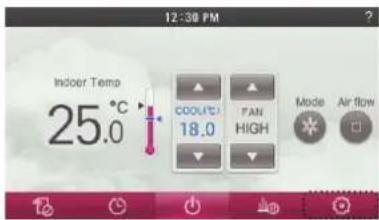
text_image
12:30 PM Indoor Temp 25.0°C COOLUTI 18.0 TAN HIGH Mode Air flow- In setting screen, press 'User' button.
- It moves to the User Setting screen.
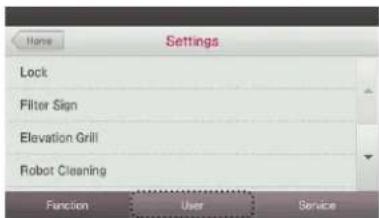
text_image
Settings Lock Filter Sign Elevation Grill Robot Cleaning Function User Service- In User Setting screen, press 'Temperature Unit' button.
It moves to the Temperature Unit Setting screen.

text_image
Home Settings Home Theme Temperature Unit Language Control Type Function User Service- Set the temperature unit increments that you want to display, and press 'Save' button to save the setting.
- You can select the temperature control in the units of 1^ C / 0.5^ C.
- If you exit without pressing the Save button, your changes will not be applied.
- If you press the Save button, it will exit from the setting screen.
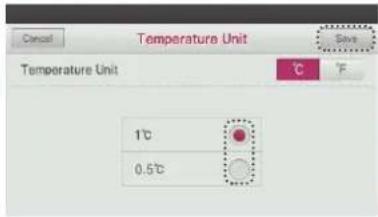
text_image
Cancel Temperature Unit Save Temperature Unit 1°C 0.5°C- If you press 'Cancel', 'Go Back', or 'Home' button, without pressing 'Save', the screen will be closed and your changes will not be applied.
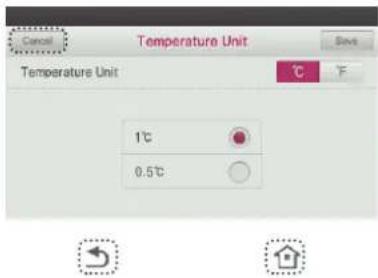
text_image
Cancel Temperature Unit Bags Temperature Unit 1°C 0.5°CNOTE
This feature is not available in all products.
Language Setting
This function allows the user to choose the local language for the display screen.
- Press the screen's Set' button.
- It moves to the settings menu screen.
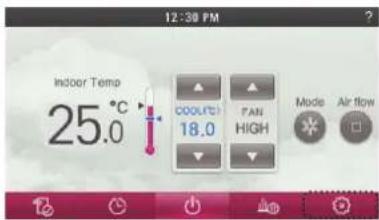
text_image
12:30 PM Indoor Temp 25.0°C COOL(°C) 18.0 FAN HIGH Mode Air flow- In setting screen, press 'User' button.
- It moves to the User Setting screen.
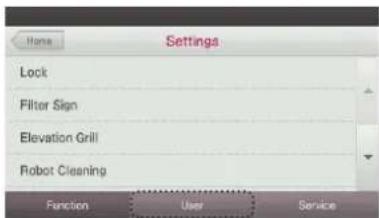
text_image
Settings Lock Filter Sign Elevation Grill Robot Cleaning Function Users Service- In User Setting screen, press 'Language' button.
- It moves to the Language screen
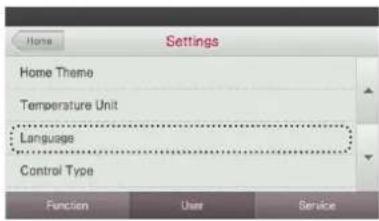
text_image
Home Settings Home Theme Temperature Unit Language Control Type Function User Service- Set the language to use, and then press 'Save'.
- If you exit without pressing the Save button, your changes will not be applied.
- Once the Save button is press, after change value, it will Pop-up window appears.
After waiting about 5 seconds if you push the reset button on the bottom of the remote control to reboot the selected language.
* Please refer to "PART DESCRIPTION" section of the manual reset button location.
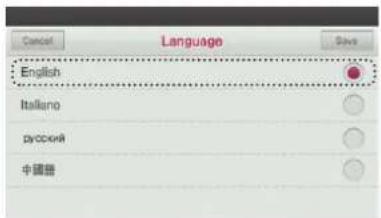
text_image
Language English Italiano русский 中國籍- If you press 'Cancel', 'Go Back', or 'Home' button without pressing 'Save', it will exit from the Language setting screen without saving any of the settings.
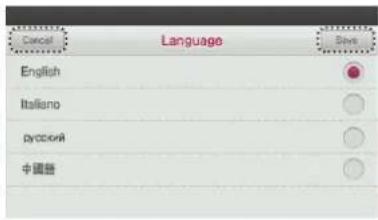
text_image
Cancel Language Save English Italiano русский 中國語

Control Type Setting(North America Only)
It is the function to set GUI type on the remote controller
? If you want to use in other regions, except North America, does not fit in the environment are expected to use this feature inconvenient.
We recommend that you use it only in the region (North America).
- Press the screen's Set' button.
- It moves to the settings menu screen.
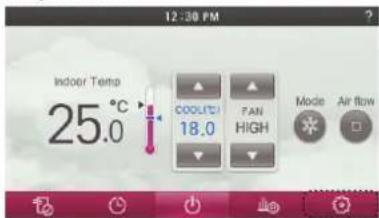
text_image
12:30 PM Indoor Temp 25.0 °C COOLICI 18.0 FAN HIGH Mode Air flow● In setting screen, press 'User' button.
It moves to the User Setting screen.
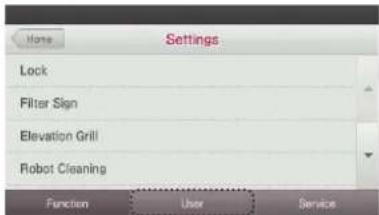
text_image
Settings Lock Filter Sign Elevation Grill Robot Cleaning Function User Service● In User Setting screen, press 'Control Type' button.
- It moves to the Control Type Settings screen.
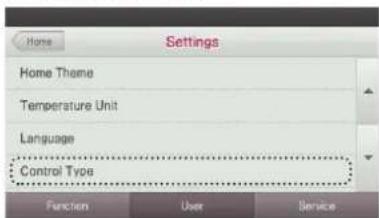
text_image
Home Settings Home Theme Temperature Unit Language Control Type Function User Service- Set the control type to use, and press 'Save' button when done.
- If you exit without pressing the Save button, your changes will not be applied.
- If the setting is changed by pressing the Save button, a pop-up window appears, perform the initialization schedule.
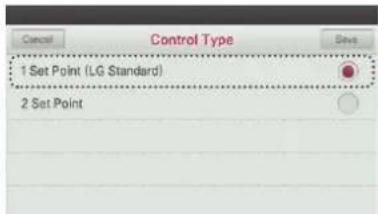
text_image
Control Type 1 Set Point (LG Standard) 2 Set Point- If you press 'Cancel', 'Go Back', or 'Home' button without pressing 'Save', it will exit from the Control Type setting screen without saving any of the settings.
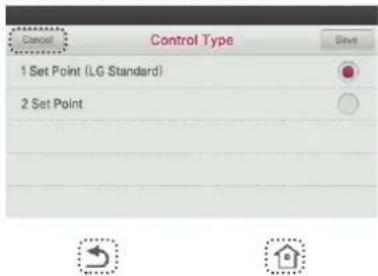
text_image
Cancel Control Type 1 Set Point (LG Standard) 2 Set Point- Replace sentence with "When 2 Set Point control is selected, a different main screen is displayed, as shown below."
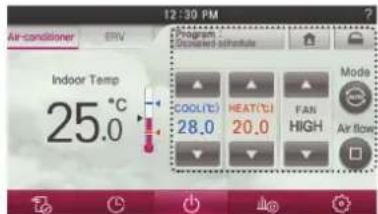
text_image
12:30 PM Air-conditioner ERV Program Standard schedule Indoor Temp 25.0 °C COOL(°C) HEAT(°C) FAN 28.0 20.0 HIGH Air flowSummer Time Setting
It is the function to set summer time duration on the remote controller system date and time.
- Press the screen's Set' button.
- It moves to the settings menu screen.
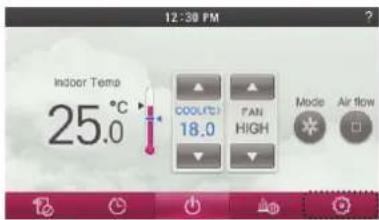
text_image
12:30 PM Indoor Temp 25.0°C COOLUTI 18.0 FAN HIGH Mode Air flow- In setting screen, press 'User' button.
- It moves to the User Setting screen.
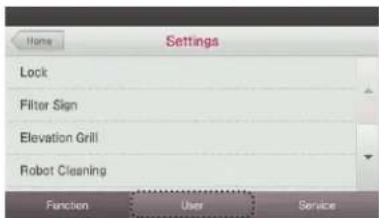
text_image
Home Settings Lock Filter Sign Elevation Grill Robot Cleaning Function Users Service● In User Setting screen, press 'Summer Time' button.
It moves to the Summer Time Setting screen.
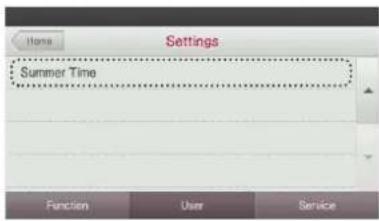
text_image
Settings Summer Time Function User Service- Set summer time duration, and press 'Save' button when done.
- If you exit without pressing the Save button, your changes will not be applied.
- If you press the Save button, your changes will be applied and the controller will exit from the setting screen.
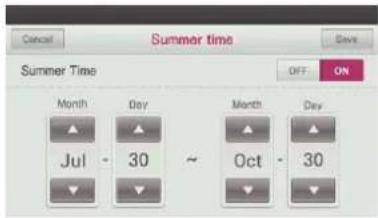
text_image
Summer time OFF ON Summer Time Month Day Month Day Jul 30 ~ Oct 30- If you press 'Cancel', 'Go Back', or 'Home' button, it will exit from the Summer time setting screen without saving any of the settings.
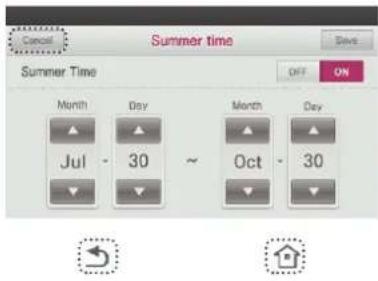
text_image
Cancel Summer time Save Summer Time OFF ON Month Day Month Day Jul 30 ~ Oct 30 ↓ ↓ ↓ ↓ ↓ ← →SERVICE SETTING
Service Contact
It is the function to check and input the telephone number of the service center that can be contacted when a defect occurs in the product.
- Press the screen's Set' button. - It moves to the settings menu screen.
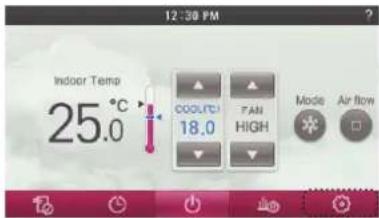
text_image
12:30 PM Indoor Temp 25.0°C COOLUTC 18.0 FAN HIGH Mode Air flow- In setting screen, press 'Service' button. - It moves to the Service Setting screen.
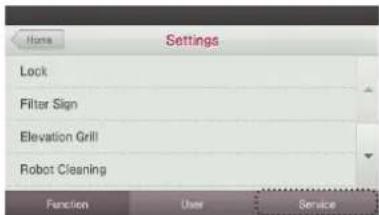
text_image
Settings Lock Filter Sign Elevation Grill Robot Cleaning Function User Service- In the service screen, press 'Service Contact' button. - It moves to the Check Service Number screen.
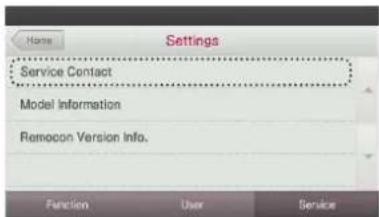
text_image
Home Settings Service Contact Model Information Remocron Version Info. Function User Service- Check the service number.
- If the service number is not registered, + 1544 7777 will be displayed.
text_image
Back Service Contact Telephone +15443777Service number registration and change
- In the service number screen, press 'Telephone'. - It moves to the service number change screen.
text_image
Back Service Contact Telephone +15443777● In the service number change screen, press the digits to input the service center number.
text_image
Back Service Contact Done Telephone +12345678 1 2 3 4 5 # 6 7 8 9 0 Done- Press 'Done' button to save the changed service number.
- If you exit without pressing the Done button, your changed value will not be applied.
- Once you press the Done button, it will exit from the setting screen.
text_image
Service Contact Telephone +12345678 1 2 3 4 5 6 7 8 9 0 Done- If you press 'Cancel', 'Go Back', or 'Home' button without pressing the Save' button, it will exit from the service number screen and you changes will not be applied.
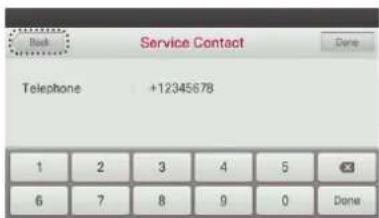
text_image
Back Service Contact Done Telephone +12345678 1 2 3 4 5 6 7 8 9 0 Done

Model Information
It is the function to check indoor/outdoor unit product type connected to the remote controller and capacity information.
- Press the screen's Set' button.
- It moves to the settings menu screen.
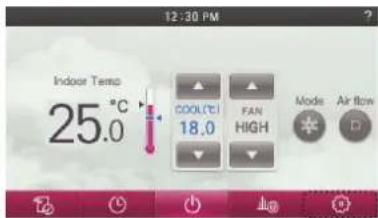
text_image
12:30 PM Indoor Temp 25.0°C COOL/TL FAN HIGH Mode Air flow- In setting screen, press 'Service' button.
- It moves to the Service Setting screen.
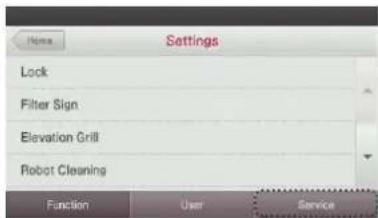
text_image
Settings Lock Filter Sign Elevation Grill Robot Cleaning Function User Service- In service screen, press 'Model Information' button.
- It moves to indoor/outdoor unit information screen.
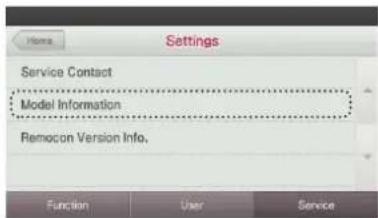
text_image
Settings Service Contact Model Information Remocon Version Info. Function User Service- Check indoor/outdoor unit and capacity information.
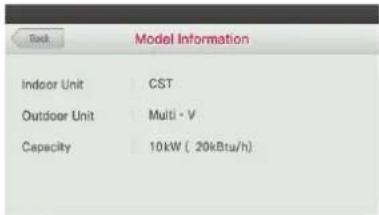
text_image
Back Model Information Indoor Unit CST Outdoor Unit Multi - V Capacity 10kW ( 20kBtu/h)- Once you press 'Back', 'Go Back', or 'Home' button, it will exit from the setting screen.
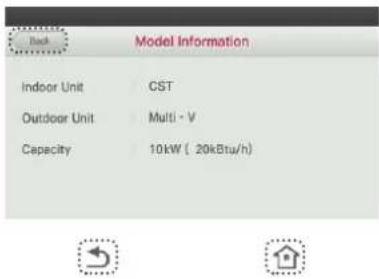
text_image
Back Model Information Indoor Unit CST Outdoor Unit Multi - V Capacity 10kW ( 20kBtu/h)
NOTE
The indoor/outdoor unit information checking function is not available on all products.
Remocon version information
It is the function to check remote controller model name and software version. This information is useful when having a service call placed.
- Press the screen's Set' button.
- It moves to the settings menu screen.
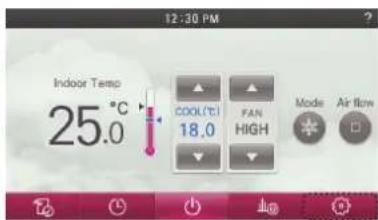
text_image
12:30 PM Indoor Temp 25.0°C COOL/CTI 18.0 FAN HIGH Mode Air flow- In setting screen, press 'Service' button. - It moves to the Service Setting screen.
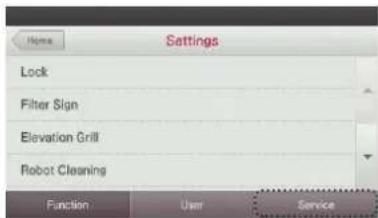
text_image
Settings Lock Filter Sign Elevation Grill Robot Cleaning Function User Service- In service screen, press 'Remocon Version Info.' button. - It moves to remote controller version information.
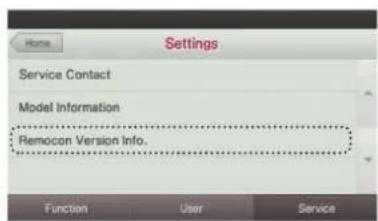
text_image
Home Settings Service Contact Model Information Remocon Version Info. Function User Service- Check software version information of wired remote controller.
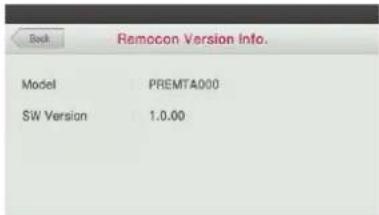
text_image
Remocon Version Info. Model PREMTA000 SW Version 1.0.00- If you press 'Back', 'Go Back', or 'Home' button, it will exit from the setting screen.
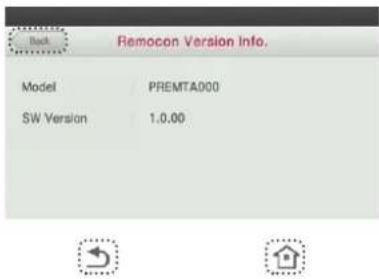
text_image
Back Remocon Version Info. Model PREMTAD00 SW Version 1.0.00Self-diagnosis for Trouble Mode
It automatically runs a self-diagnosis when there is a trouble detected in the system. It displays the trouble mode number with maintenance CODE.
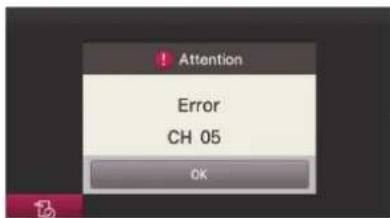
text_image
Attention Error CH 05 OKtext_image
12:30 PM Indoor Temp 25.0°C CH 05 COOL(T) 18.0 FAN HIGH Mode Air flowINSTALLATION
Installation of Remote Controller
\- Secure the back plate flush to the wall using the provided hardware. \- Take care not to bend the back plate during installation as this may cause it to malfunction. - If a reclamation box is included with your remote controller, install the remote controller installation plate as shown by the illustrations below.   <4 socket reclamation box installation> <2 socket reclamation box installation> \- Remote controller's wire may be installed at three different locations on the plate. Select appropriate direction according to the installation environment. \- Wiring directions: wall reclamation, top side, or left side \- If you install the remote controller cable on top side or left side, install after removing the remote controller cable guide groove. (Use pliers to remove guide groove.)   ● Fix the remote controller top part to the back plate on the wall as shown in the figure below, and press the bottom part to combine it with the back plate. \- Press together so that there is no gap between the remote controller and the top/bottom/left/right side of the back plate. \- Before combining with the installation plate, arrange the cable so that it does not interfere with the circuit parts.| 12 V Red |
| Signal cable Yellow |
| GND Black |
NOTE
- During the wired remote controller installation, do not reclaim in the wall. (It may cause temperature sensor disorder.) - Do not install the cable for longer than 50 m. (It may cause communication defect such as Code CH03) ÷ During the installation of the extension cable, carefully check the connecting socket and plug of the remote controller and linked indoor unit. \* If the extension cable is connected in reverse direction, connector will not make a solid connection causing loss of communications. ÷ Specification of the extension cable: Use 2547 1007 22# 2core 3shield, 5 ∅ or equivalent or higher level.Group Control
Connects and controls 2 or more air conditioner indoor units to one wired remote controller. \+ Use the group control cable for connection. flowchart
graph LR
    A["Indoor unit 1"] --> B["Master Slave Slave"]
    B --> C["Indoor unit 2"]
    C --> D["Indoor unit Main PCB"]
    D --> E["Indoor unit Main PCB"]
    style A fill:#f9f,stroke:#333
    style B fill:#ccf,stroke:#333
    style C fill:#cfc,stroke:#333
    style D fill:#fcc,stroke:#333
NOTE
- Connect only GND and signal cable to the indoor unit set as slave. (If power cable is also connected, it may cause loss of communication) - Inquiries related to the purchase of the cable shall be directed to the specialized company and the service center. \- Check the existence of the event communication in the product manual, and change master/slave of the remote controller. - It only supports the interface with event communication applied models (corresponding to the models after Multi-V Super II). \* For details, refer to 'Remote controller master/slave'. \- Change indoor unit's master/slave setting. \- Change master/slave setting with switch on the indoor unit PCB for ceiling type cassette and duct group. text_image
Master GND Signal cable 12V Black Yellow Red Slave Slave GND Signal cable ◀ (Group control connection) No. 3 switch OFF: master (factory ship-out based) No. 3 switch ON: slaveNOTE
- During the group control, set only one indoor unit as master. - During the group control, some functions except default operation setting, fan Setting Low/medium/high, remote controller lock setting, and time setting may be restricted. - Slave set indoor unit cannot communicate with remote controller when remote controller has a connection with only one indoor unit. \- If two wired remote controllers are installed to one air conditioner, connect as in the below figure If two wired remote controllers are installed to one air conditioner, as in the below figure, set one wired remote controller as master, and the remaining one as slave. Premium Wired Remote controller has a restriction in two remote controller linked with one indoor unit. Please check whether current capacity of the indoor unit can support electric current load of two premium wired remote controllers. (Please refer to details in Premium wired remote controller service manual (IMFL626129218)) text_image
GND Signal cable 12V Black Yellow Rcd GND Signal cable 12V Master SlaveNOTE
If 2 or more wired remote controllers are used, you need to set master/slave of the remote controllers. For details, refer to 'Remote Controller Master/Slave'.Air conditioner and ventilation interface
\- Use wired remote controller to control when air conditioner indoor unit and ventilation product are connected and installed at the same time. \- Once power is connection, and the remote controller establishes communication with the indoor unit, normal operation will commence.| Independent operation interfaced operation | ||
| General ventilation | [general ventilation independent operation] | [General ventilation interfaced operation] |
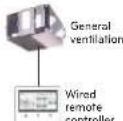 | 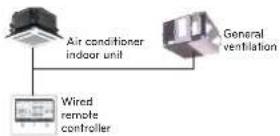 | |
| Direct ventilation | [Direct ventilation independent operation] | [Direct ventilation interfaced operation] |
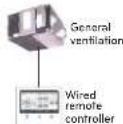 | 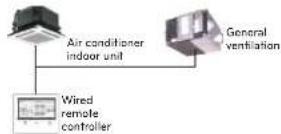 | |
INSTALLER'S SETTING OPTIONS
How to enter installer setting mode
CAUTION
Installer setting mode configures the detailed function of the remote controller. If the installer setting mode is incorrectly set, it may cause product failure, user injury, or property damage. It must be set by an installation specialist who holds an installation license. If it is installed or changed without installation license and without authorization, installer will be responsible for all malfunctions, which will result in voiding of any warranties or provision of free technical service. - When you press and hold the wireless remote controller signal receiver for 3 seconds or longer and release it in the air conditioner or ventilation main screen, it enters the installer setting mode. - When you enter from air conditioner screen, it enters air conditioner installer setting, and when you enter from ventilation screen, it enters ventilation installer setting. - If button is not pressed for at least 3 seconds, it will not enter the setting mode. text_image
温度 25.0 ℃ Control Time Temperature 12.0 °C Control 12.0 °C Control 12.0 °C Control 12.0 °C Control 12.0 °C Control 12.0 °C Control 12.0 °C Control 12.0 °C Control 12.0 °C Control 12.0 °C Control 12.0 °C Control 12.0 °C Controltext_image
Input Code Code Value 1 Value 2 Value 3 01 001NOTE
Some categories of the menu may not be displayed or menu name may differ depending on your specific indoor unit model type.Installer setting code table
| Code | Setting Mode | Setting Value | ||
| Value 1 Value 2 Value 3 | ||||
| 1 | Test Run | C01 : CoolingC02 : Heating | ||
| 2 | Control control address setting | 0~F : Group 0~F : Unit | ||
| 3 | ESP | |||
| 4 | Temperature sensor | C01 : remote controllerC02 : indoor unitC03 : 2TH | ||
| 5 | Ceiling height | C01 : lowC02 : standardC03 : highC04 : very high | ||
| 6 | Static pressure | C01 : V-HC02 : F-HC03 : V-LC04 : F-L | ||
| 7 | Remove controller master / slave setting | C00 : slaveC01 : master | ||
| 8 | Operation master / slave setting (Mode Override) | C00 : slaveC01 : master | ||
| 9 | Dry contact mode setting | C00 : manualC01 : automatic | ||
| 11 | Wind amount fixing | C01 : variableC02 : fixed | ||
| 12 | Celsius / Fahrenheit Switching | C00 : CelsiusC01 : Fahrenheit | ||
| 13 | Zone type | C00 : OldC01 : Now(4Zone)C02 : New(8Zone) | ||
| 14 | Zone number | 002-006 : Installed number | ||
| 17 | Celsius control unit setting | C00 : 1 °C controlC01 : 0.5 °C control | ||
| 18 | Emergency Heater Setting | |||
| Code | Setting Mode | Setting Value | |
| Value 1 Value 2 Value 3 | |||
| 19 | Function setting in group control | 000: use basic function only001: use basic function & someMaster indoor unit function | |
| 20 | Plasma | 000: Not Installed001: Installed | |
| 21 | Heater | ||
| 22 | Humidification | ||
| 23 | Elevation grill | ||
| 24 | Ventilation Kit | ||
| 25 | Auxiliary主席 | 000: Not installed001: installed-General002: installed-Duct type | |
| 26 | Check indoor unit Address Number | ||
| 29 | Use Refrigerant leakage Sensor | 000: not use001: use | |
| 31 | Setting temperature range | 000: 60~80 °F / 16~30 °C001: 40~99 °F / 4~37.5 °C | |
| 32 | Static Pressure step | 000: use static pressure (code 06) set value001-011: static pressure stop (code 32) set value | |
| 33 | Guard timer | 000: 0 minute001: 15 minutes002: 30 minutes003: 45 minutes004: 60 minutes | |
| 35 | Cooling thermal off Fan operation | 000: Cooling thermal off Fan speed-Low001: Cooling thermal off Fan OFF002: Cooling thermal off Fan speed setting value | |
| 36 | Use Primary Heater control | 000: Cancel primary heater control001: use primary heater control | |
| 38 | Air conditioner Fan operation interlocked with ventilation | 000: air-conditioner fan off001: air-conditioner fan operate very low | |
| 39 | Indoor unit Auto-Start setting | 000: Use indoor unit auto restart001: not use indoor unit auto restart | |
| 40 | Occupy sensor 'occupy maintain' time setting | 000: 0 minute001: 10 minutes002: 30 minutes003: 60 minutes | |
| 41 | Simple Dry Contact Setting | 00: Default01: Not Use Simple Dry Contact02: Use Simple Dry Contact03: Use Programmable Digital Inout | |
| 46 | Fan continuous operation | 000 : Do not use fan continuous operation001 : Use fan continuous operation | |
| 47 | Outdoor unit function master setting | 000 : Slave001 : Master | |
| 52 | CN_EXT | 000 : Not use001 : Simple Operation002 : Simple Dry Contact003 : Single emergency stop004 : Occupied/Unoccupied005 : All emergency stop | |
| 58 | Low Noise Mode Priority | 000 : ODU001 : RMC | |
| 59 | Humidity detection location | 000 : RMC001 : IDU | |
| Setting mode Code value | Functional product Setting value | |
| Test Run 1 | DX(Direct Ex-charger) Type01: cooling operation | |
| Central control address setting 2 | General00-FF: central control address | |
| Air supply ESP 3 | Generals/DX Type | |
| Air discharge ESP 4 | ||
| Same as general air conditioner products' marking. | ||
| Product direction 5 General | ||
| Express ventilation priority 6 Generals/DX Type | ||
| Remote controller master/slave setting | 7 General/DX Type 00:slave,01:master | |
| Operation master/slave setting 8 DX Type 00:slave,01:master | ||
| Dry contact automatic mode 9 DX Type 00 off,01:set | ||
| Wind amount fixing | 11 | DX Type 01:variable,02:fixed |
| Ventilation single humidification | 13 | General/DX Type00:function not used |
| Ventilation heating humidification | 14 | DX Type 01 automatic,02:manual |
| Ventilation standard wind amount | 15 | General Type00: factory ship out value |
Test Run Operation (air conditioner / DX type ventilator)
Test Run (air conditioner / DX|Direct Expenditure) type ventilator You must perform test operation after the product installation. For details related to the trial operation, refer to the product manual. - Press and hold 'wireless remote controller signal receiver part' of the remote controller for 3 seconds or longer to enter the installer function. - In the Code input field, select test run code value '01'. \- You can press '▲', '▼' button to charge the code value. text_image
Input Code Code Value 1 Value 2 Value 3 01 001text_image
Input Code Code Value 1 Value 2 Value 3 01 001 12:30 PM Indoor Temp 25.0 °C COOL/CH FAN 18.0 HIGH MODE Air flow TEST RUNCentral control address (air conditioner /General, DX type ventilator)
This function allows the user to set the central control address of the indoor units during the central controller connection. - Press and hold 'wireless remote controller signal receiver part' of the remote controller for 3 seconds or longer to enter the installer function. - Select '02' for Code value. \- You may need to press '▲', '▼' button to change the code value. text_image
Input Code Code Value 1 Value 2 Value 3 01 001text_image
Input Code Code Value 1 Value 2 Value 3 02 0 0ESP setting (air conditioner / Gerneral, DX type ventilator)
This function allows you to set the fan speed step value for each speed rate.NOTE
- If ESP is incorrectly set, it may cause air conditioner malfunction. • This function must be set by an installation professional. - Press and hold 'wireless remote controller signal receiver part' of the remote controller for 3 seconds or longer to enter the installer function. ● In the Code field, set the ESP setting value to '03'. For ventilation product, code values are divided to '03' supply air and '04' discharge air ESP setting. Refer to the installer setting code table. \- You can press '▲', '▼' button to charge the code value. text_image
Input Code Code Value 1 Value 2 Value 3 01 001text_image
Input Code Code Value 1 Value 2 Value 3 03 000 000| ESP wind amount stage w | nd amount |
| 01 | SLOW |
| 02 | LOW |
| 03 | MED |
| 04 | HIGH |
| 05 | POWER |
| ESP wind amount stage wind amount | |
| 01 | LOW |
| 02 | HIGH |
| 03 | POWER |
NOTE
- Be especially careful not to switch ESP values corresponding to each wind amount. - 'SLOW' and 'POWER' may not be set for some indoor unit products. • Available ESP value may be different for each product and capacity.Indoor temperature detection sensor setting (air conditioner)
This function select the temperature sensor to determine the indoor temperature. - Press and hold 'wireless remote controller signal receiver part' of the remote controller for 3 seconds or longer to enter the installer function. - At the Code input field select indoor temperature detection sensor setting code value '04'. - You can press '▲', '▼' button to change the code value. text_image
Input Code Code Value 1 Value 2 Value 3 01 001text_image
Input Code Code Value 1 Value 2 Value 3 04 001| Temperature sensor location Function | ||
| Remote controller | Operate the system with wired remote controller's temperature sensor | |
| Indoor unit Operate the system with indoor unit's temperature sensor | ||
| 2TH | Cooling | Compare the temperatures of the indoor unit and the wired remote controller and operate with the higher temperature (There are system operated with lower temperature) |
| Heating | Compare the temperatures of the indoor unit and the wired remote controller and operate with the lower temperature | |
Ceiling height selection (air conditioner)
This function adjusts the wind amount stages according to the ceiling height for the ceiling type unit. - Press and hold 'wireless remote controller signal receiver part' of the remote controller for 3 seconds or longer to enter the installer function. - At the Code field select ceiling height setting code value '05'. - You can press '▲', '▼' button to change the code value. text_image
Input Code Code Value 1 Value 2 Value 3 01 001text_image
Input Code Code Value 1 Value 2 Value 3 05 001| Ceiling height Function | |
| Low Fan speed operates one step slower than the default value. | |
| Standard Operates at the default fan speed | |
| High Fan speed operates one step faster than the default value. | |
| Very high | Fan speed operates two steps faster than the default value. |
NOTE
- Ceiling height setting is only available for certain models. - Some indoor units may not have a "very high" ceiling option. - For details, refer to the indoor indoor unit's manual.Static pressure setting (air conditioner)
Static pressure can be set only for the duct products. It cannot be set for other products. - Press and hold 'wireless remote controller signal receiver part' of the remote controller for 3 seconds or longer to enter the installer function. - At the Code field, select static pressure setting code value '06'. \- You can press '▲', '▼' button to change the code value. text_image
Input Code Code Value 1 Value 2 Value 3 01 001text_image
Input Code Code Value 1 Value 2 Value 3 06 001| Static pressure | Function | ||
| Operation region ESP | default value | ||
| Variable high static pressure V | -H Variable | High static pressure (High) | |
| Fixed high static pressure F | -H Fixed | High static pressure (High) | |
| Variable low static pressure V | -L Variable | Low static pressure (Low) | |
| Fixed low static pressure F | -L Fixed | Low static pressure (Low) | |
Remote controller master / slave setting (air conditioner / Gerneral, DX type ventilator)
This function sets configuration for the master/slave setting through the remote controller. - Press and hold 'wireless remote controller signal receiver part' of the remote controller for 3 seconds or longer to enter the installer function. - At the Code field select remote controller master / slave setting code value '07'. - You can press '▲', '▼' button to charge the code value. text_image
Input Code Code Value 1 Value 2 Value 3 01 001text_image
Input Code Code Value 1 Value 2 Value 3 07 000| Remote controller Function | |
| Master | During the group control, the indoor units are operated based on the remote controller. (It is set as master at as shipped.) |
| Slave | During the group control, all remote controllers except 1 master remote controller are set as sleeves. |
Operation master / slave setting (air conditioner / General, DX type ventilator)
This function sets the indoor unit to either slave or master mode depending on the input code value. \- Press and hold 'wireless remote controller signal receiver part' of the remote controller for 3 seconds or longer to enter the installer function. \- At the Code field select operation master / slave setting code value '08'. - You can press '▲', '▼' button to change the code value. text_image
Input Code Code Value 1 Value 2 Value 3 01 001204 INSTALLER'S SETTING OPTIONS
INSTALLER'S SETTING OPTIONS 205 \- At the Value 1 field, press the '▲', '▼' button to select operation setting value, and press 'Done' button to apply the master / slave setting. \- If you do not press 'Done' button, your settings will not be applied. text_image
Input Code Code Value 1 Value 2 Value 3 08 000NOTE
Master/slave operation is not available with all products If no buttons are pressed for about 60 seconds after the setting, it automatically exits from the setting mode. ※ Operation master / slave selection function may not work in some products. When the slave operation function is selected, 'linked control' is displayed in the remote controller display window as in the figure below text_image
12:30 PM Indoor Temp 25.0°C COOLICU 18.0 PAN HIGH Mode Air flowDry contact mode setting (air conditioner / DX type ventilator)
What is a dry contact? It refers to the contact point signal input such as a hotel card key, human body detection sensor, etc. is used with the air conditioner. - Press and hold 'wireless remote controller signal receiver part' of the remote controller for 3 seconds or longer to enter the installer function. - Select dry contact mode setting code value '09'. \- You can press '▲', '▼' button to change the code value. text_image
Input Code Code Value 1 Value 2 Value 3 01 001text_image
Input Code Code Value 1 Value 2 Value 3 09 000NOTE
For detailed functions related to the dry contact mode, refer to the dry contact manual. If no buttons are pressed for about 60 seconds after the setting, it automatically exits from the setting mode. 206 INSTALLER'S SETTING OPTIONS INSTALLER'S SETTING OPTIONS 207Fan speed fixing (air conditioner / DX type ventilator)
It is the function to apply different fan speeds automatically for each thermal control status. + Variable: When COMP is ON, operate as the set fan speed, and when COMP is OFF, operate at 'ROW' fan speed. Fixed. When COMP is ON, operate as the set fan speed, and when COMP is OFF, also operate at the set fan speed. - Press and hold 'wireless remote controller signal receiver part' of the remote controller for 3 seconds or longer to enter the installer function. - At the Code field select fan speed fixed setting code value '11'. \- You can press '▲', '▼' button to change the code value. text_image
Input Code Code Value 1 Value 2 Value 3 01 001text_image
Input Code Code Value 1 Value 2 Value 3 11 001Celsius / Fahrenheit Switching (air conditioner)
This function is used for switching the display between Celsius and Fahrenheit.(Optimized only for U.S.A) - Press and hold 'wireless remote controller signal receiver part' of the remote controller for 3 seconds or longer to enter the installer function. - Select remote controller Celsius / Fahrenheit Switching code value '12'. - You can press '▲', '▼' button to change the code value. text_image
Input Code Code Value 1 Value 2 Value 3 01 001text_image
Input Code Code Value 1 Value 2 Value 3 12 000Zone Type Setting(air conditioner)
This function is only available on some products. It is possible to setup zone new type or old one of the product which is available to install the damper controller. - Press and hold 'wireless remote controller signal receiver part' of the remote controller for 3 seconds or longer to enter the installer function. - Select remote controller Zone type setting code value '13', - You can press '▲', '▼' button to change the code value. text_image
Input Code Code Value 1 Value 2 Value 3 01 001text_image
Input Code Code Value 1 Value 2 Value 3 13 000Zone Number Setting(air conditioner)
This function is only available on some products. Zone Number is to set the number of installed zones. It's possible to control only in zone new type. - Press and hold 'wireless remote controller signal receiver part' of the remote controller for 3 seconds or longer to enter the installer function. - Select remote controller Zone Number setting code value '14'. \- You can press '▲', '▼' button to change the code value. text_image
Input Code Code Value 1 Value 2 Value 3 01 001text_image
Input Code Code Value 1 Value 2 Value 3 14 001Celsius control unit setting (air conditioner)
Celsius control unit setting you to set the temperature adjustment unit in the unit of 1°C or 0.5°C. - Press and hold 'wireless remote controller signal receiver part' of the remote controller for 3 seconds or longer to enter the installer function. - At the Code field select setting code value '17'. - You can press '▲', '▼' button to change the code value. text_image
Input Code Code Value 1 Value 2 Value 3 01 001text_image
Input Code Code Value 1 Value 2 Value 3 17 000Emergency Heater Setting(air conditioner)
This function is only available on some products This function will set the Emergency Heater Setting. Emergency Heater is used to heat the space in emergency case such as heat pump error. Emergency heat is in place of and does not supplement heat pump. Emergency Heater setting Function sets following conditions. 1) Emergency Heater operation while in error or outdoor unit operates cooling cycle. 2) Emergency Heater operation in Low Ambient temperature 31 Fan speed setting during Emergency Heater operation - Press and hold 'wireless remote controller signal receiver part' of the remote controller for 3 seconds or longer to enter the installer function. - Select remote controller Emergency heater setting code value '18'. You can press '▲', '▼' button to change the code value. text_image
Input Code Code Value 1 Value 2 Value 3 01 001text_image
Input Code Cancel Done Code Value 1 Value 2 Value 3 ▲ ▲ ▲ ▲ 18 000 ▼ ▼ ▼ ▼text_image
Input Code Code Value 1 Value 2 Value 3 18 001 000 000text_image
Input Code Code Value1 Value2 Value3 18 001 000 000NOTE
This function setting must be carried out by a certified-technician.Setting of Function control during group control (air conditioner)
This function enables the control of the common functions or some functions based on the master indoor unit during the group control. - Press and hold 'wireless remote controller signal receiver part' of the remote controller for 3 seconds or longer to enter the installer function. - At the Code field select the setting code value '19' to enable function control setting during the group control. \- You can press '▲', '▼' button to change the code value. text_image
Input Code Code Value 1 Value 2 Value 3 01 001text_image
Input Code Code Value 1 Value 2 Value 3 19 000NOTE
- Common functions and some indoor unit master based settings shall be set only for the group control of the products with the same indoor unit types. - For the group control of the product groups with different indoor unit types, set it with the value of '000' and use the existing group control method. \* If no buttons are pressed for about 60 seconds after the setting, it automatically exits from the setting mode.External Devices Of Indoor Unit Setting (air conditioner)
At the Code field, select when air cleaner/heater/humidifier/elevation grill/ventilation KIT/refrigerant leakage detection sensor are newly installed to the indoor unit or when an installed KIT is removed. - Press and hold 'wireless remote controller signal receiver part' of the remote controller for 3 seconds or longer to enter the installer function. - At the Code field, select the code value of the desired functional product as shown in the table below. \- You can press '▲', '▼' button to change the code value. text_image
Input Code Cancel Done Code Value 1 Value 2 Value 3 01 001| Function Code value | |
| Air cleaner 20 | |
| Heater 21 | |
| Humidifier 22 | |
| Elevation grill 23 | |
| Ventilation KIT 24 | |
| Refrigerant leakage detection sensor | 29 |
text_image
Input Code Code Value 1 Value 2 Value 3 20 000Indoor unit address verification (air conditioner)
This function allows you to check the address of the indoor unit designated by the outdoor unit. - Press and hold 'wireless remote controller signal receiver part' of the remote controller for 3 seconds or longer to enter the installer function. - At the Code field, select the indoor unit address verification code value '26'. - You can press '▲', '▼' button to change the code value. text_image
Input Code Code Value 1 Value 2 Value 3 01 001text_image
Input Code Done Code Value 1 Value 2 Value 3 26 028Setting temperature range (air conditioner)
This function using in 2 Set control mode. This function is used for select setting temperature range option. - Press and hold 'wireless remote controller signal receiver part' of the remote controller for 3 seconds or longer to enter the installer function. - Select remote controller temperature range setting code value '31'. - You can press '▲', '▼' button to change the code value. text_image
Input Code Code Value 1 Value 2 Value 3 01 001text_image
Input Code Code Value 1 Value 2 Value 3 31 000Static Pressure Step Setting(air conditioner)
This function is applied to only duct type. Setting this in other cases will cause malfunction. This function is only available on some models. This is the function that static pressure of the product is divided in 11 steps for setting. - Press and hold 'wireless remote controller signal receiver part' of the remote controller for 3 seconds or longer to enter the installer function. - Select remote controller code value '32'. \- You can press '▲', '▼' button to change the code value. text_image
Input Code Code Value 1 Value 2 Value 3 01 001text_image
Input Code Code Value 1 Value 2 Value 3 32 000NOTE
- Static Pressure (Code 06) setting will not be used if Static Pressure Step (Code 32) setting is being used. - For the static pressure value for each step, refer to the indoor unit in the product manual.Guard timer(air conditioner)
It is a function that sets the minimum running time of outdoor unit cycle mode when switching from cooling mode to heating mode and vice versa during Auto Operation mode. Under the condition of cooling/heating switching, it switches between cooling and heating mode after operation during the time scheduled in the Guard timer. - Press and hold 'wireless remote controller signal receiver part' of the remote controller for 3 seconds or longer to enter the installer function. - Select remote controller code value '33' \- You can press '▲', '▼' button to change the code value. text_image
Input Code Code Value 1 Value 2 Value 3 01 001text_image
Input Code Cancel Code Value 1 Value 2 Value 3 33 000| Value Guard time | |
| 0 0 minute | |
| 1 15 minutes | |
| 2 30 minute | |
| 3 45 minutes | |
| 4 60 minutes | |
Fan operation in the cooling mode and thermal off conditions (air conditioner)
It is a function that sets the indoor unit fan movement, in cooling mode, when thermal is off. - Press and hold 'wireless remote controller signal receiver part' of the remote controller for 3 seconds or longer to enter the installer function. - Select remote controller code value '35'. - You can press '▲', '▼' button to change the code value. text_image
Input Code Code Value 1 Value 2 Value 3 01 001text_image
Input Code Code Value 1 Value 2 Value 3 35 000| Value | Fan operation in the cooling mode and thermal off conditions |
| 0 Fan speed Low | |
| 1 Fan off | |
| 2 Fan speed Setting value | |
Primary Heater control setting(air conditioner)
It is a function that sets the outdoor unit to operate with auxiliary heat source and the heater to run with main heat source in heating mode. - Press and hold 'wireless remote controller signal receiver part' of the remote controller for 3 seconds or longer to enter the installer function. - Select remote controller code value '36', - You can press '▲', '▼' button to change the code value. - Press and hold 'wireless remote controller signal receiver part' of the remote controller for 3 seconds or longer to enter the installer function. - Select remote controller code value '36', - You can press '▲', '▼' button to change the code value. text_image
Input Code Code Value 1 Value 2 Value 3 01 001text_image
Input Code Code Value 1 Value 2 Value 3 36 000 Done| Value Primary Heater control setting |
| 000 Cancel primary heater control |
| 001 Use primary heater control |
Air conditioner Fan operation interlocked with ventilation (air conditioner)
It is a function that sets the availability of air conditioner FAN movement when only the ventilation is running while air conditioner is off, in case of interlock of the air conditioner operation with the ventilation operation. - Press and hold 'wireless remote controller signal receiver part' of the remote controller for 3 seconds or longer to enter the installer function. - Select remote controller code value '38'. - You can press '▲', '▼' button to change the code value. text_image
Input Code Code Value 1 Value 2 Value 3 01 001text_image
Input Code Code Value 1 Value 2 Value 3 38 000| Value Primary Heater control setting |
| 000 air-conditioner fan off |
| 001 air-conditioner fan operate very low |
Indoor unit Auto-Start setting (air conditioner)
It is a function that sets whether to restore the indoor unit operation by resuming the previous power on state or as power-off state in the power failure compensation. - Press and hold 'wireless remote controller signal receiver part' of the remote controller for 3 seconds or longer to enter the installer function. - Select remote controller code value '39', - You can press '▲', '▼' button to change the code value. - Press and hold 'wireless remote controller signal receiver part' of the remote controller for 3 seconds or longer to enter the installer function. - Select remote controller code value '39', - You can press '▲', '▼' button to change the code value. text_image
Input Code Code Value 1 Value 2 Value 3 01 001text_image
Input Code Code Value 1 Value 2 Value 3 39 000| Value Primary Heater control setting |
| 000 Use indoor unit auto restart |
| 001 Not use indoor unit auto restart |
Occupancy Duration Time Setting (air conditioner)
It is a function that sets the light-on/occupancy duration after motion is detected when installing an occupancy sensor. - Press and hold 'wireless remote controller signal receiver part' of the remote controller for 3 seconds or longer to enter the installer function. - Select remote controller code value '40'. - You can press '▲', '▼' button to change the code value. text_image
Input Code Code Value 1 Value 2 Value 3 01 001text_image
Input Code Code Value 1 Value 2 Value 3 40 000| Value Occupancy Duration Time |
| 000 0 minute |
| 001 10 minutes |
| 002 30 minutes |
| 003 60 minutes |
Setting for Simple Dry contact unit(air conditioner)
This function is used when simple dry contact unit is additionally installed in the indoor unit or the installed simple dry contact unit is removed. - Press and hold 'wireless remote controller signal receiver part' of the remote controller for 3 seconds or longer to enter the installer function. - Select remote controller code value '41'. - You can press '▲', '▼' button to change the code value. - Press and hold 'wireless remote controller signal receiver part' of the remote controller for 3 seconds or longer to enter the installer function. - Select remote controller code value '41'. - You can press '▲', '▼' button to change the code value. text_image
Input Code Code Value 1 Value 2 Value 3 01 001text_image
Input Code Code Value 1 Value 2 Value 3 41 000| Value Setting for Simple Dry contact unit |
| 000 Default - Simple Dry contact Auto identification |
| 001 Simple Dry contact : Not installed |
| 002 Simple Dry contact : Installed |
| 003 Use for digital input |