
FH069FD4P - Washing machine LG - Free user manual and instructions
Find the device manual for free FH069FD4P LG in PDF.


User questions about FH069FD4P LG
0 question about this device. Answer the ones you know or ask your own.
Ask a new question about this device
Download the instructions for your Washing machine in PDF format for free! Find your manual FH069FD4P - LG and take your electronic device back in hand. On this page are published all the documents necessary for the use of your device. FH069FD4P by LG.
USER MANUAL FH069FD4P LG
Before beginning installation, read these instructions carefully. This will simplify installation and ensure that the washer is installed correctly and safely. Leave these instructions near the washer after installation for future reference.
MODEL
FH069FDP/FH069FD4P/FH069FD6P/FH069FD7P
PRODUCT FEATURES
DIRECT DRIVE SYSTEM
The advanced brushless DC motor drives the drum directly without using a belt and pulley.
TILTED DRUM AND EXTRA LARGE DOOR OPENING
The tilted drum and extra large opening make it possible to load and unload clothing more easily.
ULTRA CAPACITY
The larger drum enables more tumbling action and greater centrifugal force, but also less tangling and wrinkling of the laundry. Heavier loads, such as king size comforters, blankets, and curtains can be washed.
SEE-THROUGH DOOR AND BIG DOOR
You can see the laundry throughout the cycle.
MAGNETIC DOOR PLUNGER
Safely and conveniently secure the door slightly ajar with the magnetic door plunger. This will promote air circulation and allow the interior of the machine to dry. To use this feature, after the load has been removed, do not close the door completely. When the magnetic door plunger comes into contact with the metal washer cabinet, it will secure the door slightly open allowing the interior of the washer to dry.
STAINLESS STEEL DRUM
Stainless steel drum offers extreme durability.
TUB CLEAN
Regular cleaning of the tub on a monthly basis using TUB CLEAN can help keep the tub clean and fresh.
IMPORTANT SAFETY INSTRUCTIONS
READ ALL INSTRUCTIONS BEFORE USE
WARNING
For your safety, the information in this manual must be followed to minimize the risk of fire or explosion, electric shock, or to prevent property damage, injury to persons, or death.
Your Safety and the safety of others are very important.
We have provided many important safety messages in this manual and on your appliance. Always read and obey all safety messages.

This is the safety alert symbol.
This symbol alerts you to potential hazards that can kill or hurt you and others.
All safety messages will follow the safety alert symbol and either the word DANGER, WARNING or CAUTION. These words mean:

DANGER
You will be killed or seriously injured if you don't immediately follow instructions.

WARNING
You can be killed or seriously injured if you don't follow instructions.

CAUTION
You may be slightly injured or cause damage to the product if you do not follow instructions. All safety messages will tell you what the potential hazard is, tell you how to reduce the chance of injury, and tell you what can happen if the instructions are not followed.
Disposal of your old appliance
natural_image
Symbol of a trash bin with crossed lines indicating no waste or discharge (no text or labels)- This crossed-out wheeled bin symbol indicates that waste electrical and electronic products (WEEE) should be disposed of separately from the municipal waste stream.
- Old electrical products can contain hazardous substances so correct disposal of your old appliance will help prevent potential negative consequences for the environment and human health.
Your old appliance may contain reusable parts that could be used to repair other products, and other valuable materials that can be recycled to conserve limited resources.
- You can take your appliance either to the shop where you purchased the product, or contact your local government waste office for details of your nearest authorised WEEE collection point. For the most up to date information for your country please see www.lg.com/global/recycling
IMPORTANT SAFETY INSTRUCTIONS
READ ALL INSTRUCTIONS BEFORE USE
WARNING
For your safety, the information in this manual must be followed to minimize the risk of fire or explosion, electric shock, or to prevent property damage, injury to persons, or death.
BASIC SAFETY PRECAUTIONS
WARNING
To reduce the risk of fire, electric shock, or injury to persons when using this appliance, follow basic precautions, including the following.
- Read all instructions before using the washer.
- Do not wash articles that have been previously cleaned in, washed in, soaked in, or spotted with gasoline, dry cleaning solvents, or other flammable or explosive substances, as they give off vapors that could ignite or explode.
- Do not add gasoline, dry cleaning solvents, or other flammable or explosive substances to the wash water. These substances give off vapors that could ignite or explode.
- Under certain conditions, hydrogen gas may be produced in a hot water system that has not been used for 2 weeks or more. HYDROGEN GAS IS EXPLOSIVE. If the hot water system has not been used for such a period, before using the washing machine, turn on all hot water faucets and let the water flow from each for several minutes. This will release any accumulated hydrogen gas. As the gas is flammable, do not smoke or use an open flame during this time.
- Do not allow children to play on or in the washer. Close supervision of children is necessary when the washer is used near children.
- Before the washer is removed from service or discarded, remove the door to prevent children from hiding inside.
- Do not install or store the washer where it will be exposed to the weather.
- Do not tamper with the controls.
- Do not repair or replace any part of the washer or attempt any servicing unless specifically recommended in the user-maintenance instructions or published user-repair instructions that you understand and have the skills to carry out.
- See Installation Instructions for grounding requirements.
- ALWAYS follow the fabric care instructions supplied by the garment manufacturer.
- Do not place items exposed to cooking oil in your washer. Items contaminated with cooking oils may contribute to a chemical reaction that could cause a load to catch fire.
- Do not use fabric softeners or products to eliminate static unless recommended by the manufacturer of the fabric softener or product.
SAVE THESE INSTRUCTIONS
GROUNDING INSTRUCTIONS
This appliance must be grounded. In the event of malfunction or breakdown, grounding will reduce the risk of electric shock by providing a path of least resistance for electric current. This appliance is equipped with a cord having an equipment-grounding conductor and grounding plug. The plug must be plugged into an appropriate outlet that is properly installed and grounded in accordance with all local codes and ordinances.
- Do not use an adapter or extension cord.
- Do not remove ground prong.
- If you don't have the proper outlet, consult an electrician.
WARNING
Improper connection of the equipment-grounding conductor can result in risk of electric shock. Consult a qualified electrician or serviceman if you are in doubt as to whether the appliance is properly grounded. Do not modify the plug provided with the appliance - if it does not fit the outlet, have a proper outlet installed by a qualified electrician.
IMPORTANT SAFETY INSTRUCTIONS
READ ALL INSTRUCTIONS BEFORE USE
WARNING
For your safety, the information in this manual must be followed to minimize the risk of fire or explosion, electric shock, or to prevent property damage, injury to persons, or death.
SAFETY INSTRUCTIONS FOR INSTALLATION
WARNING
To reduce the risk of fire, electric shock, or injury to persons when using this appliance, follow basic precautions, including the following.
- Refer to INSTALLATION INSTRUCTIONS for detailed grounding procedures. Installation instructions are packed in the washer for installer's reference. If the washer is moved to a new location, have it checked and reinstalled by a qualified service person. Failure to follow this warning can cause serious injury, fire, electric shock or death.
- Do not, under any circumstances cut or remove the third (ground) prong from the power cord. Failure to follow this warning can cause serious injury, fire, electric shock or death.
- For personal safety, this appliance must be properly grounded. Failure to follow this warning can cause serious injury, fire, electric shock or death.
- The power cord of this appliance is equipped with a 3-prong (grounding) plug which fits a standard 3-prong (grounding) wall outlet to minimize the possibility of electric shock hazard from this appliance.
- This washer must be plugged into a 220-240 V\~, 50 Hz grounded outlet. Failure to follow this warning can cause serious injury, fire, electric shock, or death.
- Have the wall outlet and circuit checked by a qualified electrician to make sure the outlet is properly grounded.
Failure to follow this warning can cause serious injury, fire, electric shock, or death.
- Where a standard 2-prong wall outlet is encountered, it is your personal responsibility and obligation to have it replaced with a properly grounded 3-prong wall outlet.
Failure to follow this warning can cause serious injury, fire, electric shock, or death.
- Do not install on carpet. Install the washer on a solid floor. Failure to follow this warning can cause serious leak damage.
-
Do not remove the ground prong. Do not use an adapter or extension cord. Plug into a grounded 3 prong outlet. Failure to follow this warning can cause serious injury, fire, electric shock, or death.
-
The washer should always be plugged into its own individual electrical outlet which has a voltage rating that matches the rating plate. This provides the best performance and also prevents overloading house wiring circuits which could cause a fire hazard from overheated wires.
- Never unplug your washer by pulling on the power cord. Always grip the plug firmly and pull straight out from the outlet. Failure to follow this warning can cause serious injury, fire, electric shock, or death.
- Repair or replace all power cords that have become frayed or otherwise damaged. Do not use a cord that shows cracks or abrasion damage along its length or at either end. Failure to follow this warning can cause serious injury, fire, electric shock, or death.
- When installing or moving the washer, be careful not to pinch, crush, or damage the power cord. Failure to follow this warning can cause serious injury, fire, electric shock, or death.
- The washer must be installed and electrically grounded by a qualified service person in accordance with local codes, to prevent shock hazard and assure stability during operation.
- The washer is heavy. Two or more people are needed to install and move the appliance. Failure to do so can result in back or other injury
- Store and install the washer where it will not be exposed to temperatures below freezing or exposed to outdoor weather conditions. Failure to follow this warning can cause serious leak damage.
- Do not install the washer in humid spaces to reduce the risk of electric shock. Failure to follow this warning can cause serious injury, fire, electric shock, or death.
- To reduce the risk of injury to persons, adhere to all industry recommended safety procedures including the use of long sleeved gloves and safety glasses. Failure to follow all of the safety warnings in this manual could result in property damage, injury to persons or death.
- Keep the area underneath and around your appliances free of combustible materials such as lint, paper, rags, chemicals, etc. Failure to do so can result in fire.
IMPORTANT SAFETY INSTRUCTIONS
READ ALL INSTRUCTIONS BEFORE USE
WARNING
For your safety, the information in this manual must be followed to minimize the risk of fire or explosion, electric shock, or to prevent property damage, injury to persons, or death.
SAFETY INSTRUCTIONS FOR USE, CARE, CLEANING, AND DISPOSAL
WARNING
To reduce the risk of fire, electric shock, or injury to persons when using the washer, follow basic precautions, including the following:
- Unplug the washer before cleaning to avoid the risk of electric shock.
- Never use harsh chemicals, abrasive cleaners, or solvents to clean the washer. They will damage the finish.
- Do not put oily or greasy rags or clothing on top of the washer. These substances give off vapors that could ignite the materials.
- Do not wash items that are soiled with vegetable or cooking oil. These items may contain some oil after laundering. Due to the remaining oil, the fabric may smoke or catch fire by itself.
- Disconnect this appliance from the power supply before attempting any user maintenance. Turning the controls to the OFF position does not disconnect this appliance from the power supply.
Failure to follow this warning can cause serious injury, fire, electric shock, or death.
- Do not combine laundry products for use in 1 load unless specified on the label. Do not mix chlorine bleach with ammonia or acids such as vinegar.
Follow package directions when using laundry products. Incorrect usage can produce poisonous gasresulting in serious injury or death.
- Do not reach into the washer while parts are moving. Before loading, unloading, or adding items, push in the cycle selector knob and allow the drum to coast to a complete stop before reaching inside.
Failure to follow this warning can cause serious injury, fire, electric shock, or death.
- This appliance is not intended for use by persons (including children) with reduced physical, sensory or mental capabilities, or lack of experience and knowledge, unless they have been given supervision or instruction concerning use of the appliance by a person responsible for their safety.
• Children should be supervised to ensure that they do not play with the appliance. - Do not allow children to play on or in the washer.
Close supervision of children is necessary when the washer is used near children. As children grow, teach them the proper, safe use of all appliances.
Failure to comply with these warnings could result in serious personal injuries.
- Destroy the carton, plastic bag, and other packing materials after the washer is unpacked. Children might use them for play.
Cartons covered with rugs, bedspreads or plastic sheets can become airtight chambers. Failure to comply with these warnings could result in serious personal injuries.
- Keep laundry products out of children's reach.
To prevent injury to persons, observe all warnings on product labels. Failure to comply with these warnings could result in serious personal injuries.
IMPORTANT SAFETY INSTRUCTIONS
READ ALL INSTRUCTIONS BEFORE USE
WARNING
For your safety, the information in this manual must be followed to minimize the risk of fire or explosion, electric shock, or to prevent property damage, injury to persons, or death.
SAFETY INSTRUCTIONS FOR USE, CARE, CLEANING, AND DISPOSAL
WARNING
To reduce the risk of fire, electric shock, or injury to persons when using the washer, follow basic precautions, including the following:
- Remove the door to the washing compartment to avoid the danger of children or small animals getting trapped inside before your washer is removed from service or discarded. Failure to do so can result injury or death.
- Before the washer is removed from service or discarded, remove the washer door to prevent accidental entrapment.
Failure to comply with these warnings could result in serious personal injuries.
- If the supply cord is damaged, it must be replaced by the manufacturer, its service agent or similarly qualified persons in order to avoid a hazard.
- The new hose-sets supplied with the appliance are to be used and that old hose-sets should not be reused.
TABLE OF CONTENTS
2 PRODUCT FEATURES
3 IMPORTANT SAFETY INSTRUCTIONS
4 BASIC SAFETY PRECAUTIONS
4 GROUNDING INSTRUCTIONS
5 SAFETY INSTRUCTIONS FOR INSTALLATION
6 SAFETY INSTRUCTIONS FOR USE, CARE, CLEANING, AND DISPOSAL
9 PARTS AND ACCESSORIES
9 Parts
9 Accessories
10 CONTROL PANEL FEATURES
10 Coin type
10 Card type / OPL type
12 INSTALLATION INSTRUCTIONS
12 Checking and choosing the proper location
13 Unpacking and removing shipping bolts
14 Connecting the water lines
15 Connecting the drain line
16 Leveling the washing machine
17 PREPARATION
17 Precautions for fabric care before wash cycle
18 Fabric care labels
18 Sorting laundry
19 Recommended detergent
19 About the dispenser
20 Loading the dispenser
23 Structure of Programming mode - Card/Coin type
24 Structure of Programming mode - OPL type
25 PROGRAMMING MODE -SETUP MODE
25 - 1. How to change regular price.
26 - 2. How to change regular delicates price.
27 - 3. How to change regular warm & cold price
28 - 4. How to change regular hot price
29 - 5. How to change special price
30 - 6. How to change special delicates price
31 - 7. How to change special warm & cold price
32 - 8. How to change special hot price
33 - 9. How to change add super wash price
34 - 10. How to change add super wash type
35 - 11. How to enter the FERI
36 - 11-1. Special price day setup
37 - 11-2. Non-stop rinse
38 - 11-3. Add super wash setup
39 - 11-4. Vend type setup - card type or coin type setup
40 - 11-5. Pre-wash setup
41 - 11-6. Twin spray setup
42 - 12. How to enter the FEA2
43 - 12-1. Pause function setup
44 - 13. How to enter the special price day
45 - 13-1. How to change to Sunday
46 - 14. Special price beginning time setup
47 - 15. Special price ending time setup
48 - 16. Washing time setup
49 - 17. Rinsing time per cycle
50 - 18. Rinsing time setup
51 - 19. Top spin speed - final spin time depends on RPM
52 - 20. Value of coin 1
53 - 21. Value of coin 2
54 - 22. Penny increment pricing offset
55 - 23. How to change the water level
56 - 24. Beep volume
57 - 25. Time to keep the coin (Use only for coin type)
58 - 26. How to set drop count
59 - 27. How to set rinse spin enable
60 - 28. How to enter the TYPE
61 - 29. How to set custom program
62 PROGRAMMING MODE - TEST MODE
62 - 1. L9C1
63 - 2. Factory reset - EEPE
64 - 3. Time setup
65 - 4. Courtesy cycle
66 - 5. Cycle Kill
67 - 6. Password - PASS
68 - 7. Tub clean - tcl
69 PROGRAMMING MODE - COLLECT MODE
70 Collect Mode Data lists
71 MAINTENANCE
71 - Care after wash
71 - Storing the Washer
71 - Cleaning the Dispenser
72 - Cleaning the water inlet filters
73 - Cleaning the drain pump filter
74 - Cleaning the door seal
74 - Clean the drum, TUB CLEAN
75 ERROR MODE
76 POWER FAIL RECOVERY
76 DEFAULT WASHER SETTINGS
77 SPECIFICATIONS
PARTS AND ACCESSORIES
Parts
text_image
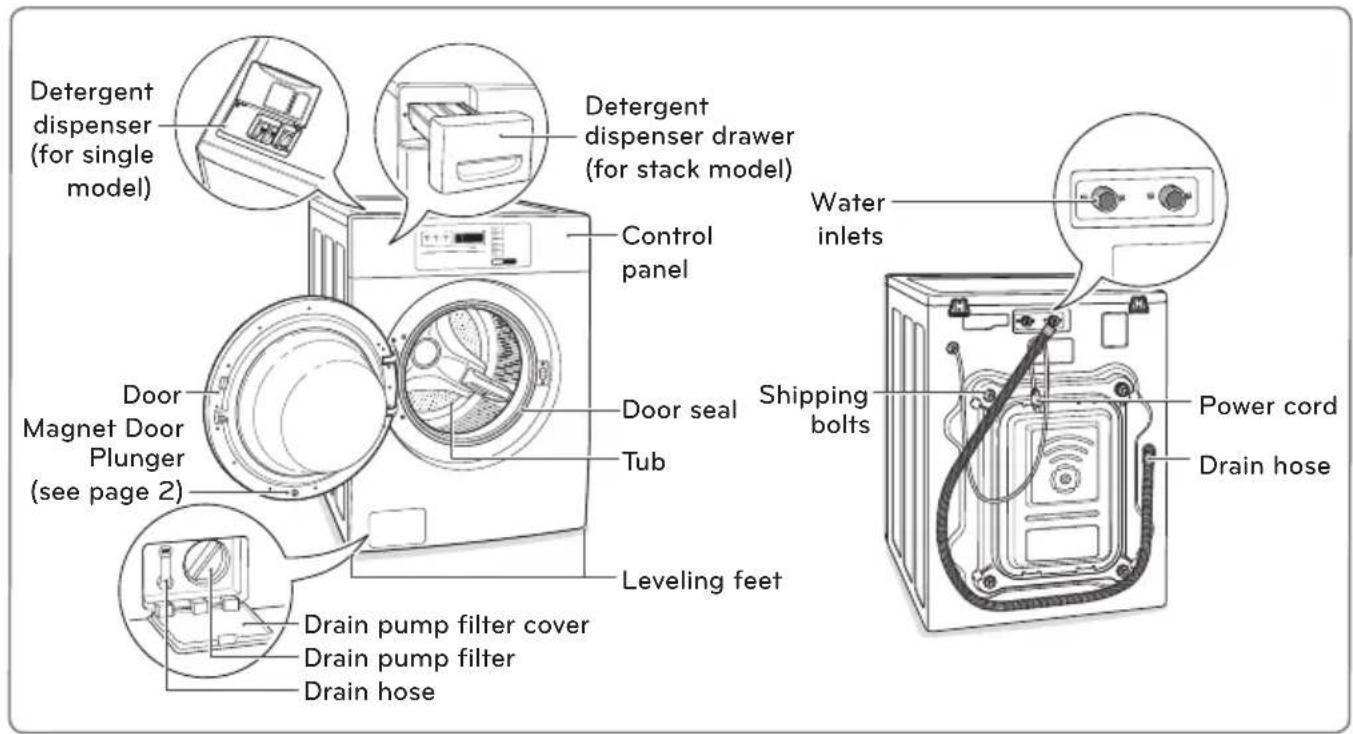
Detergent dispenser (for single model) Detergent dispenser drawer (for stack model) Control panel Water inlets Door Magnet Door Plunger (see page 2) Door seal Tub Shipping bolts Power cord Drain hose Leveling feet Drain pump filter cover Drain pump filter Drain hoseAccessories
text_image
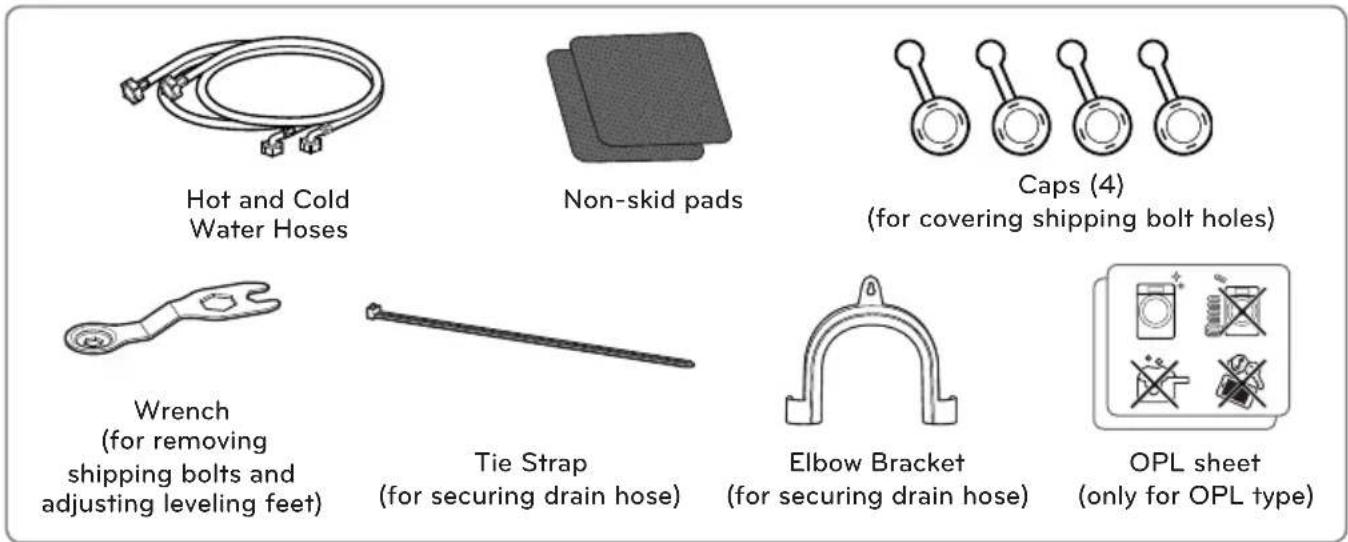
Hot and Cold Water Hoses Non-skid pads Caps (4) (for covering shipping bolt holes) Wrench (for removing shipping bolts and adjusting leveling feet) Tie Strap (for securing drain hose) Elbow Bracket (for securing drain hose) OPL sheet (only for OPL type)CONTROL PANEL FEATURES
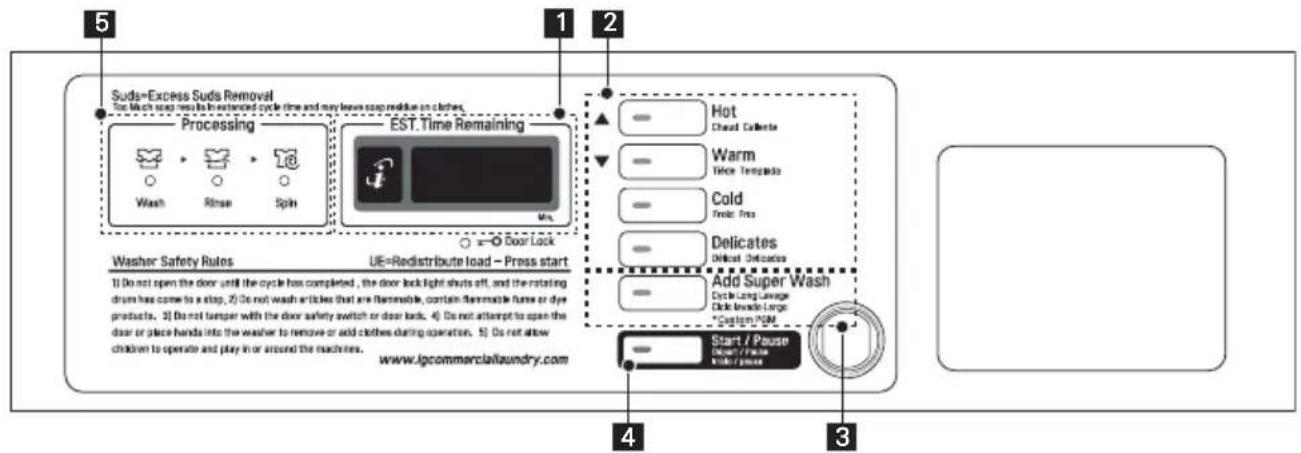
Coin type - Side by side (Fh069FD4P)
text_image
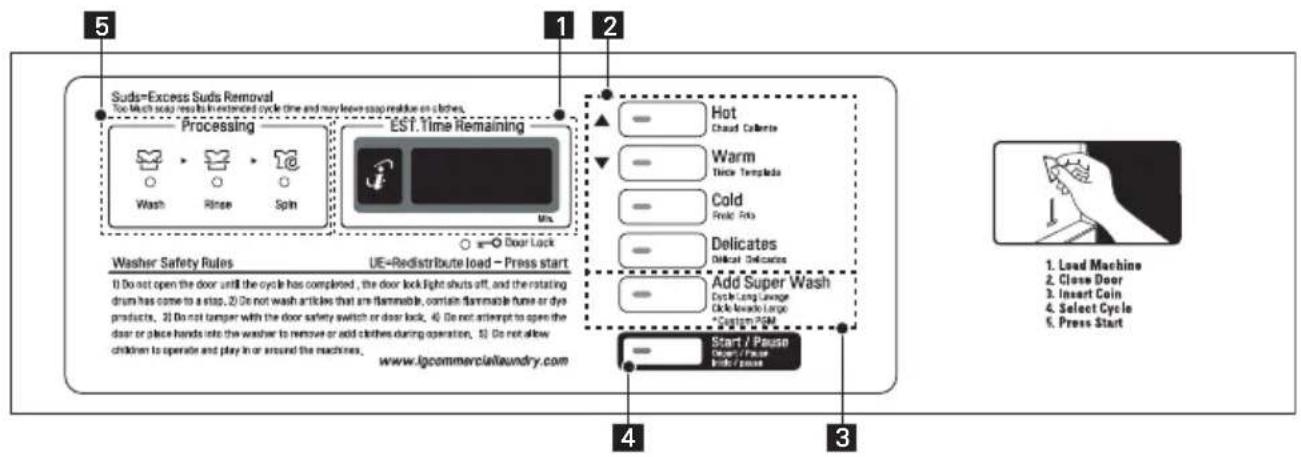
Suds=Excess Suds Removal Too Much soap results in extended cycle time and may leave soap residue on clothes. Processing Wash Rinse Spin EST.1 Time Remaining Hot Choud Colors Warm Thine Templates Cold Fruit Bio Delicates Dilical Delicates Add Super Wash Cycle Long Lunge Click Inade Large *Custom RAM Start / Pause Deck/Press Inside/Pass Washer Safety Rules UE=Redistribute load - Press start 1) Do not open the door until the cycle has completed, the door lock light shuts off, and the rotating drum has come to a stop, 2) Do not wash articles that are flammable, contain flammable fuse or dye products, 3) Do not hamper with the door safety switch or door lock, 4) Do not attempt to open the door or place hands into the washer to remove or add clothes during operation, 5) Do not allow children to operate and play in or around the machines. www.igcommerciallaundry.com 1. Load Machine 2. Close Door 3. Insert Coin 4. Select Cycle 5. Press StartCoin type - Stack (Fh069FDP)
text_image
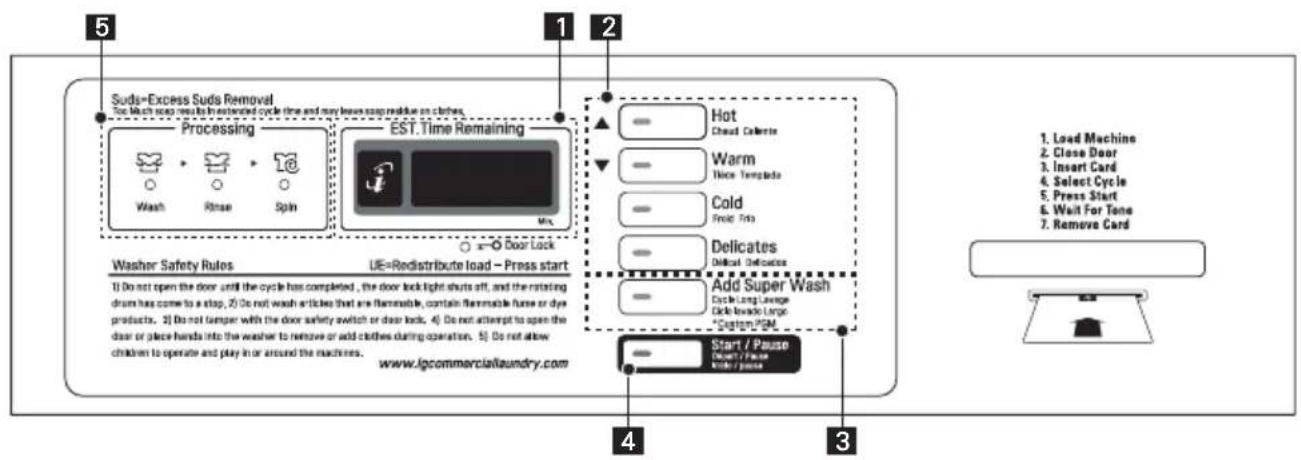
Suds=Excess Suds Removal Too Much soap results in extended cycle time and may leave soap medike on clothes. Processing Wash Rinse Spin EST.Time Remaining Hot Choud Collective Warm Time Tengado Cold Free Time Delicates Diffused Defecation Add Super Wash Cycle Long Lunge Double Inside Large *Custom PDM Start / Pause Door Lock Washer Safety Rules UE=Redistribute load - Press start 1) Do not open the door until the cycle has completed, the door lock light shots off, and the rotating drum has come to a stop. 2) Do not wash articles that are flammable, contain flammable furce or dye products. 3) Do not temper with the door safety switch or door lock. 4) Do not attempt to open the door or place hands into the washer to remove or add clothes during operation. 5) Do not allow children to operate and play in or around the machines. www.lgcommercllaundry.comCard / OPL Type (Fh069FD6P, Fh069FD7P)
text_image
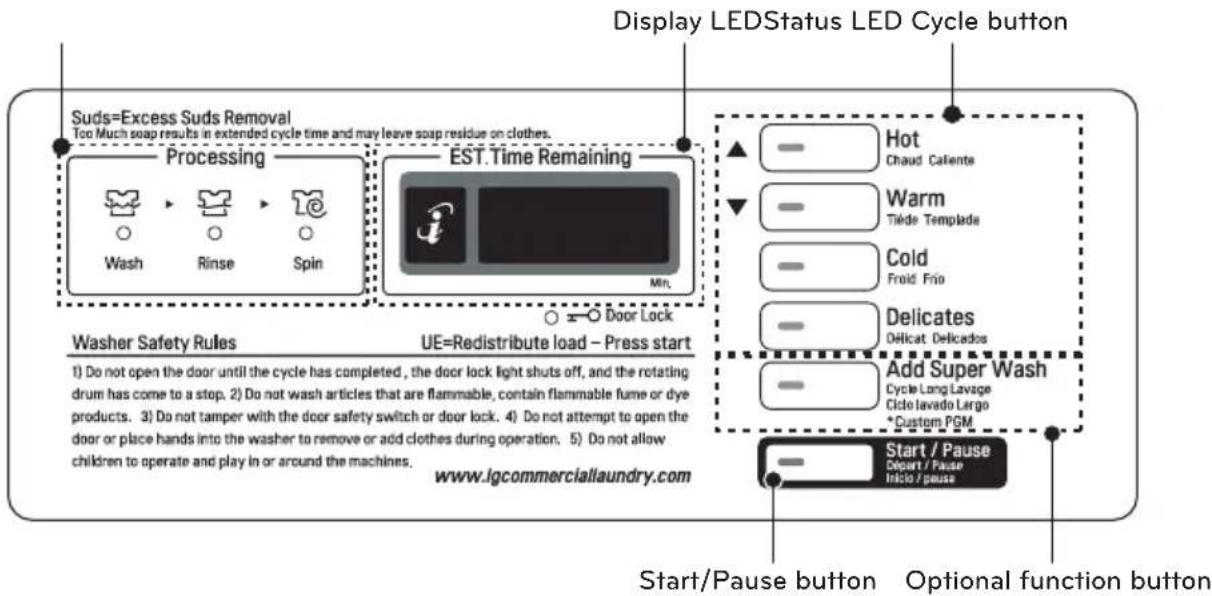
Suds=Excess Suds Removal Too Much soap results in extended cycle time and may leave soap residue on clothes. Processing Wash Rinse Spin EST.Time Remaining Hot Chad Colarette Warm Thine Template Cold Fresh Tins Delicates Deficit Deficates Add Super Wash Cycle Long Lunge Circle Inward Large *Custom PDM Start / Pause Dress / Pause Radio / please 1. Load Machine 2. Close Door 3. Insert Card 4. Select Cycle 5. Press Start 6. Wait For Tone 7. Remove Card Washer Safety Rules UE=Redistribute load - Press start 1) Do not open the door until the cycle has completed, the door lock light shuts off, and the rotating drum has come to a stop, 2) Do not wash articles that are flammable, contain flammable fuse or dye products, 3) Do not temper with the door safety switch or door lock, 4) Do not attempt to open the door or place hands into the washer to remove or add clothes during operation, 5) Do not allow children to operate and play in or around the machines. www.lgcommerciallaundry.com- Display LED
- Cycle button
-
Optional function button
-
Start/Pause button
- Status LED
text_image
Display LEDStatus LED Cycle button Suds=Excess Suds Removal Too Much soap results in extended cycle time and may leave soap residue on clothes. Processing Wash Rinse Spin EST.Time Remaining Min. Hot Chaud Calente Warm Tide Template Cold Froid Flo Delicates Dificat Delicados Add Super Wash Cycle Long Lavage Cicle lavado Largo *Custom PGM Start / Pause Depart / Pause Inicio / pause Washer Safety Rules UE=Redistribute load - Press start 1) Do not open the door until the cycle has completed, the door lock light shuts off, and the rotating drum has come to a stop. 2) Do not wash articles that are flammable, contain flammable fume or dye products. 3) Do not tamper with the door safety switch or door lock. 4) Do not attempt to open the door or place hands into the washer to remove or add clothes during operation. 5) Do not allow children to operate and play in or around the machines. www.igcommerciallaundry.com Start/Pause button Optional function buttonDisplay LED
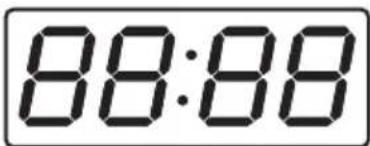
The display shows the vend price and remaining time and programming options. Error codes are also displayed here.
text_image
88:88Cycle button
Press the CYCLE button to select the desired cycle based on laundry types and conditions.
hot
Use for hot washing for heavy fabrics, such as white clothes, table linens, and heavily soiled clothes.
Warm
Use for warm washing for heavy fabrics, such as jeans, corduroys, or work clothes.
Cold
Use for cold washing for sturdy fabrics, such as casual work.
Delicates
Use for cold washing for synthetic fabrics, such as washable knit fabric and no-iron finishes.
Optional function button
Wash time or rinse cycle can be added when additional coin is inserted or a valid cash card is entered.
Start/Pause button
The START LED flashes when the full vend price has been satisfied and the cycle has been chosen.
Status LED
| LED Description | |
| LED flashes whenever the washing cycle is in operation. | |
| LED flashes whenever the Rinsing cycle is in operation. | |
| LED flashes whenever the Spining cycle is in operation. | |
| LED flashes whenever the door lock is activated. | |


INSTALLATION INSTRUCTIONS
Checking and choosing the proper location
Install the washing machine on a solid floor that is strong and rigid enough to support the weight of the washing machine, even when fully loaded, without flexing or bouncing. If the floor has too much flex, you may need to reinforce it to make it more rigid. If the floor is not solid, it may cause severe vibration and noise.
1 Clean the floor before installation.
- Make sure to select solid and smooth ground.
2 Two or more people are needed for moving and unpacking the washing machine.
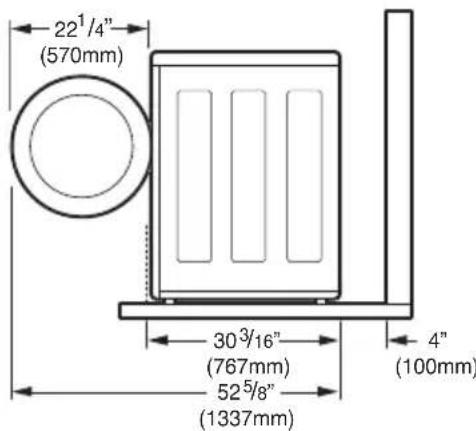
3 Allow for sufficient space between the walls and the washing machine for installation.
Space requirements
You must allow sufficient space for water lines, the drain line, and airflow.
NOTE
- Be sure to allow for wall, door, or floor moldings that may increase the required clearances.
Installing on a floor
text_image
22¹/4" (570mm) 30³/16" (767mm) 52⁵/8" (1337mm) 4" (100mm)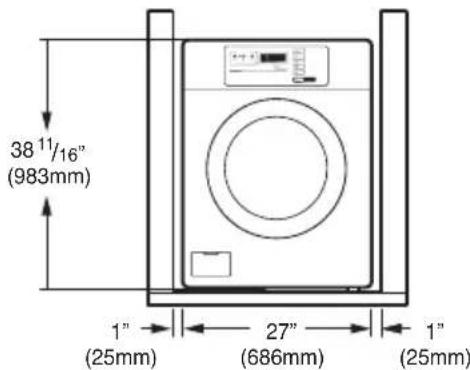
text_image
38 11/16" (983mm) 1" (25mm) 27" (686mm) 1" (25mm)NOTE
- The floor must be strong and rigid enough to support the weight of the washer, when fully loaded, without flexing or bouncing. If your floor has too much flex, you may need to reinforce it to make it more rigid. A floor that is adequate for a top-loading washer may not be rigid enough for a front loading washer, due to the difference in the spin speed and direction. If the floor is not solid, your washer may vibrate and you may hear and feel the vibration throughout your house.
- Before installing the washer, make sure the floor is clean, dry and free of dust, dirt, water and oils so the washer feet can not slide easily. Leveling feet that can move or slide on the floor can contribute to excess vibration and noise due to poor contact with the floor.
Unpacking and removing shipping bolts
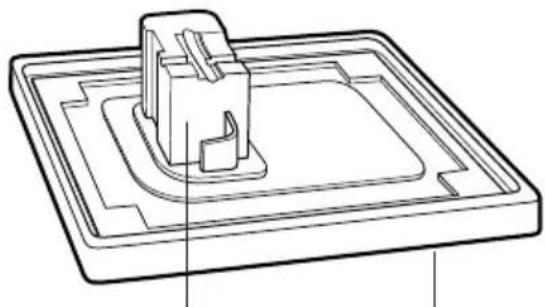
When removing the washer from the carton base, be sure to remove the foam drum support in the middle of the carton base.
If you must lay the washer down to remove the base packaging materials, always lay it carefully on its side.
DO NOT lay the washer on its front or back.
natural_image
Technical line drawing of a mechanical component with a base plate and central slot (no text or symbols)Foam Tub Support Carton Base
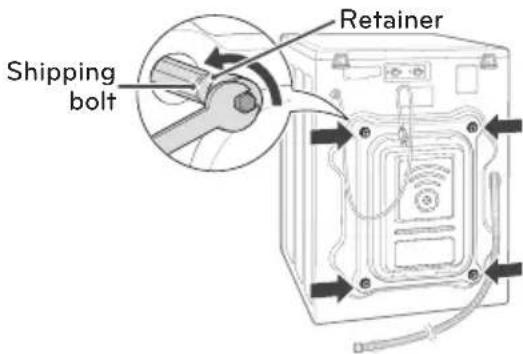
1 Remove the bottom two shipping bolts with the wrench (included) to fully loosen all four shipping bolts by turning them counterclockwise and then pulling them out.
text_image
Shipping bolt Retainer2 Locate the four hole caps included in the accessory pack and install them in the shipping bolt holes.
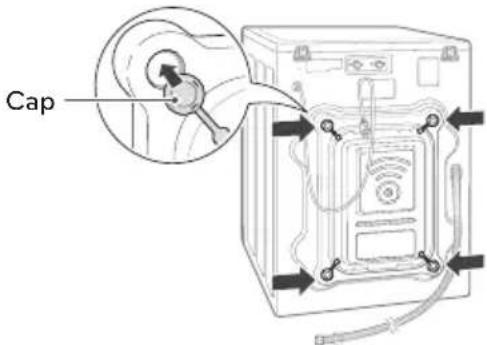
text_image
CapNOTE
- Save the bolt assemblies for future use. To prevent damage to internal components, DO NOT transport the washer without reinstalling the shipping bolts.
- Failure to remove shipping bolts and retainers may cause severe vibration and noise, which can lead to permanent damage to the washer. The cord is secured to the back of the washer with a shipping bolt to help prevent operation with shipping bolts in place.
Connecting the water lines
1 Check the rubber seals on both sides of the hose.
- Insert a rubber seal into the threaded fittings on each hose to prevent leaking.
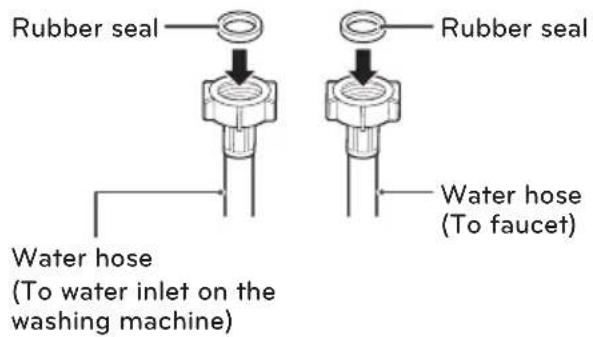
text_image
Rubber seal Rubber seal Water hose (To water inlet on the washing machine) Water hose (To faucet)2 Connect the water supply hoses to the HOT and COLD water faucets tightly by hand and then tighten another 2/3 turn with pliers.
- Connect the blue hose to a cold water faucet and the red hose to a hot water faucet.
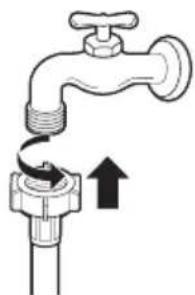
natural_image
Diagram of a faucet with a valve and a valve inserted into a pipe, showing fluid flow direction (no text or labels)WARNING
- Do not overtighten. Damage to the coupling can result.
3 After connecting inlet hose to water faucets, turn on the water faucets to flush out foreign substances (dirt, sand or sawdust) in the water lines. Let water drain into a bucket, and check the water temperature.
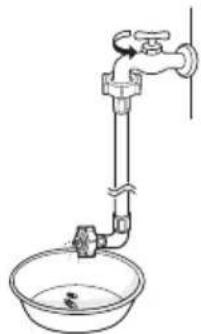
natural_image
Simple line drawing of a faucet with a bowl of water below (no text or symbols)4 Connect the hoses to the water inlets tightly by hand and then tighten another 2/3 turn with pliers.
- Connect the blue hose to the cold water inlet and the red hose to the hot water inlet.
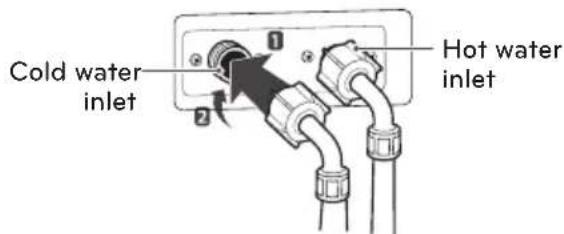
text_image
Cold water inlet Hot water inletWARNING
- Do not overtighten the hoses. Overtightening can damage the valves resulting in leaking and property damage.
5 Check for leaks by turning on the faucets. - If water leaks, check steps 1 to 4 again.
NOTE
- For your safety, and for extended product life, use only authorized components. The manufacturer is not responsible for product malfunction or accidents caused by the use of separately purchased unauthorized parts.
- Use new hoses when you install the washing machine. Do not reuse old hoses. Use only the inlet hoses provided with the washer. LG does not recommend the use of aftermarket hoses.
- Periodically check the hoses for cracks, leaks and wear, and replace the hoses every 5 years.
- Do not stretch the water hoses intentionally, and make sure that they are not crushed by other objects.
- Water supply pressure must be between 1.0 kgf/cm ^2 and 8.0 kgf/cm ^2 (0.1\~0.8 MPa). If the water supply pressure is more than 8.0 kgf/cm ^2 , a pressure reducing valve must be installed.
- To provide optimum washing performance the hot water temperature should be set at 120-135°F (48-57°C) and the cold at 60°F (15°C).
Connecting the drain line
Secure the drain hose in place to prevent moving and leaking.
NOTE
- The drain hose should be properly secured. Failure to properly secure the drain hose can result in flooding and malfunction.
- Total height of the hose end should not exceed 96 inches (244.8 cm) from the bottom of the washer.
- The drain must be installed in accordance with any applicable local codes and regulations.
• Make sure that the water lines are not stretched, pinched, crushed, or kinked.
Using a standpipe
1 Clip the end of the hose into the elbow bracket.
- Connect the elbow bracket within 4 inches (10 cm) from the end of the drain hose. If the drain hose is extended more than 4 inches (10 cm) beyond the end of the elbow bracket, mold or microorganisms could spread to the inside of the washer.
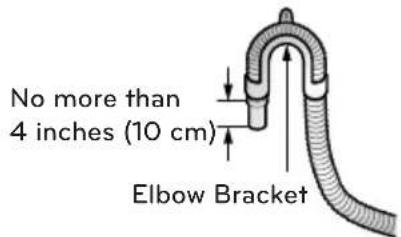
text_image
No more than 4 inches (10 cm) Elbow Bracket2 Insert the end of the drain hose into the standpipe.
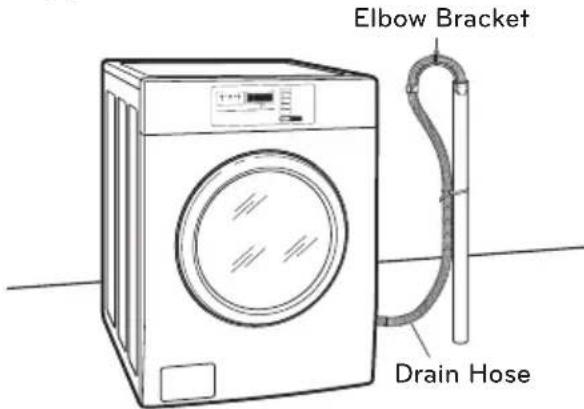
text_image
Elbow Bracket Drain Hose3 Use a tie strap to secure the drain hose in place.
Using a laundry tub
1 Clip the end of the hose into the elbow bracket.
- Connect the elbow bracket within 4 inches (10 cm) from the end of the drain hose. If the drain hose is extended more than 4 inches (10 cm) beyond the end of the elbow bracket, mold, or microorganisms could spread to the inside of the washer.
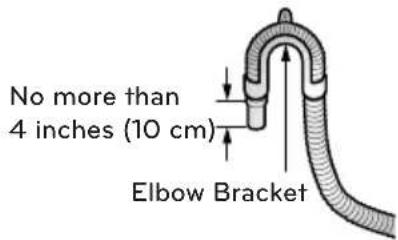
text_image
No more than 4 inches (10 cm) Elbow Bracket2 Hang the end of the drain hose over the side of the laundry tub.

text_image
Elbow Bracket Laundry Tub max. 96" (2.4 m) max. 96" (2.4 m) Drain Hose Tie Strap3 Use a tie strap to secure the drain hose in place.
Leveling the washing machine
The washer tub of your new washing machine spins at very high speeds. To minimize vibration, noise, and unwanted movement, the floor must be perfectly level and solid.
1 Check the washing machine's level.
- Check the precise level by rocking the top edges of the washing machine or placing a level on the washing machine. The slope beneath the washing machine must not exceed 1°, and all four leveling feet must rest firmly on the floor.
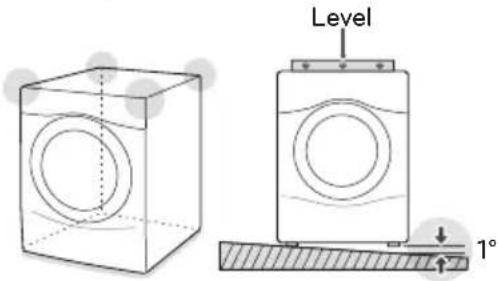
text_image
Level 1°2 Turn the lower leveling feet clockwise to level the washing machine.
- Turning the lower leveling feet clockwise raises the washing machine.
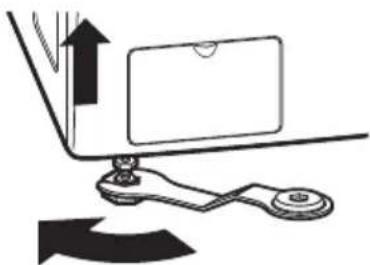
natural_image
Diagram of a mechanical device with an upward arrow and curved base, no text or symbols presentRaise
3 Turn the locknuts counterclockwise and tighten them when the washing machine is level.
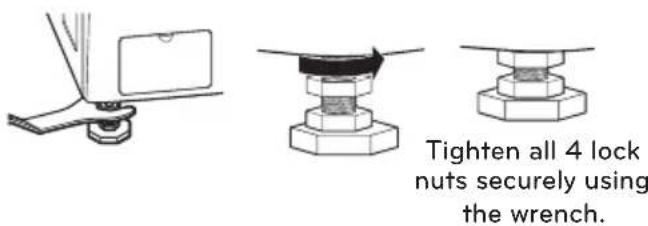
text_image
Tighten all 4 lock nuts securely using the wrench.4 Check the washing machine's level again.
- Push or rock the top edges of the washing machine gently to make sure that the washing machine does not rock.
- If the washing machine rocks, repeat steps 1 to 3.
WARNING
- Using the washing machine without leveling, it may result in malfunction caused by the production of excess vibration and noise.
- Use the leveling feet only when you level the washing machine. If you raise the leveling feet unnecessarily, it may cause abnormal vibration of the washing machine.
Using non-skid pads (optional)
If you install the washing machine on a slippery surface, it may move because of excessive vibration. Incorrect leveling may cause malfunction through noise and vibration. In the event of this, lay the non-skid pads under the leveling feet and adjust the level.
1 Clean the floor to attach the non-skid pads.
- Use a dry rag to remove and clean foreign objects or moisture. If moisture remains, the non-skid pads may slip.
2 Adjust the level after placing the washing machine in the installation area.
3 Place the adhesive side of the non-skid pad on the floor.
- It is most effective to install the non-skid pads under the front legs. If it is hard to place the pads under the front legs, place them under the back legs.
This side up
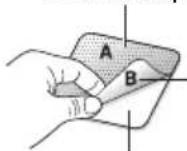
Remove backing
Adhesive side
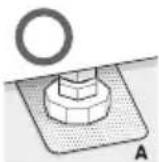
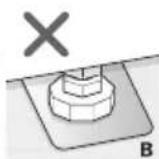
4 Check the washing machine's level again.
- Push or rock the top edges of the washing machine gently to make sure that the washing machine does not rock. If the washing machine rocks, level the washing machine again.
PREPARATION
Precautions for fabric care before wash cycle
Read and observe the following to prevent shrinkage or damage to clothes.
◆ Check all pockets to make sure that they are empty.
- Items such as clips, matches, pens, coins, and keys can damage both your washer and your clothes.
◆ Close zippers, hooks, and drawstrings to prevent these items from snagging or tangling on other clothes.
◆ Pretreat heavily stained areas before washing.
- Doing so will produce clean, stain-free results.
◆ Combine large and small items in a load. Load large items first.
◆ Large items should not be more than half of the total washload.
◆ The washer can be fully loaded, but the drum should not be tightly packed with items.
- The door of the washer should close easily.
Do not wash single items, except for bulky items such as blankets. Make sure to wash laundry in similar types of loads.
- Washing a single small item may result in the tub becoming unbalanced, vibrating, making a noise.
◆ Do not wash waterproof clothes.
- This may cause abnormal vibration or may cause the load to bounce, which could damage the tub.
◆ Check if there are any other foreign objects in the door seal and take extra care that clothes do not get caught there.
- Foreign objects in the door seal may stain clothes, and water may leak if clothes get caught in the door seal.
◆ Wash underwear or small, light items in a laundry net.
- Small, light items may get caught in the door seal, and a brassiere hook may damage other items or the tub.
◆ Brush heavy soil, dust, or hair off fabrics before washing.
- Laundry may not wash clean if there is dirt or sand on the fabrics, or they may be damaged due to particles rubbing against sheer fabrics.
◆ Wash blankets individually.
- Washing more than one blanket together may produce unclean results due to tangling or an unbalanced load.
◆ Always separate fabrics according to their colors and wash them separately to prevent colors from running.
- Fabrics may damage or become stained due to fabric dyes running or due to foreign objects transferring from one fabric to another.
Fabric care labels
Most articles of clothing feature fabric care labels that include instructions for proper care.
| Category Label Directions | ||
 Washing Washing |  | Hand Wash |
 | Machine Wash, Normal Cycle | |
 —— —— | Use Permanent Press/ Wrinkle Resistant washing machine setting (which has a cool down or cold spray before the reduced spin) | |
 —— —— | Use Gentle/Delicate washing machine setting (slow agitation and/ or reduced wash time). | |
 | Do Not Wash | |
 | Do Not Wring | |
| Water Temperature |  | Hot |
 | Warm | |
 | Cold/Cool | |
| Bleach symbols |  | Any Bleach (When Needed) |
 —— —— | Only Non-Chlorine Bleach (When Needed) | |
 , , | Do Not Bleach | |
Sorting laundry
It is recommended that you sort laundry into similar loads that are washable in the same cycle.
Refer to the following chart for sorting clothes
| Colors | Whites / Lights / Darks |
| Soil | Heavy / Normal / Light |
| Fabric | Delicates / Easy Care / Sturdy Cottons |
| Lint | Lint Producers / Lint Collectors |
Recommended detergent
Use HE (High-Efficiency) detergent for frontloading washing machines. HE detergents dissolve more efficiently and produce fewer suds to ensure efficient washing and rinsing. Use the correct amount of detergent as indicated on the label of the detergent packaging.
NOTE
- Use HE detergents, since using a regular detergent will produce excessive suds.
- HE detergents produce fewer suds, dissolve more efficiently to improve washing and rinsing performance, and help to keep the interior of your washer clean.
- Use less detergent for soft water.
- Wipe up any spills immediately, as liquids could damage the finish and the control panel of the washing machine.
- Using too much detergent can cause a build-up in the tub resulting in unsatisfactory performance and machine malfunction.
- If you use a detergent that does not dissolve easily or a detergent with high viscosity, it will leave a residue on the tub, which may not rinse properly.
About the dispenser
The automatic dispenser consists of three compartments which hold:
• Liquid chlorine bleach.
- Liquid fabric softener.
- Liquid and powdered detergent and color-safe bleach for main wash.
All laundry products can be added at once in their respective dispenser compartments. They will be dispensed at the appropriate time for the most effective cleaning.
After adding the laundry products to the dispenser, close the dispenser cover.
To add detergent, bleach, and fabric softener to the automatic dispenser:
- Open the dispenser cover.
- Load the laundry products into the appropriate compartments.
- Slowly close the dispenser cover to avoid early dispensing of the laundry products.
NOTE
- It is normal for a small amount of water to remain in the dispenser compartments at the end of the cycle.
Loading the dispenser
Main Wash Detergent Compartment
This compartment holds laundry detergent for the main wash cycle, which is added to the load at the beginning of the cycle. Always use HE (High-Efficiency) detergent with your washing machine.
Follow the detergent manufacturer's instructions with respect to the amount of detergent to use, and never use more than the recommended amount. Using too much detergent can result in detergent buildup in clothing and the washer. Either powdered or liquid detergent may be used.
NOTE
- Liquid or powdered color-safe bleach may be added to the main wash compartment with detergent of the same type.
-Single model
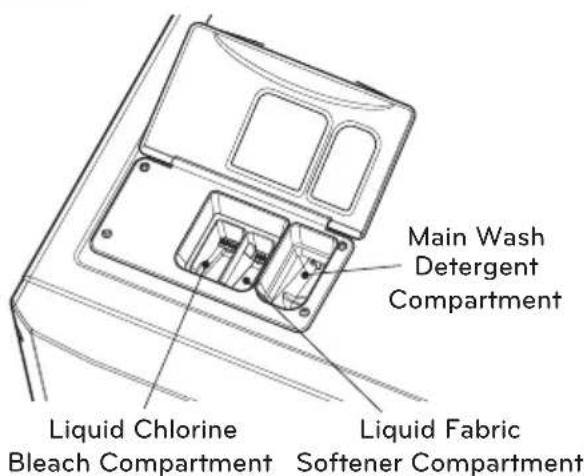
text_image
Main Wash Detergent Compartment Liquid Chlorine Bleach Compartment Liquid Fabric Softener Compartment-Stack modell-
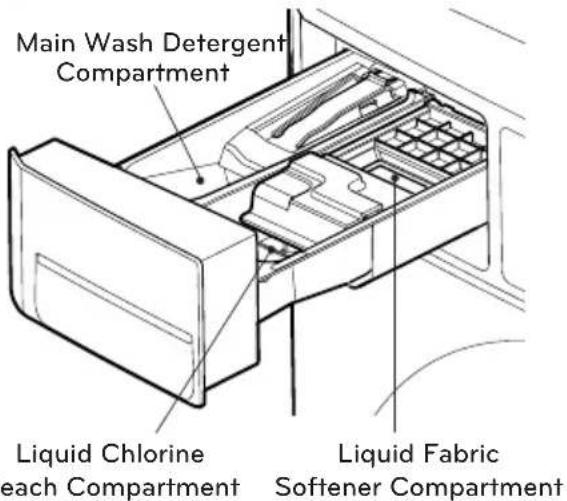
text_image
Main Wash Detergent Compartment Liquid Chlorine each Compartment Liquid Fabric Softener CompartmentLiquid Bleach Compartment
This compartment holds liquid chlorine bleach, which will be dispensed automatically at the proper time during the wash cycle.
NOTE
- Do not add powdered or liquid color-safe bleach to this compartment.
- Always follow the manufacturer's recommendations when adding bleach. Do not exceed the maximum fill line. Using too much bleach can damage fabrics.
- Never pour undiluted liquid chlorine bleach directly onto the load or into the drum. Fabric damage can occur.
Fabric Softener Compartment
This compartment holds liquid fabric softener, which will be automatically dispensed during the final rinse cycle.
NOTE
- Always follow the manufacturer's recommendations when adding fabric softener. Do not exceed the maximum fill line. Using too much fabric softener may result in stained clothes.
- Dilute concentrated fabric softeners with warm water. Do not exceed the maximum fill line.
- Never pour fabric softener directly onto the load or into the drum.
- Do not add the fabric softener sheets to this compartment.
- Do not add 'fabric sheet softener' into the dispenser draw as it is likely to cause water to leak out. If 'fabric sheet softener' has been added, please pull out the dispenser draw and remove.
- The cycle LEDs are lit at the same time, when the prices of cycles are equal.
2) OPL type
- The cycle LEDs flash at the same time, and displays PUSH.
NOTE
• Price setting varies by country
- Set your country from Loc1 mode (Refer How to enter the TYPE)
- After EEPT, reset your country (Default country is EUK)
2. Insert card/coin (not for OPL type)
Insert a cash card that has a sufficient balance. The card balance should be more than the programmed vend price for a selected cycle.
NOTE
- When the card balance is not enough, machine displays the card balance for 5 seconds and then displays 6800 message repetitively
- Insert a sufficient amount of change that is more than the programmed vend price for the selected cycle.
NOTE
- The machine will not start until sufficient coins are inserted.
3. Select the cycle
Press the desired button and press the Start button. The display LED will show the remaining time and the selected cycle starts.
- Select cycles designed for different types of fabric and soil levels.
| CYCLE Fabric type | Wash/Rinse Temp. | |
| Hot | Cotton, linen, towels, shirts, sheets | Hot / Cold |
| Warm | Cotton, mixed loads, work clothes, jeans, shirts | Warm / Cold |
| Cold | Cotton, dress shirts, pants, wrinkle-free clothing, cotton/poly blend clothing, tablecloths | Cold / Cold |
| Delicates | Dress shirts, blouses, nylons, sheer or lacey garments | Cold / Cold |
4. Add super wash
Wash time or rinse cycle can be added when additional coin is inserted or a valid cash card is entered.
5. Change course
You cannot change the cycle while the machine is running.
6. Cycle finish
The machine stops and LED display shows End with beeper sound.
* Do not work any button and stop the washer (When the washer is operating) or (when a cycle is in progress)
WARNING
- To reduce the risk of fire, electric shock, or injury to persons, read the IMPORTANT SAFETY INSTRUCTIONS before operating this appliance.
PROGRAMMING MODE
: You can check machine information or change setting on Program setup, Collect Information Data, Diagnostic Test.
There are two methods that you can enter programming mode.
how to enter Programming mode
You can enter programming mode only for Idle state and pause state.
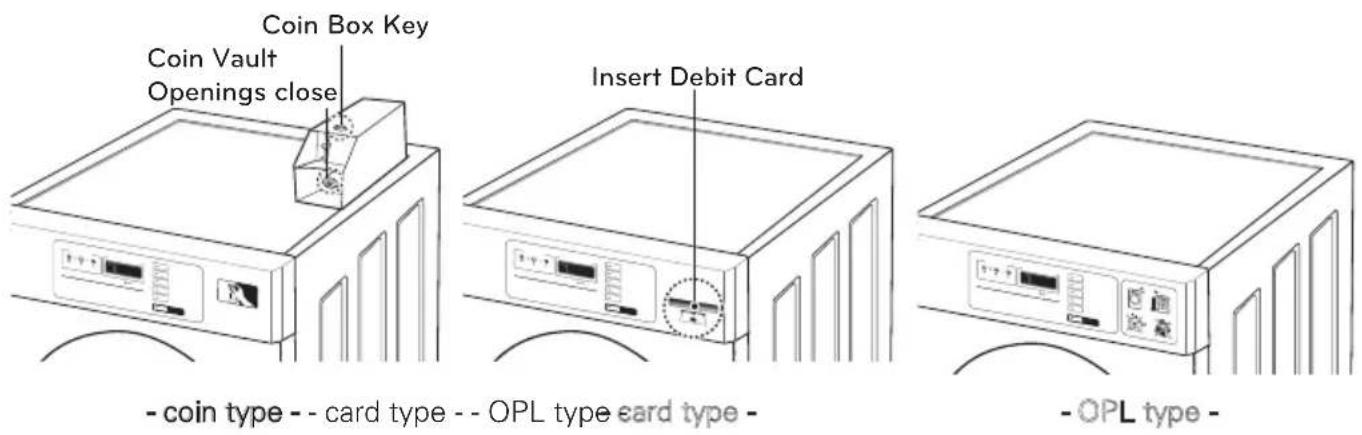
- Card Type
1) Insert service card.
2) Display will show L9C1
-Coin Type
1) Dissemble upper coin box key.
2) Take out the coin drop from the coin box.
3) Turn on/off the toggle switch at the back of the coin box.
4) Display will show L9C1
-All Types
1) Push the Hot & Cold button at the same time.
2) Push the Warm button 3 times.
3) Push the Start button.
4) Display will show L9C1
how to use button
You can change Washer vend price, cycle time and Cycle parameters, etc.
| Press Button | Description |
| Hot | Moves to upper level or Comes back to Idle State |
| Warm | Moves through modes in the same level (+) |
| Cold | Moves through modes in the same level (-) |
| Start Enters | the selected mode |
text_image
Coin Box Key Coin Vault Openings close Insert Debit Card - coin type -- card type -- OPL type card type - - OPL type -NOTE
- If you turn on the power without connecting meter case for the first time, the machine display L9C1.
- When the machine is shipped from the factory, it is set in the coin type. You can change Card/ Coin type by button. (For more information refer to SETUP mode.)
- The machine will display PUSH for OPL type
• Price setting varies by country - Set your country from Loc (Refer How to enter the TYPE)
• After EEPT, reset your country (Default country is EUK)
Structure of Programming mode - Card / Coin type
Algorithm flow chart shows how to control the programming mode.
Before program set, check the structure of the programming mode.
- Turn on/off toggle switch or insert service card, for entering setup mode (or follow OPL type instructions).
- Press Hot button to move to the upper level.
- Press Warm (+) or Cold (-) button if you want to be at the same level.
- Press Start button to enter the details of Setup or Diagnostic Tests.
SE UP
is to set price value, time value, vend type, etc.
ESE
consists of line test, reset, free cycle, and kill cycle.
CLCT
is to collect the usage data.
| STEP | TEST | CLCT |
| r9Pr CCCC | L9Cl | r9Pr AC rC It Ad |
| r9CP nr PC | L9C2 | r9CP ACCC It UC |
| r9rP BR rt | LIFE | r9rP AC AC It AC |
| r9HP tSSd | EEPt | r9HP ACHC It tI |
| SPPr Co1 | t13E | DE LC AC SC ACTI |
| SPCP Co2 | COUr | It rC AC BF It BC |
| SPrP PIPo | hILL | It CC AC UC AC BC |
| SPHP to Pt | DUcT | It AC AC FC SCPr |
| SCPA UULE | PASS | It HC AC rt to Pr |
| SPCt bEEP | tcl | It SC It nr It d |
| FEA1 rEFr | It tF It tb ACd | |
| FEA2 dHUE | It UC It Pd It Sd | |
| SPPd rSEn | It FC It dd AC Sd | |
| SPbt tYPE | ||
| SPEt CuSt | ||
| rPdc | ||
| SPdc |
NOTE
- Do not use L9C2 LIFE
- It is used only in inspecting the machine.
• Price setting varies by country - Set your country from Loc1(Refer How to enter the E4PE)
• After EEPT, reset your country (Default country is EUK)
Structure of Programming mode - OPL type
Algorithm flow chart shows how to control the programming mode.
Before program set, check the structure of the programming mode.
The method of entering setup mode.
1) Push the Hot & Cold button at the same time.
2) Push the Warm button 3 times.
3) Push the Start button.
4) Display will show L9C1
SETUP is to set price value, time value, vend type, etc.
test consists of line test, reset, free cycle, and kill cycle.
CLCT is to collect the usage data.
| S1UP | TEST | CLCT |
| -9PA CCC | L9CU | -9Pr AC FC ITAd |
| -9CP nr PC | L9C2 | -9CP ACCC ITUC |
| -9AP 80 rt | LIFE | -9rP AC AC ITAC |
| -9HP tSSd | EEPt | -9HP ACHC ITtI |
| SPPa C64 | 873E | dELC AC SC ACTI |
| SPCP I Co2 | COU- | It rC AC EF ITcC |
| SPrA P1Po | HILL | It CC AC UC ACTC |
| SPHP to Pt | DUCT | It AC AC FC SCPr |
| SCPb UULE | PASS | It HC AC rt to Pr |
| SPct bEEP | tcl | It SC It nr B1td |
| FEA1 rFFr | It EF It tb ACd | |
| FEA2 dHUe | It UC It Pd It Sd | |
| SPpd rSEn | It FC It dd AC Sd | |
| SPbt type | ||
| SPBt CuSt | ||
| rPdc | ||
| SPdc |
NOTE
- Do not use L9C2 LIFE
- It is used only in inspecting the machine.
PROGRAMMING MODE -SETUP MODE
Setup Mode : Set lay)
You can change washer vend price, cycle time, and cycle parameters, etc.
Entering setup mode
- Coin type – Turn on/off toggle switch.
- Card type – Insert the service card.
- All Types - 1) Push the Hot & Cold button at the same time.
2) Push the Warm button 3 times.
3) Push the Start button.
- Then, the washer displays L901
1. How to change regular price.
Enter setup mode.You will see LqC1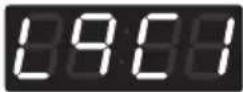 | Button Display | |
| Press the Hot button. | 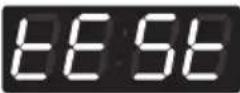 | |
| Press the Warm or the Cold button until in the display. | 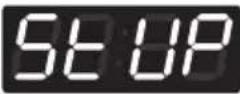 | |
| Press the Start button. | 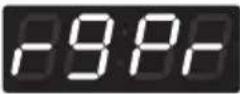 | |
| Press the Start button.Display previous regular price. | 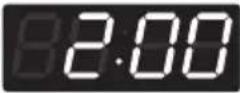 | |
| Press Warm(+) or Cold(-) button to set the regular price.(The vend price can be set from 0~10.00 in 0.1 increments.) | 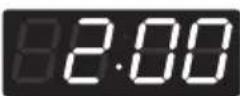 | |
| Press the Start button.The machine sets up the regular price, then advances to the next process automatically. | 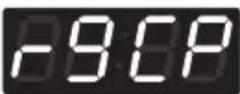 | |
| 1. Continue to set up the next price.2. Stop the change of setup value and go back to ready mode.• Coin type - Turn on/off toggle switch.• Card type - Pull the service card.• All types - Push the Hot button twice. |
NOTE
• Price setting varies by country
- Set your country from Loc! (Refer How to enter the TYPE)
• After EEPT, reset your country (Default country is EUK)
2. How to change regular delicates price.
Enter setup mode.You will see LqC1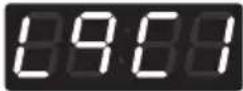 | Button Display | |
| Press the Hot button. | 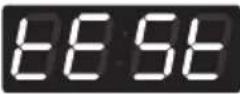 | |
| Press the Warm or the Cold button until set-up in the display. | 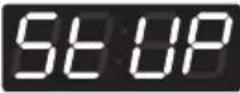 | |
| Press the Start button. | 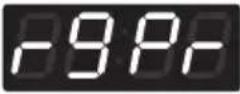 | |
| Press the Warm or the Cold button until set-up in the display. | 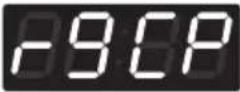 | |
| Press the Start button.Display previous regular delicates price. | 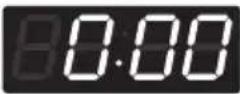 | |
| Press Warm(+) or Cold(-) button to set the regular delicates price. (The vend price can be set from 0~10.00 in 0.1 increments.) | 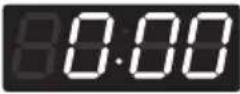 | |
| Press the Start button.The machine sets up the regular delicates price, then advances to the next process automatically. | 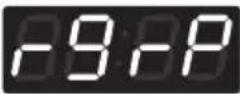 | |
| 1. Continue to set up the next price.2. Stop the change of setup value and go back to ready mode.• Coin type - Turn on/off toggle switch.• Card type - Pull the service card.• All types - Push the Hot button twice. |
NOTE
• Price setting varies by country
- Set your country from Loc! (Refer How to enter the E4PE)
• After EEPT, reset your country (Default country is EUK)
3. How to change regular warm & cold price
Enter setup mode.You will see LqC1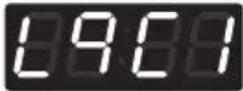 | Button Display | |
| Press the Hot button. | 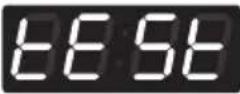 | |
| Press theWarmor theColdbutton until Set UPars in the display. | 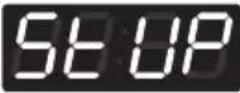 | |
| Press theStartbutton. | 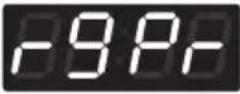 | |
| Press theWarmor theColdbutton until Set UPars in the display. | 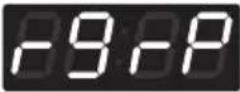 | |
| Press theStartbutton.Display previous regular warm & cold price. |  | |
| PressWarm(+)orCold(-)button to set the regular warm price. (The vend price can be set from 0~10.00 in 0.1 increments.) |  | |
| Press theStartbutton.The machine sets up the regular warm & cold price, then advances to the next process automatically. | 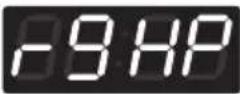 | |
| 1. Continue to set up the next price.2. Stop the change of setup value and go back to ready mode.• Coin type - Turn on/off toggle switch.• Card type - Pull the service card.• All types - Push the Hot button twice. |
NOTE
• Price setting varies by country
- Set your country from Loc! (Refer How to enter the E4PE)
• After EEPT, reset your country (Default country is EUK)
4. How to change regular hot price
| Enter setup mode.You will see LqC1 | Button Display | |
| Press the Hot button. | | |
| Press the Warm or the Cold button until in the display. | | |
| Press the Start button. | | |
| Press the Warm or the Cold button until in the display. | 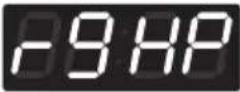 | |
| Press the Start button.Display previous regular hot price. | 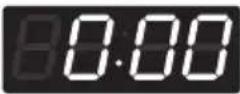 | |
| Press Warm(+) or Cold(-) button to set the regular hot price. (The vend price can be set from 0~10.00 in 0.1 increments.) | 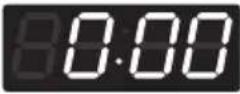 | |
| Press the Start button.The machine sets up the regular hot price, then advances to the next process automatically. | 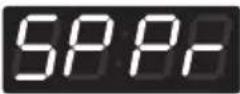 | |
| 1. Continue to set up the next price.2. Stop the change of setup value and go back to ready mode.• Coin type - Turn on/off toggle switch.• Card type - Pull the service card.• All types - Push the Hot button twice. |
NOTE
• Price setting varies by country
- Set your country from Loc! (Refer How to enter the E4PE)
• After EEPT, reset your country (Default country is EUK)
5. How to change special price
| Enter setup mode.You will see LqC1 | Button Display | |
| Press the Hot button. | | |
| Press theWarmor theColdbutton untilSepars in the display. | | |
| Press theStartbutton. | | |
| Press theWarmor theColdbutton untilSepars in the display. | 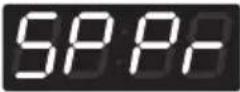 | |
| Press theStartbutton.Display previous special price. | 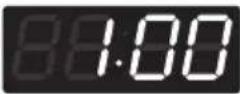 | |
| PressWarm(+)orCold(-)button to set a special price.(The vend price can be set from 0~10.00 in 0.1 increments.) |  | |
| Press theStartbutton.The machine sets up the special price, then advances to the next process automatically. | 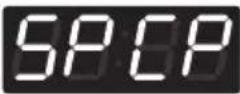 | |
| 1. Continue to set up the next price.2. Stop the change of setup value and go back to ready mode.• Coin type - Turn on/off toggle switch.• Card type - Pull the service card.• All types - Push the Hot button twice. |
NOTE
• Price setting varies by country
- Set your country from Loc! (Refer How to enter the TYPE)
• After EEPT, reset your country (Default country is EUK)
6. How to change special delicates price
Enter setup mode.You will see LqC1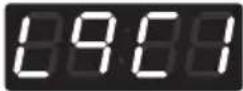 | Button Display | |
| Press the Hot button. | 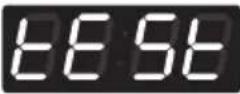 | |
| Press theWarmor theColdbutton until SETURs in the display. | 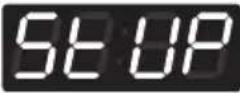 | |
| Press theStartbutton. | 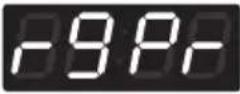 | |
| Press theWarmor theColdbutton until SETURs in the display. | 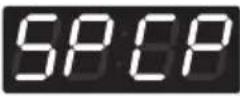 | |
| Press theStartbutton.Display previous special delicates price. | 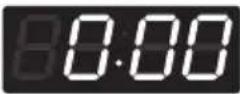 | |
| PressWarm(+)orCold(-)button to set the special delicates price. (The vend price can be set from 0~10.00 in 0.1 increments.) | 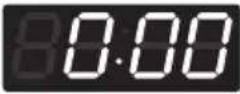 | |
| Press theStartbutton.The machine sets up the special delicates price, then advances to the next process automatically. | 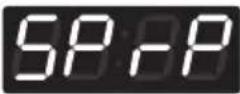 | |
| 1. Continue to set up the next price.2. Stop the change of setup value and go back to ready mode.• Coin type - Turn on/off toggle switch.• Card type - Pull the service card.• All types - Push the Hot button twice. |
NOTE
• Price setting varies by country
- Set your country from Loc! (Refer How to enter the E4PE)
• After EEPT, reset your country (Default country is EUK)
7. How to change special warm & cold price
Enter setup mode.You will see LqC1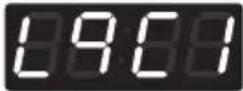 | Button Display | |
| Press the Hot button. | 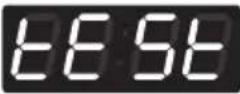 | |
| Press theWarmor theColdbutton untilSepars in the display. | 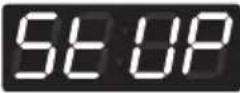 | |
| Press theStartbutton. | 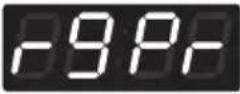 | |
| Press theWarmor theColdbutton untilSepars in the display. | 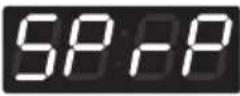 | |
| Press theStartbutton.Display previous special warm price. | 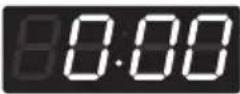 | |
| PressWarm(+) orCold(-)button to set the special warm & cold price. (The vend price can be set from 0~10.00 in 0.1 increments.) | 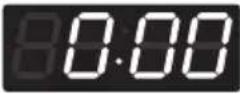 | |
| Press theStartbutton.The machine sets up the special warm & cold price, then advances to the next process automatically. | 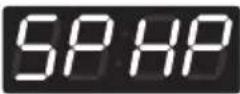 | |
| 1. Continue to set up the next price.2. Stop the change of setup value and go back to ready mode.• Coin type - Turn on/off toggle switch.• Card type - Pull the service card.• All types - Push the Hot button twice. |
NOTE
• Price setting varies by country
- Set your country from Loo! (Refer How to enter the E4PE)
• After EEPT, reset your country (Default country is EUK)
8. How to change special hot price
| Enter setup mode.You will see LqC1 | Button Display | |
| Press the Hot button. | | |
| Press the Warm or the Cold button until in the display. | | |
| Press the Start button. | | |
| Press the Warm or the Cold button until in the display. | 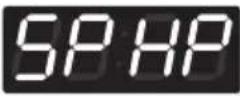 | |
| Press the Start button.Display previous special hot price. |  | |
| Press Warm(+) or Cold(-) button to set the special hot price. (The vend price can be set from 0~10.00 in 0.1 increments.) |  | |
| Press the Start button.The machine sets up the special hot price, then advances to the next process automatically. | 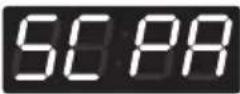 | |
| 1. Continue to set up the next price.2. Stop the change of setup value and go back to ready mode.• Coin type - Turn on/off toggle switch.• Card type - Pull the service card.• All types - Push the Hot button twice. |
NOTE
• Price setting varies by country
- Set your country from Loc! (Refer How to enter the E4PE)
• After EEPT, reset your country (Default country is EUK)
9. How to change add super wash price
Enter setup mode.You will see LqC1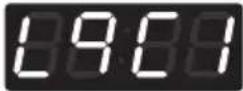 | Button Display | |
| Press the Hot button. | 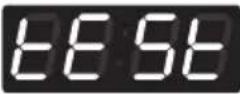 | |
| Press theWarmor theColdbutton untilSepars in the display. | 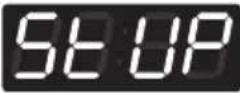 | |
| Press theStartbutton. | 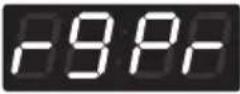 | |
| Press theWarmor theColdbutton untilSepars in the display. | 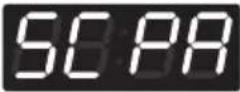 | |
| Press theStartbutton.Display previous add super wash price. | 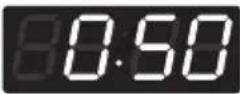 | |
| PressWarm(+)orCold(-)button to set add super wash price. (The vend price can be set from 0~10.00 in 0.1 increments.) | 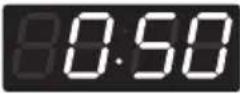 | |
| Press theStartbutton.The machine sets up the add super wash price, then advances to the next process automatically. | 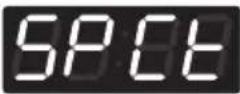 | |
| 1. Continue to set up the next mode.2. Stop the change of setup value and go back to ready mode.• Coin type - Turn on/off toggle switch.• Card type - Pull the service card.• All types - Push the Hot button twice. |
NOTE
• Price setting varies by country
- Set your country from Loo! (Refer
How to enter the TYPE)
• After EEPT, reset your country (Default country is EUK)
10. How to change add super wash type
Enter setup mode.You will see LqC1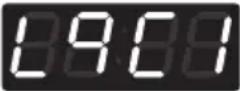 | Button Display | |
| Press the Hot button. | 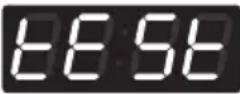 | |
| Press the Warm or the Cold button until 5x10⁴ars in the display. | 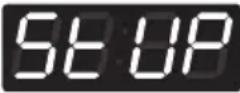 | |
| Press the Start button. | 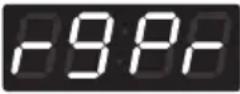 | |
| Press the Warm or the Cold button until 5x10⁴ars in the display. | 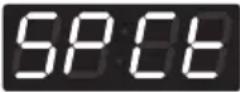 | |
| Press the Start button.Display previous add super wash type. | 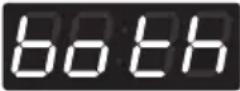 | |
Press Warm or Cold button and then select the add super wash type you want.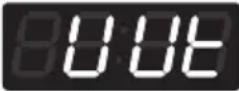 Wash time increase. Wash time increase.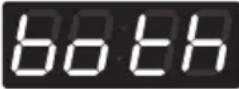 Both (Wash time increase and rinsing once more.) Both (Wash time increase and rinsing once more.)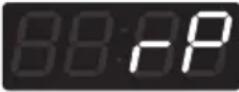 Rinsing once more. Rinsing once more. | 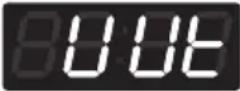 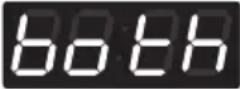 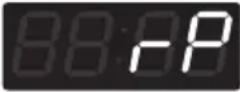 | |
| Press the Start button.The machine sets up the add super wash type, then advances to the next process automatically. | 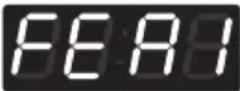 | |
| 1. Continue to set up the next mode.2. Stop the change of setup value and go back to ready mode.• Coin type - Turn on/off toggle switch.• Card type - Pull the service card.• All types - Push the Hot button twice. |
11. How to enter the FERI
Enter setup mode.You will see LqC1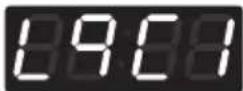 | Button Display | |
| Press the Hot button. | 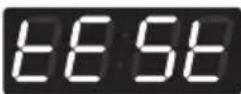 | |
| Press the Warm or the Cold button until 5:45ars in the display. | 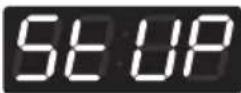 | |
| Press the Start button. | 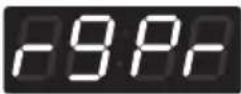 | |
| Press the Warm or the Cold button until 5:84ars in the display. | 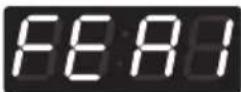 |
Structure of (F)Rht of
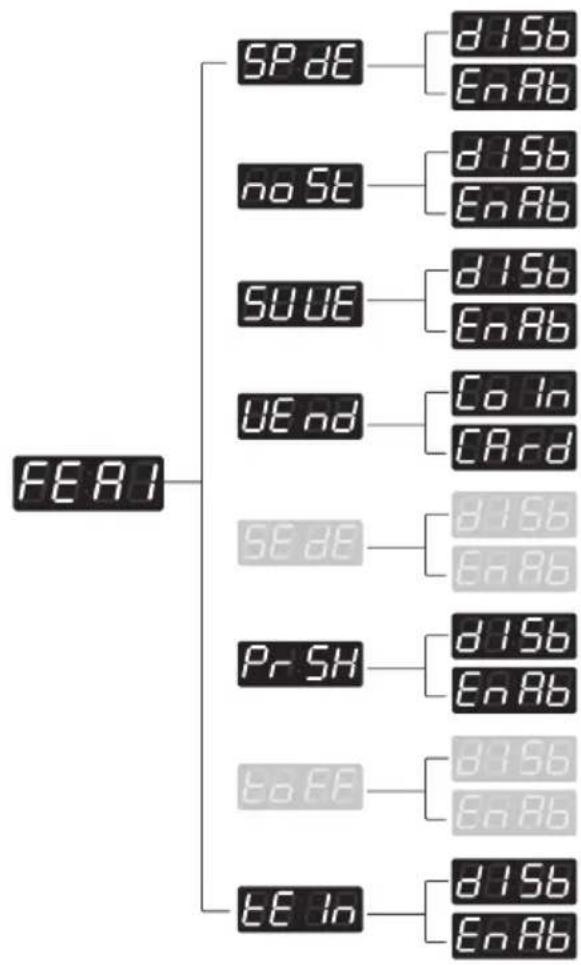
flowchart
graph TD
    A["FEAR1"] --> B["SPdE"]
    A --> C["noSt"]
    A --> D["SUVE"]
    A --> E["UEnd"]
    A --> F["SEdE"]
    A --> G["PrSH"]
    A --> H["toFF"]
    A --> I["tEIn"]
    B --> J["dISb"]
    B --> K["EnAb"]
    C --> L["dISb"]
    C --> M["EnAb"]
    D --> N["dISb"]
    D --> O["EnAb"]
    E --> P["Co In"]
    E --> Q["CArd"]
    F --> R["dISb"]
    F --> S["EnAb"]
    G --> T["dISb"]
    G --> U["EnAb"]
    H --> V["dISb"]
    H --> W["EnAb"]
    I --> X["dISb"]
    I --> Y["EnAb"]
FEAR
text_image
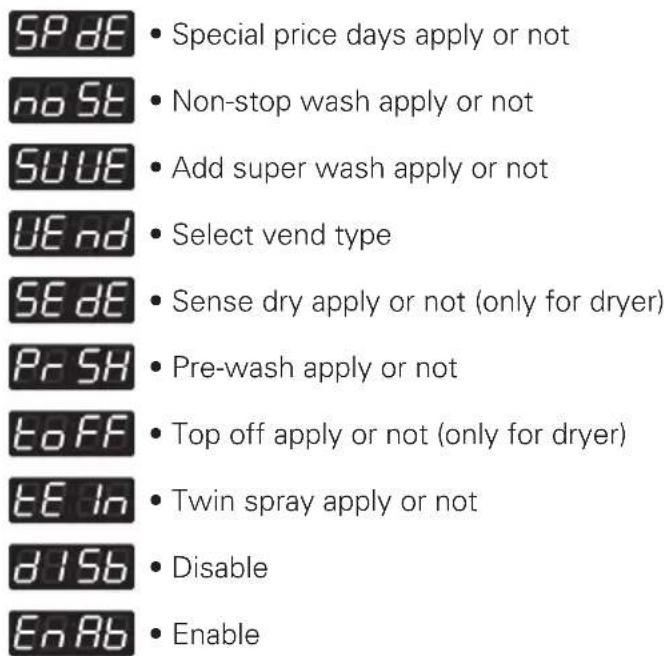
SPdE noSt SUVE UEnd SEdE PrSH toFF tEIn d15b EnAb • Special price days apply or not • Non-stop wash apply or not • Add super wash apply or not • Select vend type • Sense dry apply or not (only for dryer) • Pre-wash apply or not • Top off apply or not (only for dryer) • Twin spray apply or not • Disable • Enable11-1. Special price day setup
Enter setup mode.You will see LqC1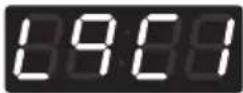 | Button Display | |
| Press the Hot button. | 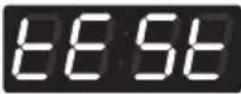 | |
| Press the Warm or the Cold button until 5:45ars in the display. | 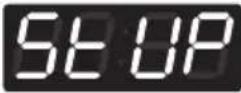 | |
| Press the Start button. | 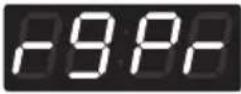 | |
| Press the Warm or the Cold button until 5:45ars in the display. | 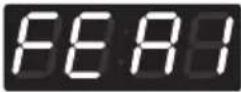 | |
| Press the Start button.Display SP de | 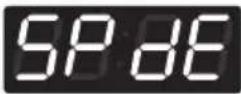 | |
Press the Start button.Press Warm or Cold button and then select d15b or EnAb .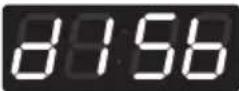 Disable Disable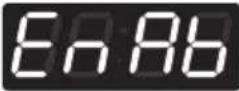 Enable Enable | One or the other will display.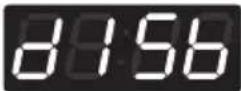 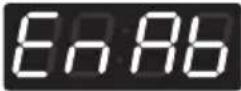 | |
| Press the Start button.The machine sets up the special price day, then advances to the next process automatically. | 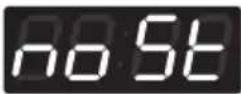 | |
| 1. Continue to set up the next mode.2. Stop the change of setup value and go back to ready mode.• Coin type - Turn on/off toggle switch.• Card type - Pull the service card.• All types - Push the Hot button three times. |
11-2. Non-stop rinse
Enter setup mode.You will see LqC1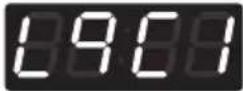 | Button Display | |
| Press the Hot button. | 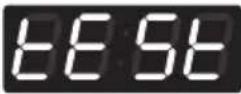 | |
| Press theWarmor theColdbutton until SETARS in the display. | 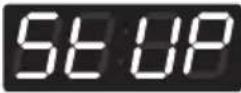 | |
| Press theStartbutton. | 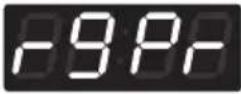 | |
| Press theWarmor theColdbutton untilFEARars in the display. | 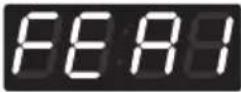 | |
| Press theStartbutton.DisplaySPdE |  | |
| Press theWarmor theColdbutton untilno SETARS in the display. | 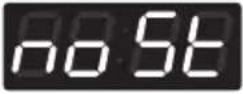 | |
Press theStartbutton.PressWarmorColdbutton and then selectd15borEnRb.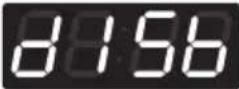 Disable Disable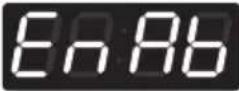 Enable Enable | One or the other will display.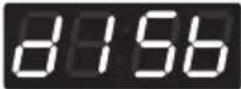 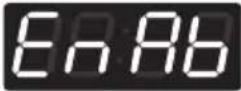 | |
| Press theStartbutton.The machine sets up the non-stop rinse, then advances to the next process automatically. | 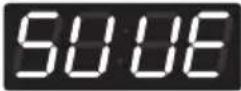 | |
| 1. Continue to set up the next mode.2. Stop the change of setup value and go back to ready mode.• Coin type - Turn on/off toggle switch.• Card type - Pull the service card.• All types - Push the Hot button three times. |
11-3. Add super wash setup
Enter setup mode.You will see LqC1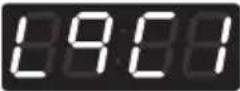 | Button Display | |
| Press the Hot button. | 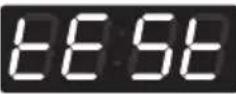 | |
| Press the Warm or the Cold button until SETURs in the display. | 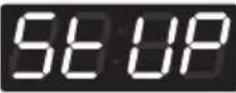 | |
| Press the Start button. | 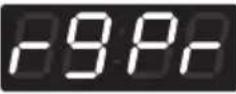 | |
| Press the Warm or the Cold button until FERARs in the display. | 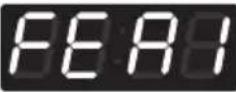 | |
| Press the Start button. Display SP dE | 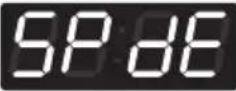 | |
| Press the Warm or the Cold button until SETURs in the display. | 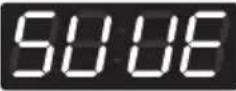 | |
Press the Start button. Press Warm or Cold button and then select d15b or EnRb . 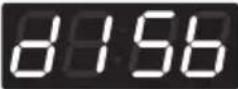 Disable Disable 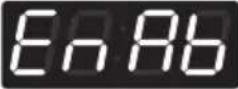 Enable Enable | One or the other will display.   | |
| Press the Start button. The machine sets up the add super wash application, then advances to the next process automatically. | 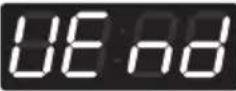 | |
| 1. Continue to set up the next mode. 2. Stop the change of setup value and go back to ready mode. Coin type - Turn on/off toggle switch. Card type - Pull the service card. All types - Push the Hot button three times. |
11-4. vend type setup - card type or coin type setup
Enter setup mode.You will see LqC1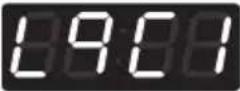 | Button Display | |
| Press the Hot button. | 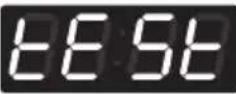 | |
| Press the Warm or the Cold button until in the display. | 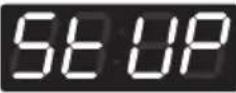 | |
| Press the Start button. | 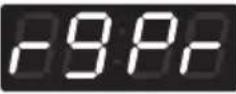 | |
| Press the Warm or the Cold button until in the display. | 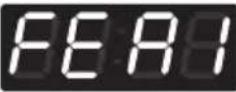 | |
| Press the Start button. Display SP dE | 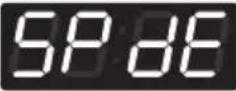 | |
| Press the Warm or the Cold button until in the display. | 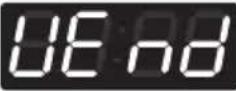 | |
Press the Start button. Press Warm or Cold button and then select to in or [ARD]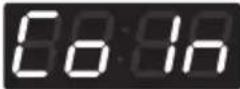 Coin type Coin type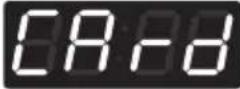 Card type Card type | One or the other will display.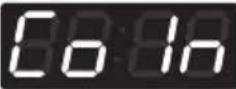 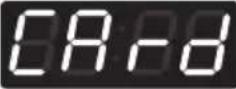 | |
| Press the Start button, then machine sets up the vend type. And it is returned to the standby state. |
NOTE
• After setting the Value to VEND, vend type is changed directly without power on/off.
- SE dE (Sense dry) is not available in washer.
11-5. Pre-wash setup
Enter setup mode.You will see LqC1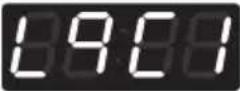 | Button Display | |
| Press the Hot button. | 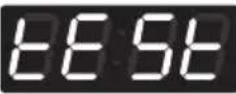 | |
| Press the Warm or the Cold button until Set-up in the display. | 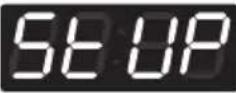 | |
| Press the Start button. |  | |
| Press the Warm or the Cold button until Set-up in the display. | 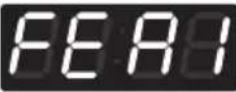 | |
| Press the Start button. Display SP dE | 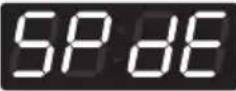 | |
| Press the Warm or the Cold button until Set-up in the display. |  | |
Press the Start button. Press Warm or Cold button and then select d15b or EnRb. 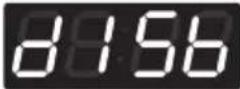 Disable Disable 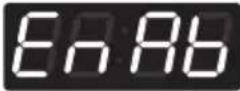 Enable Enable | One or the other will display. 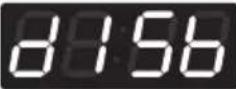 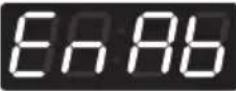 | |
| Press the Start button. The machine sets up the pre-wash, then advances to the next process automatically. |  | |
| 1. Continue to set up the next mode.2. Stop the change of setup value and go back to ready mode.• Coin type - Turn on/off toggle switch.• Card type - Pull the service card.• All types - Push the Hot button three times. |
NOTE
• toff (top off) is not available in washer (Only for dryer)
11-6. Twin spray setup
Enter setup mode.You will see LqC1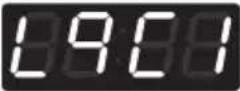 | Button Display | |
| Press the Hot button. |  | |
| Press the Warm or the Cold button until Set-up in the display. | 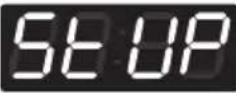 | |
| Press the Start button. | 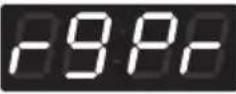 | |
| Press the Warm or the Cold button until Set-up in the display. | 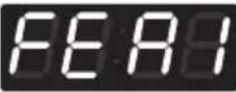 | |
| Press the Start button. Display SP dE |  | |
| Press the Warm or the Cold button until Set-up in the display. | 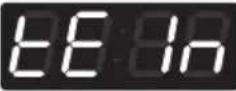 | |
Press the Start button. Press Warm or Cold button and then select d15b or En Ab 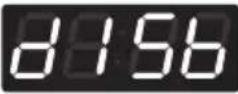 Disable Disable 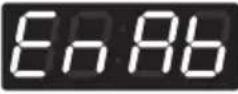 Enable Enable | One or the other will display. 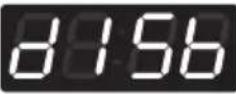 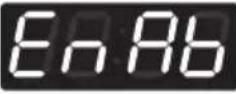 | |
| Press the Start button. The machine sets up the twin spray, then advances to the next process automatically. | 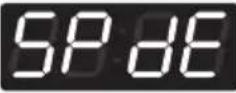 | |
| 1. Continue to set up the next mode. 2. Stop the change of setup value and go back to ready mode. Coin type - Turn on/off toggle switch. Card type - Pull the service card. All types - Push the Hot button three times. |
12. How to enter the FER2
Enter setup mode.You will see LqC1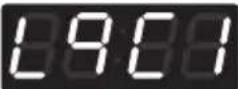 | Button Display | |
| Press the Hot button. | 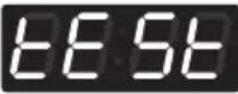 | |
| Press theWarmor theColdbutton until5xUPrs in the display. | 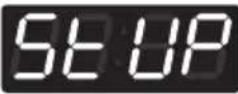 | |
| Press theStartbutton. | 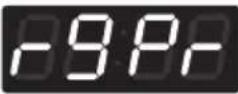 | |
| Press theWarmor theColdbutton untilFCRRrs in the display. | 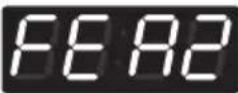 |
Structure of FER2

text_image
FEA2 PAUS d15b EnAbContent of FEA2
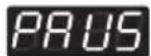
- Pause function apply or not
12-1. Pause function setup
Enter setup mode.You will see LqC1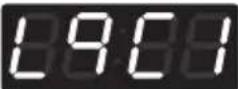 | Button Display | |
| Press the Hot button. |  | |
| Press theWarmor theColdbutton untilin the display. | 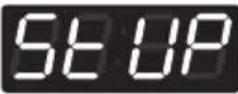 | |
| Press theStartbutton. | 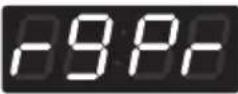 | |
| Press theWarmor theColdbutton untilin the display. | 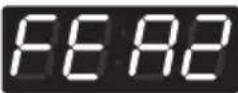 | |
| Press theStartbutton.DisplayPAUS | 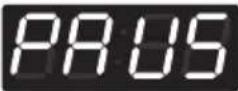 | |
Press theStartbutton.PressWarmorColdbutton and then selectd15borEnAb.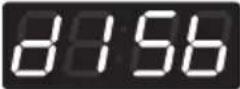 Disable Disable | One or the otherwill display.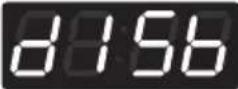 | |
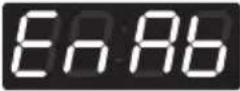 Enable Enable | 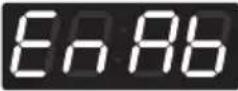 | |
| Press theStartbutton.The machine sets up the pause function, then advancesto the next process automatically. | ||
| 1. Continue to set up the next mode.2. Stop the change of setup value and go back to readymode.• Coin type - Turn on/off toggle switch.• Card type - Pull the service card.• All types - Push the Hot button three times. |
13. How to enter the special price day
Enter setup mode.You will see LqC1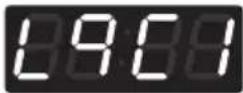 | Button Display | |
| Press the Hot button. | 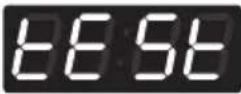 | |
| Press the Warm or the Cold button until in the display. | 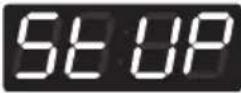 | |
| Press the Start button. |  | |
| Press the Warm or the Cold button until in the display. | 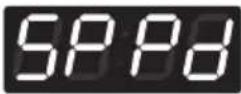 | |
| Press the Start button. Display Sun | 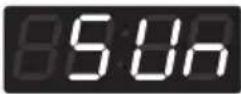 |
Structure of SPPd
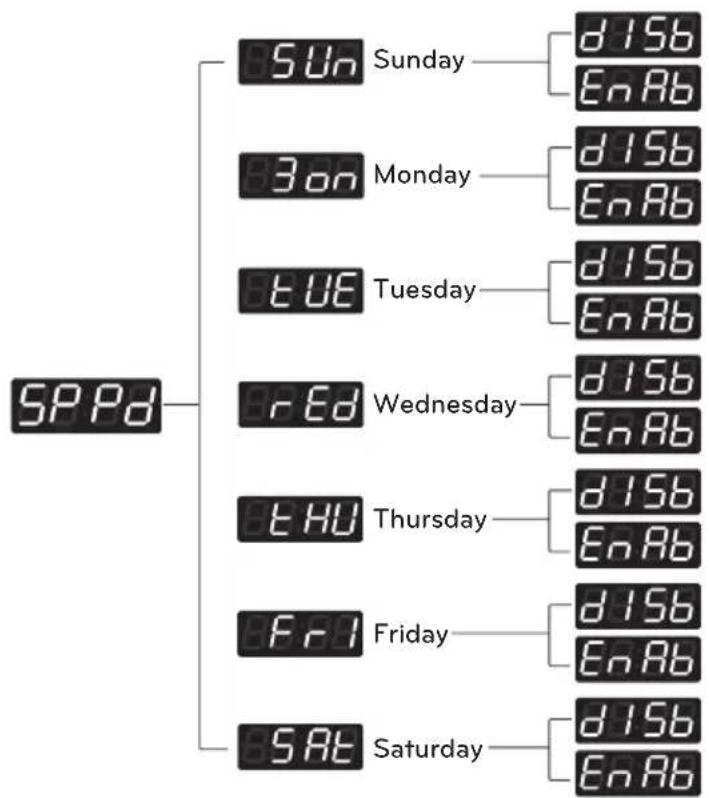
flowchart
graph TD
    A["SPPd"] --> B["Sun"]
    A --> C["30n"]
    A --> D["tUE"]
    A --> E["rED"]
    A --> F["tHU"]
    A --> G["FRI"]
    A --> H["SAT"]
    B --> I["d15b"]
    B --> J["EnAb"]
    C --> K["d15b"]
    C --> L["EnAb"]
    D --> M["d15b"]
    D --> N["EnAb"]
    E --> O["d15b"]
    E --> P["EnAb"]
    F --> Q["d15b"]
    F --> R["EnAb"]
    G --> S["d15b"]
    G --> T["EnAb"]
    H --> U["d15b"]
    H --> V["EnAb"]
13-1. How to change to Sunday
Enter setup mode.You will see LqC1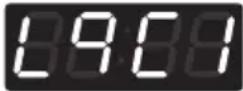 | Button Display | |
| Press the Hot button. | 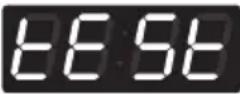 | |
| Press the Warm or the Cold button until 500+ars in the display. | 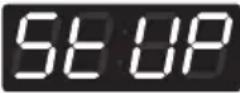 | |
| Press the Start button. | 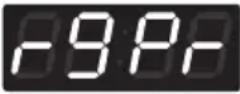 | |
| Press the Warm or the Cold button until 500+ars in the display. | 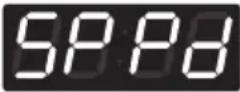 | |
| Press the Start button. Display Sun | 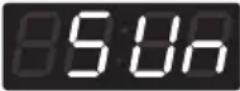 | |
Press the Start button. Press Warm or Cold button and then select d15b or EnAb. 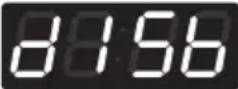 Disable Disable 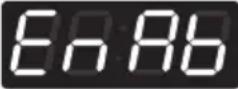 Enable Enable | One or the other will display. 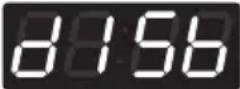  | |
| Press the Start button. The machine sets up the special price day (Sunday), then advances to the next process automatically. | 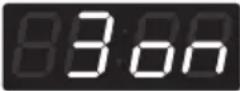 | |
| 1. Continue to set up the next mode.2. Stop the change of setup value and go back to ready mode.• Coin type - Turn on/off toggle switch.• Card type - Pull the service card.• All types - Push the Hot button three times. |
NOTE
- As explained on the previous page, similarly, other days can be set up by the same method.
14. Special price beginning time setup
Enter setup mode.You will see LqC1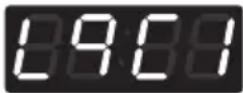 | Button Display | |
| Press the Hot button. | 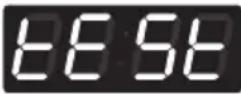 | |
| Press theWarmor theColdbutton untilStUPersin the display. | 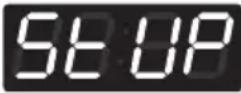 | |
| Press theStartbutton. | 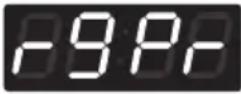 | |
| Press theWarmor theColdbutton untilSPBearsin the display. | 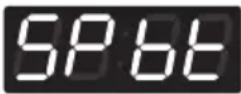 | |
| Press theStartbutton.Display previous special price beginning time. | 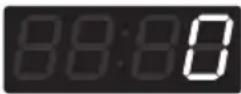 | |
| PressWarm(+)orCold(-)button to select time between0 and 23 | ||
| Press theStartbutton.The machine sets up the special price beginning time,then advances to the next process automatically. |  | |
| 1. Continue to set up the next mode.2. Stop the change of setup value and go back to ready mode.• Coin type - Turn on/off toggle switch.• Card type - Pull the service card.• All types - Push the Hot button twice. |
15. Special price ending time setup
Enter setup mode.You will see LqC1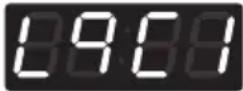 | Button Display | |
| Press the Hot button. | 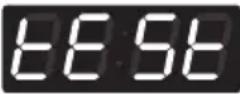 | |
| Press theWarmor theColdbutton until SETters in the display. | 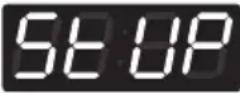 | |
| Press theStartbutton. | 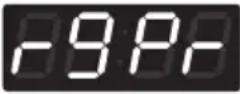 | |
| Press theWarmor theColdbutton until SETters in the display. | 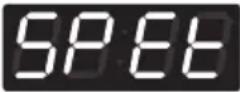 | |
| Press theStartbutton.Display previous Special Price ending time. | 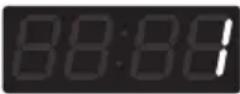 | |
| PressWarm(+)orCold(-)button to select time between 1 and 24. | ||
| Press theStartbutton.The machine sets up the special price ending time, then advances to the next process automatically. | 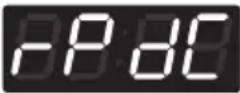 | |
| 1. Continue to set up the next mode.2. Stop the change of setup value and go back to ready mode.• Coin type - Turn on/off toggle switch.• Card type - Pull the service card.• All types - Push the Hot button twice. |
NOTE
- rPdC (regular priced dryer cycle time) is not available in washer.
- SPdC (special priced dryer cycle time) is not available in washer.
NOTE
- When setting up a special price period, the ending time must be later than the beginning time.
16. Washing time setup
Enter setup mode.You will see LqC1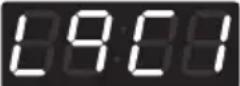 | Button Display | |
| Press the Hot button. | 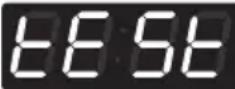 | |
| Press the Warm or the Cold button until stoprs in the display. | 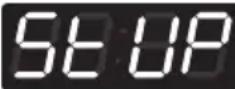 | |
| Press the Start button. | 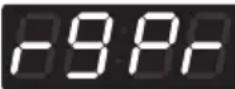 | |
| Press the Warm or the Cold button until stoprs in the display. | 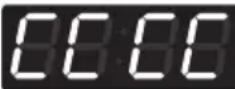 | |
| Press the Start button. Displaycos1Press Warm or Cold button to select course.cos1: Hot coursecos2: Warm coursecos3: Cold coursecos4: Delicates coursecos5: None (only for Heater model) | 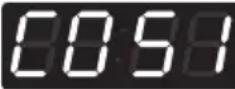 | |
| Press the Start button.Display previous wash time. | 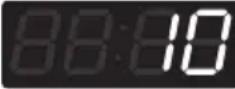 | |
| Press Warm(+) or Cold(-)button to select wash time.(Maximum 15 minutes, Minimum 5 minutes.) | ||
| Press the Start button.The machine sets up the wash time, then advances to the next process automatically. | 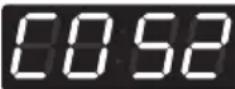 | |
| 1. Continue to set up the next mode.2. Stop the change of setup value and go back to ready mode.• Coin type - Turn on/off toggle switch.• Card type - Pull the service card.• All types - Push the Hot button three times. |
17. Rinsing times per cycle
Enter setup mode.You will see LqC1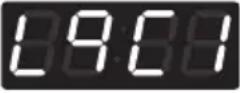 | Button Display | |
| Press the Hot button. | 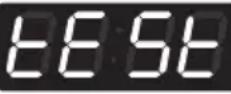 | |
| Press theWarmor theColdbutton untilSRrs in the display. | 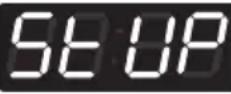 | |
| Press theStartbutton. | 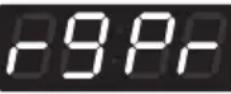 | |
| Press theWarmor theColdbutton untilSRrs in the display. | 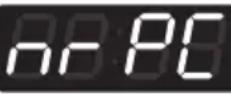 | |
| Press the Start button. DisplayCOS1Press Warm or Cold button to select course.COS1: Hot courseCOS2: Warm courseCOS3: Cold courseCOS4: Delicates courseCOS5: None (only for Heater model) | 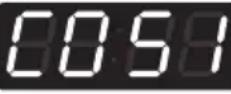 | |
| Press the Startbutton.Display previous rinsing times per cycle. | 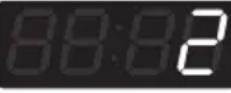 | |
| PressWarm(+)orCold(-)button to select rinsing times per cycle. (Max 5, Min 1) | ||
| Press the Startbutton.The machine sets up the rinsing times per cycle, then advances to the next process automatically. | 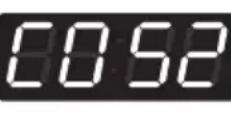 | |
| 1. Continue to set up the next mode.2. Stop the change of setup value and go back to ready mode.• Coin type - Turn on/off toggle switch.• Card type - Pull the service card.• All types - Push the Hot button three times. |
18. Rinsing time setup
Enter setup mode.You will see LqC1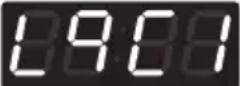 | Button Display | |
| Press the Hot button. | 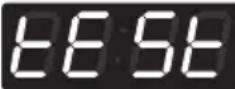 | |
| Press theWarmor theColdbutton until Startrs in the display. | 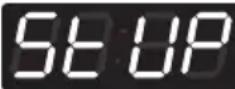 | |
| Press theStartbutton. | 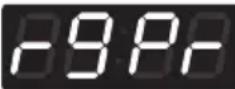 | |
| Press theWarmor theColdbutton until Startrs in the display. | 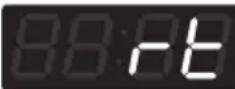 | |
| Press the Start button. DisplayCOS1Press Warm or Cold button to select course.COS1: Hot courseCOS2: Warm courseCOS3: Cold courseCOS4: Delicates courseCOS5: None (only for Heater model) | 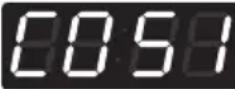 | |
| Press theStartbutton.Display previous rinsing time. | 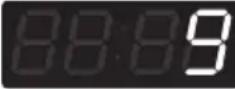 | |
| PressWarm(+)orCold(-)button to select rinse cycle.(Max 16min, Min 9min) | ||
| Press theStartbutton.The machine sets up the rinsing time, then advances to the next process automatically. |  | |
| 1. Continue to set up the next mode.2. Stop the change of setup value and go back to ready mode.• Coin type - Turn on/off toggle switch.• Card type - Pull the service card.• All types - Push the Hot button three times. |
19. Top spin speed – final spin time depends on RPM
Enter setup mode.You will see LqC1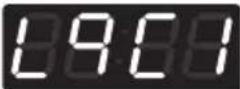 | Button Display | |
| Press the Hot button. | 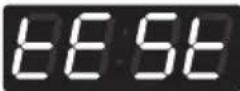 | |
| Press theWarmor theColdbutton untilStUPrs in the display. | 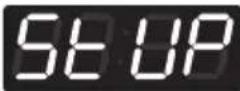 | |
| Press theStartbutton. | 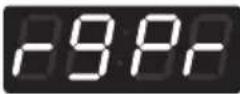 | |
| Press theWarmor theColdbutton untilESSars in the display. | 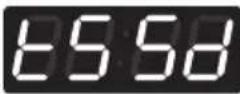 | |
Press the Start button. DisplayCOSIPress Warm or Cold button to select course.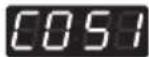 :Hot course :Hot course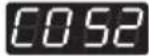 :Warm course :Warm course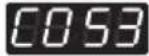 :Cold course :Cold course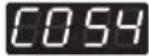 :Delicates course :Delicates course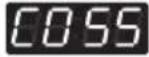 :None (only for Heater model) :None (only for Heater model) |  | |
| Press theStartbutton.Display previous top spin speed. | 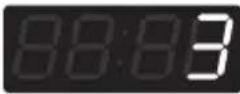 | |
| PressWarm(+)orCold(-)button to select top spin speed. (Refer to NOTE below for Top spin speed.) | ||
| Press theStartbutton.The machine sets up the top spin speed, then advances to the next process automatically. | 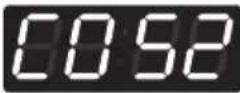 | |
| 1. Continue to set up the next mode.2. Stop the change of setup value and go back to ready mode.• Coin type - Turn on/off toggle switch.• Card type - Pull the service card.• All types - Push the Hot button three times. |
NOTE
- Top spin speed
0:1150 rpm
1:1000 rpm
2:900 rpm
3:800 rpm
4:700 rpm
5:600 rpm
6:500 rpm
20. value of coin 1
Enter setup mode.You will see LqC1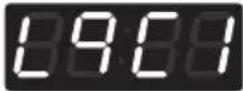 | Button Display | |
| Press the Hot button. | 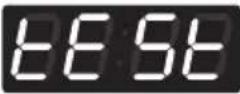 | |
| Press theWarmor theColdbutton untilSt UPars in the display. | 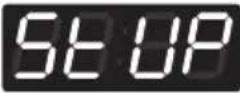 | |
| Press theStartbutton. | 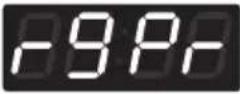 | |
| Press theWarmor theColdbutton untilF o hrs in the display. | 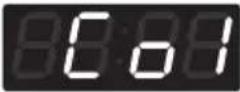 | |
| Press theStartbutton.Display previous coin 1 value. | 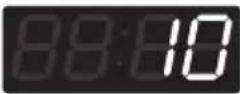 | |
| PressWarm(+) orCold(-)button to select value of coin 1 (The value can be set from 0~1000 in 10 increments.) | ||
| Press theStartbutton.The machine sets up the value of coin 1, then advances to the next process automatically. | 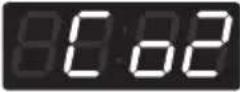 | |
| 1. Continue to set up the next price.2. Stop the change of setup value and go back to ready mode.• Coin type - Turn on/off toggle switch.• Card type - Pull the service card.• All types – Push the Hot button twice. |
NOTE
• Price setting varies by country
- Set your country from Loc! (Refer How to enter the ETYPE)
• After EEPT, reset your country (Default country is EUK)
21. value of coin 2
Enter setup mode.You will see LqC1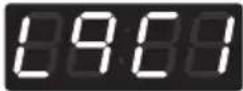 | Button Display | |
| Press the Hot button. | | |
| Press the Warm or the Cold button until 500ars in the display. | 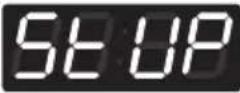 | |
| Press the Start button. | 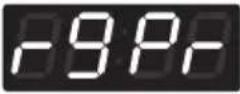 | |
| Press the Warm or the Cold button until 500ars in the display. | 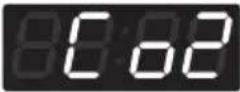 | |
| Press the Start button.Display previous coin 2 value. | 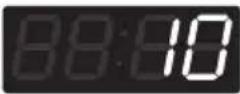 | |
| Press Warm(+) or Cold(-) button to select value of coin 2.(The value can be set from 0~1000 in 10 increments.) | ||
| Press the Start button.The machine sets up the value of coin 2, then advances to the next process automatically. | 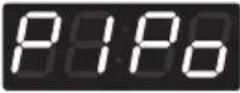 | |
| 1. Continue to set up the next mode.2. Stop the change of setup value and go back to ready mode.• Coin type - Turn on/off toggle switch.• Card type - Pull the service card.• All types - Push the Hot button twice. |
NOTE
- Coin 2 is only available for kiosk system.
NOTE
• Price setting varies by country
- Set your country from Loc! (Refer How to enter the TYPE)
• After EEPT, reset your country (Default country is EUK)
22. Penny increment pricing offset
This represents the cent increment price offset used when debit card is setup.
Enter setup mode.You will see LqC1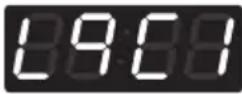 | Button Display | |
| Press the Hot button. | 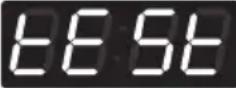 | |
| Press the Warm or the Cold button until SETARS in the display. | 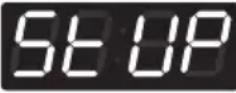 | |
| Press the Start button. | 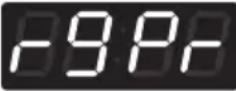 | |
| Press the Warm or the Cold button until PIPars in the display. | 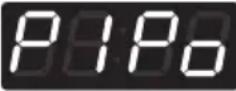 | |
| Press the Start button.Display previous penny increment pricing offset. |  | |
| Press Warm(+) or Cold(-) button to select value of PIPo.(0~4) | ||
| Press the Start button.The machine sets up the value of PIPo, then advances to the next process automatically. | 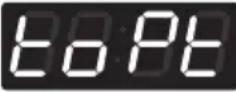 | |
| 1. Continue to set up the next mode.2. Stop the change of setup value and go back to ready mode.• Coin type - Turn on/off toggle switch.• Card type - Pull the service card.• All types - Push the Hot button twice. |
NOTE
- Penny Increment Pricing Offset is available only in card type.
(It hasn't affected the coin type's price setting.)

(top off time) is not available in washer.
23. How to change the water level
You can change the water level amongst three options.
- L indicate water level 23.8 [KHz]
- Elicate water level 23.5 [KHz]
- Hlicate water level 23.0 [KHz]
Enter setup mode.You will see LqC1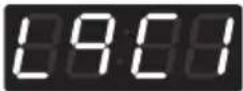 | Button Display | |
| Press the Hot button. | 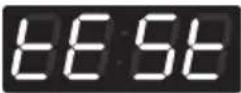 | |
| Press theWarmor theColdbutton untilSRUPrs in the display. | 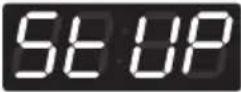 | |
| Press theStartbutton. | 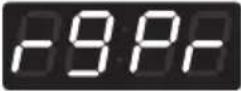 | |
| Press theWarmor theColdbutton untilSRILErs in the display. | 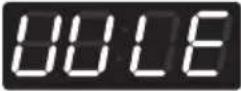 | |
| Press the Start button. DisplayCOS1Press Warm or Cold button to select course.COS1: Hot courseCOS2: Warm courseCOS3: Cold courseCOS4: Delicates courseCOS5: None (only for Heater model) | 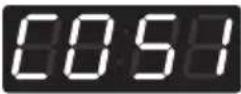 | |
| Press the Start button.PressWarm(+)orCold(-)button and then selectL0or31ddHIL023.8 [KHz]31ddKHz]23.0kHz | One or the other will display. 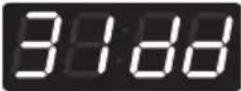 | |
| Press the Start button.The machine sets up the value of water level, then advances to the next process automatically. | 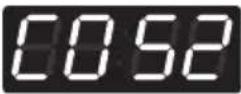 | |
| 1. Continue to set up the next mode.2. Stop the change of setup value and go back to ready mode.• Coin type – Turn on/off toggle switch.• Card type – Insert the service card.• All types – Push the Hot button three times. |
NOTE
- This function can be set only at the machine. It cannot be managed via the setup card. (It is not applied in setup card.)
24. Beep volume
Enter setup mode.You will see LqC1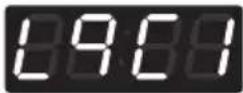 | Button Display | |
| Press the Hot button. | 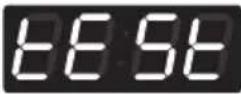 | |
| Press the Warm or the Cold button until set-upars in the display. | 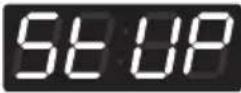 | |
| Press the Start button. | 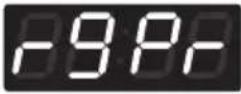 | |
| Press the Warm or the Cold button until set-upars in the display. | 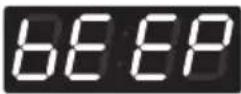 | |
| Press the Start button.Display previous value. | 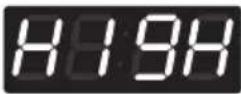 | |
| Press Warm(+)or Cold(-)button to select High or Low or Off. | ||
| Press the Start button.The machine sets up the beep volume, then advances to the next process automatically. | 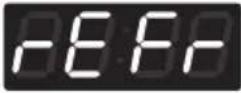 | |
| 1. Continue to set up the next mode.2. Stop the change of setup value and go back to ready mode.• Coin type – Turn on/off toggle switch.• Card type – Insert the service card.• All types – Push the Hot button twice. |
25. Time to keep the coin (Use only for coin type)
Enter setup mode.You will see LqC1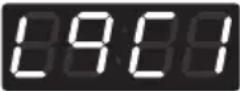 | Button Display | |
| Press the Hot button. | 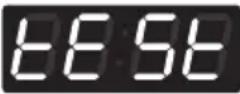 | |
| Press the Warm or the Cold button until set-upars in the display. | 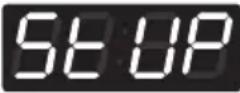 | |
| Press the Start button. | 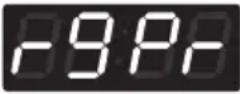 | |
| Press the Warm or the Cold button until set-upars in the display. | 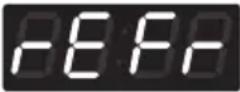 | |
| Press the Start button.Display previous value. |  | |
| Press Warm(+)or Cold(-)button to select button to select time between 0 ~ 180. | ||
| Press the Start button.The machine sets up the time to keep the coin, then advances to the next process automatically. | 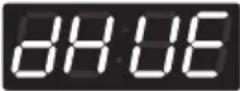 | |
| 1. Continue to set up the next mode.2. Stop the change of setup value and go back to ready mode.• Coin type - Turn on/off toggle switch.• Card type - Pull the service card.• All types - Push the Hot button twice. |
26. how to set drop count
Enter setup mode.You will see LqC1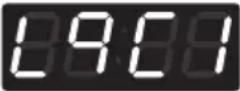 | Button Display | |
| Press the Hot button. | 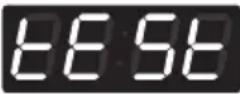 | |
| Press theWarmor theColdbutton until Set upars in the display. | 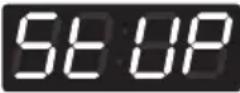 | |
| Press theStartbutton. | 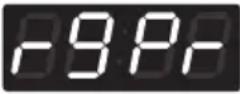 | |
| Press theWarmor theColdbutton until Set upars in the display. | 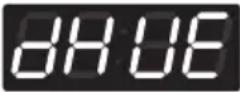 | |
| Press theStartbutton.Display default drop count. | 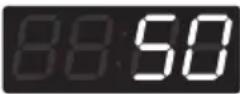 | |
| PressWarmorColdbutton to select time between 25 and 50.(Unit of drop count : 5) | ||
| Press theStartbutton.The machine sets up the drop count, then advances to the next process automatically. |  | |
| 1. Continue to set up the next mode.2. Stop the change of setup value and go back to ready mode.• Coin type - Turn on/off toggle switch.• Card type - Pull the service card.• All types - Push the Hot button twice. |
27. how to set rinse spin enable
Enter setup mode.You will see LqC1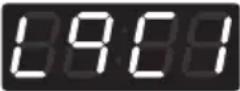 | Button Display | |
| Press the Hot button. | 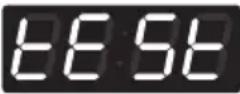 | |
| Press theWarmor theColdbutton until Set UPars in the display. | 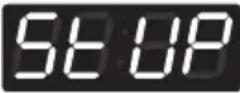 | |
| Press theStartbutton. | 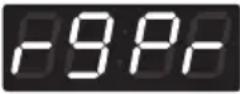 | |
| Press theWarmor theColdbutton until Set Sears in the display. | 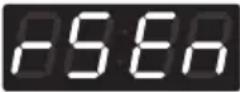 | |
| Press theStartbutton.Display step of rinse.(rs1~rs5) | 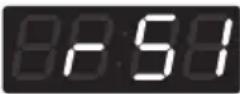 | |
| Press theWarmor theColdbutton to select risne spin En Ab or d ISb | 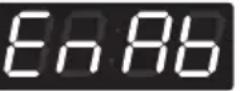 | |
| Press theStartbutton.The machine sets up the rinse spin and display next step of rinse. | 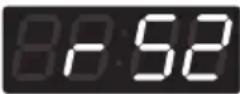 | |
| 1. Continue to set up the next mode.2. Stop the change of setup value and go back to ready mode.• Coin type - Turn on/off toggle switch.• Card type - Pull the service card.• All types - Push the Hot button twice. |
28. How to enter the TYPE
Enter setup mode.You will see LqC1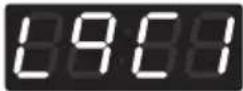 | Button Display | |
| Press the Hot button. | 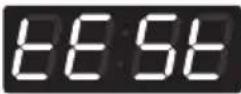 | |
| Press the Warm or the Cold button until 5:185ears in the display. | 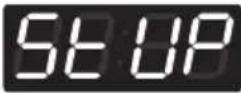 | |
| Press the Start button. | 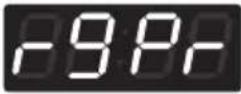 | |
| Press the Warm or the Cold button until 5:185ears in the display. | 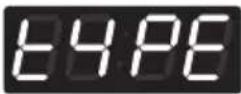 |
Structure of C#P#t of
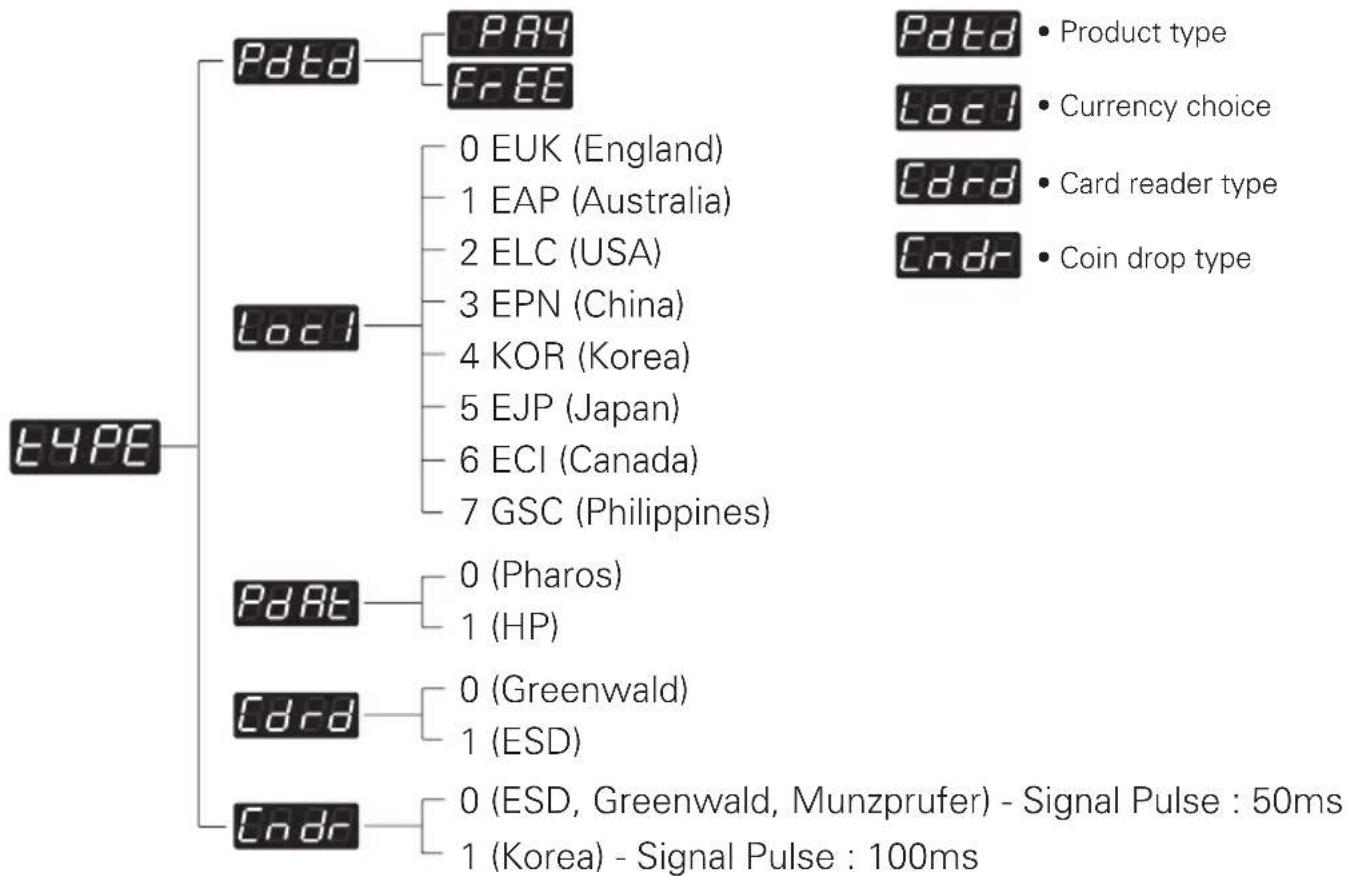
flowchart
graph TD
    A["TYPE"] --> B["Pdtd"]
    A --> C["LocI"]
    A --> D["PdAt"]
    A --> E["EdrD"]
    A --> F["Endr"]
    B --> G["PA4"]
    B --> H["Fr EE"]
    C --> I["0 EUK (England)"]
    C --> J["1 EAP (Australia)"]
    C --> K["2 ELC (USA)"]
    C --> L["3 EPN (China)"]
    C --> M["4 KOR (Korea)"]
    C --> N["5 EJP (Japan)"]
    C --> O["6 ECI (Canada)"]
    C --> P["7 GSC (Philippines)"]
    D --> Q["0 (Pharos)"]
    D --> R["1 (HP)"]
    E --> S["0 (Greenwald)"]
    E --> T["1 (ESD)"]
    F --> U["0 (ESD, Greenwald, Munzprufer) - Signal Pulse : 50ms"]
    F --> V["1 (Korea) - Signal Pulse : 100ms"]
NOTE
- Pay means card or coin type.
- Default type is coin type. If you want to change coin type to card type, you need to setup vend type in fea1. (refer to FEA1 function)
• Free means OPL type.
• Price setting varies by country - Set your country from Lcr! (Refer How to enter the E4PE)
• After EEPT, reset your country (Default country is EUK)
29. how to set custom program
Enter setup mode.You will see LqC1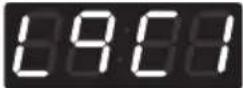 | Button Display | |
| Press the Hot button. | 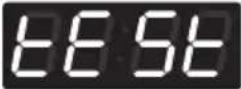 | |
| Press theWarmor theColdbutton untilS&UPrs in the display. | 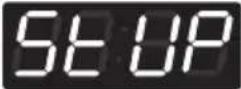 | |
| Press theStartbutton. | 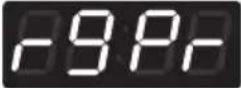 | |
| Press theWarmor theColdbutton untilCUSTrs in the display. Press theStartbutton. | 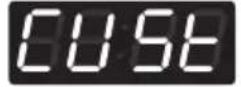 | |
| Press theWarmor theColdbutton untilEoetrs in the display. Press theStartbutton. | 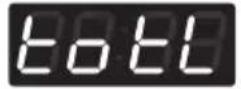 | |
| Press theWarmorColdbutton to select the Number of custom course. (1~20)Press theStartbutton. The machine sets up the number of custom course. | 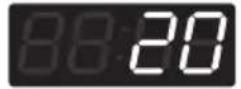 | |
| Press theWarmor theColdbutton untilEdItrs in the display. Press theStartbutton. | 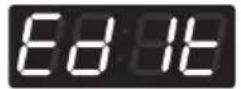 | |
| Press theWarmorColdbutton to select custom number. (no1~20)Press theStartbutton. The machine sets up the custom mode, then advances to the next process automatically. | 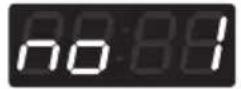 |
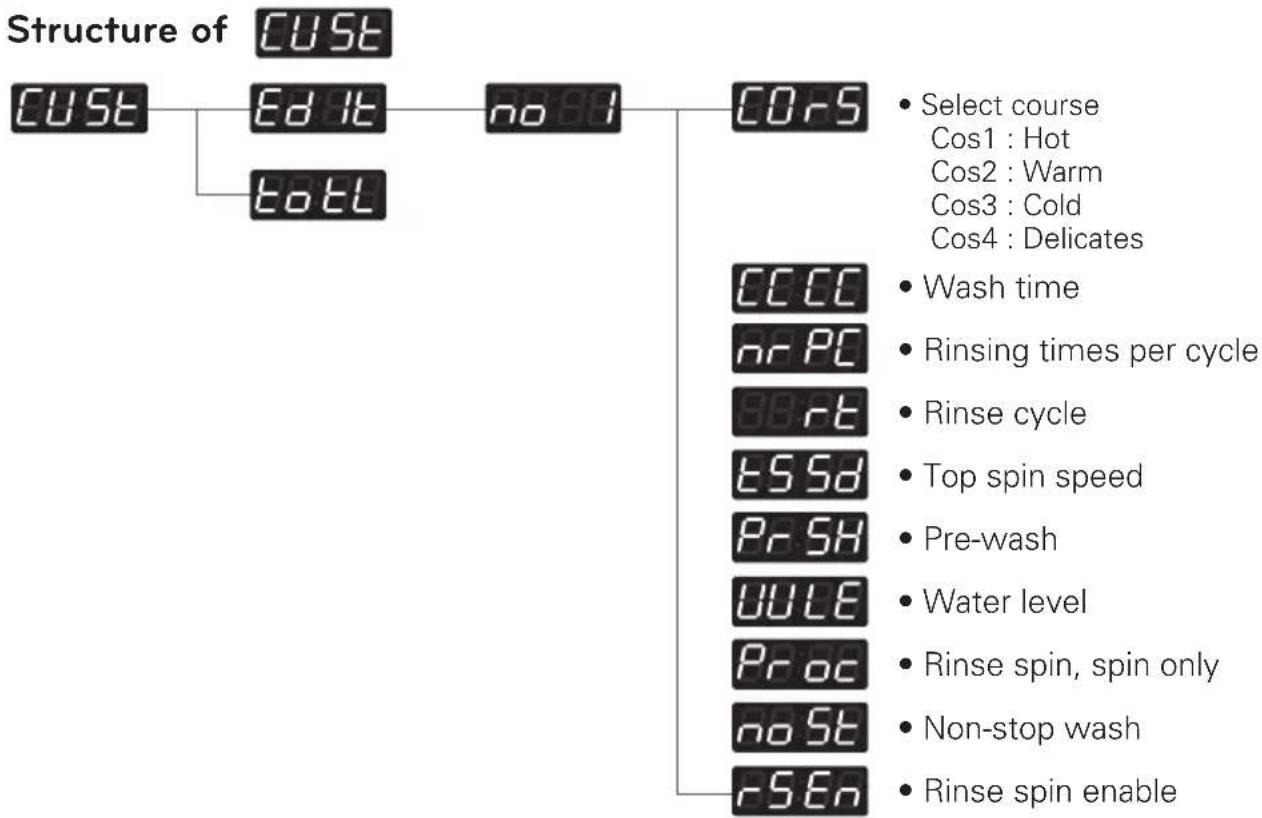
flowchart
graph TD
    A["Structure of CUST"] --> B["Ed it"]
    A --> C["total"]
    B --> D["no 01"]
    C --> E["CO-5"]
    E --> F["Select course\nCos1 : Hot\nCos2 : Warm\nCos3 : Cold\nCos4 : Delicates"]
    E --> G["CCCC"]
    G --> H["nr PC"]
    H --> I["RR rt"]
    I --> J["ESSd"]
    J --> K["Pr SH"]
    K --> L["UULE"]
    L --> M["Proc"]
    M --> N["no St"]
    N --> O["rSEn"]
    O --> P["Non-stop wash\nRinse spin enable"]
PROGRAMMING MODE - TEST MODE
Diagnostic tests: Display)
This program has been added for testing the washer and detecting errors.
Entering the test mode
| Data Name Button Display Description | |||
| Entering the test mode | 1. Entering programming mode |  | Insert service card (card type)Turn on/off toggle switch (coin type) |
| 2. Hot |  | Press the Hot button. ThenE54rs in the display. | |
| 3. Start Enter the diagnos |  | pe. | |
1. 8968
According to pressing Start button, test move to the next step.
| Number of times the START button is pressed | Check Point Display | |
| None | 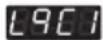 | |
| 1 time | Turns on all lamps and locks the door | Displays 1U:XX, 1g:XX and 10:XX alternately (Version) |
| 2 times Tumble Clockwise. rpm (40~50) | ||
| 3 times Low | Speed Spin rpm (600) | |
| 4 times High | Speed Spin rpm (1150) | |
| 5 times Inlet | valve for main water turns on. Water level frequency (255~) | |
| 6 times Inlet | valve for hot wash turns on. Water level frequency (255~) | |
| 7 times Inlet | valve for bleach turns on. Water level frequency (255~) | |
| 8 times Inlet | valve for atomizing turns on. Water level frequency (255~) | |
| 9 times Tumble counter clockwise. rpm (40~50) | ||
| 10 times | Turn on Circulation Pump. | Water level frequency (255~) |
| 11 times | Drain Pump turns on. | Water level frequency (255~) |
| 12 times | Turns on all lamps. | Displays 1U:XX, 1g:XX and 10:XX alternately (Version) |
| 13 times | Button Checks. | |
| 14 times | High Speed Spin rpm (1150) | |
| 15 times | PDA Signal Check | this function is not applied in this machine |
| 16 times | L9CJ | |
NOTE
- Make sure the drum is empty when a diagnostic test is performed. Do not use L9C2.
2. Factory reset - EEPT
After factory reset, machine information is changed to the default value.
Enter setup mode.You will see LqC1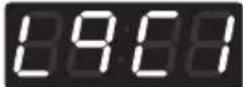 | Button Display | |
| Press theWarmor theColdbutton until Carsin the display. | 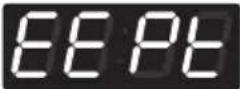 | |
| Press theStartbutton. |  | |
| Press theWarmbutton until Cars in thedisplay. | 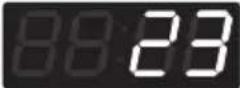 | |
| Press theStartbutton, then factory reset is done.L9C1is displayed. | 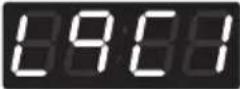 | |
| 1. Continue to set up the next mode.2. Stop the change of setup value and go back to readymode.• Coin type – Turn on/off toggle switch.• Card type – Insert the service card.• All types – Push the Hot button twice. |
NOTE
- Washing time 10 minutes
- Rinse cycle twice
• Top spin speed 800 rpm - Add SUPER WASH 3 minutes extra wash and one extra rinse
• Price setting varies by country - Set your country from Loc! (Refer How to enter the TYPE)
• After EEPT, reset your country (Default country is EUK)
3. Time setup
Enter setup mode.You will see LqC1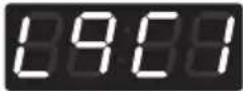 | Button Display | |
| Press theWarmor theColdbutton untilE13Eappears in the display. | 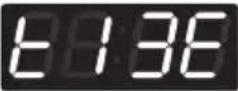 | |
| Press theStartbutton.The display will cycle through 2000 -> 0101 -> Sat -> 0000 repeatedly. | ||
| Press theStartbutton. | ||
| PressWarm(+) orCold(-)button to select year between 2000 and 2099. |  | |
| Press theStartbutton.The machine sets up the year, then advances to the next process automatically. |  | |
| PressWarm(+) orCold(-)button to select a month between 01 and 12. |  | |
| Press theStartbutton.The machine sets up the month, then advances to the next process automatically. |  | |
| PressWarm(+) orCold(-)button to select the day between 01 and 31. |  | |
| Press theStartbutton.The machine sets up the day, then advances to the next process automatically. |  | |
| PressWarm(+) orCold(-)button to select the hour between 00 and 23. |  | |
| Press theStartbutton.The machine sets up the hour, then advances to the next process automatically. |  | |
| PressWarm(+) orCold(-)button to select minute between 00 and 59. |  | |
| Press theStartbutton.The machine sets up the minute. |  | |
| 1. Continue to set up the next mode.2. Stop the change of setup value and go back to ready mode.• Coin type - Turn on/off toggle switch.• Card type - Pull the service card.• All types – Push the Hot button three times. |
NOTE
- When the machine is switched off, Time setup is initialized.
4. Courtesy cycle
A courtesy cycle is like a complimentary cycle given to the customer when the washer goes out of order after the customer has made the payment to wash clothes.
Enter setup mode.You will see LqC1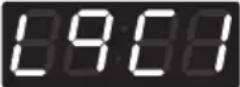 | Button Display | |
| Press theWarmor theColdbutton untilappears in the display. | 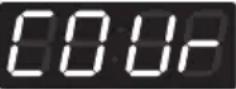 | |
| Press theStartbutton. |  | |
| Press theWarmbutton until 19rs in thedisplay. |  | |
| Press theStartbutton.Go back to ready mode. | ||
| Select the cycle you desire. | ||
| Press theStartbutton.Display will show the remaining time and Start. |
5. Cycle Kill
Coin / OPL type
Enter setup mode.You will see LqC1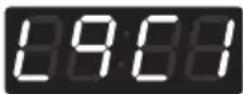 | Button Display | |
| Press theWarmor theColdbutton untilHillars in the display. | 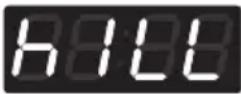 | |
| Press theStartbutton. |  | |
| Press theWarmbutton untilHillars in the display. |  | |
| Press theStartbutton.Start drain and display spin time. | Display spin time | |
| DisplayEndbeeping. | 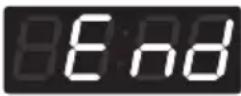 | |
| Go back to ready mode. |
Card type
| Insert cycle kill card. | Description Display | |
| Display spin time. Spin Time | ||
| Begin to drain. Spin Time | ||
| Remove cycle kill card. | 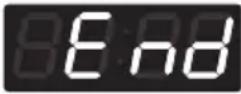 | |
| Go back to ready mode. |
6. Password - PASS
How to change the password.
Enter setup mode.You will see LqC1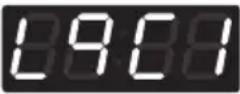 | Button Display | |
| Press theWarmor theColdbutton untilPRT55ars in the display. | 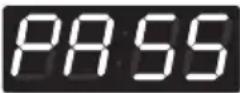 | |
| Press theStartbutton. | 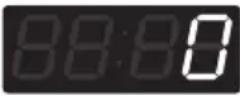 | |
| Press theWarmbutton untilPRT55ars in the display. | 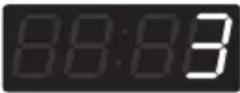 | |
| Set up the number you wantBy pressingWarmor theColdbutton.For example, If you want to change password number to No. 5.Press theWarmbutton untilPRT55ars in the display. | 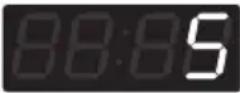 | |
| Press theStartbutton, then Password change is done.TCLis displayed. | 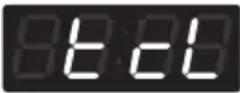 | |
| 1. Continue to set up the next price.2. Stop the change of setup value and go back to ready mode.• Coin type - Turn on/off toggle switch.• Card type - Pull the service card.• All types – Push the Hot button twice. |
NOTE
- Default password is 3.
If you want to change the password, you must know the present password.
7. Tub clean - Ecl
To clean up the tub, please run the TUB CLEAN cycle.
Enter setup mode.You will see LqC1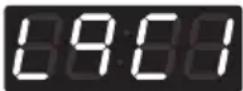 | Button Display | |
| Press theWarmor theColdbutton until [cl]rs in the display. | 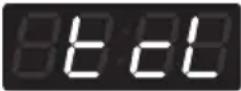 | |
| PressStartbutton.Display show the remaining time and Tub clean Start. | ||
| When the TUB CLEAN cycle is finished, [End]displayed with beeping. | 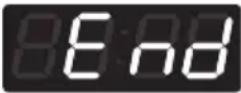 | |
| Go back to ready mode. | ||
| 1. Continue to set up the next mode.2. Stop the change of setup value and go back to ready mode.• Coin type - Turn on/off toggle switch.• Card type - Pull the service card.• All types - Push the Hot button twice. |
NOTE
- Never load laundry while using TUB CLEAN. The laundry may be damaged or become contaminated. Make sure to clean the washer tub when it is empty.
- Leave the door open after finishing the laundry to keep the tub clean.
• TUB CLEAN should be repeated monthly. - Safely and conveniently secure the door slightly ajar with a magnetic door plunger. This will promote air circulation and allow the interior of the machine to dry.
PROGRAMMING MODE - COLLECT MODE
Collect information data : [CT] (display)
The washer collects the usage data so that the owner can check various information like number of various cycles used, how many times card or coins used, etc.
Entering the collect mode
| Data Name | Button Display | Description | |
| Entering the collect mode | 1. Entering the programming mode. | ![LG FH069FD4P - Collect information data : [CT] (display) - 1](/content/2026/05/816497/images/0d8ff6b4d7144f011c356216d0d238c611813bd86e03251a917625713857a7e0.jpg) | Insert service card (card type), turn on/off toggle switch (coin type). |
| 2. Hot | ![LG FH069FD4P - Collect information data : [CT] (display) - 2](/content/2026/05/816497/images/e7bcbc8a07757e52e3e7dd60f9d83c5f79ce9f959e284fb9730ea68db72155d1.jpg) | Press the Hot button until EFSears in the display. | |
| 3. Warm(+), Cold(-) | ![LG FH069FD4P - Collect information data : [CT] (display) - 3](/content/2026/05/816497/images/308b4cd29f4223bd933b74b08708e74413ff1ad58cc2832d4e3db0e03fc194e3.jpg) | Press the Warm (+), Cold (-) button until CLCE appears in the display. | |
| 4. Start | ![LG FH069FD4P - Collect information data : [CT] (display) - 4](/content/2026/05/816497/images/b5c5ec636d5d27dd5492b85dfcf4a8521ab70f49c66f791947fa8f45298c7eb0.jpg) | Enter the Collect information data. | |
| 5. Warm(+), Cold(-) | ![LG FH069FD4P - Collect information data : [CT] (display) - 5](/content/2026/05/816497/images/e54d1c1e54fa7573c160dea778b6d333c20371ec02644d147681d37ddd116b33.jpg) | Move to each data list that you want to check by pressing with Warm (+) or Cold (-) button. | |
| 6. Start | ![LG FH069FD4P - Collect information data : [CT] (display) - 6](/content/2026/05/816497/images/f7d9c87223203717d07235c915d374e89a8c001bc11f3caf061821064085a3d4.jpg) | Display the value of selected data list | |
| 7. Hot | ![LG FH069FD4P - Collect information data : [CT] (display) - 7](/content/2026/05/816497/images/ee0627f3d8755acf8fd8f1b35285ae4d3c6abb05899dc3e00adfe7ddcfb8a411.jpg) | Move to upper level or Comes back to Idle State |
◆ Check the collect information reference to the follow lists. The lists are displayed by abbreviations.
Collect Mode Data lists
| No. | Abbreviation | Meaning Description | |
| 1 | rgPr Regular Price 0.00 ~ 10.00 | ||
| 2 | rgCP Regular Delicates Price 0.00 ~ 10.00 | ||
| 3 | rgrP Regular Warm & Cold Price 0.00 ~ 10.00 | ||
| 4 | rgHP Regular Hot Price 0.00 ~ 10.00 | ||
| 5 | dELC Dryer Moisture Sense 0: disable 1: enable | ||
| 6 | ltrC Interval Regular Cycles Number of Regular cycles (0~65535) | ||
| 7 | ItCC Interval Regular Delicates Cycles Number of Regular Delicates cycles (0~65535) | ||
| 8 | ItAC Interval Regular Warm & Cold Cycles Number of Regular Warm & Cold cycles (0~65535) | ||
| 9 | ItHC Interval Regular Hot Cycles Number of Regular Hot cycles (0~65535) | ||
| 10 | ItSC Interval Super Cycles Number of Super cycles (0~65535) ( Washer Only) | ||
| 11 | IttF Interval Topoff Cycles Number of Topoff cycles (0~65535) (Dryer Only) | ||
| 12 | ItUC Interval Service Cycles Number of Service cycles (0~65535) | ||
| 13 | ItFC Interval Token Cycles Number of Token cycles (0~65535) | ||
| 14 | ACrC Accumulated Regular Cycles Number of Regular cycles (0~65535) | ||
| 15 | ACCC Accumulated Regular Delicates Cycles Number of Regular Delicates cycles (0~65535) | ||
| 16 | ACAC Accumulated Regular Warm & Cold Cycles Number of Regular Warm & Cold cycles (0~65535) | ||
| 17 | ACHC Accumulated Regular Hot Cycles Number of Regular Hot cycles (0~65535) | ||
| 18 | ACSC Accumulated Super Cycles Number of Super cycles (0~65535) (Washer Only) | ||
| 19 | ACtF Accumulated Topoff Cycles Number of Topoff cycles (0~65535) (Dryer Only) | ||
| 20 | ACUC Accumulated Service Cycles Number of Service cycles (0~65535) | ||
| 21 | ACFC Accumulated Token Cycles Number of Token cycles (0~65535) | ||
| 22 | ACrt Accumulated Run Time Number of Running minutes (0~65535) | ||
| 23 | Itnr Interval No Runs Money inserted, but no run | ||
| 24 | Ittb Interval Trouble Cycles No money, but ran | ||
| 25 | ItPd Interval Power Downs Number of power down | ||
| 26 | Itdd Interval Unauthorized Service Door Openings Number of Unauthorized Service Door Openings (0~255) | ||
| 27 | ItAd Interval Authorized Service Door Openings Number of Authorized Service Door Openings (0~255) | ||
| 28 | ItUC Interval Unauthorized Coin Vault Openings Number of Authorized Service Door Openings (0~255) | ||
| 29 | ItAC Interval Authorized Coin Vault Openings Number of Authorized Coin Vault Openings (0~255) | ||
| 30 | Ittl Interval Total Income Amount of money cycle(0 ~ 65535) | ||
| 31 | ACtl Accumulated Total Income Amount of money cycle(0 ~ 65535) | ||
| 32 | IttC Interval Total Cycles Number of Total cycle(0 ~ 65535) | ||
| 33 | ACtC Accumulated Total Cycles Number of Total cycle(0 ~ 65535) | ||
| 34 | SCPr Super Cycle Price 0.00 ~ 10.00 | ||
| 35 | toPr Top Off Price 0.00 ~ 10.00 (Dryer Only) | ||
| 36 | Itd Interval Money Amount of money for regular cycle(0 ~ 65535) | ||
| 37 | Acd Accumulated Money Amount of money for regular cycle(0 ~ 65535) | ||
| 38 | ItSd Interval Superwash Money Amount of money for superwash cycle(0 ~ 65535) | ||
| 39 | ACSd Accumulated Superwash Money Amount of money for superwash cycle(0 ~ 65535) | ||
* Interval Cycles (Interval means Since last data collecting)
* Accumulated Cycles (Accumulated means Total cycles in washer/dryer's life time not include service cycles or trouble cycles)
* These items (No. 30\~33) are not applied this program
* Price setting varies by country
* Set your country from Loc1 mode (Refer How to enter the E4PE)
* After EEPT, reset your country (Default country is EUK)
MAINTENANCE
Care after wash
After the cycle is finished, wipe the door and the inside of the door seal to remove any moisture. Leave the door open to dry the washer tub interior. Wipe the body of the washing machine with a dry cloth to remove any moisture

WARNING
- Unplug the washer before cleaning to avoid the risk of electric shock. Failure to follow this warning can cause serious injury, fire, electrical shock, death.
- Never use harsh chemicals, abrasive cleaners, or solvents to clean the washer. They will damage the finish.
- Do not use volatile substances (benzene, paint thinner, alcohol, acetone, etc.) or detergents with strong chemical components when cleaning the washing machine. Doing so may cause discoloration or damage to the machine, or it may cause a fire.
Storing the Washer
If the washer will not be used for an extended period of time and is in an area that could be exposed to freezing temperatures:
- Turn off water supply tap.
- Disconnect hoses from water supply and drain water from hoses.
- Plug the power cord into a properly grounded electrical outlet.
- Add 1 gallon of nontoxic recreational vehicle (RV) antifreeze to the empty wash drum. Close door.
- Select the spin cycle and let washer spin for 1 minute to drain out all the water.
- Unplug the power cord, dry the drum interior with a soft cloth, and close the door.
- Remove the inserts from the dispenser. Drain any water in compartments and dry the compartments.
- Store the washer in an upright position.
- To remove the antifreeze from the washer after storage, run washer through a complete cycle using detergent. Do not add laundry!

NOTE
- Not all of the RV antifreeze will be expelled.
- Weekly cleaning of the detergent dispenser will ensure problem free operation.
Cleaning the Dispenser
- The dispenser should be cleaned periodically to remove buildup from detergent and other laundry products.
- Single model -

natural_image
Diagram of a device with two compartments and directional arrows indicating movement or assembly (no text or symbols)- Stack model -
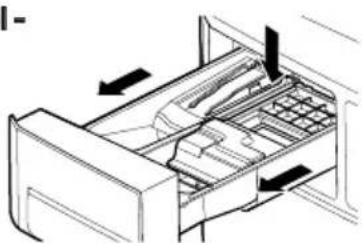
natural_image
Technical line drawing of a mechanical device with internal components and directional arrows (no text or symbols)- Remove the inserts from the drawer, and clean them with warm water and a soft cloth or brush to remove any residue or buildup. Wipe out the inside of the drawer opening with a damp cloth. Reassemble the drawer and reinstall in the drawer opening.
- Single model -
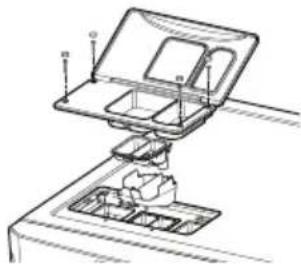
natural_image
Technical line drawing of a mechanical assembly with labeled components (no text or symbols present)- Stack model -
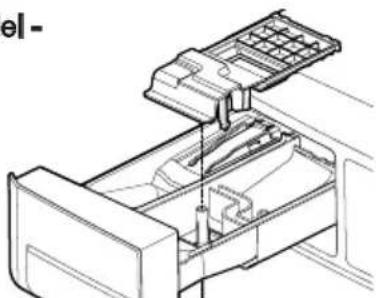
natural_image
Technical line drawing of a mechanical assembly with no visible text or symbols
NOTE
- Do not use anything other than water to clean the drawer, inserts, and drawer opening.
Cleaning the water inlet filters
Clean the water inlet filters periodically to prevent clogging. Take extra care to clean the water inlet filters for areas using hard water. Water may not be supplied if there are foreign objects, such as rust, sand, or stones in the water inlet filters.
1 Pull out the plug to turn off the washing machine.
2 Turn off the faucets connected with the water inlets.
3 Remove the water inlet hoses.
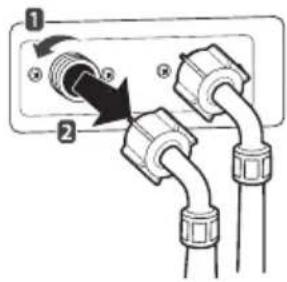
text_image
Diagram showing two connected electrical connectors with labeled parts and directional arrows indicating connection points.4 Pull out the water inlet filter.
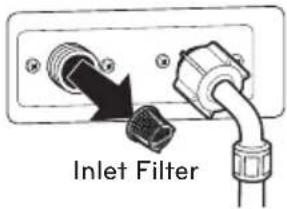
text_image
Inlet Filter5 Remove foreign objects from the water filter inlet.
- Soak the water filter inlets in white vinegar or a lime scale remover or use a toothbrush to remove foreign objects and rinse thoroughly.
6 Press the water filter inlets back into place.
7 Reattach the water lines to the washing machine.
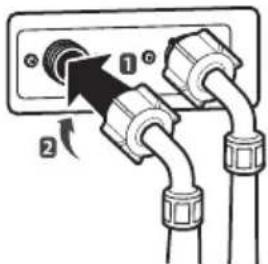
text_image
Diagram showing electrical connection with labeled components and directional arrowsWARNING
- Unplug the power cord and turn off the faucets before cleaning. Failure to do so may cause electric shock.
- Do not use the washing machine without the inlet filters. If you use the washing machine without the inlet filters it will cause leaks and malfunction.
- If you use the washing machine in an area with hard water, the inlet filter may clog due to lime buildup.
NOTE
- 1E message will blink on the display when the water pressure in the detergent drawer is weak or an inlet filter is clogged with dirt. Clean the inlet filter.
Cleaning the drain pump filter
The washing machine fails to drain if the drain pump filter is clogged. Periodically clean the drain filter to prevent clogging with foreign objects.
1 Pull out the plug to turn off the washing machine.
2 Open the drain pump filter cover.
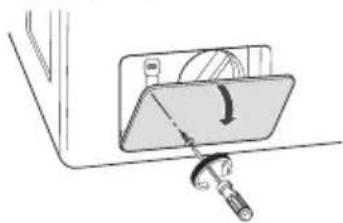
natural_image
Diagram of a mechanical device with a lever and adjustment knob (no text or symbols)3 Unclip the drain hose and remove the plug from the drain hose to drain the remaining water.
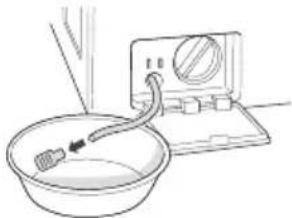
natural_image
Simple line drawing of a washing machine with a bulb and pipe, no text or symbols present4 Twist the pump filter counterclockwise to remove.
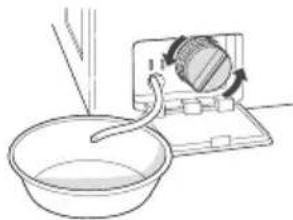
natural_image
Simple line drawing of a kitchen scene with a bowl, a spoon, and a computer monitor (no text or symbols)5 Clean the pump filter and opening.
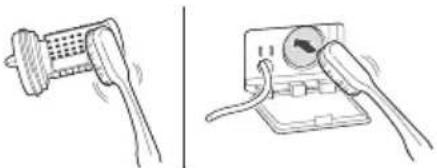
natural_image
Illustration showing two different electrical connections: one with a plug and cable, the other with a meter device (no text or symbols present)6 Recap the plug onto the drain hose and reattach the drain hose.
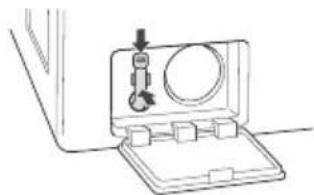
natural_image
Simple line drawing of a device with a circular component and a handle, no text or symbols present.7 Insert the drain pump filter.
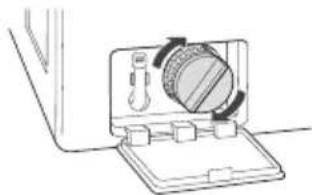
natural_image
Simple line drawing of a washing machine with a rotary knob and handle (no text or symbols)8 Close the drain pump filter cover.
WARNING
• Make sure to pull out the plug before cleaning. Failure to do so may cause electric shock.
- Opening the drain filter will result in water overflowing if there is water in the washer tub. Make sure to check if the water is completely drained before opening the drain filter.
- If you use the washing machine with the drain filter reassembled incorrectly after cleaning it, or if you use the machine without the filter, it may cause leaks or malfunction of the washing machine.
NOTE
- OE message will blink when the drain pump filter is clogged with dirt. Clean the drain pump filter.
Clean the door seal
Clean the door seal once a month to prevent build-up of dirt in the door seal.
1 Wear rubber gloves and protective goggles.
2 Dilute 3/4 cup (177 ml) of liquid chlorine bleach in 1 gallon (3.8 L) of water.
3 Soak a sponge or a soft cloth in this diluted solution and wipe down all around the door seal.
4 Wipe any moisture with a dry towel or cloth after cleaning.
5 Leave the door open to allow the door seal to dry completely.

CAUTION
- Cleaning the door seal with an undiluted solution may cause malfunction of the door seal and washing machine parts.
Clean the drum, TUB CLEAN
Using the washing machine in a humid space for a long period of time may lead to a buildup of black mold and germs in the air inside the washer tub and affect your health. If you clean the washer tub regularly on a monthly basis using TUB CLEAN it will keep the washer tub clean for hygienic use.
1 Add tub cleaner or lime scale remover into the detergent dispenser drawer.
- Do not exceed the maximum detergent limit line when you add it. Detergent may remain in the washer tub after cleaning.
- When you use liquid chlorine bleach, load it into the liquid chlorine bleach compartment. When you use a powdered cleaner, add it into the main wash detergent compartment.
- When you use cleaning tablets, place them directly into the washer tub. (Do not add cleaning tablets to the drawer.)
2 Do operate tub clean.

NOTE
- Never load laundry while using TUB CLEAN. The laundry may damage or become contaminated.
Make sure to clean the washer tub when it is empty. - Leave the door open after finishing the laundry to keep the tub clean.
• TUB CLEAN should be repeated monthly. - Safely and conveniently secure the door slightly ajar with a magnetic door plunger. This will promote air circulation and allow the interior of the machine to dry.
ERROR MODE
Meaning of Error Codes that LED displays during occurrence of problem.
| Problem Possible Cause Solution | ||
 | Water supply is not adequate in area.Water supply taps are not completely open.Water inlet hose is bent.The filter of the inlet hose clogged. | Check another tap in the house.Fully open tap.Straighten hose.Check the filter of the inlet hose. |
 | Drain hose is bent or clogged.The drain filter is clogged. | Clean and straighten the drain hose.Clean the drain filter. |
 | Load is too small.Load is out of balance.The appliance has an imbalance detection and correction system. If individual heavy articles are loaded (bath mat, bath robe, etc.) and the imbalance is too great, after several attempts to restart the spin cycle the machine will stop and the error code will be displayed. | Add 1~2 similar items to help balance the load.Rearrange load to allow proper spinning. |
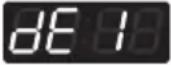 | Is the door opened or not completely closed? | Close the door completely.* If it will not open, call for service. |
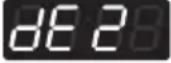 | Door lock is broken. Check the door switch. | |
 | The water overfills due to a faulty water valve. | Close the water tap.Unplug the power plug.Call for service. |
 | The water level sensor malfunction. | |
 | Overload in motor. Restart the cycle after 30 minutes. | If L.E. t released, call for service. |
 | Disconnection of card reader cable. Check the card reader wire. | |
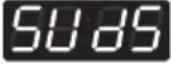 | Too much detergent is used. This is not an error. It indicates a suds removal routine.It will clear and restart the cycle when the suds are gone. | |
 | Thermistor is opened or shorted. Thermistor should be replaced. | |
POWER FAIL RECOvERY
In case of power failure, the machine stops running but the time display remains on, showing the time just before power failure.
DEFAULT WASHER SETTINGS
| Default Settings Default | |
| Wash Time (Minutes) 10 Minutes | |
| Rinse Time (Minutes) 18 Minutes | |
| Spin Time (Minutes) 10 Minutes | |
| Rinsing times Twice | |
| Coin #1 Value 10 | |
| Coin #2 Value (kiosk) 10 | |
| Vend Price 2.00 | |
| Add super wash price 0.50 | |
| Top Spin speed 800 rpm |
SPECIFICATIONS
| Model FH069FD** | |
| Name Front-loading | Washing Machine |
| Power supply 220 – | 240 V ~, 50 Hz |
| Size | 686 mm (W) X 767 mm (D) X 983 mm (H),1337 mm (D with door open)27"(W) X 303/16"(D) X 3811/16"(H),525/8"(D with door open) |
| Weight 190 lbs. (87 kg) | |
| Wash capacity 10 kg | |
| Spin speed 1150 rpm max. | |
| Permissible water pressure | 1.0 ~ 8.0 kgf/cm2(0.1 - 0.8 MPa) |
NOTE
- Specifications subject to change by manufacturer.
• Price setting varies by country - Set your country from LocI(Refer How to enter the TYPE)
• After EEPT, reset your country (Default country is EUK)
MEMO
MEMO

LG
Life's Good