
Camedia P-440 - Printer OLYMPUS - Free user manual and instructions
Find the device manual for free Camedia P-440 OLYMPUS in PDF.


| Product Type | Digital Color Printer (Dye-Sublimation) |
| Model | Olympus Camedia P-440 |
| Print Technology | Dye-Sublimation Thermal Transfer |
| Paper Sizes Supported | A4, A5 Wide, A6 Wide |
| Media Types | Standard paper, Postcard paper (P-A4P), L-size card paper (P-A4L), Passport paper (P-A4PAS, P-A6WPAS) |
| Ink Ribbon Types | P-RBM, P-RBW (for A4/A5/A6); P-A6WPAS for A6 Wide Passport |
| Input Sources | xD-Picture Card, PC Card (Type II), USB (from computer) |
| Print Modes | STANDARD, CARD, PHOTO-ALBUM, PASSPORT, INDEX |
| Maximum Prints per Job | 50 copies per picture |
| LCD Panel | Yes, for preview and menu navigation |
| TV Monitor Output | VIDEO OUT (composite) for connection to TV |
| Computer Interface | USB (compatible with Windows 98/Me/2000/XP and Mac OS 8.6-9.2/X) |
| Dimensions (Approx.) | Not specified in manual; typical size ~ 430 x 300 x 200 mm (estimated) |
| Weight | Approximately 15 kg (33 lbs) as per installation site note |
| Power Supply | AC 100-240V, 50/60 Hz (auto voltage), grounded outlet recommended |
| Power Consumption | Not specified; typical dye-sublimation printer about 150-200W during printing |
| Operating Environment | Temperature: 10-35°C; Humidity: 20-80% (non-condensing) |
| Maintenance | Clean thermal head with alcohol and cotton swab; vacuum dust on vent monthly |
| Safety Precautions | Do not touch thermal head; avoid moisture condensation; use grounded outlet; do not use solvents |
| Spare Parts / Consumables | Paper cassettes (various sizes), ink ribbons (P-RBM, P-RBW), ink cassette (ribbon holder) |
| DPOF Support | Yes, compatible with Digital Print Order Format for direct printing |
| Number of Manual Pages | 156 pages |
Frequently Asked Questions - Camedia P-440 OLYMPUS
User questions about Camedia P-440 OLYMPUS
0 question about this device. Answer the ones you know or ask your own.
Ask a new question about this device
Download the instructions for your Printer in PDF format for free! Find your manual Camedia P-440 - OLYMPUS and take your electronic device back in hand. On this page are published all the documents necessary for the use of your device. Camedia P-440 by OLYMPUS.
USER MANUAL Camedia P-440 OLYMPUS
natural_image
Line drawing of a Olympus printer with control panel and paper slots (no text or symbols on the device itself)Thank you for purchasing this OLYMPUS P-440 digital color printer. Read this manual carefully prior to use to ensure correct use of this product.
About this Reference Manual
- Unauthorized copying or reproduction of any portion of this manual by any means is strictly prohibited.
- All contents of this manual are subject to change without notice.
- Please be aware that the manufacturer does not assume responsibility for circumstances in any from that occur as a result use of this product.
- Please be aware that the manufacturer does not assume responsibility for damage and so forth caused by improper use of the product by the customer, handling of the product not in accordance with the contents of this manual, or repairs or alterations made on the product by a third party other than a representative of OLYMPUS or persons designated by OLYMPUS.
- Please be aware that the manufacturer does not assume responsibility for conditions caused by the installation of options or consumables other than genuine OLYMPUS products or OLYMPUS quality certified products.
Reading this Manual
This manual provides an explanation of the functions, operating procedures and various settings of this printer. Information on items of importance which are related to potential mechanical or operational problems are indicated with a “Caution” warning, while information that will be convenient or beneficial for you to know when using the product are indicated under the heading of “Tip”.
Indicates the operating procedure.
Operating procedure explained on this page.

flowchart
graph LR
    A["POWER ON"] --> B["Input Selection Paper"]
    B --> C["Selection Picture"]
    C --> D["Selection Printing Module"]
    D --> E["Setup Printing"]
    E --> F["5"]
Contents
For Safe Use 5
●Handling Precautions 5
Identifying the Parts....6
●Printer Body 6
-Operation Panel 7
●Paper Cassette 8
- Ink Cassette (Ribbon Holder) 8
Printer Installation....9
●Printer Installation Site 9
- Installing the Ink Ribbon 9
- Installing the Paper Cassette .... 13
- Attaching the Paper Output Tray 15
- Connecting the Power Cord and Turning on the Power Switch 16
LCD Panel 17
Connecting to a TV Monitor ....18
Using xD-Picture Card ....19
Using a PC Card 20
Installing the Printer Driver ....21
- Operating Environment 21
- Installation Procedure 22
Printing from a PC....31
●Preparing the P-440 for Printing 31
- Setting Printer Settings from a PC 33
- Printing from a PC 42
- When a Message is Displayed on the PC 43
Printing Procedure When Printing from a Card ....47
Setup 48
- Background Setup 48
- Image Adjustment (Printing Adjustment) 56
- Basic Setup 63
- Clearing the settings (Returning to the Factory Default Settings) 72
1. Input Selection ....74
- Using xD-Picture Card 74
- Using a PC Card.... 76
2. Paper Selection .... 78
- Setting the Paper 78
3. Picture Selection and Setting ....79
- Selecting and Setting Pictures on a Card 79
- Printing All Pictures on a Card 94
4. Printing Modes ...... 95
- STANDARD printing 95
- CARD printing 101
●PHOTO-ALBUM printing 110
●PASSPORT printing 124 - INDEX printing 129
5. Printing....138
Troubleshooting ....140
- When a Problem Occurs .... 140
- When a Message is Displayed 141
Appendix....145
●What you can do with the P-440 Digital Color Printer 145
- Explanation of the LCD Panel 149
- Introduction to Color Printing 151
●DPOF (Digital Print Order Format) 152
- Cleaning the Printer 153
●Replacing the Ink Ribbon 154
- To remove Dust on Vent 155
●Handling Precautions
When moisture has condensed in the printer
The formation of water droplets inside the printer is referred to as condensation. Condensation occurs in the following situations.
- When the room in which the printer is located is heated rapidly
- When cold air (from an air-conditioner, etc.) blows directly onto the printer
- When the printer is moved from a location of low humidity to a location of high humidity
When moisture has condensed in the printer, moisture will adhere to the paper, deteriorating print quality or causing paper jams. When moisture has condensed or is likely to condense, leave the printer on and wait until there is no possibility for condensation to occur.
Do not use solvents such as paint thinner or benzene when cleaning
Spraying the printer with insecticide or wiping with paint thinner or benzene may deteriorate or discolor the printer cabinet. When the printer cabinet has become dirty, wipe with a soft cloth. When soiling is particularly heavy, dampen a soft cloth with water or neutral detergent diluted with water, and wipe off the dirt after wringing the cloth out firmly.
Do not allow the printer cabinet to be in contact with rubber or vinyl products for an extended period of time. This can cause discoloration or peeling of the coating
Extended contact with rubber, vinyl or plastic products can cause discoloring or peeling of the coating.
Operate the printer at least once every six months
Not operating the printer for a long period of time can impair printer function. Operate the printer at least once every six months.
Transporting when Moving, etc.
When transporting the printer, place the printer in the packaging materials and container in which it was packaged. When these are no longer available, package the printer with sufficient cushioning materials so that it is able to withstand shocks and impacts during transport. Remove the paper cassette and ink cassette from the printer before transporting.
Identifying the Parts
- Printer Body

PC card slot
This slot is for inserting PC cards complying with PC standard ATA specifications (PCMCIA). Type II PC cards can be used. Use a PC card adapter or similar device when printing SmartMedia, CompactFlash or Memory Stick data.

•Operation Panel
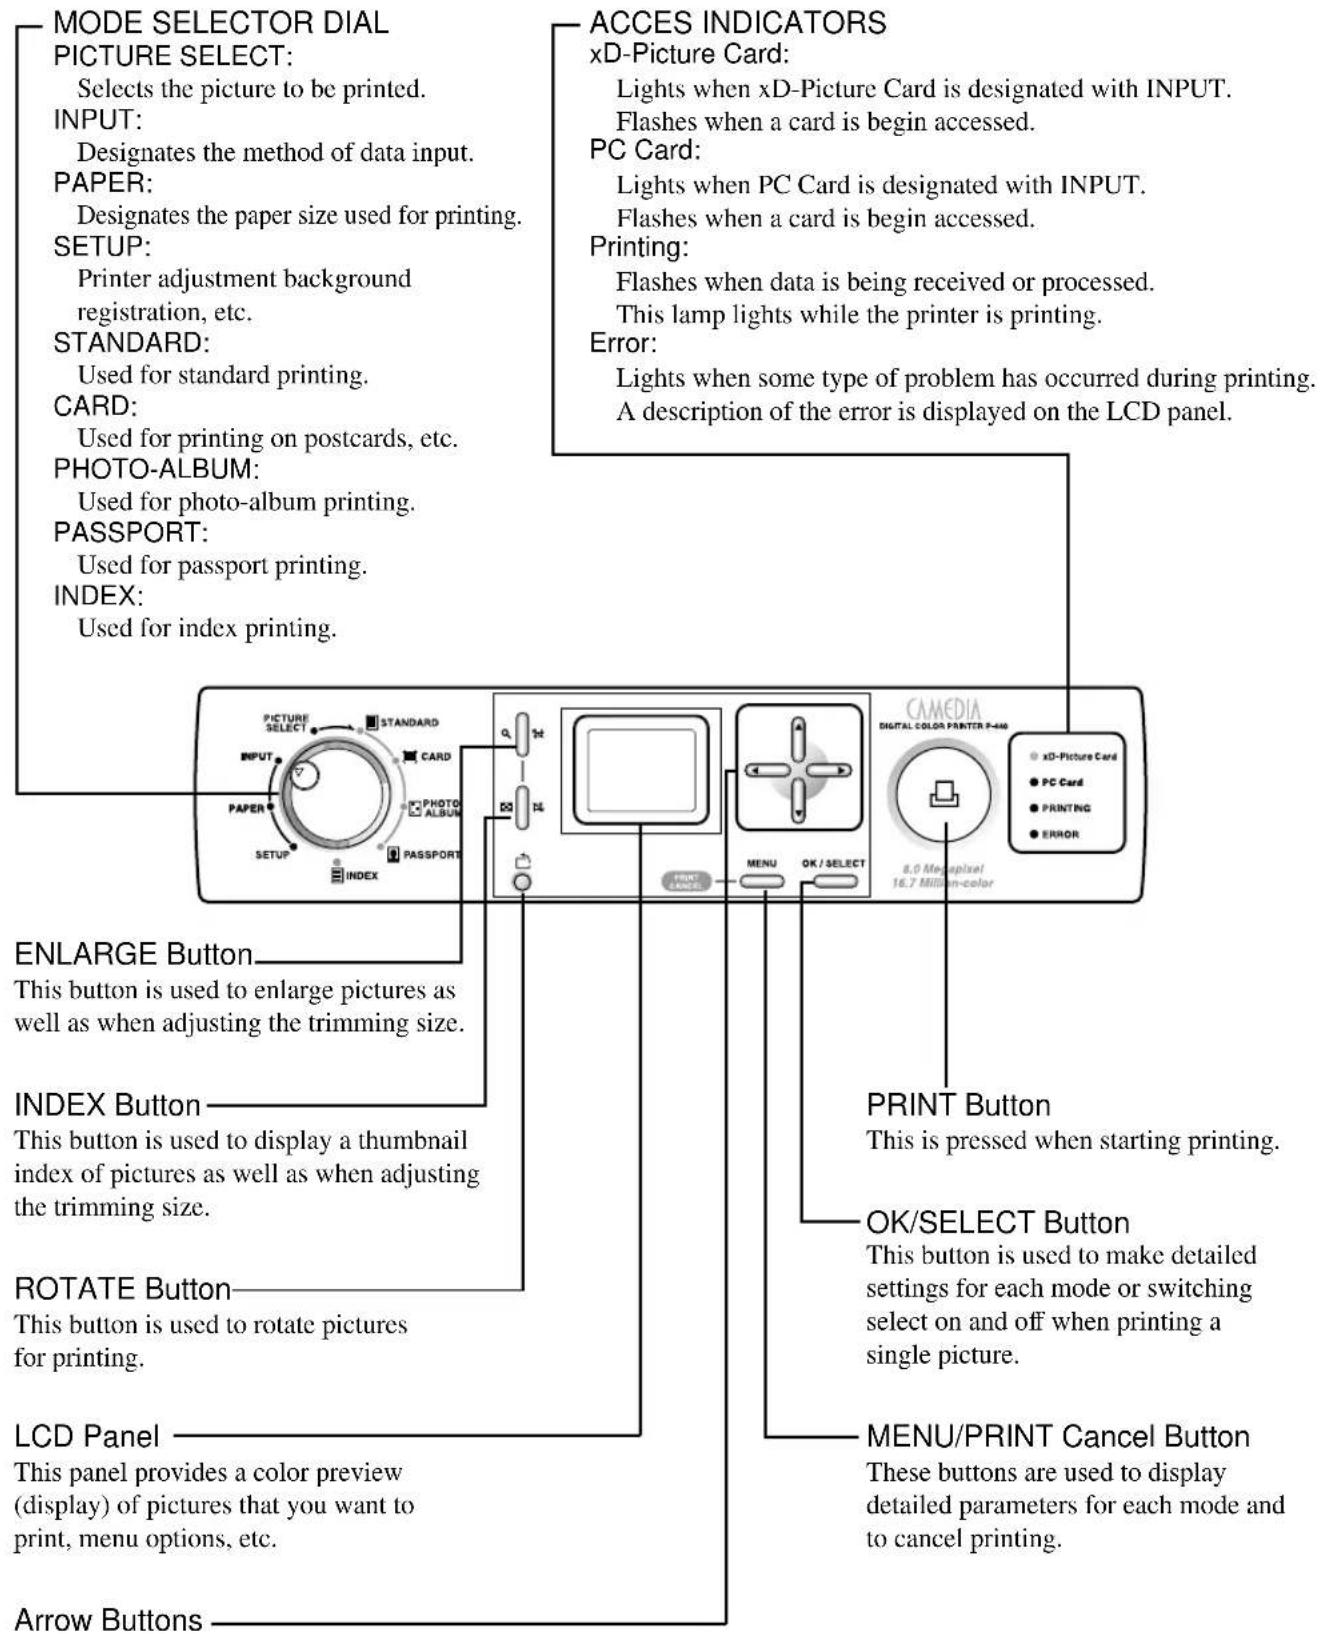
These are used to select detailed parameters and settings for each mode.
•Paper Cassette
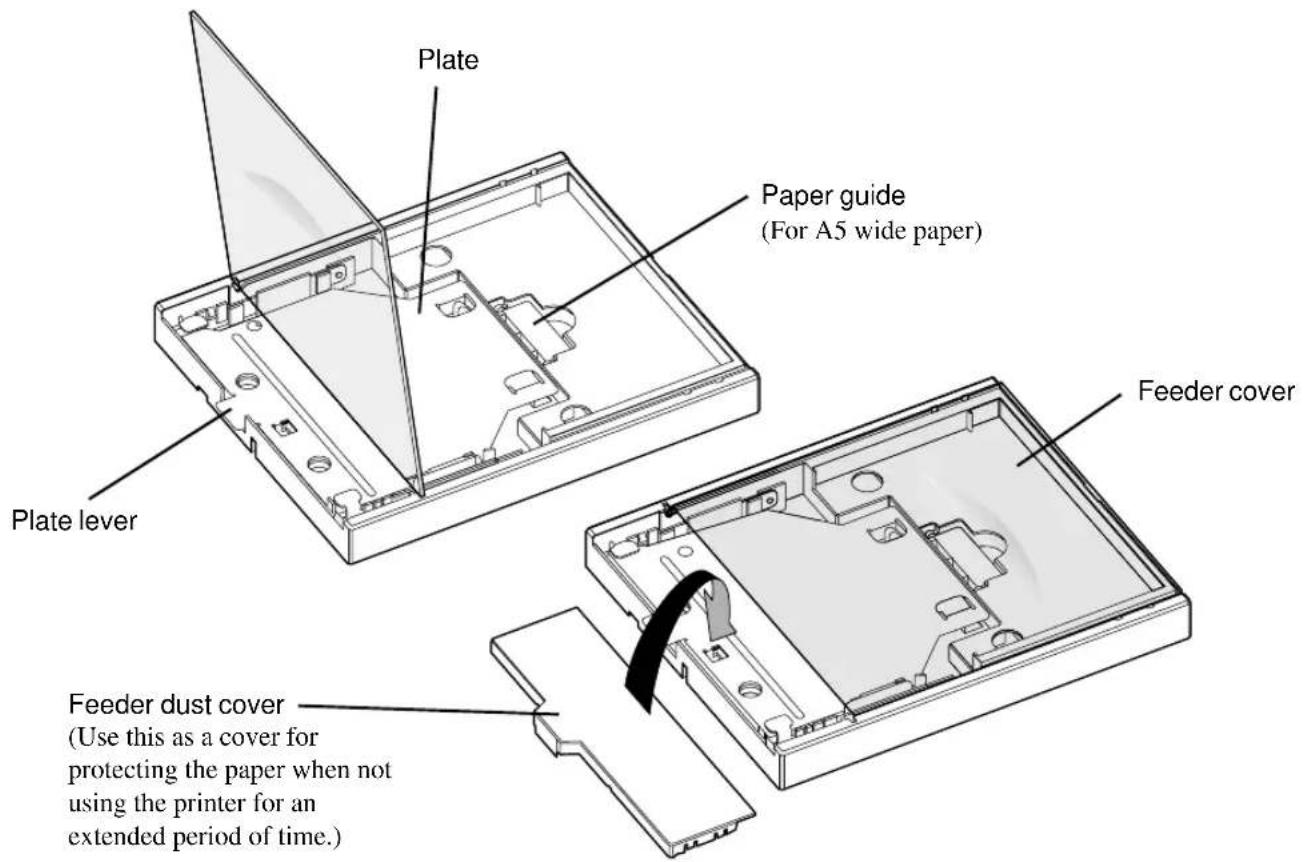

Caution
- A spacer for protection during transport is attached inside the paper cassette when the printer is shipped from the factory. Remove this spacer when using the printer.
- The feeder dust cover is attached to the back of the paper cassette when the printer is shipped from the factory. Do not lose this feeder dust cover since it is used, for example, when not using the printer for an extended period of time.
•Ink Cassette (Ribbon Holder)
Ink Cassette (Ribbon Holder)

natural_image
Illustration of a scroll or sheet with curved ends and a flat top, no text or symbols presentPrinter Installation
- Printer Installation Site
Provide a location for installing the printer that is flat and stable and ensures adequate installation space. Install the printer in a location that is able to withstand weight of approximately 15 kg (30 lbs).

Provide enough space in front of the printer so that the paper output tray can be pulled out.
When actually installing the printer, allow enough room around the printer so that it is at least 10 cm (4") away from the wall.
•Installing the Ink Ribbon

Caution
- P-400 ink ribbon P-RBN cannot be used in this printer for printing.
1
Tear off the center strip on the back of the ink ribbon package along the tear line shown.

natural_image
Line drawing of hands using a tool to cut or spread a rectangular object on a tray (no text or symbols)2
Open one of the flaps.

natural_image
Illustration of hands operating a device with a scroll wheel and directional arrow (no text or symbols)
Caution
- When cutting open the cover sheet and tearing back the flaps, do not remove the flaps completely from the package. Removal of the flaps will prevent you from determining the installation direction of the ink cassette (ribbon holder).
3 Open the flap on the opposite side.
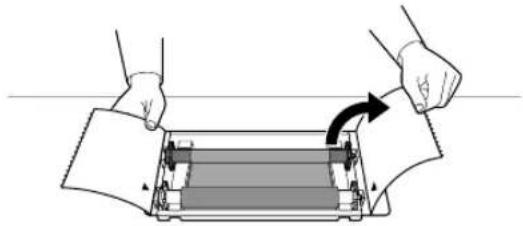
natural_image
Illustration of hands holding a rectangular device with a curved arrow indicating rotation (no text or symbols)Caution
- Do not allow the ink ribbon package to become deformed and do not take out the ink ribbon directly with your hands.
4 Align the installation direction marks (▶•◀) on the flaps on the ink ribbon package and ink cassette (ribbon holder).

natural_image
Illustration of hands operating a mechanical device with a downward arrow indicating compression or disassembly (no text or symbols present)5 Attach the ink ribbon to the ink cassette. (Press the ink cassette onto the ink ribbon until all four locations snap into place.)

natural_image
Line drawing of two hands pressing a roller on a flat surface (no text or symbols)Tip
- The procedure for installing the A6 wide-size passport ink ribbon differs from that of ink ribbon used for ordinary printing. Follow steps 1 through 3 previously stated, but replace steps 4 and 5 with the following procedure. Then, continue with steps 6 through 11.
Take out the ink ribbon from the ink ribbon package and remove the stoppers from the bobbin of the ink ribbon.
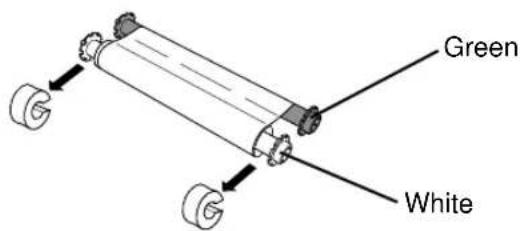
Attach the bobbin of the ink ribbon to the ink cassette (ribbon holder) until it clicks.
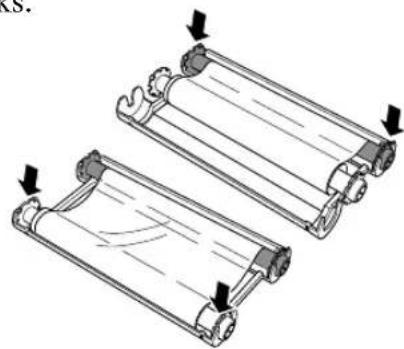
natural_image
Illustration of two cylindrical rollers with arrows indicating compression or disassembly (no text or symbols)6 Turn the bobbin in the direction indicated by the arrow to take in the slack of the ink ribbon.
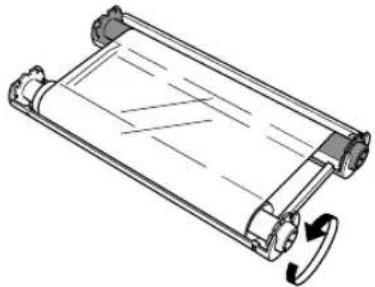
natural_image
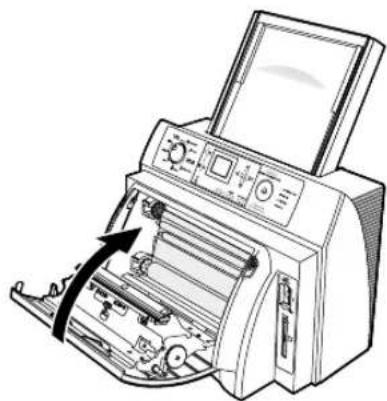
Diagram of a scroll or sheet with directional arrows indicating rotation (no text or symbols)7 Lower the eject levers on both sides of the printer cover and open the printer cover.

natural_image
Line drawing of hands operating a printer with a screen and control panel (no text or symbols)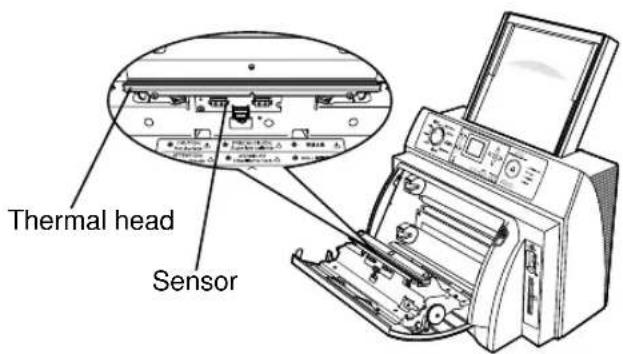
Caution
- Do not touch the inside of the printer when the printer cover has been opened.
- Never touch the thermal head. This can result in burns or a malfunction.
- The thermal head sensor is extremely sensitive to static electricity. Never touch the thermal head sensor since this has the risk of causing a malfunction.
8 Hold onto the ink cassette with both hands while checking the right (R) and left (L) sides of the ink cassette.

Caution
- Be careful not to touch the ink ribbon directly with your fingers.
Tip
- Adjust the upper and lower bobbins of the attached ink ribbon so that the ink ribbon is taut and free of twisting.
9 Install the ink cassette in the printer. Push the right side (R) of the ink cassette onto the right wheels of the printer.
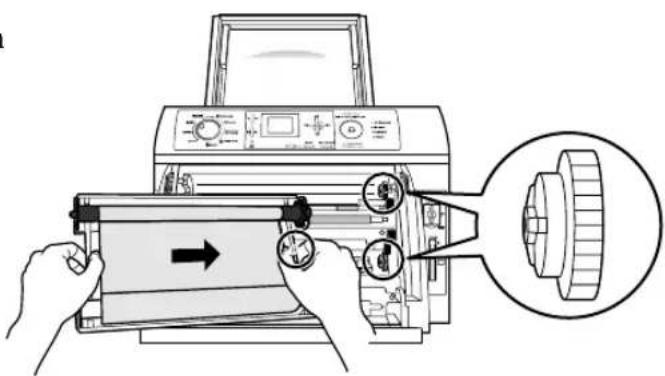
10 Push in the left (L) side. (Firmly push all the way into the printer.)

11 Close the printer cover. (Close the printer cover completely until it snaps closed.)
natural_image
Illustration of a printer with a paper airplane being inserted, showing internal components and a scroll wheel (no text or symbols)•Installing the Paper Cassette
1 The feeder dust cover is attached to the back of the paper cassette.

Tip
- The feeder dust cover is taped to the paper cassette when shipped from the factory. Since this feeder dust cover is used when not using the printer for an extended period of time, make sure not to lose it.
2 Open the feeder cover of the paper cassette.

natural_image
Diagram of a mechanical device with a rotating arrow indicating rotation (no text or symbols present)3 Remove the plate lever protective cushion and protective spacer installed for protection of the paper cassette during transport.
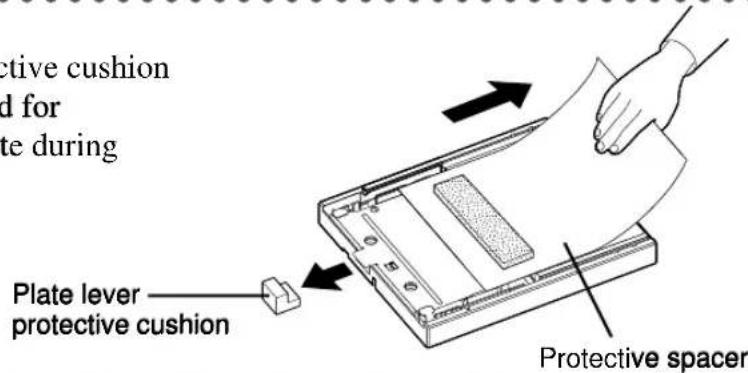
4 Push down on the plate lever of the paper cassette until a clicking sound is heard.

natural_image
Diagram of a hand inserting a component into a device casing (no text or symbols visible)5 Insert print paper with the protective sheet on top.

Caution
• Make sure to insert the paper with the correct side facing up.
- Be careful not to touch the paper directly with your hands other than the protective sheet.
6 Pull out the protective sheet.
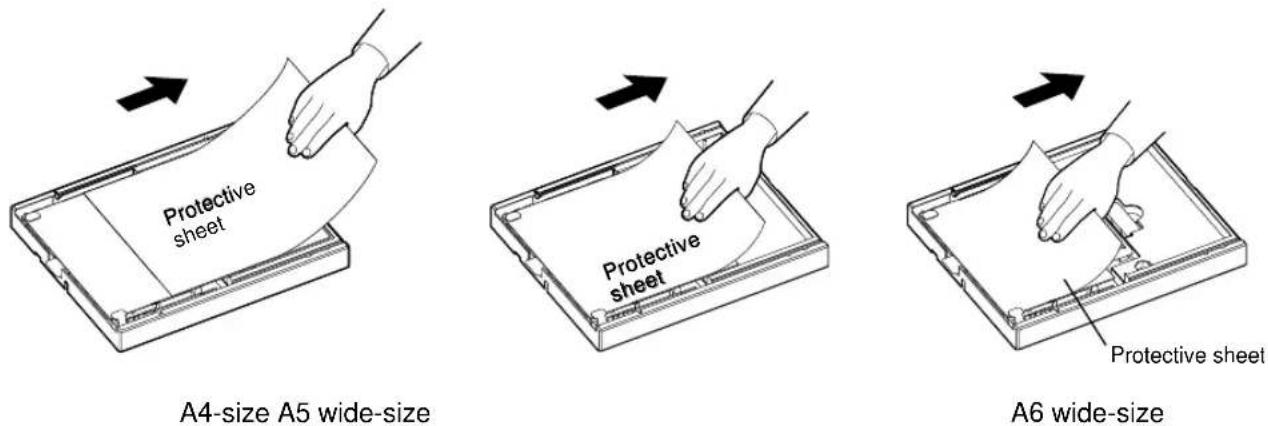
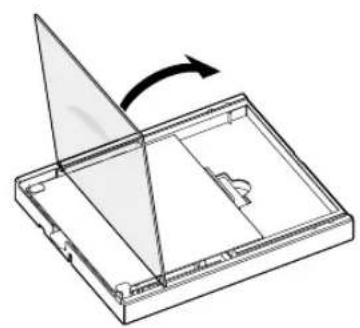
7 Close the feeder cover of the paper cassette.
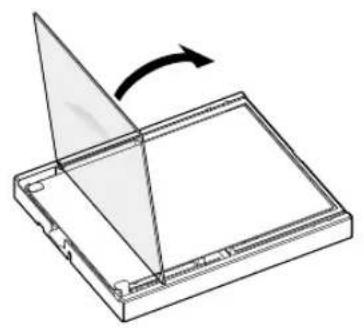
natural_image
Diagram of a folding paper or sheet with a triangular cover and an arrow indicating rotation (no text or symbols)A4-size A5 wide-size
natural_image
Diagram of a rectangular frame with an arrow indicating rotation or change, no text or symbols present
natural_image
Diagram of a mechanical assembly with a triangular component and an arrow indicating rotation (no text or symbols)A6 wide-size
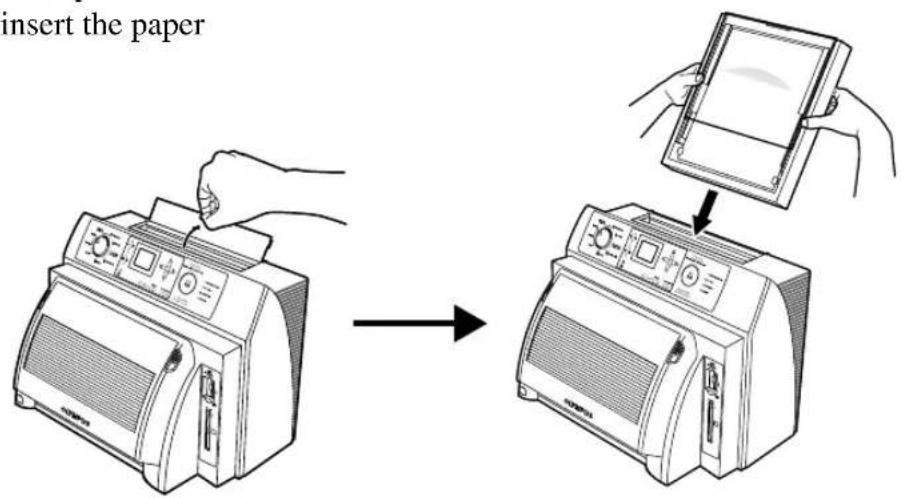
8 Open the dust cover in the top of the printer and completely insert the paper cassette.
- Attaching the Paper Output Tray
Insert the paper output tray into the bottom of the printer by following the guides.

- Connecting the Power Cord and Turning on the Power Switch
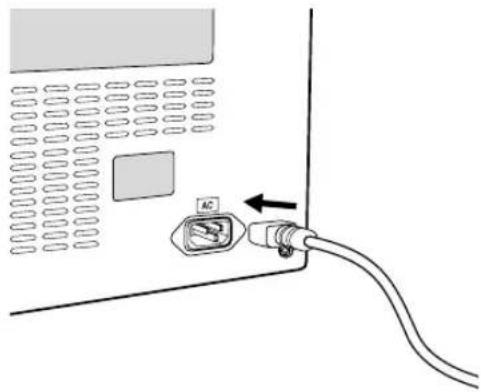
1 Plug in the power cord to the printer.
natural_image
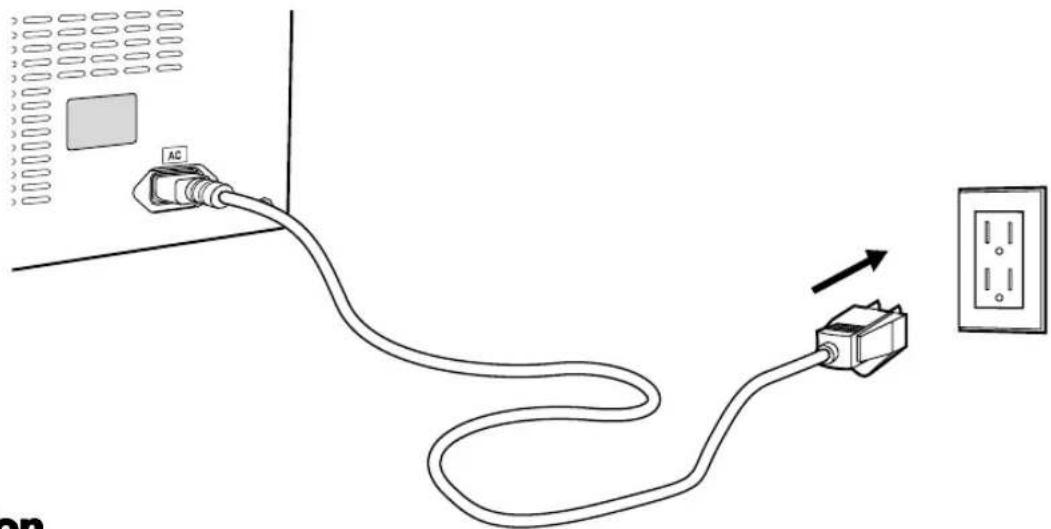
Diagram of a computer interface showing a cable inserted into a socket with an AC socket connected to the socket (no text or symbols present)2 Plug in the power cord to an outlet.
natural_image
Diagram showing a cable being inserted into an AC socket connected to a wall-mounted electrical outlet (no text or symbols present)Caution
• Always make sure to use a stationary power outlet such as a wall outlet.
Tip
- It is recommended to connect the ground wire to a grounded terminal.
[For customers outside of North America]
US and Canadian plugs do not have a separate ground wire.
3 Turn on the power switch of the printer. This completes printer preparations.

LCD Panel
The LCD panel is used to display image data for checking the layout for each of the print modes and display menus and contents.

flowchart
graph TD
    A["Start"] --> B["Layout 1 PIC."]
    B --> C["SET OK"]
    C --> D["PRINT DATE OFF FILTER OFF"]
    D --> E["SET OK"]
    E --> F["STANDARD"]
    F --> G["5/36"]
    G --> H["OK 1"]
For information on adjusting the brightness of the LCD panel, refer to page 69.
Connecting to a TV monitor
You can connect the printer to a TV monitor and view the same display on that TV as that on the LCD panel.
1 Use a off-the-self VIDEO cable to connect the VIDEO OUT jack on the printer to the VIDEO IN port on the TV monitor.
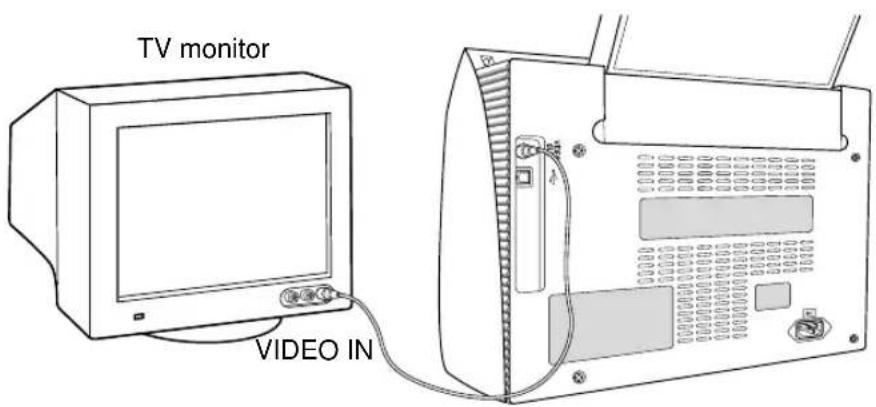
1 Turn on the TV and set it to the video input mode.
For details of switching to video input, refer to your TV's instruction manual.
The content of the LCD panel is displayed on the TV monitor.
Using xD-Picture Card
Pictures stored on xD-Picture Card can be printed directly by inserting the card into the xD-Picture Card slot in the printer.
Insert the xD-Picture Card into the xD-Picture Card slot.


Caution
- Make sure the xD-Picture Card is aligned properly when inserting into the printer.
- Be careful not to damage or soil the contacts when handling xD-Picture Card. Soiling of the contacts may prevent pictures from being read.
- Do not apply excessive force to the xD-Picture Card.
- Avoid using in environments susceptible to the occurrence of strong static electricity or electrical noise.
- Inserting xD-Picture Card that has been subjected to static electricity into the printer can cause an error in operation.
- The printer may not operate properly in the case of pictures that have been edited or processed with a PC.
- Do not insert the xD-Picture Card into a PC card slot by mistake. Doing so may cause a failure of the printer.

Caution
- Always make sure to check the access lamp on the operation panel before removing the xD-Picture Card. Never remove the xD-Picture Card while the access indicator is flashing. This can damage the data contained on the xD-Picture Card.
- Do not remove the xD-Picture Card during printing. Doing so may cause improper printing of the image.
Push the xD-Picture Card in until a click is heard then pull it completely out.

Using a PC Card
Pictures stored on a SmartMedia card, Memory Stick or CompactFlash can be printed directly by using the appropriate PC Card adapter in the PC Card slot in the printer.
Insert the CompactFlash, Memory Stick or SmartMedia into the PC card adapter, then insert the PC adapter into the PC card slot.

natural_image
Technical line drawing of a device casing and internal components (no text or symbols)
Caution
• The P-440 is compatible with PC Card Type II.
- Do not insert CompactFlash cards, Memory Stick or SmartMedia cards without the appropriate PC Card Adapter.
• Refer to the PC Card instruction manual when handling PC Cards.
- Be careful not to damage or soil the contacts when handling PC Cards.
- Avoid using in environments susceptible to the occurrence of strong static electricity or electrical noise.
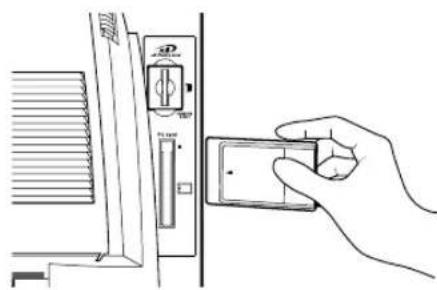
natural_image
Line drawing of a hand inserting a card into a device (no text or symbols visible)- Inserting a PC Card that has been subjected to static electricity into the printer can cause an error in operation.
- The printer may not operate properly in the case of pictures that have been edited or processed with a PC.

Caution
- Always make sure to check the access lamp on the operation panel before removing the PC card. Never remove the PC card while the access indicator is flashing. This can damage the data contained on the PC card.
- Do not remove the PC card during printing. Doing so may cause improper printing of the image.
Press the PC card eject button, then pull out the PC card.
Memory Stick is the registered trademark of the Sony Corporation. CompactFlash is the registered trademark of the U.S. SanDisk Corporation. Other system names and product names contained in this manual are generally the registered trademarks or trademarks of the respective developing manufacturer.

Installing the Printer Driver
Install the printer driver provided according to the computer being used. Refer to the “Readme” file on the CD-ROM for information on the installation procedure.
- Operating Environment
Windows
Compatible models: IBM PC/AT and compatibles
OS:Windows 98/Me/2000/XP (USB-compatible with PCs pre-installed with Windows 98/Me/2000/XP or models for which USB operation is guaranteed by the hardware manufacturer)
CPU: Pentium or higher
RAM size: 128 MB or more recommended
Hard disk space: Min. 128 MB
Interface: USB port
(Installation procedure: For Windows, refer to page 22.)
Macintosh
OS: Mac OS 8.6 to Mac OS X (compatible with New Power Mac G3, G4/iMac/iBook/PowerBook G4)
Memory: 128 MB or more recommended
Hard disk space: Min. 128 MB
Interface: USB port
(Installation procedure: For Mac OS 8.6 to 9.2, refer to page 25.)
(Installation procedure: For Mac OS X[Ver. 10.1.2-10.1.5, 10.2-10.25], refer to page 28.)

Caution
- Operation of this printer, the printer driver on a network is not guaranteed. In addition, use with commercially available printer buffers is also not guaranteed.
Windows98/Me/2000/XP
1 Turn on the PC and start Windows. Do NOT connect the printer to the computer at this time.
2 Insert the CD-ROM containing the P-440 printer driver into the PC.
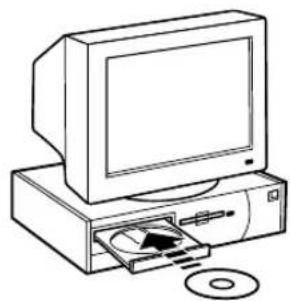
natural_image
Line drawing of a vintage desktop computer with an open CD and an inserted slot (no text or symbols)3 Start up the Setup program.
①From the CD-ROM, open the "P440PrinterDriver" folder.

②Next, doubleclikkonn "Setup.exe".
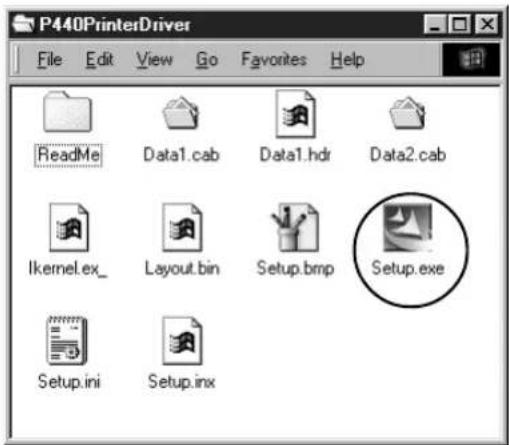
4 Select the language that you want to use during setup and then click on the "OK" button.

5 The setup program is started and a series of windows are displayed.
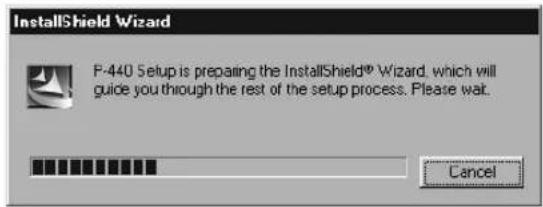
6 Click on the "Next" button.

7 Read the license agreement and click "Yes" if you accept the terms of the agreement.

8 Click on the "Finish" button.

9 Turn on the printer, connect the printer to the computer.
For information on the procedure to connect the printer to the computer, refer to page 31. Required files are automatically installed.
This completes installation of the P-440 printer driver.
Mac OS 8.6-9.2
1 Start up the Macintosh and insert the CD-ROM containing the P-440 printer driver.
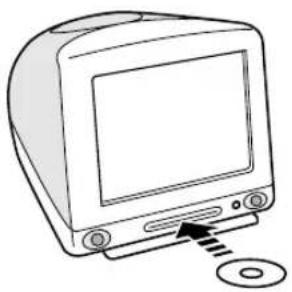
natural_image
Line drawing of a computer monitor with an attached CD and indicator lights (no text or symbols)2 Start up the install program.
①From the CCDROOM, oppathe "P440PrinterDriver" folder and then the "MacOS8.6-9" folder.
② Next, open the “English” folder and double-click on “Installer” icon.
The install program is started.


3 Click on the "Continue" button.
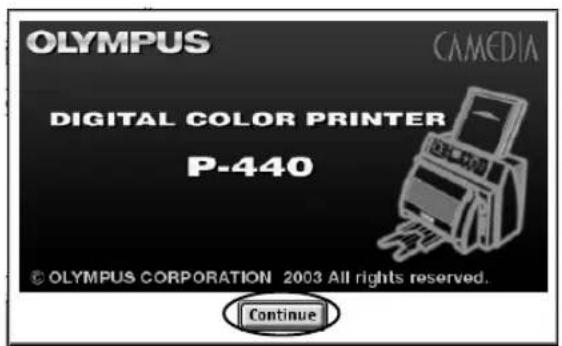
4 Read the license agreement and click "Agree" if you accept the terms of the agreement.
![LICENSE AGREEMENT FOR OLYMPUS SOFTWARE PRODUCT NOTICE TO USER: At copyright in and to the SOFTWARE PRODUCT are owned by Olympus or its owners. The SOFTWARE PRODUCT is protected by copyright (if any and international copyright reserves, as well as other Intellectual property exists and licenses). You may not distribute any products a while we part of the Software or the herein without Olympus approve. You may not copy this Software for any purpose or even have been up and maybe copy the herein. You may use the Software and the Member subject to the License Agreement for OLYMPUS SOFTWARE PRODUCT. You may not apply, reverse engineer, decomplete or disasssemble the Software, DLL or any part of the Software, combine the Software with or incorporated into any other application software, or print out the Software. OLYMPUS SHALL NOT BE LIABLE FOR ANY RESULT ARISING FROM MORIN CONNECTION WITH THE USE OR PERFORMANCE OF THE SOFTWARE. The Software and the Member are subject to change while it notes. Olympus plans to you own exclusive license to use the Software, provided that you agree to the following items and conditions: Section 1 Definitions [1] "3 different" means all the programs contained in OLYMPUS SOFTWARE PRODUCT. [2] "Manual" means the instruction manual or OLYMPUS SOFTWARE PRODUCT. Section 2 Conditions of Use [1] You may not include the Software into only one computer. [2] You may not use this Software into the Software for back more than English Save... Print... Disagree Agree](/content/2026/05/816051/images/614792a841a1dda211659f5f732962464bfe98704f78639d55db84a92ac91a61.jpg)
5 Click on the "Install" button.
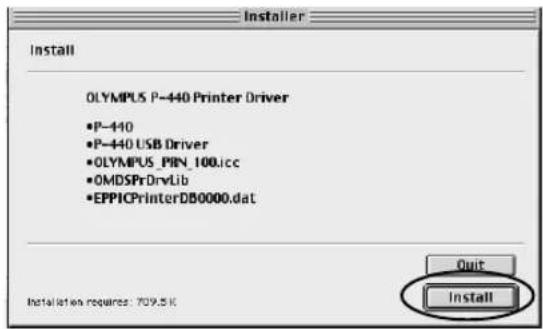
The printer driver is installed.
6 Click on the "Install" button. Do not change the folder into which the software is installed.
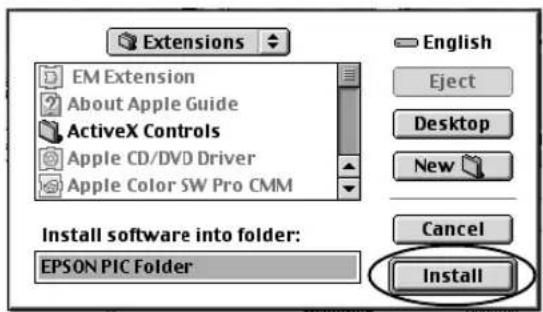
7 Click on the "Quit" button.

8
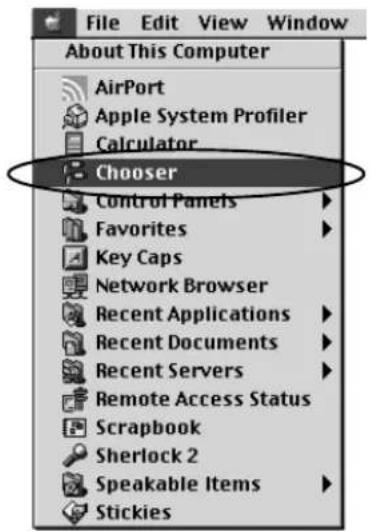
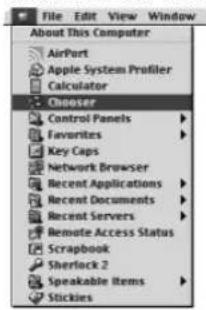
Select "Chooser" from the Apple menu.
①First, turn on the P-440's power and make sure it is connected to a USB port on the Macintosh using the appropriate USB cable.
②Using the mode selector dial on the front of P-440, set the input to "USB". After a few seconds, the P-440 should appear in the "Printer Select" list.
9
Click on the "P-440" driver icon in the left-hand window pane.
If multiple printer drivers are installed, the "P-440" icon may not appear in the Chooser. Please use the scroll bar to locate the "P-440" printer driver.
- It may be concealed within the window as a result of all of the printer driver icons being unable to be displayed. In this case, scroll the window with the scroll bar to display the concealed icons.

10
Select "P-440" in the "Printer Select" list and then click on the "box" on the upper left-hand corner to close the Chooser.
If the "P-440" is not displayed in the "Printer Select" list when the printer driver icon is clicked, check whether or not the USB cable is connected, the printer power is on, and whether or not the printer input is set to "USB".
Other tasks can be performed with the Macintosh during printing when “On” is selected for “Background Print”. However, the print time may be longer than when this option is “Off”.

For information on the procedure to connect the printer to the computer, refer to page 31.
This completes installation of the P-440 printer driver.
Mac OS X (version 10.1.2-10.2.5)
Tip
• Installation of this driver requires the Administrator privilege.
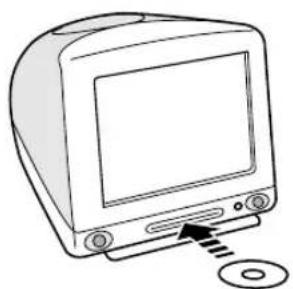
1 Start the Macintosh and insert the CD-ROM containing the P-440 printer driver.
natural_image
Line drawing of a vintage computer monitor with an attached CD and a circular button (no text or symbols)2 Start up the install program.
①From the CD-ROM, oppathe "P440PrinterDriver" folder and then the "MacOSX" folder.
② Double-click on "P440_100_MacOSX".
The install program is started.
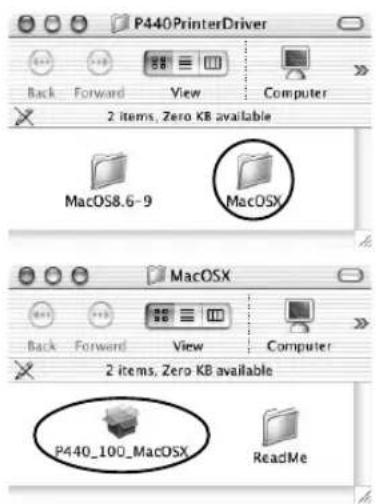
3 Follow the procedure of the installer to continue operation.

4 After the installer finishes, start up "Print Center".
①From the “Applications” folder, open the “Utilities” folder.
② Double-click the "Print center" icon. Print Center is started.
③Turn on the P-440's power and make sure it is connected to a USB port on the Macintosh using the appropriate USB cable.
For information on the procedure to connect the printer to the computer, refer to page 31.
④Using the mode selector dial on the front of P-440, set the input to "USB".

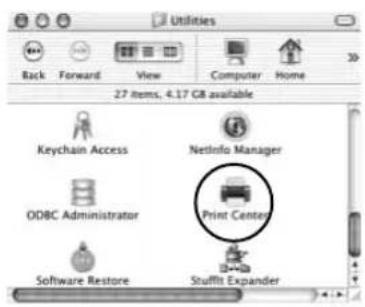

5 Click on the "Add" button.

6 Designate "USB" as destination of connection. The "P-440" icon is displayed.

7 Select "P-440" and click on the "Add" button.

This completes installation of the P-440 printer driver.
Printing from a PC
The following provides an explanation of the procedure for printing from a PC. Refer to the “Readme” file in the CD-ROM for information on the printing procedure.
Tip
- When using the P-440 with a PC, it is necessary to first install the printer driver (page 21) before connecting your P-440.
●Preparing the P-440 for Printing
1
After installing the P-440 driver, connect one end of a USB cable (sold separately) into a USB port on the computer and the other end into the USB connector on the back of the printer.


Caution
- Only use a USB cable for connecting to the printer.
- Connect the printer directly to a computer.

Tip
- Refer to the computer instruction manual for the procedure for making computer connections.
2
Set the mode selector dial to the INPUT position.

flowchart
graph TD
    A["PICTURE SELECT"] --> B["STANDARD"]
    C["INPUT"] --> D["CARD"]
    E["PAPER"] --> F["PHOTO-ALBUM"]
    G["SETUP"] --> H["PASSPORT"]
    I["INDEX"] --> J["INDEX"]
3
Select "USB" with the left or right arrow button.
The display changes in the manner shown below each time the left or right arrow button is pressed.

flowchart
graph LR
    A["xD-Picture Card"] <--> B["PC Card USB"]
    B --> C
"USB" is displayed at the top of the LCD panel.

natural_image
Symmetrical cross-shaped diagram with four directional arrows and a central circle (no text or symbols)
4
Make settings from a PC.
For Windows, refer to page 33.
For Macintosh, refer to page 38.
- Setting Printer Settings from a PC
When Using a Windows
- Paper Setting
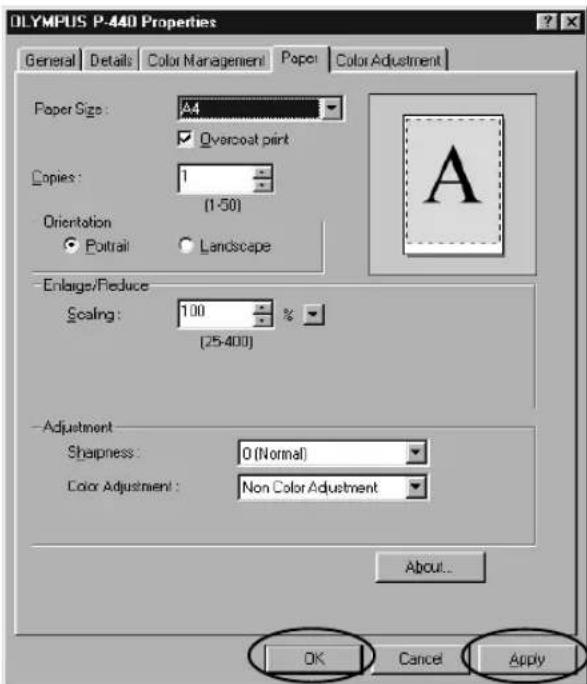
1 Select "Control Panel" and then "Printers". Right click on "OLYMPUS P-440" and display the properties.

2 Click on the "Paper" tab to set the paper.

Paper Size: Select the paper size (A4, A4 postcard, A5 WIDE, A6 WIDE) from the list box. (The printer is not compatible with A4L-size cards only when printing from a PC.)
Copies: Set the number of prints (1-50) either by key entry or using the arrow tool.
Orientation: Set the paper orientation by clicking the vertical or horizontal radio button.
Enlarge/Reduce:
Set the print size (25-400%) either by key entry or by pressing on the up or down arrow button until the desired percentage is displayed.
Sharpness: Select sharpness correction (-5-5) from the list box.
Color Adjustment:
Select the type of color adjustment that you want to make. Once you select the desired setting under “Driver”, it will be possible to make the color adjustments in the “Color Adjustment” tab.
If you select “ICM”, color adjustment will be performed based on the ICC profile. In Windows 2000/XP, a color adjusting method can be selected from Picture/Graphics/Match/Proof. To output a landscape image, select “Scene”.
When you use Print Image Matching Plug-in for Adobe Photoshop, select "Non Color Correction".
About: Version information is displayed.

Tip
- Two prints of the same picture are printed out for postcards. The number of prints can only be changed in units of 2 prints each.
3
Click on "Apply" then "OK".
The settings are enabled.
• Color Adjustment using the "Driver" Setting
If you selected the “Driver” checkbox under “Color Adjustment” in the “Paper” tab, you will be able to use a preview display as you adjust the color here.
Tip
- The color tone of the preview may differ from that of actual prints. The displayed color tone should only be used as a rough indication of color tone.
1 Click on the "Color Adjustment" tab.
Tip
- The "Color Adjustment" tab is only available when the "Driver" checkbox is selected under "Color Adjustment".
2 Adjust the color.
Gamma: Change the half of density (n=5-5) of R, G and B, respectively, with the control bar or arrow tool. Clicking on "Same" allows R, G and B to be changed all at once.
Brightness: Change the total picture density (-5-5) of R, G and B, respectively, with the control bar or arrow tool. Clicking on “Same” allows R, G and B to be changed all at once.
Contrast: Adjust the contrast (-5-5) of R, G and B, respectively, with the control bar or arrow tool. Clicking on “Same” allows R, G and B to be adjusted all at once.
Defaults: Returns the setting of each parameter to the initial setting.
Load: Load saved color adjustment values.
Save: Saves the set values.

Tips
- The procedure for changing color adjustment from the printer and that for changing color adjustment from a PC are the same.
- Adjustments made using the driver override those made on the printer.
3 Click on "Apply" or "OK".

Tips
• The same picture is printed out twice for postcards.
- During background printing, mouse and key operation may not be smooth or printing may take some time.
• Color Adjustment using the "ICM" Setting
Enables printing at a color that most closely resembles the color on your computer monitor. Selection is possible among 4 types of renderings that are normally supported under Windows 2000/XP.
Picture: Most appropriate for photographs.
Graphics: Most appropriate for bar and pie graphs.
Match: For higher quality printing.
Proof: Most appropriate for logos.
Precautions Regarding the Printer Driver
1) In the case of printing in A4 size, a minimum of 50 MB of available memory is required in the hard disk (excluding regions using the OS and applications) in order to prepare printing data.
2) When installing the printer driver, be sure to follow the installation procedure described in this manual to ensure proper installation.
3) If you remove the USB cable after the printer driver was installed, wait more than 5 seconds before connecting it again. Otherwise, the printer may not operate properly. When you turn off and on the printer or change the input selection, wait similarly.
4) Depending on the specifications or setting of the OS or PC, if processing has been interrupted while printing is in progress, the PRINTING lamp on the printer may continue flashing. At this time, temporarily turn off the printer power and then turn it back on again.
5) If the printer is turned off or the power cable is removed while printing is in progress, print data may remain in the print spooler. At this time, delete the remaining print data and then execute the next print job.
6) While "Please Wait" is displayed on the LCD panel of the printer, printing is not being performed. When the message disappears, printing will resumed automatically.
7) While data is transferred or printing is performed, be sure not to remove the USB cable, not to change the printer input selection, or not to turn off the printer power until printing is completed. Otherwise, abnormal printing may be caused.
8) If processing has been interrupted while printing is in progress (while the PRINTING lamp on the printer flashes or lights), temporarily turn off the printer power and then turn it back on again.
9) Do not delete print jobs in the spooler while transferring data. If you delete them inadvertently, temporarily turn off the printer power and then turn it back on.
10) Pure white portions of the image (R = 255, G = 255, B = 255), are not adjusted. These portions of the image will always print white.
11) If you select “ICM” for color adjustment on Windows 98/Me, the matching method is limited to “Photo”.
12) Set the bi-directional communication function to ON in the printer properties dialog.
Use the following procedure to check that the bi-directional communication function is set to ON.
(1) Select "Start" - "Settings" and then "Printers".
(2) Click on “OLYMPUS P-440” to select this printer, right-click to open a pop-up menu, and then click on “Properties”.
(3) Click on “Spool Settings” in the “Details” tab.
(4) Check that “Enable bi-directional support for this printer” is checked.
13) Depending on the version of Photoshop, item “Printer color control” is displayed in the print dialog. When printing with this setting ON after storing multiple pieces of image data in the printer spooler, normal colors may not be printed. When printing with “Printer color control” ON, do not store multiple pieces of image data in the spooler.
14) In some applications, the number of copies that have been set in the printer driver may not function. Set the number of copies in the print dialog box of the application.
When Using a Macintosh
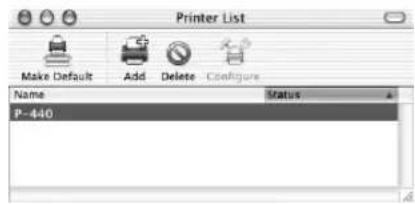
1 Select P-440 from the Chooser of the Apple menu.
For Mac OSX, open the "Utilities" folder from the "Applications" folder, start Print Center, and then select P-440.
Mac OS 8.6-9.2
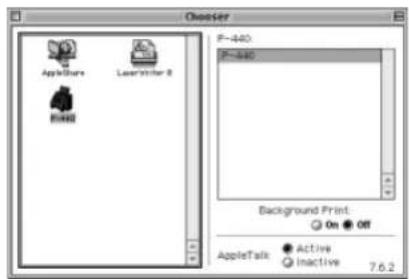
Mac OS X

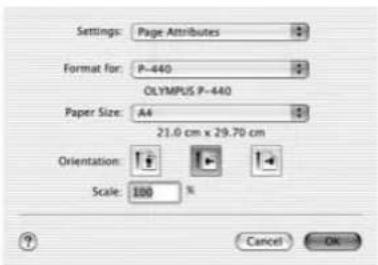
2 Select the desired paper settings in the "Page Setup" dialogue box.
For Mac OSX, select "File" - "Page Setup" or "File" - "Print".
Paper Size:
Select the paper size (A4, A4-postcard, A5 WIDE, A6 WIDE) from the pop-up menu. (The printer is not compatible with A4L-size cards only when printing from a PC.)
Orientation:
Set the paper usage, Vertical (portrait) or horizontal (landscape), by clicking on the icon.
Enlarge/Reduce:
Set the print size (25-400%) either by key entry or by pressing on the up or down arrow button until the desired percentage is displayed.
Sharpness:
Select sharpness correction (-5-5) from the pop-up menu.
ColorAdjust:
Select the type of color adjustment you want to make. (Color adjustment is possible by selecting the "Driver" item and clicking on the "Color Adjustment" button.) If you select "ColorSync", color adjustment will be performed based on the ICC profile. To output a landscape image, select "Scene".
When you use Print Image Matching Plug-in for Adobe Photoshop, select "Non Color Correction".
Mac OS 8.6-9.2

Mac OS X

3 Click on "OK".
The settings are enabled.
Mac OS 8.6-9.2 Mac OS X


• Color Adjustment using the "Driver" Setting
If you selected the "Driver" under "ColorAdjust" in the "Paper" dialog, you will be able to use a preview display as you adjust the color here.
Tip
- The color tone of the preview may differ from that of actual prints. The displayed color tone should only be used as a rough indication of color tone.
1 Click on the "Color Adjustment" button.
Caution
- The "Color Adjustment" tab is only available when the "Driver" is selected under "ColorAdjust".
2 Adjust the color.
Mac OS 8.6-9.2 Mac OS X


Gamma: Change the half-tone density (-5-5) of R, G and B, respectively, with the control bar or arrow tool. Clicking on “Same” allows R, G and B to be changed all at once.
Brightness: Change the total picture density (-5-5) of R, G and B, respectively, with the control bar or arrow tool. Clicking on “Same” allows R, G and B to be changed all at once.
Contrast: Adjust the contrast (-5-5) of R, G and B, respectively, with the control bar or arrow tool. Clicking on “Same” allows R, G and B to be adjusted all at once.
Defaults: Returns the setting of each parameter to the initial setting.
Load: Load saved color adjustment values.
Save: Saves the set values.
Tips
- The procedure for changing color adjustment from the printer and that for changing color adjustment from a PC are the same.
- Adjustments made using the driver override those made on the printer.
3 Click on "OK".
Mac OS 8.6-9.2 Mac OS X


Tips
• The same picture is printed out twice for postcards.
- During background printing, mouse and key operation may not be smooth or printing may take some time.
• The P-440 is not compatible with QuickDraw GX.
- Color Adjustment using the "ColorSync" Setting
Enables printing at a color that most closely resembles the system profile setting.
Selection is possible among 4 types of renderings that are normally supported on a Macintosh computer.
Picture: Most appropriate for photographs.
Graphics: Most appropriate for bar and pie graphs.
Match: For higher quality printing.
Proof: Most appropriate for logos.
Precautions Regarding the Printer Driver
1) In the case of printing in A4 size paper, a minimum of 50 MB of available memory is required in the hard disk (excluding regions using the OS and applications) in order to prepare printing data.
2) During background printing, mouse or key operation may not be smooth or printing may take some time.
3) This printer driver is not compatible with QuickDraw GX.
4) If you remove the USB cable after the printer driver was installed, wait at least 5 seconds before connecting it again. Otherwise, the printer may not operate properly. You must also wait if you turn the printer ON and OFF or change the input selection.
5) If you remove the USB cable during print operation, the system may freeze. Do not remove the USB cable.
6) Depending on the specifications or setting of the OS or PC, if processing has been interrupted while printing is in progress, the PRINTING lamp on the printer may continue flashing. If this occurs, temporarily turn off the printer power and then turn it back on again.
7) While “Please Wait” is displayed on the LCD panel of the printer during continuous printing, printing is not performed. When the message disappears, printing will resumed automatically.
8) Pure white portions of the image (R = 255, G = 255, B = 255), are not adjusted. These portions of the image will always print white.
9) In some applications, the number of copies that have been set in the printer driver may not function. Set the number of copies in the print dialog box of the application.
- Printing from a PC
Select a picture with the image editing software of the PC being used and print it out.

Tip
- Refer to the instruction manual of the image editing software being used for information regarding printing from a PC.
Windows Error Messages
- Errors displayed before data transfer (before printing)
| Description Cause Corrective Measures | ||
 | ·The printer is not connected or “INPUT” is not set to “USB”. | ·Interrupt processing by pressing the OK button.(An error message may be issued by the operating system if the printer is not connected.) |
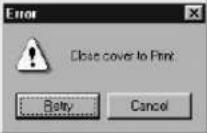 | ·The printer cover is open. | ·Retry button: Printing can be continued after removing the error.·Cancel button: Cancels printing. |
 | ·The printer is out of paper. | ·Retry button: Printing can be continued after removing the error.·Cancel button: Cancels printing. |
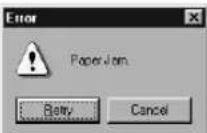 | ·There is paper remaining in the printer. | ·Retry button: Printing can be continued after removing the error.·Cancel button: Cancels printing. |
 | ·An error has occurred. | ·Contact the nearest service department of Olympus. |
- Errors displayed after data transfer (during printing)
| Description Cause Corrective Measures | ||
 | • The printer cover is open. | • OK button: Cancels printing.• Close the printer cover. |
 | • There is paper remaining in the printer. | • OK button: Cancels printing.• Take out the paper. |
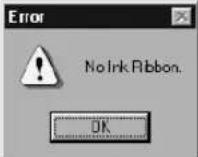 | • The ink ribbon is not installed.• The printer is out of ink ribbon. | • OK button: Cancels printing.• Check whether ink ribbon is installed in the printer.• Replace the ink ribbon (refer to page 154). |
 | • Paper of a different size than the setting is installed in the printer. | • OK button: Cancels printing.• Either insert different paper or change the paper setting (refer to page 33). |
 | • An error has occurred. | • Contact the nearest service department of Olympus. |
 | • Ink ribbon of a different size than the setting is installed in the printer. | • OK button: Cancels printing.• Either insert different ink ribbon or change the paper setting (refer to page 33). |
 | • The printer does not send back any response. | • OK button: Cancels printing.• Turn the printer power off and then on again. |
Macintosh Error Messages
1. Errors displayed before data transfer (before printing)
| Description Cause | Corrective Measures | |
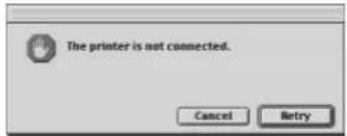 | ·The printer is not connected or “INPUT” is not set to “USB”. | ·Retry button: Printing can be continued after removing the error. ·Cancel button: Cancels printing. |
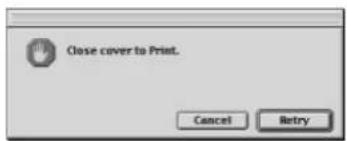 | ·The printer cover is open. | ·Retry button: Printing can be continued after removing the error. ·Cancel button: Cancels printing. |
 | ·The printer is out of paper. | ·Retry button: Printing can be continued after removing the error. ·Cancel button: Cancels printing. |
 | ·There is paper remaining in the printer. | ·Retry button: Printing can be continued after removing the error. ·Cancel button: Cancels printing. |
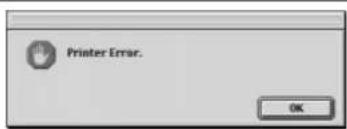 | ·An error has occurred. | ·Contact the nearest service department of Olympus. |
- Errors displayed after data transfer (during printing)
| Description Cause | Corrective Measures | |
 | The printer cover is open. | OK button: Cancels printing.Close the printer cover. |
 | There is paper remaining in the printer. | OK button: Cancels printing.Take out the paper. |
 | The ink ribbon is not installed.The printer is out of ink ribbon. | OK button: Cancels printing.Check whether ink ribbon is installed in the printer.Replace the ink ribbon (refer to page 154). |
 | Paper of a different size than the setting is installed in the printer. | OK button: Cancels printing.Either insert different paper or change the paper setting (refer to page 38). |
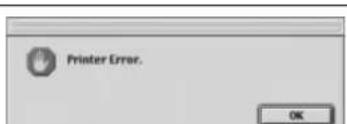 | An error has occurred. | Contact the nearest service department of Olympus. |
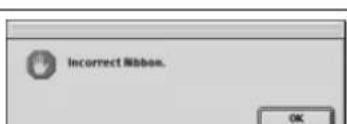 | Ink ribbon of a different size than the setting is installed in the printer. | OK button: Cancels printing.Either insert different ink ribbon or change the paper setting (refer to page 33). |
Printing Procedure When Printing from a Card
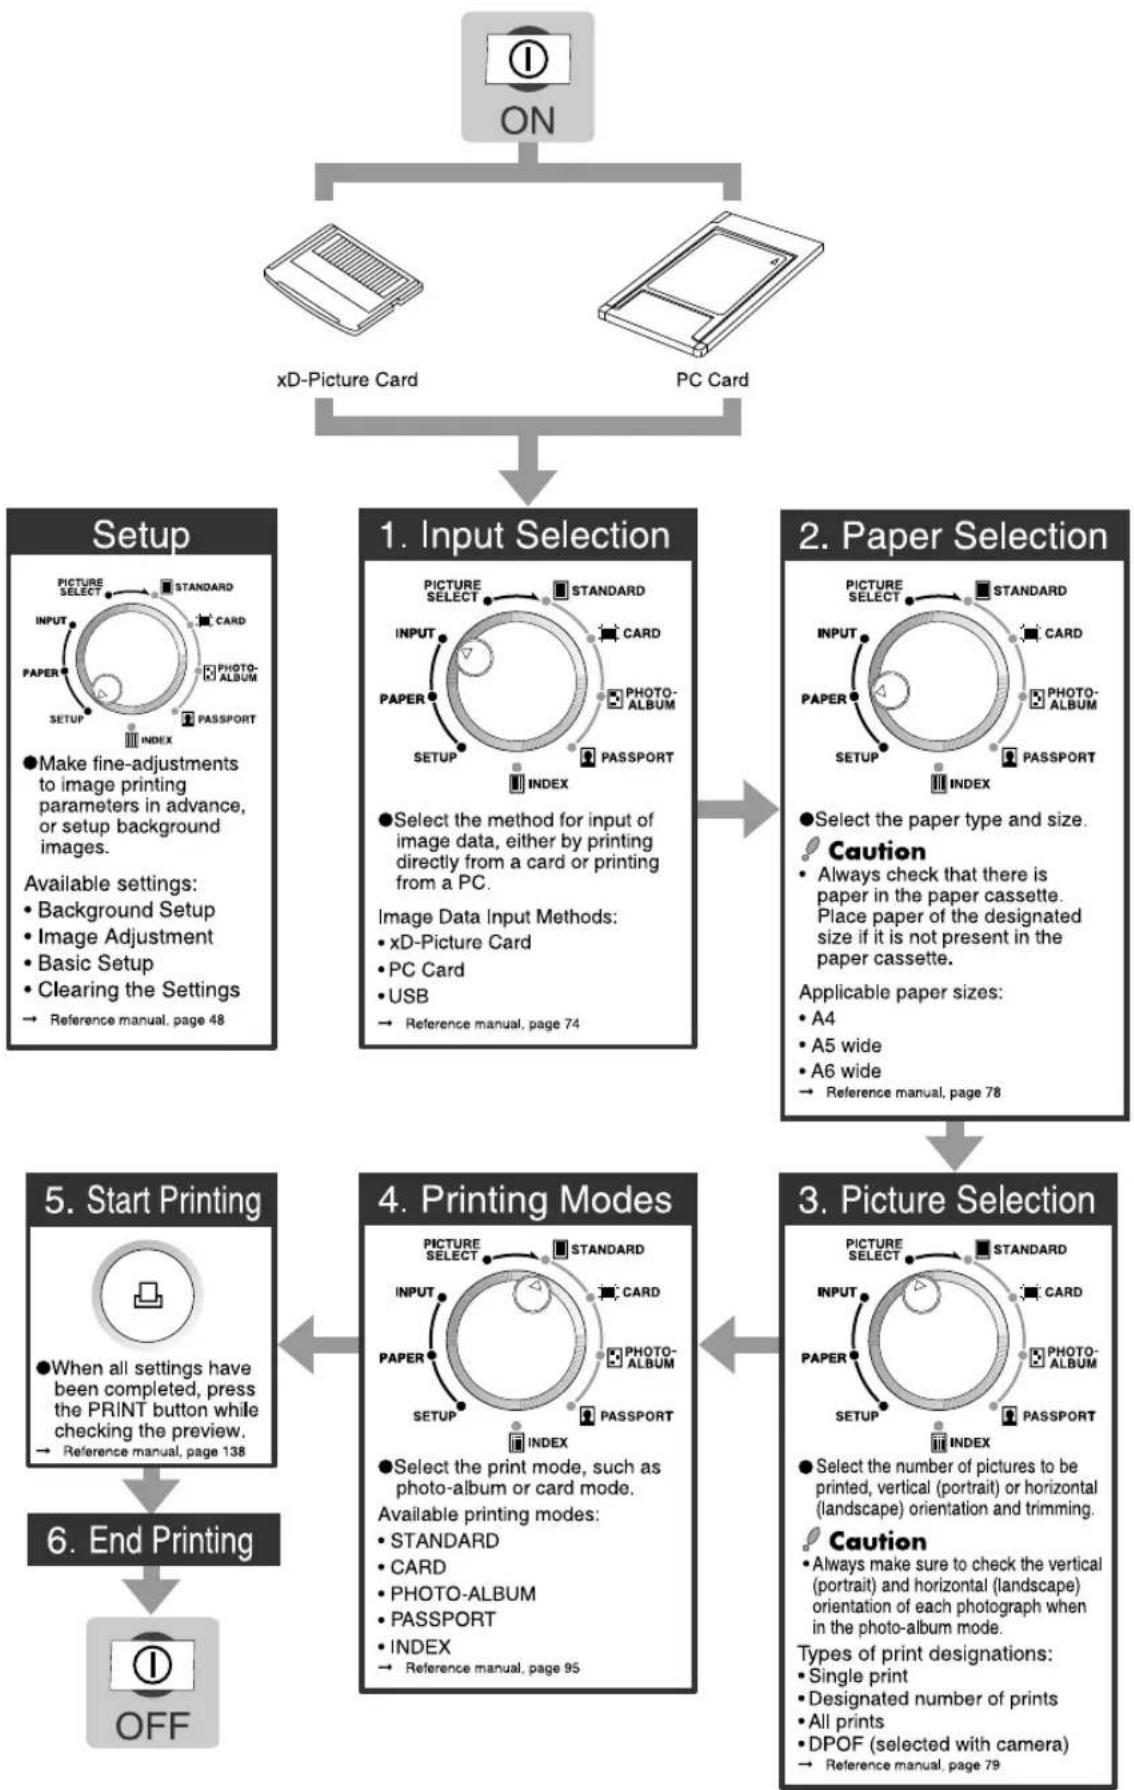
● Make fine-adjustments to image printing parameters in advance, or setup background images.
Available settings:
- Background Setup
• Image Adjustment - Basic Setup
- Clearing the Settings
→ Reference manual, page 48
- Select the method for input of image data, either by printing directly from a card or printing from a PC.
Image Data Input Methods:
• xD-Picture Card
• PC Card
•USB
→ Reference manual, page 74
- Select the paper type and size
Caution
• Always check that there is paper in the paper cassette. Place paper of the designated size if it is not present in the paper cassette.
Applicable paper sizes:
• A4
• A5 wide
• A6 wide
→ Reference manual, page 78
- When all settings have been completed, press the PRINT button while checking the preview. → Reference manual, page 138
- Select the print mode, such as photo-album or card mode.
Available printing modes:
• STANDARD
• CARD - PHOTO-ALBUM
• PASSPORT
• INDEX
→ Reference manual, page 95
- Select the number of pictures to be printed, vertical (portrait) or horizontal (landscape) orientation and trimming.
Caution
• Always make sure to check the vertical (portrait) and horizontal (landscape) orientation of each photograph when in the photo-album mode.
Types of print designations:
- Single print
• Designated number of prints
• All prints
• DPOF (selected with camera)
→ Reference manual, page 79
Setup
This mode is used to make fine-adjustments in advance to image printing parameters, or to register and/or adjust background images.
Available settings:
- Background Setup
• Image Adjustment - Basic Setup
- Clearing the Settings
- Background Setup
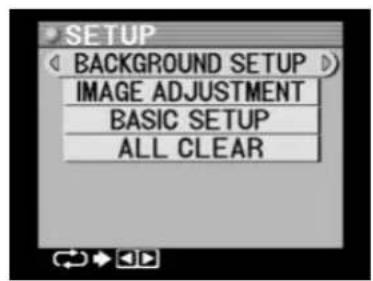
If you want to add a background to the print, perform the following procedure to register and adjust the background image.
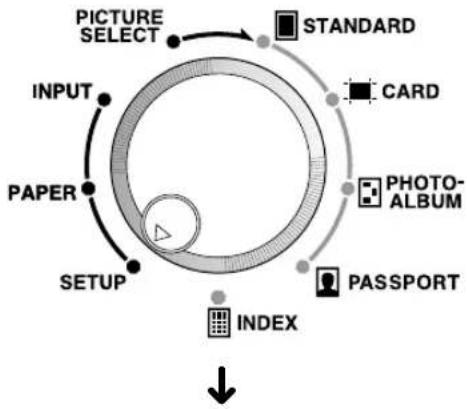
1 Set the mode selector dial to the SETUP position.
The Setup menu is displayed.

flowchart
graph TD
    A["INPUT"] --> B["PICTURE SELECT"]
    B --> C["STANDARD"]
    C --> D["CARD"]
    D --> E["PHOTO-ALBUM"]
    E --> F["PASSPORT"]
    F --> G["INDEX"]
    G --> H["↓"]

2 Press either the left or the right arrow button.
The image contained on the card in the selected card slot will be displayed.

natural_image
Symmetrical abstract diagram with four directional arrows and a central circle (no text or symbols)Tip
- If the background that you want to register is on another xD-Picture Card or PC Card, insert that card.
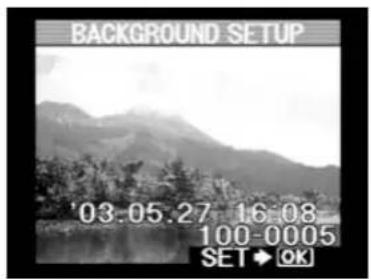
A. Selecting the Background Image
It is possible to use the image data included when this printer was shipped as a background image. It is also possible to use any other image data that you may like.
1 Scroll through the pictures using the left and right arrow buttons.
Pressing the right arrow button advances to the next picture, while pressing the left arrow button moves back to the previous picture.
Pressing the up arrow button jumps to the next set of 10 pictures, while pressing the down arrow button jumps back to the previous set of 10 pictures.

natural_image
Symmetrical four-pointed arrow diagram with directional arrows, no text or symbols presentTips
- Holding down the left or right arrow button for over 1 second will start automatic advancement of the picture file name (forward with the right arrow button and backward with the left arrow button). When you reach the desired file name, release the button to stop automatic advancement. The desired picture is displayed.
- The background image can also be selected from the index display. Refer to "3. Picture Selection and Setting" (page 79) for information on accessing the index display. The background image, however, can not be rotated.
- An enlarged picture can also be used as a background image. Refer to "3. Picture Selection and Setting" (page 79) for information on enlarging pictures. The background image, however, can not be rotated.
2 Confirm the picture that you want to use as the background image in the LCD panel, and then press the OK/SELECT button.
The picture is registered as a background image and is displayed in the Register Background menu.
OK / SELECT

↓

B. Adjusting the Background Image
This procedure is used in making partial and overall settings for the picture that has been selected as a background image, as well as in the selection of a desired filter.
1 Select whether or not to lighten the overall picture using the left and right arrow buttons.
The display changes as shown below each time the left or right arrow button is pressed.


natural_image
Symmetrical diagram with four directional arrows pointing outward from a central circle (no text or symbols)
2 Select "PALE EDGE" using the down arrow button.

natural_image
Abstract diagram with four directional arrows and a central circle, no text or symbols present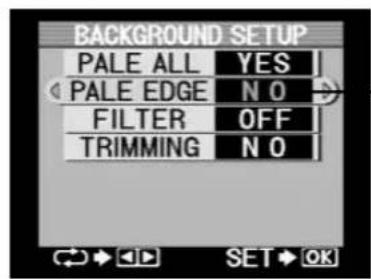
— The text will turn to green.
3 Select whether or not to lighten the edges of the picture using the left and right arrow buttons.
The display changes as shown below each time the left or right arrow button is pressed.


natural_image
Symmetrical cross-shaped diagram with four rounded rectangles and directional arrows, no text or symbols present.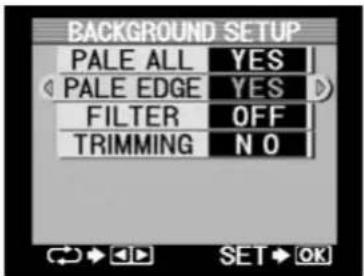
4 Select "FILTER" using the down arrow button.
natural_image
Abstract diagram with four directional arrows pointing outward from a central circle (no text or symbols)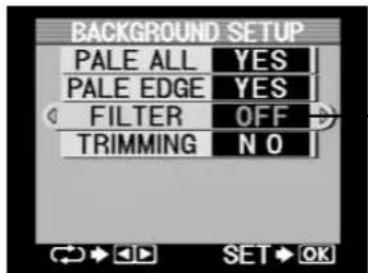
—The text will turn to green.
5
Select the desired filter using the left and right arrow buttons.
The display changes as shown below each time the left or right arrow button is pressed.

flowchart
graph LR
    A["OFF B&W SEPIA"] --> B["Next Step"]
    B --> C["End"]

natural_image
Symmetrical cross-shaped diagram with four directional arrows and a central circle (no text or symbols)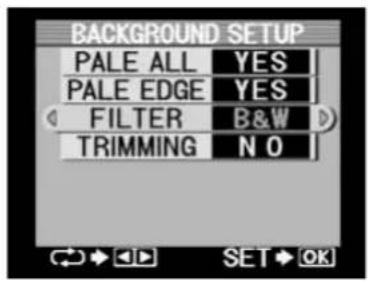
6
Select "TRIMMING" using the down arrow button.

natural_image
Pure diagram of four directional arrows pointing outward from a central cross shape, no text or symbols present.
- The text will turn to green.
7 Select whether or not to trim (crop) the picture using the left and right arrow buttons.
The display changes as shown below each time the left or right arrow button is pressed.


natural_image
Symmetrical cross-shaped diagram with four directional arrows and a central circle (no text or symbols)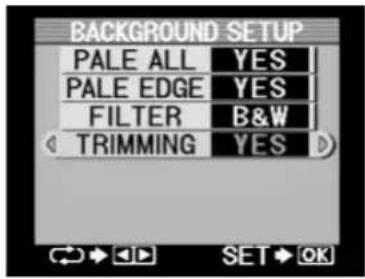
8 To trim (crop) the picture, select "YES" and press the OK/SELECT button.
Trimming is now possible.
OK / SELECT
↓
![TRIMMING [POSITION] SET OK](/content/2026/05/816051/images/8ec3c3801670d5d934619befccc8f79fc0325317dd4449718dc840ab69c72ba5.jpg)
9
Set the trimming position using the arrow buttons.
The trimming range can be selected to one of five levels each in the vertical and horizontal directions. The trimming position is selected by moving the guidelines to the desired location with the up, down, left and right arrow buttons.
Pressing the up and down arrow buttons adjusts the horizontal guidelines, while pressing the left and right arrow buttons adjusts the vertical guidelines.
natural_image
Symmetrical diagram with four directional arrows pointing outward from a central circle (no text or symbols)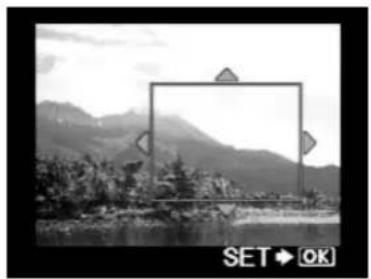
natural_image
Black-and-white landscape photo showing mountains, trees, and a lake with no visible text or symbols10
Once the various settings for the background image have been completed, press the OK/SELECT button.
The Background Image menu is displayed.
OK / SELECT


C. Registering the Background Image
This procedure is used to register settings related to the shading and filter to be used with the background image.
1 Select whether or not to register the background image using the left and right arrow buttons.
The display changes as shown below each time the left or right arrow button is pressed.


natural_image
Symmetrical cross-shaped diagram with four directional arrows pointing outward from a central circle (no text or symbols)
Tip
- If you do not want to register the background image, select "NO" and press the OK/SELECT button. The display returns to the Setup menu.
2 Press the OK/SELECT button.
If "YES" has been selected, registration of the background image begins and that progress is displayed.
The registered background image is displayed for about 2 seconds and then the display returns to the Setup menu.
OK / SELECT


Caution
- The amount of time that it takes to register the background image differs depending on the size of the image and the degree of detail of the pattern. Some images may not be registered depending on the size or pattern.
- The number pixels of pictures registered for background should be an even number both vertically and horizontally.
- Do not remove the xD-Picture Card or the PC card before registering the background image is complete.
- Image Adjustment (Printing Adjustment)
This procedure is used to make color and overall image adjustments during printing. If you are performing this procedure immediately after registering a background image, you should be able to skip step 1.
1 Set the mode selector dial to the SETUP position.
The Setup menu is displayed.

flowchart
graph TD
    A["INPUT"] --> B["PICTURE SELECT"]
    B --> C["STANDARD"]
    C --> D["CARD"]
    D --> E["PHOTO-ALBUM"]
    E --> F["PASSPORT"]
    F --> G["INDEX"]
    G --> H["SETUP"]
    H --> I["BACKGROUND SETUP"]
    I --> J["IMAGE ADJUSTMENT"]
    J --> K["BASIC SETUP"]
    K --> L["ALL CLEAR"]

Caution
- When printing from a computer these settings may be override by settings in the printer driver.
2 Select "IMAGE ADJUSTMENT" using the down arrow button.
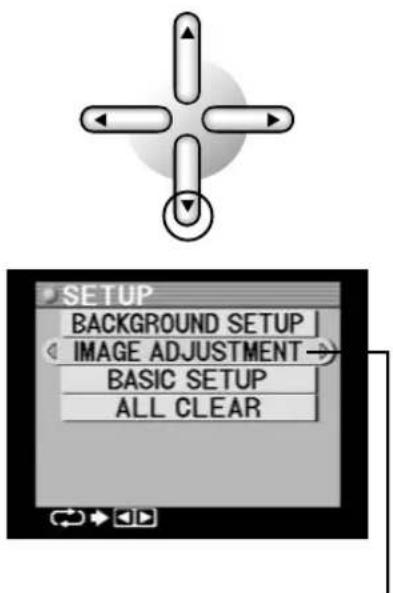
The background will turn to orange.
3 Press the left or right arrow button. The Image Adjust menu is displayed.

natural_image
Symmetrical cross-shaped diagram with four directional arrows on a central circle (no text or symbols)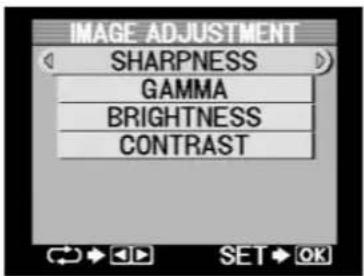
Tip
- Check that "SHARPNESS" is selected (the background color should be orange) and then proceed to sharpness adjustment. If "SHARPNESS" is not selected, select it with the up or down arrow button.
A. Sharpness Adjustment
This procedure is used to adjust sharpness.
1 Press either the left or right arrow button. The sharpness adjustment menu is displayed.

natural_image
Symmetrical abstract diagram with four directional arrows around a central circle (no text or symbols)
Tip
• The previously set value is displayed.
2 Adjust sharpness with the left or right arrow button.
Pressing the right arrow button (○) increases sharpness. Pressing the left arrow button (○) decreases sharpness.

natural_image
Symmetrical cross-shaped diagram with four rounded rectangles and directional arrows, no text or symbols present.

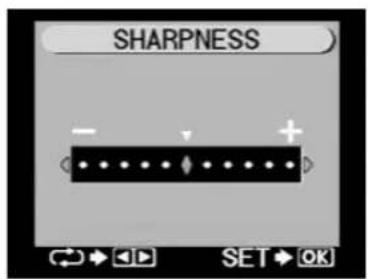


3 Once adjustment has been completed, press the OK/SELECT button.
The display returns to the Image Adjust menu.
OK / SELECT


Tip
- A red ◆ is displayed to the left of the selected setting when the sharpness is set to a value other than the middle setting.
B. Gamma Adjustment
This procedure is used to adjust gamma.
1 Select "GAMMA" with the down arrow button.

natural_image
Four directional arrows pointing in different directions around a central point, with no text or symbols present.
The background will turn to orange.
2 Press either the left or right arrow button. The gamma adjustment menu is displayed.

natural_image
Symmetrical four-pointed arrow diagram with directional arrows, no text or symbols presentTip
• The previously set value is displayed.
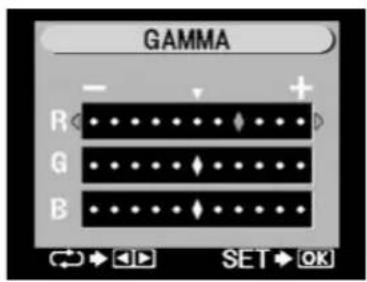
3 Select R, G and B levels with the up or down arrow button, and density with the left or right arrow button.
Pressing the right arrow button (○) results in brighter images, while pressing the left arrow button (○) results in darker images.

natural_image
Symmetrical four-pointed arrow diagram with directional arrows, no text or symbols present4 Once adjustments have been completed, press the OK/SELECT button.
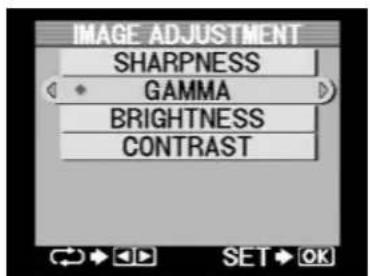
The display returns to the Image Adjust menu.
OK / SELECT

↓
Tip
- A red ◆ is displayed to the left of the selected setting when the gamma adjustment is set to a value other than the middle setting.
C. Brightness Adjustment
This procedure is used to adjust brightness (brightness of the overall pictures).
1 Select "BRIGHTNESS" by pressing the down arrow button.
natural_image
Abstract diagram with four directional arrows and a central circle, no text or symbols present
The background will turn to orange.
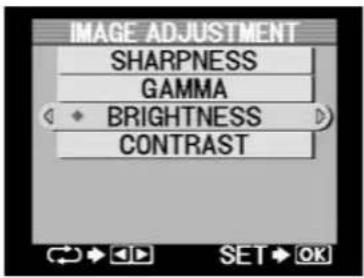
2 Press either the left or right arrow button. The brightness adjustment menu is displayed.

natural_image
Symmetrical cross-shaped diagram with four directional arrows pointing outward from a central point, no text or symbols present.Tip
• The previously set value is displayed.

3 Select R, G and B levels with the up or down arrow button, and brightness with the left or right arrow button.
Pressing the right arrow button (○) results in brighter images, while pressing the left arrow button (◀) results in darker images.
natural_image
Symmetrical four-pointed arrow diagram with directional arrows, no text or symbols present4 Once adjustments have been completed, press the OK/SELECT button.
The display returns to the Image Adjust menu.
OK / SELECT


Tip
- A red ◆ is displayed to the left of the selected setting when the brightness is set to a value other than the middle setting.
D. Contrast Adjustment
This procedure is used to adjust contrast.
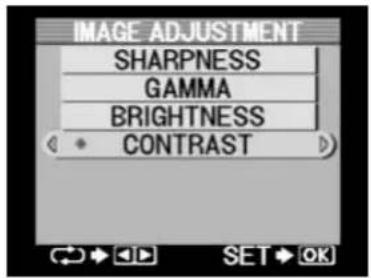
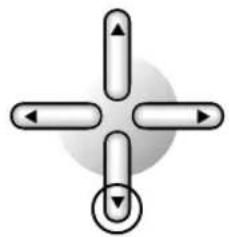
1 Select "CONTRAST" by pressing the down arrow button.

natural_image
Abstract diagram with four directional arrows and a central circle, no text or symbols present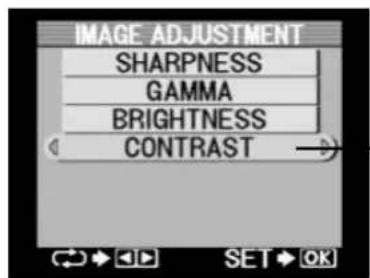
The background will turn to orange.
2 Press either the left or right arrow button. The contrast adjustment menu is displayed.

natural_image
Symmetrical four-pointed arrow diagram with directional arrows, no text or symbols presentTip
• The previously set value is displayed.

3 Select R, G and B levels with the up or down arrow button, and contrast with the left or right arrow button.
Pressing the right arrow button ( ) the ▶ contrast will be increased, while pressing the left arrow button ( ) ▶ t will be decreased.

natural_image
Symmetrical four-pointed arrow diagram with directional arrows, no text or symbols present4 Once adjustments have been completed, press the OK/SELECT button.
The display returns to the Image Adjust menu.
OK / SELECT
↓
Tip
- A red ◆ is displayed to the left of the selected setting when the contrast is set to a value other than the middle setting.
E. Completion of Image Adjustment
Image adjustment is completed by enabling the values that have been set for each parameter.
1 Press the OK/SELECT button when image adjustment has been completed. The display returns to the Setup menu.
OK / SELECT

- Basic Setup
This procedure is used to set the margin, fit the image, select the number of frames for index display, designates the order of the displayed date and make other basic settings. If you are performing this procedure immediately after registering a background image or making image adjustments, you should be able to skip step 1.
1 Set the mode selector dial to the SETUP position.
The Setup menu is displayed.
flowchart
graph TD
    A["INPUT"] --> B["PICTURE SELECT"]
    B --> C["STANDARD"]
    C --> D["CARD"]
    D --> E["PHOTO-ALBUM"]
    E --> F["PASSPORT"]
    F --> G["INDEX"]
    G --> H["↓"]
    I["PAPER"] --> J["SETUP"]
    J --> K["INDEX"]

2 Select "BASIC SETUP" by pressing the down arrow button.
natural_image
Abstract diagram with four directional arrows and a central circle, no text or symbols present
3 Press the left or right arrow button. The Basic Setup menu is displayed.

natural_image
Symmetrical diagram with four directional arrows around a central circle (no text or symbols)
A. Setting the Border Margin
This procedure is used to select how the printer will scale and print images that do not match the selected print size.
1 Select the margin area using the left and right arrow buttons.
The display changes as shown below each time the left or right arrow button is pressed.

flowchart
graph TD
    A["□/□(LEFT/BOTTOM) (RIGHT/TCP)"] --> B["□/□(RIGHT-TOP→LEFT-BOTTOM) (LEFT-BOT/TCP→RIGHT-TOP)"]
    B --> C["□/□(RIGHT-TOP→LEFT-BOTTOM) (LEFT-BOT/TCP→RIGHT-TOP)"]
natural_image
Symmetrical abstract diagram with four directional arrows around a central circle (no text or symbols)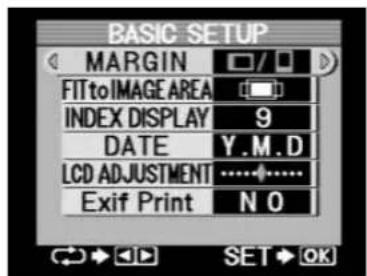
Tips
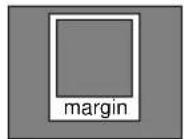
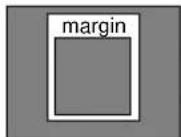
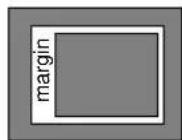
- Selecting [LEFT/BOTTOM] creates a margin on the left side of paper using horizontal (landscape) orientation, and on the bottom of paper using vertical (portrait) orientation.
- Selecting [RIGHT/TOP] creates a margin on the right side of paper using horizontal (landscape) orientation, and on the top of paper using vertical (portrait) orientation.
- Selecting [LEFT-BOTTOM → RIGHT-TOP] creates a margin on the left side of the 1st sheet of paper using horizontal (landscape) orientation, and on the right side of the 2nd sheet. This setting creates a margin on the bottom of the 1st sheet of paper using vertical (portrait) orientation, and on the top of the 2nd sheet. This setting is convenient for creating sets of prints which will be bound together.
- Selecting [RIGHT-TOP → LEFT-BOTTOM] creates a margin on the right side of the 1st sheet of paper using horizontal (landscape) orientation, and on the left side of the 2nd sheet. This setting creates a margin on the top of the 1st sheet of paper using vertical (portrait) orientation, and on the bottom of the 2nd sheet. This setting is convenient for creating sets of prints which will be bound together.
Vertical Left/Bottom:
Vertical Right/Top:

Vertical Left-Bottom → Right-Top:


Vertical Right-Top → Left-Bottom:

1st sheet 2nd sheet 1st sheet 2nd sheet
Horizontal Left/Bottom:
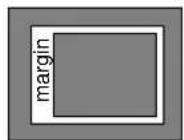
Horizontal Right/Top:
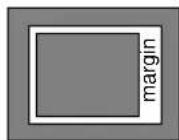
Horizontal Left-Bottom → Right-Top:
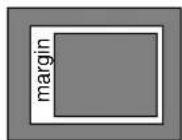
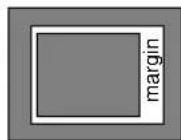
Horizontal Right-Top → Left-Bottom:

1st sheet 2nd sheet 1st sheet 2nd sheet
B. Fit to Image Area
This procedure is used to select how the printer will scale and print images that do not match the selected print size.
1 Select "FIT to IMAGE AREA" using the down arrow button.

natural_image
Abstract diagram with four directional arrows pointing outward from a central circle (no text or symbols)
- The text will turn to green.
2 Select whether to scale the size of the picture to fit onto the card or to print the picture full size.
The display changes as shown below each time the left or right arrow button is pressed.


natural_image
Symmetrical cross-shaped diagram with four directional arrows and a central circle (no text or symbols)
Tips
- If "FIT to IMAGE AREA" is selected, the picture will be printed without consideration for how it fits in the frame.
- If "FULL PICTURE" is selected, no part of the picture will be cropped, but an increased white area (margin) may thus be created.
FIT to IMAGE AREA FULL PICTURE

natural_image
Black-and-white street scene with a vintage car parked in front of palm trees and a building (no visible text or signage)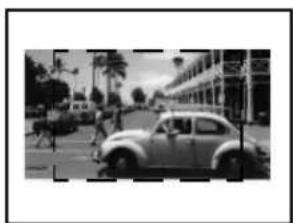
natural_image
Black-and-white street scene with vintage cars and palm trees (no visible text or signage)C. Index Display Selection
This procedure is used to switch between a 4 frame and 9 frame thumbnail index display.
1 Select "INDEX DISPLAY" using the down arrow button.

natural_image
Abstract diagram with four directional arrows and a central circle (no text or symbols)
The text will turn to green.
2 Select the number of frames to be displayed in the thumbnail index.
The display changes as shown below each time the left or right arrow button is pressed.


natural_image
Symmetrical four-pointed arrow diagram with directional arrows, no text or symbols present
D. Designating Date Order
This procedure is used to designate the manner in which the printed date is displayed.
1 Select "DATE" using the down arrow button.
natural_image
Abstract diagram with four directional arrows pointing outward from a central circle (no text or symbols)
-The text will turn to green.
2 Designate the manner in which the printed date is to be displayed with the left or right arrow button.
The display changes in the manner shown below each time the left or right arrow button is pressed.

flowchart
graph LR
    A --> B["Y.M.D M"]
    B --> C["D.Y"]
    C --> D["D.M.Y"]
    D --> E[" "]
    E --> F
Y: Year
M : Month
D : Day

natural_image
Symmetrical cross-shaped diagram with four directional arrows pointing outward from a central circle (no text or symbols)
Tips
- This is enabled when "DATE" is selected for "PRINT DATE" in the STANDARD, CARD, PHOTOALBUM and INDEX modes.
- When setting of other parameters is not required, press the OK/SELECT button and return to the setup menu.
E. Adjusting the LCD Panel Brightness
This procedure is used to adjust the brightness of the LCD panel.
1 Select "LCD ADJUSTMENT" using the down arrow button.

natural_image
Pure diagram of four directional arrows pointing outward from a central cross shape, no text or symbols present.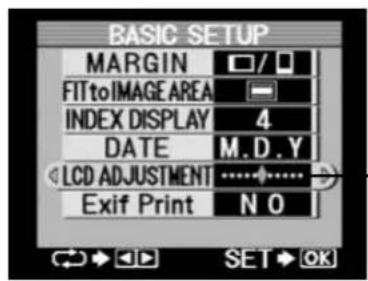
The text will turn to green.
2 Adjust the brightness of the LCD panel using the left and right arrow buttons.
Pressing the right arrow button makes the LCD panel lighter, and pressing the left arrow button makes it darker.
natural_image
Symmetrical cross-shaped diagram with four directional arrows and a central circle (no text or symbols)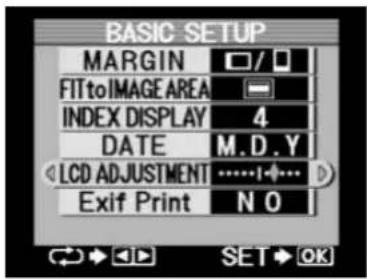
F. Exif Print
This procedure is used to designate whether Exif printing is performed or not. If Exif printing is set, print conditions such as brightness and contrast are automatically corrected in accordance with the picture taking information contained in the image data.
1 Select "Exif Print" by pressing the down arrow button.

natural_image
Abstract diagram with four rounded rectangles and directional arrows, no text or symbols present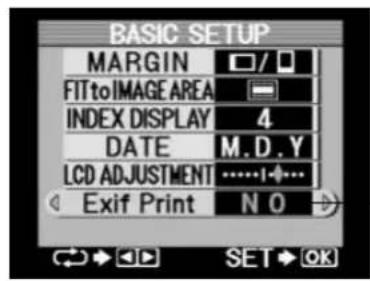
-The text will turn to green.
2 Select whether to perform Exif printing or not with the left or right arrow button.
The display changes in the manner shown below each time the left or right arrow button is pressed.

NO: Exif printing is not performed. YES: Exif printing is performed.

natural_image
Symmetrical cross-shaped diagram with four directional arrows and a central circle (no text or symbols)
Tip
- Exif print is available only if one picture has been selected in the standard print mode. This function is not available in other print modes.
G. Completing the Settings
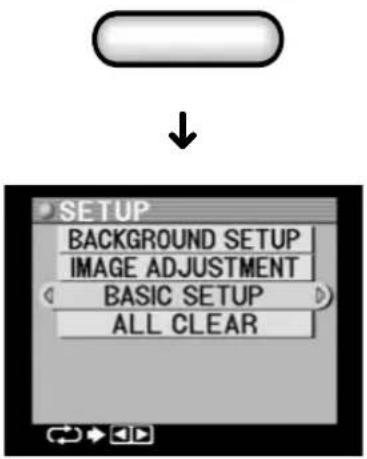
Setting is completed by enabling each of the setting of Basic Setup.
1 Press the OK/SELECT button. The display returns to the setup menu.
OK / SELECT
●Clearing the Settings (Returning to the Factory Default Settings)
This procedure is used to return all settings made in the printer to their factory defaults.
1 Set the mode selector dial to the SETUP position.
The Setup menu is displayed.

flowchart
graph TD
    A["PICTURE SELECT"] --> B["STANDARD"]
    C["INPUT"] --> D["CARD"]
    E["PAPER"] --> F["PHOTO-ALBUM"]
    G["SETUP"] --> H["PASSPORT"]
    I["INDEX"] --> J["↓"]
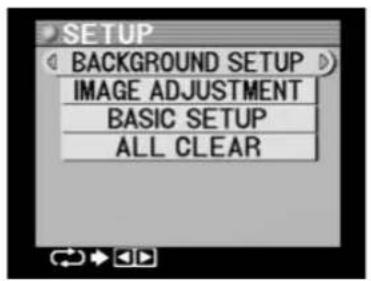
2 Select "ALL CLEAR" using the down arrow button.

natural_image
Four directional arrows pointing in different directions on a gray circular background (no text or symbols)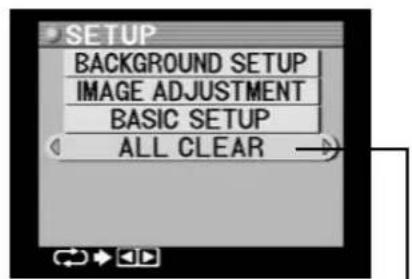
The background will turn to orange.
3 Press either the left or the right arrow button.
The ALL CLEAR screen appears.

natural_image
Symmetrical cross-shaped diagram with four rounded rectangles and directional arrows, no text or symbols present.
4 Select whether or not to clear all of the settings using the left and right arrow buttons.
The display changes as shown below each time the left or right arrow button is pressed.


natural_image
Symmetrical cross-shaped diagram with four rounded rectangles and directional arrows, no text or symbols present.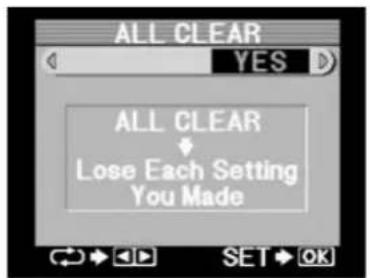
5 Press the OK/SELECT button. The display returns to the Setup menu.
OK / SELECT


1. Input Selection
Select the source from where image data is to be loaded, either from xD-Picture Card or a PC card.
• Using xD-Picture Card
1 Insert the xD-Picture Card into the xD-Picture Card slot.
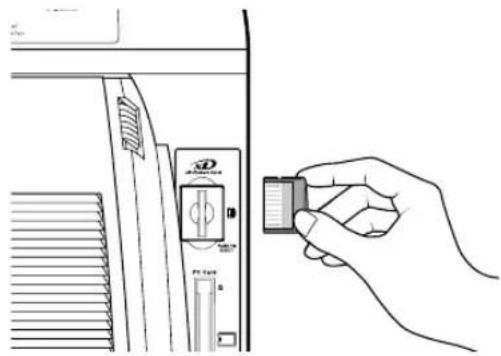
natural_image
Line drawing of a hand inserting a USB into a CD drive slot (no text or symbols)2 Set the mode selector dial to the INPUT position.

flowchart
graph TD
    A["PICTURE SELECT"] --> B["STANDARD"]
    C["INPUT"] --> D["CARD"]
    E["PAPER"] --> F["PHOTO-ALBUM"]
    G["SETUP"] --> H["PASSPORT"]
    I["INDEX"] --> J["INDEX"]
3 Select "xD-Picture Card" with the left or right arrow button.
The display changes in the manner shown below each time an arrow button is pressed.

flowchart
graph LR
    A["xD-Picture Card"] <--> B["PC Card"]
    B <--> C["USB"]
natural_image
Symmetrical four-pointed arrow diagram with directional arrows, no text or symbols present
flowchart
graph LR
    A["POWER ON"] --> B["Setup"]
    B --> C["1Input Selection"]
    C --> D["xD-Picture Card"]
    C --> E["PC card"]
    C --> F["USB"]
The xD-Picture Card access lamp flashes when image data is being transferred from the xD-Picture Card.

○ PC Card
○ PRINTING
○ ERROR

Caution
- Never remove the xD-Picture Card while the xD-Picture Card access lamp is flashing. This can damage the xD-Picture Card and prevent it from being used.
Display of xD-Picture Card reading in progress

When loading of image data is completed, the number of image data files on the xD-Picture Card and DPOF selections, when that data is present, are displayed.


Tip
- An error message is displayed on the LCD panel when an inserted xD-Picture Card does not contain image data, the xD-Picture Card is unable to be recognized, or the xD-Picture Card is removed from the printer while accessing is in progress.
4
Select the paper.
Proceed to "2. Paper Selection" (page 78).

flowchart
graph LR
    A["POWER ON"] --> B["Setup"]
    B --> C["Input Selection"]
    C --> D["xD-Picture Card"]
    C --> E["PC card"]
    C --> F["USB"]
•Using a PC Card
1 Insert the PC card into the PC card slot.

2 Set the mode selector dial to the INPUT position.

flowchart
graph TD
    A["INPUT"] --> B["PICTURE SELECT"]
    B --> C["STANDARD"]
    C --> D["CARD"]
    D --> E["PHOTO-ALBUM"]
    E --> F["PASSPORT"]
    F --> G["INDEX"]
    G --> H["SETUP"]
    H --> I["PAPER"]
    I --> J["INDEX"]
3 Select "PC Card" with the left or right arrow button.
The display changes in the manner shown below each time an arrow button is pressed.

flowchart
graph LR
    A["xD-Picture Card"] <--> B["PC Card"]
    B <--> C["USB"]

natural_image
Symmetrical four-pointed arrow diagram with directional arrows, no text or symbols present
flowchart
graph LR
    A["POWER ON"] --> B["Setup"]
    B --> C["1Input Selection"]
    C --> D["xD-Picture Card"]
    C --> E["PC card"]
    C --> F["USB"]

flowchart
graph LR
    A["The PC Card access lamp flashes and the image files are loaded from the PC card."] --> B["xD-Picture Card"]
    A --> C["PC Card"]
    A --> D["PRINTING"]
    A --> E["ERROR"]

Caution
- Never remove the PC Card while the PC Card access lamp is flashing. This can damage the PC Card and prevent it from being used.

When loading of image data is completed, the number of image data files on the PC card and DPOF selections, when that data is present, are displayed.


Tip
- An error message is displayed on the LCD panel when an inserted PC card does not contain image data, the PC card is unable to be recognized, or the PC card is removed from the printer while accessing is in progress.
4
Select the paper.
Proceed to "2. Paper Selection" (page 78).
2. Paper Selection
Select whether A4, A5 wide or A6 wide paper.
- Setting the Paper
1 Set the mode selector dial to the PAPER position.

flowchart
graph TD
    A["INPUT"] --> B["PICTURE SELECT"]
    B --> C["STANDARD"]
    C --> D["CARD"]
    D --> E["PHOTO-ALBUM"]
    E --> F["PASSPORT"]
    F --> G["INDEX"]
    G --> H["SETUP"]
    H --> I["PAPER"]
    I --> J["INPUT"]
2 Select "PAPER" with the left or right arrow button.
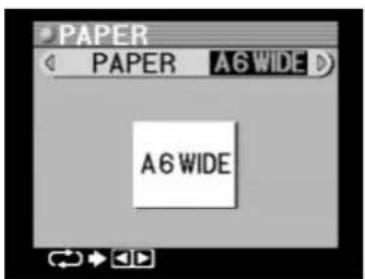
The icon of the selected paper size is displayed on the LCD panel. The display changes as shown below each time an arrow button is pressed.

When selection of paper has been completed, proceed to the next step, “3. Picture Selection and Setting” (page 79).
natural_image
Symmetrical four-pointed arrow diagram with directional arrows, no text or symbols present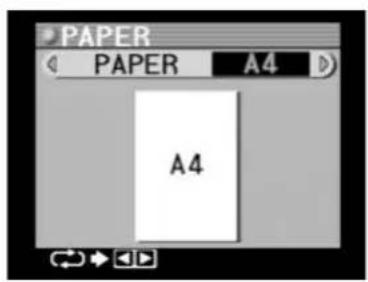

Tips
- The printer cannot determine the actual size of the paper loaded in the printer so make sure the selected size matches.
- If the paper setting is set to A5 WIDE and pictures are printed out on A4 paper, the pictures are printed out within the A5 WIDE range.
- An error occurs when the paper setting is set to A4, and pictures are printed out on A5 WIDE paper.
- A6 WIDE paper can be used only in the PASSPORT print mode. An error occurs if it is used in other modes.
3. Picture Selection and Setting
Pictures are selected using the LCD panel. Settings made in this section include how may prints are to be printed, whether the picture is to oriented vertically or horizontally relative to the paper, and whether or not trimming is to be performed on image data.
- Selecting and Setting Pictures on a Card
A. Picture Selection
1 Align the mode selector dial to the PICTURE SELECT position.
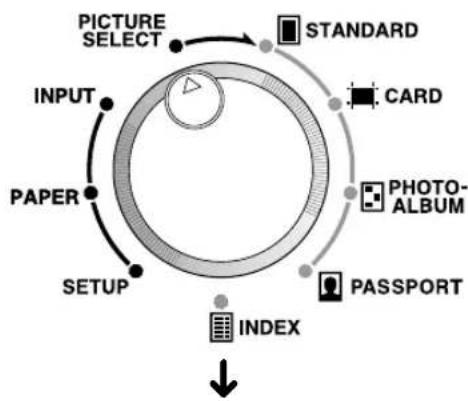
flowchart
graph TD
    A["INPUT"] --> B["PAPER"]
    B --> C["SETUP"]
    C --> D["INDEX"]
    D --> E["POST"]
    E --> F["PHOTO-ALBUM"]
    F --> G["CARD"]
    G --> H["STANDARD"]
    H --> I["PICTURE SELECT"]
Image data is displayed on the LCD panel.

Caution
- The time to display the preview varies according to the picture size and compression ratio of the digital camera used to take the pictures.
2 Scroll through the pictures using the up, down, left and right arrow buttons.
Pressing the right arrow button advances to the next picture, while pressing the left arrow button moves back to the previous picture.
Pressing the down arrow button jumps to the next set of 10 pictures, while pressing the up arrow button jumps back to the previous set of 10 pictures.

natural_image
Symmetrical four-pointed arrow diagram with directional arrows, no text or symbols present
natural_image
Close-up of plant leaves with visible fronds and a timestamp overlay (no readable text in image)Tip
- Holding down the left or right arrow button for over 1 second will start automatic advancement of the picture file name (forward with the right arrow button and backward with the left arrow button). During advancement of the file names, a scroll bar will be displayed on the left side of the screen. Release either button when desiring to stop automatic advance and display the desired picture.
3 Confirm the picture displayed on the LCD panel is the picture to be printed.
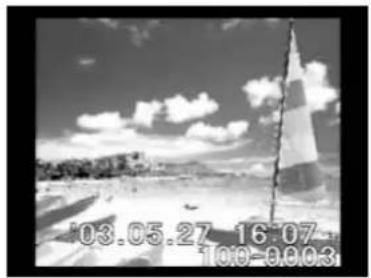
natural_image
Black-and-white beach scene with a striped lighthouse and distant hills under a cloudy sky (no text or symbols visible)B. Picture Rotation
This procedure is used to designate whether the picture to be printed is to be oriented vertically or horizontally on the paper set in “2. Paper Selection”. (Image rotation is only reflected in prints in the ALBUM mode.)
1 Select the desired orientation using the ROTATE button.
The picture is rotated 90 degrees counterclockwise each time the ROTATE button is pressed.


natural_image
Black-and-white beach scene with a lighthouse and cloudy sky (no visible text or symbols)→

Tip
- If the previewed picture (displayed on the LCD panel) has become too long in the vertical direction as a result of rotation, it is displayed after being reduced in size so that the entire picture can be confirmed on the LCD panel.
2 Once the picture orientation has been decided, press the OK/SELECT button.
OK / SELECT

Tips
- A “☐ (select mark)” is displayed on the LCD panel containing the picture selected for printing.
- A "☐ (select mark)" is displayed when a picture has been selected by the camera.
- When desiring to cancel a picture, display that picture and press the OK/SELECT button again.
• Always make sure to check the picture orientation when printing in the photo-album mode.
C. Enlarging the Size of the Picture
To help ensure that the correct image has been selected to be printed, it is possible to select a portion of the image to enlarge for confirmation purpose.
1 Press the ENLARGE button.

2 Select the desired area using the up, down, left and right arrow buttons.
Pressing the up and down arrow buttons moves the selected area up and down, while pressing the left and right arrow buttons moves the selected area to the left and right.
To cancel the procedure and return to the previous display, press the INDEX button.


natural_image
Symmetrical four-pointed arrow diagram with directional arrows, no text or symbols present
natural_image
Black-and-white beach scene with a lighthouse and ocean under a cloudy sky (no text or symbols)3 Press the ENLARGE button.
The selected area of the picture is enlarged. Press the INDEX button to return to the area selection display.

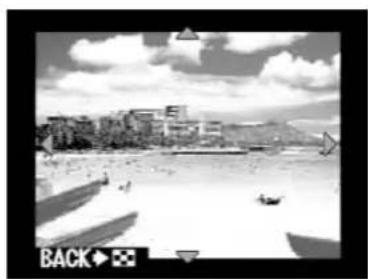
natural_image
Black-and-white beach scene with boats and buildings under cloudy sky (no visible text or symbols)4 Scroll around the picture using the up, down, left and right arrow buttons.
Pressing the up and down arrow buttons scrolls up and down in the picture, while pressing the left and right arrow buttons scrolls left and right.

natural_image
Symmetrical four-pointed arrow diagram with directional arrows, no text or symbols present
natural_image
Black-and-white photo of a sailboat on water with distant hills and cloudy sky (no text or symbols)Tip
- If you press the ROTATE button before the enlarged display, the picture is rotated 90 degrees counterclockwise and this is reflected in photo-album printing only.
5 Press the INDEX button twice to return to the full-screen display.

natural_image
Black-and-white beach scene with lighthouse and cloudy sky (no text or symbols)6 Select the picture using the OK/SELECT button.
OK / SELECT

Tip
- Even though the image on the display is enlarged, this will not affect the size of the print. Perform the appropriate trimming procedure if you want to print at a larger size.
D. Picture Index Display
All of the pictures contained on an xD-Picture Card or other media can be displayed in either 4 frame or 9 frame, thumbnail index. This is convenient, for example, when searching for a picture that you want to print.
Tip
- Perform the procedure to switch between a 4 frame and 9 frame thumbnail index in "Basic Setup" (page 63). The explanation in the following procedure uses a 4 frame display.
1 Press the INDEX button during single picture display.
The LCD panel switches to a 4 frame or 9 frame thumbnail index display.
To return to a single picture display, press the ENLARGE button.

9 frame 4 frame
2 Scroll through the picture sets using the up and down arrow buttons.
Pressing the down arrow button advances to the next set of pictures, while pressing the up arrow button moves back to the previous set.

natural_image
Symmetrical diagram with four rounded rectangles and directional arrows, no text or symbols present
natural_image
Four-panel black-and-white photo collage showing beach scenes: a person holding a surfboard, palm trees, a beach with a tower, and a car (no text or symbols)→

natural_image
Black-and-white collage of four nature scenes: a lake with mountains, a building with a flag, a petal-like flower, and foliage (no text or symbols)→

natural_image
Four black-and-white landscape photos showing forest, terraced fields, natural gas, and a small house (no text or symbols)3 Select the desired picture using the left and right arrow buttons.
Pressing the right arrow button moves the selection to the next image, while pressing the left arrow button moves the selection to the previous image.
Pressing the ENLARGE button displays only the selected picture on the screen.
natural_image
Symmetrical abstract diagram with four vertical bars and a central circle, no text or symbols present
natural_image
Four-panel black-and-white photo collage showing beach scenes: a person holding a surfboard, palm trees, coastal cityscape, and a car (no text or symbols)Tip
- If you press the ROTATE button during the index display, the picture is rotated 90 degrees counterclockwise and this is reflected in photo-album printing only.
4 Select the picture using the OK/SELECT button.
OK / SELECT

E. Selecting the Number of Prints
This procedure is used to select the number of copies to be printed for the picture displayed.
1 Press the MENU button.
The picture select menu is displayed.
MENU


2 Select the number of copies to be printed with the left or right arrow button.

natural_image
Symmetrical cross-shaped diagram with four rounded rectangles and directional arrows, no text or symbols present.
Tips
- Up to a maximum of 50 copies can be printed.
- When more than 50 copies are selected in DPOF data, the number of prints is set to 50.
- If "0" pictures is designated, either printing is not selected or canceled, and the picture is not printed.
- The setting for the number of prints is ignored in the photo-album mode.
F. Trimming selected picture (Cropping)
This procedure is used to trim the displayed image.
1 Select "TRIMMING" by pressing the down arrow button.

natural_image
Symmetrical cross-shaped diagram with four rounded rectangles and directional arrows, no text or symbols present
2 Select trimming with the left or right arrow button.

natural_image
Symmetrical cross-shaped diagram with four directional arrows and a central circle (no text or symbols)The display changes in the manner shown below each time the left or right arrow button is pressed.
When trimming has not been selected: When trimming has already been selected:


flowchart
graph LR
    A["ON OFF NEW"] --> B[" "] --> C[" "]
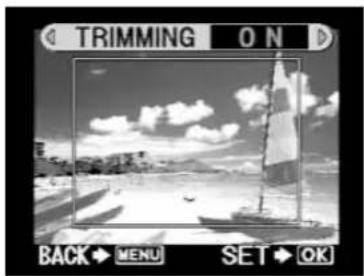
natural_image
Black-and-white beach scene with sailboat and boats under cloudy sky (no text or symbols)
natural_image
Black-and-white beach scene with sailboat on shore, no visible text or symbols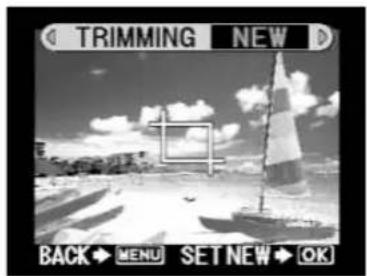
Proceed to step 2 of "H. Setting the Trimming Position" (page 92) when not performing trimming, trimming has been previously set or trimming is set in DPOF data.
3 Select "NEW" with the left or right arrow button.
natural_image
Symmetrical four-pointed arrow diagram with directional arrows, no text or symbols present
G. Selecting the Trimming Size
The trimming size is selected by adjusting the size of the guidelines. The picture is trimmed (cropped) to the size outlined by those guidelines.
There are 2 methods of selecting the trimming size: "Free Trimming" which enables a 10-position adjustment of each vertical and horizontal guideline and "3:4 Trimming" which maintains a 3:4 vertical:horizontal ratio when selecting the trimming size.
Free Trimming
1 Press the OK/SELECT button. Trimming is now possible.
![OK / SELECT Green TRIMMING [SIZE] Green White BACK MENU SET OK White](/content/2026/05/816051/images/e287f8a09165fca98d7c6ac9b5d7451398317ab71548467291b92fb8effb06ae.jpg)
2 Adjust the top and left guidelines using the up, down, left and right arrow buttons.
Each guideline can be moved to any point within the 10-position adjustment area. Pressing the up and down arrow buttons adjusts the top guideline, while pressing the left and right arrow buttons adjusts the left guideline.


3 Press the OK/SELECT button.
The bottom and right guidelines can now be adjusted.
To return to the previous display, press the MENU button.
![OK / SELECT White TRIMMING [ SIZE ] White Green BACK→MENU SET→OK Green](/content/2026/05/816051/images/3b0e705fcda935d9d7270f4a45e350878d30ffc1e82575b791f1d7bea633f4ad.jpg)
4 Adjust the bottom and right guidelines using the up, down, left and right arrow buttons.
Each guideline can be moved to any point within the 10-position adjustment area. Pressing the up and down arrow buttons adjusts the bottom guideline, while pressing the left and right arrow buttons adjusts the right guideline.
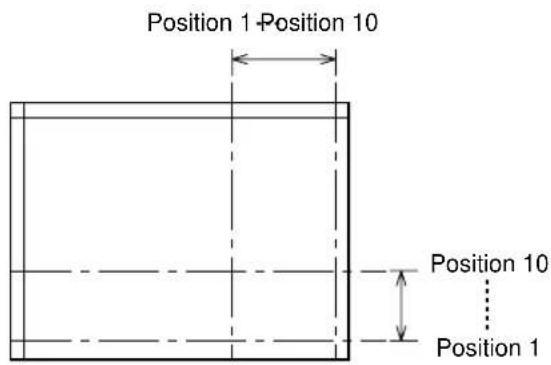

5 Once the trimming size has been selected, press the OK/SELECT button.
The display changes to that for setting the trimming position.
OK / SELECT

![TRIMMING [POSITION] BACK ◆ MENU SET ◆ OK](/content/2026/05/816051/images/2ca639c54a54e1f3d6c442446d7ceab8b9ca79a2e6efc6080592018ed72535ae.jpg)
3:4 Trimming
1 Press the OK/SELECT button. Trimming is now possible.
OK / SELECT
![Green TRIMMING [SIZE] Green White BACK ◆ MENU SET ◆ OK White](/content/2026/05/816051/images/7501bc568b040dc1437b74161e6d9e177f59f5c6bda92e529697c35b9bc92918.jpg)
2 Select the trimming size using the ENLARGE button or the INDEX button.
The vertical:horizontal ratio is changed to a 3:4 ratio with 10-position adjustment possible. Pressing the ENLARGE button increases the trimming size, while pressing the INDEX button decreases it.


3 Once the trimming size has been selected, press the OK/SELECT button.
The display changes to that for setting the right and bottom guide lines. Do not change the trimming size here, however.
![OK / SELECT White TRIMMING [ SIZE ] White Green BACK MENU SET OK Green](/content/2026/05/816051/images/9eaf467385ad494117815369a96850225a45ca785b4e97c1d4b54cc1c30cbdb7.jpg)
4 Press the OK/SELECT button.
The display changes to that for setting the trimming position.
OK / SELECT
![TRIMMING [POSITION] BACK ◆ MENU SET ◆ OK](/content/2026/05/816051/images/a384e4a20f56b9bde41b3fe9b1f97c9e3147095372bbcd1f8341f43b7d76bc9e.jpg)
H. Setting the Trimming Position
1 Designate the trimming position with the four arrow buttons.
Pressing the up and down arrow button moves the trimming range up and down, while pressing the left and right arrow button moves the trimming range to the left and right.

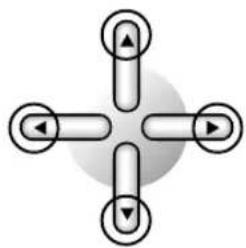
natural_image
Symmetrical four-pointed arrow diagram with directional arrows, no text or symbols present
natural_image
Black-and-white landscape photo featuring a sailboat, a sun over the sky, and a distant tower under a cloudy sky (no text or symbols visible)2 Press the OK/SELECT button. This completes setting of trimming.
OK / SELECT

Tip
- When selecting trimming for multiple pictures, repeat the procedure from "A. Picture Selection" (page 79) for each picture.
3 Press the OK/SELECT button.
This completes print selection for the displayed picture. Once picture selection and setting have been completed, proceed to “4. Printing Modes” (page 95).
OK / SELECT


Caution
- Although the picture that has actually been trimmed is not displayed on the LCD panel, the trimming mark is shown.
- Printing All Pictures on a Card
It is convenient to use the “ALL SELECT” function when you want to print out all the image data recorded on a card.
1
Press the MENU button and the picture select menu will be displayed, then press the down arrow button to select "ALL SELECT".

natural_image
Pure diagram of four directional arrows pointing outward from a central circle, no text or symbols present
2
Set "SELECT" with the left or right arrow button.
The display changes in the manner shown below each time the left or right arrow button is pressed.
SELECT CANCEL

natural_image
Symmetrical four-pointed arrow diagram with directional arrows, no text or symbols present

Tips
- When "CANCEL" is selected, all print selection, rotation, trimming, number of prints and DPOF data are canceled.
- If after canceling previous selections you wish to use DPOF data, remove and reinsert the xD-Picture Card or PC Card. Note that removing the card will reset setting made with the printer.
3
Press the OK/SELECT button.
Print selection for all pictures is completed. Proceed to "4. Printing Modes" (page 95).
OK / SELECT
4. Printing Modes
The P-440 has five printing modes: STANDARD, CARD, PHOTO-ALBUM, PASSPORT and INDEX. These modes make it possible to change the layout on the paper, print the date, or arrange the pictures using filters.
•STANDARD printing
In this mode, you can select a single picture and print it out on an entire sheet of paper (single picture print), print out one picture or up to a maximum of 16 selected multiple pictures on an A4 sheet of paper or divide a picture up into a maximum of 6 prints on A5 wide paper. In addition, you can also print out pictures selected and set in “3. Picture Selection and Setting”.

Caution
- If you selected "FIT to IMAGE AREA" (page 66), the image will be printed within a 3:4 vertical:horizontal ratio frame which may result in part of the picture not appearing in the print. If you selected "Full Picture", the full image will be visible at its current vertical:horizontal ratio, but an increased white area (margin) may thus be created.
A. Standard Selection
1 Set the mode selector dial to the STANDARD position.
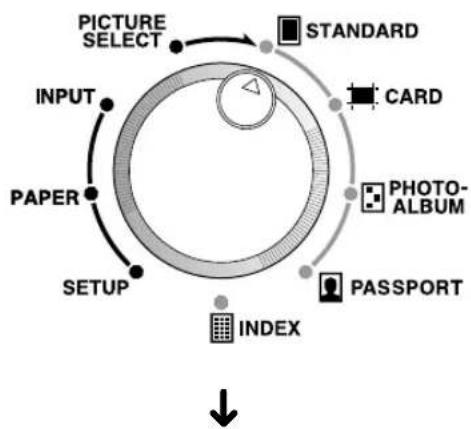
flowchart
graph TD
    A["INPUT"] --> B["PICTURE SELECT"]
    B --> C["STANDARD"]
    C --> D["CARD"]
    D --> E["PHOTO-ALBUM"]
    E --> F["PASSPORT"]
    F --> G["INDEX"]
    G --> H["SETUP"]
    H --> I["PAPER"]
    I --> J["INPUT"]
    style A fill:#f9f,stroke:#333
    style B fill:#ccf,stroke:#333
    style C fill:#cfc,stroke:#333
    style D fill:#fcc,stroke:#333
    style E fill:#cff,stroke:#333
    style F fill:#ffc,stroke:#333
    style G fill:#cfc,stroke:#333
    style H fill:#fcc,stroke:#333
    style I fill:#ffc,stroke:#333
If a picture has been selected, a preview is displayed on the LCD panel.


Tips
- When multiple pictures have been selected for printing, the last page to be printed is previewed on the LCD panel.
- When the preview is displayed, the pictures can be printed out by pressing the PRINT button.

flowchart
graph LR
    A["POWER ON"] --> B["Setup"]
    B --> C["1 Input Selection Paper"]
    C --> D["2 Selection Picture"]
    D --> E["3 Selection Printing Mode"]
    E --> F["4"]
    F --> G["STANDARD"]
    F --> H["CARD"]
    F --> I["PHOTO-ALBUM"]
    F --> J["PASSPORT"]
    F --> K["INDEX"]
B. Selecting Layout Type
The layout of the picture to be printed is selected for the paper set in "2. Paper Selection".
1 Press the MENU button.
The standard printing menu is displayed.
MENU


The text will turn to green.
2 Select the layout with the left or right arrow button.
The display changes in the manner shown below each time the left or right arrow button is pressed.

natural_image
Symmetrical cross-shaped diagram with four directional arrows and a central circle (no text or symbols)A4:

flowchart
graph TD
    A["Layout 1 PIC."] --> B["SET OK"]
    C["Layout 2 PIC."] --> D["SET OK"]
    E["Layout 3 PIC."] --> F["SET OK"]
    G["Layout 4 PIC."] --> H["SET OK"]
    I["Layout 5 PIC."] --> J["SET OK"]
    K["Layout 6 PIC."] --> L["SET OK"]
    M["Layout 7 PIC."] --> N["SET OK"]
    O["Layout 8 PIC."] --> P["SET OK"]
    Q["Layout 9 PIC."] --> R["SET OK"]
    S["Layout 10 PIC."] --> T["SET OK"]
    U["Layout 11 PIC."] --> V["SET OK"]
    W["Layout 12 PIC."] --> X["SET OK"]
    Y["Layout 13 PIC."] --> Z["SET OK"]
    AA["Layout 14 PIC."] --> AB["SET OK"]
    AC["Layout 15 PIC."] --> AD["SET OK"]
    AE["Layout 16 PIC."] --> AF["SET OK"]

flowchart
graph LR
    A["POWER ON"] --> B["Setup"]
    B --> C["1 Input Selection Paper"]
    C --> D["2 Selection Picture"]
    D --> E["3 Selection Printing Mode"]
    E --> F["4"]
    F --> G["STANDARD"]
    F --> H["CARD"]
    F --> I["PHOTO-ALBUM"]
    F --> J["PASSPORT"]
    F --> K["INDEX"]
A5 WIDE:

flowchart
graph TD
    A["Layout 1 PIC."] --> B["Layout 2 PIC."]
    B --> C["Layout 3 PIC."]
    C --> D["Layout 4 PIC."]
    D --> E["Layout 6 PIC."]
    E --> A
    style A fill:#f9f,stroke:#333
    style B fill:#f9f,stroke:#333
    style C fill:#f9f,stroke:#333
    style D fill:#f9f,stroke:#333
    style E fill:#f9f,stroke:#333

Tip
• The picture layout is displayed in gray.
3
Once the layout has been decided, press the OK/SELECT button.
The display returns to the standard printing menu.
OK / SELECT

↓

C. Printing the Date
This procedure is used to designate whether the date and/or time at which the picture was taken will be displayed on the print and, if it will be, whether it will be just the date, just the time or both the date and time.
1
Select "PRINT DATE" by pressing the down arrow button.
natural_image
Abstract diagram with four directional arrows and a central circle, no text or symbols present
The text will turn to green.

flowchart
graph LR
    A["POWER ON"] --> B["Setup"]
    B --> C["1 Input Selection Paper"]
    C --> D["2 Selection Picture"]
    D --> E["3 Selection Printing Mode"]
    E --> F["4"]
    F --> G["STANDARD"]
    F --> H["CARD"]
    F --> I["PHOTO-ALBUM"]
    F --> J["PASSPORT"]
    F --> K["INDEX"]
2 Select date printing with the left or right arrow button.
The display changes in the manner shown below each time the left or right arrow button is pressed.

flowchart
graph LR
    A["OFF DATE TIME"] --> B[" "]
    B --> C["DATE·TIME"]
    C --> A
OFF : The date is not printed.
DATE : The date is printed.
TIME : The 24 hour time is printed.
DATE·TIME : Both the date and time are printed.
The date and/or time appears in the lower right corner of the picture when printed.
natural_image
Symmetrical four-pointed arrow diagram with directional arrows, no text or symbols present
Tips
- The manner in which the date is displayed can be selected in "Basic Setup" (page 63).
- Although the date and time are not shown in the preview display, if activated, they will appear in the print.
D. Selecting Filters
A sepia or black and white filter can be applied to the picture to be printed.
1 Select "FILTER" with the down arrow button.

natural_image
Abstract geometric diagram with four directional arrows and a central cross shape (no text or symbols)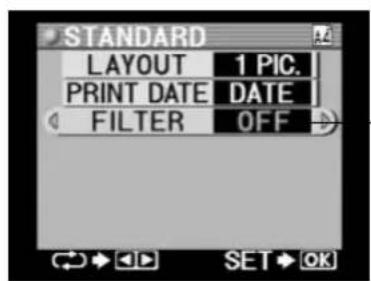
The text will turn to green.

flowchart
graph LR
    A["POWER ON"] --> B["Setup"]
    B --> C["1 Input Selection"]
    C --> D["2 Selection Picture"]
    D --> E["3 Selection Printing Mode"]
    E --> F["4"]
    F --> G["STANDARD"]
    F --> H["CARD"]
    F --> I["PHOTO-ALBUM"]
    F --> J["PASSPORT"]
    F --> K["INDEX"]
2 Select the filter to be used with the left or right arrow button.
The filter can be selected in the manner shown below each time the left or right arrow button is pressed.

flowchart
graph LR
    A["OFF B&W SEPIA"] --> B[" "]
    B --> C[" "]
    C --> D[" "]
OFF : Filter processing is not performed.
B&W : Pictures are printed in black and white.
SEPIA : Pictures are printed with a sepia tone.

natural_image
Symmetrical four-pointed arrow diagram with directional arrows, no text or symbols present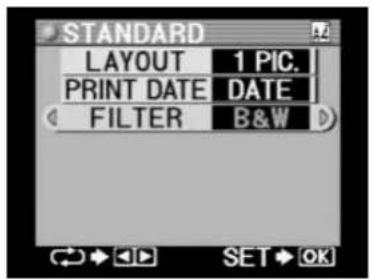
E. Confirming the Settings
1 Press the OK/SELECT button.
The display returns to the standard printing preview menu.
OK / SELECT

↓
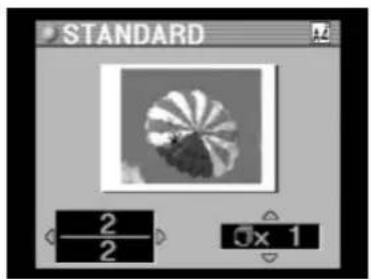
Tip
- LCD screen will show a preview of the selected picture with any modifications (background, stamp, etc.).

flowchart
graph LR
    A["POWER ON"] --> B["Setup"]
    B --> C["1 Input Selection"]
    C --> D["2 Selection Picture"]
    D --> E["3 Selection P Setting Mode"]
    E --> F["4 Prin"]
    F --> G["STANDARD"]
    F --> H["CARD"]
    F --> I["PHOTO-ALBUM"]
    F --> J["PASSPORT"]
    F --> K["INDEX"]
2 Review the pictures that have been selected for printing with the left or right arrow button.
Previews of pictures selected for printing are sequentially displayed each time the left or right arrow button is pressed, making it possible to check pictures before they are printed.
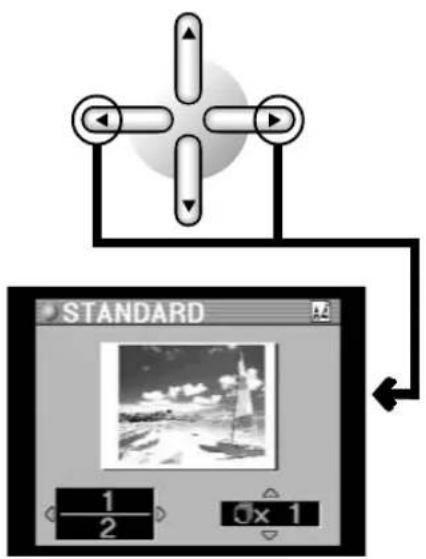
3 Select the number of copies to be printed with the up or down arrow button.
The display changes in the manner shown below each time the up or down arrow button is pressed.

flowchart
graph TD
    A["×1"] --> B["×2"]
    B --> C["..."]
    C --> D["×10"]
    D --> E["×20"]
    F["×50"] --> G["×40"]
    G --> H["..."]
    H --> I["×30"]

Tip
- Up to a maximum of 50 prints can be designated. The number of prints can be designated one print at a time for 1-9 prints, and in units of 10 prints each for 10 to 50 prints.
4 Print the picture.
Proceed to "5. Printing" (page 138).

flowchart
graph LR
    A["POWER ON"] --> B["Setup"]
    B --> C["1 Input Selection Paper"]
    C --> D["2 Selection Picture"]
    D --> E["3 Selection Printing Modes"]
    E --> F["4"]
    F --> G["STANDARD"]
    F --> H["CARD"]
    F --> I["PHOTO-ALBUM"]
    F --> J["PASSPORT"]
    F --> K["INDEX"]
- CARD printing
Use of the special-purpose card paper lets you make cards from a single picture or multiple selected pictures.
Be sure to use the approved P-A4P paper for the “POSTCARD” setting and P-4AL paper for the “4 PRECUT” setting.

Caution
- When using postcard paper, the image is scaled to fit the cutout which may result in a portion of the image being cropped.
A. Card Selection
1 Set the mode selector dial to the CARD position.
A preview of the card to be printed is displayed on the LCD panel.

flowchart
graph TD
    A["INPUT"] --> B["PAPER"]
    B --> C["SETUP"]
    C --> D["INDEX"]
    D --> E["POSTER"]
    E --> F["PHOTO-ALBUM"]
    F --> G["CARD"]
    G --> H["STANDARD"]
    H --> I["PICTURE SELECT"]
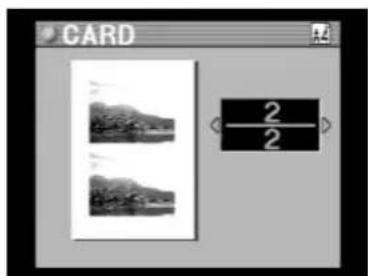

Tips
- When multiple pictures are selected for printing, the final page to be printed is displayed.
- A message is displayed when pictures have not been selected or there are no pictures present on the xD-Picture Card or PC Card.
- In the case of creating two (or four) cards of the same picture using a single sheet of paper, set the number of prints with "3. Picture Selection and Setting" (page 79).
- The last sheet printed may have blank areas depending on the number of pictures selected.

flowchart
graph LR
    A["POWER ON"] --> B["Setup"]
    B --> C["1 Input Selection Paper"]
    C --> D["2 Selection Picture"]
    D --> E["3 Selection Printing Mode"]
    E --> F["4"]
    F --> G["STANDARD"]
    F --> H["CARD"]
    F --> I["PHOTO-ALBUM"]
    F --> J["PASSPORT"]
    F --> K["INDEX"]
B. Setting the Card Size
Select the card size (layout) of the pictures to be printed for the paper set in "2. Paper Selection".
1 Press the MENU button.
The card printing menu is displayed.
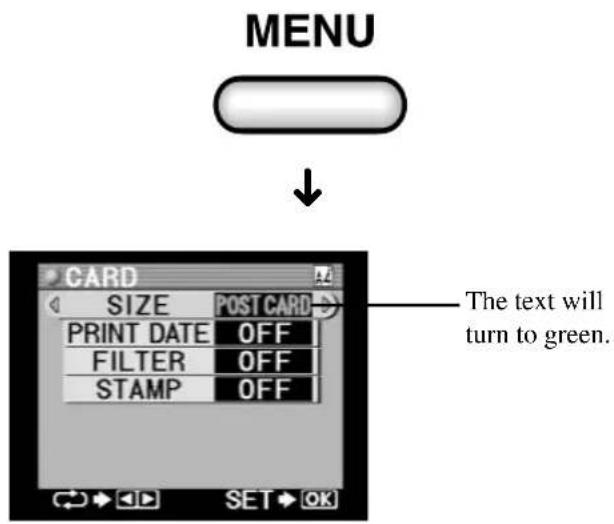
2 Select the layout with the left or right arrow button.
The display changes in the manner shown below each time the left or right arrow button is pressed.
natural_image
Symmetrical cross-shaped diagram with four directional arrows and a central circle (no text or symbols)
Tip
• The picture layout is displayed in gray.
3 Once the card size has been decided, press the OK/SELECT button.
The display returns to the card printing menu.
OK / SELECT
↓


flowchart
graph LR
    A["POWER ON"] --> B["Setup"]
    B --> C["1 Input Selection Paper"]
    C --> D["2 Selection Picture"]
    D --> E["3 Selection Printing Mode"]
    E --> F["4"]
    F --> G["STANDARD"]
    F --> H["CARD"]
    F --> I["PHOTO-ALBUM"]
    F --> J["PASSPORT"]
    F --> K["INDEX"]
C. Printing the Date
This procedure is used to designate whether the date and/or time at which the picture was taken will be displayed on the print. Also, whether it will be just the date, just the time or both the date and time.
1 Select "PRINT DATE" by pressing the down arrow button.

natural_image
Four directional arrows pointing in different directions around a central cross shape (no text or symbols)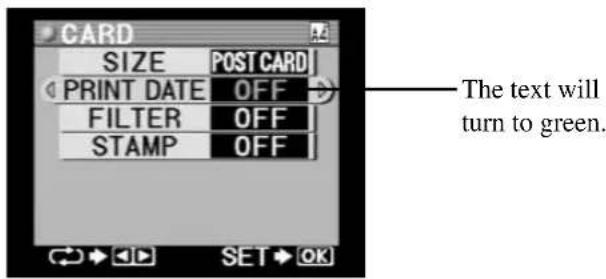
2 Select date printing with the left or right arrow button.
The display changes in the manner shown below each time the left or right arrow button is pressed.

flowchart
graph LR
    A["OFF DATE TIME"] --> B[" "]
    B --> C["DATE·TIME"]
    C --> A
OFF : The date is not printed.
DATE : The date is printed.
TIME : The 24 hour time is printed.
DATE·TIME: Both the date and time are printed.
The date and/or time appears in the lower right corner of the picture when printed.

natural_image
Symmetrical four-pointed arrow diagram with directional arrows, no text or symbols present
Tips
- The manner in which the date is displayed can be selected in "Basic Setup" (page 63).
- Although the date and time are not shown in the preview display, if activated, they will appear in the print.

flowchart
graph LR
    A["POWER ON"] --> B["Setup"]
    B --> C["1 Input Selection Paper"]
    C --> D["2 Selection Picture"]
    D --> E["3 Selection Printing Mode"]
    E --> F["4"]
    F --> G["STANDARD"]
    F --> H["CARD"]
    F --> I["PHOTO-ALBUM"]
    F --> J["PASSPORT"]
    F --> K["INDEX"]
D. Selecting Filters
A sepia or black and white filter can be applied to the picture to be printed.
1 Select "FILTER" by pressing the down arrow button.

natural_image
Pure diagram of four directional arrows on a central circle, no text or symbols present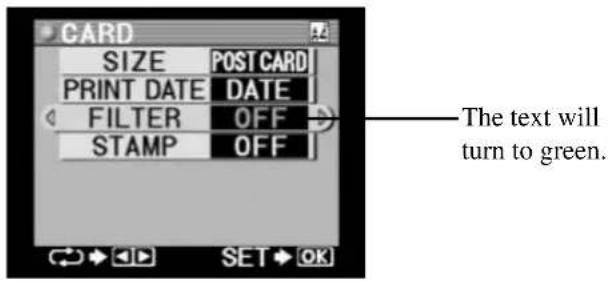
2 Select the filter to be used with the left or right arrow button.
The filter can be selected in the manner shown below each time the left or right arrow button is pressed.

flowchart
graph LR
    A["OFF B&W SEPIA"] --> B[" "]
    B --> C[" "]
    C --> D[" "]
OFF : Filter processing is not performed.
B&W : Pictures are printed in black and white.
SEPIA : Pictures are printed with a sepia tone.

natural_image
Symmetrical four-pointed arrow diagram with directional arrows, no text or symbols present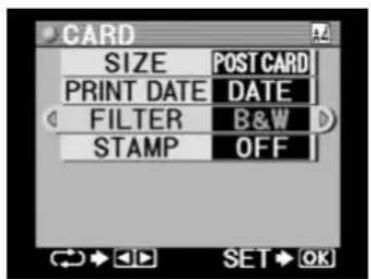

flowchart
graph LR
    A["POWER ON"] --> B["Setup"]
    B --> C["1 Input Selection Paper"]
    C --> D["2 Selection Picture"]
    D --> E["3 Selection Printing Mode"]
    E --> F["4"]
    F --> G["STANDARD"]
    F --> H["CARD"]
    F --> I["PHOTO-ALBUM"]
    F --> J["PASSPORT"]
    F --> K["INDEX"]
E. Selecting Stamps
Ten kinds of stamp images stored in the P-440 can be arranged on a card to be printed.
1 Select "STAMP" by pressing the down arrow button.
natural_image
Abstract geometric diagram with four directional arrows and a central cross shape (no text or symbols)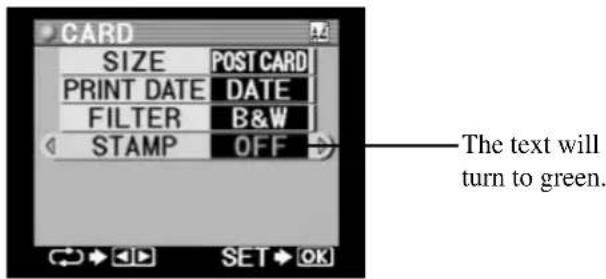

Caution
- If multiple pictures have been selected for printing the "STAMP" option is not available.
- To use stamps select, one picture at a time for printing.
2 Select the stamp to be used with the left or right arrow button.
A stamp is not printed when "OFF" is designated.

natural_image
Symmetrical cross-shaped diagram with four directional arrows pointing outward from a central circle (no text or symbols)

flowchart
graph LR
    A["POWER ON"] --> B["Setup"]
    B --> C["1 Input Selection Paper"]
    C --> D["2 Selection Picture"]
    D --> E["3 Selection Printing Modes"]
    E --> F["4"]
    F --> G["ORDER"]
    G --> H["STANDARD"]
    G --> I["CARD"]
    G --> J["PHOTO-ALBUM"]
    G --> K["PASSPORT"]
    G --> L["INDEX"]
The display change in the manner shown below each time the left or right arrow button is pressed.
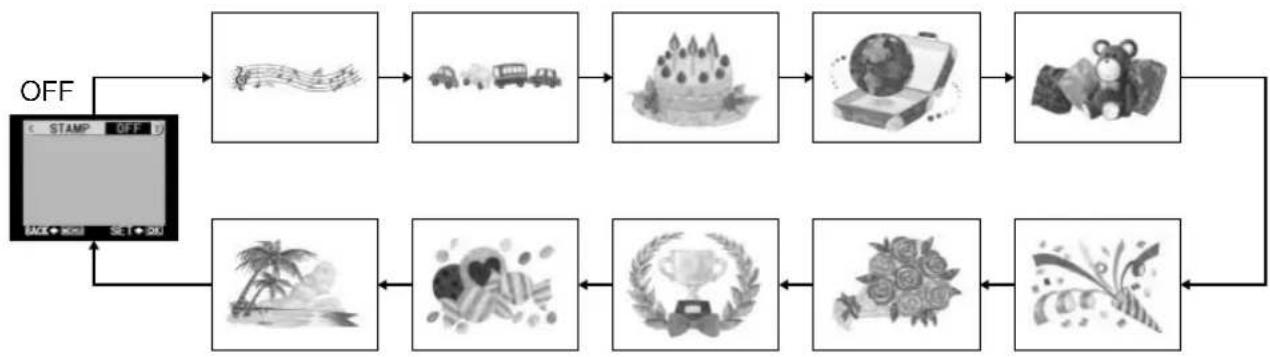
flowchart
graph TD
    A["OFF"] --> B["STAMP OFF"]
    B --> C["Image 1"]
    C --> D["Car 1"]
    D --> E["Truck 1"]
    E --> F["Beef 2"]
    F --> G["Coffee Box 3"]
    G --> H["Baby Box 4"]
    H --> I["Stone Box 5"]
    I --> J["Grain Box 6"]
    J --> K["Flour Box 7"]
    K --> L["Box Box 8"]
    L --> M["Tree Box 9"]
    M --> N["Tree Box 10"]
    N --> O["Tree Box 11"]
    O --> P["Tree Box 12"]
    P --> Q["Tree Box 13"]
    Q --> R["Tree Box 14"]
    R --> S["Tree Box 15"]
    S --> T["Tree Box 16"]
    T --> U["Tree Box 17"]
    U --> V["Tree Box 18"]
    V --> W["Tree Box 19"]
    W --> X["Tree Box 20"]
3
Once the stamp to be used has been decided, press the OK/SELECT button.
OK / SELECT


flowchart
graph LR
    A["POWER ON"] --> B["Setup"]
    B --> C["1 Input Selection Paper"]
    C --> D["2 Selection Picture"]
    D --> E["3 Selection Printing Mode"]
    E --> F["4"]
    F --> G["STANDARD"]
    F --> H["CARD"]
    F --> I["PHOTO-ALBUM"]
    F --> J["PASSPORT"]
    F --> K["INDEX"]
E-1 Selecting the Stamp Size
This procedure is used to select the size of the stamp to be printed to one of four sizes.
1 Select the stamp size with the up or down arrow button.
The display changes in the manner shown below each time the up or down arrow button is pressed.

flowchart
graph LR
    A["XL L M"] --> B[" "]
    B --> C[" "]
    C --> D["S"]
    D --> A

natural_image
Symmetrical cross-shaped diagram with four directional arrows pointing outward from a central circle (no text or symbols)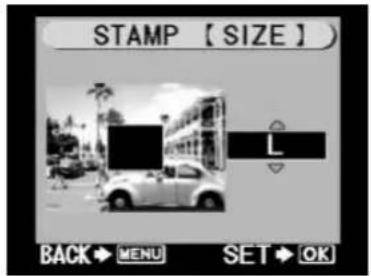
2 Once the stamp size has been selected, press the OK/SELECT button.
OK / SELECT

E-2 Stamp Rotation
1 Rotate the picture using the ROTATE button. (The stamp is always positioned facing upward.)
The picture is rotated 90 degrees in a counterclockwise direction each time the ROTATE button is pressed.

![STAMP [ROTATION] BACK→MENU SET→OK](/content/2026/05/816051/images/59d030b3ac26d62d77ddbf2b27e07d4fba512a0051e902842b096a147ac44ffa.jpg)

flowchart
graph LR
    A["POWER ON"] --> B["Setup"]
    B --> C["1 Input Selection Paper"]
    C --> D["2 Selection Picture"]
    D --> E["3 Selection Printing Mode"]
    E --> F["4"]
    F --> G["STANDARD"]
    F --> H["CARD"]
    F --> I["PHOTO-ALBUM"]
    F --> J["PASSPORT"]
    F --> K["INDEX"]
2 Once the picture has been turned, press the OK/SELECT button.
OK / SELECT

E-3 Stamp Position
This procedure is used to select on the position where the stamp is to be printed.
1 Select the position where the stamp is to be arranged with the arrow buttons.
The position of the stamp moves each time the arrow buttons are pressed.

natural_image
Symmetrical four-pointed arrow diagram with directional arrows, no text or symbols present![STAMP [POSITION] BACK ▶ MENU SET ▶ OK](/content/2026/05/816051/images/880b55ad569590f09e78961416ff5fc9fee568614a0abf3583647af6b0f8a12c.jpg)
2 Once the position has been selected, press the OK/SELECT button.
The display returns to the card printing menu.
OK / SELECT

↓


flowchart
graph LR
    A["POWER ON"] --> B["Setup"]
    B --> C["1 Input Selection Paper"]
    C --> D["2 Selection Picture"]
    D --> E["3 Selection Posting Movies"]
    E --> F["4"]
    F --> G["STANDARD"]
    F --> H["CARD"]
    F --> I["PHOTO-ALBUM"]
    F --> J["PASSPORT"]
    F --> K["INDEX"]
F. Confirming the Settings
1 Press the OK/SELECT button.
The display returns to the card printing preview menu.

Caution
- The stamp may be clipped if it is positioned too close to an edge.
OK / SELECT
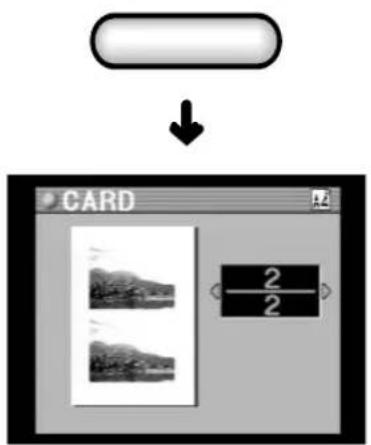

Tip
- When a stamp has been selected, the area indicated by the black square surrounded by a white frame indicates the stamp.
2 Review the pictures that have been selected for printing with the left or right arrow button.
Previews of pictures selected for printing are sequentially displayed each time the left or right arrow button is pressed, making it possible to check pictures before they are printed.


Caution
- Select the number of cards with the picture selection procedure. (The number of prints cannot be designated when the printing mode is set to CARD.)
3 Print the picture.
Proceed to "5. Printing" (page 138).
•PHOTO-ALBUM printing
This mode is selected when you wish to print out pictures in the form of a photo album. You can also add a background or stamp, or decorate pictures with a frame.

Caution
- If you selected "FIT to IMAGE AREA" (page 66), the image will be printed within a 3:4 vertical:horizontal ratio frame which may result in part of the picture not appearing in the print. If you selected "Full Picture", the full image will be visible at its current vertical:horizontal ratio, but an increased white area (margin) may thus be created.

Tip
- Setting of the number of prints performed in "3. Picture Selection and Setting" (page 79) is not reflected in the album-print mode. One set of picture data is always printed out for each print.
A. Album Selection
1
Set the mode selector dial to the PHOTO-ALBUM position.
A preview of one picture to be printed is displayed on the LCD panel.

flowchart
graph TD
    A["INPUT"] --> B["PICTURE SELECT"]
    B --> C["STANDARD"]
    C --> D["CARD"]
    D --> E["PHOTO-ALBUM"]
    E --> F["PASSPORT"]
    F --> G["INDEX"]
    G --> H["↓"]
    I["PAPER"] --> J["SETUP"]
    J --> K["INDEX"]


Tips
- When a picture has already been selected, that picture is displayed in the form of a single print.
- A message is displayed when the image data on the card cannot be read.
- Although the date and time are not shown in the preview display, they will appear in the print.

flowchart
graph LR
    A["POWER ON"] --> B["Setup"]
    B --> C["1 Input Selection Paper"]
    C --> D["2 Selection Picture"]
    D --> E["3 Selection Printing Module"]
    E --> F["4"]
    F --> G["STANDARD"]
    F --> H["CARD"]
    F --> I["PHOTO-ALBUM"]
    F --> J["PASSPORT"]
    F --> K["INDEX"]
B. Paper Orientation
This mode is used to select the paper orientation of the photo album page to either horizontal (landscape) or vertical (portrait).
1 Press the MENU button.
The photo-album printing menu is displayed.
MENU


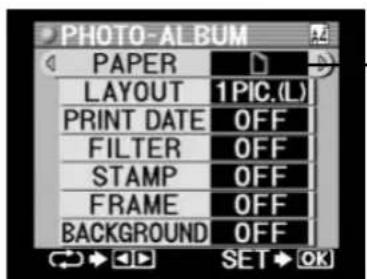
The text will turn to green.
2 Select the paper orientation with the left or right arrow button.
The display changes in the manner shown below each time the left or right arrow button is pressed.

natural_image
Symmetrical cross-shaped diagram with four directional arrows pointing outward, no text or symbols present

flowchart
graph LR
    A["POWER ON"] --> B["Setup"]
    B --> C["1 Input Selection Paper"]
    C --> D["2 Selection Picture"]
    D --> E["3 Selection Printing Module"]
    E --> F["4"]
    F --> G["STANDARD"]
    F --> H["CARD"]
    F --> I["PHOTO-ALBUM"]
    F --> J["PASSPORT"]
    F --> K["INDEX"]
C. Selecting Layout Type
This procedure is used to select the layout of the pictures to be printed using the page orientation selected in procedure B.
1 Select "LAYOUT" by pressing the down arrow button.

natural_image
Four directional arrows pointing in different directions around a central cross shape (no text or symbols)
2 Select the layout with the left or right arrow button.
The display changes in the manner shown below each time the left or right arrow button is pressed.
natural_image
Simple diagram with four directional arrows around a central circle (no text or symbols)LCD Display
A4/Vertical (Portrait):

flowchart
graph LR
    A["Layout 1 PICLE"] --> B["Layout 1 PICS"]
    B --> C["Layout 2 PIC"]
    C --> D["Layout 3 PIC"]
    D --> E["Layout 4 PIC"]
    E --> F["Layout 5 PIC"]
A4/Horizontal (Landscape):

flowchart
graph LR
    A["Layout 1"] --> B["Layout 2"]
    B --> C["Layout 3"]
    C --> D["Layout 4"]
    D --> E["Layout 5"]
    E --> F["Layout 6"]
    F --> G["Layout 7"]
    G --> H["Layout 8"]
    H --> A

flowchart
graph LR
    A["POWER ON"] --> B["Setup"]
    B --> C["1 Input Selection Paper"]
    C --> D["2 Selection Picture"]
    D --> E["3 Selection Printing Module"]
    E --> F["4"]
    F --> G["STANDARD"]
    F --> H["CARD"]
    F --> I["PHOTO-ALBUM"]
    F --> J["PASSPORT"]
    F --> K["INDEX"]
A5 WIDE/Vertical (Portrait):

flowchart
graph LR
    A["Layout 1PC LL"] --> B["Layout 1PC SS"]
    B --> C["Layout 2 PC"]
    C --> D["Layout 3 PC"]
    D --> E["Layout 4 PC"]
    E --> A
A5 WIDE/Horizontal (Landscape):

flowchart
graph LR
    A["Layout 1 PC LL"] --> B["Layout 1 PC SS"]
    B --> C["Layout 2 PC"]
    C --> D["Layout 3 PC"]
    D --> E["Layout 4 PC"]
    E --> A
3
Once the layout has been selected, press the OK/SELECT button.
The display returns to the photo-album printing menu.
OK / SELECT


D. Printing the Date
This procedure is used to designate whether the date and/or time at which the picture was taken will be displayed on the print. Also, whether it will be just the date, just the time or both the date and time.
1
Select "PRINT DATE" by pressing the down arrow button.

natural_image
Abstract geometric diagram with four directional arrows and a central circle (no text or symbols)
The text will turn to green.

flowchart
graph LR
    A["POWER ON"] --> B["Setup"]
    B --> C["1 Input Selection Paper"]
    C --> D["2 Selection Picture"]
    D --> E["3 Selection Printing Module"]
    E --> F["4"]
    F --> G["STANDARD"]
    F --> H["CARD"]
    F --> I["PHOTO-ALBUM"]
    F --> J["PASSPORT"]
    F --> K["INDEX"]
2 Select date printing with the left or right arrow button.
The display changes in the manner shown below each time the left or right arrow button is pressed.

flowchart
graph LR
    A["OFF"] --> B["DATE TIME"]
    B --> C[" "]
    C --> D["DATE·TIME"]
    D --> E
OFF : The date is not printed.
DATE : The date is printed.
TIME : The 24 hour time is printed.
DATE·TIME : Both the date and time are printed.
The date and/or time appears in the lower right corner of the picture when printed.

natural_image
Symmetrical four-pointed arrow diagram with directional arrows, no text or symbols present
Tip
- The manner in which the date is displayed can be selected in "Basic Setup" (page 63).
E. Selecting Filters
A sepia or black and white filter can be applied to the pictures to be printed.
1 Select "FILTER" with the down arrow button.
natural_image
Four directional arrows pointing in different directions around a central cross shape (no text or symbols)
- The text will turn to green.

flowchart
graph LR
    A["POWER ON"] --> B["Setup"]
    B --> C["1 Input Selection Paper"]
    C --> D["2 Selection Picture"]
    D --> E["3 Selection Printing Module"]
    E --> F["4"]
    F --> G["STANDARD"]
    F --> H["CARD"]
    F --> I["PHOTO-ALBUM"]
    F --> J["PASSPORT"]
    F --> K["INDEX"]
2 Select the filter to be used with the left or right arrow button.
The display changes in the manner shown below each time the left or right arrow button is pressed.

flowchart
graph LR
    A["OFF B&W SEPIA"] --> B[" "]
    B --> C[" "]
    C --> D[" "]
OFF : Filter processing is not performed.
B&W : Pictures are printed in black and white.
SEPIA : Pictures are printed with a sepia tone.
natural_image
Four directional arrows pointing outward from a central point, no text or symbols present
F. Selecting Stamps
Ten kinds of stamp images stored in the P-440 can be arranged in the photo album.
1 Select "STAMP" by pressing the down arrow button.

natural_image
Abstract geometric diagram with four rounded rectangles and directional arrows, no text or symbols present
The text will turn to green.

flowchart
graph LR
    A["POWER ON"] --> B["Setup"]
    B --> C["1 Input Selection Paper"]
    C --> D["2 Selection Picture"]
    D --> E["3 Selection Printing Module"]
    E --> F["4"]
    F --> G["STANDARD"]
    F --> H["CARD"]
    F --> I["PHOTO-ALBUM"]
    F --> J["PASSPORT"]
    F --> K["INDEX"]
2 Select the stamp to be used with the left or right arrow button.
A stamp is not printed when "OFF" is designated.

natural_image
Symmetrical four-pointed arrow diagram with directional arrows, no text or symbols present
The display changes in the manner shown below each time the left or right arrow button is pressed.
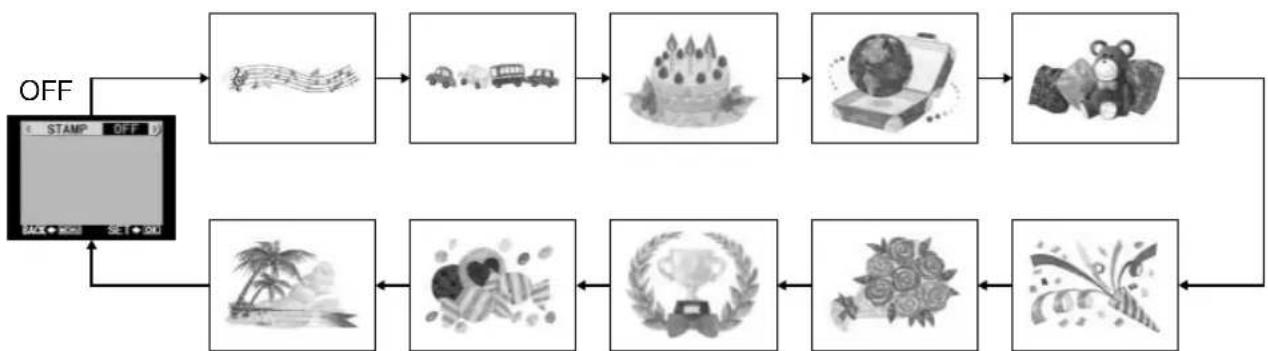
flowchart
graph TD
    A["OFF"] --> B["STAMP OFF"]
    B --> C["Image 1"]
    C --> D["Image 2"]
    D --> E["Image 3"]
    E --> F["Image 4"]
    F --> G["Image 5"]
    G --> H["Image 6"]
    H --> I["Image 7"]
    I --> J["Image 8"]
    J --> K["Image 9"]
    K --> L["Image 10"]
    L --> M["Output"]
3 Once the stamp to be used has been selected, press the OK/SELECT button.
OK / SELECT


flowchart
graph LR
    A["POWER ON"] --> B["Setup"]
    B --> C["Input Selection Paper Selection Picture Selection Printing Mode"]
    C --> D["4"]
    D --> E["STANDARD"]
    D --> F["CARD"]
    D --> G["PHOTO-ALBUM"]
    D --> H["PASSPORT"]
    D --> I["INDEX"]
F-1 Selecting the Stamp Size
This procedure is used to select the size of the stamp to be printed to one of foure sizes.
1 Select stamp size with the up or down arrow button.
The display changes in the manner shown below each time the up or down arrow button is pressed.

flowchart
graph LR
    A["XL L M"] --> B[" "]
    B --> C[" "]
    C --> D["S"]
    D --> A

natural_image
Abstract diagram with four directional arrows pointing outward from a central point, no text or symbols present.![STAMP [SIZE] L BACK→MENU SET→OK](/content/2026/05/816051/images/2141903c074bfaa799255260def512b38f0af693321c6d9cbfe944f6633a9a55.jpg)
2 Once the stamp size has been selected, press the OK/SELECT button.
OK / SELECT
F-2 Stamp Position
This procedure is used to select on the position where the stamp is to be printed.
1 Select the position where the stamp is to be arranged with the arrow buttons.
The position of the stamp moves each time the arrow buttons are pressed.
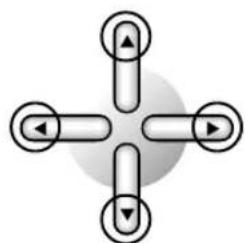
natural_image
Symmetrical four-pointed arrow diagram with directional arrows, no text or symbols present![STAMP [POSITION] BACK→MENU SET→OK](/content/2026/05/816051/images/8b8b671cfe8aef62d3b0f4f0eab18e73001afeb070df99a07d3d2b16705cb2e4.jpg)

flowchart
graph LR
    A["POWER ON"] --> B["Setup"]
    B --> C["1 Input Selection Paper"]
    C --> D["2 Selection Picture"]
    D --> E["3 Selection Printing Module"]
    E --> F["4"]
    F --> G["STANDARD"]
    F --> H["CARD"]
    F --> I["PHOTO-ALBUM"]
    F --> J["PASSPORT"]
    F --> K["INDEX"]
2 Once the position has been selected, press the OK/SELECT button.
The display returns to the photo-album printing menu.
OK / SELECT


G. Selecting Frames
This procedure is used to select a frame for each picture. Frames are pre-registered in the P-440.
1 Select "FRAME" by pressing the down arrow button.
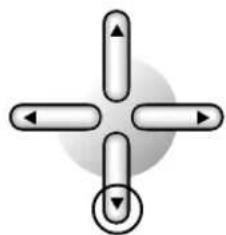
natural_image
Four directional arrows pointing in different directions around a central cross shape (no text or symbols)
The text will turn to green.

flowchart
graph LR
    A["POWER ON"] --> B["Setup"]
    B --> C["1 Input Selection Paper"]
    C --> D["2 Selection Picture"]
    D --> E["3 Selection Printing Mode"]
    E --> F["4"]
    F --> G["STANDARD"]
    F --> H["CARD"]
    F --> I["PHOTO-ALBUM"]
    F --> J["PASSPORT"]
    F --> K["INDEX"]
2 Select the frame using the left or right arrow button.
The display changes in the manner shown below each time the left or right arrow button is pressed.

flowchart
graph LR
    A["OFF"] --> B["BLACK LINE"]
    B --> C["WHITE"]
    C --> D["SHADOW"]
    D --> E["SHADE OFF"]
    E --> F["METAL"]
    F --> G["WOOD"]
    G --> A
OFF: No frame is printed.
BLACK LINE : A black line is printed around the picture.
WHITE : A white line is printed around the picture.
SHADOW : The picture is shadowed.
SHADE OFF : The edges of the picture are obscured.
METAL : A metal frame is placed around the picture.
WOOD : A wood frame is placed around the picture.
* The picture at right is shown after “Shade off” has been selected for the type of frame.
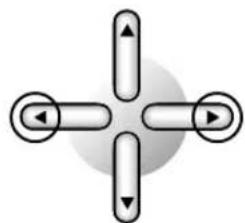
natural_image
Symmetrical four-pointed arrow diagram with directional arrows, no text or symbols present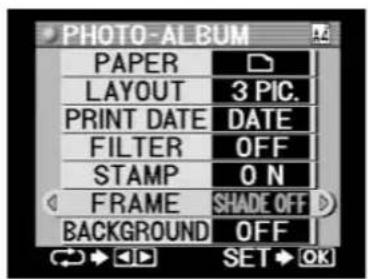

natural_image
Exterior view of a modern multi-story building with balconies and windows (no visible signage or text)Caution
- The frame overlaps a portion of the picture, and the overlapping portion of the picture is cut out.
H. Selecting Background
Background selection is enabled if background images have been registered.
Tip
- Refer to "Background Setup" (page 48) for information on registering a picture background.
1 Select "BACKGROUND" by pressing the down arrow button.


flowchart
graph LR
    A["POWER ON"] --> B["Setup"]
    B --> C["1 Input Selection Paper"]
    C --> D["2 Selection Picture"]
    D --> E["3 Selection Printing Module"]
    E --> F["4"]
    F --> G["STANDARD"]
    F --> H["CARD"]
    F --> I["PHOTO-ALBUM"]
    F --> J["PASSPORT"]
    F --> K["INDEX"]
2 Select a background using the left or right arrow button.
A background is not shown if “OFF” is selected. If “USER” is selected, the background pictures registered in “Background Setup” (page 48) can be used.
natural_image
Symmetrical four-pointed arrow diagram with directional arrows, no text or symbols present
"USER": A user registered background is used filling the entire sheet.
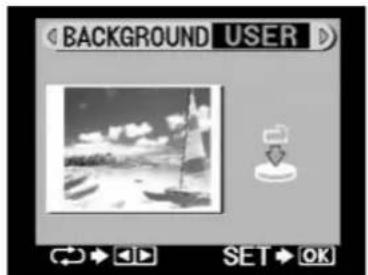
“TILE”: Small pictures are arranged in the form of tiles over the entire sheet of paper at the same color density. The P-440 contains five types of tiles.

“TILE (gradation)”: Small pictures are arranged in the form of tiles over the entire sheet of paper while gradually changing the color density. The P-440 contains five types of tiles.
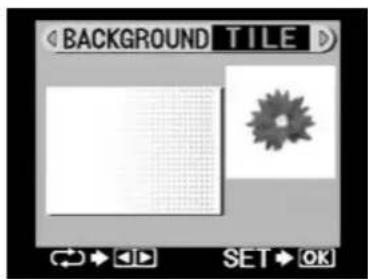

flowchart
graph LR
    A["POWER ON"] --> B["Setup"]
    B --> C["1 Input Selection Paper"]
    C --> D["2 Selection Picture"]
    D --> E["3 Selection Printing Mode"]
    E --> F["4"]
    F --> G["STANDARD"]
    F --> H["CARD"]
    F --> I["PHOTO-ALBUM"]
    F --> J["PASSPORT"]
    F --> K["INDEX"]
H-1 Background Rotation
If a “USER” registered background has been selected, the background can be rotated.

Caution
- This procedure cannot be performed if "TILE" or "TILE (gradation)" has been designated.
1
Select the background orientation using the ROTATE button.
The picture is rotated 90 degrees in a counterclockwise direction each time the ROTATE button is pressed.

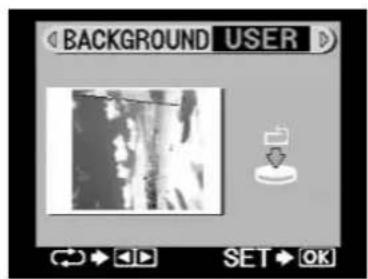
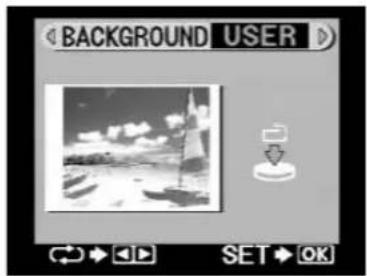

Caution
- Background pictures are registered in A4 size. When using A5 paper, the center of the background is used.
- The top, bottom or sides of the background picture may be cut off when the background picture is rotated if it does not match the paper setting.
- The picture cannot be rotated when "TILE" is designated for the background.
H-2 Background Designation
This procedure completes background designation.
1
Press the OK/SELECT button.
The display returns to the photo-album printing menu.
OK / SELECT


flowchart
graph LR
    A["POWER ON"] --> B["Setup"]
    B --> C["1 Input Selection Paper"]
    C --> D["2 Selection Picture"]
    D --> E["3 Selection Printing Module"]
    E --> F["4"]
    F --> G["STANDARD"]
    F --> H["CARD"]
    F --> I["PHOTO-ALBUM"]
    F --> J["PASSPORT"]
    F --> K["INDEX"]
I. Confirm the Setting
1 Press the OK/SELECT button.
The display returns to the photo-album printing preview menu.
OK / SELECT

↓

2 Review the pictures that have been selected for printing with the left or right arrow button.
Previews of pictures selected for printing are sequentially displayed each time the left or right arrow button is pressed, making it possible to check pictures before they are printed.


flowchart
graph LR
    A["POWER ON"] --> B["Setup"]
    B --> C["Input Selection Paper"]
    C --> D["Selection Picture"]
    D --> E["Selection Printing Mode"]
    E --> F["INDEX"]
    F --> G["PHOTO-ALBUM"]
    G --> H["POST"]
    H --> I["CARD"]
    I --> J["STANDARD"]
3 Select the number of copies with the up or down arrow button.
The display changes in the manner shown below each time the up or down arrow button is pressed.

flowchart
graph LR
    A["×1"] --> B["×2"]
    B --> C["..."]
    C --> D["×10"]
    D --> E["×20"]
    E --> F["×50"]
    F --> G["×40"]
    G --> H["×30"]
In the case of photo-album printing, be sure to check the vertical (portrait) and horizontal (landscape) layout of the pictures (page 80).

Tips
- Up to a maximum of 50 prints can be designated.
- The number of prints can be designated one print at a time for 1-9 prints, and in units of 10 prints each for 10 to 50 prints.
4 Print the picture.
Proceed to "5. Printing" (page 138).

flowchart
graph LR
    A["POWER ON"] --> B["Setup"]
    B --> C["1 Input Selection"]
    C --> D["2 Selection Picture"]
    D --> E["3 Selection Printing Modes"]
    E --> F["4"]
    F --> G["STANDARD"]
    F --> H["CARD"]
    F --> I["PHOTO-ALBUM"]
    F --> J["PASSPORT"]
    F --> K["INDEX"]
•PASSPORT printing
In this mode, you can place one picture or reserved multiple pictures for printing onto one sheet of paper.

Caution
- Paper types that can be used for PASSPORT printing are only A4 and A6 WIDE. A5 WIDE paper cannot be used for PASSPORT printing. When performing PASSPORT printing, be sure to set A4 or A6 WIDE paper and select this paper in "2. Paper Selection" (page 78).
A. Passport Selection
1 Set the mode selector dial to the PASSPORT position.
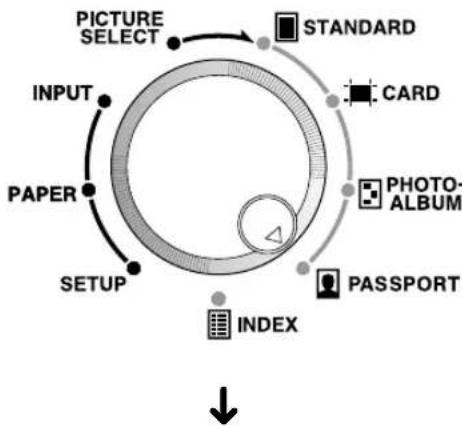
flowchart
graph TD
    A["INPUT"] --> B["PICTURE SELECT"]
    B --> C["STANDARD"]
    C --> D["CARD"]
    D --> E["PHOTO-ALBUM"]
    E --> F["PASSPORT"]
    F --> G["INDEX"]
    G --> H["↓"]
    I["PAPER"] --> J["SETUP"]
    J --> K["INDEX"]
If a picture has been selected, a preview is displayed on the LCD panel.


Tips
- When multiple pictures have been selected for printing, the last page to be printed is previewed on the LCD panel.
- When the preview is displayed, the pictures can be printed out by pressing the PRINT button.

flowchart
graph LR
    A["POWER ON"] --> B["Setup"]
    B --> C["1 Input Selection Paper"]
    C --> D["2 Selection Picture"]
    D --> E["3 Selection Printing Modes"]
    E --> F["4"]
    F --> G["STANDARD"]
    F --> H["CARD"]
    F --> I["PHOTO-ALBUM"]
    F --> J["PASSPORT"]
    F --> K["INDEX"]
B. Selecting Layout Type
The layout of the picture to be printed is selected for the paper set in “2. Paper Selection” (page 78).
1
Press the MENU button.
The passport printing menu is displayed.

2
Select the layout with the left or right arrow button.
The display changes in the manner shown below each time the left or right arrow button is pressed.

natural_image
Symmetrical cross-shaped diagram with four directional arrows pointing outward, no text or symbols presentA4:
[For P-440U/P-440U(T)]
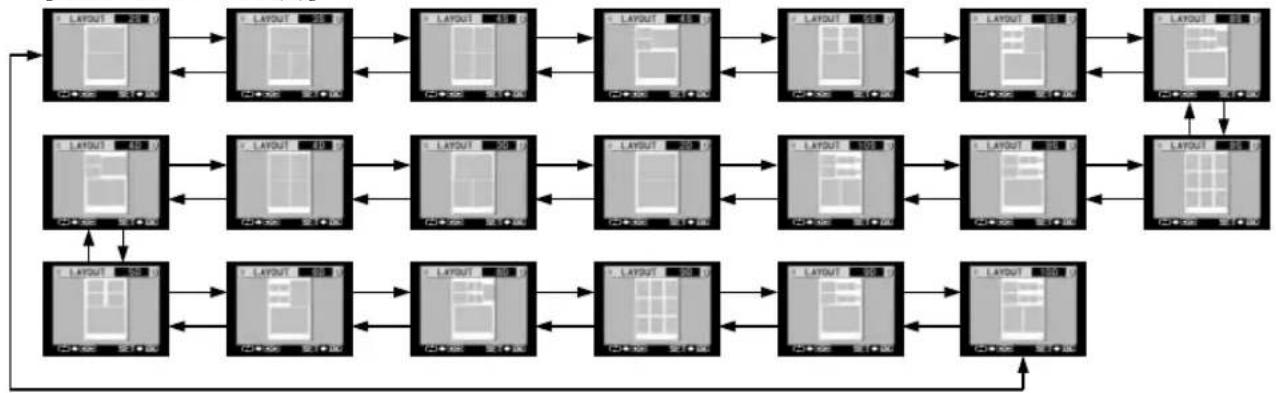
flowchart
graph TD
    A["Layout 1"] --> B["Layout 2"]
    B --> C["Layout 3"]
    C --> D["Layout 4"]
    D --> E["Layout 5"]
    E --> F["Layout 6"]
    F --> G["Layout 7"]
    G --> H["Layout 8"]
    H --> I["Layout 9"]
    I --> J["Layout 10"]
    J --> K["Layout 11"]
    K --> L["Layout 12"]
    L --> M["Layout 13"]
    M --> N["Layout 14"]
    N --> O["Layout 15"]
    O --> P["Layout 16"]
    P --> Q["Layout 17"]
    Q --> R["Layout 18"]
    R --> S["Layout 19"]
    S --> T["Layout 20"]
    T --> U["Layout 21"]
    U --> V["Layout 22"]
    V --> W["Layout 23"]
    W --> X["Layout 24"]
    X --> Y["Layout 25"]
[For P-440E/P-440E(G)]
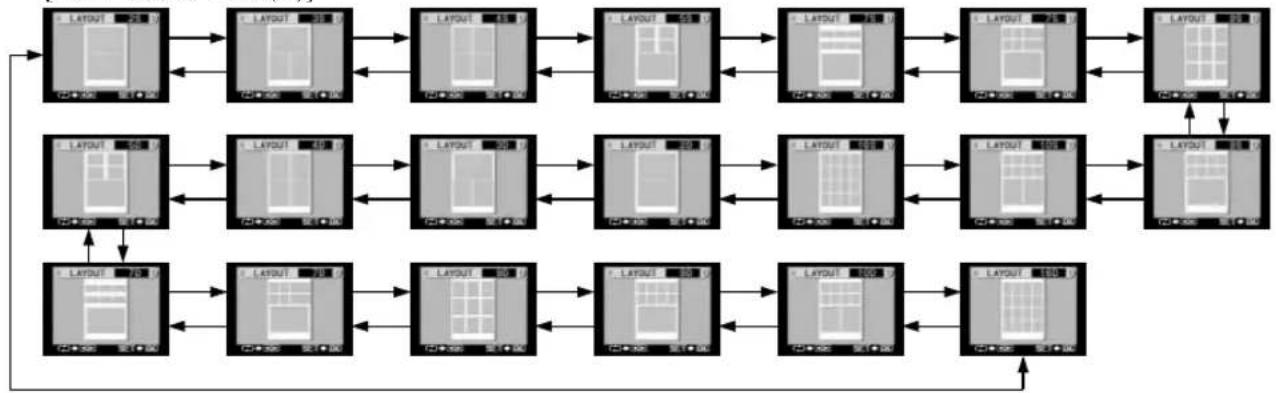
flowchart
graph TD
    A["Layout 1"] --> B["Layout 2"]
    B --> C["Layout 3"]
    C --> D["Layout 4"]
    D --> E["Layout 5"]
    E --> F["Layout 6"]
    F --> G["Layout 7"]
    G --> H["Layout 8"]
    H --> I["Layout 9"]
    I --> J["Layout 10"]
    J --> K["Layout 11"]
    K --> L["Layout 12"]
    L --> M["Layout 13"]
    M --> N["Layout 14"]
    N --> O["Layout 15"]
    O --> P["Layout 16"]
    P --> Q["Layout 17"]
    Q --> R["Layout 18"]
    R --> S["Layout 19"]
    S --> T["Layout 20"]
    T --> U["Layout 21"]
    U --> V["Layout 22"]
    V --> W["Layout 23"]
    W --> X["Layout 24"]
    X --> Y["Layout 25"]

flowchart
graph LR
    A["POWER ON"] --> B["Setup"]
    B --> C["1 Input Selection Paper"]
    C --> D["2 Selection Picture"]
    D --> E["3 Selection Printing Mode"]
    E --> F["4"]
    F --> G["STANDARD"]
    F --> H["CARD"]
    F --> I["PHOTO-ALBUM"]
    F --> J["PASSPORT"]
    F --> K["INDEX"]
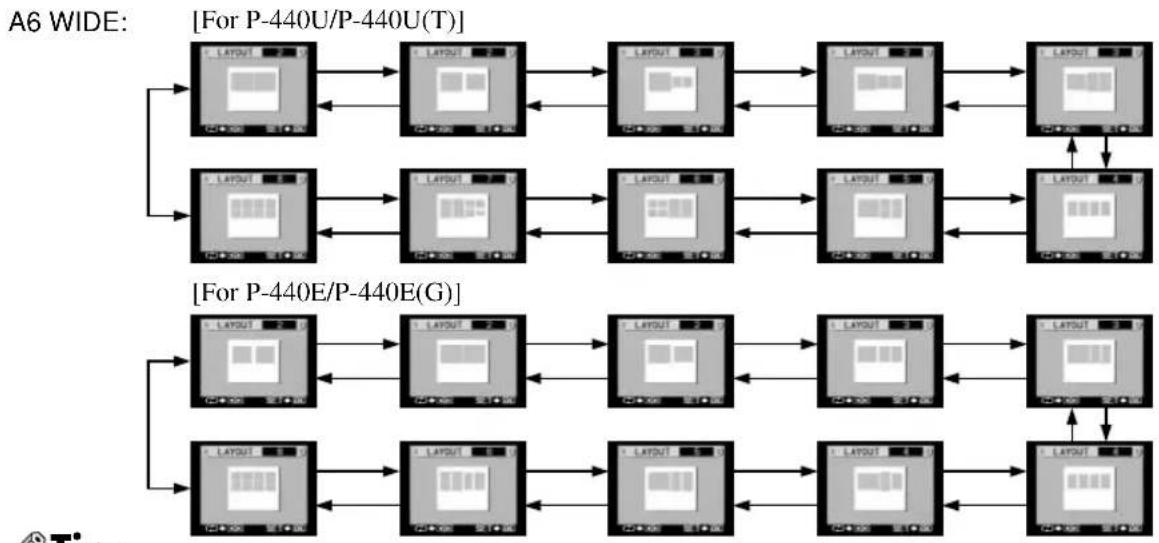
flowchart
graph TD
    subgraph_A6_WIDE["For P-440U/P-440U(T)"]
        A1["Layout"] --> B1["Layout"]
        B1 --> C1["Layout"]
        C1 --> D1["Layout"]
        D1 --> E1["Layout"]
        E1 --> F1["Layout"]
        F1 --> G1["Layout"]
        G1 --> H1["Layout"]
        H1 --> I1["Layout"]
        I1 --> J1["Layout"]
        J1 --> K1["Layout"]
        K1 --> L1["Layout"]
        L1 --> M1["Layout"]
        M1 --> N1["Layout"]
        N1 --> O1["Layout"]
        O1 --> P1["Layout"]
        P1 --> Q1["Layout"]
        Q1 --> R1["Layout"]
        R1 --> S1["Layout"]
        S1 --> T1["Layout"]
        T1 --> U1["Layout"]
        U1 --> V1["Layout"]
        V1 --> W1["Layout"]
        W1 --> X1["Layout"]
        X1 --> Y1["Layout"]
        Y1 --> Z1["Layout"]
        Z1 --> AA["Layout"]
        AA --> AB["Layout"]
        AB --> AC["Layout"]
        AC --> AD["Layout"]
        AD --> AE["Layout"]
        AE --> AF["Layout"]
        AF --> AG["Layout"]
        AG --> AH["Layout"]
        AH --> AI["Layout"]
        AI --> AJ["Layout"]
        AJ --> AK["Layout"]
        AK --> AL["Layout"]
        AL --> AM["Layout"]
        AM --> AN["Layout"]
        AN --> AO["Layout"]
        AO --> AP["Layout"]
        AP --> AQ["Layout"]
        AQ --> AR["Layout"]
        AR --> AS["Layout"]
        AS --> AT["Layout"]
        AT --> AU["Layout"]
        AU --> AV["Layout"]
        AV --> AW["Layout"]
        AW --> AX["Layout"]
        AX --> AY["Layout"]
    end

    subgraph["For P-440E/P-440E(G)"]
        A2["Layout"] --> B2["Layout"]
        B2 --> C2["Layout"]
        C2 --> D2["Layout"]
        D2 --> E2["Layout"]
        E2 --> F2["Layout"]
        F2 --> G2["Layout"]
        G2 --> H2["Layout"]
        H2 --> I2["Layout"]
        I2 --> AJ2["Layout"]
        AJ2 --> AK2["Layout"]
        AK2 --> AL2["Layout"]
        AL2 --> AM2["Layout"]
        AM2 --> AN2["Layout"]
        AN2 --> AO2["Layout"]
        AO2 --> AP2["Layout"]
        AP2 --> AQ2["Layout"]
        AQ2 --> AR2["Layout"]
        AR2 --> AS2["Layout"]
        AS2 --> AT2["Layout"]
        AT2 --> AU2["Layout"]
        AU2 --> AV2["Layout"]
        AV2 --> AW2["Layout"]
        AW2 --> AX2["Layout"]
    end
Tips
• The picture layout is displayed in gray.
- For jobs with "S" indicated on the display, a reserved image is printed onto a full sheet of paper.
- For jobs with "D" indicated on the display, multiple reserved images are printed onto a single sheet of paper.
- The options of layout types can be selected may differ depending on the region.
3 Once the layout has been decided, press the OK/SELECT button.
The display returns to the passport printing menu.
OK / SELECT

C. Selecting Filters
A sepia or black and white filter can be applied to the picture to be printed.
1 Select "FILTER" with the down arrow button.


flowchart
graph LR
    A["POWER ON"] --> B["Setup"]
    B --> C["1 Input Selection Paper"]
    C --> D["2 Selection Picture"]
    D --> E["3 Selection Printing Modes"]
    E --> F["4"]
    F --> G["STANDARD"]
    F --> H["CARD"]
    F --> I["PHOTO-ALBUM"]
    F --> J["PASSPORT"]
    F --> K["INDEX"]
2 Select the filter to be used with the left or right arrow button.
The filter can be selected in the manner shown below each time the left or right arrow button is pressed.

OFF : Filter processing is not performed.
B&W : Pictures are printed in black and white.
SEPIA : Pictures are printed with a sepia tone.

natural_image
Symmetrical cross-shaped diagram with four rounded rectangles and directional arrows, no text or symbols present.
D. Confirming the Settings
1 Press the OK/SELECT button.
The display returns to the passport printing preview menu.
OK / SELECT

↓

Tips
- When pictures to be printed have already been selected, a preview that is enabled by the designation performed here is displayed on the LCD panel.
- A picture shot vertically may be displayed upside down in the preview display depending on the orientation of the camera at the time of shooting.

flowchart
graph LR
    A["POWER ON"] --> B["Setup"]
    B --> C["1 Input Selection"]
    C --> D["2 Select Core Picture"]
    D --> E["3 Print & Setting Mode"]
    E --> F["4 Prin"]
    F --> G["STANDARD"]
    F --> H["CARD"]
    F --> I["PHOTO-ALBUM"]
    F --> J["PASSPORT"]
    F --> K["INDEX"]
2 Review the pictures that have been selected for printing with the left or right arrow button.
Previews of pictures selected for printing are sequentially displayed each time the left or right arrow button is pressed, making it possible to check pictures before they are printed.

3 Select the number of copies to be printed with the up or down arrow buttons.
The display changes in the manner shown below each time the up or down arrow button is pressed.

flowchart
graph LR
    A["×1"] --> B["×2"]
    B --> C["..."]
    C --> D["×10"]
    D --> E["×20"]
    F["×50"] --> G["×40"]
    G --> H["×30"]

Tips
- Up to a maximum of 50 prints can be designated.
- The number of prints can be designated one print at a time for 1-9 prints, and in units of 10 prints each for 10 to 50 prints.
4 Print the picture.
Proceed to "5. Printing" (page 138).

flowchart
graph LR
    A["POWER ON"] --> B["Setup"]
    B --> C["Input Selection"]
    C --> D["Selection Picture"]
    D --> E["Selection Printing Mode"]
    E --> F["4"]
    F --> G["STANDARD"]
    F --> H["CARD"]
    F --> I["PHOTO-ALBUM"]
    F --> J["PASSPORT"]
    F --> K["INDEX"]
- INDEX printing
This mode is selected when you want to print out thumbnail images of all pictures recorded on a xD-Picture Card or other type of memory card. This is convenient when you have not decided which pictures you want to print or when you want to obtain a list of image data.
Tip
- All pictures are printed both when DPOF data is recorded on the xD-Picture Card or PC Card and when pictures have been selected.
A. Index Selection
1 Set the mode selector dial to the INDEX position.
All picture data in the card is displayed in the form of gray squares on the LCD panel.

flowchart
graph TD
    A["INPUT"] --> B["PICTURE SELECT"]
    B --> C["STANDARD"]
    C --> D["CARD"]
    D --> E["PHOTO-ALBUM"]
    E --> F["PASSPORT"]
    F --> G["INDEX"]
    G --> H["SETUP"]
    H --> I["PAPER"]
    I --> J["INDEX"]
    style A fill:#f9f,stroke:#333
    style B fill:#ccf,stroke:#333
    style C fill:#cfc,stroke:#333
    style D fill:#fcc,stroke:#333
    style E fill:#cff,stroke:#333
    style F fill:#ffc,stroke:#333
    style G fill:#cfc,stroke:#333
    style H fill:#fcc,stroke:#333
    style I fill:#ffc,stroke:#333

Tips
- When the prints extended over multiple pages, only the last page is displayed.
- A message is displayed when xD-Picture Card or PC Card is not inserted properly, or when the image data on the card cannot be read.

flowchart
graph LR
    A["POWER ON"] --> B["Setup"]
    B --> C["Input Selection Paper"]
    C --> D["Selection Picture"]
    D --> E["Selection Printing Mode"]
    E --> F["INDEX"]
    F --> G["PHOTO-ALBUM"]
    F --> H["PASSPORT"]
    F --> I["STANDARD"]
    F --> J["CARD"]
B. Paper Orientation
This procedure is used to select paper orientation in order to select whether the index is to be produced using paper in the vertical (portrait) or horizontal (landscape) direction.
1 Press the MENU button.
The index printing menu is displayed with "PAPER" selected.


2 Select paper orientation with the left or right arrow button.
The display changes in the manner shown below each time the left or right arrow button is pressed.

flowchart
graph TD
    A["(Vertical)"] <--> B["(Horizontal)"]
    C["4 PRECUT"] <--> D["POSTCARD"]
    B <--> C
    D <--> B

natural_image
Symmetrical cross-shaped diagram with four directional arrows pointing outward from a central circle (no text or symbols)
Caution
- "POSTCARD" and "4 PRECUT" will not be available if the paper to be used is set to "A5 wide-size standard paper".
- If you select "POSTCARD" or "4 PRECUT", the images will be automatically printing out onto paper that has a horizontal orientation. Even if the vertical orientation setting is selected, the images will be force-printed onto horizontally oriented paper.
• A6 WIDE paper cannot be used for index printing.

flowchart
graph LR
    A["POWER ON"] --> B["Setup"]
    B --> C["Input Selection"]
    C --> D["Paper Selection"]
    D --> E["Selection Printing Mode"]
    E --> F["4"]
    F --> G["STANDARD"]
    F --> H["CARD"]
    F --> I["PHOTO-ALBUM"]
    F --> J["PASSPORT"]
    F --> K["INDEX"]
C. Selecting Layout Type
This procedure is used to select the layout of pictures to be printed for the selected paper orientation in step 2 of “B. Paper Orientation”.
1 Select "LAYOUT" by pressing the down arrow button.

natural_image
Pure diagram of four directional arrows pointing outward from a central circle, no text or symbols present
2 Select the layout (number of pictures on one page) with the left or right arrow button and then press the OK/SELECT button.
The display changes in the manner shown below each time the left or right arrow button is pressed.

natural_image
Symmetrical cross-shaped diagram with four directional arrows on a central circle (no text or symbols)A4/Vertical (Portrait): A4/Horizontal (Landscape): POSTCARD

flowchart
graph LR
    A["Layout 45 PIC"] --> B["Layout 84 PIC"]
    B --> C["Layout 49 PIC"]
    C --> D["Layout 81 PIC"]
    D --> E["Layout 24 PIC"]
    E --> F["Layout 40 PIC"]
A5 WIDE/Vertical (Portrait): A5 WIDE/Horizontal (Landscape): 4 PRECUT

flowchart
graph LR
    A["Layout 28 PIC"] --> B["Layout 45 PIC"]
    B --> C["Layout 30 PIC"]
    C --> D["Layout 49 PIC"]
    D --> E["Layout 56 PIC"]
    E --> F["Layout 54 PIC"]
Caution
- INDEX printing may take some time. Printing can be performed relatively quickly in the case of 84, 81, 45 or 49 pictures.
- If the vertical:horizontal ratio of the original picture is reduced to a ratio of 3:4, a portion of the picture may be cut out.

flowchart
graph LR
    A["POWER ON"] --> B["Setup"]
    B --> C["Input Selection"]
    C --> D["Paper Selection"]
    D --> E["Selection Printing Mode"]
    E --> F["4"]
    F --> G["STANDARD"]
    F --> H["CARD"]
    F --> I["PHOTO-ALBUM"]
    F --> J["PASSPORT"]
    F --> K["INDEX"]
D. Printing the Date
This procedure is used to designate whether the date or time at which the picture was taken will be displayed on the print and, if it will be, whether it will be the date or time.
1 Select "PRINT DATE" using the down arrow button.

natural_image
Abstract geometric diagram with four rounded rectangles and directional arrows, no text or symbols present
2 Designate how the date is printed using the left and right arrow buttons.
The display changes as shown below each time the left or right arrow button is pressed.

flowchart
graph LR
    A["OFF DATE"] --> B["TIME"]
    B --> C[" "]
    C --> D[" "]
OFF : The date is not printed.
DATE : The date is printed.
TIME : The 24 hour time is printed.

natural_image
Symmetrical four-pointed arrow diagram with directional arrows, no text or symbols present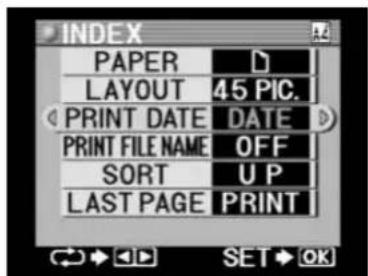
Tip
- If both PRINT DATE and PRINT FILE NAME are set, the date and the file name are printed in the positions shown below depending on the selected paper size and layout.
A4 vertical/84 pictures: Only the file name is printed at the bottom of the image.
A4 vertical/45 pictures: The file name is printed at the upper left of the image, and the date or time is printed at the lower right.
A4 horizontal/81 pictures: Only the file name is printed at the bottom of the image.
A4 horizontal/49 pictures: The file name is printed at the upper left of the image, and the date or time is printed at the lower right.
A5 WIDE vertical/45 pictures: Only the file name is printed at the bottom of the image.
A5 WIDE vertical/28 pictures: The file name is printed at the upper left of the image, and the date or time is printed at the lower right.
A5 WIDE horizontal/49 pictures: Only the file name is printed at the bottom of the image.
A5 WIDE vertical/30 pictures: The file name is printed at the upper left of the image, and the date or time is printed at the lower right.
Postcard: Only the file name is printed at the bottom of the image regardless of the selected layout.
4 precut: Only the file name is printed at the bottom of the image regardless of the selected layout.

flowchart
graph LR
    A["POWER ON"] --> B["Setup"]
    B --> C["Input Selection"]
    C --> D["Selection Picture"]
    D --> E["Selection Printing Mode"]
    E --> F["4"]
    F --> G["STANDARD"]
    F --> H["CARD"]
    F --> I["PHOTO-ALBUM"]
    F --> J["PASSPORT"]
    F --> K["INDEX"]
E. Print File Name
This procedure is used to designate whether or not the file name will be displayed on the print.
1 Select "PRINT FILE NAME" using the down arrow button.

natural_image
Pure geometric diagram with four rounded rectangles and arrows, no text or symbols present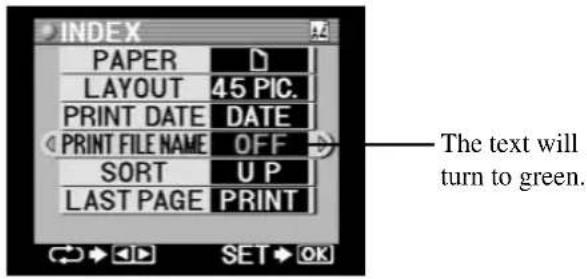
2 Select whether or not the file name will be printed using the left or right arrow button.
The display changes as shown below each time the left or right arrow button is pressed.

OFF : The file name is not printed.
ON : The file name is printed.

natural_image
Symmetrical cross-shaped diagram with four directional arrows and a central circle (no text or symbols)

flowchart
graph LR
    A["POWER ON"] --> B["Setup"]
    B --> C["Input Selection"]
    C --> D["Selection Picture"]
    D --> E["Selection Printing Mode"]
    E --> F["4"]
    F --> G["STANDARD"]
    F --> H["CARD"]
    F --> I["PHOTO-ALBUM"]
    F --> J["PASSPORT"]
    F --> K["INDEX"]
F. Designation of Picture Printing Order
This procedure is used to select the order in which pictures to be printed are arranged.
1 Select "SORT" by pressing the down arrow button.
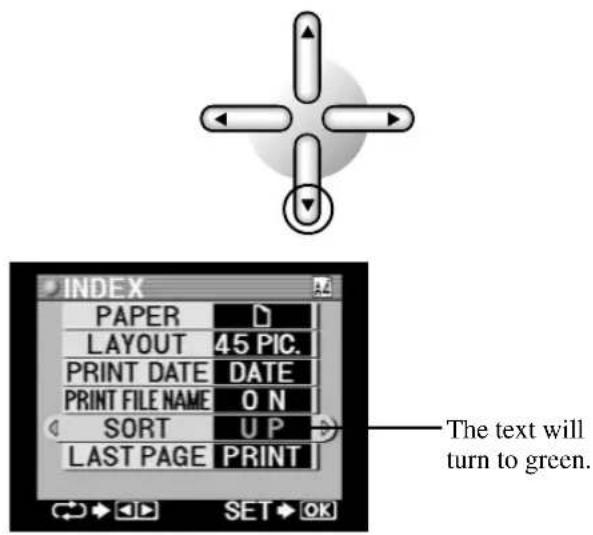
2 Select the order of pictures with the left or right arrow button.
The display changes in the manner shown below each time the left or right arrow button is pressed.


natural_image
Symmetrical cross-shaped diagram with four directional arrows and a central circle (no text or symbols)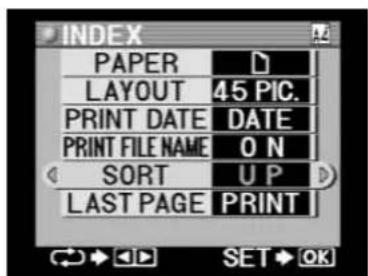
Tip
- When "UP" is selected, the order of pictures is changed so that pictures are printed starting from the lowest number (oldest picture), and when "DOWN" is selected, the order of pictures is changed so that pictures are printed starting from the largest number.

flowchart
graph LR
    A["POWER ON"] --> B["Setup"]
    B --> C["Input Selection"]
    C --> D["Selection Picture"]
    D --> E["Selection Printing Mode"]
    E --> F["4"]
    F --> G["STANDARD"]
    F --> H["CARD"]
    F --> I["PHOTO-ALBUM"]
    F --> J["PASSPORT"]
    F --> K["INDEX"]
G. Last Page Processing Designation
In the case of index printing, there are times when only a small number of pictures are printed on the last page. When this occurs, this setting can be useful for setting the printer to not print the last page, thereby saving on paper and ink ribbon costs.
1 Select "LAST PAGE" by pressing the down arrow button.

natural_image
Pure diagram of four directional arrows pointing outward from a central circle (no text or symbols)
Caution
- When the number of pages to be printed is "1", "LAST PAGE" cannot be selected. Proceed to step 3 of "H. Confirming the Setting" (page 136).
2 Select whether or not the last page is to be printed by pressing the left or right arrow button.
The display changes in the manner shown below each time the left or right arrow button is pressed.

PRINT : The last page is printed. Don't PRINT : The last page is not printed.
natural_image
Symmetrical four-pointed arrow diagram with directional arrows, no text or symbols present

flowchart
graph LR
    A["POWER ON"] --> B["Setup"]
    B --> C["Input Selection Paper Selection Picture Selection Printing Mode"]
    C --> D["INDEX"]
    C --> E["STANDARD"]
    C --> F["CARD"]
    C --> G["PHOTO-ALBUM"]
    C --> H["PASSPORT"]
H. Confirming the Setting
1 Press the OK/SELECT button.
The display returns to the index printing preview menu.
OK / SELECT
↓

2 Review the number of pictures that have been selected for printing with the left or right arrow button.
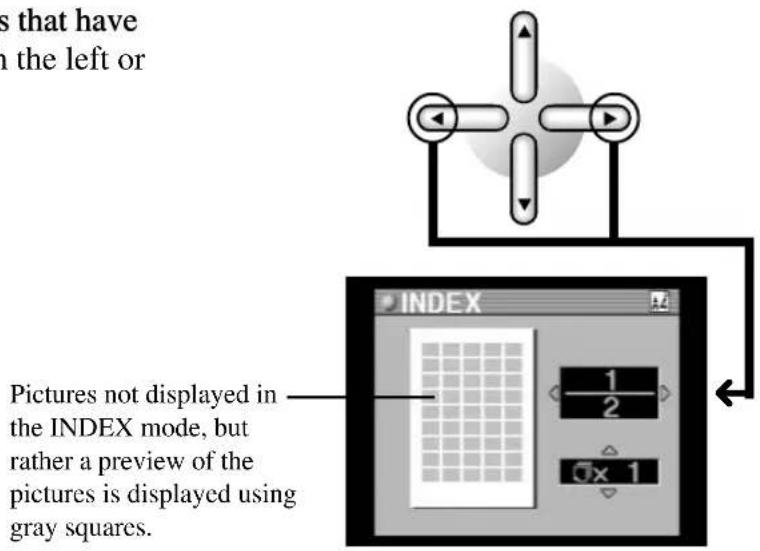

flowchart
graph LR
    A["POWER ON"] --> B["Setup"]
    B --> C["Input Selection"]
    C --> D["Selection Picture"]
    D --> E["Selection Printing Mode"]
    E --> F["4"]
    F --> G["STANDARD"]
    F --> H["CARD"]
    F --> I["PHOTO-ALBUM"]
    F --> J["PASSPORT"]
    F --> K["INDEX"]
3 Select the number of copies with the up and down arrow buttons.
The display changes in the manner shown below each time the up or down arrow button is pressed.

flowchart
graph LR
    A["×1"] --> B["×2"]
    B --> C["..."]
    C --> D["×10"]
    D --> E["×20"]
    E --> F["×50"]
    F --> G["×40"]
    G --> H["×30"]
Tips
- Up to a maximum of 50 prints can be designated.
- The number of prints can be designated one print at a time for 1-9 prints, and in units of 10 prints each for 10 to 50 prints.

4 Print the picture.
Proceed to "5. Printing" (page 138).
5. Printing
The next step is to print pictures selected for printing. Before performing printing, recheck the settings made for paper usage and pictures.
1 Press the PRINT button.
Printing is executed.

flowchart
graph TD
    A["STANDARD"] --> B["0 remain 1/1 Processing Layout"]
    C["CARD"] --> D["1 remain 1/2 Processing Layout"]
    E["PHOTO-ALBUM"] --> F["1 remain 1/2 Processing Layout"]
    G["PASSPORT"] --> H["3 remain 1/2 Processing Layout"]
    I["INDEX"] --> J["1 remain 4/45 Processing Layout"]

    K["STANDARD"] --> L["0 remain 1/1 Printing..."]
    M["CARD"] --> N["1 remain 2/2 Printing..."]
    O["PHOTO-ALBUM"] --> P["1 remain 2/2 Printing..."]
    Q["PASSPORT"] --> R["3 remain 2/2 Printing..."]
    S["INDEX"] --> T["1 remain 45/45 Printing..."]

Caution
- The time required for printing varies according to the picture size and compression ratio of the digital camera used to take the pictures.
- Do not turn off the power during printing.
- Do not open the printer cover while printing is in progress.
- Do not take out the xD-Picture Card or PC Card while printing is in progress. The xD-Picture Card or PC Card may be damaged and no longer be able to be used.
- Do not take out the paper cassette while printing is in progress. Also, do not touch the paper.
- The PRINT button is enabled during preview in each mode (STANDARD, CARD, PHOTO-ALBUM, PASSPORT and INDEX).
- The paper will start to come out of the printer during printing, but do not pull out the paper. Wait until the paper has been automatically discharged onto the paper output tray.
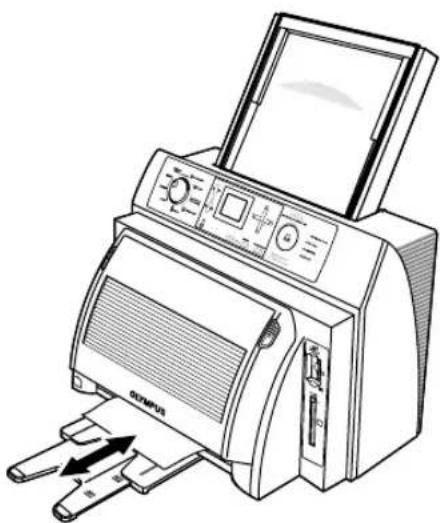
natural_image
Line drawing of a Olympus printer with paper feed and control panel (no text or symbols)
Tips
- The "PRINTING" lamp lights when printing is in progress.
- Continuously press the MENU/PRINT Cancel button to cancel printing. When print cancellation is accepted, the xD-Picture Card, PC Card and PRINTING access indicators flash. At this time, the message "Printing will Stop After this Paper" is displayed on the LCD panel, and printing stops after the current sheet of paper is printed out normally.

- If the printer runs out of paper or ink ribbon after the PRINT button has been pressed, a message is displayed and printing is stopped. Install paper or ink ribbon and then press the PRINT button to resume printing.
- Since printing is performed by using one color each of Y (yellow), M (magenta) and C (cyan) and an overcoating, the printer head passes back and forth over the paper four times to print one color print.

Caution
- When tearing off postcard paper (P-A4P) or L size paper (P-A4L), first bend along the vertical scored lines and then tear off both ends. Next, bend along the remaining scored lines and tear off. The paper cannot be torn off cleanly unless folds are firmly made in the paper.
①Carefully bend along the vertical scored lines on the top and bottom.
②Tear the paper vertically.

natural_image
Illustration of two hands pressing down on a flat surface with a textured surface (no text or symbols)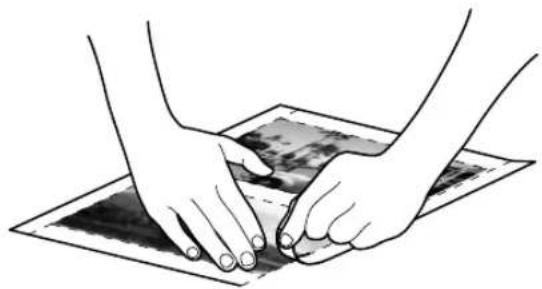
natural_image
Illustration of two hands pressing down on a flat surface with a textured surface (no text or symbols)③Carefully bend along the horizontal scored lines on the top and bottom.
④Tear the paper horizontally.

natural_image
Illustration of two hands holding a flat object with a dashed line indicating a measurement or folding (no text or symbols present)
natural_image
Illustration of two hands pressing down on a flat surface with a grid pattern (no text or symbols)Troubleshooting
Check the following items when the printer does not operate as it should or a problem occurs during operation.
- When a Problem Occurs
| Problem Cause Corrective Action | ||
| Power does not come on | ·The power cord may not be plugged in.·There may be a problem with the power outlet. | ·Turn off the printer power and check the plug of the power cord.·Try plugging in the power cord of another electrical appliance and check if it operates properly when plugged into that power outlet. |
| Unable to print from a card | ·The inserted card may not be able to be read.·There may be no image data on the card.·The card may be damaged. | ·Check if the card is inserted properly.·Check whether the card contains image data.·Check for soiling of the card contacts and the use of the card. |
| Unable to print from PC | ·The interface cable may be disconnected.·The specifications of the interface cable may not be correct.·The input mode may be set incorrectly.·The printer driver may not be installed or incorrect. | ·Check the connection of the interface cable.·Check whether USB cable is being used.·Check the connection method (USB) and input mode.·Check whether the printer driver is installed correctly. Try re-installing as necessary. |
| Unable to print correctly | ·There may be something wrong with the image data.·The ink ribbon may not be installed properly.·The cause may be the settings for filter, color tone or paper orientation.·The printing head may be soiled. | ·Check the image data with a digital camera, PC, etc.·Check the installation of the ink ribbon and ink cassette.·Check each setting.·Clean the printing head (refer to page 153). |
- When a Message is Displayed
| Message Cause Corrective Action | ||
 | The inserted xD-Picture Card or PC card cannot be read. | Take out the card and re-insert it properly. Try using a different card if the pictures can still not be read. |
 | The card (xD-Picture Card or PC Card) has been removed while the printer was operating. | Take out the card (xD-Picture Card or PC Card) and properly re-insert it (refer to pages 19, 20). |
 | A card (xD-Picture Card or PC Card) has not been inserted into the printer. | Insert a card (xD-Picture Card or PC Card). |
 | Unable to read image data. | Try re-inserting the card correctly. If image data is still unable to be read, try using a different xD-Picture Card or PC Card. |
 | There is no data recorded on the inserted xD-Picture Card or PC card. | Use a xD-Picture Card or PC card that contains image data. |
 | Pictures have not been selected. | Perform the procedure for selecting pictures (refer to page 79). |
| Message Cause Corrective Action | ||
 | ·The printer cover is open. | ·Properly close the printer cover. |
 | ·The power may have been turned on with the cover open.·An error has occurred. | ·Turn off the power, close the cover and then turn the power back on again.·Contact the nearest service department of Olympus. |
 | ·There is unnecessary paper remaining in the printer. | ·Remove the unnecessary paper. |
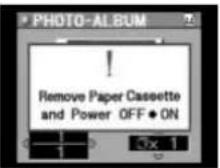 | ·The power may have been turned off during the previous printing. | ·Remove the paper cassette, turn off the power and then turn it back on again. |
 | ·The temperature of the thermal head is too high. | ·Wait 30 - 100 seconds until the thermal head cools.·Printing resumes automatically after the thermal head has cooled. |
 | ·Paper has become jammed in the printer. | ·Stop printing and remove the jammed paper. |
| Message Cause Corrective Action | |
 | The printer is out of paper. |
 | The printer is out of ink ribbon. |
 | Paper of a different size that has been set is installed in the printer. |
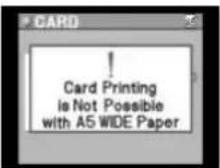 | Paper has been installed that is different from the paper setting, or the paper setting for card printing is incorrect. |
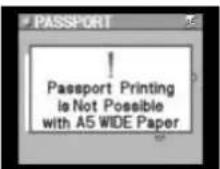 | Paper has been installed that is different from the paper setting, or the paper setting for passport printing is incorrect. |
 | USB is selected for the input. |
| Message Cause | Corrective Action | |
 | Background may not be able to be registered depending on the size and compression rate of the number of pixels of the picture. | Register a different picture for the background. |
 | A background has not been registered. | Register a background. |
- What you can do with the P-440 Digital Color Printer
The P-440 Digital Color Printer enables you to load, select and print pictures directly from an xD-Picture Card or a PC card without using a personal computer.

○: Available/ × Not available
*1 It is necessary to perform layout using special-purpose paper.
*2 The date and time are printed automatically, and may or may not be printed depending on the size of the index.
*3 A5 WIDE paper cannot be used for the PASSPORT printing.
◆STANDARD
In this mode, you can select a single picture and print it out on an entire sheet of paper (single picture print), print out one picture or up to a maximum of 16 selected multiple pictures on an A4 sheet of paper or divide a picture up into a maximum of 6 prints on A5 wide paper. In addition, you can also print out pictures selected and set in “3. Picture Selection and Setting”. (page 95)

natural_image
Beach scene with colorful sailboats on sandy shore under blue sky, distant buildings visible in background (no text or symbols)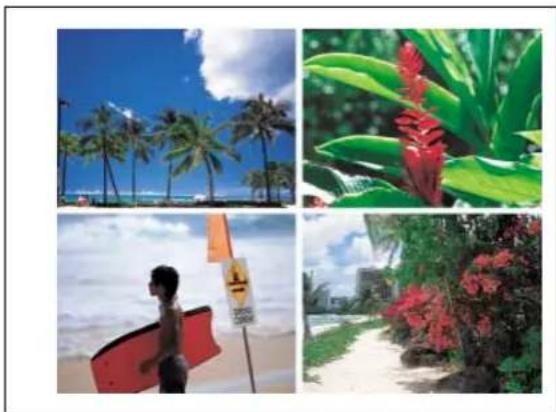
natural_image
Four-panel collage showing tropical beach scenes: palm trees under blue sky, red flowers with green leaves, beach with person holding surfboard, and garden with red flowers (no text or symbols)◆CARD
Use of the special-purpose card paper lets you make cards from a single picture or multiple selected pictures. (page 101)
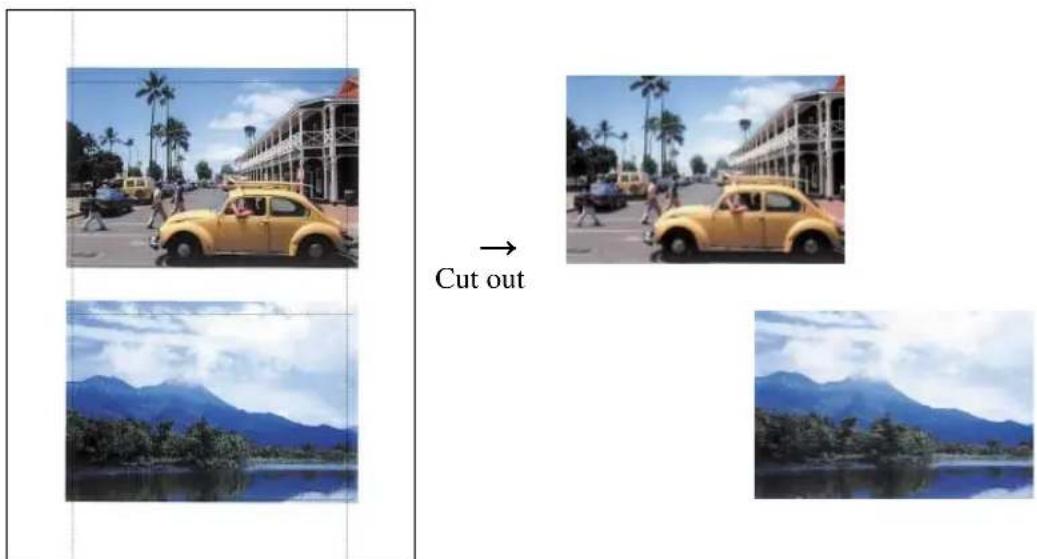
(When using P-A4P paper)
◆PHOTO-ALBUM
This mode is selected when you wish to print out pictures in the form of a photo album. You can also add a background or stamp to the paper or decorate pictures with a frame. (page 110)
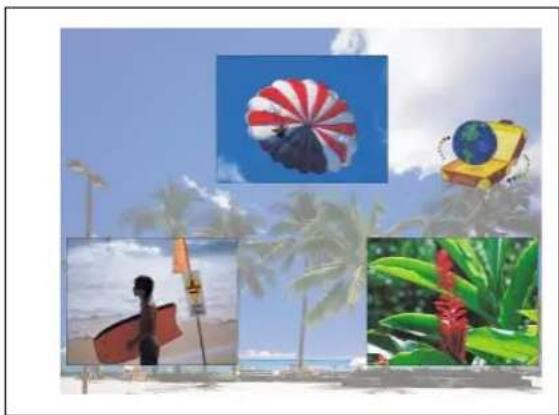
natural_image
Beach scene with palm trees, beach equipment, and tropical plants under a blue sky (no text or symbols)◆PASSPORT
In this mode, you can place one picture or different pictures for printing onto one sheet of paper. This mode is useful for printing a passport photo. (page 124)

natural_image
Illustration of two human figures side by side, one with a sad face and the other with a frowning face (no text or symbols)
natural_image
Illustration of six cartoon figures in different poses: two with surprised faces, one with a fish-like face, and three with expressive faces (no text or symbols)Tip
- Paper types that can be used for PASSPORT printing are only A4 and A6 WIDE.
INDEX
This mode is selected when you want to print out thumbnail images of all pictures recorded on a xD-Picture Card or other type of memory card. This is convenient when you have not decided which pictures you want to print or when you want to obtain a list of image data. (page 129)

natural_image
Grid of 25 colorful nature and tourism photos arranged in a 3x4 grid, no visible text or symbols.Tip
- The file name is printed on the print. Depending on the size of the index, the date and time is automatically printed as well.
- Explanation of the LCD Panel
You can check and select pictures or select a printing mode while viewing the LCD panel.
Select xD-Picture Card, PC Card or USB to designate the source from which pictures to be printed are to be read.
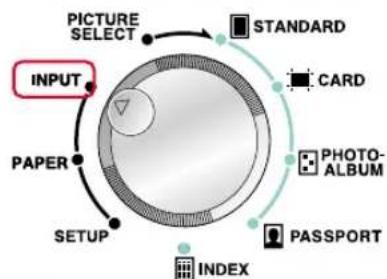
flowchart
graph TD
    A["INPUT"] --> B["PICTURE SELECT"]
    B --> C["STANDARD"]
    C --> D["CARD"]
    D --> E["PHOTO-ALBUM"]
    E --> F["PASSPORT"]
    F --> G["INDEX"]
    G --> H["SETUP"]
    H --> I["PAPER"]
    I --> J["INPUT"]

The current image data input method is displayed.

The method for input of image data is selected by pressing the left or right arrow button.

flowchart
graph TD
    A["xD-Picture Card"] --> B["PC Card"]
    B --> C["USB"]
    C --> A
Select whether A4, A5 wide or A6 wide paper.

flowchart
graph TD
    A["INPUT"] --> B["PAPER"]
    B --> C["SETUP"]
    C --> D["INDEX"]
    D --> E["PROSOFT"]
    E --> F["PHOTO-ALBUM"]
    F --> G["CARD"]
    G --> H["STANDARD"]
    H --> I["PICTURE SELECT"]
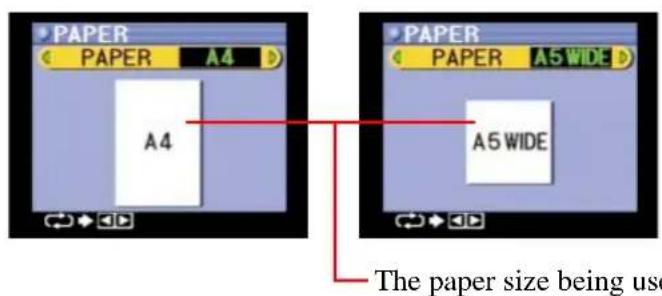

The paper size to be used is selected by pressing the left or right arrow button.
You can make fine adjustments in printed pictures, register background pictures for putting backgrounds on prints, or adjust the display of a background.

flowchart
graph TD
    A["STANDARD"] --> B["CARD"]
    B --> C["PHOTO-ALBUM"]
    C --> D["PASSPORT"]
    D --> E["INDEX"]
    E --> F["INPUT"]
    F --> G["PAPER"]
    G --> H["SETUP"]
    H --> I["PICTURE SELECT"]

The parameter that can be changed is displayed.

Parameters can be selected by pressing the up or down arrow button.

The detailed setting menu of the selected parameter is displayed by pressing the left or right arrow button.
There are five printing modes consisting of STANDARD, CARD, PHOTO-ALBUM, PASSPORT and INDEX. You can designate the orientation of pictures on the paper, print the date or arrange pictures according to a filter for each mode.

flowchart
graph TD
    A["PICTURE SELECT"] --> B["INPUT"]
    B --> C["PAPER"]
    C --> D["SETUP"]
    D --> E["INDEX"]
    E --> F["POSTO-ALBUM"]
    F --> G["CARD"]
    G --> H["STANDARD"]
    H --> I["PASSPORT"]
The CARD, PHOTO-ALBUM, PASSPORT and INDEX modes can be selected in addition to the STANDARD mode.
MENU Pressing the button displays the detailed settings for each mode.

The number of the page displayed and the total number of pages along with the number of prints are displayed.
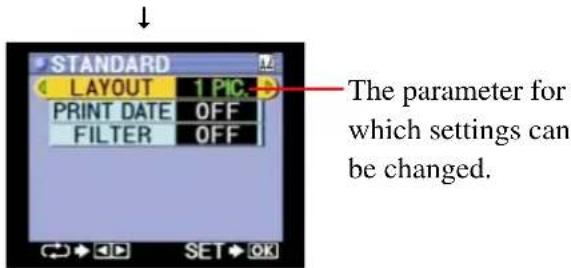

Pages are selected by pressing the left or right arrow button. The number of prints to be printed can be changed by pressing the up or down arrow button.

Settings can be changed by pressing the left or right arrow button. Settings can be selected by pressing the up or down arrow button.
Select pictures to be printed while previewing them on the LCD panel.

flowchart
graph TD
    A["PICTURE SELECT"] --> B["STANDARD"]
    B --> C["CARD"]
    C --> D["PHOTO-ALBUM"]
    D --> E["PASSPORT"]
    E --> F["INDEX"]
    F --> G["INPUT"]
    G --> H["PAPER"]
    H --> I["SETUP"]
The parameter for which details are to be set is displayed when the button is pressed.
MENU


Number of Prints
The date and time and the picture name are displayed.
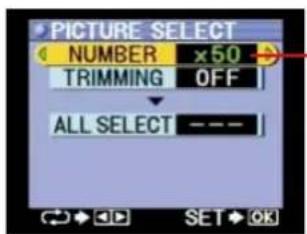
The parameter for which settings can be changed.

Settings can be changed by pressing the left or right arrow button. Settings can be selected by pressing the up or down arrow button.

Press the right arrow button to advance to the next picture and the left arrow button to move back to the previous picture.
Press the down arrow button to jump to the next set of 10 pictures and the up arrow button to jump back to the previous set of 10 pictures.

The picture will be rotated 90 degrees counterclockwise each time the ROTATE button is pressed in the photo-album mode.
OK / SELECT
Pressing the button returns the display to the currently selected image.

Caution
- If the picture name contains characters other than numbers a hyphen is displayed.
●Introduction to Color Printing
Difference Between RGB and CMY
Have you ever tried comparing actual printed images and images displayed on a personal computer? Have you ever noticed the differences in their colors? Could this be a malfunction in the printer? The answer is probably no. This is due to different types of color generation systems used between printers and PCs.
Television and Computer displays express various colors by combining three colors referred to as the three primary colors of light, namely red (R), green (G) and blue (B). Any color can be created with these three colors. In addition, mixing equal amounts of these three colors results in the color white (W).
This method is referred to as the additive color process because it represents any color by adding the primary colors together in different proportions.
The three basic colors used by printers are magenta, cyan and yellow. Any color can be printed using these three colors. Mixing equal amounts of these three colors results in the color black. This method is referred to as the subtractive color process because various colors are expressed by absorbing a portion of the color white while reflecting the remaining colors.


Tip
- For example, if magenta (M) seems to be a little too strong during printing, this can be compensated for by slightly increasing the green (G) with an adjustment of the printer.
•DPOF (Digital Print Order Format)
DPOF refers to a format used by DPOF enabled digital cameras to record printing information on a memory card, such as the images to be printed or the number of prints. DPOF enables those images to be printed, or the number of prints to be designated with a digital camera that supports DPOF function, thereby eliminating the need to make the settings on the printer. Therefore, using a DPOF-compatible printer makes printing easy. The P-440 is compatible with DPOF selection of images, quantity, rotation and trimming. When an xD-Picture Card or PC card is inserted into the printer, DPOF information is read from the media and image selection is performed automatically. If you do not use DPOF selection, select “CANCEL” for the “ALL SELECT” function in “Printing All Pictures on a Card” (page 94).
- Cleaning the Printer
Although varying according to how much the printer is used, clean the printer when it appears that printing quality has decreased significantly.
In addition, since the inside of the printer may be hot immediately after use, wait for a while after turning off the power before cleaning.
1 Turn off the printer power and unplug the power cord.


natural_image
Simple line drawing of a plug connected to a socket, with an arrow indicating cable connection (no text or symbols)Tip
- Do not unplug the power cord with wet hands. Grasping the plug of the power cord with wet hands can lead to the risk of electrical shock. Always make sure to unplug the power cord with dry hands.
2 Lower the cover eject lever to open the printer cover.

natural_image
Line drawing of hands operating a printer with a screen and control panel (no text or symbols)Caution
- Never touch the thermal head. Contact with the thermal head can cause burns.
- The thermal head sensor is extremely sensitive to static electricity. Never touch the thermal head sensor since this has the risk of causing a malfunction.

3 Gently wipe the head with a cotton swab moistened with a small amount of alcohol.
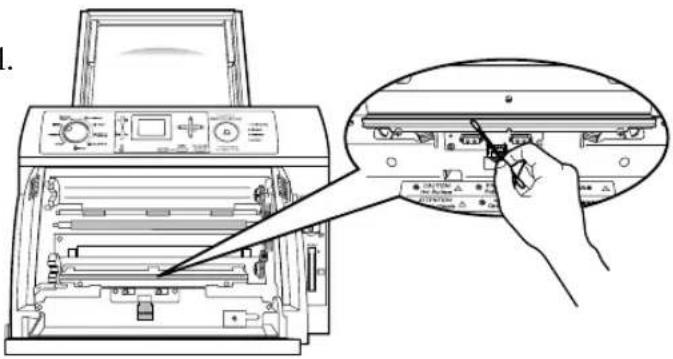

Caution
- Be careful not to damage the thermal head.
- Handle alcohol with care. (Alcohol is flammable. Turn off the printer and make sure the printer and thermal head have completely cooled before cleaning with Alcohol.)
- Never touch the thermal head directly with your fingers.
●Replacing the Ink Ribbon

Tips
• Purchase an ink ribbon pack adequate for the paper size to be used, as shown below.
| Paper types | A4-size standard paper (P-A4N) | Postcard paper (P-A4P) | L-size card paper (P-A4L) | A4-size passport paper (P-A4PASE) | A5 wide-size standard paper (P-A5N) | A6 wide-size passport paper & ribbon (P-A6WPAS) |
| Ink ribon type | P-RBM, P-RBW | |||||
- Do not open the ink ribbon package until the time of use.
- Do not store the ink ribbon package in locations subjected to direct sunlight, locations that reach high temperature or humidity or in locations within the reach of children.
- Not all types of paper are available in all regions. For specific details, please contact your local dealers.
1 Remove the ink cassette.
①Press the eject buttons on both side of the printer cover and open the printer cover.
②Remove the ink cassette.
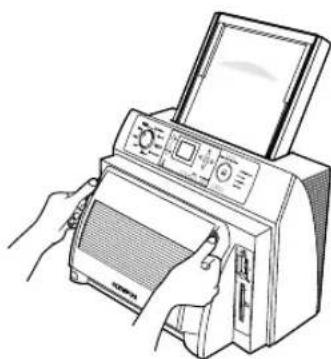
natural_image
Line drawing of hands operating a printer with a screen (no text or symbols visible)

Caution
- Never touch the thermal head. Contact with the thermal head can cause burns.
2 Remove the used ink ribbon.
Disconnect both ends of the bobbins from the ink cassette.

natural_image
Illustration of two hands holding a rolled-up scroll or sheet (no text or symbols visible)Tips
- The ink cassette can be used repeatedly. Make sure not to discard the ink cassette.
- Used ink ribbon (including the bobbins) are made of plastic. Dispose of these in accordance with the disposal procedures in your area.
3 Install a new ink ribbon.
Refer to page 9 for a description of the procedure for installing the ink ribbon.
•To remove Dust on Vent
Dust collecting on the vent cause poor air circulation leading to a temperature rise inside the panel and result in a failure. Clean the vent every month.
Vacuum dust on the vent from the outside. Use a dust brush adapter to vacuum dust.

natural_image
Line drawing of a printer with a paper feeding into it, showing no text or symbols.OLYMPUS®
- About this Reference Manual
- Reading this Manual
- Contents
- For Safe Use 5
- Identifying the Parts....6
- Printer Installation....9
- LCD Panel 17
- Connecting to a TV Monitor ....18
- Using xD-Picture Card ....19
- Using a PC Card 20
- Installing the Printer Driver ....21
- Printing from a PC....31
- Printing Procedure When Printing from a Card ....47
- Setup 48
- Input Selection ....74
- Paper Selection .... 78
- Picture Selection and Setting ....79
- Printing Modes ...... 95
- Printing....138
- Troubleshooting ....140
- Appendix....145
- ●Handling Precautions
- When moisture has condensed in the printer
- Do not use solvents such as paint thinner or benzene when cleaning
- Do not allow the printer cabinet to be in contact with rubber or vinyl products for an extended period of time. This can cause discoloration or peeling of the coating
- Operate the printer at least once every six months
- Transporting when Moving, etc.
- Identifying the Parts
- - Printer Body
- •Operation Panel
- •Paper Cassette
- Caution
- •Ink Cassette (Ribbon Holder)
- Printer Installation
- - Printer Installation Site
- •Installing the Ink Ribbon
- 1
- 2
- Tip
- •Installing the Paper Cassette
- Insert print paper with the protective sheet on top.
- Pull out the protective sheet.
- Close the feeder cover of the paper cassette.
- Open the dust cover in the top of the printer and completely insert the paper cassette.
- - Attaching the Paper Output Tray
- - Connecting the Power Cord and Turning on the Power Switch
- LCD Panel
- Connecting to a TV monitor
- Using xD-Picture Card
- Using a PC Card
- Installing the Printer Driver
- - Operating Environment
- Windows
- Macintosh
- Windows98/Me/2000/XP
- Mac OS 8.6-9.2
- Start up the install program.
- 8
- 9
- 10
- Mac OS X (version 10.1.2-10.2.5)
- After the installer finishes, start up "Print Center".
- Click on the "Add" button.
- Printing from a PC
- ●Preparing the P-440 for Printing
- 3
- 4
- - Setting Printer Settings from a PC
- When Using a Windows
- - Paper Setting
- • Color Adjustment using the "Driver" Setting
- Click on the "Color Adjustment" tab.
- Adjust the color.
- Tips
- Click on "Apply" or "OK".
- • Color Adjustment using the "ICM" Setting
- Precautions Regarding the Printer Driver
- When Using a Macintosh
- Click on "OK".
- Click on the "Color Adjustment" button.
- - Color Adjustment using the "ColorSync" Setting
- - Printing from a PC
- Windows Error Messages
- Macintosh Error Messages
- Errors displayed before data transfer (before printing)
- Printing Procedure When Printing from a Card
- Setup
- - Background Setup
- Selecting the Background Image
- Adjusting the Background Image
- 5
- 6
- Select whether or not to trim (crop) the picture using the left and right arrow buttons.
- To trim (crop) the picture, select "YES" and press the OK/SELECT button.
- Registering the Background Image
- - Image Adjustment (Printing Adjustment)
- Sharpness Adjustment
- Adjust sharpness with the left or right arrow button.
- Once adjustment has been completed, press the OK/SELECT button.
- Gamma Adjustment
- Select "GAMMA" with the down arrow button.
- Brightness Adjustment
- Once adjustments have been completed, press the OK/SELECT button.
- Contrast Adjustment
- Select "CONTRAST" by pressing the down arrow button.
- Completion of Image Adjustment
- - Basic Setup
- Setting the Border Margin
- Select the margin area using the left and right arrow buttons.
- Fit to Image Area
- Index Display Selection
- Designating Date Order
- Adjusting the LCD Panel Brightness
- Exif Print
- Completing the Settings
- ●Clearing the Settings (Returning to the Factory Default Settings)
- Press either the left or the right arrow button.
- Select whether or not to clear all of the settings using the left and right arrow buttons.
- Press the OK/SELECT button. The display returns to the Setup menu.
- Input Selection
- • Using xD-Picture Card
- •Using a PC Card
- Paper Selection
- - Setting the Paper
- Select "PAPER" with the left or right arrow button.
- Picture Selection and Setting
- - Selecting and Setting Pictures on a Card
- Picture Selection
- Confirm the picture displayed on the LCD panel is the picture to be printed.
- Picture Rotation
- Select the desired orientation using the ROTATE button.
- Once the picture orientation has been decided, press the OK/SELECT button.
- OK / SELECT
- Enlarging the Size of the Picture
- Press the ENLARGE button.
- Picture Index Display
- Press the INDEX button during single picture display.
- Scroll through the picture sets using the up and down arrow buttons.
- Select the desired picture using the left and right arrow buttons.
- Select the picture using the OK/SELECT button.
- Selecting the Number of Prints
- Press the MENU button.
- Select the number of copies to be printed with the left or right arrow button.
- Trimming selected picture (Cropping)
- Select "TRIMMING" by pressing the down arrow button.
- Select trimming with the left or right arrow button.
- Select "NEW" with the left or right arrow button.
- Selecting the Trimming Size
- Free Trimming
- Adjust the top and left guidelines using the up, down, left and right arrow buttons.
- Press the OK/SELECT button.
- Adjust the bottom and right guidelines using the up, down, left and right arrow buttons.
- 3:4 Trimming
- Select the trimming size using the ENLARGE button or the INDEX button.
- Once the trimming size has been selected, press the OK/SELECT button.
- Press the OK/SELECT button.
- Setting the Trimming Position
- - Printing All Pictures on a Card
- Printing Modes
- •STANDARD printing
- Standard Selection
- Selecting Layout Type
- Select the layout with the left or right arrow button.
- Printing the Date
- Select date printing with the left or right arrow button.
- Selecting Filters
- Select "FILTER" with the down arrow button.
- Select the filter to be used with the left or right arrow button.
- Confirming the Settings
- Press the OK/SELECT button.
- - CARD printing
- Card Selection
- Setting the Card Size
- Once the card size has been decided, press the OK/SELECT button.
- Selecting Stamps
- E-1 Selecting the Stamp Size
- E-2 Stamp Rotation
- E-3 Stamp Position
- Confirming the Settings
- Review the pictures that have been selected for printing with the left or right arrow button.
- Print the picture.
- •PHOTO-ALBUM printing
- Album Selection
- Paper Orientation
- Select the paper orientation with the left or right arrow button.
- Selecting Layout Type
- Printing the Date
- Selecting Filters
- Selecting Stamps
- Select "STAMP" by pressing the down arrow button.
- Select the stamp to be used with the left or right arrow button.
- Once the stamp to be used has been selected, press the OK/SELECT button.
- F-1 Selecting the Stamp Size
- F-2 Stamp Position
- Once the position has been selected, press the OK/SELECT button.
- Selecting Frames
- Select "FRAME" by pressing the down arrow button.
- Select the frame using the left or right arrow button.
- Selecting Background
- Select "BACKGROUND" by pressing the down arrow button.
- Select a background using the left or right arrow button.
- H-1 Background Rotation
- H-2 Background Designation
- Confirm the Setting
- Select the number of copies with the up or down arrow button.
- Print the picture.
- •PASSPORT printing
- Passport Selection
- Once the layout has been decided, press the OK/SELECT button.
- Selecting Filters
- Confirming the Settings
- - INDEX printing
- Index Selection
- Select paper orientation with the left or right arrow button.
- Print File Name
- Designation of Picture Printing Order
- Last Page Processing Designation
- Confirming the Setting
- Review the number of pictures that have been selected for printing with the left or right arrow button.
- Select the number of copies with the up and down arrow buttons.
- Printing
- Press the PRINT button.
- Troubleshooting
- - What you can do with the P-440 Digital Color Printer
- ◆STANDARD
- ◆CARD
- ◆PHOTO-ALBUM
- ◆PASSPORT
- INDEX
- - Explanation of the LCD Panel
- ●Introduction to Color Printing
- Difference Between RGB and CMY
- •DPOF (Digital Print Order Format)
- - Cleaning the Printer
- ●Replacing the Ink Ribbon
- Remove the used ink ribbon.
- Install a new ink ribbon.
- •To remove Dust on Vent
- OLYMPUS®
Brand : OLYMPUS
Model : Camedia P-440
Category : Printer