
TelePresence SX10 - Video Conferencing System CISCO - Free user manual and instructions
Find the device manual for free TelePresence SX10 CISCO in PDF.


User questions about TelePresence SX10 CISCO
0 question about this device. Answer the ones you know or ask your own.
Ask a new question about this device
Download the instructions for your Video Conferencing System in PDF format for free! Find your manual TelePresence SX10 - CISCO and take your electronic device back in hand. On this page are published all the documents necessary for the use of your device. TelePresence SX10 by CISCO.
USER MANUAL TelePresence SX10 CISCO
natural_image
Business meeting scene with four professionals in a whiteboard; one person pointing at a rising line graph (no text or symbols visible)Cisco TelePresence
SX10
TC7.3
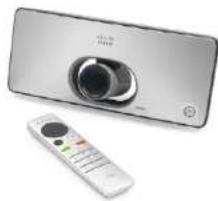
natural_image
Exterior view of a modern office building (no signage)User Guide
D1509704 User Guide
Cisco TelePresence SX10
Produced December 20' & for TC/3
All contents © 2012
Cisco Systems, Inc. All rights reserved.


Contents
What's in this guide
Introduction to Video Conferencing
Best Practice 4
Tour the screen and the remote control....5
Video Calls
Place Call From Contact List 7
Edit a Contact List Entry Status, then Place the Call....8
Place Call Using Name, Number or Video Address .... 9
Add Someone to an Ongoing Call....10
Drop Someone From a Call 11
Receive Call....12
Change the Layout of the Screen 13
Enable Do Not Disturb 14
Enable Standby....15
Share Content
Start and Stop Presentation 17
Scheduled Meetings
View Meeting List 19
Contacts
Make Someone a Favorite....21
Make Someone a Favorite In a Call 22
Camera
View Camera Settings.... 24
Change the Position of a Picture-in-Picture on the Screen 25
Far end Camera Control 26
Settings
Gain Access to the Settings 28
All entries in the table of contents are clickable hyperlinks that will take you to the corresponding article.
To go between chapters, you may also click on any of the icons in the sidebar.
D1509704 User Guide
Cisco TelePresence SX10
Produced: December 2014 for TC7.3
All contents © 2014
Cisco Systems, Inc. All rights reserved.

CISCO

Introduction
to Video
Conferencing
D1509704 User Guide
Cisco TelePresence SX10
Produced: December 20' & for TC/3
All contents © 2013
Cisco Systems, Inc. All rights reserved.

Introduction to Video Conferencing
Best Practice
A successful video conference provides a face-to-face meeting, even if the participants are miles or continents apart. Keep in mind that it still is a meeting-normal etiquette and dress code apply even here.
General
- Consider setting the unit to Automatic Answer, but mute the microphone for privacy reasons, if possible.
- Do not forget to rehearse “the noble art of operating a video system” to the extent needed.
In the meeting room
■ Make sure that you do not experience obstacles blocking the view to the microphone at all times.
- Noise sources like computers placed on the table should always be placed away from the microphone of your unit. The noise from such sources is often perceived as surprisingly loud by the remote participants.
- Pay attention to the background your system will provide to the remote participants. If the camera captures the corridor outside your office, people passing by may distract your remote participants. This applies as well to curtains with a distinct texture pattern and, in particular, to curtains moving due to draught in the room.
- If you are going to share content your system will use two video streams (duo video), one showing the presentation and the other showing the presenter—or the group of presenters. Smaller
systems may force viewers to choose between showing the presentation or the presenter.
- For duo video some attention is needed. Duo video is, on some video systems, shown side-by-side with half the screen showing the presentation and the other half showing the presenter. To avoid appearing like you are sitting with your back towards the presentation look straight into the camera.
D1509704 User Guide
Cisco TelePresence SX10
Produced: December 2014 for TC7.3
All contents © 2014
Oscop Systems, Inc. All rights reserved.


Introduction to Video Conferencing
Tour the screen and the remote control
text_image
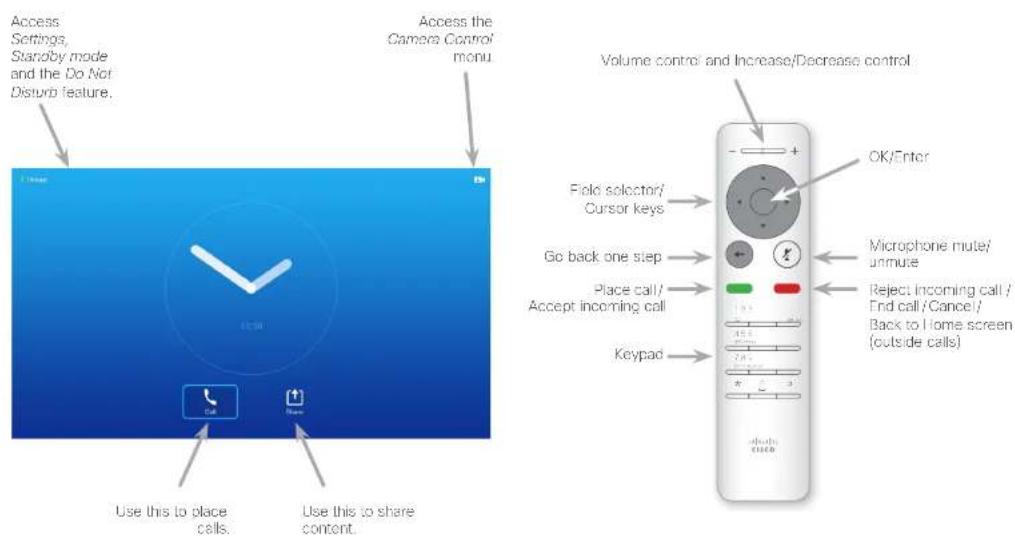
Access Settings, Standby mode and the Do Not Disturb feature. Access the Camera Control menu Use this to place calls. Use this to share content. Volume control and Increase/Decrease control OK/Enter Field selector/ Cursor keys Go back one step Place call/ Accept incoming call Keypad Microphone mute/ unnute Reject Incoming call / End call /Cancel/ Back to Home screen (outside calls)Operating tips
Use the Cursor controls to move about the screen and press OK/Enter to open the selected menu field.
Use the Cancel key to exit a menu (and return to the Home screen) undoing any changes. Use the Back key to go just one step back.
When set to Do Not Disturb, ringtones are muted and call attempts made by others to reach you will appear as missed calls. You may; however, place calls as much as you like:
As default, there is a 60 minutes timeout on the Do not disturb (after which the system will return to normal operation), but this may have been changed to a different setting by your Video Support Team.
D1509704 User Guide
Cisco TelePresence SX10
Produced December 20' & for TC/3
All contents © 2012
Cisco Systems, Inc. All rights reserved.

CISCO
Video Calls

D1509704 User Guide
Cisco TelePresence SX10
Produced: December 20' & for TC/3
All contents © 2013
Cisco Systems, Inc. All rights reserved.

CISCO
Place Call
Place Call From Contact List
1

Make sure Call is selected and press OK or the green Call button on the remote control.
②

Use the Cursor keys to go between Favorites, Recents and Directory and then down in one of the lists.
③
Once an entry has been located, press OK to invoke the Call menu.
4
Press the green Call button or press OK to place the call.
5
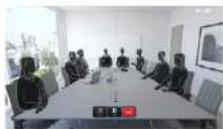
Press the red End Call button on the remote control, or use the Cursor keys to select End and press OK to terminate the call.
About the Lists of Contacts
Your lists of Contacts consist of three parts:
Favorites. These contacts have been put there by you. These entries will typically be someone you call frequently or otherwise need to access in a swift and convenient manner from time to time.
Directory will typically be a corporate directory installed on your system by your video support team.
Recents is a list of calls you have placed, received or missed earlier.
The following options apply:
- You may key in a name, number or an IP (video) address and the system will look in all lists for you.
- You may add the entry to the list of Favorites; edit aspects of the entry before calling; change the call rate and remove the entry from Recents.
D1509704 User Guide
Cisco TelePresence SX10
Produced December 20' & for TC/3
All contents © 2012
Cisco Systems, Inc. All rights reserved.

CISCO
Place Call
Edit a Contact List Entry Status, then Place the Call
1

Make sure Call is selected and press OK or the green Call button.
②

Use the Cursor keys to go between Favorites, Recents and Directory and then down in one of the lists.
③

Once an entry has been located, press OK to invoke the Call menu.
4
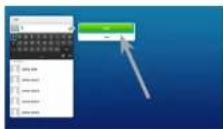
Use the Cursor keys to move the cursor to the right so that the green CaV field is selected.
5
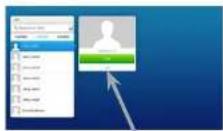
Use the Cursor keys to move the cursor down to select the More field (…).
6
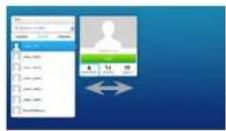
You may now use the Cursor keys to move the cursor to select any of the available options. Press OK to enter. Once set, press the green Call button to place the call.
About Entry Edits
You may have to edit an entry in one of the Contact lists before you place the call. There may be a need to add a prefix, a suffix or otherwise alter the entry to ensure success.
At the same time, this set of options allow you to change the Call Rate (the bandwidth allocated to the call) as well as the ability to promote the current entry to become a Favorite.
D1509704 User Guide
Cisco TelePresence SX10
Produced December 20' & for TC/3
All contents © 2012
Cisco Systems, Inc. All rights reserved.

CISCO
Place Call
Place Call Using Name, Number or Video Address
1

Make sure Call is selected and press OK or the green Call button.
②

Use the Cursor keys to select the Search or Dial field, as outlined.
③

To enter numbers just press the corresponding keys on the remote.
To invoke the virtual keyboard, use the left arrow Cursor key to move to the 123 field. You may now move about the keyboard and select characters. Press OK to select a character.
4
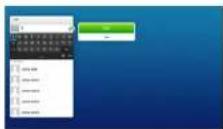
As soon as you start typing, the green Call button will appear to allow you to place the call any time.
Possible matches will appear as you type. If no matches are found, this will also be indicated.
5
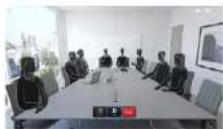
Press the red End Call button or use the Cursor keys to select End and press OK to terminate the call.
About Placing Calls
You may call someone who is not listed in your list of contacts by keying in their name, address or number using the virtual keyboard.
Anyone you have previously called will appear in the Recents list (until you clear that list) and you may then transfer any of them to your list of Favorites. This is described in the section Contacts.
Call Using Video Address
The procedure when using a video address to call someone is similar. Just key in the address and use * as separator. The system will interpret it correctly and convert it for you so that the video address appears as correctly entered.
D1509704 User Guide
Cisco TelePresence SX10
Produced December 20' & for TC73
All contents © 2012
Cisco Systems, Inc. All rights reserved.

CISCO
Place Call
Add Someone to an Ongoing Call
①
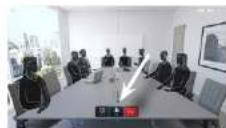
In a call, navigate to Add.
②
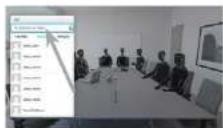
Use the Cursor keys to select the Search or Dial field, as outlined.
③

To enter numbers just press the corresponding keys on the remote.
To invoke the virtual keyboard, use the left arrow Cursor key to move to the 123 field. You may now move about the keyboard and select characters. Press OK to select a character.
4
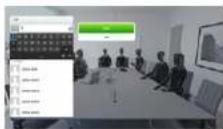
As soon as you start typing, the green Call button will appear to allow you to place the call any time.
Possible matches will appear as you type. If no matches are found, this will also be indicated.
5
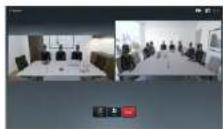
Repeat to add more participants.
Press the red End Call button on the remote control, or use the Cursor keys to select End and press OK to terminate the call.
About Adding Participants
If your system permits it, you may add participants to an existing call to turn a point-to-point call into a video conference.
The maximum number of simultaneous participants in a video conference will depend on the infrastructure of your organization. If in doubt, contact your video support team.
D1509704 User Guide
Cisco TelePresence SX10
Produced December 20' & for TC/3
All contents © 2012
Cisco Systems, Inc. All rights reserved.

CISCO
In a Call
Drop Someone From a Call
①
natural_image
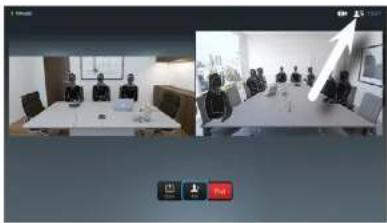
Two-panel image showing a meeting room with participants seated at tables, one in foreground and the other in background (no visible text or symbols)In a conference, use the remote control to navigate to the Participant list icon (▲) the upper right corner and press OK.
②
text_image
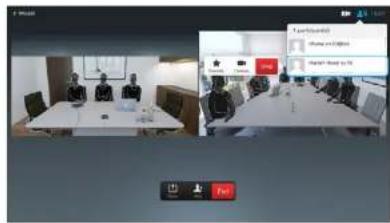
Screenshot of a video editing interface showing a virtual meeting with participants and a context menu in Chinese.A list of all the participants will now be shown. Use the remote control to navigate in this list and press OK to select someone.
3
text_image
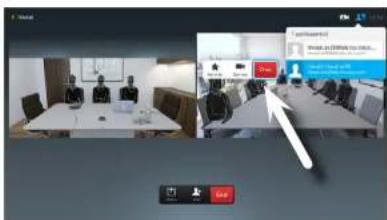
Screenshot of a video conference interface with participants, a chat window, and a user interaction dialog in Chinese.To drop someone from the call use the remote control to navigate to Drop and the press OK.
About Dropping
If your system permits it, you may drop any of the other participants from a video conference any time without ending the entire conference.
To leave an ongoing conference press the End button. This will not affect other conference participants.
D1509704 User Guide
Cisco TelePresence SX10
Produced December 20' & for TC73
All contents © 2012
Cisco Systems, Inc. All rights reserved.

CISCO
Receive Call
Receive Call
text_image
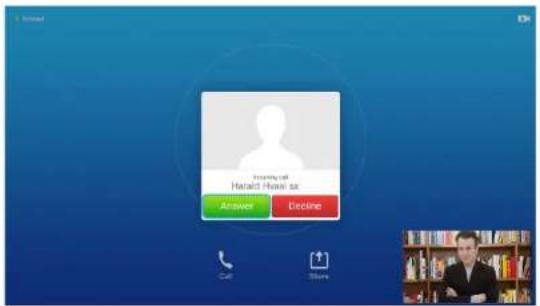
Answer call Harald Hwai sa Answer Declare Call Share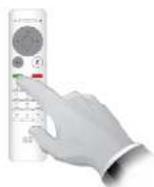
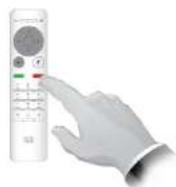
You may also use the keys on the remote control directly.
If Someone Calls You
■ If someone calls you, you may accept, decline or ignore the call.
■ If you decline the call, busy information will be sent to the calling party.
D1509704 User Guide
Cisco TelePresence SX10
Produced: December 20' & for TC/3
All contents © 2012
Cisco Systems, Inc. All rights reserved.

CISCO
Screen layout
Change the Layout of the Screen
1
natural_image
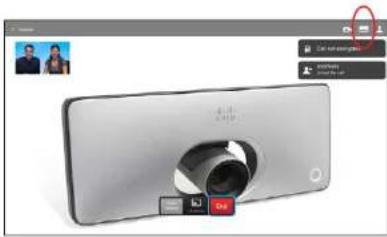
Exterior view of a modern office building (no signage)Navigate to Layout 📂 in the upper right corner and press OK. This icon will appear only when relevant
②
text_image
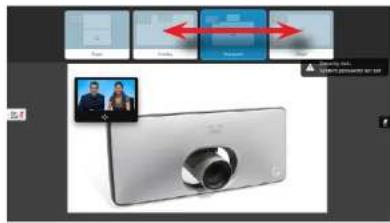
Screenshot of a smartphone interface showing video call and playback controls with Chinese text labelsUse the Arrow keys to move horizontally to the new layout you would like to use and press OK.
About Layout
Whenever you share contents or you are in video conference, you will be able to change the layout of the video shown on the screen.
Your system cannot initiate video conferences unless certain infrastructure exist in your organization. If in doubt, consult your video support team.
You can, however, be invited to a video conference by others. The ability to change the screen layout will then apply.
Any chnages you make here will not affect others than you.
For layouts with picture-in-picture (as shown here), the little image can be moved in case it blocks the view to important parts of the screen, see "Charge the Position of a Picture-in Picture on the Screen" on page 25.
D1509704 User Guide
Cisco TelePresence SX10
Produced December 20' & for TC/3
All contents © 2012
Cisco Systems, Inc. All rights reserved.

CISCO
Availability
Enable Do Not Disturb
①

Starting from Home screen, use the Cursor keys to select the field in the upper left corner of the screen.
②
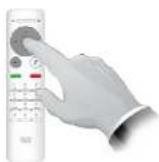
Press the OK key.
③

Use the Cursor buttons to select Available or Do Not Disturb.
4
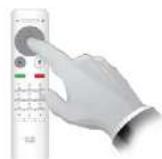
Press the OK key to exit the menu, putting changes into effect.
About Do Not Disturb
Your system can be set to not respond to incoming calls. You may, however, use it to call others as much as you want.
D1509704 User Guide
Cisco TelePresence SX10
Produced: December 20' & for TC/3
All contents © 2012
Cisco Systems, Inc. All rights reserved.

CISCO
Availability
Enable Standby
①

Starting from Home screen, use the Cursor keys to select the field in the upper left corner of the screen.
②
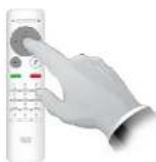
Press the OK key.
③

Use the Cursor buttons to select Standby.
4
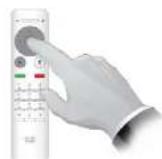
Press the OK key to exit the menu, putting changes into effect.
About Standby
Your system can be set to Standby to save electrical energy. You will still be able to receive calls as usual.
D1509704 User Guide
Cisco TelePresence SX10
Produced December 20' & for TC/3
All contents © 2012
Cisco Systems, Inc. All rights reserved.

CISCO

Share Content
D1509704 User Guide
Cisco TelePresence SX10
Produced: December 20' & for TC/3
All contents © 2013
Cisco Systems, Inc. All rights reserved.
Camera Start and Stop Presentation
1
natural_image
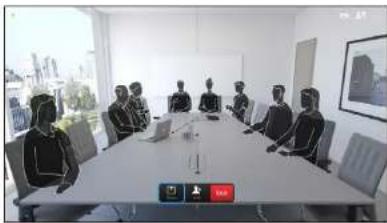
Interior view of a modern meeting room with participants seated around a long table, no visible text or symbols on the image itself.Make sure your presentation source is connected and switched on. Select Share and press OK on the remote control.
2
natural_image
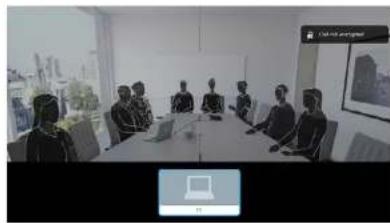
Interior view of a modern meeting room with participants seated around a table, no visible text or signageNavigate to the source to be shared.
3
text_image
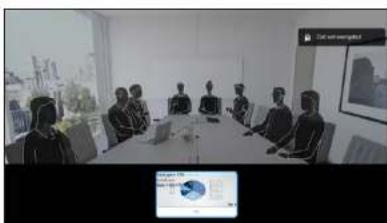
Conference room scene with participants seated at a table, laptop displaying data, and a presentation screen showing a map or chart.You will now see a preview of the content of the source to be shared. No sharing has taken place yet. Press OK on the remote control to start sharing.
4
pie
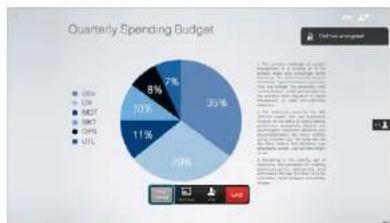
Quarterly Spending Budget | Category | Spending (%) | |---|---| | ESG | 35 | | LTR | 8 | | MDT | 10 | | DRL | 11 | | SRL | 7 | | QTL | 20 |To stop sharing content, select Stop sharing and press OK on the remote control. You may maximize or minimize the shared content image by means of the button number two from the left.
About Content Sharing
Use this feature to share content on your PC in a call or outside a call. The procedure is the same, but shown here is the in-call way only.
D1509704 User Guide
Cisco TelePresence SX10
Produced December 20' & for TC/3
All contents © 2012
Cisco Systems, Inc. All rights reserved.

CISCO
Your video system may be connected to a management system capable of scheduling video meetings for you. Any meetings scheduled will then appear in a List of Meetings on your Touch device.

Scheduled Meetings
D1509704 User Guide
Cisco TelePresence SX10
Produced December 20' & for TC/3
All contents © 2012
Cisco Systems, Inc. All rights reserved.
Scheduled Meetings
View Meeting List
text_image
QA sync with Bangalore ... 14:01 Join Google and Price Combination Manager No more meetings today Call ShareMeeting List Basics
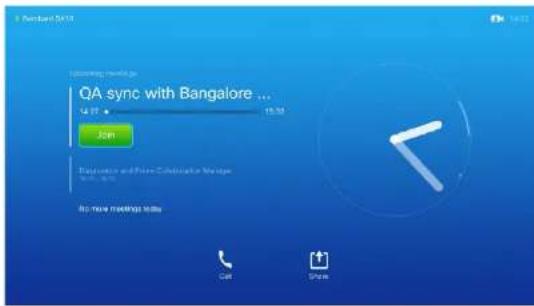
Your video system may be connected to a management system capable of scheduling video meetings. Any meetings scheduled will then appear in a List of Meetings.
Navigate to Join to enter the meeting. If the scheduling system calls you, just treat that as an incoming call.

CISCO
Contacts consists of three parts: a Directory, which typically is your corporate phone book; Recents which is a list of recent calls and finally Favorites, which is your personalized list of people you call frequently or otherwise need to get easy access to.

Contacts
D1509704 User Guide
Cisco TelePresence SX10
Produced: December 20' & for TC/3
All contents © 2013
Cisco Systems, Inc. All rights reserved.
Contacts
Make Someone a Favorite
1

Make sure Call is selected and press OK or the green Call button.
②

Use the Cursor keys to go between Recents and Directory and then down in one of the lists.
③

Once an entry has been located, press OK to invoke the Call menu.
4
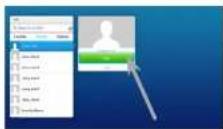
Use the Cursor keys to move the cursor to the right so that the green CaV field is selected.
5
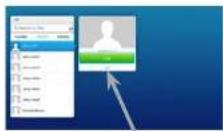
Then use the Cursor keys to move the cursor down to select the More field (…).
6
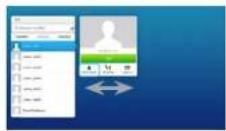
You may now use the Cursor keys to move the cursor to select Mark as Favorite. Press OK to enter.
About Directory, Recents and Favorites
The Directory serves as your corporate phone book. This directory cannot be edited by you. You may, however, copy entries to your list of Favorites and edit them there.
Tap a folder to show its contents, scroll, if needed, to locate a folder or an entry within a folder.
When searching within the corporate Directory, the search will apply to the current directory folder and its subfolders only. To go one level up, tap Back. To make the search apply to the entire corporate directory, do not enter (tap) any folder before the search is commenced.
It may happen that an entry copied from the directory to the list of favorites later is updated in the directory. This update will not be reflected in your list of favorites—you must then manually update the entry in the list of favorites. Use Edit and Call for this.
D1509704 User Guide
Cisco TelePresence SX10
Produced December 20' & for TC/3
All contents © 2012
Cisco Systems, Inc. All rights reserved.
Contacts Make Someone a Favorite In a Call
①
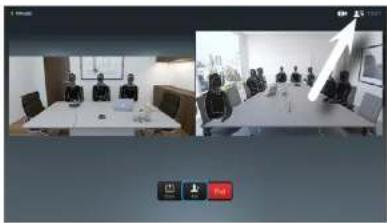
natural_image
Two-panel image showing a meeting room with participants seated at tables, one in foreground and the other in background (no visible text or symbols)In a call, use the remote control to navigate to the Participant list icon (■) in the upper right corner and press OK.
②
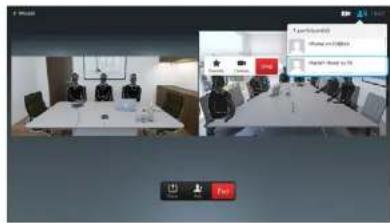
text_image
Screenshot of a video conference interface with participants in a meeting and a context menu open, showing options like 'Open', 'Hold', and 'Send'.A list of all the participants will now be shown. Use the remote control to navigate in this list and press OK to select someone.
3
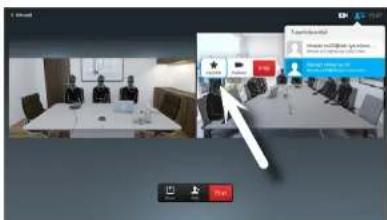
text_image
Screenshot of a virtual meeting interface with a user interacting with a virtual screen, showing Chinese text and UI elements.To turn someone from the call instantly into a favorite use the remote control to navigate to Favorite and then press OK.

cisco

Camera
D1509704 User Guide
Cisco TelePresence SX10
Produced: December 20' & for TC/3
All contents © 2013
Cisco Systems, Inc. All rights reserved.
Camera
View Camera Settings
1

In a call or outside a call, move cursor up the upper right corner to the Camera icon. Press OK.
②

The camera icon appears. Press OK.
③

You may now may now make the self-view image sticky, maximize and/or adjust the pan, zoom and tilt of the camera.
4
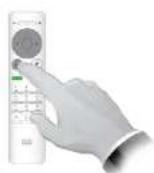
Press Back to exit the menu.
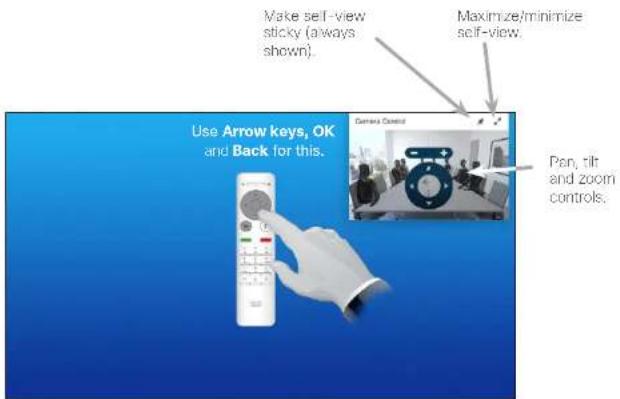
text_image
Make self-view sticky (always shown). Maximize/minimize self-view. Use Arrow keys, OK and Back for this. Camera Control Pan, tilt and zoom controls.About Camera Settings
The camera settings let you control the zoom, pan and tilt of the camera. In addition self-view (the image that the others see from your system) can be turned on and off.
The self-view image may also be moved to another position on the screen—see the following page for more on moving the self-view.
D1509704 User Guide
Cisco TelePresence SX10
Produced December 20' & for TC/3
All contents © 2012
Cisco Systems, Inc. All rights reserved.
Camera
Change the Position of a Picture-in-Picture on the Screen
1
text_image
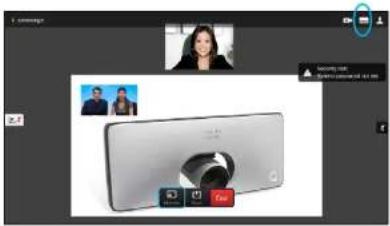
Screenshot of a video call interface with a smartphone displaying a camera, showing chat messages and a red button labeled 'Add'.With self-view activated (see previous page) or a layout involving a picture-in-picture, navigate to Layout in the upper right corner and press OK. The Layout icon will appear only when relevant.
②
natural_image
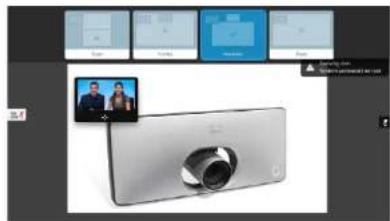
Silver smartphone with a camera lens, shown in a presentation slide (no visible text or symbols on the device itself)The layout menu appears. Press Arrow-down to navigate to the self-view image.
3
natural_image
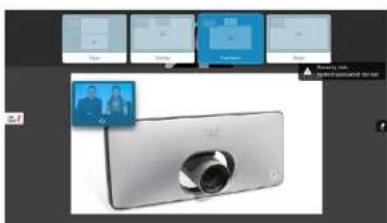
Digital camera module with lens and screen, displayed in a photo editing interface (no visible text or symbols on device)The self-view image will now turn blue to show that it has been selected. Click OK.
4

text_image
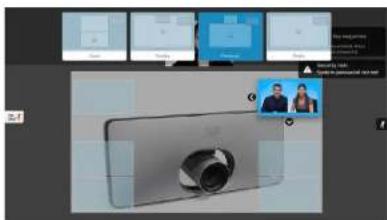
Screenshot of a digital camera interface with multiple video player thumbnails and UI elementsArrows will now appear to indicate that the self-view image can be moved. Possible new locations are indicated.
5
text_image
Screenshot of a video call interface with Chinese text and a smartphone screen, showing user comments and UI elements.Use Arrow keys to move the image. Press OK when finished.
6
text_image
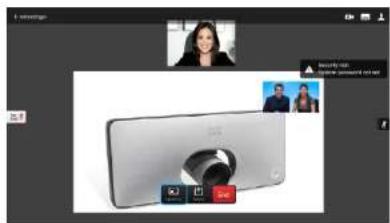
Screenshot of a video call interface with a smartphone displaying a camera lens and two video thumbnails showing people.Moving a PiP
As long as self-view (what others see of you) is not shown full size, it is shown as a PiP (picture-in-picture).
You may also set up a layout showing the other party as a PiP when content is shared. However, in this case we use self-view as an example.
You may want to have sell-view activated during a presentation to ensure that you always remain visible to the others.
During presentations you may experience that the PiP blocks important parts of the shared content on your screen. This is why your system allows you to move the PiP.
Note that this will not affect how you appear to the other participants. This is a setup affecting your screen only.
D1509704 User Guide
Cisco TelePresence SX10
Produced December 20' & for TC/3
All contents © 2012
Cisco Systems, Inc. All rights reserved.
Camera
Far end Camera Control
①
natural_image
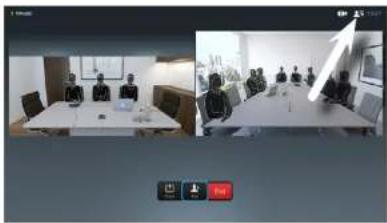
Two-panel image showing a meeting room with participants seated at tables, one in foreground and the other in background (no visible text or symbols)In a call, use the remote control to navigate to the Participant list icon (■) in the upper right corner and press OK.
②
text_image
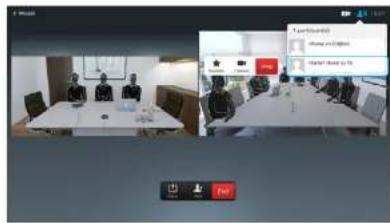
Screenshot of a video call interface with Chinese UI, showing a meeting scene with participants and a context menu open.A list of all the participants will now be shown. Use the remote control to navigate in this list and press OK to select someone.
3
text_image
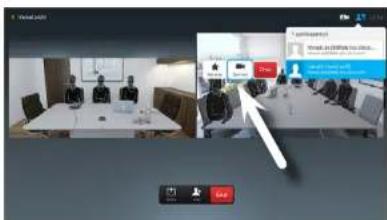
Screenshot of a virtual meeting interface with participants, showing a chat window and navigation buttonsUse the remote control to navigate to Camera and then press OK.
4
natural_image
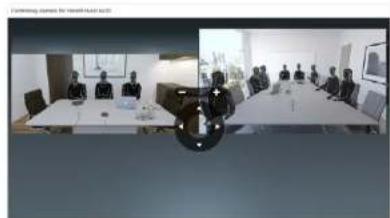
Interior view of a modern meeting room with participants seated at long tables (no visible text or signage)Use the remote control to adjust pan, tilt and zoom of the far end camera. Press OK when finished to exit the menu
About Far End Camera Control
Many video systems have a remotely controllable camera. Such systems allow you to use a remote control to change pan, tilt, and zoom.
If the far end (those you are in a meeting with) have such a system, you may control their camera during the call.
This feature may or may not be available in video conference calls, depending on your infrastructure. If in doubt consult your video support team.
D1509704 User Guide
Cisco TelePresence SX10
Produced December 20' & for TC73
All contents © 2012
Cisco Systems, Inc. All rights reserved.

CISCO
The video endpoints whose use is described in this guide can be configured via the Touch screen controller or via its web interface. For full access to all configurable parameters the web interface must be used—the Touch pad provides access to a limited set of parameters only.
The web interface is described in a guide available separately for download.

Settings
D1509704 User Guide
Cisco TelePresence SX10
Produced December 20' & for TC/3
All contents © 2012
Cisco Systems, Inc. All rights reserved.
Settings
Gain Access to the Settings
1

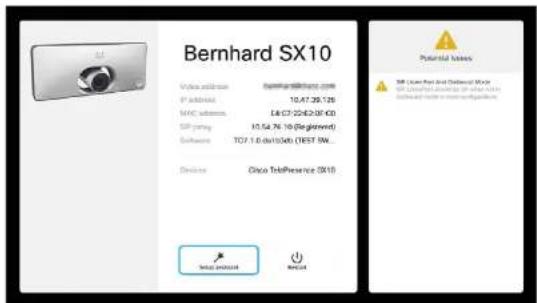
To gain access to the Settings menu, move cursor to upper left corner of the screen and press OK on the remote control. Then navigate down to Settings and press OK again.
2
text_image
Bernhard SX10 Value address: Bernhard SX10.com IP address: 10.47.26.125 MFC address: L4.03.20/42.08.13 SP pricing: 10.54.76.16 (Registered) Software: TCP-1.6 devices (TEST SIM... Devices: Cisco TelePresence 5X10 Potential losses SP User Real and Outlooker Mode SP User Real and Outlooker Mode (Other Users) Outlooker Mode is not recommended.The Settings shows basic information about the system as well as providing access to the Setup Wizard and the ability to force a restart of the system.
About Settings
Care must be taken when altering the Settings to avoid that the system stops working. If in doubt, contact your video support team.
For security reasons, access to the Administrator Settings may have been password protected by your video support team.
To enter the Settings, tap the Settings icon in the upper left corner of the touchpad, as outlined.

CISCO
D1509704 User Guide
Cisco TelePresence SX10
Produced December 20' & for TC/3
All contents © 2012
Cisco Systems, Inc. All rights reserved.

Americas Headquarters
Cisco Systems, Inc
San José, CA
Asia Pacific Headquarters
Cisco Systems (USA) Pte. Ltd.
Singapore
Europe Headquarters
Cisco Systems International BV Amsterdam.
The Netherlands
Cisco has more than 200 offices worldwide. Addresses, phone numbers, and tax numbers are listed on the Cisco Website at www.cisco.com/go/offices.
Cisco and the Cisco logo are trademarks or registered trademarks of Cisco and/or its affiliates in the U.S. and other countries. To view a list of Cisco trademarks, go to this URL:www.cisco.com/go/trademarks.
Third-party trademarks mentioned are the property of their respective owners. The use of the word partner does not imply a partnership relationship between Cisco and any other company. (1110R)