
Plenue A5 - Mp3 player COWON - Free user manual and instructions
Find the device manual for free Plenue A5 COWON in PDF.


| Product Type | Portable MP3 Player |
| Brand | Cowon |
| Model | Plenue A5 |
| Display | 5.0-inch Touchscreen |
| Dimensions | 5.5 x 2.8 x 0.6 inches (140 x 71 x 15 mm) |
| Weight | Approx. 190 g (6.7 oz) |
| Storage Capacity | 64 GB / 128 GB internal (depending on version) |
| Expandable Storage | microSD card slot (up to 512 GB) |
| Audio Formats Supported | MP3, WMA, WAV, FLAC, APE, OGG, AIFF, ALAC, DSD |
| Bluetooth | Bluetooth 5.0 (support for aptX HD, LDAC) |
| DAC | Dual AK4490 DAC |
| Amplifier | High-performance headphone amplifier |
| Battery Type | Built-in Lithium Polymer |
| Battery Capacity | 3000 mAh |
| Playback Time | Up to 20 hours (depending on usage) |
| Charging | USB-C |
| Operating System | Proprietary Cowon OS (based on Linux) |
| Main Functions | Music playback, Bluetooth streaming, USB DAC, equalizer (JetEffect), playlist management |
| Interface | Touchscreen and physical buttons (volume, play/pause, skip) |
| Care and Cleaning | Wipe with soft, dry cloth; avoid solvents; keep away from moisture |
| Safety | Do not disassemble; avoid extreme temperatures; use only authorized charger |
| Spare Parts and Repairability | Contact Cowon support for authorized service; battery replacement by certified technician |
| General Information | Hi-Fi audiophile portable player with high-resolution audio support |
Frequently Asked Questions - Plenue A5 COWON
User questions about Plenue A5 COWON
0 question about this device. Answer the ones you know or ask your own.
Ask a new question about this device
Download the instructions for your Mp3 player in PDF format for free! Find your manual Plenue A5 - COWON and take your electronic device back in hand. On this page are published all the documents necessary for the use of your device. Plenue A5 by COWON.
USER MANUAL Plenue A5 COWON
User's Guide ver. 1.3 EN
Pure and Simple Lines of Pottery
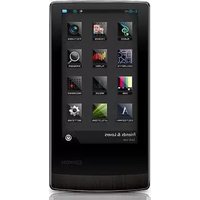
The curved, subdued lines on the front of A5 were inspired by pottery. Without the unnecessary bells and whistles, the motif of the design is simple and innocent. The sideline of the shape embodies white porcelain which grows richer as it descends.
DIGITAL PRIDE.
©WON
plenue A5
CE1177! N136 Q051702 R010WWBT0120
Product specification may change without notice.
Due to the difference of Android compatibility, certain applications may not be installed and executed properly.
+ Copyright Notice
Thank you for purchasing a COWON product.
We do our utmost to deliver DIGITAL PRIDE to our customers.
This manual contains information on how to use the product and the precautions to take during use. If you familiarize yourself with this manual, you will have a more enjoyable digital experience.
Introduction to website
- The address of the product-related website is http://www.COWON.com.
- You can download the latest information on our products and the most recent firmware updates from our website.
- For first-time users, we provide an FAQ section and a user guide.
- Become a member of the website by using the serial number on the back of the product to register the product. You will then be a registered member.
- Once you become a registered member, you can use the one-to-one enquiry service to receive online customer advice. You can also receive information on new products and events by e-mail.
+ Copyright Notice
General
- COWON is a registered trademark of COWON SYSTEMS, Inc.
- COWON SYSTEMS, Inc. owns the copyright to this manual, and any unauthorized distribution of its contents, whether in part or in its entirety, is strictly prohibited.
- COWON SYSTEMS, Inc. complies with laws and regulations related to records, disks, videos and games. Users are also encouraged to comply with the relevant laws and regulations.
- As soon as you purchase the product, visit the website (http://www.COWON.com), and become a registered member. You will benefit from various member services.
- This manual is based on product specifications, and various exemplary texts, illustrations, pictures, detailed functions and H/W and S/W specifications contained herein can be altered without any prior notice by the copyright owner.
BBE information
- BBE Sound, Inc. owns the license to the BBE name and information as applied to this product, in compliance with USP4638258, 5510752 and 5736897.
- BBE and the BBE symbol are registered trademarks of BBE Sound Inc.
+ Contents
Before You Start! 8
Precaution
Package Components
Names of Parts and Functions
Charging / Buttons
Connecting and Disconnecting the PC
Firmware Upgrade
Formatting, Installation and etc.
Basic Use 15
Home Screen
Add / Delete Icons in the Home Screen
Using Widgets
Removing Widgets
Turning On/Off the Wi-Fi
Wi-Fi Setting
Basic Menu
Connecting an HDMI Cable
Recovery Mode
Additional 23
Specifications
Troubleshooting 24
Before You Start!
+ Precaution
As these precautions are provided for the correct use of the product as well as user safety, be sure to familiarize yourself with them. The company will not be held responsible for any accident that may occur due to the failure to heed these precautions. The following information applies commonly to all products manufactured and produced by COWON SYSTEMS, Inc.
- Do not use this product for other purposes than those described in this manual.
- Handle the manual, product packaging materials, accessories, etc. with care to prevent cuts and injuries to your body.
- For your safety, do not view videos, pictures and texts stored on your player while driving a vehicle. Operating other features of the player is also dangerous and may cause fatal accidents while driving.
- The wearing of earphones while operating a vehicle, exercising, or walking may impair driving, mask or prevent recognition of emergency signals, alarms, announcements, the approach of vehicles and human speech. Doing so may also be unlawful depending on the region.
- Listening at high volume (85 dB and above) for an extended period of time may harm your hearing.
- For your protection, use the player in a well lit area where the LCD screen will not cause strain to your eyes.
-
Do not attempt to disassemble the player. Disassembly will void the warranty and the unit will be permanently disqualified from any warranty services.
-
Be sure to use only the USB power adaptor and USB cable approved by COWON SYSTEMS, Inc.
- When connecting to a PC, use only USB ports on the mother board or a USB Host card. Using an external USB hub may not guarantee proper operation (e.g. USB ports on a keyboard or an external USB hub).
- Do not mix directions when connecting USB cables or AC adaptors to your player or PC. Connecting USB cables incorrectly may damage your player or PC. Also, do not bend or press connection cables with heavy objects.
- Take extra care not to apply external shock or pressure when using products with displays (LCD, AMOLED, or Touch Screen) or Hard Disk Drive. Warranty may be voided if damage occurs due to the aforementioned circumstances.
- Do not drop or expose the product to hard impact. This may result in malfunctions and/or unit failure, voiding the warranty.
- If you smell something burning or feel excessive heat while using the product, press the RESET button to stop operation and contact the place of purchase.
- If you find any abnormalities with the battery such as swelling, press the RESET button immediately to stop the operation and contact the place of purchase.
- Do not expose the player to water or keep it in a damp or humid location for an extended period of time. If the player is damaged from moisture as described above, product failure is then classified as a user's misuse.
Before You Start!
+ Precaution
- Touching the player with wet hands may cause damages and malfunctions.
- Using the player in places with high occurrences of static electricity may cause malfunctions.
- Keep the player away from magnets and direct magnetic fields, as they can cause malfunctions.
- Be sure to disconnect the power supply to the PC and USB power adaptor during lightning or thunder storm, to prevent danger to the user and/or the risk of fire hazards.
- Maintain the device within the temperatures specified below in order to prevent fatal damages to your player. Operating temperature : 0°C \~ 40°C Storage temperature : -10°C \~ 50°C
- Keep the player in cool and ventilated places, away from direct sunlight as it may cause deformation and damages to internal circuitry or LCD screen.
- Do not use detergent or other chemicals on the product surface as it may cause fading. If necessary, wipe the polluted area carefully with a soft cloth.
-
In case of using this device primarily for a storage device, it is recommended to back up all data before use. COWON SYSTEMS Inc. is not responsible for any data loss due to hardware failure.
-
All data stored in the player may become deleted when the player is serviced. Our Service Center does not backup files while repairing players. Please note that COWON SYSTEMS, Inc. is not responsible for any data loss from products entrusted to us for service.
- The price of the product may fluctuate due to unexpected commercial conditions. COWON SYSTEMS, Inc. accepts no liability to compensate for any price fluctuation.
- Be careful not to be torn or ruptured by any sharp materials, such as animals' teeth.
- When formatting the removable disk, be sure to use only the specified file system written in this manual.
Before You Start!
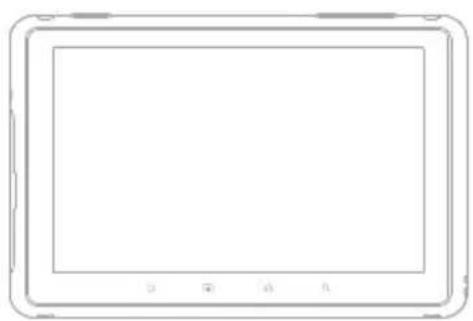
- Package Components
natural_image
Blank rectangular tablet device outline with control buttons at bottom (no text or symbols)COWON A5

natural_image
Line drawing of a medical or laboratory device with a coiled cable and two connectors (no text or symbols)Earphones
Quick Guide
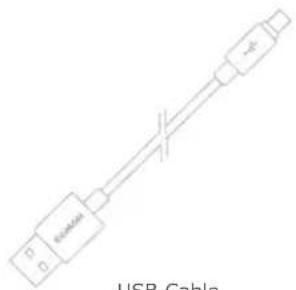
USB Cable
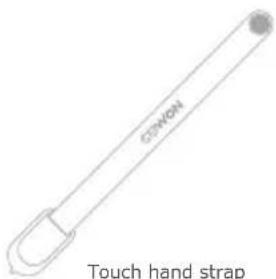
natural_image
Line drawing of a USB cable connector (no text or symbols)(Optional)
natural_image
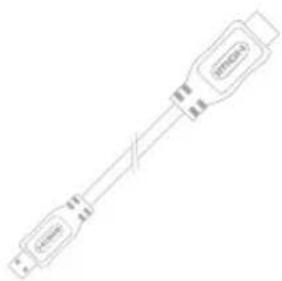
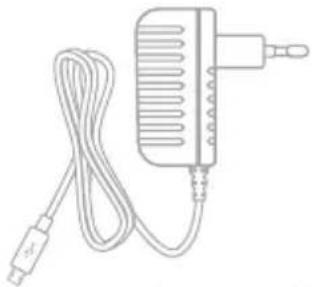
Line drawing of a portable electronic device with a cord, plug, and power outlet (no text or symbols)AC AdaptorHDMI Cable
* Actual package contents may differ from the above images.
Before You Start!
+ Names of Parts and Functions
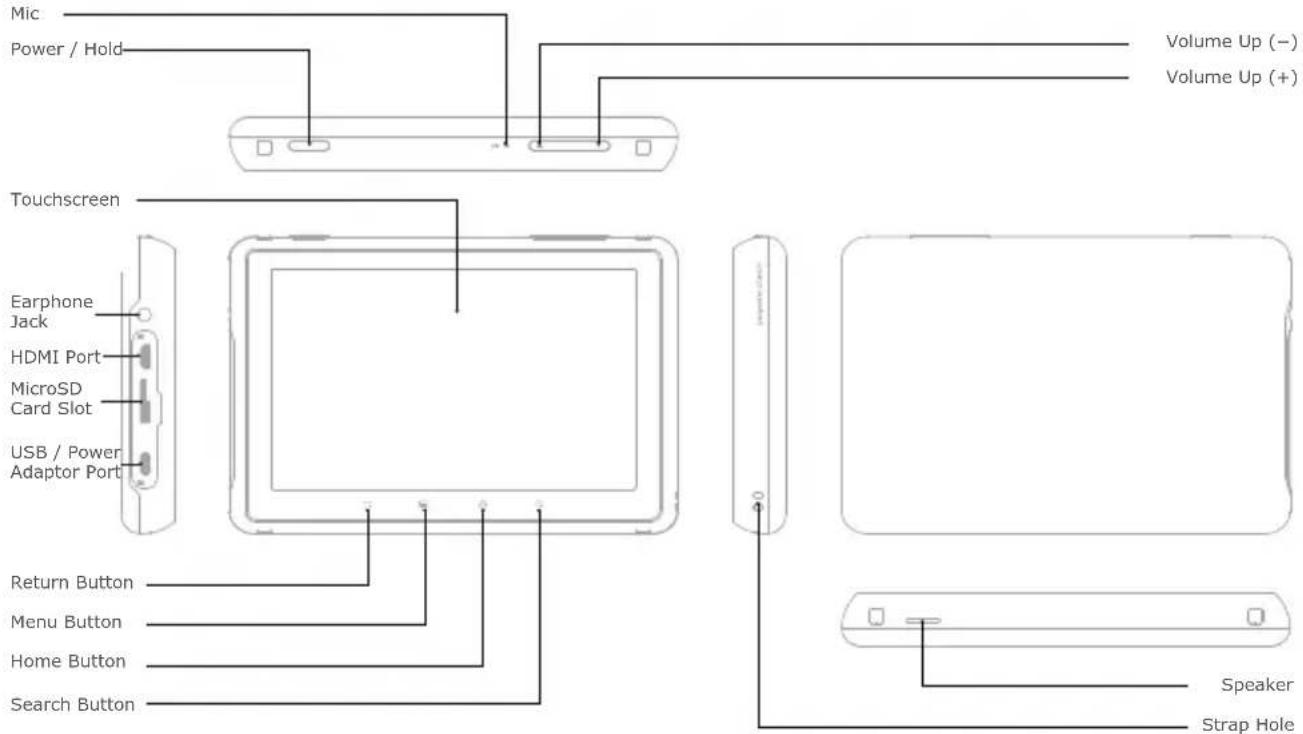
COWON A5
Before You Start!
+ Charging
natural_image
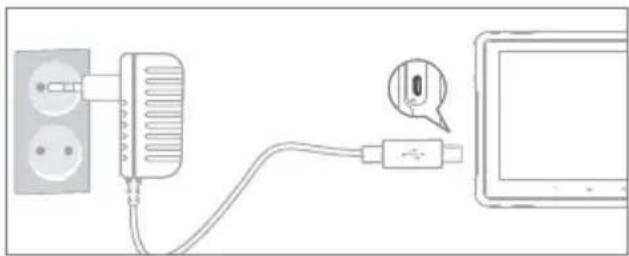
Diagram showing connections between a power outlet, a plug-in socket, and a monitor (no text or symbols present)- Fully charge the device with the power adapter before using it for the first time or if it has not been used for a long time.
- A5 may not be automatically turned on despite being plugged into the power adapter if the battery has been completely discharged. If that is the case, press the Power/Hold button for longer than 5 seconds to turn on the device. - Battery power may be used if A5 is plugged into a USB hub or if another device is consuming too much power. Always use the genuine power adapter to charge A5.
+ Buttons
- Power on/off : Press and hold the Power/Hold button
- Hold on/off : Briefly press the Power/Hold button while the device is turned on
- The touchscreen is locked in hold status.
- Locking the touchscreen with the hold button can prevent any unwanted operations usually caused by unintentional inputs.
- Press the Power/Hold button again 2 seconds after A5 enters Hold mode to begin Sleep mode.
- In Music, Radio menu: Display off
- In other menus: Sleep mode
* It is generally recommended for Android device users to use sleep mode to boot faster, and the battery consumption can also be minimized in sleep mode.
Smart RESET
Press and hold the Power/Hold button for at least 5 seconds to reset if there is an error in operation or if A5 is not responding.
Before You Start!
+ Connecting and Disconnecting the PC
- Connect A5 to a PC with USB cable.
- Tap 'Turn on USB storage' to allow your computer to recognize A5 as a portable disk.
- Copy the multimedia files from your computer to A5.
- After completing it, click the icon on the system tray.
- When the following pop-up message shows up, conduct 'safely remove the hardware' process by clicking it.
- Tap 'Turn off USB storage' to disconnect A5 from your computer.

- Always tap 'Turn off USB storage' before disconnecting the device.
- Make sure the flash memory has enough free space to maintain the proper system operation.
+ Firmware Upgrade
Firmware is the software that is embedded within the hardware. Upgrading it can enhance system stability and provide additional features.
Please be advised that Beta (unofficial) firmware versions may cause system malfunction.
- Fully charge A5 before proceeding with any firmware upgrade.
- Do not turn the player off before the firmware update has been completed. It may damage the product, and will void any warranty.
- Back up any important data before the firmware upgrade as any data stored on the device may be deleted during the process. COWON accepts no liability for any loss of data.
Before You Start!
+ Firmware Upgrade
How to upgrade the firmware
- Download the latest firmware from the SUPPORT section of the website (http://www.COWON.com).
- Use the USB cable to connect COWON A5 to the PC.
- Copy it to the root folder of COWON A5.
- After copying files to A5, tap Turn off USB storage to disconnect the device. Connect A5 to the power adapter and go to Settings ▶ About A5 ▶ System updates. Locate the files on the storage device to proceed with the update.
- Upon finishing firmware upgrade, verify the installed firmware version from Settings ▶ About A5 ▶ Firmware version.
* Firmware upgrade can also be conducted through MicroSD cards by copying firmware files to the root folder of MicroSD and inserting the MicroSD card into COWON A5.
+ Formatting, Installation and etc.
Nand Memory Formatting
Internal memory can be formatted from settings ▶ SD Card & A5 storage ▶ Unmount internal memory ▶ Format internal memory
It is recommended to format an internal memory from the device to keep the device in good working order. Be sure to back up all the data on the device since all the files are to be deleted after formatting.
Media Scanning
Copy media files to A5 and disable the USB connection to begin media scanning. During media scanning the device response can slow down, and depending on the types & capacities of the data it can maximally take dozens of minutes.
How to install applications
Connect COWON A5 to the PC and copy APK files to the APK folder of A5. After disconnecting the USB cable, check the pop-up asking whether to Install or not and touch 'Install'.
Basic Use + Home Screen
1
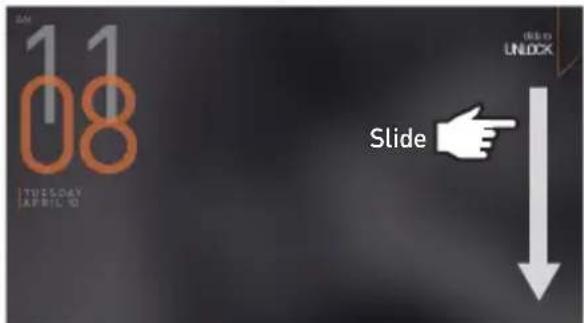
Turn the power on and push the slide bar down. The Home screen will appear.
3
2
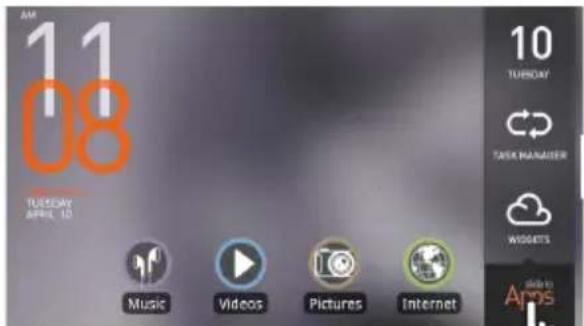
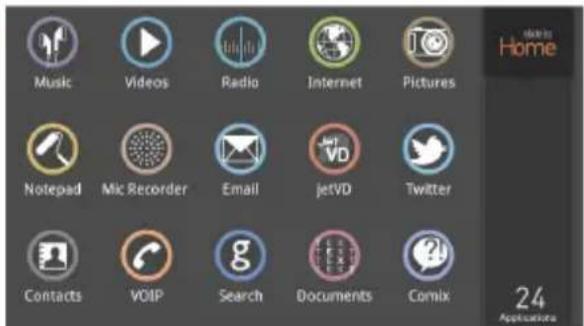
Drag through the screens and tap the Slide to Apps tab to view the list of applications.
Touch

Basic Use + Add & Delete Icons on Home Screen
1
3
2
4

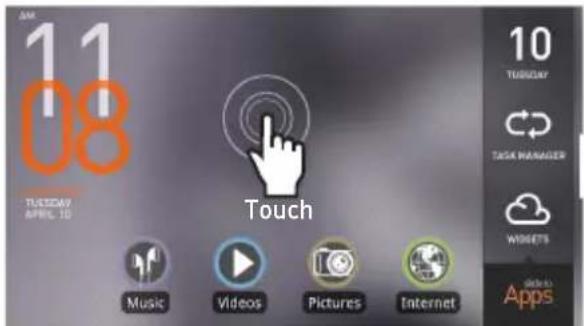
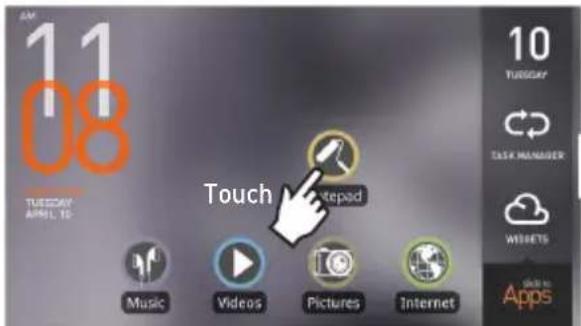
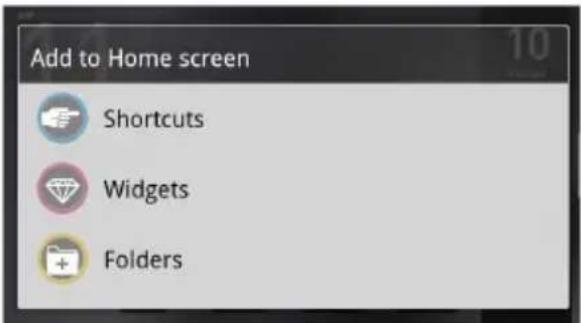
Applications & widgets can be added to the home screen with a pop-up menu that shows up by long-press on the blank part of the home screen. Also, icons located at APPS can be added to the home screen by long-press on an icon.
Added icons can be deleted from the home screen by long-press on the icon and drag it to the trash. * Deleting shortcut icons doesn't result in deleting applications in the application list.
Basic Use
+ Using Widgets
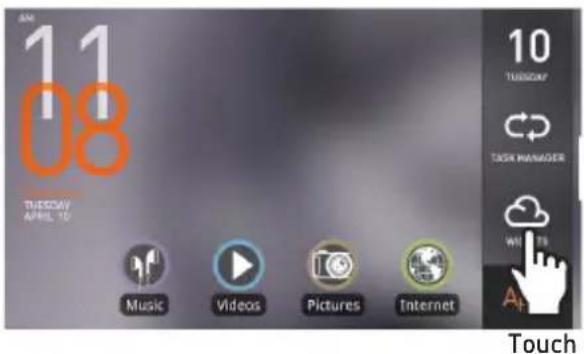
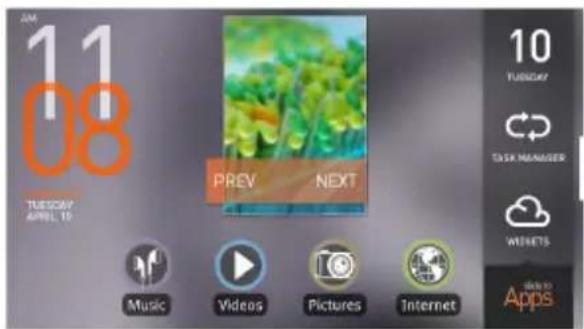
Widgets allow you to conveniently place A5 features and functions directly on your Home screen.
1
3
2

Tap the Widget menu on the Home screen and choose the mini application you would like to add to your current home screen.
Basic Use + Removing Widgets
1
3
2
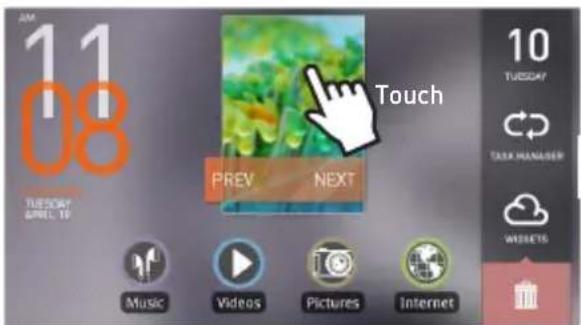
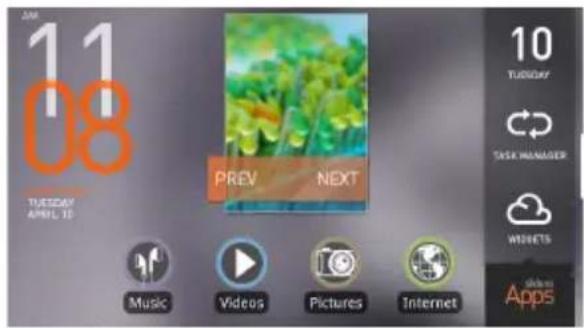
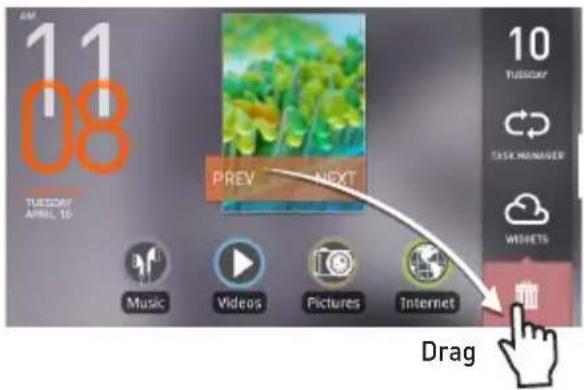
Press and hold a widget icon and drag it to the Recycle Bin to remove it from the Home screen.
Basic Use + Turning On/Off the Wi-Fi
1

Drag down the quick slot bar from the top of the screen.
2
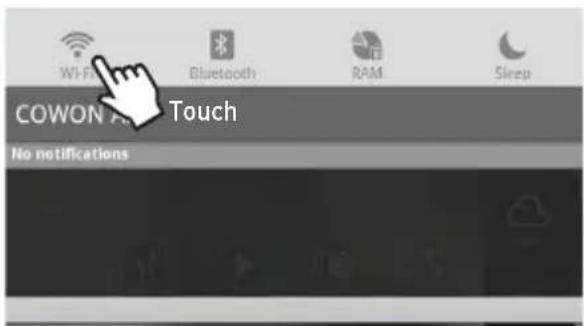
Tap the Wi-Fi icon to turn it on. To turn it off, tap the icon again.
3

Wi-Fi OFF (Grey Icon)
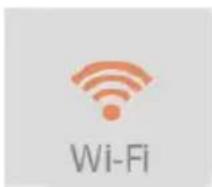
Wi-Fi ON (Orange Icon)
- Turn off the Wi-Fi icon when not in use to minimize battery consumption.
- When Wi-Fi is activated (network connected), the icon will be displayed on the bar.
Basic Use + Wi-Fi Setting
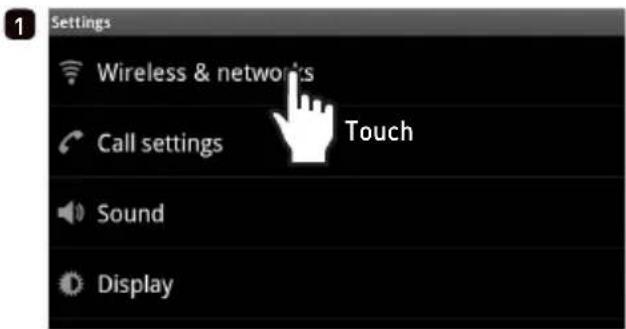

Setting ▶ Tap the Wireless & Networks. You can see the list of currently available Wi-Fi
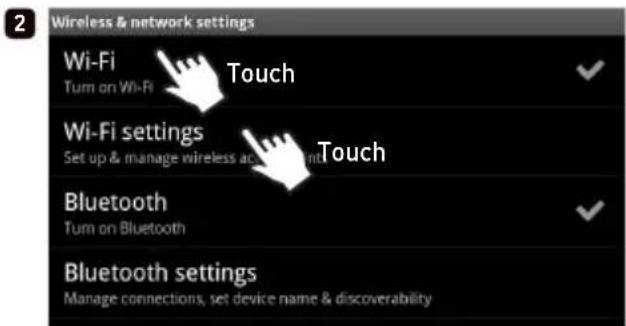
networks. Tap the network you want to connect to.
- If the wireless network is by password secured, you must enter the password for connection.
Wi-Fi ON ▶ Tap the Wi-Fi Settings.
Basic Use
+ Basic Menu
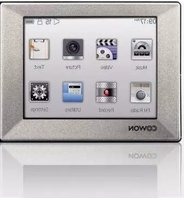
| Music Enjoy a variety of music formats. | ||
 | Videos | Watch various video files up to 1080p Full HD. |
 | Pictures | Enjoy pictures and sort out favorite pictures by albums. |
 | Internet | Access internet browser and search webs. |
 | Calculator | Calculate numbers using the calculator. |
 | Radio Listen to FM Radio. | |
 | Mic Recorder | Record using Mic. |
 | Comix Enjoy comics & cartoons on the web. | |
 | Documents | Set & read documents at your preference. |
 | Paint Draw simple memos and paints. | |
 | Settings Change settings at user's convenience. | |
 | JetVD | You can view YouTube clips in the resolution of your choice in real-time. |
+ Connecting an HDMI Cable
* HDMI cables may be purchased separately.
The COWON A5 supports high-resolution HDMI output.
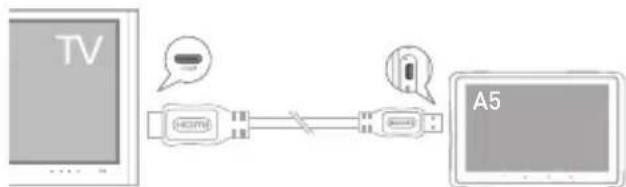
- Connect one end of the HDMI cable to A5's HDMI port and the other end to the TV.
- Set the TV's input mode to HDMI.
- Go to A5 Settings ▶ Display ▶ Output Settings, and click HDMI output.
- Verify that both audio and video are outputting normally.
flowchart
graph LR
    TV["TV"] --> HOME["HOME"]
    HOME --> A5["A5"]
Basic Use
+ Recovery Mode
When A5 shows following severe symptoms, use its recovery mode to restore the device.
- When it fails to conduct system updates.
- When it needs to reinstall a current firmware on the device to solve system errors.
* Recovery Mode can be used to recover the firmware if A5 ceases to function properly. If an error occurs while using this device, press and hold the Power button for 5 seconds to reset the device.
How to use recovery mode
-
Connect the power adapter with the device turned off.
-
To enter the recovery mode (as shown in the screen on the right), press the Power/Hold button while pressing a down button (-).
-
While in recovery mode, press the Home button to bring up 4 menus as shown in the following screen. Use the volume button (+/-) to select
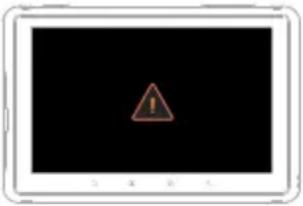
a menu and press the Power/Hold button to execute it.
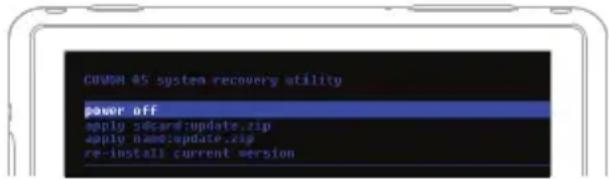
| 1 | reboot system now | Finish 'recovery mode' and reboots the device. |
| 2 | apply sdcard:update.zip | Start updating with '/sdcard/sd/update.zip' on the SD card. |
| 3 | apply nand:update.zip | Start updating with '/sdcard/update.zip' on the NAND. |
| 4 | re-install current version | When using 'OTA package', back up update.zip file to the internal storage after completing updates. This menu starts updating by using a previously backed-up file. |
* If there's no file while starting the menu number 2, 3, 4, error messages will show up and will not start installation.
4. The device will automatically reboot after the firmware updates described in step 3 are complete. After rebooting, you may begin using the updated firmware.
Additional
+ Specifications
| CPU | 1GHz ARM CORTEX-A8 CPU + 800MHz 1080p Full HD VPU + 320MHz Mali 3D GPU | |
| RAM 512MB | ||
| Display 4.8" TFT | LCD 800x480, WVGA (16.7M Color) | |
| Capacity 16GB / | 32GB / 64GB (Flash Memory, NTFS File System) * | |
| Size & Weight 12 | 3.7mm(W) × 85.2mm(H) × 15.4mm(T) / 207g | |
| Buttons Back ,Menu, Home, Search, Power/Hold, Vol +, Vol - | ||
| Color White | ||
| Power | Battery Built-in Rechargeable Lithium Polymer Battery | |
| Playback Time | Music: Max 40 hours / Video: Max 10 hours ** | |
| Battery charging AC Adapter: 3 Hours 30 Minutes | ||
| OS | Android | |
| ETC | Built-In Speaker, Mic, MicroSD Card Slot, G-Sensor | |
| Audio | Frequency Range | 20Hz~20,000Hz |
| Max Output | Left 29mW + Right 29mW (With 16Ω Earphones) | |
| S/N Ratio | 95dB | |
| File Format | MP3/2/1, WMA, OGG, WAV, ASF, FLAC, APE, M4A | |
| Audio Codec | MPEG1 Layer 1/2/3, WMA, OGG Vorbis, PCM, FLAC, Monkey's Audio *** | |
| Lyrics | LDB | |
| Playback Speed 50% - 200% pitch correction | ||
| JetEffect 5 | 48 Presets (44 Presets + 4 User Presets) | |
| EQ 5 Band Equalizer (EQ Filter) | ||
| BBE+ BBE, Mach3Bass, 3D Surround, MP Enhance | ||
| Special Effect Stereo Enhance, Reverb (9 Modes) | ||
| Video | File Format | AVI, WMV, ASF, MP4, MKV, MPG, DAT, TS, TP, TRP, 3GP |
| Video Codec | Xvld, H.264, WMV 9/8/7, MPEG1 *** | |
| Video Resolution Max 1920x1080 *** | ||
| Audio Codec | MPEG1 Layer 1/2/3, WMA, OGG Vorbis, PCM, FLAC *** | |
| Color Subtitle | SMI, SMIL, SRT, SUB (Text Form) | |
| Multi Audio | Playback multiple audio tracks | |
| Playback Speed 50% - 200% pitch correction | ||
| AV Out | HDMI | |
| Photo Viewer | JPG, PNG, GIF, BMP | |
| Document Viewer TXT supported (No file size limit) | ||
| FM Radio | Frequency Range | 87.5~108 MHz (KR, US, EU), 76~90 MHz (JP) |
| Recording | Mic / FM Radio | |
| Bluetooth | Bluetooth 2.1 + EDR, A2DP / AVRCP / OPP **** | |
| Wireless LAN | Wireless LAN IEEE 802.11 b/g/n **** | |
| System Requirements | CPU | Pentium III 500Mhz or higher |
| OS | Windows7 / Vista / XP / 2000 : All functions supported | |
| USB Port | USB 2.0 High Speed recommended | |
* The storage capacity may differ from the actual capacity due to the space used to store system files.
Only FAT32 File System is supported for MicroSD Cards.
** Note: Playback time was measured under strict testing conditions and with Wi-Fi and Bluetooth features turned off. The playback time listed above may differ from actual playback time.
*** Max resolutions may vary depending on codecs, and even with the same codec, the max resolutions can be different according to encoding options.
**** FM radio does not support Bluetooth. Uncertified Bluetooth headsets, receivers, etc. may not be compatible with the product.
***** This function can be used in the areas where WI-FI routers enable wireless Internet access.
+ Troubleshooting
+ I am still confused even after reading the manual.
COWON website (www.COWON.com) provides support for users of COWON products with FAQ (Frequently Asked Questions).
Users are strongly encouraged to check out the website for further information regarding product usages and firmware upgrades. For individual inquiries, please contact us on-line as we will try to help you as best as we can.
+ The player does not turn on.
Check if the battery is recharged or the device is connected to a power source. If the battery is fully discharged, use a genuine adapter to recharge the battery before turning on the device. If the device does not respond, simultaneously press and hold the Power/Hold button for approximately 5 seconds to force the device to reset.
+ The touch pad and buttons do not work properly.
The device will not respond while the Touchpad Hold option is turned on. Press the Power/Hold button briefly to deactivate Hold mode.
+ I can't hear any sound.
Check if the volume is set to "0". Check if there are any files available in the player. If there is no file in the player, you will not hear any sound. Please note that corrupted files will result in a noise or discontinued playback. Make sure the earphones are connected properly. Impurities in the earphone jack can cause a noise.
+ I can't see a file saved on the device.
Ensure that the format of the file is supported by the device. Non-supported file formats do not appear in their respective modes. On the rare occasion that a file has been missed during automatic scanning or due to a database problem, go to Settings ▶ Privacy ▶ Start media scan/Media database update to manually scan for the file.
+ I can't play video files.
Ensure that the format of the file is supported by A5 (e.g., codec/resolution/option). If you're unsure whether the file format is supported, we recommend using a file conversion program (e.g.:JetAudio) to convert it before use.
+ Troubleshooting
+ FM Radio does not work.
The product's earphones work as the FM Radio antenna. Straightening the earphone cable will result in better radio reception. FM Radio reception may be poor at locations where FM Radio transmissions are shielded. If FM Radio does not work where reception should be possible, please contact our service center.
+ There is too much noise in my recordings.
The product uses ultra-small internal microphone, so it may be more susceptible to noise during recordings. The microphone should not be covered with anything during recording.
+ Computer cannot recognize the player when connected.
If you cannot turn on the device or the device is not recognized by the PC after connecting the device, unplug the device from the PC and reset it by simultaneously holding the Power button for approximately 5 seconds. If the connection is unstable and the device is repeatedly disconnected, plug the device into a USB port connected directly to the motherboard of the PC. If the PC does not recognize COWON A5 because the device is out of battery power, either recharge the device or connect it to a power source before reconnecting to the PC.
+ Memory capacity of the player is different or smaller than specified.
The memory capacity indicated by Windows may be different from that indicated by the memory manufacturer. The actual capacity will be reduced from the original size because some space of the memory should be used as the system area for normal operation.
+ The player does not play properly when memory is full.
For the player to function properly, it requires at least 5 MB of space for saving settings and other system files.
+ FCC Information to User
This equipment has been tested and found to comply with the limits for a Class B digital device, pursuant to Part 15 of the FCC Rules.
These limits are designed to provide reasonable protection against harmful interference in a residential installation. This equipment generates, uses and can radiate radio frequency energy and, if not installed and used in accordance with the instructions, may cause harmful interference to radio communications.
However, there is no guarantee that interference will not occur in a particular installation.
If this equipment does cause harmful interference to radio or television reception, which can be determined by turning the equipment off and on, the user is encouraged to try to correct the interference by one of the following measures:
- Reorient or relocate the receiving antenna.
- Increase the separation between the equipment and receiver.
- Connect the equipment into an outlet on a circuit different from that to which the receiver is connected.
- Consult the dealer or an experienced radio/TV technician for help.
Caution
Modifications not expressly approved by the party responsible for compliance could void the user's authority to operate the equipment.
FCC Compliance Information:
This device complies with Part 15 of the FCC Rules. Operation is subject to the following two conditions:
(1) This device may not cause harmful interference, and
(2) this device must accept any interference received, including interference that may cause undesired operation.
IMPORTANT NOTE: FCC RF Radiation Exposure Statement:
This equipment complies with FCC RF radiation exposure limits set forth for an uncontrolled environment. This equipment should be installed and operated with a minimum distance of 20 centimeters between the radiator and your body. This transmitter must not be co-located or operating in conjunction with any other antenna or transmitter.
+ Battery Replacement + Product Disposal
natural_image
Gray circular icon with battery symbol and lightning bolt, no text or numbers presentThe rechargeable batteries have limited number of charge cycles, and it will require a replacement as capacity to hold power will eventually diminish.
The rechargeable batteries in COWON products should be replaced only by official COWON service centers. Please contact batteryreplace@cowon.com for more information on official COWON service centers.

natural_image
Symbol of a trash bin crossed with no text or labels, representing environmental restriction (no text present)COWON products contain built-in rechargeable batteries, and must be separately disposed from household waste.
Disposing the products with regular waste may cause pollution to the environment due to the waste batteries inside. Contact your local authorities for specified locations / guidance of E-waste and waste batteries, and dispose them in compliance with local regulation / guidance.
DIGITAL PRIDE
©OWON
- Pure and Simple Lines of Pottery
- plenue A5
- + Copyright Notice
- Thank you for purchasing a COWON product.
- Introduction to website
- General
- BBE information
- + Contents
- Before You Start! 8
- Basic Use 15
- Additional 23
- Troubleshooting 24
- + Precaution
- + Names of Parts and Functions
- + Charging
- + Buttons
- Smart RESET
- + Connecting and Disconnecting the PC
- + Firmware Upgrade
- How to upgrade the firmware
- + Formatting, Installation and etc.
- Nand Memory Formatting
- Media Scanning
- How to install applications
- Basic Use + Home Screen
- + Using Widgets
- Basic Use + Removing Widgets
- Basic Use + Turning On/Off the Wi-Fi
- Basic Use + Wi-Fi Setting
- + Basic Menu
- + Connecting an HDMI Cable
- + Recovery Mode
- How to use recovery mode
- + Specifications
- + Troubleshooting
- + I am still confused even after reading the manual.
- + The player does not turn on.
- + The touch pad and buttons do not work properly.
- + I can't hear any sound.
- + I can't see a file saved on the device.
- + I can't play video files.
- + FM Radio does not work.
- + There is too much noise in my recordings.
- + Computer cannot recognize the player when connected.
- + Memory capacity of the player is different or smaller than specified.
- + The player does not play properly when memory is full.
- + FCC Information to User
- Caution
- FCC Compliance Information:
- IMPORTANT NOTE: FCC RF Radiation Exposure Statement:
Brand : COWON
Model : Plenue A5
Category : Mp3 player