
DVD623 - DVD player PHILIPS - Free user manual and instructions
Find the device manual for free DVD623 PHILIPS in PDF.


User questions about DVD623 PHILIPS
0 question about this device. Answer the ones you know or ask your own.
Ask a new question about this device
Download the instructions for your DVD player in PDF format for free! Find your manual DVD623 - PHILIPS and take your electronic device back in hand. On this page are published all the documents necessary for the use of your device. DVD623 by PHILIPS.
USER MANUAL DVD623 PHILIPS
Important Note for Users in the UK
Mains plug
This apparatus is fitted with an approved 13 Amp plug. To change a fuse in this type of plug proceed as follows:
1 Remo ve fuse cover and fuse.
2 Fix new fuse which should be a BS1362 5 Amp, A.S.T.A. or BSI approved type.
3 Refit the fuse cover.
If the fitted plug is not suitable for your socket outlets, it should be cut off and an appropriate plug fitted in its place. If the mains plug contains a fuse, this should have a value of 5 Amp. If a plug without a fuse is used, the fuse at the distribution board should not be greater than 5 Amp.
Note: The severed plug must be disposed of to avoid a possible shock hazard should it be inserted into a 13 Amp socket elsewhere.
How to connect a plug
The wires in the mains lead are coloured with the following code: blue = neutral (N), brown = live (L).
As these colours may not correspond with the colour markings identifying the terminals in your plug, proceed as follows:
- Connect the blue wire to the terminal marked N or coloured black.
- Connect the brown wire to the terminal marked L or coloured red.
- Do not connect either wire to the earth terminal in the plug, marked E (or e) or coloured green (or green and yellow).
Before replacing the plug cover, make certain that the cord grip is clamped over the sheath of the lead - not simply over the two wires.
Copyright in the U.K.
Recording and playback of material may require consent. See Copyright Act 1956 and The Performer's Protection Acts 1958 to 1972.
English 5
Français 25
Deutsch 45
Nederlands 65
CAUTION
VISIBLE AND INVISIBLE LASER RADIATION WHEN OPEN AVOID EXPOSURE TO BEAM ADVARSEL
SYNLIG OG USYNLIG LASERSTRÅLING VED ÅBNING UNDGÅ UDSÆTTELSE FOR STRÅLING
WARNING
SYNLIG OCH OSYNLIG LASERSTRÅLNING NÄR DENNA DEL ÄR ÖPPNAD BETRAKTA EJ STRÅLEN
VARO!
AVATTAESSA OLET ALTTIINA NÄKYVÄLLE JA NÄKYMÄTTÖMÄLLE LASER SÄTEILYLLE. ÄLÄ KATSO SÄTEESEEN
VORSICHT
The region code for this set is 2.
Since it is usual for DVD movies to be released at different times in different regions of the world, all players have region codes and discs can have an optional region code. If you load a disc of a different region code to your player, you will see the region code notice on the screen. The disc will not play, and should be unloaded.

Manufactured under license from Dolby Laboratories. "Dolby", "Pro Logic" and the double-D symbol are trademarks of Dolby Laboratories.
This product incorporates copyright protection technology that is protected by method claims of certain U.S. patents and other intellectual property rights owned by Macrovision Corporation and other rights owners. Use of this copyright protection technology must be authorised by Macrovision Corporation, and is intended for home and other limited viewing uses only unless otherwise authorised by Macrovision Corporation. Reverse engineering or disassembly is prohibited.
TruSurround and the ● symbol are trademarks of SRS Labs, Inc. TruSurround technology is incorporated under license from SRS Labs, Inc.

The DVD VIDEO player is in conformity with the EMC directive and low-voltage directive.
For Customer Use:
Read carefully the information located at the bottom of your DVD VIDEO player and enter below the Serial No.Retain this information for future reference.
Model No. DVD VIDEO
Serial No. ____
Laser safety
This unit employs a laser. Due to possible eye injury, only a qualified service person should remove the cover or attempt to service this device.
USE OF CONTROLS, ADJUSTMENTS OR PERFORMANCE OF PROCEDURES OTHER THAN THOSE SPECIFIED HEREIN MAY RESULT IN HAZARDOUS RADIATION EXPOSURE.
NOTE: PICTURES SHOWN MAY BE DIFFERENT BETWEEN COUNTRIES.
LASER
Type Semiconductor laser GaAlAs
Wave length 650 nm (DVD)
780 nm (VCD/CD)
Output Power 7 mW (DVD)
10 mW (VCD/CD)
Beam divergence 60 degree
CAUTION (WARNING LOCATION: ON THE BACKPLATE OF SET)
NEVER MAKE OR CHANGE CONNECTIONS WITH THE POWER SWITCHED ON.
Introduction
Environmental Information 6
Supplied accessories 6
Safety Information 6
Symbols Used in this Manual 6
Functional Overview
Front and Rear Panels 7
Remote Control 8
Preparation
Basic Connections 9
Connecting to a TV 9
Connecting to an Audio System 9
Connecting to Optional Equipment 10
Inserting batteries into the Remote Control - 10
NTSC/PAL Conversion 11
Switching On 11
Menu Bars on TV Screen 11
Personal Preferences 12-14
Operation
Basic Playback 15
Playing a DVD-Video 15
Playing a Video CD 16
Playing an Audio CD 16
Special DVD features 16-17
Special VCD & SVCD Features 17
General Features 17-20
Access Control
Access Control: Child Lock 21
Access Control: Parental Control ---- 21-22
Specifications
Specifications 23
Maintenance
Maintenance 23
Troubleshooting
Troubleshooting 24
Thank you for purchasing this Philips DVD player. This Owner's Manual explains the basic operation of this DVD player.
Environmental Information
All unnecessary packaging has been omitted. We have tried to make the packaging easy to separate into three materials: cardboard (box), polystyrene foam (buffer) and polyethylene (bags, protective foam sheet).
Your DVD player consists of materials which can be recycled and reused if disassembled by a specialised company. Please observe the local regulations regarding the disposal of packaging materials, exhausted batteries and old equipment.
Supplied accessories
- Remote control
– Batteries (two AA size) for remote control - Audio cable
- SCART cable (not available for all versions)
- Owner's Manual
Safety Information
●Before operating the DVD player, check that the operating voltage indicated on the typeplate (or the voltage indication beside the voltage selector) is identical with the voltage of your local power supply. If not, please consult your dealer.
●Place the DVD player on a flat, hard and stable surface.
●There must be sufficient room in front of the player for the drawer to be opened.
●In cabinet, allow about 2.5cm (1 inch) of free space all around the player for adequate ventilation.
●Do not expose your player to extreme of temperature or humidity.
- If the DVD player is brought directly from a cold to a warm location, or is placed in a very damp room, moisture may condense on the lens of the disc unit inside the DVD player. Should this occur, the DVD player would not operate normally. Leave the power on for about one hour with no disc in the DVD player until normal playback is possible.
●The mechanical parts of the set contain self-lubricating bearings and must not be oiled or lubricated.
- When the DVD player is switched to Standby mode, it is still consuming some power. To disconnect the system from the power supply completely, remove the AC power plug from the wall socket.
Symbols Used in this Manual
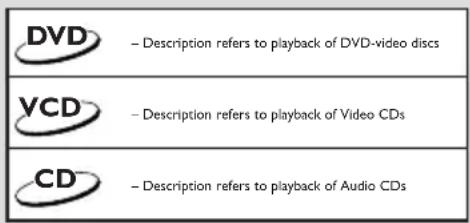
The below symbols appear in some headings and notes with the following meanings:
text_image
DVD - Description refers to playback of DVD-video discs VCD - Description refers to playback of Video CDs CD - Description refers to playback of Audio CDsHelpful Hints!
●Some DVD video discs require specific functions or allow only limited functions during playback.
●“×” may appears on the TV screen which means that the function is not available on that specific DVD video disc.
Front and Rear Panels
text_image
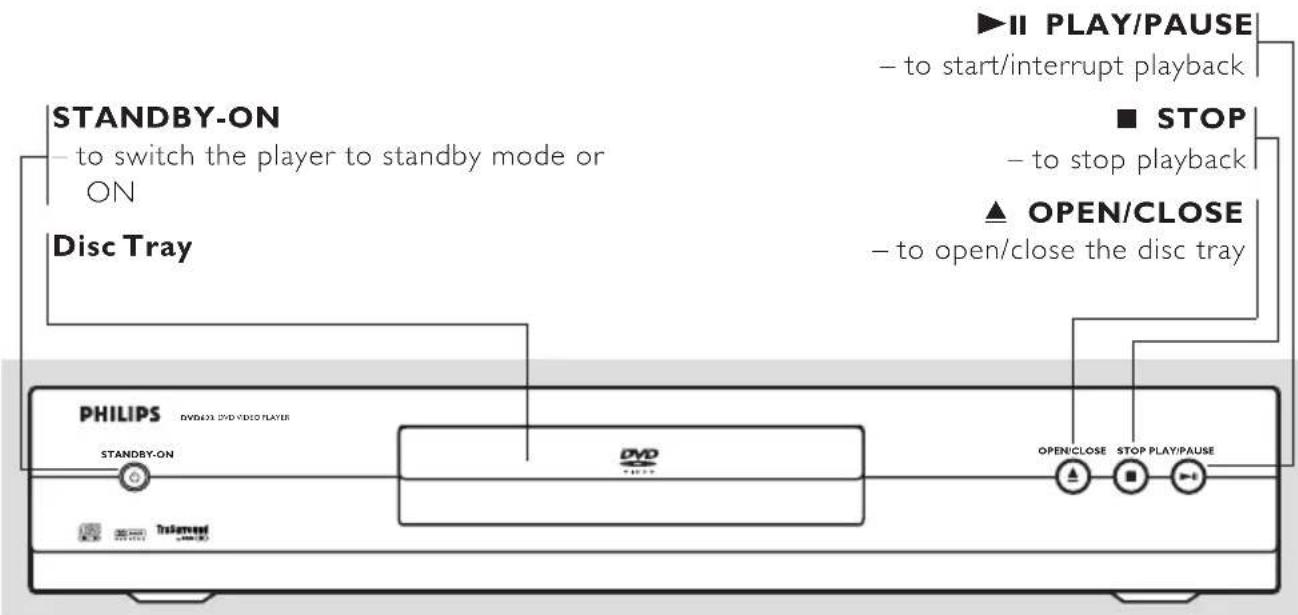
STANDBY-ON to switch the player to standby mode or ON Disc Tray PHILIPS DVD433 DVD VIDEO PLAYER STANDBY-ON DVD OPEN/CLOSE STOP PLAY/PAUSE ▶II PLAY/PAUSE – to start/interrupt playback ■ STOP – to stop playback ▲ OPEN/CLOSE – to open/close the disc tray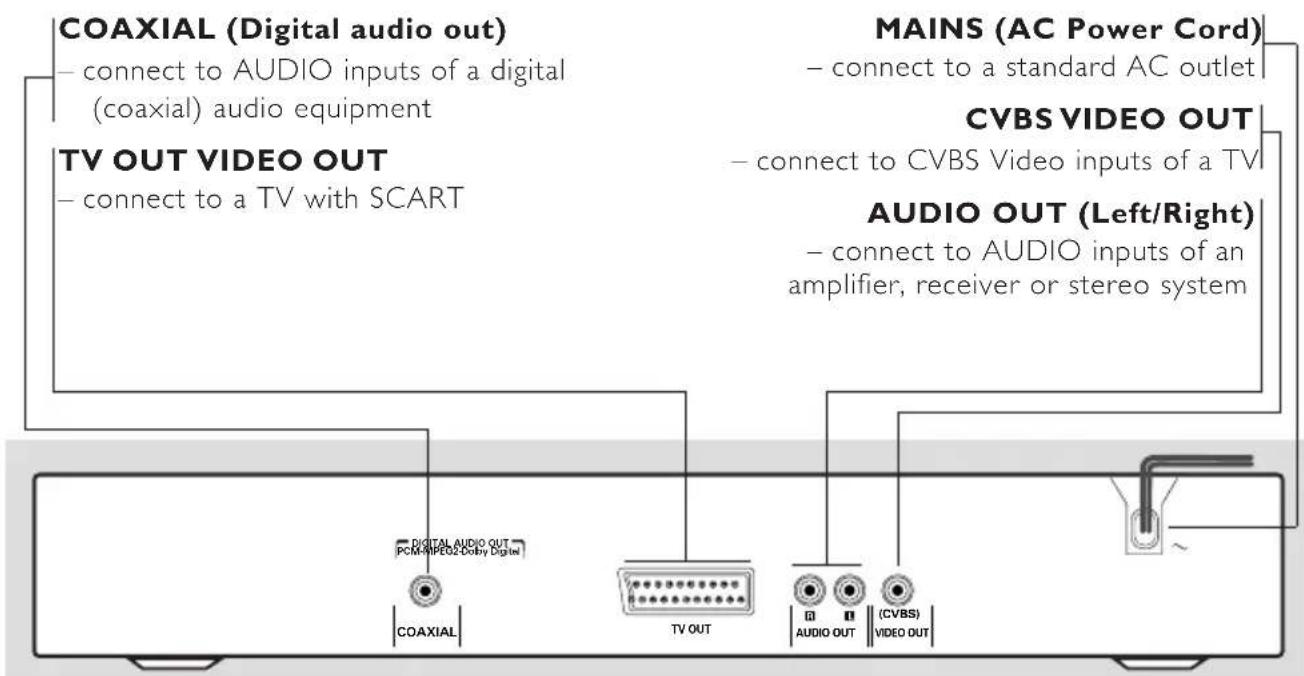
text_image
COAXIAL (Digital audio out) - connect to AUDIO inputs of a digital (coaxial) audio equipment TV OUT VIDEO OUT - connect to a TV with SCART MAINS (AC Power Cord) - connect to a standard AC outlet CVBS VIDEO OUT - connect to CVBS Video inputs of a TV AUDIO OUT (Left/Right) - connect to AUDIO inputs of an amplifier, receiver or stereo system COAXIAL TV OUT AUDIO OUT (CVBS) VIDEO OUTCaution: Do not touch the inner pins of the jacks on the rear panel. Electrostatic discharge may cause permanent damage to the unit.
Remote Control
text_image
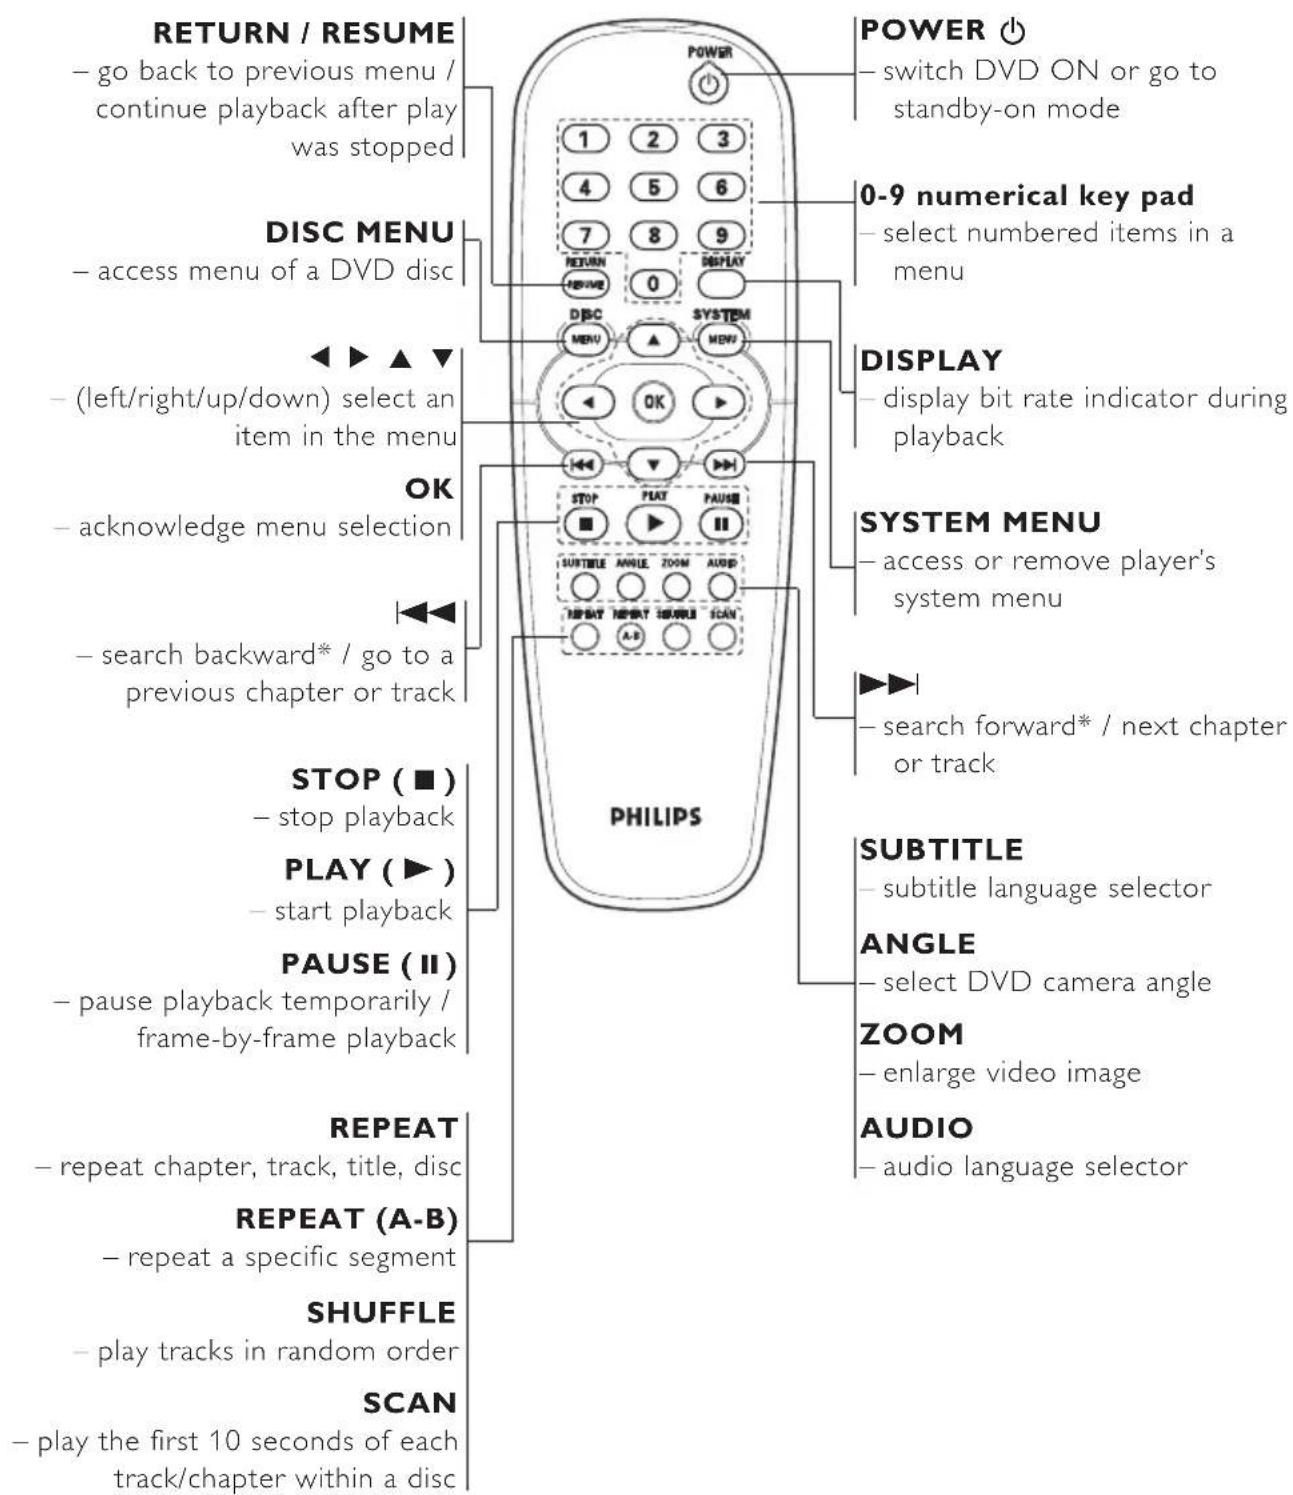
RETURN / RESUME - go back to previous menu / continue playback after play was stopped DISC MENU - access menu of a DVD disc ( left/right/up/down) select an item in the menu OK - acknowledge menu selection - search backward* / go to a previous chapter or track STOP ( ■ ) - stop playback PLAY ( ▶ ) - start playback PAUSE ( II ) - pause playback temporarily / frame-by-frame playback REPEAT - repeat chapter, track, title, disc REPEAT (A-B) - repeat a specific segment SHUFFLE - play tracks in random order SCAN - play the first 10 seconds of each track/chapter within a disc POWER ⏻ - switch DVD ON or go to standby-on mode 0-9 numerical key pad - select numbered items in a menu DISPLAY - display bit rate indicator during playback SYSTEM MENU - access or remove player's system menu ▶▶ - search forward* / next chapter or track SUBTITLE - subtitle language selector ANGLE - select DVD camera angle ZOOM - enlarge video image AUDIO - audio language selectorBasic Connections
●Please refer to the instruction books of your TV, VCR, Stereo System or other devices as necessary to make the best connections.
●Make one of the following connections, depending on the capabilities of your existing equipment.
The following guidelines are options for the best picture and sound quality available on your DVD player.
Picture
1 Use the CVBS Video Output for good picture quality.
2 Use SCART Output for best picture quality.
Sound
1 Digital audio connections provide the clearest sound. Connect one of the DVD player's DIGITAL AUDIO OUT (COAXIAL) to your amplifier or receiver.
2 If digital connections are not possible, connect the DVD player's red and white AUDIO OUT to your amplifier, receiver, stereo or TV.
Warning!
- Never make or change connections with the power switched on.
- Connect the DVD player directly to your TV, instead of eg. a VCR, to avoid distortion because DVD video discs are copy protected.
- Do not connect the DVD player AUDIO OUT to PHONO IN of your amplifier or receiver.
Connecting to a TV
1 Connect the SCART (TV OUT) to the corresponding connector on the TV IN.
Note:
- Ensure that the "TV" indication on SCART cable is connected to the TV set and "DVD" indication on SCART cable is connected to the DVD player.
If your TV is not equipped with a SCART input, you can select the following connection:
If your TV has a CVBS Video input connector,
1 Connect the CVBS VIDEO OUT on the DVD player to the CVBS VIDEO IN.
2 Connect the Left and Right AUDIO OUT on the DVD player to the Left and Right AUDIO IN on the TV.
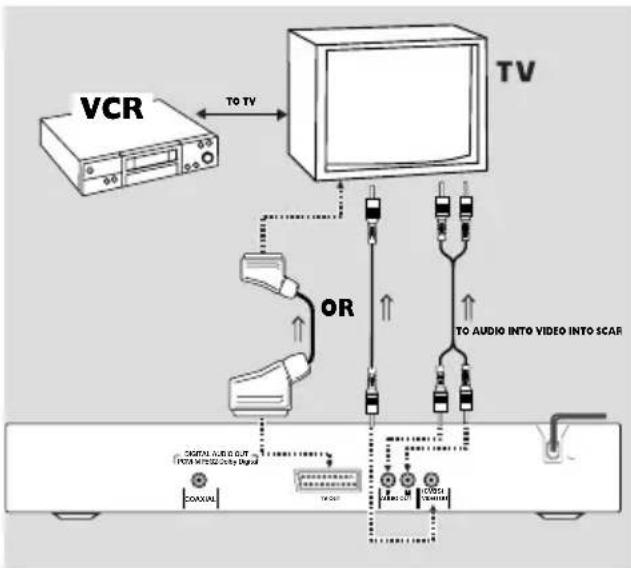
flowchart
graph TD
    A["VCR"] -->|TO TV| B["TV"]
    B --> C["OR"]
    C --> D["Digital Audio/Video Input"]
    D --> E["Digital Audio/Video Output"]
    E --> F["Digital Audio/Video Display"]
    F --> G["Digital Audio/Video Display"]
    G --> H["Digital Audio/Video Display"]
    H --> I["Digital Audio/Video Display"]
    I --> J["Digital Audio/Video Display"]
    J --> K["Digital Audio/Video Display"]
    K --> L["Digital Audio/Video Display"]
    L --> M["Digital Audio/Video Display"]
    M --> N["Digital Audio/Video Display"]
    N --> O["Digital Audio/Video Display"]
    O --> P["Digital Audio/Video Display"]
    P --> Q["Digital Audio/Video Display"]
    Q --> R["Digital Audio/Video Display"]
    R --> S["Digital Audio/Video Display"]
    S --> T["Digital Audio/Video Display"]
    T --> U["Digital Audio/Video Display"]
    U --> V["Digital Audio/Video Display"]
    V --> W["Digital Audio/Video Display"]
    W --> X["Digital Audio/Video Display"]
    X --> Y["Digital Audio/Video Display"]
    Y --> Z["Digital Audio/Video Display"]
Connecting to an Audio System
1 You can also listen to the sound of audio CDs and DVD video discs by connecting to an optional stereo system.
2 Connect the Left and Right AUDIO OUT on the DVD player to the Left and Right AUDIO IN on the stereo system.
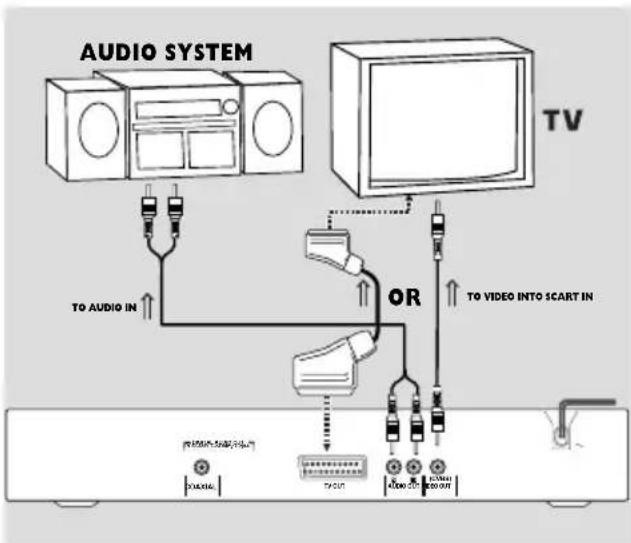
flowchart
graph TD
    A["TO AUDIO IN"] --> B["TV"]
    B --> C["OR"]
    C --> D["Video INPUT"]
    D --> E["700V"]
    E --> F["50Hz"]
    F --> G["100MHz"]
    G --> H["Video OUT"]
    style A fill:#f9f,stroke:#333
    style B fill:#ccf,stroke:#333
    style C fill:#cfc,stroke:#333
    style D fill:#fcc,stroke:#333
    style E fill:#cff,stroke:#333
    style F fill:#ffc,stroke:#333
    style G fill:#cfc,stroke:#333
    style H fill:#fcc,stroke:#333
Connecting to Optional Equipment
●A digital component with a built-in MPEG 2 or Dolby Digital™ decoder allows you to enjoy the surround sound while producing the effect of being in a movie theater or a concert hall.
●The player outputs the surround sound signals from the DIGITAL OUT COAXIAL connectors.
If your receiver has a MPEG 2 or Dolby Digital™ decoder,
1 Connect the COAXIAL DIGITAL AUDIO OUT of the DVD player to the COAXIAL DIGITAL AUDIO IN on your receiver.
2 You will need to set the DVD player's digital output to ALL (see 'Personal Preferences').
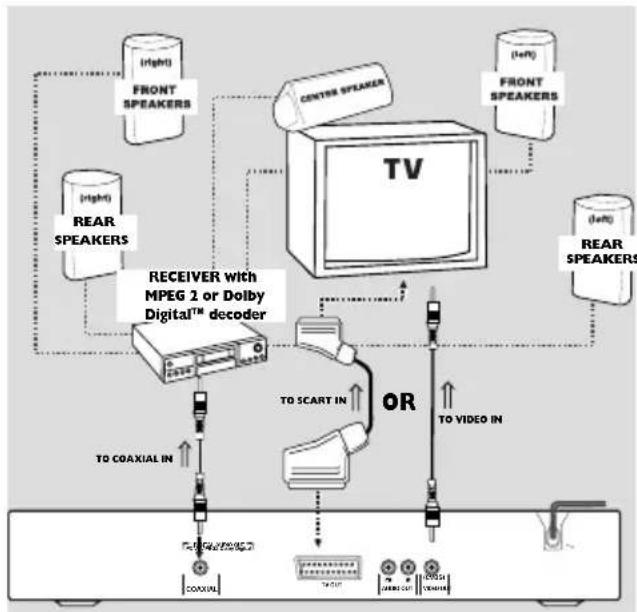
flowchart
graph TD
    A["Front Speakers"] --> B["TV"]
    C["Rear Speakers"] --> B
    B --> D["OR"]
    D --> E["Video In"]
    F["Receiver with MPEG 2 or Dolby Digital™ decoder"] --> G["TO SCART IN"]
    G --> H["TO VIDEO IN"]
    I["COAXIAL"] --> J["To COAXIAL IN"]
    J --> K["Coaxial"]
    L["FRONT SPEAKERS"] --> M["FRONT SPEAKERS"]
    N["FRONT SPEAKERS"] --> O["FRONT SPEAKERS"]
    P["FRONT SPEAKERS"] --> Q["FRONT SPEAKERS"]
    R["FRONT SPEAKERS"] --> S["FRONT SPEAKERS"]
    T["FRONT SPEAKERS"] --> U["FRONT SPEAKERS"]
    V["FRONT SPEAKERS"] --> W["FRONT SPEAKERS"]
    X["FRONT SPEAKERS"] --> Y["FRONT SPEAKERS"]
Notes:
- If the audio format of the digital output does not match the capabilities of your receiver, the receiver will produce a strong, distorted sound or no sound at all.
- To see the selected audio format of the current DVD in the Status Window, press SYSTEM MENU.
Inserting batteries into the Remote Control
1 Open the battery cover.
2 Insert batteries (AA size) with the correct polarity as indicated by the + and - symbols inside the battery compartment.
3 Close the cover.
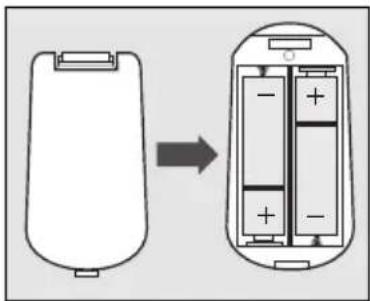
text_image
Diagram showing battery charging process with one component moving to a multi-chamber battery packCAUTION!
- Remove batteries if they are exhausted or not to be used for a long time.
- Do not use old and new or different types of batteries in combination.
- Batteries contain chemical substances, so they should be disposed off properly and kept away from children.
Using the Remote Control
●Direct the remote control at the remote sensor of the DVD player.
●Do not drop the remote control.
●Do not leave the remote control near extremely hot or humid place.
●Do not spill water or put anything wet on the remote control.
NTSC/PAL Conversion
This player is equipped with an NTSC/PAL conversion feature that converts the video output of the disc to match your TV system. To activate the conversion refer to page 13.
Switching On
1 Switch on the TV and DVD player.
2 Set the TV to the correct Video IN channel. (eg. EXT1, EXT2, AV1, AV2, AUDIO/VIDEO, etc. (Refer to your TV owner's manual for detail)
→ The player display lights up and the default screen appears on the TV.
3 If you are using an external equipment (eg, audio system or receiver), turn them on and select the appropriate input source that was used to connect to the DVD player output. Refer to the equipment owner's manual for detail.
Menu Bars on TV Screen
●Operations can be carried out directly via the multiple menu bars on the TV screen.
●The following functions are available via the menu bars. Pressing SYSTEM MENU keys repeatedly will toggle through menu bar 1, menu bar 2, menu bar 3 and menu bar OFF:
Menu bar 1

text_image
Cropped image showing partial text labels and icons, likely from a software interface or document headerFrom the left,
Personal Preferences → Subtitle Language →
Audio Language → Colour → Sound
Menu bar 2

natural_image
Blurred grayscale image with indistinct shapes and no visible text or symbolsFrom the left,
Step by step playback → Slow motion → Fast motion → Angle → Zoom
Menu bar 3

text_image
Cropped image showing fragmented text symbols including 'T', 'C', and 'B' with arrows pointing to specific cells.From the left,
Title → Chapter → Time Search →
Favourite Track Selection (FTS)
Temporary Feedback Field Icons
These icons will appear on the top left hand corner of your TV screen.
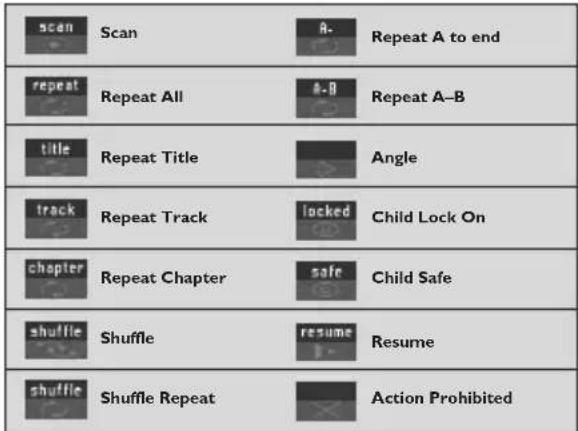
text_image
scan Scan A- Repeat A to end repeat Repeat All a-B Repeat A-B title Repeat Title Angle track Repeat Track locked Child Lock On chapter Repeat Chapter safe Child Safe shuffle Shuffle resume Resume shuffle Shuffle Repeat Action ProhibitedPersonal Preferences
In the Personal Preferences settings menu, you can customize you player to suit your own particular requirements.
General operation:
1 Press SYSTEM MENU on the remote control.
2 The will be highlighted in the menu bar.
3 Press ▼ to activate the Personal Preferences menu.
4 Use the ◀▶▲▼ keys to toggle through the functions and select your preferred option.
5 Press OK to confirm a highlighted selection. The following items are available:
Picture
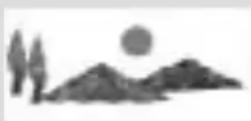
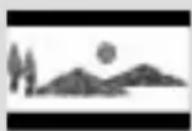
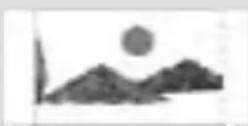
- TV Shape
Select the aspect ratio of the TV to be connected.
16:9 → when you connect a wide-screen TV to the DVD player.
4:3 LETTER BOX → when you connect a normal TV to the DVD player. Displays a wide picture with bands displayed on the upper and lower portions of the TV screen.
4:3 PAN SCAN → when you connect a normal TV to the DVD player. Displays the wide picture on the whole TV screen with a portion automatically cut off.
16:9
4:3
Letter Box
4:3
Pan Scan
Note:
- Pan Scan is subject to availability on the disc.
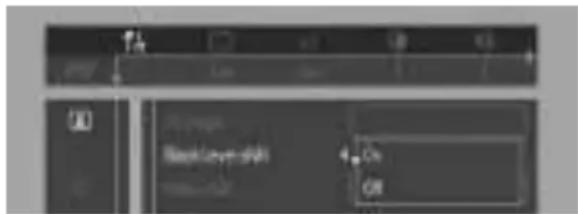
- Black level shift (NTSC output only)
Select ON for adapting the colour dynamics to obtain richer contrasts.
text_image
BlackLayer-shift On On- Video shift
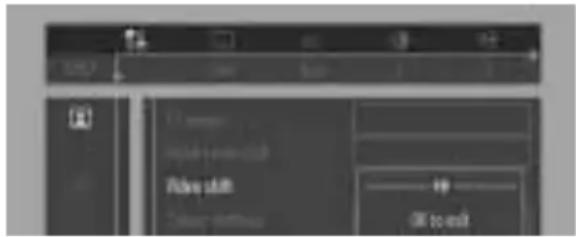
Use this setting to personalize the position of the picture on your TV by scrolling it to the left or right.
text_image
Scanned screenshot of a software interface with Chinese text labels and buttons, showing navigation tabs and input fields.- Smart Picture
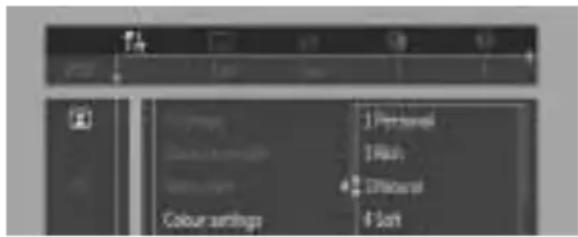
●Colour settings
You can select one of five predefined sets of colour settings and one set (Personal) which you can define yourself.
text_image
1 Personal 2 Real 3 Official 4 Sort Colour settings- When Personal is selected it allows you to fine-tune saturation, brightness and contrast
- Use ▲ or ▼ keys to adjust the values of these parameters.
- TV System (NTSC/PAL Conversion)
Allows you to select between PAL, NTSC and AUTO mode depending on your TV.
The conversions supported are as follows:
| Disc | Output format | |||
| Type | Format | Selected mode | ||
| NTSC | PAL | AUTO | ||
| DVD | NTSC | NTSC | PAL | NTSC |
| PAL | Not Supported | PAL | PAL | |
| VCD | NTSC | NTSC | PAL | NTSC |
| PAL | NTSC | PAL | PAL | |
1 In the Personal Preferences Menu, select TV System.
2 Press ▲ or ▼ to select PAL, NTSC or AUTO.
Notes:
- AUTO can only be selected when using a TV that has both the NTSC and PAL systems.
- This is applicable for CVBS output on cinch and SCART only.
- Slight picture distortions may occur due to this conversion. This is normal. Thus, the AUTO format is most suitable for the best picture quality.
Sound
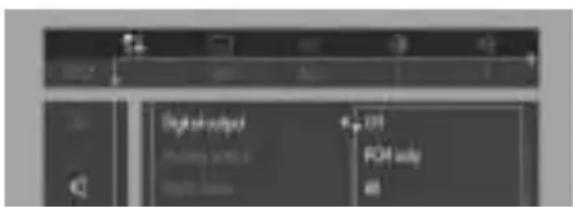
- Digital output
●Digital output selection enables you to specify the type of digital output which is suitable to your receiver.
- Select ALL (default setting), if you had connected your DIGITAL AUDIO OUT to a multichannel decoder receiver.
- Select PCM only if your receiver is not capable of decoding multichannel audio.
- Select OFF to deactivate the DIGITAL AUDIO OUT.
text_image
Digital output FCH tool- Analogue output
Select Stereo, Dolby Surround-compatible or 3D Sound output to match your system's playback capability.
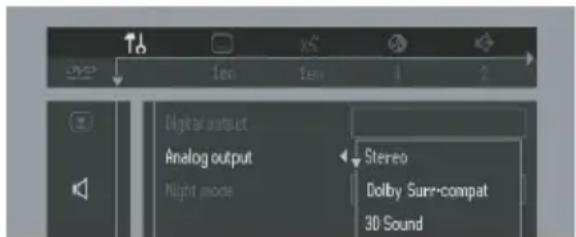
text_image
Digital output Analog output Night mode Stereo Dolby Sure-compat 3D Sound- Night Mode
When set to ON, the dynamics of your sound output are optimised. High volume outputs are softened, enabling you to watch your favourite action movie without disturbing others.
- Karaoke vocal
Put this setting to ON only when a multi-channel karaoke DVD is being played. The karaoke channels on the disc will then be mixed into a normal stereo sound.
Language
Selecting disc languages:
Menu/Audio/Subtitle language
●This is to select the audio language, subtitle language and the language used in TV screen menus or DVD menus which will always be used for every disc to be played back.
- If the language selected is not available on the disc, the original language designated by each disc will be selected.
Features
- Access Control
Access Control contains the following features: Child Lock - When Child Lock is set to ON, a 4-digit code needs to be entered in order to playback discs.
Parental control - Allows the conditional presentation of DVDs containing Parental Control information (see 'Access Control' section).
- Status Window
Displays the current status of the player and appears with the menu bar. When disc playback is stopped, it is displayed with the 'Temporary Feedback Field' in the default screen. See 'On-Screen Display' information;
Factory setting is ON. Select OFF to suppress display of the Status Window.
text_image
opening stop
text_image
DVD 2:45:23 0:00:34- Bit Rate Indicator
Press the DISPLAY key to activate the bit rate indicator. When activated, the bit rate for video and audio, as well as the total bit rate is displayed. This is only applicable during playback of DVD and SVCD discs.
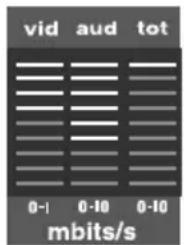
text_image
vid aud tot 0-1 0-10 0-10 mbits/s- Help text
When set to ON, help text describes the icons selected. Select OFF if you no longer require the help text.
- PBC (Playback Control - for VCD)
The Playback Control can be set to ON or OFF.
- Smart Power OFF
Puts the set to standby after a predefined time. This can be set to Enable or Disable.
Basic Playback
1 Press STANDBY ON on the front panel.
2 Press OPEN/CLOSE ▲ on the front panel to open disc loading tray.
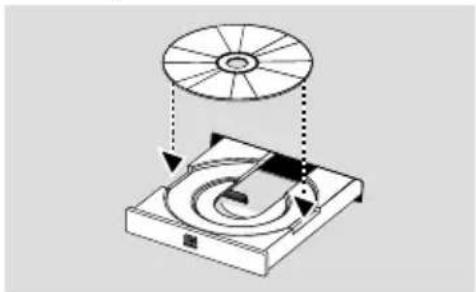
3 Place the chosen disc in the tray, with the label facing up.
4 Press OPEN/CLOSE ▲ again to close the tray. → READING appears in the status window and on the player display, and playback starts automatically.
natural_image
Diagram showing a CD/DVD disc and its mechanical assembly with arrows indicating motion (no text or symbols)Notes:
– DVDs may have a region code. Your player will not play discs that have a region code different from the region code of your player.
- If 'Child Lock' is set to ON and the disc inserted is not authorised, the 4-digit code must be entered and/or the disc must be authorised (see 'Access Control').
Playing a DVD-Video
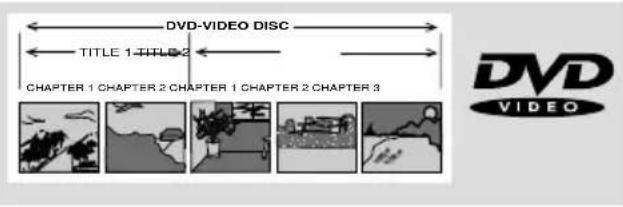
●DVD video discs may have one or more TITLES, and each TITLE may have one or more CHAPTERS.
●Playback stops at the end of each TITLE.
text_image
DVD-VIDEO DISC TITLE 1 TITLE 2 CHAPTER 1 CHAPTER 2 CHAPTER 1 CHAPTER 2 CHAPTER 3 DVD VIDEOPlaying a title
1 Insert a disc and close the tray, playback starts automatically.
→ The TV screen's and DVD player's display shows the type of disc loaded, disc's information and playing time.
2 When the Disc Menu appear on the TV screen, use ▼▲◀▶ keys or numerical keys on the remote control to select an option and continue playback.
3 If the titles are numbered, press the numerical keys or use the ▼▲ keys to select desired title in the menubar.
4 To stop playback, press STOP.
Smart Resume
●In stop mode and when a disc has not been ejected,
→Pressing PLAY will automatically resume playback from the point where the playback was last stopped.
To deactivate auto resume,
●Press STOP to stop playback.
→The help line text appears "Press Stop again to start from beginning" for 5 seconds.
- Press STOP again or unload the discs, the auto resume is cancelled.
To activate auto resume,
●Reload the disc and press PLAY.
→Playback starts from the beginning of the title.
- When resume icon ▶ appears on the screen, press PLAY again.
→Playback will resume from the point where the playback was last stopped.
Note:
- Resume feature is also applicable to VCDs and SVCDs.
Playing a Video CD
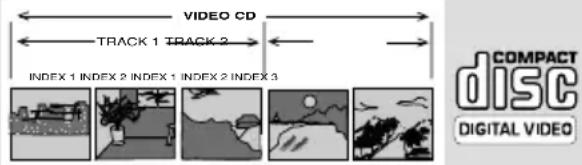
●Video CDs may have one or more TRACKS, and TRACKS may have one or more INDEXES.
●To make easy and convenient access, you can move between TRACKS and INDEXES.
●Some Video CDs have Play Back Control (PBC), which is a predefined playback sequence stored on the disc (see Playback Control section).
text_image
VIDEO CD TRACK 1 TRACK 2 INDEX 1 INDEX 2 INDEX 1 INDEX 2 INDEX 3 COMPACT disc DIGITAL VIDEOPlaying a disc
1 Insert a disc and close the tray, playback starts automatically.
→The number of tracks and the total playing time of the disc will appear on the TV screen and DVD player's display.
2 Press PLAY.
→The current track number and its elapsed playing time will be displayed.
3 Playback will stop at the end of the disc.
4 To stop playback, press STOP.
5 5 Disc Resume feature is also applicable for VCDs and SVCDs (see 5 Disc Resume section).
Playing an Audio CD
●Audio CDs contain only TRACKS.
●They can be played on your DVD player with the audio output connected to a stereo system or to your TV.
- Select tracks using the menubar on the TV screen or by pressing the numerical keys directly.
●Your DVD player also allows you to compile Favourite Track Selection (FTS) programmes for your discs by selecting or excluding tracks of your choice (see FTS Programme - Audio CDs).

text_image
AUDIO CD TRACKS COMPACT DISC DIGITAL AUDIOPlaying a disc
1 Insert a disc and close the tray, playback starts automatically.
→ The menu bar on TV screen will display the number of tracks for selection.
2 Playback will stop at the end of the disc.
3 To stop playback, press STOP.
Special DVD Features
DVDs may contain menus to navigate the disc and access special features. Press the appropriate numerical key or use the ▼,▲,►,◀ keys to highlight your selection in the DVD menu and press OK to confirm.
Title/Disc menu
1 Press DISC MENU.
→ If the current title has a menu, the menu will appear on the screen. Otherwise, the disc menu will be displayed.
2 If disc menu is available on the disc, audio language, subtitle options, chapters for the title and other options will appear for selection.
3 To remove the title/disc menu, press DISC MENU again.
Camera Angle
Some discs contain scenes which have been shot simultaneously from various angles. This DVD player allows you to select the desired camera angle.
- When the DVD player encounters a scene shot in multiple angles, it will give you an indication on the “Temporary Feedback Field.”
→ The angle icon remains displayed until multiple angles are no longer available. - Use the ▲/▼ to select the required angle icon.
→ Playback changes to the selected angle. - You can also select ➤ (ANGLE) in the menu bar or press the ANGLE button on the remote control directly.
Changing the audio language
1 Select (Audi) in the menu bar or press the AUDIO button on the remote control directly.
2 Press AUDIO or ▲/▼ repeatedly to select the different languages.
Subtitles
1 Select (SUBTITLE) in the menu bar or press the SUBTITLE button on the remote control directly.
2 Press SUBTITLE or ▲/▼ repeatedly to select the different subtitles.
Special VCD & SVCD Features
Playback Control (PBC)
1 Load a Video CD with PBC and press PLAY.
2 Go through the menu with the keys indicated on the TV screen until your chosen passage starts to playback. If a PBC menu consists of a list of tracks, you can select a track directly.
3 Enter your choice with the numerical keys (0-9).
4 Press RETURN to go back to the previous menu, if applicable on the menu.
5 You may also select PBC OFF under Personal Preferences.
→ PBC menus are not activated for further playback.
General Features
Note:
– Unless stated, all operations described are based on remote control use. Some operations can be carried out using the menu bar on the TV screen.
Moving to another title/chapter
DVD VCD
When a disc has more than one title/track or chapter, you can move to another title/chapter as follows:
1 Press SYSTEM MENU, then select T or C in the menu bar.
2 Press ▲▼ or numerical keys to select a title/chapter.
CD
1 Press ▶▶▶ I or ◀◀◀ briefly during playback to go to the next track or to return to the beginning of the current track respectively.
2 Press I◄◄ twice briefly to step back to the previous track.
3 To go directly to any track, enter the track number using the numerical keys (0-9).
Note:
- Long press of the ▶▶| or |◀◀ keys will switch the DVD player on BACKWARD or FORWARD search (see SEARCH section).
Search
DVD VCD
1 Select (FAST MOTION) in the menu bar and press ▼.
2 Use the ◀▶ keys to select the required speed: -32, -8 or -4 (backward), or +4, +8, +32 (forward).
3 Select 1 to play the disc at normal speed again.
4 To exit FAST MOTION mode, press PLAY or ▲.
CD
● To search forward or backward through different speeds, you can also hold down ▶▶▶ or ◀◀◀ respectively.
Slow Motion DVD VCD
1 Select (SLOW MOTION) in the menu bar and press ▼.
→ Playback will pause.
2 Use the cursor keys ◀▶ to select the required speed: -1, -1/2, -1/4 or -1/8 (backward), or +1/8, +1/4, +1/2 or +1 (forward).
3 Select 1 to play the disc at normal speed again.
4 If II is pressed, the speed will be set to zero (PAUSE).
5 To exit slow motion mode, press PLAY.
Still Picture and Frame-by-frame playback DVD VCD
1 Select (STEP) in the menu bar and press ▼.
→ Playback will pause.
2 Use the cursor keys ◀▶ to select the previous or next picture frame.
3 To exit step by step playback, press PLAY or ▲.
Note:
- You can also activate frame-by-frame playback by pressing the PAUSE key repeatedly on the remote control.
Scan DVD VCD CD
Scanning plays the first 10 seconds of each chapter/track on the disc.
1 Press SCAN.
2 To continue playback at your chosen chapter/track, press SCAN again or press PLAY.
Repeat
DVD
Repeat chapter/title/disc
●To repeat the current chapter, press REPEAT.
→ RPT CHP appears on the front display.
●To repeat the current title, press REPEAT a second time.
→ RPT TTL appears on the front display.
●To repeat the entire disc, press REPEAT a third time.
→ RPT ALL appears on the front display.
●To exit Repeat mode, press REPEAT a fourth time.
VCD CD
Repeat track/disc
●To repeat the current track, press REPEAT.
→ RPT TRK appears on the front display.
●To repeat the entire disc, press REPEAT a second time.
→ RPT ALL appears on the front display.
●To exit Repeat mode, press REPEAT a third time.
Repeat A-B DVD VCD CD
- DVD-Video Discs: repeat a sequence in a title
- Video and Audio CDs: repeat a sequence in a track
1 Press REPEAT A-B at your chosen starting point.
2 Press REPEAT A-B again at your chosen end point.
→ RPT A-B appears briefly on the front display, and the repeat sequence begins.
3 To exit the sequence, press REPEAT A-B.
Shuffle
DVD
This shuffles the playing order of chapters within a title, if the title has more than one chapter.
1 Press SHUFFLE during playback.
→ SHUFFLE appears on the screen for about two seconds.
2 To return to normal playback, press SHUFFLE again.
VCD CD
This shuffles the playing order of tracks within a disc, if the disc has more than one tracks.
1 Press SHUFFLE during playback.
→ SHUFFLE appears on the screen for about two seconds.
2 To return to normal playback, press SHUFFLE again.
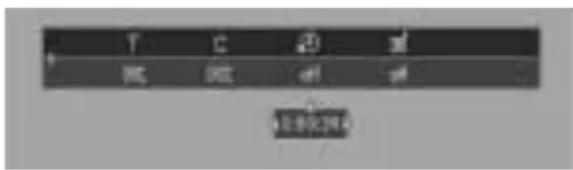
Time search DVD VCD
The Time Search function allows you to start playing at any chosen time on the disc.
1 Select (TIME SEARCH) in the menu bar and press ▼.
→ Playback will pause.
→ The elapsed playing time is displayed in a time edit box.
2 Enter hours, minutes and seconds from left to right in the time edit box using remote control numerical key pad.
→ Each time an item has been entered, the next item will be highlighted.
3 Press OK to confirm the selected time.
→ The time edit box will disappear and playback starts from the selected time position on the disc.
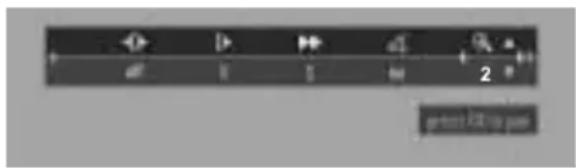
The Zoom function allows you to enlarge the video image and to pan through the enlarged image.
1 Select (ZOOM).
2 Press ▲/▼ to activate the ZOOM function and select the required zoom factor: 1.33 or 2 or 4.
→ Playback will continue.
→ The selected zoom factor and 'Press OK to pan' appears below the menu bar.
→ The zoomed picture will appear on the TV screen.
3 Press OK to confirm the selection.
→ The panning icon appears on the screen.
4 Use the ◀▶ ▲▼ keys to pan across the screen.
5 When OK is pressed only the panned picture will be shown on the screen.
6 To exit ZOOM mode, select zoom factor to "Off" (zoom factor 1) in the menu bar.
text_image
2 20:00 PMFTS Video/Audio Programme
●Favourite Track Selection (FTS) list contains 20 items (titles, chapters).
●The most recent programme list will be placed on top of the existing list.
DVD VCD
Storing a Programme
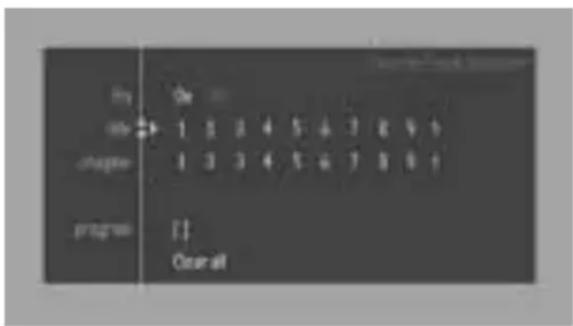
1 While playback is stopped, select VIDEO FTS ☑ in the menu bar.
2 Press ▼ to open the menu bar. → The VIDEO FTS √ menu appears.
3 Press ▶ or ◀ or FTS (on the remote control) to select ON.
Storing titles/tracks
1 Press ▼ to select TITLES/TRACKS.
2 Use ▶ and ◀ to select the require title/tracks.
3 Press OK to store the entire selected title/tracks.
→ The title number will be added to the list of selections.
Storing chapters/indexes
1 Press ▼ on the selected chapter/indexes number.
→ The chapter/indexes number will be highlighted.
2 Use ▶ and ◀ to select the required chapter number.
3 Press OK to confirm the selection.
→ The selected chapter/indexes confirmation will be added to the list of selections.
4 Press SYSTEM MENU to exit the VIDEO FTS
menu.
Erasing a selection in a Programme
1 While playback is stopped, select VIDEO FTS
☑ in the menu bar.
2 Use ▼ to select PROGRAM.
3 Use ▶ and ◀ to select the required number.
4 Press OK to erase the selection.
5 Press SYSTEM MENU to exit.
Erasing all selections
1 While playback is stopped, select VIDEO FTS
☑ in the menu bar.
2 Use ▼ to select CLEAR ALL and press OK.
→ All selections will be erased.
3 Press SYSTEM MENU to exit.
text_image
my by chapter program OverallCD
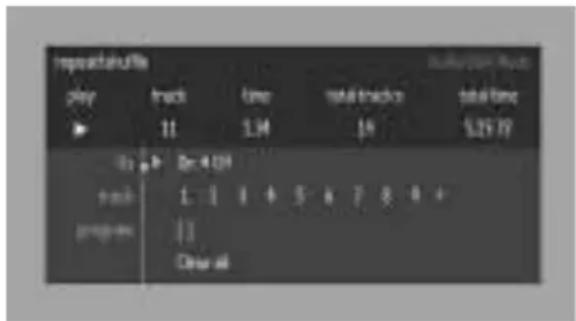
Storing a Programme
1 Load a disc and stop playback.
2 Press ▼ to go to the list of available tracks.
3 Use ▶ and ◀ to select the required tracks or directly using remote control numeric key.
4 Press OK to store the selected tracks.
→ The track number will be added to the list of selections.
Switching a Programme ON/OFF
1 Use ▲▼ to move and select desired tracks.
2 Press ▶ or ◀ to select either ON or OFF.
Erasing a track in a Programme
1 Use ▼ to go to the programmed tracks.
2 Use ▶ and ◀ to select the required number.
3 Press OK to erase the selection.
4 Press SYSTEM MENU to exit.
Erasing all selections
● Use ▼ to select CLEAR ALL and press OK.
→ All selections will be erased.
text_image
Impedashville play 11 time 5:34 total tracks 19 total time $25.77 1st 1: 4:04 track 1: 1 4 6 5 4 7 8 9 + progress 11 Clear allChild Lock DVD VCD
Activating/deactivating the Child Lock
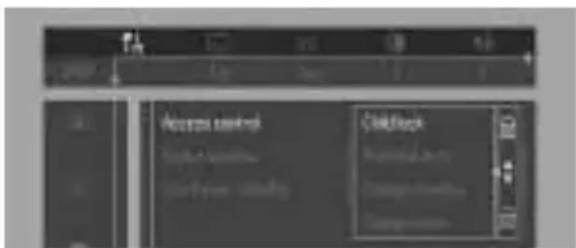
1 When disc playback is stopped, select ACCESS
CONTROL in the Personal Preferences menu using the ▲/▼ keys.
2 Enter a 4-digit code of your own choice twice.
3 Move to "CHILD LOCK" using the ▲/▼ keys.
4 Move to ☐ / ☐ using the ▶ keys.
5 Select 🔒 using the ▲/▼ keys.
6 Press OK or ◀ to confirm, then press ◀ again to exit the Personal Preferences menu.
→ Now unauthorised discs will not be played unless the 4-digit code is entered.
7 Select 🔒 to deactivate the CHILD LOCK.
Notes:
Confirmation of the 4-digit code is necessary when:
- The code is entered for the very first time (see above),
– The code is changed or cancelled (see
'Changing the 4-digit code'),
text_image
Access toolbar CheckboxAuthorising discs
1 Insert the disc.
→ The 'child safe' dialog will appear.
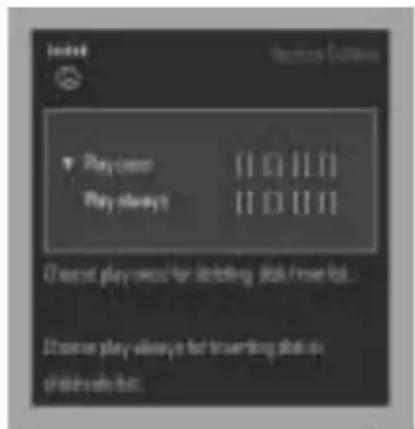
2 You will be asked to enter your secret code for 'Play Once' or 'Play Always.'
- If 'Play Once', disc can be played when in the player and the player is ON.
- If 'Play Always', disc will become authorised and can always be played, even if the Child Lock is set to ON.
Notes:
- The player memory can maintain 120 authorised ('Child safe') disc titles. A disc will be placed in the list when 'Play Always' is selected.
– Each time a ‘child safe’ disc is played, it will be placed on top of the list. When the list is full, the last disc in the list will be replaced when a new disc is added.
- Double-sided DVDs and multi-volume VCDs may have a different ID for each side. In order to make the disc ‘child safe’, each side has to be authorised.
text_image
lmct Play command Play always Clarest play never for deleting disk from disk... Clarest play always in find forwarding disk on disk from disk.Deauthorising discs
1 Insert the disc.
→ Playback starts automatically.
2 Press ■ while 😊 is visible.
→ The 😊 will appear and the disc is now deauthorised.
Parental Control DVD
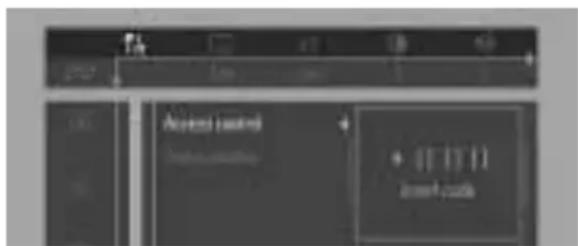
Movies on DVDs may contain scenes not suitable for children. Therefore, discs may contain 'Parental Control' information which applies to the complete disc or to certain scenes on the disc. These scenes are rated from 1 to 8, and alternative, more suitable scenes are available on the disc. Ratings are country dependent. The 'Parental Control' feature allows you to prevent discs from being played by your children or to have certain discs played with alternative scenes.
text_image
Accident Control credit codeActivating/Deactivating Parental Control
1 When disc playback is stopped, select ACCESS CONTROL in the Personal Preferences menu using the ▲/▼ keys.
2 Enter your 4-digit code. If necessary, enter the code a second time.
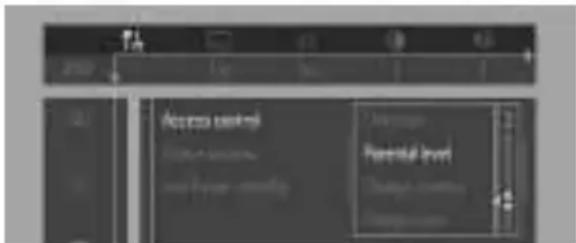
3 Move to Parental Control using the ▲/▼ keys.
4 Move to value adjustment (1-8) using the ▶ key.
5 Then use the ▲/▼ keys or the numerical keys on the remote control to select a rating from 1 to 8 for the disc inserted.
Rating 0 (displayed as ‘—’):
Parental Control is not activated. The Disc will be played in full.
Ratings 1 to 8:
The disc contains scenes not suitable for children. If you set a rating for the player, all scenes with the same rating or lower will be played. Higher rated scenes will not be played unless an alternative which has the same rating or lower is available on the disc. If no suitable alternative is found, playback will stop and the 4-digit code has to be entered.
6 Press OK or ◀ to confirm, then press ◀ again to exit the Personal Preferences menu.
text_image
Access key Parental levelCountry
1 When disc playback is stopped, select ACCESS CONTROL in the Personal Preferences menu using the ▲/▼ keys.
2 Enter the 4-digit code.
3 Move to CHANGE COUNTRY using the ▼ key.
4 Press the ▶ key.
5 Select a country using ▲/▼.
6 Press OK or ◀ to confirm, then press ◀ again to exit the menu.
Changing the 4-digit code
1 When disc playback is stopped, select ACCESS CONTROL in the Personal Preferences menu using the ▲/▼ keys.
2 Enter the current 4 digit code.
3 Move to CHANGE CODE using the ▼ and press the ▶ key.
4 Enter the new 4-digit code.
5 Enter the code a second time and reconfirm by pressing OK.
6 Press ◀ to exit the menu.
→ The new 4 digit code will be take effect.
If you forget your 4 digit code
1 Press ■ to exit the 'Child Safe' screen.
2 Select ACCESS CONTROL in the Personal Preferences menu using the ▲/▼ keys.
3 The 4-digit code can be cancelled by pressing ■ four times in the 'Access Control' dialog.
4 You can then enter a new code (twice!) as described above in 'Changing the 4 digit code'.
Parental Control Disclaimer
This DVD player features the PARENTAL
CONTROL system which is to activate when playing DVD discs furnished with certain software coding only.
Also note that at the time of release of this DVD player, certain aspects of the technical standards had not been settled between set makers and the disc industries.
On this basis, Philips cannot guarantee the functioning of the PARENTAL CONTROL system and denies any liability associated with unintended watching of disc content.
If in doubt, please make sure the disc plays according to your PARENTAL CONTROL settings before you allow children access to the player.
PLAYBACK SYSTEM
DVD Video
Video CD & SVCD
CD (CD-Recordable and CD-Rewritable)
TV STANDARD (PAL/50Hz) (NTSC/60Hz)
Number of lines 625 525
Playback Multistandard (PAL/NTSC)
VIDEO PERFORMANCE
Video output 1 Vpp into 75 ohm
RGB (SCART) output 0.7 Vpp into 75 ohm
Black Level Shift On/Off
Video Shift Left/Right
AUDIO FORMAT
Digital MPEG Compressed
Digital
Dolby Digital 16, 20, 24 bits
PCM fs, 44.1, 48 kHz
Analogue Stereo Sound
Dolby Surround-compatible downmix from Dolby Digital multi-channel sound
3D Sound for virtual 5.1 channel sound on 2 speakers
AUDIO PERFORMANCE
| DA Converter | 24 bits | |
| DVD | fs 96 kHz | 4 Hz - 22 kHz |
| fs 48 kHz | 4 Hz - 22 kHz | |
| CD/VCD | fs 44.1 kHz | 4 Hz - 20 kHz |
| SVCD fs 48 kHz | 4 Hz - 22 kHz | |
| fs 44.1 kHz | 4 Hz - 20 kHz | |
| Signal-Noise (1kHz) | 110 dB | |
| Dynamic Range (1kHz) | 95 dB | |
| Crosstalk (1kHz) | 110 dB | |
| Distortion and Noise (1kHz) | 90 dB |
CONNECTIONS
| SCART | Euroconnector |
| Video Output | Cinch (yellow) |
| Audio L+R output | Cinch (white/red) |
| Digital Output | 1 coaxialIEC958 for CDDA / LPCMIEC1937 for MPEG1/2 / Dolby Digital |
CABINET
| Dimensions (w x h x d) | 435 x 75 x 210.5 mm |
| Weight | Approximately 1.9 Kg |
* typical playing time for movie with 2 spoken languages and 3 subtitle languages
Specifications subject to change without prior notice
Maintenance
Cleaning the Cabinet
- Use a soft cloth slightly moistened with a mild detergent solution. Do not use a solution containing alcohol, spirits, ammonia or abrasives.
Cleaning Discs
- When a disc becomes dirty, clean it with a cleaning cloth. Wipe the disc from the centre out. Do not wipe in a circular motion.
- Do not use solvents such as benzine, thinner, commercially available cleaners, or antistatic spray intended for analogue records.
Cleaning the disc lens
● After prolonged use, dirt or dust may accumulate at the disc lens. To ensure good playback quality, clean the disc lens with Philips CD Lens Cleaner or any commercially available cleaner. Follow the instructions supplied with the cleaner.
WARNING
Under no circumstances should you try to repair the system yourself, as this will invalidate the warranty. Do not open the system as there is a risk of electric shock.
If a fault occurs, first check the points listed below before taking the system for repair.
Problem Solution
| No power | - Check if the AC power cord is properly connected.- Press Standby-On key on the DVD player. |
| No picture - Check if the TV is switched on. | - Check the video connection. |
| Distorted picture - Sometimes a small amount of picture distortion may appear. This is not a malfunction. | |
| Completely distorted picture or black/white picture with DVD player matches the video signal of your television.or Video CD (See NTSC/PAL Conversion/Settings) | - Make sure the NTSC/PAL setting at the DVD |
| No sound or distorted sound - Adjust the volume. | - Check that the speakers are connected correctly.- Select another audio language (if available on the DVD video disc) |
| No audio at digital output - Check the digital connections. | - Check the settings menu to make sure the digital output is set to ALL or PCM.- Check if the audio format of the selected audio language matches your receiver capabilities. |
| No sound and picture | - Check that the SCART cable is connected to the correct device (See Connecting to a TV) |
| Disc can't be played | - Ensure the disc label is facing up.- Check if the disc is defective by trying another disc. |
| Picture freezes momentarily during playback | - Check the disc for fingerprints/scratches and clean with a soft cloth wiping from centre to edge. |
| No return to start-up screen when disc is removed | - Reset the unit by switching the player off, then on again. |
| The player does not respond to the remote control | - Aim the remote control directly at the sensor on the front of the player.- Reduce the distance to the player.- Replace the batteries in the remote control.- Re-insert the batteries with their polarities (+/- signs) as indicated. |
| Buttons do not work or player stops responding | - To completely reset the player; unplug the AC cord from the AC outlet for 5-10 seconds. |
| Player does not respond to some operating commands during playback. | - Operations may not be permitted by the disc. Refer to the instructions of the disc. |
| DVD Video player cannot read CDs/DVDs | - Use a commonly available cleaning CD/DVD to clean the lens before sending the DVD Video player for repair. |
If you are unable to remedy a problem by following these hints, consult your dealer or service centre.