
A300 - Gps NAVMAN - Free user manual and instructions
Find the device manual for free A300 NAVMAN in PDF.


| Product Type | GPS Sport Tool |
| Brand | Navman |
| Model | A300 |
| Category | GPS |
| Power Source | 1 x AA battery (Alkaline or NiMH) |
| Water Resistance | Water resistant |
| Display | LCD with mode icons and values |
| Buttons | 2 (Ⓞ and ▶) |
| GPS | Global Positioning System |
| Speed Units | km/h or mph (selectable) |
| Memory | Stores up to 50 laps per session |
| Odometer | Yes, resettable |
| Clock | GPS time or local time settable |
| Timer | Automatic start/stop with movement |
| Armband | Included |
| Cleaning | Soft cloth, mild soap, avoid abrasives |
| Certification | CE, FCC, Canada 210, C-Tick |
Frequently Asked Questions - A300 NAVMAN
User questions about A300 NAVMAN
0 question about this device. Answer the ones you know or ask your own.
Ask a new question about this device
Download the instructions for your Gps in PDF format for free! Find your manual A300 - NAVMAN and take your electronic device back in hand. On this page are published all the documents necessary for the use of your device. A300 by NAVMAN.
USER MANUAL A300 NAVMAN
natural_image
Solid black equilateral triangle shape on white background (no text or symbols)A300
USER GUIDE
English
A300
Welcome
Navman's 300 series GPS Sport. Tools provide an affordable and reliable way to track and store a variety of personal performance indicators.
Please read this guide carefully and familiarize yourself with the interface and functions, as well as the intended use and limitations of the Navman A300 GPS Sport.Tool.
This product complies with CE, FCC, Canada 210, and C-Tick regulations.
Operation is subject to the following two conditions:
(1) this device may not cause interference
(2) this device must accept any interference, including interference that may cause undesired operation of the device.
WARNING: Entering information or handling the Navman Sport. Tool while moving is unsafe and may cause you to be distracted or fail to observe safe practices necessary to avoid death, serious injury, collisions or accidents to you or others. Use the memory functions to review data when you are not moving.
CAUTION: The Navman A300 GPS Sport. Tool is intended for recreational use only. Do not use this product for obtaining measurements that require professional or industrial precision. Consult your physician before starting or changing any exercise programs.
Content
1.0 General information 1-6
1.1 Checklist 1-6
1.2 Care and maintenance 1-6
1.3 Water resistance 1-6
1.4 Altitude measurement 1-6
1.5 Changing the battery 1-7
2.0 Navman A300 interface 1-8
2.1 Button functions 1-8
2.2 Display screen 1-8
3.0 Getting started 1-9
3.1 Be outdoors 1-9
3.2 Fit the A300 1-9
3.3 Startup 1-9
3.3.1 Enter setup 1-10
3.3.2 Start normal operation 1-10
4.0 Setup 1-11
4.1 Setting options
4.1.1 Set time format 1-12
4.1.2 Set date format 1-12
4.1.3 Calc up 1-13
4.1.4 Beep 1-14
4.1.5 Set speed units 1-14
4.1.6 Set offset (set local time) 1-15
4.1.7 Editing settings (overview) 1-16
5.0 Normal operation 1-17
5.1 Modes
5.1.1 Speed mode 1-18
5.1.2 Speed (Average) mode 1-18
5.1.3 Speed (Maximum) mode 1-19
5.1.4 Odometer mode 1-19
5.1.5 Altitude mode 1-20
5.1.6 Clock mode 1-21
5.1.7 Timer mode 1-22
5.1.8 Timer recall mode 1-22
5.1.9 Mode operation (overview) 1-23
6.0 Restoring default settings 1-24
7.0 Glossary 1-25
8.0 Copyright 1-25
9.0 Additional warnings, disclaimers, and limitations on liability 1-26
1.0 General information
1.1 Checklist
The A300 package should contain the following items:
- armband
- quick guide
- user guide
- 1 x AA battery
- registration card
• Navman A300 GPS Sport.Tool
1.2 Care and maintenance
Do not attempt to disassemble the A300; there are no user serviceable components in this product.
The A300 is of robust design. However, care should be taken to protect from shocks or extreme heat.
Clean using only a soft cloth with mild soap and warm water. Do not use abrasive cleaning materials or products. We recommend rinsing the A300 with fresh water after any exposure to salt water.
CAUTION: Please ensure battery cover is in place during cleaning.
Store the A300 away from direct sunlight or extreme heat sources. (Remove battery before storing for an extended period.)
1.3 Water resistance
The Navman A300 GPS Sport. Tool is water resistant.
1.4 Altitude measurement
Due to the nature of GPS, inaccurate altitude measurements can sometimes be observed. Altitude readings should be viewed as indicative measurements only.
1.5 Changing the battery
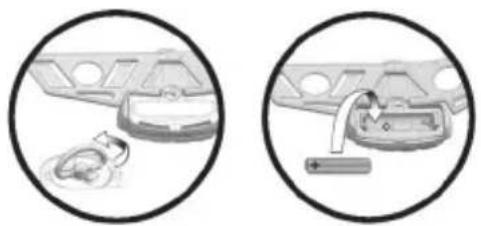
Always shut down the A300 before changing the battery.
Note: All system settings, and the calculated data that was stored at the last controlled shutdown*, are retained when the battery is removed. This information persists indefinitely until updated or reset.
natural_image
Two circular diagrams showing car interior and engine compartment with a valve (no text or symbols)- Turn D-ring anti-clockwise and slide enclosure cover down to open battery enclosure.
- Insert battery with « +» end as indicated inside enclosure.
- Replace enclosure cover (ensuring lugs at the bottom of the cover are aligned with slots in the enclosure surround), turn D-ring clockwise to seal.
text_image
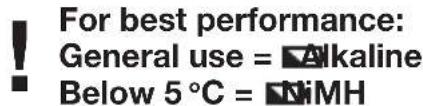
For best performance: General use = Alkaline Below 5 °C = NiMHIf battery power becomes low during operation the battery icon is displayed.

text_image
battery icon→ 3:24 51 31 - 12 PMconstant = low power
flashing = approx. 5 min before automatic shutdown**
* Press and hold ♏ to perform a controlled shutdown. ** When battery power becomes too low to continue operation, a controlled shutdown is automatically executed (current data is saved).
2.0 Navman A300 interface
2.1 Button functions

There are two control buttons, ⬙ and ▶. These buttons are pressed separately or together to turn the unit on and off, cycle through modes, and select mode options.
Throughout this guide the button icons are used as follows:
● = press this button
▶ = press this button
●▶ = press both buttons together
Note: where it is required to press and HOLD buttons, a countdown begins. To perform the required action continue to hold until the counter reaches zero; if you release the button sooner the action will not be performed.
2.2 Display screen
text_image
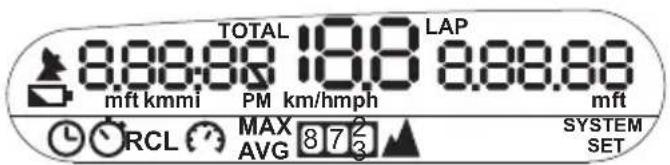
TOTAL 10.8 LAP mft kmmi PM km/hmph mft RCL MAX 8 7 2 SYSTEM AVG 3 SETThe illustration above shows the complete display capability of the A300. Only a sub-set of these elements appear at any time during operation.
The upper screen section displays the antenna ▲ and battery □ icons, as well as all values and units. The lower screen section displays the mode icons and the setup icon (SYSTEM SET).
Mode Icons
Clock

Speed (Average)

Timer

Speed (Maximum)

Timer recall

Odometer

Speed

Altitude

3.0 Getting started
3.1 Be outdoors
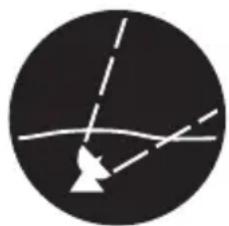
The A300 is not intended for operation indoors or under water as it uses Global Positioning System (GPS) satellites to get time and date information, and to calculate distance and speed. For best results, always use the A300 outdoors with an unobstructed view of the sky.
natural_image
Abstract geometric diagram with intersecting lines and a curved arrow, no text or symbols present√
natural_image
Simple icon of a house inside a circle with arrows indicating direction (no text or symbols)×
3.2 Fit the A300
The A300 is designed to be worn on the left upper arm. The easiest way to fit the unit is to feed the strap through the fastener to create a loose enclosure. Then slide your left arm through the enclosure and tighten the strap after the unit is in a comfortable position.


natural_image
Silhouette of a graduate head within a circle (no text or symbols)3.3 Startup
Press and hold ⬙ to turn the power on and enter setup, OR press ⬙ to turn the power on and start normal operation. First start may take up to 80 seconds to get all the satellite data
▲ Flashing = seeking GPS data
Constant = GPS data obtained
Always enter setup first if you wish to change settings. To enter setup after starting normal operation, you will need to shut down and re-start the unit.
3.3.1 Enter setup
To enter setup
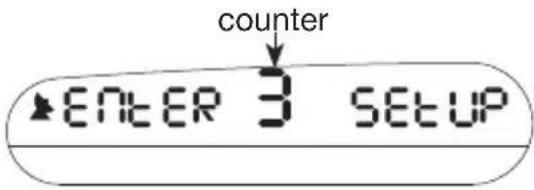
Press and hold Ⓞ to turn the power on and enter setup.
text_image
counter ENTER 3 SETUPWhen the counter reaches zero, the A300 will enter setup. If you release Ⓧ before the counter reaches zero the A300 will immediately start normal operation.
Note: To enter setup after starting normal operation you will need to restart the A300. For details about changing settings see Section 4.0.
To leave setup
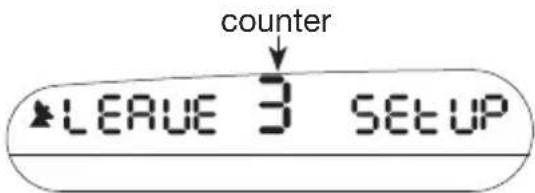
Press and hold Ⓞ to leave setup and start normal operation.
text_image
counter LEAVE 3 SETUPWhen the counter reaches zero, the A300 will leave setup and start normal operation in Speed mode. If you release ● before the counter reaches zero the A300 will remain in setup.
Note: you must leave setup first if you want to turn the power off.
3.3.2 Start normal operation
To start normal operation
Press ⚙ to turn the power on and start normal operation.
When starting directly into normal operation, the A300 will start in the mode it was in at last shutdown. (Speed mode is always displayed first when starting normal operation after leaving setup.) For details about normal operating modes see Section 5.0.
4.0 Setup
4.1 Setting options
Press and hold ● to turn the power on and enter setup. Press ▶ repeatedly to step through the setting options.
Setting options are accessed in the order shown below. See subsequent sections for details about editing settings.

flowchart
graph TD
    A["Set (12hr) Calc"] --> B["Set (31-12)"]
    B --> C[" "]
    C --> D[" "]
    D --> E["Set units (km/h)"]
    E --> F["BeepSet offset"]
    F --> D
Set (12hr)
lets you set 12hr or 24hr time format
Set (31-12)
lets you set dd-mm or mm-dd date format
Calc up
lets you set the A300 to calculate data for all movement (uphill and downhill) or for downhill movement only
Beep
When beep is ON a beep will sound when the buttons are pushed.
Set units (km/h)
lets you set the speed units to km/h or mph
Set offset (set local time)
lets you adjust the A300 to display local time
Press and hold Ⓞ to leave setup and start normal operation.
4.1.1 Set time format
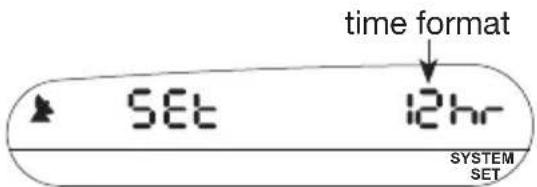
Set 12hr or 24hr time display format.
text_image
time format SET 12hr SYSTEM SETTo access this option
If necessary, press and hold ⬤ to turn the power on and enter setup. Press ⬇ repeatedly until the screen appears as shown above.
To set time format
1) Press ⬙▶ to start editing (time format option flashes).
2) Press ● or ▶ to select 12hr or 24hr.
3) Press ◎▶ to stop editing.
4) Press ▶ to go to the next option, or hold ● to leave setup.
4.1.2 Set date format
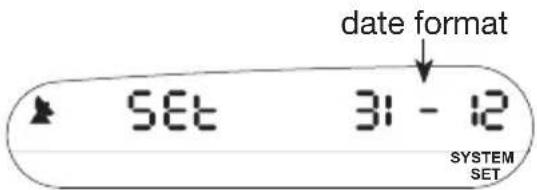
Set 'dd-mm' or 'mm-dd' date display format.
text_image
date format SET 31 - 12 SYSTEM SETTo access this option
If necessary, press and hold ⬤ to turn the power on and enter setup. Press ⬇ repeatedly until the screen appears as shown above.
To set the date format
1) Press ⬤▶ to start editing (date format example flashes).
2) Press ● or ▶ to select dd-mm or mm-dd.
3) Press ⬤▶ to stop editing.
4) Press ▶ to go to the next option, or hold ● to leave setup.
4.1.3 Calc up
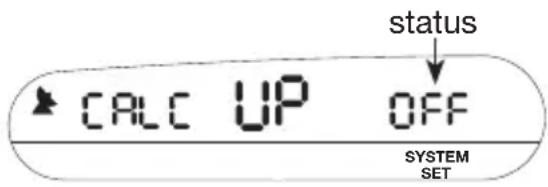
This option lets you choose to monitor and record information for all movement (uphill and downhill), or for downhill movement only.
When uphill calculation is ON, all information displayed by the Navman A300 is based on uphill and downhill movement; laps must be entered manually.
When uphill calculation is OFF, all information displayed is based on downhill movement only; laps are automatically entered if uphill movement is detected after downhill movement. Additionally, laps may be entered manually. For example, a skier may wish to enter multiple laps at certain markers on a single downhill run.
text_image
status CALC UP OFF SYSTEM SETAccess this option
If necessary, press and hold ⬤ to turn the power on and enter setup. Press ⬤ repeatedly until the screen appears as shown above.
To set the Calc up status
1) Press ⬤▶ to start editing (status flashes).
2) Press ● or ▶ to select ON or OFF.
3) Press ⬤▶ to stop editing.
4) Press ▶ to go to the next option, or hold ● to leave setup.
4.1.4 Beep
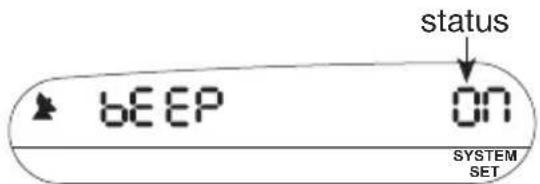
Set beep ON or beep OFF. When beep is ON, an audible 'beep' will sound when buttons are pressed.
text_image
status BEEP ON SYSTEM SETAccess this option
If necessary, press and hold ⬤ to turn the power on and enter setup. Press ▶ repeatedly until the screen appears as shown above.
To set button beep status
1) Press ◎▶ to start editing (setting status flashes).
2) Press ● or ▶ to select On or OFF.
3) Press ⬤ to stop editing.
4) Press ▶ to go to the next option, or hold ● to leave setup.
4.1.5 Set speed units
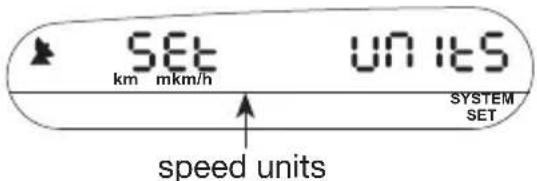
Set units for speed (km/h or mph).
text_image
SET km mkm/h UN ITS SYSTEM SET speed unitsAccess this option
If necessary, press and hold ⬤ to turn the power on and enter setup. Press ⬤ repeatedly until the screen appears as shown above.
To set speed units
1) Press ⬙▶ to start editing (speed units flash).
2) Press ● or ▶ to select km/h or mph.
3) Press ⬙▶ to stop editing.
4) Press ▶ to go to the next option, or hold ● to leave setup.
Note: Distance and altitude are displayed in units that correspond to user selected speed units. For example, if you select speed units 'km/h', then distance is displayed in 'km' and altitude in 'm'.
4.1.6 Set offset (set local time)
This option lets you adjust the A300 to display local time*. You only need to do this once, unless operating the unit in a new time zone.
(* By default the A300 displays GPS time. The A300 will perform all functions accurately without adjusting the offset to display your local time.)
Note: If you attempt to change the time offset before all GPS data are obtained, the screen displays 'no GPS' and the antenna icon flashes until all GPS data are received.
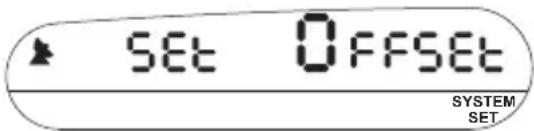
text_image
SET OFFSET SYSTEM SETAccess this option
If necessary, press and hold ⬤ to turn the power on and enter setup. Press ▶ repeatedly until the screen appears as shown above.
To set local time
1) Press to start editing (the screen now appears as shown below). The current time value flashes. The date is displayed to ensure that adjustments are made in the correct direction.
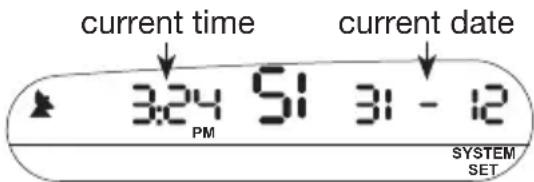
text_image
current time 3:24 51 31 - 12 PM current date SYSTEM SET2) Press ▶ repeatedly to set time display forward (press and hold ▶ to set time display forward quickly), or press ● repeatedly to set time display backward (press and hold ● to set time display backward quickly**).
3) Press ⬤▶ to stop editing.
4) Press ▶ to go to the next option, or hold ● to exit setup.
** While editing is active, holding ⬙ will not exit setup.
4.1.7 Editing settings (overview)
settings editing details
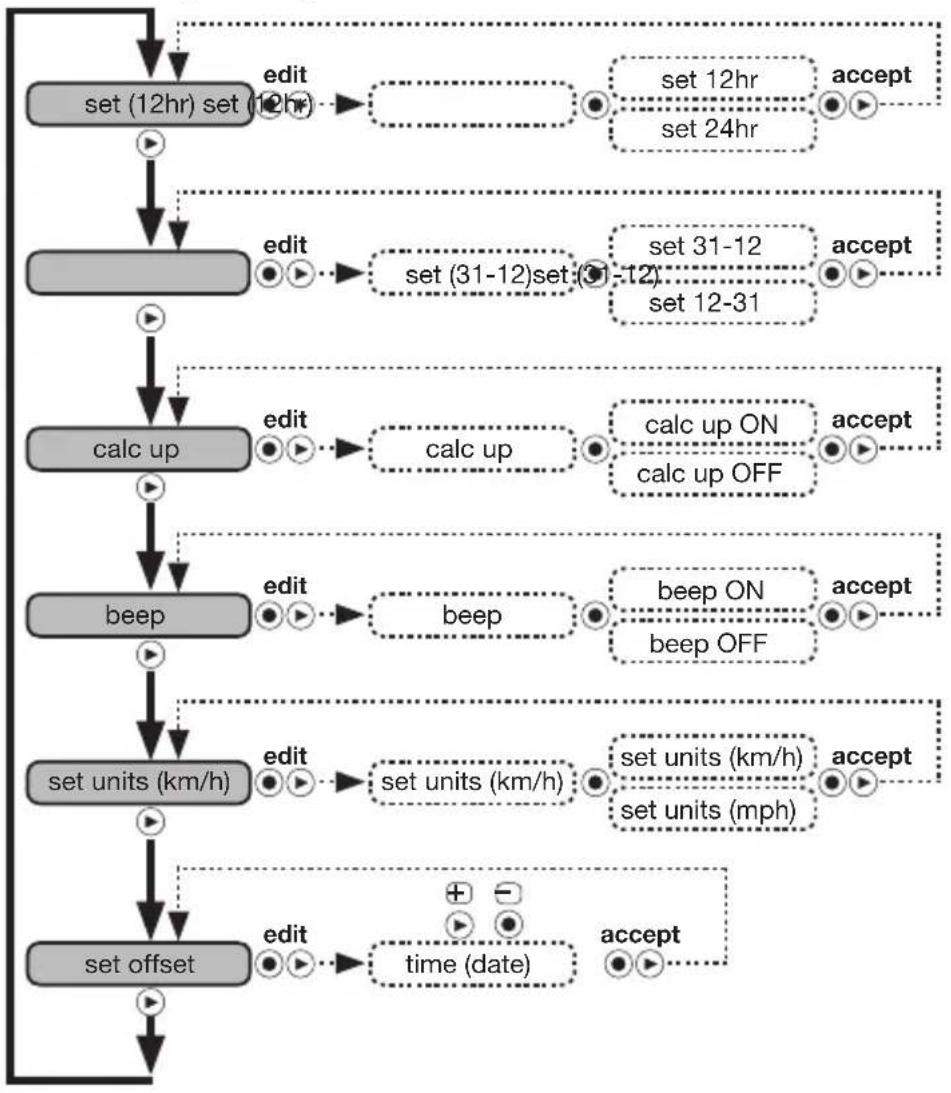
flowchart
graph TD
    A["set (12hr) set (12hr)"] --> B["edit"]
    B --> C["set 12hr"]
    B --> D["set 24hr"]
    A --> E["elect"]
    E --> F["set 12-31"]
    F --> G["set 31-12"]
    F --> H["set 12-31"]
    E --> I["edit"]
    I --> J["set (31-12) set (31-12)"]
    J --> K["set 12-31"]
    E --> L["elect"]
    L --> M["calc up"]
    M --> N["calc up ON"]
    M --> O["calc up OFF"]
    N --> P["beep"]
    P --> Q["beep ON"]
    P --> R["beep OFF"]
    Q --> S["set units (km/h)"]
    R --> T["set units (km/h)"]
    S --> U["set units (mph)"]
    T --> V["set units (mph)"]
    U --> W["set units (mph)"]
    V --> X["set offset"]
    W --> Y["set offset"]
    X --> Z["set offset"]
    Y --> AA["edit"]
    AA --> AB["time (date)"]
    AB --> AC["accept"]
    style A fill:#f9f,stroke:#333
    style E fill:#ccf,stroke:#333
    style F fill:#ccf,stroke:#333
    style G fill:#ccf,stroke:#333
    style H fill:#ccf,stroke:#333
    style I fill:#ccf,stroke:#333
    style J fill:#ccf,stroke:#333
    style K fill:#ccf,stroke:#333
    style L fill:#ccf,stroke:#333
    style M fill:#ccf,stroke:#333
    style N fill:#ccf,stroke:#333
    style O fill:#ccf,stroke:#333
    style P fill:#ccf,stroke:#333
    style Q fill:#ccf,stroke:#333
    style R fill:#ccf,stroke:#333
    style S fill:#ccf,stroke:#333
    style T fill:#ccf,stroke:#333
    style U fill:#ccf,stroke:#333
    style V fill:#ccf,stroke:#333
KEY
= press this button
= press this button
●●= press both buttons together
5.0 Normal operation
5.1 Modes
Press ⬙ to turn the power on and start normal operation.
Press ▶ repeatedly to step through the modes (press and hold
▶ to cycle through the modes quickly).
Modes are accessed in the order shown below. See subsequent sections for details about using different modes.
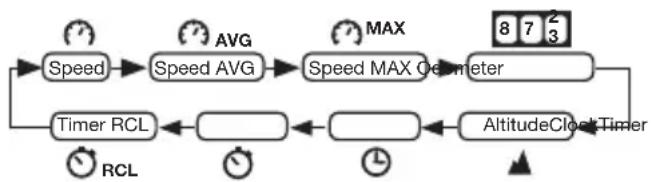
flowchart
graph TD
    A["Speed"] --> B["Speed AVG"]
    B --> C["Speed MAX Geometer"]
    C --> D["AltitudeClock Timer"]
    D --> E["Timer RCL"]
    E --> F["RCL"]
    F --> G["AVG"]
    G --> H["MAX"]
    H --> I["8 7 3"]
Speed mode
shows distance and speed
Speed (AVG) mode
shows distance and average speed
Speed (MAX) mode
shows distance and maximum speed
Odometer mode
shows total distance from last odometer reset
Altitude mode
shows total accumulated altitude and current altitude
Clock mode
shows current time and date
GPS time is displayed unless you set local time, see Section 4.1.6.
Timer mode
shows session* and lap* times
Timer recall mode
recalls stored session and lap times
(*See glossary.)
5.1.1 Speed mode
This mode lets you monitor session distance and current speed.
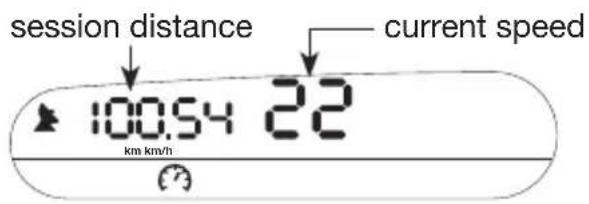
text_image
session distance current speed 100.54 22 km km/hTo access this mode
If necessary, press ⬤ to turn the power on and start normal operation. Press ▶ repeatedly until the screen appears as shown above.
While in Speed mode
- Press ⬙ to store current lap data (the screen briefly shows the lap distance, lap number, and lap time that is being stored).
- Press and hold ⬤▶ to clear all* session data. (*Does not clear odometer.)
- Press ▶ to go to the next mode.
5.1.2 Speed (Average) mode
This mode lets you monitor session distance and average speed.
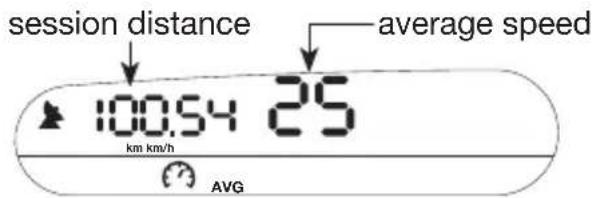
text_image
session distance average speed 100.54 25 km km/h AVGTo access this mode
If necessary, press ⬤ to turn the power on and start normal operation. Press ▶ repeatedly until the screen appears as shown above.
While in Speed (Average) mode
- Press ⬙ to store current lap data (the screen briefly shows the lap distance, lap number, and lap time that is being stored).
- Press and hold ⬤▶ to clear all* session data. (*Does not clear odometer.)
- Press ▶ to go to the next mode.
5.1.3 Speed (Maximum) mode
This mode lets you monitor session distance and maximum speed.
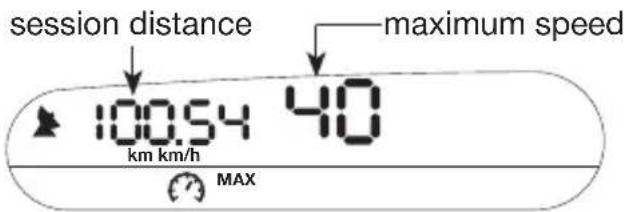
text_image
session distance 100.54 40 km km/h MAX maximum speedAccess this mode
If necessary, press ⬤ to turn the power on and start normal operation. Press ▶ repeatedly until the screen appears as shown above.
While in Speed (Maximum) mode
- Press Ⓞ to store current lap data (the screen briefly shows the lap distance, lap number, and lap time that is being stored).
- Press and hold ⬤▶ to clear maximum speed only.
- Press ▶ to go to the next mode.
5.1.4 Odometer mode
This mode shows total distance since odometer was last reset.
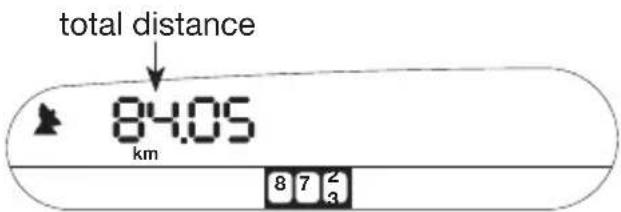
text_image
total distance 8:40.05 km 8 7 2 3Access this mode
If necessary, press ⬤ to turn the power on and start normal operation. Press ▶ repeatedly until the screen appears as shown above.
While in Odometer mode
- Press Ⓞ to store current lap data (the screen briefly shows the lap distance, lap number, and lap time that is being stored).
- Press and hold ⬤ to clear odometer only.
- Press ▶ to go to the next mode.
Note: The A300 displays distance in units corresponding to speed units (see section 4.1.5).
5.1.5 Altitude mode
This mode shows total accumulated altitude and the current altitude.
accumulated altitude current altitude
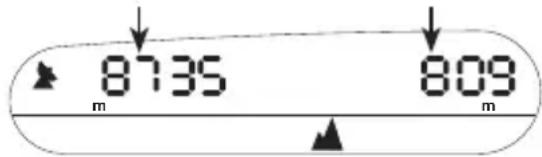
text_image
8735 809 m mAccess this mode
If necessary, press ⬤ to turn the power on and start normal operation. Press ▶ repeatedly until the screen appears as shown above.
While in Altitude mode
- Press Ⓞ to store current lap data (the screen briefly shows the lap distance, lap number, and lap time that is being stored).
- Press and hold ⬤ to clear accumulated altitude only.
- Press ▶ to go to the next mode.
Note: The Navman A300 displays altitude in units corresponding to speed units (see section 4.1.5).
5.1.6 Clock mode
Clock mode shows the current time and date.
(Time is only displayed while GPS satellite signals are available. By default, GPS time is displayed. See section 4.1.6 for instructions on setting local time.)
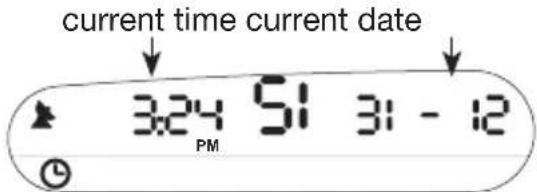
text_image
current time current date 3:24 51 31 - 12 PMAccess this mode
If necessary, press ⬤ to turn the power on and start normal operation. Press ▶ repeatedly until the screen appears as shown above.
While in Clock mode
- Press Ⓞ to store current lap data (the screen briefly shows the lap distance, lap number, and lap time that is being stored).
- Press and hold ⬤▶ to clear all* session data. (*Does not clear odometer).
- Press ▶ to go to the next mode.
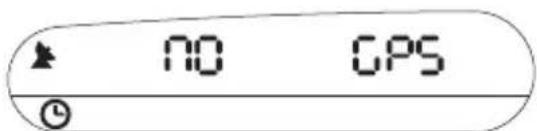
text_image
NO GPSNote: If GPS signals are not yet obtained a 'no GPS' alert is displayed. The antenna icon flashes until GPS signals are received.
5.1.7 Timer mode
Timer mode lets you monitor session time, lap number and current lap time. Up to 50 laps may be stored during each session. Each lap entry resets the current lap time to zero.
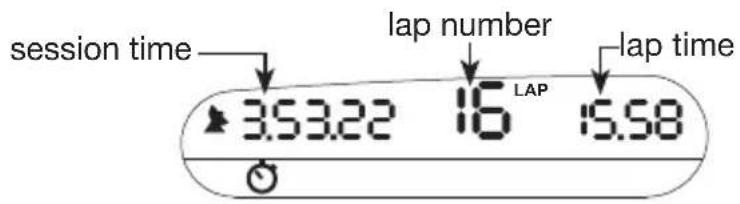
text_image
session time lap number lap time 3.53.22 16 LAP 15.58Access this mode
If necessary, press ⬤ to turn the power on and start normal operation. Press ▶ repeatedly until the screen appears as shown above.
While in Timer mode
- Press Ⓞ to store current lap data (the screen briefly shows the lap distance, lap number, and lap time that is being stored).
- Press and hold ⬤▶ to clear all* session data. (*Does not clear odometer.)
- Press ▶ to go to the next mode.
Note: The timer starts automatically whenever you start moving and stops whenever you stop moving. Uphill movement does not start the timer if 'Calc up' is OFF.
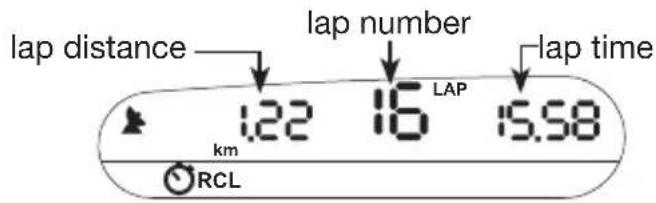
5.1.8 Timer recall mode
This mode lets you recall stored lap data.
text_image
lap distance lap number lap time 1.22 16 LAP 15.58 km RCLAccess this mode
If necessary, press ⬤ to turn the power on and start normal operation. Press ▶ repeatedly until the screen appears as shown above.
While in Timer recall mode
- press repeatedly to step through lap data
- press ⬤ to start recall again from lap 1
- press ▶ to go to the next mode
5.1.9 Mode operation (overview)
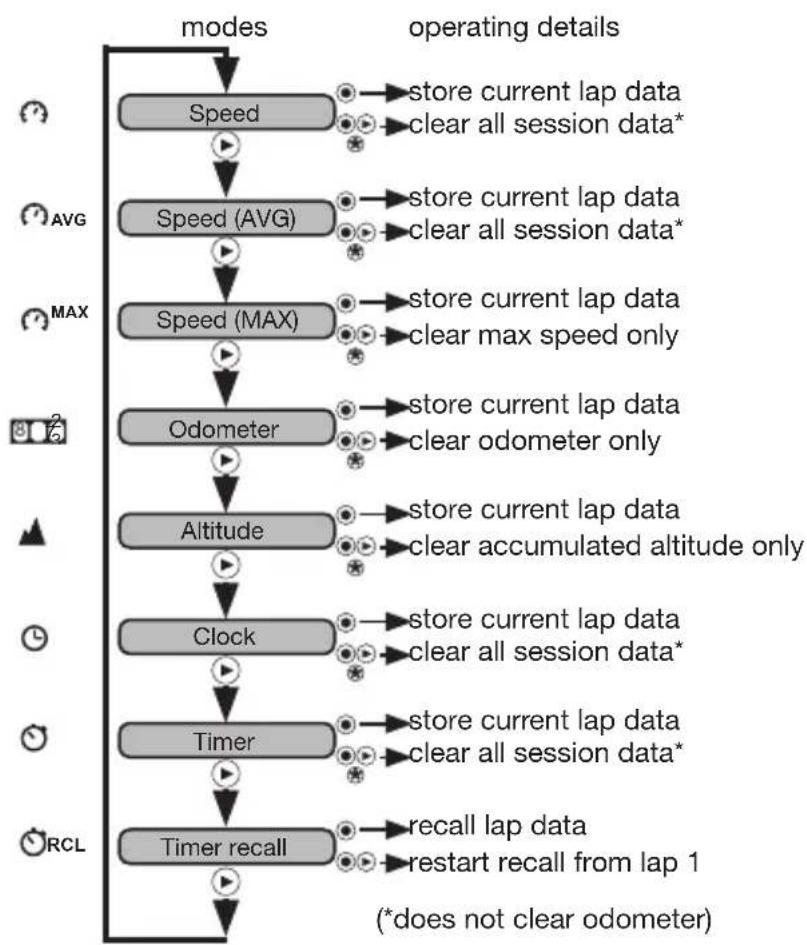
flowchart
graph TD
    A["Speed"] --> B["Speed (AVG)"]
    B --> C["Speed (MAX)"]
    C --> D["Odometer"]
    D --> E["Altitude"]
    E --> F["Clock"]
    F --> G["Timer"]
    G --> H["Timer recall"]

    style A fill:#ccc,stroke:#333
    style B fill:#ccc,stroke:#333
    style C fill:#ccc,stroke:#333
    style D fill:#ccc,stroke:#333
    style E fill:#ccc,stroke:#333
    style F fill:#ccc,stroke:#333
    style G fill:#ccc,stroke:#333
    style H fill:#ccc,stroke:#333

    note1["store current lap data\nclear all session data*"]
    note2["store current lap data\nclear all session data*"]
    note3["store current lap data\nclear max speed only"]
    note4["store current lap data\nclear odometer only"]
    note5["store current lap data\nclear accumulated altitude only"]
    note6["store current lap data\nclear all session data*"]
    note7["store current lap data\nclear all session data*"]
    note8["recall lap data\nrestart recall from lap 1\n(*does not clear odometer)."]
KEY
= press this button
= press this button
◎▶ = press both buttons together
◎◎ = press and hold both buttons together
6.0 Restoring default settings

WARNING: Restoring factory default settings clears all stored data and all user selected settings!
To restore all default factory settings
1) make sure the unit is off
2) press and hold Ⓞ to turn the unit on – DO NOT RELEASE Ⓞ
3) while holding ♏, press ⬇ five times
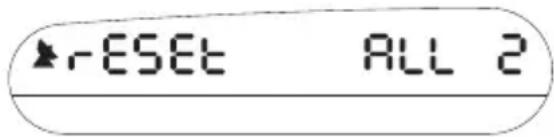
text_image
-RESET ALL 2When restoring default settings
The screen displays the message ‘reset all’ and a counter. If you stop any time down to 1 on the counter, default settings will not be restored and all current settings and data will not be cleared. After pressing the fifth time, the ‘reset done’ message appears and all settings are restored to factory defaults. A controlled shutdown is executed automatically after defaults are restored.
After factory default settings have been restored, when the A300 is next turned on you will need to enter setup if you want to display local time or adjust other setting preferences.
7.0 Glossary
Global Positioning System (GPS)
A satellite tracking system.
Lap
A lap is the distance travelled in the time between the current lap entry and the previous lap entry.
Session
A session includes all time that the Sport.Tool has been actively operating since first start-up, or since the session data was last cleared. Clearing the session data removes all stored data from the previous session except the odometer value, which must be cleared separately.
8.0 Copyright
This publication and its contents are proprietary to Navman and are intended solely for the use of its clients to obtain information about the operation of Navman Sport. Tool products, it should not be used or distributed for any other purpose. Proprietary information and specifications relating to this document or the Navman Sport. Tool products are subject to change without notice.
9.0 Additional warnings, disclaimers, and limitations on liability
It is the user's sole responsibility to set-up and use the Navman GPS Sport. Tool (the Product) in a manner that will not cause accidents, personal injury or property damage to you or others. Entering information or handling the Product while moving is unsafe and may cause you to be distracted or fail to observe safe practices necessary to avoid death, serious injury, collisions or accidents to you or others. The user of this Product is solely responsible for observing safe practices and for following the instructions including, but not limited to, those instructions relating to the care and use of the Product in the User's Guide (this document). Failure to follow instructions provided in this document relating to the care and use of the product may cause the product not to perform in its designed potential or specifications, or may result in voiding of the warranty. Navman NZ Limited (Navman) neither owns nor maintains the Global Positioning Service (GPS). Navman assumes no responsibility for the quality or continuity of the GPS service. Navman will not accept the return of products where dissatisfaction results from any changes to the GPS service.
EXCEPT AS SPECIFICALLY STATED IN ANY LIMITED WARRANTY ACCOMPANYING THIS PRODUCT, (A) NAVMAN PROVIDES THE PRODUCT WITH ALL FAULTS, (B) THE ENTIRE RISK AS TO SATISFACTORY QUALITY, PERFORMANCE, ACCURACY, AND EFFORT IS WITH THE PURCHASER AND USER, (C) NAVMAN MAKES NO WARRANTY AGAINST INTERFERENCE WITH ANY PURCHASER'S OR USER'S ENJOYMENT OF THE PRODUCT OR AGAINST INFRINGEMENT, AND (D) NAVMAN DOES NOT WARRANT THAT THE OPERATION OF THE PRODUCT WILL BE CONTINUOUS OR ERROR-FREE. IN NO CASE WILL NAVMAN HAVE ANY LIABILITY FOR ANY INCIDENTAL, CONSEQUENTIAL, PUNITIVE OR OTHER DAMAGES EVEN IF IT IS AWARE OF THE POSSIBILITY OF SUCH DAMAGES. SOME STATES AND COUNTRIES DO NOT ALLOW THE EXCLUSION OR LIMITATION OF INCIDENTAL OR CONSEQUENTIAL DAMAGES, SO THE ABOVE LIMITATION MAY NOT APPLY TO YOU. NAVMAN WILL NOT BE LIABLE FOR ANY LOSS OF DATA. ANY IMPLIED WARRANTIES WILL ONLY LAST FOR THE PERIOD STATED IN THE ACCOMPANYING LIMITED WARRANTY. SOME STATES AND COUNTRIES DO NOT ALLOW LIMITATIONS ON HOW LONG AN IMPLIED WARRANTY LASTS, SO THE ABOVE WARRANTY PERIOD MAY NOT APPLY TO YOU.
Each of these disclaimers is in addition to, and does not reduce the effect of, any other disclaimer. No dealer has the authority to change this warranty. No event that voids any warranty of the Product will have any effect on these disclaimers or limitations of liability. This disclaimer will be construed under the laws of New Zealand without regard for any conflict of law rules. Navman has taken care to ensure the information in this document is accurate. However, Navman assumes no responsibility for errors or omissions in the content of this document and no warranty of accuracy is expressed or implied. As Navman is continuously improving this Product, Navman may make changes to the Product at any time which may not be reflected in this document. Please contact your nearest Navman office if you require any further assistance. Navman' is a registered trade mark of Navman NZ Limited.