
DV-AT4000 - DVD player SANYO - Free user manual and instructions
Find the device manual for free DV-AT4000 SANYO in PDF.


| Product Type | DVD Player with 5-Disc Changer |
| Brand | Sanyo |
| Model | DV-AT4000 |
| Dimensions (W x H x D) | 17-5/16" x 2-15/16" x 11-1/8" (430 x 86 x 394 mm) |
| Weight | 6.8 lbs (5.4 kg) |
| Power Supply | AC 120 V, 60 Hz |
| Power Consumption | 16 W |
| Signal System | NTSC color |
| Supported Disc Types | DVD (Region 1 or ALL), SVCD, VCD, Audio CD, CD-R, CD-RW (MP3/JPEG) |
| Video Output | Composite, S-Video, Component (progressive/interlace switchable) |
| Audio Output | 2-channel analog, Coaxial and Optical digital (Bitstream/PCM selectable) |
| Special Features | 5-disc carousel, resume playback, bookmark (up to 6), repeat (title/chapter/track/disc), A-B repeat, angle selection, zoom (JPEG), dimmer display |
| Parental Control | Rating level 1-8 with password protection |
| Language Support | OSD: English, French, Spanish, German, Italian; Audio/Subtitle: selectable from disc |
| Remote Control | Included, requires 2x AA batteries (not supplied) |
| Accessories Included | Remote control, video cable, digital audio cable |
| Safety Certifications | FCC Class B, Class 1 Laser Product, Dolby Digital licensed |
| Maintenance | Clean cabinet with soft damp cloth; use lens cleaner for optical pickup; avoid condensation |
| Reparability | No user-serviceable parts; refer all servicing to qualified personnel. Use manufacturer-specified replacement parts. |
| Warranty | 1 year parts and labor from date of purchase (USA) |
Frequently Asked Questions - DV-AT4000 SANYO
User questions about DV-AT4000 SANYO
0 question about this device. Answer the ones you know or ask your own.
Ask a new question about this device
Download the instructions for your DVD player in PDF format for free! Find your manual DV-AT4000 - SANYO and take your electronic device back in hand. On this page are published all the documents necessary for the use of your device. DV-AT4000 by SANYO.
USER MANUAL DV-AT4000 SANYO
Thank you for purchasing this SHARP product. To obtain the best performance from this product, please read this manual carefully. It will guide you in operating your SHARP product.


SPECIAL NOTES
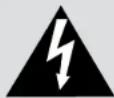

CAUTION: TO REDUCE THE RISK OF ELECTRIC SHOCK, DO NOT REMOVE COVER (OR BACK). NO USER-SERVICEABLE PARTS INSIDE. REFER SERVICING TO QUALIFIED SERVICE PERSONNEL.
Explanation of Graphical Symbols:

The lightning flash with arrowhead symbol, within an equilateral triangle, is intended to alert the user to the presence of uninsulated "dangerous voltage" within the product's enclosure that may be of sufficient magnitude to constitute a risk of electric shock to persons.

The exclamation point within an equilateral triangle is intended to alert the user to the presence of important operating and maintenance (servicing) instructions in the literature accompanying the appliance.
DD10
WARNING: TO REDUCE THE RISK OF FIRE OR ELECTRIC SHOCK, DO NOT EXPOSE THIS APPLIANCE TO RAIN OR MOISTURE.
0010
NOTE
This equipment has been tested and found to comply with the limits for a Class B digital device, pursuant to Part 15 of the FCC Rules. These limits are designed to provide reasonable protection against harmful interference in a residential installation. This equipment generates, uses, and can radiate radio frequency energy and, if not installed and used in accordance with the instructions, may cause harmful interference to radio communications. However, there is no guarantee that interference will not occur in a particular installation. If this equipment does cause harmful interference to radio or television reception, which can be determined by turning the equipment off and on, the user is encouraged to try to correct the interference by one or more of the following measures:
● Reorient or relocate the receiving antenna.
- Increase the separation between the equipment and receiver.
- Connect the equipment into an outlet on a circuit different from that to which the receiver is connected.
- Consult the dealer or an experienced radio/TV technician for help.
WARNING
FCC Regulations state that any unauthorized changes or modifications to this equipment not expressly approved by the manufacturer could void the user's authority to operate this equipment.
CAUTION:
THIS PRODUCT IS A CLASS 1 LASER PRODUCT.
USE OF CONTROLS OR ADJUSTMENTS OR PERFORMANCE OF PROCEDURES OTHER THAN THOSE SPECIFIED HEREIN MAY RESULT IN HAZARDOUS RADIATION EXPOSURE.
AS THE LASER BEAM USED IN THIS PRODUCT IS HARMFUL TO THE EYES, DO NOT ATTEMPT TO DISASSEMBLE THE CABINET. REFER SERVICING TO QUALIFIED PERSONNEL ONLY.
0207
FOR YOUR RECORDS
For your assistance in reporting this unit in case of loss or theft, please record below the model number and serial number which are located on the rear of the unit.
Please retain this information.
Model number
Serial number
Date of purchase
Place of purchase
0010
IMPORTANT SAFETY INSTRUCTIONS
1 Read Instructions - All the safety and operating instructions should be read before the product is operated.
2 Retain Instructions - The safety and operating instructions should be retained for future reference.
3 Heed Warnings - All warnings on the product and in the operating instructions should be adhered to.
4 Follow Instructions - All operating and use instructions should be followed.
5 Cleaning - Unplug this product from the wall outlet before cleaning. Do not use liquid cleaners or aerosol cleaners. Use a damp cloth for cleaning.
6 Attachments - Do not use attachments not recommended by the product manufacturer as they may cause hazards.
7 Water and Moisture - Do not use this product near water - for example, near a bath tub, wash bowl, kitchen sink, or laundry tub; in a wet basement; or near a swimming pool; and the like.
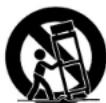
8 Accessories - Do not place this product on an unstable cart, stand, tripod, bracket, or table. The product may fall, causing serious injury to a child or adult, and serious damage to the product. Use only with a cart, stand, tripod, bracket, or table recommended by the manufacturer, or sold with the product. Any mounting of the product should follow the manufacturer's instructions, and should use a mounting accessory recommended by the manufacturer.
9 A product and cart combination should be moved with care. Quick stops, excessive force, and uneven surfaces may cause the product and cart combination to overturn.
10 Ventilation - Slots and openings in the cabinet are provided for ventilation and to ensure reliable operation of the product and to protect it from overheating, and these openings must not be blocked or covered. The openings should never be blocked by placing the product on a bed, sofa, rug, or other similar surface. This product should not be placed in a built-in installation such as a bookcase or rack unless proper ventilation is provided or the manufacturer's instructions have been adhered to.
11 Power Sources - This product should be operated only from the type of power source indicated on the marking label. If you are not sure of the type of power supply to your home, consult your product dealer or local power company. For products intended to operate from battery power, or other sources, refer to the operating instructions.
12 Grounding or Polarization - This product may be equipped with a polarized alternating-current line plug (a plug having one blade wider than the other). This plug will fit into the power outlet only one way. This is a safety feature. If you are unable to insert the plug fully into the outlet, try reversing the plug. If the plug should still fail to fit, contact your electrician to replace your obsolete outlet. Do not defeat the safety purpose of the polarized plug.
Alternate Warnings - This product is equipped with a three-wire grounding-type plug, a plug having a third (grounding) pin. This plug will only fit into a grounding-type power outlet. This is a safety feature. If you are unable to insert the plug into the outlet, contact your electrician to replace your obsolete outlet. Do not defeat the safety purpose of the grounding-type plug.
13 Power-Cord Protection - Power-supply cords should be routed so that they are not likely to be walked on or pinched by items placed upon or against them, paying particular attention to cords at plugs, convenience receptacles, and the point where they exit from the product.
14 Protective Attachment Plug - The product is equipped with an attachment plug having overload protection. This is a safety feature. See Instruction Manual for replacement or resetting of protective device. If replacement of the plug is required, be sure the service technician has used a replacement plug specified by the manufacturer that has the same overload protection as the original plug.
0109
IMPORTANT SAFETY INSTRUCTIONS (continued)
15 Outdoor Antenna Grounding - If an outside antenna or cable system is connected to the product, be sure the antenna or cable system is grounded so as to provide some protection against voltage surges and built-up static charges. Article 810 of the National Electrical Code, ANSI/NFPA 70, provides information with regard to proper grounding of the mast and supporting structure, grounding of the lead-in wire to an antenna discharge unit, size of grounding conductors, location of antenna-discharge unit, connection to grounding electrodes, and requirements for the grounding electrode.
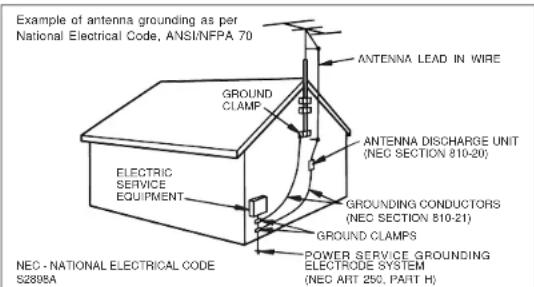
16 Lightning - For added protection for this product during a lightning storm, or when it is left unattended and unused for long periods of time, unplug it from the wall outlet and disconnect the antenna or cable system. This will prevent damage to the product due to lightning and power-line surges.
17 Power Lines - An outside antenna system should not be located in the vicinity of overhead power lines or other electric light or power circuits, or where it can fall into such power lines or circuits. When installing an outside antenna system, extreme care should be taken to keep from touching such power lines or circuits as contact with them might be fatal.
18 Overloading - Do not overload wall outlets, extension cords, or integral convenience receptacles as this can result in a risk of fire or electric shock.
19 Object and Liquid Entry - Never push objects of any kind into this product through openings as they may touch dangerous voltage points or short-out parts that could result in a fire or electric shock. Never spill liquid of any kind on the product.
20 Servicing - Do not attempt to service this product yourself as opening or removing covers may expose you to dangerous voltage or other hazards. Refer all servicing to qualified service personnel.
21 Damage Requiring Service - Unplug this product from the wall outlet and refer servicing to qualified service personnel under the following conditions:
a) When the power-supply cord or plug is damaged,
b) If liquid has been spilled, or objects have fallen into the product,
c) If the product has been exposed to rain or water,
d) If the product does not operate normally by following the operating instructions. Adjust only those controls that are covered by the operating instructions as an improper adjustment of other controls may result in damage and will often require extensive work by a qualified technician to restore the product to its normal operation,
e) If the product has been dropped or damaged in any way, and
f) When the product exhibits a distinct change in performance - this indicates a need for service.
22 Replacement Parts - When replacement parts are required, be sure the service technician has used replacement parts specified by the manufacturer or have the same characteristics as the original part. Unauthorized substitutions may result in fire, electric shock, or other hazards.
23 Safety Check - Upon completion of any service or repairs to this product, ask the service technician to perform safety checks to determine that the product is in proper operating condition.
24 Wall or Ceiling Mounting - The product should be mounted to a wall or ceiling only as recommended by the manufacturer.
25 Heat - The product should be situated away from heat sources such as radiators, heat registers, stoves, or other products (including amplifiers) that produce heat.
0109
Contents
Page
■ General Information
Accessories 6
Types of playable discs 6
Precautions 7
Controls and Indicators 8 - 10
Description of discs 11
■ Preparation for Use
System connections 12-14
Remote control....15
General control 15
Changing the initial setting of DVD 16 - 20
Language code list for disc language .....21
■ DVD Operation
Playing a disc ....22, 23
Basic operation
To select the disc 24
To locate the beginning of a chapter/track (skip) .....24
Fast forward/Fast reverse (search) 25
To start playback from the desired point (direct play) ..... 2:
To select a subtitle or audio language from the disc menu .....25
Useful operation
Still picture/Frame advance .....26
Slow-motion play 26
To play repeatedly (repeat play) .....27
To play the contents between the specified points repeatedly (A-B repeat) ..27
To change the angle 28
Playing back from the desired point (bookmark) .....28
To recall book marked position .....28
Various settings
To change the subtitle language .....29
To change the audio language (audio output) .....29
Switching sequential play mode ....30
To change the display on TV screen ....31
DVD mode operation indicators ....31
■ Video CD and Super Video CD Operation
Video CD and Super Video CD playback
Video CD with P.B.C. (playback control) 32
To play in the desired order (programmed playback) 33
■ CD, CD-R and CD-RW Operation
CD operation To play in random order (random play) ....34
MP3 and JPEG disc operation
MP3 and JPEG disc playback 35
Rotating a picture 36
To zoom in on an image (zoom) ....36
■ References
Error indicators and warnings 37
Maintenance 37
Troubleshooting chart....38,3
Specifications 39
Copyright Information:
- Unauthorized copying, broadcast, public display, transmission, public performance and rental (regardless of whether or not such activities are for profit) of disc contents are prohibited by law.
- This device is equipped with copy protection technology that causes substantial degradation of images when the contents of a disc are copied to video tape.
- This device is protected by U. S. patents and other intellectual property rights, the copyright for which belongs to Macrovision Corporation. The use of Macrovision's copy protection technology in the device is authorized by Macrovision and is intended for home use only, unless otherwise authorized in writing by Macrovision. Reverse engineering or disassembly is prohibited.
Apparatus Claims of U.S. Patent Nos. 4,631,603 4,577,216 4,819,098 and 4,907,093 licensed for limited viewing uses only.
Manufactured under license from Dolby Laboratories. "Dolby" and the double-D symbol are trademarks of Dolby Laboratories.
DV-AT4000
Accessories
Please confirm that the following accessories are included.
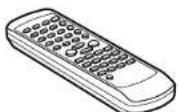
Remote control ×1 (9HX55769330)
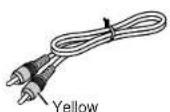
Video cable ×1 (9HX55813580)
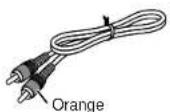
Digital audio cable ×1 (9HX55813510)
Note:
Only the above accessories are included.
Types of playable discs
The unit can play back discs bearing any of the following marks:
| Disc type Disc contents Disc size | ||
DVD Video Disc for NTSC system A Or DVD-R/DVD-RW recorded in video mode (*1) Or DVD-R/DVD-RW recorded in video mode (*1) | Audio and video (mov-ies) | 5" (12 cm)3" (8 cm) |
Super Video CD for NTSC system | Audio and video (mov-ies) | 5" (12 cm)3" (8 cm) |
Video CD for NTSC system Audio and video (mov-ies) | Audio and video (mov-ies) | 5" (12 cm)3" (8 cm) |
Audio CD Audio 5" (12 cm) Or CDV (*2) Or CDV (*2) | 3" (8 cm) | |
CD-R/CD-RW (*3) Or CD-R/CD-RW recorded in MP3 format (*4), JPEG format (*5) Or CD-R/CD-RW recorded in MP3 format (*4), JPEG format (*5) | Audio and picture 5" | (12 cm)3" (8 cm) |
(*1): The DVD-R/DVD-RW may not be played back due to properties and scratches of the disc, dirty optical pickup lens, etc.
(*2): Only the audio on the CDV can be played.
(^3): The CD-R/CD-RW may not be played back properly depending on the recording equipment or the disc.
(*4) If the sampling frequency is 44.1 or 48.1 kHz and the fixed bit rate is 128 kbps or higher, MPEG 1 Audio Layer 3 (MP3) files can be played. However, some of them may not be played depending on their conditions or formats.
(*5) JPEG or JPG picture discs also play on this unit. However, pictures may not be clear (depends on resolution and recording method), but you can still view many of them.
- For unplayable discs, see page 11.
Precautions
■ General
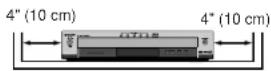
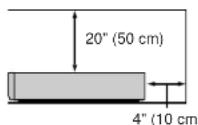
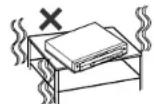
- Please ensure that the equipment is positioned in a well-ventilated area and that there is at least 4" (10 cm) of free space along the sides and back. There must also be a minimum of 20" (50 cm) of free space on the top of the unit.
- Use the unit on a firm, level surface free from vibration.
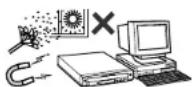
- Keep the unit away from direct sunlight, strong magnetic fields, excessive dust, humidity and electronic/electrical equipment (home computers, facsimiles, etc.) which generate electrical noise.
- Do not place anything on top of the unit.
- Do not expose the unit to moisture, to temperatures higher than 140°F (60°C) or to extremely low temperatures.
- If the unit does not work properly, unplug and plug it in again. Then turn on the unit.
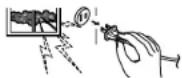
- In case of an electrical storm, unplug the unit for safety.
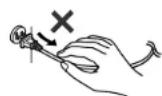
- Hold the AC power plug by the head when removing it from the AC outlet, as pulling the cord can damage internal wires.
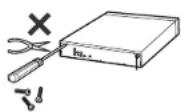
- Do not remove the outer cover, as this may result in electric shock. Refer internal service to your local SHARP service facility.
- This unit should only be used within the range of 41^ - 95^ (5°C - 35°C).
Warning:
The voltage used must be the same as that specified by this unit. Using this product with a higher voltage other than that specified is dangerous and may result in a fire or other types of accident, causing damage. SHARP will not be held responsible for any damage resulting from the use of this unit with a voltage other than that specified.
Caution:
During use the unit will get warm, do not touch warm areas of the unit for prolonged periods to avoid damage to you or the unit.
■ Care of DVD/CD discs
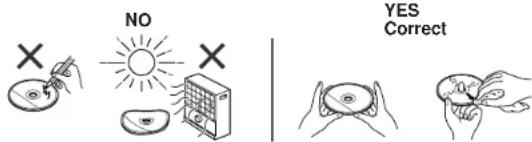
DVD/CD discs are fairly resistant to damage, however mistracking can occur due to an accumulation of dirt on the disc surface. Follow the guidelines below for maximum enjoyment from your DVD/CD collection and player.
- Do not write on either side of the disc, particularly the non-label side from which signals are read. Do not mark this surface.
- Keep your discs away from direct sunlight, heat, and excessive moisture.
- Always hold the DVD/CDs by the edges. Fingerprints, dirt, or water on the DVD/CDs can cause noise or mistracking. If a DVD/CD is dirty or does not play properly, clean it with a soft, dry cloth, wiping straight out from the center, along the radius.
Controls and indicators
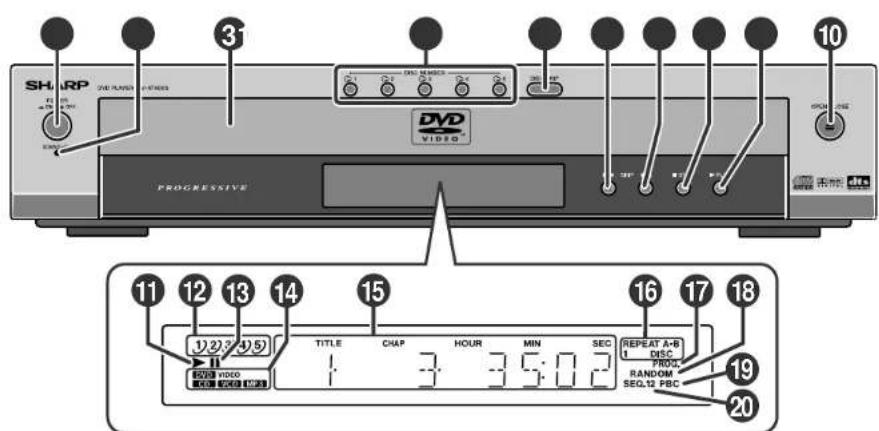
■ Main unit (front panel)
Reference page
- Power Switch 15
- Stand-by Indicator 15
3.Disc Tray 22
4.Disc Number Select Buttons 22, 24
5.Disc Skip Button 22.24
6.Chapter (track) Skip Down or Search Down Button 24.25 - Chapter (track) Skip Up or Search Up Button 24.25
- Stop Button 23
- Play Button 22
10.Disc Tray Open/Close Button 22
Reference page
11.Play Indicator 31
12.Disc Number Indicator 22
13.Pause Indicator 31
14.Disc Type Indicator 22
15. Title/Chapter Number, Track Number or Character Indicator .22. 31
16.Repeat Indicator 27
17.Program Indicator 33
18. Random Play Indicator 34
19.Playback Control Indicator 32
20.Sequential Play Indicator 30
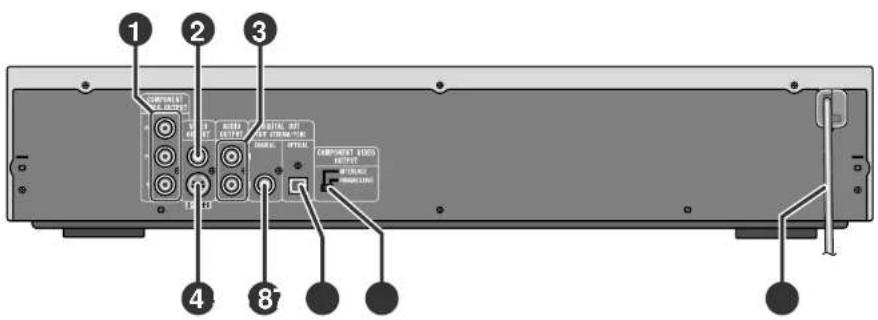
■ Main unit (rear panel)
Reference page
- Component Video Output Jacks ..... 14
2.Video Output Jack....13
3.Audio Output Jacks....13
4.S-video Output Jack 13
5.Coaxial Digital Audio Output Jack 12
6.Optical Digital Audio Output Jack 12 - Component Video Output Mode Selector Switch ..... 14
8.AC Power Cord 14
Icons used in this operation manual
Some functions may not be available depending on discs. The following icons indicate the discs that can be used in the section.
DVD ...Indicates DVDs.
SVCD ...Indicates super video CDs.
VCD ...Indicates video CDs.
CD ...Indicates audio CDs.
MP3 ...Indicates CD-R/RW with MP3 recording.
JPEG ...Indicates CD-R/RW with JPEG recording.
- Some operations may not be performed depending on discs even if they are described in this manual.
- During operation, "∅ Invalid" may be displayed on the screen. This means that the operations described in this manual are prohibited by the disc.
Controls and indicators (continued)
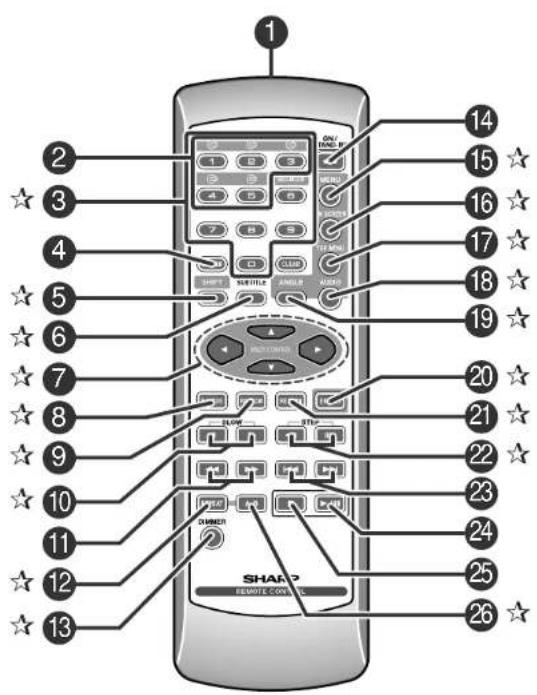
■ Remote control
Reference page
1. Remote Control Transmitter ....15
2. Disc Number Select Buttons ....22, 24
3.Direct Search Buttons 25
4. Disc Skip Button 22.24
5.Shift Button 22,24,30
6. Subtitle Select Button .....29
7.Cursor Buttons....16,32,36
8.Program Button ....33
9.Random Play Button 28,34
10.Slow-motion Play Buttons 26
11.Fast Reverse and Fast Forward Buttons 25
12.Repeat Play Button 27
13.Dimmer Button....15
14.Power On/Stand-by Button 15
15.Menu Button 16
16.TV Display Select Button 31
17.Top Menu Button 25
18.Audio Language Select or Audio Output Select Button .....29
19.Angle Select Button 28
20.Enter Button....16,32,35
21.Return Button....16
22.Frame Advance Buttons 26
23.Chapter (track) Skip Up and Down Buttons 24
24.Play or Pause Button 22,23
25. Stop Button 23
26.A-B Repeat Button 27
Buttons with "W" mark in the illustration or highlighted in bold on the list can be operated on the remote control only.
Description of discs
■ Discs that cannot be played
● DVDs without the region number "1" or
"ALL"
● DVDs with PAL system
● DVDs with SECAM system
● DVDs with MPEG sound
DVD-ROM
• DVD-RAM
CDG
● Photo CD
CD-ROM
SACD
● Discs recorded in special formats, etc.
- DVD-Audio
- When playing a DTS disc on this unit, images appear but the sound does not play. Select other audio output in "Audio Language Setting" to listen to the sound (see page 29).
- This unit adopts the NTSC system. Discs that were made in foreign countries may not be played back. Check the recording system before purchasing discs.
- The discs above cannot be played at all, or no sound is heard although images appear on the screen or vice versa.
● Faulty playback may damage the speakers and can have an adverse effect on your hearing when played at high volume settings. - You cannot play illegally produced discs.
Notes:
- A disc that has scratches or fingerprints on it may not play properly. Refer to "Care of DVD/CD discs (page 7)" and clean the disc.
- Do not play the discs of special shapes (heart or octagon shaped) as they can be ejected while rotating and cause injury.
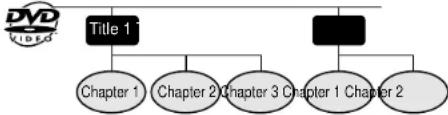
■ Title, chapter and track
DVDs are divided into "titles" and "chapters". If the disc has more than one movie on it, each movie is a separate "title", "Chapters" are subdivisions of titles.
flowchart
graph TD
    A["Title 1"] --> B["Chapter 1"]
    A --> C["Chapter 2"]
    A --> D["Chapter 3"]
    A --> E["Chapter 1 Chapter 2"]
    F[" "] --> E
Audio CDs consist of "tracks".
A "track" is each tune on an audio CD.

Note:
Title, chapter, or track numbers may not be recorded on some discs.
■ Icons used on DVD discs
Check the icons of the DVD case before playing your discs.
| Display Description | ||
| Region number (playable area number) DVD discs are programmed with region numbers indicating countries in which they can be played. This system can play discs with region number "1" or "ALL". | ||
| Format recorded on the DVD To adopt the video format to the connected TVs ("wide-screen TV" or "4:3 size TV"). | ||
| 4:3 | Recorded in 4:3. | |
| 16:9 LB | You can enjoy wide images on a wide-screen TV, and letterbox size Images on the 4:3 size TV. | |
| 16:9 PS | You can enjoy wide images on a wide-screen TV, and sides-cut 4:3 Images on the 4:3 size TV. | |
| Type of subtitles recordedExample: A desired language can be selected with the SUBTITLE button. | Recorded subtitle languages. | |
| Number of camera angles2 | Number of angles recorded on the DVD. A desired angle can be selected with the ANGLE button. | |
| Number of audio track and audio recording system2 | The number of audio tracks and audio recording system are indicated. | |
| ● The audio recorded on the DVD can be switched by using the AUDIO button.● Audio and recording system vary depending on the DVD. Check them in the DVD's manual. | ||
DV-AT4000
System connections
Caution:
Turn off all other equipment before making this connection.
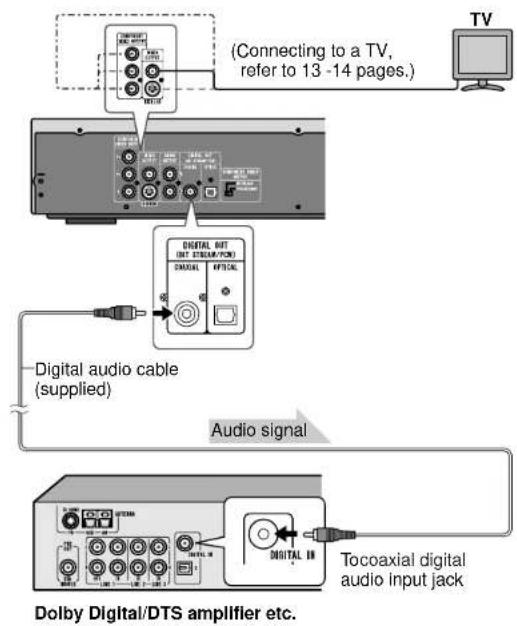
■ Digital connection to a surround amplifier, etc.
Connect the unit to a DTS digital surround amplifier, etc. to enjoy DVD/CD sounds through other equipment.
flowchart
graph TD
    A["TV"] --> B["Connecting to a TV, refer to 13-14 pages."]
    B --> C["Digital audio cable (supplied)"]
    C --> D["Audio signal"]
    D --> E["Dolby Digital/DTS amplifier etc."]
    E --> F["Tocoaxial digital audio input jack"]
■ Digital connection to a digital audio recorder, etc.
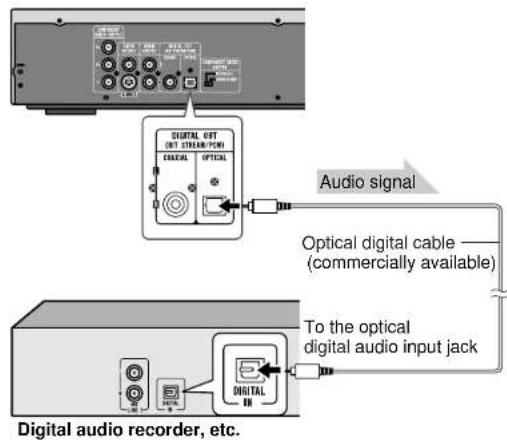
Selecting a sound signal type
When connecting other equipment to an optical digital audio output, adjust the audio output setting accordingly (see page 17). Bitstream
When the unit is connected to a processor or amplifier that supports Dolby Digital (5.1ch). LPCM
When the unit is connected to the 2-channel audio equipment or an MD recorder, the Dolby Digital does not function.
■ Connecting to a TV with a video input jack
You can enjoy DVD Images by connecting your TV and this unit with a video cable.
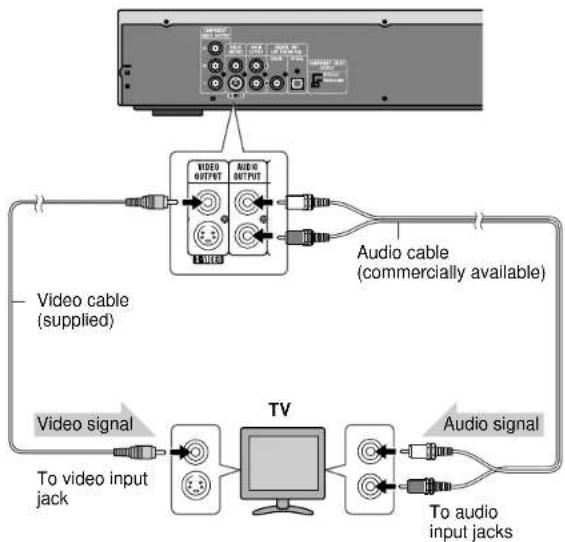
flowchart
graph TD
    A["Monitor"] --> B["Video cable (supplied)"]
    A --> C["Audio cable (commercially available)"]
    B --> D["Video signal"]
    D --> E["To video input jack"]
    E --> F["TV"]
    F --> G["Audio signal"]
    G --> H["To audio input jacks"]
    H --> I["Video cable (supplied)"]
Notes:
- Change the TV input in accordance with the connected jack.
- Do not connect other equipment between the TV and the DVD player. If they are connected via a VCR, pictures may be distorted.
- Refer to the operation manual of the equipment to be connected
- Insert the plugs fully to avoid fuzzy pictures or noise.
■ Connecting to a TV with an S-video input jack
If your TV has an S-video input jack, you can enjoy clearer DVD images by connecting an S-video cable (not supplied).
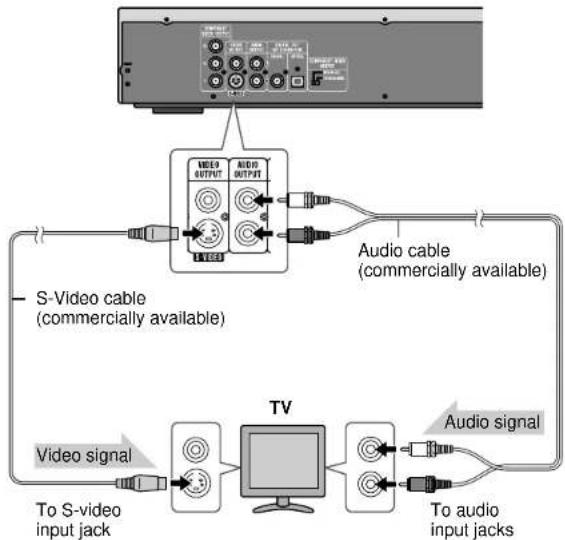
flowchart
graph TD
    A["Device"] --> B["S-Video cable (commercially available)"]
    A --> C["TV"]
    A --> D["Audio cable (commercially available)"]
    A --> E["Video signal"]
    E --> F["To S-video input jack"]
    F --> G["Switch"]
    G --> H["Computer"]
    H --> I["Switch"]
    I --> J["Audio signal"]
    J --> K["To audio input jacks"]
Caution:
When the video and S-video cables are both connected, the images from the S-video input jack appears on your TV.
System connections (continued)
■ Connecting to a TV with component video input jacks
If the connected TV supports progressive scanning, set the video mode selector switch to PROGRESSIVE to enjoy high-density images. If not, switch back to INTERLACE.
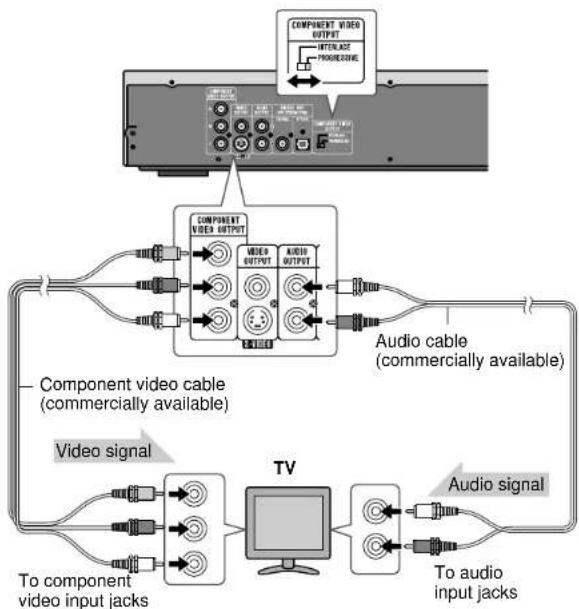
flowchart
graph TD
    A["Component video input jacks"] --> B["TV"]
    B --> C["Audio signal"]
    C --> D["To audio input jacks"]
    D --> E["Audio cable (commercially available)"]
    E --> F["COMPONENT VIDEO OUTPUT"]
    F --> G["INTERRUPT PROGRESSIVE"]
    G --> H["COMPONENT VIDEO OUTPUT"]
    H --> I["VIDEO OUTPUT"]
    I --> J["COMPONENT VIDEO OUTPUT"]
    J --> K["VIDEO OUTPUT"]
    K --> L["COMPONENT VIDEO OUTPUT"]
    L --> M["VIDEO OUTPUT"]
    M --> N["COMPONENT VIDEO OUTPUT"]
    N --> O["VIDEO OUTPUT"]
    O --> P["COMPONENT VIDEO OUTPUT"]
    P --> Q["VIDEO OUTPUT"]
    Q --> R["COMPONENT VIDEO OUTPUT"]
    R --> S["VIDEO OUTPUT"]
    S --> T["COMPONENT VIDEO OUTPUT"]
    T --> U["VIDEO OUTPUT"]
    U --> V["COMPONENT VIDEO OUTPUT"]
    V --> W["VIDEO OUTPUT"]
    W --> X["COMPONENT VIDEO OUTPUT"]
    X --> Y["VIDEO OUTPUT"]
    Y --> Z["COMPONENT VIDEO OUTPUT"]
Notes:
- If your TV has different indications for the component video inputs (Y, CB and CR or Y, B-Y and P-Y), connect jacks with its matching color.
- Do not connect to a component video input jack designed for the high-vision system, which is not DVD-compatible (the images may be distorted or not appear).
What is progressive scanning?
The conventional TV system displays 30 frames of still images per second to complete sequential movement (interlaced scanning). Whereas, progressive scanning displays one frame every 1/60th of a second (60 frames per second) to ensure less flickers and high density images.
■ Connecting the AC power cord
After checking all the connections, plug the AC power cord of this unit into the AC outlet.
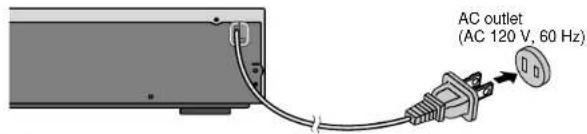
Note:
Unplug the AC power cord from the AC outlet if the unit will not be in use for a prolonged period of time.
Remote control
■ Battery installation
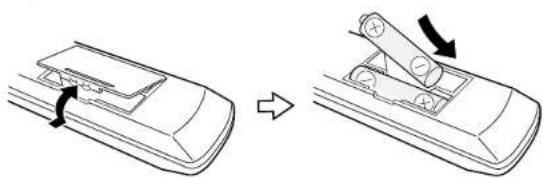
Use 2 "AA" size batteries (UM/SUM-3, R6, HP-7 or similar). Batteries are not included.
1 Remove the battery cover.
2 Insert the batteries according to the direction indicated in the battery compartment.
When inserting or removing the batteries, push them toward the battery terminals.
3 Replace the cover.
natural_image
Diagram showing a car interior with a scroll being adjusted, no text or symbols presentPrecautions for battery use:
- Replace all old batteries with new ones at the same time.
- Do not mix old and new batteries.
- Remove the batteries if the unit will not be used for long periods of time. This will prevent potential damage due to battery leakage.
Caution:
- Do not use rechargeable batteries (nickel-cadmium battery, etc.).
- Installing the batteries incorrectly may cause the unit to malfunction.
Notes concerning use:
- Replace the batteries if the operating distance is reduced or if the operation becomes erratic.
- Periodically clean the transmitter on the remote control and the sensor on the unit with a soft cloth.
- Exposing the sensor on the unit to strong light may interfere with operation. Change the lighting or the direction of the unit.
- Keep the remote control away from moisture, heat, shock, and vibrations.
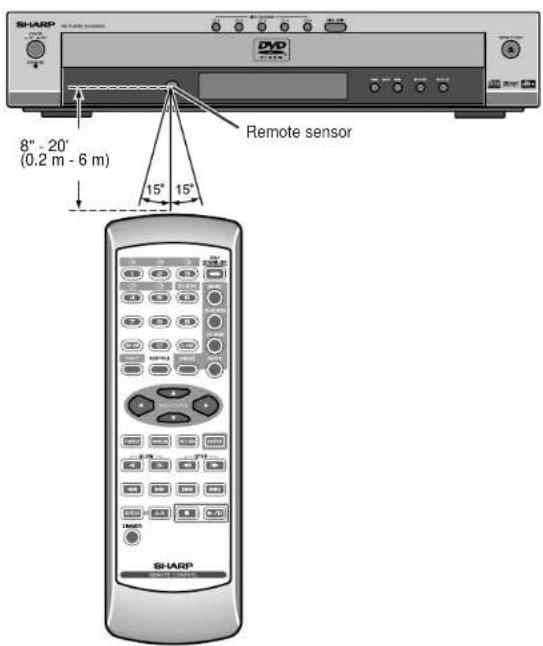
■ Remote control range
The remote control can be used within the range shown below:
Changing the initial setting of DVD
Turn on the TV, and switch the input to the "VIDEO 1" or "VIDEO 2" etc. accordingly.
Settings are retained even if the unit is set to the stand-by mode.
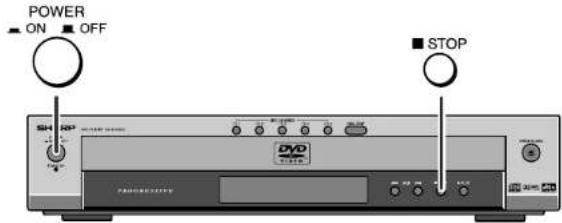
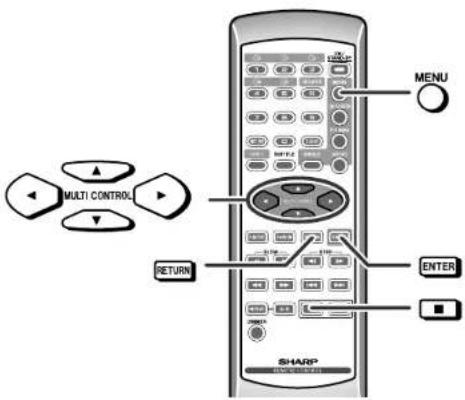
1 Press the POWER switch on the main unit to turn the power on.
● The startup screen appears.
● The disc should be stopped at this time.
- While the stand-by indicator is lit (in the stand-by mode), the unit can be turned on with the ON/STAND-BY button on the remote control.
2 After pressing the ■button, press the MENU button.
3 Press the ▲or ▼button to select the main menu and press the ▶button.
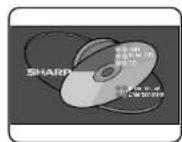
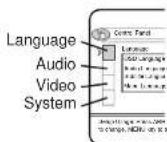
4 Press the ▲ or ▼ button to select the submenu and press the ENTER button.
If you press the ◀ button during the operation, the previous display disappears.
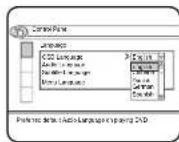
5 Press the ▲or ▼button to change the setting and press the ENTER button.
- If you press the RETURN button during the operation, the previous display disappears.
● To change other settings, begin from step 3.
6 Press the MENU button.
The new setting is memorized.
Note:
You cannot display the setup screen while a disc is playing.
| Setting Selectable parameters (* indicates initial settings.) Description | ||||
| Language | 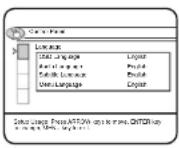 | OSD Language English* | Selects the initial or playback setting language. French Spanish German Italian | |
| Audio Language English* | Selects the language audible from the speakers. Chinese : | |||
| Subtitle Language English* | Selects the subtitle displayed on the TV screen. Chinese : | |||
| Menu Language English* | Selects the disc menu language. Chinese : | |||
| Audio (Digital output) LPCM | 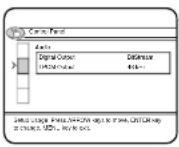 | Digital Output BitStream* | Selects a sound signal type sent from the digital audio output jack. BitStream: When the unit is connected to a processor or amplifier that supports Dolby Digital (5.1ch). LPCM: When the unit is connected to the 2-channel audio equipment or an MD recorder, the Dolby Digital does not function. | |
| LPCM Output 48 kHz* | Converts the sound signal recorded by PCM of 96 kHz into 96 kHz | 48 kHz. | ||
DV-AT4000
Changing the initial setting of DVD (continued)
| Setting Selectable parameters (* indicates initial settings.) Description | ||||
| Video | 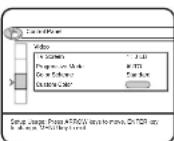 | TV Screen 4:3 LB* The screen mode should be set according to the connecting TV type (for details, see page 20). | ||
| Progressive Mode AUTO*WEAVEBOB | ||||
| Color Scheme Standard*Colors can be adjusted.BestSoftSharpCustomed | ||||
| Custom Color Brightness Fine color adjustments are possible. | ||||
| The custom color can contrastSaturationSharpness | ||||
| System | 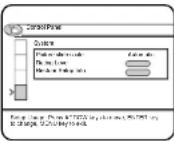 | Picture slide scale Fixed | Automatic* JPEG Images | Fixed:are automatically reduced to fit the TVscreen, and do not change when smaller than the screen size.Automatic:Displays JPEG images in the TV screen size. |
| Rating Level 8* - 1Please enter a 4-digit password.(Default setting: 0000) | New Password Sets the | 8 - 1:viewing restriction level of the DVD software.New Password:Password setting or change (for details, see page 20). | ||
| Restore Setup Info ---- This resets all settings, except for "Rating Level" and "Password", to the factory defaults. | ||||
■ Disc language
| Indicator Setting | |
| OSD Language | A language for screen display can be set, such as for initial settings or messages.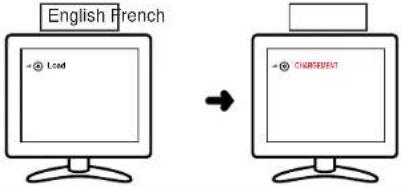 |
| Audio Language | A language for audio can be set.You can specify a language for conversation and narration.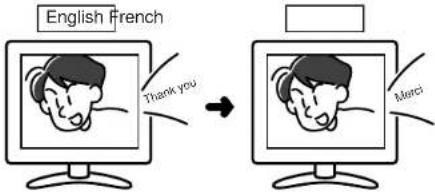 |
| Indicator Setting | |
| Subtitle Language | A language for subtitle can be set.The subtitle is displayed in a specified language. |
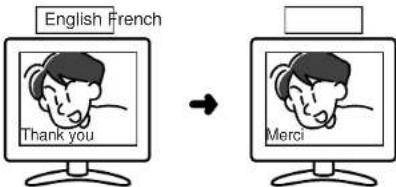 | |
| Menu Language | A language for disc menus can be set.Menu screens are displayed in a specified language. |
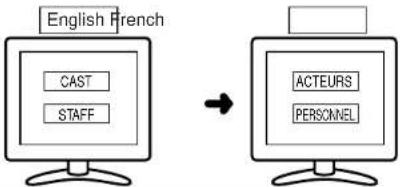 | |
DV-AT4000
Changing the initial setting of DVD (continued)
■ Video format
| Indicator Setting | ||
| 4:3 LB | When playing a wide image (16:9) disc, black bands are inserted at the top and bottom and you can enjoy full wide im-ages (16:9) on a 4:3 size TV. | 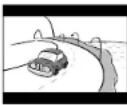 |
| A 4:3 disc is played in 4:3. | ||
| 4:3 PS | When playing a wide image (16:9) disc, the left and right sides of the image are cut (pan scan) to display a natural-look-ing 4:3 size image. | 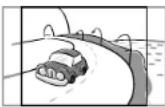 |
| A wide Image disc without pan scan PS is played back in 4:3 letterbox. | ||
| A 4:3 disc is played in 4:3. | ||
| 16:9 | A wide image (16:9) is displayed when playing a wide image (16:9) disc. | 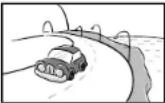 |
| ● When playing a 4:3 image disc, the image size depends on the setting of the connected TV.● If you play back a wide image (16:9) disc with this unit connected to a 4:3 TV, the vertically shrunk image is displayed. | ||
Note:
When playing the disc with a fixed video format, it will not change even if the TV screen size is changed.
■ Rating level setting
| Indicator Setting | |
| 8 | DVD software of any grade (adult/general/children) can be played back. |
| 7 - 2 | Only DVD software intended for general use and children can be played back. |
| 1 | Only DVD software intended for children can be played back. |
Notes:
- To change the rating level, enter a 4-digit password. It is set to 0000 by default.
- While playing a disc with parental lock, the display may appear requesting a password in order to watch some restricted scenes. In such a case, enter the password to temporarily change the rating level.
■ To change the password
1 After pressing the ■button, press the MENU button.
2 Press the ▲or ▼button to select "System" and press the □button.
3 Press the ▲ or ▼button to select "Rating Level" and press the EN-TER button.
4 Enter a 4-digit password with the direct buttons on the remote control and then press the ENTER button.
(Default setting: 0000)
5 Press the ▲or ▼button to select "New Password" and press the EN-TER button.
6 Enter a 4-digit password with the direct buttons on the remote control and then press the ▼button.
7 Enter the password again for confirmation.
8 Press the ENTER button.
9 Press the MENU button.
When you forget your password
1 After pressing the Button, press the MENU button.
2 Press the ▲ button to select "System" and press the button.
3 Press the 🔊 button to select "Restore Setup Infor" and press the button
4 Enter 1397 with the direct buttons and then press the ENTER button. When resetting is done according to this method, all settings, including the settings for password and parental level, will be reset to the factory defaults.
General control
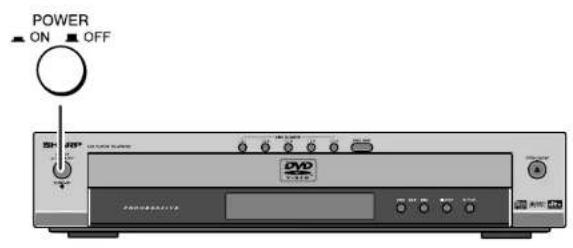
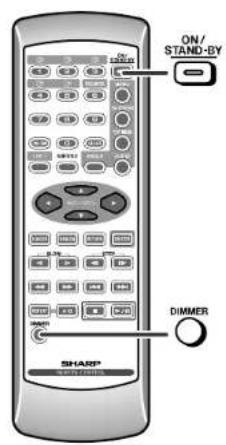
■ To turn the power on
1 Set the POWER switch on the main unit to -ON.
The stand-by indicator lights up.
2 When the stand-by indicator is lit, you can turn the power on or put the unit in stand-by mode, using the ON/STAND-BY button on the remote control.
After use:
When not using this unit, set the POWER switch on the main unit to OFF. The stand-by indicator will go out.
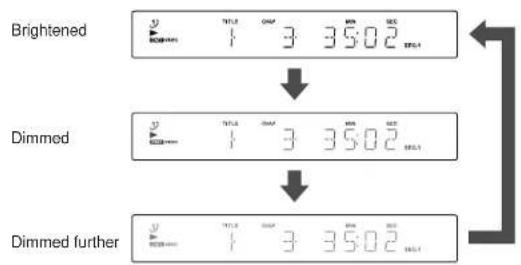
■ To change the display brightness (3 levels)
You can switch the display brightness by pressing the DIMMER button. Each time the button is pressed, the display brightness changes in the following order.
Playing a disc
Turn on the TV, and switch the input to the "VIDEO 1" or "VIDEO 2" etc. accordingly.
![ON/ STAND-BY 1 G 5 GOS S&P SHIFT MULTI CONTROL ENTER [/11] SHARP](/content/2026/05/814881/images/d8b37bbccf5abb092881c4608f0a968c7476ead010c9ed3f3ef306e87028f876.jpg)
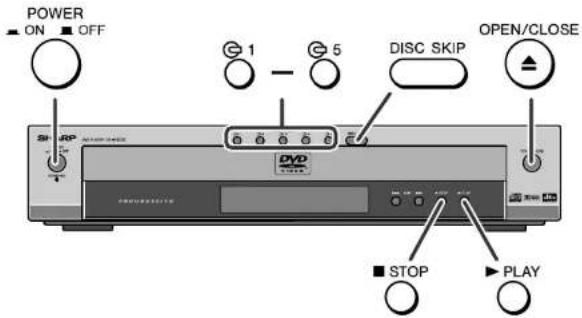
1 Press the POWER switch on the main unit to turn the power on.
While the stand-by indicator is lit (in the stand-by mode), the unit can be turned on with the ON/STAND-BY button on the remote control.
2 Press the OPEN/CLOSE ▲button to open the disc tray.
3 Place the disc on the disc tray, label side up.
- To set a disc to a different disc tray, press the DISC SKIP button to turn the disc tray, then place the disc in the open position.
- Be sure to place 3" (8 cm) discs in the middle of the disc positions.
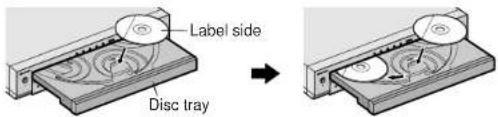
4 Press the OPEN/CLOSE ▲button to close the disc tray.
If the disc you are using supports auto start, it starts playing automatically (even if you do not press the ▶PLAY (/▶button), as soon as you close the disc tray.
5 To select the disc you want to play first, press one of the €1 - 5 buttons on the main unit.
This can be operated by pressing the SHIFT button and one of the 4 - 5 buttons on the remote control at the same time.
Selected disc number
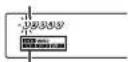
Selected disc type
6 If you cannot start playback in step 4, press the ▶PLAY ( ▶) button.
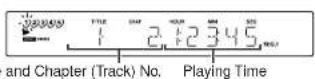
When the menu screen appears, select an item using the ▲,▼on◀ button and then press the ENTER button.
■ To interrupt playback
Press the ▶PLAY ( ) button.
To resume playback from the same point, press the▶PLAY (▶)Button.
■ To stop playback
DVD:
Press the ■STOP ( ) button twice.
Resume play starts when you press it once.
SVCD/VCD/CD/MP3/JPEG:
Press the ■STOP (■button.
When the unit is left unoperated for more than 5 minutes after pressing the stop button, a screen saver appears.
Press any button on the main unit or remote control. The startup screen returns.
Caution:
- Close the disc tray when not in use. Otherwise, dust may accumulate inside and cause malfunction to the unit.
- The unit is slightly heated when used for a long time. It does not mean the unit is damaged.
- When attempting to play discs with scratches or of a different region number, or unplayable or restricted ('1) discs, an error message will appear on the TV display and the disc will not play.
(*1)Viewing is prohibited on some DVDs according to the audience age.
Notes:
- When the unit is turned on, no operation is possible for 5 seconds as the unit is proceeding the initial setting.
- Stop positions may be recorded on some discs. When you play such a disc, play-back stops there.
- During an operation, "Invalid" may appear indicating that the operation is disabled by the disc.
■ To resume playback after stopping (resume playback) DVD
You can resume playback from the point that the playback is stopped.
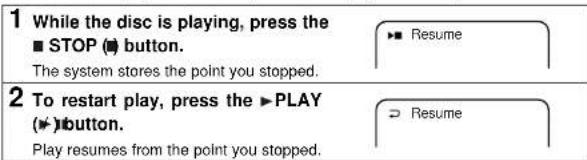
Notes:
● The sequential playback feature is disabled on some discs.
- Depending on the disc, playback may resume from slightly before the stopped position.
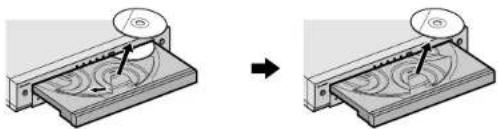
■ To remove discs
While in the stop mode, press the OPEN/CLOSE ▲button. To remove a different disc, press the DISC SKIP button to turn the disc tray.
natural_image
Diagram showing two views of a CD or DVD device with rotating blades and a circular top, no text or symbols present.● During playback, you can replace other discs.
- When the disc tray is open, playback cannot be stopped. Close it.
- DVD discs cannot be removed when the unit is in the stand-by mode for resume play (▶Resume lit). Close the tray, cancel the mode and try again.
Basic operation
■ To select the disc DVD SVCD VCD CD MP3 JPEG
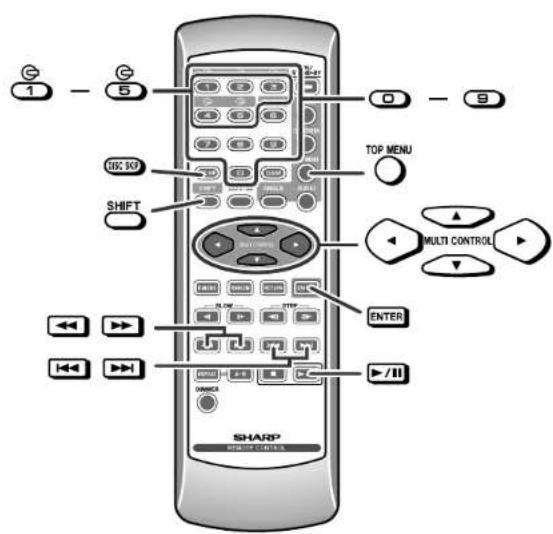
While in the stop or playback mode, pressing the SHIFT button and one of the 1 - 5 buttons on the remote control to select the desired disc.
Selected disc number
- This can be operated by press one of the 4 - 5 buttons on the main unit at the same time.
- The next disc can be played by pressing the DISC SKIP button.
■ To locate the beginning of a chapter/track (skip) DVD SVCD VCD CD MP3 JPEG
You can skip the current chapter (track) to the next.
While a disc is playing, press the
button.
● The ▶ button skips to the next chapter (track).
- The button skips to the beginning of the current chapter (track). Press the button again to skip to the beginning of the previous chapter (track).
Notes:
- The skip feature is disabled on some discs. Some discs do not display the chapter (track).
- On a DVD, skip does not operate between titles.
- When operating SVCD/VCD with the P.B.C. function, set the sequential play mode to SEQ.2 (see page 30).
■ Fast forward/Fast reverse (search)

VCD CD
You can search the desired point as you play the disc.
1 While a disc is playing, press the ◀ or ▶ button.
The scanning speed will change as follows at each press of the button.
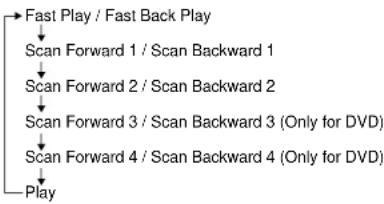
flowchart
graph TD
    A["Play"] --> B["Scan Forward 4 / Scan Backward 4 (Only for DVD)"]
    B --> C["Scan Forward 3 / Scan Backward 3 (Only for DVD)"]
    C --> D["Scan Forward 2 / Scan Backward 2"]
    D --> E["Scan Forward 1 / Scan Backward 1"]
    E --> F["Fast Play / Fast Back Play"]
The disc is forwarded by the ▶ button and reversed by the button.
2 Press the ➕ button to return to the normal playback.
Notes:
- On some discs, the search function is disabled.
- On a DVD, search does not operate between titles.
- While searching on a DVD or video CD the sound is not heard and the subtitles will not appear. With an audio CD you will not hear the sound.
- When search is performed during the DVD playback, pictures may not be forwarded or reversed in the search speed specified in this manual, depending on the disc or the scene being played.
- The same operation can be performed by holding down the key button on the main unit for 2 seconds or more.
■ To start playback from the desired point (direct play) DVD SVCD VCD CD MP3 JPEG
You can playback from desired title (track).
While in the stop or playback mode, press the direct number buttons (0 - 9) to select the title (track) number.
Playback starts in 3 seconds.
To enter title (track) numbers of 2 digits or more, press the direct number buttons within 2 seconds.
Notes:
- The direct play function is not performed with discs on which no titles (tracks) are recorded.
- Direct play feature is disabled on some discs.
● Playback starts from the first chapter of the title. - Playback does not start if you specify a title (track) number that is not listed on the disc.
- When operating SVCD/VCD with the P.B.C. function, set the sequential play mode to SEQ.2 (see page 30).
■ To select a subtitle or audio language from the disc menu DVD
You can select the desired subtitle or audio language and sound system on your DVD if it has a disc menu.
1 While the disc is stopped or played, press the TOP MENU button to display the disc menu.
Example
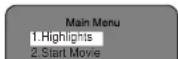
2 Press the ▲ ▼ or ▶ button to change the setting and press the ENTER button. You can also use the direct number buttons for some discs.
Note:
The procedure shown here provides only general steps. The actual procedure for using the disc menu depends on the disc you are using. See the disc jacket for details.
Useful operation
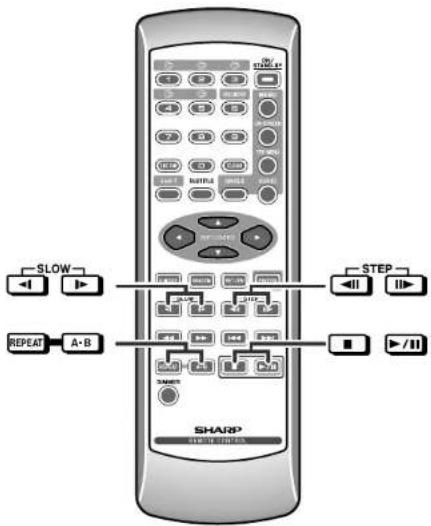
■ Still picture/Frame advance

You can freeze the image and advance frame by frame.

2 Press the ▶ button to return to the normal playback.
Notes:
● Still and frame advance features are disabled on some discs.
- The button does not allow you to operate Still picture and Frame advance on SVCD/VCD.
■ Slow-motion play

You can slow down the playback speed.
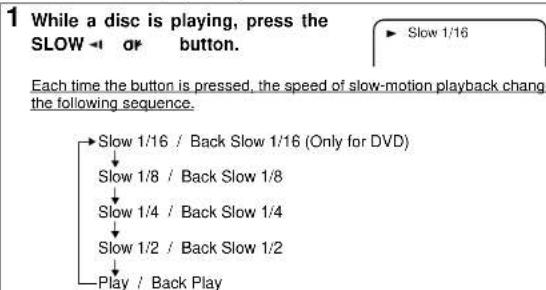
2 Press the ▶ button to return to the normal playback.
Notes:
- On some discs, the slow-motion playback functions are disabled.
- The button does not allow you to operate slow-motion play on SVCD/VCD.
■ To play repeatedly (repeat play) DVD SVCD VCD
CD MP3 JPEG
You can play a chapter (track) or a title repeatedly by specifying it during playback.
1 While the disc is playing, press the REPEAT button.
TV screen On the unit
Repeat Chapter
Each time the button is pressed, the repeat play mode changes in the following order.
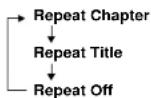
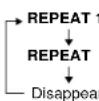
Repeat the currently playing chapter. Repeat the currently playing title. The normal playback
For SVCD/VCD/Audio CD, the mode changes as follows:
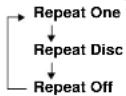
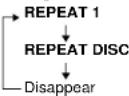
Repeat the currently playing track. Repeat the currently playing disc. The normal playback
For MP3/JPEG discs, the mode changes as follows:
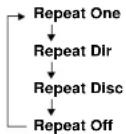
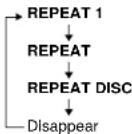
Repeat the currently playing file. Repeat the currently playing folder (directory). Repeat the currently playing disc. The normal playback
2 Select "Repeat Off" by pressing the REPEAT button repeatedly to return to the normal playback.
Caution:
After performing repeat play, be sure to press the ■ button. Otherwise, the disc will play continuously.
Notes:
- You may not be able to use this function with some discs.
- If you press another button during the repeat play, the playback may be canceled.
- When operating SVCD/VCD with the P.B.C. function, set the sequential play mode to SEQ.2 (see page 30).
■ To play the contents between the specified points repeatedly (A-B repeat) DVD SVCD VCD
CD
You can play the desired portion repeatedly by specifying it during playback.
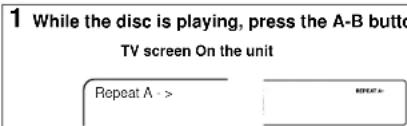
This registers the start point (A).
2 Press the A-B button again.

This starts A-B repeat from the start point (A) to the end point (B).
3 Press the A-B button to return to the normal playback.
Notes:
● A-B repeat play is disabled on some discs.
● A-B repeat play for DVD is possible only within a title.
● Perform A-B repeat play of an audio CD within a track
- Some scenes in DVD may not allow A-B repeat play.
- When operating SVCD/VCD with the P.B.C. function, set the sequential play mode to SEQ.2 (see page 30).
Useful operation (continued)
■ To change the angle
DVD
You can change the angle of view when playing a DVD disc that contains scenes recorded from multiple angles.
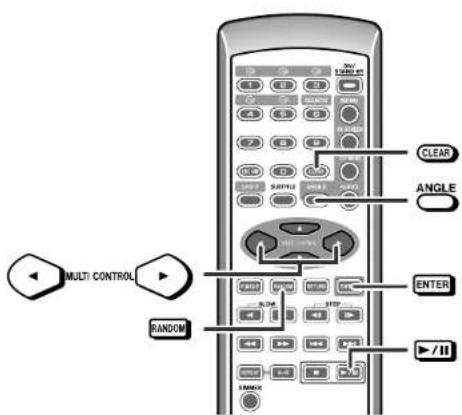
1 While a disc is playing, press the ANGLE button.
Angle information
Angle information does not appear if not recorded on the disc.
Press the ON SCREEN button on the remote control to check angle information (see page 31).
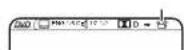
2 Within 3 seconds, press the ANGLE button repeatedly to select the desired angle.
Notes:
- Some DVDs prohibit changing the angle.
- Refer to the manual of the disc as the operation may vary depending on the disc.
■ Playing back from the desired point (bookmark) DVD SVCD VCD
During playback, make bookmarks. Playback can be resumed from the points. Up to six bookmarks can be used per disc.
1 While a disc is playing, press the RANDOM button.
The bookmark screen is displayed.
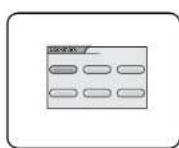
2 Press the or button to select the desired bookmark number and then press the ENTER button at the desired points.
If you enter a wrong point, press the CLEAR button and retry.
3 Press the RANDOM button to exit the bookmark screen.
Book mark selections are memorized until a disc is removed or to turn the power off.
■ To recall book marked position
1 While a disc is playing, press the RANDOM button.
2 Press the ◀ or ▶ button to select a bookmark number, and then press the ▶ button.
Notes:
● The bookmark function is not available for some discs.
- When operating SVCD/VCD with the P.B.C. function, set the sequential play mode to SEQ.2 (see page 30).
Various settings
The subtitle language and the audio language you select are reset each time you set this unit to the stand-by mode or change the disc. To keep your preferred languages, set them in the initial setting screen (see page 16).
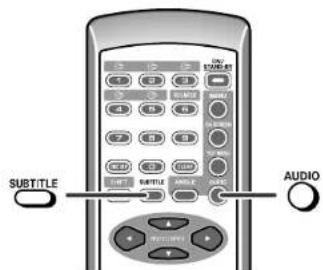
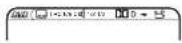
■ To change the subtitle language

You can change the subtitle language or hide the subtitle during playback.
1 While a disc is playing, press the SUBTITLE button.
2 Within 3 seconds, press the SUBTITLE button repeatedly to select the desired subtitle language.
Notes:
- Some DVDs prohibit changing the subtitle language.
- If no subtitles are recorded on the disc, "Invalid" is displayed.
- It may take a little time to switch the subtitle language to the selected one.
● The subtitle cannot be hidden on some DVDs.
■ To change the audio language (audio out-


During playback, you can change the audio language (audio output).
1 While a disc is playing, press the AUDIO button.
Audio language information
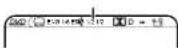
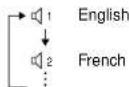
2 Within 3 seconds, press the AUDIO button repeatedly to select the desired audio number.

When playing SVCD, the language changes as follows:
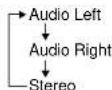
When playing VCD, the sound changes as follows:
Notes:
● The audio language on some DVDs may not be changed.
- For the audio language and audio system, refer to the manual of the disc.
- When playing a DTS disc on this unit, images appear but the sound does not play. Select other audio output in "Audio Language Setting" to listen to the sound. (Example: Dolby Digital 5.1-channel, Dolby Digital 2-channel, etc.) However, only the 2-channel sound can be reproduced. Alternatively, connect to a DTS digital surround amplifier, etc. (see page 17).
Various settings (continued)
■ Switching sequential play mode DVD SVCD VCD
CD MP3 JPEG
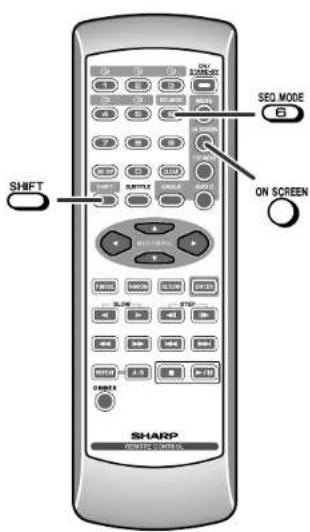
The unit is capable of sequential playback using the 5-disc changer. If a DVD and/or VCD is mixed in the discs to be played sequentially, the sequential playback may stop in the middle. The menu remains displayed. In this case, switch the sequential play mode.
While in the stop or playback mode, hold down the SHIFT button and press the SEQ.MODE button on the remote control.
Each time the button is pressed, the sequential play mode changes in the following order.

Sequential play mode 1 Sequential play mode 2
Sequential play mode 1 ("SEQ. 1")
All discs can be played including DVD discs.
- When there is a P.B.C.-compatible VCD or DVD on the tray, sequential playback may be interrupted and the menu is displayed. In this case, perform playback from the menu.
Sequential play mode 2 ("SEQ. 2")
Playback of DVD discs is skipped in order not to interrupt sequential playback.
- When playing a P.B.C.-compatible VCD, P.B.C. will be automatically set to off.
- When there is a VCD on the tray, SEQ. 2 playback may be interrupted.
Note: When switching the sequential play mode during VCD playback, the unit starts to play the next disc and P.B.C. is set to on or off.
■ To change the display on TV screen

VCD CD
You can display or hide the operation indicators on the TV screen. While the disc is playing, press the ON SCREEN button. (The display is changed at each press of this button.)
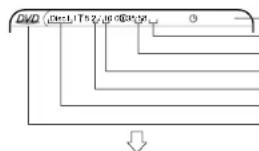
Title playing time
Total number of chapters
Current chapter number
Total number of titles
Current title number
Disc number
Disc type
Disc type

Remaining playback time for
the current title

Chapter playing time

Remaining playback time for the current chapter
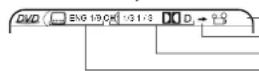
Angle information
Repeat mode information
Audio language information
Subtitle information
When playing SVCD/VCD/Audio CD, the display changes as follows:
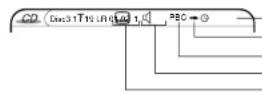
Track playing time
Repeat mode information
PBC information (SVCD/VCD)
Audio information
Subtitle information (SVCD/VCD)
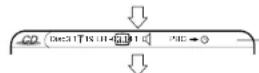
Remaining track playing time
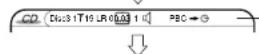
Total playing time

Remaining total playing time
■ DVD mode operation indicators

The following are examples of display indicators that appear during DVD playback.
| Operation TV screen On the unit | ||
| When the power is on without a disc | 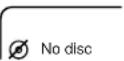 | 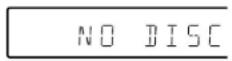 |
| Disc data is being read | 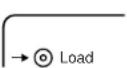 | 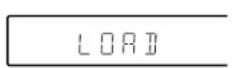 |
| Type of disc | 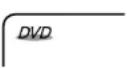 | 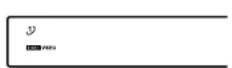 |
| Stop |  | 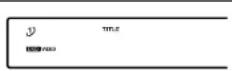 |
| Play |  | 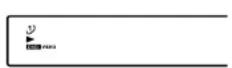 |
| Pause |  | 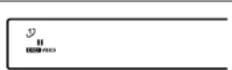 |
| Slow |  |  |
| Fast Forward (search) |  |  |
| Fast Reverse (search) |  | 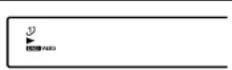 |
Video CD and Super Video CD playback
The following playback functions are the same as DVD or CD operations.
Page
Playing a disc 22
To select the disc 24
To locate the beginning of a chapter/track (skip) 24
Fast forward/Fast reverse (search) 25
To start playback from the desired point (direct play) 25
Still picture/Frame advance 26
Slow-motion play 26
To play repeatedly (repeat play) 27
To play the contents between the specified points repeatedly (A-B repeat) .. 27
Playing back from the desired point (bookmark)....28
To change the audio language (audio output) 29
Switching sequential play mode 30
To change the display on TV screen 31
To play in random order (random play) 34
■ Video CD with P.B.C. (playback control) SVCD

Set the sequential play mode to SEQ. 1 (see page 30).
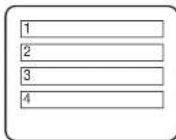
1 Load a video CD with P.B.C.
A menu screen appears.
"PBC" lights up on the main unit.
2 Press the ▲▼ or button to select a track.
- Playback starts in 3 seconds.
- After playback stops, the menu will reappear. Then, select the menu number you want to play.
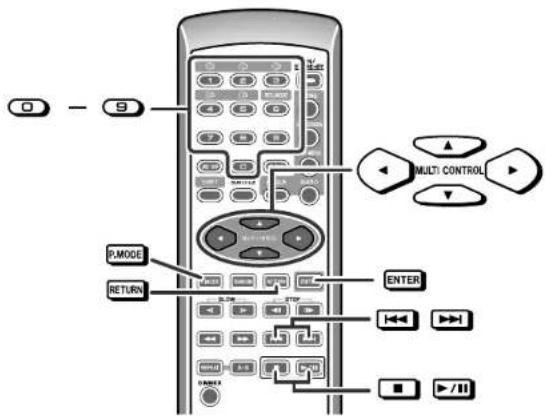
- This can be operated by pressing one of the 0 - 9 buttons on the remote control.
To scroll the menu screen (menu screen with more than 1 page)
Press the button.
To return to the menu screen during playback
Press the RETURN button.
■ To play in the desired order (programmed
p I S2D V.D CD MP3
You can play back the desired tracks in the sequence you want. Maximum of 19 tracks can be programmed.
1 While stopped, press the P.MODE button. Information on all the loaded discs is read, and then the programming screen appears.
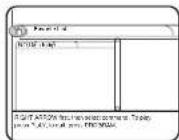
2 Press the ▶button.
3 Press the ▲ or ▼ button to select "Add" and press the ENTER button.
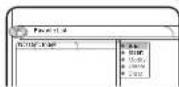
4 Press the ▲or ▼button to select a disc number and press the ENTER button.
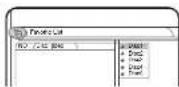
5 Press the ▲or ▼button to select a track number and press the ENTER button.
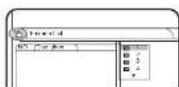
6 Repeat steps 2 - 5 for other tracks. Up to 19 tracks can be programmed.
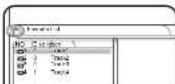
7 Press the ➕ button to start play.
- "PROG." lights up on the main unit during programmed play.
- Programmed selections are memorized until a disc is removed or you turn the power off.
- The ▶Button does not allow you to operate programmed play if the b■ton is pressed. In this case, press the P.MODE button to show the programming screen and then press the ▶Button.
- Select one of the programmed tracks with the ▲or ▼button and then press the ▶button. Playback will start from the selected track.
To change the programmed contents:
1 While stopped, press the P.MODE button.
2 Use the ▲r button to select an item and then press the button.
3 Use the button to select the desired command and then press the ENTER
button.
"Add" Adds a track to the program.
"Insert" Adds a track between programs. In this case, insertion is made above.
(before) the selected program
"Modify" Modifies the program
"Delete" Deletes the selected program.
"Clear" Deletes all programs.
Notes:
- Programming cannot be performed while paused or in the playback mode.
- Sequence programming does not work with a disc that disables programming.
● To exit the programming procedure halfway through, press the P.MODE button.
● To check the status during the programmed play, press the P.MODE button - When operating SVCD/VCD with the P.B.C. function, set the sequential play mode to SEQ.2 (see page 30).
CD operation
The following playback functions are the same as DVD or VCD operations.
Page
Playing a disc 22
To select the disc 24
To locate the beginning of a chapter/track (skip) 24
Fast forward/Fast reverse (search) 25
To start playback from the desired point (direct play) 25
To play repeatedly (repeat play) 27
To play the contents between the specified points repeatedly (A-B repeat) . . 27
Switching sequential play mode 30
To change the display on TV screen 31
To play in the desired order (programmed playback) 33
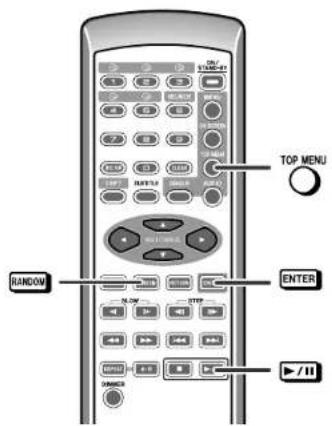
■ To play in random order (random play)
SVCD VCD CD MP3 JPEG
The tracks on the disc can be played in random order automatically.
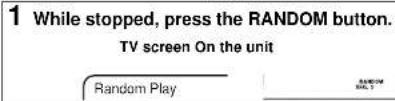
2 Press the ➕ button.
To cancel random play:
While stopped, press the RANDOM button to select the normal playback mode.
Notes:
- You may not be able to use this function with some discs.
- When all of the tracks have been played in random play, playback will stop automatically.
- You cannot set the random play while in the playback or pause mode.
- When operating SVCD/VCD with the P.B.C. function, set the sequential play mode to SEQ.2 (see page 30).
MP3 and JPEG disc operation
The following playback functions are the same as DVD, VCD or CD operations.
Page
Playing a disc 22
To select the disc....24
To locate the beginning of a chapter/track (skip) 24
To start playback from the desired point (direct play) .....25
To play repeatedly (repeat play) 27
Switching sequential play mode 30
To play in the desired order (programmed playback)....33
To play in random order (random play) ....34
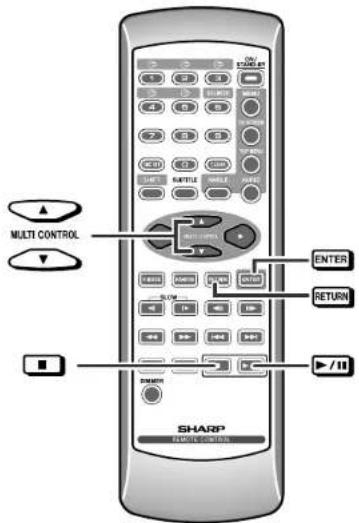
■ MP3 and JPEG disc playback MP3 JPEG
You can playback CD-R/RW recorded in the MP3 and JPEG format.
1 Load a disc containing MP3 and JPEG tracks.
A menu screen appears.

... Folder

... MP3 Track

... JPEG Track
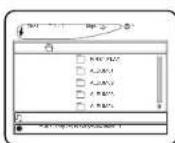
2 Press the ▲or ▼button to select a folder or a track and press the ENTER or ▶button.
Playback starts when you select a track.
To return to the previous layer, press the RETURN button.
When playing JPEG tracks
- When the ENTER button is pressed, the respective track remains displayed. (Stop condition)
- When the ▶ Button is pressed, switching to the next track will take place approx. every 5 seconds. When the ■ button is pressed, the respective track remains displayed. (Stop condition)
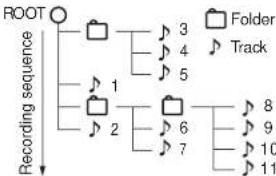
Example of playback sequence
Playback is made in the order of 1 to 11 in this example.
Tracks on some discs cannot be played in order.
flowchart
graph TD
    A["Root"] --> B["1"]
    A --> C["2"]
    B --> D["3"]
    B --> E["4"]
    B --> F["5"]
    C --> G["6"]
    C --> H["7"]
    D --> I["8"]
    E --> J["9"]
    F --> K["10"]
    G --> L["11"]
    H --> M["12"]
    I --> N["Track"]
    J --> O["Track"]
    K --> P["Track"]
Caution:
If you convert MP3 data to "audio CD" data when recording on a CD-R/RW, play it as an audio CD. The MP3 operation cannot be performed.
Notes:
- Up to 18 characters can be displayed for an album name and a track name. Underlines, asterisks, and spaces may not be displayed.
● The 8th or later layers cannot be played back.
MP3, JPEG disc operation (continued)
■ To zoom images (zoom) JPEG
You can zoom in and zoom out images.
1 Press the ▲ or ▼ button to select a track and press the ENTER button.
2 Each press of the STEP or button cycles through zoom settings as follows.
Each press of the STEP ← button cycles through zoom settings as follows.
The display changes in 5 steps.
200% 100% 50% 25% 12%
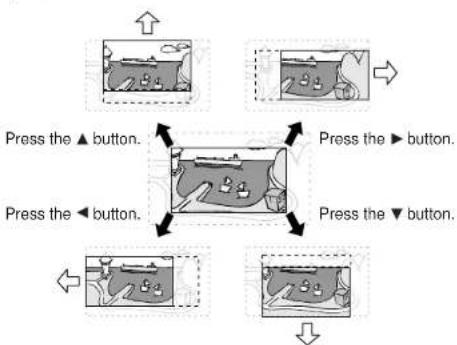
To shift the view and display the desired part of a zoomed image.
When images are larger than the TV screen, you can shift the view.
Press the ▲,▼ or button.
flowchart
graph TD
    A["Press the ▲ button."] --> B["Device with two buttons"]
    C["Press the ▶ button."] --> B
    D["Press the ▼ button."] --> B
    B --> E["Arrow Up/Down"]
Note:
When tracks are changed, the size returns to the original.
To rotate a image
When images are smaller than the TV screen, you can rotate them.
Press the ▲,▼ on button.
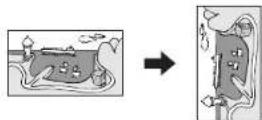
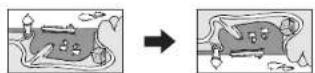
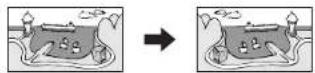
The image rotates as shown below.
▶ button : 90° rotation in a clockwise direction.
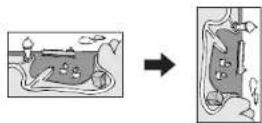
button : 90° rotation in a counterclockwise direction.
▲ button : vertical mirror image.
▼ button : Horizontal mirror image.
Error indicators and warnings
When you load an unplayable disc or fail to perform operations properly, the following messages are displayed on the TV screen.
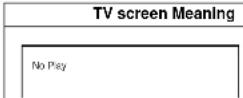 | The disc cannot be played with this system or it is loaded in an incorrect way. |
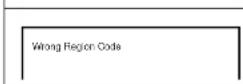 | The region number of the DVD is not "1" or "ALL". |
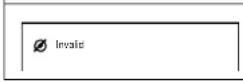 | The disc does not support the operation described in this operation manual. |
Maintenance
■ Cleaning the cabinet
Periodically wipe the cabinet with a soft cloth and a diluted soap solution, then with a dry cloth.
- Do not use chemicals for cleaning (gasoline, paint thinner, etc.). It may damage the cabinet finish.
- Do not apply oil to the inside of the equipment as this may cause malfunctions.
■ Cleaning the laser pickup lens
In order to ensure proper operation of the DVD player, preventative maintenance (cleaning of the laser pickup lens) should be performed periodically. Lens cleaners are commercially available. Contact your local DVD software dealer for options.
Troubleshooting chart
Many potential problems can be resolved by the owner without calling a service technician.
If something is wrong with this product, check the following before calling your authorized SHARP dealer or service center.
■ DVD player
| Symptom Possible cause Reference | page | |
| No sound is heard. | The audio cable is disconnected.Is the TV or amplifier volume level set to "0"? | P. 12— |
| Noise is heard during play-back. | Move the unit away from any com-puters or mobile phones. | — |
| When a button is pressed, the unit does not respond. | Set this unit to the power stand-by mode and then turn it back on. | P. 39 |
| The display on the unit is dark. | Is the display in the dimmer mode? P. 15 | 15 |
| The power is not turned on. | Is the unit unplugged? P. 14 | |
| The sound is not reproduced In the Dolby Digital 5.1 ch. | Is the initial setting screen set to "LPCM"? Change It to "BltStream". | P. 12 |
| No images are displayed. | Is TV turned on?Is the input of TV switched? | — |
| Even though a disc has been loaded, NO DISC is dis-played.Playback sounds are skipped. | Is the disc loaded upside down?Is the disc very dirty?Does the disc satisfy the standards?Is the unit located near excessive vi-brations?Has condensation formed inside the unit? | ————P. 39 |
| The control buttons do not function. Music or video play-back is interrupted. | Is the disc very dirty?Does the disc satisfy the standards?Is the unit located near excessive vi-brations?Has condensation formed inside the unit? | ——P. 39 |
| Symptom Possible cause Reference | page | |
| Pictures and sound are skipped. | ● Is the disc very dirty? ● Is the unit located near excessive vibrations? ● Has condensation formed inside the unit? | — — P. 39 |
| The unit does not operate even if the power is on. | ● Is a disc other than a DVD (region number 1 or ALL), SVCD, VCD, audio CD, CD-R or CD-RW loaded? | P. 11 |
| Image cannot be played back. (Sound is not heard.) | ● Are the video and audio cables connected improperly? ● Is a disc other than a DVD (region number 1 or ALL), SVCD, VCD, audio CD, CD-R or CD-RW loaded? ● Is the disc very dirty? ● Is the disc loaded upside down? ● Clean the optical pickup if it is dirty. P. 37 ● Is the TV input set to "VIDEO 1/VIDEO 2" etc.? ● Is the unit turned on? P. 15 | P. 12 - 14 P. 11 — — |
■ Remote control
| Symptom Possible | cause Reference | page |
| The remote control does not operate properly. | ● Is the battery polarity respected? P. 15● Are the batteries dead?● Is the distance or angle incorrect? P. 15● Are there any obstructions in front of the unit?● Is the remote control sensor exposed to strong light (inverter fluorescent light, direct sunlight, etc.)?● Is the remote control for another equipment used simultaneously? | —P. 15— |
| The unit cannot be turned on with the remote control. | ● Is the unit unplugged? P. 14● Are the batteries inserted? P. 15 |
■ Before transporting the unit
1 Set the POWER switch on the main unit to ON.
2 While in the stop mode, press the button.
The disc tray will open. Remove a disc. Then press the DISC SKIP button to rotate the tray, and remove the remaining disc(s).
3 Press the ▶ button to close the disc tray.
Make sure that "NO DISC" is displayed.
4 Set the POWER switch on the main unit to OFF, and then unplug the AC power cord from the AC outlet.
■ Condensation
Sudden temperature changes, storage or operation in an extremely humid environment may cause condensation inside the cabinet (laser pickup, etc.) or on the transmitter on the remote control.
Condensation can cause the unit to malfunction. If this happens, leave the power on with no disc in the unit until normal playback is possible (about 1 hour). Wipe off any condensation on the transmitter with a soft cloth before operating the unit.
■ If trouble occurs
When this product is subjected to strong external interference (mechanical shock, excessive static electricity, abnormal supply voltage due to lightning, etc.) or if it is operated incorrectly, it may malfunction.
If such a problem occurs, do the following:
Unplug the unit and, after for some time, plug it in again.
Specifications
As part of our policy of continuous improvement, SHARP reserves the right to make design and specification changes for product improvement without prior notice. The performance specification figures indicated are nominal values of production units. There may be some deviations from these values in individual units.
| Power source | AC 120 V, 60 Hz | |
| Power consumption | 16 W | |
| Dimensions | Width: 17-5/16" (430 mm)Height: 2-15/16" (86 mm)Depth: 11-1/8" (394 mm) | |
| Weight | 6.8 lbs. (5.4 kg) | |
| Signal system | NTSC color | |
| Supported disc types | DVD (Region number 1, ALL), SVCD, VCD, audio CD, CD-R, CD-RW | |
| Video signal | Horizontal resolution: 500 linesS/N ratio: 70 dB | |
| Audio signal Frequency characteristics | Linear PCM DVD:4 Hz to 22 kHz (sampling rate:48 kHz)4 Hz to 42 kHz (sampling rate:96 kHz)CD: 4 Hz to 20 kHz | |
CONSUMER LIMITED WARRANTY
SHARP ELECTRONICS CORPORATION warrants to the first consumer purchaser that this Sharp brand product (the "Product"), when shipped in its original container, will be free from defective workmanship and materials, and agrees that it will, at its option, either repair the defect or replace the defective Product or part thereof with a new or remanufactured equivalent at no charge to the purchaser for parts or labor for the period(s) set forth below.
This warranty does not apply to any appearance items of the Product nor to the additional excluded item(s) set forth below nor to any Product the exterior of which has been damaged or defaced, which has been subjected to improper voltage or other misuse. abnormal service or handling, or which has been altered or modified in design or construction.
In order to enforce the rights under this limited warranty, the purchaser should follow the steps set forth below and provide proof of purchase to the servicer.
The limited warranty described herein is in addition to whatever implied warranties may be granted to purchasers by law. ALL IMPLIED WARRANTIES INCLUDING THE WARRANTIES OF MERCHANTABILITY AND FITNESS FOR USE ARE LIMITED TO THE PERIOD(S) FROM THE DATE OF PURCHASE SET FORTH BELOW. Some states do not allow limitations on how long an implied warranty lasts, so the above limitation may not apply to you.
Neither the sales personnel of the seller nor any other person is authorized to make any warranties other than those described herein, or to extend the duration of any warranties beyond the time period described herein on behalf of Sharp.
The warranties described herein shall be the sole and exclusive warranties granted by Sharp and shall be the sole and exclusive remedy available to the purchaser. Correction of defects, in the manner and for the period of time described herein, shall constitute complete fulfillment of all liabilities and responsibilities of Sharp to the purchaser with respect to the Product, and shall constitute full satisfaction of all claims, whether based on contract, negligence, strict liability or otherwise. In no event shall Sharp be liable, or in any way responsible, for any damages or defects in the Product which were caused by repairs or attempted repairs performed by anyone other than an authorized servicer. Nor shall Sharp be liable or in any way responsible for any incidental or consequential economic or property damage. Some states do not allow the exclusion of incidental or consequential damages, so the above exclusion may not apply to you. THIS WARRANTY GIVES YOU SPECIFIC LEGAL RIGHTS. YOU MAY ALSO HAVE OTHER RIGHTS WHICH VARY FROM STATE TO STATE.
Model Specific Section
Your Product Model Number & Description:
DV-AT4000 DVD PLAYER
Warranty Period for this Product:
Additional Item(s) Excluded from Warranty Coverage (if any):
Where to Obtain Service: At a Sharp Authorized Servicer located in the U
What to do to Obtain Service:
(Be sure to have this information available when you need service for your Product.)
One (1) year parts and labor from the date of purchase.
Non-functional accessories, supplies, and consumable items.
United States
To find a location of the nearest Sharp Authorized Servicer, call Sharp toll free at 1-800-BE-SHARP.
Ship prepaid or carry in your Product to a Sharp Authorized Servicer
Be sure to have Proof of Purchase available. If you ship the Product, be sure it is insured and packaged securely.
TO OBTAIN SUPPLY, ACCESSORY OR PRODUCT INFORMATION, CALL 1-800-BE-SHARP.
SHARP
SHARP ELECTRONICS CORPORATION
Sharp Plaza, Mahwah, New Jersey 07430-2135
SHARP CORPORATION
Printed in Malaysia
9HX55769150
03E R YT 1○
- SPECIAL NOTES
- NOTE
- WARNING
- CAUTION:
- FOR YOUR RECORDS
- IMPORTANT SAFETY INSTRUCTIONS
- IMPORTANT SAFETY INSTRUCTIONS (continued)
- Contents
- ■ General Information
- ■ Preparation for Use
- ■ DVD Operation
- Basic operation
- Useful operation
- Various settings
- ■ Video CD and Super Video CD Operation
- ■ CD, CD-R and CD-RW Operation
- ■ References
- Copyright Information:
- Accessories
- Note:
- Types of playable discs
- Precautions
- ■ General
- Warning:
- ■ Care of DVD/CD discs
- Controls and indicators
- ■ Main unit (front panel)
- Reference page
- ■ Main unit (rear panel)
- Icons used in this operation manual
- Controls and indicators (continued)
- ■ Remote control
- Description of discs
- ■ Discs that cannot be played
- Notes:
- ■ Title, chapter and track
- ■ Icons used on DVD discs
- System connections
- ■ Digital connection to a surround amplifier, etc.
- ■ Digital connection to a digital audio recorder, etc.
- Selecting a sound signal type
- ■ Connecting to a TV with a video input jack
- ■ Connecting to a TV with an S-video input jack
- System connections (continued)
- ■ Connecting to a TV with component video input jacks
- What is progressive scanning?
- ■ Connecting the AC power cord
- Remote control
- ■ Battery installation
- ■ Remote control range
- Changing the initial setting of DVD
- Changing the initial setting of DVD (continued)
- ■ Disc language
- ■ To change the password
- When you forget your password
- General control
- ■ To turn the power on
- ■ To change the display brightness (3 levels)
- Playing a disc
- Press the POWER switch on the main unit to turn the power on.
- Press the OPEN/CLOSE ▲button to open the disc tray.
- Place the disc on the disc tray, label side up.
- Press the OPEN/CLOSE ▲button to close the disc tray.
- To select the disc you want to play first, press one of the €1 - 5 buttons on the main unit.
- If you cannot start playback in step 4, press the ▶PLAY ( ▶) button.
- ■ To interrupt playback
- ■ To stop playback
- DVD:
- SVCD/VCD/CD/MP3/JPEG:
- ■ To resume playback after stopping (resume playback) DVD
- ■ To remove discs
- ■ To select the disc DVD SVCD VCD CD MP3 JPEG
- ■ To locate the beginning of a chapter/track (skip) DVD SVCD VCD CD MP3 JPEG
- While a disc is playing, press the
- ■ Fast forward/Fast reverse (search)
- VCD CD
- ■ To start playback from the desired point (direct play) DVD SVCD VCD CD MP3 JPEG
- ■ To select a subtitle or audio language from the disc menu DVD
- ■ Still picture/Frame advance
- ■ Slow-motion play
- ■ To play repeatedly (repeat play) DVD SVCD VCD
- While the disc is playing, press the REPEAT button.
- Select "Repeat Off" by pressing the REPEAT button repeatedly to return to the normal playback.
- ■ To play the contents between the specified points repeatedly (A-B repeat) DVD SVCD VCD
- Press the A-B button again.
- Press the A-B button to return to the normal playback.
- Useful operation (continued)
- ■ To change the angle
- ■ Playing back from the desired point (bookmark) DVD SVCD VCD
- ■ To recall book marked position
- ■ To change the subtitle language
- ■ To change the audio language (audio out-
- Various settings (continued)
- ■ Switching sequential play mode DVD SVCD VCD
- CD MP3 JPEG
- While in the stop or playback mode, hold down the SHIFT button and press the SEQ.MODE button on the remote control.
- Sequential play mode 1 ("SEQ. 1")
- Sequential play mode 2 ("SEQ. 2")
- ■ To change the display on TV screen
- ■ DVD mode operation indicators
- Video CD and Super Video CD playback
- ■ Video CD with P.B.C. (playback control) SVCD
- Load a video CD with P.B.C.
- Press the ▲▼ or button to select a track.
- ■ To play in the desired order (programmed
- p I S2D V.D CD MP3
- CD operation
- ■ To play in random order (random play)
- To cancel random play:
- MP3 and JPEG disc operation
- ■ MP3 and JPEG disc playback MP3 JPEG
- Load a disc containing MP3 and JPEG tracks.
- Press the ▲or ▼button to select a folder or a track and press the ENTER or ▶button.
- When playing JPEG tracks
- Example of playback sequence
- MP3, JPEG disc operation (continued)
- ■ To zoom images (zoom) JPEG
- Error indicators and warnings
- Maintenance
- ■ Cleaning the cabinet
- ■ Cleaning the laser pickup lens
- Troubleshooting chart
- ■ Before transporting the unit
- ■ Condensation
- ■ If trouble occurs
- Specifications
- CONSUMER LIMITED WARRANTY
- Model Specific Section
- Your Product Model Number & Description:
- DV-AT4000 DVD PLAYER
- Warranty Period for this Product:
- SHARP
- SHARP ELECTRONICS CORPORATION
- SHARP CORPORATION
Brand : SANYO
Model : DV-AT4000
Category : DVD player