
P-Touch PT-H300 - Label printer BROTHER - Free user manual and instructions
Find the device manual for free P-Touch PT-H300 BROTHER in PDF.


User questions about P-Touch PT-H300 BROTHER
0 question about this device. Answer the ones you know or ask your own.
Ask a new question about this device
Download the instructions for your Label printer in PDF format for free! Find your manual P-Touch PT-H300 - BROTHER and take your electronic device back in hand. On this page are published all the documents necessary for the use of your device. P-Touch PT-H300 by BROTHER.
USER MANUAL P-Touch PT-H300 BROTHER
Read this User's Guide before you start using your P-touch. Keep this User's Guide in a handy place for future reference. Please visit us at http://solutions.brother.com/ where you can get product support and answers to frequently asked questions (FAQs).
natural_image
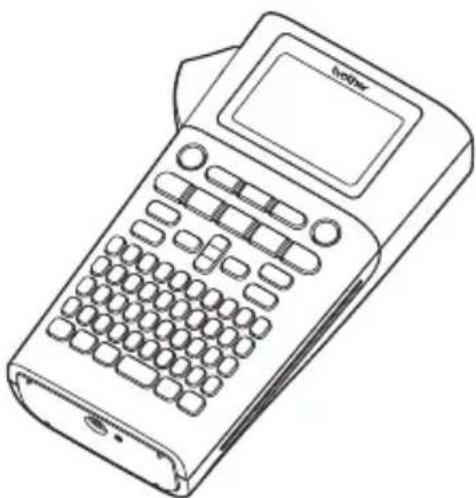
Line drawing of a handheld electronic device with control panel and display screen (no text or symbols)1 INTRODUCTION
2 GETTING STARTED
3 EDITING A LABEL
④ LABEL PRINTING
5 USING THE FILE MEMORY
6 RESETTING & MAINTAINNING YOUR P-TOUCH LABELER
7 TROUBLESHOOTING
8 APPENDIX
⑨ INDEX
INTRODUCTION
Thank you for purchasing the P-touch labeler PT-H300/H300LI.
Your new P-touch labeler is an easy to operate, feature packed labeling system that makes creating professional, high quality labels a breeze.
This manual contains various precautions and basic procedures for using this labeler. Read this manual carefully before using and keep in a handy place for future reference.
Federal Communications Commission (FCC) Compliance Notice (For USA Only)
This equipment has been tested and found to comply with the limits for a Class B digital device, pursuant to Part 15 of the FCC Rules. These limits are designed to provide reasonable protection against harmful interference in a residential installation. This equipment generates, uses, and can radiate radio frequency energy and, if not installed and used in accordance with the instructions, may cause harmful interference to radio communications. However, there is no guarantee that interference will not occur in a particular installation. If this equipment does cause harmful interference to radio or television reception, which can be determined by turning the equipment off and on, the user is encouraged to try to correct the interference by one or more of the following measures:
- Reorient or relocate the receiving antenna
- Increase the separation between the equipment and receiver.
- Connect the equipment into an outlet on a circuit different from that to which the receiver is connected.
- Consult the dealer or an experienced radio/TV technician for help.
Important
Changes or modifications not expressly approved by Brother Industries, Ltd. could void the user's authority to operate the equipment.
ATTENTION:
The Lithium Ion battery you have purchased is recyclable. At the end of its useful life, under various state and local laws, it is illegal to dispose of this battery into your municipal waste stream. Please call 1-800-8-BATTERY
Compilation and Publication Notice
Under the supervision of Brother Industries, Ltd., this manual has been compiled and published, covering the latest product's descriptions and specifications.
The contents of this manual and the specifications of this product are subject to change without notice.
If new versions of the PT-H300/H300LI software become available, this manual may not reflect the updated features. Therefore, you may find that the software and the contents in this manual are different.
Any trade names and product names of companies appearing on Brother products, related documents and any other materials are all trademarks or registered trademarks of those respective companies.
Brother® Two-Year Limited Warranty and Replacement Service (USA Only)
Who is covered:
- This limited warranty ("warranty") is given only to the original end-user/retail purchaser (referred to in this warranty as "Original Purchaser") of the accompanying product, consumables and accessories (collectively referred to in this warranty as "this Product").
- If you purchased a product from someone other than an authorized Brother reseller in the United States or if the product was used (including but not limited to floor models or refurbished product), prior to your purchase you are not the Original Purchaser and the product that you purchased is not covered by this warranty.
What is covered:
- The machine includes a Machine and may include Consumable and Accessory Items. Consumable and Accessory Items include but are not limited to label cassettes, cutters, stamps, power adapters, cases and batteries.
- Except as otherwise provided herein, Brother warrants that the Machine and the accompanying Consumable and Accessory Items will be free from defects in materials and workmanship, when used under normal conditions.
- This warranty applies only to products purchased and used in the United States. For products purchased in, but used outside, the United States, this warranty covers only warranty service within the United States (and does not include shipping outside the United States).
What is the length of the Warranty Periods:
- Machines: two years from the original purchase date.
- Accompanying Consumable and Accessory Items: 90 days from the original purchase date or the rated life of consumable, whichever comes first.
What is NOT covered:
This warranty does not cover:
(1) Physical damage to the machine;
(2) Damage caused by improper installation, improper or abnormal use, misuse, neglect or accident (including but not limited to transporting the machine without the proper preparation and/or packaging);
(3) Damage caused by another device or software used with the machine (including but not limited to damage resulting from use of non Brother ^® -brand parts and Consumable and Accessory Items);
(4) Consumable and Accessory Items that expired in accordance with a rated life; and,
(5) Problems arising from other than defects in materials or workmanship.
This limited warranty is VOID if the machine has been altered or modified in any way (including but not limited to attempted warranty repair without authorization from Brother and/or alteration/removal of the serial number).
What to do if you think your Product is eligible for warranty service:
Report your issue to our P-touch Customer Service Hotline at 1-877-BROTHER (1-877-276-8437) or to a Brother Authorized Service Center within the applicable warranty period. Supply Brother or the Brother Authorized Service Center with a copy of your dated bill of sale showing that the machine was purchased within the U.S. For the name of local Brother Authorized Service Center(s), call 1-877-BROTHER (1-877-276-8437).
What Brother will ask you to do:
After contacting Brother or a Brother Authorized Service Center, you may be required to deliver (by hand if you prefer) or send the Product properly packaged, freight prepaid, to the Authorized Service Center together with a photocopy of your bill of sale. You are responsible for the cost of shipping, packing product, and insurance (if you desire). You are also responsible for loss or damage to the machine in shipping.
What Brother will do:
If the problem reported concerning your Machine and/or accompanying Consumable and Accessory Items is covered by this warranty and if you first reported the problem to Brother or an Authorized Service Center within the applicable warranty period, Brother or its Authorized Service Center will repair or replace the Machine and/or accompanying Consumable and Accessory Items at no charge to you for parts or labor. The decision as to whether to repair or replace the Machine and/or accompanying Consumable and Accessory Items is made by Brother in its sole discretion.
Brother reserves the right to supply a refurbished or remanufactured replacement Machine and/or accompanying Consumable and Accessory Items and use refurbished parts provided such replacement products conform to the manufacturer's specifications for new product/parts.
The repaired or replacement Machine and/or accompanying Consumable and Accessory Items will be returned to you freight prepaid or made available for you to pick up at a conveniently located Authorized Service Center.
If the Machine and/or accompanying Consumable and Accessory Items are not covered by this warranty (either stage), you will be charged for shipping the Machine and/or accompanying Consumable and Accessory Items back to you and charged for any service and/or replacement parts/products at Brother's then current published rates.
The foregoing are your sole (i.e., only) and exclusive remedies under this warranty.
What happens when Brother elects to replace your Machine:
When a replacement Machine is authorized by Brother, and you have delivered the Machine to an Authorized Service Center, the Authorized Service Center will provide you with a replacement Machine after receiving one from Brother. If you are dealing directly with Brother, Brother will send to you a replacement Machine with the understanding that you will, after receipt of the replacement Machine, supply the required proof of purchase information, together with the Machine that Brother agreed to replace. You are then expected to pack the Machine that Brother agreed to replace in the package from the replacement Machine and return it to Brother using the pre-paid freight bill supplied by Brother in accordance with the instructions provided by Brother. Since you will be in possession of two machines, Brother will require that you provide a valid major credit card number. Brother will issue a hold against the credit card account number that you provide until Brother receives your original Product and determines that your original Product is entitled to warranty coverage. Your credit card will be charged up to the cost of a new Product only if: (i) you do not return your original Product to Brother within five (5) business days; (ii) the problems with your original Product are not covered by the limited warranty; (iii) the proper packaging instructions are not followed and has caused damage to the product; or (iv) the warranty period on your original Product has expired or has not been sufficiently validated with a copy of the proof of purchase (bill of sale). The replacement Machine you receive (even if refurbished or remanufactured) will be covered by the balance of the limited warranty period remaining on the original Product, plus an additional thirty (30) days. You will keep the replacement Machine that is sent to you and your original Machine shall become the property of Brother. Retain your original Accessory Items and a copy of the return freight bill, signed by the courier.
Limitations:
Brother is not responsible for damage to or loss of any equipment, media, programs or data related to the use of the machine. Except for that repair or replacement as described above, Brother shall not be liable for any direct, indirect, incidental or consequential damages or specific relief. Because some states do not allow the exclusion or limitation of consequential or incidental damages, the above limitation may not apply to you.
THIS WARRANTY IS GIVEN IN LIEU OF ALL OTHER WARRANTIES, WRITTEN OR ORAL, WHETHER EXPRESSED BY AFFIRMATION, PROMISE, DESCRIPTION, DRAWING, MODEL OR SAMPLE. ANY AND ALL WARRANTIES OTHER THAN THIS ONE, WHETHER EXPRESS OR IMPLIED, INCLUDING IMPLIED WARRANTIES OF MERCHANTABILITY AND FITNESS FOR A PARTICULAR PURPOSE, ARE HEREBY DISCLAIMED.
- This Limited Warranty is the only warranty that Brother is giving for the machine. It is the final expression and the exclusive and only statement of Brother's obligations to you. It replaces all other agreements and understandings that you may have with Brother or its representatives.
- This warranty gives you certain rights and you may also have other rights that may vary from state to state.
- This Limited Warranty (and Brother's obligation to you) may not be changed in any way unless you and Brother sign the same piece of paper in which we (1) refer to the machine and your bill of sale date, (2) describe the change to this warranty and (3) agree to make that change.
Important:
We recommend that you keep all original packing materials, in the event that you ship the machine.
Important Information
Should you have questions, or need information about your Brother Product, we have a variety of support options for you to choose from:
USA-Customer Service:
Customer Service
1-877-BROTHER (877-276-8437)
Customer Service
1-901-379-1210 (fax)
World Wide Web
www.brother-usa.com
Supplies / Accessories
www.brothermall.com
or 1-877-552-MALL (6255)
BROTHER INTERNATIONAL CORPORATION
200 CROSSING BOULEVARD
BRIDGEWATER, N.J. 08807
Please record your model and serial number and your date and location of Purchase below for your records. Keep this information with your proof of purchase (bill of sale) in case your Product requires service.
Model #
Serial #
Date of purchase:
Store where purchased:
Location of store:
Important: We recommend that you keep all original packing materials, in the event you ship this product.
Save Time - Register On-Line!
Don't stand in line at the post office or worry about lost mail. Visit us on-line at
www.registermybrother.com
Your product will immediately be registered in our database and you can be on your way!
Also, while you're there, look for contests and other exciting information!
Contents
Safety Precautions ...... 3
General Precautions.... 10
Symbols Used in this Guide 11
How to use the P-touch labeler 12
GETTING STARTED 13
Unpacking Your P-touch labeler.... 13
General Description.... 14
LCD Display & Keyboard.... 15
LCD Display 15
Key Names and Functions.... 16
Power Supply 18
Battery....18
AC Adapter (AD-E001: Optional on the PT-H300) 19
Using the Rechargeable Li-ion Battery (BA-E001: Optional on the PT-H300)..... 20
Inserting a Tape Cassette 22
Turning Power On/Off 23
Feeding Tape 23
Feed function 23
LCD Display 23
LCD Contrast 23
Back Light 24
Setting Language and Unit 24
Language 24
Unit 24
EDITING A LABEL...... 25
Entering and Editing Text.... 25
Entering Text from the Keyboard 25
Using Text Reminder 25
Deleting Text Reminder Memory 25
Adding a New Line 26
Adding a New Block.... 26
Moving the Cursor....26
Inserting Text 26
Deleting Text....26
Entering Symbols 27
Entering Symbols Using the Symbol Function 27
Using Symbol History 28
Entering Accented Characters 30
Setting Character Attributes 31
Setting Character Attributes by Label 31
Setting Character Attributes by Each Line 32
INTRODUCTION
Setting Auto Fit Style ....34
Setting Label Attributes 34
Using Auto-Format Layouts 38
Using Templates - Example creating an Asset Tag....38
Using Block Layouts 41
Creating a Bar Code Label....44
Setting Bar Code Parameters and Entering Bar Code Data....44
Editing and Deleting a Bar Code 46
LABEL PRINTING 47
Label Preview 47
Printing a Label 47
Printing Multiple Copies 47
Auto-numbering Labels....48
Mirror Printing 49
Setting Margin 50
Adjusting the Label Length....51
Attaching Labels....51
Printing from the Label Collection 52
Printing a label from the Label Collection Stored in the Machine 52
USING THE FILE MEMORY 54
Storing a Label into Memory 54
Opening a Stored Label File 54
Printing a Stored Label File....55
Deleting a Stored Label File....55
RESETTING & MAINTAINING YOUR P-TOUCH LABELER 56
Resetting the P-touch Labeler....56
Resetting the data to factory settings 56
Maintenance....57
Cleaning the Unit 57
Cleaning the Print Head....57
Cleaning the Tape Cutter....57
TROUBLESHOOTING 58
What to do when....58
Error Messages....59
APPENDIX 62
Specifications 62
INDEX......63
Safety Precautions
To prevent injury and damage, important notes are explained using various symbols. The symbols and their meanings are as follows:
 DANGER DANGER | Indicates an imminently hazardous situation which, if the product is handled without following the warnings and instructions, will result in death or serious injuries. |
 WARNING WARNING | Indicates a potentially hazardous situation which, if not avoided, could result in death or serious injuries. |
 CAUTION CAUTION | Indicates a potentially hazardous situation which, if not avoided, may result in minor or moderate injuries. |
The symbols used in this manual are as follows:
 | Action NOT allowed DO NOT disassemole | the product. |
 | DO NOT splash the product with or immerse the product in water. | |
 | Mandatory action Unplugging is required | |
 | Indicates risk of fire under certain circumstances. |

DANGER
Rechargeable Li-ion Battery (The rechargeable Li-on battery comes with the PT-H300LI. Li-ion battery optional with the PT-H300).
Carefully observe the following precautions for the rechargeable Li-ion battery (hereafter referred to as "rechargeable battery"), If these precautions are not followed, overheating, leaking, or cracks in the battery may result in an electrical short, explosion, smoke, fire, electric shock, injury to yourself or others, or damage to the product or other property.

Use the rechargeable battery only for its intended purpose. The labeler and rechargeable battery are designed to function exclusively with each other. Do not insert a different rechargeable battery into the labeler or insert the rechargeable battery into a different labeler, otherwise fire or damage may result.

To charge the rechargeable battery, insert the rechargeable battery into the labeler, and then use the AC adapter designed specifically for this labeler. DO NOT charge the rechargeable battery near a fire or in direct sunlight.

This could activate the protection circuitry, which is designed to prevent danger from high heat. Activation of the protection circuitry could cause charging to stop, charging to occur with excessive current or voltage if the protection circuitry fails, or an abnormal chemical reaction within the battery.

When charging the rechargeable battery, use only a battery charger designed specifically for the rechargeable battery.

DO NOT allow wires or other metal objects to come into contact with the terminals of the rechargeable battery. Do not carry or store the rechargeable battery with metal objects such as necklaces or hairpins. This could cause an electrical short, and could cause metal objects to overheat, such as wires, necklaces, or hairpins to overheat.

DO NOT use or leave the rechargeable battery near fire, heaters, or other high temperature (above 176^ F/80°C) locations.

DO NOT allow the rechargeable battery to come into contact with or to be immersed in water.

DO NOT use in corrosive environments, such as areas where salty air, salt water, acids, alkalis, corrosive gases, chemicals, or any corrosive liquid are present.

DO NOT use the rechargeable battery if it is damaged or leaking.

DO NOT directly solder any connections to the rechargeable battery. This could cause internal insulation to melt, gas to be emitted, or safety mechanisms to fail.

DO NOT use the rechargeable battery with the polarity (+) (-) reversed. Check the orientation of the rechargeable battery before inserting it, and do not try to force the rechargeable battery into the labeler. Charging the rechargeable battery with the polarity reversed could cause an abnormal chemical reaction within the rechargeable battery or abnormal current flow during discharge.

DO NOT directly connect the rechargeable battery to a household.

DANGER
Rechargeable Li-ion Battery (The rechargeable Li-on battery comes with the PT-H300LI. Li-ion battery optional with the PT-H300).

Liquid (electrolyte) leaking from the labeler or rechargeable battery may indicate that the rechargeable battery is damaged. If the rechargeable battery leaks, immediately discontinue use of the printer, unplug the AC adapter, and isolate the printer by putting it in a bag. Do not touch the electrolyte. If electrolyte gets in the eyes, do not rub the eyes. Immediately rinse liberally with tap water or other clean water and seek the advice of a medical professional. If left alone, the electrolyte could cause eye damage. If electrolyte contacts your skin or clothing, immediately rinse them with water.

DO NOT put the rechargeable battery, or a labeler with the rechargeable battery installed, into a microwave oven or a high pressure container.

DO NOT leave the rechargeable battery with out of power in the main unit for a long period of time. This could shorten the life of the rechargeable battery or lead to an electrical short.

If the printer can only be used for a short period of time, even though the rechargeable battery is fully charged, the rechargeable battery may have reached the end of its service life. Replace the rechargeable battery with a new one. When removing and replacing the rechargeable battery, cover the terminals of the old rechargeable battery with tape to avoid creating a short in the battery.

DO NOT disassemble, modify, or attempt to repair the rechargeable battery.

DO NOT dispose of the rechargeable battery in fire or intentionally overheat. This could cause the internal insulation to melt, gas to be emitted, or safety mechanisms to fail. Additionally, the electrolyte solution could catch fire.

DO NOT puncture the rechargeable battery with any objects, subject it to severe shocks or throw it. Damage to the rechargeable battery's protection circuit could cause the rechargeable battery to be recharged at an abnormal current/voltage or cause an abnormal chemical reaction within the rechargeable battery.

DO NOT incinerate the rechargeable battery or dispose of it with household waste.

WARNING
P-touch Labeler
Follow these guidelines to avoid fire, electric shock, the risk of injury to yourself or others, and/or damage to the printer or other property.
natural_image
Mechanical assembly diagram showing a clamping mechanism with a hand holding a cross symbol (no text or labels present)
DO NOT allow the printer to get wet or use the printer in areas that may become wet, such as bathrooms or near sinks.

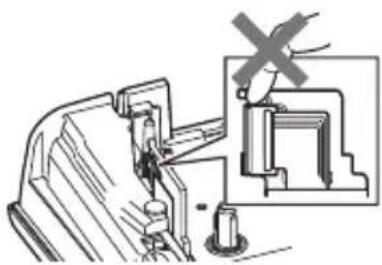
DO NOT touch any metal parts near the print head. The print head becomes very hot during use and remains very hot immediately after use. Do not touch it directly with your hands.

DO NOT disassemble the P-touch labeler. For inspection, adjustment, and repair of the labeler, contact the retail outlet where the P-touch labeler was purchased or your local authorized service center.

Plastic bags are used in the packaging of your labeler. To avoid danger of suffocation, keep these bags away from babies and children.

If you notice heat, an abnormal odor, discoloration of the printer, deformation, or anything else unusual while using or storing the printer, immediately discontinue use of the printer, disconnect the AC adapter, and remove the batteries.

To prevent damage, do not drop or hit the P-touch labeler.

DO NOT use the P-touch labeler with a foreign object in it. If water, a metallic substance, or any other foreign object enters the P-touch labeler, disconnect the AC adapter and remove batteries, and contact the retail outlet where the P-touch labeler was purchased or your local authorized service center.
Alkaline batteries/Ni-MH rechargeable batteries
Follow these guidelines to avoid liquid leakage, heat, rupture of the battery and cause personal injury.

DO NOT throw into fire, heat up, short-circuit, recharge, or disassemble the battery.

DO NOT allow batteries to get wet, for example, by handling them with wet hands or spilling beverages onto them.

If fluid leaked from the batteries gets into your eyes, immediately rinse your eyes with a large amount of clean water, and then seek medical attention. If leaked fluid enters your eyes, loss of eyesight or other damage to the eyes may result.

DO NOT allow a metal object to contact both the plus and minus ends of a battery.

DO NOT use sharp objects, such as tweezers or a metallic pen, to remove or replace the batteries.

DO NOT use a damaged, deformed, or leaking battery, or a battery whose label is damaged. Doing so may result in generating excessive heat. Use of a damaged or leaking battery may also lead to battery fluid getting on your hands. If fluid leaked from the batteries gets onto your hands, there is a possibility of chemical burns. If leaked fluid gets onto your hands and you rub your eyes, loss of eyesight or other damage to the eyes may result. Immediately rinse your hands with a large amount of clean water, and then seek medical attention.

WARNING
AC Adapter
Follow these guidelines to avoid fire, damage, electric shock, failure or the risk of injury.
Make sure that the plug is fully inserted in the power outlet. Do not use an outlet that is loose.
Always use the specified AC adapter, and always plug the AC adapter into an electrical outlet with the specified voltage (120V). Failure to do so may result in injury to yourself or others, or damage to the printer or other property. Brother does not assume, any responsibility for any accident or damage resulting from not using the specified AC adapter and adapter cord.
DO NOT connect the AC adapter or adapter cord to other products.
DO NOT touch the AC adapter and the P-touch labeler during an thunderstorm. There may be a remote risk of electric shock from lightning when the printer is used during a thunderstorm.
Tape Cutter
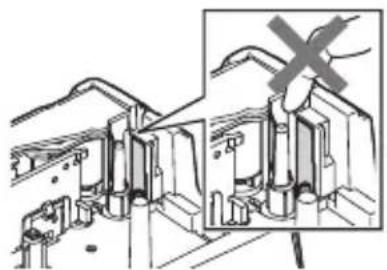
DO NOT touch the blade of the cutter unit.
natural_image
Technical diagram showing a mechanical assembly with an inset magnified view of a cross symbol (no text or labels present)DO NOT touch the AC adapter or power plug with wet hands.
DO NOT use the AC adapter in places with high humidity or moisture, such as bathrooms.
DO NOT use a damaged adapter cord or power plug.
DO NOT place heavy objects on, damage, or modify the adapter cord or plug. Do not forcibly bend or pull the adapter cord.
DO NOT drop, hit, or otherwise damage the AC adapter.

CAUTION
Alkaline batteries/Ni-MH rechargeable batteries
Follow these guidelines to avoid liquid leakage, overheating or rupture of the battery.

DO NOT use a battery other than the one specified for use with your printer. Do not use combinations of old and new batteries or combinations of different types, different charging levels, different manufacturers or different models. Do not insert a battery with the polarity (+ and -) reversed.

If fluid leaked from the battery gets on your skin or clothes, immediately rinse them with clean water.

Remove the batteries if you do not intend to use the P-touch labeler for an extended period of time.

Before using Ni-MH rechargeable batteries, carefully read the instructions for the batteries and battery charger, and be sure to use them correctly.

When using Ni-MH rechargeable batteries, charge the batteries with the appropriate, specialized battery charger. Before using the batteries.

DO NOT disassemble or modify the batteries.

DO NOT expose the batteries to heat or dispose of the batteries in a fire.
AC Adapter

If you do not intend using the P-touch labeler for an extended period of time, disconnect the AC adapter from the power outlet.

When disconnecting the AC adapter from the power outlet, always hold the AC adapter.

DO NOT use the AC adapter in places of high humidity such as bathrooms.

DO NOT overloading electrical circuit the power cord.

DO NOT disassemble or modify the AC adapter.

DO NOT allow the AC adapter/power plug to get wet, for example, by handling them with wet hands or spilling beverages on to them.
Tape Cutter
Follow these guidelines to avoid minor personal injury and damage to the labeler.

DO NOT open the tape compartment cover when operating the cutter unit.

DO NOT apply excessive pressure to the cutter unit.

CAUTION
P-touch Labeler
Follow these guidelines to avoid minor personal injury and damage to the P-touch labeler.
! Store the P-touch labeler on a flat, stable surface such as a desk or in a drawer.
DO NOT leave the P-touch labeler or any tape within the reach of young children.
DO NOT place any heavy objects on top of the P-touch labeler.
Always use the suggested AC adapter (AD-E001) for the P-touch labeler and plug it into an outlet with the specified voltage. Failure to do so could result in damage or failure of the P-touch labeler.
DO NOT use the P-touch labeler in places with moisture or high humidity, such as bathrooms.
DO NOT allow the P-touch labeler to get wet, for example, by handling it with wet hands or spilling beverages onto them.
DO NOT disassemble or modify the P-touch labeler.
If you notice heat, an abnormal odor, discoloration of the P-touch labeler, deformation, or anything else unusual while using or storing the P-touch labeler, immediately discontinue use of the P-touch labeler, disconnect the AC adapter, and remove the batteries.
General Precautions
Rechargeable Li-ion battery
- At the time of purchase, the rechargeable Li-ion battery is slightly charged so that the operation of the labeler can be verified; however, the rechargeable Li-ion battery should be fully charged with the AC adapter before the labeler is used.
- If the labeler will not be used for a long period of time, remove the rechargeable Li-ion battery from the labeler, and then store it in a location where it is not exposed to static electricity, high humidity, or high temperatures (temperatures between 59^ / 15^ and 77^ / 25^ and 40% to 60% humidity are recommended). In order to maintain the efficiency and life of the Li-ion rechargeable battery, charge it at least every six months.
- If there is anything unusual about the Li-ion rechargeable battery the first time it is used, for example, if it appears rusted or if it overheats, do not use the Li-ion rechargeable battery. Contact the retail outlet where the printer was purchased.
Labeler
- DO NOT install P-touch labeler near any device that will cause electromagnetic interference. P-touch labeler may malfunction if left near a television, radio, etc.
- DO NOT use the P-touch labeler in any way or for any purpose not described in this guide. Doing so may result in injury or damage the machine.
- DO NOT put any foreign objects into the tape exit slot, AC adapter connector, or any other part of the printer.
- DO NOT touch the print head (refer to page 6) with your fingers. Use the optional print head cleaning cassette (TZe-CL4), the self-cleaning function of the labeler, or a soft wipe (e.g. a cotton swab) when cleaning the print head (refer to "Cleaning the Unit" on page 57.).
- DO NOT clean any part of the machine with alcohol or other organic solvents. Only use a soft, dry cloth.
- DO NOT place the P-touch labeler in direct sunlight, near heaters or other hot appliances, or in any location exposed to extremely high or low temperatures, high humidity, or dust. The standard operating temperature range of the P-touch labeler is 50^ to 95^ .
- DO NOT leave any rubber or vinyl, or products made of rubber or vinyl, on the printer for an extended period of time, otherwise the printer may be stained.
- Depending on the environmental conditions and the applied settings, some characters or symbols may be difficult to read.
- Use only Brother TZe tapes with P-touch labeler. Do not use tapes that do not have the mark.
- DO NOT pull or apply pressure to the tape in the cassette. Otherwise the tape cassette or labeler may be damaged.
- DO NOT try to print labels using an empty tape cassette or without a tape cassette in the P-touch labeler. Doing so will damage the print head.
- DO NOT attempt to cut the tape while printing or feeding since this will damage the tape.
-
Depending on the location, material, and environmental conditions, the label may unpeel or become irremovable, and the color of the label may change or be transferred to other objects.
-
DO NOT expose the tape cassettes to direct sunlight, high temperatures, high humidity, or dust. Store tape cassettes in a cool, dark place. Use the tape cassettes soon after opening the tape cassette package.
- Markings made with oil-based or water-based ink may be visible through a label affixed over them. To hide the markings, use two labels layered on top of each other or use a dark-colored label.
- Any data stored in memory will be lost due to failure or repair of the P-touch labeler, or if the battery expires.
- When power is disconnected for more than two minutes, all text and format settings will be cleared. Any text files stored in the memory will also be cleared.
- A protective clear plastic sticker is placed over the display during manufacturing and shipping. This sticker should be removed prior to use.
- You can also use heat shrink tube tape in this model. Please check our website for further information. You might not be able to print frame, label collection and a part of font setting when using heat shrink tape.
- The P-touch is not equipped with a charging feature for Ni-MH rechargeable batteries.
- The printed label may differ from the image that appears on the LCD.
- Note that Brother Industries, Ltd. does not assume responsibility for any damage or injury arising from the failure to follow the precautions listed in this manual.
- We strongly recommend that you read this User's Guide carefully before using your P-touch labeler, and then keep it nearby for future reference.
Symbols Used in this Guide
The following symbols are used throughout this guide to indicate additional information.

This symbol indicates information or directions that may result in damage or injury if ignored, or operations that will result in errors.

This symbol indicates information or directions that may help you understand and use the P-touch labeler more efficiently.
How to use the P-touch labeler
■ Create a label with the P-touch labeler
1 GETTING STARTED
• Prepare the P-touch labeler.
P. 13
2 | CREATING A LABEL
- Entering and Editing text.
P. 25
- Entering Symbols. P. 27
- Entering Accented Characters.
P. 30
• Using Auto-Format Layouts.
P. 38

In addition to entering text, the P-touch labeler has a large range of formatting options.
Create labels like these :

text_image
P-touch Property of: ABC Company, Inc. *00001*3 | LABEL PRINTING
- Printing a label.
P. 47
- Setting Margin.
P. 50
- Printing from the Label collection.
P. 52

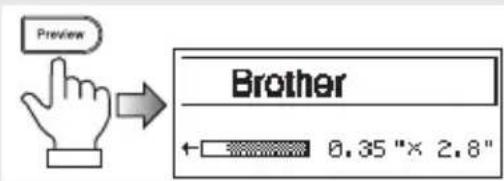
Before printing, you can check the layout of your label using the preview function.
Create labels like these :
text_image
Preview Brother ← 0.35 "× 2.8"■ Printing from the Label Collection
Using the Label Collection function, labels can be created easily by selecting and then printing designs already built into the machine.
GETTING STARTED
Unpacking Your P-touch labeler
Check that the package contains the following before using your P-touch labeler.
| ■ PT-H300 | |
P-touch labeler Batteries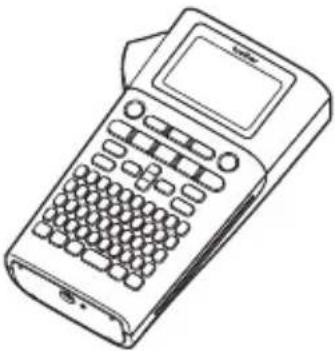 |  |
Strap | |
Starter Tape Cassette User's Guide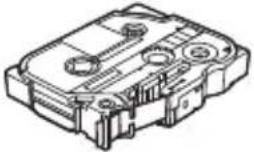 | 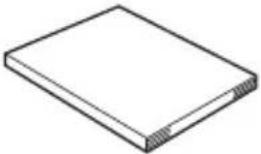 |
| ■ PT-H300LI | ||
P-touch labeler AC adapter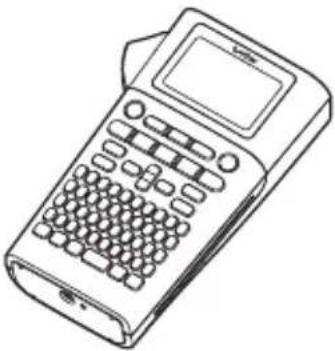 | 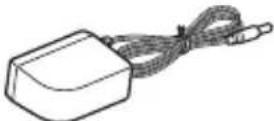 The plug may differ by countries. The plug may differ by countries. | |
Li-ion Battery Strap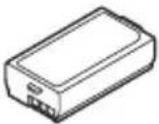 | 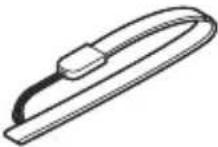 | |
Starter Tape Cassette User's Guide | 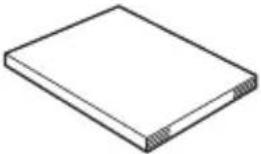 | |
General Description
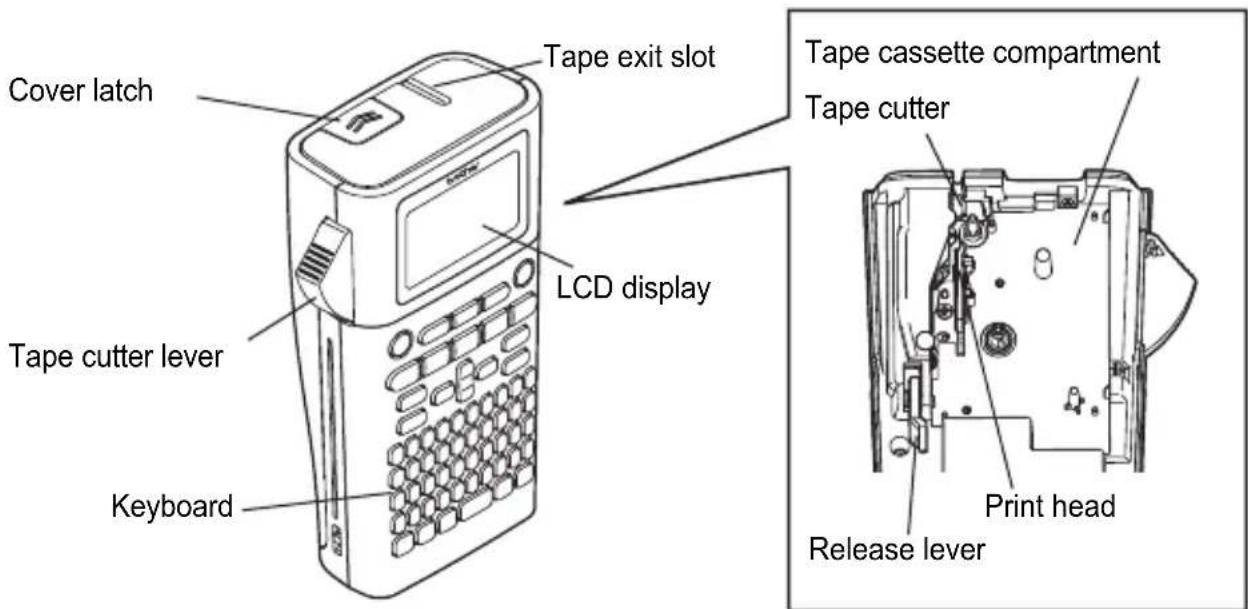
text_image
Cover latch Tape cutter lever Keyboard LCD display Tape exit slot Tape cassette compartment Tape cutter Print head Release lever
When shipped from the factory, the LCD display is covered with a protective sheet to prevent damage. Remove this sheet before using the P-touch.

text_image
Tape viewer Rear cover AC adapter connector LED lamp Battery compartmentLCD Display & Keyboard
LCD Display
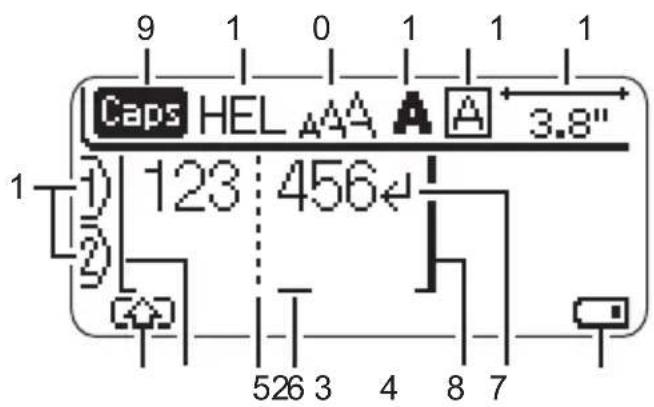
text_image
9 1 0 1 1 1 Caps HEL AAA A A 3.8" 1 123 456 2 526 3 4 8 7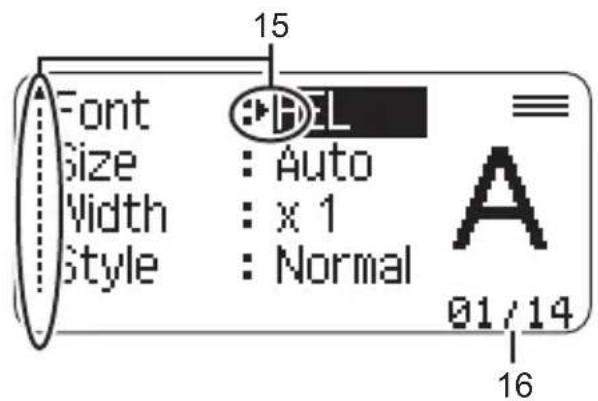
text_image
Font Size Width Style BEL Auto x 1 Normal 01/14 15 ≡ A 16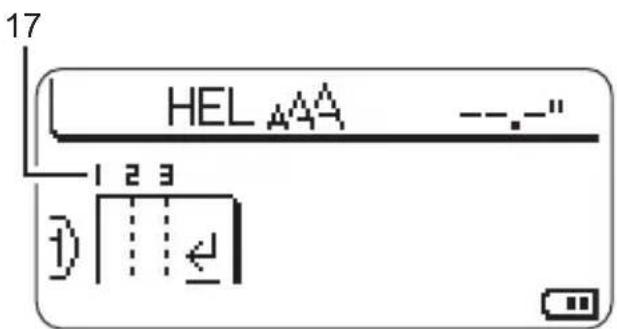
text_image
17 HEL AAA --.-- 1 2 3 1) | : : ←1. Line number
Indicates line number within the label layout.
2. Shift Mode
Indicates shift mode is on.
3. Start Line / 4. End Line
The area between the start and end line will be printed.
The short lines extending from the start/end lines show the end of the label layout.
5. Block Separator Line
Indicates the end of a block.
6. Cursor
Characters are entered to the left of the cursor. Indicates the current data input position.
7. Return mark
Indicates the end of a line of text.
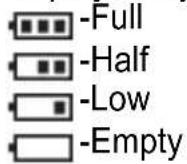
8. Battery Level
Indicates remaining battery level. It displays only when using Li-ion battery.
9. Caps mode
Indicates that the Caps mode is on.
10.-13. Style guidance
Indicates the current font (10), character size (11), character style (12) and frame (13) settings.
14. Tape length
Indicates the tape length for the text entered.
15.Cursor selection
Use the ▲ and keys to select menu items and the ◀ and keys to change the settings.
16.Counter
Indicates currently selected number/ selectable number.
17.Block Number
Indicates the block number.
Refer to “LCD Display” on page 23 for changing.
Key Names and Functions
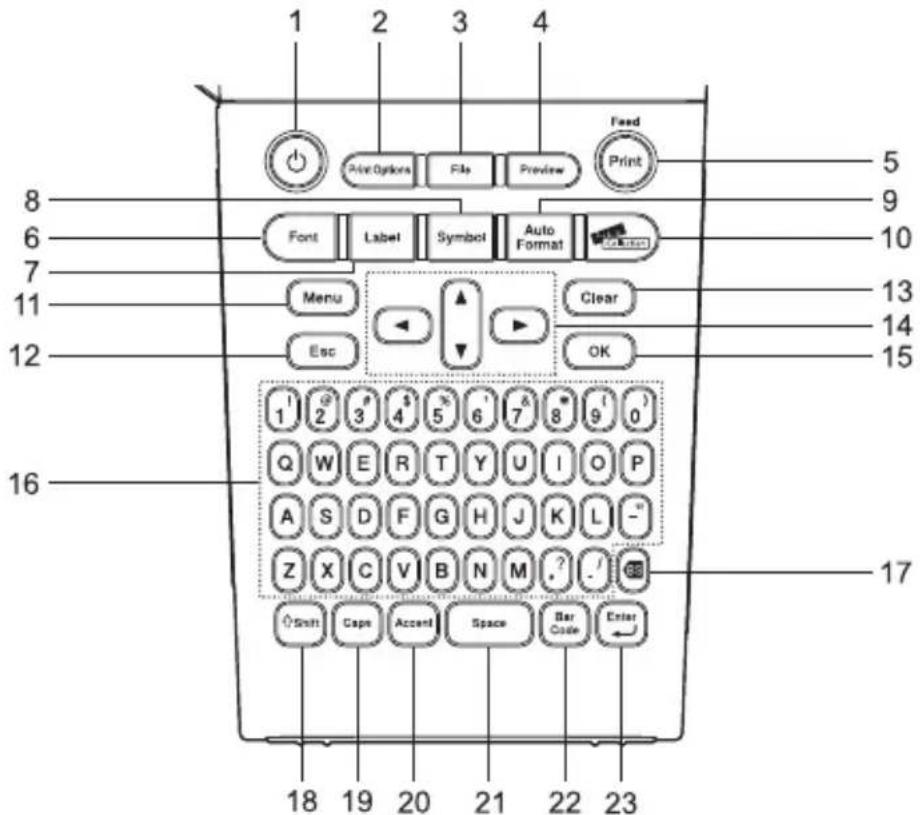
text_image
1 2 3 4 Load Options File Preview Feed Print 5 8 9 6 10 7 11 13 14 12 15 16 17 18 19 20 21 22 23The default language is "English".
1. Power
Turns the P-touch labeler on and off.
2. Print Options
Enables Numbering or Mirror to be selected and printed.
3. File
Enables frequently used labels in the file memory to be printed, opened, saved, or deleted.
4. Preview
Displays a preview of the label.
5. Print
Prints the current label design onto the tape.
6. Font
- Enables character attributes for the label to be set.
- Character attributes can be set for each line of the label when the Text menu is opened in combination with the Shift key.
7.Label
Enables label attributes for the label to be set.
8. Symbol
Use this to select and enter a symbol from a list of available symbols.
9. Auto-Format
Enables labels to be created using pre-defined templates or block formats.
10. Label Collection
Enables label collections to be selected and printed.
11. Menu
Enables operating preferences (Language, Adjustment, etc.) for the P-touch labeler to be set.
12. Escape
Cancels the current command and returns the display to the data entry screen or the previous step.
13. Clear
Clears all text entered, or all text and current label settings.
14. Cursor ( ) ▲ ▼ ◀ ▶
Moves the cursor in the direction of the arrow.
15. OK
Selects the displayed option.
16. Letter
- Use these keys to type letters or numbers.
• Uppercase letters and symbols can be entered using these keys in combination with the Caps or Shift key.
17. Backspace
Deletes the character to the left of the cursor.
18. Shift
Use this key in combination with the letter and number keys to type uppercase letters or the symbols indicated on the number keys.
19. Caps
Turns Caps mode on and off.
20. Accent
Use this to select and enter an accented character.
21. Space
- Enters a blank space.
- Returns a setting to the default value.
22. Bar Code
Opens Bar Code Setup screen.
23. Enter
- Enters a new line when entering text.
- Enters a new block when used in combination with the Shift key.
Power Supply
Battery
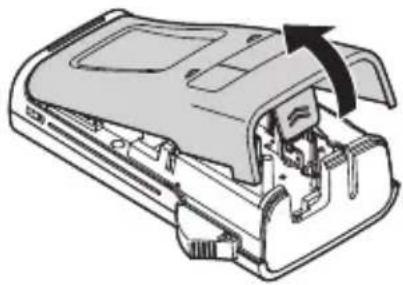
1 After making sure that the power is off, remove the rear cover on the back of the machine. If the batteries are already in the machine, remove them.
Make sure that the power is turned off when replacing batteries.
natural_image
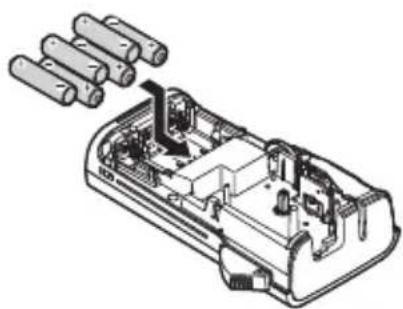
Diagram of a device's internal structure showing a component being inserted, with an arrow indicating the direction (no text or symbols present)2 Insert six new AA-size alkaline batteries (LR06), or fully charged Ni-MH rechargeable batteries (HR06), making sure that the positive (+) and negative (-) ends of the batteries match the positive (+) and negative (-) marks inside the battery compartment.
Users of alkaline batteries
Always replace all six batteries at the same time using brand new ones.
natural_image
Technical line drawing of an electronic device casing with multiple cylindrical components emerging from the internal casing (no text or symbols)Users of Ni-MH rechargeable batteries
Always replace all six batteries at the same with fully charged ones.
Visit us at http://solutions.brother.com/ for the latest information about the recommended batteries.
3 Attach the rear cover by inserting the three hooks at the bottom into the slots on the machine, then pushing down firmly until it snaps into place.

natural_image
Diagram of a device casing with internal components and a black arrow indicating direction (no text or symbols)Remove the batteries if you do not intend to use the P-touch labeler for an extended period of time.
AC Adapter (AD-E001: Optional on the PT-H300)
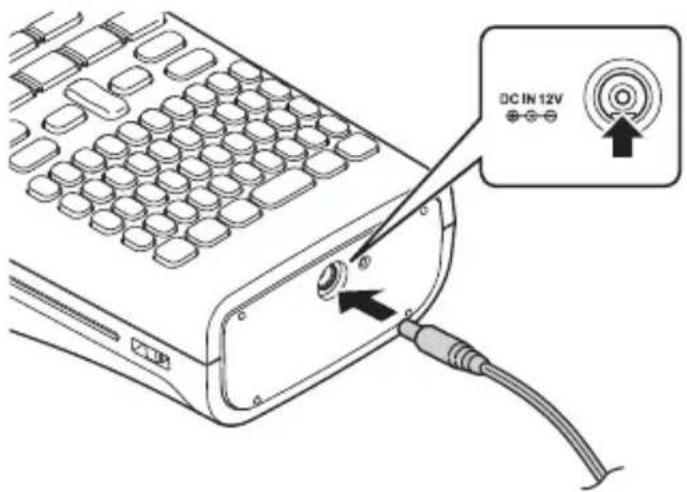
Use AD-E001 (AC adapter) for this labeler. AD-18 or AD-24ES cannot be used.
Connect the AC adapter directly to the P-touch labeler.
text_image
DC IN 12V1 Insert the plug on the AC adapter cord into the connector marked DC IN 12V on the P-touch labeler.
2 Insert the AC adapter plug into a standard electrical outlet.

- Turn the P-touch labeler off before disconnecting the AC adapter.
- Do not pull or bend the AC adapter cord.

To safe guard and backup the labeler's memory, when the AC adapter is unplugged it is recommended to have AA-size alkaline batteries (LR06) or Ni-MH rechargeable batteries (HR06) installed into the machine.

WARNING
- Use only the adapter, which is designed exclusively for your P-touch. Failure to observe this may result in an accident or damage. Brother shall not assume any responsibility for any accident or damage resulting from not using the specified AC adapter.
- Do not connect the AC adapter to a non-standard electrical outlet. Failure to observe this may result in an accident or damage. Brother shall not assume any responsibility for any accident or damage resulting from not using a standard electrical outlet.

CAUTION
- Disconnect the AC adapter from the P-touch and electrical outlet when you do not intend to use the P-touch for an extended period.
- When power is disconnected for more than two minutes, all text and format settings will be cleared. Any text files stored in the memory will also be cleared.
GETTING STARTED
Using the Rechargeable Li-ion Battery (BA-E001: Optional on the PT-H300)
■ Installing the Rechargeable Li-ion Battery
1 Open the rear cover by pressing the cover latch.
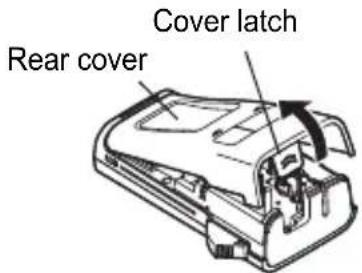
text_image
Cover latch Rear cover2 Insert the rechargeable Li-ion battery into the battery compartment.
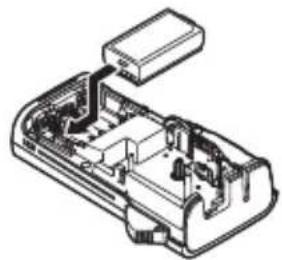
natural_image
Technical line drawing of an open electronic device casing with internal components (no text or symbols)3 Confirm that the hooks on the edge of the rear cover are inserted correctly, and then reattach the cover.
Removing the Rechargeable Li-ion Battery
Remove the battery cover and the rechargeable Li-ion battery, and then reattach the battery cover.
■ Charging the Rechargeable Li-ion Battery
The rechargeable Li-ion battery can be charged while it is inserted in the labeler. Perform the following procedure to charge the rechargeable Li-ion battery.

- Before using the rechargeable Li-ion battery, use the following procedure to charge it.
- Up to 360 minutes is needed to fully charge a rechargeable Li-ion battery.
1 Make sure that the labeler is turned off. If the labeler is turned on, press the ⒹPower button to turn it off.
2| Make sure that the rechargeable Li-ion battery is installed in the labeler.
3 Use the AC adapter and AC power cord to connect the labeler to an AC power outlet. The LED next to the adapter connector turns on during charging, it goes off when the rechargeable Li-ion battery is full charged. The battery level indicator on the display will fill in with three bars
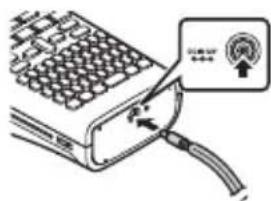
text_image
Diagram showing a device with a sensor icon and Chinese text indicating 'Scan to access' or 'Scan to exit'Stopping Rechargeable Li-ion Battery Charging
To stop rechargeable Li-ion battery from charging, disconnect the AC adapter cord.
■ Tips on Using the Rechargeable Li-ion Battery
- Charge the rechargeable Li-ion battery before use. Do not use it before it is charged.
- The rechargeable Li-ion battery charging can take place in 41^ - 95^ (5°C-35°C) environments. Charge the rechargeable Li-ion battery in an environment in this temperature range. If the surrounding temperature is out of this range, the rechargeable Li-ion battery will not be charged, and the battery indicator will remain lit.
- If the labeler is used when both the rechargeable Li-ion battery is installed and the AC adapter is connected, the battery indicator may turn off and charging may stop even if the rechargeable Li-ion battery has not been fully charged.
Rechargeable Li-ion Battery Characteristics
Understanding the properties of the rechargeable Li-ion battery will allow you to optimize its usage.
- Using or storing the rechargeable Li-ion battery in a location exposed to high or low temperatures may accelerate its deterioration. In particular, using a rechargeable Li-ion battery with a high charge (charged 90% or more) in a location exposed to high temperatures will considerably accelerate battery deterioration.
- Using the labeler while the rechargeable Li-ion battery is installed and charging may accelerate the battery's deterioration. If using the labeler when the rechargeable Li-ion battery is installed, disconnect the AC adapter.
- If the labeler will not be used for longer than one month, remove the rechargeable Li-ion battery from the labeler when its charge is 50% or less, and then store the battery in a cool place away from direct sunlight.
- If the rechargeable Li-ion battery will not be used for a long period of time, we recommend charging it every 6 months.
- If you touch a part of the device while a Li-ion battery is charging, the device may feel warm. This is normal, and the device may be used safely. If the machine becomes extremely hot, discontinue use.
Rechargeable Li-ion Battery Specifications
- Charging time: Approximately 6 hours when charged by a AC adapter (AD-E001).
• Nominal Voltage: DC 7.2 V
• Nominal Capacity: 1900 mAh
Inserting a Tape Cassette
Tape cassettes of 0.13", 0.23", 0.35", 0.47" or 0.70" (3.5mm, 6mm, 9mm, 12mm or 18mm) width can be used in your P-touch labeler. Use only Brother tape cassettes with the TZG mark.
If the new tape cassette has a cardboard stopper, be sure to remove the stopper before inserting the cassette.
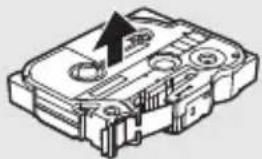
natural_image
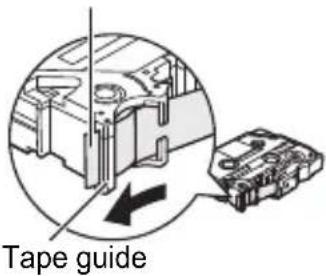
Technical line drawing of a mechanical component with an arrow indicating direction (no text or symbols)1 Check that the end of the tape is not bent and that it passes through the tape guide. If the tape is not passed through, pass it through the tape guide referring to the illustration.
End of tape
text_image
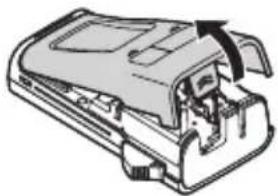
Tape guide2 | After making sure that the power is off, open the rear cover. If there is already a tape cassette in the machine, remove it by pulling it straight up.
natural_image
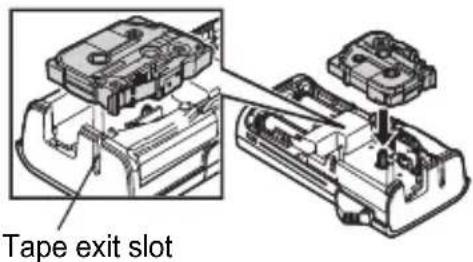
Diagram of a device housing with an arrow indicating a component (no text or symbols present)3 Insert the tape cassette into the tape compartment, with the end of the tape facing the machine's tape exit slot, and press firmly until you hear a click.
text_image
Tape exit slotWhen inserting the tape cassette, make sure that the tape and ink ribbon do not catch on the print head.
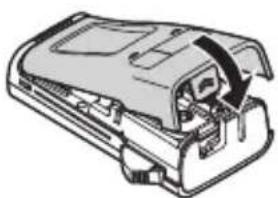
4 Close the rear cover.
natural_image
Diagram of a device casing with internal components and an arrow indicating direction (no text or symbols)- Do not pull the label coming out of the tape exit slot. Doing so will cause the ink ribbon to be discharged with the tape.
- Store tape cassettes in a cool dark location, away from direct sunlight and high temperature, high humidity, or dusty locations. Use the tape cassette as quickly as possible after opening the sealed package.
Turning Power On/Off
Press the Power key to turn the P-touch labeler on.
Press the Power key again to turn the P-touch labeler off.

- Your P-touch labeler has a power saving function that automatically turns itself off if no key is pressed within a certain time under certain operating conditions. Refer to the Auto Power-Off Time table below for details.
- If the batteries are installed or the P-touch labeler is connected to an electrical outlet by the AC adapter, the previous session's information is displayed when the power is turned on.
Auto Power-Off Time
| With AC adapter | 5 minutes |
| With battery | 5 minutes |
Feeding Tape
Feed function
The Feed function feeds 0.98" (25mm) of blank tape.

- Do not pull the label coming out of the tape exit slot. Doing so will cause the ink ribbon to be discharged with the tape.
- Do not block the tape exit slot during printing or when feeding tape. Doing so will cause the tape to jam.
1 | Press the Shift key and then press the Print key.
2| The message "Feeding Tape... Please Wait" appears while the tape is fed.
LCD Display
LCD Contrast
You can change the contrast setting of the LCD display to one of five levels (+2, +1, 0, -1, -2) to make the screen easier to read. The default setting is "0".
1 Press the Menu key to display the setup menu, select "Adjustment" using the or key, and then press the OK or Enter key.
2| Select "LCD Contrast" using or key and set the value using or key.
3 | Press the OK or Enter key.

- Pres Escapekey to return to the previous step.
- Pressing the Space key on the contrast setting screen sets the contrast to the default value "0".
GETTING STARTED
Back Light
You can change the back light setting either to ON or OFF.
The display is easier to see with the back light ON. The default setting is "ON".
| 1 | Press the Menu key to display the Setup menu, select "Backlight" using the ▲ or▼key, and then press the OK or Enter key. |
| 2 | Select "ON" or "OFF" using the ▲ or key. |
| 3 | Press the OK or Enter key. |
- Power can be saved when the back light is turned off.
- The back light is turned off automatically if there is no operation for more than 10 seconds. It can be turned back on by pressing any key. The back light turns off when printing.
Setting Language and Unit
Language
| 1 | Press the Menu key to display the Setup menu, select "Language" using the ▲ or ▼ key, and then press the OK or Enter key. |
| 2 | Select a language for menu commands and messages shown on the LCD display by using the ▼ or key.The language can be selected from "Čeština", "Dansk", "Deutsch", "English", "Español", "Français", "Hrvatski", "Italiano", "Magyar", "Nederlands", "Norsk", "Polski", "Português", "Português(Brasil)", "Română", "Slovenski", "Slovenský", "Suomi", "Svenska" or "Türkçe". |
| 3 | Press the OK or Enter key. |

Press the Escape key to return to the previous step.
Unit
| 1 | Press the Menu key to display the Setup menu, select "Unit" using the ▲ or k▼, and then press the OK or Enter key. |
| 2 | Select a unit for dimensions shown on the LCD display by using the ▲ or k▼. Either "inch" or "mm" can be selected. |
| 3 | Press the OK or Enter key. |

The default setting is "inch". Press the Escape key to return to the previous step.
EDITING A LABEL
Entering and Editing Text
Entering Text from the Keyboard
- The keyboard of your P-touch labeler can be used in the same way as a standard computer keyboard.
Using Text Reminder
When a character is entered, the machine remembers character sequences beginning with the character entered from a history of all printed character sequences to date, and displays a list of options from which to select.
1| Enter "c".
2 The machine displays the last word printed beginning with the letter "c" such as "computer".
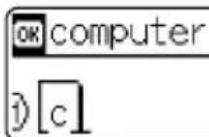
3 Press the OK key to display other word options that match the entered character. Press the or key to select the desired word.
4 | Press the OK or Enter key. The selected character word will then appear on the text line.

Text Reminder settings can be changed by pressing the Menu key.
Deleting Text Reminder Memory
1 Press the Menu key.
2 | Press the ▲ or key to select "Text Reminder", and then press the OK or Enter key.
3 | Press the or key to select "Clear Memory", and then press the OK or Enter key.
4 | "Clear All Text Reminder Memory ?" is then displayed.
5 Press the OK or Enter key. All text options in memory will be deleted.
EDITING A LABEL
Adding a New Line
• To end the current line of text and start a new line, press the Enter key. A return mark appears at the end of the line and the cursor moves to the start of the new line.

- There is a maximum number of lines of text that can be entered for each tape width. A maximum of 5 lines for 0.70" (18mm) tape, 3 lines for 0.47" (12mm) tape, 2 lines for 0.35" (9mm) and 0.23" (6 mm) tape, and 1 line for 0.13" (3.5mm) tape.
- If you press the Enter key when five lines already exist, an error message is displayed.
- To change the character attribute of each line, refer to “Setting Character Attributes by Each Line” on page 32.
Adding a New Block
• To create a new block of text/lines to the right of your current text, press the Shift key and then press the Enter key. The cursor moves to the start of the new block.

A maximum of 5 blocks can be entered in one label.
Moving the Cursor
- Press the ,▲ or key to move the cursor one space or line.
• To move the cursor to the beginning or end of the current line, press the Shift key and then press the or key.
• To move the cursor to the very beginning or end of the text, press the Shift key and then press the ▼ or key.
Inserting Text
• To insert additional text into an existing line of text, move the cursor to the character to the right of the position where you want to start inserting text and then enter the additional text. The new text is inserted to the left of the cursor.
Deleting Text
■ Deleting one character at a time
• To delete a character from an existing line of text, move the cursor to the character to the right of the position you want to start deleting text and then press the Backspace key. The character to the left of the cursor is deleted each time the Backspace key is pressed.

If you hold down the Backspace key, the characters left of the cursor are deleted continuously.
■ Deleting all text at once
Use the Clear key to delete all text at once.

Press the Clear key. The Clear options are displayed.
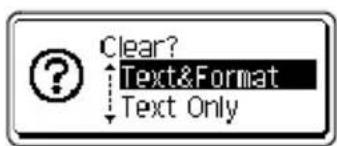
text_image
? Clear? ↑ Text&Format ↓ Text Only2 Using the ▲ or ▶▼, select "Text Only" to delete all text while retaining the current format settings, or select "Text & Format" to delete all text and format settings.

Press the Escape key to return to the text entry screen, without erasing (or clearing) text or format.
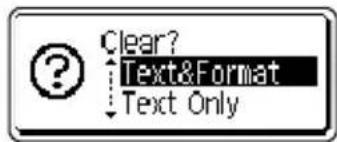
text_image
? Clear? Text&Format Text Only3 Press the OK or Enter key. All text is deleted. All format settings are also deleted if Text & Format was selected.
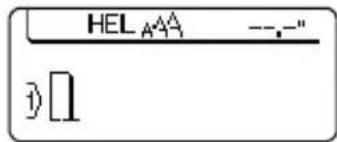
text_image
HELAAA --,-" 3) ]Entering Symbols
In addition to the symbols available on the keyboard, there are various symbols (including international and extended ASCII characters) available with the symbol function.
To enter a symbol, use the Symbol function (see below).
Alternatively, press the Shift key and then press a key on the keyboard to enter the symbol printed on the selected key's upper-right corner.
Entering Symbols Using the Symbol Function
1 Press the Symbol key. A list of symbol categories and symbols in that category is displayed.

The last symbol entered is selected in the displayed list.
2 Select a symbol category (Punctuation, Business, Mathematics, etc.) using the ▲ or ▼ key or by pressing the Symbol key repeatedly, and then press the OK or Enter key.
3 Select a symbol using ▲, ▼or ◀key and then press the The selected symbol is inserted into the line of text.
OK or Enter key.

When selecting symbol:
- Press the Shift key and Symbol key to return to the previous page.
- Press the Symbol key to return to the next page.

Press the Escape key to return to the previous step.
EDITING A LABEL
Using Symbol History
You can create your personal category of symbols by using the Symbol History. The "History" will appear first when selecting the symbols to help you locate the desired symbols quickly.
| 1 | Press the Menu key to display the Setup menu, and then select "Symbol History" using the ▲ or key. | 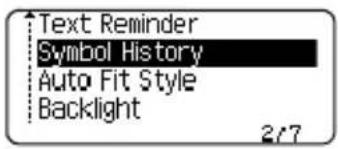 |
| 2 | Press the OK or Enter key to display the Symbol History screen, and then select "On" to create your personal category by using the ▲ or key. | 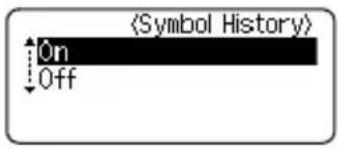 |
| 3 | Press the OK or Enter key to apply the setting.The screen returns to the text entry screen. | 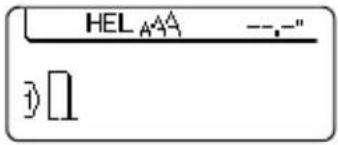 |
| 4 | Enter the symbol you wish to add to your History.Refer to “Entering Symbols Using the Symbol Function” on page 27 for detail. | 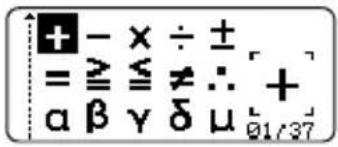 |
| 5 | Press the Symbol key.The "History" appears, including the symbol entered in step 4. | 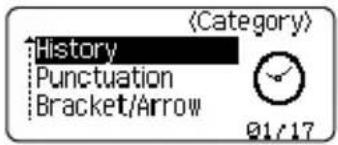 |

- Up to 15 symbols can be added to the "History". The oldest symbol will be deleted from the category when the symbols added to the "History" exceed 15 symbols.
• To stop using the Symbol History, select "Off" in the Symbol History screen.
Symbol List
| Category Symbols | |
| Pictograph |  |

The symbols shown in the table may look slightly different on the machine LCD and when printed.
Entering Accented Characters
The P-touch labeler can display and print a set of accented characters such as other language specific characters.
1 Enter the character you wish to change to an accented character.

Caps mode can be used with the Accent function.
2 | Press the Accent key. The character you entered will change to an accented character.
3 Press the Accent key repeatedly until the desired accented character is selected, or select it by using the or key.

The order of accented characters displayed will differ depending on the selected LCD language.
4 Press the OK or Enter key. The selected accented character is inserted into the line of text.

- Press the Escape key to return to the previous step. - Refer to the Accented Character List table for a complete list of all accented characters available.
- Accented Character List
| Character | Accented Characters | Character | Accented Characters |
| a | á à â ä æ ã a á ã ã | n | ñ ñ ñ ñ |
| A | Á Á Á Á Æ Á Á Á Á Á | N | Ñ Ý Ý Ý Ý |
| c | ç č ć | o | ó ò ò ø ò ò ø ò ò |
| C | Ç Č Č | O | Ó Ó Ó ∅ ∅ ∅ ∅ ∅ |
| d | d' ß d | r | ǐ f ō |
| D | Ď Đ | R | Ř R R |
| e | é è ê ë e ë ë ë | s | š s s s B |
| E | É É É É É É É É | S | Š S S S B |
| g | ġ ğ | t | ť t p |
| G | G G | T | Ť T P |
| i | í i î î î î | u | ú ù ù ù u ù ù ù |
| l | í í í î î î î | U | Ú ù ù ù U ù ù ù |
| k | k | y | ý ŷ |
| K | K | Y | Ý ŷ |
| l | ł í l l' | z | ž z z |
| L | Ł L L L' | Z | ž z z |
Setting Character Attributes
Setting Character Attributes by Label
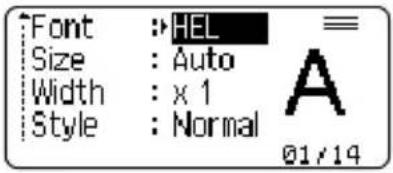
Using the Font key, you can select a font and apply size, width, style, line, and alignment attributes.
1 Press the Font key.
The current settings are displayed.
2 Select an attribute using the ▲ or key, and then set a value for that attribute using the ◀ or key.
3 | Press the OK or Enter key to apply the settings.

New settings are NOT applied if you do not press theOK or Enter key.

- Press the Escape key to return to the previous step.
- Press the Space key to set the selected attribute to the default value.
• Refer to the Setting Options table for a list of all available settings. - Small characters may be difficult to read when certain styles are applied (e.g. Shadow + Italic).
Setting Character Attributes by Each Line
When a label consists two or more lines of text, you can set different value of character attributes (font, size, width, style, line and alignment) for each line.
Move the cursor to the line you wish to change the character attribute by using the ▲, ▼or ◀key. Next, press the Shift key and then press the Font key to display the attributes. ( On the screen indicates that you are now applying the attribute for that specific line only.)
text_image
Font :→HEL Size : Auto Width : x 1 Style : Normal 01/14When different value of attribute is set for each line, the value will be displayed as **** when you press the Font key. When you change the setting on this screen by using the or key, the same change will be applied to all lines of the label.

text_image
Font : ****** Size : 36 pt Width : x 1 Style : NormalSetting Options
| Attribute | Value | Result | Value | Result |
| Font | HEL (Helsinki) | ABCabc | BEL (Belgium) | ABCabc |
| BRU (Brussels) | ABCabc | ATL (Atlanta) | ABCabc | |
| US (US) | ABCabc | ADM (Adams) | ABCabc | |
| LA (Los Angeles) | ABCabc | BRN (Brunei) | ABCabc | |
| SGO (San Diego) | ABCabc | SOF (Sofia) | ABCabc | |
| FLO (Florida) | ABCabc | GER (Germany) | ABCabc | |
| CAL (Calgary) | ABCabc | LGO (Letter Gothic) | ABCabc | |
| Size | Auto | When Auto is selected, the text is automatically adjusted to print in the largest size available for each tape width. | 42pt | ABCabc |
| Attribute | Value Result | Value Result | ||
| Size | 36pt 12pt | ABCabc | ABCabc | |
| 24pt 9pt | ABCabc | ABCabc gaiyy | ||
| 18pt 6pt | ABCabc | ABCabc gaiyy | ||
| Width | x2 x2/3 | ABCabc | ABCabc | |
| x1 | ABCabc | x1/2 | ABCabc | |
| Style | Normal | ABCabc | I+BLD(Italic Bold) | ABCabc |
| BLD(Bold) | ABCabc | I+OUT(Italic Outline) | ABCabc | |
| OUT(Outline) | ABCabc | I+SHD(Italic Shadow) | ABCabc | |
| SHD(Shadow) | ABCabc | I+SLD(Italic Solid) | ABCabc | |
| SLD(Solid) | ABCabc | VRT(Vertical) | < img src=""> | |
| ITL(Italic) | ABCabc | |||
| Line | Off | ABCabc | UND(Underline) | ABCabc |
| STR(Strikeout) | ABCabc | |||
| Align(Alignment) | Left | ABCabc | Right | ABCabc |
| Center | ABCabc | Just(Justify) | A B C a b c | |
EDITING A LABEL

- The actual printed font size depends on the tape width, number of characters and number of input lines. Once characters reach a minimum size, the selected font will default to a custom font which is based on the Helsinki style. This allows labels to print using the smallest text possible on narrow or multi-line labels.
- The 6 point font only prints in Helsinki, no other font type.
Setting Auto Fit Style
When "Size" is set to "Auto" and "Length" is set to a specific length, you can select the way of reducing the text size to fit within the label length.
When "Text Size" is selected, the total text size is modified to fit within the label.
When "Text Width" is selected, the text width will be reduced to the size of x1/2 setting. (If further size reduction is required to fit the text into the selected label length, the total text size will be modified after reducing the text width to x1/2 setting.)
1 Press the Menu key to display the Setup menu, Select "Auto Fit Style" using the ▲ or ▼ key, and then press the OK or Enter key. The Auto Fit Style screen is displayed.
2 Select the style using the ▲ or k▼y.
3 Press the OK or Enter key to apply the setting.

- Press the Escape key to return to the previous step.
- Press the Space key to set the style to the default setting ("Text Size").
Setting Label Attributes
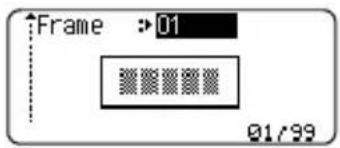
Using the Label key, you can create a label with a frame around the text and specify the label length. (Refer to "Setting Margin" on page 50.)
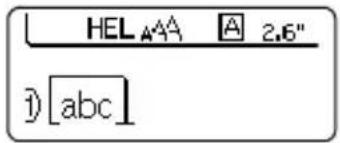
1 Press the Label key. The current settings are displayed. You can select frame by using and key.
text_image
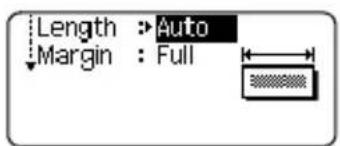
Frame :01 01:992 Select an attribute using the or key, and then set a value for that attribute using the or key.

When setting the label length, refer to “Adjusting the Label Length” on page 51.
text_image
Length : Auto Margin : Full3 | Press the OK or Enter key to apply the settings.

New settings are NOT applied if you do not press the OK or Enter key.
text_image
HEL 4A 2.6" 1) [abc]
- Press the Escape key to return to the previous step.
- Press the Space key to set the selected attribute to the default value.
• Refer to the Setting Options table for a list of all available settings.
Frames
| Attribute | Value Result Value Result | ||
| Frame | Off | ABCabc | 16 |
| 1 | ABCabc | 17 | |
| 2 | ABCabc | 18 | |
| 3 | ABCabc | 19 | |
| 4 | ABCabc | 20 | |
| 5 | ABCabc | 21 | |
| 6 | ABCabc | 22 | |
| 7 | ABCabc | 23 | |
| 8 | ABCabc | 24 | |
| 9 | ABCabc | 25 | |
| 10 26 | ABCabc | ||
| 11 27 | ABCabc | ||
| 12 28 | ABCabc | ||
| 13 29 | ABCabc | ||
| 14 30 | ABCabc | ||
| 15 31 | ABCabc |
| Attribute | Value Result Value Result | |||
| Frame | 32 50 | 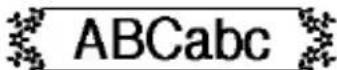 |  | |
| 33 51 | 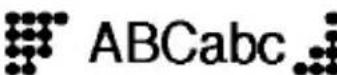 |  | ||
| 34 52 | 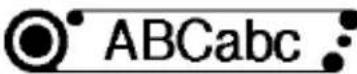 |  | ||
| 35 53 |  |  | ||
| 36 54 |  |  | ||
| 37 55 | 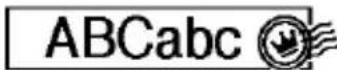 | 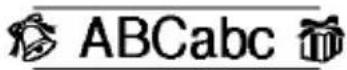 | ||
| 38 56 |  | 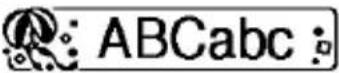 | ||
| 39 57 |  |  | ||
| 40 58 |  |  | ||
| 41 59 |  | 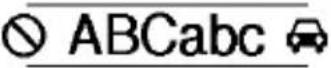 | ||
| 42 60 |  | 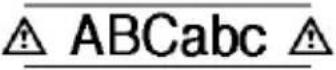 | ||
| 43 61 |  | 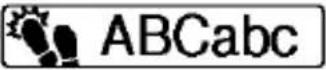 | ||
| 44 62 |  |  | ||
| 45 63 |  |  | ||
| 46 64 | 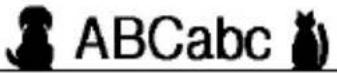 | 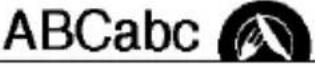 | ||
| 47 65 |  |  | ||
| 48 66 |  | 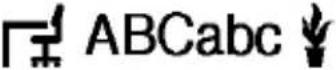 | ||
| 49 67 |  | 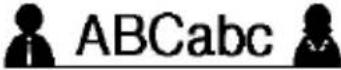 | ||
| Frame | 68 84 |  | 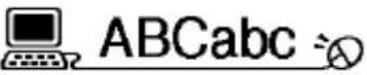 | |
| 69 85 |  |  _ _ | ||
| 70 86 |  |  | ||
| 71 87 |  | 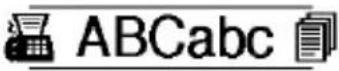 | ||
| 72 88 |  | 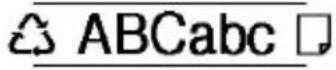 | ||
| 73 89 |  |  | ||
| 74 90 | 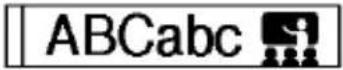 | 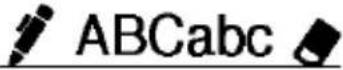 | ||
| 75 91 |  |  | ||
| 76 92 |  | 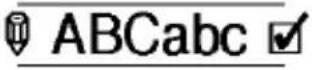 | ||
| 77 93 |  |  | ||
| 78 94 |  | 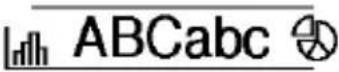 | ||
| 79 95 | 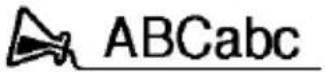 |  | ||
| 80 96 |  | 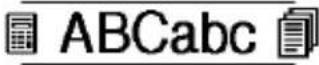 | ||
| 81 97 | 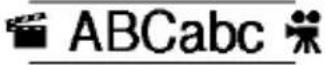 |  | ||
| 82 98 |  | 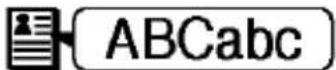 | ||
| 83 99 |  |  | ||
| Length | The length of the label can be set within the range 1.2" (30 mm) - 12.0" (300 mm). WhenAutois selected, the length of the label is automatically adjusted based on the amount of text entered. | |||
Using Auto-Format Layouts
Using the Auto-Format function you can quickly and easily create labels for a variety of purposes, such as file tabs, equipment labels, name badges, etc. Simply select a layout from the templates or block layouts, enter the text and apply formatting as desired.

Symbols and accented characters can also be used in auto-format layouts.
Using Templates - Example creating an Asset Tag
| 1 | Press the Auto-Format key to display the Auto-Format screen, and then select "Templates" using the ▲ or key. | |
| 2 | Press the OK or Enter key.The last template used is displayed. | |
| 3 | Select a template using the ▲ or key. | |
| 4 | Press the OK or Enter key.The Style screen is displayed. | 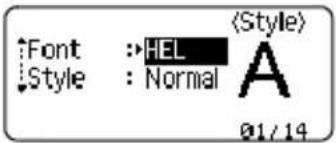 |
| 5 | Select an attribute using the ▲ or key, and then set a value for that attribute using the ▲ or key. | 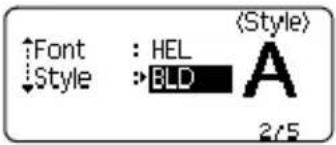 |
| 6 | Press the OK or Enter key.The Bar Code Setup screen is displayed.The Bar Code Setup screen is displayed only when a layout containing a bar code is selected. | 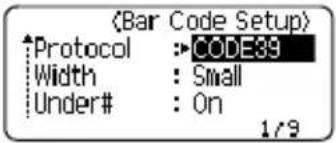 |
| 7 | Select an attribute using the ▲ or key, and then set a value for that attribute using the ▲ or key.The "C.Digit" (Check Digit) attribute is only available for the CODE39, I-2/5 and CODABAR protocols. | 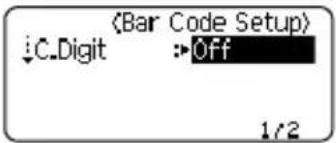 |
| 8 | Press the OK or Enter key.The template text entry screen is displayed.Caps mode can be used when entering text. | 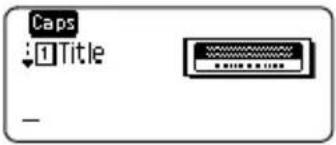 |
9 Enter the text and then press the OK or Enter key. Repeat this for each text field.
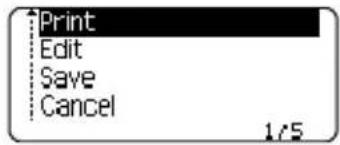
After all text fields are entered, the print menu is displayed when the OK or Enter key is pressed.
text_image
Print Edit Save Cancel 1/510 Select "Print" using the ▲ or ▶▼ and then press the the Copies screen.
OK or Enter key to display

- Select "Edit" to change the text data or style settings.
- Select "Save" to store the label in a file memory.
- Select "Cancel" to exit the Auto-Format function.
- Select "Print Options" to set the print settings.
11 Select the number of copies to be printed using the or key, or type the number using the number keys.
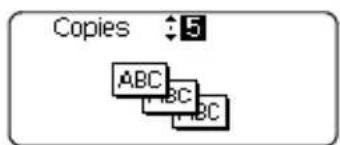
text_image
Copies ↑5 ABC ABC12 Press the OK or Enter key to print the labels. "Printing...Copies" is displayed while the labels are being printed.
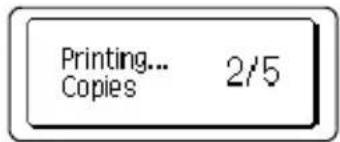
text_image
Printing... Copies 2/5
- Press the Escape key to return to the previous step.
- On the Style and Bar Code Setup screens, press the Space key to change the selected attribute to the default value.
- Refer to the Templates table for a list of available templates.

- If the width of the current tape cassette does not match the set width for the selected layout, an error message is displayed when you try to print the label. Press the Escape key or any other key to clear the error message, and insert a tape cassette of the correct width.
- If the number of characters entered exceeds the limit, "Text Too Long!" is displayed when the OK or Enter key is pressed. Press the Escape key or any other key to clear the error message, and edit the text using fewer characters.
Templates
| Attribute Value Details | ||
| Template Name | Flag 1 |  (0.47" x 3.5" [12mm x 90mm]) (0.47" x 3.5" [12mm x 90mm]) |
| Flag 2 |  (0.47" x 3.5" [12mm x 90mm]) (0.47" x 3.5" [12mm x 90mm]) | |
| Cable Wrap(Rotate & repeat) | 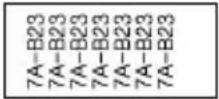 (0.70" x 1.5" [18mm x 39mm]) (0.70" x 1.5" [18mm x 39mm]) | |
| Faceplate |  (0.47" x 2.7" [12mm x 70mm]) (0.47" x 2.7" [12mm x 70mm]) | |
| Binder Spine |  (0.70" x 8.6" [18mm x 219mm]) (0.70" x 8.6" [18mm x 219mm]) | |
| File Folder Tab |  (0.47" x 3.2" [12 mm x 82 mm]) (0.47" x 3.2" [12 mm x 82 mm]) | |
| Divider Tab(Hanging Folder) | 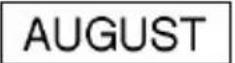 (0.47" x 1.6" [12 mm x 42 mm]) (0.47" x 1.6" [12 mm x 42 mm]) | |
| Asset Tag | 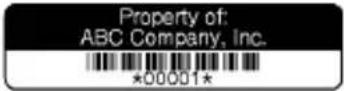 (0.70" x 2.7" [18 mm x 70 mm]) (0.70" x 2.7" [18 mm x 70 mm]) | |
| Bin Box | 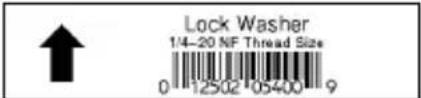 (0.70" x 3.0" [18 mm x 76 mm]) (0.70" x 3.0" [18 mm x 76 mm]) | |
| Equipment Label | 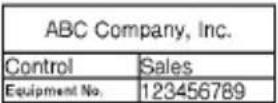 (0.70" x 2.2" [18 mm x 58 mm]) (0.70" x 2.2" [18 mm x 58 mm]) | |
| Template Name | Address Label | XXXX CORPORATION.7819N,Brother Blvd.Bartlett,TN 38133Telephone:+1-901-377-XXXX(0.70" x 2.7" [18 mm x 70 mm]) |
| Name Badge | Robert BeckerABC Company, Inc.(0.70" x 2.8" [18 mm x 72 mm]) | |
| CD Case Spine 1 | My Favorite Music(0.23" x 4.4" [6 mm x 113 mm]) | |
| CD Case Spine 2 | My Favorite Music(0.13" x 4.4" [3.5 mm x 113 mm]) | |
Using Block Layouts
| 1 | Press the Auto-Format key to display the Auto-Format screen, and then select “Block Layouts” using the ▲ or k▼. | |
| 2 | Press the OK or Enter key to display the Tape Width screen, and then select a tape width using the ▲ or k▼. | |
| 3 | Press the OK or Enter key. When the tape width has not changed, the last block layout selected is displayed. When the tape width has changed, the default layout for the new tape width is displayed. | |
| 4 | Select a block layout using the ▲ or k▼. | |
| 5 | Press the OK or Enter key.The Style screen is displayed. | 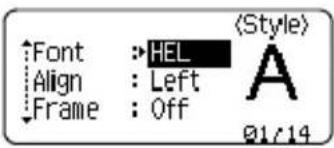 |
| 6 | Select an attribute using the ▲ or k▼, and then set a value for that attribute using the ▲ or k▼.Press the Space key to set the selected attribute to the default value. | 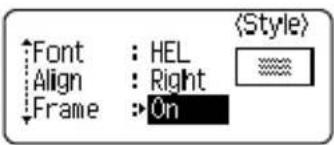 |
| 7 | Press the OK or Enter key.The block layout text entry screen is displayed. | 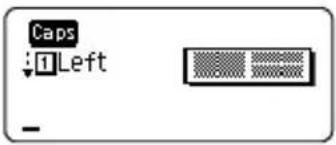 |
| Caps mode can be used when entering text. | ||
| 8 | Enter text and then press the OK or Enter key.Repeat for each text field.After all text fields are completed, press the OK or Enter key to display the print menu. | 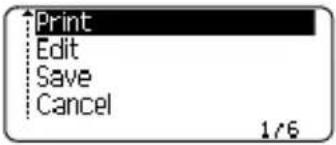 |
| 9 | Select "Print" using the ▲ or key and then press the the Copies screen. | OK or Enter key to display |
| Select "Edit" to change the text data or style settings.Select "Save" to store the label in a file memory.Select "Cancel" to exit the Auto-Format function.Select "Change Layout" to use a different layout.Select "Print Options" to set the print settings. | ||
| 10 | Select the number of copies to be printed using the ▲ or key, or type the number using the number keys. | 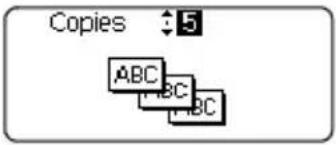 |
| 11 | Press the OK or Enter key to print the labels."Printing...Copies" is displayed while the labels are being printed. | 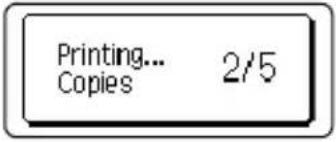 |
 | Press the Escape key to return to the previous step.Refer to the Block Layouts table for a list of available block layouts. | |
| [6HZS] | If the width of the current tape cassette does not match the set width for the selected layout, an error message is displayed when you try to print the label. Press the Escape key or any other key to clear the error message, and insert a tape cassette of the correct width. | |
Block Layouts
| Attribute Value Details | ||
| Block layout(0.70" [18 mm] tape) | 2LineA | 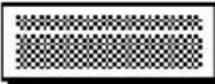 ....12pt....24pt ....12pt....24pt |
| 2LineB | 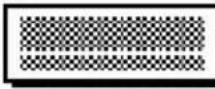 ....24pt....12pt ....24pt....12pt | |
| 3Line | 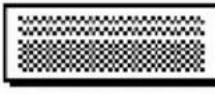 ....9pt....9pt....24pt ....9pt....9pt....24pt | |
| 1+2LineA | 42pt...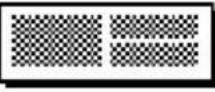 ....18pt....18pt ....18pt....18pt | |
| 1+2LineB | 42pt...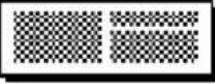 ....12pt....24pt ....12pt....24pt | |
| 1+3Line | 42pt... ....12pt ....12pt | |
| 1+4Line | 42pt...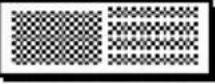 ....9pt ....9pt | |
| 1+5Line | 42pt...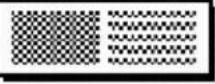 ....9pt ....9pt | |
| Block layout(0.47" [12 mm] tape) | 2LineA | 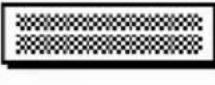 ....9pt....12pt ....9pt....12pt |
| 2LineB | 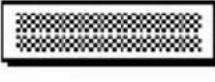 ....12pt....9pt ....12pt....9pt | |
| 3Line | 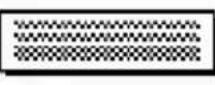 ....6pt....6pt....12pt ....6pt....6pt....12pt | |
| 1+2Line | 24pt...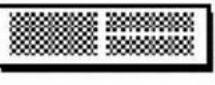 ....12pt....12pt ....12pt....12pt | |
| Block layout(0.35" [9 mm] tape) | 2LineA | 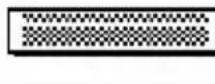 ....6pt....12pt ....6pt....12pt |
| 2LineB | 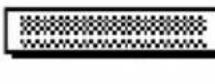 ....12pt....6pt ....12pt....6pt | |
| 1+2Line | 18pt...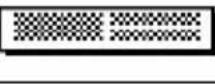 ....9pt....9pt ....9pt....9pt | |
| Block layout(0.23" [6 mm] tape) | 1+2Line | 12pt...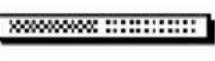 ....6pt....6pt ....6pt....6pt |
Creating a Bar Code Label
Using the Bar Code function you can create labels with one dimensional bar codes for use with cash registers, stock control systems or other bar code reader systems, or even asset control tags used in an asset management system.

- The P-touch labeler is not designed exclusively for creating bar code labels. Always check that bar code labels can be read by the bar code reader.
- For best results, print bar code labels in black ink on white tape. Some bar code readers may not be able to read bar code labels created using colored tape or ink.
- Use the “Large” setting for “Width” whenever possible. Some bar code readers may not be able to read bar code labels created using the “Small” setting.
- Continuously printing a large number of labels with bar codes can overheat the print head, which may affect printing quality.
Setting Bar Code Parameters and Entering Bar Code Data
1 Press the Bar Code key. The Bar Code Setup screen is displayed.

Up to five bar codes can be entered on a label.
2 Select an attribute using the ▲ or key, and then set a value for that attribute using the ◀ or key.
Characters may not appear below the bar code even when "On" is selected for "Under #", depending on the tape width being used, the number of lines entered, or the current character style settings.
3 | Press the OK or Enter key to apply the settings.

New settings are NOT applied if you do not press the OK or Enter key.
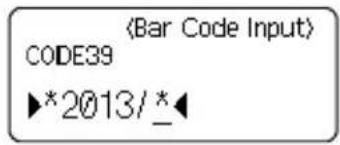
4 | Type in the bar code data. Special characters can be entered in the bar code when using the CODE39, CODE128, CODABAR or GS1-128 protocols. When not using special characters, go to step 7.
5 Press the Symbol key. A list of characters available for the current protocol is displayed.
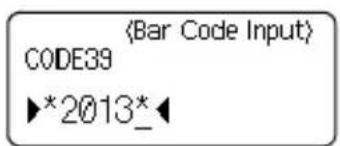
text_image
〈Bar Code Input〉 CODE39 *2013*6 Select a character using the ▲ or▼ key, then press the OK or Enter key to insert the character in the bar code data.
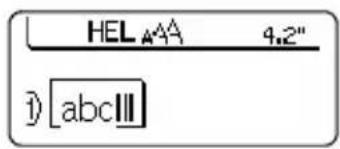
7 Press the OK or Enter key to insert the bar code in the label. The bar code is displayed on the text entry screen.
text_image
HEL 4.2" 1) abcIII
- The "C.Digit" (Check Digit) attribute is only available for the CODE39, I-2/5 and CODABAR protocols
- Press the Escape key to return to the previous step.
- Press the Space key to set the selected attribute to the default value.
- Refer to the Bar Code Settings table for a list of all available settings.
Bar Code Settings
| Attribute Value | |
| Protocol | CODE39, CODE128, EAN-8, EAN-13, GS1-128 (UCC/EAN-128), UPC-A, UPC-E, I-2/5 (ITF), CODABAR |
| Width | Small |
| Large | |
| Under# (characters printed below bar code) | On |
| Off | |
| C.Digit(check digit) | Off |
| On(only available for the CODE39, I-2/5 and CODABAR protocols) |
Special Character List
CODE39 CODABAR
| Code | Special Character |
| 0 | - |
| 1 | . |
| 2 (SPACE) 2 | |
| 3 | $ |
| 4 | / |
| 5 | + |
| 6 | % |
| Code | Special Character |
| 0 | - |
| 1 | $ |
| : | |
| 3 | / |
| 4 | . |
| 5 | + |
CODE128, GS1-128 (UCC / EAN-128)
| Code | Special Character | Code | Special Character | Code | Special Character |
| 0 (SPACE) 24 48 DC3 | \ | ||||
| 1 25 | 49 DC4 ! | ] | |||
| 2 26 | 50 NAK '' | ^ | |||
| 3 27 | 51 SYN # | - | |||
| 4 28 | NUL 52 EJB | ||||
| 5 29 | 53 CAN % | . | |||
| 6 30 | SOH 54 BM | ||||
| 7 31 | STX 55 SUB | ||||
| 8 32 | ETX 56 ESC | ||||
| 9 33 | EOT 57 ) | { | |||
| 10 34 | ENQ 58 ES | ||||
| 11 35 | ACK 59 + | | | |||
| 12 36 | BEL 60 GS | ||||
| 13 37 | BS 61 - | } | |||
| 14 38 | HT 62 RS | ||||
| 15 39 | / LF | 63 | ~ | ||
| 16 40 | VT 64 US | ||||
| 17 41 | FF ; 65 DEL | ||||
| 18 42 | CR 66 < FNC3 | ||||
| 19 43 | SO 67 = FNC2 | ||||
| 20 | > | 44 | SI | 68 | FNC4 |
| 21 | ? | 45 | DLE | 69 | FNC1 |
| 22 46 | DC1 a | ||||
| 23 47 | DC2 [ | ||||
Editing and Deleting a Bar Code
- To edit bar code parameters and bar code data, position the cursor beneath the bar code mark on the data entry screen and then open the Bar Code Setup screen. Refer to "Setting Bar Code Parameters and Entering Bar Code Data" on page 44.
- To delete a bar code from a label, position the cursor to the right of the bar code mark on the data entry screen and press the Backspace key.
LABEL PRINTING
Label Preview
Using the Preview function you can check the layout of the label before printing.
1 | Press the Preview key.
An image of the label is displayed on the screen.
The length of the label is shown in the lower-right corner of the screen.
Press the ◄ or key to scroll the preview to the left or right.
Press the ▲ or ▼▼▼▼▼▼▼▼▼▼▼▼▼▼▼▼▼▼▼▼▼▼▼▼▼▼▼▼▼▼▼▼▼▼▼▼▼▼▼▼▼▼▼▼▼▼▼▼▼▼▼▼▼▼▼▼▼▼▼▼▼▼▼▼▼▼▼▼▼▼▼▼▼▼▼▼▼▼▼▼▼▼▼▼▼▼▼▼▼▼▼▼▼▼▼▼▼▼▼▼▼▲▼▼▼▼▼▼▼▼▼▼▼▼▼▼▼▼▼▼▼▼▼▼▼▼▼▼▼▼▼▼▼▼▼▼▼▼▼▼▼▼▼▼▼▼▼▼▼▼▼▼▼▼▼▼▼▼▼▼▼▼▼▼▼▼▼▼▼▼▼▼▼▼▼▲▲▲▲▲▲▲▲▲▲▲▲▲▲▲▲▲▲▲▲▲▲▲▲▲▲▲▲▲▲▲▲▲▲▲▲▲▲▲▲▲▲▲▲▲▲▲▲▲▲▲▲▲▲▲▲▲▲▲▲▲▲▲▲▲▲▲▲▲▲▲▲▲▲▲▲▲▲▲▲▲▲▲▲▲▲▲▲▲▲▲▲▲▲▲▲▲▲▲▲●

- Press the Escape, OK or Enter key to return to the text entry screen.
- To scroll the preview to the left or right end, press the Shift key and then press the or key.
- To print the label directly from the preview screen, press the Print key or open the print options screen and select a print option. Refer to "Printing a Label" below for details.
- The print preview is a generated image of the label, and may differ from the actual label when printed.
Printing a Label
Labels can be printed once text entry and formatting is complete. Printing options include single and multiple copies, sequential numbering and mirror-printing.

- Do not pull the label coming out of the tape exit slot. Doing so will cause the ink ribbon to be discharged with the tape, making the tape no longer usable.
- Do not block the tape exit slot during printing or when feeding tape. Doing so will cause the tape to jam.
- Be sure to check that there is enough tape remaining when printing several labels continuously. If tape is running low, set fewer copies, print labels one at a time, or replace the tape cassette.
- Striped tape indicates the end of the tape cassette. If this appears during printing, press the Power key to turn the P-touch labeler off. Attempting to print with an empty tape cassette may damage the machine.
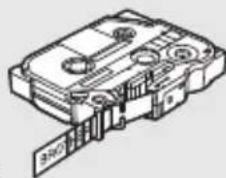
natural_image
Technical line drawing of a mechanical component with no visible text or symbolsPrinting Multiple Copies
Using this function you can print up to 9 copies of the same label.
1 Make sure that the appropriate tape cassette is inserted and ready for printing.
2 Press the Print key to display the Copies screen, and then select the number of copies to be printed using the ▲ or ▶ key, or type the number using the number keys.

Hold down the ▲ or ▶ to change the number of copies faster.
LABEL PRINTING
3 Press the OK or Enter key. "Printing...Copies" is displayed while the labels are being printed.
Printing...
Copies
2/5

- Press the Escape key to return to the previous step.
- The figures shown on the screen during printing indicate the “count / number of copies set”.
- Pressing the Space key when setting the number of copies resets the value to 1, the default.
Auto-numbering Labels
Using the numbering function you can create a set of sequentially numbered labels from a single label format.
1 Make sure that the appropriate tape cassette is inserted and ready for printing.
2 Press the Print Options key to display the print options screen, and then select "Numbering" using the or key.
3 | Press the OK or Enter key.
The numbering start point screen is displayed.
Start Point?

To apply auto-numbering to a bar code, select the bar code here. After selecting the bar code you will be prompted to enter the number of labels to be printed (step 6).
1)abc 10
(Numbering)
4 Move the cursor to the first character to be incremented in the numbering sequence and press the OK or Enter key. The numbering end point screen is displayed.
End Point?
1)abc 10
5 Move the cursor to the last character to be incremented in the numbering sequence and press the OK or Enter key. The number of labels to be printed is displayed.
1
(Numbering)
10 - 10
6 Select the number of labels to be printed using the or key, or type the number using the number key.
5
(Numbering)
10 - 14
Hold down the ▲r key to change the number of labels faster.
7 | Press the OK or Enter key.
The labels are printed.
As each label is printed the number of copies printed is shown.

- Press the Escape key to return to the previous step.
- The figures shown on the screen during printing indicate the "count / number of copies".
- Pressing the Space key when selecting the number of copies resets the value to 1, the default.
- Auto-numbering can also be applied to bar codes. When a bar code contains an auto-numbering sequence, no other fields in the label can contain an auto-numbering sequence.
- The auto-number portion of the label is incremented after each label is printed.
- Only one auto-numbering sequence can be used in a label.
- Any symbols or other non-alphanumeric characters in the auto-numbering sequence are ignored.
- An auto-numbering sequence can only contain a maximum of five characters.

• Letters and numbers increase as shown below:
| 0 | 1 | . | 0. | 9 ... | ||
| A | B | . | A | Z ... | ||
| a | b | . | a. | z ... | ||
| A0 | A1 ...A9 | B0 | ... |
Spaces (shown as underscores “_” in the example below) can be used to adjust the spacing between characters or to control the number of digits that are printed.
| _9 | → | 10 ...99 | → | 00 | → | ... |
| _Z | → | AA ...ZZ | → | AA | → | ... |
| 1_9 | → | 2_0 ...9_9 | → | 0_0 | → | ... |
Mirror Printing
Using the mirror printing function you can create labels with the text printed in reverse so that they can be read from the opposite side when attached to glass or other transparent material.
1 Make sure that the appropriate tape cassette is inserted and ready for printing.
2| Press the Print Options key to display the print options screen, and then select "Mirror" using the or key.
3 | Press the OK or Enter key.
The message "Print OK?" is displayed
4 Press the OK or Enter key. "Printing...Copies" is displayed while the labels are being printed.
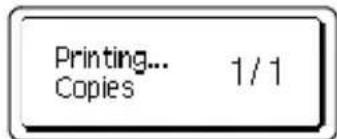
text_image
Printing... Copies 1/1
- Press the Escape key to return to the previous step.
- Text should be printed on clear tape when using the mirror printing function.
- The copy and auto-numbering functions cannot be used together with the mirror printing function.
Setting Margin
The tape cutting options allow you to specify how the tape is fed and cut when printing labels. In particular, the “Chain” options greatly reduce the amount of wasted tape by using smaller margins and eliminating blank sections cut between labels.
1 Press the Label key to display the Label menu.
2 Select "Margin" using the ▲ or key, and then set the value by using the or ◀ ▶ key.
3 Press the OK or Enter key to apply the settings.

New settings are NOT applied if you do not press the OK or Enter key.

- Press the Escape key to return to the previous step.
• Refer to the Tape Cutting table for a list of all available settings.
Tape Cutting Options
| Setting Description Example | ||
| Full | Each label is printed, leaving a margin of 0.98" (25 mm) on each end. | 0.98" (25 mm)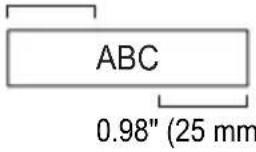 ) ) |
| Half | A margin of 0.98" (25 mm) is printed first, and then each label is printed, leaving a margin of 0.47" (12 mm) before and after the text.Dots (:) are printed in front of the text. Cut along the printed dots (:) with scissors. | 0.98" (25 mm)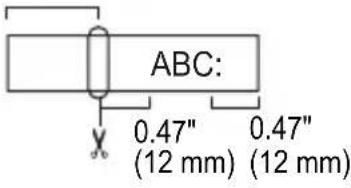 |
| Narrow | A margin of 0.98" (25 mm) is printed first, and then each label is printed, leaving a margin of 0.16" (4 mm) before and after the text.Dots (:) are printed in front of the text. Cut along the printed dots (:) with scissors. | 0.98" (25 mm)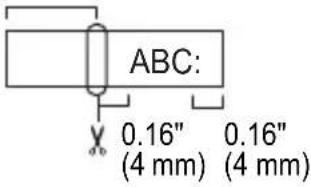 |
| Chain | Use this setting when printing several labels with minimum margins.Feed the tape before using the cutter. Otherwise a part of the text may be cut off. Do not try to pull the tape since this may damage the tape cassette.After pressing Print, “OK to Feed?” appears. Press the Escape key to enter more texts or press the OK or Enter key to feed.The final label is printed with an 0.37" (9.5 mm) margin to the right of the characters. Use scissors to cut off any part of this margin that is not required. | *Feed the tape before using the cutter.ABC ABC0.37"(9.5 mm) |
Adjusting the Label Length
You can adjust the length of the printed label in levels of -5 to +5.
1 Press the Menu key to display the setup menu, select "Adjustment" using the or ▲▼ key, and then press the OK or Enter key.
2 Select "Label Length" using ▲ or key and set the value using ◀ or key.
3 Press the OK or Enter key to apply the setting.

- Press the Escape key to return to the previous step.
- Press the Space key to set the value to default setting.
• Approximately 1% of the total label length will be adjusted by 1 level.
Attaching Labels
1 If necessary, trim the printed label to the desired shape and length using scissors, etc.
2 Peel the backing from the label.
3 Position the label and then press firmly from top to bottom with your finger to attach the label.
LABEL PRINTING

- The backing of some types of tapes may be pre-cut to make it easier to peel the backing. To remove the backing, simply fold the label lengthwise with the text facing inward, to expose the inside edges of the backing. Next, peel off the backing one piece at a time.
- Labels may be difficult to attach to surfaces that are wet, dirty, or uneven. The labels may peel off easily from these surfaces.
- Be sure to read the instructions provided with Fabric Iron-On Tapes, Extra Strength Adhesive Tapes or other special tapes and observe all precautions noted in the instructions.
- Please use scissors to cut heat shrink tube tape.
Printing from the Label Collection
Printing a label from the Label Collection Stored in the Machine
Pages 53 shows the many labels that are stored in your Label Collection. Printing these pre-designed labels saves you time.
1 Press the Label Collection key.
2 Select the language of the label to be printed using the or key, and then press the OK or Enter key. The language can be selected from "Croatian", "Czech", "Danish", "Dutch", "English(United Kingdom)", "English(United States)", "Finnish", "French", "French(Canada)", "German", "Hungarian", "Italian", "Norwegian", "Polish", "Portuguese", "Portuguese(Brazil)", "Romanian", "Slovak", "Slovenian", "Spanish(Spain)", "Spanish(United States)", "Swedish" or "Turkish".
3 | Select the category using the ▲ or ▶ key, and then press the OK or Enter key.

Refer to the Label Collection List to view all of the available labels.
4 | The first label image is displayed.
Select a label using the ▲ or key, and then press the OK or Enter key.

To add the label to your "Favorites", select "Add to Favorites" using the ▲ or ▼ key, and then press the OK or Enter key to register the selected label image in the Favorites category. Registering your most frequently used label images allows you to quickly and easily display them when needed again.
5 | Select "Print" using the ▲ or ▶▼, and then press the OK or Enter key.

Only 0.47" (12mm) or 0.70" (18mm) tape can be used for Label Collection.
6 Select the number of copies to be printed using the or key, or type the number using the number keys.
7 Press the OKor Enter key to print the labels. "Printing...Copies" is displayed while the labels are being printed.
Label Collection List
| Category Label | |||
| Files |  |  | |
 |  |  | |
| Office Signage |  | ||
 |  | ||
 |  | ||
| Communication |  | ||
 | |||
 |  | ||
 |  | ||
| Attention |  |  |  |
 |  | ||
| Retail |  |  | |
 |  | ||
* Labels are for illustrative purposes only.
USING THE FILE MEMORY
You can store up to 50 of your most frequently used labels in the file memory. Each label is stored as a file, allowing you to quickly and easily recall your label when needed again.

When the file memory is full, each time you save a file you will need to overwrite one of your stored files.
Storing a Label into Memory
1 After entering the text and formatting the label, press the File key to display the File screen.
2 Select "Save" using the ▲ or k▼.
3 | Press the OK or Enter key. A file number is displayed.
A label text is also displayed if a label is already stored in that file number.
4 Select a file number using the ▲ or ▶ key, and then press the OK or Enter key to save the label under the selected file number.
The file is saved and the screen returns to the text entry screen.
When there is already a stored file in the selected number, the data will be overwritten by the file you try to save.
- Press the Escape key to return to the previous step.
- Up to 200 characters can be saved in one file. However, the number of characters that can be saved may differ, for example when entering symbols.
- To store a label created by using the Auto-Format Layouts, refer to “Using Auto-Format Layouts” on page 38.


Opening a Stored Label File
1 Press the File key to display the File screen.
2 Select "Open" using the or key.
3 Press the OK or Enter key. The file number of a stored label is displayed. The label text is also displayed to identify the label.
4 Select a file number using the ▲ or ▶ key, and then press the OK or Enter key to open the selected file. The file is opened and displayed on the text entry screen.

Press the Escape key to return to the previous step.
Printing a Stored Label File
1 Press the File key to display the File screen.
2 Select "Print" using the ▲ or ▶▼.
3 Press the OK or Enter key. The file number of a stored label is displayed. The label text is also displayed to identify the label.
4 Select a file number using the or key, and then press the to display the Copies screen. Print, OK or Enter key
5 Select the number of copies to be printed using the ▲ or ▶ key, or type the number using the number keys.
6 Press the OK or Enter key to print the labels. "Printing...Copies" is displayed while the labels are being printed.

- Press the Escape key to return to the previous step.
- The message "No Text!" is displayed when you try to print a file with no text.
Deleting a Stored Label File
1 Press the File key to display the File screen.
2 Select "Delete" using the ▲ or k▼.
3 Press the OK or Enter key. The file number of a stored label is displayed. The label text is also displayed to identify the label.
4 Select a file number using the ▲ or ▶ key, and then press the OK or Enter key. The message "Delete?" is displayed.
5 Press the OK or Enter key to delete the file. The file is deleted and the screen returns to the text entry screen.

Press the Escape key to cancel deleting the file and return to the previous screen.
Resetting the P-touch Labeler
You can reset the internal memory of your P-touch labeler when you want to clear all saved label files, or in the event the P-touch labeler is not operating correctly.
Resetting the data to factory settings
(Label collections stored in Favorites is not reset.)
Turn off the machine. Press and hold down the Shift and R keys. While holding down the Shift and R keys, press the Power key once and then release the Shift and R keys.

- Release the Power key before releasing the other key.
- All text, format settings, option settings and stored label files are cleared when you reset the P-touch labeler. Language and unit settings will also be cleared
Maintenance
Your P-touch labeler should be cleaned on a regular basis to maintain its performance and life span.

Always remove the batteries and disconnect the AC adapter before cleaning the P-touch labeler.
Cleaning the Unit
Wipe any dust and marks from the main unit using a soft, dry cloth. Use a slightly dampened cloth on difficult to remove marks.

Do not use paint thinner, benzene, alcohol or any other organic solvent. These may deform the case or damage the appearance of your P-touch labeler.
Cleaning the Print Head
Streaks or poor quality characters on printed labels generally indicates that the print head is dirty. Clean the print head using a cotton swab or the optional print head cleaning cassette (TZe-CL4).

- Do not touch the print head directly with your bare hands.
- Refer to the instructions provided with the print head cleaning cassette for directions on how to use it.
Print head
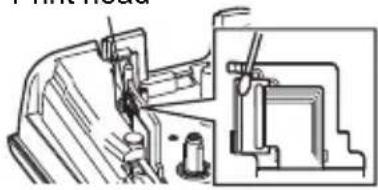
natural_image
Technical line drawing of a mechanical assembly with an inset close-up showing internal components (no text or symbols)Cleaning the Tape Cutter
Tape adhesive can build up on the cutter blade after repeated use, taking the edge off the blade which may result in the tape jamming in the cutter.

- About once every year, wipe the cutter blade using a cotton swab moistened with Isopropyl alcohol (rubbing alcohol).
- Do not touch the cutter blade directly with your bare hands.
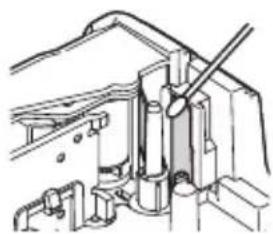
natural_image
Technical line drawing of a mechanical assembly with no visible text or symbolsWhat to do when...
| Problem Solution | |
| The screen ‘locks’, or the P-touch labeler does not respond normally. | Refer to “Resetting the P-touch Labeler” on page 56 and reset the internal memory to the initial settings. If resetting the P-touch labeler does not solve the problem, disconnect the AC adapter and remove the batteries for more than 10 minutes. |
| The display remains blank after turning on the power. | Check that the batteries are correctly installed and that the AC adapter designed exclusively for your P-touch labeler (provided) is correctly connected.Check that the rechargeable Li-ion battery is fully charged. |
| The LCD messages are displayed in a foreign language. | Refer to “Setting Language and Unit” on page 24 to select your desired language. |
| The label is not printed after pressing the Print key. | · Check that text has been entered and that the tape cassette is installed correctly with sufficient tape remaining.· If the tape is bent, cut off the bent section and thread the tape through the tape exit slot.· If the tape is jammed, remove the tape cassette and then pull out the jammed tape and cut it. Check that the end of the tape passes through the tape guide before reinstalling the tape cassette. |
| The label is not printed correctly. | · Remove the tape cassette and reinstall it, pressing it firmly until it clicks into place.· If the print head is dirty, clean it with a cotton swab or optional print head cleaning cassette (TZe-CL4). |
| The ink ribbon is separated from the ink roller. | If the ink ribbon is broken, replace the tape cassette. If not, leave the tape uncut and remove the tape cassette, then wind the loose ink ribbon onto the spool as shown in the figure. 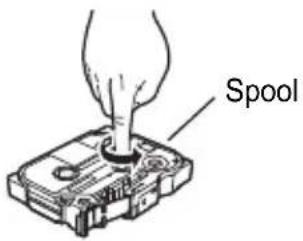 |
| The P-touch labeler stops while printing a label. | · Replace the tape cassette if striped tape is visible, as this indicates that you have reached the end of the tape.· Replace all batteries or connect the AC adapter directly to the P-touch labeler. |
| Label files saved previously are now empty. | All files stored in the internal memory are deleted if the batteries are weak or the AC adapter was disconnected. |
| The tape jam which cannot be cleared easily occurred. | Please contact our customer service. |
Error Messages
When an error message appears on the display, follow the directions provided below.
| Message Cause/Remedy | |
| Wrong Type Of Adapter Connected! | An incompatible AC adapter is connected. Use an appropriate AC adapter. |
| Low Battery! | The installed batteries are getting weak. |
| Replace Battery! | The installed batteries are about to run out. |
| Recharge Li-ion Battery! | The battery is low. Please charge the lithium-ion battery. |
| Li-ion is damaged Use other power source! | The Li-ion is damaged. Please use an AC adapter or an other battery. |
| Unit Cooling Wait 10 min. before restart! | High temperature error. |
| Cutter Error! | The tape cutter is closed when you try to print or feed tape. Turn the P-touch labeler off and then on again before continuing. When tape is tangled in the cutter, remove the tape. |
| Insert Tape Cassette! | There is no tape cassette installed when you try to print or preview a label, or feed tape. Install a tape cassette before continuing. |
| Text Full! | The maximum number of characters have already been entered. Edit the text and use fewer characters. |
| No Text! | There is no text, symbols or bar code data entered when you try to print or preview a label. Enter data before continuing. |
| Line Limit! Max 5 Lines | There are already five lines of text when you press the Enter key. Limit the number of lines to five. |
| Incorrect Value! | The value entered for setting the tape length, multiple copies or numbering function is invalid. Enter a valid value for the setting. |
| Tape Width Limit! Max 3 Lines | There are more than lines of text that can be input when you press the Print or Preview key while using 0.47"(12 mm) tape. Limit the number of lines to three, or replace with a larger width tape cassette. |
| Tape Width Limit! Max 2 Lines | There are more than two lines of text when you press the Print or Preview key while using 0.35" or 0.23" (9 mm or 6 mm) tape. Limit the number of lines to two, or replace with a larger width tape cassette. |
| Tape Width Limit! Max 1 Line | There is more than one line of text when you press the Print or Preview key while using 0.13" (3.5 mm) tape. Limit the number of lines to one, or replace with a larger width tape cassette. |
| Block Limit!Max 5 Blocks | There are already five blocks of text. Limit the number of blocks to five. |
| Length Limit! | The length of the label to be printed using the text entered is longer than 39.37" (1 m). Edit the text so that the length of the label is less than 39.37" (1 m). |
| Insert0.70" TapeCassette! | An 0.70" (18 mm) tape cassette is not installed when an Auto-Format for 0.70" (18 mm) tape is selected. Install an 0.70" (18 mm) tape cassette. |
| Insert18mm TapeCassette! | |
| Insert0.47" TapeCassette! | An 0.47" (12 mm) tape cassette is not installed when an Auto-Format for 0.47" (12 mm) tape is selected. Install a 0.47" (12 mm) tape cassette. |
| Insert12mm TapeCassette! | |
| Insert0.35" TapeCassette! | An 0.35" (9 mm) tape cassette is not installed when an Auto-Format for 0.35" (9 mm) tape is selected. Install a 0.35" (9 mm) tape cassette. |
| Insert9mm TapeCassette! | |
| Insert0.23" TapeCassette! | An 0.23" (6 mm) tape cassette is not installed when an Auto-Format for 0.23" (6 mm) tape is selected. Install a 0.23" (6 mm) tape cassette. |
| Insert6mm TapeCassette! | |
| Insert0.13" TapeCassette! | An 0.13" (3.5 mm) tape cassette is not installed when an Auto-Format for 0.13" (3.5 mm) tape is selected. Install an 0.13" (3.5 mm) tape cassette. |
| Insert3.5mm TapeCassette! | |
| Too Much TextFor This Layout! | The maximum number of characters for the selected layout have already been entered. Edit the text to use fewer characters or use a different layout. |
| TextToo Long! | The length of the label to be printed using the text entered is longer than the length setting. Edit the text to fit within the set length or change the length setting. |
| Memory Full! | There is not enough internal memory available when you try to save a label file. Delete any unnecessary files to make more memory available for the new label file. |
| Check # of Digits Entered! | The number of digits entered in the bar code data does not match the number of digits set in the bar code parameters. Enter the correct number of digits. |
| Input A,B,C or D At Start&End! | The bar code data entered does not have the required start/stop code (A, B, C, or D required at the beginning and end of the bar code data for the CODABAR protocol). Enter the bar code data correctly. |
| Maximum Of 5 Bar Codes Per Label! | There are already 5 bar codes entered in the text data when you try to enter a new bar code. You can only use up to five bar codes in each label. |
| Text Too High! | The text size is too large. Select a different size option. |
| Select Other Margin! | The tape length set using the tape length setting is shorter than the total length of the left and right margins applied for the "Large Margin" setting. Select a different margin setting. |
| Installed tape is not compatible with this machine! | Tape that is incompatible with the machine has been installed. Use compatible tape. |
| Category Full! | The memory available for categories is full. To make more memory available, delete any unnecessary registered label files by highlighting the label file and pressing the OK key. |
| Already Exists in Favorites! | The label which already exists is added in favorites category of Label Collection. |
| Favorites Folder Empty! | Favorites folder of Label Collection is empty. |
| Insert 0.47" or 0.70" tape! | The cassette tape other than 0.47"/0.70" (12 mm/18 mm) width or no cassette tape is set when printing Label Collection. Set an appropriate width tape. |
| Insert 12mm or 18mm tape! | |
| System Error XX | Please contact our customer service. |
Specifications
Main Unit
| Item Specification | |
| Display | |
| Character display 16 | characters x 2 guidance and 2 lines text(128 dot x 56 dot) |
| Screen contrast 5 levels (+2, +1, 0, -1, -2) | |
| Printing | |
| Print method Thermal | Transfer |
| Print head 112 dot / 1 | 80 dpi |
| Print height 0.62" (15 | 8 mm) max. (when using 0.70"/18 mm tape) *1 |
| Print speed Approx. 0 | .78" (20 mm)/ sec. |
| Tape cassette | Standard TZe tape cassette (0.13", 0.23", 0.35", 0.47",0.70" [3.5 mm, 6 mm, 9 mm, 12 mm, 18 mm] widths) |
| No. of lines 0.70" (18 | mm) tape : 1 - 5 lines;0.47" (12 mm) tape : 1 - 3 lines; 0.35" (9 mm) tape : 1 - 2 lines;0.23" (6 mm) tape : 1 - 2 lines; 0.13" (3.5 mm) tape : 1 line |
| Margin Full, Half, Narrow, Chain | |
| Memory | |
| Memory buffer size Maximum 2800 characters | |
| File storage Maximum 50 files | |
| Other Features | |
| Templates Label Collections, Auto-Format | |
| Power Supply | |
| Power supply | Six "AA" alkaline batteries (LR06), Six "AA" Ni-MH rechargeable batteries (HR06)*3 Li-ion Battery (BA-E001)*2,AC adapter (AD-E001)*2. |
| Auto Power-off Battery: 5 min. AC adapter: 5 min. | |
| Size | |
| Dimensions | Approx.5.2"(W) x 8.4"(D) 2.6"(H)[132 mm(W) x 214 mm(D) x 66 mm(H)] |
| Weight Approx.1.5lb (670g) (without tape cassette and batteries) | |
| Other | |
| Operating temperature / humidity | 50°F - 95°F / 20% - 80% humidity (without condensation)Maximum wet bulb temperature: 80.6°F |
*1 Actual character size may be smaller than maximum print height.
*2 Option for PT-H300 only.
*3 Visit us at http://solutions.brother.com/ for the latest information about the recommended batteries.
INDEX
A
AC adapter 19
Accented Character List 31
Auto power-off time 23
B
Battery 18
Block Layouts 43
C
Caps mode 15
contrast 23
cursor keys 26
D
deleting
text and formatting 27
text only 27
E
entering
text 25
F
formatting
character attributes 31
label attributes 34
Frames 35
K
Keyboard 16
L
Label Collection 52
length 34
line 31
Line number 15
N
new line 26
P
Power Supply 18
R
Return mark 15
S
size 31
Special Character List ....45
Specifications 62
style 31
Symbol List 29
symbols 27
T
tape cassettes 22
tape length 15
Templates 40
text
entering and editing .....25
lines 26
W
width 31
Contact Information (For USA Only)
Service Center Locations
If you need a local service center, please call 1-877-BROTHER (1-877-276-8437) to locate the authorized service center closest to you.
Note: Be sure to call the Service Center before your visit.
Service centers do not provide operational assistance. See "Operational Assistance".
Operational Assistance
For technical and operational assistance you may call Brother Customer Service at: Voice 1-877-BROTHER (1-877-276-8437), or Fax 1-901-379-1210
Assistance on the Internet
For product information: www.brother-usa.com
For downloading the latest drivers: http://solutions.brother.com
For purchasing accessories and certain Brother products: http://www.brothermall.com
Accessories and Supplies
To order Brother accessories or supplies by Visa, MasterCard, Discover or American Express, you may call toll free 1-877-552-MALL (6255), or complete the order form and fax both sides of the form to 1-800-947-1445.
For purchasing accessories on the Internet: http://www.brothermall.com
To order by mail or pay by check, please complete the accessory order form and mail it along with payment to:
Brother International Corporation
Attn: Consumer Accessory Division
P.O. Box 341332
Bartlett, TN 38133-1332