
HXR-NX5P - Camcorder SONY - Free user manual and instructions
Find the device manual for free HXR-NX5P SONY in PDF.


User questions about HXR-NX5P SONY
0 question about this device. Answer the ones you know or ask your own.
Ask a new question about this device
Download the instructions for your Camcorder in PDF format for free! Find your manual HXR-NX5P - SONY and take your electronic device back in hand. On this page are published all the documents necessary for the use of your device. HXR-NX5P by SONY.
USER MANUAL HXR-NX5P SONY
Digital HD Video Camera Recorder
HXR-NX5E/NX5P/NX5M
Operating Guide
Before operating the unit, please read this manual thoroughly, and retain it for future reference.
NXCAM
AVCHD

InfoLITHIUM™

PROGRESSIVE




Read this first
Before operating this unit, please read this manual thoroughly, and retain it for future reference.
To handle the recorded images on your computer
Refer to “Help” on the supplied CD-ROM “Content Management Utility.”
Notes on use
Types of memory cards you can use in your camcorder
- You can use the following memory cards for this camcorder; “Memory Stick PRO Duo” (Mark2) media, “Memory Stick PRO-HG Duo” media, SD memory cards, SDHC memory cards, SDXC memory cards (Speed Class 4 or faster is required for each SD card). However, operation with all memory cards is not assured.
- “Memory Stick PRO Duo” media of up to 32 GB and SD cards of up to 64 GB have been verified to operate with your camcorder.
- In this manual, “Memory Stick PRO Duo” (Mark2) media and “Memory Stick PRO-HG Duo” media are called “Memory Stick PRO Duo” media. SD memory card, SDHC memory card and SDXC memory card are called SD card.
• See page 101 for the recordable time of memory cards.
Notes
- A MultiMedia Card cannot be used with this camcorder.
- Movies recorded on SDXC memory cards cannot be imported to or played back on computers or A/V devices not supporting the exFAT* file system by connecting the camcorder to these devices with the USB cable. Confirm in advance that the connecting equipment is supporting the exFAT system. If you connect an equipment not supporting the exFAT system and the format screen appears, do not perform the format. All the data recorded will be lost.
* The exFAT is a file system that is used for SDXC memory cards.
Size of memory card you can use with your camcorder
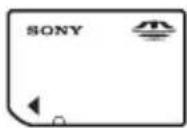
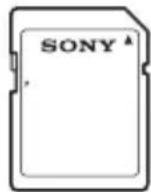
- “Memory Stick PRO Duo” media, half the size of “Memory Stick,” or standard size SD cards can be used for this camcorder.
- Do not attach a label or the like on memory card or memory card adaptor. Doing so may cause a malfunction.
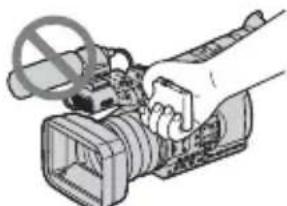
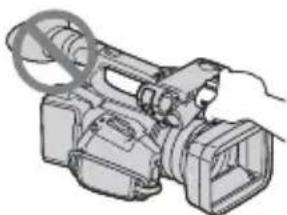
Using the camcorder
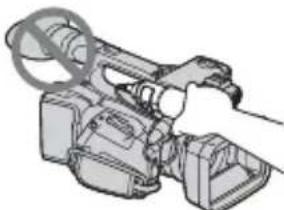
- Do not hold the camcorder by the following part.

natural_image
Illustration of a video camera with no visible text or symbolsLens hood
natural_image
Illustration of a hand operating a video camera with a no-smoking symbol (no text or symbols present)LCD panel
natural_image
Line drawing of a professional video camera with no visible text or symbolsInternal microphone
natural_image
Illustration of a professional video camera with extended lens and external frame (no text or symbols)Microphone or Microphone holder
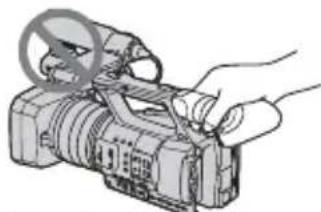
natural_image
Illustration of a hand holding a video camera with a circular symbol overlay (no text or symbols present)Viewfinder
Notes
- The camcorder is not dustproof, dripproof or waterproof.
See “About handling of your camcorder” (p. 109). - Connect cables to your camcorder with their terminals placed the correct way. Squeezing the terminals into your camcorder's jacks may damage them or results in a malfunction of your camcorder.
- HXR-NX5E/NX5P: Even if the camcorder is turned off, the GPS function is working as long as the GPS switch is set to ON. Make sure that the GPS switch is set to OFF during take off and landing of an airplane.
About menu items, LCD panel, viewfinder, and lens
- A menu item that is grayed out is not available under the current recording or playback conditions.
- The LCD screen and the viewfinder are manufactured using extremely high-precision technology, so over 99.99% of the pixels are operational for effective use. However, there may be some tiny black points and/or bright points (white, red, blue, or green in color) that appear constantly on the LCD screen and/or the viewfinder. These points are normal results of the manufacturing process and do not affect the recording in any way.
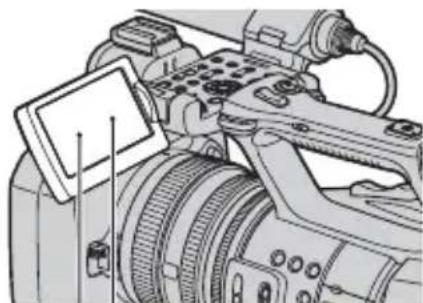
natural_image
Technical line drawing of a digital camera with lens and external components (no text or symbols)Black point
White, red, blue or green point
Do not expose your camcorder's viewfinder, lens, or LCD screen to the sun or strong light source for extended periods.
- Intense light sources, especially the sun will converge on the viewfinder or lens and damage the internal parts of your camcorder. Avoid sunlight or other strong light sources when storing your camcorder. Protect this device by always closing the lens cover or by placing it in its bag when not in use.
About temperature of your camcorder and battery pack
- Your camcorder has a protective function that disables recording or playback if the temperature of your camcorder or battery pack is beyond the safely operable range. In this case, a message appears on the LCD screen or in the viewfinder (p. 99).
On recording
- In order to stabilize memory card operation, it is recommended that you format the memory card when you use it with your camcorder for the first time. All data recorded on the memory card will be erased by formatting, and can not be recovered. Save important data on the memory card on other media such as a computer, before formatting the memory card.
- Before starting to record, test the recording function to make sure the picture and sound are recorded without any problems.
- Compensation for the loss of the content of recordings or the loss of recording opportunities cannot be provided, even if recording or playback is not possible due to a malfunction of the camcorder, storage media, etc., or even if images or sounds are distorted due to the limits of the capabilities of the camcorder.
• TV color systems differ depending on the countries/regions. To view your
Read this first (Continued)
recordings on a TV, you need a PAL system-based TV.
- Television programs, films, video tapes, and other materials may be copyrighted. Unauthorized recording of such materials may be contrary to the copyright laws.
- Because of the way that the image device (CMOS sensor) reads out image signals, the following phenomena may occur.
- The subjects passing by the frame rapidly might appear crooked depending on the recording conditions. (This phenomenon may be notable in displays having high motion resolution.)
– Horizontal lines appear on the screen during recording under fluorescent lights. The phenomena can be reduced by adjusting the shutter speed (p. 29).
– Images on the screen look horizontally divided when a subject is lighted with a flash. The phenomena can be reduced by using a slower shutter speed.
On playing back movies
- Your camcorder is compatible with MPEG-4 AVC/H.264 High Profile for high definition image quality (HD) recording. Therefore, you cannot play back images recorded with high definition image quality (HD) on your camcorder with the following devices;
- Other AVCHD format compatible devices which are not compatible with High Profile
- Devices which are not compatible with the AVCHD format
- Movies made using this camcorder may not play back normally on devices other than this camcorder. Also, movies recorded on other devices may not play back properly on this camcorder.
- Standard (SD) image quality movies recorded on SD memory cards cannot be played on AV equipment of other manufacturers.
Discs recorded with high definition image quality (HD)
This camcorder captures high definition footage in the AVCHD format. DVD media containing AVCHD footage should not be used with DVD based players or recorders, as the DVD player/recorder may fail to eject the media and may erase its contents without warning.
Save all your recorded image data
To prevent your image data from being lost, save all your recorded images on external media periodically. It is recommended that you save the image data on a computer using the supplied application software.
Format the recording media using [MEDIA FORMAT] if images are not recorded or played back properly
If you continue recording and deleting images on recording media for a long time, the files on that recording media may be fragmented. As a result, you may not be able to record and save images properly. If this happens, save images on a separate recordable media, such as a disc or computer, then format the recording media (p. 65).
Note on disposal/transfer
Even if you delete all data or format the recording media on your camcorder or computer, you may not delete data from the recording media completely. When you transfer the recording media or your camcorder, it is recommended that you delete the data completely using commercially available data deletion software to prevent the recovery of your data. Also, when you dispose of the recording media, it is recommended that you destroy the actual body of the recording media.
About the operation of the camcorder
You can operate the camcorder using the SEL/PUSH EXEC dial/◄/► buttons (p. 17), ♠/▼/◄/►/EXEC buttons (p. 67), and the touch panel. However, you cannot use the touch panel to make some settings such as the MENU items.
About this manual
- Memory cards and a flash memory unit are both referred to as recording media in this manual.
- The images of the LCD screen and the viewfinder used in this manual for illustration purposes are captured using a digital still camera, and therefore may appear different.
- The on-screen displays in each local language are used for illustrating the operating procedures. Change the screen language before using your camcorder if necessary (p. 18).
- Design and specifications of recording media and other accessories are subject to change without notice.
- Illustrations of camcorders in this manual show the HXR-NX5E unless otherwise specified.
- Illustrations of battery packs in this manual show the NP-F770 unless otherwise specified.
Table of Contents
Read this first 2
Getting Started
Step 1: Checking supplied items ...... 9
Step 2: Attaching the supplied microphone and the lens hood with lens cover 10
Step 3: Charging the battery pack 12
Step 4: Turning the power on and holding your camcorder properly ..... 14
Step 5: Adjusting the LCD panel and viewfinder .... 15
Step 6: Setting the date and time .... 17
Changing the language setting.... 18
Step 7: Inserting a memory card/Attaching a flash memory unit ..... 19
Recording/Playback
Recording 21
Changing the setting of the record button/handle record button ..... 23
Selecting high definition image quality (HD) or standard definition image quality (SD)....
Selecting the recording format.... 25
Changing the settings of your camcorder recordings 26
Adjusting the zoom.... 26
Adjusting the focus manually 27
Adjusting the image brightness 28
Adjusting to natural color (White balance) 30
Customizing the picture quality (Picture profile) 32
Audio setup 39
Acquiring location information (HXR-NX5E/NX5P).... 41
Recording with the SMOOTH SLOW REC function.... 42
Setting time data 43
Assigning the functions to the ASSIGN buttons 45
Playback 47
Viewing still images.... 49
Changing/checking the settings in your camcorder 51
Changing the screen.... 51
Displaying recording data (Data code).... 51
Displaying the settings in your camcorder (Status check) 52
Connecting a monitor or a TV 54
Editing
Operating the MODE menu 57
Protecting recorded images (Protect) 58
Using the Playlist of movies 59
Creating the Playlist 59
Playing the Playlist 59
Capturing still images from a movie 60
Dividing a movie 61
Deleting movies and still images 62
Dubbing movies/copying still images 63
Dubbing movies 63
Copying still images.... 64
Formatting the recording media 65
Preventing data on recording media from being recovered ....65
Repairing the image database file ....66
Using the Menu
Operating the menu 67
Menu items 69

(CAMERA SET) menu 71
Settings to adjust your camcorder to the recording conditions (GAIN SET/BACK LIGHT/STEADYSHOT, etc.)

(REC/OUT SET) menu 77
Recording settings, input and output settings (REC SET/VIDEO OUT)

(AUDIO SET) menu 78
Settings for the audio recording (AUDIO FORMAT/XLR SET, etc.)

(DISPLAY SET) menu 81
Display settings of the display and the viewfinder (MARKER/VF BACKLIGHT/DISPLAY OUTPUT, etc.)

(TC/UB SET) menu 85
(TC PRESET/UB PRESET, etc.)

(OTHERS) menu 86
Settings while recording or other basic settings (AREA SET/BEEP, etc.)
Connecting with a Computer
Saving images with a computer 88
Table of Contents (Continued)
Troubleshooting
Troubleshooting 90
Warning indicators and messages 99
Additional Information
Recording time of movies 101
Using your camcorder abroad ....103
File/folder structure on the memory card and the flash memory unit ... 104
Maintenance and precautions 105
About the AVCHD format 105
About GPS (HXR-NX5E/NX5P) 105
About the memory card.... 106
About the "InfoLITHIUM" battery pack.... 107
About charging the battery pack 108
About x.v.Color.... 109
About handling of your camcorder 109
Specifications 112
Quick Reference
Identifying parts and controls ....116
Screen indicators 122
Index 124
Getting Started
Step 1: Checking supplied items
Make sure that you have following items supplied with your camcorder.
The number in the parentheses indicates the number of that item supplied.
• Memory cards are not included. See pages 2 and 106 for types of memory cards that you can use on your camcorder.
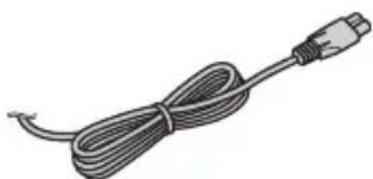
AC Adaptor/Charger (AC-VL1) (1) (p. 12)
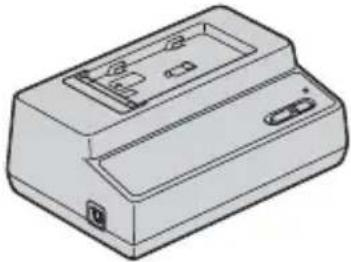
natural_image
Line drawing of a rectangular electronic device casing with internal components and ports (no text or symbols)Power cord (mains lead) (1) (p. 12)
natural_image
Illustration of a USB cable with a connector (no text or symbols)Wireless Remote Commander (RMT-845) (1) (p. 121)
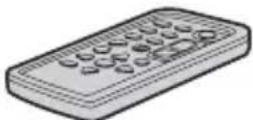
A button-type lithium battery is already installed.
Component video cable (1) (p. 54)
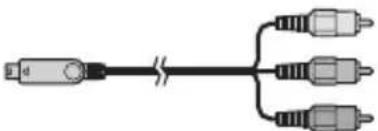
natural_image
Pure electrical circuit lines without any symbolsA/V connecting cable (1) (p. 54)
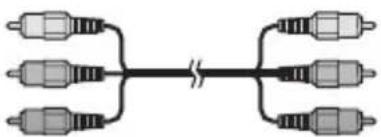
natural_image
Pure electrical circuit lines without any symbolsUSB cable (1) (p. 88)
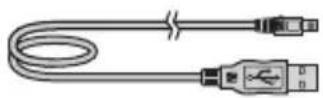
Large eyecup (1) (p. 16)

natural_image
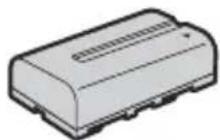
Simple line drawing of a baby bottle with a curved lid and oval base (no text or symbols)Rechargeable battery pack (NP-F570) (1) (p. 12, 107)
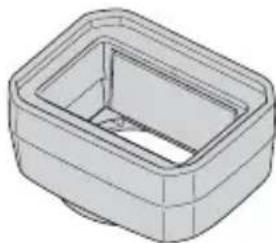
Lens hood with lens cover (1) (p. 10) This lens hood is pre-mounted.
natural_image
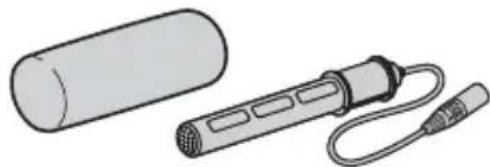
3D rendering of a rectangular mechanical housing or enclosure with internal cavity (no text or symbols)Wind Screen (1), Microphone (ECM-XM1) (1) (p. 10)
natural_image
Illustration of a cylindrical device next to a handheld device with coiled cable (no text or symbols)Accessory shoe kit (Accessory shoe (1), Accessory shoe plate (1), screws (4)) (p. 116)
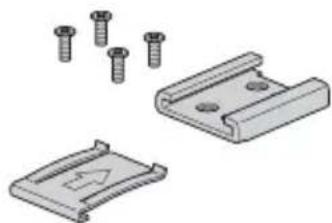
natural_image
Technical illustration of mechanical components including screws and a bracket (no text or symbols)Connecting cord (DK-415) (1) (p. 13) CD-ROM "Content Management Utility" (1) CD-ROM "Manuals for Digital HD Video Camera Recorder" (1) Operating Guide (2)
Step 2: Attaching the supplied microphone and the lens hood with lens cover
Attaching the supplied microphone
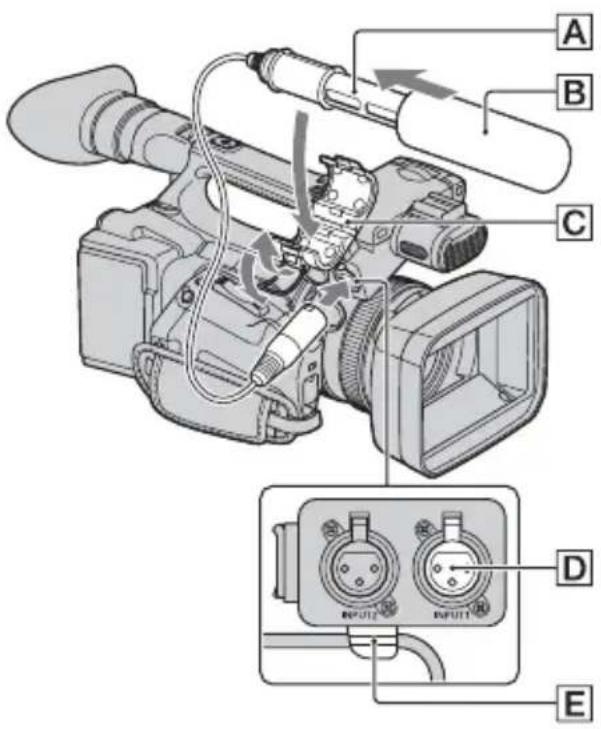
When you use the supplied microphone (ECM-XM1) for recording sound, do the following steps.
text_image
Diagram of a video camera with labeled parts A through E, showing internal wiring and control buttons.1 Attach the wind screen B to the supplied microphone A.
2 Place the microphone A in the microphone holder C with the model name facing upward, close the cover, and shut the clamp.
3 Connect the plug of the microphone to the INPUT1 jack D.
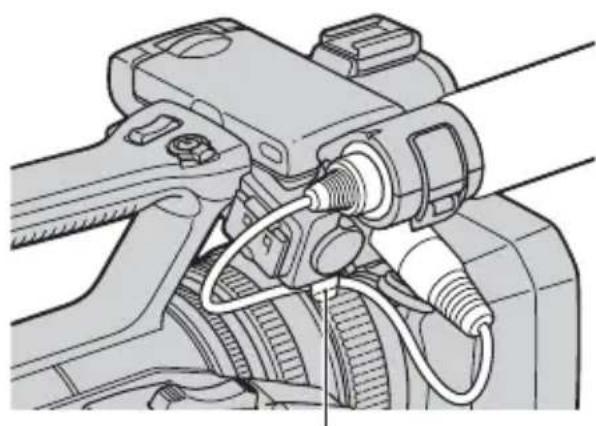
4 Put the microphone cable into the cable holder E.
natural_image
Mechanical assembly diagram showing a connector with threaded shaft and wiring (no text or labels)Hook the cable in the outer cable holder.
Attaching the lens hood with lens cover
text_image
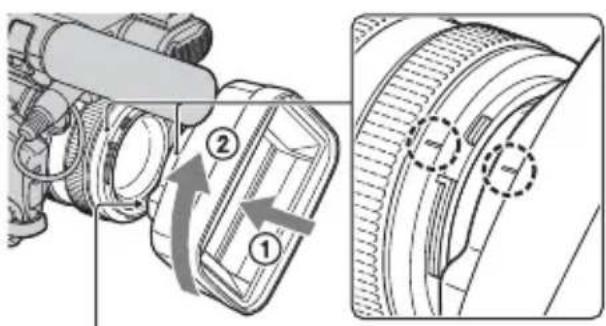
Technical diagram showing camera lens assembly with numbered components and directional arrows indicating rotation or adjustment.PUSH (lens hood release) button
Align the marks on the lens hood to those on the camcorder, and turn the lens hood in the direction of the arrow ② until it is locked.
To remove the lens hood with lens cover
Turn the lens hood in the opposite direction to the arrow ② in the illustration while pressing the PUSH (lens hood release) button.

Tips
- If you attach or remove a 72mm (2 7/8 in.) PL filter or MC protector, remove the lens hood with lens cover.
To open or close the shutter of the lens hood with lens cover
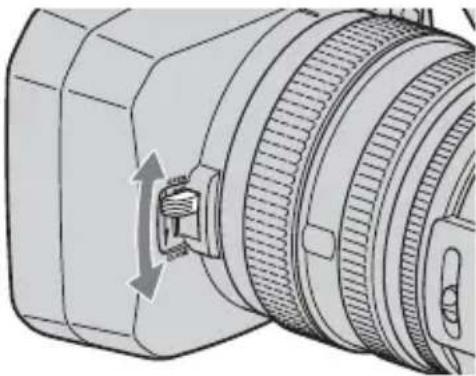
Move the lens cover lever to OPEN to open the lens cover, and move the lever to CLOSE to close the lens cover.
natural_image
Technical illustration of a camera lens assembly with no visible text or symbolsStep 3: Charging the battery pack
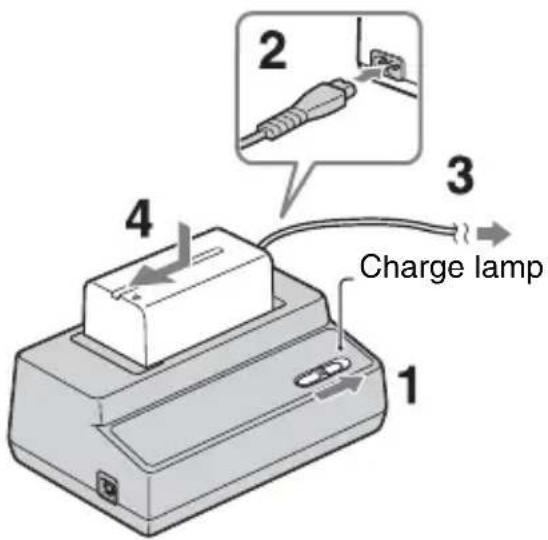
You can charge the "InfoLITHIUM" battery pack (L series) with the supplied AC Adaptor/Charger.
Notes
- You cannot use batteries other than the "InfoLITHIUM" battery pack (L series) (p. 107).
text_image
1 2 3 4 Charge lamp1 Set the mode switch to CHARGE.
2 Connect the power cord (mains lead) to the AC Adaptor/Charger.
3 Connect the power cord (mains lead) to the wall outlet (wall socket).
4 Place the battery pack in the slot of the AC Adaptor/Charger, press it down, and slide it in the direction of the arrow as illustrated.
The charge lamp turns on and charging starts.
After charging the battery
The charge lamp turns off (normal charge). If you continue charging more 1 hour after the charge lamp turns off, you can use the battery a little longer (full charge). Remove the battery pack from the AC Adaptor/Charger when the charge is completed.
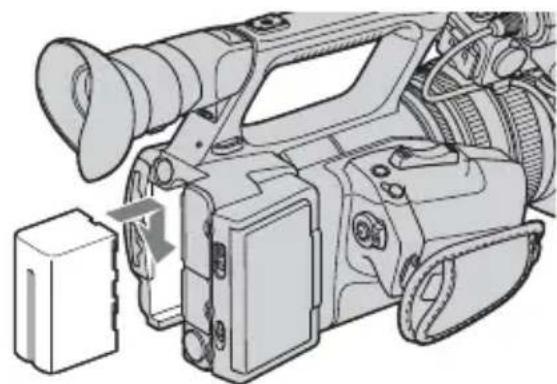
To attach the battery pack
Press the battery pack against the back of your camcorder and slide it down.
natural_image
Line drawing of a video camera with a box and lens assembly (no text or symbols)Tips
- You can check the remaining battery life with the status check function (p. 52).
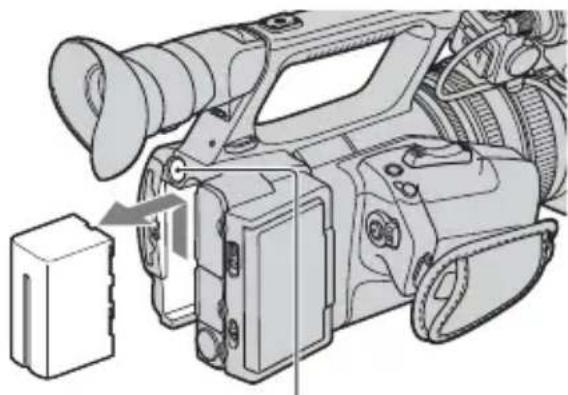
To remove the battery pack
Slide the POWER switch to OFF. Push the BATT RELEASE (battery release) button and remove the battery pack.
natural_image
Illustration of a professional video camera with a box inserted, showing no text or symbols on the device itself.BATT RELEASE (battery release) button
To store the battery pack
If the battery pack is not in use for a while, run down the battery and store it. See page 108 for details on storage of the battery pack.
Charging time
Approximate time (min.) required when you charge a fully discharged battery pack.
| Battery pack | Normal charge time | Fully charge time |
| NP-F570 140 200 | ||
| NP-F770 250 310 | ||
| NP-F970 365 425 |
Notes
• The supplied battery pack is NP-F570.
- You cannot use the NP-F330 battery pack with your camcorder.
On the battery pack
- Before changing the battery pack, slide the POWER switch to OFF.
- The Battery Info (p. 52) will not be correctly displayed under the following conditions.
- The battery pack is not attached correctly.
- The battery pack is damaged.
- The battery pack is worn-out.
Using an outside power source
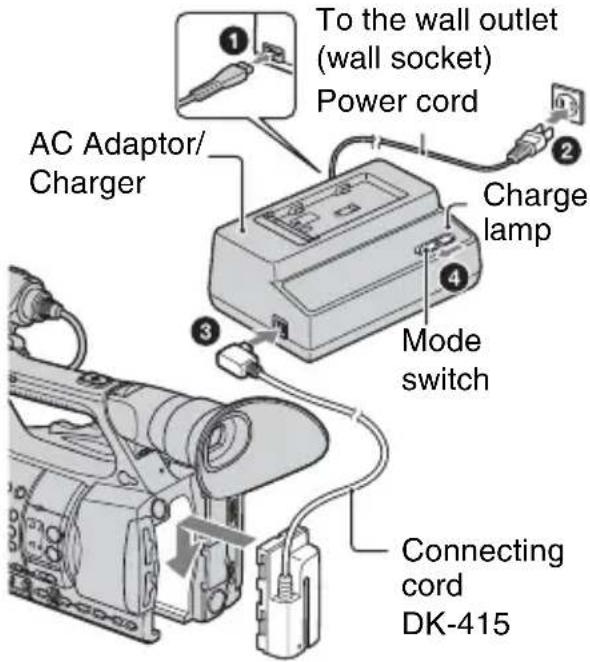
You can use the AC Adaptor/Charger to obtain AC power.
text_image
To the wall outlet (wall socket) Power cord AC Adaptor/ Charger Charge lamp Mode switch Connecting cord DK-415①Connect the power cord (mains lead) to the AC Adaptor/Charger.
②Connect the power cord (mains lead) to the wall outlet (wall socket).
③Connect the connecting cord (DK-415) to the AC Adaptor/Charger.
④Set the mode switch of the AC Adaptor/Charger to VCR/CAMERA.
⑤Press the connecting part of the connecting cord (DK-415) against the back of your camcorder in the battery slot and slide it down.
On the AC Adaptor/Charger
- Use the nearby wall outlet when using the AC Adaptor/Charger. Disconnect the AC Adaptor/Charger from the wall outlet (wall socket) immediately if any malfunction occurs while using your camcorder.
- Do not use the AC Adaptor/Charger placed in a narrow space, such as between a wall and furniture.
- Do not short-circuit the DC plug of the AC Adaptor/Charger or battery terminal with any metallic objects. This may cause a malfunction.
Step 3: Charging the battery pack (Continued)
- Even if your camcorder is turned off, AC power (house current) is still supplied to it while connected to the wall outlet (wall socket) via the AC Adaptor/Charger.
Step 4: Turning the power on and holding your camcorder properly
To record or play back, set the POWER switch to ON.
When you use your camcorder for the first time, the [CLOCK SET] screen appears (p. 17).
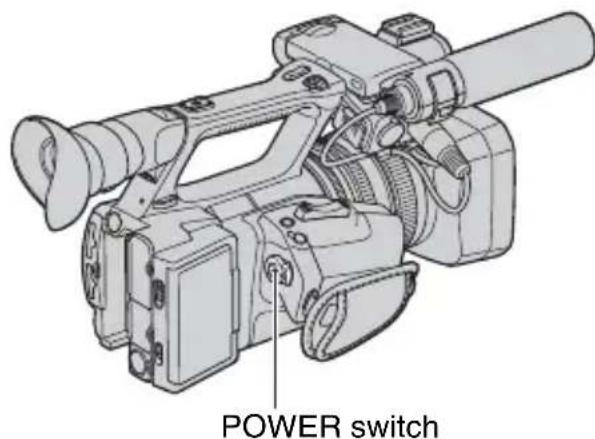
text_image
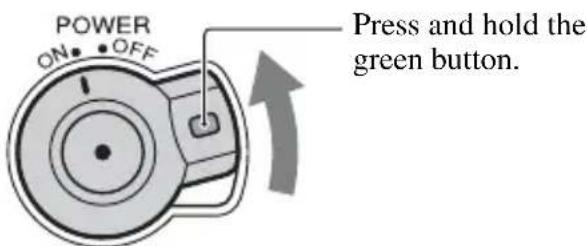
POWER switch1 Slide the POWER switch to ON while you press the green button.
text_image
POWER ON• OFF Press and hold the green button.Notes
- The current date and time appear on the LCD screen for a few seconds when you turn on your camcorder after you set the date and time with [CLOCK SET], p. 17.
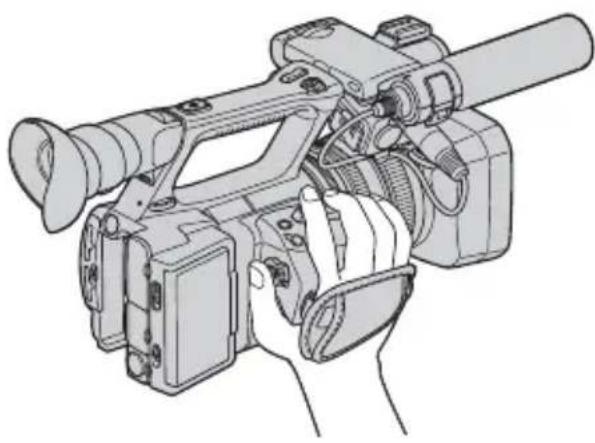
2 Hold the camcorder properly.
natural_image
Line drawing of a video camera with hand operating controls (no text or symbols)3 Ensure a good grip, then fasten the grip belt.
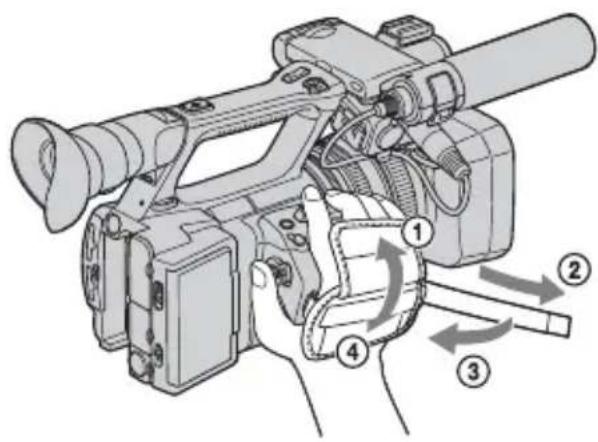
text_image
Technical diagram of a video camera with numbered parts and directional arrows indicating motion or assembly.To turn off the power
Slide the POWER switch to OFF.
Notes
- If warning messages appear on the screen, follow the instructions.
Step 5: Adjusting the LCD panel and viewfinder
LCD panel
Open the LCD panel 180 degrees (①), then rotate it to the best angle to record or play back (②).
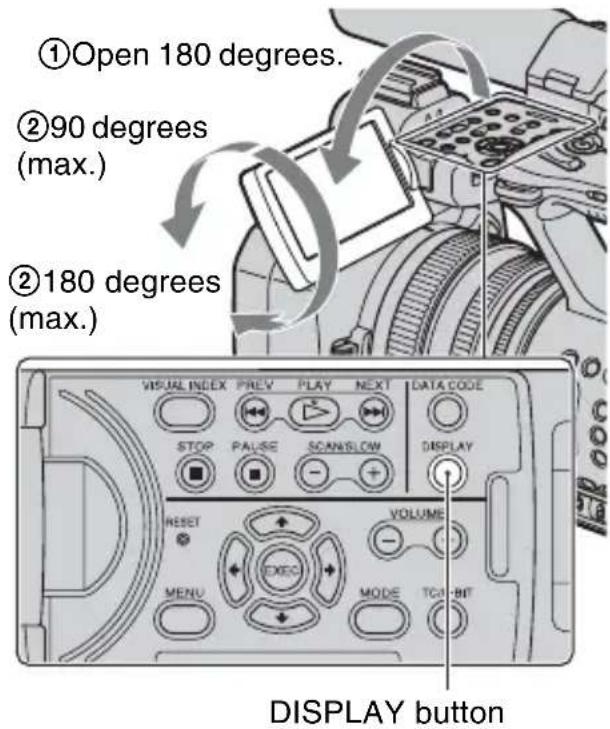
text_image
①Open 180 degrees. ②90 degrees (max.) ②180 degrees (max.) VISUAL INDEX PREV PLAY NEXT DATA CODE STOP PAUSE SCANSLOW DISPLAY RESET VOLUME MENU MODE TCH-BIT DISPLAY button
Tips
- Images are displayed as mirror images on the LCD screen, but are recorded as normal images.
To turn off the LCD backlight to make the battery last longer
Press and hold the DISPLAY button for a few seconds until appears.
This setting is practical when you use your camcorder in bright conditions or when you want to save battery power. The recorded picture will not be affected by the setting. To turn on the LCD backlight, press and hold the DISPLAY button for a few seconds until disappears.
Also, you can turn on the LCD backlight by turning on/off the camcorder.

Tips
- You can adjust the brightness of the LCD screen from [LCD BRIGHT] (p. 83).
Step 5: Adjusting the LCD panel and viewfinder (Continued)
Viewfinder
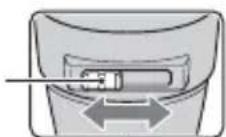
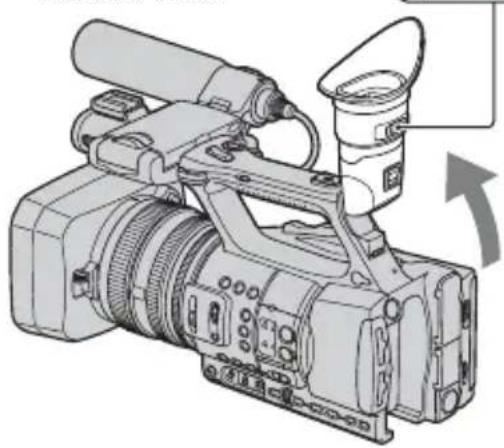
Viewfinder lens adjustment lever
Move it until the picture becomes clear.
natural_image
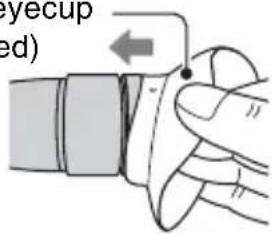
Illustration of a digital camera with lens and external components, showing no text or symbolsLarge eyecup (supplied)
Attach with the protruding part at the top.
text_image
Eyecup (ed)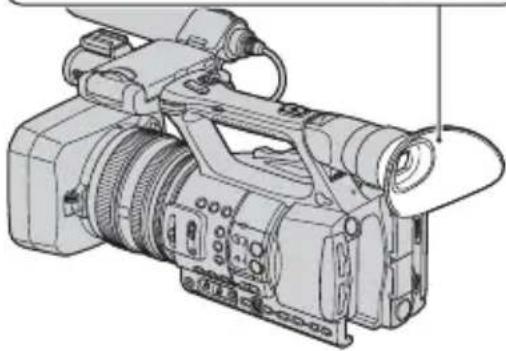
natural_image
Technical line drawing of a video camera with lens and external frame (no text or symbols)Notes
- You may see primary colors shimmering in the viewfinder when you move your line of sight. This is not a malfunction. The shimmering colors will not be recorded on the recording media.
Tips
- You can adjust the brightness of the viewfinder backlight from [VF BACKLIGHT] (p. 83).
- To display images both on the LCD display and in the viewfinder, set [VF POWERMODE] to [ON] (p. 84).
• To display images in black and white in the viewfinder, set [VF COLOR] to [OFF] (p. 84).
When the picture in the viewfinder is hard to see
If you cannot see the picture in the viewfinder clearly under bright circumstances, use the supplied large eyecup. To attach the large eyecup, stretch it slightly and align it with the eyecup groove in the viewfinder. You can attach the large eyecup facing either the right or left side.
Notes
- Do not remove the pre-attached eyecup.
Step 6: Setting the date and time
Set the date and time when using your camcorder for the first time. If you do not set the date and time, [CLOCK SET] screen appears every time you turn on your camcorder.

Tips
- If you do not use your camcorder for about 3 months, the built-in rechargeable battery gets discharged and the date and time settings may be cleared from the memory. In that case, charge the rechargeable battery and then set the date and time again (p. 111).
text_image
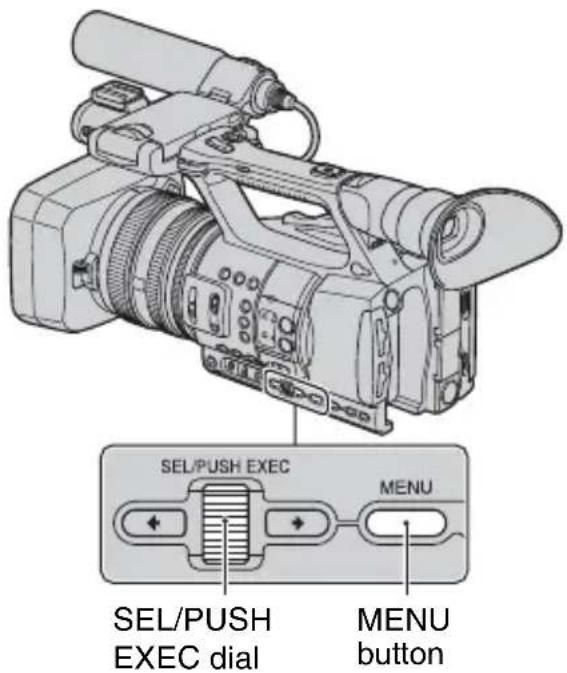
SEL/PUSH EXEC MENU SEL/PUSH EXEC dial MENU buttonSkip to step 4 when you set the clock for the first time.
1 Press the MENU button.
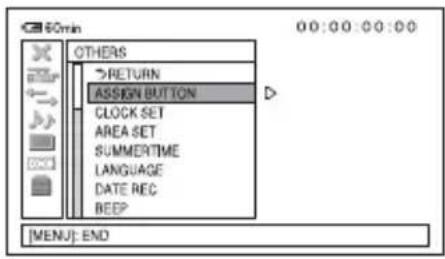
2 Select (OTHERS) by turning the SEL/PUSH EXEC dial, then press the dial.
text_image
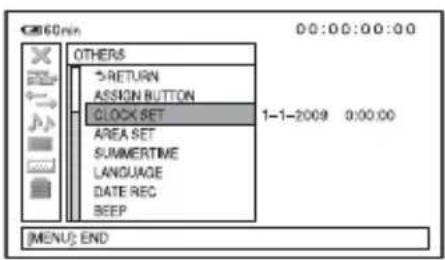
CB 60min OTHERS RETURN ASSIGN BUTTON CLOCK SET AREA SET SUMMERTIME LANGUAGE DATE REC BEEP [MENU]: END3 Select [CLOCK SET] by turning the SEL/PUSH EXEC dial, then press the dial.
text_image
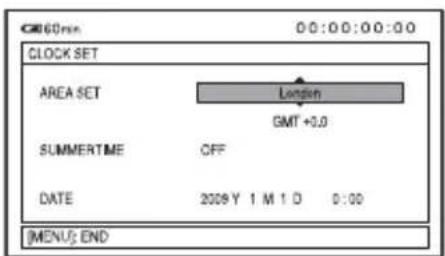
0:00:00:00 OTHERS 5-RETURN ASSIGN BUTTON CLOCK SET AREA SET SUMMERTIME LANGUAGE DATE REC BEEP 1-1-2009 0:00:00 MENU END4 Select your area by turning the SEL/PUSH EXEC dial, then press the dial.
text_image
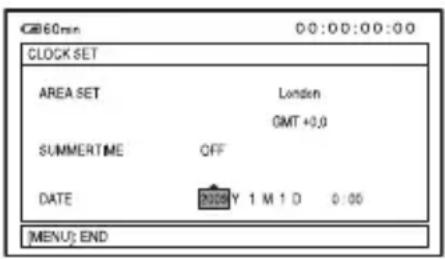
CLOCK SET AREA SET Longen GMT +0.0 SUMMERTIME OFF DATE 2009 Y 1 M 1 D 0:00 [MENUS END5 Set [SUMMERTIME], [Y] (year), [M] (month), [D] (day), hour and minute, by turning the SEL/PUSH EXEC dial, then press the dial.
Step 6: Setting the date and time (Continued)
text_image
CLOCK SET AREA SET London GMT +0.0 SUMMERTIME OFF DATE COPY 1 M 1 D 0:00 [MENU] ENDThe clock starts.
- Set [SUMMERTIME] to [ON] to move the time forward 1 hour.
- You can set any year up to the year 2037.

Tips
- The date and time are automatically recorded on the selected recording media, and can be displayed during playback (DATA CODE button, p. 51).
Changing the language setting
You can change the on-screen displays to show messages in a specified language. Press the MENU button and select
(OTHERS) with the SEL/PUSH EXEC dial. Select the screen language in [LANGUAGE] (p. 86).
Step 7: Inserting a memory card/Attaching a flash memory unit
Memory card
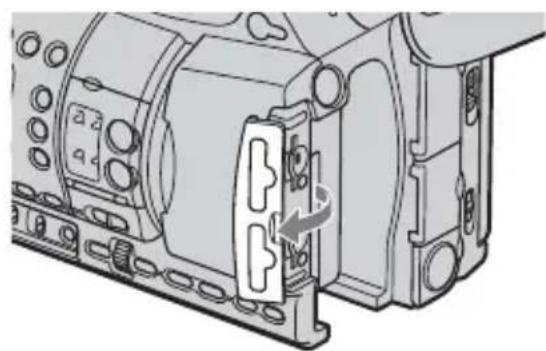
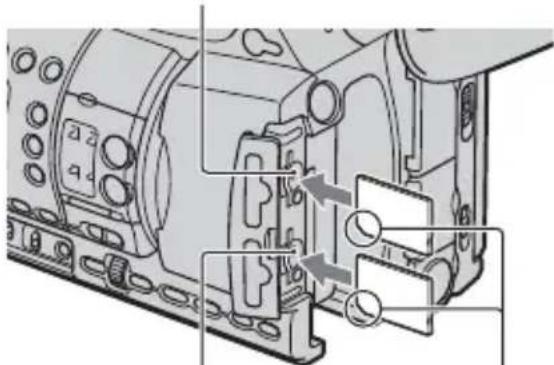
1 Open the cover in the direction of the arrow.
natural_image
Technical diagram of a mechanical assembly with no visible text or symbols2 Orient the memory card's notched corner as shown in the illustration, and insert into the memory card slot until it clicks.
Memory card slot A and its access lamp
natural_image
Technical diagram of an industrial machine with mounting holes and internal components (no text or labels)Memory card slot B and its access lamp
Insert with the notched corner first, and facing down.
Notes
- If you insert a memory card into the slot in the wrong direction, the memory card, the memory card slot, or image data may be damaged.
- When you insert a new memory card in standby mode, the [Create a new Image Database File.] screen appears. Follow the screen indication, and touch [YES].
To eject the memory card
Lightly push the memory card once.
Notes
- When the access lamp is lit or flashing in red, your camcorder is reading/writing data. Do not shake or knock your camcorder, turn the power off, eject the memory card, or remove the battery pack. Otherwise, image data may be damaged.
- If [Failed to create a new Image Database File. It may be possible that there is not enough free space.] appears in step 2, format the memory card (p. 65).
- When inserting or ejecting the memory card, be careful to prevent the memory card from popping out and dropping.
Selecting the memory card slot to be used for recording
Press the A or B button of the memory card slot where the memory card you want to record on is inserted. The lamp of the selected slot lights up in green.
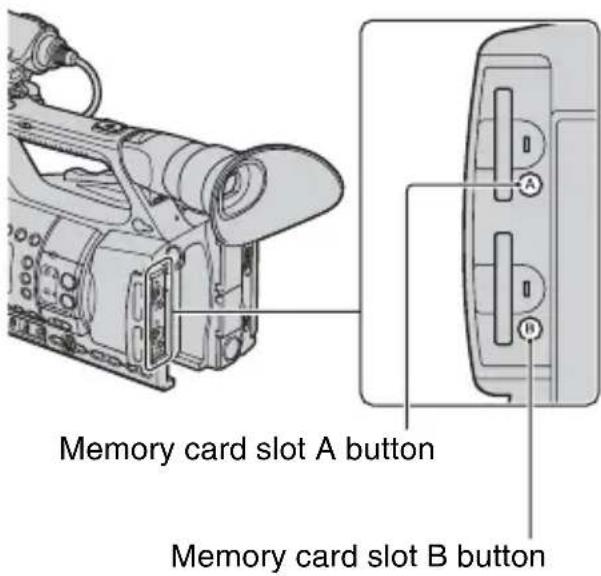
text_image
Memory card slot A button Memory card slot B buttonStep 7: Inserting a memory card/Attaching a flash memory unit (Continued)
Notes
- You can only select a slot that already has a memory card inserted.
- While movies are being recorded on the memory card, you cannot switch the slot even if you press the memory card slot A/B buttons.

Tips
- When only one slot has a memory card inserted, the slot that has the memory card is selected automatically.
- If the memory card is fully recorded during recording, the camcorder continues recording automatically on the memory card inserted in the other slot (Relay recording, p. 22).
Flash memory unit
You can attach a flash memory unit HXR-FMU128 (sold separately) to your camcorder for recording movies.
1
While sliding the RELEASE lever in the direction of the arrow, remove the flash memory unit jack cover.
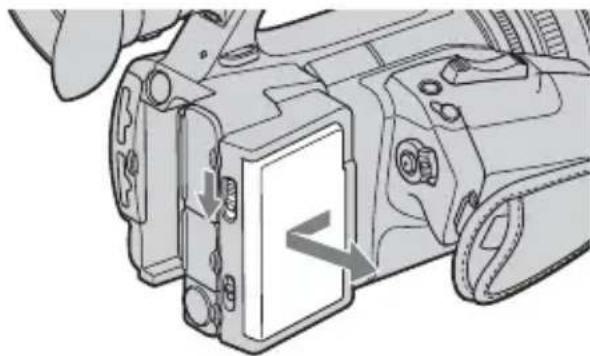
natural_image
Diagram of a DSLR camera module showing internal components and directional arrows (no text or symbols)2
Align the mark on the camcorder and that on the flash memory unit, and slide the flash memory unit in the direction of the arrow.
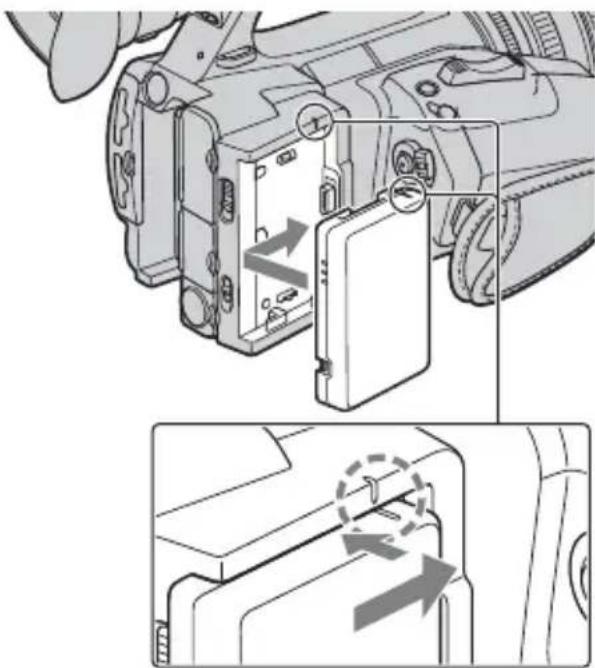
natural_image
Diagram of a camera module with internal components and directional arrows indicating movement (no text or symbols present)3
When [EXT media has been attached. It is necessary to reboot. Execute?] appears on the screen, touch [YES].
[NO TEXT]
Notes
- If you touch [NO] in step 3, turn on your camcorder again. You will be able to record in the flash memory unit.
To remove the flash memory unit
Turn off your camcorder, and while sliding the RELEASE lever in the direction of arrow, remove the flash memory unit.
When you do not use an flash memory unit, leave the flash memory unit jack cover attached.
Recording/Playback Recording
text_image
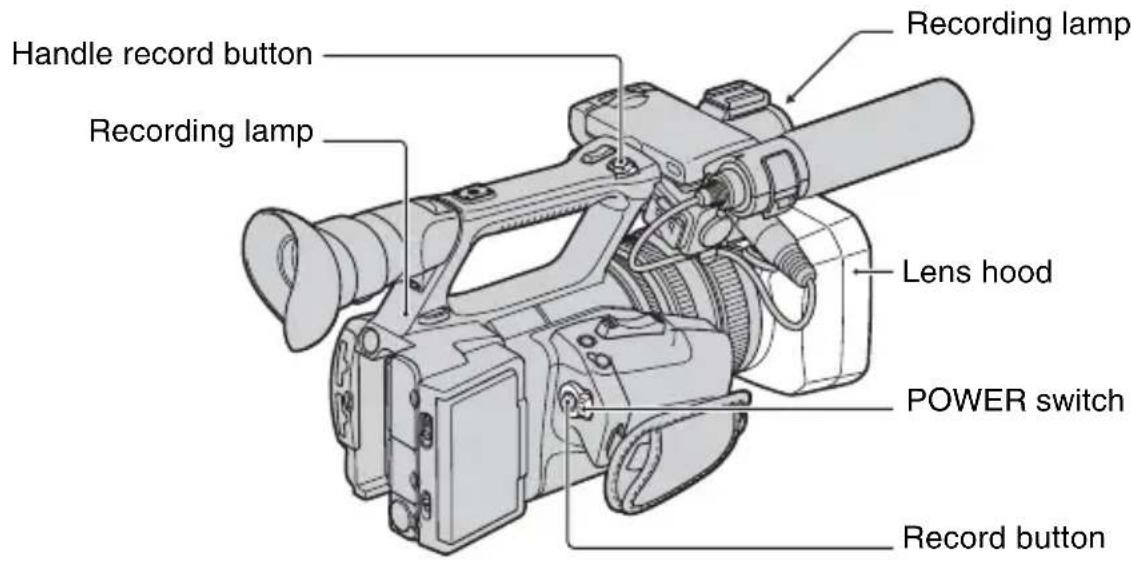
Handle record button Recording lamp Recording lamp Lens hood POWER switch Record buttonYour camcorder records movies on memory cards or a flash memory unit. Do the following steps to record movies.
- This camcorder can record movies in either high definition image quality (HD) or standard definition image quality (SD). The factory setting is high definition image quality (HD) ([ /SET].pd24).
Notes
- When the access lamp is lit or flashing in red, your camcorder is writing data on recording media. Do not shake or knock your camcorder, or remove the battery pack or the AC Adaptor/Charger.
• See page 101 on the recording time of movies. - Your camcorder can record movies for about 13 hours continuously.
- If a movie file exceeds 2 GB during recording, the camcorder divides the file and create a new file automatically.
- The menu settings, the PICTURE PROFILE settings, and the settings made by the AUTO/MANUAL switch are stored in your camcorder when you turn the POWER switch to OFF. The access lamp lights up while the settings are being stored. If you remove the battery pack or the AC Adaptor/Charger before turning off the power, the settings may return to the default settings.
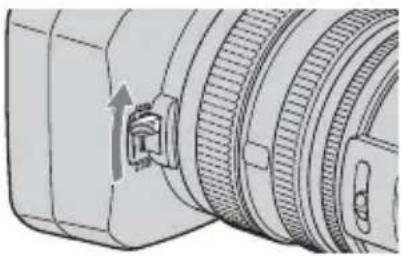
1 Open the shutter of the lens hood.
natural_image
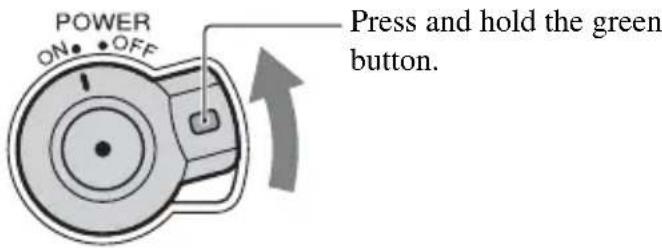
Technical line drawing of a camera lens assembly with an arrow indicating a component (no text or symbols present)2 Slide the POWER switch to ON while pressing the green button.
text_image
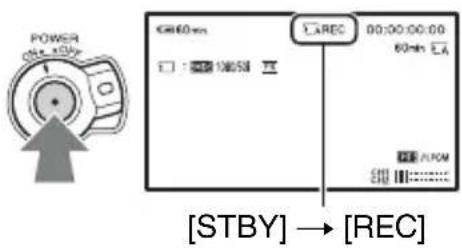
POWER ON• • OFF Press and hold the green button.3 Press the record button or the handle record button.
text_image
POWER 0Hz x 50Hz [STBY] → [REC] C: 60min □ : 霍星端口 CAREC 00:00:00:00 60min EA AUXM 细The recording lamp lights up during recording.
To stop the movie recording, press the record button or the handle record button again.

Tips
- When recording in high definition image quality (HD), the aspect ratio is fixed to 16:9. When recording in standard definition image quality (SD), you can switch the aspect ratio to 4:3 ([HSD] WIDE REC], p. 77).
- You can change the screen display during recording (p. 51).
- Indicators displayed on the screen during recording are shown on page 122.
- The recording lamp can be set to stay off ([REC LAMP[F]], [REC LAMP[R]], p. 86).
- For low angle recording, the handle record button is convenient. Release the HOLD lever to enable the handle record button. It might be helpful if you set the LCD panel face up or close it after turning it face down, or lift the viewfinder up during the low angle recording.
- You can capture still images from the movies you recorded (p. 60).
To continue recording on the memory cards, one after another (Relay recording)
Insert memory cards each in both slots A and B, so the camcorder switches memory card A (or B) just before space on the other one runs out, and continues recording on the next memory card automatically.
Insert a recordable memory card.
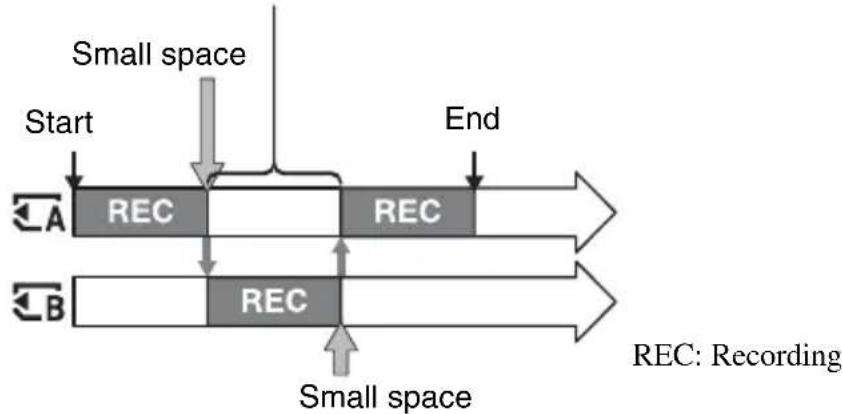
flowchart
graph TD
    Start --> REC1["REC"]
    REC1 --> REC2["REC"]
    REC2 --> End
    REC1 --> REC3["REC"]
    REC3 --> REC4["REC"]
    REC4 --> REC5["REC"]
    REC5 --> End
    style REC1 fill:#f9f,stroke:#333
    style REC2 fill:#f9f,stroke:#333
    style REC3 fill:#f9f,stroke:#333
    style REC4 fill:#f9f,stroke:#333
    style REC5 fill:#f9f,stroke:#333
    note right of REC: Small space
    note right of REC: Recording
    A <--> REC1
    B <--> REC2
    end
Notes
- Do not eject the memory card that is currently being used for recording. Replace only the memory card whose slot lamp is off.
• Even if you press the memory card slot button, A or B, while recording movies, you cannot switch the slot currently being used. - When the remaining recording time of the memory card being used is less than 1 minute and the other slot has recordable memory card inserted, [↓ or ↑] appears on the camcorder screen. The indicator turns off when the memory card is switched.
- If you start recording on a memory card with the remaining recording time of less than 1 minute, the camcorder may not be able to relay-record. To relay-record without fail, make sure that the memory card has more than 1 minute when you start recording.
- Seamless playback of relay-recorded movies with this camcorder is not possible.
- You can re-combine relay-recorded movies using the supplied application software (Windows only).
To record movies using both the memory card and the flash memory unit (Simultaneous recording)
You can record movies on both of these recording media simultaneously.
You can change the recording media using the record button and the handle record button with [REC BUTTON SET] (p. 23).
Notes
- You cannot record on the memory cards in slots A and B simultaneously.
Tips
- Relay recording works during simultaneous recording on different media.
- If one of the recording media used becomes unable to continue recording during simultaneous recording, the other recording media continues recording without pause.
Changing the setting of the record button/handle record button
You can start and stop recording on different recording media at different timing by operating the record button and the handle record button.
In the default setting, movies are recorded on both the memory card and the flash memory unit at the same time when either record button is pressed.
- REC BUTTON:[ ] [EXT]
- HANDLE REC BUTTON:[ ] [EXT]
To change the setting
Press MENU → select ⇌ (REC/OUT SET) → [REC SET] → [REC BUTTON SET] with the SEL/PUSH EXEC dial.
| [REC BUTTON SET] setting Button and recording media | |
| REC BUTTON:[←] [EXT HANDLE REC BUTTON:[←] [EXT] | Recording on both the memory card and the flash memory unit starts and stops at the same time when either record button is pressed. |
| REC BUTTON:[←] HANDLE REC BUTTON:[[EXT] | Recording on the memory card starts and stops when the record button is pressed, and on the flash memory unit when the handle record button is pressed. |
| REC BUTTON:[[EXT] HANDLE REC BUTTON:[←] | Recording on the flash memory unit starts and stops when the record button is pressed, and on the memory card when the handle record button is pressed. |
Selecting high definition image quality (HD) or standard definition image quality (SD)
You can set the recording image quality, high definition image quality (HD) or standard definition image quality (SD), separately for the memory card and the flash memory unit.
To change the setting
Press MENU → select ⇌ (REC/OUT SET) → [REC SET] → [HD:/SD:SET] with the SEL/PUSH EXEC dial.
To record in high definition image quality (HD)
Select [ : In/ SET HD HD SD]
Images are recorded in high definition image quality (HD) on the memory card and the flash memory unit.
To record in standard definition image quality (SD)
To record in standard definition image quality (SD) on the memory card, select [
EXT: [ / S E H C : SD :
To record in standard definition image quality (SD) on the flash memory unit, select [ : ]
[EXT: SD].
Notes
- You cannot record in standard definition image quality (SD) on both the memory card and the flash memory unit simultaneously.
Selecting the recording format
You can select the recording format (bit-rate, image size, frame rate, scanning system). In the default setting, [HDS selected.FX ESD 576/50i HQ
To change the setting
Press MENU → select ⇌ (REC/OUT SET) → [REC SET] → [REC FORMAT] with the SEL/PUSH EXEC dial.
| Setting value Description | |
| HD: 1080/50i FX | Bit-rateFX: max. 24 MbpsFH: approx. 17 Mbps (average)HQ: approx. 9 Mbps (average)LP: approx. 5 Mbps (average) |
| ISD: 576/50i HQ | |
| HD: 1080/50i FH | |
| ISD: 576/50i HQ | |
| HD: 1080/50i HQ | Image sizeFX: 1920×1080/1280×720FH: 1920×1080/1280×720HQ: HD recording 1440×1080SD recording 720×576LP: 1440×1080 |
| ISD: 576/50i HQ | |
| HD: 1080/25p FX | Frame rateeither 25 or 50 |
| ISD: 576/25p SCAN HQ | |
| HD: 1080/25p FH | Scanning systemi: interlacep: progressivepSCAN: Records images of progressive scanning system as interlace signal (50i). |
| ISD: 576/25p SCAN HQ | |
| HD: 720/50p FX | |
| ISD: 576/50i HQ | |
| HD: 720/50p FH | |
| ISD: 576/50i HQ | |
Setting value
If you select [REDACTED FOR EXAMPLE, movies are recorded with following format.
• HD: High definition image quality. SD is standard definition image quality.
• 1080: Effective scanning lines
- 50: Frame rate
• i: Scanning system
- FX: Recording mode
Notes
- The recording mode is fixed to FX or FH with the progressive scanning system.
- When the recording format is changed to or from the 720/50p, you will be prompted to reboot the camcorder. Select [YES]. Otherwise, you cannot switch the recording format.

Tips
- When [ : ] [ID] SET is selected, [Hons are grayed out.
SD
Changing the settings of your camcorder recordings
Adjusting the zoom
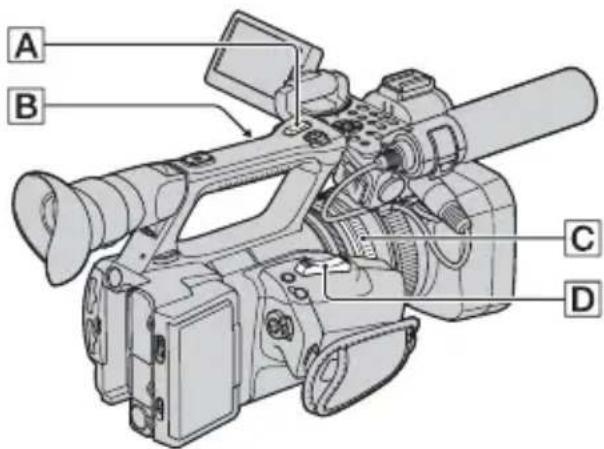
text_image
A B C DUsing the power zoom lever
Move the power zoom lever D slightly for a slower zoom. Move it further for a faster zoom.
Wide view: (Wide angle)
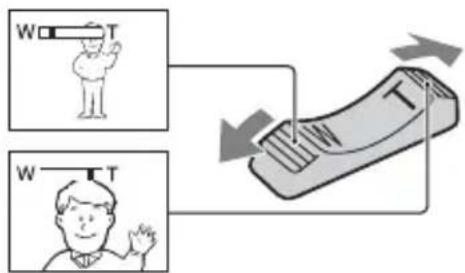
flowchart
graph TD
    A["Person at position 1"] --> B["Position 1: W"]
    C["Person at position 2"] --> D["Position 2: T"]
    B --> E["Arrow to right"]
    D --> E
    style A fill:#f9f,stroke:#333
    style C fill:#f9f,stroke:#333
Close view: (Telephoto)

Tips
- The minimum distance required between your camcorder and the subject for focus is about 1 cm (about 13/32 in.) for wide angle and about 80 cm (about 2 5/8 feet) for telephoto.
- The focus may not be adjusted at certain zoom positions if the subject is within 80 cm (about 2 5/8 feet) from your camcorder.
- When you set [FOCUS MACRO] to [OFF], you cannot focus on a subject within 80 cm (about 25/8 feet) regardless of the zoom position (p. 74).
- Be sure to keep your finger on the power zoom lever D. If you move your finger off the power zoom lever D, the operation sound of the power zoom lever D may also be recorded.
- You can increase the zoom speed of the power zoom lever [D] or the handle zoom [A] ([SPEED ZOOM], p. 74).
Using the handle zoom
① Set the handle zoom switch B to VAR or FIX.

Tips
- When you set the handle zoom switch to VAR, you can zoom in or out at variable speed.
- When you set the handle zoom switch to FIX, you can zoom in or out at fixed speed set in [HANDLE ZOOM] (p. 74).
② Press the handle zoom lever A to zoom in or out.
Notes
- You cannot use the handle zoom lever when the handle zoom switch is set to OFF.
- You cannot change the zoom speed of the power zoom lever D with the handle zoom switch B.
Using the zoom ring
You can zoom at the desired speed by turning the zoom ring C. Fine adjustment is also possible.
Notes
- Turn the zoom ring at a moderate speed. If you turn it too fast, the zoom speed may lag behind the zoom ring rotation speed, or the operation sound of the zoom may also be recorded.
Adjusting the focus manually
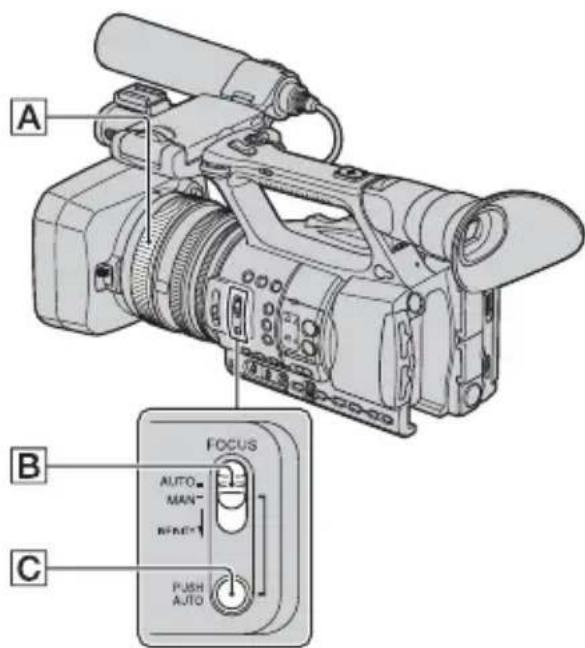
text_image
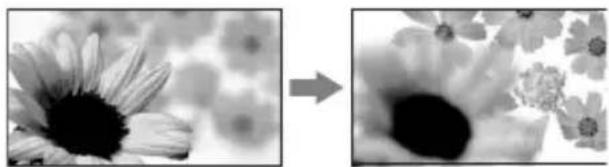
A B C AUTO- MAN- MAIN- PUSH AUTO FOCUSYou can adjust the focus manually for different recording conditions.
Use this function in the following cases.
- To record a subject behind a window covered with raindrops.
- To record horizontal stripes.
- To record a subject with little contrast between the subject and its background.
- When you want to focus on a subject in the background.
natural_image
Two grayscale flower images showing a close-up of daisy-like petals, one with a dark center and the other with a bright center, both without any text or symbols.- To record a stationary subject using a tripod.
1 During recording or standby, set the FOCUS switch B to MAN.
F appears.
2 Rotate the focus ring A and adjust the focus.
changes to when the focus cannot be adjusted any farther. changes to when the focus cannot be adjusted any closer.
Tips
For focusing manually
- It is easier to focus on the subject when you use the zoom function. Move the power zoom lever towards T (telephoto) to adjust the focus, and then, towards W (wide angle) to adjust the zoom for recording.
- When you want to record a close-up image of a subject, move the power zoom lever towards W (wide angle) to fully magnify the image, then adjust the focus.
To restore automatic adjustment
Set the FOCUS switch B to AUTO. F disappears and the automatic focus adjustment is restored.
Using automatic focus temporarily (Push auto focus)
Record the subject while pressing and holding the PUSH AUTO button [C]. If you release the button, the setting returns to manual focusing.
Use this function to shift the focus on one subject to another. The scenes will shift smoothly.
Tips
- The focal distance information (for when it is dark and hard to adjust the focus) appears for about 3 seconds in the following cases. (It will not be displayed correctly if you are using a conversion lens (sold separately)).
- When you set the FOCUS switch to MAN and appears on the screen
- When you rotate the focus ring while Ⓗ is displayed on the screen.
Changing the settings of your camcorder recordings (Continued)
Using the expanded focus (Expanded focus)
[EXPANDED FOCUS] is assigned to the ASSIGN 7 button (p. 45).
Press the ASSIGN 7 button.
[EXPANDED FOCUS] appears and the center of the screen is magnified by about 2.0 times. It will be easier to confirm the focus setting during manual focusing. The screen returns to the original size when you press the button again.
Notes
• Even though the image appears expanded on the screen, the recorded image is not expanded.
Tips
- You can select a type of an expanded image displayed during the expanded focus ([EXPANDED FOCUS TYPE], p. 82).
Focusing on a distant subject (Focus infinity)
Slide the FOCUS switch to INFINITY and hold it there.
appears on the screen. To return to manual focus mode, release the FOCUS switch B. This function enables you to set focus on a distant subject even when the focus is automatically set on a close subject.
Notes
- This function is only available during the manual focus. It is not available during the automatic focus.
Adjusting the image brightness
text_image
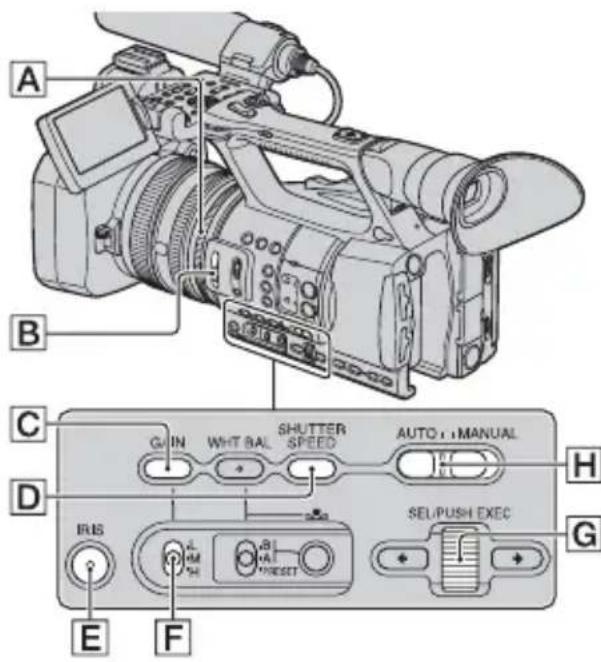
A B C D E F G H I R S WHT BAL SHUTTER AUTO + MANUAL RESET SEL/PUSH EXECYou can adjust the image brightness by adjusting the iris, gain or shutter speed, or by reducing the light volume with the ND filter B.
Notes
- You cannot use the back light function and the spotlight function when iris, gain and shutter speed are adjusted manually.
- [AE SHIFT] is not effective temporarily while you adjust the iris, gain and shutter speed all manually.
Adjusting the iris
You can manually adjust the iris to control the volume of the light entering the lens. By adjusting the iris, you can change or close (▶) aperture of the lens, which is expressed as an F value between F1.6 and F11. The volume of the light increases the more that you open the aperture (decreasing F value). The volume of the light decreases the more that you close the aperture (increasing F value). The current F value appears on the screen.
①During recording or standby, set the AUTO/MANUAL switch H to MANUAL.
②When the iris is automatically adjusted, press the IRIS button E.
A next to the iris value disappears, or the iris value appears on the screen.
③ Adjust the iris with the iris ring A. When you assign [PUSH AUTO IRIS] to one of the ASSIGN buttons, you can automatically adjust the iris while pressing and holding that ASSIGN button. See page 45 for details on the ASSIGN button.

Tips
- The F value becomes close to F3.4 as the zoom position changes from W to T even when you open the aperture by setting the F value lower than F3.4, such as F1.6.
- The range of focus, an important effect of the aperture, is called the depth of field. The depth of field gets shallower as the aperture is opened, and deeper as the aperture is closed. Use the aperture creatively to obtain the desired effect in your photography.
- This is handy for making the background blurred or sharp.
To adjust the iris automatically
Press the IRIS button E, or set the AUTO/MANUAL switch H to AUTO.
The iris value disappears, or Appears next to the iris value.

Notes
- When you set the AUTO/MANUAL switch to AUTO, other manually adjusted items (gain, shutter speed, white balance) also become automatic.
Adjusting the gain
You can adjust the gain manually when you do not want to use the AGC (automatic gain control).
①During recording or standby, set the AUTO/MANUAL switch H to MANUAL.
②When the gain is automatically adjusted, press the GAIN button C.
A next to the gain value disappears, or the gain value appears on the screen.
③ Set the gain switch F to H, M or L. The gain value set for the selected gain switch position appears on the screen. You can set the gain value for each gain switch position from [GAIN SET] of the (CAMERA SET) menu (p. 71).
To adjust the gain automatically
Press the GAIN button C, or set the AUTO/MANUAL switch H to AUTO. The gain value disappears, or appears next to the gain value.
Notes
- When you set AUTO/MANUAL switch to AUTO, other manually adjusted items (iris, shutter speed, white balance) also become automatic.

Tips
- When you record high definition image quality (HD) movies with the gain set to [-6dB] and play them back with the data code, the gain value is displayed as [---].
Adjusting the shutter speed
You can manually adjust and fix the shutter speed. You can make a moving subject look still or emphasize the movement of a moving subject by adjusting the shutter speed.
①During recording or standby, set the AUTO/MANUAL switch to MANUAL.
②Press the SHUTTER SPEED button D until the shutter speed value is highlighted.
③Change the shutter speed displayed on the screen by turning the SEL/PUSH EXEC dial G.
You can adjust the shutter speed in a range of 1/3 second through 1/10000 second.
The denominator of the set shutter speed appears on the screen. For example,
Changing the settings of your camcorder recordings (Continued)
[100] appears on the screen when you set the shutter speed to 1/100 second. The larger the value on the screen, the faster the shutter speed.
④ Press the SEL/PUSH EXEC dial G to lock the shutter speed.
To readjust the shutter speed, do steps ② to ④.
Tips
- It is difficult to focus automatically at a lower shutter speed. Manual focusing with your camcorder attached to a tripod is recommended.
- When recording under fluorescent lamps, sodium lamps, or mercury lamps, the picture may flicker or change colors, or may have horizontal bands of noise. You may be able to improve the situation by adjusting the shutter speed.
To adjust the shutter speed automatically
Press the SHUTTER SPEED button D twice, or set the AUTO/MANUAL switch H to AUTO.
The shutter speed value disappears, or appears next to the shutter speed value.
Notes
- When you set the AUTO/MANUAL switch to AUTO, other manually adjusted items (iris, gain, white balance) also become automatic.
Adjusting the volume of light (ND filter)
You can record the subject clearly by using the ND filter B when the recording environment is too bright. The ND filters 1, 2 and 3 reduce the volume of light to about 1/4, 1/16 and 1/64, respectively.
If ND1ashes during the iris automatic adjustment, set the ND filter to 1. If ND2 flashes during the iris automatic adjustment, set the ND filter to 2. If ND3 flashes during the iris automatic adjustment, set the ND filter to 3.
The ND filter indicator will stop flashing and remain on the screen.
If NDashes, set the ND filter to OFF.
The ND filter icon will disappear from the screen.
Notes
- If you change the ND filters during recording, the movie and sound may be distorted.
- When adjusting the iris manually, the ND filter icon does not flash even if the light volume should be adjusted with the ND filter.
- If the camcorder cannot detect the ND filter position (OFF/1/2/3), flashes on the screen. Make sure that the ND filter is set correctly.
Tips
- While recording a bright subject, diffraction may occur if you close the aperture further down, resulting in a fuzzy focus (this is a common phenomenon with video cameras). The ND filter B suppresses this phenomenon and gives better recording results.
Adjusting to natural color (White balance)
text_image
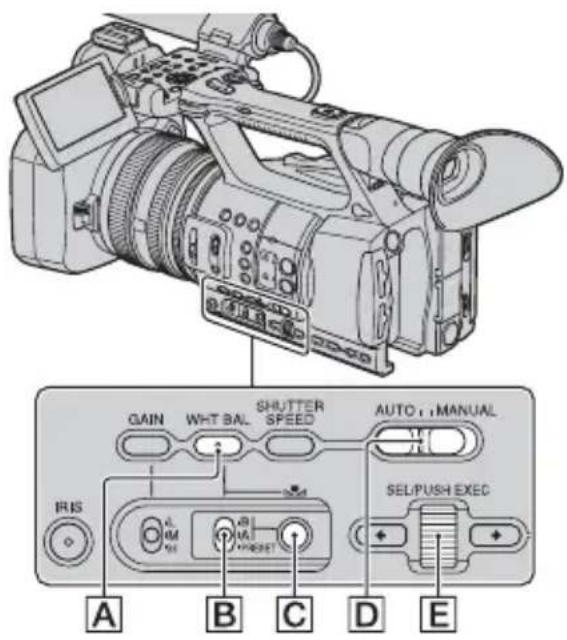
GAIN WHT BAL SHUTTER SPEED AUTO : MANUAL IRIS A B C D E SEL/PUSH EXECYou can adjust and fix the white balance according to the lighting conditions of recording environment.
You can store white balance values in
memory A (☑) and memory B (B),☑ respectively. Unless a white balance is readjusted, values will remain even after the power has been turned off. When you select PRESET, [OUTDOOR], [INDOOR] or [MANU WB TEMP] is selected, according to which one you previously set with [WB PRESET] in the

(CAMERA SET) menu.
1 During recording or standby, set the AUTO/MANUAL switch D to MANUAL.
2 Press the WHT BAL button A.
3 Set the white balance memory switch B to any one of PRESET/A/B.
Select A or B for recording with the white balance setting stored in memory A or B.
Indicator Shooting conditions
| A(Memory A)B(Memory B) | · White balance values adjusted for light sources can be stored in memory A and memory B. Follow the steps in “To save the adjusted white balance value in memory A or B” (p. 31). |
| Outdoor([OUTDOOR]) | · Recording neon signs or fireworks· Recording sunset/ sunrise, just after sunset or just before sunrise· Under daylight color fluorescent lamps |
Indicator Shooting conditions
| Indoor ([INDOOR]) | · Under the lighting conditions that change in many ways, such as a party hall· Under strong light, such as in a photography studio· Under sodium lamps or mercury lamps |
| Color temperature ([MANU WB TEMP]) | · Color temperature can be set between 2300K and 15000K (the default setting is 6500K). |
Tips
- You can change the outdoor white balance setting by setting offset. Press ☐ one push) button ☐ while ⚫ outdoor) is selected and turn the SEL/PUSH EXEC dial ☐ to select an offset value from -7 (bluish) to 0 (normal, the default setting) to +7 (reddish). You can also set the white balance offset value from the menu ([WB OUTDOOR LEVEL], p. 72).
- You can change the color temperature. Set [WB PRESET] to [MANU WB TEMP], and the white balance memory switch to PRESET, then press the (one push) button . Turn the SEL/PUSH EXEC dial until the desired temperature appears on the screen, then press the dial to set the temperature. You can also set the color temperature from the menu ([WB TEMP SET], p. 72).
To save the adjusted white balance value in memory A or B
① Set the white balance memory switch to A (☑) or B (B) step 3 of “Adjusting to natural color (White balance).”
②Capture a white subject, such as white paper, full-screen in the same lighting condition as the one in which the subject is.
③Press the (one push) button C.
Changing the settings of your camcorder recordings (Continued)
A or B starts flashing rapidly. It will stay on when the white balance adjustment is completed and the adjusted value is stored in B or B.
Notes
- When a white balance adjustment value has not been obtained successfully, or B turns from rapid flashing to slow flashing. Adjust the subject appropriately and set the shutter speed to auto or around 1/50, then try adjusting the white balance again.
- It may take a long time to adjust the white balance, depending on the recording conditions. If you want to perform a different operation before completing the adjustment, set the white balance memory switch to another position to temporarily suspend white balance adjustment.
To adjust the white balance automatically
Press the WHT BAL button A or set the AUTO/MANUAL switch D to AUTO.
Notes
- When you set the AUTO/MANUAL switch D to AUTO, other manual adjusted items (iris, gain, and shutter speed) also become automatic.
Customizing the picture quality (Picture profile)
text_image
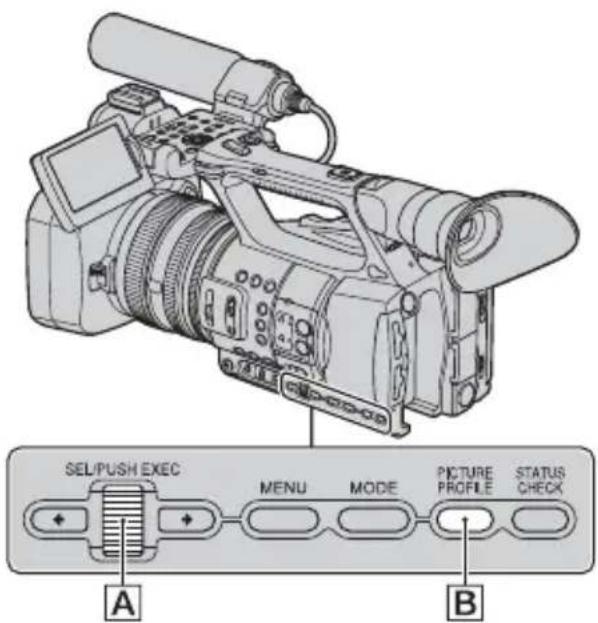
SEL/PUSH EXEC MENU MODE PICTURE PROFILE STATUS CHECK A BYou can customize the picture quality by adjusting picture profile items such as [GAMMA] and [DETAIL].
Connect your camcorder to a TV or monitor, and adjust the picture quality while observing the picture on the TV or monitor screen.
Picture quality settings for different recording conditions have been stored in [PP1] through [PP6] as default settings.
Notes
- When you set [x.v.Color] in the (CAMERA SET) menu to [ON], the picture profile will be disabled.
| Picture profile number | Recording condition |
| PP1 Default settings the same as when Picture Profile is [OFF] | |
| PP2 Default settings the same as when Picture Profile is [OFF] | |
| PP3 Example settings of pictures recorded by a professional shoulder camcorder with ITU-709 gamma | |
| PP4 Example settings of pictures recorded by a professional handy camcorder with PD gamma | |
| PP5 Example settings of pictures recorded on cinema color negative film | |
| PP6 Example settings of pictures screened with cinema color print film | |
1 During standby, press the PICTURE PROFILE button B.
2 Select a picture profile number with the SEL/PUSH EXEC dial A.
You can record with the settings of the selected picture profile.
3 Select [OK] with the SEL/PUSH EXEC dial A.
To cancel the picture profile recording
Select [OFF] in step 2 with the SEL/PUSH EXEC dial A.
To change the picture profile
You can change the settings stored in [PP1] through [PP6].
①Press the PICTURE PROFILE button B.
②Select the PICTURE PROFILE number with the SEL/PUSH EXEC dial [A].
③Select [SETTING] with the SEL/PUSH EXEC dial A.
④Select an item to be adjusted with the SEL/PUSH EXEC dial A.
⑤Adjust the picture quality with the SEL/PUSH EXEC dial A.
⑥ Repeat steps ④ and ⑤ to adjust other items.
⑦Select [RETURN] with the SEL/PUSH EXEC dial A.
⑧Select [OK] with the SEL/PUSH EXEC dial A.
A picture profile indicator appears.
Changing the settings of your camcorder recordings (Continued)
BLACK LEVEL
To set the black level.
| Item Description and settings |
| [MASTER BLACK] Sets the master black level. -15 to +15 |
| [BLACK R] Sets the black level of Rch. [MASTER BLACK] + [BLACK R] is the black level of Rch. -15 to +15 |
| [BLACK G] Sets the black level of Gch. [MASTER BLACK] + [BLACK G] is the black level of Gch. -15 to +15 |
| [BLACK B] Sets the black level of Bch. [MASTER BLACK] + [BLACK B] is the black level of Bch. -15 to +15 |
GAMMA
To select a gamma curve.
| Item Description and settings | |
| [STANDARD] | Standard gamma curve |
| [CINEMATONE1] | Gamma curve 1 for producing tone of film camera images |
| [CINEMATONE2] | Gamma curve 2 for producing tone of film camera images |
| [ITU709] | Gamma curve that corresponds to ITU-709. Gain in low intensity area: 4.5 |
| [G5.0] | Gamma curve with 5.0 of a low intensity area gain |
| [PD] | Gamma curve for producing tone similar to DSR-PD series |
| [x.v.] | Gamma curve similar to x.v.Color |
BLACK GAMMA
To correct gamma in low intensity area.
| Item Description and settings |
| [RANGE] Selects a correcting range.HIGH / MIDDLE / LOW |
| [LEVEL] Sets the correcting level.-7 (maximum black compression) to +7 (maximum black stretch) |
KNEE
To set knee point and slope for video signal compression to prevent over-exposure by limiting signals in high intensity areas of the subject to the dynamic range of your camcorder.
| Item Description and settings |
| [MODE] Selects a mode either automatic or manual.[AUTO] : to set the knee point and slope automatically.[MANUAL] : to set the knee point and slope manually. |
| [AUTO SET] Sets the maximum point and sensitivity in the automatic mode.[MAX POINT] : Sets the maximum point.90% to 100%[SENSITIVITY] : Sets the sensitivity.HIGH/MIDDLE/LOW |
| [MANUAL SET] Sets the knee point and slope manually.[POINT] : Sets the knee point.75% to 105%[SLOPE] : Sets the knee slope.-5(gentle) to +5(steep) |
COLOR MODE
To set type and level of colors.
| Item Description and settings | |
| [TYPE] Selects a type of colors. | |
| [STANDARD] : Standard colors | |
| [CINEMATONE1] : Film camera image-like colors good with [GAMMA] set to [CINEMATONE1] | |
| [CINEMATONE2] : Film camera image-like colors good with [GAMMA] set to [CINEMATONE2] | |
| [ITU709 MATRIX]: Colors corresponding to ITU-709 | |
| [LEVEL] | Sets a color level when you set [TYPE] to the settings other than [STANDARD]. |
| 1 (close to color settings of [STANDARD]) to 8 (color settings of the selected type) | |
COLOR LEVEL
To set the color level.
| Item Description and settings |
| -7 (light) to +7 (dark), -8: black and white |
COLOR PHASE
To set the color phase.
| Item Description and settings |
| -7 (greenish) to +7 (reddish) |
Changing the settings of your camcorder recordings (Continued)
COLOR DEPTH
To set the color depth for each color phase.
This function is more effective for chromatic colors and less effective for achromatic colors. The color looks deeper as you increase the setting value to more positive side, and lighter as you decrease the value to more negative side. This function is effective even if you set [COLOR LEVEL] to [-8] (black and white).
| Item Description and settings |
| [R] -7 (light red) to +7 (deep red) |
| [G] -7 (light green) to +7 (deep green) |
| [B] -7 (light blue) to +7 (deep blue) |
| [C] -7 (light cyan) to +7 (deep cyan) |
| [M] -7 (light magenta) to +7 (deep magenta) |
| [Y] -7 (light yellow) to +7 (deep yellow) |
WB SHIFT
To set items for the white balance shift.
| Item Description and settings |
| [FILTER TYPE] Selects a color filter type for the white balance shift.[LB-CC] : Film type (color conversion and correction)[R-B] : Video type (correction of R and B levels) |
| [LB[COLOR TEMP]] Sets a color temperature offset value.-9 (bluish) to +9 (reddish) |
| [CC[MG/GR]] Sets a color correct offset value.-9 (greenish) to +9 (magentish) |
| [R GAIN] Sets an R level.-9 (low R level) to +9 (high R level) |
| [B GAIN] Sets a B level.-9 (low B level) to +9 (high B level) |
DETAIL
To set items for the detail.
Item Description and settings
| [LEVEL] Sets the detail level. |
| -7 to +7 |
[MANUAL SET] [ON/OFF]: Turns on and off the manual detail adjustment.
[ON]: Enables the manual detail adjustment (automatic optimization will not be performed).
[OFF]: Disables the manual detail adjustment.
[V/H BALANCE]: Sets the vertical (V) and horizontal (H) balance of DETAIL. -2 (off to the vertical (V) side) to +2 (off to the horizontal (H) side)
[B/W BALANCE]: Selects the balance of the lower DETAIL (B) and the upper DETAIL (W). TYPE 1 (off to the lower DETAIL (B) side) to TYPE 5 (off to the upper DETAIL (W) side)
[BLACK LIMIT] : Sets the limit level of the lower DETAIL (B). 0 (Low limit level: likely to be limited) to 7 (High limit level: not likely to be limited)
[WHITE LIMIT] : Sets the limit level of the upper DETAIL (W). 0 (Low limit level: likely to be limited) to 7 (High limit level: not likely to be limited)
[CRISPENING] : Sets the crispening level. 0 (shallow crispening level) to 7 (deep crispening level)
[HI-LIGHT DETAIL]: Sets the DETAIL level in the high intensity areas. -2 to +2
Changing the settings of your camcorder recordings (Continued)
SKINTONE DETAIL
To adjust the detail of skintone areas to reduce wrinkles.
| Item Description and settings |
| [ON/OFF] Suppresses details in skin-tone areas to reduce wrinkles. Select [ON] when you want to use this function. You can also select other areas. |
| [LEVEL] Sets the adjustment level.1 (less adjust the detail) to 8 (more adjust the detail) |
| [COLOR SEL] Sets color items for the detail adjustment.[PHASE] : Sets the color phase.0 (purple) → 32 (red) → 64 (yellow) →96 (green) → 127 (blue)[RANGE] : Sets the color range.0 (selects no color), 1 (narrow: selects a single color) to 31 (wide: selects multiple colors in similar color phases and saturation)The detail will not be adjusted when you set [RANGE] to 0.[SATURATION] : Sets the color saturation.0 (selects a light color) to 31 (selects a deep color)[REVERSE] : Reverses the selected color range.If you execute this function when a color has been selected, colors that have not been selected will be selected instead.[Y LEVEL] : Sets the color brightness.0 (selects a dark color) to 31 (selects a bright color)[Y RANGE] : Sets the color brightness range.1 (narrows the brightness range) to 32 (expands the brightness range) |
COPY
To copy the settings of the picture profile to another picture profile number.
RESET
To reset the picture profile to the default setting.
To copy the picture profile setting to another picture profile number
See page 32 for the location of the buttons.
①Press the PICTURE PROFILE button B.
②Select the picture profile number that you want to copy from with the SEL/PUSH EXEC dial [A].
③ Select [SETTING] → [COPY] with SEL/PUSH EXEC dial A.
④Select the number of the picture profile that you want to copy to with the SEL/PUSH EXEC dial [A].
⑤Select [YES] with the SEL/PUSH EXEC dial A.
⑥ Select [ ← RETURN] → [OK] with the SEL/PUSH EXEC dial A.
To reset the picture profile settings
You can reset the picture profile settings by each picture profile number. You cannot reset all picture profile settings at once. See page 32 for the location of the buttons.
①Press the PICTURE PROFILE button B.
②Select the number of the picture profile that you want to reset with the SEL/PUSH EXEC dial [A].
③ Select [SETTING] → [RESET] → [YES] → [← RETURN] → [OK] with the SEL/PUSH EXEC dial [A].
Audio setup
text_image
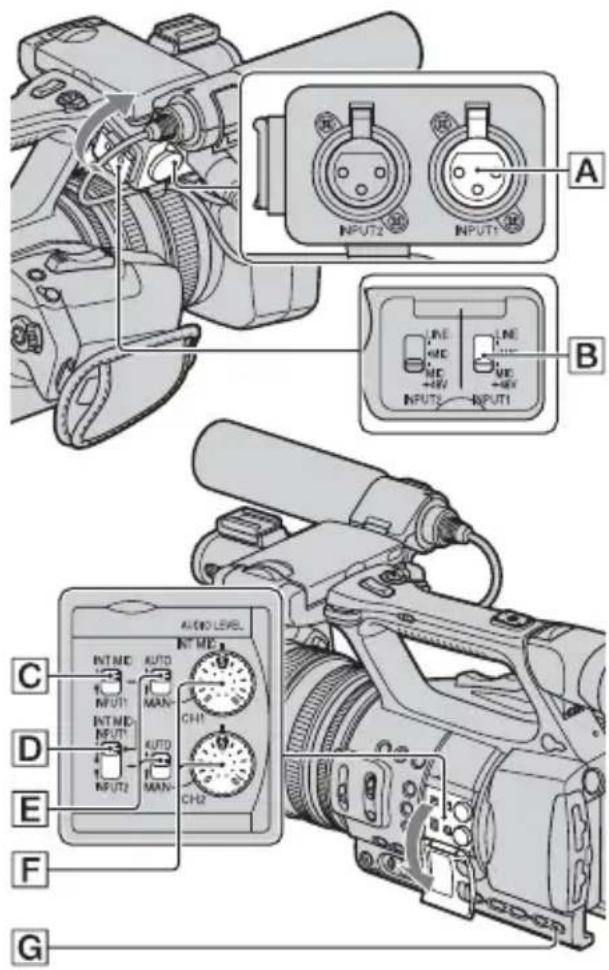
A INPUT2 INPUT1 B LINE LINE LINE LINE INPUT2 INPUT1 C INTIME AUTO INTIME AUTO INTIME AUTO INTIME AUTO CH11 CH12 D E F GChannel setting
①Select input sources with the CH1 (INT MIC/INPUT1) switch C and the CH2 (INT MIC/INPUT1/INPUT2) switch D.
See the table below for the recording channels.
Changing the settings of your camcorder recordings (Continued)
When the CH1 switch is set to INT MIC
| CH2 switch position | Input channel and source | |
| INT MIC Internal | ||
| microphone (L) | CH1 | |
| Internal microphone (R) | CH2* | |
| INPUT1 Internal | ||
| microphone (mono) | CH1 | |
| XLR INPUT1 | CH2^** | |
| INPUT2 Internal | ||
| microphone (mono) | CH1 | |
| XLR INPUT2 | CH2^** | |
When the CH1 is set to INPUT1
| CH2 switch position | Input channel and source | |
| INT MIC XLR INPUT1 CH1→ | ||
| Internal microphone (mono) | CH2** | |
| INPUT1 XLR INPUT1 CH1→ | CH2** | |
| INPUT2 XLR INPUT1 CH1→ | ||
| XLR INPUT2 CH2**→ | ||
* The recording level of channel 2 is synchronized with that of channel 1 when only the internal microphone is used. The recording level of channel 2 is controlled with the CH1 (AUDIO LEVEL) dial and the CH1 (AUTO/MAN) switch.
** You can adjust the recording levels of channel 1 and channel 2 separately.
② Set the INPUT1 switch B to an appropriate position for the microphone connected to the INPUT1 jack A.
LINE: For inputting sound from an audio device
MIC: For inputting sound from an external microphone that does not support the +48V power source.
MIC+48V: For inputting sound from a device that supports the +48V power source including the supplied microphone.
When you connect a microphone to the INPUT2 jack, set the INPUT2 switch to an appropriate position for that microphone.
Notes
- Do not operate the INPUT1/INPUT2 switches during recording to prevent noise from being recorded.
- When you connect a device that supports the +48V power source to the INPUT1 or INPUT2 jack, set the INPUT1/INPUT2 switches to MIC prior to connecting the device. When you disconnect the device, set the INPUT1/INPUT2 switch to MIC first, then disconnect it.
- When you connect a microphone that does not support the +48V power source to the INPUT1 or INPUT2 jack, set the INPUT1/INPUT2 switch to MIC. If you use it with the INPUT1/INPUT2 switch set to MIC+48V, it may be damaged or the recorded sound may be distorted.
Adjusting the volume
You can adjust the volume of an internal microphone or a microphone connected to the INPUT1/INPUT2 jacks.
Tips
- See page 10 for details on attaching the supplied microphone, and page 39 on the CH1 (INT MIC/INPUT1) and the CH2 (INT MIC/INPUT1/INPUT2) switches.
① Set the AUTO/MAN (CH1/CH2) switch E of the channel to be adjusted to MAN.
M_2^1 appears on the screen.
② Turn the AUDIO LEVEL dial F to adjust the volume during recording or standby.
To restore automatic adjustment
Set the AUTO/MAN (CH1/CH2) switch E of the manually adjusted channel to AUTO.

Tips
- To check other audio settings, press the STATUS CHECK button .
- You can select [LINEAR PCM] or [DOLBY DIGITAL] when recording in high definition image quality (HD). (The default setting is [LINEAR PCM]. See page 78 for details.)
- For other settings, see the (AUDIO SET) menu (p. 78).
Setting the headphone sound
text_image
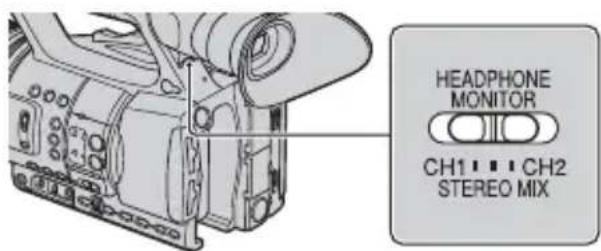
HEADPHONE MONITOR CH1 CH2 STEREO MIXYou can select the channel, CH1 or CH2, to output from the headphone.
See [HEADPHONE OUT] on the sound at STEREO MIX (p. 78).
Acquiring location information (HXR-NX5E/NX5P)
text_image
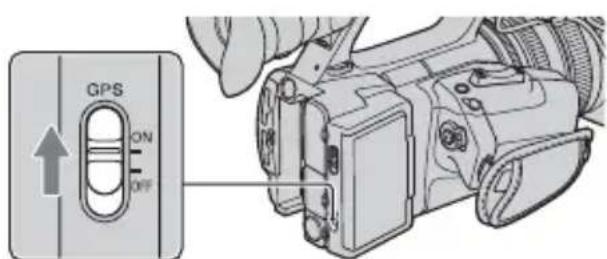
GPS ON OFFSet the GPS switch to ON.
✗ appears, and your camcorder starts trying to triangulate. When your camcorder
triangulates successfully, it will record the location information at the time movies were recorded.
Notes
• The indicator changes according to the strength of GPS signal reception.
| Tri-angulating status | GPS indicators | GPS reception status |
| Function off | No indicator | The GPS switch is set to OFF, or the GPS receiver is not functioning normally. |
Difficult The camcorder

cannot find a GPS signal, therefore, it cannot triangulate. Use the camcorder in an open area.
Searching The camcorder is

searching the GPS signal. It may take several minutes until the camcorder triangulates.
| Tri-angulating | [CGWD] | The camcorder is receiving a weak GPS signal. |
| Tri-angulating |  | The camcorder is receiving a GPS signal, and can acquire location information. |
| Tri-angulating |  | The camcorder is receiving a strong GPS signal, and can acquire location information. |
- The GPS switch is set to ON in the default setting. Movies recorded during triangulation by GPS will be recorded with location information. If you do not want to record location information, set the GPS switch to OFF.
Changing the settings of your camcorder recordings (Continued)
- If the GPS indicator does not become a triangulating status indicator even after several minutes, the camcorder is having trouble with receiving GPS signals. You may start recording if you do not need to record location information, or go to a location with access to the open sky.
- The camcorder can hardly receive GPS signals indoors or near tall buildings. Go to a location with access to the open sky and turn on the GPS switch again.
- Even if the camcorder is turned off, the GPS function is working as long as the GPS switch is set to ON. Make sure that the GPS switch is set to OFF during take off and landing of an airplane.
- Even if a triangulating status indicator is displayed, the camcorder may not record the GPS information continuously, depending on the condition of GPS signal reception.
Recording with the SMOOTH SLOW REC function
Fast moving subjects and actions, which cannot be captured under the general recording conditions, can be recorded in smooth moving slow-motion. This is useful for recording fast actions such as a golf or tennis swing.
1 Press the MODE button.
2 On the LCD screen, select [CAMERA] → [SMOOTH SLOW REC].
3 Select the recording media and image quality → recording time.
You can select the recording time from [3sec], [6sec] and [12sec].
4 Press the record button.
A recording of the length selected as the recording time is stretched by 4 times and recorded as a slow-motion movie.
Recording ends when [Recording...] disappears from the screen.
To cancel [SMOOTH SLOW REC], press the MODE button.
To change the setting
Press the MENU button, and select the setting to be changed.
REC MODE
You can select the record mode from [1080/50i FX], [1080/50i FH], [1080/50i HQ], or [1080/50i LP] for smooth slow recording.
REC TIMING
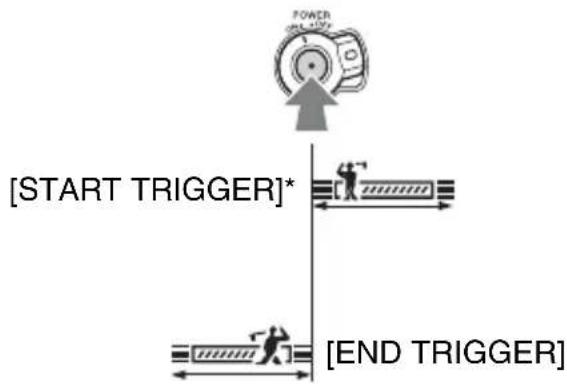
You can use this to select when recording starts in relation to when the record button (handle record button) is pressed.
text_image
[START TRIGGER]* [END TRIGGER]* The default setting is [START TRIGGER].
Notes
- Sounds cannot be recorded.
- The shutter speed is automatically set to 1/215 second when you start [SMOOTH SLOW REC]. (You cannot set a slower shutter speed than 1/215 second.)
- The recording time may be shorter than the set time, depending on recording conditions.
- The image quality is lower than with the regular recording.
-
The simultaneous recording on the memory card and the flash memory unit is not available.
-
The longer the recording time, the poorer the image quality.
- The camcorder does not perform relay recording with the memory cards during [SMOOTH SLOW REC]. If the space on the memory card is insufficient, the camcorder records movies only as long as there is space available.
- The time of the movie recorded using [SMOOTH SLOW REC] is recorded after being converted to slow-motion, not the time when the movie is actually shot.
- Progressive recording is not available for [SMOOTH SLOW REC]. The progressive setting is changed to the interlace setting automatically.
- [SMOOTH SLOW REC] is not available when the recording format of high definition image quality (HD) is set to 720/50p.
- Even if you change the record mode with [RDF MODE], the record mode of the standard definition image quality (SD) does not change.
Setting time data
The camcorder records movies accompanied by time data, such as time code and user bit.
Display the setting screen by pressing the MENU button → select (TC/UB SET) with the SEL/PUSH EXEC dial.
Presetting the time code
①Select [TC PRESET] with the SEL/PUSH EXEC dial.
②Select [PRESET] with the SEL/PUSH EXEC dial.
③Select the first 2 digits with the SEL/PUSH EXEC dial.
You can set the time code between 00:00:00:00 and 23:59:59:24.
④Set other digits by repeating step ③.
⑤Select [OK] with the SEL/PUSH EXEC dial.
To reset the time code
You can reset the time code (00:00:00:00). Select [RESET] in step ② of “Presetting the time code.”
To reset the time code using the Wireless Remote Commander
You can reset the time code (00:00:00:00) also by pressing the TC RESET button on the Wireless Remote Commander.
Presetting the user bit
①Select [UB PRESET] with the SEL/PUSH EXEC dial.
②Select [PRESET] with the SEL/PUSH EXEC dial.
③Select the first 2 digits with the SEL/PUSH EXEC dial.
④Set other digits by repeating step ③.
⑤Select [OK] with the SEL/PUSH EXEC dial.
To reset the user bit
You can reset the user bit (00 00 00 00). Select [RESET] in step ② of “Presetting the user bit.”
Synchronizing the time code of this camcorder with that of another camcorder
You can synchronize the time code of this camcorder with the time code of another camcorder.
The camcorder that generates the time code must be set to FREE RUN (the time code advances regardless).
①Set [TC RUN] and [TC MAKE] in (TC/UB SET) as follows:
00:00
• [TC MAKE]: [PRESET]
• [TC RUN]: [FREE RUN]
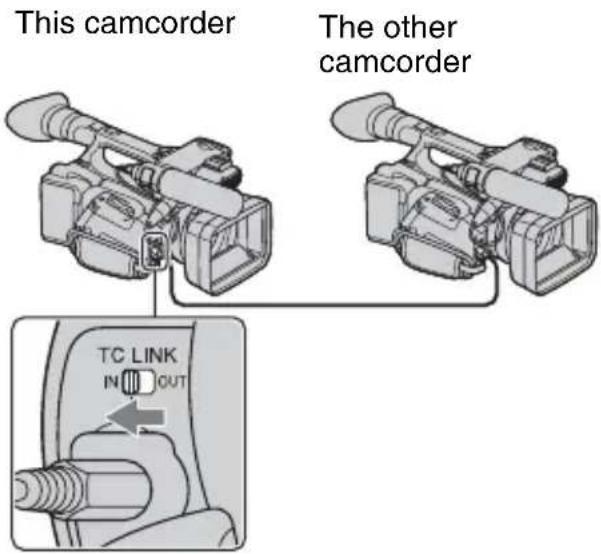
②Set the TC LINK switch of this camcorder to IN, and connect the TC LINK IN/OUT jack and the TC OUT jack of the other camcorder with a cable.
Changing the settings of your camcorder recordings (Continued)
text_image
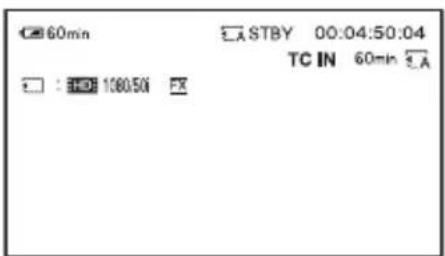
This camcorder The other camcorder TC LINK IN OUTThe time code of this camcorder synchronizes with that of the connected camcorder. [TC IN] appears on this camcorder screen.
Following conditions must be satisfied to input time code.
- The TC LINK switch is set to IN, and there are input time code data.
- Recording standby
- The frame rate of this camcorder time code and that of the input time code are the same.
• The input time code is advancing.
text_image
60min STBY 00:04:50:04 TC IN 60min : 1300 1000.501The time code remains synchronized, even if the other camcorder is disconnected.
Notes
- Connect the camcorders when both camcorders are recording standby.
- If the frame rate of the input time code differ from that of this camcorder, or the input time code is not advancing, the input time code is not regarded as effective time code. The input time code to the TC LINK IN/OUT jack are as follows:
- 50i/25p: 25-frame
Synchronizing the time code of another camcorder with that of this camcorder
You can synchronize the time code of another camcorder with the time code of this camcorder.
The camcorder that generates the time code must be set to FREE RUN (the time code advances regardless).
①Set the time code of this camcorder with [TC RUN] and [TC MAKE] in 00:00 (TC/UB SET).
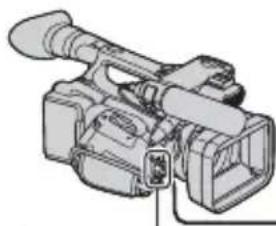
②Set the TC LINK switch of this camcorder to OUT, and connect the TC LINK IN/OUT jack and the TC IN jack of the other camcorder with a cable.
This camcorder
I he other camcorder
natural_image
Line drawing of a video camera with attached cable (no text or symbols)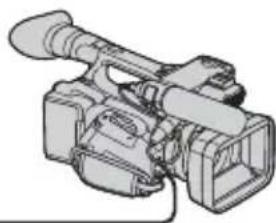
natural_image
Line drawing of a professional video camera with lens and external casing (no text or symbols)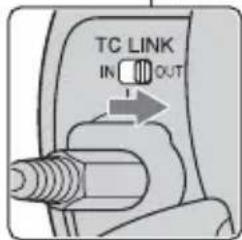
text_image
TC LINK IN OUTNotes
- The output time code from the TC LINK IN/OUT jack are as follows:
- 50i/25p: 25-frame
Tips
- You can output time code from this camcorder also when the camcorders are connected via the SDI jacks.
Assigning the functions to the ASSIGN buttons
Some functions can be assigned to the ASSIGN buttons for use. You can assign a single function to any one of the ASSIGN 1 to 7 buttons.
Functions you can assign to the ASSIGN buttons
The buttons in parentheses indicate that the functions are assigned to the buttons by default.
- EXPANDED FOCUS (p. 28) (ASSIGN 7 button)
- PUSH AUTO IRIS (p. 28)
• HYPER GAIN (p. 71)
• IRIS RING ROTATE (p. 72)
• AE SHIFT (p. 72) (ASSIGN 5 button) - BACK LIGHT (p. 73)
- SPOTLIGHT (p. 73)
• STEADYSHOT (p. 73)
• FOCUS MACRO (p. 74)
• D.EXTENDER (p. 75)
• FADER (p. 75)
• COLOR BAR (p. 76)
• ZEBRA (p. 81) (ASSIGN 4 button) - PEAKING (p. 81)
- MARKER (p. 81)
- REC LAMP[F] (p. 86)
- REC LAMP[R] (p. 86)
• VISUAL INDEX (p. 47) (ASSIGN 6 button) - MODE (p. 57)
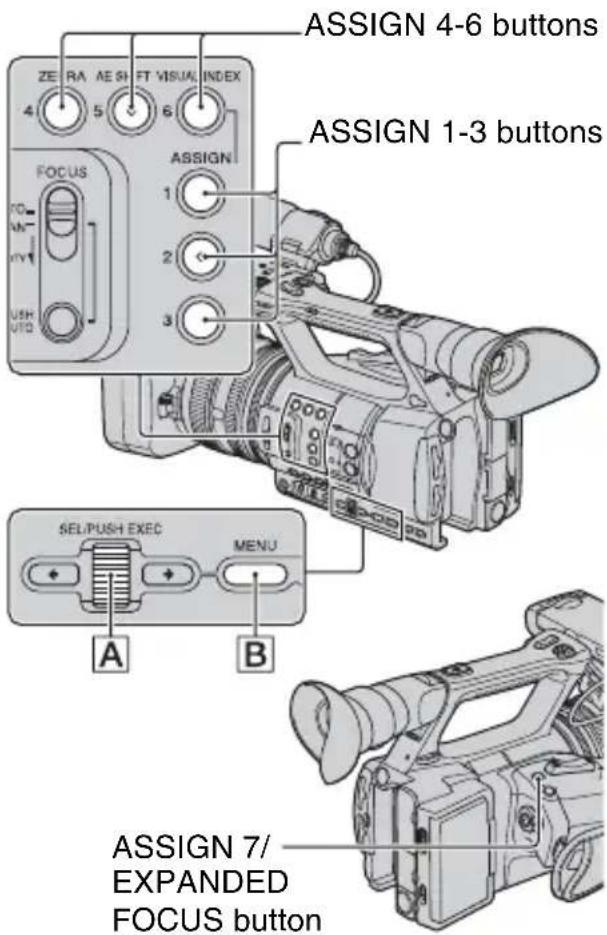
text_image
ASSIGN 4-6 buttons ASSIGN 1-3 buttons ZE RA AE SH FT VISUAL INDEX 4 5 6 FOCUS 1 2 3 SEL/PUSH EXEC MENU A B ASSIGN 7/ EXPANDED FOCUS button1 Press the MENU button B.
2 Select 📄 (OTHERS) → [ASSIGN BUTTON] with the SEL/PUSH EXEC dial A.
![SONY HXR-NX5P - Select 📄 (OTHERS) → [ASSIGN BUTTON] with the SEL/PUSH EXEC dial A. - 1](/content/2026/05/814133/images/d5e9f3a80aba1df7059acaad64567caee504da7fe9513b1ab28f8b66e79befd0.jpg)
text_image
60min STBY 00:00:00:00 OTHERS RETURN ASSIGN BUTTON CLOCK SET AREA SET SUMMERTIME LANGUAGE DATE REG BEEP MENU: END3 Select the ASSIGN button to which you want to assign a function with the SEL/PUSH EXEC dial A.
Assigning the functions to the ASSIGN buttons (Continued)
- [----] appears if no function is assigned to the ASSIGN button.
4 Select the function that you want to assign with the SEL/PUSH EXEC dial A.
5 Select [OK] with the SEL/PUSH EXEC dial A.
6 Select [RETURN] with the SEL/PUSH EXEC dial A.
7 Press the MENU button B to hide the menu screen.
Playback
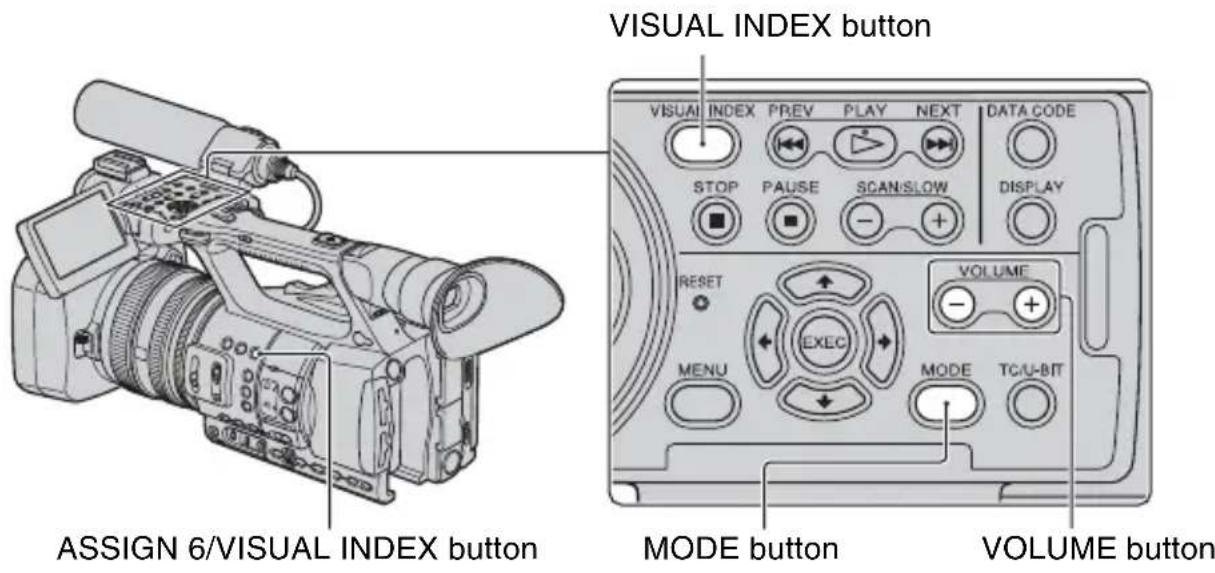
text_image
ASSIGN 6/VISUAL INDEX button VISUAL INDEX button VISUAL INDEX PREV PLAY NEXT DATA CODE STOP PAUSE SCAN/SLOW DISPLAY RESET EXEC MENU MODE TC/U-BIT VOLUME MODE button VOLUME buttonYou can play back movies as follows:
1 Slide the POWER switch to ON.
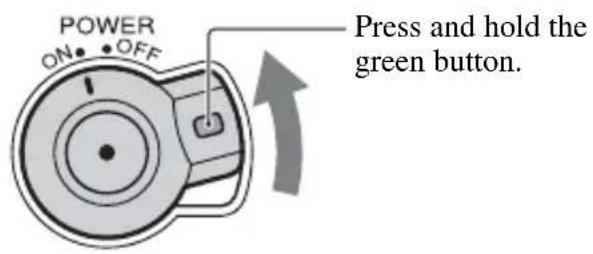
text_image
POWER ON• OFF Press and hold the green button.2 Press the VISUAL INDEX button.
The VISUAL INDEX screen appears after a few seconds.
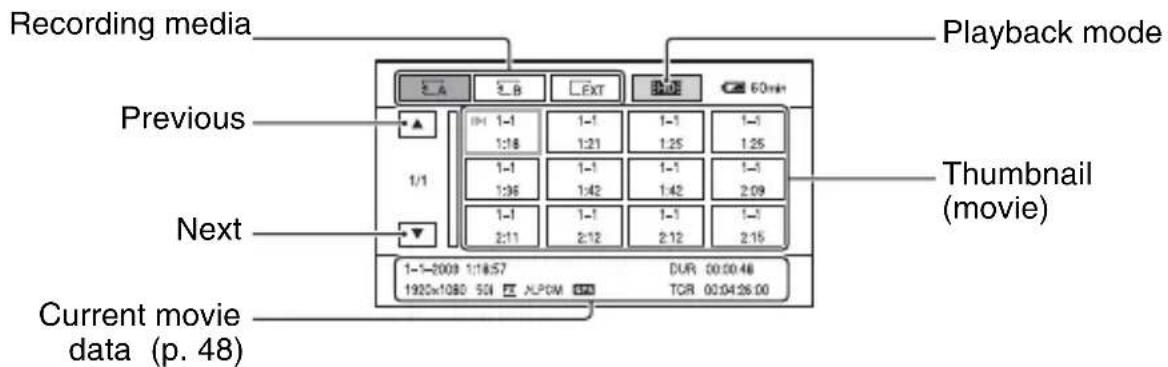
text_image
Recording media Previous Next Current movie data (p. 48) Playback mode Thumbnail (movie)You can display the VISUAL INDEX screen also by pressing the MODE button, followed by touching [PLAY] → [VISUAL INDEX] on the screen.
You can turn on or off the time and date display on the thumbnails by pressing the DISPLAY button.
3 Play back movies.
①Touch the recording media you want to play back.
A: Memory card A
B: Memory card B
□EXT : Flash memory unit
②Touch the playback mode, and select the desired image quality of movies.
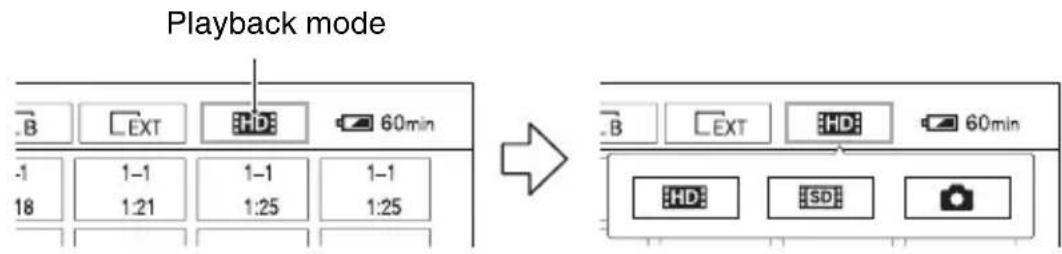
text_image
Playback mode .B EXT HD 60min -1 1-1 1-1 1-1 18 1:21 1:25 1:25 → .B EXT HD 60min HD SDHD: High definition image quality (HD)
SD: Standard definition image quality (SD)
③Touch twice the thumbnail of the movie you want to play back.
The first touch will show the information on the movie at the lower part of the screen.
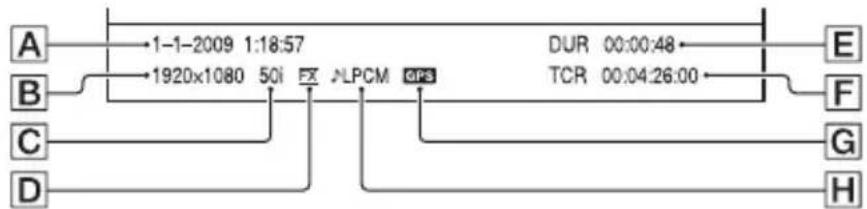
flowchart
graph LR
    A["A"] -->|1-1-2009 1:18:57| B["B"]
    B -->|1920x1080 50i FX ALPCM GPS| C["C"]
    C --> D["D"]
    D --> E["E"]
    E --> F["F"]
    F --> G["G"]
    G --> H["H"]
    style A fill:#f9f,stroke:#333
    style B fill:#f9f,stroke:#333
    style C fill:#f9f,stroke:#333
    style D fill:#f9f,stroke:#333
    style E fill:#ccf,stroke:#333
    style F fill:#ccf,stroke:#333
    style G fill:#ccf,stroke:#333
    style H fill:#ccf,stroke:#333
A Date and time of recording started
BResolution
CFrame rate
DRecord mode
EDuration
F Time code of recording started
Time code will not be displayed correctly when you play back recording media with no time code, or recording media with time code that your camcorder does not support.
G GPS data (HXR-NX5E/NX5P)
Appears on the movie that was recorded with the GPS switch set to ON.
H LPCM recording
Appears when audio is recorded in Linear PCM. This does not appear for movies in the standard definition image quality (SD).
- I▶I appears with the movie that has been most recently played back or recorded. If you touch the movie with I▶I, you can continue playback from the previous time.
Your camcorder starts playing the selected movie.
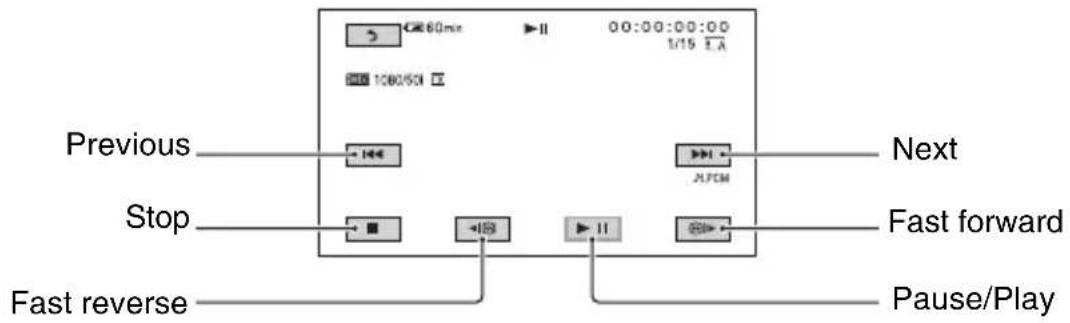
text_image
60ms 1/15 ΛA 10005CM Previous Stop Fast reverse Next APCM Fast forward Pause/PlayNotes
- You may not be able to play back movies recorded on other camcorders.

Tips
- When playback from the selected movie reaches the last movie, the screen returns to the VISUAL INDEX screen.
- Touch / during pause to play back movies slowly.
- As you repeat touching /during playback, movies are played back as fast as about 5 times → about 10 times → about 30 times → about 60 times.
- Reduced-size images which enable you to view many movies at the same time on the VISUAL INDEX screen are called “thumbnails.”
- You can operate playback using the PREV/PLAY/NEXT/STOP/PAUSE/SCAN/SLOW buttons on the camcorder.
To adjust the volume
Adjust the volume with the VOLUME buttons.
To return to the recording mode
Press the VISUAL INDEX button.
Viewing still images
You can create still images by capturing scenes from movies that you recorded on your camcorder (p. 60).
View still images.
①Touch the recording media you want to view.
A: Memory card A
B: Memory card B
□EXT: Flash memory unit
Playback (Continued)
②Touch the playback mode, then select (still image).
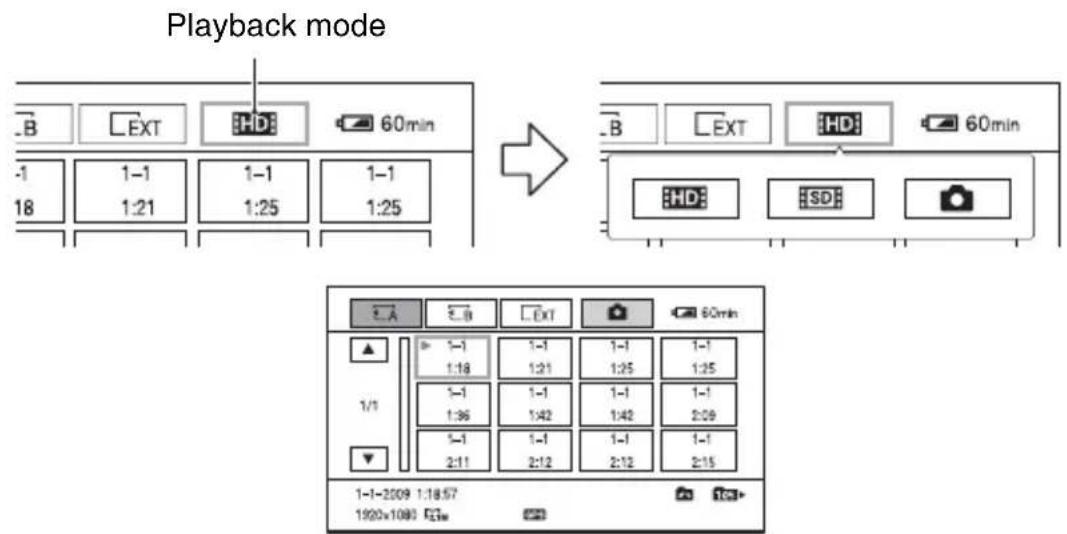
text_image
Playback mode -B EXT HD 60min -1 1-1 1-1 1-1 18 1:21 1:25 1:25 → -B EXT HD 60min HD SD③Touch twice the thumbnail of the still image you want to view.
The first touch will show the information on the still image at the lower part of the screen.

flowchart
graph LR
    A["A"] -->|1-1-2009 1:18:57| B["B"]
    B -->|1920x1080 2.1M| C["C"]
    C -->|GFR| D["D"]
    D -->|10S| E["E"]
    E --> F["F"]
Date and time of recording
BResolution
C Image size
DPlayback folder
EPlayback folder edge
Indicates that this is the first or the last page of the playback folder. This does not appear when there is only 1 playback folder.
F GPS data (HXR-NX5E/NX5P)
Appears on a still image that was created from a movie recorded with the GPS switch set to ON.
- appears on a still image recorded on a memory card.
Your camcorder displays the selected still image.
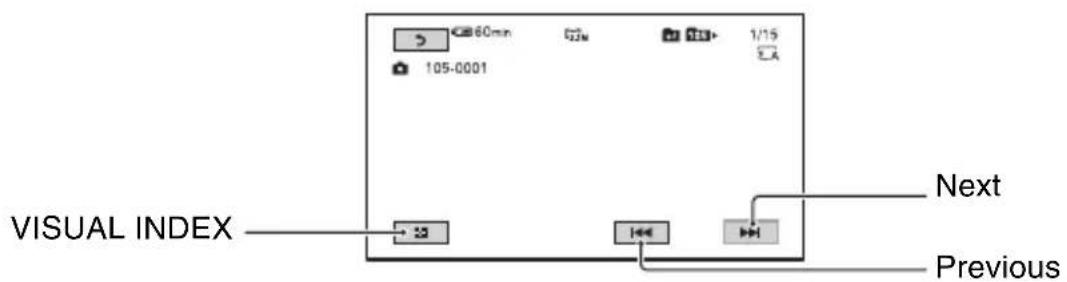
text_image
60min 105-0001 1/15 VISAUL INDEX Next PreviousChanging/checking the settings in your camcorder
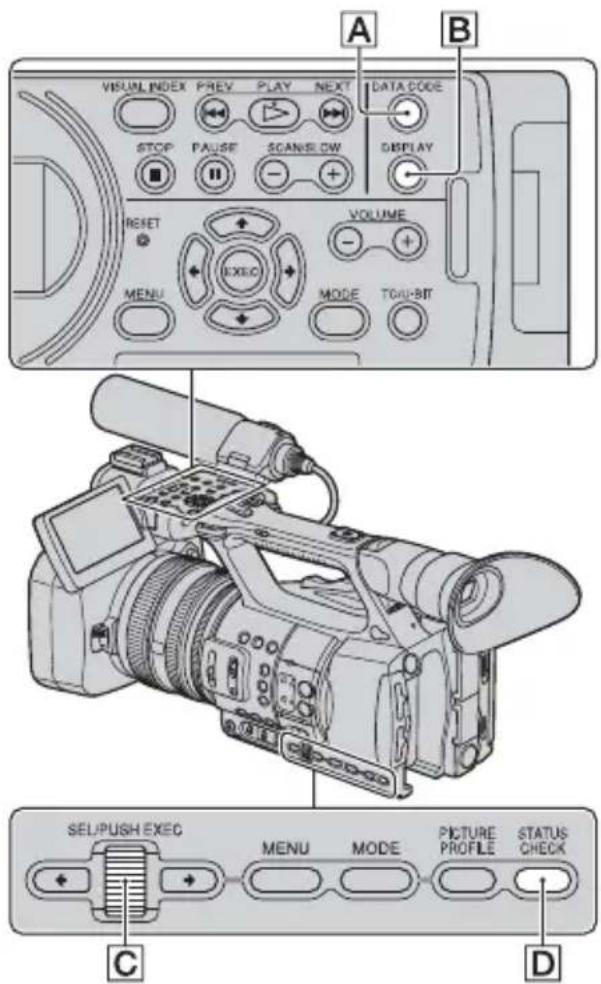
text_image
A B VISUAL INDEX PREV PLAY NEXT DATA CODE STOP PULSE SCANSELL DISPLAY RESET VOLUME MENU EXEC MODE TOU-BIT C D SEL/PUSH EXEC MENU MODE PICTURE PROFILE STATUS CHECKChanging the screen
You can turn on and off the display of the time code, and other information on the screen.
Press the DISPLAY button B.
The screen indicators turn on (displayed) and off (not displayed) as you press the button.
In the recording mode, the screen changes like “detailed display → simple display → no display” as you press the button.

Tips
- You can display the screen indicators during playback on a TV. Select [ALL OUTPUT] of [DISPLAY OUTPUT] (p. 84).
Displaying recording data (Data code)
You can display information, including date, time, camera data and GPS triangulation data (HXR-NX5E/NX5P) automatically stored during recording on the screen during playback.
Press the DATA CODE button A during playback or pause.
The screen changes like “date and time display → camera data display → GPS triangulation data (HXR-NX5E/NX5P) → no display” as you press the button.
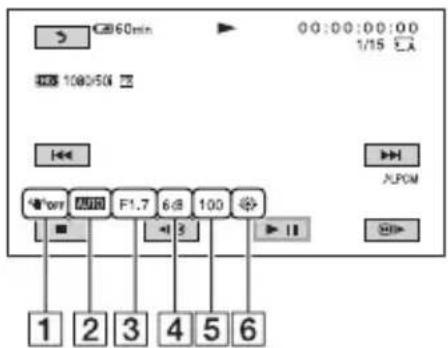
text_image
60min 00:00:00:00 1/15 L.A 100/50 OFF F1.7 6# 100 APCM 1 2 3 4 5 61 SteadyShot
② Exposure
AUTO appears during playback of the movie recorded with the iris, gain or shutter speed automatically adjusted.
MANUAL appears during playback of the movie recorded with the iris, gain or shutter speed manually adjusted.
3 Iris
CLOSE appears in the iris value display area during playback of the movie recorded with the iris manually adjusted to its maximum value.
4Gain
5 Shutter speed
6 White balance
Changing/checking the settings in your camcorder (Continued)
PWB appears during playback of the movie recorded with [MANU WB TEMP].
Notes
- The exposure correction value (EV), shutter speed, iris and flash on/off will be displayed during viewing still images.
- When you play back the memory card on other devices, the camera data may be displayed incorrectly. Confirm the correct camera data on your camcorder.
- When GPS triangulation data is displayed, latitude, longitude, date and time of recording are displayed in the data code area (HXR-NX5E/NX5P).
- You can select UTC time or local time for the date and time display with [GPS TIME DISPLAY] in the menu (HXR-NX5E/NX5P).
- If you record without receiving GPS data, [-- --- ----] and [--:--:--] will be displayed (HXR-NX5E/NX5P).
Displaying the settings in your camcorder (Status check)
You can check the settings of the following items.
- Audio setup such as microphone volume level (p. 78)
- Output signal setup ([VIDEO OUT], etc.) (p. 77)
- Functions assigned to the ASSIGN buttons (p. 45)
- Camera setup (p. 71)
- Record button setup (p. 23) You can check the record button setting.
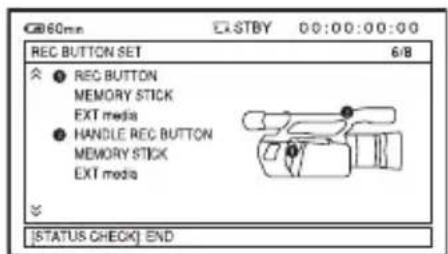
text_image
60min E-STBY 00:00:00:00 REC BUTTON SET 6/8 ● REC BUTTON MEMORY STICK EXT media ● HANDLE REC BUTTON MEMORY STICK EXT media [STATUS CHECK] END- Recording media information You can check the estimated used and free spaces.
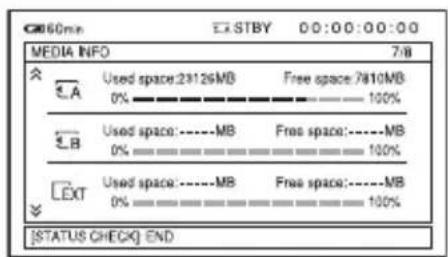
text_image
60min STBY 00:00:00:00 MEDIA INFO 7/8 A Used space:23126MB Free space:7810MB 0% 100% B Used space:----MB Free space:----MB 0% 100% EXT Used space:----MB Free space:----MB 0% 100% [STATUS CHECK] END- Battery Info You can check the remaining capacity of the attached battery.
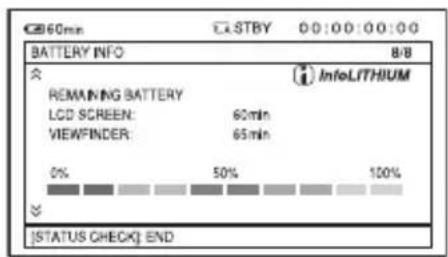
text_image
60min C:\STBY 0:00:00:00 BATTERY INFO 8/8 REMAINING BATTERY LCD SCREEN: 60min VIEWPINDER: 65min 0% 50% 100% [STATUS CHECK] END1 Press the STATUS CHECK button D.
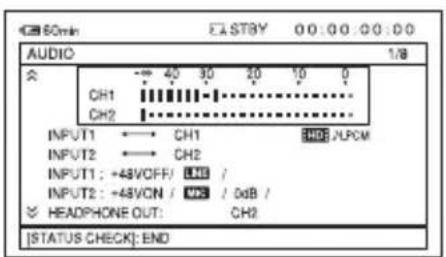
text_image
60min EASTBY 0:00:00:00 AUDIO 1/8 CH1 CH2 INPUT1 CH1 HOG /UPCM INPUT2 CH2 INPUT1: +48VCOFF/ UIC / INPUT2: +48VON / VAS / 0dB / HEADPHONE OUT: CH2 [STATUS CHECK]: END2 Turn the SEL/PUSH EXEC dial C until a desired display shows up on the screen.
AUDIO → OUTPUT → ASSIGN → CAMERA → REC BUTTON SET → MEDIA INFO → BATTERY INFO
Setup items are displayed according to the settings of the camcorder when it is turned on.
To hide the display
Press the STATUS CHECK button D.
Connecting a monitor or a TV
Playback image quality depends on the type of monitor or TV, or the jacks used to make the connection.
You do not need an audio cable to connect a monitor that supports SDI audio input via an SDI cable. If the monitor does not support SDI audio input, you must connect the red and white jacks with an audio cable. When you connect the monitor with the component video cable, you must connect the red and white jacks with an A/V connecting cable.
Set ← (REC/OUT SET) menu → [VIDEO OUT] → [OUTPUT SELECT] to output signals from the respective jacks.
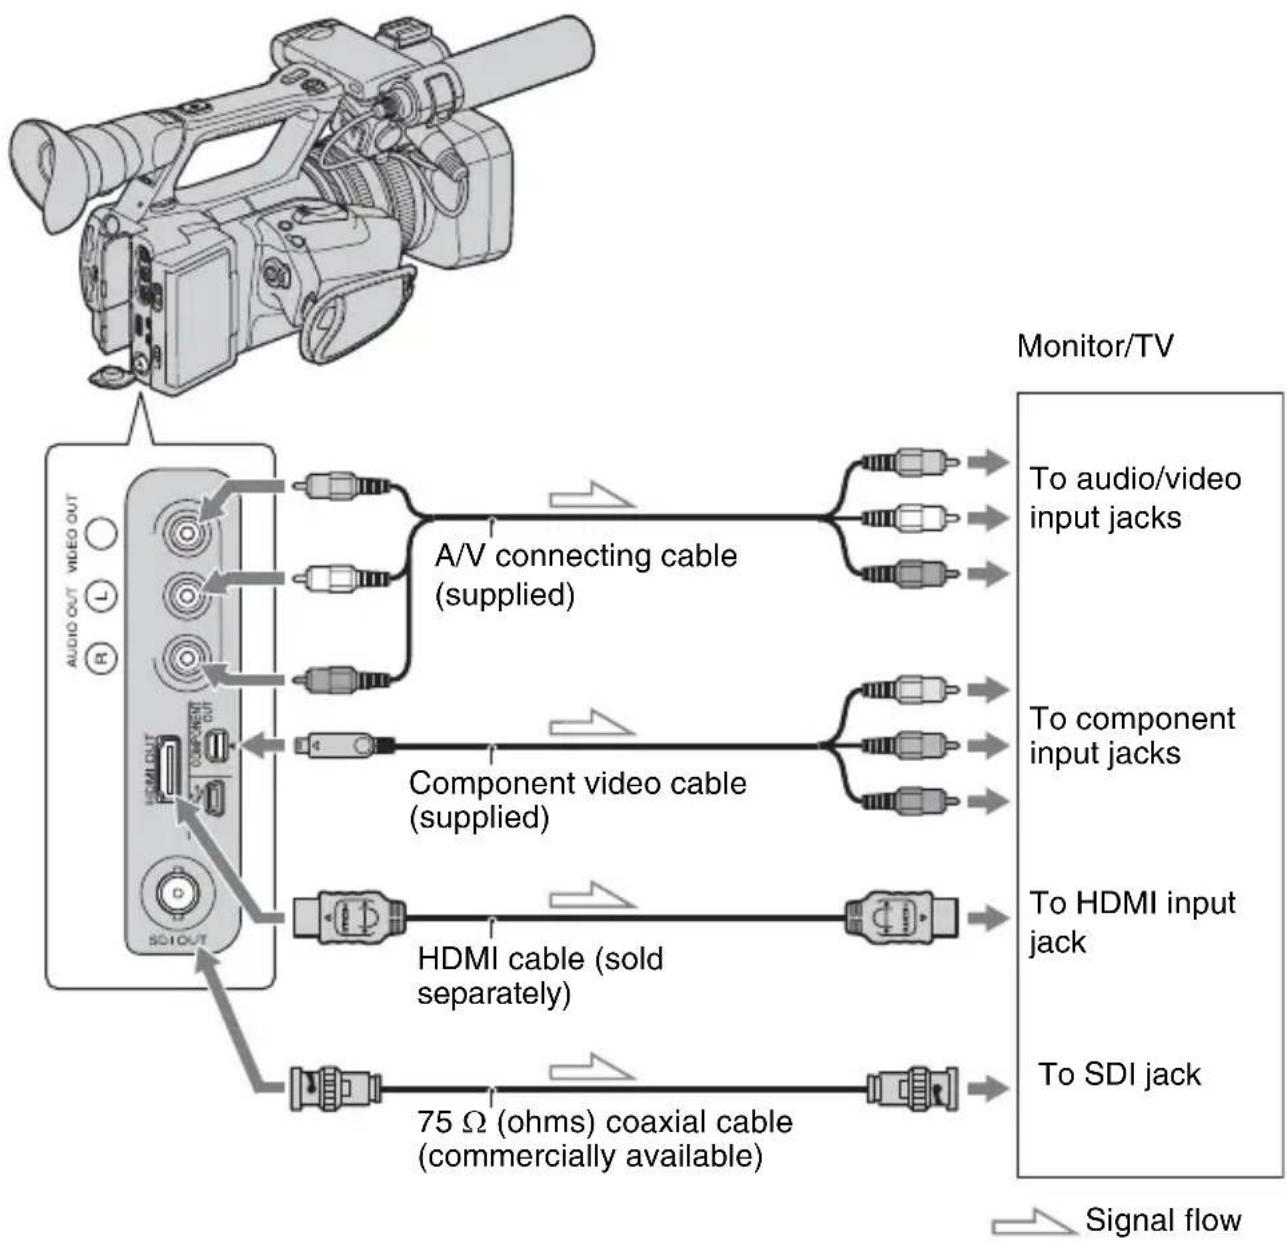
flowchart
graph TD
    A["Monitor/TV"] --> B["To audio/video input jacks"]
    A --> C["To component input jacks"]
    A --> D["To HDMI input jack"]
    A --> E["To SDI jack"]
    B --> F["A/V connecting cable (supplied)"]
    C --> G["Component video cable (supplied)"]
    D --> H["HDMI cable (sold separately)"]
    E --> I["75 Ω (ohms) coaxial cable (commercially available)"]
    F --> J["Signal flow"]
    G --> K["Signal flow"]
    H --> L["Signal flow"]
    I --> M["Signal flow"]
Notes
- Select the jack to output signals with [OUTPUT SELECT].
| [OUTPUT SELECT] setting | SDI OUT | HDMI OUT | COMPONENT OUT | VIDEO OUT |
| [SDI] ○ | ○ | - | - | |
| [HDMI] - ○ - | *1 | -*2 | ||
| [COMPONENT] -- ○ - | *3 | |||
| [VIDEO] | - | - | - | ○ |
* 1 When the HDMI OUT jack is not connected, signals are output from the COMPONENT OUT jack.
*2 When the HDMI OUT and COMPONENT OUT jacks are not connected, signals are output from the VIDEO OUT jack.
*3 When the COMPONENT OUT jack is not connected, signals are output from the VIDEO OUT jack.
- Output resolution depends on the settings of [SDI/HDMI/COMPONENT].
| HD/SD | [SDI/HDMI/COMPONENT] setting | Output resolution | |||
| SDI OUT | HDMI OUT | COMPONENT OUT | VIDEO OUT | ||
| HD | 720p/576i | 720p | 720p | 720p | 576i |
| 1080i/576i | 1080i | 1080i | 1080i | 576i | |
| 576p | No output | 576p | 576p | 576i | |
| 576i | 576i | 576i | 576i | 576i | |
| SD | 720p/576i 576i | 576i | 576i | 576i | |
| 1080i/576i | 576i | 576i | 576i | 576i | |
| 576p | No output | 576p | 576p | 576i | |
| 576i | 576i | 576i | 576i | 576i | |
- If you set [SDI/HDMI/COMPONENT] to [576p], no signals are output from the SDI OUT jack.
- Use an HDMI cable with the HDMI logo.
- Images are not output from the HDMI OUT jack of your camcorder, if copyright protection signals are recorded in the movies.
- Images and sounds may not be reproduced correctly on some monitors or TVs.
- Do not connect the output jacks of the camcorder with the output jacks of the monitor or TV. A malfunction may be caused.
- This camcorder is not compatible with “BRAVIA” sync.

Tips
- HDMI (High-Definition Multimedia Interface) is an interface to send both video/audio signals. The HDMI OUT jack outputs high quality images and digital audio.
Connecting a monitor or a TV (Continued)
If your TV/VCR has a 21-pin adaptor (EUROCONNECTOR)
Use a 21-pin adaptor (commercially available) to view playback images.

flowchart
graph LR
    A["Input Source"] --> B["Node"]
    B --> C["Node"]
    C --> D["Output"]
    D --> E["TV/VCR"]
Editing
Operating the MODE menu
You can edit the recorded movies, format recording media, etc.
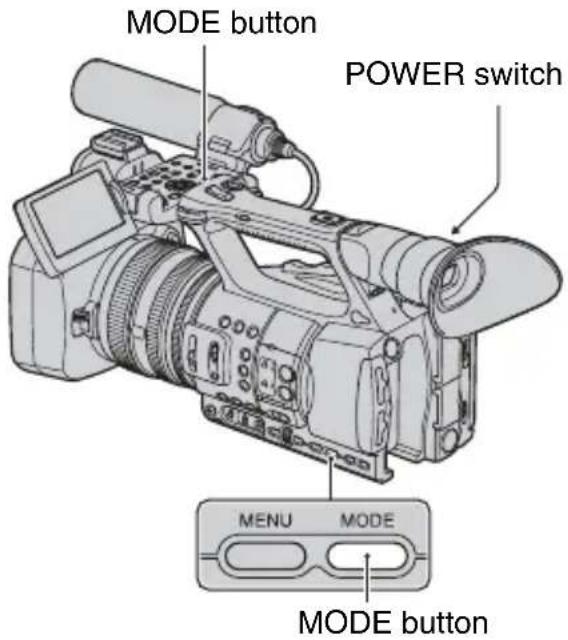
text_image
MODE button POWER switch MENU MODE MODE button1 Set the POWER switch to ON.
2 Press the MODE button.
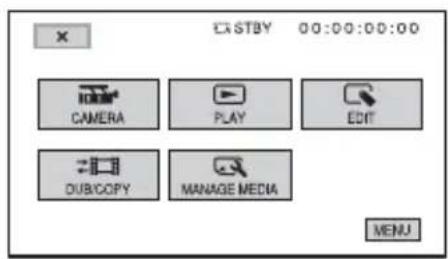
text_image
CSTBY 00:00:00:00 CAMERA PLAY EDIT OUB/COPY MANAGE MEDIA MENU3 Touch the desired category.
Example: [EDIT] category
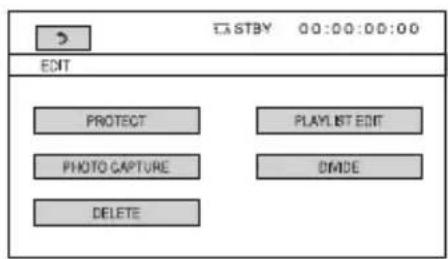
text_image
EXIT BY 00:00:00:00 EDIT PROTECT PHOTO CAPTURE DELETE PLAYLIST EDIT DMDE4 Touch the desired item.
Example: [DELETE]
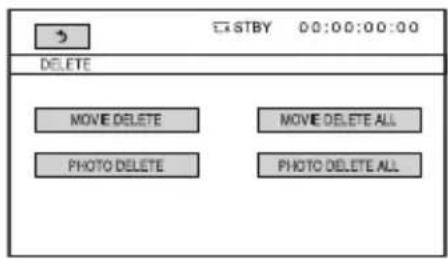
text_image
STBY 00:00:00:00 DELETE MOVE DELETE PHOTO DELETE MOVIE DELETE ALL PHOTO DELETE ALL5 Operate following the instructions on the screen.
To hide the MODE menu screen Touch ☒ or press the MODE button.
To return to the previous screen Touch ↩.
Protecting recorded images (Protect)
Protect movies and still images to avoid deleting them by mistake.

Tips
- You can also protect movies and still images by pressing the MENU button on the VISUAL INDEX screen or the playback screen.
1 Press the MODE button.
2 Touch [EDIT] → [PROTECT].
3 To protect movies, touch [MOVIE PROTECT] → select the desired recording media and image quality.
To protect still images, touch [PHOTO PROTECT] → select the desired recording media.
4 Touch the movies or still images to be protected.
o— is displayed on the selected images.
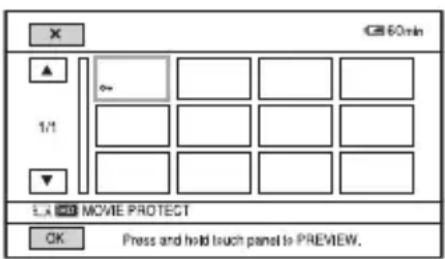
text_image
X GB 60min ▲ 0-# 1/1# ▼ LA MOVIE PROTECT OK Press and hold touch panel to PREVIEW.Tips
- Press and hold the image down to preview the image. Touch to return to the previous screen.
- You can select up to 100 images at one time.
5 Touch OK → [YES] → OK.
To undo the protection of movies and still images
Touch the movie or still image marked with
in step 4.
disappears.
Using the Playlist of movies
The Playlist is a list showing thumbnails of the movies that you have selected. The original movies are not changed even if you edit or erase the movies added to the Playlist.
Creating the Playlist
Notes
- High definition image quality (HD) movies and standard definition image quality (SD) movies are added to individual Playlists.
1 Press the MODE button.
2 Touch [EDIT] → [PLAYLIST EDIT] → [ADD] → select the desired recording media and image quality.
3 Touch the movie to be added to the Playlist.
√ is displayed on the selected movies.
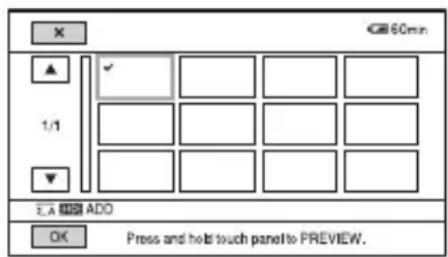
text_image
60min 1/1 E.A ADD OK Press and hold touch panel to PREVIEW.Tips
- Press and hold the image down to preview the image. Touch to return to the previous screen.
4 Touch OK → [YES] → OK.
Notes
- Do not remove the battery pack, the AC Adaptor/Charger or the recording media that contains the movies from your camcorder during the operation. It may damage the recording media.
- You cannot add still images to a Playlist.
Tips
- You can add a maximum of 999 high definition image quality (HD) movies, or 99 standard definition image quality (SD) movies to the Playlist.
- You can also add movies by pressing the MENU button on the VISUAL INDEX screen, the playback screen or the Playlist screen.
Playing the Playlist
1 Press the MODE button.
2 Touch [PLAY] → [PLAYLIST] → select the desired recording media and image quality.
Movies added to the Playlist appear.
3 Touch the movie you want to play back.
The Playlist is played back from the selected movie to the end, then the screen returns to the Playlist screen.
To erase unnecessary movies from the Playlist
①Press the MODE button.
② Touch [EDIT] → [PLAYLIST EDIT] → [ERASE] → select the desired recording media and image quality.
• To erase all the movies from the Playlist, touch [EDIT] → [PLAYLIST EDIT] →
Using the Playlist of movies (Continued)
[ERASE ALL] → select the desired recording media and image quality.
③Touch the movie to be erased from the list.
√ is displayed on the selected movies.
Tips
- Press and hold the image down to preview the image. Touch to return to the previous screen.
④ Touch OK → [YES] → OK.
Tips
• Even if you erase a movie from a Playlist, the original movie is not deleted.
- You can also erase movies by pressing the MENU button on the Playlist screen or the Playlist playback screen.
To change the order within the Playlist
①Press the MODE button.
② Touch [EDIT] → [PLAYLIST EDIT] → [MOVE] → select the desired recording media and image quality.
③Touch the movie to be moved.
√ is displayed on the selected movies.
Tips
- Press and hold the image down to preview the image. Touch to return to the previous screen.
④Touch OK.
⑤ Select the destination with / .
⑥ Touch OK → [YES] → OK.
Tips
- When you select multiple movies, the movies are moved following the order appearing in the Playlist.
- You can also reorder movies by pressing the MENU button on the Playlist screen.
Capturing still images from a movie
You can save a selected frame from a recorded movie as a still image.
1 Press the MODE button.
2 Touch [EDIT] → [PHOTO CAPTURE] → select the desired recording media and image quality.
3 Touch the movie to be captured. The selected movie starts playback.
4 Touch at the point where you want to capture.
The movie pauses. Play and pause toggles as you press ▶ II
After you select the point with make fine adjustment with /
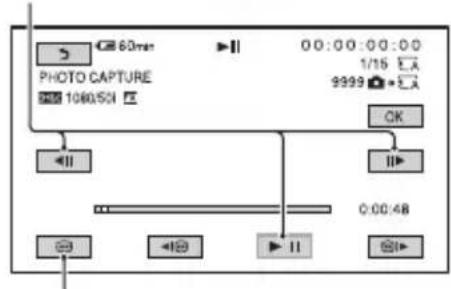
text_image
60min PHOTO CAPTURE 1080.501 0:00:00:00:00 1/15 1A 9999 OK OFF 0:00:48Returns to the beginning of the selected movie
5 Touch OK.
The captured still image is saved on the recording media selected for movies. When capturing is finished, the screen returns to pause.
• To continue capturing, touch then repeat steps from step 4.
• To capture a still image from another movie, touch , then repeat steps from step 3. If you change the recording media and the
Dividing a movie
image quality of the movies, start again from the beginning.

Touch


Notes
- The image size is fixed depending on the image quality of the movie:
- [2.1M] with high definition image quality (HD)
- [0.2M] in 16:9 (wide) with standard definition image quality (SD)
- [VGA(0.3M)] in 4:3 with standard definition image quality (SD)
- The recording media where you want to save still images should have enough free space.
- The recording date and time of captured still images is the same as the recording date and time of the movies.
- If the movie you are capturing from has no data code, the recording date and time of the still image will be the date and time you captured from the movie.
You can divide a movie at a designated point.
1 Press the MODE button.
2 Touch [EDIT] → [DIVIDE] → select the desired recording media and image quality.
3 Touch the movie to be divided. The selected movie starts playback.
4 Touch at the point where you want to divide.
The movie pauses. Play and pause toggles as you press ▶ II
After you select the point with ,make fine adjustment with /
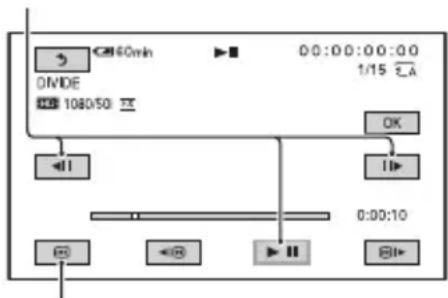
text_image
60min ON/DE 1080/50 0:0:00:00:00 1/15 2A OK 11 0:00:10Returns to the beginning of the selected movie
5 Touch OK → [YES] → OK.
Notes
- You cannot restore movies once they are divided.
- Do not remove the battery pack, the AC Adaptor/Charger or the recording media that contains the movies from your camcorder during the operation. It may damage the recording media.
Dividing a movie (Continued)
- A slight difference may occur from the point where you touch and the actual dividing point, as your camcorder selects the dividing point based in about half-second increments.
- If you divide the original movie, the movie added to the Playlist will also be divided.

Tips
- You can also divide a movie by pressing the MENU button on the VISUAL INDEX screen or the playback screen of movies.
Deleting movies and still images
You can free media space by deleting movies and still images from recording media.
Notes
- You cannot restore images once they are deleted.
- Do not remove the battery pack, the AC Adaptor/Charger or the recording media that contains the movies or still images from your camcorder during the operation. It may damage the recording media.
- You cannot delete protected movies and still images. Undo the protection of the movies and still images to delete them, before you try to delete them (p. 58).
- If the deleted movie is included in the Playlist (p. 59), the movie added to the Playlist is deleted also from the Playlist.
- Save important movies and still images in advance (p. 88).
Tips
- You can select up to 100 images at one time.
- To delete all data recorded on the recording media and recover all the recordable space of the media, format the media (p. 65).
1 Press the MODE button.
2 Touch [EDIT] → [DELETE].
3 To delete movies, touch [MOVIE DELETE] → select the desired recording media and image quality.
To delete still images, touch [PHOTO DELETE] → select the desired recording media.
4 Touch the movies or still images to be deleted.
√ is displayed on the selected images.
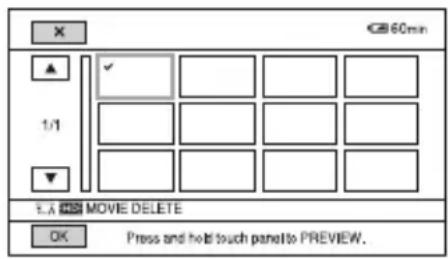
text_image
X 60min 1/1 MOVIE DELETE OK Press and hold touch panel to PREVIEW.Tips
- Press and hold the image down to preview the image. Touch to return to the previous screen.
5 Touch OK → [YES] → OK.
To delete all movies/still images at one time
In step 3, touch [MOVIE DELETE ALL] → select the desired recording media and image quality → [YES] → [YES] → OK.
- To delete all still images at one time, touch [PHOTO DELETE ALL] select the desired recording media [YES] [YES] OK.
Notes
- Protected movies and still images are not deleted from the recording media.
Tips
- You can also delete images by pressing the MENU button on the VISUAL INDEX screen or the playback screen of movies and still images.
Dubbing movies/ copying still images
Dubbing movies
You can dub movies recorded on the memory card to the flash memory unit. Insert the memory card, and attach the flash memory unit to your camcorder before the operation.
Notes
- If there is no image database file on the flash memory unit, you cannot dub movies. in this case, press the MODE button, then touch [MANAGE MEDIA] → [REPAIR IMAGE DB FILE] → [., do create the image database file.
- Connect your camcorder to the wall outlet (wall socket) using the supplied AC Adaptor/Charger to prevent your camcorder from running out of power during the operation.
Tips
- The original movie will not be deleted after dubbing.
1 Press the MODE button.
2 Touch [DUB/COPY] → [MOVIE DUB].
3 Touch the type of dubbing.
[DUB by select]: To select movies and dub
[DUB ALL]: To dub all movies recorded
4 Touch the recording media and the image quality of the movie to be dubbed.
5 Select the movie to be dubbed.
Dubbing movies/copying still images (Continued)
[DUB by select]: Touch the movie to be dubbed, and mark it with √You can select multiple movies.
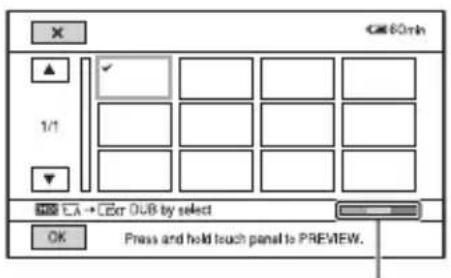
text_image
OK 60 min 1/1 EA → CEx DUB by select OK Press and hold touch panel to PREVIEW.Estimated remaining capacity of the flash memory unit

Tips
- Press and hold the image down to preview the image. Touch to return to the previous screen.
When you select [DUB ALL], follow the instructions on the screen.
6
Touch OK → [YES] → OK.
Copying still images
You can copy still images recorded on the memory card to the flash memory unit. Insert the memory card, and attach the flash memory unit to your camcorder before the operation.
Notes
- Connect your camcorder to the wall outlet (wall socket) using the supplied AC Adaptor/Charger to prevent your camcorder from running out of power during the operation.
1
Press the MODE button.
2
Touch [DUB/COPY] → [PHOTO COPY].
3 Touch the type of copying.
[COPY by select]: To select still images and copy
[COPY ALL]: To copy all still images recorded
4 Touch the recording media of the still image to be copied.
5 Select the still image to be copied.
[COPY by select]: Touch the still image to be copied, and mark it with √You can select multiple still images.

Tips
- Press and hold the image down to preview the image. Touch to return to the previous screen.
When you select [COPY ALL], follow the instructions on the screen.
6 Touch OK → [YES] → OK.
Formatting the recording media
Formatting deletes all data from the recording media to recover recordable free space.
Notes
- Connect your camcorder to the wall outlet (wall socket) using the supplied AC Adaptor/Charger to prevent your camcorder from running out of power during the operation.
- To avoid the loss of important images, you should save them (p. 88) before formatting the recording media.
- Protected movies and still images are also deleted.
1 Press the MODE button.
2 Touch [MANAGE MEDIA] → [MEDIA FORMAT].
3 Touch the recording media to be formatted.
4 Touch [YES] → [YES] → .
Notes
- While [Executing...] is displayed, do not operate the buttons on the camcorder, disconnect the AC Adaptor/Charger, or remove the recording media from your camcorder. (The access lamp is lit or flashing while formatting recording media.)
Preventing data on recording media from being recovered
Unintelligible data will be written on recording media. Thus, it may become more difficult to recover any original data. Even if you format recording media, there may be some data remaining. Therefore, when you dispose of or transfer the recording media, it is recommended that you perform a [MEDIA EMPTY]/[MEDIA EMPTY]/[MEDIA EMPTY] operation.
Notes
- If you perform this operation, all stored data are deleted. To avoid the loss of important images, they should be saved (p. 88) before the operation.
- You cannot perform this operation unless you connect the AC Adaptor/Charger to the wall outlet (wall socket).
- Disconnect all cables except the AC Adaptor/Charger. Do not disconnect the AC Adaptor/Charger during the operation.
- Do not apply any vibrations or shocks to your camcorder during this operation.
1 Operate the camcorder on an outside power source using the AC Adaptor/Charger (p. 13).
2 Set the POWER switch to ON.
3 Press the MODE button.
4 Touch [MANAGE MEDIA] → [MEDIA FORMAT].
5 Touch the recording media to be formatted.
The format screen appears.
Preventing data on recording media from being recovered (Continued)
6 Press and hold the STOP button for more than 3 seconds.
The media empty screen appears.
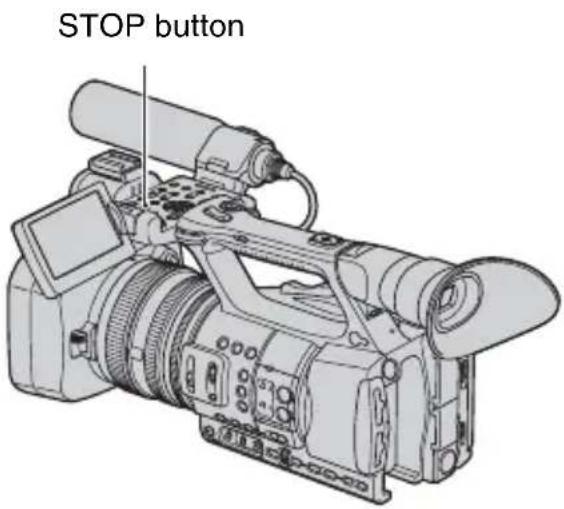
text_image
STOP button7 Touch [YES] → [YES] → OK.
Notes
- It may take from several minutes to several hours to empty recording media, depending on the capacity. You can check the actual time required on the LCD screen.
- If you stop the operation while [Executing...] appears, be sure to complete the operation by performing [MEDIA FORMAT] or emptying when you use the recording media next time.
Repairing the image database file
This function checks the management information and the consistency of movies and still images on the recording media, and repairs any inconsistencies found.
Notes
- Connect your camcorder to the wall outlet (wall socket) using the supplied AC Adaptor/Charger to prevent your camcorder from running out of power during the operation.
1 Press the MODE button.
2 Touch [MANAGE MEDIA] → [REPAIR IMAGE DB FILE].
3 Touch the recording media you want to check the management file.
4 Touch [YES].
The management file check starts. Touch and quit the management file check if no inconsistency is found.
5 Touch [YES].
After [Completed.] appears, touch OK
Notes
- If you stop the operation while [Repairing the Image Database File] appears, be sure to complete the operation as described above when you use the recording media next time.
Operating the menu
You can change various settings or make detailed adjustments using the menu items displayed on the screen.
MENU button
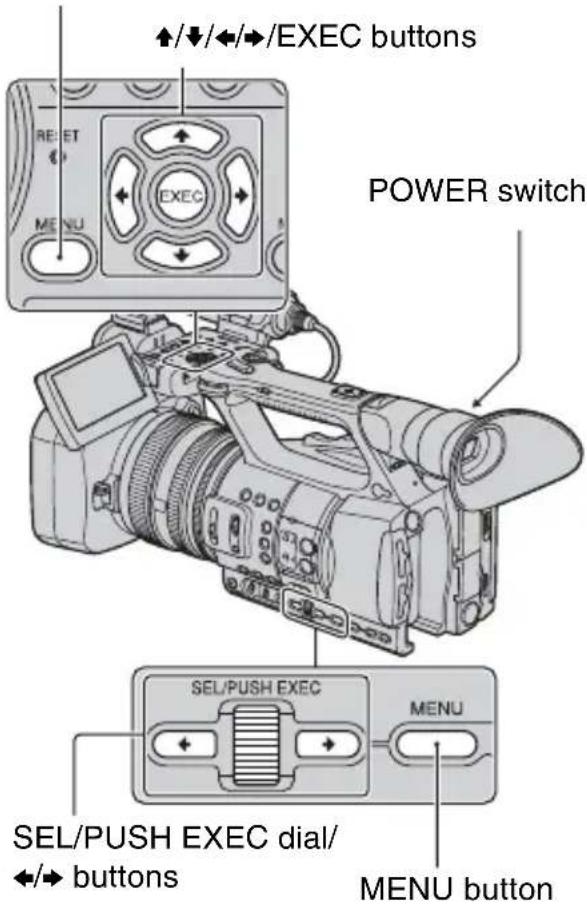
text_image
↑/↓/↔/→/EXEC buttons RESET MENU EXEC POWER switch SEL/PUSH EXEC MENU SEL/PUSH EXEC dial/ ↔/→ buttons MENU button
Tips
- You may select menu items also with the ◀/► buttons.
1 Set the POWER switch to ON.
2 Press the MENU button.
The menu screen appears.
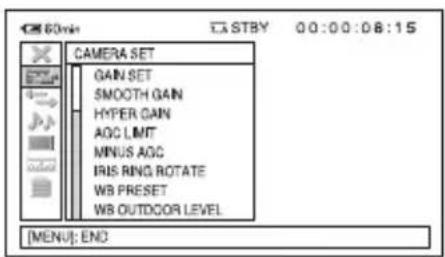
text_image
CAMERA SET GAIN SET SMOOTH GAIN HYPER GAIN AOC LIMIT MINUS AGC IRIS RING ROTATE WB PRESET WB OUTDOOR LEVEL [MENU]: END3 Turn the SEL/PUSH EXEC dial until the icon of the desired menu is highlighted, then press the dial to select the menu.
CAMERA SET (p. 71)
REC/OUT SET (p. 77)
AUDIO SET (p. 78)
☐ DISPLAY SET (p. 81)
00:00 TC/UB SET (p. 85)
OTHERS (p. 86)
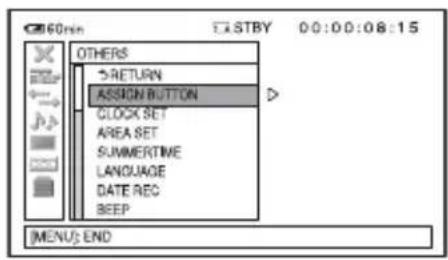
text_image
60min STBY 00:00:08:15 OTHERS RETURN ASSIGN BUTTON CLOCK SET AREA SET SUMMERTIME LANGUAGE DATE REC BEEP MENU END4 Turn the SEL/PUSH EXEC dial until the desired menu item is highlighted, then press the dial to select the item.
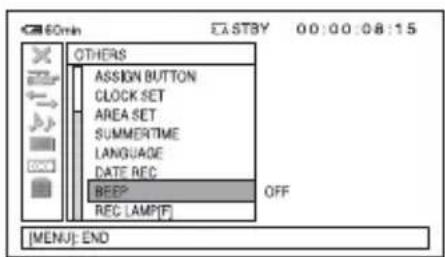
text_image
60min EASTBY 00:00:08:15 OTHERS ASSIGN BUTTON CLOCK SET AREA SET SUMMERTIME LANGUAGE DATE REC BEEP OFF REC LAMP[F] [MENJ]: END5 Turn the SEL/PUSH EXEC dial until the desired setting is highlighted, then press the dial to confirm the setting.
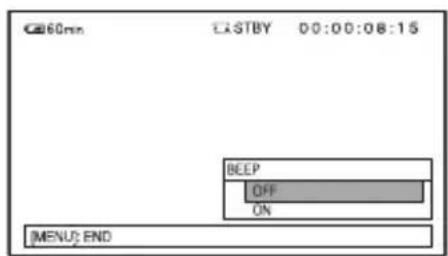
text_image
60min EXISTBY 00:00:08:15 BEEP OFF ON MENU END6 Press the MENU button to hide the menu screen.
To return to the previous screen, select [RETURN].
Notes
- The available menu items vary depending on the context of your camcorder during recording or playback.
Menu items
●: Functions that return to the default settings when you switch the format, perform the functions by the MODE button, or turn off the camcorder.
ASSIGN : Functions that can be assigned to the ASSIGN buttons.
(CAMERA SET) menu
(p. 71)
| GAIN SET | |
| SMOOTH GAIN | |
| HYPER GAIN ● | [ASSIGN] |
| AGC LIMIT | |
| MINUS AGC | |
| IRIS RING ROTATE | [ASSIGN] |
| WB PRESET | |
| WB OUTDOOR LEVEL | |
| WB TEMP SET | |
| ATW SENS | |
| SMOOTH WB | |
| AE SHIFT | [ASSIGN] |
| AE RESPONSE | |
| AUTO IRIS LIMIT | |
| FLICKER REDUCE | |
| BACK LIGHT | [ASSIGN] |
| SPOTLIGHT | [ASSIGN] |
| STEADYSHOT | [ASSIGN] |
| AF ASSIST | |
| FOCUS MACRO | [ASSIGN] |
| HANDLE ZOOM | |
| SPEED ZOOM | |
| D.EXTENDER ● | [ASSIGN] |
| FADER ● | [ASSIGN] |
| x.v.Color | |
| COLOR BAR ● | [ASSIGN] |

(REC/OUT SET) menu
(p. 77)
| REC SET |
| VIDEO OUT |

(AUDIO SET) menu (p. 78)
| :HD: AUDIO FORMAT |
| AUDIO LIMIT |
| HEADPHONE OUT |
| INT MIC SET |
| XLR SET |

(DISPLAY SET) menu
(p. 81)
| ZEBRA | ASSIGN |
| PEAKING | ASSIGN |
| MARKER | ASSIGN |
| EXPANDED FOCUS TYPE | |
| CAMERA DATA DISPLAY | |
| AUDIO LEVEL DISPLAY | |
| ZOOM DISPLAY | |
| FOCUS DISPLAY | |
| SHUTTER DISPLAY | |
| LCD BRIGHT | |
| LCD COLOR | |
| LCD BACKLIGHT LEVEL | |
| VF BACKLIGHT | |
| VF COLOR | |
| VF POWERMODE | |
| REMAINING | |
| GPS TIME DISPLAY* | |
| DISPLAY OUTPUT | |

(TC/UB SET) menu (p. 85)
| TC PRESET |
| UB PRESET |
| TC RUN |
| TC MAKE |
| UB TIME REC |

(OTHERS) menu (p. 86)
| ASSIGN BUTTON | |
| CLOCK SET | |
| AREA SET | |
| SUMMERTIME | |
| LANGUAGE | |
| DATE REC | |
| BEEP | |
| REC LAMP[F] | [ASSIGN] |
| REC LAMP[R] | [ASSIGN] |
| REMOTE CONTROL | |
| OPERATION TIME | |
| CALIBRATION | |

(SMOOTH SLOW REC)
menu (p. 42)
| HD: REC MODE |
| REC TIMING |

(EDIT) menu (p. 58, 59, 61,
62)
| PROTECT |
| ADD TO PLAYLIST |
| DIVIDE |
| DELETE |
| DELETE ALL |

(PLAYLIST EDIT) menu
(p. 59)
| ADD |
| MOVE |
| ERASE |
| ERASE ALL |
* HXR-NX5E/NX5P only
menu
Settings to adjust your camcorder to the recording conditions (GAIN SET/BACK LIGHT/STEADYSHOT, etc.)
The default settings are marked with ▶. The indicators in parentheses appear when the items are selected.
See page 67 for details on selecting menu items.
Press the MENU button select

(CAMERA SET) with the SEL/PUSH C dial.
GAIN SET
You can set gain values for H, M and L positions of the GAIN switch. The default settings of [H], [M] and [L] are 18 dB, 9 dB and 0 dB, respectively.
①Select [H], [M] or [L] with the SEL/PUSH EXEC dial.
②Set the gain value with the SEL/PUSH EXEC dial, and press the dial.
You can select the value between -6 dB and 21 dB by 3 dB. The larger the value, the higher the gain.
③Select [OK] with the SEL/PUSH EXEC dial.
④Press the MENU button to hide the menu screen.
SMOOTH GAIN
You can set the transition speed at which the gain setting shifts from one value to another, set for the GAIN switch positions, when you switch the GAIN switch from a position to another. You can select the transition speed from [FAST], [MIDDLE] and [SLOW] or set to [OFF]. The default setting is [OFF].
HYPER GAIN
When you set this function to [ON] (HYVER) can increase the gain to its limit. The default setting is [OFF].
Notes
- During the hyper gain, the picture quality will be reduced due to noise.
- This function returns to the default setting when you switch the format, perform the function by the MODE button, or turn off the camcorder.
- When you record a high definition image quality (HD) movie with [HYPER GAIN] set to [ON] and play it with the data code, the gain value is displayed as [---].
Tips
- It is recommended to use this function with manual focus.
- You can assign this function to an ASSIGN button (p. 45).
AGC LIMIT
You can select the upper limit for the Auto Gain Control (AGC) from [OFF] (21 dB, the default setting), [18dB], [15dB], [12dB], [9dB], [6dB], [3dB] and [0dB].
Notes
- If you adjust the gain manually, you cannot obtain the effect of [AGC LIMIT].
MINUS AGC
When you set this function to [ON], the automatic gain control range can be expanded to the negative range. Especially in a bright environment, minus gain control allows more suitable gain setting and enables low noise recording. The dynamic range of the camcorder is not reduced when you set [MINUS AGC] to [ON].
▶ ON
Enables minus gain control (up to -3 dB) during automatic gain control, as required.
OFF
Disables minus gain control during automatic gain control.
IRIS RING ROTATE
You can select the operating direction of the iris ring.
▶ NORMAL
Makes images dark with clockwise rotation of the iris ring.
OPPOSITE
Makes images dark with counterclockwise rotation of the iris ring.

Tips
- You can assign this function to an ASSIGN button (p. 45).
WB PRESET
You can use the preset white balance. For more details, see page 30.
WB OUTDOOR LEVEL
You can set an offset value to adjust the outdoor white balance when you set [WB PRESET] to [OUTDOOR]. You can select the offset value from [-7] (bluish) - 0 - [+7] (reddish). The default setting is [0].
WB TEMP SET
You can set the color temperature between 2300K and 15000K in 100K steps when you set [WB PRESET] to [MANU WB TEMP].
ATW SENS
You can set the auto white balance operation under a reddish light source such as an incandescent lamp or candle, or under a bluish light source such as in outdoor shade.
▶ INTELLIGENT
Automatically adjusts the white balance so that scenes look natural for the light source.
HIGH
Automatically adjusts the white balance while reducing redness or blueness.
MIDDLE
LOW
Automatically adjusts the white balance while increasing redness or blueness.
Notes
- This is only effective when white balance is adjusted automatically.
- [ATW SENS] is not effective under a clear sky or the sun.
SMOOTH WB
You can set the transition speed at which the color temperature values shifts from one value to another, set for the white balance memory switch positions, when you switch the white balance memory switch from a position to another. You can select the transition speed from [FAST], [MIDDLE] and [SLOW] or set to [OFF]. The default setting is [OFF].
AE SHIFT
ON/OFF
You can turn on or off the function. When [ON] is selected, AS and selected value appear on the screen.
LEVEL
You can set an offset value to adjust the automatic exposure adjustment value from [-7] (dark) - [0] (standard) - [+7] (bright) with the SEL/PUSH EXEC dial. The default setting is [0].
Notes
- This function is not effective while you adjust the iris, shutter speed and gain all manually.
- This function is not effective temporarily when [HYPER GAIN] is set to [ON].

Tips
- You can assign an ASSIGN button to work as [ON/OFF] (p. 45).
AE RESPONSE
You can select the speed at which the exposure is adjusted automatically following the changes in the brightness of the subject. You can select the speed from [FAST], [MIDDLE] and [SLOW]. The default setting is [FAST].
AUTO IRIS LIMIT
You can select the highest iris value for the automatic adjustment from [F11], [F9.6], [F8], [F6.8], [F5.6], [F4.8] and [F4]. The default setting is [F11].
Notes
- This function is not effective during the manual iris adjustment.
FLICKER REDUCE
▶ ON
Reduces flickering. Flickering of the screen under a light source such as fluorescent lamps will be reduced.
OFF
Not reduce flickering.
Notes
- Flickering may not be reduced for certain light sources.
BACK LIGHT
When you set this function to [ON] (☑), you can correct backlighting. The default setting is [OFF].
Notes
- [BACK LIGHT] is set to [OFF] when you set [SPOTLIGHT] to [ON].
- [BACK LIGHT] is set to [OFF] if all of iris, gain, and shutter speed are adjusted manually.
- [BACK LIGHT] is set to [OFF] when [HYPER GAIN] is set to [ON].

Tips
- You can assign this function to an ASSIGN button (p. 45).
SPOTLIGHT
When you set this function to [ON] ( ) you can prevent overexposure of light while recording a subject under strong light, such as a stage. For example, you can prevent people's faces from being over-exposed. The default setting is [OFF].
Notes
- [SPOTLIGHT] is set to [OFF] when you set [BACK LIGHT] to [ON].
- [SPOTLIGHT] is set to [OFF] if all of iris, gain, and shutter speed are adjusted manually.
- [SPOTLIGHT] is set to [OFF] when [HYPER GAIN] is set to [ON].

Tips
- You can assign this function to an ASSIGN button (p. 45).
STEADYSHOT
SET
▶ STEADYSHOT
You can activate the camera-shake reduction setting.
ACTIVE STEADYSHOT ( )ACT
You can use the camera-shake reduction with more powerful effect.
OFF
Select [OFF] (When you use a tripod (sold separately) to make images look natural.
STEADYSHOT TYPE
You can select a type of camera-shake reduction for different recording situations.
HARD
Reduces camera shake considerably. This setting is not suitable for recording when you are using techniques like panning or tilting.
▶ STANDARD
Standard camera-shake reduction.
SOFT
Reduces camera shakes moderately. Slight unsteadiness remains in movies, which make the movies look as they are.
WIDE CONVERSION
This item is provided for a wide conversion lens (sold separately), and especially effective for Sony wide conversion lens.
■ ACTIVE STEADYSHOT TYPE
You can select a type of powerful camera-shake reduction for different recording situations.
▶ STANDARD
Reduces camera shakes more powerfully while you are walking or moving around.
WIDE CONVERSION
This item is provided for using a wide conversion lens (sold separately) in [ACTIVE STEADYSHOT] mode, and especially effective for Sony wide conversion lens.
Notes
- At the [ACTIVE STEADYSHOT] setting, the imaging field shifts slightly to the telephoto side, and the resolution will deteriorate slightly, as well.
Tips
- You can assign an ASSIGN button to work as [SET] (p. 45).
AF ASSIST
When you set this function to [ON], you can temporarily focus manually using the focus ring during the auto focus adjustment. The default setting is [OFF].
Notes
- This function is effective only when the FOCUS switch is set to AUTO (p. 27).
FOCUS MACRO
When you set this function to [ON], you can focus on a subject within 80 cm (about 2 5/8 feet). The default setting is [ON]. When you set this function to [OFF]
( ) you can set fine focus on a subject further than 80 cm regardless of the zoom position, although you will lose focus on a subject within 80 cm.
Tips
- You can assign this function to an ASSIGN button (p. 45).
HANDLE ZOOM
You can select the zoom speed for the FIX position of the handle zoom switch from [1] (slow) through [8] (fast). The default setting is [3].
SPEED ZOOM
When you set this function to [ON], you can increase the zoom speed of the power zoom lever and the handle zoom. The default setting is [OFF].
Notes
- When you set this function to [ON], the operation sound of the zoom may also be recorded.
D. EXTENDER
When you set this function to [ON]
( DIGEST displayed image becomes about 1.5 times larger. The image quality decreases because the image is digitally processed. This function helps you to focus on far-away subjects such as a wild bird away at a distance. The default setting is [OFF].
Notes
- The function returns to the default setting when you switch the format, perform the function by the MODE button, or turn off the camcorder.
- You cannot set this function when [HD 720/50p FX]/[HD 720/50p FH] is selected in [REC FORMAT] (p. 25).

Tips
- You can assign this function to an ASSIGN button (p. 45).
FADER
You can add visual effects to transition between scenes.
①Select [WHITE FADER] or [BLACK FADER] during standby to fade in with the selected effect, or recording to fade out with the selected effect.
②Press the record button. The fader indicator stops flashing and disappears when the fading is complete.
To cancel before starting the operation, select [OFF] in step ①. The setting will be cleared every time you press the record button.
Fading out Fading in
WHITE FADER
BLACK FADER


Notes
- This function is automatically set to [OFF] (the default setting) when you switch the format, perform the function by the MODE button, or turn off the camcorder.
- You cannot set [FADER], when different media are selected for the record button and the handle record button in [REC BUTTON SET].
- You cannot set this function when the remaining space of recording media is less than 1 minute.
Tips
- You can assign this function to an ASSIGN button (p. 45).
x.v.Color
When you set this function to [ON] ( COLOR) an record with the wider color range. Your camcorder can reproduce brilliant and vivid colors for flowers and the beautiful blue-green of tropical oceans. The default setting is [OFF].
Notes
- The colors may not be well reproduced when you play back a movie recorded with this function set to [ON] on a TV that does not support x.v.Color.
- You cannot set [x.v.Color] in the following cases:
- When either memory card or flash memory unit is set to record in standard definition image quality (SD).
– During recording movies
- When you set [x.v.Color] to [ON], the picture profile will be disabled.
COLOR BAR
ON/OFF
When you select [ON], you can display color bars on the screen or record them on recording media. This function helps you to adjust colors when you view movies recorded with your camcorder on a TV or a monitor. The default setting is [OFF].
Notes
- This function is automatically set to [OFF] when you switch the format, perform the function by the MODE button, or turn off the camcorder.
- You cannot change the setting during recording or expanded focus operation, or when fader is set.
TYPE
Selects a type of the color bars.

natural_image
Abstract grayscale gradient pattern with no text or symbolsTYPE 1

natural_image
Abstract grayscale pixelated pattern with no discernible text or symbolsTYPE 2
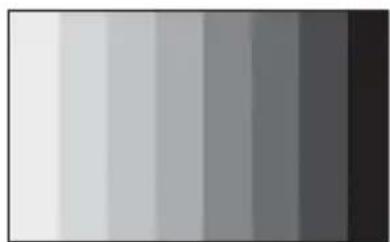
natural_image
Gradient grayscale vertical bands from white to dark gray (no text or symbols)TYPE 3
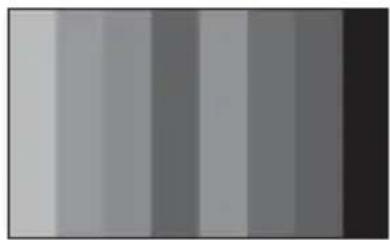
natural_image
Gray gradient vertical bands with no text or symbolsTYPE 4 (75% brightness of TYPE 3)
TONE
Outputs audio tone signals (1 kHz: full bit -18 dB) when you set [TONE] to [ON]. The default setting is [OFF].
Tips
- You can assign an ASSIGN button to work as [ON/OFF] (p. 45).

(REC/OUT SET)
menu
Recording settings, input and output settings (REC SET/VIDEO OUT)
The default settings are marked with ▶.
The indicators in parentheses appear when the items are selected.
See page 67 for details on selecting menu items.
Press the MENU button → select

(REC/OUT SET) with the SEL/PUSH
EXEC dial.
REC SET
You can select a recording format.

/ HD: \$SD:
E T
See page 24.

REC FORMAT
See page 25.

REC BUTTON SET
See page 23.

WIDE REC
You can set the aspect ratio when recording in standard definition image quality (SD).
▶ ON
Records in 16:9.
OFF (4:3
Records in 4:3. [MARKER] is set to [ON], and [ASPECT] to [4:3] automatically. In the case of [SMOOTH SLOW REC], black bands appear at both sides of the screen.
Notes
- When recording in high definition image quality (HD), the aspect ratio is fixed to 16:9.
- When [WIDE REC] is set to [OFF], [MARKER] is set to [ON] and the [ASPECT] 4:3 indicator appears automatically. At the same time, when [CENTER], [SAFETY ZONE], or [GUIDEFRAME] is not set to [OFF], a marker is displayed in accordance with the setting. If you do not want to display a marker, set [MARKER] to [OFF] (p. 81).
VIDEO OUT
OUTPUT SELECT
You can select the jack to the output signal.
SDI
▶ HDMI
COMPONENT
VIDEO
Notes
- When you switch the setting between [SDI] and [HDMI], the screen will go out momentarily, and the image and sound will be intermitted.
SDI/HDMI/COMPONENT
You can select the resolution of the output signal from the SDI/HDMI/COMPONENT jacks.
720p/576i
▶ 1080i/576i
576p
576i
■ DOWN CONVERT TYPE
You can select a down convert type when you down-covert video signal.
Use this function for outputting movies and still images recorded in16:9.
▶ SQUEEZE
Outputs a horizontally compressed image while maintaining its original height.
LETTER BOX (16:9)
LETTER BOX (15:9)
LETTER BOX (14:9)
LETTER BOX (13:9)
Outputs a vertically compressed image while maintaining its original aspect ratio.
EDGE CROP
Outputs the central portion of the original image by cropping its right and left edges.
Press the MENU button → select

(REC/OUT SET) with the SEL/PUSH
EXEC dial.
Notes
- When you view a movie recorded in standard definition image quality (SD) with [NIDE REC] set to [ON] on a standard 4:3 TV, images of the movie may appear horizontally compressed while maintaining its original height. In such a case, select LETTER BOX or [EDGE CROP].
- If you change the setting from [SQUEEZE] to another option, or from another option to [SQUEEZE], the screen will go out momentarily, and the image and sound will be intermitted.
SD-SDI SET
VIDEO INDEX
Superimposes the index signal, including aspect ratio and signal system, on the SDI output signal. The default setting is [ON].
▶ RP188 ATC
Superimposes RP188 ATC (Ancillary Time Code) on the SDI output signal. The default setting is [ON].
VITC LINE SEL
Set the vertical blanking line of the SD video signal to record VITC (Vertical Interval Time Code) between 9 and 22. The default setting is [19].

(AUDIO SET) menu
Settings for the audio recording (AUDIO FORMAT/XLR SET, etc.)
The default settings are marked with ▶. The indicators in parentheses appear when the items are selected.
See page 67 for details on selecting menu items.
Press the MENU button → select ♪ (AUDIO SET) with the SEL/PUSH EXEC dial.

AUDIO FORMAT
You can set the audio format for high definition image quality (HD) recording.

LINEAR PCM (J)LPCM
Records in Linear PCM system.
DOLBY DIGITAL (♩) DolbyD
Records in Dolby Digital system.
Notes
- Audio format is fixed to [DOLBY DIGITAL] with the standard definition image quality (SD) recording.
AUDIO LIMIT
You can set the clipping-noise reduction function for CH1/CH2.
▶ OFF
Disables the function.
ON
Enables the function.
Notes
- This function is available only when you set the AUTO/MAN (CH1/CH2) switch to MAN.
HEADPHONE OUT
You can set the sound to output to the headphone when the HEADPHONE MONITOR switch is set to STEREO MIX.
▶ STEREO
Outputs in stereo.
MONO
Outputs in monaural.
INT MIC SET
INT MIC SENS
You can set recording sensitivity of the internal microphone.
▶ NORMAL
Sensitivity that is normally used in professional recordings.
HIGH
Sensitivity that is normally used in consumer recordings.
SENS-Hi appears on the status check screen.
INT MIC WIND
▶ OFF
Disables wind noise reduction.
ON
Enables wind noise reduction.
appears on the status check screen.
XLR SET
XLR AGC LINK
You can select either linked or separate AGC (Auto Gain Control) of CH1 and CH2 when using an external microphone.
▶ SEPARATE
Separately applies the AGC for CH1/CH2. Sound inputs from CH1/CH2 will be recorded as separate sound.
LINKED (A _2 ]
Applies the AGC of CH1 linked with that of CH2. Sound inputs from CH1/CH2 will be recorded as a set of sound such as stereo sound. Appears on the status check screen.
Notes
- This function is available when the CH1 and CH2 switches are set to AUTO and the INPUT1
and INPUT2 switches are both set to MIC or both set to LINE (p. 39).
AUDIO MANUAL GAIN
You can select either linked or separate audio level control of CH1 and CH2 when using an external microphone.
▶ SEPARATE
Separately controls the audio levels of CH1 and CH2. Sound inputs from CH1 and CH2 will be recorded as separate sound.
LINKED ( M_2^1 )
Controls the audio level of CH1 linked with that of CH2. Sound inputs from CH1 and CH2 will be recorded as a set of sound such as stereo sound. Appears on the status check screen.
Notes
- This function is available when the CH1 and CH2 switches are set to MAN and the INPUT1 and INPUT2 switches are both set to MIC or both set to LINE (p. 39).
- When you select [LINKED], you can adjust the volume with the AUDIO LEVEL dial of CH1 (p. 39).
INPUT1 TRIM
You can adjust the input signal level from INPUT1.
You can select from [-18dB], [-12dB], [-6dB], [0dB], [+6dB] and [+12dB]. The default setting is [0dB].
Notes
- The setting is not effective when you set the INPUT1 switch to LINE.
■ INPUT1 WIND
▶ OFF
Disables wind noise reduction.
ON
Enables wind noise reduction.
appears on the status check screen.
Notes
- The setting is not effective when you set the INPUT1 switch to LINE.
INPUT2 TRIM
INPUT2 WIND
You can set INPUT2 in the same way as INPUT1.

Tips
- -48 dBu is set as 0 dB in your camcorder.
- Set INPUT TRIM to [0dB] for the supplied microphone.
- The INPUT TRIM function adjusts the input level from an external microphone. When using a highly sensitive microphone or recording loud sound, set this to the minus side. When using a less sensitive microphone or recording quiet sound, set it to the plus side.
- When recording loud sound, the sound may be distorted at either the input point or the recording point. If it is distorted at the input point, adjust the sound using the INPUT TRIM function. If it is distorted at the recording point, lower the total volume level manually.
- If you set INPUT TRIM too far to the minus side, the microphone volume becomes too low, resulting in a poor signal to noise ratio.
- Test the effect of the [AUDIO SET] function according to the microphone used or the sound field of the recording site before actual recording.

(DISPLAY SET)
menu
Display settings of the display and the viewfinder (MARKER/VF BACKLIGHT/ DISPLAY OUTPUT, etc.)
The default settings are marked with ▶. The indicators in parentheses appear when the items are selected.
See page 67 for details on selecting menu items.
Press the MENU button select (DISPLAY SET) with the SEL/PUSH EXEC dial.
ZEBRA
You can display a zebra pattern as a guide for adjusting brightness.
ON/OFF
When you select [ON], and the brightness level appear on the screen. The zebra pattern will not be recorded with the image. The default setting is [OFF].
LEVEL
You can select the brightness level between 70 and 100 or 100+. The default setting is [70].

Tips
- The zebra pattern is a strip pattern displayed over a part of an image on the screen when the part is higher than the preset brightness level.
- You can assign an ASSIGN button to work as [ON/OFF] (p. 45).
PEAKING
ON/OFF
When you select [ON], PEAKING and you can display an image on the screen with its outlines enhanced. This function helps you to adjust the focus. The default setting is [OFF].
COLOR
You can select peaking color from [WHITE], [RED] and [YELLOW]. The default setting is [WHITE].
LEVEL
You can select a peaking sensitivity from [HIGH], [MIDDLE] and [LOW]. The default setting is [MIDDLE].
Notes
- The enhanced outlines will not be recorded on the recording media.
Tips
- You can focus more easily using this function in combination with the expanded focus function (p. 28).
- You can assign an ASSIGN button to work as [ON/OFF] (p. 45).
MARKER
ON/OFF
When you select [ON], you can display markers. The default setting is [OFF]. Markers will not be recorded on the recording media.
CENTER
When you select [ON], you can display a marker at the center of the screen. The default setting is [ON].
ASPECT
You can display markers at boundaries of display area defined by the aspect ratio, which you can select from [4:3], [13:9], [14:9], and [15:9]. The default setting is [OFF].
SAFETY ZONE
When you select either one of [80% (16:9)], [80% (4:3)], [90% (16:9)] or [90% (4:3)], you can display markers at boundaries of
display area that regular home TVs can display. The default setting is [OFF].
GUIDEFRAME
When you select [16:9] or [4:3], you can display frame markers that help you to check horizontal and vertical positions of a subject. The default setting is [OFF].
Notes
- Only the time code is output to an external device via external output jacks when [MARKER] is set to [ON], even if [DISPLAY OUTPUT] is set to [ALL OUTPUT].
- You cannot display markers under following conditions:
- [EXPANDED FOCUS]
– During [SMOOTH SLOW REC] - When the current time is displayed after the power is turned on
- You can display markers only on the LCD panel and viewfinder. You cannot display them on an external device.
Tips
- You can display all types of markers at the same time.
- You can obtain a balanced composition by positioning the subject at the cross points of the guideframe marker.
- You can assign an ASSIGN button to work as [ON/OFF] (p. 45).
EXPANDED FOCUS TYPE
You can set a type of the expanded focus display.
▶ TYPE 1
Simply enlarges images.
TYPE 2
Enlarges and shows images in black and white.
CAMERA DATA DISPLAY
When you set this function to [ON], you can constantly display the iris, gain and shutter speed settings on the screen. The default setting is [OFF].
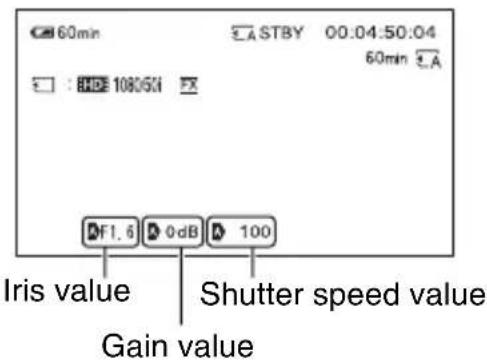
text_image
60min ASTBY 00:04:50:04 60min : RHDE 10806N F1.6 0dB 100 Iris value Shutter speed value Gain valueTips
- The settings appear on the screen during the manual adjustment regardless of the settings of this function.
- Indicates that the settings are automatically adjusted values.
- The displayed settings are different from the settings that will be displayed when you press the DATA CODE button (p. 51).
AUDIO LEVEL DISPLAY
When you set this function to [ON], you can display the audio level meter on the screen. The default setting is [ON].
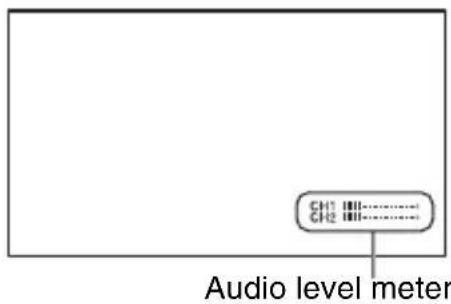
text_image
CH1 III CH2 III Audio level meterZOOM DISPLAY
▶ BAR
Displays a bar that indicates the zoom position.
NUMBER
Displays a number (0 through 99) that indicates the zoom position.
FOCUS DISPLAY
You can select how to display the focal distance during manual focus.
▶ METER
Displays the focal distance in meters.
FEET
Displays the focal distance in feet.
SHUTTER DISPLAY
You can select how to display the shutter speed.
▶ SECOND
Displays the shutter speed in seconds.
DEGREE
Displays the shutter speed in degrees.
The shutter speed equal to the period that your camcorder reads image data from the image sensor is defined as 360 degrees.
The degree is calculated based on this definition and displayed.
- When [REC FORMAT] is set to the followings, 1/50 second is defined as 360 degrees.
HD 1080/50i FX SD 576/50i HQ
HD 1080/50i FH SD 576/50i HQ
HD 1080/50i HQ SD 576/50i HQ
HD 1080/50i LP SD 576/50i HQ
HD 720/50p FX SD 576/50i HQ
HD 720/50p FH SD 576/50i HQ
- When [REC FORMAT] is set to the followings, 1/25 second is defined as 360 degrees.
HD 1080/25p FX SD 576/25pSCAN HQ
HD 1080/25p FH SD 576/25pSCAN HQ
For details on [REC FORMAT], see page 25.
Notes
- When you press the DATA CODE button, the shutter speed will be displayed in seconds regardless of the setting of this function.
Tips
- Shutter speed slower than 360^ are displayed in multiples of 360^ , such as 360^ × 2 .
LCD BRIGHT
You can adjust the brightness of the LCD screen. Changes in the LCD brightness will not affect the brightness of recording images.
Tips
- You can also turn off the LCD backlight (p. 15).
LCD COLOR
You can adjust the color level of the LCD panel. Changes in the LCD color level will not affect the color level of recording images.
LCD BACKLIGHT LEVEL
You can adjust the backlight level of the LCD screen.
▶ NORMAL
Standard brightness.
BRIGHT
Brightens the LCD screen.
Notes
- When you connect your camcorder to outside power sources, [BRIGHT] is automatically selected for the setting.
- When you select [BRIGHT], the recordable time with the battery is slightly reduced.
VF BACKLIGHT
You can adjust the brightness of the viewfinder.
▶ NORMAL
Standard brightness.
BRIGHT
Brightens the viewfinder screen.
Notes
- When you connect your camcorder to outside power sources, [BRIGHT] is automatically selected for the setting.
- When you select [BRIGHT], the recordable time with the battery is slightly reduced.
VF COLOR
▶ ON
Displays images in the viewfinder in color.
OFF
Displays images in the viewfinder in black and white.
VF POWERMODE
▶ AUTO
Turns on the viewfinder while you close the LCD panel or record in mirror mode.
ON
Always turns on the viewfinder.

REMAINING
AUTO
Displays the remaining recording time available for movies when you re-enter movie recording mode or switch to [SMOOTH SLOW REC]. When the remaining time is 5 minutes or more, the display goes off after 8 seconds.
▶ ON
Always displays the remaining recording time available for movies.
GPS TIME DISPLAY (HXR-NX5E/NX5P)
You can select the GPS time as the data code.
▶ LOCAL TIME
Displays the time with the time difference compensated for. The local time with the summer time setting taken into account is displayed.
UTC TIME
Displays the coordinated universal time.
Notes
- In the case of still images, if you select [LOCAL TIME], the triangulated time is displayed as [----].
DISPLAY OUTPUT
You can select where to output the display information, such as time code.
▶ LCD PANEL
Outputs the information to the LCD screen and viewfinder.
ALL OUTPUT
Outputs the information to the LCD screen, viewfinder, SDI output, HDMI output, component output and video output.
Notes
- Only the time code is output when [MARKER] is set to [ON] and a marker is displayed on the screen.
(TC PRESET/UB PRESET, etc.)
The default settings are marked with ▶. The indicators in parentheses appear when the items are selected.
See page 67 for details on selecting menu items.
Press the MENU button → select 06:00 (TC/UB SET) with the SEL/PUSH EXEC dial.
TC PRESET
See page 43.
UB PRESET
See page 43.
TC RUN
You can select how the time code advances.
▶ REC RUN
Advances the time code only during recording.
Select this setting to record the time code continuous from the last time code of the previous recording.
FREE RUN
Advances the time code regardless of operation of your camcorder.
Notes
- Even if the time code advances in the [REC RUN] mode, the time code may not be recorded sequentially in the following cases:
- When the recording format is changed.
- When the images are recorded on the memory card and the flash memory unit simultaneously.
- When the recording media is removed.
TC MAKE
PRESET
Records the newly set time code on the recording media.
REGENERATE
Reads the last time code of the previous recording from the recording media and records the new time code consecutively from the last time code during the backspace editing.
The time code runs in [REC RUN] mode regardless of the setting of [TC RUN].
UB TIME REC
▶ OFF
Does not save the actual time in the user bit code.
ON
Saves the actual time in the user bit code.
Notes
- The last 2 digits are fixed to 00 when it is set to [ON].

(OTHERS) menu
Settings while recording or other basic settings (AREA SET/BEEP, etc.)
The default settings are marked with ▶. The indicators in parentheses appear when the items are selected.
See page 67 for details on selecting menu items.
Press the MENU button → select (OTHERS) with the SEL/PUSH EXEC dial.
ASSIGN BUTTON
See page 45.
CLOCK SET
See page 17.
AREA SET
You can adjust a time difference without stopping the clock. When you use your camcorder abroad, you can adjust the clock to the local time.
SUMMERTIME
You can change this setting without stopping the clock. Set to [ON] to move the time forward 1 hour.
▶ OFF
Does not set the summertime.
ON
Sets the summertime.
LANGUAGE
You can select the language to be used on the LCD screen.
Tips
- Your camcorder offers [ENG[SIMP]] (simplified English) in case that you cannot find your native tongue among the options.
DATE REC
▶ OFF
Does not superimpose the date and time on images.
ON
Superimposes the date and time on images.
Tips
- When zebra or peaking is activated, the date and time characters are affected by the signal, but properly recorded on images.
BEEP
▶ OFF
Cancels the melody.
ON
Activates a melody when you start/stop recording, or when you are warned with warning indicators, etc.
REC LAMP[F] (Recording lamp [front])
When you set this function to [OFF], you can turn off the front camera recording lamp. The default setting is [ON].
Tips
- You can assign this function to an ASSIGN button (p. 45).
REC LAMP[R] (Recording lamp [rear])
When you set this function to [OFF], you can turn off the rear camera recording lamp. The default setting is [ON].
Tips
- You can assign this function to an ASSIGN button (p. 45).
REMOTE CONTROL
When you set this function to [ON], you can use the supplied Wireless Remote Commander (p. 121). The default setting is [ON].

Tips
- Set to [OFF] to prevent your camcorder from responding to a command sent by another remote control unit.
OPERATION TIME
Displays the total hours of operation in 10-hour increments.
CALIBRATION
See page 110.
Saving images with a computer
Preparing a computer (Windows)
You can perform following operations using “Content Management Utility.”
- Importing images to a computer
- Viewing imported images
To save movies using a computer, install the software from the supplied CD-ROM “Content Management Utility” beforehand. Use commercially available software to edit images or create discs.
Step 1 Checking the computer system
OS ^*1
Microsoft Windows XP SP3 ^2 /Windows Vista SP2 ^3 /Windows 7
CPU
Use an Intel Core 2 Duo 2.20 GHz CPU or faster to play back videos with high definition image quality (HD) in the FX mode. Videos with high definition image quality (HD) recorded in other than the FX mode may be played back with a slower CPU. Depending on the performance of your video card, videos with high definition image quality (HD) recorded using the FX mode may be played back with a slower CPU than that recommended above. For the following operations, an Intel Pentium III 1GHz or faster is necessary. - Importing movies to the computer - Processing with standard definition image quality (SD)
Memory
For Windows XP: 512 MB or more (1 GB or more is recommended.) However, 256 MB or more is sufficient for processing only the movies with standard definition image quality (SD).
For Windows Vista/Windows 7: 1 GB or more
Hard disk
Disk volume required for installation: Approximately 100 MB Only the NTFS or exFAT file system can be used for importing videos or registering them for viewing.
Display
Minimum 1,024 × 768 dots
Others
USB port (this must be provided as standard, High-Speed USB (USB 2.0 compatible)) (CD-ROM drive is necessary for installation)
*1 Standard installation is required. Operation is not assured if the OS has been upgraded or in a multi-boot environment.
*2 64-bit editions and Starter (Edition) are not supported.
*3 Starter (Edition) is not supported.
Notes
- Operation with all computer environments is not assured.
- The supplied software “Content Management Utility” is not supported by Macintosh computers.
Step 2 Installing the supplied software "Content Management Utility"
Install “Content Management Utility” before connecting your camcorder to a computer.
①Confirm that your camcorder is not connected to the computer.
②Turn on the computer.
- Log on as an Administrator for installation.
- Close all applications running on the computer before installing the software.
③Place the supplied CD-ROM “Content Management Utility” in the disc drive of your computer.
The installation screen appears.
- If the screen does not appear, click [Start] [Computer] (in Windows XP, [My
Computer]), then double-click [SONYCMU(E:)] (CD-ROM).
④Select the language for the application to be installed, then click [OK].
⑤When the install wizard screen appears, click [Next].
⑥Confirm the license agreement, and if you accept the terms, click [Next].
⑦Select the drive or folder to install the application, then click [Next].
⑧Select the option to create the desk-top shortcut, then click [Next].
⑨Turn on your camcorder, then connect the camcorder to the computer using the supplied USB cable.
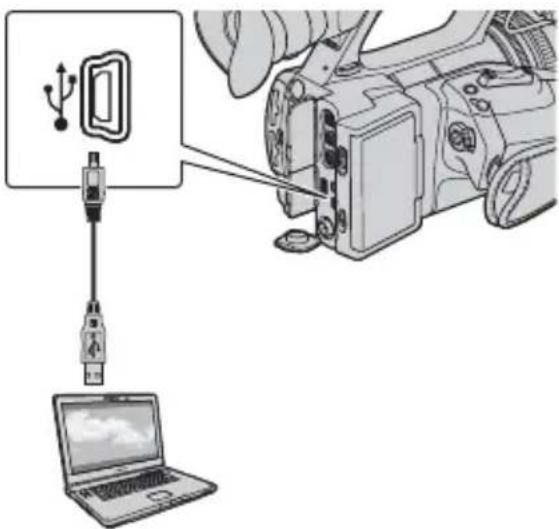
text_image
Diagram showing a device connected to a laptop via USB cable, with an illustration of the device being inserted into it.The [USB SELECT] screen appears on the camcorder screen automatically.
⑩Touch [ ] or [ ] on the camcorder screen.
- If the [USB SELECT] screen does not appear, press the MODE button, then touch [MANAGE MEDIA] [USB CONNECT].
⑪Click [Next].
⑫Follow the on-screen instructions to install the software.
- Restart the computer if required to complete the installation.
When the installation is completed, the following icon will appear, depending on the selection in step ⑧.
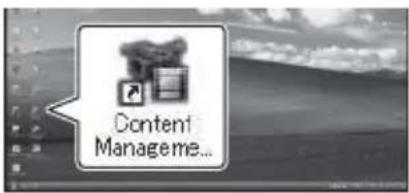
text_image
Content Manageme...⑬Remove the CD-ROM from the computer.
To disconnect your camcorder from the computer
①Click the icon at the bottom right of the desktop of the computer → [Safely remove USB Mass Storage Device-Drive].
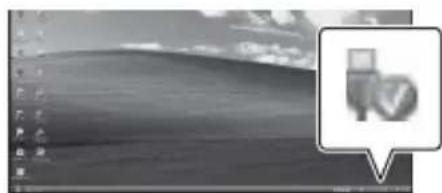
text_image
Desktop screenshot showing a desktop with icons and a file icon, likely from an older computer system.② Touch [END] → [YES] on the camcorder screen.
③Disconnect the USB cable.
Troubleshooting
If you run into any problems using your camcorder, follow the flow chart below.
①Check your camcorder, referring to the items on pages 90 to 98.
② Disconnect the power source, reconnect the power source after about 1 minute and turn on your camcorder.
③ Press the RESET button (p. 120) with a pointed object, then turn on your camcorder. This operation will reset the date, time and area settings.
④Consult your Sony dealer or local authorized Sony service facility.
- Power sources/LCD screen/Wireless Remote Commander…p. 90
- Memory card/flash memory unit…p. 92
- Recording…p. 92
- Playback…p. 95
- Connecting to TV…p. 96
- Dubbing/Editing/Connecting to other devices…p. 97
• GPS (HXR-NX5E/NX5P)...p. 97 - Connecting to a computer…p. 98
Power sources/LCD screen/Wireless Remote Commander
The power does not turn on or abruptly turns off.
- Attach a charged battery pack to the camcorder (p. 12).
- Use the AC Adaptor/Charger to connect to a wall outlet (wall socket) (p. 12).
The camcorder does not operate even when the power is set to on.
- Disconnect the AC Adaptor/Charger from the wall outlet (wall socket) or remove the battery pack, then reconnect it after about 1 minute.
- Press the RESET button (p. 120) using a sharp-pointed object.
The camcorder gets warm.
- The camcorder may get warmer while you use it. This is not a malfunction.
The remaining battery time indicator does not indicate the correct time.
- Ambient temperature is too high or too low, or the battery pack has not been charged enough. This is not a malfunction.
- Fully charge the battery again. If the problem persists, the battery may be worn-out. Replace it with a new one (p. 12, 107).
- The indicated time may not be correct in certain circumstances. For example, when you open or close the LCD panel, it takes about 1 minute to display the correct remaining battery time.
The battery pack discharges too quickly.
- Ambient temperature is too high or low, or the battery pack has not been charged enough. This is not a malfunction.
- Fully charge the battery again. If the problem persists, the battery may be worn-out. Replace it with a new one (p. 12, 107).
The image remains on the LCD screen.
- This occurs if you disconnect the DK-415 cable or remove the battery pack without turning off the power first. This is not a malfunction.
The image in the viewfinder is not clear.
- Move the viewfinder lens adjustment lever until the image appears clearly (p. 16).
The image in the viewfinder has disappeared.
- If you set [VF POWERMODE] to [AUTO], the finder light remains off while the LCD panel is open (p. 84).
The supplied Wireless Remote Commander does not function.
- Set [REMOTE CONTROL] to [ON] (p. 87).
- Remove any obstructions between the Wireless Remote Commander and the remote sensor of the camcorder.
- Keep strong light sources, such as sunlight or overhead lighting, away from the remote sensor, otherwise the Wireless Remote Commander may not function properly.
- Insert a fresh battery in the compartment with its +/- terminals matching those of the compartment (p. 121).
Another video device malfunctions when you use the supplied Wireless Remote Commander.
- Select a commander mode other than DVD2 for your video device.
- Cover the sensor of your video device with black paper.
When a device is connected to the REMOTE jack, the camcorder or the device does not operate properly.
- The connected device may react slowly to some operations, such as zooming.
- If you disconnect the cable from the device while the cable is still connected to the camcorder's REMOTE jack, the camcorder may not restore the proper settings. Disconnect the cable also from the camcorder's REMOTE jack.
Memory card/flash memory unit
The remaining movie recording indicator is not displayed.
- Set [REMAINING] to [ON] to always display the remaining movie recording indicator (p. 84).
The camcorder does not operate with the memory card inserted.
- The memory card was formatted on a computer. Format it on this camcorder (p. 65).
The data file name is incorrect, or flashing.
- The file is damaged.
- Use a file format supported by your camcorder (p. 104).
The recording media indicator is flashing.
- Something wrong happened to one of recording media. Stop recording of all recording media, and repair the database file.
Images on the recording media cannot be deleted.
- You can select no more than 100 images to be deleted on the edit screen.
- The images are protected. Release the protect function (p. 58).
Recording
The recording does not start when you press the record button.
- The playback screen is displayed. Finish playback operation (p. 47).
- There is no empty space on the recording media. Replace the recording media with new one, delete unnecessary images (p. 62) or format the recording media (p. 65).
- Total number of movie scenes exceeds the recordable capacity of your camcorder (p. 102). Delete unnecessary images (p. 62).
- The temperature of your camcorder is extremely high. Turn off your camcorder and leave it for a while in a cool place.
- The temperature of your camcorder is extremely low. Turn off your camcorder and leave it for a while in a warm place.
- A particular record button is selected to start/stop recording. Check the record button setting (p. 23).
- Something wrong happened to one of recording media. Stop recording of all recording media, and repair the database file.
The handle zoom does not work.
- Set the handle zoom switch to FIX or VAR (p. 26).
The access lamp remains lit even after recording was stopped.
- Your camcorder is recording the scene you have just shot on the memory card.
The imaging field looks different.
- The imaging field may look different depending on the condition of your camcorder. This is not a malfunction.
The actual recording time for movies is less than the expected recording time of the recording media.
- Depending on the recording conditions, the time available for recording may be shorter, for example when recording a fast moving object, etc. (p. 101).
The camcorder does not keep the setting changes.
- Some menu items return to the default setting when the power is turned off (p. 69).
- The LCD backlight setting and the EXPANDED FOCUS setting are not stored.
- You disconnected the power sources when the POWER switch was set to ON. Before disconnecting the battery or the AC Adaptor/Charger, set the POWER switch to OFF and make sure that the access lamp is turned off.
There is a time difference between the point when the record button is pressed and the point that the recording movie is started or stopped actually.
- On your camcorder, there may be a slight time difference between the point where you press the record button and the actual point that recording movie starts/stops. This is not a malfunction.
There are time differences in recording start/stop points of the simultaneously recorded movies.
- When you do the simultaneous recording with [HSETset to [: EXT:sort[: : ] there may be slight time lags in the recorded movies. This is not a malfunction.
The aspect ratio (16:9 (wide)/4:3) cannot be changed.
- The aspect ratio of high definition image quality (HD) movies is 16:9 (wide).
Automatic focus does not function.
- Set the FOCUS switch to AUTO to enable the automatic focus function (p. 27).
- Adjust the focus manually if the automatic focus does not work properly (p. 27).
[This function is currently not available.] appears when selecting a function on the MODE menu.
- Try again after finishing all tasks currently selected on the MODE menu.
- If 720 is selected as [REC FORMAT] for [SMOOTH SLOW REC], select 1080 as [REC FORMAT].
Menu items are grayed out or do not work.
- You cannot select grayed out display items in the current recording/playback situation.
- There are some functions you cannot activate simultaneously. The following list shows examples of unworkable combinations of functions and menu items.
| Cannot use Situation | |
| [BACK LIGHT], [SPOTLIGHT], [ON/OFF] of [AE SHIFT] | All of iris, gain, and shutter speed are set manually.[HYPER GAIN] is set to [ON]. |
| [FADER] The record button and the handle record button are set to different recording media.The camcorder is unable to record images.The recording media has less than 1 minute of remaining capacity.[COLOR BAR] is set to [ON]. | |
| [ZEBRA], [PEAKING], [CAMERA DATA DISPLAY] | [COLOR BAR] is set to [ON]. |
| [ON/OFF] of [MARKER] [EXPANDED FOCUS] is set to [ON].While the date and time are displayed when the power is turned on. | |
| [LCD BACKLIGHT LEVEL], [VF BACKLIGHT] | AC power source is being used. |
| [TC PRESET] [TC MAKE] is set to [REGENERATE].When inputting time code, [TC RUN] is set to [FREE RUN] and [TC MAKE] is set to [PRESET]. | |
| [UB TIME REC] Date and time are not set. | |
| [AREA SET], [DATE REC], [SUMMERTIME] | Date and time are not set. |
| [x.v.Color] [/SET] is set to [HD-SIPOR] or [SD-HD]. | |
| [COLOR BAR] Movies are being recorded.[FADER] is selected.[EXPANDED FOCUS] is set to [ON]. | |
| [D.EXTENDER] [REC FORMAT] is set to [HD 720/50p FX] or [HD 720/50p FH]. | |
Iris, gain, shutter speed, or white balance cannot be adjusted manually.
- Set the AUTO/MANUAL switch to MANUAL.
Tiny spots in white, red, blue, or green appear on the screen.
- This phenomenon appears when using a slow shutter speed (p. 29). This is not a malfunction.
The subjects passing by the frame very fast appear crooked.
- This is called the focal plane phenomenon. This is not a malfunction. Because of the way that the image device (CMOS sensor) reads out image signals, the subjects passing by the frame rapidly might appear crooked depending on the recording conditions.
The LCD screen is too bright, and the subject cannot be seen.
- Set [BACK LIGHT] to [OFF].
- Set [HYPER GAIN] to [OFF].
The LCD screen is too dark, and the subject cannot be seen.
- Press and hold the DISPLAY button for a few seconds to turn on the backlight (p. 15).
Horizontal stripes appear on the image.
- This occurs when recording pictures under a fluorescent lamp, sodium lamp, or mercury lamp. This is not a malfunction. This can be improved by changing the shutter speed (p. 29).
The image appears divided horizontally.
- This occurs when you light the subject using a flash. This can be avoided by using a shutter speed as slow as possible (p. 29).
Black bands appear when you record a TV screen or computer screen.
- This can be improved by adjusting the shutter speed (p. 29).
Fine patterns flicker, diagonal lines look jagged.
- Adjust [DETAIL] to the negative side (p. 37).
The time code is not recorded in sequence.
- The time code may not be recorded sequentially if you change the settings of [ AHD: SD: SET] and [REC FORMAT].
Playback
Refer also to the “Memory card/flash memory unit” section (p. 92).
The desired images cannot be found. Images cannot be played back.
- Select the recording media and image quality of the image you want to play back on the VISUAL INDEX screen (p. 47).
- Image data cannot be played back if you have modified file names or folders, or have edited the data on a computer (When viewing still images, the file name flashes). This is not a malfunction (p. 107).
- Images recorded on other devices may not be played back, or displayed in incorrect size. This is not a malfunction.
The data file name is displayed incorrectly, or flashing.
- The file is damaged.
- The file format is not supported on your camcorder (p. 104).
- Only the file name is displayed, if the folder structure does not conform to the universal standard.
No sound or only a low sound is heard.
- Turn up the volume (p. 49).
- Movies recorded using [SMOOTH SLOW REC] do not have sounds.
“---” is displayed on the screen.
- The recording media you are playing was recorded without setting the date and time.
- The recording media you are playing was recorded with [HYPER GAIN] set to [ON].
- Bars will be displayed for the camera data of the movies recorded with [SMOOTH SLOW REC] or [COLOR BAR] set to [ON].
- Bars will be displayed for the exposure correction value and flash information of the still images created with [PHOTO CAPTURE].
Multi ch appears on the LCD screen.
- This appears when you play back movies recorded with 5.1ch surround sound. 5.1ch surround sound is down-mixed to 2ch stereo and played back on your camcorder.
Connecting to TV
Neither image nor sound is played back on the TV connected with the component video cable.
- Set [VIDEO OUT] according to the requirements of the connected device (p. 77).
- When you are using the component video cable, make sure that you connect the red and white plugs of the A/V connecting cable (p. 54).
Neither image nor sound is played back on the TV connected with the HDMI cable.
- Images are not output from the HDMI OUT jack, if copyright protection signals are recorded in the images.
Neither image nor sound is played back on the TV, projector, or AV amplifier connected with the HDMI cable.
- If you cannot view images or hear sound on the TV, projector, or AV amplifier connected with the HDMI cable, try disconnecting and connecting the HDMI cable, or turn on your camcorder again.
Neither image nor sound is played back on the TV or monitor connected with the HDMI cable or a commercially available 75Ω (ohm) coaxial cable.
- Signals are not output from the HDMI OUT and SDI OUT jacks when the USB jack is connected.
The image appears distorted on the 4:3 TV.
- This happens when viewing a movie recorded in 16:9 (wide) mode on a 4:3 TV. Select [REC/OUT SET] [VIDEO OUT] [DOWN CONVERT TYPE] the appropriate down conversion type (p. 77).
Black zone appears at top and bottom of a 4:3 TV screen.
- This happens when viewing a movie recorded in the 16:9 (wide) mode on a 4:3 TV. This is not a malfunction.
Dubbing/Editing/Connecting to other devices
Time code and other information appear on the display of the connected device.
- Set [DISPLAY OUTPUT] to [LCD PANEL] while connected with the A/V connecting cable (p. 84).
Dubbing cannot be done correctly using the A/V connecting cable.
- The A/V connecting cable is not connected properly. Make sure that the A/V connecting cable is connected to the input jack of the other device for dubbing images from your camcorder.
Sound cannot be added to the recording media after recording.
- You cannot add sound to the recording media after recording on your camcorder.
Dubbing cannot be done correctly using the HDMI cable.
- You cannot dub movies using the HDMI cable.
GPS (HXR-NX5E/NX5P)
The camcorder is not receiving a GPS signal.
- Your camcorder may not be able to receive radio signals from GPS satellites because of obstructions. Bring your camcorder to an open area. For details on places where radio signals do not reach, see page 105.
The triangulating location is different from the actual current location.
- If your camcorder receives the radio signal reflected by surrounding buildings, or weak radio signals, the margin of error can be as wide as several-hundred meters, at a maximum.
Connecting to a computer
The computer does not recognize the camcorder.
- Disconnect the cable from the computer, then connect it again securely.
- Disconnect the cable from the computer, restart the computer, then connect the computer to your camcorder correctly.
Movies cannot be viewed or copied to a computer.
- Disconnect the cable from the computer, then connect it again.
- You need to install the supplied “Content Management Utility” to copy movies from your camcorder to your computer (p. 88).
The computer freezes.
- Disconnect the cable from your computer and camcorder. Reboot your computer, and connect your computer and camcorder following the steps in the correct order (p. 88).
Warning indicators and messages
Self-diagnosis display/Warning indicators
When an error occurs, a warning indicator appears on the LCD screen or in the viewfinder.
You can fix some problems associated with the symptoms yourself. If the problem persists even after you have tried a couple of times, contact your Sony dealer or local authorized Sony service facility.
C:04:□□
- The battery pack is not an "InfoLITHIUM" battery pack. Use an "InfoLITHIUM" battery pack (p. 107).
C:06:□□
- The battery pack is too hot. Replace the battery pack, or remove it and put it in a cool place.
C:13:□□
- Remove the recording media. After installing them again, operate your camcorder.
C:32:□□
- Remove the power source. Reconnect it and operate your camcorder again.
E:20:□□ / E:61:□□ / E:62:□□ /
E:92:□□ / E:94:□□ / E:95:□□
- Try the steps ② to ④ on page 90.

(Battery level warning)
• The battery pack is nearly used up.
- Depending on the operating, environment, or battery conditions, may flash, even if there are approximately 5 to 10 minutes remaining.
⚠️ (Warning indicator pertaining to battery pack temperature)
- The battery pack is too hot. Replace the battery pack, or remove it and put it in a cool place.
Warning indicator pertaining to memory cards)
Slow flashing
- Free spaces for recording images are running out. For the type of memory cards you can use with your camcorder, see page 2.
- No memory card is inserted (p. 19).
Fast flashing
- There are not enough free spaces for recording images. Delete unnecessary images (p. 62), or format the memory card (p. 65) after storing the images on other media (p. 88).
- The image database file may be damaged (p. 66).
A B (Warning indicators pertaining to memory card formatting)
• The memory card is damaged.
- The memory card is not formatted correctly (p. 65).
5?A 5?B (Warning indicator pertaining to incompatible memory cards)
- Incompatible memory card is inserted (p. 2).
(A) Warning indicator pertaining to the write-protect of the memory card)
- Access to the memory card was restricted on another device.
_EXT (Warning indicator pertaining to a flash memory unit)
Slow flashing
- Free spaces for recording images are running out. For the flash memory unit you can use with your camcorder, see page 20.
- No flash memory unit is attached (p. 20).
Fast flashing
- There are not enough free spaces for recording images. delete unnecessary images (p. 62), or format the flash memory unit (p. 65) after storing the images on other media (p. 88).
- The image database file may be damaged (p. 66).
EXT (Warning indicators pertaining to a flash memory unit formatting)
- The flash memory unit is damaged.
- The flash memory unit is not formatted correctly (p. 65).
* When [BEEP] is set to [ON] (p. 86), you hear a melody when the warning indicators appear on the screen.
Warning messages
If messages appear on the screen, follow the instructions.
Recording time of movies
Estimated time of recording and playback with each battery pack
Recording time
Approximate time available when you use a fully charged battery pack.
(unit: minute)
| Battery pack | Continuous recording time | Typical recording time |
| NP-F570 110 | 120 | 65 |
| 70 | ||
| NP-F770 245 | 255 | 135 |
| 140 | ||
| NP-F970 370 | 385 | 205 |
| 215 |
Notes
• Top: HXR-NX5E/NX5P
Bottom: HXR-NX5M
- Using ECM-XM1
- Typical recording time shows the time when you repeat recording start/stop, zooming, and so on.
- Times measured when using the camcorder at 25^ (77 °F) (10 °C to 30 °C (50 °F to 86 °F) is recommended).
- The recording and playback time will be shorter when you use your camcorder in low temperatures.
- The recording and playback time will be shorter depending on the conditions under which you use your camcorder.
Playing time
Approximate time available when you use a fully charged battery pack.
(unit: minute)
| Battery pack | HXR-NX5E/NX5P | HXR-NX5M |
| NP-F570 170 180 | ||
| NP-F770 355 375 | ||
| NP-F970 530 570 | ||
Notes
- Playing on the LCD screen with the LCD backlight turned on
Estimated recording time of movies
High definition image quality (HD)
■ When [ AUDIO FORMAT] is set to [LINEAR PCM]
(unit: minute)
| AVCHD24 M(FX) | AVCHD17 M(FH) | AVCHD9 M(HQ) | AVCHD5 M(LP) | |
| 1 GB 4 | (4) | 6(6) | 10(8) | 15(10) |
| 2 GB 10 | (10) | 10(10) | 20(15) | 35(30) |
| 4 GB 20 | (20) | 25(25) | 45(35) | 70(60) |
| 8 GB 40 | (40) | 55(55) | 95(70) | 150(130) |
| 16 GB 85 | (85) | 110(110) | 190(145) | 300(260) |
| 32 GB 170 | (170) | 225(225) | 385(295) | 605(525) |
■ When [ AUDIO FORMAT] is set to [DOLBY DIGITAL]
(unit: minute)
| AVCHD24 M(FX) | AVCHD17 M(FH) | AVCHD9 M(HQ) | AVCHD5 M(LP) | |
| 1 GB 5 | (5) | 6(6) | 10(9) | 20(15) |
| 2 GB 10 | (10) | 10(10) | 25(15) | 40(35) |
| 4 GB 20 | (20) | 25(25) | 50(40) | 90(75) |
| 8 GB 45 | (45) | 55(55) | 105(80) | 185(155) |
| 16 GB 90 | (90) | 115(115) | 215(165) | 375(315) |
| 32 GB 180 | (180) | 235(235) | 435(335) | 750(630) |
Standard definition image quality (SD)
(unit: minute)
| SD 9 M (HQ) |
| 1 GB 10 (10) |
| 2 GB 25 (25) |
| 4 GB 55 (50) |
| 8 GB 115 (105) |
| 16 GB 235 (210) |
| 32 GB 475 (425) |
Notes
- The recordable time may vary depending on the recording and subject conditions, [REC SET] (p. 77).
- The number in ( ) is the minimum recordable time.

Tips
- You can record movies of a maximum of 3,999 scenes with high definition image quality (HD), and 9,999 scenes with standard definition image quality (SD).
-
The maximum continuous recording time of movies is approximately 13 hours.
-
Your camcorder uses the VBR (Variable Bit Rate) format to automatically adjust image quality to suit the recording scene. This technology causes fluctuations in the recording time of the media. Movies containing quickly moving and complex images are recorded at a higher bit-rate, and this reduces the overall recording time.
- Bit-rate (movie + audio, etc.), number of pixels, and aspect ratio of each recording mode of movies are as follows.
– High definition image quality (HD)
FX: max. 24 Mbps 1920 × 1080/16:9, 1280 × 720/16:9
FH: approx. 17 Mbps (ave.) 1920 × 1080/16:9 , 1280 × 720/16:9
HQ: approx. 9 Mbps (ave.) 1440 × 1080/16:9
LP: approx. 5 Mbps (ave.) 1440 × 1080/16:9
– Standard definition image quality (SD)
HQ: approx. 9 Mbps (ave.) 720 × 576/16:9 , 4:3
- Number of pixels and aspect ratio of still images (Still images are created from movies.)
1920 × 1080 dots/16:9
640 × 360 dots/16:9
640 × 480 dots/4:3
Using your camcorder abroad
Power supply
You can use your camcorder in any country/region using the AC Adaptor/Charger supplied with your camcorder within the AC 100 V to 240 V, 50 Hz/60 Hz range.
Viewing high definition image quality (HD) movies
In countries/regions where 1080/50i is supported, you can view the movies with the same high definition image quality (HD) as that of the recorded movies. You need a PAL-system-based and 1080/50i compatible TV (or monitor) with component and AUDIO/VIDEO input jacks. The component video cable (supplied) or an HDMI cable (sold separately) must be connected.
Viewing standard definition image quality (SD) movies
To view standard definition image quality (SD) movies, you need a PAL-system-based TV with AUDIO/VIDEO input jacks. An A/V connecting cable must be connected.
On TV color systems
Your camcorder is PAL system, so its picture can only be viewed on a PAL-system TV with AUDIO/VIDEO input jacks.
System Used in
| PAL Australia, Austria, Belgium, China, Czech Republic, Denmark, Finland, Germany, Holland, Hong Kong, Hungary, Italy, Kuwait, Malaysia, New Zealand, Norway, Poland, Portugal, Singapore, Slovak Republic, Spain, Sweden, Switzerland, Thailand, United Kingdom, etc. |
PAL - M Brazil
System Used in
PAL - N Argentina, Paraguay, Uruguay.
SECAM Bulgaria, France, Guiana, Iran, Iraq, Monaco, Russia, Ukraine, etc.
NTSC Bahama Islands, Bolivia, Canada, Central America, Chile, Colombia, Ecuador, Guyana, Jamaica, Japan, Korea, Mexico, Peru, Surinam, Taiwan, the Philippines, the U.S.A., Venezuela, etc.
Simple setting of the clock by time difference
When you are abroad, you can easily adjust the clock to the local time by setting the time difference. Select [AREA SET], then set the time difference (p. 86).
File/folder structure on the memory card and the flash memory unit
The file/folder structure is shown below. You do not usually need to acknowledge the file/folder structure, when recording/playing back movies and still images on the camcorder.
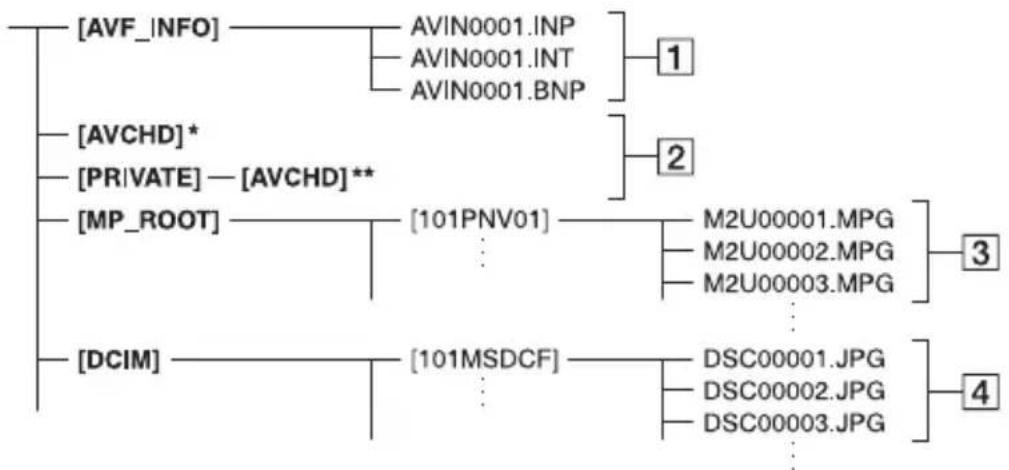
flowchart
graph TD
    A["[AVF_INFO"]] --> B["AVIN0001.INP"]
    A --> C["AVIN0001.INT"]
    A --> D["AVIN0001.BNP"]
    E["[AVCHD"]*] --> F["[PRIVATE"] -["AVCHD"]**]
    G["[MP_ROOT"]] --> H["[101PNV01"]]
    G --> I["M2U00001.MPG"]
    G --> J["M2U00002.MPG"]
    G --> K["M2U00003.MPG"]
    L["[DCIM"]] --> M["[101MSDCF"]]
    L --> N["DSC00001.JPG"]
    L --> O["DSC00002.JPG"]
    L --> P["DSC00003.JPG"]
    B --> Q["1"]
    C --> R["2"]
    H --> S["3"]
    M --> T["4"]
* "Memory Stick PRO Duo" media, flash memory unit
**SD memory card, SDHC memory card, SDXC memory card
1 Image management files When you delete the files, you cannot record/play back the images correctly. The files are defaulted as hidden files and not usually displayed.
② HD movie management information folder This folder contains recording data of high definition image quality (HD) movies. Do not try to open this folder or access the contents of this folder from a computer. Doing so might damage image files, or prevent image files from being played back.
3 SD movie files (MPEG-2 files) The extension of the files is “.MPG”. The maximum size is 2 GB. When the capacity of a file exceeds 2 GB, the file becomes divided.
The file numbers go up automatically. When the capacity of a file number exceeds 9999, another folder is created to record new movie files. The folder name goes up: [101PNV01] → [102PNV01]
4 Still image files (JPEG files) The extension of the files is “.JPG”. The file numbers go up automatically. When
the capacity of a file number exceeds 9999, another folder is created to store new still image files.
The folder name goes up: [101MSDCF] [102MSDCF]
- By pressing the MODE button, then selecting [MANAGE MEDIA] [USB CONNECT] [3/1], you can access the memory card from the computer through USB connection.
- Do not modify the files or folders on the camcorder from the computer. The image files may be destroyed or may not be played back.
• Operation is not guaranteed, if you perform the above operation.
- When you delete image files, follow the steps on page 62. Do not delete the image files on the camcorder directly from the computer.
- Do not format the recording media using a computer. The camcorder may not operate correctly.
- Do not copy the files on the recording media from the computer. Operation is not guaranteed.
- Use the supplied application software “Content Management Utility” to input data from the recording media to a computer.
Maintenance and precautions
About the AVCHD format About GI
What is the AVCHD format?
The AVCHD format is a high definition digital video camera format used to record a high definition (HD) signal, using efficient data compression coding technology. The MPEG-4 AVC/H.264 format is adopted to compress video data, and the Dolby Digital or Linear PCM system is used to compress audio data.
The MPEG-4 AVC/H.264 format is capable of compressing images at higher efficiency than that of the conventional image compressing format.
- Because the AVCHD format uses a data compression system, images may be distorted in scenes where the image, angle, or brightness changes drastically. This is not a malfunction.
Recording and playback on your camcorder
Based on the AVCHD format, your camcorder records with the high definition image quality (HD). In addition to high definition image quality (HD), your camcorder is capable of recording a standard definition (SD) signal in the conventional MPEG2 format.
Video signal*: MPEG-4 AVC/H.264
$$ \begin{array}{l} 1 9 2 0 \times 1 0 8 0 / 5 0 \mathrm{i}, 1 2 8 0 \times 7 2 0 / 5 0 \mathrm{p}, \ 1 4 4 0 \times 1 0 8 0 / 5 0 \mathrm{i} \end{array} $$
Audio signal: Dolby Digital 2ch, Linear PCM 2ch
Recording media: memory card, flash memory unit (sold separately)
* Data recorded in AVCHD format other than the above mentioned cannot be played back on your camcorder.
- 1080i specification
A high definition specification which utilizes 1,080 effective scanning lines and the interlace system.
- 720p specification
A high definition specification which utilizes 720 effective scanning lines and the progressive system.
IXR-NX5E/NX5P)
The GPS (Global Positioning System) is a system that calculates geographical location from highly accurate US space satellites. The GPS satellites are located in 6 orbits, 20,000 km above the earth. The GPS system consists of 24 or more GPS satellites. A GPS receiver receives radio signals from the satellites, and calculates the current location of the receiver based on the orbital information (almanac data) and travel time of the signals, etc.
Determining a location is called “triangulating.” A GPS receiver can determine the location’s latitude and longitude by receiving signals from 3 or more satellites.
Notes
- As the positions of GPS satellites vary constantly, it may take longer to determine the location or the receiver may not be able to determine the location at all, depending on the location and time you use the camcorder.
- “GPS” is a system for determining geographic location by triangulating radio signals from GPS satellites. Avoid using the camcorder in places where radio signals are blocked or reflected, such as a shadowy place surrounded by buildings or trees, etc. Use the camcorder in open sky environments.
- You may not be able to record location information at locations or in situations where radio signals from the GPS satellites do not reach the camcorder as follows.
– In tunnels, indoors or under the shade of buildings.
- Between tall buildings or at narrow streets surrounded by buildings.
- In underground locations, locations surrounded by dense trees, under an elevated bridge, or in locations where magnetic fields are generated, such as near high voltage cables.
- Near devices that generate radio signals of the same frequency band as the camcorder: near 1.5 GHz band mobile telephones, etc.
On triangulating errors
- If you move to another location right after setting the GPS switch to ON, it may take a longer time for the camcorder to start triangulating, compared to when you stay in the same place.
- Error caused by the position of GPS satellites The camcorder automatically triangulates your current location when the camcorder receives radio signals from 3 or more GPS satellites. The triangulating error allowed by the GPS satellites is about ± 10 m ( ± 32 feet). Depending on the environment of the location, the triangulating error can be greater. In this case, your actual location may not match the location on the map based on the GPS information. Meanwhile, the GPS satellites are controlled by the United States Department of Defense, and the degree of accuracy may be changed intentionally.
- Error during the triangulating process The camcorder acquires location information periodically during triangulating.
On the restriction of use of GPS on an airplane
During take off and landing of an airplane, set the GPS switch to OFF and turn off the camcorder, as you will be instructed to do by the on-board announcement. In other cases, use GPS in accordance with the regulations of the place or situation.
On the geographic coordinate system
The “WGS-84” geographic coordinate system is used.
About the memory card
- A memory card formatted by a computer (Windows OS/Mac OS) does not have guaranteed compatibility with your camcorder.
- Data read/write speed may vary depending on the combination of the memory card and memory card compliant product you use.
- Damaged or lost image data will not be compensated for, and may occur in the following cases:
- If you eject the memory card, turn the power off on your camcorder, or remove the battery pack for replacement while your camcorder is reading or writing image files on the memory card (while the access lamp is lit or flashing).
- If you use the memory card near magnets or magnetic fields.
- It is recommended to make a back-up of important data on the hard disk of a computer.
- Be careful not to apply excessive force when writing on a memo area on memory card.
- Do not attach a label or the like on memory card or a memory card adaptor.
- Do not touch, or allow metallic objects to come into contact with the terminals.
- Do not bend, drop or apply strong force to the memory card.
- Do not disassemble or modify the memory card.
- Do not let the memory card get wet.
- Be careful to keep memory card out of the reach of small children. There is danger that a child might swallow it.
- Do not insert anything other than the compliant size of memory card into the memory card slot. Doing so may cause a malfunction.
-
Do not use or keep the memory card in the following locations:
-
Places subject to extremely high temperature, such as a car parked outside in the summer.
- Places under direct sunlight.
- Places with extremely high humidity or subject to corrosive gases.
■ On the memory card adaptor
- When inserting memory card into a memory card adaptor, make sure the memory card is inserted facing in the correct direction, then insert it all the way in. Note that improper use may cause a malfunction.
On image data compatibility
- Image data files recorded on a memory card by your camcorder conform to the “Design rule for Camera File system” universal standard established by the JEITA (Japan Electronics and Information Technology Industries Association).
- On your camcorder, you cannot play back still images recorded on other devices (DCR-TRV900E or DSC-D700/D770) that do not conform to the universal standard. (These models are not sold in some regions.)
- If you cannot use memory card that has been used with another device, format it with your camcorder (p. 65). Note that formatting erases all information on the memory card.
- You may not be able to play back images with your camcorder:
- When playing back image data modified on your computer.
- When playing back image data recorded with other devices.
About the "Memory Stick" media
| Types of “Memory Stick” media | Recording /Playback |
| “Memory Stick Duo” media (with MagicGate) | - |
| “Memory Stick PRO Duo” (Mark2) media | ○ |
| “Memory Stick PRO-HG Duo” media | ○* |
* This product does not support 8-bit parallel data transfer but it supports 4-bit parallel data transfer the same as with “Memory Stick PRO Duo” media.
- This product cannot record or play data that uses “MagicGate” technology. “MagicGate” is a copyright protection technology that records and transfers the contents in an encrypted format.
About the “InfoLITHIUM” battery pack
This unit is compatible with an “InfoLITHIUM” battery pack (L series).
Your camcorder operates only with an "InfoLITHIUM" battery pack.
"InfoLITHIUM" L series battery packs have the mark.
What is an "InfoLITHIUM" battery pack?
An “InfoLITHIUM” battery pack is a lithium-ion battery pack that has functions for communicating information related to operating conditions between your camcorder and a supplied AC Adaptor/Charger.
The “InfoLITHIUM” battery pack calculates the power consumption according to the operating conditions of your camcorder, and displays the remaining battery time in minutes.
With an AC Adaptor/Charger, the remaining battery time and charging time appear.
To charge the battery pack
- Be sure to charge the battery pack before you start using your camcorder.
- We recommend charging the battery pack in an ambient temperature of between 10^ to 30^ (50 °F to 86 °F) until the charge lamp of the AC Adaptor/Charger turns off. If you charge the battery pack outside of this temperature range, you may not be able to charge it efficiently.
To use the battery pack effectively
- Battery pack performance decreases when the ambient temperature is 10^ (50°F) or below, and the length of time you can use the battery pack becomes shorter. In that case, do one of the following to use the battery pack for a longer time.
- Put the battery pack in a pocket to warm it up, and insert it in your camcorder right before you start taking shots.
-
Use a large capacity battery pack: NP-F770/F970 (sold separately).
-
Frequent use of the LCD screen or a frequent playback, fast forward or rewind operation wears out the battery pack faster. We recommend using a large capacity battery pack: NP-F770/F970 (sold separately).
- Be sure to set the POWER switch to OFF when not recording or playing back on your camcorder. The battery pack is also consumed when your camcorder is in recording standby or playback pause.
- Have spare battery packs ready for two or three times the expected recording time, and make trial recordings before making the actual recording.
- Do not expose the battery pack to water. The battery pack is not water resistant.
About the remaining battery time indicator
- When the power goes off even though the remaining battery time indicator indicates that the battery pack has enough power to operate, charge the battery pack fully again. Remaining battery time will be indicated correctly. Note, however, that the battery indication will not be restored if it is used in high temperatures for a long time, or if left in a fully charged state, or when the battery pack is frequently used. Use the remaining battery time indication as a rough guide only.
- The ⏻ mark that indicates low battery flashes even if there are still 5 to 10 minutes of battery time remaining, depending on the operating conditions or ambient temperature.
About storage of the battery pack
- If the battery pack is not used for a long time, fully charge the battery pack and use it up on your camcorder once a year to maintain proper function. To store the battery pack, remove it from your camcorder and put it in a dry, cool place.
- To discharge the battery pack on your camcorder completely, leave your camcorder in recording standby until the power goes off (p. 14).
About battery life
- Battery capacity decreases over time and through repeated use. If decreased usage time between charges becomes significant, it is probably time to replace it with a new one.
- Each battery's life is governed by storage, operating and environmental conditions.
About charging the battery pack
- Use the AC Adaptor/Charger (supplied) to charge the designated batteries only. If you charge other types of batteries, those batteries may leak, heat up, burst, or give an electric shock, resulting in burns or injury.
- Remove the charged battery from the AC Adaptor/Charger.
- The CHARGE lamp of the supplied AC Adaptor/Charger flashes in 2 patterns as follows:
Fast-flashing...Turns on and off rapidly at about 0.15-second intervals. Slow-flashing...Turns on and off alternately for about 1.5 seconds, and turns off completely for about 1.5 seconds. The lamp repeats this sequence. - If the CHARGE lamp is fast-flashing, remove the battery that is being charged, and then re-attach the same battery again firmly. If the CHARGE lamp continues fast-flashing, the cause could be that the battery is damaged, or the battery is not a designated type. Check the battery to confirm whether it is a designated type or not. If it is a designated type, remove the battery first, and then attach a brand-new battery or another known-to-be-good battery to see if the AC Adaptor/Charger is working correctly. If the AC Adaptor/Charger is working correctly, the cause could be that the battery is damaged.
- If the CHARGE lamp is slow-flashing, the AC Adaptor/Charger is in standby mode and charging is suspended. When the ambient temperature is out of the appropriate temperature range for charging, the AC Adaptor/Charger suspends charging automatically and enters standby mode. When the ambient temperature returns to an appropriate temperature, the AC Adaptor/Charger restarts charging and the CHARGE lamp lights up. We recommend charging the battery pack in an ambient temperature of between 10^ to 30^ (50 °F to 86 °F).
About x.v.Color
- x.v.Color is a more familiar term for the xvYCC standard proposed by Sony, and is a trademark of Sony.
- xvYCC is an international standard for color space in video. This standard can express a wider color range than the currently used broadcast standard.
About handling of your camcorder
On use and care
- Do not use or store the camcorder and accessories in the following locations.
– Anywhere extremely hot or cold. Never leave them exposed to temperatures above 60 ^ ( 140 ^ ), such as under direct sunlight, near heaters or in a car parked in the sun. They may malfunction or become deformed.
– Near strong magnetic fields or mechanical vibration. The camcorder may malfunction. - Near strong radio waves or radiation. The camcorder may not be able to record properly.
- Near AM receivers and video equipment. Noise may occur.
- On a sandy beach or anywhere dusty. If sand or dust gets in your camcorder, it may malfunction. Sometimes this malfunction cannot be repaired.
- Near windows or outdoors, where the LCD screen, the viewfinder, or the lens may be exposed to direct sunlight. This damages the inside of the viewfinder or the LCD screen.
- Anywhere very humid.
- Operate your camcorder on DC 7.2 V (battery pack) or DC 8.4 V (AC Adaptor).
- For DC or AC operation, use the accessories recommended in these operating instructions.
- Do not let your camcorder get wet, for example, from rain or sea water. If your camcorder gets wet, it may malfunction. Sometimes this malfunction cannot be repaired.
- If any solid object or liquid gets inside the casing, unplug your camcorder and have it checked by a Sony dealer before operating it any further.
- Avoid rough handling, disassembling, modifying, physical shock, or impact such as hammering, dropping or stepping on the product. Be particularly careful of the lens.
- Do not use a deformed or damaged battery pack.
- Keep the POWER switch setting to OFF when you are not using your camcorder.
- Do not wrap your camcorder with a towel, for example, and operate it. Doing so might cause heat to build up inside.
- When disconnecting the power cord (mains lead), pull it by the plug and not the lead.
- Do not damage the power cord (mains lead) such as by placing anything heavy on it.
- Keep metal contacts clean.
- Keep the Wireless Remote Commander and button-type battery out of children's reach. If the battery is accidentally swallowed, consult a doctor immediately.
- If the battery electrolytic liquid has leaked,
– consult your local authorized Sony service facility. - wash off any liquid that may have contacted your skin.
- if any liquid gets in your eyes, wash with plenty of water and consult a doctor.
■ When not using your camcorder for a long time
- Turn on the camcorder and record and play back images about once a month to keep it in an optimum state for a long time.
- Use up the battery pack completely before storing it.
Moisture condensation
If your camcorder is brought directly from a cold place to a warm place, moisture may condense inside your camcorder and cause a malfunction of your camcorder.
■ If moisture condensation has occurred
Leave your camcorder for about 1 hour without turning it on.
■ Note on moisture condensation
Moisture may condense when you bring your camcorder from a cold place into a warm place (or vice versa) or when you use your camcorder in a humid place as shown below.
- When you bring your camcorder from a ski slope into a place warmed up by a heating device.
- When you bring your camcorder from an air conditioned car or room into a hot place outside.
- When you use your camcorder after a squall or a shower.
- When you use your camcorder in a hot and humid place.
■ How to avoid moisture condensation
When you bring your camcorder from a cold place into a warm place, put your camcorder in a plastic bag and seal it tightly. Remove the bag when the air temperature inside the plastic bag has reached the ambient temperature (after about 1 hour).
LCD screen
- Do not exert excessive pressure on the LCD screen, as it may cause damage.
- If your camcorder is used in a cold place, a residual image may appear on the LCD screen. This is not a malfunction.
- While using your camcorder, the back of the LCD screen may heat up. This is not a malfunction.
■ To clean the LCD screen
The surface of the LCD screen is coated. If you scratch the surface, the coating may be come off. Mind the following points when cleaning and handling it.
- Use a soft cloth (a cloth for glasses, etc.) gently to clean the dirt.
- Remove the dust or sand with a blower, etc. before wiping the dirt.
- The coating may be scratched if you wipe the screen with a tissue, etc.
- If hand grease or hand cream remains on the screen, the coating comes off more easily. Wipe it early.
On adjustment of the touch panel (CALIBRATION)
The buttons on the touch panel may not work correctly. If this happens, follow the procedure below. It is recommended that you connect your camcorder to the wall outlet (wall socket) using the supplied AC Adaptor/Charger during the operation.
①Turn on the camcorder.
② Press the MENU button → select (OTHERS) → [CALIBRATION] with the SEL/PUSH EXEC dial.
text_image
CALIBRATION 1/3 Touch the "X". CANCEL③ Touch “×” displayed on the screen with the corner of memory card or the like 3 times.
- If you did not press the right spot, try the calibration again.
- Touch [CANCEL] to cancel calibration.
Notes
- Do not use a sharp-pointed object for calibration. Doing so may damage the LCD screen.
On handling the casing
- If the casing is soiled, clean the camcorder body with a soft cloth lightly moistened with water, and then wipe the casing with a dry soft cloth.
- Avoid the following to avoid damage to the finish.
- If the casing is soiled, clean the camcorder body with a soft cloth lightly moistened with water, and then wipe the casing with a dry soft cloth. - Avoid the following to avoid damage to the finish.
- Using chemicals such as thinner, benzine, alcohol, chemical cloths, repellent, insecticide and sunscreen.
- Handling with above substances on your hands.
- Leaving the casing in contact with rubber or vinyl objects for a long period of time.
- Using chemicals such as thinner, benzine, alcohol, chemical cloths, repellent, insecticide and sunscreen. - Handling with above substances on your hands. - Leaving the casing in contact with rubber or vinyl objects for a long period of time.
About care and storage of the lens
- Wipe the surface of the lens clean with a soft cloth in the following instances:
- When there are fingerprints on the lens surface.
– In hot or humid locations - When the lens is exposed to salty air such as at the seaside.
- Store in a well-ventilated location subject to little dirt or dust.
• To prevent mold, periodically clean the lens as described above.
On charging the pre-installed rechargeable battery
Your camcorder has a pre-installed rechargeable battery to retain the date, time, and other settings even when the POWER switch is set to OFF. The pre-installed rechargeable battery is always charged while your camcorder is connected to the wall outlet (wall socket) via the AC Adaptor/Charger or while the battery pack is attached. The rechargeable battery will be fully discharged in about 3 months if you do not use your camcorder at all without the AC Adaptor/Charger connected or the battery pack attached. Use your camcorder after charging the pre-installed rechargeable battery.
However, even if the pre-installed rechargeable battery is not charged, the camcorder operation will not be affected as long as you are not recording the date.
■ Procedures
Connect your camcorder to a wall outlet (wall socket) using the supplied AC Adaptor/Charger, and leave it with the POWER switch set to OFF for more than 24 hours.
Removing dust from inside the viewfinder
1 Remove the eye piece of the viewfinder.
Slide down the viewfinder release lever and hold it at the position (①), then lift the eye piece of the viewfinder as indicated with the arrow in the illustration (②).
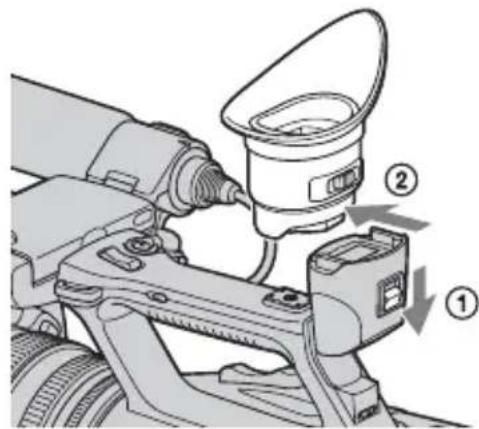
text_image
Technical diagram showing mechanical assembly with labeled parts ① and ②, likely illustrating a device or component assembly.2 Remove dust inside the eye piece and viewfinder with a blower.
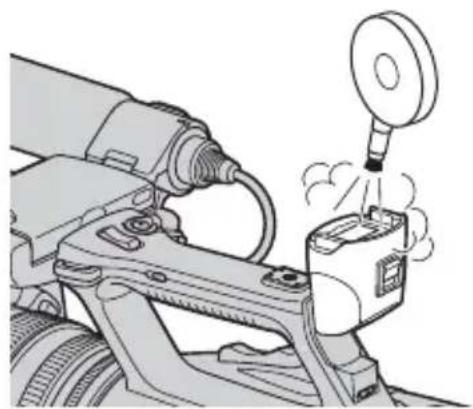
natural_image
Mechanical assembly diagram showing a motor with rotating components and a pulley (no text or symbols)Specifications
System
Video signal
PAL color, CCIR standards
HDTV 1080/50i, 720/50p
Video recording system
HD image quality: MPEG-4 AVC/
H.264 AVCHD
SD image quality: MPEG-2 PS
Audio recording system
Linear PCM 2ch (48 kHz 16-bit)
Dolby Digital 2ch (48 kHz 16-bit)
Dolby Digital Stereo Creator employed
Still image recording system
DCF Ver. 2.0
Exif Ver. 2.21
MPF Baseline
Recording media (movies/still images)
"Memory Stick PRO Duo" media
Flash memory units
SD card (Class 4 or faster)
Viewfinder
Electric viewfinder (color, black and white)
Picture: 1.1 cm (0.45 type, aspect ratio 16:9)
Total dot number:
1 226 880 (approx. 852 × 3 [RGB] × 480)
Image device
6.0 mm (1/3 type) 3CMOS sensor
Gross: Approx. 1 120 000 pixels
Effective (movie, 16:9):
Approx. 1 040 000 pixels*
Effective (movie, 4:3):
Approx. 780 000 pixels*
Lens
G Lens
20 × (Optical), Approx. 30 × (Digital,
when [D.EXTENDER] is set to [ON])
Focal length
f=4.1 - 82.0 mm (3/16 - 3 1/4 in.)
When converted to a 35 mm still camera*
29.5 - 590 mm (1 3/16 - 23 1/4 in.)
(16:9),
36.1 - 722 mm (1 7/16 - 28 1/2 in.)
(4:3)
F1.6 - 3.4
Filter diameter: 72 mm (2 7/8 in.)
Color temperature
[AUTO]

(one push) A/B
[INDOOR] (3 200K)
[OUTDOOR] (5 800K±7 offset levels)
[MANU WB TEMP] (2 300K -
15 000K in 100K steps)
Minimum illumination
1.5 lx (lux) (Fixed Shutter Speed 1/25, auto gain, auto iris) (F 1.6)
* When [SET] of [STEADYSHOT] is set to
[STEADYSHOT] or [OFF]
Output connectors
VIDEO OUT jack
Pin connector
1 Vp-p, 75 Ω (ohms) unbalanced, sync negative
AUDIO OUT jacks
Pin connectors
-10 dBu (at load impedance 47 kΩ
(kilohms)), Output impedance with less than 2.2 kΩ (kilohms)
(0 dBu = 0.775 Vrms)
COMPONENT OUT jack
Mini-D jack
Y: 1 Vp-p, 75 Ω (ohms)
P_B / PR CB / CR : 0.7 Vp-p, 75 Ω (ohms)
HDMI OUT jack
HDMI connector
SDI OUT jack
BNC
SMPTE292M/259M
○ (headphones) jack
Stereo-minijack (∅ 3.5 mm)
Input connectors
INPUT1/INPUT2 jacks
XLR 3-pin, female,
MIC: -48 dBu: 3 kΩ (kilohms)
(Variable in the range of between
-60dBu and -30dBuin 6dBustep b7y4W
the INPUT TRIM function)
LINE: +4 dBu: 10 kΩ (kilohms)
(0 dBu = 0.775 Vrms)
Input/Output connectors
USB jack
mini-B
Remote jack
Stereo mini-minijack (∅ 2.5 mm)
TC LINK IN/OUT jack
Pin connector
IN: 0.5 V to 18 Vp-p, 10 kΩ (kilohms)
OUT: 1.2 Vp-p, 75 Ω (ohms)
(IN/OUT switch-able)
LCD screen
Picture
8.0 cm (3.2 type, aspect ratio 16:9)
Total dot number
921 600 (1 920 × 480)
General
Power requirements
DC 7.2 V (battery pack)
DC 8.4 V (AC Adaptor/Charger)
Average power consumption*
HXR-NX5E/NX5P
During camera recording using the microphone ECM-XM1 and viewfinder with normal brightness:
7.7 W
During camera recording using the microphone ECM-XM1 and LCD with normal brightness:
7.7 W
HXR-NX5M
During camera recording using the microphone ECM-XM1 and viewfinder with normal brightness:
07y4 W
During camera recording using the microphone ECM-XM1 and LCD with normal brightness:
7.4 W
* When Flash Memory Unit HXR-FMU128 is used, the average power consumption increases about 1.1 W.
Operating temperature
0^ to 40^ (32°F to 104°F)
Storage temperature
-20^ to +60^ (-4^ to +140^)
Dimensions (approx.)
173 × 193 × 449 ~mm
(6 7/8 × 7 5/8 × 17 3/4 in.) (w/h/d)
including the projecting parts
173 × 193 × 449 ~mm
(6 7/8 × 7 5/8 × 17 3/4 in.) (w/h/d)
including the projecting parts with the battery pack (NP-F570)
Mass (approx.)
2.2 kg (4 lb 15 oz) including the lens hood with lens cover
2.5 kg (5 lb 7 oz) including the battery pack (NP-F570), lens hood with lens cover and microphone (ECM-XM1)
AC Adaptor/Charger AC-VL1
Power requirements
AC 100 V - 240 V, 50 Hz/60 Hz
Power consumption
22 W
Output voltage
DC 8.4 V*
Operating temperature
0^ to 40^ (32°F to 104°F)
Storage temperature
-20^ to +60^ (-4^ to +140
Dimensions (approx.)
136 × 51 × 90 ~mm
(53/8×21/8×35/8in.) (w/h/d)
excluding the projecting parts
Mass (approx.)
270 g (9.6 oz) excluding the power cord (mains lead)
* See the label on the AC Adaptor/Charger for other specifications.
Rechargeable battery pack NP-F570
Maximum output voltage
DC 8.4 V
Output voltage
DC 7.2 V
Maximum charge voltage
DC 8.4 V
Maximum charge current
3.0 A
Capacity
Typical: 15.8 Wh (2 200 mAh)
Minimum: 15.0 Wh (2 100 mAh)
Type
Li-ion
Design and specifications are subject to change without notice.
- Manufactured under license from Dolby Laboratories.
On trademarks
- “NXCAM” logo is a trademark of Sony Corporation.
•F"AVCHD" and "AVCHD" logotype are trademarks of Panasonic Corporation and Sony Corporation.
- “Memory Stick,” “Memory Stick Duo,” “Memory Stick PRO Duo,” “MEMORY STICK PRO DUO” “Memory Stick PRO-HG Duo,”
"MEMS Gate PRO-HG Duo
“,”“MagicGate Memory
Stick” and “MagicGate Memory Stick Duo” are trademarks of Sony Corporation.
- “InfoLITHIUM” is a trademark of Sony Corporation.
• is a trademark of Sony Corporation.
- “x.v.Colour” is a trademark of Sony Corporation.
- Dolby and the double-D symbol are trademarks of Dolby Laboratories.
- Microsoft, Windows, and Windows Vista are trademarks or registered trademarks of U.S. Microsoft Corporation in the U.S. and other countries.
• Macintosh and Mac OS are registered trademarks of Apple Inc. in the U.S. and other countries.
- HDMI, HDMI logo, and High-Definition Multimedia Interface are trademarks or registered trademarks of HDMI Licensing LLC.
- Intel, Intel Core, and Pentium are trademarks or registered trademarks of Intel Corporation or its subsidiaries in the United States and other countries.
- Adobe, the Adobe logo, and Adobe Acrobat are either registered trademarks or trademarks of Adobe Systems Incorporated in the United States and/or other countries.
- SDXC and SDHC logos are trademarks of SD-3C, LLC.
- MultiMedia Card is a trademark of MultiMediaCard Association.
All other product names mentioned herein may be the trademarks or registered trademarks of their respective companies. Furthermore, ^TM and “®” are not mentioned in each case in this manual.
Notes on the License
ANY USE OF THIS PRODUCT OTHER THAN CONSUMER PERSONAL USE IN ANY MANNER THAT COMPLIES WITH THE MPEG-2 STANDARD FOR ENCODING VIDEO INFORMATION FOR PACKAGED MEDIA IS EXPRESSLY PROHIBITED WITHOUT A LICENSE UNDER APPLICABLE PATENTS IN THE MPEG-2 PATENT PORTFOLIO, WHICH LICENSE IS AVAILABLE FROM MPEG LA, L.L.C., 250 STEELE STREET, SUITE 300, DENVER, COLORADO 80206.
THIS PRODUCT IS LICENSED UNDER THE AVC PATENT PORTFOLIO LICENSE FOR THE PERSONAL AND NON-COMMERCIAL USE OF A CONSUMER TO
(i) ENCODE VIDEO IN COMPLIANCE WITH THE AVC STANDARD (“AVC VIDEO”) AND /OR
(ii) DECODE AVC VIDEO THAT WAS ENCODED BY A CONSUMER ENGAGED IN A PERSONAL AND
NON-COMMERCIAL ACTIVITY AND/OR WAS OBTAINED FROM A VIDEO PROVIDER LICENSED TO PROVIDE AVC VIDEO.
NO LICENSE IS GRANTED OR SHALL BE IMPLIED FOR ANY OTHER USE.
ADDITIONAL INFORMATION MAY BE
OBTAINED FROM MPEG LA, L.L.C.
“C Library,” “Expat,” “zlib,” “libjpeg,” “dtoa” and “pcre” software are provided in your camcorder. We provide this software based on license agreements with their owners of copyright. Based on requests
by the owners of copyright of these software applications, we have an obligation to inform you of the following. Please read the following sections.
Read “license1.pdf” in the “License” folder on the CD-ROM “Content Management Utility.” You will find licenses (in English) of “C Library,”
“Expat,” “zlib,” “libjpeg,” “dtoa” and “pcre” software.
On GNU GPL/LGPL applied software
The software that is eligible for the following GNU General Public License (hereinafter referred to as “GPL”) or GNU Lesser General Public License (hereinafter referred to as “LGPL”) are included in the camcorder.
This informs you that you have a right to have access to, modify, and redistribute source code for these software programs under the conditions of the supplied GPL/LGPL.
Source code is provided on the web. Use the following URL to download it. When downloading the source code, select HXR-NX5J as the model for your camcorder.
http://www.sony.net/Products/Linux/
We would prefer you do not contact us about the contents of source code.
Read “license2.pdf” in the “License” folder on the CD-ROM “Content Management Utility.” You will find licenses (in English) of “GPL,” and “LGPL” software.
To view the PDF, Adobe Reader is needed. If it is not installed on your computer, you can download it from the Adobe Systems web page:
http://www.adobe.com/
Quick Reference
Identifying parts and controls
The numbers in ( ) are reference pages.
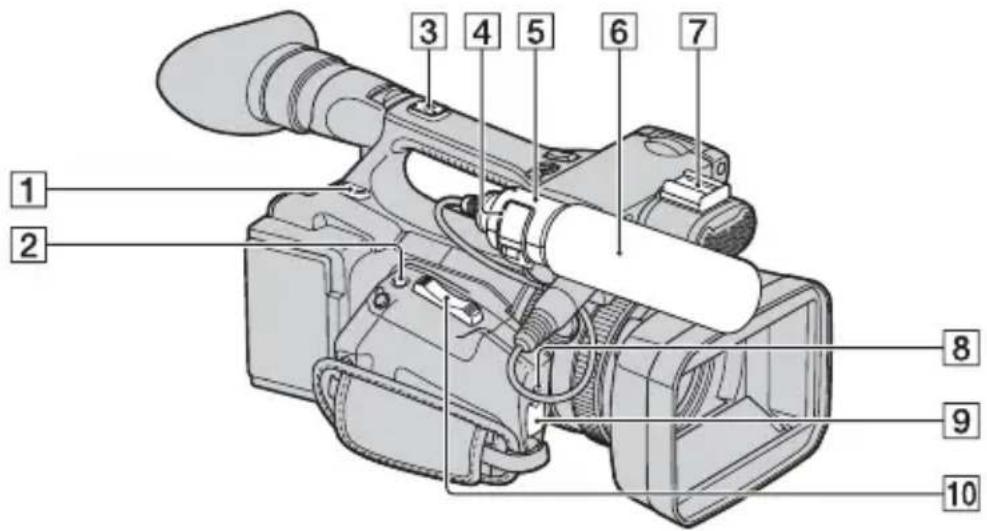
text_image
1 2 3 4 5 6 7 8 9 101 Hook for shoulder strap (119)
2 ASSIGN 7/EXPANDED FOCUS button (45)
3 Accessory shoe mount
4 Microphone fixing clamper (10)
5 Microphone holder (10)
6 Microphone (10)
7 Accessory shoe
8 TC LINK switch (43)
9 TC LINK IN/OUT jack (43)
10 Zoom lever (26)
To mount the accessory shoe
Mount the accessory shoe on the accessory shoe mount as illustrated.
Accessory shoe plate
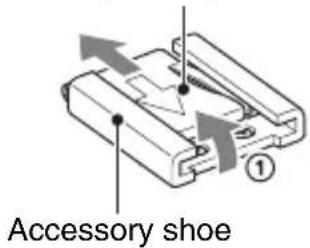
text_image
Accessory shoe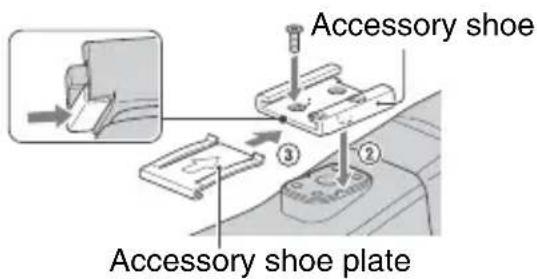
text_image
Accessory shoe Accessory shoe plate①Lift the edge of the accessory shoe plate and pull it in the direction opposite to that of the arrow on the accessory shoe
plate and remove it from the accessory shoe.
②Place the accessory shoe as its protrusions matches recesses of the accessory shoe mount, then fix it to the mount with four screws.
③Insert the accessory shoe plate in the direction of the arrow on the plate surface until the end of the plate engages the end of the shoe.
To remove the accessory shoe
Remove the shoe plate in the same way as step ① of "To mount the accessory shoe." Loosen the 4 screws and remove the accessory shoe from the accessory shoe mount.
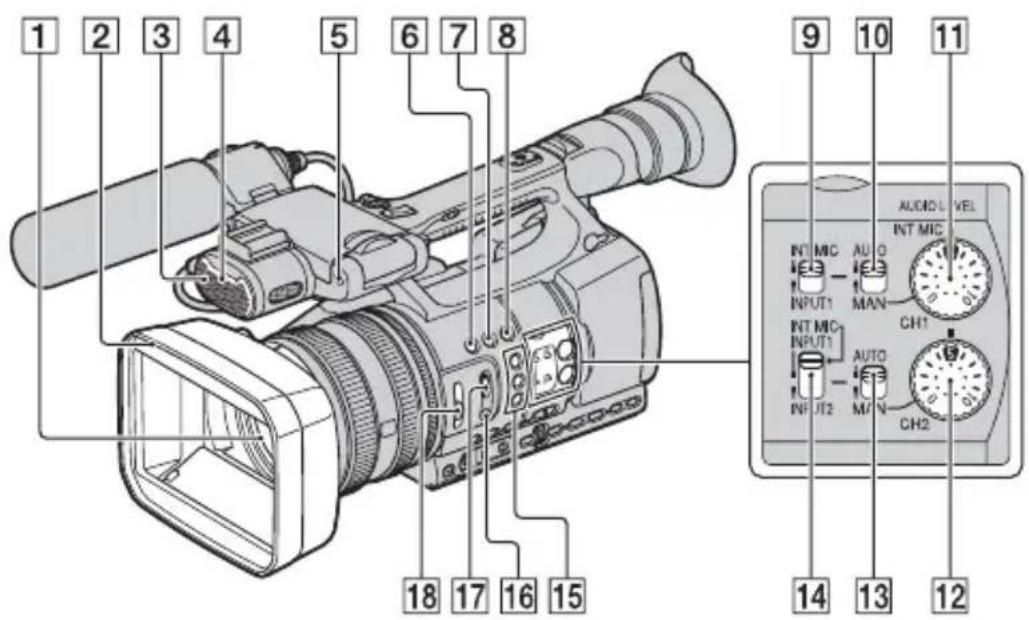
text_image
1 2 3 4 5 6 7 8 9 10 11 AUDIO LEVEL INT MIC AUTO INPUT1 MAN CH1 INT MIC INPUT1 AUTO INT J12 M/N CH2 14 13 121 Lens (10)
2 Lens hood with lens cover (10)
3Internal microphone (39)
4 Front recording lamp (86)
The recording lamp flashes if the remaining capacity of recording media or battery is low.
5 Remote sensor (87)
6 ASSIGN 4/ZEBRA button (45)
7 ASSIGN 5/AE SHIFT button* (45)
8 ASSIGN 6/VISUAL INDEX button (45)
9CH1 (INT MIC/INPUT1) switch (39)
10 AUTO/MAN (CH1) switch (40)
11 AUDIO LEVEL(CH1) dial (40)
12 AUDIO LEVEL(CH2) dial (40)
13 AUTO/MAN (CH2) switch (40)
14 CH2 (INT MIC/INPUT1/INPUT2) switch (39)
15 ASSIGN 1/2*/3 buttons (45)
16 PUSH AUTO button (27)
17FOCUS switch (27)
18ND filter (30)
* The ASSIGN 5/AE SHIFT button and the ASSIGN 2 button have raised tactile dots for your convenience in locating the button.
Identifying parts and controls (Continued)
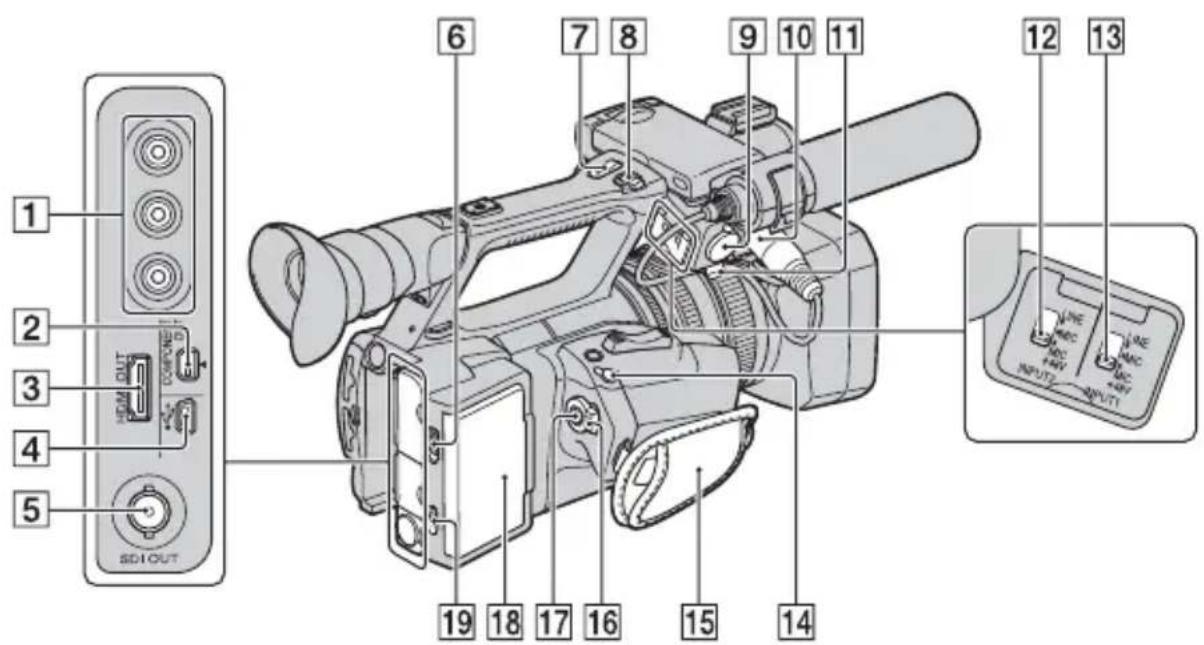
text_image
1 2 3 4 5 SDIOUT 6 7 8 9 10 11 12 13 14 15 16 17 18 19 INPUT2 INPUT11VIDEO OUT jack/AUDIO OUT jacks (54)
②COMPONENT OUT jack (54)
③HDMI OUT jack (54)
4 USB jack (88)
5 SDI OUT jack (54)
6 RELEASE lever (20)
7 Handle zoom lever (26)
8Handle record button (21)
9 INPUT2 jack (10)
10 INPUT1 jack (10)
11 Cable holder (10) Provided for securing a microphone cable, etc.
12 INPUT2 switch (39)
13 INPUT1 switch (39)
14 REMOTE jack The REMOTE jack is used for controlling playback, etc. on the video device and peripherals connected to it.
15 Grip belt (14)
16 POWER switch (14)
17Record button (21)
18 Flash memory unit mount (20) For attaching a flash memory unit (sold separately).
Flash memory unit jack
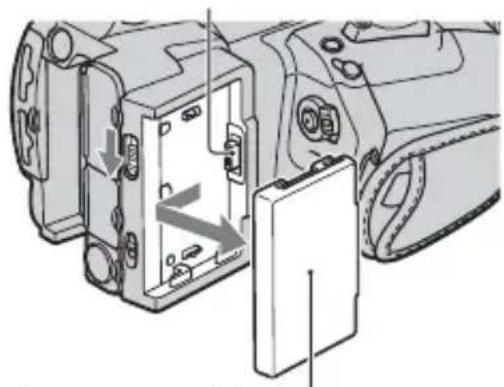
natural_image
Technical illustration of a camera module with internal components and directional arrows indicating assembly (no text or symbols)Flash memory unit jack cover
19 GPS switch (41) (HXR-NX5E/NX5P) When it is set to ON, the camcorder acquires the GPS information (location and time of recording) and records with images.
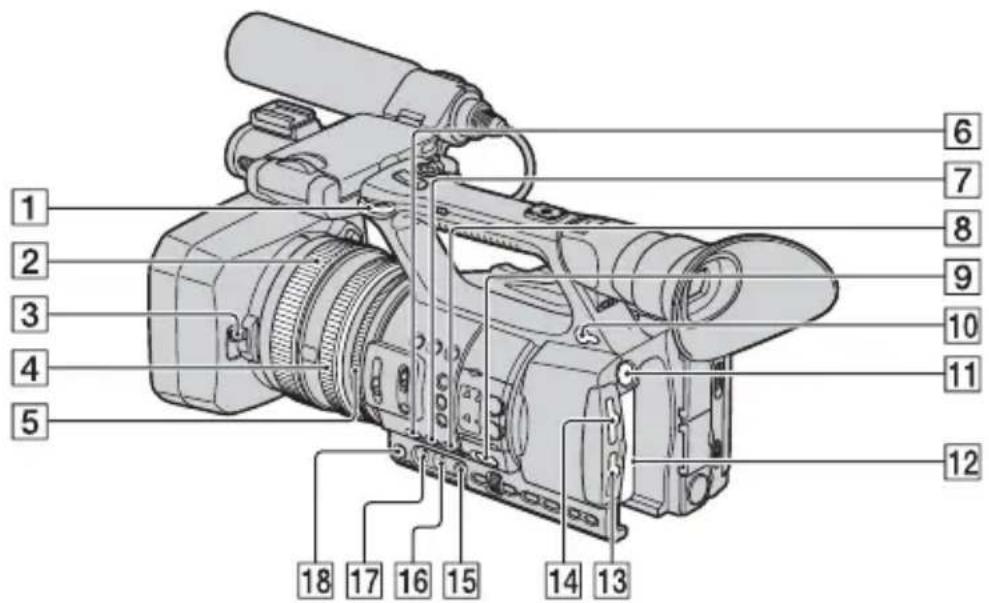
text_image
1 2 3 4 5 6 7 8 9 10 11 12 13 14 15 16 17 181 Hook for shoulder strap
2 Focus ring (27)
3 Lens cover lever (10)
4 Zoom ring (26)
5 Iris ring (28)
6 GAIN button (29)
7 WHT BAL button* (30)
8 SHUTTER SPEED button (29)
9 AUTO/MANUAL switch (28)
10 Ⓞ (headphones) jack For stereo mini-jack headphones
11 BATT RELEASE button (12)
12Battery pack (12)
13 Memory card B slot/select button/access lamp (19)
14 Memory card A slot/select button/access lamp (19)
15 (One push) button (31)
16 White balance memory switch (30)
17Gain switch (29)
18 IRIS button (28)
* WHT BAL button has a raised tactile dot for your convenience in locating the button.
To attach a shoulder strap
Attach a shoulder strap (sold separately) to the hooks for a shoulder strap.
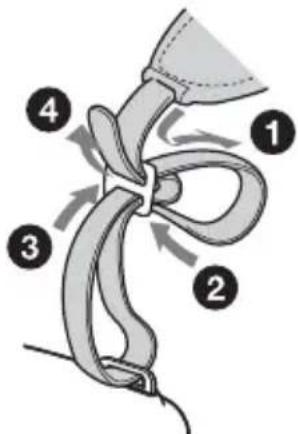
text_image
Diagram illustrating a rope knot with numbered steps and directional arrows indicating movementIdentifying parts and controls (Continued)
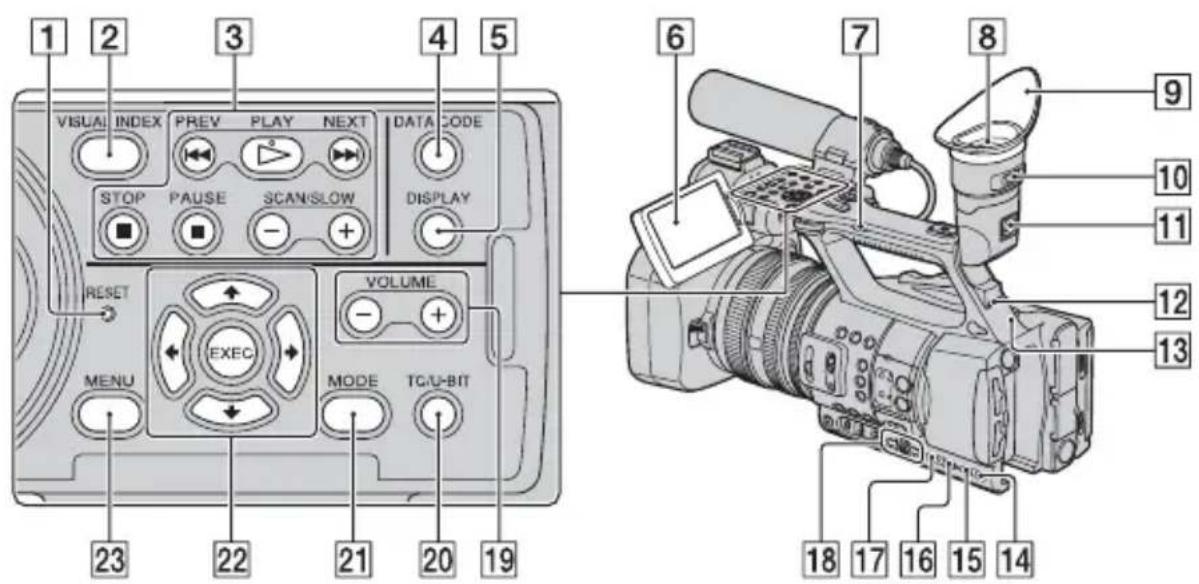
text_image
1 2 3 4 5 VISUAL INDEX PREV PLAY NEXT DATA CODE STOP PAUSE SCAN/SLOW DISPLAY RESET EXEC VOLUME MENU MODE TCU-BIT 23 22 21 20 19 6 7 8 9 10 11 12 13 18 17 16 15 141 RESET button
If you press the RESET button, all settings including the clock setting (except the picture profile settings) return to the default.
② VISUAL INDEX button (47)
③Playback control buttons (PREV/PLAY*/NEXT/STOP/PAUSE/SCAN/SLOW) (47)
④ DATA CODE button (51)
5DISPLAY button (51)
6 LCD screen/touch panel (15)
7 Handle zoom switch (26)
8 Viewfinder (16)
9 Large eyecup (16)
10 Viewfinder lens adjustment lever (16)
11 Viewfinder release lever (111)
12HEADPHONE MONITOR switch (41)
13 Rear recording lamp (86)
The recording lamp flashes if the remaining capacity of recording media or battery is low.
14 STATUS CHECK button (52)
15 PICTURE PROFILE button* (32)
16 MODE button (57)
17 MENU button** (17, 67)
18 SEL/PUSH EXEC dial/↔/→ buttons (17, 67)
19 VOLUME buttons* (47)
20 TC/U-BIT button
Switches between time code and user bit to display on the LCD screen.
21MODE button (57)
22 ↑/↓/←/→/EXEC buttons (67)
23 MENU button* (17, 67)
* PICTURE PROFILE button, VOLUME+ button, MENU button, and PLAY button have raised tactile dots for your convenience in locating the buttons.
**MENU button has a raised tactile bar for your convenience in locating the button.
Wireless Remote Commander
Remove the insulation sheet before using the Wireless Remote Commander.
Insulation sheet
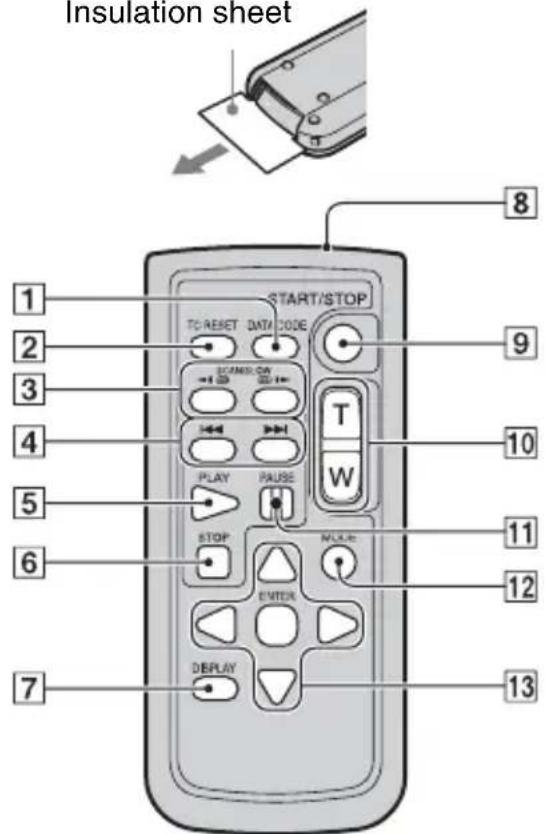
text_image
Insulation sheet 1 2 3 4 5 6 7 8 9 START/STOP TO RESET DATA CODE STATION PLAY PAUSE STOP ENTER DISPLAY W NOME 10 11 12 131DATA CODE button (51)
2 TC RESET button (43)
3 SCAN/SLOW buttons (47)
4 ◀◀◀ ▶▶▶ (PREV/NEXT) buttons (47)
5 PLAY button (47)
6 STOP button (47)
7DISPLAY button (51)
8 Transmitter
9 START/STOP button (21)
10 Power zoom buttons (26)
11 PAUSE button (47)
12 MODE button (57)
13 ◀/▶/▲/▼/ENTER buttons
Notes
- Aim the Wireless Remote Commander towards the remote sensor to operate your camcorder.
- Point the remote sensor away from strong light sources such as direct sunlight or overhead lighting. Otherwise, the Wireless Remote Commander may not function properly.
- When you are operating with the Wireless Remote Commander supplied with your camcorder, your video device may also operate. In that case, select a commander mode other than DVD2 for your video device, or cover the sensor of your video device with black paper.
To change the battery of the Wireless Remote Commander
①While pressing on the tab, inset your fingernail into the slit to pull out the battery case.
②Place a new battery with the + side facing up.
③Insert the battery case back into the Wireless Remote Commander until it clicks.
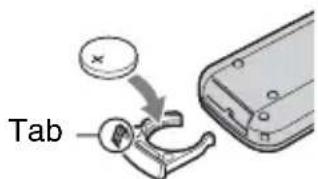
text_image
TabWARNING
Battery may explode if mistreated. Do not recharge, disassemble or dispose of in fire.
- When the lithium battery becomes weak, the operating distance of the Wireless Remote Commander may shorten, or the Wireless Remote Commander may not function properly. In this case, replace the battery with a Sony CR2025 lithium battery. Use of another battery may present a risk of fire or explosion.
Screen indicators
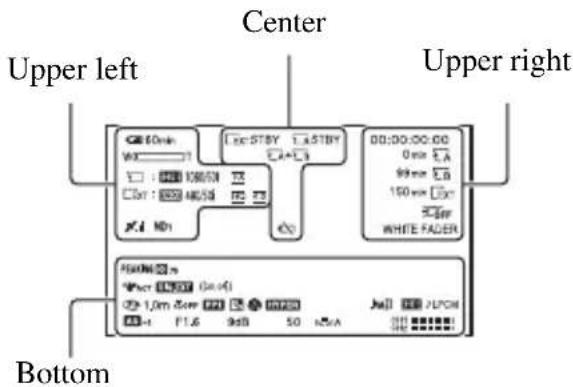
text_image
Center Upper left Upper right 10min W: 1 Ex: STBY 1.4STBY 2+3 00:00:00:00 0ms 5A 99mm 5A 150mm 5A 36pc WHITE FADER FLOWS: 5m Photo: 10000 (in.s) 1.0m Screen 1000 F1.6 9dB 50 kVA BottomUpper left
| Indicator Meaning | |
| 60min Remaining battery | |
| HD: 1080/50i FX | HD: /SET (24), REC FORMAT (25) |
| 4:3 | SD: WIDE REC (77) |
| ×,×,×,×,×,×,×,×,×,×,×,×,×,×,×,×,×,×,×,×,×,×,×,×,×,×,×,×,×,×,×,×,×,×,×,×,×,×,×,×,×,×,×,×,×,×,×,×,×,×,× | GPS triangulating status (41) |
| NDOFF ND1 ND2 ND3 | ND filter (30) |
Center
| Indicator Meaning | |
| Recording media | |
| Relay recording (22) | |
| STBY REC Recording status (21) | |
| Warning (99) | |
| ▶Playback indicator (47) |
Upper right
| Indicator Meaning | |
| 0min Estimated remaining recording time | |
| A B EXT | Recording/playback media |
| 00:00:00:00 Time code (hour:minute:second: frame) | |
| TC IN Time code input (44) | |
| Indicator Meaning | |
| OFF | LCD backlight off (15) |
| WHITE FADER | Fader (75) |
| BLACK FADER | |
Bottom
| Indicator Meaning | |
| PEAKING | PEAKING (81) |
| ZEBRA (81) | |
| "ACT"OFF | STEADYSHOT (73) |
| DIG.EXT | D.EXTENDER (75) |
| (COLOR) | x.v.Color (75) |
| Manual focus (27) | |
| FOCUS MACRO (74) | |
| PP1 ~ PP6 | Picture profile (32) |
| BACK LIGHT (73) | |
| SPOTLIGHT(73) | |
| HYPER | HYPER GAIN (71) |
| CLOSE | Iris (28) |
| 9dB | Gain (29) |
| 50 | Shutter speed (29) |
| JM_2^1 | Manual volume control (40) |
| JLPCM | :HD:AUDIO FORMAT (78) |
| AS | AE SHIFT (72) |
| A | Auto setting (82) |
| White balance (30) | |
Tips
- Indicators may look different or appear at different positions.
- Some indicators may not appear, depending on your camcorder model.
Data code during recording
The recording date, time and condition are recorded automatically on the recording media. They are not displayed while recording. However, you can check them by pressing the DATA CODE button (p. 51).
Index
A
AC Adaptor/Charger .....12
Access lamp....19
Accessory shoe....116
Accessory shoe mount......116
Accessory shoe plate .....116
ACTIVE STEADYSHOT ....73
AE RESPONSE....73
AE SHIFT....72, 94
AE SHIFT/ASSIGN 5 button 45
AF ASSIST....74
AGC LIMIT 71
AREA SET......86, 94
ASPECT 81
ASSIGN BUTTON ....45
ASSIGN buttons......45
ATW SENS 72
AUDIO LEVEL DISPLAY 82
AUDIO LEVEL (CH1/CH2) dial....40
AUDIO LIMIT 78
AUDIO MANUAL GAIN....79
AUDIO SET menu .....78
AUTO IRIS LIMIT .....73
AUTO/MAN (CH1/CH2) switch....40
AUTO/MANUAL switch.....28
B
BACK LIGHT....73, 94
BATT RELEASE (battery release) button ....12
Battery 12
Battery Info....52
BEEP 86
BLACK FADER .....75
BLACK GAMMA......34
BLACK LEVEL......34
Button-type lithium battery 121
C
CALIBRATION 110
CAMERA DATA DISPLAY 82,94
CAMERA SET menu ...... 71
CENTER...... 81
CH1 (INT MIC/INPUT1) switch.... 39
CH2 (INT MIC/INPUT1/ INPUT2) switch.... 39
Channel setting 39
Charge lamp.... 12
Charging time 13
CLOCK SET...... 17
COLOR BAR...... 76, 94
COLOR DEPTH...... 36
COLOR LEVEL 35
COLOR MODE...... 35
COLOR PHASE 35
Connect Computer....88 TV....54
Connecting cord.... 13
COPY 38
D
DATA CODE button ..... 51
Date and time.... 18, 123
DATE REC...... 86, 94
DELETE 62
DETAIL...... 37
DISPLAY button ...... 15, 51
DISPLAY OUTPUT...... 84
DISPLAY SET menu...... 81
DIVIDE.... 61
DOWN CONVERT TYPE 77
D.EXTENDER 75,94
E
EXPANDED FOCUS...... 28
Expanded focus ......28
EXPANDED FOCUS TYPE 82
EXPANDED FOCUS/ASSIGN
7 button....45
F
FADER....75, 94
Flash memory unit......20
Flash memory unit jack......20
FLICKER REDUCE ......73
Focus 27
FOCUS DISPLAY......83
Focus infinity......28
FOCUS MACRO .....74
Focus ring....27
FOCUS switch....27
FREE RUN....85
G
Gain 29
GAIN button....29
GAIN SET....71
Gain switch....29
GAMMA 34
GPS....41
GPS TIME DISPLAY......84
Grip belt....15
GUIDEFRAME......82
H
Handle record button.....21, 23
HANDLE ZOOM......74
Handle zoom 26
Handle zoom lever ......26
Handle zoom switch......26
HD AUDIO FORMAT......78
HD/SD SET......24
HEADPHONE OUT ......78
Headphones jack .....119
Holding the camcorder .....15
Hook for shoulder strap .....119
HYPER GAIN ....71
|
Image database file ......66
INDOOR....31
Indoor....31
“InfoLITHIUM” battery pack 107
INPUT1 39
INPUT1 jack....10
INPUT1 switch ....39
INPUT1 TRIM 79
INPUT1 WIND......79
INPUT2 39
INPUT2 jack....10
INPUT2 switch 39
INPUT2 TRIM 80
INPUT2 WIND......80
Insulation sheet ......121
INT MIC SENS ....79
INT MIC SET....79
INT MIC WIND .....79
Internal microphone....79
IRIS....28
IRIS button 28
Iris ring 28
IRIS RING ROTATE .....72
K
KNEE....35
L
LANGUAGE 86
Large eyecup....16
LCD backlight ....15
Lens hood with lens cover ... 10
LOCAL TIME......84
M
MANAGE MEDIA ...... 65
MANU WB TEMP ....31
MARKER....81, 94
MEDIA FORMAT......65
Memory card ......2, 106
Insert/Eject......19
Memory card slot 19
"Memory Stick Duo" media slot cover.... 19
"Memory Stick" media 2,107
"Memory Stick PRO Duo" media......107
Menu 67
AUDIO SET menu...... 78
CAMERA SET menu ... 71
DISPLAY SET menu.... 81
MODE menu....57
OTHERS menu......86
REC/OUT SET menu ... 77
TC/UB SET menu...... 85
MENU button.... 17, 67
Menu items.... 69
MIC+48V.... 40
MINUS AGC 71
MODE button.... 57
MODE menu ....57
Moisture condensation ..... 109
MOVIE DUB 63
N
ND filter 30
NTSC 103
0
One push button....31
Outside power source .....13
P
PAL....103
PEAKING....81, 94
PHOTO CAPTURE......60
PHOTO COPY ......64
Picture profile ....32
PICTURE PROFILE button 32
Playback 47
PLAYLIST ....59
PLAYLIST EDIT ....59
Power cord (mains lead)......13
POWER switch....14
Pre-installed rechargeable battery ....111
PROTECT 58
PUSH AUTO button......27
Push auto focus......27
PUSH (lens hood release) button......10
R
REC BUTTON SET ......23
REC CH SELECT switch.....39
REC FORMAT......25
REC LAMP[F] 86
REC LAMP[R]......86
REC RUN......85
REC SET 77
Record button ......21, 23
Recording 21
Recording format......25
Index (Continued)
Recording image quality .....24
Recording lamp ......21
REC/OUT SET menu .....77
Relay recording .....22
REMAINING 84
REMOTE CONTROL......87
Remote sensor ......117
REPAIR IMAGE DB FILE 66
RESET....38, 43
RESET button....120
S
SAFETY ZONE ....81
Screen indicators ......122
SD WIDE REC......77
SDI/HDMI/COMPONENT 77
SD-SDI SET....78
Self-diagnosis display......99
SEL/PUSH EXEC dial ...17, 67
Shoulder strap......119
SHUTTER DISPLAY ......83
Shutter speed 29
SHUTTER SPEED button 29
Simultaneous recording .....23
SKINTONE DETAIL......38
SMOOTH GAIN ....71
SMOOTH SLOW REC......42
SMOOTH WB......72
Specifications ....112
SPEED ZOOM......74
SPOTLIGHT 73,94
Status check....52
STATUS CHECK button .....52
STEADYSHOT....73
Still image....60
SUMMERTIME......86, 94
T
TC MAKE.... 85
TC PRESET...... 43, 94
TC RUN.... 85
TC/UB SET menu...... 85
TC/U-BIT button 120
Telephoto 26
TONE....76
Trademark.... 114
Transmitter.... 121
Triangulating information.... 41
Troubleshooting 90
TV 54
TV color systems ...... 103
U
UB PRESET 43
UB TIME REC 85,94
USB SELECT.... 89
Using the menu.... 57, 67
Using your camcorder abroad 103
UTC TIME.... 84
V
VF BACKLIGHT ...... 83, 94
VF COLOR.... 84
VF POWERMODE...... 84
VIDEO OUT...... 77
Viewfinder 16
Viewfinder lens adjustment lever 16
Viewfinder release lever .... 111
VISUAL INDEX button ..... 47
VISUAL INDEX/ASSIGN 6 button 45
Volume.... 49
VOLUME buttons...... 49
W
Warning indicators...... 99
Warning messages......100
WB OUTDOOR LEVEL .....72
WB PRESET....72
WB SHIFT 36
WB TEMP SET......72
White balance....30
White balance memory switch 31
WHITE FADER....75
WHT BAL button....30
Wide angle....26
Wireless Remote Commander 121
X
XLR AGC LINK....79
XLR SET....79
x.v.Color....75, 94
Z
ZEBRA....81, 94
ZEBRA/ASSIGN 4 button ... 45
Zoom 26
ZOOM DISPLAY ....82
Zoom lever 26
Zoom ring....26
ZOOM switch......26
http://www.sony.net/
Printed in Japan