
FreeWave - Remote control Vello - Free user manual and instructions
Find the device manual for free FreeWave Vello in PDF.


| Product Type | Wireless Remote Shutter Release |
| Brand | Vello |
| Model | FreeWave |
| Transmitter Power | 12V / 23A battery |
| Receiver Power | 3V / CR2 battery |
| Transmitter Battery Life | Up to 3 years |
| Receiver Battery Life | Approx. 20,000 triggers |
| Operating Frequency | 433 MHz |
| Wireless Range | 100m (320 ft) with no obstructions |
| Smart Code Channels | Up to 16,000,000 possible codes |
| Shutter Modes | Single shot, 2-second delay, continuous (5-shot or lock), bulb |
| Confirmation LEDs | 2-color (green for focus, red for exposure) |
| Compatible Cameras | Many models via interchangeable release cables (Canon, Nikon, Sony, Olympus, Panasonic, etc.) |
| Wired Operation | Yes, receiver works as wired remote without battery |
| Mounting | Hot shoe mount or optional bracket (CB-600) |
| Dimensions (approx.) | Transmitter: 85 x 35 x 15 mm; Receiver: 60 x 30 x 25 mm |
| Weight (approx.) | Transmitter: 30 g; Receiver: 40 g (without battery) |
| Safety | Do not disassemble; avoid water, extreme heat/cold; keep away from children; remove batteries when not in use |
| Maintenance | Wipe with dry cloth; replace batteries as needed; do not use solvents |
| Warranty | 1-year limited warranty (repair or replacement) |
Frequently Asked Questions - FreeWave Vello
User questions about FreeWave Vello
0 question about this device. Answer the ones you know or ask your own.
Ask a new question about this device
Download the instructions for your Remote control in PDF format for free! Find your manual FreeWave - Vello and take your electronic device back in hand. On this page are published all the documents necessary for the use of your device. FreeWave by Vello.
USER MANUAL FreeWave Vello
natural_image
Hand holding a handheld device next to a camera on a tripod against a black background (no text or symbols visible)
VELLO
INTRODUCTION
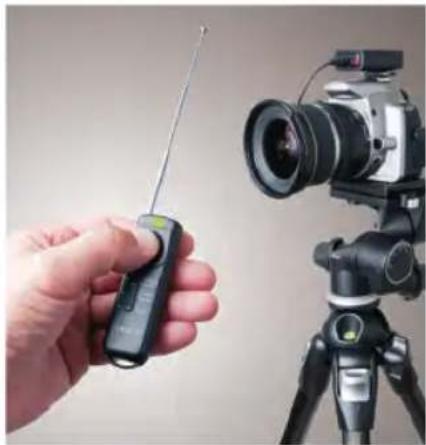
Thank you for choosing the Vello FreeWave Wireless Remote Shutter Release. This device triggers your camera wired or wirelessly, allowing you to trip the shutter without disturbing the camera. It's ideal for taking pictures of subjects that are difficult to approach, such as wildlife. It also eliminates vibrations caused by pressing your camera's shutter release button during macro, close-up, or long-exposure photography. The two-second delay function is great for self-portraits.
Unlike infrared remotes, which won't work if the receiver is not in direct line-of-sight of the transmitter, the FreeWave uses radio frequencies. Radio waves can pass through and around objects such as walls, windows, and floors. You can even trigger your camera around corners.
The FreeWave can transmit over 16,000,000 possible channels, and there are no dip switches to set. The device configures with the press of a button.
natural_image
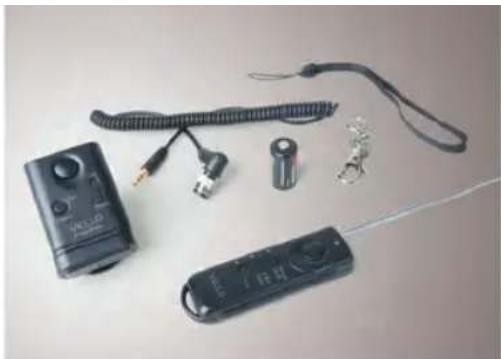
Collection of electronic devices including a JF-LED controller, USB cable, and two black handheld devices with metallic components (no visible text or symbols)Your Vello FreeWave
Wireless Remote Shutter Release kit contains:
Wireless RF Receiver,
Wireless RF Transmitter,
Camera Release cable,
Battery, Lanyard, and Clip.
KEY FEATURES
Smart Code: 16,000,000 possible radio channels. No dip switches to set. One transmitter can trigger multiple receivers.
Extended Range: up to 100m (320 ft.)
Multi-function: Trigger your camera wirelessly or wired. Wired triggering works even if the battery in the receiver is dead or missing.
Versatile: One receiver works with dozens of camera models. Just swap out the camera release cable.
Dual-Function Release: Press halfway to focus; press full to trigger shutter.
Delayed Release: Two-second delay function gives you extra time to get into position.
Multi-exposure: Take multiple shots with one press of the trigger.
Long Exposure: Control the length of the exposure remotely.
LED indicators: Confirm pre-focus and exposure during wireless mode.
natural_image
Hand holding a handheld electronic device next to a camera on a tripod (no visible text or symbols)SAFETY WARNINGS
- There are no user-serviceable parts inside the devices. Do not attempt to disassemble or perform any unauthorized modification.
- Do not operate the FreeWave in the presence of flammable gas or vapors.
- Do not handle with wet hands or immerse in or expose to water or rain. Failure to observe this precaution could result in fire or electric shock.
-
Keep out of the reach of children. This device contains small parts which may pose a choking hazard.
-
Observe caution when handling batteries. Batteries may leak or explode if improperly handled. Use only the batteries listed in this manual. Make certain to align batteries with correct polarity.
-
Batteries are prone to leakage when fully discharged. To avoid damage to the product, be sure to remove the batteries when leaving the product unattended for prolonged periods or when no charge remains.
-
Do not use or leave the devices in conditions of extreme heat, severe cold, or high humidity.
- Turn off the camera's power before inserting or removing the remote cord.
- Dispose used batteries, packaging, and old devices in accordance with appropriate local environmental regulations.
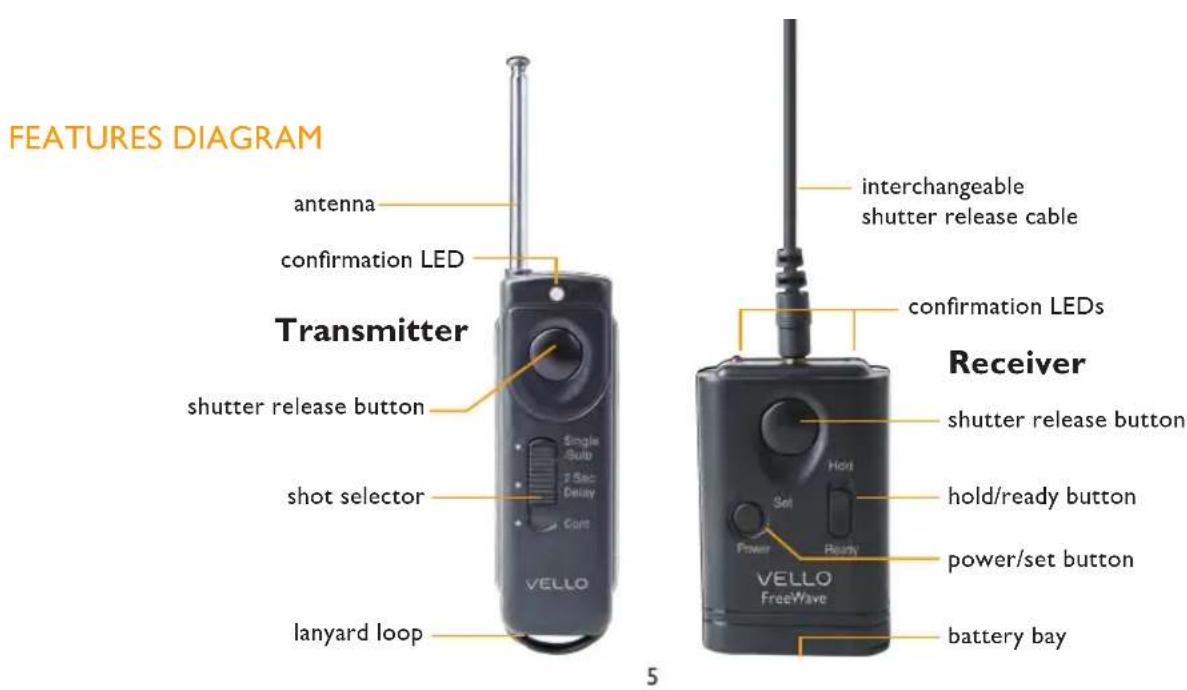
antenna confirmation LED
shutter release button
shot selector
lanyard loop
POWERING UP
Turning ON the Receiver: Press and hold the Set/Power button until the red LED comes on. The Receiver turns off the same way. Press and hold the Set/Power button until the red LED turns off.
Turning ON the Transmitter: There is no need for a power button on the Transmitter. The Transmitter is always ready to fire and uses power only when you press the shutter release button.
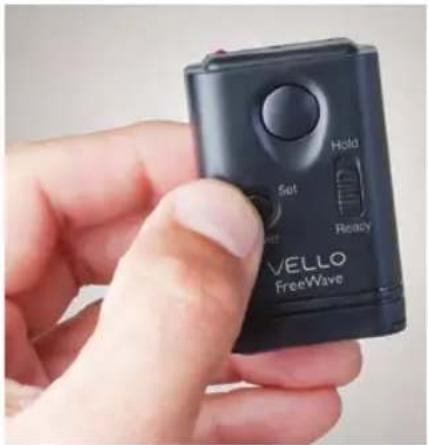
Press and hold the Set/Power button for \~3 seconds to power up the Receiver.
SETTING THE SMART CODE
The FreeWave supports 16,000,000 possible radio channels. The units have been synchronized at the factory, so your system can work right out of the box. However, to maximize signal quality and range, it's best to use the Smart Code technology to sense the "quiet" frequencies in your environment and re-synchronize on that channel.
Multiple receivers can be programmed to respond to a single transmitter, allowing you to trigger several cameras with a single transmitter.
To synchronize the Transmitter and Receiver(s):
- Turn on the Receiver(s) by pressing and holding the Set/Power button until the left red LED comes on.
- Set the Receiver(s) to Ready and the Transmitter to Single/Bulb.
- Press the Set/Power button on the Receiver(s) five times. The right LED will begin blinking red.
-
Fully depress the shutter button on the Transmitter. The right LED on the Receiver(s) will blink and then turn off.
-
Your Smart Code is set and will remain set to this code even after the Receiver is turned off.
To test for synchronization, press the shutter release button on the Transmitter. If you press halfway, the right LED on the Receiver will light green. Pressing all the way will turn the LED red. If you don't see this confirmation, re-synchronize the units.
MOUNTING THE RECEIVER
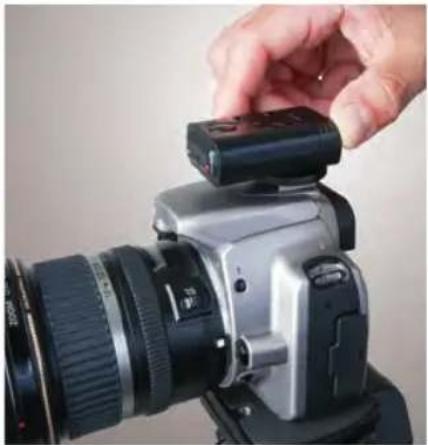
If using the FreeWave wirelessly, mount the Receiver on your camera's hot shoe, facing forwards or backwards.
If your camera's hot shoe is in use, you can use an optional straight bracket accessory (Vello CB-600) to attach the Receiver to your camera.
With your camera and Receiver OFF, connect the shutter release cable's sub-mini plug end to the Receiver and the other end to your camera's shutter release jack. Power up your camera and Receiver.
natural_image
Close-up of a hand holding a camera lens and top handle, no visible text or symbols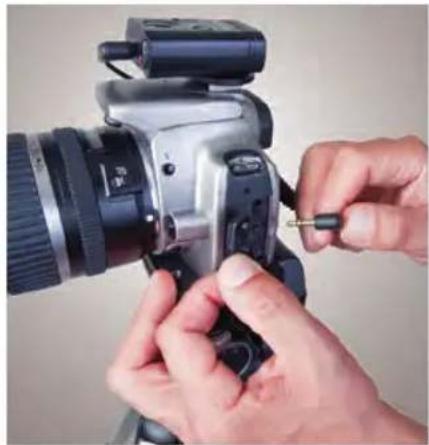
natural_image
Close-up of hands adjusting a DSLR camera with a screwdriver (no visible text or symbols)SINGLE SHOTS | WIRELESSLY
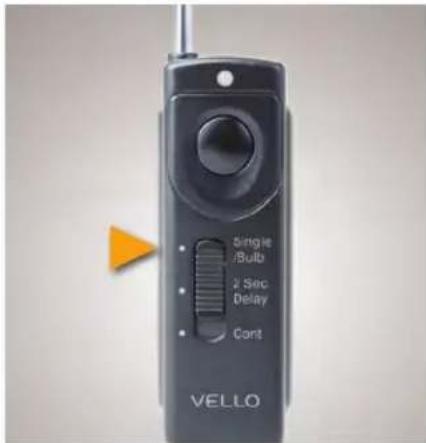
- Turn on the Receiver by pressing and holding the Set/Power button until the left red LED comes on.
- Set the Receiver to Ready and the Transmitter to Single/Bulb.
- Press the Transmitter's shutter release button halfway to wake or focus your camera (if set to Auto Focus). The LED will turn green.
- Fully depress the shutter button on the Transmitter. The LED will turn red and the shutter will be triggered.

TWO SECOND DELAY / WIRELESSLY
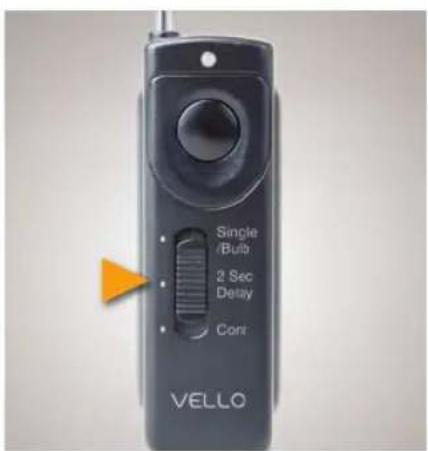
- Turn on the Receiver by pressing and holding the Set/Power button until the left red LED comes on.
- Set the Receiver to Ready and the Transmitter to 2 Sec Delay.
- Press the Transmitter's shutter release button halfway to focus the camera (if set to Auto Focus). The LED will turn green.
- Fully depress the shutter button on the Transmitter. The LED will turn red and the shutter will be triggered after a two second delay.
natural_image
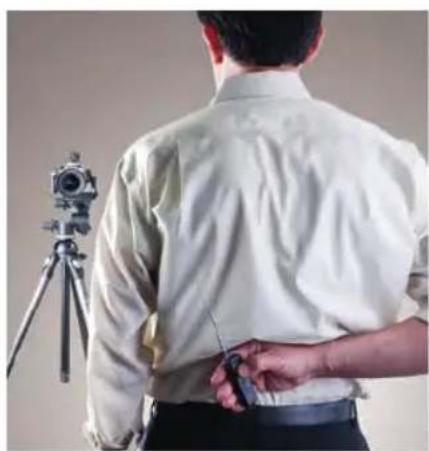
Back view of a person wearing a light-colored shirt, holding a camera on a tripod (no visible text or symbols)- Turn on the Receiver by pressing and holding the Set/Power button until the left red LED comes on.
- Set the Receiver to Ready and the Transmitter to Cont.
-
Press the Transmitter's shutter release button halfway to focus the camera (if set to Auto Focus). The LED will turn green.
-
If your camera is set to Single Shot Mode, a full press of the Transmitter's shutter button will trigger the camera to take five photos.
If your camera is set to Continuous Mode, a full press of the Transmitter's shutter button will trigger the camera to take continuous photos until you release the shutter button.
To lock in Continuous Mode: Set the Receiver to Ready and the Transmitter to Single/Bulb. Set your camera to Continuous Mode. Fully press the Transmitter shutter button for four seconds. The camera will continue to take photos until you press the shutter button again.

natural_image
Silhouette of a black bird standing on a branch against a cloudy sky background (no text or symbols visible)
natural_image
Silhouette of a black bird perched on a branch against a blurred sky background (no text or symbols visible)
natural_image
Silhouette of a bird perched on a branch against a blue sky with clouds (no text or symbols visible)
natural_image
Silhouette of a bird in flight against a blue sky with clouds (no text or symbols)
natural_image
Silhouette of a bird in flight against a blue sky with white clouds (no text or symbols)BULB MODE (LONG EXPOSURE) | WIRELESSLY
- Set your camera to Bulb mode.
- Turn on the Receiver by pressing and holding the Set/Power button until the left red LED comes on.
- Set the Receiver to Ready and the Transmitter to Single/Bulb.
-
Press the Transmitter's shutter release button halfway to wake or focus the camera (if set to Auto Focus). The LED will turn green.
-
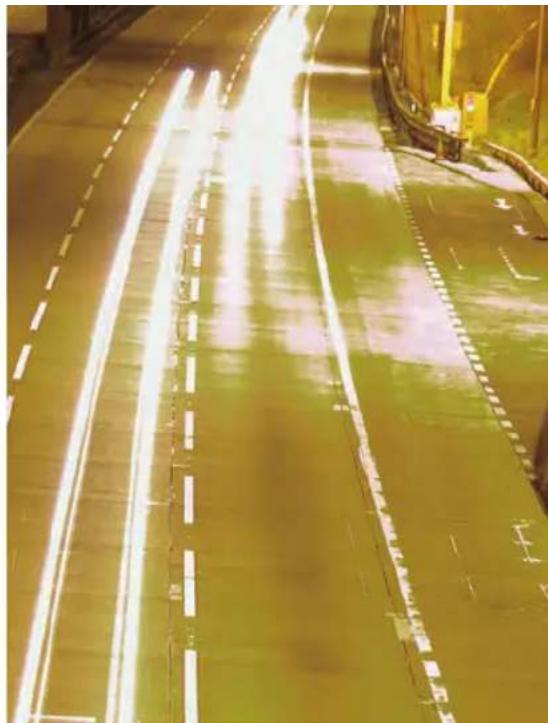
Fully depress the Transmitter's shutter button for three seconds until the red LED on the Transmitter turns off. The shutter will remain open until you half-press or full-press the shutter button again.
natural_image
Aerial view of a road with visible lane markings and light reflections, no text or symbols present.SINGLE SHOTS | WIRED
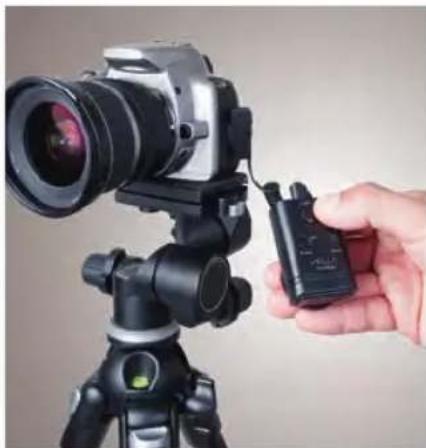
The FreeWave Receiver can also be used as a wired remote. With your camera and receiver OFF, connect the shutter release cable's miniplug end to the Receiver and the other end to your camera's shutter release jack. Power up your camera. The Receiver does not need to be on, but because the Receiver does not need power in wired mode, the LEDs will not light.
-
Turn on the Receiver by pressing and holding the Set/Power button until the left red LED comes on.
-
Set the Receiver to Ready.
- Press the Receiver's shutter release button halfway to wake or focus your camera (if set to Auto Focus). The confirmation LED will not display, so be sure to manually focus or allow the camera to Auto Focus without confirmation.
- Fully depress the shutter button on the Receiver. The shutter will be triggered.
Moving the Receiver switch to Hold will also trigger the shutter.
natural_image
Hand holding a small black-and-white photo recording device mounted on a tripod (no visible text or symbols)CONTINUOUS MODE | WIRED
- Power up your camera and set it to Continuous Mode. The Receiver does not need to be on, but because the Receiver does not need power in wired mode, the LEDs will not light.
- Set the Receiver switch to Ready.
- Press the shutter release button halfway to wake or focus the camera (if set to Auto Focus).
The confirmation LED will not display, so be sure to focus manually or allow the camera to Auto Focus without confirmation.
- A full press of the shutter button will trigger the camera to take continuous photos until you release the shutter button.
You can also take continuous photos by moving the Receiver switch to the Hold position. The camera will take photos until you move the switch back to the Ready position.
natural_image
Close-up of a white net with red rim in mid-air, against black background (no text or symbols)
natural_image
Close-up of a basketball going through the hoop, with no visible text or symbols.
natural_image
Close-up of a basketball hoop with white netting against black background (no text or symbols)
natural_image
Close-up of a white net with a red basket, against a black background (no text or symbols visible)
natural_image
Close-up of a basketball hoop with white wireframe net against black background (no text or symbols)BULB MODE (LONG EXPOSURE) | WIRED
- Power up your camera and set it to Bulb Mode. The Receiver does not need to be on, but because the Receiver does not need power in wired mode, the LEDs will not light.
- Set the Receiver to Ready.
-
Press the Receiver's shutter release button halfway to wake or focus the camera (if set to Auto Focus). The confirmation LED will not display, so be sure to focus manually or allow the camera to Auto Focus without confirmation.
-
Fully depress the Receiver's shutter button to take the shot. The shutter will stay open as long as the shutter button is pressed.
Sliding the Receiver switch to the Hold position will keep the shutter open until the switch is returned to the Ready position.

natural_image
Nighttime view of a narrow cobblestone alley with illuminated streetlights and streetlights (no visible text or signage)CHANGING THE BATTERIES
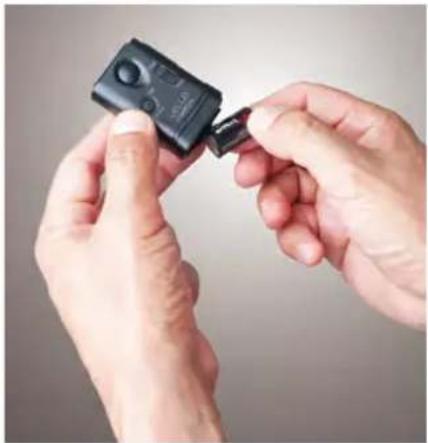
The FreeWave Receiver uses a CR2 3V battery which should last through approximately 20,000 triggers. It is easy to change. Slide open the battery door on the end of the unit.
The FreeWave Transmitter uses a 23A 12V battery, which should last three years under normal conditions. To replace the battery, release two screws on the back of the unit to access the battery. Be sure to line up the catches on the selector switch before closing.
natural_image
Close-up of hands holding a black electronic device with a small cable (no visible text or symbols)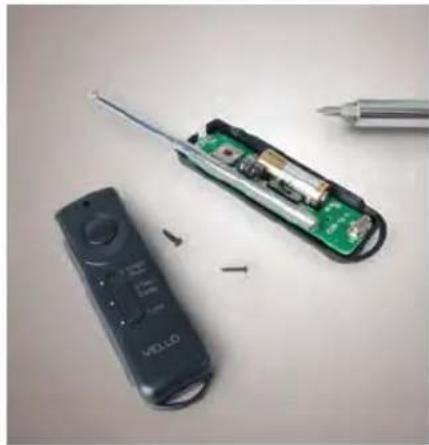
natural_image
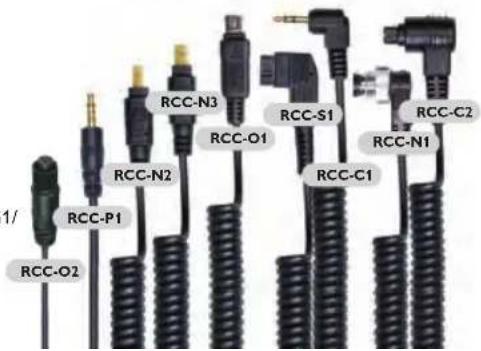
Disassembled electronic device with a green circuit board and a black remote control, next to a pen and screwdriver (no text or symbols visible)The FreeWave includes a camera release cable that enables the remote to work with certain models of cameras, but just by changing the camera release cable, a single FreeWave Receiver can work with many other cameras as well.
At right are models of Vello Camera Release Cables for FreeWave and the cameras they support. For these cables, and cables for other camera models, check with your Vello dealer.
RCC-C2 - Canon EOS 10D / 20D / 30D / 40D / 50D / 5D / 5D Mark II / 5D Mark III / 7D / 1D / Mark II / Mark IIn / Mark III / Mark IV / 1DS / Mark II/ Mark III / 1D X
RCC-N1 - Nikon D1 / D1H / D1X / D2 / D2H/ D2Hs / D2X / D2XS / D3 / D3X / D3S / D4 / D200 / D300 / D300s / D700 / D800 / D800E Fuji S3pro / SSPro Kodak DCS-14N
RCC-C1 - Canon EOS 30 / 33 / 50 / 60D / 300 / Digital Rebel (300D) / XT (350D) / XTi (400D) / XSi (450D) / XS (1000D) / T1i (500D) / T2i (550D) / T3 (1100D) / T3i (600D) / Powershot G10 / G11 / G12 / G1 X Contax N / 645 Pentax K100D / K110D / K200D / K10D / K20D / K-5 / K-7 / *ist DS / DS2 / DL2 / DL / D Sigma SD1
Samsung GX-1S / GX-1L / GX-10 / GX-20 / NX Series
RCC-S1 - Sony a100 / a200 / a300 / a350 / a500 / a550 / a560 / a580 / a700 / a850 / a900 / SLT a33 / a35 / a55 / a57 / a65 / a77
RCC-O1 – Olympus E400 /E410 / E420 / E450 / E510 / E520 / E620 / E-P2 / E-P3 / E-PL2 / E-PL3 / E-PM1 / SP-510UZ / SP-550UZ / SP-560UZ / SP-570UZ / XZ-1
RCC-O2 - Olympus E-1/ E-3/ E-5
RCC-N3 - Nikon D70s / D80
RCC-N2 - Nikon D90 / D3100 / D3200 / D5000 / D5100 / D7000
RCC-P1 - Panasonic DMC-L1 / DMC-L10/ DMC-G1/ DMC-GF1 / DMC-GH1 / DMC-GX1/ DMC-G2 / DMC-GH2 / DMC-G3 / DMC-G10 / DMC-FZ100 / DMC-FZ150
SPECIFICATIONS | TROUBLESHOOTING
| Tr ansmi tt er | Receiver | |
| Power | 12V / 23A | 3V / CR2 |
| Battery Life | up to 3 years | approx. 20,000 triggers |
| Smart Code Channels | 16,000,000 possible codes | |
| Range | 100m (320 ft) with no obstructions | |
| Frequency | 433 MHz | |
| Confirmation LEDs | 2 color | |
| Shutter Modes | single shot, 2-second delay, continuous, & bulb | |
Troubleshooting
Problems with the FreeWave can be traced to the following most common causes. Perform the following steps to diagnose the problem:
- Check that the shutter release cable is in good condition and is properly connected.
- Make sure that the Receiver switch has not been set to Hold.
- Remove the battery from the Receiver, reinsert it, and reset the Smart Code.
FCC COMPLIANCE
This equipment generates, uses, and can radiate radio frequency energy, and if not installed and used in accordance with the instructions, may cause harmful interference to radio communications. This equipment has been tested and found to comply with the limits for a Class B digital device pursuant to Part 15 of the FCC Rules. These limits are designated to provide reasonable protection against harmful interference in a residential installation.
There is no guarantee that interference will not occur in a particular installation.
If this equipment does cause harmful interference to radio or television reception, which can be determined by turning the equipment ON or OFF, the user is encouraged to try to correct the interference by one or more of the following measures:
- Reorient or relocate the receiving antenna;
- Increase the distance between the equipment and the receiver.
This device complies with Part 15, Subpart B, Class B of the FCC Rules.
Operation is subject to the following two conditions:
- This device may not cause harmful interference;
- This device must accept any interference received, including interference that may cause undesired operation.
Any changes or modifications (including the antennae) made to this device that are not expressly approved by the manufacturer may void the user's authority to operate the equipment.
One-Year Limited Warranty
This VELLO product is warranted to the original purchaser to be free from defects in materials and workmanship under normal consumer use for a period of one (1) year from the original purchase date or thirty (30) days after replacement, whichever occurs later. The warranty provider's responsibility with respect to this limited warranty shall be limited solely to repair or replacement, at the provider's discretion, of any product that fails during normal use of this product in its intended manner and in its intended environment. Inoperability of the product or part(s) shall be determined by the warranty provider. If the product has been discontinued, the warranty provider reserves the right to replace it with a model of equivalent quality and function.
This warranty does not cover damage or defect caused by misuse, neglect, accident, alteration, abuse, improper installation or maintenance. EXCEPT AS PROVIDED HEREIN, THE WARRANTY PROVIDER MAKES NEITHER ANY EXPRESS WARRANTIES NOR ANY IMPLIED WARRANTIES, INCLUDING BUT NOT LIMITED TO ANY IMPLIED WARRANTY OF MERCHANTABILITY OR FITNESS FOR A PARTICULAR PURPOSE. This warranty provides you with specific legal rights, and you may also have additional rights that vary from state to state.
To obtain warranty coverage, contact the Vello Customer Service Department to obtain a return merchandise authorization ("RMA") number, and return the defective product to Vello along with the RMA number and proof of purchase. Shipment of the defective product is at the purchaser's own risk and expense.
For more information or to arrange service, visit www.vellogear.com or call Customer Service at 212-594-2353.
Product warranty provided by the Gradus Group.
www.gradusgroup.com
VELLO is a registered trademark of the Gradus Group.

VELLO™
A Gradus Group Brand
www.vellogear.com © Copyright 2014 Gradus Group

VELLO
GG2
- INTRODUCTION
- KEY FEATURES
- SAFETY WARNINGS
- POWERING UP
- SETTING THE SMART CODE
- To synchronize the Transmitter and Receiver(s):
- MOUNTING THE RECEIVER
- SINGLE SHOTS | WIRELESSLY
- TWO SECOND DELAY / WIRELESSLY
- BULB MODE (LONG EXPOSURE) | WIRELESSLY
- SINGLE SHOTS | WIRED
- CONTINUOUS MODE | WIRED
- BULB MODE (LONG EXPOSURE) | WIRED
- CHANGING THE BATTERIES
- SPECIFICATIONS | TROUBLESHOOTING
- Troubleshooting
- FCC COMPLIANCE
- One-Year Limited Warranty
Brand : Vello
Model : FreeWave
Category : Remote control