Flowline 750N - Tripod Flycam - Free user manual and instructions
Find the device manual for free Flowline 750N Flycam in PDF.


| Brand | Flycam |
| Model | Flowline 750N |
| Product Type | Ergonomic Camera Support (Wearable) |
| Category | Tripod |
| Mounting Height | 100 cm (39") |
| Folded Height | 60 cm (23.6") |
| Product Weight (Complete) | 4 kg (9 lb) |
| Load Capacity | 10 - 12 kg (22 - 26.4 lb) |
| Suspension Line Length | 107 cm (42") |
| Top Bar Length (with Extension) | 520 mm (20.5") |
| Top Bar Length (without Extension) | 340 mm (13.4") |
| Waist Strap Length (Min) | 87 cm (34") |
| Waist Strap Length (Max) | 142 cm (56") |
| Extension Length | 18 cm (7") |
| Warranty | 1 year from date of purchase |
| Safety Features | Safety belt included; always hold camera; never undo waist buckle with camera attached |
| Adjustments | Height adjustment knobs, angle adjustment ring, side support adjustment |
| Included Accessories | Suspension line, camera hook, support arm, angle adjustment ring, height adjustment knobs, side support adjustment, accessory bag |
| Care & Cleaning | Clean with damp cloth; store upright when not in use for extended periods |
| Spare Parts & Repairability | Replacement parts available at nominal cost after warranty period |
| Intended Use | Reduces static load on neck and shoulders; allows extended shooting sessions |
Frequently Asked Questions - Flowline 750N Flycam
User questions about Flowline 750N Flycam
0 question about this device. Answer the ones you know or ask your own.
Ask a new question about this device
Download the instructions for your Tripod in PDF format for free! Find your manual Flowline 750N - Flycam and take your electronic device back in hand. On this page are published all the documents necessary for the use of your device. Flowline 750N by Flycam.
USER MANUAL Flowline 750N Flycam
natural_image
Two black diving brays with adjustable straps and clips, shown from different angles (no text or symbols visible)Flycam Flowline Camera Support (FLCM-FLN-N)
Instruction Manual
FLYCAM
At Flycam, our goal is to ensure 100% Customer Satisfaction in all that we do. We back our sales with a 1 year warranty from the date of purchase and work hard to resolve any problems in the unlikely event one should arise. With our commitment to continuous improvement and your Feedback, building on our reputation of providing affordable, quality products is PRIORITY #1.
Table of Contents
Subject Page
Foreword 3
Introduction 4
Specifications 5
Safety Hints 5-6
Assembling 7-9
Warranty 10-11
■ Welcome To Flycam!
Dear Client,
On behalf of all the people that work so hard to provide you with the most up-to-date, flexible and cost-efficient production gear, we would like to welcome you into the Flycam family.
By purchasing your Flycam Flowline Camera Support, you have just joined a host of designers, engineers, machinists, assembly, customer service and office staff that take great pride in all that they do. Our mantra of continuous improvement has been the guiding principle of how we conduct our business since day one.
Once you have the opportunity to experience your new Flycam Flowline Camera Support, we hope you will agree that we craft quality products at a competitive price. Products designed to meet and exceed the standards of today's real production world.
Standards set by our valued clients and standards we strive to maintain.
With Best Wishes,
Flycam Team
Introduction
Flycam Flowline is a professional Ergonomic Stabilizing Camera Support which ensures comfort & lets you shoot 24x7. It is designed to reduce the static load on neck and shoulder muscles and distributes it to your torso. Flowline is properly packed in a protective bag pack to ensure safety of the product & for travel convenience.
What's In The Box
Please inspect the contents of your shipped package to ensure you have received everything that is listed below.
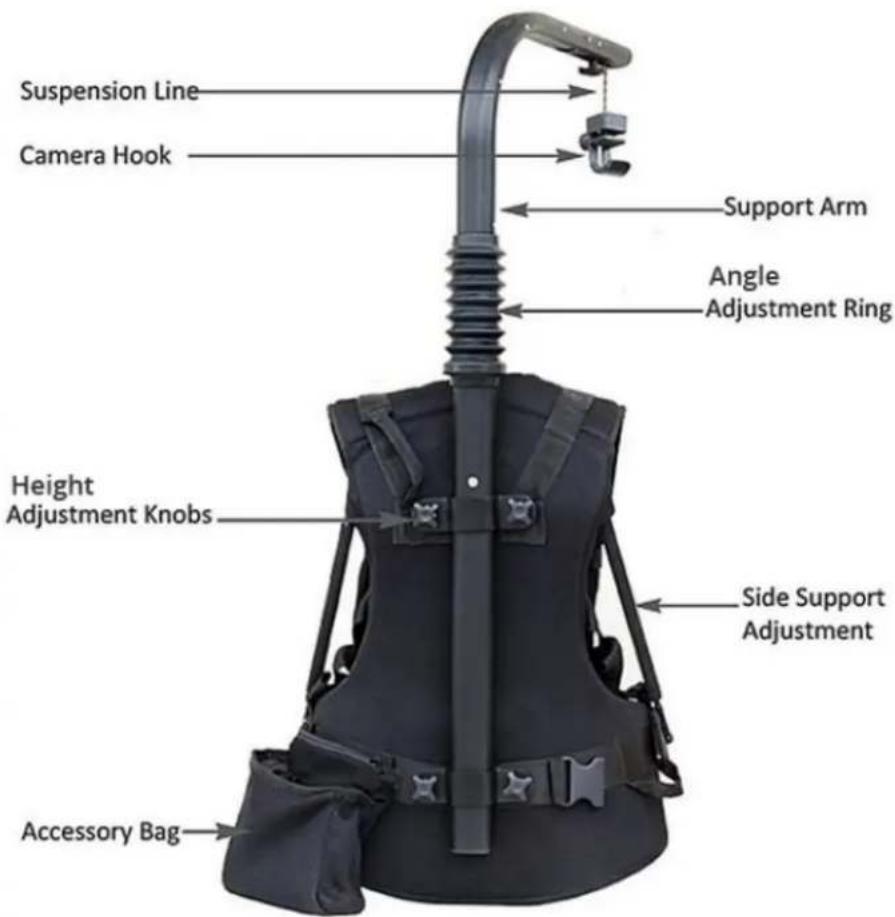
text_image
Suspension Line Camera Hook Support Arm Angle Adjustment Ring Height Adjustment Knobs Side Support Adjustment Accessory Bag| SPECIFICATIONS | FLOWLINE 300N | FLOWLINE 400N | FLOWLINE 500N |
| Product Weight: without packing | Complete 4kg (9lb) | Complete 4kg (9lb) | Complete 4kg (9lb) |
| Height: | Mounted: 100 cm (39")Folded: 60 cm (23.6") | Mounted: 100 cm (39")Folded: 60 cm (23.6") | Mounted: 100 cm (39")Folded: 60 cm (23.6") |
| Capacity: | 5 - 8 kg (11 - 17.6 lb) | 8 - 10 kg (17.6 - 22 lb) | 10 - 12 kg (22 - 26.4 lb) |
| Suspension line length: | 107 cm (42") when fully stretched. | 107 cm (42") when fully stretched. | 107 cm (42") when fully stretched |
| Top Bar Length: | Including extension :520mmExcluding extension :340mm | Including extension :520mmExcluding extension :340mm | Including extension :520mmExcluding extension :340mm |
| Min. waist hip strap length: | 87 cm (34")) | 87 cm (34")) | 87 cm (34")) |
| Max. waist hip strap length: | 142 cm (56") | 142 cm (56") | 142 cm (56") |
| Extension: | 18 cm (7") | 18 cm (7") | 18 cm (7") |
Safety Hints
- Always hold the camera when working with Flycam Flowline. There is safety belt which you attach to camera and hook on the jacket.
- Never undo the waist buckle when camera is attached to Flycam Flowline! The weight of camera will pull the top of Flycam Flowline down, and you might lose control of camera.
- It is important that Support Arm is vertical. The weight of camera should primarily be on your hips. If it is lopsided, the load will be unevenly distributed on hips and camera might hit the Arm.
-
The hip/waist belt should be tightened so that the rig doesn't slide down around the hips. Shoulder Strap is mainly for balancing the Flowline, and prevent it from tilting.
-
If the shoulder arm is too high or too low, first try adjusting the Support Arm in relation to Support Jacket or hip/waist belt. It is also possible to adjust the tube inside Support Arm, but that might require adjusting the tightness of Suspension Line.
- If you work with the Flycam Flowline under special conditions, i.e. in a car, boat, plane or helicopter, make sure to use Safety Belt.
- If you don't use your Flycam Flowline for more than a couple of months, make sure to store it standing upwards. Otherwise the shock absorber gasket might dry out.
Friendly Tips
- It is as simple to put the Flowline on as a backpack. Just don't forget to adjust it so it feels comfortable.
- When attaching the hook onto camera, you might find it easier to put the camera on a table or bench. Try and find right balance before you secure the hook.
- Try to keep the camera as close to your body as possible, to avoid unnecessary strain on your back.
- When filming upwards, you might find it easier if you have the camera tucked under your arm.
- When shooting at hip or knee level, lean backwards when pushing the camera forward; thus minimizing the load on your back. You can attach LCD screen, to get better control of the shot.
- When shooting at hip level during longer periods of time, rest the camera on hip/waist belt to increase stability.
Assembling
NOTE: Assembling steps are same for all Models.
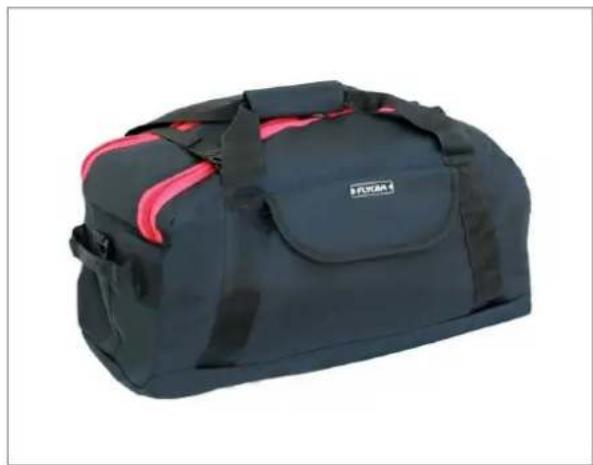
- You will receive Flycam Flowline packed in Bag. Open the Bag and take out your Flycam Flowline.
natural_image
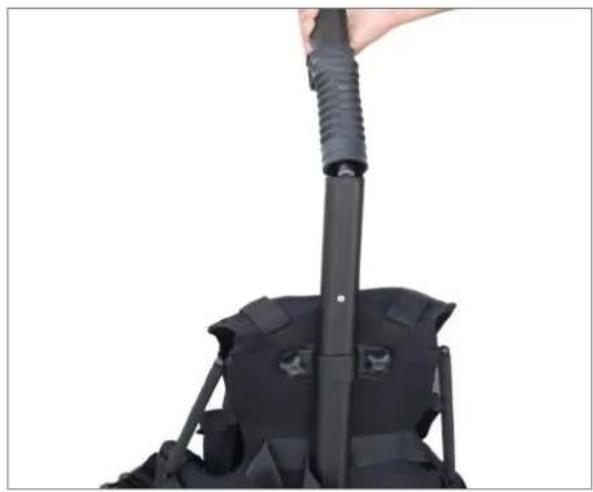
Black and red Fiji 4 athletic bag with black straps and blue covers (no text or symbols visible)- Join Support Arm Section with Section on Support Jacket, by simple push-fit technique.
natural_image
Close-up of a hand holding a black tactical rifle with a strap, mounted on a dark tactical vest (no text or symbols visible)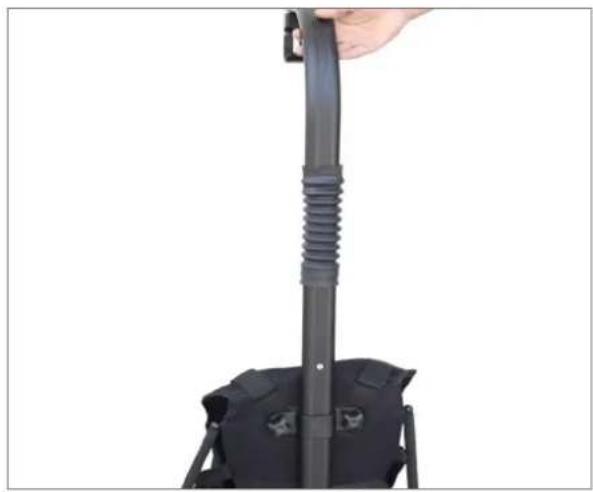
natural_image
Close-up of a black mechanical device with a coiled cable and support bracket, no visible text or symbols- Slightly loosen all the four Adjustment Knobs provided on back of Support Jacket to adjust the height of Support Arm.

natural_image
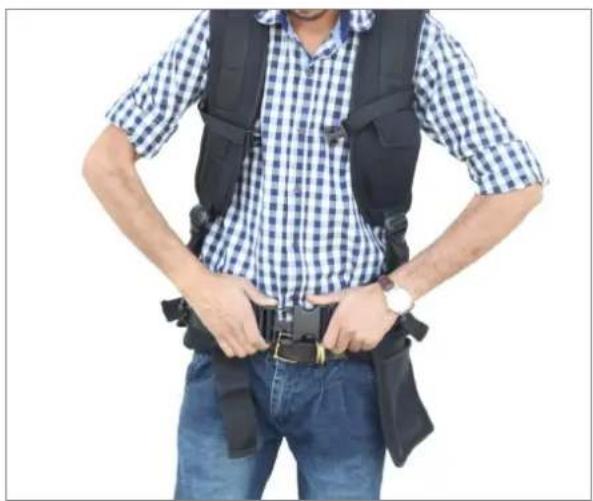
Back view of a black diving bridle with adjustable neck and handle, showing red directional arrows indicating movement or positioning (no text or symbols)- Wear Support Jacket and tighten the buckles provided at waist and chest. Then adjust until you find it comfortable.
natural_image
Person wearing a checkered shirt and vest with a belt, hands on hips (no visible text or symbols)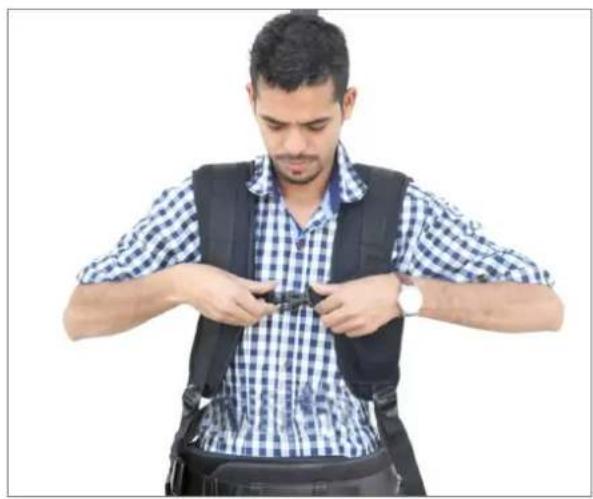
natural_image
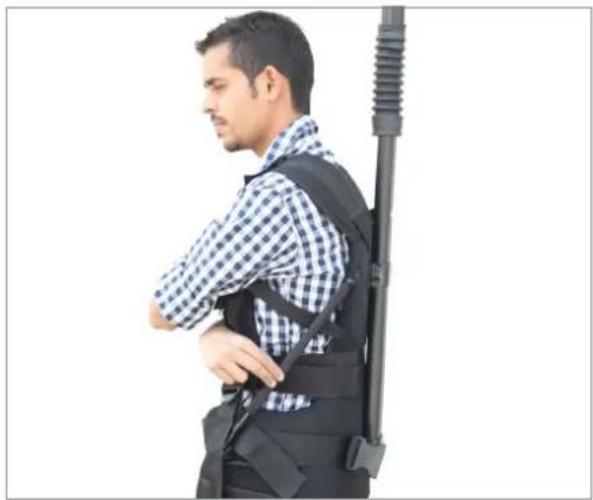
Man wearing a checkered shirt and vest, adjusting a black safety belt (no text or symbols visible)- Adjust Support Arms on both sides. This will fine tune your Jacket to a comfortable position and also help in shifting weight to your shoulders and hips.
natural_image
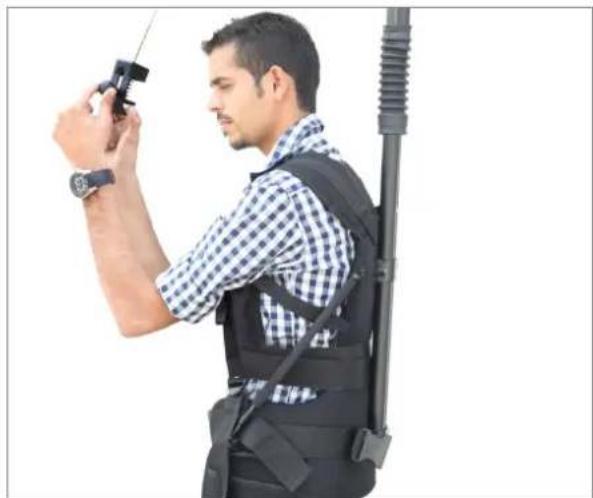
Side profile of a man wearing a checkered shirt and full-body backpack, standing beside a vertical rifle (no text or symbols visible)- Loosen the knob on hook and attach camera with it. Tighten the knob back to ensure slip-free connection.
natural_image
Man in checkered shirt and vest holding a camera, standing beside a black tactical device (no visible text or symbols)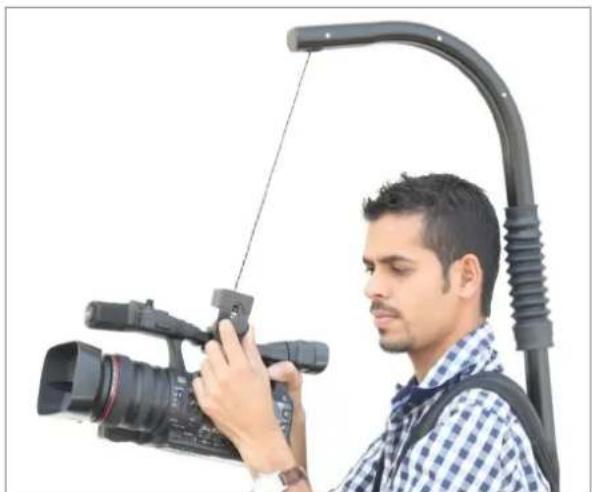
natural_image
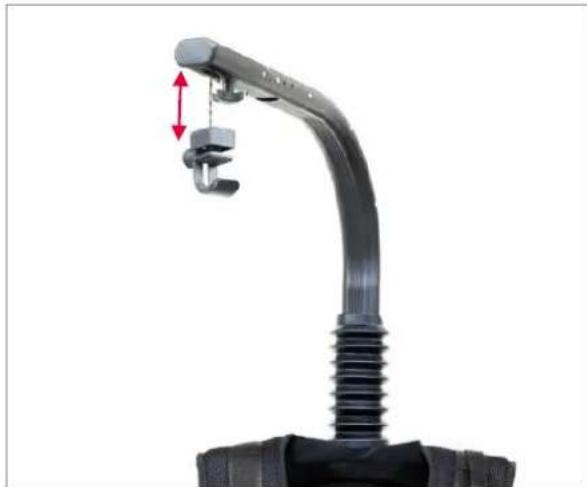
Man using a professional video camera setup with a curved cable, no visible text or symbolsNOTE: Leave a gap of approximately 2cm/1" between the top of Camera Hook and Support Arm.
natural_image
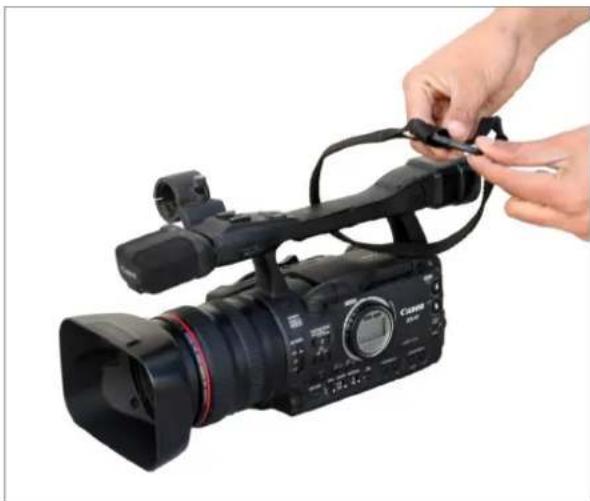
Close-up of a black automotive connector with a red double-headed arrow indicating a force or adjustment (no text or symbols visible)- Finally, attach one end of Safety Belt with camera and other end with Support Jacket, for more safety & protection.
natural_image
Person adjusting a Canon EF video camera with cable (no visible text or symbols)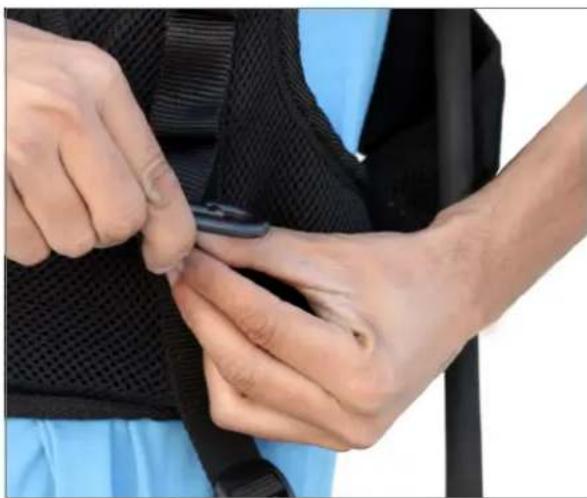
natural_image
Close-up of a person's lower body being adjusted with a tool, wearing a black vest (no visible text or symbols)- When folding Flycam Flowline, always make sure to put the upper part of Support Arm inside hip/waist belt and fasten buckle at the hip/waist belt. This will prevent Suspension Line from wearing.
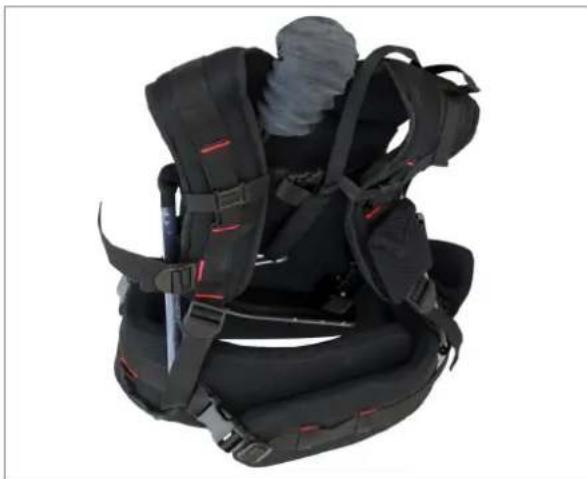
natural_image
Black and red protective suit with straps and straps, no visible text or symbolsYOUR FLYCAM FLOWLINE CAMERA SUPPORT ALL DRESSED UP AND READY TO GO!
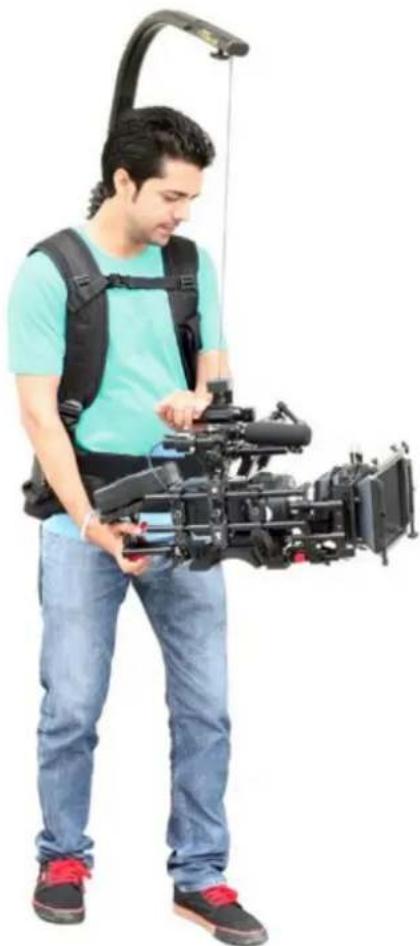
natural_image
Man in casual attire holding a professional video camera with a headlamp (no visible text or symbols)WARRANTY
We offer a one year warranty for our products from the date of purchase.
We will repair or replace your product, free of charge, in the event of a defect in materials or craftsmanship obtained during normal use or handling based on the user manual. Please note that we will not cover any shipping costs for returning the product to us. If any VAT or import duties are applied to the return, we will also charge these costs to the customer.
The warranty does not include, by the way of example, damage caused by products that we do not supply or from mishandling in transit, accident, misuse, neglect, lack of care of the product, or service by anyone other than our company.
We are not liable for incidental or consequential damages resulting from the use of the unit or occurring due to any breach of this warranty.
Replacement parts of the product will be provided at nominal cost (covering the cost price of the ,replacement parts only) to the customers after the Warranty Period has expired. We will cover the complete cost of sending replacement parts within the warranty period. After that, Nominal cost of the product & Actual shipping cost will be charged.
Do not send the unit to us without first getting a response and getting the approval to send back the item.
In case of any kind of dissatisfaction, we urge you to Contact us immediately and we shall do our Best to help you out. For any other assistance you can reach us via email. For any other assistance you can reach us via email.