Zest - Uncategorized Flycam - Free user manual and instructions
Find the device manual for free Zest Flycam in PDF.


User questions about Zest Flycam
0 question about this device. Answer the ones you know or ask your own.
Ask a new question about this device
Download the instructions for your Uncategorized in PDF format for free! Find your manual Zest - Flycam and take your electronic device back in hand. On this page are published all the documents necessary for the use of your device. Zest by Flycam.
USER MANUAL Zest Flycam
natural_image
Two black robotic exoskeleton devices with attached sensors and a mounted camera rig, shown from different angles (no visible text or symbols)Zest Stabilizer + Vista-II Arm & Vest (VSTA-ZEST)
Instruction Manual
FLYCAM
At Proaim, our goal is to ensure 100% Customer Satisfaction in all that we do.
We back our sales with a 1 year warranty from the date of purchase and work hard to resolve any problems in the unlikely event one should arise.
With our commitment to continuous improvement and your Feedback, building on our reputation of providing affordable, quality products is PRIORITY #1.
Table of Contents
Subject Page
Foreword 3
Introduction 4
Safety Hints 5
Assembling 6-12
Warranty 13
■ Welcome To Proaim!
Dear Client,
On behalf of all the people that work so hard to provide you with the most up-to-date, flexible and cost-efficient production gear, we would like to welcome you into the Proaim family.
By purchasing your Zest Power Stabilizer with Vista-II Arm & Vest, you have just joined a host of designers, engineers, machinists, assembly, customer service and office staff that take great pride in all that they do. Our mantra of continuous improvement has been the guiding principle of how we conduct our business since day one.
Once you have the opportunity to experience your Zest Power Stabilizer with Vista-II Arm & Vest, we hope you will agree that we craft quality products at a competitive price. Products designed to meet and exceed the standards of today's real production world.
Standards set by our valued clients and standards we strive to maintain.
With Best Wishes, Proaim Team
Introduction
Flycam Zest, the first Electronic Power Video Stabilizer, is made to support today's HD broadcast cameras with payload capacity of 5-15kg / 11-33lb. The highly adaptive and open architecture of Flycam Zest allows for extreme system configuration. You can lift the camera up with maximum extendibility of telescopic post or invert it to skim the floor, and then seamlessly return to normal Steadycam-mode. Flycam Vista-II Stabilizing Arm & Vest makes extended shooting nearly effortless, providing complete comfort and functionality for extended productions and long continuous shot.
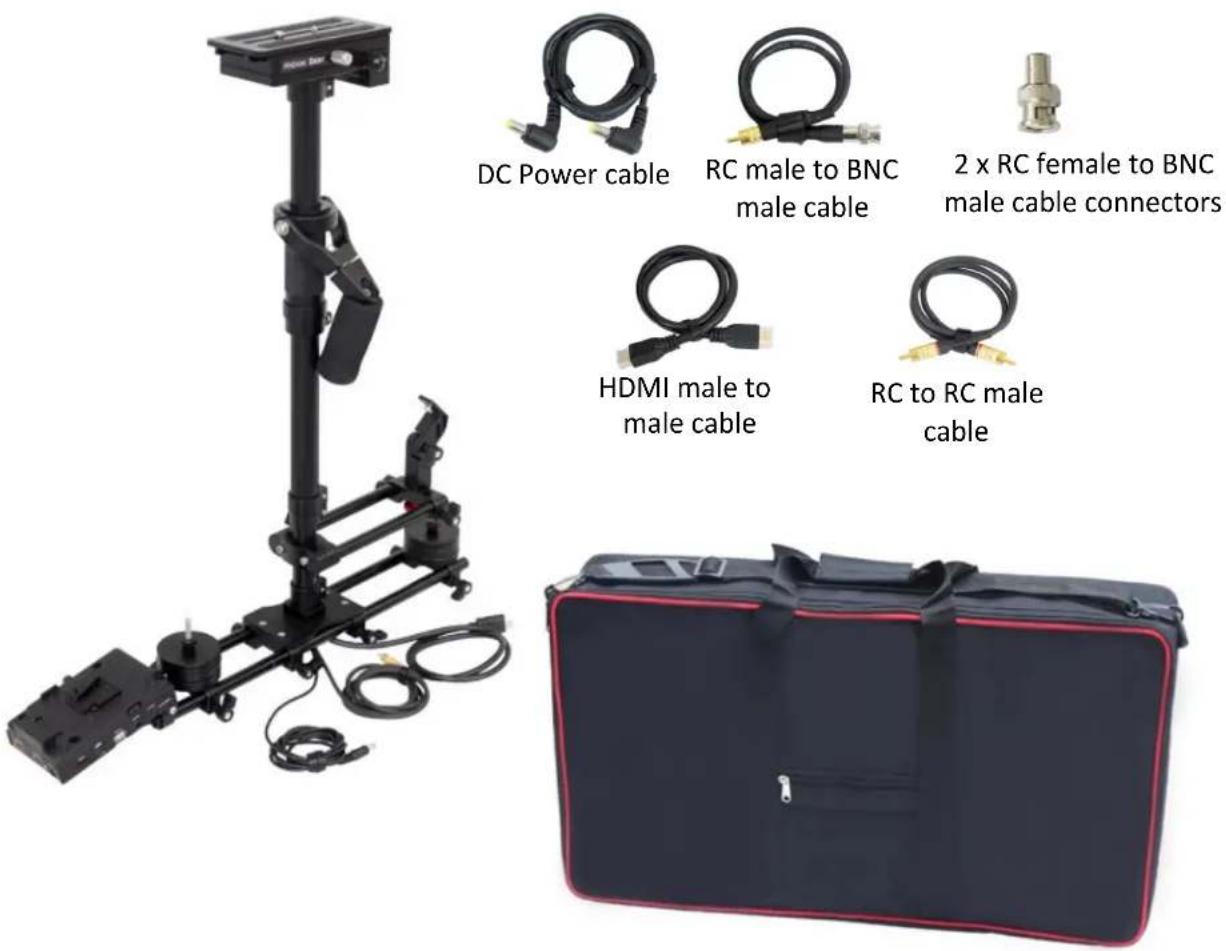
What's In The Box
Please inspect the contents of your shipped package to ensure you have received everything that is listed below.
Note: If you have purchased (ST-ZEST) kit, you will receive the following:
text_image
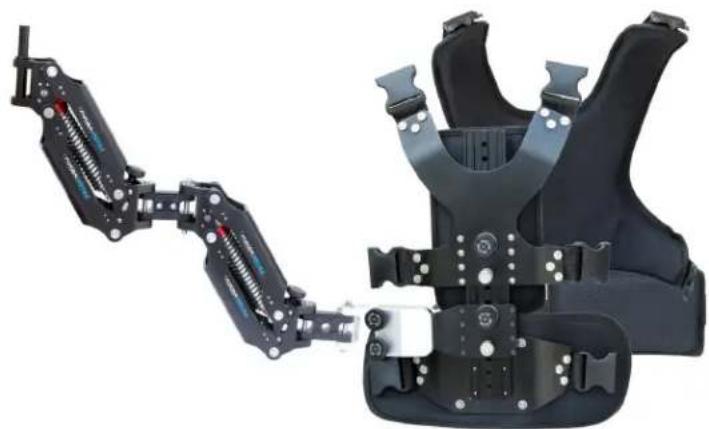
DC Power cable RC male to BNC male cable 2 x RC female to BNC male cable connectors HDMI male to male cable RC to RC male cableNote: If you have purchased (ST-VSTA-ZEST) kit, you will also receive the following:
• Vista-II Camera Stabilizer Arm
• Vista-II Camera Stabilizer Vest
natural_image
Mechanical robotic device with articulated joints and headgear (no visible text or symbols)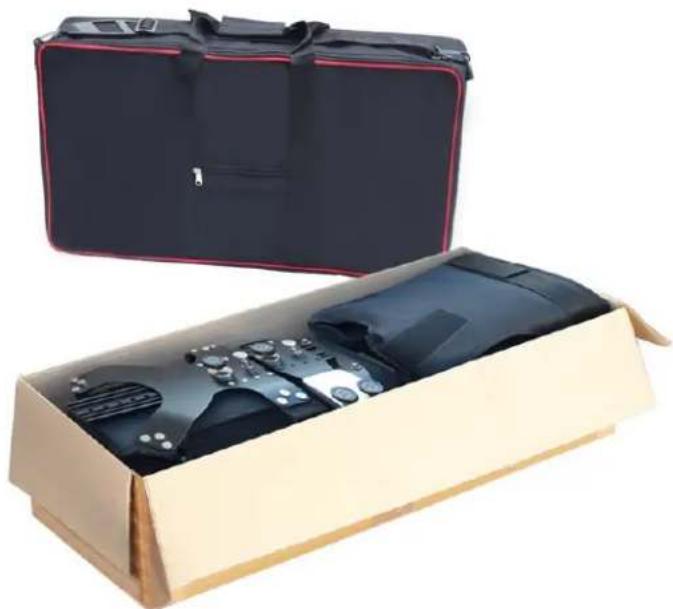
natural_image
Two open wooden boxes containing black-and-white accessories, one open and one closed (no text or symbols visible)
Safety Hints
ATTENTION: PLEASE READ THIS BEFORE USING TO PREVENT SERIOUS DAMAGE TO THE GEAR!
BE WATCHFUL OF THE HANDS
Cautiously operate to avoid pinching your hand/fingers inside the arm.
ALWAYS ESTABLISH THE CORRECT BALANCE
Adjust the weight balance before telescoping the length.
NEVER LEAVE THE FIXTURES LOOSE
All the knobs/screws must be locked tightly to avoid unbalancing of the whole camera setup.
BE HIGHLY VIGILANT WHILE ASSEMBLING
Lack of attention while attaching Stabilizer, Arm & Vest together can cause substantial damage to equipment.
NEVER LEAVE THE ARM UNATTANDED
Don't let an unloaded arm swing about as it may hit you or someone near you.
FOLLOWING THESE GUIDELINES WILL PROVIDE BETTER SHOTS AND TROUBLE-FREE OPERATION.
SHOULD YOU NEED ADDITIONAL INFORMATION, TECHNICAL ASSISTANCE IS AVAILABLE 'ONLINE' BY CONTACTING OUR SALES REPRESENTATIVE.

Assembling of Stabilizer
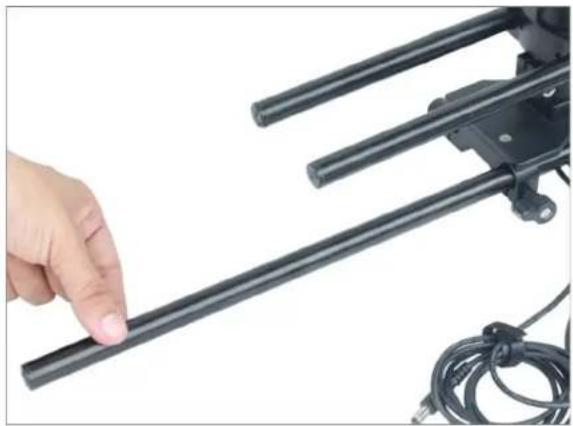
- Attach both Rods with Stabilizer & tighten the knobs accurately.
natural_image
Close-up of a hand adjusting a black mechanical lever with cable and connector (no text or symbols visible)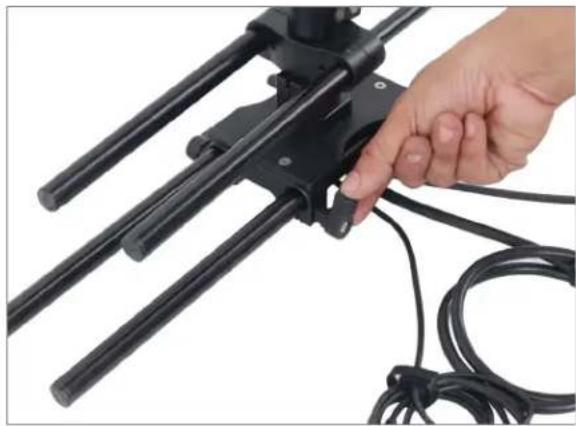
natural_image
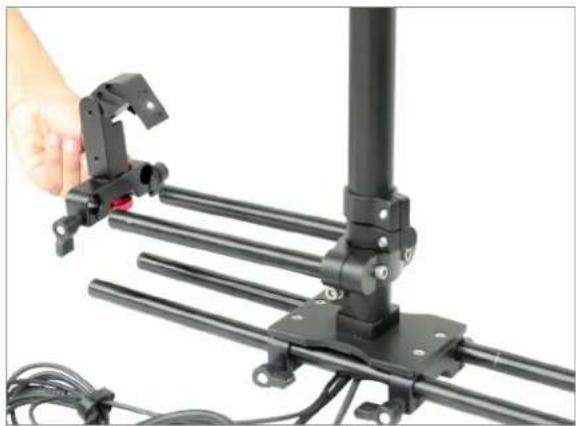
Close-up of a hand adjusting a black mechanical device with coiled cables (no text or symbols visible)• Now attach Monitor Mount clamp onto Rods and tighten the knobs.
natural_image
Close-up of a black mechanical assembly with a hand adjusting a bracket, showing no visible text or symbols.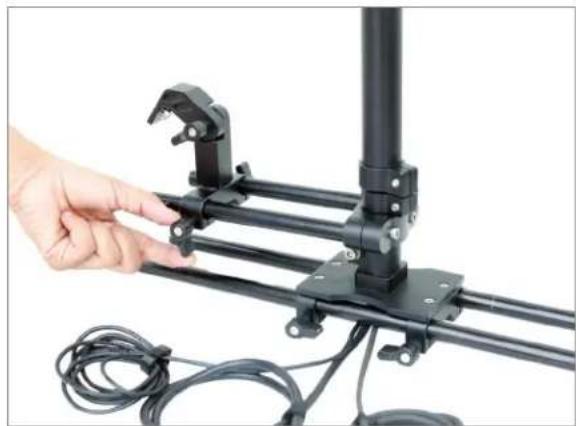
natural_image
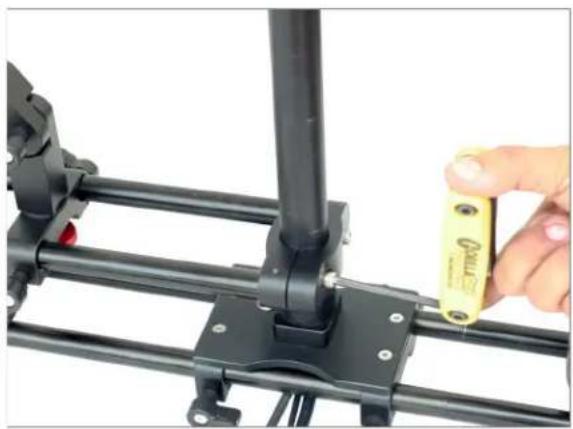
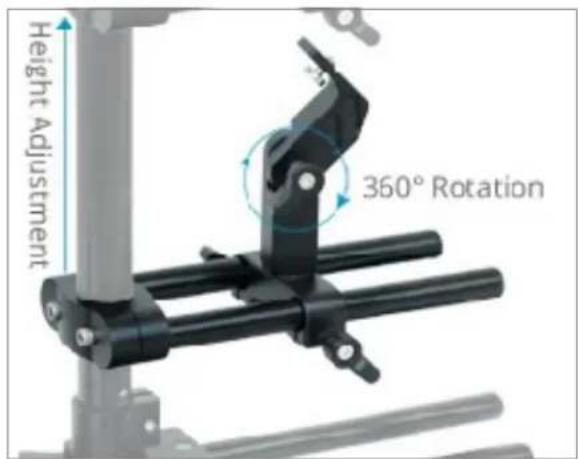
Close-up of a black mechanical device with attached clamps and cables, no visible text or symbols- Loosen bolts to adjust the height of Monitor Mount as per your requirement.
natural_image
Close-up of a mechanical assembly with a hand holding a yellow cylindrical component (no visible text or symbols)
natural_image
Close-up of a hand adjusting a black mechanical frame with a clamp, no visible text or symbolsNOTE: Loosen the knob and rotate Monitor Mount plate. The unique pivot mechanism of Monitor Clamp enables 360° Rotation and angle adjustment for more convenience.
text_image
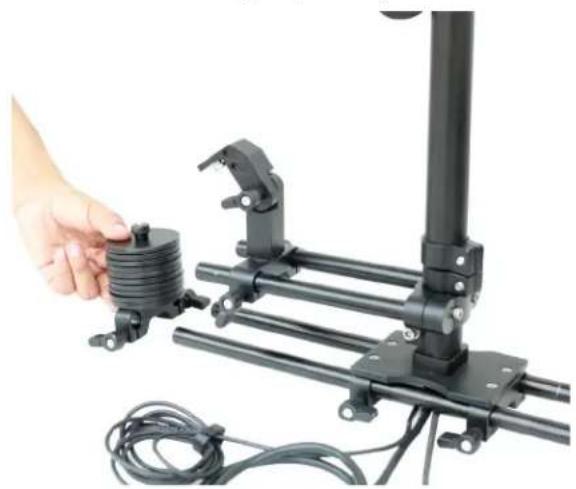
Height Adjustment 360° Rotation- Now attach provided Weight Plates at both sides on Stabilizer Rods and tighten the knobs to secure them appropriately.
natural_image
Close-up of a black mechanical device with attached cable and a hand adjusting a coiled spring (no text or symbols visible)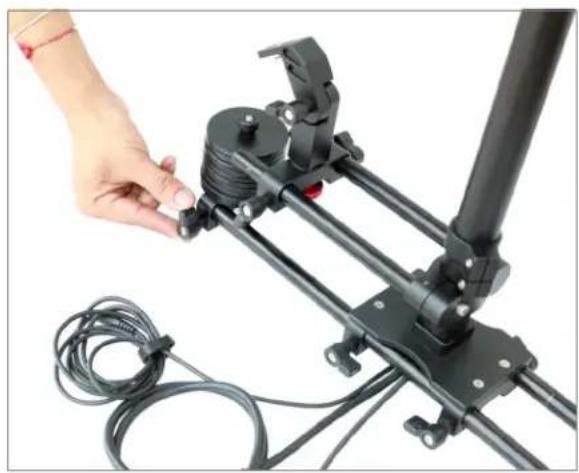
natural_image
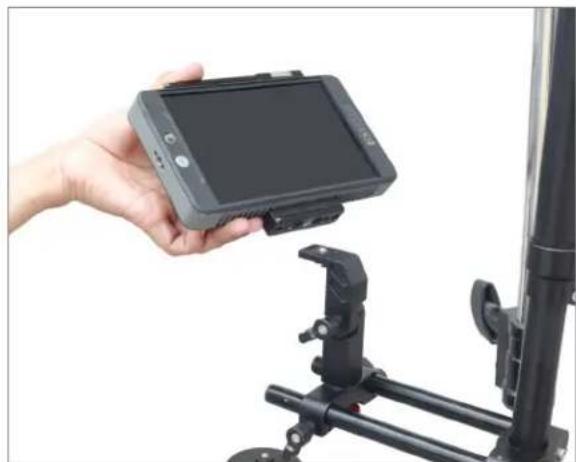
Close-up of a black mechanical device with attached cable and a hand adjusting a spring, no visible text or symbols.- Now mount your LCD (Not Included) on Monitor Mount plate as shown in image.
natural_image
Hand holding a tablet device mounted on a black tripod stand (no visible text or symbols)- Attach V-Mount Battery Plate onto Stabilizer Rods and tighten the provided knob to secure it properly.
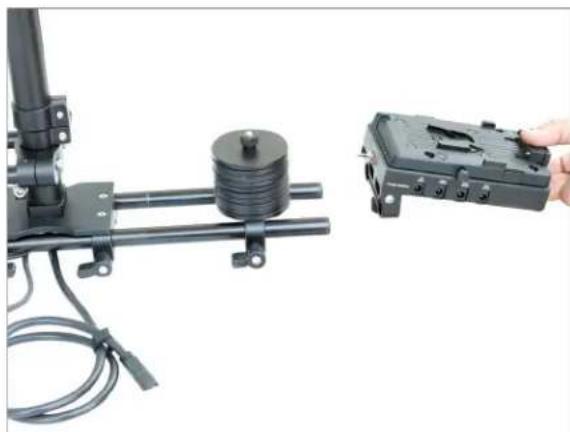
natural_image
Mechanical assembly with a cylindrical spring and connected rod, next to a black electronic device with ports (no visible text or symbols)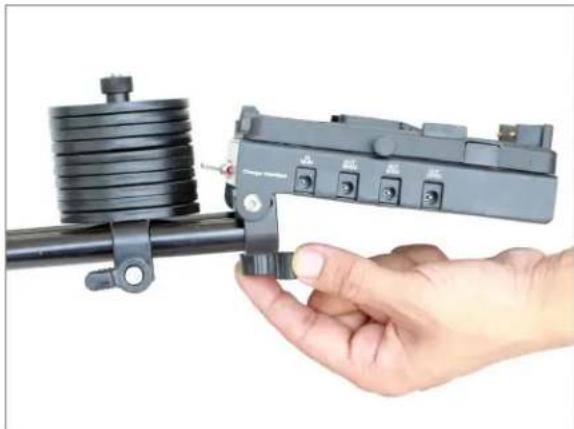
natural_image
Hand holding a mechanical device with coiled spring and terminal blocks (no visible text or symbols)- Now slide Battery (Not Included) onto the Battery Plate.
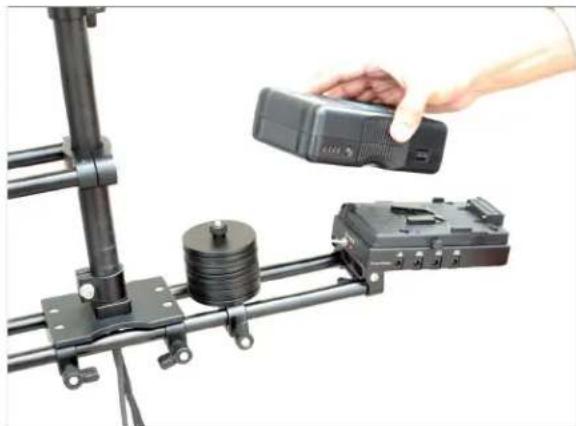
natural_image
Close-up of a hand holding a small electronic device mounted on a metal frame with a coiled spring and base mount (no visible text or symbols)NOTE: The up and down (vertical) position of Telescopic Central Post is adjusted by loosening the knob on Central Post. Ascend or descend the stalk to achieve desired location and then re-tighten the knob.
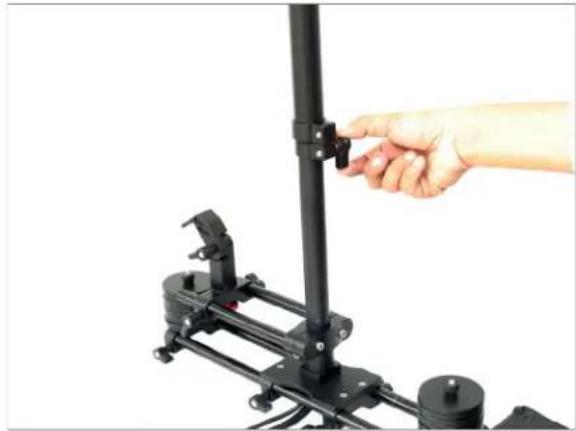
natural_image
Hand operating a black mechanical device with a vertical rod and mounting bracket (no text or symbols visible)- Loosen the knob of Camera Plate to move it according to your requirement, as shown.
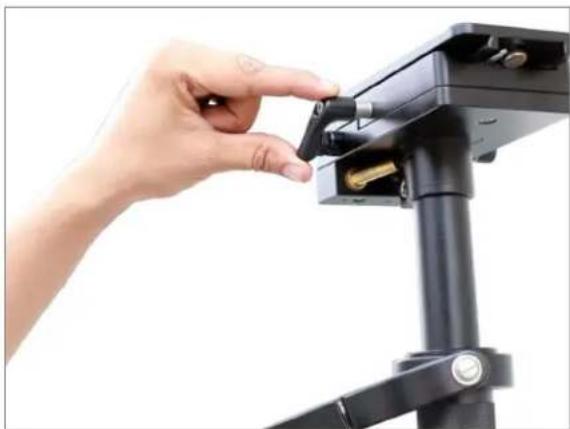
natural_image
Close-up of a hand adjusting a black mechanical device with a gold clip, no visible text or symbols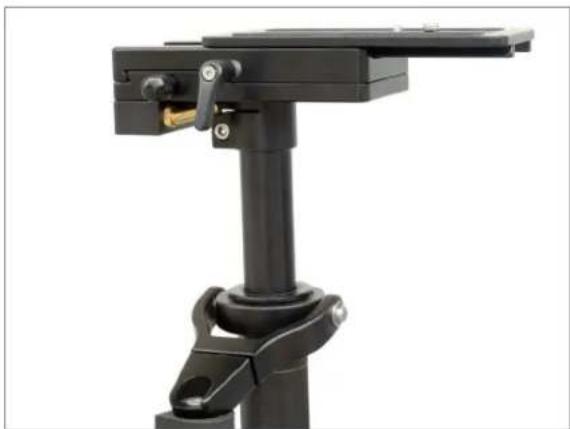
natural_image
Close-up of a black mechanical device with adjustable lever and base mount (no visible text or symbols)- Mount your Camera (Not Included) on the Camera Plate of Stabilizer and tighten the screw to secure it accurately.
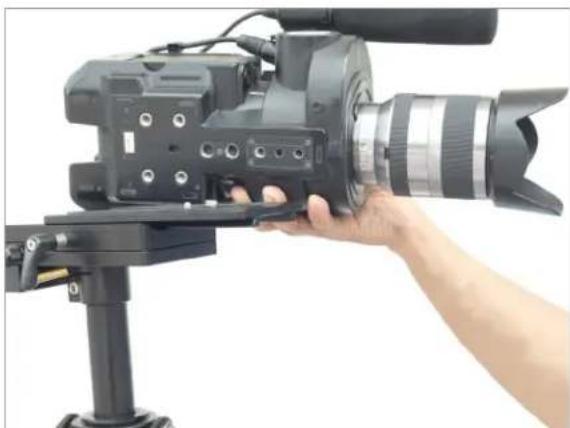
natural_image
Hand holding a professional video camera on a tripod, no visible text or symbols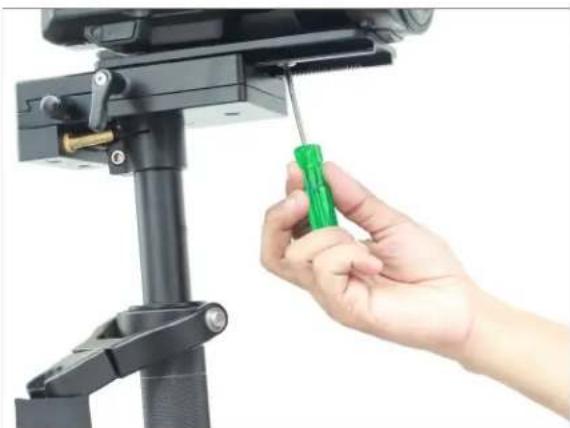
natural_image
Close-up of a hand using a green screwdriver to adjust or install a black mechanical component (no text or symbols visible)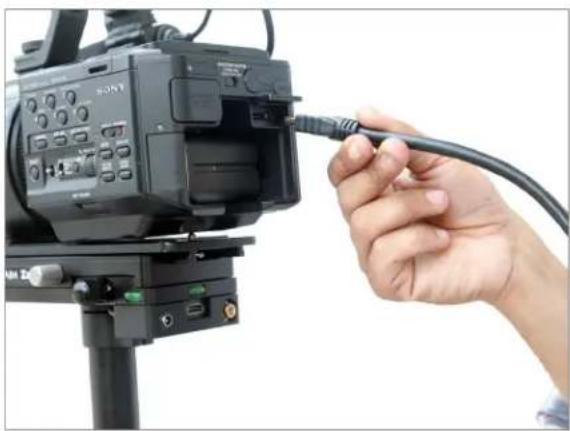
natural_image
Close-up of a hand inserting a cable into a Sony video camera on a tripod (no text or symbols visible)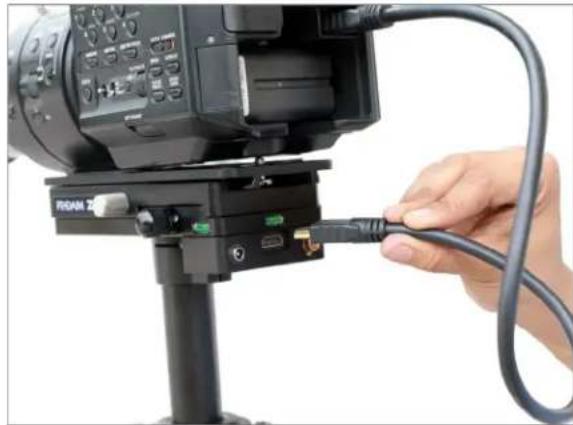
natural_image
Close-up of a camera setup with a hand connecting cable to a tripod-mounted device (no visible text or symbols)Note: If you have purchased (ST-VSTA-ZEST) kit, please consider the following steps.
Assembling of Arm & Vest
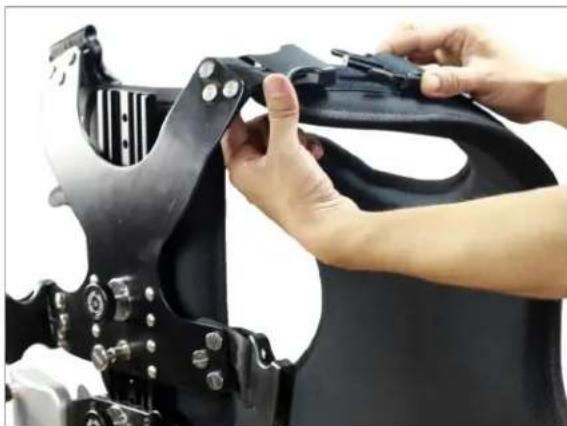
- Join both parts of Jacket by attaching the top buckles. Then wear the jacket/vest.
natural_image
Close-up of hands adjusting a black mechanical component with bolts (no visible text or symbols)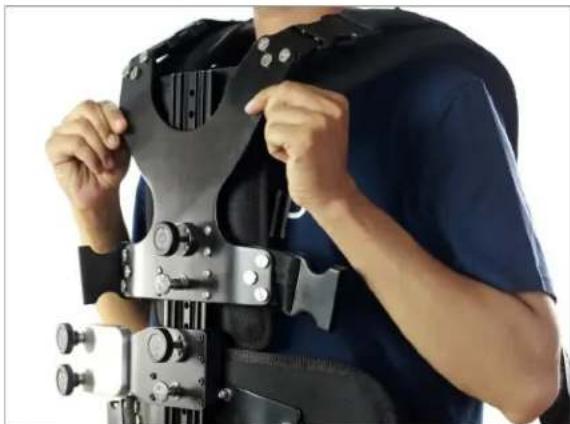
natural_image
Person wearing a black robotic exoskeleton device, hands adjusting the chest area (no visible text or symbols)• After wearing the Vest, attach the waist buckles.
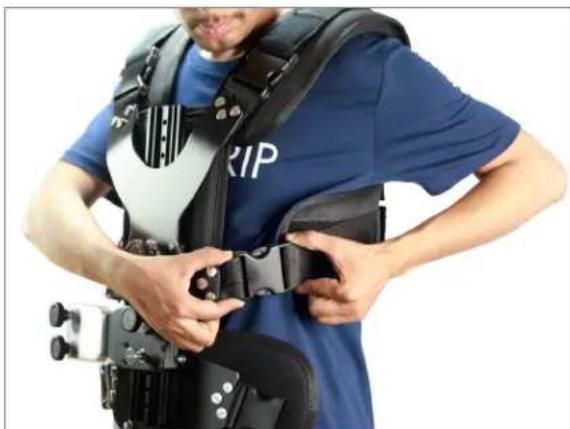
natural_image
Person wearing a blue T-shirt and full-body medical equipment (no visible text or symbols)• Now attach Hip Pad at both sides.
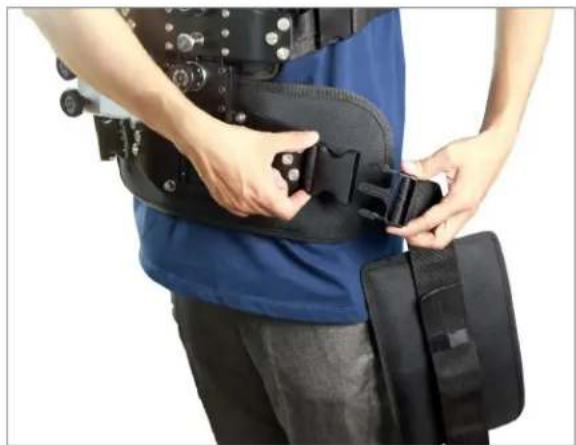
natural_image
Person wearing a blue medical or athletic vest with black equipment, hands adjusting the belt (no visible text or symbols)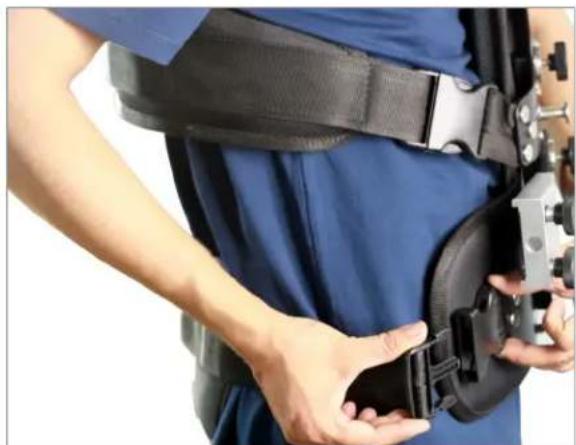
natural_image
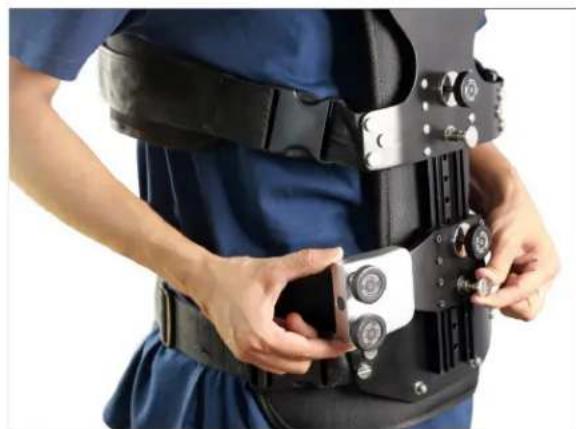
Person wearing a blue medical or rehabilitation suit with a black and gray harness, hands adjusting the belt (no visible text or symbols)NOTE: Length of chest plate can be adjusted according to the height of person by using the pin & knob, as shown in image.
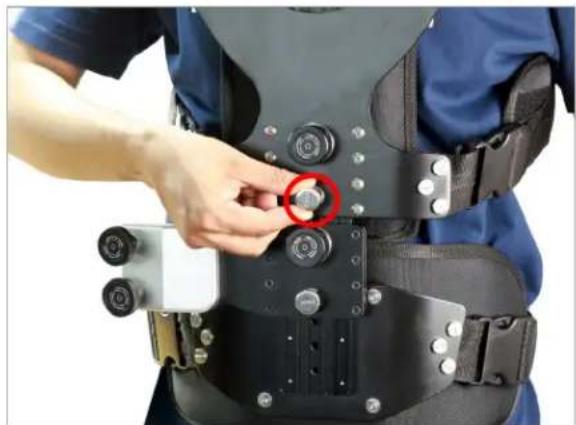
natural_image
Person wearing a blue medical or ergonomic device with black equipment and a red circle highlighting a button (no visible text or symbols)
natural_image
Person wearing a blue medical or ergonomic exoskeleton device with a red circular annotation highlighting a specific joint (no text or symbols visible)NOTE: You can also adjust the height of the Socket Block with the provided pin.
natural_image
Person wearing a blue medical or ergonomic device with black and white equipment, hands adjusting the belt (no visible text or symbols)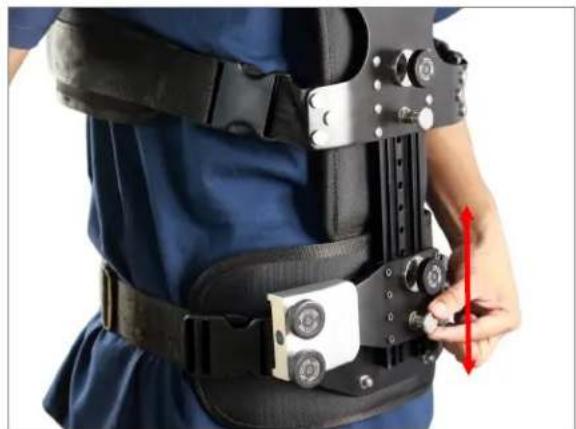
natural_image
Person wearing a black and blue robotic exoskeleton device with a red directional arrow indicating movement (no text or symbols visible)- Loosen the knobs of Socket Block on Vest. Insert male part of Arm Socket Block into Socket Block of Vest and tighten back the knobs.
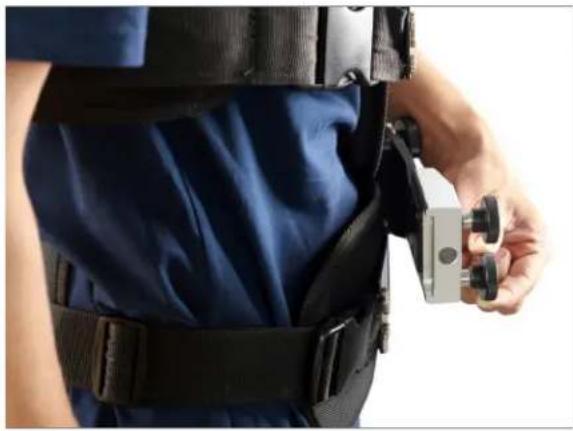
natural_image
Person wearing blue medical suit and black exoskeleton device, holding a small mechanical component (no visible text or symbols)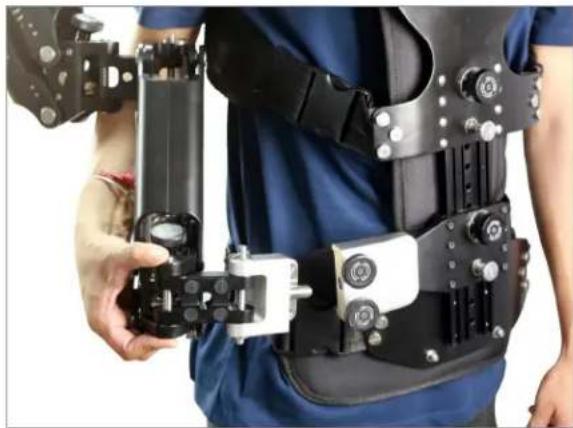
natural_image
Person wearing a black and blue robotic exoskeleton device with articulated joints (no visible text or symbols)NOTE: For attaching the Stabilizer to Arm & Vest, keep the handle of Stabilizer straight in accordance to the pin of Arm.
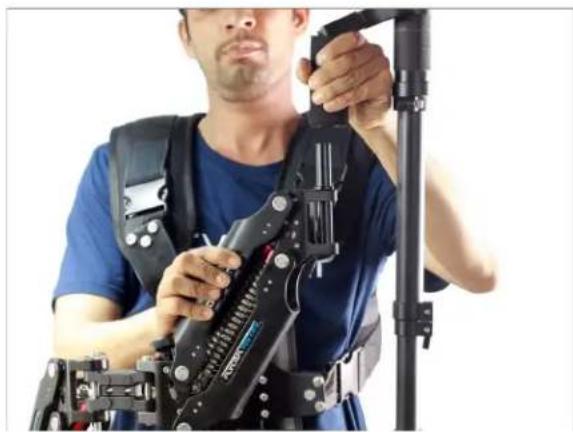
natural_image
Man wearing a black exoskeleton device with a camera rig, standing against a plain white background (no text or symbols visible)- You can adjust the tension of Arm with mounted Stabilizer, by provided knob, according to your setup requirement. Adjust the lift with Arm angled slightly up, and the knob will turn easily. Both Arm sections should track together.
NOTE: Adjust the 'forearm' (section nearest to Stabilizer) first, then the 'upper arm' section.
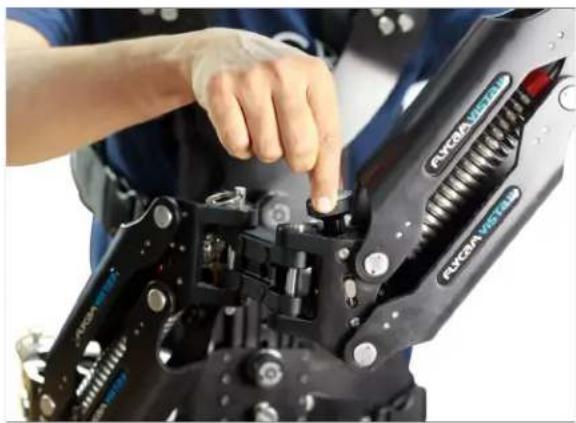
natural_image
Close-up of a person adjusting a Bruker robotic device with a hand pointing to the component (no visible text or symbols)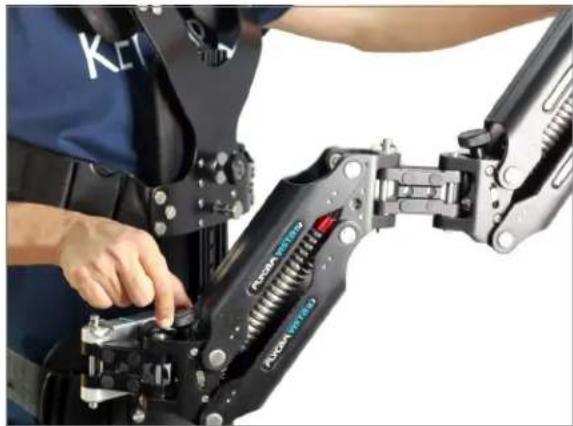
natural_image
Close-up of a person adjusting a robotic gripper with a tool (no visible text or symbols)To Use As Single Arm Configuration
• Pull the pin from middle jointer and remove one section of the Arm.
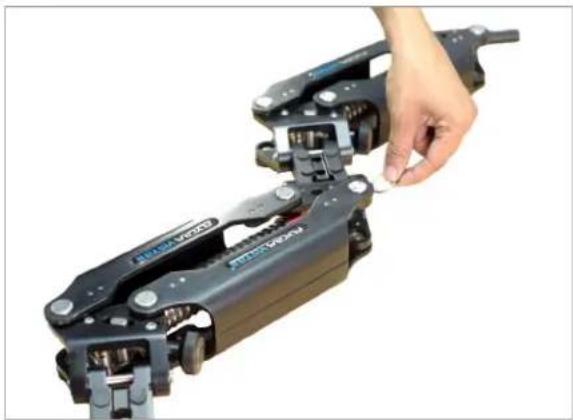
natural_image
Close-up of a hand adjusting a mechanical device with a small piece inserted (no visible text or symbols)
natural_image
Close-up of a hand adjusting a mechanical component with no visible text or symbols- Pull a pin to remove male part of Socket Block from the end of section and attach it with upper single arm.
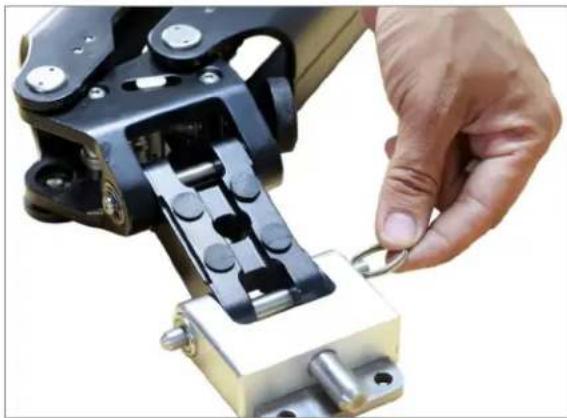
natural_image
Close-up of a hand adjusting a mechanical clamp or bracket component (no visible text or symbols)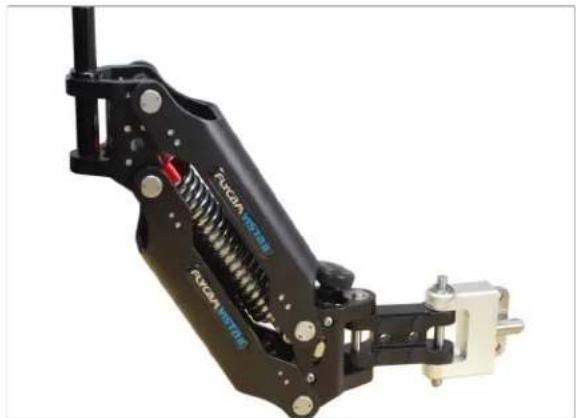
natural_image
Mechanical linkage component with black and white parts, no visible text or symbolsFor Interchanging the spring, Follow this video
https://bit.ly/2usguqc
YOUR FLYCAM ZEST STABILIZER WITH VISTA-II ARM & VEST ALL DRESSED UP AND READY TO GO!
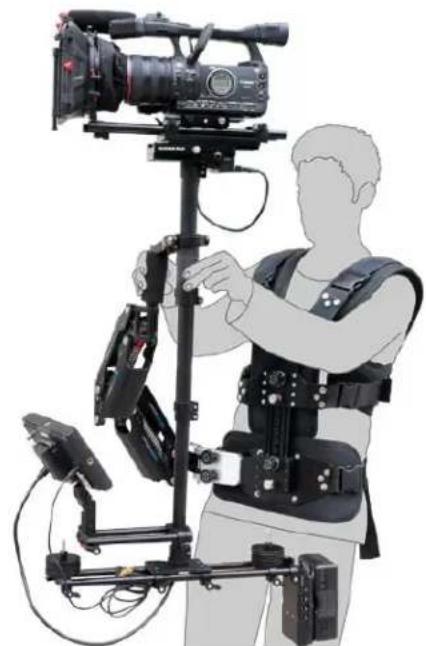
natural_image
Person wearing a video camera and ergonomic vest with a tripod-mounted device (no visible text or symbols)(SHOWN WITH OPTIONAL ACCESSORIES)
WARRANTY
We offer a one year warranty for our products from the date of purchase.
We will repair or replace your product, free of charge, in the event of a defect in materials or craftsmanship obtained during normal use or handling based on the user manual. Please note that we will not cover any shipping costs for returning the product to us. If any VAT or import duties are applied to the return, we will also charge these costs to the customer.
The warranty does not include, by the way of example, damage caused by products that we do not supply or from mishandling in transit, accident, misuse, neglect, lack of care of the product, or service by anyone other than our company.
We are not liable for incidental or consequential damages resulting from the use of the unit or occurring due to any breach of this warranty.
Replacement parts of the product will be provided at nominal cost (covering the cost price of the replacement parts only) to the customers after the Warranty Period has expired. We will cover
the complete cost of sending replacement parts within the warranty period. After that, Nominal cost of the product & Actual shipping cost will be charged.
Do not send the unit to us without first getting a response and getting the approval to send back the item.
In case of any kind of dissatisfaction, we urge you to Contact us immediately and we shall do our Best to help you out. For any other assistance you can reach us via email.
For any other assistance you can reach us via email.