
QBiC MS-1 - Camcorder Elmo - Free user manual and instructions
Find the device manual for free QBiC MS-1 Elmo in PDF.


| Product Type | Camcorder |
| Model | QBiC MS-1 |
| Brand | Elmo |
| Dimensions (W × H × D) | 54.4 × 61.2 × 40.1 mm (including lens cover) |
| Weight | 93 g |
| Power Supply | Built-in rechargeable lithium-polymer battery (3.7V, 1000mAh) |
| Battery Operating Time | Approx. 1 hour 45 minutes (1080p/30fps, WiFi off) |
| Charging Time | Approx. 3 hours (via USB) |
| Image Sensor | 1/2.3" CMOS sensor, approx. 5 megapixels effective |
| Lens Aperture | F2.0 |
| Horizontal Angle of View | 185° / 165° / 135° (selectable) |
| Recording Resolution (Video) | 1080p/60fps, 1080p/30fps, 720p/120fps (high speed), 720p/60fps, 720p/30fps, WVGA/240fps (high speed) |
| Recording Media | microSD / microSDHC (Class 6 or higher) / microSDXC (Class 10 or higher) |
| File Format | MPEG4 (.mp4) for video, JPEG (.jpg) for photo |
| Wireless Connectivity | IEEE 802.11 b/g/n WiFi |
| Interfaces | USB micro B, HDMI micro D, microSD card slot |
| Waterproof Rating | IPX4 (splash-proof) |
| Operating Temperature | 0°C to 40°C |
| Storage Temperature | -20°C to 60°C |
| Main Functions | Movie/photo recording, WiFi live viewing via QBiC App, HDMI output, mass storage, burst/interval photo modes |
| Maintenance & Cleaning | Wipe with dry soft cloth; avoid solvents; after water exposure, dry thoroughly |
| Safety Features | Over-temperature protector, automatic power-off, FCC/IC compliance |
| Spare Parts & Repairability | Contact dealer or ELMO for battery replacement, dome replacement, repairs |
| General Information | Includes USB cable, lens cap, start-up guide, warranty card; optional smart clip |
Frequently Asked Questions - QBiC MS-1 Elmo
User questions about QBiC MS-1 Elmo
0 question about this device. Answer the ones you know or ask your own.
Ask a new question about this device
Download the instructions for your Camcorder in PDF format for free! Find your manual QBiC MS-1 - Elmo and take your electronic device back in hand. On this page are published all the documents necessary for the use of your device. QBiC MS-1 by Elmo.
USER MANUAL QBiC MS-1 Elmo
natural_image
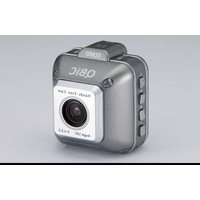
3D rendered image of a silver compact digital camera with lens and buttons (no text or symbols visible)Copyright 2014 ELMO CO., LTD. All Rights Reserved
Table of contents
IMPORTANT SAFEGUARDS 6
BEFORE YOU USE 11
FEDERAL COMMUNICATIONS COMMISSION INTERFERENCE STATEMENT...17
PACKAGE CONTENTS....20
ABOUT THE CAMERA....21
THE NAME OF EACH PART 21
PREPARATIONS....22
CHARGING THE BATTERY 22
INSERTING THE MICRO SD CARD 23
POWERING ON/OFF 24
CHANGING SSID AND KEY 24
RECORDING....25
MOVIE RECORDING....25
PHOTO RECORDING....25
Starting WiFi 26
VIEWING THE RECORDED FILES 27
VIEWING ON TV OR PROJECTOR....27
HDMI OUTPUT RELATED ICONS....27
VIEWING ON SMART DEVICE....31
VIEWING ON COMPUTER....31
TRANSFERRING THE FILES TO YOUR COMPUTER 32
MASS STORAGE 32
MICRO SD CARD 32
LIVE VIEWING 33
LIVE VIEWING ON QBIC APP 33
LIVE VIEWING ON TV OR PROJECTOR....35
RESETTING THE CAMERA....36
FORCING THE CAMERA TO TURN OFF....36
RESETTING THE CAMERA TO FACTORY DEFAULT SETTINGS....36
EXPLANATIONS FOR ICONS OF QBIC APP 38
MOVIE RECORDING....38
PHOTO RECORDING....38
GRID DISPLAY 38
ANGLE OF VIEW....39
WHITE BALANCE....39
SELF-TIMER....39
WDR SHOOTING (WIDE DYNAMIC RANGE SHOOTING) 40
EXPOSURE 40
RESOLUTION....40
REMAINING BATTERY 41
RECORD 41
SOURCE (THUMBNAIL) 41
MOVIE/ PHOTO (THUMBNAIL) 41
EDIT....41
DOWNLOAD 42
DELETE 42
JOINT....42
SPLIT 42
SEND FILE 42
SETTINGS....43
MAINTENANCE....47
MAINTENANCE OF THE CAMERA....47
UPDATING THE CAMERA 47
TROUBLESHOOTING....49
AFTER SALES SERVICE....50
SPECIFICATIONS....52
CAMERA....52
MEANING OF THE LEDs....53
FUNCTIONS OF THE SWITCHES....55
RECORDABLE TIME AND NUMBER OF PHOTOS 56
ESTIMATED RECORDABLE TIME....56
ESTIMATED RECORDABLE NUMBER OF PHOTOS 56
Thank you for purchasing the QBiC MS-1.
To ensure safe and proper use, be sure to read this instruction manual first before using this product.
PLEASE NOTE
- Reproduction of this instruction manual either in part or in whole, is strictly prohibited.
- The contents of this instruction manual are subject to change without notice.
- Although great care has been taken to ensure the accuracy and completeness of the information contained in this instruction manual, please notify ELMO or your dealer in case any unclear points, errors, or omissions are found.
- ELMO shall not be held responsible for consequential damages arising from the use of this product.
Copyright 2014 ELMO Co., Ltd. All rights reserved.
Any names, company names and product names referred to in this instruction manual are trademarks or registered trademarks of the respective companies.

IMPORTANT SAFEGUARDS
Please read all precautions and warnings before starting to use the product.
The information is provided to ensure proper operation of this product and will prevent you or others from personal injury or loss of assets.
Review the following symbols so that you understand them before reading the rest of the manual.
Please read carefully and keep the manual in a safe place for future reference.
 | DANGER | Ignoring the warning and operating the system incorrectly subjects the user to an extremely high risk of injury or death. |
 | WARNING | Ignoring the warning and operating the system incorrectly subjects the user to possible risk of injury or death. |
 | CAUTION | Ignoring the warning and operating the system incorrectly subjects the user to risk of injury or loss of assets. |
 DANGER DANGER | |
| Never operate, or check monitor when driving a car, motorcycle, or bicycle.Operation of the product or monitor should be always made when vehicle is not in motion.May cause a collision, falling, injury, death or accident. Observe laws and pay close attention to traffic and road conditions in order to avoid risk and accident. | |
| Never drive a vehicle while hanging this product with a strap.The strap may become stuck and it may cause a collision, falling, accident, injury or death.If this product accidentally comes off the strap, it may be thrown, striking a nearby person or object, causing injury, death or damage. | |
| Do not mount this product on the exterior of a car, motorcycle, or bicycle.It may be prohibited by law to place any object (exclusive to designated items) on the exterior of vehicle. If you have a permit and intend to attach this product outside, make sure to attach it firmly so that it won't come off during driving. | |
| The battery used for this product is a rechargeable lithium-polymer battery.This battery is susceptible to temperature and humidity.This battery is designed to be used solely with this product. Do not use it with other product. | |
| Pay close attention to traffic and road conditions and drive safely when driving with this product mounted on your body.A collision or falling of this product may strike your body and it may cause injury. | |
| Do not place this product near equipment with heat, such as heating equipment. Do not throw this product into fire or heat it.The built-in battery may ignite or burst and it may subject the user to an extremely high risk of injury, death or fire. | |
| Do not use this product near flammable, ignitable or explosive gas.It could cause fire or explosion. | |
DANGER
 WARNING WARNING | |
| Do not remove screws from this product, or pry open the case by force. Some parts of this product have high-voltage and smoke, fire, electrical shock, burns or breakdown may occur. Contact your dealer or ELMO for product check-up and repair. | |
| Keep this product and accessories out of reach from babies and children. The cable may be wound around their neck and may cause choking. Babies and children may get injured by dropping, stepping on or crushing this product. | |
| If the product begins to smoke or develops a strange odor or abnormal noise, turn it off immediately. Then disconnect all the cables and remove all nearby inflammable objects. Wait from a distance until no more smoke or odor or noise comes from the product. If you continue to use in this condition, fire or electric shock may occur. Make sure that no more smoke appears. Then contact your dealer or ELMO for repair. Never attempt to repair it by yourself. | |
| Do not give excessive shock by dropping or bumping this product. Do not place any heavy objects on this product. Very high risk of smoke, fire, electric shock, burns or malfunction. The product may de deformed and the waterproof performance may be compromised. | |
| Do not spill water or insert foreign objects inside this product. Do not solder wires or pins or insert foreign objects into the USB/HDMI connector ports or card slot. Do not insert irregular plug or connector into the connector port. Firmly insert the connector into the port. Do not touch with wet hand. Very high risk of smoke, fire, electric shock, burns or malfunction. | |
WARNING
 | This product is waterproof (IPX4). However, we do not guarantee its waterproof ability in all conditions. Pay close attention when using this product in rain, snow, at the seaside or a waterfront.If any abnormality is found during use, turn it off immediately and contact your dealer or ELMO Customer Service.• Continuous use could lead to fire or electric shock. |
 | If any liquid or any foreign object gets into this product, turn it off immediately and disconnect all the cables if connected. Contact your dealer or ELMO Customer Service.• Continuous use could lead to smoke, fire, electric shock, or malfunction. |
 | Do not touch this product or cable-connected devices during thunderstorm.• Very high risk of electric shock under these conditions. |
 | Do not place this product on an unstable location in a vehicle.• Pay close attention when placing this product to prevent it from falling during severe braking operations. |
 | Pay attention to your surroundings during shooting.• Do not start shooting without knowing the conditions around you. It could cause an accident or get injured. |
 | Do not swing this product by the hanging strap.• It may hit a person or object and it could lead to injury, failure, malfunction or breakdown. |
 | The USB cable is exclusive to this product. Do not use it with anything else.• Do not place any heavy objects on the USB cable, or do not damage, work on, add bend by force, twist, pull or heat the USB cable connector port to avoid smoke, fire, electric shock or burns. |
 CAUTION CAUTION | |
| Prior to using this product on a commercial airplane or in a hospital, check with authorized personnel.This product will emit electromagnetic energy which can interfere with aircraft instruments or patient monitoring equipment. | |
| Remove the attachments and leave this product uncharged if this product is unused for an extended period or when you do maintenance on the product.(Charge at least every 6 months even if this product is unused for an extended period. Leaving this product uncharged may cause charging trouble).Leaving and storing this product to a “power ON” state may cause degradation of insulation, electric leakage and so on. It may cause smoke, ignition or fire. | |
| Do not use or store this product in a hot place such as a car, in a dusty, humid, or steamy place for an extended period.It could cause fire or electric shockIt could deform the body, leading to a malfunction. | |
| Do not leave this product in areas with smoke, steam or water vapor.It could cause fire or electric shockIt may degrade the waterproof performance. | |
| Do not pull the wire when unplugging a cable from an outlet. Hold the plug to disconnect. Unplug the cable before carrying this product.Damaged cable could cause smoke, fire, electric shock, burns or malfunction. | |
| Hold onto this product when disconnecting a cable, strap, or other accessories such as tripod.This product may pop-up and it may cause injury or malfunction if it falls. | |
| Do not directly point the lens at the sun.It could cause smoke, fire, burns or breakdown. | |
| Do not put this product in contact with your skin for an extended period. Pay close attention if your skin is sensitive. In case skin irritation occurs after touching this product go to see doctor immediately.This product may get hot. Holding this product with hand for an extended period may cause low temperature burns.The material of plastic parts and metallic parts of this product may rarely be a cause of the skin irritation. | |
CAUTION
BEFORE YOU USE
This product may be used in outdoor environment. However, ELMO shall not be liable for malfunction and/or breakdown followed by using this product under excessive conditions and/or misuse by the user. In that case this product will no longer be qualified for free repair regardless of warranty period.
■ When shooting an important scene, be sure of try shooting beforehand and confirm normal video and audio recording operation. ELMO shall not be liable for compensation to the user if the visual record or audio record fails due to a problem not related to this product.
■ Use this product under the following environmental conditions:
Temperature: 0° to 40°C
Humidity: 10 to 80% (No condensation)
* Do not place heavy objects on this product.
■ Supplied USB cable
● Make sure to use the supplied USB cable when charging this product.
- The USB cable is exclusive to this product. Do not use it with anything else.
- Do not pull the supplied USB cable.
- Do not connect or disconnect the supplied USB cable while the power of this product is on.
■ Wireless LAN (WiFi) radio wave
- This product uses 2.4GHz radio waves. This product and the wireless device in this product have been certified under the Radio Law. Using this product in countries other than the country where you purchased it may infringe the radio wave laws of the country where it is used.
- In case of communication problem change location. Depending on the using environment (e.g., there are many obstacles) the wireless communication may be adversely affected. Especially the wireless communication is not available under the following conditions.
- There are metal and/or concrete between the product and monitor.
- Do not use this product under the following conditions.
- Near industrial, scientific, and medical devices, such as a pacemaker
- Near in-plant radio station for mobile equipment identifier (license required and being used in factory line; etc.)
- Near low power wireless base station (license not required)
- Electromagnetic interference caused by using Bluetooth devices, microwaves, some other devices and this product at the same area
Bluetooth devices, microwaves, some other devices and this product use the same band of frequency (2.4GHz). So using these devices in the same area may cause electromagnetic interference and it may cause lower communication speed or connection failure.
Turn off the device which is not currently using if the communication problem occurs.
■ Waterproof performance
- This product is guaranteed to be water resistant (waterproof against brief water splash) under the criteria set forth by us. However, we do not guarantee its waterproof performance in all conditions.
- The product warranty does not cover malfunction due to misuse by the user.
- This product is not guaranteed to be waterproof when the Interface terminal cover is not properly closed.
- Do not open or close the Interface terminal cover in dusty place or in the rain or by the wet hand. Do not leave this product with the Interface terminal cover open. Doing so may compromise the waterproof performance, leading to malfunction.
- We do not guarantee its waterproof performance if the product is given excessive shock by dropping or bumping it or when the rubber packing of the Interface terminal cover gets deteriorated over time. Contact your dealer or ELMO Customer Service for repair (fee applies).
- Inside of the Interface terminal cover and the microSD card are not waterproof. Do not touch them with wet hands.
Pay attention to the handling of the transparent dome in front of this product as it is prone to scratches. Cover it with a lens protection cap while not in use. Clear images may not be obtained if it is damaged. Refer to the QBiC MS-1 official website: http://www.elmoqbic.com/ms1/ or contact your dealer or ELMO Customer Service for information about how to replace the transparent dome.
■ Do not leave this product in any of the following places:
● Outdoor, humid or dusty place
- In a place exposed to direct sunlight (inside a car or by the window) or high temperature
- In a place where the temperature is below 0^ (cold place without heater)
- In a place exposed to extreme temperature or humidity variation (such as near air-conditioner or heater)
- In a place exposed to frequent vibration (such as inside a vehicle or machine)
● Near magnet or magnetic field
● In a place where organic solvents are used
■ Using this product in cold environments
- Touching metallic parts in cold environments may damage the skin. Use gloves when using this product in cold environments.
- In cold environments, the battery performance will temporarily drop and the recordable time will be shorter than normal.
Condensation
- Condensation is the formation of small drops of water on the inside or outside of this product, especially on the inside surface of the lens, when moisture in the air changes to liquid when it is brought from a cold place suddenly into a warm place.
- Using this product with condensation may result in malfunction. If condensation occurs, turn off the power, swipe the surface with a dry soft cloth, and then leave this product in the place where humidity and dust are less and temperature is stable (between 10^ and 30^ ). Start to use again after condensation is completely gone. If this product is used with the condensation left on the inside of the camera lens, the product may not record clear images.
■ Built-in microphone
- Operational sounds from this product itself may be recorded when the built-in microphone is used; however, that is not a malfunction of this product.
■ Precautions for shooting
● The recording time varies depends on the resolution and the recording quality.
- Do not use this product in places where photo or video recording is prohibited by law. Doing so may cause you to be ordered to leave, subjected to fine, be arrested,
and/or forfeit the product.
- Do not use this product for purposes prohibited by law. Doing so may cause you to be subjected to fine, be arrested, and/or forfeit the product.
■ Normal maintenance
- Do not clean this product with strong solvents, such as thinner and benzene. Doing so may cause malfunction.
● Wipe with a dry soft cloth. - When this product is splashed with detergent, soap, hot spring, bath additive, sun oil, sun screen, etc., wipe it off with a dry cloth immediately.
■ Luminescent spot and black spot
- This product uses a CMOS area image sensor composed of numerous pixels, and some of the pixels may not operate normally. Therefore, luminescent spots or black spots could be witnessed on the output screen. This is not a defect but a phenomenon peculiar to a CMOS area image sensor.
■ Change of SSID and Key
- It is recommended that you change your SSID and Key to avoid other people from using your connection without permission. The SSID and Key can be reset to factory defaults.
Recorded files
- This product is composed of precision electronic parts and components. If this product is handled as follows, the internal data of the microSD card could be destroyed:
- The microSD card is dislodged, or power is turned OFF while this product is in operation.
- The supplied USB cable comes out during communication.
- Under those circumstances, ELMO shall not be liable for any damages due to corruption of or loss of the recorded data.
■ microSD card
- When using the microSD card other than supplied, format it with this product before starting to use. Do not use any other device to format. Depending on the manufacturer and type, some microSD card may not be used even after formatting
with this product. Make sure that you save or transfer important data to a computer or other recording device before formatting the card
- Do not remove the microSD card while this product is turned on. Doing so may cause malfunction or breakdown.
- After use or for storage or transportation, put the microSD card into a case or pouch.
■ Advice for disposing/giving someone microSD card
- Data in the microSD card cannot be completely deleted even if using "format" or "delete" feature in this product or a computer.
- We recommend “physically” destroying or using the data deletion software available in the market to completely delete all the data. Any data in the microSD card shall be managed under the user’s responsibility.
■ Performance and lifetime of built-in battery
A rechargeable lithium polymer battery is used in this product.
- The battery has its own life span. Along with the temperature, frequency of use, time of use and the time passed, battery capacity decreases gradually.
- If operation time becomes substantially short at normal temperature (between 10° and 30°C), the battery life seems to have come near its end. Replace it with a new battery. Contact your dealer or ELMO Customer Service for battery replacement (fee applies).
- Charging may not be possible in the cold and hot environment. In that case leave this product in the moderate temperature (between 10°C and 30°C) for a while and retry. Pay attention to condensation when moving this product from a cold place to a hot place.
- Date/time information is cleared once battery gets out of charge.
■ Disposal of this product
The rechargeable lithium polymer battery can be recycled but cannot be removed by the user. Contact your dealer or ELMO Customer Service for information about how to dispose of this product.
■ Over-temperature protector
- When the temperature inside the product rises to a set temperature while it is turned on, the over-temperature protector will start to work and warn it by turning
the Power LED in Cyan. If the temperature continues to rise to a certain level, the protector will automatically stop the recording and turn off the power. The protector may work within the normal working temperature when the product is used in high temperature.
The contents of this document are subject to change without notice. The latest version can be obtained from the following website:
QBiC MS-1 official website: http://www.elmoqbic.com/ms1/
It is prohibited under copyright law to use or copy any part or the whole of this document without our prior written consent.
ELMO shall not be liable for any claim for damage or loss of earnings or any claim raised by a third person due to the use, malfunction or repair of this product.
■ Some items are described in this document as follows:
- "microSD memory card", "microSDHC memory card", and "microSDXC card" → "microSD card"
Copyright
Unless used for personal use, it is prohibited strictly under copyright law or international treaty to use any photo files or movie files without the prior consent of the copyright holder. It is also prohibited strictly under copyright law or international treaty to transfer such files, whether they are paid for or charge-free, onto the Internet or distribute the same to a third person. If this product should be used for any illegal act against copyright law, be forewarned that ELMO shall not be liable at all for any compensation. Even if using for personal use, be careful that there could be a situation where video or audio recording is restricted or illegal.
ATTENTION:
* This product is designed to be used in domestic environment. However, if this product is used in close proximity to a radio or television, it may cause harmful interference to radio or television reception.
* Any image, which is obtained by this product, and which can be identified, is considered to be private information. Be forewarned that the person who makes use of such images shall be liable for disclosing of such images.
* Unless used for personal use, it is prohibited by copyright law to record books and photos without the prior consent of copyright holder.
* Repair parts
Repair parts are the items which are needed to maintain product functionality. The holding period of such repair parts is equal to the repair period which we will accept.

FEDERAL COMMUNICATIONS COMMISSION INTERFERENCE STATEMENT
This equipment has been tested and found to comply with the limits for a Class B digital device, pursuant to part 15 of the FCC Rules. These limits are designed to provide reasonable protection against harmful interference in a residential installation. This equipment generates, uses and can radiate radio frequency energy and, if not installed and used in accordance with the instructions, may cause harmful interference to radio communications. However, there is no guarantee that interference will not occur in a particular installation. If this equipment does cause harmful interference to radio or television reception, which can be determined by turning the equipment off and on, the user is encouraged to try to correct the interference by one or more of the following measures:
- Reorient or relocate the receiving antenna.
- Increase the separation between the equipment and receiver.
- Connect the equipment into an outlet on a circuit different from that to which the receiver is connected.
- Consult the dealer or an experienced radio/ TV technician for help.
CAUTION:
Any changes or modifications not expressly approved by the grantee of this device could void the user's authority to operate the equipment.
This device complies with Part 15 of the FCC Rules. Operation is subject to the following two conditions: (1) this device may not cause harmful interference, and (2) this device must accept any interference received, including interference that may cause undesired operation.
RF exposure warning
This equipment must be installed and operated in accordance with provided instructions and the antenna(s) used for this transmitter must be installed to provide a separation distance of at least 20 cm from all persons and must not be co-located or operating in conjunction with any other antenna or transmitter. End-users and installers must be provide with antenna installation instructions and transmitter operating conditions for satisfying RF exposure compliance.
Canada, Industry Canada (IC) Notices
This Class B digital apparatus complies with Canadian ICES-003 and RSS-210.
Operation is subject to the following two conditions: (1) this device may not cause interference, and (2) this device must accept any interference, including interference that may cause undesired operation of the device.
Canada, avis d'Industry Canada (IC)
Radio Frequency (RF) Exposure Information
The radiated output power of the Wireless Device is below the Industry Canada (IC) radio frequency exposure limits. The Wireless Device should be used in such a manner such that the potential for human contact during normal operation is minimized.
This device has also been evaluated and shown compliant with the IC RF Exposure limits
under mobile exposure conditions. (antennas are greater than 20cm from a person's body).
natural_image
Line drawing of a digital camera with lens and mounting holes (no text or symbols)□ USB cable (0.2m)
natural_image
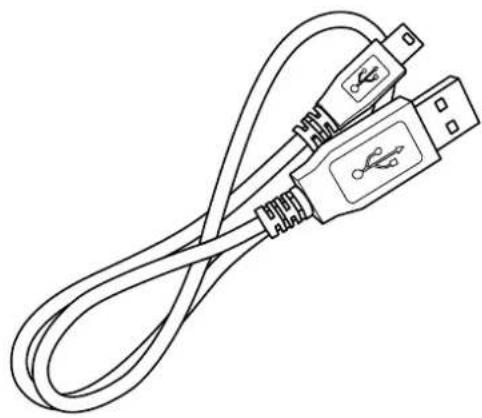
Line drawing of a USB cable with two connectors and a logo on its side (no text or symbols)□ Lens protection cap

natural_image
Technical line drawing of a circular mechanical component with mounting holes and a central dial (no text or symbols)□ Start-Up Guide & Important Safeguards
□ Warranty card
☐ For the user who purchased MS-1 with the smart clip
For details about how to use the smart clip, refer to the instructions on the bottom of the box of the smart clip or download the instruction manual from official website of QBiC MS-1.
We recommend you use a protective sheet and the like to protect your device when attaching the clip to a device which is susceptible to damage such as a smartphone.
This product has been carefully packaged with special attention to quality. Should you find anything damaged or missing, please contact your dealer or ELMO.
THE NAME OF EACH PART
FRONT

BACK

CHARGING THE BATTERY
This camera is equipped with a built-in battery.
* The battery cannot be removed by the user.
* The battery is not fully charged at the time of purchase. Charge the battery fully before starting to use the camera.
- Make sure that the power of the camera is off. (Charging is not possible when the power of the camera is on.)
- Open the Interface Terminal Cover and connect the micro USB plug (smaller one) of the supplied USB cable to the USB port.
- Connect the USB plug of the USB cable to a USB port on your running computer. Charging will automatically start. The Power LED on the camera turns red while charging.
- The battery is fully charged when the Power LED turns off.

About AC adapter (Option)
The battery capacity decreases as time goes when the camera is turned on after connecting to the USB port of your computer. In this case, long time continuous use of the camera is not possible.
If you want to use the camera continuously for long time, use the dedicated AC adapter (option). The battery capacity does not decrease by time.
(Make sure to use the dedicated AC adapter. The camera may not start when a commercially available AC adapter is used.)
INSERTING THE MICRO SD CARD

- Open the Interface Terminal Cover. (①).
- Insert the commercially available microSD card in the microSD card slot. (②).
* Pay attention to the direction of the card when inserting the microSD card. Insert the card until it clicks.
* Improper insertion of the card may cause error or damage the camera.
- Close the Interface Terminal Cover.
* Make sure to close the cover correctly.
Otherwise, the waterproof performance of the camera may be compromised, causing malfunction.
Compatible microSD card
| Type | Recording Capacity | SD Speed Class |
| microSD | 2GB | — |
| microSDHC | 4 - 32GB | Class 6 or higher |
| microSDXC | 64GB | Class 10 or higher |
* Refer to the QBiC MS-1 official website for a list of compatible microSD card.
QBiC MS-1 official website http://www.elmoqbic.com/ms1/
POWERING ON/OFF
Powering ON
Press and hold (over 1 second) the Power Switch to power on the camera.
The Power LED turns blue.
Powering OFF
Press and hold (over 2 seconds) the Power Switch to power off the camera.
All the LEDs turn off.
(When the camera is connected to a computer via USB cable or the power is supplied by the optional AC adapter, charging will start after the camera is turned off and the Power LED will turn red.)
* The camera automatically turns off when the following abnormalities occur:
- The temperature inside the camera has exceeded the limit of normal operating temperature.
- An error has been found with the built-in battery.
CHANGING SSID AND KEY
It is recommended that you change your SSID and Key to avoid other people from using your connection without permission. The SSID and Key can be reset to factory defaults.
Refer to the following page for details about how to change SSID and Key.
P.43 Settings

RECORDING
There are 2 types of recording methods - Movie recording and Photo recording.
There are 3 modes for Photo recording - Single mode, Burst mode, and Interval mode.
The recorded movies and photos are stored in the micro SD card.
All settings are configured from QBiC APP installed in a smart device. The recording can be performed using QBiC APP.
The recorded movies and photos are stored in the following file formats:
| Movie / Photo | File format |
| Movie | MPEG4 (*.mp4) |
| Photo | JPEG (*.jpg) |
MOVIE RECORDING
The movie recording starts with a confirmation sound when the Recording Switch is pressed. The Recording LED turns red during the recording.
The recording stops with a confirmation sound when the Recording Switch is pressed again during the recording. The Recording LED turns off.
PHOTO RECORDING
The following 3 modes are available for photo recording.
Single mode
The camera records a photo with a shutter sound each time the Shutter Switch is pressed. The Recording LED turns blue during the recording.
Burst mode
The camera records 10 photos with shutter sounds each time the Shutter Switch is pressed. The Recording LED turns blue during the recording.
Interval mode
The camera continuously records photos with shutter sounds at a certain set interval
when the Shutter Switch is pressed. The Recording LED turns blue during the recording. The camera automatically turns off between the intervals when the interval has been set to 30 seconds or longer. The interval recording stops when the Power Switch is pressed during the Interval recording.
* Refer to the following page for details about how to change the settings.
P. 43 Settings

Starting WiFi
You can switch between start WiFi and stop WiFi by pressing the WiFi Switch for over 1 second. The WiFi LED turns blue while the WiFi is on.

VIEWING THE RECORDED FILES
The files recorded by the camera can be viewed by the following 3 methods.
VIEWING ON TV OR PROJECTOR
- Open the Interface Terminal Cover.
- Connect the camera to a TV or projector using a commercially available HDMI cable. (The HDMI cable needs to have micro D connector.)
- Press the Power Switch of the camera for longer than 1 second to turn on the camera. The live view appears on the TV monitor or screen of the projector after the camera is started.
- The live view changes to the Thumbnail mode after the Power Switch is pressed for short.
- In the Thumbnail mode you can see thumbnails of the recorded files (movie / photo). Select the file to be displayed using the Power Switch.
- Press the Recording Switch to play the selected file. (Playback mode)
- Select the Thumbnail mode after the playback of the file is finished. Then press the Recording Switch to return to the Thumbnail mode.
HDMI OUTPUT RELATED ICONS
Modes
 | Recording mode |
 | Thumbnail mode |
 | Playback mode |
▶ Remaining battery level
| 100% - 76% | |
| 75% - 51% | |
 | 50% - 26% |
 | 25% - 1% |
 | 0% |
 | Charging |
WiFi
 | On |
 | Off |
Exposure level
 | +2 |
 | +1 |
 | 0 |
 | -1 |
 | -2 |
White balance
 | Auto |
 | Night |
 | Sunny |
 | Cloudy |
 | Incandescent light |
 | Fluorescent light |
WDR
 | On |
 | Off |
Resolution
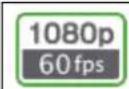 | 1080p / 60fps |
 | 1080p / 30fps |
 | 720p / 120fps High Speed |
 | 720p / 60fps |
 | 720p / 30fps |
 | WVGA / 240fps High Speed |
Angle of view
 |
Mode change
| Recording mode | |
| Thumbnail mode |
File type to be displayed
 | Movie |
 | Photo |
 | Movie and photo |
* The file type to be displayed can be changed with the Shutter Switch.
▶ File operations
 | Play |
 | Pause |
 | Rewind |
 | Fast forward |
 | Go to the previous file |
 | Go to the next file |
* The icon will disappear in about 10 seconds after HDMI connection is established.
VIEWING ON SMART DEVICE
The files stored in the camera can be viewed with QBiC APP available in App Store and Google Play.
* The movie may stop during the playback depending on the network environment.
* The seek position moves when FF or RWD is performed during the playback on QBiC APP.
Refer to the following pages for details.
P. 38 Explanations for ICONS OF QBIC APP
VIEWING ON COMPUTER
The files stored in the microSD card can be viewed on your computer.
Refer to the following pages for details.
P. 32 TRANSFERRING THE FILES TO YOUR COMPUTER

TRANSFERRING THE FILES TO YOUR COMPUTER
The files recorded by the camera can be transferred to your computer using the Mass Storage feature or the microSD.

MASS STORAGE
- Open the Interface Terminal Cover.
- Connect the camera to your computer using the supplied USB cable.
- Press the Power Switch of the camera for longer than 1 second to turn on the camera. The computer recognizes the camera as a removable disk after the camera is started.
* Remove the USB cable after the camera is turned off.

MICRO SD CARD
- Open the Interface Terminal Cover.
- Remove the microSD card. Then, insert it into the card slot of your computer. (If your computer does not have the card slot for the microSD card, use a commercially available card reader.)

LIVE VIEWING
By connecting the camera to your smart device using WiFi, you can view real-time images from the camera on your smart device.
The live image can also be viewed on TV or projector.
The following smart devices can be used as a monitor for the live viewing:
[iOS]: 5.1 or later
[Android OS]: 2.3 or later
* Some functions are limited for the Android 2.3.

LIVE VIEWING ON QBIC APP
You can switch between start WiFi and stop WiFi by pressing the WiFi Switch for over 1 second. The WiFi LED turns blue while the WiFi is on.
INSTALLING QBIC APP

For both iOS and Android, QBiC proprietary application software needs to be installed in your device in advance
[iOS]: Download "QBiC APP" from "App Store".
[Android OS]: Download "QBiC APP" from "Google Play".
Refer to the QBiC MS-1 official website for details about the downloading procedure.
QBiC MS-1 official website: http://www.elmoqbic.com/ms1/
CONNECTING YOUR SMART DEVICE
This section describes how to connect your smart device to the camera using WiFi.
Refer to the instruction manual of your smart device for further details.
[Camera operation]
- Turn on the camera.
- Verify that the flashing WiFi LED of the camera turns blue (which means the WiFi is activated). If the WiFi LED does not flash or turn blue, press the WiFi
Switch to activate the WiFi.
[Operation of iOS device]
- From the home screen of your iOS device, tap "Setting" → "Wi-Fi".
- Set the "Wi-Fi" in the "Wi-Fi" setting window to "ON".
- Select "QBiCMSxxxxxxx (xxxxxxx is a serial number of the camera)" from the list in "Select the network....." and tap it.
- Enter "1234567890" to the password window.
- Tap the "Connect" button.
- √ mark will be displayed at the left of "QBiCMSxxxxxxx".
- Close the "WiFi" setting window to return to the home screen.
[Operation of Android device]
- From the home screen of your Android device, tap "Setting"→"Wi-Fi".
- Set the "Wi-Fi" in the "Wi-Fi" setting window to "ON".
- Select "QBiCMSxxxxxx from the list displayed and tap it."
- Enter "1234567890" to the password window.
- Tap the "Connect" button.
- You can see that "QBiCMSxxxxxxx" is now connected.
- Close the "WiFi" setting window to return to the home screen.
* The application may not work properly when more than 2 smart devices are connected to 1 camera.
* SSID and Key can be changed. Refer to the following page for details.
P. 43 Settings
* Actual setting procedure for iOS device and Android device may be different depending on its version. Refer to the instruction manual or website of your device for further details.
STARTING QBIC APP
- From the home screen of your smart device, start QBiC APP.
- The live view of the camera will be displayed after the live button is tapped.
* The live viewing may be frame-by-frame when recording movies. The live view cannot be displayed when the resolution is set to High Speed.
* If a communication error message is displayed on the application, check the settings of the camera and your smart device and restart the camera and your
smart device. Then restart the application.
* The communication range differs depending on the using environment.
In case of communication problem, shorten the distance between the camera and your smart device or retry in the location where there are no obstacles.
LIVE VIEWING ON TV OR PROJECTOR
- Open the Interface Terminal Cover.
- Connect the camera to a TV or projector using a commercially available HDMI cable. (The HDMI cable needs to have micro D connector.)
- Press the Power Switch of the camera for longer than 1 second to turn on the camera. The live view appears on the TV monitor or screen of the projector after the camera is started.
* The resolution of the live view changes according to the setting of the camera.
FORCING THE CAMERA TO TURN OFF
In case that the camera cannot be turned off or does not accept any operation, you can force the camera to turn off by pressing the Power Switch for over 10 seconds. All the LEDs will turn off.
- RESETTING THE CAMERA TO FACTORY DEFAULT SETTINGS
You can reset the camera to factory default settings by pressing the Recording Switch and the WiFi Switch together for over 5 seconds. All the LEDs will flash green and the camera will automatically restart.
Default settings of the camera
| Item | Default setting |
| Horizontal angle of view | 185° |
| White Balance | Auto |
| Self-timer | OFF |
| WDR | OFF |
| Exposure | ±0 |
| Resolution | 1080p / 30fps |
| Light Metering | Center-weighted |
| Distortion Correction | OFF |
| Hand-Shake Correction | OFF |
| Image Rotation | OFF |
| Photo Recording Mode | Single |
| Burst Recording Interval | 60fps: 10 frames |
| Interval Recording Time | 00:00:30 |
| Recording Setting | Level : 5, Balance : 0 |
| Auto Power OFF | 120 seconds |
| Streaming Setting | MJPEG |
| WiFi Auto-OFF | ON |
| Camera AP mode | SSID & KEY : Numbers on the back of the camera |
| Movie File Setting | 30 minutes |
| Camera Operation Sound | 100% |
* When the firmware version is 01.01.0001.

EXPLANATIONS FOR ICONS OF QBIC APP
MOVIE RECORDING
To start or stop movie recording.
 | This icon is green when a smart device is viewed in vertical way. |
 | This icon is grey when a smart device is viewed in horizontal way. |
PHOTO RECORDING
To take a photo.
 | This icon is green when a smart device is viewed in vertical way. |
 | This icon is grey when a smart device is viewed in horizontal way. |
GRID DISPLAY
To change the grid display during the Live Viewing.
The grid display changes each time the icon is tapped.
 | Single grid display |
 | Quad display |
 | 3 x 3 display |
 | Diagonal display |
ANGLE OF VIEW
To change the angle of view.
| 185° | |
| 165° | |
| 135° |
* According to the angle of view, the resolution of the photo changes as follows: 185°: 2912 x 1640, 165°: 2464 x 1384, 135°: 1920 x 1080
WHITE BALANCE
To change the white balance.
 |  | AUTO |
 | Night | |
 | Sunny | |
 | Cloudy | |
 | Incandescent light | |
 | Fluorescent light |
SELF-TIMER
To set the Self-Timer.
 | OFF |
| 5 seconds | |
| 10 seconds | |
| 30 seconds |
WDR SHOOTING (WIDE DYNAMIC RANGE SHOOTING)
To switch between ON and OFF of the WDR (Wide Dynamic Range) shooting.
To change the exposure level.
 | +2 |
| +1 | |
| 0 | |
| -1 | |
| -2 |
RESOLUTION
To change the resolution.
 | 1080p / 60fps |
| 1080p / 30fps | |
| 720p / 120fps High Speed *1 | |
| 720p / 60fps | |
| 720p / 30fps | |
| WVGA / 240fps High Speed *2 |
*1 -- Recorded at 4x speed and played at 1/4x speed. The sound is not recorded.
*2 -- Recorded at 8x speed and played at 1/8x speed. The sound is not recorded.
* Flickering may occur when the recording (movie recording or photo recording) is performed at high-speed setting under illumination such as a fluorescent light.
REMAINING BATTERY
To display the remaining battery level of the camera.
 | Less than 0% |
 | 1% - 30% |
 | 31% - 60% |
 | 61% - 100% |
 | Charging |
RECORD
To indicate that the recording is in progress.

SOURCE (THUMBNAIL)
To change the source of the file to be displayed in the thumbnail.
 | Smart device |
| [27X8] | Camera |
MOVIE/ PHOTO (THUMBNAIL)
To switch the file type to be displayed in the thumbnail.
 | Movie |
 | Still Picture |
* Only still pictures can be displayed for the Android 2.3. These icons do not appear.
EDIT
To enter the edit mode in which you can download files or delete files.

DOWNLOAD
To download files to the memory of the application software from the microSD card of the camera.

DELETE
To delete a selected file.

JOINT
To joint selected 2 movie files.
* You can joint only movie files in your smart device.
* You may fail to joint movie files when the file sizes are too large.

SPLIT
To split a selected movie file.
* You can split only movie files in your smart device.
* You may fail to split a movie file when the file size is too large.

SEND FILE
To send a selected file to other application.

SETTINGS
To set the following items.

▶ Camera Settings
- Light Metering
You can change the method for measuring light.
| Overall mean |
| Center-weighted |
- Distortion Correction
You can correct the image distortion.
| ON |
| OFF |
* The Distortion Correction cannot be set to ON when the resolution is set to WVGA / 240fps High Speed.
- Hand-Shake Correction
You can correct the hand-shake effect in the image.
| ON |
| OFF |
* When using Hand-Shake Correction during the shooting, set the WiFi to OFF in advance.
* The Hand-Shake Correction cannot be set to ON when the resolution is set to 720p / 120fps High Speed or WVGA / 240fps High Speed.
- Image Rotation
You can rotate the image by 180^
| ON |
| OFF |
* The Image Rotation cannot be set to ON when the resolution is set to WVGA / 240fps.
- Photo Recording Mode
You can change the recording mode when recording photos.
| Single |
| Burst |
| Interval |
- Burst Recording Interval
You can change the intervals during the Burst Recording.
| 2fps:10 frames |
| 5fps:10 frames |
| 60fps:10 frames |
- Interval Recording Time
You can change the intervals during the Interval Recording.
| 00:00:02 - 24:00:00 |
- Audio Recording Setting
You can change the recording level and recording balance.
| Level | 0 ~ 10 |
| Balance | L5 ~ 0 ~ R5 |
* The more the value is close to L5, the larger the left sound is recorded. The more the value is close to R5, the larger the right sound is recorded.
- Auto Power OFF
The camera automatically turns off after no operation is performed for the set period of time when the built-in battery is in use.
| OFF |
| 60 sec. |
| 120 sec. |
| 300 sec. |
WiFi Settings
- Streaming Setting
You can change the method for streaming.
HTTP (MJPEG)
HLS (H.264) / RTSP (H.264)
* For the app for iOS, HLS can be selected.
* Only HTTP (MJPEG) can be selected for the Android 2.3.
- WiFi Auto-OFF
To automatically turn off the WiFi of the camera after 5 minutes of "no connection" status between the camera and QBiC APP.
ON
OFF
- Camera AP mode
You can change the network setting.
✿ SSID(Random alphanumeric characters and some symbols : 1 digit - 32 digits)
Key(Random alphanumeric characters and some symbols : 8 digits - 63 digits)
* The camera will automatically update the network setting after the change.
You will need to change the network setting of your smart device accordingly after the camera is restarted.
* “some symbols”: “@”, “-”, “_”
- Network Setting Initialization
To initialize the network setting.
Others
- Movie Download Setting
You can change the setting for downloading files to your smart device from the SD card of the camera.
Reduced size (For faster download)
Shooting size (For quality download)
- Movie File Setting
To split a movie file into smaller files of a set playback time.
| 1 minute |
| 3 minutes |
| 5 minutes |
| 10 minutes |
| 30 minutes |
- Camera Operation Sound
To change the volume of the operation sound of the camera.
0% \~ 100%
- Time Synchronization
You can synchronize the time setting on the camera with your smart device.
| ON |
| OFF |
- Remaining Battery Alarm
You can switch between ON and OFF of the Remaining Battery Alarm which indicates that the remaining battery level of the camera is low.
| ON |
| OFF |
- Camera SD card Format
To format the microSD card.
- Camera Settings Initialization
To initialize the camera settings.
* The network settings will not be initialized.
- Information
To display versions of FW of the camera and app.
MAINTENANCE OF THE CAMERA
Normal Maintenance
Clean the camera surface gently with a dry, soft cloth.
- Maintenance after the camera is exposed to water Wipe off the water droplets with a soft, dry cloth, and then dry the camera completely at a well-ventilated location in the shade.
How to remove heavy dirt Wipe off the dirt with a soft, moistened cloth, and then wipe off the water droplets with a soft, dry cloth, and dry the camera completely at a well-ventilated location in the shade.
* Leaving droplets or foreign objects may deteriorate the waterproof performance and damage the camera.
Do not open or close the cover until all the foreign objects such as sand and dust are completely removed.
Otherwise, foreign objects or water may get inside the camera.
* Do not use soap, neutral detergents, or chemicals to rinse the camera. It may deteriorate the waterproof performance.
UPDATING THE CAMERA
The firmware of the camera will be updated from time to time to improve their performance and functionality. By updating the firmware, you will be able to use new functions.
* Be sure to save the important files before starting the update.
- Download the update file (ms1fw_xx.xx.xxxx.bin) from the QBiC MS-1 official website: http://www.elmoqbic.com/ms1/ to your computer.
- Save the downloaded file to the microSD card.
- Turn off the camera and insert the microSD card.
- Turn on the camera. The update will start automatically. * The camera needs to have enough battery charge to update its firmware.
Use the AC adapter when the battery charge is low.
- The update process is complete when the camera restarts twice.

TROUBLESHOOTING
| Cannot turn on the camera. | Is the battery fully charged?You cannot turn on the camera when the battery level is low.Charge the battery and retry.Are you using the camera in a cold place?The performance of the battery may decrease temporarily when using in a cold place.Warm the camera by putting it inside your jacket for a while and retry. |
| Cannot charge the battery. | Is the camera turned on?Charging cannot be done when the camera is turned on Turn off the camera and retry. |
[LIMITED WARRANTY AND REPAIR]
WARRANTY PERIOD
We offer you a 1 year limited warranty on our product, from the date of the original purchase ("Warranty Period").
Keep the warranty card included in the product package in a safe place.
Faults reported outside of the Warranty Period are subject to a chargeable repair.
WARRANTY COVERAGE
This warranty shall apply only when the camera is used under the conditions and in the manner intended by ELMO as specified in the QBiC MS-1 instruction manual or the leaflets of QBiC MS-1 during the Warranty Period.
EXCLUSIONS AND LIMITATIONS
This warranty does not cover the following:
(1) Failure or damage caused by misuse, improper application, wrong operation other than specified in the QBiC MS-1 instruction manual;
(2) Failure or damage resulting from repair, modification or cleaning by disassembling by someone other than authorized service center;
(3) Failure or damage caused by mud, sand, water, dropping or impact;
(4) Failure or damage caused by fire, salt, gas, earthquake, wind, flood, environmental pollution, lightning, electrical surges or other natural disasters;
(5) Failure or damage that occurs in shipment or during transportation after the purchase or the failure or damage caused by dropping or improper storage after the purchase;
(6) When the warranty card is lost; and
(7) If the information such as the name of the shop and the date of purchase is altered.
REPAIR CONDITIONS
(1) The warranty repair is available only for products manufactured by ELMO.
(2) We do not provide on-site repair service. Faulty units have to be brought to our customer service or to be sent to our customer service at customer's expenses.
(3) Contact our customer service (described below) when you need repair service.
[OTHER CUSTOMER SERVICE]
Customer service
You can inquire the following inquiries about QBiC MS-1 to our customer service;
(1) About repair service
(2) About instruction of use, sale or other issues
Refer to the warranty card included in the product package or go to QBiC MS-1 website for detailed contact information.
QBiC MS-1 official website: http://www.elmoqbic.com/ms1/

CAMERA
| CAMERA | |
| Horizontal angle of view | 185°/ 165°/ 135° |
| Effective pixels | 2912 × 1640 (Approx. 5 mega pixels) |
| Image device | 1/2.3" CMOS sensor |
| F number | F 2.0 |
| White Balance | AUTO / Night / Sunny / Cloudy / Incandescent light / Fluorescent light |
| Recording Resolution (Movie) | 1080p / 60fps, 1080p / 30fps, 720p / 120fps High Speed, 720p / 60fps, 720p / 30fps, WVGA / 240fps High Speed |
| Recording media | microSD microSDHC Class 6 or higher microSDXC Class 10 or higher |
| File format | MPEG4(Movie) / JPEG(Photo) |
| WiFi | IEEE802.11 b/g/n |
| Battery | Lithium-polymer battery (built-in) 3.7V 1000mAh |
| Battery operating time | Approx. 1hr45min (at 1080/30p) |
| Charging time | Approx. 3hrs |
| Interface | USB micro B, HDMI micro D microSD card slot |
| Weight | 93 g |
| Dimensions (W × H × D) | 54.4 × 61.2 × 40.1 mm*including lens cover**without including the projecting parts |
| Waterproof level | IPX4 |
| Operating temperature | 0 - 40°C |
| Storage temperature | -20 - 60°C |
MEANING OF THE LEDs
| STATUS | WiFi LED | POWER LED | RECORDING LED |
| Power ON | — | On (Blue) | — |
| Power OFF | — | — | — |
| When charging | — | On (Red) | — |
| Mass Storage | — | On (Green) | — |
| Initializing | — | Flashing (Green/normal speed) | — |
| Formatting microSD card | — | — | Flashing (Green/normal speed) |
| Updating(0% - 33%) | Flashing (Green/normal speed) | — | — |
| Updating(34% - 66%) | On(Green) | Flashing (Green/normal speed) | — |
| Updating(67% - 99%) | On(Green) | On(Green) | Flashing (Green/normal speed) |
| Initializing WiFi | Flashing (Blue/slow speed) | ||
| Switching WiFi | Flashing (Blue/normal speed) | ||
| WiFi ON | On(Blue) | ||
| WiFi OFF | — | ||
| Sufficient remaining battery | On(Blue) | ||
| Remaining battery is low | Flashing (Blue/high speed) | ||
| Recording | On (Red) | ||
| Taking a photo | On (Blue) | ||
| Self-timer | Flashing(Magenta) | ||
| Failed to format microSD card | — | — | Flashing (Green/high speed) |
| microSD error | — | Flashing (Green/high speed) | Flashing (Green/high speed) |
| Temperature warning | On(Cyan) | ||
| Abnormal temperature ※ | — | — | — |
| Battery error ※ | — | — | — |
| Recovery is in process | Flashing (Yellow/high speed) | — | Flashing (Yellow/high speed) |
※The camera automatically turns off with a beep.
* ‘—’ indicates that the LED is OFF.
FUNCTIONS OF THE SWITCHES
| ACTION | SWITCHES TO BE USED | CONDITIONS |
| To turn on the camera. | Power Switch (1 second) | Power is off. |
| To turn off the camera. | Power Switch(2 seconds) | Power is on. |
| To start movie recording. | Recording Switch | Power is on.Recording is not in process. |
| To stop movie recording. | Recording Switch | Power is on.Recording is in process. |
| To take a photo. | Photo Capture Switch | Power is on. |
| To start WiFi. | WiFi Switch | Power is on.WiFi is off. |
| To stop WiFi. | WiFi Switch | Power is on.WiFi is on. |
| To return to factory default settings. | Recording Switch+WiFi Switch (5 seconds) | Power is on. |
| To switch the mode. | Power Switch(Press Short) | Power is on.Recording is not in process. |
| To select the operation icons. | Power Switch(Press Short) | Thumbnail mode /Playback mode |
| To select/ to play a file. | Recording Switch(Press short) | Thumbnail mode /Playback mode |
| To move between files. | Shutter Switch(Press Short) | Thumbnail mode |
* The microSD card needs to be inserted into the camera for above operations.
| Recording Resolution | microSD card | ||||
| 4GB | 8GB | 16GB | 32GB | 64GB | |
| 1080p / 60fps | 30min | 1hr | 2hrs | 4hrs | 8hrs |
| 1080p / 30fps | 30min | 1hr | 2hrs | 4hrs | 8hrs |
| 720p / 120fps High Speed | 30min | 1hr | 2hrs | 4hrs | 8hrs |
| 720p / 60fps | 45min | 1hr30min | 3hrs | 6hrs | 12hrs |
| 720p / 30fps | 1hr | 2hrs | 4hrs | 8hrs30min | 17hrs |
| WVGA / 240fps High Speed | 45min | 1hr30min | 3hrs | 6rs | 12hrs |
*The estimated recordable time is only a guide. Actual recordable time may be shorter depending on the shooting conditions.

ESTIMATED RECORDABLE NUMBER OF PHOTOS
| Recording Resolution (Angle of view) | microSD card | ||||
| 4GB | 8GB | 16GB | 32GB | 64GB | |
| 2912 x 1640 (185°) | 5,000 | 10,000 | 21,000 | 42,000 | 84,000 |
| 2464 x 1384 (165°) | 7,000 | 14,000 | 28,000 | 56,000 | 112,000 |
| 1920 x 1080 (135°) | 10,000 | 21,000 | 42,000 | 84,000 | 168,000 |
*The estimated recordable number of photos is only a guide. Actual recordable number of photos may be shorter depending on the shooting conditions.

ESTIMATED CONTINUOUS OPERATION TIME
| Recording Resolution | Estimated continuous operation time (Record only/ WiFi OFF) |
| 1080p / 60fps | 80 minutes |
| 1080p / 30fps | 105 minutes |
| 720p / 120fps High speed | 100 minutes |
| 720p / 60fps | 100 minutes |
| 720p / 30fps | 110 minutes |
| WVGA / 240fps High speed | 95 minutes |
* The estimated continuous operation time is only a guide. Actual operation time may be shorter depending on the shooting conditions.

TRADEMARKS
ELMO and ELMO QBiC are registered trademarks of ELMO Co.,
Bluetooth is a registered trademark of Bluetooth SIG, Inc.
App Store is a service mark of Apple Inc.
- iOS is a trademark or registered trademark of Cisco, Inc.
➢ Android, Google Play are the trademark or registered trademark of Google Inc.
Wi-Fi is a trademark or registered trademark of Wi-Fi Alliance.
...
All other company/product names described in this manual are trademarks or registered trademarks of their respective companies.
We do not use the ^TM or ^ mark to indicate these trademarks or registered trademarks in this manual.

LICENSE
This product uses open source software. Under the request of the copyright holder of the open source software, ELMO is obliged to provide the following information to the user.
About the software subject to GNU GPL/LGPL
This product uses software which is subject to the obligation under GNU General Public License (GPL) or GNU Lesser General Public License (LGPL). According to the conditions of GNL/LGPL, the user has the right to obtain, modify or redistribute the source code of the software.
Contact ELMO for information about how to obtain the source code.
Note that we do not accept any inquiries regarding the detail of the source code.
The terms and conditions of the license (English) are stored in the camera. Connect the camera to your smart device using WiFi and access http://192.168.42.1/license.txt.
6X1MWMA08 R4_Xxx

- Table of contents
- PLEASE NOTE
- IMPORTANT SAFEGUARDS
- DANGER
- WARNING
- CAUTION
- BEFORE YOU USE
- ■ Waterproof performance
- ■ Normal maintenance
- ■ Luminescent spot and black spot
- ■ Change of SSID and Key
- Recorded files
- ■ microSD card
- ATTENTION:
- FEDERAL COMMUNICATIONS COMMISSION INTERFERENCE STATEMENT
- CAUTION:
- RF exposure warning
- Canada, Industry Canada (IC) Notices
- Canada, avis d'Industry Canada (IC)
- Radio Frequency (RF) Exposure Information
- THE NAME OF EACH PART
- FRONT
- BACK
- CHARGING THE BATTERY
- About AC adapter (Option)
- INSERTING THE MICRO SD CARD
- POWERING ON/OFF
- Powering ON
- Powering OFF
- CHANGING SSID AND KEY
- RECORDING
- MOVIE RECORDING
- PHOTO RECORDING
- Starting WiFi
- VIEWING THE RECORDED FILES
- VIEWING ON TV OR PROJECTOR
- HDMI OUTPUT RELATED ICONS
- VIEWING ON SMART DEVICE
- VIEWING ON COMPUTER
- TRANSFERRING THE FILES TO YOUR COMPUTER
- MASS STORAGE
- MICRO SD CARD
- LIVE VIEWING
- LIVE VIEWING ON QBIC APP
- INSTALLING QBIC APP
- CONNECTING YOUR SMART DEVICE
- [Camera operation]
- [Operation of iOS device]
- [Operation of Android device]
- STARTING QBIC APP
- LIVE VIEWING ON TV OR PROJECTOR
- FORCING THE CAMERA TO TURN OFF
- - RESETTING THE CAMERA TO FACTORY DEFAULT SETTINGS
- EXPLANATIONS FOR ICONS OF QBIC APP
- GRID DISPLAY
- ANGLE OF VIEW
- WHITE BALANCE
- SELF-TIMER
- WDR SHOOTING (WIDE DYNAMIC RANGE SHOOTING)
- RESOLUTION
- REMAINING BATTERY
- RECORD
- SOURCE (THUMBNAIL)
- MOVIE/ PHOTO (THUMBNAIL)
- EDIT
- DOWNLOAD
- DELETE
- JOINT
- SPLIT
- SEND FILE
- SETTINGS
- ▶ Camera Settings
- - Light Metering
- - Distortion Correction
- - Hand-Shake Correction
- - Image Rotation
- - Photo Recording Mode
- - Burst Recording Interval
- - Interval Recording Time
- - Audio Recording Setting
- - Auto Power OFF
- WiFi Settings
- - Streaming Setting
- - WiFi Auto-OFF
- - Camera AP mode
- - Network Setting Initialization
- Others
- - Movie Download Setting
- - Movie File Setting
- MAINTENANCE OF THE CAMERA
- UPDATING THE CAMERA
- TROUBLESHOOTING
- [LIMITED WARRANTY AND REPAIR]
- WARRANTY PERIOD
- WARRANTY COVERAGE
- EXCLUSIONS AND LIMITATIONS
- REPAIR CONDITIONS
- [OTHER CUSTOMER SERVICE]
- Customer service
- FUNCTIONS OF THE SWITCHES
- ESTIMATED CONTINUOUS OPERATION TIME
- TRADEMARKS
- LICENSE
- About the software subject to GNU GPL/LGPL
Brand : Elmo
Model : QBiC MS-1
Category : Camcorder