
Zenmuse XT2 - Drone FLIR - Free user manual and instructions
Find the device manual for free Zenmuse XT2 FLIR in PDF.


| Product Type | Thermal & Optical Camera Gimbal |
| Brand | FLIR |
| Model | Zenmuse XT2 |
| Dimensions | 150 x 120 x 120 mm (approx.) |
| Weight | 570 g (approx.) |
| Power Supply | Powered by drone battery (12-24 V) |
| Thermal Sensor | FLIR Tau 2, 640x512 or 336x256 resolution |
| Visual Sensor | 1/1.7" CMOS, 20 MP |
| Gimbal Stabilization | 3-axis (pitch, roll, yaw) |
| Main Functions | Thermal imaging, visual imaging, radiometry, MSX blending, picture-in-picture |
| Video Output | 1080p @ 30fps |
| Storage | MicroSD card (up to 128GB) |
| Care & Cleaning | Wipe lenses with soft cloth; store in dry, cool place; avoid sand |
| Safety | Use only with compatible DJI drones; follow local drone regulations |
| Spare Parts & Repairability | Contact FLIR or DJI authorized service centers; replaceable cables and mounting parts |
| General Information | Designed for professional inspection, search & rescue, and surveillance |
Frequently Asked Questions - Zenmuse XT2 FLIR
User questions about Zenmuse XT2 FLIR
0 question about this device. Answer the ones you know or ask your own.
Ask a new question about this device
Download the instructions for your Drone in PDF format for free! Find your manual Zenmuse XT2 - FLIR and take your electronic device back in hand. On this page are published all the documents necessary for the use of your device. Zenmuse XT2 by FLIR.
USER MANUAL Zenmuse XT2 FLIR
natural_image
Line drawing of a vintage camera with lens and frame (no text or symbols)
Searching for Keywords
Search for keywords such as "battery" and "install" to find a topic. If you are using Adobe Acrobat Reader to read this document, press Ctrl+F on Windows or Command+F on Mac to begin a search.

Navigating to a Topic
View a complete list of topics in the table of contents. Click on a topic to navigate to that section.

Printing this Document
This document supports high resolution printing.
Using this Manual
Legend

Warning Important Tips!

DJI Pilot App Download
Search for "DJI Pilot" in Google Play and install the app on your tablet.

DJI Pilot is compatible with Android 5.0 and later and is only available for 7.85" and larger size tablets. It is recommended to use the DJI CrystalSky, Xiaomi Pad 2/3, Nexus 9, Samsung Galaxy Tab Pro 8.4/Tab A, and Huawei M2/M3 tablets for optimal usage.
Content
Using this Manual 2
Legend 2
DJI Pilot App Download 2
Introduction 4
Installation 5
Supported Aircraft 5
Mounting the Zenmuse XT 2 5
DJI Pilot App 6
Connecting to DJI Pilot 6
Settings 6
Remote Controller Operation 15
Specifications 15
Introduction
The ZENMUSE™ XT 2 gimbal and camera features a FLIR longwave infrared thermal camera and a visual camera, providing both infrared and visible light imaging simultaneously. The HeatTrack and QuickTrack features make it easy to mark and track objects on your mobile device's screen. The FLIR longwave infrared thermal camera provides high-sensitivity (<50 mK @nf/1.0) infrared scanning at 640/30 fps or 336/60 fps (depending on the camera model), and has 9 mm, 13 mm, 19 mm, and 25 mm lens options. The visual camera captures 4K videos and 12MP photos.
As with other DJI ^™ 3-axis gimbal systems, the Zenmuse XT 2 can be mounted onto the MATRICE ^™ 200 series and Matrice 600 series aircraft and can stream live HD video to the DJI Pilot app. This makes it excellent for aerial thermal applications such as inspection and maintenance, search and rescue, and precision agriculture.
Zenmuse XT 2 Overview
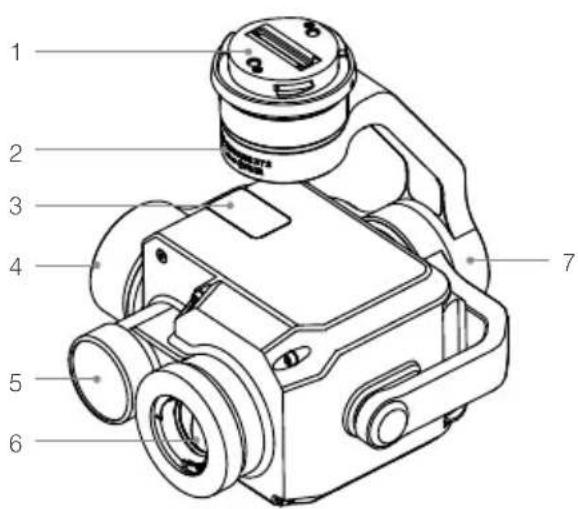
- Gimbal Connector
- Pan Motor
- MicroSD Card Slots
- Tilt Motor
- Visual Camera
- Infrared Thermal Camera
- Roll Motor
Installation
Supported Aircraft
Matrice 200 Series Matrice 600 Series
Mounting the Zenmuse XT 2
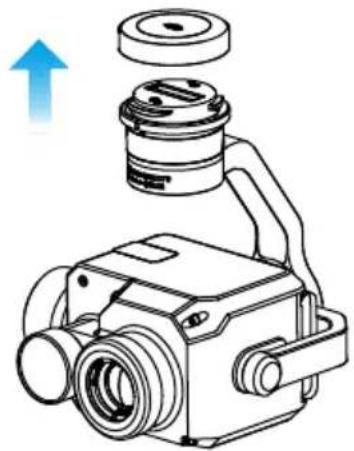
- Remove the gimbal cap, as shown below.
natural_image
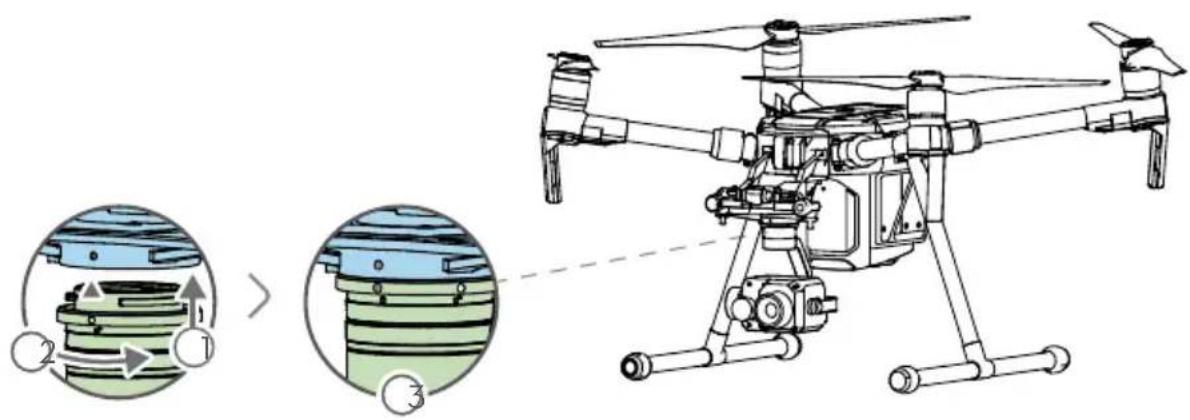
Technical line drawing of a camera with an upward arrow indicating motion (no text or symbols present)- Rotate the gimbal connector to the unlocked position and insert the gimbal. Rotate the gimbal connector to the locked position, as shown below using the Matrice 200 aircraft as an example.

- Ensure that the Zenmuse XT 2 is mounted securely. Hold the gimbal connector firmly and apply a steady, firm rotating force when attaching or detaching the gimbal.
- Ensure that the M200 series aircraft firmware version is 1.01.0900 or later. When mounting on a M210 or M210 RTK aircraft, ensure that the Zenmuse XT 2 is mounted to gimbal connector I.
- Ensure that the microSD card slot cover is firmly in place to prevent dust or moisture damage.
- The Zenmuse XT 2 is a sophisticated device. Do not disassemble the gimbal or camera, as this will cause permanent damage.
DJI Pilot App
Connecting to DJI Pilot
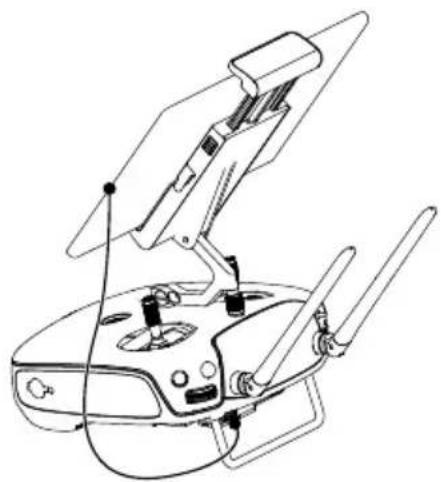
- Turn on the aircraft and remote controller.
- Connect your mobile device to the remote controller via the USB cable.
- Launch DJI Pilot and enter Camera View. When the connection is established, your mobile device will display real-time video from the camera.
natural_image
Line drawing of a mechanical device with articulated arms and control panels (no text or symbols)Settings
Camera View
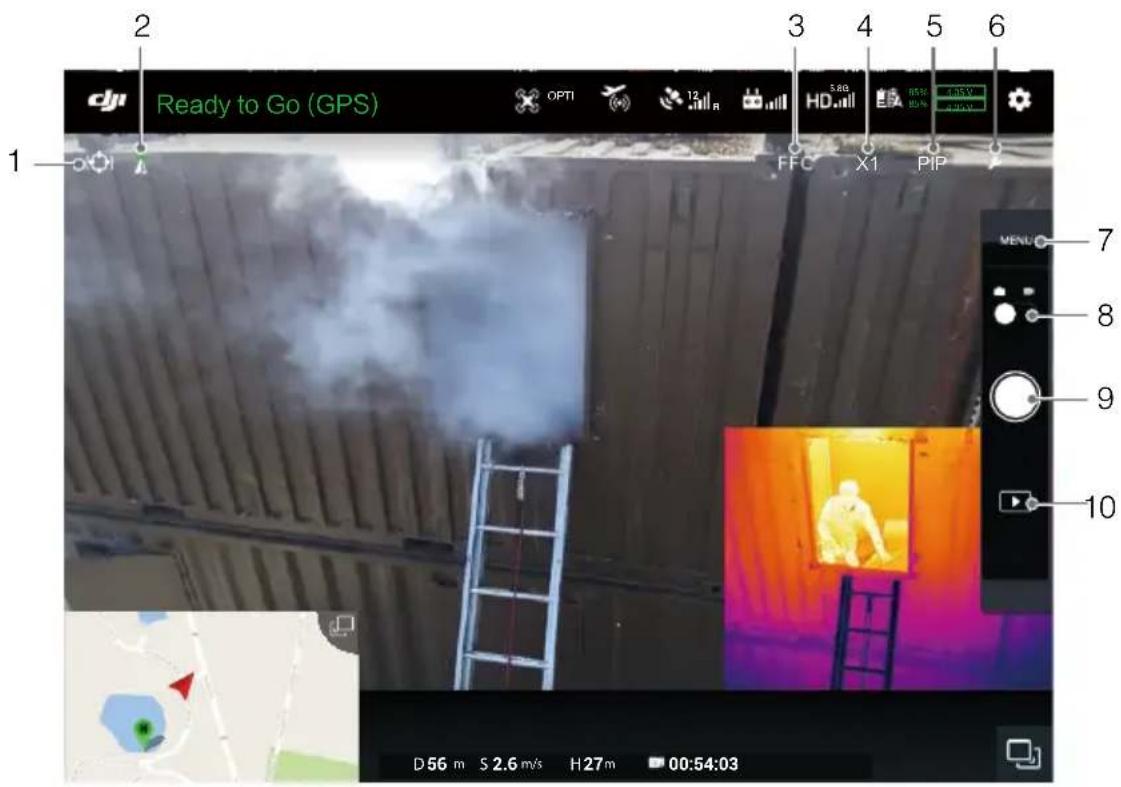
1. Spotlight
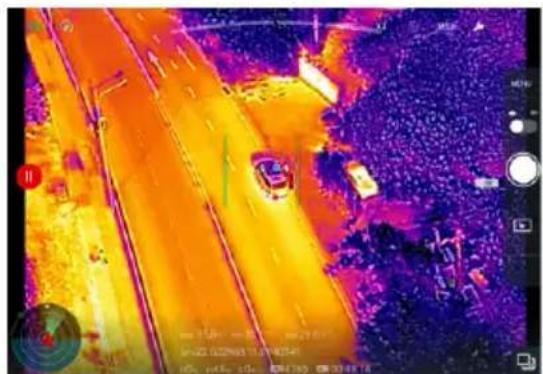
Spotlight provides access to the QuickTrack and HeatTrack features. When using QuickTrack, drag a box on the screen surrounding the desired subject, which the gimbal will follow. The red and blue points represent the hottest and coolest points in the selected area, respectively. If the desired subject is lost during tracking, manually reselect it.
When using HeatTrack, the gimbal automatically recognizes and follows the hottest object on the screen. The red point represents the hottest point on the screen. If the gimbal recognizes a hotter point while tracking, the red point will move and a circle will appear around it. Tap on this point to follow it.
Please note that Spotlight is only available when using the Zenmuse XT 2 with the M200 series aircraft.
natural_image
Aerial thermal image showing a vehicle driving on a road with surrounding vegetation and a camera lens (no readable text or symbols)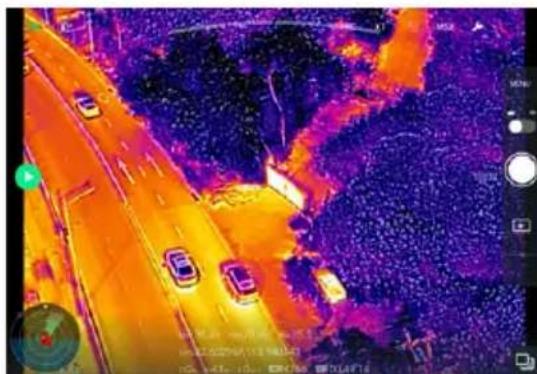
natural_image
Thermal imaging view of a highway with cars and trees, showing heat distribution (no text or symbols)2. Gimbal Mode
The three gimbal modes are Follow, Free, and Recenter.
3. FFC Calibration
Calibration is used to optimize image quality. During calibration, your screen may freeze momentarily and the camera will make a clicking sound.
4. Digital Zoom
Tap to adjust the digital zoom.
5. Display Mode
Tap to switch between the Vision, PIP, Infrared, and MSX display modes.
Vision mode: Only displays the footage that visual camera captures.
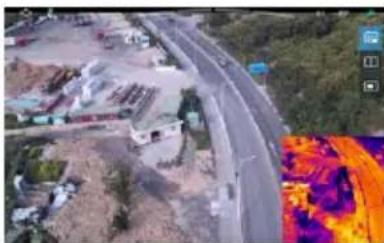
PIP mode: PIP mode includes three sub-modes:
1) Visual footage contains embedded infrared footage, whose position can be adjusted;
2) Visual and infrared footage display side by side;
3) Infrared footage lays exactly over corresponding visual footage.
natural_image
Aerial view of a highway with surrounding greenery and a thermal or heat map overlay (no visible text or symbols)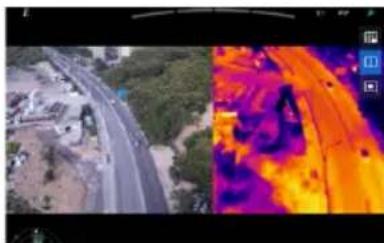
natural_image
Aerial view of a highway alongside a thermal imaging view showing heat distribution (no text or symbols)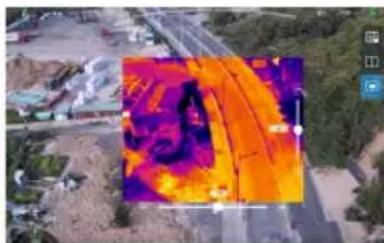
natural_image
Aerial view of a highway with a large heat map overlay showing temperature distribution (no text or symbols visible)Infrared mode
Only displays the footage that infrared thermal camera captures.
MSX mode
Fuses the infrared and visual footage. Tap the tool icon to select the degree of fusion.
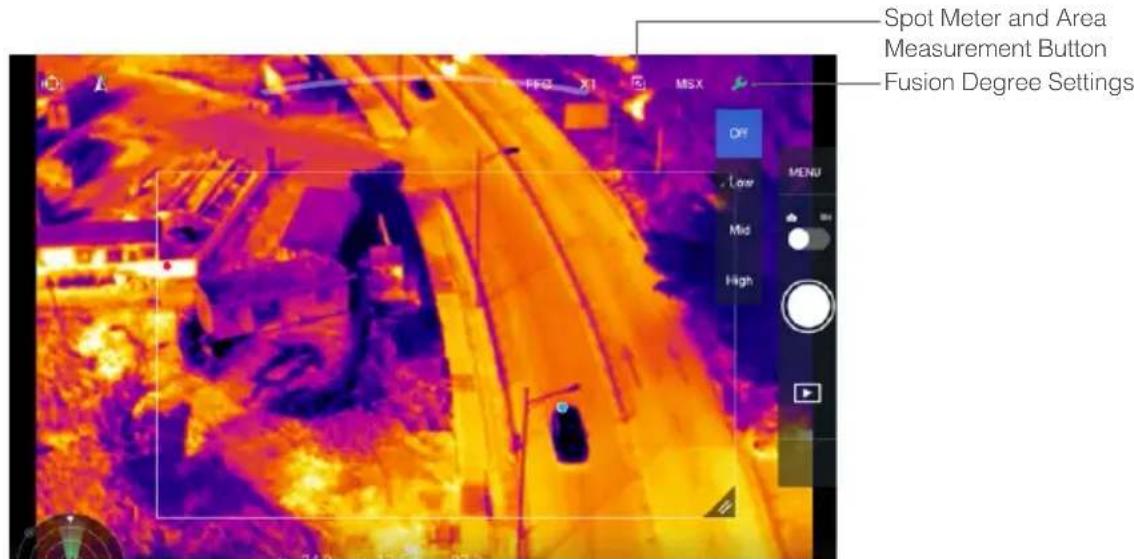
Spot meter and Area measurement are available when using Infrared or MSX modes.
Spot Meter
The temperature of any position in an image can be measured with an accuracy of ±10^ ( ±50^ ). Under ideal environmental conditions are ideal, the camera provides an accuracy of ±5^ ( ±41^ ).
Area Measurement
Enabling this function will display the average temperature, lowest temperature, highest temperature, and the corresponding locations of each area in DJI Pilot. Full-screen view also supported.
The temperature measurement accuracy is affected by various factors:
1) Reflectivity of objects - shiny metals with high reflectivity will reflect more of the background radiation and result in lower accuracy, whereas objects with matte surfaces will produce a higher accuracy.
2) Temperature of background radiation - a sunny day without clouds will have less of an effect on the accuracy than a cloudy day.
3) Air temperature and humidity - as temperature and humidity increases, accuracy decreases.
4) Distance between camera and object - as distance decreases, accuracy increases.
5) Emissivity of objects – emissivity and accuracy increase together.
When MSX is selected, adjust the accuracy of the MSX footage using MSX adjustment.
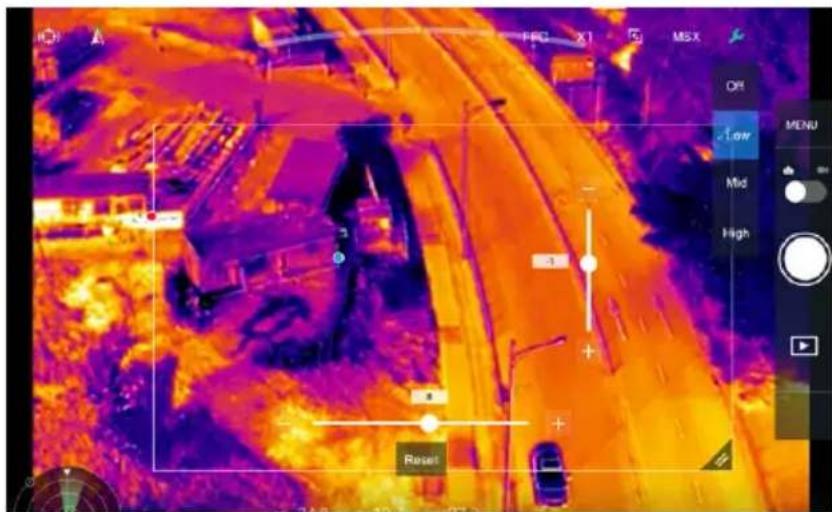
6. Tool Icon
Tap for display mode settings.
7. Camera Settings
1) Photo Settings
Shooting modes include Single Shot, Burst: 3/5 frames, Interval Timer (2/3/5/7/10/15/20/30 s).
Photo Format: R-JPEG, JPEG, TIFF (14-bit).
2) Video Settings
The video format can be set independently for the infrared and visual cameras.
Visual camera: MOV or MP4 formats, with differing resolutions.
Infrared camera: MOV, MP4, TIFF Sequence and SEQ formats.
3) General Settings
Video caption: Create an onscreen information file to support the video file.
Anti-flicker: Select the frequency to prevent light flickering.
PIP settings: Set where live views from both cameras are displayed on the screen.
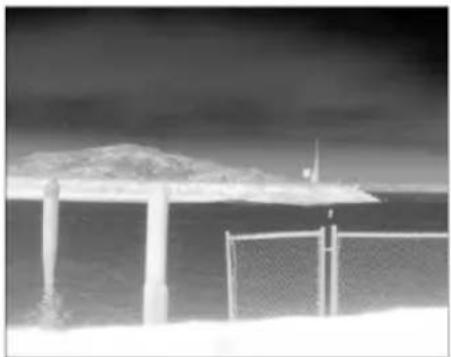
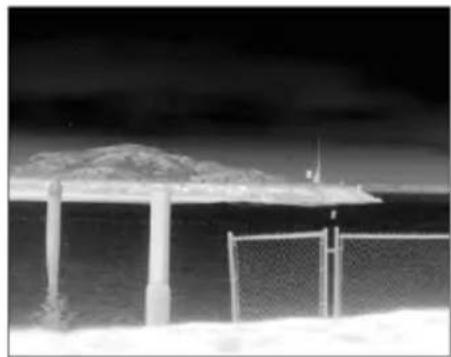
ROI (Region of Interest)
Use this feature to manage color range distribution across the screen to maximize contrast for regions of highest interest.
Select "Full" to evenly distribute the color spectrum across the entire image.
For instance, if there is a large patch of sky (relatively low temperature) in your image, much of the color spectrum will be allocated to the lower range, meaning that other parts of the spectrum will have a lower contrast. In this case, you may select "Sky excluded (33%)" or "Sky excluded (50%)" to ignore areas of the sky so that most of the spectrum can be allocated to remaining areas, providing higher contrast and utility for analysis.
natural_image
Black-and-white photo of a beachside structure with a net fence and a curved roof, no visible text or symbols.ROI set to "Full" Sky excluded from ROI
natural_image
Black-and-white photo of a beachside pavilion with a large canopy and a distant island (no text or symbols visible)Palette
The Zenmuse XT 2 offers a variety of palette options. Distinct colors are used to show temperature differences in the thermal image, which are related to grayscale intensity. The temperature range of the image is mapped to 256 colors and displayed in the 8-bit JPEG or MPEG-4, MOV format.
The following table shows all palette options.
Cold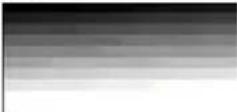 HotWhite Hot HotWhite Hot | Cold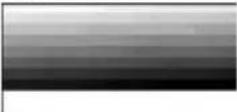 HotBlack Hot HotBlack Hot | Cold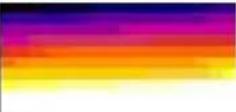 HotFusion HotFusion | Cold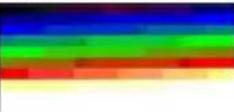 HotRainbow HotRainbow |
Cold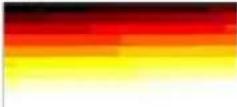 HotGlowbow HotGlowbow | Cold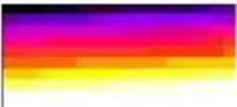 HotIronbow1 HotIronbow1 | Cold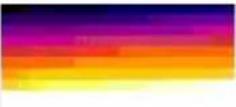 HotIronbow2 HotIronbow2 | Cold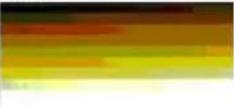 HotSepia HotSepia |
Cold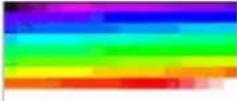 HotColor1 HotColor1 | Cold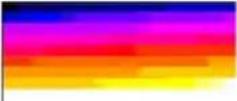 HotColor2 HotColor2 | Cold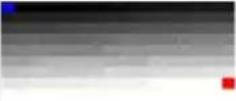 HotIce Fire HotIce Fire | Cold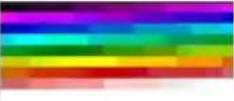 HotRain HotRain |
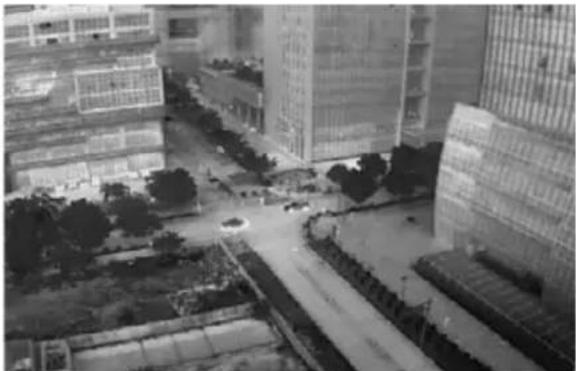
Different palettes applied to the same example image are shown below.
White Hot Black Hot
natural_image
Aerial black-and-white view of a modern urban area with high-rise buildings and construction sites (no visible text or signage)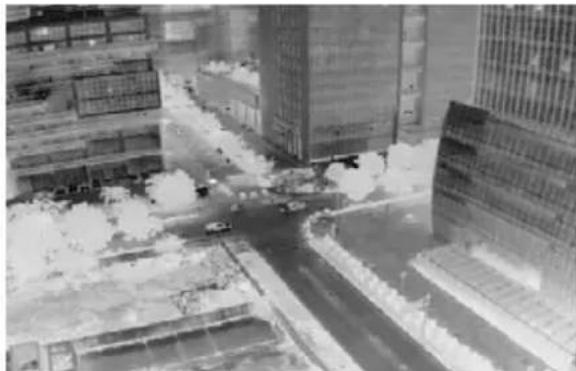
natural_image
Aerial black-and-white photo of a cityscape with modern high-rise buildings and a road (no visible text or signage)Fusion Rainbow
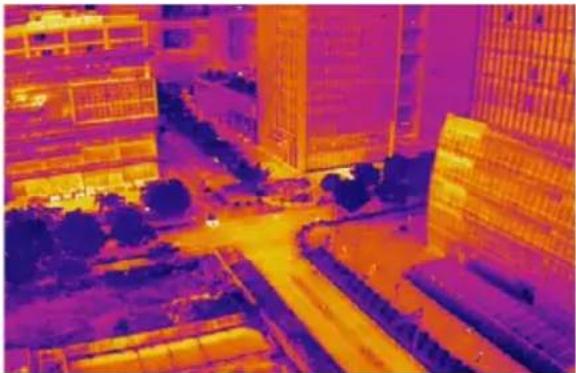
natural_image
Thermal imaging view of a city street with illuminated buildings and surrounding greenery (no visible text or symbols)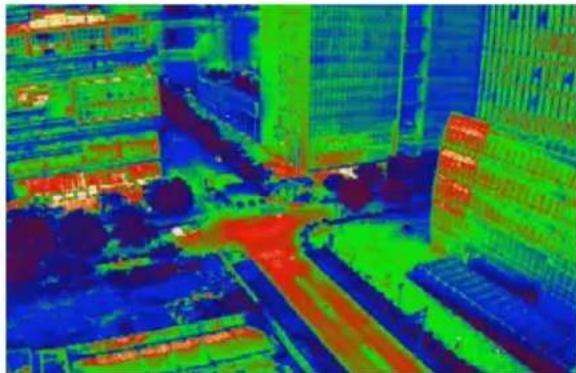
natural_image
Thermal imaging view of a cityscape with buildings and roads (no visible text or symbols)Scene
Instantly enhance your images through selecting the Linear, Default, Sea/Sky, Outdoor, Indoor, Manual, or Custom options. The camera will automatically apply the following properties to obtain the best result.
- DDE (Digital Detail Enhancement): Enhances image details and/or suppresses fixed pattern noise.
- ACE (Active Contrast Enhancement): Provides a contrast adjustment dependent on the relative scene temperature. ACE thresholds greater than 0 impart more contrast to hotter scene content and decrease contrast for colder scene content (e.g., the sky or ocean). ACE thresholds less than 0 do the opposite by decreasing contrast for hotter scene content and leaves more of the gray-scale shades available to represent the colder scene content.
- SSO (Smart Scene Optimization): Defines the percentage of the histogram that will be allotted a linear mapping. SSO features facilitate the avoidance of irradiance level compression, which is specifically important for bimodal scenes, and better preserves the radiometric aspects of an image (i.e., the difference in gray shades between two objects is a better representative of the difference in temperature). While radiometry is better preserved with this feature, the optimization of local contrast is compromised.
- Contrast: The ratio of the black and white of the image. Colors will be richer and have more contrast when the value is high.
• Brightness: The brightness of the image.
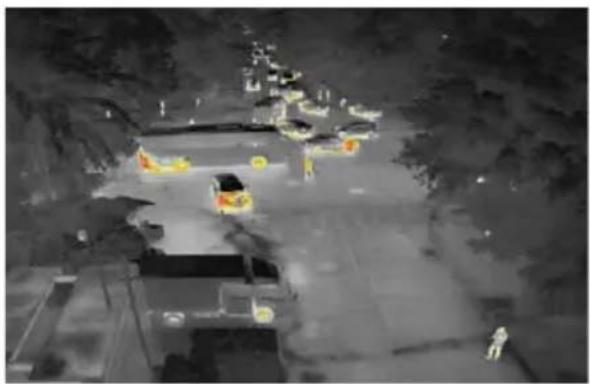
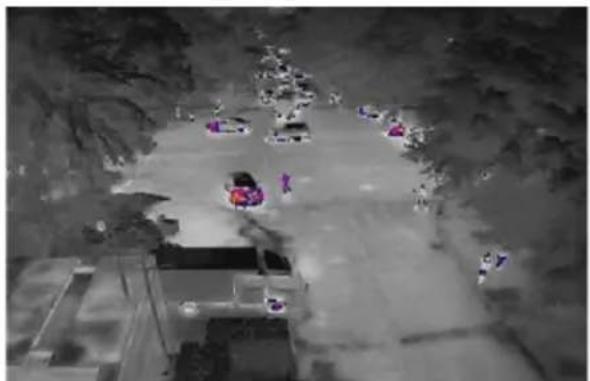
Isotherm
This feature allows designated temperature ranges to be represented with different color schemes, so that objects measured in a single color scheme impart higher contrast and better visibility.
Individual isotherms (or color schemes) are separated by upper, middle, and lower thresholds, which have a value in percentage or temperature.
Take the white-hot isotherm as an example. In the image below, the lower threshold of 128-grayscale is used to represent temperature differences.
Between the lower and middle thresholds, color scheme 1 (48-Isotherm) is used. Between the middle and upper thresholds, color scheme 2 (48-Isotherm) is used. Above the upper threshold, color scheme 3 (32-Isotherm) is used.
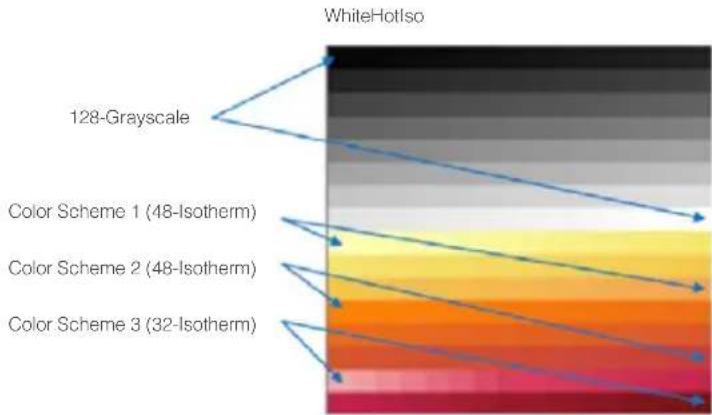
| Cold WhiteHotIso Hot | Cold BlackHotIso Hot | Cold FusionIso Hot | Cold RainbowIso Hot |
| Cold GlowboIso Hot | Cold IronbowWhiteHotIso Hot | Cold IronbowBlackHotIso Hot | Cold SepiaIso Hot |
| Cold MidRangeWHIso Hot | Cold MidRangeBHIso Hot | Cold IceFireIso Hot | Cold RainbowHCIso Hot |
| Cold RedHotIso Hot | Cold GreenHotIso Hot | ||
White Hot Isotherm Black Hot Isotherm
natural_image
Aerial night view of a building complex with illuminated structures and surrounding greenery (no visible text or symbols)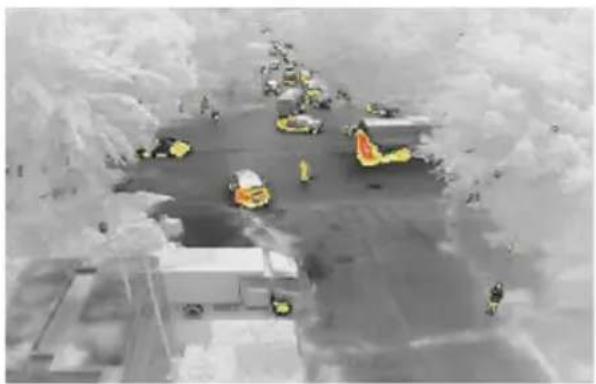
natural_image
Aerial view of a military or emergency response area with vehicles and personnel (no visible text or symbols)Fusion Isotherm Rainbow Isotherm
natural_image
Aerial view of a parking lot with multiple vehicles and pedestrians, no visible text or signage.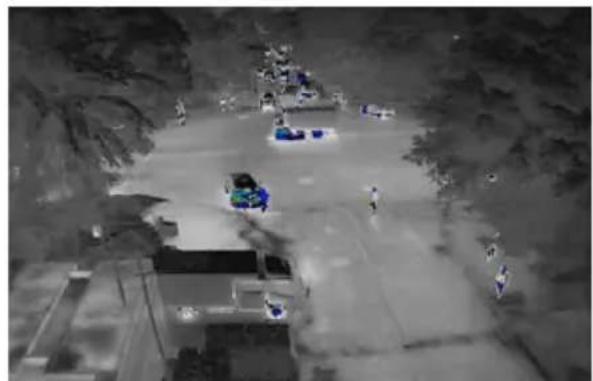
natural_image
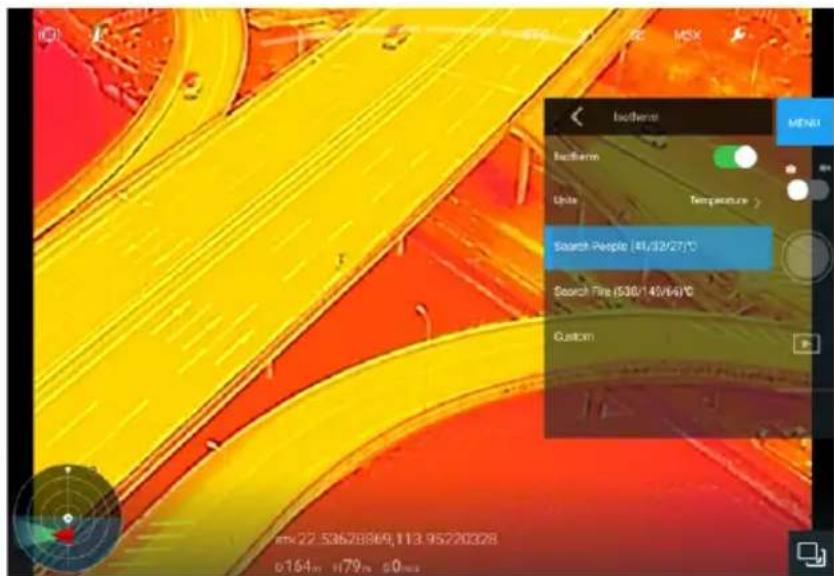
Aerial view of a rural road with vehicles and people, surrounded by trees (no visible text or symbols)There are three options for Isotherm: Search People, Search Fire, and Customized. When Search People or Search Fire are selected, the upper, middle, and lower thresholds are set. The footage will display with people or fire enhanced for greater visibility. Screenshot shown below is an example of Search People.
Gain Modes
High Gain mode: A narrower temperature range can be captured with a higher sensitivity to temperature differences.
Low Gain mode: A wider temperature range can be captured with a lower sensitivity to temperature differences.
Auto Gain mode (default): The optimal temperature range is automatically selected according to the temperature range of the image.
External Parameters
The scene emissivity, background temperature, and other external parameters can be set by the user to improve temperature measurement accuracy.
Temperature Alert
After enabling the Area measurement feature, an alert temperature value can be set.
When the highest temperature in the selected area exceeds the alert value, an onscreen notification will appear in DJI Pilot.
FFC Settings
Both manual and automatic FFC calibration are supported.
Restore Settings
Tap restore factory default settings to restore the camera to the default settings.
Tap "Format microSD card" to format and remove all content from the microSD card.

- SD card 2, which is located near the lens, is used to store TIFF Sequence and SEQ infrared RAW video only. All other format footage will be stored on SD card 1.
- It is recommended to use ImageJ to play the TIFF Sequence video and FLIR Tools to play SEQ video.
8. Shutter/Record Toggle
Switch between photo and video modes.
9. Shutter/Record Button
Shoot photos or video depending on the camera mode.
10. Playback
Tap to view photos and videos from the microSD card.
Remote Controller Operation
Press the right dial to select a Palette and press the Shutter or Record button to capture photos or record video. Adjust the camera's tilt using the left dial.
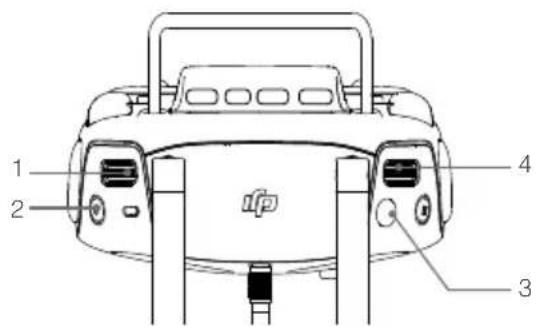
1. Left Dial
Turn to adjust the camera's tilt or pan.
2. Record Button
Press to start/stop recording video.
3. Shutter Button
Press to take photos.
4. Right Dial
Press to select a palette.
Specifications
| General | |
| Name Zenmuse XT 2 | |
| Dimensions | 25 mm lens: 123.7×112.6×127.1 mmOther lens versions: 118.02×111.6×125.5 mm |
| Weight 25 mm lens: 629 g; Other lens versions: 588 g | |
| Gimbal | |
| Angular Vibration Range ±0.01° | |
| Mount Detachable | |
| Controllable Range Tilt: +30° to -90°, Pan: ±320° | |
| Mechanical Range Tilt: +45° to -130°, Pan: ±330°, Roll: -90° to +60° | |
| Max Controllable Speed Tilt: 90°/s, Pan: 90°/s | |
| Camera (Thermal) | |
| Thermal Imager Uncooled VOx Microbolometer | |
| FPA/ Digital Video Display Formats 640×512; 336×256 | |
| Digital Zoom 640×512: 1x, 2x, 4x, 8x; 336×256: 1x, 2x, 4x | |
| Pixel Pitch 17 μm | |
| Spectral Band 7.5-13.5 μm | |
| Full Frame Rates 30 Hz | |
| Exportable Frame Rates <9 Hz | |
| Sensitivity (NEdT) <50 mk @ f/1.0 | |
| Scene Range (High Gain) | 640×512: -25° to 135°C336×256: -25° to 100°C |
| Scene Range (Low Gain) -40° to 550°C | |
| File Storage microSD card | |
| Photo Format JPEG, TIFF, R-JPEG | |
| Video Format | 8 bit: MOV, MP414 bit: TIFF Sequence, SEQ |
| Camera (Visual) | |
| Sensor CMOS, 1/1.7", Effective Pixels: 12 M | |
| Lens Prime lens; Focus at 8 mm, FOV 57.12°× 42.44° | |
| Digital Zoom 1x, 2x, 4x, 8x | |
| Photo Formats JPEG | |
| Video Formats MOV, MP4 | |
| Video Resolutions | 4K Ultra HD: 3840×2160 29.97pFHD: 1920×1080 29.97p |
| Working Modes Capture, Record, Playback | |
| Still Photography Modes | Single ShotBurst Shooting (3/5 frames)Interval (2/3/5/7/10/15/20/30 s) |
| Video Caption Supported | |
| Anti-flicker Auto, 50 Hz, 60 Hz | |
| Storage | microSD card. Max capacity: 128 GB. UHS-3 required.Recommended model:Sandisk Extreme 16/32 GB UHS-3 microSDHCSandisk Extreme 64/128 GB UHS-3 microSDXC |
| Supported File System FAT 32 (≤32GB), exFAT (>32GB) | |
| Image Processing & Display Control | |
| Image Optimization Yes | |
| Digital Detail Enhancement | Yes |
| Polarity Control (Black Hot/ White Hot) | Yes |
| Color & Monochrome Palettes (LUT) | Yes |
| Lens Models 9 mm 13 mm 19 mm 25 mm | |||||
| f/1.25 | f/1.25 | f/1.1 | |||
| 640×512 | FoV | / | 45^ × 37^ | 32^ × 26^ | 25^ × 20^ |
| iFoV | 1.308 mr | 0.895 mr | 0.680 mr | ||
| f/1.25 | f/1.25 | f/1.25 | |||
| 336×256 | FoV | 35^ × 27^ | 25^ × 19^ | 17^ × 13^ | / |
| iFoV | 1.889 mr | 1.308 mr | 0.895 mr | ||
| Min Focus Distance 3.2 cm 7.6 cm 15.3 cm 30 cm | |||||
| Hyperfocal Distance 2.1 m 4.4 m 9.5 m 21 m | |||||
| Hyperfocal Depth of Field 1.1 m 2.2 m 4.8 m | 11 m | ||||
This content is subject to change.
Download the latest version from https://www.dji.com/zenmuse-xt2
If you have any questions about this document, please contact DJI by sending a message to DocSupport@dji.com.
ZENMUSE is a trademark of DJI OSMO.
DJI is a trademark of DJI.
Copyright © 2018 DJI All Rights Reserved.

- Searching for Keywords
- Navigating to a Topic
- Printing this Document
- Using this Manual
- DJI Pilot App Download
- Content
- Introduction
- Installation
- Supported Aircraft
- Mounting the Zenmuse XT 2
- DJI Pilot App
- Connecting to DJI Pilot
- Settings
- Spotlight
- Gimbal Mode
- FFC Calibration
- Digital Zoom
- Display Mode
- Infrared mode
- MSX mode
- Spot Meter
- Area Measurement
- Tool Icon
- Camera Settings
- 1) Photo Settings
- 2) Video Settings
- 3) General Settings
- ROI (Region of Interest)
- Palette
- White Hot Black Hot
- Fusion Rainbow
- Scene
- Isotherm
- Gain Modes
- External Parameters
- Temperature Alert
- FFC Settings
- Restore Settings
- Shutter/Record Toggle
- Shutter/Record Button
- Playback
- Remote Controller Operation
- Left Dial
- Record Button
- Shutter Button
- Right Dial
Brand : FLIR
Model : Zenmuse XT2
Category : Drone