
Maxify MB2120 - Printer CANON - Free user manual and instructions
Find the device manual for free Maxify MB2120 CANON in PDF.


User questions about Maxify MB2120 CANON
0 question about this device. Answer the ones you know or ask your own.
Ask a new question about this device
Download the instructions for your Printer in PDF format for free! Find your manual Maxify MB2120 - CANON and take your electronic device back in hand. On this page are published all the documents necessary for the use of your device. Maxify MB2120 by CANON.
USER MANUAL Maxify MB2120 CANON
Trademarks and Licenses. 23
Search Tips. 32
Using the Machine.... 34
Printing Documents from Your Computer (Windows). 35
Printing Documents from Your Computer (Mac OS). 38
Copying. 42
Faxing. 45
Printer Functions. 47
Printing from an AirPrint-enabled Printer. 48
Printing from an AirPrint-enabled Printer with Mac. 49
Printing from an AirPrint-enabled Printer with iOS Device. 51
Connect Wirelessly in "Direct Connection".... 55
Download a Variety of Content Materials. 56
Print Items with Easy-PhotoPrint+ (Web Application).... 57
Managing Printer Conveniently Using Quick Utility Toolbox. 58
Available Connection Methods. 59
Scan Originals Larger than the Platen. 61
Scan Multiple Originals at One Time. 62
Using PIXMA/MAXIFY Cloud Link. 63
Notice for Web Service Printing.... 64
Using PIXMA/MAXIFY Cloud Link from Your Printer. 65
Before Using PIXMA/MAXIFY Cloud Link. 66
Registering Printer Information to PIXMA/MAXIFY Cloud Link. 68
Application Management.... 71
Using PIXMA/MAXIFY Cloud Link. 76
Cloud Windows. 79
Cloud Troubleshooting....82
Using PIXMA/MAXIFY Cloud Link from Your Smartphone, Tablet, or Computer. 83
Before Using Canon Inkjet Cloud Printing Center.... 84
Requirements for Canon Inkjet Cloud Printing Center operation. 85
Registering User Information to Canon Inkjet Cloud Printing Center.... 87
Registering User Information to Canon Inkjet Cloud Printing Center (Color LCD Monitor)....88
Registering User Information to Canon Inkjet Cloud Printing Center (Monochrome LCD Monitor)....96
Registering User Information to Canon Inkjet Cloud Printing Center (No LCD Monitor/Using PRO-1000 series or PRO-500 series). 105
Using Canon Inkjet Cloud Printing Center.... 112
Canon Inkjet Cloud Printing Center window.... 116
Adding a Printer.... 155
Adding a PIXMA/MAXIFY Cloud Link User. 158
Troubleshooting Canon Inkjet Cloud Printing Center.... 164
Print Easily from a Smartphone or Tablet with Canon PRINT Inkjet/SELPHY.... 167
Printing with Windows RT.... 168
Online Storage Integration Function. 169
Handling Paper, Originals, Ink Tanks, etc. 170
Loading Paper.... 171
Paper Sources.... 172
Loading Plain Paper / Photo Paper. 174
Loading Envelopes. 179
Loading Originals. 183
Where to Load Originals.... 184
Loading Originals on the Platen Glass. 185
Loading Documents in the ADF (Auto Document Feeder).... 186
Loading Based on Use. 187
Supported Originals.... 189
Inserting a USB Flash Drive. 191
Inserting a USB Flash Drive.... 192
Removing a USB Flash Drive. 193
Replacing Ink Tanks. 194
Replacing Ink Tanks. 195
Checking Ink Status on the LCD.... 200
Maintenance.... 201
If Printing Is Faint or Uneven. 202
Maintenance Procedure.... 203
Printing the Nozzle Check Pattern.... 205
Examining the Nozzle Check Pattern. 207
Cleaning the Print Head. 209
Deep Print Head Cleaning. 211
Aligning the Print Head. 213
Aligning the Print Head Manually. 215
Performing Maintenance Functions from Your Computer (Windows)....219
Cleaning the Print Heads. 220
Aligning the Print Head Position.... 222
Aligning the Print Head Position Manually. 223
Printing a Nozzle Check Pattern. 226
Cleaning.... 227
Cleaning Exterior Surfaces.... 228
Cleaning the Platen Glass and Document Cover. 229
Cleaning the ADF (Auto Document Feeder).... 230
Cleaning Paper Feed Rollers. 232
Cleaning Inside the Machine (Bottom Plate Cleaning).... 234
Cleaning Cassette Pads. 237
Overview. 238
Safety. 240
Safety Precautions.... 241
Regulatory Information.... 242
WEEE (EU&EEA).... 247
Main Components and Their Use. 257
Main Components. 258
Front View. 259
Rear View. 261
Inside View.... 262
Operation Panel.... 263
Power Supply. 265
Confirming that the Power Is On. 266
Turning the Machine On and Off. 267
Checking the Power Plug/Power Cord. 269
Unplugging the Machine.... 270
LCD and Operation Panel.... 271
Entering Numbers, Letters, and Symbols. 273
Changing Settings. 276
Changing Printer Settings from Your Computer (Windows).... 277
Changing the Print Options. 278
Registering a Frequently Used Printing Profile. 279
Managing the Printer Power.... 281
Reducing the Printer Noise.... 282
Changing the Printer Operation Mode. 284
Changing Settings from Operation Panel. 286
Changing Settings from Operation Panel. 287
Setting Items on Operation Panel. 289
FAX settings.... 290
Print settings.... 294
LAN settings.... 295
Device user settings. 299
Timezone List. 302
Language selection.... 304
Firmware update.... 305
Cassette settings.... 306
Administrator password setting.... 307
Setting Administrator Password on Operation Panel. 308
Operation restrictions.... 310
Restricting Machine Operation.... 311
Reset setting. 314
Web service setup.... 316
System information. 317
ECO settings. 318
Quiet setting.... 323
Registering Favorite Settings (Custom profiles). 325
Checking the Total Number of Uses of Machine.... 327
Changing Printer's Setting Using Web Browser. 328
Changing Settings Using Web Browser. 329
Registering Printer's Root Certificate to Web Browser. 332
Changeable Setting Items Using Web Browser. 336
Setting Password. 338
Setting Mail Server.... 340
Specifying Mail Setting for Sending Scanned Data. 342
Receiving Printer Status by E-mail. 343
Network Connection.... 345
Network Connection Tips. 346
Default Network Settings.... 347
Another Printer Found with Same Name. 349
Connecting to Another Computer via LAN/Changing from USB to LAN Connection. 350
Printing Network Settings. 351
Changing Wireless LAN Connection Method. 355
Network Settings (IJ Network Device Setup Utility) (Windows).... 356
IJ Network Device Setup Utility 357
Starting Up IJ Network Device Setup Utility 358
IJ Network Device Setup Utility Screen.... 359
Performing Network Settings. 364
Performing/Changing Wired LAN Settings.... 365
Performing/Changing Wireless LAN Settings. 368
Assigning Printer Information. 372
Initializing Network Settings.... 373
Changing Administrator Password.... 374
Setting Criteria for Printer Search/Searching Specific Printer. 375
If WEP Details Screen Appears.... 377
If WPA/WPA2 Details Screen Appears. 378
Checking Network Status. 379
Checking Wireless Network Status. 380
Displaying Computer Network Information.... 381
Displaying Printer Network Information. 382
Checking Connection Status between Printer and Wireless Router. 383
Checking Network Setting Difference.... 384
IJ Network Device Setup Utility Menus. 385
Printer Menu.... 386
View Menu. 388
Option Menu.... 390
Help Menu.... 391
Other Network Information.... 392
Technical Terms.... 393
Restrictions. 400
Firewall. 401
Ensuring Optimal Printing Results. 402
Ink Tips. 403
Printing Tips.... 404
Check Paper Settings Before Printing. 405
Set Cassette Paper Information After Loading Paper. 406
Canceling Print Jobs. 407
Keeping Print Quality High. 408
Transporting Your Machine.... 409
Legal Restrictions on Scanning/Copying. 410
Specifications.... 411
Information about Paper.... 416
Supported Media Types. 417
Paper Load Limit. 419
Unsupported Media Types.... 421
Handling Paper. 422
Print Area. 423
Print Area 424
Standard Sizes. 425
Envelopes. 427
Administrator Settings. 428
Sharing the Printer on a Network. 429
Setting Up a Shared Printer.... 430
Restrictions on Printer Sharing. 432
Administrator Password.... 434
Password and Cookie.... 436
How to locate your printer's serial number. 438
Registering Root Certificate to Web Browser. 439
Printing.... 440
Printing from Computer.... 441
Printing from Application Software (Windows Printer Driver). 442
Printing with Easy Setup. 443
Paper Settings on the Printer Driver and the Printer (Media Type).... 446
Paper Settings on the Printer Driver and the Printer (Paper Size).... 447
Various Printing Methods. 448
Setting a Page Size and Orientation. 449
Setting the Number of Copies and Printing Order.... 450
Setting the Stapling Margin. 452
Fit-to-Page Printing. 454
Scaled Printing. 456
Page Layout Printing. 459
Tiling/Poster Printing. 461
Booklet Printing. 464
Duplex Printing. 466
Stamp/Background Printing. 470
Setting Up Envelope Printing. 479
Printing on Postcards.... 481
Displaying the Print Results before Printing. 483
Setting Paper Dimensions (Custom Size).... 484
Editing the Print Document or Reprinting from the Print History. 486
Changing the Print Quality and Correcting Image Data. 490
Printing a Color Document in Monochrome.... 491
Specifying Color Correction.... 493
Adjusting Color Balance.... 501
Adjusting Color Balance Using Sample Patterns (Printer Driver). 503
Adjusting Brightness.... 507
Adjusting Intensity.... 509
Adjusting Contrast. 511
Adjusting Intensity/Contrast Using Sample Patterns (Printer Driver). 513
Overview of the Printer Driver. 517
Canon IJ Printer Driver. 518
Canon IJ Status Monitor.... 520
Canon IJ Preview. 522
Deleting the Undesired Print Job. 523
Instructions for Use (Printer Driver). 524
Printer Driver Description.... 526
Quick Setup tab Description.... 527
Main tab Description.... 533
Page Setup tab Description.... 538
Maintenance tab Description.... 550
Canon IJ Preview Description.... 556
Canon IJ XPS Preview Description.... 559
Canon IJ Status Monitor Description.... 568
Updating the MP Drivers. 571
Obtaining the Latest MP Drivers.... 572
Deleting the Unnecessary MP Drivers.... 573
Before Installing the MP Drivers. 574
Installing the MP Drivers. 575
Printing Using a Web Service. 576
Using PIXMA/MAXIFY Cloud Link. 63
Printing with Google Cloud Print. 578
Getting Google Account.... 580
Registering Printer with Google Cloud Print. 581
Printing from Computer or Smartphone with Google Cloud Print. 584
Deleting Printer from Google Cloud Print. 588
Printing from an AirPrint-enabled Printer with Mac. 49
Printing from a Device Equipped with Windows 10 Mobile. 592
Printing from Smartphone/Tablet. 593
Printing Directly from Smartphone/Tablet. 594
Android Print. 595
Printing from an AirPrint-enabled Printer with iOS Device. 51
Using Machine with Direct Connection.... 601
Printing Using a Web Service.... 606
Using PIXMA/MAXIFY Cloud Link. 63
Printing with Google Cloud Print. 578
Printing Using Operation Panel.... 610
Printing Photo Data. 611
Printing Photographs Saved on USB Flash Drive. 612
Setting Items for Photo Printing Using Operation Panel. 616
Using Useful Display Functions.... 617
Printing Documents (PDF File) Saved on USB Flash Drive. 618
Paper Settings. 621
Copying. 625
Making Copies.... 626
Displaying Preview Screen.... 629
Setting Items for Copying. 630
Reducing/Enlarging Copies.... 632
Two-Sided Copying.... 634
Special Copy Menu.... 636
Copying Two Pages onto Single Page. 637
Copying Four Pages onto Single Page. 640
Copying Thick Originals Such as Books. 643
Copying ID Card to Fit onto Single Page. 644
Collated Copying. 646
Copying from Smartphone/Tablet. 648
Scanning. 650
Scanning from Computer (Windows).... 651
Using IJ Scan Utility.... 652
What Is IJ Scan Utility (Scanner Software)?...... 653
Starting IJ Scan Utility. 655
Scanning Documents....656
Scanning Photos.... 657
Scanning with Favorite Settings. 658
Scanning Originals Larger than the Platen (Image Stitch). 659
Adjusting Cropping Frames in the Image Stitch Window.... 664
Extracting Text from Scanned Images (OCR).... 665
Sending Scanned Images via E-mail. 667
Scanning Multiple Originals at One Time. 668
Scanning Multiple Documents at One Time from the ADF (Auto Document Feeder)....672
Saving after Checking Scan Results. 677
IJ Scan Utility Screens.... 680
IJ Scan Utility Main Screen.... 681
Settings Dialog Box. 683
Save Settings Dialog Box.... 739
Password Security Settings Dialog Box. 743
Image Stitch Window.... 745
Scanning Using Application Software (ScanGear). 750
What Is ScanGear (Scanner Driver)? 751
Scanning with Advanced Settings Using ScanGear (Scanner Driver).... 753
Starting ScanGear (Scanner Driver). 754
Scanning in Basic Mode.... 755
Scanning in Advanced Mode.... 758
Scanning Multiple Documents from the ADF (Auto Document Feeder) in Advanced Mode. 760
Scanning Multiple Documents at One Time with ScanGear (Scanner Driver)....762
Correcting Images and Adjusting Colors with ScanGear (Scanner Driver). 766
Correcting Images (Unsharp Mask, Reduce Dust and Scratches, Fading Correction, etc.). 767
Adjusting Colors Using a Color Pattern. 771
Adjusting Saturation and Color Balance.... 773
Adjusting Brightness and Contrast. 775
Adjusting Histogram.... 778
Adjusting Tone Curve.... 782
Setting Threshold....785
ScanGear (Scanner Driver) Screens. 786
Basic Mode Tab.... 787
Advanced Mode Tab. 795
Input Settings.... 801
Output Settings. 804
Image Settings....807
Color Adjustment Buttons.... 812
Preferences Dialog Box. 815
Scanner Tab. 816
Preview Tab. 819
Scan Tab. 821
Color Settings Tab.... 822
Positioning Originals (Scanning from Computer). 824
Adjusting Cropping Frames (ScanGear). 827
General Notes (Scanner Driver).... 831
Other Scanning Methods.... 833
Scanning with WIA Driver.... 834
IJ Network Scanner Selector EX2 Menu and Setting Screen. 838
Uninstalling IJ Network Scanner Selector EX2. 841
Scanning Tips. 842
Resolution.... 843
Data Formats. 845
Color Matching....846
Positioning Originals (Scanning from Computer).... 847
Network Scan Settings....850
Scanning from Computer (Mac OS).... 854
Scanning from Operation Panel. 855
Forwarding Scanned Data to Computer Using Operation Panel.... 856
Sending Scanned Data as E-Mail from Computer. 860
Sending Scanned Data as E-Mail from Machine.... 863
Sending Scanned Data as E-Mail from Machine. 864
Registering Recipients' E-Mail Address.... 868
Registering Recipients in Group E-Mail. 871
Changing Registered Information.... 875
Deleting Registered Information.... 877
Importing/Exporting E-Mail Address Book. 878
Saving Scanned Data on USB Flash Drive. 880
Forwarding Scanned Data to Shared Folder on Computer.... 883
Deleting Scanned Data on USB Flash Drive. 886
Setting Items for Scanning Using Operation Panel.... 888
Setting Up Operation Panel with IJ Scan Utility (Windows).... 890
Scanning Using Smartphone/Tablet. 893
Using PIXMA/MAXIFY Cloud Link. 63
Faxing....895
Preparing for Faxing. 896
Connecting Telephone Line.... 897
Setting Telephone Line Type. 900
Setting Receive Mode. 901
Setting Sender Information.... 906
Sending Faxes Using Operation Panel of Printer.... 912
Sending Faxes by Entering Fax/Telephone Number. 913
Resending Faxes (Redialing Busy Number).... 917
Setting Items for Sending Faxes. 919
Sending Faxes Using Useful Functions.... 920
Sending Fax after Speaking on Telephone.... 921
Sending Fax to Registered Recipient. 923
Sending Same Document to Several Recipients (Sequential Broadcasting). 925
Preventing Mistransmission of Faxes. 929
Using On Hook Dial Function.... 931
Registering Recipients. 933
Registering Recipients Using Operation Panel of Printer. 934
Registering Fax/Telephone Number of Recipients. 935
Registering Recipients in Group Dial. 939
Changing Registered Information. 943
Deleting Registered Information.... 944
Printing List of Registered Destinations.... 945
Registering Recipients Using Speed Dial Utility2 (Windows).... 946
Starting Up Speed Dial Utility2. 947
Speed Dial Utility2 Dialog box. 948
Saving Registered Telephone Directory on Printer to Your Computer. 950
Registering a Fax/telephone Number Using Speed Dial Utility2. 951
Changing a Fax/telephone Number Using Speed Dial Utility2. 953
Deleting a Fax/telephone Number Using Speed Dial Utility2. 955
Changing Sender Information Using Speed Dial Utility2. 956
Registering/Changing Rejected Number Using Speed Dial Utility2. 957
Registering Telephone Directory Has been Saved on Your Computer to Printer. 958
Receiving Faxes. 959
Receiving Faxes. 960
Changing Paper Settings. 965
Memory Reception....967
Receiving Faxes Using Useful Functions. 969
Saving Received Faxes Automatically on USB Flash Drive. 970
Forwarding Received Faxes Automatically to Shared Folder on Computer.... 972
Remote Reception.... 974
Rejecting Fax Reception.... 975
Using Caller ID Service to Reject Calls. 978
Other Useful Fax Functions.... 980
Using Information Services. 981
Transmission/Reception of Faxes Using ECM. 983
Document Stored in Printer's Memory. 984
Printing Document in Printer's Memory. 985
Deleting Document in Printer's Memory. 987
Saving Document in Printer's Memory to USB Flash Drive. 989
Forwarding Document in Printer's Memory to Shared Folder on Computer. 992
Summary of Reports and Lists. 995
Sending Faxes from Computer (Windows).... 1000
Sending a FAX (Fax Driver). 1001
Creating an Address Book (Fax Driver).... 1004
Edit or Remove a Recipient from an Address Book (Fax Driver).... 1008
Search for a Recipient in an Address Book (Fax Driver). 1011
Cannot Send Faxes from Computer.... 1013
How to Open the Setting Screen of the Fax Driver.... 1015
General Notes (Fax Driver).... 1017
Sending Faxes from Computer (Mac OS). 1018
Sending a Fax.... 1019
General Notes.... 1022
Troubleshooting.... 1023
Network Communication Problems.... 1025
Cannot Find Machine on Network. 1026
Cannot Find Machine on Check Printer Settings Screen.... 1027
Check 1: Cannot Find Machine on Check Printer Settings Screen During Wireless LAN Setup. 1028
Check 2: Cannot Find Machine on Check Printer Settings Screen During Wireless LAN Setup. 1029
Check 3: Cannot Find Machine on Check Printer Settings Screen During Wireless LAN Setup. 1030
Check 4: Cannot Find Machine on Check Printer Settings Screen During Wireless LAN Setup. 1032
Check 5: Cannot Find Machine on Check Printer Settings Screen During Wireless LAN Setup. 1033
Check 6: Cannot Find Machine on Check Printer Settings Screen During Wireless LAN Setup. 1034
Cannot Find Machine after Searching it on Printer Detection Screen During Setup. 1035
Searching Machine by IP Address or Host Name During Setup (Windows). 1037
Cannot Proceed beyond Printer Connection Screen/Connect Cable Screen. 1040
Cannot Find Machine while Using Wireless LAN. 1042
Network Connection Problems.... 1044
Machine Suddenly Cannot Be Used. 1045
Network Key Unknown.... 1049
Administrator Password Set for Machine Unknown. 1051
Machine Cannot Be Used After Replacing Wireless Router or Changing Its Settings. ..... 1052
Printing Is Slow.... 1054
Cannot Access to Internet on Wireless LAN from Communication Device. 1055
Ink Level Not Shown on Printer Status Monitor (Windows).... 1056
Other Network Problems.... 1057
Message Appears on Computer During Setup. 1058
Packets Are Sent Constantly (Windows).... 1060
Checking Network Information.... 1061
Restoring to Factory Defaults.... 1064
Problems while Printing/Scanning from Smartphone/Tablet. 1065
Cannot Print/Scan from Smartphone/Tablet. 1066
Printing Problems.... 1069
Printing Does Not Start. 1070
Paper Jams. 1073
Print Results Are Unsatisfactory.... 1075
Cannot Complete Printing.... 1077
Part of Page Is Not Printed (Windows). 1078
Paper Is Blank/Printing Is Blurry/Colors Are Wrong/White Streaks Appear.... 1079
Lines Are Misaligned.... 1082
Lines Incomplete or Missing (Windows). 1083
Images Incomplete or Missing (Windows).... 1084
Ink Blots / Paper Curl. 1085
Paper Is Smudged / Printed Surface Is Scratched. 1086
Back of Paper Is Smudged. 1090
Uneven or Streaked Colors. 1091
No Ink Comes Out. 1093
Paper Does Not Feed Properly/"No Paper" Error. 1094
Automatic Duplex Printing Problems.... 1096
Copying/Printing Stops. 1098
Cannot Print Using AirPrint. 1099
Scanning Problems (Windows).... 1100
Scanning Problems.... 1101
Scanner Does Not Work.... 1102
ScanGear (Scanner Driver) Does Not Start. 1103
Error Message Appears and the ScanGear (Scanner Driver) Screen Does Not Appear..... 1104
Cannot Scan Multiple Originals at One Time.... 1105
Slow Scanning Speed.... 1106
"There is not enough memory." Message Is Displayed.... 1107
Computer Stops Operating during Scanning.... 1108
Scanner Does Not Work after Upgrading Windows.... 1109
Scanned Image Does Not Open. 1110
Scan Results Are Unsatisfactory.... 1111
Moire Appears in Scan Results. 1112
Scan Quality (Image Displayed on the Monitor) Is Poor. 1113
Scanned Image Is Surrounded by Extra White Areas. 1115
Cannot Scan at the Correct Size.... 1116
Position or Size of the Image Cannot be Detected Correctly When Scanning from the Operation Panel. 1117
Original Is Placed Correctly, but the Scanned Image Is Slanted.... 1118
Scanned Image Is Enlarged (Reduced) on the Computer Monitor.... 1119
Software Problems.... 1120
The E-mail Client You Want to Use Does Not Appear in the Screen for Selecting an E-mail Client. 1121
IJ Scan Utility Error Messages.... 1122
ScanGear (Scanner Driver) Error Messages. 1124
Faxing Problems.... 1127
Problems Sending Faxes.... 1128
Cannot Send a Fax. 1129
Cannot Perform Sequential Broadcasting by Redialing, or Cannot Dial by Entering Numbers. . 1131
Errors Often Occur When You Send a Fax.... 1132
Problems Receiving Faxes. 1133
Cannot Receive a Fax, Cannot Print a Fax. 1134
Printer Does Not Switch Automatically between Voice and Fax Calls. 1137
Quality of Received Fax is Poor. 1138
Cannot Receive a Color Fax. 1139
Errors Often Occur When You Receive a Fax. 1140
Cannot Send a Fax Clearly. 1141
Telephone Problems.... 1142
Cannot Dial.... 1143
Telephone Disconnects During a Call. 1144
Mechanical Problems. 1145
Power Does Not Come On. 1146
USB Connection Problems.... 1147
Cannot Communicate with Machine via USB.... 1148
LCD Is Off. 1149
LCD Shows Wrong Language. 1150
Print Head Holder Does Not Move to Replacement Position. 1151
Printer Status Monitor Not Displayed (Windows).... 1152
Installation and Download Problems. 1153
Cannot Install MP Drivers. 1154
Easy-WebPrint EX Does Not Start or Easy-WebPrint EX Menu Does Not Appear (Windows). . . . . 1156
Updating MP Drivers in Network Environment (Windows).... 1157
Errors and Messages.... 1158
An Error Occurs. 1159
A Message for Faxing Is Displayed on Fax Standby Screen. 1161
Message Appears. 1164
If You Cannot Solve a Problem. 1173
List of Support Code for Error.... 1174
List of Support Code for Error (Paper Jams). 1176
1300.... 1177
- 1181
1313.... 1184
1314.... 1187
2801.... 1190
Other Cases. 1192
- 1193
1200.... 1194
1309.... 1195
- 1196
1319.... 1197
1575.... 1198
1600.... 1199
1660.... 1200
- 1201
1700.... 1202
1701.... 1203
- 1204
1755 1205
1871.... 1206
1890.... 1207
2001.... 1208
2002....1209
- 1210
2120.... 1213
2500 1214
-
1215
-
1216
2803....1217
3401.... 1219
-
1220
-
1221
3404....1222
- 1223
3406....1224
3407.... 1225
-
1226
-
1227
3411.... 1228
-
1229
-
1230
-
1231
-
1232
3416.... 1233
3417 1234
- 1235
3419.... 1236
3420....1237
3421.... 1238
3422....1239
- 1240
3424.... 1241
-
1242
-
1243
-
1244
3436.... 1245
3437 1246
4100.... 1247
4103.... 1248
5011.... 1249
5012.... 1250
5040....1251
5050....1252
-
1253
-
1254
-
1255
-
1256
5105.... 1257
5200....1258
-
1259
-
1260
-
1261
5206....1262
5207 1263
-
1264
-
1265
5400....1266
5500....1267
- 1268
5B00.... 1269
5B01.... 1270
5C01.... 1271
6000....1272
-
1273
-
1274
6800....1275
6801.... 1276
6900....1277
6901.... 1278
- 1279
6910.... 1280
6911.... 1281
6930....1282
6931.... 1283
- 1284
6933....1285
- 1286
6937 1287
6938 1288
- 1289
693A. 1290
6940....1291
6941.... 1292
- 1293
6943....1294
6944....1295
6945....1296
6946....1297
7100.... 1298
7200 1299
7201.... 1300
- 1301
7204....1302
- 1303
9000....1304
9500....1305
B202. 1306
B203. 1307
B204.... 1308
B205. 1309
B502.... 1310
B503.... 1311
B504....1312
C000....1313
Using This Online Manual
→ Symbols Used in This Document
→ Touch-enabled Device Users (Windows)
Symbols Used in This Document
Warning
Instructions that, if ignored, could result in death or serious personal injury caused by incorrect operation of the equipment. These must be observed for safe operation.
Caution
Instructions that, if ignored, could result in personal injury or material damage caused by incorrect operation of the equipment. These must be observed for safe operation.
Important
Instructions including important information. To avoid damage and injury or improper use of the product, be sure to read these indications.
Note
Instructions including notes for operation and additional explanations.
Basics
Instructions explaining basic operations of your product.
Note
- Icons may vary depending on your product.
Touch-enabled Device Users (Windows)
For touch actions, you need to replace "right-click" in this document with the action set on the operating system. For example, if the action is set to "press and hold" on your operating system, replace "right-click" with "press and hold."
Trademarks and Licenses
- Microsoft is a registered trademark of Microsoft Corporation.
- Windows is a trademark or registered trademark of Microsoft Corporation in the U.S. and/or other countries.
- Windows Vista is a trademark or registered trademark of Microsoft Corporation in the U.S. and/or other countries.
- Internet Explorer is a trademark or registered trademark of Microsoft Corporation in the U.S. and/or other countries.
• Mac, Mac OS, AirPort, Safari, Bonjour, iPad, iPhone and iPod touch are trademarks of Apple Inc., registered in the U.S. and other countries. App Store, AirPrint and the AirPrint logo are trademarks of Apple Inc. - IOS is a trademark or registered trademark of Cisco in the U.S. and other countries and is used under license.
- Google Cloud Print, Google Chrome, Chrome OS, Chromebook, Android, Google Play, Google Drive, Google Apps and Picasa are either registered trademarks or trademarks of Google Inc.
- Adobe, Flash, Photoshop, Photoshop Elements, Lightroom, Adobe RGB and Adobe RGB (1998) are either registered trademarks or trademarks of Adobe Systems Incorporated in the United States and/or other countries.
- Bluetooth is a trademark of Bluetooth SIG, Inc., U.S.A. and licensed to Canon Inc.
- Autodesk and AutoCAD are registered trademarks or trademarks of Autodesk, Inc., and/or its subsidiaries and/or affiliates in the USA and/or other countries.
Note
- The formal name of Windows Vista is Microsoft Windows Vista operating system.
Copyright (c) 2003-2004, Apple Computer, Inc. All rights reserved.
Redistribution and use in source and binary forms, with or without modification, are permitted provided that the following conditions are met:
- Redistributions of source code must retain the above copyright notice, this list of conditions and the following disclaimer.
- Redistributions in binary form must reproduce the above copyright notice, this list of conditions and the following disclaimer in the documentation and/or other materials provided with the distribution.
- Neither the name of Apple Computer, Inc. ("Apple") nor the names of its contributors may be used to endorse or promote products derived from this software without specific prior written permission.
THIS SOFTWARE IS PROVIDED BY APPLE AND ITS CONTRIBUTORS "AS IS" AND ANY EXPRESS OR IMPLIED WARRANTIES, INCLUDING, BUT NOT LIMITED TO, THE IMPLIED WARRANTIES OF MERCHANTABILITY AND FITNESS FOR A PARTICULAR PURPOSE ARE DISCLAIMED. IN NO EVENT SHALL APPLE OR ITS CONTRIBUTORS BE LIABLE FOR ANY DIRECT, INDIRECT, INCIDENTAL, SPECIAL, EXEMPLARY, OR CONSEQUENTIAL DAMAGES (INCLUDING, BUT NOT LIMITED TO, PROCUREMENT OF SUBSTITUTE GOODS OR SERVICES; LOSS OF USE, DATA, OR PROFITS; OR BUSINESS INTERRUPTION) HOWEVER CAUSED AND ON ANY THEORY OF LIABILITY, WHETHER IN CONTRACT, STRICT LIABILITY, OR TORT INCLUDING NEGLIGENCE OR OTHERWISE) ARISING IN ANY WAY OUT OF THE USE OF THIS SOFTWARE, EVEN IF ADVISED OF THE POSSIBILITY OF SUCH DAMAGE.
Apache License
Version 2.0, January 2004
http://www.apache.org/licenses/
TERMS AND CONDITIONS FOR USE, REPRODUCTION, AND DISTRIBUTION
1. Definitions.
"License" shall mean the terms and conditions for use, reproduction, and distribution as defined by Sections 1 through 9 of this document.
"Licensor" shall mean the copyright owner or entity authorized by the copyright owner that is granting the License.
"Legal Entity" shall mean the union of the acting entity and all other entities that control, are controlled by, or are under common control with that entity. For the purposes of this definition, "control" means (i) the power, direct or indirect, to cause the direction or management of such entity, whether by contract or otherwise, or (ii) ownership of fifty percent (50%) or more of the outstanding shares, or (iii) beneficial ownership of such entity.
"You" (or "Your") shall mean an individual or Legal Entity exercising permissions granted by this License.
"Source" form shall mean the preferred form for making modifications, including but not limited to software source code, documentation source, and configuration files.
"Object" form shall mean any form resulting from mechanical transformation or translation of a Source form, including but not limited to compiled object code, generated documentation, and conversions to other media types.
"Work" shall mean the work of authorship, whether in Source or Object form, made available under the License, as indicated by a copyright notice that is included in or attached to the work (an example is provided in the Appendix below).
"Derivative Works" shall mean any work, whether in Source or Object form, that is based on (or derived from) the Work and for which the editorial revisions, annotations, elaborations, or other modifications represent, as a whole, an original work of authorship. For the purposes of this License, Derivative Works shall not include works that remain separable from, or merely link (or bind by name) to the interfaces of, the Work and Derivative Works thereof.
"Contribution" shall mean any work of authorship, including the original version of the Work and any modifications or additions to that Work or Derivative Works thereof, that is intentionally submitted to Licensor for inclusion in the Work by the copyright owner or by an individual or Legal Entity authorized to submit on behalf of the copyright owner. For the purposes of this definition, "submitted" means any form of electronic, verbal, or written communication sent to the Licensor or its representatives, including but not limited to communication on electronic mailing lists, source code control systems, and issue tracking systems that are managed by, or on behalf of, the Licensor for the purpose of discussing and improving the Work, but excluding communication that is conspicuously marked or otherwise designated in writing by the copyright owner as "Not a Contribution."
"Contributor" shall mean Licensor and any individual or Legal Entity on behalf of whom a Contribution has been received by Licensor and subsequently incorporated within the Work.
- Grant of Copyright License. Subject to the terms and conditions of this License, each Contributor hereby grants to You a perpetual, worldwide, non-exclusive, no-charge, royalty-free, irrevocable
copyright license to reproduce, prepare Derivative Works of, publicly display, publicly perform, sublicense, and distribute the Work and such Derivative Works in Source or Object form.
-
Grant of Patent License. Subject to the terms and conditions of this License, each Contributor hereby grants to You a perpetual, worldwide, non-exclusive, no-charge, royalty-free, irrevocable (except as stated in this section) patent license to make, have made, use, offer to sell, sell, import, and otherwise transfer the Work, where such license applies only to those patent claims licensable by such Contributor that are necessarily infringed by their Contribution(s) alone or by combination of their Contribution(s) with the Work to which such Contribution(s) was submitted. If You institute patent litigation against any entity (including a cross-claim or counterclaim in a lawsuit) alleging that the Work or a Contribution incorporated within the Work constitutes direct or contributory patent infringement, then any patent licenses granted to You under this License for that Work shall terminate as of the date such litigation is filed.
-
Redistribution. You may reproduce and distribute copies of the Work or Derivative Works thereof in any medium, with or without modifications, and in Source or Object form, provided that You meet the following conditions:
-
You must give any other recipients of the Work or Derivative Works a copy of this License; and
- You must cause any modified files to carry prominent notices stating that You changed the files; and
- You must retain, in the Source form of any Derivative Works that You distribute, all copyright, patent, trademark, and attribution notices from the Source form of the Work, excluding those notices that do not pertain to any part of the Derivative Works; and
- If the Work includes a "NOTICE" text file as part of its distribution, then any Derivative Works that You distribute must include a readable copy of the attribution notices contained within such NOTICE file, excluding those notices that do not pertain to any part of the Derivative Works, in at least one of the following places: within a NOTICE text file distributed as part of the Derivative Works; within the Source form or documentation, if provided along with the Derivative Works; or, within a display generated by the Derivative Works, if and wherever such third-party notices normally appear. The contents of the NOTICE file are for informational purposes only and do not modify the License. You may add Your own attribution notices within Derivative Works that You distribute, alongside or as an addendum to the NOTICE text from the Work, provided that such additional attribution notices cannot be construed as modifying the License.
You may add Your own copyright statement to Your modifications and may provide additional or different license terms and conditions for use, reproduction, or distribution of Your modifications, or for any such Derivative Works as a whole, provided Your use, reproduction, and distribution of the Work otherwise complies with the conditions stated in this License.
- Submission of Contributions. Unless You explicitly state otherwise, any Contribution intentionally submitted for inclusion in the Work by You to the Licensor shall be under the terms and conditions of this License, without any additional terms or conditions. Notwithstanding the above, nothing herein shall supersede or modify the terms of any separate license agreement you may have executed with Licensor regarding such Contributions.
- Trademarks. This License does not grant permission to use the trade names, trademarks, service marks, or product names of the Licensor, except as required for reasonable and customary use in describing the origin of the Work and reproducing the content of the NOTICE file.
- Disclaimer of Warranty. Unless required by applicable law or agreed to in writing, Licensor provides the Work (and each Contributor provides its Contributions) on an "AS IS" BASIS, WITHOUT WARRANTIES OR CONDITIONS OF ANY KIND, either express or implied, including, without
limitation, any warranties or conditions of TITLE, NON-INFRINGEMENT, MERCHANTABILITY, or FITNESS FOR A PARTICULAR PURPOSE. You are solely responsible for determining the appropriateness of using or redistributing the Work and assume any risks associated with Your exercise of permissions under this License.
- Limitation of Liability. In no event and under no legal theory, whether in tort (including negligence), contract, or otherwise, unless required by applicable law (such as deliberate and grossly negligent acts) or agreed to in writing, shall any Contributor be liable to You for damages, including any direct, indirect, special, incidental, or consequential damages of any character arising as a result of this License or out of the use or inability to use the Work (including but not limited to damages for loss of goodwill, work stoppage, computer failure or malfunction, or any and all other commercial damages or losses), even if such Contributor has been advised of the possibility of such damages.
- Accepting Warranty or Additional Liability. While redistributing the Work or Derivative Works thereof, You may choose to offer, and charge a fee for, acceptance of support, warranty, indemnity, or other liability obligations and/or rights consistent with this License. However, in accepting such obligations, You may act only on Your own behalf and on Your sole responsibility, not on behalf of any other Contributor, and only if You agree to indemnify, defend, and hold each Contributor harmless for any liability incurred by, or claims asserted against, such Contributor by reason of your accepting any such warranty or additional liability.
END OF TERMS AND CONDITIONS
---- Part 1: CMU/UCD copyright notice: (BSD like) ----
Copyright 1989, 1991, 1992 by Carnegie Mellon University
Derivative Work - 1996, 1998-2000
Copyright 1996, 1998-2000 The Regents of the University of California
All Rights Reserved
Permission to use, copy, modify and distribute this software and its documentation for any purpose and without fee is hereby granted, provided that the above copyright notice appears in all copies and that both that copyright notice and this permission notice appear in supporting documentation, and that the name of CMU and The Regents of the University of California not be used in advertising or publicity pertaining to distribution of the software without specific written permission.
CMU AND THE REGENTS OF THE UNIVERSITY OF CALIFORNIA DISCLAIM ALL WARRANTIES WITH REGARD TO THIS SOFTWARE, INCLUDING ALL IMPLIED WARRANTIES OF MERCHANTABILITY AND FITNESS. IN NO EVENT SHALL CMU OR THE REGENTS OF THE UNIVERSITY OF CALIFORNIA BE LIABLE FOR ANY SPECIAL, INDIRECT OR CONSEQUENTIAL DAMAGES OR ANY DAMAGES WHATSOEVER RESULTING FROM THE LOSS OF USE, DATA OR PROFITS, WHETHER IN AN ACTION OF CONTRACT, NEGLIGENCE OR OTHER TORTIOUS ACTION, ARISING OUT OF OR IN CONNECTION WITH THE USE OR PERFORMANCE OF THIS SOFTWARE.
---- Part 2: Networks Associates Technology, Inc copyright notice (BSD) ----
Copyright (c) 2001-2003, Networks Associates Technology, Inc
All rights reserved.
Redistribution and use in source and binary forms, with or without modification, are permitted provided that the following conditions are met:
* Redistributions of source code must retain the above copyright notice, this list of conditions and the following disclaimer.
* Redistributions in binary form must reproduce the above copyright notice, this list of conditions and the following disclaimer in the documentation and/or other materials provided with the distribution.
* Neither the name of the Networks Associates Technology, Inc nor the names of its contributors may be used to endorse or promote products derived from this software without specific prior written permission.
THIS SOFTWARE IS PROVIDED BY THE COPYRIGHT HOLDERS AND CONTRIBUTORS ``AS IS'' AND ANY EXPRESS OR IMPLIED WARRANTIES, INCLUDING, BUT NOT LIMITED TO, THE IMPLIED WARRANTIES OF MERCHANTABILITY AND FITNESS FOR A PARTICULAR PURPOSE ARE DISCLAIMED. IN NO EVENT SHALL THE COPYRIGHT HOLDERS OR CONTRIBUTORS BE LIABLE FOR ANY DIRECT, INDIRECT, INCIDENTAL, SPECIAL, EXEMPLARY, OR CONSEQUENTIAL DAMAGES (INCLUDING, BUT NOT LIMITED TO, PROCUREMENT OF SUBSTITUTE GOODS OR SERVICES; LOSS OF USE, DATA, OR PROFITS; OR BUSINESS INTERRUPTION) HOWEVER CAUSED AND ON ANY THEORY OF LIABILITY, WHETHER IN CONTRACT, STRICT LIABILITY, OR TORT (INCLUDING NEGLIGENCE OR OTHERWISE) ARISING IN ANY WAY OUT OF THE USE OF THIS SOFTWARE, EVEN IF ADVISED OF THE POSSIBILITY OF SUCH DAMAGE.
---- Part 3: Cambridge Broadband Ltd. copyright notice (BSD) ----
Portions of this code are copyright (c) 2001-2003, Cambridge Broadband Ltd.
All rights reserved.
Redistribution and use in source and binary forms, with or without modification, are permitted provided that the following conditions are met:
* Redistributions of source code must retain the above copyright notice, this list of conditions and the following disclaimer.
* Redistributions in binary form must reproduce the above copyright notice, this list of conditions and the following disclaimer in the documentation and/or other materials provided with the distribution.
* The name of Cambridge Broadband Ltd. may not be used to endorse or promote products derived from this software without specific prior written permission.
THIS SOFTWARE IS PROVIDED BY THE COPYRIGHT HOLDER ``AS IS'' AND ANY EXPRESS OR IMPLIED WARRANTIES, INCLUDING, BUT NOT LIMITED TO, THE IMPLIED WARRANTIES OF MERCHANTABILITY AND FITNESS FOR A PARTICULAR PURPOSE ARE DISCLAIMED. IN NO EVENT SHALL THE COPYRIGHT HOLDER BE LIABLE FOR ANY DIRECT, INDIRECT, INCIDENTAL, SPECIAL, EXEMPLARY, OR CONSEQUENTIAL DAMAGES (INCLUDING, BUT NOT LIMITED TO, PROCUREMENT OF SUBSTITUTE GOODS OR SERVICES; LOSS OF USE, DATA, OR PROFITS; OR BUSINESS INTERRUPTION) HOWEVER CAUSED AND ON ANY THEORY OF LIABILITY, WHETHER IN CONTRACT, STRICT LIABILITY, OR TORT (INCLUDING NEGLIGENCE OR OTHERWISE) ARISING IN ANY WAY OUT OF THE USE OF THIS SOFTWARE, EVEN IF ADVISED OF THE POSSIBILITY OF SUCH DAMAGE.
---- Part 4: Sun Microsystems, Inc. copyright notice (BSD) ----
Copyright c 2003 Sun Microsystems, Inc., 4150 Network Circle, Santa Clara, California 95054, U.S.A. All rights reserved.
Use is subject to license terms below.
This distribution may include materials developed by third parties.
Sun, Sun Microsystems, the Sun logo and Solaris are trademarks or registered trademarks of Sun Microsystems, Inc. in the U.S. and other countries.
Redistribution and use in source and binary forms, with or without modification, are permitted provided that the following conditions are met:
* Redistributions of source code must retain the above copyright notice, this list of conditions and the following disclaimer.
* Redistributions in binary form must reproduce the above copyright notice, this list of conditions and the following disclaimer in the documentation and/or other materials provided with the distribution.
* Neither the name of the Sun Microsystems, Inc. nor the names of its contributors may be used to endorse or promote products derived from this software without specific prior written permission.
THIS SOFTWARE IS PROVIDED BY THE COPYRIGHT HOLDERS AND CONTRIBUTORS ``AS IS" AND ANY EXPRESS OR IMPLIED WARRANTIES, INCLUDING, BUT NOT LIMITED TO, THE IMPLIED WARRANTIES OF MERCHANTABILITY AND FITNESS FOR A PARTICULAR PURPOSE ARE DISCLAIMED. IN NO EVENT SHALL THE COPYRIGHT HOLDERS OR CONTRIBUTORS BE LIABLE FOR ANY DIRECT, INDIRECT, INCIDENTAL, SPECIAL, EXEMPLARY, OR CONSEQUENTIAL DAMAGES (INCLUDING, BUT NOT LIMITED TO, PROCUREMENT OF SUBSTITUTE GOODS OR SERVICES; LOSS OF USE, DATA, OR PROFITS; OR BUSINESS INTERRUPTION) HOWEVER CAUSED AND ON ANY THEORY OF LIABILITY, WHETHER IN CONTRACT, STRICT LIABILITY, OR TORT (INCLUDING NEGLIGENCE OR OTHERWISE) ARISING IN ANY WAY OUT OF THE USE OF THIS SOFTWARE, EVEN IF ADVISED OF THE POSSIBILITY OF SUCH DAMAGE.
---- Part 5: Sparta, Inc copyright notice (BSD) ----
Copyright (c) 2003-2009, Sparta, Inc
All rights reserved.
Redistribution and use in source and binary forms, with or without modification, are permitted provided that the following conditions are met:
* Redistributions of source code must retain the above copyright notice, this list of conditions and the following disclaimer.
* Redistributions in binary form must reproduce the above copyright notice, this list of conditions and the following disclaimer in the documentation and/or other materials provided with the distribution.
* Neither the name of Sparta, Inc nor the names of its contributors may be used to endorse or promote products derived from this software without specific prior written permission.
THIS SOFTWARE IS PROVIDED BY THE COPYRIGHT HOLDERS AND CONTRIBUTORS ``AS IS" AND ANY EXPRESS OR IMPLIED WARRANTIES, INCLUDING, BUT NOT LIMITED TO, THE IMPLIED WARRANTIES OF MERCHANTABILITY AND FITNESS FOR A PARTICULAR PURPOSE ARE DISCLAIMED. IN NO EVENT SHALL THE COPYRIGHT HOLDERS OR CONTRIBUTORS BE LIABLE FOR ANY DIRECT, INDIRECT, INCIDENTAL, SPECIAL, EXEMPLARY, OR CONSEQUENTIAL DAMAGES (INCLUDING, BUT NOT LIMITED TO, PROCUREMENT OF SUBSTITUTE GOODS OR SERVICES; LOSS OF USE, DATA, OR PROFITS; OR BUSINESS INTERRUPTION) HOWEVER CAUSED AND ON ANY THEORY OF LIABILITY, WHETHER IN CONTRACT, STRICT LIABILITY, OR TORT (INCLUDING NEGLIGENCE OR OTHERWISE) ARISING IN ANY WAY OUT OF THE USE OF THIS SOFTWARE, EVEN IF ADVISED OF THE POSSIBILITY OF SUCH DAMAGE.
---- Part 6: Cisco/BUPTNIC copyright notice (BSD) ----
Copyright (c) 2004, Cisco, Inc and Information Network Center of Beijing University of Posts and Telecommunications.
All rights reserved.
Redistribution and use in source and binary forms, with or without modification, are permitted provided that the following conditions are met:
* Redistributions of source code must retain the above copyright notice, this list of conditions and the following disclaimer.
* Redistributions in binary form must reproduce the above copyright notice, this list of conditions and the following disclaimer in the documentation and/or other materials provided with the distribution.
* Neither the name of Cisco, Inc, Beijing University of Posts and Telecommunications, nor the names of their contributors may be used to endorse or promote products derived from this software without specific prior written permission.
THIS SOFTWARE IS PROVIDED BY THE COPYRIGHT HOLDERS AND CONTRIBUTORS ``AS IS'' AND ANY EXPRESS OR IMPLIED WARRANTIES, INCLUDING, BUT NOT LIMITED TO, THE IMPLIED WARRANTIES OF MERCHANTABILITY AND FITNESS FOR A PARTICULAR PURPOSE ARE DISCLAIMED. IN NO EVENT SHALL THE COPYRIGHT HOLDERS OR CONTRIBUTORS BE LIABLE FOR ANY DIRECT, INDIRECT, INCIDENTAL, SPECIAL, EXEMPLARY, OR CONSEQUENTIAL DAMAGES (INCLUDING, BUT NOT LIMITED TO, PROCUREMENT OF SUBSTITUTE GOODS OR SERVICES; LOSS OF USE, DATA, OR PROFITS; OR BUSINESS INTERRUPTION) HOWEVER CAUSED AND ON ANY THEORY OF LIABILITY, WHETHER IN CONTRACT, STRICT LIABILITY, OR TORT (INCLUDING NEGLIGENCE OR OTHERWISE) ARISING IN ANY WAY OUT OF THE USE OF THIS SOFTWARE, EVEN IF ADVISED OF THE POSSIBILITY OF SUCH DAMAGE.
---- Part 7: Fabasoft R&D Software GmbH & Co KG copyright notice (BSD) ----
Copyright (c) Fabasoft R&D Software GmbH & Co KG, 2003 oss@fabasoft.com
Author: Bernhard Penz
Redistribution and use in source and binary forms, with or without modification, are permitted provided that the following conditions are met:
* Redistributions of source code must retain the above copyright notice, this list of conditions and the following disclaimer.
* Redistributions in binary form must reproduce the above copyright notice, this list of conditions and the following disclaimer in the documentation and/or other materials provided with the distribution.
* The name of Fabasoft R&D Software GmbH & Co KG or any of its subsidiaries, brand or product names may not be used to endorse or promote products derived from this software without specific prior written permission.
THIS SOFTWARE IS PROVIDED BY THE COPYRIGHT HOLDER ``AS IS'' AND ANY EXPRESS OR IMPLIED WARRANTIES, INCLUDING, BUT NOT LIMITED TO, THE IMPLIED WARRANTIES OF MERCHANTABILITY AND FITNESS FOR A PARTICULAR PURPOSE ARE DISCLAIMED. IN NO EVENT SHALL THE COPYRIGHT HOLDER BE LIABLE FOR ANY DIRECT, INDIRECT, INCIDENTAL, SPECIAL, EXEMPLARY, OR CONSEQUENTIAL DAMAGES (INCLUDING, BUT NOT LIMITED TO, PROCUREMENT OF SUBSTITUTE GOODS OR SERVICES; LOSS OF USE, DATA, OR PROFITS; OR BUSINESS INTERRUPTION) HOWEVER CAUSED AND ON ANY THEORY OF LIABILITY, WHETHER
IN CONTRACT, STRICT LIABILITY, OR TORT (INCLUDING NEGLIGENCE OR OTHERWISE) ARISING IN ANY WAY OUT OF THE USE OF THIS SOFTWARE, EVEN IF ADVISED OF THE POSSIBILITY OF SUCH DAMAGE.
LEADTOOLS
Copyright (C) 1991-2009 LEAD Technologies, Inc.
CMap Resources
Copyright 1990-2009 Adobe Systems Incorporated. All rights reserved.
Copyright 1990-2010 Adobe Systems Incorporated. All rights reserved.
Redistribution and use in source and binary forms, with or without modification, are permitted provided that the following conditions are met:
Redistributions of source code must retain the above copyright notice, this list of conditions and the following disclaimer.
Redistributions in binary form must reproduce the above copyright notice, this list of conditions and the following disclaimer in the documentation and/or other materials provided with the distribution.
Neither the name of Adobe Systems Incorporated nor the names of its contributors may be used to endorse or promote products derived from this software without specific prior written permission.
THIS SOFTWARE IS PROVIDED BY THE COPYRIGHT HOLDERS AND CONTRIBUTORS "AS IS" AND ANY EXPRESS OR IMPLIED WARRANTIES, INCLUDING, BUT NOT LIMITED TO, THE IMPLIED WARRANTIES OF MERCHANTABILITY AND FITNESS FOR A PARTICULAR PURPOSE ARE DISCLAIMED. IN NO EVENT SHALL THE COPYRIGHT HOLDER OR CONTRIBUTORS BE LIABLE FOR ANY DIRECT, INDIRECT, INCIDENTAL, SPECIAL, EXEMPLARY, OR CONSEQUENTIAL DAMAGES (INCLUDING, BUT NOT LIMITED TO, PROCUREMENT OF SUBSTITUTE GOODS OR SERVICES; LOSS OF USE, DATA, OR PROFITS; OR BUSINESS INTERRUPTION) HOWEVER CAUSED AND ON ANY THEORY OF LIABILITY, WHETHER IN CONTRACT, STRICT LIABILITY, OR TORT (INCLUDING NEGLIGENCE OR OTHERWISE) ARISING IN ANY WAY OUT OF THE USE OF THIS SOFTWARE, EVEN IF ADVISED OF THE POSSIBILITY OF SUCH DAMAGE.
Copyright (c) 1998, 1999, 2000 Thai Open Source Software Center Ltd
Permission is hereby granted, free of charge, to any person obtaining a copy of this software and associated documentation files (the "Software"), to deal in the Software without restriction, including without limitation the rights to use, copy, modify, merge, publish, distribute, sublicense, and/or sell copies of the Software, and to permit persons to whom the Software is furnished to do so, subject to the following conditions:
The above copyright notice and this permission notice shall be included in all copies or substantial portions of the Software.
THE SOFTWARE IS PROVIDED "AS IS", WITHOUT WARRANTY OF ANY KIND, EXPRESS OR IMPLIED, INCLUDING BUT NOT LIMITED TO THE WARRANTIES OF MERCHANTABILITY, FITNESS FOR A PARTICULAR PURPOSE AND NONINFRINGEMENT. IN NO EVENT SHALL THE AUTHORS OR COPYRIGHT HOLDERS BE LIABLE FOR ANY CLAIM, DAMAGES OR OTHER LIABILITY, WHETHER IN AN ACTION OF CONTRACT, TORT OR OTHERWISE, ARISING FROM, OUT OF OR IN CONNECTION WITH THE SOFTWARE OR THE USE OR OTHER DEALINGS IN THE SOFTWARE.
The following applies only to products supporting Wi-Fi.
(c) 2009-2013 by Jeff Mott. All rights reserved.
Redistribution and use in source and binary forms, with or without modification, are permitted provided that the following conditions are met:
* Redistributions of source code must retain the above copyright notice, this list of conditions, and the following disclaimer.
* Redistributions in binary form must reproduce the above copyright notice, this list of conditions, and the following disclaimer in the documentation or other materials provided with the distribution.
* Neither the name CryptoJS nor the names of its contributors may be used to endorse or promote products derived from this software without specific prior written permission.
THIS SOFTWARE IS PROVIDED BY THE COPYRIGHT HOLDERS AND CONTRIBUTORS "AS IS," AND ANY EXPRESS OR IMPLIED WARRANTIES, INCLUDING, BUT NOT LIMITED TO, THE IMPLIED WARRANTIES OF MERCHANTABILITY AND FITNESS FOR A PARTICULAR PURPOSE, ARE DISCLAIMED. IN NO EVENT SHALL THE COPYRIGHT HOLDER OR CONTRIBUTORS BE LIABLE FOR ANY DIRECT, INDIRECT, INCIDENTAL, SPECIAL, EXEMPLARY, OR CONSEQUENTIAL DAMAGES (INCLUDING, BUT NOT LIMITED TO, PROCUREMENT OF SUBSTITUTE GOODS OR SERVICES; LOSS OF USE, DATA, OR PROFITS; OR BUSINESS INTERRUPTION) HOWEVER CAUSED AND ON ANY THEORY OF LIABILITY, WHETHER IN CONTRACT, STRICT LIABILITY, OR TORT (INCLUDING NEGLIGENCE OR OTHERWISE) ARISING IN ANY WAY OUT OF THE USE OF THIS SOFTWARE, EVEN IF ADVISED OF THE POSSIBILITY OF SUCH DAMAGE.
Search Tips
You can search for target pages by entering keywords in the search window.
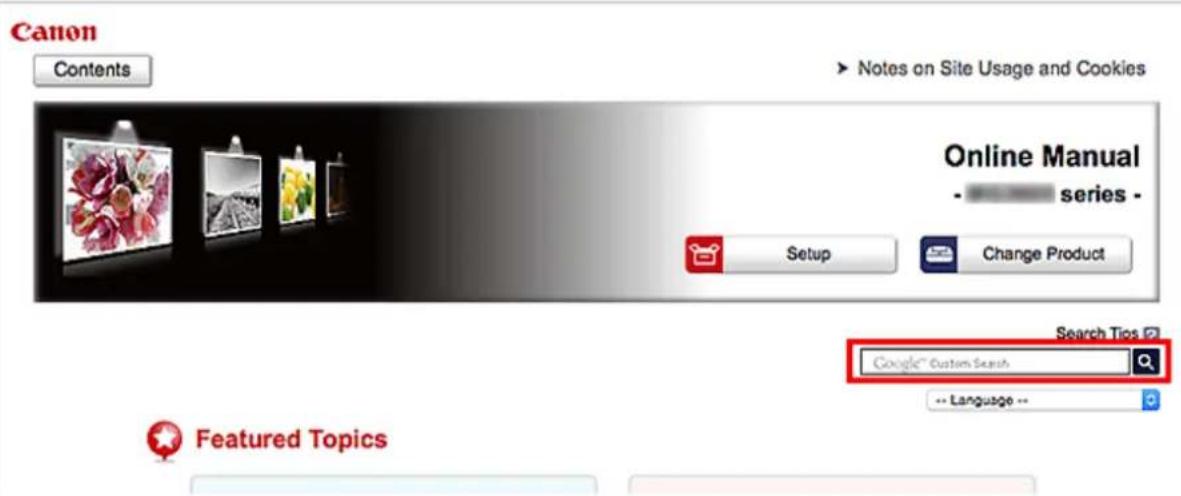
text_image
Canon Contents Notes on Site Usage and Cookies Online Manual - series - Setup Change Product Search Tips Google™ Custom Search Language -- Featured TopicsImportant
- This function may not be available in some countries/regions.
Note
• The displayed screen may vary.
- When searching from this page without entering your product's model name or your application's name, all products supported by this guide will be considered for the search.
If you want to narrow down the search results, add your product's model name or your application's name to the keywords.
- Searching for Functions
Enter your product's model name and a keyword for the function you want to learn about
Example: When you want to learn how to load paper
Enter "(your product's model name) load paper" in the search window and perform a search
- Troubleshooting Errors
Enter your product's model name and a support code
Example: When the following error screen appears
Enter "(your product's model name) 1003" in the search window and perform a search
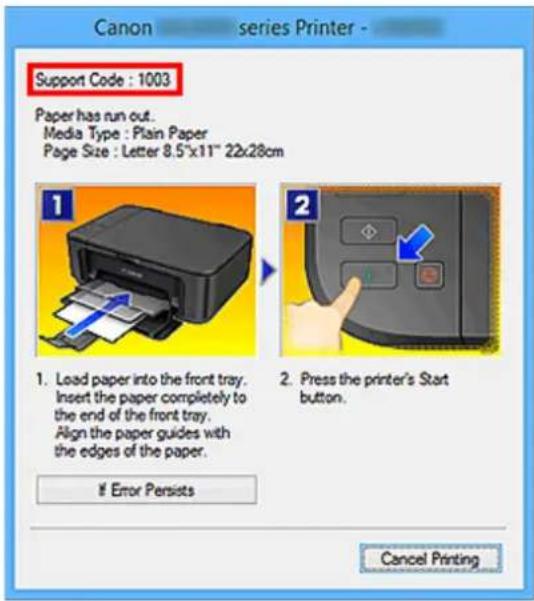
text_image
Canon series Printer - Support Code : 1003 Paper has run out. Media Type : Plain Paper Page Size : Letter 8.5"x11" 22x28cm 1. Load paper into the front tray. Insert the paper completely to the end of the front tray. Align the paper guides with the edges of the paper. 2. Press the printer's Start button. If Error Persists Cancel Printing
Note
- The displayed screen varies depending on your product.
- Searching for Application Functions
Enter your application's name and a keyword for the function you want to learn about
Example: When you want to learn how to print collages with My Image Garden
Enter "My Image Garden collage" in the search window and perform a search
- Searching for Reference Pages
Enter your model name and a reference page title*
* You can find reference pages more easily by entering the function name as well.
Example: When you want to browse the page referred to by the following sentence on a scanning procedure page
Refer to "Color Settings Tab" for your model from Home of the Online Manual for details.
Enter "(your product's model name) scan Color Settings Tab" in the search window and perform a search
Using the Machine
▶ Printing Documents from Your Computer (Windows)
▶ Printing Documents from Your Computer (Mac OS)
▶ Copying
Faxing
Printing Documents from Your Computer (Windows)
Print documents from applications on a computer or other device as follows.
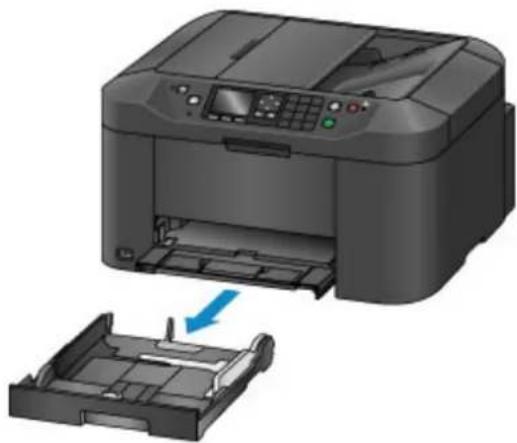
- Pull out the cassette.
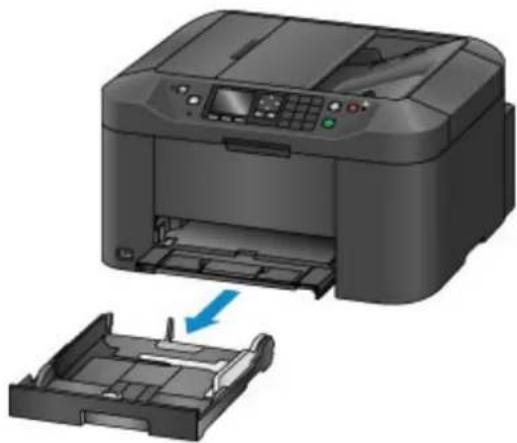
natural_image
Illustration of a printer with an open lid and a blue arrow indicating a component (no text or symbols present)-
Load paper printing-side DOWN.
-
Align the paper guides with the paper length and width.
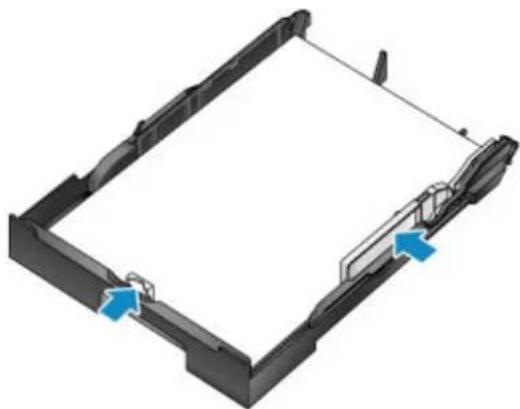
natural_image
3D diagram of a computer monitor with blue directional arrows indicating orientation or movement (no text or symbols)- Insert the cassette.
After you insert the cassette, a screen for registering paper information for the cassette is displayed on the LCD.
- Select the size and type of paper in the cassette in Page size and Type, and then press the OK button.
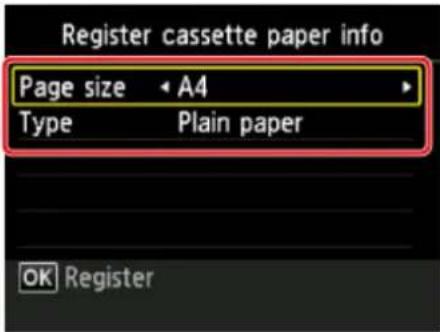
text_image
Register cassette paper info Page size • A4 Type Plain paper OK RegisterFollow the instructions of any messages displayed to register the paper information.
- Pull out the output tray extension (A) and open the paper output support (B).
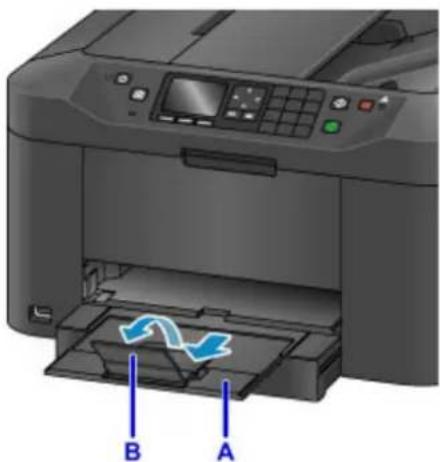
natural_image
Illustration of a printer with paper feed and blue arrows indicating print direction (no text or symbols)- In the application, select Print.
You can often access the Print dialog box by selecting Print in the File menu.
- Select the model name and click Preferences (or Properties).
Printer driver settings are displayed.
Note
- Command and menu names vary by application, and printing may involve more steps. For detailed instructions, refer to the application user manual.
- Select a typical printing profile.
In Commonly Used Settings on the Quick Setup tab, select a profile that suits the purpose of printing.
Once you select a printing profile, preset values are automatically applied to Additional Features, Media Type, and Printer Paper Size settings.
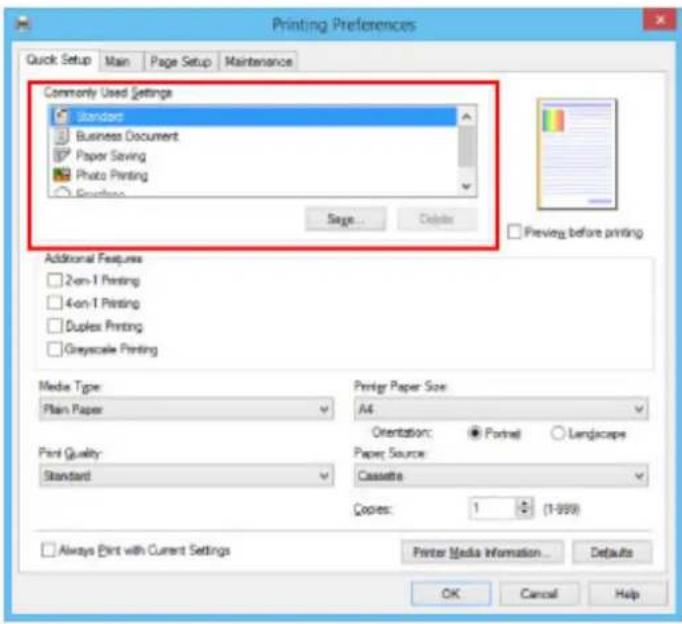
text_image
Printing Preferences Quick Setup Main Page Setup Maintenance Commonly Used Settings Standard Business Document Paper Saving Photo Printing English Sage... Delete Additional Features 2 on-1 Printing 4 on-1 Printing Duplex Printing Grayscale Printing Media Type Plain Paper Print Quality: Standard Printer Paper Size: All Orientation: Portrait Landscape Paper Source Cassette Copies: 1 2 (1-999) Always Print with Current Settings Printer Media Information...Defaults OK Cancel Help- Once the print settings are complete, click OK to print.

Note
- A variety of print settings can be configured with the printer driver.
→ Printing from Application Software (Windows Printer Driver)
Printing Documents from Your Computer (Mac OS)
Print documents from applications on a computer or other device as follows.
- Pull out the cassette.
natural_image
Illustration of a printer with an open lid and a blue arrow indicating a component (no text or symbols present)-
Load paper printing-side DOWN.
-
Align the paper guides with the paper length and width.
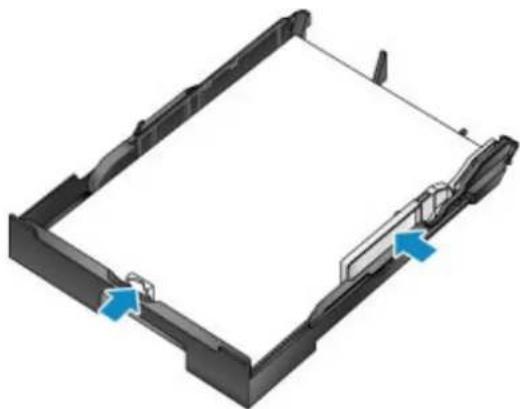
natural_image
3D diagram of a computer monitor with two blue directional arrows indicating orientation or movement (no text or symbols)- Insert the cassette.
After you insert the cassette, a screen for registering paper information for the cassette is displayed on the LCD.
- Select the size and type of paper in the cassette in Page size and Type, and then press the OK button.
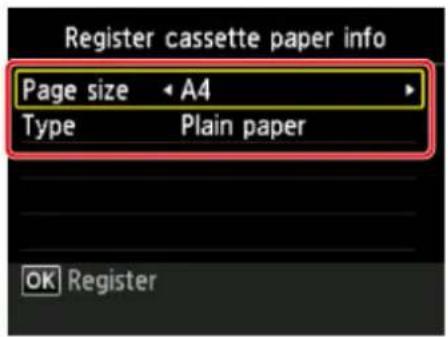
text_image
Register cassette paper info Page size • A4 Type Plain paper OK RegisterFollow the instructions of any messages displayed to register the paper information.
- Pull out the output tray extension (A) and open the paper output support (B).
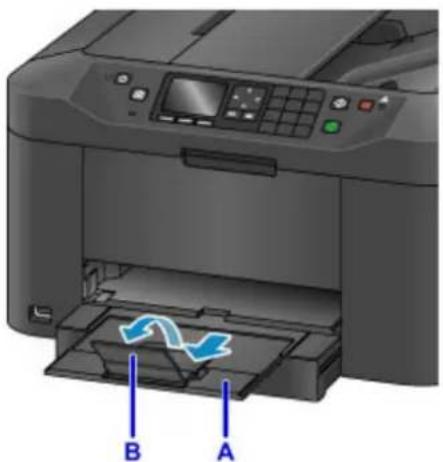
natural_image
Illustration of a printer with paper feed and blue arrows indicating print direction (no text or symbols)- In the application, select Print.
You can often access the Print dialog by selecting Print... in the File menu.

Note
- For detailed instructions on operation, refer to the application user manual.
- Select the model name and click Printer list.
Click Show Details to switch the Setup window to the detailed display.
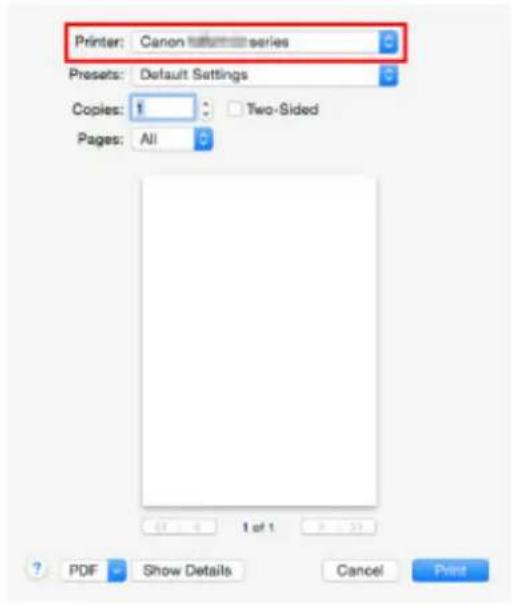
text_image
Printer: Canon series Presets: Default Settings Copies: 1 Pages: All 1 of 1 ? PDF Show Details Cancel Print9. Select the paper size.
In Paper Size, select the paper size you use.
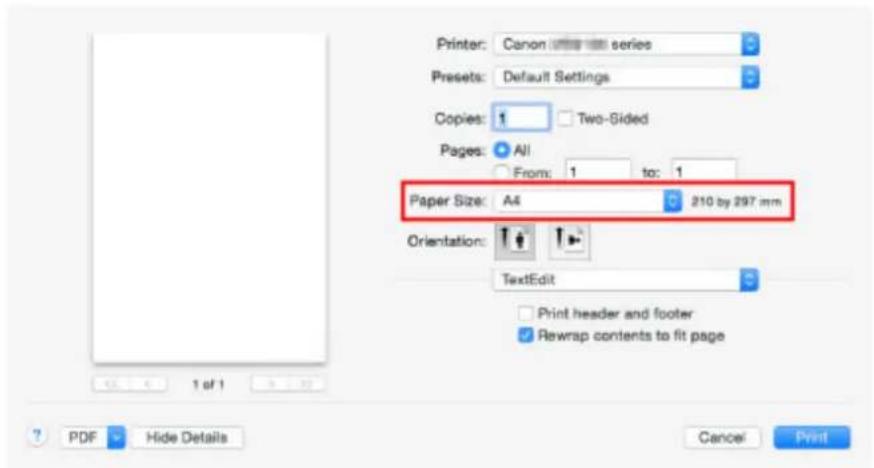
text_image
Printer: Canon series Presets: Default Settings Copies: 1 Two-Sided Pages: All From: 1 to: 1 Paper Size: A4 210 by 297 mm Orientation: TextEdit Print header and footer Rewrap contents to fit page PDF Hide Details Cancel Print- Select Quality & Media from the pop-up menu.

text_image
Printer: Canon series Presets: Default Settings Copies: 1 Two-Sided Pages: All From: 1 to: 1 Paper Size: A4 210 by 297 mm Orientation: Quality & Media Media Type: Plain Paper Paper Source: Cassette Print Quality: Standard Grayscale Printing Printer Media Information PDF Hide Details Cancel Print- Select the media type.
In Media Type, select the same media type loaded in the machine.
- Once the print settings are complete, click Print to print.
Note
- A variety of print settings can be configured with the printer driver.
→ Printing from Application Software (Mac OS Printer Driver)
Copying
Load originals and copy them on plain paper as follows.
- Pull out the cassette.
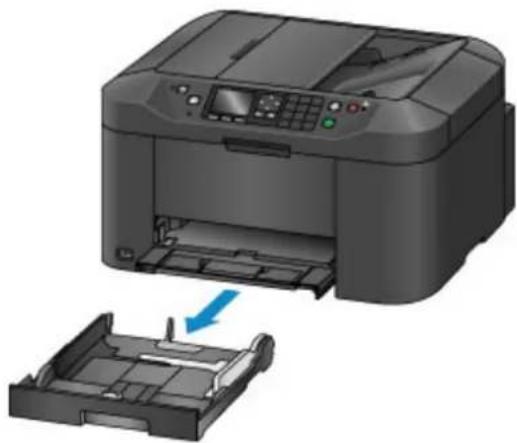
natural_image
Illustration of a printer with an open lid and a blue arrow indicating a component (no text or symbols present)-
Load paper printing-side DOWN.
-
Align the paper guides with the paper length and width.
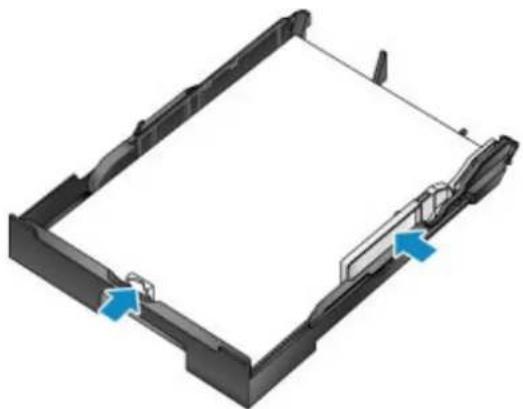
natural_image
3D diagram of a computer monitor with two blue arrows indicating directional components (no text or symbols)- Insert the cassette.
After you insert the cassette, a screen for registering paper information for the cassette is displayed on the LCD.
- Select the size and type of paper in the cassette in Page size and Type, and then press the OK button.
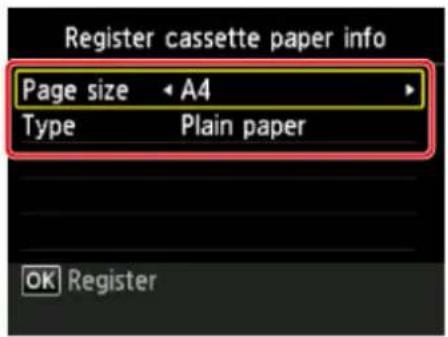
text_image
Register cassette paper info Page size • A4 Type Plain paper OK RegisterFollow the instructions of any messages displayed to register the paper information.
- Pull out the output tray extension (A) and open the paper output support (B).
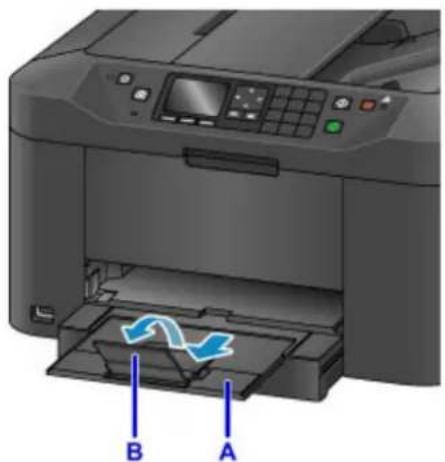
natural_image
Illustration of a printer with paper feed and blue arrows indicating flow or movement (no text or symbols)-
Press the HOME button (C).
-
Select Copy (D), and then press the OK button.
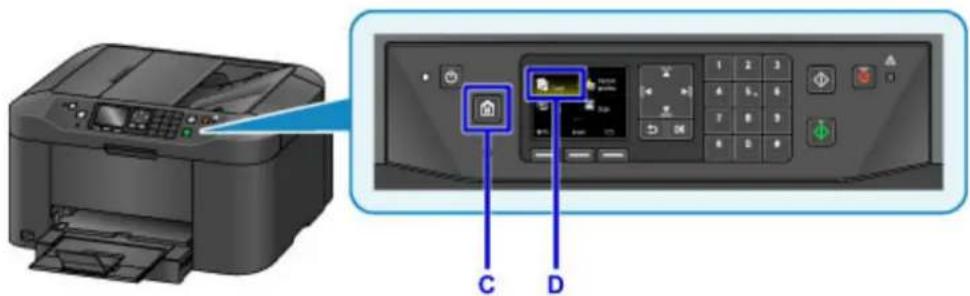
text_image
Diagram showing printer operation with labeled buttons and control panel, highlighting 'C' and 'D' functions.-
Open the document cover (E).
-
Load the original face-DOWN, aligned with the alignment mark (F).
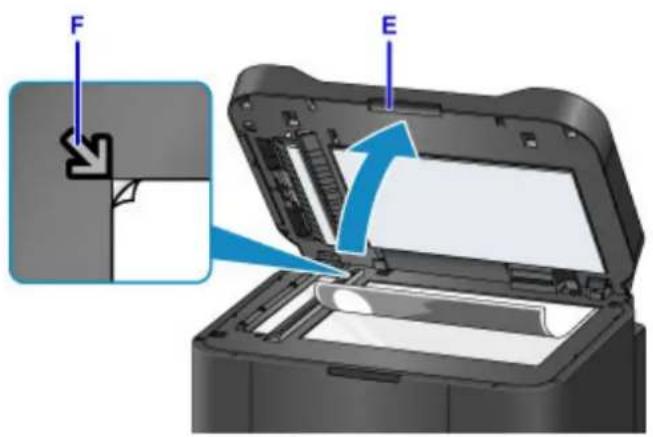
text_image
F ENote
- For continuous copying of multiple originals, use the ADF (Auto Document Feeder).
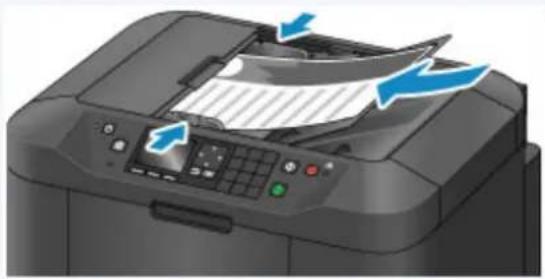
natural_image
Illustration of a printer with paper being inserted, showing paper layout and control panel (no text or symbols)- Close the document cover.
- Check the paper settings, and then press the Black or Color button (G).
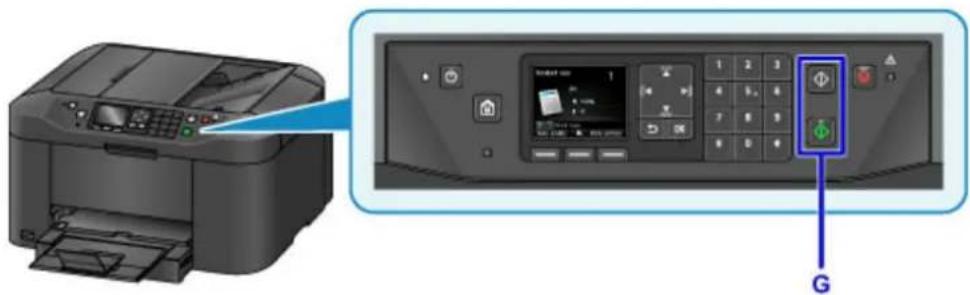
text_image
Diagram showing printer operation with control panel and function buttons, labeled 'G' in cornerImportant
- Do not open the document cover until copying is finished.
Note
- The machine offers many other convenient copying features.
→ Copying
Faxing
Fax multiple documents in black and white as follows.
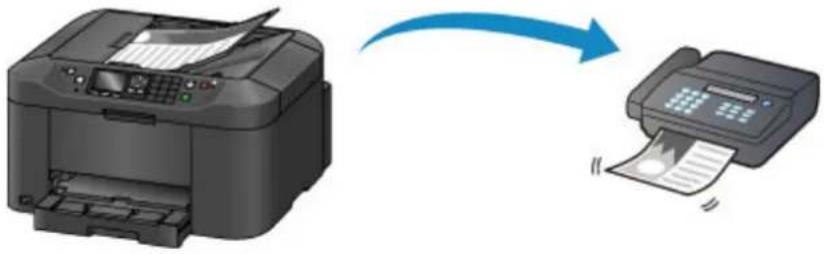
natural_image
Illustration of a printer being processed by a printer, showing the printer's output and the printer's print (no text or symbols present)- Open the document tray (A).
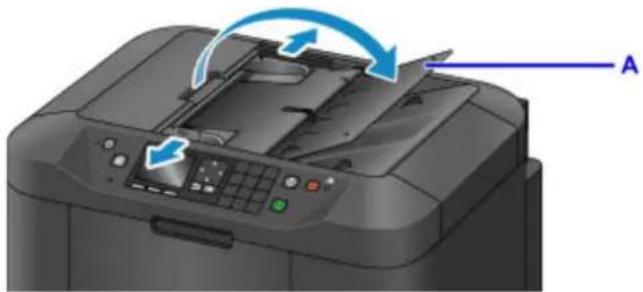
natural_image
Illustration of a printer with blue arrows indicating motion or rotation, labeled 'A' (no text or symbols on the device itself)- Insert the documents face-UP.
- Adjust the document guides as needed.
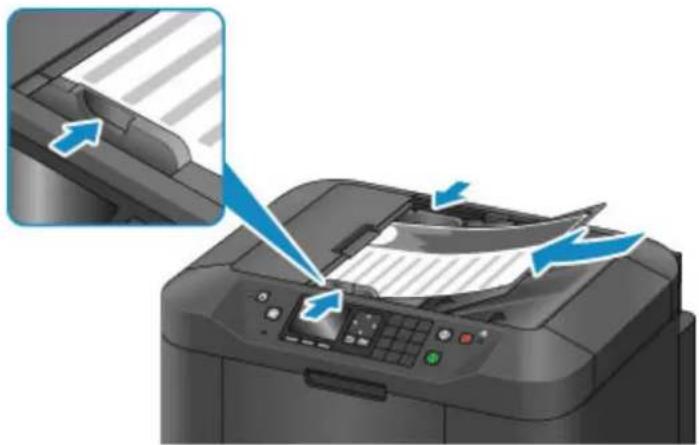
natural_image
Illustration of a printer with paper being inserted, showing paper being folded and being removed (no text or symbols present)-
Press the HOME button (B).
-
Select
FAX (C), and then press the OK button.
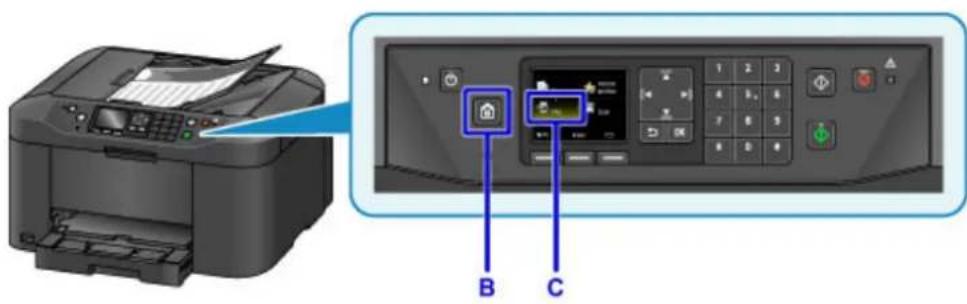
text_image
Diagram showing printer operation with labeled buttons and control panel, highlighting 'B' and 'C' functions.- Use the keypad to enter the fax number (D).
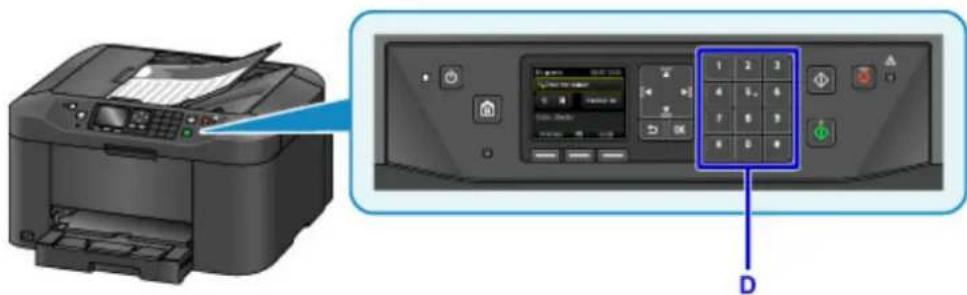
text_image
Diagram showing printer operation with control panel and labeled buttons, including a blue 'D' indicator.- Press the Black button (E).
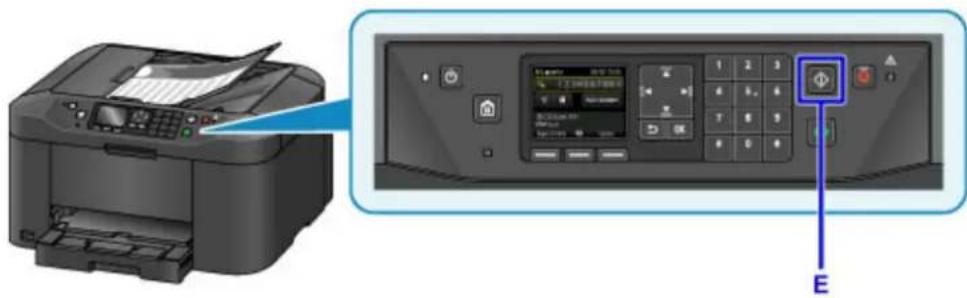
text_image
Diagram showing printer operation with control panel and labeled button E, including Chinese text labels and icons.Note
- Many other convenient faxing features are available.
→ Faxing
Printer Functions
Connect Wirelessly in "Direct Connection"
▶ Download a Variety of Content Materials
Print Items with Easy-PhotoPrint+ (Web Application)
Managing Printer Conveniently Using Quick Utility Toolbox
Available Connection Methods
▶ Scan Originals Larger than the Platen
▶ Scan Multiple Originals at One Time
Using PIXMA/MAXIFY Cloud Link
Print Easily from a Smartphone or Tablet with Canon PRINT Inkjet/SELPHY
▶ Printing with Windows RT
▶ Online Storage Integration Function
Printing from an AirPrint-enabled Printer
▶ Printing from an AirPrint-enabled Printer with Mac
▶ Printing from an AirPrint-enabled Printer with iOS Device
Printing from an AirPrint-enabled Printer with Mac
Using AirPrint to print from your iPhone, iPad, iPod touch, or Mac.
AirPrint enables you to print photos, email, Web pages and documents from iPhone, iPad, iPod touch, and Mac without the need to install drivers, or download apps or software.
Note
- If you want to print using AirPrint from iOS device, see below.
→ Printing from an AirPrint-enabled Printer with iOS Device
Checking Your Environment
First, check your environment.
• AirPrint Operation Environment
- iPhone, iPad, and iPod touch running the latest version of iOS
• Mac running the latest version of Mac OS
- Requirement
The iOS device or Mac and the printer must be connected to the same network over a LAN or connected directly without wireless router.
Adding Printer as AirPrint Printer to Your Mac
- Open System Preferences, and select Printers & Scanners (Print & Scan) on your Mac.
- Select + to display the printer list.
- Select the printer's name listed as Bonjour Multifunction.
- Select Secure AirPrint or AirPrint from Use.
- Select Add.
Printing with AirPrint from Mac
- Make sure printer is turned on.

Note
- If the printer's Auto Power On function is enabled, the printer is turned on automatically when it receives the print data.
- Load paper.
- Perform printing on your application software.
Print dialog appears.
- Select your model name added as AirPrint printer from the Printer list in the Print Dialog.
- Set the paper size, media type, and other settings as needed.
- Select Print.
When you execute printing, the printer prints according to the specified settings.
Note
- For wireless LAN connection:
• After you turn on the printer, it may take few minutes before the printer can communicate through a wireless LAN connection. Make sure the printer is connected to the wireless LAN and try printing.
- If Bonjour on the printer is disabled, AirPrint cannot be used. Check the LAN settings on the printer, and enable Bonjour.
- For other AirPrint troubleshooting, see below.
→ Cannot Print Using AirPrint
Checking Print Status
→ Display the Printing Status Screen
Deleting Print Job
To delete a print job with AirPrint, use one of the following two methods:
- From printer: Use Stop button to cancel the print job.
- From iOS device: Deleting the Undesired Print Job
Printing from an AirPrint-enabled Printer with iOS Device
Using AirPrint to print from your iPhone, iPad, iPod touch, or Mac.
AirPrint enables you to print photos, email, Web pages and documents from iPhone, iPad, iPod touch, and Mac without the need to install drivers, or download apps or software.
Note
- If you want to print using AirPrint from Mac, see below.
→ Printing from an AirPrint-enabled Printer with Mac
Checking Your Environment
First, check your environment.
• AirPrint Operation Environment
- iPhone, iPad, and iPod touch running the latest version of iOS
• Mac running the latest version of Mac OS
- Requirement
The iOS device or Mac and the printer must be connected to the same network over a LAN or connected directly without wireless router.
Printing with AirPrint from iOS Device
- Make sure printer is turned on.
Note
- If the printer's Auto Power On function is enabled, the printer is turned on automatically when it receives the print data.
- Load paper.
- Tap operation icon to display menu options from applications of your iOS device.
The figure below is an example of when printing from the iPad web browser. The screen differs depending on the devices or applications.
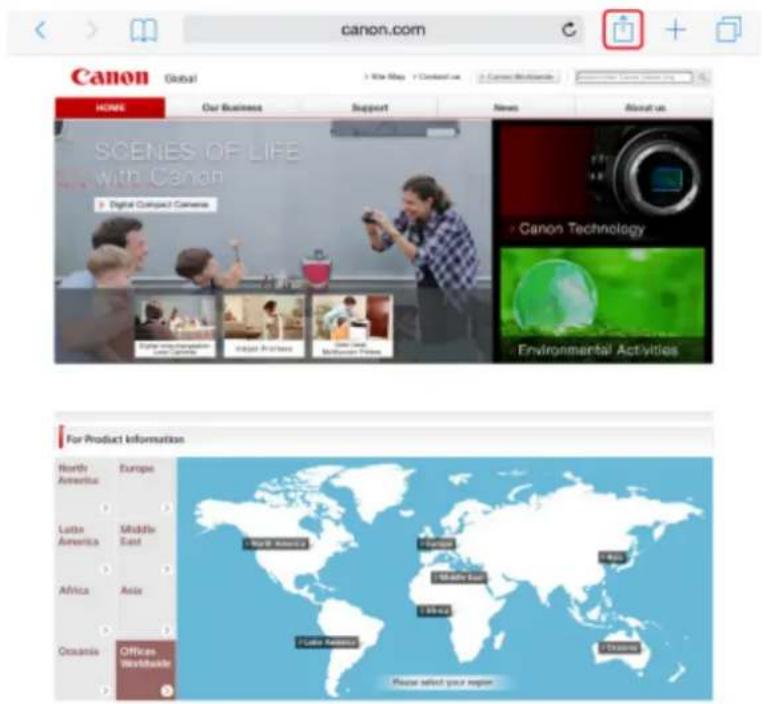
text_image
canon.com Canon Global HOME Our Business Support News About us SCENES OF LIFE with Canon Digital Compound Camera Canon Technology Environmental Activities For Product Information North America Europe Latin America Middle East Africa Asia Oceania Offices Worldwide World: America Europe Middle East Africa Asia Lima: America Europe Lima: Europe Lima: Africa Lima: Latin America Lima: Latin America Please select your region.4. Tap Print from menu options.
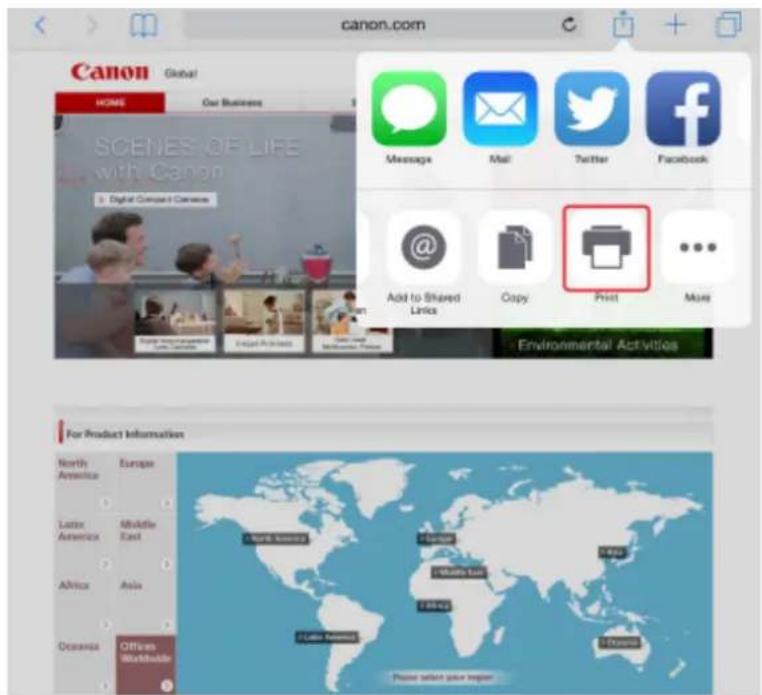
text_image
canon.com Canon Global HOME Our Business SCENES OF LIFE with Canon Digital Compact Camera Message Mail Twitter Facebook Add to Shared Links Copy Print More Environmental Activities For Product Information North America Europe Latin America Middle East Africa Asia Oceania Offices Worldwide E-mail: 12345678 Email: 12345678 Email: 12345678 Email: 12345678 Email: 12345678 Email: 12345678 Email: 12345678 Email: 12345678 Email: 12345678 Email: 100000000000000000000000000000000000000000000000000000000000000000000000000000000000000000000000000 Please select your region5. Select your model name from Printer on Printer Options.
Important
- Because some applications do not support AirPrint, Printer Options may not be displayed. If an application does not let you use printer options, you cannot print from that application.

Note
- Printer Options differ depending on the application that you are using.
-
When printing file type that has multiple pages, such as PDF file, tap Range and tap All Pages or select range of pages to be printed.
-
For 1 Copy, tap + or - to set number of required copies.
-
For Duplex Printing, tap On to enable duplex printing or tap Off to disable function.
-
Tap Print.
When you execute printing, the printer prints according to the specified settings.
Note
- For wireless LAN connection:
- After you turn on the printer, it may take few minutes before the printer can communicate through a wireless LAN connection. Make sure the printer is connected to the wireless LAN and try printing.
- If Bonjour on the printer is disabled, AirPrint cannot be used. Check the LAN settings on the printer, and enable Bonjour.
- For other AirPrint troubleshooting, see below.
→ Cannot Print Using AirPrint
Paper Size
With AirPrint, the paper size is selected automatically according to the application being used on the iOS device and the region in which AirPrint is used.
When you use the photo application, the default paper size is L size in Japan, and 4"x6" or KG in other countries and regions.
When you use the document application, the default paper size is letter size in the U.S. region, and A4 in Japan and Europe.
Important
- Depending on the device or operation system, the default paper size is different from above size.
We recommend you perform test printing.
- Your application may support different paper sizes.
Printing of Envelopes
For printing on the envelope from iOS device with AirPrint, refer to the following.
Print result image Orientation of print data Orientation of loading envelope
| Load the envelope in vertically with the address side facing down so that the folded flap of the envelope will be faced up on the right side. |
Checking Print Status
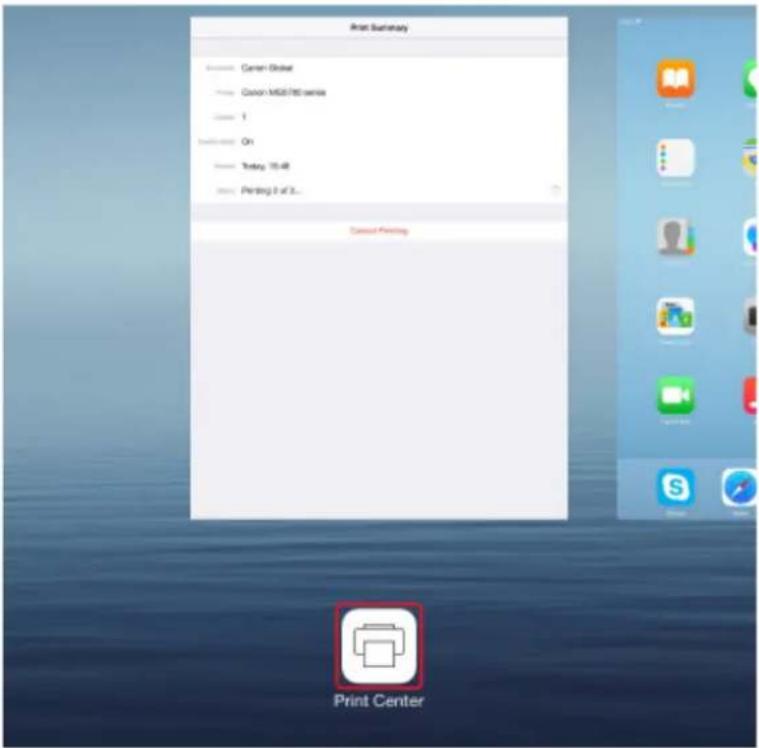
During printing, a Print Center icon is displayed in the list of recently used applications and you can use it to check the print progress.
Press the Home button on the iOS device twice to set the Multitasking mode. Then swipe to the right to display the Print Center icon and a Print Summary.
text_image
Print Summary Canon: Canon Global Canon: Canon MG8/100 version Date: 1 Registration: On Date: Tuesday 10:48 Date: Printing 3 of 2... Print CenterDeleting Print Job
To delete a print job with AirPrint, use one of the following two methods:
- From printer: Use Stop button to cancel the print job.
- From iOS device: Press the Home button on the iOS device twice to set the Multitasking mode and swipe to the right. Tap the Print Center icon to display a Print Summary. Tap the print job to be canceled and tap Cancel Printing.
Connect Wirelessly in "Direct Connection"
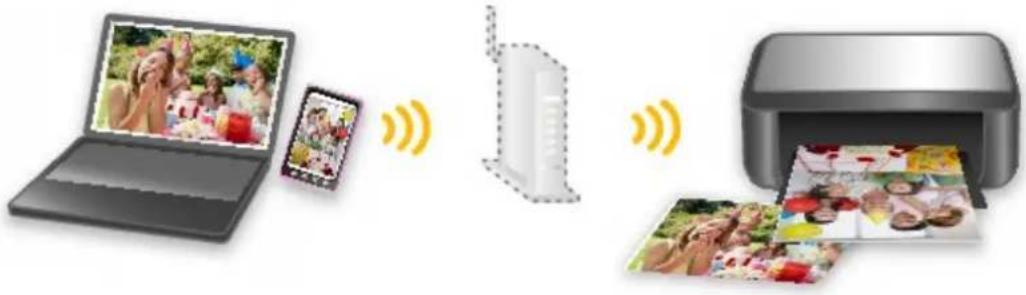
The printer supports "direct connection" in which you can connect to the printer wirelessly from a computer or smartphone without a wireless router.
Switch to "direct connection" to print or scan wirelessly.
→ Using Machine with Direct Connection
text_image
Diagram illustrating the relationship between a laptop, a smartphone, a wireless router, and a printer with photo content being processed.Download a Variety of Content Materials
CREATIVE PARK
A "printing materials site" where you can download all the printing materials for free.
Various types of content such as seasonal cards and paper crafts that can be made by assembling paper parts are provided.
A service where customers using models that support PREMIUM Contents can download exclusive printing materials.
PREMIUM Contents can be downloaded easily via Easy-PhotoPrint+. Downloaded PREMIUM Contents can be printed directly with Easy-PhotoPrint+.
To download PREMIUM Contents, make sure that genuine Canon ink tanks/ink cartridges are installed for all colors on a supported printer.

text_image
Jan Married Jamie Seluthie Burroton December 2017 and Mrs. Henry and a woman's birthday.
Note
- The designs of PREMIUM Contents provided in this page are subject to change without prior notice.
Print Items with Easy-PhotoPrint+ (Web Application)
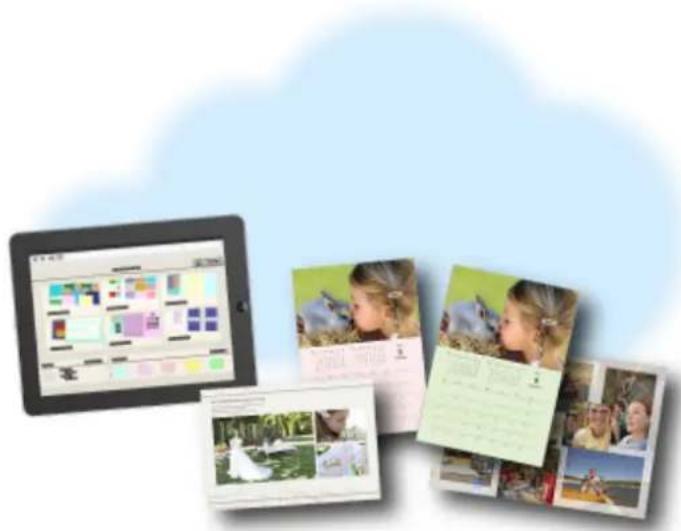
You can easily create and print personalized items such as calendars and collages, anytime and anywhere, by simply accessing Easy-PhotoPrint+ on the web from a computer or tablet.
By using Easy-PhotoPrint+, you can create items in the latest environment without going through the trouble of installation.
Moreover, you can use various photos for your item through integration with social networks such as Facebook, or with online storage, web albums, etc.
Refer to "Easy-PhotoPrint+ Guide" for details.
natural_image
Tablet displaying a photo editing interface with multiple photo thumbnails and text overlays, set against a cloud background (no readable text or symbols)Managing Printer Conveniently Using Quick Utility Toolbox
Quick Utility Toolbox is a shortcut menu that lets you access the functions you want to use with one click. After installing utilities compatible with Quick Utility Toolbox, they will be added to this menu. The Quick Utility Toolbox provides a convenient way to quickly launch added utilities for making printer settings and doing other management tasks.
Refer to the following for details.
→ Quick Utility Toolbox Guide (Windows)
→ Quick Utility Toolbox Guide (Mac OS)
natural_image
Illustration of a printer with a cloud and a recycling symbol, no text or symbols presentAvailable Connection Methods
The following connection methods are available on the printer.
Wireless Connection
- With a wireless router
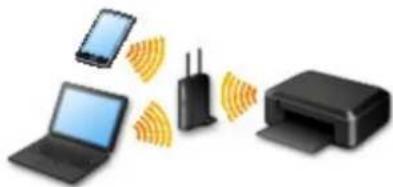
natural_image
Illustration of wireless communication between a laptop, smartphone, wireless router, and printer (no text or symbols)- Without a wireless router
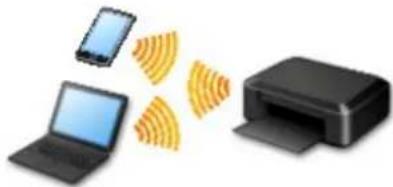
natural_image
Illustration of a printer, laptop, and smartphone with signal waves (no text or symbols)USB Connection

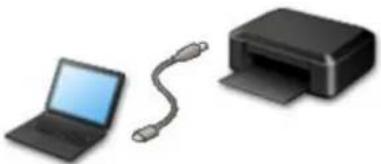
natural_image
Illustration of a laptop connected to a printer (no text or symbols present)Wireless Connection
There are two methods for connecting the printer to your device (e.g. smartphone or tablet). One method is to connect using a wireless router, and the other method is to connect without using a wireless router.
The two connection methods cannot be used at the same time.
If you have a wireless router, we recommend you use the method described in Connection Using a Wireless Router.
When connecting another device while a device is already connected to the printer, connect it using the same connection method as the connected device.
If you connect using a different connection method, the connection to the device in use will be disabled.
- Connection Using a Wireless Router
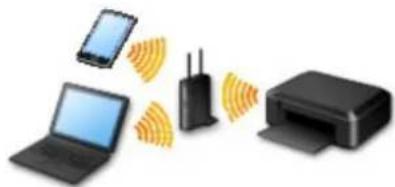
natural_image
Illustration of wireless communication network with smartphone, laptop, wireless router, and printer (no text or symbols)- Connect the printer and a device using a wireless router.
- Connection methods vary depending on the wireless router type.
- You can change network settings such as the SSID and security protocol on the printer.
- When the connection between a device and a wireless router is completed and (Wi-Fi icon) is displayed in the device's screen, you can connect the device to the printer using the wireless router.
- Connection without Using a Wireless Router
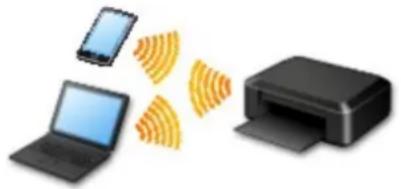
natural_image
Illustration of a printer, smartphone, and laptop with signal waves (no text or symbols)- Connect the printer and a device without using a wireless router. Connect a device and the printer directly using the printer's direct connection.
While you are using the printer with direct connection, Internet connection from the printer becomes unavailable. In that case, web services for the printer cannot be used.
- If you connect a device connected to the Internet via a wireless router to the printer that is in the direct connection, the connection between the device and wireless router will be disabled. In that case, the connection of the device may switch to a mobile data connection automatically depending on your device. Transmission fees for connecting to the Internet using a mobile data connection apply.
In the direct connection, you can connect up to five devices at the same time. If you try to connect a sixth device while five devices are already connected, an error will appear. If an error appears, disconnect a device you do not use and configure settings again.
- Network settings such as the SSID and security protocol are specified automatically.
USB Connection
Connect the printer and a computer with a USB cable. Prepare a USB cable.
Restrictions
(Appears in a new window)
Scan Originals Larger than the Platen
By using the stitch function of IJ Scan Utility, you can scan the left and right halves of an item larger than the platen and combine them back into one image. Items up to approximately twice as large as the platen are supported.
Refer to the following for details.
→ Scanning Originals Larger than the Platen (Image Stitch) (Windows)
→ Scanning Originals Larger than the Platen (Image Stitch) (Mac OS)
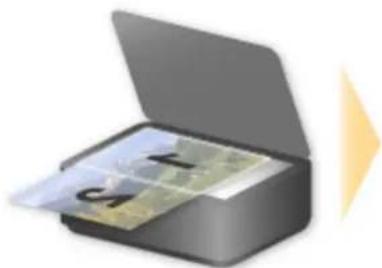
natural_image
Open box with printed cards inside, no visible text or symbols on the card faces
natural_image
Scenic mountain landscape with snow-capped peaks and a small village nestled in green hills, no visible text or symbols.Scan Multiple Originals at One Time
By using IJ Scan Utility, you can scan two or more photos (small items) placed on the platen at one time and save each image individually.
Refer to the following for details.
→ Scanning Multiple Originals at One Time (Windows)
→ Scanning Multiple Originals at One Time (Mac OS)
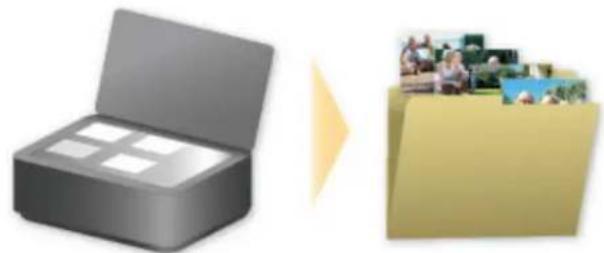
natural_image
Illustration of a gray open box next to a yellow folder with photos (no text or symbols)Using PIXMA/MAXIFY Cloud Link
By using PIXMA/MAXIFY Cloud Link, you can connect your printer to a cloud service, such as CANON iIMAGE GATEWAY, Evernote, or Twitter, and use the following functions without using a computer:
- Print images from a photo-sharing service
- Print documents from a data management service
- Save scanned images to a data management service.
- Use Twitter to report the printer status, such as no paper or low ink levels.
In addition, you can use various functions by adding and registering apps that are linked with various cloud services.
Using PIXMA/MAXIFY Cloud Link from Your Printer
Using PIXMA/MAXIFY Cloud Link from Your Smartphone, Tablet, or Computer
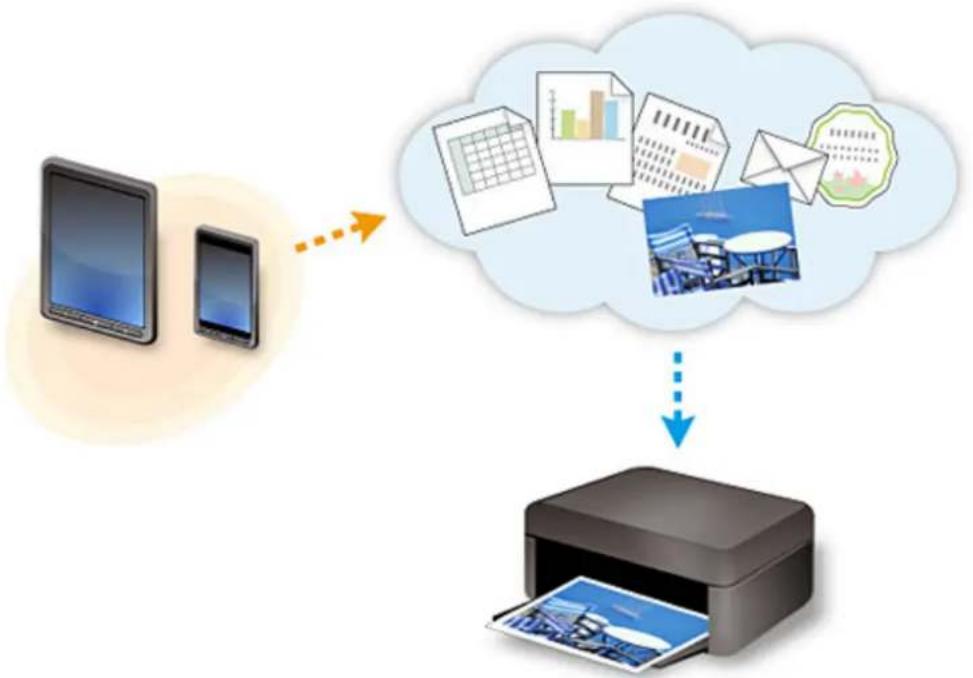
flowchart
graph TD
    A["Input Device"] --> B["Printer"]
    C["External Thought"] --> B
    B --> D["Output Display"]

Important
- In certain countries, PIXMA/MAXIFY Cloud Link may not be available or the available apps may be different.
- Some apps require that you have an account before you use those apps. For such apps, please set up an account beforehand.
- To find out which models support PIXMA/MAXIFY Cloud Link check the Canon homepage.
• The screen display may change without prior notice.
Notice for Web Service Printing
When Using Web Service
- Canon does not guarantee the continuity and reliability of the web services provided, the availability of site access, or permission to download the materials.
- Canon may at any time update, change, or delete the information provided through the web service, or may suspend or discontinue the service without prior notice. Canon shall not be held responsible for any damages resulting from such actions.
- In no event shall Canon be liable for any damages whatsoever resulting from the use of the web services.
- User registration is necessary before you can use the external link site.
When you use the external link site, observe the conditions of use of the site and use the service within your own responsibility. - All or part of the web service may not be available depending on the country or region you live in.
- Depending on your network environment, some functions on web service are not available. Even if they are available, it may take a while to print or display the contents, or communication may be interrupted while operation is in progress.
- When you use web service, your machine's name, information of your region or country, your selected language, and what kind of service you use (e.g. photo sharing site) are sent to and saved in our server. Canon is unable to identify specific customers using this information.
- Before you transfer ownership or dispose of a printer that supports a color LCD monitor, select Device settings -> Reset setting -> Reset all and delete your login name and password.
- For details, contact a Canon-authorized sales representative in the country or region you live in.
To Those Living in Mainland China
- PIXMA/MAXIFY Cloud Link, Easy-PhotoPrint+, and some functions of Canon PRINT Inkjet/SELPHY, which are included with this machine, are provided by Canon Inc.
However, as the server is installed outside of mainland China, some of these services may not be available yet.
Copyrights and Rights of Publicity
When printing using a service provided by Canon
- The copyright of each material (photos, illustrations, logos, or documents: hereinafter referred to as "the materials") provided on the printing service belongs to their respective owners. Issues pertaining to Rights of Publicity may arise regarding the use of any of people or characters displayed on the printing service.
Except as otherwise permitted (please see "2" below), copying, modifying or distributing all or a portion of any of the materials contained on the web template printing service without prior consent of the respective rights (Rights of Publicity and Copyright) holder is strictly prohibited.
- All of the materials provided on the web template printing service can be freely used for personal and non-commercial purposes.
Using PIXMA/MAXIFY Cloud Link from Your Printer
Before Using PIXMA/MAXIFY Cloud Link
Registering Printer Information to PIXMA/MAXIFY Cloud Link
Using PIXMA/MAXIFY Cloud Link
Cloud Troubleshooting
Before Using PIXMA/MAXIFY Cloud Link
First, check the following content:
- Precautions
If you plan to use the web service to print documents, be sure to check these precautions beforehand.
- Printer Specifications
• The printer must support a color LCD monitor.
To check whether your model supports this function, see "Models that Support PIXMA/MAXIFY Cloud Link from Your Printer".
- Your printer may not support the scan function.
- The printer must support the Canon Inkjet Cloud Printing Center.
To check whether your model supports this function, see "Models that Support Canon Inkjet Cloud Printing Center".
• Network environment
The printer must be connected to a LAN and to the Internet.
If your printer is not connected to a LAN, see here and set one up.
For information on the LAN and Internet settings, see the manual of your network devices or contact the manufacturer.

Important
- The user will bear the cost of Internet access.
Registering Printer Information to PIXMA/MAXIFY Cloud Link
Copyright c 1991-2015 Unicode, Inc. All rights reserved. Distributed under the Terms of Use in http://www.unicode.org/copyright.html.
This software is based in part on the work of the Independent JPEG Group.
THE BASIC LIBRARY FUNCTIONS
Written by: Philip Hazel
Email local part: ph10
Email domain: cam.ac.uk
University of Cambridge Computing Service, Cambridge, England.
Copyright (c) 1997-2008 University of Cambridge All rights reserved.
THE "BSD" LICENCE
Redistribution and use in source and binary forms, with or without modification, are permitted provided that the following conditions are met:
* Redistributions of source code must retain the above copyright notice, this list of conditions and the following disclaimer.
* Redistributions in binary form must reproduce the above copyright notice, this list of conditions and the
following disclaimer in the documentation and/or other materials provided with the distribution.
* Neither the name of the University of Cambridge nor the name of Google Inc. nor the names of their contributors may be used to endorse or promote products derived from this software without specific prior written permission.
THIS SOFTWARE IS PROVIDED BY THE COPYRIGHT HOLDERS AND CONTRIBUTORS "AS IS" AND ANY EXPRESS OR IMPLIED WARRANTIES, INCLUDING, BUT NOT LIMITED TO, THE IMPLIED WARRANTIES OF MERCHANTABILITY AND FITNESS FOR A PARTICULAR PURPOSE ARE DISCLAIMED. IN NO EVENT SHALL THE COPYRIGHT OWNER OR CONTRIBUTORS BE LIABLE FOR ANY DIRECT, INDIRECT, INCIDENTAL, SPECIAL, EXEMPLARY, OR CONSEQUENTIAL DAMAGES (INCLUDING, BUT NOT LIMITED TO, PROCUREMENT OF SUBSTITUTE GOODS OR SERVICES; LOSS OF USE, DATA, OR PROFITS; OR BUSINESS INTERRUPTION) HOWEVER CAUSED AND ON ANY THEORY OF LIABILITY, WHETHER IN CONTRACT, STRICT LIABILITY, OR TORT (INCLUDING NEGLIGENCE OR OTHERWISE) ARISING IN ANY WAY OUT OF THE USE OF THIS SOFTWARE, EVEN IF ADVISED OF THE POSSIBILITY OF SUCH DAMAGE.
Registering Printer Information to PIXMA/MAXIFY Cloud Link
Follow the steps described below to register the printer information to the cloud service server.
-
Check that the printer is connected to the Internet
-
From the printer home screen, select


Note
- If multiple users will be using the printer after the initial registration, select the login user name from the Switch user screen, enter the Security code, and proceed with the registration. If the Security code is incorrect, use your smartphone, tablet, or computer, and change the setting from the My account of the Canon Inkjet Cloud Printing Center.
- When the registration preparation completed screen appears, select OK
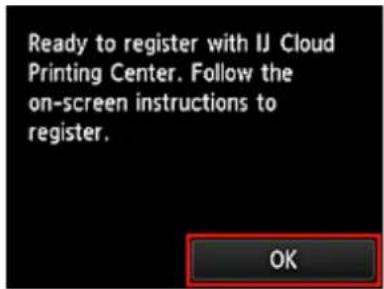
text_image
Ready to register with IJ Cloud Printing Center. Follow the on-screen instructions to register. OK- On the confirmation screen, select Next
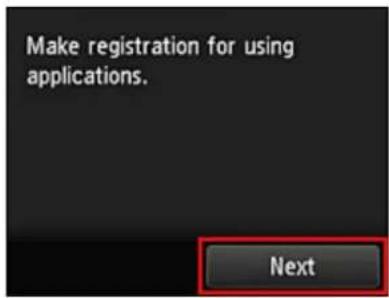
text_image
Make registration for using applications. Next- In the License agreement and Privacy statement windows, read the statements, and then select Agree if you agree
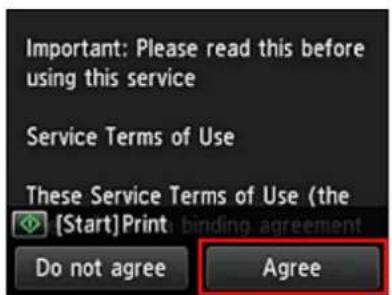
text_image
Important: Please read this before using this service Service Terms of Use These Service Terms of Use (the [Start]Print binding agreement Do not agree Agree
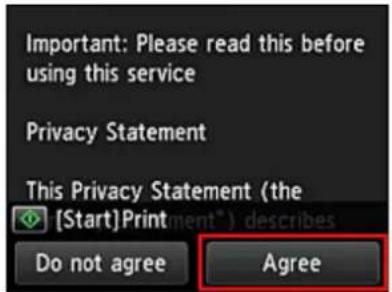
text_image
Important: Please read this before using this service Privacy Statement This Privacy Statement (the [Start]Printment*) describes Do not agree AgreeNote
- If you select Do not agree, a confirmation screen asking whether you want to cancel Register My account appears. If you select Yes, then Register My account is canceled, and you return to the Home screen.
Even if you select Do not agree, you can still use this service by selecting Agree from the registration screen later. - You can print the displayed information by pressing the Start button.
6. On the Current time check screen, select the time closest to the current time, and then select Next
You can set the time in 10-minute units.
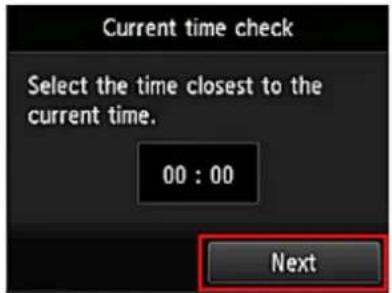
text_image
Current time check Select the time closest to the current time. 00 : 00 Next7. In the time zones list, select the region closest to you
For some regions, a screen for applying the daylight saving time setting may appear.
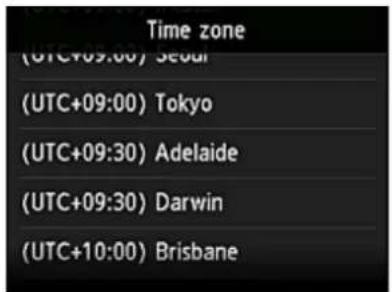
text_image
Time zone (UTC+09:00) Seoul (UTC+09:00) Tokyo (UTC+09:30) Adelaide (UTC+09:30) Darwin (UTC+10:00) BrisbaneThe registration of printer information is completed, and a list of apps is displayed.
See here for the description of the apps list screen.
After you complete the registration, you can print photos and documents that have been uploaded to apps on the linked cloud service and add/delete/sort apps.
→ Using PIXMA/MAXIFY Cloud Link
Application Management
This section explains how to add, delete, and sort apps.

Important
- Select how to manage allows you to change which users can use this service. For details, see "Canon Inkjet Cloud Printing Center window".
Add apps
You can add your favorite apps to the printer. Follow the steps described below to add apps.

-
From the printer home screen, select
-
On the cloud's Main screen, select Add/delete
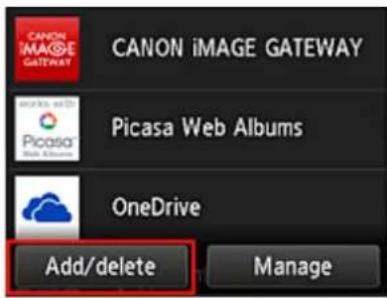
text_image
CANON iIMAGE GATEWAY Picasa Web Albums OneDrive Add/delete Manage- Select Register apps
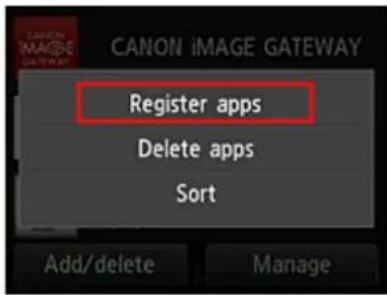
text_image
CANON iIMAGE GATEWAY Register apps Delete apps Sort Add/delete Manage- From the list, select the category of the app
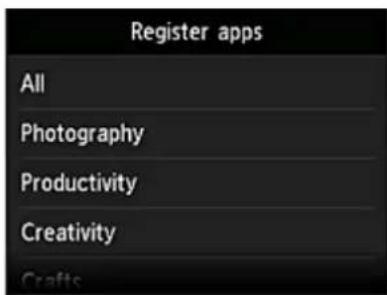
text_image
Register apps All Photography Productivity Creativity Crafts- From the displayed apps list, select the app that you want to register
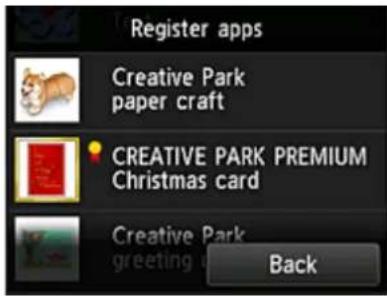
text_image
Register apps Creative Park paper craft CREATIVE PARK PREMIUM Christmas card Creative Park greeting BackNote
• Description of displayed icons

: Can be used with genuine Canon ink.
If you are using a G3000 series model, you cannot use this service because the model is not supported.
6. Select Register
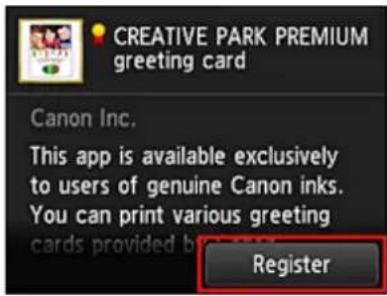
text_image
CREATIVE PARK PREMIUM greeting card Canon Inc. This app is available exclusively to users of genuine Canon inks. You can print various greeting cards provided by RegisterThe registration is completed and the app is added to the apps list.
To register another app, repeat the procedure from step 5.
To end the app registration, select Back and return to the cloud's Main screen.
Important
- Some apps may require a linked app account before you can use the app. If this is the case, set up an account beforehand.
Delete apps
You can delete unnecessary apps from the apps list.
Follow the steps described below to delete apps.

-
From the printer home screen, select
-
On the cloud's Main screen, select Add/delete
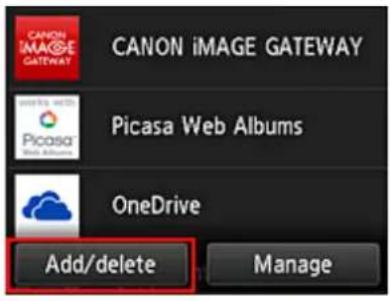
text_image
CANON iIMAGE GATEWAY Picasa Web Albums OneDrive Add/delete Manage3. Select Delete apps
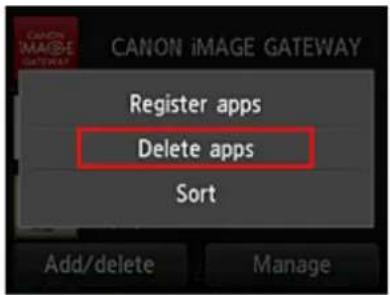
text_image
CANON iIMAGE GATEWAY Register apps Delete apps Sort Add/delete Manage4. From the apps list, select the app that you want to delete
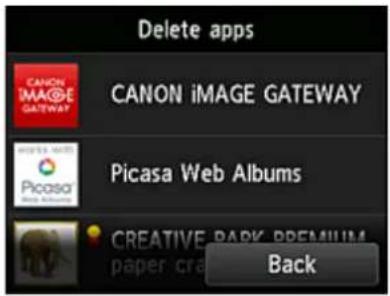
text_image
Delete apps CANON iIMAGE GATEWAY Picasa Web Albums CREATIVE PARK PREMIUM BackNote
• Description of displayed icons
: Cannot be used because it is not yet released or does not support your region, model, or language.
: Can be used with genuine Canon ink.
If you are using a G3000 series model, you cannot use this service because the model is not supported.
5. Select Delete
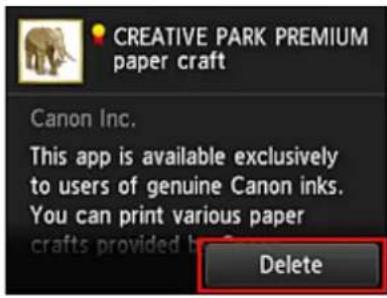
text_image
CREATIVE PARK PREMIUM paper craft Canon Inc. This app is available exclusively to users of genuine Canon inks. You can print various paper crafts provided by DeleteWhen the deletion is finished, the app will be deleted from the apps list on the main screen.
To delete another app, repeat the procedure from step 4.
To end the app deletion, select Back and return to the cloud's Main screen.

Note
- Config allows you to re-register deleted apps.
Sort apps
You can sort apps displayed on the apps list.
Follow the steps described below to sort apps.
Cld

-
From the printer home screen, select
-
On the cloud's Main screen, select Add/delete
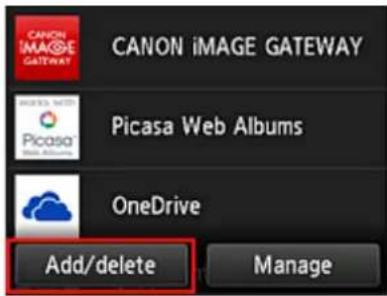
text_image
CANON iIMAGE GATEWAY Picasa Web Albums OneDrive Add/delete Manage- Select Sort
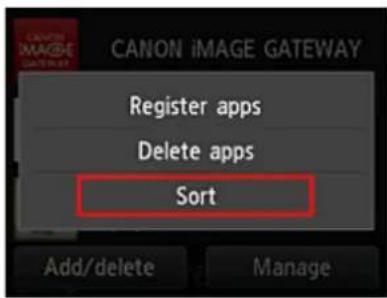
text_image
CANON iIMAGE GATEWAY Register apps Delete apps Sort Add/delete Manage- On the apps list, select the app that you want to sort
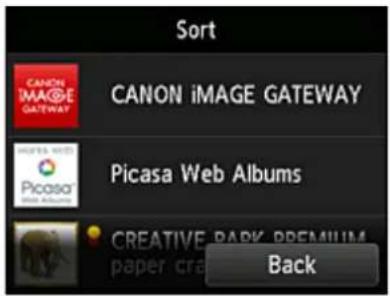
text_image
Sort CANON iIMAGE GATEWAY Picasa Web Albums CREATIVE PARK PREMIUM paper cra BackNote
• Description of displayed icons
: Cannot be used because it is not yet released or does not support your region, model, or language.
: Can be used with genuine Canon ink.
If you are using a G3000 series model, you cannot use this service because the model is not supported.
- Use ▲ buttons to move the app
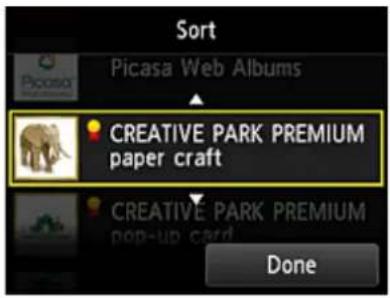
text_image
Sort Picasa Web Albums CREATIVE PARK PREMIUM paper craft CREATIVE PARK PREMIUM pop-up card Done- Select Done
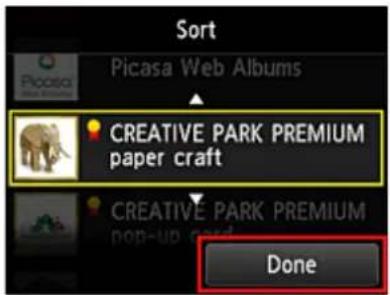
text_image
Sort Picasa Web Albums CREATIVE PARK PREMIUM paper craft CREATIVE PARK PREMIUM pop-up card DoneSorting is complete.
To continue the sorting, repeat the procedure from step 4.
To end the sorting, select Back and return to the cloud's Main screen.
Using PIXMA/MAXIFY Cloud Link
This section introduces the photo printing procedure by using CANON iIMAGE GATEWAY as an example.

Important
• The available functions differ depending on the app.
• The printing procedure differs depending on the app.
- You need to get the account and register photo and other data beforehand.
- The following file formats can be printed: jpg, jpeg, pdf, docx, doc, xlsx, xls, pptx, ppt, and rtf.
The file formats that can be printed differ depending on the app.
- Before you print, check that printer is on and is connected to the network. Then start.

Note
- You can use CANON iMAGE GATEWAY to print jpg and jpeg file formats.
- On the Main screen, select the app to be used
- Enter the information according to the instructions on the authentication screen, and then select Log in
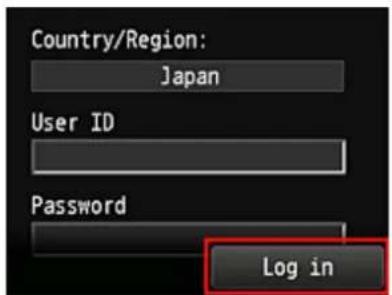
text_image
Country/Region: Japan User ID Password Log in
Important
- Some apps may not be fully displayed in the display area. If this is the case, scroll up, down, right, and left to change the display area.
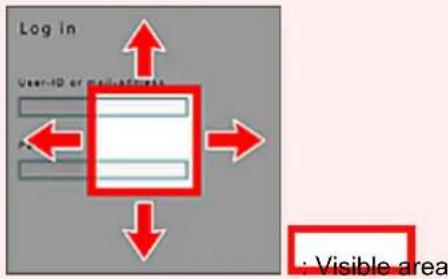
text_image
Log in User-ID or mail-requests : Visible area- The Login screen may vary between apps.
• After logging in, you may be asked from an external service to agree to use their app. Agree if you are using the app.
- The Login screen may vary between apps. - After logging in, you may be asked from an external service to agree to use their app. Agree if you are using the app.
- In the displayed album list, select the album of your choice
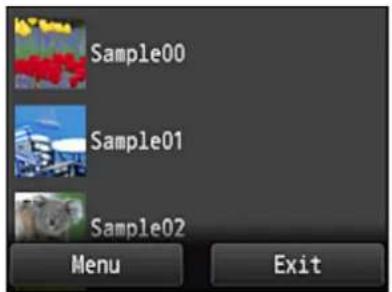
text_image
Sample00 Sample01 Sample02 Menu Exit- In the displayed image list, select the image that you want to print, and then select Next
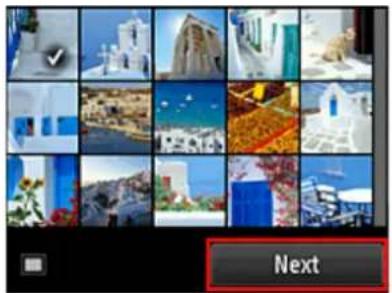
natural_image
Grid of 20 diverse natural and scenic photos including buildings, landscapes, and a sunset, with a 'Next' button highlighted in red (no readable text or symbols on the images themselves)- Make the necessary print settings, and then select Color
A message that indicates the completion of issuing print job appears, and printing starts.
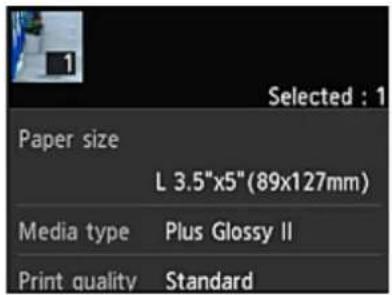
text_image
Selected : 1 Paper size L 3.5"x5"(89x127mm) Media type Plus Glossy II Print quality StandardTo continue printing, select Continue, and perform the operation from Step 3.
To end the printing, select Apps. The screen returns to the apps list screen.

text_image
The print data has been sent. Continue AppsImportant
- If a print job is not printed within 24 hours after the print job is issued, the print job will expire and cannot be printed.
- With premium apps that limit the number of print jobs, print jobs that cannot be printed due to expiration and other reasons are also included in the print count.
• To leave a usage history of this service, from the Home window on the operation panel, select

Setup -> Web service setup -> Web service connection setup -> IJ Cloud Printing Center setup -> History setting for this service -> Save.
Cloud Troubleshooting
Cloud Windows
This section describes the Main screen of Cloud and the services available on the Main screen.

Important
- Select how to manage allows you to change which users can use this service. For details, see "Canon Inkjet Cloud Printing Center window".

When you select Cloud from the printer home screen, the cloud's Main screen appears.
You can use the areas shown below to perform various functions, including adding, starting, and managing apps.
You can also print photos and documents by starting the appropriate app.
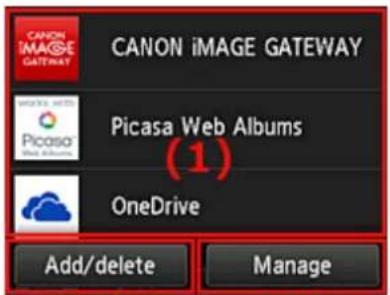
text_image
CANON iIMAGE GATEWAY Picasa Web Albums (1) OneDrive Add/delete Manage(2)
(3)
(1) Applications
(2) Add/delete button
(3) Manage button

Important
- Depending on the apps you plan to use, you may need to have an account beforehand. If this is the case, get an account for each of those apps.
• After selecting the app, some apps may not be fully displayed in the display area. If this is the case, scroll up, down, right, and left to change the display area.
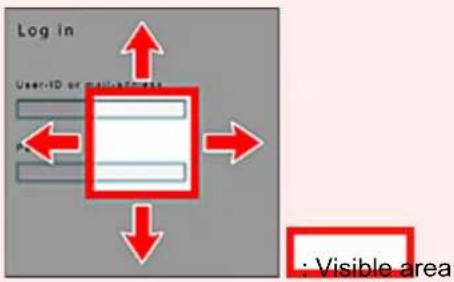
text_image
Log in User-ID or multi-accratic : Visible area- If an app is not yet released or does not support your model, language, or region, you will not be able to start that app.
(1) Applications
Immediately after the cloud's Main screen appears, a list of the registered apps appears.
To start an app, select the app that you want to use on the list.

Note
• Description of displayed icons
: Cannot be used because it is not yet released or does not support your region, model, or language.
: Can be used with genuine Canon ink.
If you are using a G3000 series model, you cannot use this service because the model is not supported.
(2) Add/delete button
Use this button to add, delete, and sort apps.
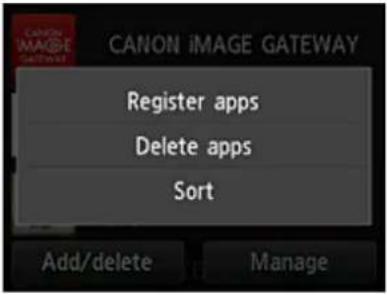
text_image
CANON iIMAGE GATEWAY Register apps Delete apps Sort Add/delete ManageRegister apps
Select this to add your favorite apps.
→ See here for details on how to add apps
Delete apps
Select this to delete registered apps.
→ See here for details on how to delete apps
Sort
Select this to sort the apps list.
→ See here for details on how to sort the apps list
(3) Manage button
Use this button to manage jobs, log out of an app, show the license agreement and privacy statement, and set the time zone.
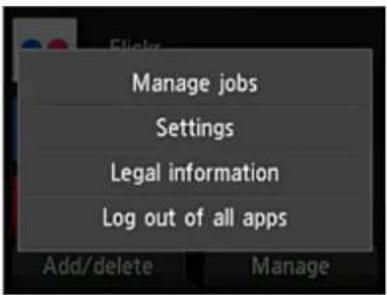
text_image
Manage jobs Settings Legal information Log out of all apps Add/delete ManageManage jobs
From the Status list window, you can check the status of a job.
Settings
Select this to set the Time zone.
Select your region on the list. For some regions, you can set whether or not to apply the daylight saving time setting.

Important
- If you cannot find your region on the list, select the one closest to your region.
Legal information
This shows the License agreement and Privacy statement.
Press the Start button to print the displayed information.
Log out of all apps
You can log out at the same time from all apps that you are logged into.

Note
- Some apps may keep you logged in even after the app ends. Therefore if you want to log in again with a different account, select Log out of all apps to log out first.
- Once you log out, you need to log in again. You may lose the settings with some apps.
Cloud Troubleshooting
If you cannot print
Check the following if you cannot print.
- Check that the printer is connected to the Internet.
- Check that the printer is connected to a LAN and the LAN environment is connected to the Internet.
- Check that no error message is displayed on the printer's LCD monitor.
- If printing does not start even after you wait awhile, go to the printer's home screen, and select Setup -> Web service inquiry.

If the problem is not resolved, use the printer driver from your computer to perform the print job and check whether the data can be printed normally on the printer.
If you still cannot print, see the troubleshooting page for your model on the Home of the Online Manual.
Note
- With a wireless LAN connection, after the printer is turned on, it may take several minutes before communication is possible. Check that your printer is connected to the wireless network, and wait a while before you start printing.
- If the printer is not turned on or is not connected to the Internet, and consequently a print job is not processed within 24 hours after it was submitted, the print job is automatically canceled. If this happens, check the printer power and the Internet connection, and then re-submit the print job.
Using PIXMA/MAXIFY Cloud Link from Your Smartphone, Tablet, or Computer
Before Using Canon Inkjet Cloud Printing Center
Registering User Information to Canon Inkjet Cloud Printing Center
Using Canon Inkjet Cloud Printing Center
▶ Adding a Printer
▶ Adding a PIXMA/MAXIFY Cloud Link User
Troubleshooting Canon Inkjet Cloud Printing Center
Before Using Canon Inkjet Cloud Printing Center
Canon Inkjet Cloud Printing Center is a service that links with the cloud function of the printer and allows you to perform operations such as registering and managing apps from your smartphone or tablet device, and checking the print status, print error, and ink status of the printer. You can also print app photos and documents from your smartphone or tablet.
First, check the following content:
- Precautions
If you plan to use the web service to print documents, be sure to check these precautions beforehand.
- Printer specification
Check that Canon Inkjet Cloud Printing Center supports the printer.
Some models do not support this function. To check whether your model supports this function, see "Models that Support Canon Inkjet Cloud Printing Center".
• Network environment
The printer must be connected to a LAN and to the Internet.

Important
- The user will bear the cost of Internet access.
- Operating requirements
For computers, smartphones, and tablet devices, see "Requirements for Canon Inkjet Cloud Printing Center operation".

Important
- This service may not be available in certain countries or regions. Also even if the service is available, there are apps that cannot be used in certain regions.
Registering User Information to Canon Inkjet Cloud Printing Center
Requirements for Canon Inkjet Cloud Printing Center operation
Computer
| CPU x86 or | x64 1.6 GHz or higher |
| RAM 2 GB | or higher |
| Monitor display | Resolution 1024 x 768 pixels or higherNumber of display colors 24 bits (true-color) or higher |
| OS Browser | |
| Windows Vista SP2 | Internet Explorer 9Mozilla FirefoxGoogle Chrome |
| Windows 7 | Internet Explorer 9, 10, 11Mozilla FirefoxGoogle Chrome |
| Windows 8 | Internet Explorer 10, 11Mozilla FirefoxGoogle Chrome |
| Windows 8.1 | Internet Explorer 11Mozilla FirefoxGoogle Chrome |
| Windows 10 | Internet Explorer 11Microsoft EdgeMozilla FirefoxGoogle Chrome |
| Mac OS X v10.6-OS X Yosemite v10.10 | Safari 5.1, 6, 7, 8 |
Smartphone or tablet
| OS Browser Resolution | ||
| iOS 7 or later | OS standard browser | 320 x 480 or higher |
| Android 4 or later | 480 x 800 or higher | |
The operation requirements may change without prior notice. If this happens, you may no longer be able to use this service from your computer, smartphone, or tablet.

Important
- On the browser you are using, enable JavaScript and cookies.
- If you use the zoom function or change the font size on your browser, the web pages may not display correctly.
- If you use the translation function of Google Chrome, the web pages may not display correctly.
- The service does not support the use of its provided services through a proxy server outside of your country.
- In an in-house network environment, the 5222 port must be released. For confirmation instructions, contact the network administrator.
Registering User Information to Canon Inkjet Cloud Printing Center
To use the Canon Inkjet Cloud Printing Center, you need to follow the steps described below and register My account information.
→ If your model has color LCD monitor
If your model has monochrome LCD monitor
If your model has no LCD monitor/If you are using PRO-1000 series or PRO-500 series
Registering User Information to Canon Inkjet Cloud Printing Center (Color LCD Monitor)
To use the Canon Inkjet Cloud Printing Center, you need to follow the steps described below and register My account information.
Registering from Printer
-
Check that the printer is connected to the Internet
-
From the printer home screen, select

If printer information has not been registered to the cloud service server, the Registration Preparation Completion Screen appears.
- From cloud main screen, select Use from Smartphone or Mobile Integration Guide
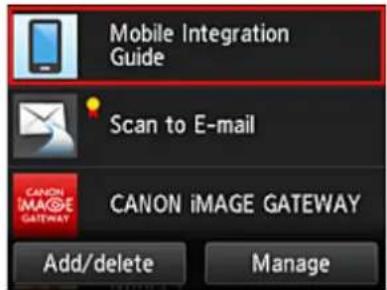
text_image
Mobile Integration Guide Scan to E-mail CANON iIMAGE GATEWAY Add/delete Manage-
Follow instructions appearing in screen, and select Next
-
In user registration screen, select Show QR Code
You can also access the URL manually from you smartphone, tablet, or computer.
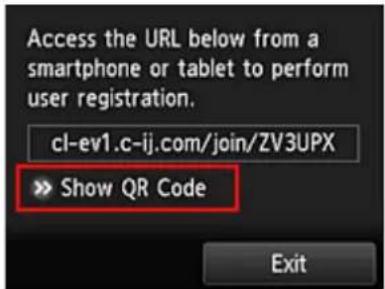
text_image
Access the URL below from a smartphone or tablet to perform user registration. cl-ev1.c-ij.com/join/ZV3UPX Show QR Code Exit- Read displayed QR code by using your smartphone or tablet
text_image
Copyright ExitTo return to the cloud main screen, select Exit.
Note
- You must have a special app to read QR codes from your smartphone or tablet. If you do not have an app that reads QR codes on your smartphone or tablet, install one from App Store or Google Play.
7. In Preparation for registration screen, select Send blank e-mail
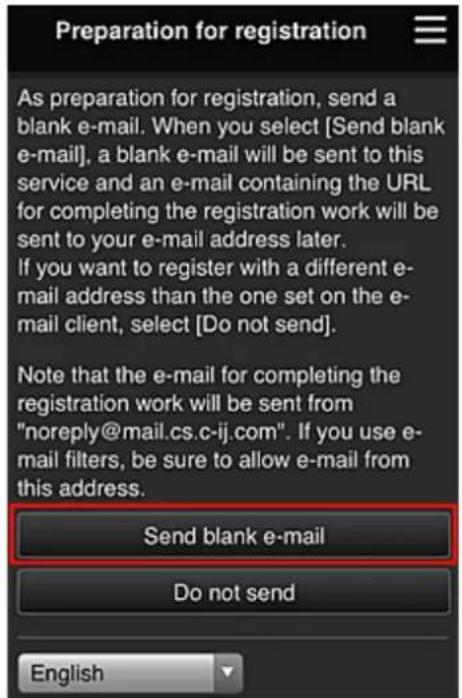
text_image
Preparation for registration As preparation for registration, send a blank e-mail. When you select [Send blank e-mail], a blank e-mail will be sent to this service and an e-mail containing the URL for completing the registration work will be sent to your e-mail address later. If you want to register with a different e-mail address than the one set on the e-mail client, select [Do not send]. Note that the e-mail for completing the registration work will be sent from "noreply@mail.cs.c-ij.com". If you use e-mail filters, be sure to allow e-mail from this address. Send blank e-mail Do not send EnglishNote
- When you select Send blank e-mail, the "destination entry completed" mailer starts up automatically. After the blank e-mail is created, send that e-mail without making any changes.
If you want to register a different e-mail address, select Do not send to display the E-mail address entry screen.
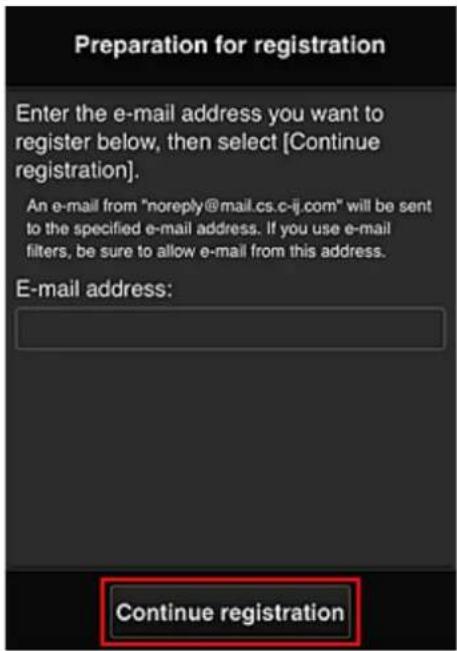
text_image
Preparation for registration Enter the e-mail address you want to register below, then select [Continue registration]. An e-mail from "noreply@mail.cs.c-ij.com" will be sent to the specified e-mail address. If you use e-mail filters, be sure to allow e-mail from this address. E-mail address: Continue registrationIn the displayed screen, enter the E-mail address that you want to register, and then select Continue registration.
Note
- If you enter an e-mail address that has already been registered, you will receive an "already registered" e-mail. Follow the instructions in the e-mail, and register a different e-mail address.
Important
- There are character restrictions for the e-mail address, as shown below.
- Up to 255 characters consisting of single-byte alphanumeric characters and symbols (!\$*/^_{}|-.-@). (Uppercase and lowercase letters are differentiated.)
- Multibyte characters cannot be used.
You will get an error if the e-mail address you enter contains a character that cannot be used.
- If you registered a different e-mail address by mistake, you can cancel the registration by going to the printer's Home screen and selecting Setup -> Web service setup -> Web service connection setup -> IJ Cloud Printing Center setup -> Delete from this service.
- You may not be able to receive the notification if you are using a spam filter. If you have a setting to receive only the e-mails from certain domains, be sure to change the setting to allow receiving e-mails from "noreply@mail.cs.c-ij.com".
There will be no error display even if you could not receive the e-mail because of the spam filter setting or if you entered an incorrect e-mail address.
- Check that you received blank e-mail, and then select Yes
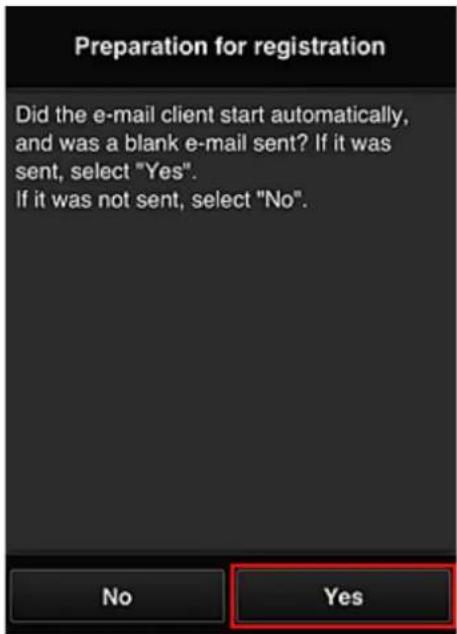
text_image
Preparation for registration Did the e-mail client start automatically, and was a blank e-mail sent? If it was sent, select "Yes". If it was not sent, select "No". No Yes- Follow instructions in screen display, and select OK
The registration page URL will be sent to the registered e-mail address.
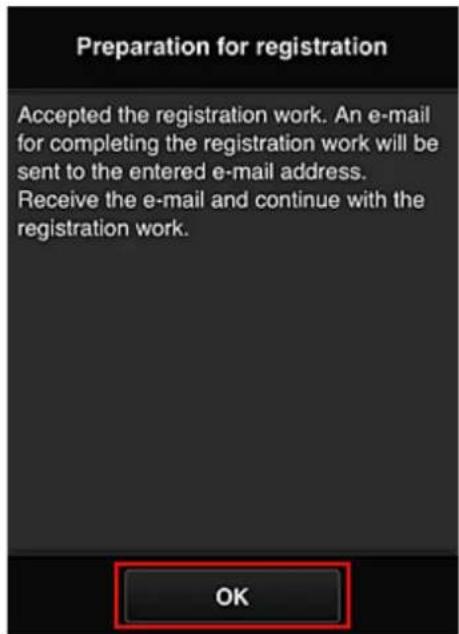
text_image
Preparation for registration Accepted the registration work. An e-mail for completing the registration work will be sent to the entered e-mail address. Receive the e-mail and continue with the registration work.Access the URL in the e-mail, Register the Information, and Complete the User Registration
- Check that e-mail containing URL has been sent to registered e-mail address, and access URL
- In the License agreement and Privacy statement windows of Canon Inkjet Cloud Printing Center, read the statements, and select Agree if you agree
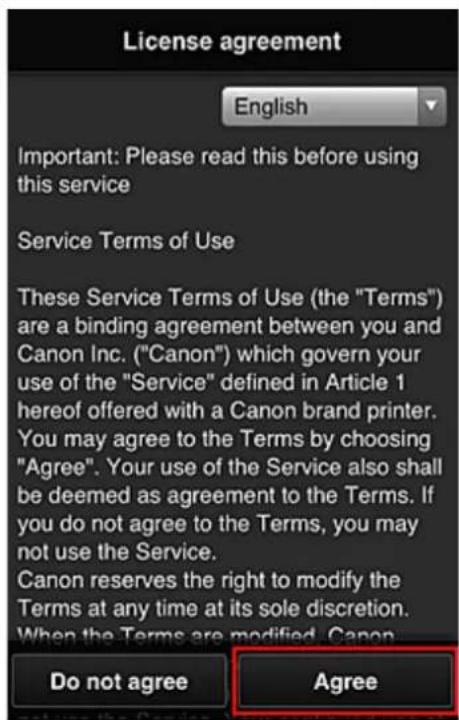
text_image
License agreement English Important: Please read this before using this service Service Terms of Use These Service Terms of Use (the "Terms") are a binding agreement between you and Canon Inc. ("Canon") which govern your use of the "Service" defined in Article 1 hereof offered with a Canon brand printer. You may agree to the Terms by choosing "Agree". Your use of the Service also shall be deemed as agreement to the Terms. If you do not agree to the Terms, you may not use the Service. Canon reserves the right to modify the Terms at any time at its sole discretion. When the Terms are modified, Canon Do not agree Agree
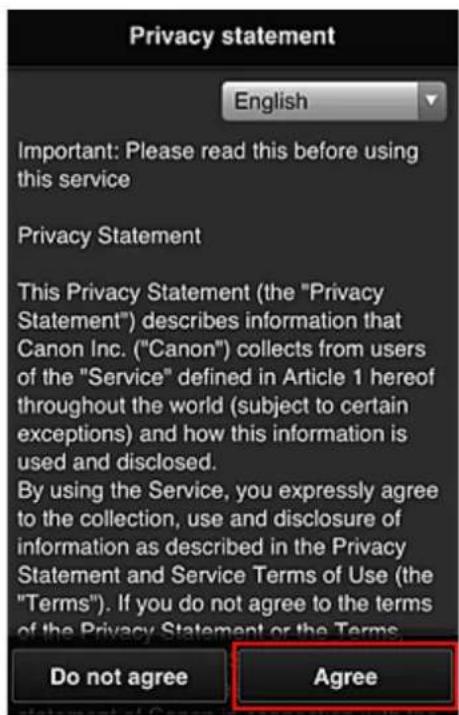
text_image
Privacy statement English Important: Please read this before using this service Privacy Statement This Privacy Statement (the "Privacy Statement") describes information that Canon Inc. ("Canon") collects from users of the "Service" defined in Article 1 hereof throughout the world (subject to certain exceptions) and how this information is used and disclosed. By using the Service, you expressly agree to the collection, use and disclosure of information as described in the Privacy Statement and Service Terms of Use (the "Terms"). If you do not agree to the terms of the Privacy Statement or the Terms. Do not agree Agree- Register password for logging in to Canon Inkjet Cloud Printing Center
In the My account registration screen, enter the password you want to register into Password and Password (Confirmation), and then select Next.
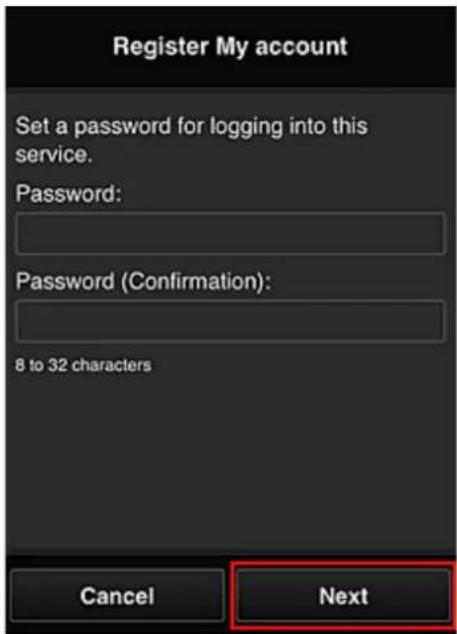
text_image
Register My account Set a password for logging into this service. Password: Password (Confirmation): 8 to 32 characters Cancel NextImportant
- There are character restrictions for the Password, as shown below.
- The password must be between 8 and 32 characters long, using single-byte alphanumeric characters and symbols (!"#\$%&')*+,-./:;<=>?@[¥]^_'{}\~). (Alphabets are case-sensitive)
4. Enter Nickname
Enter any user name you want to use.
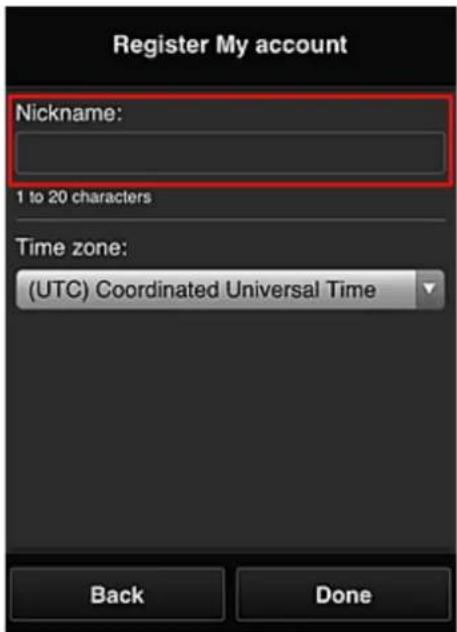
text_image
Register My account Nickname: 1 to 20 characters Time zone: (UTC) Coordinated Universal Time Back DoneImportant
- The user name entry field has the following character restrictions:
- The user name must be between 1 and 20 characters long, using single-byte alphanumeric characters and symbols (!"#\$%&')*+, -./;<=>?@[¥]^_ {|}\~). (Alphabets are case-sensitive)
5. Specify the Time zone setting, and select Done
Select your region on the list. If you cannot find your region on the list, select the one closest to your region.
Apply daylight saving time
This appears only when there is a daylight saving time in the Time zone that you selected. Select whether or not to apply the daylight saving time.
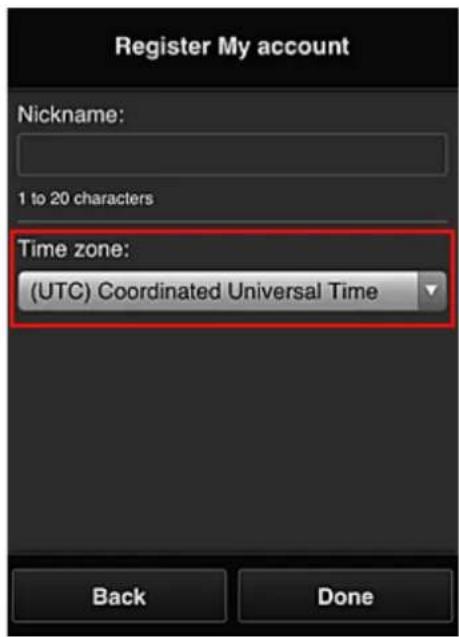
text_image
Register My account Nickname: 1 to 20 characters Time zone: (UTC) Coordinated Universal Time Back DoneThe registration is complete. A registration completion message is displayed. When you select the OK button in the message, the login screen is displayed.
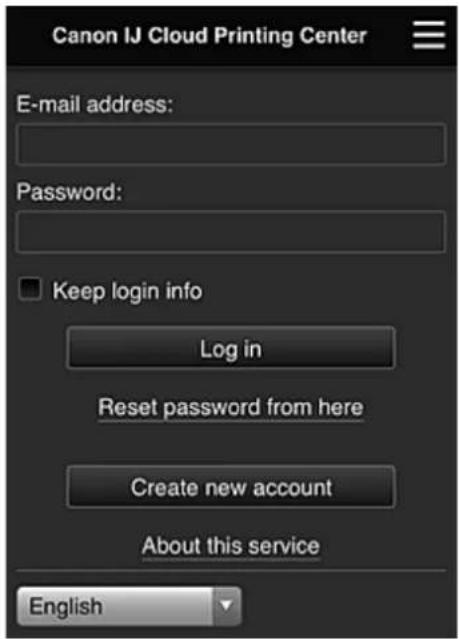
text_image
Canon IJ Cloud Printing Center E-mail address: Password: Keep login info Log in Reset password from here Create new account About this service EnglishEnter the registered E-mail address and Password, and Log in to the Canon Inkjet Cloud Printing Center.
→ Using Canon Inkjet Cloud Printing Center
Registering User Information to Canon Inkjet Cloud Printing Center (Monochrome LCD Monitor)
To use the Canon Inkjet Cloud Printing Center, you need to follow the steps described below and register My account information.
Print registration information from the printer

- On the printer operation panel, select the
Setup button, and then select Web
service setup -> Connection setup -> IJCloudPrintingCtr -> Register w/ service
- In the registration confirmation window, Select Yes
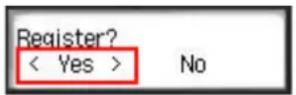
- In the print settings, select the display language
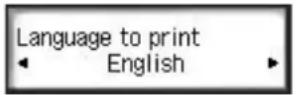
- Follow the instructions displayed in the window, and print the URL of the authentication site and the Printer registration ID
Set A4 size or Letter size or Legal size plain paper and select OK.
The authentication URL and Printer registration ID are printed.
Important
- The operation to complete the registration should be done within 60 minutes.
Access the URL on the printed page, and then enter the e-mail address and other necessary information
Important
- Do not use the Back button of the web browser while an operation is processing. The screen may not transition properly.
Note
- If you enter an e-mail address that has already been registered, you will receive an "already registered" e-mail. Follow the instructions in the e-mail, and register a different e-mail address.
- Use the web browser on your PC, smartphone, tablet, or other devices to access the authentication URL
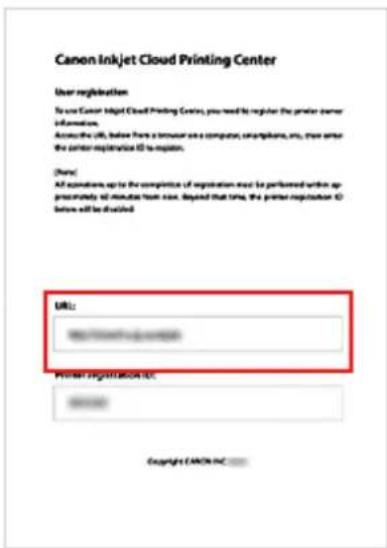
text_image
Canon Inkjet Cloud Printing Center User registration To use Canon Inkjet Cloud Printing Centers, you need to register the printer owner information. Access the URL, before there is a browser on a computer, telephone, etc., then enter the printer registration ID to register. [None] All applications up to the completion of registration must be performed within approximately 60 minutes from next. Beyond that time, the printer registration ID before will be deleted.- When the printer registration screen is displayed, select Create new account
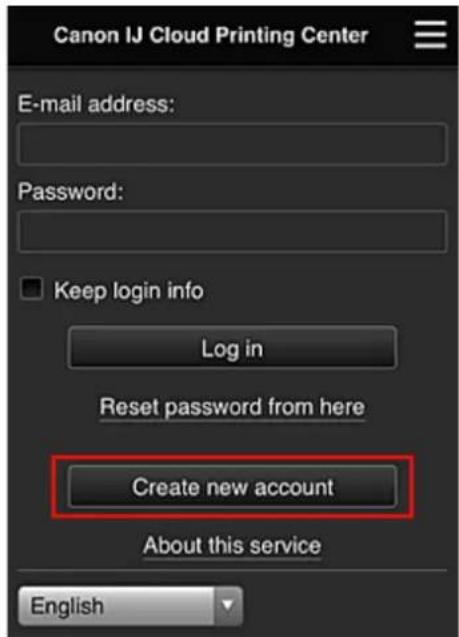
text_image
Canon IJ Cloud Printing Center E-mail address: Password: Keep login info Log in Reset password from here Create new account About this service English- Enter the E-mail address and Printer registration ID of the printer's owner, and then select OK
The registration page URL is sent to the e-mail address entered.
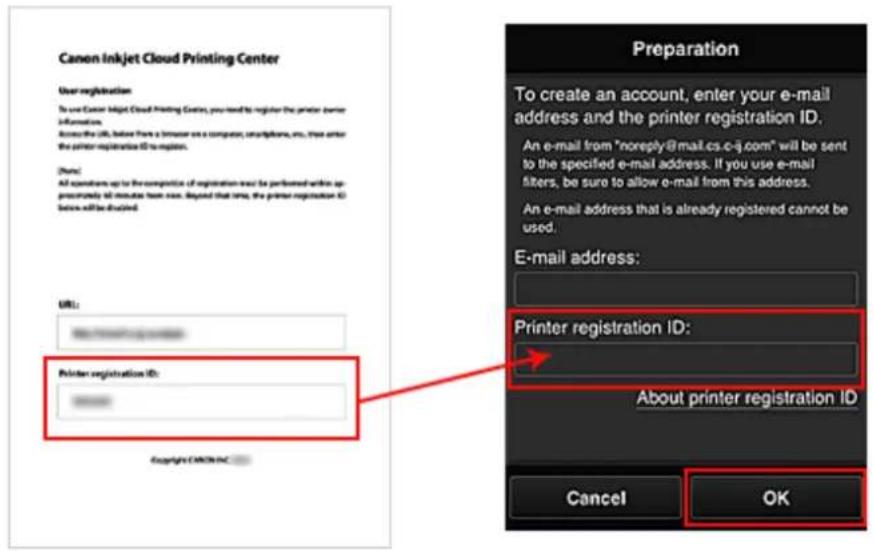
text_image
Canon Inkjet Cloud Printing Center User registration To use Canon Inkjet Cloud Printing Center, you need to register the printer course information. Access the URL below from a browser as a computer, smartphones, etc., then enter the printer registration ID to register. [Note] All operators up to the competition of registration must be performed within approximately 50 minutes from time. Beyond that time, the printer registration ID before will be deleted. URL: Printer registration ID: Preparation To create an account, enter your e-mail address and the printer registration ID. An e-mail from "noreply@mail.cs.c-j.com" will be sent to the specified e-mail address. If you use e-mail filters, be sure to allow e-mail from this address. An e-mail address that is already registered cannot be used. E-mail address: Printer registration ID: About printer registration ID Cancel OKImportant
- There are character restrictions for the e-mail address, as shown below.
- Up to 255 characters consisting of single-byte alphanumeric characters and symbols (!\$*/^_{}|\~.-@). (Uppercase and lowercase letters are differentiated.)
- Multibyte characters cannot be used.
You will get an error if the e-mail address you enter contains a character that cannot be used.
- If you registered a different e-mail address by mistake, you can cancel the registration by selecting the Setup button on the printer operation panel, and then selecting Web service setup -> Connection setup -> IJCloudPrintingCtr -> Delete from service.
- You may not be able to receive the notification if you are using a spam filter. If you have a setting to receive only the e-mails from certain domains, be sure to change the setting to allow receiving e-mails from "noreply@mail.cs.c-ij.com".
There will be no error display even if you could not receive the e-mail because of the spam filter setting or if you entered an incorrect e-mail address.
Access the URL in the e-mail, Register the Information, and Complete the User Registration
- Check that e-mail containing URL has been sent to entered e-mail address, and access URL
- In the License agreement and Privacy statement windows of Canon Inkjet Cloud Printing Center, read the statements, and select Agree if you agree
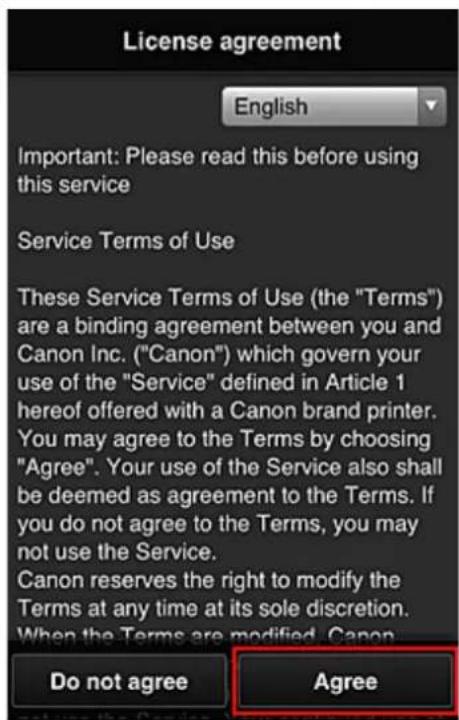
text_image
License agreement English Important: Please read this before using this service Service Terms of Use These Service Terms of Use (the "Terms") are a binding agreement between you and Canon Inc. ("Canon") which govern your use of the "Service" defined in Article 1 hereof offered with a Canon brand printer. You may agree to the Terms by choosing "Agree". Your use of the Service also shall be deemed as agreement to the Terms. If you do not agree to the Terms, you may not use the Service. Canon reserves the right to modify the Terms at any time at its sole discretion. When the Terms are modified, Canon Do not agree Agree
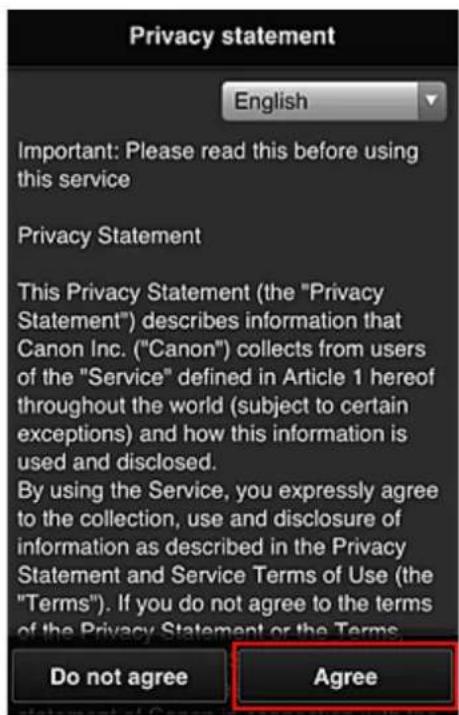
text_image
Privacy statement English Important: Please read this before using this service Privacy Statement This Privacy Statement (the "Privacy Statement") describes information that Canon Inc. ("Canon") collects from users of the "Service" defined in Article 1 hereof throughout the world (subject to certain exceptions) and how this information is used and disclosed. By using the Service, you expressly agree to the collection, use and disclosure of information as described in the Privacy Statement and Service Terms of Use (the "Terms"). If you do not agree to the terms of the Privacy Statement or the Terms. Do not agree Agree- Register password for logging in to Canon Inkjet Cloud Printing Center
In the My account registration screen, enter the password you want to register into Password and Password (Confirmation), and then select Next.
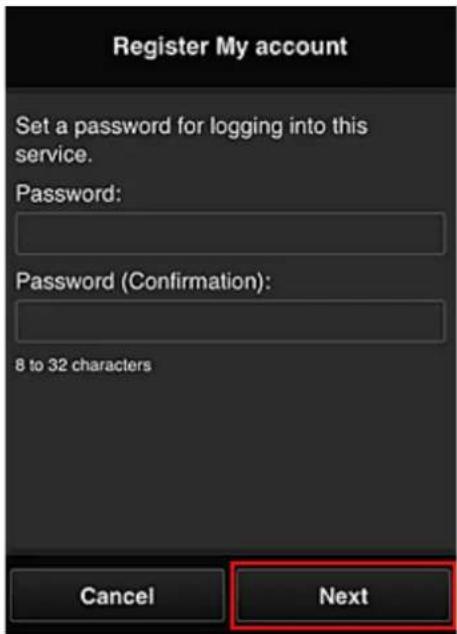
text_image
Register My account Set a password for logging into this service. Password: Password (Confirmation): 8 to 32 characters Cancel NextImportant
- There are character restrictions for the Password, as shown below.
- The password must be between 8 and 32 characters long, using single-byte alphanumeric characters and symbols (!"#\$%&')*+,-./:;<=>?@[¥]^_'{}\~). (Alphabets are case-sensitive)
4. Enter Nickname
Enter any user name you want to use.
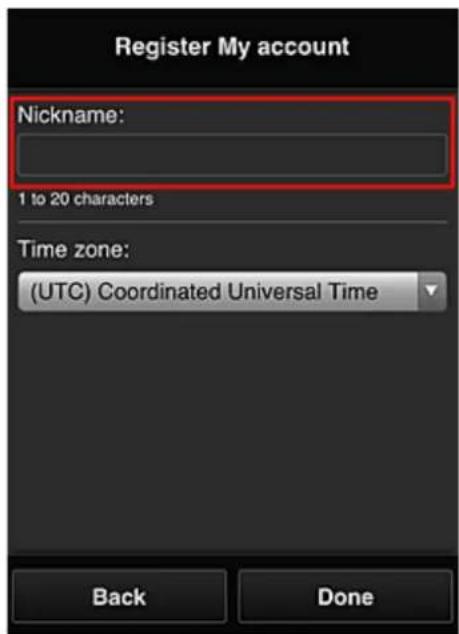
text_image
Register My account Nickname: 1 to 20 characters Time zone: (UTC) Coordinated Universal Time Back DoneImportant
- The user name entry field has the following character restrictions:
- The user name must be between 1 and 20 characters long, using single-byte alphanumeric characters and symbols (!"#\$%&')*+, -./;<=>?@[¥]^_ {|}\~). (Alphabets are case-sensitive)
5. Specify the Time zone setting, and select Done
Select your region on the list. If you cannot find your region on the list, select the one closest to your region.
Apply daylight saving time
This appears only when there is a daylight saving time in the Time zone that you selected. Select whether or not to apply the daylight saving time.
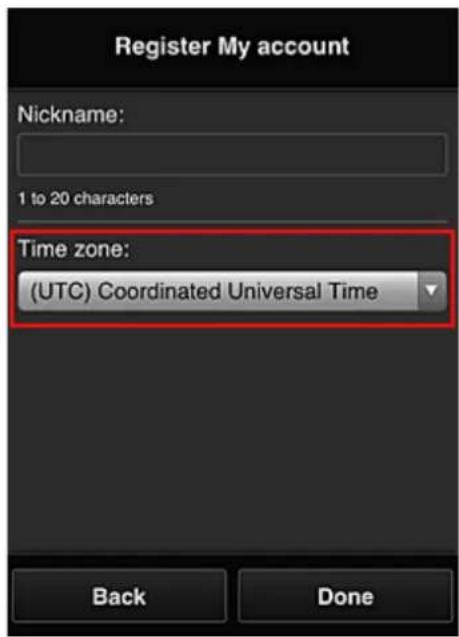
text_image
Register My account Nickname: 1 to 20 characters Time zone: (UTC) Coordinated Universal Time Back DoneThe registration is complete. A registration completion message is displayed. When you select the OK button in the message, the login screen is displayed.
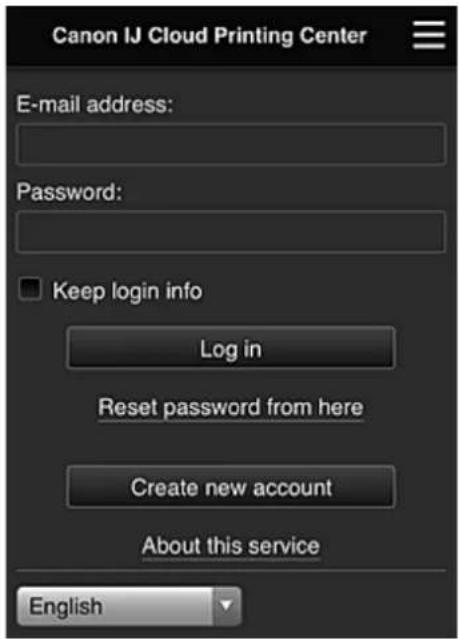
text_image
Canon IJ Cloud Printing Center E-mail address: Password: Keep login info Log in Reset password from here Create new account About this service EnglishEnter the registered E-mail address and Password, and Log in to the Canon Inkjet Cloud Printing Center.
→ Using Canon Inkjet Cloud Printing Center
Printing Your Printer Registration ID

Important
- Some models do not support this function.
To add a printer by using Canon Inkjet Cloud Printing Center, you will need a Printer registration ID.
From the operation panel of this printer, print the URL of the authentication site and your Printer registration ID. The procedure is as follows:
- Check that the printer is connected to the Internet

Important
• To use this function, you must connect this printer to the Internet.
If your model has color LCD monitor
- From the home window, select


service setup -> Web service connection setup -> IJ Cloud Printing Center setup -> Register with this service
- In the registration confirmation window, Select Yes
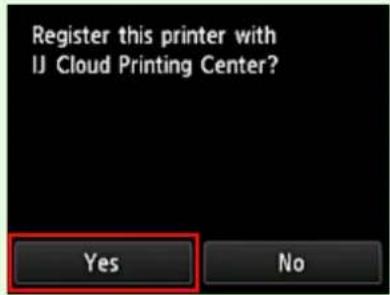
text_image
Register this printer with IJ Cloud Printing Center? Yes No- In the print settings, select the display language
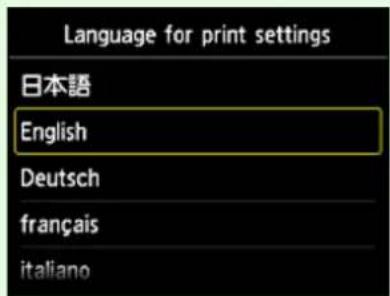
text_image
Language for print settings 日本語 English Deutsch français italianoIf your model has monochrome LCD monitor

-
On the printer operation panel, select the Setup button, and then select Web service setup -> Connection setup -> IJCloudPrintingCtr -> Register w/ service
-
In the registration confirmation window, Select Yes
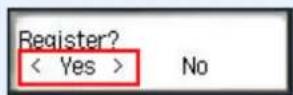
- In the print settings, select the display language
- Follow the instructions displayed in the window, and print the URL of the authentication site and your Printer registration ID
When you set A4 size or Letter size or Legal size plain paper and select OK, the authentication site URL and your Printer registration ID are printed.
Important
- The operation to complete the registration should be done within 60 minutes.
Registering User Information to Canon Inkjet Cloud Printing Center (No LCD Monitor/Using PRO-1000 series or PRO-500 series)
To use the Canon Inkjet Cloud Printing Center, you need to follow the steps described below and register My account information.
Registering from Your Smartphone, Tablet, or Computer
- Check that the printer is connected to the Internet
Important
- To use this function, you must connect this printer to the Internet.
- Displaying Printer Information
For details, go to the Online Manual home page, and see "Checking Printer Information" for your model. - Select IJ Cloud Printing Center setup -> Register with this service
- Follow the instructions displayed in the window, and run the authentication
- When the Preparation for registration screen appears, select Send blank e-mail
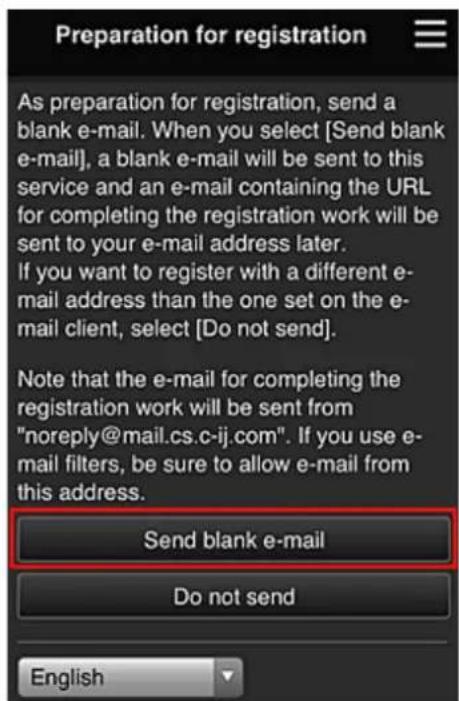
text_image
Preparation for registration As preparation for registration, send a blank e-mail. When you select [Send blank e-mail], a blank e-mail will be sent to this service and an e-mail containing the URL for completing the registration work will be sent to your e-mail address later. If you want to register with a different e-mail address than the one set on the e-mail client, select [Do not send]. Note that the e-mail for completing the registration work will be sent from "noreply@mail.cs.c-ij.com". If you use e-mail filters, be sure to allow e-mail from this address. Send blank e-mail Do not send EnglishNote
- When you select Send blank e-mail, the "destination entry completed" mailer starts up automatically.
After the blank e-mail is created, send that e-mail without making any changes.
If you want to register a different e-mail address, select Do not send to display the E-mail address entry screen.
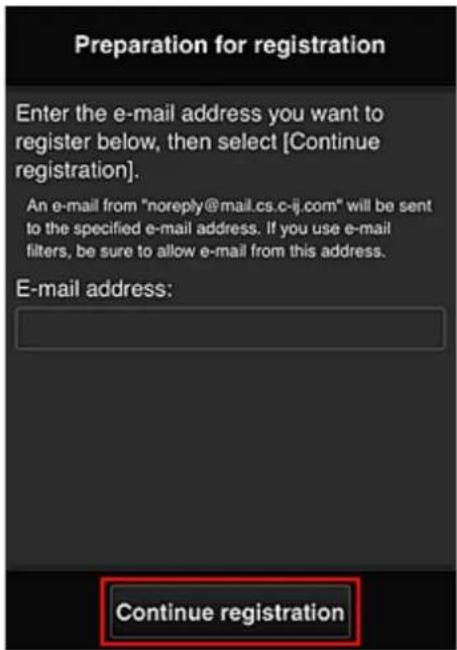
text_image
Preparation for registration Enter the e-mail address you want to register below, then select [Continue registration]. An e-mail from "noreply@mail.cs.c-ij.com" will be sent to the specified e-mail address. If you use e-mail filters, be sure to allow e-mail from this address. E-mail address: Continue registrationIn the displayed screen, enter the E-mail address that you want to register, and then select Continue registration.
Note
- If you enter an e-mail address that has already been registered, you will receive an "already registered" e-mail. Follow the instructions in the e-mail, and register a different e-mail address.
Important
- There are character restrictions for the e-mail address, as shown below.
- Up to 255 characters consisting of single-byte alphanumeric characters and symbols (!\$*/^_{}|\~.-@). (Uppercase and lowercase letters are differentiated.)
- Multibyte characters cannot be used.
You will get an error if the e-mail address you enter contains a character that cannot be used.
- If you registered a different e-mail address by mistake, you can cancel the registration by Displaying Printer Information and selecting IJ Cloud Printing Center setup -> Delete from this service.
To display printer information, go to the Online Manual home page, and see "Checking Printer Information" for your model.
- You may not be able to receive the notification if you are using a spam filter. If you have a setting to receive only the e-mails from certain domains, be sure to change the setting to allow receiving e-mails from "noreply@mail.cs.c-ij.com".
There will be no error display even if you could not receive the e-mail because of the spam filter setting or if you entered an incorrect e-mail address.
- Check that you received blank e-mail, and then select Yes
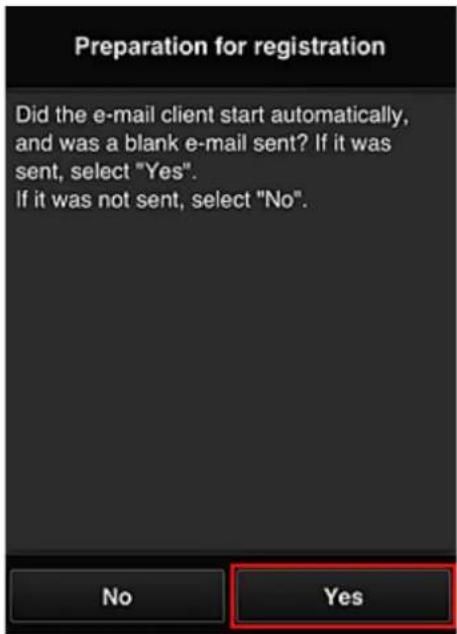
text_image
Preparation for registration Did the e-mail client start automatically, and was a blank e-mail sent? If it was sent, select "Yes". If it was not sent, select "No". No Yes- Follow instructions in screen display, and select OK
The registration page URL will be sent to the registered e-mail address.
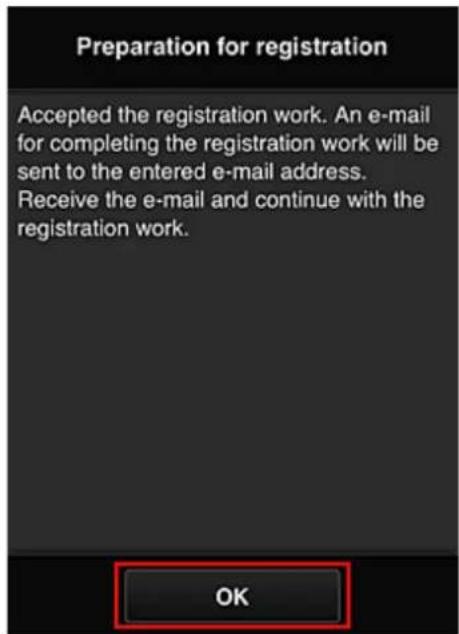
text_image
Preparation for registration Accepted the registration work. An e-mail for completing the registration work will be sent to the entered e-mail address. Receive the e-mail and continue with the registration work.Access the URL in the e-mail, Register the Information, and Complete the User Registration
- Check that e-mail containing URL has been sent to registered e-mail address, and access URL
- In the License agreement and Privacy statement windows of Canon Inkjet Cloud Printing Center, read the statements, and select Agree if you agree
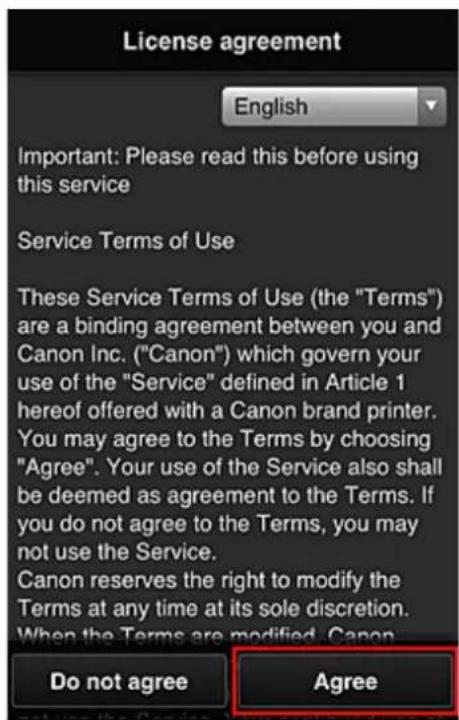
text_image
License agreement English Important: Please read this before using this service Service Terms of Use These Service Terms of Use (the "Terms") are a binding agreement between you and Canon Inc. ("Canon") which govern your use of the "Service" defined in Article 1 hereof offered with a Canon brand printer. You may agree to the Terms by choosing "Agree". Your use of the Service also shall be deemed as agreement to the Terms. If you do not agree to the Terms, you may not use the Service. Canon reserves the right to modify the Terms at any time at its sole discretion. When the Terms are modified, Canon Do not agree Agree
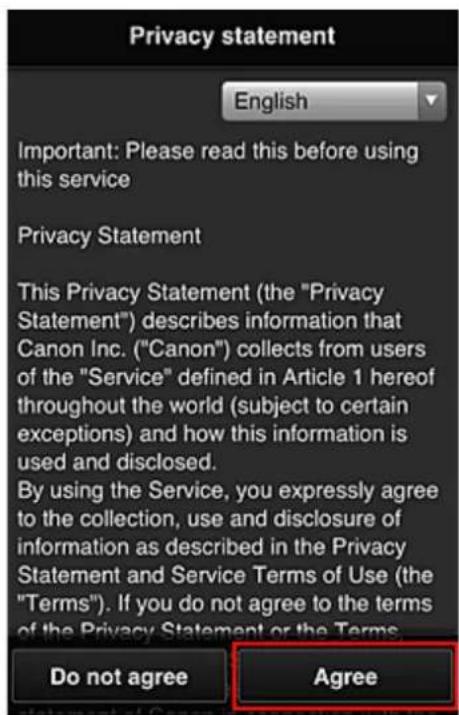
text_image
Privacy statement English Important: Please read this before using this service Privacy Statement This Privacy Statement (the "Privacy Statement") describes information that Canon Inc. ("Canon") collects from users of the "Service" defined in Article 1 hereof throughout the world (subject to certain exceptions) and how this information is used and disclosed. By using the Service, you expressly agree to the collection, use and disclosure of information as described in the Privacy Statement and Service Terms of Use (the "Terms"). If you do not agree to the terms of the Privacy Statement or the Terms. Do not agree Agree- Register password for logging in to Canon Inkjet Cloud Printing Center
In the My account registration screen, enter the password you want to register into Password and Password (Confirmation), and then select Next.
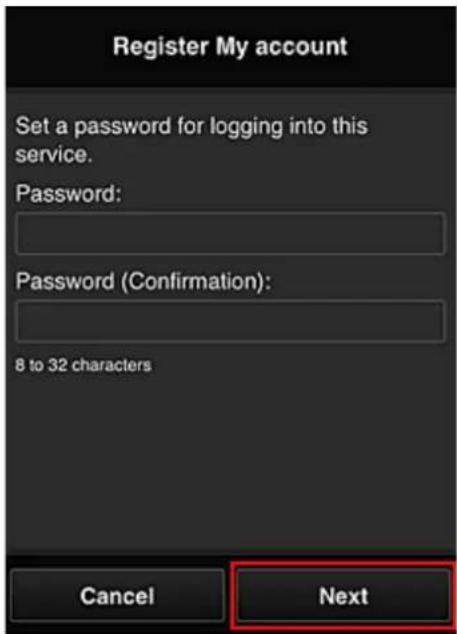
text_image
Register My account Set a password for logging into this service. Password: Password (Confirmation): 8 to 32 characters Cancel NextImportant
- There are character restrictions for the Password, as shown below.
- The password must be between 8 and 32 characters long, using single-byte alphanumeric characters and symbols (!"#\$%&')*+,-./:;<=>?@[¥]^_'{}\~). (Alphabets are case-sensitive)
4. Enter Nickname
Enter any user name you want to use.
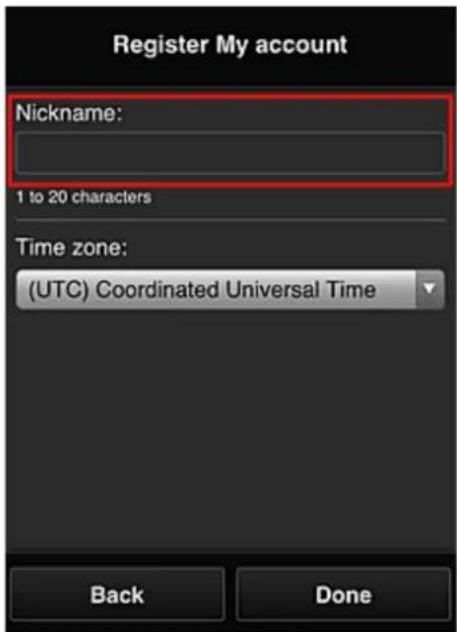
text_image
Register My account Nickname: 1 to 20 characters Time zone: (UTC) Coordinated Universal Time Back DoneImportant
- The user name entry field has the following character restrictions:
- The user name must be between 1 and 20 characters long, using single-byte alphanumeric characters and symbols (!"#\$%&')*+, -./;<=>?@[¥]^_ {|}\~). (Alphabets are case-sensitive)
5. Specify the Time zone setting, and select Done
Select your region on the list. If you cannot find your region on the list, select the one closest to your region.
Apply daylight saving time
This appears only when there is a daylight saving time in the Time zone that you selected. Select whether or not to apply the daylight saving time.
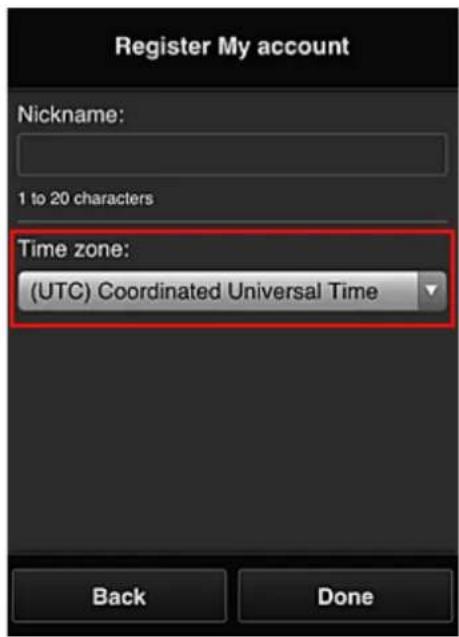
text_image
Register My account Nickname: 1 to 20 characters Time zone: (UTC) Coordinated Universal Time Back DoneThe registration is complete. A registration completion message is displayed. When you select the OK button in the message, the login screen is displayed.
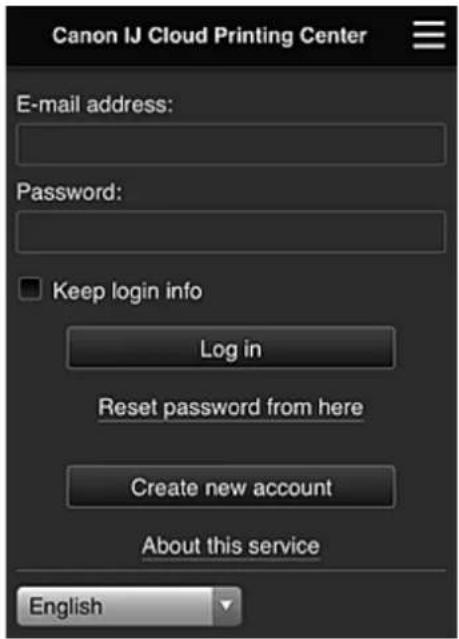
text_image
Canon IJ Cloud Printing Center E-mail address: Password: Keep login info Log in Reset password from here Create new account About this service EnglishEnter the registered E-mail address and Password, and Log in to the Canon Inkjet Cloud Printing Center.
→ Using Canon Inkjet Cloud Printing Center
Using Canon Inkjet Cloud Printing Center
When the user registration is completed, you can log in to the Canon Inkjet Cloud Printing Center and use the service.
- From your PC, smartphone, or tablet, access the service login URL (http://cs.c-ij.com/)
- On the Login screen, enter the E-mail address and Password, and then select Log in
Important
- The e-mail address and password are case-sensitive. Make sure the case is correct.
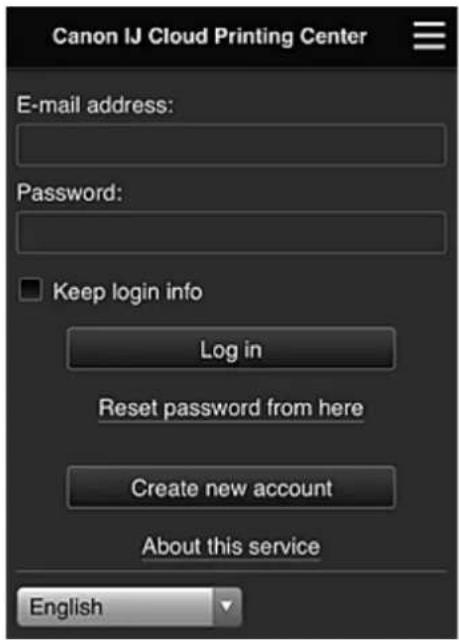
text_image
Canon IJ Cloud Printing Center E-mail address: Password: Keep login info Log in Reset password from here Create new account About this service EnglishE-mail address
Enter the e-mail address that you entered in the user registration.
Password
Enter the password that you entered in the user registration.
Keep login info
When you select the check box, the login screen is skipped for 14 days since the last day that the service screen was accessed.
Important
- If you fail to log in five straight times, you will not be able to login again for about the next 60 minutes.
- You remain logged in for 60 minutes after the last access.
- The service may not function properly if you log in by using the same e-mail address from multiple devices at the same time.
After logging in, you can use useful services such as adding/managing apps that work in conjunction with this product's cloud functionality and checking the ink status.
For screen descriptions and operation instructions, see "Canon Inkjet Cloud Printing Center window".
Printing procedure
This section introduces the photo printing procedure by using CANON iIMAGE GATEWAY as an example.

Important
- The available functions differ depending on the app.
• The printing procedure differs depending on the app. - You need to get the account and register photo and other data beforehand.
- The following file formats can be printed: jpg, jpeg, pdf, docx, doc, xlsx, xls, pptx, ppt, and rtf. The file formats that can be printed differ depending on the app.
- Before you print, check that printer is on and is connected to the network. Then start.
• This is available if you are using a smartphone or tablet.

Note
- You can use CANON iIMAGE GATEWAY to print jpg and jpeg file formats.
- On the Main screen, select the app to be used
- Enter the information according to the instructions on the authentication screen, and then select Log in
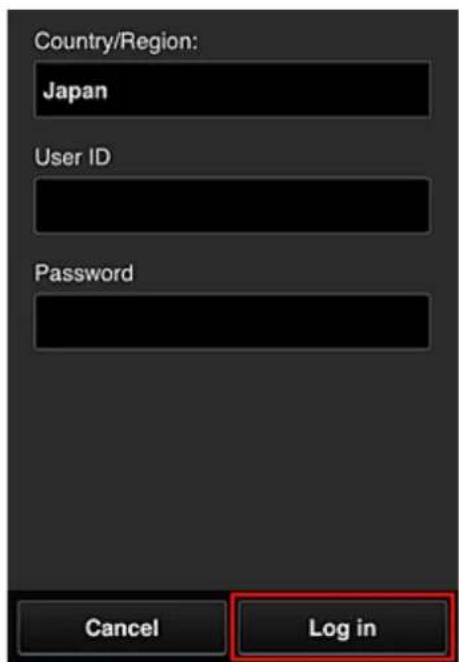
text_image
Country/Region: Japan User ID Password Cancel Log in- In the displayed album list, select the album of your choice
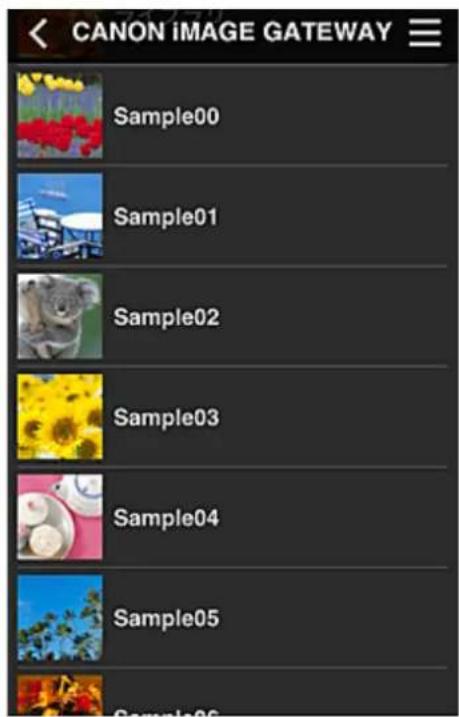
text_image
CANON IMAGE GATEWAY Sample00 Sample01 Sample02 Sample03 Sample04 Sample05 Sample06- In the displayed image list, select the image that you want to print, and then select Next
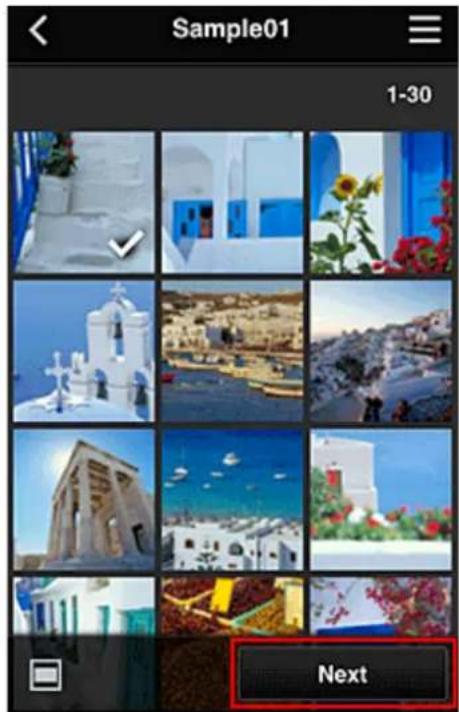
text_image
Sample01 1-30 Next- Make the necessary print settings, and then select Print
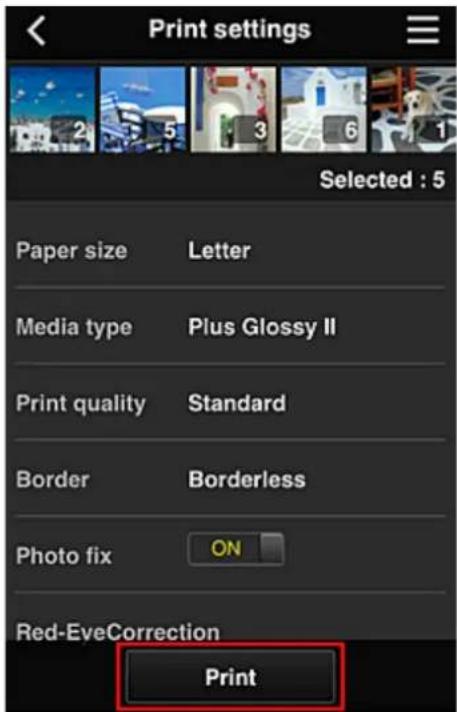
text_image
Print settings Selected : 5 Paper size Letter Media type Plus Glossy II Print quality Standard Border Borderless Photo fix ON Red-EveCorrection Print- A print job completion message appears, and printing starts
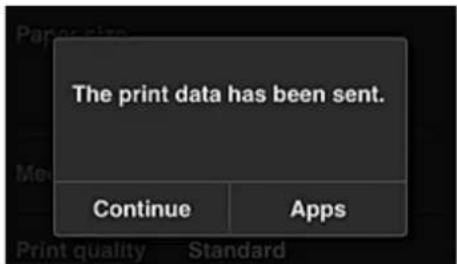
text_image
The print data has been sent. Continue AppsTo continue printing, select Continue, and perform the operation from Step 3. To end the printing, select Apps. The screen returns to the apps list screen.
Important
- If a print job is not printed within 24 hours after the print job is issued, the print job will expire and cannot be printed.
- With premium apps that limit the number of print jobs, print jobs that expire and cannot be printed are also included in the print count.
→ Adding a Printer
Canon Inkjet Cloud Printing Center window
This section describes the Canon Inkjet Cloud Printing Center screens that are displayed on your smartphone, tablet device, or computer.
→ Description of the Login screen
→ Description of the Main screen
Description of the Login screen
This section provides the description of the Login screen of Canon Inkjet Cloud Printing Center.
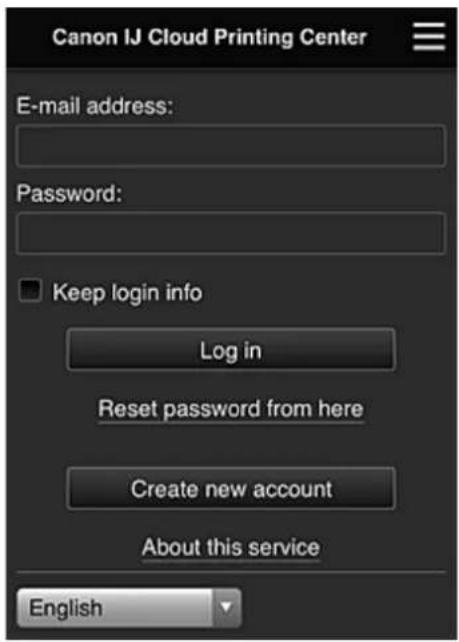
text_image
Canon IJ Cloud Printing Center E-mail address: Password: Keep login info Log in Reset password from here Create new account About this service English
Important
- You have 5 tries to enter your password. If you fail, you will not be able to log in for about the next 60 minutes.
- You remain logged in for 60 minutes after the last access.
Language
Select the language you will be using.
E-mail address
Enter the e-mail address that you entered in the user registration.

Important
- The e-mail address is case-sensitive. Make sure the case is correct.
Password
Enter the password that you entered in the user registration.
Keep login info
When you select the check box, the login screen is skipped for 14 days since the last day that the service screen was accessed.
Reset password from here
Select this if you forgot the password.
Reset your password by following the instructions on the screen.
Create new account
A new registration will be added to the Canon Inkjet Cloud Printing Center.
For a new registration, you need the Printer registration ID.
About this service
This displays the descriptions of this service.
System requirements
This displays the system requirements for the Canon Inkjet Cloud Printing Center.
Software license info
The licensing information of Canon Inkjet Cloud Printing Center is displayed.
Description of the Main screen
When you log in to the Canon Inkjet Cloud Printing Center, the Main screen appears. If you are using a smartphone or a tablet, you can also print photos and documents.

Important
- With this service, the available functions differ depending on whether the user is the Administrator or Standard user of the printer, and also on the management method that was set.
You can use areas shown below to start, add, and manage apps.
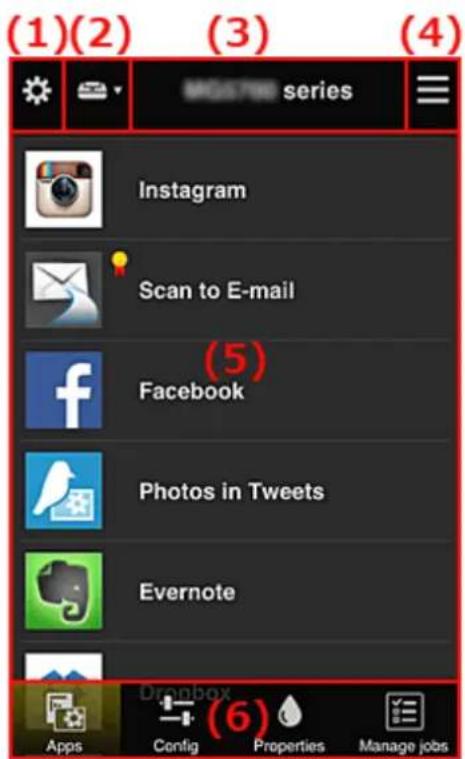
text_image
(1)(2) (3) (4) Instagram Scan to E-mail (5) Facebook Photos in Tweets Evernote Apps Config Properties Manage jobs(1) Left context menu (Administrator only)
(2) Select printer
(3) Printer name area
(4) Right context menu
(5) Display area
(6) Menu area
(1) Left context menu (Administrator only)
When you select 📂 e left context menu appears.
When you select Mng. printer, Manage users, Group management, or Advanced management, the corresponding screen appears.

Note
- Group management appears only when you use Select how to manage and set Manage by group (for office users).
Mng. printer screen
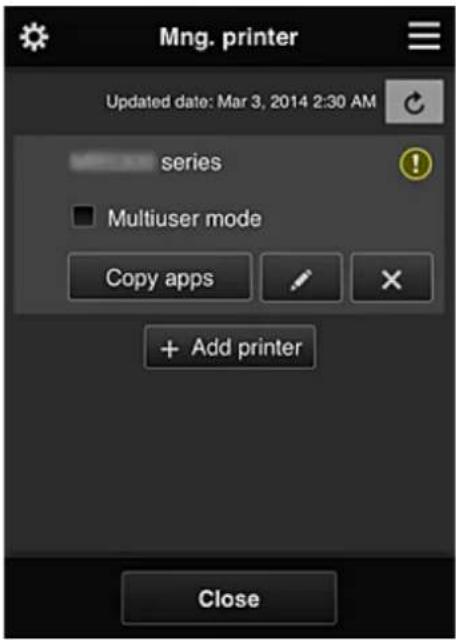
text_image
Mng. printer Updated date: Mar 3, 2014 2:30 AM series Multiuser mode Copy apps + Add printer CloseFrom the Mng. printer screen, you can check or update printer information registered to the Canon Inkjet Cloud Printing Center, copy apps, change printer names, delete printers, and add printers.
- Check the printer information
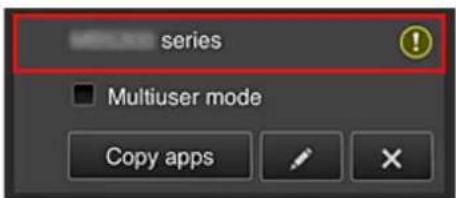
text_image
series Multiuser mode Copy appsThe registered printer name is displayed.

indicates that an error occurred on the printer.
- Display update date/time of the printer information
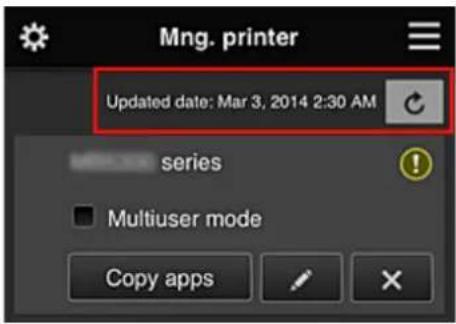
text_image
Mng. printer Updated date: Mar 3, 2014 2:30 AM series Multiuser mode Copy appsThis displays the date and time the printer information was last updated.

refreshes the information.
- Multiuser mode (MAXIFY series only)
If multiple users will be using the printer, add a check mark to Multiuser mode.
The check mark is linked to the Require security code screen.
- Copy apps
Select this to copy apps added in the selected printer to another printer.
When you select, the screen shown below appears.
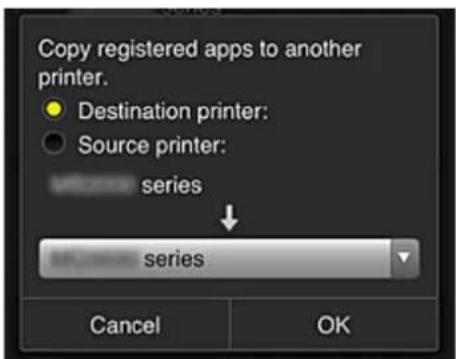
text_image
Copy registered apps to another printer. Destination printer: Source printer: series series Cancel OKSet the Destination printer and the Source printer. Then select OK.
Note
- If Select how to manage has been set, you can use this function only when you select Manage app availability by printer.
For details, see "Tips on Using Canon Inkjet Cloud Printing Center (at Work)".
- Change the printer name
When you select a screen to change the printer name appears.
Follow the instructions on the screen to change the name.
Important
- The printer name entry has the following character limitation:
- Up to 128 characters (Uppercase and lowercase letters are differentiated.)
- Delete printers
When you select the printer is deleted from the Canon Inkjet Cloud Printing Center. When transferring the ownership of the printer, select Clear the information saved on the printer.
- Add printers
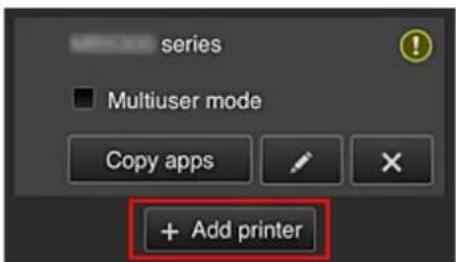
text_image
series Multiuser mode Copy apps + Add printerSelect this to add printers to be used in the Canon Inkjet Cloud Printing Center.
You need a Printer registration ID to add a printer.
Note
- Although the number of printers that can be registered for one domain is not limited, only up to 16 printers are guaranteed to operate.
Manage users screen
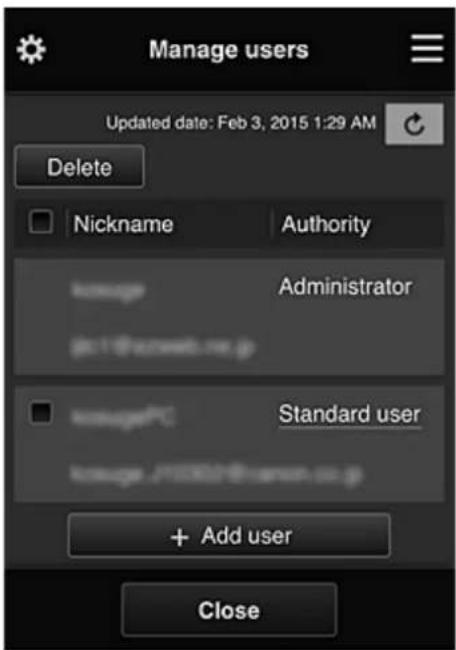
text_image
Manage users Updated date: Feb 3, 2015 1:29 AM Delete Nickname Authority Administrator ########## Standard user ######## /##########.sc.p + Add user CloseFrom the Manage users screen, you can check user information registered to the Canon Inkjet Cloud Printing Center, delete users, add users, and change the Administrator and Standard user settings.
- User deletion
Select the check box of the user to be deleted, and select Delete.
However, you cannot delete yourself. To delete yourself, cancel your membership from the My account screen.
- Adding a user
Select Add user. The user registration screen appears.
- Changing Administrator and Standard user settings
To change the privileges of the Administrator or a Standard user, select Authority for the user whom you want to change the settings for.
Group management screen
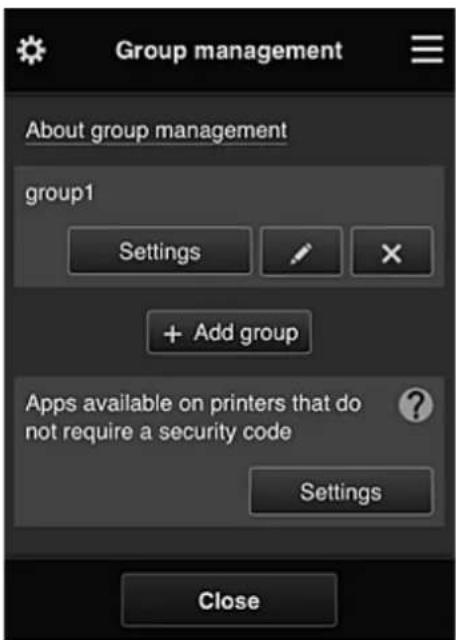
text_image
Group management About group management group1 Settings + Add group Apps available on printers that do not require a security code Settings CloseFrom the Group management screen, you can use functions for checking group information registered to Canon Inkjet Cloud Printing Center, changing groups, deleting groups, adding groups, and setting up users, printers, and apps belonging to each group.
- Checking group information
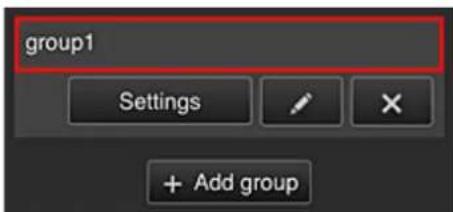
text_image
group1 Settings Add groupThe registered group names appear.
If there are items that have not been set, appears .
Select to display the following screen, which allows you to set up information for each group.
The displayed information changes depending on the selected tab.
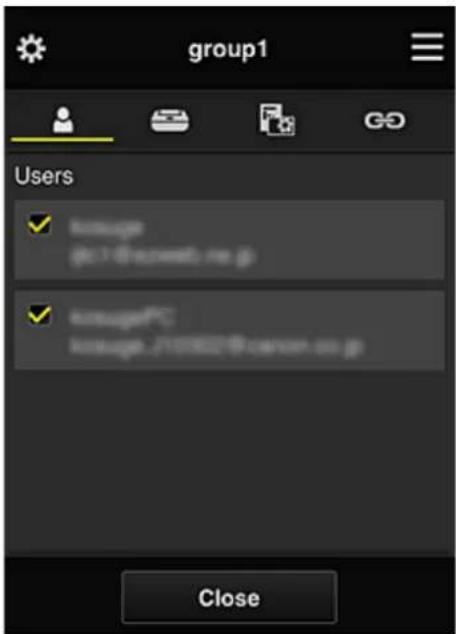
text_image
group1 Users ✓ knotage gc:7 @scnewt.re.p ✓ knotageFC knotage.7@100021@camer.soc.p Close
Users
Displays all users and mail addresses registered in the domain.

Printers
Displays all printers registered in the domain.

Apps
With the default settings, the screen displays all apps. To display only registered apps, select the Registered category.
To switch between app registration/deletion, select ON OFF

Web services
Displays the external link service.
You can restrict the use of other web services that use Canon Inkjet Cloud Printing Center accounts such as Easy-PhotoPrint+.
To switch between service linking/release, select ON OFF

appears for items that do not have anything selected.
In the default settings, all check marks are cleared for Printers and Users. Only the system apps under Apps are set to ON.
- Changing a Group name
To display the Group name change screen, select
You can change the name to one of your liking by following the instructions in the displayed screen.

Important
- When you enter a Group name, the following restrictions apply:
- When using single-byte alphanumeric characters, enter at least 1 but not more than 20 characters. When using double-byte characters, enter at least 1 but not more than 10 characters.
- Duplicate group names cannot be registered in the same domain.
- Deleting a Group
To delete a group from Canon Inkjet Cloud Printing Center, select
If you delete all groups, you must create a new one. To set a different management method, set the target method from the Select how to manage screen.
- Add group
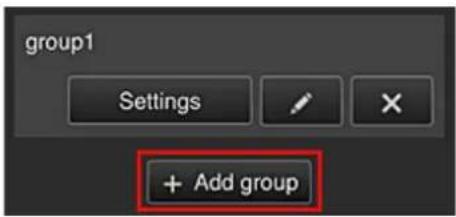
text_image
group1 Settings + Add groupAdd a group to be used in Canon Inkjet Cloud Printing Center.
Note
- You can register up to 20 groups.
- Apps available on printers that do not require a security code
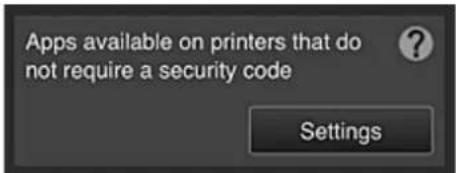
text_image
Apps available on printers that do not require a security code SettingsFor printers without the Multiuser mode setting or Security code settings, set the apps to be
displayed when a user selects cloud from the printer's home screen.
If the domain does not have a printer that meets this condition, this setup screen does not appear.
To go to the setup screen, select
Note
- If only the following printer is registered in the domain, it is not displayed.
- Printer without LCD monitor
- Printer with monochrome LCD monitor
- Multiuser mode printer
Advanced management screen
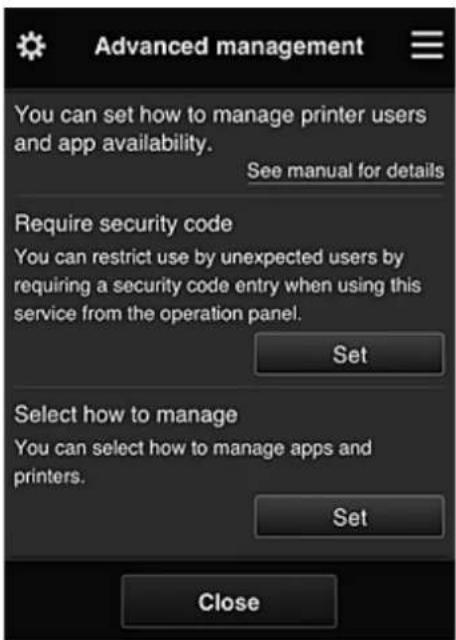
text_image
Advanced management You can set how to manage printer users and app availability. See manual for details Require security code You can restrict use by unexpected users by requiring a security code entry when using this service from the operation panel. Set Select how to manage You can select how to manage apps and printers. Set CloseThe Advanced management screen allows you to set the management method for printer users and apps that can be used.
To go to the setup screen, select Set
- Require security code
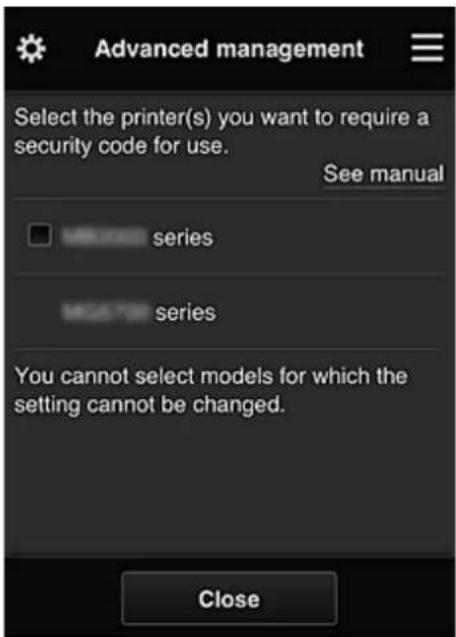
text_image
Advanced management Select the printer(s) you want to require a security code for use. See manual series series You cannot select models for which the setting cannot be changed. CloseEach user can set a Security code, start the app, and perform printing and other operations.
This setting is linked with Multiuser mode on the Mng. printer screen.
Note
- The list does not display models without an LCD or models with a monochrome LCD.
- The check box does not appear for models that do not support Multiuser mode.
- Select how to manage
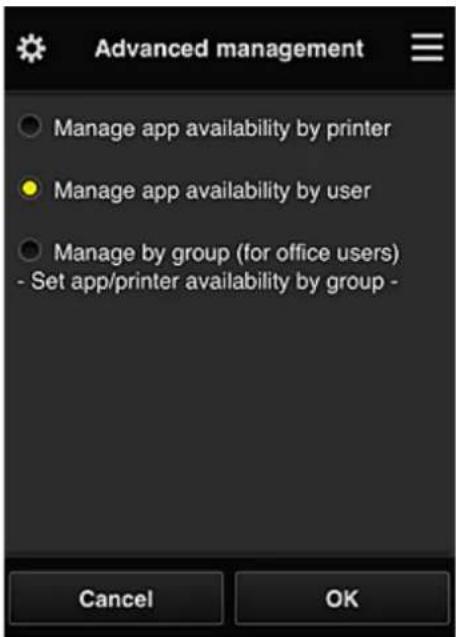
text_image
Advanced management Manage app availability by printer Manage app availability by user Manage by group (for office users) - Set app/printer availability by group - Cancel OKYou can change the management method for usable apps and printers.
Manage app availability by printer
If you are using multiple printers, you can manage the useable apps for each printer.
Manage app availability by user
When one printer is used, you can manage the usable apps by user.
For usage examples, see "Tips on Using Canon Inkjet Cloud Printing Center (at Home/If you are using PRO-1000 series or PRO-500 series)".
Manage by group (for office users)
You can manage the usable apps and printers by group.
For usage examples, see "Tips on Using Canon Inkjet Cloud Printing Center (at Work)".
Note
- If you manage the usable apps by printer, the default settings will allow all users to add, delete, and rearrange apps.
Also, if you are using a MAXIFY series printer and you select Multiuser mode in the Mng.printer screen, only the administrator will be able to add, delete, and rearrange apps. - If you manage the usable apps by user, all users will be able to add, delete, and rearrange apps, regardless of the Multiuser mode setting.
- If you manage the usable apps and printers by group, all users will only be able to rearrange apps.
(2) Select printer
Select 📄 and then from the Select printer screen, select a printer.
If you are using a computer, you can select a printer directly from the pull-down menu.
Note
- Printers with settings that restrict their use do not appear.
(3) Printer name area
The registered name of the printer selected is displayed.
The Administrator can change the printer name from the Mng. printer screen of the left context menu.
(4) Right context menu
When you select the context menu appears.
The information displayed depends on the menu currently selected in the menu area.
The symbol indicates that there is a new unread notice.
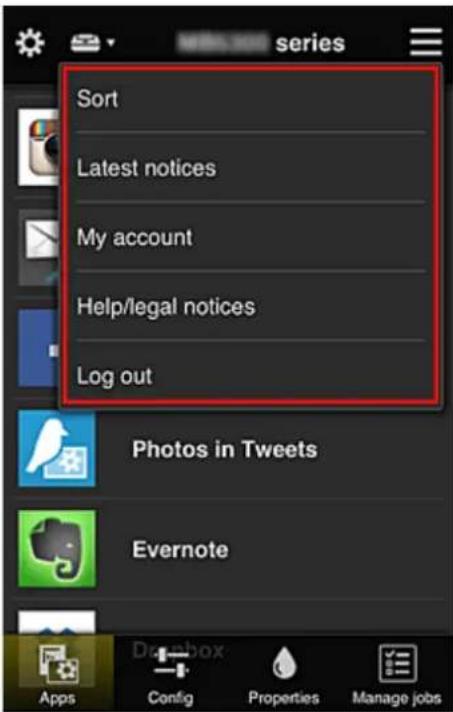
text_image
Sort Latest notices My account Help/legal notices Log out Photos in Tweets Evernote Apps Config Properties Manage jobs- Sort
This displays the screen to sort registered apps.
You can use the buttons to change the display order of apps. When you finish sorting, select Done.
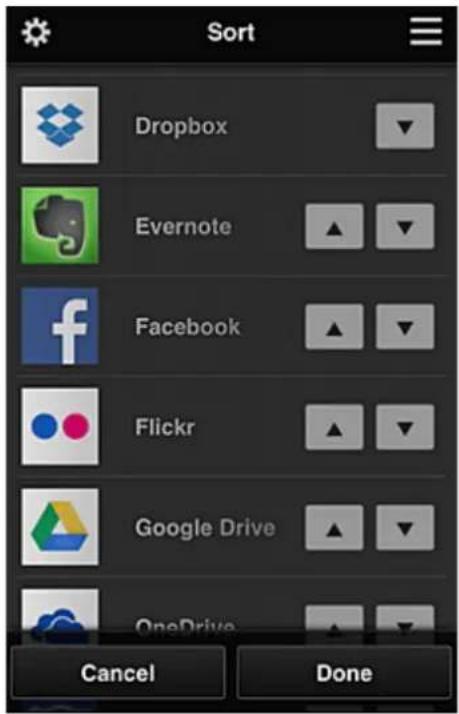
text_image
Sort Dropbox Evernote Facebook Flickr Google Drive OneDrive Cancel DoneNote
• Description of displayed icons
: Cannot be used because it is not yet released or does not support your region, model, or language.
: Can be used with genuine Canon ink.
If you are using a G3000 series model, you cannot use this service because the model is not supported.
Latest notices
This displays the latest notices. The i symbol indicates that there is a new unread notice.
• My account
Displays user information.
From the My account screen, you can change your account settings.
From the My account screen, you can display the Permitted services screen and clear any linked service setting.
• Help/legal notices
The description of the Canon Inkjet Cloud Printing Center screen and various reminders are displayed.
Log out Log out
This opens the Log out screen of the Canon Inkjet Cloud Printing Center.
(5) Display area
The display changes based on the menu you select.
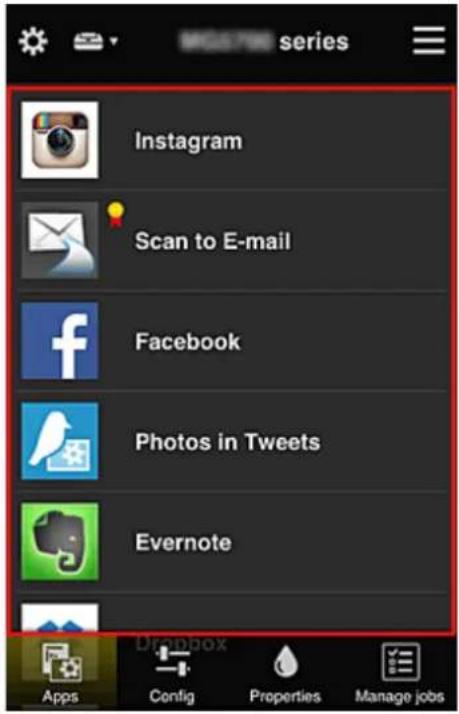
text_image
Instagram Scan to E-mail Facebook Photos in Tweets Evernote Apps Dropbox Config Properties Manage jobs(6) Menu area
The following 4 menu buttons are displayed:
This displays the list of registered apps in the Display area.
This displays the Register apps screen in the Display area.
The display can be toggled between Registered and Search apps.
The Registered screen lists registered apps.
You can check the information of these apps or deregister them.
Note
- If Group management has been set, Config is not displayed.
- If Manage app availability by user has been set, even Standard user can register and delete apps.
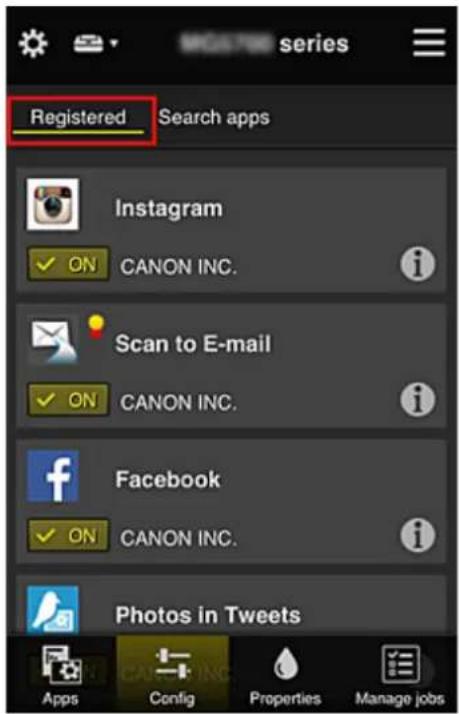
text_image
Registered Search apps Instagram ✓ ON CANON INC. Scan to E-mail ✓ ON CANON INC. Facebook ✓ ON CANON INC. Photos in Tweets Apps Config Properties Manage jobsOn the Search apps screen, the apps that you can register by using the Canon Inkjet Cloud Printing Center are displayed by category.
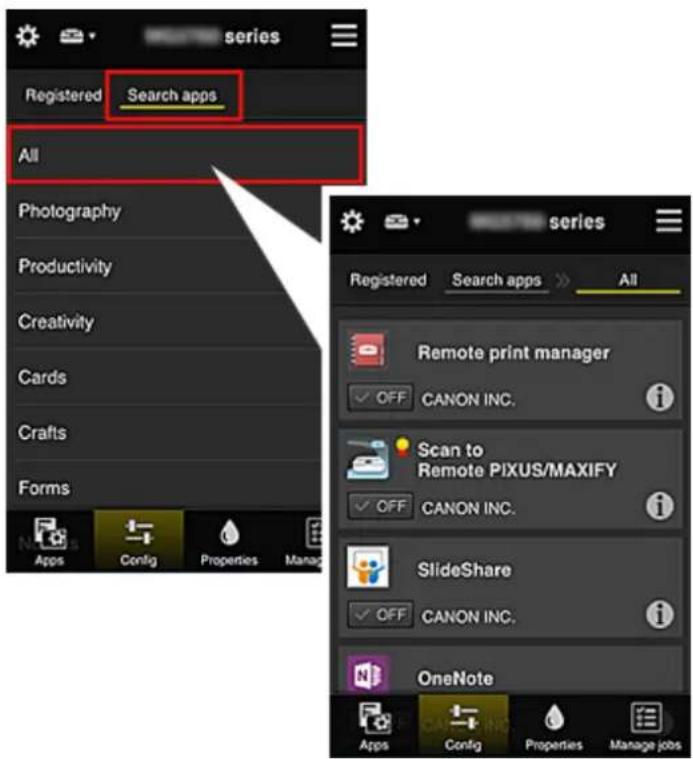
text_image
registered Search apps All Photography Productivity Creativity Cards Crafts Forms Apps Config Properties Manage registered Search apps All Remote print manager OFF CANON INC. Scan to Remote PIXUS/MAXIFY OFF CANON INC. SlideShare OFF CANON INC. OneNote Apps Config Properties Manage jobs- When you select, the details of the app are displayed. When you select, you can choose to register or unregister the app.
Note
• Description of displayed icons
: Cannot be used because it is not yet released or does not support your region, model,
or language.

: Can be used with genuine Canon ink.
If you are using a G3000 series model, you cannot use this service because the model is not supported.

This screen displays the status of the printer that is currently selected.
You can check how much ink is remaining or details about an error that occurred. You can also access the ink purchasing site and the Online Manual.

Important
- The Properties displayed may differ from the actual status at the display time, depending on the printer status.
This screen displays the print or scan status and history.
You can check the print or scan status by looking at Status list, and the print or scan history by looking at History.
You can also cancel print or scan jobs and delete history information.
To cancel or delete a job, select that job and then select Cancel or Delete.
Tips on Using Canon Inkjet Cloud Printing Center (at Home/If you are using PRO-1000 series or PRO-500 series)
The Advanced management function allows you to take advantage of the many useful functions that the service offers for home use.
This section introduces those functions by using a family of 3 (father, mother, and child) as an example.
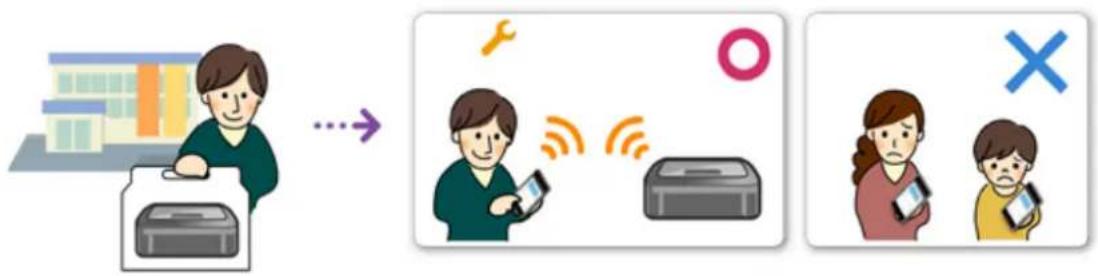
text_image
Illustration showing a printer processing devices with icons and Chinese labels, including a factory, phone, radio, and phone check symbols.If the father registers the printer to Canon Inkjet Cloud Printing Center, only the father is managed by the service, and the mother and the child cannot use the service unless the father tells them the login E-mail address and Password.
If Mother and Child Want to Use the Service from Their Smartphones
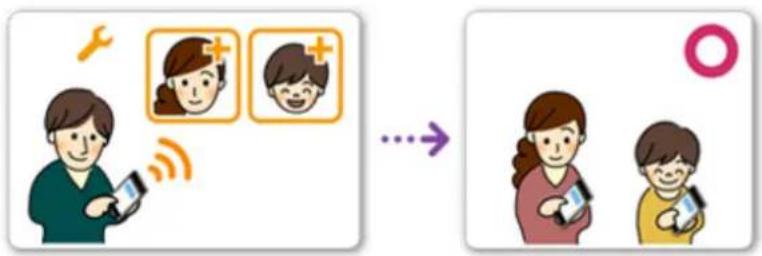
text_image
Illustration showing a person using a smartphone with icons and a transformation process, alongside two children holding smartphones.-
The father registers to Canon Inkjet Cloud Printing Center and becomes the Administrator
-
After logging in, the father selects Manage users from
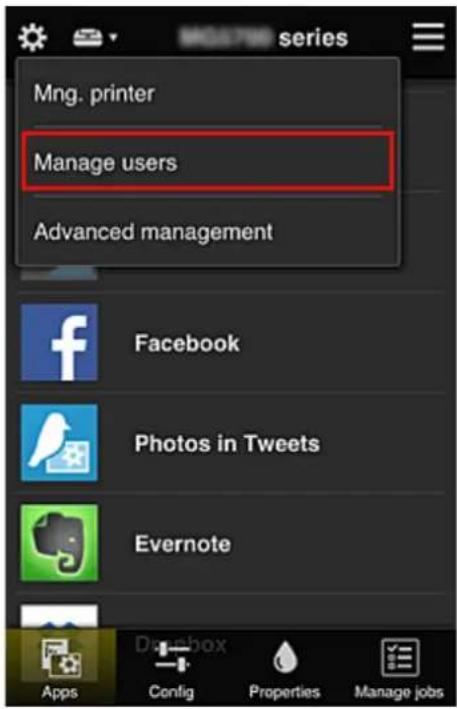
text_image
Mng. printer Manage users Advanced management Facebook Photos in Tweets Evernote Apps Config Properties Manage jobs- The father selects Add user, and by following the screen instructions, registers the mother and child as users.
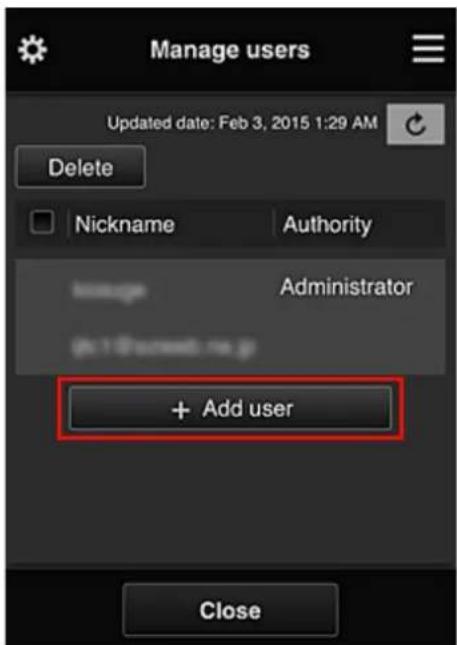
text_image
Manage users Updated date: Feb 3, 2015 1:29 AM Delete Nickname Authority Message Administrator (4x10@scnewt.no.p) + Add user CloseAfter this registration is complete, the mother and child can individually use the service.
If Father, Mother, and Child Want to Manage Apps Individually
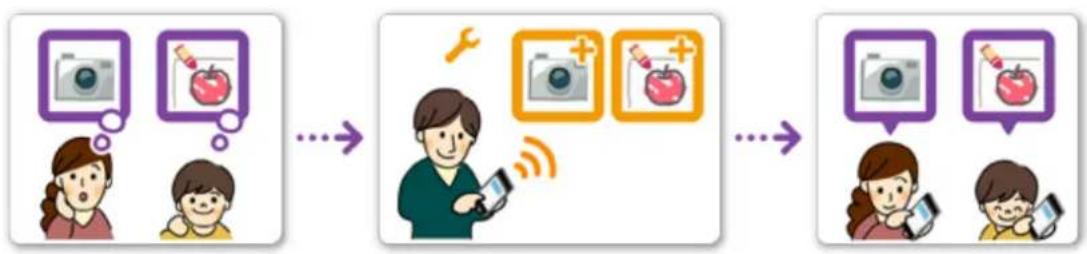
flowchart
graph LR
    A["User Interaction"] --> B["User Use"]
    B --> C["Mobile Phone Use"]
    C --> D["Mobile Phone Use"]
    style A fill:#f9f,stroke:#333
    style B fill:#ccf,stroke:#333
    style C fill:#cfc,stroke:#333
    style D fill:#fcc,stroke:#333
With the default settings, only the Administrator (father) can register apps to be used or delete apps. After the Administrator (father) specifies settings according to the procedure below, the father, the mother, and the child will be able to manage apps individually.
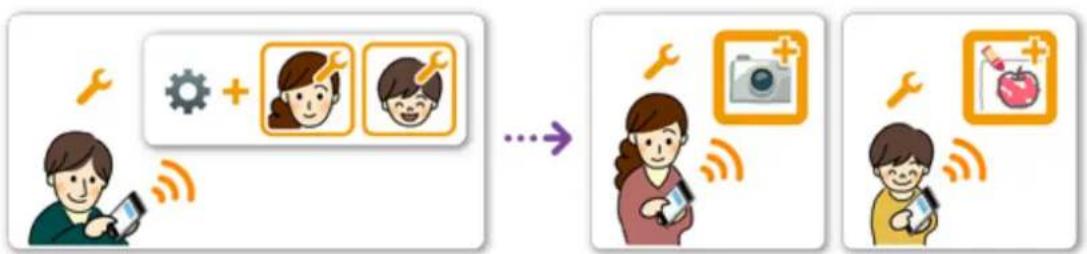
flowchart
graph LR
    A["User Interaction"] --> B["Step 1: Tool Icon + Gear Icon + Photo Icon"]
    B --> C["Step 2: Display Icon + Camera Icon"]
    C --> D["Step 3: Display Icon + Apple Icon"]
- As the Administrator, the father logs in to Canon Inkjet Cloud Printing Center and selects Advanced management from
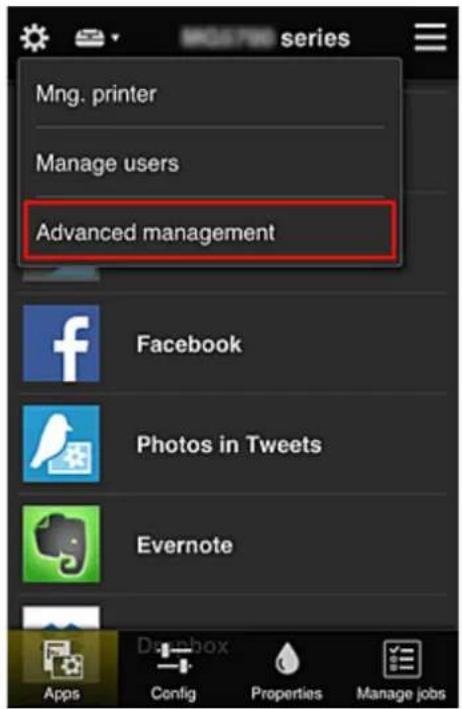
text_image
series Mng. printer Manage users Advanced management Facebook Photos in Tweets Evernote Apps Config Properties Manage jobs- For Select how to manage, the father selects Set
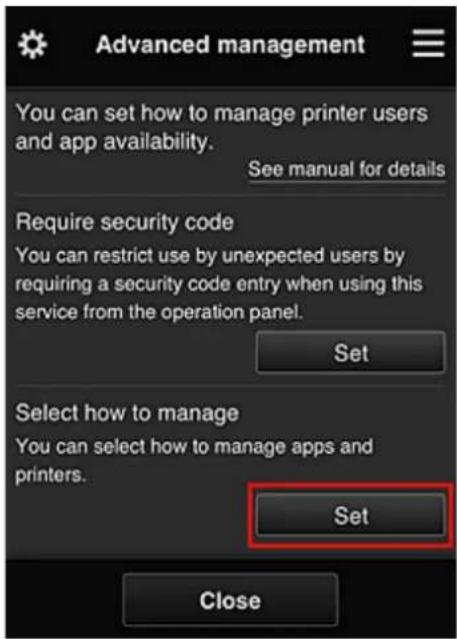
text_image
Advanced management You can set how to manage printer users and app availability. See manual for details Require security code You can restrict use by unexpected users by requiring a security code entry when using this service from the operation panel. Set Select how to manage You can select how to manage apps and printers. Set Close- The father sets Manage app availability by user and selects OK
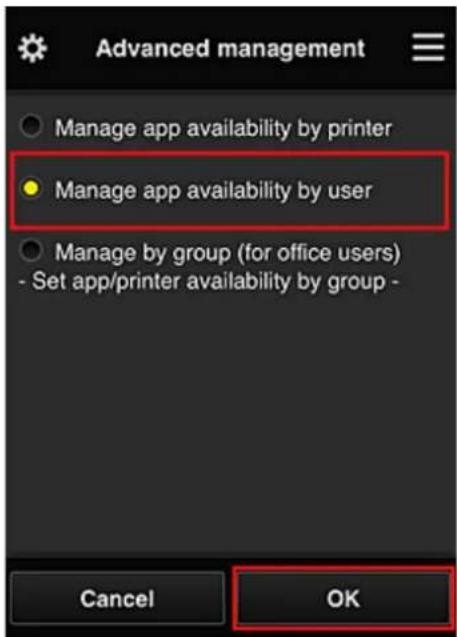
text_image
Advanced management Manage app availability by printer Manage app availability by user Manage by group (for office users) - Set app/printer availability by group - Cancel OK- The screen for checking the management method change appears
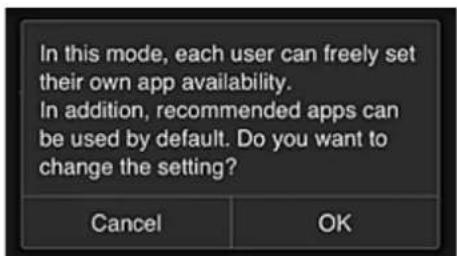
text_image
In this mode, each user can freely set their own app availability. In addition, recommended apps can be used by default. Do you want to change the setting? Cancel OKTo complete the setup and return to the Advanced management window, select OK.
All registered users can register and delete apps freely.
Tips on Using Canon Inkjet Cloud Printing Center (at Work)
The Group management function allows you to take advantage of the many useful functions that the service offers for office use.
This section introduces an example in which two printers are used, the Administrator is the senior clerk, and the other members are the company president, the section manager, and the new hire.

Note
- If the second printer has not been registered, select "Adding a Printer" and register the printer by following the procedure.
Creating a Group for All Office Members to Use
Set the basic group.
In this example, only the Evernote app will be used on 2 printers.
-
The senior clerk registers to Canon Inkjet Cloud Printing Center and becomes the Administrator
-
The senior clerk selects Manage users from

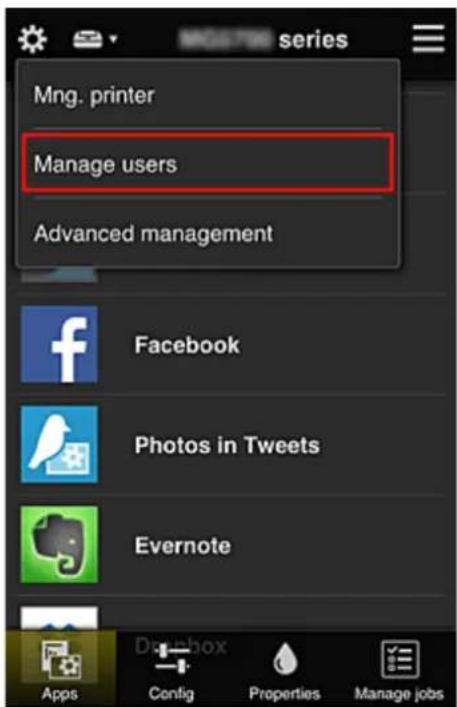
text_image
Mng. printer Manage users Advanced management Facebook Photos in Tweets Evernote Apps Config Properties Manage jobs- On the displayed screen, the senior clerk selects Add user and registers the company president, the section manager, and the new hire as users
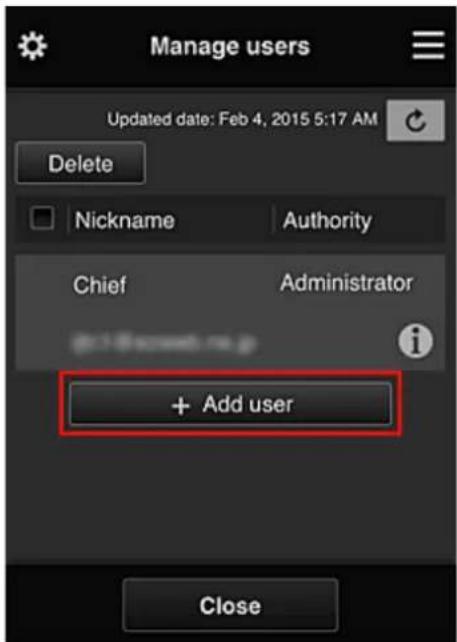
text_image
Manage users Updated date: Feb 4, 2015 5:17 AM Delete Nickname Authority Chief Administrator @1-8 screen.mg + Add user Close- The senior clerk selects Advanced management from

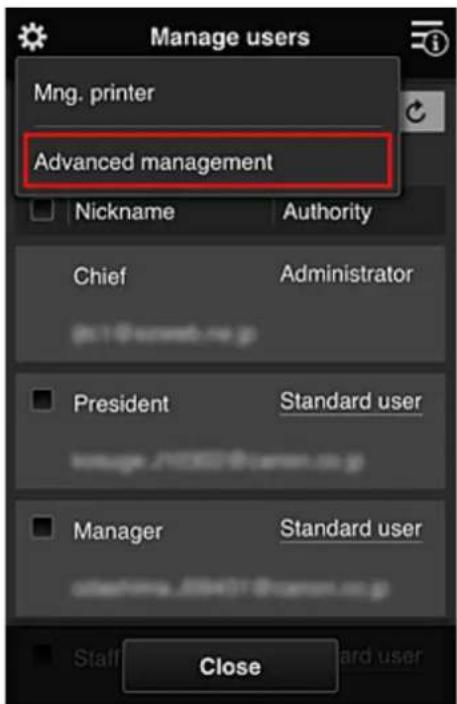
text_image
Manage users Mng. printer Advanced management Nickname Authority Chief Administrator President Standard user manager: 10000@user.cn.p Manager Standard user systems: 10000@user.cn.p Staff Standard user Close- For Select how to manage, the senior clerk selects Set

text_image
Advanced management You can set how to manage printer users and app availability. See manual for details Require security code You can restrict use by unexpected users by requiring a security code entry when using this service from the operation panel. Set Select how to manage You can select how to manage apps and printers. Set Close- The senior clerk sets Manage by group (for office users) and selects OK
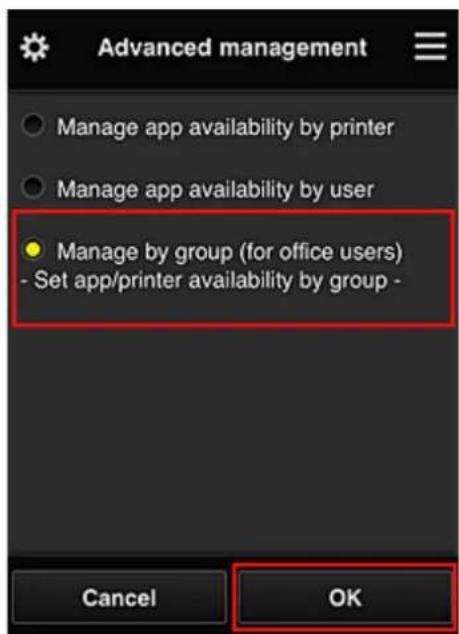
text_image
Advanced management Manage app availability by printer Manage app availability by user Manage by group (for office users) - Set app/printer availability by group - Cancel OK
Note
- If Group management has already been set up, refer to step 10 and the subsequent steps.
- On the screen for checking management method changes, the senior clerk checks the displayed information and selects OK.
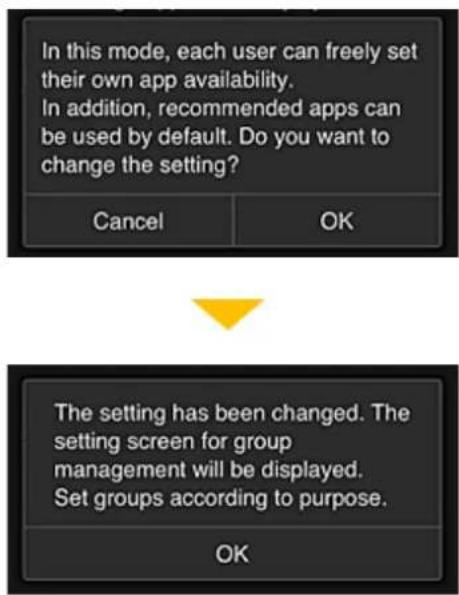
text_image
In this mode, each user can freely set their own app availability. In addition, recommended apps can be used by default. Do you want to change the setting? Cancel OK The setting has been changed. The setting screen for group management will be displayed. Set groups according to purpose. OKThis appears only if the selected mode is Group management.
To complete the setup and display the Group management screen, select OK.

Note
- With the default settings, the group is named "group1".
-
With the default settings, all registered users belong to the same group.
-
In the Group management screen, the senior clerk selects the of the group to be renamed
-
The senior clerk enters the Group name and selects OK
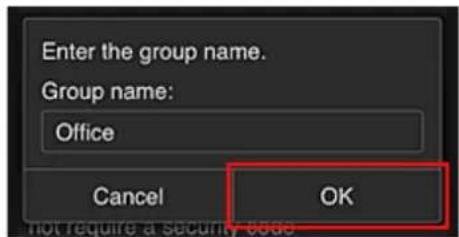
text_image
Enter the group name. Group name: Office Cancel OK Not require a security codeThe chief clerk enters "Office" here because the clerk is setting up a group that everyone in the office will use.

Important
• The following restrictions apply to entering the Group name.
- The group name can have up to 20 single-byte alphanumeric characters or up to 10 double-byte characters.
- The same group name cannot be registered more than once in the same domain.
- Up to 20 groups can be registered.
• The person who created the group becomes the Administrator.
- Select Settings, and in group setup screen, check that all users on the Users tab are selected
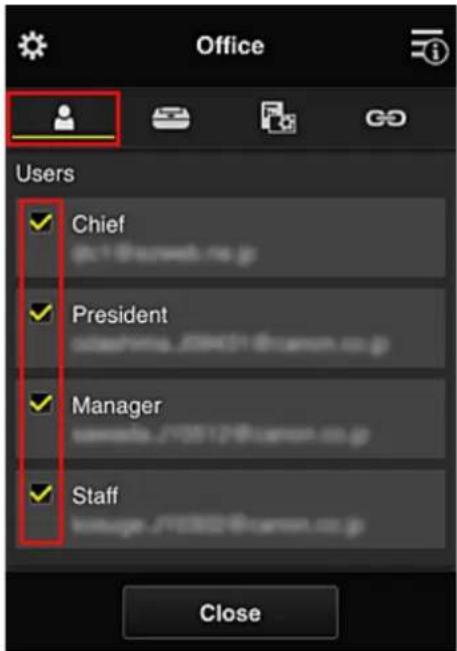
text_image
Office Users ✓ Chief ph:1@web.no.jp ✓ President sachena_20001@camen.co.jp ✓ Manager samate_70012@camen.co.jp ✓ Staff voltage_70002@camen.co.jp Close- On Printers tab, check that all printers are selected
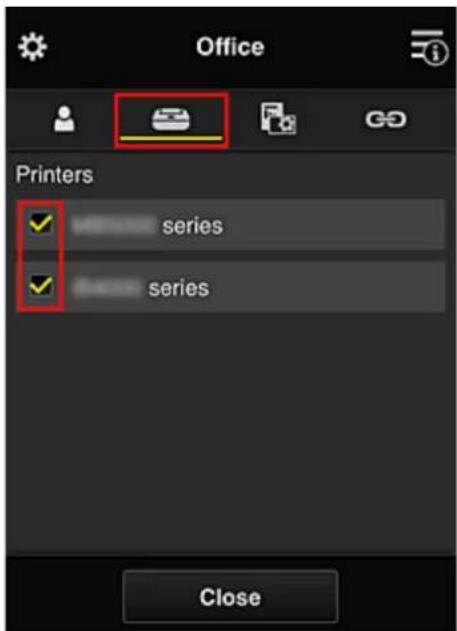
text_image
Office Printers ✓ series ✓ series Close- On Apps tab, set only Evernote app to

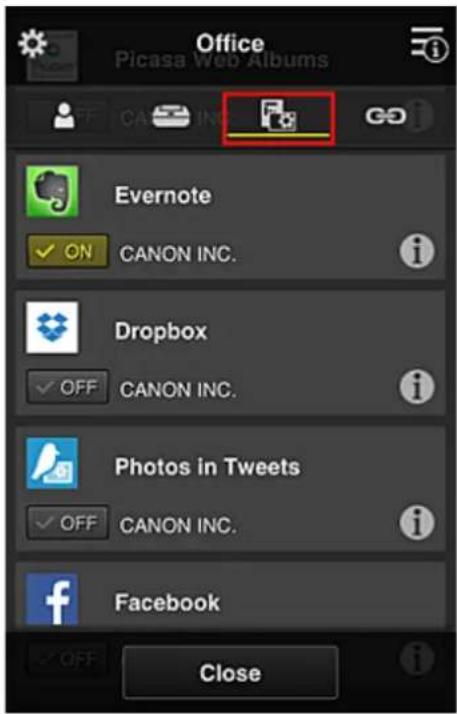
text_image
Office Picasa Web Albums Evernote ✓ ON CANON INC. Dropbox ✓ OFF CANON INC. Photos in Tweets ✓ OFF CANON INC. Facebook CloseTo switch between app registration/deletion, select


To return to the Group management screen, select Close.
This completes the setup of the group to be used by the entire office.

Note
- The group setup screen displays all users and printers that are registered in the domain.
- If you want to set up new apps as an individual, you can add a group.
To create a new group, use Add group, and then in the setup screen for the added group, add users and printers.
→ Limiting Apps That Each User Can Use
→ Limiting Apps That All Members Can Use on Printer
→ Limiting Apps That Individual Users Can Use on Printer
→ Limiting Printers That Individual Users Can Use

Important
- The available apps may differ depending on the country or the region.
Limiting Apps That Each User Can Use
Set the following:
• Entire office: Use only Evernote app
• President: Use Evernote app and Facebook app
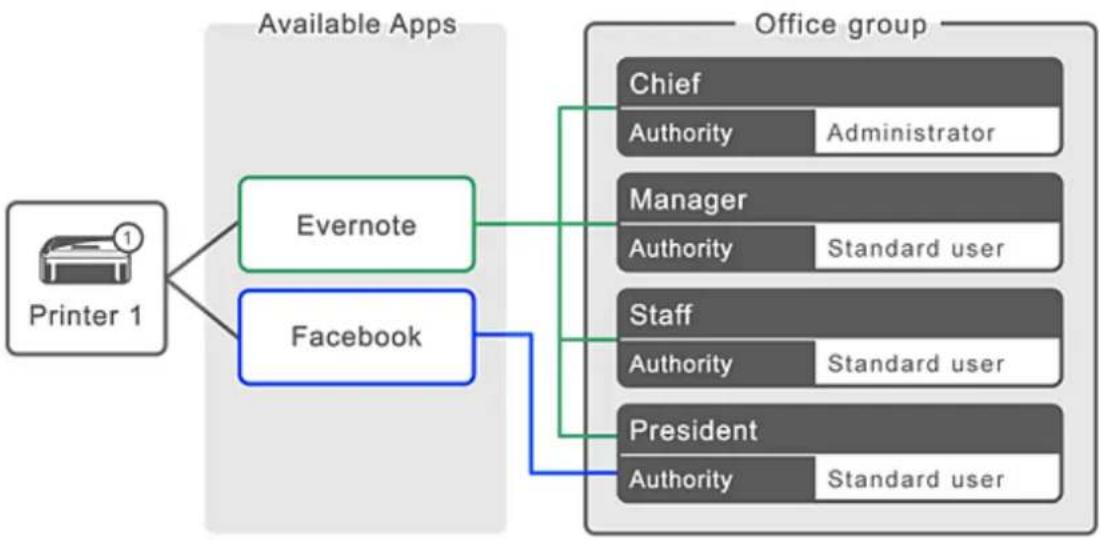
flowchart
graph TD
    A["Printer 1"] --> B["Evernote"]
    A --> C["Facebook"]
    B --> D["Office group"]
    C --> D
    D --> E["Chief"]
    D --> F["Manager"]
    D --> G["Staff"]
    D --> H["President"]
    E --> I["Authority"]
    F --> J["Authority"]
    G --> K["Authority"]
    H --> L["Authority"]
    style A fill:#f9f,stroke:#333
    style B fill:#ccf,stroke:#333
    style C fill:#cfc,stroke:#333
    style D fill:#fcc,stroke:#333
    style E fill:#cff,stroke:#333
    style F fill:#ffc,stroke:#333
    style G fill:#cfc,stroke:#333
    style H fill:#cfc,stroke:#333
    style I fill:#ccc,stroke:#333
    style J fill:#ccc,stroke:#333
    style K fill:#ccc,stroke:#333
- From select Group management
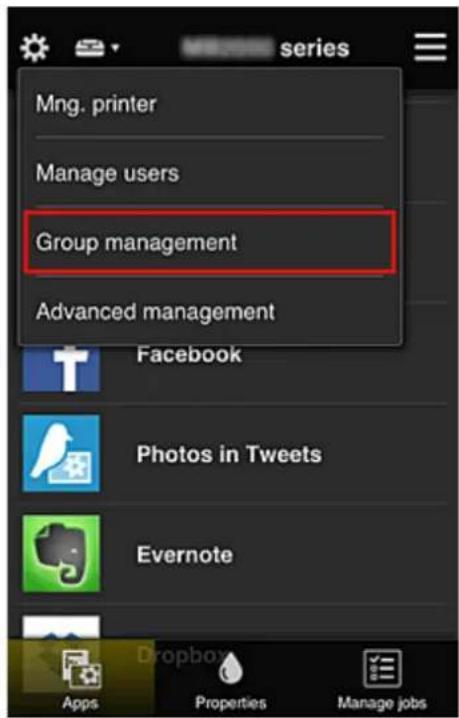
text_image
Mng. printer Manage users Group management Advanced management Facebook Photos in Tweets Evernote Apps Dropbox Properties Manage jobsNote
- This appears only if Manage by group (for office users) is set in Advanced management.
- In displayed screen, select Add group
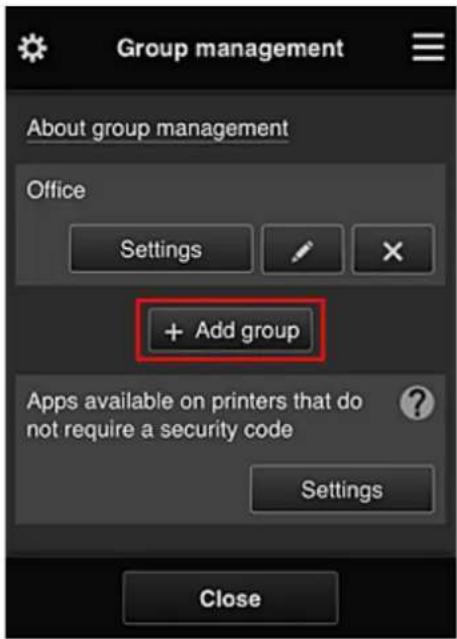
text_image
Group management About group management Office Settings + Add group Apps available on printers that do not require a security code Settings Close3. The senior clerk enters the Group name and selects OK
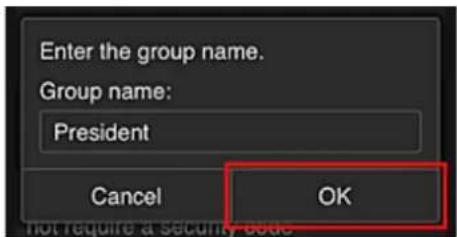
text_image
Enter the group name. Group name: President Cancel OK Not require a security codeIn this field, enter "President" as the president-only group because you will be setting apps that only the president can use.
Important
• The following restrictions apply to entering the Group name.
- The group name can have up to 20 single-byte alphanumeric characters or up to 10 double-byte characters.
- The same group name cannot be registered more than once in the same domain.
- Up to 20 groups can be registered.
• The person who created the group becomes the Administrator.
4. Follow messages displayed on screen, and select OK
The group setup screen appears.
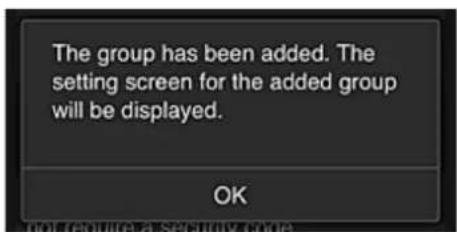
text_image
The group has been added. The setting screen for the added group will be displayed. OK- On Users tab, select only president

text_image
President Users Chief @:1@web.no.jp President olshimura_08402@camen.no.jp Manager sensata_08412@camen.no.jp Staff kouage_08402@camen.no.jp Close- On the Printers tab, select printer to be used.
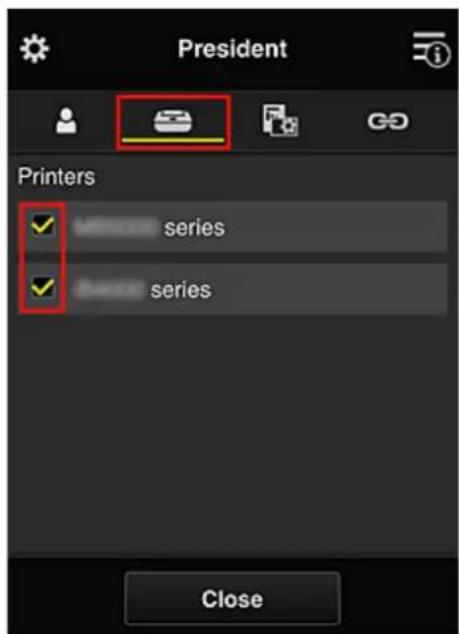
text_image
President Printers ✓ series ✓ series Close- On the Apps tab, set the Evernote and Facebook apps to

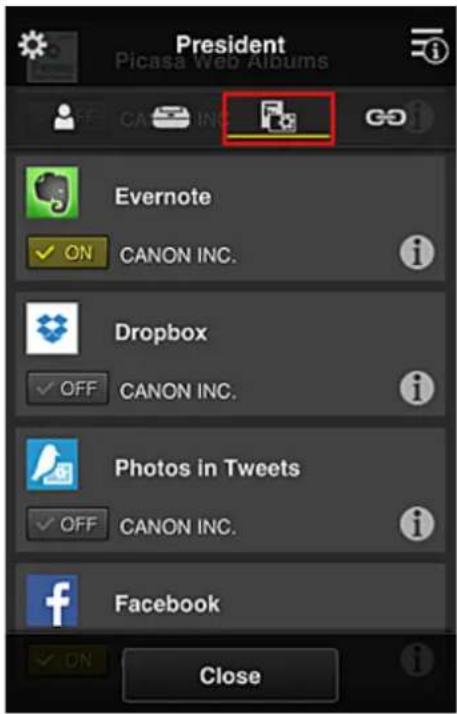
text_image
President Picasa Web Albums Evernote ON CANON INC. Dropbox OFF CANON INC. Photos in Tweets OFF CANON INC. Facebook CloseTo switch between app registration/deletion, select ON OFF
To return to the Group management screen, select Close.
The above procedure allows you to set apps that only the president can use.

Note
- The group setup screen displays all users and printers that are registered in the domain.
Limiting Apps That All Members Can Use on Printer
To set the apps to be used on the printer, use the following procedure provided by this service.
As an example, this section describes the procedure for allowing all users to use the Evernote app from the printer.
- From Select Group management
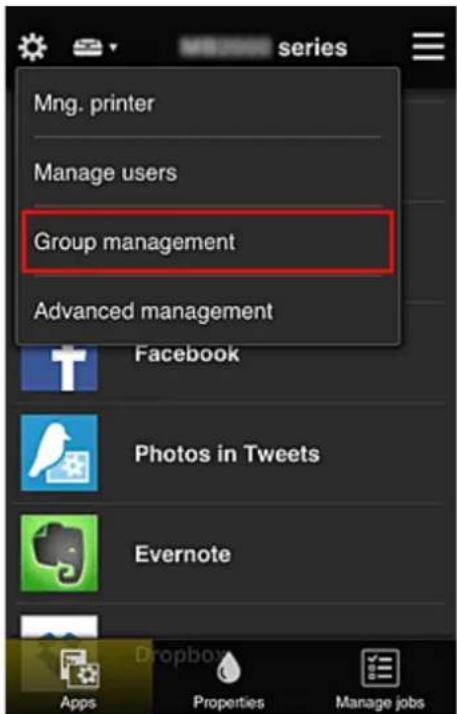
text_image
Mng. printer Manage users Group management Advanced management Facebook Photos in Tweets Evernote Apps Properties Manage jobs
Note
- This appears only if Manage by group (for office users) is set in Advanced management.
- For Apps available on printers that do not require a security code, select Settings
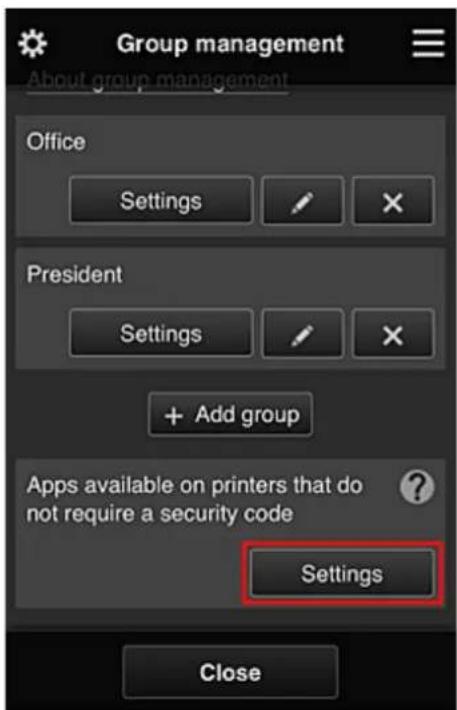
text_image
Group management About group management Office Settings President Settings + Add group Apps available on printers that do not require a security code Settings Close- On Apps tab, set only Evernote app to

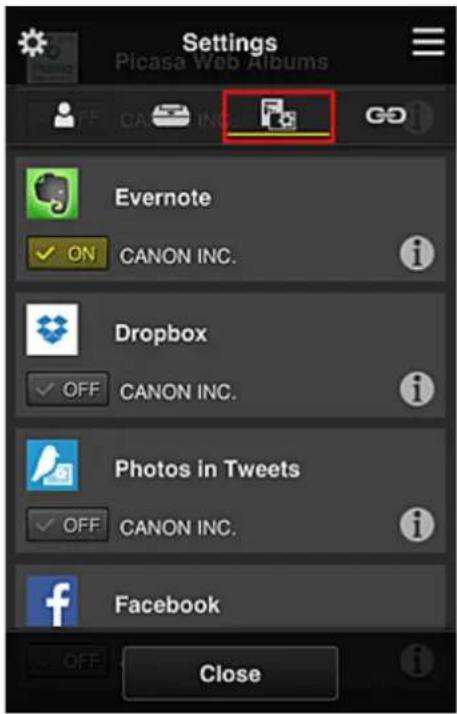
text_image
Settings Picasa Web Albums OFF CANON INC. GO Evernote ✓ ON CANON INC. Dropbox ✓ OFF CANON INC. Photos in Tweets ✓ OFF CANON INC. Facebook CloseTo switch between app registration/deletion, select ON OFF
To return to the Group management screen, select Close.
The above procedure sets up Evernote as the only app that all users can use on the printer.
Limiting Apps That Individual Users Can Use on Printer
For each user, you can set the apps that the user can use on the printer.
As an example, this section describes the procedure for allowing only the president to also use the Facebook app from the printer.
- From Select Advanced management
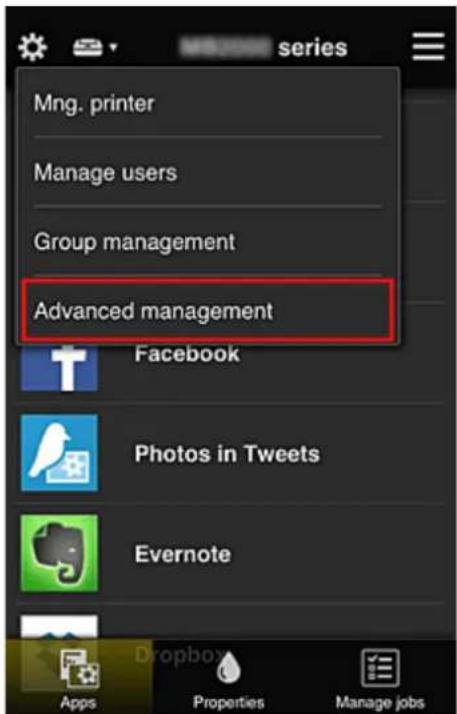
text_image
series Mng. printer Manage users Group management Advanced management Facebook Photos in Tweets Evernote Apps Properties Manage jobs- For Require security code, select Set.
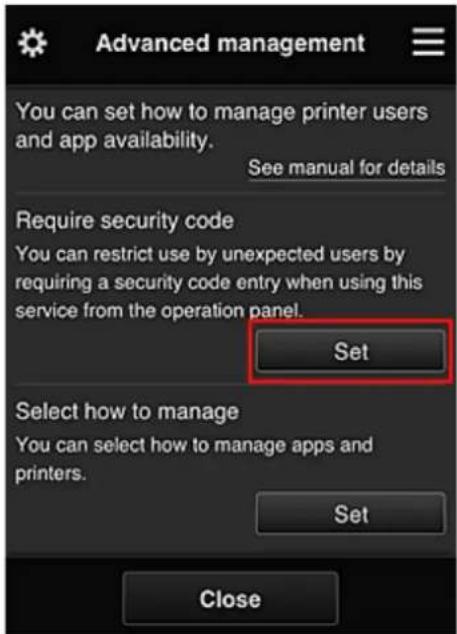
text_image
Advanced management You can set how to manage printer users and app availability. See manual for details Require security code You can restrict use by unexpected users by requiring a security code entry when using this service from the operation panel. Set Select how to manage You can select how to manage apps and printers. Set Close- Select printer for setting up Security code.
Security codes identify individual users when multiple users are using a printer.
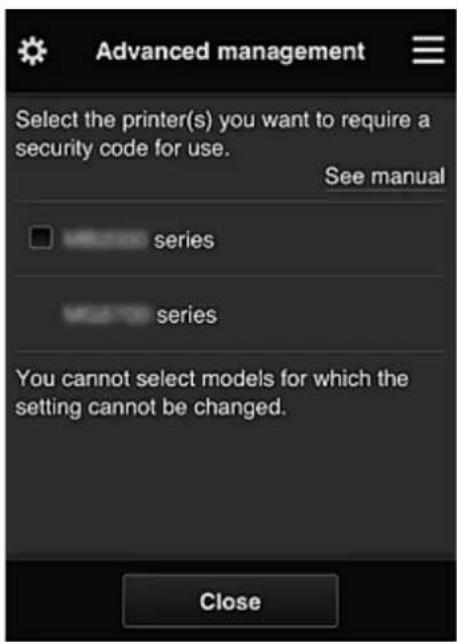
text_image
Advanced management Select the printer(s) you want to require a security code for use. See manual series series You cannot select models for which the setting cannot be changed. CloseNote
- On models where the settings cannot be changed, this function cannot be selected. Some models do not support this function. To check whether your model supports this function, see "Models that Support Security Codes".
4. Set up Security code
If there are users who have not set up a Security code, a screen appears for checking whether to send an e-mail prompting those users to set up a Security code.
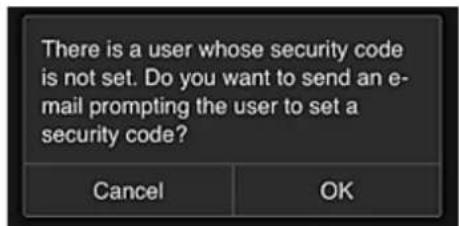
text_image
There is a user whose security code is not set. Do you want to send an e- mail prompting the user to set a security code? Cancel OKTo send a notification e-mail only to users without a Security code, select OK.
To display the Security code setup screen when each user logs in and not send the notification e-mail, select Cancel.
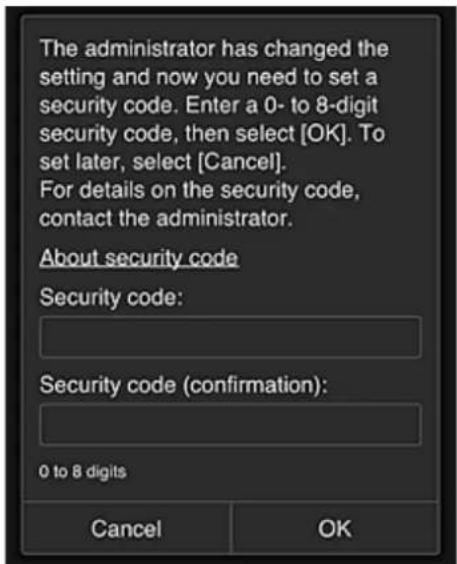
text_image
The administrator has changed the setting and now you need to set a security code. Enter a 0- to 8-digit security code, then select [OK]. To set later, select [Cancel]. For details on the security code, contact the administrator. About security code Security code: Security code (confirmation): 0 to 8 digits Cancel OKImportant
• The following character restriction applies to Security code entries:
- Up to 8 alphanumeric characters
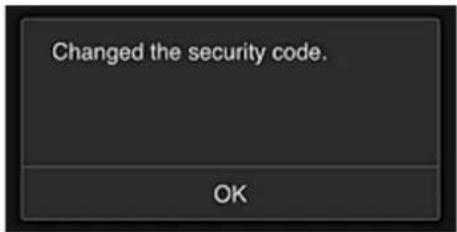
text_image
Changed the security code. OKThe Security code change process ends, and the change completion message appears. In the message screen, select OK to return to the main screen.
- Select Cloud from the printer's home screen
- In Switch user screen, select user
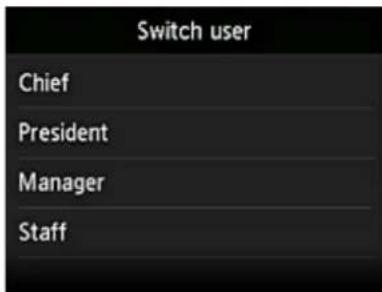
text_image
Switch user Chief President Manager Staff- Enter Security code that you set and Log in
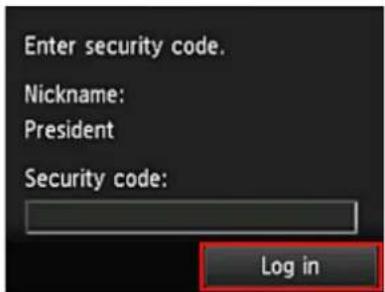
text_image
Enter security code. Nickname: President Security code: Log inNote
- If you have not set a Security code, set a Security code from My account, and then Log in.
8. Select Facebook app
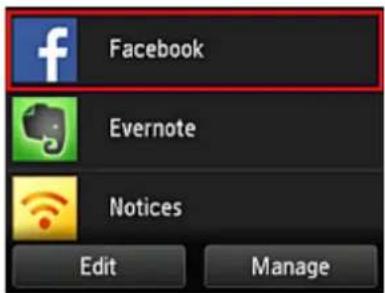
text_image
Facebook Evernote Notices Edit ManageOnly the president will be able to use the Facebook app from the printer.
Limiting Printers That Individual Users Can Use
As an example, this section describes the procedure for setting up one printer for the president and another printer for all users.
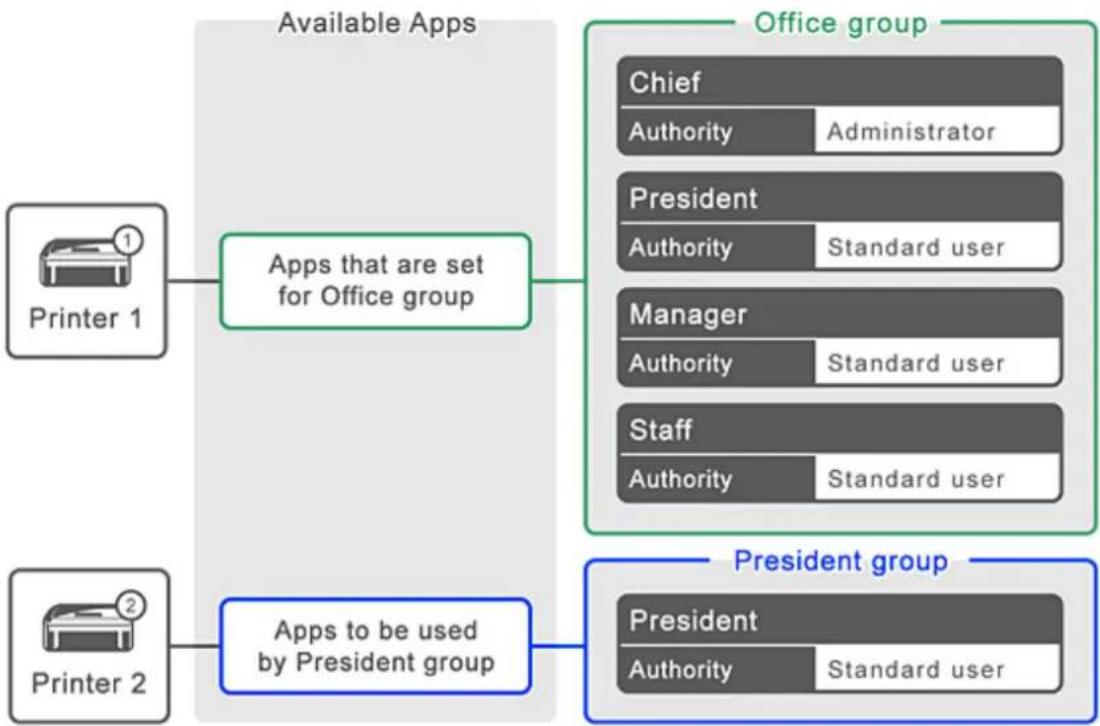
flowchart
graph TD
    A["Printer 1"] --> B["Apps that are set for Office group"]
    C["Printer 2"] --> D["Apps to be used by President group"]
    B --> E["Office group"]
    D --> F["President group"]
    E --> G["Chief"]
    E --> H["Authority"]
    E --> I["Administrator"]
    E --> J["President"]
    E --> K["Authority"]
    E --> L["Standard user"]
    E --> M["Manager"]
    E --> N["Authority"]
    E --> O["Standard user"]
    E --> P["Staff"]
    E --> Q["Authority"]
    E --> R["Standard user"]
    F --> S["President"]
    F --> T["Authority"]
    F --> U["Standard user"]
1. From

elect Group management
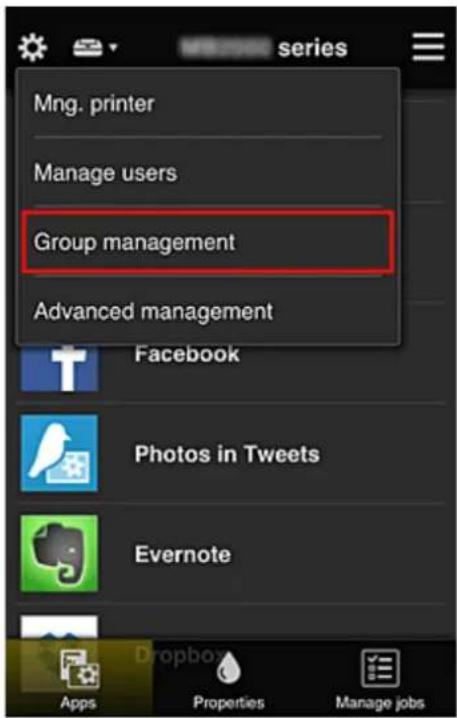
text_image
Mng. printer Manage users Group management Advanced management Facebook Photos in Tweets Evernote Apps Properties Manage jobs
Note
- This appears only if Manage by group (for office users) is set in Advanced management.
2. Select Settings for the group containing all users
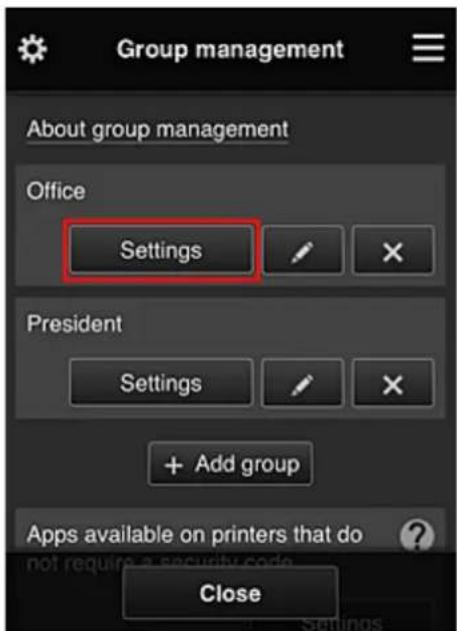
text_image
Group management About group management Office Settings President Settings + Add group Apps available on printers that do not require a security code Close3. On the Printers tab, clear printer that was set up for president
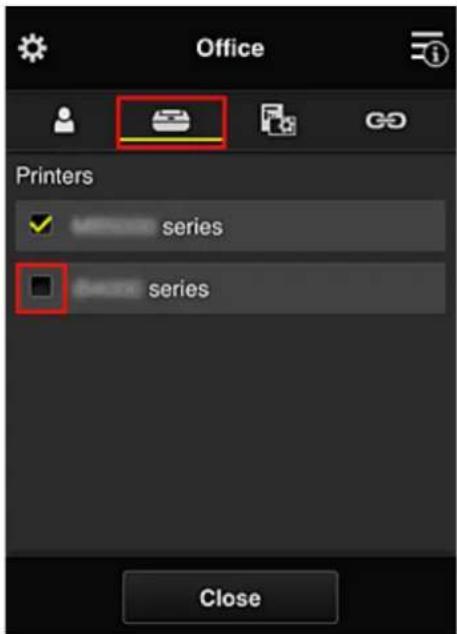
text_image
Office Printers ✓ series series CloseTo return to the Group management screen, select Close.
Important
- If a user is being managed in multiple groups and an app is deleted or the target printer is changed for one of those groups, the user can still use that app or printer if the one of the other groups allows it.
Only the printer that was set can be used by all users.
What is a Security code?
A Security code identifies the user when multiple other users are sharing the same printer.

Important
- If you are using the MAXIFY series, you can set a Security code. We recommend that you set a Security code to prevent other users from using your account.
- This code is valid only when you use MAXIFY Cloud Link from the printer operation panel. You cannot use this code when you access the Canon Inkjet Cloud Printing Center from your smartphone, tablet, or computer.
Adding a Printer
With one account, you can use the Canon Inkjet Cloud Printing Center services on multiple printers.
The procedure for adding a printer is as follows:
If your model has color LCD monitor
If your model has monochrome LCD monitor
If your model has no LCD monitor/If you are using PRO-1000 series or PRO-500 series
If your model has color LCD monitor
- Check that an e-mail containing the URL has been sent to the registered e-mail address, and access the URL
- Enter the information according to the instructions on the authentication screen, and then select Log in
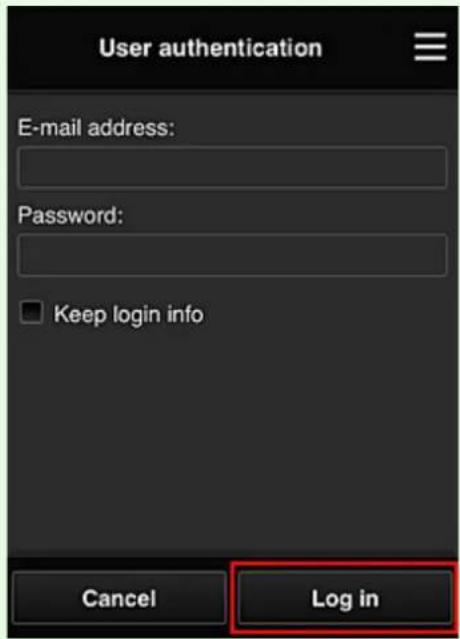
text_image
User authentication E-mail address: Password: Keep login info Cancel Log in- When printer addition complete message appears, select OK
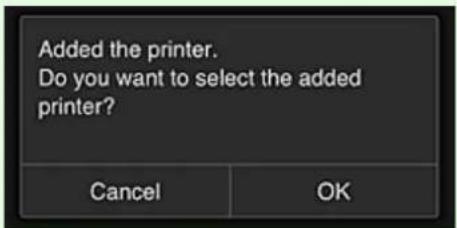
text_image
Added the printer. Do you want to select the added printer?The printer addition process ends, and the main screen of Canon Inkjet Cloud Printing Center appears.
Note
- If you select Cancel, the printer selection status does not change and the main screen of Canon Inkjet Cloud Printing Center appears.
If your model has monochrome LCD monitor If your model has no LCD monitor/If you are using PRO-1000 series or PRO-500 series
- Check that an e-mail containing the URL has been sent to the registered e-mail address, and access the URL
→ If your model has monochrome LCD monitor
If your model has no LCD monitor/If you are using PRO-1000 series or PRO-500 series
- Enter the information according to the instructions on the authentication screen, and then select Log in
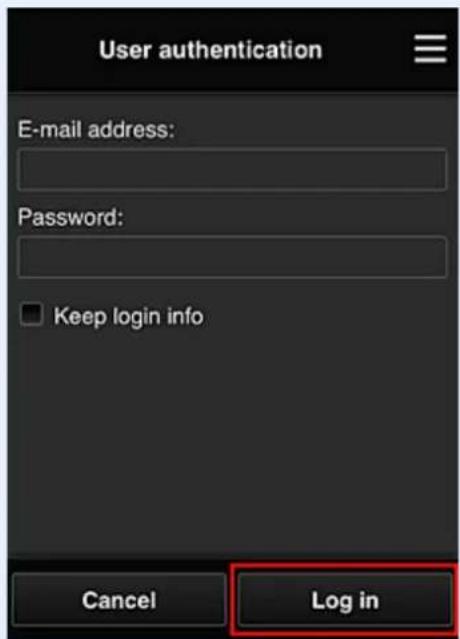
text_image
User authentication E-mail address: Password: Keep login info Cancel Log in- When printer addition complete message appears, select OK
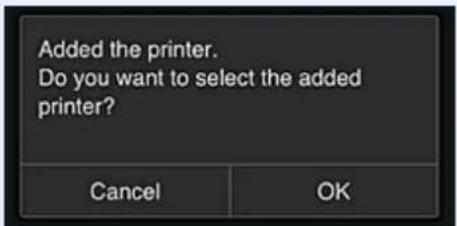
text_image
Added the printer. Do you want to select the added printer?The printer addition process ends, and the main screen of Canon Inkjet Cloud Printing Center appears.
Note
- If you select Cancel, the printer selection status does not change and the main screen of Canon Inkjet Cloud Printing Center appears.
→ Adding a PIXMA/MAXIFY Cloud Link User
Adding a PIXMA/MAXIFY Cloud Link User
Several people can use one printer.
This section describes the user addition procedure and the user privileges.
Adding a user
- On the service screen, select Manage users from

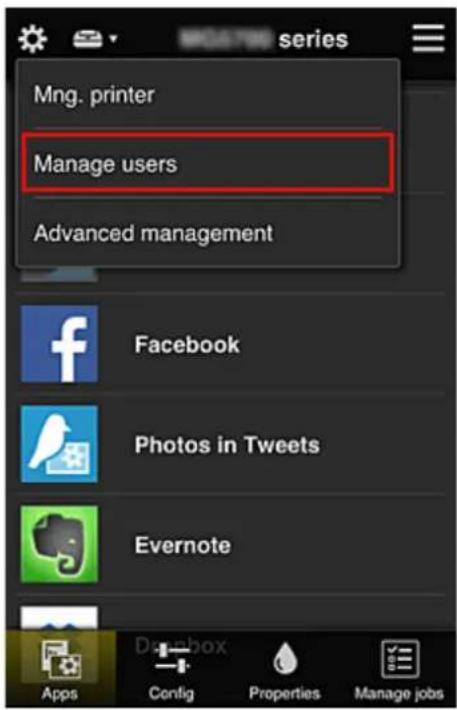
text_image
Mng. printer Manage users Advanced management Facebook Photos in Tweets Evernote Apps Config Properties Manage jobs- Select Add user
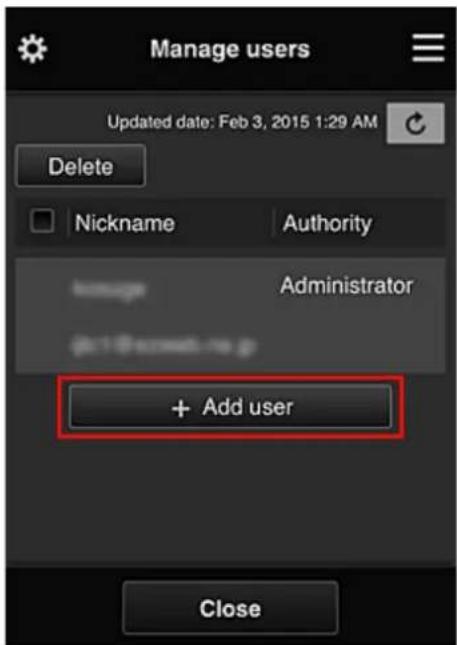
text_image
Manage users Updated date: Feb 3, 2015 1:29 AM Delete Nickname Authority Administrator + Add user Close
Note
- When you select Add user, the service first checks whether the maximum number of users has been reached. If new users can be added, the user registration screen appears.
-
The maximum number of users that can be added for 1 printer is 20.
-
Enter the e-mail address of the user to be added, and then select OK
The URL for completing the registration is then sent to the entered e-mail address.

Note
- If you enter an e-mail address that is already registered, you will receive notification that the address is registered. To specify another e-mail address, follow the displayed instructions.
- Access the URL reported in the e-mail
The procedure that follows describes what to do if you receive a notification e-mail.
- Read the terms displayed in the License agreement and Privacy statement screens. If you agree to the terms, select Agree.
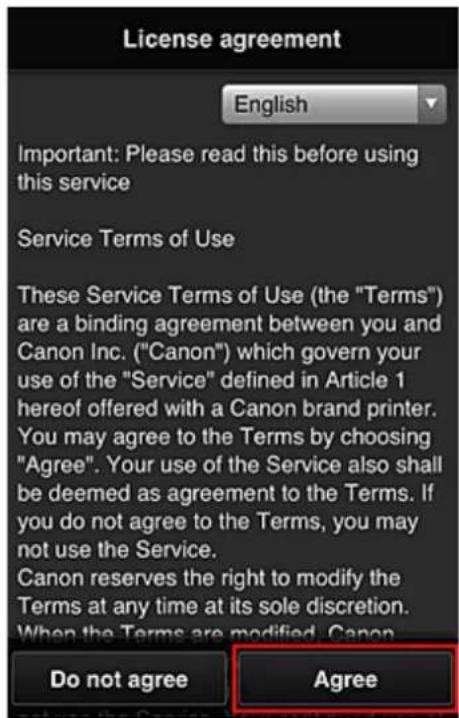
text_image
License agreement English Important: Please read this before using this service Service Terms of Use These Service Terms of Use (the "Terms") are a binding agreement between you and Canon Inc. ("Canon") which govern your use of the "Service" defined in Article 1 hereof offered with a Canon brand printer. You may agree to the Terms by choosing "Agree". Your use of the Service also shall be deemed as agreement to the Terms. If you do not agree to the Terms, you may not use the Service. Canon reserves the right to modify the Terms at any time at its sole discretion. When the Terms are modified, Canon Do not agree Agree
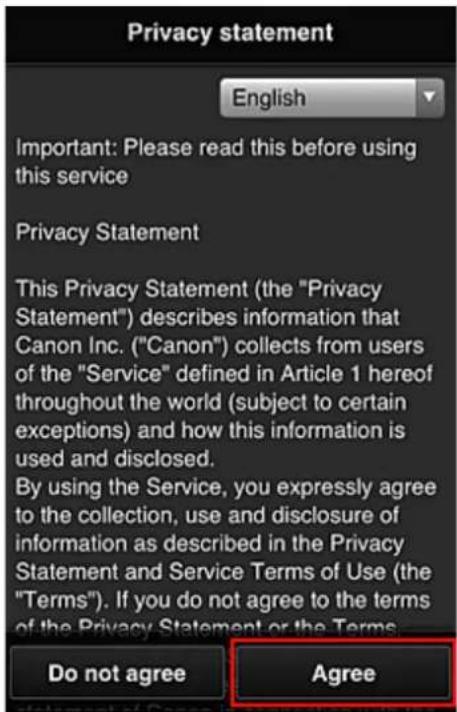
text_image
Privacy statement English Important: Please read this before using this service Privacy Statement This Privacy Statement (the "Privacy Statement") describes information that Canon Inc. ("Canon") collects from users of the "Service" defined in Article 1 hereof throughout the world (subject to certain exceptions) and how this information is used and disclosed. By using the Service, you expressly agree to the collection, use and disclosure of information as described in the Privacy Statement and Service Terms of Use (the "Terms"). If you do not agree to the terms of the Privacy Statement or the Terms. Do not agree Agree- Register a password for logging in to the Canon Inkjet Cloud Printing Center.
On the My Account Registration screen, enter you desired password into Password and Password (Confirmation) and select Next.
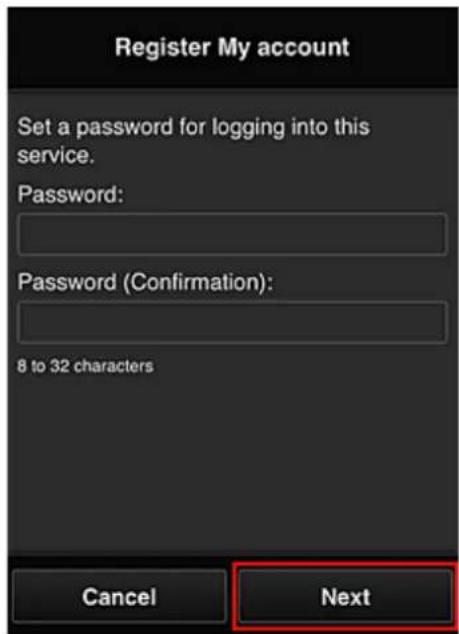
text_image
Register My account Set a password for logging into this service. Password: Password (Confirmation): 8 to 32 characters Cancel NextImportant
- There are character restrictions for the Password, as shown below.
- The password must be between 8 and 32 characters long, using single-byte alphanumeric characters and symbols (!"#\$%&')*+, -./:;<=>?@[¥]^_^{}\~). (Alphabets are case-sensitive)
7. Enter Nickname
Enter any user name that you want to use.
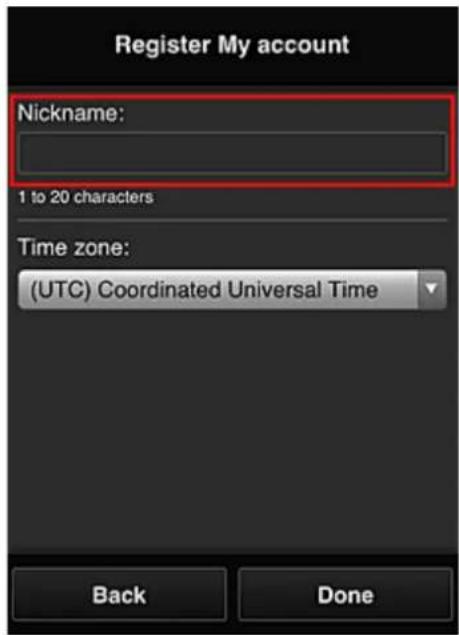
text_image
Register My account Nickname: 1 to 20 characters Time zone: (UTC) Coordinated Universal Time Back DoneImportant
- The user name entry field has the following character restrictions:
- The user name must be between 1 and 20 characters long, using single-byte alphanumeric characters and symbols (!"#\$%&'()*+,-./;<=>?@[¥]^_'{}\~). (Alphabets are case-sensitive)
8. Specify the Time zone setting, and select Done
Select your region on the list. If you cannot find your region on the list, select the one closest to your region.
Apply daylight saving time
This appears only when there is a daylight saving time in the Time zone that you selected. Select whether or not to apply the daylight saving time.
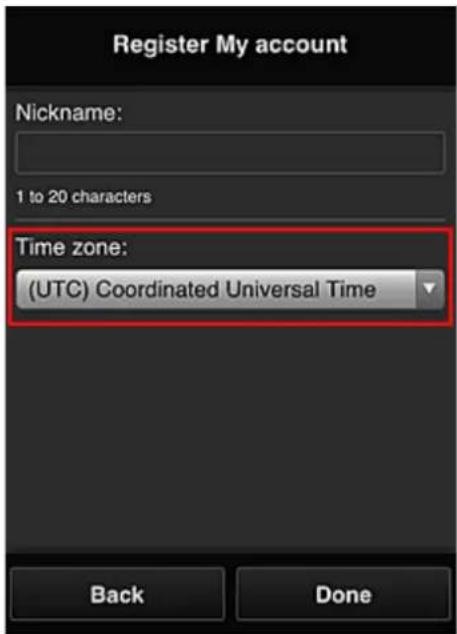
text_image
Register My account Nickname: 1 to 20 characters Time zone: (UTC) Coordinated Universal Time Back DoneThe main registration is complete, and a registration completion e-mail is sent.

Note
- When you use MAXIFY Cloud Link, a cookie for the selected user is added to the printer, and the login status of each user is recovered. For each printer, you can register cookies for up to 8 users.
Printer user privileges
If several users are using the cloud service for 1 printer, each user is categorized as the Administrator or a Standard user.

Note
- The user who is registered first becomes the Administrator. The administrator can change the privileges of users from the Manage users screen.
An Administrator can change printer information, add and delete apps, manage users, and perform various other operations.
A Standard user can check printer information and start apps.
For information about the functions that each user can use, refer to the "Canon Inkjet Cloud Printing Center window".
If you are using MAXIFY Cloud Link from the printer, select Multiuser mode in the Mng.printer screen to set the printer to Multiuser mode. Each user can then start an app and print documents.

Note
- If you have not set your own Security code, select Multiuser mode to display the Security code setup screen.
If you select Cancel, you will not be able to set Multiuser mode. - If you are the Administrator, a confirmation screen appears asking whether you want to send an e-mail prompting standard users without a Security code to set up their Security code.
- To send a notification e-mail is sent only to users without a Security code and to set Multiuser mode, select OK.
- To set Multiuser mode without sending a notification e-mail, select Cancel.
→ Troubleshooting Canon Inkjet Cloud Printing Center
Troubleshooting Canon Inkjet Cloud Printing Center
→ If an app cannot be installed
If the registered app is not in the Apps list
If the information is not updated when you press the update button
→ If you do not receive the registration e-mail
→ If you cannot print
→ Printing starts on its own even if you do not do anything
If you are unable to log in correctly even after entering the correct password in iOS or Mac
If an app cannot be installed
Check the country or region where the printer was purchased.
If the printer is taken outside the country or region where it was purchased, apps cannot be installed.
If You Are Using iP110 series
Check the country or region where the printer was purchased.
If you take the printer outside the country or region where you purchased it, you may not be able to install certain apps.
You can continue to use apps that are already installed, as long as the apps support the country or region you are moving to.
If the registered app is not in the Apps list
Check the display language of Canon Inkjet Cloud Printing Center.
If the display language is switched to a language that does not support an app, the app will not be displayed in the apps list but will continue to be registered.
If you switch back to the target language of the app, it will be displayed in the apps list and you will be able to start, register, or unregister the app.
If the information is not updated when you press the update button
Because the Properties screen requires network connection with this product, the information may not be reflected immediately. Please wait awhile, and then try updating the information again.
If the information is still not updated, then check that the product is connected to the Internet.
If you do not receive the registration e-mail
You may have entered a different e-mail address during the user registration of Canon Inkjet Cloud Printing Center.
If your model has color LCD monitor
On the printer's Home screen, select

Setup

us settings) ->
Web service
setup -> Web service connection setup -> IJ Cloud Printing Center setup -> Delete from this service to delete the service registration.
If your model has monochrome LCD monitor

On the printer operation panel, select the
Setup button, and then select Web service setup ->
Connection setup -> IJCloudPrintingCtr -> Delete from service to delete the service registration.
If your model has no LCD monitor
Displaying Printer Information -> IJ Cloud Printing Center setup -> Delete from this service to delete the service registration.
To display printer information, go to the Online Manual home page, and see "Checking Printer Information" for your model.
After resetting the printer, repeat the user registration of Canon Inkjet Cloud Printing Center from the beginning.
If you cannot print
Check the following if you cannot print.
If your model has color LCD monitor
- Check that the printer is connected to the Internet.
- Check that the printer is connected to a LAN and the LAN environment is connected to the Internet.
- Check that no error message is displayed on the printer's LCD monitor.
- If printing does not start even after you wait awhile, go to the printer's home screen, and select

Setup

(Various settings) -> Web service inquiry.
If your model has monochrome LCD monitor
- Check that the printer is connected to the Internet.
- Check that the printer is connected to a LAN and the LAN environment is connected to the Internet.
- Check that no error message is displayed on the printer's LCD monitor.
- If printing does not start even after you wait awhile, go to the printer operation panel, select Setup, and run Web service inquiry. If printing does not start, run the inquiry several times

If your model has no LCD monitor
- Check that the printer is connected to the Internet.
- Check that the printer is connected to a LAN and the LAN environment is connected to the Internet.
- If printing does not start even after you wait awhile, first turn off the printer, and then turn it back on again.
If the problem is not resolved, use the printer driver from your computer to perform the print job and check whether the data can be printed normally on the printer.
If you still cannot print, see the troubleshooting page for your model on the Home of the Online Manual.
Note
- With a wireless LAN connection, after the printer is turned on, it may take several minutes before communication is possible. Check that your printer is connected to the wireless network, and wait a while before you start printing.
- If the printer is not turned on or is not connected to the Internet, and consequently a print job is not processed within 24 hours after it was submitted, the print job is automatically canceled. If this happens, check the printer power and the Internet connection, and then re-submit the print job.
Printing starts on its own even if you do not do anything
A third party may be able to illegally use the Canon Inkjet Cloud Printing Center services.
If your model has color LCD monitor
On the printer's Home screen, select

Setup

Various settings) ->

Web service
setup -> Web service connection setup -> IJ Cloud Printing Center setup -> Delete from this service to delete the service registration.
If your model has monochrome LCD monitor
On the printer operation panel, select the

Setup button, and then select Web service setup ->
Connection setup -> IJCloudPrintingCtr -> Delete from service to delete the service registration.
If your model has no LCD monitor
Displaying Printer Information -> IJ Cloud Printing Center setup -> Delete from this service to delete the service registration.
To display printer information, go to the Online Manual home page, and see "Checking Printer Information" for your model.
After resetting the printer, repeat the user registration of Canon Inkjet Cloud Printing Center from the beginning.
If you are unable to log in correctly even after entering the correct password in iOS or Mac
If you are using iOS or Mac and the password contains the ¥ or ⌘ symbol, enter a backslash instead. For instructions on entering a backslash, see the OS help.
Print Easily from a Smartphone or Tablet with Canon PRINT Inkjet/SELPHY
Use the "Canon PRINT Inkjet/SELPHY" application to easily print photos saved on a smartphone or tablet (iOS or Android) wirelessly.
You can also receive scanned data (PDF or JPEG) directly on a smartphone or tablet without using a computer.
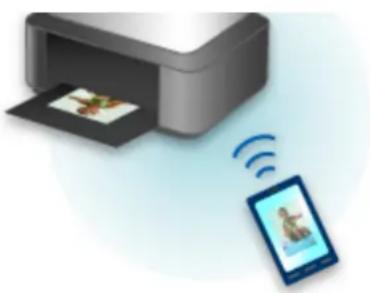
natural_image
Illustration of a printer emitting a smartphone to a wireless signal (no text or symbols)Canon PRINT Inkjet/SELPHY can be downloaded from App Store and Google Play.
Follow the steps below to print photos easily.
- Download Canon PRINT Inkjet/SELPHY.
For iOS
For Android
- Connect printer to Wi-Fi by following instructions on application screen.
- Select photo in Photo Print of application, and then tap Print.
Printing with Windows RT
When you use Windows RT 8.1 or a later version, printing is easy because you simply connect this printer to the network.
For information about connecting to the network, see the setup URL (http://www.canon.com/ijsetup) for using this product from your computer, smartphone, or tablet device.
When the connection is complete, the Canon Inkjet Print Utility software, which allows you to specify detailed print settings, is downloaded automatically.
By using Canon Inkjet Print Utility, you can check the Printer status and specify detailed print settings. (The available functions will differ depending on your usage environment and connection method.)
Online Storage Integration Function
The printer can integrate with online storage services such as Evernote.
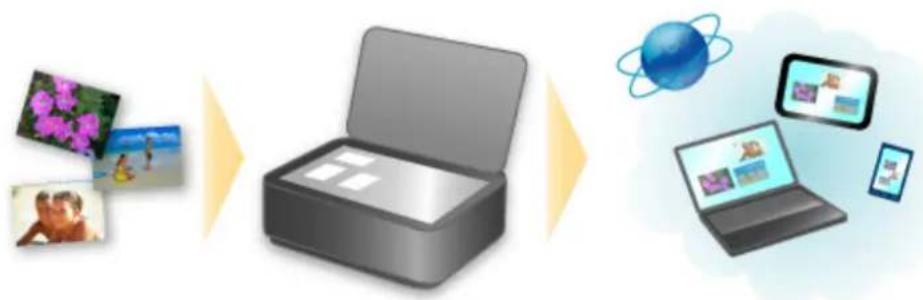
flowchart
graph LR
    A["Photo: flowers, beach, people"] --> B["Image processing box"]
    B --> C["Satellite: Earth with orbit, tablet, phone"]
Integration with Online Notetaking Service "Evernote"
If an Evernote client application is installed on your computer, you can import scanned images into the application and upload them to the Evernote server.
The uploaded images can be browsed from other computers, smartphones, etc.
To use Evernote, you need to create an account. See the "CREATE ACCOUNT" page of Evernote for account creation.
Settings
For Windows:
In the Settings Dialog Box of IJ Scan Utility, select the item you want to set, then select Evernote for Send to an application in Application Settings.
Refer to "Settings Dialog Box" for your model from Home of the Online Manual for details.
For Mac OS:
In the Settings Dialog of IJ Scan Utility, select the item you want to set, then select Evernote for Send to an application in Application Settings.
Refer to "Settings Dialog" for your model from Home of the Online Manual for details.

Important
- The Evernote service features are subject to change or termination without prior notice.
Handling Paper, Originals, Ink Tanks, etc.
Loading Paper
Paper Sources
- Loading Plain Paper / Photo Paper
- Loading Envelopes
Loading Originals
• Where to Load Originals
- Loading Originals on the Platen Glass
- Loading Documents in the ADF (Auto Document Feeder)
- Loading Based on Use
• Supported Originals
Inserting a USB Flash Drive
- Inserting a USB Flash Drive
- Removing a USB Flash Drive
Replacing Ink Tanks
• Replacing Ink Tanks
- Checking Ink Status on the LCD
Loading Paper
Paper Sources
Loading Plain Paper / Photo Paper
Loading Envelopes
Paper Sources
Adjusting the cassette to the Size of Paper Used
The cassette can be adjusted to three lengths. To extend the cassette, hold down the lock (A) as you pull the front toward you.
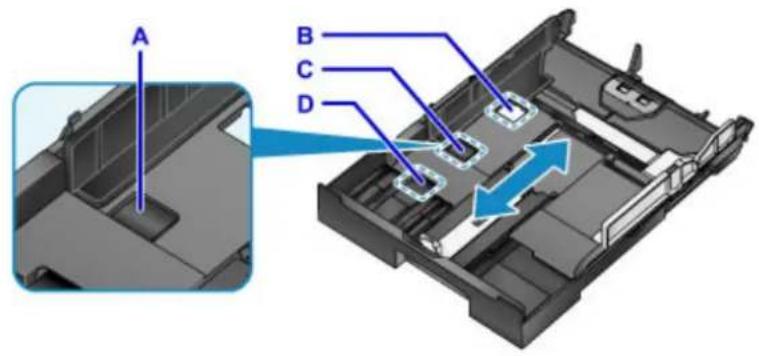
text_image
A B C D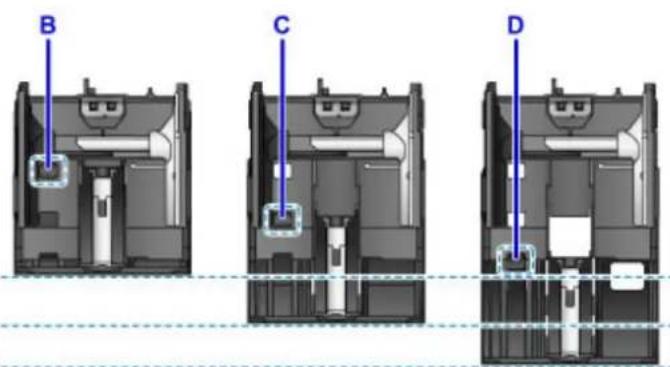
text_image
B C DB: Lock position for stowing the cassette
Set to position B when the machine will not be used for some time, or before shipping it. In this position, the cassette is flush against the surface of the machine. Note that paper cannot be loaded in this position.
C: Lock position for A4 or Letter-sized paper or smaller
Set to position C for paper of A4 or Letter size or smaller. The cassette is not flush against the machine, but you can cover it by pulling out the paper output tray. Set the cassette to this position for normal use.
D: Lock position for paper larger than A4 or Letter size
Set to position D for paper larger than A4 size, such as Legal-sized paper. In this position, the cassette is not fully covered when you pull out the paper output tray. (By design, the cassette protrudes from the machine a little.)
Load Paper Printing-Side Down
Some paper such as photo paper has distinct top and bottom surfaces. Load this paper with the whiter or glossy side facing down.
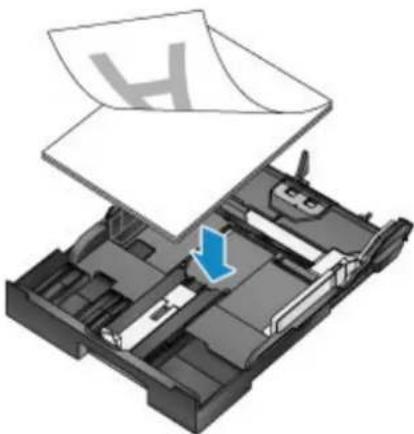
natural_image
3D printer assembly diagram showing paper feeding into a printer with a blue arrow indicating the print direction (no text or symbols present)
Note
- When printing, select the correct sizes and types of paper. Incorrect page size and media type settings may cause improper print quality.
For instructions on loading paper in the cassette, see these sections.
Loading Plain Paper / Photo Paper
Loading Envelopes
Loading Plain Paper / Photo Paper
Load paper in the cassette.

Important
- Paper may jam if you test printing by cutting plain paper into smaller sizes, such as 4" x 6" (10 x 15 cm) or 5" x 7" (13 x 18 cm).

Note
- For details on sizes and weights of paper you can use, see Supported Media Types.
- For instructions on loading envelopes, see Loading Envelopes.
1. Prepare the paper.
Align the edges of the paper. If the paper is curled, flatten it.

natural_image
Illustration of two hands holding a blank sheet with bidirectional arrows indicating vertical movement (no text or symbols)
Note
- Align the edges of paper neatly before loading it. Loading an uneven stack of paper may cause paper jams.
- If paper is curled, gently bend the curled corners in the opposite direction to flatten the paper.
For details on how to flatten curled paper, see "Correct curl before loading paper." in Paper Is Smudged / Printed Surface Is Scratched. - Slight curling of Photo Paper Plus Semi-gloss SG-201 should not be straightened. Instead, load one sheet at a time as-is. Bending this kind of paper to flatten it may crack the surface and reduce print quality.
2. Pull out the cassette.
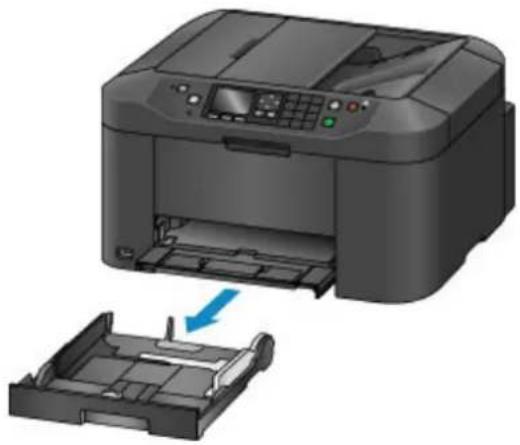
natural_image
3D printer image showing the printer's internal structure being inserted into a plastic case (no text or symbols visible)-
Slide the front (A) and right (B) paper guides out to make room for the paper.
-
Load the stack of paper printing-side DOWN, centered on the cassette.
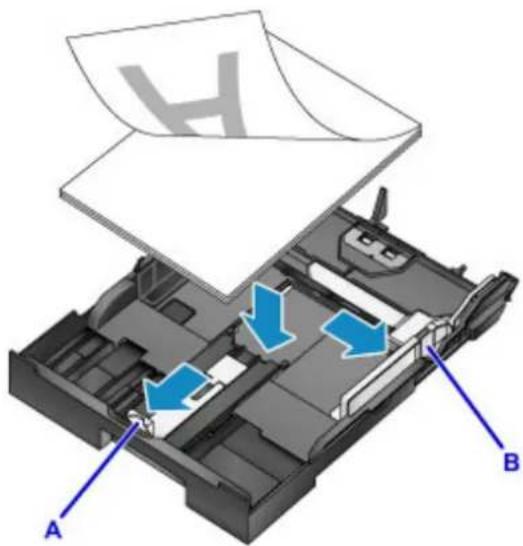
text_image
Diagram of a printer's internal structure with labeled parts A and B, showing airflow direction arrows.Important
• Always load paper in portrait orientation (C). Loading paper in landscape orientation (D) may cause paper jams.

C

D
Note
- Some paper such as photo paper has distinct top and bottom surfaces. Load this paper with the whiter or glossy side facing down.
- Align the stack of paper with the edge of the cassette as shown.
Feeding problems may occur if the paper is touching the protrusion (E).
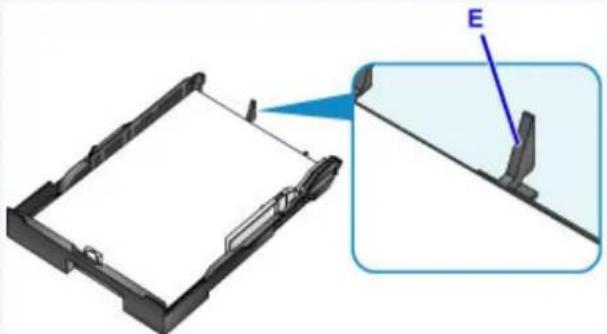
natural_image
3D mechanical assembly diagram showing a frame with a tool and a close-up view of a bracket (no text or symbols)- To load paper 5" x 7" (13 x 18 cm) or smaller, lift the tab (F) on the paper guide.
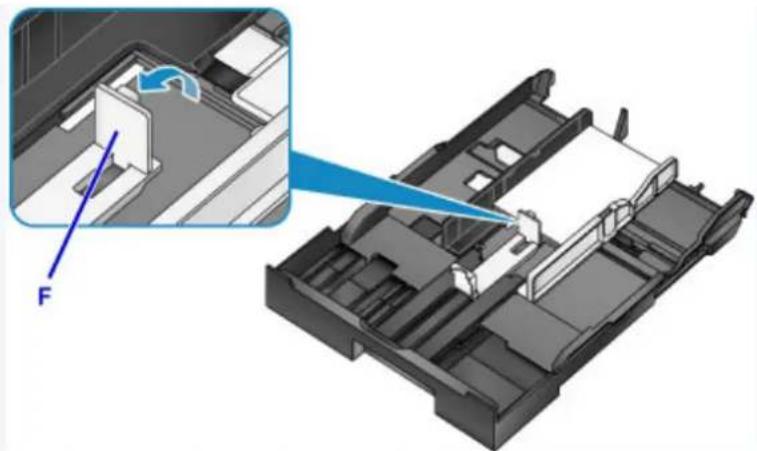
natural_image
3D mechanical assembly diagram showing internal components and a blue arrow labeled 'F' pointing to a component (no text or symbols beyond label)• To load paper larger than A4 size, press the lock (G) and pull the cassette all the way out.
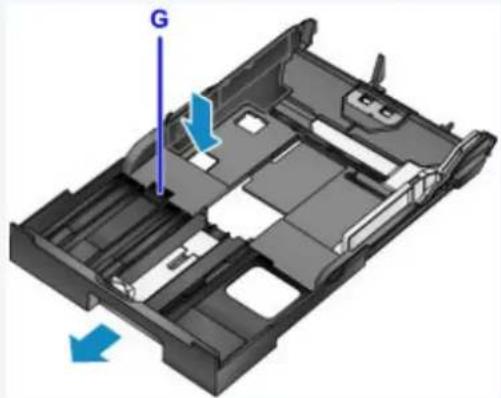
natural_image
3D mechanical assembly diagram showing internal components with blue arrows indicating direction (no text or symbols)- Align the front paper guide (A) with the stack.
The paper guide (A) clicks into place when aligned with a page size marked on the cassette.
- Slide the right paper guide (B) to align the right and left guides with both edges of the stack.
Do not set the paper guides too firmly against the paper, which may cause feeding problems.
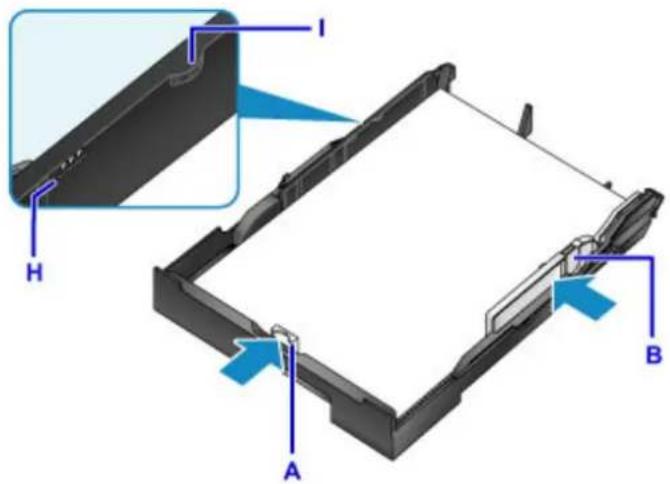
text_image
I H A BNote
- Do not load sheets of paper past the load limit mark (H).
- Keep the stack height below the paper guide tabs (I).
7. Insert the cassette.
Push the cassette into the machine until it stops.
After you insert the cassette, a screen for registering paper information for the cassette is displayed on the LCD.
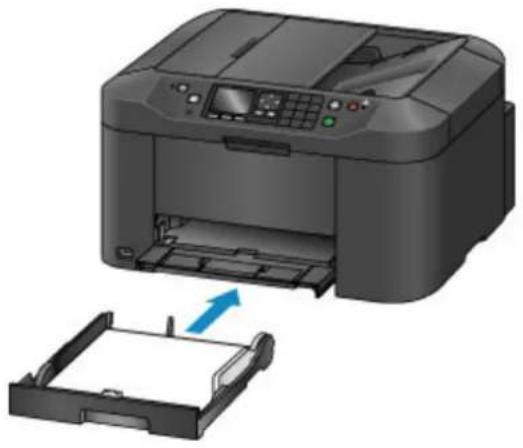
natural_image
Illustration of a printer with an open lid and a blue arrow indicating the paper's edge (no text or symbols present)Note
- Paper A4 or Letter-sized or smaller: The cassette stops at the same position as the extended paper output tray, which then covers the cassette.
- Paper larger than A4 or Letter size: The cassette protrudes past the paper output tray. Do not force the cassette into the machine any further, which may damage the machine or cassette.
natural_image
3D rendering of a printer's internal structure showing paper feed and paper holder (no text or symbols visible)8. Select the size and type of paper in the cassette in Page size and Type, and then press the OK button.
Follow the instructions of any messages displayed to register the paper information.
→ Paper Settings
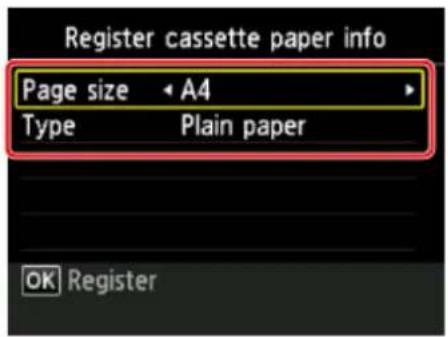
text_image
Register cassette paper info Page size • A4 Type Plain paper OK Register- Pull out the output tray extension (J) and open the paper output support (K).
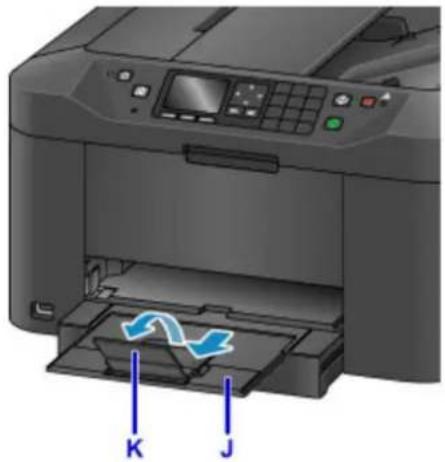
natural_image
Illustration of a printer with arrows indicating print process, showing internal structure and control panel (no text or symbols)Note
- Before printing, select the size and type of paper loaded, either on the print settings screen of the operation panel or in the printer driver.
Loading Envelopes
Once you have set up the printer driver correctly, addresses are automatically rotated and printed to suit the envelope orientation.

Important
- Do not use the following envelopes. These kinds of envelops may become stuck or cause the machine to malfunction.
- Envelopes with embossed or coated surfaces
- Envelopes with a double flap
- Envelopes with adhesive flaps that are already moistened

Note
- For details on sizes and weights of paper you can use, see Supported Media Types.
- Prepare the envelopes.
• To flatten the envelopes, press down on the corners and edges.
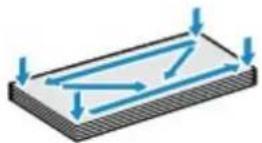
- If the envelopes are curled, hold opposite corners and gently bend them the opposite way.

natural_image
Illustration of two hands holding a folded fabric or material, with blue arrows indicating direction (no text or symbols)- Flatten any flaps that are bent.
- Using a pen, press the leading edge in the direction of insertion to flatten the envelope.
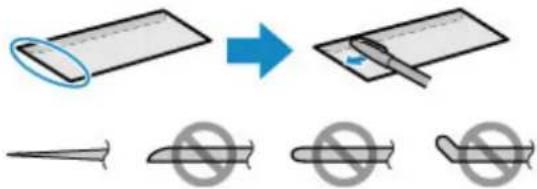
text_image
Diagram illustrating a process of removing a plastic sheet into a pen, with corresponding prohibition symbols.Side view of the envelope's leading edge.

Important
- Envelopes that are not flat or that are loaded unevenly may become stuck. Make sure that any curled or bowed surfaces are no higher than 0.1 inch (3 mm).
- Pull out the cassette.

natural_image
Illustration of a printer being inserted into a plastic holder, showing internal structure and control panel (no text or symbols)-
Slide the front (A) and right (B) paper guides out to make room for the paper.
-
Load the envelopes face-DOWN, centered in the cassette.
The flap will face up, as shown below.

Up to 10 envelopes can be loaded at once.
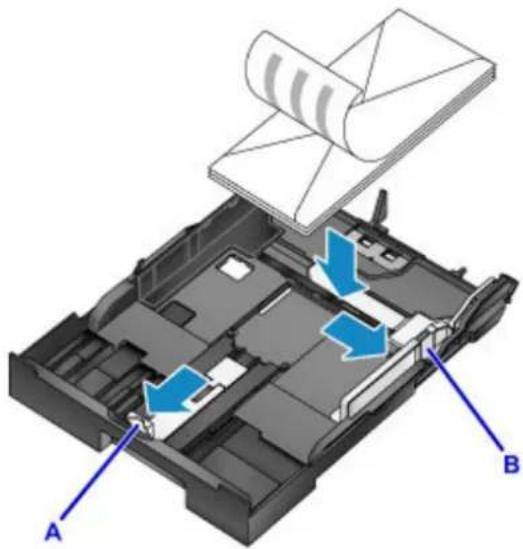
natural_image
3D mechanical assembly diagram showing internal components with blue arrows indicating flow or movement, labeled A and B (no text or symbols beyond labels)Note
- Align the stack of envelopes with the edge of the cassette as shown. Feeding problems may occur if the envelopes are touching the protrusion (C).
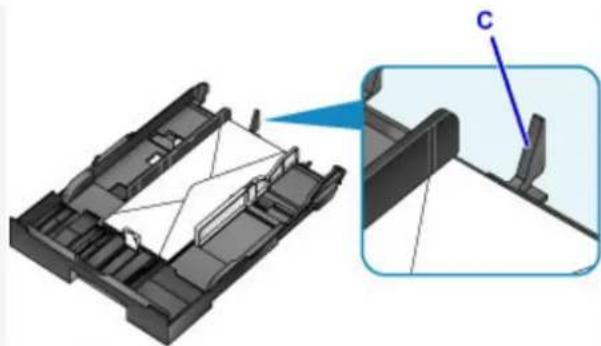
natural_image
3D mechanical assembly diagram showing a component with a highlighted section labeled 'C' (no text or symbols present)-
Align the front paper guide (A) with the edge of the envelopes.
-
Slide the right paper guide (B) to align the right and left guides with both edges of the envelopes.
Do not set the paper guides too firmly against the envelopes, which may cause feeding problems.
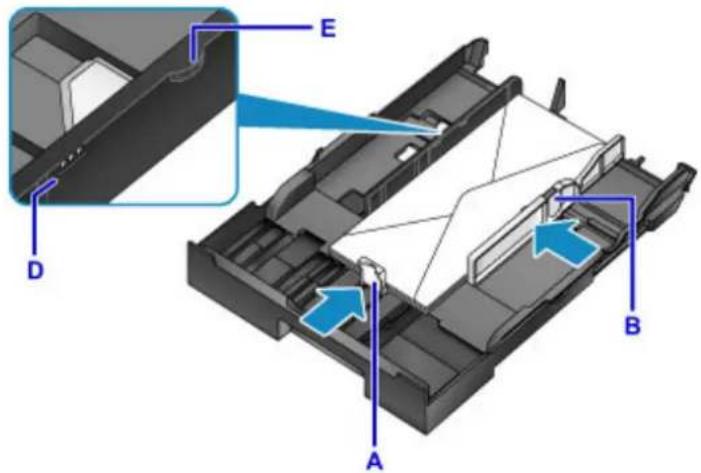
text_image
Technical diagram of a printer or printer assembly with labeled parts A, B, D, and E, showing internal structure and directional arrows.Note
- Do not load envelopes past the load limit mark (D).
- Keep the stack height below the paper guide tabs (E).
7. Insert the cassette.
Push the cassette into the machine until it stops.
After you insert the cassette, a screen for registering paper information for the cassette is displayed on the LCD.
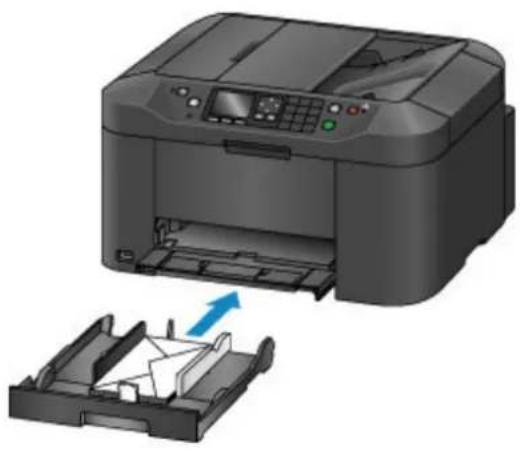
natural_image
Illustration of a printer with an open lid and a blue arrow indicating a loading or transformation (no text or symbols present)- Select the size and type of envelopes in the cassette in Page size and Type, and then press the OK button.
→ Paper Settings
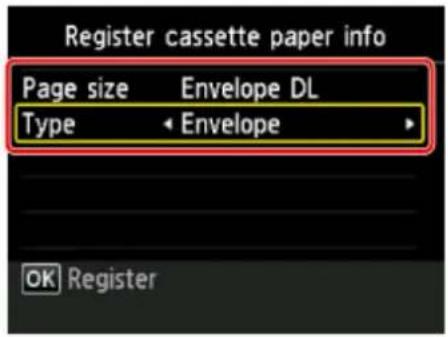
text_image
Register cassette paper info Page size Envelope DL Type Envelope OK Register- Pull out the output tray extension (F), and then open the paper output support (G).
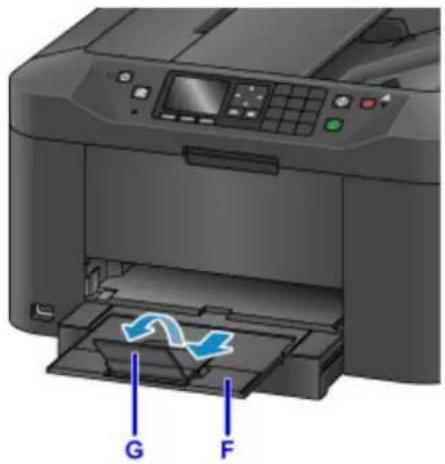
natural_image
3D printer image showing paper feeding into a slot, with arrows indicating flow direction (no text or symbols)Note
- Before printing, select the size and type of loaded envelopes on the print settings screen of the printer driver.
Loading Originals
Where to Load Originals
Loading Originals on the Platen Glass
Loading Documents in the ADF (Auto Document Feeder)
Loading Based on Use
▶ Supported Originals
Where to Load Originals
Load originals on the platen glass or in the ADF (Auto Document Feeder).
To decide where to load originals, consider the size and type of originals and the purpose of use.
→ Supported Originals
Loading Originals, Photos, or Books on the platen glass
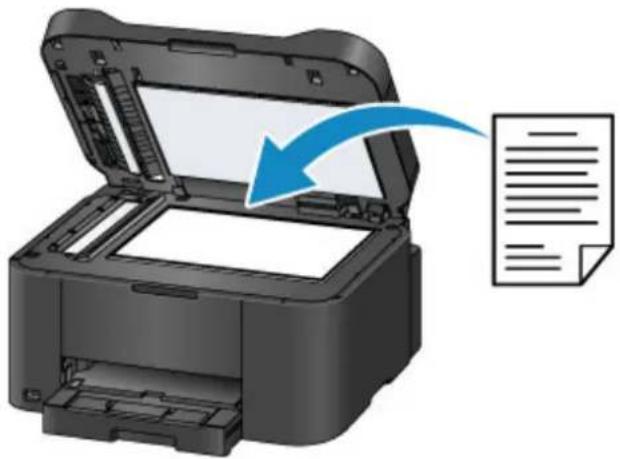
natural_image
Illustration of a printer with an open lid and paper feed, showing a blue arrow indicating the process (no text or symbols present)Loading Multiple Documents of the Same Size and Thickness in the ADF
Individual documents can also be loaded in the ADF.
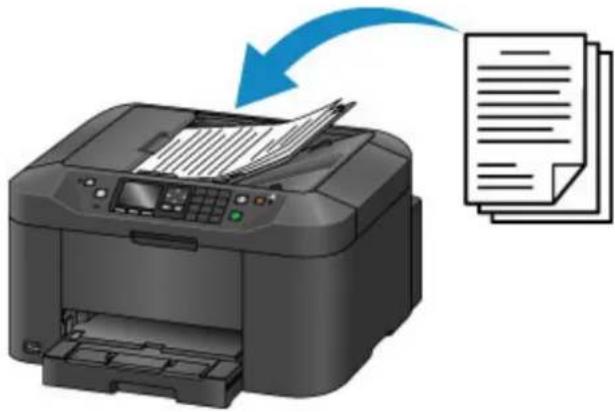
text_image
Illustration of a printer with a blue arrow indicating document processing or receipt, accompanied by a stack of paper sheets.Note
- For best results, load originals on the platen glass.
Loading Originals on the Platen Glass
- Open the document cover.
Important
- When opening or closing the document cover, be careful not to touch buttons or the LCD on the operation panel. This may cause unexpected operation.
- Load the original face-DOWN on the platen glass.
→ Supported Originals
→ Loading Based on Use
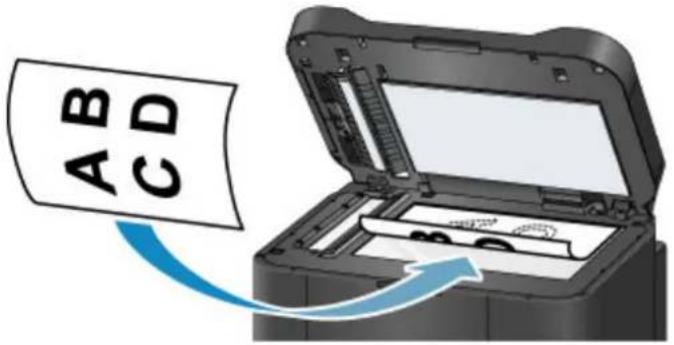
text_image
A B C DImportant
- Note these precautions when loading originals on the platen glass.
- Do not place any objects weighing 4.4 lb (2.0 kg) or more on the platen glass.
- Do not apply pressure of 4.4 lb (2.0 kg) or more against the platen glass, as by pressing down on originals.
This may prevent correct scanning or damage the platen glass.
- Close the document cover gently.
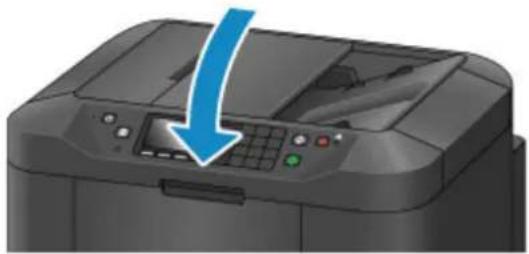
natural_image
Close-up of a printer with a blue arrow pointing to the front panel (no visible text or symbols)Important
• After loading an original on the platen glass, close the document cover before copying, faxing, or scanning.
Loading Documents in the ADF (Auto Document Feeder)

Note
- For best results, load documents on the platen glass.
-
Remove any originals left on the platen glass.
-
Open the document tray.
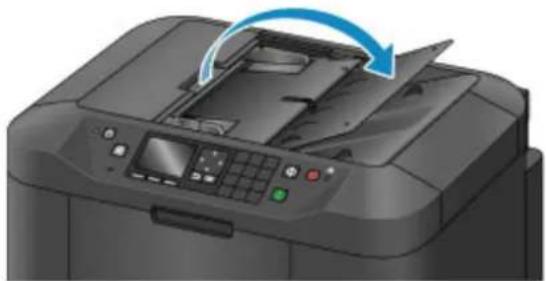
natural_image
Illustration of a printer with a blue arrow indicating rotation or compression (no text or symbols present)- Insert the document in the document tray until the machine beeps.
Load documents face-UP in the document tray.
→ Supported Originals

Note
- No tone is played if you have silenced beeping in Device user settings > Sound control. → Device user settings
- Adjust the document guides (A) to match the width of the document.
Do not set the document guides too firmly against the document, which may cause feeding problems.
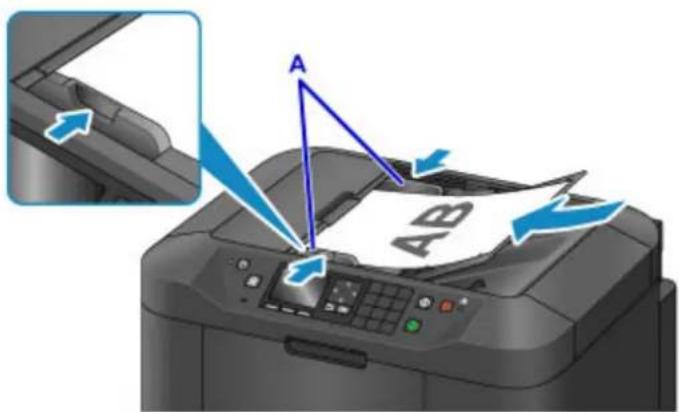
text_image
Diagram showing printer printing process with labeled paper and arrows indicating steps A and ABLoading Based on Use
Load originals correctly for how they will be used. Originals loaded incorrectly may cause scanning problems.
Align Originals with the alignment mark
- When loading originals to copy or fax
- When selecting Doc.type > Document or Photo in Scan and specifying a standard size (such as A4/Letter) in Scan size
-
When using a computer to:
-
Scan documents, magazines, or newspapers
- Specify a standard size (such as A4/Letter) to scan originals
Place the original face-DOWN on the platen glass and align it with the alignment mark ( ). The diagonally striped area is outside the scanning area.
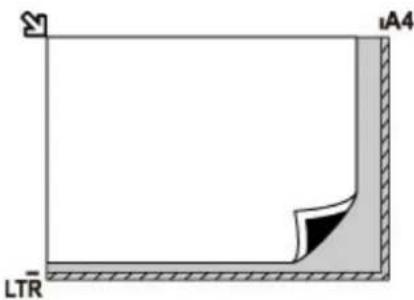
natural_image
Pure geometric diagram showing a corner with labeled dimensions LTR and A4, no text or symbols present.Important
- The striped area (A, 0.04 inch (1 mm) from the edges of the platen glass) is outside the scanning area.
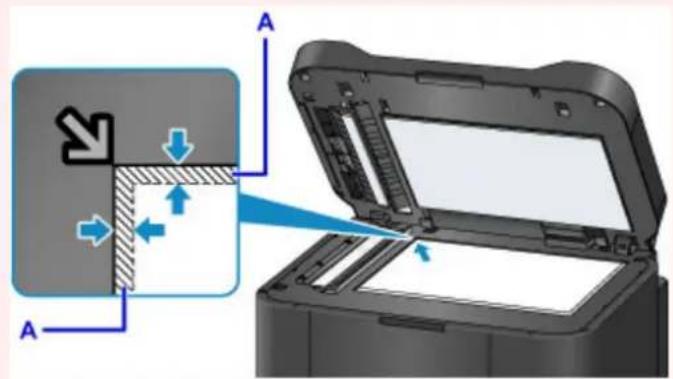
text_image
Diagram illustrating printer operation with labeled parts and directional arrows indicating flow or movementCenter One Original on the platen glass
- When selecting Doc.type > Photo in Scan and specifying Scan size > Auto scan to scan one original
Load the original face-DOWN at least 0.4 inch (1 cm) from the edges of the platen glass. The diagonally striped area is outside the scanning area.
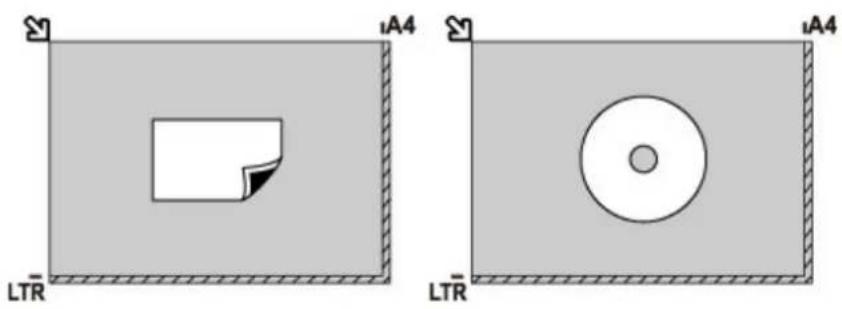
natural_image
Two gray rectangular panels with cutouts and circular patterns, labeled LTR on each side (no text or symbols within panels)Load Multiple Originals on the platen glass
- When selecting Doc.type > Photo in Scan and specifying Scan size > Auto multi scan to scan multiple originals
- When scanning multiple photos, postcards, or business cards from a computer
Load the originals face-DOWN. Leave at least 0.4 inch (1 cm) open between originals and from the edges of the platen glass. The diagonally striped area is outside the scanning area.
You can load up to 12 originals at once.

text_image
A A A A LTR A A4A: At least 0.4 inch (1 cm)
Note
- Skew Correction automatically straightens images scanned from originals loaded askew (up to approximately 10^ ). However, scans of photos with a long edge of 7.1 inches (180 mm) or more that are loaded askew cannot be corrected.
- Non-rectangular or irregularly shaped photos (such as cut-out photos) may not be scanned correctly.
Supported Originals
On the platen glass
| Item Details | |
| Kind of original - Document, magazine, or | newspaper- Photo, postcard, business card, or optical disc (Blu-ray disc, DVD, or CD)- Documents unsuitable for the ADF |
| Size (width x height) Max. 8.5 x 11.7 inches (216 x 297 mm) | |
| Quantity One or more sheets* | |
| Thickness Max. 0.4 inch (10 mm) | |
* With some functions, multiple originals can be loaded on the platen glass.
→ Loading Based on Use
In the ADF (Auto Document Feeder)
| Item Details | |
| Kind of original Plain-paper documents with multiple pages of the same size, thickness,and weight | |
| Size (width x height) - Max. 8.5 x 14.0 inches (216 x 356 mm)- Min. 5.8 x 5.8 inches (148 x 148 mm)Duplex copying or 2-on-1/4-on-1 copying: A4/Letter only | |
| Quantity | - A4/Letter: Max. 50 sheets (20 lb (75 g /m2) paper), up to 0.20 inch (5 mm) high- Legal: Max. 10 sheets (20 lb (75 g /m2) paper), up to 0.04 inch (1 mm) high- Other sizes: 1 sheet |
| Thickness 0.003 to 0.005 inch (0.07 to 0.13 mm) | |
| Weight | 16.0 to 25.3 lb (60 to 95 g /m2) |
Note
- Make sure any liquids on documents, such as glue, ink, or correction fluid are dry before loading.
Do not load glued documents in the ADF, even if the glue is dry, because this may cause paper jams. - Remove all staples, paper clips, or other fasteners before feeding documents.
- Load Legal-sized documents in the ADF.
- Do not load these kinds of documents in the ADF, which may cause paper jams.
- Wrinkled or creased documents
- Curled documents
- Torn documents
-
Documents with holes
-
Glued documents
- Documents with sticky notes
- Documents on carbon paper
- Documents on coated paper
- Documents on onion skin or other thin paper
- Photos or excessively thick documents
Inserting a USB Flash Drive
Inserting a USB Flash Drive
Removing a USB Flash Drive
Inserting a USB Flash Drive
Supported Image Files
- Can print images taken with cameras conforming to Design Rule for Camera File System specifications, as well as TIFF images. Both types of images must conform to Exif 2.2/2.21/2.3. Other types of images or movies such as RAW images cannot be printed.
- Can print images scanned and saved by the machine itself with Doc.type set to Photo and Format set to JPEG (file extension ".jpg").
Note
• This device incorporates exFAT technology licensed from Microsoft.
- If the USB flash drive does not fit in the machine's USB flash drive port, you may need an extension cable for it. This accessory is available at electronics stores.
- Not all USB flash drives may be detected by the machine, and correct operation is not guaranteed.
- Secure USB flash drives may not be compatible.
- Insert the USB flash drive into the USB flash drive port.
Make sure the USB flash drive is right-side up and insert it straight into the port.
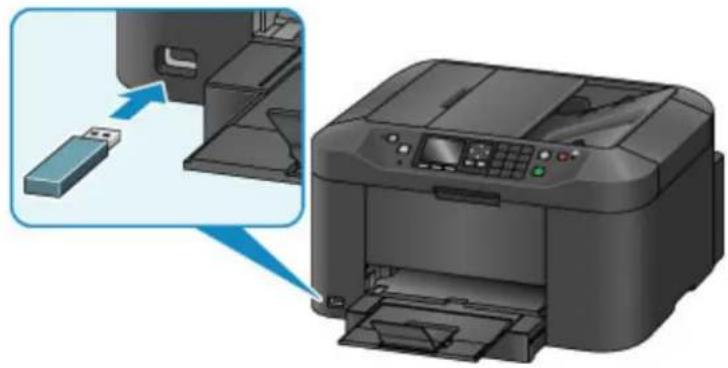
natural_image
Illustration of a printer with an open slot and a blue arrow pointing to it, showing internal components (no text or symbols)Removing a USB Flash Drive
- Before removing a USB flash drive, make sure the machine is not reading or writing data.
During these operations, a message appears on the LCD.
Important
- Do not remove a USB flash drive or turn off the machine while the machine is reading or writing data.
Note
- If your USB flash drive has an access indicator, check it to make sure reading or writing is finished. Refer to the USB flash drive instruction manual, as needed.
- Remove the USB flash drive.
Hold the USB flash drive and pull it straight out of the machine.
Replacing Ink Tanks
Replacing Ink Tanks
▶ Checking Ink Status on the LCD
Replacing Ink Tanks
In the case of warnings or errors caused by low ink levels, messages appear on the LCD to notify you. Respond to the message as needed.
Message Appears
Note
- If printing is faint or affected by white streaks even when there is enough ink, see Maintenance Procedure.
- For precautionary notes on handling ink tanks, see Notes on ink tanks.
Steps to Replace ink tanks
When needed, replace ink tanks as follows.
- After confirming that the machine is on, open the front cover.
The ink tanks you can replace are identified on the LCD, and the print head holder (A) moves into position for replacement of those ink tanks.

natural_image
3D printer image showing internal structure with blue arrow indicating motion (no text or symbols)Caution
- Do not stop the moving print head holder or force it to a different position. Do not touch the print head holder until it stops moving.
Important
- Do not remove an ink tank until a new one is prepared to be installed.
- Once you remove an ink tank, the machine will not operate until a new one is installed.
-
Once you remove an ink tank, the machine will not operate even if the removed ink tank is just reinstalled.
-
The ink tanks in other positions cannot be replaced. Forcing them out may damage the machine or cause malfunction.
- Do not touch metallic parts or other areas inside the machine.
- If you leave the front cover open for more than 60 minutes, the print head holder will move to the right. In this case, close the front cover and open it again.

Note
- If a warning about ink tank replacement appears, check the message and press the OK button.
- Once the ink tank for replacement is identified on the LCD, push up the ink tank eject lever (B).
The ink tank is ejected.
To replace another ink tank, press the right Function button to select Next and display the screen for the next ink tank to replace.
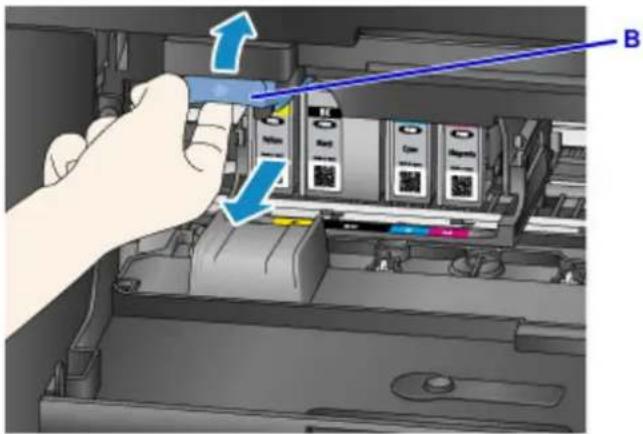
natural_image
Hand inserting a cable into an electronic device (no text or symbols visible)
Important
- Place the removed ink tank into a plastic bag immediately after removing from the machine. Otherwise, ink residue may stain your clothes or the surrounding area.
- Do not touch parts other than ink tanks.
- Follow local regulations when discarding used ink tanks.
-
Handle ink tanks carefully. Do not drop them or press hard on them.
-
Remove the ink tank from the package.

natural_image
Illustration of a cutting tool with a blade and blade, showing a blue arrow indicating rotation (no text or symbols)
Important
- Do not touch the contact (C) or interface (D) of the ink tank.
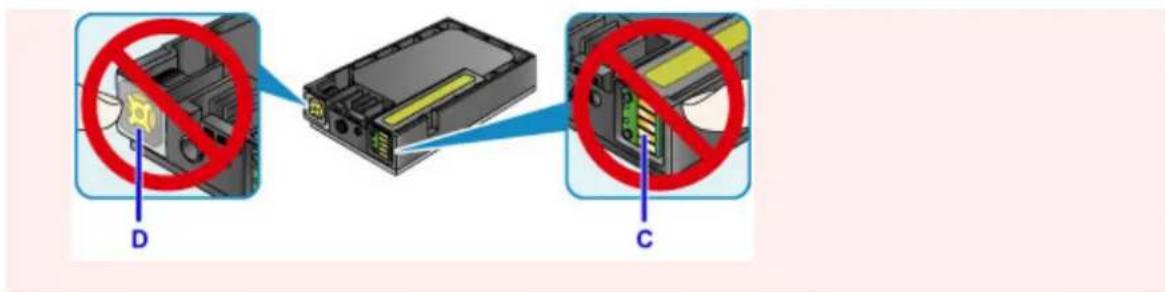
text_image
D C- Insert the new ink tank, aligning it with the installation guide (E) on the machine.
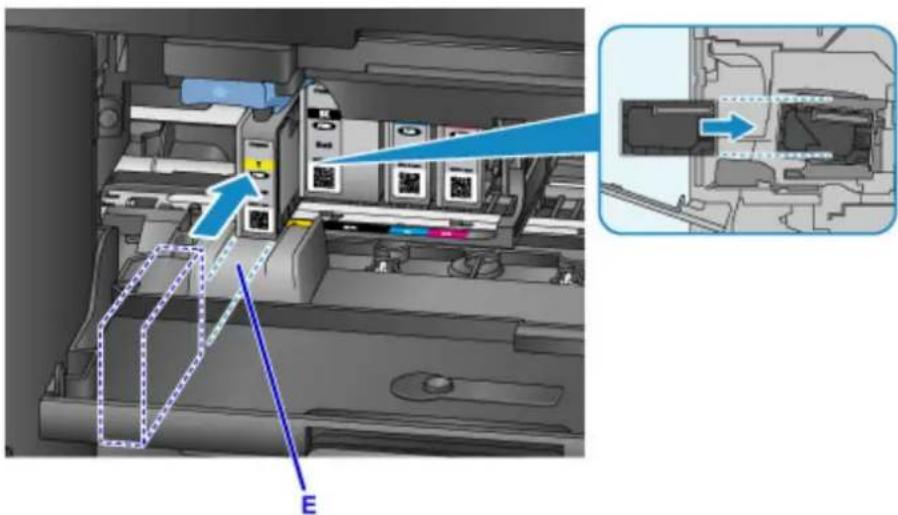
text_image
Technical diagram showing internal components of a printer or printer with labeled parts and directional arrows indicating flow or movement.Important
- The ink tank will not fit in the wrong position. Check the label under the installation position, and install the ink tank in the correct position.
- Push the ink tank in firmly until it clicks into place.
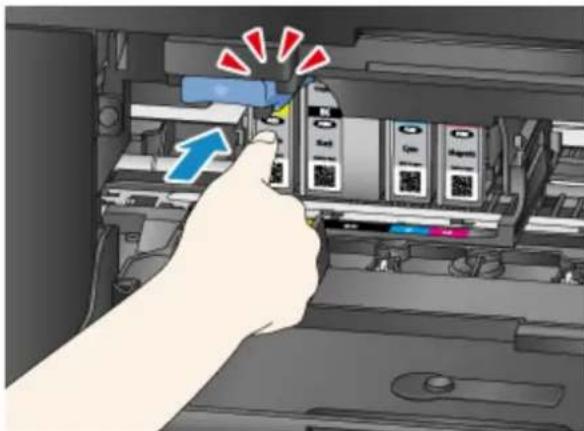
natural_image
Hand inserting a USB into a printer's internal circuit (no text or symbols visible)- Press the right Function button to select Exit.
If Next is displayed, another ink tank can be replaced.
To replace the next ink tank, press the right Function button and repeat this procedure from step 2.
To exit ink tank replacement, press the right Function button until Exit is displayed.
The print head holder moves to the standby position. The ink tanks cannot be removed from this position.
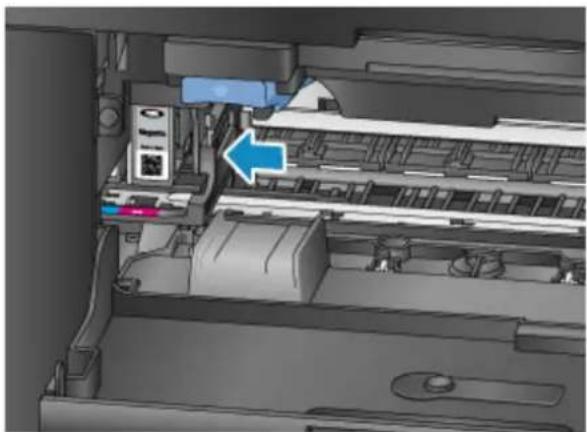
natural_image
Interior view of a printer or printer mechanism showing internal components and a blue arrow indicating a specific part (no text or symbols visible)Important
- Printing is not possible without a complete set of ink tanks installed. Install all ink tanks.
- Installed ink tanks cannot be removed until a replacement message appears.
7. Close the front cover.
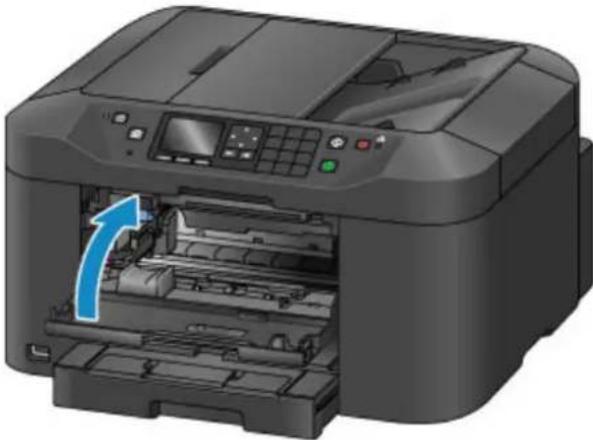
natural_image
3D printer image showing internal structure with a blue arrow indicating the paper's opening (no text or symbols visible)After ink tank replacement, the machine starts mixing the ink automatically. Wait until this noise stops. (Mixing takes 1–2 minutes.)
Note
- Respond to any error messages as needed.
Message Appears - If the print head is out of alignment, as when parallel lines are not printed parallel, align the print head.
- The machine may make a noise during these operations, but this does not indicate a problem.
Notes on ink tanks

Important
• Install replacement ink tanks promptly. Do not leave the machine without ink tanks installed.
- Replace empty ink tanks with new ones. Installing used ink tanks may clog the nozzles. Used ink tanks may also prevent correct notification of the ink tank replacement timing.
- Do not remove installed ink tanks and leave them outside the machine. In this state, ink tanks will dry out, which may prevent correct operation when they are reinstalled. To maintain optimal print quality, use up ink tanks within six months after you install them.

Note
- Color ink may be consumed even when printing black-and-white originals, or when black-and-white printing is specified.
All colors of ink are also consumed during standard and deep print head cleaning to maintain performance. When ink tanks run out of ink, promptly replace them with new ones.

Ink Tips
Checking Ink Status on the LCD

Note
- If one or more ink colors runs out,

to in the HOME screen. When

appears, check which ink (or inks) has run out using the following procedure.
- Make sure the machine is on, and display the HOME screen.
If the HOME screen is not displayed, press the HOME button to display it.
- Press the center Function button on the HOME screen.
→ LCD and Operation Panel
A symbol appears in area A in case of any messages about the remaining ink level.
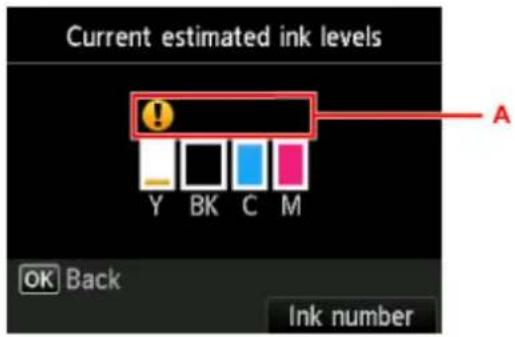
text_image
Current estimated ink levels Y BK C M OK Back Ink number AExample:
Ink tank is running low. Prepare a new ink tank.

Note
- Ink levels on this screen are estimates.
- You can also display the Current estimated ink levels screen by selecting Setup on the HOME screen and then Estimated ink levels in the setup menu.
- To check the ink tank model number, display the Ink number screen by pressing the right Function button. Selecting Print number on this screen enables you to print the ink tank model number. Selecting Order ink now displays the QR code for accessing the ink order site. Cost of connecting to Internet is to be born by the customer.
- Ink status can also be checked from the LCD during printing.
- You can also check ink status from a computer.
→ Checking the Ink Status from Your Computer (Windows)
→ Checking the Ink Status from Your Computer (Mac OS)
Maintenance
If Printing Is Faint or Uneven
Performing Maintenance Functions from Your Computer (Windows)
Performing Maintenance Functions from Your Computer (Mac OS)
Cleaning
If Printing Is Faint or Uneven
Maintenance Procedure
▶ Printing the Nozzle Check Pattern
Examining the Nozzle Check Pattern
▶ Cleaning the Print Head
▶ Deep Print Head Cleaning
▶ Aligning the Print Head
▶ Aligning the Print Head Manually
Maintenance Procedure
Follow these steps to restore print quality if printing becomes faint or uneven, colors are incorrect, or printing results are not as expected (as when parallel lines are not printed parallel).
Note
- Increasing the print quality in the printer driver may give better results.
→ Changing the Print Quality and Correcting Image Data (Windows)
→ Changing the Print Quality and Correcting Image Data (Mac OS)
To Correct Faint or Uneven Printing:
Step1 Print the nozzle check pattern.
From your machine
→ Printing the Nozzle Check Pattern
From your computer
→ Printing a Nozzle Check Pattern (Windows)
→ Printing a Nozzle Check Pattern (Mac OS)
Step2 Examine the nozzle check pattern.
Some missing lines or horizontal white streaks in the pattern:

Step3 Clean the print head.
From your machine
→ Cleaning the Print Head
From your computer
→ Cleaning the Print Heads (Windows)
→ Cleaning the Print Heads (Mac OS)
After cleaning the print head, print and examine the nozzle check pattern again: Step1
Problem not resolved after you perform from step 1 to step 3 twice:

Step4 Perform deep print head cleaning.
From your machine
→ Deep Print Head Cleaning
From your computer
→ Cleaning the Print Heads (Windows)
→ Cleaning the Print Heads (Mac OS)
Note
- If printing problems remain even after step 4, turn the machine off, wait at least 24 hours, and perform deep print head cleaning again. Leave the machine plugged in after you turn it off. If the problem is still not resolved, the print head may be damaged. Contact the service center.
To Correct Misalignment:
Step Align the print head.
From your machine
→ Aligning the Print Head
From your computer
→ Aligning the Print Head Position (Windows)
→ Aligning the Print Head Position (Mac OS)
Printing the Nozzle Check Pattern
Print the nozzle check pattern to determine whether ink is being ejected correctly from the print head nozzles.
Note
- If ink runs out as the nozzle check pattern is printed, an error message appears on the LCD.
Message Appears
What you will need: one sheet of A4 or Letter-sized plain paper
-
Make sure the machine is on.
-
Select 📁 on the HOME screen, and then press the OK button.
→ LCD and Operation Panel
The setup menu screen is displayed.
- Select Maintenance, and then press the OK button.
The Maintenance screen is displayed.
- Select Print nozzle check pattern, and then press the OK button.
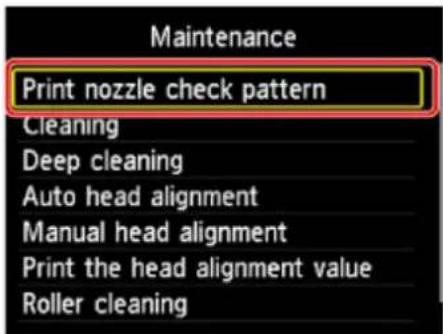
text_image
Maintenance Print nozzle check pattern Cleaning Deep cleaning Auto head alignment Manual head alignment Print the head alignment value Roller cleaningA confirmation screen is displayed.
- Load a sheet of A4 or Letter-sized plain paper in the cassette.
Important
- The screen for registering page size and media type is not displayed during any of the operations available in the Maintenance screen. Therefore, printing will be executed even if paper other than A4 or Letter-sized plain paper is loaded.
-
Pull out the output tray extension and open the paper output support.
-
Select Yes, and then press the OK button.
After the nozzle check pattern is printed, two pattern confirmation screens are displayed.
- Examine the nozzle check pattern.
Examining the Nozzle Check Pattern
Examine the nozzle check pattern and clean the print head if necessary.
- Check for any missing lines in pattern C or horizontal white streaks in pattern D.
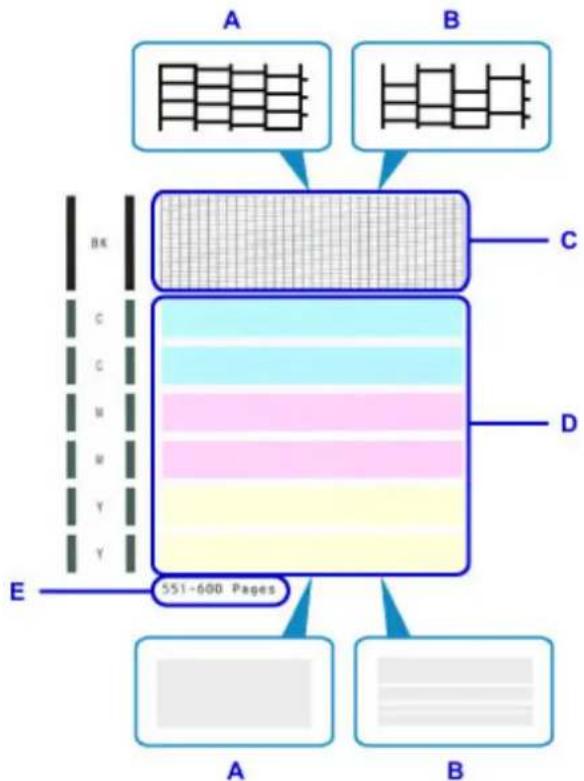
flowchart
graph TD
    A["Stage A"] --> B["Stage B"]
    B --> C["Stage C"]
    C --> D["Stage D"]
    D --> E["Stage E"]
    E --> F["551-600 Pages"]
    style A fill:#f9f,stroke:#333
    style B fill:#f9f,stroke:#333
    style C fill:#ccf,stroke:#333
    style D fill:#ccf,stroke:#333
    style E fill:#cfc,stroke:#333
    style F fill:#fcc,stroke:#333
A: No missing lines or horizontal white streaks
B: Some missing lines and horizontal white streaks
E: Number of pages printed to date
- On the checking screen, select patterns that most resemble the printed nozzle check pattern.
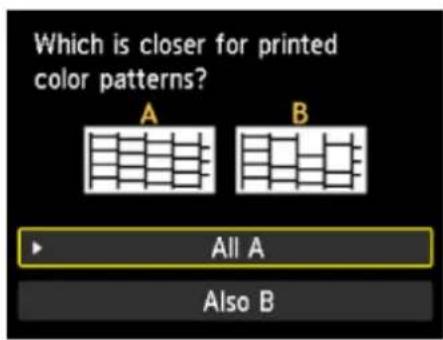
text_image
Which is closer for printed color patterns? A B ▶ All A Also B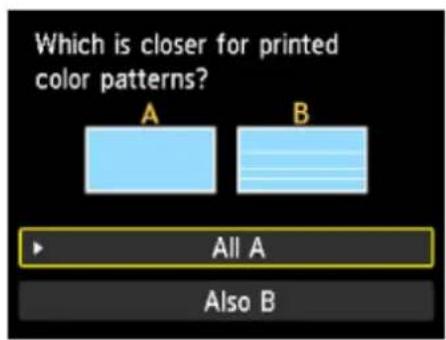
text_image
Which is closer for printed color patterns? A B ▶ All A Also BIn the case of A (no missing lines or horizontal white streaks) in both patterns (C and D):
No cleaning is required. Select All A, and then press the OK button.
Check the message, and then press the OK button.
The Maintenance screen is now displayed again.
In the case of B (some missing lines or horizontal white streaks) in either pattern (C or D) or both patterns:
Cleaning is required. Select Also B, and then press the OK button.
A cleaning confirmation screen is displayed.
Select Yes, and then press the OK button.
The machine now starts cleaning the print head.
→ Cleaning the Print Head
Note
- On the nozzle check printout, the record of total pages printed is indicated in increments of 50 pages.
Cleaning the Print Head
Clean the print head if the nozzle check pattern has missing lines or horizontal white streaks. Cleaning unclogs nozzles and restores the print head to a better condition. However, because print head cleaning consumes ink, this operation is advisable only when necessary.
Note
- Cleaning can also be performed from a computer. When using a computer, you can also select the ink group for cleaning.
Cleaning the Print Heads (Windows)
Cleaning the Print Heads (Mac OS)
- Cleaning from the operation panel cleans all print head colors.
What you will need: one sheet of A4 or Letter-sized plain paper
- Make sure the machine is on.
- Select Setup on the HOME screen, and then press the OK button.
LCD and Operation Panel
The setup menu screen is displayed.
- Select Maintenance, and then press the OK button.
The Maintenance screen is displayed.
- Select Cleaning, and then press the OK button.
A confirmation screen is displayed.
- Select Yes, and then press the OK button.
The machine now starts cleaning the print head.
Do not perform any other operations until print head cleaning is finished. Cleaning will take about 2 minutes.
Afterward, a confirmation screen is displayed for printing a nozzle check pattern.
- Load a sheet of A4 or Letter-sized plain paper in the cassette.
Important
- The screen for registering page size and media type is not displayed during any of the operations available in the Maintenance screen. Therefore, printing will be executed even if paper other than A4 or Letter-sized plain paper is loaded.
- Pull out the output tray extension and open the paper output support.
- Select Yes, and then press the OK button.
The nozzle check pattern is now printed.
- Examine the nozzle check pattern.
Note
- If printing problems remain even after you clean the print head twice, perform deep print head cleaning.
Deep Print Head Cleaning
If standard print head cleaning does not improve print quality, try deep print head cleaning. However, because deep print head cleaning consumes more ink, this operation is advisable only when necessary.

Note
- Deep print head cleaning can also be performed from a computer. When using a computer, you can also select the ink group for deep cleaning.
→ Cleaning the Print Heads (Windows)
→ Cleaning the Print Heads (Mac OS)
- Deep print head cleaning from the operation panel cleans all print head colors.
What you will need: one sheet of A4 or Letter-sized plain paper
-
Make sure the machine is on.
-
Select 📁 on the HOME screen, and then press the OK button.
→ LCD and Operation Panel
The setup menu screen is displayed.
- Select Maintenance, and then press the OK button.
The Maintenance screen is displayed.
- Select Deep cleaning, and then press the OK button.

text_image
Maintenance Print nozzle check pattern Cleaning Deep cleaning Auto head alignment Manual head alignment Print the head alignment value Roller cleaningA confirmation screen is displayed.
- Select Yes, and then press the OK button.
Deep print head cleaning now begins.
Do not perform any other operations until deep print head cleaning is finished. Cleaning will take 2–3 minutes.
Afterward, a confirmation screen is displayed for printing a nozzle check pattern.
- Load a sheet of A4 or Letter-sized plain paper in the cassette.
Important
- The screen for registering page size and media type is not displayed during any of the operations available in the Maintenance screen. Therefore, printing will be executed even if paper other than A4 or Letter-sized plain paper is loaded.
- Pull out the output tray extension and open the paper output support.
- Select Yes, and then press the OK button.
The nozzle check pattern is now printed.
- Press the OK button when a message is displayed indicating that deep print head cleaning is finished.
- Examine the nozzle check pattern.
If printing problems remain, turn the machine off, wait at least 24 hours, and perform deep print head cleaning again. Leave the machine plugged in after you turn it off.
If the problem is still not resolved, the print head may be damaged. Contact the service center.
Aligning the Print Head
If printed images seem distorted, as when parallel lines are not printed parallel, align the print head.

Note
- If ink runs out as the print head alignment sheet is printed, an error message appears on the LCD.
Message Appears
What you will need: one sheet of A4 or Letter-sized plain paper (recycled paper is acceptable)*
* Use white paper that is clean on both sides.
-
Make sure the machine is on.
-
Select Setup on the HOME screen, and then press the OK button.
→ LCD and Operation Panel
The setup menu screen is displayed.
- Select Maintenance, and then press the OK button.
The Maintenance screen is displayed.
- Select Auto head alignment, and then press the OK button.
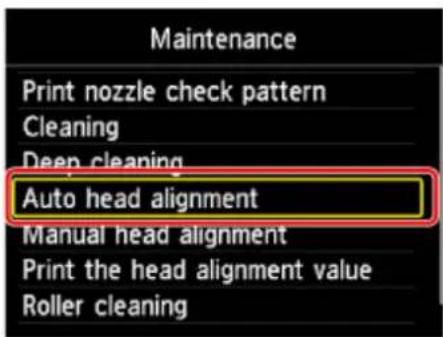
text_image
Maintenance Print nozzle check pattern Cleaning Deep cleaning Auto head alignment Manual head alignment Print the head alignment value Roller cleaningA confirmation screen is displayed.
- Load a sheet of A4 or Letter-sized plain paper in the cassette.

Important
- The screen for registering page size and media type is not displayed during any of the operations available in the Maintenance screen. Therefore, printing will be executed even if paper other than A4 or Letter-sized plain paper is loaded.
- Pull out the output tray extension and open the paper output support.
7. Select Yes, and then press the OK button.
The print head alignment sheet is printed, and the print head is aligned automatically.
This process takes 3–4 minutes.

Note
- If automatic print head alignment fails, an error message appears on the LCD.
Message Appears
8. Press the OK button when a message is displayed indicating that print head alignment is finished.

Note
- If printing is still unsatisfactory after automatic print head alignment, align the print head manually. You can also align the print head manually from a computer.
→ Aligning the Print Head Position Manually (Windows)
→ Aligning the Print Head Position Manually (Mac OS)
Aligning the Print Head Manually
Try aligning the print head manually after automatic alignment if printing results are not as expected, as when parallel lines are not printed parallel.

Note
- For details on automatic print head alignment, see Aligning the Print Head.
What you will need: two sheets of A4 or Letter-sized plain paper
-
Make sure the machine is on.
-
Select 📋 on the HOME screen, and then press the OK button.
→ LCD and Operation Panel
The setup menu screen is displayed.
- Select Maintenance, and then press the OK button.
The Maintenance screen is displayed.
- Select Manual head alignment, and then press the OK button.
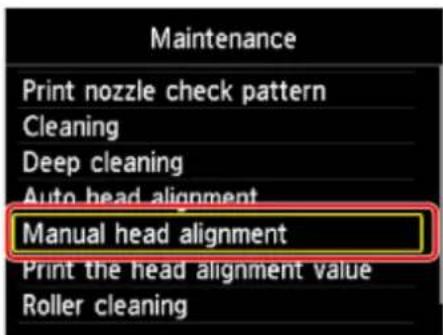
text_image
Maintenance Print nozzle check pattern Cleaning Deep cleaning Auto head alignment Manual head alignment Print the head alignment value Roller cleaningA confirmation screen is displayed.

Note
- To print and check the current head position alignment values, select Print the head alignment value.
- Load two sheets of A4 or Letter-sized plain paper in the cassette.

Important
- The screen for registering page size and media type is not displayed during any of the operations available in the Maintenance screen. Therefore, printing will be executed even if paper other than A4 or Letter-sized plain paper is loaded.
-
Pull out the output tray extension and open the paper output support.
-
Select Yes, and then press the OK button.
The print head alignment pattern is printed.
- Confirm that the pattern was printed correctly, and if so, select Yes after "Did the patterns print correctly?" is displayed, and then press the OK button.
The input screen for head position alignment values is displayed.
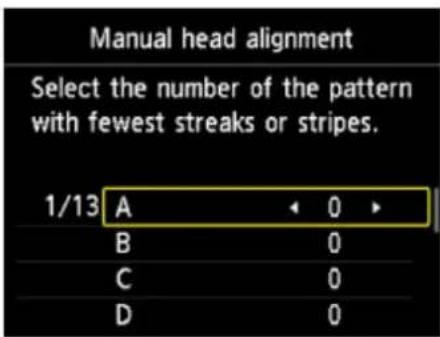
text_image
Manual head alignment Select the number of the pattern with fewest streaks or stripes. 1/13 A 0 ▶ B 0 C 0 D 0- Examine the first patterns. In column A, find the pattern in which vertical streaks are least noticeable, and then use the or button to select the number of that pattern.
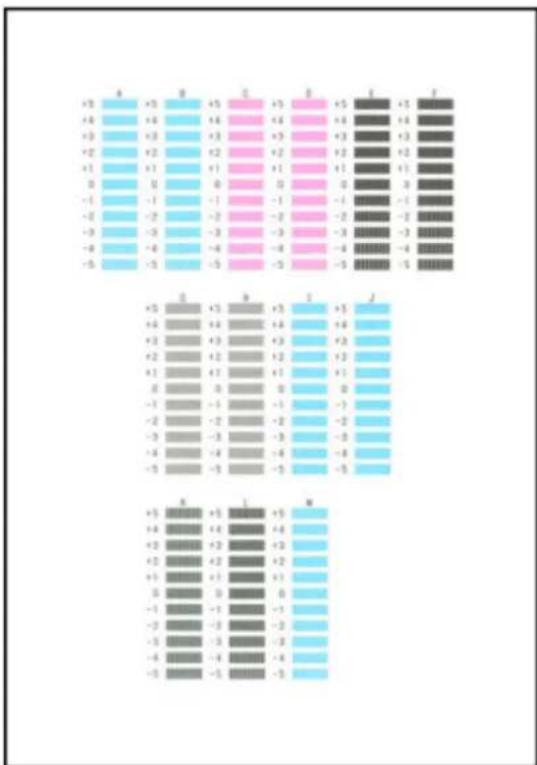
Note
- If all patterns look different, choose the pattern in which vertical streaks are least noticeable.
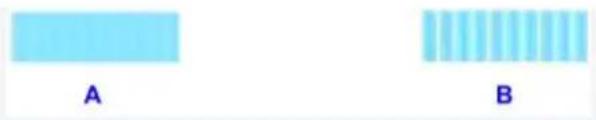
natural_image
Two horizontal bars labeled A and B, no text or symbols presentA: Subtle vertical streaks
B: Noticeable vertical streaks
- Repeat these steps until you have finished entering pattern numbers for columns B to M, and then press the OK button.
- Check the message, and then press the OK button.
The second set of patterns is printed.
- Examine the second patterns. In column N, find the pattern in which horizontal streaks are least noticeable, and then use the or button to select the number of that pattern.
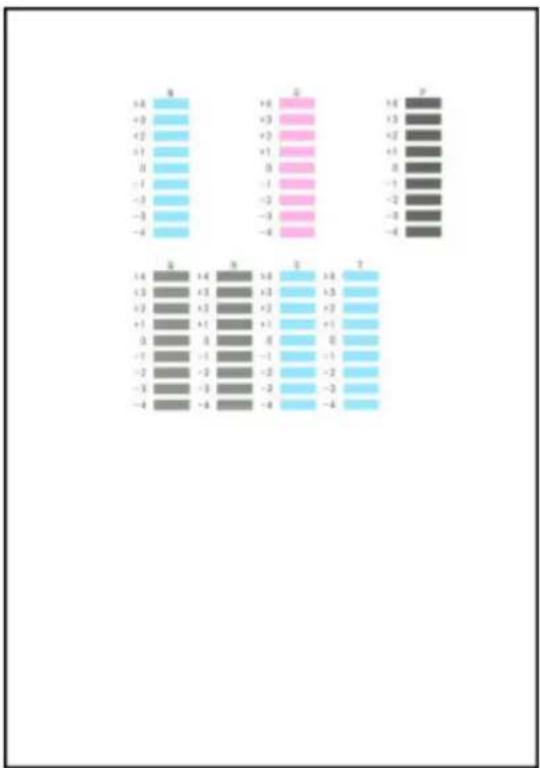
bar
| Row | Column | Value | |---|---|---| | 1 | N | +6 | | 1 | N | +8 | | 1 | N | +3 | | 2 | 0 | +2 | | 2 | 0 | +1 | | 2 | 0 | 0 | | 3 | -1 | -1 | | 3 | -1 | -2 | | 3 | -2 | -3 | | 3 | -3 | -4 | | 4 | 0 | +4 | | 4 | 0 | +6 | | 4 | 0 | +8 | | 5 | 1 | +3 | | 5 | 1 | +5 | | 5 | 1 | +2 | | 6 | 2 | +3 | | 6 | 2 | +2 | | 6 | 2 | +3 | | 7 | 3 | +1 | | 7 | 3 | +1 | | 7 | 4 | -8 | | 7 | 4 | -1 | | 8 | -1 | -1 | | 8 | -2 | -2 | | 8 | -3 | -3 | | 9 | -2 | -2 | | 9 | -3 | -3 | | 9 | -4 | -4 | The image displays two rows of bars: the top row contains 'N' and the bottom row contains '0', both labeled with positive integers. The middle rows contain additional numeric labels (e.g., '+1', '+2', '+3') but lack explicit numerical labels on the bars.Note
- If all patterns look different, choose the pattern in which horizontal streaks are least noticeable.

natural_image
Two horizontal light blue bars labeled C and D, no additional text or symbols present.C: Subtle horizontal streaks
D: Noticeable horizontal streaks
- Repeat these steps until you have finished entering pattern numbers for columns O to T, and then press the OK button.
For column P, choose the pattern in which vertical streaks are least noticeable.
- Press the OK button when a message is displayed indicating that print head alignment is finished.
Performing Maintenance Functions from Your Computer (Windows)
▶ Cleaning the Print Heads
▶ Aligning the Print Head Position
▶ Printing a Nozzle Check Pattern
Cleaning the Print Heads
The print head cleaning function allows you to clear up clogged print head nozzle. Perform print head cleaning if printing is faint or a specific color fails to print, even though there is enough ink.
The procedure for cleaning the print head is as follows:
Cleaning
- Open the printer driver setup window
- Click Cleaning on the Maintenance tab
When the Print Head Cleaning dialog box opens, select the ink group for which cleaning is to be performed.
Click Initial Check Items to display the items you need to check before performing cleaning.
- Execute cleaning
Make sure that the printer is on and then click Execute.
Print head cleaning starts.
- Complete cleaning
The Nozzle Check dialog box opens after the confirmation message.
- Check the results
To check whether the print quality has improved, click Print Check Pattern. To cancel the check process, click Cancel.
If cleaning the head once does not resolve the print head problem, clean it once more.
Important
- Cleaning consumes a small amount of ink.
Cleaning the print head frequently will rapidly deplete your printer's ink supply. Consequently, perform cleaning only when necessary.
Deep Cleaning
Deep Cleaning is more thorough than cleaning. Perform deep cleaning when two Cleaning attempts do not resolve the print head problem.
- Open the printer driver setup window
2. Click Deep Cleaning on the Maintenance tab
When the Deep Cleaning dialog box opens, select the ink group for which deep cleaning is to be performed.
Click Initial Check Items to display the items you need to check before performing deep cleaning.
3. Execute deep cleaning
Make sure that the printer is on and then click Execute.
Click OK when the confirmation message appears.
Print head deep cleaning starts.
4. Complete deep cleaning
The Nozzle Check dialog box opens after the confirmation message.
5. Check the results
To check whether the print quality has improved, click Print Check Pattern. To cancel the check process, click Cancel.
Important
- Deep Cleaning consumes a larger amount of ink than Cleaning.
Cleaning the print head frequently will rapidly deplete your printer's ink supply. Consequently, perform cleaning only when necessary.
Note
- If there is no sign of improvement after Deep Cleaning, turn off the printer, wait 24 hours, and then perform Deep Cleaning again. If there is still no sign of improvement, the ink may have run out or the print head may be worn. For details on the remedial action to be taken, see "No Ink Comes Out."
Related Topic
→ Printing a Nozzle Check Pattern
Aligning the Print Head Position
Print head alignment corrects the installation positions of the print head and improves deviated colors and lines.
This printer supports two head alignment methods: automatic head alignment and manual head alignment. Normally, the printer is set for automatic head alignment.
If the printing results of automatic print head alignment are not satisfactory, perform manual head alignment.
The procedure for performing automatic print head alignment is as follows:
Print Head Alignment
- Open the printer driver setup window
-
Click Print Head Alignment on the Maintenance tab
The Start Print Head Alignment dialog box opens. -
Load paper in the printer
Load one sheet of A4 size or Letter size plain paper into the cassette.
Note
- The number of sheets to be used differs when you select the manual head alignment.
- Execute head alignment
Make sure that the printer is on and click Align Print Head.
Follow the instruction in the message.
Important
- Do not open the front cover while printing is in progress.
Note
- Wait until printing ends before performing other operations. Printing takes about 3 to 4 minutes to complete.
Note
- To print and check the current setting, open the Start Print Head Alignment dialog box, and click Print Alignment Value.
Aligning the Print Head Position Manually
Print head alignment corrects the installation positions of the print head and improves deviated colors and lines.
This printer supports two head alignment methods: automatic head alignment and manual head alignment. Normally, the printer is set for automatic head alignment.
If the printing results of automatic print head alignment are not satisfactory, perform manual head alignment.
The procedure for performing manual print head alignment is as follows:
Print Head Alignment
- Open the printer driver setup window
- Click Custom Settings on the Maintenance tab
The Custom Settings dialog box opens.

Note
- If the printer is off or if communication between the printer and the computer is disabled, an error message may appear because the computer cannot collect the printer status. If this happens, click OK to display the most recent settings specified on your computer.
- Switch head alignment to manual
Check the Align heads manually check box.
- Apply the settings
Click OK and when the confirmation message appears, click OK.
- Click Print Head Alignment on the Maintenance tab
The Start Print Head Alignment dialog box opens.
- Load paper in the printer
Load two sheets of A4 size or Letter size plain paper into the cassette.
- Execute head alignment
Make sure that the printer is on and click Align Print Head.
Follow the instruction in the message.

Important
- Do not open the front cover while printing is in progress.
8. Check the printed pattern
Enter the numbers of the patterns with the least noticeable streaks in the associated boxes.
Even if the patterns with the least noticeable streaks are clicked in the preview window, their numbers are automatically entered in the associated boxes.

When you have entered all the necessary values, click OK.

Note
- If it is difficult to pick the best pattern, pick the setting that produces the least noticeable vertical streaks.

(A)

(B)
(A) Least noticeable vertical streaks
(B) Most noticeable vertical streaks
9. Confirm the displayed message and click OK
The second pattern is printed.

Important
- Do not open the front cover while printing is in progress.
10. Check the printed pattern
Enter the numbers of the patterns with the least noticeable stripes or streaks in the associated boxes. Even if the patterns with the least noticeable stripes or streaks are clicked in the preview window, their numbers are automatically entered in the associated boxes.
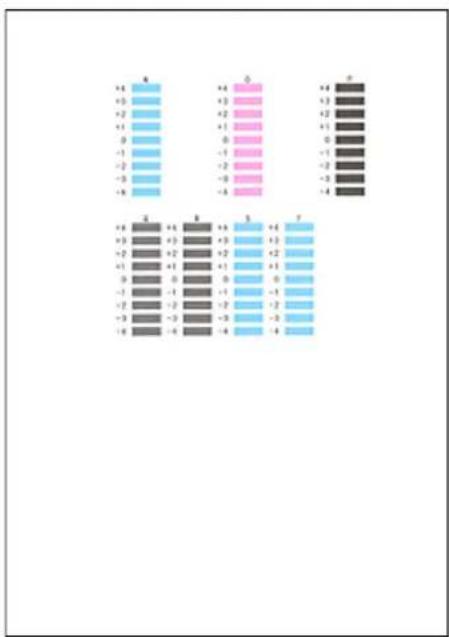
bar
| Category | Value | |---|---| | A | +4 | | B | +3 | | C | +2 | | D | +1 | | E | 0 | | F | -1 | | G | -2 | | H | -3 | | I | -4 | | J | +5 | | K | +4 | | L | +3 | | M | +2 | | N | +1 | | O | -1 | | P | -2 | | Q | -3 | | R | -4 | | S | +6 | | T | +5 | | U | +4 | | V | +3 | | W | +2 | | X | +1 | | Y | 0 | | Z | -1 | | AA | -2 | | AB | -3 | | AC | -4 | The chart displays a vertical bar chart with three distinct color bars (light blue, gray, black) representing different categories labeled A through R. The values for each category are explicitly labeled on the bars. There is no explicit numerical data provided in the image.When you have entered all the necessary values, click OK.
Note
- If it is difficult to pick the best pattern, pick the setting that produces the least noticeable horizontal stripes.

(A)

(B)
(A) Least noticeable horizontal stripes
(B) Most noticeable horizontal stripes
- If it is difficult to pick the best pattern, pick the setting that produces the least noticeable vertical streaks.

(A)

(B)
(A) Least noticeable vertical streaks
(B) Most noticeable vertical streaks
Note
- To print and check the current setting, open the Start Print Head Alignment dialog box, and click Print Alignment Value.
Printing a Nozzle Check Pattern
The nozzle check function allows you to check whether the print head is working properly by printing a nozzle check pattern. Print the pattern if printing becomes faint, or if a specific color fails to print.
The procedure for printing a nozzle check pattern is as follows:
Nozzle Check
-
Open the printer driver setup window
-
Click Nozzle Check on the Maintenance tab
The Nozzle Check dialog box opens.
Click Initial Check Items to display the items that you need to check before printing the nozzle check pattern.
- Load paper in the printer
Load one sheet of A4 size or Letter size plain paper into the cassette.
- Print a nozzle check pattern
Make sure that the printer is on and click Print Check Pattern.
Printing of the nozzle check pattern begins.
Click OK when the confirmation message appears.
The Pattern Check dialog box opens.
- Check the print result
Check the print result. If the print result is normal, click Exit.
If the print result is smudged or if there are any unprinted sections, click Cleaning to clean the print head.
Related Topic
→ Cleaning the Print Heads
Cleaning
▶ Cleaning Exterior Surfaces
▶ Cleaning the Platen Glass and Document Cover
▶ Cleaning the ADF (Auto Document Feeder)
▶ Cleaning Paper Feed Rollers
Cleaning Inside the Machine (Bottom Plate Cleaning)
▶ Cleaning Cassette Pads
Cleaning Exterior Surfaces
Using a soft, dry cloth such as an eyeglass cloth, gently wipe the surfaces clean. Smooth out any wrinkles in the cloth before you begin.

Important
- Before cleaning the machine, turn it off and unplug it.
- The power cannot be turned off while the machine is sending or receiving a fax, or when unsent faxes are stored in the machine's memory. Make sure the machine has finished sending or receiving faxes before turning it off.
- Remember that faxes cannot be sent or received while the machine is off.
-
Unplugging the machine will reset the date/time setting and erase all documents in the machine's memory. Send faxes, print documents, or save jobs to a USB flash drive as needed before unplugging the machine.
-
To avoid scratching surfaces, do not clean with tissue paper, paper towels, or rough-textured cloth. Additionally, paper dust or fibers may remain in the machine and clog the print head or affect printing quality.
- Never clean the machine with detergent or volatile chemicals such as thinner, benzine, or acetone, which may cause malfunction or damage surfaces.
Cleaning the Platen Glass and Document Cover

Important
- Before cleaning the machine, turn it off and unplug it.
- The power cannot be turned off while the machine is sending or receiving a fax, or when unsent faxes are stored in the machine's memory. Make sure the machine has finished sending or receiving faxes before turning it off.
- Remember that faxes cannot be sent or received while the machine is off.
- Unplugging the machine will reset the date/time setting and erase all documents in the machine's memory. Send faxes, print documents, or save jobs to a USB flash drive as needed before unplugging the machine.
- To avoid scratching surfaces, do not clean with tissue paper, paper towels, or rough-textured cloth. Additionally, paper dust or fibers may remain in the machine and clog the print head or affect printing quality.
- Never clean the machine with detergent or volatile chemicals such as thinner, benzine, or acetone, which may cause malfunction or damage surfaces.
Use a soft, dry cloth that is clean and lint-free.
Wipe away any smudges or dust on the platen glass (A), the bottom of the document cover (B, in white), the glass surface of the ADF (Auto Document Feeder) (C), and the bottom of the ADF (D, in white).
Wipe the glass surfaces carefully, leaving no residue.
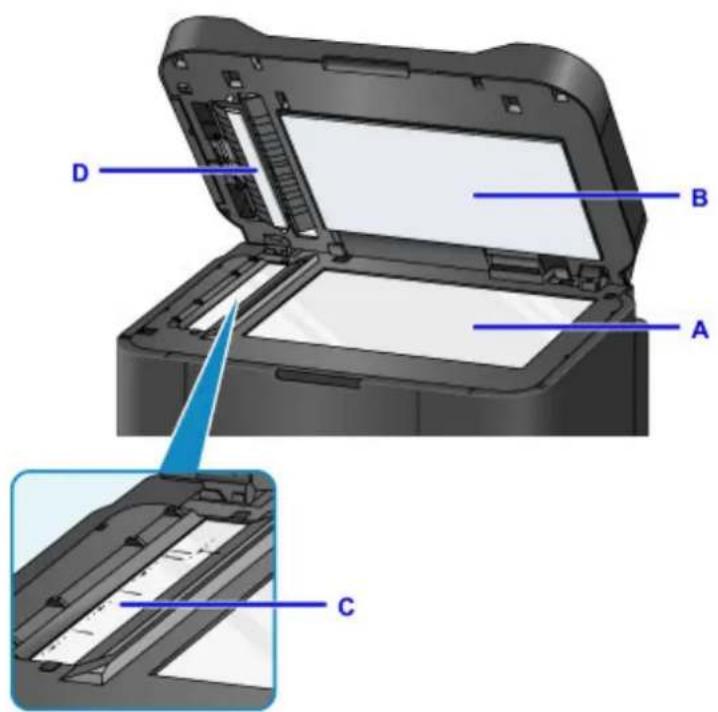
text_image
D B A C
Important
- Be especially gentle when wiping the bottom of the document cover (B, in white).
- Any glue, ink, correction fluid, or other substances on the ADF glass (C) may cause black streaks in scanned images. Gently wipe away any of these substances on the glass.
Cleaning the ADF (Auto Document Feeder)
Use a soft, dry cloth that is clean and lint-free to clean the ADF (Auto Document Feeder).

Important
- Before cleaning the machine, turn it off and unplug it.
- The power cannot be turned off while the machine is sending or receiving a fax, or when unsent faxes are stored in the machine's memory. Make sure the machine has finished sending or receiving faxes before turning it off.
- Remember that faxes cannot be sent or received while the machine is off.
- Unplugging the machine will reset the date/time setting and erase all documents in the machine's memory. Send faxes, print documents, or save jobs to a USB flash drive as needed before unplugging the machine.
- To avoid scratching surfaces, do not clean with tissue paper, paper towels, or rough-textured cloth. Additionally, paper dust or fibers may remain in the machine and clog the print head or affect printing quality.
- Never clean the machine with detergent or volatile chemicals such as thinner, benzine, or acetone, which may cause malfunction or damage surfaces.
- Open the document tray.
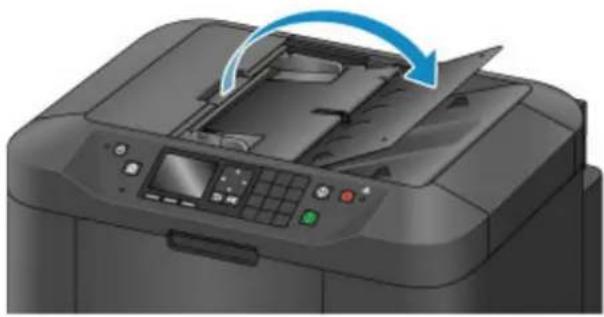
natural_image
Illustration of a printer with a blue arrow indicating rotation or compression (no text or symbols present)- Open the document feeder cover.
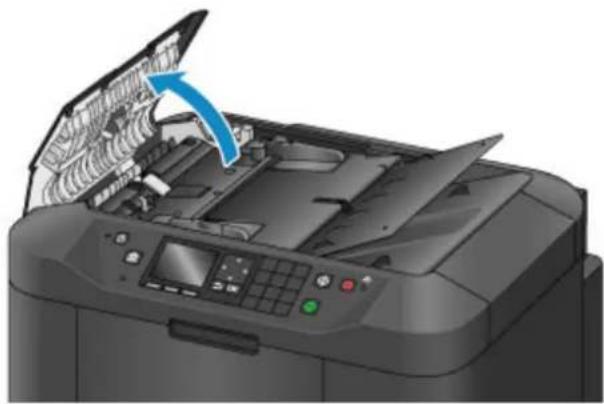
natural_image
Illustration of a printer with an open lid and a blue arrow indicating the process (no text or symbols present)- Use the cloth to wipe off any paper dust inside the document feeder cover (A).
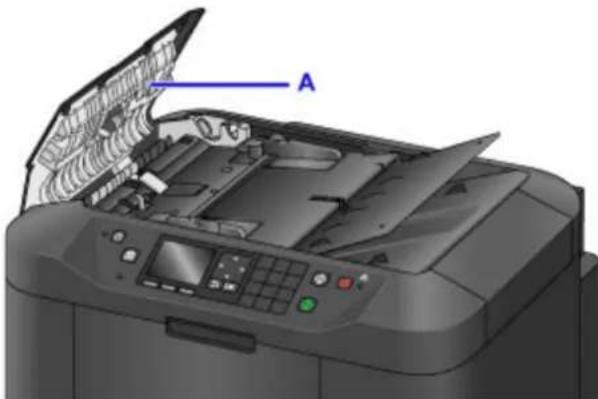
natural_image
Interior view of a printer with open lid and control panel (no visible text or symbols)-
When finished, push the document feeder cover closed until it clicks into place.
-
Close the document tray.
Cleaning Paper Feed Rollers
Dusty or dirty paper feed rollers may prevent correct feeding.
In this case, clean the paper feed rollers. However, because cleaning causes roller wear, perform cleaning only when necessary.
What you will need: three sheets of A4 or Letter-sized plain paper
- Make sure the machine is on.

- Select 📋 on the HOME screen, and then press the OK button.
→ LCD and Operation Panel
The setup menu screen is displayed.

- Select Maintenance, and then press the OK button.
The Maintenance screen is displayed.
- Select Roller cleaning, and then press the OK button.
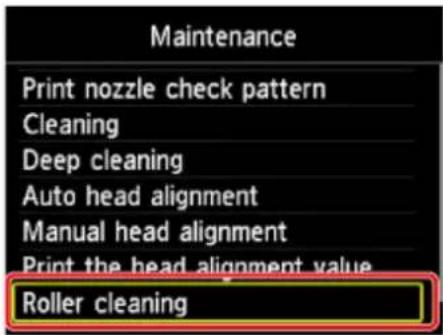
text_image
Maintenance Print nozzle check pattern Cleaning Deep cleaning Auto head alignment Manual head alignment Print the head alignment value Roller cleaningA confirmation screen is displayed.
-
Select Yes, and then press the OK button.
-
Follow the instructions to remove any paper from the cassette.
-
Press the OK button.
The paper feed rollers rotate as they are cleaned without paper.
- After confirming that the paper feed rollers have stopped rotating, follow the instructions to load three sheets of A4 or Letter-sized plain paper in the cassette.
Important
- The screen for registering page size and media type is not displayed during any of the operations available in the Maintenance screen. Therefore, printing will be executed even if paper other than A4 or Letter-sized plain paper is loaded.
-
Pull out the output tray extension and open the paper output support.
-
Press the OK button.
Cleaning begins again. Once the paper is ejected, cleaning is finished.
- Press the OK button when a message is displayed indicating that cleaning is finished. If the problem remains after you clean the paper feed rollers, contact the service center.
Cleaning Inside the Machine (Bottom Plate Cleaning)
Remove stains inside the machine as follows. Clean this way regularly, because any dust or excess ink in the machine may get on your printouts.
What you will need: one sheet of A4 or Letter-sized plain paper*
* Use a new sheet of paper.
- Make sure the machine is on.

- Select 📋 on the HOME screen, and then press the OK button.
→ LCD and Operation Panel
The setup menu screen is displayed.

- Select Maintenance, and then press the OK button.
The Maintenance screen is displayed.
- Select Bottom plate cleaning, and then press the OK button.
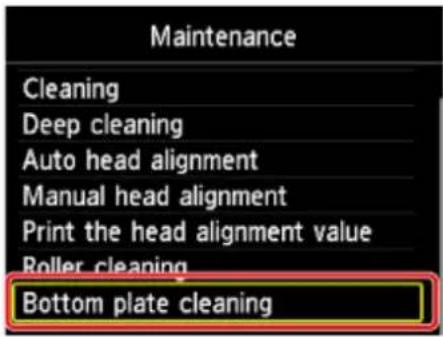
text_image
Maintenance Cleaning Deep cleaning Auto head alignment Manual head alignment Print the head alignment value Roller cleaning Bottom plate cleaningA confirmation screen is displayed.
-
Select Yes, and then press the OK button.
-
Follow the instructions to remove any paper from the cassette, and then press the OK button.
-
Fold a single sheet of A4 or Letter-sized plain paper in half widthwise, and then unfold it.
-
Fold one side in half again, aligning the edge of the sheet with the center crease. Unfold the paper and press the OK button.
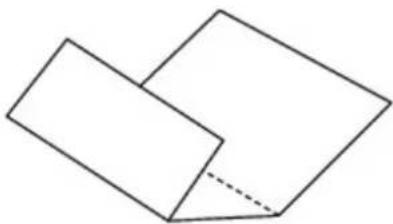
natural_image
Simple line drawing of two overlapping parallelograms with a dashed diagonal line (no text or symbols)- Load only this sheet in the cassette, with the ridges of the creases facing up and the edge of the uncreased half facing away from you.
Important
- The screen for registering page size and media type is not displayed during any of the operations available in the Maintenance screen. Therefore, printing will be executed even if paper other than A4 or Letter-sized plain paper is loaded.
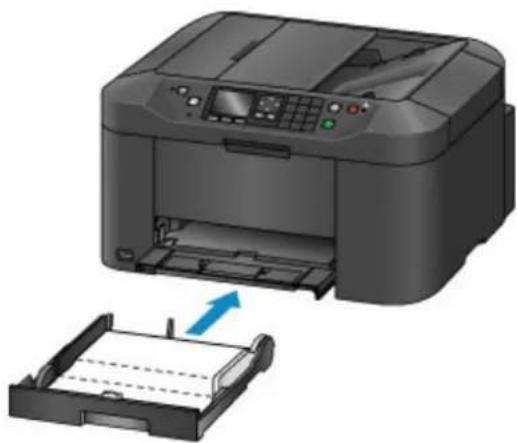
natural_image
Illustration of a printer with an open paper feed into a plastic sheet, showing no text or symbols.-
Pull out the output tray extension and open the paper output support.
-
Press the OK button.
The paper now cleans inside the machine as it passes through.
Check the ridges of the ejected paper. If they are smudged with ink, perform Bottom Plate Cleaning again.
- Press the OK button when a message is displayed indicating that cleaning is finished
Note
- When repeating Bottom Plate Cleaning, use a new sheet of paper.
If the problem remains after repeated cleaning, protrusions inside the machine may be stained. Carefully wipe off any ink on the protrusions using a cotton swab or the like.
Important
- Before cleaning the machine, turn it off and unplug it.
- The power cannot be turned off while the machine is sending or receiving a fax, or when unsent faxes are stored in the machine's memory. Make sure the machine has finished sending or receiving faxes before turning it off.
- Remember that faxes cannot be sent or received while the machine is off.
- Unplugging the machine will reset the date/time setting and erase all documents in the machine's memory. Send faxes, print documents, or save jobs to a USB flash drive as needed before unplugging the machine.

natural_image
Illustration of a printer with internal components and a close-up view of the internal structure (no text or symbols visible)Cleaning Cassette Pads
If the pad in a cassette becomes dirty or covered with paper dust, multiple sheets of paper may be ejected at once. Clean cassette pads as follows.
What you will need: cotton swab
-
Pull out the cassette and remove the paper.
-
Use a moistened cotton swab to wipe away any dirt or debris on the pad (A).
Important
• After cleaning, allow the pad to dry completely.
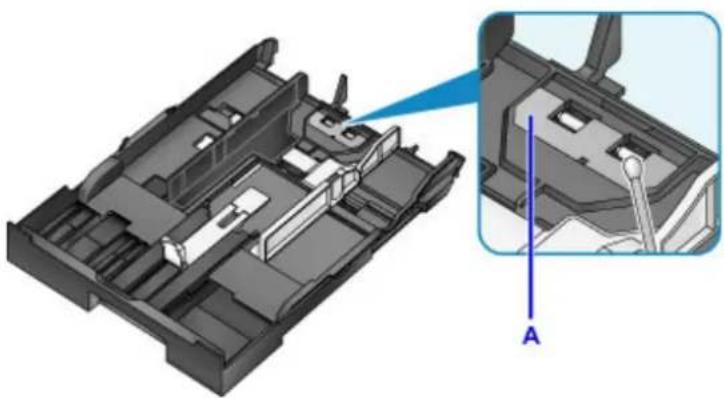
natural_image
3D mechanical assembly diagram showing internal components and a close-up view of a component labeled A (no text or symbols present)- Reload the paper and insert the cassette.
Note
- If a message appears after you insert the cassette, press the OK button.
If the problem is not resolved, contact the service center.
Overview
Safety
• Safety Precautions
• Regulatory Information
WEEE (EU & EEA)
▶ Main Components and Their Use
- Main Components
Power Supply
• LCD and Operation Panel - Entering Numbers, Letters, and Symbols
Changing Settings
• Changing Printer Settings from Your Computer (Windows)
- Changing Printer Settings from Your Computer (Mac OS)
- Changing Settings from Operation Panel
- Changing Printer's Setting Using Web Browser
Network Connection
• Network Connection Tips
Network Settings (IJ Network Device Setup Utility) (Windows)
- IJ Network Device Setup Utility
• Starting Up IJ Network Device Setup Utility - IJ Network Device Setup Utility Screen
• Performing Network Settings - Checking Network Status
- IJ Network Device Setup Utility Menus
• Other Network Information
▶ Network Communication (Mac OS)
- Checking and Changing Network Settings
• Network Communication Tips
Ensuring Optimal Printing Results
- Ink Tips
- Printing Tips
- Check Paper Settings Before Printing
- Set Cassette Paper Information After Loading Paper
- Canceling Print Jobs
- Keeping Print Quality High
- Transporting Your Machine
▶ Legal Restrictions on Scanning/Copying
Specifications
Safety
Safety Precautions
Regulatory Information
WEEE (EU&EEA)
Safety Precautions
Choosing a location
- Do not install the printer in a location that is unstable or subject to excessive vibration.
- Do not install the printer in locations that are very humid or dusty, in direct sunlight, outdoors, or close to a heating source.
To avoid the risk of fire or electric shocks, use the printer under the operating environment specified in the Specifications.
- Do not place the printer on a thick rug or carpet.
- Place the printer with its back in a location that is more than 2 inches (5 cm) away from the wall.
Power Supply
- Ensure that the area around the power outlet is kept clear at all times so you can easily unplug the power cord if necessary.
- Never remove the plug by pulling on the cord.
Pulling the cord may damage the power cord, leading to possible fire or electrical shock.
- Do not use an extension lead/cord.
Working Around the Printer
- Never put your hands or fingers in the printer while it is printing.
- When moving the printer, carry the printer at both ends. In case the printer weighs more than 14 kg, it is recommended to have two people lifting the printer. Accidental dropping of the printer causes injury. For the printer's weight, refer to the Specifications.
- Do not place any object on the printer. Especially do not place metal objects (paper clips, staples, etc.) or containers of flammable solvents (alcohol, thinners, etc.) on top of the printer.
- Do not transport or use the printer on a slant, vertically or upside-down, as the ink may leak and damage the printer.
- When loading a thick book on the Platen Glass, do not press hard on the Document Cover. The Platen Glass may break and cause injury.
Print Heads/Ink Tanks/FINE Cartridges
- Keep ink tanks out of the reach of children. In case ink is accidentally licked or swallowed, rinse out mouth or give one or two glasses of water to drink. If irritation or discomfort occurs, obtain medical advice immediately.
- In case ink gets in contact with eyes, rinse with water immediately. In case ink gets in contact with skin, wash with soap and water immediately. If irritation to eyes or skin persists, obtain medical advice immediately.
- Never touch the electrical contacts on a print head or FINE cartridges after printing. The metal parts may be very hot and could cause burns.
- Do not throw ink tanks and FINE cartridges into fire.
- Do not attempt to disassemble or modify the print head, ink tanks, and FINE cartridges.
Regulatory Information
IMPORTANT SAFETY INSTRUCTIONS
SAVE THESE INSTRUCTIONS
When using your telephone equipment, basic safety precautions should always be followed to reduce the risk of fire, electric shock and injury to persons, including the following:
- Do not use this product near water, for example, near a bath tub, wash bowl, kitchen sink or laundry tub, in a wet basement or near a swimming pool.
- Avoid using this product during an electrical storm. There may be a remote risk of electric shock from lightning.
- Do not use this product to report a gas leak in the vicinity of the leak.
"CAUTION - To reduce the risk of fire, use only No. 26 AWG or larger telecommunication line cord."
IMPORTANTES MESURES DE SÉCURITÉ
CONSERVER CES INSTRUCTIONS
FCC Notice (U.S.A. Only)
For 120V, 60Hz model
Model Number: K10434 (Contains FCC Approved WLAN Module K30365)
This device complies with Part 15 of the FCC Rules. Operation is subject to the following two conditions: (1) This device may not cause harmful interference, and (2) this device must accept any interference received, including interference that may cause undesired operation.
Note: This equipment has been tested and found to comply with the limits for a Class B digital device, pursuant to Part 15 of the FCC Rules. These limits are designed to provide reasonable protection against harmful interference in a residential installation. This equipment generates, uses and can radiate radio frequency energy and, if not installed and used in accordance with the instructions, may cause harmful interference to radio communications.
However, there is no guarantee that interference will not occur in a particular installation. If this equipment does cause harmful interference to radio or television reception, which can be determined by turning the equipment off and on, the user is encouraged to try to correct the interference by one or more of the following measures:
- Reorient or relocate the receiving antenna.
- Increase the separation between the equipment and receiver.
- Connect the equipment into an outlet on a circuit different from that to which the receiver is connected.
- Consult the dealer or an experienced radio/TV technician for help.
Use of a shielded cable is required to comply with Class B limits in Subpart B of Part 15 of the FCC Rules.
Do not make any changes or modifications to the equipment unless otherwise specified in the manual. If such changes or modifications should be made, you could be required to stop operation of the equipment.
FCC ID:AZDK30365
Changes or modifications not expressly approved by the party responsible for compliance could void the user's authority to operate equipment.
This transmitter must not be co-located or operating in conjunction with any other antenna or transmitter.
The equipment complies with FCC radiation exposure limits for at uncontrolled equipment. This equipment should be installed and operated with minimum distance at least 20cm between the radiator and persons body (excluding extremities: hands, wrists, feet and ankles) and must not be colocated or operated with any other antenna or transmitter.
Canon U.S.A., Inc.
One Canon Park
Melville, New York 11747
1-800-652-2666
Pre-Installation Requirements
Order Information
When ordering service from the telephone company for this equipment, the following may be required.
Universal Service Order Code (USOC): RJ11C
The Facility Interface Code (FIC): 02LS2
Service Order Code (SOC): 9.0F
Connection of the Equipment
This equipment complies with Part 68 of the FCC rules and the requirements adopted by the ACTA.
A label on this equipment contains, among other information, a product identifier in the format US:AAAEQ##TXXXX. If requested, this number must be provided to the telephone company.
The REN is used to determine the number of devices that may be connected to a telephone line.
Excessive RENs on a telephone line may result in the devices not ringing in response to an incoming call. In most but not all areas, the sum of RENs should not exceed five (5.0). To be certain of the number of devices that may be connected to a line, as determined by the total RENs, contact the local telephone company. The REN for this product is part of the product identifier that has the format
US:AAAEQ##TXXXX. The digits represented by ## are the REN without a decimal point (e.g., 03 is a REN of 0.3).
A plug and jack used to connect this equipment to the premises wiring and telephone network must comply with the applicable FCC Part 68 rules and requirements adopted by the ACTA. A compliant telephone cord and modular plug is provided with this product. It is designed to be connected to a compatible modular jack that is also compliant. See installation instructions for details.
Connection to party lines is subjected to state tariffs. Contact the state public utility commission, public service commission or corporation commission for information.
If your home has specially wired alarm equipment connected to the telephone line, ensure the installation of this equipment does not disable your alarm equipment. If you have questions about what will disable alarm equipment, consult your telephone company or a qualified installer.
In Case of Equipment Malfunction
Should any malfunction occur which cannot be corrected by the procedures described in the Online Manual, disconnect the equipment from the telephone line cable, turn off the power and disconnect the power cord. The telephone line cable should not be reconnected or the main power switch turned ON until the problem is completely resolved. Users should contact their local authorized Canon Facsimile Service Dealer for the servicing of equipment.
Information regarding Authorized Service Facility locations can be obtained by calling the Canon Customer Center.
Rights of the Telephone Company
If this equipment causes harm to the telephone network, the telephone company may temporarily disconnect service. The telephone company also retains the right to make changes in facilities and services that may affect the operation of this equipment. When such changes are necessary, the telephone company is required to give adequate prior notice to the user. However, if advance notice is not possible, the telephone company will notify the customer as soon as possible. Also, the customer will be advised of his/her right to file a compliant with the FCC if he/she believes it is necessary.
Warning
The Telephone Consumer Protection Act of 1991 makes it unlawful for any person to use a computer or other electronic device to send any message via a telephone FAX machine unless such message clearly contains in a margin at the top or bottom of each transmitted page, or on the first page of the transmission, the date and time it is sent and an identification of the business or other entity, or other individual sending the message and the telephone number of the sending machine or such business, other entity, or individual.
In order to program this information into your FAX machine, you should complete the procedure to register your name, unit's telephone number, time, and date. Refer to the Online Manual.
Users in Canada
This device complies with Industry Canada license-exempt RSS standard(s). Operation is subject to the following two conditions:
(1) this device may not cause interference, and (2) this device must accept any interference, including interference that may cause undesired operation of the device.
This equipment complies with IC radiation exposure limits set forth for an uncontrolled environment and meets RSS-102 of the IC radio frequency (RF) Exposure rules. This equipment should be installed and operated keeping the radiator at least 20cm or more away from person's body (excluding extremities: hands, wrists, feet and ankles).
Pre-Installation Requirements
Notice
This product meets the applicable Innovation, Science and Economic Development Canada technical specifications.
The Ringer Equivalence Number is an indication of the maximum number of devices allowed to be connected to a telephone interface. The termination on an interface may consist of any combination of devices subject only to the requirement that the sum of the RENs of all the devices does not exceed five.
Users in New Zealand
The grant of a Telepermit for any item of terminal equipment indicates only that Spark has accepted that the item complies with minimum conditions for connection to its network. It indicates no endorsement of the product by Spark, nor does it provide any sort of warranty. Above all, it provides no assurance that any item will work correctly in all respects with another item of Telepermitted equipment of a different make or model, nor does it imply that any product is compatible with all of Spark's network services.
This equipment is not capable, under all operating conditions, of correct operation at the higher speeds for which it is designed. Spark will accept no responsibility should difficulties arise in such circumstances.
This condition typically applies to 56 kbit/s modems and V34 facsimile machines.
Please note when you connect an extension phone to this device, if you use an extension phone which has features such as "last number redial", redial memory numbers may be lost.
The automatic calling functions of this equipment must not be used to a nuisance to other Spark customers.
Telepermitted equipment only may be connected to the telephone port. The telephone port is not specifically designed for 3-wire connected equipment. 3-wire connected equipment might not respond to incoming ringing when attached to this port.
Environmental Information
Reducing your environmental impact
Power Consumption and Operational Modes
The amount of electricity a device consumes depends on the way the device is used. This product is designed and set in a way to allow you to reduce the power consumption. After the last print it switches to Ready Mode. In this mode it can print again immediately if required. If the product is not used for a time, the device switches to its Sleep Mode. The devices consume less power (Watt) in these modes.
Energy Star®
The Energy Star ^® programme is a voluntary scheme to promote the development and purchase of energy efficient models, which help to minimise environmental impact.
Products which meet the stringent requirements of the Energy Star ^® programme for both environmental benefits and the amount of energy consumption will carry the Energy Star ^® logo accordingly.
Paper types
This product can be used to print on both recycled and virgin paper (certified to an environmental stewardship scheme), which complies with EN12281 or a similar quality standard. In addition it can support printing on media down to a weight of 64g/m^2 , lighter paper means less resources used and a lower environmental footprint for your printing needs.

CE
WEEE (EU&EEA)
Only for European Union and EEA (Norway, Iceland and Liechtenstein)

This symbol indicates that this product is not to be disposed of with your household waste, according to the WEEE Directive (2012/19/EU) and national legislation. This product should be handed over to a designated collection point, e.g., on an authorized one-for-one basis when you buy a new similar product or to an authorized collection site for recycling waste electrical and electronic equipment (EEE). Improper handling of this type of waste could have a possible negative impact on the environment and human health due to potentially hazardous substances that are generally associated with EEE. At the same time, your cooperation in the correct disposal of this product will contribute to the effective usage of natural resources. For more information about where you can drop off your waste equipment for recycling, please contact your local city office, waste authority, approved WEEE scheme or your household waste disposal service. For more information regarding return and recycling of WEEE products, please visit www.canoneurope.com/weee.
Main Components and Their Use
Main Components
Power Supply
LCD and Operation Panel
- Entering Numbers, Letters, and Symbols
Main Components
Front View
Rear View
Inside View
▶ Operation Panel
Front View
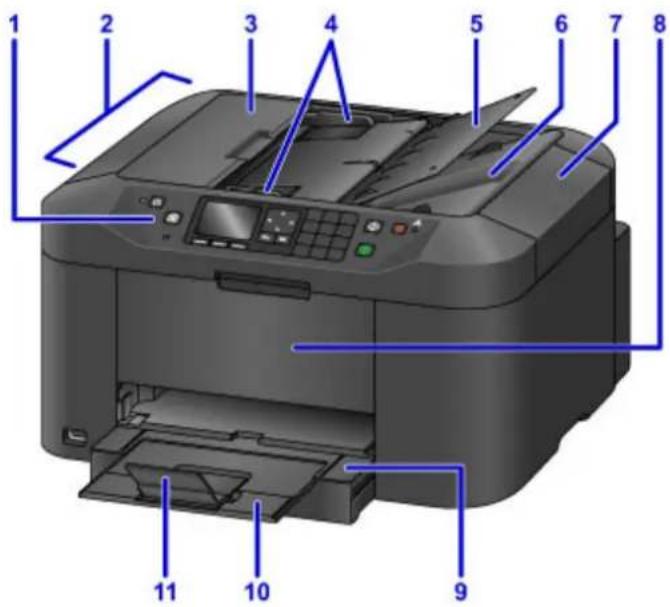
text_image
Diagram of a printer with numbered parts labeled for identification(1) operation panel
Used to adjust settings or operate the machine.
→ Operation Panel
(2) ADF (Auto Document Feeder)
Load documents here. Documents loaded in the document tray are scanned automatically, one page at a time.
Loading Documents in the ADF (Auto Document Feeder)
(3) document feeder cover
Open to clear jammed documents.
(4) document guides
Adjust to match the width of documents in the ADF.
(5) document tray
Open to load documents in the ADF. You can load multiple pages of the same size and thickness. Load documents face-up.
(6) document output slot
Ejects documents scanned in the ADF.
(7) document cover
Open to load originals on the platen glass.
(8) front cover
Open to replace ink tanks or clear internal paper jams.
(9) paper output tray
Pull out to support printed documents. The tray covers the cassette when extended. Normally, leave the tray out.
(10) output tray extension
Pull out to support ejected paper.
(11) paper output support
Open to support ejected paper.

natural_image
3D rendering of a printer with open lid and internal structure, labeled with numbers 12, 13, and 14 pointing to the base (no text or symbols on the device itself)(12) USB flash drive port
Insert USB flash drives here.

Warning
- Do not connect any equipment other than USB flash drives to the machine's USB flash drive port. This may cause fire, electric shock, or damage to the machine.

Important
- Do not touch any exposed metal parts.
- Do not connect USB cables longer than 10 feet (3 meters), which may affect operation of other peripherals.
(13) cassette
Load paper here. Load a stack of the same size and type of paper, which will be fed automatically one sheet at a time.

Paper Sources
(14) platen glass
Load originals here.
Rear View
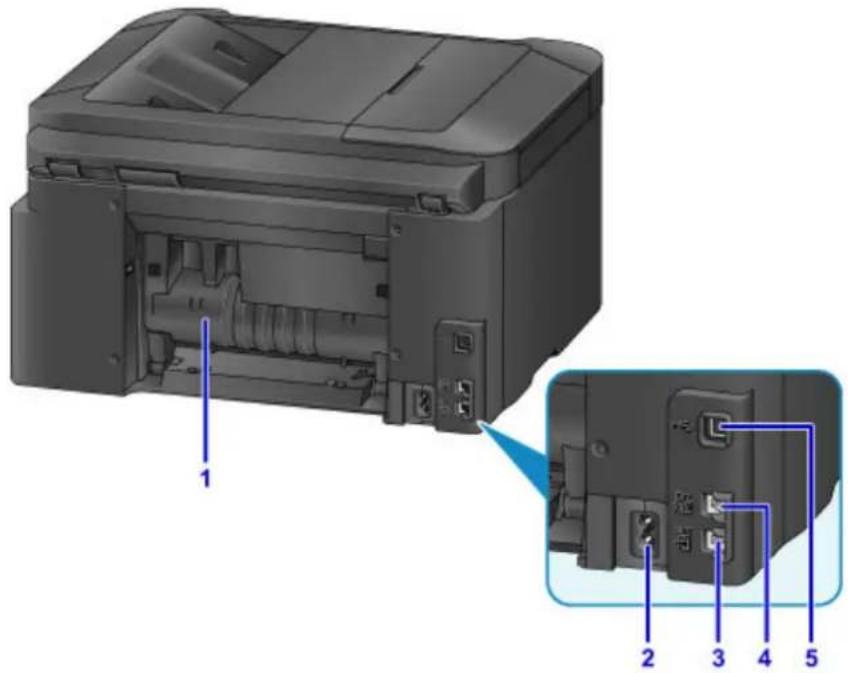
text_image
Technical diagram of an HP printer internal structure with labeled ports and connection points(1) rear cover
Open to clear paper jams.
(2) power cord connector
Connect the supplied power cord.
(3) telephone line jack
Connect the phone cord.
(4) external device jack
Connect a telephone or answering machine.
(5) USB port
Connect the USB cable for a direct connection with a computer.
Important
- Do not touch any exposed metal parts.
- Do not connect or disconnect the USB cable while printing or scanning from a computer.
Inside View
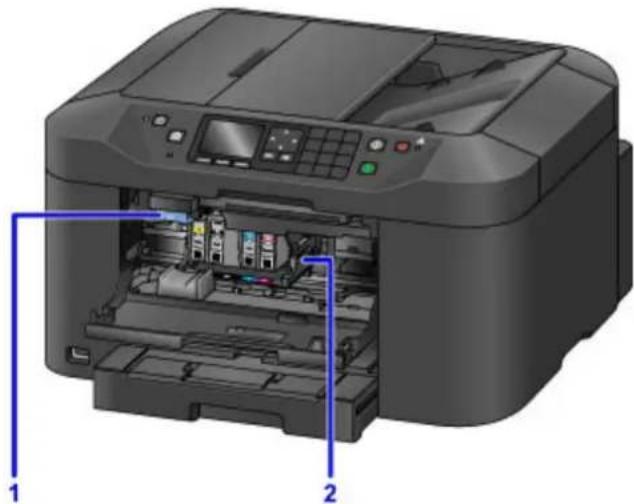
natural_image
3D rendering of an HP printer with internal components and labeled parts (no text or symbols on the printer itself)(1) ink tank eject lever
Push up to remove ink tanks.
(2) print head holder
The print head is pre-installed.
Note
- For instructions on replacing ink tanks, see Replacing Ink Tanks.
Operation Panel
* Here, all operation panel indicators are shown lit for the purpose of illustration.
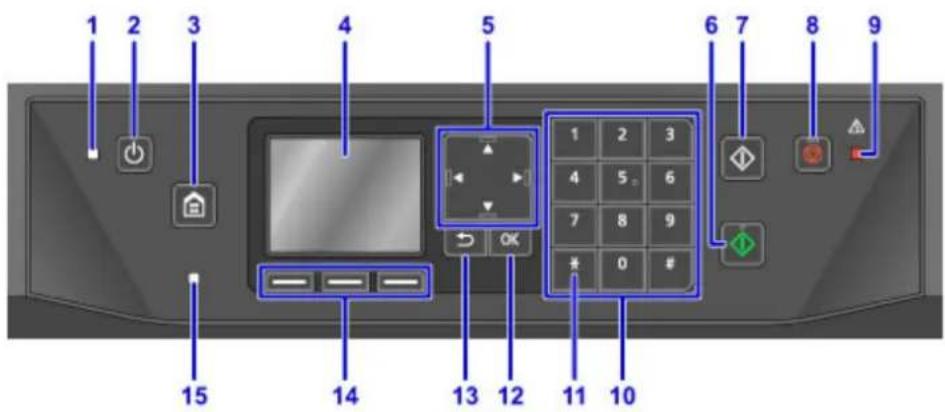
text_image
1 2 3 4 5 6 7 8 9 15 14 13 12 11 10(1) POWER lamp
Remains lit after flashing when the machine is turned on.
(2) ON button
Turns the machine on or off.
→ Turning the Machine On and Off
(3) HOME button
Used to display the HOME screen.
→ LCD and Operation Panel
(4) LCD (Liquid Crystal Display)
Displays messages, menu items, and operating status.
(5) ▲, ▼, and buttons
Used to select menu or setting items. Also used to enter information.
→ LCD and Operation Panel
(6) Color button
Starts color copying, scanning, or faxing.
(7) Black button
Starts black-and-white copying, scanning, or faxing.
(8) Stop button
Cancels printing, copying, scanning, or faxing in progress.
(9) Alarm lamp
Lights up or flashes in case of errors.
(10) Numeric button
Used to enter information such as the number of copies, fax/telephone numbers, or text.
(11) Tone button
Temporarily switches to tone dialing, when connected to a rotary (pulse) line.
(12) OK button
Confirms your selection of menu or setting items. Also used to dismiss error messages or eject documents from the ADF (Auto Document Feeder).
(13) Back button
Returns to the previous screen.
(14) Function buttons
Used to select function menu items on the bottom of the LCD.
→ Using the Function Buttons
(15) FAX Memory lamp
When lit, indicates that there are received or unsent documents in the machine's memory.
Power Supply
▶ Confirming that the Power Is On
▶ Turning the Machine On and Off
▶ Checking the Power Plug/Power Cord
▶ Unplugging the Machine
Confirming that the Power Is On
The POWER lamp is lit when the machine is on.
Even if the LCD is off, as long as the POWER lamp is lit, the machine is on.
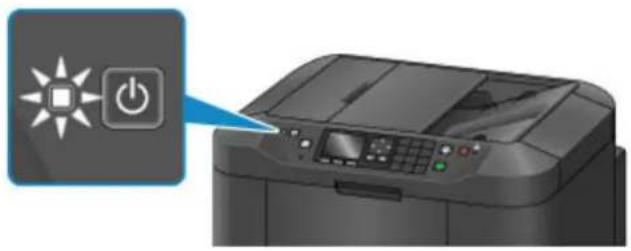
natural_image
Illustration of a printer with a power button icon and sunburst symbol (no text or symbols present)Note
• After you turn the machine on, it requires a warm-up period of about 20 seconds before any operations. Wait until the HOME screen is displayed.
- The LCD turns off automatically after about 5 minutes of inactivity. To activate the display again, press a button other than the ON button, or perform a printing operation. The display is also activated when receiving faxes. The time before LCD deactivation cannot be adjusted.
Turning the Machine On and Off
Turning the machine on
- Press the ON button to turn the machine on.
The POWER lamp flashes and then remains lit.
→ Confirming that the Power Is On
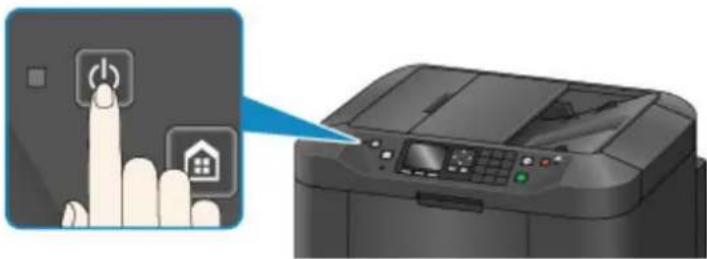
natural_image
Illustration of a printer with a finger pressing a button, showing the printer's screen and control panel (no text or symbols present)Note
• After you turn the machine on, it requires a warm-up period of about 20 seconds before any operations. Wait until the HOME screen is displayed.
- If the Alarm lamp lights up or flashes and an error message appears on the LCD, see Message Appears.
- You can schedule automatic power-on at specified times on specified days of the week.
ECO settings
- You can set the machine to turn on automatically when printing is started from a machine connected by USB or network or when scanning or fax reception is started. This feature is disabled by default.
ECO settings
Turning the machine off
- Press the ON button to turn the machine off.
Once the POWER lamp stops flashing, the machine goes off.
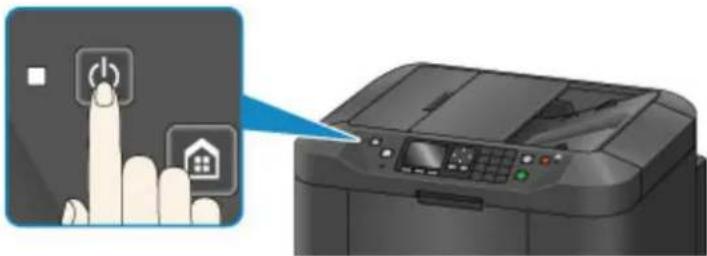
natural_image
Illustration of a printer with a hand pressing a button and emitting a blue light beam (no text or symbols)Important
- Before unplugging the machine after turning it off, confirm that the POWER lamp is off.
Note
- Remember that faxes cannot be sent or received while the machine is off.
- The power cannot be turned off while the machine is sending or receiving a fax, or when unsent faxes are stored in the machine's memory.
- You can schedule automatic power-off at specified times on specified days of the week.
ECO settings
- You can set the machine to turn off automatically after a specified period when no operations are performed or print jobs are received from a computer. (The machine cannot be turned off when a telephone is connected.) This feature is enabled by default.
ECO settings
Checking the Power Plug/Power Cord
Check the power plug/power cord once a month to ensure that it is not affected by these problems.
- Excessively hot
- Corroded
- Bent
- Worn
- Cracked or split
Caution
- If the power plug/power cord case is affected by these or other problems, unplug the machine and request service. Continuing to use the machine with any of these problems may cause a fire or electric shock.
Unplugging the Machine
Always follow these steps when unplugging the machine.

Important
- Unplug the machine only after pressing the ON button and confirming that the POWER lamp is off. Unplugging the machine while the POWER lamp is still on may cause the print head to dry out or become clogged, which may affect print quality.
-
Unplugging the machine will reset the date/time setting and erase all documents in the machine's memory. Send faxes, print documents, or save jobs to a USB flash drive as needed before unplugging the machine.
-
Press the ON button to turn the machine off.
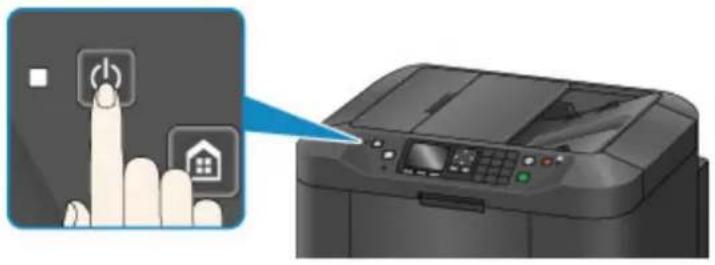
natural_image
Illustration of a printer with a control panel and icon buttons, showing no text or symbols on the device itself.- Confirm that the POWER lamp is off.
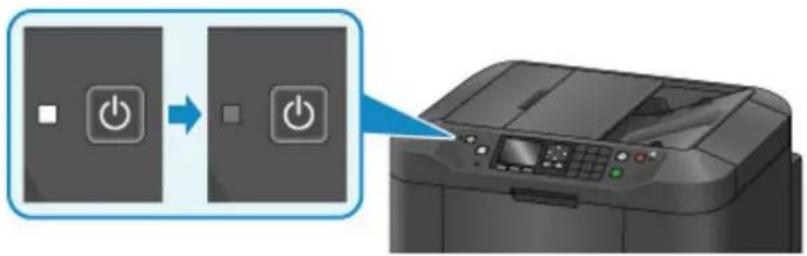
text_image
Diagram showing power switch operation on printer, with icons indicating left and right buttons and a printer output.- Unplug the machine.
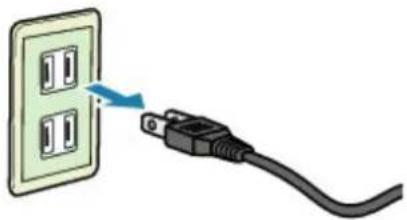
natural_image
Illustration of a plug being inserted into a wall socket (no text or symbols)Power cord specifications vary by region.
LCD and Operation Panel
The operation panel features an LCD and buttons.
Select icons on the HOME screen to choose menus for copying, faxing, or scanning.
The HOME screen consists of three sections.
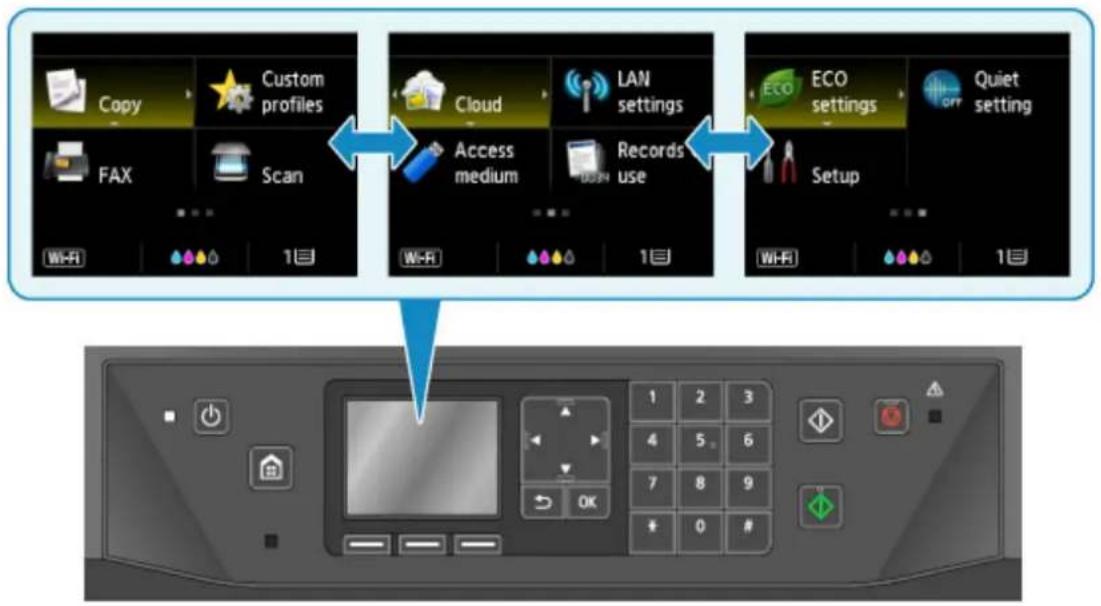
flowchart
graph TD
    A["Copy"] --> B["Custom profiles"]
    B --> C["FAX"]
    C --> D["Scan"]
    D --> E["Cloud"]
    E --> F["Access medium"]
    F --> G["Records use"]
    G --> H["ECO"]
    H --> I["Setup"]
    I --> J["ECO settings"]
    J --> K["Quiet setting"]
Basic use of the operation panel
Use the ▲, ▼, ◀, or ▶ buttons (A) to select a menu or option on a screen, and then press the OK button (B).
To return to the previous screen, press the Back button (C).
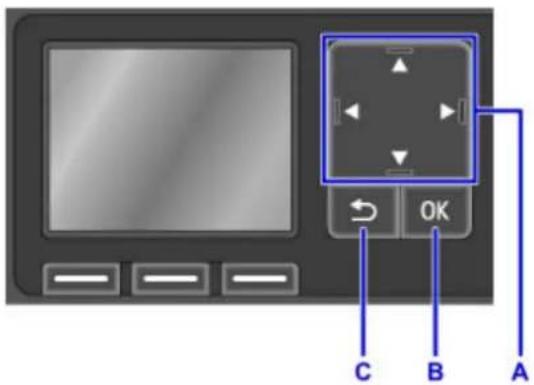
text_image
Diagram of a device control panel with labeled buttons A, B, and C pointing to a central display and OK button.Using the Function Buttons
Function menu items (D) are displayed as needed on the bottom of the LCD. To use a function here, press the corresponding Function button (E, F, or G).
The number and nature of function menu items varies depending on the screen. Check function menu items on the bottom of the screen, and then select the one you need.
Example: HOME screen

text_image
Copy Custom profiles FAX Scan WIFI 1 D E F GPress the left Function button (E) to display the Change LAN screen. From there, you can adjust wireless LAN settings.
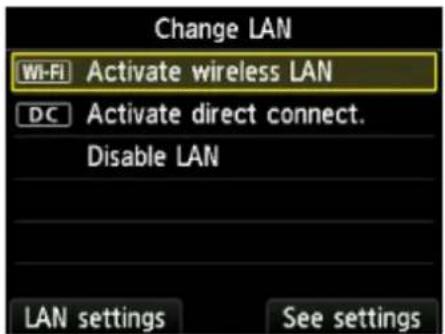
text_image
Change LAN Wi-Fi Activate wireless LAN DC Activate direct connect. Disable LAN LAN settings See settingsPress the center Function button (F) to display the Current estimated ink levels screen. From there, you can check current ink levels.

text_image
Current estimated ink levels Y BK C M OK Back Ink numberPress the right Function button (G) to display the Register cassette paper info screen. From there, you can check the cassette's page size and media type settings.
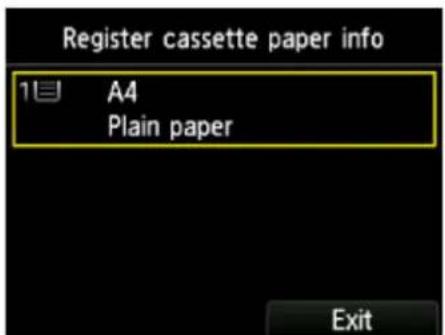
text_image
Register cassette paper info 1 A4 Plain paper ExitEntering Numbers, Letters, and Symbols
Use the Numeric button to enter or edit user or recipient names or other information.
Switching the Input Mode
The machine has input modes for lowercase letters, uppercase letters, and numbers. To switch modes, press the button (A). The mode cycles from lowercase to uppercase to numeric mode.
The current input mode is indicated on the bottom right of the LCD.
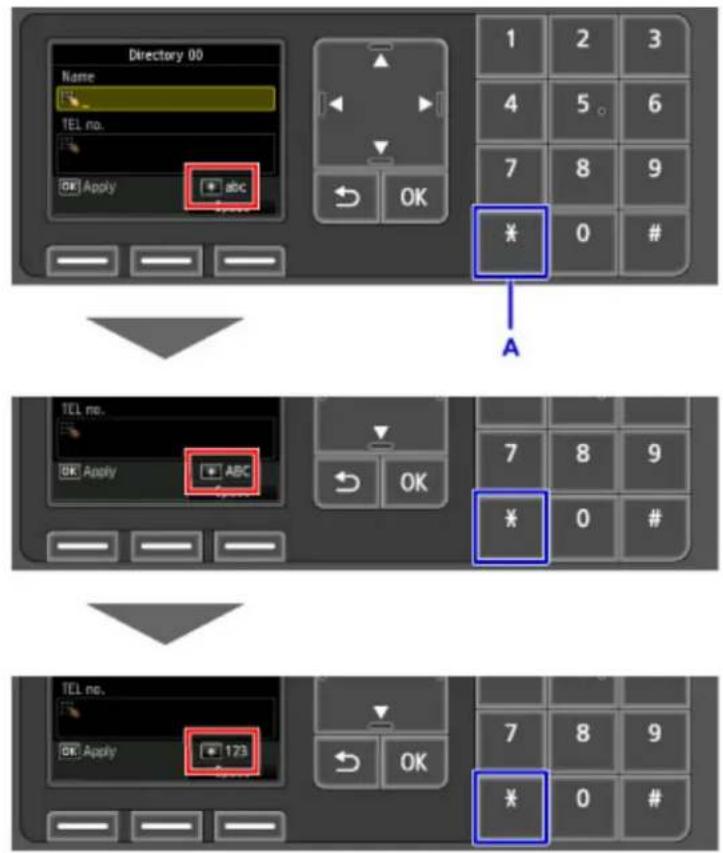
text_image
Directory 00 Name TEL no. Apply abc 1 2 3 4 5 6 7 8 9 ¥ 0 # A TEL no. OK Apply ABC 7 8 9 ¥ 0 # TEL no. OK Apply 173 7 8 9 OK ¥ 0 #
Note
- Only numbers and symbols that are available for the type of information you are entering are displayed, such as numbers for telephone or fax number input.
Entering Numbers, Letters, and Symbols
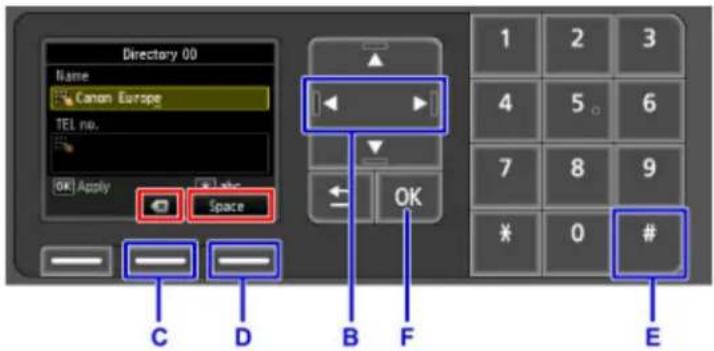
text_image
Directory 00 Name Canon Europe TEL no. OK Apply Space 1 2 3 4 5 6 7 8 9 ¥ 0 # C D B F EPress the same Numeric button repeatedly until the desired character is displayed in the input field.
Enter information as follows.
- To move the insertion point (cursor position) in the input field
Press the ▶ or button (B).
• To delete an entered character
Move the cursor to the character to delete, and then press the center Function button (C) to select

- To insert a space
Press the right Function button (D) to select Space.
- To insert a symbol

When finished, press the OK button (F).
Characters Assigned to Numeric Buttons
| Button | Lowercase Mode (abc) | Uppercase Mode (ABC) | Numeric Mode (123) | Fax/Telephone No. |
| 1 | 1 1 | |||
| 2 | abcàääääæç ABCÄÄÄÄÄÄÄÄÄÄÄÄÄÄÄÄÄÄÄÄÄÄÄÄÄÄÄÄÄÄÄÄÄÄÄÄÄÄÄÄÄÄÄÄÄÄÄÄÄÄÄÄÄÄÄÄÄÄÄÄÄÄÄÄÄÄÄÄÄÄÄÄÄÄÄÄÄÄÄÄÄÄÄÄÄÄÄÄÄÄÄÄÄÄÄÄÄÄÄÄ | 2 2 | ||
| 3 | defëèèê DEFÉÉÈÊ 3 3 | |||
| 4 | gh iï ì ì ì GH IÏ ì ì ì ì 4 4 | |||
| 5 | jkl JKL 5 5 | |||
| 6 | mnoñøöööö MNOÑØÖÖÖÖÖÖ 6 6 | |||
| 7 | pqrsþ | PQRSP | 7 7 | |
| 8 | tuvüúùû | TUVÜÚÜÜ | 8 8 | |
| 9 | wxyzý WXYZÝ 9 9 | |||
| 0 | 0 0 | |||
| # | .@-_SP*1 *#!",;:^`=/|'? $ % & + ()[]{}<>\*2~*2 | # | ||
| ¥ | Switches the input mode | * | ||
*1 "SP": For entering a blank space.
*2 Only available when network settings are entered.
Changing Settings
Changing Printer Settings from Your Computer (Windows)
Changing Printer Settings from Your Computer (Mac OS)
Changing Settings from Operation Panel
Changing Printer's Setting Using Web Browser
Changing Printer Settings from Your Computer (Windows)
Changing the Print Options
Registering a Frequently Used Printing Profile
Managing the Printer Power
▶ Reducing the Printer Noise
Changing the Printer Operation Mode
Changing the Print Options
You can change the detailed printer driver settings for print data that is sent from an application software.
Specify this option if you encounter print failures such as part of an image data being cut off.
The procedure for changing the print options is as follows:
- Open the printer driver setup window
- Click Print Options... on the Page Setup tab

text_image
Canon series Printer Printing Preferences Quick Setup Main Page Setup Maintenance Page Size: Letter 8.5"x11" 22x28cm Orientation: ● Portrait A Landscape Rotate 180 degrees Printer Paper Size: Same as Page Size Page Layout: Normal-size Normal-size Fit-to-Page Scaled Page Layout Tiling/Poster ✓ Automatically reduce large document that the printer cannot output Duplex Printing ✓ Automatic Print Area Setup Stapling Side: Long-side stapling (Left) Specify Margin... Copies: 1 (1-999) ✓ Print from Last Page ✓ Cylate Print Options... Stamp/Background...Defaults OK Cancel Apply HelpThe Print Options dialog box opens.
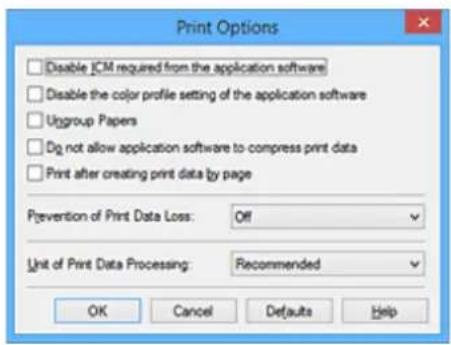
text_image
Print Options Disable ICM required from the application software Disable the color profile setting of the application software Uggroup Papers Do not allow application software to compress print data Print after creating print data by page Prevention of Print Data Loss: Off Unit of Print Data Processing: Recommended OK Cancel Defaults HelpNote
- When you use the XPS printer driver, the functions available to you are different.
- Change the individual settings
If necessary, change the setting of each item, and then click OK.
The Page Setup tab is displayed again.
Registering a Frequently Used Printing Profile
You can register the frequently used printing profile to Commonly Used Settings on the Quick Setup tab. Unnecessary printing profiles can be deleted at any time.
The procedure for registering a printing profile is as follows:
Registering a Printing Profile
-
Open the printer driver setup window
-
Set the necessary items
From Commonly Used Settings on the Quick Setup tab, select the printing profile to be used and if necessary, change the settings after Additional Features.
You can also register necessary items on the Main and Page Setup tabs.
- Click Save...
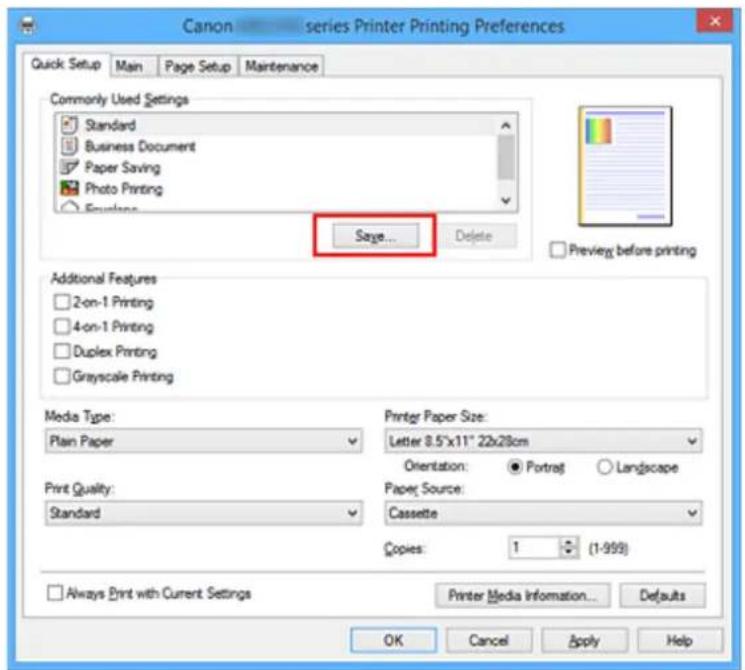
text_image
Canon series Printer Printing Preferences Quick Setup Main Page Setup Maintenance Commonly Used Settings Standard Business Document Paper Saving Photo Printing Envelope Sage... Delete Preview before printing Additional Features 2-on-1 Printing 4-on-1 Printing Duplex Printing Grayscale Printing Media Type: Plain Paper Print Quality: Standard Printer Paper Size: Letter 8.5"x11" 22x28cm Orientation: ● Portrait ○ Landscape Paper Source: Cassette Copies: 1 (1-999) Always Print with Current Settings Printer Media Information... Defaults OK Cancel Apply HelpThe Save Commonly Used Settings dialog box opens.
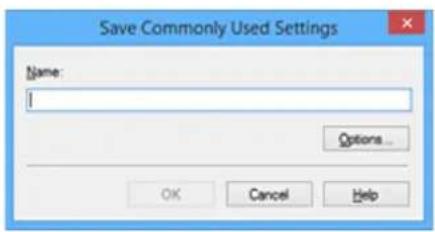
text_image
Save Commonly Used Settings Name: I Options... OK Cancel Help- Save the settings
Enter a name in the Name field. If necessary, click Options..., set the items, and then click OK.
In the Save Commonly Used Settings dialog box, click OK to save the print settings and return to the Quick Setup tab.
The name and icon are displayed in Commonly Used Settings.
Important
- To save the page size, orientation, and number of copies that was set in each sheet, click Options..., and check each item.
Note
- When you re-install the printer driver or upgrade the printer driver version, the print settings that are already registered will be deleted from Commonly Used Settings.
Registered print settings cannot be saved and preserved. If a profile is deleted, register the print settings again.
Deleting Unnecessary Printing Profile
- Select the printing profile to be deleted
Select the printing profile you want to delete from the Commonly Used Settings list on the Quick Setup tab.
- Delete the printing profile
Click Delete. When the confirmation message appears, click OK.
The selected printing profile is deleted from the Commonly Used Settings list.
Note
- Printing profiles that are registered in the initial settings cannot be deleted.
Managing the Printer Power
This function allows you to manage the printer power from the printer driver.
The procedure for managing the printer power is as follows:
Power Off
The Power Off function turns off the printer. When you use this function, you will not be able to turn the printer on from the printer driver.
- Open the printer driver setup window
- Execute power off
Click Power Off on the Maintenance tab. When the confirmation message appears, click OK.
The printer power switches off, and the Maintenance tab is displayed again.
Important
- You cannot receive faxes when the printer is switched off.
Reducing the Printer Noise
The silent function allows you to reduce the operating noise of this printer. Select when you wish to reduce the operating noise of the printer at night, etc.
Using this function may lower the print speed.
The procedure for using the quiet mode is as follows:
Quiet Settings
-
Open the printer driver setup window
-
Click Quiet Settings on the Maintenance tab
The Quiet Settings dialog box opens.
Note
- If the printer is off or if communication between the printer and the computer is disabled, an error message may appear because the computer cannot collect the printer status.
- Set the quiet mode
If necessary, specify one of the following items:
Do not use quiet mode
Select this option when you wish to use the printer with volume of normal operating noise.
Always use quiet mode
Select this option when you wish to reduce the operating noise of the printer.
Use quiet mode during specified hours
Select this option when you wish to reduce the operating noise of the printer during a specified period of time.
Set the Start time and the End time of the quiet mode you wish to be activated. If both are set to the same time, the quiet mode will not function.
Important
- You can set the quiet mode from the operation panel of the printer, the printer driver, or ScanGear (scanner driver). No matter how you use to set the quiet mode, the mode is applied when you perform operations from the operation panel of the printer or printing and scanning from the computer.
- Apply the settings
Make sure that the printer is on and click OK.
Click OK when the confirmation message appears.
The settings are enabled hereafter.
- The effects of the quiet mode may be less depending on the print quality settings.
Changing the Printer Operation Mode
If necessary, switch between various modes of printer operation.
The procedure for configuring Custom Settings is as follows:
Custom Settings
-
Open the printer driver setup window
-
Make sure that the printer is on, and then click Custom Settings on the Maintenance tab
The Custom Settings dialog box opens.
Note
- If the printer is off or if communication between the printer and the computer is disabled, an error message may appear because the computer cannot collect the printer status. If this happens, click OK to display the most recent settings specified on your computer.
- If necessary, complete the following settings:
Prevent paper abrasion
The printer can increase the gap between the print head and the paper during high-density printing to prevent paper abrasion.
Check this check box to prevent paper abrasion.
Align heads manually
Usually, the Print Head Alignment function on the Maintenance tab is set to automatic head alignment, but you can change it to manual head alignment.
If the printing results of automatic print head alignment are not satisfactory, perform manual head alignment.
Check this check box to perform the manual head alignment. Uncheck this check box to perform the automatic head alignment.
Rotate 90 degrees left when orientation is [Landscape]
On the Page Setup tab, you can change the rotation direction of the Landscape in the Orientation.
To rotate the print data 90 degrees to the left during printing, select this item. To rotate the print data 90 degrees to the right during printing, clear this item.
Important
- Do not change this setting while the print job is displayed in the print wait list. Otherwise, characters may be omitted or the layout may become corrupt.
Don't detect mismatch of paper settings when printing from computer
When you print documents from your computer and the paper settings on the printer driver and the cassette paper information registered on the printer do not match, this setting disables the
message display and allows you to continue printing.
To disable detection of paper setting mismatches, select this check box.
Ink Drying Wait Time
You can set the length of the printer rest time until printing of the next page begins. Moving the slider to the right increases the pause time, and moving the slider to the left decreases the time. If the paper gets stained because the next page is ejected before the ink on the printed page dries, increase the ink drying wait time.
Reducing the ink drying wait time speeds up printing.
4. Apply the settings
Click OK and when the confirmation message appears, click OK.
The printer operates with the modified settings hereafter.
Changing Settings from Operation Panel
Changing Settings from Operation Panel
Setting Items on Operation Panel
FAX settings
▶ Print settings
LAN settings
▶ Device user settings
Language selection
Firmware update
▶ Cassette settings
Administrator password setting
▶ Operation restrictions
Reset setting
Web service setup
System information
ECO settings
Quiet setting
Registering Favorite Settings (Custom profiles)
Checking the Total Number of Uses of Machine
Changing Settings from Operation Panel
This section describes the procedure to change the settings in the Device settings screen, taking the steps to specify Prevent paper abrasion as an example.
- Make sure printer is turned on.

- Select 📋 on HOME screen.
→ LCD and Operation Panel

- Select Device settings and press OK button.
The Device settings screen appears.
- Select setting item and press OK button.
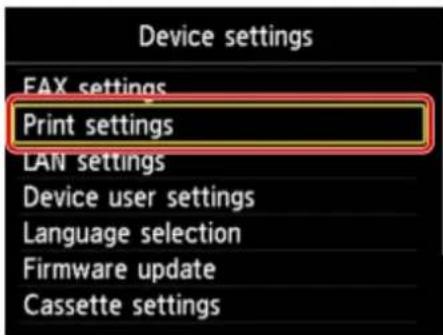
text_image
Device settings FAX settings Print settings LAN settings Device user settings Language selection Firmware update Cassette settingsThe setting screen for the selected item is displayed.
- Select item and press OK button.
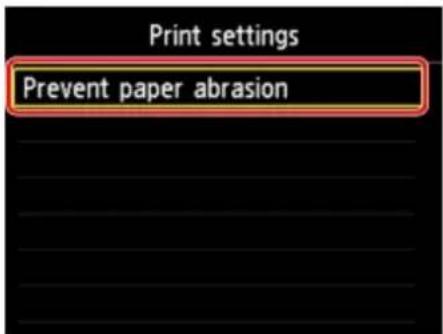
text_image
Print settings Prevent paper abrasion- Select setting item and press OK button.
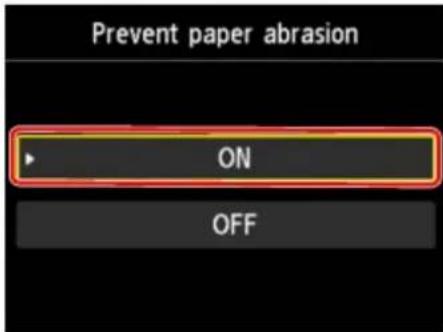
text_image
Prevent paper abrasion ON OFFFor more on setting items on the operation panel:
Setting Items on Operation Panel
Setting Items on Operation Panel
Note
- The administrator password is required to change some setting items if it is enabled for changing settings using the operation panel.
For more on setting items which the administrator password is required:
Setting Administrator Password on Operation Panel
Items for Security
→ Administrator password setting
→ Operation restrictions
Items for Printer
→ FAX settings
→ Device user settings
→ Web service setup
Language selection
ECO settings
→ Quiet setting
→ Registering Favorite Settings (Custom profiles)
Items for Paper/Printing
→ Print settings
→ Cassette settings
→ Paper Settings
Items for Maintenance/Management
→ System information
→ Firmware update
→ LAN settings
→ Reset setting
→ Checking the Total Number of Uses of Machine
FAX settings

Important
- This setting item is for the administrator.
This section describes the setting items in FAX settings.
→ FAX user settings
→ Advanced FAX settings
→ Auto print settings
→ Auto save setting
→ Security control
→ Easy setup

Note
- Before changing the settings, you can confirm the current settings by printing USER'S DATA LIST.
→ Summary of Reports and Lists
FAX user settings
- User information settings
Registers your name and fax/telephone number printed on sent faxes.
→ Registering User Information
- Telephone line type
Selects the telephone line type setting for the printer.
Setting Telephone Line Type
Note
- This setting may not be available depending on the country or region of purchase.
Advanced FAX settings
- Auto redial
Enables/disables automatic redialing.
If you select ON, you can specify the maximum number of redial attempts and the length of time the printer waits between redial attempts.
- Dial tone detect
Avoids mistransmission when reception and transmission occur at the same time.
If you select ON, the printer transmits the fax after confirming the dial tone.
Note
- This setting may not be available depending on the country or region of purchase.
- Pause time settings
Sets the length of pause time for each when you enter "P" (pause).
- TTI position
Selects the position of the sender information (outside or inside the image area).
- Remote RX
Enables/disables remote reception.
If you select ON, you can specify the remote reception ID.
→ Remote Reception
• Color transmission
When faxing color documents using the ADF, selects whether to convert them into black & white data if the recipient's fax device does not support color faxing.
If you select Disconnect, the printer does not send color documents when the recipient's fax device does not support color faxing.
- RX image reduction
Enables/disables automatic reduction of incoming faxes so that they fit in the selected paper.
If you select ON, you can select the image reduction direction.
- Adv. communication settings
• ECM TX
Selects whether to send faxes in Error Correction Mode (ECM).
Transmission/Reception of Faxes Using ECM
- ECM RX
Selects whether to receive faxes in Error Correction Mode (ECM).
Transmission/Reception of Faxes Using ECM
- TX start speed
Selects the fax transmission speed.
The fax transmission start speed will be faster as the value is bigger.
When the telephone line condition or connection is poor, selecting a lower transmission start speed may solve transmission problems.
- RX start speed
Selects the fax reception speed.
The fax reception start speed will be faster as the value is bigger.
When the telephone line condition or connection is poor, selecting a lower reception start speed may solve reception problems.
Auto print settings
• Received documents
Selects whether to print the received fax automatically when receiving a fax.
If you select Do not print, the received fax is stored in the printer's memory.
For details on the received fax stored in the printer's memory:
→ Document Stored in Printer's Memory
- Activity report
Selects whether to print ACTIVITY REPORT automatically.
If you select Print, the printer prints ACTIVITY REPORT for the 20 histories of sent and received faxes automatically.
For details on the procedure to print ACTIVITY REPORT manually:
→ Summary of Reports and Lists
• TX report
Selects whether to print TX REPORT/ERROR TX REPORT automatically after sending a fax.
If you print the report, select Print error only or Print for each TX.
If you select Print error only or Print for each TX, you can specify the print setting that the first page of the fax is printed along with the report.
- RX report
Selects whether to print RX REPORT automatically after receiving a fax.
If you print RX REPORT, select Print error only or Print for each RX.
- Print when out of ink
Sets whether to continue printing the received fax without storing it in the printer's memory when the ink has run out.
However, part or all of the fax may not be printed since the ink has run out.
Auto save setting
Selects whether to save the received fax on the USB flash drive automatically or to forward to the shared folder on the computer automatically after receiving a fax.
→ Saving Received Faxes Automatically on USB Flash Drive
Forwarding Received Faxes Automatically to Shared Folder on Computer
Security control
• FAX number re-entry
If you select ON, you can set the printer to send faxes after using the Numeric buttons to enter the number twice.
→ Preventing Mistransmission of Faxes
- Check RX FAX information
If you select ON, the printer checks whether the recipient's fax device information matches the dialed number. If it matches the number, the printer starts to send faxes.
→ Preventing Mistransmission of Faxes
- Hook key setting
If you select Enable, you can use the on hook dial function.
• FAX reception reject
If you select ON, the printer rejects the reception of faxes with no sender information or faxes from specific senders.
→ Rejecting Fax Reception
- Caller rejection
If you subscribe to the Caller ID service, the printer detects the sender's Caller ID. If the sender's ID matches the condition specified in this setting, the printer rejects the phone call or fax reception from the sender.
If you select Yes on the subscribing confirmation screen, you can specify the settings of rejection.
→ Using Caller ID Service to Reject Calls
Note
- This setting may not be supported depending on the country or region of purchase. Contact your telephone company to confirm whether it provides this service.
Easy setup
The printer must be set up depending on your telephone line and use of the faxing function. Follow the procedure according to the instructions on the LCD.
Note
- You can specify the setup setting individually or the advanced setting.
For details on how to specify the setting:
→ Preparing for Faxing
Print settings
Select this setting item from Device settings on Setup.
- Prevent paper abrasion
Use this setting only if the print surface becomes smudged.

Important
- Be sure to set this back to OFF after printing since it may result in lower printing speed or lower print quality.
LAN settings
Select this setting item from Device settings on Setup.
Important
- The administrator password is required to change settings if it is enabled for changing settings using the operation panel.
- Change LAN
Enables/disables either wireless LAN or direct connection.
- Wireless LAN setup
Selects the setup method for wireless LAN connection.
Note
- You can also enter this setting menu by selecting LAN settings on the HOME screen. In this case, enable wireless LAN.
- Cableless setup
Select if you specify the settings of the access point information to the printer directly from a device (e.g. smartphone, or tablet) without operating the wireless router. Follow the on-screen instructions of the connecting device for the setup procedure.
- Standard setup
Select when you perform settings for wireless LAN manually using the operation panel of the printer.
- WPS (Push button method)
Select when you perform settings for wireless LAN using a wireless router supporting a Wi-Fi Protected Setup (WPS) push button method. Follow the on-screen instructions during setup.
- Other setup
■ Advanced setup
Select when you perform settings for wireless LAN manually. You can specify multiple WEP keys.
■ WPS (PIN code method)
Select when you perform settings for wireless LAN using a wireless router supporting a Wi-Fi Protected Setup (WPS) PIN code method. Follow the on-screen instructions during setup.
- Confirm LAN settings
The list of wireless LAN settings or the direct connection of this printer is displayed on the LCD. Press the right Function button, select Yes and then press the OK button to print the list.
For more information on the printer's network setting is printed out:
→ Printing Network Settings
Important
- The network settings printout contains important information about your network. Handle it with care.
- WLAN setting list
The list of wireless LAN settings of this printer is displayed on the LCD.
The following setting items are displayed. (Some setting items are not displayed depending on the printer settings.)
| Items Setting | |
| SSIDXXXXXXXXXXXXXX | XXXXXXXXXXXXXXX (up to 32 characters) |
| Wireless LAN security Inactive/WEP(64bit)/WEP(128bit)/WPA-PSK(TKIP)/WPA-PSK(AES)/WPA2-PSK(TKIP)/WPA2-PSK(AES) | |
| Signal strength (%) XXX | |
| IPv4 address XXX. XXX. XXX. XXX (12 characters) | |
| IPv4 subnet mask XXX. XXX. XXX. XXX (12 characters) | |
| IPv4 default gateway XXX. XXX. XXX. XXX (12 characters) | |
| IPv6 address XXXX: XXXX: XXXX: XXXX:XXXXX: XXXX: XXXX: XXXX (32 characters) | |
| MAC address XX:XX:XX:XX:XX:XX (12 characters) | |
| Printer nameXXXXXXXXXXXXX (up to 15 characters) | |
| Bonjour service nameXXXXXXXXXXXXXXXXXXXXXXXXXXXXXXXXXXXXXXXXXX (up to 52 characters) | |
| Root cert. thumbprint (SHA-1) XXXXXXXXXXXXXXXXXXXXXXXXXXX | |
| Root cert. thumbprint (SHA-256)XXXXXXXXXXXXXXXXXXXXXXXXXXXXXX | |
("XX" represents alphanumeric characters.)
- Direct connection setting list
The list of direct connection settings of this printer is displayed on the LCD.
The following setting items are displayed. (Some setting items are not displayed depending on the printer settings.)
| Items Setting | |
| SSID DIRECT-XXXX-XXXXXXseries | |
| Password XXXXXXXXXXXX (10 characters) | |
| Wireless LAN security WPA2-PSK(AES) | |
| IPv4 address XXX. XXX. XXX. XXX (12 characters) | |
| IPv4 subnet mask XXX. XXX. XXX. XXX (12 characters) | |
| IPv4 default gateway XXX. XXX. XXX. XXX. XXX (12 characters) | |
| IPv6 addressXXXX:XXXX:XXXX:XXXX:XXXX:XXXX:XXXX:XXXX (32 characters) | |
| MAC address XX:XX:XX:XX:XX:XX (12 characters) | |
| Printer nameXXXXXXXXXXXXX (up to 15 characters) | |
| Bonjour service nameXXXXXXXXXXXXXXXXXXXXXXXXXXXXXXXXXXXXXXXXXXX (up to 52 characters) | |
| Direct connection device nameXXXX-XXXXXseries | |
| Root cert. thumbprint (SHA-1)XXXXXXXXXXXXXXXXXXXXXXXXXXXXXXXXXXXXX | |
| Root cert. thumbprint (SHA-256)XXXXXXXXXXXXXXXXXXXXXXXXXXXXXXXXXXXXXXXXXXXXXXX | |
("XX" represents alphanumeric characters.)
- Other settings
Important
- You cannot select the items below when Disable LAN is selected for Change LAN.
- Direct connection settings
Setting items are available when you connect a device to the printer.
Important
- You can select these setting items only when Activate direct connect. is selected for Change LAN.
■ Update SSID/password
Selecting Yes updates the identifier (SSID) and password for direct connection.
■ Change device name
Changes the printer's name displayed on a Wi-Fi Direct compatible device.
■ Connection request confirmation
Selecting Yes displays the confirmation screen when a Wi-Fi Direct compatible device is connecting the printer.
→ Using Machine with Direct Connection
- Set printer name
Specifies the printer name. You can use up to 15 characters for the name.
Note
- You cannot use the same printer name as that already used for other LAN connected devices.
- You cannot use a hyphen for the initial or last character of the printer name.
- TCP/IP settings
Performs IPv4 or IPv6 setting.
- WSD setting
Setting items when you use WSD (one of the network protocols supported in Windows 10, Windows 8.1, Windows 8, Windows 7, and Windows Vista).
■ Enable/disable WSD
Selects whether WSD is enabled or disabled.
Note
- When this setting is enabled, the printer icon is displayed on the Network Explorer in Windows 10, Windows 8.1, Windows 8, Windows 7, and Windows Vista.
■ Optimize inbound WSD
Selecting Enable allows you to receive the WSD printing data faster.
■ WSD scan from this device
Selecting Enable allows you to transfer the scanned data to the computer using WSD.
■ Timeout setting
Specifies the timeout length.
- Bonjour settings
Setting items for LAN using Bonjour for Mac OS.
■ Enable/disable Bonjour
Selecting Enable allows you to use Bonjour to perform the network settings.
■ Service name
Specifies the Bonjour service name. You can use up to 48 characters for the name.
Note
- You cannot use the same service name as that already used for other LAN connected devices.
- LPR protocol setting
Enables/disables the LPR setting.
- RAW protocol
Enables/disables RAW printing.
。LLMNR
Enables/disables LLMNR (Link-Local Multicast Name Resolution). Selecting Active allows the printer to detect printer's IP address from the printer name without a DNS server.
Device user settings
Select this setting item from Device settings on Setup.
Important
- The administrator password is required to change settings if it is enabled for changing settings using the operation panel.
- Date/time setting
Sets the current date and time.
For more on the procedure:
Setting Sender Information
- Date display format
Sets the format of dates displayed on the LCD and printed on sent faxes and photos.
Note
- When ON is selected for Print date on the print settings screen in printing from a USB flash drive, the shooting date is printed in the date display format you selected.
Setting Items for Photo Printing Using Operation Panel
• Daylight saving time setting
Enables/disables the summer time setting. If you select ON, you can select additional sub-settings. This setting may not be available depending on the country or region of purchase.
- Start date/time
Sets the date and time that summer time starts.
Month: Specify the month.
Week: Specify the week.
DOW: Specify the day of the week.
The screen to set the shift time to start summer time will be displayed after specifying the items above and pressing the OK button.
After specifying the shift time and pressing the OK button, you can specify the end date/time.
- End date/time
Sets the date and time that summer time ends.
Month: Specify the month.
Week: Specify the week.
DOW: Specify the day of the week.
The screen to set the shift time to end summer time will be displayed after specifying the items above and pressing the OK button.
Specify the shift time and press the OK button.
- Time zone
Specifies the time zone according to a country or region you live in.
Specifying the time zone allows you to display the correct time and date an e-mail was sent on your mail software.
For more on the time zone for each country or region:
→ Timezone List
- Sound control
Selects the volume.
- Keypad volume
Selects the beep volume when pressing the buttons on the operation panel.
- Alarm volume
Selects the alarm volume.
• Line monitor volume
Selects the line monitor volume.
- Offhook alarm
Selects the alarm volume when the phone receiver is not put on the hook properly.
• Country or region
Selects the country or region where you are using the printer.
Note
- This setting may not be available depending on the country or region of purchase.
• Key repeat
Enables/Disables continuous input by pressing and holding down the button when changing the photo displayed on the LCD, setting the zoom ratio, etc.
• Device info sending setting
Selects whether you will send the printer usage information to Canon. The information sent to Canon will be utilized to develop better products. Select Agree to send the printer usage information to Canon.
- Power control
Allows you to turn on/off the printer automatically to save electricity. In addition, you can specify the time and day to turn it on/off.
- Enable auto power control
Specifies the length of time to turn off the printer automatically when no operation is made or no printing data is sent to the printer. In addition, you can allow the printer to turn on automatically when a scanning command from a computer or printing data is sent to the printer.
- Enable scheduling
Specifies the time to turn on/off the printer automatically for each day.
- Do not control power
Disables the function to turn on/off the printer automatically.
Note
- You can also enter this setting menu by selecting ECO settings and Power control on the HOME screen.
→ ECO settings
Timezone List
| Time zone Country or region | |
| (UTC-12:00) | Baker Island, Howland Island |
| (UTC-11:00) | American Samoa, Niue |
| (UTC-10:00) | Hawaii, Western area of Aleutian Islands |
| (UTC-9:00) | Alaska |
| (UTC-8:00) | US/Canada/Mexico (Pacific Time) |
| (UTC-7:00) | US/Canada/Mexico (Mountain Time) |
| (UTC-6:00) | US/Canada/Mexico (Central Time) |
| (UTC-5:00) | US/Canada/Mexico (Eastern Time), Cuba, Peru |
| (UTC-4:30) | Venezuela |
| (UTC-4:00) | Canada (Atlantic Time), Most areas of Lesser Antilles, Brazil (Amazon Time), Chile |
| (UTC-3:30) | Canada (Newfoundland) |
| (UTC-3:00) | Brazil (Brasilia time), Argentina, Greenland |
| (UTC-2:00) | Brazil (Fernando de Noronha) |
| (UTC-1:00) | Azores, Cape Verde |
| (UTC+00:00) | United Kingdom, Ireland, Portugal, Iceland, Morocco (Western Africa), Ghana |
| (UTC+1:00) | Central European Time (France, Germany), West Africa Time (Nigeria, Congo) |
| (UTC+2:00) | Eastern European Time (Finland, Greece), Central Africa Time, South Africa |
| (UTC+3:00) | Russia (Kaliningrad), Ukraine, Belarus, Saudi Arabia, East Africa Time |
| (UTC+3:30) | Iran |
| (UTC+4:00) | Russia (Moscow), Azerbaijan, Georgia, United Arab Emirates, Mauritius |
| (UTC+4:30) | Afghanistan |
| (UTC+5:00) | Pakistan |
| (UTC+5:30) | India |
| (UTC+5:45) | Nepal |
| (UTC+6:00) | Russia (Yekaterinburg), Kazakhstan, Bangladesh |
| (UTC+6:30) | Myanmar, Cocos Islands |
| (UTC+7:00) | Russia (Omsk), Mongolia, Thailand, Vietnam, Jakarta |
| (UTC+8:00) | Russia (Krasnoyarsk), China, Mongolia, Malaysia, Australia (Western Australia) |
| (UTC+8:45) | Australia (Eucla) |
| (UTC+9:00) | Russia (Irkutsk), South Korea, Japan, Palau |
| (UTC+9:30) | Australia (Northern Territory, South Australia) |
| (UTC+10:00) | Russia (Yakutsk), Guam, Australian Eastern Standard Time |
| (UTC+10:30) | Australia (Lord Howe Island) |
| (UTC+11:00) | Russia (Vladivostok), Solomon Islands, New Caledonia |
| (UTC+12:00) | Russia (Magadan), New Zealand, Fiji, Kiribati (Gilbert Islands) |
| (UTC+12:45) | New Zealand (Chatham Island) |
| (UTC+13:00) | Tonga, Kiribati (Phoenix Islands), Samoa (From 2011/12/31), Tokelau (From 2011/12/31) |
| (UTC+14:00) | Kiribati (Line Islands) |
Language selection
Select this setting item from Device settings on Setup.
Important
- The administrator password is required to change settings if it is enabled for changing settings using the operation panel.
Changes the language for the messages and menus on the LCD.
Firmware update
Select this setting item from Device settings on Setup.
Important
- The administrator password is required to change settings if it is enabled for changing settings using the operation panel.
You can update the firmware of the printer, check the firmware version, or perform settings of a notification screen, a DNS server and a proxy server.
Note
- Only Check current version is available when Disable LAN or Activate direct connect. is selected for Change LAN in LAN settings.
- Install update
Performs the firmware update of the printer. If you select Yes, the firmware update starts. Follow the on-screen instructions to perform update.
Important
- When you use this function, make sure the printer is connected to the Internet.
- If the firmware update is carried out, all faxes stored in the printer's memory are deleted.
- You cannot start the firmware update under the following conditions:
- While the printer is sending or receiving a fax
- While the printer is storing the unprinted fax in printer's memory (memory reception)
- When the unsent faxes are stored in the printer's memory
Note
- If the firmware update is not complete, check the following and take an appropriate action.
- Check the network settings such as a wireless router.
- If Cannot connect to the server. is displayed on the LCD, press the OK button and try again after a while.
- Check current version
You can check the current firmware version.
- Update notification setting
When ON is selected and the firmware update is available, the screen to inform you of the firmware update is displayed on the LCD.
- DNS server setup
Performs settings for a DNS server. Select Auto setup or Manual setup. If you select Manual setup, follow the display on the LCD to perform settings.
- Proxy server setup
Performs settings for a proxy server. Follow the display on the LCD to perform settings.
Cassette settings
Select this setting item from Device settings on Setup.
By registering the paper size and the media type loaded in the cassette, you can prevent the printer from misprinting by displaying the message before printing starts when the paper size or the media type of the loaded paper differs from the print settings.
For details:
→ Paper Settings
- Register cassette paper info
Registers the paper size and the media type you load in the cassette.
Note
- When you register the paper size and the media type, the screen to select whether you apply the settings to those for copying is displayed. Select Yes to apply the registered settings to copying.
- For more on the combination of paper settings you can specify by the printer driver or on the LCD:
- For Windows:
→ Paper Settings on the Printer Driver and the Printer (Media Type)
→ Paper Settings on the Printer Driver and the Printer (Paper Size)
- For Mac OS:
→ Paper Settings on the Printer Driver and the Printer (Media Type)
→ Paper Settings on the Printer Driver and the Printer (Paper Size)
- Detect paper setting mismatch
If you select Yes, the printer detects whether the paper size and the media type are identical with those registered in Register cassette paper info. If printing starts with the settings that do not match, an error message is displayed on the LCD.
- Detect cassette reinsertion
If you select Yes, the printer detects the cassette is reinserted. When the Register cassette paper info screen is displayed, register the paper size and the media type.
Administrator password setting
Select this setting item from Device settings on Setup.
Important
- The administrator password is required to change settings if it is enabled for changing settings using the operation panel.
You can specify or disable the administrator password.
If you specify the administrator password, select the range and specify the administrator password.
Remote UI or other tools
Entering the administrator password is required to change the setting items using Remote UI or some software.
LCD, Remote UI, or other tools
Entering the administrator password is required to change the setting items using the operation panel of the printer, Remote UI, or some software.
For details:
Setting Administrator Password on Operation Panel
Setting Administrator Password on Operation Panel
You can specify or disable the administrator password.
Specifying the administrator password requires you to enter the password to use the items or change the settings below.
- Web service setup
- FAX settings
• LAN settings
• Device user settings - Language selection
- Firmware update
- ECO settings
- Quiet setting
- Administrator password setting
• Operation restrictions - Reset setting (except for Reset all)
- Import e-mail address book
- Export e-mail address book
Follow the procedure below to specify the administrator password.
-
Make sure printer is turned on.
-
Select Setup on HOME screen.
→ LCD and Operation Panel
- Select Device settings and press OK button.
The Device settings screen appears.
-
Select Administrator password setting and press OK button.
-
When confirmation screen to specify administrator password is displayed, select Yes and press OK button.
If an administrator password is not specified, the register confirmation message appears. Selecting Yes and pressing the OK button displays the message again. Press the OK button.
Important
- The administrator password is set at the time of purchase. The printer's serial number is used as the password.
For the administrator password, refer to Administrator Password.
- Select Change administrator password and press OK button.
If you do not specify an administrator password, select Remove administrator password. Selecting Yes and pressing the OK button displays the message again. Press the OK button.
- Select range where administrator password is valid and press OK button.
Remote UI or other tools
Entering the administrator password is required to change the setting items using Remote UI or some software.
LCD, Remote UI, or other tools
Entering the administrator password is required to change the setting items using the operation panel of the printer, Remote UI, or some software.
- Enter administrator password.
Important
- The following character restrictions apply to the password:
- Set the password by using 4 to 32 characters.
- The allowed characters are single-byte alphanumeric characters.
-
For security reasons, we recommend you use 6 and more alphanumeric characters.
-
Select Apply and press OK button.
- Enter administrator password you specified again.
- Select Apply and press OK button.
The administrator password is enabled.
When You Want to Change or Disable the Administrator Password:
When the administrator password is enabled, selecting Setup, Device settings, and Administrator password setting in this order and entering the administrator password displays Change administrator password and Remove administrator password on the LCD. Select either item and follow the on-screen instructions to perform settings.
Operation restrictions
Select this setting item from Device settings on Setup.
Important
- The administrator password is required to change settings if it is enabled for changing settings using the operation panel.
You can restrict printing, copying, or faxing operations or to use a USB flash drive or a shared folder on the computer.
Note
- When no operation restrictions are enabled, the confirmation screen to enable operation restrictions is displayed. Selecting Yes and pressing the OK button enables you to restrict operations. If you have already restricted any operations, the menu items are displayed. Selecting Change operation restrictions and pressing the OK button enables you to change the settings of operation restrictions.
For details:
→ Restricting Machine Operation
Restricting Machine Operation
You can restrict printing, copying, or faxing operations or to use a USB flash drive or a shared folder on the computer. Restrictions can be disabled temporality.
→ Disabling Operation Restriction Temporarily
To enable this function, apply the administrator password for changing settings on the operation panel.
Setting Administrator Password on Operation Panel
- Make sure printer is turned on.

- Select Setup on HOME screen.
→ LCD and Operation Panel

-
Select Device settings and press OK button.
-
Select Operation restrictions and press OK button.
-
Enter administrator password.
-
When confirmation screen of operation restriction is displayed, select Yes and press OK button.
If you have already performed operation restriction setting, the menu items are displayed. Select Change operation restrictions and press the OK button.
- Select operation you want to restrict and press OK button.
After you have selected the operation you want to restrict, the setting items are displayed. Use the ▲▼ button to select an item and press the OK button.
Copy
Restricts copying operations. If you select Restrict all copying, you can restrict all copying operations. If you select Restrict color copying, you can restrict color copying operations only.
Print from storage medium
Restricts to print from a USB flash drive.
Scan to USB flash drive
Restricts to save the scanned data on a USB flash drive.
Scan to destination folder
Restricts to forward the scanned data to a shared folder on the computer.
Scan (E-mail direct from device)
Restricts to send an e-mail with scanned data attached from the printer.
E-mail address book
Restricts operations related to the printer's e-mail address book.
FAX transmission
Restricts to send a fax from the printer. (Sending a fax from the computer is not restricted.)
FAX reception
Restricts to receive a fax.
Important
- If the printer receives a fax while Restrict is selected, Not available. An operation restriction is set. is displayed on the LCD and the fax standby screen is displayed. In this case, you cannot receive the faxes. Ask the administrator of the printer you are using to change the setting and have the sender resend the faxes.
Directory
Restricts operations related to the printer's directory.
8. Press left Function button.
The operation restrictions you selected are enabled.
Note
- If you disable all restrictions, select Cancel operation restrictions in step 6 and press the OK button. When the confirmation screen is displayed, select Yes and press the OK button.
To disable each operation restriction, select the item in step 7, press the OK button, select Do not restrict, and then press the OK button.
Disabling Operation Restriction Temporarily
Specify the override password to disable operation restriction temporarily following the procedure below.
-
Make sure printer is turned on.
-
Select step on HOME screen.
→ LCD and Operation Panel
-
Select Device settings and press OK button.
-
Select Operation restrictions and press OK button.
-
Enter administrator password.
-
Select Override password setting on displayed screen and press OK button.
-
Select Yes on displayed screen and press OK button.
-
Press OK button on displayed screen.
-
Specify password.
-
Press OK button.
-
Enter password you specified again.
-
Press OK button.
The override password is enabled.

Note
- Receiving a fax is restricted even though operation restriction is disabled by the override password.
- If the LCD turns off while disabling operation restriction temporarily, enter the override password again to resume the printer.
Reset setting
Select this setting item from Device settings on Setup.
Returns all settings you made to the printer back to the default. However, some data may not be changed, depending on the current usage state of your printer.
Important
- The administrator password is required to change settings if it is enabled for changing settings using the operation panel.
- Depending on the setting item, it is necessary to perform connection or setup again after you have returned the setting back to the default.
- Web service setup only
Deletes IJ Cloud Printing Center and Google Cloud Print registrations.
• LAN settings only
Sets the LAN settings other than the administrator password back to the default.
After resetting, perform setup again as necessary.
- Telephone number only
Deletes all registered telephone/fax numbers.
- Settings only
Returns the settings such as the paper size, media type, or other setting items back to the default. The LAN settings and the telephone/fax number are not returned back to the default.
• Device info sending setting only
Applies the setting not to send the device information to Canon.
• E-mail address book entries only
Deletes all registered e-mail addresses.
- FAX settings only
Returns all fax settings back to the default. Disconnect the telephone line from the printer before you return this setting item back to the default.
After resetting, perform setup again as necessary.
- Reset all
Sets all settings you made to the printer back to the default. The administrator password specified for the printer is set to the default setting.
After resetting, perform setup again as necessary.
Note
- You cannot set the following setting items back to the default:
• The language displayed on the LCD
- The current position of the print head
• The country or region selected for Country or region
- Total use of copying, scanning, and faxing recorded in Records of use
- CSR (Certificate Signing Request) for encryption method (SSL/TLS) setting
You can delete the registered user's name or telephone number following the procedure below.
- Display User information settings screen.
Setting Sender Information
- Use ▲ button to select user's name or telephone number and delete all characters or numbers.
- Press OK button when you finished deleting all characters or numbers.
- Agree is selected for Device info sending setting on Device user settings after you have reset the setting to send device information. However, the printer does not send device information. Select Do not agree and press the OK button to disable the function to send device information.
Web service setup
Select this setting item from Web service setup on Setup.
Important
- The administrator password is required to change settings if it is enabled for changing settings using the operation panel.
- Web service connection setup
The following setting items are available.
- Google Cloud Print setup
Registers/Deletes the printer to/from Google Cloud Print.
- IJ Cloud Printing Center setup
Registers/Deletes the printer to/from Canon Inkjet Cloud Printing Center.
- Check Web service setup
Make sure whether the printer is registered to Google Cloud Print or Canon Inkjet Cloud Printing Center.
- DNS server setup
Performs settings for a DNS server. Select Auto setup or Manual setup. If you select Manual setup, follow the display on the LCD to perform settings.
- Proxy server setup
Performs settings for a proxy server. Follow the display on the LCD to perform settings.
System information
Select this setting item from System information on Setup.
- Current version
Displays the current firmware version. - Printer name
Displays the printer name currently specified.
- Serial number
Displays the printer serial number.
• MAC address of wireless LAN
Displays the MAC address of wireless LAN.
ECO settings
Select this setting item from HOME screen.
This setting allows you to use following functions.
• Using automatic duplex printing to save paper
→ Using Duplex Printing
- Turning on the printer automatically when printing or scanning from a device, or turning it off automatically during the specified elapsed time to save electricity
→ Turning On/Off Printer Automatically
- Turning on/off the printer automatically at the specified time and day
→ Specifying Time and Day to Turn on/off Printer Automatically
Note
- You cannot enable the functions below at the same time.
- Turning on/off the printer automatically
- Specifying the time and day to turn on/off the printer automatically
Important
- The administrator password is required to change settings if it is enabled for changing settings using the operation panel.
Using Duplex Printing
Follow the procedure below to use duplex printing.
- Make sure printer is turned on.

- Select ECG settings on HOME screen.
→ LCD and Operation Panel

- Select Two-sided printing setting and press OK button.
- Use ▲ button to change setting item, use button to change setting, and then use OK button to confirm selection.
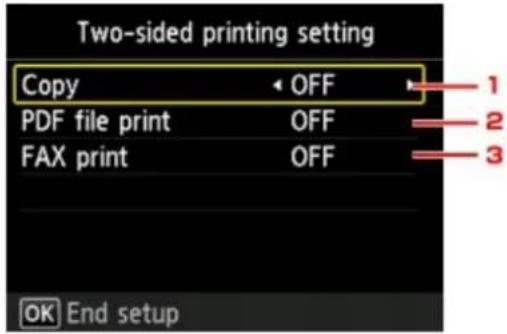
text_image
Two-sided printing setting Copy OFF PDF file print OFF FAX print OFF OK End setup- Copy
Sets two-sided copying as a default.
- PDF file print
Sets duplex printing of PDF files saved on a USB flash drive as a default.
- FAX print
Select two-sided printing of sent/received faxes, reports, or lists as a default.

Note
- When duplex printing is selected, the icon is displayed on each menu of the HOME screen or on the setting items for duplex printing on each print setting screen.

Turning On/Off Printer Automatically
Follow the procedure below to enable turning on/off the printer automatically.
-
Make sure printer is turned on.
-
Select

settings on HOME screen.
→ LCD and Operation Panel
- Select

er control and press OK button.
-
Select Enable auto power control and press OK button.
-
Check message and press OK button.
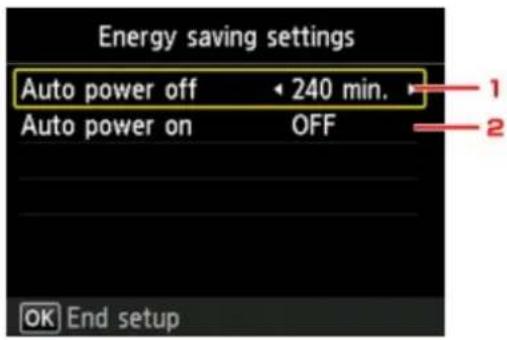
text_image
Energy saving settings Auto power off 240 min. Auto power on OFF OK End setup1. Auto power off
Specifies the length of time to turn the printer off automatically when no operation is made or no printing data is sent to the printer.
2. Auto power on
Selecting ON enables the printer to turn on automatically when a scanning command from a computer or printing data is sent to the printer.
Specifying Time and Day to Turn on/off Printer Automatically
Follow the procedure below to use power saving function.
-
Make sure printer is turned on.
-
Select settings on HOME screen.
→ LCD and Operation Panel
- Select Power control and press OK button.
- Select Enable scheduling and press OK button.
- Check message and press OK button.
- Specify settings as necessary.
- When you specify the time and day to turn the printer on:
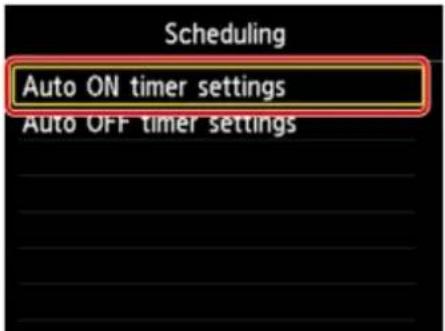
text_image
Scheduling Auto ON timer settings Auto OFF timer settings- Select Auto ON timer settings and press OK button.
- Select Enable on displayed screen and press OK button.
The screen below is displayed.

text_image
Time setting Time to turn ON 08:00 OK Set- Use Numeric buttons to specify time to turn on printer.
You can specify the hour from 0 to 24 and specify the minute in increments of 10 minutes.
- Press OK button to confirm time to turn on printer.
After confirming the time to turn the printer on, the screen to specify the day is displayed. Use the ▲▼ button to select the day, use the ◀▶ button to select Enable or Disable, and then press the OK button. The setting is valid on the day(s) you select Enable for.
- When you specify the time and day to turn the printer off:
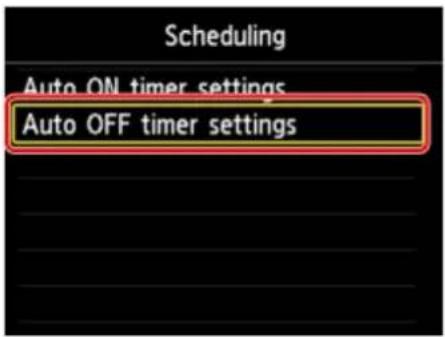
text_image
Scheduling Auto ON timer settings Auto OFF timer settings- Select Auto OFF timer settings and press OK button.
- Select Enable on displayed screen and press OK button.
- Check message and press OK button.
The screen below is displayed.
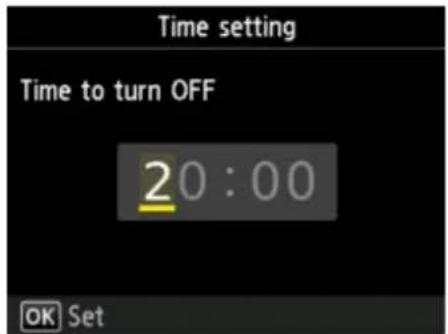
text_image
Time setting Time to turn OFF 20:00 OK Set- Use Numeric buttons to specify time to turn off printer.
You can specify the hour from 0 to 24 and specify the minute in increments of 10 minutes.
- Press OK button to confirm time to turn off printer.
After confirming the time to turn the printer off, the screen to specify the day is displayed. Use the ▲▼ button to select the day, use the ◀▶ button to select Enable or Disable, and then press the OK button. The setting is valid on the day(s) you select Enable for.
Quiet setting
Select this setting item from HOME screen.
Enables this function on the printer if you want to reduce the operating noise, such as when printing at night. In addition, you can specify the time range to reduce the operating noise.

Important
- The administrator password is required to change settings if it is enabled for changing settings using the operation panel.
- Set the current date and time in advance.
Setting Sender Information
Follow the procedure below to perform setting.
- Make sure printer is turned on.

- Select OFF t setting on HOME screen.
→ LCD and Operation Panel
- Select Use quiet mode or Use during specified hours and press OK button.
- When Use quiet mode is selected:
The confirmation screen is displayed and the 🔊 appears as the Quiet setting menu icon.
- When Use during specified hours is selected:
The Quiet mode hours screen is displayed.
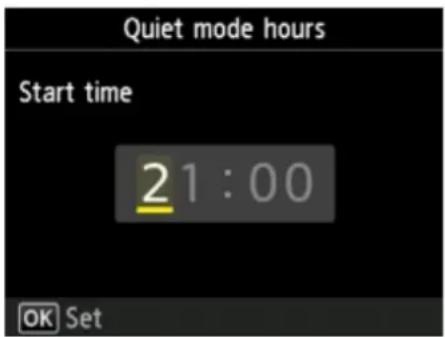
text_image
Quiet mode hours Start time 21:00 OK SetUse the button to move the cursor under the desired position, use the Numeric buttons to enter the starting time, and then press the OK button.
You can specify the hour from 0 to 24.
After that, the screen to specify ending time is displayed. Enter the ending time as in the same way and press the OK button.
You can reduce the operating noise during the specified time.
Important
- Operating speed is reduced compared to when Do not use quiet mode is selected.
- This function may not be so effective depending on the printer's setting. Furthermore, certain noise, such as when the printer is preparing for printing, is not reduced.
Note
- You can set the quiet mode from the operation panel of the printer or the printer driver. No matter how you set the quiet mode, the mode is applied when you perform operations from the operation panel of the printer or printing and scanning from the computer.
- For Windows, you can set the quiet mode from ScanGear (scanner driver).
Registering Favorite Settings (Custom profiles)
You can register the favorite copying, scanning, or faxing settings and call them up from the HOME screen.
You can register up to 20 settings.
→ Registering the Setting
→ Calling Up the Registered Setting
→ Editing/Deleting the Registered setting
Registering the Setting
Press the left Function button on each standby screen or on the screen displayed after the settings are specified.
Copy standby screen Scan standby screen Fax transmission standby screen
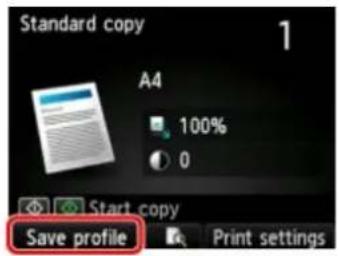
text_image
Standard copy 1 A4 100% 0 Start copy Save profile Print settings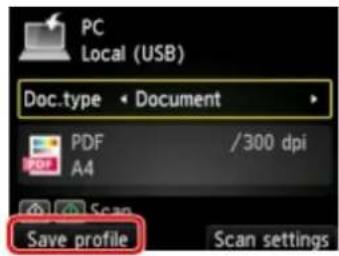
text_image
PC Local (USB) Doc.type < Document > PDF /300 dpi A4 Scan Save profile Scan settings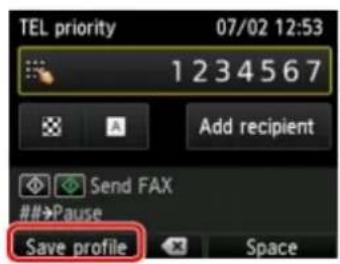
text_image
TEL priority 07/02 12:53 1 2 3 4 5 6 7 Add recipient Send FAX ##→Pause Save profile SpaceWhen the confirmation screen of Save profile is displayed, select Yes and press the OK button.
When the screen to enter the name of the setting is displayed, enter the name and press the OK button.

Note
- If you press the OK button without entering the name, the name currently shown is applied as the name of the setting.
Calling Up the Registered Setting
Follow the procedure below to call up the registered setting.
-
Make sure printer is turned on.
-
Select custom profiles on HOME screen.
→ LCD and Operation Panel
- Select the setting you want to call up and press OK button.

Note
- You can change the displayed items by pressing the right Function button.
Editing/Deleting the Registered setting
Follow the procedure below to edit or delete the registered setting.
-
Make sure printer is turned on.
-
Select custom profiles on HOME screen.

→ LCD and Operation Panel
- Press left Function button.
You can change the order or name of the registered settings and delete the settings.
- To change the order of the registered settings
- Select Rearrange and press OK button.
- Select the setting you want to move and press OK button.
- Move the selected setting.
- Press right Function button.
- Press right Function button again.
- To change the name of the registered settings
- Select Rename and press OK button.
- Select setting you want to rename and press OK button.
- Enter new name and press OK button.
→ Entering Numbers, Letters, and Symbols
- Press right Function button.
• To delete the registered settings
- Select Delete and press OK button.
- Select setting you want to delete and press OK button.
- Select Yes on displayed screen and press OK button.
- Press right Function button.
Checking the Total Number of Uses of Machine
You can check the total number of uses of the printer (e.g. the total number of printing, copying, sending/receiving faxes, or scanning).
- Make sure printer is turned on.

- Select Records of use on HOME screen.
→ LCD and Operation Panel
The Records of use screen is displayed.
- Select item to check and press OK button.
Total sheets used on the device
Displays the total number of printing.
No. of sheets used for copying
Displays the total number of copying.
No. of sheets used for FAX
Displays the total number of received or printed faxes.
Sheets used for other functions
Displays the total number of printing other than copying or faxing.
Number of FAX sheets sent
Displays the total number of sent faxes.
Number of sheets scanned
Displays the total number of scanning.

Note
- The record of the total number of uses is not reverted even if the printer is reverted back to the default by Reset setting in Device settings.
Changing Printer's Setting Using Web Browser
Changing Settings Using Web Browser
Changeable Setting Items Using Web Browser
Setting Password
Setting Mail Server
Specifying Mail Setting for Sending Scanned Data
▶ Receiving Printer Status by E-mail
Changing Settings Using Web Browser
You can check the printer status and change the printer settings using the web browser on your smartphone, tablet, or computer.
To check the printer status and to change the printer settings, display "Remote UI" on the web browser.
Note
- Remote UI is a software that enables you to perform operations, which are usually performed on the printer's operation panel, using a Web browser over a network.
LAN connection with the printer is required to use Remote UI.
- You can use Remote UI on the following OS and the web browser.
- iOS device
OS: iOS 7.0 or later
Web browser: iOS standard Web browser (Mobile Safari)
- Android device
OS: Android 4.0 or later
Web browser: Android standard Web browser (Browser or Chrome)
- Mac OS device
OS: Mac OS X v.10.6 or later
Web browser: Safari 5.1 or later
- Windows device
OS: Windows Vista SP2 or later
Web browser: Internet Explorer 9 or later, Google Chrome 41.0.2272.118m or later, Mozilla Firefox 37.0.1 or later
-
Make sure printer is turned on.
-
Check printer's IP address.
Check the printer's IP address by following the steps below.

- Select Ship on HOME screen.
→ LCD and Operation Panel
The menu screen is displayed.

-
Select Device settings and press OK button.
-
Select LAN settings and press OK button.
-
Select Confirm LAN settings and press OK button.
-
Check IPv4 address.
-
Open web browser on your smartphone, tablet, or computer and enter IP address.
Enter as following in the URL field of the web browser.
http://XXX.XX.X.XXX
Enter the IP address in "XXX.XX.X.XXX".
When you access, "Remote UI" will be displayed on the web browser on your smartphone, tablet, or computer.
- If you display Remote UI for the first time on your smartphone, tablet, or computer, select
For secure communication.
Download the root certificate, and then register it.
Registering Printer's Root Certificate to Web Browser
Note
- Once you register the root certificate to the web browser on your smartphone, tablet, or computer, this step is not necessary after the next time.
If Reset all was performed from the printer's operation panel, download the root certificate again, and then register it. - If the root certificate is not registered, a message to warn you that the secure connection is not guaranteed may appear.
5. Select Log on.
The password authentication screen appears.
Note
- When the standard user mode is enabled, choose either administrator mode or standard user mode to log on.
- After choosing a mode and selecting Log on, the password authentication screen of each mode appears.
6. Enter password.
When the password authentication is complete, the menus that can be utilized are displayed on the web browser.
Important
-
The password is set at the time of purchase. The password is the printer serial number. The printer serial number is printed on the sticker attached on the printer. It consists of 9 alphanumeric characters (four alphabets followed by five numbers).
For details on setting password, see Setting Password. -
Check printer status and change printer settings.
For changeable setting items, see below.
→ Changeable Setting Items Using Web Browser
- When you finish checking printer status and changing printer settings, select Log off.
- Close web browser.
Registering Printer's Root Certificate to Web Browser
If the printer's root certificate has not been registered to the web browser, a message to warn you that the secure connection is not guaranteed may appear.
When you display Remote UI for the first time on your smartphone, tablet, or computer, download the root certificate, and then register it to the web browser. The secure connection will be confirmed and a message will not appear.
How to register the root certificate varies depending on the web browser.
For Internet Explorer
→ For Safari
→ For Chrome on Android
→ Mobile Safari on iOS
For other web browser, refer to each help.

Important
- Make sure that you have accessed to the printer IP address correctly by checking the URL field of the web browser before registering the root certificate.
For Internet Explorer
- Select Download on Remote UI.
Downloading the root certificate is started.
- If confirmation screen appears, select Open.
Certificate screen is displayed.

Note
- To save the certificate file to your device and register it, select Save. Select Internet options from Tool menu of Internet Explorer, register the root certificate from Certificates on Content sheet.
- Select Install Certificate.
Certificate Import Wizard screen is displayed.
-
Select Next.
-
Select Place all certificates in the following store.
-
Select Browse.
Select Certificate Store screen is displayed.
-
Select Trusted Root Certification Authorities and OK.
-
Select Next on Certificate Import Wizard screen.
- If Completing the Certificate Import Wizard appears, select Finish.
Security Warning screen is displayed.
- Make sure that thumbprint on Security Warning screen matches printer's thumbprint.
For printer's thumbprint, press the HOME button, select Setup -> Device settings -> LAN settings -> Confirm LAN settings, check Root cert. thumbprint (SHA-1) or Root cert. thumbprint (SHA-256).
- If thumbprint on Security Warning screen matches printer's thumbprint, select Yes.
- Select Yes on Certificate Import Wizard screen.
The root certificate registration is completed.
For Safari
- Select Download on Remote UI.
Downloading the root certificate is started.
- Open the download file.
Add Certificates screen is displayed.
- Select Add.
- Make sure that thumbprint of certificate detail information matches printer's thumbprint.
For printer's thumbprint, press the HOME button, select Setup -> Device settings -> LAN settings -> Confirm LAN settings, check Root cert. thumbprint (SHA-1) or Root cert. thumbprint (SHA-256).
- If thumbprint of certificate detail information matches printer's thumbprint, select Always Trust.
The root certificate registration is completed.
Note
- If a password is set on your device, entering a password may be required.
For Chrome on Android
- Select Download on Remote UI.
Downloading the root certificate is started and then Downloading Certificate screen is displayed.
2. Specify certificate name, and then select OK.
The root certificate registration is completed.

Note
- If PIN or password is not set as security type, the attention screen may appear. Select OK, and then set the security type to PIN or password.
- If the message to warn you that the secure connection is not guaranteed appears when you select Log on on Remote UI after registering the root certificate, restart the web browser. The message will not appear on the web browser.
After Root Certificate Registration
We recommend that you make sure that the correct root certificate has been registered.
Depending on the Android device, a warning may appear because the root certificate that contains the authentication information was registered.
To make sure that the correct root certificate has been registered, make sure that thumbprint of certificate information matches printer's thumbprint. Follow the steps below.

Note
- Some Android devices cannot check the thumbprint of a registered root certificate.
- From Settings menu on your device, select Security, Trust credentials, and USER.
The list of downloaded certificates is displayed.
- Select downloaded certificate.
The certificate information is displayed.
- Make sure that thumbprint of certificate information screen matches printer's thumbprint.
For printer's thumbprint, press the HOME button, select Setup -> Device settings -> LAN settings -> Confirm LAN settings, check Root cert. thumbprint (SHA-1) or Root cert. thumbprint (SHA-256).
- If thumbprint of certificate information matches printer's thumbprint, select OK.
Confirmation of the root certificate is completed.
For Mobile Safari on iOS
- Select Download on Remote UI.
Downloading the root certificate is started and then Install Profile screen is displayed.
- Select Install.
Warning screen is displayed.

Note
- If a password is set on your device, entering a password may be required.
-
Select Install.
-
Select Install on displayed dialog.
The root certificate registration is completed.
Changeable Setting Items Using Web Browser
Note
- The items described here and the items displayed in the web browser may differ in display order.
- The item which can be used is different in administrator mode or in standard user mode.
Items for Security
Security (Item for administrator)
This function allows you to specify the password, the standard user mode settings, the operation restrictions, and SSL/TLS settings of certificate for encrypted communication.
For details on setting password, see Setting Password.
Items for Maintenance/Management
Utilities
This function allows you to set and execute the printer utility functions such as cleaning.
System info and LAN settings
This function allows you to check the system information and to change the LAN settings.
Using IP filtering in Other settings in LAN settings, you can permit or refuse the connection of a specific IP address for IPv4 address or IPv6 address.
Using SNMP settings in Other settings in LAN settings, you can specify the SNMP and MIB setting to management the printer via a network.
Important
- If you has refused the IP address of administrator's device using IP filtering by mistake, reset LAN settings of the printer.
For resetting LAN settings, see Reset setting.
Note
- Some of the menu is available only when you logged on in administrator mode.
Firmware update (Item for administrator)
This function allows you to update the firmware and check version information.
Language selection (Item for administrator)
This function allows you to change the language on the display.
Items for Printer
Device settings
This function allows you to change the printer settings such as the quiet setting, the energy saving settings, and the print settings.
Additionally, this function allows you to change the mail settings and to receive the printer status information such as the remaining ink level and the error.
Setting Mail Server
→ Specifying Mail Setting for Sending Scanned Data
→ Receiving Printer Status by E-mail
Note
- Some of the menu is available only when you logged on in administrator mode.
AirPrint settings
This function allows you to specify the AirPrint settings, such as position information.
Web service connection setup (Item for administrator)
This function allows you to register to Google Cloud Print or IJ Cloud Printing Center, or delete a registration.
Other Items
Printer status
This function displays printer information such as the remaining ink amount, the status, and detailed error information.
You can also connect to the ink purchase site or support page, and use Web Services.
Records of use
This function displays the total number of uses of the printer (e.g. the total number of printing, copying, sending/receiving faxes, or scanning).
Manual (Online)
This function displays the Online Manual.
Setting Password
Each of passwords for administrator and standard user can be set.
When logging on with password for administrator, all settings can be changed.
When logging on with password for standard user, some of the settings can be changed.
When logging on with password for administrator, you can restrict the function for standard user.
Setting Administrator Password
Setting Standard User Password
Note
- Password can be set only when you are logged in administrator mode.
Setting Administrator Password
Change the administrator password by following the steps below.
Important
- The password is set at the time of purchase. The password is the printer serial number. The printer serial number is printed on the sticker attached on the printer. It consists of 9 alphanumeric characters (four alphabets followed by five numbers).
- Display printer status on web browser.
- Select Security.
The menus are displayed.
- Select Administrator password setting.
- Select Change administrator password.
If the administrator password is not set, registration confirming message is displayed. Select Yes. When message is displayed again, select OK.
- Select a range where the administrator password is valid, and then select OK.
Remote UI or other tools
Entering the administrator password is required to change the setting items using the Remote UI or some software.
Operation panel/Remote UI/other tools
Entering the administrator password is required to change the setting items using the operation panel of the printer, the Remote UI, or some software.
- Enter a password, and then select OK.
Important
- The following character restrictions apply to the password:
- Set the password by using 4 to 32 characters.
- The allowed characters are single-byte alphanumeric characters.
-
For security reasons, we recommend you use 6 and more alphanumeric characters.
-
When the completion message is displayed, select OK.
Setting Standard User Password
For restricting the function for standard user, enable the standard user mode and set a standard user password by following the steps below.
- Display printer status on web browser.
- Select Security.
The menus are displayed.
- Select Standard user mode settings.
- When the confirming message is displayed, select Yes.
- Enter a password, and then select OK.
Important
- The following character restrictions apply to the password:
- Set the password by using 4 to 32 characters.
- The allowed characters are single-byte alphanumeric characters.
-
For security reasons, we recommend you use 6 and more alphanumeric characters.
-
When the completion message is displayed, select OK.
Setting Mail Server
To use mail function, specify the mail server settings.
Note
-
If you did not specify the time zone setting using the printer's operation panel, a message to inform you that the correct time may not be reflected on the sent e-mail appears. We recommended that you set the time zone setting using the printer's operation panel.
For the time zone setting, see Device user settings.
• These functions can be set only when you are logged in administrator mode. -
Display printer status on web browser.
-
Select Device settings.
The menus are displayed.
-
Select Set mail server / test connect.
-
Select Set mail server.
The setting items for mail server are displayed.
- Specify mail server settings.
Specify the following items.
Sender address
Enter the e-mail address of the sender (this printer).
Outgoing mail server (SMTP)
Enter the address of your SMTP server.
Port number (SMTP)
Enter the port number of your SMTP server.
Secure connection (SSL)
Select if you use the secure connection (SSL).
Don't verify certificates
Select if you do not verify the certificate.
Authentication method
Select one of the following authentication methods.
SMTP authentication
Select if you send e-mail with SMTP authentication.
Next, you can specify the following settings.
- Outgoing account
Enter the account name for sending to perform the authentication.
- Outgoing password
Enter the password for sending to perform the authentication.
POP before SMTP
Select if you send e-mail with POP before SMTP authentication.
Next, you can specify the following settings.
- Incoming mail server (POP3)
Enter the address of your POP server. - Port number (POP3)
Enter the port number of your POP server. - Incoming account
Enter the account name for receiving to perform the authentication. - Incoming password
Enter the password for receiving to perform the authentication. - Use APOP authentication
Select if you send the password by the encryption transmission. - Clear mailbox
Select if you delete the e-mails that remain in the POP3 server.

Important
- When this setting is enabled, e-mail in the Inbox on the server will have all been removed. If you specify the e-mail address of your everyday, be sure to disable this setting as unread e-mail is not deleted. We recommended that you prepare this printer dedicated e-mail account not to accidentally delete the unread e-mail.
No authentication
Select if the authentication is not necessary.
6. After specifying mail server settings, select OK.
The setting operation is completed.

Note
- To make sure that the mail server settings have been specified correctly, select Test connection to mail server.
Specifying Mail Setting for Sending Scanned Data
You can specify the mail settings to send the scanned data from printer via e-mail.
This section describes the mail settings such as the title of e-mail, initial body text, and file size.
Note
- These functions can be set only when you are logged in administrator mode.
- To send the scanned data from printer via e-mail and to register the e-mail address of the destination, see below.
→ Sending Scanned Data as E-Mail from Machine -
Specify the mail server settings in advance.
Setting Mail Server -
Display printer status on web browser.
-
Select Device settings.
The menus are displayed.
-
Select Scan(Email direct from device).
-
Select E-mail transmission settings.
The setting items for mail setting are displayed.
- Specify mail settings.
Specify the following items.
Subject
Enter the title of the e-mail up to 20 alphanumeric characters.
Note
- The title that you specify here is the initial title when sending scan data. You can change the title when sending scan data using the printer's operation panel.
Body text
Enter the body text of the e-mail up to 80 alphanumeric characters.
Maximum attachment size
Select a maximum file size of the scan data that can be sent.
- After specifying mail settings, select OK.
The setting operation is completed.
Receiving Printer Status by E-mail
You receive the printer status information such as the remaining ink level and the error from the printer.
Note
- Specify the mail server settings in advance.
Setting Mail Server
- If you did not specify the date and time setting using the printer's operation panel, the date and time may not be reflected on the sent e-mail. We recommended that you set the date and time setting using the printer's operation panel.
For the date and time setting, see Device user settings.
- These functions can be set only when you are logged in administrator mode.
Specify the information settings by following the steps below.
-
Display printer status on web browser.
-
Select Device settings.
The menus are displayed.
-
Select Status notification e-mail.
-
Select Notification recipients.
The screen to register the destination is displayed.
- Specify destination settings.
Up to 5 destinations can be registered by following the steps below.
-
Select number of destination.
-
Select Register.
-
Enter e-mail address, and then select printer status to send information.
-
Select OK.
The registration for destination is completed.
-
Select Device settings -> Status notification e-mail -> Retry settings.
-
Specify resending settings.
The number of resending can be specified by following the steps below.
-
Specify number of resending.
-
Specify interval of resending.
-
Select OK.
The resending setting is completed.
Network Connection
▶ Network Connection Tips
Network Connection Tips
Default Network Settings
Another Printer Found with Same Name
Connecting to Another Computer via LAN/Changing from USB to LAN Connection
▶ Printing Network Settings
Changing Wireless LAN Connection Method
Default Network Settings
LAN Connection Defaults
| Item Default | |
| Change LAN Disable LAN | |
| SSID BJNPSETUP | |
| Communication mode Infrastructure | |
| Wireless LAN security Disable | |
| IP address (IPv4) Auto setup | |
| IP address (IPv6) Auto setup | |
| Set printer name*XXXXXXXX | |
| Enable/disable IPv6 Enable | |
| Enable/disable WSD Enable | |
| Timeout setting 1 minute | |
| Enable/disable Bonjour Enable | |
| Service name Canon MB2100 series | |
| LPR protocol setting Enable | |
| RAW protocol Enable | |
| LLMNR Active | |
("XX" represents alphanumeric characters.)
* Default value depends on printer. To check value, use operation panel.
→ LAN settings
Direct Connection Defaults
| Item | Default |
| SSID (Identifier for direct connection) | DIRECT-abXX-MB2100series *1 |
| Password | YYYYYYYYYY *2 |
| Wireless LAN security | WPA2-PSK (AES) |
| Direct connection device name | ZZZZZZ-MB2100series *3 |
| Connection request confirmation | Displayed |
*1 "ab" is specified at random and "XX" represents last two digits of printer's MAC address. (The value is specified when the printer is turned on for the first time.)
*2 The password is specified automatically when the printer is turned on for the first time.
*3 "ZZZZZZ" represents last six digits of printer's MAC address.
Another Printer Found with Same Name
When the printer is found during setup, other printers with the same name may appear on the results screen.
Select a printer with checking the printer settings against those on detection result screen.
- For Windows:
Check the printer's MAC address or serial to select the correct printer from the results.
- For Mac OS:
The printer names appear with the MAC address added at the end or as the printer name specified by Bonjour.
Check identifiers such as the MAC address, the printer name specified by Bonjour, and the printer's serial number to select the printer from among those that appear.
Note
- Serial number may not appear on result screen.
Check the printer's MAC address and the serial number by one of the following methods.
- Display on the LCD.
MAC address
→ LAN settings
Serial number
→ System information
- Print the network settings.
→ Printing Network Settings
Connecting to Another Computer via LAN/Changing from USB to LAN Connection
→ For Windows:
→ For Mac OS:
For Windows:
To add a computer to connect to the printer on a LAN or to change from USB to LAN connection, perform setup using the Setup CD-ROM or follow the instructions on the Canon website.
For Mac OS:
To connect an additional computer to the printer via LAN, or to change from USB to LAN connection, follow the instructions on the Canon website.
Printing Network Settings
Use the operation panel to print the printer's current network settings.
Important
- The network settings printout contains important information about your network. Handle it with care.
- Make sure printer is turned on.
-
Load two sheets of A4 or Letter-sized plain paper.
-
Select Setup on HOME screen.
→ LCD and Operation Panel
The menu screen appears.

- Select Device settings and press OK button.
- Select LAN settings and press OK button.
If you specify the administrator password, enter the password.
- Select Confirm LAN settings and press OK button.
- Check message, select Yes, and then press OK button.
- Press right Function button.
- Select Yes and press OK button to start printing.
The printer starts printing network settings information.
The printed network settings information is as follows:
| Item Description Setting | ||
| Product Information Product | information – | |
| Product Name Product name | XXXXXXXXX | |
| ROM Version ROM version | XXXXXXXXX | |
| Serial Number Serial number | XXXXXXXXX | |
| Wireless LAN Wireless LAN | Enable/Disable | |
| MAC Address MAC address | XX:XX:XX:XX:XX:XX | |
| Infrastructure Infrastructure | Enable/Disable | |
| Connection Connection status | Active/Inactive | |
| SSID SSID Wireless LAN SSID | ||
| Channel *1 Channel XX (1 to 11) | ||
| Encryption Encryption method | None/WEP/TKIP/AES | |
| WEP Key Length WEP key length (bits) Inactive/128/64 | ||
| Authentication Authentication | method None/auto/open/shared/WP | A-PSK/WPA2-PSK |
| Signal Strength Signal strength | 0 to 100 [%] | |
| TCP/IPv4 TCP/IPv4 | Enable | |
| IP Address | IP address | XXX.XXX.XXX.XXX |
| Subnet Mask | Subnet mask | XXX.XXX.XXX.XXX |
| Default Gateway | Default gateway | XXX.XXX.XXX.XXX |
| TCP/IPv6 TCP/IPv6 | Enable/Disable | |
| Link Local Address | Link local address XXXX:XXXX:XXXX | XXXX:XXXX:XXXX:XXXX:XXXX |
| Link Local Prefix Length | Link local prefix length | XXX |
| Manual Setting | Manual setting | Enable/Disable |
| IP Address *2 | IP address | XXXX:XXXX:XXXX:XXXXXXXX:XXXX:XXXX:XXXX |
| Subnet Prefix Length *2 | Subnet prefix length | XXX |
| Stateless Address1 *2 | Stateless address 1 XXXX:XXXX:XXXX | XXXX:XXXXXXXX:XXXX:XXXX:XXXX |
| Stateless Prefix Length1 *2 | Stateless prefix length 1 | XXX |
| Stateless Address2 *2 | Stateless address 2 XXXX:XXXX:XXXX | XXXX:XXXXXXXX:XXXX:XXXX:XXXX |
| Stateless Prefix Length2 *2 | Stateless prefix length 2 | XXX |
| Stateless Address3 *2 | Stateless address 3 XXXX:XXXX:XXXX | XXXX:XXXXXXXX:XXXX:XXXX:XXXX |
| Stateless Prefix Length3 *2 | Stateless prefix length 3 | XXX |
| Stateless Address4 *2 | Stateless address 4 XXXX:XXXX:XXXX | XXXX:XXXXXXXX:XXXX:XXXX:XXXX |
| Stateless Prefix Length4 *2 | Stateless prefix length 4 XXX | |
| Default Gateway1 *2 Default | gateway 1 XXXX:XXXX:XXXX:XXXX | XXXX:XXXX:XXXX:XXXX |
| Default Gateway2 *2 Default | gateway 2 XXXX:XXXX:XXXX:XXXX | XXXX:XXXX:XXXX:XXXX |
| Default Gateway3 *2 Default | gateway 3 XXXX:XXXX:XXXX:XXXX | XXXX:XXXX:XXXX:XXXX |
| Default Gateway4 *2 Default | gateway 4 XXXX:XXXX:XXXX:XXXX | XXXX:XXXX:XXXX:XXXX |
| IPsec *3 IPsec setting Active | ||
| Security Protocol *3 Security | method ESP/ESP & AH/AH | |
| Direct Connection Direct connection Enable/Disable | ||
| Connection Connection status Active/Inactive | ||
| SSID SSID Direct Connection SSID | ||
| Password Password Direct | Connection password (10 alphanumeric characters) | |
| Channel Channel 3 | ||
| Encryption | Encryption method | AES |
| Authentication | Authentication method | WPA2-PSK |
| TCP/IPv4 TCP/IPv4 | Enable | |
| IP Address | IP address | XXX.XXX.XXX.XXX |
| Subnet Mask | Subnet mask | XXX.XXX.XXX.XXX |
| Default Gateway | Default gateway | XXX.XXX.XXX.XXX |
| TCP/IPv6 TCP/IPv6 | Enable/Disable | |
| Link Local Address | Link local address XXXX:XXXX:XXXX | XXXX:XXXX:XXXX:XXXX |
| Subnet Prefix Length *2 | Subnet prefix length | XXX |
| IPsec *3 IPsec setting Active | ||
| Security Protocol *3 Security | method - | |
| Other Settings | Other settings | - |
| Printer Name | Printer name Printer name (Up to 15 alphanumeric characters) | |
| Direct Conn. DevName Device name for direct connection (Up to 32 characters) | Device name for direct connection | |
| WSD Printing WSD printing setting Enable/Disable | ||
| WSD Timeout Timeout 1/5/10/15/20 [min] | ||
| LPD Printing LPD printing setting Enable/Disable | ||
| RAW Printing RAW printing setting Enable/Disable | ||
| Bonjour Bonjour setting Enable/Disable | ||
| Bonjour Service Name Bonjour service name Bonjour service name (Up to 52 alphanumeric characters) | ||
| LLMNR LLMNR setting Enable/Disable | ||
| SNMP SNMP setting Enable/Disable | ||
| DNS Server | Obtain DNS server address automatically | Auto/Manual |
| Primary Server | Primary server address | XXX.XXX.XXX.XXX |
| Secondary Server | Secondary server address | XXX.XXX.XXX.XXX |
| Proxy Server | Proxy server setting | Enable/Disable |
| Proxy Address | Proxy address | XXXXXXXXXXXXXXXXXXXXX |
| Proxy Port | Proxy port specification | 1 to 65535 |
| Cert. Fingerprt(SHA-1) | Certificate fingerprint(SHA-1) | XXXXXXXXXXXXXXXXXXXXXXXXXXXXXXXXXXXXXXXXXXXXXXXX |
| Cert. Fingerprt(SHA-256) | Certificate fingerprint(SHA-256) | XXXXXXXXXXXXXXXXXXXXXXXXXXXXXXXXXXXXXXXXXXXXXXXX |
("XX" represents alphanumeric characters.)
*1 Channel may range from 1 to 11 depending on country or region of purchase.
*2 Network status is only printed when IPv6 is enabled.
*3 Network status is only printed when IPv6 and IPsec settings are enabled.
Changing Wireless LAN Connection Method
Follow either procedure below to change wireless LAN connection method (infrastructure or direct connection).
- For Windows:
- Use the Setup CD-ROM or follow the instructions on the Canon website to redo setup.
• Perform settings on the Protocol Settings screen on IJ Network Device Setup Utility.
Important
- Before you perform settings using IJ Network Device Setup Utility, turn on cableless setup mode on the printer following the procedure below.
- Make sure printer is turned on.
- Select Settings on HOME screen.

→ LCD and Operation Panel
If you specify the administrator password, enter the password.
- Select Wireless LAN setup and press OK button.
- Select Cableless setup and press OK button.
- Check message and press OK button.
Follow instructions on your smartphone or tablet. - If message saying setup is completed appears, press OK button.
- For Mac OS:
Follow the instructions on the Canon website to redo setup.
Network Settings (IJ Network Device Setup Utility) (Windows)
IJ Network Device Setup Utility
Starting Up IJ Network Device Setup Utility
IJ Network Device Setup Utility Screen
▶ Performing Network Settings
▶ Checking Network Status
IJ Network Device Setup Utility Menus
▶ Other Network Information
IJ Network Device Setup Utility
IJ Network Device Setup Utility allows a network/printer administrator to manage printers on network. When you perform printer setup, the utility is installed at the same time.
Use IJ Network Device Setup Utility for:
- Searching printers on network and performing initial network setup for detected printers
- Performing initial network setup by connecting the printer and computer using a USB cable (Not available for some models)
- Changing printer network settings
- Checking status between computer on which IJ Network Device Setup Utility is installed and printer if anything is wrong with connection
Important
- Depending on the printer you are using, an administrator password is already specified for the printer at the time of purchase. When you change the network settings, authentication by the administrator password is required.
For details:
→ Administrator Password
For improving security, we recommend to change the administrator password.
→ Changing Administrator Password
- To use the printer over LAN, make sure you have the equipment necessary for the connection type, such as a wireless router or a LAN cable.
- When you perform setup or install IJ Network Device Setup Utility, disable block function of firewall.
- Do not change network settings using IJ Network Device Setup Utility while printing is in progress.
Starting Up IJ Network Device Setup Utility
Start up IJ Network Device Setup Utility as shown below.
- In Windows 10, click the Start button, select All apps, Canon Utilities, and then IJ Network Device Setup Utility. If IJ Network Device Setup Utility is not displayed, search for "IJ Network Device Setup Utility" on Search the web and Windows.
- In Windows 8.1 or Windows 8, select IJ Network Device Setup Utility on the Start screen to start IJ Network Device Setup Utility. If IJ Network Device Setup Utility is not displayed on the Start screen, select the Search charm and search for "IJ Network Device Setup Utility".
- In Windows 7 or Windows Vista, click Start and select All Programs, Canon Utilities, IJ Network Device Setup Utility, and then IJ Network Device Setup Utility.
When you start up IJ Network Device Setup Utility, it searches for printers on network and detected printers are listed.
IJ Network Device Setup Utility Screen
Items on IJ Network Device Setup Utility Screen
→ Menus on IJ Network Device Setup Utility Screen
Items on IJ Network Device Setup Utility Screen Toolbar
Items on IJ Network Device Setup Utility Screen
The screen below appears when you start up IJ Network Device Setup Utility. Detected printers are listed on the screen and the items below are shown.
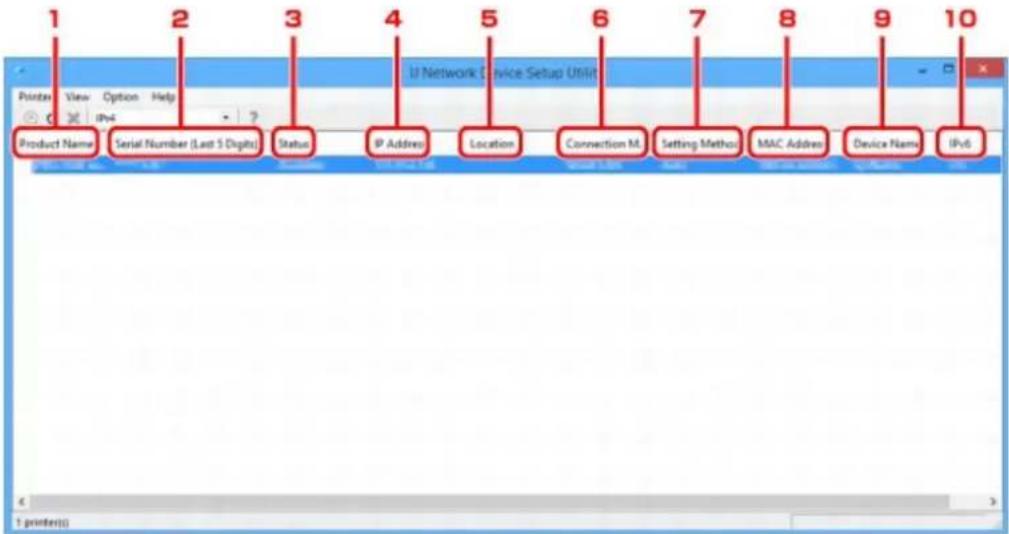
text_image
1 2 3 4 5 6 7 8 9 10 Printer View Option Help U Network Device Setup Utility Product Name Serial Number (Last 5 Digits) Status IP Address Location Connection M Setting Method MAC Address Device Name IPv6 1 printer(s)1. Product Name
Displays the product name of detected printer. The icon below appears on the left if the printer cannot be used.
: Appears when the printer has not been connected or configured.
IP: Appears when the IP address is duplicated to another printer.
: Appears when you cannot communicate with the printer.
Note
- If a printer you want to use is not detected, try to set the criteria for printer search.
Setting Criteria for Printer Search/Searching Specific Printer
2. Serial Number (Last 5 Digits)
Displays the last five digits of printer's serial number.
3. Status
Displays the printer status as shown below.
Available
Indicates the printer is available.
Setup Completed
Appears after performing network setup and clicking Set to close the window.
Not Connected
Indicates the printer is required to perform wireless LAN setup.
→ Performing/Changing Wireless LAN Settings
Not Set
Indicates the printer cannot be used on network. Specify an IP address or enable IPv6.
IP Address Overlap
Indicates the IP address is duplicated to another printer.
Unknown
Indicates the printer used in the past cannot be used currently.
Note
- If USB is selected from the pulldown menu on the toolbar, nothing is displayed.
4. IP Address
Displays the printer IP address.
Note
- If USB is selected from the pulldown menu on the toolbar, "-" is displayed for the interface (wireless/wired LAN) disabled on the printer setting.
5. Location
Displays the printer location if it is registered.
Note
- If USB is selected from the pulldown menu on the toolbar, nothing is displayed.
→ Assigning Printer Information
6. Connection Method
Displays printer connection method (wired or wireless LAN).
Note
- If USB is selected from the pulldown menu on the toolbar, either of the LAN connection method (wired or wireless) available for the printer is displayed.
- If the printer supports both of the LAN connection methods, the printer is recognized as two printers and they are displayed separately.
- If the printer does not support wired LAN, wired LAN is not displayed.
- If you are using IJ Network Device Setup Utility on the computer which does not support wireless LAN, wireless LAN is not displayed.
- If you are using the printer with direct connection, neither wired LAN nor wireless LAN is displayed.
7. Setting Method
Displays printer setting method.
• Auto
Appears if the printer is used by IP address specified automatically.
- Manual
Appears if the printer is used by IP address specified manually.
Note
- If USB is selected from the pulldown menu on the toolbar, "-" is displayed for the interface (wireless/wired LAN) disabled on the printer setting.
8. MAC Address
Displays the MAC address of the detected printer.
Note
- If USB is selected from the pulldown menu on the toolbar, "-" is displayed for the interface (wireless/wired LAN) disabled on the printer setting.
9. Device Name
Displays the printer device name if it is registered.
Note
- If USB is selected from the pulldown menu on the toolbar, nothing is displayed.
→ Assigning Printer Information
10. IPv6
On appears when an IPv6 address is assigned for the printer.
Note
- If USB is selected from the pulldown menu on the toolbar, "-" is displayed.
Menus on IJ Network Device Setup Utility Screen
This section describes menus on IJ Network Device Setup Utility screen.
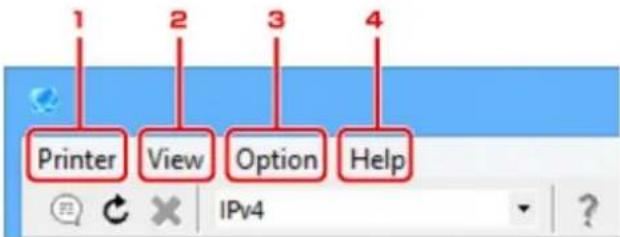
text_image
1 2 3 4 Printer View Option Help IPv41. Printer menu
→ Printer Menu
2. View menu
→ View Menu
3. Option menu
→ Option Menu
4. Help menu
→ Help Menu
Items on IJ Network Device Setup Utility Screen Toolbar
This section describes items on IJ Network Device Setup Utility Screen toolbar.
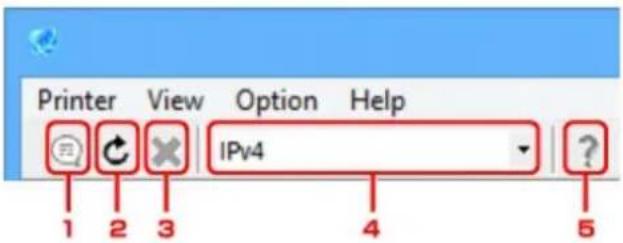
text_image
Printer View Option Help IPv4 1 2 3 4 51. Perform wired or wireless LAN setup.
Note
- This item has the same function as Protocol Settings... in the Printer menu.
2. Redetects printers.
Note
- This item has the same function as Update in the View menu.
3. Stops detecting printers.
Note
- This item has the same function as Cancel in the View menu.
4. Switches the printer list. (IPv4, IPv6, or USB printers)
Note
- This item has the same function as Switch IPv4/IPv6/USB in the View menu.
- You can also display the USB connected printer list. (Not available for some models.) In this case, select USB.
5. Displays this guide.

Note
- This item has the same function as Online Manual in the Help menu.
Performing Network Settings
Performing/Changing Wired LAN Settings
Performing/Changing Wireless LAN Settings
▶ Assigning Printer Information
▶ Initializing Network Settings
Changing Administrator Password
Setting Criteria for Printer Search/Searching Specific Printer
If WEP Details Screen Appears
If WPA/WPA2 Details Screen Appears
Performing/Changing Wired LAN Settings
Follow the procedure below to perform/change wired LAN settings.
Note
- For some models, you can perform network setup for a USB connected printer using IJ Network Device Setup Utility. Select USB on Switch IPv4/IPv6/USB under the View menu to display printers for which you can perform setup.
- Start up IJ Network Device Setup Utility.
Detected printers are listed.
- Select printer to perform/change settings from printer list.
Select the printer with Wired LAN displayed on Connection Method and the setting other than Unknown or Setup Completed displayed on Status to perform settings.
To perform setup for a USB connected printer, select USB from the pulldown menu on the toolbar and select the printer with Wired LAN displayed on Connection Method.
- Select Protocol Settings... on Printer menu.
The Confirm Printer Password screen appears.
For more on the password, refer to Administrator Password.
Note
- Clicking the icon allows you to perform/change settings.
- Enter password and click OK.
The Protocol Settings screen appears.
- Perform/change settings.
You can switch the screen between IPv4 and IPv6. Click the tab to switch the protocol.
- IPv4 settings
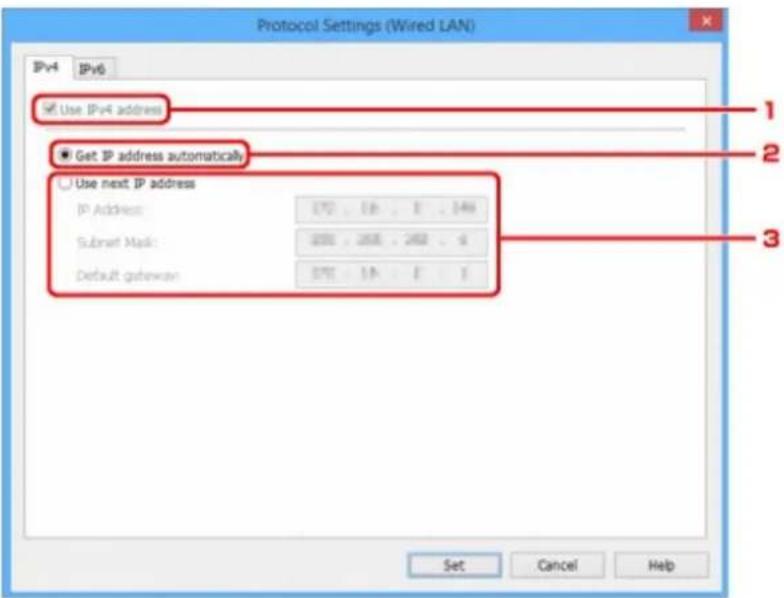
text_image
Protocol Settings (Wired LAN) IPv4 IPv6 Use IPv4 address Get IP address automatically Use next IP address IP Address: 172. 18. 19. 34# Subnet Mask: 2000. 2008. 2009. 6 Default gateway: 5711. 1A. 1F. 1 Set Cancel Help1. Use IPv4 address
Always selected. (displayed in a gray out state)
2. Get IP address automatically
Select this option to use an IP address automatically assigned by a DHCP server. DHCP server functionality must be enabled on your router.
3. Use next IP address
Select this option if no DHCP server functionality is available in your setup where you use the printer, or you want to use a fixed IP address.
Enter the IP address, subnet mask, and default gateway.
- IPv6 settings
Note
- If USB is selected from the pulldown menu on the toolbar, you cannot perform IPv6 settings.
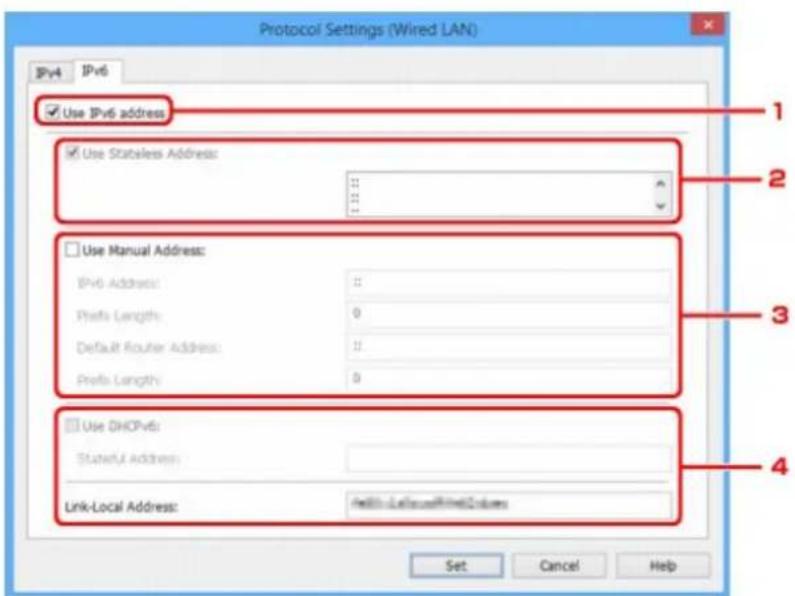
text_image
Protocol Settings (Wired LAN) IPv4 IPv6 Use IPv6 address Use Stables Address: Use Manual Address: IPv6 Address: 11 Profile Length: 0 Default Router Address: 11 Profile Length: 0 Use DHCPv6: StableAddress: Link-Local Address: Web://www.hire2.com/ Set Cancel Help1. Use IPv6 address
Select when you use the printer with IPv6 environment.
2. Use Stateless Address:
Select when you use an IP address assigned automatically. Use a router compatible with IPv6.

Note
- This setting item is not available depending on the printer you are using.
3. Use Manual Address:
Select this option if no DHCP server functionality is available in your setup where you use the printer, or you want to use a fixed IP address.
Enter the IP address and IP address prefix length.

Note
- This setting item is not available depending on the printer you are using.
4. Use DHCPv6:
Select when you obtain an IP address using DHCPv6.

Note
- This setting item is not available depending on the printer you are using.
6. Click Set.
Performing/Changing Wireless LAN Settings
Follow the procedure below to perform/change wireless LAN settings.
Important
- Enable cableless setup before performing printer setup. (Not required if you change the IP address.) For details, search for "NR049" on your printer's online manual and see the page shown.
Note
- For some models, you can perform network setup for a USB connected printer using IJ Network Device Setup Utility. Select USB on Switch IPv4/IPv6/USB under the View menu to display printers.
- Start up IJ Network Device Setup Utility.
Detected printers are listed.
- Select printer to perform/change settings from printer list.
Select the printer with Wireless LAN displayed on Connection Method and the setting other than Unknown or Setup Completed displayed on Status to perform settings.
To perform setup for a USB connected printer, select USB from the pulldown menu on the toolbar and select the printer with Wireless LAN displayed on Connection Method.
- Select Protocol Settings... on Printer menu.
The Confirm Printer Password screen appears.
For more on the password, refer to Administrator Password.
Note
- Clicking the icon allows you to perform/change settings.
- Enter password and click OK.
The Protocol Settings screen appears.
- Perform/change settings.
You can switch the screen between IPv4 and IPv6. Click the tab to switch the protocol.
- IPv4/IPv6 settings
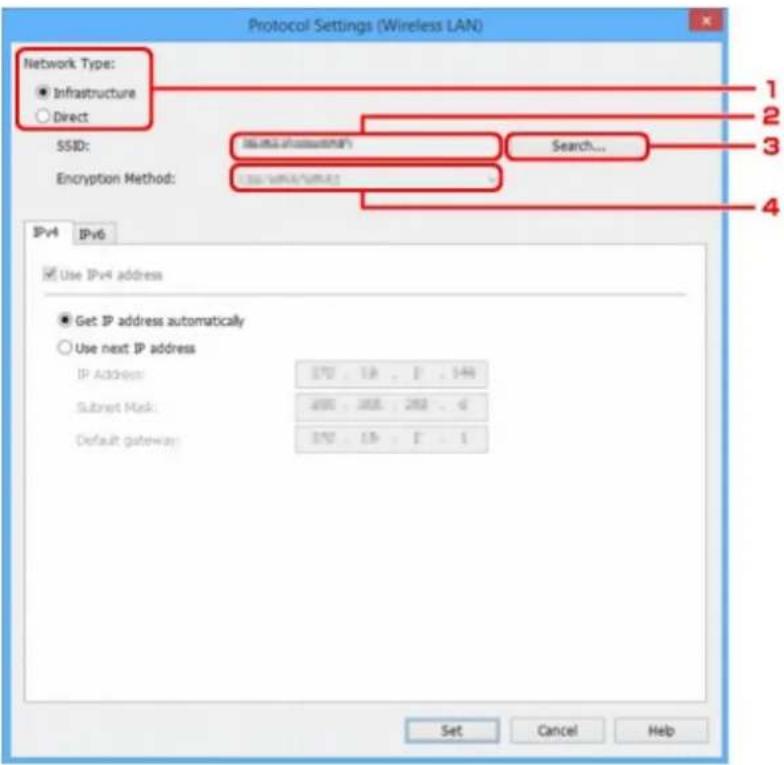
text_image
Protocol Settings (Wireless LAN) Network Type: ● Infrastructure ○ Direct SSID: Search... Encryption Method: IPv4 IPv6 Use IPv4 address ● Get IP address automatically ○ Use next IP address IP Address: 170 1.5 1 146 Subset Mask: 285 285 285 4 Default gateway: 170 1.5 1 1 Set Cancel Help1. Network Type:
Select the wireless LAN mode.
Infrastructure
Connects the printer to the wireless LAN with a wireless router.
Direct
Connects the printer to wireless communication devices without a wireless router.
Note
- If Direct is selected, the Search... button is displayed in a gray out status.
In addition, you cannot connect to Internet from your computer depending on your operating environment.
2. SSID:
The network identifier (SSID) of the wireless LAN currently used is displayed.
The identifier for direct connection (SSID) appears while in direct connection.
3. Search...
The Detected Wireless Routers screen is displayed to select a wireless router to connect to.
For a wireless router already connected to the computer, Available is displayed on
Communication Status.
If you select a wireless router with Not Connected on Communication Status from the list, clicking Set displays the WPA/WPA2 or WEP setting screen for a wireless router.
→ If WEP Details Screen Appears
→ If WPA/WPA2 Details Screen Appears
4. Encryption Method:
Displays the encryption method used over the wireless LAN.
- IPv4 settings
Note
- The setting items below are available only when Infrastructure is selected for Network Type:.
If Direct is selected, the setting items below are displayed in a gray out status.

text_image
Protocol Settings (Wireless LAN) Network Type: ■ Infrastructure ○ Direct SSID: 16.00.0000000000000000000000000000000000000000000000000000000000000000000000000000000 Encryption Method: Use "write"write IPv4 IPv6 Use IPv4 address Get IP address automatically Use next IP address IP Address: 172 18 1 194 Subnet Mask: 488 265 288 4 Default gateway: 172 18 19 2 Set Cancel Help- Use IPv4 address
Always selected. (displayed in a gray out state)
- Get IP address automatically
Select this option to use an IP address automatically assigned by a DHCP server. DHCP server functionality must be enabled on your router.
- Use next IP address
Select this option if no DHCP server functionality is available in your setup where you use the printer, or you want to use a fixed IP address.
Enter the IP address, subnet mask, and default gateway.
- IPv6 settings
Note
- If USB is selected from the pulldown menu on the toolbar, you cannot perform IPv6 settings.
- The setting items below are available only when Infrastructure is selected for Network Type:.
If Direct is selected, the setting items below are displayed in a gray out status.
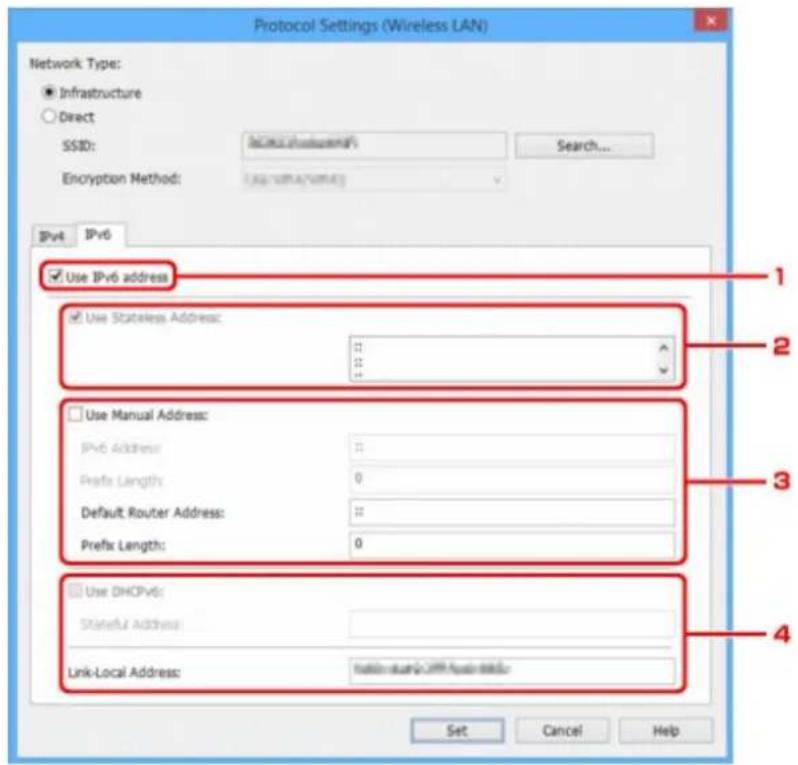
text_image
Protocol Settings (Wireless LAN) Network Type: ● Infrastructure ○ Direct SSID: 10.000.00000000000000000000000000000000000000000000000000000000000000000000000000000 Encryption Method: 1.82-593A/593E IPv4 IPv6 ✓ Use IPv6 address ✓ Use Stainless Address: □ Use Manual Address: IPv6 Address: 11 Prefix Length: 0 Default Router Address: 11 Prefix Length: 0 ✓ Use DHCPv6: Stateful Address: Link-Local Address: 1.82-593A/593E Set Cancel Help1. Use IPv6 address
Select when you use the printer with IPv6 environment.
2. Use Stateless Address:
Select when you use an IP address assigned automatically. Use a router compatible with IPv6.
Note
- This setting item is not available depending on the printer you are using.
3. Use Manual Address:
Select this option if no DHCP server functionality is available in your setup where you use the printer, or you want to use a fixed IP address.
Enter the IP address and IP address prefix length.
Note
- This setting item is not available depending on the printer you are using.
4. Use DHCPv6:
Select when you obtain an IP address using DHCPv6.
Note
- This setting item is not available depending on the printer you are using.
6. Click Set.
Assigning Printer Information
Follow the procedure below to assign/change printer location name or device name.
The names appear on Device Name: and Location: on the IJ Network Device Setup Utility screen.
Note
- If USB is selected from the pulldown menu on the toolbar, this setting item is not available.
- Start up IJ Network Device Setup Utility.
Detected printers are listed.
- Select printer to assign location name and device name.
Select the printer with Available displayed on Status.
- Select Detailed Printer Settings... on Printer menu.
The Confirm Printer Password screen appears.
For more on the password, refer to Administrator Password.
- Enter password and click OK.
The Detailed Printer Settings screen appears.
- Perform/change settings.
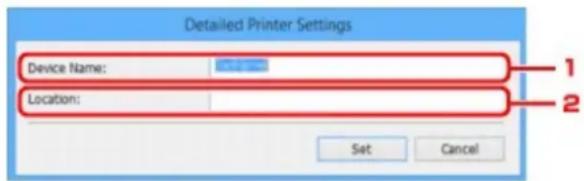
text_image
Detailed Printer Settings Device Name: Location: Set Cancel 1 2The setting items below are available.
- Device Name:
Assigns the device name.
- Location:
Assigns the location name.
- Click Set.
Initializing Network Settings
Follow the procedure below to initializing printer network settings.
- Start up IJ Network Device Setup Utility.
Detected printers are listed. - Select printer to initialize settings.
Select the printer with Available displayed on Status. - Select Reset LAN settings on Printer menu.
The Confirm Printer Password screen appears.
For more on the password, refer to Administrator Password. - Enter password and click OK.
- Click Yes on the displayed screen.
- Click OK on the displayed screen.
The printer network settings are initialized.
Changing Administrator Password
Follow the procedure below to change the administrator password.
- Start up IJ Network Device Setup Utility.
Detected printers are listed.
- Select printer to change password.
Select the printer with Available displayed on Status.
- Select Change Password... on Printer menu.
The Change Printer Password screen appears.
For more on the password, refer to Administrator Password.
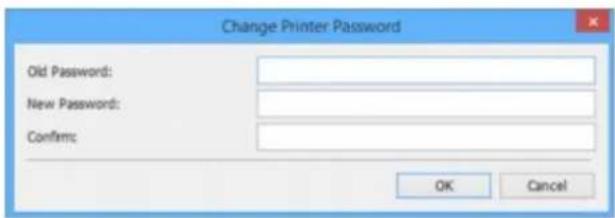
text_image
Change Printer Password Old Password: New Password: Confirm: OK Cancel- Enter current password and new password.
- Enter new password in Confirm: again.
- Click OK.
The administrator password is updated.
Setting Criteria for Printer Search/Searching Specific Printer
You can set the criteria for printer search when you start up IJ Network Device Setup Utility or update the printer search, or you can search the specific printer.
Changing these settings may detect the printer you want to use if it is not detected
Note
- If the printer you want to use is not detected, it may be detected by entering IP address, subnet mask, or default gateway on the operation panel and search again.
Setting Criteria for Printer Search
→ Searching Specific Printer
Setting Criteria for Printer Search
- Start up IJ Network Device Setup Utility.
- Select Search Settings... on Option menu.
The Search Settings screen appears.
- Enter criteria for printer search.
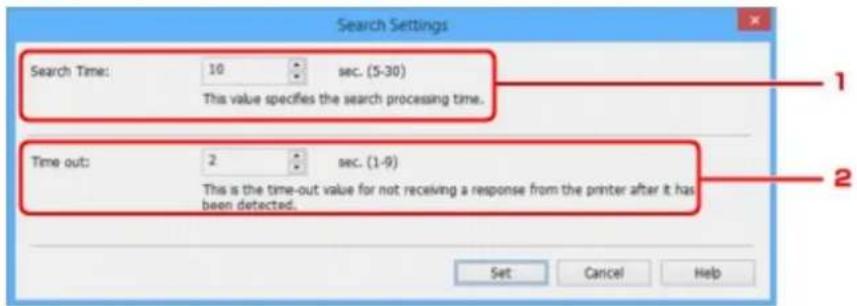
text_image
Search Settings Search Time: 10 sec. (5-30) This value specifies the search processing time. Time out: 2 sec. (1-9) This is the time-out value for not receiving a response from the printer after it has been detected. Set Cancel Help- Search Time:
Specifies the time to search printers.
- Time out:
Specifies the timeout length for not receiving a response from printer.
Note
- Printers you want to find are more likely to be detected as the values are larger, however, it may take a while to search them.
- Click Set.
Searching Specific Printer
-
Start up IJ Network Device Setup Utility.
-
Select Specified Searching... on Option menu.
The Specified Searching screen appears.
- Select item to specify and enter value.
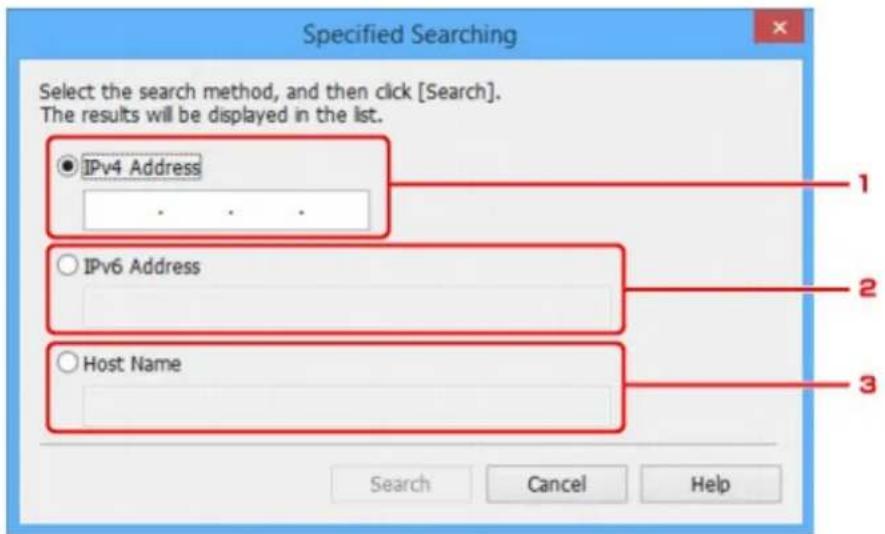
text_image
Specified Searching Select the search method, and then click [Search]. The results will be displayed in the list. IPv4 Address 1 IPv6 Address 2 Host Name 3 Search Cancel Help- IPv4 Address
Specifies the IPv4 address of the printer you want to search.
- IPv6 Address
Specifies the IPv6 address of the printer you want to search.
- Host Name
Specifies the host name of the printer you want to search.
- Click Search.
IJ Network Device Setup Utility starts searching by the specified criteria and detected printers are listed.
If WEP Details Screen Appears
Enter the password (passphrase) according to wireless router's encryption method if you change a wireless router to connect to the printer.
- Enter items below when WEP Details screen appears.
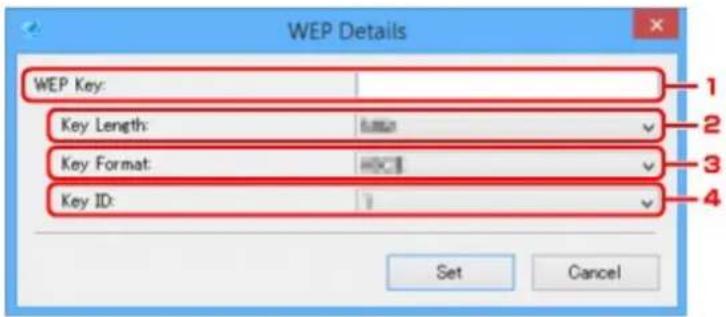
text_image
WEP Details WEP Key: Key Length: Key Format: Key ID: Set Cancel- WEP Key:
Enter the same key as the one set to the wireless router.
The number of characters and character type that can be entered differ depending on the combination of the key length and key format.
| Key Length: | |||
| 64bit 128bit | |||
| Key Format: | ASCII 5 characters 13 characters | ||
| Hexadecimal (Hex) | 10 digits 26 digits | ||
- Key Length:
Select either 64bit or 128bit.
- Key Format:
Select either ASCII or Hex.
- Key ID:
Select the Key ID (index) set to the wireless router.
- Click Set.
Important
- If the printer cannot communicate with the computer after the encryption type of the printer was switched, make sure encryption types for the computer and the wireless router match that set to the printer.
If WPA/WPA2 Details Screen Appears
Enter the password (passphrase) according to wireless router's encryption method if you change a wireless router to connect to the printer.
- Enter passphrase when WPA/WPA2 Details screen appears.
Enter the passphrase set to the wireless router. The passphrase should be a string of 8 to 63 alphanumeric characters or a 64-digit hexadecimal value.
If you do not know the wireless router passphrase, refer to the instruction manual provided with the wireless router or contact its manufacturer.
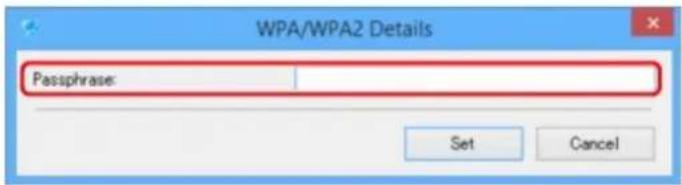
text_image
WPA/WPA2 Details Passphrase: Set Cancel- Click Set.
Important
- If the printer cannot communicate with the computer after the encryption type of the printer was switched, make sure encryption types for the computer and the wireless router match that set to the printer.
Checking Network Status
▶ Checking Wireless Network Status
▶ Displaying Computer Network Information
▶ Displaying Printer Network Information
Checking Connection Status between Printer and Wireless Router
▶ Checking Network Setting Difference
Checking Wireless Network Status
Follow the procedure below to check the wireless network status (signal strength) between the printer and computer.
If anything is wrong with the wireless LAN connection, check the network status from this menu.
- Start up IJ Network Device Setup Utility.
The detected printers are listed.
- Select printer to check wireless network status from printer list.
Select the printer with Available displayed on Status.
- Select Check Wireless Communication Status on Printer menu.
The Confirm Printer Password screen appears.
For more on the password, refer to Administrator Password.
- Enter password and click OK.
- If the printer is connected to the computer with a wireless router:
The screen below appears.
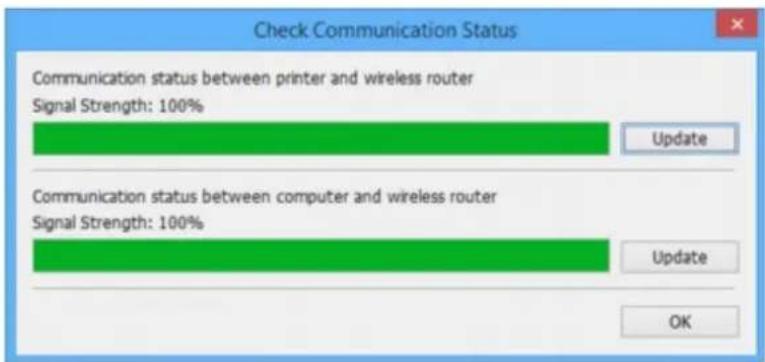
text_image
Check Communication Status Communication status between printer and wireless router Signal Strength: 100% Update Communication status between computer and wireless router Signal Strength: 100% Update OK- If the printer is connected to the computer using direct connection:
The screen below appears.
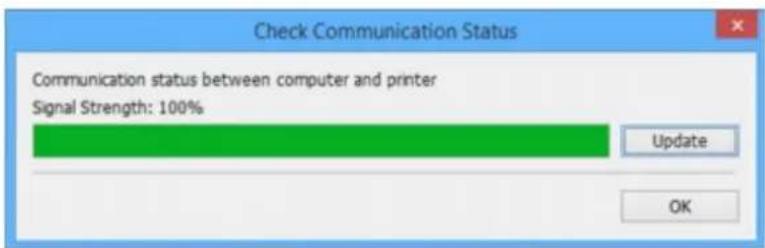
text_image
Check Communication Status Communication status between computer and printer Signal Strength: 100% Update OKClicking Update measures the signal strength again.
- Click OK to close screen.
Displaying Computer Network Information
Follow the procedure below to display the network information of the computer which the printer selected in the IJ Network Device Setup Utility screen connects to and on which IJ Network Device Setup Utility is installed.
-
Start up IJ Network Device Setup Utility.
-
Select Computer Network Information on View menu.
The screen below appears.
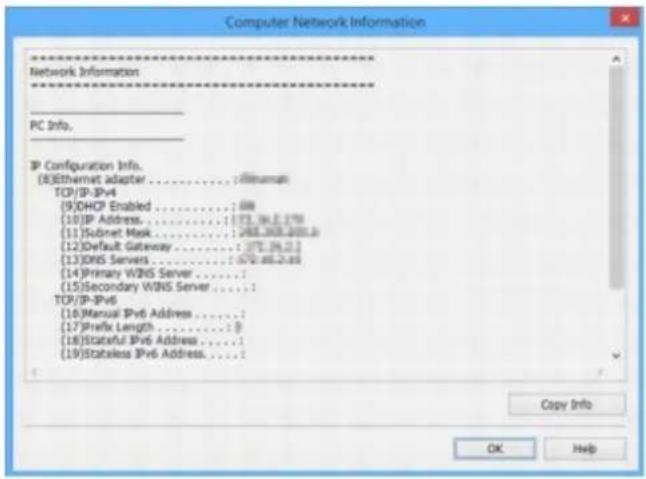
text_image
Computer Network Information Network Information PC Info. IP Configuration Info. [8]Ethernet adapter ....../@human TCP/IP-IPv4 [9]DHCP Enabled ....../000 [10]IP Address....../075.06.2.1750 [11]Socket Mask....../088.308.2005.0 [12]Default Gateway....../075.06.2.1 [13]DNS Servers....../075.06.2.1.69 [14]Primary WINS Server....../075.06.2.1.69 [15]Secondary WINS Server....../075.06.2.1.69 TCP/IP-IPv6 [16]Manual IPv6 Address....../075.06.2.1.69 [17]Prefix Length....../075.06.2.1.69 [18]Stateful IPv6 Address....../075.06.2.1.69 [19]Stateless IPv6 Address....../075.06.2.1.69 Copy Info OK HelpClicking Copy Info copies all network information on the clipboard.
- Click OK to close screen.
Displaying Printer Network Information
Follow the procedure below to display the printer network information.
- Start up IJ Network Device Setup Utility.
The detected printers are listed.
- Select printer to display network information from printer list.
Select the printer with Available displayed on Status.
- Select Printer Network Information on View menu.
The Confirm Printer Password screen appears.
For more on the password, refer to Administrator Password.
- Enter password and click OK.
The screen below appears.
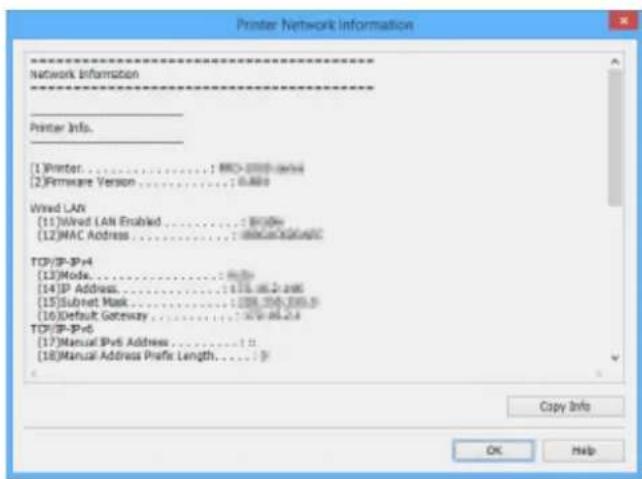
text_image
Printer Network Information Network Information Printer Info. [1] Printer....: MAC-2000 series [2] Firmware Version....: 0.869 Wired LAN [11] Wired LAN Enabled....: 87.00m [12] MAC Address....: 00000000000000000000000000000000000000000000000000000000000000000000000000000000000 TCP/IP-3P+4 [13] Mode....: 9.55m [14] IP Address....: 1.576.96.2.496 [15] Subnet Mask....: 1.588.756.246.5 [16] Default Gateway....: 1.576.96.2.4 TCP/IP-3P+6 [17] Manual IPv6 Address....: 11 [18] Manual Address Prefix Length....: 9 Copy Info OK HelpClicking Copy Info copies all network information on the clipboard.
- Click OK to close screen.
Checking Connection Status between Printer and Wireless Router
Follow the procedure below to check the wireless router information detected by the printer.
Detects wireless routers around the printer and the detected ones are listed. Use this menu to make sure whether the printer is located properly.
- Start up IJ Network Device Setup Utility.
The detected printers are listed.
- Select printer to check connection status between printer and wireless router from printer list.
Select the printer with Available displayed on Status and Wireless LAN displayed on Connection Method.
- Select Status of Printer and Wireless Router Connection on View menu.
The Confirm Printer Password screen appears.
For more on the password, refer to Administrator Password.
- Enter password and click OK.
The screen below appears.
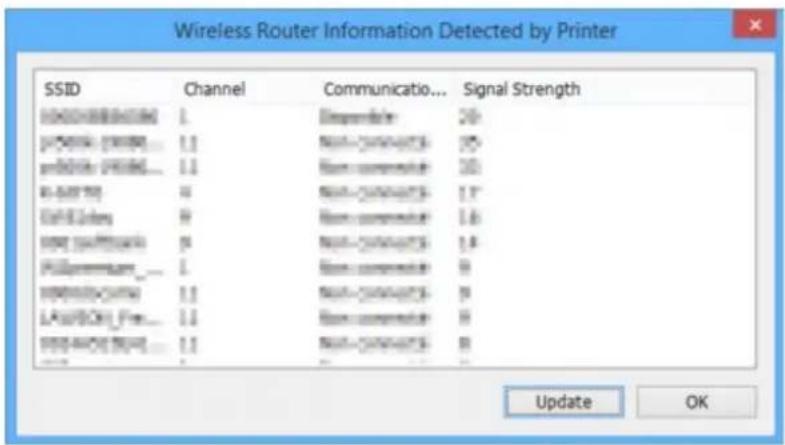
text_image
Wireless Router Information Detected by Printer SSID Channel Communication... Signal Strength H0000000000 L Disperside 20 [1-2]N-000000000 ... Non-000000000 25 [3]N-000000000 ... Non-000000000 25 N-24778 N Non-000000000 1.7 D9E2688 R Non-000000000 1.6 NFT software N Non-000000000 1.6 PUMBERGER ... N Non-000000000 9 NFTSOSOOMI 1.1 Non-000000000 9 LAWSOON_Fee... 1.1 Non-000000000 9 NFTSOSOER FEE ... 1.1 Non-000000000 9 Update OKClicking Update searches wireless routers again.
- Click OK to close screen.
Checking Network Setting Difference
If you cannot use a printer you used on the network before, compare the current network status with that when you could use the printer and check the difference.
- Start up IJ Network Device Setup Utility.
The detected printers are listed.
- Select printer with Unknown or Not Set displayed on Status from printer list.
- Select Check Connection Status on View menu.
The screen below appears.
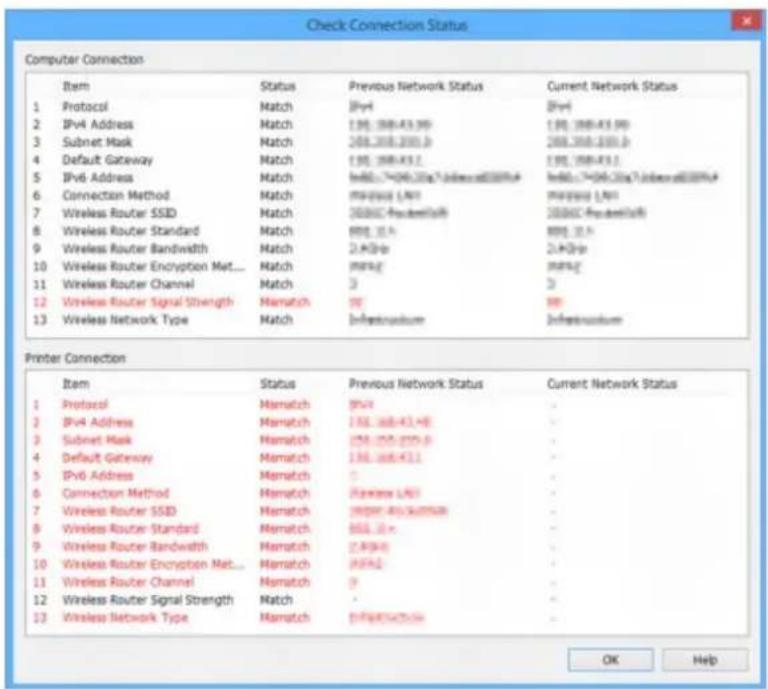
text_image
Check Connection Status Computer Connection Item Status Previous Network Status Current Network Status 1 Protocol Match IPv4 IPv4 2 IPv4 Address Match 198.168-43.99 198.168-43.99 3 Subnet Mask Match 208.168-208.168 208.168-208.168 4 Default Gateway Match 198.168-43.2 198.168-43.2 5 IPv6 Address Match Inbit/7*06.01ns?Inbmod0000A# Inbit/7*06.01ns?Inbmod0000A# 6 Connection Method Match IP address LAN IP address LAN 7 Wireless Router SSID Match 2000C freudenfaib 2000C freudenfaib 8 Wireless Router Standard Match 888.168.4 888.168.4 9 Wireless Router Bandwidth Match 2.4@6-p 2.4@6-p 10 Wireless Router Encryption Met... Match MPAG MPAG 11 Wireless Router Channel Match 3 3 12 Wireless Router Signal Strength Mamatch 98 98 13 Wireless Network Type Match Infrastructure Infrastructure Printer Connection Item Status Previous Network Status Current Network Status 1 Protocol Mematch IPv4 - 2 Bp4 Address Mamatch 198.168-43.98 - 3 Subnet Mask Mamatch 158.158-225.6 - 4 Default Gateway Mamatch 198.168-43.1 - 5 IPv6 Address Mematch 0 - 6 Connection Method Mematch Pausea LAN - 7 Wireless Router SSID Mematch IP address LAN/SD/SD/SD/SD/SD/SD/SD/SD/SD/SD/SD/SD/SD/SD/SD/SD/SD/SD/SD/SD/SD/SD/SD/SD/SD/SD/SD/SD/SD/SD/SD/SD/SD/SD/SD/SD/SD/SD/SD/SD/SD/SD/SD/SD/SD/SD/SD/SD/SD/SD/SC 8 Wireless Router Standard Mematch 98.168-43.2-p - 9 Wireless Router Bandwidth Mematch IP address LAN/SD/SD/SD/SD/SD/SD/SD/SD/SD/SD/SD/SD/SD/SD/SD/SD/SD/SD/SD/SD/SD/SD/SD/SD/SD/SD/SD/SD/SC 10 Wireless Router Signal Strength Mamatch IP address LAN/SD/SD/SD/SD/SD/SD/SD/SD/SD/SD/SD/SD/SD/SD/SD/SC 11 Wireless Network Type Mamatch IP address LAN/SD/SD/SD/SD/SD/SD/SD/SD/SD/SC OK HelpIf the network status when you used the printer is different from the current status, Mismatch appears on Status and the items are displayed in red. Check the red items.
- Click OK to close screen.
IJ Network Device Setup Utility Menus
Printer Menu
View Menu
Option Menu
Help Menu
Printer Menu
This section describes the items displayed on the Printer menu.
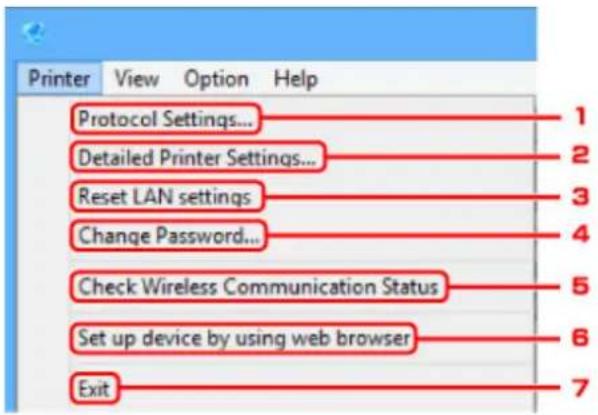
text_image
Printer View Option Help Protocol Settings... Detailed Printer Settings... Reset LAN settings Change Password... Check Wireless Communication Status Set up device by using web browser Exit1. Protocol Settings...
Performs wired or wireless LAN settings.
→ Performing/Changing Wired LAN Settings
→ Performing/Changing Wireless LAN Settings
2. Detailed Printer Settings...
Assigns the printer device name and location name.
→ Assigning Printer Information
3. Reset LAN settings
Initializes the printer LAN settings.
→ Initializing Network Settings
4. Change Password...
Changes the password specified for the printer.
→ Changing Administrator Password
5. Check Wireless Communication Status
Check wireless LAN communication status.
→ Checking Wireless Network Status
6. Set up device by using web browser
Check the printer information or perform settings in detail on the web page.
Note
- You can use this function on the following the OS and the web browser.
OS: Windows Vista SP2 or later
Web browser: Internet Explorer 9 or later, Google Chrome 41.0.2272.118m or later, Mozilla Firefox 37.0.1 or later
7. Exit
Finishes IJ Network Device Setup Utility.
View Menu
This section describes the items displayed on the View menu.
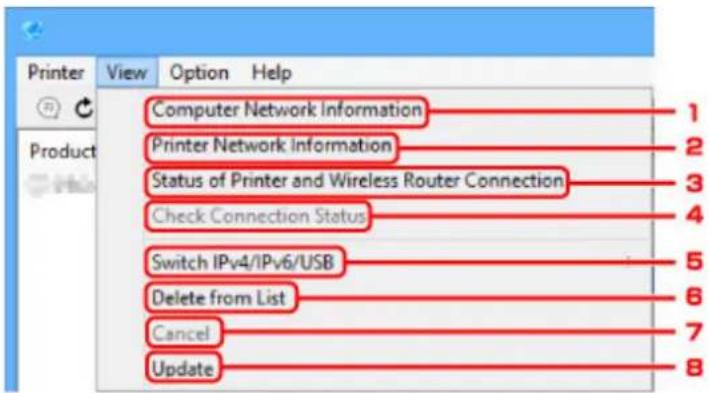
text_image
Printer View Option Help Computer Network Information 1 Printer Network information 2 Status of Printer and Wireless Router Connection 3 Check Connection Status 4 Switch IPv4/IPv6/USB 5 Delete from List 6 Cancel 7 Update 81. Computer Network Information
Check the computer network information.
→ Displaying Computer Network Information
2. Printer Network Information
Check the printer network information.
→ Displaying Printer Network Information
3. Status of Printer and Wireless Router Connection
Searches wireless routers and check the wireless router information (wireless channel, communication status, and signal strength) detected by the printer.
→ Checking Connection Status between Printer and Wireless Router
4. Check Connection Status
If you cannot use a printer you used on the network before, compare the current network status with that when you can use the printer and check the difference.
→ Checking Network Setting Difference
5. Switch IPv4/IPv6/USB
Switches the printer list between IPv4 printers and IPv6 printers. For some models, you can list USB connected printers.
6. Delete from List
Deletes the selected printer from the printer list.
7. Cancel
Cancels printer search.
Note
- You can also cancel printer search by clicking the icon.
8. Update
Searches printers again.
Note
- You can also search printers again by clicking the icon.
Option Menu
This section describes the items displayed on the Option menu.
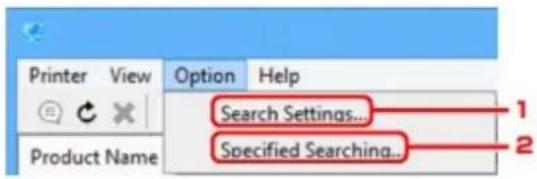
text_image
Printer View Option Help Search Settings... Product Name Specified Searching... 1 21. Search Settings...
Specifies criteria for printer search.
Setting Criteria for Printer Search
2. Specified Searching...
Searches the printer by an IP address or host name.
→ Searching Specific Printer
Help Menu
This section describes the items displayed on the Help menu.
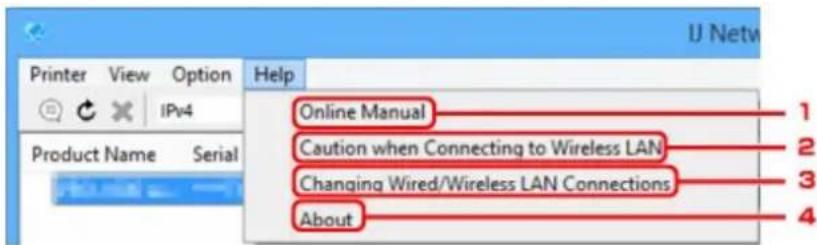
text_image
Printer View Option IPv4 Product Name Serial Help Online Manual Caution when Connecting to Wireless LAN Changing Wired/Wireless LAN Connections About 1 2 3 41. Online Manual
Displays this guide.
2. Caution when Connecting to Wireless LAN
Displays the caution message for wireless LAN connection.
3. Changing Wired/Wireless LAN Connections
Displays the message on changing LAN connection method (wired or wireless) for the selected printer.
4. About
Displays IJ Network Device Setup Utility version information.
Other Network Information
Technical Terms
Restrictions
Firewall
Technical Terms
In this section, technical terms used in the manual are explained.
→ A
→ B
→ C
→ D
→ F
→ H
→ !
→ K
→ L
→ M
→ O
→ P
→ R
→ S
→ T
→ U
→ W
A
- Access point mode
The printer is used as an access point to connect external wireless communication devices (e.g. computers, smartphones, or tablets) in an environment where no access point (wireless router) is available. You can connect up to 5 devices to the printer using the access point mode (direct connection).
- Ad-hoc
Client computer and printer setting where wireless communication occurs on a peer-to-peer basis, i.e., all clients in with the same SSID/network name communicate directly with each other. No wireless router is required. This printer does not support ad-hoc communication.
- Admin Password
Administrator password in IJ Network Device Setup Utility to restrict access to network users. It must be entered to access the printer and change printer settings.
• AES
An encryption method. It is optional for WPA. Strong cryptographic algorithm adopted within U.S. government organizations for information processing.
- Authentication Method
The method that a wireless router uses to authenticate a printer through a wireless LAN. The methods are agreeable each other.
For WPA/WPA2, authentication method is PSK.
B
• Bonjour
A service built into Mac OS X operating system to detect the connectable devices on a network automatically.
C
- Cableless setup
Specifies a wireless router settings using a device (e.g. smartphone) directly without using a wireless router.
- Channel
Frequency channel for wireless communication. In the infrastructure mode, the channel is automatically adjusted to match that set to the wireless router. This printer supports channels 1 to 13. (Channels 12 and 13 are not supported depending on the country or region of purchase.) Note that the number of channels that can be used for your wireless LAN varies depending on the region or country.
D
- Default Gateway
A relay device to connect to another network such as a router or a computer.
- Default router address
A default IP address set for a router.
• DHCP server functionality
The router assigns an IP address automatically whenever the printer or the personal computer on a network starts up.
• DHCPv6
A protocol to assign necessary information automatically when a computer connects to network. DHCPv6 can be used when IPv6 is enabled.
- Direct connection (Access point mode)
The printer is used as an access point to connect external wireless communication devices (e.g. computers, smartphones, or tablets) in an environment where no wireless router is available. You can connect up to 5 devices to the printer using the direct connection (access point mode).
- DNS server
A server that converts device names into IP addresses. When specifying IP addresses manually, specify the addresses of both a primary and a secondary server.
F
- Firewall
It is a system that prevents an unlawful computer access in the network. To prevent, you can use the firewall function of a broadband router, the security software installed in the computer, or operation system for computer.
H
- Host name
A name for a computer or printer on network so that it can be recognized easily. Single-byte alphanumeric characters are used generally.
|
• IEEE802.11b
International standard for wireless LAN using the 2.4 GHz frequency range with a throughput of up to 11 Mbps.
- IEEE802.11g
International standard for wireless LAN using the 2.4 GHz frequency range with a throughput of up to 54 Mbps. Compatible with 802.11b.
• IEEE802.11n
International standard for wireless LAN using the 2.4 GHz and 5 GHz frequency ranges. Even when using two or more antennas simultaneously or obtaining a bigger transfer rate than before by using multiple communication channels at the same time, the transmission speed may be influenced by the connected apparatus.
At the maximum transfer rate of 600 Mbps, it is possible to communicate with multiple computer terminals within a dozen or so metre radius.
Compatible with 802.11b and 802.11g.
- Infrastructure
One of the wireless communication methods. Wireless communication devices (e.g. computer or printer) are connected to the network via a wireless router.
- IP Address
A unique number with four parts separated by dots. Every network device that is connected to the Internet has an IP address. Example: 192.168.0.1
An IP address is usually assigned by a wireless router or a DHCP server of the router automatically.
- IPv4/IPv6
They are internetwork-layer protocol used on the internet. IPv4 uses 32-bit addresses and IPv6 uses 128-bit addresses.
K
- Key Format
Select either ASCII or Hex as the WEP key format. The character that can be used for the WEP key differs depending on the selected key formats.
。ASCII
Specify with a 5 or 13-character string that can include alphanumeric and underscore "_" characters. It is case-sensitive.
。Hex
Specify a 10-digit or 26-digit string that can contain hexadecimal (0 to 9, A to F, and a to f).
- Key Length
Length of the WEP key. Select either 64 bits or 128 bits. Longer key length allows you to set a more complex WEP key.
L
- Link local address
An IP address generated automatically from a specific prefix (information of current network: fe80::) and an interface identifier generated from printer's MAC address.
- Link Quality
The status of the connection between the wireless router and the printer excluding noise (interference) is indicated with a value from 0 to 100%.
• LPR
A platform-independent printing protocol used in TCP/IP networks. It does not support bidirectional communication.
M
- MAC Address
Also known as the physical address. A unique and permanent hardware identifier that is assigned to network devices by its manufacturer. MAC addresses are 48 bits long and are written as a hexadecimal number separated by colons, i.e., 11:22:33:44:55:66.
0
- Operation Status
Indicates the status on whether the printer can be used.
P
- Prefix length
The number of bits on the network part of an IP address. The number of bits is 8 bit to 24 bit for IPv4, and 64 bit for IPv6.
- Proxy server
A server that links a LAN-connected computer to the Internet. When using a proxy server, specify the address and the port number of the proxy server.
• PSK
An encryption method employed by WPA/WPA2.
R
- Router
A relay device to connect to another network.
s
- Signal Strength
The strength of the signal received by the printer from the wireless router is indicated with a value from 0 to 100%.
- SSID
Unique label for wireless LAN. It is often represented such as a network name or a wireless router name.
SSID distinguishes one wireless LAN from another to prevent interference.
The printer and all clients on a wireless LAN must use the same SSID in order to communicate with each other. The SSID can be up to 32 characters long, and is made up of alphanumeric characters. The SSID may also be referred to by its network name.
- Stealth
In the stealth mode, a wireless router hides itself by not broadcasting its SSID. The client must specify the SSID set to the wireless router to detect it.
- Stateful address
An IPv6 address acquired from a DHCP server using DHCPv6.
- Stateless address
A tentative IPv6 address generated automatically using a prefix included in RA (Router Advertisement) and a MAC address. An IPv6 address is generated in an environment where a DHCP server is not available.
- Subnet Mask
IP address has two components, the network address and the host address. Subnet Mask used to calculate the Subnet Mask address from the IP address. A Subnet Mask is usually assigned by a wireless router or a DHCP server of the router automatically.
Example:
IP Address: 192.168.127.123
Subnet Mask: 255.255.255.0
Subnet Mask Address: 192.168.127.0
T
- TCP/IP
Suite of communications protocols used to connect hosts on the Internet or the LAN. This protocol allows different terminals to communicate with each other.
• TKIP
An encryption protocol employed by WPA/WPA2.
U
• USB
Serial interface designed to enable you to "hot-swap" devices, i.e., by plugging and unplugging them without turning off the power.
W
- WCN (Windows Connect Now)
Users running Windows Vista or later can obtain the setting information directly via wireless network (WCN-NET).
- WEP/WEP Key
An encryption method employed by IEEE 802.11. Shared security key used to encrypt and decrypt data sent over wireless networks. This printer supports key length of 64 bits or 128 bits, key format of ASCII code or Hexadecimal, and key number of 1 to 4.
• Wi-Fi
International association that certifies interoperability of wireless LAN products based on the IEEE 802.11 specification.
This printer is a Wi-Fi authorized product.
- Wireless LAN
A network that, instead of being connected by physical wires, is connected by a wireless technology, such as Wi-Fi.
- Wireless Router
A wireless transceiver or base station that receives information from wireless clients/the printer and rebroadcasts it. Required in an infrastructure network.
• WPA
Security framework announced by the Wi-Fi Alliance in October 2002. The security has been strengthened more than WEP.
- Authentication
WPA defines the following authentication methods: PSK that can be used without an authentication server, plus WPA-802.1x that do require an authentication server.
This printer supports WPA-PSK.
- Passphrase
This encrypted key is used to perform WPA-PSK authentication.
The passphrase should be a string of 8 to 63 alphanumeric characters or a 64-digit hexadecimal value.
• WPA2
Security framework released by the Wi-Fi Alliance in September 2004 as a later version of WPA. Provides a stronger encryption mechanism through Advanced Encryption Standard (AES).
- Authentication
WPA2 defines the following authentication methods: PSK that can be used without an authentication server, plus WPA2-802.1x that do require an authentication server.
This printer supports WPA2-PSK.
- Passphrase
This encrypted key is used to perform WPA2-PSK authentication.
The passphrase should be a string of 8 to 63 alphanumeric characters or a 64-digit hexadecimal value.
• WPS (Wi-Fi Protected Setup)
WPS is a standard for easy and secure establishment of a wireless network.
There are 2 primary methods used in the Wi-Fi Protected Setup:
PIN entry: a mandatory method of setup for all WPS certified devices
Push button configuration (PBC): an actual push button on the hardware or through a simulated push button in the software.
Restrictions
If you use a printer over the wireless LAN, the printer may recognize nearby wireless systems, you should set a network key (WEP or WPA/WPA2) to the access point to encrypt wireless transmission. Wireless communication with a product that does not comply with the Wi-Fi standard cannot be guaranteed.
Connecting with too many computers may affect the printer performance, such as printing speed.
If you use a printer with direct connection, you cannot perform the following settings:
- Specifying an IP address manually
- Enabling/disabling IPv6
Firewall
A firewall is a function of the security software installed in the computer or operation system for computer, and is a system that is designed to prevent unauthorized access to a network.
Precautions When Firewall Function is Enabled
- A firewall function may limit communications between a printer and a computer. This may disable printer setup and communications.
- During the printer setup, you may be prompted to enable or disable communications, depending on the firewall function of the security software or operation system. If so, choose to enable communications.
- When using IJ Network Device Setup Utility, you may be prompted to enable or disable communications, depending on the firewall function of the security software. If so, choose to enable communications.
- If you cannot set up the printer, temporarily disable the firewall function of the security software or operation system.
Important
- If you disabled the firewall function, disconnect your network from the Internet.
- Some applications (like the network configuration software) override firewall settings. Check the application's settings beforehand.
- If the printer you use is set to Get IP address automatically, the IP address changes every time the printer connects to the network. This may disable printer setup and communications, depending on the firewall settings. In this case, either change the firewall settings or assign a fixed IP address to the printer. An IP address can be set using IJ Network Device Setup Utility.
→ Performing/Changing Wired LAN Settings
→ Performing/Changing Wireless LAN Settings
When assigning a fixed IP address to the printer, you will need to specify an IP address with which the computer can communicate.
Note
- For the operation system firewall settings or the security software firewall settings, refer to the instruction manual of the computer or software, or contact its manufacturer.
Ensuring Optimal Printing Results
Ink Tips
▶ Printing Tips
▶ Check Paper Settings Before Printing
Set Cassette Paper Information After Loading Paper
Canceling Print Jobs
Keeping Print Quality High
▶ Transporting Your Machine
Ink Tips
Is ink consumed for purposes other than printing?
Ink is sometimes consumed for purposes other than printing.
When you use the Canon printer for the first time after you install the bundled ink tanks, the printer consumes a small amount of ink in the amount to enable printing by filling the nozzles of the Print Head with ink.
The printing costs described in the brochures or websites are based on the consumption data from not the first ink tank /ink cartridge but the succeeding ink tank /ink cartridge.
Ink is sometimes used to maintain the optimal printing quality.
To keep printer's performance, Canon printer performs cleaning automatically according to its condition. When the printer performs cleaning, a small amount of ink is consumed. In this case, all colors of ink may be consumed.
[Cleaning function]
The cleaning function helps the printer to suck air bubbles or ink itself from the nozzle and thus prevents print quality degradation or nozzle clogging.
Is color ink consumed for black-and-white printing?
Black-and-white printing may consume ink in colors other than black, depending on the type of paper and printer driver settings used. Color ink is therefore consumed in some cases even for black-and-white print jobs.

Note
- The machine uses pigment ink. With pigment ink, some ink on printed surfaces may come off when rubbed or scratched.
Printing Tips
Check status before printing
• Is the print head in good condition?
Clogged print head nozzles make printing fainter, which affects print quality and wastes paper. To check the print head, print the nozzle check pattern.
→ Maintenance Procedure
• Is ink smeared inside the machine?
After many print jobs, areas where paper passes through the machine may become smeared with ink. To clean the inside the machine, perform Bottom Plate Cleaning.
Confirm that paper is loaded correctly
• Is the paper loaded in the correct orientation?
To load paper in the cassette, load paper printing-side DOWN.
→ Loading Paper
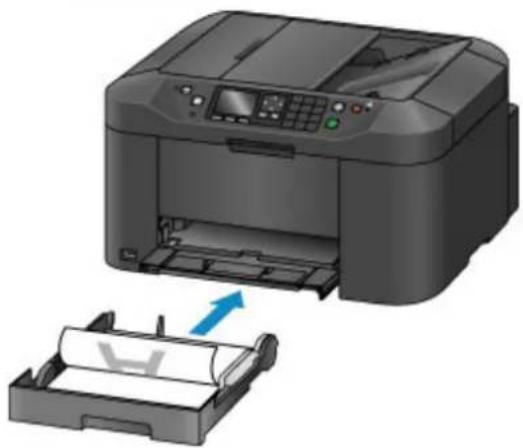
natural_image
Illustration of a printer being inserted into a paper holder, showing the printer's internal structure and the printer's base (no text or symbols present)• Is the paper curled?
The curled paper causes paper jam. Flatten the curled paper, and then reload it.
"Correct curl before loading paper." in Paper Is Smudged / Printed Surface Is Scratched
Check Paper Settings Before Printing
Before printing, complete paper settings on the operation panel or from a computer.
Paper comes in many varieties. Some is specially coated for high-quality photo printing, while other paper is designed for documents.
Each type of paper has specific preset settings that determine details such as ink application and usage and the distance from nozzles, which ensures optimal print quality for the paper. In contrast, incorrect paper settings may impair color performance, or printed surfaces may rub against the machine.
If printing seems blurry or colors uneven, try printing again at a higher print quality setting.
Set Cassette Paper Information After Loading Paper
When you insert a cassette after loading paper, a screen for setting the type and size of paper is displayed. Set the paper information for the cassette, indicating the type and size of paper loaded.
To prevent incorrect printing, the machine can compare paper information entered for the cassette to print job paper settings to ensure they match. Before printing, specify paper settings consistent with the cassette paper information. If these settings do not match, automatic paper checking (if enabled) will prevent incorrect printing and display an error message. In this case, check and correct the paper settings.
To check cassette paper information, display the paper information screen on the operation panel.
Canceling Print Jobs
Do not press the ON button to cancel print jobs
Pressing the ON button to turn off the machine during printing may prevent the machine from printing again if print jobs are not cleared internally.
Press the Stop button to cancel printing.
Keeping Print Quality High
The key to maintaining optimal print quality is preventing the print head from drying out or becoming clogged. To ensure print quality, follow these tips.
Note
- On some paper, ink may run if you mark over it with a highlighter or water-based marker, or if water or sweat comes into contact with printed areas.
Never unplug the machine until it is off
Pressing the ON button to turn off the machine will automatically cap the print head (which is equipped with nozzles) to prevent it from drying out. However, capping is not performed if you unplug the machine while the POWER lamp is lit or flashing. This may cause drying or clogging.
Before unplugging the machine, make sure the POWER lamp is not lit.
Important
- Unplugging the machine will reset the date/time setting and erase all documents in the machine's memory. Send faxes, print documents, or save jobs to a USB flash drive as needed before unplugging the machine.
Print regularly
Just as felt-tip pens dry up and become unusable (even when capped) if not used over extended periods, the print head may dry out or become clogged if the machine is not used for some time. Use the machine at least once a month, if possible.
Allow regular ink mixing
The machine automatically mixes ink periodically to maintain optimal print quality. Regular printing helps keep the ink in good condition.
If the machine is not used for some time, it will automatically mix the ink before printing.
Transporting Your Machine
Take these precautions when relocating the machine for changing your living place or repairing it.

Important
- Place the machine upright in a sturdy box and pack it with sufficient cushioning to protect it in transit.
- With the print head and ink tank set still installed, press the ON button to turn off the machine. This enables automatic capping of the print head, which prevents it from drying out.
- After packing, do not tilt the box, tip it over, or turn it upside down. This may damage the machine and cause ink leakage in transit.
- When shipping the machine via a courier service, label the box "THIS SIDE UP". Also label the box "FRAGILE" or "HANDLE WITH CARE".
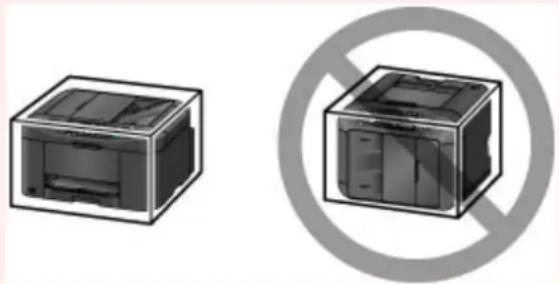
natural_image
Two grayscale images of printer units enclosed in a square frame, with a prohibition symbol below (no text or symbols present)- Turn the machine off.
- After confirming that the POWER lamp is off, unplug the machine.

Important
- Do not unplug the machine while the POWER lamp is lit or flashing. This may damage the machine or cause it to malfunction, which may prevent you from printing.
- Take out the cassette and remove the paper. Shorten the cassette in preparation for stowing them inside.
→ Paper Sources - Close the paper output support, and then push in the output tray extension and paper output tray.
- Reinsert the cassette.
- Disconnect all cables and the power cord from the machine.
- Tape down all covers on the machine to prevent them from opening, and to prevent the cassette from coming out in transit. Place the machine in a plastic bag.
- In the box, surround the machine with cushioning material to protect it.
Legal Restrictions on Scanning/Copying
Scanning, printing, copying, or modifying copies of the following may be punishable under law.
This list is non-exhaustive. When in doubt, check with a local legal representative.
- Paper money
- Money orders
• Certificates of deposit - Postage stamps (canceled or uncanceled)
- Identification badges or insignia
- Selective service or draft papers
- Checks or drafts issued by governmental agencies
- Motor vehicle licenses and certificates of title
- Traveler's checks
- Food stamps
- Passports
- Immigration papers
- Internal revenue stamps (canceled or uncanceled)
- Bonds or other certificates of indebtedness
- Stock certificates
- Copyrighted works or works of art, without the owner's consent
Specifications
General Specifications
| Printing resolution (dpi) 600 (horizontal) x 1200 (vertical) | |
| Interface USB Port: | Hi-Speed USB *1USB Flash Drive Port:USB flash driveLAN Port:Wireless LAN: IEEE802.11n / IEEE802.11g / IEEE802.11b *2*1 A computer that complies with Hi-Speed USB standard is required. Since the Hi-Speed USB interface is fully upwardly compatible with USB 1.1, it can be used at USB 1.1.*2 Setup possible through Standard setup, WPS (Wi-Fi Protected Setup), WCN (Windows Connect Now) or Cableless setup.USB and LAN can be used at the same time. |
| Print width 8 inches/203.2 mm | |
| Operating environment Temperature: | 41 to 95 °F (5 to 35 °C)Humidity: 10 to 90 % RH (no condensation)* The performance of the printer may be reduced under certain temperature and humidity conditions.Recommended conditions:Temperature: 59 to 86 °F (15 to 30 °C)Humidity: 10 to 80 % RH (no condensation)* For the temperature and humidity conditions of papers such as photo paper, refer to the paper's packaging or the supplied instructions. |
| Storage environment Temperature: | 32 to 104 °F (0 to 40 °C)Humidity: 5 to 95 % RH (no condensation) |
| Power supply AC 100-240 V, 50/60 | Hz |
| Power consumption Printing (Copy): | Approx. 27 WStandby (minimum): Approx. 0.9 W *1*2OFF: Approx. 0.2 W *1*1 USB connection to PC*2 The wait time for standby cannot be changed. |
| External dimensions Approx. 18.3 | (W) x 15.3 (D) x 10.3 (H) inchesApprox. 463 (W) x 389 (D) x 260 (H) mm* With the Paper Output Tray and Cassette retracted. |
| Weight Approx. 23.2 lb (Approx. 10.6 kg) | |
| * With the Print Head and ink tanks installed. | |
| Print Head/Ink Total 4352 nozzles (BK 1280 nozzles, C/M/Y 512 x 6 nozzles) | |
| ADF capacity | A4 or Letter size: max. 50 sheets (20 lb/75 g /m ^2 paper), up to 0.20 inch/5 mm in heightLegal size: max. 10 sheets (20 lb/75 g /m ^2 paper), up to 0.04 inch/1 mm in heightOther sizes: 1 sheet |
Copy Specifications
| Multiple copy max. 99 pages | |
| Intensity adjustment 9 positions, Auto intensity (AE copy) | |
| Reduction / Enlargement 25 % - 400 % (1 % unit) |
Scan Specifications
| Scanner driver Windows: TWAIN | 1.9 Specification, WIAMac OS: ICA |
| Maximum scanning size Platen Glass | A4/Letter, 8.5" x 11.7"/216 x 297 mmADF: A4/Letter/Legal, 8.5" x 14.0"/216 x 356 mm |
| Scanning resolution Optical resolution | ution (horizontal x vertical) max: 1200 x 1200 dpi *1Interpolated resolution max: 19200 x 19200 dpi *2*1 Optical Resolution represents the maximum sampling rate based on ISO 14473.*2 Increasing the scanning resolution will limit the maximum possible scanning area. |
| Gradation (Input / Output) Gray: | 16 bit/8 bitColor: 48 bit/24 bit (RGB each 16 bit/8 bit) |
Fax Specifications
| Applicable line Public Switched Telephone Network (PSTN) | |
| Communication mode Super G3, G3 | |
| Data compressing system Black: | MH, MR, MMRColor: JPEG |
| Modem speed max. 33.6 kbps | (Automatic fallback) |
| Transmission speed Black: Approx. 3 seconds/page at 33.6 kbps | |
| (Based on ITU-T No.1 chart for US specifications and Canon FAX Standard chart No.1 for others, both in standard mode.)Color: Approx. 1 minute/page at 33.6 kbps(Based on Canon COLOR FAX TEST SHEET.) | |
| Gradation Black: 256 levels | Color: 24 bit Full Color (RGB each 8 bit) |
| Density adjustment 3 levels | |
| Memory Transmission/reception: | approx. 250 pages(Based on ITU-T No.1 chart for US specifications and Canon FAX Standard chart No.1 for others, both in standard mode.) |
| Fax resolution Black Standard: 203 pels/inch x 98 lines/inch (8 pels/mm x 3.85 lines/mm)Black Fine, Photo: 203 pels/inch x 196 lines/inch (8 pels/mm x 7.70 lines/mm)Black Extra fine: 300 x 300 dpiColor: 200 x 200 dpi | |
| Dialing Automatic dialing | - Recipient (max. 100 destinations)- Group dial (max. 99 destinations)Regular dialing (with Numeric buttons)Automatic redialingManual redialing (max. 10 destinations) |
| Others Activity report (after every 20 transactions)Sequential broadcasting (max. 101 destinations)Rejected numbers (max. 10 destinations) | |
Network Specifications
| Communication protocol SNMP (supports Canon-MIB), TCP/IP | |
| Wireless LAN Supported Standards | : IEEE802.11n / IEEE802.11g / IEEE802.11bFrequency bandwidth: 2.4 GHzChannel: 1-11 or 1-13* Frequency bandwidth and available channels differ depending on country or region.Communication distance: Indoors 164 feet/50 m* Effective range varies depending on the installation environment and location.Security:WEP (64/128 bits)WPA-PSK (TKIP/AES)WPA2-PSK (TKIP/AES)Setup:Standard setupWPS (Push button configuration/PIN code method)WCN (WCN-NET)Cableless setupOther Features: Administration password |
Minimum System Requirements
Conform to the operating system's requirements when higher than those given here.
Windows
| Operating System Windows 10, W | Windows 8.1*, Windows 8Windows 7, Windows 7 SP1Windows Vista SP2* Windows 8.1 includes Windows 8.1 Update.For the printer driver, fax driver, Quick Utility Toolbox, and IJ Network Device Setup Utility:Windows Server 2008, Windows Server 2008 R2, Windows Server 2012, and Windows Server 2012 R2 |
| Hard Disk Space 3.1 GB | Note: For bundled software installation.The necessary amount of hard disk space may be changed without notice. |
| Display XGA 1024 x 768 |
Mac OS
| Operating System OS X v10.8.5 - OS X v10.11 | |
| Hard Disk Space 1.5 GB | Note: For bundled software installation.The necessary amount of hard disk space may be changed without notice. |
| Display XGA 1024 x 768 | |
Other Supported OS
Some functions may not be available with each OS. Refer to the Canon web site for details on operation with iOS, Android, and Windows RT.
Mobile Printing Capability
Apple AirPrint
Google Cloud Print
MAXIFY Cloud Link
- An internet connection is required to use Easy-WebPrint EX and all the Online Manual.
- Windows: Operation can only be guaranteed on a computer with Windows 10, Windows 8.1, Windows 8, Windows 7 or Windows Vista pre-installed.
- Windows: A CD-ROM Drive or internet connection is required during software installation.
- Windows: Internet Explorer 8, 9, 10 or 11 is required to install Easy-WebPrint EX.
- Windows: Some functions may not be available with Windows Media Center.
- Windows: .NET Framework 4 or 4.5 must be installed to use the Windows software.
- Windows: The TWAIN driver (ScanGear) is based on the TWAIN 1.9 Specification and requires the Data Source Manager bundled with the operating system.
• Mac OS: For Mac OS, an internet connection is required during software installation. - In an in-house network environment, the 5222 port must be open. Contact the network administrator for details.
Information in this guide is subject to change without notice.
Information about Paper
▶ Supported Media Types
Paper Load Limit
▶ Unsupported Media Types
Handling Paper
▶ Print Area
- Print Area
- Standard Sizes
- Envelopes
Supported Media Types
For best results, choose paper designed for how you are printing. A variety of paper for documents as well as photos or illustrations is available from Canon. Use genuine Canon paper to print important photos, when possible.
Media Types
Genuine Canon paper
Note
- For warnings on use of the non-printable side, see each product's usage information.
- For details on page sizes and media types, access the Canon website.
- Genuine Canon paper is not available in some countries or regions. Note that in the United States, Canon paper is not sold by model number. Instead, purchase paper by name.
Paper for printing documents:
- Canon Red Label Superior
- Canon Océ Office Colour Paper
• High Resolution Paper
Paper for printing photos:
- Glossy Photo Paper "Everyday Use"
• Photo Paper Glossy
• Photo Paper Plus Glossy II
• Photo Paper Pro Luster
• Photo Paper Plus Semi-gloss - Matte Photo Paper
Paper other than genuine Canon paper
- Plain Paper (including recycled paper)
- Envelopes
- Label Paper
→ Paper Load Limit
→ Paper Settings on the Printer Driver and the Printer (Media Type) (Windows)
→ Paper Settings on the Printer Driver and the Printer (Media Type) (Mac OS)
Page Sizes
You can use the following page sizes.
Note
• Page sizes and media types the machine supports differ depending on the OS you are using.
Standard sizes:
- Letter
- Legal
• Executive (7.25 x 10.5 inches (184.2 x 266.7 mm))
• A4
• B5
• A5
• A6 - Oficio (8.5 x 12.5 inches (215.9 x 317.5 mm))
• B-Oficio (8.5 x 14 inches (216.0 x 355.0 mm))
• M-Oficio (8.50 x 13.43 inches (216.0 x 341.0 mm)) - Foolscap (8.5 x 13 inches (215.9 x 330.2 mm))
• Legal(India) (8.46 x 13.58 inches (215 x 345 mm))
• L(89x127mm) - KG/4"x6"(10x15)
- 2L/5"x7"(13x18)
- Hagaki
- Hagaki 2
- 8"x10"(20x25cm)
- Envelope Com 10
- Envelope DL
- Nagagata 3
- Nagagata 4
- Yougata 4
- Yougata 6
- Envelope C5
- Envelope Monarch (3.88 x 7.5 inches (98.4 x 190.5 mm))
Special sizes
Special page sizes must be within the following limits:
• Minimum size: 3.50 x 5.00 inches (89.0 x 127.0 mm)
• Maximum size: 8.50 x 14.00 inches (216.0 x 355.6 mm)
Paper Weight
You can use paper in the following weight range.
- 17 to 28 lb (64 to 105g / m^2 ) (plain paper other than genuine Canon paper)
Paper Load Limit
Genuine Canon Paper
Paper for printing documents:
| Media Name <Model No.> Cassette Paper Output Tray | ||
| Canon Red Label Superior <WOP111> Approx. 250 sheets Approx. 75 sheets | ||
| Canon Océ Office Colour Paper <SAT213> Approx. 200 sheets Approx. 75 sheets | ||
| High Resolution Paper <HR-101N> 65 sheets 65 sheets |
Paper for printing photos:

Note
- For best results in continuous printing, remove printed sheets from the paper output tray to avoid smearing or discoloration.
| Media NameCassette | |
| Glossy Photo Paper "Everyday Use"*1A4, Letter: 10 sheets4" x 6" (10 x 15 cm): 20 sheets | 4, Letter: 10 sheets4" x 6" (10 x 15 cm): 20 sheets |
| Photo Paper Glossy*1A4, Letter: 10 sheets | 4" x 6" (10 x 15 cm): 20 sheets |
| Photo Paper Plus Glossy II*1 | A4, Letter, 5" x 7" (13 x 18 cm), 8" x 10" (20 x 25 cm): 10 sheets4" x 6" (10 x 15 cm): 20 sheets |
| Photo Paper Pro Luster*1A4, Letter: 10 sheets | |
| Photo Paper Plus Semi-gloss*1 | A4, Letter, 5" x 7" (13 x 18 cm), 8" x 10" (20 x 25 cm): 10 sheets4" x 6" (10 x 15 cm): 20 sheets |
| Matte Photo Paper | A4, Letter: 10 sheets4" x 6" (10 x 15 cm): 20 sheets |
Paper other than Genuine Canon Paper
| Common Name | Cassette Paper Out | out Tray |
| Plain Paper (including recycled paper)*2 | Approx. 250 sheets | Approx. 75 sheets |
| Envelopes | 10 envelopes | *3 |
| Label Paper | 10 sheets *3 | — |
*1 Feeding from a loaded stack of paper may leave marks on the printed side or prevent efficient feeding. In this case, load one sheet at a time.
*2 Normal feeding at maximum capacity may not be possible with some types of paper, or under very high or low temperature or humidity. In this case, load half the amount of paper or less.
*3 For best results in continuous printing, remove printed paper or envelopes from the paper output tray to avoid smearing or discoloration.
Unsupported Media Types
Do not use the following paper. Not only will print quality be poor, the paper may jam or cause the machine to malfunction.
• Paper that is folded, curled, or wrinkled
- Paper that is damp
- Plain paper or notepad paper cut to a smaller size
- Picture postcards
- Postcards with photos or stickers attached
- Envelopes with a double flap
- Envelopes with embossed or coated surfaces
- Envelopes with adhesive flaps that are already moistened
- Any paper with holes
• Non-rectangular paper
- Stapled or glued paper
• Paper with an adhesive surface
- Paper coated with glitter or other decorative particles
Handling Paper
- Be careful not to rub or scratch the surfaces of any types of paper when handling.
- Hold the paper as closely as possible to its edges and try not to touch the printing surface. The print quality may be degraded if the printing surface is smudged with sweat or oil that comes from your hands.
- Do not touch the printed surface until the ink is dried. Even when the ink is dried, be careful not to touch the printed surface as much as possible when handling. Due to the nature of the pigment ink, the ink on the printed surface may be removed when being rubbed or scratched.
• Take out only the necessary number of paper from the package, just before printing. - To avoid curling, when you do not print, put unused paper back into the package and keep it on a level surface. And also, store it avoiding heat, humidity, and direct sunlight.
Print Area
Print Area
Standard Sizes
Envelopes
Print Area
To maintain print quality, the machine leaves a margin around the edges of paper. The printable area is inside this margin.
(recommended print area): Print within this area, when possible.
(printable area): You can also print in this area. However, feeding precision or print quality may be affected.
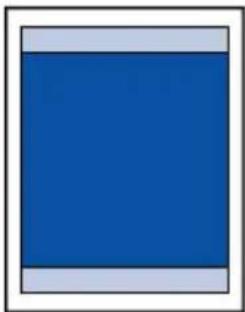
natural_image
Solid blue square with light gray border, no text or symbols presentNote
- Automatic duplex printing and duplex copying reduces the printable area by 0.08 inch (2 mm) in the top margin.
Standard Sizes
| Size Print Area (width x height) | |
| Letter 8.00 x 10.69 inches (203.2 x 271.4 mm) | |
| Legal 8.00 x 13.69 inches (203.2 x 347.6 mm) | |
| Executive 6.98 x 10.19 inches (177.4 x 258.7 mm) | |
| A6 3.87 x 5.51 inches (98.2 x 140.0 mm) | |
| A5 5.56 x 7.95 inches (141.2 x 202.0 mm) | |
| A4 8.00 x 11.38 inches (203.2 x 289.0 mm) | |
| B5 6.90 x 9.80 inches (175.2 x 249.0 mm) | |
| Oficio 8.00 x 12.09 inches (203.2 x 307.0 mm) | |
| B-Oficio 8.00 x 13.66 inches (203.2 x 347.0 mm) | |
| M-Oficio 8.00 x 13.11 inches (203.2 x 333.0 mm) | |
| Foolscap 8.00 x 12.69 inches (203.2 x 322.2 mm) | |
| Legal (India) 8.00 x 13.27 inches (203.2 x 337.0 mm) | |
| 4" x 6" (10 x 15 cm) 3.73 x 5.69 inches (94.8 x 144.4 mm) | |
| 5" x 7" (13 x 18 cm) 4.73 x 6.69 inches (120.2 x 169.8 mm) | |
| 8" x 10" (20 x 25 cm) 7.73 x 9.69 inches (196.4 x 246.0 mm) |
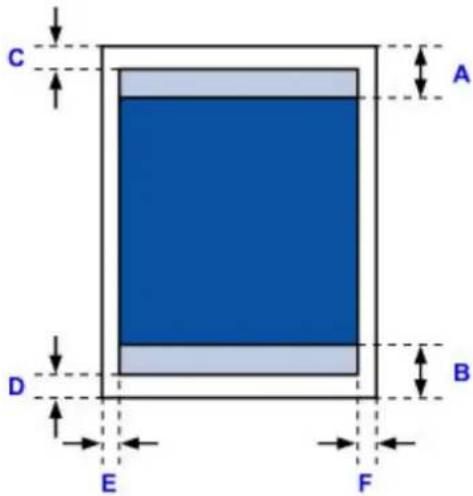
text_image
C A D B E F
Recommended print area
A: 1.80 inches (45.8 mm)
B: 1.45 inches (36.8 mm)

Printable area
Executive, A6, A5, A4, B5, 4" x 6" (10 x 15 cm), 5" x 7" (13 x 18 cm), 8" x 10" (20 x 25 cm)
C: 0.12 inch (3.0 mm)
D: 0.20 inch (5.0 mm)
E: 0.13 inch (3.4 mm)
F: 0.13 inch (3.4 mm)
Letter, Legal, Foolscap
C: 0.12 inch (3.0 mm)
D: 0.20 inch (5.0 mm)
E: 0.25 inch (6.4 mm)
F: 0.25 inch (6.3 mm)
Legal (India)
C: 0.12 inch (3.0 mm)
D: 0.20 inch (5.0 mm)
E: 0.23 inch (5.9 mm)
F: 0.23 inch (5.9 mm)
Oficio
C: 0.12 inch (3.0 mm)
D: 0.30 inch (7.5 mm)
E: 0.25 inch (6.4 mm)
F: 0.25 inch (6.3 mm)
B-Oficio, M-Oficio
C: 0.12 inch (3.0 mm)
D: 0.20 inch (5.0 mm)
E: 0.25 inch (6.4 mm)
F: 0.25 inch (6.4 mm)
Envelopes
| Size Recommended Print Area (width x height) | |
| Envelope Com 10 3.68 x 8.50 inches (93.5 x 215.9 mm) | |
| Envelope DL 3.88 x 7.67 inches (98.8 x 194.6 mm) | |
| Envelope C5 5.94 x 8.02 inches (150.8 x 203.6 mm) | |
| Envelope Monarch 3.43 x 6.50 inches (87.2 x 165.1 mm) | |
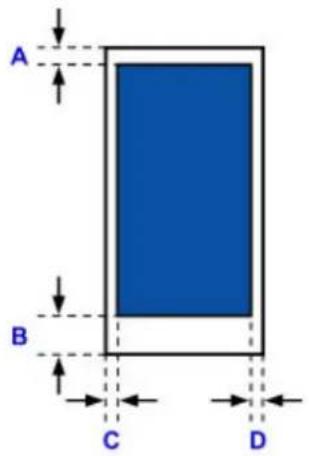
text_image
A B C DRecommended print area
A: 0.5 inch (12.7 mm)
B: 0.5 inch (12.7 mm)
C: 0.22 inch (5.6 mm)
D: 0.22 inch (5.6 mm)
Administrator Settings
Sharing the Printer on a Network
Sharing the Printer on a Network
When computers are used in a network environment, documents can be printed from multiple computers that share a single printer.
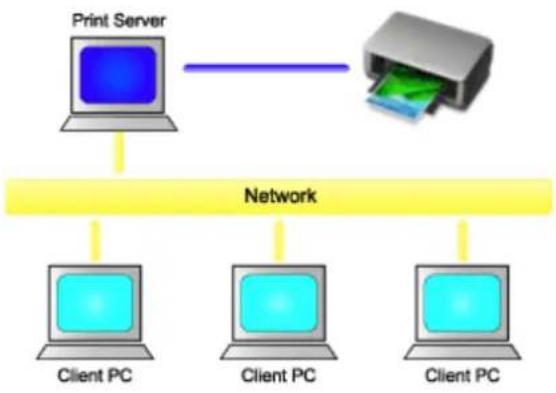
flowchart
graph TD
    A["Print Server"] --> B["Printer"]
    B --> C["Client PC"]
    B --> D["Client PC"]
    B --> E["Client PC"]
    style A fill:#e6f3ff,stroke:#333
    style B fill:#d4edda,stroke:#333
    style C fill:#fff2cc,stroke:#333
    style D fill:#fff2cc,stroke:#333
    style E fill:#fff2cc,stroke:#333
- Setting Up a Shared Printer
This section describes how to set up the print server and the client.
Note
- The Windows versions of the computers connected to the network do not necessarily have to be the same.
• To set up the fax driver, use the same procedure.
Related Topic
→ Restrictions on Printer Sharing
Setting Up a Shared Printer
On the print server, set up sharing of the printer driver. Then from the client, set up the connection to the print server.
-
Install the printer driver on the print server system
-
Select as described below:
-
If you are using Windows 10, Windows 8.1, Windows 8, Windows 7, Windows Server 2012 R2, Windows Server 2012, or Windows Server 2008 R2, select the Control Panel -> Hardware and Sound (Hardware) -> Devices and Printers The Devices and Printers window is displayed.
- If you are using Windows Vista or Windows Server 2008, select the Control Panel -> Hardware and Sound -> Printers The Printers window is displayed.
-
Click the icon for the model name of printer to be shared
-
If you are using Windows 10, Windows 8.1, Windows 8, Windows 7, Windows Server 2012 R2, Windows Server 2012, or Windows Server 2008 R2, press the Alt key, and from the displayed File menu, select Printer properties -> Sharing tab.
- If you are using Windows Vista, press the Alt key, and from the displayed File menu, select Run as administrator -> Sharing....
- If you are using Windows Server 2008 select Sharing... from the File menu.
Important
-
A confirmation/warning dialog box may appear when starting, installing or uninstalling software. This dialog box appears when administrative rights are required to perform a task.
When you are logged on to an administrator account, click Yes (or Continue, Allow) to continue. Some applications require an administrator account to continue. In such cases, switch to an administrator account, and restart the operation from the beginning. -
Set sharing
On the Sharing tab, check (or select) Share this printer, set the shared name as necessary, and then click OK.
-
If the print server and the client have different architectures (32 bit or 64 bit), install an additional driver
-
Display the Devices and Printers, Printers, or Printers and Faxes window.
- Select as described below:
- If you are using Windows 10, Windows 8.1, Windows 8, Windows 7, Windows Server 2012 R2, Windows Server 2012, or Windows Server 2008 R2, select the printer icon, click Print server properties, and select the Drivers tab
- If you are using Windows Vista, press the Alt key, and from the displayed File menu, select Run as administrator -> Server Properties..., and select the Drivers tab
- If you are using Windows Server 2008 from the File menu, open Server Properties, and select the Drivers tab
- Click Add....
- When the Add Printer Driver Wizard window is displayed, click Next.
- If the print server has a 32-bit architecture, select x64. If the print server has a 64-bit architecture, select x86. Then click Next.
- Click Have Disk....
- In the Install From Disk window, open the "Driver" folder of the downloaded printer driver, specify the "inf" file, and click OK.
- Select the printer to be used, and click Next.
Note
- If an error message is displayed, select the other printer.
9. Click Finish
The setup on the print server system is complete. Next, set up the client systems.
- On the client, open Explorer, and double-click the icon of the printer to be shared
- Follow the window instructions, and install the printer driver
The setup on the client system is complete.
Even when you perform the setup on a different client, follow the same steps 6 and 7.
Restrictions on Printer Sharing
If you are using the XPS printer driver, replace "Canon IJ Preview" with "Canon IJ XPS Preview" when reading this information.
These are restrictions that apply when you are using a printer in a network environment. Check the restrictions for the environment you are using.
Restriction on setting up printer sharing
- If "ntprint.inf" is requested when you install the driver from Add Printer, specify the file as follows:
- Start Explorer on the print server and on the client with the different architecture, paste the following path in the address bar, and press Enter on the keyboard: %windir%\system32\driverstore\
- Right-click the FileRepository folder, and click Properties.
- On the Sharing tab, click Share.
- In the message window displayed on the print server, specify "ntprint.inf_xxxxxxxx" in the folder that was shared in step 3, and click OK.
If there are multiples copies, select the file with the latest update date and time.
Restrictions on sharing and using a printer
- A print completion message may be displayed. To disable the message display, follow the procedure below.
- If you are using Windows 10, Windows 8.1, Windows 8, Windows Server 2012 R2, or Windows Server 2012:
In the Devices and Printers window of the client system, select the printer from Printers, and click Print server properties on the command bar.
Uncheck Show informational notifications for network printers on the Advanced tab, and then restart the computer.
• If you are using Windows 7 or Windows Server 2008 R2:
In the Devices and Printers window of the client system, select the printer from Printers and Faxes, and click Print server properties on the command bar.
Uncheck Show informational notifications for network printers on the Advanced tab, and then restart the computer.
• If you are using Windows Vista:
In the Printers window of the client system, press the Alt key, and from the displayed File menu, click Run as administrator -> Server Properties....
Uncheck Show informational notifications for network printers on the Advanced tab, and then restart the computer.
- If you are using Windows Server 2008:
In the Printers window of the client system, click Server Properties... from the File menu. Uncheck Show informational notifications for network printers on the Advanced tab, and then restart the computer.
- The bi-directional communication function is disabled and the correct printer status may not be recognized.
If a client user opens the printer driver properties and then clicks OK with the Enable bidirectional
support check box cleared on the Ports tab, the bidirectional communication function of the print server may also be disabled.
In this case, check Enable bidirectional support check box on both the print server system and the client system.
- When you print from a client system, you cannot use Canon IJ Preview.
- When the functions on the Maintenance tab cannot be set properly from a client system, they may be grayed out. In this case, change the settings from the print server.
When you change the settings of the print server, you should delete the icon of the shared printer from the client system, and then specify the shared settings again in the client system.
- If the same driver installed on the print server is also installed on the client, the network printer icon may be created automatically.
- If an error occurs when you print a document on a shared printer from a client, the error message of the Canon IJ status monitor is displayed on both the client and the print server. If a document is printed out normally, the Canon IJ status monitor is displayed only on the client.
Administrator Password
Depending on the printer you are using, an administrator password is specified at the time of purchase.
The password is either "canon" or the printer serial number if it is specified.
Model whose administrator password is specified as "canon":
MG7500 series, MG6700 series, MG6600 series, MG5600 series
MG2900 series, MX490 series, MB5300 series, MB5000 series
MB2300 series, MB2000 series, E480 series, E460 series
iP110 series, iB4000 series, PRO-100S series, PRO-10S series
- At the time of purchase, the user name "ADMIN" is also specified for the models above.
- The following character restrictions apply to the password that you change:
- Set the password by using 0 to 32 characters.
- The allowed characters are single-byte alphanumeric characters.
- For security reasons, we recommend you use 6 and more alphanumeric characters.
Model whose serial number is used as the administrator password:
- For the models other than the above, the printer serial number is used as the administrator password.
→ Where Serial Number Is Located
- The following character restrictions apply to the password that you change:
- Set the password by using 4 to 32 characters.
• The allowed characters are single-byte alphanumeric characters.
- For security reasons, we recommend you use 6 and more alphanumeric characters.
Important
- You can change the password using one of the tools below. (Some tools may not be available depending on the printer you are using.)
• operation panel of the printer
- IJ Network Tool
- printer information screen displayed on some Canon application software
- IJ Network Device Setup Utility*
* Only for Windows
- If the password has been changed while you are sharing the printer and you do not know the password, ask the administrator of the printer you are using.
- Set the password back to the default setting by initializing the printer settings.
For more on initializing the printer, search for "UG067" or "UG505" on your printer's Online Manual and see the instructions shown.
Password and Cookie
→ Password
→ Cookie
Password
Enter the password when the authentication screen is displayed.
→ Administrator Password
You need to enter the user name as well as the password depending on the printer you are using. For more on the user name, see the link above.

Important
- A message to warn you that the identification information is not verified may be displayed depending on the printer you are using.
- We recommend you change the password.
Cookie
Cookie allows a website master to save user information or user's access log on each computer through a web browser temporarily.
The printer may send one or more cookies to your communication device to verify Remote UI users and to enable the printer to offer useful information for each user.

Important
- Most browsers automatically accept cookies, but you can modify your browser setting so as not to accept cookies.
If you modify your browser so as not to accept cookies, you cannot log on to Remote UI and none of its functions are available.

Note
- Use an OS or web browser below to use Remote UI.
- iOS devices:
OS: iOS 7.0 or later
Browser: Default browser of iOS device (Mobile Safari) - Android devices:
OS: Android 4.0 or later
Browser: Default browser of Android device (browser or Chrome) - Mac OS devices:
OS: Mac OS X v.10.6 or later
Browser: Safari 5.1 or later - Windows devices:
OS: Windows Vista SP2 or later
Browser: Internet Explorer 9 or later / Google Chrome 41.0.2272.118m or later / Mozilla Firefox 37.0.1 or later
How to locate your printer's serial number
The serial number is printed on a white sticker attached to each printer. The serial number will consist of 9 alphanumeric characters (4 letters followed by 5 numbers).
Example:

text_image
XXXX00000
Note
- Depending on the printer you are using, you can check the serial number by printing out the network setting information of the printer. For more on printing, search for "NR044" on your printer's Online Manual and see the instructions shown.
Registering Root Certificate to Web Browser
When you display Remote UI for the first time on your smartphone, tablet, or computer, download the root certificate, and then register it to the web browser. The secure connection will be confirmed and a message will not appear.
For details, search for "AF111" on your printer's Online Manual and see the instructions shown.
Printing
Printing from Computer
Printing from Smartphone/Tablet
Printing Using Operation Panel

Paper Settings
Printing from Computer
▶ Printing from Application Software (Windows Printer Driver)
▶ Printing from Application Software (Mac OS Printer Driver)
▶ Printing Using Canon Application Software
▶ Printing Using a Web Service
▶ Printing from an AirPrint-enabled Printer with Mac
Printing from Application Software (Windows Printer Driver)
▶ Printing with Easy Setup Basic
▶ Various Printing Methods
Changing the Print Quality and Correcting Image Data
Overview of the Printer Driver
Printer Driver Description
▶ Updating the MP Drivers
Printing with Easy Setup
This section describes the simple procedure for setting the Quick Setup tab so that you can carry out appropriate printing on this printer.
Printing with Easy Setup
- Check that the printer is turned on
- Load paper on the printer
- Open the printer driver setup window
- Select a frequently used profile
In Commonly Used Settings on the Quick Setup tab, select a printing profile suited for the purpose. When you select a printing profile, the Additional Features, Media Type, and Printer Paper Size settings are automatically switched to the values that were preset.
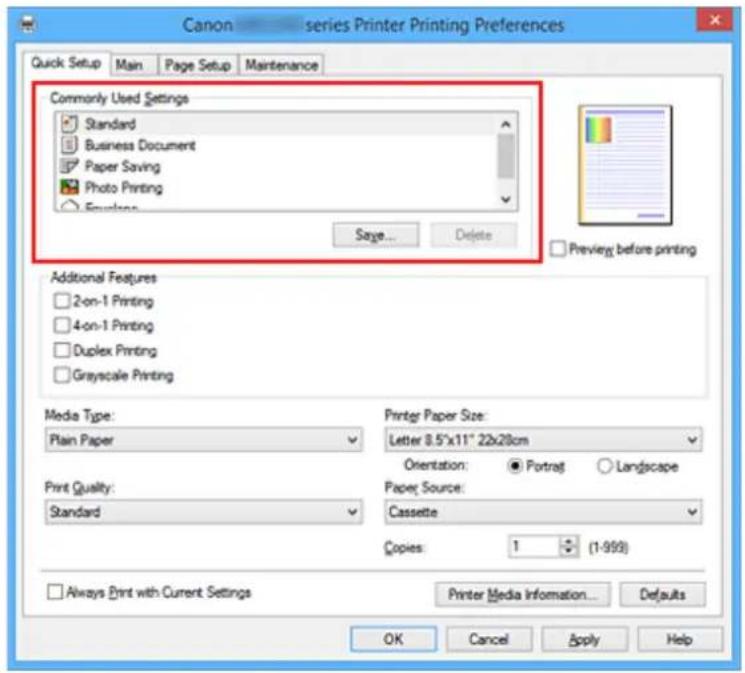
text_image
Canon - series Printer Printing Preferences Quick Setup Main Page Setup Maintenance Commonly Used Settings Standard Business Document Paper Saving Photo Printing Envelope Sage... Delete Additional Features 2-on-1 Printing 4-on-1 Printing Duplex Printing Grayscale Printing Media Type: Plain Paper Print Quality: Standard Printer Paper Size: Letter 8.5"x11" 22x28cm Orientation: ● Portrait ○ Landscape Paper Source: Cassette Copies: 1 (1-999) Always Print with Current Settings Printer Media Information... OK Cancel Apply Help- Select the print quality
For Print Quality, select High or Standard according to your purpose.
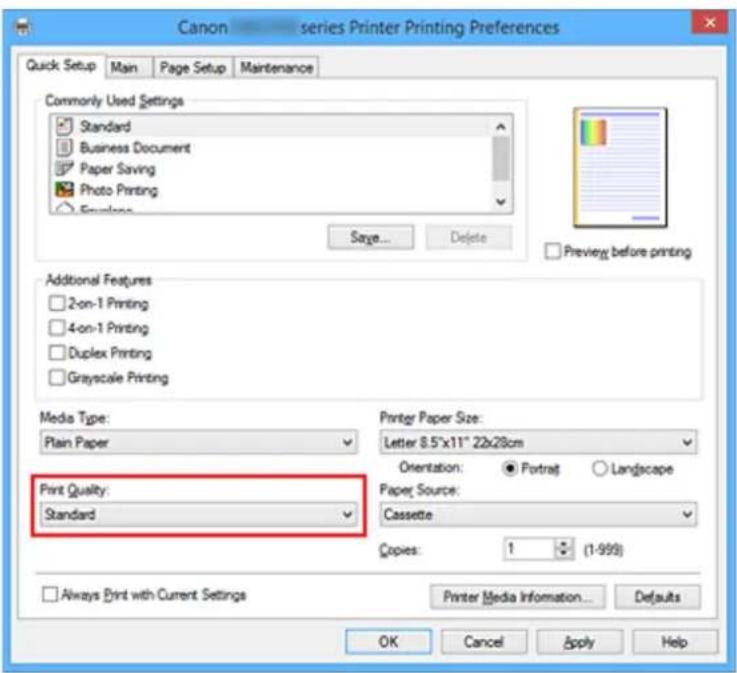
text_image
Canon series Printer Printing Preferences Quick Setup Main Page Setup Maintenance Commonly Used Settings Standard Business Document Paper Saving Photo Printing Envelope Sage... Delete Preview before printing Additional Features 2-on-1 Printing 4-on-1 Printing Duplex Printing Grayscale Printing Media Type: Plain Paper Print Quality: Standard Printer Paper Size: Letter 8.5"x11" 22x28cm Orientation: ● Portrait ○ Landscape Paper Source: Cassette Copies: 1 (1-999) Always Print with Current Settings Printer Media Information... OK Cancel Apply HelpImportant
- The print quality settings that can be selected may differ depending on a printing profile.
6. Complete the setup
Click OK.
When you execute print, the document is printed with settings that match your purpose.
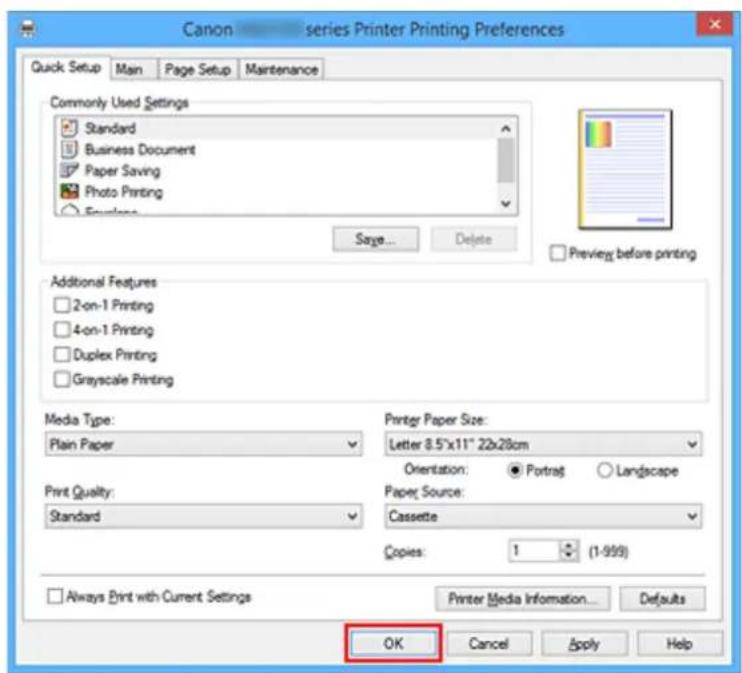
text_image
Canon series Printer Printing Preferences Quick Setup Main Page Setup Maintenance Commonly Used Settings Standard Business Document Paper Saving Photo Printing Envelope Sage... Delete Preview before printing Additional Features 2-on-1 Printing 4-on-1 Printing Duplex Printing Grayscale Printing Media Type: Plain Paper Print Quality: Standard Printer Paper Size: Letter 8.5"x11" 22x28cm Orientation: ● Portrait ○ Landscape Paper Source: Cassette Copies: 1 (1-999) Always Print with Current Settings Printer Media Information... OK Cancel Apply HelpImportant
- When you select the Always Print with Current Settings check box, all settings specified on the Quick Setup, Main, and Page Setup tabs are saved, and you can print with the same settings from the next time as well.
- In the Commonly Used Settings window, click Save... to register the specified settings.
Note
- If the paper settings on the printer driver differ from the cassette paper information registered on the printer, an error may occur. For instructions on what to do if an error occurs, see "Paper Settings." To check the current printer settings or to apply the printer settings to the printer driver, click Printer Media Information... from the Quick Setup tab, and specify the settings in the dialog box that appears.
For details about the cassette paper information to be registered on the printer, see the following:
• Paper Settings on the Printer Driver and the Printer (Media Type)
• Paper Settings on the Printer Driver and the Printer (Paper Size)
Checking Printer Settings and Applying Settings to Printer Driver
- Open printer driver setup window
- Click Printer Media Information... on Quick Setup tab The Printer Media Information dialog box appears.
- Select Paper Source
From Paper Source, check the setting or select a new paper source. The current printer settings appear in Media Type and Page Size.
- Apply settings
To apply the printer settings to the printer driver, click Set.
Note
- If the media type on the printer is set to Hagaki, Ink Jet Hagaki, or Hagaki K or if the output paper size on the printer is set to 2L/5"x7"(13x18), click Set to display the dialog box. Select the media type and paper size that matches your purpose, and then click OK.
- If the media type and the output paper size are not set on the printer, Set will be grayed out and cannot be clicked.
- If communication with the printer is disabled, the Printer Media Information... does not appear or printer media information from the printer cannot be obtained.
Paper Settings on the Printer Driver and the Printer (Media Type)
When you use this printer, selecting a media type and paper size that matches the print purpose will help you achieve the best print results.
You can use the following media types on this printer.
Canon genuine papers (Document Printing)
| Media name | Media Type in the printer driver | Paper information registered on the printer |
| Canon Red Label SuperiorPlain Paper Plain paper | ||
| Canon Océ Office Colour PaperPlain Paper Plain paper |
Canon genuine papers (Photo Printing)
| Media name Media | Type in the printer driver | Paper information registered on the printer |
| Photo Paper Plus Glossy II Photo | Photo Paper Plus Glossy II Plus Glossy II | |
| Photo Paper Pro Luster Photo | Paper Pro Luster Pro Luster | |
| Photo Paper Plus Semi-gloss Photo | Photo Paper Plus Semi-gloss Plus Semi-gloss | |
| Photo Paper Glossy Glossy Photo Paper Glossy | ||
| Matte Photo Paper Matte Photo Paper Matte |
Canon genuine papers (Business Letter Printing)
| Media name Media Type in the printer driver | Paper information registered on the printer |
| High Resolution Paper | High Resolution Paper |
Commercially available papers
| Media name | Media Type in the printer driver | Paper information registered on the printer |
| Plain Paper (including recycled paper) | Plain Paper | Plain paper |
| Envelopes | Envelope | Envelope |
| Label Paper | Label Paper | Label Paper |
Paper Settings on the Printer Driver and the Printer (Paper Size)
When you use this printer, selecting a paper size that matches the print purpose will help you achieve the best print results.
You can use the following paper sizes on this printer.
| Printer Paper Size in the printer driver Paper information registered on the printer | |
| Letter 8.5"x11" 22x28cm Letter | |
| Legal 8.5"x14" 22x36cm Legal | |
| Executive 7.25"x10.5" 184.2x266.7mm Executive | |
| A6 A6 | |
| A5 A5 | |
| A4 A4 | |
| B5 B5 | |
| Oficio 8.5"x12.5" 215.9x317.5mm Oficio | |
| B-Oficio 8.5"x14" 216.0x355.0mm B-Oficio | |
| M-Oficio 8.50"x13.43" 216.0x341.0mm M-Oficio | |
| Foolscap 8.5"x13" 215.9x330.2mm Foolscap | |
| Legal (India) 8.46"x13.58" 215x345mm Legal(India) | |
| 4"x6" 10x15cm KG/4"x6"(10x15) | |
| 5"x7" 13x18cm 2L/5"x7"(13x18) | |
| 8"x10" 20x25cm 8"x10"(20x25cm) | |
| L 89x127mm L(89x127mm) | |
| 2L 127x178mm 2L/5"x7"(13x18) | |
| Envelope Com 10 Envelope Com 10 | |
| Envelope DL | Envelope DL |
| Yougata 4 4.13"x9.25" | Yougata 4 |
| Yougata 6 3.86"x7.48" | Yougata 6 |
| Envelope C5 Envelope C5 | |
| Envelope Monarch 3.88"x7.5" 98.4x190.5mm | Envelope Monarch |
| Custom Size | Others |
Various Printing Methods
Setting a Page Size and Orientation
Setting the Number of Copies and Printing Order
Setting the Stapling Margin
Fit-to-Page Printing
Scaled Printing
Page Layout Printing
▶ Tiling/Poster Printing
Booklet Printing
Duplex Printing
Stamp/Background Printing
Registering a Stamp
Registering Image Data to be Used as a Background
Setting Up Envelope Printing
▶ Printing on Postcards
▶ Displaying the Print Results before Printing
Setting Paper Dimensions (Custom Size)
Editing the Print Document or Reprinting from the Print History
Setting a Page Size and Orientation
The paper size and orientation are essentially determined by the application software. When the page size and orientation set for Page Size and Orientation on the Page Setup tab are same as those set with the application software, you do not need to select them on the Page Setup tab.
When you are not able to specify them with the application software, the procedure for selecting a page size and orientation is as follows:
You can also set page size and orientation on the Quick Setup tab.
- Open the printer driver setup window
- Select the paper size
Select a page size from the Page Size list on the Page Setup tab.
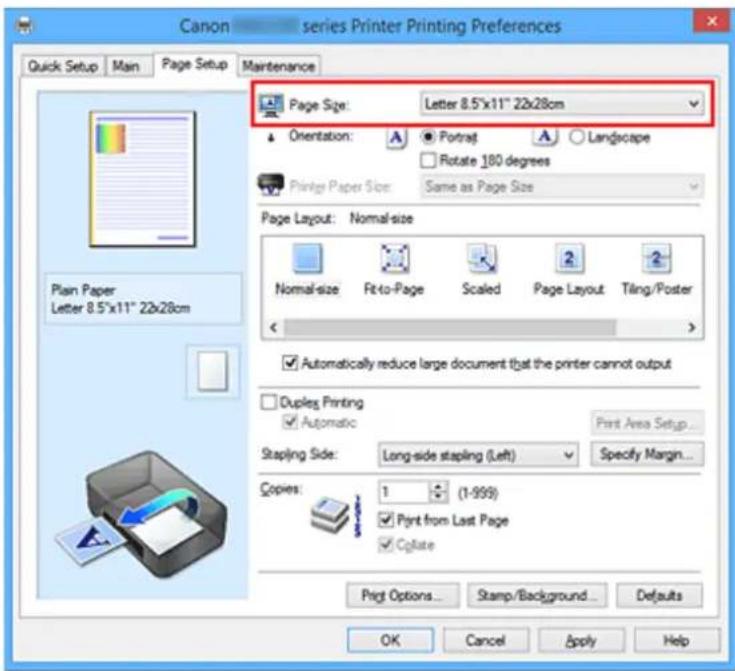
text_image
Canon series Printer Printing Preferences Quick Setup Main Page Setup Maintenance Page Size: Letter 8.5"x11" 22x28cm Orientation: ● Portrait ○ Landscape Rotate 180 degrees Printer Paper Size: Same as Page Size Page Layout: Normal-size Normal-size Fit-to-Page Scaled Page Layout Tiling/Poster ✓ Automatically reduce large document that the printer cannot output Duplex Printing ✓ Automatic Pirnt Area Setup... Stapling Side: Long-side stapling (Left) Specify Margin... Copies: 1 (1-999) ✓ Print from Last Page ✓ Copyrate Print Options... Stamp/Background...Defaults OK Cancel Apply Help- Set Orientation
Select Portrait or Landscape for Orientation. Check Rotate 180 degrees check box when you want to perform printing with the original being rotated 180 degrees.
- Complete the setup
Click OK.
When you execute print, the document will be printed with the selected page size and the orientation.

Note
- If Normal-size is selected for Page Layout, then Automatically reduce large document that the printer cannot output is displayed.
Normally, you can leave the check box checked. During printing, if you do not want to reduce large documents that cannot be printed on the printer, uncheck the check box.
Setting the Number of Copies and Printing Order
The procedure for specifying the number of copies and printing order is as follows: You can also set the number of copies on the Quick Setup tab.
-
Open the printer driver setup window
-
Specify the number of copies to be printed
For Copies on the Page Setup tab, specify the number of copies to be printed.
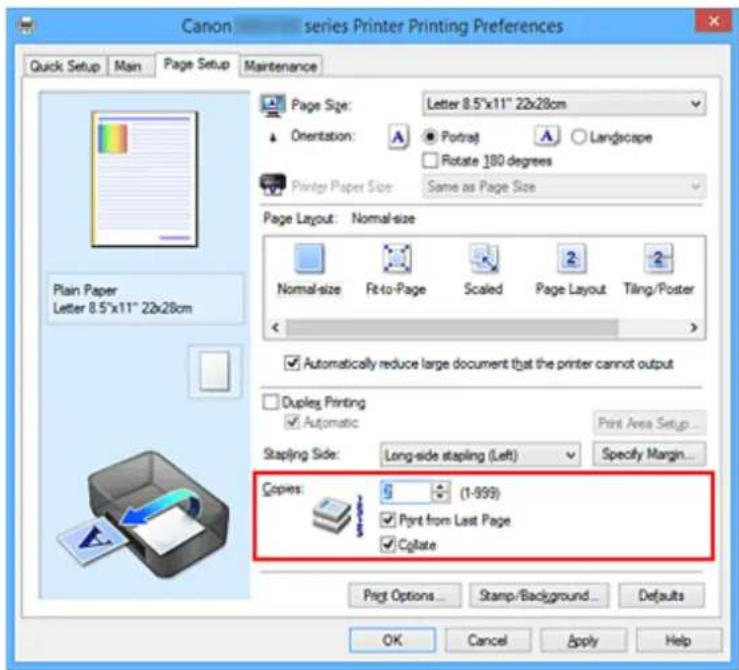
text_image
Canon series Printer Printing Preferences Quick Setup Main Page Setup Maintenance Page Size: Letter 8.5"x11" 22x28cm Orientation: ● Portrait ○ Landscape □ Rotate 180 degrees Printer Paper Size: Same as Page Size Page Layout: Normal-size Normal-size Fit-to-Page Scaled Page Layout Tiling/Poster ✓ Automatically reduce large document that the printer cannot output □ Duplex Printing ✓ Automatic Print Area Setup... Stapling Side: Long-side stapling (Left) Specify Margin... Copies: (1-999) ✓ Print from Last Page ✓ Cylate Print Options... Stamp/Background... Defaults OK Cancel Apply Help- Specify the print order
Check the Print from Last Page check box when you want to print from the last page in order, and uncheck the check box when you want to print from the first page.
Check the Collate check box when you are printing multiple copies of a document and want to print out all pages in each copy together. Uncheck this check box when you want to print all pages with the same page number together.
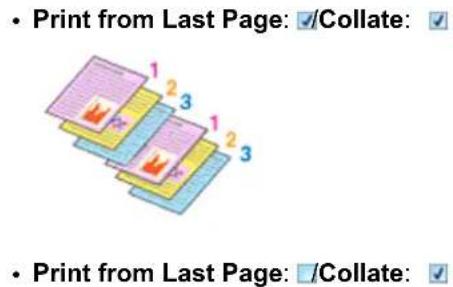
text_image
• Print from Last Page: ✓/Collate: • Print from Last Page: ✓/Collate: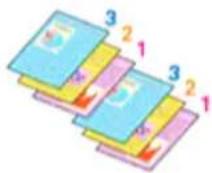
- Print from Last Page: Collate:
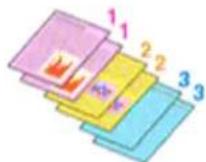
- Print from Last Page: /Collate:
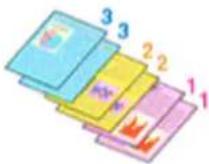
4. Complete the setup
Click OK.
When you execute print, the specified number of copies will be printed with the specified printing order.

Important
- When the application software that you used to create the document has the same function, specify the settings on the printer driver. However, if the print results are not acceptable, specify the function settings on the application software. When you specify the number of copies and the printing order with both the application software and this printer driver, the number of copies may be multiplied numbers of the two settings or the specified printing order may not be enabled.
- Print from Last Page appears grayed out and is unavailable when Tiling/Poster is selected for Page Layout.
- When Booklet is selected for Page Layout, Print from Last Page and Collate appear grayed out and cannot be set.
- When Duplex Printing is selected, Print from Last Page appears grayed out and cannot be set.

Note
- By setting both Print from Last Page and Collate, you can perform printing so that papers are collated one by one starting from the last page.
These settings can be used in combination with Normal-size, Fit-to-Page, Scaled, and Page Layout.
Setting the Stapling Margin
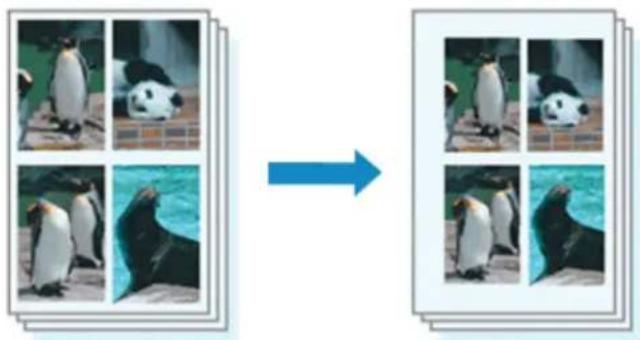
text_image
Image processing flow showing transformation from a grid of penguin images to a single panel with black-and-white penguin portraits.The procedure for setting the staple side and the margin width is as follows:
- Open the printer driver setup window
- Specify the side to be stapled
Check the position of the stapling margin from Stapling Side on the Page Setup tab.
The printer analyzes the Orientation and Page Layout settings, and automatically selects the best staple position. When you want to change the setting, select from the list.
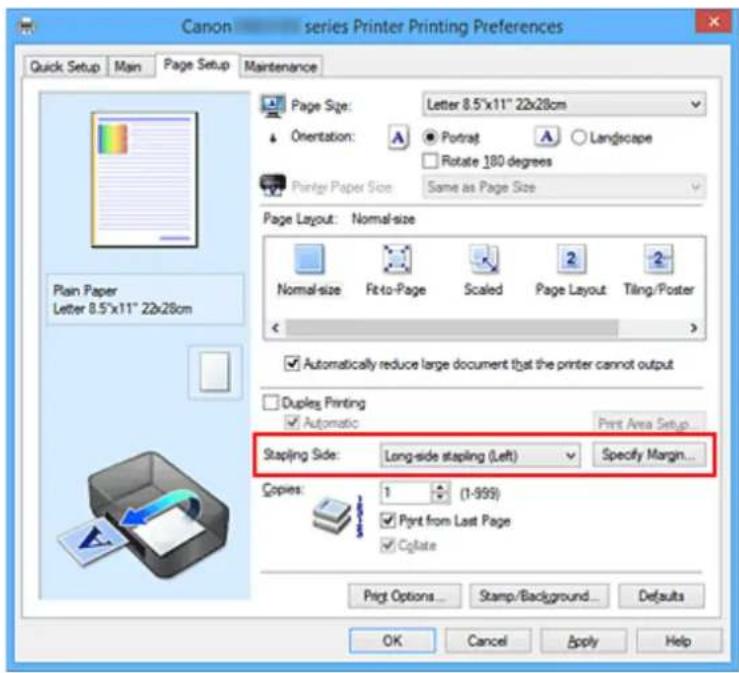
text_image
Canon series Printer Printing Preferences Quick Setup Main Page Setup Maintenance Page Size: Letter 8.5"x11" 22x28cm Orientation: ● Portrait ○ Landscape □ Rotate 180 degrees Printer Paper Size Same as Page Size Page Layout: Normal-size Normal-size Fit-to-Page Scaled Page Layout Tiling/Poster ✓ Automatically reduce large document that the printer cannot output □ Duplex Printing ✓ Automatic Print Area Setup... Stapling Side: Long-side stapling (Left) Specify Margin... Copies: 1 (1-999) ✓ Print from Last Page ✓ Cqlate Print Options... Stamp/Background...Defaults OK Cancel Apply Help- Set the margin width
If necessary, click Specify Margin... and set the margin width, and then click OK.
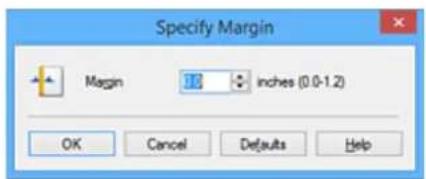
text_image
Specify Margin Margin 16 inches (0.0-1.2) OK Cancel Defaults Help- The printer automatically reduces the print area depending on the staple position margin.
4. Complete the setup
Click OK on the Page Setup tab.
When you execute print, the data is printed with the specified staple side and margin width.
Important
- Stapling Side and Specify Margin... appear grayed out and are unavailable when:
- Tiling/Poster or Booklet is selected for Page Layout
- Scaled is selected for Page Layout (When Duplex Printing is also selected, only Stapling Side can be specified.)
Fit-to-Page Printing
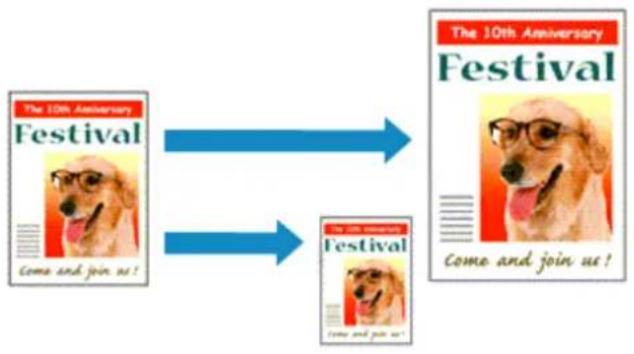
flowchart
graph LR
    A["The 10th Anniversary Festival\nCome and join us!"] --> B["The 10th Anniversary Festival\nCome and join us!"]
The procedure for printing a document that is automatically enlarged or reduced to fit the page size to be used is as follows:
- Open the printer driver setup window
- Set fit-to-page printing
Select Fit-to-Page from the Page Layout list on the Page Setup tab.
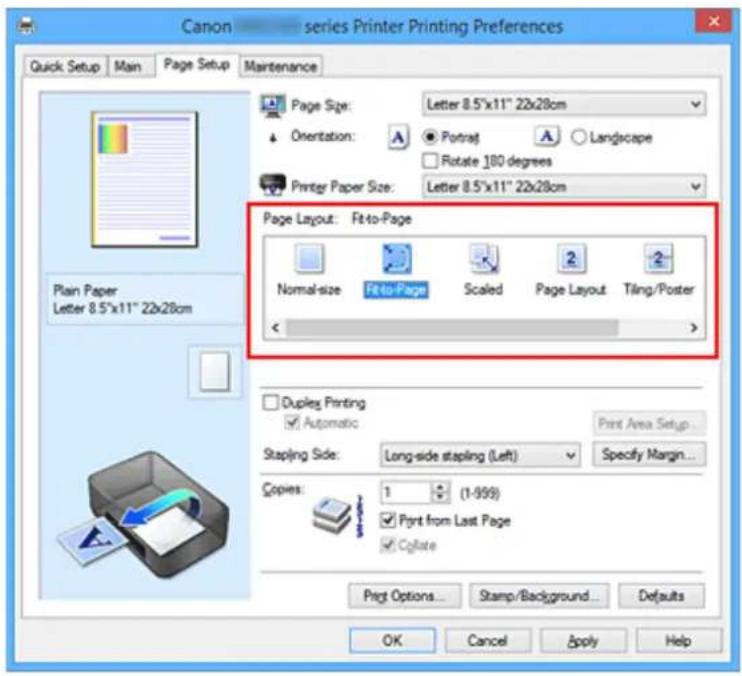
text_image
Canon series Printer Printing Preferences Quick Setup Main Page Setup Maintenance Page Size: Letter 8.5"x11" 22x28cm Orientation: ●Portrait A Landscape Rotate 180 degrees Printer Paper Size: Letter 8.5"x11" 22x28cm Page Layout: Fit-to-Page Normal-size Fit-to-Page Scaled Page Layout Tiling/Poster Duplex Printing Automatic Print Area Setup... Stapling Side: Long-side stapling (Left) Specify Margin... Copies: 1 (1-999) Print from Last Page Cylate Print Options... Stamp/Background...Defaults OK Cancel Apply Help- Select the paper size of the document
Using Page Size, select the page size that is set with your application software.
- Select the print paper size
Select the size of the paper loaded in the printer from the Printer Paper Size list. When the Printer Paper Size is smaller than the Page Size, the page image will be reduced. When the Printer Paper Size is larger than the Page Size, the page image will be enlarged.
The current settings are displayed in the settings preview on the left side of the printer driver.
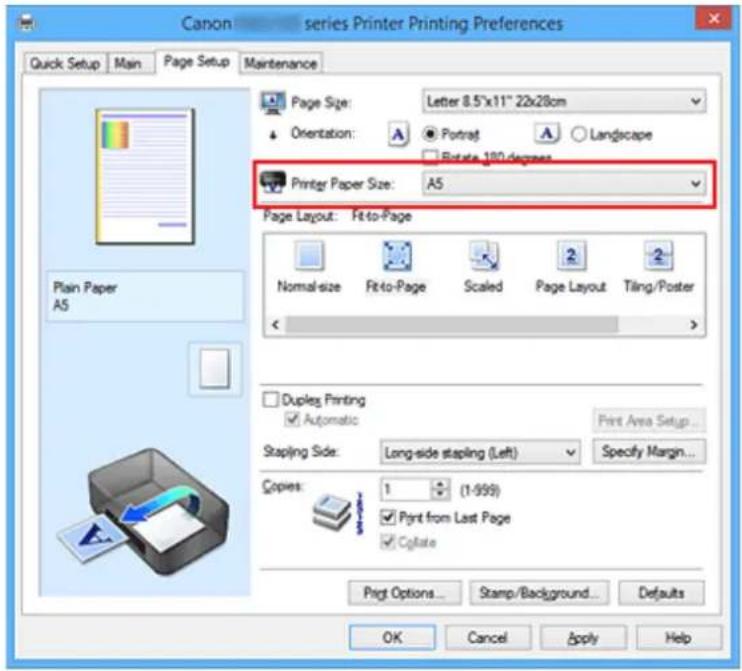
text_image
Canon series Printer Printing Preferences Quick Setup Main Page Setup Maintenance Page Size: Letter 8.5"x11" 22x28cm Orientation: ● Portrait ○ Landscape Rotate 100 degrees Printer Paper Size: A5 Page Layout: Fit-to-Page Normal-size Fit-to-Page Scaled Page Layout Tiling/Poster Duples Printing ✓ Automatic Stapling Side: Long-side stapling (Left) Specify Margin... Copies: 1 (1-999) ✓ Print from Last Page ✓ Copyrate Print Options... Stamp/Background... Defaults OK Cancel Apply Help5. Complete the setup
Click OK.
When you execute print, the document will be enlarged or reduced to fit to the page size.
Scaled Printing
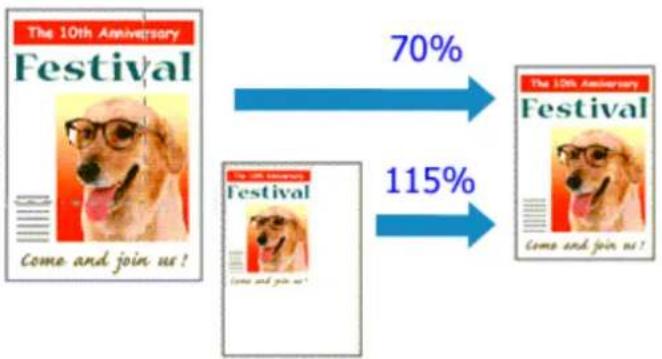
other
| Period | Percentage | |--------|----------| | The 10th Anniversary Festival | 70% | | The 10th Anniversary Festival (Come and join us) | 115% |The procedure for printing a document with pages enlarged or reduced is as follows:
- Open the printer driver setup window
- Set scaled printing
Select Scaled from the Page Layout list on the Page Setup tab.
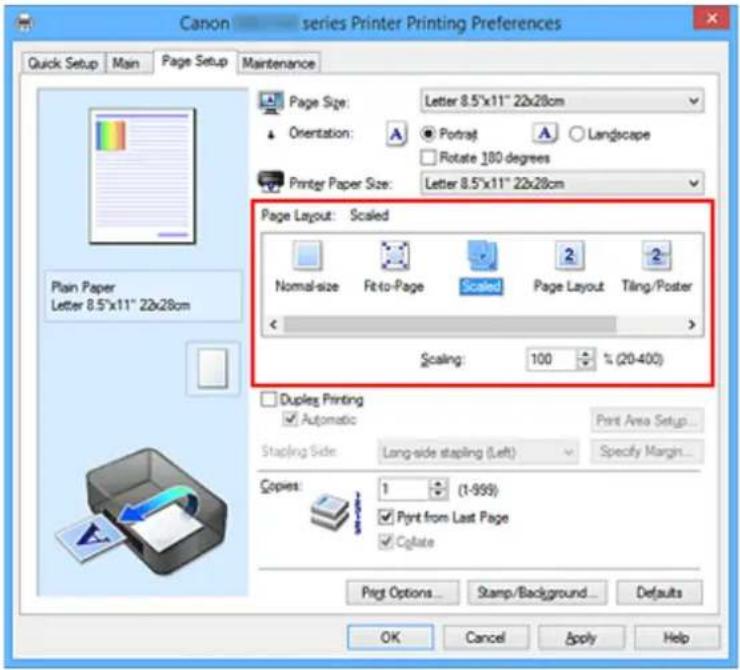
text_image
Canon series Printer Printing Preferences Quick Setup Main Page Setup Maintenance Page Size: Letter 8.5"x11" 22x28cm Orientation: A ● Portrait A ○ Landscape Rotate 180 degrees Printer Paper Size: Letter 8.5"x11" 22x28cm Page Layout: Scaled Normal-size Fit-to-Page Scaled Page Layout Tiling/Poster Scaling: 100 % (20-400) Duples Printing Automatic Print Area Setup... Stapling Side: Long-side stapling (Left) Specify Margin... Copies: 1 (1-999) Print from Last Page Cylate Print Options... Stamp/Background... Defaults OK Cancel Apply Help- Select the paper size of the document
Using Page Size, select the page size that is set with your application software.
- Set the scaling rate by using one of the following methods:
- Select a Printer Paper Size
When the printer paper size is smaller than the Page Size, the page image will be reduced. When the printer paper size is larger than the Page Size, the page image will be enlarged.
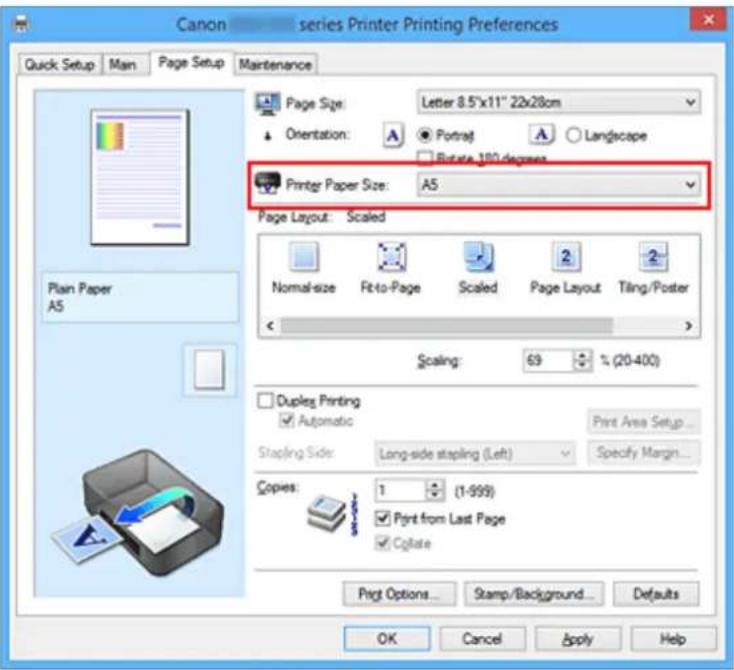
text_image
Canon series Printer Printing Preferences Quick Setup Main Page Setup Maintenance Page Size: Letter 8.5"x11" 22x28cm Orientation: A ● Portrait A ○ Landscape □ Rotate 380 degrees Printer Paper Size: A5 Page Layout: Scaled Normal-size Fit-to-Page Scaled Page Layout Tiling/Poster Scaling: 69 % (20-400) □ Duples Printing ☑ Automatic Print Area Setup... Stapling Side: Long-side stapling (Left) Specify Margin... Copies: 1 (1-999) Print from Last Page □ Cylate Print Options... Stamp/Background... Defaults OK Cancel Apply Help- Specify a scaling factor
Directly type in a value into the Scaling box.
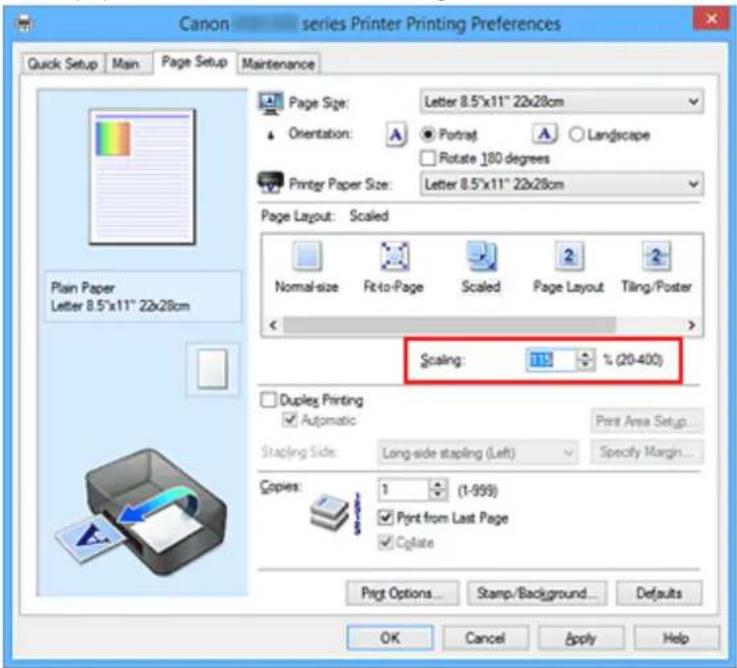
text_image
Canon series Printer Printing Preferences Quick Setup Main Page Setup Maintenance Page Size: Letter 8.5"x11" 22x28cm Orientation: ● Portrait ○ Landscape Rotate 180 degrees Printer Paper Size: Letter 8.5"x11" 22x28cm Page Layout: Scaled Normal-size Fit-to-Page Scaled Page Layout Tiling/Poster Scaling: 11% (20-400) Duplex Printing Automatic Print Area Setup Stapling Side: Long-side stapling (Left) Specify Margin... Copies: 1 (1-999) ✓ Print from Last Page ✓ Copyrate Print Options... Stamp/Background... Defaults OK Cancel Apply HelpThe current settings are displayed in the settings preview on the left side of the printer driver.
5. Complete the setup
Click OK.
When you execute print, the document will be printed with the specified scale.
Important
- When the application software which you used to create the original has the scaled printing function, configure the settings on your application software. You do not need to configure the same setting in the printer driver.
Note
- Selecting Scaled changes the printable area of the document.
Page Layout Printing
The page layout printing function allows you to print more than one page image on a single sheet of paper.
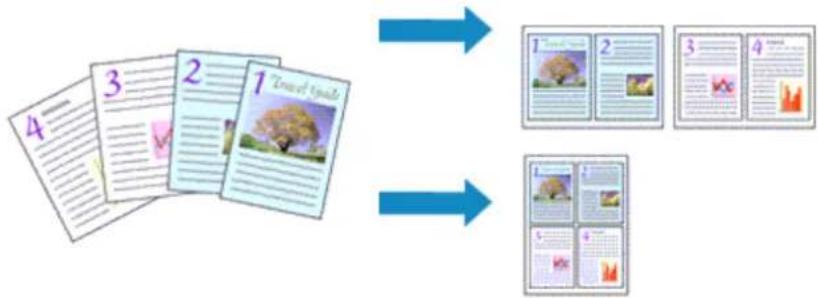
flowchart
graph TD
    A["1: Document 1"] --> B["2: Document 2"]
    B --> C["3: Document 3"]
    C --> D["4: Document 4"]
    D --> E["Final Image 1"]
    E --> F["Final Image 2"]
    F --> G["Final Image 3"]
    G --> H["Final Image 4"]
The procedure for performing page layout printing is as follows:
- Open the printer driver setup window
- Set page layout printing
Select Page Layout from the Page Layout list on the Page Setup tab.
The current settings are displayed in the settings preview on the left side of the printer driver.
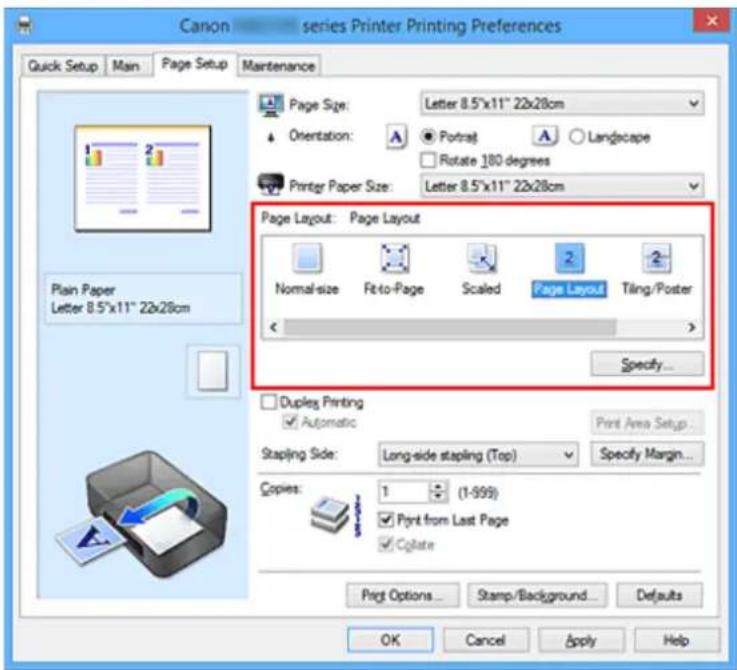
text_image
Canon series Printer Printing Preferences Quick Setup Main Page Setup Maintenance Page Size: Letter 8.5"x11" 22x28cm Orientation: ● Portrait ○ Landscape □ Rotate 180 degrees Printer Paper Size: Letter 8.5"x11" 22x28cm Page Layout: Page Layout Normal-size Fit-to-Page ScaledITO Biling/Poster Specify... Plain Paper Letter 8.5"x11" 22x28cm Duplex Printing Automatic Print Area Setup Stapling Side: Long-side stapling (Top) Specify Margin... Copies: 1 (1-999) Cash/Cash Cash/Cash Print from Last Page Cylate Print Options... Stamp/Background... Defaults OK Cancel Apply Help- Select the print paper size
Select the size of the paper loaded in the printer from the Printer Paper Size list.
- Set the number of pages to be printed on one sheet and the page order
If necessary, click Specify..., specify the following settings in the Page Layout Printing dialog box, and click OK.
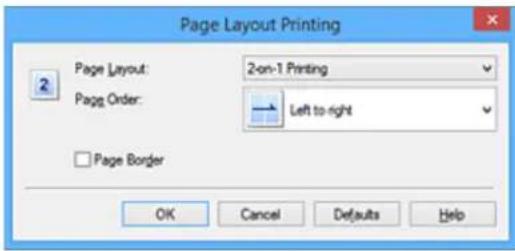
text_image
Page Layout Printing Page Layout: 2-on-1 Printing Page Order: Left to-right Page Border OK Cancel Defaults HelpPage Layout
To change the number of pages to be printed on a single sheet of paper, select the number of pages from the list.
Page Order
To change the page arrangement order, select a placement method from the list.
Page Border
To print a page border around each document page, check this check box.
5. Complete the setup
Click OK on the Page Setup tab.
When you execute print, the specified number of pages will be arranged on each sheet of paper in the specified order.
Tiling/Poster Printing
The tiling/poster printing function allows you to enlarge image data, divide it into several pages, and print these pages on separate sheets of paper. You can also paste the pages together to create a large print like a poster.
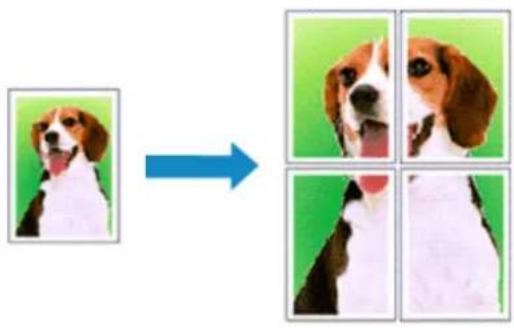
text_image
Image showing a dog photo before and after transformation, with four quadrants of the dog images.The procedure for performing tiling/poster printing is as follows:
Setting Tiling/Poster Printing
-
Open the printer driver setup window
-
Set tiling/poster printing
Select Tiling/Poster from the Page Layout list on the Page Setup tab.
The current settings are displayed in the settings preview on the left side of the printer driver.
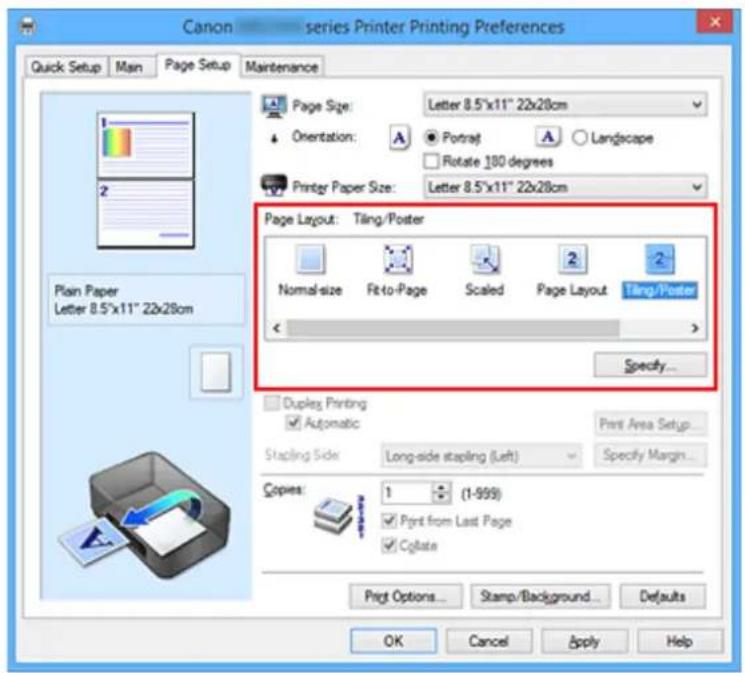
text_image
Canon series Printer Printing Preferences Quick Setup Main Page Setup Maintenance Page Size: Letter 8.5"x11" 22x28cm Orientation: ● Portrait ○ Landscape Rotate 180 degrees Printer Paper Size: Letter 8.5"x11" 22x28cm Page Layout: Tiling/Poster Normal-size Fit-to-Page Scaled Page Layout Tiling/Poster Specify... Duplex Printing Automatic Print Area Setup... Stapling Side: Long-side stapling (Left) Specify Margin... Copies: 1 (1-999) Print from Last Page Cylate Print Options... Stamp/Background... Defaults OK Cancel Apply Help- Select the print paper size
Select the size of the paper loaded in the printer from the Printer Paper Size list.
4. Set the number of image divisions and the pages to be printed
If necessary, click Specify..., specify the following settings in the Tiling/Poster Printing dialog box, and then click OK.
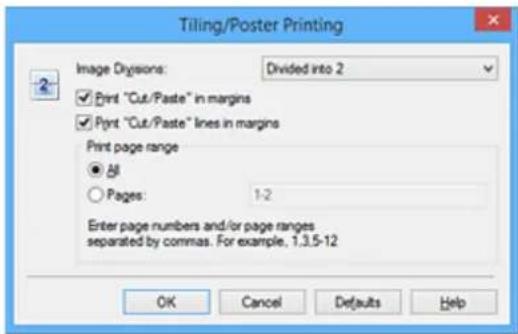
text_image
Tiling/Poster Printing Image Disions: Divided into 2 ✓ Print "Cut/Paste" in margins ✓ Print "Cut/Paste" lines in margins Print page range ● All ○ Pages: 1-2 Enter page numbers and/or page ranges separated by commas. For example, 1.3.5-12 OK Cancel Defaults HelpImage Divisions
Select the number of divisions (vertical x horizontal).
As the number of divisions increases, the number of sheets used for printing increases. If you are pasting pages together to create a poster, increasing the number of divisions allows you to create a larger poster.
Print "Cut/Paste" in margins
To leave out words "Cut" and "Paste", uncheck this check box.
Note
- This feature may be unavailable when certain printer drivers or operating environments are used.
Print "Cut/Paste" lines in margins
To leave out cut lines, uncheck this check box.
Print page range
Specifies the printing range. Select All under normal circumstances.
To reprint only a specific page, select Pages and enter the page number you want to print. To specify multiple pages, enter the page numbers by separating them with commas or by entering a hyphen between the page numbers.
Note
- You can also specify the print range by clicking the pages in the settings preview.
5. Complete the setup
Click OK on the Page Setup tab.
When you execute print, the document will be divided into several pages during printing.
Printing Only Specific Pages
If ink becomes faint or runs out during printing, you can reprint only the specific pages by following the procedure below:
1. Set the print range
In the settings preview on the left of the Page Setup tab, click the pages that do not need to be printed.
The pages that were clicked are deleted, and only the pages to be printed are displayed.
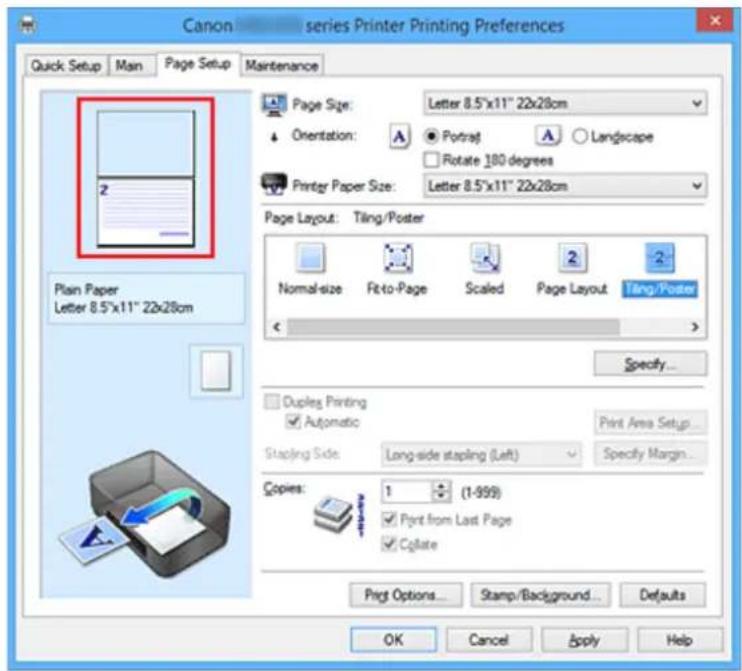
text_image
Canon series Printer Printing Preferences Quick Setup Man Page Setup Maintenance Page Size: Letter 8.5"x11" 22x28cm Orientation: ● Portrait ○ Landscape Rotate 180 degrees Printer Paper Size: Letter 8.5"x11" 22x28cm Page Layout: Tiling/Poster Normal-size Fit-to-Page Scaled Page Layout Tiling/Poster Specify... Duplex Printing Automatic Print Area Setup... Stapling Side: Long-side stapling (Left) Specify Margin... Copies: 1 (1-999) ✓ Print from Last Page ✓ Cylate Print Options... Stamp/Background...Defaults OK Cancel Apply HelpNote
- Click the deleted pages to display them again.
- Right-click the settings preview to select Print all pages or Delete all pages.
2. Complete the setup
After completing the page selection, click OK.
When you execute print, only specified pages will be printed.
Important
- Since tiling/poster printing enlarges the document when printing it, the print results may become coarse.
Booklet Printing
The booklet printing function allows you to print data for a booklet. Data is printed on both sides of the paper. This type of printing ensures that pages can be collated properly, in page number order, when the printed sheets are folded and stapled at the center.
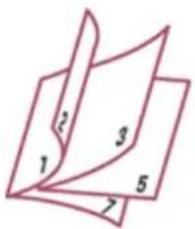
text_image
1 2 3 5 7The procedure for performing booklet printing is as follows:
- Open the printer driver setup window
- Set booklet printing
Select Booklet from the Page Layout list on the Page Setup tab.
The current settings are displayed in the settings preview on the left side of the window.
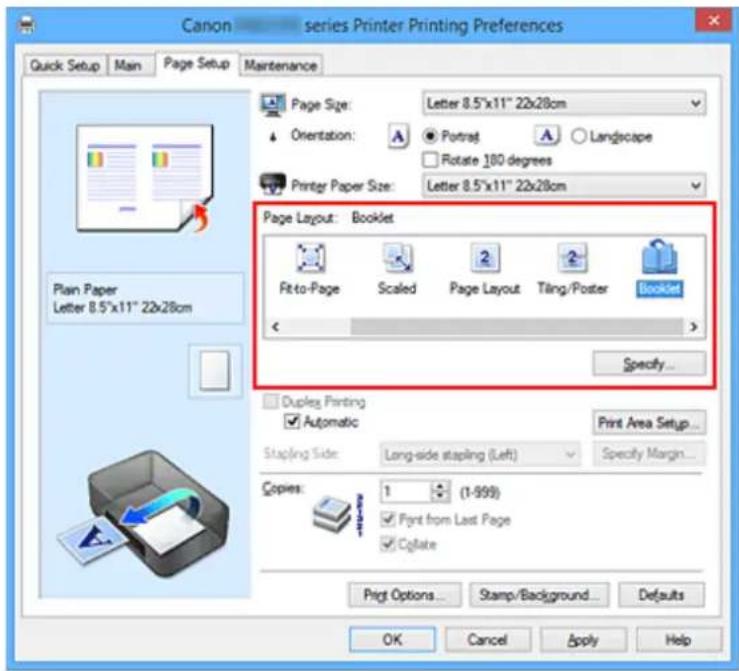
text_image
Canon series Printer Printing Preferences Quick Setup Man Page Setup Maintenance Page Size: Letter 8.5"x11" 22x28cm Orientation: ● Portrait ○ Landscape □ Rotate 100 degrees Printer Paper Size: Letter 8.5"x11" 22x28cm Page Layout: Booklet Fit-to-Page Scaled Page Layout Tiling/Poster Booklet Specify... Duplex Printing Automatic Print Area Setup... Stapling Side: Long-side stapling (Left) Specify Margin... Copies: 1 (1-999) □ Print from Last Page □ Cqlate Print Options... Stamp/Background...Defaults OK Cancel Apply Help- Select the print paper size
Select the size of the paper loaded in the printer from the Printer Paper Size list.
- Set the margin for stapling and the margin width
Click Specify... and specify the following settings in the Booklet Printing dialog box, and then click OK.
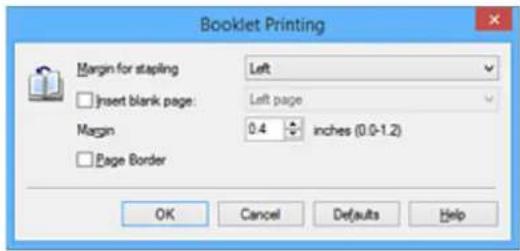
text_image
Booklet Printing Margin for stapling Left Insert blank page: Left page Margin 0.4 inches (0.0-1.2) Page Border OK Cancel Defaults HelpMargin for stapling
Select which side should the stapling margin be on when the booklet is completed.
Insert blank page
To leave one side of a sheet blank, check the check box, and select the page to be left blank.
Margin
Enter the margin width. The specified width from the center of the sheet becomes the margin width for one page.
Page Border
To print a page border around each document page, check the check box.
5. Complete the setup
Click OK on the Page Setup tab.
When you execute print, the document is automatically printed first on one side of a sheet of paper and then on the opposite side.
When the printing is complete, fold the paper at the center of the margin and make a booklet.

Important
- Booklet cannot be selected when a media type other than Plain Paper is selected for Media Type on the Main tab.

Note
- The stamp and background are not printed on the inserted blank sheets with the Insert blank page function of booklet printing.
Duplex Printing
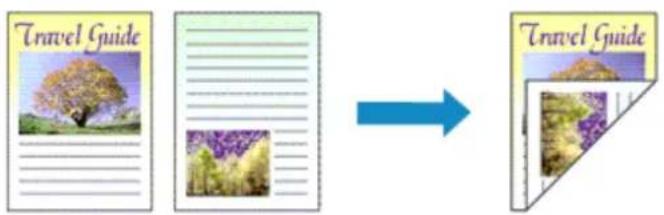
text_image
Travel Guide Travel GuideThe procedure for printing data on both sides of a sheet of paper is as follows: You can also set duplex printing in Additional Features on the Quick Setup tab.
Performing Automatic Duplex Printing
You can perform the duplex printing without having to turn over the paper.
-
Open the printer driver setup window
-
Set automatic duplex printing
Check the Duplex Printing check box on the Page Setup tab and confirm that Automatic is checked.
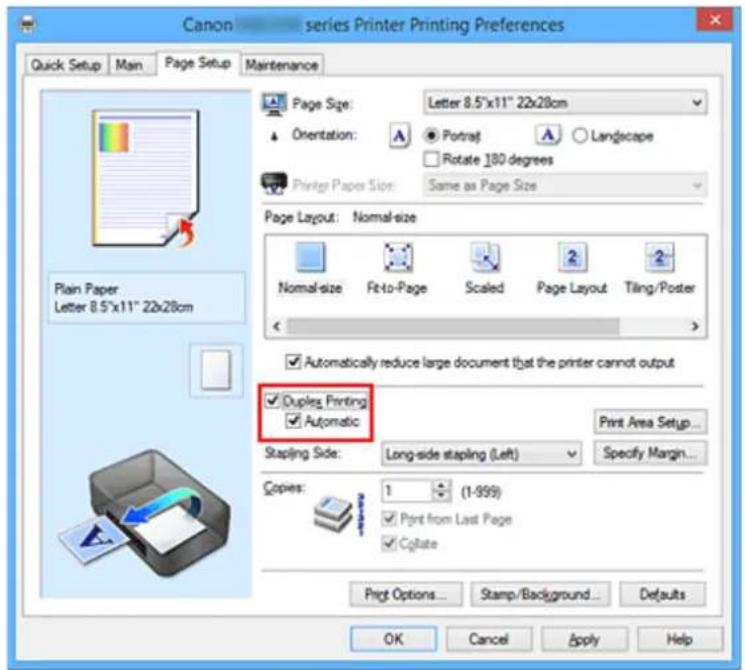
text_image
Canon series Printer Printing Preferences Quick Setup Main Page Setup Maintenance Page Size: Letter 8.5"x11" 22x28cm Orientation: ● Portrait ○ Landscape Rotate 180 degrees Printer Paper Size: Same as Page Size Page Layout: Normal-size Normal-size Fit-to-Page Scaled Page Layout Tiling/Poster ✓ Automatically reduce large document that the printer cannot output ✓ Duples Printing ✓ Automatic Print Area Setup... Stapling Side: Long-side stapling (Left) Specify Margin... Copies: 1 (1-999) ✓ Print from Last Page ✓ Copyrate Print Options... Stamp/Background... Defaults OK Cancel Apply Help- Select the layout
Select Normal-size, Fit-to-Page, Scaled, or Page Layout from the Page Layout list.
- Set the print area
When you perform duplex printing, the print area of the document becomes slightly narrower than usual and the document may not fit on one page.
Click Print Area Setup..., select one of the following process methods, and then click OK.
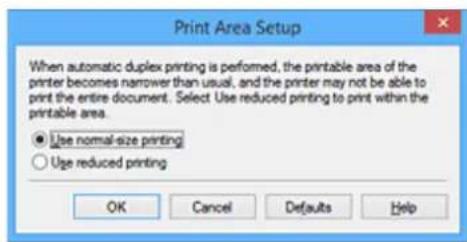
text_image
Print Area Setup When automatic duplex printing is performed, the printable area of the printer becomes narrower than usual, and the printer may not be able to print the entire document. Select Use reduced printing to print within the printable area. ● Use normal-size printing ○ Use reduced printing OK Cancel Defaults HelpUse normal-size printing
Print without reducing the page.
Use reduced printing
Reduce the page slightly during printing.
5. Specify the side to be stapled
The best Stapling Side is selected automatically from the Orientation and Page Layout settings. To change the setting, select another stapling side from the list.
6. Set the margin width
If necessary, click Specify Margin... and set the margin width, and then click OK.
7. Complete the setup
Click OK on the Page Setup tab.
When you execute print, duplex printing will be started.
Performing Duplex Printing Manually
You can perform the duplex printing manually.
-
Open the printer driver setup window
-
Set duplex printing
Check the Duplex Printing check box and uncheck the Automatic check box on the Page Setup tab.
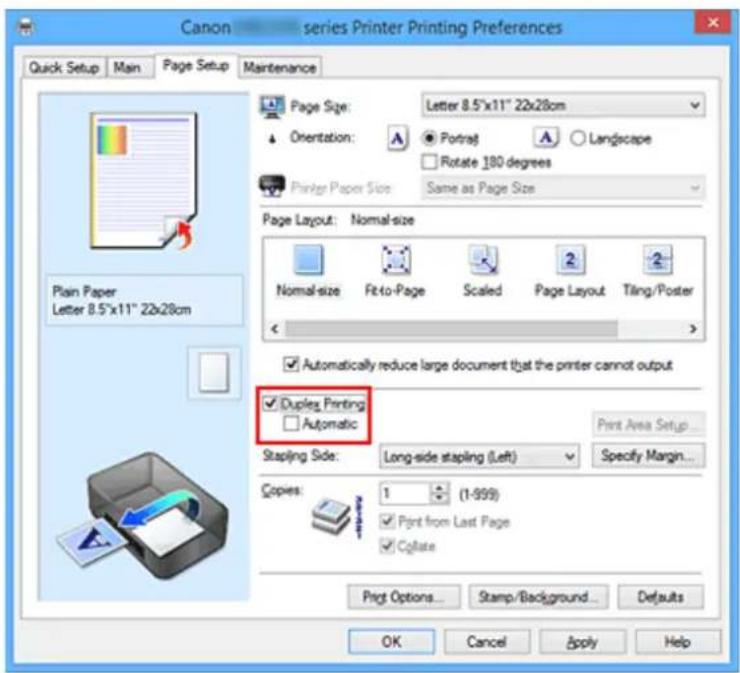
text_image
Canon series Printer Printing Preferences Quick Setup Main Page Setup Maintenance Page Size: Letter 8.5"x11" 22x28cm Orientation: ● Portrait ○ Landscape □ Rotate 180 degrees Printer Paper Size Same as Page Size Page Layout: Normal-size Normal-size Fit-to-Page Scaled Page Layout Tiling/Poster ✓ Automatically reduce large document that the printer cannot output ✓ Duplex Printing □ Automatic Print Area Setup... Stapling Side: Long-side stapling (Left) Specify Margin... Copies: 1 (1-999) ✓ Print from Last Page ✓ Cylate Print Options... Stamp/Background...Defaults OK Cancel Apply Help3. Select the layout
Select Normal-size, Fit-to-Page, Scaled, or Page Layout from the Page Layout list.
4. Specify the side to be stapled
The best Stapling Side is selected automatically from the Orientation and Page Layout settings. To change the setting, select another stapling side from the list.
5. Set the margin width
If necessary, click Specify Margin... and set the margin width, and then click OK.
6. Complete the setup
Click OK on the Page Setup tab.
When you execute print, the document is first printed on one side of a sheet of paper. After one side is printed, reload the paper correctly according to the message.
Then click Start Printing to print the opposite side.
Important
- When a media type other than Plain Paper is selected from the Media Type list on the Main tab, Duplex Printing appears grayed out and is unavailable.
- When Tiling/Poster, or Booklet is selected from the Page Layout list, Duplex Printing and Stapling Side appear grayed out and are unavailable.
- Duplex Printing can be performed only when one of the following paper sizes is selected from Page Size on the Page Setup tab.
• Letter 8.5"x11" 22x28cm, A4
- After printing the front page, there is an ink drying wait time before starting to print the back page (Operation stops temporarily). Do not touch the paper during this time. You can change the ink drying wait time at Custom Settings on the Maintenance tab.
Related Topic
→ Changing the Printer Operation Mode
Stamp/Background Printing
Stamp or Background may be unavailable when certain printer drivers or operating environments are used.
The Stamp function allows you to print a stamp text or a bitmap over or behind document data. It also allows you to print date, time and user name. The Background function allows you to print a light illustration behind the document data.
The procedure for performing stamp/background printing is as follows:
Printing a Stamp
"CONFIDENTIAL," "IMPORTANT," and other stamps that are used often in companies are pre-registered.
- Open the printer driver setup window
- Click Stamp/Background... (Stamp...) on the Page Setup tab

text_image
Canon series Printer Printing Preferences Quick Setup Main Page Setup Maintenance Page Size: Letter 8.5"x11" 22x28cm Orientation: ● Portrait ○ Landscape □ Rotate 180 degrees Printer Paper Size: Same as Page Size Page Layout: Normal-size Normal-size Fit-to-Page Scaled Page Layout Tiling/Poster ✓ Automatically reduce large document that the printer cannot output □ Duplex Printing ✓ Automatic Print Area Setup Stapling Side: Long-side stapling (Left) Specify Margin... Copies: 1 (1-999) ✓ Print from Last Page ✓ Cqlate Print Options... Stamp/Background... Defaults OK Cancel Apply HelpThe Stamp/Background (Stamp) dialog box opens.
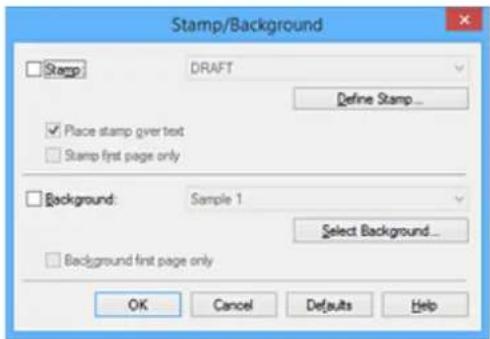
text_image
Stamp/Background Stamp DRAFT Define Stamp... Place stamp gver text Stamp first page only Background: Sample 1 Select Background... Background first page only OK Cancel Defaults Help
Note
- With the XPS printer driver, the Stamp/Background... button has become the Stamp... button and only the stamp function can be used.
3. Select a stamp
Check the Stamp check box, and select the stamp to be used from the list.
The current settings are displayed in the settings preview on the left side of the Page Setup tab.
4. Set the stamp details
If necessary, specify the following settings, and then click OK.
Define Stamp... button
To change the stamp text, bitmap, or position, click this.
Place stamp over text
To print the stamp on the front of the document, check this check box.
Note
- The stamp is given priority because the stamp is printed over the document data in the sections where the stamp and the document data overlap. When this check box is unchecked, the stamp is printed behind the document data and may be hidden in the overlapping sections depending on the application software used.
- Place stamp over text cannot be used when the XPS printer driver is used. When the XPS printer driver is used, the stamp is normally printed in the foreground of the document.
Print semitransparent stamp
Check this check box to print a semi-transparent stamp on the document.
This function is available only when the XPS printer driver is used.
Stamp first page only
To print the stamp only on the first page, check this check box.
5. Complete the setup
Click OK on the Page Setup tab.
When you execute print, the data is printed with the specified stamp.
Printing a Background
Two bitmap files are pre-registered as samples.
- Open the printer driver setup window
-
Click Stamp/Background... on the Page Setup tab
The Stamp/Background dialog box opens. -
Select the background
Check the Background check box, and select the background to be used from the list.
The current settings are displayed in the settings preview on the left side of the Page Setup tab.
4. Set the background details
If necessary, complete the following settings, and then click OK.
Select Background... button
To use another background or change the layout or density of a background, click this.
Background first page only
To print the background only on the first page, check this check box.
5. Complete the setup
Click OK on the Page Setup tab.
When you execute print, the data is printed with the specified background.

Note
- The stamp and background are not printed on blank sheets inserted with the Insert blank page function of booklet printing.
Related Topics
→ Registering a Stamp
Registering Image Data to be Used as a Background
Registering a Stamp
This feature may be unavailable when certain printer drivers or operating environments are used.
You can create and register a new stamp. You can also change and re-register some of the settings of an existing stamp. Unnecessary stamps can be deleted at any time.
The procedure for registering a new stamp is as follows:
Registering a New Stamp
- Open the printer driver setup window
- Click Stamp/Background... (Stamp...) on the Page Setup tab
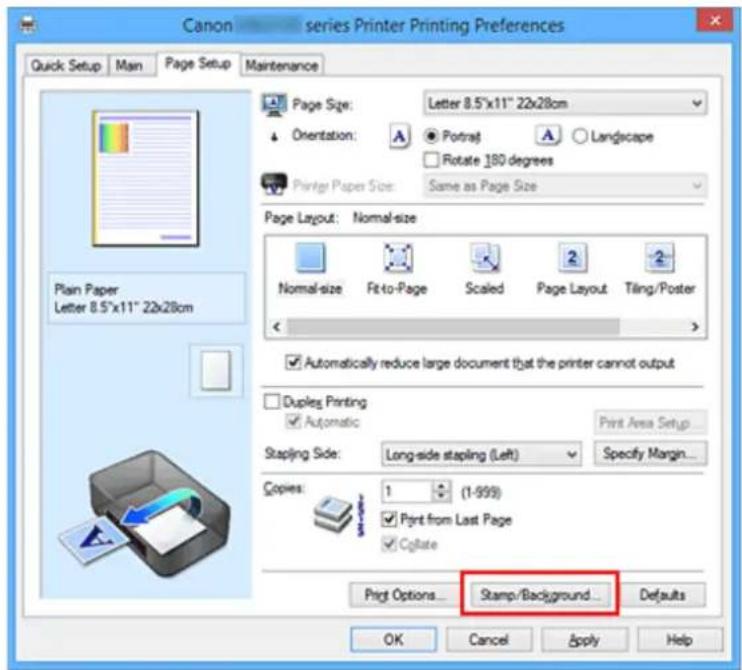
text_image
Canon series Printer Printing Preferences Quick Setup Main Page Setup Maintenance Page Size: Letter 8.5"x11" 22x28cm Orientation: ● Potraj A Landscape Rotate 180 degrees Printer Paper Size: Same as Page Size Page Layout: Normal-size Normal-size Fit-to-Page Scaled Page Layout Tiling/Poster ✓ Automatically reduce large document that the printer cannot output Duplex Printing ✓ Automatic Print Area Setup Stapling Side: Long-side stapling (Left) Specify Margin... Copies: 1 (1-999) ✓ Print from Last Page ✓ Cylate Print Options... Stamp/Background... Defaults OK Cancel Apply HelpThe Stamp/Background (Stamp) dialog box opens.

text_image
Stamp/Background Stamp: DRAFT Define Stamp... Place stamp gver text Stamp first page only Background: Sample 1 Select Background... Background first page only OK Cancel Defaults HelpNote
- With the XPS printer driver, the Stamp/Background... button has become the Stamp... button and only the stamp function can be used.
3. Click Define Stamp...
The Stamp Settings dialog box opens.
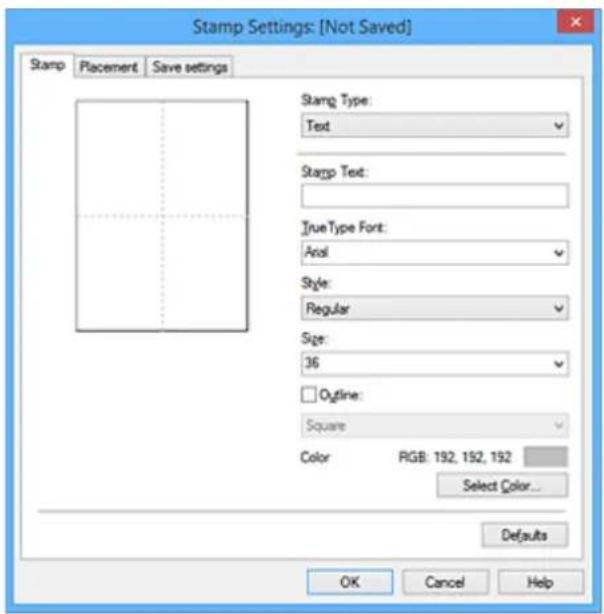
text_image
Stamp Settings: [Not Saved] Stamp Placement Save settings Stamp Type: Text Stamp Text: True Type Font: Anal Style: Regular Size: 36 Outline: Square Color RGB: 192, 152, 192 Select Color... Defaults OK Cancel Help4. Configure the stamp while viewing the preview window
- Stamp tab
Select Text, Bitmap, or Date/Time/User Name that matches your purpose for Stamp Type.
- For Text registration, the characters must already be entered in Stamp Text. If necessary, change the TrueType Font, Style, Size, and Outline settings. You can select the color of the stamp by clicking Select Color....
- For Bitmap, click Select File... and select the bitmap file (.bmp) to be used. If necessary, change the settings of the Size and Transparent white area.
- For Date/Time/User Name, the creation date/time and user name of the printed object are displayed in Stamp Text. If necessary, change the settings of TrueType Font, Style, Size, and Outline. You can select the color of the stamp by clicking Select Color....
Important
- Stamp Text appears grayed out and is unavailable when Date/Time/User Name is selected.
- Placement tab
Select the stamp position from the Position list. You can also select Custom from the Position list and specify coordinates for X-Position and Y-Position.
You can also change the stamp position by dragging the stamp in the preview window.
To change the stamp position angle, type a value in the Orientation box directly.
Important
- Orientation cannot be changed when Bitmap is selected for Stamp Type on the Stamp tab.
5. Save the stamp
Click the Save settings tab and enter a title in the Title box, and then click Save.
Click OK when the confirmation message appears.
Note
- Spaces, tabs, and returns cannot be entered at the beginning or end of a title.
6. Complete the setup
Click OK. The Stamp/Background (Stamp) dialog box opens again.
The registered title appears in the Stamp list.
Changing and Registering Some of Stamp Settings
- Select the stamp for which the settings are to be changed
Select the Stamp check box in the Stamp/Background (Stamp) dialog box. Then from the list, select the title of the stamp to be changed.
- Click Define Stamp...
The Stamp Settings dialog box opens.
-
Configure the stamp while viewing the preview window
-
Overwrite save the stamp
Click Save overwrite on the Save settings tab.
When you want to save the stamp with a different title, type a new title in the Title box and click Save.
Click OK when the confirmation message appears.
- Complete the setup
Click OK. The Stamp/Background (Stamp) dialog box opens again.
The registered title appears in the Stamp list.
Deleting an Unnecessary Stamp
- Click Define Stamp... in the Stamp/Background (Stamp) dialog box
The Stamp Settings dialog box opens.
- Select the stamp to be deleted
Select the title of the stamp you want to delete from the Stamps list on the Save settings tab. Then click Delete.
Click OK when the confirmation message appears.
- Complete the setup
Click OK. The Stamp/Background (Stamp) dialog box opens again.
Registering Image Data to be Used as a Background
This feature may be unavailable when certain printer drivers or operating environments are used.
You can select a bitmap file (.bmp) and register it as a new background. You can also change and register some of the settings of an existing background. An unnecessary background can be deleted.
The procedure for registering image data to be used as a background is as follows:
Registering New Background
- Open the printer driver setup window
- Click Stamp/Background... on the Page Setup tab
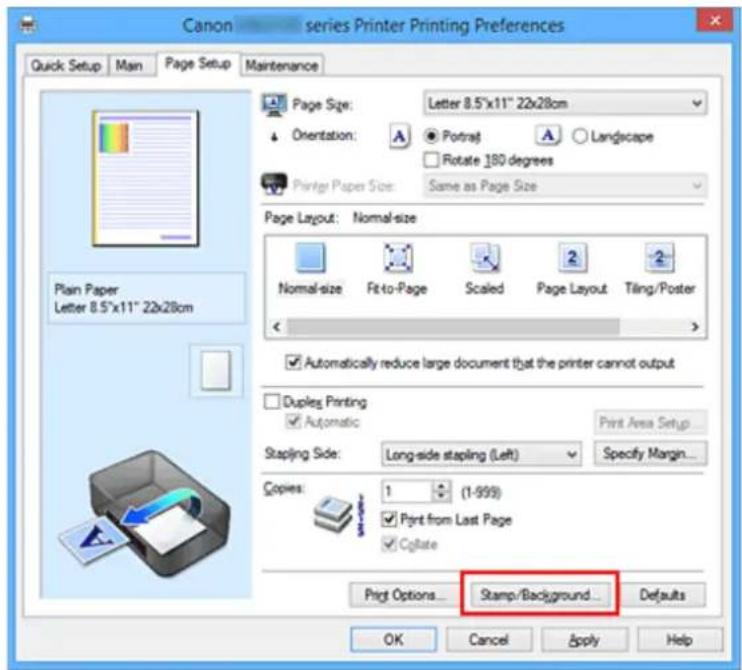
text_image
Canon series Printer Printing Preferences Quick Setup Main Page Setup Maintenance Page Size: Letter 8.5"x11" 22x28cm Orientation: ● Potraj A Landscape Rotate 180 degrees Printer Paper Size: Same as Page Size Page Layout: Normal-size Normal-size Fit-to-Page Scaled Page Layout Tiling/Poster ✓ Automatically reduce large document that the printer cannot output Duplex Printing ✓ Automatic Print Area Setup Stapling Side: Long-side stapling (Left) Specify Margin... Copies: 1 (1-999) ✓ Print from Last Page ✓ Cylate Print Options... Stamp/Background... Defaults OK Cancel Apply HelpThe Stamp/Background dialog box opens.
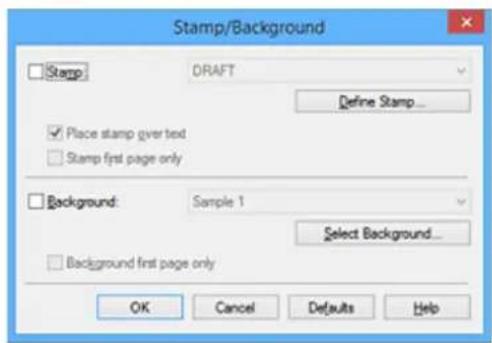
text_image
Stamp/Background Stamp: DRAFT Define Stamp... Place stamp gver text Stamp first page only Background: Sample 1 Select Background... Background first page only OK Cancel Defaults HelpNote
- With the XPS printer driver, the Stamp/Background... button has become the Stamp... button and Background cannot be used.
3. Click Select Background...
The Background Settings dialog box opens.
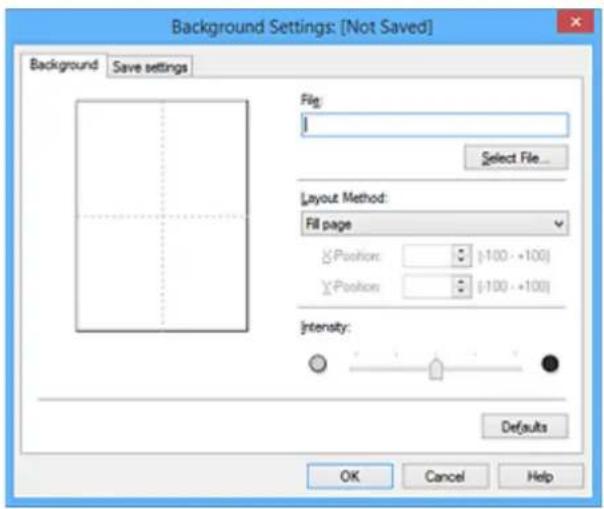
text_image
Background Settings: [Not Saved] Background Save settings File: 1 Select File... Layout Method: Fill page Position: [-100 - +100] Position: [-100 - +100] Intensity: Defaults OK Cancel Help4. Select the image data to be registered to the background
Click Select File.... Select the target bitmap file (.bmp), and then click Open.
5. Specify the following settings while viewing the preview window
Layout Method
Select how the background image data is to be placed.
When Custom is selected, you can set coordinates for X-Position and Y-Position.
You can also change the background position by dragging the image in the preview window.
Intensity
Set the intensity of the background image data with the Intensity slider. Moving the slider to the right darkens the background, and moving the slider to the left lightens the background. To print the background at the original bitmap intensity, move the slider to the rightmost position.
6. Save the background
Click the Save settings tab and enter a title in the Title box, and then click Save.
Click OK when the confirmation message appears.

Note
- Spaces, tabs, and returns cannot be entered at the beginning or end of a title.
7. Complete the setup
Click OK, then it returns to Stamp/Background dialog box.
The registered title appears in the Background list.
Changing and Registering Some Background Settings
1. Select the background for which the settings are to be changed
Select the Background check box in the Stamp/Background dialog box. Then from the list, select the title of the background you want to change.
- Click Select Background...
The Background Settings dialog box opens.
-
Specify each item on the Background tab while viewing the preview window
-
Save the background
Click Save overwrite on the Save settings tab. When you want to save the background with a different title, enter a new title in the Title box and click Save.
Click OK when the confirmation message appears.
- Complete the setup
Click OK, then it returns to Stamp/Background dialog box.
The registered title appears in the Background list.
Deleting an Unnecessary Background
- Click Select Background... in the Stamp/Background dialog box
The Background Settings dialog box opens.
- Select the background to be deleted
Select the title of the background you want to delete from the Backgrounds list on the Save settings tab, and then click Delete.
Click OK when the confirmation message appears.
- Complete the setup
Click OK, then it returns to Stamp/Background dialog box.
Setting Up Envelope Printing
The procedure for performing envelope printing is as follows:
- Load envelope on the printer
-
Open the printer driver setup window
-
Select the media type
Select Envelope from Commonly Used Settings on the Quick Setup tab.
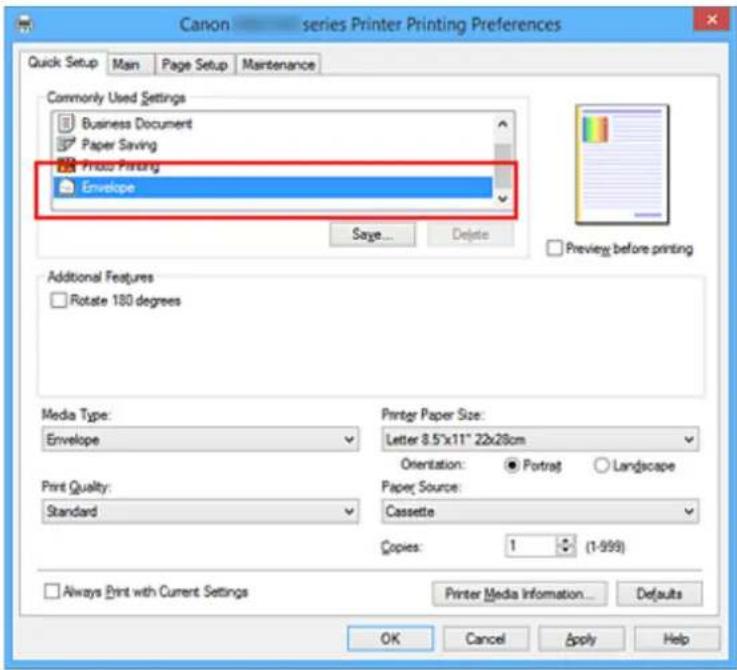
text_image
Canon series Printer Printing Preferences Quick Setup Main Page Setup Maintenance Commonly Used Settings Business Document Paper Saving Print Copy Envelope Sage... Delete Preview before printing Additional Features Rotate 180 degrees Media Type: Envelope Print Paper Size: Letter 8.5"x11" 22x28cm Orientation: ● Portrait ○ Landscape Paper Source: Cassette Print Quality: Standard Copies: 1 (1-999) Always Print with Current Settings Printer Media Information... OK Cancel Apply Help Printer Media Information...- Select the paper size
When the Envelope Size Setting dialog box is displayed, select Envelope Com 10, Envelope DL, Yougata 4 4.13"x9.25", Yougata 6 3.86"x7.48", Envelope C5, or Envelope Monarch 3.88"x7.5" 98.4x190.5mm and then click OK.
- Set the orientation
To print the addressee horizontally, select Landscape for Orientation.
Note
- If Yougata 4 4.13"x9.25", Yougata 6 3.86"x7.48", Envelope Com 10, Envelope DL, Envelope C5, or Envelope Monarch 3.88"x7.5" 98.4x190.5mm is selected for Printer Paper Size, the
printer rotates the paper 90 degrees to the left to print, regardless of the Rotate 90 degrees left when orientation is [Landscape] setting for Custom Settings on the Maintenance tab.
6. Select the print quality
Select High or Standard that matches your purpose for Print Quality.
7. Complete the setup
Click OK.
When you execute print, the information is printed on the envelope.

Important
- When you execute envelope printing, guide messages are displayed.
To hide the guide messages, check the Do not show this message again check box.
To show the guide again, click the View Printer Status button on the Maintenance tab, and start the Canon IJ Status Monitor.
Then click Envelope Printing from Display Guide Message of the Option menu to enable the setting.

Note
- If the paper settings on the printer driver differ from the cassette paper information registered on the printer, an error may occur. For instructions on what to do if an error occurs, see "Paper Settings."
To check the current printer settings or to apply the printer settings to the printer driver, click Printer Media Information... from the Quick Setup tab, and specify the settings in the dialog box that appears.
For details about the cassette paper information to be registered on the printer, see the following:
• Paper Settings on the Printer Driver and the Printer (Media Type)
• Paper Settings on the Printer Driver and the Printer (Paper Size)
Printing on Postcards
This section describes the procedure for postcard printing.
- Load postcard on the printer
-
Open the printer driver setup window
-
Select commonly used settings
Display the Quick Setup tab, and for Commonly Used Settings, select Standard.
- Select the media type
For Media Type, select Ink Jet Hagaki (A), Ink Jet Hagaki, Hagaki K (A), Hagaki K, Hagaki (A), or Hagaki.
Important
- This printer cannot print on postcards that have photos or stickers attached.
- When printing on each side of a postcard separately, you will get cleaner printing if you print the message side first and then print the address side.
- The paper settings on the printer driver are different, depending on whether you are printing on the address side or the message side.
To check the current printer settings or to apply the printer settings to the printer driver, click Printer Media Information... from the Quick Setup tab, and specify the settings in the dialog box that appears.
For details about the cassette paper information to be registered to the printer driver and on the printer, see the following:
• Paper Settings on the Printer Driver and the Printer (Media Type)
• Paper Settings on the Printer Driver and the Printer (Paper Size)
- Select the paper size
For Printer Paper Size, select Hagaki 100x148mm or Hagaki 2 200x148mm.
Important
- Return postcards can be used only when you print them from the computer.
- When printing a return postcard, always set the paper size to Hagaki 2 200x148mm from your application software or the printer driver.
-
Do not fold the return postcard. If a crease is formed, the printer will not be able to feed the postcard properly, and this condition will cause line shifts or a paper jam.
-
Set the print orientation
To print the address horizontally, set Orientation to Landscape.
- Select the print quality
For Print Quality, select High or Standard, according to your purpose.
8. Complete the setup
Click OK.
When you execute printing, the data will be printed onto the postcard.
Important
- When you execute postcard printing, a guide message is displayed.
When the guide message is displayed, select Do not show this message again if you do not want any guide messages to be displayed.
To display guide messages again, open the Maintenance tab and click View Printer Status to start the Canon IJ Status Monitor.
On the Option menu, choose Display Guide Message and click Hagaki Printing to enable the setting. - When printing on media other than postcards, load the media according to usage method of that media, and click Start Printing.
Displaying the Print Results before Printing
If you are using the XPS printer driver, replace "Canon IJ Preview" with "Canon IJ XPS Preview" when reading this information.
You can display and check the print result before printing.
The procedure for displaying the print result before printing is as follows:
You can also set the print results display on the Quick Setup tab.
- Open the printer driver setup window
- Set the preview
Check the Preview before printing check box on the Main tab.
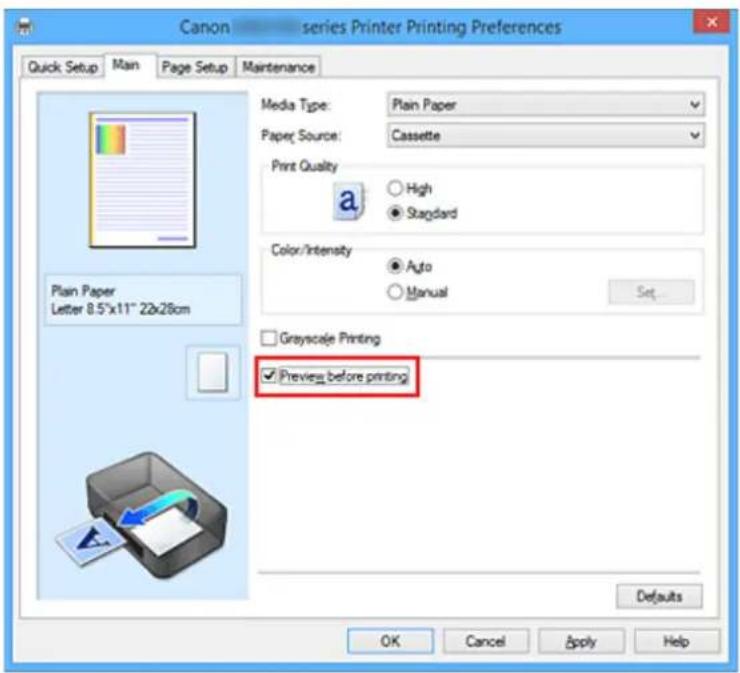
text_image
Canon series Printer Printing Preferences Quick Setup Main Page Setup Maintenance Media Type: Plain Paper Paper Source: Cassette Print Quality High Standard Color/Intensity Auto Manual Set... Plain Paper Letter 8.5"x11" 22x28cm Grayscale Printing Preview before printing Defaults OK Cancel Apply Help- Complete the setup
Click OK.
When you execute print, the Canon IJ Preview opens and displays the print results.

Important
- In the Manual Color Adjustment dialog box, the Color Adjustment tab contains the Print a pattern for color adjustment check box. When this check box is selected, the Preview before printing appears grayed out and is unavailable.
Related Topic
Canon IJ Preview
Setting Paper Dimensions (Custom Size)
You can specify the height and width of paper when its size cannot be selected from the Page Size. Such a paper size is called "custom size."
The procedure for specifying a custom size is as follows:
You can also set a custom size in Printer Paper Size on the Quick Setup tab.
- Open the printer driver setup window
- Select the paper size
Select Custom... for Page Size on the Page Setup tab.
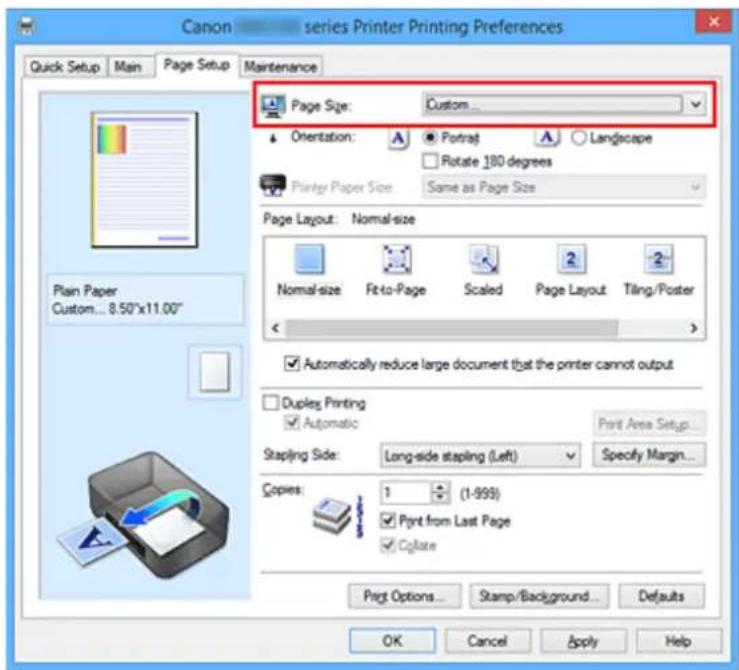
text_image
Canon series Printer Printing Preferences Quick Setup Main Page Setup Maintenance Page Size: Custom_ Orientation: ● Portrait ○ Landscape Rotate 180 degrees Printer Paper Size Same as Page Size Page Layout: Normal-size Normal-size Fit-to-Page Scaled Page Layout Tiling/Poster ✓ Automatically reduce large document that the printer cannot output Duplex Printing ✓ Automatic Print Area Setup... Stapling Side: Long-side stapling (Left) Specify Margin... Copies: 1 (1-993) ✓ Print from Last Page ✓ Cylate Print Options... Stamp/Background...Defaults OK Cancel Apply HelpThe Custom Paper Size dialog box opens.

text_image
Custom Paper Size Units: ○ cm ● inch Paper Size Width: 8.50 inches (3.50-16.54) Height: 11.00 inches (5.00-23.39) OK Cancel Help- Set the custom paper size
Specify Units, and enter the Width and Height of the paper to be used. Then click OK.
- Complete the setup
Click OK on the Page Setup tab.
When you execute print, the data is printed with the specified paper size.
Important
- If the application software that created the document has a function for specifying height and width values, use the application software to set the values. If the application software does not have such a function or if the document does not print correctly, perform the above procedure from the printer driver to set the values.
- Printing may be disabled depending on the size of the specified user-defined media. For information about printable sizes for user-defined media, see "Supported Media Types."
Note
- If the paper settings on the printer driver differ from the cassette paper information registered on the printer, an error may occur. For instructions on what to do if an error occurs, see "Paper Settings." To check the current printer settings or to apply the printer settings to the printer driver, click Printer Media Information... from the Quick Setup tab, and specify the settings in the dialog box that appears. For details about the cassette paper information to be registered on the printer, see the following:
• Paper Settings on the Printer Driver and the Printer (Media Type)
• Paper Settings on the Printer Driver and the Printer (Paper Size)
Editing the Print Document or Reprinting from the Print History
This function is unavailable when the standard IJ printer driver is used.
In the Canon IJ XPS preview window, you can edit the print document or retrieve the document print history to print the document.
The procedure for using the Canon IJ XPS Preview is as follows:
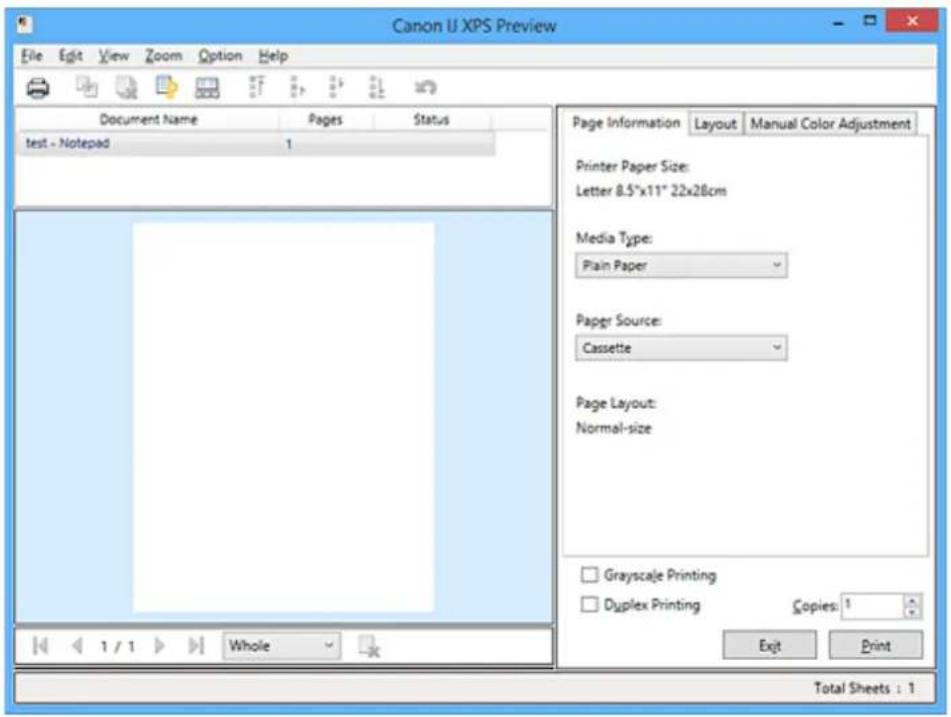
text_image
Canon U XPS Preview File Edit View Zoom Option Help Document Name Pages Status test - Notepad 1 Page Information Layout Manual Color Adjustment Printer Paper Size: Letter 8.5"x11" 22x28cm Media Type: Plain Paper Paper Source: Cassette Page Layout: Normal-size Grayscale Printing Duplex Printing Copies: 1 Exit Print Total Sheets : 1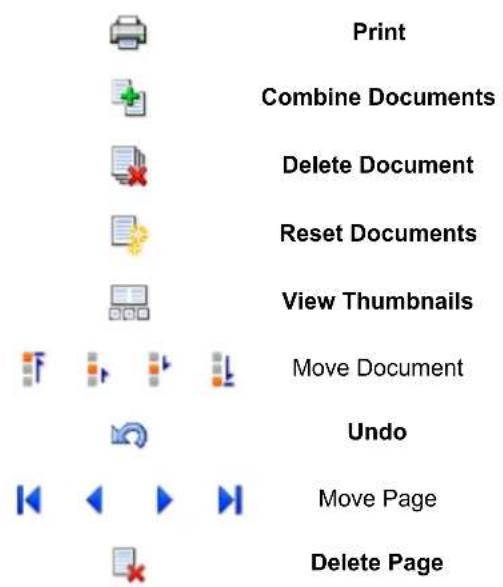
text_image
Print Combine Documents Delete Document Reset Documents View Thumbnails Move Document Undo Move Page Delete PageNote
- By clicking View Thumbnails, you can display or hide thumbnails of the print documents selected in the Document Name list.
- Clicking Undo reverses the change that just performed.
Editing and Printing a Print Document
When printing multiple documents or pages, you can combine documents, change the print sequence of the documents or pages, or delete documents or pages.
-
Open the printer driver setup window
-
Set the preview
Check the Preview before printing check box on the Main tab.
- Complete the setup
Click OK.
The Canon IJ XPS Preview will start and the print result will be displayed before printing.
- Editing print documents and print pages
• Combining print documents
You can combine multiple print documents to form a single document. By combining print documents, you can prevent blank pages from being inserted when you execute duplex printing or page layout printing.
From the Document Name list, select the documents to be combined. On the Edit menu, select Combine Documents from Documents to combine the documents in the listed sequence.
To select multiple print documents, hold down the Ctrl key and click the documents to be merged, or hold down the Shift key and press the upper arrow or lower arrow key. You can also click a blank area in the document list and drag the mouse to select multiple documents.
When you combine documents, the documents selected before the combining are deleted from the list and the combined document is added to the list.
- Changing the sequence of print documents or print pages
To change the sequence of the print documents, go to the Document Name list, and select the print document to be moved. Next, on the Edit menu, select Move Document from Documents, and select the appropriate item. You can also click and drag a print document to change the print sequence.
To change the sequence of the print pages, click View Thumbnails from the Option menu, and select the print page to be moved. Next, on the Edit menu, select Move Page from Pages, and select the appropriate item. You can also click and drag a print page to change the print sequence.
- Deleting print documents and print pages
To delete a print document, select the target document from the Document Name list, and on the Edit menu, choose Documents and then Delete Document.
To delete a print page, click View Thumbnails from the Option menu, and select the print page to be deleted. Next, on the Edit menu, select Delete Page from Pages.
- Print page recovery
You can recover pages that were deleted with Delete Page.
To recover pages, select the View Deleted Pages check box from the Option menu, and select
the pages to be recovered from among the displayed thumbnail pages. Then from the Edit menu chose Pages and then Restore Page.
After editing the print documents or print pages, you can change the print settings on the Page Information, Layout and Manual Color Adjustment tabs as necessary.
Important
- To display the multiple documents in the list, open the preview and execute print again.
- To return the print documents to their original condition before they were edited in the preview, on the Edit menu, select Reset Documents from Documents.
- If the documents to be combined have different print settings, a message may be displayed. Check the contents of the displayed message before combining the documents.
- If the documents to be combined have different output paper sizes and duplex printing or page layout printing is to be performed, the printer may not produce the expected print results for certain print pages.
Check the preview before printing. - Depending on the print settings of the print document, some functions may not be available in the Canon IJ XPS preview.
Note
- You can rename Document Name to any name.
5. Executing print
Click Print.
When you execute print, the printer uses the specified settings to print the data.
Reprinting from the Print History
When you click Save Print History on the File menu to enable the setting, the document printed from the preview is saved, and you can reprint the document with the same settings.
1. Displaying the print history
Open the printer driver setup window. Then on the Maintenance tab, select View Print History. The saved print document is displayed in the preview.
Important
- To limit the number of print history registrations, click History Entry Limit on the File menu.
- If the limit on the number of registration is exceeded, the print history registrations are deleted starting from the oldest one.
2. Selecting a print document
From the Document Name list, select the document to be printed.
3. Executing print
Click Print.
Related Topic
→ Displaying the Print Results before Printing
Changing the Print Quality and Correcting Image Data
▶ Printing a Color Document in Monochrome
▶ Specifying Color Correction
▶ Optimal Photo Printing of Image Data
Adjusting Colors with the Printer Driver
▶ Printing with ICC Profiles
Adjusting Color Balance
Adjusting Color Balance Using Sample Patterns (Printer Driver)
Adjusting Brightness
Adjusting Intensity
Adjusting Contrast
Adjusting Intensity/Contrast Using Sample Patterns (Printer Driver)
Printing a Color Document in Monochrome
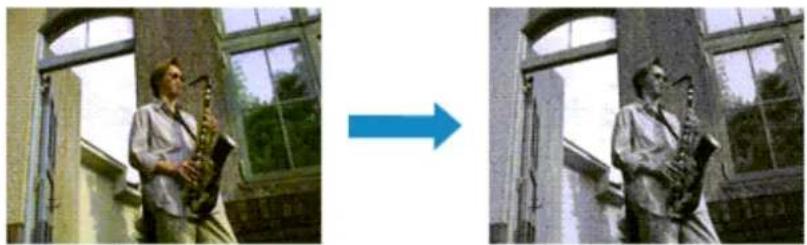
natural_image
Two grayscale photos of a person playing saxophones in front of a building, one with a blue arrow pointing to the right image (no text or symbols visible)The procedure for printing a color document in monochrome is as follows:
You can also set a grayscale printing in Additional Features on the Quick Setup tab.
- Open the printer driver setup window
- Set grayscale printing
Check the Grayscale Printing check box on the Main tab.
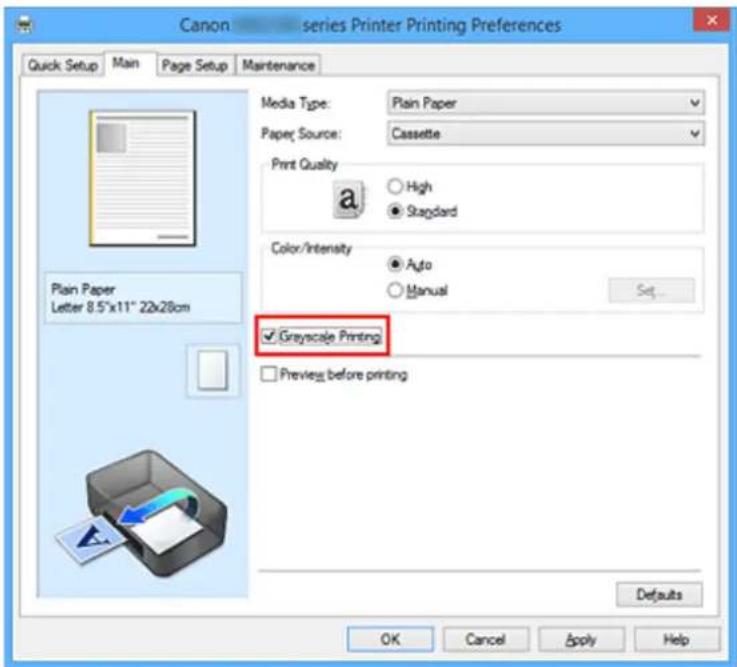
text_image
Canon series Printer Printing Preferences Quick Setup Main Page Setup Maintenance Media Type: Plain Paper Paper Source: Cassette Print Quality High Standard Color/Intensity Auto Manual Gray-scale Printing Preview before printing Set... OK Cancel Apply Help- Complete the setup
Click OK.
When you execute print, the document is converted to grayscale data. It allows you to print the color document in monochrome.

Important
- When the Grayscale Printing check box is checked, the printer driver processes image data as sRGB data. In this case, actual colors printed may differ from those in the original image data. When using the grayscale printing function to print Adobe RGB data, convert the data to sRGB data using an application software.
- During Grayscale Printing, inks other than black ink may be used as well.
Specifying Color Correction
You can specify the color correction method suited to the type of document to be printed.
Normally, the printer driver adjusts the colors by using Canon Digital Photo Color so that data is printed with color tints that most people prefer. This method is suitable for printing sRGB data.
When you want to print by using the color space (sRGB) of the image data effectively, select ICM (ICC Profile Matching). When you want to use an application software to specify a printing ICC profile, select None.
The procedure for specifying color correction is as follows:
You can also set color correction on the Quick Setup tab by choosing Photo Printing under Commonly Used Settings, and then choosing Color/Intensity Manual Adjustment under Additional Features.
- Open the printer driver setup window
- Select the manual color adjustment
On the Main tab, select Manual for Color/Intensity, and click Set....
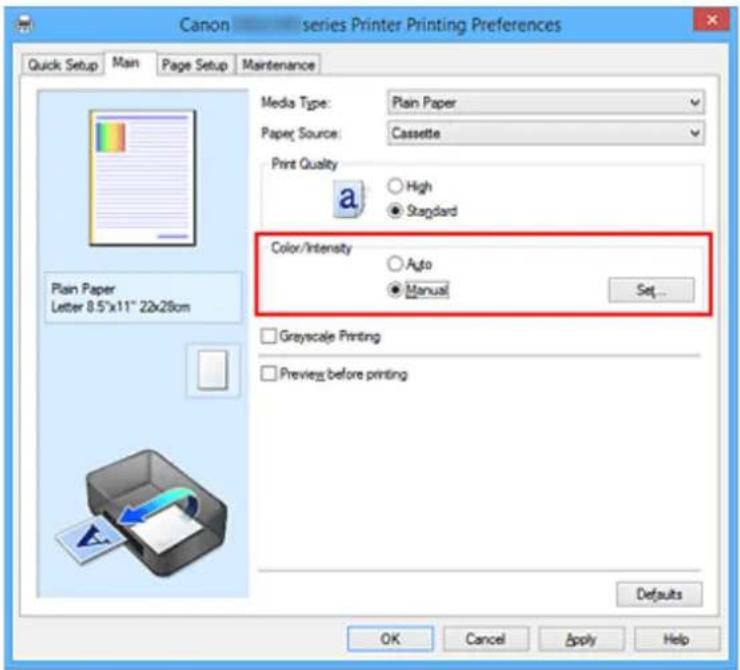
text_image
Canon series Printer Printing Preferences Quick Setup Main Page Setup Maintenance Media Type: Plain Paper Paper Source: Cassette Print Quality High Standard Color/Intensity Auto Manual Set... Plain Paper Letter 8.5"x11" 22x28cm Grayscale Printing Preview before printing Defaults OK Cancel Apply HelpThe Manual Color Adjustment dialog box opens.
- Select color correction
Click Matching tab, select Color Correction setting that matches your purpose from the following, and click OK.
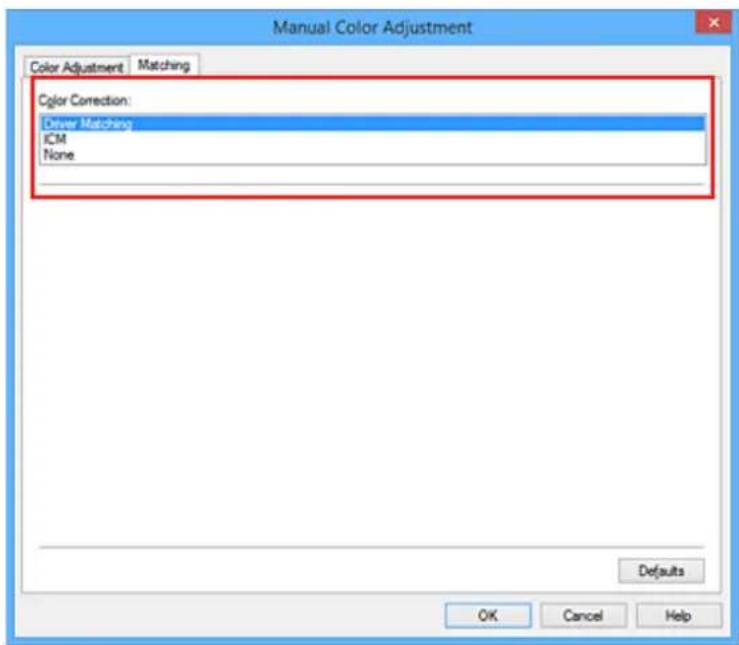
text_image
Manual Color Adjustment Color Adjustment Matching Color Correction: Driver Matching ICM None Defaults OK Cancel HelpDriver Matching
With Canon Digital Photo Color, you can print sRGB data with color tints that most people prefer.
ICM (ICC Profile Matching)
Adjusts the colors by using an ICC profile when printing.
None
The printer driver does not perform color correction. Select this value when you are specifying an individually created printing ICC profile or a printing ICC profile for special Canon paper in an application software to print data.
4. Complete the setup
Click OK on the Main tab.
When you execute print, the document data is printed with the specified color correction.

Important
- When ICM is disabled in the application software, ICM is unavailable for Color Correction and the printer may not be able to print the image data properly.
- When the Grayscale Printing check box on the Main tab is checked, Color Correction appears grayed out and is unavailable.
Related Topics
→ Optimal Photo Printing of Image Data
Adjusting Colors with the Printer Driver
→ Printing with ICC Profiles
Optimal Photo Printing of Image Data
When people print images taken with digital cameras, they sometimes feel that the printed color tones differ from those of actual image or those displayed on the monitor.
To get the print results as close as possible to the desired color tones, you must select a printing method that is best suited to the application software used or to your purpose.
Color Management
Devices such as digital cameras, scanners, monitors, and printers handle color differently. Color management (color matching) is a method that manages device-dependent "colors" as a common color space.
For Windows, a color management system called "ICM" is built into the operating system.
sRGB is one of the common color spaces that is frequently used.
ICC profiles convert device-dependent "colors" into a common color space. By using an ICC profile and carrying out color management, you can draw out the color space of the image data within the color reproduction area that the printer can express.
Selecting a Printing Method Suited to the Image Data
The recommended printing method depends on the color space (sRGB) of the image data or the application software to be used.
There are two typical printing methods.
Check the color space (sRGB) of the image data and the application software to be used, and then select the printing method suited to your purpose.
Adjusting Colors with the Printer Driver
Describes the procedure for printing sRGB data by using the color correction function of the printer driver.
• To print using Canon Digital Photo Color
The printer prints data with color tints that most people prefer, reproducing colors of the original image data and producing three-dimensional effects and high, sharp contrasts.
- To print by directly applying editing and touch-up results of an application software
When printing the data, the printer brings out subtle color difference between dark and light areas, while leaving the darkest and lightest areas intact.
When printing the data, the printer applies fine adjustment results, such as brightness adjustments made with an application software.
Printing with ICC Profiles
Describes the procedure for printing by using the color space of sRGB effectively.
You can print with a common color space by setting up the application software and the printer driver so that the color management matches the input ICC profile of the image data.
The method for setting up the printer driver differs depending on the application software to be used.
Adjusting Colors with the Printer Driver
You can specify the color correction function of the printer driver to print sRGB data with color tints that most people prefer through the use of Canon Digital Photo Color.
When printing from an application software that can identify ICC profiles and allows you to specify them, use a printing ICC profile in the application software, and select settings for color management.
The procedure for adjusting colors with the printer driver is as follows:
- Open the printer driver setup window
- Select the manual color adjustment
On the Main tab, select Manual for Color/Intensity, and click Set....
The Manual Color Adjustment dialog box opens.
- Select color correction
Click Matching tab, and select Driver Matching for Color Correction.
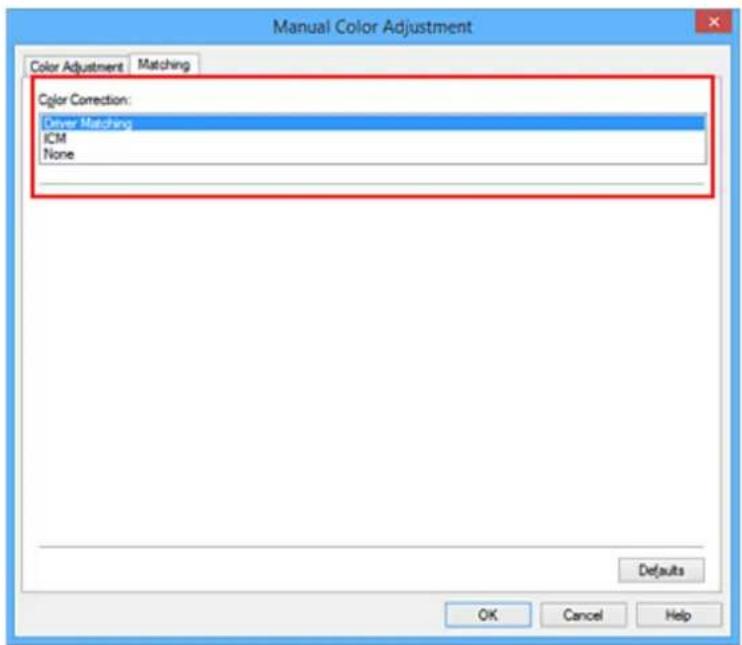
text_image
Manual Color Adjustment Color Adjustment Matching Color Correction: Driver Matching ICM None Defaults OK Cancel Help- Set the other items
If necessary, click Color Adjustment tab, and adjust the color balance (Cyan, Magenta, Yellow) and adjust Brightness, Intensity, and Contrast settings, and then click OK.
- Complete the setup
Click OK on the Main tab.
When you execute print, the printer driver adjusts the colors when printing the data.
Related Topics
→ Specifying Color Correction
Adjusting Color Balance
Adjusting Brightness
→ Adjusting Intensity
Adjusting Contrast
Printing with ICC Profiles
When the image data has a specified input ICC profile, you can print by using the color space (sRGB) of the data effectively.
The printer driver setting procedure varies depending on the application software used to print.
Specify an ICC Profile from the Application Software and Print the Data
When you print the editing and touch-up results of Adobe Photoshop, Canon Digital Photo Professional, or any application software that allows you to specify input and printing ICC profiles, you print by effectively using the color space of the input ICC profile specified in the image data.
To use this printing method, use your application software to select color management items and specify an input ICC profile and a printing ICC profile in the image data.
Even if you print using a printing ICC profile that you created yourself from your application software, be sure to select color management items from your application software.
For instructions, refer to the manual of the application software you are using.
-
Open the printer driver setup window
-
Select the manual color adjustment
On the Main tab, select Manual for Color/Intensity, and click Set....
The Manual Color Adjustment dialog box opens.
- Select color correction
Click Matching tab, and select None for Color Correction.
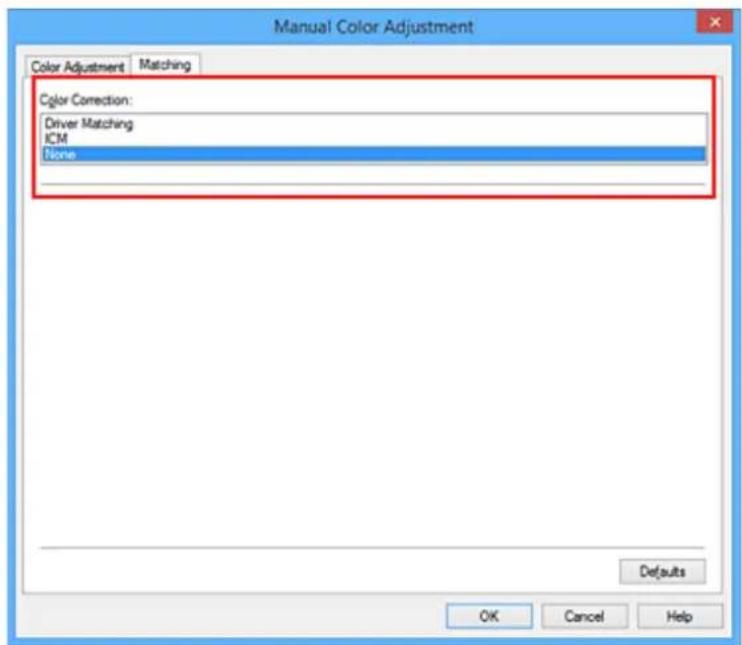
text_image
Manual Color Adjustment Color Adjustment Matching Color Correction: Driver Matching ICM None Defaults OK Cancel Help- Set the other items
If necessary, click Color Adjustment tab, and adjust the color balance (Cyan, Magenta, Yellow) and adjust Brightness, Intensity, and Contrast settings, and then click OK.
- Complete the setup
Click OK on the Main tab.
When you execute print, the printer uses the color space of the image data.
Specify an ICC Profile with the Printer Driver, and then Print
Print from an application software that cannot identify input ICC profiles or does allow you to specify one by using the color space of the input ICC profile (sRGB) found in the data.
-
Open the printer driver setup window
-
Select the manual color adjustment
On the Main tab, select Manual for Color/Intensity, and click Set...
The Manual Color Adjustment dialog box opens.
- Select color correction
Click Matching tab, and select ICM (ICC Profile Matching) for Color Correction.
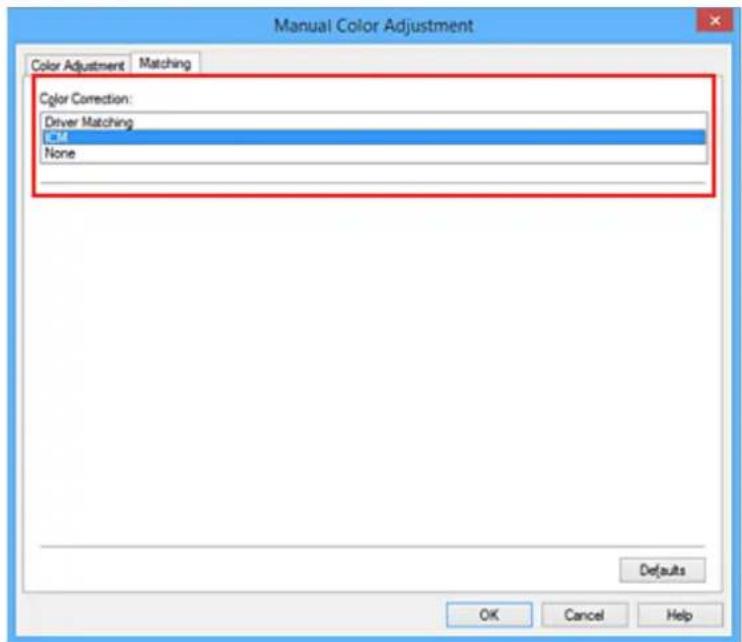
text_image
Manual Color Adjustment Color Adjustment Matching Color Correction: Driver Matching CM None Defaults OK Cancel Help- Set the other items
If necessary, click Color Adjustment tab, and adjust Cyan, Magenta, Yellow, Brightness, Intensity, and Contrast settings, and then click OK.
- Complete the setup
Click OK on the Main tab.
When you execute print, the printer uses the color space of the image data.
Related Topics
→ Specifying Color Correction
Adjusting Color Balance
Adjusting Brightness
→ Adjusting Intensity
Adjusting Contrast
Adjusting Color Balance
You can adjust the color tints when printing.
Since this function adjusts color balance of the output by changing the ink ratios of each color, it changes the total color balance of the document. Use the application software when you want to change the color balance significantly. Use the printer driver only when you want to adjust the color balance slightly.
The following sample shows the case when color balance is used to intensify cyan and to diminish yellow so that the overall colors are more uniform.
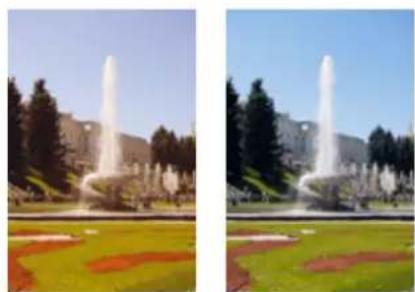
natural_image
Two-panel image showing a fountain in full bloom and a grassy park with red flowers; no text or symbols visible.No adjustment Adjust color balance
The procedure for adjusting color balance is as follows:
You can also set color balance on the Quick Setup tab by choosing Photo Printing under Commonly Used Settings, and then choosing Color/Intensity Manual Adjustment under Additional Features.
- Open the printer driver setup window
- Select the manual color adjustment
On the Main tab, select Manual for Color/Intensity, and click Set....
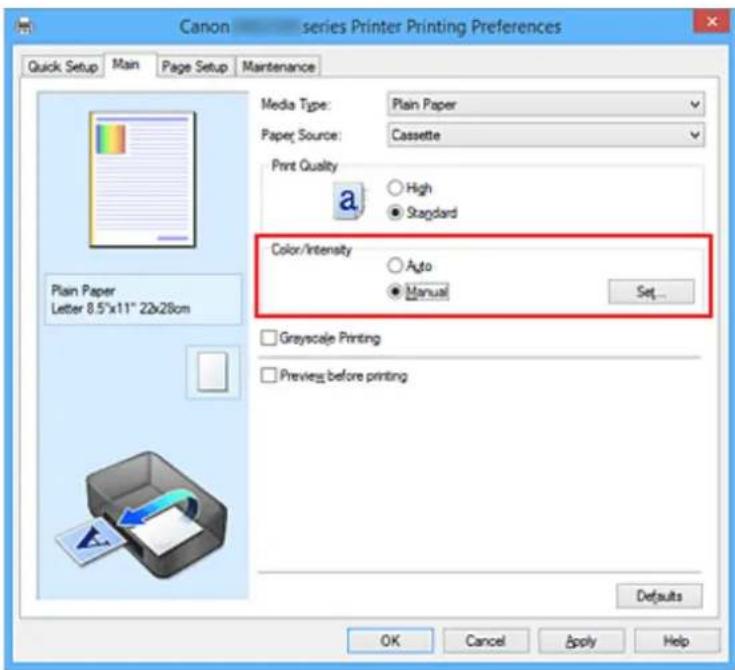
text_image
Canon series Printer Printing Preferences Quick Setup Main Page Setup Maintenance Media Type: Plain Paper Paper Source: Cassette Print Quality High Standard Color/Intensity Auto Manual Set... Plain Paper Letter 8.5"x11" 22x28cm Grayscale Printing Preview before printing Defaults OK Cancel Apply HelpThe Manual Color Adjustment dialog box opens.
3. Adjust color balance
There are individual sliders for Cyan, Magenta, and Yellow. Each color becomes stronger when the corresponding slider is moved to the right, and becomes weaker when the corresponding slider is moved to the left. For example, when cyan becomes weaker, the color red becomes stronger.
You can also directly enter a value linked to the slider. Enter a value in the range from -50 to 50. The current settings are displayed in the settings preview on the left side of the printer driver.
After adjusting each color, click OK.
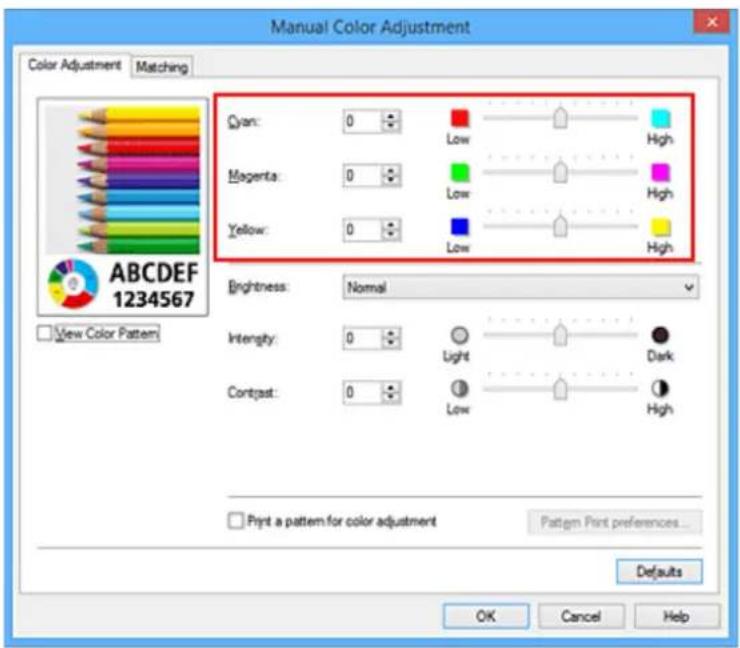
text_image
Manual Color Adjustment Color Adjustment Matching Qyan: 0 Low High Magenta: 0 Low High Yellow: 0 Low High Brightness: Normal Intensity: 0 Light Dark Contrast: 0 Low High Print a pattern for color adjustment Pattern Print preferences... Defaults OK Cancel Help View Color Pattern ABCDEF 12345674. Complete the setup
Click OK on the Main tab.
When you execute print, the document is printed with the adjusted color balance.

Important
- When the Grayscale Printing check box on the Main tab is checked, the color balance (Cyan, Magenta, Yellow) appear grayed out and are unavailable.
Related Topics
→ Specifying Color Correction
Adjusting Color Balance Using Sample Patterns (Printer Driver)
Adjusting Brightness
→ Adjusting Intensity
Adjusting Contrast
Adjusting Intensity/Contrast Using Sample Patterns (Printer Driver)
Adjusting Color Balance Using Sample Patterns (Printer Driver)
You can look at the print results of pattern print and adjust the color balance.
When you change the color balance or intensity/contrast of a document, the pattern print function prints the adjustment results in a list, together with the adjustment values.
Described below is the procedure for adjusting the color balance while looking at the pattern.
-
Open the printer driver setup window
-
Select the manual color adjustment
On the Main tab, select Manual for Color/Intensity, and click Set....
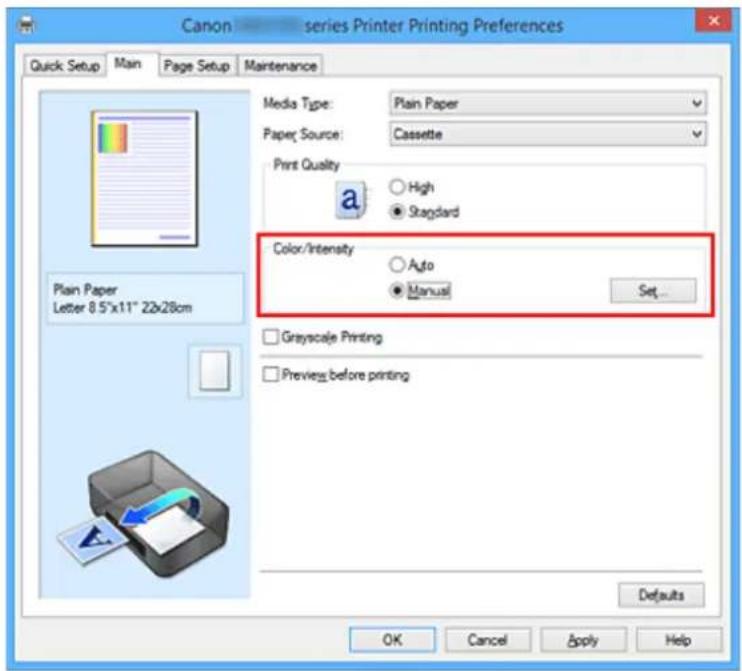
text_image
Canon —— series Printer Printing Preferences Quick Setup Main Page_SetUP Maintenance Media Type: Plain Paper Paper Source: Cassette Print Quality High Standard Color/Intensity Auto Manual Set... Plain Paper Letter 8.5"x11" 22x28cm Grayscale Printing Preview before printing Defaults OK Cancel Apply HelpThe Manual Color Adjustment dialog box opens.
- Selecting pattern print
On the Color Adjustment tab, select the Print a pattern for color adjustment check box, and click Pattern Print preferences....

text_image
Manual Color Adjustment Color Adjustment Matching Qyan: 0 Low High Magenta: 0 Low High Yellow: 0 Low High Brightness: Normal Intensity: 0 Light Dark Contrast: 0 Low High ✓ Print a pattern for color adjustment Pattern Print preferences... Defaults OK Cancel Help ABCDEF 1234567 View Color Pattern4. Setting pattern print
When the Pattern Print dialog box opens, set the following items, and then click OK.
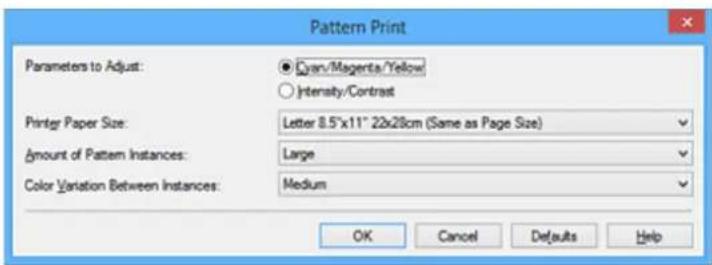
text_image
Pattern Print Parameters to Adjust: ○ Cyan/Magenta/Yellow ○ Intensity/Contrast Printer Paper Size: Letter 8.5"x11" 22x28cm (Same as Page Size) Amount of Pattern Instances: Large Color Variation Between Instances: Medium OK Cancel Defaults HelpParameters to Adjust
Select Cyan/Magenta/Yellow.
Important
- When the Grayscale Printing check box on the Main tab is checked, Cyan/Magenta/Yellow appear grayed out and are unavailable.
Printer Paper Size
Select the paper size to be used for pattern printing.
Note
- Depending on the paper size selected on the Page Setup tab, there may be sizes that cannot be selected.
Amount of Pattern Instances
Select Largest, Large, or Small to set the number of patterns to be printed.
Note
- Largest and Large cannot be selected when certain paper sizes or output paper sizes are selected.
Color Variation Between Instances
Set the amount of color change between neighboring patterns.

Note
• Large is about double the size of Medium, and Small is about half the size of Medium.
5. Checking the print results of pattern print
On the Color Adjustment tab, select OK to close the Manual Color Adjustment dialog box.
On the Main tab, select OK, and then execute printing. The printer then prints a pattern in which the color balance that you set is the center value.
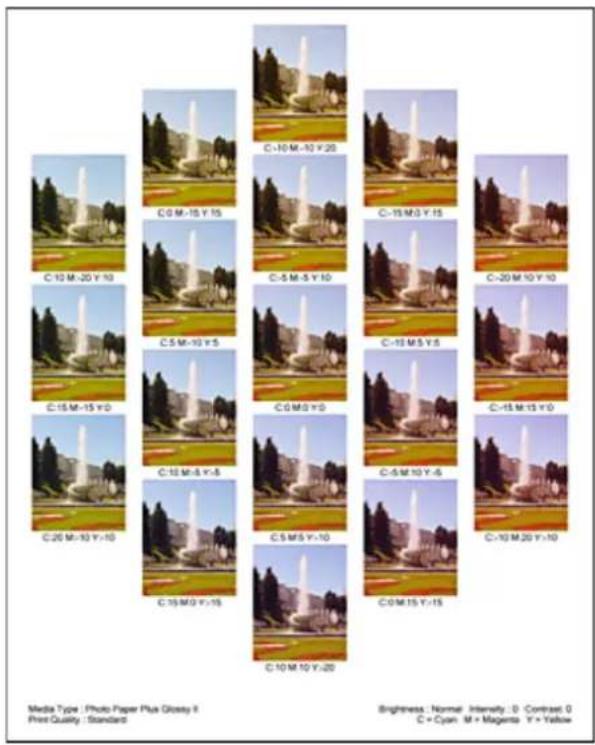
text_image
C-10 M-10 Y-20 C 0 M-15 Y-15 C-5 M-5 Y-10 C-15 M-3 Y-15 C-20 M-10 Y-10 C-15 M-15 Y-0 C 15 M-8 Y-8 C 15 M-3 Y-15 C 15 M-3 Y-10 C 10 M-15 Y-20 Media Type : Photo Paper Plus Glossy II Print Quality : Standard Brightness: Normal Intensity: 0 Contrast: 0 C = Cyan M = Magenta Y = Yellow6. Adjusting the color balance
Look at the print results and select the image that you like best. Then enter the color balance numbers indicated at the bottom of that image into the Cyan, Magenta, and Yellow fields on the Color Adjustment tab.
Clear the Print a pattern for color adjustment check box, and click OK.
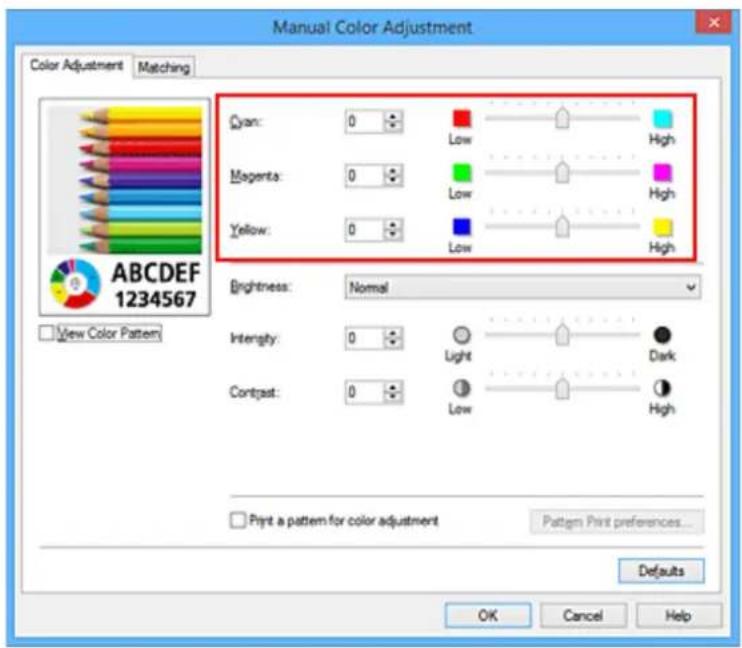
text_image
Manual Color Adjustment Color Adjustment Matching Qyan: 0 Low High Magenta: 0 Low High Yellow: 0 Low High Brightness: Normal Intensity: 0 Light Dark Contrast: 0 Low High Print a pattern for color adjustment Pattern Print preferences... Defaults OK Cancel Help ABCDEF 1234567 View Color PatternNote
- You can also set color balance on the Quick Setup tab by choosing Photo Printing under Commonly Used Settings, and then choosing Color/Intensity Manual Adjustment under Additional Features.
7. Complete the setup
Click OK on the Main tab.
Then when you execute printing, the document is printed with the color balance that was adjusted by the pattern print function.
Important
- When Print a pattern for color adjustment is selected on the Color Adjustment tab, the following items are grayed out and cannot be set:
- Preview before printing on the Main tab
- Stapling Side and Specify Margin... on the Page Setup tab (When Duplex Printing is set, only Stapling Side can be set.)
- When the Print a pattern for color adjustment on the Color Adjustment tab is checked, the Page Layout on the Page Setup tab is set to Normal-size.
- When the Grayscale Printing check box on the Main tab is checked, Cyan, Magenta, and Yellow appear grayed out and are unavailable.
- Depending on your application software, this function may not be available.
Related Topics
Adjusting Color Balance
Adjusting Intensity
Adjusting Contrast
Adjusting Intensity/Contrast Using Sample Patterns (Printer Driver)
Adjusting Brightness
You can change the brightness of the overall image data during printing.
This function does not change pure white or pure black but it changes the brightness of the intermediate colors.
The following sample shows the print result when the brightness setting is changed.

natural_image
Two children wearing matching caps standing outdoors on a grassy field (no text or symbols visible)Light is selected

natural_image
Two young children wearing matching white and black striped shirts standing outdoors on a grassy field with trees in the background (no text or symbols visible)Normal is selected
natural_image
Two children wearing striped caps standing outdoors on a grassy field (no text or symbols visible)Dark is selected
The procedure for adjusting brightness is as follows:
You can also set brightness on the Quick Setup tab by choosing Photo Printing under Commonly Used Settings, and then choosing Color/Intensity Manual Adjustment under Additional Features.
- Open the printer driver setup window
- Select the manual color adjustment
On the Main tab, select Manual for Color/Intensity, and click Set....
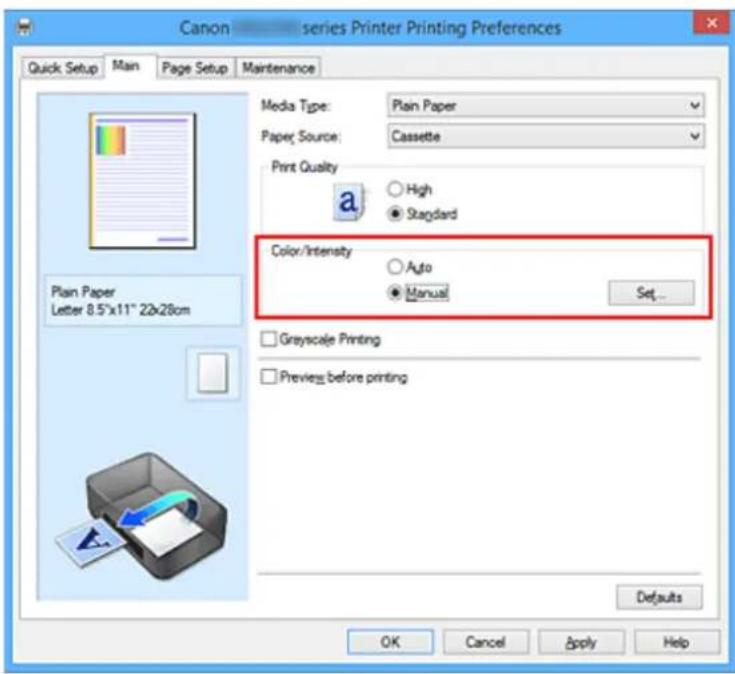
text_image
Canon series Printer Printing Preferences Quick Setup Main Page Setup Maintenance Media Type: Plain Paper Paper Source: Cassette Print Quality a. High ●Standard Color/Intensity ○Auto ●Manual Set... Plain Paper Letter 8.5"x11" 22x28cm Grayscale Printing Preview before printing Defaults OK Cancel Apply HelpThe Manual Color Adjustment dialog box opens.
- Specify the brightness
Select Light, Normal, or Dark for Brightness, and click OK. The current settings are displayed in the settings preview on the left side of the printer driver.
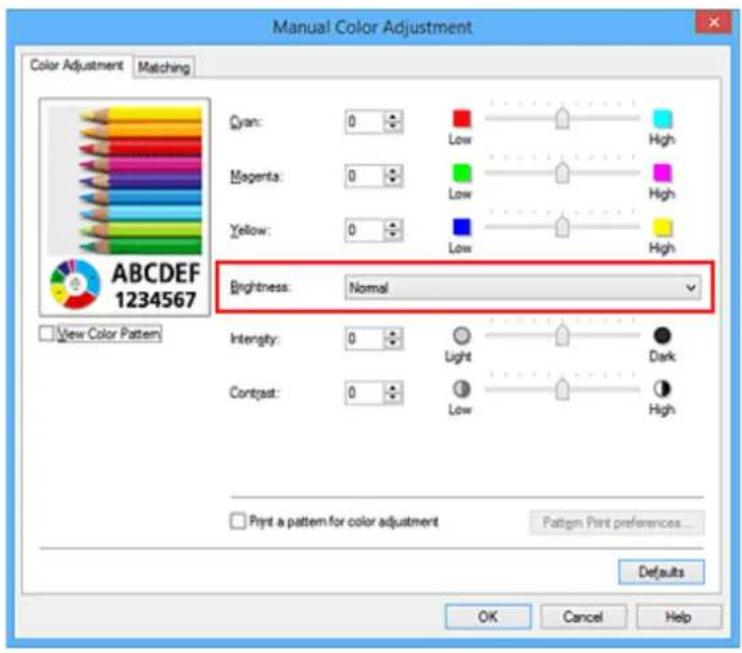
text_image
Manual Color Adjustment Color Adjustment Matching Qyan: 0 Low High Magenta: 0 Low High Yellow: 0 Low High Brightness: Normal Intensity: 0 Light Dark Contrast: 0 Low High View Color Pattern Print a pattern for color adjustment Pattern Print preferences... Defaults OK Cancel Help ABCDEF 12345674. Complete the setup
Click OK on the Main tab.
When you execute print, the data is printed at the specified brightness.
Related Topics
→ Specifying Color Correction
Adjusting Color Balance
→ Adjusting Intensity
→ Adjusting Contrast
Adjusting Intensity
You can dilute (brighten) or intensify (darken) the colors of the overall image data during printing.
The following sample shows the case when the intensity is increased so that all colors become more intense when the image data is printed.
natural_image
Tropical beach scene with palm trees and blue sky (no text or symbols visible)
natural_image
Tropical landscape with palm trees and blue sky (no text or symbols)No adjustment Higher intensity
The procedure for adjusting intensity is as follows:
You can also set intensity on the Quick Setup tab by choosing Photo Printing under Commonly Used Settings, and then choosing Color/Intensity Manual Adjustment under Additional Features.
- Open the printer driver setup window
- Select the manual color adjustment
On the Main tab, select Manual for Color/Intensity, and click Set....
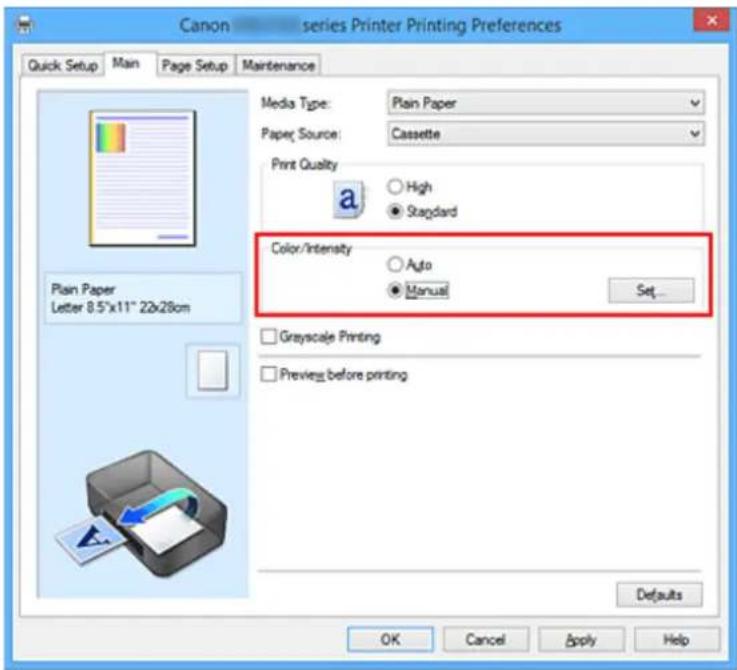
text_image
Canon series Printer Printing Preferences Quick Setup Main Page Setup Maintenance Media Type: Plain Paper Paper Source: Cassette Print Quality High Standard Color/Intensity Auto Manual Set... Plain Paper Letter 8.5"x11" 22x28cm Grayscale Printing Preview before printing Defaults OK Cancel Apply HelpThe Manual Color Adjustment dialog box opens.
- Adjust intensity
Moving the Intensity slider to the right intensifies (darkens) the colors, and moving the slider to the left dilutes (brightens) the colors.
You can also directly enter a value linked to the slider. Enter a value in the range from -50 to 50. The current settings are displayed in the settings preview on the left side of the printer driver.
After adjusting each color, click OK.
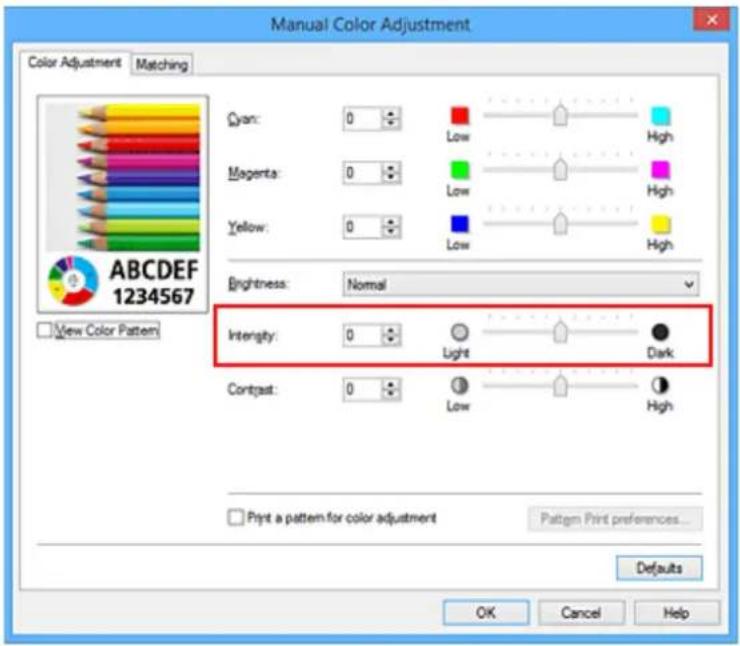
text_image
Manual Color Adjustment Color Adjustment Matching Gyan: 0 Low High Magenta: 0 Low High Yellow: 0 Low High Brightness: Normal Intensity: 0 Light Dark Contrast: 0 Low High Print a pattern for color adjustment Pattern Print preferences... Defaults OK Cancel Help View Color Pattern A B C D E F G H I J K L M N O P Q R S T U V W X Y Z4. Complete the setup
Click OK on the Main tab.
When you execute print, the image data is printed with the adjusted intensity.
Related Topics
→ Specifying Color Correction
Adjusting Color Balance
Adjusting Color Balance Using Sample Patterns (Printer Driver)
Adjusting Brightness
Adjusting Contrast
Adjusting Intensity/Contrast Using Sample Patterns (Printer Driver)
Adjusting Contrast
You can adjust the image contrast during printing.
To make the differences between the light and dark portions of images greater and more distinct, increase the contrast. On the other hand, to make the differences between the light and dark portions of images smaller and less distinct, reduce the contrast.
natural_image
Exterior view of a modern building with illuminated windows and green ivy-covered roof (no signage or text visible)No adjustment Adjust the contrast
The procedure for adjusting contrast is as follows:
You can also set contrast on the Quick Setup tab by choosing Photo Printing under Commonly Used Settings, and then choosing Color/Intensity Manual Adjustment under Additional Features.
- Open the printer driver setup window
- Select the manual color adjustment
On the Main tab, select Manual for Color/Intensity, and click Set....
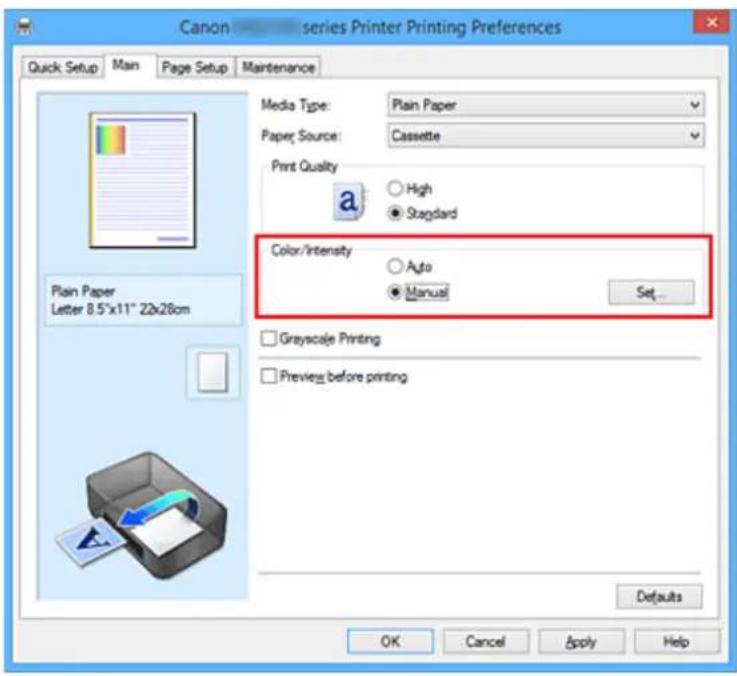
text_image
Canon series Printer Printing Preferences Quick Setup Main Page Setup Maintenance Media Type: Plain Paper Paper Source:Cassette Print Quality High Standard Color/Intensity Auto Manual Set... Plain Paper Letter 8.5"x11" 22x28cm Grayscale Printing Preview before printing Defaults OK Cancel Apply HelpThe Manual Color Adjustment dialog box opens.
- Adjust the contrast
Moving the Contrast slider to the right increases the contrast, and moving the slider to the left decreases the contrast.
You can also directly enter a value linked to the slider. Enter a value in the range from -50 to 50. The current settings are displayed in the settings preview on the left side of the printer driver.
After adjusting each color, click OK.
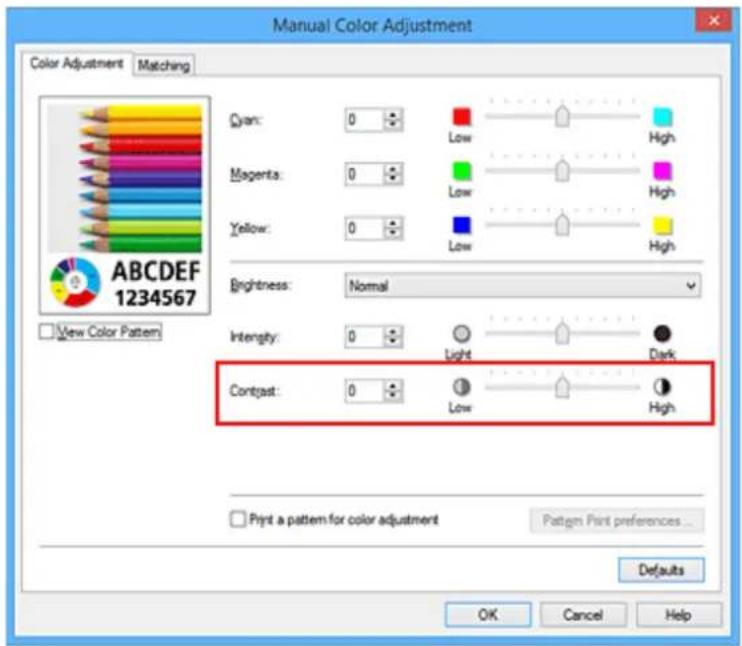
text_image
Manual Color Adjustment Color Adjustment Matching Qyan: 0 Low High Magenta: 0 Low High Yellow: 0 Low High Brightness: Normal Intensity: 0 Light Dark Contrast: 0 Low High Print a pattern for color adjustment Pattern Print preferences... Defaults OK Cancel Help ABCDEF 1234567 View Color Pattern4. Complete the setup
Click OK on the Main tab.
When you execute print, the image is printed with the adjusted contrast.
Related Topics
→ Specifying Color Correction
Adjusting Color Balance
Adjusting Color Balance Using Sample Patterns (Printer Driver)
Adjusting Brightness
Adjusting Intensity
Adjusting Intensity/Contrast Using Sample Patterns (Printer Driver)
Adjusting Intensity/Contrast Using Sample Patterns (Printer Driver)
You can look at the print results of pattern print and adjust the intensity/contrast.
When you change the color balance or intensity/contrast of a document, the pattern print function prints the adjustment results in a list, together with the adjustment values.
Described below is the procedure for adjusting the intensity/contrast while looking at the pattern.
-
Open the printer driver setup window
-
Select the manual color adjustment
On the Main tab, select Manual for Color/Intensity, and click Set....
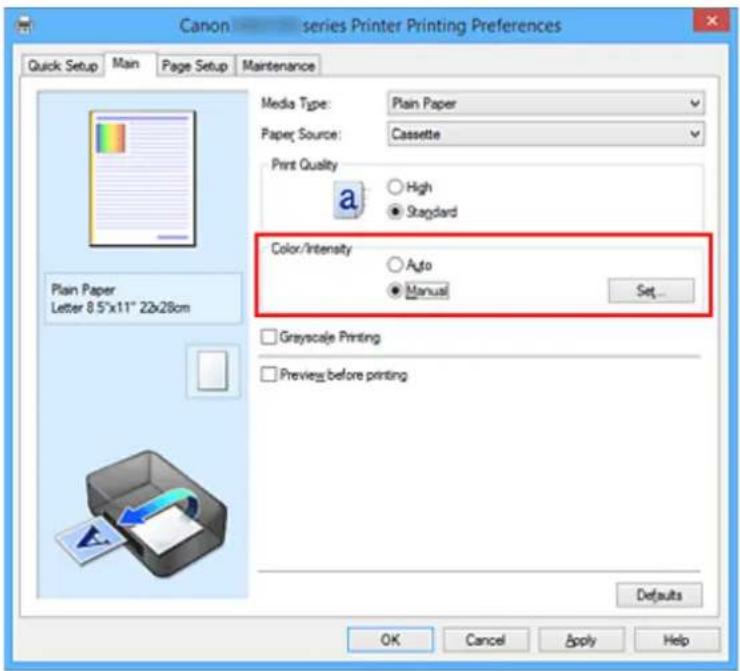
text_image
Canon —— series Printer Printing Preferences Quick Setup Main Page Setup Maintenance Media Type: Plain Paper Paper Source: Cassette Print Quality a ○ High ● Stagard Color/Intensity ○ Auto ● Manual Set... Plain Paper Letter 8.5"x11" 22x28cm □ Grayscale Printing □ Preview before printing Defaults OK Cancel Apply HelpThe Manual Color Adjustment dialog box opens.
- Selecting pattern print
On the Color Adjustment tab, select the Print a pattern for color adjustment check box, and click Pattern Print preferences....
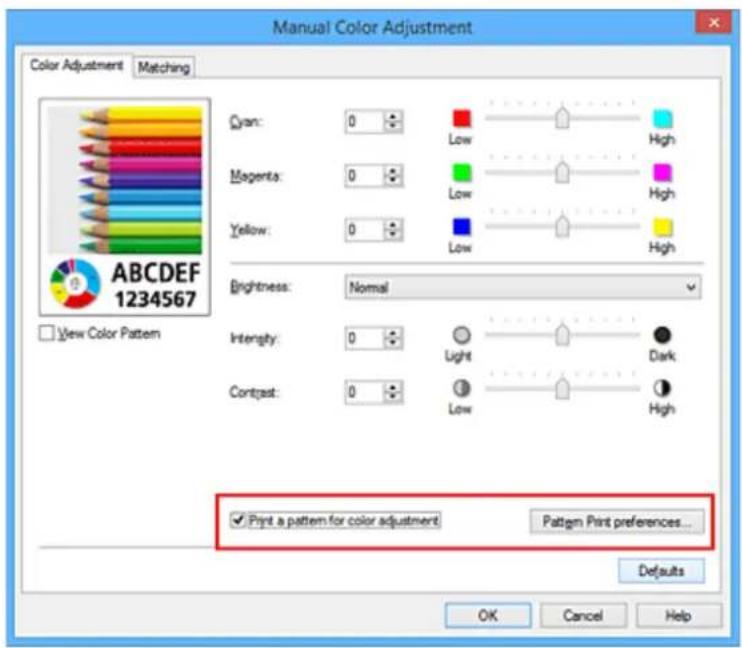
text_image
Manual Color Adjustment Color Adjustment Matching Qyan: 0 Low High Magenta: 0 Low High Yellow: 0 Low High Brightness: Normal Intensity: 0 Light Dark Contrast: 0 Low High ✓ Print a pattern for color adjustment Pattern Print preferences... Defaults OK Cancel Help ABCDEF 1234567 View Color Pattern4. Setting pattern print
When the Pattern Print dialog box opens, set the following items, and then click OK.
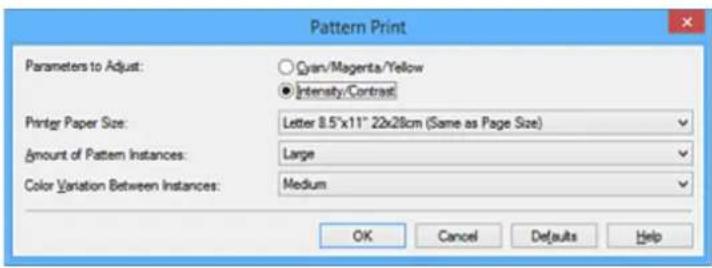
text_image
Pattern Print Parameters to Adjust: ○ Cyan/Magenta/Yellow ● Intensity/Contrast Printer Paper Size: Letter 8.5"x11" 22x28cm (Same as Page Size) Amount of Pattern Instances: Large Color Variation Between Instances: Medium OK Cancel Defaults HelpParameters to Adjust
Select Intensity/Contrast.
Printer Paper Size
Select the paper size to be used for pattern printing.
Note
- Depending on the paper size selected on the Page Setup tab, there may be sizes that cannot be selected.
Amount of Pattern Instances
Select Largest, Large, or Small to set the number of patterns to be printed.
Note
- Largest and Large cannot be selected when certain paper sizes or output paper sizes are selected.
Color Variation Between Instances
Set the amount of color change between neighboring patterns.
Note
• Large is about double the size of Medium, and Small is about half the size of Medium.
5. Checking the print results of pattern print
On the Color Adjustment tab, select OK to close the Manual Color Adjustment dialog box. On the Main tab, select OK, and then execute printing. The printer then prints a pattern in which the intensity/contrast that you set is the center value.
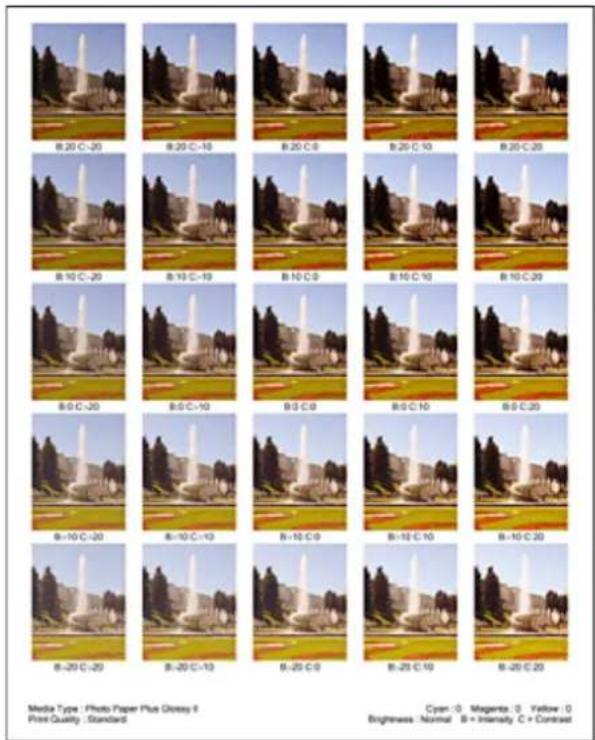
text_image
B:20 C:20 B:20 C:10 B:20 C:0 B:20 C:0 B:20 C:0 B:10 C:20 B:10 C:10 B:10 C:0 B:10 C:0 B:10 C:0 B:10 C:20 B:0 C:20 B:0 C:10 B:0 C:0 B:0 C:10 B:0 C:20 B=10 C:20 B=10 C:10 B=10 C:0 B=10 C:10 B=10 C:20 B=20 C:20 B=20 C:10 B=20 C:0 B=20 C:10 B=20 C:20 Media Type : Photo Paper Plus Glossy II Print Quality : Standard Cyan : 0 Magenta : 0 Yellow : 0 Brightness : Normal B = Intensity C = Contrast6. Adjusting the intensity/contrast
Look at the print results and select the image that you like best. Then enter the intensity/contrast numbers indicated at the bottom of that image into the Intensity and Contrast fields on the Color Adjustment tab.
Clear the Print a pattern for color adjustment check box, and click OK.
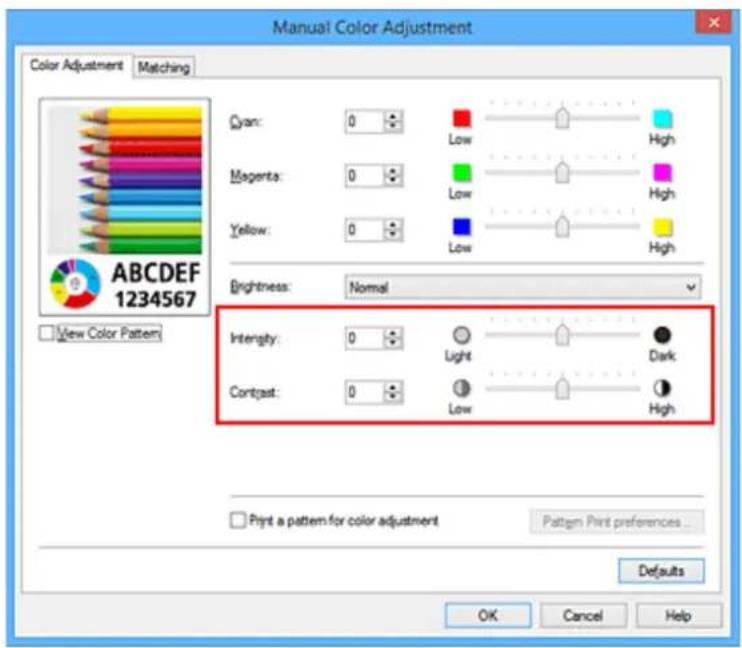
text_image
Manual Color Adjustment Color Adjustment Matching Cyan: 0 Low High Magenta: 0 Low High Yellow: 0 Low High Brightness: Normal Intensity: 0 Light Dark Contrast: 0 Low High Print a pattern for color adjustment Pattern Print preferences... Defaults OK Cancel Help ABCDEF 1234567 View Color PatternNote
- You can also set intensity/contrast on the Quick Setup tab by choosing Photo Printing under Commonly Used Settings, and then choosing Color/Intensity Manual Adjustment under Additional Features.
7. Complete the setup
Click OK on the Main tab.
Then when you execute printing, the document is printed with the intensity/contrast that was adjusted by the pattern print function.
Important
- When Print a pattern for color adjustment is selected on the Color Adjustment tab, the following items are grayed out and cannot be set:
- Preview before printing on the Main tab
- Stapling Side and Specify Margin... on the Page Setup tab (When Duplex Printing is set, only Stapling Side can be set.)
- You can print a pattern only if Normal-size is selected for Page Layout on the Page Setup tab.
- Depending on your application software, this function may not be available.
Related Topics
Adjusting Color Balance
Adjusting Color Balance Using Sample Patterns (Printer Driver)
Adjusting Intensity
Adjusting Contrast
Overview of the Printer Driver
Canon IJ Printer Driver
How to Open the Printer Driver Setup Window
Canon IJ Status Monitor
▶ Checking the Ink Status from Your Computer
Canon IJ Preview
▶ Deleting the Undesired Print Job
▶ Instructions for Use (Printer Driver)
Canon IJ Printer Driver
The Canon IJ printer driver (called printer driver below) is a software that is installed on your computer for printing data with this printer.
The printer driver converts the print data created by your application software into data that your printer can understand, and sends the converted data to the printer.
Because different models support different print data formats, you need a printer driver for the specific model you are using.
Printer Driver Types
On Windows Vista SP1 or later, you can install the XPS printer driver in addition to the regular printer driver.
The XPS printer driver is suited to print from an application software that supports XPS printing.

Important
- To use the XPS printer driver, the standard printer driver must already be installed on your computer.
Installing the Printer Driver
- To install the regular printer driver, load the Setup CD-ROM that comes with the printer, and then install the driver from Start Setup Again.
- To install the XPS printer driver, load the Setup CD-ROM that comes with the printer, and then select XPS Driver from Add Software.
Specifying the Printer Driver
To specify the printer driver, open the Print dialog box of the application software you are using, and select "XXX Printer" (where "XXX" is your model name) to specify the regular printer driver or select "XXX Printer XPS" (where "XXX" is your model name) to specify the XPS printer driver.
Displaying the Manual from the Printer Driver
To display a description of a tab in the printer driver setup window, click the Help button found on the tab.
Related Topic

How to Open the Printer Driver Setup Window
How to Open the Printer Driver Setup Window
You can display the printer driver setup window from the application software in use or from the printer icon.
Open the Printer Driver Setup Window through the Application Software
Follow the procedure below to configure printing profile when printing.
- Select the command that you perform printing on the application software
In general, select Print on the File menu to open the Print dialog box.
- Select your model name and click Preferences (or Properties)
The printer driver setup window appears.
Note
- Depending on application software you use, command names or menu names may vary and there may be more steps. For details, refer to the user's manual of your application software.
Opening the Printer Driver Setup Window from the Printer Icon
Follow the procedure below to perform printer maintenance operations such as print head cleaning, or to configure a printing profile that is common to all application software.
-
Select as described below:
-
If you are using Windows 10, Windows 8.1 or Windows 8, select Control Panel -> Hardware and Sound -> Devices and Printers.
- If you are using Windows 7, select the Start menu -> Devices and Printers.
-
If you are using Windows Vista, select the Control Panel -> Hardware and Sound -> Printers.
-
Right-click your model name icon, and then select Printing preferences from the displayed menu
The printer driver setup window appears.
Important
- Opening the printer driver setup window through Printer properties (Windows 10, Windows 8.1, Windows 8, Windows 7) or Properties (Windows Vista) displays such tabs regarding the Windows functions as the Ports (or Advanced) tab. Those tabs do not appear when opening through Printing preferences or application software. For tabs regarding Windows functions, refer to the user's manual for the Windows.
Canon IJ Status Monitor
The Canon IJ Status Monitor is an application software that shows the status of the printer and the progress of printing. You will know the status of the printer with graphics, icons, and messages.
Launching the Canon IJ Status Monitor
The Canon IJ Status Monitor launches automatically when print data is sent to the printer. When launched, the Canon IJ Status Monitor appears as a button on the task bar.

text_image
Screenshot of a desktop application showing the Windows logo, icons, and a folder with an icon highlighted in red.Click the button of the status monitor displayed on the task bar. The Canon IJ Status Monitor appears.
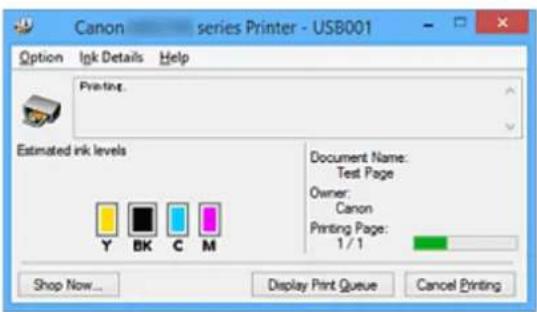
text_image
Canon - series Printer - USB001 Option Ink Details Help Printing. Estimated ink levels Document Name: Test Page Owner: Canon Printing Page: 1/1 Shop Now... Display Print Queue Cancel PrintingNote
- To open the Canon IJ Status Monitor when the printer is not printing, open the printer driver setup window and click View Printer Status on the Maintenance tab.
- The information displayed on the Canon IJ Status Monitor may differ depending on the country or region where you are using your printer.
When Errors Occur
The Canon IJ Status Monitor is automatically displayed if an error occurs (e.g., if the printer runs out of paper or if the ink is low).
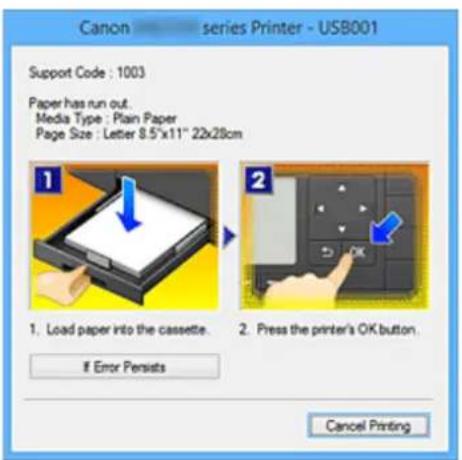
text_image
Canon - series Printer - USB001 Support Code : 1003 Paper has run out. Media Type : Plain Paper Page Size : Letter 8.5"x11" 22x28cm 1. Load paper into the cassette. 2. Press the printer's OK button. If Error Pensists Cancel PrintingIn such cases, take the appropriate action as described.
Checking the Ink Status from Your Computer
You can check the remaining ink level and the ink tank types for your model.
-
Open the printer driver setup window
-
Launching the Canon IJ Status Monitor
On the Maintenance tab, click View Printer Status.
The Canon IJ Status Monitor opens and displays an image of the ink status.
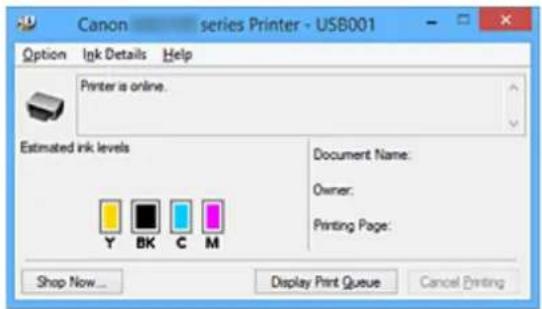
text_image
Canon series Printer - USB001 Option Ink Details Help Printer is online. Estimated ink levels Document Name: Owner: Printing Page: Y BK C M Shop Now... Display Print Queue Cancel Printing
Note
- The information displayed on the Canon IJ Status Monitor may differ depending on the country or region where you are using your printer.
- If necessary, click Ink Details
You can check the ink-related information.
If a warning or error related to the remaining ink amount occurs, a notification icon is displayed at the top of the image in the Ink Details dialog box.
In such cases, take the appropriate action as described on the screen.

Note
- You can also display the Ink Details dialog box by selecting the ink icon on the Canon IJ Status Monitor.
Canon IJ Preview
The Canon IJ Preview is an application software that displays what the print result will look like before a document is actually printed.
The preview reflects the information that is set within the printer driver and allows you to check the document layout, print order, and number of pages. You can also change the media type settings.
When you want to display a preview before printing, open the printer driver setup window, click the Main tab, and check the Preview before printing check box.
When you do not want to display a preview before printing, uncheck the check box.

Important
- If you are using the XPS printer driver, see "Editing the Print Document or Reprinting from the Print History."
Related Topic
→ Displaying the Print Results before Printing
Deleting the Undesired Print Job
If you are using the XPS printer driver, replace "Canon IJ Status Monitor" with "Canon IJ XPS Status Monitor" when reading this information.
If the printer does not start printing, canceled or failed print job data may be remaining. Delete the undesired print job by using the Canon IJ Status Monitor.
- Display the Canon IJ Status Monitor
Click the icon of the Canon IJ Status Monitor displayed on the task bar. The Canon IJ Status Monitor appears.
- Display the print jobs
Click Display Print Queue. The print queue window opens.
- Delete the print jobs
Select Cancel All Documents from the Printer menu. When the confirmation message appears, click Yes. The deletion of the print job is complete.
Important
- Users who have not been granted access permission for printer management cannot delete the print job of another user.
Note
- When you perform this operation, all print jobs are deleted. If the print queue list contained a necessary print job, start the printing process over from the beginning.
Instructions for Use (Printer Driver)
This printer driver is subject to the following restrictions. Keep the following points in mind when using the printer driver.
Restrictions on the Printer Driver
- With some applications, the Copies setting in the Page Setup tab of the printer driver may not be enabled.
In this case, use the copies setting in the Print dialog box of the application software. - If the selected Language in the About dialog box of the Maintenance tab does not match the operating system interface language, the printer driver setup window may not be displayed properly.
- Do not change the Advanced tab items of the printer properties. If you change any of the items, you will not be able to use the following functions correctly.
Also, if Print to file is selected in the Print dialog box of the application software and with applications that prohibit EMF spooling, such as Adobe Photoshop LE and MS Photo Editor, the following functions will not operate.
• Preview before printing on the Main tab
• Prevention of Print Data Loss in the Print Options dialog box on the Page Setup tab
Page Layout, Tiling/Poster, Booklet, Duplex Printing, Specify Margin..., Print from Last Page, Collate, and Stamp/Background... (Stamp...) on the Page Setup tab
- Print a pattern for color adjustment on the Color Adjustment tab in the Manual Color Adjustment dialog box
- Since the resolution in the preview display differs from the printing resolution, text and lines in the preview display may appear different from the actual print result.
- With some applications, the printing is divided into multiple print jobs.
To cancel printing, delete all divided print jobs.
- If image data is not printed correctly, display the Print Options dialog box from the Page Setup tab and change the setting of Disable ICM required from the application software. This may solve the problem.
Note
- Disable ICM required from the application software cannot be used when the XPS printer driver is used.
- Do not start up the Canon IJ Network Tool while printing.
- Do not print when the Canon IJ Network Tool is running.
Points to Note About Applications with Restrictions
- There are following restrictions in Microsoft Word (Microsoft Corporation).
- When Microsoft Word has the same printing functions as the printer driver, use Word to specify them.
- When Fit-to-Page, Scaled, or Page Layout is used for Page Layout on the Page Setup tab of the printer driver, the document may not print normally in certain versions of Word.
-
When Page Size in Word is set to "XXX Enlarge/Reduce", the document may not print normally in certain versions of Word.
If this happens, follow the procedure below. -
Open Word's Print dialog box.
- Open the printer driver setup window, and on the Page Setup tab, set Page Size to the same paper size that you specified in Word.
- Set the Page Layout that you want, and then click OK to close the window.
- Without starting printing, close the Print dialog box.
- Open Word's Print dialog box again.
- Open the printer driver setup window and click OK.
- Start printing.
- If bitmap printing is enabled in Adobe Illustrator (Adobe Systems Incorporated), printing may take time or some data may not be printed. Print after unchecking the Bitmap Printing check box in the Print dialog box.
Printer Driver Description
Quick Setup tab Description
Main tab Description
Page Setup tab Description
▶ Maintenance tab Description
Canon IJ Preview Description
Canon IJ XPS Preview Description
Canon IJ Status Monitor Description
Quick Setup tab Description
The Quick Setup tab is for registering commonly used print settings. When you select a registered setting, the printer automatically switches to the preset items.
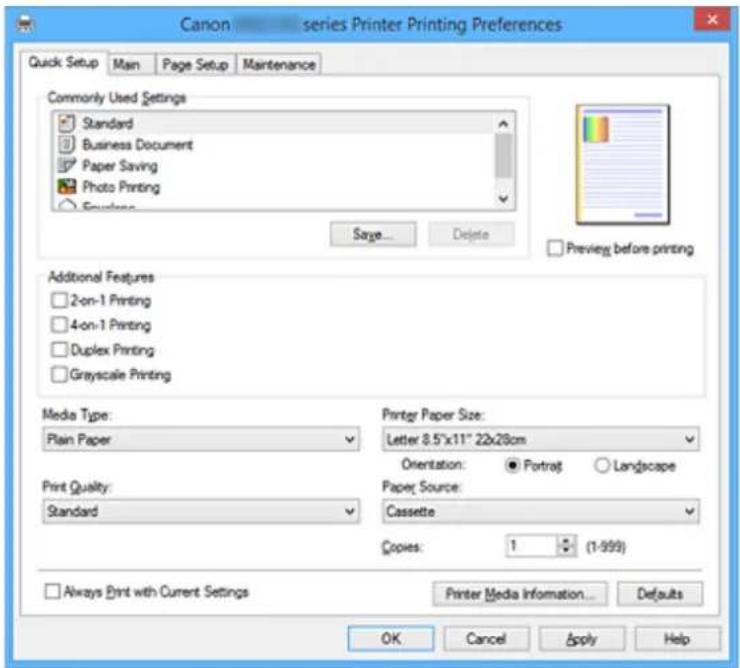
text_image
Canon series Printer Printing Preferences Quick Setup Main Page Setup Maintenance Commonly Used Settings Standard Business Document Paper Saving Photo Printing Envelope Sage... Delete Preview before printing Additional Features 2-on-1 Printing 4-on-1 Printing Duplex Printing Grayscale Printing Media Type: Plain Paper Print Quality: Standard Printer Paper Size: Letter 8.5"x11" 22x28cm Orientation: ● Portrait ○ Landscape Paper Source: Cassette Copies: 1 (1-999) Always Print with Current Settings Printer Media Information... Defaults OK Cancel Apply HelpCommonly Used Settings
The names and icons of frequently used printing profiles are registered. When you select a printing profile according to the purpose of the document, settings that match the purpose are applied.
In addition, functions that are thought to be useful for the selected printing profile are displayed in
Additional Features.
You can also change a printing profile and register it under a new name. You can delete the registered printing profile.
You can rearrange the profiles either by dragging the individual profiles or by holding down the Ctrl key and pressing the up or down arrow keys.
Standard
These are the factory settings.
If Page Size, Orientation, and Copies were set from the application software, those settings have priority.
Business Document
Select this setting when printing a general document.
If Page Size, Orientation, and Copies were set from the application software, those settings have priority.
Paper Saving
Select this setting to save paper when printing a general document. The 2-on-1 Printing and Duplex Printing check boxes are checked automatically.
If Page Size, Orientation, and Copies were set from the application software, those settings have priority.
Photo Printing
If you select this setting when printing a photo, the photo paper and photo size generally used are set.
If Orientation and Copies were set from the application software, those settings have priority.
Envelope
If you select this setting for printing an envelope, Media Type is set automatically to Envelope. In the Envelope Size Setting dialog box, select the size of the envelope to be used.

Note
- The combination of the Additional Features that was displayed for the printing profile that had been selected when the added printing profile was saved is also displayed when that added printing profile is selected.
Save...
Displays the Save Commonly Used Settings dialog box.
Click this button when you want to save the information that you set on the Quick Setup, Main, and Page Setup tabs to Commonly Used Settings.
Delete
Deletes a registered printing profile.
Select the name of the setting to be deleted from Commonly Used Settings, and click Delete. When a confirmation message is displayed, click OK to delete the specified printing profile.

Note
- Printing profiles that are registered in the initial settings cannot be deleted.
Settings Preview
The paper illustration shows how the original will be laid out on a sheet of paper.
You can check an overall image of the layout.
Preview before printing
Shows what the print result will look like before you actually print the data.
Check this check box to display a preview before printing.
Uncheck this check box if you do not want to display a preview.

Important
- To use the Canon IJ XPS Preview, you must have Microsoft .NET Framework 4 Client Profile installed on your computer.
Additional Features
Displays the frequently used, convenient functions for the printing profile that you selected for
Commonly Used Settings on the Quick Setup tab.
When you move the mouse pointer near a function that can be changed, a description of that function is displayed.
To enable a function, check the corresponding check box.
For some functions, you can set detailed settings from the Main and Page Setup tabs.

Important
- Depending on the printing profiles, certain function may be grayed out and you will not be able to change them.
2-on-1 Printing
Prints two pages of the document, side by side, on one sheet of paper.
To change the page sequence, click the Page Setup tab, select Page Layout for Page Layout, and click Specify.... Then in the Page Layout Printing dialog box that appears, specify the Page Order.
4-on-1 Printing
Prints four pages of the document, side by side, on one sheet of paper.
To change the page sequence, click the Page Setup tab, select Page Layout for Page Layout, and click Specify.... Then in the Page Layout Printing dialog box that appears, specify the Page Order.
Duplex Printing
Selects whether to print the document on both sides or one side of a sheet of paper.
To change the staple side or the margins, set the new values from the Page Setup tab.
Grayscale Printing
This function converts the data to monochrome data when printing your document.
Rotate 180 degrees
Prints the document by rotating it 180 degrees against the paper feed direction.
The width of print area and the amount of extension that are configured in other application software will be reversed vertically and horizontally.
Color/Intensity Manual Adjustment
Select when you set the Color Correction method and individual settings such as Cyan, Magenta, Yellow, Brightness, Intensity, and Contrast, etc.
Media Type
Selects a type of printing paper.
Select a media type that matches the paper that is loaded in the printer. This ensures that printing is carried out properly for the specified paper.
Printer Paper Size
Selects the size of paper actually loaded into the printer.
Normally, the paper size is set automatically according to the output paper size setting, and the document is printed with no scaling.
When you set 2-on-1 Printing or 4-on-1 Printing in Additional Features, you can manually set the paper size with Page Size on the Page Setup tab.
If you select a paper size that is smaller than the Page Size, the document size will be reduced. If you select a paper size that is larger, the document size will be enlarged.
Also if you select Custom..., the Custom Paper Size dialog box opens and allows you to specify any vertical and horizontal dimensions for the paper size.
Orientation
Selects the printing orientation.
If the application used to create your document has a similar function, select the same orientation that you selected in that application.
Portrait
Prints the document so that its top and bottom positions are unchanged relative to the paper feed direction. This is the default setting.
Landscape
Prints the document by rotating it 90 degrees relative to the paper feed direction.
You can change the rotation direction by going to the Maintenance tab, opening the Custom
Settings dialog box, and then using Rotate 90 degrees left when orientation is [Landscape] check box.
To rotate the document 90 degrees to the left when printing, select the Rotate 90 degrees left when orientation is [Landscape] check box.
Print Quality
Selects your desired printing quality.
Select one of the following to set the print quality level that is appropriate for the purpose.
High
Gives priority to print quality over printing speed.
Standard
Prints with average speed and quality.
Paper Source
Shows the source from which paper is supplied.
Cassette
Paper is always supplied from the cassette.
Copies
Specifies the number of copies you want to print. You can specify a value from 1 to 999.
Important
- When the application software that you used to create the document has the same function, specify the settings on the printer driver. However, if the print results are not acceptable, specify the function settings on the application software.
Always Print with Current Settings
Prints documents with the current settings starting from the next print execution.
When you select this function and then close the printer driver setup window, the information that you set on the Quick Setup, Main, and Page Setup tabs are saved and printing with the same settings is possible starting from the next print execution.
Important
- If you log on with a different user name, the settings that were set when this function was enabled are not reflected in the print settings.
- If a setting was specified on the application software, it has priority.
Printer Media Information...
Displays Printer Media Information dialog box.
You can check the printer settings and apply the checked settings to the printer driver.
Defaults
Restores all the settings you have changed to their default values.
Click this button to return all settings on the Quick Setup, Main, and Page Setup tabs to their default values (factory settings).
Save Commonly Used Settings dialog box
This dialog box allows you to save the information that you set on the Quick Setup, Main, and Page
Setup tabs and add the information to the Commonly Used Settings list on the Quick Setup tab.
Name
Enter the name for the printing profile you wish to save.
Up to 255 characters can be entered.
The name appears, with its associated icon, in the Commonly Used Settings list on the Quick Setup tab.
Options...
Opens the Save Commonly Used Settings dialog box.
Changes the details of printing profile to be saved.
Save Commonly Used Settings dialog box
Select the icons of the printing profiles to be registered to Commonly Used Settings, and change the items to be saved in the printing profiles.
Icon
Select the icon for the printing profile you wish to save.
The selected icon appears, with its name, in the Commonly Used Settings list on the Quick Setup tab.
Save the paper size setting
Saves the paper size to the printing profile in Commonly Used Settings.
To apply the saved paper size when the printing profile is selected, check this check box.
If this check box is unchecked, the paper size is not saved, and consequently the paper size setting is not applied when the printing profile is selected. Instead the printer prints with the paper size specified with the application software.
Save the orientation setting
Saves the Orientation to the printing profile in Commonly Used Settings.
To apply the saved print orientation when the printing profile is selected, check this check box. If this check box is unchecked, the print orientation is not saved, and consequently the Orientation setting is not applied when the printing profile is selected. Instead the printer prints with the print orientation specified with the application software.
Save the copies setting
Saves the Copies setting to the printing profile in Commonly Used Settings.
To apply the saved copies setting when the printing profile is selected, check this check box. If this check box is unchecked, the copies setting is not saved, and consequently the Copies setting is not applied when the printing profile is selected. Instead the printer prints with the copies setting specified with the application software.
Custom Paper Size dialog box
This dialog box allows you to specify the size (width and height) of the custom paper.
Units
Select the unit for entering a user-defined paper size.
Paper Size
Specifies the Width and the Height of the custom paper. Measurement is shown according to the units specified in Units.
Printer Media Information dialog box
This dialog box allows you to check the printer settings and apply the checked settings to the printer driver.
Paper Source
Check the setting or select a new paper source.
Media Type
Displays the Media Type that is currently set on the printer.
To apply the displayed setting to the printer driver, click Set.
Page Size
Displays the Page Size that is currently set on the printer.
To apply the displayed setting to the printer driver, click Set.
Related Topics
→ Printing with Easy Setup
Setting a Page Size and Orientation
Setting the Number of Copies and Printing Order
→ Duplex Printing
Setting Up Envelope Printing
→ Printing on Postcards
→ Displaying the Print Results before Printing
Setting Paper Dimensions (Custom Size)
→ Printing a Color Document in Monochrome
→ Specifying Color Correction
Adjusting Color Balance
Adjusting Color Balance Using Sample Patterns (Printer Driver)
→ Adjusting Brightness
Adjusting Intensity
→ Adjusting Contrast
Adjusting Intensity/Contrast Using Sample Patterns (Printer Driver)
→ Registering a Frequently Used Printing Profile
Main tab Description
The Main tab allows you to create a basic print setup in accordance with the media type. Unless special printing is required, normal printing can be performed just by setting the items on this tab.
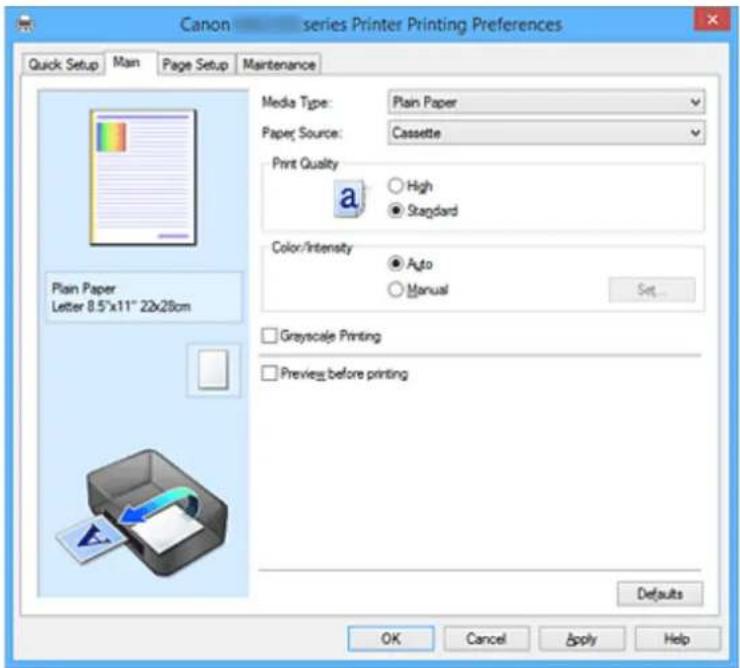
text_image
Canon series Printer Printing Preferences Quick Setup Main Page Setup Maintenance Media Type: Plain Paper Paper Source: Cassette Print Quality High Standard Color/Intensity Auto Manual Gray-scale Printing Preview before printing Defaults OK Cancel Apply HelpSettings Preview
The paper illustration shows how the original will be laid out on a sheet of paper.
You can check an overall image of the layout.
Media Type
Selects a type of printing paper.
Select a media type that matches the paper that is loaded in the printer. This ensures that printing is carried out properly for the specified paper.
Paper Source
Shows the source from which paper is supplied.
Cassette
Paper is always supplied from the cassette.
Print Quality
Selects your desired printing quality.
Select one of the following to set the print quality level that is appropriate for the purpose.
Important
- Depending on the Media Type settings, the same print results may be produced even if the Print Quality is changed.
High
Gives priority to print quality over printing speed.
Standard
Prints with average speed and quality.
Color/Intensity
Selects color adjustment method.
Auto
Cyan, Magenta, Yellow, Brightness, Intensity, and Contrast, and so on are adjusted automatically.
Manual
Select when you set the individual settings such as Cyan, Magenta, Yellow, Brightness, Intensity, and Contrast, etc. and Color Correction method.
Set...
Select Manual for Color/Intensity to enable this button.
In the Manual Color Adjustment dialog box, you can adjust individual color settings such as Cyan, Magenta, Yellow, Brightness, Intensity, and Contrast on the Color Adjustment tab, and select the Color Correction method on the Matching tab.
Note
- If you want to use an ICC profile to adjust colors, use the Manual Color Adjustment dialog box to set the profile.
Grayscale Printing
This function converts the data to monochrome data when printing your document.
Check this check box to print a color document in monochrome.
Preview before printing
Shows what the print result will look like before you actually print the data.
Check this check box to display a preview before printing.
Important
- To use the Canon IJ XPS Preview, you must have Microsoft .NET Framework 4 Client Profile installed on your computer.
Defaults
Restores all the settings you have changed to their default values.
Clicking this button restores all the settings on the current screen to their default values (factory settings).
Color Adjustment Tab
This tab allows you to adjust the color balance by changing the settings of the Cyan, Magenta, Yellow, Brightness, Intensity, and Contrast options.
Preview
Shows the effect of color adjustment.
The color and brightness change when each item is adjusted.
Note
- The graphic is in monochrome when the Grayscale Printing check box is checked.
View Color Pattern
Displays a pattern for checking color changes produced by color adjustment.
If you want to display the preview image with a color pattern, check this check box.
Cyan / Magenta / Yellow
Adjusts the strengths of Cyan, Magenta, and Yellow.
Moving the slider to the right makes a color stronger, and moving the slider to the left makes a color weaker.
You can also directly enter a value linked to the slider. Enter a value in the range from -50 to 50.
This adjustment changes the relative amount of ink of each color used, which alters the total color balance of the document. Use your application if you want to change the total color balance significantly. Use the printer driver only if you want to adjust the color balance slightly.
Important
- When Grayscale Printing is checked on the Main tab, Cyan, Magenta, and Yellow appear grayed out and are unavailable.
Brightness
Selects the brightness of your print.
You cannot change the levels of pure white and black. However, the brightness of the colors between white and black can be changed.
Intensity
Adjusts the overall intensity of your print.
Moving the slider to the right increases the intensity, and moving the slider to the left decreases the intensity.
You can also directly enter a value linked to the slider. Enter a value in the range from -50 to 50.
Contrast
Adjusts the contrast between light and dark in the image to be printed.
Moving the slider to the right increases the contrast, moving the slider to the left decreases the contrast.
You can also directly enter a value linked to the slider. Enter a value in the range from -50 to 50.
Print a pattern for color adjustment
When the color balance or intensity/contrast is changed, the pattern printing function prints a list of the adjustment results along with the adjustment values.
Select this function when printing a pattern for color adjustment.
Pattern Print preferences...
Check Print a pattern for color adjustment to enable this button.
The Pattern Print dialog box opens and allows you to set pattern printing settings.
Pattern Print dialog box
Performs the setup for printing of patterns that allow you to check the color balance and intensity/contrast of documents.
Parameters to Adjust
Select the item to be checked by pattern printing.
Cyan/Magenta/Yellow
Prints a pattern that allows you to check the cyan/magenta/yellow balance.
Important
- When Grayscale Printing is checked on the Main tab, Cyan/Magenta/Yellow appear grayed out and are unavailable.
Intensity/Contrast
Prints a pattern that allows you to check the intensity/contrast balance.
Printer Paper Size
Selects the paper size to be used for pattern printing.
This setting is linked to Printer Paper Size on the Page Setup tab.
Note
- Depending on the paper size selected on the Page Setup tab, there may be sizes that cannot be selected.
Amount of Pattern Instances
Sets the number of patterns to be printed.
You can select from Largest, Large, and Small. When you select a pattern size, the number of patterns that can be printed is as follows:
Note
- Largest and Large cannot be selected when certain paper sizes or output paper sizes are selected.
- The setting preview on the Main tab displays an image that allows you to check the overall layout.
Largest
Cyan/Magenta/Yellow 37
Intensity/Contrast 49
Large
Cyan/Magenta/Yellow 19
Intensity/Contrast 25
Small
Cyan/Magenta/Yellow 7
Intensity/Contrast 9
Color Variation Between Instances
Sets the amount of color change between neighboring patterns.
Select from Large, Medium, and Small. Large produces a large amount of change, and Small produces a small amount of change.
Note
- Large is about double the size of Medium, and Small is about half the size of Medium.
Matching Tab
Allows you to select the method for adjusting colors to match the type of document to be printed.
Color Correction
Allows you to select Driver Matching, ICM (ICC Profile Matching), or None to match the purpose of the print operation.
Important
- When Grayscale Printing is checked on the Main tab, Color Correction appears grayed out and is unavailable.
Driver Matching
With Canon Digital Photo Color, you can print sRGB data with color tints that most people prefer.
ICM (ICC Profile Matching)
Adjusts the colors by using an ICC profile when printing.
Important
- If the application software is set so that ICM is disabled, ICM (ICC Profile Matching) is unavailable for Color Correction and the printer may not be able to print the image data properly.
None
Disables color adjustment with the printer driver.
Note
- In the XPS printer driver, ICM has become ICC Profile Matching.
Related Topics
Adjusting Color Balance
Adjusting Brightness
Adjusting Intensity
Adjusting Contrast
Adjusting Color Balance Using Sample Patterns (Printer Driver)
Adjusting Intensity/Contrast Using Sample Patterns (Printer Driver)
→ Specifying Color Correction
→ Adjusting Colors with the Printer Driver
→ Printing with ICC Profiles
→ Printing a Color Document in Monochrome
→ Displaying the Print Results before Printing
Page Setup tab Description
The Page Setup tab allows you to determine how a document is to be arranged on the paper. Also, this tab allows you to set the number of copies and the order of printing. If the application which created the document has a similar function, set them with the application.
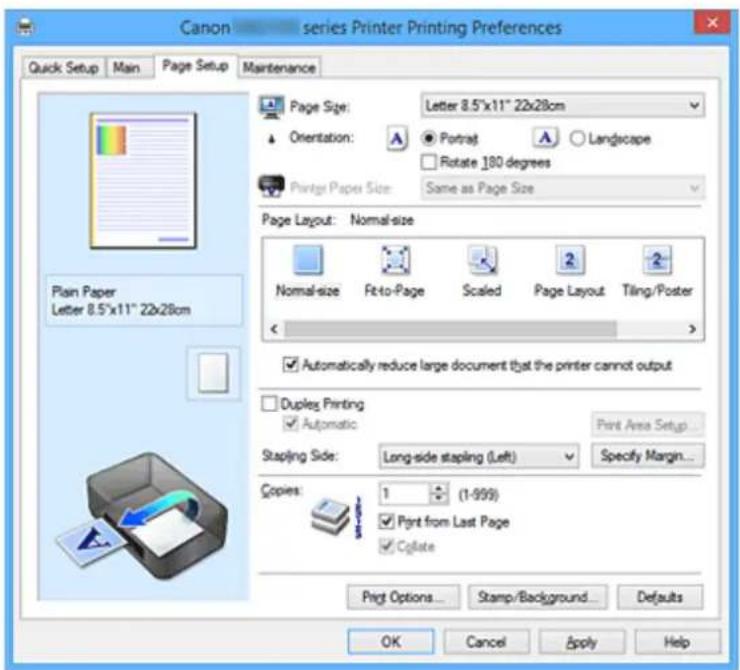
text_image
Canon series Printer Printing Preferences Quick Setup Main Page Setup Maintenance Page Size: Letter 8.5"x11" 22x28cm Orientation: ● Portrait ○ Landscape Rotate 180 degrees Prints Paper Size: Same as Page Size Page Layout: Normal-size Normal-size Fit-to-Page Scaled Page Layout Tiling/Poster < > ✓ Automatically reduce large document that the printer cannot output □ Duplex Printing ✓ Automatic Print Area Setup Stapling Side: Long-side stapling (Left) Specify Margin... Copies: 1 (1-999) ✓ Print from Last Page ✓ Cylate Print Options... Stamp/Background...Defaults OK Cancel Apply HelpSettings Preview
The paper illustration shows how the original will be laid out on a sheet of paper.
You can check an overall image of the layout.
Page Size
Selects a page size.
Ensure that you select the same page size as you selected within the application.
If you select Custom..., the Custom Paper Size dialog box opens and allows you to specify any vertical and horizontal dimensions for the paper size.
Orientation
Selects the printing orientation.
If the application used to create your document has a similar function, select the same orientation that you selected in that application.
Portrait
Prints the document so that its top and bottom positions are unchanged relative to the paper feed direction. This is the default setting.
Landscape
Prints the document by rotating it 90 degrees relative to the paper feed direction.
You can change the rotation direction by going to the Maintenance tab, opening the Custom Settings dialog box, and then using Rotate 90 degrees left when orientation is [Landscape] check box.
To rotate the document 90 degrees to the left when printing, select the Rotate 90 degrees left when orientation is [Landscape] check box.
Rotate 180 degrees
Prints the document by rotating it 180 degrees against the paper feed direction.
The width of print area and the amount of extension that are configured in other application software will be reversed vertically and horizontally.
Printer Paper Size
Selects the size of paper actually loaded into the printer.
The default setting is Same as Page Size to perform normal-sized printing.
You can select a printer paper size when you select Fit-to-Page, Scaled, Page Layout, Tiling/Poster, or Booklet for Page Layout.
If you select a paper size that is smaller than the Page Size, the document size will be reduced. If you select a paper size that is larger, the document size will be enlarged.
Also if you select Custom..., the Custom Paper Size dialog box opens and allows you to specify any vertical and horizontal dimensions for the paper size.
Page Layout
Selects the size of the document you want to print and the type of printing.
Normal-size
This is the normal printing method. Select this when you do not specify any page layout.
Automatically reduce large document that the printer cannot output
If the printer cannot print the paper size of a document, the printer can automatically reduce the size when it prints the document.
Check this check box to reduce the size when printing the document.
Fit-to-Page
This function enables you to automatically enlarge or reduce documents to fit to the paper size loaded in the printer without changing the paper size you specified in your application software.
Scaled
Documents can be enlarged or reduced to be printed.
Specify the size in Printer Paper Size, or enter the scaling ratio in the Scaling box.
Scaling
Specifies an enlargement or reduction ratio for the document you want to print.
Page Layout
Multiple pages of document can be printed on one sheet of paper.
Specify...
Opens the Page Layout Printing dialog box.
Click this button to set details on page layout printing.
Tiling/Poster
This function enables you to enlarge the image data and divide the enlarged data into several pages to be printed. You can also glue together these sheets of paper to create large printed matter, such as a poster.
Specify...
Opens the Tiling/Poster Printing dialog box.
Click this button to set details on tiling/poster printing.
Booklet
The booklet printing function allows you to print data for a booklet. Data is printed on both sides of the paper. This type of printing ensures that pages can be collated properly, in page number order, when the printed sheets are folded and stapled at the center.
Specify...
Opens the Booklet Printing dialog box.
Click this button to set details on booklet printing.
Duplex Printing
Selects whether to print the document automatically on both sides or one side of a sheet of paper.
Check this check box to print the document on both sides.
This function can be used only when Plain Paper is selected for Media Type and one of Normal-size,
Fit-to-Page, Scaled, or Page Layout is selected.
Automatic
Selects whether duplex printing is to be performed automatically or manually.
This check box will be enabled if Booklet is selected from the Page Layout list or the Duplex
Printing check box is checked.
To perform duplex printing automatically, check this check box.
To perform duplex printing manually, uncheck this check box.
Print Area Setup...
Opens the Print Area Setup dialog box in which you can configure the print area for automatic duplex printing.
Stapling Side
Selects the stapling margin position.
The printer analyzes the Orientation and Page Layout settings, and automatically selects the best stapling margin position. Check Stapling Side, and select from the list to change it.
Specify Margin...
Opens the Specify Margin dialog box.
You can specify the width of the margin.
Copies
Specifies the number of copies you want to print. You can specify a value from 1 to 999.
Important
- If the application used to create your document has a similar function, specify the number of copies with the application without specifying it here.
Print from Last Page
Check this check box when you want to print from the last page in order. If you do this, you do not need to sort the pages into their correct order after printing.
Uncheck this check box to print your document in normal order, starting from the first page.
Collate
Check this check box to group together the pages of each copy when you want to print multiple copies. Uncheck this check box when you want to print with all pages of the same page number grouped together.
Important
- When the application software that you used to create the document has the same function, give priority to the printer driver settings. However, if the print results are not acceptable, specify the function settings on the application software. When you specify the number of copies and the printing order with both the application and this printer driver, the number of copies may be multiplied numbers of the two settings or the specified printing order may not be enabled.
Print Options...
Opens the Print Options dialog box.
Changes detailed printer driver settings for print data that is sent from applications.
Stamp/Background... (Stamp...)
Opens the Stamp/Background (Stamp) dialog box.
The Stamp function allows you to print a stamp text or a bitmap over or behind document data. It also allows you to print date, time and user name. The Background function allows you to print a light illustration behind the document data.
Note
- With the XPS printer driver, the Stamp/Background... button has become the Stamp... button and only the stamp function can be used.
Depending on the type of printer driver you are using and the environment, Stamp and Background may not be available.
Custom Paper Size dialog box
This dialog box allows you to specify the size (width and height) of the custom paper.
Units
Select the unit for entering a user-defined paper size.
Paper Size
Specifies the Width and the Height of the custom paper. Measurement is shown according to the units specified in Units.
Page Layout Printing dialog box
This dialog box allows you to select the number of document pages to be placed on one sheet of paper, the page order, and whether a page border line is to be printed around each document page.
The settings specified in this dialog box can be confirmed in the settings preview on the printer driver.
Preview Icon
Shows the settings made on the Page Layout Printing dialog box.
You can check what the print result will look like before you actually print the data.
Page Layout
Specifies the number of document pages to fit on one sheet.
Page Order
Specifies the document orientation to be printed on a sheet of paper.
Page Border
Prints a page border line around each document page.
Check this check box to print the page border line.
Tiling/Poster Printing dialog box
This dialog box allows you to select the size of the image to be printed. You can also make settings for cut lines and paste markers which are convenient for pasting together the pages into a poster.
The settings specified in this dialog box can be confirmed in the settings preview on the printer driver.
Preview Icon
Shows the settings of the Tiling/Poster Printing dialog box.
You can check what the print result will look like.
Image Divisions
Select the number of divisions (vertical x horizontal).
As the number of divisions increases, the number of sheets used for printing increases. If you are pasting pages together to create a poster, increasing the number of divisions allows you to create a larger poster.
Print "Cut/Paste" in margins
Specifies whether to print the words "Cut" and "Paste" in the margins. These words serve as guidelines for pasting together the pages into a poster.
Check this check box to print the words.
Note
- Depending on the type of printer driver you are using and the environment, this function may not be available.
Print "Cut/Paste" lines in margins
Specifies whether to print cut lines that serve as guidelines for pasting together the pages into a poster.
Check this check box to print the cut lines.
Print page range
Specifies the printing range. Select All under normal circumstances.
Select Pages to specify a specific page or range.
Note
- If some of the pages have not been printed well, specify the pages that do not need to be printed by clicking them in the settings preview of the Page Setup tab. Only the pages shown on the screen will be printed this time.
Booklet Printing dialog box
This dialog box allows you to set how to bind the document as a booklet. Printing only on one side and printing a page border, can also be set in this dialog box.
The settings specified in this dialog box can be confirmed in the settings preview on the printer driver.
Preview Icon
Shows the settings made on the Booklet Printing dialog box.
You can check what the document will look like when printed as a booklet.
Margin for stapling
Specifies which side of the booklet is to be stapled.
Insert blank page
Selects whether to print the document on one side or both sides of the booklet.
Check this check box to print the document on one side of the booklet and select the side to be left blank from the list.
Margin
Specifies the width of the stapling margin.
The specified width becomes the stapling margin from the center of the sheet.
Page Border
Prints a page border line around each document page.
Check this check box to print the page border line.
Print Area Setup dialog box
When you perform duplex printing, the print area of the document becomes slightly narrower than usual.
Therefore when a document that has small margins is printed, the document may not fit on one page.
This dialog box allows you to set whether the page is to be reduced when printed so that the document fits in one page.
Use normal-size printing
Prints the document pages without reducing them. This is the default setting.
Use reduced printing
Slightly reduces each document page so that it fits on one sheet of paper during printing.
Select this setting when using automatic duplex printing to print a document with small margins.
Specify Margin dialog box
This dialog box allows you to specify the margin width for the side to be stapled. If a document does not fit on one page, the document is reduced when printed.
Margin
Specifies the width of the stapling margin.
The width of the side specified by Stapling Side becomes the stapling margin.
Print Options dialog box
Makes changes to print data that is sent to the printer.
Depending on the type of printer driver you are using and the environment, this function may not be available.
Disable ICM required from the application software
Disables the ICM function required from the application software.
When an application software uses Windows ICM to print data, unexpected colors may be produced or the printing speed may decrease. If these problems occur, checking this check box may resolve the problems.
Important
- Uncheck this check box under normal circumstances.
- This function does not work when ICM is selected for Color Correction on the Matching tab of the Manual Color Adjustment dialog box.
Note
- Disable ICM required from the application software tab cannot be used with the XPS printer driver.
Disable the color profile setting of the application software
Checking this check box disables information in the color profile that was set on the application software.
When the information in the color profile set on the application software is output to the printer driver, the print result may contain unexpected colors. If this happens, checking this check box may resolve the problem.
Important
- Even when this check box is checked, only some of the information in the color profile is disabled, and the color profile can still be used for printing.
- Uncheck this check box under normal circumstances.
Ungroup Papers
Sets the display method of Media Type, Page Size, and Printer Paper Size.
To display the items separately, select the check box.
To display the items as a group, clear the check box.
Do not allow application software to compress print data
Compression of the application software print data is prohibited.
If the print result has missing image data or unintended colors, selecting this check box may improve the condition.
Important
- Uncheck this check box under normal circumstances.
Note
- Do not allow application software to compress print data tab cannot be used with the XPS printer driver.
Print after creating print data by page
The print data is created in page units, and printing starts after the processing of one page of print data is complete.
If a printed document contains unintended results such as streaks, selecting this check box may improve the results.
Important
- Uncheck this check box under normal circumstances.
Scale images using nearest-neighbor interpolation
When an image is to be enlarged or reduced when printed, the printer uses a simple interpolation process to enlarge or reduce the image.
If the image data in a printed document is not printed clearly, selecting this check box may improve the results.
Important
- Uncheck this check box under normal circumstances.
Note
- Scale images using nearest-neighbor interpolation can be used only with the XPS printer driver.
Prevention of Print Data Loss
You can reduce the size of the print data that was created with the application software and then print the data.
Depending on the application software being used, the image data may be cut off or may not be printed properly. In such cases, select On. If you will not be using this function, select Off.
Important
- When using this function, the print quality may drop depending on the print data.
Unit of Print Data Processing
Selects the processing unit of the print data to be sent to the printer.
Select Recommended under normal circumstances.
Important
- A large amount of memory may be used for certain settings. Do not change the setting if your computer has a small amount of memory.
Note
- Unit of Print Data Processing tab cannot be used with the XPS printer driver.
Stamp/Background (Stamp...) dialog box
The Stamp/Background (Stamp...) dialog box allows you to print a stamp and/or background over or behind the document pages. In addition to the pre-registered ones, you can register and use your original stamp or background.
Note
- With the XPS printer driver, the Stamp/Background... button has become the Stamp... button and only the stamp function can be used.
Stamp
Stamp printing is a function that prints a stamp over a document.
Check this check box and select a title from the list to print a stamp.
Define Stamp...
Opens the Stamp Settings dialog box.
You can check the details of a selected stamp or save a new stamp.
Place stamp over text
Sets how the stamp is to be printed over the document.
Check the Stamp check box to enable this.
Check this check box to print a stamp over the printed document page. The printed data may be hidden behind the stamp.
Uncheck this check box to print the document data over the stamp. The printed data will not be hidden behind the stamp. However, the sections of the stamp that are overlapped by the document may be hidden.
Print semitransparent stamp
Sets how the stamp is to be printed over the document.
Check the Stamp check box to enable this.
Check this check box to print a semi-transparent stamp over the printed document page.
Uncheck this check box to print the stamp over the document data. The printed data may be hidden behind the stamp.
Note
- You can use Print semitransparent stamp only with the XPS printer driver.
Stamp first page only
Selects whether the stamp is to be printed on the first page only or on all pages when the document has two or more pages.
Check the Stamp check box to enable this.
Check this check box to print a stamp on the first page only.
Background
Background printing is a function that allows you to print an illustration or a similar object (bitmap) behind the document.
Check this check box to print a background and select a title from the list.
Select Background...
Opens the Background Settings dialog box.
You can register a bitmap as a background, and change layout method and intensity of the selected background.
Background first page only
Selects whether to print the background on the first page only or print on all pages when the document has two or more pages.
Check the Background check box to enable this.
Check this check box to print a background on the first page only.
Stamp Tab
The Stamp tab allows you to set the text and bitmap file (.bmp) to be used for a stamp.
Preview Window
Shows the status of the stamp configured in each tab.
Stamp Type
Specifies the stamp type.
Select Text to create a stamp with characters. Select Bitmap to create with a bitmap file. Select
Date/Time/User Name to display the creation date/time and user name of the printed document.
The setting items in the Stamp tab change depending on the selected type.
When Stamp Type is Text or Date/Time/User Name
Stamp Text
Specifies the stamp text string.
Up to 64 characters can be entered.
For Date/Time/User Name, the creation date/time and user name of the printed object are displayed in Stamp Text.
- Stamp Text appears grayed out and is unavailable if Date/Time/User Name is selected.
TrueType Font
Selects the font for the stamp text string.
Style
Selects the font style for the stamp text string.
Size
Selects the font size for the stamp text string.
Outline
Selects a frame that encloses the stamp text string.
If a large font size is selected for Size, characters may extend outside of the stamp border.
Color/Select Color...
Shows the current color for the stamp.
To select a different color, click Select Color... to open the Color dialog box, and select or create a color you wish to use as a stamp.
When Stamp Type is Bitmap
File
Specifies the name of the bitmap file to be used as the stamp.
Select File...
Opens the dialog box to open a file.
Click this button to select a bitmap file to be used as a stamp.
Size
Adjusts the size of the bitmap file to be used as a stamp.
Moving the slider to the right increases the size, moving the slider to the left decreases the size.
Transparent white area
Specifies whether to make white-filled areas of the bitmap transparent.
Check this check box to make white-filled areas of the bitmap transparent.
Note
- Click Defaults to set Stamp Type to text, Stamp Text to blank, TrueType Font to Arial, Style to Regular, Size to 36 points, Outline unchecked, and Color to gray with the RGB values (192, 192, 192).
Placement Tab
The Placement tab allows you to set the position where the stamp is to be printed.
Preview Window
Shows the status of the stamp configured in each tab.
Position
Specifies the stamp position on the page.
Selecting Custom from the list allows you to enter values for the X-Position and Y-Position coordinates directly.
Orientation
Specifies the angle of rotation for the stamp. The angle can be set by entering the number of degrees.
Negative values rotate the stamp clockwise.
Note
- Orientation is enabled only when Text or Date/Time/User Name is selected for Stamp Type on the Stamp tab.
Note
- Click Defaults to set the stamp position to Center and the orientation to 0.
Save settings Tab
The Save settings tab allows you to register a new stamp or delete an unnecessary stamp.
Title
Enter the title to save the stamp you created.
Up to 64 characters can be entered.
Note
- Spaces, tabs, and returns cannot be entered at the beginning or end of a title.
Stamps
Shows a list of saved stamp titles.
Specify a title to display the corresponding stamp in Title.
Save/Save overwrite
Saves the stamp.
Enter a title in Title, and then click this button.
Delete
Deletes an unnecessary stamp.
Specify the title of an unnecessary stamp from the Stamps list, and click this button.
Background Tab
The Background tab allows you to select a bitmap file (.bmp) to be used as a background or determine how to print the selected background.
Preview Window
Shows the status of the bitmap set on the Background tab.
File
Specifies the name of the bitmap file to be used as the background.
Select File...
Opens the dialog box to open a file.
Click this button to select a bitmap file (.bmp) to be used as the background.
Layout Method
Specifies how the background image is to be placed on the paper.
When Custom is selected, you can set coordinates for X-Position and Y-Position.
Intensity
Adjusts the intensity of the bitmap to be used as a background.
Moving the slider to the right increases the intensity, and moving the slider to the left decreases the intensity. To print the background at the original bitmap intensity, move the slider to the rightmost position.
Note
- Depending on the type of printer driver you are using and the environment, this function may not be available.
- Click Defaults to set File to blank, Layout Method to Fill page, and the Intensity slider to the middle.
Save settings Tab
The Save settings tab allows you to register a new background or delete an unnecessary background.
Title
Enter the title to save the background image you specified.
Up to 64 characters can be entered.
Note
- Spaces, tabs, and returns cannot be entered at the beginning or end of a title.
Backgrounds
Shows a list of registered background titles.
Specify a title to display the corresponding background in Title.
Save/Save overwrite
Saves the image data as a background.
After inserting the Title, click this button.
Delete
Deletes an unnecessary background.
Specify the title of an unnecessary background from the Backgrounds list, and then click this button.
Maintenance tab Description
The Maintenance tab allows you to perform printer maintenance or change the settings of the printer.
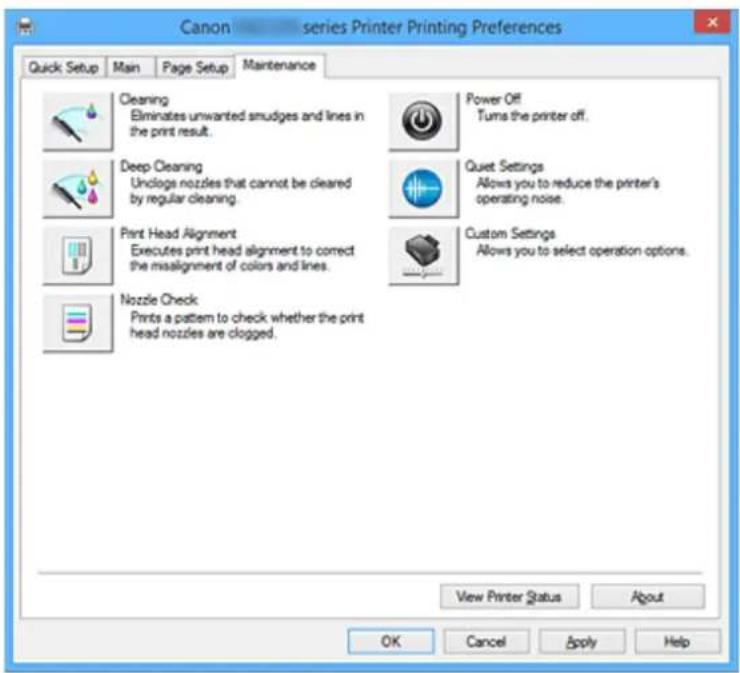
text_image
Canon series Printer Printing Preferences Quick Setup Main Page Setup Maintenance Cleaning Eliminates unwanted smudges and lines in the print result. Power Off Turns the printer off. Deep Cleaning Unclogs nozzles that cannot be cleared by regular cleaning. Quiet Settings Allows you to reduce the printer's operating noise. Print Head Alignment Executes print head alignment to correct the misalignment of colors and lines. Custom Settings Allows you to select operation options. Nozzle Check Prints a pattern to check whether the print head nozzles are clogged. View Printer Status About OK Cancel Apply Help
Cleaning
Performs print head cleaning.
Print head cleaning removes any blockage in the print head nozzles.
Perform cleaning when printing becomes faint, or a specific color fails to print, even though all ink levels are sufficiently high.
Deep Cleaning
Performs deep cleaning.
Perform deep cleaning when two cleaning attempts do not resolve the print head problem.

Note
- Deep Cleaning consumes a larger amount of ink than Cleaning.
Cleaning the print heads frequently will rapidly deplete your printer's ink supply. Therefore, perform cleaning only when necessary.
Ink Group
When you click Cleaning or Deep Cleaning, the Ink Group window is displayed.
Selects the ink group that you want to clean the print head for.
Click Initial Check Items to display the items that you need to check before you execute cleaning or deep cleaning.
Print Head Alignment
Print head alignment corrects the installation positions of the print head and improves deviated colors and lines.
Align the print head immediately after installing the print head.
When you click Print Head Alignment, the Start Print Head Alignment dialog box is displayed.
Nozzle Check
Prints a nozzle check pattern.
Perform this function if printing becomes faint or a specific color fails to print. Print a nozzle check pattern, and check whether the print head is working properly.
If the print result for a specific color is fainted, or if there are any unprinted sections, click Cleaning to clean the print head.
To display a list of items that you should check before printing the nozzle check pattern, click Initial Check Items.
Print Check Pattern
This function prints a pattern that allows you to check whether the any of the ink nozzles are clogged.
Click Print Check Pattern. When the confirmation message is displayed, click OK. The Pattern Check dialog box is then displayed.
Left-side bitmap (good)
The print head nozzles are not clogged.
Right-side bitmap (bad)
The print head nozzles may be clogged.
Exit
Closes the Pattern Check dialog box, and returns to the Maintenance tab.
Cleaning
Performs print head cleaning.
Print head cleaning removes any blockage in the print head nozzles.
Perform cleaning when printing becomes faint, or if a specific color fails to print, even though all ink levels are sufficiently high.
Power Off
Turns off the printer from the printer driver.
Perform this function to turn off the printer when you cannot press the ON button (POWER button) on the printer because the printer is out of your reach.
You must press the ON button (POWER button) on the printer to turn the printer on again after clicking this button. When you use this function, you will not be able to turn the printer on from the printer driver.

Quiet Settings
Opens the Quiet Settings dialog box.
Quiet Settings dialog box allows you to specify a setting that reduces the operating noise of the printer.
This mode comes in handy when the operating noise of the printer becomes a concern, such when printing at night. Perform this operation when you want to change the quiet mode setting.
Note
- If the printer is off or if communication between the printer and the computer is disabled, an error message may appear because the computer cannot collect the printer status.
Custom Settings
Opens the Custom Settings dialog box.
Perform this function to change the settings of this printer.
Note
- If the printer is off or if communication between the printer and the computer is disabled, an error message may appear because the computer cannot collect the printer status. If this happens, click OK to display the most recent settings specified on your computer.
View Print History
This function starts the Canon IJ XPS preview, and displays the print history.
Note
- You can use this function only with the XPS printer driver.
View Printer Status
Starts the Canon IJ Status Monitor.
Perform this function when you want to check the printer status and how a print job is proceeding.
Note
- If you are using the XPS printer driver, the "Canon IJ Status Monitor" becomes the "Canon IJ XPS Status Monitor".
About
Opens the About dialog box.
The version of the printer driver, plus a copyright notice, can be checked.
In addition, the language to be used can be switched.
Initial Check Items (Cleaning / Deep Cleaning)
Before running Cleaning or Deep Cleaning, check that the printer power is on, and open the cover of the printer.
Check the following items for each ink.
- Check the amount of ink remaining in the tank.
- Make sure that you push in the ink tank completely until you hear a clicking sound.
- If an orange tape is adhered to the ink tank, peel it off completely.
Any remaining tape will hinder ink output. - Check that the ink tanks are installed in their correct positions.
Start Print Head Alignment dialog box
This dialog box allows you to adjust the attachment position for the print head, or to print the current setting value for the print head position.
Align Print Head
Aligns the print head.
Print head alignment corrects the installation positions of the print head and improves deviated colors and lines.
Align the print head immediately after installing the print head.
Print Alignment Value
Click this button to check the current setting value of the print head position.
Prints the current setting value for the print head position.
Print Head Alignment dialog box
To adjust the print head position manually, click Align Print Head in the Start Print Head Alignment dialog box, and perform the operations instructed in the messages. The Print Head Alignment dialog box is then displayed.
This dialog box allows you to check the printed pattern and adjust the print head position.
Preview Window
Displays the pattern of Print Head Alignment, and checks the position of the selected pattern.
You can also change the setting by clicking the pattern on the screen directly.
Select the Pattern Number
Compare the printed adjustment patterns, and enter the pattern number of the pattern with the least visible streaks or horizontal stripes into the corresponding box.
Note
- If you do not know how to analyze the printed pattern, see Aligning the Print Head Position.
Initial Check Items (Nozzle Check)
Before running Nozzle Check, check that the printer power is on, and open the cover of the printer. Check the following items for each ink.
- Check the amount of ink remaining in the tank.
- Make sure that you push in the ink tank completely until you hear a clicking sound.
- If an orange tape is adhered to the ink tank, peel it off completely.
Any remaining tape will hinder ink output. - Check that the ink tanks are installed in their correct positions.
Quiet Settings dialog box
When you click Quiet Settings, the Quiet Settings dialog box is displayed.
Quiet Settings dialog box allows you to specify a setting that reduces the operating noise of the printer. Select when you wish to reduce the operating noise of the printer at night, etc.
Using this function may lower the print speed.
Do not use quiet mode
Select this option when you wish to use the printer with volume of normal operating noise.
Always use quiet mode
Select this option when you wish to reduce the operating noise of the printer.
Use quiet mode during specified hours
Select this option when you wish to reduce the operating noise of the printer during a specified period of time.
Set the Start time and the End time of the quiet mode you wish to be activated. If both are set to the same time, the quiet mode will not function.
Important
- You can set the quiet mode from the operation panel of the printer, the printer driver, or ScanGear (scanner driver).
No matter how you use to set the quiet mode, the mode is applied when you perform operations from the operation panel of the printer or printing and scanning from the computer.
Custom Settings dialog box
When you click Custom Settings, the Custom Settings dialog box is displayed.
If necessary, switch between various modes of printer operation.
Prevent paper abrasion
The printer can increase the gap between the print head and the paper during high-density printing to prevent paper abrasion.
Check this check box to enable this function.
Align heads manually
Usually, the Print Head Alignment function on the Maintenance tab is set to automatic head alignment, but you can change it to manual head alignment.
If the printing results of automatic print head alignment are not satisfactory, perform manual head alignment.
Check this check box to perform the manual head alignment.
Rotate 90 degrees left when orientation is [Landscape]
On the Page Setup tab, you can change the rotation direction of the Landscape in the Orientation.
To rotate the document 90 degrees to the left when printing, select the check box.
Note
- If Yougata 4 4.13"x9.25", Yougata 6 3.86"x7.48", Envelope Com 10, Envelope DL, Envelope C5, or Envelope Monarch 3.88"x7.5" 98.4x190.5mm is selected for Page Size on the Page Setup tab, the printer rotates the paper 90 degrees to the left to print, regardless of the Rotate 90 degrees left when orientation is [Landscape] setting for Custom Settings on the Maintenance tab.
Don't detect mismatch of paper settings when printing from computer
When you print documents from your computer and the paper settings on the printer driver and the cassette paper information registered on the printer do not match, this setting disables the message display and allows you to continue printing.
To disable detection of paper setting mismatches, select this check box.
Ink Drying Wait Time
The printer can pause before printing a subsequent page. Moving the slider to the right increases the pause time, and moving the slider to the left decreases the time.
If the paper gets stained because the next page is ejected before the ink on the printed page dries, increase the ink drying wait time.
Reducing the ink drying wait time speeds up printing.
About dialog box
When you click About, the About dialog box is displayed.
This dialog box displays the version, copyright, and module list of the printer driver. You can select the language to be used and switch the language displayed in the setup window.
Modules
Lists the printer driver modules.
Language
Specifies the language you wish to use in the printer driver setup window.
Important
- If the font for displaying the language of your choice is not installed in your system, the characters will be garbled.
Related Topics
→ Cleaning the Print Heads
→ Aligning the Print Head Position
→ Printing a Nozzle Check Pattern
→ Managing the Printer Power
→ Reducing the Printer Noise
→ Changing the Printer Operation Mode
Canon IJ Preview Description
Canon IJ Preview is an application software that displays what the print result will look like before a document is actually printed.
The preview reflects the information that is set within the printer driver and allows you to check the document layout, print order, and number of pages. You can also change the media type and paper source settings.
When you want to display a preview before printing, open the printer driver setup window, and check the
Preview before printing check box on the Main tab.
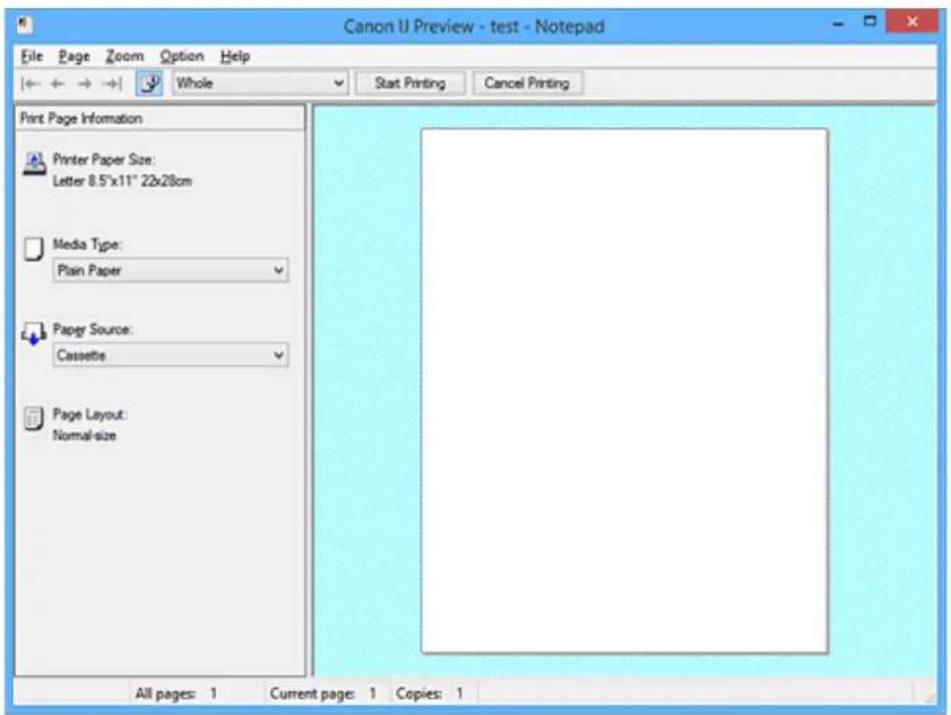
text_image
Canon U Preview - test - Notepad File Page Zoom Option Help ← ← → → Whole Start Printing Cancel Printing Print Page Information Printer Paper Size: Letter 8.5"x11" 22x28cm Media Type: Plain Paper Paper Source: Cassette Page Layout: Normal-size All pages: 1 Current page: 1 Copies: 1File Menu
Selects the print operation.
Start Printing
Ends the Canon IJ Preview and then starts printing the document that is displayed on the preview screen.
This command has the same function as the Start Printing on the toolbar.
Cancel Printing
Ends the Canon IJ Preview and cancels the printing of the document that is displayed on the preview screen.
This command has the same function as the Cancel Printing on the toolbar.
Exit
Ends the Canon IJ Preview.
Page Menu
This menu includes the following commands to select page to be displayed.
All of these commands except Page Selection... can also be selected from the toolbar.

Note
- If the pages are being spooled, the last spooled page becomes the last page.
- If the Page Layout setting on the Page Setup tab is specified to Page Layout, Tiling/Poster, or Booklet, the number of pages is the number of sheets to be used for printing, and not the number of pages in the original document created with the application software.
- If duplex printing manually has been set, the front pages which will be printed first are all displayed together, and then the back pages are displayed.
First Page
Displays the first page of the document.
If the currently displayed page is the first page, this command is grayed out and cannot be selected.
Previous Page
Displays the page located before the currently displayed page.
If the currently displayed page is the first page, this command is grayed out and cannot be selected.
Next Page
Displays the page located after the currently displayed page.
If the currently displayed page is the last page, this command is grayed out and cannot be selected.
Last Page
Displays the last page of the document.
If the currently displayed page is the last page, this command is grayed out and cannot be selected.
Page Selection...
Displays the Page Selection dialog box.
This command allows you to specify the page number of the page to be displayed.
Zoom Menu
Selects the ratio of the actual size printed on the paper to the preview display size.
You can also select the ratio from the drop-down list box located on the toolbar.
Whole
Displays the entire page of data as one page.
50%
Reduces the displayed data to 50% of the actual size to be printed.
100%
Displays the data at the actual size to be printed.
200%
Enlarges the displayed data to 200% of the actual size to be printed.
400%
Enlarges the displayed data to 400% of the actual size to be printed.
Option Menu
This menu includes the following command:
Displays Print Page Information
Displays print setup information (including printer paper size, media type, and page layout) for each page at the left side of the preview screen.
This screen also allows you to change the media type and paper source settings.
Help Menu
When you select this menu item, the Help window for Canon IJ Preview is displayed, and you can check the version and copyright information.
Start Printing button
Prints the documents selected in the document list.
The printed documents are deleted from the list, and when all documents are printed, the Canon IJ XPS Preview closes.
Cancel Printing button
Ends the Canon IJ Preview, and cancels the printing of the document that is displayed on the preview screen.
You can click this button while spooling.
Print Page Information Screen
Displays print setup information for each page at the left side of the preview screen.
This screen also allows you to change the media type and paper source settings.
Important
- If the media type and paper source are set from the application software, those settings have priority and the changed settings may become ineffective.
Printer Paper Size
Displays the paper size of the document to be printed.
Media Type
You can select the media type of the document to be printed.
Paper Source
You can select the paper source of the document to be printed.
Page Layout
Displays the page layout of the document to be printed.
Canon IJ XPS Preview Description
Canon IJ XPS Preview is an application software that displays what the print result will look like before a document is actually printed.
The preview reflects the information which is set within the printer driver and allows you to check the document layout, print order, and number of pages. The preview also allows you to edit the print document, edit the print pages, change the print settings, and perform other functions.
When you want to display a preview before printing, open the printer driver setup window, and check the
Preview before printing check box on the Main tab.

Important
- To use the Canon IJ XPS Preview, you must have Microsoft .NET Framework 4 Client Profile installed on your computer.
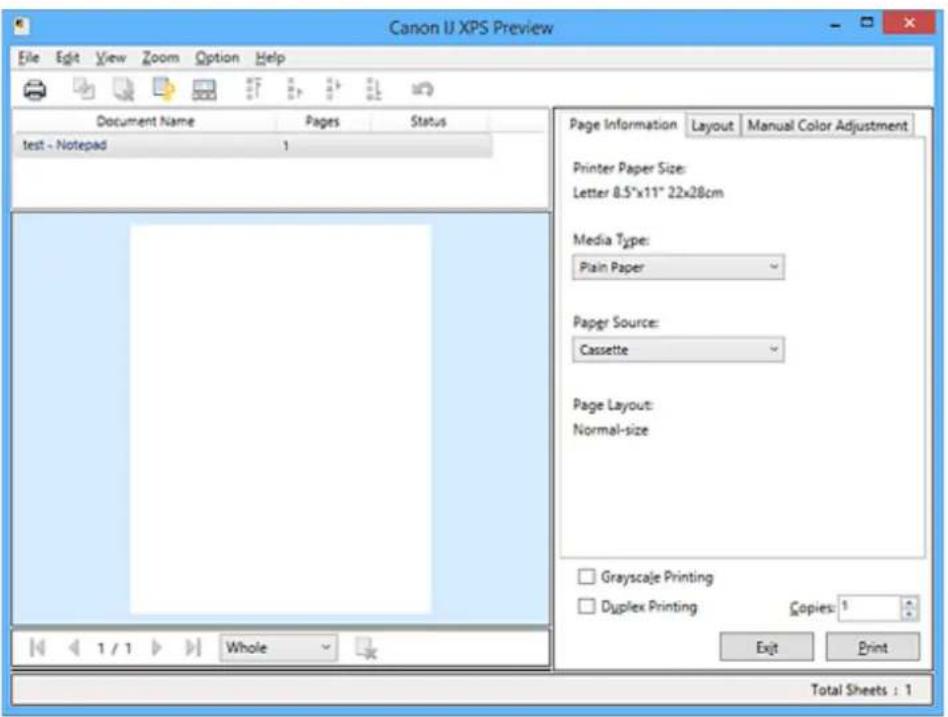
text_image
Canon IJ XPS Preview File Edit View Zoom Option Help Document Name Pages Status test - Notepad 1 Page Information Layout Manual Color Adjustment Printer Paper Size: Letter 8.5"x11" 22x28cm Media Type: Plain Paper Paper Source: Cassette Page Layout: Normal-size Grayscale Printing Duplex Printing Copies: 1 Exit Print Total Sheets : 1File Menu
Selects print operation and print history settings:
Prints the documents selected in the document list.
The printed documents are deleted from the list, and when all documents are printed, the Canon IJ XPS Preview closes.
This command has the same function as (Print) on the toolbar and the Print in the print settings area.
Print All Documents
Prints all documents in the document list and closes the Canon IJ XPS Preview.
Save Print History
Switches whether the documents printed from the Canon IJ XPS Preview are to be saved as print history entries.
History Entry Limit
Switches the maximum number of print history registrations.
Select 10 Entries, 30 Entries, or 100 Entries.
Important
- If the limit on the number of registration is exceeded, the print history registrations are deleted starting from the oldest one.
Add documents from history to the list
Adds the document saved in the print history to the document list.
Exit
Ends the Canon IJ XPS Preview. The documents remaining in the document list will be deleted from the list.
This command has the same function as the Exit in the print settings area.
Edit Menu
Selects the method for editing multiple documents or pages.
Undo
Reverses the previous change.
If the change cannot be reversed, this function is grayed out and cannot be selected.
This command has the same function as the (Undo) on the toolbar.
Documents
Selects the method for editing print documents.
Combine Documents
Combines the documents selected in the document list into one document.
If only one document is selected, this command is grayed out and cannot be selected.
This command has the same function as the (Combine Documents) on the toolbar.
Reset Documents
Returns the document selected in the document list to their status before they were added to the Canon IJ XPS Preview.
The combined documents are separated, and the original documents are restored.
This command has the same function as the (Reset Documents) on the toolbar.
Move Document
Use the following command to change the order of the documents selected in the document list.
Move to First
Moves the selected print document to the beginning of the document list.
If the currently selected document is the first document, this command is grayed out and cannot be selected.
Move Up One
Moves the selected print document one up from its current position.
If the currently selected document is the first document, this command is grayed out and cannot be selected.
Move Down One
Moves the selected print document one down from its current position.
If the currently selected document is the last document, this command is grayed out and cannot be selected.
Move to Last
Moves the selected print document to the end of the document list.
If the currently selected document is the last document, this command is grayed out and cannot be selected.
Delete Document
Deletes the selected document from the document list.
If the document list contains only one document, the document is grayed out and cannot be selected.
This command has the same function as the (Delete Document) on the toolbar.
Grayscale Printing
Allows you to change the monochrome print settings.
This command has the same functionality as the Grayscale Printing check box in the print settings area.
Page Layout Printing...
Opens the Page Layout Printing dialog box.
This dialog box allows you to set Page Layout Printing, Page Layout, Page Order, and
Page Border.
Duplex Printing...
Opens the Duplex Printing dialog box.
This dialog box allows you to set Duplex Printing, Automatic, Stapling Side, and Margin.
Copies...
Opens the Copies dialog box.
This dialog box allows you to set Copies, Collate, and Print from Last Page.
Pages
Selects the method for editing print pages.
Delete Page
Deletes the currently selected page.
If page layout printing is set, the pages enclosed with red frame will be deleted.
This command has the same function as the (Delete Page) on the toolbar.
Restore Page
Restores pages that were deleted with the Delete Page function.
To restore pages, you must select the View Deleted Pages check box on the Option menu and display the deleted pages as thumbnails.
Move Page
Use the following command to change the order of the currently selected pages.
Move to First
Moves the currently selected page to the beginning of the document.
If the currently selected page is the first page, this command is grayed out and cannot be selected.
Move Forward One
Moves the currently selected page one position in front of its current position.
If the currently selected page is the first page, this command is grayed out and cannot be selected.
Move Backward One
Moves the currently selected page one position after its current position.
If the currently selected page is the last page, this command is grayed out and cannot be selected.
Move to Last
Moves the currently selected page to the end of the document.
If the currently selected page is the last page, this command is grayed out and cannot be selected.
View Menu
Selects the documents and pages to be displayed.
Documents
Use the following command to select the document to display.
First Document
Displays the first document in the document list.
If the currently selected document is the first document, this command is grayed out and cannot be selected.
Previous Document
Displays the document located before the currently displayed document.
If the currently selected document is the first document, this command is grayed out and cannot be selected.
Next Document
Displays the document located after the currently displayed document.
If the currently selected document is the last document, this command is grayed out and cannot be selected.
Last Document
Displays the last document in the document list.
If the currently selected document is the last document, this command is grayed out and cannot be selected.
Pages
Use the following command to select the page to be displayed.
Note
- If the Page Layout setting in the printer driver is specified to Tiling/Poster, or Booklet, the number of pages is the number of sheets to be used for printing, and not the number of pages in the original document created with the application software.
First Page
Displays the first page of the document.
If the currently displayed page is the first page, this command is grayed out and cannot be selected.
Previous Page
Displays the page located before the currently displayed page.
If the currently displayed page is the first page, this command is grayed out and cannot be selected.
Next Page
Displays the page located after the currently displayed page.
If the currently displayed page is the last page, this command is grayed out and cannot be selected.
Last Page
Displays the last page of the document.
If the currently displayed page is the last page, this command is grayed out and cannot be selected.
Page Selection...
Displays the Page Selection dialog box.
This command allows you to specify the page number of the page to be displayed.
Zoom Menu
Selects the ratio of the actual size printed on the paper to the preview display size.
You can also select the ratio from the drop-down list box located on the toolbar.
Whole
Displays the entire page of data as one page.
50%
Reduces the displayed data to 50% of the actual size to be printed.
100%
Displays the data at the actual size to be printed.
200%
Enlarges the displayed data to 200% of the actual size to be printed.
400%
Enlarges the displayed data to 400% of the actual size to be printed.
Option Menu
Toggles the show / hide status of the following information.
View Thumbnails
Reduces all pages in the document selected in the document list and displays them at the bottom of the preview window.
This command has the same function as the (View Thumbnails) on the toolbar.
View Document List
Displays the print document list at the top of the preview window.
View Print Settings Area
Displays the print settings area at the right side of the preview window.
View Deleted Pages
When the thumbnails are displayed, this function displays pages that were deleted with the Delete
Page function.
To check deleted pages, you must first select the View Thumbnails check box.
Keep printed documents on the list
Leaves the printed document in the document list.
Print Settings Displayed at Startup
Switches the tab of the print settings area to be displayed when the Canon IJ XPS Preview is started.
Select Page Information, Layout, or Manual Color Adjustment.
Help Menu
When you select this menu item, the Help window for Canon IJ XPS Preview is displayed, and you can check the version and copyright information.

(Print)
Prints the documents selected in the document list.
The printed documents are deleted from the list, and when all documents are printed, the Canon IJ XPS Preview closes.

Combine Documents)
Combines the documents selected in the document list into one document.
If only one document is selected, this command is grayed out and cannot be selected.

Delete Document)
Deletes the selected document from the document list.
If the document list contains only one document, the document is grayed out and cannot be selected.

(Reset Documents)
Returns the document selected in the document list to their status before they were added to the Canon IJ XPS Preview.
The combined documents are separated, and the original documents are restored.

(View Thumbnails)
Reduces all pages in the document selected in the document list and displays them at the bottom of the preview window.
To hide the print pages, click View Thumbnails again.

(Move to First)
Moves the selected print document to the beginning of the document list.
If the currently selected document is the first document, this command is grayed out and cannot be selected.

(Move Up One)
Moves the selected print document one up from its current position.
If the currently selected document is the first document, this command is grayed out and cannot be selected.

(Move Down One)
Moves the selected print document one down from its current position.
If the currently selected document is the last document, this command is grayed out and cannot be selected.

(Move to Last)
Moves the selected print document to the end of the document list.
If the currently selected document is the last document, this command is grayed out and cannot be selected.

(Undo)
Reverses the previous change.
If the change cannot be reversed, this function is grayed out and cannot be selected.

(Delete Page)
Deletes the currently selected page.
If page layout printing is set, the pages enclosed with red frame will be deleted.
Document list
Displays the list of the print documents.
The document selected in the document list becomes the target for preview display and editing.
Document Name
Displays the name of the print document.
If you click the name of the selected print document, a text box is displayed, and you can rename the document to any name.
Pages
Displays the number of pages in the print document.

Important
- The number displayed in Pages and the output page count are different.
- To check the output page count, check the status bar at the bottom of the preview window.
Status
Displays the status of the print documents.
Documents that are undergoing data processing are displayed as Processing data.

Important
- Documents showing Processing data cannot be printed or edited.
Wait until the data processing ends.
Print Settings Area Screen
Allows you to check and change the print settings of the documents selected in the document list.
Print Settings Area is displayed on the right side of the preview window.
Page Information tab
The print settings are displayed for each page.
You can change the media type and paper source settings.
Printer Paper Size
Displays the paper size of the document to be printed.
Media Type
Allows you to select the media type of the document to be printed.
Paper Source
Allows you to select the paper source of the document to be printed.
Page Layout
Displays the page layout of the document to be printed.
Layout tab
You can specify settings for page layout printing.
To apply the specified settings, click Apply.
If the page layout print settings cannot be changed for the print document, the individual items are grayed out and cannot be selected.
Manual Color Adjustment tab
This tab allows you to adjust the color balance by changing the settings of the Cyan, Magenta,
Yellow, Brightness, Intensity, and Contrast options.
Cyan/Magenta/Yellow
Adjusts the strengths of Cyan, Magenta, and Yellow.
Moving the slider to the right makes a color stronger, and moving the slider to the left makes a color weaker.
You can also directly enter a value linked to the slider. Enter a value in the range from -50 to 50.
This adjustment changes the relative amount of ink of each color used, which alters the total color balance of the document.
Use your application software if you want to change the total color balance significantly. Use the printer driver only if you want to adjust the color balance slightly.

Important
- When Grayscale Printing is checked, Cyan, Magenta, and Yellow appear grayed out and are unavailable.
Brightness
Selects the brightness of your print.
Pure white and black will not change, but colors between white and black will change.
Intensity
Adjusts the overall intensity of your print.
Moving the slider to the right increases the intensity, and moving the slider to the left decreases the intensity.
You can also directly enter a value linked to the slider. Enter a value in the range from -50 to 50.
Contrast
Adjusts the contrast between light and dark in the image to be printed.
Moving the slider to the right increases the contrast, moving the slider to the left decreases the contrast.
You can also directly enter a value linked to the slider. Enter a value in the range from -50 to 50.
Defaults
Restores all the settings you have changed to their default values.
Clicking this button restores all the settings on this tab to their default values (factory settings).
Grayscale Printing
Allows you to change the monochrome print settings.
Duplex Printing
Selects whether to print the document on both sides or one side of a sheet of paper.
If the duplex print settings cannot be changed for the print document, this item is grayed out and is unavailable.
Important
- When you select Booklet for Page Layout, Duplex Printing of the print settings area will be set automatically. In this case, Duplex Printing is grayed out and is unavailable.
Copies
Specifies the number of copies you want to print. You can specify a value from 1 to 999.
If the numbers of copies cannot be changed for the print document, this item is grayed out and is unavailable.
Exit
Ends the Canon IJ XPS Preview.
The documents remaining in the document list will be deleted from the list.
Prints the documents selected in the document list.
The printed documents are deleted from the list, and when all documents are printed, the Canon IJ XPS Preview closes.
Canon IJ Status Monitor Description
The Canon IJ Status Monitor displays the status of the printer and the printing progress. The monitor uses graphics, icons, and messages to let you know the printer status.
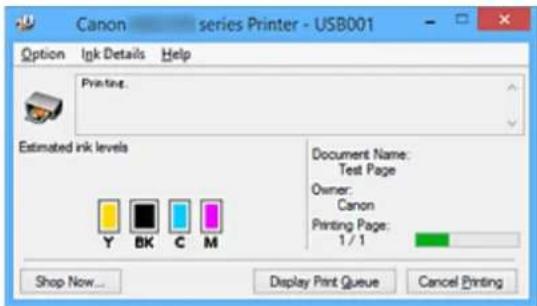
text_image
Canon - series Printer - USB001 Option Ink Details Help Printing. Estimated ink levels Document Name: Test Page Owner: Canon Printing Page: 1 / 1 Y BK C M Shop Now... Display Print Queue Cancel PrintingCanon IJ Status Monitor Features
The Canon IJ Status Monitor offers the following advantages:
You can check the status of the printer on the screen.
The status of the printer is shown on the screen in real time.
You can check the printing progress of each printing document (print job).
Error types and solutions are shown on the screen.
Shown when a printer error occurs.
You can immediately check how to respond.
You can check the ink status.
This function displays graphics showing the ink tank type and the estimated ink levels.
Icons and messages are displayed when ink is running low (ink level warning).
Canon IJ Status Monitor Overview
Canon IJ Status Monitor allows you to check the status of the printer and ink with graphics and messages.
You can check the information on the printing document and the printing progress during printing.
When a printer error occurs, it shows the cause and solution. Follow the instruction in the message.
Printer
Canon IJ Status Monitor shows an icon when a warning or error occurs to the printer.
! : Indicates that a warning (operator call error) has occurred or the printer is working.
: There has been an error which requires a service.
Ink Tank
Canon IJ Status Monitor shows an icon when a low ink warning or a no ink error occurs.
In addition, this function displays graphics showing the estimated ink levels of the ink tank.
In this case, click the graphics to open the Ink Details dialog box. You can check the detail information such as the remaining ink level and the ink tank types for your printer.
Document Name
Shows the name of the document to be printed.
Owner
Shows the owner's name of the document to be printed.
Printing Page
Shows the number of printing page and total printing pages.
Display Print Queue
Shows the print window used to manage the print job that is being printed or being in the print queue.
Cancel Printing
Cancels the current print job.

Important
- The Cancel Printing button is enabled only while print data is being sent to the printer. Once the print data has been sent, the button is grayed out and becomes unavailable.
Option Menu
If you select Enable Status Monitor, when a printer related message is generated the Canon IJ Status Monitor starts.
When Enable Status Monitor is selected, following commands are available.
Always Display Current Job
Displays the Canon IJ Status Monitor during printing.
Always Display on Top
Displays the Canon IJ Status Monitor in front of other windows.
Display Guide Message
Displays the guide for operations in which how to set paper is complicated.
Envelope Printing
Displays the guide message when envelope printing starts. To hide this guide message, select the Do not show this message again check box. To display the guide messages again, click Envelope Printing on the Display Guide Message in the Option menu and enable this setting.
Hagaki Printing
Displays the guide message before the printer begins hagaki printing. To hide this guide message, select the Do not show this message again check box. To display the guide messages again, click Hagaki Printing on the Display Guide Message in the Option menu and enable this setting.
Display Warning Automatically
When a Low Ink Warning Occurs
Starts the Canon IJ Status Monitor window automatically and displays it in front of the other windows when a low ink warning occurs.
Start when Windows is Started
Starts the Canon IJ Status Monitor automatically when you start Windows.
Ink Details Menu
Select this menu to display the Ink Details dialog box. Check the detail information such as the remaining ink level and the ink tank types for your printer.
Ink Details dialog box
This function displays graphics and messages showing the ink tank type and the estimated ink levels.
Ink Information (displayed at left)
Shows the ink tank types with graphics.
If a warning or error related to the remaining ink level occurs, the printer driver displays an icon to let you know.
If the icon is displayed, operate the printer according to the instructions displayed on the screen.
Message (displayed at right)
Shows information such as the ink status and ink colors with sentences.
Ink Model Number
Shows the ink tank types for your printer.
Close
Closes the Ink Details dialog box to return to Canon IJ Status Monitor.
Help Menu
When you select this menu item, the Help window for Canon IJ Status Monitor is displayed, and you can check the version and copyright information.
Updating the MP Drivers
Obtaining the Latest MP Drivers
▶ Deleting the Unnecessary MP Drivers
Before Installing the MP Drivers
Installing the MP Drivers
Obtaining the Latest MP Drivers
The MP Drivers include a printer driver, ScanGear (scanner driver), and fax driver.
By updating the MP Drivers to the latest version of the MP Drivers, unresolved problems may be solved.
You can access our website and download the latest MP Drivers for your model.

Important
- You can download the MP Drivers for free, but any Internet access charges incurred are your responsibility.
- Before installing the latest MP Drivers, delete the previously installed version.
Related Topics
Before Installing the MP Drivers
→ Installing the MP Drivers
Deleting the Unnecessary MP Drivers
The MP Drivers which you no longer use can be deleted.
When deleting the MP Drivers, first exit all programs that are running.
The procedure to delete the unnecessary MP Drivers is as follows:
1. Start the uninstaller
Select Control Panel -> Programs -> Programs and Features.
From the program list, select "XXX MP Drivers" (where "XXX" is your model name) and then click Uninstall.
The confirmation window for uninstalling the model appears.
Important
- A confirmation/warning dialog box may appear when starting, installing or uninstalling software. This dialog box appears when administrative rights are required to perform a task. When you are logged on to an administrator account, click Yes (or Continue, Allow) to continue. Some applications require an administrator account to continue. In such cases, switch to an administrator account, and restart the operation from the beginning.
2. Execute the uninstaller
Click Execute. When the confirmation message appears, click Yes.
When all the files have been deleted, click Complete.
The deletion of the MP Drivers is complete.
Important
- Printer driver, XPS printer driver, ScanGear (scanner driver), and fax driver will be deleted when you uninstall the MP Drivers.
Before Installing the MP Drivers
This section describes the items that you should check before installing the MP Drivers. You should also refer to this section if the MP Drivers cannot be installed.
Checking the Printer Status
- Turn off the printer.
Checking the Personal Computer Settings
- Terminate all running applications.
- Log on as a user who has the administrator account.

Important
- Before installing the latest MP Drivers, delete the previously installed version.
Related Topics
→ Obtaining the Latest MP Drivers
→ Installing the MP Drivers
Installing the MP Drivers
You can access our web site through the Internet and download the latest MP Drivers and XPS printer driver for your model.
The procedure for installing the downloaded MP Drivers is as follows:
- Turn off the printer
- Start the installer
Double-click the icon of the downloaded file.
The installation program starts.
Important
- A confirmation/warning dialog box may appear when starting, installing or uninstalling software. This dialog box appears when administrative rights are required to perform a task. When you are logged on to an administrator account, click Yes (or Continue, Allow) to continue. Some applications require an administrator account to continue. In such cases, switch to an administrator account, and restart the operation from the beginning.
- Install the MP Drivers
Take the appropriate action as described on the screen.
- Complete the installation
Click Complete.
Depending on the environment you are using, a message prompting you to restart the computer may be displayed. To complete the installation properly, restart the computer.
Important
- You can install the XPS printer driver with the same procedure for installing the MP Drivers. However, when installing the XPS printer driver, first complete installation of the MP Drivers.
- You can download the MP Drivers and XPS printer driver for free, but any Internet access charges incurred are your responsibility.
- Before installing the latest MP Drivers, delete the previously installed version.
Related Topics
→ Obtaining the Latest MP Drivers
→ Deleting the Unnecessary MP Drivers
Before Installing the MP Drivers
Printing Using a Web Service
Using PIXMA/MAXIFY Cloud Link
▶ Printing with Google Cloud Print
Using PIXMA/MAXIFY Cloud Link
By using PIXMA/MAXIFY Cloud Link, you can connect your printer to a cloud service, such as CANON iIMAGE GATEWAY, Evernote, or Twitter, and use the following functions without using a computer:
- Print images from a photo-sharing service
- Print documents from a data management service
- Save scanned images to a data management service.
- Use Twitter to report the printer status, such as no paper or low ink levels.
In addition, you can use various functions by adding and registering apps that are linked with various cloud services.
Using PIXMA/MAXIFY Cloud Link from Your Printer
Using PIXMA/MAXIFY Cloud Link from Your Smartphone, Tablet, or Computer
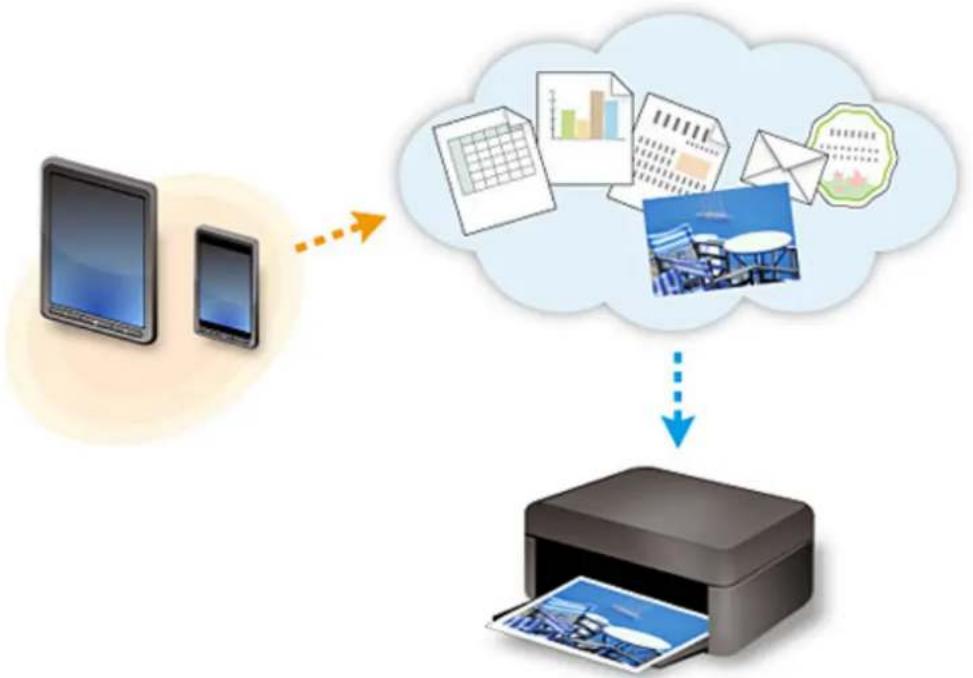
flowchart
graph TD
    A["Input Device"] --> B["Printer"]
    C["External Thought"] --> B
    B --> D["Output Photo"]

Important
- In certain countries, PIXMA/MAXIFY Cloud Link may not be available or the available apps may be different.
- Some apps require that you have an account before you use those apps. For such apps, please set up an account beforehand.
- To find out which models support PIXMA/MAXIFY Cloud Link check the Canon homepage.
• The screen display may change without prior notice.
Printing with Google Cloud Print
The printer is compatible with Google Cloud Print™ (Google Cloud Print is a service provided by Google Inc.).
By using Google Cloud Print, you can print from anywhere with applications or services supporting Google Cloud Print.
Sending Print Data and Printing via Internet
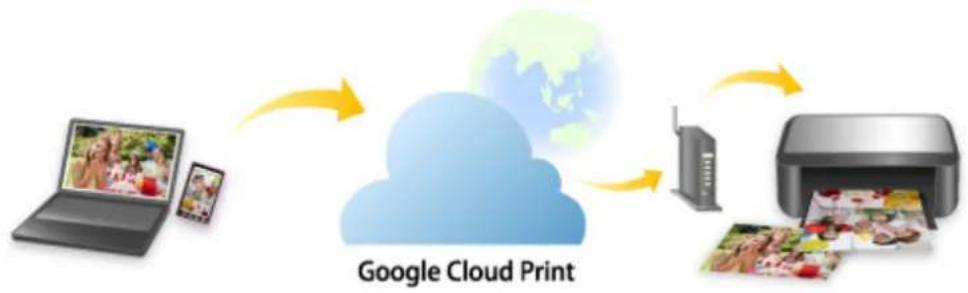
flowchart
graph LR
    A["Laptop"] -->|Data Image| B["Cloud"]
    B --> C["Global Map"]
    C --> D["Printer"]
    D --> E["Print"]
    E --> F["Product Image"]
    style A fill:#f9f,stroke:#333
    style B fill:#ccf,stroke:#333
    style C fill:#cfc,stroke:#333
    style D fill:#fcc,stroke:#333
    style E fill:#cff,stroke:#333
    style F fill:#ffc,stroke:#333
Once you register the printer to Google Cloud Print, you can print from applications or services supporting Google Cloud Print without internet connection.
Sending Print Data and Printing without Going through Internet
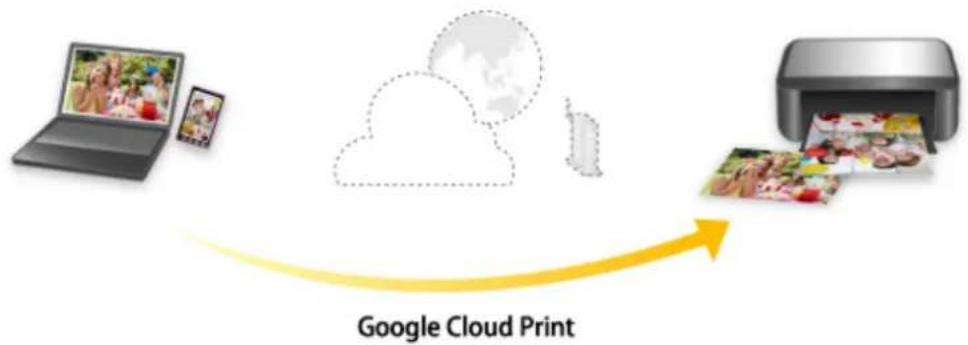
flowchart
graph LR
    A["Laptop"] --> B["Cloud"]
    C["Image"] --> B
    D["Printer"] --> E["Print Image"]
    B --> F["Google Cloud Print"]
    E --> F
Important
- This function may not be available depending on the country or region you live in.
-
To use Google Cloud Print, you need to get Google account and register the printer with Google Cloud Print in advance.
Additionally, LAN connection with the printer and internet connection are required to register the printer to Google Cloud Print. Internet connection fees apply. -
Getting Google Account
-
Registering Printer with Google Cloud Print
-
Printing from Computer or Smartphone with Google Cloud Print
Important
- When the printer owner changes, delete its registration from Google Cloud Print.
→ Deleting Printer from Google Cloud Print
LAN connection with the printer and internet connection are required to delete the printer from Google Cloud Print. Internet connection fees apply.
Getting Google Account
To print with Google Cloud Print, you need to get Google account and register the printer with Google Cloud Print in advance.

Note
- If you already have Google account, register the printer to Google Cloud Print.
→ Registering Printer with Google Cloud Print
Access to Google Cloud Print with the web browser on the computer or the mobile device and register the required information.
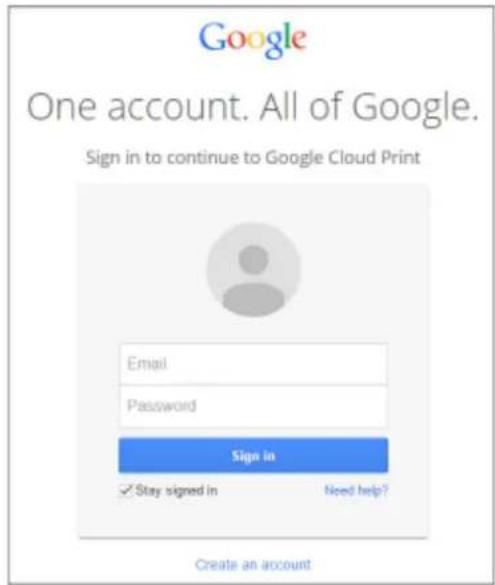
text_image
Google One account. All of Google. Sign in to continue to Google Cloud Print Email Password Sign in ✓ Stay signed in Need help? Create an account* The screen above may change without prior notice.
Registering Printer with Google Cloud Print
The printer can be registered to Google Cloud Print with the following two methods.
→ Registration Using Google Chrome
→ Registration Using Printer
Important
- If you have not gotten Google account, get it.
→ Getting Google Account - When the printer owner changes, delete its registration from Google Cloud Print.
→ Deleting Printer from Google Cloud Print
• LAN connection with the printer and internet connection are required to register the printer to Google Cloud Print and to delete it. Internet connection fees apply.
Registration Using Google Chrome
- Start Google Chrome browser on your computer.
- Select Sign in to Chrome... from (Chrome menu).
- Log in to your Google account.
- Select Settings from (Chrome menu).
- Select Show advanced settings... to display information.
- Select Manage for Google Cloud Print.
- When Canon MB2100 series and Add printers button are displayed, select Add printers.
- When confirmation message for registering printer appears, select OK.
- When register confirmation screen is displayed on printer's LCD, select Yes and press OK button.
Printer registration is complete.
Registration Using Printer
Important
- Entering the administrator password may be required depending on the range of administrator password.
-
Make sure printer is turned on.
-
Select Setup on HOME screen.
→ LCD and Operation Panel
-
Select Web service setup and press OK button.
-
Select Web service connection setup -> Google Cloud Print setup -> Register with Google Cloud Print.
Note
- If you have already registered the printer with Google Cloud Print, the confirmation message to re-register the printer is displayed.
-
When confirmation screen to register printer is displayed, select Yes and press OK button.
-
Select language on print setting screen of Google Cloud Print and press OK button.
The confirmation message to print the authentication URL is displayed.
- Load A4 or Letter-sized plain paper and press OK button.
The authentication URL is printed.
-
Make sure authentication URL is printed, select Yes, and then press OK button.
-
Perform authentication process using web browser on computer or mobile device.
Access to the URL using the web browser on the computer or the mobile device and perform the authentication process following the on-screen instructions.
Important
- Accessing to printed URL and performing the authentication process have to be carried out quickly.
- If you exceed time limit of the authentication process, an error message is displayed on the LCD. Press the OK button. When the confirmation message to print the authentication URL is displayed, try again from step 7.

Note
- Perform the authentication process with your Google account which you have gotten in advance.
- When message that registration is complete is displayed on printer's LCD, press OK button.
When authentication process is complete properly, the registration items are displayed. When authentication process is complete, you can print the data with Google Cloud Print.
Printing from Computer or Smartphone with Google Cloud Print
When you send print data with Google Cloud Print, the printer receives the print data and prints it automatically.
When printing from a smartphone, tablet, computer, or other external device by using Google Cloud Print, load paper into the printer in advance.
You can print with Google Cloud Print with the following two methods.
- Printing via internet
LAN connection with the printer and internet connection are required.
→ Sending Print Data via Internet
- Printing without going through internet
Local network connection with the printer or enabling printer's direct connection is required. Enabling Bonjour on the printer is required.
→ Sending Print Data without Going through Internet
Note
- Depending on the communication status, it may take a while to print the print data or the printer may not receive the print data.
- While printing with Google Cloud Print, the printing may be canceled depending on the printer's status, such as when the printer is being operated or an error has occurred. To resume printing, check the printer's status and print with Google Cloud Print again.
- For print settings:
- If you select the media type other than plain paper or if you select the paper size other than A4 or Letter size, the print data is printed in single-sided even when you select the duplex print setting.
- If you select plain paper as media type or if you select B5/A5-size as paper size, the print data is printed with border even when you select the borderless print setting.
- The print results may differ from the print image depending on the print data.
- Depending on the device sending the print data, you may not select the print settings when sending the print data with Google Cloud Print.
Sending Print Data via Internet
This section describes the operation to send print data from Google Chrome browser on the computer. The operation differs depending on the device, applications, or services.
Important
• LAN connection with the printer and internet connection are required to sending print data via internet. Internet connection fees apply.
- Make sure printer is turned on.

Note
- If the printer's Auto Power On function is enabled, the printer is turned on automatically when it receives the print data.
-
Start Google Chrome browser on your computer.
-
Select Sign in to Chrome... from (Chrome menu).
-
Log in to your Google account.
-
Select Print... from (Chrome menu).
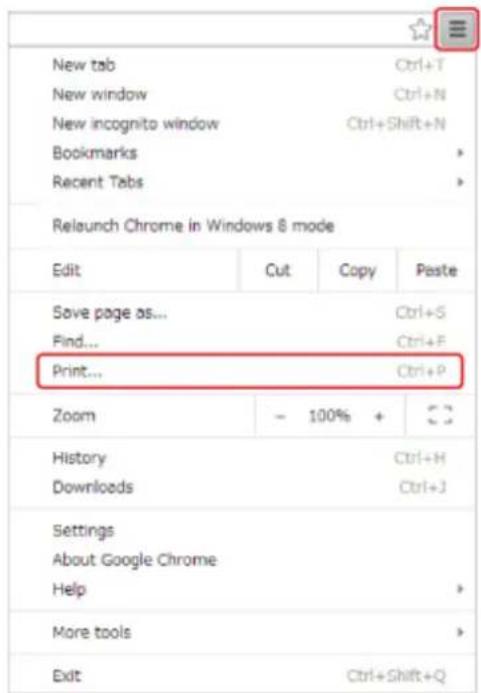
text_image
New tab Ctrl+T New window Ctrl+N New incognito window Ctrl+Shift+N Bookmarks Recent Tabs Relaunch Chrome in Windows 8 mode Edit Cut Copy Paste Save page as... Ctrl+S Find... Ctrl+F Print... Ctrl+P Zoom - 100% + History Ctrl+H Downloads Ctrl+J Settings About Google Chrome Help More tools Exit Ctrl+Shift+Q- Select Change... next Destination.
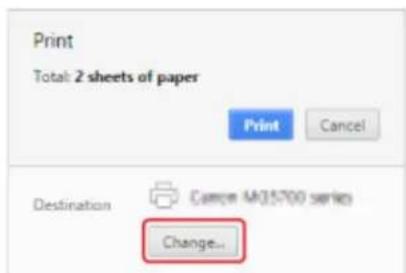
text_image
Print Total: 2 sheets of paper Print Cancel Destination Canon MG35700 series Change...-
Select Canon MB2100 series in Google Cloud Print.
-
Select Print.
When the preparation for printing with Google Cloud Print is complete, the printer receives the print data and prints it automatically.
When you want to print from Google Cloud Print immediately
When the printer cannot receive the print data, or you want to start printing immediately, you can check whether there is a print job on the Google Cloud Print and start printing manually.
Follow the steps below.
-
Make sure printer is turned on.
-
Select Setup on HOME screen.
→ LCD and Operation Panel
- Select Web service inquiry and press OK button.


Note
- If you have not registered the printer with Google Cloud Print, Web service inquiry is not displayed.
- Select Print from Google Cloud Print and press OK button.
The confirmation screen to check is displayed.
- Select Yes and press OK button.
If there is the print data, the printer receives the print data and prints it.
Sending Print Data without Going through Internet
This section describes the operation to send print data from Google Chrome browser on the computer. The operation differs depending on the device, applications, or services.
Important
- Local network connection with the printer or enabling printer's direct connection is required.
-
Enabling Bonjour on the printer is required.
-
Make sure printer is turned on.
Note
- If the printer's Auto Power On function is enabled, the printer is turned on automatically when it receives the print data.
-
Start Google Chrome browser on your computer.
-
Select Sign in to Chrome... from (Chrome menu).
-
Log in to your Google account.
-
Select Print... from (Chrome menu).
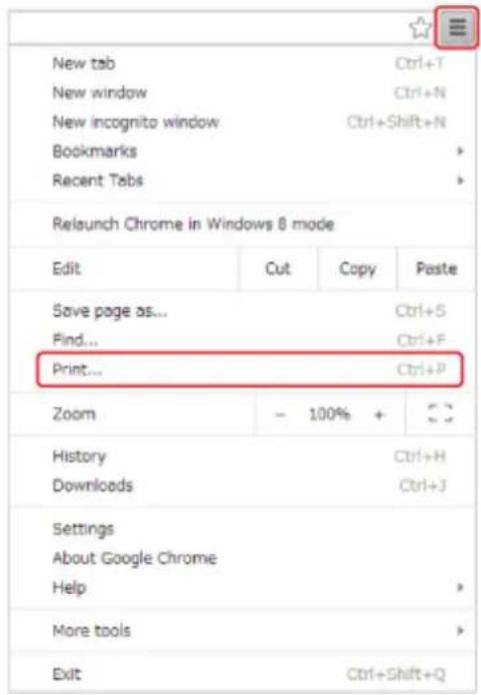
text_image
New tab Ctrl+T New window Ctrl+N New incognito window Ctrl+Shift+N Bookmarks Recent Tabs Relaunch Chrome in Windows 8 mode Edit Cut Copy Paste Save page as... Ctrl+S Find... Ctrl+F Print... Ctrl+P Zoom - 100% + History Ctrl+H Downloads Ctrl+J Settings About Google Chrome Help More tools Exit Ctrl+Shift+Q- Select Change... next Destination.
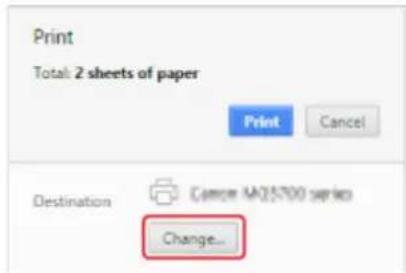
text_image
Print Total: 2 sheets of paper Print Cancel Destination Cancer MO5700 series Change...-
Select Canon MB2100 series in Local Destinations.
-
Select Print.
When the preparation for printing with Google Cloud Print is complete, the printer receives the print data and prints it automatically.
Deleting Printer from Google Cloud Print
If the printer's owner changes or if you want to re-register the printer, delete it from Google Cloud Print by following the steps below.
The printer can be deleted from Google Cloud Print with the following two methods.
Deletion Using Google Chrome
Deletion Using Printer
Important
• LAN connection with the printer and internet connection are required to delete the printer from Google Cloud Print. Internet connection fees apply.
Deletion Using Google Chrome
- Start Google Chrome browser on your computer.
- Select Sign in to Chrome... from (Chrome menu).
- Log in to your Google account.
- Select Settings from (Chrome menu).
- Select Show advanced settings... to display information.
- Select Manage for Google Cloud Print.
- Select Manage next Canon MB2100 series on device list.
- Select Delete.
- When confirmation message for deleting printer appears, select OK.
Deletion Using Printer
Important
- Entering the administrator password may be required depending on the range of administrator password.
- Make sure printer is turned on.
- Select Ship on HOME screen.

→ LCD and Operation Panel

-
Select Web service setup and press OK button.
-
Select Web service connection setup -> Google Cloud Print setup -> Delete from Google Cloud Print.
-
When confirmation screen to delete printer is displayed, select Yes and press OK button.
-
When message that deletion is complete is displayed, press OK button.
Printing from an AirPrint-enabled Printer with Mac
Using AirPrint to print from your iPhone, iPad, iPod touch, or Mac.
AirPrint enables you to print photos, email, Web pages and documents from iPhone, iPad, iPod touch, and Mac without the need to install drivers, or download apps or software.
Note
- If you want to print using AirPrint from iOS device, see below.
→ Printing from an AirPrint-enabled Printer with iOS Device
Checking Your Environment
First, check your environment.
• AirPrint Operation Environment
- iPhone, iPad, and iPod touch running the latest version of iOS
• Mac running the latest version of Mac OS
- Requirement
The iOS device or Mac and the printer must be connected to the same network over a LAN or connected directly without wireless router.
Adding Printer as AirPrint Printer to Your Mac
- Open System Preferences, and select Printers & Scanners (Print & Scan) on your Mac.
- Select + to display the printer list.
- Select the printer's name listed as Bonjour Multifunction.
- Select Secure AirPrint or AirPrint from Use.
- Select Add.
Printing with AirPrint from Mac
- Make sure printer is turned on.

Note
- If the printer's Auto Power On function is enabled, the printer is turned on automatically when it receives the print data.
- Load paper.
- Perform printing on your application software.
Print dialog appears.
- Select your model name added as AirPrint printer from the Printer list in the Print Dialog.
- Set the paper size, media type, and other settings as needed.
- Select Print.
When you execute printing, the printer prints according to the specified settings.
Note
- For wireless LAN connection:
• After you turn on the printer, it may take few minutes before the printer can communicate through a wireless LAN connection. Make sure the printer is connected to the wireless LAN and try printing.
- If Bonjour on the printer is disabled, AirPrint cannot be used. Check the LAN settings on the printer, and enable Bonjour.
- For other AirPrint troubleshooting, see below.
→ Cannot Print Using AirPrint
Checking Print Status
→ Display the Printing Status Screen
Deleting Print Job
To delete a print job with AirPrint, use one of the following two methods:
- From printer: Use Stop button to cancel the print job.
- From iOS device: Deleting the Undesired Print Job
Printing from a Device Equipped with Windows 10 Mobile
You can print from a device equipped with Windows 10 Mobile.
This function enables you to print photos, email, Web pages and documents from Windows 10 without the need to install drivers, or download apps or software.
Checking Your Environment
First, check your environment.
• Operation Environment
Windows 10
- Requirement
The Windows device and the printer must be connected to the same network over a LAN or connected directly without wireless router.
Adding Printer to Your Windows Device
To add the printer, refer to Windows 10 help.
Printing from Windows Device
- Make sure printer is turned on.
Note
- If the printer's Auto Power On function is enabled, the printer is turned on automatically when it receives the print data.
-
Load paper.
-
Select command that you perform printing on application software.
In general, select Print on the File menu to open the Print dialog box.
-
Select your model name.
-
Set the paper size, media type, and other settings as needed.
-
Select Print.
When you execute printing, the printer prints according to the specified settings.
Printing from Smartphone/Tablet
▶ Printing Directly from Smartphone/Tablet
▶ Printing Using a Web Service
Printing Directly from Smartphone/Tablet
Android Print
▶ Printing from an AirPrint-enabled Printer with iOS Device
▶ Printing from a Device Equipped with Windows 10 Mobile
▶ Using Machine with Direct Connection
Android Print
You can print to a Canon printer from your Android smartphone or tablet by installing a printing plug-in.
Installing Printing Plug-in
• Installing Canon Print Service
Canon Print Service is a printing plug-in for Android 4.4.2 or later, and is available for free on Google Play. Install the plug-in and activate it.
→ Printing Using Canon Print Service
• Installing Mopria Print Service
Mopria Print Service is a plug-in that allows printing to a Mopria authentication printer from Android 4.0 or later, and is available for free on Google Play. Install the plug-in and activate it.
See the Mopria homepage (http://www.mopria.org) for details.
→ Printing Using Mopria Print Service
Important
- Internet connection is required to download the printing plug-in. Internet connection fees apply.
Printing Using Canon Print Service
Important
- The operation may differ depending on your Android device or your application.
- Activate the plug-in after installing it to your Android device. The service is not enabled immediately after installing.
-
You can print using Canon Print Service with wireless LAN.
-
Make sure printer is turned on.
- Load paper.
- Perform print operation on your application of Android device.
- Select printer on your application of Android device.
Select the printer that is displayed with your printer's name and "Canon Print Service".
- Specify number of copies, paper size, etc if necessary.
- Start printing.
When you execute printing, the printer prints according to the specified settings.
Printing Using Mopria Print Service
Important
- The operation may differ depending on your Android device or your application.
- Activate the plug-in after installing it to your Android device. The service is not enabled immediately after installing.
-
You can print using Mopria Print Service with wireless LAN or with the printer's direct connection.
-
Make sure printer is turned on.
-
Load paper.
-
Perform print operation on your application of Android device.
-
Select printer on your application of Android device.
Select the printer that is displayed with your printer's name and "Mopria Print Service".
-
Specify number of copies, paper size, etc if necessary.
-
Start printing.
When you execute printing, the printer prints according to the specified settings.
Printing from an AirPrint-enabled Printer with iOS Device
Using AirPrint to print from your iPhone, iPad, iPod touch, or Mac.
AirPrint enables you to print photos, email, Web pages and documents from iPhone, iPad, iPod touch, and Mac without the need to install drivers, or download apps or software.
Note
- If you want to print using AirPrint from Mac, see below.
→ Printing from an AirPrint-enabled Printer with Mac
Checking Your Environment
First, check your environment.
• AirPrint Operation Environment
- iPhone, iPad, and iPod touch running the latest version of iOS
• Mac running the latest version of Mac OS
- Requirement
The iOS device or Mac and the printer must be connected to the same network over a LAN or connected directly without wireless router.
Printing with AirPrint from iOS Device
- Make sure printer is turned on.
Note
- If the printer's Auto Power On function is enabled, the printer is turned on automatically when it receives the print data.
- Load paper.
- Tap operation icon to display menu options from applications of your iOS device.
The figure below is an example of when printing from the iPad web browser. The screen differs depending on the devices or applications.
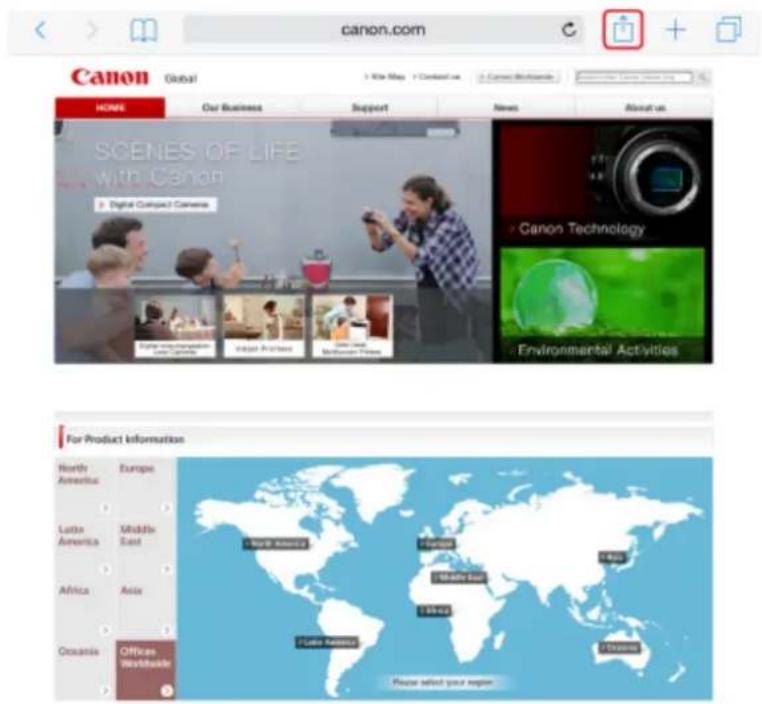
text_image
canon.com Canon Global HOME Our Business Support News About us SCENES OF LIFE with Canon Digital Compound Camera Canon Technology Environmental Activities For Product Information North America Europe Latin America Middle East Africa Asia Oceania Offices Worldwide World: America Europe Middle East Africa Asia Lima: America Europe Lima: Europe Lima: Africa Lima: Latin America Lima: Latin America Please select your region.4. Tap Print from menu options.
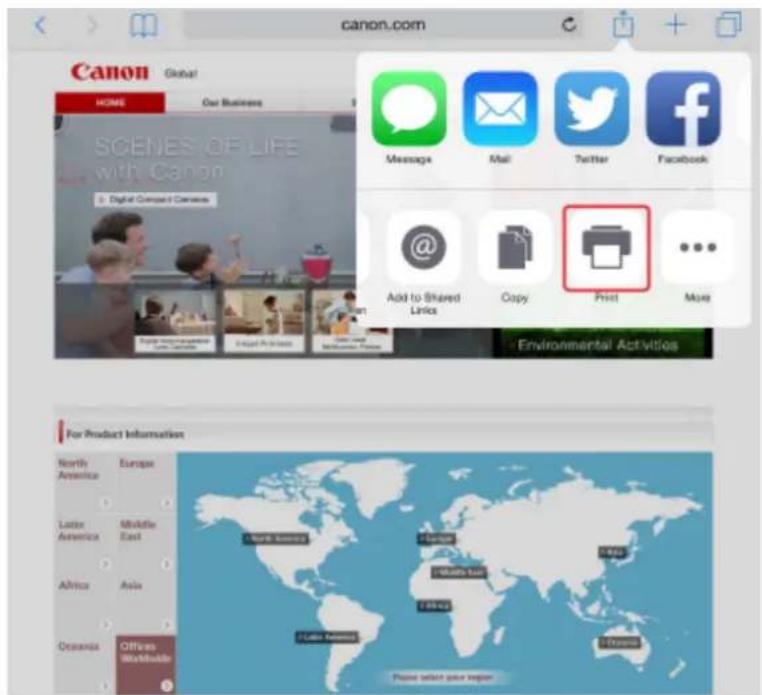
text_image
canon.com Canon GLOBAL HOME Our Business SCENES OF LIFE with Canon Digital Compact Camera Message Mail Twitter Facebook Add to Shared Links Copy Print More Environmental Activities For Product Information North America Europe Latin America Middle East Africa Asia Oceania Officans Worldwide World America Ecuador Mobile Latin USA China Please select your region5. Select your model name from Printer on Printer Options.
Important
- Because some applications do not support AirPrint, Printer Options may not be displayed. If an application does not let you use printer options, you cannot print from that application.

Note
- Printer Options differ depending on the application that you are using.
-
When printing file type that has multiple pages, such as PDF file, tap Range and tap All Pages or select range of pages to be printed.
-
For 1 Copy, tap + or - to set number of required copies.
-
For Duplex Printing, tap On to enable duplex printing or tap Off to disable function.
-
Tap Print.
When you execute printing, the printer prints according to the specified settings.
Note
- For wireless LAN connection:
• After you turn on the printer, it may take few minutes before the printer can communicate through a wireless LAN connection. Make sure the printer is connected to the wireless LAN and try printing.
- If Bonjour on the printer is disabled, AirPrint cannot be used. Check the LAN settings on the printer, and enable Bonjour.
- For other AirPrint troubleshooting, see below.
→ Cannot Print Using AirPrint
Paper Size
With AirPrint, the paper size is selected automatically according to the application being used on the iOS device and the region in which AirPrint is used.
When you use the photo application, the default paper size is L size in Japan, and 4"x6" or KG in other countries and regions.
When you use the document application, the default paper size is letter size in the U.S. region, and A4 in Japan and Europe.
Important
- Depending on the device or operation system, the default paper size is different from above size.
We recommend you perform test printing.
- Your application may support different paper sizes.
Printing of Envelopes
For printing on the envelope from iOS device with AirPrint, refer to the following.
Print result image Orientation of print data Orientation of loading envelope
| Load the envelope in vertically with the address side facing down so that the folded flap of the envelope will be faced up on the right side. |
Checking Print Status
During printing, a Print Center icon is displayed in the list of recently used applications and you can use it to check the print progress.
Press the Home button on the iOS device twice to set the Multitasking mode. Then swipe to the right to display the Print Center icon and a Print Summary.
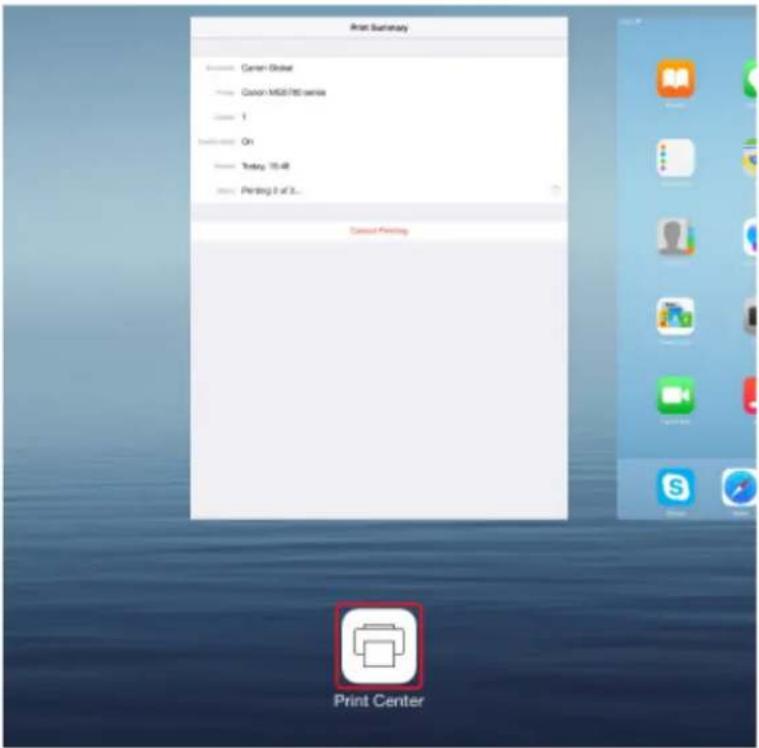
text_image
Print Summary Canon Global Canon MG8/190 series 1 On Today 10:48 Printing 2 of 2... Print CenterDeleting Print Job
To delete a print job with AirPrint, use one of the following two methods:
- From printer: Use Stop button to cancel the print job.
- From iOS device: Press the Home button on the iOS device twice to set the Multitasking mode and swipe to the right. Tap the Print Center icon to display a Print Summary. Tap the print job to be canceled and tap Cancel Printing.
Using Machine with Direct Connection
You can connect devices (e.g. smartphone, or tablet) to the printer by two methods below.
- Wireless connection (connecting devices via a wireless router)
- Direct wireless connection (connecting devices using direct connection)
This section describes direct connection, which allows you to print or scan by connecting the devices to the printer directly.
Follow the procedure below to use direct connection.
- Enable direct connection.
- Connect devices to printer.
- Perform printing or scanning operation.
This section also describes changing direct connection to wireless LAN.
→ Changing Printer Setting to Use Wireless LAN
Important
- The administrator password is required to change settings if it is enabled for changing settings using the operation panel.
- You can connect up to 5 devices to the printer at the same time.
- Check the usage restrictions and switch the printer to the direct connection.
→ Restrictions
Preparing for Direct Connection
Change settings below to prepare for direct connection.
- Printer's LAN settings
→ Changing Printer's Settings - Settings of a device to connect
Changing Settings of a Device and Connecting It to the Printer
Changing Printer's Settings
-
Make sure printer is turned on.
-
Select Setup on HOME screen.
→ LCD and Operation Panel
-
Select Device settings and press OK button.
-
Select LAN settings and press OK button.
-
Select Change LAN and press OK button.
- Select Activate direct connect. and press OK button.
- Select Yes and press OK button.
The identifier (SSID) for direct connection appears.
The device detects the printer by the identifier (SSID).
Note
- If you press the right Function button, select Yes and press the OK button, the following items appear.
- Security setting
- Password
- Printer's name which appears on a Wi-Fi Direct compatible device
The password is required when connecting a device to the printer. Depending on the device you are using, no password is required.
When you connect a Wi-Fi Direct compatible device to the printer, select the device name displayed on the LCD from your device.
- The identifier (SSID) and the security setting are specified automatically. To update them, see below.
→ Changing Direct Connection Setting
8. Press OK button.
The direct connection is enabled and a device can be connected to the printer wirelessly.
Changing Settings of a Device and Connecting It to the Printer
- Turn on wireless communication on your device.
Enable "Wi-Fi" on your device's "Setting" menu.
For more on turning on wireless communication, see your device's instruction manual.
- Select "DIRECT-XXXX-MB2100series" ("X" represents alphanumeric characters) from list displayed on device.
Note
- If "DIRECT-XXXX-MB2100series" does not appear on the list, direct connection is not enabled.
See Changing Printer's Settings to enable direct connection.
- Enter password.
Your device is connected to the printer.
Note
- Check the password for the direct connection.
Check by one of the following methods.
- Display on the LCD.
→ LAN settings
- Print the network settings.
→ Printing Network Settings
- Depending on the device you are using, entering the password is required to connect a device to the printer via wireless LAN. Enter the password specified for the printer.
- If your Wi-Fi Direct compatible device is set to prioritize using Wi-Fi Direct and it is connecting to the printer, the printer displays a confirmation screen asking if you allow the device to connect to the printer.
Make sure the name on the LCD is the same as that of your wireless communication device, select Yes, and then press the OK button.
Printing/Scanning with Direct Connection
Connect a device and the printer and start printing/scanning.
Note
- For more on printing or scanning from a device via wireless LAN, refer to the device's or application's instruction manual.
- You can print/scan from your smartphone or tablet by installing Canon PRINT Inkjet/SELPHY. Download it from App Store and Google Play.
→ For iOS
→ For Android
Changing Printer Setting to Use Wireless LAN
Follow the procedure below to change the printer setting to use wireless LAN.
- Select

on HOME screen.
→ LCD and Operation Panel
- Select

e settings and press OK button.
-
Select LAN settings and press OK button.
-
Select Change LAN and press OK button.
-
Select Activate wireless LAN and press OK button.
If you do not use the printer over wireless LAN, select Disable LAN.
Changing Direct Connection Setting
Change the settings for the direct connection following the procedure below.
-
Make sure printer is turned on.
-
Select Setup on HOME screen.
→ LCD and Operation Panel
-
Select Device settings and press OK button.
-
Select LAN settings and press OK button.
-
Select Other settings and press OK button.
-
Select Direct connection settings and press OK button.
-
Select an item and press OK button.
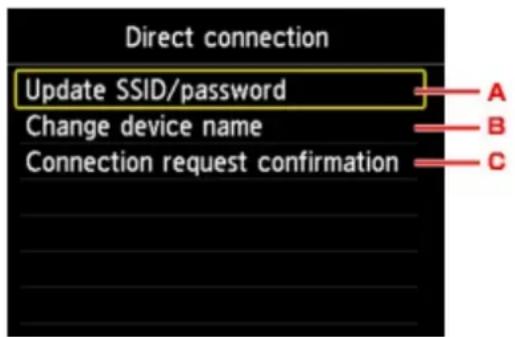
text_image
Direct connection Update SSID/password Change device name Connection request confirmation A B C- To update the identifier (SSID) and the password for direct connection Selecting A and pressing the OK button displays the confirmation screen. To update the identifier (SSID) and the password, select Yes and press the OK button.
To check the security setting and the updated password, press the right Function button select Yes on the screen displayed next and press the OK button.
- To change the printer's name displayed on the Wi-Fi Direct compatible device Selecting B and pressing the OK button displays the screen to specify the device name. Follow the procedure below to change the name.
- Press OK button.
-
Enter device name (up to 32 characters).
-
Press left Function button to finish entering device name.
- To change the confirmation screen setting when a Wi-Fi Direct compatible device is connecting to the printer
Selecting C and pressing the OK button displays the confirmation screen. If you want the printer to display the screen to inform you a Wi-Fi Direct device is connecting to the printer, select Yes and press the OK button.
Important
- To prevent an unauthorized access, we recommend you should not change the setting from the default.
When you finished performing the settings, the printer returns to the Direct connection settings screen.
8. Press HOME button.
The HOME screen is displayed.
Note
- If you change the direct connection setting of the printer, also change the wireless router setting of the device.
Printing Using a Web Service
Using PIXMA/MAXIFY Cloud Link
▶ Printing with Google Cloud Print
Using PIXMA/MAXIFY Cloud Link
By using PIXMA/MAXIFY Cloud Link, you can connect your printer to a cloud service, such as CANON iIMAGE GATEWAY, Evernote, or Twitter, and use the following functions without using a computer:
- Print images from a photo-sharing service
- Print documents from a data management service
- Save scanned images to a data management service.
- Use Twitter to report the printer status, such as no paper or low ink levels.
In addition, you can use various functions by adding and registering apps that are linked with various cloud services.
Using PIXMA/MAXIFY Cloud Link from Your Printer
Using PIXMA/MAXIFY Cloud Link from Your Smartphone, Tablet, or Computer
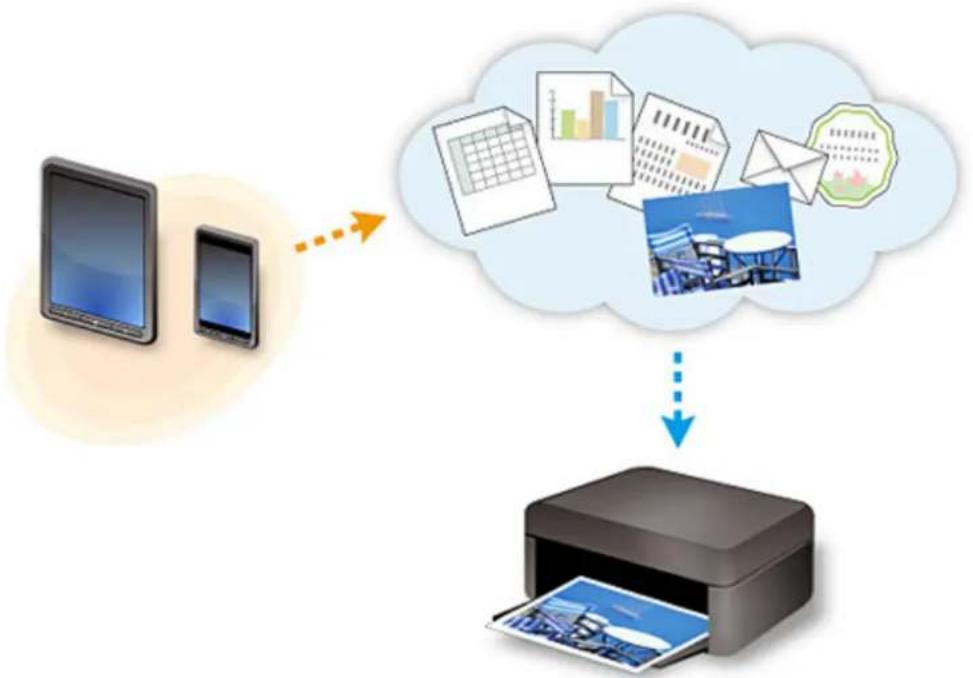
flowchart
graph TD
    A["Input Device"] --> B["External Thought"]
    C["Input Device"] --> B
    D["Printer"] --> B
    style A fill:#f9f,stroke:#333
    style C fill:#f9f,stroke:#333
    style D fill:#ccf,stroke:#333

Important
- In certain countries, PIXMA/MAXIFY Cloud Link may not be available or the available apps may be different.
- Some apps require that you have an account before you use those apps. For such apps, please set up an account beforehand.
- To find out which models support PIXMA/MAXIFY Cloud Link check the Canon homepage.
• The screen display may change without prior notice.
Printing with Google Cloud Print
The printer is compatible with Google Cloud Print™ (Google Cloud Print is a service provided by Google Inc.).
By using Google Cloud Print, you can print from anywhere with applications or services supporting Google Cloud Print.
Sending Print Data and Printing via Internet
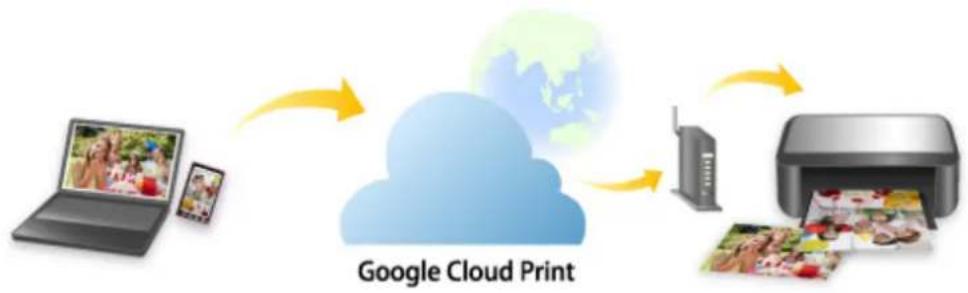
flowchart
graph LR
    A["Laptop"] -->|Data Image| B["Cloud"]
    B --> C["Global Map"]
    C --> D["Printer"]
    D --> E["Print"]
    E --> F["Product Image"]
    style A fill:#f9f,stroke:#333
    style B fill:#ccf,stroke:#333
    style C fill:#cfc,stroke:#333
    style D fill:#fcc,stroke:#333
    style E fill:#cff,stroke:#333
    style F fill:#ffc,stroke:#333
Once you register the printer to Google Cloud Print, you can print from applications or services supporting Google Cloud Print without internet connection.
Sending Print Data and Printing without Going through Internet
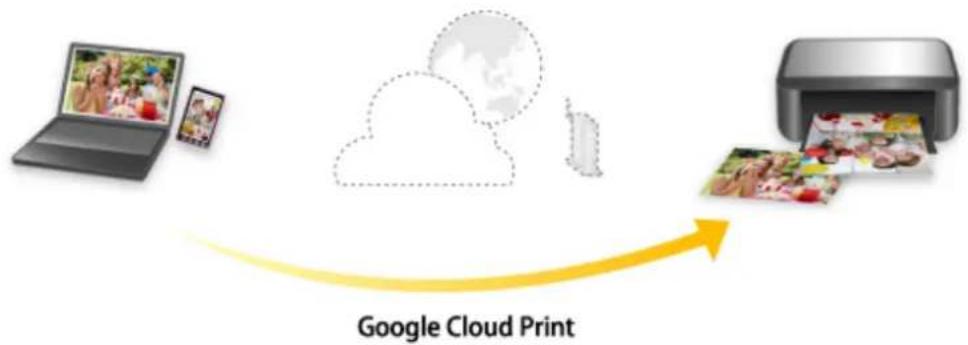
flowchart
graph LR
    A["Laptop"] --> B["Cloud"]
    C["Image"] --> B
    B --> D["Printer"]
    style B fill:#f9f,stroke:#333,stroke-width:2px
    note right of B Google Cloud Print
Important
- This function may not be available depending on the country or region you live in.
-
To use Google Cloud Print, you need to get Google account and register the printer with Google Cloud Print in advance.
Additionally, LAN connection with the printer and internet connection are required to register the printer to Google Cloud Print. Internet connection fees apply. -
Getting Google Account
-
Registering Printer with Google Cloud Print
-
Printing from Computer or Smartphone with Google Cloud Print
Important
- When the printer owner changes, delete its registration from Google Cloud Print.
→ Deleting Printer from Google Cloud Print
LAN connection with the printer and internet connection are required to delete the printer from Google Cloud Print. Internet connection fees apply.
Printing Using Operation Panel
▶ Printing Photo Data
▶ Printing Documents (PDF File) Saved on USB Flash Drive
Printing Photo Data
▶ Printing Photographs Saved on USB Flash Drive
Setting Items for Photo Printing Using Operation Panel
▶ Using Useful Display Functions
Printing Photographs Saved on USB Flash Drive
You can print the photograph saved on the USB flash drive easily.
- Make sure printer is turned on.
- Load photo paper.
- Insert USB flash drive into USB flash drive port.
Important
- If you already insert the USB flash drive to save the received faxes automatically, you cannot print the photographs even when the USB flash drive which contains the photo data is set. In this case, set Auto save setting in FAX settings to OFF and remove the USB flash drive for saving faxes, and then insert the USB flash drive which contains the photo data.
- Select a less medium on the HOME screen.
→ LCD and Operation Panel
The photo selection screen is displayed.
Note
- When the message informing you that the operation restriction is enabled, ask the administrator of the printer you are using.
- If both photo files and PDF files are saved on the USB flash drive, the confirmation screen to select which file you print is displayed. Select Print photos in the displayed screen and press the OK button.
- If no printable photo data is saved on the USB flash drive, Data of supported types are not saved. is displayed on the LCD.
-
If more than 2,000 photo data are saved on the USB flash drive, the photo data is split by group per 2,000 photos in reverse chronological order (date last modified) automatically. Check the message displayed on the LCD and press the OK button.
-
Specify settings as necessary.
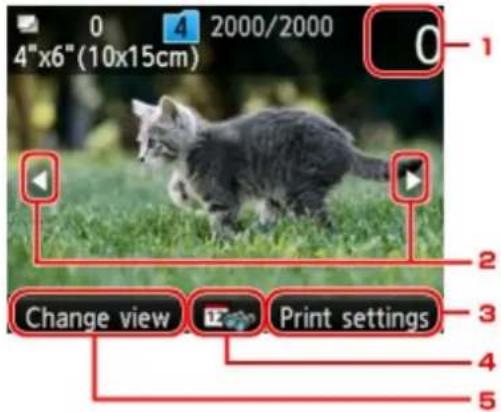
text_image
0 4"x6"(10x15cm) 2000/2000 0 Change view Print settings- Number of copies
Specify by using the Numeric buttons.
- Selection photo
Select the photo you want to print by using the button.
- Print settings
By pressing the right Function button, the print settings confirmation screen is displayed.
On the print settings confirmation screen, you can change the settings of page size, media type, and print quality and so on.
Setting Items for Photo Printing Using Operation Panel
- Date specification
By pressing the center Function button, you can select photo with specifying the date (last modified date of data).
→ Using Useful Display Functions
- Change view
By pressing the left Function button, you can change the display method.
→ Using Useful Display Functions
Note
- If you specify the number of copies for each photo, use the button to display the photo you want to print and use the Numeric buttons to specify the number of copies when the desired photo is displayed.
-
You can also display the screen to specify the number of copies by pressing the OK button when the desired photo is displayed. When the screen to specify the number of copies is displayed, specify the number of copies by using the Numeric buttons. Press the OK button to display the photo selection screen.
-
Press Color button.
The printer starts printing.
Note
- To cancel printing, press the Stop button.
- You can add the print job by pressing the right Function button while printing.
→ Adding Print Job
Adding Print Job
You can add the print job (Reserve photo print) while printing photos.
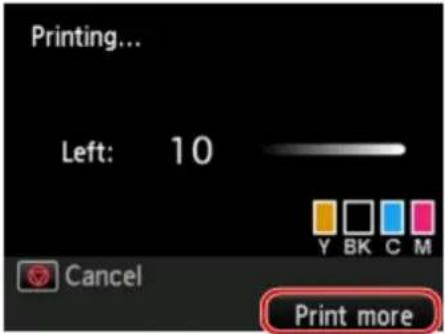
text_image
Printing... Left: 10 Y BK C M Cancel Print moreFollow the procedure below to add the print job.
- Press the right Function button when the print progress screen is displayed.
The photo selection screen is displayed.
- Select the next photo to print.
Note
- While you select the photo, the printer prints the reserved photos.

- The reserved photo icon appears on the photo included in the print job.
- Specify the number of copies for each photo.
Note
- While processing the print job, you cannot change the setting for Page size or Type on print settings confirmation screen. The setting is the same as the setting for the photo included in the print job.
- Press Color button.
The reserved photo is printed next to the photo that has already been started printing.
If you want to print more photos, operate from step 1 again.
Note
- While processing the print job, you cannot display the HOME screen, change the print menu, or print from the computer or other devices.
- While processing the print job, the photo in other group is not selected.
- If you press the Stop button while processing the print job, the screen to select a method to cancel reservation is displayed. If you select Cancel all reservations and press the OK button, you can
cancel printing all photos. If you select Cancel the last reservation and press the OK button, you can cancel the last printing job.
- If there are many print jobs, Cannot reserve more print jobs. Please wait a while and redo the operation. may be displayed on the LCD. In this case, wait a while and add the print job.
Setting Items for Photo Printing Using Operation Panel
You can specify the setting of page size, media type, photo fix and so on to print the photos saved on the USB flash drive.
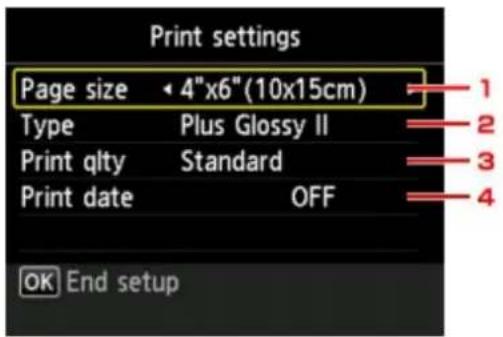
text_image
Print settings Page size • 4"x6"(10x15cm) Type Plus Glossy II Print qlty Standard Print date OFF OK End setupUse the button to change the setting item and use the button to change the setting.
Note
- Some settings cannot be specified in combination with the other setting items or the print menus. If the setting which cannot be specified in combination is selected, Error details appears on the LCD and appears at the setting item. In this case, press the left Function button to confirm the message and change the setting.
- The settings of the page size, media type, etc. are retained even if another print menu is selected or the printer is turned off.
1. Page size
Select the page size of the loaded paper.
Note
- Only the page sizes selectable from the operation panel are displayed.
2. Type (Media type)
Select the media type of the loaded paper.
Note
- Only the media types selectable from the operation panel are displayed.
3. Print qlty (Print quality)
Select print quality according to the photo.
4. Print date
Activates/deactivates to print the date (shooting date) on a photo.
Note
- The shooting date is printed according to the settings of Date display format in Device user settings under Device settings under Setup.
→ Device user settings
Using Useful Display Functions
You can change the method to display the photos saved on the USB flash drive and specify the date (last modified date of data) to select photos.
→ Changing the Method to Display
→ Specifying Date to Select Photo
Changing the Method to Display
By pressing the left Function button on the photo selection screen, the screen to select a display method is displayed.
Use the ▲ button to select the display method and press the OK button.
The following methods are selectable.
- Standard view:
The photos are displayed one by one. To select the photo, use the []<button.
- List view (x9):
Nine photos are displayed at a time. To select the photo, use the ▲button.
Note
- You can specify the number of copies for each photo you want to print by using the Numeric buttons.
- List view (x45):
45 photos are displayed at a time. To select the photo, use the ▲button.
Specifying Date to Select Photo
By pressing the center Function button on the photo selection screen, the following screen is displayed.
text_image
To most recent date 1 5/2011 20/05/2011 1 18/02/Use the button to select the date (last modified date of data) and press the OK button.
The photos on date specified are displayed.
Note
- The date is displayed according to the settings of Date display format in Device user settings under Device settings under Setup.
→ Device user settings
Printing Documents (PDF File) Saved on USB Flash Drive
You can print following PDF files (Extension: .pdf) using the operation panel of the printer.
- PDF files scanned using the operation panel of the printer and saved on a USB flash drive
→ Saving Scanned Data on USB Flash Drive
- PDF files saved on a USB flash drive when receiving faxes
Saving Document in Printer's Memory to USB Flash Drive
→ Saving Received Faxes Automatically on USB Flash Drive
- PDF files made using Canon IJ Scan Utility
For Windows:
→ Scanning Documents
For Mac OS:
→ Scanning Documents
- For more on PDF files you cannot print from the printer:
→ PDF Files You Cannot Print
Follow the procedure below to print a PDF file.
- Make sure printer is turned on.
- Load A4, Letter, or Legal-sized plain paper.
- Insert USB flash drive into USB flash drive port.
Important
- If you already insert the USB flash drive to save the received faxes automatically, you cannot print the documents even when the USB flash drive which contains the document data is set.
In this case, set Auto save setting in FAX settings to OFF and remove the USB flash drive for saving faxes, and then insert the USB flash drive which contains the document data.
- Select Massess medium on the HOME screen.
→ LCD and Operation Panel
The document list is displayed.
Note
- When the message informing you that the operation restriction is enabled, ask the administrator of the printer you are using.
- If both photo files and PDF files are saved on USB flash drive, the confirmation screen to select which file you print is displayed. Select Print documents in the displayed screen and press the OK button.
- If no printable document (PDF files) is saved on the USB flash drive, Data of supported types are not saved. is displayed on the LCD.
5. Select the document to print and press the OK button.
Use the ▲▼ button to select the document to print on the list view and use the ▼ button to select the document to print on the preview.
Note
- File names may not be displayed properly on the document list if the file name is long or includes incompatible characters.
- When the document list is displayed, pressing the left Function button displays the preview screen. On the preview screen, the first page of each PDF file is displayed on the LCD. Also, if a document is in landscape format, it will be displayed rotated by 90 degrees.
- For some PDF files, it may take longer to display the preview or part of the preview may be cropped.
-
The name of the PDF files is displayed even though the PDF files cannot be printed using the operation panel of the printer. If one of the following conditions is applicable to the PDF files, they are not printable.
-
PDF files saved using application software other than Canon IJ Scan Utility (application software compatible with the printer)
- PDF files for which the preview screen is not available ("?" is displayed on the preview screen.)
- We recommended you confirm whether a PDF file is printable. When the document list is displayed, pressing the right Function button displays the Details screen. If one of the following conditions is applicable to the PDF file, it is not printable.
• Information on the Details screen cannot be displayed.
- Characters other than the printer name or IJ Scan Utility are displayed on Created with.
- The PDF files made using application software other than Canon IJ Scan Utility (application software compatible with the printer) are not printable even if they are saved using Canon IJ Scan Utility.
6. Specify settings as necessary.
Use the ▲ button to select the setting item and use the button to change the settings.

text_image
PDF file print 1 Page size A4 Type Plain paper Print qlty Standard 2-sidedPrintSetting 1-sided Print1. Number of copies
Use the Numeric buttons to specify the number of copies.
2. Page size
Select the page size depending on the loaded paper.
Note
- Only the page sizes selectable from the operation panel are displayed.
3. Type (Media type)
The paper type is set to Plain paper.
4. Print qlty (Print quality)
Specify the print quality.
5. 2-sided PrintSetting
Select two-sided printing or single-sided printing.
When 2-sided is selected, you can select the orientation and the stapling side of the paper by pressing the right Function button.
Note
- When the printer name or IJ Scan Utility is displayed in Created with on the Details screen, you can select 2-sided to print onto the both sides of a single sheet of paper.
7. Press Color button for color printing, or Black button for black & white printing.
The printer starts printing.
Note
- You can print up to 250 pages at a time. If you try to print more than 250 pages of a PDF file, The specified PDF file contains too many pages. The pages exceeding the number of printable pages will not be printed. Continue? is displayed on the LCD. To start printing, select Yes and press the OK button. If you need to print more than 250 pages of a PDF file, print them from a computer.
- Depending on the PDF file, it may be printed rotated by 90 degrees.
- If the document size is larger than the page size specified on the printer, the document will be printed at a reduced size. In this case, thin lines on the document may not be printed or images may be misaligned.
- For some PDF files, an error message may be displayed before printing starts or while printing is in progress.
For details, see Message Appears.
PDF Files You Cannot Print
You cannot print the following PDF files even though the name of the PDF files is displayed on the list.
- Files scanned using the operation panel of the printer and saved on a USB flash drive with Format set to other than PDF or Compact PDF
- Files made using Canon IJ Scan Utility and one of the following conditions is applied
-Encrypted data
-Data more than 2 GB
-Data including images scanned at 9601 pixels or more in the vertical and horizontal directions
Paper Settings
By registering the paper size and the media type loaded in the cassette, you can prevent the printer from misprinting by displaying the message before printing starts when the paper size or the media type of the loaded paper differs from the print settings.

Note
- The default display setting is different between when you print or copy from the operation panel of the printer and when you print using the printer driver.
Default Setting for Displaying the Message which Prevents Misprinting
- When you insert the cassette with paper loaded:
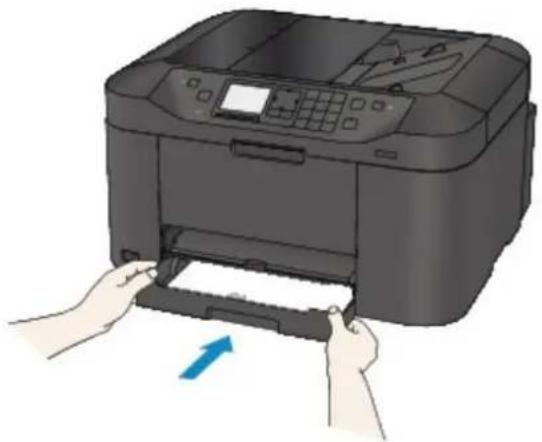
natural_image
Illustration of hands printing a printer with a blue arrow indicating print direction (no text or symbols present)The screen to register the cassette paper information is displayed.
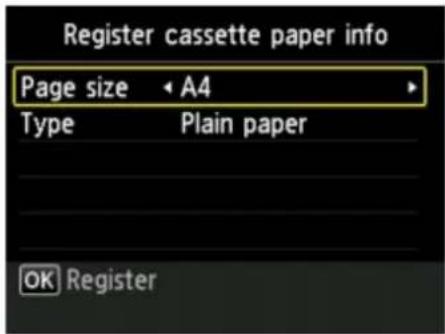
text_image
Register cassette paper info Page size A4 Type Plain paper OK RegisterRegister the paper size and the media type according to the loaded paper.

Important
- For copying, specify the paper settings for copying so that they match the cassette paper information.
- For more on the proper combination of paper settings you can specify by the printer driver or on the LCD:
- For Windows:
→ Paper Settings on the Printer Driver and the Printer (Media Type)
→ Paper Settings on the Printer Driver and the Printer (Paper Size) - For Mac OS:
→ Paper Settings on the Printer Driver and the Printer (Media Type)
→ Paper Settings on the Printer Driver and the Printer (Paper Size)

Note
- Depending on the registered cassette paper information, the screen to make sure whether you apply the registered information to the paper settings for copying is displayed. If you select Yes, the information is applied to the paper settings for copying.
- When the paper settings for printing or copying are different from the cassette paper information registered to the printer:
Ex:
- Paper setting for printing or copying: A5
• Cassette paper information registered to the printer: A4
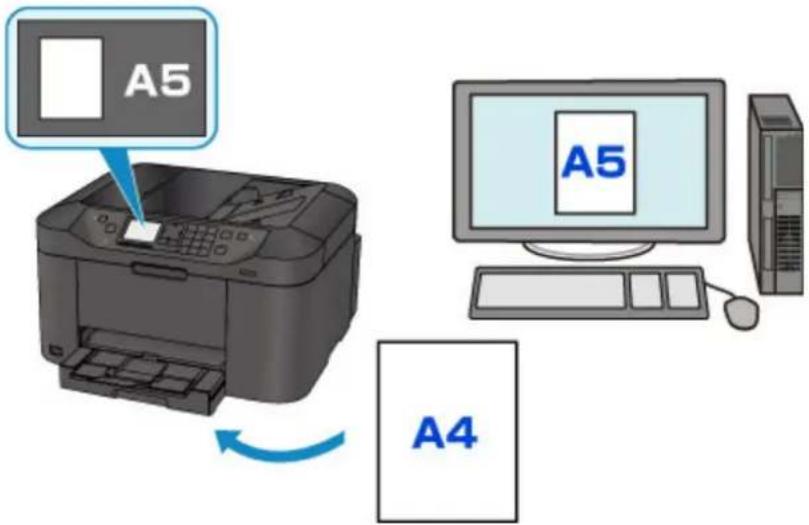
text_image
A5 A5 A4When you start printing or copying, a message is displayed.
Pressing the OK button displays the paper setting specified for printing or copying under the message.
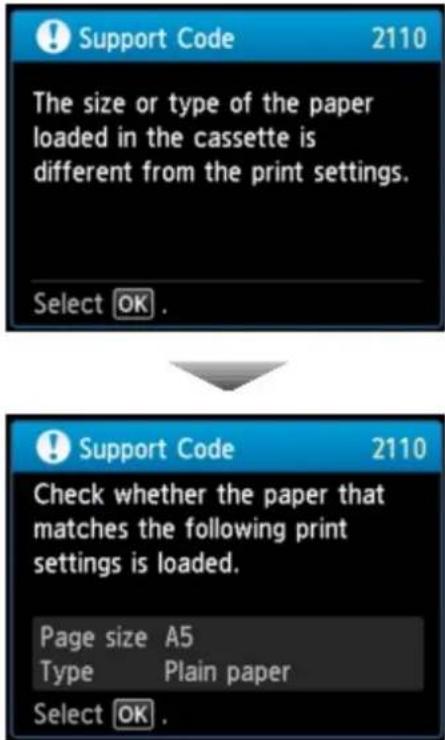
text_image
Support Code 2110 The size or type of the paper loaded in the cassette is different from the print settings. Select OK . Support Code 2110 Check whether the paper that matches the following print settings is loaded. Page size A5 Type Plain paper Select OK .Check the message and press the OK button. When the screen to select the operation is displayed, select one of the operations below.
Note
- Depending on the setting, the choices below may not be displayed.
Print with the loaded paper.
Select if you want to print on the paper loaded in the cassette without changing the paper settings.
For example, when the paper setting for printing or copying is A5 and the cassette paper information registered to the printer is A4, the printer starts printing or copying with A5 on the paper loaded in the cassette.
Replace the paper and print
Select if you want to print after replacing the paper of the cassette.
For example, when the paper setting for printing or copying is A5 and the cassette paper information registered to the printer is A4, you load A5 sized paper in the cassette before you start printing or copying.
The cassette paper information registration screen is displayed after replacing the paper and inserting the cassette. Register the cassette paper information according to the paper you loaded in the cassette.
Note
- If you do not know what paper information to register to the printer, press the Back button when the screen to select the operation is displayed. When the previous screen is displayed, check the paper size and the media type and register them to the printer.
- For more on the proper combination of paper settings you can specify by the printer driver or on the LCD:
- For Windows:
→ Paper Settings on the Printer Driver and the Printer (Media Type)
→ Paper Settings on the Printer Driver and the Printer (Paper Size)
- For Mac OS:
→ Paper Settings on the Printer Driver and the Printer (Media Type)
→ Paper Settings on the Printer Driver and the Printer (Paper Size)
Cancel
Cancels printing.
Select when you change the paper settings specified for printing or copying. Change the paper settings and try printing again.
Default Setting for Displaying the Message which Prevents Misprinting
- When you print using the operation panel of the printer:
The message which prevents misprinting is enabled by default.
To change the display setting when you copy or print using the operation panel of the printer:
→ Cassette settings
- When you print using the printer driver:
The message which prevents misprinting is disabled by default.
To change the display setting when you print using the printer driver:
- For Windows:
→ Changing the Printer Operation Mode
- For Mac OS:
→ Changing the Printer Operation Mode
Important
- When the message which prevents misprinting is disabled:
The printer starts printing or copying even though the paper settings for printing or copying and the cassette paper information registered to the printer are different.
Copying
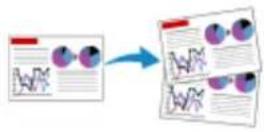
Making Copies Basics
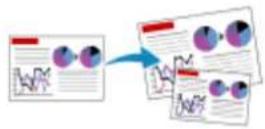
Reducing/Enlarging Copies
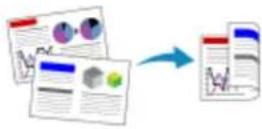
Two-Sided Copying
Special Copy Menu
Making Copies
This section describes the procedure to copy with Standard copy.
- Make sure printer is turned on.
-
Load paper.
-
Select Copy on HOME screen.
→ LCD and Operation Panel
The Copy standby screen is displayed.
- Load original document on platen glass or in ADF.
- Specify settings as necessary.
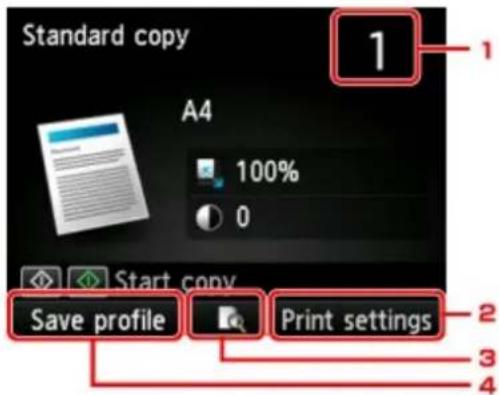
text_image
Standard copy 1 A4 100% 0 Start copy Save profile Print settings 2 3 4- Number of copies
Specify by using the Numeric buttons.
- Print settings
By pressing the right Function button, the print settings screen is displayed.
On the print settings screen, you can change the settings of page size, media type, and print quality and so on.
Setting Items for Copying
- Preview
By pressing the center Function button, you can preview an image of the printout on the preview screen.
→ Displaying Preview Screen
- Save profile
By pressing the right Function button, you can register the current print settings as a custom setting.
- Press Color button for color copying, or Black button for black & white copying.
The printer starts copying.
Remove the original on the platen glass or from the document output slot after copying is complete.
Important
- If you load the original on the platen glass, do not open the document cover or remove the original while Scanning document... is displayed on the LCD.
- If you load the original in the ADF, do not move the original until copying is complete.
Note
- To cancel copying, press the Stop button.
- If you load the original on the platen glass, you can add the copying job while printing.
→ Adding Copying Job (Reserve copy) - When the message informing you that the operation restriction is enabled, ask the administrator of the printer you are using.
Adding Copying Job (Reserve copy)
If you load the original on the platen glass, you can add the copying job while printing (Reserve copy).
The screen below is displayed when you can add the copying job.
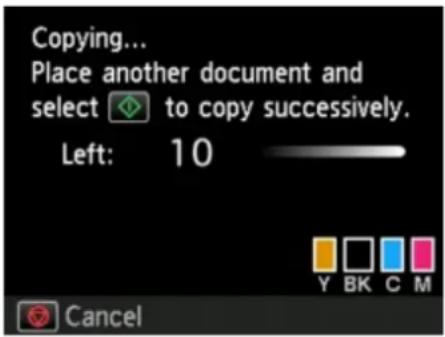
text_image
Copying... Place another document and select to copy successively. Left: 10 Y BK C M CancelLoad the original on the platen glass and press the same button (the Color button or the Black button) as the one which you previously pressed.
Important
- When you load the original on the platen glass, move the document cover gently.
Note
- When Print qlty (print quality) is set High, or you load the original in the ADF, you cannot add the copying job.
- When you add the copying job, the number of copies or the settings such as the page size or media type cannot be changed.
- If you press the Stop button while reserve copying is in progress, the screen to select the method to cancel copying is displayed. If you select Cancel all reservations and press the OK button, you can
cancel copying all scanned data. If you select Cancel the last reservation and press the OK button, you can cancel the last copying job.
- If you set a document of too many pages to add the copying job, Cannot add more copy jobs. Please wait a while and redo the operation. may appear on the LCD. Press the OK button and wait a while, and then try copying again.
- If Failed to reserve the copy job. Start over from the beginning. appears on the LCD when scanning, press the OK button and press the Stop button to cancel copying. After that, copy the documents that have not been finished copying.
Displaying Preview Screen
Pressing the center Function button allows you to preview an image of the printout on the preview screen.
Important
- The preview screen is not available when you load the original in the ADF.
-
In the following conditions, you cannot use the center Function button when the Copy standby screen is displayed.
-
2-sided is selected for 2-sidedPrintSetting.
- 2-on-1 copy or 4-on-1 copy is selected for Layout.
• ON is selected for Collate.
When 2-sided, 2-on-1 copy, or 4-on-1 copy is selected and the original is loaded on the platen glass, you can set to display the preview screen after scanning the original is finished.
→ Two-Sided Copying
→ Copying Two Pages onto Single Page
→ Copying Four Pages onto Single Page
- The original will be scanned to display the preview image. Therefore, do not open the document cover until the preview screen is displayed.
- Originals are rescanned after displaying the preview screen and before copying starts. Therefore, do not open the document cover or remove the original from the platen glass while Scanning document... is displayed.
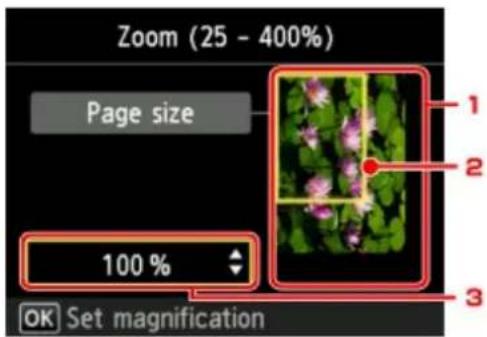
text_image
Zoom (25 - 400%) Page size 100 % OK Set magnification- Preview of the original
The original that is set on the platen glass is displayed. If the displayed image is skewed, refer to Loading Originals, reset the original properly, and then display the preview screen again and preview the original.
- Page size
A frame showing the selected page size appears over the image. The inside of the frame will be printed.
- Magnification
The magnification setting, which was set when the preview screen was displayed, is displayed. If the setting other than Fit to page is selected, you can change the magnification setting using the ▲▼ button.
Setting Items for Copying
The following screen is displayed by pressing the right Function button on the Copy standby screen.
Use the ▲ button to change the setting item and use the button to change the setting.
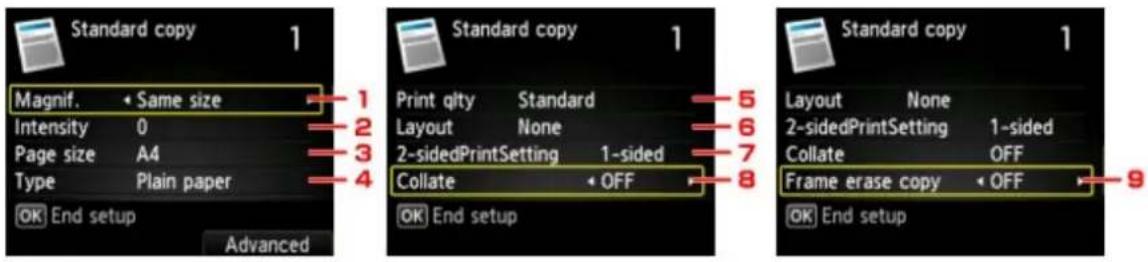
text_image
Standard copy Magnif. • Same size Intensity 0 Page size A4 Type Plain paper OK End setup Advanced Standard copy Print qity Standard Layout None 2-sidedPrintSetting 1-sided Collate • OFF OK End setup 5 6 7 8 9 Standard copy Layout None 2-sidedPrintSetting 1-sided Collate OFF Frame erase copy • OFF OK End setupNote
- Some settings cannot be specified in combination with the setting of other setting item or the copy menu. If the setting which cannot be specified in combination is selected, Error details appears on the LCD and 🔊 appears at the setting item. In this case, press the left Function button to check the message and change the setting.
- The settings of the page size, media type, etc. are retained even if the printer is turned off.
- When copying starts in the copy menu that is not available with the specified setting, The specified function is not available with current settings. is displayed on the LCD. Change the setting, following the on-screen instructions.
1. Magnif. (Magnification)
Specify the reduction/enlargement method.
→ Reducing/Enlarging Copies
2. Intensity
Specify the intensity. When Auto is selected, the intensity is adjusted automatically according to the originals loaded on the platen glass. Auto is displayed on the Copy standby screen.
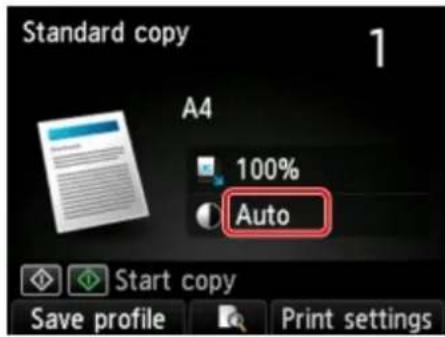
text_image
Standard copy 1 A4 100% Auto Start copy Save profile Print settingsNote
- When Auto is selected, load the original on the platen glass. You cannot use the ADF.
3. Page size
Select the page size of the loaded paper.
Note
- Only the page sizes selectable from the operation panel are displayed.
4. Type (Media type)
Select the media type of the loaded paper.
Note
- Only the media types selectable from the operation panel are displayed.
5. Print qlty (Print quality)
Adjust print quality according to the original.
Important
- If you use Standard with Type set to Plain paper and the quality is not as good as expected, select High for Print qlty and try copying again.
- Select High for Print qlty to copy in grayscale. Grayscale renders tones in a range of grays instead of black or white.
6. Layout
Select the layout.
→ Copying Two Pages onto Single Page
→ Copying Four Pages onto Single Page
→ Copying ID Card to Fit onto Single Page
7. 2-sided PrintSetting
Select whether to perform two-sided copying.
→ Two-Sided Copying
8. Collate
Select whether to obtain sorted printouts when making multiple copies of a multi-paged original.
→ Collated Copying
9. Frame erase copy
When copying thick originals such as books, you can make a copy without black margins around the image and gutter shadows.
→ Copying Thick Originals Such as Books
Reducing/Enlarging Copies
You can specify the magnification optionally or select the preset-ratio copying or fit-to-page copying.
The screen below is displayed when you press the right Function button in the Copy standby screen. Select the reduction/enlargement method from Magnif..
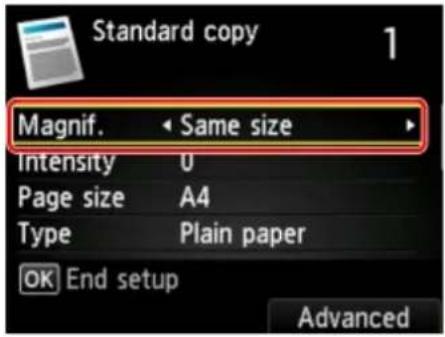
text_image
Standard copy Magnif. < Same size Intensity 0 Page size A4 Type Plain paper OK End setup AdvancedNote
- Some of the reduction/enlargement methods are not available depending on the copy menu.
- Fit to page
The printer automatically reduces or enlarges the image to fit the page size.


The setting in Magnif.: Fit to page
Note
- When you select Fit to page, the page size may not be detected correctly depending on the original. In this case, select the setting other than Fit to page.
- Preset ratio
You can select one of the preset ratios to reduce or enlarge copies.
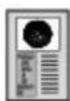

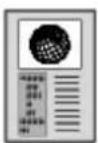
Use the button to select the appropriate ratio for size of original and page size.
The setting in Magnif.: 70% A4->A5/86% A4->B5/94% A4->LTR/115% B5->A4/141% A5->A4/156% 5x7->LTR/183% 4x6->LTR
Note
- Some of the preset ratios are not available depending on the country or region of purchase.
- Ratio specified copy
You can specify the copy ratio as a percentage to reduce or enlarge copies.
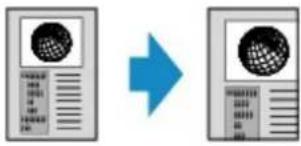
flowchart
graph LR
    A["Server"] --> B["Mobile Device"]
    style A fill:#f9f,stroke:#333
    style B fill:#bbf,stroke:#333
If you select other than Fit to page and press the right Function button, Magnification screen is displayed. Use the ▲ button to specify the magnification.
Note
- 400% MAX (maximum copy ratio) and 25% MIN (minimum copy ratio) are selectable.
- If you make a copy at the same size as the original, select Same size.
Two-Sided Copying
When you select 2-sided for 2-sidedPrintSetting in Standard copy, you can copy two original pages onto the both sides of a single sheet of paper.
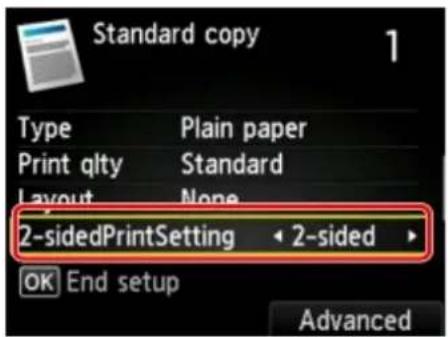
text_image
Standard copy Type Plain paper Print qlty Standard Layout None 2-sidedPrintSetting 2-sided OK End setup AdvancedPress the right Function button to select the orientation and the stapling side.
- When you select Portrait for Orientation and Long-side stapling for Stapling side of print paper:
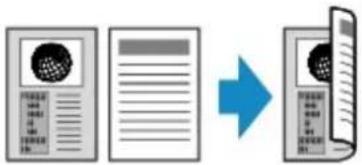
flowchart
graph LR
    A["Document Submission"] --> B["Review"]
    B --> C["Output"]
- When you select Portrait for Orientation and Short-side stapling for Stapling side of print paper:
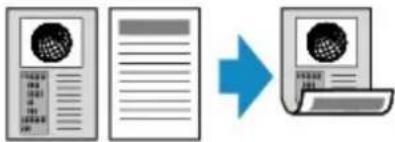
flowchart
graph LR
    A["Document with folder icon"] --> B["Transfer to Laptop with globe icon"]
- When you select Landscp. for Orientation and Long-side stapling for Stapling side of print paper:

flowchart
graph LR
    A["Certificate with globe icon"] --> B["Laptop with user interface"]
- When you select Landscp. for Orientation and Short-side stapling for Stapling side of print paper:
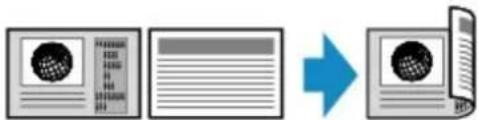
flowchart
graph LR
    A["Server with globe icon"] --> B["Email with folder icon"]
    B --> C["Server with folder icon"]
After selecting the stapling side and press the OK button, you can select whether you use the preview screen. If you select Yes, the preview screen is displayed so that you can check the orientation.
Note
- Two-sided copy setting can be used in combination with 2-on-1 copy or 4-on-1 copy.
→ Copying Two Pages onto Single Page
→ Copying Four Pages onto Single Page
- If you are copying in black & white, print intensity of the Two-sided copy may differ from that of a single-sided copy.
When Loading the Original on the platen glass:
- Before scanning:
When you select 2-sided for 2-sidedPrintSetting and the preview function is activated, the printer starts pre-scanning before scanning the original. When pre-scanning is finished, the screen below (preview screen) appears on the LCD.
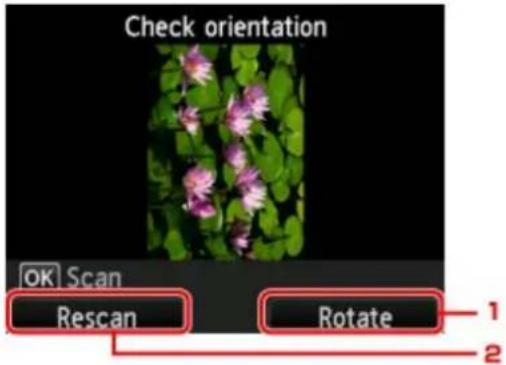
text_image
Check orientation OK Scan Rescan Rotate 1 21. Rotate
If you press the right Function button, the original rotates by 180 degrees.
2. Rescan
If you press the left Function button, the original is rescanned.
Press the OK button to start scanning.
• After scanning:
The screen below appears after scanning each sheet of original.
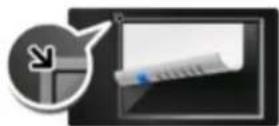
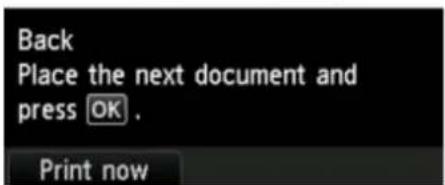
text_image
Back Place the next document and press OK . Print nowRemove the sheet of original from the platen glass after scanning and load the next sheet on the platen glass and press the OK button.
Note
- If you do not need more scanning, press the left Function button. The printer starts copying.
- You can add the copying job while printing.
→ Adding Copying Job (Reserve copy)
Special Copy Menu
▶ Copying Two Pages onto Single Page
▶ Copying Four Pages onto Single Page
▶ Copying Thick Originals Such as Books
▶ Copying ID Card to Fit onto Single Page
Collated Copying
Copying Two Pages onto Single Page
When you select 2-on-1 copy for Layout in Standard copy, you can copy two original pages onto a single sheet of paper by reducing each image.
Press the right Function button on the Copy standby screen to display the print settings screen and select 2-on-1 copy for Layout.
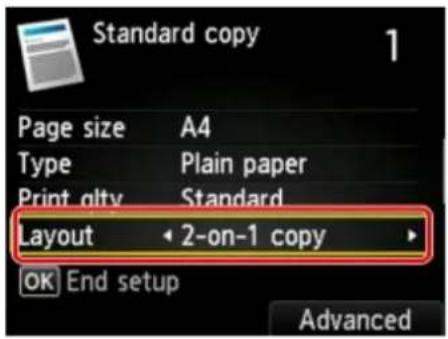
text_image
Standard copy Page size A4 Type Plain paper Print qlty Standard Layout 2-on-1 copy OK End setup AdvancedPress the right Function button to specify the orientation and the advanced layout.
- When you select Portrait for Orientation and Left to right for 2-on-1 copy layout:

flowchart
graph LR
    A["A"] --> B["B"]
    B --> C["A B"]
- When you select Portrait for Orientation and Right to left for 2-on-1 copy layout:
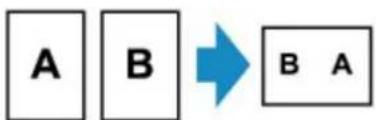
flowchart
graph LR
    A["A"] --> B["B"]
    B --> C["B A"]
- When you select Landscp. for Orientation and Top to bottom for 2-on-1 copy layout:
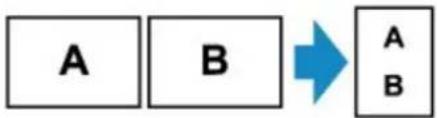
flowchart
graph LR
    A["A"] --> B["B"]
    B --> C["A"]
    B --> D["B"]
- When you select Landscp. for Orientation and Bottom to top for 2-on-1 copy layout:
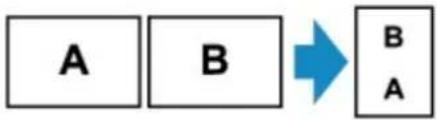
flowchart
graph LR
    A["A"] --> B["B"]
    B --> C["BA"]
After selecting the layout and press the OK button, you can select whether you use the preview screen. If you select Yes, the preview screen is displayed so that you can check the orientation.
Note
- This function can be used in combination with Two-sided copy.
If you use this function in combination, you can copy four original pages on one sheet of paper. In this case, two original pages are copied on each side of paper.
If you use this function in combination, select 2-sided for 2-sided PrintSetting and select the orientation and the stapling side of print paper on the Print settings screen.
For more on two-sided copy function:
→ Two-Sided Copying
When Loading the Original on the platen glass:
- Before scanning:
When the preview function is activated, the printer starts pre-scanning before scanning the original. When pre-scanning is finished, the screen below (preview screen) appears on the LCD.
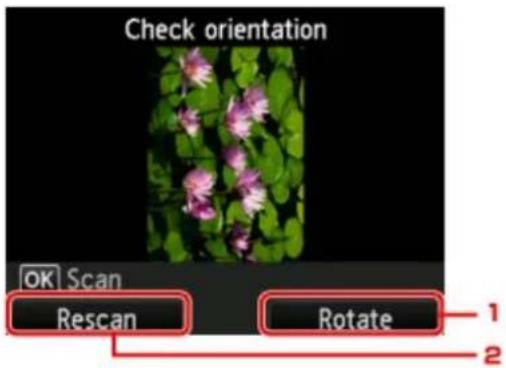
text_image
Check orientation OK Scan Rescan Rotate 1 21. Rotate
If you press the right Function button, the original rotates by 180 degrees.
2. Rescan
If you press the left Function button, the original is rescanned.
Press the OK button to start scanning.
• After scanning:
The screen below appears after scanning each sheet of original.
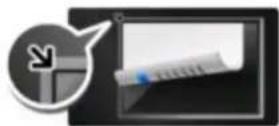
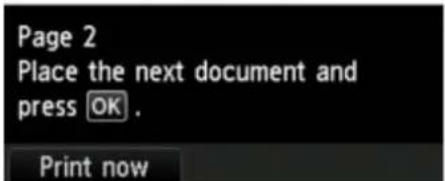
text_image
Page 2 Place the next document and press OK . Print nowRemove the first sheet of original from the platen glass and load the second sheet on the platen glass and press the OK button.
The printer starts scanning the second sheet of original and copying.
Note
- If you do not need more scanning, press the left Function button. The printer starts copying.
- You can add the copying job while printing.
→ Adding Copying Job (Reserve copy)
- If you use this function in combination with Two-sided copy, the screen above is displayed after scanning the second sheet of original is complete. Follow the on-screen instructions to scan the third and fourth sheet of original.
Copying Four Pages onto Single Page
When you select 4-on-1 copy for Layout in Standard copy, you can copy four original pages onto a single sheet of paper by reducing each image. Four different layouts are available.
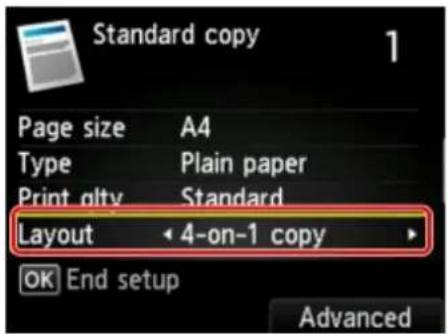
text_image
Standard copy Page size A4 Type Plain paper Print gltv Standard Layout 4-on-1 copy OK End setup AdvancedPress the right Function button to specify the orientation and the advanced layout.
Note
- The layout is the same regardless of the orientation.
- When you select Upper-left to right for 4-on-1 copy layout:
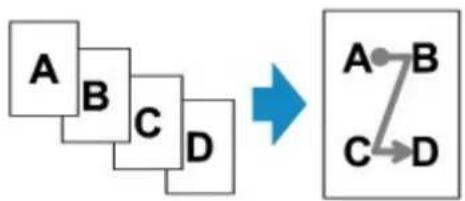
flowchart
graph TD
    A["Block A"] --> B["Block B"]
    B --> C["Block C"]
    C --> D["Block D"]
    D --> E["Arrow pointing to a simplified structure"]
    E --> F["Block A → B"]
    E --> G["Block C → D"]
- When you select Upper-right to left for 4-on-1 copy layout:
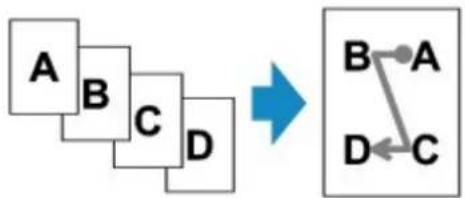
flowchart
graph TD
    A["A"] --> B["B"]
    B --> C["C"]
    C --> D["D"]
    D --> E["-->"]
    E --> F["A"]
    E --> G["C"]
    G --> H["D"]
- When you select Upper-left to bottom for 4-on-1 copy layout:
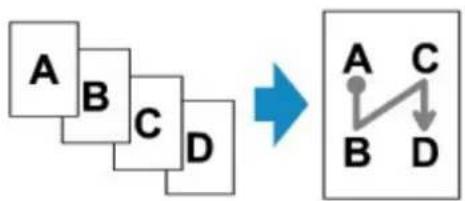
flowchart
graph LR
    A["Block A"] --> B["Block B"]
    B --> C["Block C"]
    C --> D["Block D"]
    D --> E["Arrow pointing to a simple structure with nodes A, B, C, D"]
- When you select Upper-right to bottom for 4-on-1 copy layout:
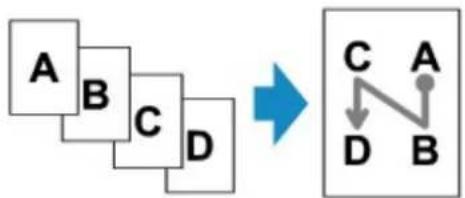
flowchart
graph TD
    A["Block A"] --> B["Block B"]
    B --> C["Block C"]
    C --> D["Block D"]
    D --> E["Arrow pointing to a simple structure with nodes A, B, C, D"]
After selecting the layout and press the OK button, you can select whether you use the preview screen. If you select Yes, the preview screen is displayed so that you can check the orientation.

Note
- This function can be used in combination with Two-sided copy.
If you use this function in combination, you can copy eight original pages on one sheet of paper. In this case, four original pages are copied on each side of paper.
If you use this function in combination, select 2-sided for 2-sided PrintSetting and select the orientation and the stapling side of print paper on the Print settings screen.
For more on two-sided copy function:
→ Two-Sided Copying
When Loading the Original on the platen glass:
- Before scanning:
When the preview function is activated, the printer starts pre-scanning before scanning the original. When pre-scanning is finished, the screen below (preview screen) appears on the LCD.
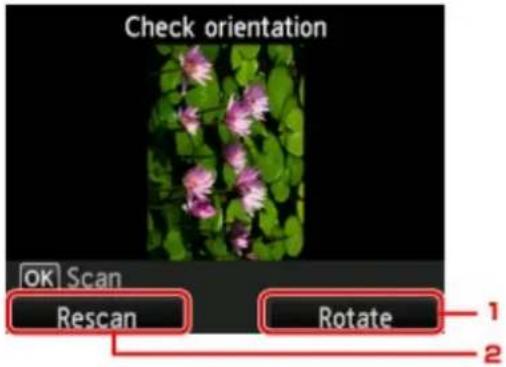
text_image
Check orientation OK Scan Rescan Rotate 1 21. Rotate
If you press the right Function button, the original rotates by 180 degrees.
2. Rescan
If you press the left Function button, the original is rescanned.
• After scanning:
The screen below appears after scanning each sheet of original.
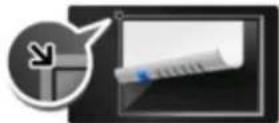
Page 2
Place the next document and
press OK.
Print now
Remove the first sheet of original from the platen glass and load the second sheet on the platen glass and press the OK button.
The printer starts scanning the second sheet of original and copying.
Note
- If you do not need more scanning, press the left Function button. The printer starts copying.
- You can add the copying job while printing.
→ Adding Copying Job (Reserve copy)
- If you use this function in combination with Two-sided copy, the screen above is displayed after scanning the fourth sheet of original is complete. Follow the on-screen instructions to scan the rest of originals.
Copying Thick Originals Such as Books
When ON is selected for Frame erase copy in Standard copy, you can make a copy without black margins around the image and gutter shadows in copying thick originals such as books. Using this function, you can reduce unnecessary ink consumption.


Note
- When you use this function, load the original on the platen glass and close the document cover.
- When the Copy standby screen is displayed, pressing the center Function button allows you to preview an image of the printout on the preview screen.

Displaying Preview Screen
- There may be a narrow black margin that appears around the image. This function removes the dark margins only. If a scanned book is too thin or when the printer is used near a window or in a bright environment, a faint black frame may remain. Also, if the color of an original is dark, the printer cannot distinguish the document color from the shadow and this may cause slight cropping or a shadow on the crease.
Copying ID Card to Fit onto Single Page
When you select ID card copy for Layout in Standard copy, you can copy a card sized original such as an ID card onto a single sheet of paper.
Press the right Function button on the Copy standby screen to display the print settings screen and select ID card copy for Layout.
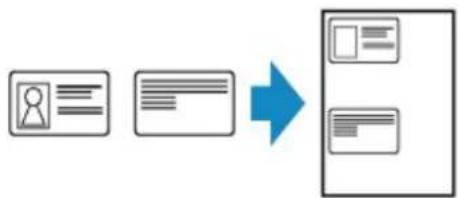
flowchart
graph LR
    A["Input ID"] --> C["Add Image"]
    B["Identity Verification"] --> C
    C --> D["Output Image"]
You can check printing result of the front side using the preview screen.
→ Using Preview Screen to Check Printing Result of Front Side
Note
- When you use this function, load the original on the platen glass.
Pressing the Color or Black button displays the screen below.
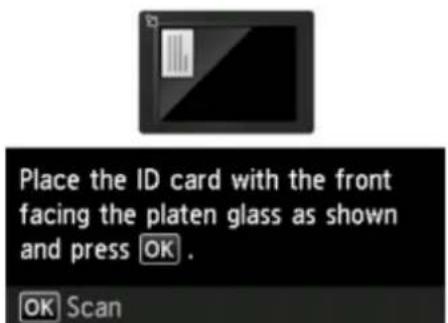
text_image
Place the ID card with the front facing the platen glass as shown and press OK . OK ScanLoad the original on the platen glass following the on-screen instructions and press the OK button.
When the front side has been scanned, the screen below appears.
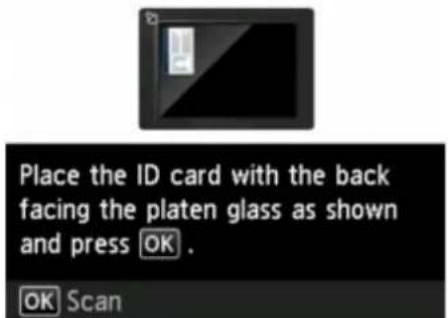
text_image
Place the ID card with the back facing the platen glass as shown and press OK . OK ScanLoad the original on the platen glass following the on-screen instructions and press the OK button.
The printer starts copying.
Remove the original on the platen glass after copying is complete.
Using Preview Screen to Check Printing Result of Front Side
Pressing the center Function button before loading the original on the platen glass displays how to load the original on the LCD. Loading the original following the on-screen instructions and pressing the OK button displays the preview screen to check the printing result of the front side. Pressing the Color or Black button starts scanning the front side.

Note
- Pressing the OK button on the preview screen returns to Copy standby screen.
When the front side has been scanned, the screen below appears.
Place the ID card with the back facing the platen glass as shown and press OK.

Load the original on the platen glass following the on-screen instructions and press the OK button.
The printer starts copying.
Remove the original on the platen glass after copying is complete.
Collated Copying
You can obtain sorted printouts when making multiple copies of a multi-paged original.
When you select ON for Collate in Standard copy, you can obtain sorted printouts when making multiple copies of a multi-paged original. In addition, you can copy originals on both sides of paper.
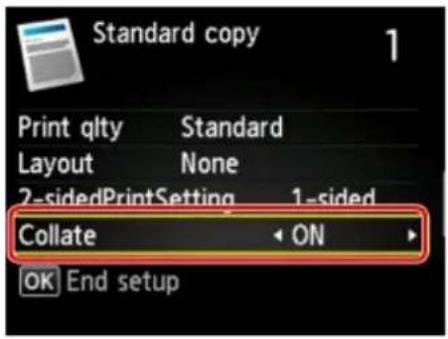
text_image
Standard copy 1 Print qlty Standard Layout None 2-sidedPrintSetting 1-sided Collate ON OK End setup- When ON is selected:
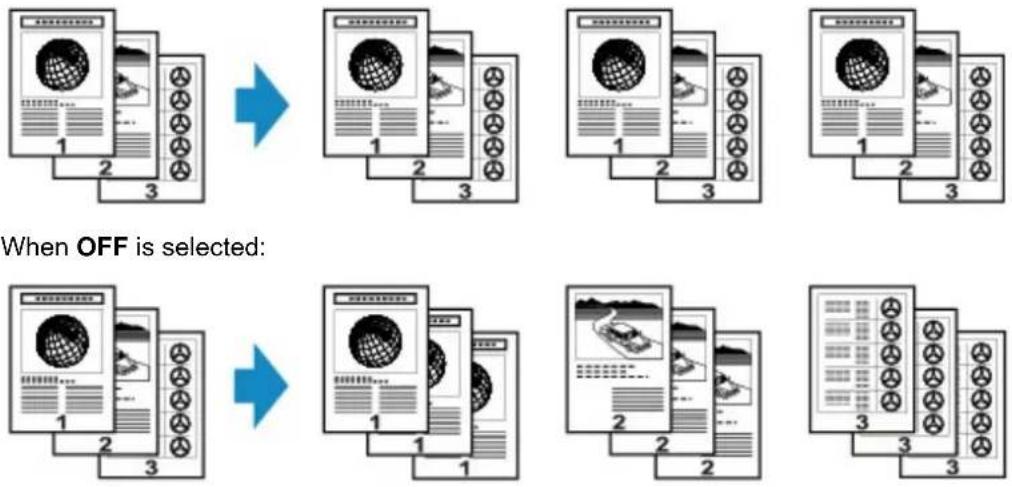
- When OFF is selected:
Note
- When you use this function, load the original in the ADF.
- The number of pages the printer can read varies with the document. If Device memory is full. Cannot continue process. appears on the LCD when scanning, reduce the number of document pages to scan and try copying again.
Collated Copying in Combination with Two-Sided Copying
Collated copying is also available when two-sided copying is selected.
If you use this function in combination, select the two-sided copy setting for 2-sided PrintSetting and the stapling side of print paper on the Print settings screen.
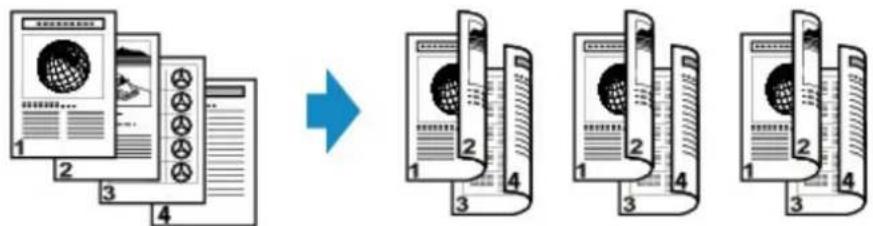
flowchart
graph LR
    A["Document 1: Initial Document"] --> B["Arrow pointing to Product 2"]
    B --> C["Output: Product 3 with globe icon"]
    C --> D["Final Output: Product 4 with ruler icons"]
See Two-Sided Copying for two-sided copying.
Copying from Smartphone/Tablet
Installing Canon PRINT Inkjet/SELPHY on your smartphone/tablet allows you to perform copy settings or operations from your smartphone/tablet.
Canon PRINT Inkjet/SELPHY is a Canon-made application and can be downloaded from App Store and Google Play.
→ For iOS
→ For Android
- Make sure machine is turned on.
- Load paper.
-
Connect machine and your smartphone/tablet.
-
Connection with a wireless router:
→ Wireless Connection -
Connection without a wireless router:
→ Using Machine with Direct Connection -
Start application "Canon PRINT Inkjet/SELPHY" from your smartphone/tablet.
- Make sure your machine is selected.
If not, select your machine.
- Tap Copy on application.
- Specify settings as necessary.
The setting items below are available.
- Copies
- Paper Size
- Media Type
- Magnification
- Copy Intensity
-
Print Quality
-
Load original document on platen glass.
-
Tap Color on application for color copying or Black for black & white copying.
-
If screen asking you to enter password is displayed, enter password and tap OK on application.
The machine starts copying.
Important
- The password is set at the time of purchase. The password is the printer serial number. The printer serial number is printed on the sticker attached on the printer. It consists of 9 alphanumeric characters (four alphabets followed by five numbers). For details on setting password, see Setting Password.
Scanning
Scanning from Computer (Windows)
Scanning from Computer (Mac OS)
Scanning from Operation Panel
Scanning Using Smartphone/Tablet
Scanning from Computer (Windows)
Using IJ Scan Utility
Scanning Using Application Software (ScanGear)
▶ Other Scanning Methods
IJ Network Scanner Selector EX2 Menu and Setting Screen
Scanning Tips
Positioning Originals (Scanning from Computer)
▶ Network Scan Settings
Using IJ Scan Utility
What Is IJ Scan Utility (Scanner Software)?
Starting IJ Scan Utility
Scanning Documents Basics
Scanning Photos
Scanning with Favorite Settings
Scanning Originals Larger than the Platen (Image Stitch)
- Adjusting Cropping Frames in the Image Stitch Window
Extracting Text from Scanned Images (OCR)
▶ Sending Scanned Images via E-mail
Scanning Multiple Originals at One Time
Scanning Multiple Documents at One Time from the ADF (Auto Document Feeder)
Saving after Checking Scan Results
IJ Scan Utility Screens
What Is IJ Scan Utility (Scanner Software)?
IJ Scan Utility is an application that allows you to easily scan documents, photos, etc.
You can complete from scanning to saving at one time by simply clicking the corresponding icon in the IJ Scan Utility main screen.
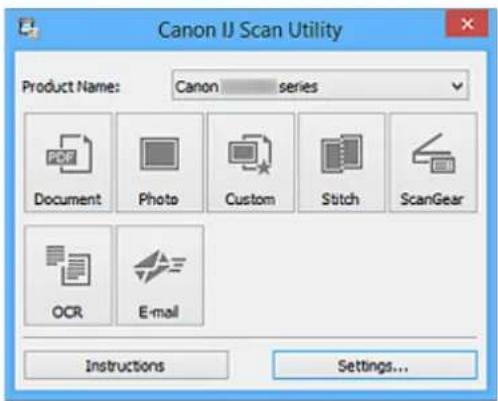
text_image
Canon IJ Scan Utility Product Name: Canon series Document Photo Custom Stitch ScanGear OCR E-mail Instructions Settings...What You Can Do with IJ Scan Utility
Scan Easily according to Purposes
You can scan by simply clicking an icon such as Document to sharpen text in a document or magazine for better readability, or Photo to scan with settings suitable for photos, according to the item type or your purpose.
Note
- Refer to "IJ Scan Utility Main Screen" for details on the IJ Scan Utility main screen.
Save Scanned Images Automatically
Scanned images are automatically saved in a preset folder. You can change the folder as required.
Note
- The default save folders are as follows.
- Windows 10/Windows 8.1/Windows Vista: Documents folder
• Windows 8/Windows 7: My Documents folder
• Refer to "Settings Dialog Box" for how to specify a folder.
Integrate with Applications
You can utilize scanned images through integration with other applications; display scanned images in your favorite application, attach them to e-mails, extract text from images, and more.
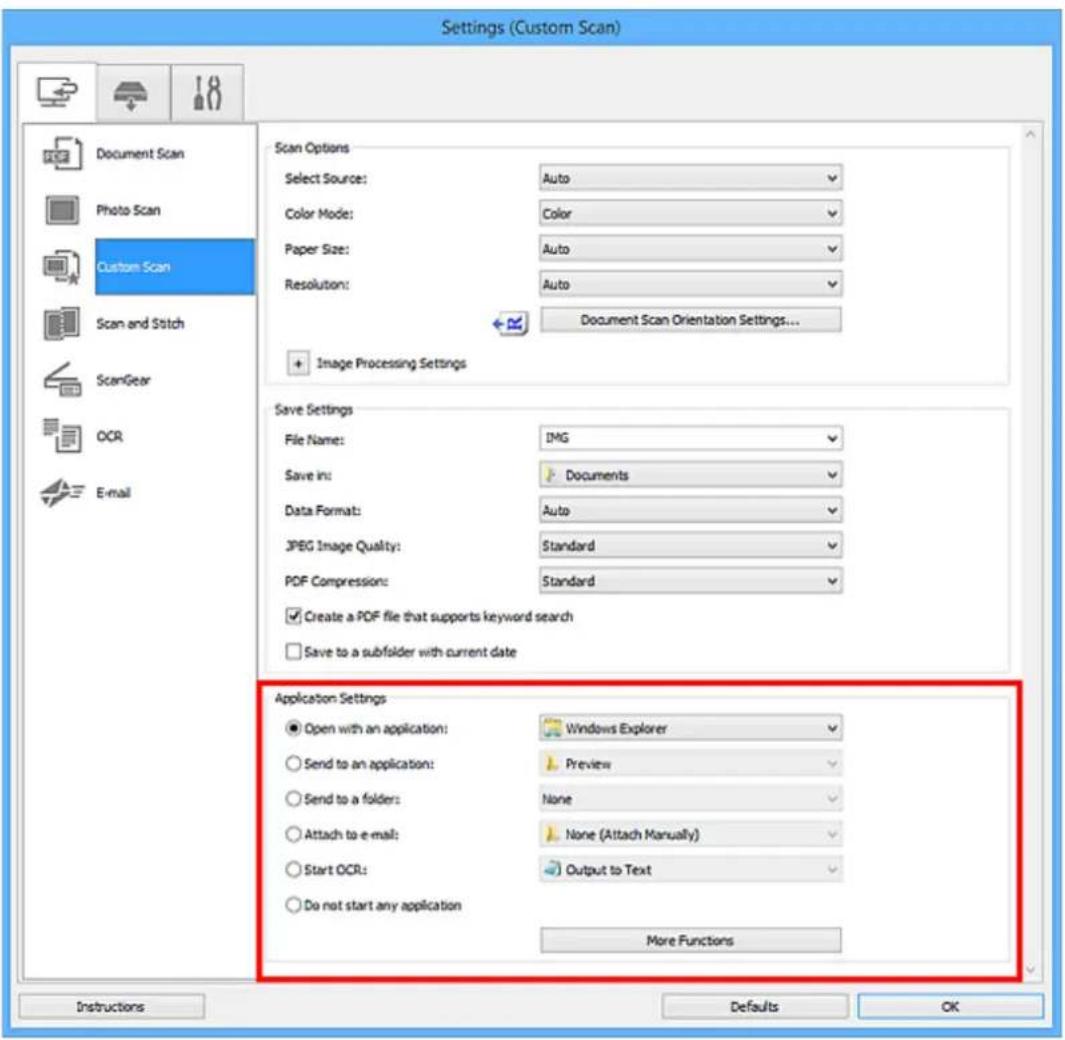
text_image
Settings (Custom Scan) Scan Options Select Source: Auto Color Mode: Color Paper Size: Auto Resolution: Auto Document Scan Orientation Settings... + Image Processing Settings Save Settings File Name: IMG Save in: Documents Data Format: Auto JPEG Image Quality: Standard PDF Compression: Standard ✓ Create a PDF file that supports keyword search ✓ Save to a subfolder with current date Application Settings ● Open with an application: Windows Explorer ○ Send to an application: Preview ○ Send to a folder: None ○ Attach to e-mail: None (Attach Manually) ○ Start OCR: Output to Text ○ Do not start any application More Functions Instructions Defaults OKNote
- Refer to "Settings Dialog Box" for how to set the applications to integrate with.
Starting IJ Scan Utility
Note
- If you have more than one scanner or have changed the connection from USB connection to network connection, set up the network environment from IJ Scan Utility.
→ Network Scan Settings
Follow the steps below to start IJ Scan Utility.
Windows 10:
From Start menu, select All apps > Canon Utilities > IJ Scan Utility.
Windows 8.1/Windows 8:
Select IJ Scan Utility on the Start screen.
If IJ Scan Utility is not displayed on the Start screen, select the Search charm, and then search for "IJ Scan Utility".
Windows 7/Windows Vista:
From Start menu, select All Programs > Canon Utilities > IJ Scan Utility > IJ Scan Utility.
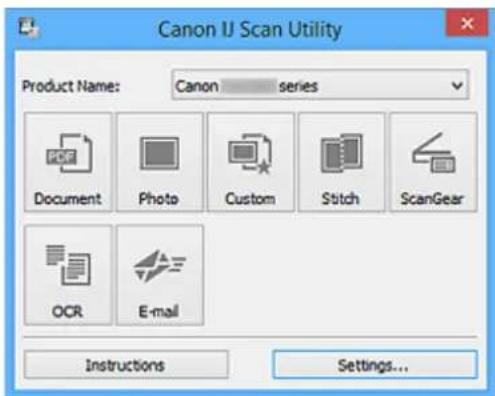
text_image
Canon IJ Scan Utility Product Name: Canon series Document Photo Custom Stitch ScanGear OCR E-mail Instructions Settings...Scanning Documents
You can scan items placed on the platen with settings suitable for documents.
- Place the item on the platen.
→ Positioning Originals (Scanning from Computer)
-
Start IJ Scan Utility.
-
Click Settings..., then set the paper size, resolution, etc. in the Settings (Document Scan) dialog box as required.
When setting is completed, click OK.
- Click Document.
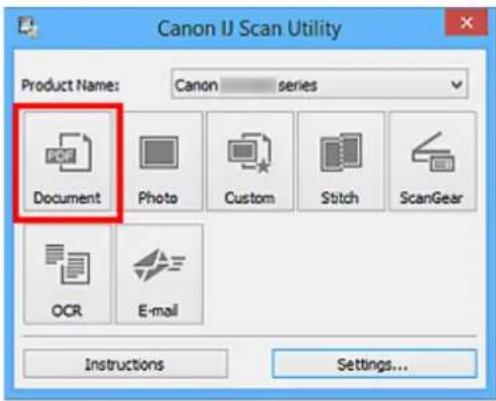
text_image
Canon IJ Scan Utility Product Name: Canon series Document Photo Custom Stitch ScanGear OCR E-mail Instructions Settings...Scanning starts.
Note
- Click Cancel to cancel the scan.
- Scanned images are saved in the folder set for Save in in the Settings (Document Scan) dialog box displayed by clicking Settings.... In the Settings (Document Scan) dialog box, you can also make advanced scan settings.
Scanning Photos
You can scan photos placed on the platen with settings suitable for photos.
- Place the photo on the platen.
→ Positioning Originals (Scanning from Computer)
-
Start IJ Scan Utility.
-
Click Settings..., then set the paper size, resolution, etc. in the Settings (Photo Scan) dialog box as required.
When setting is completed, click OK.
- Click Photo.
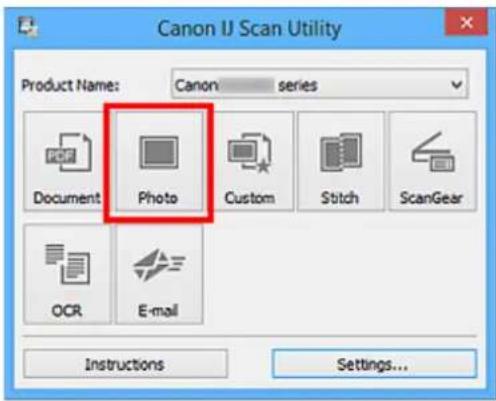
text_image
Canon IJ Scan Utility Product Name: Canon series Document Photo Custom Stitch ScanGear OCR E-mail Instructions Settings...Scanning starts.
Note
- Click Cancel to cancel the scan.
- Scanned images are saved in the folder set for Save in in the Settings (Photo Scan) dialog box displayed by clicking Settings.... In the Settings (Photo Scan) dialog box, you can also make advanced scan settings.
Scanning with Favorite Settings
You can scan items placed on the platen with your favorite settings saved beforehand.
This is convenient for saving frequently used settings or when specifying scan settings in detail.
-
Start IJ Scan Utility.
-
Click Settings..., then set the item type, resolution, etc. in the Settings (Custom Scan) dialog box as required.
When setting is completed, click OK.
Note
- Once the settings are made, you can scan with the same settings from the next time.
- Place the item on the platen.
→ Positioning Originals (Scanning from Computer)
- Click Custom.
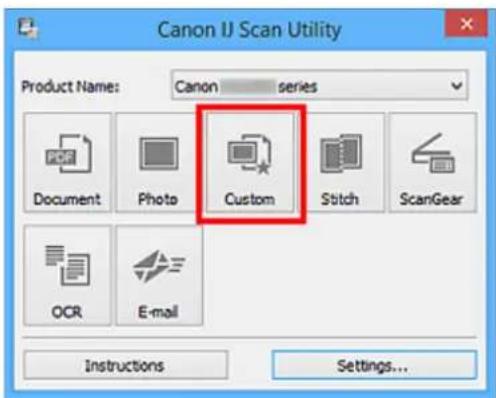
text_image
Canon IJ Scan Utility Product Name: Canon series Document Photo Custom Stitch ScanGear OCR E-mail Instructions Settings...Scanning starts.
Note
- Click Cancel to cancel the scan.
- Scanned images are saved in the folder set for Save in in the Settings (Custom Scan) dialog box displayed by clicking Settings.... In the Settings (Custom Scan) dialog box, you can also make advanced scan settings.
Scanning Originals Larger than the Platen (Image Stitch)
You can scan the left and right halves of an item larger than the platen and combine them back into one image. Items up to approximately twice as large as the platen are supported.

Note
- The following explains how to scan from the item to be placed on the left side.
-
Start IJ Scan Utility.
-
Click Settings..., then set the item type, resolution, etc. in the Settings (Scan and Stitch) dialog box as required.
When setting is completed, click OK.
- Click Stitch.
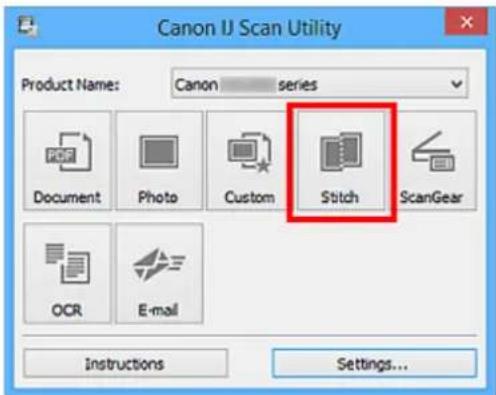
text_image
Canon IJ Scan Utility Product Name: Canon series Document Photo Custom Stitch ScanGear OCR E-mail Instructions Settings...The Image Stitch window appears.
- In Select Output Size, select an output size according to the paper size.
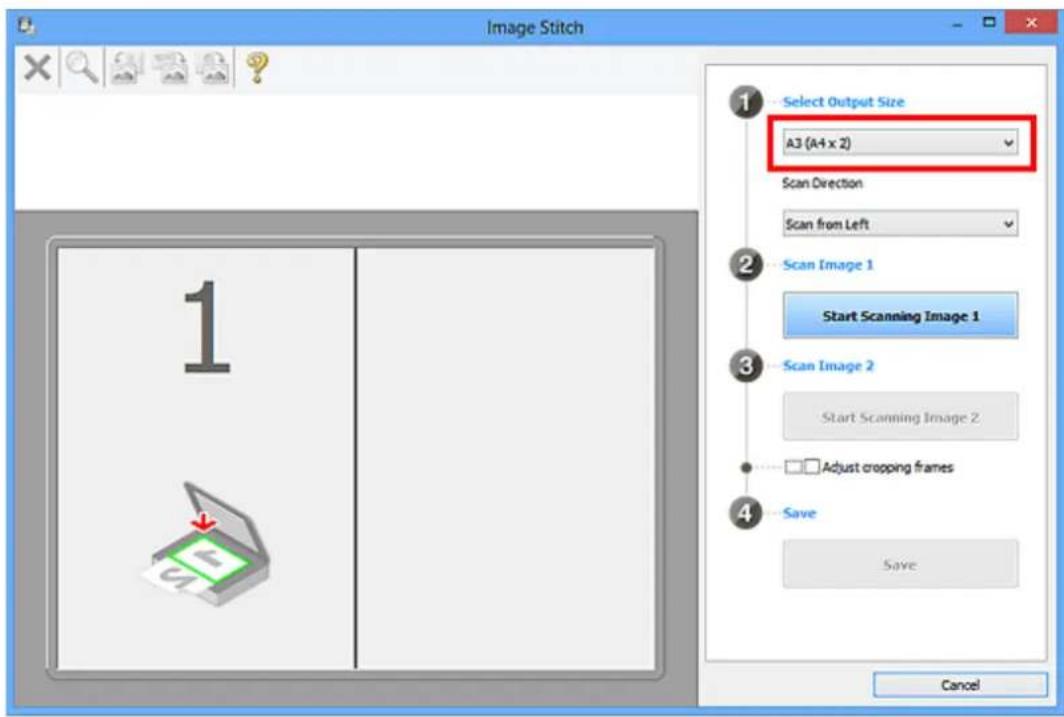
text_image
Image Stitch 1 Select Output Size A3 (A4 x 2) Scan Direction Scan from Left Scan Image 1 Start Scanning Image 1 Scan Image 2 Start Scanning Image 2 Adjust cropping frames Save Save Cancel- Make sure that Scan from Left is selected in Scan Direction.
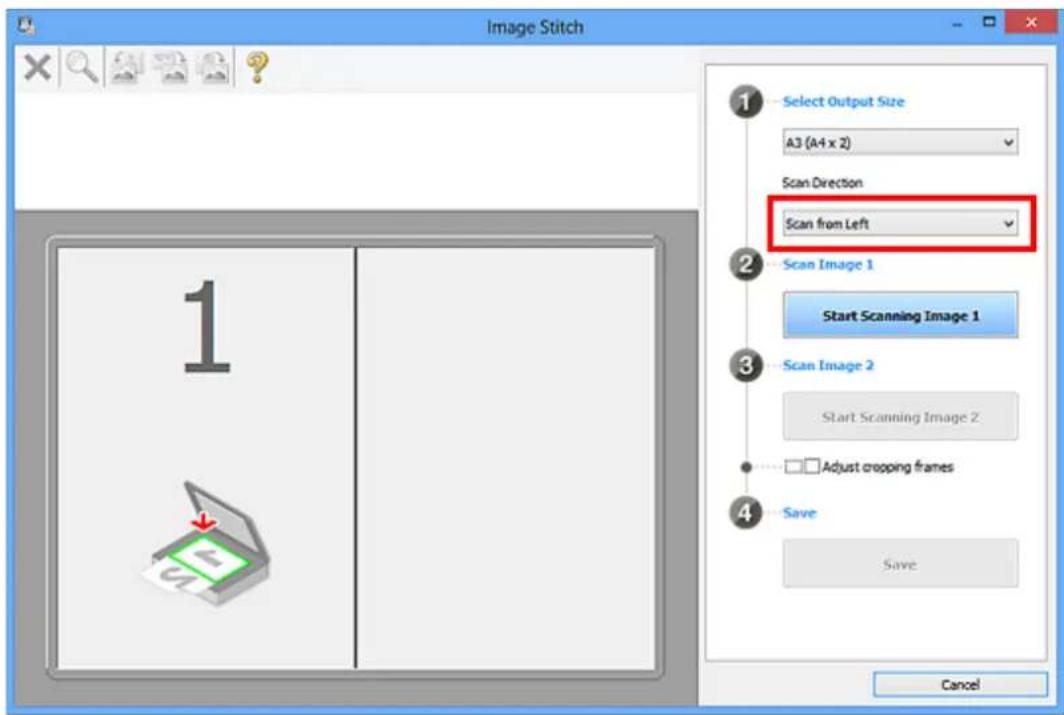
text_image
Image Stitch 1 Select Output Size A3 (A4 x 2) Scan Direction Scan from Left Scan Image 1 Start Scanning Image 1 Scan Image 2 Start Scanning Image 2 Adjust cropping frames Save Save Cancel- Place the item that is to be displayed on the left side of the screen face-down on the platen.
- Click Start Scanning Image 1.
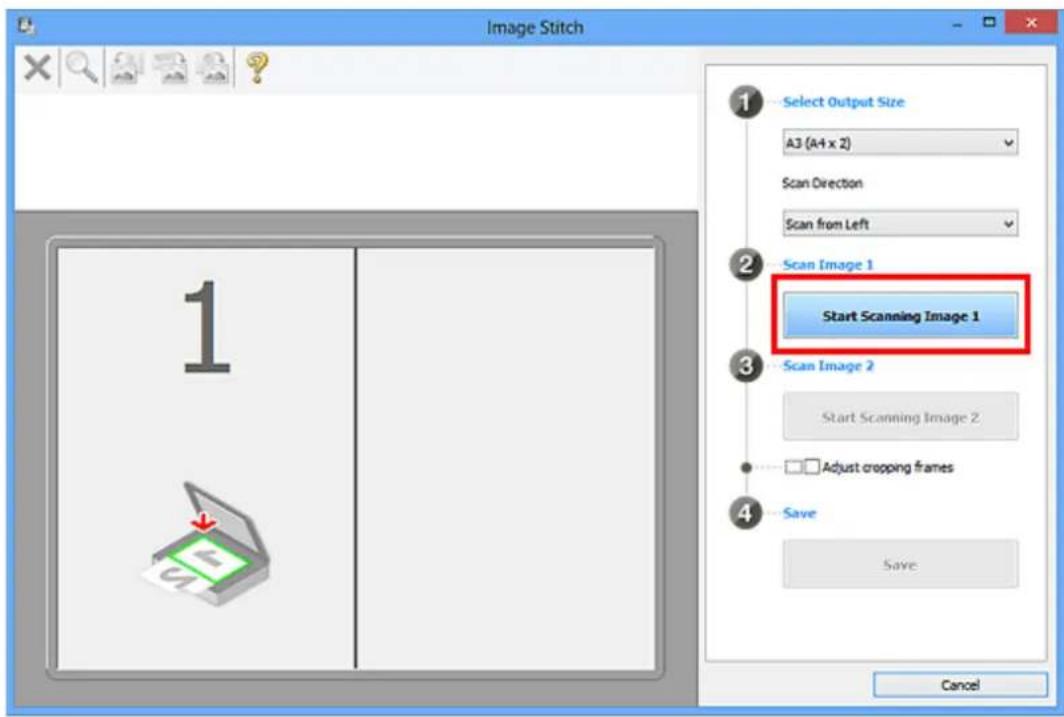
text_image
Image Stitch 1 Select Output Size A3 (A4 x 2) Scan Direction Scan from Left Scan Image 1 Start Scanning Image 1 Scan Image 2 Start Scanning Image 2 Adjust cropping frames Save Save CancelThe first item is scanned and appears in 1.
Note
- Click Cancel to cancel the scan.
- Place the item that is to be displayed on the right side of the screen face-down on the platen.
- Click Start Scanning Image 2.
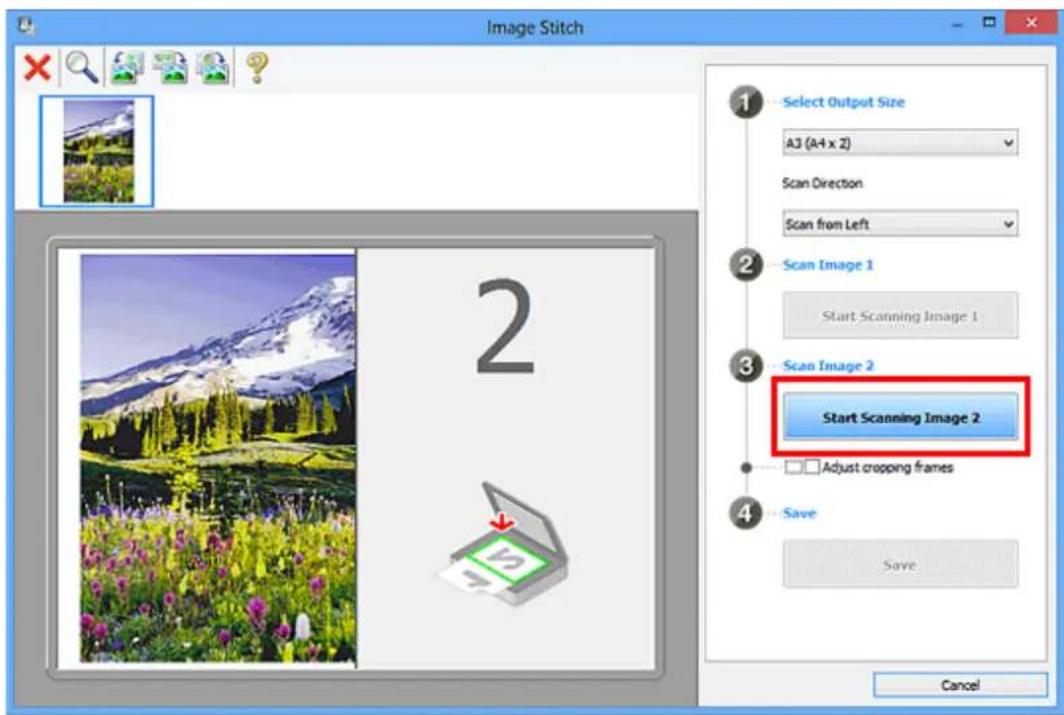
text_image
Image Stitch 1 Select Output Size A3 (A4 x 2) Scan Direction Scan from Left 2 Scan Image 1 Start Scanning Image 1 3 Scan Image 2 Start Scanning Image 2 □ Adjust cropping frames 4 Save Save CancelThe second item is scanned and appears in 2.

Note
- Click Cancel to cancel the scan.
10. Adjust the scanned images as required.
Use the Toolbar to rotate or zoom in/out, or drag the images to adjust their positions.

text_image
Image Stitch 1 Select Output Size A3 (A4 x 2) Scan Direction Scan from Left 2 Scan Image 1 Start Scanning Image 1 3 Scan Image 2 Start Scanning Image 2 □ Adjust cropping frames 4 Save Save Cancel
Note
- Select the Adjust cropping frames checkbox to specify the area to be saved.
Adjusting Cropping Frames in the Image Stitch Window
• To scan an item again, select the image in the Preview area or the thumbnail at the top of the screen, then click ✗ (Delete). The selected image is deleted, allowing you to scan the item again.
11. Click Save.
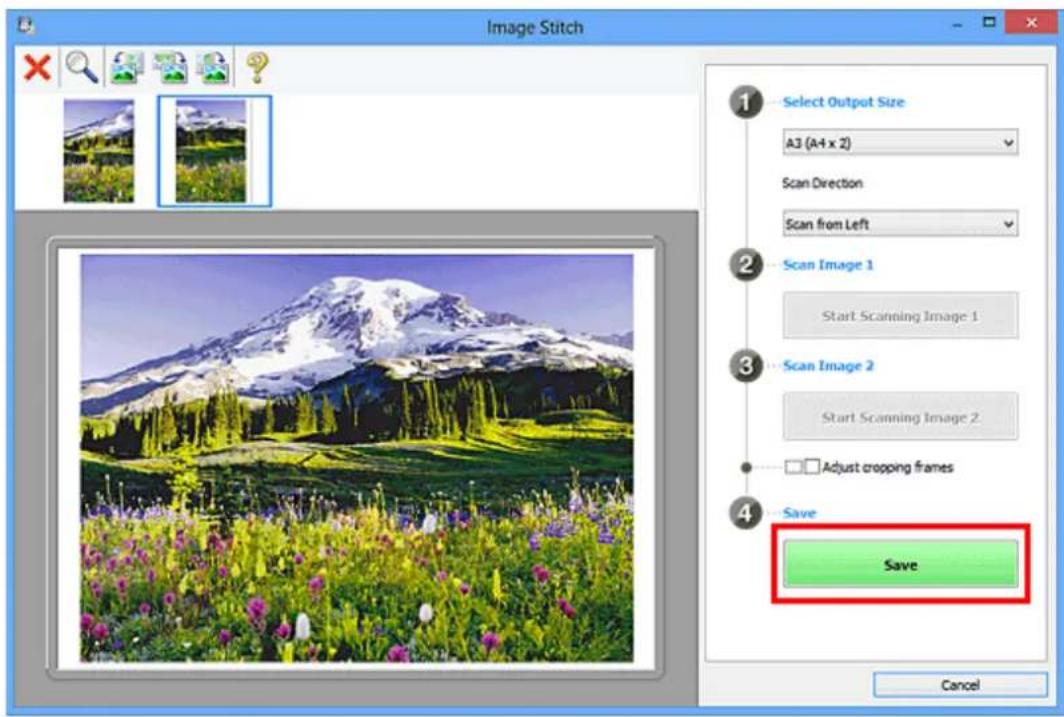
text_image
Image Stitch 1 Select Output Size A3 (A4 x 2) Scan Direction Scan from Left 2 Scan Image 1 Start Scanning Image 1 3 Scan Image 2 Start Scanning Image 2 □□ Adjust cropping frames 4 Save Save CancelThe combined image is saved.
Note
- Refer to "Image Stitch Window" for details on the Image Stitch window.
- You can make advanced scan settings in the Settings (Scan and Stitch) dialog box displayed by clicking Settings....
Adjusting Cropping Frames in the Image Stitch Window
"Cropping" is the act of selecting the area you want to keep in an image and discarding the rest when scanning it.
In the Image Stitch window, you can specify a cropping frame on the image displayed in the Preview area.

Note
- Refer to "Adjusting Cropping Frames (ScanGear)" for your model from Home of the Online Manual for how to adjust cropping frames with ScanGear (scanner driver).
Initial Cropping Frame
No cropping frame is specified. When you select the Adjust cropping frames checkbox, an active cropping frame is automatically specified around the image in the Preview area. You can drag the cropping frame to specify the area.
When you perform a scan, the image in the area specified with the cropping frame will be scanned.
Adjusting a Cropping Frame
The cursor will change into

(Arrow) when it is positioned over a cropping frame. Click and popping frame.
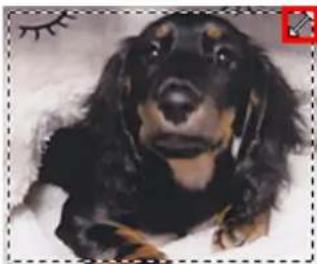
natural_image
Close-up photo of a black and brown dog with floppy ears (no text or symbols visible)The cursor will change into

(Crosshair Arrow) when it is positioned within a cropping frame. Click and the entire cropping frame.
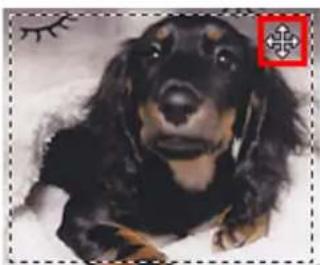
natural_image
Close-up of a black and brown dog with a red decorative symbol in the corner (no text or symbols on the dog itself)Deleting Cropping Frames
To delete the cropping frame, deselect the Adjust cropping frames checkbox.
Extracting Text from Scanned Images (OCR)
Click OCR in the IJ Scan Utility main screen to scan text in scanned magazines and newspapers and display it in a specified application.
Note
- You can also extract text from Document, Custom, or ScanGear.
-
Start IJ Scan Utility.
-
Click Settings..., then set the document type, resolution, etc. in the Settings (OCR) dialog box, and then select the application in which you want to display the result.
When setting is completed, click OK.
Note
- For Resolution, only 300 dpi or 400 dpi can be set.
- If a compatible application is not installed, the text in the image is extracted and appears in your text editor.
Text to be displayed is based on Document Language in the Settings (General Settings) dialog box. Select the language you want to extract in Document Language and scan. -
You can add the application from the pull-down menu.
-
Click OCR.
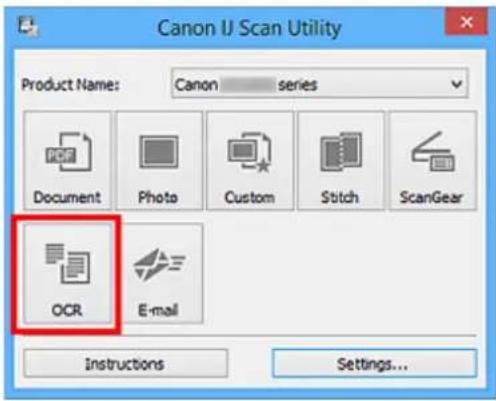
text_image
Canon IJ Scan Utility Product Name: Canon series Document Photo Custom Stitch ScanGear OCR E-mail Instructions Settings...Scanning starts.
When scanning is completed, the scanned images are saved according to the settings, and the extracted text appears in the specified application.
Note
- Click Cancel to cancel the scan.
- Text displayed in your text editor is for guidance only. Text in the image of the following types of documents may not be detected correctly.
- Documents containing text with font size outside the range of 8 points to 40 points (at 300 dpi)
-
Slanted documents
-
Documents placed upside down or documents with text in the wrong orientation (rotated characters)
- Documents containing special fonts, effects, italics, or hand-written text
- Documents with narrow line spacing
- Documents with colors in the background of text
- Documents containing multiple languages
Sending Scanned Images via E-mail
You can send scanned images via e-mail easily by simply clicking E-mail in the IJ Scan Utility main screen.

Note
- You can also send scanned images via e-mail from Document, Photo, Custom, or ScanGear.
-
Start IJ Scan Utility.
-
Click Settings..., then set the item type, resolution, etc. in the Settings (E-mail) dialog box, and then select an e-mail client.
When setting is completed, click OK.
- Place the item on the platen.
→ Positioning Originals (Scanning from Computer)
- Click E-mail.

text_image
Canon J Scan Utility Product Name: Canon series Document Photo Custom Stitch ScanGear OCR E-mail Instructions Settings...Scanning starts.
When scanning is completed, the specified e-mail client starts and the images will be attached to a new message.

Note
- Click Cancel to cancel the scan.
- The scanned images are saved according to the settings made in the Settings dialog box.
-
If the Check scan results and specify save settings checkbox is selected in the Settings dialog box, the Save Settings dialog box appears. After you set the save options and click OK, the scanned images are saved and automatically attached to a new message of the specified e-mail client.
-
Specify the recipient, enter the subject and message, then send e-mail.
Refer to the manual of your e-mail client for e-mail settings.
Scanning Multiple Originals at One Time
You can scan two or more photos (small items) placed on the platen at one time and save each image individually.

Important
- The following types of items may not be scanned correctly. In that case, adjust the cropping frames (scan areas) in whole image view of ScanGear (scanner driver) and scan again.
• Photos that have a whitish background
- Items printed on white paper, hand-written documents, business cards, etc.
- Thin items
- Thick items
Refer to "Scanning Multiple Documents at One Time with ScanGear (Scanner Driver)" for your model from Home of the Online Manual for details.

Note
- The screens for scanning with favorite settings are used as examples in the following descriptions.
- Place the items on the platen.
→ Positioning Originals (Scanning from Computer)
- Start IJ Scan Utility.
- Click Settings....
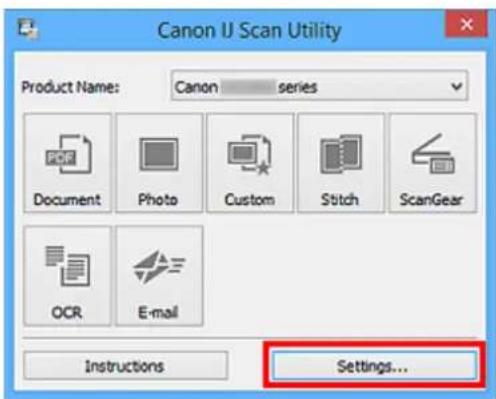
text_image
Canon IJ Scan Utility Product Name: Canon series Document Photo Custom Stitch ScanGear OCR E-mail Instructions Settings...The Settings dialog box appears.
- Click Custom Scan.
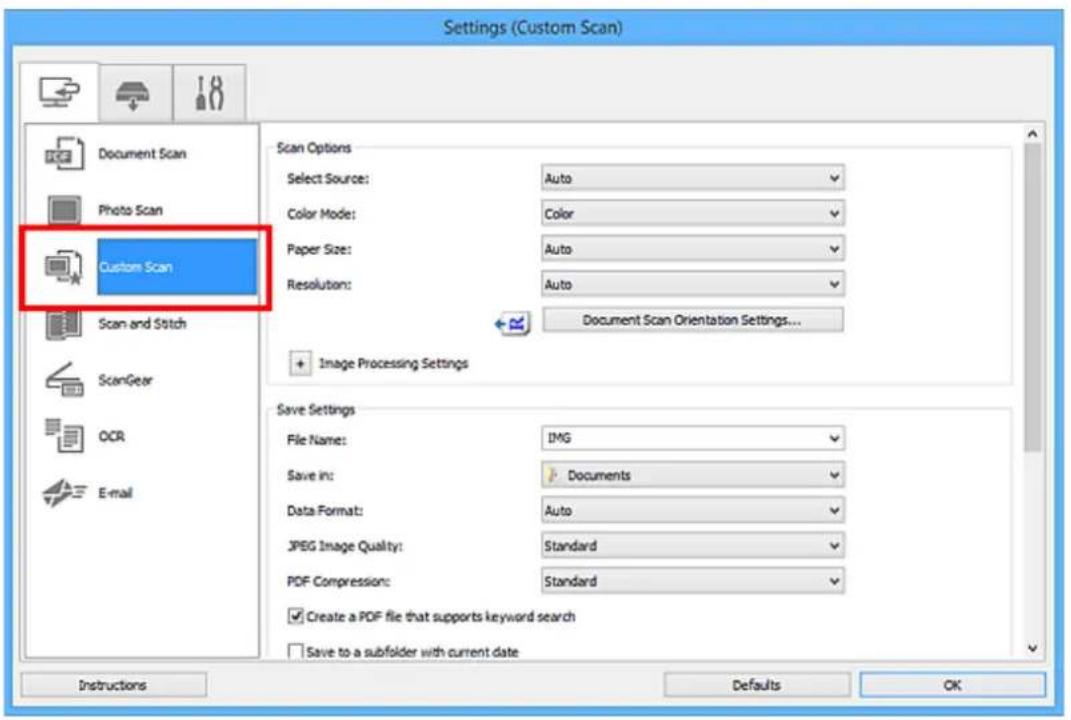
text_image
Settings (Custom Scan) Document Scan Photo Scan Custom Scan Scan and Stitch ScanGear OCR E-mail Scan Options Select Source: Auto Color Mode: Color Paper Size: Auto Resolution: Auto Document Scan Orientation Settings... Image Processing Settings Save Settings File Name: IMG Save in: Documents Data Format: Auto JPEG Image Quality: Standard PDF Compression: Standard Create a PDF file that supports keyword search Save to a subfolder with current date Instructions Defaults OK- Select Select Source according to the items to be scanned.
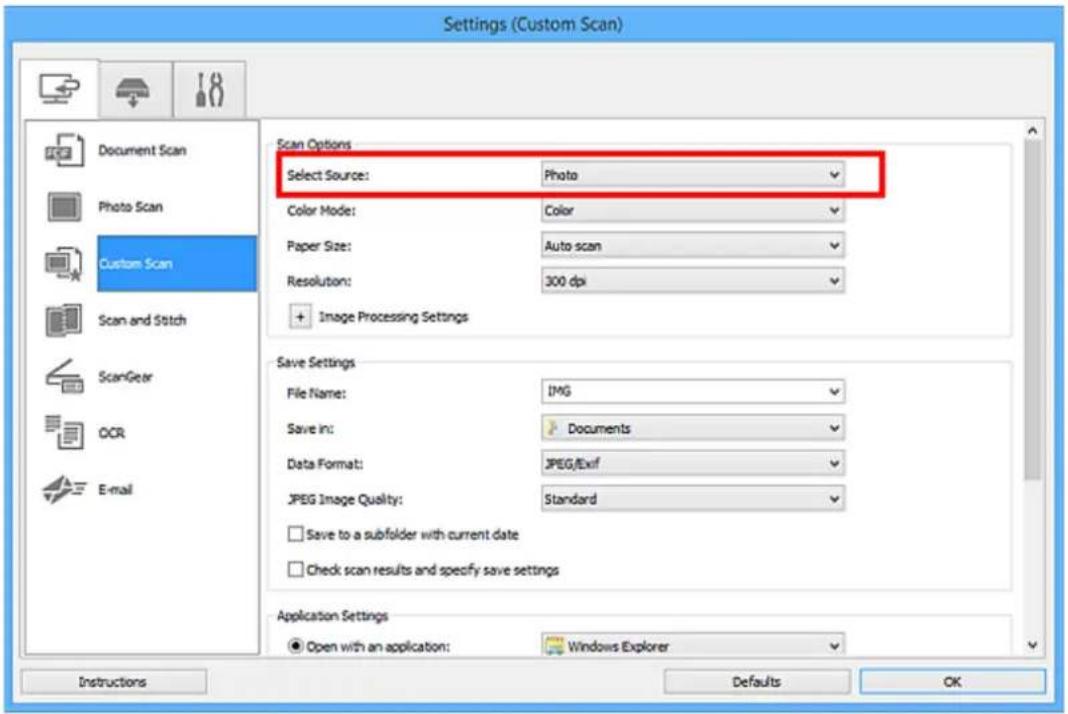
text_image
Settings (Custom Scan) Scan Options Select Source: Photo Color Mode: Color Paper Size: Auto scan Resolution: 300 dpi + Image Processing Settings Save Settings File Name: IMG Save In: Documents Data Format: JPEG/Exif JPEG Image Quality: Standard □ Save to a subfolder with current date □ Check scan results and specify save settings Application Settings ● Open with an application: Windows Explorer Instructions Defaults OK- Select Auto scan for Paper Size, then click OK.
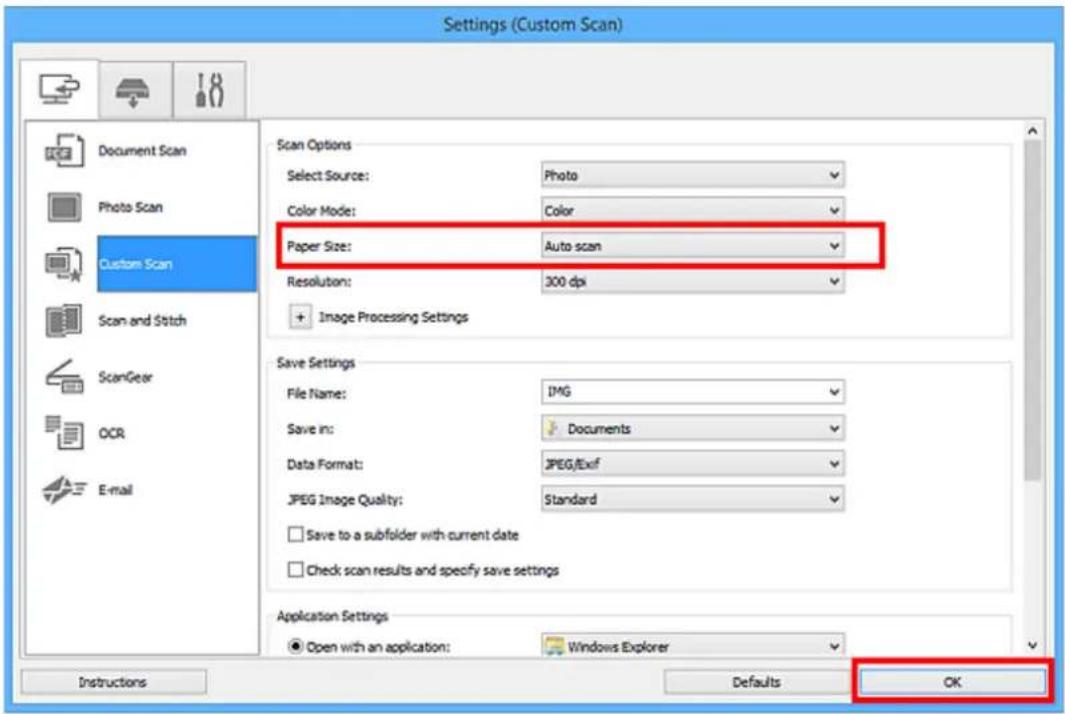
text_image
Settings (Custom Scan) Scan Options Select Source: Photo Color Mode: Color Paper Size: Auto scan Resolution: 300 dpi + Image Processing Settings Save Settings File Name: IMG Save in: Documents Data Format: JPEG/Exif JPEG Image Quality: Standard □ Save to a subfolder with current date □ Check scan results and specify save settings Application Settings ● Open with an application: Windows Explorer Instructions Defaults OKThe IJ Scan Utility main screen appears.
Note
- Refer to the following pages for details on the setting items in the Settings dialog box.
→ Settings (Document Scan) Dialog Box
Settings (Photo Scan) Dialog Box
→ Settings (Custom Scan) Dialog Box
Settings (OCR) Dialog Box
Settings (E-mail) Dialog Box
7. Click Custom.

text_image
Canon IJ Scan Utility Product Name: Canon series Document Photo Custom Stitch ScanGear OCR E-mail Instructions Settings...Multiple items are scanned at one time.
Note
- Click Cancel to cancel the scan.
- Scanned images are saved in the folder set for Save in in the corresponding Settings dialog box displayed by clicking Settings.... In each Settings dialog box, you can also make advanced scan settings.
Scanning Multiple Documents at One Time from the ADF (Auto Document Feeder)
Place multiple documents on the ADF (Auto Document Feeder) and scan at one time.
Note
- You can scan multiple documents at one time from the ADF when scanning via Document, Custom, ScanGear, OCR, or E-mail.
Refer to "Scanning Using Application Software (ScanGear)" for your model from Home of the Online Manual for how to scan using ScanGear (scanner driver). -
The screens for scanning documents are used as examples in the following descriptions.
-
Place the documents on the ADF.
→ Placing Documents (ADF (Auto Document Feeder))
- Start IJ Scan Utility.
- Click Settings....
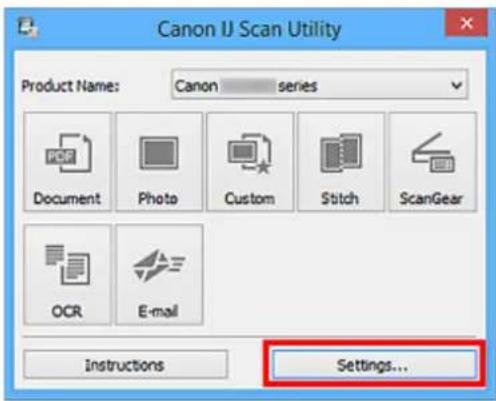
text_image
Canon IJ Scan Utility Product Name: Canon series Document Photo Custom Stitch ScanGear OCR E-mail Instructions Settings...The Settings dialog box appears.
- Click Document Scan.
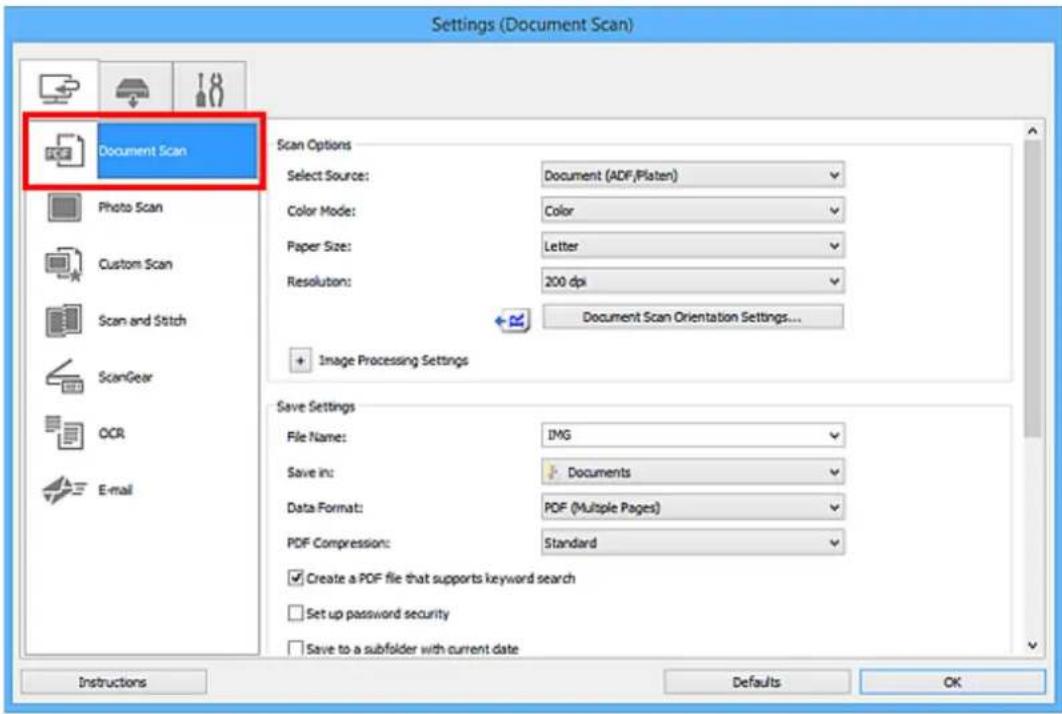
text_image
Settings (Document Scan) Document Scan Scan Options Select Source: Document (ADF/Platen) Color Mode: Color Paper Size: Letter Resolution: 200 dpi Document Scan Orientation Settings... Image Processing Settings Save Settings File Name: IMG Save in: Documents Data Format: PDF (Multiple Pages) PDF Compression: Standard Create a PDF file that supports keyword search Set up password security Save to a subfolder with current date Instructions Defaults OK- Select Select Source according to the documents to be scanned.
To scan only the front side of each document, select Document (ADF/Platen) or Document (ADF Simplex).
To scan the front side then the back side of each document, select Document (ADF Manual Duplex).
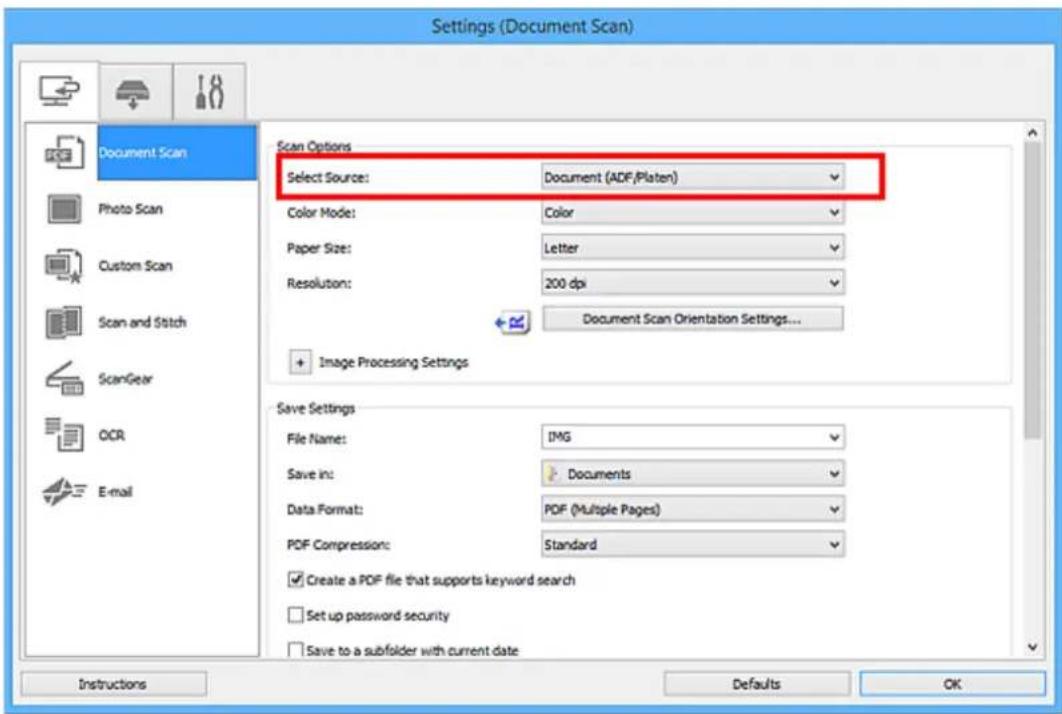
text_image
Settings (Document Scan) Scan Options Select Source: Document (ADF/Platen) Color Mode: Color Paper Size: Letter Resolution: 200 dpi Document Scan Orientation Settings... + Image Processing Settings Save Settings File Name: IMG Save in: Documents Data Format: PDF (Multiple Pages) PDF Compression: Standard ✓ Create a PDF file that supports keyword search ☐ Set up password security ☐ Save to a subfolder with current date Instructions Defaults OK- Set the color mode, document size, and scanning resolution as required.
Click Document Scan Orientation Settings... to specify the orientation of the documents to be scanned. In the displayed dialog box, you can specify the Orientation and Binding Side. How to place the documents when scanning the back sides depends on the Binding Side.
When setting is completed, click OK.
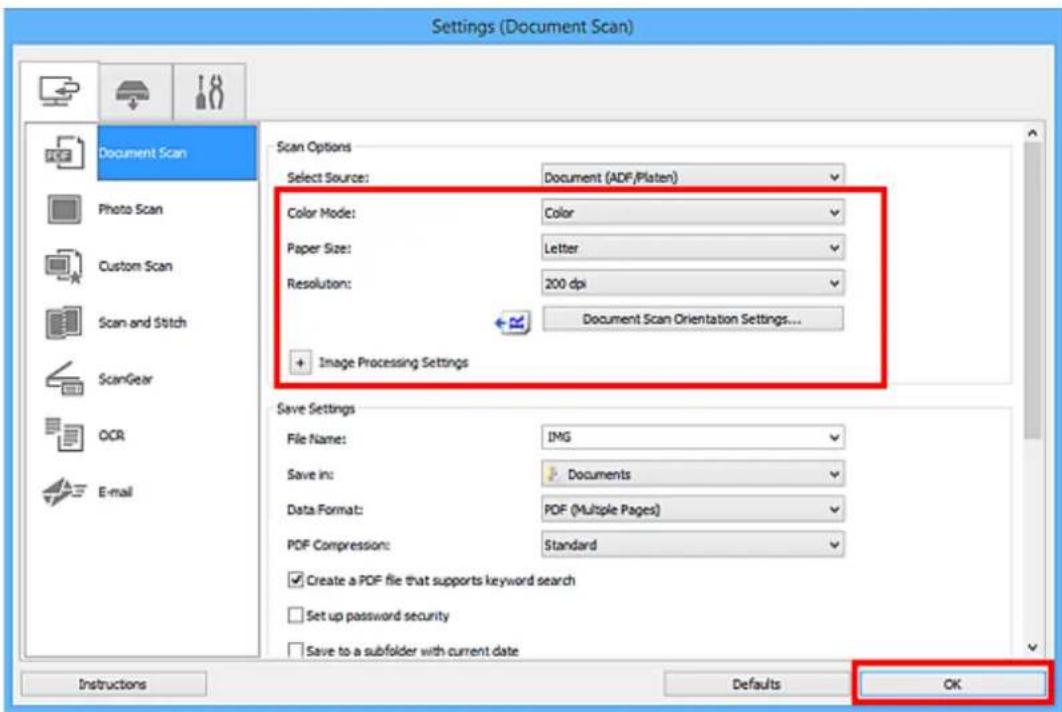
text_image
Settings (Document Scan) Scan Options Select Source: Document (ADF/Platen) Color Mode: Color Paper Size: Letter Resolution: 200 dpi Document Scan Orientation Settings... + Image Processing Settings Save Settings File Name: IMG Save in: Documents Data Format: PDF (Multiple Pages) PDF Compression: Standard ✓ Create a PDF file that supports keyword search ☐ Set up password security ☐ Save to a subfolder with current date Instructions Defaults OKThe IJ Scan Utility main screen appears.
Note
- Refer to the following pages for details on the setting items in the Settings dialog box.
Settings (Document Scan) Dialog Box
Settings (Custom Scan) Dialog Box
→ Settings (OCR) Dialog Box
→ Settings (E-mail) Dialog Box
7. Click Document.
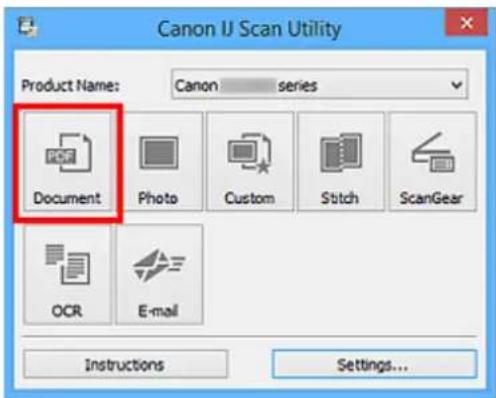
text_image
Canon IJ Scan Utility Product Name: Canon series Document Photo Custom Stitch ScanGear OCR E-mail Instructions Settings...Scanning starts.
Note
- Click Cancel to cancel the scan.
When Document (ADF Manual Duplex) is selected for Select Source, proceed to Step 8.
- Follow the on-screen instructions to place the documents.
Note
- The screens for scanning with Orientation set to Portrait are used as examples in the following descriptions.
When Long edge is Selected for Binding Side in Document Scan Orientation Settings...:
Place the documents after rotating the output documents 180 degrees.
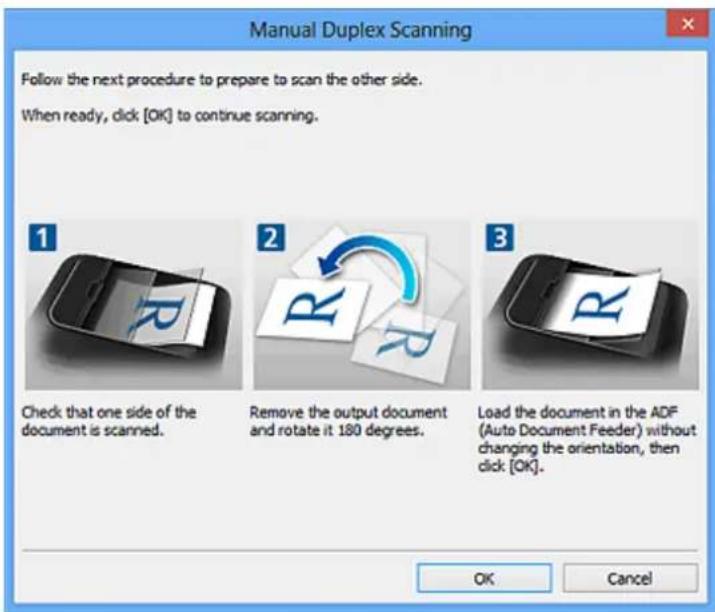
text_image
Manual Duplex Scanning Follow the next procedure to prepare to scan the other side. When ready, click [OK] to continue scanning. Check that one side of the document is scanned. Remove the output document and rotate it 180 degrees. Load the document in the ADF (Auto Document Feeder) without changing the orientation, then click [OK]. OK CancelWhen Short edge is Selected for Binding Side in Document Scan Orientation Settings...:
Place the documents without changing the orientation of the output documents.
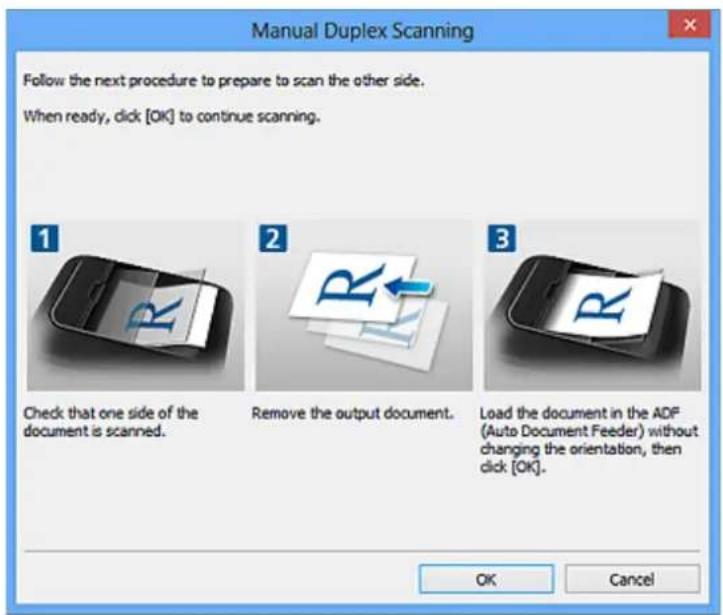
text_image
Manual Duplex Scanning Follow the next procedure to prepare to scan the other side. When ready, click [OK] to continue scanning. Check that one side of the document is scanned. Remove the output document. Load the document in the ADF (Auto Document Feeder) without changing the orientation, then click [OK]. OK Cancel9. Click OK.
Scanning starts.

Note
- Click Cancel to cancel the scan.
- Scanned images are saved in the folder set for Save in in the corresponding Settings dialog box displayed by clicking Settings.... In each Settings dialog box, you can also make advanced scan settings.
Saving after Checking Scan Results
You can check the scan results, then save the images to a computer.

Important
- You cannot check the scan results before saving when scanned using the operation panel.

Note
- The screens for scanning photos are used as examples in the following descriptions.
- Start IJ Scan Utility.
- Click Settings....
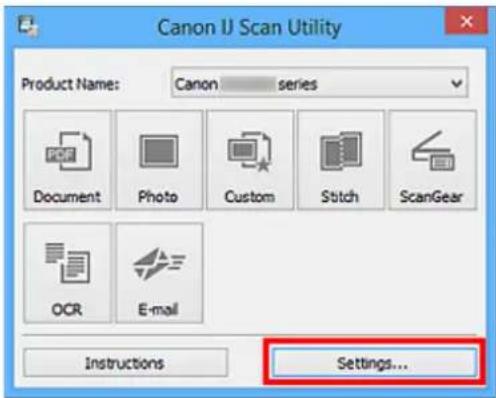
text_image
Canon IJ Scan Utility Product Name: Canon series Document Photo Custom Stitch ScanGear OCR E-mail Instructions Settings...The Settings dialog box appears.
- Click Photo Scan.
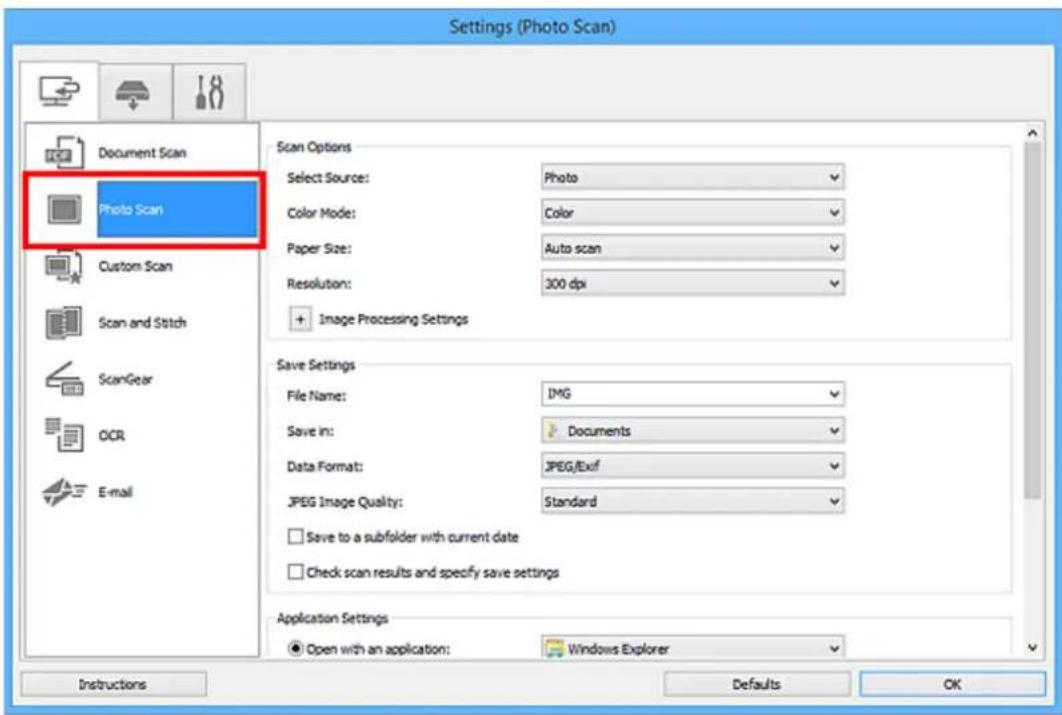
text_image
Settings (Photo Scan) Document Scan Photo Scan Custom Scan Scan and Stitch ScanGear OCR E-mail Scan Options Select Source: Photo Color Mode: Color Paper Size: Auto scan Resolution: 300 dpi + Image Processing Settings Save Settings File Name: IMG Save in: Documents Data Format: JPEG/Excf JPEG Image Quality: Standard □ Save to a subfolder with current date □ Check scan results and specify save settings Application Settings ● Open with an application: Windows Explorer Instructions Defaults OK- Select Check scan results and specify save settings checkbox, and then click OK.
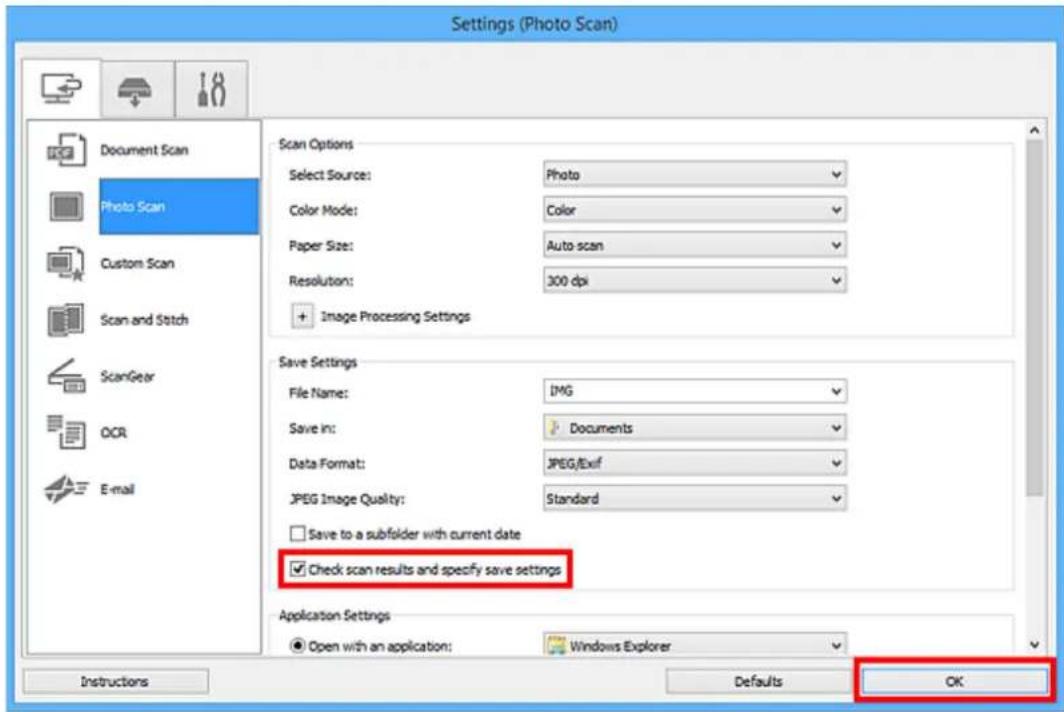
text_image
Settings (Photo Scan) Scan Options Select Source: Photo Color Mode: Color Paper Size: Auto-scan Resolution: 300 dpi + Image Processing Settings Save Settings File Name: IMG Save in: Documents Data Format: JPEG/Exif JPEG Image Quality: Standard □ Save to a subfolder with current date ☑ Check scan results and specify save settings Application Settings ● Open with an application: Windows Explorer Instructions Defaults OKThe IJ Scan Utility main screen appears.
Note
- Refer to the following pages for details on the setting items in the Settings dialog box.
Settings (Document Scan) Dialog Box
→ Settings (Photo Scan) Dialog Box
Settings (Custom Scan) Dialog Box
Settings (Scan and Stitch) Dialog Box
Settings (ScanGear) Dialog Box
Settings (OCR) Dialog Box
→ Settings (E-mail) Dialog Box
- Click Photo.
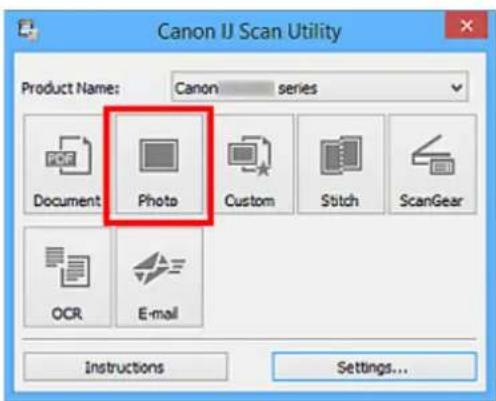
text_image
Canon IJ Scan Utility Product Name: Canon series Document Photo Custom Stitch ScanGear OCR E-mail Instructions Settings...Scanning starts.
When scanning is completed, the Save Settings dialog box appears.

Note
- Click Cancel to cancel the scan.
- Change the image order or file save options as required.
You can change the image order or file save options in the Save Settings dialog box.

Note
- The default save folders are as follows.
- Windows 10/Windows 8.1/Windows Vista:
Documents folder -
Windows 8/Windows 7:
My Documents folder -
Click OK.
Scanned images are saved according to the settings.
IJ Scan Utility Screens
IJ Scan Utility Main Screen
Settings Dialog Box
- Settings (Document Scan) Dialog Box
- Settings (Photo Scan) Dialog Box
- Settings (Custom Scan) Dialog Box
- Settings (Scan and Stitch) Dialog Box
- Settings (ScanGear) Dialog Box
- Settings (OCR) Dialog Box
- Settings (E-mail) Dialog Box
- Settings (Save to PC (Document)) Dialog Box
- Settings (Save to PC (Photo)) Dialog Box
- Settings (Attach to E-mail (Document)) Dialog Box
- Settings (Attach to E-mail (Photo)) Dialog Box
- Settings (General Settings) Dialog Box
Save Settings Dialog Box
▶ Password Security Settings Dialog Box
▶ Image Stitch Window
IJ Scan Utility Main Screen
Follow the steps below to start IJ Scan Utility.
Windows 10:
From Start menu, select All apps > Canon Utilities > IJ Scan Utility to start IJ Scan Utility.
Windows 8.1/Windows 8:
Select IJ Scan Utility on Start screen to start IJ Scan Utility.
If IJ Scan Utility is not displayed on the Start screen, select the Search charm, and then search for "IJ Scan Utility".
Windows 7/Windows Vista:
From Start menu, select All Programs > Canon Utilities > IJ Scan Utility > IJ Scan Utility to start IJ Scan Utility.
You can complete from scanning to saving at one time by simply clicking the corresponding icon.
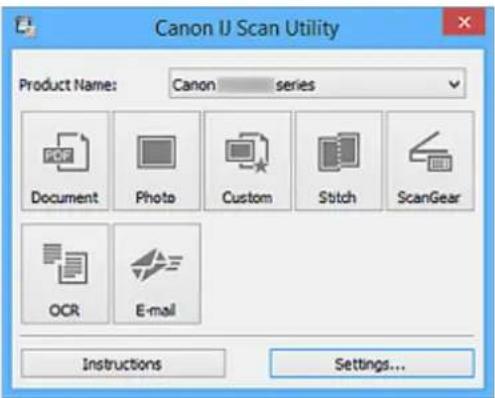
text_image
Canon IJ Scan Utility Product Name: Canon series Document Photo Custom Stitch ScanGear OCR E-mail Instructions Settings...Product Name
Displays the name of the product that IJ Scan Utility is currently set to use.
If the displayed product is not the one you want to use, select the desired product from the list.
In addition, for network connection, select one with "Network" after the product name.
Note
- Refer to "Network Scan Settings" for how to set up a network environment.
Document
Scans items as documents and saves them to a computer.
Scan/save settings and the response after scanning can be specified in the Settings (Document Scan) dialog box.
Photo
Scans items as photos and saves them to a computer.
Scan/save settings and the response after scanning can be specified in the Settings (Photo Scan) dialog box.
Custom
Scans items with your favorite settings and saves the images to a computer. The item type can be automatically detected.
Scan/save settings and the response after scanning can be specified in the Settings (Custom Scan) dialog box.
Stitch
Displays the Image Stitch window in which you can scan the left and right halves of an item larger than the platen and combine the scanned images back into one image.
Scan/save settings and the response after scanning can be specified in the Settings (Scan and Stitch) dialog box.
ScanGear
Starts ScanGear (scanner driver) in which you can make image corrections and color adjustments when scanning.
Scan/save settings and applications can be specified in the Settings (ScanGear) dialog box.
OCR
Scan text in scanned magazines and newspapers and display it in a specified application.
Scan/save settings and applications can be specified in the Settings (OCR) dialog box.
You can send scanned images via e-mail.
Scan/save settings and applications can be specified in the Settings (E-mail) dialog box.
Instructions
Opens this guide.
Settings...
Displays the Settings dialog box in which you can specify the scan/save settings and the response after scanning.
Settings Dialog Box
There are three tabs in the Settings dialog box: (Scanning from a Computer), (Scanning from the Operation Panel), and (General Settings). When you click a tab, the view in the red frame switches and you can make advanced settings to functions on each tab.
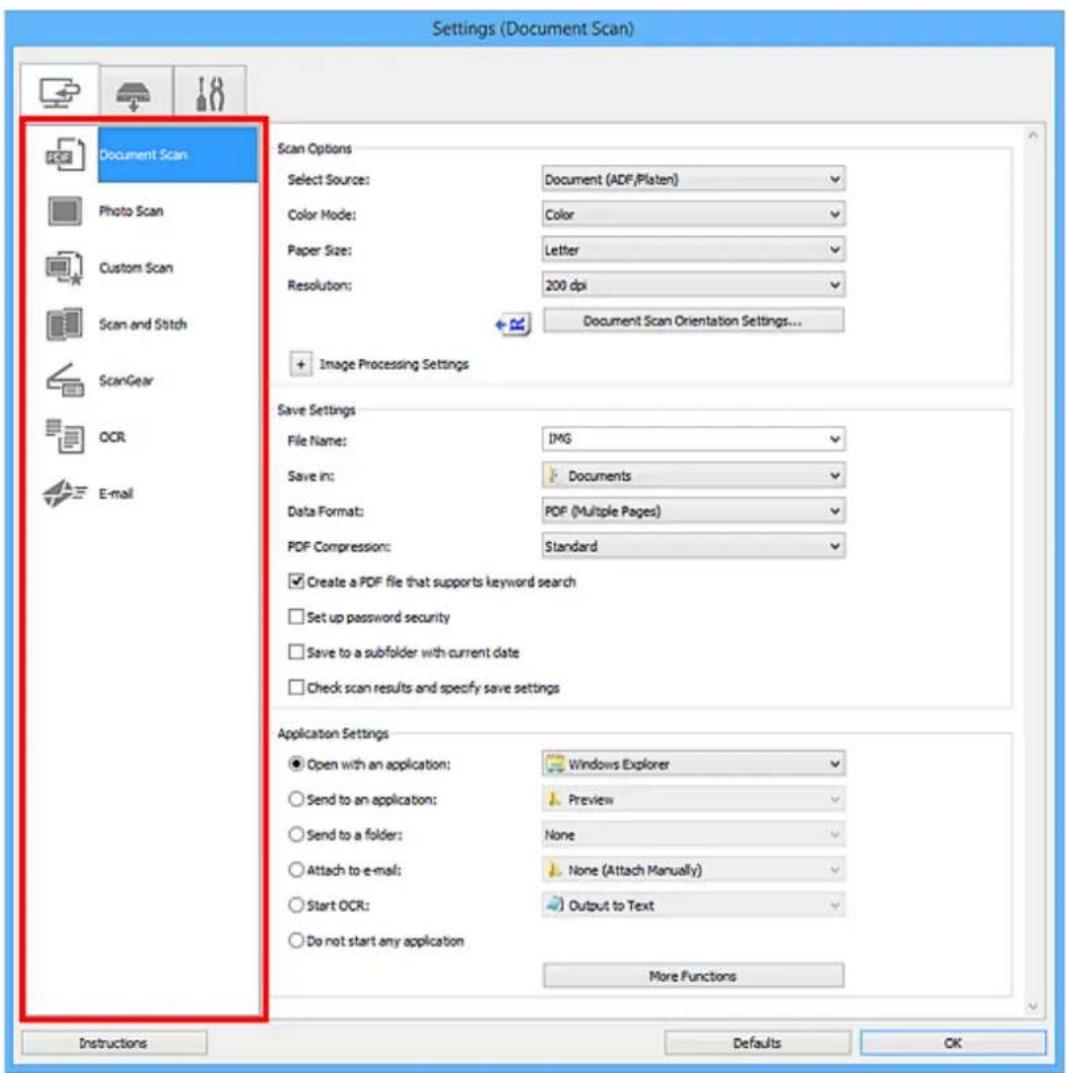
text_image
Settings (Document Scan) Document Scan Photo Scan Custom Scan Scan and Stitch ScanGear OCR E-mail Scan Options Select Source: Document (ADF/Platen) Color Mode: Color Paper Size: Letter Resolution: 200 dpi Document Scan Orientation Settings... + Image Processing Settings Save Settings File Name: IMG Save in: Documents Data Format: PDF (Multiple Pages) PDF Compression: Standard ✓ Create a PDF file that supports keyword search ☐ Set up password security ☐ Save to a subfolder with current date ☐ Check scan results and specify save settings Application Settings ● Open with an application: Windows Explorer ○ Send to an application: Preview ○ Send to a folder: None ○ Attach to e-mail: None (Attach Manually) ○ Start OCR: Output to Text ○ Do not start any application More Functions Instructions Defaults OK
(Scanning from a Computer) Tab
You can specify how to respond when scanning from IJ Scan Utility.
Settings (Document Scan) Dialog Box
Settings (Photo Scan) Dialog Box
Settings (Custom Scan) Dialog Box
Settings (Scan and Stitch) Dialog Box
Settings (ScanGear) Dialog Box
Settings (OCR) Dialog Box
Settings (E-mail) Dialog Box

(Scanning from the Operation Panel) Tab
You can specify how to respond when scanning from the operation panel.
→ Settings (Save to PC (Document)) Dialog Box
→ Settings (Save to PC (Photo)) Dialog Box
→ Settings (Attach to E-mail (Document)) Dialog Box
→ Settings (Attach to E-mail (Photo)) Dialog Box

(General Settings) Tab
You can set the product to use, file size restriction on e-mail attachment, language to detect text in images, and folder in which to save images temporarily.
→ Settings (General Settings) Dialog Box
Settings (Document Scan) Dialog Box
Click Document Scan on the 📋 (Scanning from a Computer) tab to display the Settings (Document Scan) dialog box.
In the Settings (Document Scan) dialog box, you can make advanced scan settings to scan items as documents.
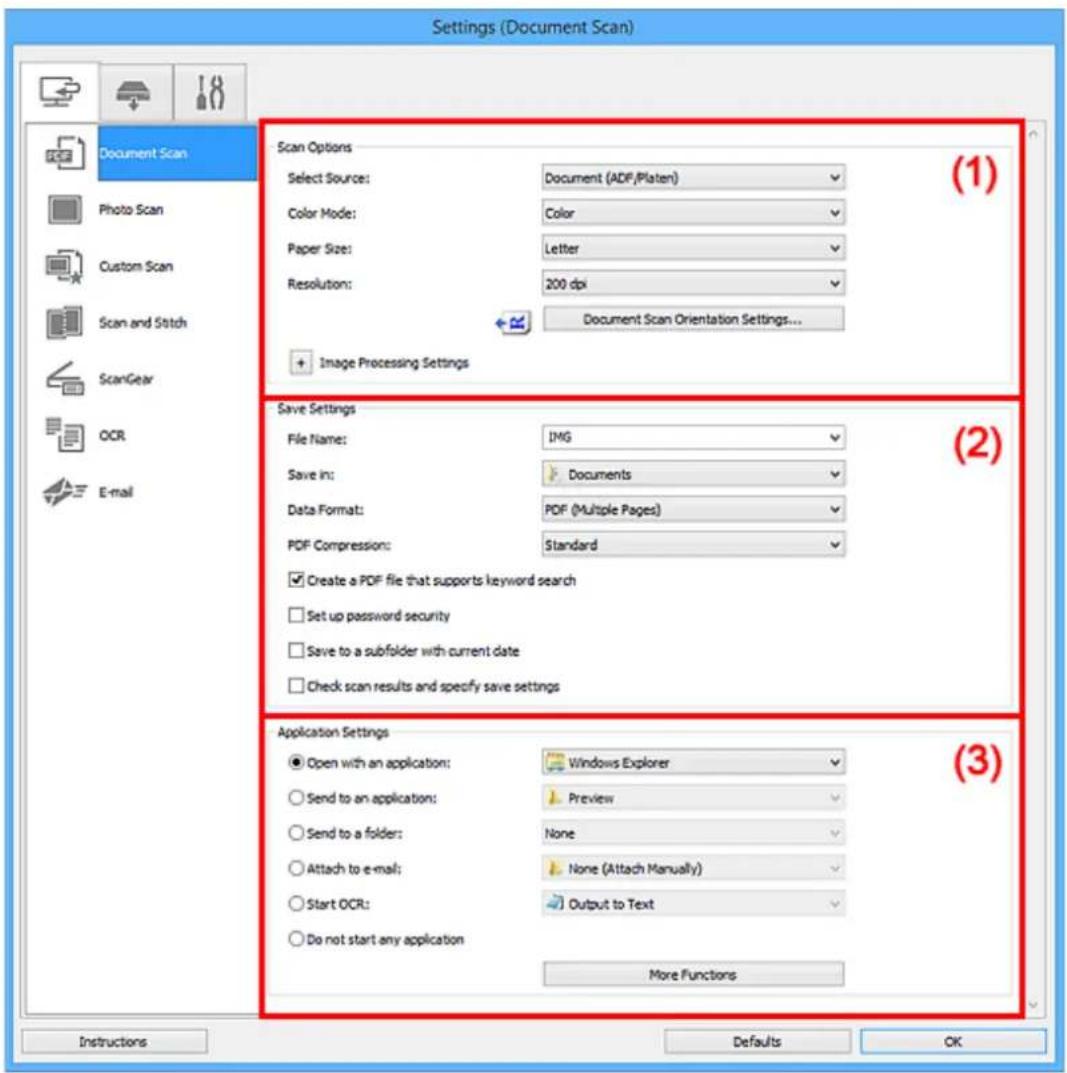
text_image
Settings (Document Scan) Scan Options Select Source: Document (ADF,Platen) Color Mode: Color Paper Size: Letter Resolution: 200 dpi Document Scan Orientation Settings... + Image Processing Settings Save Settings File Name: IMG Save in: Documents Data Format: PDF (Multiple Pages) PDF Compression: Standard ✓ Create a PDF file that supports keyword search ✓ Set up password security ✓ Save to a subfolder with current date ✓ Check scan results and specify save settings Application Settings ● Open with an application: Windows Explorer ○ Send to an application: Preview ○ Send to a folder: None ○ Attach to e-mail: None (Attach Manually) ○ Start OCR: Output to Text ○ Do not start any application More Functions Instructions Defaults OK(1) Scan Options Area
(2) Save Settings Area
(3) Application Settings Area
(1) Scan Options Area
Select Source
Select the type of item to be scanned.
- Scanning documents: Document or Document (ADF/Platen)
• Scanning magazines: Magazine - Scanning documents from the ADF (Auto Document Feeder): Document (ADF Simplex), Document (ADF Manual Duplex), or Document (ADF/Platen)
Note
- When Document (ADF/Platen) is selected and documents are placed both on the platen and ADF, those placed on the ADF will be scanned.
Color Mode
Select the color mode in which to scan the item.
Paper Size
Select the size of the item to be scanned.
When you select Custom, a screen in which you can specify the paper size appears. Select a Unit, then enter the Width and Height, and then click OK.
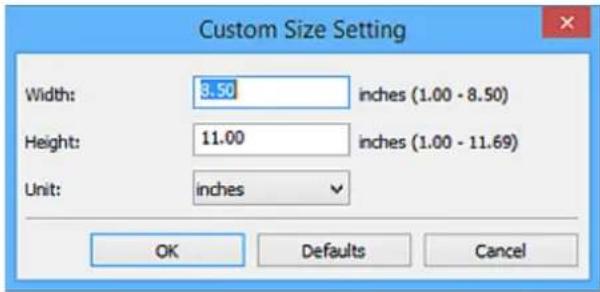
text_image
Custom Size Setting Width: 3.50 inches (1.00 - 8.50) Height: 11.00 inches (1.00 - 11.69) Unit: inches OK Defaults CancelNote
- Click Defaults to restore the specified settings to the default settings.
Resolution
Select the resolution of the item to be scanned.
The higher the resolution (value), the more detail in your image.
→ Resolution
Note
- Only 300 dpi or 400 dpi can be set when Start OCR is selected in Application Settings.
Document Scan Orientation Settings...
This appears when you select ADF for Select Source.
Click to display the Document Scan Orientation Settings dialog box in which you can set the orientation and binding side of the documents to be scanned from the ADF.
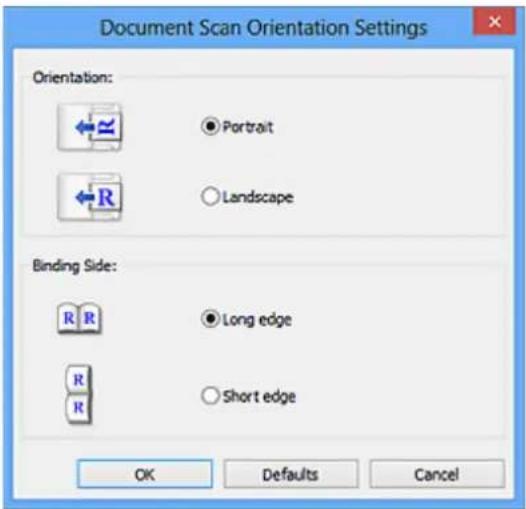
text_image
Document Scan Orientation Settings Orientation: ● Portrait ○ Landscape Binding Side: ● Long edge ○ Short edge OK Defaults CancelImportant
- Binding Side cannot be specified when scanning only the front side of each document.
Image Processing Settings
Click (Plus) to set the following.
Note
• The displayed items vary by Select Source and Color Mode.
Apply Auto Document Fix
Select this checkbox to sharpen text in a document or magazine for better readability.
Important
- The color tone may differ from the source image due to corrections. In that case, deselect the checkbox and scan.
Note
- Scanning takes longer than usual when you enable this function.
Sharpen outline
Emphasizes the outline of the subjects to sharpen the image.
Reduce show-through
Sharpens text in an item or reduces show-through in newspapers, etc.
Reduce moire
Reduces moire patterns.
Printed materials are displayed as a collection of fine dots. "Moire" is a phenomenon where uneven gradation or a stripe pattern appears when such photos or pictures printed with fine dots are scanned.
Note
- Scanning takes longer than usual when you enable Reduce moire.
Reduce gutter shadow/Reduce gutter shadow (platen)
Reduces gutter shadows that appear between pages when scanning open booklets.
Important
- This function is available only when scanning from the platen.
Note
- Use ScanGear (scanner driver)'s Advanced Mode tab to correct gutter shadows when scanning non-standard size items or specified areas.
Refer to "Gutter Shadow Correction" for your model from Home of the Online Manual for details. - When you enable this function, scanning may take longer than usual with network connection.
Correct slanted text document
Detects the scanned text and corrects the angle (within -0.1 to -10 degrees or +0.1 to +10 degrees) of the document.
Important
- The following types of documents may not be corrected properly since the text cannot be detected correctly.
- Documents in which the text lines are inclined more than 10 degrees or the angles vary by line
- Documents containing both vertical and horizontal text
- Documents with extremely large or small fonts
- Documents with small amount of text
- Documents containing figures/images
- Hand-written text
- Documents containing both vertical and horizontal lines (tables)
Note
- Scanning takes longer than usual when you enable Correct slanted text document.
Detect the orientation of text document and rotate image
Automatically rotates the image to the correct orientation by detecting the orientation of text in the scanned document.
Important
- Only text documents written in the language selected from Document Language in the Settings (General Settings) dialog box are supported.
- The orientation may not be detected for the following types of settings or documents since the text cannot be detected correctly.
- Resolution is outside the range of 300 dpi to 600 dpi
- Font size is outside the range of 8 points to 48 points
- Documents containing special fonts, effects, italics, or hand-written text
- Documents with patterned backgrounds
In that case, select the Check scan results and specify save settings checkbox, and then rotate the image in the Save Settings dialog box.
(2) Save Settings Area
File Name
Enter the file name of the image to be saved. When you save a file, the date and four digits are appended to the set file name in the "_20XX0101_0001" format.
Note
- When you select the Save to a subfolder with current date checkbox, the date and four digits are appended to the set file name.
Save in
Displays the folder in which to save the scanned images. To add a folder, select Add... from the pull-down menu, then click Add in the displayed Select Destination Folder dialog box and specify the destination folder.
The default save folders are as follows.
- Windows 10/Windows 8.1/Windows Vista:
Documents folder
- Windows 8/Windows 7:
My Documents folder
Data Format
Select the data format in which to save the scanned images.
You can select JPEG/Exif, TIFF, PNG, PDF, or PDF (Multiple Pages).
Important
- You cannot select JPEG/Exif when Color Mode is Black and White.
- When Start OCR is selected in Application Settings, you cannot select PDF or PDF (Multiple Pages).
Note
- With network connection, scanning may take longer than usual when you set TIFF or PNG in Data Format.
PDF Compression
Select the compression type for saving PDF files.
Standard
It is recommended that you normally select this setting.
High
Compresses the file size when saving, allowing you to reduce the load on your network/server.
Important
- This appears only when PDF or PDF (Multiple Pages) is selected in Data Format.
- When Black and White is selected in Color Mode, this option does not appear.
JPEG Image Quality
You can specify the image quality of JPEG files.
Important
- This appears only when JPEG/Exif is selected in Data Format.
Create a PDF file that supports keyword search
Select this checkbox to convert text in images into text data and create PDF files that support keyword search.
Important
- This appears only when PDF or PDF (Multiple Pages) is selected in Data Format.
Note
- If text cannot be searched correctly, we recommend that you select 300 dpi or higher for Resolution.
- PDF files that are searchable in the language selected in Document Language on the (General Settings) tab of the Settings dialog box are created.

Set up password security
Select this checkbox to display the Password Security Settings dialog box.
Important
- This appears only when PDF or PDF (Multiple Pages) is selected in Data Format.
Save to a subfolder with current date
Select this checkbox to create a current date folder in the folder specified in Save in and save scanned images in it. The folder will be created with a name such as "20XX_01_01" (Year_Month_Date).
If this checkbox is not selected, files are saved directly in the folder specified in Save in.
Check scan results and specify save settings
Displays the Save Settings dialog box after scanning.
(3) Application Settings Area
Open with an application
Select this when you want to enhance or correct the scanned images.
You can specify the application from the pull-down menu.
Send to an application
Select this when you want to use the scanned images as they are in an application that allows you to browse or organize images.
You can specify the application from the pull-down menu.
Send to a folder
Select this when you also want to save the scanned images to a folder other than the one specified in Save in.
You can specify the folder from the pull-down menu.
Attach to e-mail
Select this when you want to send e-mails with the scanned images attached.
You can specify the e-mail client you want to start from the pull-down menu.
Start OCR
Select this when you want to convert text in the scanned image into text data.
You can specify the application from the pull-down menu.
Do not start any application
Saves to the folder specified in Save in.
Note
- To add an application or folder to the pull-down menu, select Add... from the pull-down menu, then click Add in the displayed Select Application or Select Destination Folder dialog box and specify the application or folder.
Instructions
Opens this guide.
Defaults
You can restore the settings in the displayed screen to the default settings.
Settings (Photo Scan) Dialog Box
Click Photo Scan on the 📄 (Scanning from a Computer) tab to display the Settings (Photo Scan) dialog box.
In the Settings (Photo Scan) dialog box, you can make advanced scan settings to scan items as photos.
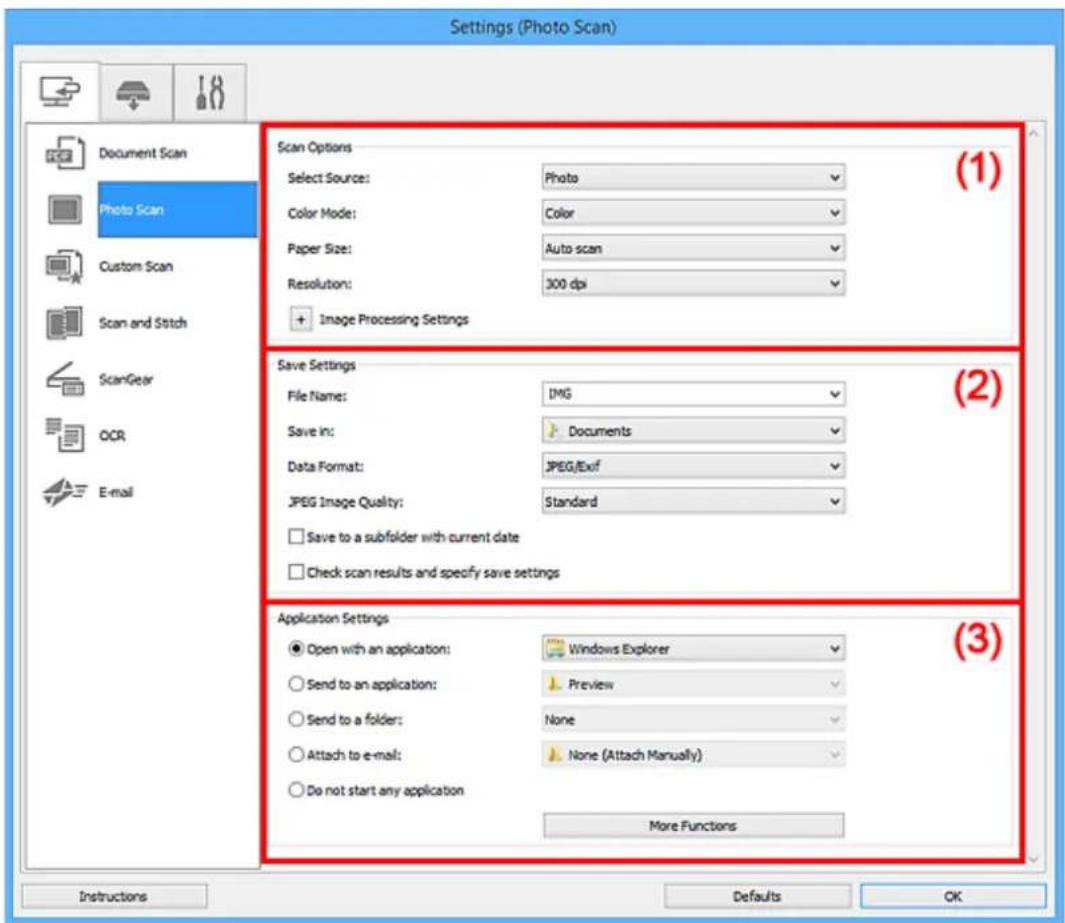
text_image
Settings (Photo Scan) Document Scan Photo Scan Custom Scan Scan and Stitch ScanGear OCR E-mail Scan Options Select Source: Photo Color Mode: Color Paper Size: Auto scan Resolution: 300 dpi + Image Processing Settings (1) Save Settings File Name: IMG Save In: Documents Data Format: JPEG/Exif JPEG Image Quality: Standard □ Save to a subfolder with current date □ Check scan results and specify save settings (2) Application Settings ● Open with an application: Windows Explorer ○ Send to an application: Preview ○ Send to a folder: None ○ Attach to e-mail: None (Attach Manually) ○ Do not start any application More Functions Instructions Defaults OK(1) Scan Options Area
→ (2) Save Settings Area
(3) Application Settings Area
(1) Scan Options Area
Select Source
Photo is selected.
Color Mode
Select the color mode in which to scan the item.
Paper Size
Select the size of the item to be scanned.
When you select Custom, a screen in which you can specify the paper size appears. Select a Unit, then enter the Width and Height, and then click OK.
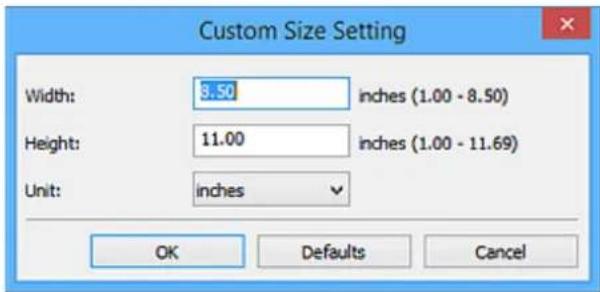
text_image
Custom Size Setting Width: 3.50 inches (1.00 - 8.50) Height: 11.00 inches (1.00 - 11.69) Unit: inches OK Defaults CancelNote
- Click Defaults to restore the specified settings to the default settings.
Resolution
Select the resolution of the item to be scanned.
The higher the resolution (value), the more detail in your image.
→ Resolution
Image Processing Settings
Click (Plus) to set the following.
Important
- When Color Mode is Black and White, Image Processing Settings is not available.
Sharpen outline
Emphasizes the outline of the subjects to sharpen the image.
(2) Save Settings Area
File Name
Enter the file name of the image to be saved. When you save a file, the date and four digits are appended to the set file name in the "_20XX0101_0001" format.
Note
- When you select the Save to a subfolder with current date checkbox, the date and four digits are appended to the set file name.
Save in
Displays the folder in which to save the scanned images. To add a folder, select Add... from the pull-down menu, then click Add in the displayed Select Destination Folder dialog box and specify the destination folder.
The default save folders are as follows.
• Windows 10/Windows 8.1/Windows Vista:
Documents folder
• Windows 8/Windows 7:
My Documents folder
Data Format
Select the data format in which to save the scanned images.
You can select JPEG/Exif, TIFF, or PNG.

Important
- You cannot select JPEG/Exif when Color Mode is Black and White.

Note
- With network connection, scanning may take longer than usual when you set TIFF or PNG in Data Format.
JPEG Image Quality
You can specify the image quality of JPEG files.

Important
- This appears only when JPEG/Exif is selected in Data Format.
Save to a subfolder with current date
Select this checkbox to create a current date folder in the folder specified in Save in and save scanned images in it. The folder will be created with a name such as "20XX_01_01" (Year_Month_Date).
If this checkbox is not selected, files are saved directly in the folder specified in Save in.
Check scan results and specify save settings
Displays the Save Settings dialog box after scanning.
(3) Application Settings Area
Open with an application
Select this when you want to enhance or correct the scanned images.
You can specify the application from the pull-down menu.
Send to an application
Select this when you want to use the scanned images as they are in an application that allows you to browse or organize images.
You can specify the application from the pull-down menu.
Send to a folder
Select this when you also want to save the scanned images to a folder other than the one specified in Save in.
You can specify the folder from the pull-down menu.
Attach to e-mail
Select this when you want to send e-mails with the scanned images attached.
You can specify the e-mail client you want to start from the pull-down menu.
Do not start any application
Saves to the folder specified in Save in.

Note
- To add an application or folder to the pull-down menu, select Add... from the pull-down menu, then click Add in the displayed Select Application or Select Destination Folder dialog box and specify the application or folder.
Instructions
Opens this guide.
Defaults
You can restore the settings in the displayed screen to the default settings.
Settings (Custom Scan) Dialog Box
Click Custom Scan on the 📄 (Scanning from a Computer) tab to display the Settings (Custom Scan) dialog box.
In the Settings (Custom Scan) dialog box, you can make advanced scan settings to scan according to your preference.
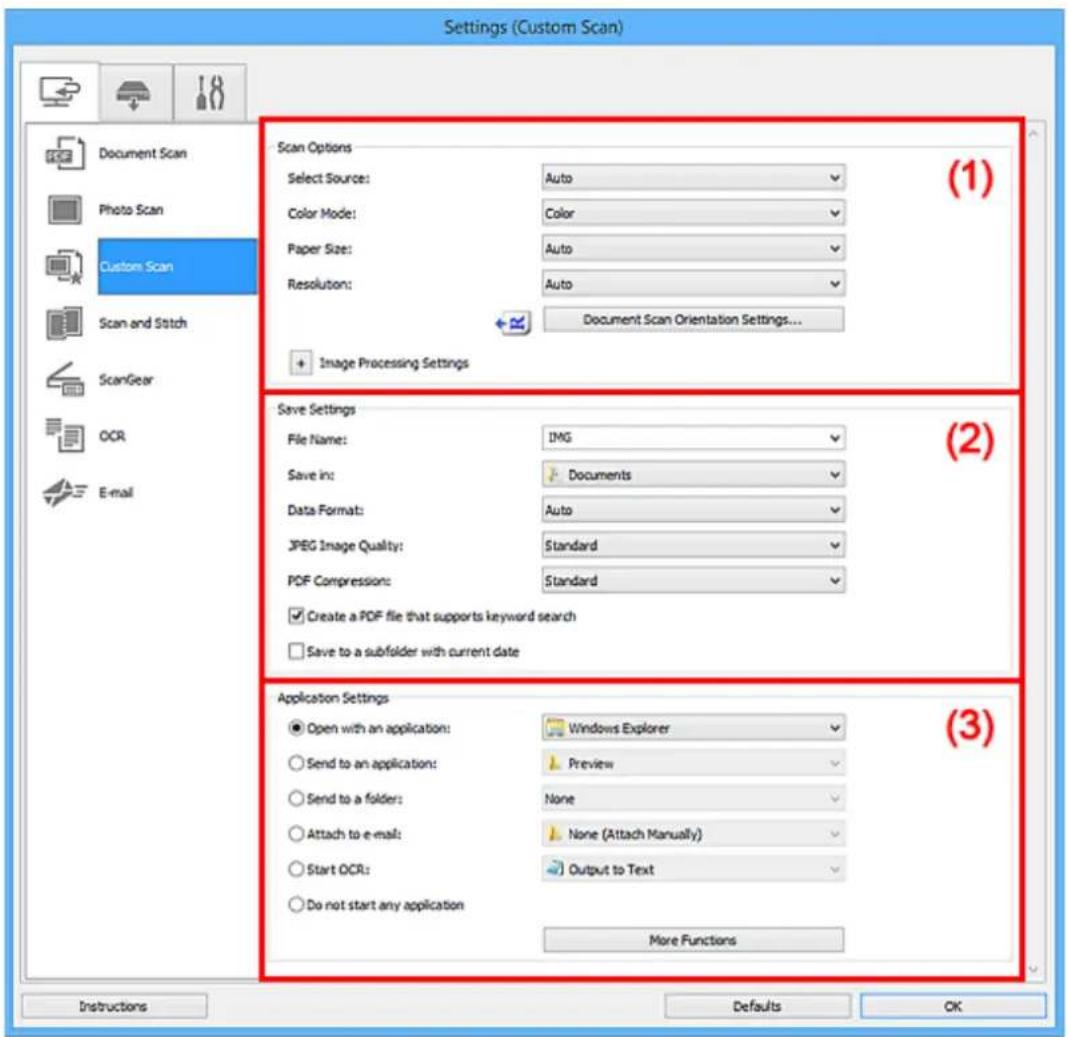
text_image
Settings (Custom Scan) Scan Options Select Source: Auto Color Mode: Color Paper Size: Auto Resolution: Auto Document Scan Orientation Settings... Image Processing Settings Save Settings File Name: IMG Save in: Documents Data Format: Auto JPEG Image Quality: Standard PDF Compression: Standard Create a PDF file that supports keyword search Save to a subfolder with current date Application Settings Open with an application: Windows Explorer Send to an application: Preview Send to a folder: None Attach to e-mail: None (Attach Manually) Start OCR: Output to Text Do not start any application More Functions Instructions Defaults OK(1) Scan Options Area
(2) Save Settings Area
(3) Application Settings Area
(1) Scan Options Area
Select Source
Select the type of item to be scanned. Select Auto to detect the item type automatically and to set Color Mode, Paper Size, and Resolution automatically as well.
Important
- Item types supported by Auto are photos, postcards, business cards, magazines, newspapers, documents, and BD/DVD/CD.
- To scan the following types of items, specify the item type or size. You cannot scan correctly with Auto.
- A4 size photos
- Text documents smaller than 2L (5 inches x 7 inches) (127 mm x 178 mm), such as paperback pages with the spine cut off
- Items printed on thin white paper
- Long narrow items such as panoramic photos
- Reflective disc labels may not be scanned as expected.
- Place items correctly according to the type of item to be scanned. Otherwise, items may not be scanned correctly.
Refer to "Positioning Originals (Scanning from Computer)" for how to place items.
- When scanning two or more documents from the ADF (Auto Document Feeder), place documents of the same size even if Auto is set.
Note
• To convert text in the image into text data after scanning, specify Select Source instead of selecting Auto.
- To reduce moire, set Select Source to Magazine or select the Reduce moire checkbox in Image Processing Settings.
Color Mode
Select the color mode in which to scan the item.
Note
- Only Color is available when Select Source is Auto.
Paper Size
Select the size of the item to be scanned.
When you select Custom, a screen in which you can specify the paper size appears. Select a Unit, then enter the Width and Height, and then click OK.
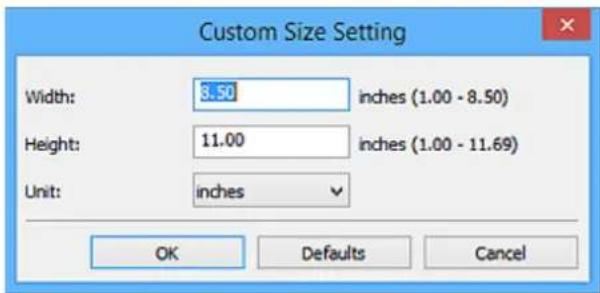
text_image
Custom Size Setting Width: 8.50 inches (1.00 - 8.50) Height: 11.00 inches (1.00 - 11.69) Unit: inches OK Defaults CancelNote
- Only Auto is available when Select Source is Auto.
- Click Defaults in the screen in which you can specify the paper size to restore the specified settings to the default settings.
Resolution
Select the resolution of the item to be scanned.
The higher the resolution (value), the more detail in your image.
→ Resolution
Note
- Only Auto is available when Select Source is Auto.
- Only 300 dpi or 400 dpi can be set when Start OCR is selected in Application Settings.
Document Scan Orientation Settings...
This appears when you select ADF or Auto for Select Source.
Click to display the Document Scan Orientation Settings dialog box in which you can set the orientation and binding side of the documents to be scanned from the ADF.
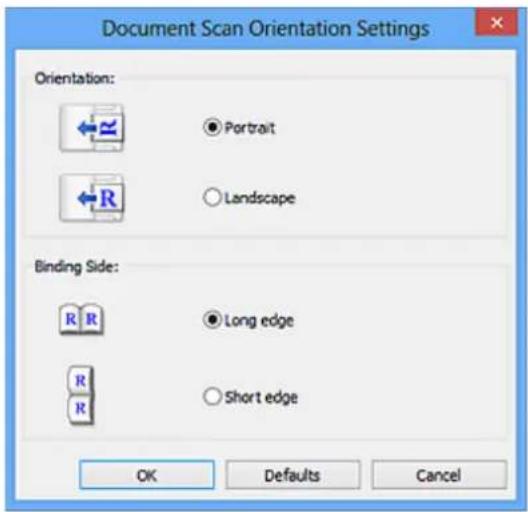
text_image
Document Scan Orientation Settings Orientation: ● Portrait ○ Landscape Binding Side: ● Long edge ○ Short edge OK Defaults CancelImportant
- Binding Side cannot be specified when scanning only the front side of each document.
Image Processing Settings
Click (Plus) to set the following. Available setting items vary by Select Source.
- When Select Source is Auto:
Apply recommended image correction
Applies suitable corrections automatically based on the item type.
Important
- The color tone may differ from the source image due to corrections. In that case, deselect the checkbox and scan.
Note
- Scanning takes longer than usual when you enable this function.
- When Select Source is Photo:
Important
- When Color Mode is Black and White, Image Processing Settings is not available.
Sharpen outline
Emphasizes the outline of the subjects to sharpen the image.
- When Select Source is Magazine or Document:
Note
- The displayed items vary by Select Source and Color Mode.
Apply Auto Document Fix
Select this checkbox to sharpen text in a document or magazine for better readability.
Important
- The color tone may differ from the source image due to corrections. In that case, deselect the checkbox and scan.
Note
- Scanning takes longer than usual when you enable this function.
Sharpen outline
Emphasizes the outline of the subjects to sharpen the image.
Reduce show-through
Sharpens text in an item or reduces show-through in newspapers, etc.
Reduce moire
Reduces moire patterns.
Printed materials are displayed as a collection of fine dots. "Moire" is a phenomenon where uneven gradation or a stripe pattern appears when such photos or pictures printed with fine dots are scanned.
Note
- Scanning takes longer than usual when you enable Reduce moire.
Reduce gutter shadow
Reduces gutter shadows that appear between pages when scanning open booklets.
Important
- This function is available only when scanning from the platen.
Note
- Use ScanGear (scanner driver)'s Advanced Mode tab to correct gutter shadows when scanning non-standard size items or specified areas.
Refer to "Gutter Shadow Correction" for your model from Home of the Online Manual for details. - When you enable this function, scanning may take longer than usual with network connection.
Correct slanted text document
Detects the scanned text and corrects the angle (within -0.1 to -10 degrees or +0.1 to +10 degrees) of the document.

Important
- The following types of documents may not be corrected properly since the text cannot be detected correctly.
- Documents in which the text lines are inclined more than 10 degrees or the angles vary by line
- Documents containing both vertical and horizontal text
- Documents with extremely large or small fonts
- Documents with small amount of text
- Documents containing figures/images
- Hand-written text
- Documents containing both vertical and horizontal lines (tables)

Note
- Scanning takes longer than usual when you enable Correct slanted text document.
Detect the orientation of text document and rotate image
Automatically rotates the image to the correct orientation by detecting the orientation of text in the scanned document.

Important
- Only text documents written in languages that can be selected from Document Language in the Settings (General Settings) dialog box are supported.
-
The orientation may not be detected for the following types of settings or documents since the text cannot be detected correctly.
-
Resolution is outside the range of 300 dpi to 600 dpi
- Font size is outside the range of 8 points to 48 points
- Documents containing special fonts, effects, italics, or hand-written text
- Documents with patterned backgrounds
In that case, select the Check scan results and specify save settings checkbox, and then rotate the image in the Save Settings dialog box.
(2) Save Settings Area
File Name
Enter the file name of the image to be saved. When you save a file, the date and four digits are appended to the set file name in the "_20XX0101_0001" format.
Note
- When you select the Save to a subfolder with current date checkbox, the date and four digits are appended to the set file name.
Save in
Displays the folder in which to save the scanned images. To add a folder, select Add... from the pull-down menu, then click Add in the displayed Select Destination Folder dialog box and specify the destination folder.
The default save folders are as follows.
- Windows 10/Windows 8.1/Windows Vista:
Documents folder
- Windows 8/Windows 7:
My Documents folder
Data Format
Select the data format in which to save the scanned images.
You can select JPEG/Exif, TIFF, PNG, PDF, PDF (Multiple Pages), or Auto.
Important
- You cannot select JPEG/Exif when Color Mode is Black and White.
- When Start OCR is selected in Application Settings, you cannot select PDF or PDF (Multiple Pages).
Note
- Auto appears only when Auto is selected for Select Source.
- With network connection, scanning may take longer than usual when you set TIFF or PNG in Data Format.
JPEG Image Quality
You can specify the image quality of JPEG files.
Important
- This appears only when JPEG/Exif or Auto is selected in Data Format.
PDF Compression
Select the compression type for saving PDF files.
Standard
It is recommended that you normally select this setting.
High
Compresses the file size when saving, allowing you to reduce the load on your network/server.
Important
- This appears only when PDF, PDF (Multiple Pages), or Auto is selected in Data Format.
- When Black and White is selected in Color Mode, this option does not appear.
Create a PDF file that supports keyword search
Select this checkbox to convert text in images into text data and create PDF files that support keyword search.
Important
- This appears only when PDF, PDF (Multiple Pages), or Auto is selected in Data Format.
Note
- PDF files that are searchable in the language selected in Document Language on the (General Settings) tab of the Settings dialog box are created.

Set up password security
Select this checkbox to display the Password Security Settings dialog box.
Important
- This appears only when PDF or PDF (Multiple Pages) is selected in Data Format.
Save to a subfolder with current date
Select this checkbox to create a current date folder in the folder specified in Save in and save scanned images in it. The folder will be created with a name such as "20XX_01_01"
(Year_Month_Date).
If this checkbox is not selected, files are saved directly in the folder specified in Save in.
Check scan results and specify save settings
Displays the Save Settings dialog box after scanning.
Important
- This does not appear when Select Source is Auto.
(3) Application Settings Area
Open with an application
Select this when you want to enhance or correct the scanned images.
You can specify the application from the pull-down menu.
Send to an application
Select this when you want to use the scanned images as they are in an application that allows you to browse or organize images.
You can specify the application from the pull-down menu.
Send to a folder
Select this when you also want to save the scanned images to a folder other than the one specified in Save in.
You can specify the folder from the pull-down menu.
Attach to e-mail
Select this when you want to send e-mails with the scanned images attached.
You can specify the e-mail client you want to start from the pull-down menu.
Start OCR
Select this when you want to convert text in the scanned image into text data.
You can specify the application from the pull-down menu.
Do not start any application
Saves to the folder specified in Save in.
Note
- To add an application or folder to the pull-down menu, select Add... from the pull-down menu, then click Add in the displayed Select Application or Select Destination Folder dialog box and specify the application or folder.
Instructions
Opens this guide.
Defaults
You can restore the settings in the displayed screen to the default settings.
Settings (Scan and Stitch) Dialog Box
Click Scan and Stitch on the 📄 (Scanning from a Computer) tab to display the Settings (Scan and Stitch) dialog box.
In the Settings (Scan and Stitch) dialog box, you can make advanced scan settings for scanning items larger than the platen.
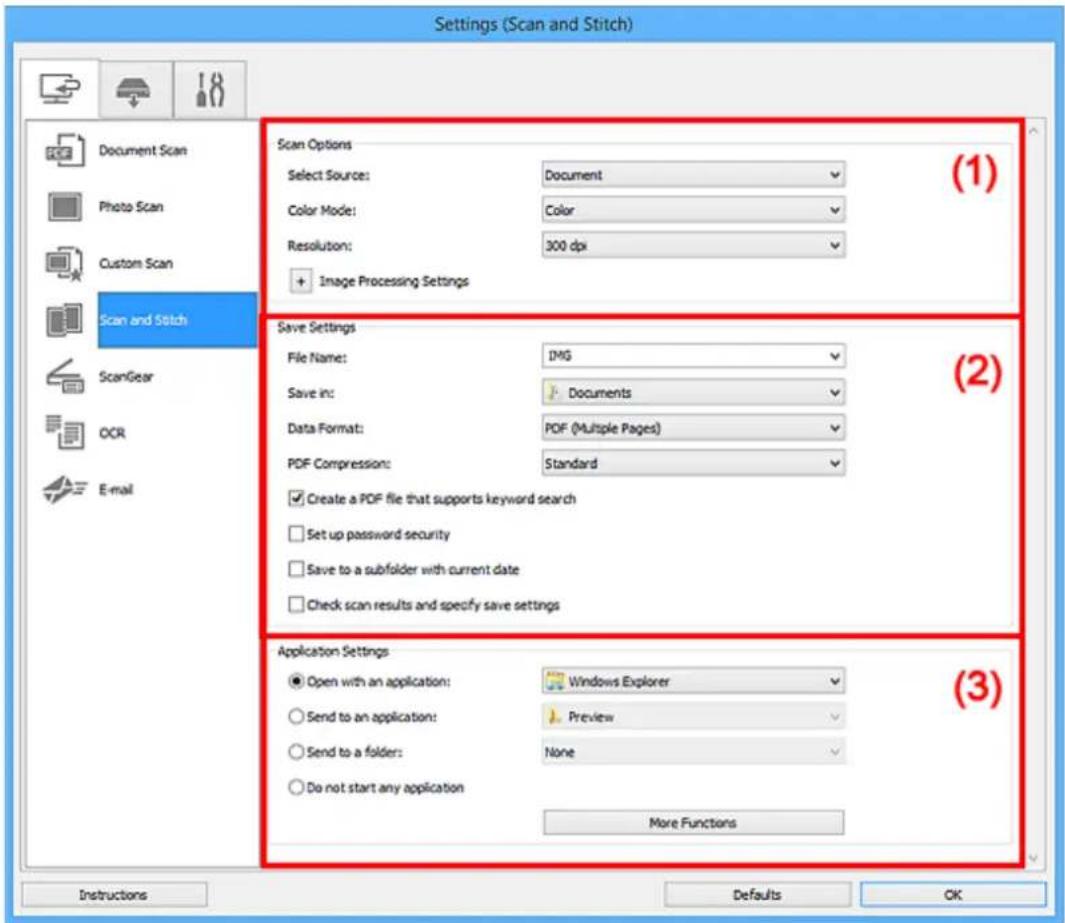
text_image
Settings (Scan and Stitch) Scan Options Select Source: Document Color Mode: Color Resolution: 300 dpi + Image Processing Settings (1) Save Settings File Name: IMG Save in: Documents Data Format: PDF (Multiple Pages) PDF Compression: Standard ✓ Create a PDF file that supports keyword search □ Set up password security □ Save to a subfolder with current date □ Check scan results and specify save settings Application Settings ● Open with an application: Windows Explorer ○ Send to an application: Preview ○ Send to a folder: None ○ Do not start any application More Functions Instructions Defaults OK(1) Scan Options Area
(2) Save Settings Area
(3) Application Settings Area
(1) Scan Options Area
Select Source
Select the type of item to be scanned.
- Scanning photos: Photo
- Scanning documents: Document
• Scanning magazines: Magazine
Note
- To reduce moire, set Select Source to Magazine or select the Reduce moire checkbox in Image Processing Settings.
Color Mode
Select the color mode in which to scan the item.
Resolution
Select the resolution of the item to be scanned.
The higher the resolution (value), the more detail in your image.
→ Resolution
Image Processing Settings
Click (Plus) to set the following. Available setting items vary by Select Source.
Important
- When Color Mode is Black and White, Image Processing Settings is not available.
- When Select Source is Photo:
Sharpen outline
Emphasizes the outline of the subjects to sharpen the image.
- When Select Source is Magazine or Document:
Sharpen outline
Emphasizes the outline of the subjects to sharpen the image.
Reduce show-through
Sharpens text in an item or reduces show-through in newspapers, etc.
Reduce moire
Reduces moire patterns.
Printed materials are displayed as a collection of fine dots. "Moire" is a phenomenon where uneven gradation or a stripe pattern appears when such photos or pictures printed with fine dots are scanned.
Note
- Scanning takes longer than usual when you enable Reduce moire.
(2) Save Settings Area
File Name
Enter the file name of the image to be saved. When you save a file, the date and four digits are appended to the set file name in the "_20XX0101_0001" format.
Note
- When you select the Save to a subfolder with current date checkbox, the date and four digits are appended to the set file name.
Save in
Displays the folder in which to save the scanned images. To add a folder, select Add... from the pull-down menu, then click Add in the displayed Select Destination Folder dialog box and specify the destination folder.
The default save folders are as follows.
• Windows 10/Windows 8.1/Windows Vista:
Documents folder
• Windows 8/Windows 7:
My Documents folder
Data Format
Select the data format in which to save the scanned images.
You can select JPEG/Exif, TIFF, PNG, PDF, or PDF (Multiple Pages).

Important
- You cannot select JPEG/Exif when Color Mode is Black and White.

Note
- With network connection, scanning may take longer than usual when you set TIFF or PNG in Data Format.
PDF Compression
Select the compression type for saving PDF files.
Standard
It is recommended that you normally select this setting.
High
Compresses the file size when saving, allowing you to reduce the load on your network/server.

Important
- This appears only when PDF or PDF (Multiple Pages) is selected in Data Format.
- When Black and White is selected in Color Mode, this option does not appear.
JPEG Image Quality
You can specify the image quality of JPEG files.

Important
- This appears only when JPEG/Exif is selected in Data Format.
Create a PDF file that supports keyword search
Select this checkbox to convert text in images into text data and create PDF files that support keyword search.

Important
- This appears only when PDF or PDF (Multiple Pages) is selected in Data Format.

Note
- PDF files that are searchable in the language selected in Document Language on the (General Settings) tab of the Settings dialog box are created.

Set up password security
Select this checkbox to display the Password Security Settings dialog box.
- This appears only when PDF or PDF (Multiple Pages) is selected in Data Format.
Save to a subfolder with current date
Select this checkbox to create a current date folder in the folder specified in Save in and save scanned images in it. The folder will be created with a name such as "20XX_01_01" (Year_Month_Date).
If this checkbox is not selected, files are saved directly in the folder specified in Save in.
Check scan results and specify save settings
Displays the Save Settings dialog box after scanning.
(3) Application Settings Area
Open with an application
Select this when you want to enhance or correct the scanned images.
You can specify the application from the pull-down menu.
Send to an application
Select this when you want to use the scanned images as they are in an application that allows you to browse or organize images.
You can specify the application from the pull-down menu.
Send to a folder
Select this when you also want to save the scanned images to a folder other than the one specified in Save in.
You can specify the folder from the pull-down menu.
Do not start any application
Saves to the folder specified in Save in.
Note
- To add an application or folder to the pull-down menu, select Add... from the pull-down menu, then click Add in the displayed Select Application or Select Destination Folder dialog box and specify the application or folder.
Instructions
Opens this guide.
Defaults
You can restore the settings in the displayed screen to the default settings.
Settings (ScanGear) Dialog Box
Click ScanGear on the 📋 (Scanning from a Computer) tab to display the Settings (ScanGear) dialog box.
In the Settings (ScanGear) dialog box, you can specify how to save images when scanning items by starting ScanGear (scanner driver) and how to respond after saving them.
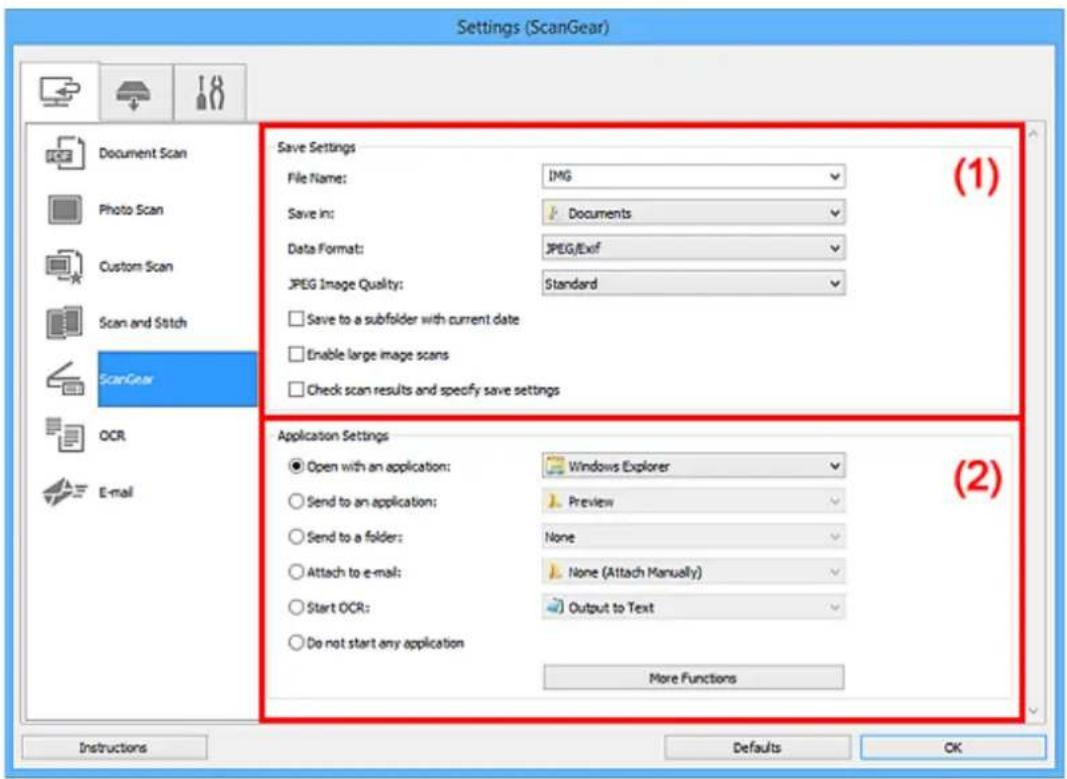
text_image
Settings (ScanGear) Document Scan Photo Scan Custom Scan Scan and Stitch ScanGear OCR E-mail Save Settings File Name: IMG Save in: Documents Data Format: JPEG/Exif JPEG Image Quality: Standard Save to a subfolder with current date Enable large image scans Check scan results and specify save settings Application Settings Open with an application: Windows Explorer Send to an application: Preview Send to a folder: None Attach to e-mail: None (Attach Manually) Start OCR: Output to Text Do not start any application More Functions Instructions Defaults OK(1) Save Settings Area
(2) Application Settings Area
(1) Save Settings Area
File Name
Enter the file name of the image to be saved. When you save a file, the date and four digits are appended to the set file name in the "_20XX0101_0001" format.
Note
- When you select the Save to a subfolder with current date checkbox, the date and four digits are appended to the set file name.
Save in
Displays the folder in which to save the scanned images. To add a folder, select Add... from the pull-down menu, then click Add in the displayed Select Destination Folder dialog box and specify the destination folder.
The default save folders are as follows.
- Windows 10/Windows 8.1/Windows Vista:
Documents folder
- Windows 8/Windows 7:
My Documents folder
Data Format
Select the data format in which to save the scanned images.
You can select JPEG/Exif, TIFF, PNG, PDF, or PDF (Multiple Pages).
Note
- When PDF or PDF (Multiple Pages) is selected, images up to 9600 pixels x 9600 pixels can be scanned.
- When the Enable large image scans checkbox is selected in Save Settings, or when Start OCR is selected in Application Settings, you can select JPEG/Exif, TIFF, or PNG.
- With network connection, scanning may take longer than usual when you set TIFF or PNG in Data Format.
JPEG Image Quality
You can specify the image quality of JPEG files.
Important
- This appears only when JPEG/Exif is selected in Data Format.
PDF Compression
Select the compression type for saving PDF files.
Standard
It is recommended that you normally select this setting.
High
Compresses the file size when saving, allowing you to reduce the load on your network/server.
Important
- This appears only when PDF or PDF (Multiple Pages) is selected in Data Format.
Create a PDF file that supports keyword search
Select this checkbox to convert text in images into text data and create PDF files that support keyword search.
Important
- This appears only when PDF or PDF (Multiple Pages) is selected in Data Format.
Note
- PDF files that are searchable in the language selected in Document Language on the (General Settings) tab of the Settings dialog box are created.

Set up password security
Select this checkbox to display the Password Security Settings dialog box.
Important
- This appears only when PDF or PDF (Multiple Pages) is selected in Data Format.
Save to a subfolder with current date
Select this checkbox to create a current date folder in the folder specified in Save in and save scanned images in it. The folder will be created with a name such as "20XX_01_01" (Year_Month_Date).
If this checkbox is not selected, files are saved directly in the folder specified in Save in.
Enable large image scans
Select this checkbox to scan images up to 21000 pixels x 30000 pixels and 1.8 GB.
Important
- When this checkbox is selected, you cannot select Send to an application, Send to a folder, Attach to e-mail, or Start OCR.
Note
- When this checkbox is not selected, images up to 10208 pixels x 14032 pixels can be scanned.
Check scan results and specify save settings
Displays the Save Settings dialog box after scanning.
(2) Application Settings Area
Open with an application
Select this when you want to enhance or correct the scanned images.
You can specify the application from the pull-down menu.
Send to an application
Select this when you want to use the scanned images as they are in an application that allows you to browse or organize images.
You can specify the application from the pull-down menu.
Send to a folder
Select this when you also want to save the scanned images to a folder other than the one specified in Save in.
You can specify the folder from the pull-down menu.
Attach to e-mail
Select this when you want to send e-mails with the scanned images attached.
You can specify the e-mail client you want to start from the pull-down menu.
Start OCR
Select this when you want to convert text in the scanned image into text data.
You can specify the application from the pull-down menu.
Do not start any application
Saves to the folder specified in Save in.
Note
- To add an application or folder to the pull-down menu, select Add... from the pull-down menu, then click Add in the displayed Select Application or Select Destination Folder dialog box and specify the application or folder.
Instructions
Opens this guide.
Defaults
You can restore the settings in the displayed screen to the default settings.
Settings (OCR) Dialog Box
Click OCR on the (Scanning from a Computer) tab to display the Settings (OCR) dialog box.
In the Settings (OCR) dialog box, you can make advanced settings for extracting text from scanned images.
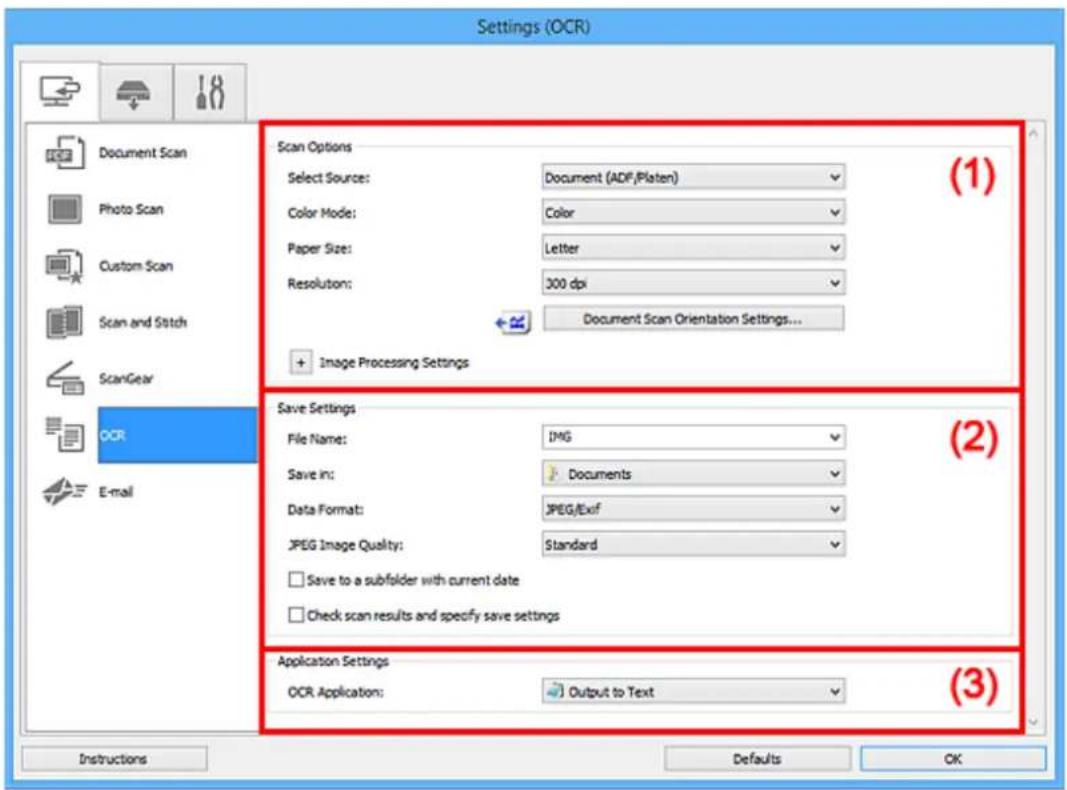
text_image
Settings (OCR) Scan Options Select Source: Document (ADF,Platen) Color Mode: Color Paper Size: Letter Resolution: 300 dpi Document Scan Orientation Settings... + Image Processing Settings Save Settings File Name: IMG Save in: Documents Data Format: JPEG/Exif JPEG Image Quality: Standard □ Save to a subfolder with current date □ Check scan results and specify save settings Application Settings OCR Application: Output to Text Instructions Defaults OK(1) Scan Options Area
→ (2) Save Settings Area
(3) Application Settings Area
(1) Scan Options Area
Select Source
Select the type of item to be scanned.
- Scanning documents: Document or Document (ADF/Platen)
• Scanning magazines: Magazine - Scanning documents from the ADF (Auto Document Feeder): Document (ADF Simplex), Document (ADF Manual Duplex), or Document (ADF/Platen)
Note
- When Document (ADF/Platen) is selected and documents are placed both on the platen and ADF, those placed on the ADF will be scanned.
Color Mode
Select the color mode in which to scan the item.
Paper Size
Select the size of the item to be scanned.
When you select Custom, a screen in which you can specify the paper size appears. Select a Unit, then enter the Width and Height, and then click OK.
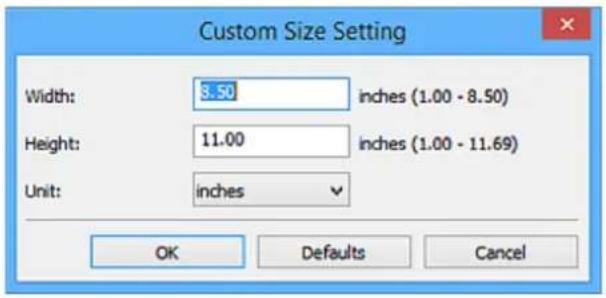
text_image
Custom Size Setting Width: 8.50 inches (1.00 - 8.50) Height: 11.00 inches (1.00 - 11.69) Unit: inches OK Defaults CancelImportant
- Custom cannot be selected depending on the Select Source setting.
Note
- Click Defaults to restore the specified settings to the default settings.
Resolution
Select the resolution of the item to be scanned.
The higher the resolution (value), the more detail in your image.
→ Resolution
Note
- For Resolution, only 300 dpi or 400 dpi can be set.
Document Scan Orientation Settings...
This appears when you select ADF for Select Source.
Click to display the Document Scan Orientation Settings dialog box in which you can set the orientation and binding side of the documents to be scanned from the ADF.
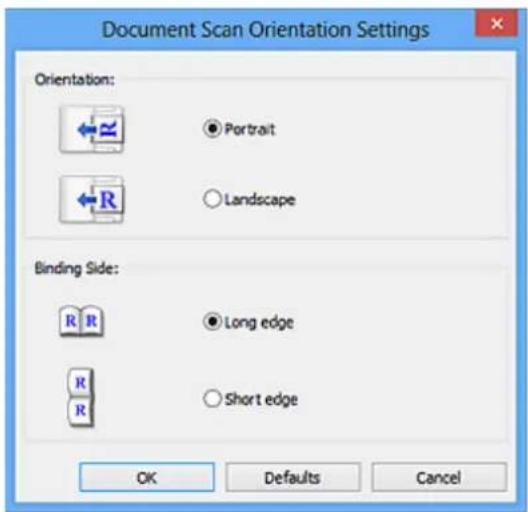
text_image
Document Scan Orientation Settings Orientation: ● Portrait ○ Landscape Binding Side: ● Long edge ○ Short edge OK Defaults CancelImportant
- Binding Side cannot be specified when scanning only the front side of each document.
Image Processing Settings
Click (Plus) to set the following.
Note
- The displayed items vary by Select Source and Color Mode.
Apply Auto Document Fix
Select this checkbox to sharpen text in a document or magazine for better readability.
Important
- The color tone may differ from the source image due to corrections. In that case, deselect the checkbox and scan.
Note
- Scanning takes longer than usual when you enable this function.
Sharpen outline
Emphasizes the outline of the subjects to sharpen the image.
Reduce show-through
Sharpens text in an item or reduces show-through in newspapers, etc.
Reduce moire
Reduces moire patterns.
Printed materials are displayed as a collection of fine dots. "Moire" is a phenomenon where uneven gradation or a stripe pattern appears when such photos or pictures printed with fine dots are scanned.
Note
- Scanning takes longer than usual when you enable Reduce moire.
Reduce gutter shadow/Reduce gutter shadow (platen)
Reduces gutter shadows that appear between pages when scanning open booklets.
Important
- This function is available only when scanning from the platen.
Note
- Use ScanGear (scanner driver)'s Advanced Mode tab to correct gutter shadows when scanning non-standard size items or specified areas.
Refer to "Gutter Shadow Correction" for your model from Home of the Online Manual for details. - When you enable this function, scanning may take longer than usual with network connection.
Correct slanted text document
Detects the scanned text and corrects the angle (within -0.1 to -10 degrees or +0.1 to +10 degrees) of the document.
Important
- The following types of documents may not be corrected properly since the text cannot be detected correctly.
- Documents in which the text lines are inclined more than 10 degrees or the angles vary by line
- Documents containing both vertical and horizontal text
- Documents with extremely large or small fonts
- Documents with small amount of text
- Documents containing figures/images
- Hand-written text
- Documents containing both vertical and horizontal lines (tables)
Note
- Scanning takes longer than usual when you enable Correct slanted text document.
Detect the orientation of text document and rotate image
Automatically rotates the image to the correct orientation by detecting the orientation of text in the scanned document.
Important
- Only text documents written in languages that can be selected from Document Language in the Settings (General Settings) dialog box are supported.
-
The orientation may not be detected for the following types of settings or documents since the text cannot be detected correctly.
-
Resolution is outside the range of 300 dpi to 600 dpi
- Font size is outside the range of 8 points to 48 points
- Documents containing special fonts, effects, italics, or hand-written text
- Documents with patterned backgrounds
In that case, select the Check scan results and specify save settings checkbox, and then rotate the image in the Save Settings dialog box.
(2) Save Settings Area
File Name
Enter the file name of the image to be saved. When you save a file, the date and four digits are appended to the set file name in the "_20XX0101_0001" format.
Note
- When you select the Save to a subfolder with current date checkbox, the date and four digits are appended to the set file name.
Save in
Displays the folder in which to save the scanned images. To add a folder, select Add... from the pull-down menu, then click Add in the displayed Select Destination Folder dialog box and specify the destination folder.
The default save folders are as follows.
- Windows 10/Windows 8.1/Windows Vista:
Documents folder
- Windows 8/Windows 7:
My Documents folder
Data Format
Select the data format in which to save the scanned images.
You can select JPEG/Exif, TIFF, or PNG.

Important
- You cannot select JPEG/Exif when Color Mode is Black and White.

Note
- With network connection, scanning may take longer than usual when you set TIFF or PNG in Data Format.
JPEG Image Quality
You can specify the image quality of JPEG files.

Important
- This appears only when JPEG/Exif is selected in Data Format.
Save to a subfolder with current date
Select this checkbox to create a current date folder in the folder specified in Save in and save scanned images in it. The folder will be created with a name such as "20XX_01_01"
(Year_Month_Date).
If this checkbox is not selected, files are saved directly in the folder specified in Save in.
Check scan results and specify save settings
Displays the Save Settings dialog box after scanning.
(3) Application Settings Area
OCR Application
Displays the extracted text in a specified application.

Note
- To add an application to the pull-down menu, select Add... from the pull-down menu, then click Add in the displayed Select Application dialog box and specify the application.
Instructions
Opens this guide.
Defaults
You can restore the settings in the displayed screen to the default settings.
Settings (E-mail) Dialog Box
Click E-mail on the (Scanning from a Computer) tab to display the Settings (E-mail) dialog box.
In the Settings (E-mail) dialog box, you can specify how to respond when attaching images to an e-mail after scanning them using the scanner button.
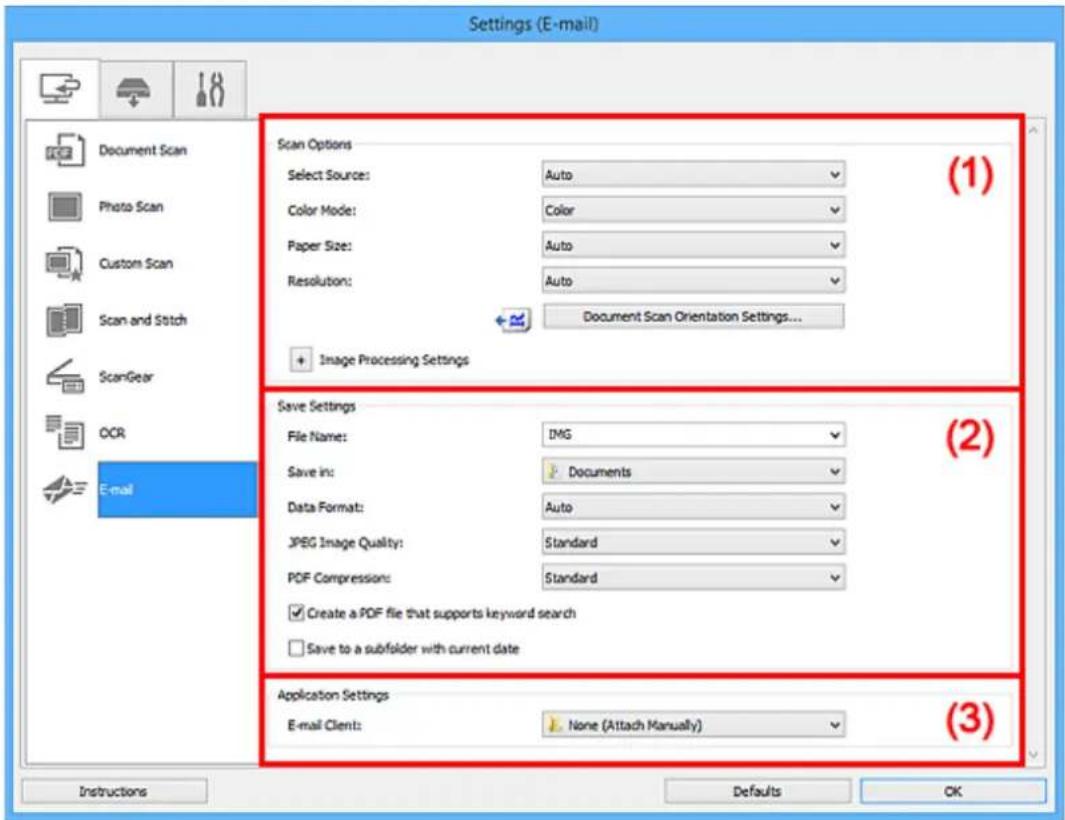
text_image
Settings (E-mail) Scan Options Select Source: Auto Color Mode: Color Paper Size: Auto Resolution: Auto Document Scan Orientation Settings... Image Processing Settings Save Settings File Name: IMG Save in: Documents Data Format: Auto JPEG Image Quality: Standard PDF Compressions: Standard ✓ Create a PDF file that supports keyword search ✓ Save to a subfolder with current date Application Settings E-mail Client: None (Attach Manually) Instructions Defaults OK(1) Scan Options Area
(2) Save Settings Area
(3) Application Settings Area
(1) Scan Options Area
Select Source
Select the type of item to be scanned. Select Auto to detect the item type automatically and to set Color Mode, Paper Size, and Resolution automatically as well.
Important
- Item types supported by Auto are photos, postcards, business cards, magazines, newspapers, documents, and BD/DVD/CD.
• To scan the following types of items, specify the item type or size. You cannot scan correctly with Auto. - A4 size photos
- Text documents smaller than 2L (5 inches x 7 inches) (127 mm x 178 mm), such as paperback pages with the spine cut off
- Items printed on thin white paper
-
Long narrow items such as panoramic photos
-
Reflective disc labels may not be scanned as expected.
- Place items correctly according to the type of item to be scanned. Otherwise, items may not be scanned correctly.
Refer to "Positioning Originals (Scanning from Computer)" for how to place items. - When scanning two or more documents from the ADF (Auto Document Feeder), place documents of the same size even if Auto is set.
Note
- To reduce moire, set Select Source to Magazine or select the Reduce moire checkbox in Image Processing Settings.
Color Mode
Select the color mode in which to scan the item.
Note
- Only Color is available when Select Source is Auto.
Paper Size
Select the size of the item to be scanned.
When you select Custom, a screen in which you can specify the paper size appears. Select a Unit, then enter the Width and Height, and then click OK.
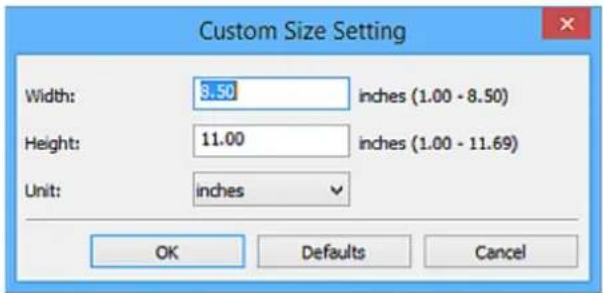
text_image
Custom Size Setting Width: 3.50 inches (1.00 - 8.50) Height: 11.00 inches (1.00 - 11.69) Unit: inches OK Defaults CancelNote
- Only Auto is available when Select Source is Auto.
- Click Defaults in the screen in which you can specify the paper size to restore the specified settings to the default settings.
Resolution
Select the resolution of the item to be scanned.
The higher the resolution (value), the more detail in your image.
→ Resolution
Note
- Only Auto is available when Select Source is Auto.
Document Scan Orientation Settings...
This appears when you select ADF or Auto for Select Source.
Click to display the Document Scan Orientation Settings dialog box in which you can set the orientation and binding side of the documents to be scanned from the ADF.
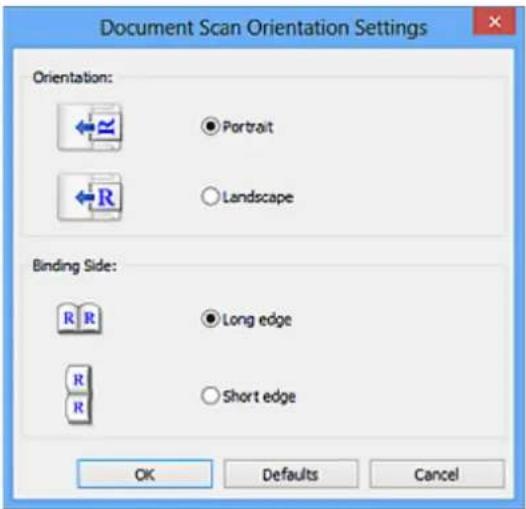
text_image
Document Scan Orientation Settings Orientation: ● Portrait ○ Landscape Binding Side: ● Long edge ○ Short edge OK Defaults CancelImportant
- Binding Side cannot be specified when scanning only the front side of each document.
Image Processing Settings
Click (Plus) to set the following. Available setting items vary by Select Source.
- When Select Source is Auto:
Apply recommended image correction
Applies suitable corrections automatically based on the item type.
Important
- The color tone may differ from the source image due to corrections. In that case, deselect the checkbox and scan.
Note
- Scanning takes longer than usual when you enable this function.
- When Select Source is Photo:
Important
- When Color Mode is Black and White, Image Processing Settings is not available.
Sharpen outline
Emphasizes the outline of the subjects to sharpen the image.
- When Select Source is Magazine or Document:
Note
• The displayed items vary by Select Source and Color Mode.
Apply Auto Document Fix
Select this checkbox to sharpen text in a document or magazine for better readability.

Important
- The color tone may differ from the source image due to corrections. In that case, deselect the checkbox and scan.

Note
- Scanning takes longer than usual when you enable this function.
Sharpen outline
Emphasizes the outline of the subjects to sharpen the image.
Reduce show-through
Sharpens text in an item or reduces show-through in newspapers, etc.
Reduce moire
Reduces moire patterns.
Printed materials are displayed as a collection of fine dots. "Moire" is a phenomenon where uneven gradation or a stripe pattern appears when such photos or pictures printed with fine dots are scanned.

Note
- Scanning takes longer than usual when you enable Reduce moire.
Reduce gutter shadow
Reduces gutter shadows that appear between pages when scanning open booklets.

Important
- This function is available only when scanning from the platen.

Note
- Use ScanGear (scanner driver)'s Advanced Mode tab to correct gutter shadows when scanning non-standard size items or specified areas.
Refer to "Gutter Shadow Correction" for your model from Home of the Online Manual for details. - When you enable this function, scanning may take longer than usual with network connection.
Correct slanted text document
Detects the scanned text and corrects the angle (within -0.1 to -10 degrees or +0.1 to +10 degrees) of the document.

Important
- The following types of documents may not be corrected properly since the text cannot be detected correctly.
- Documents in which the text lines are inclined more than 10 degrees or the angles vary by line
- Documents containing both vertical and horizontal text
- Documents with extremely large or small fonts
- Documents with small amount of text
- Documents containing figures/images
- Hand-written text
- Documents containing both vertical and horizontal lines (tables)
Note
- Scanning takes longer than usual when you enable Correct slanted text document.
Detect the orientation of text document and rotate image
Automatically rotates the image to the correct orientation by detecting the orientation of text in the scanned document.
Important
- Only text documents written in languages that can be selected from Document Language in the Settings (General Settings) dialog box are supported.
- The orientation may not be detected for the following types of settings or documents since the text cannot be detected correctly.
- Resolution is outside the range of 300 dpi to 600 dpi
- Font size is outside the range of 8 points to 48 points
- Documents containing special fonts, effects, italics, or hand-written text
- Documents with patterned backgrounds
In that case, select the Check scan results and specify save settings checkbox, and then rotate the image in the Save Settings dialog box.
(2) Save Settings Area
File Name
Enter the file name of the image to be saved. When you save a file, the date and four digits are appended to the set file name in the "_20XX0101_0001" format.
Note
- When you select the Save to a subfolder with current date checkbox, the date and four digits are appended to the set file name.
Save in
Displays the folder in which to save the scanned images. To add a folder, select Add... from the pull-down menu, then click Add in the displayed Select Destination Folder dialog box and specify the destination folder.
The default save folders are as follows.
- Windows 10/Windows 8.1/Windows Vista:
Documents folder - Windows 8/Windows 7:
My Documents folder
Data Format
Select the data format in which to save the scanned images.
You can select JPEG/Exif, TIFF, PNG, PDF, PDF (Multiple Pages), or Auto.
Important
- You cannot select JPEG/Exif when Color Mode is Black and White.
Note
• Auto appears only when Auto is selected for Select Source.
- With network connection, scanning may take longer than usual when you set TIFF or PNG in Data Format.
JPEG Image Quality
You can specify the image quality of JPEG files.
Important
- This appears only when JPEG/Exif or Auto is selected in Data Format.
PDF Compression
Select the compression type for saving PDF files.
Standard
It is recommended that you normally select this setting.
High
Compresses the file size when saving, allowing you to reduce the load on your network/server.
Important
- This appears only when PDF or PDF (Multiple Pages) is selected in Data Format.
- When Black and White is selected in Color Mode, this option does not appear.
Create a PDF file that supports keyword search
Select this checkbox to convert text in images into text data and create PDF files that support keyword search.
Important
- This appears only when PDF, PDF (Multiple Pages), or Auto is selected in Data Format.
Note
- PDF files that are searchable in the language selected in Document Language on the (General Settings) tab of the Settings dialog box are created.

Set up password security
Select this checkbox to display the Password Security Settings dialog box.
Important
- This appears only when PDF or PDF (Multiple Pages) is selected in Data Format.
Save to a subfolder with current date
Select this checkbox to create a current date folder in the folder specified in Save in and save scanned images in it. The folder will be created with a name such as "20XX_01_01" (Year_Month_Date).
If this checkbox is not selected, files are saved directly in the folder specified in Save in.
Check scan results and specify save settings
Displays the Save Settings dialog box after scanning.

Important
- This does not appear when Select Source is Auto.
(3) Application Settings Area
E-mail Client
Specify the e-mail client to use for attaching scanned images.

Note
- To add an e-mail client to the pull-down menu, select Add... from the pull-down menu, then click Add in the displayed Select Application dialog box and specify the e-mail client.
Instructions
Opens this guide.
Defaults
You can restore the settings in the displayed screen to the default settings.
Settings (Save to PC (Photo)) Dialog Box
Click Save to PC (Photo) on the (Save to PC (Photo)) dialog box.

(Scanning from the Operation Panel) tab to display the Settings
In the Settings (Save to PC (Photo)) dialog box, you can specify how to respond when saving images to a computer as photos after scanning them from the operation panel.
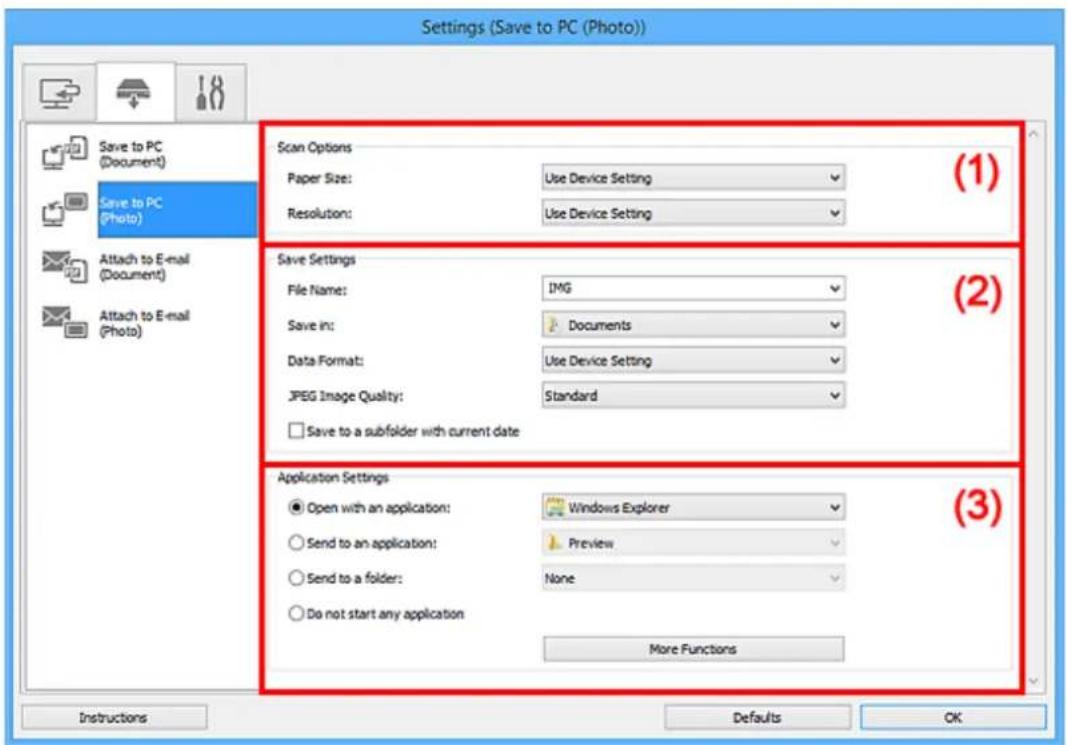
text_image
Settings (Save to PC (Photo)) Scan Options Paper Size: Use Device Setting Resolution: Use Device Setting (1) Save Settings File Name: IMG Save in: Documents Data Format: Use Device Setting JPEG Image Quality: Standard □ Save to a subfolder with current date (2) Application Settings ● Open with an application: Windows Explorer ○ Send to an application: Preview ○ Send to a folder: None ○ Do not start any application More Functions (3) Instructions Defaults OK→ (1) Scan Options Area
(2) Save Settings Area
(3) Application Settings Area
(1) Scan Options Area
Paper Size
Set from the operation panel.
Resolution
Set from the operation panel.
(2) Save Settings Area
File Name
Enter the file name of the image to be saved. When you save a file, the date and four digits are appended to the set file name in the "_20XX0101_0001" format.
Note
- When you select the Save to a subfolder with current date checkbox, the date and four digits are appended to the set file name.
Save in
Displays the folder in which to save the scanned images. To add a folder, select Add... from the pull-down menu, then click Add in the displayed Select Destination Folder dialog box and specify the destination folder.
The default save folders are as follows.
- Windows 10/Windows 8.1/Windows Vista:
Documents folder
- Windows 8/Windows 7:
My Documents folder
Data Format
Set from the operation panel.
JPEG Image Quality
You can specify the image quality of JPEG files.
Save to a subfolder with current date
Select this checkbox to create a current date folder in the folder specified in Save in and save scanned images in it. The folder will be created with a name such as "20XX_01_01"
(Year_Month_Date).
If this checkbox is not selected, files are saved directly in the folder specified in Save in.
(3) Application Settings Area
Open with an application
Select this when you want to enhance or correct the scanned images.
You can specify the application from the pull-down menu.
Send to an application
Select this when you want to use the scanned images as they are in an application that allows you to browse or organize images.
You can specify the application from the pull-down menu.
Send to a folder
Select this when you also want to save the scanned images to a folder other than the one specified in Save in.
You can specify the folder from the pull-down menu.
Do not start any application
Saves to the folder specified in Save in.

Note
- To add an application or folder to the pull-down menu, select Add... from the pull-down menu, then click Add in the displayed Select Application or Select Destination Folder dialog box and specify the application or folder.
Instructions
Opens this guide.
Defaults
You can restore the settings in the displayed screen to the default settings.
Settings (Save to PC (Document)) Dialog Box
Click Save to PC (Document) on the (Save to PC (Document)) dialog box.

(Scanning from the Operation Panel) tab to display the Settings
In the Settings (Save to PC (Document)) dialog box, you can specify how to respond when saving images to a computer as documents after scanning them from the operation panel.
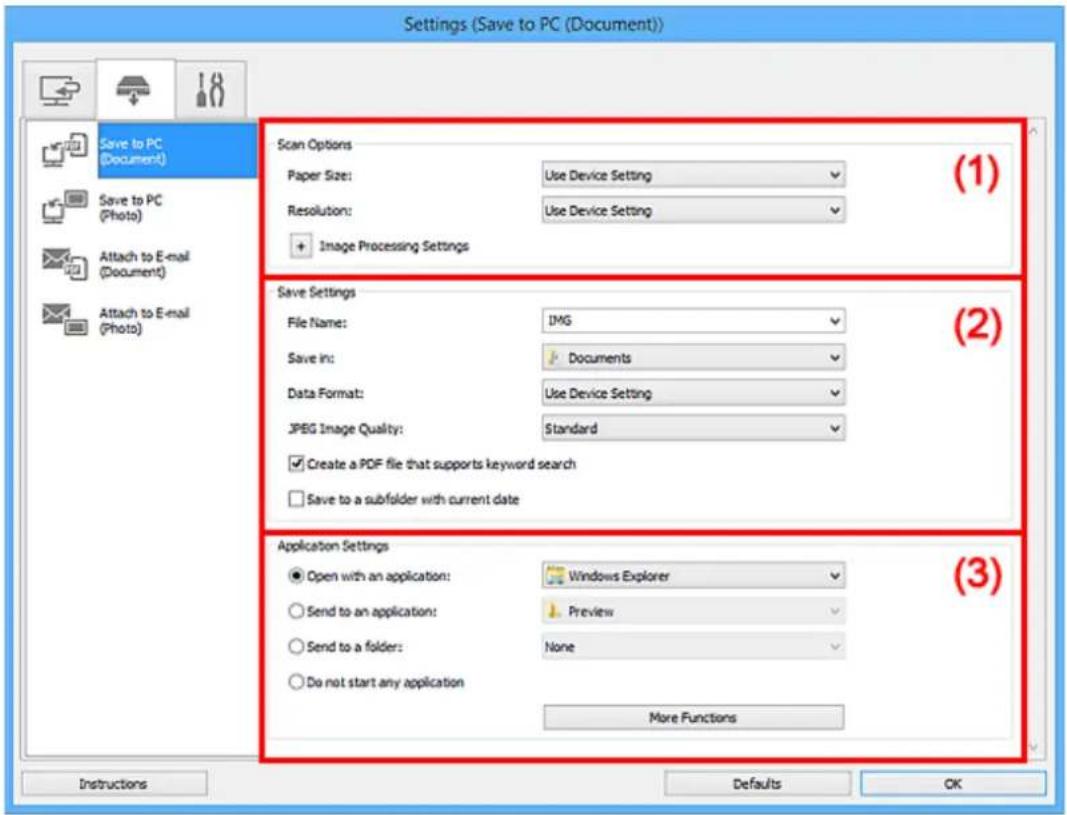
text_image
Settings (Save to PC (Document)) Save to PC (Document) Save to PC (Photo) Attach to E-mail (Document) Attach to E-mail (Photo) Scan Options Paper Size: Use Device Setting Resolution: Use Device Setting + Image Processing Settings (1) Save Settings File Name: IMG Save in: Documents Data Format: Use Device Setting JPEG Image Quality: Standard ✓ Create a PDF file that supports keyword search ✓ Save to a subfolder with current date Application Settings ● Open with an application: Windows Explorer ○ Send to an application: Preview ○ Send to a folder: None ○ Do not start any application More Functions Instructions Defaults OK(1) Scan Options Area
→ (2) Save Settings Area
(3) Application Settings Area
(1) Scan Options Area
Paper Size
Set from the operation panel.
Resolution
Set from the operation panel.
Image Processing Settings
Click (Plus) to set the following.
Apply Auto Document Fix
Select this checkbox to sharpen text in a document or magazine for better readability.

Important
- The color tone may differ from the source image due to corrections. In that case, deselect the checkbox and scan.

Note
- Scanning takes longer than usual when you enable this function.
Reduce gutter shadow (platen)
Reduces gutter shadows that appear between pages when scanning open booklets.

Important
- This function is available only when scanning from the platen.

Note
- When you enable this function, scanning may take longer than usual with network connection.
Correct slanted text document
Detects the scanned text and corrects the angle (within -0.1 to -10 degrees or +0.1 to +10 degrees) of the document.

Important
- The following types of documents may not be corrected properly since the text cannot be detected correctly.
- Documents in which the text lines are inclined more than 10 degrees or the angles vary by line
- Documents containing both vertical and horizontal text
- Documents with extremely large or small fonts
- Documents with small amount of text
- Documents containing figures/images
- Hand-written text
- Documents containing both vertical and horizontal lines (tables)

Note
- Scanning takes longer than usual when you enable Correct slanted text document.
Detect the orientation of text document and rotate image
Automatically rotates the image to the correct orientation by detecting the orientation of text in the scanned document.

Important
- Only text documents written in languages that can be selected from Document Language in the Settings (General Settings) dialog box are supported.
- The orientation may not be detected for the following types of settings or documents since the text cannot be detected correctly.
- Resolution is outside the range of 300 dpi to 600 dpi
- Font size is outside the range of 8 points to 48 points
- Documents containing special fonts, effects, italics, or hand-written text
- Documents with patterned backgrounds
(2) Save Settings Area
File Name
Enter the file name of the image to be saved. When you save a file, the date and four digits are appended to the set file name in the "_20XX0101_0001" format.
Note
- When you select the Save to a subfolder with current date checkbox, the date and four digits are appended to the set file name.
Save in
Displays the folder in which to save the scanned images. To add a folder, select Add... from the pull-down menu, then click Add in the displayed Select Destination Folder dialog box and specify the destination folder.
The default save folders are as follows.
- Windows 10/Windows 8.1/Windows Vista:
Documents folder - Windows 8/Windows 7:
My Documents folder
Data Format
Set from the operation panel.
JPEG Image Quality
You can specify the image quality of JPEG files.
Create a PDF file that supports keyword search
Select this checkbox to convert text in images into text data and create PDF files that support keyword search.
Note
- PDF files that are searchable in the language selected in Document Language on the (General Settings) tab of the Settings dialog box are created.

Save to a subfolder with current date
Select this checkbox to create a current date folder in the folder specified in Save in and save scanned images in it. The folder will be created with a name such as "20XX_01_01" (Year_Month_Date).
If this checkbox is not selected, files are saved directly in the folder specified in Save in.
(3) Application Settings Area
Open with an application
Select this when you want to enhance or correct the scanned images.
You can specify the application from the pull-down menu.
Send to an application
Select this when you want to use the scanned images as they are in an application that allows you to browse or organize images.
You can specify the application from the pull-down menu.
Send to a folder
Select this when you also want to save the scanned images to a folder other than the one specified in Save in.
You can specify the folder from the pull-down menu.
Do not start any application
Saves to the folder specified in Save in.

Note
- To add an application or folder to the pull-down menu, select Add... from the pull-down menu, then click Add in the displayed Select Application or Select Destination Folder dialog box and specify the application or folder.
Instructions
Opens this guide.
Defaults
You can restore the settings in the displayed screen to the default settings.
Settings (Attach to E-mail (Photo)) Dialog Box
Click Attach to E-mail (Photo) on the 📄 (Scanning from the Operation Panel) tab to display the Settings (Attach to E-mail (Photo)) dialog box.
In the Settings (Attach to E-mail (Photo)) dialog box, you can specify how to respond when attaching images to an e-mail as photos after scanning them from the operation panel.
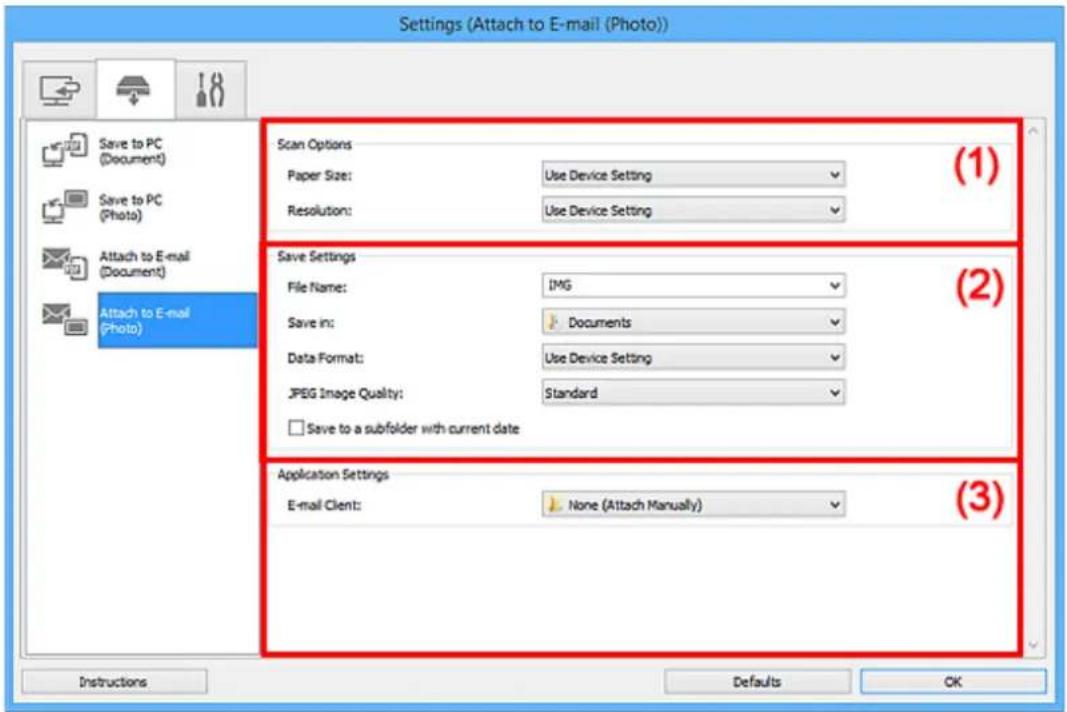
text_image
Settings (Attach to E-mail (Photo)) Scan Options Paper Size: Use Device Setting Resolution: Use Device Setting (1) Save Settings File Name: IMG Save in: Documents Data Format: Use Device Setting JPEG Image Quality: Standard □ Save to a subfolder with current date (2) Application Settings E-mail Client: None (Attach Manually) (3) Instructions Defaults OK(1) Scan Options Area
→ (2) Save Settings Area
(3) Application Settings Area
(1) Scan Options Area
Paper Size
Set from the operation panel.
Resolution
Set from the operation panel.
(2) Save Settings Area
File Name
Enter the file name of the image to be saved. When you save a file, the date and four digits are appended to the set file name in the "_20XX0101_0001" format.
Note
- When you select the Save to a subfolder with current date checkbox, the date and four digits are appended to the set file name.
Save in
Displays the folder in which to save the scanned images. To add a folder, select Add... from the pull-down menu, then click Add in the displayed Select Destination Folder dialog box and specify the destination folder.
The default save folders are as follows.
- Windows 10/Windows 8.1/Windows Vista:
Documents folder
- Windows 8/Windows 7:
My Documents folder
Data Format
Set from the operation panel.
JPEG Image Quality
You can specify the image quality of JPEG files.
Save to a subfolder with current date
Select this checkbox to create a current date folder in the folder specified in Save in and save scanned images in it. The folder will be created with a name such as "20XX_01_01"
(Year_Month_Date).
If this checkbox is not selected, files are saved directly in the folder specified in Save in.
(3) Application Settings Area
E-mail Client
Specify the e-mail client to use for attaching scanned images.
You can specify the e-mail client you want to start from the pull-down menu.

Note
- To add an e-mail client to the pull-down menu, select Add... from the pull-down menu, then click Add in the displayed Select Application dialog box and specify the e-mail client.
Instructions
Opens this guide.
Defaults
You can restore the settings in the displayed screen to the default settings.
Settings (Attach to E-mail (Document)) Dialog Box
Click Attach to E-mail (Document) on the ⬆ (Scanning from the Operation Panel) tab to display the Settings (Attach to E-mail (Document)) dialog box.
In the Settings (Attach to E-mail (Document)) dialog box, you can specify how to respond when attaching images to an e-mail as documents after scanning them from the operation panel.
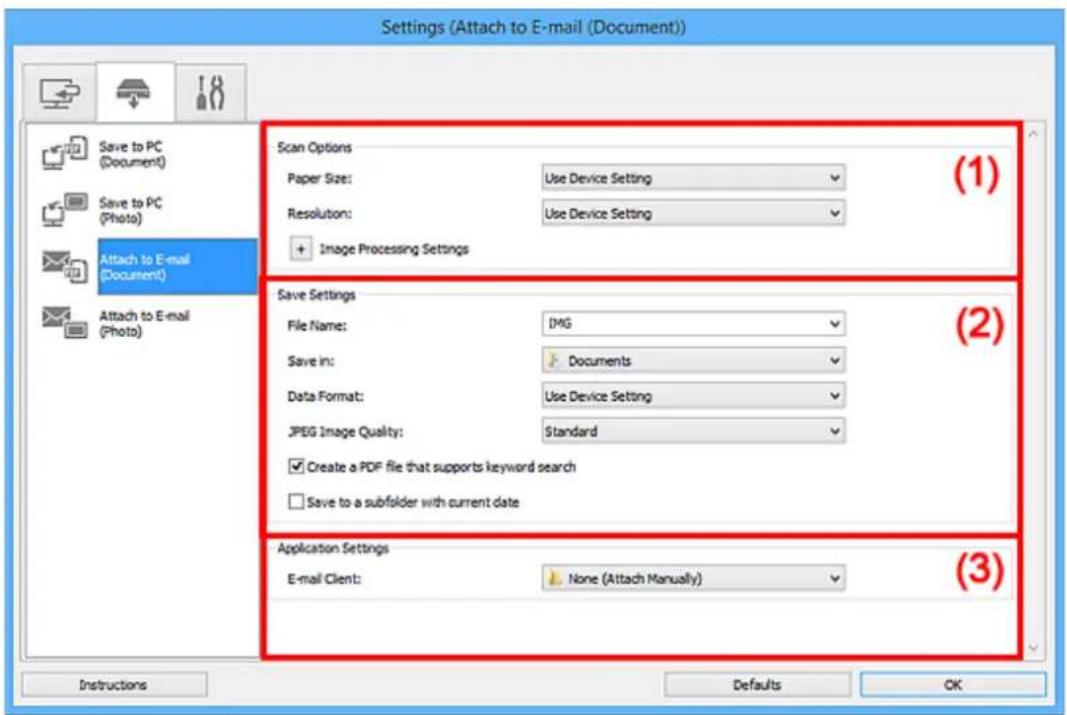
text_image
Settings (Attach to E-mail (Document)) Scan Options Paper Size: Use Device Setting Resolution: Use Device Setting + Image Processing Settings (1) Save Settings File Name: IMG Save in: Documents Data Format: Use Device Setting JPEG Image Quality: Standard ✓ Create a PDF file that supports keyword search ✓ Save to a subfolder with current date Application Settings E-mail Client: None (Attach Manually) (2) (3) Instructions Defaults OK(1) Scan Options Area
→ (2) Save Settings Area
(3) Application Settings Area
(1) Scan Options Area
Paper Size
Set from the operation panel.
Resolution
Set from the operation panel.
Image Processing Settings
Click (Plus) to set the following.
Apply Auto Document Fix
Select this checkbox to sharpen text in a document or magazine for better readability.

Important
- The color tone may differ from the source image due to corrections. In that case, deselect the checkbox and scan.

Note
- Scanning takes longer than usual when you enable this function.
Reduce gutter shadow (platen)
Reduces gutter shadows that appear between pages when scanning open booklets.

Important
- This function is available only when scanning from the platen.

Note
- When you enable this function, scanning may take longer than usual with network connection.
Correct slanted text document
Detects the scanned text and corrects the angle (within -0.1 to -10 degrees or +0.1 to +10 degrees) of the document.

Important
- The following types of documents may not be corrected properly since the text cannot be detected correctly.
- Documents in which the text lines are inclined more than 10 degrees or the angles vary by line
- Documents containing both vertical and horizontal text
- Documents with extremely large or small fonts
- Documents with small amount of text
- Documents containing figures/images
- Hand-written text
- Documents containing both vertical and horizontal lines (tables)

Note
- Scanning takes longer than usual when you enable Correct slanted text document.
Detect the orientation of text document and rotate image
Automatically rotates the image to the correct orientation by detecting the orientation of text in the scanned document.

Important
- Only text documents written in languages that can be selected from Document Language in the Settings (General Settings) dialog box are supported.
- The orientation may not be detected for the following types of settings or documents since the text cannot be detected correctly.
- Resolution is outside the range of 300 dpi to 600 dpi
- Font size is outside the range of 8 points to 48 points
- Documents containing special fonts, effects, italics, or hand-written text
- Documents with patterned backgrounds
(2) Save Settings Area
File Name
Enter the file name of the image to be saved. When you save a file, the date and four digits are appended to the set file name in the "_20XX0101_0001" format.
Note
- When you select the Save to a subfolder with current date checkbox, the date and four digits are appended to the set file name.
Save in
Displays the folder in which to save the scanned images. To add a folder, select Add... from the pull-down menu, then click Add in the displayed Select Destination Folder dialog box and specify the destination folder.
The default save folders are as follows.
- Windows 10/Windows 8.1/Windows Vista:
Documents folder - Windows 8/Windows 7:
My Documents folder
Data Format
Set from the operation panel.
JPEG Image Quality
You can specify the image quality of JPEG files.
Create a PDF file that supports keyword search
Select this checkbox to convert text in images into text data and create PDF files that support keyword search.
Note
- PDF files that are searchable in the language selected in Document Language on the (General Settings) tab of the Settings dialog box are created.

Save to a subfolder with current date
Select this checkbox to create a current date folder in the folder specified in Save in and save scanned images in it. The folder will be created with a name such as "20XX_01_01" (Year_Month_Date).
If this checkbox is not selected, files are saved directly in the folder specified in Save in.
(3) Application Settings Area
E-mail Client
Specify the e-mail client to use for attaching scanned images.
You can specify the e-mail client you want to start from the pull-down menu.
Note
- To add an e-mail client to the pull-down menu, select Add... from the pull-down menu, then click Add in the displayed Select Application dialog box and specify the e-mail client.
Instructions
Opens this guide.
Defaults
You can restore the settings in the displayed screen to the default settings.
Settings (General Settings) Dialog Box
Click the (General Settings) tab to display the Settings (General Settings) dialog box.
In the Settings (General Settings) dialog box, you can set the product to use, file size restriction on e-mail attachment, language to detect text in images, and folder in which to save images temporarily.
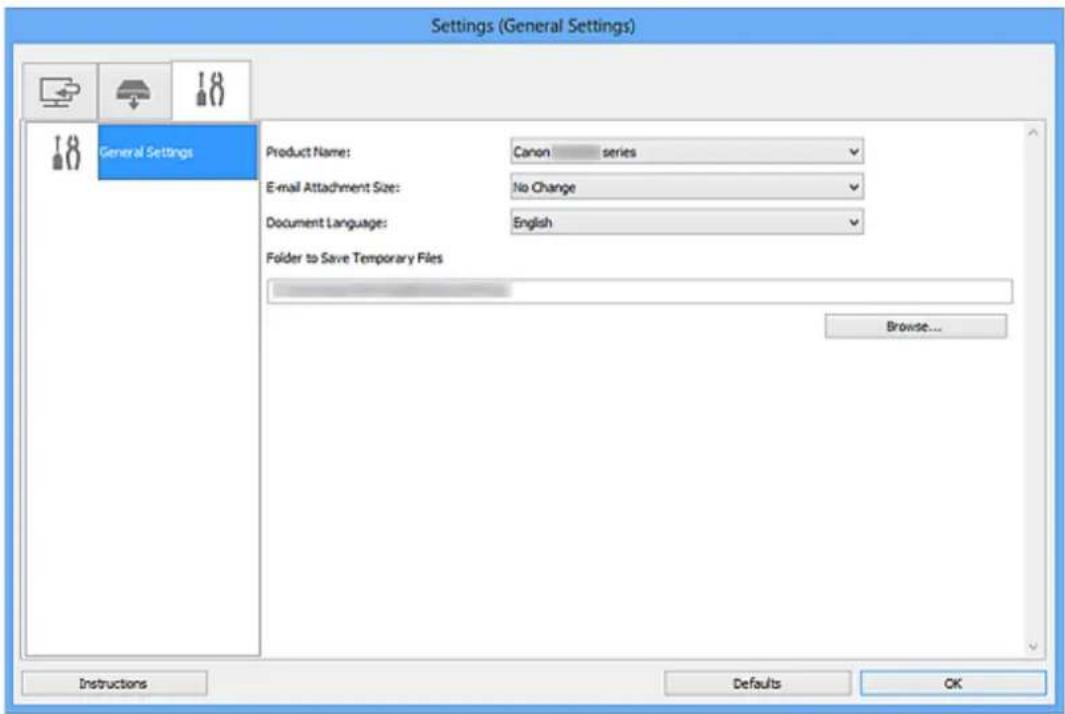
text_image
Settings (General Settings) General Settings Product Name: Canon series E-mail Attachment Size: No Change Document Language: English Folder to Save Temporary Files Browse... Instructions Defaults OKProduct Name
Displays the name of the product that IJ Scan Utility is currently set to use.
If the displayed product is not the one you want to use, select the desired product from the list.
In addition, for network connection, select one with "Network" after the product name.
Note
- With network connection, Select appears on the right side of the product name. Click Select to display IJ Network Scanner Selector EX from which you can change the scanner to use. Refer to "Network Scan Settings" for the setting procedure.
E-mail Attachment Size
You can restrict the size of scanned images to be attached to an e-mail.
You can select Small (Suitable for 640 x 480 Windows), Medium (Suitable for 800 x 600 Windows), Large (Suitable for 1024 x 768 Windows), or No Change.
Document Language
You can select the language for detecting text in images and for use with search when a PDF file that supports keyword search is created.
Folder to Save Temporary Files
Displays the folder in which to save images temporarily. Click Browse... to specify the destination folder.
Instructions
Opens this guide.
Defaults
You can restore the settings in the displayed screen to the default settings.
Save Settings Dialog Box
Select the Check scan results and specify save settings checkbox in Save Settings of the Settings dialog box to display the Save Settings dialog box after scanning.
You can specify the data format and destination while viewing the thumbnails of scan results.
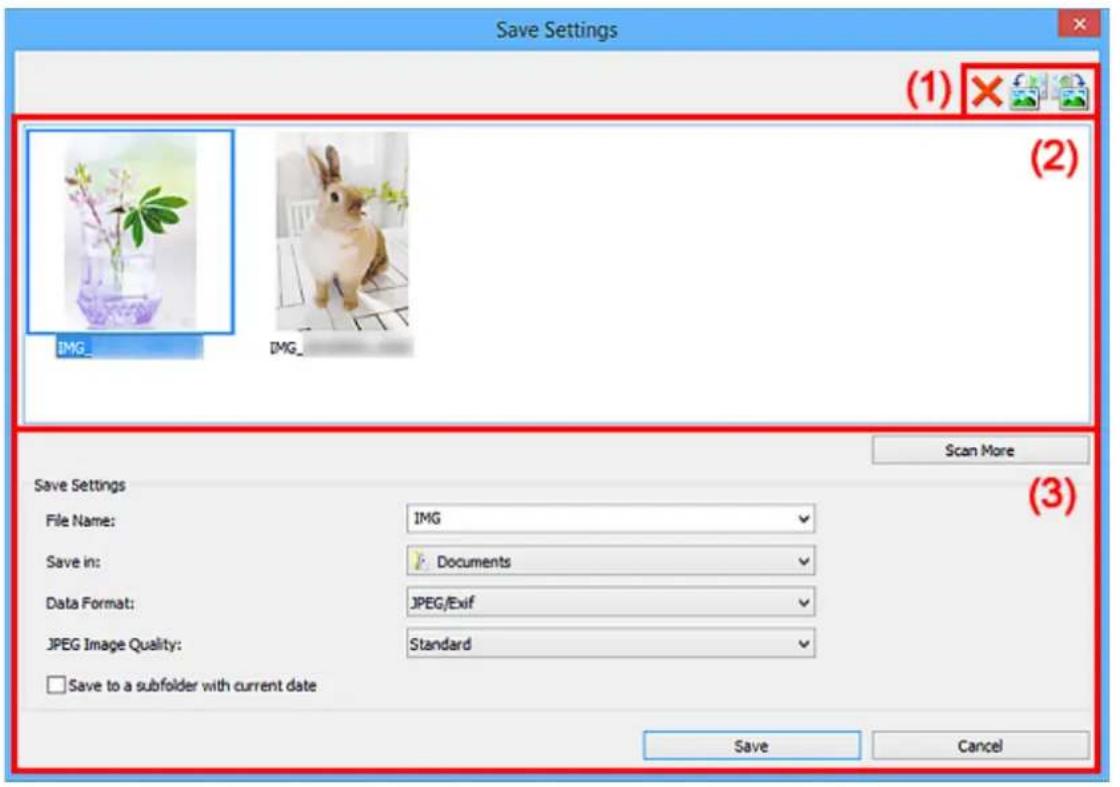
text_image
Save Settings (1) × (2) IMG IMG_ Scan More Save Settings File Name: IMG Save in: Documents Data Format: JPEG/Exif JPEG Image Quality: Standard □ Save to a subfolder with current date Save Cancel(1) Preview Operation Buttons
(2) Scan Results Area
(3) Save Settings Area
(1) Preview Operation Buttons

(Delete)
Deletes the image selected in the Scan Results area.


/ (Rotate Left 90°)/(Rotate Right 90°)
Rotates scanned images 90 degrees counter-clockwise or clockwise.
Select the image you want to rotate, then click (Rotate Left 90°) or (Rotate Right 90°).

Important
- The preview operation buttons do not appear when the Enable large image scans checkbox is selected in the Settings (ScanGear) dialog box.
(2) Scan Results Area
Displays the thumbnails of the scanned images. You can change the save order of images via drag-and-drop. The file names for saving appear below the thumbnails.
Double-click a thumbnail to enlarge the view of the scanned image.
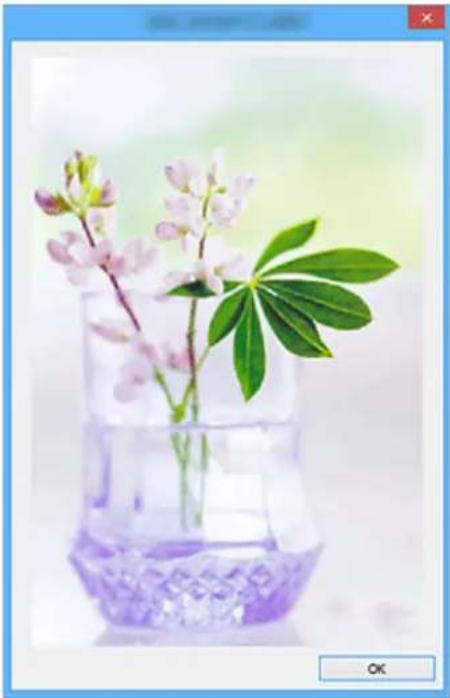
natural_image
A glass vase with pink flowers and green leaves, placed on a purple textured base (no text or symbols visible)(3) Save Settings Area
Scan More
Starts scanning again, and then adds the image to the Scan Results area.
File Name
Enter the file name of the image to be saved. When you save a file, the date and four digits are appended to the set file name in the "_20XX0101_0001" format.
Note
- When you select the Save to a subfolder with current date checkbox, the date and four digits are appended to the set file name.
Save in
Displays the folder in which to save the scanned images. To add a folder, select Add... from the pull-down menu, then click Add in the displayed Select Destination Folder dialog box and specify the destination folder.
The default save folders are as follows.
• Windows 10/Windows 8.1/Windows Vista:
Documents folder
• Windows 8/Windows 7:
My Documents folder
Data Format
Select the data format in which to save the scanned images.
You can select JPEG/Exif, TIFF, PNG, PDF, or PDF (Multiple Pages).
Important
- You cannot select PDF or PDF (Multiple Pages) in the following cases.
- When scanned by clicking Photo in the IJ Scan Utility main screen
- The Enable large image scans checkbox is selected in Save Settings of the Settings (ScanGear) dialog box
- Start OCR is selected in Application Settings of the Settings (Document Scan), Settings (Custom Scan), or Settings (ScanGear) dialog box
- You cannot select JPEG/Exif when Color Mode is Black and White.
Note
- With network connection, scanning may take longer than usual when you set TIFF or PNG in Data Format.
JPEG Image Quality
You can specify the image quality of JPEG files.
Important
- This appears only when JPEG/Exif is selected in Data Format.
PDF Compression
Select the compression type for saving PDF files.
Standard
It is recommended that you normally select this setting.
High
Compresses the file size when saving, allowing you to reduce the load on your network/server.
Important
- This appears only when PDF or PDF (Multiple Pages) is selected in Data Format.
Create a PDF file that supports keyword search
Select this checkbox to convert text in images into text data and create PDF files that support keyword search.
Important
- This appears only when PDF or PDF (Multiple Pages) is selected in Data Format.
Note
- PDF files that are searchable in the language selected in Document Language on the (General Settings) tab of the Settings dialog box are created.
#
Set up password security
Select this checkbox to display the Password Security Settings dialog box.
- This appears only when PDF or PDF (Multiple Pages) is selected in Data Format.
Save to a subfolder with current date
Select this checkbox to create a current date folder in the folder specified in Save in and save scanned images in it. The folder will be created with a name such as "20XX_01_01"
(Year_Month_Date).
If this checkbox is not selected, files are saved directly in the folder specified in Save in.
Save
Saves the scanned images.
Cancel
Cancels saving.
Password Security Settings Dialog Box
Set passwords for opening or printing/editing PDF files.
Display the Password Security Settings dialog box by one of the following operations.
- Select the Set up password security checkbox in the Settings dialog box, and then scan
- Select the Set up password security checkbox in the Save Settings dialog box, and then save
Note
- The Save Settings dialog box appears after scanning with the Check scan results and specify save settings checkbox selected in Save Settings of the Settings dialog box.
Important
- You will not be able to open or edit the PDF file if you forget the password. It is recommended that you write down the passwords and keep them in a safe place for future reference.
- Password-protected PDF files cannot be opened in applications that do not support security settings for PDF files.

text_image
Password Security Settings Compatibility: Acrobat 5.0 and later Encryption Level: High (128-bit RC4) □ Require a password to open the document Document Open Password: Password (Confirmation): □ Require a password to print or edit the document Permissions Password: Password (Confirmation): OK CancelRequire a password to open the document
You can specify whether to require a password to open the PDF file. Select this checkbox to enter characters in Document Open Password.
Document Open Password
Enter a password for opening the PDF file.
Password (Confirmation)
Enter the password set in Document Open Password.
Require a password to print or edit the document
You can specify whether to require a password to print or edit the PDF file. Select this checkbox to enter characters in Permissions Password.
Permissions Password
Enter a password for printing or editing the PDF files.
Password (Confirmation)
Enter the password set in Permissions Password.

Important
- Enter a password of up to 32 characters using single-byte letters, numbers, and/or symbols (!"#\$%&')* +,-./:;<=>?@[^_^\~{}}\~). Passwords are case sensitive.
- To set both Document Open Password and Permissions Password, select both checkboxes and specify a different password for each.
OK
OK can be clicked after entering Document Open Password and Password (Confirmation), or Permissions Password and Password (Confirmation). Click OK to scan or save.
Cancel
After scanning with Set up password security checkbox selected in Settings dialog box:
The IJ Scan Utility main screen reappears.
After saving with Set up password security checkbox selected in Save Settings dialog box:
A confirmation screen appears; click Cancel to return to the Password Security Settings dialog box. Click OK to save the scanned images without setting a password.
Image Stitch Window
Click Stitch in the IJ Scan Utility main screen to display the Image Stitch window.
You can scan the left and right halves of an item larger than the platen and combine them back into one image. You can scan items up to approximately twice as large as the platen.
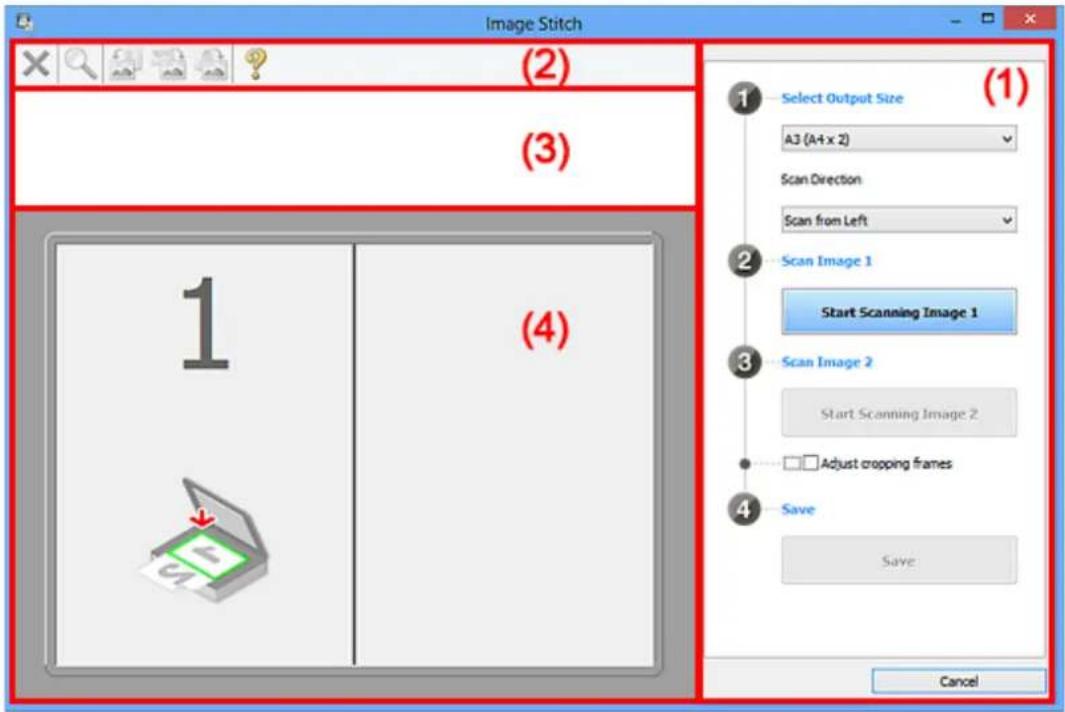
text_image
Image Stitch (2) (3) 1 (4) 1 Select Output Size (1) A3 (A4 x 2) Scan Direction Scan from Left Scan Image 1 Start Scanning Image 1 Scan Image 2 Start Scanning Image 2 Adjust cropping frames Save Save Cancel(1) Settings and Operation Buttons
→ (2) Toolbar
(3) Thumbnail View Area
→ (4) Preview Area
Note
- The displayed items vary depending on the select source and view.
(1) Settings and Operation Buttons
Select Output Size
B4 (B5 x 2)
Scans the left and right halves of a B4 size item separately.
A3 (A4 x 2)
Scans the left and right halves of an A3 size item separately.
11 x 17 (Letter x 2)
Scans the left and right halves of an item twice as large as Letter size separately.
Full Platen x 2
Scans the left and right halves of an item twice as large as the platen separately.
Scan Direction
Scan from Left
Displays the first scanned image on the left side.
Scan from Right
Displays the first scanned image on the right side.
Scan Image 1
Start Scanning Image 1
Scans the first item.
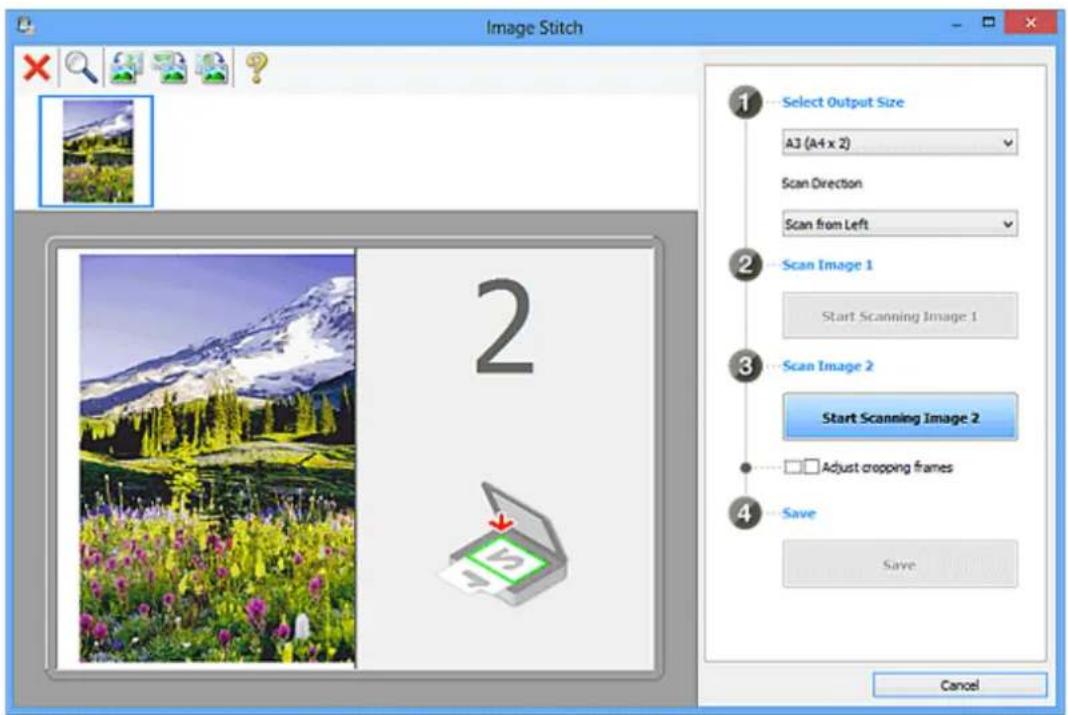
text_image
Image Stitch 1 Select Output Size A3 (A4 x 2) Scan Direction Scan from Left 2 Scan Image 1 Start Scanning Image 1 3 Scan Image 2 Start Scanning Image 2 □ Adjust cropping frames 4 Save Save CancelScan Image 2
Start Scanning Image 2
Scans the second item.
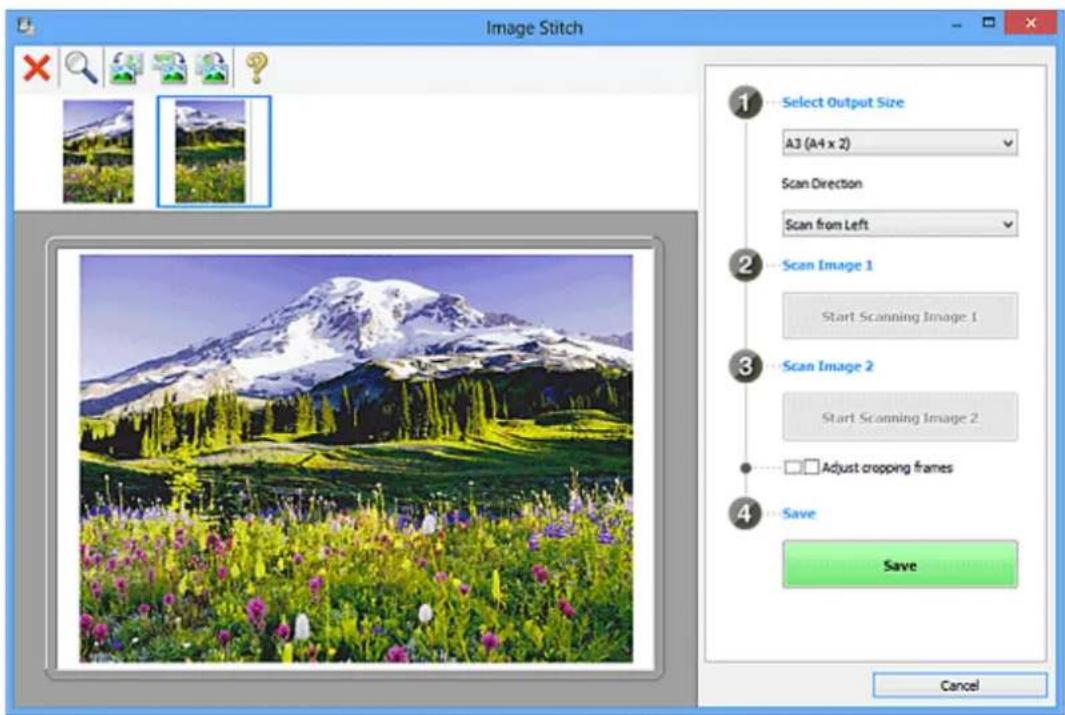
text_image
Image Stitch Select Output Size A3 (A4 x 2) Scan Direction Scan from Left Scan Image 1 Start Scanning Image 1 Scan Image 2 Start Scanning Image 2 Adjust cropping frames Save Save CancelAdjust cropping frames
You can adjust the scan area in preview.
If no area is specified, the image of the size selected in Select Output Size will be saved. If an area is specified, only the image in the cropping frame will be scanned and saved.
Adjusting Cropping Frames in the Image Stitch Window
Save
Save
Saves the two scanned images as one image.
Cancel
Cancels Stitch scan.
(2) Toolbar
You can delete the scanned images or adjust the previewed images.

(Delete)
Deletes the image selected in the Thumbnail View area.

(Enlarge/Reduce)
Allows you to enlarge or reduce the preview image.
Clicking the Preview area enlarges the displayed image.
Right-clicking the Preview area reduces the displayed image.

(Rotate Left)
Rotates the preview image 90 degrees counter-clockwise.

(Rotate 180°)
Rotates the preview image 180 degrees.

(Rotate Right)
Rotates the preview image 90 degrees clockwise.

(Open Guide)
Opens this page.
(3) Thumbnail View Area
Displays the thumbnails of the scanned images. Appears blank if none has been scanned.
(4) Preview Area
Displays the scanned images. You can adjust the layout by dragging the scanned image or check the results of the settings made in "(1) Settings and Operation Buttons."
When no image has been scanned:
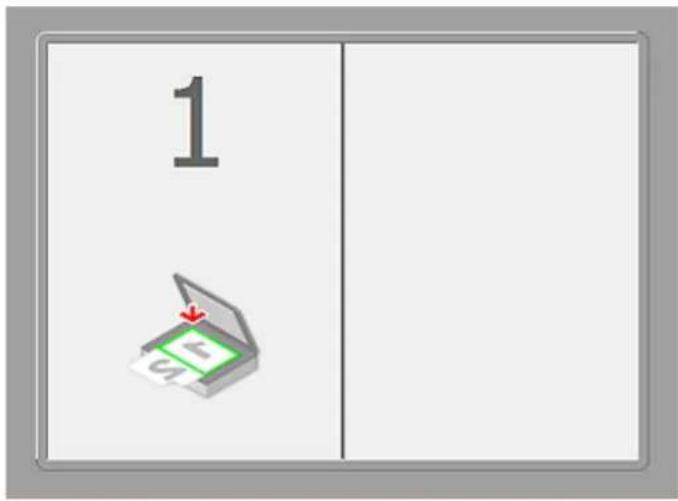
text_image
1 124After scanning the first item by clicking Start Scanning Image 1:
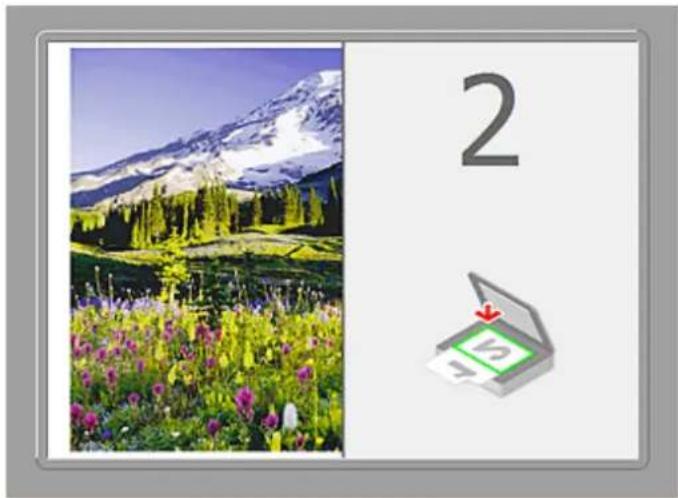
natural_image
Scenic landscape with snow-capped mountains, flowers in field, and a laptop displaying '5' with download icon (no text or symbols on main image)The image is scanned in the direction specified in Scan Direction, and 2 appears next to it.
After scanning the second item by clicking Start Scanning Image 2:
natural_image
Scenic mountain landscape with snow-capped peaks and colorful wildflowers in the foreground (no text or symbols visible)The two scanned images appear.
Related Topic
→ Scanning Originals Larger than the Platen (Image Stitch)
Scanning Using Application Software (ScanGear)
What Is ScanGear (Scanner Driver)?
Scanning with Advanced Settings Using ScanGear (Scanner Driver)
Starting ScanGear (Scanner Driver)
Scanning in Basic Mode
▶ Scanning in Advanced Mode
Scanning Multiple Documents from the ADF (Auto Document Feeder) in Advanced Mode
Scanning Multiple Documents at One Time with ScanGear (Scanner Driver)
Correcting Images and Adjusting Colors with ScanGear (Scanner Driver)
▶ ScanGear (Scanner Driver) Screens
Positioning Originals (Scanning from Computer)
Adjusting Cropping Frames (ScanGear)
▶ General Notes (Scanner Driver)
Important
• Available functions and settings vary depending on your scanner or printer.
What Is ScanGear (Scanner Driver)?
ScanGear (scanner driver) is software required for scanning documents. It enables you to specify the output size and make image corrections when scanning.
ScanGear can be started from IJ Scan Utility or applications that are compatible with a standard interface called TWAIN. (ScanGear is a TWAIN-compatible driver.)
What You Can Do with This Software
This software enables you to preview scan results or set document type and output size, etc. when scanning documents. It is useful when you want to scan in a specific color tone, as it allows you to make various corrections and adjust brightness, contrast, etc.
Screens
There are two modes: Basic Mode and Advanced Mode.
Switch modes by clicking a tab on the upper right of the screen.
Basic Mode
Advanced Mode

Note
- ScanGear starts in the last used mode.
- Settings are not retained when you switch modes.
Basic Mode
Use the Basic Mode tab to scan easily by following three simple on-screen steps ( 1 , and 3 ).
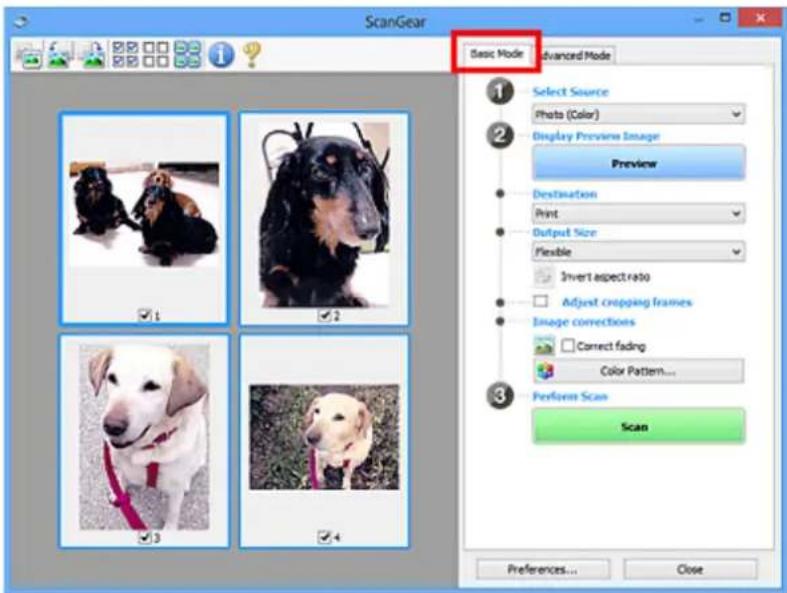
text_image
ScanGear Basic Mode Advanced Mode Select Source Photo (Color) Display Preview Image Preview Destination Print Output Size Flexible Invert aspect ratio Adjust cropping frames Image corrections Correct fading Color Pattern... Perform Scan Scan Preferences... CloseAdvanced Mode
Use the Advanced Mode tab to specify the color mode, output resolution, image brightness, color tone, etc. when scanning.
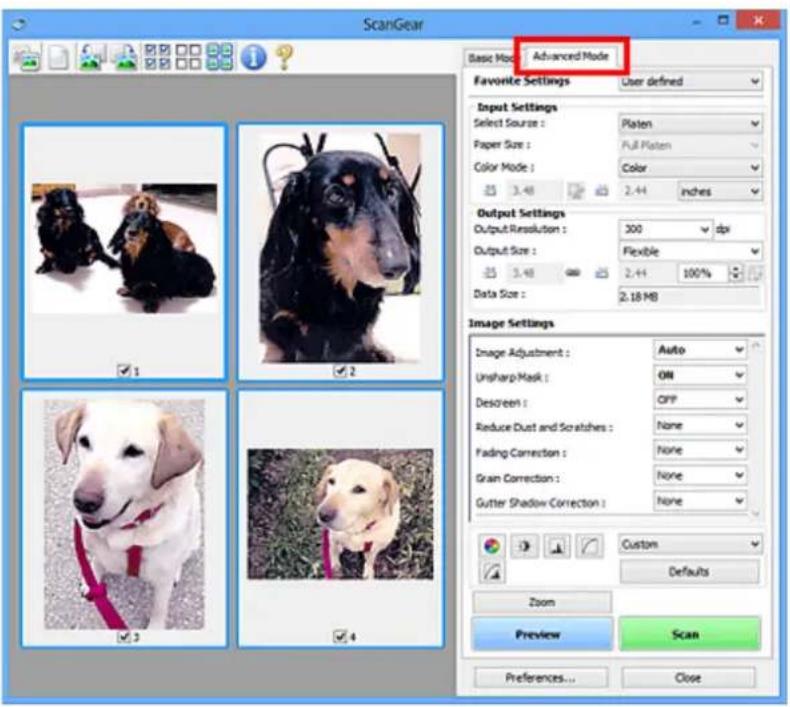
text_image
ScanGear Basic Mode: Advanced Mode Favorite Settings User defined Input Settings Select Source: Platen Paper Size: Full Platen Color Mode: Color 3.48 2.44 inches Output Settings Output Resolution: 300 dpi Output Size: Flexible 3.48 2.44 100% Data Size: 2.18 MB Image Settings Image Adjustment: Auto Unsharp Mask: ON Descreen: OFF Reduce Dust and Scratches: None Fading Correction: None Gram Correction: None Gutter Shadow Correction: None Custom Defaults Zoom Preview Scan Preferences... CloseScanning with Advanced Settings Using ScanGear (Scanner Driver)
Starting ScanGear (Scanner Driver)
Scanning in Basic Mode
▶ Scanning in Advanced Mode
Scanning Multiple Documents from the ADF (Auto Document Feeder) in Advanced Mode
Scanning Multiple Documents at One Time with ScanGear (Scanner Driver)
Starting ScanGear (Scanner Driver)
Use ScanGear (scanner driver) to make image corrections and color adjustments when scanning. ScanGear can be started from IJ Scan Utility or other applications.
Note
- Set up the network environment if you have more than one scanner or have a network compatible model and changed the connection from USB connection to network connection.
Starting IJ Scan Utility
Follow these steps to start ScanGear from IJ Scan Utility.
- Start IJ Scan Utility.
Refer to "Starting IJ Scan Utility" for your model from Home of the Online Manual for how to start IJ Scan Utility.
- Click ScanGear in the IJ Scan Utility main screen.
The ScanGear screen appears.
Starting from an Application
Follow these steps (example) to start ScanGear from an application.
The procedure varies depending on the application. For details, refer to the application's manual.
-
Start the application.
-
On the menu of the application, select the machine.
Note
- When you want to use a network compatible model by connecting to a network, select one with "Network" displayed after the product name.
- Select the command to scan a document.
The ScanGear screen appears.
Scanning in Basic Mode
Use the Basic Mode tab to scan easily by following the on-screen steps.
Refer to "Scanning Multiple Documents at One Time with ScanGear (Scanner Driver)" to scan multiple documents at one time from the Platen.
When scanning from the ADF (Auto Document Feeder), documents are scanned without preview.

Important
- The following types of documents may not be scanned correctly. In that case, click (Thumbnail) on the Toolbar to switch to whole image view and scan.
• Photos that have a whitish background - Documents printed on white paper, hand-written text, business cards, etc.
- Thin documents
- Thick documents
- The following types of documents may not be scanned correctly.
- Documents smaller than 1.2 inches (3 cm) square
• Photos that have been cut to various shapes

Note
- When using a model supporting ADF duplex scanning, you can scan both sides of the documents automatically from the ADF.
- Place the document on the Platen or ADF, then start ScanGear (scanner driver).
→ Positioning Originals (Scanning from Computer)
Starting ScanGear (Scanner Driver)
- Set Select Source according to the document placed on the Platen or ADF.
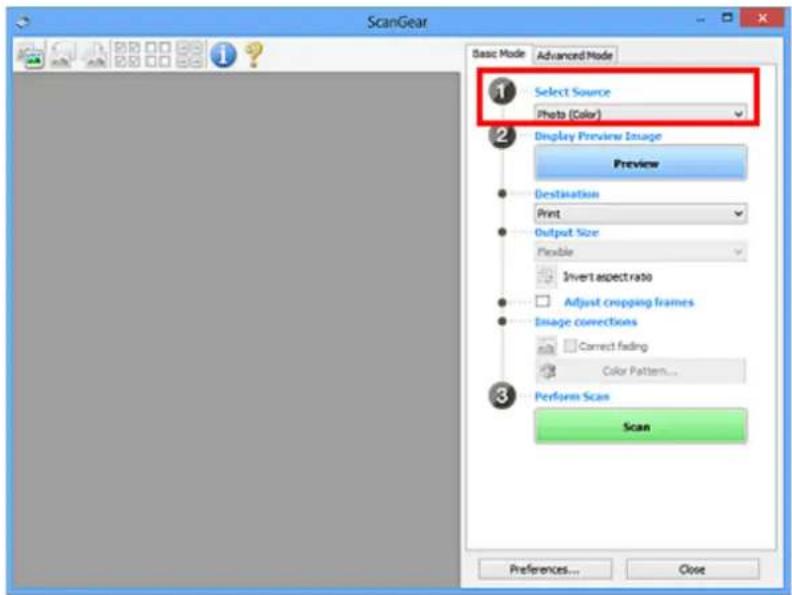
text_image
ScanGear Basic Mode Advanced Mode 1 Select Source Photo (Color) 2 Display Preview Image Preview Destination Print Output Size Flexible Invert aspect ratio Adjust cropping frames Image connections Correct fading Color Pattern... 3 Perform Scan Scan Preferences... CloseImportant
- Some applications do not support continuous scanning from the ADF. For details, refer to the application's manual.
Note
• To scan magazines containing many color photos, select Magazine (Color).
3. Click Preview.
Preview image appears in the Preview area.
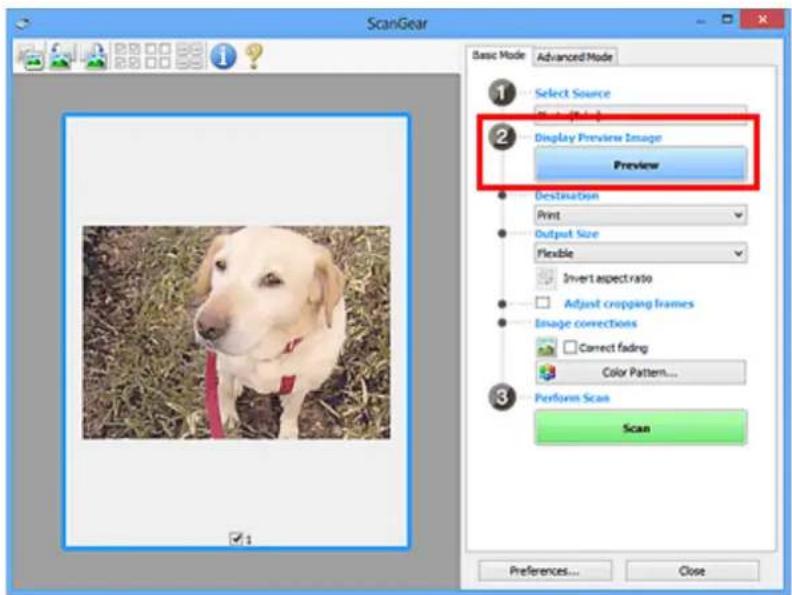
text_image
ScanGear Basic Mode Advanced Mode Select Source Display Preview Image Preview Destination Print Output Size Flexible Invert aspect ratio Adjust cropping frames Image corrections Correct fading Color Pattern... Perform Scan Scan Preferences... CloseImportant
- Preview is not displayed when an ADF type is selected for Select Source.
Note
- Colors are adjusted based on the document type selected in Select Source.
4. Set Destination.
Note
- Skip ahead to Step 7 when an ADF type is selected for Select Source.
5. Set Output Size according to purpose.
Output size options vary by the item selected in Destination.
6. Adjust the cropping frames (scan areas) as required.
Adjust the size and position of the cropping frames on the preview image.
Adjusting Cropping Frames (ScanGear)
-
Set Image corrections as required.
-
Click Scan.
Scanning starts.

Note
- Click (Information) to open a dialog box in which you can check the current scan settings (document type, etc.).
- A response of ScanGear after scanning can be specified in Status of ScanGear dialog after scanning on the Scan tab of the Preferences dialog box.
Related Topic
→ Basic Mode Tab
Scanning in Advanced Mode
Use the Advanced Mode tab to specify the color mode, output resolution, image brightness, color tone, etc. when scanning.
Refer to "Scanning Multiple Documents at One Time with ScanGear (Scanner Driver)" to scan multiple documents at one time.
Refer to "Scanning Multiple Documents from the ADF (Auto Document Feeder) in Advanced Mode" to scan multiple documents placed on the ADF (Auto Document Feeder).

Important
- The following types of documents may not be scanned correctly. In that case, click (Thumbnail) on the Toolbar to switch to whole image view and scan.
• Photos that have a whitish background
- Documents printed on white paper, hand-written text, business cards, etc.
- Thin documents
- Thick documents
- The following types of documents may not be scanned correctly.
- Documents smaller than 1.2 inches (3 cm) square
• Photos that have been cut to various shapes

- Place the document on the Platen, then start ScanGear (scanner driver).
→ Positioning Originals (Scanning from Computer)
Starting ScanGear (Scanner Driver)
- Click the Advanced Mode tab.
The tab switches to Advanced Mode.
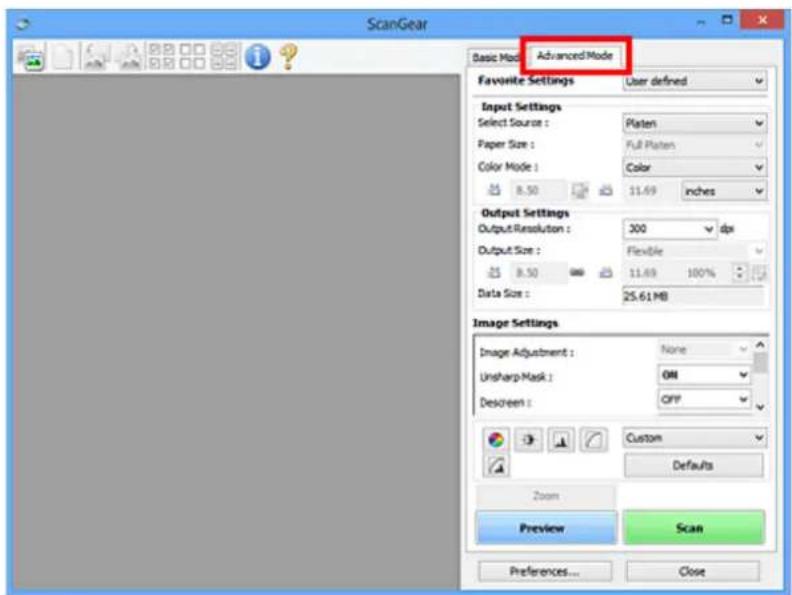
text_image
ScanGear Basic Mode: Advanced Mode Favorite Settings User defined Input Settings Select Source : Platen Paper Size : Full Platen Color Mode : Color 8.50 11.69 inches Output Settings Output Resolution : 300 dpi Output Size : Flexible 8.50 11.69 100% Data Size : 25.61 MB Image Settings Image Adjustment : None Unsharp Mask : ON Descreen : OFF Custom Defaults Zoom Preview Scan Preferences... Close- Settings are not retained when you switch modes.
-
Set Input Settings according to the document or purpose.
-
Click Preview.
Preview images appear in the Preview area.
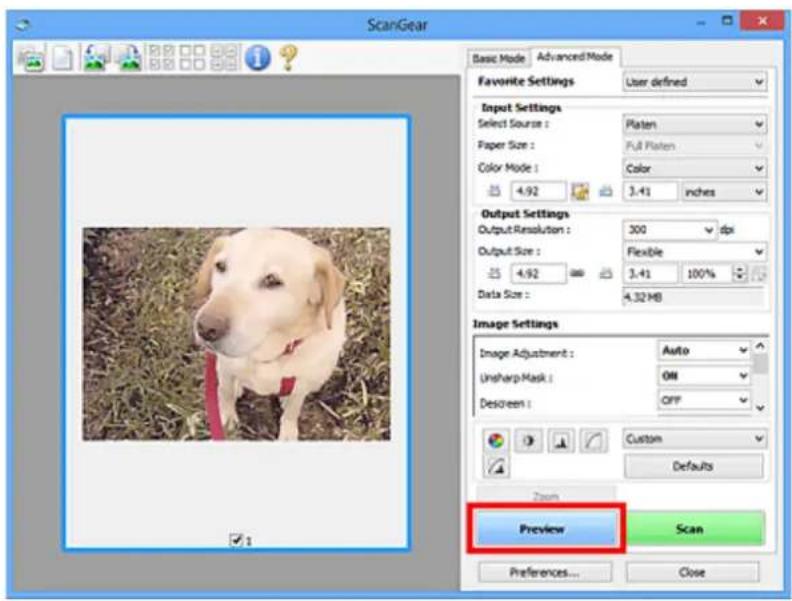
text_image
ScanGear Basic Mode Advanced Mode Favorite Settings User defined Input Settings Select Source : Platen Paper Size : Full Platen Color Mode : Color 4.92 3.41 inches Output Settings Output Resolution : 300 dpi Output Size : Flexible 4.92 3.41 100% Data Size : 4.32 MB Image Settings Image Adjustment : Auto Unsharp Mask : ON Descreen : OFF Custom Defaults Zoom Preview Scan Preferences... Close-
Set Output Settings.
-
Adjust the cropping frame (scan area), correct image, and adjust colors as required.
Adjusting Cropping Frames (ScanGear)
→ Image Settings
→ Color Adjustment Buttons
- Click Scan.
Scanning starts.
Note
- Click (Information) to open a dialog box in which you can check the current scan settings (document type, etc.).
- A response of ScanGear after scanning can be specified in Status of ScanGear dialog after scanning on the Scan tab of the Preferences dialog box.
Related Topic
→ Advanced Mode Tab
Scanning Multiple Documents from the ADF (Auto Document Feeder) in Advanced Mode
Use the Advanced Mode tab to specify the image brightness, color tone, etc. and scan multiple documents placed on the ADF (Auto Document Feeder) at one time. When using a model supporting ADF duplex scanning, you can scan both sides of the documents automatically from the ADF.
When scanning from the ADF, documents are scanned without preview.
- Place the documents on the ADF of the machine, then start ScanGear (scanner driver).
→ Placing Documents (ADF (Auto Document Feeder))
Starting ScanGear (Scanner Driver)
- Click the Advanced Mode tab and select Document (ADF Simplex) or Document (ADF Duplex) for Select Source.
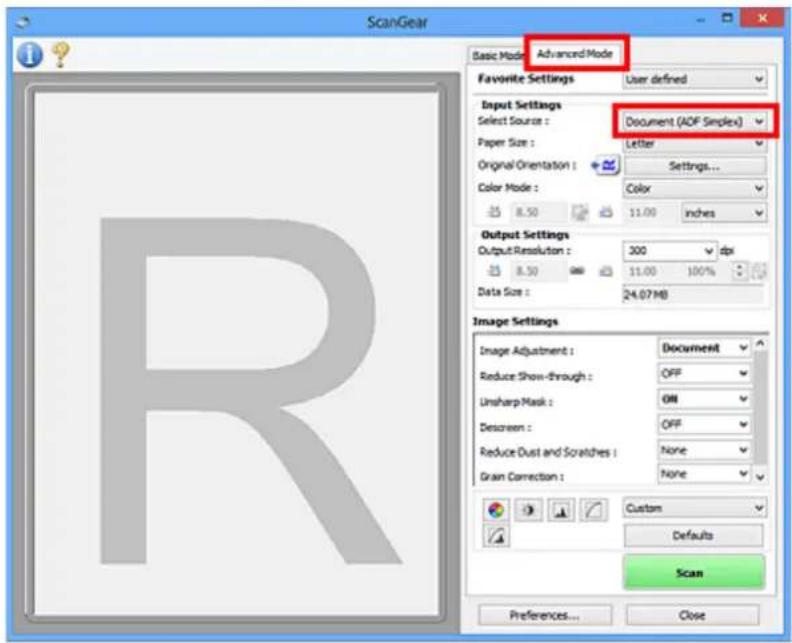
text_image
ScanGear Basic Mode Advanced Mode Favorite Settings User defined Input Settings Select Source : Document (ADF Simplex) Paper Size : Letter Original Orientation : Settings... Color Mode : Color 8.50 11.00 inches Output Settings Output Resolution : 300 dpi 8.50 11.00 100% Data Size : 24.07 MB Image Settings Image Adjustment : Document Reduce Show-through : OFF Unsharp Mask : ON Descreen : OFF Reduce Dust and Scratches : None Grain Correction : None Custom Defaults Scan Preferences... CloseNote
- Settings are not retained when you switch modes.
-
You can select Document (ADF Duplex) when using a model supporting ADF duplex scanning.
-
Set Input Settings according to the document or purpose.
- Set Output Settings.
- Make image corrections and color adjustments as required.
→ Image Settings
→ Color Adjustment Buttons
6. Click Scan.
Scanning starts.

Note

- Click (Information) to open a dialog box in which you can check the current scan settings (document type, etc.).
- A response of ScanGear after scanning can be specified in Status of ScanGear dialog after scanning on the Scan tab of the Preferences dialog box.
Related Topic
→ Advanced Mode Tab
Scanning Multiple Documents at One Time with ScanGear (Scanner Driver)
You can scan two or more photos (small documents) on the Platen at one time on the Basic Mode tab and Advanced Mode tab.
This section explains how to scan multiple documents from the Basic Mode tab.

Important
- To scan multiple documents as a single image, scan in whole image view.
- The following types of documents may not be cropped correctly. In that case, adjust the cropping frames (scan areas) in whole image view and scan.
- Photos that have a whitish background
- Documents printed on white paper, hand-written text, business cards, etc.
- Thin documents
-
Thick documents
→ Scanning Multiple Documents in Whole Image View -
The following types of documents may not be scanned correctly.
- Documents smaller than 1.2 inches (3 cm) square
- Photos that have been cut to various shapes

Note
- You can also scan multiple documents at one time from the Advanced Mode tab. Use the Advanced Mode tab to make advanced scan settings such as the color mode, output resolution, image brightness, and color tone.
- Refer to the corresponding sections below for details on the Basic Mode tab and Advanced Mode tab.
→ Basic Mode Tab
→ Advanced Mode Tab
- Place the document on the Platen, then start ScanGear (scanner driver).
→ Positioning Originals (Scanning from Computer)
Starting ScanGear (Scanner Driver)
- Set Select Source according to the document placed on the Platen.
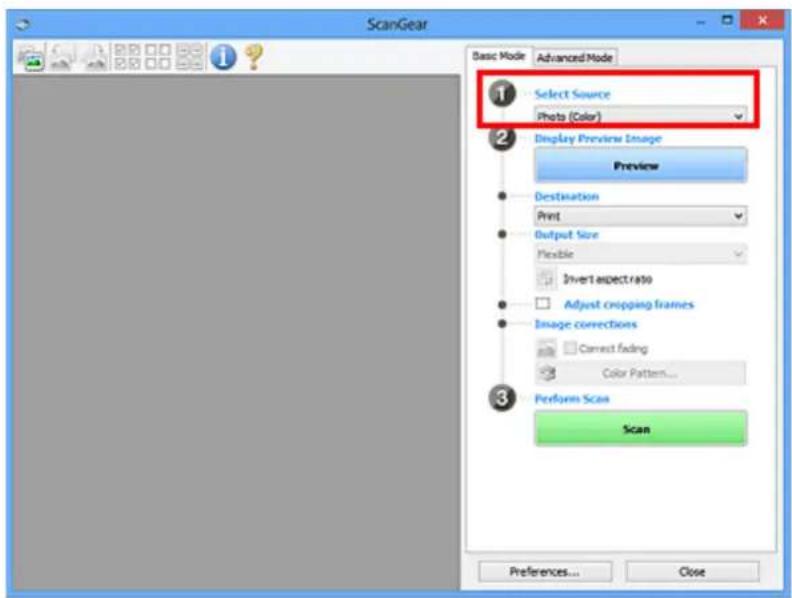
text_image
ScanGear Basic Mode Advanced Mode 1 Select Source Photo (Color) 2 Display Preview Image Preview Destination Print Output Size Flexible Invert aspect ratio Adjust cropping frames Image corrections Correct fading Color Pattern... 3 Perform Scan Scan Preferences... Close3. Click Preview.
Thumbnails of the preview images appear in the Preview area. Cropping frames are specified automatically according to the document size.
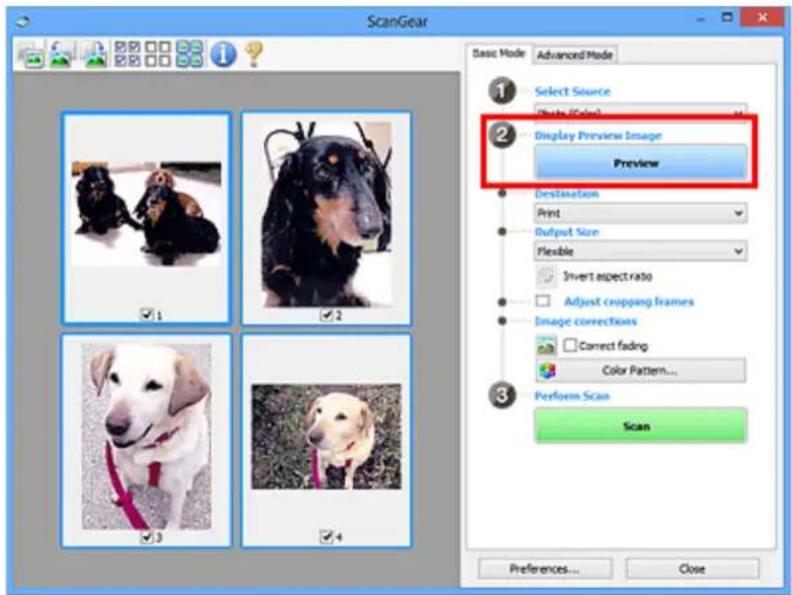
text_image
ScanGear Basic Mode Advanced Mode Select Source Photo (Color) Display Preview Image Preview Destination Print Output Size Flexible Invert aspect ratio Adjust cropping frames Image corrections Correct fading Color Pattern... Perform Scan Scan Preferences... Close4. Set Destination.
- Set Output Size according to purpose.
- Adjust the cropping frames and set Image corrections as required.
Note
- You can correct each image separately. Select the frame you want to correct.
-
In thumbnail view, you can only create one cropping frame per image. To create multiple cropping frames in an image, scan in whole image view.
-
Select the images you want to scan.
Select the checkboxes of the images you want to scan.
- Click Scan.
Scanning Multiple Documents in Whole Image View
Follow these steps if thumbnails are not displayed correctly when previewed or if you want to scan multiple documents as a single image.

Note
- Positions of slanted documents are not corrected in whole image view.
- After previewing images, click (Thumbnail) on the Toolbar.
Switch to whole image view.
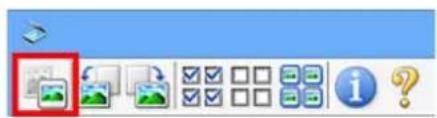
text_image
Screenshot of a software toolbar with icons and a highlighted red rectangle containing a photo file icon.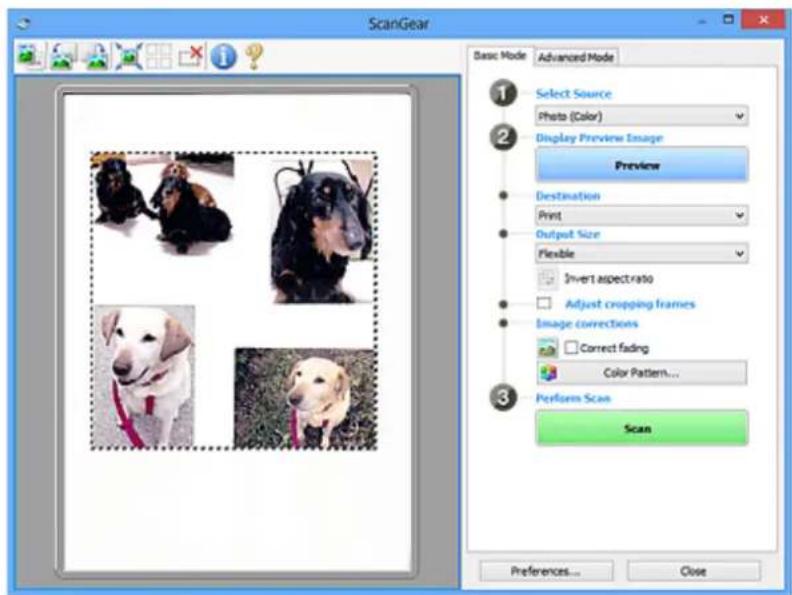
text_image
ScanGear Basic Mode Advanced Mode 1 Select Source Photo (Color) 2 Display Preview Image Preview Destination Print Output Size Flexible Invert aspect ratio Adjust cropping frames Image corrections Correct fading Color Pattern... 3 Perform Scan Scan Preferences... Close
Note
- When the whole image is displayed, the icon changes to (Whole Image).
- Set Destination.
- Set Output Size according to purpose.
Invert aspect ratio will be enabled when Output Size is set to anything but Flexible. Click this button to rotate the cropping frame. Click again to return it to the original orientation.
4. Adjust the cropping frames.
Adjust the size and position of the cropping frames on the preview image. You can also create two or more cropping frames.
If an area is not specified, the document will be scanned at the document size (Auto Crop). If an area is specified, only the portion in the specified area will be scanned.
→ Adjusting Cropping Frames (ScanGear)
5. Set Image corrections as required.
6. Click Scan.
Areas framed by broken lines are scanned.

Note
- A response of ScanGear after scanning can be specified in Status of ScanGear dialog after scanning on the Scan tab of the Preferences dialog box.
Correcting Images and Adjusting Colors with ScanGear (Scanner Driver)
Correcting Images (Unsharp Mask, Reduce Dust and Scratches, Fading Correction, etc.)
Adjusting Colors Using a Color Pattern
Adjusting Saturation and Color Balance
Adjusting Brightness and Contrast
Adjusting Histogram
Adjusting Tone Curve
Setting Threshold
Correcting Images (Unsharp Mask, Reduce Dust and Scratches, Fading Correction, etc.)
The Image Settings functions on the Advanced Mode tab of ScanGear (scanner driver) allow you to enhance the outline of the subjects, reduce dust/scratches, and correct faded colors when scanning images.
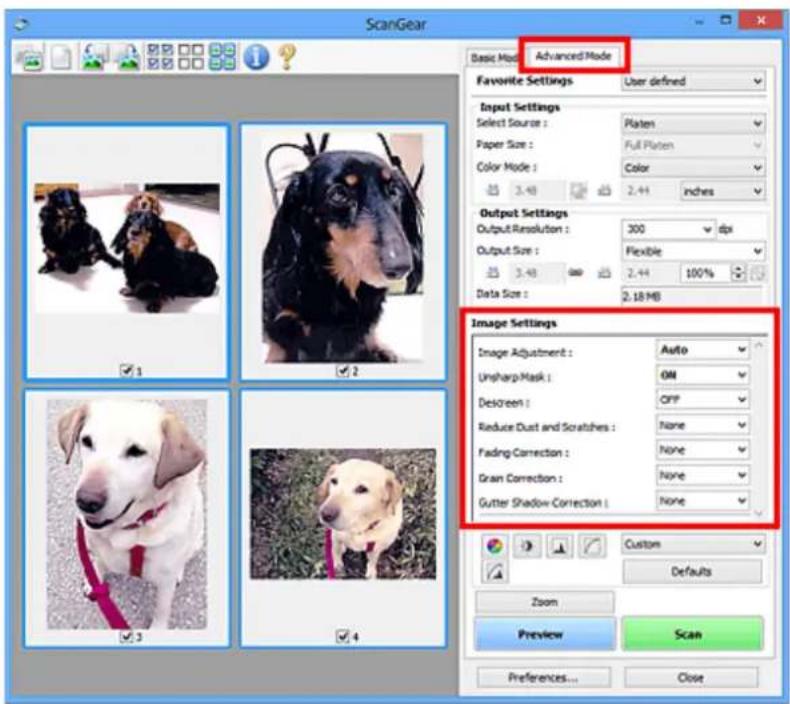
text_image
ScanGear Basic Mode: Advanced Mode Favorite Settings User defined Input Settings Select Source : Platen Paper Size : Full Platen Color Mode : Color 2.44 inches Output Settings Output Resolution : 300 dpi Output Size : Flexible 100% Data Size : 2.18 MB Image Settings Image Adjustment : Auto Unsharp Mask : ON Descreen : OFF Reduce Dust and Scratches : None Fading Correction : None Grain Correction : None Gutter Shadow Correction : None Custom Defaults Zoom Preview Scan Preferences... CloseSetting Items
Click (Arrow) of a function and select an item from the pull-down menu.
Reduce Dust and Scratches :
Fading Correction :
Grain Correction :
Gutter Shadow Correction :
Important
- Do not apply these functions to images without moire, dust/scratches, or faded colors. The color tone may be adversely affected.
- Refer to "Image Settings" for details and precautions on each function.
Note
- Refer to "Scanning in Advanced Mode" to start the Advanced Mode tab of ScanGear and scan.
Adjusting the image brightness and color tone
Set Image Adjustment to Auto, Photo, Magazine, or Document according to the document type.
| None Auto |
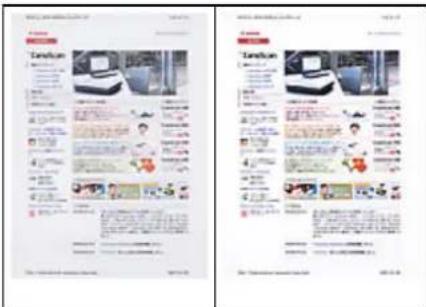
text_image
Scanned document page with two sections: 'Tension' and 'Other', featuring images of a person in a wheelchair and surrounding text blocks.Reducing show-through in text documents or lightening the base color in recycled paper, newspapers, etc. when scanning documents
Set Reduce Show-through to ON.
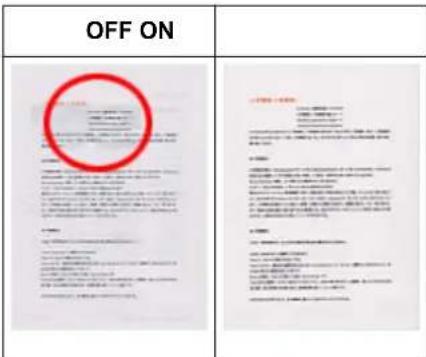
Sharpening slightly out-of-focus images
Set Unsharp Mask to ON.
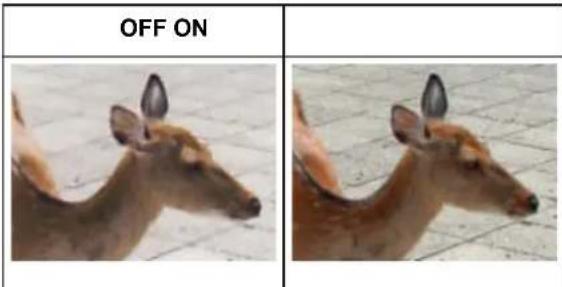
text_image
OFF ONReducing gradations and stripe patterns
Set Descreen to ON.
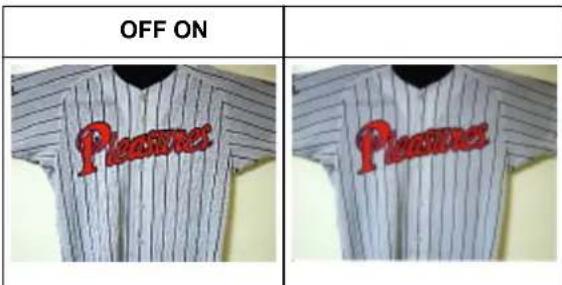
text_image
OFF ON Peces PecesNote
- Printed photos and pictures are displayed as a collection of fine dots. "Moire" is a phenomenon where uneven gradation or a stripe pattern appears when such photos or pictures printed with fine dots are scanned. Descreen is the function for reducing this moire effect.
Reducing dust and scratches
Set Reduce Dust and Scratches to Low, Medium, or High according to the degree of dust and scratches.
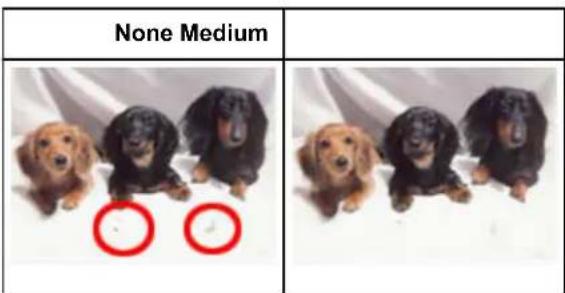
text_image
None MediumCorrecting photos that have faded with time or due to colorcast
Set Fading Correction to Low, Medium, or High according to the degree of fading or colorcast.
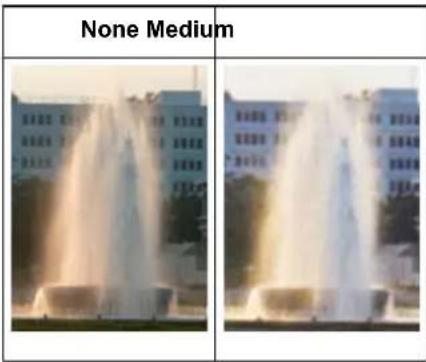
text_image
None MediumReducing graininess
Set Grain Correction to Low, Medium, or High according to the degree of graininess.
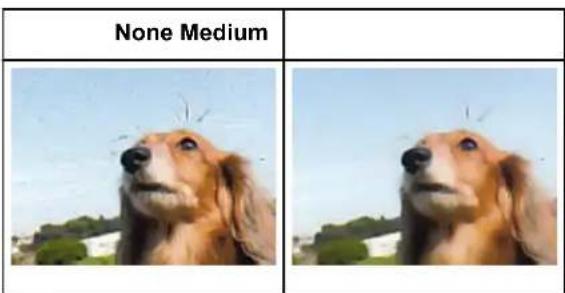
text_image
None MediumCorrecting shadows that appear between pages when scanning open booklets
Set Gutter Shadow Correction to Low, Medium, or High according to the degree of shadows.
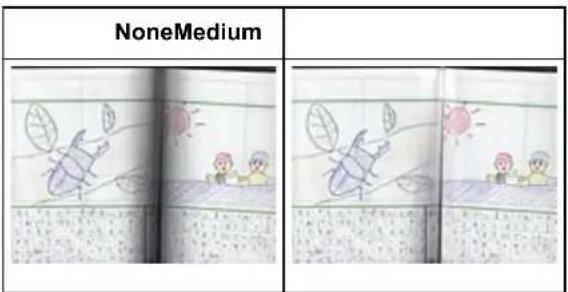
text_image
NoneMediumAdjusting Colors Using a Color Pattern
You can preview color changes and reproduce natural colors by using the color pattern function in ScanGear (scanner driver)'s Basic Mode tab.
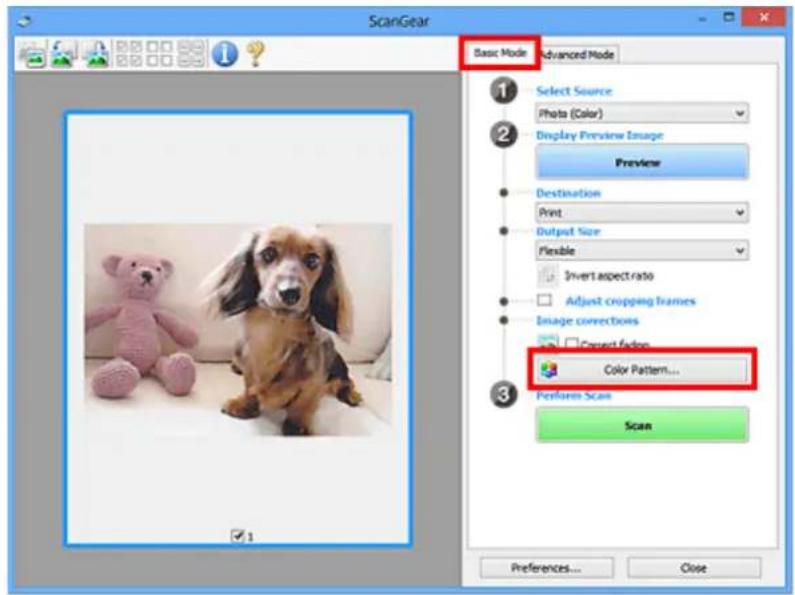
text_image
ScanGear Basic Mode Advanced Mode Select Source Photo (Color) Display Preview Image Preview Destination Print Output Size Flexible Invert aspect ratio Adjust cropping frames Image corrections Correct fade... Color Pattern... Perform Scan Scan Preferences... Close
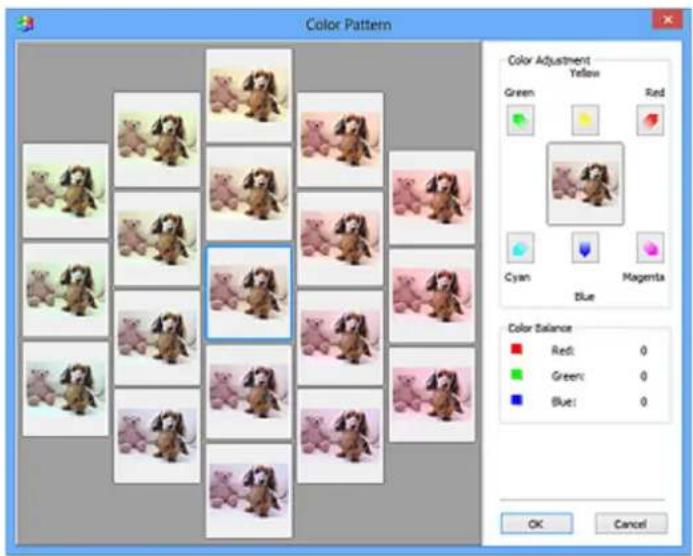
text_image
Color Pattern Color Adjustment Yellow Green Red Cyan Blue Magnets Color Balance Red: 0 Green: 0 Blue: 0 OK CancelColor Adjustment
Correct colors that have faded with time or due to colorcast. "Colorcast" is a phenomenon where a specific color affects the entire picture due to the weather or ambient strong colors.
Click an arrow in Color Adjustment to emphasize the corresponding color.
Cyan & red, magenta & green, and yellow & blue are complementary color pairs (each pair produces a shade of gray when mixed). You can reproduce the natural colors of the scene by reducing the cast color and increasing the complementary color.
It is recommended that you find a portion in the image where it should be white, and adjust the colors so that the portion turns white.
Preview image appears in the center. Preview image colors change as you adjust them.
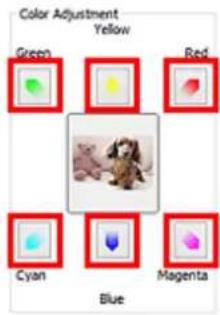
text_image
Color Adjustment Yellow Green Red Cyan Blue MagentaBelow is an example of correcting a bluish image.
Since Blue and Green are too strong, click the Yellow and Magenta arrows to correct.
| Before After | |
 |  |
Note
- Color adjustments are applied only to the cropping frames (scan areas) or the frame selected in thumbnail view.
- You can select multiple frames or cropping frames by clicking them while pressing the Ctrl key.
- You can also select a color tone from the color pattern displayed on the left of the Color Pattern screen.
- You can also use this function to add a specific tint to an image. Increase the magenta to add a warm tint, and increase the blue to add a cool tint.
Adjusting Saturation and Color Balance
You can brighten colors that have faded with time or due to colorcast by using (Saturation/Color Balance) in ScanGear (scanner driver)'s Advanced Mode tab.
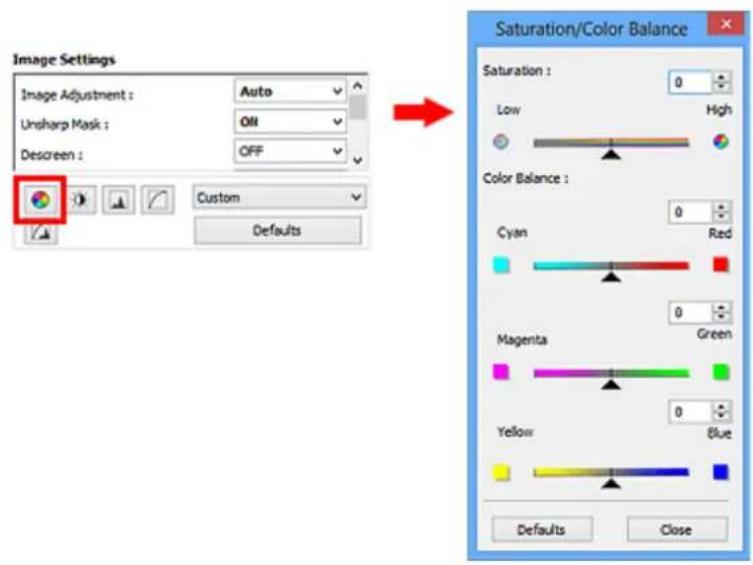
text_image
Image Settings Image Adjustment : Auto Unsharp Mask : ON Descreen : OFF Custom Defaults Saturation/Color Balance Saturation : 0 Low High Color Balance : Cyan Red Magenta Green Yellow Blue Defaults Close
Note
- Click Defaults to reset all adjustments in the current window.
Saturation
Adjust the image's saturation (vividness). You can brighten colors that have faded with time, etc.
Move ▲ (Slider) under Saturation to the left to decrease the saturation (darken the image), and to the right to increase the saturation (brighten the image). You can also enter a value (-127 to 127).
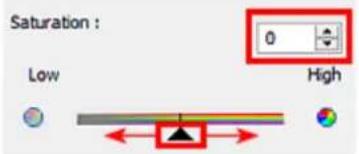
text_image
Saturation : 0 Low HighSaturation decreased Original image Saturation increased
natural_image
Close-up of pale yellow flowers with green foliage in the background (no text or symbols visible)
natural_image
Close-up of yellow and orange flowers with green foliage in the background (no text or symbols)
natural_image
Close-up of vibrant yellow and orange flowers with green foliage (no text or symbols)
Note
- The natural color tone of the original image may be lost if you increase saturation too much.
Color Balance
Adjust images that have a colorcast. "Colorcast" is a phenomenon where a specific color affects the entire picture due to the weather or ambient strong colors.
Move ▲Slider) under Color Balance to the left or right to emphasize the corresponding color.
Cyan & Red
Magenta & Green
Yellow & Blue
These are complementary color pairs (each pair produces a shade of gray when mixed). You can reproduce the natural colors of the scene by reducing the cast color and increasing the complementary color.
It is usually difficult to correct the image completely by adjusting only one color pair. It is recommended that you find a portion in the image where it should be white, and adjust all three color pairs so that the portion turns white.
You can also enter a value (-127 to 127).
Below is an example of an image in which the "Cyan & Red" pair has been adjusted.
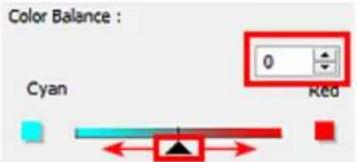
text_image
Color Balance : Cyan Red
text_image
Cyan is increased Red is increasedAdjusting Brightness and Contrast
You can adjust images that are too dark or bright, or too flat due to lack of contrast by using (Brightness/Contrast) in ScanGear (scanner driver)'s Advanced Mode tab.
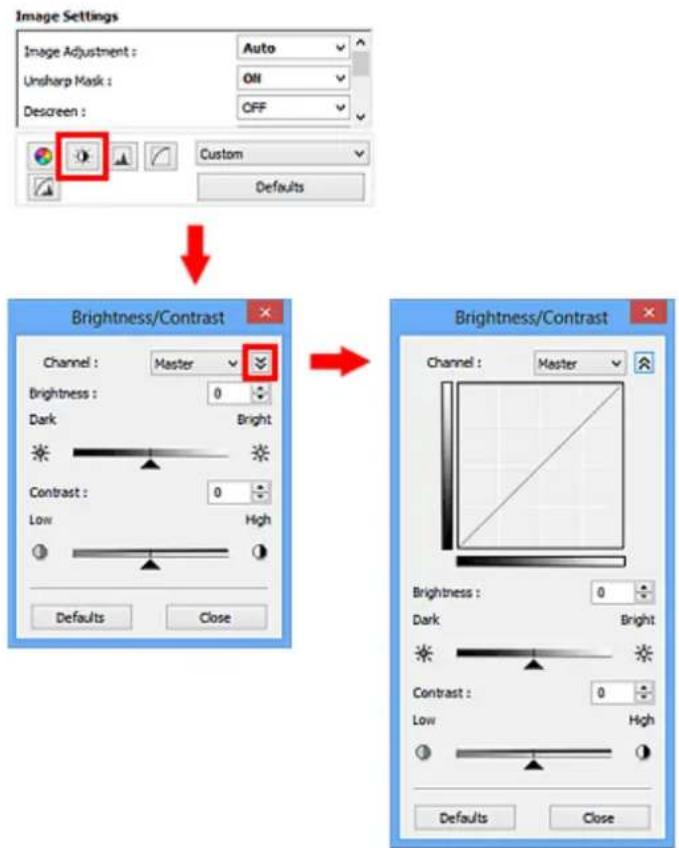
text_image
Image Settings Image Adjustment : Auto Unsharp Mask : Off Descreen : OFF Custom Defaults Brightness/Contrast Channel : Master Brightness : 0 Dark Bright Contrast : 0 Low High Defaults Close Brightness/Contrast Channel : Master Brightness : 0 Dark Bright Contrast : 0 Low High Defaults CloseNote
- Click (Down arrow) to switch to detailed view. Click (Up arrow) to return to the previous view.
- Click Defaults to reset all adjustments in the current window.
Channel
Each dot of an image is a mixture of Red, Green, and Blue in various proportions (gradation). These colors can be adjusted individually as a "channel."
Master
Adjust the Red, Green, and Blue combined.
Red
Adjust the Red channel.
Green
Adjust the Green channel.
Blue
Adjust the Blue channel.
- Only Grayscale will be displayed in Channel when Color Mode is Grayscale.
Brightness
Adjust the image brightness.
Move ▲ (Slider) under Brightness to the left to darken and right to brighten the image. You can also enter a value (-127 to 127).
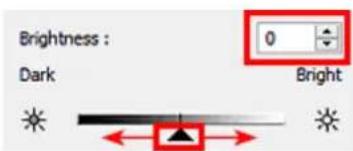
text_image
Brightness : Dark 0 Bright * * * * * * * * * * * * * * * * * * * * * * * * * * * * * * * * * * * * * * * * * * * * * * * * * * * * * * * * * * * * * * * * * * * * * * * * * * * * * * * * * * * * * * * * * * * * * * * * * *Darkened Original image Brightened
natural_image
Close-up of yellow and orange flowers with green leaves (no text or symbols visible)
natural_image
Close-up of vibrant yellow and orange flowers with green foliage (no text or symbols)
natural_image
Close-up of vibrant yellow and orange flowers with green foliage (no text or symbols)Note
- Highlights may be lost if you brighten the image too much, and shadows may be lost if you darken the image too much.
Contrast
"Contrast" is the degree of difference between the brighter and darker parts of an image. Increasing contrast will increase the difference, thus sharpening the image. Decreasing contrast will decrease the difference, thus softening the image.
Move ▲ (Slider) under Contrast to the left to decrease and right to increase the contrast of the image. You can also enter a value (-127 to 127).
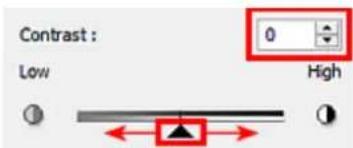
text_image
Contrast : 0 Low HighDecreased contrast Original image Increased contrast
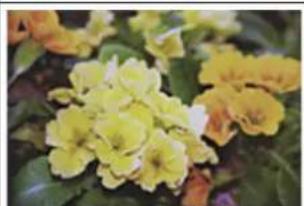
natural_image
Close-up of yellow flowers with green foliage in the background (no text or symbols visible)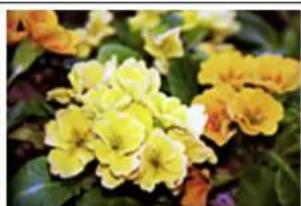
natural_image
Close-up of vibrant yellow and orange flowers with green foliage (no text or symbols visible)
natural_image
Close-up of vibrant yellow and orange flowers with green foliage (no text or symbols)Note
- Increasing the contrast is effective in adding a three-dimensional feel to soft images. However, shadows and highlights may be lost if you increase the contrast too much.
Adjusting Histogram
You can adjust the image color tone by using a graph (histogram) showing brightness distribution, via (Histogram) in ScanGear (scanner driver)'s Advanced Mode tab.
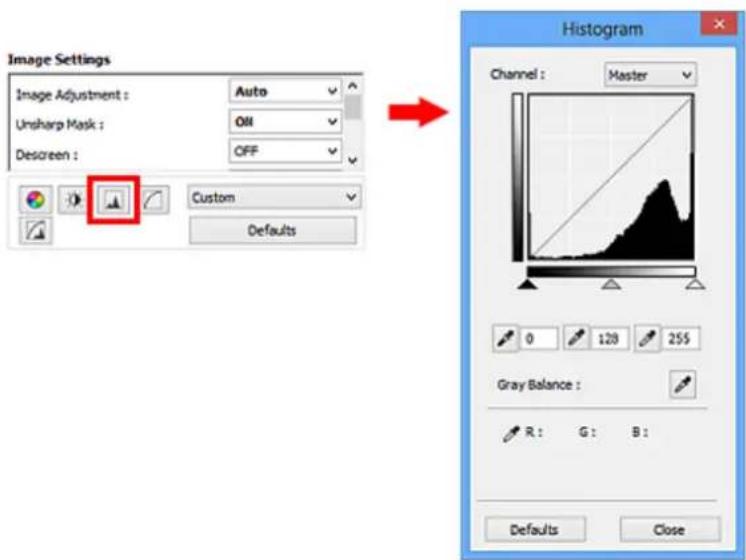
text_image
Image Settings Image Adjustment : Auto Unsharp Mask : Oil Descreen : OFF Custom Defaults Histogram Channel : Master 0 128 255 Gray Balance : R : G : B : Defaults CloseNote
- Click Defaults to reset all adjustments in the current window.
Channel
Each dot of an image is a mixture of Red, Green, and Blue in various proportions (gradation). These colors can be adjusted individually as a "channel."
Master
Adjust the Red, Green, and Blue combined.
Red
Adjust the Red channel.
Green
Adjust the Green channel.
Blue
Adjust the Blue channel.
Note
- Only Grayscale will be displayed in Channel when Color Mode is Grayscale.
Reading Histograms
You can see the histogram of a specified area for each Channel. The higher the histogram peak, the more data is distributed to that level.
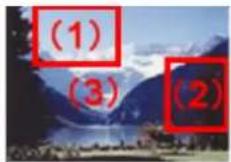
| (1) Bright area (2) Dark area (3) Whole image | ||
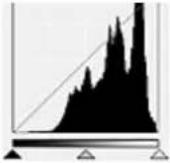 | 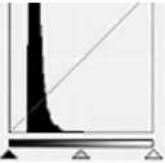 | 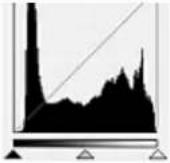 |
| More data is distributed to the high-light side. | More data is distributed to the shadow side. | Data is widely distributed between the highlight and shadow. |
Adjusting Histograms (Using the Slider)
Select a Channel, then move ▲ (Black-point Slider) or ∠(White-point Slider) to specify the level to be set as the shadow or highlight.
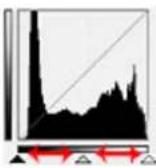
- All parts to the left of (Black-point Slider) will be black (level 0).
- The parts at (Mid-point Slider) will turn to the color exactly between the black-point and white-point.
- All parts to the right of (White-point Slider) will turn white (level 255).
When Image Adjustment is set to anything but None, the adjustments shown below are performed automatically.
Moving the Black-point and White-point Sliders
Move the Black-point Slider or White-point Slider to adjust brightness.
Images with more data distributed to the highlight side
Move the Black-point Slider toward the highlight side.
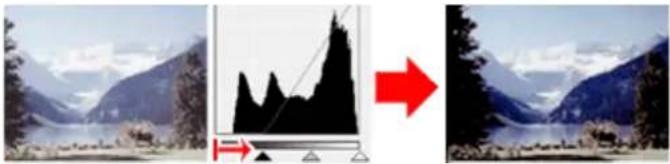
natural_image
Three-panel image showing a mountain landscape with a black histogram and red arrow indicating direction (no text or symbols)Images with more data distributed to the shadow side
Move the White-point Slider toward the shadow side.
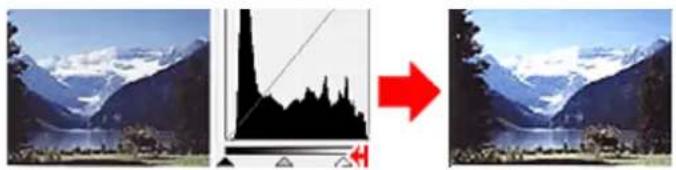
natural_image
Two-panel image showing a mountain landscape with snow-capped peaks and a black silhouette overlay, alongside a red arrow pointing right (no text or symbols)Images with widely distributed data
Move the Black-point Slider toward the highlight side, and White-point Slider toward the shadow side.
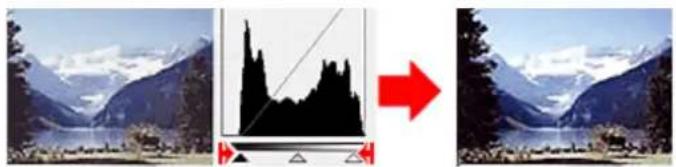
natural_image
Two-panel image showing a black histogram in the first panel and a red arrow pointing right over a snowy mountain landscape (no text or symbols)Moving the Mid-point Slider
Move the Mid-point Slider to specify the level to be set as the middle of the tonal range.
Images with more data distributed to the highlight side
Move the Mid-point Slider toward the highlight side.
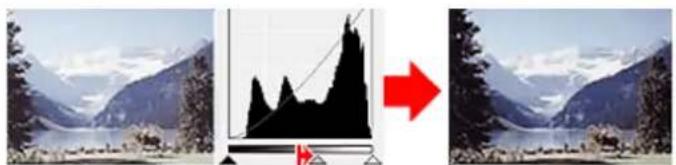
natural_image
Panoramic landscape with snow-capped mountains and a black histogram overlay, showing a red arrow pointing to a peak in the right panel (no text or symbols)Images with more data distributed to the shadow side
Move the Mid-point Slider toward the shadow side.
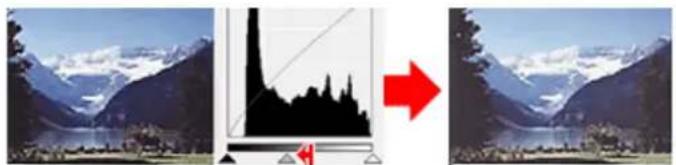
natural_image
Panoramic view of a mountain range with snow-capped peaks, showing a black silhouette and a red arrow indicating direction (no text or symbols)Adjusting Histograms (Using the Droppers)
When you select a Channel and click the Black-point, Mid-point, or White-point Dropper, the mouse pointer on the preview image changes to a dropper. Click a Dropper displayed below the histogram to change the setting.
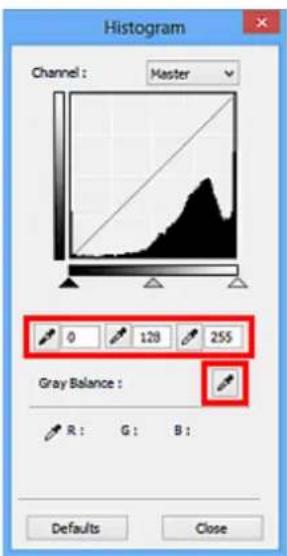
text_image
Histogram Channel : Master 0 128 255 Gray Balance : R: G: B: Defaults Close- The point clicked with (Black-point Dropper) will be the darkest point. You can also enter a value (0 to 245).
- The point clicked with (Mid-point Dropper) will be the middle of the tonal range. You can also enter a value (5 to 250).
- The point clicked with (White-point Dropper) will be the brightest point. You can also enter a value (10 to 255).
- Click (Dropper) for Gray Balance and click the area you want to adjust the color in the preview image.
The clicked point will be set as the achromatic color reference, and the rest of the image is adjusted accordingly. For instance, if snow in a photo appears bluish, click the bluish part to adjust the whole image and reproduce natural colors.
Adjusting Tone Curve
You can adjust the brightness of an image by selecting the type of graph (tone curve) showing the balance of tone input and output, via ☐ (Tone Curve Settings) in ScanGear (scanner driver)'s Advanced Mode tab.

text_image
Image Settings Image Adjustment : Auto Unsharp Mask : Off Descreen : OFF Custom Defaults Tone Curve Settings Channel : Master Select Tone Curve : No correction Defaults CloseNote
- Click Defaults to reset all adjustments in the current window.
Channel
Each dot of an image is a mixture of Red, Green, and Blue in various proportions (gradation). These colors can be adjusted individually as a "channel."
Master
Adjust the Red, Green, and Blue combined.
Red
Adjust the Red channel.
Green
Adjust the Green channel.
Blue
Adjust the Blue channel.
Note
- Only Grayscale will be displayed in Channel when Color Mode is Grayscale.
Reading Tone Curves
With ScanGear, scanning images via a scanner is the input, and displaying to a monitor is the output. "Tone Curve" shows the balance of tone input and output for each Channel.
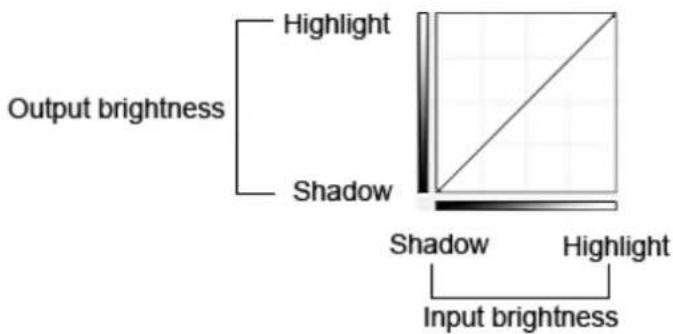
text_image
Output brightness Highlight Shadow Shadow Input brightness HighlightAdjusting Tone Curve
In Select Tone Curve, select a tone curve from No correction, Overexposure, Underexposure, High contrast, Reverse the negative/positive image, and Edit custom curve.
No correction (No adjustment)
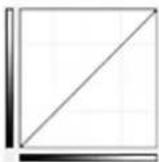
Overexposure (Convex curve)
The midtone data of the input side is stretched toward the highlight of the output side, resulting in a bright-toned image when viewed on a monitor.
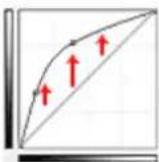
Underexposure (Concave curve)
The midtone data of the input side is stretched toward the shadow of the output side, resulting in a dark-toned image when viewed on a monitor.
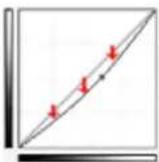
High contrast (S curve)
The highlight and shadow of the input side are enhanced, resulting in a high-contrast image.
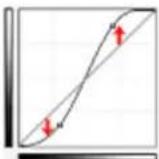
Reverse the negative/positive image (Downward-sloping line)
The input and output sides are reversed, resulting in a negative-positive inverted image.
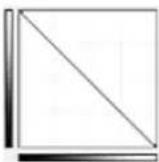
Edit custom curve
You can drag specific points on the Tone Curve to freely adjust the brightness of the corresponding areas.
Setting Threshold
You can sharpen text in a document or reduce show-through in newspapers by adjusting the threshold level via (threshold) in ScanGear (scanner driver)'s Advanced Mode tab.
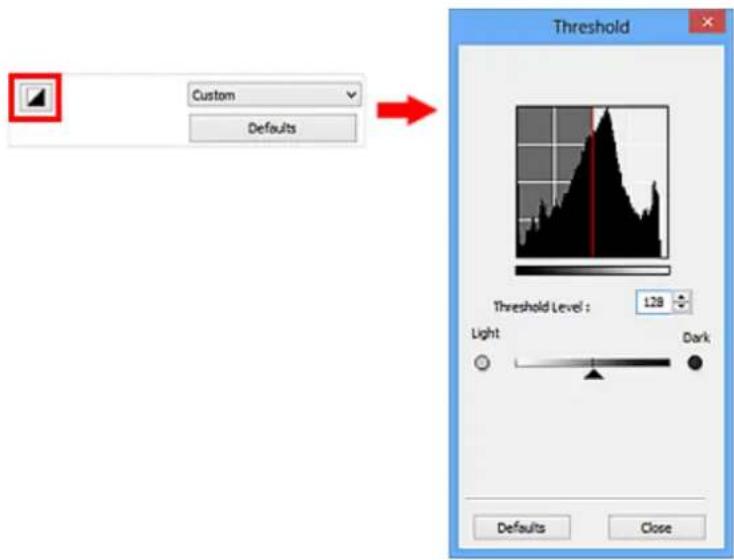
text_image
Custom Defaults Threshold Threshold Level : 128 Light Dark Defaults CloseNote
- This function is available when Color Mode is Black and White.
- Click Defaults to reset all adjustments in the current window.
Adjusting Threshold
The brightness of color and grayscale images is expressed in a value between 0 and 255. However, in creating black and white images, all colors are mapped to either black (0) or white (255). "Threshold" is the borderline value that determines a color as black or white.
Move ▲Slider) to the right to increase the threshold value and thus increase the black areas. Move the slider to the left to decrease the value and thus increase the white areas. You can also enter a value (0 to 255).
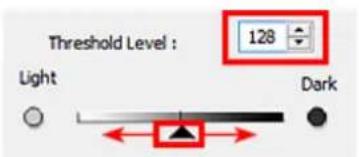
text_image
Threshold Level : 128 Light DarkScanGear (Scanner Driver) Screens
Basic Mode Tab
▶ Advanced Mode Tab
- Input Settings
Output Settings
• Image Settings
• Color Adjustment Buttons
▶ Preferences Dialog Box
Scanner Tab
- Preview Tab
- Scan Tab
• Color Settings Tab
Basic Mode Tab
This mode allows you to scan easily by following the on-screen steps.
This section describes the settings and functions available on the Basic Mode tab.
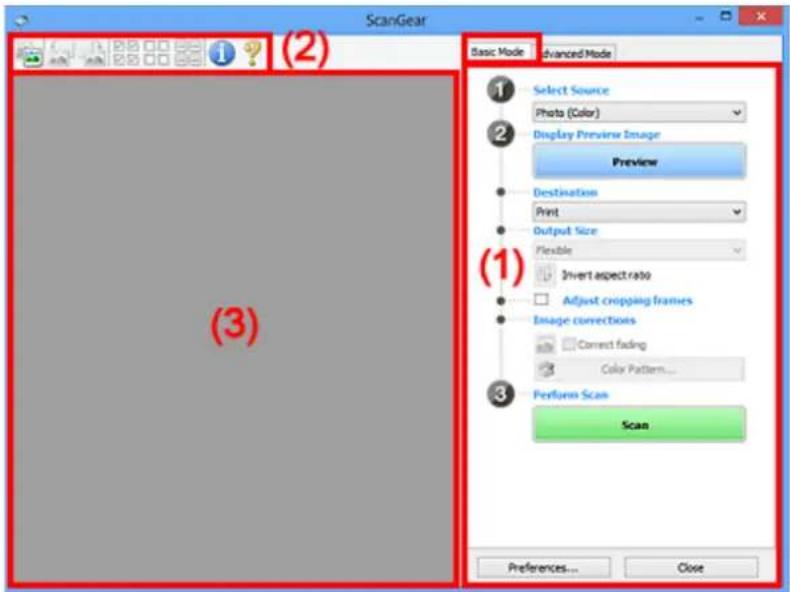
text_image
ScanGear Basic Mode Advanced Mode 1 Select Source Photo (Color) 2 Display Preview Image Preview Destination Print Output Size Flexible Invert aspect ratio Adjust cropping frames Image corrections Correct fading Color Pattern... 3 Perform Scan Scan Preferences... Close(1) Settings and Operation Buttons
→ (2) Toolbar
→ (3) Preview Area
Note
- The displayed items vary by document type and view.
- The preview function is not available when scanning from the ADF (Auto Document Feeder).
(1) Settings and Operation Buttons
Select Source
Photo (Color)
Scan color photos.
Magazine (Color)
Scan color magazines.
Document (Color)
Scan documents in color.
Document (Grayscale)
Scan documents in black and white.
Document (Color) ADF Simplex
Scan documents from the ADF in color.
Document (Grayscale) ADF Simplex
Scan documents from the ADF in black and white.
Document (Color) ADF Duplex (only for models supporting ADF duplex scanning)
Scan both sides of documents from the ADF in color.
Document (Grayscale) ADF Duplex (only for models supporting ADF duplex scanning)
Scan both sides of documents from the ADF in black and white.
Important
- Some applications do not support continuous scanning from the ADF. For details, refer to the application's manual.
Note
- When you select a document type, the unsharp mask function will be active.
- When you select an option other than the ADF types, the image adjustment function which adjusts images based on the document type will also be active.
- If you select Magazine (Color), the descreen function will be active.
Display Preview Image
Preview
Performs a trial scan.
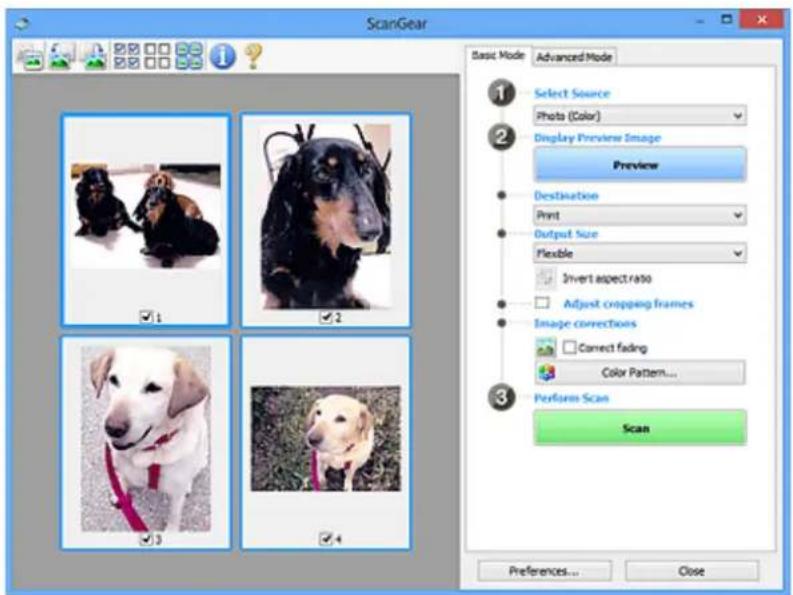
text_image
ScanGear Basic Mode Advanced Mode 1 Select Source Photo (Color) 2 Display Preview Image Preview Destination Print Output Size Flexible Invert aspect ratio Adjust cropping frames Image corrections Correct fading Color Pattern... 3 Perform Scan Scan Preferences... CloseNote
- When using the machine for the first time, scanner calibration starts automatically. Wait a while until the preview image appears.
Destination
Select what you want to do with the scanned image.
Select this to print the scanned image on a printer.
Image display
Select this to view the scanned image on a monitor.
OCR
Select this to use the scanned image with OCR software.
"OCR software" is software that converts text scanned as an image into text data that can be edited in word processors and other programs.
Output Size
Select an output size.
Output size options vary by the item selected in Destination.
Flexible
Allows you to freely adjust the cropping frames (scan areas).
In thumbnail view:
Drag the mouse over a thumbnail to display a cropping frame. When a cropping frame is displayed, the portion within the cropping frame will be scanned. When no cropping frame is displayed, each frame is scanned individually.
In whole image view:
When no cropping frame is displayed, the entire Preview area will be scanned. When a cropping frame is displayed, the portion within the cropping frame will be scanned.
Paper Size (L, A4, etc.)
Select an output paper size. The portion within the cropping frame will be scanned at the size of the selected paper size. You can drag the cropping frame to enlarge/reduce it while maintaining the aspect ratio.
Monitor Size (1024 x 768 pixels, etc.)
Select an output size in pixels. A cropping frame of the selected monitor size will be displayed and the portion within the cropping frame will be scanned. You can drag the cropping frame to enlarge/reduce it while maintaining the aspect ratio.
Add/Delete...
Opens the Add/Delete the Output Size dialog box, in which you can specify custom output sizes. You can select this option when Destination is Print or Image display.
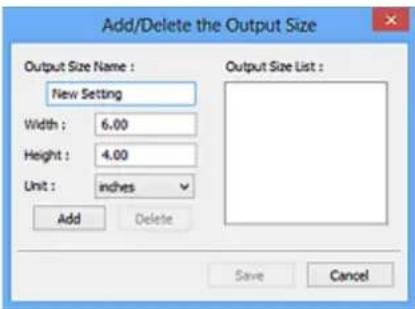
text_image
Add/Delete the Output Size Output Size Name : New Setting Width : 6.00 Height : 4.00 Unit : inches Add Delete Output Size List : Save CancelIn the Add/Delete the Output Size dialog box, you can specify multiple output sizes and save them at one time. Saved items will be registered to the Output Size list and can be selected, along with the predefined items.
Adding:
Enter Output Size Name, Width, and Height, then click Add. For Unit, you can select inches or mm when Destination is Print but you can only select pixels when Destination is Image display. The name of the added size appears in Output Size List. Click Save to save the items listed in Output Size List.
Deleting:
Select the output size you want to delete in Output Size List, then click Delete. Click Save to save the items listed in Output Size List.

Important
- You cannot delete predefined output sizes such as A4 and 1024 x 768 pixels.

Note
- Save up to 10 items.
- An error message appears when you enter a value outside the setting range. Enter a value within the setting range.
Note
- For details on whether or how the cropping frame is initially displayed on a preview image, refer to Cropping Frame on Previewed Images in "Preview Tab" (Preferences dialog box).

Invert aspect ratio
Available when Output Size is set to anything but Flexible.
Click this button to rotate the cropping frame. Click again to return it to the original orientation.
Adjust cropping frames
You can adjust the scan area within the Preview area.
If an area is not specified, the document will be scanned at the document size (Auto Crop). If an area is specified, only the portion in the cropping frame will be scanned.
Adjusting Cropping Frames (ScanGear)
Image corrections
Allows you to apply corrections to images.
Important
- Apply Auto Document Fix and Correct fading are available when Recommended is selected on the Color Settings tab of the Preferences dialog box.
Note
• Available functions vary by the document type selected in Select Source.
Apply Auto Document Fix
Sharpens text in a document or magazine for better readability.
Important
- Scanning may take longer than usual when this checkbox is selected.
- The color tone may change from the source image due to corrections. In that case, deselect the checkbox and scan.
- Correction may not be applied properly if the scan area is too small.
Correct fading
Corrects and scans photos that have faded with time or have a colorcast.
Reduce gutter shadow
Corrects shadows that appear between pages when scanning open booklets.

Important
- For precautions on using this function, refer to "Gutter Shadow Correction."
Color Pattern...
Allows you to adjust the image's overall color. You can correct colors that have faded due to colorcast, etc. and reproduce natural colors while previewing color changes.
Adjusting Colors Using a Color Pattern

Important
- This setting is not available when you select Color Matching on the Color Settings tab of the Preferences dialog box.
Perform Scan
Scan
Starts scanning.

Note
- When scanning starts, the progress will be displayed. Click Cancel to cancel the scan.
Preferences...
Opens the Preferences dialog box in which you can make scan/preview settings.
Close
Closes ScanGear (scanner driver).
(2) Toolbar
You can adjust or rotate preview images. The buttons displayed on the Toolbar vary by view.
In thumbnail view:


In whole image view:


(Thumbnail) / (Whole Image)
Switches the view in the Preview area.
→ (3) Preview Area

(Rotate Left)
Rotates the preview image 90 degrees counter-clockwise.
• The result will be reflected in the scanned image.
- The image returns to its original state when you preview again.

(Rotate Right)
Rotates the preview image 90 degrees clockwise.
- The result will be reflected in the scanned image.
- The image returns to its original state when you preview again.

(Auto Crop)
Displays and adjusts the cropping frame automatically to the size of the document displayed in the Preview area. The scan area is reduced every time you click this button if there are croppable areas within the cropping frame.

(Check All Frames)
Available when two or more frames are displayed.
Selects the checkboxes of the image in thumbnail view.

(Uncheck All Frames)
Available when two or more frames are displayed.
Deselects the checkboxes of the image in thumbnail view.

(Select All Frames)
Available when two or more frames are displayed.
Selects the images in thumbnail view and outlines them in blue.

(Select All Cropping Frames)
Available when two or more cropping frames are specified.
Turns the cropping frames into thick broken lines and applies the settings to all of them.

(Remove Cropping Frame)
Removes the selected cropping frame.

(Information)
Displays the version of ScanGear and the current scan settings (document type, etc.).

(Open Guide)
Opens this page.
(3) Preview Area
This is where a trial image appears after you click Preview. You can also check the results of the settings (image corrections, color adjustments, etc.) made in "(1) Settings and Operation Buttons."
When (Thumbnail) is displayed on the Toolbar:
Cropping frames are specified according to the document size, and thumbnails of scanned images are displayed. Only the images with the checkbox selected will be scanned.

natural_image
Four separate photos of dog breeds with different expressions and tags, no visible text or symbolsNote
- When multiple images are previewed, different outlines indicate different selection status.
- Focus Frame (thick blue outline): The displayed settings will be applied.
- Selected Frame (thin blue outline): The settings will be applied to the Focus Frame and Selected Frames simultaneously. You can select multiple images by clicking them while pressing the Ctrl key.
- Unselected (no outline): The settings will not be applied.
- Double-click a frame to zoom in on the image. Click (Frame Advance) at the bottom of the screen to display the previous or next frame. Double-click the frame again to return the display to its non-magnified state.

When (Whole Image) is displayed on the Toolbar:
Items on the Platen are scanned and displayed as a single image. All portions in the cropping frames will be scanned.
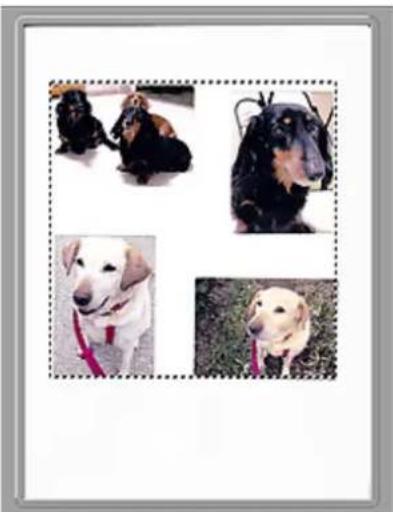
natural_image
Four separate photos of dog breeds and dogs, each with a different color and tag (black, brown, white, pink) against a plain background.Note
- You can specify the cropping frame on the displayed image. In thumbnail view, you can only create one cropping frame per image. In whole image view, you can create multiple cropping frames.
→ Adjusting Cropping Frames (ScanGear)
Related Topic
→ Scanning in Basic Mode
Advanced Mode Tab
This mode allows you to make advanced scan settings such as the color mode, output resolution, image brightness, and color tone.
This section describes the settings and functions available on the Advanced Mode tab.
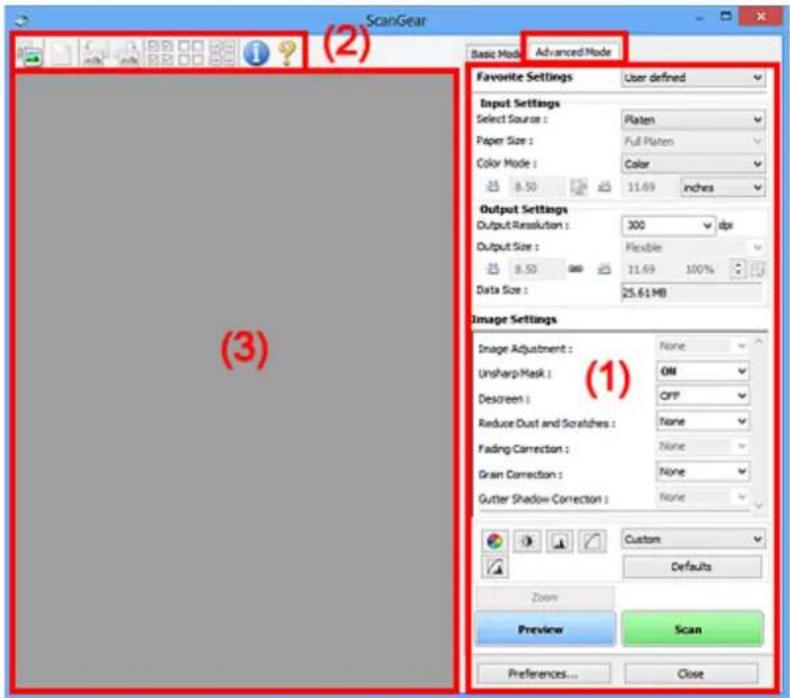
text_image
(2) ScanGear Basic Mode Advanced Mode Favorite Settings User defined Input Settings Select Source : Platen Paper Size : Full Platen Color Mode : Color 8.50 11.69 inches Output Settings Output Resolution : 300 dpi Output Size : Flexible 8.50 11.69 100% Data Size : 25.61 MB Image Settings Image Adjustment : None Unsharp Mask : ON Descreen : OFF Reduce Dust and Scratches : None Fading Correction : None Grain Correction : None Gutter Shadow Correction : None Custom Defaults Zoom Preview Scan Preferences... Close(1) Settings and Operation Buttons
→ (2) Toolbar
→ (3) Preview Area
Note
- The displayed items vary by document type and view.
- The preview function is not available when scanning from the ADF (Auto Document Feeder).
(1) Settings and Operation Buttons
Favorite Settings
You can name and save a group of settings (Input Settings, Output Settings, Image Settings, and Color Adjustment Buttons) on the Advanced Mode tab, and load it as required. It is convenient to save a group of settings if you will be using it repeatedly. You can also use this to reload the default settings.
Select Add/Delete... from the pull-down menu to open the Add/Delete Favorite Settings dialog box.
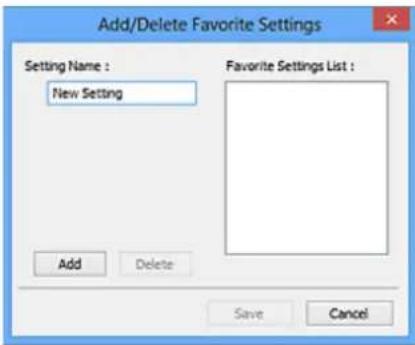
text_image
Add/Delete Favorite Settings Setting Name : New Setting Favorite Settings List : Add Delete Save CancelEnter Setting Name and click Add; the name appears in Favorite Settings List.
When you click Save, the item appears in the Favorite Settings list and can be selected, along with the predefined items.
To delete an item, select it in Favorite Settings List and click Delete. Click Save to save the settings displayed in Favorite Settings List.
Note
- You can set Add/Delete... in Favorite Settings after preview.
- Save up to 10 items.
Input Settings
Specify the input settings such as the document type and size.
Output Settings
Specify the output settings such as the output resolution and size.
Image Settings
Enable/disable various image correction functions.
Color Adjustment Buttons
Fine corrections to the image brightness and color tones can be made including adjustments to the image's overall brightness or contrast and adjustments to its highlight and shadow values (histogram) or balance (tone curve).
Zoom
Zooms in on a frame, or zooms in on the image in the area specified with a cropping frame (scan area). When zoomed in, Zoom changes to Undo. Click Undo to return the display to its non-magnified state.
In thumbnail view:
When multiple images are displayed in thumbnail view, clicking this button zooms in on the selected
frame. Click (Frame Advance) at the bottom of the screen to display the previous or next frame.
Note
- You can also zoom in on an image by double-clicking the frame. Double-click the frame again to return the display to its non-magnified state.
In whole image view:
Rescans the image in the area specified with a cropping frame at higher magnification.
Note
- Zoom rescans the document and displays high-resolution image in Preview.

- (Enlarge/Reduce) on the Toolbar zooms in on the preview image quickly. However, the resolution of the displayed image will be low.
Preview
Performs a trial scan.
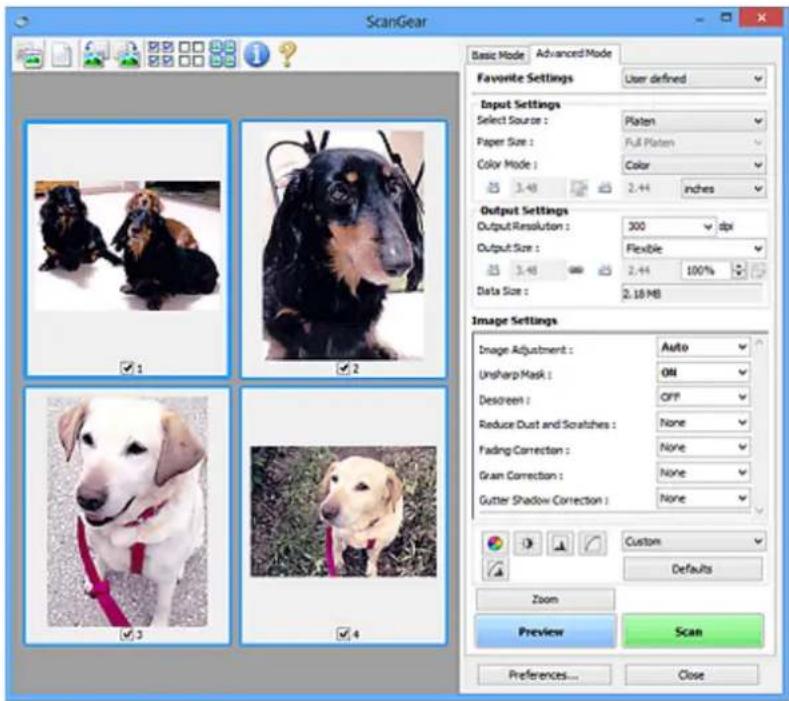
text_image
ScanGear Basic Mode Advanced Mode Favorite Settings User defined Input Settings Select Source : Platen Paper Size : Full Platen Color Mode : Color 2.44 inches Output Settings Output Resolution : 300 dpi Output Size : Flexible 2.44 100% Data Size : 2.18 MB Image Settings Image Adjustment : Auto Unsharp Mask : ON Descreen : OFF Reduce Dust and Scratches : None Fading Correction : None Grain Correction : None Gutter Shadow Correction : None Custom Defaults Zoom Preview Scan Preferences... CloseScan
Starts scanning.
Note
- When scanning starts, the progress will be displayed. Click Cancel to cancel the scan.
- When scanning is completed, a dialog box prompting you to select the next action may appear. Follow the prompt to complete. For details, refer to Status of ScanGear dialog after scanning in Scan Tab (Preferences dialog box).
- It will take time to process the images if the total size of the scanned images exceeds a certain size. In that case, a warning message appears; it is recommended that you reduce the total size. To continue, scan in whole image view.
Preferences...
Opens the Preferences dialog box in which you can make scan/preview settings.
Close
Closes ScanGear (scanner driver).
(2) Toolbar
You can adjust or rotate preview images. The buttons displayed on the Toolbar vary by view.
In thumbnail view:

text_image
Row of software icons including file, document, image editing, checklist, checkboxes, and a question mark, likely representing user interface elements.In whole image view:

text_image
Row of software icons including document, image editing, search, photo editing, and information tools
(Thumbnail) / (Whole Image)
Switches the view in the Preview area.
→ (3) Preview Area

(Clear)
Deletes the preview image from the Preview area.
It also resets the Toolbar and color adjustment settings.

(Crop)
Allows you to specify the scan area by dragging the mouse.

(Move Image)
Allows you to drag the image until the part you want to see is displayed when an image enlarged in the Preview area does not fit in the screen. You can also move the image using the scroll bars.

(Enlarge/Reduce)
Allows you to zoom in on the Preview area by clicking the image. Right-click the image to zoom out.

(Rotate Left)
Rotates the preview image 90 degrees counter-clockwise.
• The result will be reflected in the scanned image.
- The image returns to its original state when you preview again.

(Rotate Right)
Rotates the preview image 90 degrees clockwise.
• The result will be reflected in the scanned image.
- The image returns to its original state when you preview again.

(Auto Crop)
Displays and adjusts the cropping frame automatically to the size of the document displayed in the Preview area. The scan area is reduced every time you click this button if there are croppable areas within the cropping frame.

(Check All Frames)
Available when two or more frames are displayed.
Selects the checkboxes of the image in thumbnail view.

(Uncheck All Frames)
Available when two or more frames are displayed.
Deselects the checkboxes of the image in thumbnail view.

(Select All Frames)
Available when two or more frames are displayed.
Selects the images in thumbnail view and outlines them in blue.

(Select All Cropping Frames)
Available when two or more cropping frames are specified.
Turns the cropping frames into thick broken lines and applies the settings to all of them.

(Remove Cropping Frame)
Removes the selected cropping frame.

(Information)
Displays the version of ScanGear and the current scan settings (document type, etc.).

(Open Guide)
Opens this page.
(3) Preview Area
This is where a trial image appears after you click Preview. You can also check the results of the settings (image corrections, color adjustments, etc.) made in "(1) Settings and Operation Buttons."

When (Thumbnail) is displayed on the Toolbar:
Cropping frames are specified according to the document size, and thumbnails of scanned images are displayed. Only the images with the checkbox selected will be scanned.
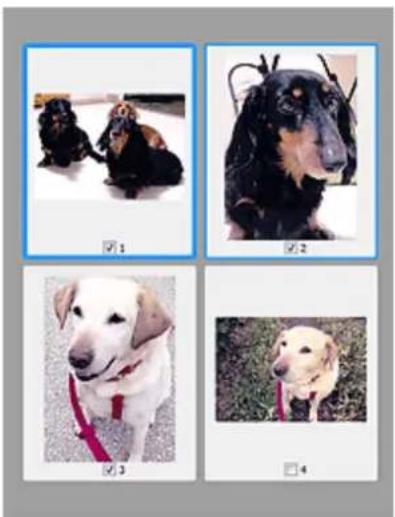
natural_image
Four separate photos of dog breeds and dogs with numbered labels (1–4), no visible text or symbols.
Note
- When multiple images are previewed, different outlines indicate different selection status.
- Focus Frame (thick blue outline): The displayed settings will be applied.
- Selected Frame (thin blue outline): The settings will be applied to the Focus Frame and Selected Frames simultaneously. You can select multiple images by clicking them while pressing the Ctrl key.
- Unselected (no outline): The settings will not be applied.

When (Whole Image) is displayed on the Toolbar:
Items on the Platen are scanned and displayed as a single image. All portions in the cropping frames will be scanned.
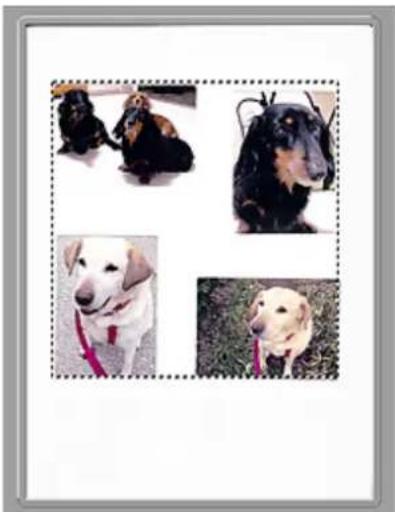
natural_image
Four dog photos with different breeds and lifeguard details, no visible text or symbols
Note
- You can specify the cropping frame on the displayed image. In thumbnail view, you can only create one cropping frame per image. In whole image view, you can create multiple cropping frames.
Adjusting Cropping Frames (ScanGear)
Related Topic
→ Scanning in Advanced Mode
→ Scanning Multiple Documents from the ADF (Auto Document Feeder) in Advanced Mode
Input Settings
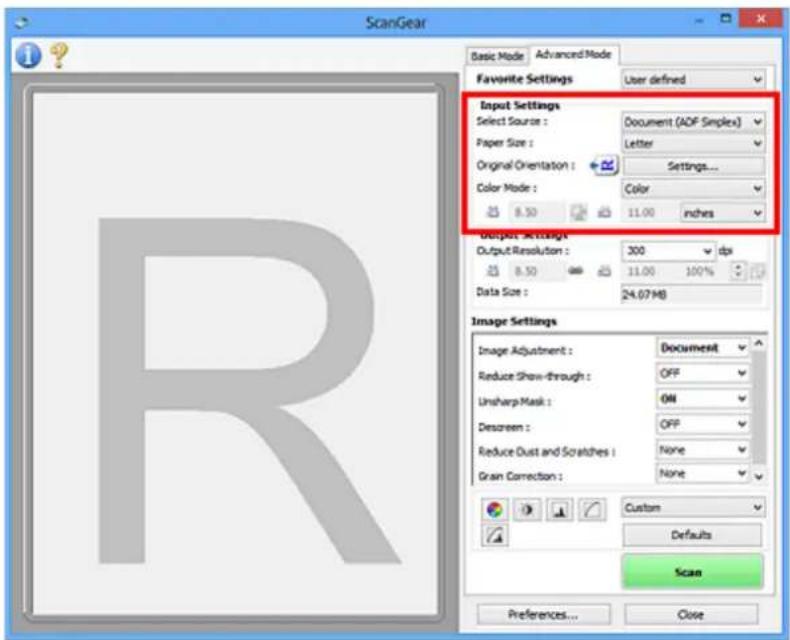
text_image
ScanGear Basic Mode Advanced Mode Favorite Settings User defined Input Settings Select Source : Document (ADF Simplex) Paper Size : Letter Original Orientation : Settings... Color Mode : Color 8.50 11.00 inches Output Settings Output Resolution : 300 dpi 8.50 11.00 100% Data Size : 24.07MB Image Settings Image Adjustment : Document Reduce Show-through : OFF Unsharp Mask : ON Descreen : OFF Reduce Dust and Scratches : None Grain Correction : None Custom Defaults Scan Preferences... CloseInput Settings allows you to set the following items:
Select Source
The type of document to be scanned is displayed. To scan from the Platen, select Platen; to scan from the ADF (Auto Document Feeder), select Document (ADF Simplex) or Document (ADF Duplex).
Important
- Some applications do not support continuous scanning from the ADF. For details, refer to the application's manual.
Note
- You can select Document (ADF Duplex) when using a model supporting ADF duplex scanning.
Paper Size
Select the size of the document to be scanned. This setting is available in whole image view only.
When you select a size, the Preview area size changes accordingly.
Important
- Some applications have a limit to the amount of scan data they can receive. Available scan range is as follows.
• 21000 pixels x 30000 pixels or less
- If you change Paper Size after previewing, the preview image will be deleted.
Note
- If you are not sure which size you should select for Paper Size, set Paper Size to Full Platen, then measure the size of the document and enter the values into (Width) and (Height).
Original Orientation
Set the orientation and stapling side of the documents to scan from the ADF.
Click Settings... to open the Orientation dialog box.
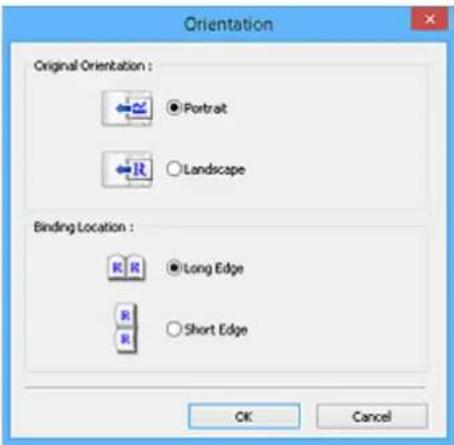
text_image
Orientation Original Orientation : ● Portrait ○ Landscape Binding Location : ● Long Edge ○ Short Edge OK Cancel
Important
- The Orientation dialog box can only be opened when Select Source is Document (ADF Simplex) or Document (ADF Duplex).
- Binding Location is displayed when using a model supporting ADF duplex scanning.
- Binding Location cannot be specified when Select Source is Document (ADF Simplex).
Color Mode
Select how to scan the document.
Color
Select this mode to scan color documents or to create color images. This mode renders the image in 256 levels (8 bit) of R(ed), G(reen), and B(lue).
Grayscale
Select this mode to scan black and white photos or to create black and white images. This mode renders the image in 256 levels (8 bit) of black and white.
Black and White
Select this mode to scan photos and documents in black and white. This mode renders the image in black and white. The contrast in the image is divided at certain levels (threshold level) into black
and white and is rendered in two colors. The threshold level can be set with (threshold).
Input Size
In thumbnail view, the cropped document size is displayed after preview.
In whole image view, the Paper Size is displayed before preview, and the cropping frame (scan area) size is displayed after preview.
You can adjust the cropping frame size by entering the values into (Width) and (Height).
Click (Change Aspect Ratio) and change it to (Keep Aspect Ratio) to maintain the aspect ratio when you specify the cropping frame size.
Important
- Input size settings are available only when Output Size in Output Settings is Flexible. If you select a size other than Flexible, a cropping frame calculated from Output Size and Output Resolution is displayed, and its aspect ratio is fixed.
Note
- The values you can enter will be within the range of the selected document size. The minimum size is 96 pixels x 96 pixels when Output Resolution is 600 dpi, scaled at 100 %.
- When Auto Crop is performed in whole image view, the aspect ratio will not be maintained since the size will be prioritized.
- Refer to "Adjusting Cropping Frames (ScanGear)" for details on cropping frames.
Output Settings
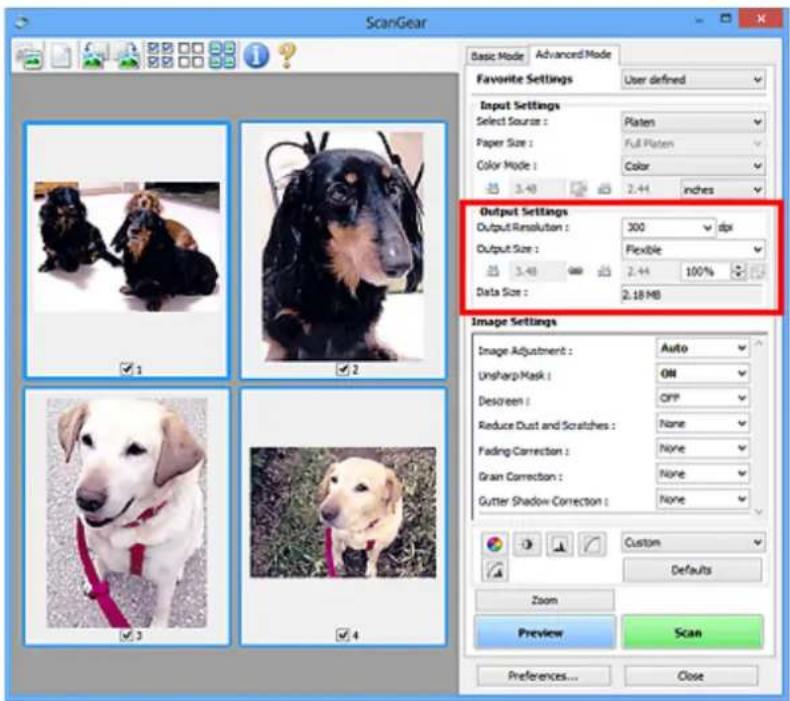
text_image
ScanGear Basic Mode Advanced Mode Favorite Settings User defined Input Settings Select Source : Platen Paper Size : Full Platen Color Mode : Color 2.44 inches Output Settings Output Resolution : 300 dpi Output Size : Flexible 100% Data Size : 2.18 MB Image Settings Image Adjustment : Auto Unsharp Mask : ON Descreen : OFF Reduce Dust and Scratches : None Fading Correction : None Grain Correction : None Gutter Shadow Correction : None Custom Defaults Zoom Preview Scan Preferences... CloseOutput Settings allows you to set the following items:
Output Resolution
Select the resolution to scan at.
The higher the resolution (value), the more detail in your image.
Select a resolution from the options displayed by clicking the button, or enter a value in 1 dpi increments.
Refer to "Resolution" for your model from Home of the Online Manual for details.
When Select Source is Platen:
You can enter a value within the range of 25 dpi to 19200 dpi.
When Select Source is Document (ADF Simplex) or Document (ADF Duplex):
You can enter a value within the range of 25 dpi to 600 dpi.
Output Size
Select an output size.
Select Flexible to set custom sizes or select a size for printing or displaying. Select Add/Delete... to set custom size and save it as a new output size option.
Flexible
You can specify the output resolution and scale, and adjust the cropping frames (scan areas).
In thumbnail view:
Drag the mouse over a thumbnail to display a cropping frame. When a cropping frame is displayed, the portion within the cropping frame will be scanned. When no cropping frame is displayed, each frame is scanned individually.
In whole image view:
When no cropping frame is displayed, the entire Preview area will be scanned. When a cropping frame is displayed, the portion within the cropping frame will be scanned.
Note
- To enlarge/reduce the scanned image, enter values into (Width) and (Height) in Output Settings or specify a value (by 1% ) for % . Although the maximum value available for % depends on the Output Resolution, it can be specified for up to 19200 dpi (the maximum available output resolution).
Paper Size (L, A4, etc.) & Monitor Size (1024 x 768 pixels, etc.)
(Width), (Height), and scale cannot be specified. The preview image will be cropped according to the selected output size and resolution. The portion within the cropping frame will be scanned at the size of the selected paper/monitor size. You can drag the cropping frame to enlarge, reduce, or move it while maintaining the aspect ratio.
Add/Delete...
Opens the Add/Delete the Output Size dialog box, in which you can specify custom output sizes.
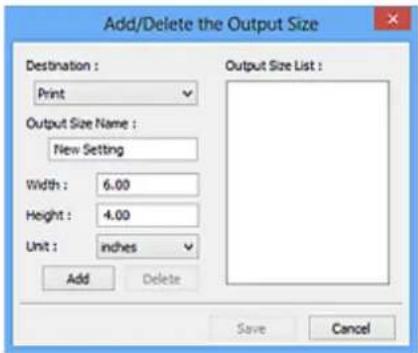
text_image
Add/Delete the Output Size Destination : Print Output Size List : New Setting Width : 6.00 Height : 4.00 Unit : inches Add Delete Save CancelIn the Add/Delete the Output Size dialog box, you can specify multiple output sizes and save them at one time. Saved items will be registered to the Output Size list and can be selected, along with the predefined items.
Adding:
Select Print or Image display for Destination, then enter Output Size Name, Width, and Height, then click Add. For Unit, you can select inches or mm when Destination is Print but you can only select pixels when Destination is Image display. The name of the added size appears in Output Size List. Click Save to save the items listed in Output Size List.
Deleting:
Select the output size you want to delete in Output Size List, then click Delete. Click Save to save the items listed in Output Size List.
Important
- You cannot delete predefined output sizes such as A4 and 1024 x 768 pixels.
Note
- Save up to 10 items for each destination.
- An error message appears when you enter a value outside the setting range. Enter a value within the range displayed in the message.
Note
- Refer to "Adjusting Cropping Frames (ScanGear)" for details on cropping frames.
- For details on whether or how the cropping frame is initially displayed on a preview image, refer to Cropping Frame on Previewed Images in "Preview Tab" (Preferences dialog box).

(Switch Aspect Ratio)
Available when Output Size is set to anything but Flexible.
Click this button to rotate the cropping frame. Click again to return it to the original orientation.
Data Size
The data size when scanned with the current settings is displayed.
Note
- When the data size exceeds a certain size, the value appears in red. In that case, a warning message appears when you click Scan. It is recommended that you adjust the settings to reduce Data Size. To continue, scan in whole image view.
Image Settings
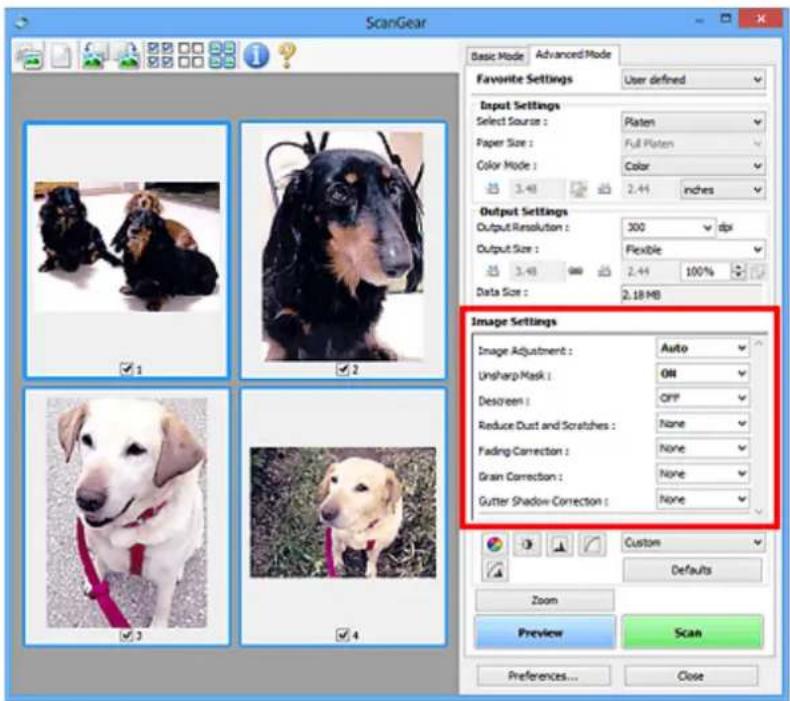
text_image
ScanGear Basic Mode Advanced Mode Favorite Settings User defined Input Settings Select Source : Platen Paper Size : Full Platen Color Mode : Color 3.48 2.44 inches Output Settings Output Resolution : 300 dpi Output Size : Flexible 3.48 2.44 100% Data Size : 2.18 MB Image Settings Image Adjustment : Auto Unsharp Mask : ON Descreen : OFF Reduce Dust and Scratches : None Fading Correction : None Grain Correction : None Gutter Shadow Correction : None Custom Defaults Zoom Preview Scan Preferences... CloseImportant
- Do not apply these functions to images without moire, dust/scratches, or faded colors. The color tone may be adversely affected.
- Image correction results may not be reflected in the preview image.
Note
- Selectable settings depend on Color Mode settings.
- Scanning may take longer than usual when you use Image Settings.
Image Settings allows you to set the following items:
Image Adjustment
When Image Adjustment is set, the brightness of the specified portion of the image is optimized. Images can be adjusted according to the automatically detected document type or the specified document type. The result of the adjustment will be reflected in the entire image.
None
Image Adjustment will not be applied.
Auto
Applies Image Adjustment by automatically detecting the document type. It is recommended that you normally select this setting.
Photo
Applies Image Adjustment suitable for photos.
Magazine
Applies Image Adjustment suitable for magazines.
Document
Applies Image Adjustment suitable for text documents.
Important
- You can set Image Adjustment after preview.
- You can set this setting when Recommended is selected on the Color Settings tab of the Preferences dialog box.
Note
- If the image is not adjusted properly with Auto, specify the document type.
- The color tone may change from the source image due to the Image Adjustment. In that case, set Image Adjustment to None.
Reduce Show-through
Use this function to reduce show-through in duplex documents or lighten the base color in recycled paper and other colored paper when scanning documents.
OFF
Show-through will not be reduced.
ON
Select this to reduce show-through in duplex documents or lighten the base color. It is recommended that you normally select this setting.
Important
- Reduce Show-through can be set when Recommended is selected on the Color Settings tab of the Preferences dialog box and Document or Magazine is selected for Image Adjustment.
Unsharp Mask
Emphasizes the outline of the subjects to sharpen the image when scanning photos.
OFF
Unsharp Mask will not be applied.
ON
Emphasizes the outline of the subjects to sharpen the image. It is recommended that you normally select this setting.
Descreen
Printed photos and pictures are displayed as a collection of fine dots. "Moire" is a phenomenon where uneven gradation or a stripe pattern appears when such photos or pictures printed with fine dots are scanned. Descreen is the function for reducing this moire effect.
OFF
Moire will not be reduced.
ON
Reduces moire. It is recommended that you normally select this setting.
Note
- Even if Descreen is set to ON, some moire effects may remain if Unsharp Mask is set to ON. In that case, set Unsharp Mask to OFF.
Reduce Dust and Scratches
Scanned photos may contain white dots caused by dust or scratches. Use this function to reduce such noise.
None
Dust and scratches will not be reduced.
Low
Select this to reduce small dust particles and scratches. Large ones may remain.
Medium
It is recommended that you normally select this setting.
High
Select this to reduce large dust particles and scratches; however, evidence of the reduction process may remain or delicate parts of the image may be removed.

Important
- This function may not be effective for some types of photos.

Note
- It is recommended that you select None when scanning printed materials.
Fading Correction
Use this function to correct photos that have faded with time or have a colorcast. "Colorcast" is a phenomenon where a specific color affects the entire picture due to the weather or ambient strong colors.
None
Fading Correction will not be applied.
Low
Select this to correct a small amount of fading and colorcast.
Medium
It is recommended that you normally select this setting.
High
Select this to correct a large amount of fading and colorcast. This can affect the tone of the image.

Important
- You can set Fading Correction after preview.
- You can set this setting when Recommended is selected on the Color Settings tab of the Preferences dialog box.
- Correction may not be applied properly if the scan area is too small.
Grain Correction
Use this function to reduce graininess (roughness) in photos taken with high-speed or sensitized film.
None
Graininess will not be reduced.
Low
Select this when the photo is slightly grainy.
Medium
It is recommended that you normally select this setting.
High
Select this when the photo is very grainy. This can affect the gradation and sharpness of the image.

Important
- Correction may not be applied properly if the scan area is too small.
Gutter Shadow Correction
Use this function to correct shadows that appear between pages when scanning open booklets.
When you set the Gutter Shadow Correction setting in the preview image, the result will be reflected.
Preview the effects before scanning, as results vary depending on the type of document and how it is pressed.
Unclear or blurred text/lines caused by curved pages are not corrected.
None
Gutter shadow will not be corrected.
Low
Select this when the effect level is too strong with the medium setting.
Medium
It is recommended that you normally select this setting.
High
Select this when the effect level is too weak with the medium setting.

Important
- You can set Gutter Shadow Correction after preview.
- Do not place objects that weigh 4.4 lbs (2.0 kg) or more on the platen. Also, do not press on the document with a force exceeding 4.4 lbs (2.0 kg). If you press heavily, the scanner may not work correctly or you might break the glass.
- Align the document with the edge of the Platen. If not, the shadow will not be corrected properly.
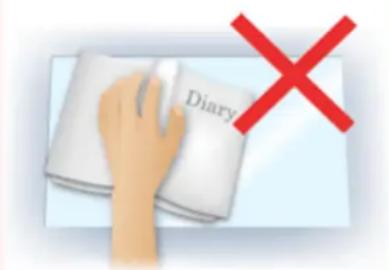
text_image
Diary- Shadows may not be corrected properly depending on the document. If the page background is not white, shadows may not be detected correctly or may not be detected at all.
- While scanning, press down on the spine with the same amount of pressure you used to preview the scan. If the binding part is not even, the shadow will not be corrected properly.
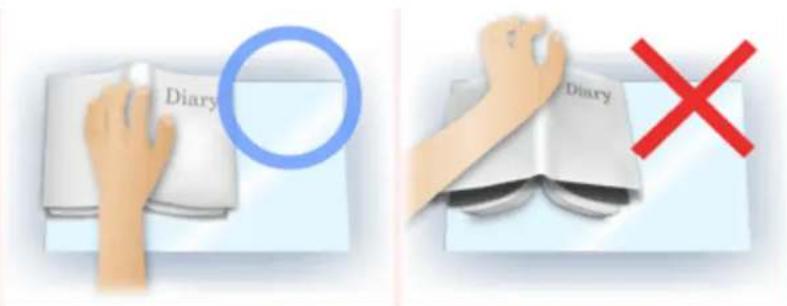
text_image
Diary Diary- How to place the document depends on your model and the document to be scanned.
Note
- Cover the document with black cloth if white spots, streaks, or colored patterns appear in scan results due to ambient light entering between the document and the Platen.
- If the shadow is not corrected properly, adjust the cropping frame (scan area) on the preview image.
Adjusting Cropping Frames (ScanGear)
Color Adjustment Buttons
The Color Adjustment Buttons allow you to make fine corrections to the image brightness and color tones including adjustments to the image's overall brightness or contrast and adjustments to its highlight and shadow values (histogram) or balance (tone curve).
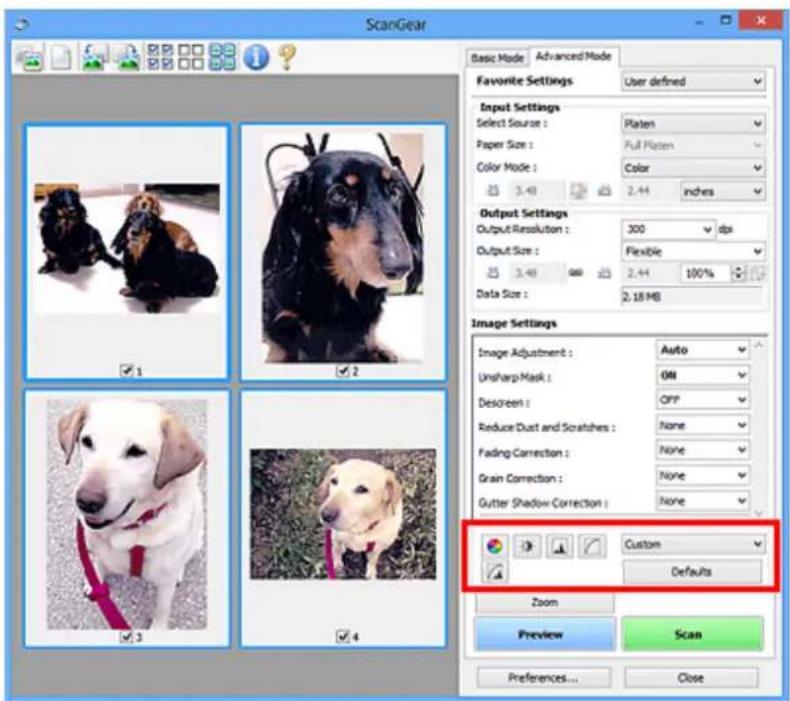
text_image
ScanGear Basic Mode Advanced Mode Favorite Settings User defined Input Settings Select Source : Platen Paper Size : Full Platen Color Mode : Color 2.44 inches Output Settings Output Resolution : 300 dpi Output Size : Flexible 2.44 100% Data Size : 2.18 MB Image Settings Image Adjustment : Auto Unsharp Mask : ON Descreen : OFF Reduce Dust and Scratches : None Fading Correction : None Grain Correction : None Gutter Shadow Correction : None Custom Defaults Zoom Preview Scan Preferences... CloseImportant
- The Color Adjustment Buttons are not available when you select Color Matching on the Color Settings tab of the Preferences dialog box.
Note
- Selectable settings depend on Color Mode settings.
- When you adjust the image via the Color Adjustment Buttons, the results will be reflected in the preview image.
Click a Color Adjustment Button to set the following items:

(Saturation/Color Balance)
Adjust the saturation (vividness) and color tone of the image. Use this function to brighten colors that have faded with time or due to colorcast. "Colorcast" is a phenomenon where a specific color affects the entire picture due to the weather or ambient strong colors.
Adjusting Saturation and Color Balance

(Brightness/Contrast)
Adjust the brightness and contrast of the image. If the image is too dark or too bright, or if the image quality is flat due to lack of contrast, you can adjust the levels of brightness and contrast.
→ Adjusting Brightness and Contrast

(Histogram)
A histogram allows you to see the data concentration at each brightness level of an image. You can specify the brightest level (highlight) and darkest level (shadow) within an image, cut the levels and expand the middle of the tonal range of the image.
Adjusting Histogram

(Tone Curve Settings)
Adjust the brightness of an image by selecting the type of graph (tone curve) showing the balance of tone input and output. You can make fine adjustments to the brightness of a specific area.
Adjusting Tone Curve

(Final Review)
Make a final check of color adjustments. The final synthesized tone curve and the histogram derived from the subsequent image processing will be displayed. There are no settings to make in this screen.
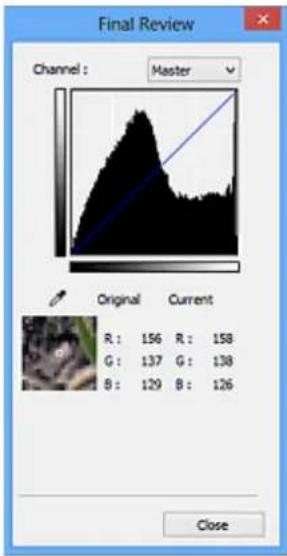
text_image
Final Review Channel : Master Original Current R: 156 R: 158 G: 137 G: 138 B: 129 B: 126 Close- For a color image, select a color in Channel to check either Red, Green, or Blue, or select Master to check three colors together.
- If you place the cursor on the preview image, the portion will be enlarged and its RGB values (only L when Color Mode is Grayscale) before and after the adjustments will be displayed.

(Threshold)
Set the boundary (threshold) at which black and white are divided. By adjusting the threshold level, you can sharpen text in a document or reduce show-through in newspapers.
Setting Threshold
Custom
You can name and save a set of tone curve and threshold settings of the Color Adjustment Buttons.
Select Add/Delete... from the pull-down menu; when Color Mode is set to anything but Black and White, the Add/Delete Tone Curve Settings dialog box opens; when Color Mode is Black and White, the Add/Delete Threshold Settings dialog box opens.
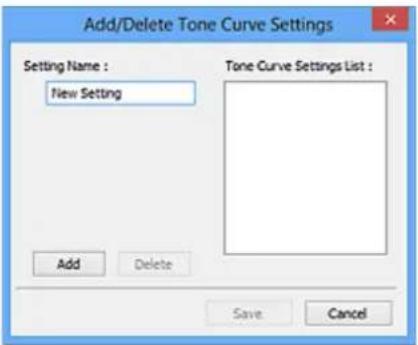
text_image
Add/Delete Tone Curve Settings Setting Name : New Setting Tone Curve Settings List : Add Delete Save CancelEnter Setting Name and click Add; the name appears in Tone Curve Settings List or Threshold Settings List. Click Save to save.
To delete an item, select it in Tone Curve Settings List or Threshold Settings List and click Delete. Click Save to save the settings displayed in Tone Curve Settings List or Threshold Settings List.
You can load and apply the saved tone curve/threshold settings to a preview image. To load the settings, select the saved item from the pull-down menu.
Note
- Save up to 20 items.
Defaults
Reset all adjustments (saturation/color balance, brightness/contrast, histogram, and tone curve).
Preferences Dialog Box
In the Preferences dialog box, you can make advanced settings to ScanGear (scanner driver) functions via the Scanner, Preview, Scan, and Color Settings tabs.
Click Preferences... in the ScanGear screen to open the Preferences dialog box.
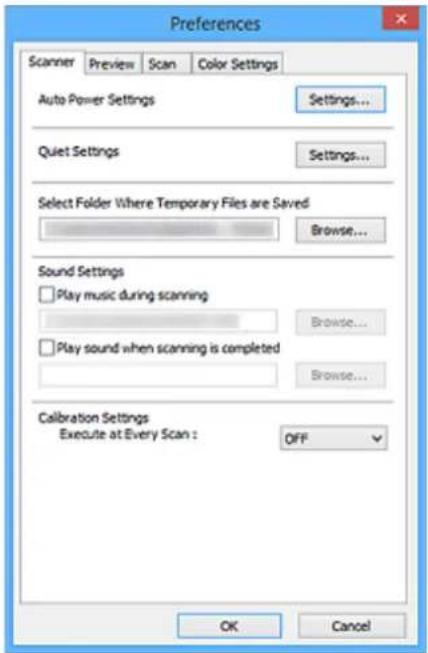
text_image
Preferences Scanner Preview Scan Color Settings Auto Power Settings Settings... Quiet Settings Settings... Select Folder Where Temporary Files are Saved Browse... Sound Settings Play music during scanning Browse... Play sound when scanning is completed Browse... Calibration Settings Execute at Every Scan : OFF OK CancelScanner Tab
Allows you to set the auto power settings, specify the folder in which to save images temporarily, and set the music file to play during or at the end of a scan.
Preview Tab
Allows you to select what to do with Preview when ScanGear is started, how to display cropping frames after previewing images, and the cropping size for thumbnails of scanned documents.
Scan Tab
Allows you to select what to do with ScanGear after scanning image.
Color Settings Tab
Allows you to select how to adjust color, and specify the monitor gamma value.
Scanner Tab
On the Scanner tab, you can specify the following settings.

Important
• Available functions and settings vary depending on your scanner or printer.
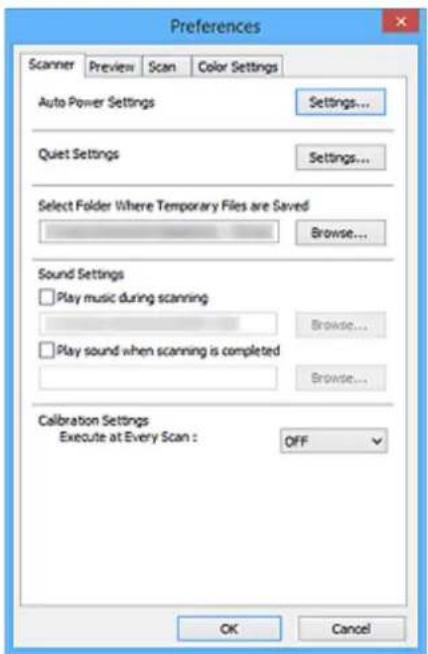
text_image
Preferences Scanner Preview Scan Color Settings Auto Power Settings Settings... Quiet Settings Settings... Select Folder Where Temporary Files are Saved Browse... Sound Settings Play music during scanning Browse... Play sound when scanning is completed Browse... Calibration Settings Execute at Every Scan : OFF OK CancelAuto Power Settings
You can set to turn the machine on or off automatically.
Click Settings... to display the Auto Power Settings dialog box.

Note
- If the machine is off or bi-directional communication is disabled, a message may appear because the computer cannot collect the machine status. In that case, click OK to exit ScanGear (scanner driver).
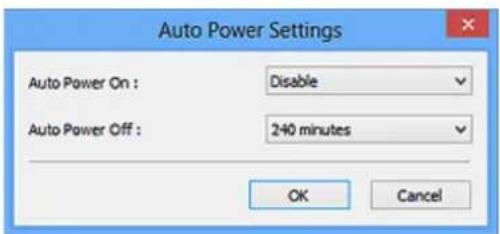
text_image
Auto Power Settings Auto Power On : Disable Auto Power Off : 240 minutes OK CancelAuto Power On
Select Enable to turn on the machine automatically when data is received.
Auto Power Off
Specify the amount of time you want to set from the list. When this time lapses without any data being received, the machine turns off automatically.
Important
When connected to the network, depending on your model, the power does not turn off automatically even if Auto Power Off is set.
Refer to "Function Support List by Model (Auto Power Off)" to check if your model supports the Auto Power Off function.
Quiet Settings
The silent function allows you to reduce the operating noise of this machine. Use this when you wish to reduce the operating noise such as when scanning or printing at night.
Click Settings... to set the quiet mode.
Note
- You can set the quiet mode from the operation panel of the machine, the printer driver, or ScanGear.
No matter how the setting is made, it applies to operations from the operation panel of the machine or when printing/scanning from a computer, etc.
- Scanning or printing may take longer than usual when this function is used.
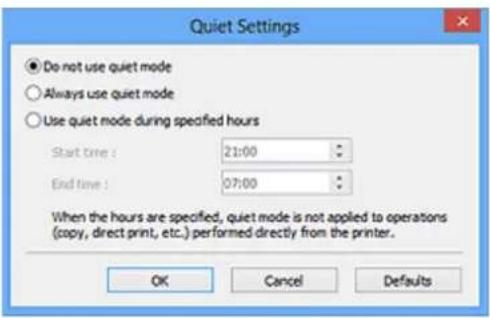
text_image
Quiet Settings ● Do not use quiet mode ○ Always use quiet mode ○ Use quiet mode during specified hours Start time : 21:00 End time : 07:00 When the hours are specified, quiet mode is not applied to operations (copy, direct print, etc.) performed directly from the printer. OK Cancel DefaultsDo not use quiet mode
Select this option when you wish to use the machine with volume of normal operating noise.
Always use quiet mode
Select this option when you wish to reduce the operating noise of the machine.
Use quiet mode during specified hours
Select this option when you wish to reduce the operating noise of the machine during a specified period of time.
Set the Start time and End time during which quiet mode is to be activated.
Important
- The time specified in Start time and in End time must be different.
- If your scanner or printer does not support fax functions, quiet mode is not applied to operations (copy, direct print, etc.) performed directly from the machine even if the hours are specified.
Select Folder Where Temporary Files are Saved
Displays the folder in which to save images temporarily. To change the folder, click Browse... to specify another one.
Sound Settings
You can set the machine to play music during/at the end of a scan.
Select the Play music during scanning or Play sound when scanning is completed checkbox, then click Browse... and specify a sound file.
You can specify the following files.
- MIDI file (*.mid, *.rmi, *.midi)
• Audio file (*.wav, *.aif, *.aiff) - MP3 file (*.mp3)
Calibration Settings
When you set Execute at Every Scan to ON, the scanner will be calibrated every time before previewing and scanning, to reproduce correct color tones in scanned images.

Note
- Even when Execute at Every Scan is set to OFF, the scanner may be calibrated automatically in some cases (such as immediately after you turn the machine on).
- Calibration may take time depending on your computer.
Preview Tab
On the Preview tab, you can specify the following settings.
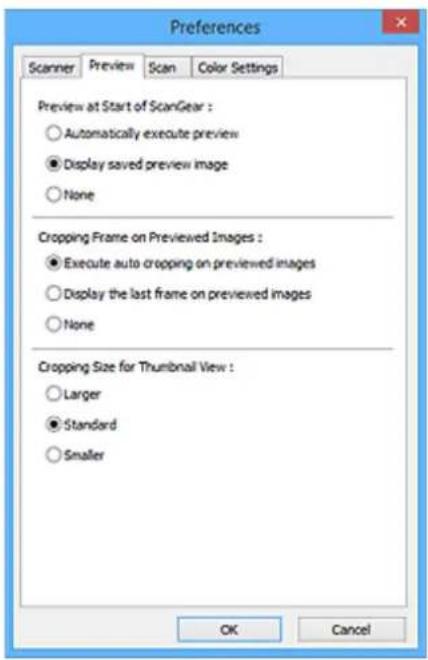
text_image
Preferences Scanner Preview Scan Color Settings Preview at Start of ScanGear : ○ Automatically execute preview ● Display saved preview image ○ None Cropping Frame on Previewed Images : ● Execute auto cropping on previewed images ○ Display the last frame on previewed images ○ None Cropping Size for Thumbnail View : ○ Larger ● Standard ○ Smaller OK CancelPreview at Start of ScanGear
Select what to do with Preview when ScanGear (scanner driver) is started.
Automatically execute preview
ScanGear will automatically start previewing at startup.
Display saved preview image
The previously previewed image will be displayed.
The Color Adjustment Button settings, the Toolbar settings, and the Advanced Mode tab settings are also saved.
None
No preview image will be displayed at startup.
Note
- Select None if you do not want to save the preview image.
Cropping Frame on Previewed Images
Select how to display cropping frames after previewing images.
Execute auto cropping on previewed images
The cropping frame (scan area) will automatically be displayed in the document size after previewing.
Display the last frame on previewed images
A cropping frame of the same size as the last used cropping frame will be displayed after previewing.
None
No cropping frame will be displayed after previewing.
Cropping Size for Thumbnail View
Select the cropping size for thumbnails of scanned documents.
Larger
Displays 105 % (in width and height) of the area displayed for the standard size.
Standard
The standard size.
Smaller
Displays 95 % (in width and height) of the area displayed for the standard size.

Note
- When you change the Cropping Size for Thumbnail View setting, the preview images will be refreshed and cropped to the new size. As the preview images are refreshed, the color adjustments and other settings applied to them are reset.
Scan Tab
On the Scan tab, you can specify the following settings.
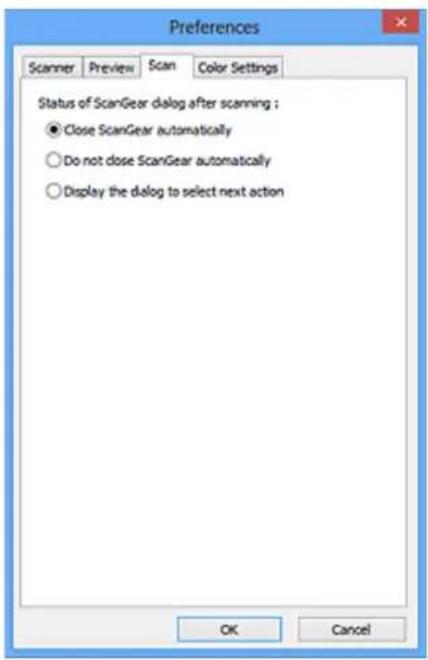
text_image
Preferences Scanner Preview Scan Color Settings Status of ScanGear dialog after scanning ; ● Close ScanGear automatically ○ Do not close ScanGear automatically ○ Display the dialog to select next action OK CancelStatus of ScanGear dialog after scanning
Select what to do with ScanGear (scanner driver) after scanning images.
Close ScanGear automatically
Select this to return to the original application when scanning is completed.
Do not close ScanGear automatically
Select this to return to the ScanGear screen for another scan when scanning is completed.
Display the dialog to select next action
Select this to open a screen and select what to do when scanning is completed.
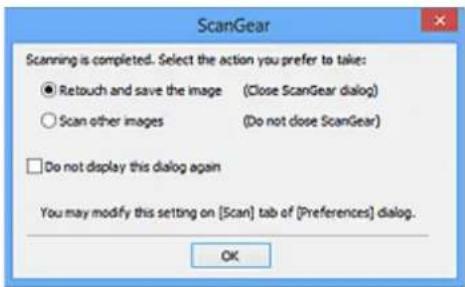
text_image
ScanGear Scanning is completed. Select the action you prefer to take: ● Retouch and save the image (Close ScanGear dialog) ○ Scan other images (Do not close ScanGear) □ Do not display this dialog again You may modify this setting on [Scan] tab of [Preferences] dialog. OKNote
- Even if Do not close ScanGear automatically or Display the dialog to select next action is set, some applications may not support it.
Color Settings Tab
On the Color Settings tab, you can specify the following settings.
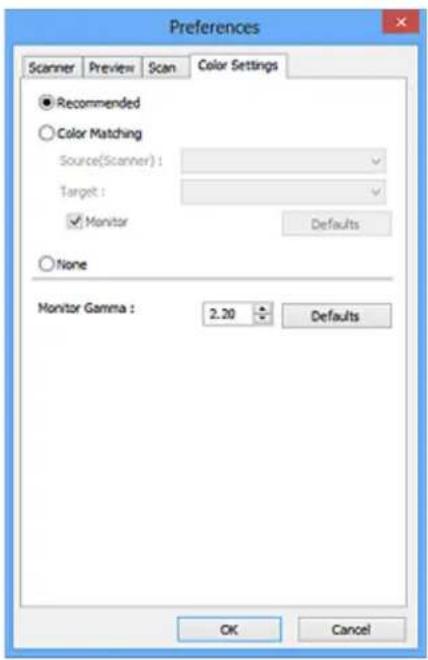
text_image
Preferences Scanner Preview Scan Color Settings Recommended Color Matching Source(Scanner) : Target : ✓ Monitor Defaults None Monitor Gamma : 2.30 Defaults OK CancelColor Adjustment
Select one of the following.
Recommended
Select this to vividly reproduce the tone of a document on the screen. It is recommended that you normally select this setting.
Color Matching
Select this to automatically match the scanner, monitor, and color printer colors, thus reducing time and trouble to manually match the monitor and printer colors.
Source(Scanner)
Select scanner profile.
Target
Select target profile.
Monitor
Select this checkbox to display preview image with optimum correction for monitor.
Defaults
Returns to the default Color Matching settings.
Note
- The Color Adjustment Buttons on the Advanced Mode tab are not available when you select Color Matching.
- This function is available when Color Mode is Color.
None
Select this to disable color correction provided by ScanGear (scanner driver).
Note
- Depending on your scanner or printer, this setting may not be available when scanning from the ADF (Auto Document Feeder).
- You can select one when Color Mode is Color or Grayscale.
- Color Matching is available when ScanGear, monitor, color management-compliant application (such as Adobe Photoshop), and printer are set up correctly.
Refer to the corresponding manual for the monitor, printer, and application settings.
Monitor Gamma
By setting the gamma value of a monitor, you can adjust the input data to the brightness characteristics of the monitor. Adjust the value if your monitor's gamma value does not match the default value set in ScanGear, and the colors of the original image are not accurately reflected in the monitor.
Click Defaults to return to the default Monitor Gamma value (2.20).
Note
- Refer to the manual of your monitor to check its gamma value. If it is not written in the manual, contact the manufacturer.
Positioning Originals (Scanning from Computer)
Learn how to place items on the platen or ADF (Auto Document Feeder) of your scanner or printer. Place items correctly according to the type of item to be scanned. Otherwise, items may not be scanned correctly.

Important
- Do not place objects on the document cover. When you open the document cover, the objects may fall into your scanner or printer, resulting in malfunction.
- Close the document cover when scanning.
- Do not touch the operation panel buttons or LCD (Liquid Crystal Display) when opening/closing the document cover. May result in unintended operation.
→ Placing Items (Platen)
→ Placing Documents (ADF (Auto Document Feeder))
Placing Items (Platen)
Place items as described below to scan by detecting the item type or size automatically.

Important
- When scanning by specifying the paper size in IJ Scan Utility or ScanGear (scanner driver), align an upper corner of the item with the corner at the arrow (alignment mark) of the platen.
- Photos that have been cut to various shapes and items smaller than 1.2 inches (3 cm) square cannot be cropped accurately when scanning.
- Reflective disc labels may not be scanned as expected.
For Photos, Postcards, Business Cards, or BD/DVD/CD


Placing a Single Item:
Place the item face-down on the platen, with 0.4 inch (1 cm) or more space between the edges (diagonally striped area) of the platen and the item. Portions placed on the diagonally striped area cannot be scanned.
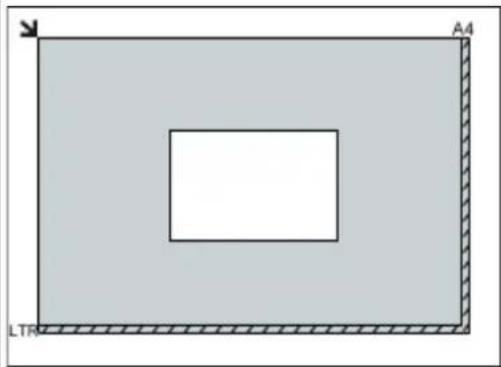
natural_image
Simple geometric diagram showing a rectangle with an inner square and labeled corner points A4 and LTR (no text or symbols within the shapes)For Magazines, Newspapers, or Documents
Place the item face-down on the platen and align an upper corner of the item with the corner at the arrow (alignment mark) of the platen. Portions placed on the diagonally striped area cannot be scanned.
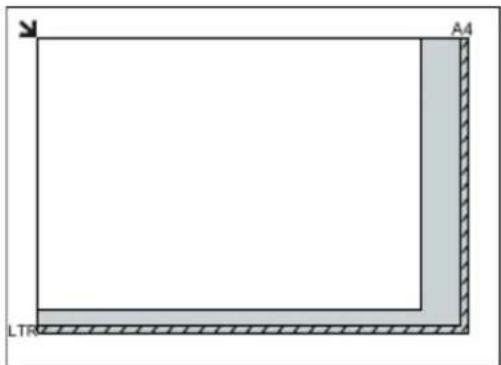
natural_image
Pure geometric diagram with shaded regions and labeled points A4 and LTR (no text or symbols beyond labels)
Important
- Large items (such as A4 size photos) that cannot be placed away from the edges/arrow (alignment mark) of the platen may be saved as PDF files. To save in a format other than PDF, scan by specifying the data format.
Placing Multiple Items:
Allow 0.4 inch (1 cm) or more space between the edges (diagonally striped area) of the platen and items, and between items. Portions placed on the diagonally striped area cannot be scanned.
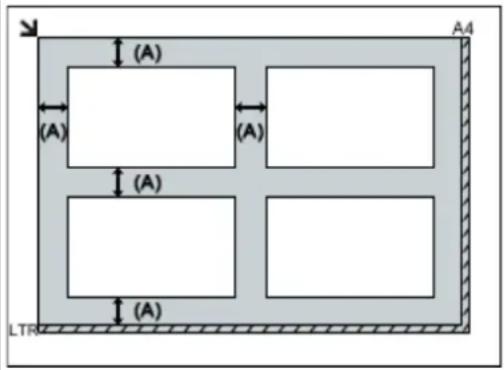
text_image
(A) (A) (A) (A) (A) (A) (A) (LTR)
more than 0.4 inch (1 cm)

Note
- You can place up to 12 items.
- You can place up to four items when the Compress scanned images upon transfer checkbox is selected in the Settings dialog box of IJ Scan Utility.
- With network connection, items may not be scanned correctly when five or more items are placed. In that case, reduce the number of items placed on the platen to four or less, then scan again.
- Positions of slanted items (10 degrees or less) are corrected automatically.

Important
- Refer to "Loading Originals" for your model from Home of the Online Manual for details on the portions in which items cannot be scanned.
Placing Documents (ADF (Auto Document Feeder))

Important
- Do not leave thick items on the platen when scanning from the ADF. May result in paper jam.
- Place and align documents of the same size when scanning two or more documents.
-
Refer to "Originals You Can Load" for your model from Home of the Online Manual for details on supported document sizes when scanning from the ADF.
-
Open the document tray.
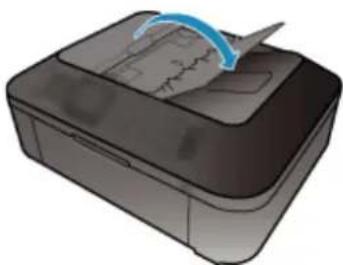
natural_image
Illustration of a printer with a blue arrow indicating print direction (no text or symbols)- Place the documents on the ADF, then adjust the document guides to the width of the documents.
Insert the documents face-up until a beep sounds.
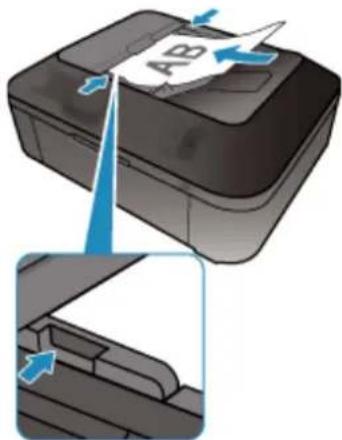
text_image
ABNote
- When scanning duplex documents, place the front sides facing up. They will not be scanned in the correct page order if placed the other way around.
Adjusting Cropping Frames (ScanGear)
"Cropping" is the act of selecting the area you want to keep in an image and discarding the rest when scanning it.
On the Basic Mode tab and Advanced Mode tab, you can specify cropping frames (scan areas) on the image(s) displayed in the Preview area of the screen.
When you perform a scan, each area specified with a cropping frame will be scanned as a separate image.
Note
- In whole image view, you can specify multiple cropping frames on the preview image.
- Refer to "Adjusting Cropping Frames in the Image Stitch Window" for your model from Home of the Online Manual for how to adjust cropping frames with IJ Scan Utility.
Initial Cropping Frame
In thumbnail view:
No cropping frame is specified. You can drag the mouse over a thumbnail to specify a cropping frame.
In whole image view:
An active cropping frame is automatically specified around the preview image. You can drag the cropping frame in the Preview area to specify the area.
Note
- You can change the auto crop setting in the Preferences dialog box. Refer to Cropping Frame on Previewed Images in "Preview Tab" for details.
Cropping Frame Types
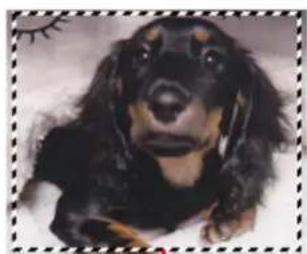
natural_image
Close-up photo of a black and brown dachshoe dog (no text or symbols visible)1
(1)
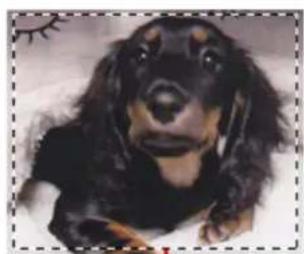
natural_image
Close-up photo of a black and brown dog (no text or symbols visible)(2)
(1) Thick cropping frame (rotating or stationary)
Represents a selected cropping frame. Appears only in whole image view. You can select multiple cropping frames by clicking them while pressing the Ctrl key. Output size, image corrections, and other settings on the Basic Mode tab or Advanced Mode tab will be applied to all the selected cropping frames.
(2) Thin cropping frame
In thumbnail view:
Output size, image corrections, and other settings on the Basic Mode tab or Advanced Mode tab will be applied.
In whole image view:
Represents an unselected cropping frame. The settings on the Basic Mode tab or Advanced Mode tab will not be applied.
Adjusting a Cropping Frame
The cursor will change into (Arrow) when it is positioned over a cropping frame. If you click and drag the mouse in the direction of the arrow, the cropping frame will expand or contract accordingly.
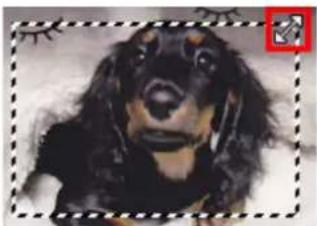
natural_image
Close-up photo of a black and brown dog with floppy ears (no text or symbols visible)The cursor will change into (Crosshair Arrow) when it is positioned within a cropping frame. Click and drag the mouse to move the entire cropping frame.
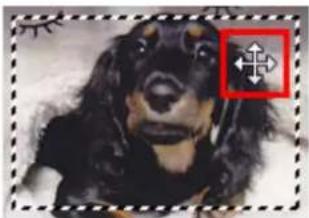
natural_image
Close-up of a black and white dog's face with a red square overlay containing a cross symbol (no readable text or symbols)Note
- On the Advanced Mode tab, you can specify the cropping frame size by entering the values into (Width) and (Height) in Input Settings.
- You can rotate a cropping frame 90 degrees by clicking (Switch Aspect Ratio). However, (Switch Aspect Ratio) is not available when Output Size is Flexible.


Creating Multiple Cropping Frames
In thumbnail view:
You can only create one cropping frame per image.
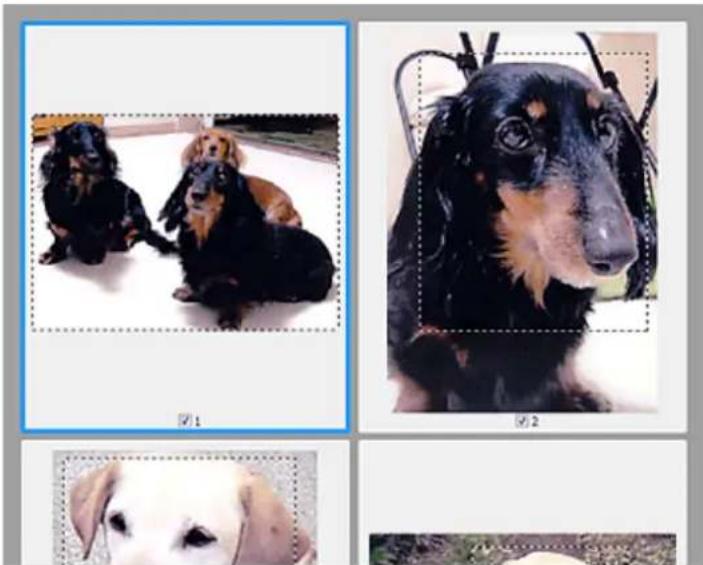
natural_image
Collage of four photos showing different dog breeds: two black-and-brown sitting, one black-and-brown with large eyes, and two white sheep (no text or symbols)In whole image view:
Click and drag the mouse in a space outside the existing cropping frame to create a new cropping frame in the Preview area. The new cropping frame will be the active cropping frame, and the old cropping frame will be the unselected cropping frame.
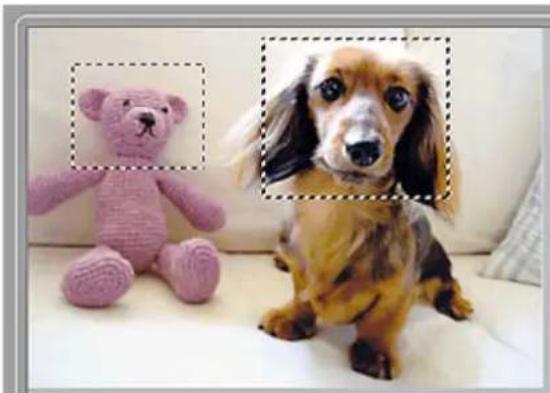
natural_image
A pink teddy bear and a small brown dog sitting together on a couch, with no visible text or symbols.You can create multiple cropping frames and apply different scan settings to each cropping frame.
You can also select multiple cropping frames by clicking them while pressing the Ctrl key.
If you select multiple cropping frames and change the settings on a tab at the right of ScanGear, the settings will be applied to all the selected cropping frames.
When you create a new cropping frame, it retains the settings of the latest cropping frame.
Note
- Create up to 12 cropping frames.
- Scanning takes longer than usual when multiple cropping frames are selected.
Deleting Cropping Frames
In thumbnail view:
To delete a cropping frame, click an area outside the cropping frame on an image.
In whole image view:
To delete a cropping frame, select it and click (Remove Cropping Frame) on the Toolbar.
Alternatively, press the Delete key.
When there are multiple cropping frames, all the selected cropping frames (active cropping frame and selected cropping frames) are deleted simultaneously.
General Notes (Scanner Driver)
ScanGear (scanner driver) is subject to the following restrictions. Keep these points in mind when using it.
Scanner Driver Restrictions
- When using the NTFS file system, the TWAIN data source may not be invoked. This is because the TWAIN module cannot be written to the winnt folder for security reasons. Contact the computer's administrator for help.
- Some computers (including laptops) connected to the machine may not resume correctly from standby mode. In that case, restart the computer.
- Do not connect two or more scanners or multifunction printers with scanner function to the same computer simultaneously. If multiple scanning devices are connected, you cannot scan from the operation panel of the machine and also may experience errors while accessing the devices.
-
Scanning may fail if the computer has resumed from sleep or standby mode. In that case, follow these steps and scan again.
-
Turn off the machine.
- Exit ScanGear, then disconnect the USB cable from the computer and reconnect it.
- Turn on the machine.
- ScanGear cannot be opened in multiple applications at the same time. Within an application, ScanGear cannot be opened for the second time when it is already open.
- Be sure to close the ScanGear window before closing the application.
- When using a network compatible model by connecting to a network, the machine cannot be accessed from multiple computers at the same time.
- When using a network compatible model by connecting to a network, scanning takes longer than usual.
- Make sure that you have adequate disk space available when scanning large images at high resolutions. For example, at least 300 MB of free space is required to scan an A4 document at 600 dpi in full-color.
- ScanGear and WIA driver cannot be used at the same time.
- Do not enter the computer into sleep or hibernate state during scanning.
Applications with Restrictions on Use
- If you start Media Center included in Windows XP Media Center Edition 2005, you may not be able to scan using the operation panel of the machine. In that case, restart the computer.
- You cannot scan images with Media Center included in Windows XP Media Center Edition 2005. Scan with other applications such as IJ Scan Utility.
- Some applications may not display the TWAIN user interface. In that case, refer to the application's manual and change the settings accordingly.
- Some applications do not support continuous scanning of multiple documents. In some cases, only the first scanned image is accepted, or multiple images are scanned as one image. For such applications, do not scan multiple documents from the ADF (Auto Document Feeder).
-
To import scanned images into Microsoft Office 2000, first save them using IJ Scan Utility, then import the saved files from the Insert menu.
-
When scanning Platen size images into Microsoft Office 2003 (Word, Excel, PowerPoint, etc.), click Custom Insert in the Insert Picture from Scanner or Camera screen. Otherwise, images may not be scanned correctly.
- When scanning images into Microsoft Office 2007/Microsoft Office 2010 (Word, Excel, PowerPoint, etc.), use Microsoft Clip Organizer.
- Images may not be scanned correctly in some applications. In that case, increase the operating system's virtual memory and retry.
- When image size is too large (such as when scanning large images at high resolution), your computer may not respond or the progress bar may remain at 0 % depending on the application. In that case, cancel the action (for example by clicking Cancel on the progress bar), then increase the operating system's virtual memory or reduce the image size/resolution and retry. Alternatively, scan the image via IJ Scan Utility first, then save and import it into the application.
Other Scanning Methods
▶ Scanning with WIA Driver
Scanning with WIA Driver
You can scan an item from a WIA (Windows Image Acquisition)-compliant application.
The procedure varies depending on the application. The following procedures are examples only.
Refer to the application's manual for details.

Important
- Some applications do not support continuous scanning from the ADF (Auto Document Feeder). Refer to the application's manual for details.
- Follow these steps to enable scanning over a network.
- Windows 10/Windows 8.1/Windows 8:
- Right-click Start menu, and then select File Explorer > Network.
- In Network menu of displayed screen, select Add devices and printers.
- In screen for adding device, select XXX_MAC address (where "XXX" is model name), and then click Next.
• Windows 7/Windows Vista:
- Follow the procedure below to open Network.
- Windows 7: From Start menu, select Computer > Network.
- Windows Vista: From Start menu, select Network.
- Right-click XXX_MAC address (where "XXX" is model name) in the displayed screen, then select Install.
The setting may have been completed already depending on your environment. In that case, Uninstall appears.
Scanning with WIA Driver 2.0
The following is an example of scanning using "Windows Fax and Scan."
- Place the item on the platen or ADF.
→ Positioning Originals (Scanning from Computer)
- Select New on the File menu of "Windows Fax and Scan," then click Scan....
The scan setting screen appears.

Note
- If you have more than one scanner or printer, a scanner selection screen may appear. Double-click the scanner you want to use.
- For USB connection: Canon XXX series (where "XXX" is the model name)
-
For network connection: XXX series_MAC address (where "XXX" is the model name)
-
Specify the settings.
Scanner
The currently set product name is displayed. To change the scanner, click Change... and select the product you want to use.
Profile
Select Photo (Default) or Documents according to the type of item to be scanned. To save a new Profile, select Add profile.... You can specify the details in the Add New Profile dialog box.
Source
Select a scanner type. To scan from the platen, select Flatbed. To scan from the ADF, select Feeder (Scan one side).
Paper size
Select the paper size. Paper size can be set only when Source is Feeder (Scan one side).
Color format
Select the color mode in which to scan the item.
File type
Select a data format from JPEG, BMP, PNG, and TIFF.
Resolution (DPI)
Enter the resolution. Specify a value between 50 dpi and 600 dpi.
→ Resolution
Note
- When using the scanner or printer with network connection, the following resolutions can be specified. 150 dpi / 300 dpi / 600 dpi
Brightness
Move the slider to adjust the brightness. Move it to the left to darken and right to brighten the image. You can also enter a value (-100 to 100).
Contrast
Move the slider to adjust the contrast. Moving it to the left will decrease the contrast of the image, thus softening the image. Moving it to the right will increase the contrast of the image, thus sharpening the image. You can also enter a value (-100 to 100).
Preview or scan images as separate files
Select this checkbox to preview or scan multiple images as separate files.
Important
- When using the scanner or printer with network connection, you cannot specify Brightness, Contrast, and Preview or scan images as separate files.
4. Click Preview to preview the image.
The preview image appears on the right.
Important
- With network connection, scan without preview when scanning documents from the ADF. If you preview, place the document again and scan.
If there is document left in the ADF after previewing, press the OK button on the operation panel and remove the document.
5. Click Scan.
Scanning starts, then the scanned image appears in the application.
Scanning with WIA Driver 1.0
The following is an example of scanning using "Paint."
1. Place the item on the platen or ADF.
→ Positioning Originals (Scanning from Computer)
2. Click From scanner or camera from the File menu of Paint. (Select the command to scan an item in the application.)
Note
- If you have more than one scanner or printer, a scanner selection screen may appear. Double-click the scanner you want to use.
- For USB connection: Canon XXX series (where "XXX" is the model name)
- For network connection: XXX series_MAC address (where "XXX" is the model name)
3. Select the paper source and type of picture according to the item to be scanned.
To scan from the platen, select Flatbed for Paper source. To scan from the ADF, select Document Feeder.
Select the type of picture from Color picture, Grayscale picture, Black and white picture or text, and Custom Settings.
Note
- When using the scanner or printer with network connection, the options for the type of picture may differ from those displayed with USB connection.
- To scan with the values previously set in Adjust the quality of the scanned picture, select Custom Settings.
- Selecting Document Feeder for Paper source enables you to select Page size.
4. Click Adjust the quality of the scanned picture and set the preferences as required.
Brightness
Move the slider to adjust the brightness. Move it to the left to darken and right to brighten the image. You can also enter a value (-127 to 127).
Contrast
Move the slider to adjust the contrast. Moving it to the left will decrease the contrast of the image, thus softening the image. Moving it to the right will increase the contrast of the image, thus sharpening the image. You can also enter a value (-127 to 127).
Resolution (DPI)
Enter the resolution. Specify a value between 50 dpi and 600 dpi.
→ Resolution
Note
- When using the scanner or printer with network connection, the following resolutions can be specified. 150 dpi / 300 dpi / 600 dpi
Picture type
Select the type of scan you want for your item.
Reset
Click to restore the original settings.
Important
- When using the scanner or printer with network connection, you cannot specify Brightness and Contrast.
5. Click Preview to preview the image.
The preview image appears on the right. Drag ☐ to specify the scan area.
Important
- With network connection, scan without preview when scanning documents from the ADF. If you preview, place the document again and scan. If there is document left in the ADF after previewing, press the OK button on the operation panel and remove the document.
6. Click Scan.
Scanning starts, then the scanned image appears in the application.
IJ Network Scanner Selector EX2 Menu and Setting Screen
IJ Network Scanner Selector EX2 allows you to select the scanners or printers to be used for scanning or printing over a network from your computer or the operation panel.
After installation, IJ Network Scanner Selector EX2 appears in the notification area on the desktop.

Important
- If you cannot scan over a network, download and upgrade to the latest MP Drivers from our website.
- While IJ Network Scanner Selector EX2 is enabled, it periodically transmits packets to check whether it can communicate with your scanner or printer over the network. When using the computer in a network environment other than the one used to set up your scanner or printer, disable IJ Network Scanner Selector EX2.

Note
- If the icon is not displayed in the notification area on the desktop, follow the procedure below to start.
- Windows 10:
From Start menu, click All apps > Canon Utilities > IJ Network Scanner Selector EX2.
- Windows 8.1/Windows 8:
Click IJ Network Scanner Selector EX2 on the Start screen.
If IJ Network Scanner Selector EX2 is not displayed on the Start screen, select the Search charm, then search for "IJ Network Scanner Selector EX2".
- Windows 7/Windows Vista:
From the Start menu, click All Programs > Canon Utilities > IJ Network Scanner Selector EX2 > IJ Network Scanner Selector EX2.
Menu
Displays a menu when you right-click (IJ Network Scanner Selector EX2) in the notification area on the desktop.
Disable Canon IJ Network Scanner Selector EX2 / Enable Canon IJ Network Scanner Selector EX2
Enables or disables IJ Network Scanner Selector EX2.
When you select Disable Canon IJ Network Scanner Selector EX2, you will not be able to scan over a network from the operation panel.
Enabled: , Disabled:


Important
- When using a model with which you cannot scan over a network from the operation panel, you cannot scan using the operation panel even if this setting is enabled.
Settings...
The Scan-from-PC Settings screen appears. You can select the model you want to use.
About
Displays the version information.
In the displayed dialog box, you can change the language to be used in the application. The change will be reflected after restarting the computer.
Exit
Exits IJ Network Scanner Selector EX2; (Enabled) or (Disabled) disappears from the notification area on the desktop.
Scan-from-PC Settings Screen
Right-click the icon from the notification area on the desktop, then select Settings... to display the Scan-from-PC Settings screen.
Your scanner or printer must be selected with IJ Network Scanner Selector EX2 before scanning over a network.
Scanners
MAC addresses of the scanners or printers that can be used over the network are displayed.
You can select one scanner or printer per model. Selecting a scanner or printer automatically enables scanning from the operation panel.
Instructions
Opens this guide.
Scan-from-Operation-Panel Settings
The Scan-from-Operation-Panel Settings screen appears. You can select up to three scanners and printers in total for scanning from the operation panel. You can scan items using the operation panel of the selected scanner or printer, and send the scanned images to your computer over a network.

Important
- When using a model with which you cannot scan over a network from the operation panel, that model does not appear in Scanners and the setting is not available.
Scan-from-Operation-Panel Settings Screen
Click Scan-from-Operation-Panel Settings in the Scan-from-PC Settings screen to display the Scan-from-Operation-Panel Settings screen.
Scanners
MAC addresses of the scanners or printers that can be used over the network are displayed.
You can select up to three scanners and printers in total at the same time. Selecting a scanner or printer automatically enables scanning from the operation panel.
Instructions
Opens this guide.
Important
- When using a model with which you cannot scan over a network from the operation panel, Scan-from-Operation-Panel Settings may appear in the Scan-from-PC Settings screen; however, the setting is not available.
Note
- If your scanner or printer does not appear, check the following, click OK to close the screen, then reopen it and try selecting again.
- MP Drivers is installed
• Network settings of your scanner or printer is completed after installing the MP Drivers
• Network communication between your scanner or printer and computer is enabled
If your scanner or printer still does not appear, refer to "Problems with Network Communication" for your model from Home of the Online Manual.
- You do not need to use this software when scanning via USB. Refer to "Uninstalling IJ Network Scanner Selector EX2" to delete it. You can scan via USB even if it is not deleted.
Uninstalling IJ Network Scanner Selector EX2
Follow the procedure below to uninstall IJ Network Scanner Selector EX2 from your computer.

Important
- You cannot scan over a network after uninstalling IJ Network Scanner Selector EX2.
-
Log into a user account with administrator privilege.
-
Click Control Panel > Programs > Programs and Features.
- Select Canon IJ Network Scanner Selector EX2, then click Uninstall/Change.

Note
- If the User Account Control screen appears, click Continue.
- Click Yes when the confirmation message appears.
- When uninstallation is complete, click OK.

Note
- When the message prompting you to restart your computer appears, click OK to restart your computer.
Scanning Tips
Resolution
Data Formats
Color Matching
Resolution
The data in the image you have scanned is a collection of dots carrying information about brightness and color. The density of these dots is called "resolution," and resolution will determine the amount of detail your image contains. The unit of resolution is dots per inch (dpi). Dpi is the number of dots per inch (2.5 cm).
The higher the resolution (value), the more detail in your image; the lower the resolution (value), the less detail.

text_image
A AHow to Set the Resolution
You can set the resolution in the following screens.
IJ Scan Utility:
Resolution on the (Scanning from a Computer) tab of the Settings dialog box
ScanGear (Scanner Driver):
Output Resolution in Output Settings on the Advanced Mode tab
Appropriate Resolution Settings
Set the resolution according to the use of the scanned image.
| Item Type Use Color | Mode | Appropriate Resolution | |
| Color photo | Copying(Printing) | Color 300 dpi | |
| Creating a postcard Color 300 dpi | |||
| Saving to a computer Color 300 dpi | |||
| Using on a website or attaching to e-mail | Color 150 dpi | ||
| Black and white photo | Saving to a computer Grayscale 300 dpi | ||
| Using on a website or attaching to e-mail | Grayscale 150 dpi | ||
| Text document (document or magazine) | Copying | Color, Grayscale, or Black and White | 300 dpi |
| Attaching to e-mail | Color, Grayscale, or Black and White | 150 dpi | |
| Scanning text using OCR Color or Grayscale 300 dpi | |||
Important
- If you double the resolution, the data size of the scanned image quadruples. If the file is too large, the processing speed will slow down significantly, and you will experience inconvenience such as lack of memory. Set the minimum required resolution according to the use of the image.
Note
- When you will be printing the scanned image by enlarging it, scan by setting a higher resolution than the recommended one above.
Data Formats
You can select a data format when saving scanned images. You should specify the most suitable data format according to how you want to use the image on which application.
Available data formats vary by application and operating system (Windows or Mac OS).
See below for the characteristics of each image data format.
PNG (Standard File Extension: .png)
A data format often used on websites.
PNG is suitable for editing saved images.
JPEG (Standard File Extension: .jpg)
A data format often used on websites and for digital camera images.
JPEG features high compression rates. JPEG images slightly degrade every time they are saved, and cannot be returned to their original state.
JPEG is not available for black and white images.
TIFF (Standard File Extension: .tif)
A data format featuring a relatively high compatibility between various computers and applications.
TIFF is suitable for editing saved images.
Note
- Some TIFF files are incompatible.
- IJ Scan Utility supports the following TIFF file formats.
- Uncompressed, black and white binary
- Uncompressed, RGB (8 bits per channel)
- Uncompressed, Grayscale
PDF (Standard File Extension: .pdf)
A data format for electronic documents, developed by Adobe Systems Incorporated.
It can be used on various computers and operating systems, and fonts can be embedded as well; therefore, people in different environments can exchange the files without being aware of the differences.
Color Matching
"Color Matching" is the act of making adjustments so that the color tones match between the original item, the monitor display, and the color printout. On your scanner or printer, the color tones are adjusted as shown below.
Example: When sRGB is selected as the output profile (target):
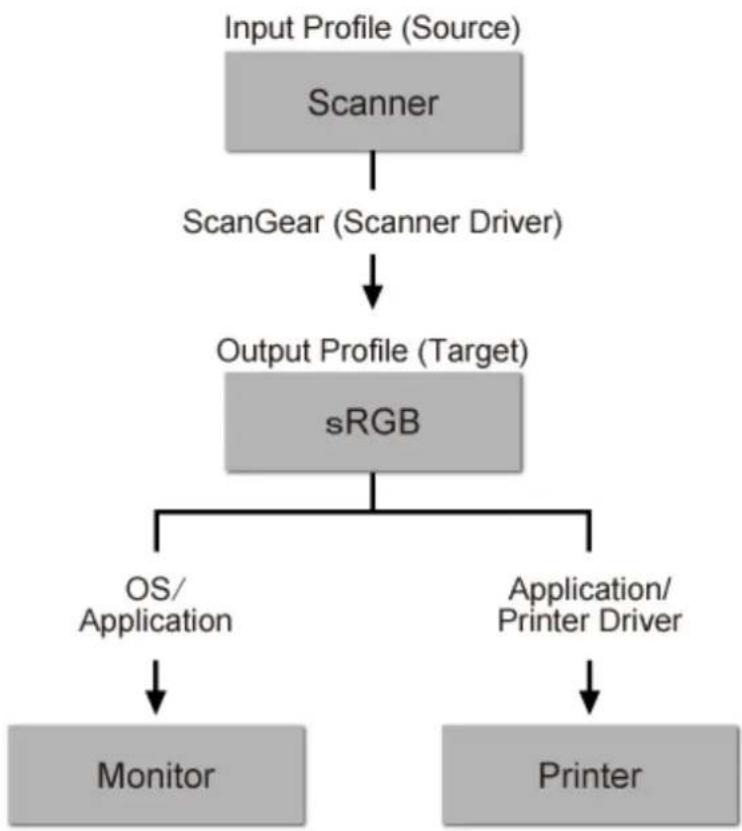
flowchart
graph TD
    A["Input Profile (Source)"] --> B["Scanner"]
    B --> C["ScanGear (Scanner Driver)"]
    C --> D["Output Profile (Target)"]
    D --> E["sRGB"]
    E --> F["OS/Application"]
    E --> G["Application/Printer Driver"]
    F --> H["Monitor"]
    G --> I["Printer"]
The image's color space is converted from the scanner's color space to sRGB by ScanGear.
When displaying on a monitor, the image's color space is converted from sRGB to the monitor's color space based on the operating system's monitor settings and the application's working space settings.
When printing, the image's color space is converted from sRGB to the printer's color space based on the application's print settings and the printer driver's settings.
Positioning Originals (Scanning from Computer)
Learn how to place items on the platen or ADF (Auto Document Feeder) of your scanner or printer. Place items correctly according to the type of item to be scanned. Otherwise, items may not be scanned correctly.

Important
- Do not place objects on the document cover. When you open the document cover, the objects may fall into your scanner or printer, resulting in malfunction.
- Close the document cover when scanning.
- Do not touch the operation panel buttons or LCD (Liquid Crystal Display) monitor when opening/closing the document cover. May result in unintended operation.
→ Placing Items (Platen)
→ Placing Documents (ADF (Auto Document Feeder))
Placing Items (Platen)
Place items as described below to scan by detecting the item type or size automatically.

Important
- When scanning by specifying the paper size in IJ Scan Utility or ScanGear (scanner driver), align an upper corner of the item with the corner at the arrow (alignment mark) of the platen.
- Photos that have been cut to various shapes and items smaller than 1.2 inches (3 cm) square cannot be cropped accurately when scanning.
- Reflective disc labels may not be scanned as expected.
For Photos, Postcards, Business Cards, or BD/DVD/CD
For Magazines, Newspapers, or Documents



Placing a Single Item:
Place the item face-down on the platen, with 0.4 inch (1 cm) or more space between the edges (diagonally striped area) of the platen and the item. Portions placed on the diagonally striped area cannot be scanned.
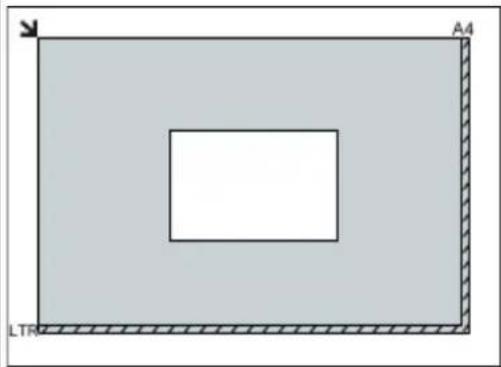
natural_image
Simple geometric diagram showing a rectangle with an inner square and labeled corner A4, plus a dashed border labeled LTR (no text or symbols within the shapes)
Place the item face-down on the platen and align an upper corner of the item with the corner at the arrow (alignment mark) of the platen. Portions placed on the diagonally striped area cannot be scanned.
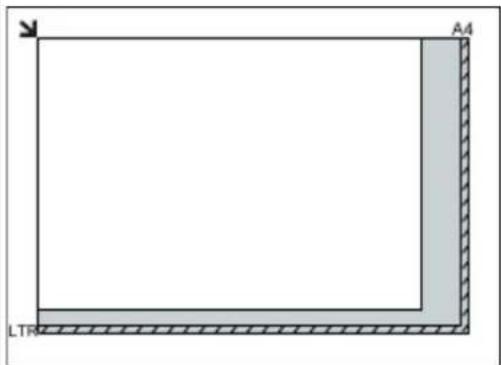
natural_image
Pure geometric diagram showing a rectangle with corner hatching and label 'A4' and 'LTM' (no text or symbols within the diagram itself)
Important
- Large items (such as A4 size photos) that cannot be placed away from the edges/arrow (alignment mark) of the platen may be saved as PDF files. To save in a format other than PDF, scan by specifying the data format.
Placing Multiple Items:
Allow 0.4 inch (1 cm) or more space between the edges (diagonally striped area) of the platen and items, and between items. Portions placed on the diagonally striped area cannot be scanned.
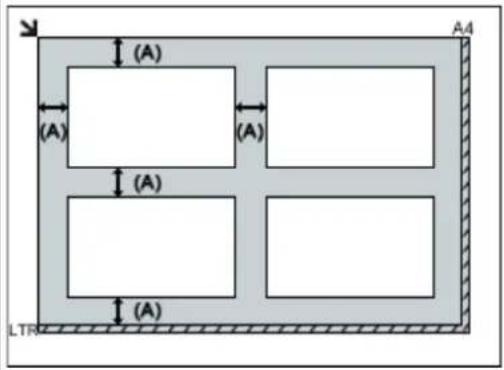
text_image
(A) (A) (A) (A) (A) (A) (A) (LTR)
more than 0.4 inch (1 cm)

Note
- You can place up to 12 items.
- Positions of slanted items (10 degrees or less) are corrected automatically.

Important
- For the portions in which items cannot be scanned, see Loading Originals.
Placing Documents (ADF (Auto Document Feeder))

Important
- Do not leave thick items on the platen when scanning from the ADF. May result in paper jam.
- Place and align documents of the same size when scanning two or more documents.
-
For supported document sizes when scanning from the ADF, see Supported Originals.
-
Open the document tray.
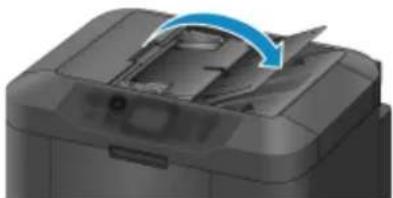
natural_image
Close-up of a printer's front panel showing internal structure and a blue arrow indicating rotation (no text or symbols)- Place the documents on the ADF, then adjust the document guides to the width of the documents.
Insert the documents face-up until a beep sounds.
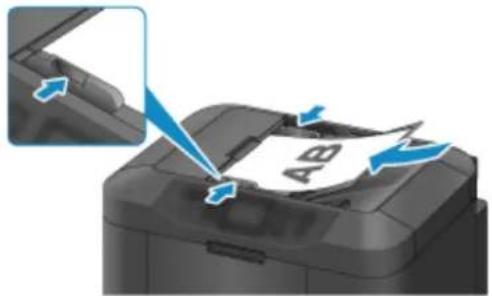
natural_image
Close-up of a printer's paper being inserted, showing paper being placed with arrows indicating process (no text or symbols visible)Network Scan Settings
You can connect your scanner or printer to a network to share it among multiple computers or scan images into a specified computer.

Important
- Multiple users cannot scan at the same time.

Note
- Complete the network settings of your scanner or printer beforehand from the Setup CD-ROM or by following the instructions our website.
- With network connection, scanning takes longer than USB connection.
Complete the following settings to enable scanning over a network.
Specifying Your Scanner or Printer
Use IJ Network Scanner Selector EX to specify the scanner you want to use. By specifying the scanner, you can scan over a network from your computer or the operation panel.

Important
- If the product you want to use is changed with IJ Network Scanner Selector EX, the product used for scanning with IJ Scan Utility changes as well. The product for scanning from the operation panel also changes.
If your scanner or printer is not selected in IJ Scan Utility, check that it is selected with IJ Network Scanner Selector EX.
Refer to "IJ Network Scanner Selector EX2 Menu and Setting Screen" for your model from Home of the Online Manual for details. - To scan from the operation panel, specify your scanner or printer with IJ Network Scanner Selector EX beforehand.
1. Check that IJ Network Scanner Selector EX is running.
If IJ Network Scanner Selector EX is running, (IJ Network Scanner Selector EX2) appears in the notification area on the desktop. Click to check the hidden icons as well.

Note
- If the icon is not displayed in the notification area on the desktop, follow the procedure below to start.
- Windows 10:
From the Start menu, click All apps > Canon Utilities > IJ Network Scanner Selector EX2. - Windows 8.1/Windows 8:
Click IJ Network Scanner Selector EX2 on the Start screen.
If IJ Network Scanner Selector EX2 is not displayed on the Start screen, select the Search charm, then search for "IJ Network Scanner Selector EX".
- Windows 7/Windows Vista:
From the Start menu, click All Programs > Canon Utilities > IJ Network Scanner Selector EX2 > IJ Network Scanner Selector EX2.
The icon appears in the notification area on the desktop, and the Scan-from-PC Settings screen appears. In that case, skip ahead to Step 3.
- In the notification area on the desktop, right-click (IJ Network Scanner Selector EX2), then select Settings....
The Scan-from-PC Settings screen appears.
- Select your scanner or printer from Scanners.
Normally, the MAC address of your scanner or printer is already selected after the network setup. In that case, you do not need to select it again.
Important
- If multiple scanners exist on the network, multiple model names appear. In that case, you can select one scanner per model.
- Click OK.
Note
- The scanner selected in the Scan-from-PC Settings screen will be automatically selected in the Scan-from-Operation-Panel Settings screen as well.
Setting for Scanning with IJ Scan Utility
To scan from IJ Scan Utility using a scanner or printer connected to a network, specify your scanner or printer with IJ Network Scanner Selector EX, then follow the steps below to change the connection status between it and the computer.
-
Start IJ Scan Utility.
-
Select "Canon XXX series Network" (where "XXX" is the model name) for Product Name.
-
Click Settings... to use another scanner connected to a network.
-
Click (General Settings), then click Select in Product Name.
The Scan-from-PC Settings screen of IJ Network Scanner Selector EX appears.
Select the scanner you want to use and click OK.
- In the Settings (General Settings) dialog box, click OK.
The IJ Scan Utility main screen reappears. You can scan via a network connection.
Setting for Scanning from the Operation Panel
You can make the setting for scanning from the operation panel.

Important
- Set IJ Scan Utility to use your scanner or printer via a network connection beforehand.

Setting for Scanning with IJ Scan Utility
- Check that IJ Network Scanner Selector EX is running.
If IJ Network Scanner Selector EX is running, (IJ Network Scanner Selector EX2) appears in the notification area on the desktop. Click to check the hidden icons as well.

Note
- If the icon is not displayed in the notification area on the desktop, follow the procedure below to start.
- Windows 10:
From the Start menu, click All apps > Canon Utilities > IJ Network Scanner Selector EX2.
- Windows 8.1/Windows 8:
Click IJ Network Scanner Selector EX2 on the Start screen.
If IJ Network Scanner Selector EX2 is not displayed on the Start screen, select the Search charm, then search for "IJ Network Scanner Selector EX".
• Windows 7/Windows Vista:
From the Start menu, click All Programs > Canon Utilities > IJ Network Scanner Selector EX2 > IJ Network Scanner Selector EX2.
The icon appears in the notification area on the desktop, and the Scan-from-PC Settings screen appears. In that case, skip ahead to Step 3.
- In the notification area on the desktop, right-click (IJ Network Scanner Selector EX2), then select Settings....
The Scan-from-PC Settings screen appears.
- Click Scan-from-Operation-Panel Settings.
The Scan-from-Operation-Panel Settings screen appears.
- Select your scanner or printer from Scanners and click OK.
Select the MAC address of your scanner or printer.

Note
- When multiple scanners are connected via a network, you can select up to three scanners.
- In the Scan-from-PC Settings screen, click OK.

Note
- If your scanner or printer does not appear, check the following, click OK to close the screen, then reopen it and try selecting again.
- MP Drivers is installed
• Network settings of your scanner or printer is completed after installing the MP Drivers
• Network communication between your scanner or printer and computer is enabled
If the problem is still not solved, see Network Communication Problems.
Scanning from Computer (Mac OS)
▶ Using IJ Scan Utility
▶ Using Scanner Driver
Scanning Tips
▶ Positioning Originals (Scanning from Computer)
▶ Network Scan Settings
Scanning from Operation Panel
Forwarding Scanned Data to Computer Using Operation Panel Basics
Sending Scanned Data as E-Mail from Computer
Sending Scanned Data as E-Mail from Machine
Saving Scanned Data on USB Flash Drive
Forwarding Scanned Data to Shared Folder on Computer
▶ Deleting Scanned Data on USB Flash Drive
Setting Items for Scanning Using Operation Panel
Setting Up Operation Panel with IJ Scan Utility (Windows)
Setting Up Operation Panel with IJ Scan Utility (Mac OS)
Forwarding Scanned Data to Computer Using Operation Panel
Before forwarding scanned data to the computer, check the following:
- MP Drivers are installed. (Windows)
If MP Drivers are not yet installed, install MP Drivers with the Setup CD-ROM or install them from the Canon website.
• The scanner driver is installed. (Mac OS)
If the scanner driver is not yet installed, install the scanner driver from the Canon website.
- The printer is connected to a computer correctly.
Make sure the printer is connected to the computer correctly.
Do not plug in or unplug the USB cable while the printer is in operation, or when the computer is in the sleep or standby mode.
If you perform scanning via a network connection, make sure all the required settings have been specified.
- For Windows:
→ Network Scan Settings
- For Mac OS:
→ Network Scan Settings
- The destination and the file name are specified in Canon IJ Scan Utility.
You can specify the destination and the file name in Canon IJ Scan Utility. For more on settings of Canon IJ Scan Utility:
- For Windows:
Settings Dialog Box
- For Mac OS:
→ Settings Dialog
For Mac OS X 10.11, starting Canon IJ Scan Utility is required to forward the scanned data to your computer.
Follow the procedure below to forward scanned data to the computer.
- Make sure printer is turned on.

- Select Screen on HOME screen.
→ LCD and Operation Panel
The screen for selecting to which you save the data is displayed.
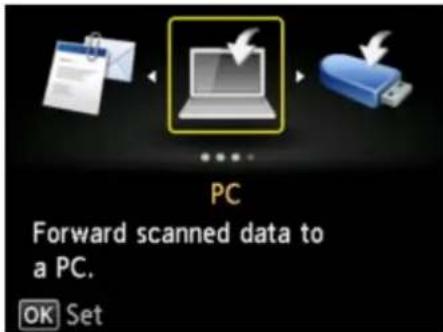
text_image
PC Forward scanned data to a PC. OK Set-
Select PC and press OK button.
-
Select computer to forward scanned data and press OK button.
Select Local (USB) for a USB-connected computer, or select the computer to forward the scanned data for a network-connected computer.
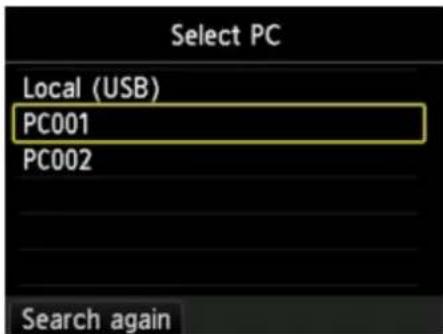
text_image
Select PC Local (USB) PC001 PC002 Search againThe Scan standby screen is displayed.
Note
- When you forward the scanned data to the computer using WSD (one of the network protocols supported in Windows 10, Windows 8.1, Windows 8, Windows 7, and Windows Vista), select Enable for WSD scan from this device on WSD setting on Other settings in LAN settings under Device settings.
→ WSD setting
If you press the left Function button, the printer starts searching for the connected computers again.
- Select document type.
Note
- When you forward the scanned data to the computer searched using WSD, you cannot select the document type.
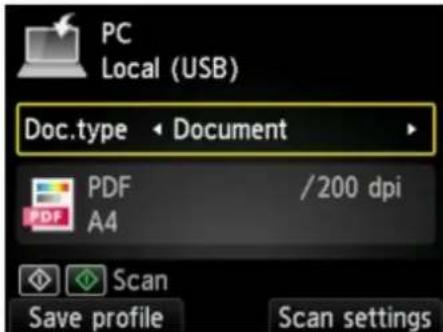
text_image
PC Local (USB) Doc.type < Document PDF /200 dpi PDF A4 Scan Save profile Scan settingsDocument
Scans the original on the platen glass or in the ADF as a document data applying the settings specified in Scan settings.
Photo
Scans the original on the platen glass as a photo data applying the settings specified in Scan settings.
- Press right Function button to adjust settings as necessary.
Setting Items for Scanning Using Operation Panel
Note
-
Pressing the left Function button on the Scan standby screen allows you to register the current scan settings as a custom setting.
Registering Favorite Settings (Custom profiles) -
Load original document on platen glass or in ADF.
-
Press Color button for color scanning, or Black button for black & white scanning.
Note
- When you forward the scanned data to the computer using WSD, press the Color button.
- If the original is not loaded properly, a message is displayed on the LCD. Load the original on the platen glass or in the ADF according to the scan settings.
• If you load the original in the ADF:
The printer starts scanning and scanned data is forwarded to the computer.
- If you load the original on the platen glass:
- When you select JPEG or TIFF for Format on the scan setting screen, the printer starts scanning and scanned data is forwarded to the computer.
- When you select PDF or Compact PDF for Format on the scan setting screen, the confirmation screen asking you if you continue scanning is displayed after scanning is complete.

To continue scanning, place the next document on the platen and select ◆ ◆.
End
If you continue scanning, load the original on the platen glass and start scanning.
If you do not continue scanning, press the left Function button. The scanned data is forwarded to the computer.
Scanned data is forwarded to the computer according to the settings specified in Canon IJ Scan Utility.
Remove the original on the platen glass or from the document output slot after scanning is complete.
If program selection screen appears (Windows):
The program selection screen may be displayed after pressing the Color or Black button. In this case, select Canon IJ Scan Utility and click OK.
If you want to scan originals with advanced settings, or if you want to edit or print scanned images:
If you scan originals from a computer, you can edit the scanned images, such as optimizing or trimming.
In addition, you can edit or print the scanned images using the compatible application software to make better use of them.
→ Using IJ Scan Utility
Note
- For Windows:
- You can use a WIA-compliant application software to scan originals with this printer.
For details:
→ Scanning with WIA Driver
- If you want to convert a scanned document to text:
→ Extracting Text from Scanned Images (OCR)
Sending Scanned Data as E-Mail from Computer
Before attaching scanned data to an e-mail, check the following:
- MP Drivers are installed. (Windows)
If MP Drivers are not yet installed, install MP Drivers with the Setup CD-ROM or install them from the Canon website.
• The scanner driver is installed. (Mac OS)
If the scanner driver is not yet installed, install the scanner driver from the Canon website.
- The printer is connected to a computer correctly.
Make sure the printer is connected to the computer correctly.
Do not plug in or unplug the USB cable while the printer is in operation, or when the computer is in the sleep or standby mode.
If you perform scanning via a network connection, make sure all the required settings have been specified.
- For Windows:
→ Network Scan Settings
- For Mac OS:
→ Network Scan Settings
- The mail software and the file name are specified in Canon IJ Scan Utility.
You can specify the destination and the file name in Canon IJ Scan Utility. For more on settings of Canon IJ Scan Utility:
- For Windows:
Settings Dialog Box
- For Mac OS:
→ Settings Dialog
For Mac OS X 10.11, starting Canon IJ Scan Utility is required to forward the scanned data to your computer.
Follow the procedure below to send the scanned data as an e-mail from the computer.
- Make sure printer is turned on.

- Select Screen on HOME screen.
→ LCD and Operation Panel
The screen for selecting to which you save the data is displayed.
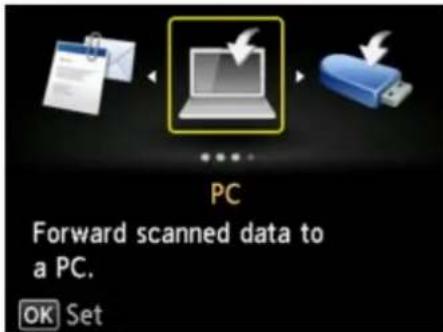
text_image
PC Forward scanned data to a PC. OK Set-
Select Attach to E-mail and press OK button.
-
Select Email from PC and press OK button.
-
Select computer to forward scanned data and press OK button.
Select Local (USB) for a USB-connected computer, or select the computer to forward the scanned data for a network-connected computer.
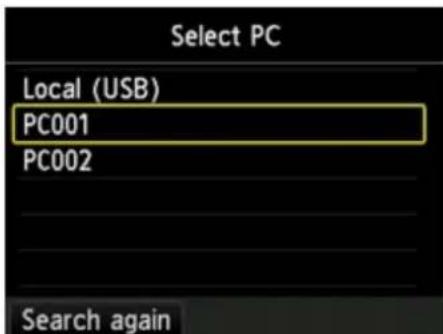
text_image
Select PC Local (USB) PC001 PC002 Search againThe Scan standby screen is displayed.
- Select document type.
Document
Scans the original on the platen glass or in the ADF as a document data applying the settings specified in Scan settings.
Photo
Scans the original on the platen glass as a photo data applying the settings specified in Scan settings.
- Press right Function button to specify settings as necessary.
Setting Items for Scanning Using Operation Panel
Note
- Pressing the left Function button on the Scan standby screen allows you to register the current scan settings as a custom setting.
-
Load original document on platen glass or in ADF.
-
Press Color button for color scanning, or Black button for black & white scanning.
Note
- If the original is not loaded properly, a message is displayed on the LCD. Load the original on the platen glass or in the ADF according to the scan settings.
- If you load the original in the ADF:
The printer starts scanning and scanned data is forwarded to the computer and attached to an e-mail.
- If you load the original on the platen glass:
- When you select JPEG for Format on the scan setting screen, the printer starts scanning and scanned data is forwarded to the computer and attached to an e-mail.
- When you select PDF or Compact PDF for Format on the scan setting screen, the confirmation screen asking you if you continue scanning is displayed after scanning is complete.
To continue scanning, place the next document on the platen and select 🔒 🔒.
End
If you continue scanning, load the original on the platen glass and start scanning.
If you do not continue scanning, press the left Function button. The scanned data is forwarded to the computer and attached to an e-mail.
Scanned data is forwarded to the computer and attached to an e-mail according to the settings specified in Canon IJ Scan Utility.
For the settings or how to send an e-mail, refer to the mail software's instruction manual.
Remove the original on the platen glass or from the document output slot after scanning is complete.
If program selection screen appears (Windows):
The program selection screen may be displayed after pressing the Color or Black button. In this case, select Canon IJ Scan Utility and click OK.
Sending Scanned Data as E-Mail from Machine
Sending Scanned Data as E-Mail from Machine
Registering Recipients' E-Mail Address
Registering Recipients in Group E-Mail
Changing Registered Information
▶ Deleting Registered Information
Importing/Exporting E-Mail Address Book
Sending Scanned Data as E-Mail from Machine
You can send scanned data as an e-mail from the printer.
Before you use this function, check the following.
• The printer is connected to a LAN.
Make sure the printer is connected to a LAN correctly.
- Mail server settings are completed using Remote UI.
Setting Mail Server
- Settings for sending scanned data as an e-mail are specified using Remote UI.
→ Specifying Mail Setting for Sending Scanned Data
Follow the procedure below to send the scanned data as an e-mail from the printer.
-
Make sure printer is turned on.
-
Select Screen on HOME screen.
→ LCD and Operation Panel
The screen for selecting to which you save the data is displayed.

text_image
PC Forward scanned data to a PC. OK Set-
Select Attach to E-mail and press OK button.
-
Select 📄ail directly from device and press OK button.
-
Select Select recipients and press OK button.
-
Specify recipient(s).

text_image
Select recipients Select from e-mail address book Direct entry Select from input history A B CA. Select the recipient(s) from the address book. Press the OK button to display the address book and select the recipient(s).
B. Enter recipient's e-mail address. Press the OK button to display the input screen and enter the address.
C. Select the recipient(s) from the input log. Press the OK button to display the input log and select the recipient(s).
7. Perform mail sending settings.
The screen below appears.
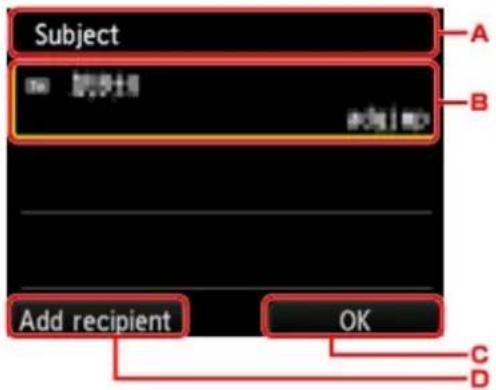
text_image
Subject A B Add recipient OK C DA. Enter the subject. Press the OK button to display the input screen.
B. Press the OK button to select the items below.
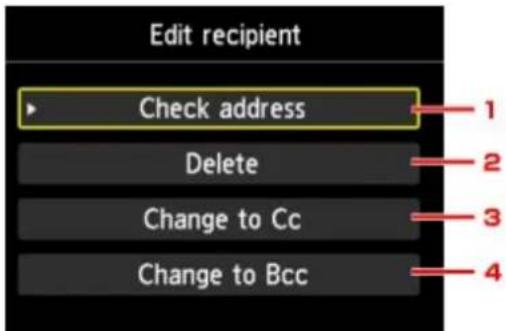
text_image
Edit recipient Check address Delete Change to Cc Change to Bcc 1 2 3 4- Press the OK button to check the address. Pressing the right Function button returns to the previous screen.
- Pressing the OK button and selecting Yes deletes the recipient.
-
Press the OK button twice to change to Cc (carbon copy).
-
Press the OK button twice to change to Bcc (blind carbon copy).
Note
- To change Cc or Bcc to To, press the OK button, select Change to To, and then press the OK button again.
C. Press the right Function button to complete specifying the recipient.
D. Press the left Function button to add the recipient.
- Select document type.
Document
Scans the original on the platen glass or in the ADF as a document data applying the settings specified in Scan settings.
Photo
Scans the original on the platen glass as a photo data applying the settings specified in Scan settings.
- Press right Function button to specify settings as necessary.
Setting Items for Scanning Using Operation Panel
Note
-
Pressing the left Function button on the Scan standby screen allows you to register the current scan settings as a custom setting.
→ Registering Favorite Settings (Custom profiles) -
Load original document on the platen glass or in ADF.
- Press Color button for color scanning, or Black button for black & white scanning.
Note
- If the original is not loaded properly, a message is displayed on the LCD. Load the original on the platen glass or in the ADF according to the scan settings.
- If you select ON for Preview on the scan setting screen: The preview screen is displayed before sending the scanned original as an e-mail.
If ON is selected for Preview on the scan settings screen, the preview screen is displayed on the LCD after scanning. To rescan the original, press the left Function button. If you select PDF or Compact PDF for Format on the scan setting screen, you can rotate the scanning image on the preview screen by pressing the right Function button. To start saving, press the OK button.
- If you load the original in the ADF:
The printer starts scanning and scanned data is sent as an e-mail.
- If you load the original on the platen glass:
- When you select JPEG for Format on the scan setting screen, the printer starts scanning and scanned data is sent as an e-mail.
- When you select PDF or Compact PDF for Format on the scan setting screen, the confirmation screen asking you if you continue scanning is displayed after scanning is complete.
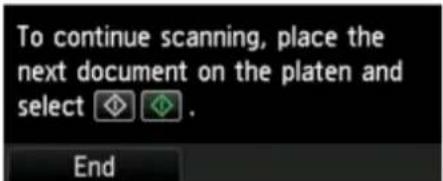
text_image
To continue scanning, place the next document on the platen and select EndIf you continue scanning, load the original on the platen glass and start scanning.
If you do not continue scanning, press the left Function button. The scanned data is sent as an e-mail.
Remove the original on the platen glass or from the document output slot after scanning is complete.
Checking Send Log
Selecting Check send log on E-mail directly from device and pressing the OK button displays the items below.
- Display send log
Displays the send log of the printer (up to 100). Select the item and press the OK button to check more information.
- Print send log
Prints out the send log of the printer. Select Yes and press the OK button to start printing.
Registering Recipients' E-Mail Address
Before you can use the printer's address book, you need to register the recipients' e-mail address. Follow the procedure below to register the recipients' e-mail address.
- Make sure printer is turned on.

- Select 📄 on HOME screen.
→ LCD and Operation Panel
The screen for selecting to which you save the data is displayed.
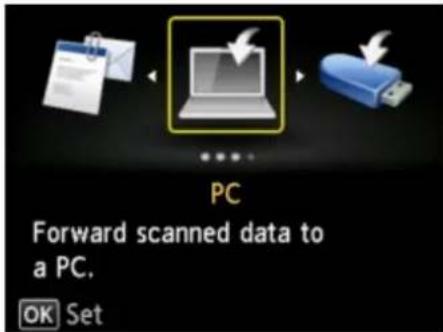
text_image
PC Forward scanned data to a PC. OK Set- Select Attach to E-mail and press OK button.

- Select Email directly from device and press OK button.

-
Select Edit e-mail address book and press OK button.
-
Select Display e-mail address book and press OK button.
The screen to select an ID number is displayed.
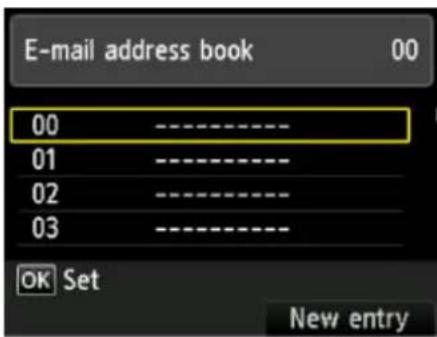
text_image
E-mail address book 00 00 ------------------ 01 ------------------ 02 ------------------ 03 ------------------ OK Set New entry
Note
- If you already registered the recipients, the recipients' name is displayed next to the ID number. If you already registered the group mail, the icon and the group name are displayed next to the ID number.
7. Select unregistered ID number.

Note
- If you already registered the recipients and they are displayed by name, press the left Function button. The registered recipients are displayed by ID number.
- If you press the right Function button, an unregistered ID number will be selected in numerical order.
8. Select E-mail address and press OK button.
9. Select registration method and press OK button.
- Direct entry
The screen to register the recipient's e-mail address and name is displayed. Go to next step.
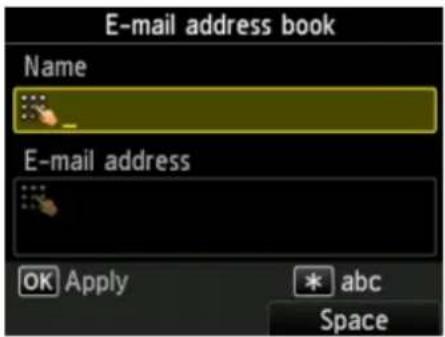
text_image
E-mail address book Name E-mail address OK Apply * abc Space- Select from send log
When you select this registration method, the screen to select the e-mail address from the send logs is displayed.
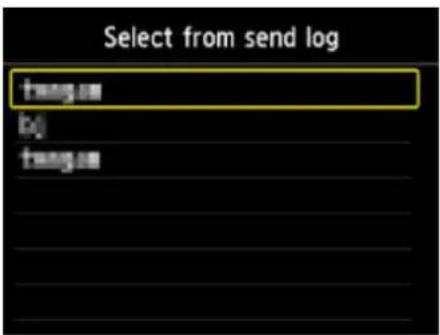
text_image
Select from send log fengue bj fengueSelecting an e-mail address and pressing the OK button, the screen to register the recipient's e-mail address and name is displayed. Go to next step.
10. Enter recipient's name.
- Move cursor to entry field of name.
- Enter recipient's name.
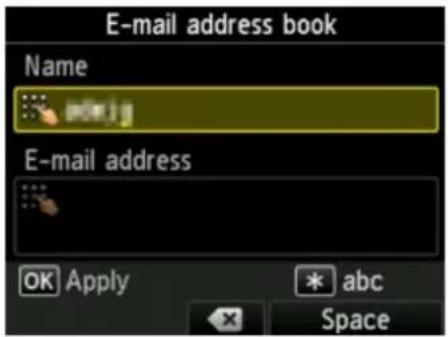
text_image
E-mail address book Name E-mail address OK Apply * abc Space- Press OK button.

Note
- You can enter the name up to 16 characters, including spaces.
→ Entering Numbers, Letters, and Symbols
- Enter recipient's e-mail address.
If you select an e-mail address on Select from send log, the e-mail address is already entered. If you do not change the e-mail address, go to next step.
- Move cursor to entry field of e-mail address.
- Enter recipient's mail address.
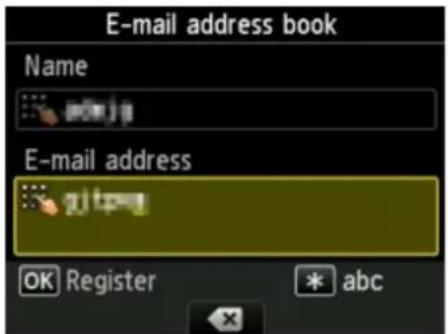
text_image
E-mail address book Name E-mail address OK Register * abc- Press OK button.

Note
- You can enter the e-mail address up to 60 characters (40 characters for the US, Canada, Korea and some regions of Latin America), including spaces.
→ Entering Numbers, Letters, and Symbols
- Press OK button to finalize registration.

Note
- To register another recipient's number and name, select an unregistered ID number and operate in the same procedure.
Registering Recipients in Group E-Mail
If you register two or more registered e-mail address to a group e-mail, you can send the same mail successively to all recipients registered to the group e-mail.
- Make sure printer is turned on.

- Select on HOME screen.
→ LCD and Operation Panel
The screen for selecting to which you save the data is displayed.
text_image
PC Forward scanned data to a PC. OK Set
- Select Attach to E-mail and press OK button.

-
Select Email directly from device and press OK button.
-
Select Edit e-mail address book and press OK button.
-
Select Display e-mail address book and press OK button.
The screen to select an ID number is displayed.
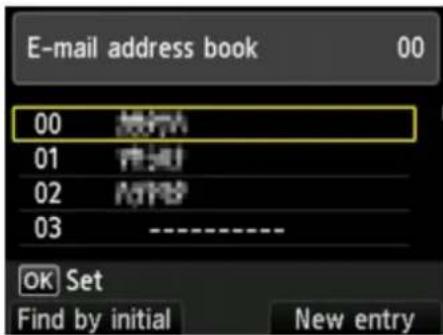
text_image
E-mail address book 00 00 01 02 03 OK Set Find by initial New entryNote
- If you already registered the recipients, the recipients' name is displayed next to the ID number. If you already registered the group mail, the icon and the group name are displayed next to the ID number.
7. Select unregistered ID number.
Note
- If you already registered the recipients and they are displayed by name, press the left Function button. The registered recipients are displayed by ID number.
- If you press the right Function button, an unregistered ID number will be selected in numerical order.
8. Select Group e-mail and press OK button.
The screen to register the group name and the member of the group is displayed.
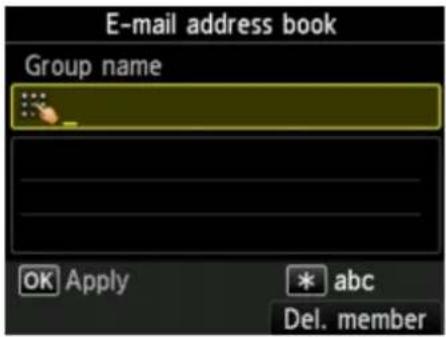
text_image
E-mail address book Group name OK Apply * abc Del. member9. Enter group name.
- Move cursor to entry field of group name.
- Enter group name.
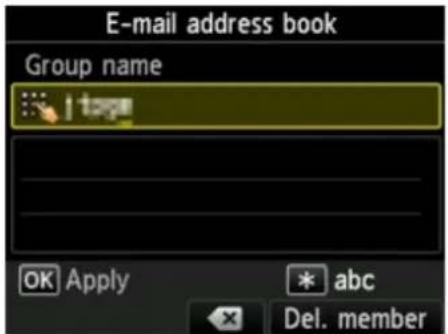
text_image
E-mail address book Group name OK Apply * abc Del. member3. Press OK button.
Note
-
You can enter the name up to 16 characters, including spaces.
→ Entering Numbers, Letters, and Symbols -
Register the registered recipient as a member of the group e-mail.
-
Make sure Member is displayed.
- Press left Function button.
The address book is displayed.
- Choose member to register.
Display by name Display by ID number
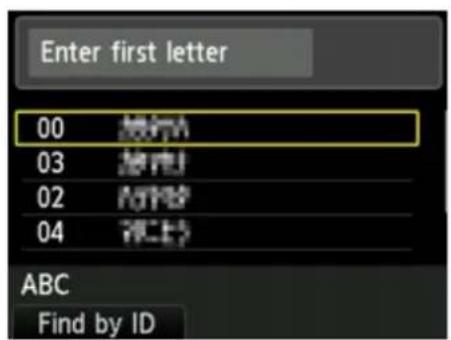
text_image
Enter first letter 00 播开 03 播开 02 双击 04 双击 ABC Find by IDBy entering the initial letter using the Numeric buttons, the registered recipients are sorted by name.
Select a member and press the OK button.
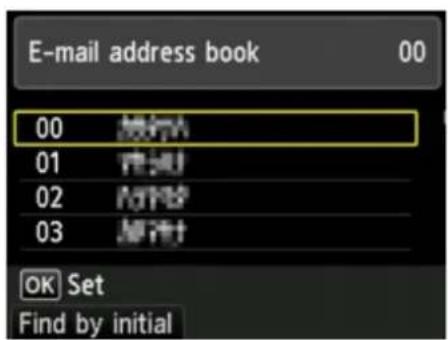
text_image
E-mail address book 00 00 操作 01 清洁 02 打印 03 新建 OK Set Find by initialBy entering the ID number using the Numeric buttons, the registered recipients are searched by ID number.
Select a member and press the OK button.
Note
• To switch the display by name and by ID number, press the left Function button.
The selected member is added on the list.
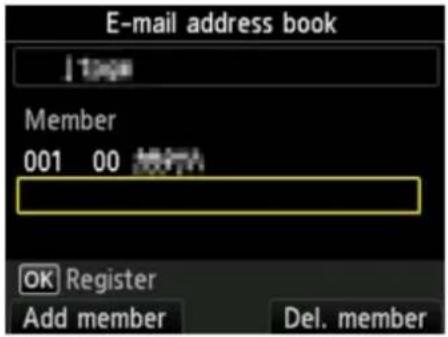
text_image
E-mail address book ! Member 001 00 操作 OK Register Add member Del. memberNote
- To delete the recipient from the group e-mail, select a recipient that you want to delete from the list and the right Function button.
- To add another member, press the left Function button.
The address book is displayed.
- Select recipient to register as group member.
The member to register is displayed on the list.
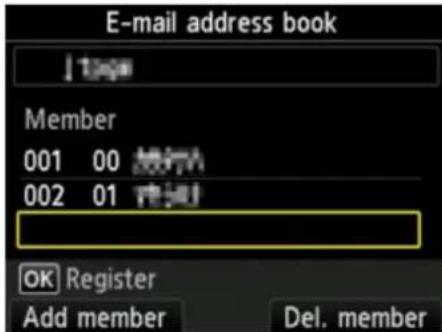
text_image
E-mail address book Member 001 00 焊門A 002 01 進捜 OK Register Add member Del. memberRepeat the procedure to register another member to the same group e-mail.
- Press OK button to finalize registration.

Note
• To register another group, select an unregistered ID number and operate in the same procedure.
Changing Registered Information
To change information registered for recipient and group e-mail, follow the procedure below.
- Make sure printer is turned on.

- Select on HOME screen.
→ LCD and Operation Panel
The screen for selecting to which you save the data is displayed.
text_image
PC Forward scanned data to a PC. OK Set- Select Attach to E-mail and press OK button.

- Select Email directly from device and press OK button.

-
Select Edit e-mail address book and press OK button.
-
Select Display e-mail address book and press OK button.
-
Use ▲ button or Numeric buttons to select recipient or group dial to change and press OK button.
-
Select Edit and press OK button.
-
Change registered information.
• To change an individual recipient:
When you want to change the recipient's name, move the cursor to the entry field of name and change the recipient's name. After pressing the OK button, the cursor moves to the entry field of e-mail addresses. To register the changed recipient's name, press the OK button again.
When you want to change the e-mail address, move the cursor to the entry field of e-mail address and change the e-mail address. After pressing the OK button, the changed address is registered.
• To change a group e-mail:
When you want to change the group name, move the cursor to the entry field of group name and change the group name. After pressing the OK button, the cursor moves to the list of the members. To register the changed group name, press the OK button again.
When you want to add the member to group or delete from group, move the cursor to the list of the members and add the member or delete. After pressing the OK button, the changed group is registered.
Deleting Registered Information
To delete information registered for recipient and group e-mail, follow the procedure below.
- Make sure printer is turned on.

- Select on HOME screen.
→ LCD and Operation Panel
The screen for selecting to which you save the data is displayed.
text_image
PC Forward scanned data to a PC. OK Set- Select Attach to E-mail and press OK button.

- Select Email directly from device and press OK button.

-
Select Edit e-mail address book and press OK button.
-
Select Display e-mail address book and press OK button.
-
Use ▲ button or Numeric buttons to select recipient or group dial to change and press OK button.
-
Select Delete and press OK button.
-
Select Yes and press OK button.
Importing/Exporting E-Mail Address Book
You can import an e-mail address book saved on a USB flash drive, or export the e-mail address book saved on the printer to a USB flash drive.
→ Importing E-Mail Address Book
→ Exporting E-Mail Address Book
Importing E-Mail Address Book
Follow the procedure below to import the e-mail address book.
- Make sure printer is turned on.

- Select Screen on HOME screen.
→ LCD and Operation Panel
The screen for selecting to which you save the data is displayed.
text_image
PC Forward scanned data to a PC. OK Set- Insert USB flash drive into USB flash drive port.

- Select Attach to E-mail and press OK button.

- Select fil directly from device and press OK button.
- Select Edit e-mail address book and press OK button.
- Select Import e-mail address book and press OK button.
- Check message that is displayed, select Yes, and then press OK button.
The address book saved on the USB flash drive is imported and the address book on the printer is overwritten. (The address book name is "EMAIL_ADDRESS.BIN").
Exporting E-Mail Address Book
Follow the procedure below to export the e-mail address book.
-
Make sure printer is turned on.
-
Select on HOME screen.

→ LCD and Operation Panel
The screen for selecting to which you save the data is displayed.
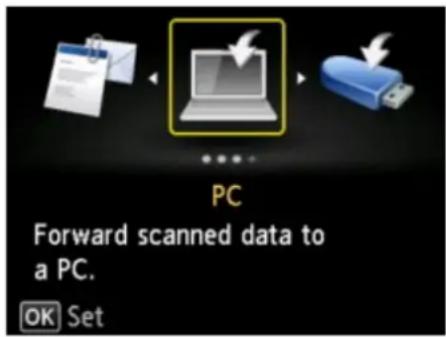
text_image
PC Forward scanned data to a PC. OK Set- Insert USB flash drive into USB flash drive port.
Note
- To avoid overwriting the e-mail address book, you cannot save the book on a USB flash drive which already includes it.
Delete the book from the USB flash drive or use the one which includes no book. -
The folder name which includes the e-mail address book is "CANON_SC_ \EMAIL_ADDRESS.BIN".
-
Select Attach to E-mail and press OK button.

- Select 📄 il directly from device and press OK button.

-
Select Edit e-mail address book and press OK button.
-
Select Export e-mail address book and press OK button.
-
Check message that is displayed, select Yes, and then press OK button.
The address book on the printer is saved on the USB flash drive.
Saving Scanned Data on USB Flash Drive
You can save scanned data on the USB flash drive directly.
Important
- Do not remove the USB flash drive from the printer under the following conditions:
• While scanning is in progress
• Before saving the scanned data - For safety reasons, we recommend backing up the scanned data saved on a USB flash drive to another media periodically to avoid unexpected accidents.
-
We assume no responsibility for damage to or loss of data for whatever reason even within the warranty period.
-
Make sure printer is turned on.
-
Select on HOME screen.
→ LCD and Operation Panel
The screen for selecting to which you save the data is displayed.
text_image
PC Forward scanned data to a PC. OK Set-
Insert USB flash drive into USB flash drive port.
-
Select flash drive and press OK button.
Note
- When the message informing you that the operation restriction is enabled, ask the administrator of the printer you are using.
- Select to USB flash drive and press OK button.
The Scan standby screen is displayed.
- Select document type.
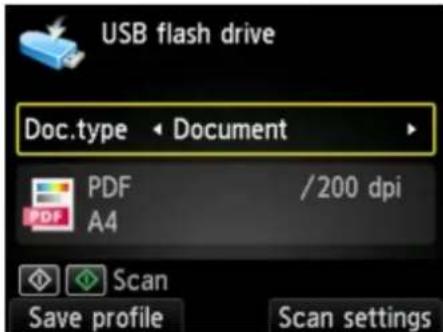
text_image
USB flash drive Doc.type < Document PDF /200 dpi PDF A4 Scan Save profile Scan settingsDocument
Scans the original on the platen glass or the ADF as a document data applying the settings specified in Scan settings.
Photo
Scans the original on the platen glass as a photo data applying the settings specified in Scan settings.
- Press the right Function button to adjust the settings as necessary.
Setting Items for Scanning Using Operation Panel
Note
- Pressing the left Function button on the Scan standby screen allows you to register the current scan settings as a custom setting.
Registering Favorite Settings (Custom profiles)
-
Load original document on platen glass or in ADF.
-
Press Color button for color scanning, or Black button for black & white scanning.
Note
- If the original is not loaded properly, a message is displayed on the LCD. Load the original on the platen glass or in the ADF according to the scan settings.
- If you select ON for Preview on the scan setting screen:
The preview screen is displayed before saving the scanned original on the USB flash drive.
If ON is selected for Preview on the scan settings screen, the preview screen is displayed on the LCD after scanning. To rescan the original, press the left Function button. If you select PDF or Compact PDF for Format on the scan setting screen, you can rotate the scanning image on the preview screen by pressing the right Function button. To start saving, press the OK button.
- If you load the original in the ADF:
The printer starts scanning and scanned data is saved on the USB flash drive.
- If you load the original on the platen glass:
- When you select JPEG for Format on the scan settings screen, the printer starts scanning and scanned data is saved on the USB flash drive.
- When you select PDF or Compact PDF for Format on the scan settings screen, the confirmation screen asking you if you continue scanning is displayed after scanning is complete.
If you continue scanning, load the original on the platen glass and start scanning.
If you do not continue scanning, press the left Function button. The scanned data is saved on the USB flash drive in one PDF file.
When you scan the originals continuously, you can save up to 100 pages of images in one PDF file.
Remove the original on the platen glass or from the document output slot after scanning is complete.
Note
- If the USB flash drive becomes full while scanning images is in progress, only the images already scanned can be saved.
- You can save up to 2000 files of scanned data in both PDF and JPEG data format.
-
The folder and file name of scanned data saved on the USB flash drive is as follows:
-
Folder name: (file extension: PDF): CANON_SC\DOCUMENT\0001
- Folder name: (file extension: JPG): CANON_SC\IMAGE\0001
- File name: Running numbers, starting from SCN_0001
- File date: The date and time of saving as set in the printer.
For details on how to set the date and time:
Setting Sender Information
- Importing the Scanned Data Saved on USB Flash Drive to the Computer
You can import the scanned data saved on a USB flash drive to the computer. After scanning the data, connect the USB flash drive to the computer and import the data.
Forwarding Scanned Data to Shared Folder on Computer
Before forwarding scanned data on the shared folder on the computer, confirm the following:
- MP Drivers and Canon Quick Utility Toolbox are installed. (Windows)
If MP Drivers and Canon Quick Utility Toolbox are not yet installed, install them with the Setup CD-ROM or install them from our website. - The scanner driver and Canon Quick Utility Toolbox are installed. (Mac OS)
If the scanner driver and Canon Quick Utility Toolbox are not yet installed, install them from our website. - The printer is connected to a computer via a LAN correctly.
- The destination folder is registered using Canon Quick Utility Toolbox in advance.
You can register the destination folder using Canon Quick Utility Toolbox. For more on settings of Canon Quick Utility Toolbox:
- For Windows:
→ Destination Folder Settings
- For Mac OS:
→ Destination Folder Settings
Follow the procedure below to forward scanned data to the shared folder on the computer.
- Make sure the printer is turned on.

- Select Screen on HOME screen.
→ LCD and Operation Panel
The screen for selecting to which you save the data is displayed.
text_image
PC Forward scanned data to a PC. OK Set- Select Destination folder and press OK button.

Note
- When the message informing you that the operation restriction is enabled, ask the administrator of the printer you are using.
- Select folder to save scanned data and press OK button.

Note
- When you specify a PIN code for a registered folder, a screen asking you to enter a PIN code is displayed. Entering the PIN code allows you to assign the shared folder as the destination.
- Select document type.
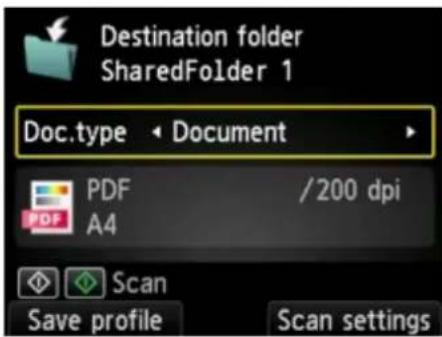
text_image
Destination folder SharedFolder 1 Doc.type Document PDF /200 dpi PDF A4 Scan Save profile Scan settingsDocument
Scans the original on the platen glass or in the ADF as a document data applying the settings specified in Scan settings.
Photo
Scans the original on the platen glass as a photo data applying the settings specified in Scan settings.
- Press the right Function button to specify the settings as necessary.
Setting Items for Scanning Using Operation Panel

Note
-
Pressing the left Function button on the Scan standby screen allows you to register the current scan settings as a custom setting.
Registering Favorite Settings (Custom profiles) -
Load original document on platen glass or in ADF.
-
Press Color button for color scanning, or Black button for black & white scanning.

Note
- If the original is not loaded properly, a message is displayed on the LCD. Load the original on the platen glass or in the ADF according to the scan settings.
If ON is selected for Preview on the scan settings screen, the preview screen is displayed on the LCD after scanning. To rescan the original, press the left Function button. If you select PDF or Compact PDF for Format on the scan setting screen, you can rotate the scanning image on the preview screen by pressing the right Function button. To start saving, press the OK button.
• If you select JPEG for Format on the scan setting screen:
The printer starts scanning and scanned data is forwarded to the shared folder on the computer.
• If you select PDF or Compact PDF for Format on the scan setting screen:
The confirmation screen asking you if you continue scanning is displayed after scanning is complete.
If you continue scanning, load the original on the platen glass and start scanning.
If you do not continue scanning, press the left Function button. The scanned data is forwarded to the shared folder on the computer in one PDF file.
When you scan the originals continuously, you can forward up to 100 pages of images in one PDF file.
Remove the original on the platen glass or from the document output slot after scanning is complete.
- If you load the original in the ADF:
The printer starts scanning and scanned data is forwarded to the shared folder of the computer.
- If you load the original on the platen glass:
■ When you select JPEG for Format on the scan setting screen, the printer starts scanning and scanned data is saved on the shared folder of the computer.
■ When you select PDF or Compact PDF for Format on the scan setting screen, the confirmation screen asking you if you continue scanning is displayed after scanning is complete.
If you continue scanning, load the original on the platen glass and start scanning.
If you do not continue scanning, press the left Function button. The scanned data is forwarded to the shared folder on the computer in one PDF file.
Scanned data is forwarded to the shared folder on the computer according to the settings specified in Canon Quick Utility Toolbox.
Remove the original on the platen glass or from the document output slot after scanning is complete.
Deleting Scanned Data on USB Flash Drive
You can delete scanned data on the USB flash drive using the operation panel.
- Make sure printer is turned on.

- Select on HOME screen.
→ LCD and Operation Panel
The screen for selecting to which you save the data is displayed.
-
Insert USB flash drive into USB flash drive port.
-
Select flash drive and press OK button.

Note
- When the message informing you that the operation restriction is enabled, ask the administrator of the printer you are using.

- Select Delete scanned data and press OK button.
The file list is displayed.
Note
- You can preview the file to delete or switch the file list between PDF and JPEG.
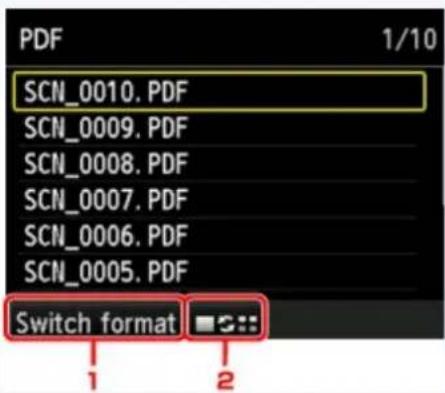
text_image
PDF 1/10 SCN_0010. PDF SCN_0009. PDF SCN_0008. PDF SCN_0007. PDF SCN_0006. PDF SCN_0005. PDF Switch format1. Switch format
By pressing the left Function button, you can switch the display between the PDF data list and the JPEG data list.
- Change display
By pressing the center Function button, you can switch the display between the list and the preview.
When the format for PDF data is selected, only the first page of the PDF data is displayed on the LCD.
-
Select file to delete and press OK button.
-
Select Yes on confirmation screen and press OK button.
The printer starts deleting the file.
Setting Items for Scanning Using Operation Panel
You can change the scan settings such as the scan size, resolution, or data format.
When the Scan standby screen is displayed, press the right Function button to select the setting item. Use the ▲▼ button to select the setting item, use the ◀▶ button to specify the setting, and then press the OK button.
Note
- When you forward the scanned data to the computer using WSD (one of the network protocols supported in Windows 10, Windows 8.1, Windows 8, Windows 7, and Windows Vista), you cannot specify the scan setting.
- Depending on the destination, some setting items cannot be selected. This section describes the setting items when you select USB flash drive on the screen for selecting to which you save the data. The setting item which cannot be selected is displayed grayed out.
- Some settings cannot be specified in combination with the setting of other setting item, the document type selected for Doc.type, or the scan menu on the screen for selecting to which you save the data. If the setting which cannot be specified in combination is selected, Error details appears on the LCD and ! appears at the setting item. In this case, press the left Function button to check the message and change the setting.
- The specified scan settings such as the scan size, resolution, and data format are retained even if the printer is turned off.
- When scanning starts in the scan menu that is not available with the specified setting, The specified function is not available with current settings. is displayed on the LCD. Change the setting, following the on-screen instructions.
- For setting items or procedure for scanning from the computer:
- For Windows:
Settings Dialog Box
→ Using IJ Scan Utility
- For Mac OS:
Settings Dialog
→ Using IJ Scan Utility
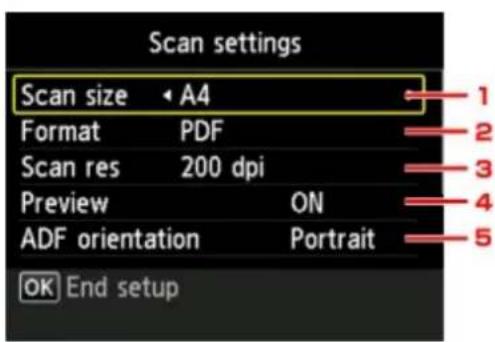
text_image
Scan settings Scan size • A4 Format PDF Scan res 200 dpi Preview ON ADF orientation Portrait OK End setup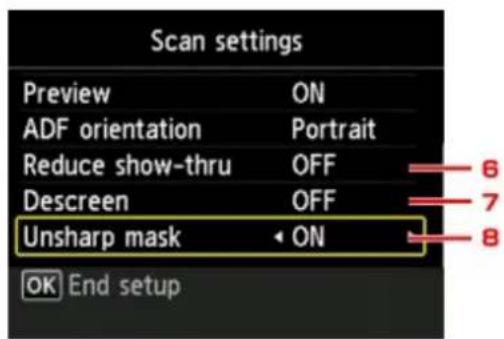
text_image
Scan settings Preview ON ADF orientation Portrait Reduce show-thru OFF Descreen OFF Unsharp mask ON OK End setup1. Scan size
Select the size of the original.
2. Format
Select the data format of the scanned data.
3. Scan res (Scan resolution)
Select the resolution for scanning.
4. Preview
Select to preview the scanned data or not when saving the data on a USB flash drive or forwarding to a shared folder.
5. ADF orientation
Select the orientation of the original document.
This setting item is not available when Photo is selected for Doc.type.
6. Reduce show-thru (Reducing show-through)
Characters on the back may show through when scanning a thin document such as a newspaper. Select ON if characters seem to show through on the scanned document.
This setting item is not available when Photo is selected for Doc.type.
7. Descreen
A printout consists of minute dots to make characters or graphs. Interfering with each dot may result in uneven shades or a striped pattern. Select ON if you notice any uneven shades or a striped pattern on the scanned image.
This setting item is not available when Photo is selected for Doc.type.

Note
- Even if ON is selected for this setting, some moire effects may remain if Unsharp mask is set to ON. In that case, select OFF for Unsharp mask.
8. Unsharp mask
The outline of small characters or thin objects such as a hair or leaves on a photo can be accentuated. Select ON if you want to accentuate the outline of the scanned data.
Setting Up Operation Panel with IJ Scan Utility (Windows)
IJ Scan Utility allows you to specify how to respond when scanning from the operation panel.

Note
- The screens for scanning photos from the operation panel are used as examples in the following descriptions.
- Start IJ Scan Utility.
- Click Settings....
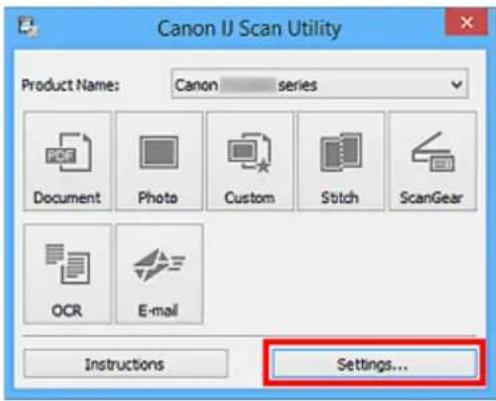
text_image
Canon IJ Scan Utility Product Name: Canon series Document Photo Custom Stitch ScanGear OCR E-mail Instructions Settings...The Settings dialog box appears.
- Select a scan mode on the (Scanning from the Operation Panel) tab.
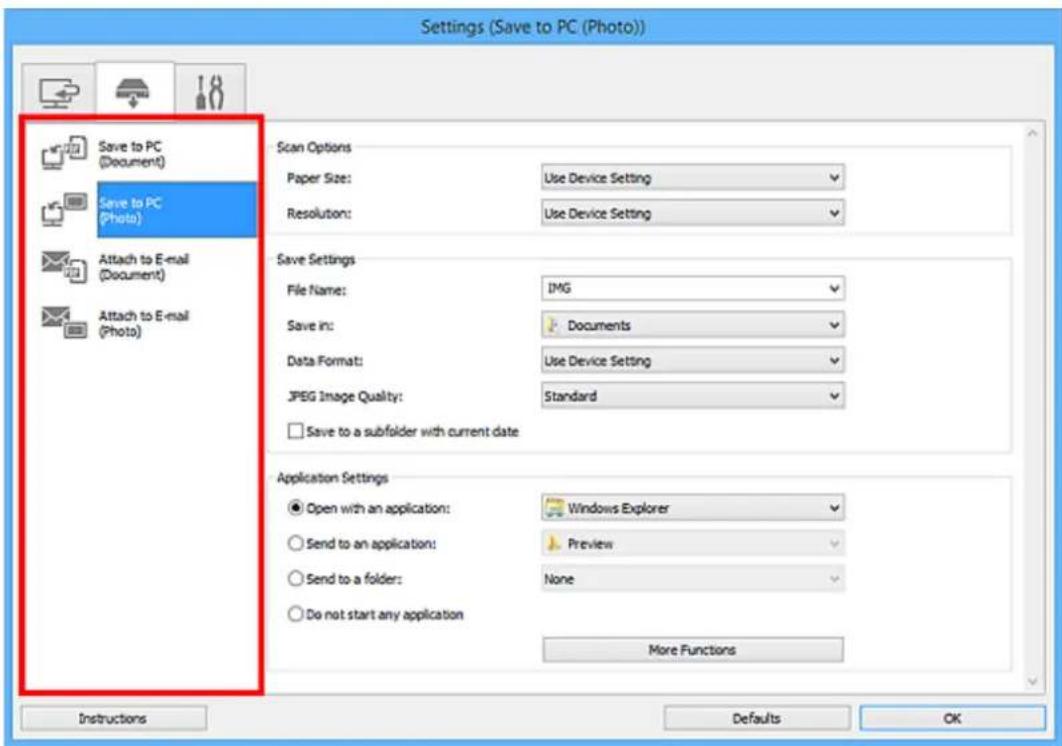
text_image
Settings (Save to PC (Photo)) Save to PC (Document) Save to PC (Photo) Attach to E-mail (Document) Attach to E-mail (Photo) Scan Options Paper Size: Use Device Setting Resolution: Use Device Setting Save Settings File Name: IMG Save in: Documents Data Format: Use Device Setting JPEG Image Quality: Standard Save to a subfolder with current date Application Settings Open with an application: Windows Explorer Send to an application: Preview Send to a folder: None Do not start any application More Functions Instructions Defaults OK
Note
• Refer to the following for details.
Settings (Save to PC (Document)) Dialog Box
Settings (Save to PC (Photo)) Dialog Box
Settings (Attach to E-mail (Document)) Dialog Box
Settings (Attach to E-mail (Photo)) Dialog Box
4. Set Scan Options.
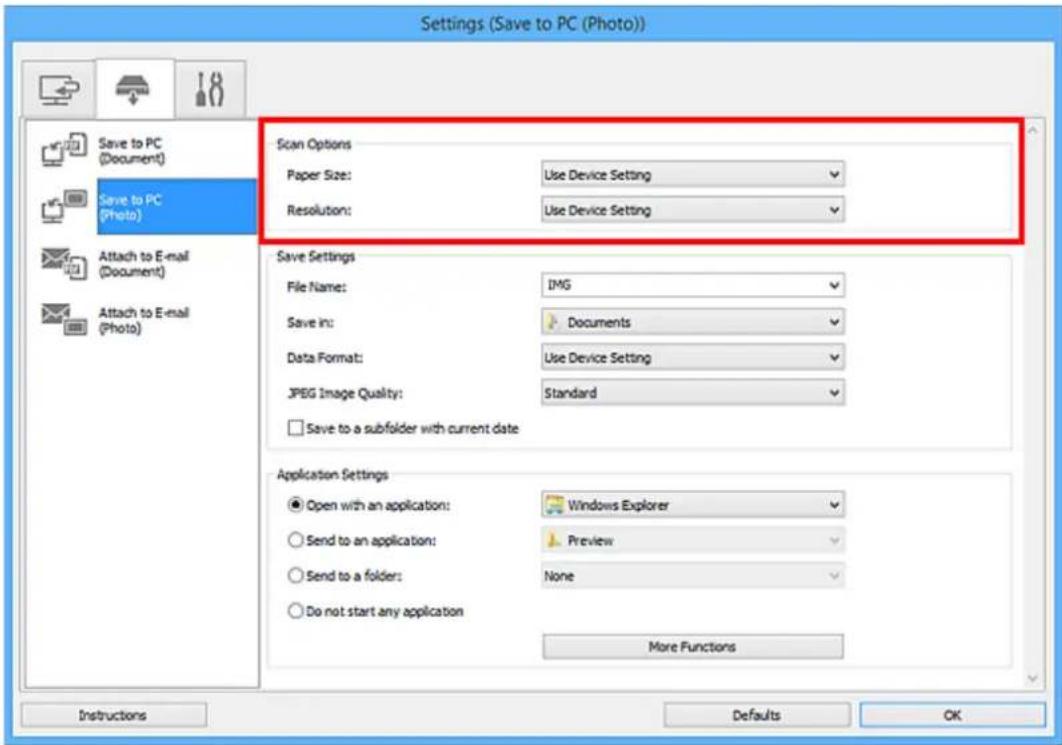
text_image
Settings (Save to PC (Photo)) Scan Options Paper Size: Use Device Setting Resolution: Use Device Setting Save Settings File Name: IMG Save in: Documents Data Format: Use Device Setting JPEG Image Quality: Standard Save to a subfolder with current date Application Settings Open with an application: Windows Explorer Send to an application: Preview Send to a folder: None Do not start any application More Functions Instructions Defaults OK- Specify the file name and other settings in Save Settings.
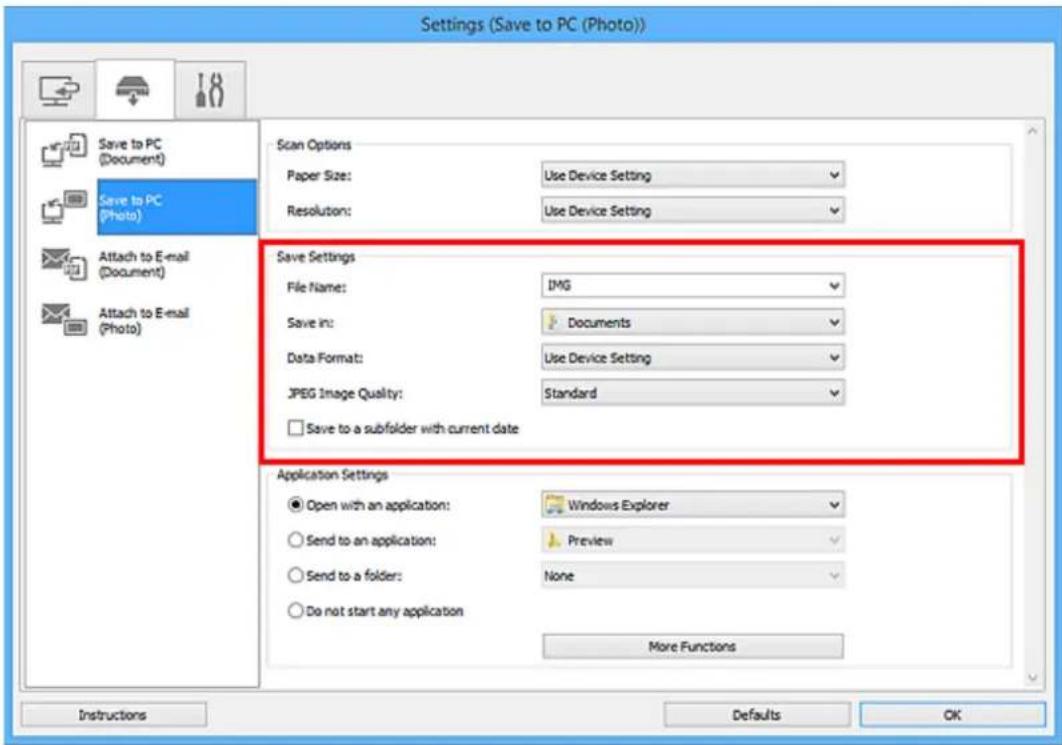
text_image
Settings (Save to PC (Photo)) Scan Options Paper Size: Use Device Setting Resolution: Use Device Setting Save Settings File Name: IMG Save in: Documents Data Format: Use Device Setting JPEG Image Quality: Standard Save to a subfolder with current date Application Settings Open with an application: Windows Explorer Send to an application: Preview Send to a folder: None Do not start any application More Functions Instructions Defaults OK- Select the application you want to start after scanning in Application Settings.
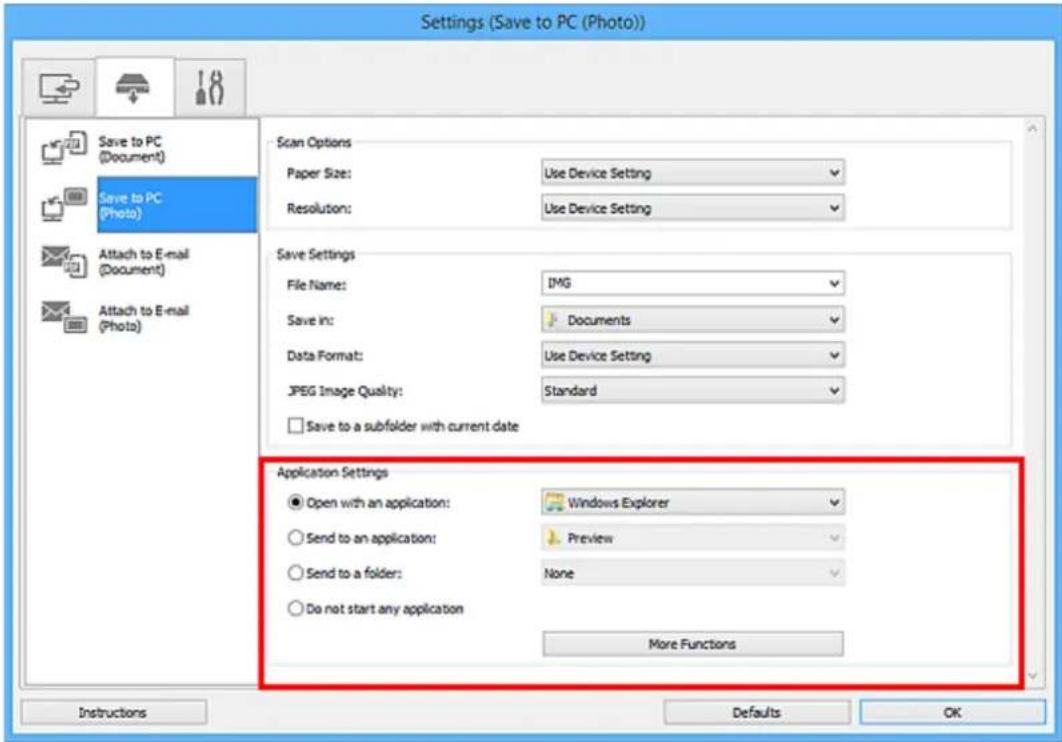
text_image
Settings (Save to PC (Photo)) Save to PC (Document) Save to PC (Photo) Attach to E-mail (Document) Attach to E-mail (Photo) Scan Options Paper Size: Use Device Setting Resolution: Use Device Setting Save Settings File Name: IMG Save in: Documents Data Format: Use Device Setting JPEG Image Quality: Standard Save to a subfolder with current date Application Settings Open with an application: Windows Explorer Send to an application: Preview Send to a folder: None Do not start any application More Functions Instructions Defaults OK- Click OK.
The responses will be executed according to the specified settings when you start scanning from the operation panel.
Scanning Using Smartphone/Tablet
This machine supports the following scan functions.
PIXMA/MAXIFY Cloud Link
PIXMA/MAXIFY Cloud Link is a web service provided by Canon. Save scanned images to data storage services through integration with various cloud services without using a computer.
→ Using PIXMA/MAXIFY Cloud Link
Using PIXMA/MAXIFY Cloud Link
By using PIXMA/MAXIFY Cloud Link, you can connect your printer to a cloud service, such as CANON iIMAGE GATEWAY, Evernote, or Twitter, and use the following functions without using a computer:
- Print images from a photo-sharing service
- Print documents from a data management service
- Save scanned images to a data management service.
- Use Twitter to report the printer status, such as no paper or low ink levels.
In addition, you can use various functions by adding and registering apps that are linked with various cloud services.
Using PIXMA/MAXIFY Cloud Link from Your Printer
Using PIXMA/MAXIFY Cloud Link from Your Smartphone, Tablet, or Computer
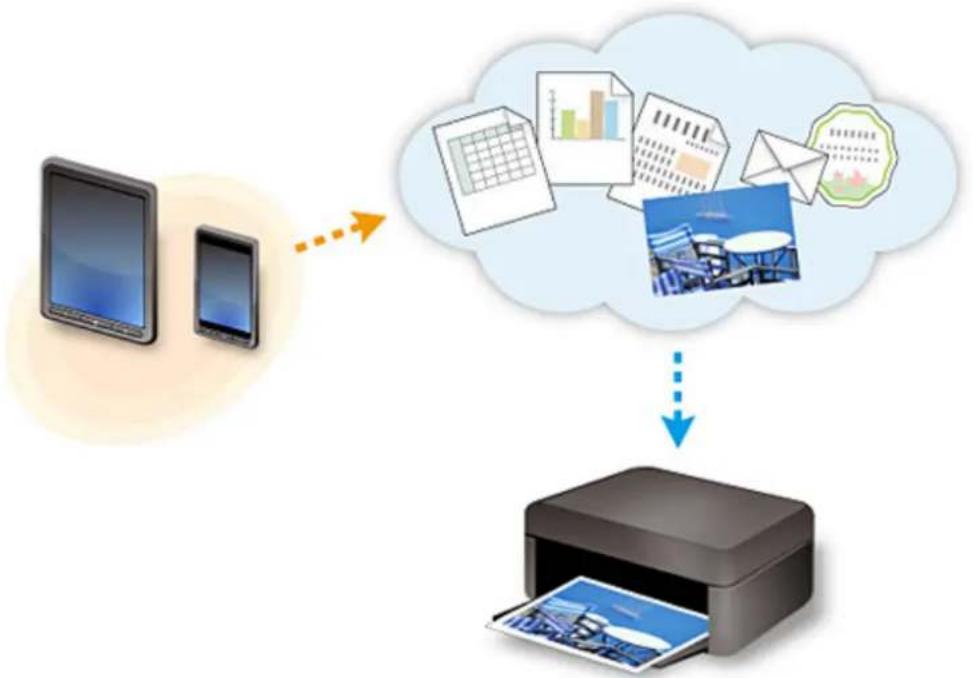
flowchart
graph TD
    A["Input Device"] --> B["Printer"]
    C["External Thought"] --> B
    B --> D["Output Photo"]

Important
- In certain countries, PIXMA/MAXIFY Cloud Link may not be available or the available apps may be different.
- Some apps require that you have an account before you use those apps. For such apps, please set up an account beforehand.
- To find out which models support PIXMA/MAXIFY Cloud Link check the Canon homepage.
• The screen display may change without prior notice.
Faxing
Preparing for Faxing
Sending Faxes Using Operation Panel of Printer
Registering Recipients
Receiving Faxes
Other Useful Fax Functions
Sending Faxes from Computer (Windows)
Sending Faxes from Computer (Mac OS)
Preparing for Faxing
Connect the printer to the telephone line and set up the printer before using the faxing functions. Then specify the basic setting such as sender information, date/time, and daylight saving time.

Important
- If the Power Disconnects:
If there is a power failure or if you accidentally unplug the power cord, the date/time settings will be reset.
- The settings for user information and directory will be retained.
- All faxes stored in the printer's memory, such as unsent and received faxes, will be lost.
If the power disconnects, the following will apply:
- You will not be able to send or receive faxes, make copies, or scan originals.
- When you are connecting the telephone, whether or not you can use it depends upon your telephone line or telephone.
Setting Up Printer
The printer must be set up depending on your telephone line and use of the faxing function. Follow the procedure below to set up the printer.
- Connecting Telephone Line
- Setting Telephone Line Type
- Setting Receive Mode

Note
- You can set the fax setting according to the instruction on the LCD.
→ Easy setup
If you set up according to the instruction on the LCD, the receive mode is set to TEL priority mode or FAX only mode. To receive faxes with DRPD or Network switch, change the receive mode.
Setting Receive Mode
Specifying Basic Settings for Faxing
Setting Sender Information
Connecting Telephone Line
The connection method differs depending on your telephone line.
- If you connect the printer to wall telephone line directly/If you connect the printer with the xDSL splitter:
→ Basic Connection - If you connect the printer to another line such as an xDSL:
Connecting Various Lines
If the connection is incorrect, the printer cannot send/receive faxes. Connect the printer correctly.

Important
- Do not connect fax devices and/or telephones in parallel (US and Canada only).
If two or more fax devices and/or telephones are connected in parallel, the following problems may occur and the printer may not operate properly.
- If you pick up the handset of the telephone that is connected in parallel during fax transmission or reception, the fax image may be corrupted or a communication error may occur.
- Such services as Caller ID, etc. may not operate properly on the telephone.
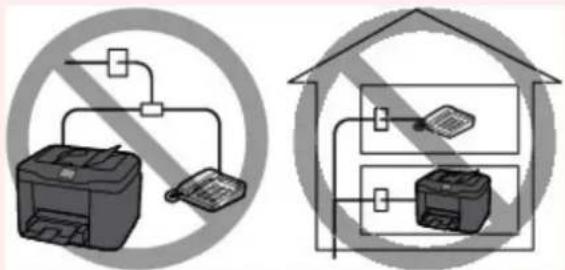
text_image
Diagram showing a printer and printer connected to a router, with no symbols indicating prohibition or prohibition in the image.If you cannot avoid parallel connections, set the receive mode to TEL priority mode, understanding that the above problems may occur. You will only be able to receive faxes manually.
Basic Connection
Make sure that the printer is turned off, connect one end of supplied telephone line cable to the telephone line jack near the "LINE" mark of the printer, and then connect the other end to the telephone line jack on the wall or to the telephone line jack of the xDSL splitter.
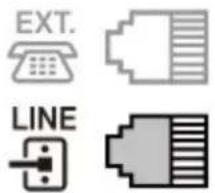
text_image
EXT. LINEWhen you connect the telephone to the printer, make sure that the printer is turned off, connect one end of the modular cable to the external device jack near the "EXT." mark of the printer, and then connect the other end to the telephone line jack of the telephone.
Important
- Be sure to connect the telephone line before the printer is turned on.
If you connect the telephone line when the printer is turned on, turn the printer off and unplug the power cord. Wait for 1 minute, and then connect the telephone line and power plug.
Note
- Refer to Rear View for the position of the telephone line jack and the external device jack.
- Before connecting a telephone or answering machine, remove the Telephone connector cap.
• For users in the UK:
If the connector of the external device cannot be connected to the jack on the printer, you will need to purchase a B.T. adapter to connect as follows:
Attach the B.T. adapter to the modular cable connecting the external device, and then connect the B.T. adapter to the external device jack.
Connecting Various Lines
This section introduces how to connect various lines.
These are examples and could not be guaranteed to suit every connecting condition. For details, refer to the instruction manual supplied with the network device (control devices such as an xDSL (Digital Subscriber Line) modem or terminal adapter) you are connecting to this printer.
Note
- xDSL is the generic term for the high speed digital communication technology with telephone line such as ADSL/HDSL/SDSL/VDSL.
- Connecting to an Internet Telephone
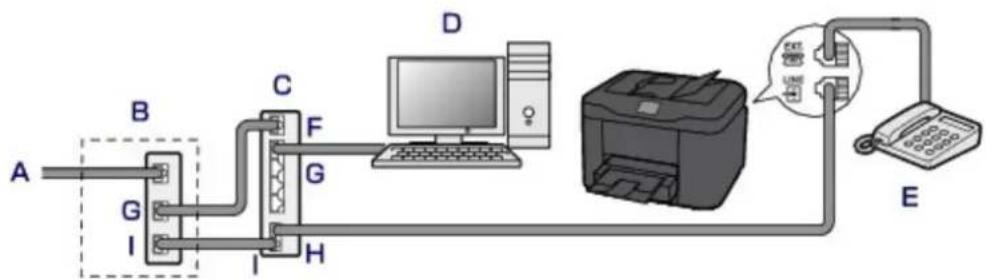
flowchart
graph LR
    A["A"] --> B["B"]
    B --> C["C"]
    C --> D["D"]
    D --> E["E"]
    E --> F["Printer"]
    F --> G["Computer"]
    style A fill:#f9f,stroke:#333
    style B fill:#ccf,stroke:#333
    style C fill:#cfc,stroke:#333
    style D fill:#fcc,stroke:#333
    style E fill:#cff,stroke:#333
    style F fill:#ffc,stroke:#333
    style G fill:#cfc,stroke:#333
A. Digital Subscriber Line
B. xDSL modem (splitter may not be built-in to the modem)
C. Broadband router compatible with Internet Telephone
D. Computer
E. Telephone or answering machine
F. WAN (Wide Area Network) port
G. LAN (Local Area Network) port
H. TEL port
I. LINE port
* Port configurations and names may vary depending on the product.
Note
- When connecting to the xDSL line, select the same line type as you are subscribing to in Telephone line type.
Setting Telephone Line Type
- Connecting to an xDSL
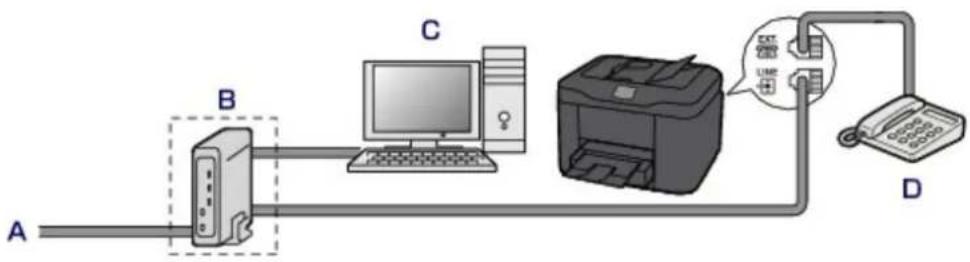
flowchart
graph LR
    A["Server A"] --> B["Server B"]
    B --> C["Computer C"]
    C --> D["Printer D"]
    D --> E["Telephone E"]
    style A fill:#f9f,stroke:#333
    style B fill:#ccf,stroke:#333
    style C fill:#cfc,stroke:#333
    style D fill:#fcc,stroke:#333
    style E fill:#cff,stroke:#333
A. Analog Subscriber Line
C. Computer
D. Telephone or answering machine
B. xDSL modem (splitter may not be built-in to the modem)
Important
- When the splitter is not built-in to the modem, do not branch the telephone line before the splitter (wall side). And also, do not connect splitters in parallel. The printer may not be able to operate properly.
Note
- When connecting to the xDSL line, select the same line type as you are subscribing to in Telephone line type.
Setting Telephone Line Type
- Connecting to an ISDN Line
For details on ISDN (Integrated Service Digital Network) connection and settings, refer to the manuals supplied with your terminal adapter or dial-up router.
Setting Telephone Line Type
Before using your printer, make sure you set the correct telephone line type for your telephone line. If you are unsure of your telephone line type, contact your telephone company. For xDSL or ISDN connections, contact the telephone company or service provider to confirm your line type.
Note
- Telephone line type will not appear in countries or regions where Rotary pulse is not supported.
-
You can print USER'S DATA LIST to check the current setting.
→ Summary of Reports and Lists -
Make sure that printer is turned on.
-
Select Setup on HOME screen.
→ Using the Operation Panel
-
Select Device settings, and then press OK button.
-
Select FAX settings, and then press OK button.
-
Select FAX user settings, and then press OK button.
-
Select Telephone line type, and then press OK button.
-
Select a telephone line type, and then press OK button.
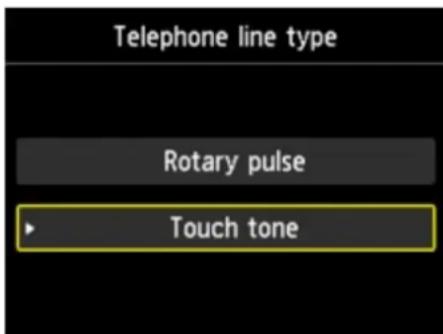
text_image
Telephone line type Rotary pulse Touch toneRotary pulse
Select when your telephone line type is pulse dialing.
Touch tone
Select when your telephone line type is tone dialing.
Setting Receive Mode
Set the receiving operation (receiving mode).
For details on how to set the receive mode:
Setting Receive Mode
You can select the appropriate mode.
For details on the selectable receive mode:
→ About Receive Mode
For details on the advanced settings of the receive mode:
→ Advanced Settings of Receive Mode
Note
- The receiving operation procedure varies depending on the selected receive mode.
For details on receiving method depending on each receive mode:
→ Receiving Faxes
- If you want to use a single telephone line for faxes and voice calls, you need to connect a telephone or an answering machine to the external device jack of this printer.
For details on how to connect the telephone or the answering machine to the printer:
→ Basic Connection
Setting Receive Mode
This section describes the procedure to select the receive mode.
- Make sure that printer is turned on.

- Select on HOME screen.
→ Using the Operation Panel
- Select Function list, and then press OK button.
The Function list screen is displayed.
-
Select Receive mode settings, and then press OK button.
-
Select receive mode, and then press OK button.
Note
- By pressing the right Function button when a receive mode is selected, you can specify the advanced settings of each receive mode.
For details on the advanced settings of the receive mode:
→ Advanced Settings of Receive Mode
- For details on the receive mode:
→ About Receive Mode
- DRPD is available only in the US and Canada.
• Network switch may not be available depending on the country or region of purchase.
- Refer to Receiving Faxes for information on receiving faxes or the procedure for each receive mode.
About Receive Mode
You can select the receive mode suitable for your fax use conditions: whether you use a dedicated line for fax, etc.
| Receive mode | Your fax use condition Receivng operation | |
| TEL priori-ty mode | When mainly receiving voice calls (with a telephone or an-swering machine connected to the printer): | When a call incomes, the telephone will ring.Pick up the handset.If the call is a voice call, talk on the telephone.If the call is a fax, hang up the handset after the printer starts receiving the fax.NoteThe telephone may not ring when a call incomes even if it is con-nected to the printer, depending on the type or settings of the tele-phone. |
| DRPD or Network switch | When receiving voice calls (with a telephone or answer-ing machine connected to the printer) and subscribing to a ring pattern detection service provided by your telephone company: | When a call incomes, the telephone will ring. The printer detects a fax call by the fax ring pattern.If the call is a fax, the printer will receive the fax automatically.If the printer does not detect the fax ring pattern, the telephone will continue ringing.NoteThe telephone may not ring when a call incomes even if it is con-nected to the printer, depending on the type or settings of the tele-phone. |
| FAX only mode | When not receiving voice calls: | When a fax incomes, the printer will receive the fax automatically. |
Advanced Settings of Receive Mode
You can specify the advanced settings of each receive mode.
- Advanced setting in TEL priority mode
You can specify the following setting items.
- Manual/auto switch
If you select ON, the printer automatically receives faxes after the external device rang a specified length of time.
You can specify the length of time until automatic reception is started.
- User-friendly reception
If you select ON, the printer automatically switches from telephone calling to fax reception by detecting the fax signal (CNG signal) when you lift the handset of the telephone or the answering machine answers. When you have an answering machine connected to the printer, select ON to switch to fax reception automatically after the answering machine answers.
If you select OFF, the printer does not switch from telephone calling to fax reception automatically even if the printer detects the fax signal (CNG signal). Select OFF if you want the printer not to switch automatically during a call.
Note
- If you subscribe to Duplex Ringing service in Hong Kong, the number of times the external device rings specified with Incoming ring in FAX only mode is available in TEL priority mode.
If you want to specify the number of times the external device rings in TEL priority mode, select FAX only mode on the Receive mode settings screen, specify the number of times the external device rings with Incoming ring, and then switch to TEL priority mode on the Receive mode settings screen.
- If you subscribe to Duplex Ringing service in Hong Kong, we recommend that Manual/auto switch be set to OFF.
- Advanced setting in FAX only mode
You can specify the following setting item.
- Incoming ring
You can specify the number of times the external device rings when incoming.
• Advanced setting in DRPD
You can specify the following setting items.
- DRPD: FAX ring pattern
Sets the distinctive ring pattern of a call that the printer assumes is a fax call.
If you subscribe to a DRPD service, set the ring pattern to match the pattern assigned by your telephone company.
Setting DRPD Ring Pattern (US and Canada only)
- Incoming ring
You can specify the number of times the external device rings when incoming.
- Advanced setting in Network switch
You can specify the following setting item.
- Incoming ring
You can specify the number of times the external device rings when incoming.
Setting DRPD Ring Pattern (US and Canada only)
If you have subscribed to a Distinctive Ring Pattern Detection (DRPD) service provided by your telephone company, your telephone company will assign two or more telephone numbers with distinctive ring patterns to your single telephone line, allowing you to have different numbers for fax calls and voice calls using only one telephone line. Your printer will automatically monitor the ring pattern, and will automatically receive the fax if the ring pattern is a fax call.
To use DRPD, follow the procedure below to set the fax ring pattern that matches the pattern assigned by your telephone company.

Note
- Contact your local telephone company for detailed information on this service.
- Make sure that printer is turned on.

- Select on HOME screen.
→ Using the Operation Panel
- Select Function list, and then press OK button.
The Function list screen is displayed.
-
Select Receive mode settings, and then press OK button.
-
Select DRPD.
-
Press right Function button.
-
Select DRPD: FAX ring pattern, and then press OK button.
The DRPD: FAX ring pattern screen is displayed.
- Select ring pattern that your telephone company assigned to your fax number, and then press OK button.
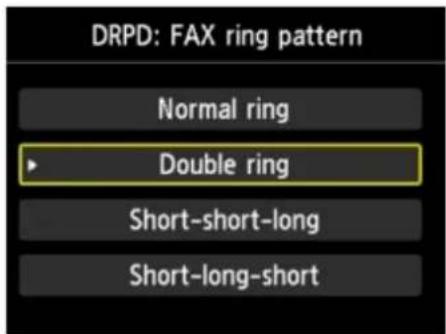
text_image
DRPD: FAX ring pattern Normal ring ► Double ring Short-short-long Short-long-short- Press Back button.
The Receive mode settings screen is displayed.
- Press OK button.
The Function list screen is displayed.
Setting Sender Information
You can set the sender information such as date/time, unit name, and unit fax/telephone number.
→ About Sender Information
Setting Date and Time
Setting Daylight Saving Time (Summer Time)
→ Registering User Information
About Sender Information
If the unit name and unit fax/telephone number are registered, they are printed with date and time as sender information on the recipient's fax.
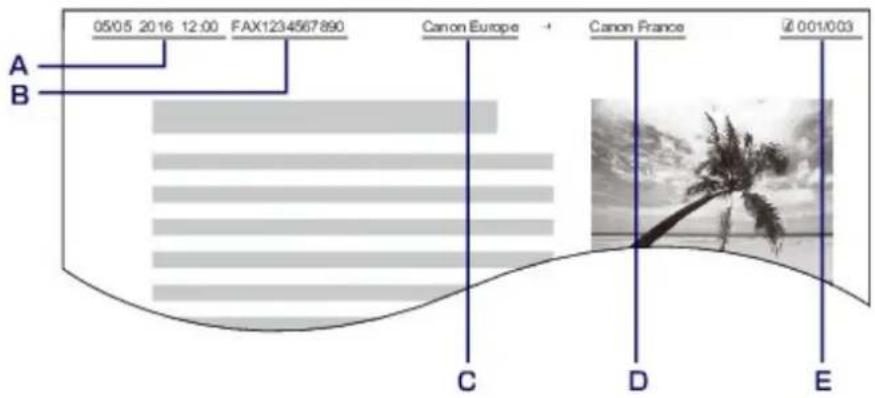
text_image
05/05 2016 12:00 FAX1234567890 Canon Europe Canon France 001/003 A B C D EA. Date and time of transmission
B. Unit fax/telephone number
C. Unit name
D. The registered recipient's name is printed when sending faxes.
E. Page number
Note
- You can print USER'S DATA LIST to confirm the sender information you have registered.
→ Summary of Reports and Lists
- When sending faxes in black & white, you can select whether to print the sender information inside or outside the image area.
Specify the setting on TTI position in Advanced FAX settings under FAX settings.
→ Advanced FAX settings
- You can select the date print format from three formats: YYYY/MM/DD, MM/DD/YYYY, and DD/MM/YYYY.
Select the date print format on Date display format under Device user settings.
→ Device user settings
Setting Date and Time
This section describes the procedure to set the date and time.
-
Make sure that printer is turned on.
-
Select 5-11p on HOME screen.
→ Using the Operation Panel
-
Select Device settings, and then press OK button.
-
Select Device user settings, and then press OK button.
-
Select Date/time setting, and then press OK button.
-
Set date and time.
Use the button to move the cursor under the desired position, and then use the button to enter the date and time.
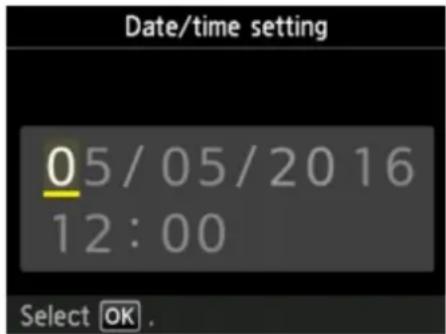
text_image
Date/time setting 05/05/2016 12:00 Select OK .Enter the date and time in 24-hour format.
Enter only the last two digits of the year.
-
Press OK button.
-
Press HOME button to return to HOME screen.
Setting Daylight Saving Time (Summer Time)
Some countries adopt the daylight saving time (summer time) system that shifts the clock time forward at certain periods of the year.
You can set your printer to automatically change the time by registering the date and time that daylight saving time (summer time) begins and ends.
Important
- Not all the latest information of all countries or regions is applied for Daylight saving time setting by default. You need to change the default setting according to the latest information of your country or region.
Note
- This setting may not be available depending on the country or region of purchase.
-
Make sure that printer is turned on.
-
Select Setup on HOME screen.
→ Using the Operation Panel
-
Select Device settings, and then press OK button.
-
Select Device user settings, and then press OK button.
-
Select Daylight saving time setting, and then press OK button.
-
Select ON, and then press OK button.
To disable summer time, select OFF.
-
Set date and time when summer time starts.
-
Set date when summer time starts.
Use the ▲ button to change the setting item, use the button to change the setting, and then use the OK button to confirm the selection.
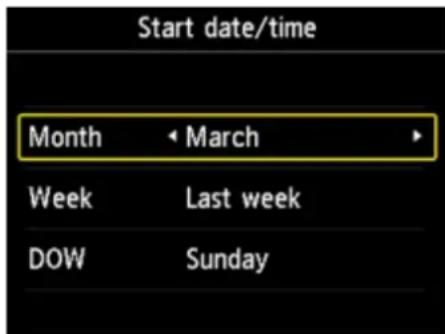
text_image
Start date/time Month • March Week Last week DOW Sunday- Set time (in 24-hour format) when summer time starts.
Use the button to move the cursor under the desired position, use the button to enter the time, and then press the OK button.
Precede single digits with a zero.
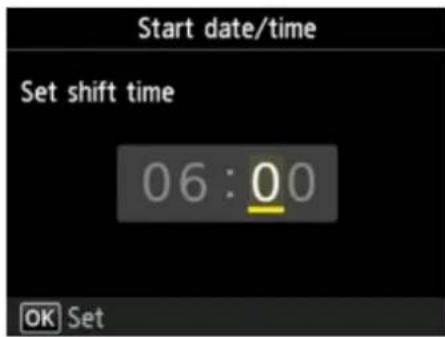
text_image
Start date/time Set shift time 06:00 OK Set-
Set date and time when summer time ends.
-
Set date when summer time ends.
Use the ▲▼ button to change the setting item, use the ▼ button to change the setting, and then use the OK button to confirm the selection.
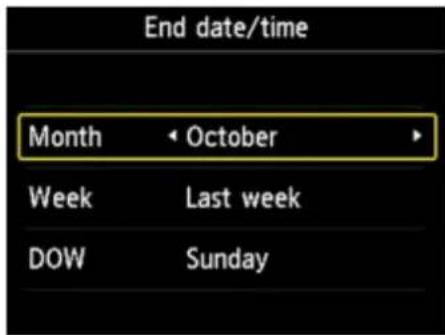
text_image
End date/time Month • October Week Last week DOW Sunday- Set time (in 24-hour format) when summer time ends.
Use the ◀ button to move the cursor under the desired position, use the ▲ button to enter the time, and then press the OK button.
Precede single digits with a zero.
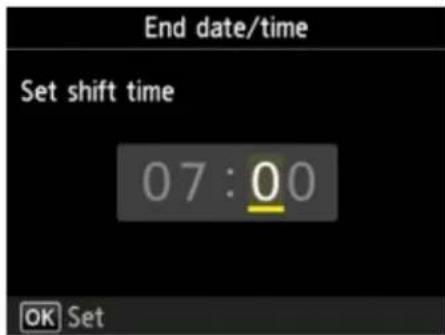
text_image
End date/time Set shift time 07:00 OK Set- Press HOME button to return to HOME screen.
Registering User Information
This section describes the procedure to register the user information.
Note
- Before sending a fax, be sure to enter your name and fax/telephone number in Unit name and Unit TEL on the User information settings screen (for US only).
-
Make sure that printer is turned on.
-
Select 📄 on HOME screen.
→ Using the Operation Panel
-
Select Device settings, and then press OK button.
-
Select FAX settings, and then press OK button.
-
Select FAX user settings, and then press OK button.
-
Select User information settings, and then press OK button.
The screen to register the unit name and the unit fax/telephone number is displayed.
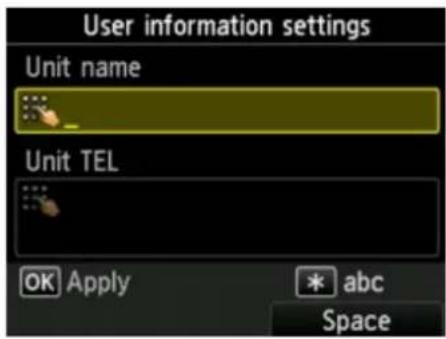
text_image
User information settings Unit name Unit TEL OK Apply * abc Space-
Enter unit name.
-
Move cursor to Unit name.
- Enter unit name.
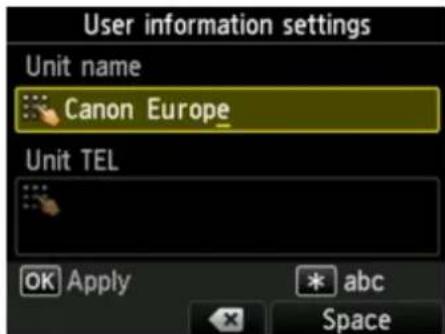
text_image
User information settings Unit name Canon Europe Unit TEL OK Apply * abc Space- Press OK button.
Note
- You can enter the name up to 24 characters, including spaces.
- For details on how to enter or delete characters:
→ Entering Numbers, Letters, and Symbols
8. Enter unit fax/telephone number.
- Move cursor to Unit TEL.
- Enter unit fax/telephone number.
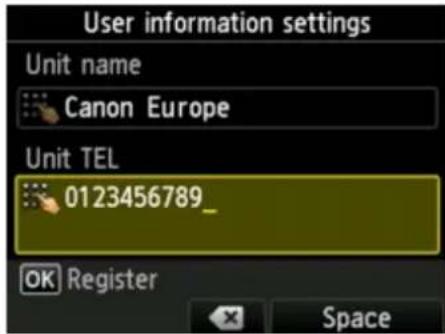
text_image
User information settings Unit name Canon Europe Unit TEL 0123456789_ OK Register SpaceNote
- You can enter the fax/telephone number up to 20 digits, including spaces.
-
For details on how to enter or delete characters:
→ Entering Numbers, Letters, and Symbols -
Press OK button to finalize registration.
Sending Faxes Using Operation Panel of Printer
Sending Faxes by Entering Fax/Telephone Number
▶ Resending Faxes (Redialing Busy Number)
Setting Items for Sending Faxes
▶ Sending Faxes Using Useful Functions
Sending Faxes by Entering Fax/Telephone Number
This section describes dialing and sending faxes directly by entering the fax/telephone numbers.
Important
- It may be possible that faxes will reach unintended recipients due to the misdialing or incorrect registration of fax/telephone numbers. When you send important documents, we recommend that you send them after speaking on the telephone.
→ Sending Fax after Speaking on Telephone
- Make sure that printer is turned on.
- Load documents on platen glass or in ADF.
Important
- When sending a double-sided document, load the document on the platen glass. Double-sided documents cannot be automatically scanned and sent from the ADF.
Note
- For details on the types, conditions of document, and how to load the document:
Loading Originals
- Select on HOME screen.
→ Using the Operation Panel
The Fax standby screen is displayed.
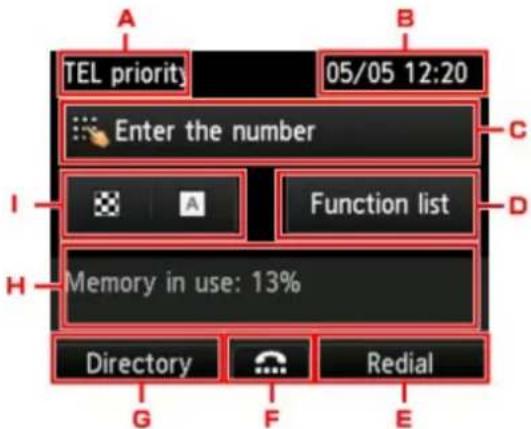
text_image
TEL priority 05/05 12:20 Enter the number Function list Memory in use: 13% Directory RedialA. Receive mode
The receive mode selected currently is displayed.
B. Date and time
The date and time are displayed.
C. Entry field of fax/telephone numbers
The entered numbers are displayed.
D. Function list
You can use the each fax function and change the setting for the fax.
E. Redial
Select to send faxes with redialing.
→ Resending Faxes (Redialing Busy Number)
F. On hook dial
Select to send faxes with the on hook dial function.
→ Using On Hook Dial Function
G. Directory
You can select a registered fax/telephone number.
→ Sending Fax to Registered Recipient
H. Current state
The current state is displayed.
I. Send Settings
Setting Items for Sending Faxes
Note
- If you have not set up the printer for sending/receiving faxes yet, the message for setup is displayed on the LCD when you select FAX for the first time. When you set up for faxing, follow the procedure according to the instructions on the LCD.
- Use Numeric buttons to dial recipient's fax/telephone number.
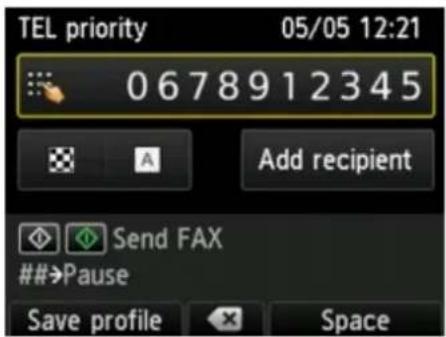
text_image
TEL priority 05/05 12:21 0678912345 Add recipient Send FAX ##→Pause Save profile SpaceUse the following buttons to dial the recipient's fax/telephone number.
Numeric buttons:
Enters the number.
Right Function button:
Enters a space.
Center Function button:
Deletes the last character you entered.
Left Function button:
You can register the current print settings as a custom setting.
Registering Favorite Settings (Custom profiles)
- Press Color button for color transmission, or Black button for black & white transmission.
The printer starts scanning the document.
Important
• Color transmission is available only when the recipient's fax device supports color faxing.
- Do not open the document cover until scanning is completed.
- Start sending.
- If you load the document in the ADF:
The printer scans the document automatically and starts sending the fax.
Note
- To cancel a fax transmission, press the Stop button. To cancel a fax transmission while it is in progress, press the Stop button, and then follow the instructions on the LCD.
- If documents remain in the ADF after the Stop button is pressed while scanning is in progress, Document in ADF. Select OK to eject document. is displayed on the LCD. By pressing OK, the remaining documents are automatically ejected.
- If you load the document on the platen glass:
After scanning the document, the confirmation screen asking you if you load the next document is displayed.
To send the scanned document, press the OK button to start sending it.
To send two or more pages, follow the message to load the next page, and press the Color or Black button. After scanning all pages, press the OK button to start sending.
Note
- To cancel sending the fax, press the Stop button.
Note
- When your printer is connected to a PBX (Private Branch Exchange) system, refer to the operating instructions of the system for details on dialing the recipient's fax/telephone number.
- In case the printer was not able to send a fax, such as when the recipient's line was busy, it has the function to automatically redial the number after a specified interval. Automatic redialing is enabled by default.
→ Automatic Redialing - Unsent documents, such as those pending redial, are stored in the printer's memory. They are not stored in the case of a sending error.
→ Document Stored in Printer's Memory
- Do not unplug the power cord until all documents are sent. If you unplug the power cord, all unsent documents stored in the printer's memory are lost.
Resending Faxes (Redialing Busy Number)
There are two methods of redialing: Automatic redialing and Manual redialing.
• Automatic Redialing
If you send a document and the recipient's line is busy, the printer will redial the number after a specified interval.
→ Automatic Redialing
- Manual Redialing
You can redial to the recipients dialed by entering the fax/telephone numbers.
→ Manual Redialing

Important
- It may be possible that faxes will reach unintended recipients due to the misdialing or incorrect registration of fax/telephone numbers. When you send important documents, we recommend that you send them after speaking on the telephone.
→ Sending Fax after Speaking on Telephone

Note
• Automatic redialing is enabled by default.
- For details on the basic sending operations:
→ Sending Faxes by Entering Fax/Telephone Number
Automatic Redialing
You can enable or disable automatic redialing. If you enable automatic redialing, you can specify the maximum number of redial attempts and the length of time the printer waits between redial attempts.
Enable and specify the automatic redialing setting on Auto redial in Advanced FAX settings under FAX settings.
→ Advanced FAX settings

Important
- While automatic redialing, the unsent fax is stored in the printer's memory temporarily until the sending fax is complete. If a power failure occurs or you unplug the power cord before automatic redialing is complete, all faxes stored in the printer's memory are deleted and not sent.

Note
- To cancel automatic redialing, wait until the printer starts redialing, and then press the Stop button.
- To cancel automatic redialing, delete the unsent fax from the printer's memory while the printer is on-standby for a redial operation. For details, see Deleting Document in Printer's Memory.
Manual Redialing
Follow the procedure below for manual redialing.
- Make sure that printer is turned on.
-
Load documents on platen glass or in ADF.
-
Select ON HOME screen.
→ Using the Operation Panel
The Fax standby screen is displayed.
- Change send settings as necessary.
Setting Items for Sending Faxes
- Press right Function button.
The Redial screen is displayed.
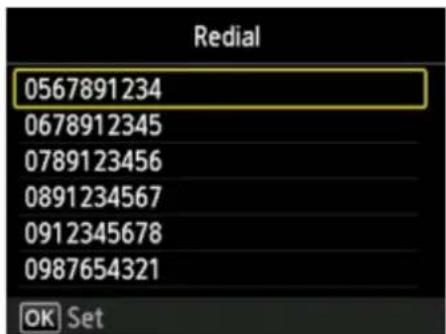
text_image
Redial 0567891234 0678912345 0789123456 0891234567 0912345678 0987654321 OK Set- Select a recipient's number to redial, and then press OK button.
- Press Color button for color transmission, or Black button for black & white transmission.
Important
• Color transmission is available only when the recipient's fax device supports color faxing.
Note
- For manual redialing, the printer memorizes up to 10 recent recipients dialed by entering the fax/telephone numbers. Note that the printer does not memorize any recipients dialed using the redial function or selecting from the directory.
- To cancel manual redialing, press the Stop button. To cancel a fax transmission while it is in progress, press the Stop button, and then follow the instructions on the LCD.
- If documents remain in the ADF after the Stop button is pressed while scanning is in progress, Document in ADF. Select OK to eject document. is displayed on the LCD. By pressing OK, the remaining documents are automatically ejected.
Setting Items for Sending Faxes
You can change the send settings such as the scan contrast or the scan resolution on the Fax standby screen.
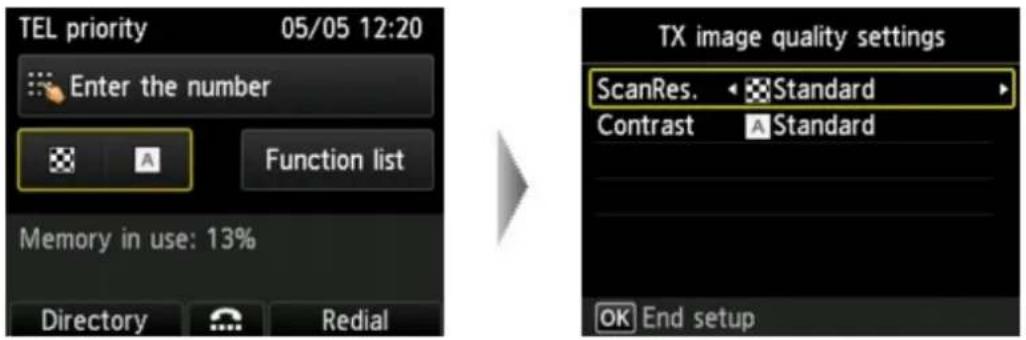
text_image
TEL priority 05/05 12:20 Enter the number Function list Memory in use: 13% Directory Redial TX image quality settings ScanRes. Standard Contrast Standard OK End setupUse the button to change the setting item and use the button to change the setting.
- ScanRes.
The following settings of the scan resolution are selectable.
Standard
Suitable for text-only documents.
Fine
Suitable for fine-print documents.
Extra fine
Suitable for detailed illustration or fine-print quality documents.
If the recipient's fax device is not compatible with Extra fine (300 x 300 dpi), the fax will be sent in the Standard or Fine resolution.
Photo
Suitable for photographs.
Note
- When sending a color fax, documents are always scanned in the same resolution (200 x 200 dpi). The image quality (compression rate) is determined by which scan resolution is selected, except that Extra fine and Photo provide the same image quality.
- Contrast
Select a setting of the scan contrast from Lower, Standard, and Higher.
The LCD returns to the Fax standby screen when you finish specifying the setting and pressing the OK button.
Sending Faxes Using Useful Functions
Sending Fax after Speaking on Telephone
▶ Sending Fax to Registered Recipient
Sending Same Document to Several Recipients (Sequential Broadcasting)
▶ Preventing Mistransmission of Faxes
Using On Hook Dial Function
Sending Fax after Speaking on Telephone
If you want to speak to the recipient before sending a fax, or if the recipient does not have a fax device that can receive faxes automatically, send a fax manually after speaking to the recipient on the telephone to check whether the recipient can receive faxes.

Important
- It may be possible that faxes will reach unintended recipients due to the misdialing or incorrect registration of fax/telephone numbers. When you send important documents, we recommend that you send them after speaking on the telephone. See below for the procedure to send a fax manually.
- With manual transmission, you cannot use the platen glass to load documents. Load the documents in the ADF.
When loading document on the platen glass, send a fax with automatic transmission.
→ Sending Faxes by Entering Fax/Telephone Number
- To speak to the recipient before sending a fax, you need to connect a telephone to the printer.
For details on how to connect the telephone to the printer:
→ Basic Connection

Note
-
For details on the basic sending operations:
→ Sending Faxes by Entering Fax/Telephone Number -
Make sure that printer is turned on.
- Load documents in ADF.
- Make sure that printer is turned on.
-
Load documents in ADF.
-
Select on HOME screen.
→ Using the Operation Panel
The Fax standby screen is displayed.
- Change send settings as necessary.
Setting Items for Sending Faxes
- Lift handset of telephone connected to printer.
- Use telephone to dial recipient's fax/telephone number.
- Speak to recipient.
When you hear a high-pitched signal instead of the recipient's voice, you cannot check whether the recipient can receive faxes. If you want to stop sending the fax, replace the handset. If you want to send the fax, go to step 8.
-
Ask recipient to set recipient's fax device to receive faxes.
-
When you hear a high-pitched signal, press Color button or Black button.
Press the Color button for color transmission, or the Black button for black & white transmission.
Important
• Color transmission is available only when the recipient's fax device supports color faxing.
- Hang up handset.
Note
- To cancel a fax transmission, press the Stop button. To cancel a fax transmission while it is in progress, press the Stop button, and then follow the instructions on the LCD.
- If documents remain in the ADF after the Stop button is pressed while scanning is in progress, Document in ADF. Select OK to eject document. is displayed on the LCD. By pressing OK, the remaining documents are automatically ejected.
Sending Fax to Registered Recipient
Registering recipient's fax/telephone number and name in the printer's directory enables you to send faxes easily.

Important
- It may be possible that faxes will reach unintended recipients due to the misdialing or incorrect registration of fax/telephone numbers. When you send important documents, we recommend that you send them after speaking on the telephone.
→ Sending Fax after Speaking on Telephone

Note
- For details on the basic sending operations:
→ Sending Faxes by Entering Fax/Telephone Number
- Make sure that printer is turned on.
-
Load documents on platen glass or in ADF.
-
Select on HOME screen.
→ Using the Operation Panel
The Fax standby screen is displayed.
- Change send settings as necessary.
Setting Items for Sending Faxes
- Press left Function button.
The screen to select a registered recipient is displayed.
- Select a registered recipient.
Display by name Display by ID number
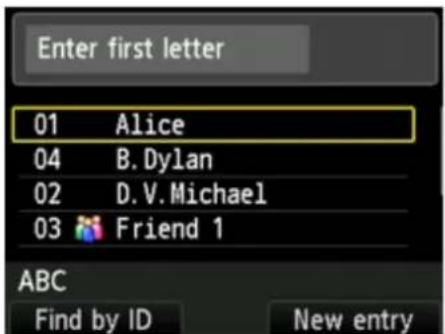
text_image
Enter first letter 01 Alice 04 B. Dylan 02 D. V. Michael 03 Friend 1 ABC Find by ID New entry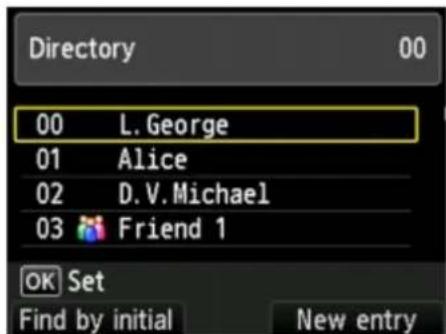
text_image
Directory 00 L. George 01 Alice 02 D. V. Michael 03 Friend 1 OK Set Find by initial New entryBy entering the initial letter using the Numeric buttons, the registered recipients are sorted by name.
By entering the ID number using the Numeric buttons, the registered recipients are searched by ID number.
Select a recipient, and then press the OK button.
Select a recipient, and then press the OK button.
The screen to select a operation for selected recipient appears.
The screen to select a operation for selected recipient appears.
Note
• To switch the display by name and by ID number, press the left Function button.
- If you press the left Function button, you can register a new recipient or a new group dial.
Registering Fax/Telephone Number of Recipients
→ Registering Recipients in Group Dial
7. Select Send FAX as operation for selected recipient, and then press OK button.
The LCD returns to the Fax standby screen.
Note
- You can edit or delete a selected recipient.
→ Changing Registered Information
→ Deleting Registered Information
8. Press Color button for color transmission, or Black button for black & white transmission.
Important
• Color transmission is available only when the recipient's fax device supports color faxing.
Note
- To cancel a fax transmission, press the Stop button. To cancel a fax transmission while it is in progress, press the Stop button, and then follow the instructions on the LCD.
- If documents remain in the ADF after the Stop button is pressed while scanning is in progress, Document in ADF. Select OK to eject document. is displayed on the LCD. By pressing OK, the remaining documents are automatically ejected.
- In case the printer was not able to send a fax, such as when the recipient's line was busy, it has the function to automatically redial the number after a specified interval. Automatic redialing is enabled by default.
→ Automatic Redialing
To cancel automatic redialing, wait until the printer starts redialing, and then press the Stop button.
Sending Same Document to Several Recipients (Sequential Broadcasting)
This printer allows you to prepare for sending the same document to a maximum of 101 recipients in one operation. The recipients can be specified by entering the fax/telephone numbers and selecting the registered recipients (the particular recipient's number and the group dial) in combination.
The following number of recipients can be specified in combination.
• The recipient registered to the printer:
Up to 100 (total of the particular recipient's number and the group dial)
- Entering the fax/telephone numbers or redialing:
1

Important
- It may be possible that faxes will reach unintended recipients due to the misdialing or incorrect registration of fax/telephone numbers. When you send important documents, we recommend that you send them one by one after speaking on the telephone.
→ Sending Fax after Speaking on Telephone

Note
- If you frequently send documents to the same group of recipients, you can group these numbers for group dialing. This will allow you to send documents to all the recipients in the group by simply operation.
→ Registering Recipients in Group Dial
- For details on the basic sending operations:
→ Sending Faxes by Entering Fax/Telephone Number
- Make sure that printer is turned on.
-
Load documents on platen glass or in ADF.
-
Select TAX on HOME screen.
→ Using the Operation Panel
The Fax standby screen is displayed.
- Change send settings as necessary.
Setting Items for Sending Faxes
- Specify first recipient.
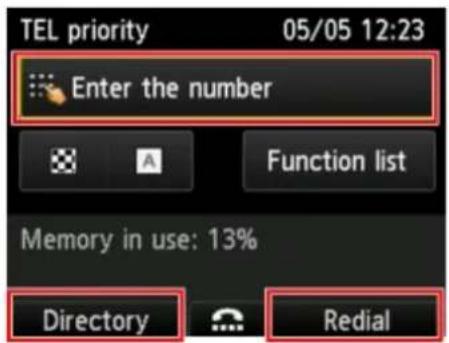
text_image
TEL priority 05/05 12:23 Enter the number Function list Memory in use: 13% Directory RedialSpecify the first recipient with the one of the following methods.
- By specifying with the recipient registered to the printer:
Press the left Function button and specify the recipient.
→ Sending Fax to Registered Recipient
- By entering the fax/telephone numbers:
Use the Numeric buttons to enter the recipient's fax/telephone number.
→ Sending Faxes by Entering Fax/Telephone Number

Note
- If FAX number re-entry in Security control under FAX settings is set to ON, enter the number again.
→ Security control
- By redialing:
Press the right Function button and select a number in the outgoing call logs.
→ Manual Redialing
6. Add recipient.
- Select Add recipient, and then press OK button.
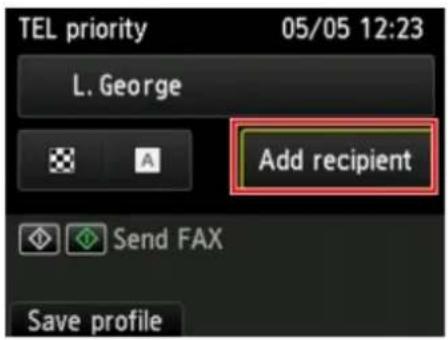
text_image
TEL priority 05/05 12:23 L. George Add recipient Send FAX Save profileThe list of the recipients is displayed.
- Select a method to add recipient.
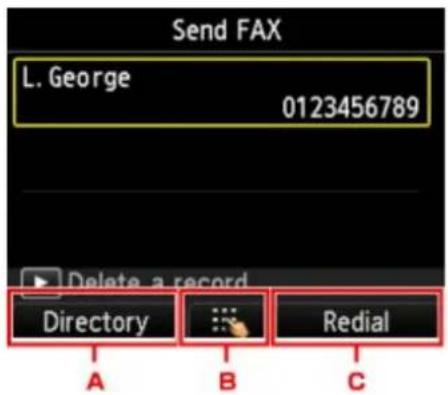
text_image
Send FAX L. George 0123456789 Delete a record Directory Redial A B CA. You can add the recipient from the registered recipients by the left Function button.
B. You can add the recipient by entering the fax/telephone numbers after pressing the center Function button if you specified a first recipient from the registered recipients.
C. You can add the recipient by selecting a number from the outgoing call logs after pressing the right Function button if you specified a first recipient from the registered recipients.
- Add a recipient.
Add a recipient according to the selected method.
The Sequential broadcasting screen is displayed after specifying the multiple recipients.
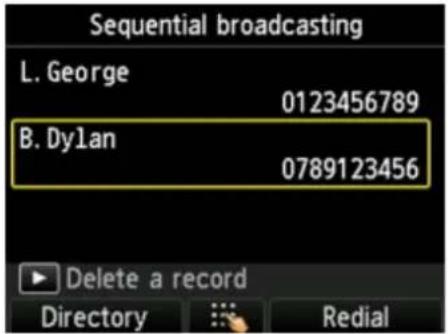
text_image
Sequential broadcasting L. George 0123456789 B. Dylan 0789123456 Delete a record Directory Redial- If you want to add recipient further, repeat same procedure.
Note
- You can specify the recipient either by entering the fax/telephone number or by selecting a number from the outgoing call logs.
- If you want to delete the recipient, select a recipient that you want to delete, and then press the button.
- Press Color button for color transmission, or Black button for black & white transmission.
Important
• Color transmission is available only when the recipient's fax device supports color faxing.
Note
- To cancel a fax transmission, press the Stop button. To cancel a fax transmission while it is in progress, press the Stop button, and then follow the instructions on the LCD.
When you press the Stop button, fax transmission to all the recipients specified will be canceled. You cannot cancel a fax transmission to only one recipient.
- If documents remain in the ADF after the Stop button is pressed while scanning is in progress, Document in ADF. Select OK to eject document. is displayed on the LCD. By pressing OK, the remaining documents are automatically ejected.
Preventing Mistransmission of Faxes
This printer has two functions for preventing the mistransmission of faxes.
- Sending faxes after entering the fax/telephone number twice
This function requires you to re-enter the fax/telephone number after entering the number, so that the printer prevents you from misdialing.
→ Sending Faxes after Dialing Twice (Fax Number Re-entry)
- Sending faxes after the printer checks the recipient's fax device information
Before sending a fax, the printer checks whether the recipient's fax device information matches the dialed number.
→ Sending Faxes after Checking Information (Checking Recipient's Information)
Sending Faxes after Dialing Twice (Fax Number Re-entry)
Set FAX number re-entry to ON following the procedure below.
- Make sure that printer is turned on.
- Select Setup on HOME screen.
→ Using the Operation Panel - Select Device settings, and then press OK button.
- Select FAX settings, and then press OK button.
- Select Security control, and then press OK button.
- Select FAX number re-entry, and then press OK button.
- Select ON, and then press OK button.
If you send a fax with this function, the following screen is displayed after entering the recipient's fax/telephone number.
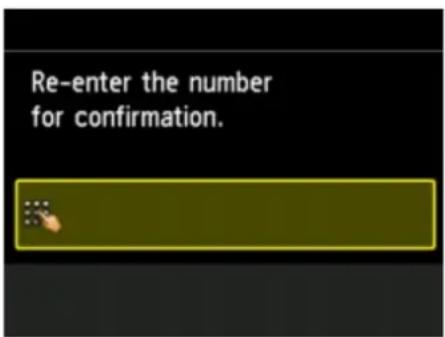
text_image
Re-enter the number for confirmation.Enter the recipient's fax/telephone number again.
Sending Faxes after Checking Information (Checking Recipient's Information)
Set Check RX FAX information to ON following the procedure below.

Important
- This function is not available when you send a fax manually.
→ Sending Fax after Speaking on Telephone
- Make sure that printer is turned on.
- Select Setup on HOME screen.
→ Using the Operation Panel - Select Device settings, and then press OK button.
- Select FAX settings, and then press OK button.
- Select Security control, and then press OK button.
- Select Check RX FAX information, and then press OK button.
- Select ON, and then press OK button.

Important
- Transmission will be canceled if the printer fails to receive the recipient's fax information or if the received information does not match the fax/telephone number.
Using On Hook Dial Function
Follow the procedure below to send faxes with the on hook dial function.
Important
- It may be possible that faxes will reach unintended recipients due to the misdialing or incorrect registration of fax/telephone numbers. When you send important documents, we recommend that you send them after speaking on the telephone.
→ Sending Fax after Speaking on Telephone - With manual transmission, you cannot use the platen glass to load documents. Load the documents in the ADF.
When loading document on the platen glass, send a fax with automatic transmission.
→ Sending Faxes by Entering Fax/Telephone Number
Note
- You can use the on hook dial function only when Hook key setting in Security control under FAX settings is set to Enable.
→ Security control
- For details on the basic sending operations:
→ Sending Faxes by Entering Fax/Telephone Number
-
Make sure that printer is turned on.
-
Load documents in ADF.
-
Select ON HOME screen.
→ Using the Operation Panel
The Fax standby screen is displayed.
- Change send settings as necessary.
Setting Items for Sending Faxes
-
Press center Function button.
-
Specify a recipient.
Specify the recipient with the one of the following methods.
- By specifying with the recipient registered to the printer: Select the registered recipient by pressing the left Function button.
→ Sending Fax to Registered Recipient
- By entering the fax/telephone numbers:
Use the Numeric buttons to enter the recipient's fax/telephone number.
→ Sending Faxes by Entering Fax/Telephone Number
- Manual redialing:
Press the left Function button and select a number in the outgoing call logs.
→ Manual Redialing
- When you hear a high-pitched signal, press Color button or Black button.
Press the Color button for color transmission, or the Black button for black & white transmission.
Important
- Color transmission is available only when the recipient's fax device supports color faxing.
Note
- To cancel a fax transmission, press the Stop button. To cancel a fax transmission while it is in progress, press the Stop button, and then follow the instructions on the LCD.
- If documents remain in the ADF after the Stop button is pressed while scanning is in progress, Document in ADF. Select OK to eject document. is displayed on the LCD. By pressing OK, the remaining documents are automatically ejected.
Registering Recipients
Registering Recipients Using Operation Panel of Printer
Registering Recipients Using Speed Dial Utility2 (Windows)
Registering Recipients Using Speed Dial Utility2 (Mac OS)
Registering Recipients Using Operation Panel of Printer
Registering recipients in the printer's directory in advance allows you to dial fax/telephone numbers simply.
The following methods to register are available:
- Recipient registration
Registering the recipient's fax/telephone number and name allows you to send a fax by selecting a registered recipient in the printer directory.
→ Registering Fax/Telephone Number of Recipients
- Group dial registration
You can combine two or more recipients registered in advance into a group. You can send the same document to all the registered recipients in the group.
→ Registering Recipients in Group Dial
You can register up to 100 recipients in total of individual recipients and group dials.
Note
- To change the registered information of the recipient or the group dial, see Changing Registered Information.
- To delete the registered information of the recipient or the group dial, see Deleting Registered Information.
- To print a list of the recipient's fax/telephone numbers and names registered, see Printing List of Registered Destinations.
-
You can register, change, or delete the registered information of the recipient or the group dial using Speed Dial Utility2 on the computer.
-
For Windows:
Registering Recipients Using Speed Dial Utility2 (Windows) - For Mac OS:
→ Registering Recipients Using Speed Dial Utility2 (Mac OS)
Registering Fax/Telephone Number of Recipients
Before you can use the printer's directory, you need to register the recipients' fax/telephone numbers. Follow the procedure below to register the recipients' fax/telephone numbers.
- Make sure that printer is turned on.

- Select on HOME screen.
→ Using the Operation Panel
The Fax standby screen is displayed.
- Select Function list, and then press OK button.
The Function list screen is displayed. - Select TEL number registration, and then press OK button.
- Select Directory registration, and then press OK button.
The screen to select an ID number is displayed.
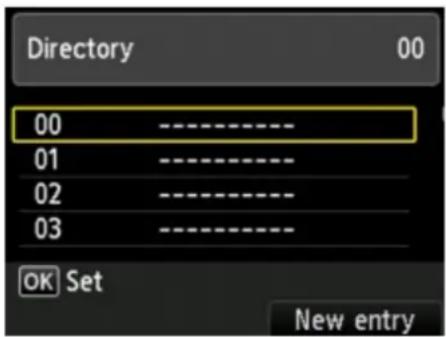
text_image
Directory 00 00 01 02 03 OK Set New entryNote
-
If you already registered the recipients, the recipients' name is displayed next to the ID number. If
you already registered the group dial, the icon and the group name are displayed next to the ID number. -
Use button or Numeric buttons to select an unregistered ID number, and then press OK button.
Note
- If you already registered the recipients and they are displayed by name, press the left Function button. The registered recipients are displayed by ID number.
-
If you press the right Function button, an unregistered ID number will be selected in numerical order.
-
Select Recipient, and then press OK button.
-
Select a registration method, and then press OK button.
-
Register recipients' fax/telephone number.
Register the recipients' fax/telephone number depending on the registration method selected.
- Direct entry
The screen to register the recipient's fax/telephone number and name is displayed. Go to next step.
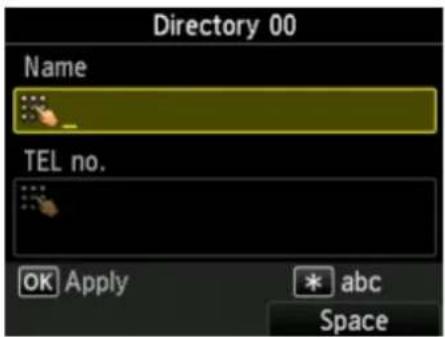
text_image
Directory 00 Name TEL no. OK Apply * abc Space• From outgoing call log
When you select this registration method, the screen to select the fax/telephone number from the outgoing call logs is displayed.
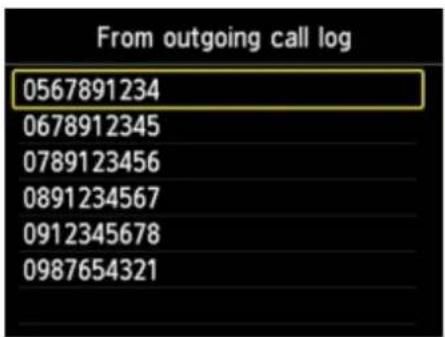
text_image
From outgoing call log 0567891234 0678912345 0789123456 0891234567 0912345678 0987654321Selecting a fax/telephone number and pressing the OK button, the screen to register the recipient's fax/telephone number and name is displayed. Go to next step.
• From incoming call log
When you select this registration method, the screen to select the fax/telephone number or the name from the incoming call logs is displayed.
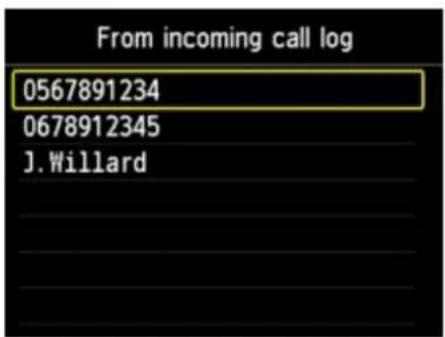
text_image
From incoming call log 0567891234 0678912345 J. WillardSelecting a fax/telephone number or name and pressing the OK button, the screen to register the recipient's fax/telephone number and name is displayed. Go to next step.

Note
- This registration method may not be available depending on the country or region of purchase.
10. Enter recipient's name.
If you select From incoming call log as a registration method, the recipient's name may be already entered. If you do not change the name, go to next step.
- Move cursor to entry field of name.
- Enter recipient's name.
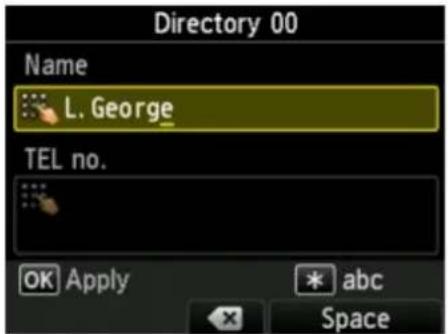
text_image
Directory 00 Name L. George TEL no. OK Apply * abc Space- Press OK button.

Note
- You can enter the name up to 16 characters, including spaces.
→ Entering Numbers, Letters, and Symbols
11. Enter recipient's fax/telephone number.
If you select a fax/telephone number on From outgoing call log or From incoming call log, the fax/telephone number is already entered. If you do not change the fax/telephone number, go to next step.
- Move cursor to entry field of fax/telephone numbers.
- Enter recipient's fax/telephone number.
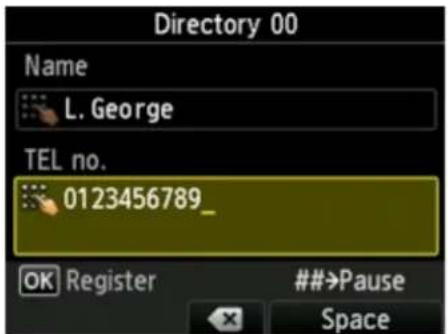
text_image
Directory 00 Name L. George TEL no. 0123456789_ OK Register ###→Pause Space
Note
- You can enter the fax/telephone number up to 60 digits (40 digits for the US, Canada, Korea and some regions of Latin America), including spaces.
→ Entering Numbers, Letters, and Symbols
- When Telephone line type in FAX user settings under FAX settings is set to Rotary pulse, you can enter a tone ("T") by pressing the Tone key.
12. Press OK button to finalize registration.
Note
- To register another recipient's number and name, select an unregistered ID number and operate in the same procedure.
- You can check the recipient's numbers and names you have registered by printing RECIPIENT TELEPHONE NUMBER LIST.
→ Printing List of Registered Destinations
Registering Recipients in Group Dial
If you register two or more registered recipients to a group dial, you can send the same document successively to all recipients registered to the group dial.
- Make sure that printer is turned on.

- Select on HOME screen.
→ Using the Operation Panel
The Fax standby screen is displayed.
- Select Function list, and then press OK button.
The Function list screen is displayed.
-
Select TEL number registration, and then press OK button.
-
Select Directory registration, and then press OK button.
The screen to select an ID number is displayed.
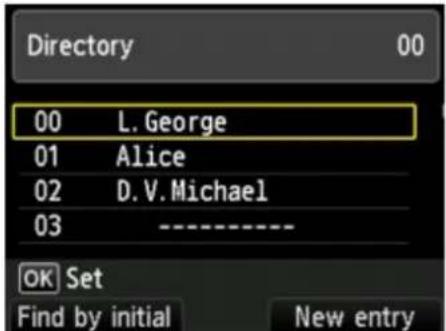
text_image
Directory 00 00 L. George 01 Alice 02 D. V. Michael 03 ---- OK Set Find by initial New entryNote
- If you already registered the recipients, the recipients' name is displayed next to the ID number. If you already registered the group dial, the icon and the group name are displayed next to the ID number.
- Use button or Numeric buttons to select an unregistered ID number, and then press OK button.
Note
- If you already registered the recipients and they are displayed by name, press the left Function button. The registered recipients are displayed by ID number.
- If you press the right Function button, an unregistered ID number will be selected in numerical order.
7. Select Group dial, and then press OK button.
The screen to register the group name and the member of the group is displayed.
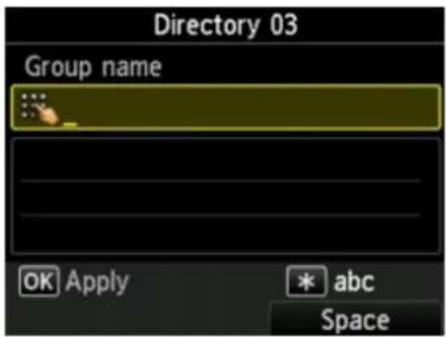
text_image
Directory 03 Group name OK Apply * abc Space8. Enter group name.
- Move cursor to entry field of group name.
- Enter group name.
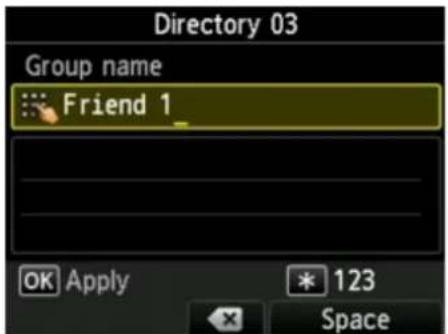
text_image
Directory 03 Group name : Friend 1_ OK Apply * 123 Space- Press OK button.
Note
- You can enter the name up to 16 characters, including spaces.
→ Entering Numbers, Letters, and Symbols
9. Register registered recipient as a member of group dial.
- Make sure that Member is displayed.
- Press left Function button.
The printer's directory is displayed. - Choose a member to register.
Display by name Display by ID number
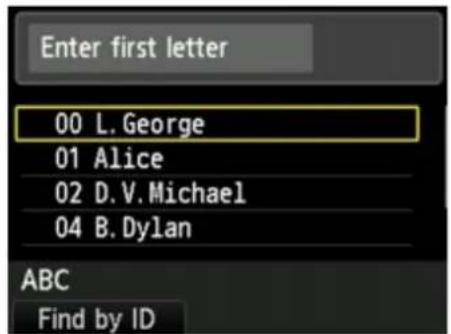
text_image
Enter first letter 00 L. George 01 Alice 02 D. V. Michael 04 B. Dylan ABC Find by IDBy entering the initial letter using the Numeric buttons, the registered recipients are sorted by name.
Select a member, and then press the OK button.
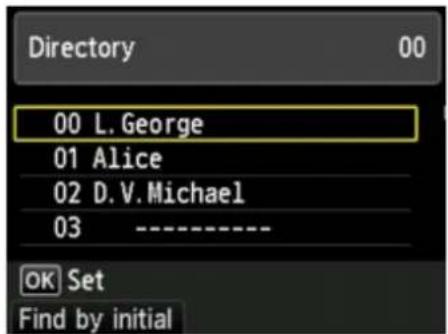
text_image
Directory 00 00 L. George 01 Alice 02 D. V. Michael 03 ---- OK Set Find by initialBy entering the ID number using the Numeric buttons, the registered recipients are searched by ID number.
Select a member, and then press the OK button.
Note
- To switch the display by name and by ID number, press the left Function button.
The selected member is added on the list.
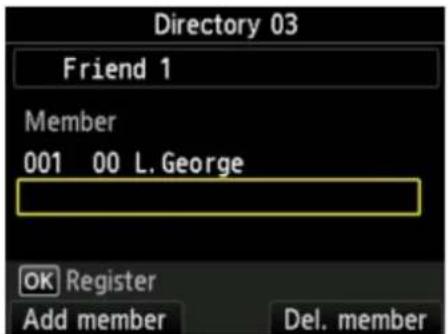
text_image
Directory 03 Friend 1 Member 001 00 L. George OK Register Add member Del. memberNote
- To delete the recipient from the group dial, select a recipient that you want to delete from the list and the right Function button.
- To add another member, press left Function button.
The printer's directory is displayed.
- Select a member to register as group member.
The member to register is displayed on the list.
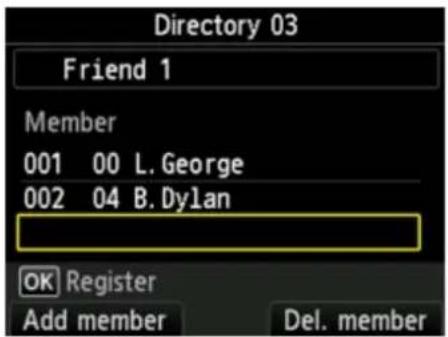
text_image
Directory 03 Friend 1 Member 001 00 L. George 002 04 B. Dylan OK Register Add member Del. memberRepeat the procedure to register another member to the same group dial.
- Press OK button to finalize registration.

Note
- To register another group, select an unregistered ID number and operate in the same procedure.
- You can check the recipients you have registered to the group dial by printing GROUP DIAL TELEPHONE NO. LIST.
→ Printing List of Registered Destinations
Changing Registered Information
To change information registered for recipient and group dial, follow the procedure below.
- Make sure that printer is turned on.

- Select ▼ on HOME screen.
→ Using the Operation Panel
The Fax standby screen is displayed.
- Select Function list, and then press OK button.
The Function list screen is displayed. - Select TEL number registration, and then press OK button.
- Select Directory registration, and then press OK button.
- Use ▲ button or Numeric buttons to select a recipient or a group dial to change, and then press OK button.
- Select Edit, and then press OK button.
- Change registered information.
• To change an individual recipient:
When you want to change the recipient's name, move the cursor to the entry field of name, and then change the recipient's name. After pressing the OK button, the cursor moves to the entry field of fax/telephone numbers. To register the changed recipient's name, press the OK button again.
When you want to change the fax/telephone number, move the cursor to the entry field of fax/telephone numbers, and then change the fax/telephone number. After pressing the OK button, the changed number is registered.
• To change a group dial:
When you want to change the group name, move the cursor to the entry field of group name, and then change the group name. After pressing the OK button, the cursor moves to the list of the members. To register the changed group name, press the OK button again.
When you want to add the member to group or delete from group, move the cursor to the list of the members, and then add the member or delete. After pressing the OK button, the changed group is registered.
Deleting Registered Information
To delete information registered for recipient and group dial, follow the procedure below.
- Make sure that printer is turned on.

- Select ▼ on HOME screen.
→ Using the Operation Panel
The Fax standby screen is displayed.
- Select Function list, and then press OK button.
The Function list screen is displayed.
-
Select TEL number registration, and then press OK button.
-
Select Directory registration, and then press OK button.
-
Use ▶ button to select a recipient or a group dial to delete, and then press OK button.
-
Select Delete, and then press OK button.
-
Select Yes, and then press OK button.
Printing List of Registered Destinations
You can print a list of the fax/telephone numbers and can keep it near the printer to refer to when dialing.
- Make sure that printer is turned on.
-
Load paper.
-
Select ON HOME screen.
→ Using the Operation Panel
The Fax standby screen is displayed.
- Select Function list, and then press OK button.
The Function list screen is displayed. - Select Print reports/lists, and then press OK button.
- Select Directory list, and then press OK button.
- Select an item to print, and then press OK button.
• If you selected Recipient:
The confirmation screen to select whether to print the list in alphabetical order is displayed.
If you select Yes and press the OK button: Prints RECIPIENT TELEPHONE NUMBER LIST in alphabetical order.
If you select No and press the OK button: Prints RECIPIENT TELEPHONE NUMBER LIST in the order of the ID number.
- If you selected Group dial:
The printing confirmation screen is displayed. Select Yes, and then press the OK button to print GROUP DIAL TELEPHONE NO. LIST.
Registering Recipients Using Speed Dial Utility2 (Windows)
About Speed Dial Utility2
Speed Dial Utility2 is a utility for forwarding the telephone directory registered on the printer to a computer and registering/changing it on the computer. In addition, you can register the telephone directory edited on the computer to the printer. You can also save them on the computer as a backup.
For safety reasons, it is recommended that you backup the registered data on the computer using Speed Dial Utility2.
Starting Up Speed Dial Utility2
→ Speed Dial Utility2 Dialog box
→ Saving Registered Telephone Directory on Printer to Your Computer
Registering a Fax/telephone Number Using Speed Dial Utility2
Changing a Fax/telephone Number Using Speed Dial Utility2
→ Deleting a Fax/telephone Number Using Speed Dial Utility2
→ Changing Sender Information Using Speed Dial Utility2
Registering/Changing Rejected Number Using Speed Dial Utility2
Registering Telephone Directory Has been Saved on Your Computer to Printer
Starting Up Speed Dial Utility2
Important
- Before starting up Speed Dial Utility2, make sure that the printer is connected to the computer correctly.
- Do not plug in or unplug any cables while the printer is in operation, or when the computer is in sleep or standby mode.
- If your printer is compatible with LAN connection, make sure that the printer is connected to the computer with LAN connection to use Speed Dial Utility2 via LAN connection.
- The password entry screen may appear during startup or operation. If it appears, enter the administrator password, and then click OK. If you do not know the administrator password, contact the administrator of the printer.
Follow the procedure below to start up Speed Dial Utility2.
- Make sure printer is turned on.
- Start up Speed Dial Utility2.
- For Windows 10, click Start button and select All apps, Canon Utilities, and then Speed Dial Utility2.
- For Windows 8.1 or Windows 8, select Speed Dial Utility2 on the Start screen to start Speed Dial Utility2. If Speed Dial Utility2 is not displayed on the Start screen, select the Search charm, and then search for "Speed Dial Utility2".
- For Windows 7 or Windows Vista, click Start and select All programs, Canon Utilities, Speed Dial Utility2, and then Speed Dial Utility2.
Speed Dial Utility2 starts up.
Note
- You can also start up Speed Dial Utility2 from Quick Utility Toolbox.
Speed Dial Utility2 Dialog box
The following items are on the Speed Dial Utility2 dialog box.
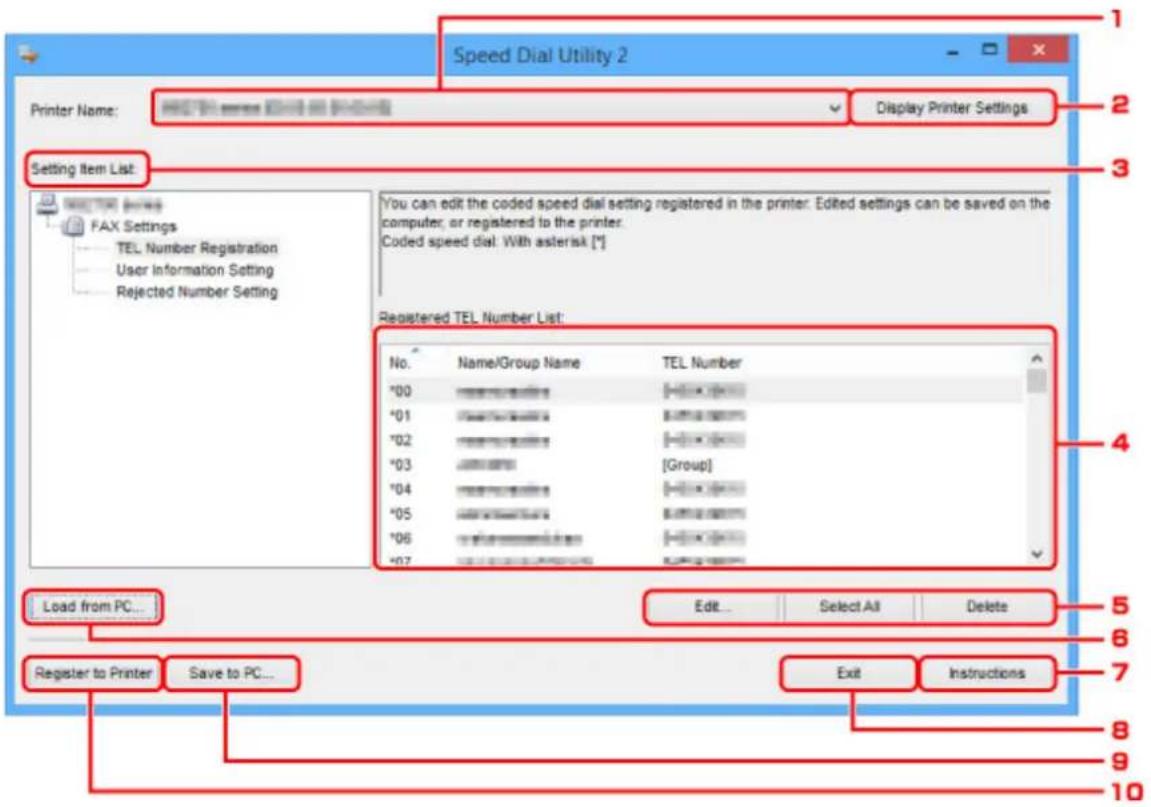
text_image
Speed Dial Utility 2 Printer Name: Display Printer Settings Setting Item List: FAX Settings TEL Number Registration User Information Setting Rejected Number Setting You can edit the coded speed dial setting registered in the printer. Edited settings can be saved on the computer, or registered to the printer. Coded speed dial: With asterisk [*] Registered TEL Number List: No. Name/Group Name TEL Number *00 [Group] *01 [Group] *02 [Group] *03 [Group] *04 [Group] *05 [Group] *06 [Group] *07 [Group] Load from PC... Register to Printer Save to PC... Edit... Select All Delete Exit Instructions 101. Printer Name:
Selects the printer for editing the telephone directory using Speed Dial Utility2.
Behind printer name, printer's MAC address is displayed.
Note
- For checking printer's MAC address, refer to "Checking Network Information" for your model from Home of the Online Manual.
- For printer that supports both wireless LAN connection and wired LAN connection, MAC address of wired LAN connection is displayed regardless of the connection method.
2. Display Printer Settings
Loads the telephone directory registered on the printer that selected for Printer Name: into Speed Dial Utility2.
3. Setting Item List:
Selects a setting item for editing. Choose one item from TEL Number Registration, User Information Setting, and Rejected Number Setting.
4. Registered information list
Displays the registered information selected for Setting Item List:.
- By clicking on the item name, you can sort the display order.
5. Edit.../Select All/Delete
Edits the item that selected for Setting Item List:, or deletes the item, or selects all the items.
When multiple items on the registered information list are selected, you cannot use the Edit... button.
6. Load from PC...
Displays the telephone directory saved on the computer.
7. Instructions
Displays this guide.
8. Exit
Quits Speed Dial Utility2. Information registered or edited using Speed Dial Utility2 is neither saved on the computer nor registered on the printer.
9. Save to PC...
Saves the telephone directory edited using Speed Dial Utility2 on the computer.
10. Register to Printer
Registers the telephone directory edited using Speed Dial Utility2 to the printer.
Saving Registered Telephone Directory on Printer to Your Computer
Follow the procedure below to save the telephone directory (includes recipients' name, recipients' fax/telephone number, group dial, user's name, user's fax/telephone number, and rejected numbers) that registered on the printer to the computer.
- Start up Speed Dial Utility2.
- Select a printer from Printer Name: list box, and then click Display Printer Settings.
- Click Save to PC....
- Enter file name on displayed screen, and then click Save.
Note
- The data of the telephone directory (RSD file, *.rsd) can be imported to other printer.
Registering Telephone Directory Has been Saved on Your Computer to Printer
Registering a Fax/telephone Number Using Speed Dial Utility2
Follow the procedure below to register fax/telephone numbers.
Note
Before you register fax/telephone numbers using Speed Dial Utility2, make sure that no fax operations are in progress.
- Start up Speed Dial Utility2.
- Select a printer from Printer Name: list box, and then click Display Printer Settings.
- Click TEL Number Registration from Setting Item List:.
The list of registered fax/telephone numbers is displayed.
- Select an unoccupied code from list, and then click Edit....
The Individual or Group Selection dialog box is displayed.
- Click Register individual TEL number or Register group dial, and then click Next....
- If Register individual TEL number is selected:
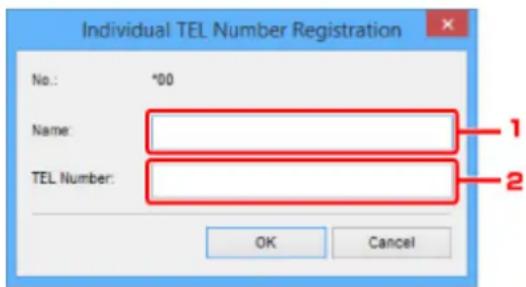
text_image
Individual TEL Number Registration No.: *00 Name: TEL Number: 1 2 OK Cancel-
Enter name.
-
Enter fax/telephone number.
- If Register group dial is selected:
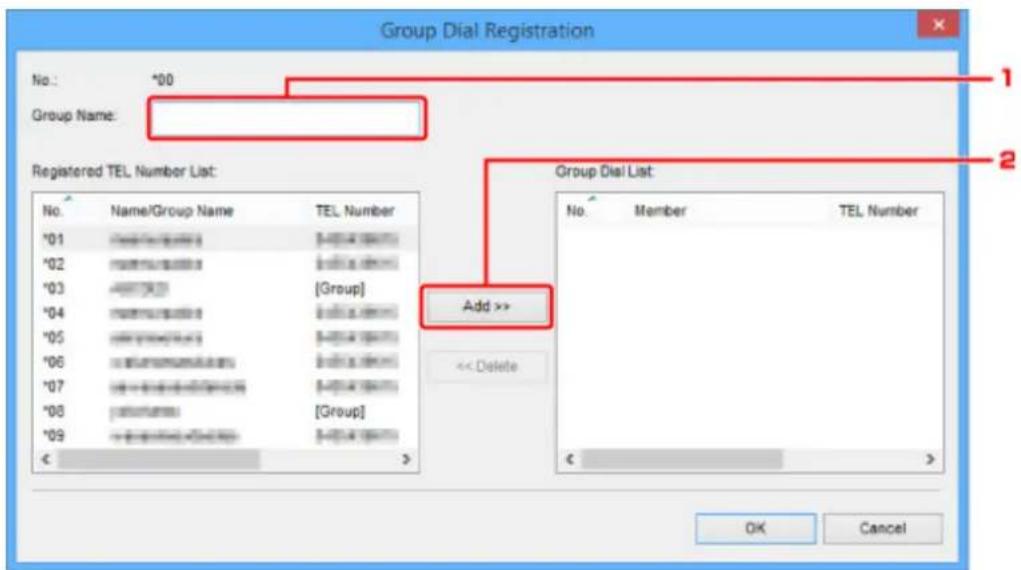
text_image
Group Dial Registration No.: *00 Group Name: Registered TEL Number List: No. Name/Group Name TEL Number *01 name/mouse [Group] *02 name/mouse [Group] *03 name/mouse [Group] *04 name/mouse [Group] *05 name/mouse [Group] *06 name/mouse [Group] *07 name/mouse [Group] *08 name/mouse [Group] *09 name/mouse [Group] << Delete Group Dial List No. Member TEL Number << Delete OK Cancel- Enter group name.
- Select a code you want to add to group dial, and then click Add >>.
Note
- You can only add the numbers that have already been registered.
6. Click OK.
To continue registering fax/telephone numbers or a group dial, repeat steps 4 to 6.
• To save the registered information on the computer.
- Click Save to PC....
- Enter file name on displayed screen, and then click Save.
• To register the registered information to the printer:
- Click Register to Printer.
- When message appears, check it and click OK.
The information is registered to the printer.
Changing a Fax/telephone Number Using Speed Dial Utility2
Follow the procedure below to change fax/telephone numbers.
Note
- Before you change fax/telephone numbers using Speed Dial Utility2, make sure that no fax operations are in progress.
- Start up Speed Dial Utility2.
- Select a printer from Printer Name: list box, and then click Display Printer Settings.
- Click TEL Number Registration from Setting Item List:.
The list of registered fax/telephone numbers is displayed.
- Select a code to change from list, and then click Edit....
- If an individual fax/telephone number is selected:
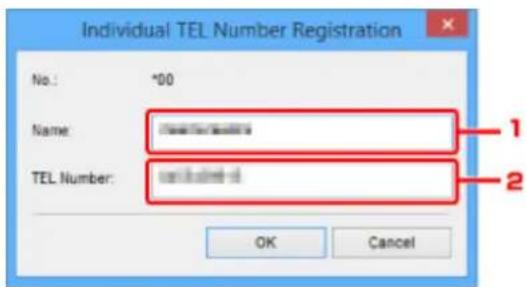
text_image
Individual TEL Number Registration No.: *00 Name: unlabeled TEL Number: unlabeled OK Cancel- Enter a new name.
- Enter a new fax/telephone number.
• If a group dial is selected:
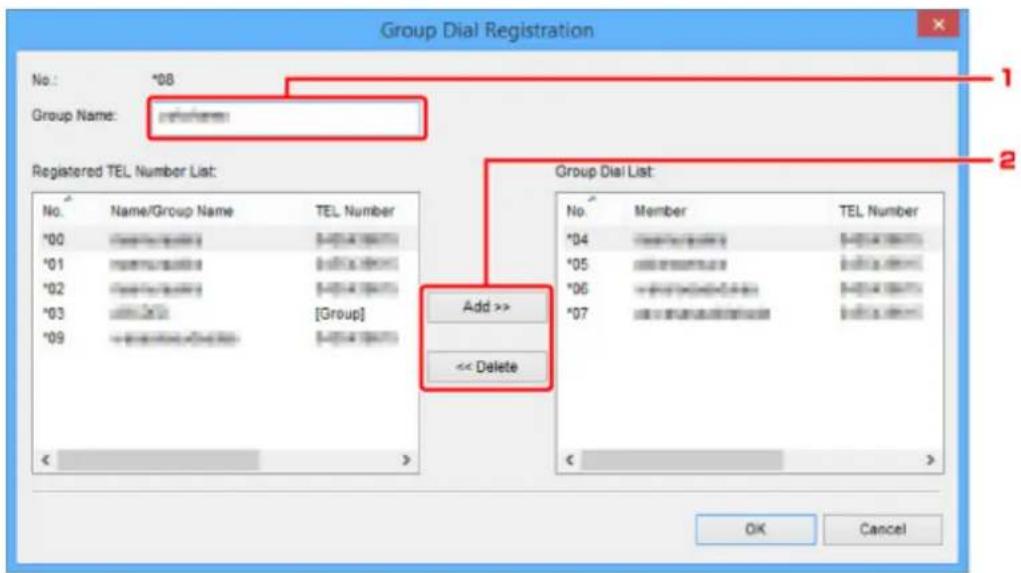
text_image
Group Dial Registration No.: *08 Group Name: re#formem Registered TEL Number List: No. Name/Group Name TEL Number *00 re#formem [Group] 1-4[14 units] *01 re#formem [Group] 1-6[14 units] *02 re#formem [Group] 1-6[14 units] *03 re#formem [Group] 1-6[14 units] *09 re#formem [Group] 1-6[14 units] Add >> << Delete Group Dial List No. Member TEL Number *04 re#formem [Group] 1-4[14 units] *05 re#formem [Group] 1-6[14 units] *06 re#formem [Group] 1-6[14 units] *07 re#formem [Group] 1-6[14 units] OK Cancel-
Enter a new group name.
-
Add or delete a member to/from group dial.
To add a member:
Select a code to add to group dial, and then click Add >>.
To delete a member:
Select a code to delete from group dial, and then click << Delete.
5. Click OK.
To continue changing fax/telephone numbers or group dials, repeat steps 4 and 5.
- To save the edited information on the computer.
- Click Save to PC....
- Enter file name on displayed screen, and then click Save.
• To register the edited information to the printer:
- Click Register to Printer.
- When message appears, check it and click OK.
The information is registered to the printer.
Deleting a Fax/telephone Number Using Speed Dial Utility2
Follow the procedure below to delete fax/telephone numbers.
Note
- Before you delete fax/telephone numbers using Speed Dial Utility2, make sure that no fax operations are in progress.
- Start up Speed Dial Utility2.
- Select a printer from Printer Name: list box, and then click Display Printer Settings.
- Click TEL Number Registration from Setting Item List:.
The list of registered fax/telephone numbers is displayed.
- Select a code to delete from list, and then click Delete.
Note
- To delete all fax/telephone numbers on the list, click Select All, and then Delete.
- When confirmation screen appears, click OK.
The selected fax/telephone number is deleted.
To continue deleting fax/telephone numbers, repeat steps 4 and 5.
• To save the edited information on the computer.
-
Click Save to PC....
-
Enter file name on the displayed screen, and then click Save.
• To register the edited information to the printer:
-
Click Register to Printer.
-
When message appears, check it and click OK.
The information is registered to the printer.
Changing Sender Information Using Speed Dial Utility2
Follow the procedure below to change the user's name or fax/telephone number.
- Start up Speed Dial Utility2.
- Select a printer from Printer Name: list box, and then click Display Printer Settings.
- Click User Information Setting from Setting Item List:.
The user's information is displayed.
- Select an item to change, and then click Edit....
The User Information dialog box is displayed.
- Enter new user's name on User Name and new fax/telephone number in TEL Number, and then click OK.
• To save the edited information on the computer:
- Click Save to PC....
- Enter file name on displayed screen, and then click Save.
- To register the edited information to the printer:
- Click Register to Printer.
- When message appears, check it and click OK.
The information is registered to the printer.
Registering/Changing Rejected Number Using Speed Dial Utility2
Follow the procedure below to register, change, or delete rejected numbers.
- Start up Speed Dial Utility2.
- Select a printer from Printer Name: list box, and then click Display Printer Settings.
- Click Rejected Number Setting from Setting Item List:.
The list of rejected numbers is displayed.
• To register a rejected number:
- Select an unoccupied code from list, and then click Edit....
- Enter fax/telephone number in Rejected Number dialog box, and then click OK.
• To change a rejected number:
- Select a code to change from list, and then click Edit....
- Enter fax/telephone number in Rejected Number dialog box, and then click OK.
• To delete a rejected number:
- Select a code to delete from list, and then click Delete.
The selected fax/telephone number is deleted.
Note
- To delete all fax/telephone numbers on the list, click Select All, and then Delete.
Registering Telephone Directory Has been Saved on Your Computer to Printer
You can load the data of the telephone directory (RSD file, *.rsd) and register it to your printer.
The data of the telephone directory (RSD file, *.rsd) that is exported from other printer can be loaded and registered to your printer.
Note
- In Speed Dial Utility2, the data of the telephone directory (RSD file, *.rsd) that is exported using Speed Dial Utility can be loaded.
- Start up Speed Dial Utility2.
- Select a printer from Printer Name: list box, and then click Display Printer Settings.
- Click Load from PC....
- Select a data of telephone directory (RSD file, *.rsd) to register to your printer.
- Click Open on dialog box.
The selected telephone directory is displayed.
Note
- If you select the data of the telephone directory (RSD file, *.rsd) that is exported from other printer, the confirmation message appears. Click OK.
- Click Register to Printer.
The telephone directory that has been saved on the computer is registered to your printer.
Receiving Faxes
Receiving Faxes
Changing Paper Settings
▶ Memory Reception
▶ Receiving Faxes Using Useful Functions
Receiving Faxes
This section describes the preparation necessary for receiving a fax and how to receive a fax.
Preparing for Receiving Fax
Prepare for receiving a fax according to the following procedure.
- Make sure that printer is turned on.

- Select on HOME screen.
→ Using the Operation Panel
The Fax standby screen is displayed.
- Check receive mode setting.
Check the receive mode setting displayed on the Fax standby screen.
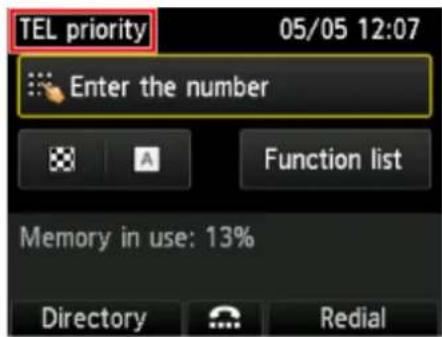
text_image
TEL priority 05/05 12:07 Enter the number Function list Memory in use: 13% Directory RedialNote
- For details on how to change the receive mode:
Setting Receive Mode
- Load paper.
Load the sheets of plain paper.
- Specify paper settings as necessary.
→ Changing Paper Settings
This completes the preparation for receiving fax.
When a fax is received, it is printed on the loaded paper automatically.
Receiving Fax
Depending on the selected receive mode, the receive operation varies.
Note
- For details on the receive mode:
Setting Receive Mode
- You can specify the advanced settings of each receive mode.
For details on the advanced settings of the receive mode:
→ Advanced Settings of Receive Mode
- If the printer was not able to print a received fax, the printer stores the unprinted fax temporarily in its memory (memory receiving).
→ Memory Reception
- When receiving a fax, you can save received faxes on a USB flash drive as PDF files automatically or forward received faxes to the shared folder on the computer as PDF files automatically.
→ Saving Received Faxes Automatically on USB Flash Drive
Forwarding Received Faxes Automatically to Shared Folder on Computer
When TEL priority mode is selected:
- When the call is a fax:
The telephone will ring when a call incomes.
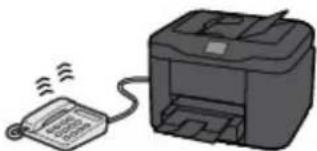
natural_image
Illustration of a printer emitting a signal from a telephone receiver (no text or symbols present)Pick up the handset. If you hear the fax tone, wait for at least 5 seconds after it stops, and then hang up the handset.
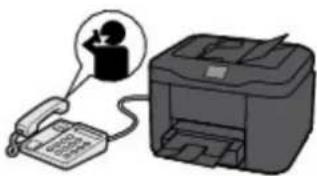
natural_image
Illustration of a printer emitting a phone to a person using a phone (no text or symbols present)The printer will receive the fax.
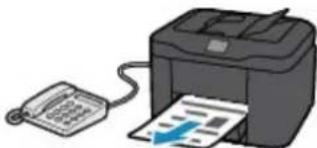
natural_image
Illustration of a printer with a paper sheet being inserted, connected to a telephone (no text or symbols visible)Note
- If the printer will not switch to fax reception, select FAX again on the HOME screen, and then the Color or Black button to receive the fax.
- To receive a fax without picking up the handset, set Manual/auto switch in Advanced to ON. RX start time allows you to specify the number of seconds until the printer switches to fax reception.
- If you have subscribed to Duplex Ringing service in Hong Kong, the telephone will ring a specified number of times when there is an incoming call with a fax distinctive ring pattern. Then, the printer will switch to fax reception automatically without the handset being picked up. The number of times to ring the telephone until switching to fax reception can be changed.
- Set the printer to enable you to initiate fax reception from a connected telephone (remote reception).
→ Remote Reception
- When the answering machine is connected to the printer:
- If the answering machine is set to the answering mode, set User-friendly reception in Advanced to ON. If the call is a fax, the printer will receive the fax automatically.
- If the answering mode is turned off on the answering machine, pick up the handset. If you hear the fax tone, wait for at least 5 seconds after it stops, and then hang up the handset.
- If Manual/auto switch in Advanced is set to ON, set RX start time to longer than the time before the answering machine starts playing the answering message. After making this setting, we recommend that you call the answering machine using a mobile phone, etc. to confirm that messages are recorded successfully in the answering machine.
- Set your answering machine to answering mode and adjust it as follows:
- The entire message should be no longer than 15 seconds.
- In the message, tell your callers how to send a fax.
- When the call is a voice call:
The telephone will ring when a call incomes.
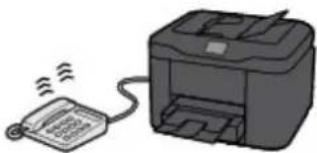
natural_image
Illustration of a printer emitting a QR code to a mobile phone (no text or symbols present)Pick up the handset, and talk on the telephone.
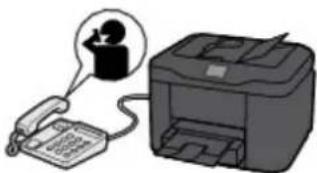
natural_image
Illustration of a printer emitting a phone to a document, with a thought bubble showing a person speaking (no text or symbols present)Note
- If the printer unexpectedly switches to fax reception during telephone calls, set User-friendly reception in Advanced to OFF.
- If Manual/auto switch in Advanced is set to ON, you must answer an incoming call by picking up the handset within the time specified in RX start time. Otherwise the printer will switch to fax reception.
When FAX only mode is selected:
- When the call is a fax:
The printer will receive the fax automatically.
Note
- If a telephone is connected to the printer, the telephone will ring when a call incomes.
- You can change the number of times to ring the telephone with Incoming ring in Advanced.
When DRPD or Network switch is selected:
- When the call is a fax:
The telephone will ring when a call incomes.
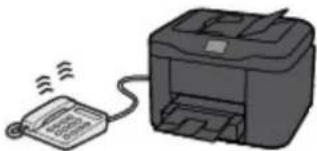
natural_image
Illustration of a printer emitting a QR code to a document (no text or symbols present)The printer will receive the fax automatically when the fax ring pattern is detected.
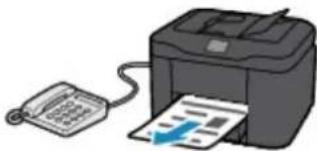
natural_image
Illustration of a printer emitting a document to a telephone (no text or symbols visible)Note
- You can change the number of times to ring the telephone.
→ Advanced Settings of Receive Mode
- When the call is a voice call:
The telephone will ring when a call incomes.
When the printer does not detect the fax ring pattern, the telephone will continue ringing.
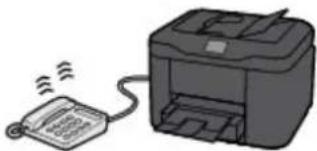
natural_image
Illustration of a printer emitting a telephone to a mobile phone (no text or symbols present)Pick up the handset, and talk on the telephone.
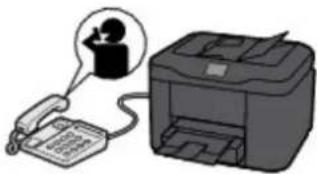
natural_image
Illustration of a printer emitting a phone to a person using a handheld device (no text or symbols present)Note
- To use this feature, you need to subscribe to a compatible service provided by your telephone company.
- For DRPD
You need to select the appropriate ring pattern on the printer.
Setting DRPD Ring Pattern (US and Canada only)
- For Network switch
The name of this service varies depending on the country or region of purchase. This setting may not be also available depending on the country or region of purchase.
Changing Paper Settings
This printer prints received faxes to paper loaded in the printer beforehand. You can use the operation panel to change the paper settings for printing faxes. Make sure that the settings are appropriate for the loaded paper.

Important
- If the size of loaded paper is different from that specified in the paper size setting, the received faxes are stored in the printer's memory and Check the page size and select OK is displayed on the LCD. In this case, load the same size of paper as that specified in the paper size setting, and then press the OK button.
You can also press the Stop button to close the message and print the stored documents in the printer's memory later.
→ Printing Document in Printer's Memory
- If no paper is loaded, or paper has run out while printing is in progress, the received faxes are stored in the printer's memory and the error message for no paper is displayed on the LCD. In this case, load paper and press the OK button.
You can also press the Stop button to close the message and print the stored documents in the printer's memory later.
→ Printing Document in Printer's Memory

Note
- If the sender sends a document that is larger than Letter-size or Legal-size, such as 11 x 17 inches, the sender's device may send the fax automatically reduced in size or divided, or send only a part of the original.
-
Make sure that printer is turned on.
-
Select on HOME screen.
→ Using the Operation Panel
The Fax standby screen is displayed.
- Select Function list, and then press OK button.
The Function list screen is displayed.
- Select FAX paper settings, and then press OK button.
The FAX paper settings screen is displayed.
- Specify settings.
Use the ▲ button to change the setting item and use the button to change the setting.
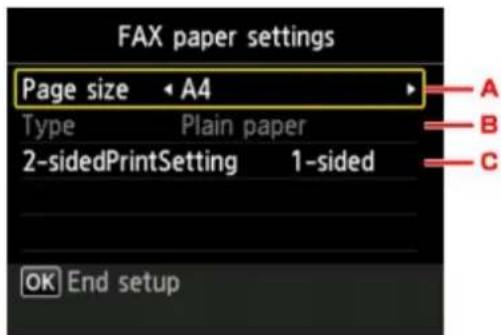
text_image
FAX paper settings Page size • A4 Type Plain paper 2-sidedPrintSetting 1-sided OK End setup A B CA. Page size
Select the page size from A4, Letter, or Legal.
B. Type (Media type)
The paper type is set to Plain paper.
C. 2-sided PrintSetting
Select two-sided printing or single-sided printing.
Two sided printing is available for black & white faxes. Color faxes are printed on the single-side of paper regardless of this setting.
After 2-sided is selected for 2-sidedPrintSetting, press the right Function button to specify the stapling side.
Note
- When Page size is set to A4 or Letter, the received faxes are printed on the two-sides of paper.
- Press OK button.
Memory Reception
If the printer was not able to print the received fax, the received fax is stored in the printer's memory. The FAX Memory lamp is lit and Received in memory. is displayed at the Fax standby screen.

Important
- If you unplug the power cord, all faxes stored in the printer's memory are deleted. The next time you turn the printer on, press the OK button after a confirmation screen is displayed. The list of the faxes deleted from the printer's memory (MEMORY CLEAR REPORT) will be printed.
If the printer receives a fax under one of the following conditions, the received fax will be automatically stored in the printer's memory.
- The printer is set to store received faxes in its memory:
When Do not print is selected for Received documents in Auto print settings under FAX settings, the received faxes are stored in the printer's memory.
You can print the faxes stored in the printer's memory from the Memory reference screen in the Fax menu.
→ Printing Document in Printer's Memory

Note
- To print the received faxes automatically, select Print for Received documents in Auto print settings under FAX settings.
→ Auto print settings
- An error has occurred on the printer:
If you select Print for Received documents in Auto print settings under FAX settings, a received fax will be printed automatically. However, if any of the following errors occurs, the received fax will not be printed. It will instead be stored in the printer's memory.
When the error is resolved, the fax stored in the printer's memory is printed automatically.
• The amount of remaining ink is insufficient to print a fax:
Replace the ink tank.
→ Replacing Ink Tanks

Note
- You can set the printer to forcibly print a received fax even if the ink has run out.
Set Print when out of ink in Auto print settings under FAX settings to Print.
However, part or all of the fax may not be printed since the ink has run out.
Also, the contents of the fax will not be stored in the printer's memory.
If the ink has already run out, we recommend that Do not print be selected for Received documents in Auto print settings under FAX settings to store the received fax in the printer's memory. After you replace the ink tank and select Print for Received documents in Auto print settings, the fax stored in the printer's memory will be printed automatically.
- Paper has run out:
Load the paper and press the OK button.
• A different size of paper from that specified by Page size in FAX paper settings is loaded:
Load the same size of paper as that specified by Page size in FAX paper settings, and then press OK button.
- You pressed the Stop button to cancel printing of a fax:
Press the HOME button and select FAX to resume printing of the fax.
Note
- The printer can store up to max. 250 pages* (max. 30 documents) of faxes in the printer's memory.
* When using ITU-T No.1 chart (Standard mode)
- If the printer's memory becomes full during memory reception, only pages which already have been received are stored in the memory. Print the received faxes stored in the printer's memory, save them on the USB flash drive, or forward received faxes to the shared folder on the computer, and then delete them from the printer's memory and have the sender resend the faxes.
→ Document Stored in Printer's Memory
Receiving Faxes Using Useful Functions
Saving Received Faxes Automatically on USB Flash Drive
Forwarding Received Faxes Automatically to Shared Folder on Computer
Remote Reception
▶ Rejecting Fax Reception
Using Caller ID Service to Reject Calls
Saving Received Faxes Automatically on USB Flash Drive
You can save received faxes on a USB flash drive as PDF files automatically when receiving a fax.
This section describes the procedure to enable the printer to save received faxes on a USB flash drive automatically.
Important
- Do not remove the USB flash drive from the printer when the printer is set to save received faxes on a USB flash drive automatically.
- For safety reasons, we recommend backing up faxes saved on a USB flash drive to another media periodically to avoid unexpected accidents.
- We assume no responsibility for damage to or loss of data for whatever reason even within the warranty period.
- Awaiting document processing. is displayed on the Fax standby screen and the faxes are stored in the printer's memory when the received faxes are not saved on the USB flash drive because the USB flash drive is not inserted or because it is not writable.
You can save the faxes stored in the printer's memory to the USB flash drive manually. Delete the unnecessary fax from printer's memory after saving to the USB flash drive.
→ Saving Document in Printer's Memory to USB Flash Drive
→ Deleting Document in Printer's Memory
- Make sure that printer is turned on.
-
Insert USB flash drive into USB flash drive port.
-
Select Setup on HOME screen.
→ Using the Operation Panel
-
Select Device settings, and then press OK button.
-
Select FAX settings, and then press OK button.
-
Select Auto save setting, and then press OK button.
-
Select ON, and then press OK button.
-
Select USB flash drive, and then press OK button.
Note
- You can save up to 250 pages of fax as one PDF file.
-
You can save up to 2000 PDF files on a USB flash drive.
-
If the USB flash drive is removed or becomes full while saving faxes is in progress, the error message is displayed on the LCD. Press the OK button to dismiss the error.
-
The folder and file name of faxes saved on the USB flash drive is as follows:
-
Folder name: CANON_SC\FAXDOC\0001
- File name (file extension: PDF): Running numbers, starting from FAX_0001
- File date: The date and time of saving as set in the printer.
For details on how to set the date and time:
Setting Date and Time
- When removing the USB flash drive, set Auto save setting to OFF.
Forwarding Received Faxes Automatically to Shared Folder on Computer
You can forward received faxes to the shared folder on the computer as PDF files automatically.
This section describes the procedure to enable the printer to forward received faxes to the shared folder on the computer automatically.

Important
- Do not disconnect the printer with the computer when the printer is set to forward received faxes to the shared folder on the computer automatically.
- We assume no responsibility for damage to or loss of data for whatever reason even within the warranty period.
- Awaiting document processing. is displayed on the Fax standby screen and the faxes are stored in the printer's memory when the received faxes are not forward to the shared folder because the printer is not connected with the computer or because the shared folder setting is changed.
- You can forward the faxes stored in the printer's memory to the shared folder on the computer manually. Delete the unnecessary fax from printer's memory after forwarding to the shared folder.
Forwarding Document in Printer's Memory to Shared Folder on Computer
→ Deleting Document in Printer's Memory

Note
- Register the destination folder using Quick Utility Toolbox in advance. For details on how to register the destination folder:
- For Windows:
→ Destination Folder Settings -
For Mac OS:
→ Destination Folder Settings -
Make sure that printer is turned on.
-
Make sure that printer is connected with destination computer.
-
Select Setup on HOME screen.
→ Using the Operation Panel
-
Select Device settings, and then press OK button.
-
Select FAX settings, and then press OK button.
-
Select Auto save setting, and then press OK button.
-
Select ON, and then press OK button.
- Select Destination folder, and then press OK button.
- Select a shared folder, and then press OK button.

Note
- When you specify a PIN code for a registered folder, a screen asking you to enter a PIN code is displayed. Entering the PIN code allows you to assign the shared folder as the destination.

Note
- You can forward up to 250 pages of fax as one PDF file.
- You can forward up to 2000 PDF files to the shared folder on the computer.
- If the printer is disconnected with the computer or if the writing error occurs on the computer while saving faxes is in progress, the error message is displayed on the LCD. Press the OK button to dismiss the error.
- The faxes forwarded to the shared folder are named with the serial number from FAX_0001 (file extension: PDF).
- When disconnecting the printer with the computer, set Auto save setting to OFF.
Remote Reception
If the printer is located away from the telephone, pick up the handset of the telephone connected to the printer and dial 25 (the remote reception ID) to receive faxes (remote reception).
- If you use a rotary pulse line, temporarily switch your telephone to tone dialing. For details on how to switch to tone dialing, refer to your telephone's instruction manual.
- If you have an answering machine connected to the printer that can carry out remote control operations, the security code for this function may be the same as the remote reception ID. In this case, change the remote reception ID in Remote RX ID in Remote RX in Advanced FAX settings under FAX settings.
→ Advanced FAX settings
Remote reception can be disabled.
Rejecting Fax Reception
You can set the printer to reject faxes with no sender information or those from specific senders.
Select one of the following conditions to reject faxes.
- Faxes with no caller identification.
- Faxes from senders not registered in the printer's directory.
- Faxes from senders registered in the printer as rejected numbers.
Select a fax rejection condition following the procedure below.
-
Make sure that printer is turned on.
-
Select Setup on HOME screen.
→ Using the Operation Panel
-
Select Device settings, and then press OK button.
-
Select FAX settings, and then press OK button.
-
Select Security control, and then press OK button.
-
Select FAX reception reject, and then press OK button.
-
Select ON, and then press OK button.
-
Select fax rejection condition, and then press OK button.
No sender info.
Rejects faxes with no caller identification.
Not in directory
Rejects faxes from the senders not registered in the printer's directory.
Rejected numbers
Rejects faxes from the senders registered in the printer as rejected numbers.
For details on how to register the rejected number, see Registering Rejected Number.
Note
- When the printer rejects reception, Reception rejected. is displayed on The Fax standby screen.
- Faxes with no caller identification are also rejected when the setting other than No sender info. is selected.
Registering Rejected Number
Register the rejected number following the procedure below.
-
When confirmation screen to register rejected number is displayed, select Yes, and then press OK button.
-
Select a registration number, and then press OK button.
-
Select a registration method, and then press OK button.
-
Register rejected number.
Register the rejected number depending on the registration method.
- Direct entry
When you select this registration method, the screen to register the fax/telephone number is displayed.
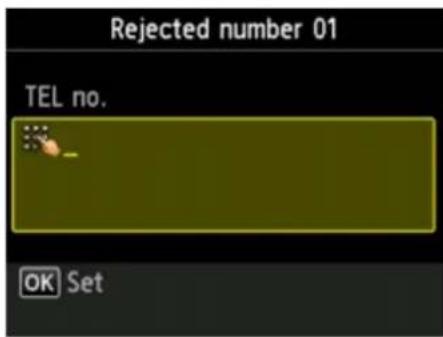
text_image
Rejected number 01 TEL no. OK SetThe screen to enter the fax/telephone number is displayed when you press the OK button. Enter the fax/telephone number you want to register, and then press the OK button.
• From outgoing call log
When you select this registration method, the screen to select the fax/telephone number from the outgoing call logs is displayed.
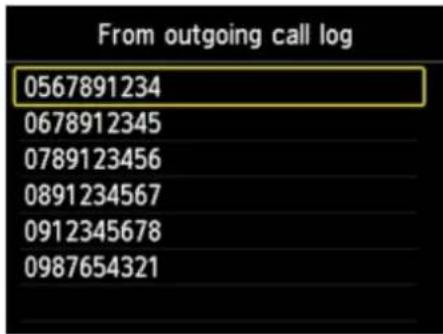
text_image
From outgoing call log 0567891234 0678912345 0789123456 0891234567 0912345678 0987654321Select a fax/telephone number, and then press the OK button.
• From incoming call log
When you select this registration method, the screen to select the fax/telephone number or the name from the incoming call logs is displayed.
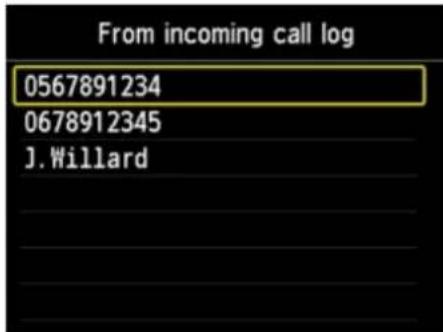
text_image
From incoming call log 0567891234 0678912345 J. WillardSelect a fax/telephone number or a name, and then press the OK button.
Note
- This registration method may not be available depending on the country or region of purchase.
Note
- To register another rejected number, select another registration number, and then register the rejected number. You can register up to 10 rejected numbers.
- You can print the list of rejected numbers (REJECTED NUMBER LIST).
→ Summary of Reports and Lists
• To change the registered rejected number:
- Select a registered rejected number you want to change, and then press OK button.
- Select Edit, and then press OK button.
The screen to change the registered rejected number is displayed. - Change registered rejected number in same procedure when you register.
- Finalize registration in same procedure when you register.
• To delete the registered rejected number:
- Select a registered rejected number you want to delete, and then press OK button.
- Select Delete, and then press OK button.
The confirmation screen is displayed. - Select Yes, and then press OK button.
- You can register the rejected number by pressing Function list on the Fax standby screen, and then selecting Rejected numbers under TEL number registration.
Using Caller ID Service to Reject Calls
If you subscribe to the Caller ID service, the printer detects the sender's Caller ID. If the sender's ID matches the condition specified in this setting, the printer rejects the phone call or fax reception from the sender.
Note
- This setting may not be supported depending on the country or region of purchase.
Contact your telephone company to confirm whether it provides this service.
Specify the setting following the procedure below.
-
Make sure that printer is turned on.
-
Select Setup on HOME screen.
→ Using the Operation Panel
-
Select Device settings, and then press OK button.
-
Select FAX settings, and then press OK button.
-
Select Security control, and then press OK button.
-
Select Caller rejection, and then press OK button.
-
Select Yes, and then press OK button.
The Caller rejection conditions screen is displayed.
- Specify rejection conditions.
Use the ▲▼ button to select a setting item and use the ◀▶ button to select Accept or Reject.
Anonymous no.
Selects whether to reject a phone call or fax reception from an anonymous number.
Out of area no.
Selects whether to reject a phone call or fax reception out of the subscribed service area.
Rejected numbers
Selects whether to reject a phone call or fax reception from the specified numbers.
- Press OK button to finish specifying rejection conditions.
If you select Reject for Rejected numbers, Register rejected numbers? is displayed on the LCD.
Select Yes, and then register the rejected number.
For details on how to register the rejected number, see Registering Rejected Number.
Note
• Even if you select Reject, the printer rings once.
(The printer may not ring depending on the country or region of purchase.)
Other Useful Fax Functions
▶ Using Information Services
▶ Transmission/Reception of Faxes Using ECM
Document Stored in Printer's Memory
Summary of Reports and Lists
Using Information Services
You can use various information services such as provided by banks, and make airline reservations or hotel reservations. Since these services require tone dialing to use their services, you need to temporarily switch to tone dialing if your printer is connected to a rotary pulse line.
→ Using Touch Tone Line
→ Using Rotary Pulse Line

Important
- You may need to contract with the service providers for some information services. For details, contact the service providers.
Using Touch Tone Line
- Dialing by Using the On Hook Dial Function
Note
- You can use the on hook dial function only when Hook key setting in Security control under FAX settings is set to Enable.
→ Security control
- Make sure that printer is turned on.

- Select PAY on HOME screen.
→ Using the Operation Panel
The Fax standby screen is displayed.
- Press center Function button.
- Use Numeric buttons to dial number of information service.
- When recorded message for information service answers, use Numeric buttons to press numbers in accordance with message.
- Press center Function button to finish using service.
- Dialing by Using the Telephone Connected to the Printer
- Make sure that printer is turned on.

- Select PAY on HOME screen.
→ Using the Operation Panel
The Fax standby screen is displayed.
- Lift handset of telephone.
- Use telephone to dial number of information service.
-
When recorded message for information service answers, use telephone to press numbers in accordance with message.
-
Hang up handset to finish using service.
Using Rotary Pulse Line
- Dialing by Using the On Hook Dial Function
Note
- You can use the on hook dial function only when Hook key setting in Security control under FAX settings is set to Enable. → Security control
-
Make sure that printer is turned on.
-
Select 📄 on HOME screen.

→ Using the Operation Panel
The Fax standby screen is displayed.
- Press center Function button.
- Use Numeric buttons to dial number of information service.
- When recorded message for information service answers, press Tone button to switch to tone dialing.
- Use Numeric buttons to press numbers in accordance with message.
- Press center Function button to finish using service.
- Dialing by Using the Telephone Connected to the Printer
-
Make sure that printer is turned on.
-
Select ▼AY on HOME screen.

→ Using the Operation Panel
The Fax standby screen is displayed.
- Lift handset of telephone.
- Use telephone to dial number of information service.
- When recorded message for information service answers, use telephone to switch to tone dialing.
When you dial the number of the information service using the telephone connected to the printer, you cannot use the printer to switch to tone dialing. For instructions on how to switch to tone dialing, refer to your telephone's instruction manual.
- Use telephone to press numbers in accordance with message.
- Hang up handset to finish using service.
Transmission/Reception of Faxes Using ECM
This printer is set to send/receive faxes in Error Correction Mode (ECM). If the recipient's fax device is compatible with ECM, ECM automatically corrects errors and resends the fax.

Note
- If the sender's or recipient's fax device is not compatible with ECM, the fax will be sent/received without automatic error correction.
- To receive color faxes, make sure that ECM RX in Adv. communication settings in Advanced FAX settings under FAX settings is set to ON.
→ Advanced FAX settings
To disable ECM transmission/reception, set ECM TX and ECM RX in Adv. communication settings to OFF.
- Transmission may take longer when ECM is enabled.
Document Stored in Printer's Memory
If the sending faxes is not complete or the printer was not able to print the received faxes, these faxes are stored in the printer's memory.
If an error occurred during a fax transmission, the document is not stored in the printer's memory.
In the following cases, the printer is not able to print the received fax and will automatically store the fax in its memory.
- The amount of remaining ink is insufficient to print a fax.
- Paper has run out.
- A different size of paper from that specified by Page size in FAX paper settings is loaded.
- Do not print is selected for Received documents in Auto print settings under FAX settings.
- You pressed the Stop button to cancel printing of a received fax.

Important
- If you unplug the power cord of the printer, all faxes stored in the printer's memory are deleted.
For details on how to unplug the power cord, refer to Unplugging the Machine.
You can print or delete the faxes stored in the printer's memory. You can also save the received faxes stored in the printer's memory on the USB flash drive or forward the received faxes stored in the printer's memory to the shared folder on the computer.
- To print a document in the printer's memory:
→ Printing Document in Printer's Memory
- To delete a document in the printer's memory:
→ Deleting Document in Printer's Memory
- To save a document on a USB flash drive
→ Saving Document in Printer's Memory to USB Flash Drive
- To forward a document to the shared folder on the computer
Forwarding Document in Printer's Memory to Shared Folder on Computer

Note
- When confirming, printing, or deleting a document stored in the printer's memory, you specify it by its transaction number. If you do not know the transaction number for your target document, print the list of documents (MEMORY LIST) first.
For details on how to print MEMORY LIST, see Printing Document in Printer's Memory.
Printing Document in Printer's Memory
You can print a specified document in the printer's memory or print all the received documents in its memory at a time.
When printing a specified document, you specify it by its transaction number. If you do not know the transaction number for your target document, print the list of documents (MEMORY LIST) first.
- Make sure that printer is turned on.
-
Load paper.
-
Select ON HOME screen.
→ Using the Operation Panel
The Fax standby screen is displayed.
- Select Function list, and then press OK button.
The Function list screen is displayed.
- Select Memory reference, and then press OK button.
Note
- If no document is stored in the printer's memory, There is no document in memory. is displayed. Press the OK button to return to the previous screen.
- Select a print menu, and then press OK button.
• To print the memory list (MEMORY LIST):
If you select Print memory list, you can print a list of the documents in the printer's memory (MEMORY LIST).
When the print confirmation screen is displayed, select Yes and press the OK button. The printing starts.
MEMORY LIST shows the transaction number of the unsent or unprinted fax (TX/RX NO.), transaction mode, recipient's number, and the date and time of the transaction.
A transaction number from "0001" to "4999" on MEMORY LIST indicates a document being sent. A transaction number from "5001" to "9999" on MEMORY LIST indicates a document being received.
• To specify a document to print:
If you select Print specified document, you can specify the document and print it.
If you select this menu, the document selection screen is displayed.
Note
- If the specified document is not stored in the printer's memory, There is no document that can be printed. is displayed. Press the OK button to return to the previous screen.
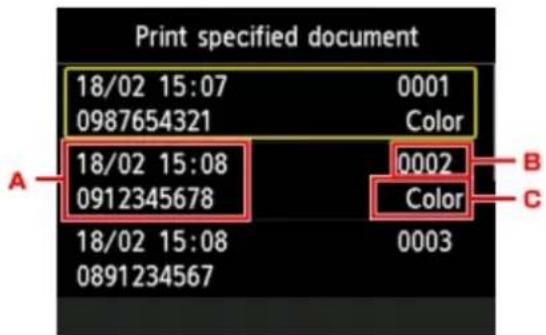
text_image
Print specified document 18/02 15:07 0001 0987654321 Color A 18/02 15:08 0002 0912345678 Color 18/02 15:08 0003 0891234567A. Date and time of transaction and fax/telephone number
B. Transaction number (TX/RX NO.)
A transaction number from "0001" to "4999" indicates a document being sent.
A transaction number from "5001" to "9999" indicates a document being received.
C. Color information
Color is displayed for color transmission/reception. Nothing is displayed for black & white transmission/reception.
After selecting the document to print and pressing the OK button, the confirmation screen to select whether to print only the first page of the document is displayed.
If you select Yes, only the first page of the document will be printed. The document is still stored in the printer's memory.
If you select No, all pages of the document will be printed. The screen to confirm whether to delete the printed document in the printer's memory is displayed after printing.
• To print all the received documents stored in the printer's memory:
If you select Print all received documents, you can print all the received documents stored in the printer's memory.
If you select this menu, the confirmation screen is displayed.
After selecting Yes and pressing the OK button, all the documents in the printer's memory are printed.
Each time a document is printed, the screen to confirm whether to delete the printed document in the printer's memory is displayed.
If you select Yes and press the OK button, the printed document in the printer's memory is deleted.
Deleting Document in Printer's Memory
You can delete a specified document in the printer's memory or delete all the documents in its memory at a time.

Note
- When deleting a specified document, you specify it by its transaction number. If you do not know the transaction number for your target document, print the list of documents (MEMORY LIST) first.
→ Printing Document in Printer's Memory
- Make sure that printer is turned on.

- Select on HOME screen.
→ Using the Operation Panel
The Fax standby screen is displayed.
- Select Function list, and then press OK button.
The Function list screen is displayed.
- Select Memory reference, and then press OK button.

Note
- If no document is stored in the printer's memory, There is no document in memory. is displayed. Press the OK button to return to the previous screen.
- Select a delete menu, and then press OK button.
• To specify a document to delete:
If you select Delete specified document, you can specify the document to delete.
If you select this menu, the document selection screen is displayed.

Note
- If the specified document is not stored in the printer's memory, There is no document that can be deleted. is displayed. Press the OK button to return to the previous screen.
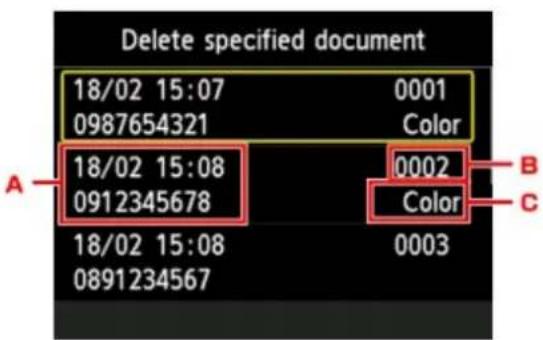
text_image
Delete specified document 18/02 15:07 0001 0987654321 Color 18/02 15:08 0002 0912345678 Color 18/02 15:08 0003 0891234567A. Date and time of transaction and fax/telephone number
B. Transaction number (TX/RX NO.)
A transaction number from "0001" to "4999" indicates a document being sent.
A transaction number from "5001" to "9999" indicates a document being received.
C. Color information
Color is displayed for color transmission/reception. Nothing is displayed for black & white transmission/reception.
After selecting the document to print and pressing the OK button, the confirmation screen is displayed.
If you select Yes and press the OK button, the specified document is deleted from printer's memory.
- To delete all documents stored in the printer's memory:
If you select Delete all documents, you can delete all documents from printer's memory.
If you select this menu, the confirmation screen is displayed.
If you select Yes and press the OK button, all documents are deleted from printer's memory.
Saving Document in Printer's Memory to USB Flash Drive
You can save the received faxes stored in the printer's memory to the USB flash drive as PDF files LCD and Operation Panel of the printer.
You can save a specified document in the printer's memory to the USB flash drive or save all the documents in its memory to the USB flash drive at a time.
Important
- Do not remove the USB flash drive from the printer until saving is complete.
- For safety reasons, we recommend backing up faxes saved on a USB flash drive to another media periodically to avoid unexpected accidents.
- We assume no responsibility for damage to or loss of data for whatever reason even within the warranty period.
Note
- When saving a specified document, you specify it by its transaction number. If you do not know the transaction number for your target document, print the list of documents (MEMORY LIST) first.
→ Printing Document in Printer's Memory -
After saving the fax in the printer's memory to the USB flash drive, the fax is still stored in the printer's memory.
For details on how to delete the fax in the printer's memory, see Deleting Document in Printer's Memory. -
Make sure that printer is turned on.
-
Insert USB flash drive into USB flash drive port.
-
Select on HOME screen.
→ Using the Operation Panel
The Fax standby screen is displayed.
- Select Function list, and then press OK button.
The Function list screen is displayed.
- Select Memory reference, and then press OK button.
Note
- If no document is stored in the printer's memory, There is no document in memory. is displayed. Press the OK button to return to the previous screen.
- Select a save menu, and then press OK button.
• To specify a document to save on the USB flash drive:
If you select Save specified document, you can specify the document to save on the USB flash drive.
When the Specify the storage medium screen is displayed, select USB flash drive and press the OK button. The document selection screen is displayed.

Note
- If the specified document is not stored in the printer's memory, There is no document that can be saved. is displayed. Press the OK button to return to the previous screen.
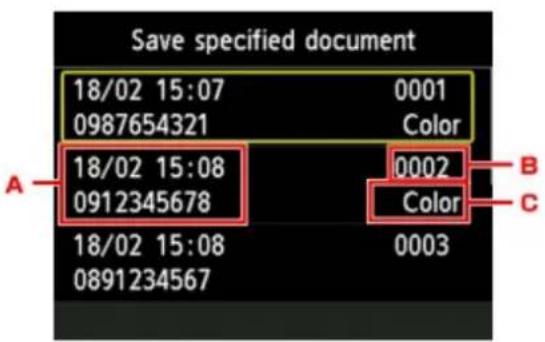
text_image
Save specified document 18/02 15:07 0001 0987654321 Color A 18/02 15:08 0002 0912345678 Color 18/02 15:08 0003 0891234567A. Date and time of transaction and fax/telephone number
B. Transaction number (TX/RX NO.)
A transaction number from "0001" to "4999" indicates a document being sent.
A transaction number from "5001" to "9999" indicates a document being received.
C. Color information
Color is displayed for color transmission/reception. Nothing is displayed for black & white transmission/reception.
After selecting the document to save and pressing the OK button, the specified document is saved on the USB flash drive.
• To save all the received documents stored in the printer's memory on the USB flash drive:
If you select Save all RX documents, you can save all documents on the USB flash drive.
When the confirmation screen is displayed, select Yes and press the OK button.
When the Specify the storage medium screen is displayed, select USB flash drive and press the OK button. All documents are saved on the USB flash drive.

Note
- You can save up to 250 pages of fax as one PDF file.
- You can save up to 2000 PDF files on a USB flash drive.
- Faxes are saved according to the order of the transaction number when Save all RX documents is selected.
- If the USB flash drive is removed or becomes full while saving faxes is in progress, the error message is displayed on the LCD. Press the OK button to dismiss the error.
- The folder and file name of faxes saved on the USB flash drive is as follows:
- Folder name: CANON_SC\FAXDOC\0001
- File name (file extension: PDF): Running numbers, starting from FAX_0001
- File date: The date and time of saving as set in the printer.
For details on how to set the date and time:
Setting Date and Time
Forwarding Document in Printer's Memory to Shared Folder on Computer
You can forward the received faxes stored in the printer's memory to the shared folder on the computer as PDF files LCD and Operation Panel of the printer.
You can forward a specified document in the printer's memory to the shared folder on the computer or forward all the documents in its memory to the shared folder on the computer at a time.

Important
- Do not disconnect the printer with the computer when the printer forwards received faxes to the shared folder on the computer.
- We assume no responsibility for damage to or loss of data for whatever reason even within the warranty period.

Note
- Register the destination folder using Quick Utility Toolbox in advance.
For details on how to register the destination folder:
- For Windows:
→ Destination Folder Settings
- For Mac OS:
→ Destination Folder Settings
- When forwarding a specified document, you specify it by its transaction number. If you do not know the transaction number for your target document, print the list of documents (MEMORY LIST) first.
→ Printing Document in Printer's Memory
- After forwarding the fax in the printer's memory to the shared folder on the computer, the fax is still stored in the printer's memory.
For details on how to delete the fax in the printer's memory, see Deleting Document in Printer's Memory.
- Make sure that printer is turned on.
-
Make sure that printer is connected with destination computer.
-
Select TAX on HOME screen.
→ Using the Operation Panel
The Fax standby screen is displayed.
- Select Function list, and then press OK button.
The Function list screen is displayed.
- Select Memory reference, and then press OK button.
Note
- If no document is stored in the printer's memory, There is no document in memory. is displayed. Press the OK button to return to the previous screen.
- Select a forward menu, and then press OK button.
• To specify a document to forward to the shared folder on the computer:
If you select Save specified document, you can specify the document to forward to the shared folder on the computer.
When the Specify the storage medium screen is displayed, select Destination folder and press the OK button.
When the Select folder screen is displayed, select a destination folder, and then press the OK button. The document selection screen is displayed.
Note
- If the specified document is not stored in the printer's memory, There is no document that can be forwarded. is displayed. Press the OK button to return to the previous screen.
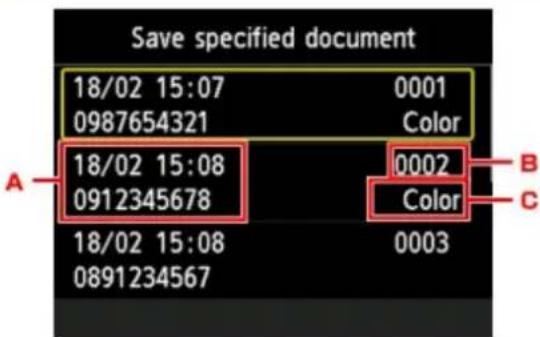
text_image
Save specified document 18/02 15:07 0001 0987654321 Color 18/02 15:08 0002 0912345678 Color 18/02 15:08 0003 0891234567A. Date and time of transaction and fax/telephone number
B. Transaction number (TX/RX NO.)
A transaction number from "0001" to "4999" indicates a document being sent.
A transaction number from "5001" to "9999" indicates a document being received.
C. Color information
Color is displayed for color transmission/reception. Nothing is displayed for black & white transmission/reception.
Note
- When you specify a PIN code for a registered folder, a screen asking you to enter a PIN code is displayed. Entering the PIN code allows you to assign the shared folder as the destination.
After selecting the document to save and pressing the OK button, the specified document is forwarded to the shared folder on the computer.
- To forward all the received documents stored in the printer's memory to the shared folder on the computer:
If you select Save all RX documents, you can forward all documents to the shared folder on the computer.
When the confirmation screen is displayed, select Yes and press the OK button.
When the Specify the storage medium screen is displayed, select Destination folder and press the OK button.
When the Select folder screen is displayed, select a destination folder, and then press the OK button. All documents are forwarded to the shared folder on the computer.
Note
- When you specify a PIN code for a registered folder, a screen asking you to enter a PIN code is displayed. Entering the PIN code allows you to assign the shared folder as the destination.
Note
- You can forward up to 250 pages of fax as one PDF file.
- You can forward up to 2000 PDF files on a USB flash drive.
- Faxes are forwarded according to the order of the transaction number when Save all RX documents is selected.
- If the printer is disconnected with the computer or if the writing error occurs on the computer while forwarding faxes is in progress, the error message is displayed on the LCD. Press the OK button to dismiss the error.
- The faxes forwarded to the shared folder are named with the serial number from FAX_0001 (file extension: PDF).
Summary of Reports and Lists
The printer prints the report of sending or receiving a fax automatically. You can print the list of the fax/telephone number or the current settings.
→ Type of Reports and Lists
→ Printing Report or List
Type of Reports and Lists
| Report or List Description | |
| ACTIVITY REPORT | Shows recent fax transactions at sight. • You can print ACTIVITY REPORT manually. For details on the procedure to print, see Printing Report or List. • The * (asterisk) is appended to the history already printed on ACTIVITY REPORT. • If you select Print for Activity report in Auto print settings under FAX settings, the printer prints ACTIVITY REPORT for the 20 histories of sent and received faxes automatically. → Auto print settings |
| Directory list • RECIPIENT TELEPHONE NUMBER LIST • GROUP DIAL TELEPHONE NO. LIST | Lists the numbers and names registered. You can print the lists of the recipient and group dial. For details on the procedure to print, see Printing Report or List. |
| USER'S DATA LIST | Lists the current settings of the printer and the registered sender information. For details on the procedure to print, see Printing Report or List. |
| MEMORY LIST Lists | the documents currently stored in the printer's memory. For details on the procedure to print, see Printing Report or List. Note • You can print MEMORY LIST by selecting Print memory list in Memory reference. → Printing Document in Printer's Memory |
| REJECTED NUM-BER LIST | Lists the rejected numbers. For details on the procedure to print, see Printing Report or List. |
| CALLER HISTORY L | Lists the caller history. This list is available when Caller ID service is subscribed. For details on the procedure to print, see Printing Report or List. This list may not be supported depending on the country or region of purchase. |
| TX REPORT/ERROR TX REPORT | Either of these reports is printed after each fax transmission.·At the time of purchase, ERROR TX REPORT is set to be printed only when a transmission error occurred.You can set the printer to print TX REPORT each time it sends a document, or disable printing of the report by selectingTX reportinAuto print settingsunder FAX settings.You can also specify the print setting so that the first page of the fax is printed along with the report.→Auto print settingsNote·The first page of the fax is not printed in color transmission.·MULTI TRANSMISSION REPORT is printed after sequential broadcasting of a document.·If an error occurs when you send a fax, the error number is printed on ERROR TX REPORT (there are some errors for which the cause is also printed).For details on the error number, seeErrors When You Send Fax. |
| MULTI TRANSMISSION REPORT | This report is printed after sequential broadcasting of a document.Confirms whether the transmission to all the recipients has been completed successfully.The procedure to print and the error number is same as TX REPORT. |
| RX REPORT This report is printed after each fax reception.·At the time of purchase, the printer is set so that RX REPORT is not printed at all.You can set the printer to print RX REPORT each time it receives a document, or only when an error occurs by selectingRX reportinAuto print settingsunder FAX settings.→Auto print settings·If an error occurs when you receive a fax, the error number is printed on RX REPORT (there are some errors for which the cause is also printed).For details on the error number, seeErrors When You Receive Fax. | |
| MEMORY CLEAR REPORT | Lists the deleted faxes in the printer's memory if the faxes stored in the printer's memory are deleted by a power failure or unplugging the power cord.When the printer is turned on, The power cord has been unplugged and unsent/received docs in memory have been lost. Load paper and select print a list of the lost docs. is displayed on the LCD. MEMORY CLEAR REPORT is printed by pressing the OK button. |
Printing Report or List
This section describes the procedure to print the report or the list manually.
Print the following report or list manually.
• ACTIVITY REPORT
- Directory list (RECIPIENT TELEPHONE NUMBER LIST/GROUP DIAL TELEPHONE NO. LIST)
- USER'S DATA LIST
- MEMORY LIST
- REJECTED NUMBER LIST
- CALLER HISTORY
- CALLER HISTORY may not be supported depending on the country or region of purchase.
- Make sure that printer is turned on.
-
Load paper.
-
Select on HOME screen.

→ Using the Operation Panel
The Fax standby screen is displayed.
- Select Function list, and then press OK button.
The Function list screen is displayed. - Select Print reports/lists, and then press OK button.
- Select report or list you want to print, and then press OK button to start printing.
- When you select Directory list:
Select Recipient or Group dial, and then press OK button.
If you select Recipient, select whether to print RECIPIENT TELEPHONE NUMBER LIST in alphabetical order, and then press the OK button. If you select Yes, the printer prints RECIPIENT TELEPHONE NUMBER LIST in alphabetical order. If you select No, the printer prints RECIPIENT TELEPHONE NUMBER LIST in numerical order.
If you select Group dial, the confirmation screen is displayed. Select Yes, and then press OK button. The printer prints GROUP DIAL TELEPHONE NO. LIST.
- When you select an item other than Directory list:
The confirmation screen is displayed. Select Yes, and then press OK button.
The printer prints the selected report or list.
Errors When You Send Fax
If an error occurs when you send a fax, the error number is printed on ERROR TX REPORT or ACTIVITY REPORT (there are some errors for which the cause is also printed).
The causes corresponding to the error numbers are as follows.
| No. Cause Action | ||
| #001 | Document is jammed in the ADF. | The document is jammed in the ADF.When the error is cleared, redo the operation. |
| #003 | Document is too long. | You attempted to send a document longer than 15.75 inches / 400 mm.You cannot send a document longer than 15.75 inches / 400 mm from the ADF."#003" is also printed if it takes time to send a page. Divide the document or set the image quality (Fax resolution) to a lower setting, and then resend it. |
| #005 | No answer. The recipient's fax device does not respond.Contact the recipient and have the recipient check that the telephone line is connected correctly. | |
| #012 | No paper is in the recipient's fax device. | There is no paper in the recipient's fax device.Contact the recipient and have the recipient load paper. |
| #017 | No tone is detected. The printer could not detect the dial tone.Dial tone detect in Advanced FAX settings under FAX settings is set to ON. Set to OFF.→ Advanced FAX settings | |
| #018 | Line was busy. The fax/telephone number you dialed is busy.Try dialing again after waiting for a moment. | |
| #022 | Number is deleted. The fax/telephone number registered in the printer's directory is incorrect.Check the recipient's fax/telephone number, correct the fax/telephone number registered in the printer's directory, and then send the document again.→ Changing Registered Information | |
| #037 | Memory is full. The printer could not send a fax because its memory is full.Delete contents in memory, and then send a fax again.→ Document Stored in Printer's Memory | |
| #059 | Transmission has been canceled due to a fax information mismatch. | Transmission has been canceled because the printer could not detect the recipient's fax device information or the information did not match the dialed number. This message is displayed when Check RX FAX information in Security control under FAX settings is set to ON.For details, see Sending Faxes after Checking Information (Checking Recipient's Information). |
| #085 | Try again in black & white transmission. | The recipient's fax device is not color-compatible.Resend the document in black & white. |
| #099 | The Stop button was pressed during transmission. | The Stop button was pressed to cancel transmission of the document. Resend it if necessary. |
| #412 | The fax could not be sent from the computer. | The fax could not be sent from the computer. Ensure that the printer is connected with the computer correctly and redo operation. |
| #995 | The unsent fax was deleted while automatic redialing. | While automatic redialing, the unsent fax is stored in the printer's memory temporarily until the sending fax is complete. If a power failure occurs or you unplug the powercord before automatic redialing is complete, all faxes stored in the printer's memory are deleted and not sent.Resend the document. |
Errors When You Receive Fax
If an error occurs when you receive a fax, the error number is printed on RX REPORT or ACTIVITY REPORT (there are some errors for which the cause is also printed).
The causes corresponding to the error numbers are as follows.
| No. Cause Action | |
| #003 It takes too long to receive a page. | Contact the sender and have the sender divide the fax or set the image quality (Fax resolution) to a lower setting and resend it. |
| #005 No answer. When receiving a fax manually, the printer could not detect the signals from the sender's fax device.Contact the sender and have the sender resend it, or set the printer to receive the fax automatically. | |
| #037 Memory is full. The printer could not receive a fax because its memory is full.Delete contents in memory, and then ask the sender to resend the fax. See Document Stored in Printer's Memory. | |
| #046 Reception has been rejected due to the specified fax rejection condition. | Reception has been rejected because the fax matches the fax rejection condition specified by FAX reception reject in Security control under FAX settings.For details, see Rejecting Fax Reception. |
| #099 The Stop button was pressed during reception. | The Stop button was pressed to cancel reception of the fax. Contact the sender and have the sender resend it if necessary. |
| #995 The received fax was deleted. | The received fax was deleted before being saved to the USB flash drive, forwarded to the shared folder on the computer, or printed. Contact the sender and have the sender resend it if necessary. |