
PIXMA G6020 - Printer CANON - Free user manual and instructions
Find the device manual for free PIXMA G6020 CANON in PDF.


User questions about PIXMA G6020 CANON
0 question about this device. Answer the ones you know or ask your own.
Ask a new question about this device
Download the instructions for your Printer in PDF format for free! Find your manual PIXMA G6020 - CANON and take your electronic device back in hand. On this page are published all the documents necessary for the use of your device. PIXMA G6020 by CANON.
USER MANUAL PIXMA G6020 CANON
Symbols Used in This Document. 10
Touch-enabled Device Users (Windows).... 11
Trademarks and Licenses. 12
Basic Operation.... 27
Printing Photos from a Computer. 28
Printing Photos from a Smartphone/Tablet. 34
Network. 38
Restrictions. 41
Network Connection Tips. 43
Default Network Settings. 44
Detect Same Printer Name. 46
Connects to Another Computer via LAN/Changes from USB to LAN Connection. 47
Printing Network Settings. 48
Reconfiguration Method of LAN Connection/Reconfiguration Method of Wi-Fi Connection. 54
IJ Network Device Setup Utility (Windows).... 55
IJ Network Device Setup Utility. 56
Starting Up IJ Network Device Setup Utility. 57
Diagnosing and Repairing Network Settings. 58
Performing/Changing Network Settings.... 59
Canon IJ Network Device Setup Utility Screen. 60
Performing Network Settings. 64
Performing/Changing Wired LAN Connection (Ethernet Cable) Settings. 65
Performing/Changing Wi-Fi Settings. 68
Assigning Printer Information. 73
List of Models Which Does Not Support Diagnosis and Repair Function. 74
List of Models Which Does Not Support IPv6 Configuration via USB Connection.... 75
Handling Paper, Ink Tanks, etc. 77
Loading Paper. 78
Paper Sources. 79
Loading Paper in the Rear Tray. 80
Loading Paper in the Cassette....86
Loading Envelopes in Rear Tray.... 91
Refilling Ink Tanks. 96
Refilling Ink Tanks. 97
Checking Ink Level.... 103
Ink Tips. 104
If Printing Is Faint or Uneven. 105
Maintenance Procedure.... 106
Printing the Nozzle Check Pattern.... 109
Examining the Nozzle Check Pattern.... 110
Cleaning the Print Head. 111
Deep Print Head Cleaning.... 112
Aligning the Print Head.... 113
Cleaning. 114
Cleaning Paper Feed Rollers.... 115
Cleaning Inside the Printer (Bottom Plate Cleaning). 117
Overview. 120
Safety.... 121
Safety Precautions.... 122
Regulatory Information.... 125
WEEE (EU&EEA).... 127
Handling Precautions.... 138
Legal Restrictions on Printing. 139
Printer Handling Precautions.... 140
Transporting Your Printer.... 141
When Repairing, Lending, or Disposing of the Printer.... 146
Keeping Print Quality High. 147
Main Components and Their Use. 148
Main Components. 149
Front View.... 150
Rear View.... 152
Inside View. 153
Operation Panel.... 154
Power Supply. 155
Checking that Power Is On. 156
Turning the Printer On and Off. 157
Checking the Power Plug/Power Cord. 159
Unplugging the Printer.... 160
LCD and Operation Panel. 161
Entering Numbers, Letters, and Symbols. 163
Changing Settings.... 164
Changing Printer Settings from Your Computer (Windows). 165
Changing the Print Options.... 166
Registering a Frequently Used Printing Profile. 167
Setting the Ink to be Used.... 169
Managing the Printer Power.... 170
Changing the Printer Operation Mode. 172
Changing Settings from Operation Panel. 174
Changing Settings from Operation Panel.... 175
Setting Items on Operation Panel.... 176
Print settings.... 177
LAN settings.... 178
Other dev. settings.... 182
Language selection.... 183
Firmware update.... 184
Reset setting.... 185
Feed settings. 186
Web service setup.... 187
ECO settings. 188
Quiet setting.... 189
System information.... 190
Specifications. 191
Information about Paper.... 195
Supported Media Types. 196
Paper Load Limit.... 199
Unsupported Media Types.... 201
Handling Paper.... 202
Economy Mode.... 203
Printing.... 204
Printing from Computer.... 205
Printing from Application Software (Windows Printer Driver). 206
Basic Printing Setup.... 207
Paper Settings on the Printer Driver and the Printer (Media Type).... 211
Paper Settings on the Printer Driver and the Printer (Paper Size).... 213
Various Printing Methods. 215
Setting a Page Size and Orientation. 216
Setting the Number of Copies and Printing Order.... 217
Execute Borderless Printing. 219
Scaled Printing....222
Page Layout Printing.... 225
Tiling/Poster Printing. 227
Duplex Printing. 230
Setting Up Envelope Printing.... 234
Printing on Postcards.... 236
Overview of the Printer Driver.... 238
Canon IJ Printer Driver.... 239
Opening Printer Driver's Setup Screen. 240
Canon IJ Status Monitor.... 241
Instructions for Use (Printer Driver). 243
Printer Driver Description.... 245
Quick Setup Tab Description.... 246
Main Tab Description.... 253
Page Setup Tab Description.... 259
Maintenance Tab Description.... 271
Canon IJ Status Monitor Description. 273
Installing the Printer Driver.... 276
Printing Using Canon Application Software.... 277
Printing from Smartphone/Tablet. 278
Printing with Wireless Direct. 279
Paper Settings. 283
Frequently Asked Questions.... 287
Network Settings and Common Problems.... 289
Network Communication Problems. 292
Cannot Find Printer on Network. 293
Cannot Find Printer on Check Printer Settings Screen During Setup (Windows).... 294
Cannot Find Printer on Check Printer Settings Screen During Wi-Fi Setup (Windows)-Checking Power Status. 296
Cannot Find Printer on Check Printer Settings Screen During Wi-Fi Setup (Windows)-Checking PC Network Connection. 297
Cannot Find Printer on Check Printer Settings Screen During Wi-Fi Setup (Windows)-Checking Printer's Wi-Fi Settings. 298
Cannot Find Printer on Check Printer Settings Screen During Wi-Fi Setup (Windows)-Checking Wi-Fi Environment. 299
Cannot Find Printer on Check Printer Settings Screen During Wi-Fi Setup (Windows)-Checking Printer's IP Address. 301
Cannot Find Printer on Check Printer Settings Screen During Wi-Fi Setup (Windows)-Checking Security Software Settings. 302
Cannot Find Printer on Check Printer Settings Screen During Wi-Fi Setup (Windows)-Checking Wireless Router Settings. 303
Cannot Find Printer on Check Printer Settings Screen During Wired LAN Setup (Windows)-Checking LAN Cable and Router. 304
Cannot Find Printer on Check Printer Settings Screen During Wired LAN Setup (Windows)-Checking PC Network Connection. 305
Cannot Find Printer on Check Printer Settings Screen During Wired LAN Setup (Windows)-Checking Printer's Wired LAN Settings. 306
Cannot Find Printer on Check Printer Settings Screen During Wired LAN Setup (Windows)-Checking Printer's IP Address. 307
Cannot Find Printer on Check Printer Settings Screen During Wired LAN Setup (Windows)-Checking Security Software Settings. 308
Cannot Find Printer on Check Printer Settings Screen During Wired LAN Setup (Windows)-Checking Router Settings. 309
Cannot Proceed beyond Printer Connection Screen. 310
Cannot Find Printer while Using Wi-Fi. 312
Network Connection Problems.... 315
Printer Suddenly Stopped Working for Some Reason. 316
Network Key (Password) Unknown. 321
Printer Cannot Be Used After Replacing Wireless Router or Changed Router Settings. . . . . . . 323
Other Network Problems.... 325
Checking Network Information.... 326
Restoring to Factory Defaults.... 329
Problems while Printing from Smartphone/Tablet. 330
Cannot Print from Smartphone/Tablet. 331
Printing Problems. 335
Printer Does Not Print. 336
Ink Does Not Come Out. 338
Printer Does Not Pick up or Feed the Paper/"No Paper" Error. 341
Printout Results Are Unsatisfactory. 344
Printouts Are Blank/Blurry or Fuzzy/Inaccurate or Bleeding Colors/Streaks or Lines. 346
Colors Are Unclear. 349
Lines Are Misaligned/Distorted. 351
Paper Is Smudged / Printed Surface Is Scratched. 352
Vertical Line Next to Image. 356
Mechanical Problems. 357
Printer Does Not Turn On. 358
Printer Turns Off Unexpectedly or Repeatedly. 359
USB Connection Problems. 360
Cannot Communicate with Printer via USB. 361
Wrong Language Appears in LCD. 362
Installation and Download Problems. 363
Failed to Printer Driver Installation (Windows). 364
Updating Printer Driver in Network Environment (Windows).... 366
Errors and Messages.... 367
Four-Digit Alphanumeric Characters Appear on LCD. 368
When Error Occurred.... 369
Message (Support Code) Appears.... 370
List of Support Code for Error. 373
List of Support Code for Error (Paper Jams). 375
-
376
-
378
-
380
-
382
Paper Is Jammed inside Printer.... 383
Removing Jammed Paper from Rear Side. 387
-
391
-
392
1200.... 393
-
394
-
395
1366.... 396
1367.... 397
1431.... 398
- 402
1641.... 406
-
407
-
408
-
409
-
410
2110....411
- 413
2114.... 415
-
417
-
418
5200....419
5B00....420
6000....421
C000....422
Using Online Manual
▶ Operating Environment
Symbols Used in This Document
▶ Touch-enabled Device Users (Windows)
▶ Printing Online Manual
Trademarks and Licenses
▶ Screenshots in This Manual
Symbols Used in This Document
⚠ Warning
Instructions that, if ignored, could result in death, serious personal injury, or property damage caused by incorrect operation of the equipment. These must be observed for safe operation.
Caution
Instructions that, if ignored, could result in personal injury or property damage caused by incorrect operation of the equipment. These must be observed for safe operation.
Important
Instructions including important information that must be observed to avoid damage and injury or improper use of the product. Be sure to read these instructions.
Note
Instructions including notes for operation and additional explanations.
Basics
Instructions explaining basic operations of your product.
Note
- Icons may vary depending on your product.
Touch-enabled Device Users (Windows)
For touch actions, you need to replace "right-click" in this document with the action set on the operating system. For example, if the action is set to "press and hold" on your operating system, replace "right-click" with "press and hold."
Trademarks and Licenses
- Microsoft is a registered trademark of Microsoft Corporation.
- Windows is a trademark or registered trademark of Microsoft Corporation in the U.S. and/or other countries.
- Windows Vista is a trademark or registered trademark of Microsoft Corporation in the U.S. and/or other countries.
- Internet Explorer is a trademark or registered trademark of Microsoft Corporation in the U.S. and/or other countries.
• Mac, Mac OS, macOS, OS X, AirPort, App Store, AirPrint, the AirPrint logo, Safari, Bonjour, iPad, iPhone and iPod touch are trademarks of Apple Inc., registered in the U.S. and other countries. - IOS is a trademark or registered trademark of Cisco in the U.S. and other countries and is used under license.
- Google Cloud Print, Google Chrome, Chrome OS, Chromebook, Android, Google Drive, Google Apps and Google Analytics are either registered trademarks or trademarks of Google Inc. Google Play and Google Play Logo are trademarks of Google LLC.
- Adobe, Acrobat, Flash, Photoshop, Photoshop Elements, Lightroom, Adobe RGB and Adobe RGB (1998) are either registered trademarks or trademarks of Adobe Systems Incorporated in the United States and/or other countries.
- Bluetooth is a trademark of Bluetooth SIG, Inc., U.S.A. and licensed to Canon Inc.
- Autodesk and AutoCAD are registered trademarks or trademarks of Autodesk, Inc., and/or its subsidiaries and/or affiliates in the USA and/or other countries.
- USB Type-C™ is a trademark of USB Implementers Forum.
Note
- The formal name of Windows Vista is Microsoft Windows Vista operating system.
Copyright (c) 2003-2015 Apple Inc. All rights reserved.
Redistribution and use in source and binary forms, with or without modification, are permitted provided that the following conditions are met:
- Redistributions of source code must retain the above copyright notice, this list of conditions and the following disclaimer.
- Redistributions in binary form must reproduce the above copyright notice, this list of conditions and the following disclaimer in the documentation and/or other materials provided with the distribution.
- Neither the name of Apple Inc. ("Apple") nor the names of its contributors may be used to endorse or promote products derived from this software without specific prior written permission.
THIS SOFTWARE IS PROVIDED BY APPLE AND ITS CONTRIBUTORS "AS IS" AND ANY EXPRESS OR IMPLIED WARRANTIES, INCLUDING, BUT NOT LIMITED TO, THE IMPLIED WARRANTIES OF MERCHANTABILITY AND FITNESS FOR A PARTICULAR PURPOSE ARE DISCLAIMED. IN NO EVENT SHALL APPLE OR ITS CONTRIBUTORS BE LIABLE FOR ANY DIRECT, INDIRECT, INCIDENTAL, SPECIAL, EXEMPLARY, OR CONSEQUENTIAL DAMAGES (INCLUDING, BUT NOT LIMITED TO, PROCUREMENT OF SUBSTITUTE GOODS OR SERVICES; LOSS OF USE, DATA, OR PROFITS; OR BUSINESS INTERRUPTION) HOWEVER CAUSED AND ON ANY THEORY OF LIABILITY, WHETHER IN CONTRACT, STRICT LIABILITY, OR TORT (INCLUDING NEGLIGENCE OR OTHERWISE) ARISING IN ANY WAY OUT OF THE USE OF THIS SOFTWARE, EVEN IF ADVISED OF THE POSSIBILITY OF SUCH DAMAGE.
Apache License
Version 2.0, January 2004
http://www.apache.org/licenses/
TERMS AND CONDITIONS FOR USE, REPRODUCTION, AND DISTRIBUTION
1. Definitions.
"License" shall mean the terms and conditions for use, reproduction, and distribution as defined by Sections 1 through 9 of this document.
"Licensor" shall mean the copyright owner or entity authorized by the copyright owner that is granting the License.
"Legal Entity" shall mean the union of the acting entity and all other entities that control, are controlled by, or are under common control with that entity. For the purposes of this definition, "control" means (i) the power, direct or indirect, to cause the direction or management of such entity, whether by contract or otherwise, or (ii) ownership of fifty percent (50%) or more of the outstanding shares, or (iii) beneficial ownership of such entity.
"You" (or "Your") shall mean an individual or Legal Entity exercising permissions granted by this License.
"Source" form shall mean the preferred form for making modifications, including but not limited to software source code, documentation source, and configuration files.
"Object" form shall mean any form resulting from mechanical transformation or translation of a Source form, including but not limited to compiled object code, generated documentation, and conversions to other media types.
"Work" shall mean the work of authorship, whether in Source or Object form, made available under the License, as indicated by a copyright notice that is included in or attached to the work (an example is provided in the Appendix below).
"Derivative Works" shall mean any work, whether in Source or Object form, that is based on (or derived from) the Work and for which the editorial revisions, annotations, elaborations, or other modifications represent, as a whole, an original work of authorship. For the purposes of this License, Derivative Works shall not include works that remain separable from, or merely link (or bind by name) to the interfaces of, the Work and Derivative Works thereof.
"Contribution" shall mean any work of authorship, including the original version of the Work and any modifications or additions to that Work or Derivative Works thereof, that is intentionally submitted to Licensor for inclusion in the Work by the copyright owner or by an individual or Legal Entity authorized to submit on behalf of the copyright owner. For the purposes of this definition, "submitted" means any form of electronic, verbal, or written communication sent to the Licensor or its representatives, including but not limited to communication on electronic mailing lists, source code control systems, and issue tracking systems that are managed by, or on behalf of, the Licensor for the purpose of discussing and improving the Work, but excluding communication that is conspicuously marked or otherwise designated in writing by the copyright owner as "Not a Contribution."
"Contributor" shall mean Licensor and any individual or Legal Entity on behalf of whom a Contribution has been received by Licensor and subsequently incorporated within the Work.
- Grant of Copyright License. Subject to the terms and conditions of this License, each Contributor hereby grants to You a perpetual, worldwide, non-exclusive, no-charge, royalty-free, irrevocable copyright license to reproduce, prepare Derivative Works of, publicly display, publicly perform, sublicense, and distribute the Work and such Derivative Works in Source or Object form.
-
Grant of Patent License. Subject to the terms and conditions of this License, each Contributor hereby grants to You a perpetual, worldwide, non-exclusive, no-charge, royalty-free, irrevocable (except as stated in this section) patent license to make, have made, use, offer to sell, sell, import, and otherwise transfer the Work, where such license applies only to those patent claims licensable by such Contributor that are necessarily infringed by their Contribution(s) alone or by combination of their Contribution(s) with the Work to which such Contribution(s) was submitted. If You institute patent litigation against any entity (including a cross-claim or counterclaim in a lawsuit) alleging that the Work or a Contribution incorporated within the Work constitutes direct or contributory patent infringement, then any patent licenses granted to You under this License for that Work shall terminate as of the date such litigation is filed.
-
Redistribution. You may reproduce and distribute copies of the Work or Derivative Works thereof in any medium, with or without modifications, and in Source or Object form, provided that You meet the following conditions:
-
You must give any other recipients of the Work or Derivative Works a copy of this License; and
- You must cause any modified files to carry prominent notices stating that You changed the files; and
- You must retain, in the Source form of any Derivative Works that You distribute, all copyright, patent, trademark, and attribution notices from the Source form of the Work, excluding those notices that do not pertain to any part of the Derivative Works; and
- If the Work includes a "NOTICE" text file as part of its distribution, then any Derivative Works that You distribute must include a readable copy of the attribution notices contained within such NOTICE file, excluding those notices that do not pertain to any part of the Derivative Works, in at least one of the following places: within a NOTICE text file distributed as part of the Derivative Works; within the Source form or documentation, if provided along with the Derivative Works; or, within a display generated by the Derivative Works, if and wherever such third-party notices normally appear. The contents of the NOTICE file are for informational purposes only and do not modify the License. You may add Your own attribution notices within Derivative Works that You distribute, alongside or as an addendum to the NOTICE text from the Work, provided that such additional attribution notices cannot be construed as modifying the License.
You may add Your own copyright statement to Your modifications and may provide additional or different license terms and conditions for use, reproduction, or distribution of Your modifications, or for any such Derivative Works as a whole, provided Your use, reproduction, and distribution of the Work otherwise complies with the conditions stated in this License.
-
Submission of Contributions. Unless You explicitly state otherwise, any Contribution intentionally submitted for inclusion in the Work by You to the Licensor shall be under the terms and conditions of this License, without any additional terms or conditions. Notwithstanding the above, nothing herein shall supersede or modify the terms of any separate license agreement you may have executed with Licensor regarding such Contributions.
-
Trademarks. This License does not grant permission to use the trade names, trademarks, service marks, or product names of the Licensor, except as required for reasonable and customary use in describing the origin of the Work and reproducing the content of the NOTICE file.
-
Disclaimer of Warranty. Unless required by applicable law or agreed to in writing, Licensor provides the Work (and each Contributor provides its Contributions) on an "AS IS" BASIS, WITHOUT WARRANTIES OR CONDITIONS OF ANY KIND, either express or implied, including, without limitation, any warranties or conditions of TITLE, NON-INFRINGEMENT, MERCHANTABILITY, or FITNESS FOR A PARTICULAR PURPOSE. You are solely responsible for determining the appropriateness of using or redistributing the Work and assume any risks associated with Your exercise of permissions under this License.
- Limitation of Liability. In no event and under no legal theory, whether in tort (including negligence), contract, or otherwise, unless required by applicable law (such as deliberate and grossly negligent acts) or agreed to in writing, shall any Contributor be liable to You for damages, including any direct, indirect, special, incidental, or consequential damages of any character arising as a result of this License or out of the use or inability to use the Work (including but not limited to damages for loss of goodwill, work stoppage, computer failure or malfunction, or any and all other commercial damages or losses), even if such Contributor has been advised of the possibility of such damages.
- Accepting Warranty or Additional Liability. While redistributing the Work or Derivative Works thereof, You may choose to offer, and charge a fee for, acceptance of support, warranty, indemnity, or other liability obligations and/or rights consistent with this License. However, in accepting such obligations, You may act only on Your own behalf and on Your sole responsibility, not on behalf of any other Contributor, and only if You agree to indemnify, defend, and hold each Contributor harmless for any liability incurred by, or claims asserted against, such Contributor by reason of your accepting any such warranty or additional liability.
END OF TERMS AND CONDITIONS
---- Part 1: CMU/UCD copyright notice: (BSD like) ----
Copyright 1989, 1991, 1992 by Carnegie Mellon University
Derivative Work - 1996, 1998-2000
Copyright 1996, 1998-2000 The Regents of the University of California
All Rights Reserved
Permission to use, copy, modify and distribute this software and its documentation for any purpose and without fee is hereby granted, provided that the above copyright notice appears in all copies and that both that copyright notice and this permission notice appear in supporting documentation, and that the name of CMU and The Regents of the University of California not be used in advertising or publicity pertaining to distribution of the software without specific written permission.
CMU AND THE REGENTS OF THE UNIVERSITY OF CALIFORNIA DISCLAIM ALL WARRANTIES WITH REGARD TO THIS SOFTWARE, INCLUDING ALL IMPLIED WARRANTIES OF MERCHANTABILITY AND FITNESS. IN NO EVENT SHALL CMU OR THE REGENTS OF THE UNIVERSITY OF CALIFORNIA BE LIABLE FOR ANY SPECIAL, INDIRECT OR CONSEQUENTIAL DAMAGES OR ANY DAMAGES WHATSOEVER RESULTING FROM THE LOSS OF USE, DATA OR PROFITS, WHETHER IN AN ACTION OF CONTRACT, NEGLIGENCE OR OTHER TORTIOUS ACTION, ARISING OUT OF OR IN CONNECTION WITH THE USE OR PERFORMANCE OF THIS SOFTWARE.
---- Part 2: Networks Associates Technology, Inc copyright notice (BSD) ----
Copyright (c) 2001-2003, Networks Associates Technology, Inc
All rights reserved.
Redistribution and use in source and binary forms, with or without modification, are permitted provided that the following conditions are met:
* Redistributions of source code must retain the above copyright notice, this list of conditions and the following disclaimer.
* Redistributions in binary form must reproduce the above copyright notice, this list of conditions and the following disclaimer in the documentation and/or other materials provided with the distribution.
* Neither the name of the Networks Associates Technology, Inc nor the names of its contributors may be used to endorse or promote products derived from this software without specific prior written permission.
THIS SOFTWARE IS PROVIDED BY THE COPYRIGHT HOLDERS AND CONTRIBUTORS "AS IS" AND ANY EXPRESS OR IMPLIED WARRANTIES, INCLUDING, BUT NOT LIMITED TO, THE IMPLIED WARRANTIES OF MERCHANTABILITY AND FITNESS FOR A PARTICULAR PURPOSE ARE DISCLAIMED. IN NO EVENT SHALL THE COPYRIGHT HOLDERS OR CONTRIBUTORS BE LIABLE FOR ANY DIRECT, INDIRECT, INCIDENTAL, SPECIAL, EXEMPLARY, OR CONSEQUENTIAL DAMAGES (INCLUDING, BUT NOT LIMITED TO, PROCUREMENT OF SUBSTITUTE GOODS OR SERVICES; LOSS OF USE, DATA, OR PROFITS; OR BUSINESS INTERRUPTION) HOWEVER CAUSED AND ON ANY THEORY OF LIABILITY, WHETHER IN CONTRACT, STRICT LIABILITY, OR TORT (INCLUDING NEGLIGENCE OR OTHERWISE) ARISING IN ANY WAY OUT OF THE USE OF THIS SOFTWARE, EVEN IF ADVISED OF THE POSSIBILITY OF SUCH DAMAGE.
---- Part 3: Cambridge Broadband Ltd. copyright notice (BSD) ----
Portions of this code are copyright (c) 2001-2003, Cambridge Broadband Ltd.
All rights reserved.
Redistribution and use in source and binary forms, with or without modification, are permitted provided that the following conditions are met:
* Redistributions of source code must retain the above copyright notice, this list of conditions and the following disclaimer.
* Redistributions in binary form must reproduce the above copyright notice, this list of conditions and the following disclaimer in the documentation and/or other materials provided with the distribution.
* The name of Cambridge Broadband Ltd. may not be used to endorse or promote products derived from this software without specific prior written permission.
THIS SOFTWARE IS PROVIDED BY THE COPYRIGHT HOLDER ``AS IS'' AND ANY EXPRESS OR IMPLIED WARRANTIES, INCLUDING, BUT NOT LIMITED TO, THE IMPLIED WARRANTIES OF MERCHANTABILITY AND FITNESS FOR A PARTICULAR PURPOSE ARE DISCLAIMED. IN NO EVENT SHALL THE COPYRIGHT HOLDER BE LIABLE FOR ANY DIRECT, INDIRECT, INCIDENTAL, SPECIAL, EXEMPLARY, OR CONSEQUENTIAL DAMAGES (INCLUDING, BUT NOT LIMITED TO, PROCUREMENT OF SUBSTITUTE GOODS OR SERVICES; LOSS OF USE, DATA, OR PROFITS; OR BUSINESS INTERRUPTION) HOWEVER CAUSED AND ON ANY THEORY OF LIABILITY, WHETHER IN CONTRACT, STRICT LIABILITY, OR TORT (INCLUDING NEGLIGENCE OR OTHERWISE) ARISING IN ANY WAY OUT OF THE USE OF THIS SOFTWARE, EVEN IF ADVISED OF THE POSSIBILITY OF SUCH DAMAGE.
---- Part 4: Sun Microsystems, Inc. copyright notice (BSD) ----
Copyright c 2003 Sun Microsystems, Inc., 4150 Network Circle, Santa Clara, California 95054, U.S.A. All rights reserved.
Use is subject to license terms below.
This distribution may include materials developed by third parties.
Sun, Sun Microsystems, the Sun logo and Solaris are trademarks or registered trademarks of Sun Microsystems, Inc. in the U.S. and other countries.
Redistribution and use in source and binary forms, with or without modification, are permitted provided that the following conditions are met:
* Redistributions of source code must retain the above copyright notice, this list of conditions and the following disclaimer.
* Redistributions in binary form must reproduce the above copyright notice, this list of conditions and the following disclaimer in the documentation and/or other materials provided with the distribution.
* Neither the name of the Sun Microsystems, Inc. nor the names of its contributors may be used to endorse or promote products derived from this software without specific prior written permission.
THIS SOFTWARE IS PROVIDED BY THE COPYRIGHT HOLDERS AND CONTRIBUTORS "AS IS" AND ANY EXPRESS OR IMPLIED WARRANTIES, INCLUDING, BUT NOT LIMITED TO, THE IMPLIED WARRANTIES OF MERCHANTABILITY AND FITNESS FOR A PARTICULAR PURPOSE ARE DISCLAIMED. IN NO EVENT SHALL THE COPYRIGHT HOLDERS OR CONTRIBUTORS BE LIABLE FOR ANY DIRECT, INDIRECT, INCIDENTAL, SPECIAL, EXEMPLARY, OR CONSEQUENTIAL DAMAGES (INCLUDING, BUT NOT LIMITED TO, PROCUREMENT OF SUBSTITUTE GOODS OR SERVICES; LOSS OF USE, DATA, OR PROFITS; OR BUSINESS INTERRUPTION) HOWEVER CAUSED AND ON ANY THEORY OF LIABILITY, WHETHER IN CONTRACT, STRICT LIABILITY, OR TORT (INCLUDING NEGLIGENCE OR OTHERWISE) ARISING IN ANY WAY OUT OF THE USE OF THIS SOFTWARE, EVEN IF ADVISED OF THE POSSIBILITY OF SUCH DAMAGE.
---- Part 5: Sparta, Inc copyright notice (BSD) ----
Copyright (c) 2003-2012, Sparta, Inc
All rights reserved.
Redistribution and use in source and binary forms, with or without modification, are permitted provided that the following conditions are met:
* Redistributions of source code must retain the above copyright notice, this list of conditions and the following disclaimer.
* Redistributions in binary form must reproduce the above copyright notice, this list of conditions and the following disclaimer in the documentation and/or other materials provided with the distribution.
* Neither the name of Sparta, Inc nor the names of its contributors may be used to endorse or promote products derived from this software without specific prior written permission.
THIS SOFTWARE IS PROVIDED BY THE COPYRIGHT HOLDERS AND CONTRIBUTORS "AS IS" AND ANY EXPRESS OR IMPLIED WARRANTIES, INCLUDING, BUT NOT LIMITED TO, THE IMPLIED WARRANTIES OF MERCHANTABILITY AND FITNESS FOR A PARTICULAR PURPOSE ARE DISCLAIMED. IN NO EVENT SHALL THE COPYRIGHT HOLDERS OR CONTRIBUTORS BE LIABLE FOR ANY DIRECT, INDIRECT, INCIDENTAL, SPECIAL, EXEMPLARY, OR CONSEQUENTIAL DAMAGES (INCLUDING, BUT NOT LIMITED TO, PROCUREMENT OF SUBSTITUTE GOODS OR SERVICES; LOSS OF USE, DATA, OR PROFITS; OR BUSINESS INTERRUPTION) HOWEVER CAUSED AND ON ANY THEORY OF LIABILITY, WHETHER IN CONTRACT, STRICT LIABILITY, OR
TORT (INCLUDING NEGLIGENCE OR OTHERWISE) ARISING IN ANY WAY OUT OF THE USE OF THIS SOFTWARE, EVEN IF ADVISED OF THE POSSIBILITY OF SUCH DAMAGE.
---- Part 6: Cisco/BUPTNIC copyright notice (BSD) ----
Copyright (c) 2004, Cisco, Inc and Information Network Center of Beijing University of Posts and Telecommunications.
All rights reserved.
Redistribution and use in source and binary forms, with or without modification, are permitted provided that the following conditions are met:
* Redistributions of source code must retain the above copyright notice, this list of conditions and the following disclaimer.
* Redistributions in binary form must reproduce the above copyright notice, this list of conditions and the following disclaimer in the documentation and/or other materials provided with the distribution.
* Neither the name of Cisco, Inc, Beijing University of Posts and Telecommunications, nor the names of their contributors may be used to endorse or promote products derived from this software without specific prior written permission.
THIS SOFTWARE IS PROVIDED BY THE COPYRIGHT HOLDERS AND CONTRIBUTORS ``AS IS'' AND ANY EXPRESS OR IMPLIED WARRANTIES, INCLUDING, BUT NOT LIMITED TO, THE IMPLIED WARRANTIES OF MERCHANTABILITY AND FITNESS FOR A PARTICULAR PURPOSE ARE DISCLAIMED. IN NO EVENT SHALL THE COPYRIGHT HOLDERS OR CONTRIBUTORS BE LIABLE FOR ANY DIRECT, INDIRECT, INCIDENTAL, SPECIAL, EXEMPLARY, OR CONSEQUENTIAL DAMAGES (INCLUDING, BUT NOT LIMITED TO, PROCUREMENT OF SUBSTITUTE GOODS OR SERVICES; LOSS OF USE, DATA, OR PROFITS; OR BUSINESS INTERRUPTION) HOWEVER CAUSED AND ON ANY THEORY OF LIABILITY, WHETHER IN CONTRACT, STRICT LIABILITY, OR TORT (INCLUDING NEGLIGENCE OR OTHERWISE) ARISING IN ANY WAY OUT OF THE USE OF THIS SOFTWARE, EVEN IF ADVISED OF THE POSSIBILITY OF SUCH DAMAGE.
---- Part 7: Fabasoft R&D Software GmbH & Co KG copyright notice (BSD) ----
Copyright (c) Fabasoft R&D Software GmbH & Co KG, 2003 oss@fabasoft.com
Author: Bernhard Penz bernhard.penz@fabasoft.com
Redistribution and use in source and binary forms, with or without modification, are permitted provided that the following conditions are met:
* Redistributions of source code must retain the above copyright notice, this list of conditions and the following disclaimer.
* Redistributions in binary form must reproduce the above copyright notice, this list of conditions and the following disclaimer in the documentation and/or other materials provided with the distribution.
* The name of Fabasoft R&D Software GmbH & Co KG or any of its subsidiaries, brand or product names may not be used to endorse or promote products derived from this software without specific prior written permission.
THIS SOFTWARE IS PROVIDED BY THE COPYRIGHT HOLDER ``AS IS'' AND ANY EXPRESS OR IMPLIED WARRANTIES, INCLUDING, BUT NOT LIMITED TO, THE IMPLIED WARRANTIES OF MERCHANTABILITY AND FITNESS FOR A PARTICULAR PURPOSE ARE DISCLAIMED. IN NO EVENT SHALL THE COPYRIGHT HOLDER BE LIABLE FOR ANY DIRECT, INDIRECT, INCIDENTAL,
SPECIAL, EXEMPLARY, OR CONSEQUENTIAL DAMAGES (INCLUDING, BUT NOT LIMITED TO, PROCUREMENT OF SUBSTITUTE GOODS OR SERVICES; LOSS OF USE, DATA, OR PROFITS; OR BUSINESS INTERRUPTION) HOWEVER CAUSED AND ON ANY THEORY OF LIABILITY, WHETHER IN CONTRACT, STRICT LIABILITY, OR TORT (INCLUDING NEGLIGENCE OR OTHERWISE) ARISING IN ANY WAY OUT OF THE USE OF THIS SOFTWARE, EVEN IF ADVISED OF THE POSSIBILITY OF SUCH DAMAGE.
---- Part 8: Apple Inc. copyright notice (BSD) ----
Copyright (c) 2007 Apple Inc. All rights reserved.
Redistribution and use in source and binary forms, with or without modification, are permitted provided that the following conditions are met:
- Redistributions of source code must retain the above copyright notice, this list of conditions and the following disclaimer.
- Redistributions in binary form must reproduce the above copyright notice, this list of conditions and the following disclaimer in the documentation and/or other materials provided with the distribution.
- Neither the name of Apple Inc. ("Apple") nor the names of its contributors may be used to endorse or promote products derived from this software without specific prior written permission.
THIS SOFTWARE IS PROVIDED BY APPLE AND ITS CONTRIBUTORS "AS IS" AND ANY EXPRESS OR IMPLIED WARRANTIES, INCLUDING, BUT NOT LIMITED TO, THE IMPLIED WARRANTIES OF MERCHANTABILITY AND FITNESS FOR A PARTICULAR PURPOSE ARE DISCLAIMED. IN NO EVENT SHALL APPLE OR ITS CONTRIBUTORS BE LIABLE FOR ANY DIRECT, INDIRECT, INCIDENTAL, SPECIAL, EXEMPLARY, OR CONSEQUENTIAL DAMAGES (INCLUDING, BUT NOT LIMITED TO, PROCUREMENT OF SUBSTITUTE GOODS OR SERVICES; LOSS OF USE, DATA, OR PROFITS; OR BUSINESS INTERRUPTION) HOWEVER CAUSED AND ON ANY THEORY OF LIABILITY, WHETHER IN CONTRACT, STRICT LIABILITY, OR TORT (INCLUDING NEGLIGENCE OR OTHERWISE) ARISING IN ANY WAY OUT OF THE USE OF THIS SOFTWARE, EVEN IF ADVISED OF THE POSSIBILITY OF SUCH DAMAGE.
---- Part 9: ScienceLogic, LLC copyright notice (BSD) ----
Copyright (c) 2009, ScienceLogic, LLC
All rights reserved.
Redistribution and use in source and binary forms, with or without modification, are permitted provided that the following conditions are met:
* Redistributions of source code must retain the above copyright notice, this list of conditions and the following disclaimer.
* Redistributions in binary form must reproduce the above copyright notice, this list of conditions and the following disclaimer in the documentation and/or other materials provided with the distribution.
* Neither the name of ScienceLogic, LLC nor the names of its contributors may be used to endorse or promote products derived from this software without specific prior written permission.
THIS SOFTWARE IS PROVIDED BY THE COPYRIGHT HOLDERS AND CONTRIBUTORS "AS IS" AND ANY EXPRESS OR IMPLIED WARRANTIES, INCLUDING, BUT NOT LIMITED TO, THE IMPLIED WARRANTIES OF MERCHANTABILITY AND FITNESS FOR A PARTICULAR PURPOSE ARE DISCLAIMED. IN NO EVENT SHALL THE COPYRIGHT HOLDERS OR CONTRIBUTORS BE LIABLE
FOR ANY DIRECT, INDIRECT, INCIDENTAL, SPECIAL, EXEMPLARY, OR CONSEQUENTIAL DAMAGES (INCLUDING, BUT NOT LIMITED TO, PROCUREMENT OF SUBSTITUTE GOODS OR SERVICES; LOSS OF USE, DATA, OR PROFITS; OR BUSINESS INTERRUPTION) HOWEVER CAUSED AND ON ANY THEORY OF LIABILITY, WHETHER IN CONTRACT, STRICT LIABILITY, OR TORT (INCLUDING NEGLIGENCE OR OTHERWISE) ARISING IN ANY WAY OUT OF THE USE OF THIS SOFTWARE, EVEN IF ADVISED OF THE POSSIBILITY OF SUCH DAMAGE.
LEADTOOLS
Copyright (C) 1991-2009 LEAD Technologies, Inc.
CMap Resources
Copyright 1990-2009 Adobe Systems Incorporated. All rights reserved.
Copyright 1990-2010 Adobe Systems Incorporated. All rights reserved.
Redistribution and use in source and binary forms, with or without modification, are permitted provided that the following conditions are met:
Redistributions of source code must retain the above copyright notice, this list of conditions and the following disclaimer.
Redistributions in binary form must reproduce the above copyright notice, this list of conditions and the following disclaimer in the documentation and/or other materials provided with the distribution.
Neither the name of Adobe Systems Incorporated nor the names of its contributors may be used to endorse or promote products derived from this software without specific prior written permission.
THIS SOFTWARE IS PROVIDED BY THE COPYRIGHT HOLDERS AND CONTRIBUTORS "AS IS" AND ANY EXPRESS OR IMPLIED WARRANTIES, INCLUDING, BUT NOT LIMITED TO, THE IMPLIED WARRANTIES OF MERCHANTABILITY AND FITNESS FOR A PARTICULAR PURPOSE ARE DISCLAIMED. IN NO EVENT SHALL THE COPYRIGHT HOLDER OR CONTRIBUTORS BE LIABLE FOR ANY DIRECT, INDIRECT, INCIDENTAL, SPECIAL, EXEMPLARY, OR CONSEQUENTIAL DAMAGES (INCLUDING, BUT NOT LIMITED TO, PROCUREMENT OF SUBSTITUTE GOODS OR SERVICES; LOSS OF USE, DATA, OR PROFITS; OR BUSINESS INTERRUPTION) HOWEVER CAUSED AND ON ANY THEORY OF LIABILITY, WHETHER IN CONTRACT, STRICT LIABILITY, OR TORT (INCLUDING NEGLIGENCE OR OTHERWISE) ARISING IN ANY WAY OUT OF THE USE OF THIS SOFTWARE, EVEN IF ADVISED OF THE POSSIBILITY OF SUCH DAMAGE.
MIT License
Copyright (c) 1998, 1999, 2000 Thai Open Source Software Center Ltd
Permission is hereby granted, free of charge, to any person obtaining a copy of this software and associated documentation files (the "Software"), to deal in the Software without restriction, including without limitation the rights to use, copy, modify, merge, publish, distribute, sublicense, and/or sell copies of the Software, and to permit persons to whom the Software is furnished to do so, subject to the following conditions:
The above copyright notice and this permission notice shall be included in all copies or substantial portions of the Software.
THE SOFTWARE IS PROVIDED "AS IS", WITHOUT WARRANTY OF ANY KIND, EXPRESS OR IMPLIED, INCLUDING BUT NOT LIMITED TO THE WARRANTIES OF MERCHANTABILITY, FITNESS FOR A PARTICULAR PURPOSE AND NONINFRINGEMENT. IN NO EVENT SHALL THE AUTHORS OR COPYRIGHT HOLDERS BE LIABLE FOR ANY CLAIM, DAMAGES OR OTHER LIABILITY, WHETHER IN AN ACTION OF CONTRACT, TORT OR OTHERWISE, ARISING FROM, OUT OF OR IN CONNECTION WITH THE SOFTWARE OR THE USE OR OTHER DEALINGS IN THE SOFTWARE.
Copyright 2000 Computing Research Labs, New Mexico State University
Copyright 2001-2015 Francesco Zappa Nardelli
Permission is hereby granted, free of charge, to any person obtaining a copy of this software and associated documentation files (the "Software"), to deal in the Software without restriction, including without limitation the rights to use, copy, modify, merge, publish, distribute, sublicense, and/or sell copies of the Software, and to permit persons to whom the Software is furnished to do so, subject to the following conditions:
The above copyright notice and this permission notice shall be included in all copies or substantial portions of the Software.
THE SOFTWARE IS PROVIDED "AS IS", WITHOUT WARRANTY OF ANY KIND, EXPRESS OR IMPLIED, INCLUDING BUT NOT LIMITED TO THE WARRANTIES OF MERCHANTABILITY, FITNESS FOR A PARTICULAR PURPOSE AND NONINFRINGEMENT. IN NO EVENT SHALL THE COMPUTING RESEARCH LAB OR NEW MEXICO STATE UNIVERSITY BE LIABLE FOR ANY CLAIM, DAMAGES OR OTHER LIABILITY, WHETHER IN AN ACTION OF CONTRACT, TORT OR OTHERWISE, ARISING FROM, OUT OF OR IN CONNECTION WITH THE SOFTWARE OR THE USE OR OTHER DEALINGS IN THE SOFTWARE.
Written by Joel Sherrill joel@OARcorp.com.
COPYRIGHT (c) 1989-2000.
On-Line Applications Research Corporation (OAR).
Permission to use, copy, modify, and distribute this software for any purpose without fee is hereby granted, provided that this entire notice is included in all copies of any software which is or includes a copy or modification of this software.
THIS SOFTWARE IS BEING PROVIDED "AS IS", WITHOUT ANY EXPRESS OR IMPLIED WARRANTY. IN PARTICULAR, THE AUTHOR MAKES NO REPRESENTATION OR WARRANTY OF ANY KIND
CONCERNING THE MERCHANTABILITY OF THIS SOFTWARE OR ITS FITNESS FOR ANY PARTICULAR PURPOSE.
(1) Red Hat Incorporated
Copyright (c) 1994-2009 Red Hat, Inc. All rights reserved.
This copyrighted material is made available to anyone wishing to use, modify, copy, or redistribute it subject to the terms and conditions of the BSD License. This program is distributed in the hope that it will be useful, but WITHOUT ANY WARRANTY expressed or implied, including the implied warranties of MERCHANTABILITY or FITNESS FOR A PARTICULAR PURPOSE. A copy of this license is available at http://www.opensource.org/licenses. Any Red Hat trademarks that are incorporated in the source code or documentation are not subject to the BSD License and may only be used or replicated with the express permission of Red Hat, Inc.
(2) University of California, Berkeley
Copyright (c) 1981-2000 The Regents of the University of California.
All rights reserved.
Redistribution and use in source and binary forms, with or without modification, are permitted provided that the following conditions are met:
* Redistributions of source code must retain the above copyright notice, this list of conditions and the following disclaimer.
* Redistributions in binary form must reproduce the above copyright notice, this list of conditions and the following disclaimer in the documentation and/or other materials provided with the distribution.
* Neither the name of the University nor the names of its contributors may be used to endorse or promote products derived from this software without specific prior written permission.
THIS SOFTWARE IS PROVIDED BY THE COPYRIGHT HOLDERS AND CONTRIBUTORS "AS IS" AND ANY EXPRESS OR IMPLIED WARRANTIES, INCLUDING, BUT NOT LIMITED TO, THE IMPLIED WARRANTIES OF MERCHANTABILITY AND FITNESS FOR A PARTICULAR PURPOSE ARE DISCLAIMED. IN NO EVENT SHALL THE COPYRIGHT OWNER OR CONTRIBUTORS BE LIABLE FOR ANY DIRECT, INDIRECT, INCIDENTAL, SPECIAL, EXEMPLARY, OR CONSEQUENTIAL DAMAGES (INCLUDING, BUT NOT LIMITED TO, PROCUREMENT OF SUBSTITUTE GOODS OR SERVICES; LOSS OF USE, DATA, OR PROFITS; OR BUSINESS INTERRUPTION) HOWEVER CAUSED AND ON ANY THEORY OF LIABILITY, WHETHER IN CONTRACT, STRICT LIABILITY, OR TORT (INCLUDING NEGLIGENCE OR OTHERWISE) ARISING IN ANY WAY OUT OF THE USE OF THIS SOFTWARE, EVEN IF ADVISED OF THE POSSIBILITY OF SUCH DAMAGE.
The FreeType Project LICENSE
2006-Jan-27
Copyright 1996-2002, 2006 by
David Turner, Robert Wilhelm, and Werner Lemberg
Introduction
The FreeType Project is distributed in several archive packages; some of them may contain, in addition to the FreeType font engine, various tools and contributions which rely on, or relate to, the FreeType Project.
This license applies to all files found in such packages, and which do not fall under their own explicit license. The license affects thus the FreeType font engine, the test programs, documentation and makefiles, at the very least.
This license was inspired by the BSD, Artistic, and IJG (Independent JPEG Group) licenses, which all encourage inclusion and use of free software in commercial and freeware products alike. As a consequence, its main points are that:
o We don't promise that this software works. However, we will be interested in any kind of bug reports. ('as is' distribution)
o You can use this software for whatever you want, in parts or full form, without having to pay us. ('royalty-free' usage)
o You may not pretend that you wrote this software. If you use it, or only parts of it, in a program, you must acknowledge somewhere in your documentation that you have used the FreeType code. ('credits')
We specifically permit and encourage the inclusion of this software, with or without modifications, in commercial products.
We disclaim all warranties covering The FreeType Project and assume no liability related to The FreeType Project.
Finally, many people asked us for a preferred form for a credit/disclaimer to use in compliance with this license. We thus encourage you to use the following text:
......
Portions of this software are copyright ©
Project (www.freetype.org). All rights reserved.
......
Please replace
Legal Terms
- Definitions
Throughout this license, the terms `package', `FreeType Project', and `FreeType archive' refer to the set of files originally distributed by the authors (David Turner, Robert Wilhelm, and Werner Lemberg) as the `FreeType Project', be they named as alpha, beta or final release.
'You' refers to the licensee, or person using the project, where 'using' is a generic term including compiling the project's source code as well as linking it to form a 'program' or 'executable'.
This program is referred to as `a program using the FreeType engine'.
This license applies to all files distributed in the original FreeType Project, including all source code, binaries and documentation, unless otherwise stated in the file in its original, unmodified form as distributed in the original archive.
If you are unsure whether or not a particular file is covered by this license, you must contact us to verify this.
The FreeType Project is copyright (C) 1996-2000 by David Turner, Robert Wilhelm, and Werner Lemberg. All rights reserved except as specified below.
1. No Warranty
THE FREETYPE PROJECT IS PROVIDED 'AS IS' WITHOUT WARRANTY OF ANY KIND, EITHER EXPRESS OR IMPLIED, INCLUDING, BUT NOT LIMITED TO, WARRANTIES OF MERCHANTABILITY AND FITNESS FOR A PARTICULAR PURPOSE. IN NO EVENT WILL ANY OF THE AUTHORS OR COPYRIGHT HOLDERS BE LIABLE FOR ANY DAMAGES CAUSED BY THE USE OR THE INABILITY TO USE, OF THE FREETYPE PROJECT.
2. Redistribution
This license grants a worldwide, royalty-free, perpetual and irrevocable right and license to use, execute, perform, compile, display, copy, create derivative works of, distribute and sublicense the FreeType Project (in both source and object code forms) and derivative works thereof for any purpose; and to authorize others to exercise some or all of the rights granted herein, subject to the following conditions:
o Redistribution of source code must retain this license file ('FTL.TXT') unaltered; any additions, deletions or changes to the original files must be clearly indicated in accompanying documentation. The copyright notices of the unaltered, original files must be preserved in all copies of source files.
o Redistribution in binary form must provide a disclaimer that states that the software is based in part of the work of the FreeType Team, in the distribution documentation. We also encourage you to put an URL to the FreeType web page in your documentation, though this isn't mandatory.
These conditions apply to any software derived from or based on the FreeType Project, not just the unmodified files. If you use our work, you must acknowledge us. However, no fee need be paid to us.
3. Advertising
Neither the FreeType authors and contributors nor you shall use the name of the other for commercial, advertising, or promotional purposes without specific prior written permission.
We suggest, but do not require, that you use one or more of the following phrases to refer to this software in your documentation or advertising materials: `FreeType Project', `FreeType Engine', `FreeType library', or `FreeType Distribution'.
As you have not signed this license, you are not required to accept it. However, as the FreeType Project is copyrighted material, only this license, or another one contracted with the authors, grants you the right to use, distribute, and modify it.
Therefore, by using, distributing, or modifying the FreeType Project, you indicate that you understand and accept all the terms of this license.
4. Contacts
There are two mailing lists related to FreeType:
o freetype@nongnu.org
Discusses general use and applications of FreeType, as well as future and wanted additions to the library and distribution.
If you are looking for support, start in this list if you haven't found anything to help you in the documentation.
o freetype-devel@nongnu.org
Discusses bugs, as well as engine internals, design issues, specific licenses, porting, etc.
Our home page can be found at
http://www.freetype.org
--- end of FTL.TXT ---
The TWAIN Toolkit is distributed as is. The developer and distributors of the TWAIN Toolkit expressly disclaim all implied, express or statutory warranties including, without limitation, the implied warranties of merchantability, noninfringement of third party rights and fitness for a particular purpose. Neither the developers nor the distributors will be liable for damages, whether direct, indirect, special, incidental, or consequential, as a result of the reproduction, modification, distribution or other use of the TWAIN Toolkit.
JSON for Modern C++
Copyright (c) 2013-2017 Niels Lohmann
Permission is hereby granted, free of charge, to any person obtaining a copy of this software and associated documentation files (the "Software"), to deal in the Software without restriction, including without limitation the rights to use, copy, modify, merge, publish, distribute, sublicense, and/or sell copies of the Software, and to permit persons to whom the Software is furnished to do so, subject to the following conditions:
The above copyright notice and this permission notice shall be included in all copies or substantial portions of the Software.
THE SOFTWARE IS PROVIDED "AS IS", WITHOUT WARRANTY OF ANY KIND, EXPRESS OR IMPLIED, INCLUDING BUT NOT LIMITED TO THE WARRANTIES OF MERCHANTABILITY, FITNESS FOR A PARTICULAR PURPOSE AND NONINFRINGEMENT. IN NO EVENT SHALL THE AUTHORS OR COPYRIGHT HOLDERS BE LIABLE FOR ANY CLAIM, DAMAGES OR OTHER LIABILITY, WHETHER IN AN ACTION OF CONTRACT, TORT OR OTHERWISE, ARISING FROM, OUT OF OR IN CONNECTION WITH THE SOFTWARE OR THE USE OR OTHER DEALINGS IN THE SOFTWARE.
Copyright (c) 2011 - 2015 ARM LIMITED
All rights reserved.
Redistribution and use in source and binary forms, with or without modification, are permitted provided that the following conditions are met:
- Redistributions of source code must retain the above copyright notice, this list of conditions and the following disclaimer.
- Redistributions in binary form must reproduce the above copyright notice, this list of conditions and the following disclaimer in the documentation and/or other materials provided with the distribution.
- Neither the name of ARM nor the names of its contributors may be used to endorse or promote products derived from this software without specific prior written permission.
THIS SOFTWARE IS PROVIDED BY THE COPYRIGHT HOLDERS AND CONTRIBUTORS "AS IS" AND ANY EXPRESS OR IMPLIED WARRANTIES, INCLUDING, BUT NOT LIMITED TO, THE IMPLIED WARRANTIES OF MERCHANTABILITY AND FITNESS FOR A PARTICULAR PURPOSE ARE DISCLAIMED. IN NO EVENT SHALL COPYRIGHT HOLDERS AND CONTRIBUTORS BE LIABLE FOR ANY DIRECT, INDIRECT, INCIDENTAL, SPECIAL, EXEMPLARY, OR CONSEQUENTIAL DAMAGES (INCLUDING, BUT NOT LIMITED TO, PROCUREMENT OF SUBSTITUTE GOODS OR SERVICES; LOSS OF USE, DATA, OR PROFITS; OR BUSINESS INTERRUPTION) HOWEVER CAUSED AND ON ANY THEORY OF LIABILITY, WHETHER IN CONTRACT, STRICT LIABILITY, OR TORT (INCLUDING NEGLIGENCE OR OTHERWISE) ARISING IN ANY WAY OUT OF THE USE OF THIS SOFTWARE, EVEN IF ADVISED OF THE POSSIBILITY OF SUCH DAMAGE.
The following applies only to products supporting Wi-Fi.
(c) 2009-2013 by Jeff Mott. All rights reserved.
Redistribution and use in source and binary forms, with or without modification, are permitted provided that the following conditions are met:
* Redistributions of source code must retain the above copyright notice, this list of conditions, and the following disclaimer.
* Redistributions in binary form must reproduce the above copyright notice, this list of conditions, and the following disclaimer in the documentation or other materials provided with the distribution.
* Neither the name CryptoJS nor the names of its contributors may be used to endorse or promote products derived from this software without specific prior written permission.
THIS SOFTWARE IS PROVIDED BY THE COPYRIGHT HOLDERS AND CONTRIBUTORS "AS IS," AND ANY EXPRESS OR IMPLIED WARRANTIES, INCLUDING, BUT NOT LIMITED TO, THE IMPLIED WARRANTIES OF MERCHANTABILITY AND FITNESS FOR A PARTICULAR PURPOSE, ARE DISCLAIMED. IN NO EVENT SHALL THE COPYRIGHT HOLDER OR CONTRIBUTORS BE LIABLE FOR ANY DIRECT, INDIRECT, INCIDENTAL, SPECIAL, EXEMPLARY, OR CONSEQUENTIAL DAMAGES (INCLUDING, BUT NOT LIMITED TO, PROCUREMENT OF SUBSTITUTE GOODS OR SERVICES; LOSS OF USE, DATA, OR PROFITS; OR BUSINESS INTERRUPTION) HOWEVER CAUSED AND ON ANY THEORY OF LIABILITY, WHETHER IN CONTRACT, STRICT LIABILITY, OR TORT (INCLUDING NEGLIGENCE OR OTHERWISE) ARISING IN ANY WAY OUT OF THE USE OF THIS SOFTWARE, EVEN IF ADVISED OF THE POSSIBILITY OF SUCH DAMAGE.
Basic Operation
▶ Printing Photos from a Computer
▶ Printing Photos from a Smartphone/Tablet
Printing Photos from a Computer
This section describes how to print photos with Easy-PhotoPrint Editor.
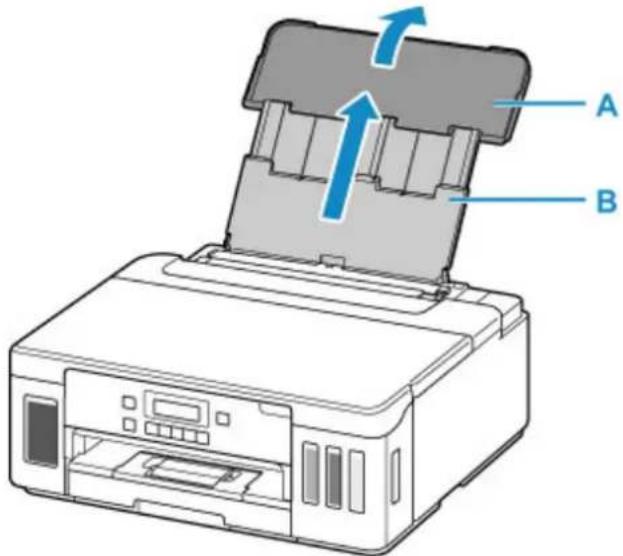
- Open rear tray cover (A). Pull straight up and fold back paper support (B).
text_image
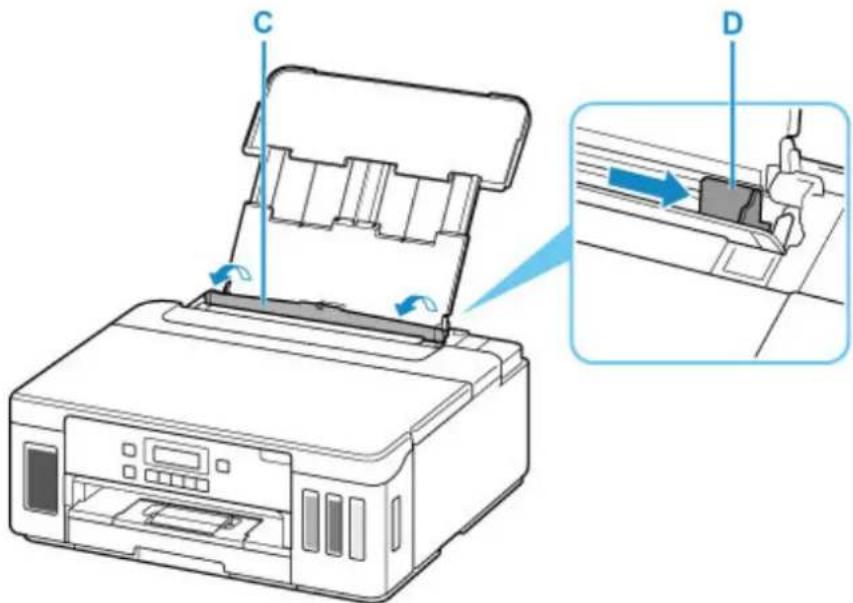
Diagram of a printer with labeled parts A and B, showing internal structure and directional arrows indicating flow or movement.- Open the feed slot cover (C).
- Slide right paper guide (D) to open both paper guides.
text_image
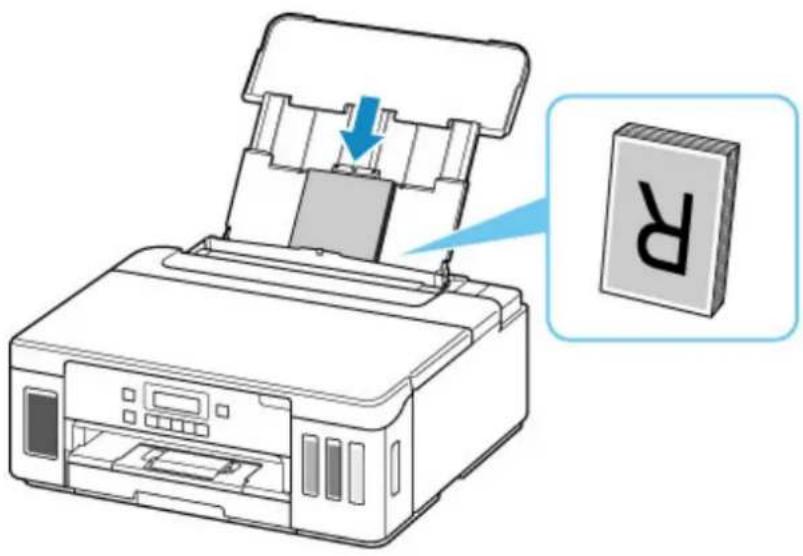
Diagram of a printer with labeled parts C and D, showing internal structure and assembly steps- Load photo paper in portrait orientation WITH PRINT SIDE FACING UP.
natural_image
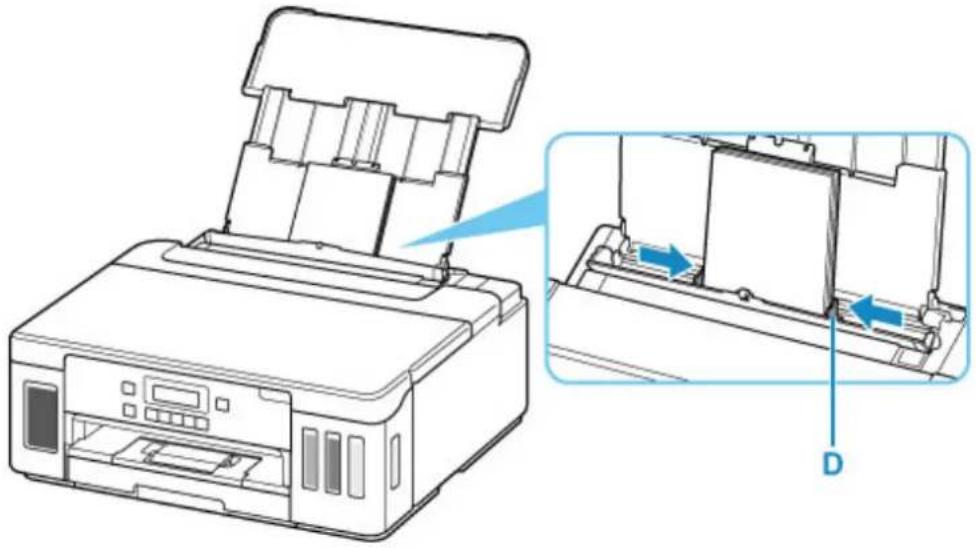
Illustration of a printer being inserted into a paper holder, with a close-up of the paper holder showing the same print (no text or symbols present)- Slide right paper guide (D) to align with both sides of paper stack.
natural_image
Line drawing of a printer with an open lid and internal structure, showing a close-up view of the printer's internal components (no text or symbols)- Close feed slot cover (C) gently.
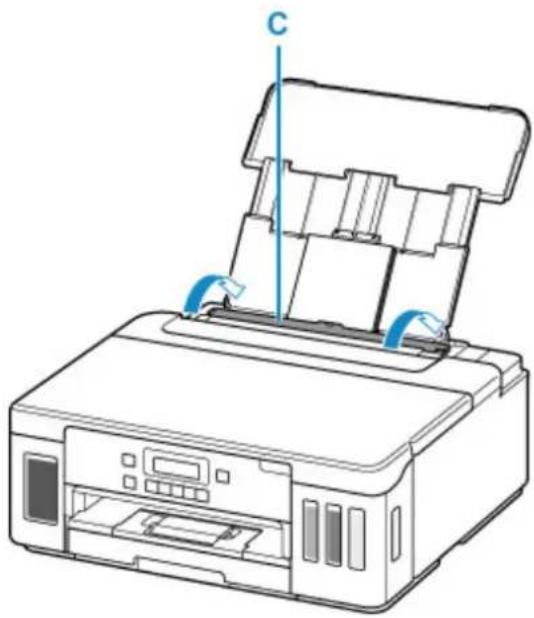
natural_image
Line drawing of a printer with a paper roll and blue scroll wheel (no text or symbols)After closing the feed slot cover, the paper information registration screen for the rear tray appears on the LCD.
- Press the OK button.
Save the rear tray paper [OK]Next
- Use the ◀ button to select the size of the loaded paper on the rear tray, then press the OK button.
Size: KG/4"x6" Type: *Plain paper
Note
• The *asterisk) on the LCD indicates the current setting.
- Use the ◀ button to select the type of the loaded paper on the rear tray, then press the OK button.
Size: KG/4"x6" Type: PlusGlossyII
Follow the instructions of any messages displayed to register the paper information.
- Pull out paper output tray (E), and then open output tray extension (F).
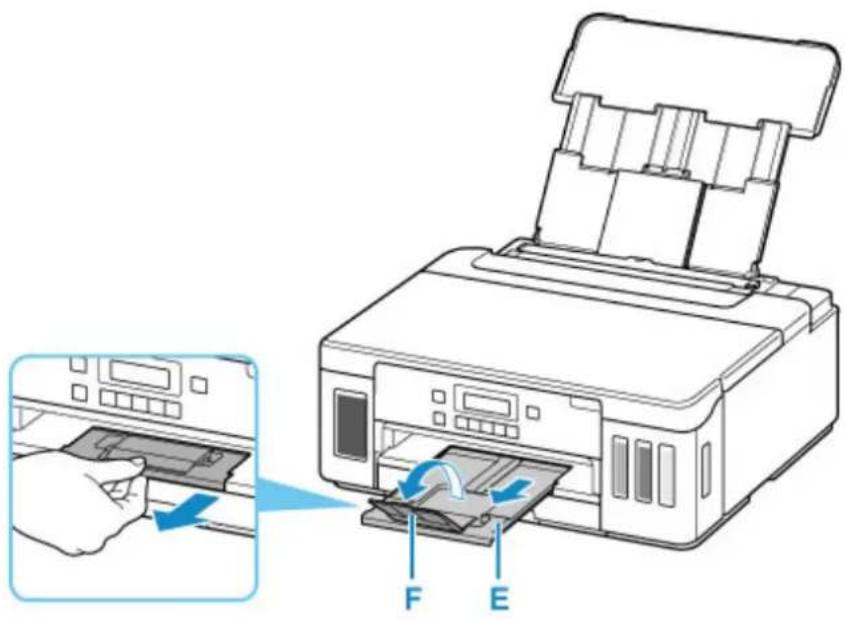
text_image
Diagram showing printer printing process with labeled parts F and E, including a hand inserting a paper into the printer.- Start Easy-PhotoPrint Editor.
For Windows:
The procedure below is for a computer running the Windows 10 operating system.
From the Start menu, select (All apps >) Canon Utilities > Easy-PhotoPrint Editor.
For macOS:
From the Go menu in Finder, select Application and double-click the Canon Utilities folder, the Easy-PhotoPrint Editor folder, and then the Easy-PhotoPrint Editor icon.
- Click Photos icon (G).
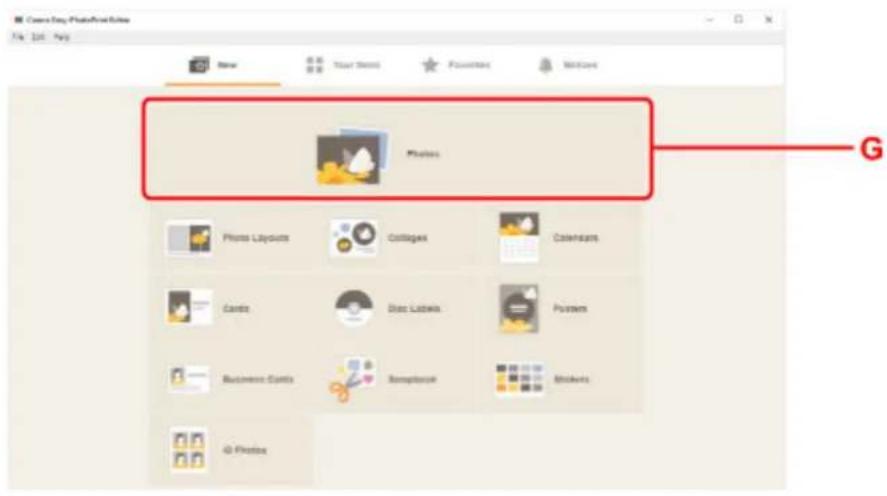
text_image
Coca Day, PhotoFirst Edition File Edit View New Your Tools Pounders MidCar Flowers G Flowers Layouts Collages Colorcards Cards Dsc Labella Patterns Business Cards Rampbox Bookets @ Photos- Click Browse (H) in From computer: and select folder with photos you want to print.

text_image
Photo Locations Investigated from and write locations photo Photo Locations Browse H- Click photos (I) you want to print and select Open (J).
For Windows:
To select two or more photos at a time, click photos while pressing the Ctrl key.
For macOS:
To select two or more photos at a time, click photos while pressing the command key.
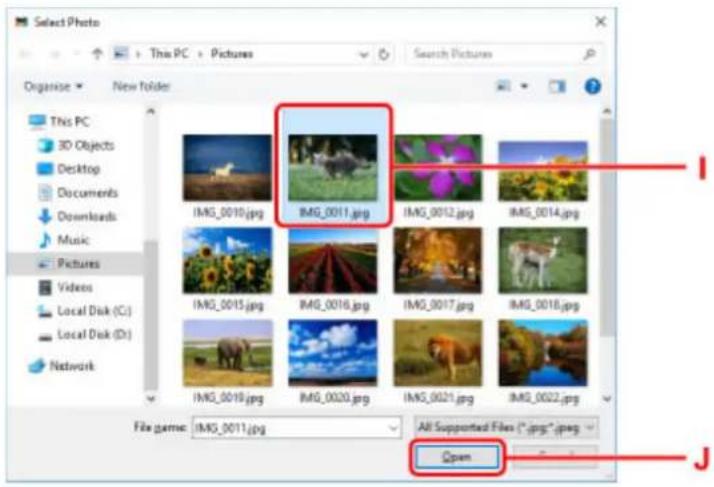
text_image
Select Photo This PC > Pictures Organise > New Folder This PC 3D Objects Desktop Documents Downloads Music Pictures Videos Local Disk (C:) Local Disk (D:) Network IMG_0010.jpg IMG_0011.jpg IMG_0012.jpg IMG_0014.jpg IMG_0015.jpg IMG_0016.jpg IMG_0017.jpg IMG_0018.jpg IMG_0019.jpg IMG_0020.jpg IMG_0021.jpg IMG_0022.jpg File games: IMG_0011.jpg All Supported Files (*.jpg;*.jpeg) Open- Specify number of copies and other options under Print Settings (K).
For Windows:
Specify the number of copies, your model name, the paper size, and other options.
For macOS:
Specify the number of copies, the paper size, and other options.
Note
- Selecting Same No. of each photo enables you to specify the number of copies for all photos with a single setting.
- Selecting Same No. of each photo disables the number-of-copies setting specified for each
photo. When unchecked, the previous settings for each copy are re-enabled. for specifying the number of copies is also re-enabled.
- Start printing.
For Windows:
Click Print (L).
For macOS:
Click Next. When the Print dialog appears, specify your model name, paper, and other options, and then click Print.
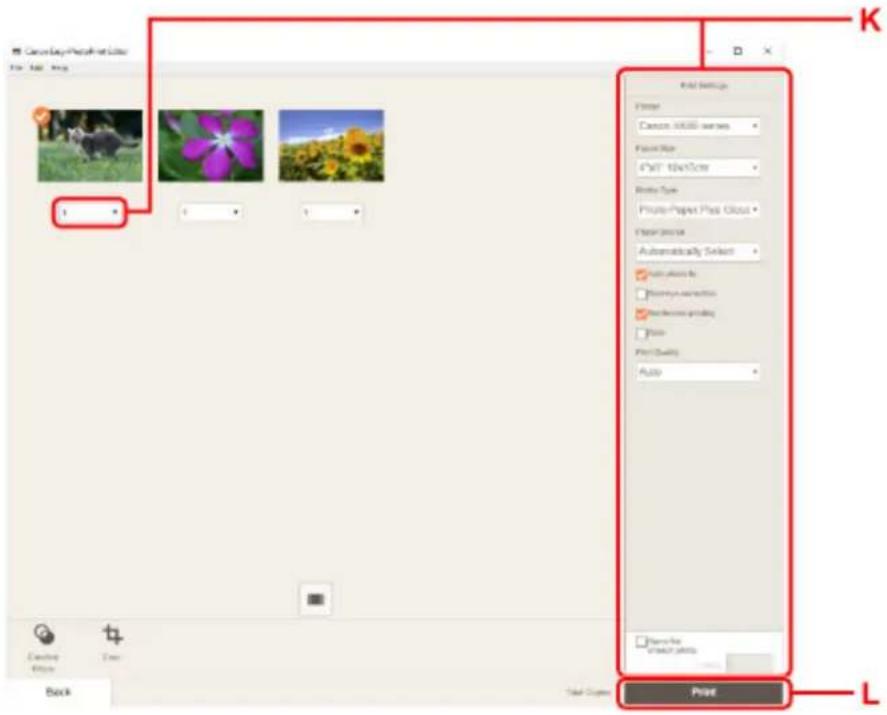
text_image
Canvas Day - Print In Color File Edit Help K Print Settings Color: 00000 pixels Face Plot: 4x17 - 50x700 Ratio Type: Private Paper Plus Cloud Print Status: Automatically Select Auto-Bliss By Newry-Selection Performance griding Print Print Quality: Auto Save All CREATE DATA Print Back Text CapsetsNote
- Easy-PhotoPrint Editor lets you easily create and print original collages, cards, or calendars using your favorite photos.
→ Easy-PhotoPrint Editor Guide
Printing Photos from a Smartphone/Tablet
This section describes how to print photos with Canon PRINT Inkjet/SELPHY.
For details on how to download Canon PRINT Inkjet/SELPHY, see below.
→ Print Photos from Your Smartphone
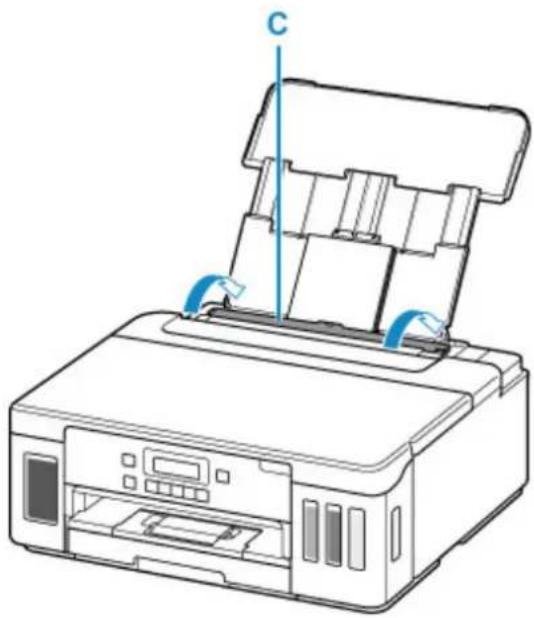
- Open rear tray cover (A). Pull straight up and fold back paper support (B).
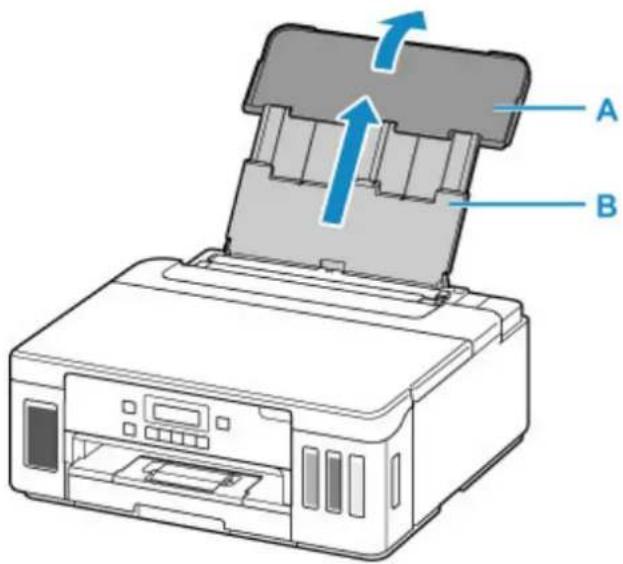
text_image
Diagram of a printer with labeled parts A and B, showing internal structure and directional arrows indicating flow or movement.- Open the feed slot cover (C).
- Slide right paper guide (D) to open both paper guides.
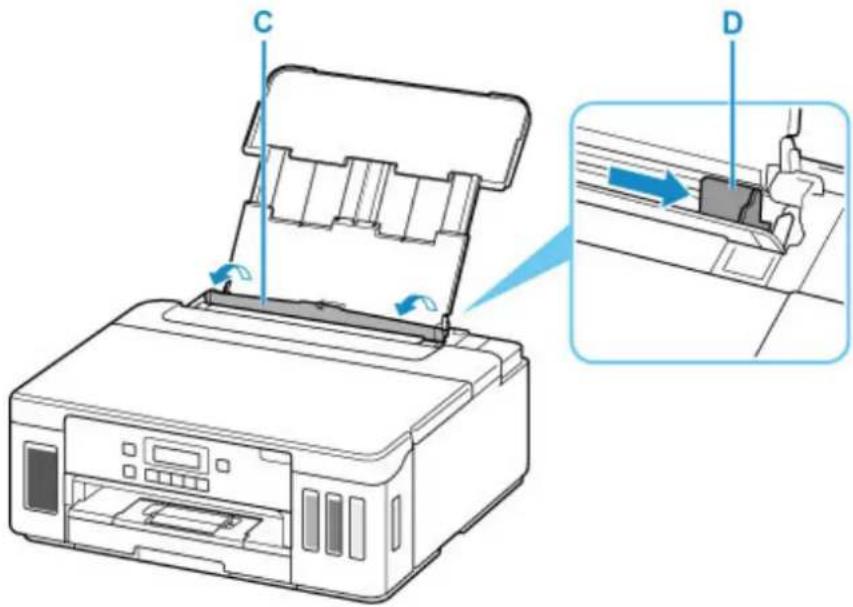
text_image
Diagram of a printer with labeled parts C and D, showing paper folding process with arrows indicating rotation.- Load photo paper in portrait orientation WITH PRINT SIDE FACING UP.
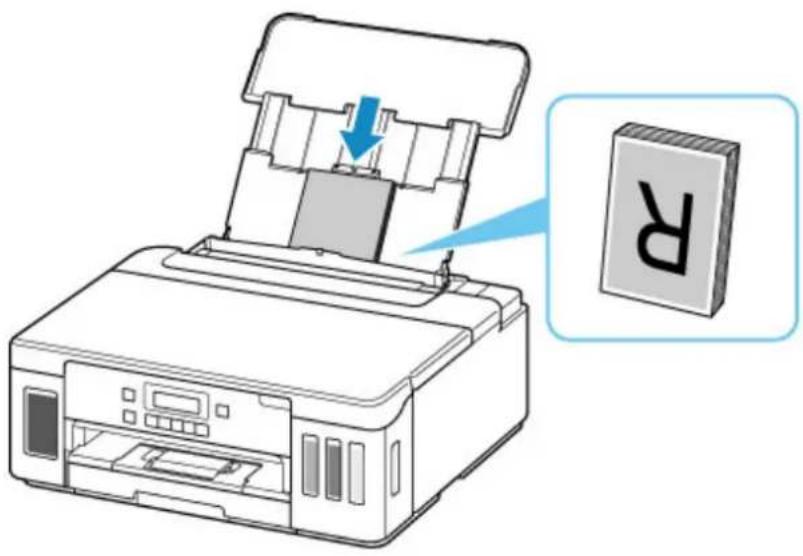
natural_image
Illustration of a printer being inserted into a paper holder, with a close-up of the paper holder showing the same print (no text or symbols present)- Slide right paper guide (D) to align with both sides of paper stack.
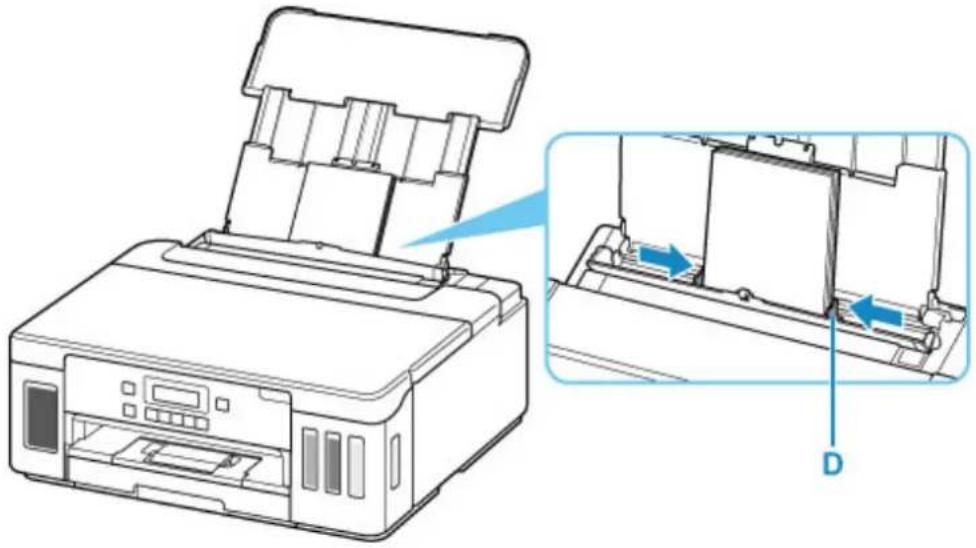
natural_image
Line drawing of a printer with an open lid and internal structure, showing part assembly and alignment (no text or symbols)- Close feed slot cover (C) gently.
natural_image
Line drawing of a printer with a paper roll and blue scroll wheel (no text or symbols)After closing the feed slot cover, the paper information registration screen for the rear tray appears on the LCD.
- Press the OK button.
Save the rear tray paper [OK]Next
- Use the ◀ button to select the size of the loaded paper on the rear tray, then press the OK button.
Size: KG/4"x6" Type: *Plain paper
Note
• The *asterisk) on the LCD indicates the current setting.
- Use the ◀ button to select the type of the loaded paper on the rear tray, then press the OK button.
Size: KG/4"x6" Type: PlusGlossyII
Follow the instructions of any messages displayed to register the paper information.
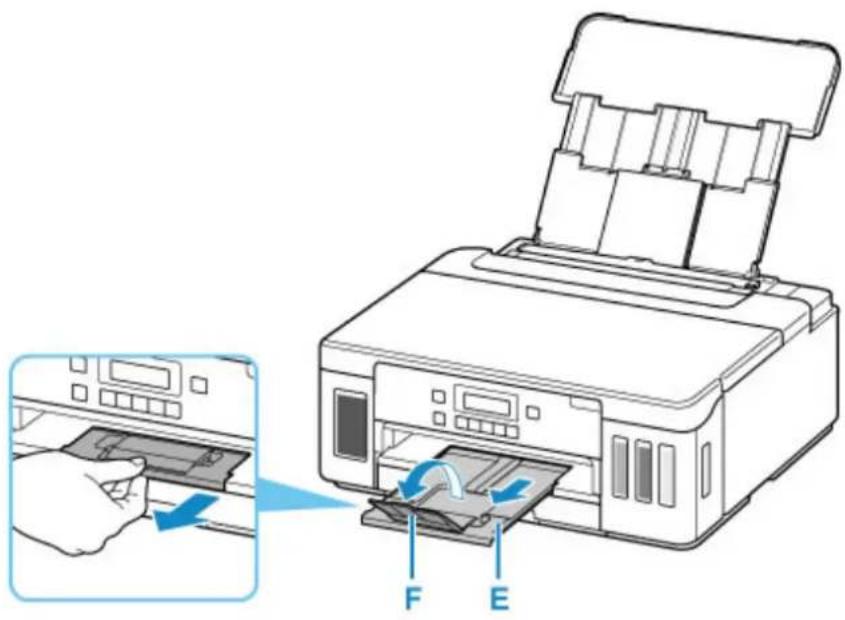
- Pull out paper output tray (E), and then open output tray extension (F).
text_image
Diagram showing printer operation with labeled parts F and E, including a hand inserting a paper into the printer.
- Start (Canon PRINT Inkjet/SELPHY) from your smartphone/tablet.
- Select Photo Print on Canon PRINT Inkjet/SELPHY.
The list of photos saved on your smartphone/tablet is displayed.
- Select a photo.
You can also select multiple photos at once.
- Specify the number of copies, paper size, etc.
- Start printing.
Available Connection Methods
The following connection methods are available on the printer.
- Wireless Connection

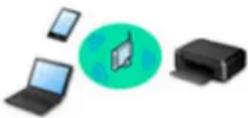
Connect the printer and devices (e.g. computer/smartphone/tablet) using a wireless router.
If you have a wireless router, we recommend you use one for wireless connection.
- Connection methods vary depending on the wireless router type.
- You can change network settings such as the network name (SSID) and security protocol on the printer.
- When the connection between a device and a wireless router is completed and (Wi-Fi icon) is displayed in the device's screen, you can connect the device to the printer using the wireless router.
- Wireless Direct
Connect the printer and devices (e.g. computer/smartphone/tablet) without using a wireless router.
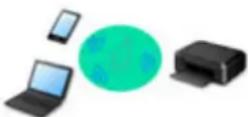
- While you are using the printer with Wireless Direct, Internet connection from the printer becomes unavailable. In that case, web services for the printer cannot be used.
• If you connect a device connected to the Internet via a wireless router to the printer that is in the Wireless Direct, the connection between the device and wireless router will be disabled. In that case, the connection of the device may switch to a mobile data connection automatically depending on your device. Transmission fees for connecting to the Internet using a mobile data connection apply. - In the Wireless Direct, you can connect up to five devices at the same time. If you try to connect a sixth device while five devices are already connected, an error will appear. If an error appears, disconnect a device you do not use and configure settings again.
• Network settings such as the network name (SSID) and security protocol are specified automatically.
- Wired Connection

Connect the printer and hub/router using a LAN cable. Prepare a LAN cable.
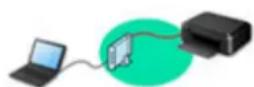

Note
- You can connect the printer and computer using a USB cable (USB connection). Prepare a USB cable. For details, see Connects to Another Computer via LAN/Changes from USB to LAN Connection.
Network Connection Settings/Setup
Perform connection setup for the printer and computer/smartphone/tablet.
For more on setup procedure, click here.
Changing Network Settings
See below for changing connection settings for the printer and computer/smartphone/tablet.
• To change network connection method:
Reconfiguration Method of LAN Connection/Reconfiguration Method of Wi-Fi Connection
→ Changing the Connection Mode
- To add computer/smartphone/tablet to the printer:
→ Connects to Another Computer via LAN/Changes from USB to LAN Connection
• To use Wireless Direct temporarily:
→ Printing with Wireless Direct
IJ Network Device Setup Utility
IJ Network Device Setup Utility checks or diagnoses the settings of the printer and those of computer and restores the status of them if anything is wrong with network connection. Select either link below to download IJ Network Device Setup Utility.
→ Checking Printer Connection Status Using IJ Network Device Setup Utility
- Performing/Changing Network Settings (Windows)
For Windows, you can perform network settings using IJ Network Device Setup Utility.
IJ Network Device Setup Utility (Windows)
- Diagnosing and Repairing Network Settings (Windows/macOS)
You can diagnose or repair network settings using IJ Network Device Setup Utility.
- For Windows:
IJ Network Device Setup Utility (Windows)
- For macOS:
→ IJ Network Device Setup Utility (macOS)
Network Connection Tips
See below for tips on using the printer via network connection.
→ Network Connection Tips
→ Handling Printer Configuration using the Web Browser
→ Countermeasures against Unauthorized Access
Troubleshooting
See Network Settings and Common Problems for troubleshooting on network connection.
Notice/Restriction
See below for details.
- Restrictions on network settings:
→ Restrictions - Notices when printing using web service:
→ Notice for Web Service Printing
Restrictions
When connecting another device while a device (such as a computer) is already connected to the printer, connect it using the same connection method as the connected device.
If you connect using a different connection method, the connection to the device in use will be disabled.
Connection Using a Wired Network cannot be performed on printers that do not support a wired connection.
Connect via wireless router
- You cannot establish a printer with wireless and wired connections at the same time.
- Make sure your device and the wireless router are connected. For details on checking these settings, see the manual supplied with the wireless router or contact its manufacturer.
As for a device already connected to the printer without using a wireless router, reconnect it via a wireless router.
- Configuration, router functions, setup procedures and security settings of wireless routers vary depending on the system environment. For details, see the manual for your wireless router or contact its manufacturer.
- This printer does not support IEEE802.11ac, IEEE802.11a, or IEEE802.11n (5 GHz). Check if your device supports IEEE802.11n (2.4 GHz), IEEE802.11g or IEEE802.11b.
- If your device is set to the "IEEE802.11n only" mode, WEP or TKIP cannot be used as a security protocol. Change the security protocol for your device to something other than WEP and TKIP or change the setting to something other than "IEEE802.11n only."
The connection between your device and the wireless router will be temporarily disabled while the setting is changed. Do not proceed to the next screen of this guide until setup is complete.
- For office use, consult your network administrator.
- Note that if you connect to a network with no security protection, your personal information could be disclosed to a third party.
Wireless Direct
Important
- If a device is connected to the Internet via a wireless router, and you then connect it to a printer in Wireless Direct mode, the existing connection between the device and wireless router will be disabled. In that case, the connection of the device may switch to a mobile data connection automatically depending on your device. When you connect to the Internet using a mobile data connection, charges may apply depending on your contract.
- When you connect a device and the printer using Wireless Direct, the connection information will be saved to Wi-Fi settings. The device may be connected to the printer automatically even after disconnecting it or connecting it to another wireless router.
- To prevent automatic connection to the printer in Wireless Direct mode, change the connection mode after using the printer, or set not to connect automatically in the Wi-Fi settings of the device.
For details on changing the settings of your device, see the manual supplied with the device or contact its manufacturer.
- If you connect a device and the printer using Wireless Direct, Internet connection may become unavailable depending on your environment. In that case, web services for the printer cannot be used.
- In Wireless Direct mode, you can connect up to five devices at the same time. If you try to connect a sixth device while five devices are already connected, an error will appear.
If an error appears, disconnect a device that does not use the printer, then configure settings again.
- Devices connected to the printer using Wireless Direct cannot communicate with each other.
- Firmware updates for the printer are not available while using Wireless Direct.
- When a device has been connected to the printer without using a wireless router and you want to set it up again using the same connection method, disconnect it first. Disable the connection between the device and printer in the Wi-Fi setting screen.
Connection Using a Wired Network
- You cannot establish a printer with wireless and wired connections at the same time.
- When using a router, connect the printer and a device to the LAN side (same network segment).
Network Connection Tips
Default Network Settings
▶ Detect Same Printer Name
Connects to Another Computer via LAN/Changes from USB to LAN Connection
▶ Printing Network Settings
Reconfiguration Method of LAN Connection/Reconfiguration Method of Wi-Fi Connection
LAN Connection Defaults
| Item Default | |
| Change wireless/wired LAN Disable LAN | |
| Network name (SSID) BJNPSETUP | |
| Wi-Fi security Disable | |
| IP address (IPv4) Auto setup | |
| IP address (IPv6) Auto setup | |
| Set printer name*XXXXXXXXXX | |
| Enable/disable IPv6 Enable | |
| Enable/disable WSD Enable | |
| Timeout setting 15 minutes | |
| Enab./disab. Bonjour Enable | |
| Service name Canon G5000 series | |
| LPR setting Enable | |
| RAW protocol Enable | |
| LLMNR Enable | |
| PictBridge commun. (Enable/disable) | Enable |
| DRX setting (Wired LAN) Enable |
("XX" represents alphanumeric characters.)
* Default value depends on printer. To check value, use operation panel.
→ LAN settings
Wireless Direct Defaults
| Item | Default |
| Network name (SSID) for wireless direct | DIRECT-abXX-G5000series *1 |
| WL Direct dev. name DIRECT-abXX-G5000series *1 | |
| Password | YYYYYYYYYY *2 |
| Security method | WPA2-PSK (AES) |
| Confirm request Displayed | |
*1 "ab" is specified at random and "XX" represents last two digits of printer's MAC address. (The value is specified when the printer is turned on for the first time.)
*2 The password is specified automatically when the printer is turned on for the first time.
Detect Same Printer Name
When the printer is detected during setup, plural printers with the same name may appear on the results screen.
Select a printer with checking the printer settings against those on detection result screen.
- For Windows:
Check the printer's MAC address or serial to select the correct printer from the results.
- For macOS:
The printer names appear with the MAC address added at the end or as the printer name specified by Bonjour.
Check identifiers such as the MAC address, the printer name specified by Bonjour, and the printer's serial number to select the printer from among those that appear.
Note
- Serial number may not appear on result screen.
To check the printer's MAC address and the serial number, print out the network settings information.
→ Printing Network Settings
Note
- You can check the serial number by displaying on the LCD.
→ System information
Connects to Another Computer via LAN/Changes from USB to LAN Connection
To connect an additional computer to the printer via LAN, or to change from USB to LAN connection, perform setup from the web page.
For Windows, you can perform setup using the Setup CD-ROM.
Printing Network Settings
Use the operation panel to print the printer's current network settings.

Important
- The network settings printout contains important information about your network. Handle it with care.
- Check that printer is turned on.
- Load three sheets of A4 or Letter-sized plain paper.
- Press Setup button.
The Setup menu screen appears.
-
Select Device settings and press OK button.
-
Select LAN settings and press OK button.
-
Select Print LAN details and press OK button.
The printer starts printing the network setting information.
The following information on the printer's network setting is printed out. (Some setting values are not displayed depending on the printer settings.)
| Item Number | Item Description Setting | ||
| 1 Product Information Product information – | |||
| 1-1 Product Name Product name XXXXXXXXX | |||
| 1-2 ROM Version ROM version XXXXXXXXX | |||
| 1-3 Serial Number Serial number XXXXXXXXX | |||
| 2 Network Diagnostics Network diagnostics – | |||
| 2-1 Diagnostic Result Diagnostic result XXXXXXXXX | |||
| 2-2 Result Codes Result codes XXXXXXXXX | |||
| 2-3 Result Code Details Result code details http://carlon.com/ijnwt | |||
| 3 Wireless LAN Wireless LAN Enable/Disable | |||
| 3-2 Infrastructure Infrastructure | Enable/Disable | ||
| 3-2-1 | Signal Strength | Signal strength | 0 to 100 [%] |
| 3-2-2 | Link Quality | Link quality | 0 to 100 [%] |
| 3-2-3 Frequency | Frequency XX (GHz) | ||
| 3-2-4 MAC Address MAC address XX:XX:XX:XX:XX:XX | |||
| 3-2-5 Connection Connection status Active/Inactive | |||
| 3-2-6 SSID SSID Wireless LAN network name (SSID) | |||
| 3-2-7 Channel Channel XX (1 to 13) | |||
| 3-2-8 Encryption Encryption method None/WEP/TKIP/AES | |||
| 3-2-9 WEP Key Length WEP key length (bits) Inactive/128/64 | |||
| 3-2-10 Authentication Authentication method None/auto/open/shared/WPA-PSK/WPA2-PSK | |||
| 3-2-11 TCP/IPv4 TCP/IPv4 Enable | |||
| 3-2-12 IP Address IP address XXX.XXX.XXX.XXX | |||
| 3-2-13 Subnet Mask Subnet mask XXX.XXX.XXX.XXX | |||
| 3-2-14 Default Gateway Default gateway XXX.XXX.XXX.XXX | |||
| 3-2-15 TCP/IPv6 TCP/IPv6 Enable/Disable | |||
| 3-2-16 Link Local Address Link local address XXXX:XXXX:XXXX:XXXX:XXXX:XXXX:XXXX | |||
| 3-2-17 Link Local Prefix Length | Link local prefix length XXX | ||
| 3-2-18 Stateless Address1 Stateless address 1 XXXX:XXXX:XXXX:XXXX:XXXX:XXXX:XXXX | |||
| 3-2-19 Stateless Prefix Length1 | Stateless prefix length 1 XXX | ||
| 3-2-20 Stateless Address2 Stateless address 2 XXXX:XXXX:XXXX:XXXX:XXXX:XXXX:XXXX | |||
| 3-2-21 Stateless Prefix Length2 | Stateless prefix length 2 XXX | ||
| 3-2-22 Stateless Address3 Stateless address 3 XXXX:XXXX:XXXX:XXXX:XXXX:XXXX:XXXX | |||
| 3-2-23 Stateless Prefix Length3 | Stateless prefix length 3 XXX | ||
| 3-2-24 Stateless Address4 Stateless address 4 XXXX:XXXX:XXXX:XXXX:XXXX:XXXX:XXXX | |||
| 3-2-25 Stateless Prefix Length4 | Stateless prefix length 4 XXX | ||
| 3-2-26 Default | It Gateway1 Default gateway | way 1 XXXX:XXXX:XXXX | XXXX |
| XXXX:XXXX:XXXX:XXXX | |||
| 3-2-27 Default | It Gateway2 Default gateway | way 2 XXXX:XXXX:XXXX | XXXX |
| XXXX:XXXX:XXXX:XXXX | |||
| 3-2-28 Default | It Gateway3 Default gateway | way 3 XXXX:XXXX:XXXX | XXXX |
| XXXX:XXXX:XXXX:XXXX | |||
| 3-2-29 Default | It Gateway4 Default gateway | way 4 XXXX:XXXX:XXXX | XXXX |
| XXXX:XXXX:XXXX:XXXX | |||
| 3-2-33 IPsec | IPsec setting Active | ||
| 3-2-34 Security Protocol Security method ESP/ESP & AH/AH | |||
| 3-3 Wireless | Direct/Access Point Mode | Operation mode for Wireless Direct | Enable/Disable |
| 3-3-1 MAC Address MAC address XX:XX:XX:XX:XX | |||
| 3-3-2 Connection Connection status Active/Inactive | |||
| 3-3-3 SSID SSID Wireless Direct network name (SSID) | |||
| 3-3-4 Password Password Wireless Direct password (10 alphanumeric characters) | |||
| 3-3-5 Channel Channel 3 | |||
| 3-3-6 Encryption Encryption method | AES | ||
| 3-3-7 Authentication Authentication method WPA2-PSK | |||
| 3-3-8 TCP/IPv4 TCP/IPv4 Enable | |||
| 3-3-9 IP Address IP address XXX.XXX.XXX.XXX | |||
| 3-3-10 Subnet Mask Subnet mask XXX.XXX.XXX.XXX | |||
| 3-3-11 Default Gateway Default gateway XXX.XXX.XXX.XXX | |||
| 3-3-12 TCP/IPv6 TCP/IPv6 Enable/Disable | |||
| 3-3-13 Link Local Address Link local address XXXX:XXXX | XXXX:XXXX | ||
| XXXX:XXXX:XXXX:XXXX | |||
| 3-3-14 Link Local Prefix Length | Link local prefix length | XXX | |
| 3-3-15 IPsec IPsec setting Active | |||
| 3-3-16 Security Protocol Security method - | |||
| 4 | Wired LAN | Wired LAN | Enable/Disable |
| 4-1 MAC Address MAC address XX:XX:XX:XX:XX:XX | |||
| 4-2 Connection Wired LAN status Active/Inactive | |||
| 4-3 TCP/IPv4 TCP/IPv4 Enable | |||
| 4-4 IP Address IP address XXX.XXX.XXX.XXX | |||
| 4-5 Subnet Mask Subnet mask XXX.XXX.XXX.XXX | |||
| 4-6 Default Gateway Default gateway XXX.XXX.XXX.XXX | |||
| 4-7 TCP/IPv6 TCP/IPv6 Enable/Disable | |||
| 4-8 Link Local Address Link local address XXXX:XXXX:XXXX:XXXXX:XXXX:XXXX:XXXX | |||
| 4-9 Link Local Prefix Length | Link local prefix length XXX | ||
| 4-10 Stateless Address1 Stateless address 1 XXXX:XXXX:XXXX:XXXX:XXXX:XXXX:XXXX:XXXX | |||
| 4-11 Stateless Prefix Length1 | Stateless prefix length 1 | XXX | |
| 4-12 Stateless Address2 Stateless address 2 XXXX:XXXX:XXXX:XXXX:XXXX:XXXX:XXXX | |||
| 4-13 Stateless Prefix Length2 | Stateless prefix length 2 | XXX | |
| 4-14 Stateless Address3 Stateless address 3 XXXX:XXXX:XXXX:XXXX:XXXX:XXXX:XXXX | |||
| 4-15 Stateless Prefix Length3 | Stateless prefix length 3 | XXX | |
| 4-16 Stateless Address4 Stateless address 4 XXXX:XXXX:XXXX:XXXX:XXXX:XXXX:XXXX | |||
| 4-17 Stateless Prefix Length4 | Stateless prefix length 4 | XXX | |
| 4-18 Default Gateway1 Default gateway 1 XXXX:XXXX:XXXX:XXXX:XXXX:XXXX:XXXX:XXXX | |||
| 4-19 Default Gateway2 Default gateway 2 XXXX:XXXX:XXXX:XXXX:XXXX:XXXX:XXXX:XXXX | |||
| 4-20 Default Gateway3 Default gateway 3 XXXX:XXXX:XXXX:XXXX:XXXX:XXXX:XXXX:XXXX | |||
| 4-21 Default | Gateway4 Default gateway | 4 XXXX:XXXX:XXXX:X | XXXX |
| XXXX:XXXX:XXXX:XXXX | |||
| 4-25 IPsec IPsec setting Active | |||
| 4-26 Security | Protocol Security method | ESP/ESP & AH/AH | |
| 4-27 Wired LAN DRX Discontinuous reception (wired LAN) | Enable/Disable | ||
| 5 Other Settings Other settings - | |||
| 5-1 Printer Name Printer name (Up to 15 alphanumeric characters) | |||
| 5-2 Wireless | Direct Dev-Name | Device name for wireless direct | Device name for wireless direct (Up to 32 alphanumeric characters) |
| 5-4 WSD Printing WSD printing setting | Enable/Disable | ||
| 5-5 WSD Timeout Timeout 1/5/10/15/20 [min] | |||
| 5-6 LPD Printing LPD printing setting Enable/Disable | |||
| 5-7 RAW Printing RAW printing setting Enable/Disable | |||
| 5-9 Bonjour | Bonjour setting Enable/Disable | ||
| 5-10 | Bonjour Service Name | Bonjour service name | Bonjour service name (Up to 52 alphanumeric characters) |
| 5-11 LLMNR | LLMNR setting Enable/Disable | ||
| 5-12 SNMP | SNMP setting Enable/Disable | ||
| 5-13 PictBridge Commun. | PictBridge Communication | Enable/Disable | |
| 5-14 DNS Server | Obtain DNS server address automatically | Auto/Manual | |
| 5-15 Primary | Server Primary server address XXX.XX | XXX.XXX | |
| 5-16 Secondary | Server Secondary server address | XXX.XXX.XXX | |
| 5-17 Proxy Server | Proxy server setting Enable/Disable | ||
| 5-18 Proxy Address | Proxy addressXXXXXXXXXX | XXXXXXXXXX | |
| 5-19 Proxy Port | Proxy port specification 1 to 655 | 35 | |
| 5-20 Cert. Fingertp(SHA-1) | Certificate fingerprint(SHA-1) | XXXXXXXXXXXXXXXXXX | |
| 5-21 Cert. Fingertp(SHA-256) | Certificate fingerprint(SHA-256) | XXXXXXXXXXXXXXXXXX | |
("XX" represents alphanumeric characters.)
Reconfiguration Method of LAN Connection/Reconfiguration Method of Wi-Fi Connection
→ Reconfiguration Method of LAN Connection
→ Reconfiguration Method of Wi-Fi Connection
Reconfiguration Method of LAN Connection
Follow either procedure below to change LAN connection method (wired or Wi-Fi).
- For Windows:
- Redo setup using the Setup CD-ROM or from the web page.
- Enable Wi-Fi or wired LAN on the operation panel of the printer. After that, perform settings on the Network Settings screen on IJ Network Device Setup Utility.
For details, refer to Performing/Changing Wi-Fi Settings or Performing/Changing Wired LAN Connection (Ethernet Cable) Settings.
- For macOS:
- Redo setup from the web page.
Reconfiguration Method of Wi-Fi Connection
Follow either procedure below to change Wi-Fi connection method (infrastructure or Wireless Direct).
- For Windows:
- Redo setup using the Setup CD-ROM or from the web page.
• Perform settings on the Network Settings screen on IJ Network Device Setup Utility.
Important
- Before you perform settings using IJ Network Device Setup Utility, turn on Easy WL connect mode on the printer following the procedure below.
- Check that printer is turned on.
- Press and hold Wireless connect button for 3 seconds.
→ LCD and Operation Panel
- Perform operations following instructions on your smartphone or tablet.
- If message saying setup is completed appears, press OK button.
- For macOS:
Redo setup from the web page.
IJ Network Device Setup Utility (Windows)
IJ Network Device Setup Utility
Starting Up IJ Network Device Setup Utility
Diagnosing and Repairing Network Settings
▶ Performing/Changing Network Settings
List of Models Which Does Not Support Diagnosis and Repair Function
List of Models Which Does Not Support IPv6 Configuration via USB Connection
IJ Network Device Setup Utility
IJ Network Device Setup Utility allows you to diagnose or repair the network status, and to perform printer settings on network.
Use IJ Network Device Setup Utility for:
- Searching printers on network and performing initial network setup for detected printers
- Performing initial network setup by connecting the printer and computer using a USB cable (Not available for some models)
- Changing printer network settings
- Diagnosing the settings of the printer and those of computer on which IJ Network Device Setup Utility is installed if anything is wrong with connection. In addition, IJ Network Device Setup Utility repairs the status of the printer and computer (Not available for some models).
Important
- Depending on the printer you are using, an administrator password is already specified for the printer at the time of purchase. When you change the network settings, authentication by the administrator password is required.
For details:
→ Administrator Password
For improving security, we recommend to change the administrator password.
→ Change Administrator Password
- To use the printer over LAN, make sure you have the equipment necessary for the connection type, such as a wireless router or a LAN cable.
- When you install IJ Network Device Setup Utility, disable block function of firewall.
- Do not change network settings using IJ Network Device Setup Utility while printing is in progress.
Starting Up IJ Network Device Setup Utility
Start up IJ Network Device Setup Utility as shown below.
- In Windows 10, select Start > (All apps >) > Canon Utilities > IJ Network Device Setup Utility.
- In Windows 8.1 or Windows 8, select IJ Network Device Setup Utility on the Start screen to start IJ Network Device Setup Utility. If IJ Network Device Setup Utility is not displayed on the Start screen, select the Search charm and search for "IJ Network Device Setup Utility".
- In Windows 7 or Windows Vista, click Start and select All Programs, Canon Utilities, IJ Network Device Setup Utility, and then IJ Network Device Setup Utility.
When you start up IJ Network Device Setup Utility, a message appears. Check the message and select Yes. The screen below appears.
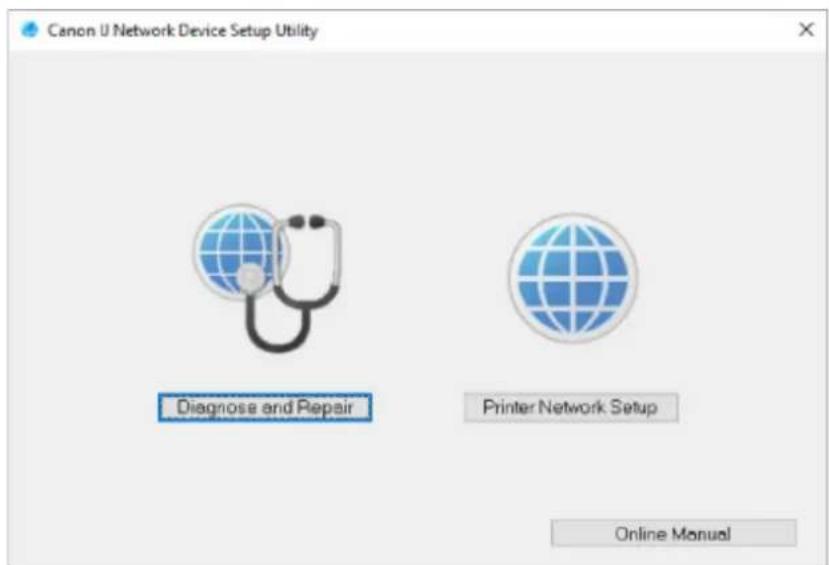
text_image
Canon U Network Device Setup Utility Diagnose and Repair Printer Network Setup Online ManualSelect Diagnose and Repair or Printer Network Setup on the displayed screen.
• If you select Diagnose and Repair:
→ Diagnosing and Repairing Network Settings
- If you select Printer Network Setup:
→ Performing/Changing Network Settings
Diagnosing and Repairing Network Settings
IJ Network Device Setup Utility diagnoses and repairs computer settings or connection between the computer and printer when a problem (e.g. cannot print from a printer on the network) occurs.
Important
- Some models do not support diagnosis and repair function.
For details:
List of Models Which Does Not Support Diagnosis and Repair Function
Follow the procedure below.
- Start up IJ Network Device Setup Utility.
- Check the displayed message and select Yes.
- Select Diagnose and Repair on the displayed screen.
Perform operations following the instructions on the screen.
Note
- This function checks the following items:
- whether the computer is connected to the router
- whether a web page on the Internet can be viewed
- whether the printer can be detected on the network
- whether the signal strength or communication level is sufficient (when using Wi-Fi)
- whether the printer port setting matches with the network setting
Performing/Changing Network Settings
Canon IJ Network Device Setup Utility Screen
▶ Performing Network Settings
Canon IJ Network Device Setup Utility Screen
Items on Canon IJ Network Device Setup Utility Screen
→ Menus on Canon IJ Network Device Setup Utility Screen
Items on Canon IJ Network Device Setup Utility Screen Toolbar
Items on Canon IJ Network Device Setup Utility Screen
The screen below appears when you start up IJ Network Device Setup Utility and select Printer Network Setup. Detected printers are listed on the screen and the items below are shown.
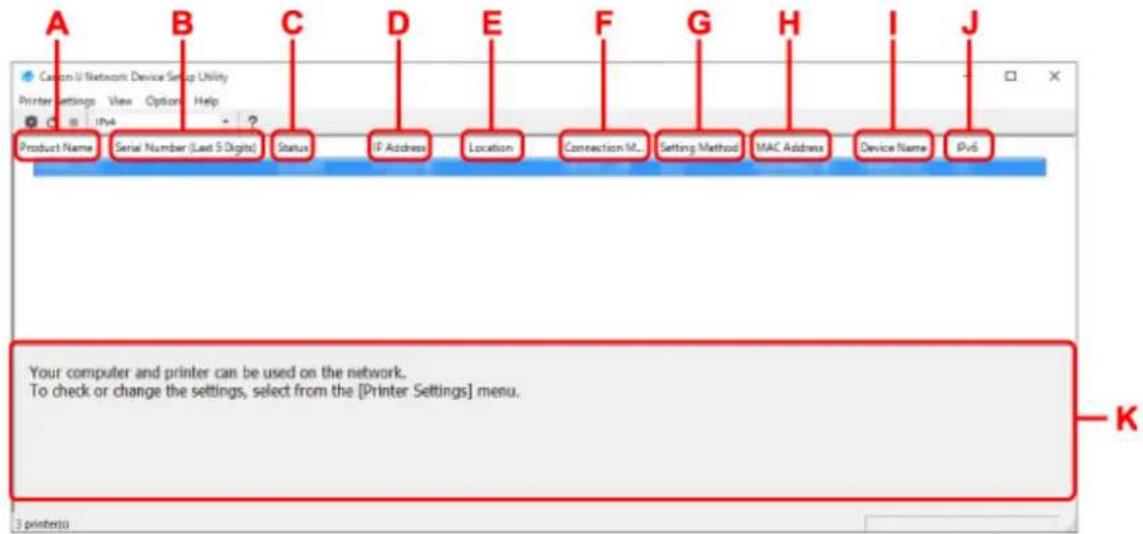
text_image
A Product Name Serial Number (Last 5 Digits) Status IF Address Location Connection M... Setting Method MAC Address Device Name IPv6 Your computer and printer can be used on the network. To check or change the settings, select from the [Printer Settings] menu. K 3 printer(s)A: Product Name
Displays the product name of detected printer. The icon below appears on the left if the printer cannot be used.
: Appears when the printer requires setup or has not been configured.
IP: Appears when the IP address is duplicated to another printer.
: Appears when you cannot communicate with the printer.
Note
- If a printer you want to use is not detected, try to set the criteria for printer search.
Setting Criteria for Printer Search/Searching Specific Printer - Right-clicking a printer displays setting items or items to confirm.
B: Serial Number (Last 5 Digits)
Displays the last five digits of printer's serial number.
C: Status
Displays the printer status as shown below.
• Available
Indicates the printer is available.
- Setup Completed
Appears after performing network setup and clicking Set to close the window.
- Requires Setup
Indicates the printer is required to perform Wi-Fi setup.
→ Performing/Changing Wi-Fi Settings
- Not Set
Indicates the printer cannot be used on network, or IPv6 is disabled. Specify an IP address or enable IPv6 on Network Settings....
→ Performing/Changing Wi-Fi Settings
- IP Address Overlap
Indicates the IP address is duplicated to another printer.
- Unknown
Indicates the printer recognized as Available in the past cannot be used currently.
Note
- If USB is selected from the pulldown menu on the toolbar, nothing is displayed.
D: IP Address
Displays the printer IP address. Nothing is displayed if the printer status is Requires Setup.
Note
- If USB is selected from the pulldown menu on the toolbar, "-" is displayed.
E: Location
Displays the printer location if it is registered. Nothing is displayed if the printer status is Requires Setup.
Note
- If USB is selected from the pulldown menu on the toolbar, nothing is displayed.
→ Assigning Printer Information
F: Connection Method
Displays printer connection method (wired LAN, Wi-Fi, or USB).
Note
- If USB is selected from the pulldown menu on the toolbar, USB is displayed.
- If the printer supports both of the LAN connection methods, the printer is recognized as two printers and they are displayed separately. (The same numbers are displayed on Serial Number (Last 5 Digits).)
- If the printer does not support wired LAN, wired LAN is not displayed.
- If you are using IJ Network Device Setup Utility on the computer which does not support Wi-Fi, Wi-Fi is not displayed.
G: Setting Method
Displays printer setting method.
• Auto
Appears if the printer is used by IP address specified automatically.
- Manual
Appears if the printer is used by IP address specified manually.
Note
- If USB is selected from the pulldown menu on the toolbar, "-" is displayed.
H: MAC Address
Displays the MAC address of the detected printer.
Note
- If USB is selected from the pulldown menu on the toolbar, "-" is displayed.
I: Device Name
Displays the printer device name if it is registered.
Note
- If USB is selected from the pulldown menu on the toolbar, nothing is displayed.
- The printer with Requires Setup displayed on Status is not displayed.
→ Assigning Printer Information
J: IPv6
On appears when an IPv6 address is assigned for the printer.
Note
- If USB is selected from the pulldown menu on the toolbar, "-" is displayed.
K: Displays the printer status and operation guides.
Selecting a printer from the printer list displays its current status and what to do next.
Menus on Canon IJ Network Device Setup Utility Screen
This section describes menus on Canon IJ Network Device Setup Utility screen.
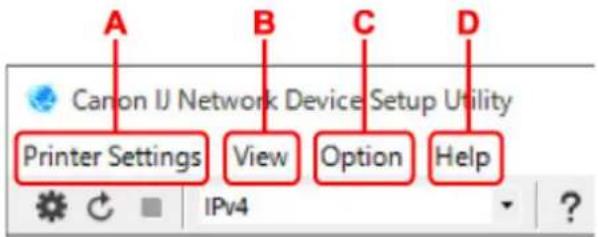
text_image
Canon IJ Network Device Setup Utility Printer Settings View Option HelpA: Printer Settings menu
→ Printer Settings Menu
B: View menu
→ View Menu
C: Option menu
→ Option Menu
D: Help menu
→ Help Menu
Items on Canon IJ Network Device Setup Utility Screen Toolbar
This section describes items on Canon IJ Network Device Setup Utility Screen toolbar.
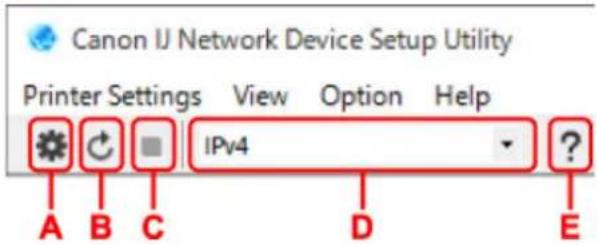
text_image
Canon IJ Network Device Setup Utility Printer Settings View Option Help IPv4 A B C D E ?A: Perform wired or Wi-Fi setup.
Note
- This item has the same function as Network Settings... in the Printer Settings menu.
B: Redetects printers.
Note
- This item has the same function as Update in the View menu.
C: Stops detecting printers.
Note
- This item has the same function as Cancel in the View menu.
D: Switches the printer list. (IPv4, IPv6, or USB printers)
Note
- This item has the same function as Switch View in the View menu.
- You can also display the USB connected printer list. (Not available for some models.) In this case, select USB.
E: Displays this guide.
Note
- This item has the same function as Online Manual in the Help menu.
Performing Network Settings
Performing/Changing Wired LAN Connection (Ethernet Cable) Settings
▶ Performing/Changing Wi-Fi Settings
▶ Assigning Printer Information
Performing/Changing Wired LAN Connection (Ethernet Cable) Settings
Follow the procedure below to perform/change wired LAN settings.
Note
- For some models, you can perform network setup for a USB connected printer using IJ Network Device Setup Utility. Select USB on Switch View under the View menu to display printers for which you can perform setup.
- Start up IJ Network Device Setup Utility.
- Check the displayed message and select Yes.
- Select Printer Network Setup on the displayed screen.
Detected printers are listed.
- Select printer to perform/change settings from printer list.
Select the printer with Wired LAN displayed on Connection Method and Available displayed on Status to perform settings.
You can perform settings for a printer with Available not displayed on Status via USB connection.
To perform setup for a USB connected printer, select USB from the pulldown menu on the toolbar and select the printer to perform/change settings.
- Select Network Settings... on Printer Settings menu.
The Confirm Printer Password screen appears.
For more on the password, refer to Administrator Password.
Note
- Clicking the icon allows you to perform/change settings.
- If you select a USB connected printer on step 4, the screen below appears after the Confirm Printer Password screen appears
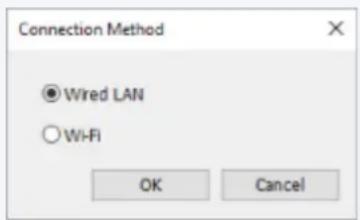
text_image
Connection Method ● Wired LAN ○ Wi-Fi OK CancelSelect Wired LAN and click OK.
- Enter password and click OK.
The Network Settings screen appears.
7. Perform/change settings.
You can switch the screen between IPv4 and IPv6. Click the tab to switch the protocol.
- IPv4 settings
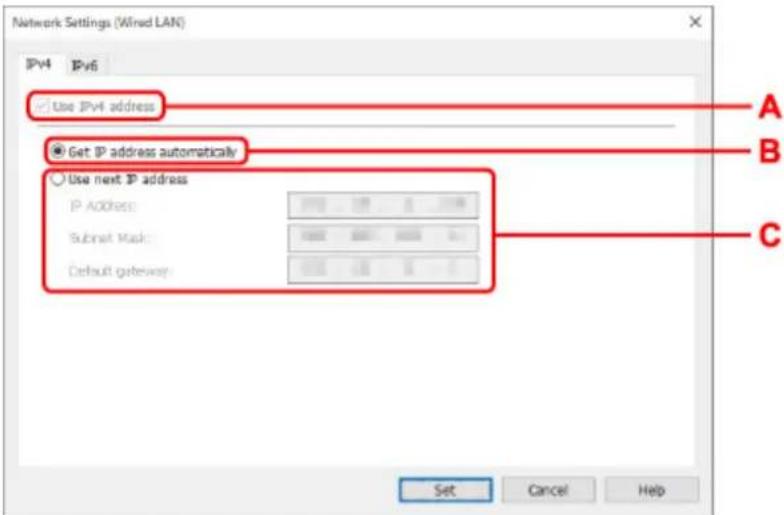
text_image
Network Settings (Wind LAN) IPv4 IPv6 Use IPv4 address Get IP address automatically Use next IP address IP Address: Subset Mask: Default gateway: Set Cancel HelpA: Use IPv4 address
Always selected. (displayed in a gray out state)
B: Get IP address automatically
Select this option to use an IP address automatically assigned by a DHCP server. DHCP server functionality must be enabled on your router.
C: Use next IP address
Select this option if no DHCP server functionality is available in your setup where you use the printer, or you want to use a fixed IP address.
Enter the IP address, subnet mask, and default gateway.
- IPv6 settings
Note
- If you select a USB connected printer on step 4, you cannot perform IPv6 settings depending on the printer you are using.
For details, see List of Models Which Does Not Support IPv6 Configuration via USB Connection.

text_image
Network Settings (Wired LAN) IPv4 IPv6 Use IPv6 address Use Staleless Address: Use Manual Address: IPv6 Address: Prefix Length: 0 Use DHCPv6: Stateful Address: Link-Local Address: Set Cancel Help A B C DA: Use IPv6 address
Select when you use the printer with IPv6 environment.
B: Use Stateless Address:
Select when you use an IP address assigned automatically. Use a router compatible with IPv6.
Note
- This setting item is not available depending on the printer you are using.
C: Use Manual Address:
Select this option if no DHCP server functionality is available in your setup where you use the printer, or you want to use a fixed IP address.
Enter the IP address and IP address prefix length.
Note
- This setting item is not available depending on the printer you are using.
D: Use DHCPv6:
Select when you obtain an IP address using DHCPv6.
Note
- This setting item is not available depending on the printer you are using.
8. Click Set.
Performing/Changing Wi-Fi Settings
Follow the procedure below to perform/change Wi-Fi settings.
Important
- Enable Easy wireless connect (Cableless setup) before performing printer setup. (Not required if you change the IP address.) For details, search for "NR049" on your printer's online manual and see the page shown.
- If you use a printer over the Wi-Fi, we highly recommend you perform security settings for Wi-Fi network using WPA/WPA2 from the viewpoint of security.
Note
- For some models, you can perform network setup for a USB connected printer using IJ Network Device Setup Utility. Select USB on Switch View under the View menu to display printers.
- Start up IJ Network Device Setup Utility.
- Check the displayed message and select Yes.
- Select Printer Network Setup on the displayed screen.
Detected printers are listed.
- Select printer to perform/change settings from printer list.
Select the printer with Wi-Fi displayed on Connection Method and Available or Requires Setup displayed on Status to perform settings.
You can perform settings for a printer with Available or Requires Setup not displayed on Status via USB connection.
To perform setup for a USB connected printer, select USB from the pulldown menu on the toolbar and select the printer to perform/change settings.
- Select Network Settings... on Printer Settings menu.
The Confirm Printer Password screen appears.
For more on the password, refer to Administrator Password.
Note
- Clicking the icon allows you to perform/change settings.
- If you select a USB connected printer on step 4 and the selected printer is compatible with wired LAN, the screen below appears after the Confirm Printer Password screen appears
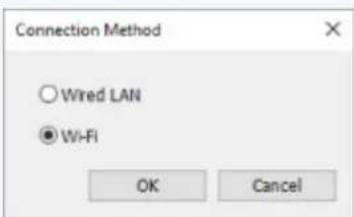
text_image
Connection Method ○ Wired LAN ● Wi-Fi OK CancelSelect Wi-Fi and click OK.
6. Enter password and click OK.
The Network Settings screen appears.
7. Perform/change settings.
You can switch the screen between IPv4 and IPv6. Click the tab to switch the protocol.
- IPv4/IPv6 settings
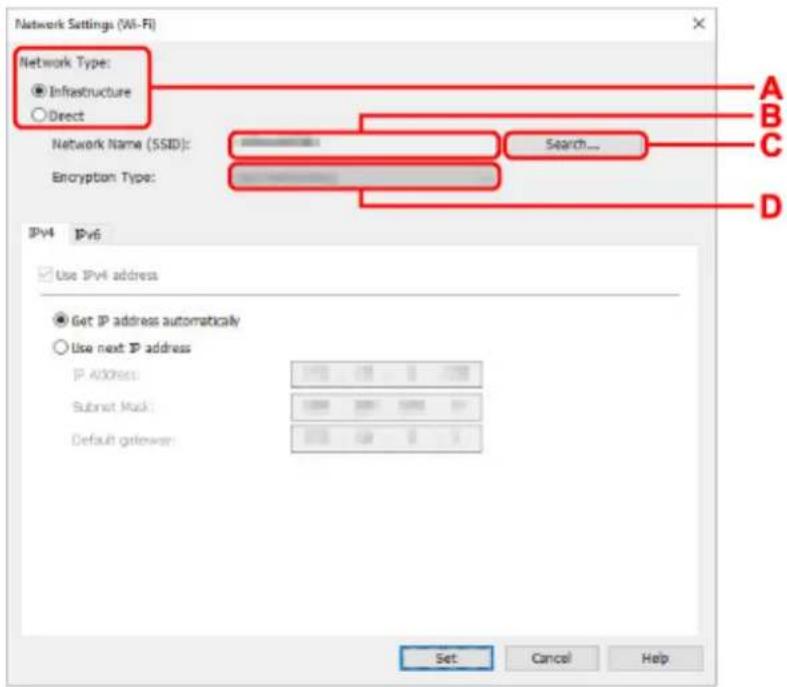
text_image
Network Settings (Wi-Fi) Network Type: ● Infrastructure ○ Direct Network Name (SSID): Encryption Type: Search... IPv4 IPv6 Use IPv4 address ● Get IPv4 address automatically ○ Use next IPv4 address IPv Address: Submit Mask: Default gateway: Set Cancel HelpA: Network Type:
Select the Wi-Fi mode.
- Infrastructure
Connects the printer to the Wi-Fi with a wireless router.
Direct
Connects the printer to wireless communication devices (smartphone or tablet) without a wireless router.
Note
- If Wi-Fi is enabled on the computer and if you select a USB connected printer on step 4, you can select Direct depending on the printer you are using.
- If Direct is selected, all items are displayed in a gray out status and you cannot perform any settings.
In addition, you cannot connect to Internet from your computer depending on your operating environment.
B: Network Name (SSID):
The network name (SSID) of the Wi-Fi currently used is displayed.
The network name (SSID) for Wireless Direct appears while in Wireless Direct.
C: Search...
The Detected Wireless Routers screen is displayed to select a wireless router to connect to.
For a wireless router already connected to the computer, Available is displayed on
Communication Status.
If you select a wireless router with Not Connected on Communication Status from the list, clicking Set displays the WPA/WPA2 or WEP setting screen for a wireless router.
→ If WEP Details Screen Appears
If WPA/WPA2 Details Screen Appears
D: Encryption Type:
Displays the encryption method used over the Wi-Fi.
- IPv4 settings
Note
- The setting items below are available only when Infrastructure is selected for Network Type:.
If Direct is selected, all items are displayed in a gray out status and you cannot perform any settings.
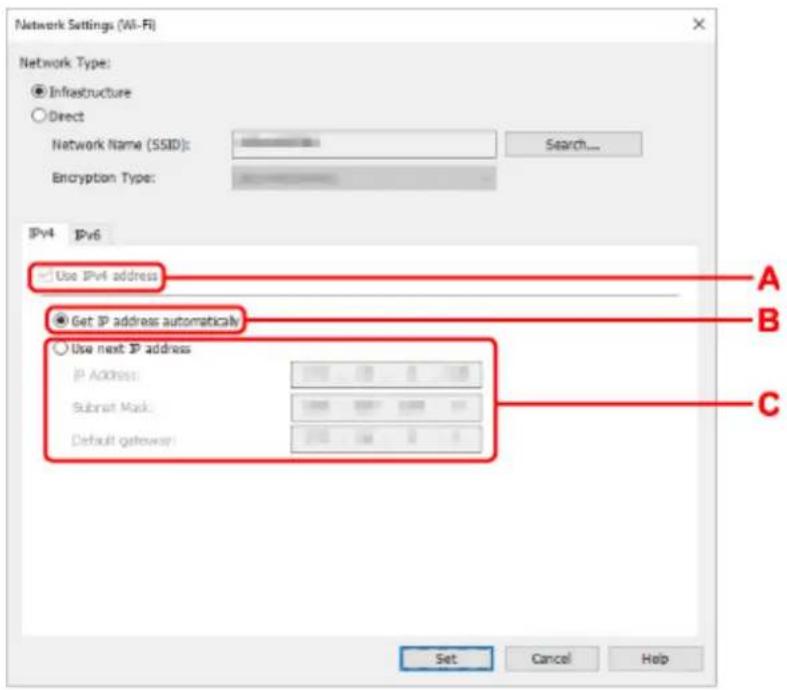
text_image
Network Settings (Wi-Fi) Network Type: ● Infrastructure ○ Direct Network Name (SSID): Encryption Type: Search... IPv4 IPv6 Use IPv4 address A B Get IP address automatically ○ Use next IP address IP Address: Submat Mask: Default gateway: C Set Cancel HelpA: Use IPv4 address
Always selected. (displayed in a gray out state)
B: Get IP address automatically
Select this option to use an IP address automatically assigned by a DHCP server. DHCP server functionality must be enabled on your wireless router.
C: Use next IP address
Select this option if no DHCP server functionality is available in your setup where you use the printer, or you want to use a fixed IP address.
Enter the IP address, subnet mask, and default gateway.
- IPv6 settings

Note
- If you select a USB connected printer on step 4, you cannot perform IPv6 settings depending on the printer you are using.
For details, see List of Models Which Does Not Support IPv6 Configuration via USB Connection.
- The setting items below are available only when Infrastructure is selected for Network Type:.
If Direct is selected, all items are displayed in a gray out status and you cannot perform any settings.
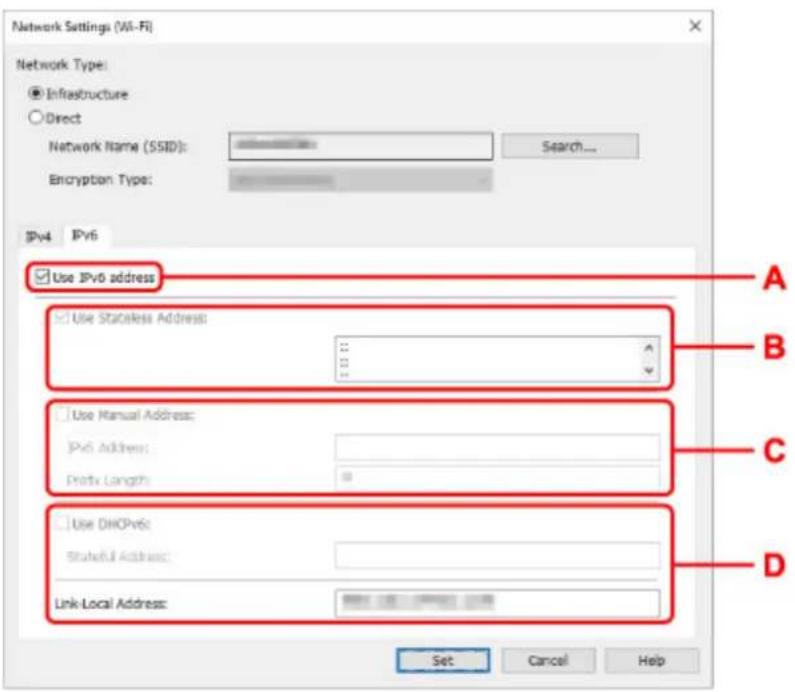
text_image
Network Settings (Wi-Fi) Network Type: ● Infrastructure ○ Direct Network Name (SSID): Search... Encryption Type: IPv4 IPv6 Use IPv6 address Use Stacless Address: A B C Use Manual Address: IPv6 Address: Prefix Length: D Use DHCPv6: Stakeful Address: Link-Local Address: Set Cancel HelpA: Use IPv6 address
Select when you use the printer with IPv6 environment.
B: Use Stateless Address:
Select when you use an IP address assigned automatically. Use a router compatible with IPv6.

Note
- This setting item is not available depending on the printer you are using.
C: Use Manual Address:
Select this option if no DHCP server functionality is available in your setup where you use the printer, or you want to use a fixed IP address.
Enter the IP address and IP address prefix length.

Note
- This setting item is not available depending on the printer you are using.
D: Use DHCPv6:
Select when you obtain an IP address using DHCPv6.
Note
- This setting item is not available depending on the printer you are using.
8. Click Set.
Assigning Printer Information
Follow the procedure below to assign/change printer location name or device name.
The names appear on Device Name: and Location: on the Canon IJ Network Device Setup Utility screen.
Note
- If USB is selected from the pulldown menu on the toolbar, this setting item is not available.
- Start up IJ Network Device Setup Utility.
- Check the displayed message and select Yes.
- Select Printer Network Setup on the displayed screen.
Detected printers are listed.
- Select printer to assign location name and device name.
Select the printer with Available displayed on Status.
- Select Detailed Printer Settings... on Printer Settings menu.
The Confirm Printer Password screen appears.
For more on the password, refer to Administrator Password.
- Enter password and click OK.
The Detailed Printer Settings screen appears.
- Perform/change settings.
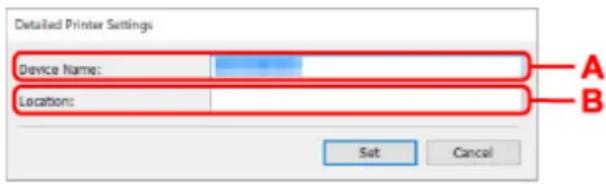
text_image
Detailed Printer Settings Device Name: Location: Set Cancel A BThe setting items below are available.
A: Device Name:
Assigns the device name.
B: Location:
Assigns the location name.
- Click Set.
List of Models Which Does Not Support Diagnosis and Repair Function
The following models does not support "Diagnose and Repair" function of IJ Network Device Setup Utility.
• G4000 series
- PRO-500 series
- PRO-1000 series
- MB2100 series
- MB2700 series
- MB5100 series
- MB5400 series
- iB4000 series
- PRO-520
• PRO-540
• PRO-540S
• PRO-560
• PRO-560S
• PRO-2000
• PRO-4000
• PRO-4000S
• PRO-6000
• PRO-6000S
- TS9000 series
- TS8000 series
- TS6000 series
- TS5000 series
- MG3000 series
• E470 series
List of Models Which Does Not Support IPv6 Configuration via USB Connection
For the following models, you can perform settings only for IPv4 using IJ Network Device Setup Utility. (You cannot perform settings for IPv6.)
- iB4100 series
- MG3000 series
• E470 series
• G4000 series - TS5000 series
- TS6000 series
- TS8000 series
- TS9000 series
- TR8500 series
- TR7500 series
- TS9100 series
- TS8100 series
- TS6100 series
- TS5100 series
- TS3100 series
• E3100 series - TS300 series
• E300 series - TR8580 series
- TS9180 series
- TS8180 series
- TS6180 series
- TR8530 series
- TR7530 series
- TS8130 series
- TS6130 series
- XK70 series
- XK50 series
• G4010 series
• G3010 series - TR4500 series
• E4200 series - TS6200 series
- TS6280 series
- TS6230 series
- TS8200 series
- XK80 series
- TS8280 series
• TS8230 series - TS9500 series
• TS9580 series
- TR9530 series
Handling Paper, Ink Tanks, etc.
Loading Paper
Refilling Ink Tanks
Loading Paper
Paper Sources
Loading Paper in the Rear Tray
Loading Paper in the Cassette
Loading Envelopes in Rear Tray
Paper Sources
The printer has two paper sources for feeding paper, the rear tray (A) and cassette (B).
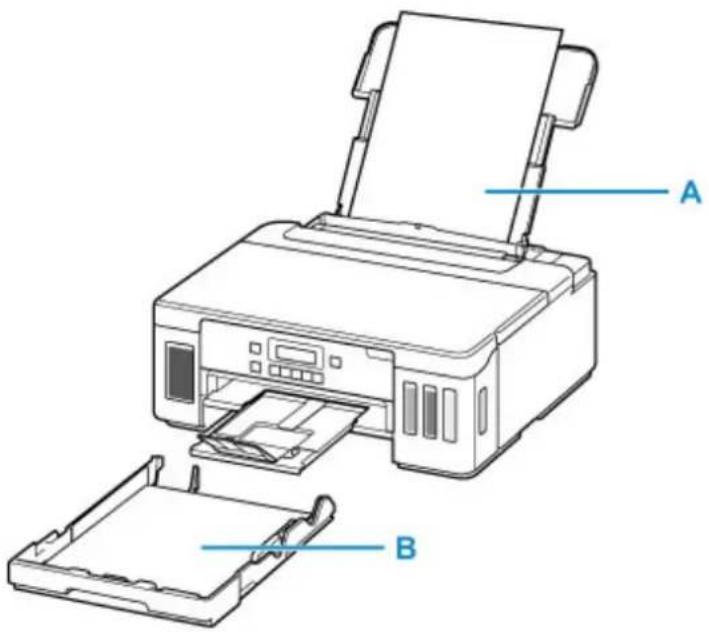
text_image
Diagram of a printer with labeled parts A and B, showing internal structure and assembly.You can load all supported paper on the rear tray.
→ Supported Media Types
You can load A4, B5, A5, or Letter-sized plain paper in the cassette.
Note
- When printing, select the correct page size and media type. If you select the wrong page size or media type, the printer may feed paper from the wrong paper source or may not print with the proper print quality.
For details on how to load paper in each paper source, see below.
Loading Paper in the Rear Tray
Loading Paper in the Cassette
Loading Envelopes in Rear Tray
Loading Paper in the Rear Tray
You can load plain paper or photo paper.
You can also load envelopes on the rear tray.
Loading Envelopes in Rear Tray
Important
- If you cut plain paper to a size of 5" x 7" (13 x 18 cm) or smaller to perform a trial print, it may cause a paper jam.
Note
• We recommend Canon genuine photo paper for printing photos.
For details on the Canon genuine paper, see Supported Media Types.
- You can use general copy paper or Canon Red Label Superior WOP111/Canon Océ Office Colour Paper SAT213.
For the page size and paper weight you can use for this printer, see Supported Media Types.
1. Prepare paper.
Align the edges of paper. If paper is curled, flatten it.

natural_image
Illustration of two hands holding a blank sheet with bidirectional arrows indicating vertical movement (no text or symbols)Note
- Align the edges of paper neatly before loading. Loading paper without aligning the edges may cause paper jams.
- If paper is curled, hold the curled corners and gently bend them in the opposite direction until the paper becomes completely flat.
For details on how to flatten curled paper, see Check3 in Paper Is Smudged / Printed Surface Is Scratched. -
When using Photo Paper Plus Semi-gloss SG-201, even if the sheet is curled, load one sheet at a time as it is. If you roll up this paper to flatten, this may cause cracks on the surface of the paper and reduce the print quality.
-
Open rear tray cover (A). Pull straight up and fold back paper support (B).
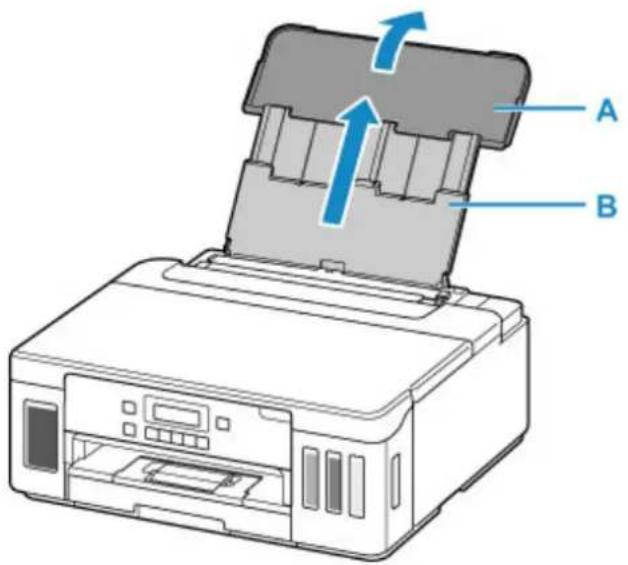
text_image
Diagram of a printer with labeled parts A and B, showing internal structure and directional arrows indicating flow or movement.- Open the feed slot cover (C).
- Slide right paper guide (D) to open both paper guides.

text_image
Diagram of a printer with labeled parts C and D, showing internal structure and assembly steps- Load paper stack in portrait orientation WITH PRINT SIDE FACING UP.
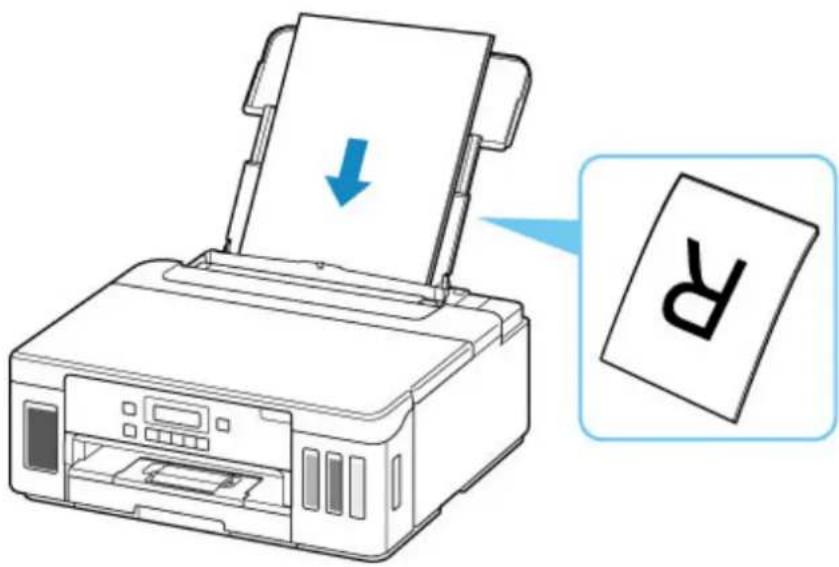
text_image
Diagram showing printer printing process with a blue arrow indicating the paper's print and an icon labeled 'R' pointing to it.- Slide right paper guide (D) to align with both sides of paper stack.
Do not slide the paper guides too hard against the paper. The paper may not be fed properly.
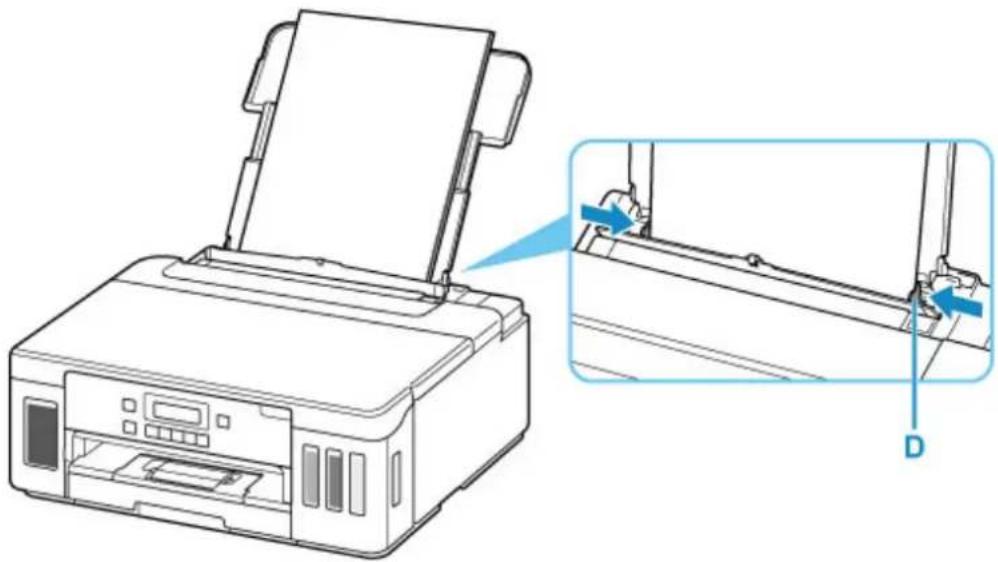
natural_image
Line drawing of a printer with an open lid and a close-up view showing the printer's edge detail (no text or symbols)Important
• Always load paper in portrait orientation (E). Loading paper in landscape orientation (F) can cause paper jams.

E

F
Note
- Do not load sheets of paper higher than the load limit mark (G).
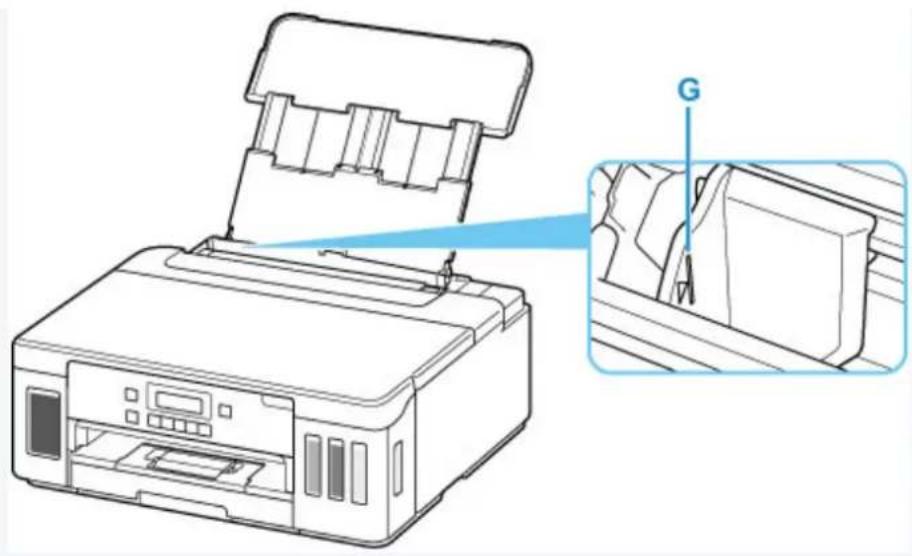
natural_image
Line drawing of a printer with a close-up inset showing the internal structure (no text or symbols)7. Close feed slot cover (C) gently.
Important
- If the feed slot cover is open, paper cannot be fed. Be sure to close the feed slot cover.
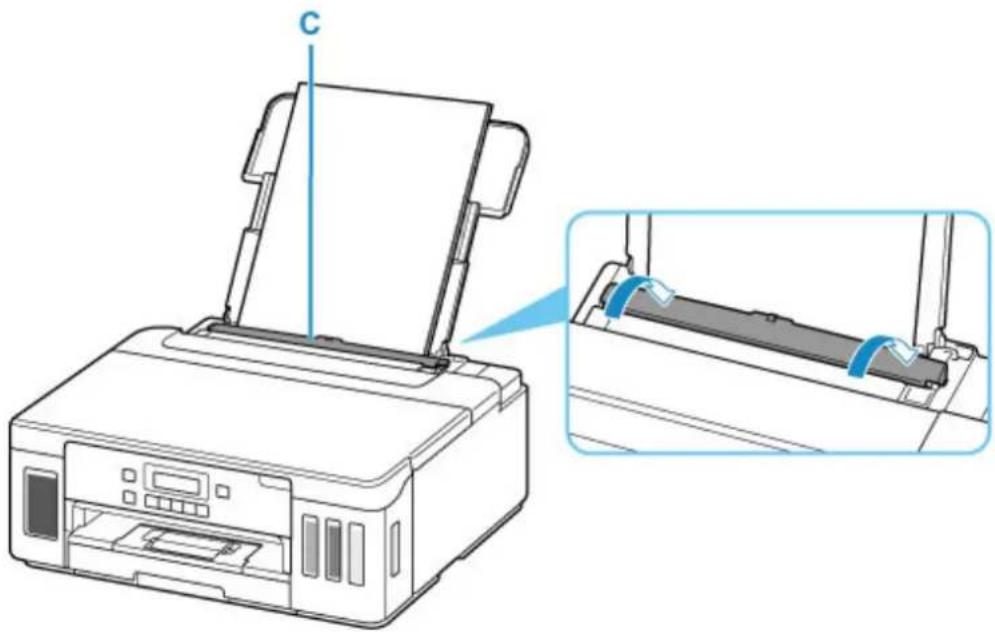
natural_image
Diagram of a printer with paper feed and a close-up view showing the internal structure (no text or symbols)After closing the feed slot cover, the paper information registration screen for the rear tray appears on the LCD.
8. Press the OK button.
Save the rear tray paper [OK]Next
- Use the button to select the size of the loaded paper on the rear tray, then press the OK button.
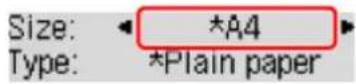
Note
• The *asterisk) on the LCD indicates the current setting.
- Use the ▶ button to select the type of the loaded paper on the rear tray, then press the OK button.
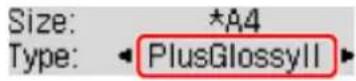
Follow the instructions of any messages displayed to register the paper information.
- Pull out paper output tray (H) and open output tray extension (I).

natural_image
Illustration of a printer being inserted into a paper holder, showing the printer's internal structure and the printer's open lid (no text or symbols present)Note
- There are various types of paper, such as paper with a special surface coating for printing photos at optimal quality and paper suitable for documents. Each media type has specific preset settings (how ink is used and sprayed, distance from nozzles, etc.), that allow you to print to that type with optimal image quality. The wrong paper settings may cause poor printout color quality or scratches on the printed surface. If you notice blurring or uneven colors, increase the print quality setting and try printing again.
- To prevent incorrect printing, this printer has a function that detects whether the settings for the paper loaded on the rear tray matches the paper settings. Before printing, make print settings in accordance with the paper settings. When this function is enabled, an error message is displayed if these settings
do not match to prevent incorrect printing. When this error message is displayed, check and correct the paper settings.
Loading Paper in the Cassette
You can load A4, B5, A5, or Letter-sized plain paper in the cassette.
Note
• In the cassette, be sure to load only plain paper.
- You can use general copy paper or Canon Red Label Superior WOP111/Canon Océ Office Colour Paper SAT213.
For the page size and paper weight you can use for this printer, see Supported Media Types.
1. Prepare paper.
Align the edges of paper. If paper is curled, flatten it.

natural_image
Illustration of two hands holding a blank sheet with bidirectional arrows indicating movement (no text or symbols)Note
- Align the edges of paper neatly before loading. Loading paper without aligning the edges may cause paper jams.
- If paper is curled, hold the curled corners and gently bend them in the opposite direction until the paper becomes completely flat.
For details on how to flatten curled paper, see Check3 in Paper Is Smudged / Printed Surface Is Scratched.
2. Pull out the cassette (A) from the printer.
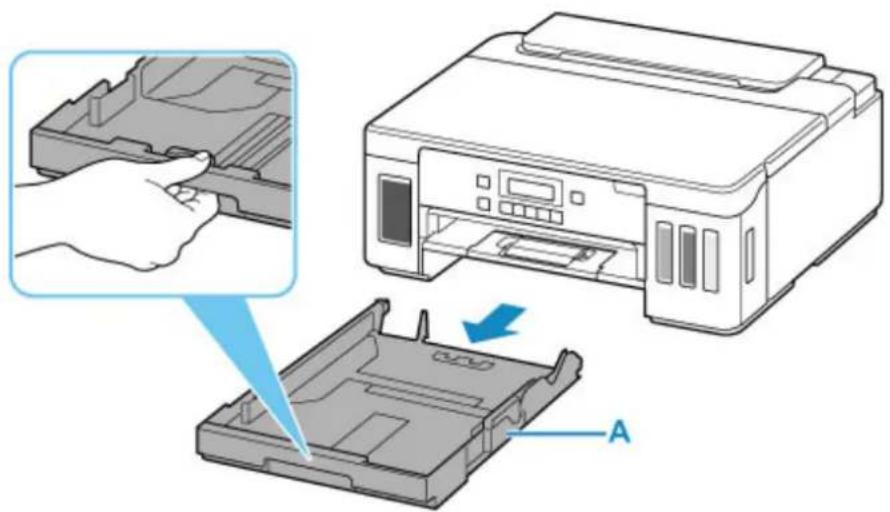
text_image
Diagram illustrating the process of printer printing into a plastic case, with labeled parts and an arrow indicating the process.3.Slide paper guides (B) in front and (C) on right to open guides.
- Load paper stack in portrait orientation WITH PRINT SIDE FACING DOWN, and place it in center of cassette.
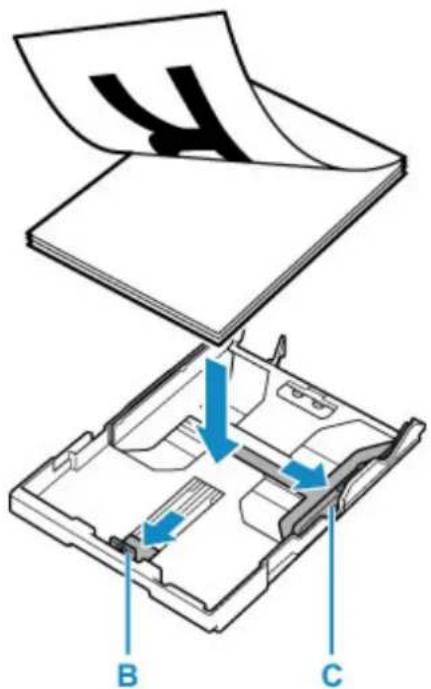
text_image
Diagram of a printer or printer with labeled parts B and C, showing internal structure and directional arrows indicating flow or movement.Important
• Always load paper in portrait orientation (D). Loading paper in landscape orientation (E) can cause paper jams.

D

E
Note
- Align the paper stack with the edge of the cassette as shown in the figure below. If the paper stack is in contact with the protrusion (F), the paper may not be fed properly.
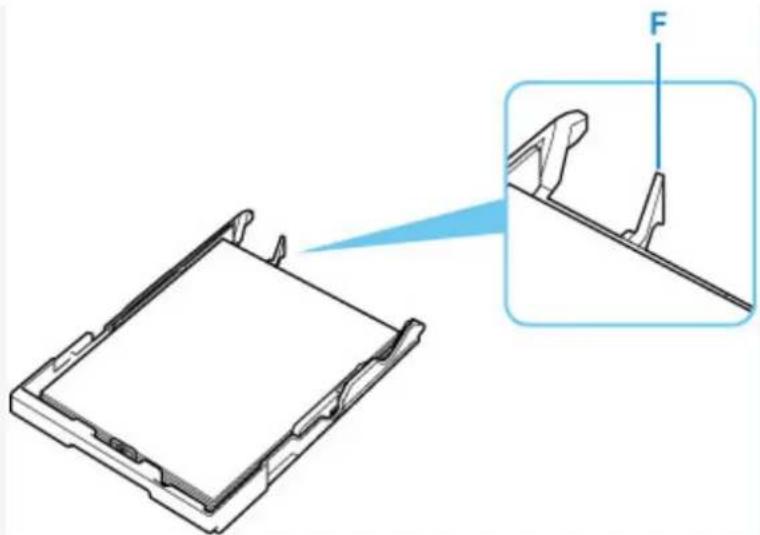
natural_image
Technical diagram showing a mechanical component with an inset view labeled 'F' (no text or symbols present)- Slide front paper guide (B) to align it with paper stack.
Align paper guide with where it clicks into place.
- Slide right paper guide (C) to align it with paper stack.
Do not slide the paper guide too hard against the paper. The paper may not be fed properly.
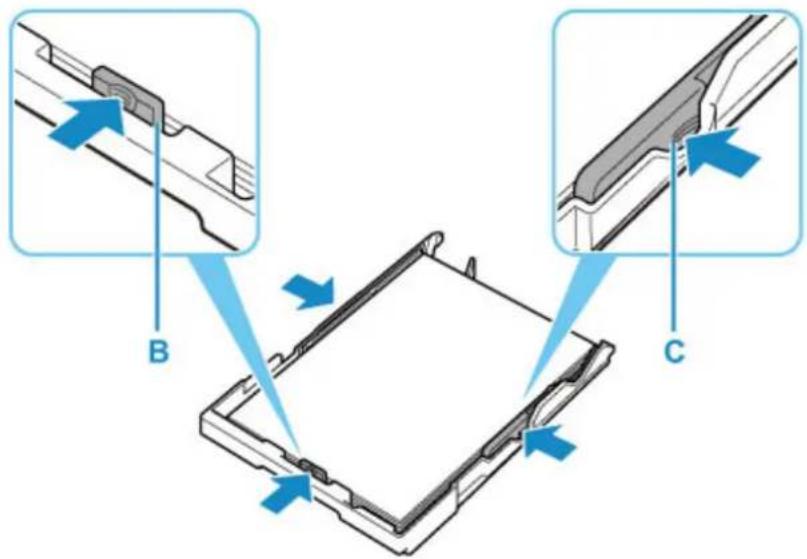
text_image
Technical diagram showing three labeled components (B, C) of a mechanical assembly with directional arrows indicating flow or movement.Note
- Do not load sheets of paper higher than the load limit mark (G).
- Keep the paper stack height below the tabs (H) of the paper guides.
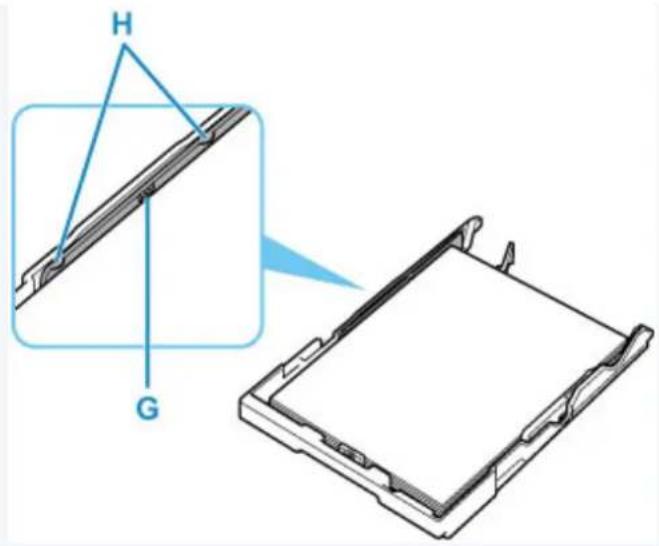
text_image
H G7. Insert cassette into printer.
Push the cassette into the printer until it stops.
After inserting the cassette into the printer, the paper information registration screen for the cassette appears on the LCD.
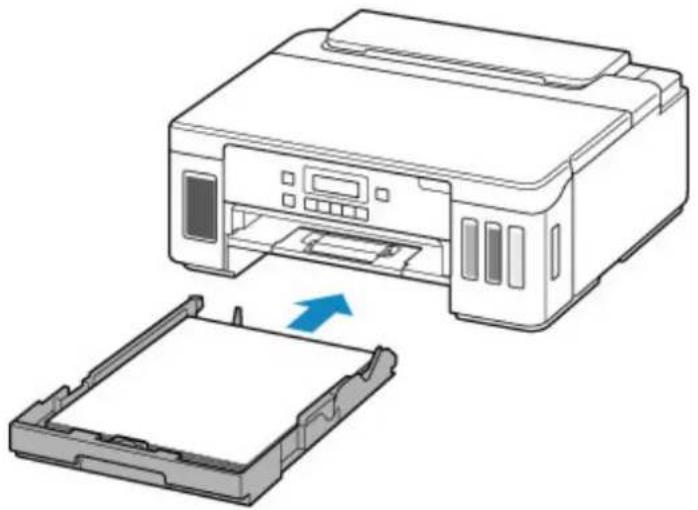
natural_image
Diagram showing a printer being inserted into a plastic tray, with an arrow indicating the process (no text or symbols present)8. Press the OK button.
Save the cassette paper [OK]Next
9. Use the button to select the size of the loaded paper in the cassette, then press the OK button.
Size: *A4 Type: *Plain paper
Note
• The *asterisk) on the LCD indicates the current setting.
- Check media type and press OK button.
Size: *A4 Type: *Plain paper
Follow the instructions of any messages displayed to register the paper information.
- Pull out paper output tray (I) and open output tray extension (J).
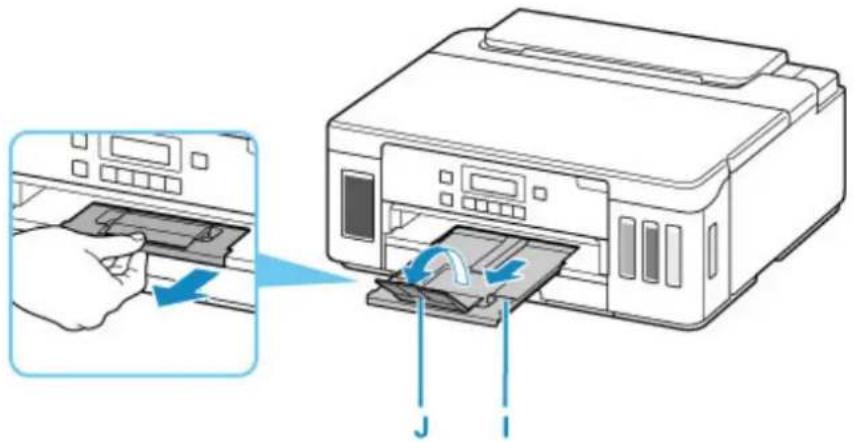
natural_image
Diagram showing a printer being inserted into a paper holder, with a hand operating the printer and arrows indicating the process (no text or symbols present)Note
- To prevent incorrect printing, this printer has a function that detects whether the settings for the paper loaded in the cassette matches the paper settings. Before printing, make print settings in accordance with the paper settings. When this function is enabled, an error message is displayed if these settings do not match to prevent incorrect printing. When this error message is displayed, check and correct the paper settings.
Loading Envelopes in Rear Tray
You can load Envelope DL and Envelope Com 10 on the rear tray.
The address is automatically rotated and printed according to the envelope's direction by specifying with the printer driver properly.

Important
- Printing of envelopes from the operation panel or from a PictBridge (Wi-Fi) compliant device is not supported.
- Do not use the following envelopes. They could jam in the printer or cause the printer to malfunction.
- Envelopes with an embossed or treated surface
• Envelopes with a double flap - Envelopes whose gummed flaps are already moistened and adhesive
1. Prepare envelopes.
- Press down on all four corners and edges of the envelopes to flatten them.
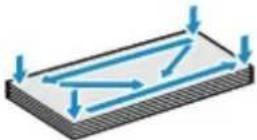
- If the envelopes are curled, hold the opposite corners and gently twist them in the opposite direction.
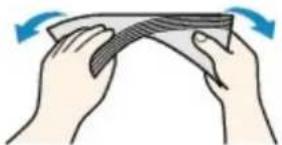
natural_image
Illustration of two hands holding a folded paper or cloth, with blue arrows indicating rotation (no text or symbols)- If the corner of the envelope flap is folded, flatten it.
- Use a pen to press the leading edge in the inserting direction flat and sharpen the crease.
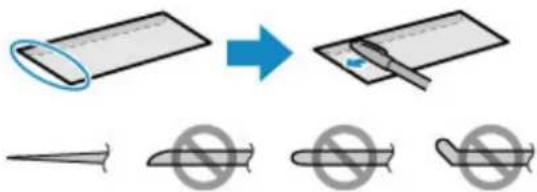
text_image
Diagram illustrating a process of removing a plastic sheet into a pen, with corresponding prohibition symbols.The figures above show a side view of the leading edge of the envelope.

Important
- The envelopes may jam in the printer if they are not flat or the edges are not aligned. Make sure that no curl or puff exceeds 0.12 in. (3 mm).
- Open rear tray cover (A). Pull straight up and fold back paper support (B).
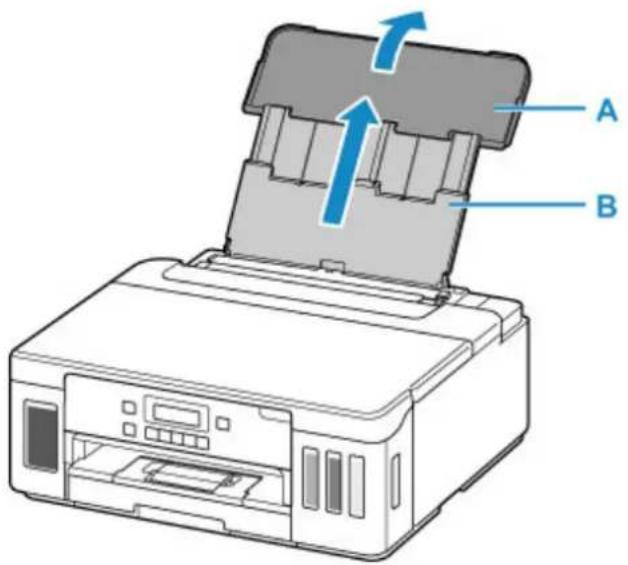
text_image
Diagram of a printer with labeled parts A and B, showing internal structure and directional arrows indicating flow or movement.- Open the feed slot cover (C).
- Slide right paper guide (D) to open both paper guides.
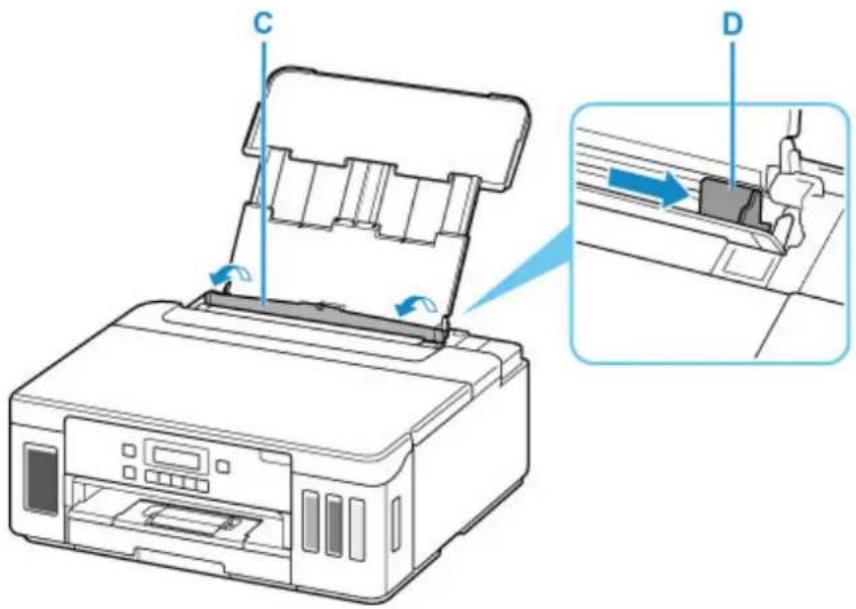
text_image
Diagram of a printer with labeled parts C and D, showing internal structure and assembly steps- Load envelopes in portrait orientation WITH PRINT SIDE FACING UP.
Up to 10 envelopes can be loaded at once.
Fold flap of the envelope and load the envelope in portrait orientation with the address side facing up
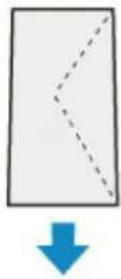
- Slide right paper guide (D) to align with both sides of envelopes.
Do not slide the paper guides too hard against the envelopes. The envelopes may not be fed properly.
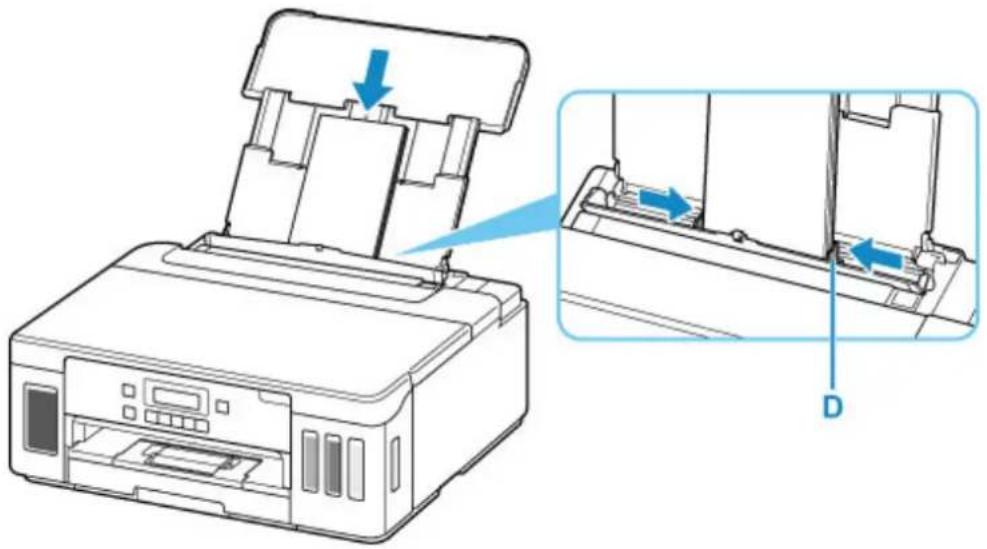
natural_image
Diagram of a printer with arrows indicating process flow, showing internal structure and component alignment (no text or symbols)Note
- Do not load envelopes higher than the load limit mark (E).
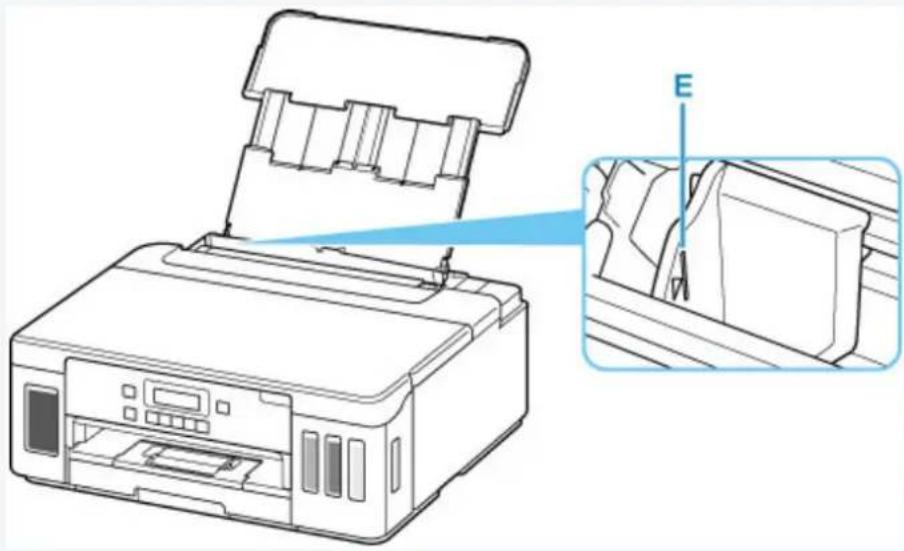
natural_image
Line drawing of a printer with an open lid and a close-up inset showing the internal structure (no text or symbols)- Close feed slot cover (C) gently.
Important
- If the feed slot cover is open, paper cannot be fed. Be sure to close the feed slot cover.
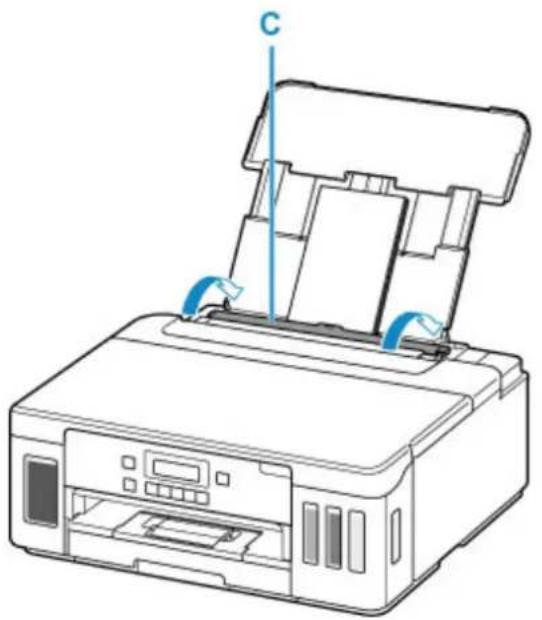
natural_image
Line drawing of a printer with a paper sheet being inserted, showing internal structure and no text or symbolsAfter closing the feed slot cover, the paper information registration screen for the rear tray appears on the LCD.
- Press the OK button.
Save the rear tray paper [OK]Next
- Use ◀ button to select size of loaded envelopes on rear tray and press OK button.
Size: Envelope DL Type: *Plain paper
Note
- The (asterisk) on the LCD indicates the current setting.
- Use ◀▶ button to select Envelope and press OK button.
Size: Envelope DL Type: Envelope
Follow the instructions of any messages displayed to register the paper information.
- Pull out paper output tray (F) and open output tray extension (G).

text_image
Diagram showing printer printing process with labeled parts G and F, including a hand inserting a paper into the printer.Note
- To prevent incorrect printing, this printer has a function that detects whether the settings for the paper loaded on the rear tray matches the paper settings. Before printing, make print settings in accordance with the paper settings. When this function is enabled, an error message is displayed if these settings do not match to prevent incorrect printing. When this error message is displayed, check and correct the paper settings.
Refilling Ink Tanks
Refilling Ink Tanks
▶ Checking Ink Level
Ink Tips
Refilling Ink Tanks
When remaining ink cautions or errors occur, the message will appear on the LCD to inform you of the error. In this state, the printer cannot print. Check the remaining ink level with the ink tank indicator on the front of the printer. If the ink level is near the lower limit line (A), refill the ink tank.
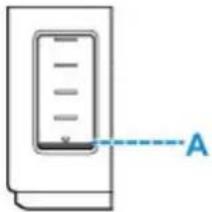
text_image
ANote
- If print results become faint or white streaks appear despite sufficient ink levels, see Maintenance Procedure.
- For precautionary notes on handling ink bottles, see Notes on ink bottles.
Refilling Procedure
When you refill ink tanks, follow the steps below.
Important
- Please ensure the printer remains flat after initial setup and is NOT turned upside down or on its side, as ink in the printer may leak.
- Check that printer is turned on.
- Open the top cover (B).
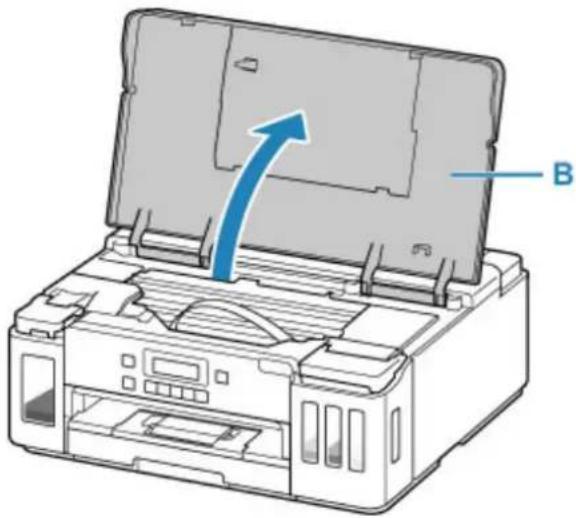
natural_image
Diagram of an open printer with a blue arrow indicating the paper's edge, labeled 'B' (no text or symbols on the diagram itself)Important
- Do not touch tubes or other parts inside the printer. This can cause trouble with the printer.
3.Open the ink tank cover.
To refill the black ink tank, open the left ink tank cover (C).
To refill color ink tanks, open the right ink tank cover (D).
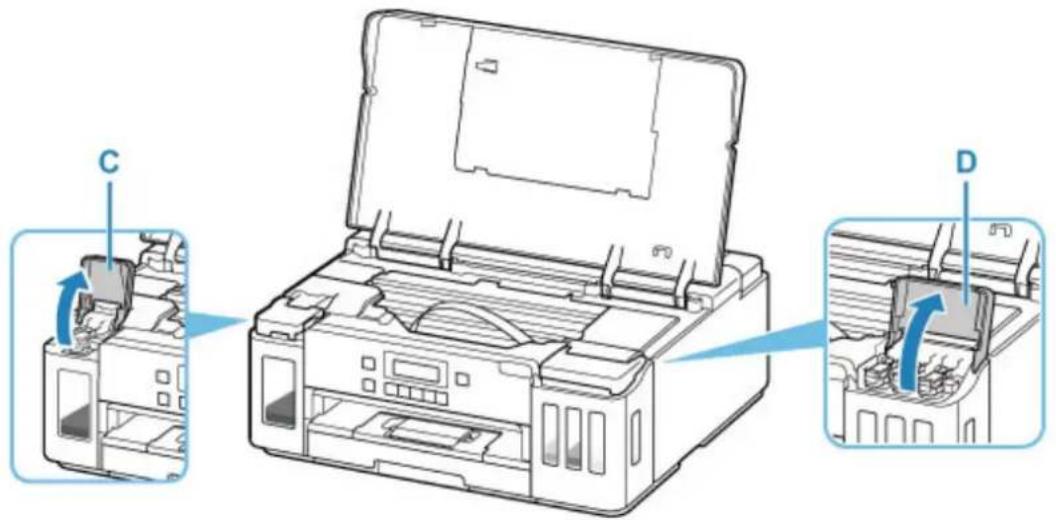
text_image
Diagram of a printer with labeled parts C and D showing internal components and directional arrows indicating flow or movement.4. Open the tank cap (E) of the ink tank to be refilled.
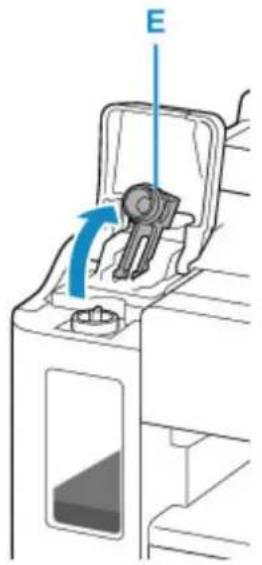
natural_image
Diagram of a mechanical device with a blue arrow indicating rotation or force direction (no text or symbols)Important
- Carefully open the tank cap of the ink tank. Ink on the inside of the tank cap may spatter when opening it.
5. Take a new ink bottle out of its package.
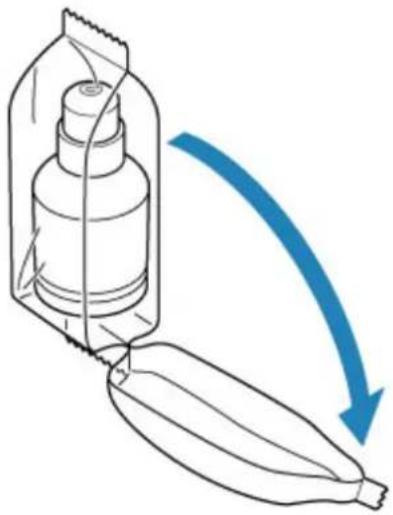
natural_image
Diagram of a bottle being inserted into a container with a blue arrow indicating the process (no text or symbols present)- Hold the ink bottle upright and gently twist the bottle cap (F) to remove.
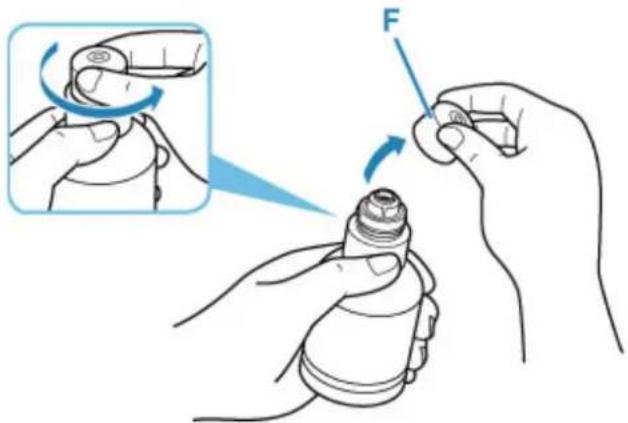
text_image
Diagram illustrating finger turning technique with magnified view of hand positioning and force application on a deviceImportant
- Do not shake the ink bottle. Ink may spatter when opening the cap.
- Refill the ink tank.
Aligning the ink bottle's tip with the printer's inlet (G), slowly stand the bottle upside down, and push the bottle into the inlet.
The ink tank is refilled. Support the bottle with your hand so that it does not fall.
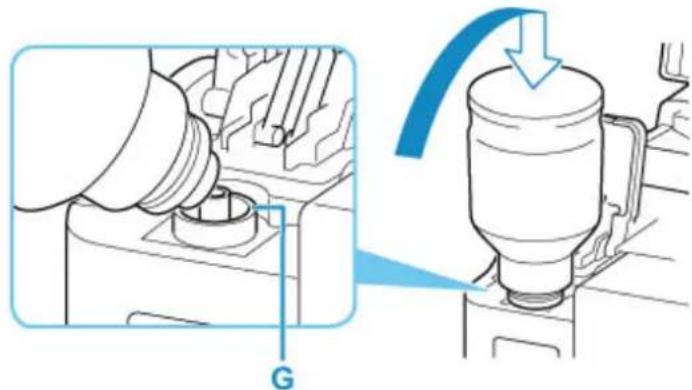
natural_image
Technical illustration of a mechanical assembly with a magnified inset showing a component labeled 'G' (no text or symbols present)Important
- Make sure that each color of ink tanks is filled with corresponding color of ink bottles.
- If ink is not injected into the ink tank, slowly remove and insert the ink bottle.
- Make sure to refill the ink tank with ink up to the upper limit line (H) on the ink tank.
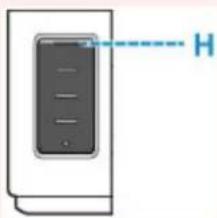
natural_image
Diagram of a device with a labeled component (H) and internal components, no text or symbols present.- Once ink reaches the upper limit line, remove the ink bottle from the inlet.
Hold up the ink bottle slightly and remove the bottle from the inlet while slowly tilting it.
Important
- Do not leave ink bottles in ink tanks.
- Close the bottle cap of the ink bottle securely and store the ink bottle upright.
-
Discard empty ink bottles in compliance with local laws and regulations regarding disposal of consumables.
-
Close the tank cap of the ink tank.
Make sure the tank cap is completely inserted.
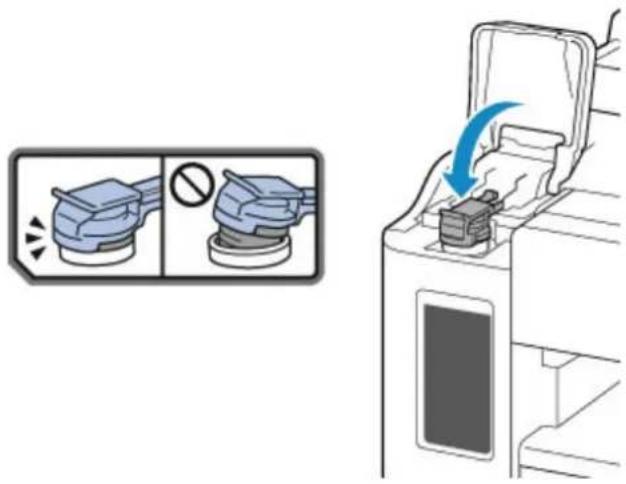
text_image
Diagram showing a washing machine with a stopper and a warning sign, alongside its exploded view.-
Close the ink tank cover.
-
Close the top cover gently.
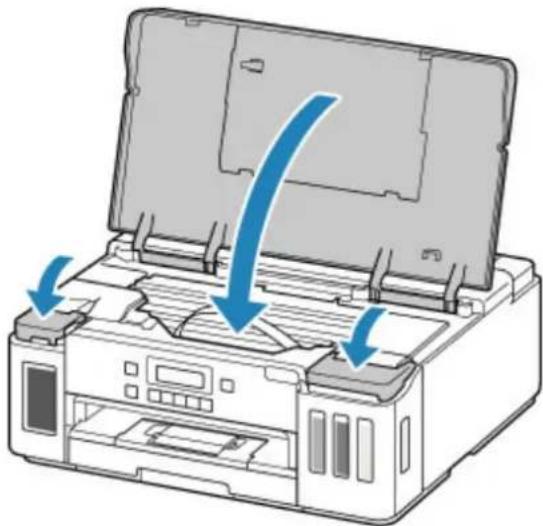
natural_image
Diagram of a printer with open lid and blue arrows indicating process flow (no text or symbols)Note
- If the error message appears on the LCD after the top cover is closed, take appropriate action.
→ An Error Occurs
• The printer may make noise during operation.
Notes on ink bottles
Important
- Keep out of reach of children.
- Do not drink ink.
- Be careful not to get any ink in your eyes or in your mouth. (In case of eye contact or swallowing, rinse with water and contact a doctor immediately).
- When you store ink bottles, close bottle caps completely and place bottles in standing position. If the ink bottles are laid down, ink may leak.
- When refilling ink tanks, take sufficient care to prevent ink from spattering onto surroundings.
- Ink may stain clothes or other belongings permanently. Washing may not remove ink stains.
- Do not use ink bottles and ink contained therein except to refill tanks of printers specified by Canon.
- Do not leave ink bottles in areas exposed to high temperature, such as near fire or a heater or in a car. Bottles may warp and cause ink leakage or ink may become poor quality.
- Do not subject ink bottles to impacts. Ink bottles may be damaged or bottle caps may come off by such impact, and ink may leak.
- Do not transfer ink to other containers. This may result in accidental ingestion, inappropriate use, or poor ink quality.
- Do not mix ink with water or other ink. This may damage the printer.
- Once an ink bottle has been opened, do not leave it with bottle cap off. Ink will dry out, possibly preventing proper operation of the printer when an ink tank is refilled using this bottle.
- To obtain optimum print quality, we recommend to refill the ink tank with ink up to the upper limit line at least once a year.
Note
- Color ink may be consumed even when printing a black-and-white document or when black-and-white printing is specified. Every ink is also consumed in the standard cleaning and deep cleaning of the print head, which may be necessary to maintain the performance of the printer.
When ink runs low, promptly refill it.
→ Ink Tips
Checking Ink Level
Check ink level with the ink tank indicator on the front of the printer.
When ink reaches the upper limit line (A), ink is full.
When ink is near the lower limit line (B), ink is running low. Refill the ink tank.
Note
- To check the remaining ink level, visually inspect the remaining ink in the ink tank.
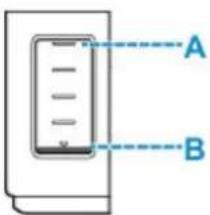
text_image
A BImportant
- If printing is continued when the remaining ink level is below the lower limit line, the printer may consume a certain amount of ink to return to printable status and may also become damaged.
Note
- When you refill the ink tank, refill the ink tank until ink reaches the upper limit line (A). If ink does not reach the upper limit line, the remaining ink level is not detected correctly.
- If a remaining ink error occurs, the error message appears on the LCD.
→ An Error Occurs
- To ensure you receive premium print quality and to help protect your print head, a certain amount of ink remains in the ink tank when the printer indicates to refill the ink tank. The estimated page yields of the ink bottle do not include this amount.
- Ink flows from the ink tanks to the inside of the printer. Ink may seem to run out fast due to this procedure when you start using the printer or after transporting it.
Ink Tips
How is ink used for various purposes other than printing?
Ink may be used for purposes other than printing.
During initial setup, some of the ink from the bundled ink bottles is used to fill the print head's nozzles to ensure the printer is print-ready.
Therefore, the page yield of the initial bundled set of ink bottles is lower than that of the subsequent sets of bottles.
To keep printer's performance, Canon printer performs cleaning automatically according to its condition. When the printer performs cleaning, a small amount of ink is consumed. In this case, all colors of ink may be consumed.
[Cleaning function]
The cleaning function helps the printer to suck air bubbles or ink itself from the nozzle and thus prevents print quality degradation or nozzle clogging.
Does black-and-white printing use color ink?
Black-and-white printing may use ink other than black ink depending on the type of printing paper or the settings of the printer driver. So, color ink is consumed even when printing in black-and-white.
Similarly, color inks are also consumed along with black ink during print head cleaning when Black is specified for cleaning.
If Printing Is Faint or Uneven
▶ Maintenance Procedure
▶ Printing the Nozzle Check Pattern
▶ Examining the Nozzle Check Pattern
▶ Cleaning the Print Head
Deep Print Head Cleaning
Aligning the Print Head
Maintenance Procedure
If print results are blurred, colors are not printed correctly, or print results are unsatisfactory (e.g. misaligned printed ruled lines), perform the maintenance procedure below.
Important
- Do not rinse or wipe the print head. This can cause trouble with the print head.
Note
- Check if ink remains in the ink tanks.
→ Checking Ink Level
- If the Alarm lamp lights or flashes, see An Error Occurs.
- For Windows, increasing the print quality in the printer driver settings may improve the print result.
→ Changing the Print Quality and Correcting Image Data
When the Print Results Are Blurred or Uneven:
Step1 Print the nozzle check pattern.
From the printer
→ Printing the Nozzle Check Pattern
From the computer
- For Windows:
→ Printing a Nozzle Check Pattern
- For macOS:
→ Printing a Nozzle Check Pattern
Step2 Examine the nozzle check pattern.
If there are missing lines or horizontal white streaks in the pattern:

Step3 Clean the print head.
From the printer
→ Cleaning the Print Head
From the computer
- For Windows:
→ Cleaning the Print Heads
- For macOS:
→ Cleaning the Print Heads
After cleaning the print head, print and examine the nozzle check pattern: Step1
If the problem is not resolved after performing from step 1 to step 3 twice:

Step4 Clean the print head deeply.
From the printer
→ Deep Print Head Cleaning
From the computer
- For Windows:
→ Cleaning the Print Heads - For macOS:
→ Cleaning the Print Heads
After deep print head cleaning, print and examine the nozzle check pattern: Step1
When you have performed the procedure until step 4 and the problem has not been resolved, turn off the power and clean the print head deeply again after 24 hours. Do not unplug the power cord when turning off the power.
If the problem is still not resolved, perform ink flush.
Ink flush consumes a great amount of ink. Frequent ink flush can rapidly consume ink, so perform ink flush only when necessary.
Important
- If ink flush is performed when the remaining ink level is insufficient, it may cause a failure. Be sure to check the remaining ink level before performing ink flush.
From the printer
→ How to Do Ink Flush
From the computer
→ Ink Flush
If the nozzle check pattern is not printed correctly even after performing ink flush, see Check Installation of Print Head.
When the Print Results Are Not Even such as the Ruled Lines Are Misaligned:
Step Align the print head.
From the printer
→ Aligning the Print Head
From the computer
- For Windows:
→ Adjusting Print Head Position Automatically
- For macOS:
→ Adjusting Print Head Position
Print the nozzle check pattern to determine whether the ink ejects properly from the print head nozzle.
Note
- If the remaining ink level is low, the nozzle check pattern will not be printed correctly. If the remaining ink level is low, refill ink tanks.
You need to prepare: a sheet of A4 or Letter-sized plain paper
- Check that printer is turned on.
- Load a sheet of A4 or Letter-sized plain paper in the cassette.
→ Loading Paper in the Cassette
- Press the Setup button, use the ◀▶ button to select Maintenance, and press the OK button.
→ LCD and Operation Panel
- Use the ◀ button to select Nozzle check and press the OK button.
The nozzle check pattern will be printed.
Do not perform any other operations until the printer completes the printing of the nozzle check pattern.
- Examine the nozzle check pattern.
Examining the Nozzle Check Pattern
Examine the nozzle check pattern, and clean the print head if necessary.
- Check if there are missing lines in the pattern A or horizontal white streaks in the pattern B.
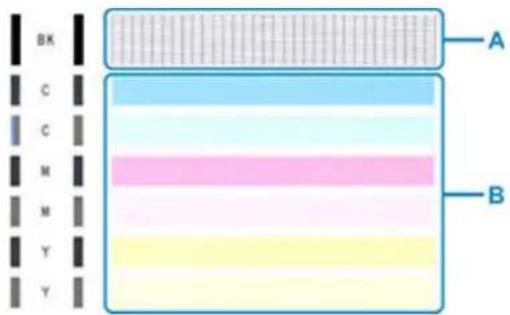
text_image
Bk C C M M Y Y A BIf there are missing lines in the pattern A:

C
D
C: Good
D: Bad (lines are missing)
If there are horizontal white streaks in the pattern B:

E

F
E: Good
F: Bad (horizontal white streaks are present)
If any color in the pattern A or the pattern B is not printed:

(Example: Magenta pattern is not printed)
If one of the above is applied, cleaning the print head is required.
Cleaning the Print Head
Clean the print head if lines are missing or if horizontal white streaks are present in the printed nozzle check pattern. Cleaning unclogs the nozzles and restores the print head condition. Cleaning the print head consumes ink, so clean the print head only when necessary.
-
Check that printer is turned on.
-
Press the Setup button, use the ◀▶ button to select Maintenance, and press the OK button.
→ LCD and Operation Panel
- Use the ◀ button to select Cleaning and then press the OK button.
The printer starts cleaning the print head.
Do not perform any other operations until the printer completes the cleaning of the print head. This takes about 2 minutes.
- Check the print head condition.
To check the print head condition, print the nozzle check pattern.
Note
- If the problem is not resolved after cleaning the print head twice, clean the print head deeply.
Deep Print Head Cleaning
If print quality does not improve by the standard cleaning of the print head, clean the print head deeply. Cleaning the print head deeply consumes more ink than the standard cleaning of the print head, so clean the print head deeply only when necessary.
-
Check that printer is turned on.
-
Press the Setup button, use the ◀▶ button to select Maintenance, and press the OK button.
→ LCD and Operation Panel
- Use ▶ button to select Deep Cleaning and press OK button.
The printer starts cleaning the print head deeply.
Do not perform any other operations until the printer completes the deep cleaning of the print head. This takes about 1 minute.
- Check the print head condition.
To check the print head condition, print the nozzle check pattern.
If the problem is not resolved, turn off the power and clean the print head deeply again after 24 hours. Do not unplug the power cord when turning off the power.
Aligning the Print Head
If printed ruled lines are misaligned or print results are otherwise unsatisfactory, adjust the print head position.
Note
- If the remaining ink level is low, the print head alignment sheet will not be printed correctly.
If the remaining ink level is low, refill ink tanks. - If ink runs out as the print head alignment sheet is printed, an error message appears on the LCD.
→ An Error Occurs
You need to prepare: two sheets of A4 or Letter-sized plain paper
- Check that printer is turned on.
- Load two sheets of A4 or Letter-sized plain paper in cassette.
Loading Paper in the Cassette
- Press the Setup button, use the ◀▶ button to select Maintenance, and press the OK button.
→ LCD and Operation Panel
- Use the ◀▶ button to select Head alignment and then press the OK button.
The print head alignment sheet is printed, and the print head is aligned automatically.
This takes about 4 to 5 minutes.
Note
- If automatic print head alignment fails, an error message appears on the LCD.
→ An Error Occurs
Note
- For Windows, when the print results are still not satisfactory after adjusting the print head position as described above, adjust the print head position manually from the computer.
→ Adjusting the Print Head Position Manually
- To print and check the current head position adjustment values, select Print align value on the Maintenance screen.
Cleaning
▶ Cleaning Exterior Surfaces
▶ Cleaning Paper Feed Rollers
▶ Cleaning Inside the Printer (Bottom Plate Cleaning)
▶ Cleaning Cassette Pads
If the paper feed roller is dirty or paper powder is attached to it, paper may not be fed properly.
In this case, clean the paper feed roller. Cleaning will wear out the paper feed roller, so perform this only when necessary.
You need to prepare: three sheets of A4 or Letter-sized plain paper
- Check that printer is turned on.
- Remove any paper from paper source to clean rollers.
Note
- If a message appears on the screen, check it and then press the OK button.
- Press the Setup button, use the ◀▶ button to select Maintenance, and press the OK button.
→ LCD and Operation Panel
-
Clean the paper feed rollers without paper.
-
Use ▶ button to select Roller Cleaning and press OK button.
- Use ◀▶ button to select paper source (Cassette or Rear tray) to clean rollers and press OK button.
The paper feed roller will rotate as it is cleaned without paper.
-
Clean the paper feed rollers with paper.
-
Make sure paper feed rollers have stopped rotating, and then load three sheets of A4 or Letter-sized plain paper in paper source selected in step 4.
Loading Paper in the Rear Tray
Loading Paper in the Cassette
- Press the OK button.
The printer starts cleaning. The cleaning will be complete when the paper is ejected.
If the problem is still not resolved with the operation described above, follow the operation below.
- Turn off the power and then unplug the power cord.
- While rotating the paper feed rollers (A) located inside the rear tray more than two laps, wipe them with a cloth tightly squeezed after moistening.
Do not touch the paper feed rollers with your fingers. Paper feeding performance may be degraded.
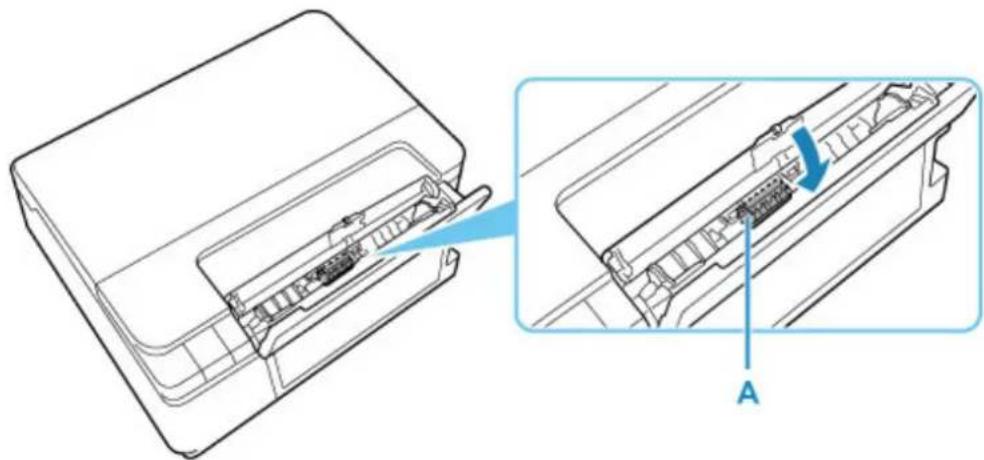
natural_image
Technical line drawing of a printer internal structure with a blue arrow indicating a component (no text or symbols present)- Turn on the power, then clean the paper feed rollers again.
If the problem is not resolved after cleaning the paper feed roller, contact your nearest Canon service center to request a repair.
Cleaning Inside the Printer (Bottom Plate Cleaning)
Remove stains from the inside of the printer. If the inside of the printer becomes dirty, printed paper may get dirty, so we recommend performing cleaning regularly.
You need to prepare: a sheet of A4 or Letter-sized plain paper*
* Be sure to use a new piece of paper.
- Make sure that the power is turned on, then remove any paper from the cassette.
-
Prepare paper.
-
Fold a single sheet of A4 or Letter-sized plain paper in half widthwise, then unfold the paper.
- Fold one side of the opened paper in another half, aligning the edge with the center crease, and then unfold the paper.
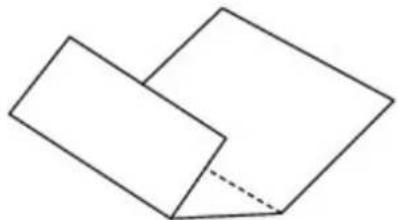
natural_image
Simple line drawing of two overlapping rectangles with a dashed diagonal line (no text or symbols)- Load only this sheet of paper in the cassette with the ridges of the creases facing up and the edge of the half with no crease facing to the far side.
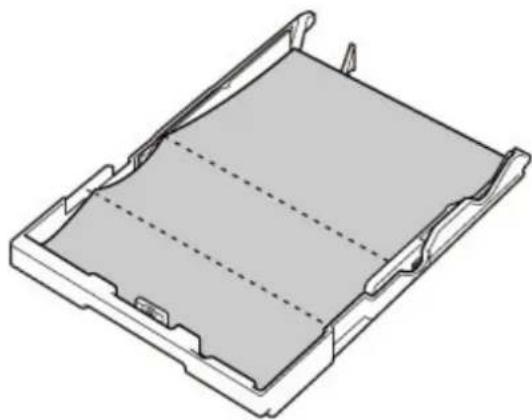
natural_image
Isometric technical drawing of a mechanical component with dashed centerlines (no text or symbols)- Insert cassette into printer.
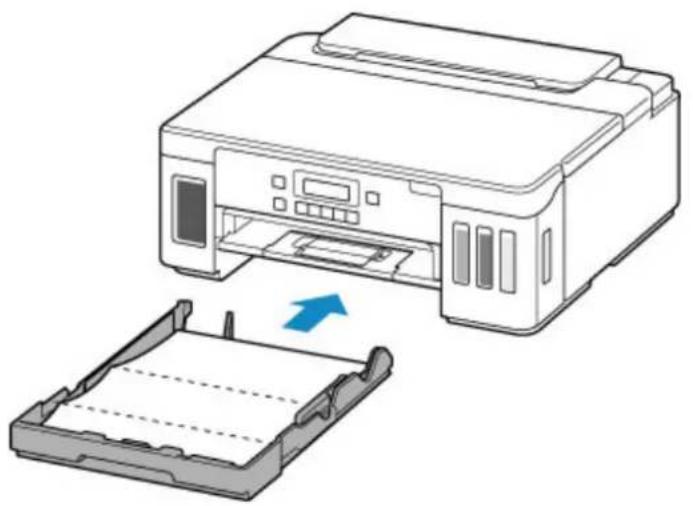
natural_image
Illustration of a printer and its corresponding blank sheet device, showing the printer's internal structure and the plastic tray (no text or symbols)After inserting the cassette into the printer, the paper information registration screen is displayed on the LCD. Select A4 or Letter for Size:
Size: *A4 Type: *Plain paper
- Pull out paper output tray (A) and open output tray extension (B).
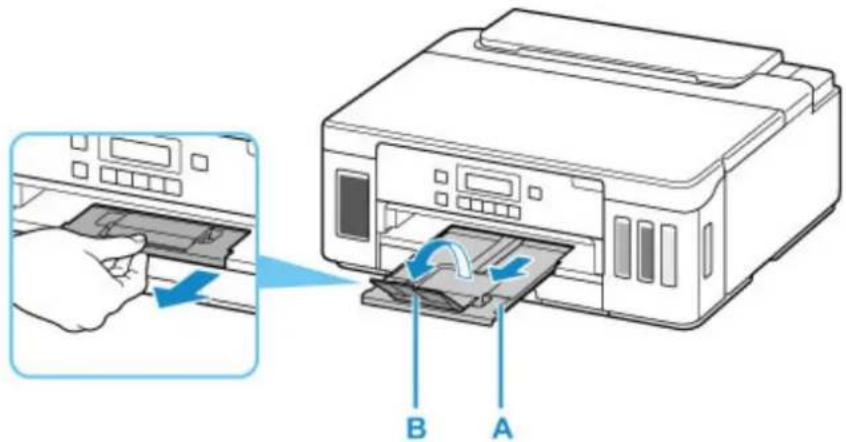
text_image
Diagram showing printer printing process with labeled parts A and B, including a hand inserting a paper into the printer.- Press the Setup button, use the ◀▶ button to select Maintenance, and press the OK button.
→ LCD and Operation Panel
- Use ◀▶ button to select Btm Plate Cleaning and press OK button.
Maintenance
Btm Plate Cleaning
The paper cleans the inside of the printer as it feeds through the printer.
Check the folded parts of the ejected paper. If they are smudged with ink, perform Bottom Plate Cleaning again.

Note
- When performing Bottom Plate Cleaning again, be sure to use a new piece of paper.
If the problem is not resolved after performing cleaning again, the protrusions inside the printer may be stained. Wipe off any ink from the protrusions using a cotton swab or the like.

Important
- Before cleaning the printer, turn it off and unplug it.
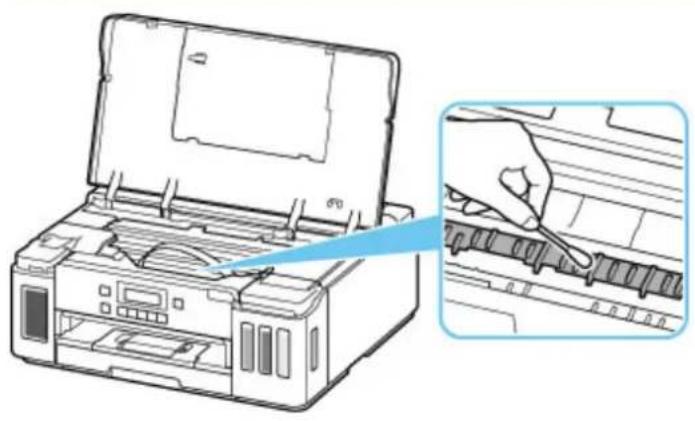
natural_image
Line drawing of a printer with open lid and internal circuit board, showing a hand inserting a component into a rack (no text or symbols)Overview
Safety
- Safety Precautions
• Regulatory Information
WEEE (EU & EEA)
Handling Precautions
- Canceling Print Jobs
• Legal Restrictions on Printing
• Printer Handling Precautions - Transporting Your Printer
- When Repairing, Lending, or Disposing of the Printer
- Keeping Print Quality High
▶ Main Components and Their Use
- Main Components
Power Supply
• LCD and Operation Panel - Entering Numbers, Letters, and Symbols
Changing Settings
- Changing Printer Settings from Your Computer (Windows)
- Changing Printer Settings from Your Computer (macOS)
- Changing Settings from Operation Panel
Specifications
Safety
Safety Precautions
Regulatory Information
WEEE (EU&EEA)
Safety Precautions
- This manual contains important notices and safety precautions about your printer.
Do not use the printer in ways other than described in the accompanying manuals, as this may result in fire, electric shock or other unexpected accidents.
Safety standard marks and declarations are only valid for the supported voltages and frequencies in the applicable countries or regions.
! Warning
- Users with cardiac pacemakers:
This product emits a low-level magnetic flux. If you feel abnormalities, please move away from the product and consult your doctor.
- Do not use the printer in the following cases:
Stop use immediately, unplug the printer and call your local service representative to request repair.
- Metal objects or liquids are spilt inside the printer.
- The printer emits smoke, strange odors, or makes unusual noises.
- The power cord or plug overheat or are broken, bent or damaged in any way.
- Failure to adhere to the following may result in fire, electric shock, or injury:
- Do not place product close to the flammable solvents such as alcohol or thinner.
- Do not open or modify the printer.
- Use only the power cord/cables that came with your printer. Do not use these cables with other devices.
- Do not plug in to voltages or frequencies other than those specified.
- Plug the power cord into the socket completely.
- Do not plug in or unplug the power cord with wet hands.
- Do not damage the power cord by twisting, bundling, tying, pulling or excessively bending it.
- Do not place heavy objects on the power cord.
- Do not connect multiple power cords to a single electrical outlet. Do not use multiple extension cords.
- Do not leave the printer plugged in during lightning storms.
- Always unplug the power cord and cables when cleaning. Do not use flammable sprays or liquids such as alcohol or thinners for cleaning.
- Unplug the power cord once a month to check that it is not overheating, rusted, bent, scratched, split, or otherwise damaged.
Caution
- Do not put your hands inside the printer while printing.
- Do not touch the metal parts of the print head immediately after printing.
-
Ink bottles
-
Keep out of reach of children.
- Do not drink ink.
If ink is accidentally licked or swallowed, rinse out your mouth or drink one or two glasses of
water and obtain medical advice immediately.
If ink gets into your eyes, flush them with water right away, and obtain medical advice immediately.
- If ink gets on your skin, wash the area with soap and water immediately. If irritation to your skin persists, obtain medical advice immediately.
- When you store ink bottles, close bottle caps completely and place bottles in standing position. If the ink bottles are laid down, ink may leak.
- When refilling ink tanks, take sufficient care to prevent ink from spattering onto surroundings.
- Ink may stain clothes or other belongings permanently. Washing may not remove ink stains.
- Do not leave ink bottles in areas exposed to high temperature, such as near fire or a heater or in a car. Bottles may warp and cause ink leakage or ink may become poor quality.
- Do not subject ink bottles to impacts. Ink bottles may be damaged or bottle caps may come off by such impact, and ink may leak.
- Do not transfer ink to other containers. This may result in accidental ingestion, inappropriate use, or poor ink quality.
- Moving the printer
- Do not hold the printer by the cassette. Hold the printer by its sides and carry it with both hands.
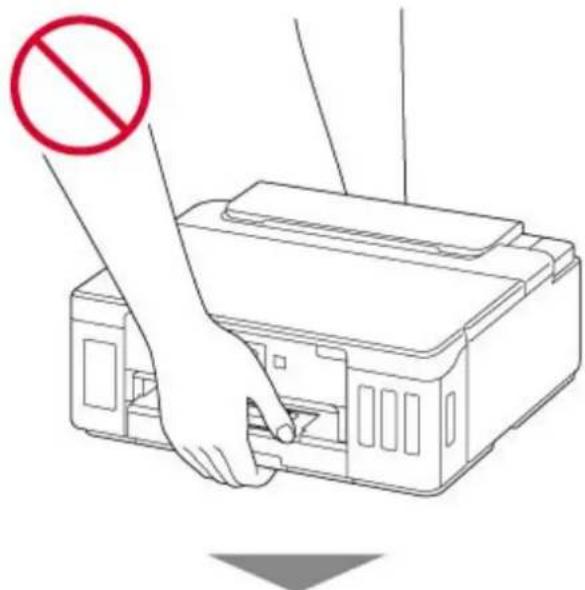
natural_image
Line drawing of a printer with a hand inserting a paper into the base, no text or symbols present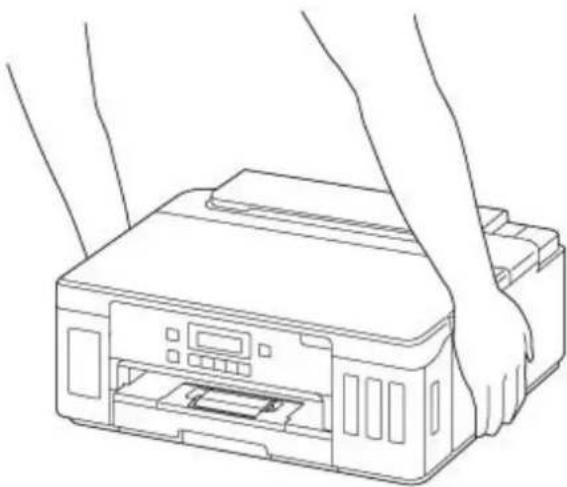
natural_image
Line drawing of hands operating a printer with a paper airplane (no text or symbols)General Notices
Choosing a Location
Refer to "Specifications" in the Online manual for details on operating environment.
- Do not install the printer in a location that is unstable or subject to excessive vibration.
- Do not install the printer in locations that get very hot (direct sunlight, or close to a heating source), very humid or dusty locations, or outdoors.
- Do not place the printer on a thick rug or carpet.
- Do not place the printer flush against a wall.
Power Supply
- Keep the area around the power outlet clear at all times so you can easily unplug the power cord if necessary.
- Never remove the plug by pulling on the cord.
General Notices
- Do not tilt the printer, stand it on end, or turn it upside down. This may cause ink to leak.
- Do not place anything on top of the printer. Be especially careful to avoid metal objects such as paper clips and staples, and containers holding flammable liquids such as alcohol or thinner.
- Modifying or dismantling the print head or ink bottles, such as by putting holes in them, could cause the ink to leak out and cause a malfunction. We recommend that you do not modify or dismantle them.
- Do not put the print head or ink bottles into a fire.
Users in the U.S.A.
FCC Notice (U.S.A. Only)
For 120V, 60Hz model
Model Number: K10495 (Contains FCC Approved WLAN Module K30365)
This device complies with Part 15 of the FCC Rules. Operation is subject to the following two conditions:
(1) This device may not cause harmful interference, and (2) this device must accept any interference received, including interference that may cause undesired operation.
Note: This equipment has been tested and found to comply with the limits for a Class B digital device, pursuant to Part 15 of the FCC Rules. These limits are designed to provide reasonable protection against harmful interference in a residential installation. This equipment generates, uses and can radiate radio frequency energy and, if not installed and used in accordance with the instructions, may cause harmful interference to radio communications.
However, there is no guarantee that interference will not occur in a particular installation. If this equipment does cause harmful interference to radio or television reception, which can be determined by turning the equipment off and on, the user is encouraged to try to correct the interference by one or more of the following measures:
- Reorient or relocate the receiving antenna.
- Increase the separation between the equipment and receiver.
- Connect the equipment into an outlet on a circuit different from that to which the receiver is connected.
- Consult the dealer or an experienced radio/TV technician for help.
Use of a shielded cable is required to comply with Class B limits in Subpart B of Part 15 of the FCC Rules.
Do not make any changes or modifications to the equipment unless otherwise specified in the manual. If such changes or modifications should be made, you could be required to stop operation of the equipment.
FCC ID:AZDK30365
Changes or modifications not expressly approved by the party responsible for compliance could void the user's authority to operate equipment.
This transmitter must not be co-located or operating in conjunction with any other antenna or transmitter.
The equipment complies with FCC radiation exposure limits for at uncontrolled equipment. This equipment should be installed and operated with minimum distance at least 20cm between the radiator and persons body (excluding extremities: hands, wrists, feet and ankles) and must not be colocated or operated with any other antenna or transmitter.
Canon U.S.A., Inc.
One Canon Park
Melville, New York 11747
1-800-652-2666
Interference
Do not use the printer around medical equipment or other electronic devices. Signals from the printer may interfere with the correct operation of these devices.
Only for European Union and EEA (Norway, Iceland and Liechtenstein)

This symbol indicates that this product is not to be disposed of with your household waste, according to the WEEE Directive (2012/19/EU) and national legislation. This product should be handed over to a designated collection point, e.g., on an authorized one-for-one basis when you buy a new similar product or to an authorized collection site for recycling waste electrical and electronic equipment (EEE). Improper handling of this type of waste could have a possible negative impact on the environment and human health due to potentially hazardous substances that are generally associated with EEE. At the same time, your cooperation in the correct disposal of this product will contribute to the effective usage of natural resources. For more information about where you can drop off your waste equipment for recycling, please contact your local city office, waste authority, approved WEEE scheme or your household waste disposal service. For more information regarding return and recycling of WEEE products, please visit www.canoneurope.com/weee.
▶ Canceling Print Jobs
▶ Legal Restrictions on Printing
Printer Handling Precautions
▶ Transporting Your Printer
When Repairing, Lending, or Disposing of the Printer
Keeping Print Quality High
Legal Restrictions on Printing
Printing or modifying printed copies of the following may be punishable under law.
This list is non-exhaustive. When in doubt, check with a local legal representative.
- Paper money
- Money orders
- Certificates of deposit
- Postage stamps (canceled or uncanceled)
- Identification badges or insignia
- Selective service or draft papers
- Checks or drafts issued by governmental agencies
- Motor vehicle licenses and certificates of title
- Traveler's checks
- Food stamps
- Passports
- Immigration papers
- Internal revenue stamps (canceled or uncanceled)
• Bonds or other certificates of indebtedness - Stock certificates
• Copyrighted works or works of art, without the owner's consent
Printer Handling Precautions
Do not place any object on the top cover!
Do not place any object on the top cover. It will fall into the rear tray when the top cover is opened and cause the printer to malfunction. Also, place the printer where objects will not fall on it.
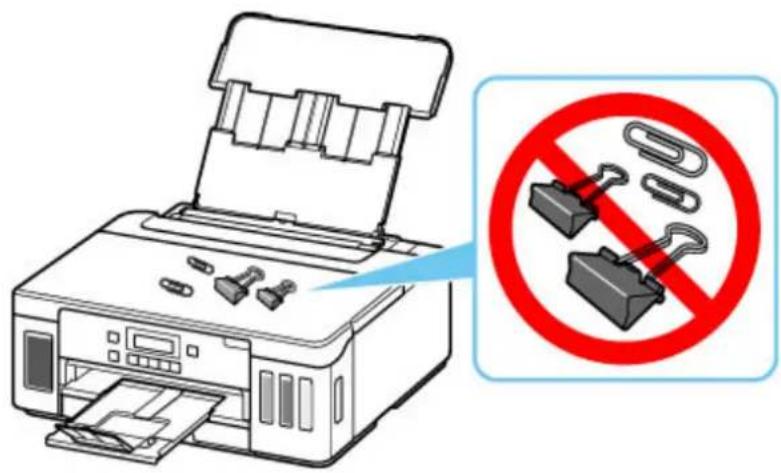
text_image
Diagram showing a printer with plastic clips and a prohibition sign about no plastic clipsTransporting Your Printer
When relocating the printer for changing your living place or repairing it, make sure of the following.

Important
- You cannot take ink out of ink tanks.
- Check if the tank cap is completely inserted. If the ink tank cover is not completely closed, insert the tank cap properly.
- Prepare for transporting the printer with the print head attached. This allows the printer to automatically cap the print head, thus preventing it from drying.
- Do not remove the print head. Ink may leak.
- If ink stains the inside of the printer, wipe them using a soft cloth dampened with water.
- When transporting the printer, pack the printer in a plastic bag so that ink does not leak.
- Pack the printer in a sturdy box so that it is placed with its bottom facing down, using sufficient protective material to ensure safe transport.
- Do not tilt the printer. Ink may leak.
- When a shipping agent is handling transport of the printer, have its box marked "THIS SIDE UP" to keep the printer with its bottom facing down. Mark also with "FRAGILE" or "HANDLE WITH CARE".
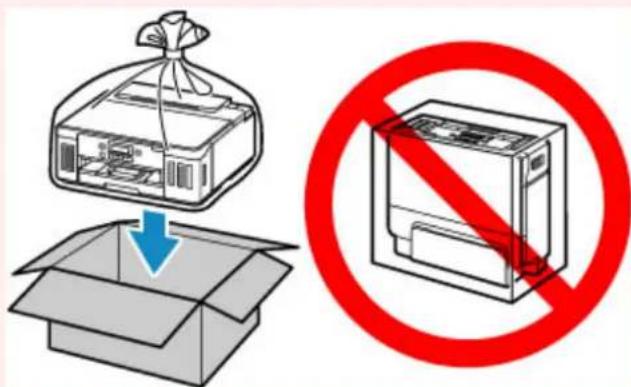
text_image
Diagram illustrating a storage or disposal process with a bag, open box, and prohibition symbol- Please handle with care and ensure the box remains flat and NOT turned upside down or on its side, as the printer may be damaged and ink in the printer may leak.
- Press the Setup button, use the ◀▶ button to select Maintenance, and press the OK button.
→ LCD and Operation Panel
-
Use the ◀▶ button to select Transport mode and press the OK button.
-
Use the ◀▶ button to select Yes and press the OK button.
If you do not want to enter the transporting mode, select No.
Note
- When entering the transporting mode and proceeding with the procedure, the power is turned off automatically.
4.Open the top cover.
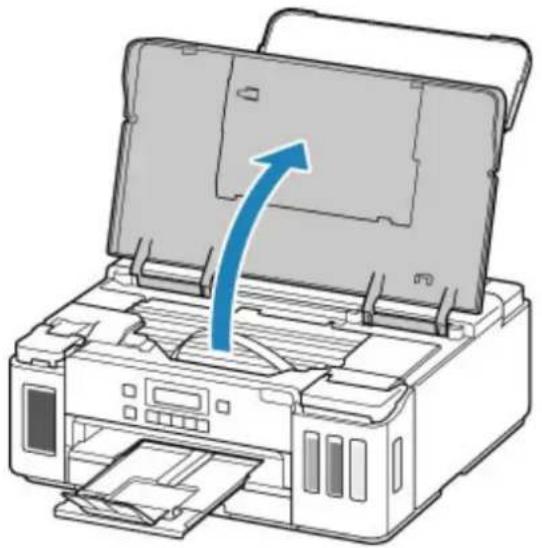
natural_image
Illustration of a printer with an open lid and paper feed, showing a blue arrow indicating the process (no text or symbols present)Important
- Do not touch tubes or other parts inside the printer. This can cause trouble with the printer.
- Turn the ink valve lever to the left.
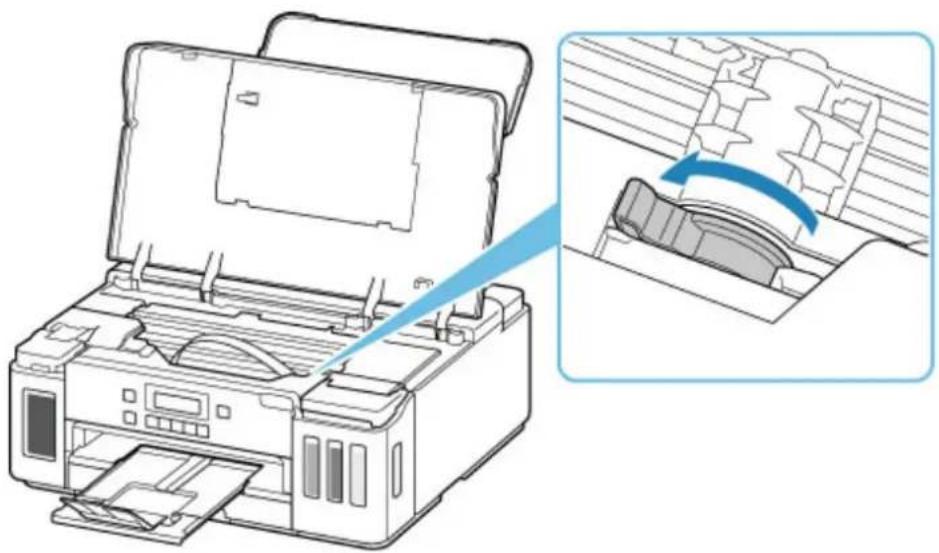
natural_image
Diagram of a printer with open lid and internal structure, showing a close-up of the printer's internal structure (no text or symbols present)Important
- The inside of the printer may become stained with ink. Be careful not to get your clothes and your hands dirty.
- Close the top cover gently.
The printer is turned off.
- Check that ON lamp is off and unplug power cord.
Important
- Do not unplug the printer while the ON lamp is lit or flashing, as it may cause malfunction or damage to the printer, making the printer unable to print.
-
Open the top cover again.
-
Remove the carriage stopper (A) and insert it all the way into the hole in the printer side. Pull the carriage stopper forward while pulling it up and insert it in the same orientation.
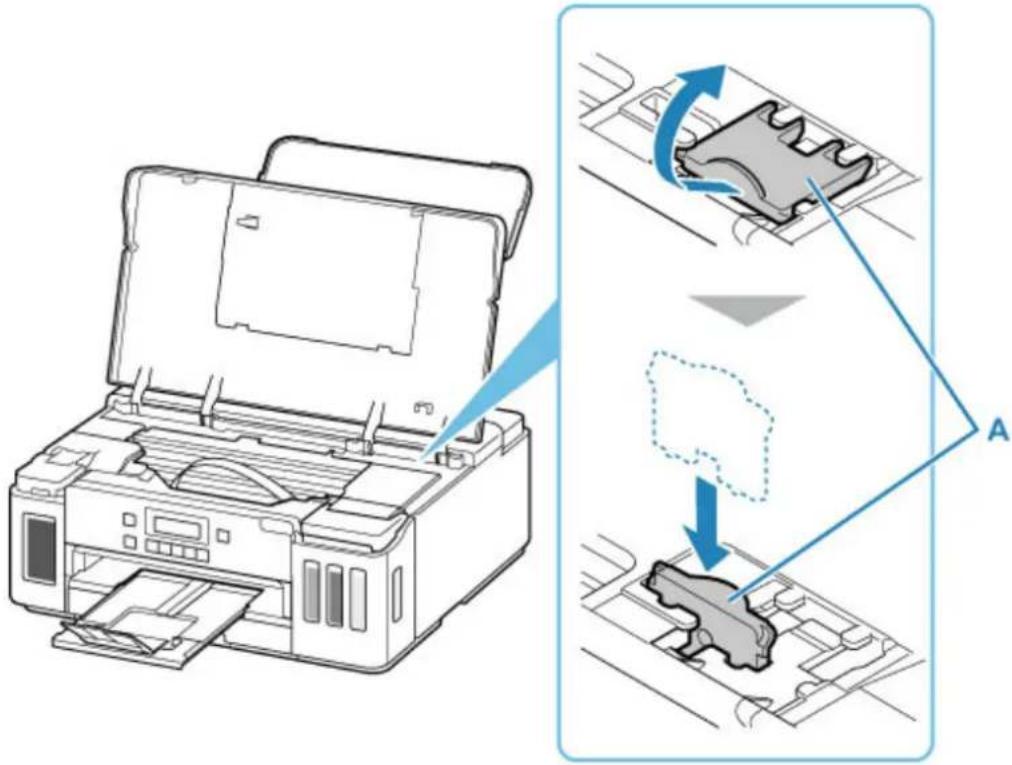
text_image
Diagram illustrating the process of printer printing and packaging, showing steps from opening to cutting into a final packaging with directional arrows.Note
- Insert the carriage stopper by aligning its protrusions with the indentations on the printer.
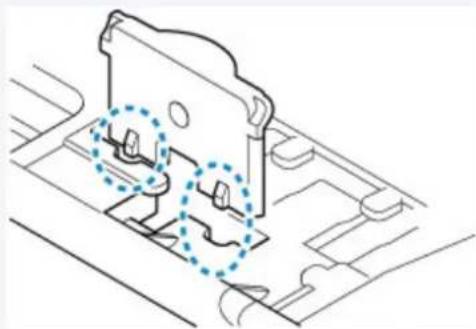
natural_image
Technical line drawing of a mechanical component with highlighted areas (no text or symbols)-
Close the top cover gently.
-
Retract output tray extension and paper output tray.
-
Retract paper support, and then close rear tray cover.
-
Unplug the printer cable from the computer and from the printer, then unplug the power cord from the printer.
-
Use adhesive tape to secure all the covers on the printer to keep them from opening during transportation. Then pack the printer in the plastic bag.
Close and seal the opening of the bag with an object such as tape so as not to leak ink.
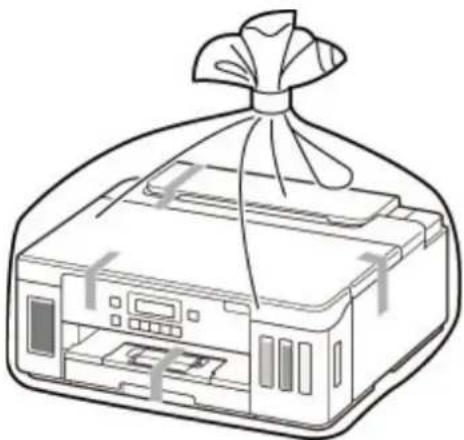
natural_image
Line drawing of a printer with a cloth cover and paperclip, no text or symbols present- Attach the protective material to the printer when packing the printer in the box.
Important
- We recommend to hold and carry out this printer as shown in the figure below. If you hold the cassette, it may fall out of the printer.
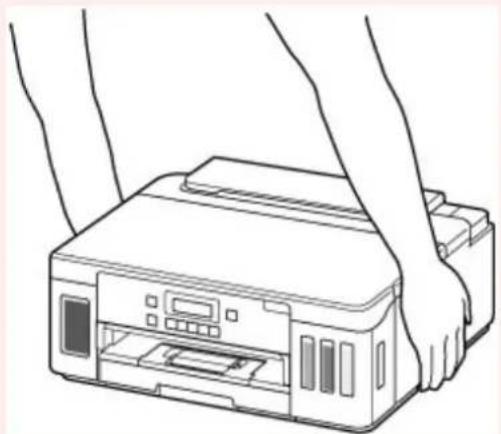
natural_image
Line drawing of hands operating a printer with a paper airplane (no text or symbols)Important
- After transporting your printer, remove the carriage stopper, place it in the original position, turn the ink valve lever to the right, and then turn on the printer.
When Repairing, Lending, or Disposing of the Printer
If you have entered personal data, passwords and/or other security settings on the printer, such information may be stored in the printer.
When sending the printer for repair, lending or transferring the printer to another person, or disposing of the printer, please be sure to follow the steps below in order to delete such information and prevent third parties from accessing it.
- Press the Setup button, select Device settings > Reset setting > All data, and then select Yes.
Keeping Print Quality High
The key to printing with the optimal printing quality is to prevent the print head from drying or clogging. Always observe the following rules for optimal printing quality.
Note
- Depending on the type of paper, ink may blur if you trace the printed area with a highlight pen or paint-stick, or bleed if water or sweat comes in contact with the printed area.
Never unplug the power cord until the power is turned off!
If you press the ON button to turn off the power, the printer caps the print head (nozzles) automatically to prevent from drying. If you unplug the power cord from the wall outlet before the ON lamp is turned off, the print head will not be capped properly and this will cause drying or clogging.
When unplugging the power cord, check that the ON lamp is not lit.
Print periodically!
Just as the tip of a felt pen becomes dry and unusable if it has not been used for a long time, even if it is capped, the print head too, may become dried or clogged if the printer has not been used for a long time. We recommend you to use the printer at least once a month.
Main Components and Their Use
Main Components
Power Supply
LCD and Operation Panel
- Entering Numbers, Letters, and Symbols
Main Components
Front View
Rear View
Inside View
▶ Operation Panel
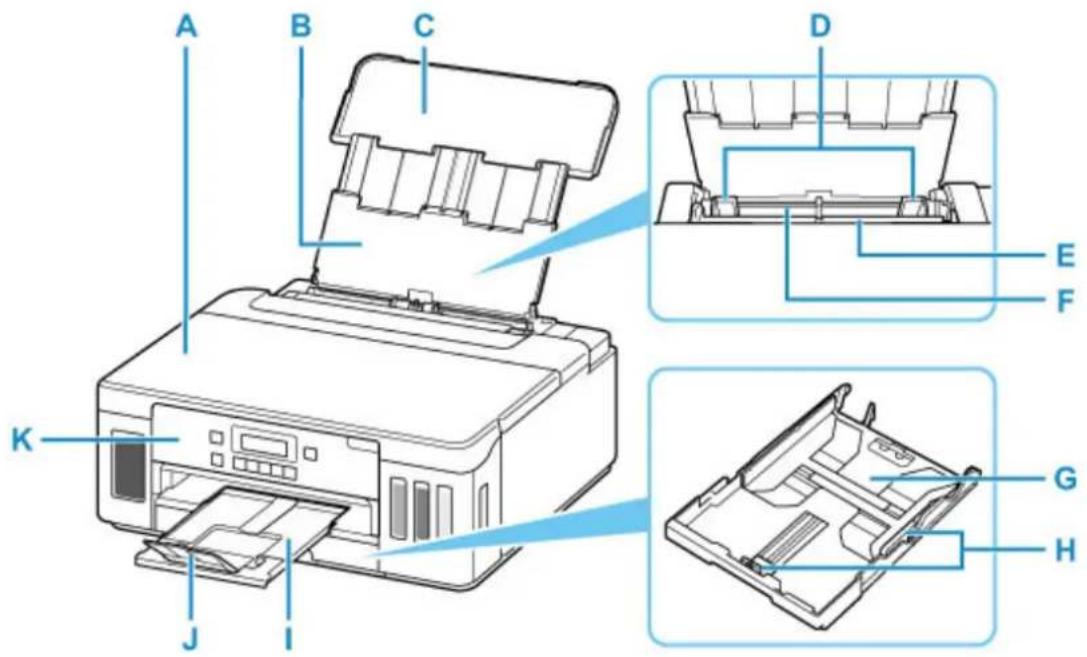
text_image
A B C D E F K J I G HA: Top Cover
Open to refill ink tanks and to remove jammed paper.
B: Paper Support
Extend to load paper in the rear tray.
C: Rear Tray Cover
Open to load paper in the rear tray.
D: Paper Guides
Align with both sides of the paper stack.
E: Feed Slot Cover
Prevents anything from falling into the feed slot.
Open it to slide the paper guides, and close it before printing.
F: Rear Tray
Load paper here. Two or more sheets of the same size and type of paper can be loaded at the same time, and fed automatically one sheet at a time.
→ Loading Paper in the Rear Tray
Loading Envelopes in Rear Tray
G: Cassette
Load A4, B5, A5, or Letter-sized plain paper into the cassette, and insert it into the printer.
→ Loading Paper in the Cassette
H: Paper Guides
Align with right/left/front sides of the paper stack.
I: Paper Output Tray
Printed paper is ejected. Pull out it before printing.
J: Output Tray Extension
Open to support ejected paper.
K: Operation Panel
Use to change the settings of the printer or to operate it.
→ Operation Panel
Rear View
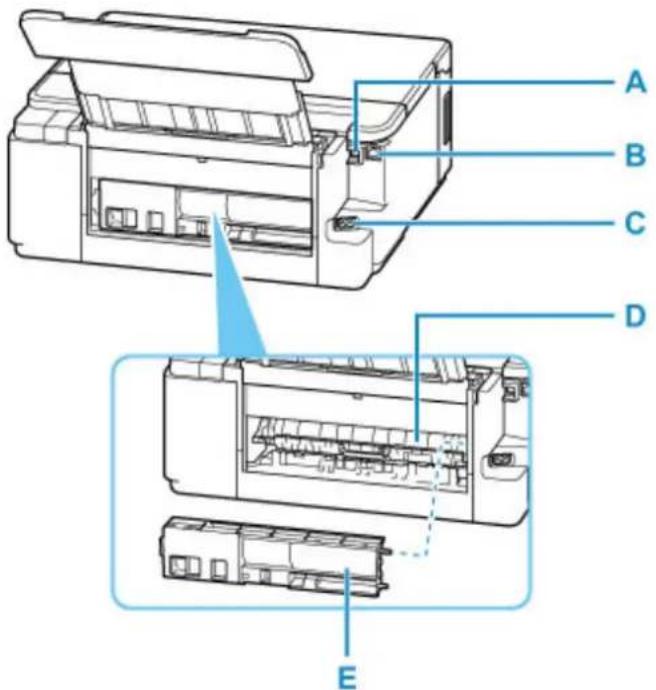
text_image
A B C D EA: USB Port
Plug in the USB cable to connect the printer with a computer.
B: Wired LAN Connector
Plug in the LAN cable to connect the printer to a LAN.
C: Power Cord Connector
Plug in the supplied power cord.
D: Transport Unit Cover
Open when removing jammed paper.
E: Rear Cover
Detach when removing jammed paper.
Important
- Do not touch the metal casing.
- Do not plug in or unplug the USB cable or LAN cable while the printer is printing with the computer. This can cause trouble.
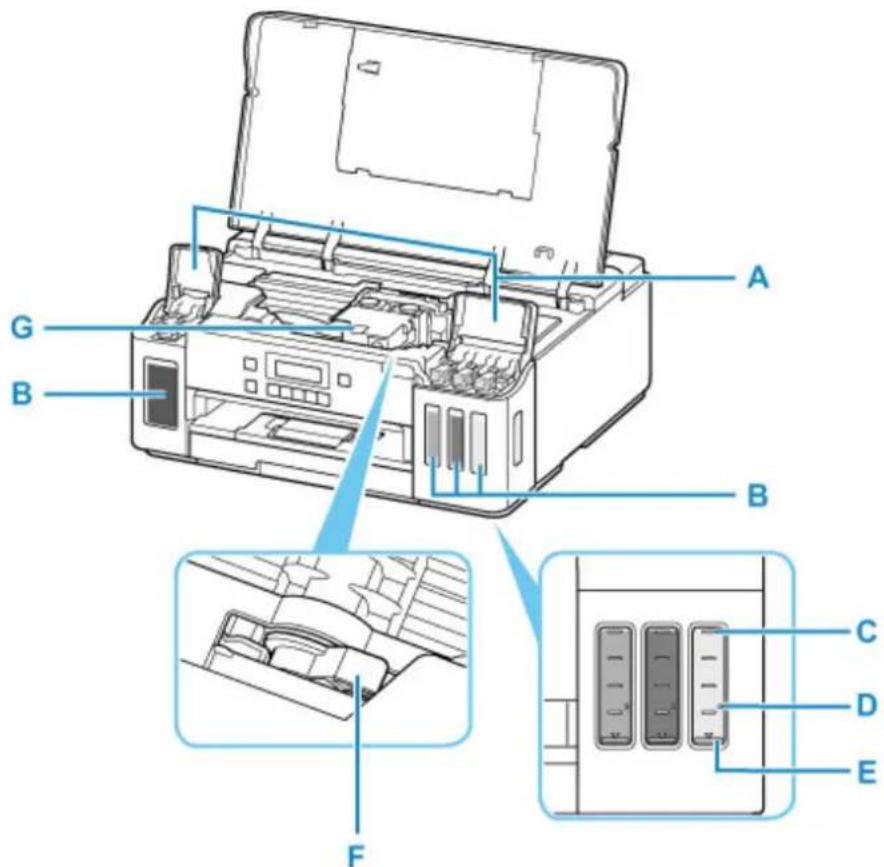
text_image
A G B B C D E FA: Ink Tank Covers
Open to refill ink tanks.
B: Ink Tanks
The black ink tank is on the left, and the color ink tanks (cyan, magenta, and yellow) are on the right. If any ink levels are low, refill the low tanks.
→ Refilling Ink Tanks
C: Upper limit line
Indicates the maximum capacity of the ink.
D: Single dot
Indicates the amount of ink required when performing ink flush.
E: Lower limit line
Indicates the lower limit of the sufficient amount of ink to print. Refill the ink tank before the amount of ink is below this line.
F: Ink Valve Lever
Operate when transporting a printer.
→ Transporting Your Printer
G: Print Head Holder
The print head is pre-installed.
Operation Panel
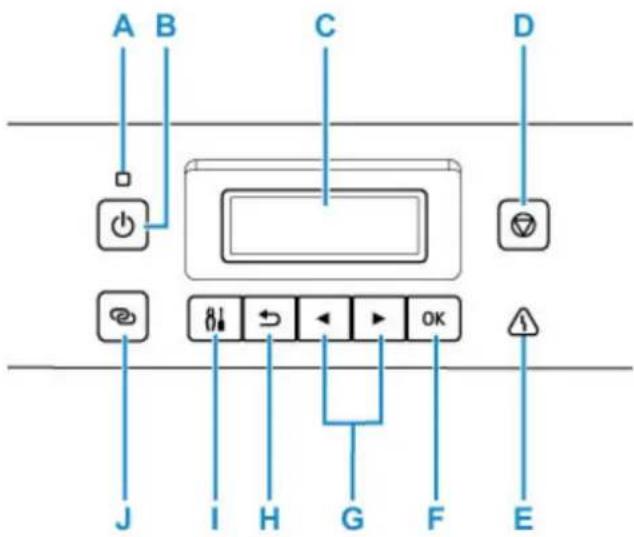
text_image
A B C D J I H G F EA: ON lamp
Lights after flashing when the power is turned on.
B: ON button
Turns the power on or off.
→ Turning the Printer On and Off
C: LCD (Liquid Crystal Display)
Displays messages, menu items, and the operational status.
D: Stop button
Cancels operation when printing is in progress or when selecting a menu item.
E: Alarm lamp
Lights or flashes when an error occurs.
F: OK button
Finalizes your selection of items. Also used to resolve errors.
G: and buttons
Used to select a setting item. These buttons are also used for entering characters.
→ Selecting a Menu or Setting Item
H: Back button
Returns the LCD to the previous screen.
I: Setup button
Displays the Setup menu screen. With this menu, you can perform printer maintenance and change printer settings. Also used for selecting the input mode.
J: Wireless connect button
To set wireless router information in the printer directly from a smartphone or other such device (without having to do any procedures at the router), hold down this button.
Power Supply
▶ Checking that Power Is On
▶ Turning the Printer On and Off
▶ Checking the Power Plug/Power Cord
▶ Unplugging the Printer
Checking that Power Is On
The ON lamp is lit when the printer is turned on.
Even if the LCD is off, if the ON lamp is lit, the printer is on.
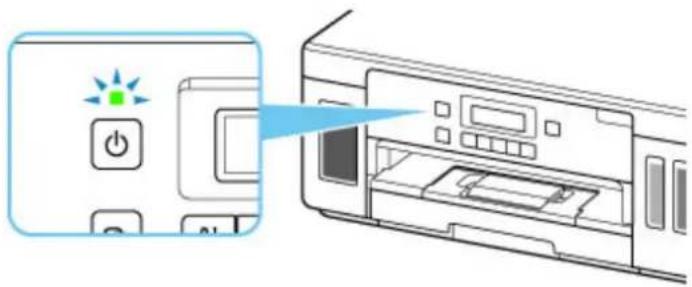
natural_image
Diagram showing a printer with a green indicator light and control buttons, connected to an open printer (no text or symbols present)Note
- It may take a while for the printer to start printing immediately after you turn on the printer.
- The LCD will turn off if the printer is not operated for about 10 minutes. To restore the display, press any button or perform the print operation.
Turning on the printer
1. Press the ON button to turn on the printer.
The ON lamp flashes and then remains lit.
→ Confirming that the Power Is On
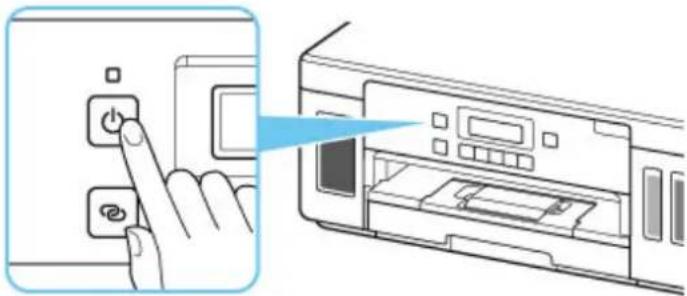
natural_image
Illustration of a hand pressing a button on a printer's front panel (no text or symbols visible)Note
- It may take a while for the printer to start printing immediately after you turn on the printer.
- If an error message is displayed on the LCD, see An Error Occurs.
- You can set the printer to automatically turn on when a print operation is performed from a computer connected by USB cable or via network. This feature is set to off by default.
From the printer
ECO settings
From the computer
- For Windows:
→ Managing the Printer Power - For macOS:
→ Managing the Printer Power
Turning off the printer
1. Press the ON button to turn off the printer.
When the ON lamp stops flashing, the printer is turned off.
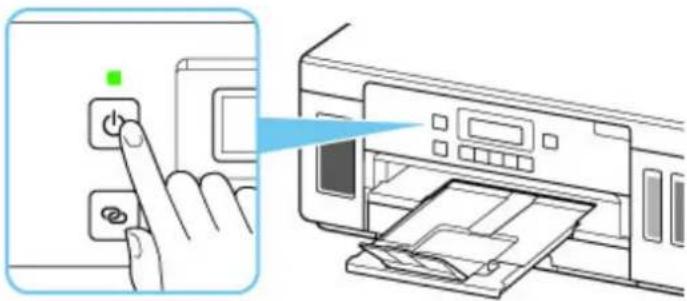
natural_image
Illustration of a hand inserting a printer into a printer with a green indicator light (no text or symbols)Important
- When you unplug the power cord after turning off the printer, be sure to confirm that the ON lamp is off.
Note
- You can set the printer to automatically turn off when no operations are performed or no print jobs are sent to the printer for a certain interval. This feature is set to on by default.
From the printer
→ ECO settings
From the computer
- For Windows:
→ Managing the Printer Power
- For macOS:
→ Managing the Printer Power
Checking the Power Plug/Power Cord
Unplug the power cord once a month to confirm that the power plug/power cord does not have anything unusual described below.
- The power plug/power cord is hot.
• The power plug/power cord is rusty. - The power plug/power cord is bent.
- The power plug/power cord is worn.
- The power plug/power cord is split.
Caution
- If you find anything unusual with the power plug/power cord described above, unplug the power cord and call for service. Using the printer with one of the unusual conditions above may cause a fire or an electric shock.
Unplugging the Printer
To unplug the power cord, follow the procedure below.

Important
- When you unplug the power cord, press the ON button, then confirm that the ON lamp is off. Unplugging the power cord while the ON lamp is lit or flashing may cause drying or clogging of the print head and print quality may be reduced.
- Press the ON button to turn the printer off.
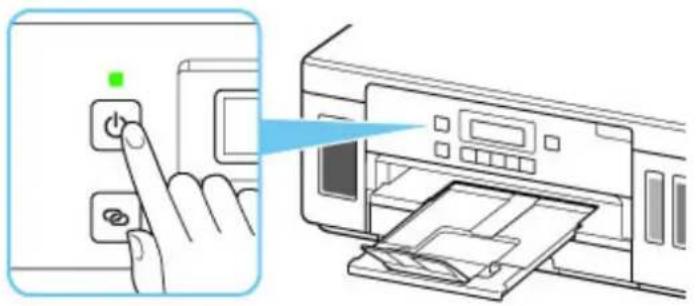
natural_image
Illustration of a hand inserting a printer into a printer with a green indicator light (no text or symbols)- Confirm that the ON lamp is off.
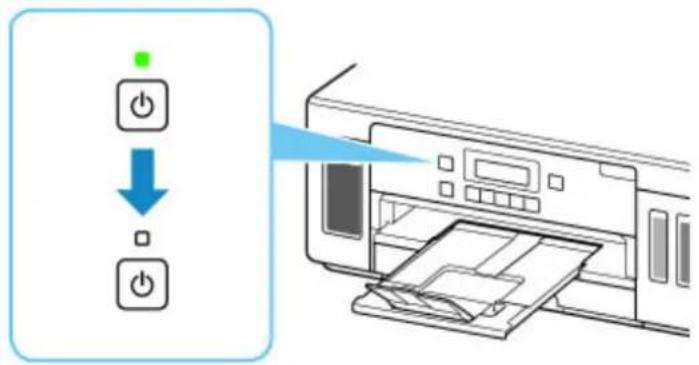
text_image
Diagram showing a printer with power button and arrow indicating direction, likely illustrating print or printing process.- Unplug the power cord.
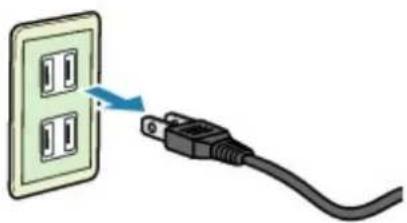
natural_image
Illustration of a plug inserted into a wall socket, showing the cable being inserted (no text or symbols present)The specification of the power cord differs depending on the country or region of use.
LCD and Operation Panel
Pressing the Setup button (A) on the operation panel displays the Setup menu screen, which enables you to perform printer settings and maintenance.
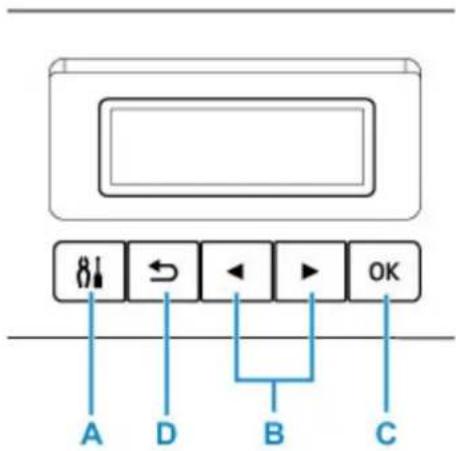
text_image
8↓ A D ← B C OKSelecting a Menu or Setting Item
In a menu screen or settings screen, use the ◀ button (B) to select an item or option, and then press the OK button (C) to proceed with the procedure.
To return to the previous screen, press the Back button (D).
Example: Changing the setting for Prevent Abrasion.
- Press Setup button (A).
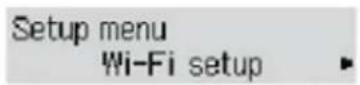
- Use ◀▶ button (B) to select Device settings and press OK button (C).

- Press OK button (C).
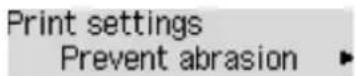
- Press OK button (C).

- Use ▶ button (B) to change setting and press OK button (C).
Network Status Indication
Wi-Fi setting and the network status indicate by the icon in the standby screen.
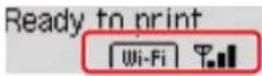
If the icon appears on the LCD, it indicates that Wi-Fi is enabled and the printer is connected to the wireless router.
Depending on the signal state, the icon will change.

Signal strength: 81 % or more
You can use the printer over Wi-Fi without any problems.

Signal strength: 51 % or more
The problem such as the printer cannot print may occur according to the network status. We recommend placing the printer near the wireless router.

Signal strength: 50 % or less
The problem such as the printer cannot print may occur. Place the printer near the wireless router.

Wi-Fi is enabled but the printer is not connected to the wireless router.
If the icon appears on the LCD, it indicates that the wired LAN is enabled.
Note
- When Wi-Fi, wired LAN, or both are disabled, the icon, icon, or both are not displayed.
Entering Numbers, Letters, and Symbols
The buttons on the operation panel allow you to enter (or change) characters, numbers, or symbols when setting up the network or making other settings.
Switching the Input Mode
The current input mode appears at the upper right corner of the LCD.
Pressing the Setup button on the operation panel toggles through the input modes in the order lowercase > uppercase > numeric > symbols, showing the first available character.
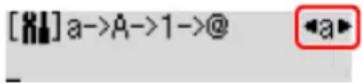
The following shows available characters in each mode.
| Mode Available characters | |
| Lowercase abcdefghijklmnopqrstuvwxyz SP | |
| Uppercase ABCDEFGHIJKLMNOPQRSTUVWXYZ SP | |
| Numeric 1234567890 SP | |
| Symbols | .@-_SP *!",;:^`=/|'? $%&+( )[]{}<>\~ |
SP: Indicates a space.
Note
- Only the input modes or characters available for input appear in their respective screens.
Entering Numbers, Letters, and Symbols
Use the ◀ button to select a character and press the OK button to input it.
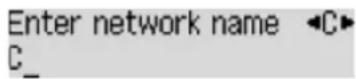
When input of all characters is complete, hold down the OK button. When a confirmation message appears, select Yes and press the OK button.
- To insert a space
Switch to the lowercase, uppercase, or numeric mode, and then press the button once.
Alternatively switch to the symbol mode and then press the ▶ button four times.
• To delete the last entered character
Press the Back button. You can only delete the last entered character.
Note
- To terminate character entry, press the Stop button. When a confirmation message appears, select Yes and press the OK button.
Changing Settings
Changing Printer Settings from Your Computer (Windows)
Changing Printer Settings from Your Computer (macOS)
Changing Settings from Operation Panel
Changing Printer Settings from Your Computer (Windows)
Changing the Print Options
Registering a Frequently Used Printing Profile
Setting the Ink to be Used
Managing the Printer Power
Changing the Printer Operation Mode
Changing the Print Options
You can change the detailed printer driver settings for print data that is sent from an application software.
Check this check box if part of the image data is cut off, the paper source during printing differs from the driver settings, or printing fails.
- Open the printer driver setup window
- Click Print Options... on the Page Setup tab
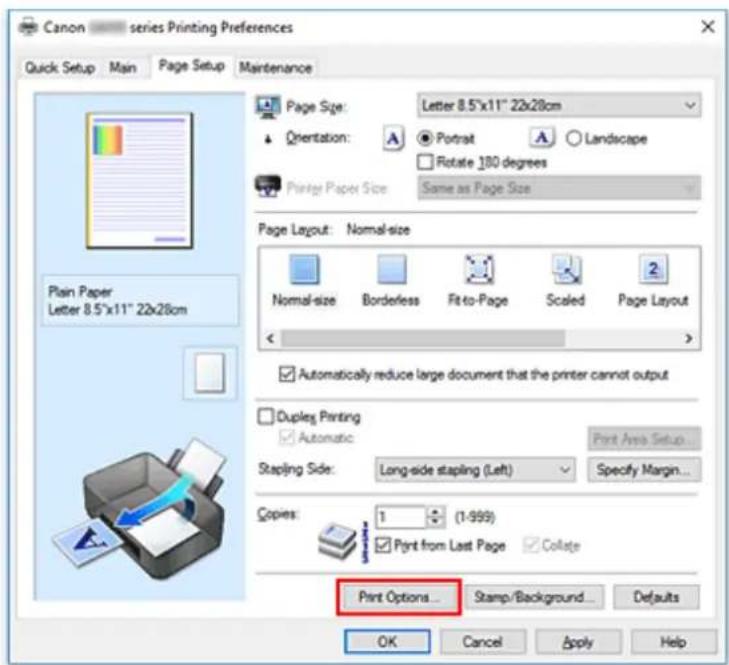
text_image
Canon — series Printing Preferences Quick Setup Main Page Setup Maintenance Plain Paper Letter 8.5"x11" 22x28cm Page Size: Letter 8.5"x11" 22x28cm Orientation: Rotate 180 degrees Same as Page Size Printer Paper Size Page Layout: Normal-size Normal-size Borderless Fit-to-Page Scaled Page Layout Automatically reduce large document that the printer cannot output Duplex Printing Automatic Print Area Setup... Stapling Side: Long-side stapling (Left) Specify Margin... Copies: 1 (1-999) Print from Last Page Collate Print Options... Stamp/Background... Defaults OK Cancel Apply HelpThe Print Options dialog box opens.
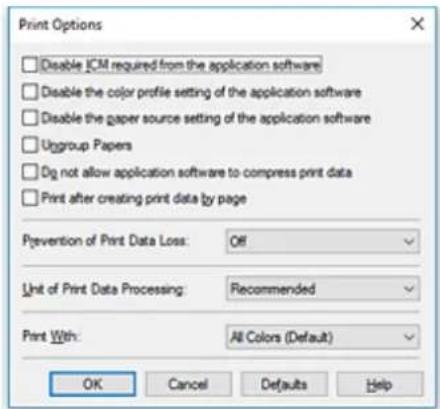
text_image
Print Options □ Disable ICM required from the application software □ Disable the color profile setting of the application software □ Disable the paper source setting of the application software □ Urgroup Papers □ Dig not allow application software to compress print data □ Print after creating print data by page Prevention of Print Data Loss: Off Unit of Print Data Processing: Recommended Print With: All Colors (Default) OK Cancel Defaults Help- Change the individual settings
If necessary, change the setting of each item, and then click OK.
The Page Setup tab is displayed again.
Registering a Frequently Used Printing Profile
You can register the frequently used printing profile to Commonly Used Settings on the Quick Setup tab. Unnecessary printing profiles can be deleted at any time.
Registering a Printing Profile
-
Open the printer driver setup window
-
Set the necessary items
From Commonly Used Settings on the Quick Setup tab, select the printing profile to be used and if necessary, change the settings after Additional Features.
You can also register necessary items on the Main and Page Setup tabs.
- Click Save...
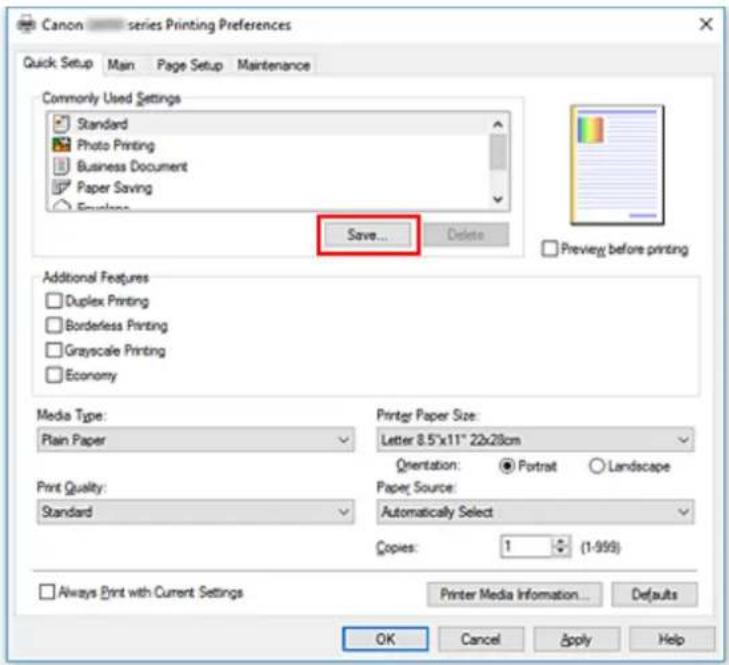
text_image
Canon — series Printing Preferences Quick Setup Main Page Setup Maintenance Commonly Used Settings Standard Photo Printing Business Document Paper Saving Envelope Save... Delete Preview before printing Additional Features Duplex Printing Borderless Printing Grayscale Printing Economy Media Type: Plain Paper Print Quality: Standard Printer Paper Size: Letter 8.5"x11" 22x28cm Orientation: ● Portrait ○ Landscape Paper Source: Automatically Select Copies: 1 (1-999) Always Print with Current Settings Printer Media Information... Defaults OK Cancel Apply HelpThe Save Commonly Used Settings dialog box opens.
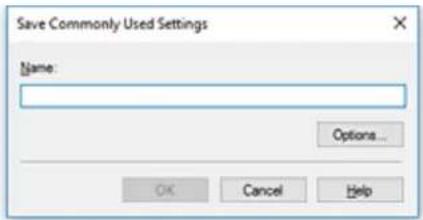
text_image
Save Commonly Used Settings Name: Options... OK Cancel Help- Save the settings
Enter a name in the Name field. If necessary, click Options..., set the items, and then click OK. In the Save Commonly Used Settings dialog box, click OK to save the print settings and return to the
Quick Setup tab.
The name and icon are displayed in Commonly Used Settings.
Important
- To save the page size, orientation, and number of copies that was set in each sheet, click Options..., and check each item.
Note
- When you re-install the printer driver or upgrade the printer driver version, the print settings that are already registered will be deleted from Commonly Used Settings.
Registered print settings cannot be saved and preserved. If a profile is deleted, register the print settings again.
Deleting Unnecessary Printing Profile
- Select the printing profile to be deleted
Select the printing profile you want to delete from the Commonly Used Settings list on the Quick Setup tab.
- Delete the printing profile
Click Delete. When the confirmation message appears, click OK.
The selected printing profile is deleted from the Commonly Used Settings list.
Note
- Printing profiles that are registered in the initial settings cannot be deleted.
Setting the Ink to be Used
This feature enables you to specify which ink to use when printing.
- Open the printer driver setup window
-
Click Print Options... on the Page Setup tab
The Print Options dialog box appears. -
Select the ink to be used from Print With
Select the ink to be used for printing and click OK.
- Click OK on the Page Setup tab
When you perform printing, the specified ink will be used.
Important
- When the following settings are specified, Black Only does not function because the printer uses an ink other than black to print documents.
- Other than Plain Paper, Envelope, Ink Jet Hagaki (A), Hagaki K (A), Hagaki (A), or Hagaki is selected for Media Type on the Main tab
- Borderless is selected from the Page Layout list on the Page Setup tab
- Do not detach the print head that is not in use. Printing cannot be performed while either print head is detached.
This function allows you to manage the printer power from the Canon IJ Printer Assistant Tool.

Power Off
The Power Off function turns off the printer. When you use this function, you will not be able to turn the printer on from the Canon IJ Printer Assistant Tool.
- Open Canon IJ Printer Assistant Tool
- Execute power off
Click Power Off. When the confirmation message appears, click OK.
The printer power switches off.

Auto Power
Auto Power allows you to set Auto Power On and Auto Power Off.
The Auto Power On function automatically turns on the printer when data is received.
The Auto Power Off function automatically turns off the printer when there are no operations from the printer driver or the printer for a specified period of time.
- Open the Canon IJ Printer Assistant Tool
- Check that the printer is on and then click Auto Power
The Auto Power Settings dialog box opens.
Note
- If the printer is off or if communication between the printer and the computer is disabled, an error message may appear because the computer cannot collect the printer status. If this happens, click OK to display the most recent settings specified on your computer.
- If necessary, complete the following settings:
Auto Power On
Specifying Enable from the list will turn the printer on upon receipt of print data.
Auto Power Off
Specify the time from the list. When this time lapses without any operations from the printer driver or the printer, the printer is turned off automatically.
- Apply the settings
Click OK. When the confirmation message appears, click OK.
The setting is enabled after this. When you want to disable this function, select Disable from the list according to the same procedure.
Note
- When the printer is turned off, the Canon IJ Status Monitor message varies depending on the Auto Power On setting.
When the setting is Enable, "Printer is standing by" is displayed. When the setting is Disable, "Printer is offline" is displayed.
If necessary, switch between various modes of printer operation.
Custom Settings
-
Open the Canon IJ Printer Assistant Tool
-
Check that the printer is on and then click Custom Settings
The Custom Settings dialog box opens.
Note
- If the printer is off or if communication between the printer and the computer is disabled, an error message may appear because the computer cannot collect the printer status. If this happens, click OK to display the most recent settings specified on your computer.
- If necessary, complete the following settings:
Prevents paper abrasion
The printer can increase the gap between the print head and the paper during high-density printing to prevents paper abrasion.
Check this check box to prevents paper abrasion.
Align heads manually
Usually, the Print Head Alignment function in the Canon IJ Printer Assistant Tool is set to automatic head alignment, but you can change it to manual head alignment.
If the printing results of automatic Print Head Alignment are not satisfactory, perform manual head alignment.
Check this check box to perform the manual head alignment. Uncheck this check box to perform the automatic head alignment.
Rotate 90 degrees left when orientation is [Landscape]
On the Page Setup tab, you can change the rotation direction of the Landscape in the Orientation.
To rotate the print data 90 degrees to the left during printing, select this item. To rotate the print data 90 degrees to the right during printing, clear this item.
Important
- Do not change this setting while the print job is displayed in the print wait list. Otherwise, characters may be omitted or the layout may become corrupt.
Do not detect mismatched paper settings when printing from a computer
When you print documents from your computer, the paper settings in the printer driver and the paper information registered on the printer do not match, this setting disables the message display and allows you to continue printing.
To disable detection of paper setting mismatches, select this check box.
Ink Drying Wait Time
You can set the length of the printer rest time until printing of the next page begins. Moving the slider to the right increases the pause time, and moving the slider to the left decreases the time. If the paper gets stained because the next page is ejected before the ink on the printed page dries, increase the ink drying wait time.
Reducing the ink drying wait time speeds up printing.
4. Apply the settings
Click OK and when the confirmation message appears, click OK.
The printer operates with the modified settings hereafter.
Changing Settings from Operation Panel
Changing Settings from Operation Panel
Setting Items on Operation Panel
▶ Print settings
LAN settings
PictBridge settings
Other dev. settings
Language selection
Firmware update
Reset setting
▶ Feed settings
Web service setup
ECO settings
Quiet setting
System information
Changing Settings from Operation Panel
This section describes the procedure to change the settings in the Device settings screen, taking the steps to specify Prevent abrasion as an example.
Note
• The *asterisk) on the LCD indicates the current setting.
- Check that printer is turned on.
- Press the Setup button.
The Setup menu screen is displayed.
- Select Device settings and then press the OK button.
The Device settings screen is displayed.
- Select a setting item to adjust and then press the OK button.
Device settings Print settings
The setting screen for the selected item is displayed.
- Select a setting item and then press the OK button.
Print settings Prevent abrasion
- Select a setting to specify and then press the OK button.
Prevent abrasion *OFF
For more on setting items on the operation panel:
Setting Items on Operation Panel
Setting Items on Operation Panel
Items for Printer
→ Other device settings
Language selection
→ Web service setup
ECO settings
→ Quiet setting
Items for Paper/Printing
→ Print settings
→ PictBridge settings
→ Feed settings
Items for Maintenance/Management
→ LAN settings
→ Firmware update
→ Reset setting
→ System information
Select this menu from Device settings in Setup menu.
- Prevent abrasion
Use this setting only if the print surface becomes smudged.
Important
- Be sure to set this back to OFF after printing since it may result in lower printing speed or lower print quality.
- Amount of extension
Select the amount of image that extends off the paper when performing Borderless Printing.
When performing Borderless Printing, slight cropping may occur at the edges since the printed image is enlarged to fill the whole page. You can change the width to be cropped from the borders of the original image as needed.
Cropped area will be larger if Amount: Large is selected.
Note
- For Borderless Printing, at Paper Size Settings at the computer, select a paper size for Borderless Printing, then print.
- If printouts contain margins even though you are printing in Borderless, specifying Amount: Large for this setting may help solve the problem.
- Depending on your devices or how to print, the setting may be disabled.
- Auto photo fix set.
When ON is selected, you can select whether to print photos using the Exif information recorded in the image files when Default* or On is selected in printing with a PictBridge (Wi-Fi) compliant device.
* When Default is selected for the print setting on the PictBridge (Wi-Fi) compliant device, select Auto photo fix for Photo fix in PictBridge settings.
- Paper print position
Adjusts the print position when the left/right margins are not aligned.
Select Rear tray or Cassette for the paper source. You can adjust their printing positions in increments of 0.01 in. (0.1 mm) between -0.08 in. (-2 mm) and +0.08 in. (+2 mm) to the right or left with respect to its center of the paper along the horizontal axis.
Important
- When using A4/Letter sized paper, the amount of adjustment that can be made is limited. You cannot make adjustments greater than this limit.
Select this menu from Device settings in Setup menu.
→ Wi-Fi
→ Wireless Direct
→ Wired LAN
→ Print LAN details
Wi-Fi
- Wi-Fi enab./disable
Enables or disables Wi-Fi.
- Wi-Fi setup
Selects the setup method for Wi-Fi connection.
Note
- You can also enter this setting menu by selecting Wi-Fi setup from the Setup menu screen and pressing the OK button.
- Easy WL connect
Select if you specify the settings of the access point information to the printer directly from a device (such as a smartphone) without operating the wireless router. Follow the on-screen instructions of the connecting device for the setup procedure.
- Manual connect
Select when you perform settings for Wi-Fi manually using the operation panel of the printer.
- WPS (Push button)
Select when you perform settings for Wi-Fi using a wireless router supporting a Wi-Fi Protected Setup (WPS) push button method. Follow the on-screen instructions during setup.
- Other setup
■ Manual setup
Select when you perform settings for Wi-Fi manually. You can specify multiple WEP keys.
■ WPS (PIN code)
Select when you perform settings for Wi-Fi using a wireless router supporting a Wi-Fi Protected Setup (WPS) PIN code method. Follow the on-screen instructions during setup.
- Manual setup
For details on each setting item:
→ Manual setup
Wireless Direct
- Switch WL Direct
Enables/disables Wireless Direct. - Change name (SSID)
Changes the identifier (SSID/the printer's name displayed on a Wi-Fi Direct compatible device) for Wireless Direct. - Change password
Changes the password for Wireless Direct. - Confirm request
Set whether the printer displays the confirmation screen when a Wi-Fi Direct compatible device is connecting the printer. - Manual setup
For details on each setting item:
→ Manual setup
Wired LAN
- Enab./dis. wired LAN
Enables or disables wired LAN.
- Manual setup
For details on each setting item:
→ Manual setup
Print LAN details
You can print out the network settings of the printer such as its IP address and SSID.
For more information on the printer's network setting is printed out:
→ Printing Network Settings
Important
- The network settings printout contains important information about your network. Handle it with care.
Manual setup
- Set printer name
Specifies the printer name. You can use up to 15 characters for the name.
Note
- You cannot use the same printer name as that already used for other LAN connected devices.
- You cannot use a hyphen for the initial or last character of the printer name.
- TCP/IP settings
Performs IPv4 or IPv6 setting.
- WSD setting
Setting items when you use WSD (one of the network protocols supported in Windows).
- Enable/disable WSD
Selects whether WSD is enabled or disabled.
Note
- When this setting is enabled, the printer icon is displayed on the Network Explorer in Windows.
- Optimize WSD-In
Selecting Enable allows you to receive the WSD printing data faster.
- Timeout setting
Specifies the timeout length.
- Bonjour settings
Setting items when you use Bonjour.
- Enab./disab. Bonjour
Selecting Enable allows you to use Bonjour to perform the network settings.
- Enter service name
Specifies the Bonjour service name. You can use up to 48 characters for the name.
Note
- You cannot use the same service name as that already used for other LAN connected devices.
- LPR setting
Enables/disables the LPR setting.
- RAW protocol
Enables/disables RAW printing.
• LLMNR
Enables/disables LLMNR (Link-Local Multicast Name Resolution). Selecting Enable allows the printer to detect printer's IP address from the printer name without a DNS server.
- IPP settings
Selecting Enable allows you to print via the network with the IPP protocol.
- PictBridge commun.
Setting items for printing from a PictBridge (Wi-Fi) compliant device.
- Enable/disable
Selecting Enable allows you to print from a PictBridge (Wi-Fi) compliant device.
- Timeout setting
Specifies the timeout length.
- DRX setting
Selecting Wired LAN then Enable allows you to activate discontinuous reception when the printer is connected to a device compatible with wired LAN.
- IPsec settings
Selecting Enable allows you to specify the IPsec settings.
Other dev. settings
Select this menu from Device settings in Setup menu.
• Key repeat
Selecting ON lets you quickly display candidate numbers or characters by holding down the ◀ button during character entry.
Language selection
Changes the language for LCD messages and menus.
Japanese / English / German / French / Italian / Spanish / Dutch / Portuguese / Norwegian / Swedish / Danish / Finnish / Russian / Ukrainian / Polish / Czech / Slovak / Hungarian / Slovene / Croatian / Romanian / Bulgarian / Turkish / Greek / Estonian / Latvian / Lithuanian / Simplified Chinese / Traditional Chinese / Korean / Indonesian / Vietnamese
Firmware update
Select this menu from Device settings in Setup menu.
You can update the firmware of the printer, check the firmware version, or perform settings of a notification screen.
Important
- When you use this function, make sure the printer is connected to the internet.
Note
- Only Current version is available when Disable is selected for Wi-Fi enab./disable of Wi-Fi and also for Enab./dis. wired LAN of Wired LAN in LAN settings.
- Install update
Performs the firmware update of the printer. Follow the on-screen instructions to perform update.
Note
- If the firmware update is not complete, check the following and take an appropriate action.
- Check the network settings.
- If Cannot connect to the server; try again is displayed on the LCD, press the OK button and try again after a while.
- Current version
You can check the current firmware version.
- Update notification
When ON is selected and the firmware update is available, the screen to inform you of the firmware update is displayed on the LCD.
- DNS server setup
Performs settings for a DNS server. Select Auto setup or Manual setup. If you select Manual setup, follow the display on the LCD to perform settings.
- Proxy server setup
Performs settings for a proxy server. Select Use or Do not use. If you select Use, follow the display on the LCD to perform settings.
Reset setting
Select this menu from Device settings in Setup menu.
Returns all settings you made to the printer back to the default. However, some data may not be changed, depending on the current usage state of your printer.
Important
- Depending on the setting item, it is necessary to perform connection or setup again after you have returned the setting back to the default.
- Web service setup
Returns the Web service settings back to the default.
• LAN settings
Returns the LAN settings back to the default.
- Setting data
Returns the settings such as the paper size, media type, or other setting items other than the network settings back to the default.
- All data
Sets all settings you made to the printer back to the default. The administrator password specified by Remote UI or IJ Network Device Setup Utility reverts to the default setting.
After resetting, perform setup again as necessary.
Note
- You cannot set the following setting items back to the default:
• The language displayed on the LCD
• The current position of the print head
- CSR (Certificate Signing Request) for encryption method (SSL/TLS) setting
Feed settings
Select this menu from Setup menu.
By registering the paper size and the media type loaded on the rear tray or in the cassette, you can prevent the printer from misprinting by displaying the message before printing starts when the paper size or the media type of the loaded paper differs from the print settings.
For details:
→ Paper Settings
- Save paper info
Registers the paper size and the media type you load on the rear tray and in the cassette.
Note
- Plain paper can only be loaded in the cassette.
- For more on the proper combination of paper settings you can specify by the printer driver (Windows) or on the LCD:
→ Paper Settings on the Printer Driver and the Printer (Media Type)
→ Paper Settings on the Printer Driver and the Printer (Paper Size)
- Det. paper mismatch
If you select ON, the printer detects whether the paper size and the media type are identical with those registered in Save paper info. If printing starts with the settings that do not match, an error message is displayed on the LCD.
Web service setup
Select this menu from Setup menu.
- Connection setup
The following setting items are available.
GoogleCloudPrint
Registers/Deletes the printer to/from Google Cloud Print.
- DNS server setup
Performs settings for a DNS server. Select Auto setup or Manual setup. If you select Manual setup, follow the display on the LCD to perform settings.
- Proxy server setup
Performs settings for a proxy server. Select Use or Do not use. If you select Use, follow the display on the LCD to perform settings.
This setting allows you to turn on/off the printer automatically to save electricity.
→ Turning off Printer Automatically
→ Turning on Printer Automatically
Turning off Printer Automatically
You can enable the printer to turn off automatically when no operation is made or no printing data is sent to the printer for a specified period of time.
- Check that printer is turned on.
- Press the Setup button.
The Setup menu screen is displayed.
- Select ECO settings and then press the OK button.
- Select EnergySaveSettings and then press the OK button.
- Select Auto power off and then press the OK button.
- Select a time to turn off the printer and then press the OK button.
Turning on Printer Automatically
You can enable the printer to turn on automatically when printing data is sent to the printer.
- Check that printer is turned on.
- Press the Setup button.
The Setup menu screen is displayed.
- Select ECO settings and then press the OK button.
- Select EnergySaveSettings and then press the OK button.
- Select Auto power on and then press the OK button.
- Select ON and then press the OK button.
Quiet setting
Enables this function on the printer if you want to reduce the operating noise, such as when printing at night. Follow the procedure below to perform setting.
- Check that printer is turned on.
- Press the Setup button.
The Setup menu screen is displayed.
- Select Quiet mode and then press the OK button.
- Select ON or OFF and press OK button.
When ON is selected, you can reduce the operating noise while printing is in progress.
Important
- When ON is selected, operating speed may be reduced compared to when OFF is selected.
- This function may not be so effective depending on the printer's setting. Furthermore, certain noise, such as when the printer is preparing for printing, is not reduced.
Note
- You can set the quiet mode from the operation panel of the printer or the printer driver. No matter how you set the quiet mode, the mode is applied when you perform operations from the operation panel of the printer or printing from the computer.
System information
Select this menu from Setup menu.
- Current version
Displays the current firmware version.
- Printer name
Displays the printer name currently specified.
- Serial number
Displays the printer serial number.
- Printed sheet count
Displays the printed sheet count in increments of 50 sheets. (Ex: In case of 25 sheets, [1-50] is displayed.)
General Specifications
| Printing resolution (dpi) 4800* (ho | horizontal) x 1200 (vertical)* Ink droplets can be placed with a pitch of 1/4800 inch at minimum. |
| Interface USB Port: | Hi-Speed USB *Network Port:Wired LAN: 100BASE-TX / 10BASE-TWi-Fi: IEEE802.11n / IEEE802.11g / IEEE802.11b* A computer that complies with Hi-Speed USB standard is required. Since the Hi-Speed USB interface is fully upwardly compatible with USB 1.1, it can be used at USB 1.1.USB and LAN can be used at the same time.Wi-Fi and wired LAN cannot be used at the same time. |
| Print width 8 in. (203.2 mm) (for Bo | orderless Printing: 8.5 in. (216 mm)) |
| Printable area Borderless printing: | Top/Bottom/Left/Right margin: 0.0 in. (0.0 mm)Standard printing:Top margin:Square 3.5" x 3.5" 9 x 9 cm, Square 4" x 4" 10 x 10 cm: 0.20 in. (5.0 mm)Square 5" x 5" 13 x 13 cm: 0.24 in. (6.0 mm)Other sizes: 0.12 in. (3.0 mm)Bottom margin:Square 5" x 5" 13 x 13 cm: 0.24 in. (6.0 mm)Other sizes: 0.20 in. (5.0 mm)Left margin:Letter/Legal: 0.26 in. (6.4 mm)Square 3.5" x 3.5" 9 x 9 cm, Square 4" x 4" 10 x 10 cm: 0.20 in. (5.0 mm)Square 5" x 5" 13 x 13 cm: 0.24 in. (6.0 mm)Other sizes: 0.14 in. (3.4 mm)Right margin:Letter/Legal: 0.25 in. (6.3 mm)Square 3.5" x 3.5" 9 x 9 cm, Square 4" x 4" 10 x 10 cm: 0.20 in. (5.0 mm)Square 5" x 5" 13 x 13 cm: 0.24 in. (6.0 mm)Other sizes: 0.14 in. (3.4 mm)* For printable area of envelope, see below. ➔ EnvelopesAuto duplex printing:Top margin: 0.20 in. (5.0 mm)Bottom margin: 0.20 in. (5.0 mm)Left margin:Letter: 0.26 in. (6.4 mm)Other sizes: 0.14 in. (3.4 mm)Right margin:Letter: 0.25 in. (6.3 mm)Other sizes: 0.14 in. (3.4 mm) |
| Operating environment Temperature | 41 to 95 °F (5 to 35 °C)Humidity: 10 to 90 % RH (no condensation)* The performance of the printer may be reduced under certain temperature and humidity conditions.Recommended conditions:Temperature: 59 to 86 °F (15 to 30 °CHumidity: 10 to 80 % RH (no condensation)* For the temperature and humidity conditions of papers such as photo paper, refer to the paper's packaging or the supplied instructions. |
| Storage environment Temperature | 32 to 104 °F (0 to 40 °CHumidity: 5 to 95 % RH (no condensation) |
| Power supply AC 100-240 V, 50/60 | Hz(The supplied power cord is only for the country or region you purchased.) |
| Power consumption Printing: 21 W | W or less *1Standby (minimum): 0.8 W or less *1*2OFF: 0.3 W or less*1 USB connection to PC*2 The wait time for standby cannot be changed. |
| External dimensions (W x D x H) | Approx. 15.9 x 14.6 x 6.6 in. (Approx. 403 x 369 x 166 mm)* With the Cassette and trays retracted. |
| Weight Approx. 14.3 lb (Approx. 6.5 kg) | * With the Print Head installed. |
| Print Head/Ink Total 1792 nozzles (BK 640 nozzles, C/M/Y each 384 nozzles) | |
Network Specifications
| Communication protocol TCP/IP | |
| Wired LAN Supported Standards: | IEEE802.3u (100BASE-TX) / IEEE802.3 (10BASE-T)Transfer speed: 10 M/100 Mbps (auto switching) |
| Wi-Fi Supported Standards: IEEE802.11n / IEEE802.11g / IEEE802.11bFrequency bandwidth: 2.4 GHzChannel: 1-11 or 1-13* Frequency bandwidth and available channels differ depending on country or region.Communication distance: Indoors 164 feet/50 m* Effective range varies depending on the installation environment and location.Security:WEP (64/128 bits)WPA-PSK (TKIP/AES)WPA2-PSK (TKIP/AES)Setup:WPS (Push button configuration/PIN code method)WCN (WCN-NET)Easy wireless connectOther Features: Administration password | |
Minimum System Requirements
Conform to the operating system's requirements when higher than those given here.
Windows
| Operating System Windows 10, W | Windows 8.1, Windows 7 SP1Note: Operation can only be guaranteed on a PC with pre-installed Windows 7 or later.Printer driver and IJ Network Device Setup Utility support the following OS: Windows Server 2008 R2 SP1, Windows Server 2012 R2 and Windows Server 2016. |
| Hard Disk Space 2.0 GB or more | Note: For bundled software installation.The necessary amount of hard disk space may be changed without notice. |
| Display XGA 1024 x 768 |
macOS
| Operating System OS X 10.10.5 - OS X 10.11, macOS 10.12 - macOS 10.14 | |
| Hard Disk Space 1.0 GB or more | Note: For bundled software installation.The necessary amount of hard disk space may be changed without notice. |
| Display XGA 1024 x 768 | |
Other Supported OS
iOS, Android, Windows 10 Mobile Some functions may not be available with the supported OS. Refer to the Canon web site for details.
Mobile Printing Capability
| Apple AirPrint |
| Google Cloud Print |
| PIXMA Cloud Link |
| Windows 10 Mobile Print |
| Mopria Print Service |
- Internet connection or CD-ROM drive is required to install the software for Windows.
- Internet connection is required to use Easy-PhotoPrint Editor and all the user's guide.
- macOS: For macOS, an internet connection is required during software installation.
- In an in-house network environment, the 5222 port must be open. Contact the network administrator for details.
Information in this manual is subject to change without notice.
Information about Paper
▶ Supported Media Types
Paper Load Limit
▶ Unsupported Media Types
Handling Paper
▶ Print Area
Supported Media Types
For best results, choose paper designed for how you are printing. A variety of paper for documents as well as photos or illustrations is available from Canon. Use genuine Canon paper to print important photos, when possible.
Media Types
Genuine Canon paper
Note
- For warnings on use of the non-printable side, see each product's usage information.
- Page sizes and media types differ depending on the country or region where the paper is sold. For details on page sizes and media types, access the Canon website.
- Genuine Canon paper is not available in some countries or regions. Note that in the United States, Canon paper is not sold by model number. Instead, purchase paper by name.
Paper for printing documents:
- Canon Red Label Superior
- Canon Océ Office Colour Paper
• High Resolution Paper*1
Paper for printing photos:
• Photo Paper Pro Platinum
- Glossy Photo Paper "Everyday Use"
• Photo Paper Glossy
• Photo Paper Plus Glossy II
• Photo Paper Pro Luster
• Photo Paper Plus Semi-gloss
- Matte Photo Paper
Paper for making original goods:
- Photo Stickers (16 stickers per sheet)
• Photo Stickers (Free Cutting)
• Photo Stickers (Variety Pack) - Restickable Photo Paper
- Removable Photo Stickers
• Magnetic Photo Paper
Paper other than genuine Canon paper
- Plain Paper (including recycled paper)
- Envelopes*1
- Greeting Card*1
*1 Printing to this paper from the operation panel or from a PictBridge (Wi-Fi) compliant device is not supported.
→ Paper Load Limit
→ Paper Settings on the Printer Driver and the Printer (Media Type) (Windows)
Note
- When printing photos saved on a PictBridge (Wi-Fi) compliant device, you must specify the page size and media type.
→ Printing from Digital Camera
Page Sizes
You can use the following page sizes.
Note
- Page sizes and media types the printer supports differ depending on the OS you are using.
Standard sizes:
- Letter
- Legal
• A5
• A4
• B5 - KG/4"x6"(10x15)
- 5"x7"(13x18cm)
- 7"x10"(18x25cm)
- 8"x10"(20x25cm)
• L(89x127mm) - 2L(127x178mm)
- Square 3.5"
- Square 4"
- Square 5"
- Hagaki
- Hagaki 2
-
Envelope Com 10
-
Envelope DL
- Nagagata 3
- Nagagata 4
- Yougata 4
- Yougata 6
- Card 2.17"x3.58"
Special sizes
Special page sizes must be within the following limits:
- rear tray
• Minimum size: 2.17 x 3.51 in. (55.0 x 89.0 mm)
• Maximum size: 8.50 x 26.61 in. (215.9 x 676.0 mm) - cassette
• Minimum size: 5.83 x 8.27 in. (148.0 x 210.0 mm)
• Maximum size: 8.50 x 11.69 in. (215.9 x 297.0 mm)
Paper Weight
You can use paper in the following weight range.
- Plain paper: From 17 to 28 lb (64 to 105g / m^2 )
• Specialty paper: Up to 53 lb (200 g /m ^2 )
Paper Load Limit
This section shows the paper load limits of the rear tray, the cassette, and the paper output tray.
→ Paper Load Limits of Rear Tray and Cassette
→ Paper Load Limit of Paper Output Tray
Note
- Page sizes and media types differ depending on the country or region where the paper is sold. For details on page sizes and media types, access the Canon website.
Paper Load Limits of Rear Tray and Cassette
Genuine Canon Paper
Paper for printing documents:
| Media Name <Model No.> Rear Tray Cassette | ||
| Canon Red Label Superior <WOP111> A4: Approx. 100 sheets A4: Approx. 250 sheets | ||
| Canon Océ Office Colour Paper <SAT213> A4: Approx. 80 sheets A4: Approx. 200 sheets | ||
| High Resolution Paper <HR-101N>*1 A4, B5, Letter: Approx. 80 sheets | N/A |
Paper for printing photos:
| Media NameRear Tray | |
| Photo Paper Pro Platinum ^*2 Glossy Photo Paper "Everyday Use"GP-508> ^*2 Photo Paper Glossy ^*2 Photo Paper Plus Glossy II ^*2 Photo Paper Pro Luster ^*2 Photo Paper Plus Semi-gloss ^*2 Matte Photo Paper | A4, Letter, 5"x7"(13x18cm), 8"x10"(20x25cm), 2L(127x178mm): 10 sheetsKG/4"x6"(10x15), L(89x127mm), Square 3.5", Square 4", Square 5", Hagaki: 20 sheets |
Paper for making original goods:
| Media NameRear Tray | |
| Photo Stickers (16 stickers per sheet) | 1 sheet |
| Photo Stickers (Free Cutting) | |
| Photo Stickers (Variety Pack) | |
| Restickable Photo Paper | |
| Removable Photo Stickers | |
| Magnetic Photo Paper |
Paper other than Genuine Canon Paper
| Common Name Rear Tray Cassette | ||
| Plain Paper (including recycled paper)*1 Approx. 100 sheets | (Legal: 10 sheets) | Approx. 250 sheets |
| Envelopes 10 envelopes N/A | ||
| Greeting Card Letter, 7"x10"(18x25cm): 1 | sheet | N/A |
*1 Normal feeding at maximum capacity may not be possible with some types of paper, or under very high or low temperature or humidity. In this case, load half the amount of paper or less.
*2 Feeding from a loaded stack of paper may leave marks on the printed side or prevent efficient feeding. In this case, load one sheet at a time.
Paper Load Limit of Paper Output Tray
Genuine Canon Paper
Paper for printing documents:
| Media NamePaper Output Tray | |
| Canon Red Label SuperiorCanon Océ Office Colour PaperHigh Resolution Paper | Approx. 50 sheets |
Paper other than Genuine Canon Paper
| Common Name Paper Output Tray | |
| Plain Paper (including recycled paper) Approx. 50 sheets (Legal: 10 sheets) | |
When continuing printing with paper other than the above, we recommend removing already printed paper or envelopes from the paper output tray to avoid smearing or discoloration.
Unsupported Media Types
Do not use the following types of paper. Using such paper will cause not only unsatisfactory results, but also the printer to jam or malfunction.
- Folded, curled, or wrinkled paper
- Damp paper
- Paper thinner than a postcard, including plain paper or notepad paper cut to a small size (when printing on paper smaller than A5)
- Picture postcards
- Postcards
- Envelopes with a double flap
- Envelopes with an embossed or treated surface
- Envelopes whose gummed flaps are already moistened and adhesive
- Any type of paper with holes
• Paper that is not rectangular
• Paper bound with staples or glue - Paper with an adhesive surface on the back such as label seal
• Paper decorated with glitter, etc.
Handling Paper
- Be careful not to rub or scratch the surfaces of any types of paper when handling.
- Hold the paper as closely as possible to its edges and try not to touch the printing surface. The print quality may be degraded if the printing surface is smudged with sweat or oil that comes from your hands.
- Do not touch the printed surface until the ink is dried. Even when the ink is dried, be careful not to touch the printed surface as much as possible when handling. Due to the nature of the pigment ink, the ink on the printed surface may be removed when being rubbed or scratched.
• Take out only the necessary number of paper from the package, just before printing. - To avoid curling, when you do not print, put unused paper back into the package and keep it on a level surface. And also, store it avoiding heat, humidity, and direct sunlight.
Economy Mode
By setting Print quality to Economy, the consumption of black ink can be reduced. More printing is available compared with when Print quality is set to Standard.
For color printing, the consumption of black ink can be reduced, though the consumption of color ink is the same as that when Standard is set.
• Number of printable sheets
Number of printable sheets per pigment black ink bottle (A4 plain paper) when printing in color
Standard mode: 6,000
Economy mode: 8,300
• Measurement conditions
• Measurement images:
Color printing: A4 color document ISO/IEC24712
Black & white printing: A4 monochrome document ISO/IEC19752
- Measurement method:
Canon original
- Paper type:
Plain paper
- Print driver setting:
Setting to the default for plain paper, setting Grayscale Printing to ON when measuring in black and white.
- Borderless printing :
OFF
*The number of printable sheets is calculated based on the ink bottle filled from the second time on, instead of the ink bottle filled when the printer is used for the first time.
Printing
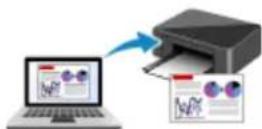
Printing from Computer
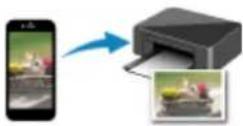
Printing from Smartphone/Tablet
Printing from Digital Camera
Paper Settings
Printing from Computer
▶ Printing from Application Software (Windows Printer Driver)
▶ Printing from Application Software (macOS AirPrint)
▶ Printing Using Canon Application Software
▶ Printing Using a Web Service
Printing from Application Software (Windows Printer Driver)
Basic Printing Setup Basic
▶ Various Printing Methods
Changing the Print Quality and Correcting Image Data
Overview of the Printer Driver
Printer Driver Description
▶ Updating the Printer Driver
This section describes settings on the Quick Setup tab used for basic printing.
Basic Printing Setup
- Check that printer is turned on
- Load paper in printer
- Open printer driver's setup screen
- Select frequently used settings
On the Quick Setup tab, use Commonly Used Settings to select from predefined print settings. When you select a print setting, the settings for Additional Features, Media Type, and Printer Paper Size automatically switch to the predefined values.
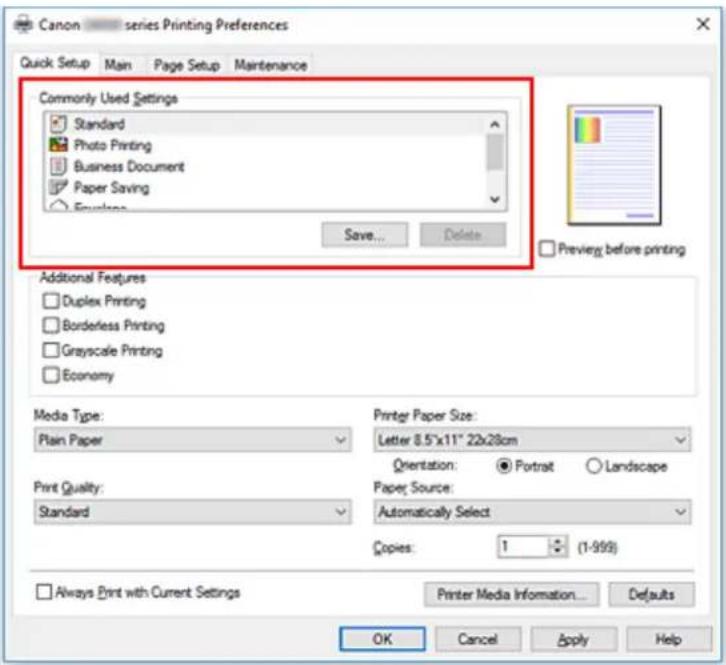
text_image
Canon series Printing Preferences Quick Setup Main Page Setup Maintenance Commonly Used Settings Standard Photo Printing Business Document Paper Saving Envelope Save... Delete Additional Features Duplex Printing Borderless Printing Grayscale Printing Economy Media Type: Plain Paper Print Quality: Standard Printer Paper Size: Letter 8.5"x11" 22x28cm Orientation: ● Portrait ○ Landscape Paper Source: Automatically Select Copies: 1 (1-999) Always Print with Current Settings Printer Media Information... OK Cancel Apply Help- Select print quality
For Print Quality, select from High, Standard, or Economy.
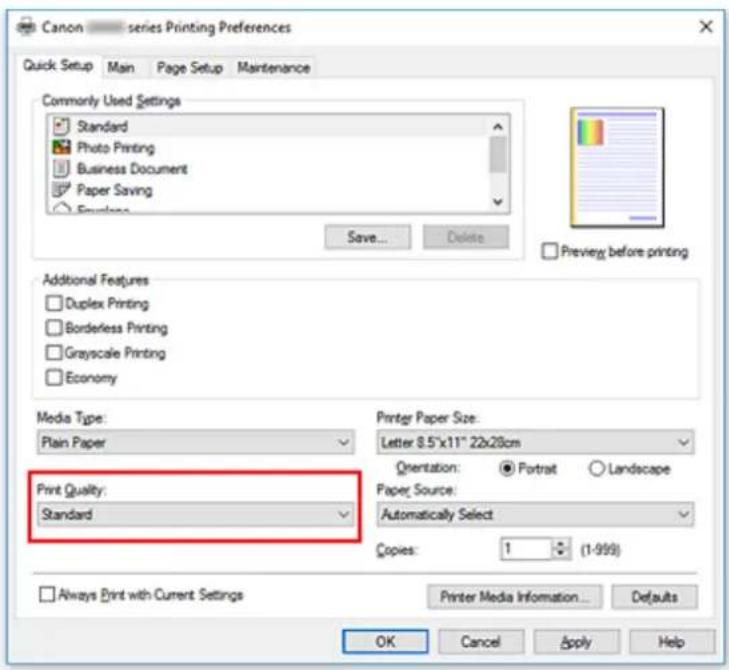
text_image
Canon — series Printing Preferences Quick Setup Main Page Setup Maintenance Commonly Used Settings Standard Photo Printing Business Document Paper Saving Envelope Save... Delete Preview before printing Additional Features Duplex Printing Borderless Printing Grayscale Printing Economy Media Type: Plain Paper Print Quality: Standard Printer Paper Size: Letter 8.5"x11" 22x28cm Orientation: ● Portrait ○ Landscape Paper Source: Automatically Select Copies: 1 (1-999) Always Print with Current Settings Printer Media Information... Defaults OK Cancel Apply HelpImportant
- The print quality selections will differ depending on which print setting you select.
Note
- Selecting Economy in Print Quality reduces black ink consumption. This means that you can print more than if you have Standard selected. The Economy setting does not affect the amount of color ink consumed. Economy and Standard will consume the same amount of color ink. For details on Economy Mode, see "Economy Mode."
6. Select paper source
For Paper Source, select Automatically Select, Rear Tray, or Cassette, whichever matches your purpose.
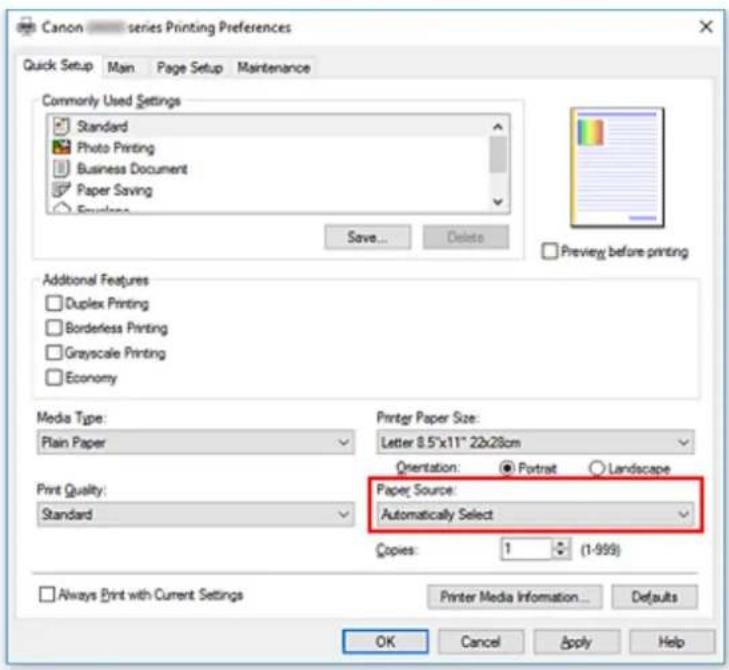
text_image
Canon — series Printing Preferences Quick Setup Man Page Setup Maintenance Commonly Used Settings Standard Photo Printing Business Document Paper Saving Envelope Save... Delete Additional Features Duplex Printing Borderless Printing Grayscale Printing Economy Media Type: Plain Paper Print Quality: Standard Printer Paper Size: Letter 8.5"x11" 22x28cm Orientation: ● Portrait ○ Landscape Paper Source: Automatically Select Copies: 1 (1-999) Always Print with Current Settings Printer Media Information... Defaults OK Cancel Apply HelpImportant
- The paper source settings that can be selected may differ depending on the paper type and size.
7. Click OK
The printer will now print using these settings.
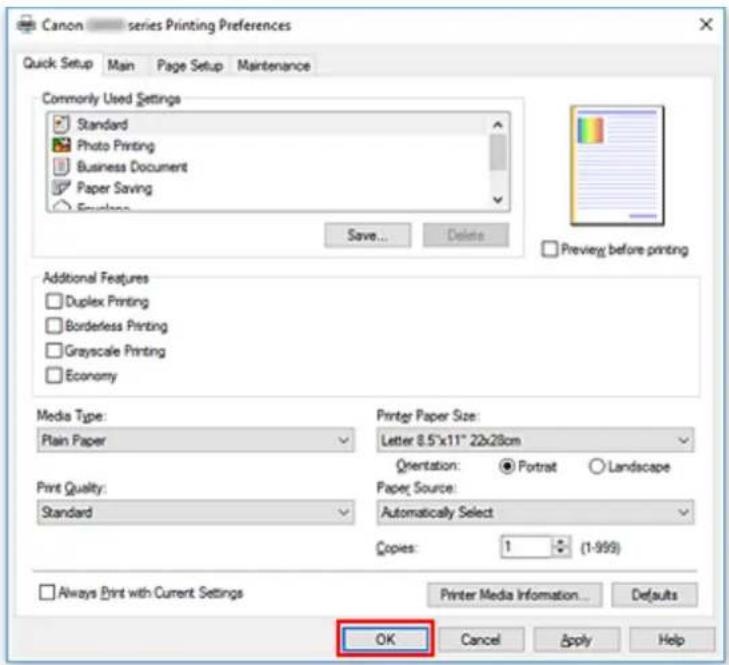
text_image
Canon — series Printing Preferences Quick Setup Man Page Setup Maintenance Commonly Used Settings Standard Photo Printing Business Document Paper Saving Envelope Save... Delete Preview before printing Additional Features Duplex Printing Borderless Printing Grayscale Printing Economy Media Type: Plain Paper Print Quality: Standard Printer Paper Size: Letter 8.5"x11" 22x28cm Orientation: ● Portrait ○ Landscape Paper Source: Automatically Select Copies: 1 (1-999) Always Print with Current Settings Printer Media Information... OK Cancel Apply HelpImportant
- When you select Always Print with Current Settings, the settings on the Quick Setup, Main, and Page Setup tabs are saved, and those settings are used in subsequent printings.
- To register the current settings as a new preset, click Save... under Commonly Used Settings.
Note
- If the paper settings in the printer driver differ from the paper information registered on the printer, an error may occur. For instructions on what to do if an error occurs, see "Paper Settings."
To check the current printer settings or to apply the printer settings to the printer driver, display the Quick Setup tab, click Printer Media Information..., and specify the settings in the dialog box that appears.
For details about the paper information to be registered on the printer, see the following:
• Paper Settings on the Printer Driver and the Printer (Media Type)
• Paper Settings on the Printer Driver and the Printer (Paper Size)
Checking Printer Settings and Applying Settings to Printer Driver
-
Open printer driver setup window
-
On Quick Setup tab, click Printer Media Information...
The Printer Media Information dialog box appears.
- Select Paper Source
From Paper Source, check the setting or select a new paper source.
The current printer settings appear in Media Type and Page Size.
- Apply settings
To apply the printer settings to the printer driver, click Set.
Note
- If the Type on the printer is set to IJ Hagaki, Hagaki K, or Hagaki, or if the Page size on the printer is set to 2L/5"x7", click Set to display the dialog box.
Select the media type and paper size that match your purpose, and then click OK. - If the Type and the Page size on the printer are not set or are set to Others, Set will be grayed out and cannot be clicked.
- If communication with the printer is disabled, the Printer Media Information... dialog box will not appear or the printer driver will not be able to obtain printer media information.
Paper Settings on the Printer Driver and the Printer (Media Type)
When you use this printer, selecting a media type and paper size that matches the print purpose will help you achieve the best print results.
You can use the following media types on this printer.
Canon genuine papers (Document Printing)
| Media nameMedia Type in the printer driverPaper information registered on the printer | Type in the printer driver | Paper information registered on the printer |
| Canon Red Label SuperiorPlain Paper Plain paper | ||
| Canon Océ Office Colour PaperPlain Paper Plain paper | ||
| High Resolution PaperHigh Resolution Paper High Res |
Canon genuine papers (Photo Printing)
| Media nameMedia Type in the printer driverPaper information registered on the printer | in the printer driver | Paper information registered on the printer |
| Photo Paper Plus Glossy IIPhoto Paper Plus Glossy II PlusGlossyII | Photo Paper Plus Glossy II PlusGlossyII | |
| Photo Paper Pro PlatinumPhoto Paper Pro | Platinum ProPlatinum | |
| Photo Paper Pro LusterPhoto Paper Pro Luster Pro Luster | ||
| Photo Paper Plus Semi-glossPhoto Paper | Plus Semi-gloss Semi-gloss | |
| Glossy Photo Paper "Everyday Use"Glossy Photo Paper Glossy | ||
| Photo Paper Glossy | Glossy Photo Paper Glossy | |
| Matte Photo Paper | Matte Photo Paper | Matte |
Canon genuine papers (Original Product)
| Media name | Media Type in the printer driver | Paper information registered on the printer |
| Restickable Photo Paper | Glossy Photo Paper Glossy | |
| Removable Photo Stickers | Glossy Photo Paper Glossy | |
| Magnetic Photo Paper | Glossy Photo Paper Glossy |
Commercially available papers
| Media name Media Type | in the printer driver | Paper information registered on the printer |
| Plain Paper (including recycled paper) | Plain Paper Plain paper | |
| Envelopes Envelope Envelope | ||
| Greeting Cards Inkjet Greeting Card | Others |
Paper Settings on the Printer Driver and the Printer (Paper Size)
When you use this printer, selecting a paper size that matches the print purpose will help you achieve the best print results.
You can use the following paper sizes on this printer.
| Printer Paper Size in the printer driver | Cassette paper information registered on the printer |
| Letter 8.5"x11" 22x28cm Letter | |
| Legal 8.5"x14" 22x36cm Legal | |
| A5 A5 | |
| A4 A4 | |
| B5 B5 | |
| 4"x6" 10x15cm KG/4"x6" | |
| 5"x7" 13x18cm 2L/5"x7" | |
| 7"x10" 18x25cm 7"x10" | |
| 8"x10" 20x25cm 8"x10" | |
| L 89x127mm L | |
| 2L 127x178mm 2L/5"x7" | |
| Square 3.5"x3.5" 9x9cm Square 3.5" | |
| Square 4"x4" 10x10cm Square 4" | |
| Square 5"x5" 13x13cm Square 5" | |
| Hagaki 100x148mm Hagaki | |
| Hagaki 2 200x148mm Hagaki 2 | |
| Envelope Com 10 Env. Com 10 | |
| Envelope DL Envelope DL | |
| Nagagata 3 4.72"x9.25" Nagagata 3 | |
| Nagagata 4 3.54"x8.07" Nagagata 4 | |
| Yougata 4 4.13"x9.25" Yougata 4 | |
| Yougata 6 3.86"x7.48" Yougata 6 | |
| Card 2.17"x3.58" 55x91mm Card 2"x3.5' | |
| Custom Size Others |
Various Printing Methods
Setting a Page Size and Orientation
Setting the Number of Copies and Printing Order
▶ Execute Borderless Printing
Scaled Printing
Page Layout Printing
▶ Tiling/Poster Printing
Duplex Printing
Setting Up Envelope Printing
▶ Printing on Postcards
Setting a Page Size and Orientation
The paper size and orientation are essentially determined by the application software. When the page size and orientation set for Page Size and Orientation on the Page Setup tab are same as those set with the application software, you do not need to select them on the Page Setup tab.
When you are not able to specify them with the application software, the procedure for selecting a page size and orientation is as follows:
You can also set page size and orientation on the Quick Setup tab.
- Open the printer driver setup window
- Select the paper size
Select a page size from the Page Size list on the Page Setup tab.
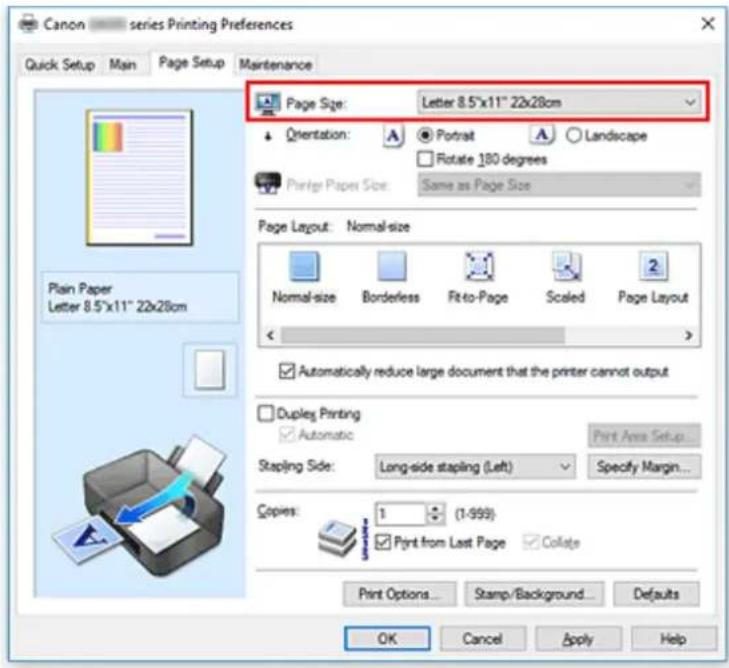
text_image
Canon — series Printing Preferences Quick Setup Main Page Setup Maintenance Page Size: Letter 8.5"x11" 22x28cm Orientation: Portrait Landscape Rotate 180 degrees Printer Paper Size: Same as Page Size Page Layout: Normal-size Normal-size Borderless Fit-to-Page Scaled Page Layout Automatically reduce large document that the printer cannot output Duplex Printing Automatic Print Area Setup... Stapling Side: Long-side stapling (Left) Specify Margin... Copies: 1 (1-999) Print from Last Page Collate Print Options... Stamp/Background... Defaults OK Cancel Apply Help3. Set Orientation
Select Portrait or Landscape for Orientation. Check Rotate 180 degrees check box when you want to perform printing with the original being rotated 180 degrees.
4. Click OK
When you execute print, the document will be printed with the selected page size and the orientation.
Note
- If Normal-size is selected for Page Layout, then Automatically reduce large document that the printer cannot output is displayed.
Normally, you can leave the check box checked. During printing, if you do not want to reduce large documents that cannot be printed on the printer, uncheck the check box.
Setting the Number of Copies and Printing Order
You can also set the number of copies on the Quick Setup tab.
-
Open the printer driver setup window
-
Specify the number of copies to be printed
For Copies on the Page Setup tab, specify the number of copies to be printed.
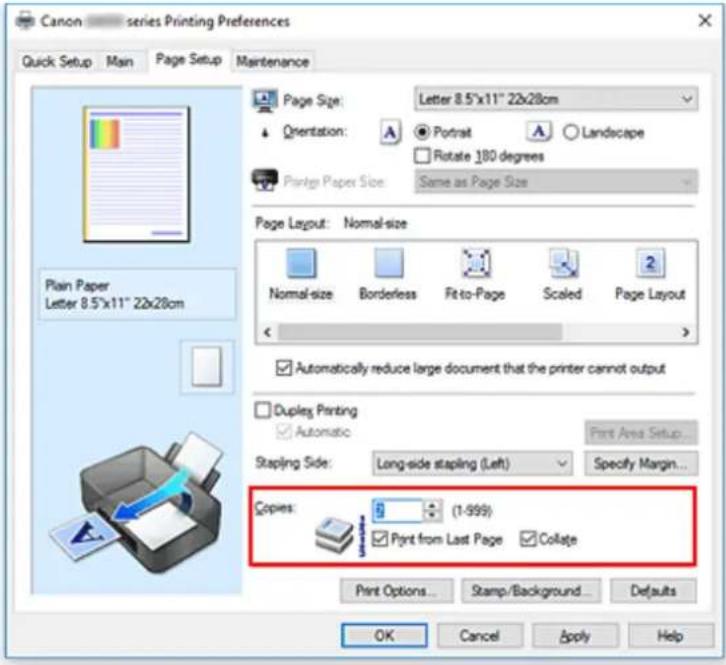
text_image
Canon - series Printing Preferences Quick Setup Main Page Setup Maintenance Page Size: Letter 8.5"x11" 22x28cm Orientation: ● Portrait ○ Landscape Rotate 180 degrees Print Paper Size: Same as Page Size Page Layout: Normal-size Normal-size Borderless Fit-to-Page Scaled Page Layout Automatically reduce large document that the printer cannot output Duplex Printing Automatic Stapling Side: Long-side stapling (Left) Specify Margin... Copies: (1-999) Print from Last Page Collate Print Options... Stamp/Background...Defaults OK Cancel Apply Help- Specify the print order
Check the Print from Last Page check box when you want to print from the last page in order, and uncheck the check box when you want to print from the first page.
Check the Collate check box when you are printing multiple copies of a document and want to print out all pages in each copy together. Uncheck this check box when you want to print all pages with the same page number together.
- Print from Last Page: ✓Collate: ✓
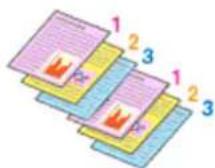
- Print from Last Page: /Collate: √
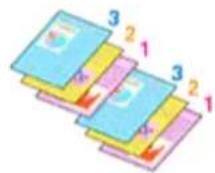
- Print from Last Page: √Collate: □
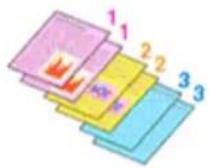
- Print from Last Page: /Collate:
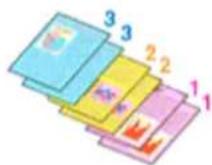
4. Click OK
When you execute print, the specified number of copies will be printed with the specified printing order.
Important
- When the application software that you used to create the document has the same function, specify the settings on the printer driver. However, if the print results are not acceptable, specify the function settings on the application software. When you specify the number of copies and the printing order with both the application software and this printer driver, the number of copies may be multiplied numbers of the two settings or the specified printing order may not be enabled.
- Print from Last Page appears grayed out and is unavailable when Tiling/Poster is selected for Page Layout.
- When Booklet is selected for Page Layout, Print from Last Page and Collate appear grayed out and cannot be set.
- When Duplex Printing is selected, Print from Last Page appears grayed out and cannot be set.
Note
- By setting both Print from Last Page and Collate, you can perform printing so that papers are collated one by one starting from the last page. These settings can be used in combination with Normal-size, Borderless, Fit-to-Page, Scaled, and Page Layout.
Execute Borderless Printing
The borderless printing function allows you to print data without any margin by enlarging the data so that it extends slightly off the paper. In standard printing, margins are created around the document area.
However, in borderless printing function, these margins are not created. When you want to print data such as a photo without providing any margin around it, set borderless printing.
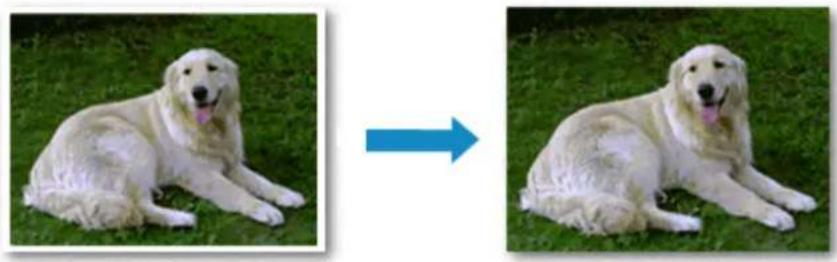
natural_image
Two photos of a golden retriever dog lying on grass, one with a blue arrow indicating transformation (no text or symbols)You can also set borderless printing in Additional Features on the Quick Setup tab.
Note
- You can also set Amount of extension on the operation panel of the printer, but the settings on the printer driver will be prioritized.
Setting Borderless Printing
-
Open the printer driver setup window
-
Set borderless printing
Select Borderless from the Page Layout list on the Page Setup tab.
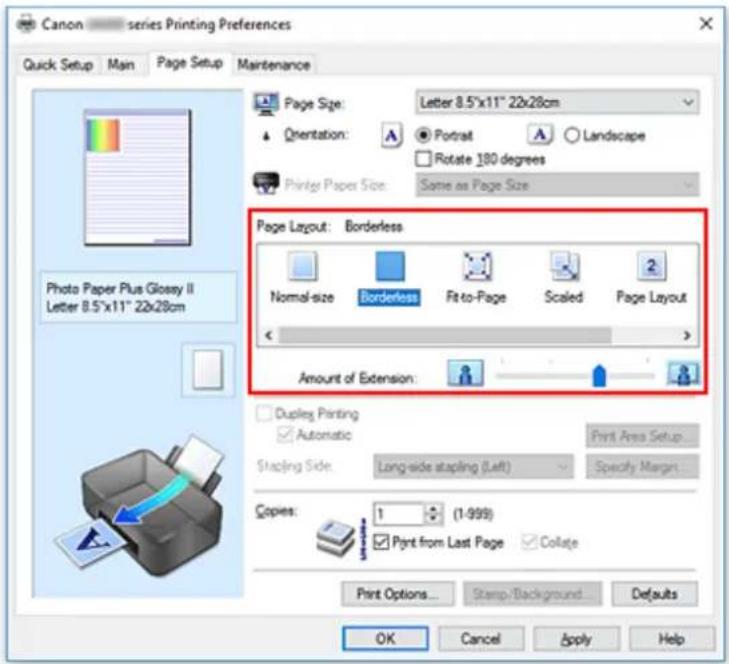
text_image
Canon series Printing Preferences Quick Setup Main Page Setup Maintenance Page Size: Letter 8.5"x11" 22x28cm Orientation: ● Portrait ○ Landscape Rotate 180 degrees Same as Page Size Printer Paper Size: Page Layout: Borderless Normal-size Borderless Fit-to-Page Scaled Page Layout Amount of Extension: Duplex Printing Automatic Shaping Side: Long-side stapling (Left) Specify Margin Copies: 1 (1-999) Print from Last Page Collate Print Options... Stamp/Background Defaults OK Cancel Apply HelpClick OK when the confirmation message appears.
When a message prompting you to change the media type appears, select a media type from the list and click OK.
3. Check the paper size
Check the Page Size list. When you want to change it, select another page size from the list. The list displays only sizes that can be used for borderless printing.
4. Adjust the amount of extension from the paper
If necessary, adjust the amount of extension using the Amount of Extension slider.
Moving the slider to the right increases the amount extending off the paper, and moving the slider to the left decreases the amount.
It is recommended to set the slider at the second position from the right for most cases.

Important
- When the Amount of Extension slider is set to the rightmost position, the back side of the paper may become smudged.
5. Click OK
When you execute print, the data is printed without any margins on the paper.
Important
- When a page size that cannot be used for borderless printing is selected, the size is automatically changed to the valid page sizes for borderless printing.
- When Borderless is selected, the Printer Paper Size, Duplex Printing, Stapling Side settings, and the Stamp/Background... button on the Page Setup tab appear grayed out and are unavailable.
- When Envelope or High Resolution Paper is selected from the Media Type list on the Main tab, you cannot perform borderless printing.
- Depending on the type of the media used during borderless printing, the print quality may deteriorate at the top and bottom of the sheet or stains may form.
- When the ratio of the height to the width differs from the image data, a portion of the image may not be printed depending on the size of the media used.
In this case, crop the image data with an application software according to the paper size.
Note
- When Plain Paper is selected for Media Type on the Main tab, borderless printing is not recommended. Therefore, the message for media selection appears.
When you are using plain paper for test printing, select Plain Paper, and click OK.
Expanding the Range of the Document to Print
Setting a large amount of extension allows you to perform borderless printing with no problems. However, the portion of the document extending off the paper range will not be printed and for this reason, the subjects around the perimeter of a photo may not be printed.
When you are not satisfied with the result of borderless printing, reduce the amount of extension. The extension amount decreases as the Amount of Extension slider is moved to the left.

Important
- When the amount of extension is decreased, an unexpected margin may be produced on the print, depending on the size of the paper.

Note
- When the Amount of Extension slider is set to the leftmost position, image data will be printed in the full size. If you set this when printing the address side of a postcard, the postal code of the sender is printed in the correct position.
- When Preview before printing is checked on the Main tab, you can confirm whether there will be no margin before printing.
Scaled Printing

other
| Event Description | Percentage Change | | ----------------- | ----------------- | | The 10th Anniversary Festival | 70% | | The 10th Anniversary Festival (Come and join us) | 115% |- Open the printer driver setup window
- Set scaled printing
Select Scaled from the Page Layout list on the Page Setup tab.
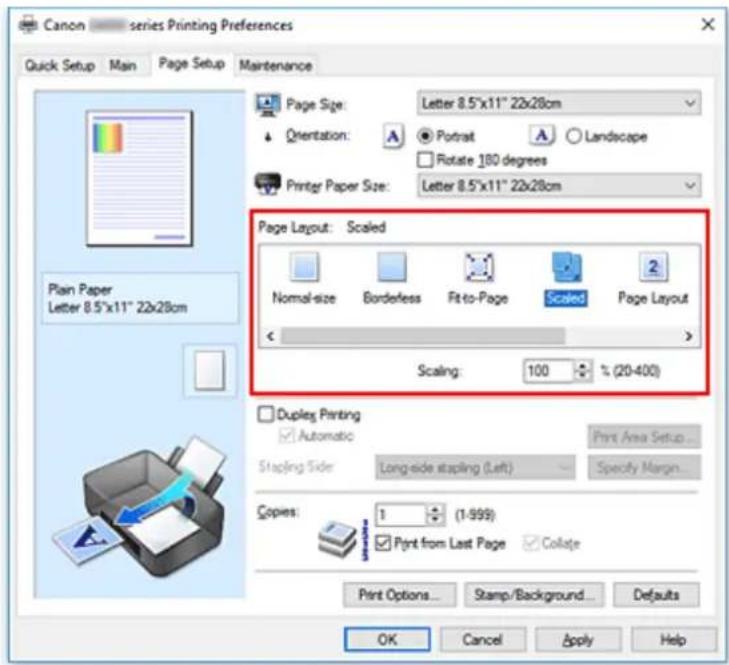
text_image
Canon series Printing Preferences Quick Setup Main Page Setup Maintenance Page Size: Letter 8.5"x11" 22x28cm Orientation: ● Portrait ○ Landscape Rotate 180 degrees Printer Paper Size: Letter 8.5"x11" 22x28cm Page Layout: Scaled Normal-size Borderless Fit-to-Page Scaled Page Layout Scaling: 100 % (20-400) Duplex Printing Automatic Print Area Setup... Stapling Side Long-side stapling (Left) Specify Margin... Copies: 1 %(1-999) Print from Last Page Collate Print Options... Stamp/Background... Defaults OK Cancel Apply Help- Select the paper size of the document
Using Page Size, select the page size that is set with your application software.
- Set the scaling rate by using one of the following methods:
- Select a Printer Paper Size
When the printer paper size is smaller than the Page Size, the page image will be reduced. When the printer paper size is larger than the Page Size, the page image will be enlarged.
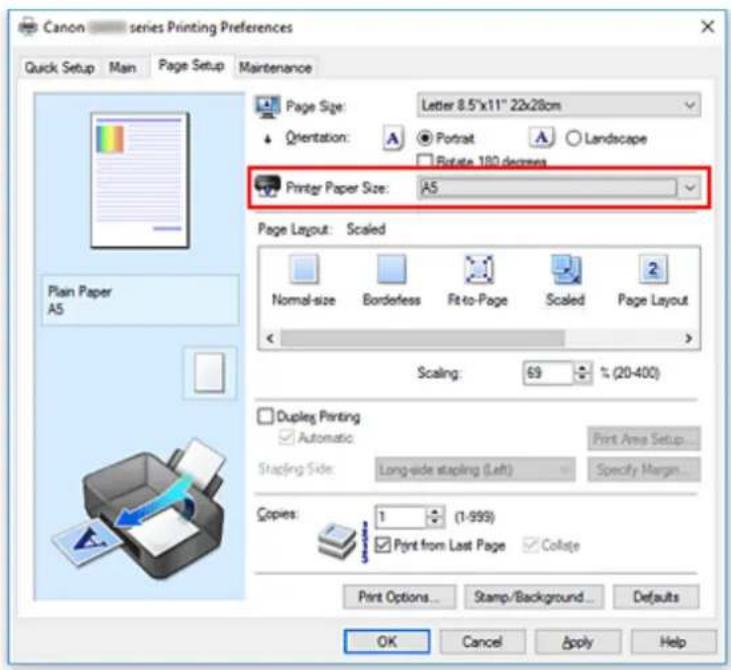
text_image
Canon series Printing Preferences Quick Setup Main Page Setup Maintenance Page Size: Letter 8.5"x11" 22x28cm Orientation: ● Portrait ○ Landscape Rotate 180 degrees Printer Paper Size: A5 Page Layout: Scaled Normal-size Borderless Fit-to-Page Scaled Page Layout Scaling: 69 %(20-400) Duplex Printing Automatic Print Area Setup... Stamping Side: Long-side stapling (Left) Specify Margin... Copies: 1 (1-999) ✓ Print from Last Page Collate Print Options... Stamp/Background...Defaults OK Cancel Apply Help- Specify a scaling factor
Directly type in a value into the Scaling box.
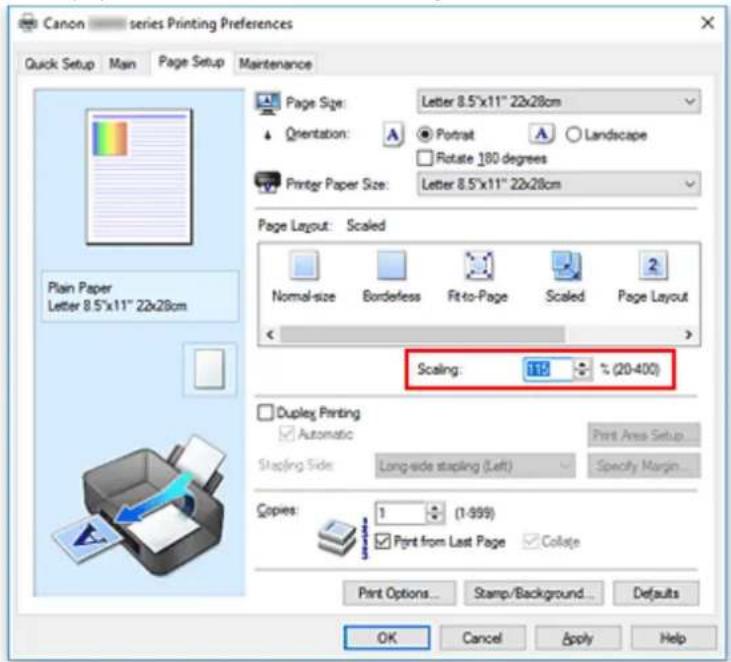
text_image
Canon series Printing Preferences Quick Setup Main Page Setup Maintenance Page Size: Letter 8.5"x11" 22x28cm Orientation: ● Portrait ○ Landscape Rotate 180 degrees Printer Paper Size: Letter 8.5"x11" 22x28cm Page Layout: Scaled Normal-size Borderless Fit-to-Page Scaled Page Layout Scaling: 113 % (20-400) Duplex Printing Automatic Print Area Setup Stepfing Side: Long-side stapling (Left) Specify Margin... Copies: 1 (1-999) ✓ Print from Last Page ✓ Collate Print Options... Stamp/Background... Defaults OK Cancel Apply HelpThe current settings are displayed in the settings preview on the left side of the printer driver.
5.Click OK
When you execute print, the document will be printed with the specified scale.
Important
- When the application software which you used to create the original has the scaled printing function, configure the settings on your application software. You do not need to configure the same setting in the printer driver.
Note
- Selecting Scaled changes the printable area of the document.
Page Layout Printing
The page layout printing function allows you to print more than one page image on a single sheet of paper.
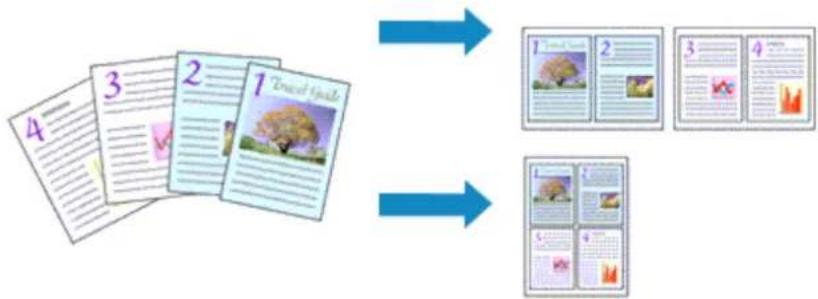
flowchart
graph LR
    A["1: Document 1"] --> B["2: Image 1"]
    B --> C["3: Document 2"]
    C --> D["4: Document 3"]
    D --> E["Final Output Image 1"]
    E --> F["Final Output Image 2"]
    F --> G["Final Output Image 3"]
    G --> H["Final Output Image 4"]
- Open the printer driver setup window
- Set page layout printing
Select Page Layout from the Page Layout list on the Page Setup tab.
The current settings are displayed in the settings preview on the left side of the printer driver.
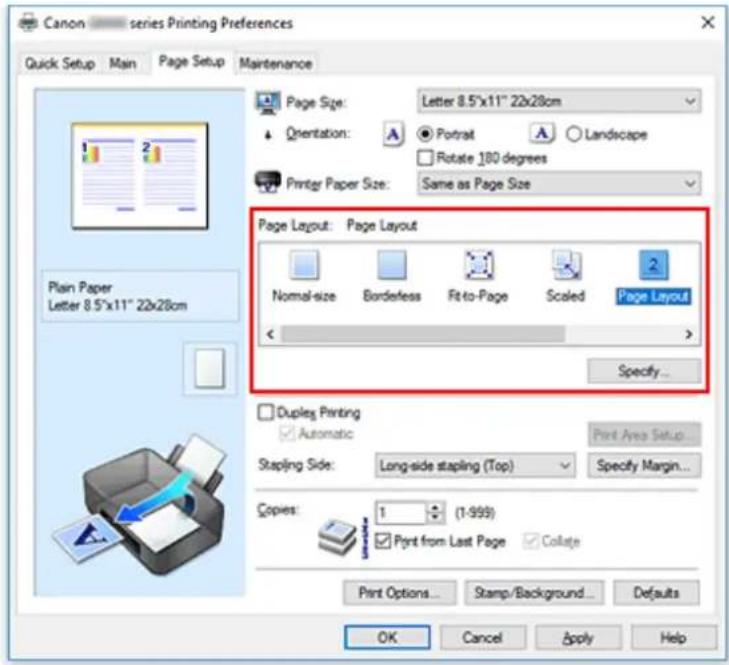
text_image
Canon series Printing Preferences Quick Setup Main Page Setup Maintenance Page Size: Letter 8.5"x11" 22x28cm Orientation: ● Portrait ○ Landscape Rotate 180 degrees Printer Paper Size: Same as Page Size Page Layout: Page Layout Normal-size Borderless Fit-to-Page Scaled Page Layout Specify... Duplex Printing Automatic Print Area Setup... Stapling Side: Long-side stapling (Top) Specify Margin... Copies: 1 (1-999) Print from Last Page Collate Print Options... Stamp/Background...Defaults OK Cancel Apply Help- Select the print paper size
Select the size of the paper loaded in the printer from the Printer Paper Size list.
- Set the number of pages to be printed on one sheet and the page order
If necessary, click Specify..., specify the following settings in the Page Layout Printing dialog box, and click OK.
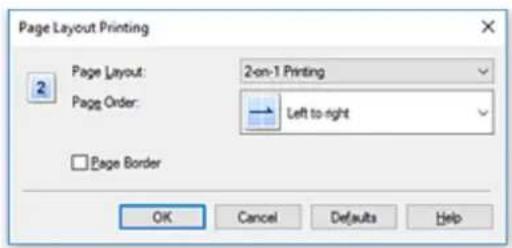
text_image
Page Layout Printing Page Layout: 2-on-1 Printing Page Order: Left to-right Page Border OK Cancel Defaults HelpPage Layout
To change the number of pages to be printed on a single sheet of paper, select the number of pages from the list.
Page Order
To change the page arrangement order, select a placement method from the list.
Page Border
To print a page border around each document page, check this check box.
5. Complete the setup
Click OK on the Page Setup tab.
When you execute print, the specified number of pages will be arranged on each sheet of paper in the specified order.
Tiling/Poster Printing
The tiling/poster printing function allows you to enlarge image data, divide it into several pages, and print these pages on separate sheets of paper. You can also paste the pages together to create a large print like a poster.
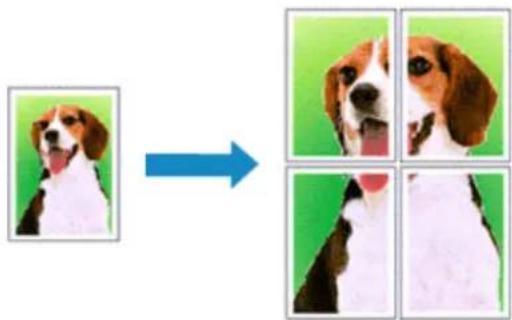
text_image
Image showing a dog with a photo frame transforming into four separate images, likely illustrating a visual or segmentation process.Setting Tiling/Poster Printing
-
Open the printer driver setup window
-
Set tiling/poster printing
Select Tiling/Poster from the Page Layout list on the Page Setup tab.
The current settings are displayed in the settings preview on the left side of the printer driver.
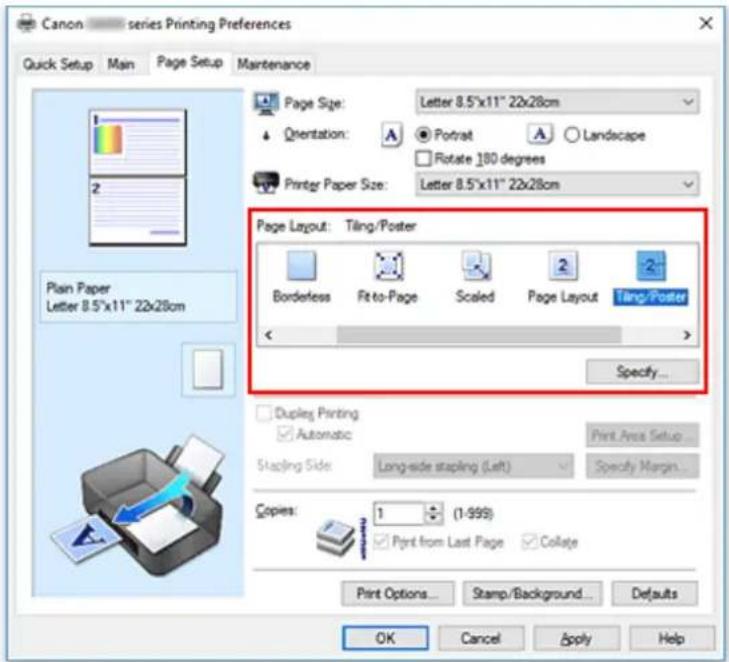
text_image
Canon - series Printing Preferences Quick Setup Main Page Setup Maintenance Page Size: Letter 8.5"x11" 22x28cm Orientation: Rotate 180 degrees Printer Paper Size: Letter 8.5"x11" 22x28cm Page Layout: Tiling/Poster Borderless Fit-to-Page Scaled Page Layout Tiling/Poster Specify... Duplex Printing Automatic Print Area Setup Stapling Side: Long-side stapling (Left) Specify Margin... Copies: 1 (1-999) Print from Last Page Collate Print Options... Stamp/Background... Defaults OK Cancel Apply Help- Select the print paper size
Select the size of the paper loaded in the printer from the Printer Paper Size list.
4. Set the number of image divisions and the pages to be printed
If necessary, click Specify..., specify the following settings in the Tiling/Poster Printing dialog box, and then click OK.
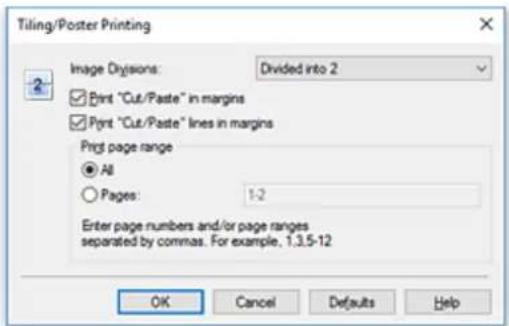
text_image
Tiling/Poster Printing Image Disions: Divided into 2 Print "Cut/Paste" in margins Print "Cut/Paste" lines in margins Print page range All Pages: 1-2 Enter page numbers and/or page ranges separated by commas. For example, 1.3.5-12 OK Cancel Defaults HelpImage Divisions
Select the number of divisions (vertical x horizontal).
As the number of divisions increases, the number of sheets used for printing increases. If you are pasting pages together to create a poster, increasing the number of divisions allows you to create a larger poster.
Print "Cut/Paste" in margins
To leave out words "Cut" and "Paste", uncheck this check box.
Note
- This feature may be unavailable when certain printer drivers or operating environments are used.
Print "Cut/Paste" lines in margins
To leave out cut lines, uncheck this check box.
Print page range
Specifies the printing range. Select All under normal circumstances.
To reprint only a specific page, select Pages and enter the page number you want to print. To specify multiple pages, enter the page numbers by separating them with commas or by entering a hyphen between the page numbers.
Note
- You can also specify the print range by clicking the pages in the settings preview.
5. Complete the setup
Click OK on the Page Setup tab.
When you execute print, the document will be divided into several pages during printing.
Printing Only Specific Pages
If ink becomes faint or runs out during printing, you can reprint only the specific pages by following the procedure below:
1. Set the print range
In the settings preview on the left of the Page Setup tab, click the pages that do not need to be printed.
The pages that were clicked are deleted, and only the pages to be printed are displayed.
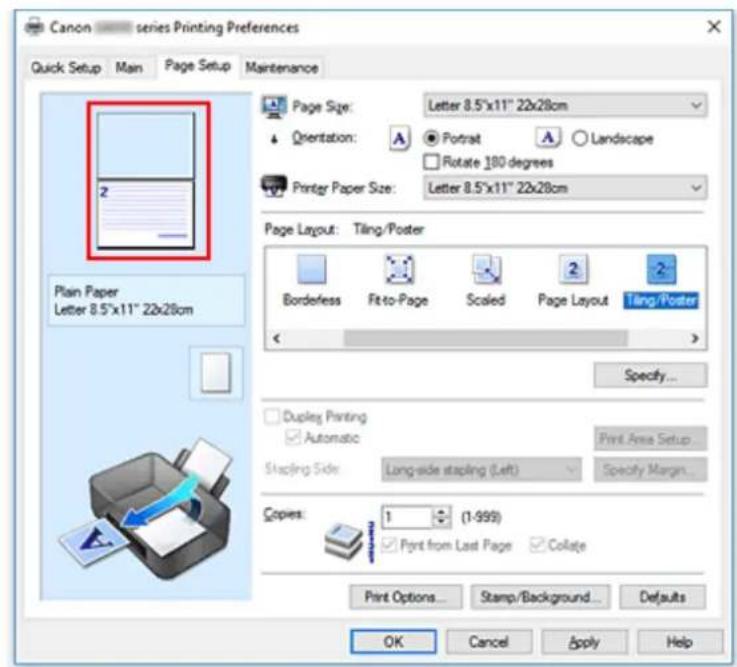
text_image
Canon series Printing Preferences Quick Setup Main Page Setup Maintenance 2 Plain Paper Letter 8.5"x11" 22x28cm Page Size: Letter 8.5"x11" 22x28cm Orientation: A ● Potrat A ○ Landscape Rotate 180 degrees Printer Paper Size: Letter 8.5"x11" 22x28cm Page Layout: Tiling/Poster Borderless Fit-to-Page Scaled Page Layout Tiling/Poster Specify... Duplex Printing Automatic Stacking Side: Long-side stapling (Left) Specify Margin... Copies: 1 (1-999) Print from Last Page Collate Print Options... Stamp/Background...Defaults OK Cancel Apply HelpNote
- Click the deleted pages to display them again.
- Right-click the settings preview to select Print all pages or Delete all pages.
2. Complete the setup
After completing the page selection, click OK.
When you execute print, only specified pages will be printed.
Important
- Since tiling/poster printing enlarges the document when printing it, the print results may become coarse.
Duplex Printing

text_image
Travel Guide Travel GuideYou can also set duplex printing in Additional Features on the Quick Setup tab.
Performing Automatic Duplex Printing
You can perform the duplex printing without having to turn over the paper.
- Open the printer driver setup window
- Set automatic duplex printing
Check the Duplex Printing check box on the Page Setup tab and confirm that Automatic is checked.
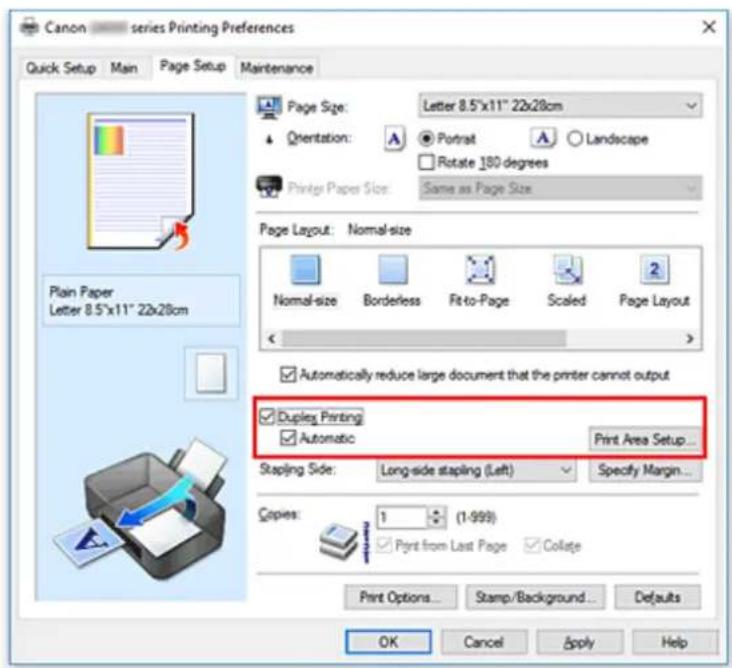
text_image
Canon series Printing Preferences Quick Setup Main Page Setup Maintenance Page Size: Letter 8.5"x11" 22x28cm Orientation: ● Portrait A Landscape Rotate 180 degrees Print Paper Size: Same as Page Size Page Layout: Normal-size Normal-size Borderless Fit-to-Page Scaled Page Layout Automatically reduce large document that the printer cannot output Duplex Printing Automatic.Print Area Setup... Stapling Side: Long-side stapling (Left) Specify Margin... Copies: 1 (1-999) Print from Last Page Collate Print Options... Stamp/Background...Defaults OK Cancel Apply Help- Select the layout
Select Normal-size, Fit-to-Page, Scaled, or Page Layout from the Page Layout list.
- Set the print area
When you perform duplex printing, the print area of the document becomes slightly narrower than usual and the document may not fit on one page.
Click Print Area Setup..., select one of the following process methods, and then click OK.

text_image
Print Area Setup When automatic duplex printing is performed, the printable area of the printer becomes narrower than usual, and the printer may not be able to print the entire document. Select Use reduced printing to print within the printable area. ● Use normal-size printing ○ Use reduced printing OK Cancel Defaults HelpUse normal-size printing
Print without reducing the page.
Use reduced printing
Reduce the page slightly during printing.
5. Specify the side to be stapled
The best Stapling Side is selected automatically from the Orientation and Page Layout settings. To change the setting, select another stapling side from the list.
6. Set the margin width
If necessary, click Specify Margin... and set the margin width, and then click OK.
7. Complete the setup
Click OK on the Page Setup tab.
When you execute print, duplex printing will be started.
Performing Duplex Printing Manually
You can perform the duplex printing manually.
-
Open the printer driver setup window
-
Set duplex printing
Check the Duplex Printing check box and uncheck the Automatic check box on the Page Setup tab.
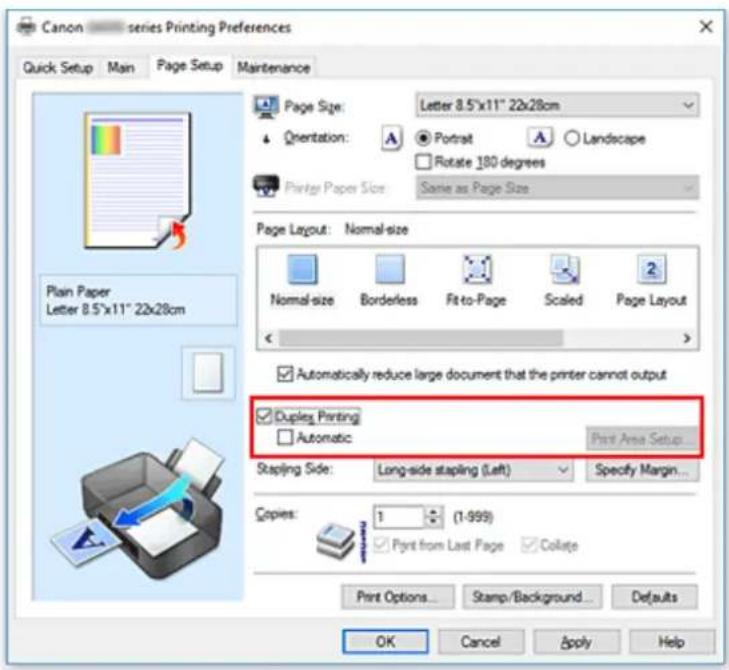
text_image
Canon — series Printing Preferences Quick Setup Main Page Setup Maintenance Page Size: Letter 8.5"x11" 22x28cm Orientation: Rotate 180 degrees Same as Page Size Print Paper Size Page Layout: Normal-size Normal-size Borderless Fit-to-Page Scaled Page Layout Automatically reduce large document that the printer cannot output Duplex Printing Automatic Print Area Setup Stapling Side: Long-side stapling (Left) Specify Margin... Copies: 1 (1-999) Print from Last Page Collate Print Options... Stamp/Background... Defaults OK Cancel Apply Help3. Select the layout
Select Normal-size, Fit-to-Page, Scaled, or Page Layout from the Page Layout list.
4. Specify the side to be stapled
The best Stapling Side is selected automatically from the Orientation and Page Layout settings. To change the setting, select another stapling side from the list.
5. Set the margin width
If necessary, click Specify Margin... and set the margin width, and then click OK.
6. Complete the setup
Click OK on the Page Setup tab.
When you execute print, the document is first printed on one side of a sheet of paper. After one side is printed, reload the paper correctly according to the message.
Then click Start Printing to print the opposite side.
Important
- When a media type other than Plain Paper is selected from the Media Type list on the Main tab, Duplex Printing appears grayed out and is unavailable.
- When Borderless, Tiling/Poster, or Booklet is selected from the Page Layout list, Duplex Printing and Stapling Side appear grayed out and are unavailable.
- Duplex Printing can be performed only when one of the following paper sizes is selected from Page Size on the Page Setup tab.
• Letter 8.5"x11" 22x28cm, A5, A4, B5
- After printing the front page, there is an ink drying wait time before starting to print the back page (Operation stops temporarily). Do not touch the paper during this time. You can change the ink drying wait time at Custom Settings in the Canon IJ Printer Assistant Tool.
Related Topic
→ Changing the Printer Operation Mode
Setting Up Envelope Printing
- Load envelope on the printer
- Open the printer driver setup window
- Select the media type
Select Envelope from Commonly Used Settings on the Quick Setup tab.
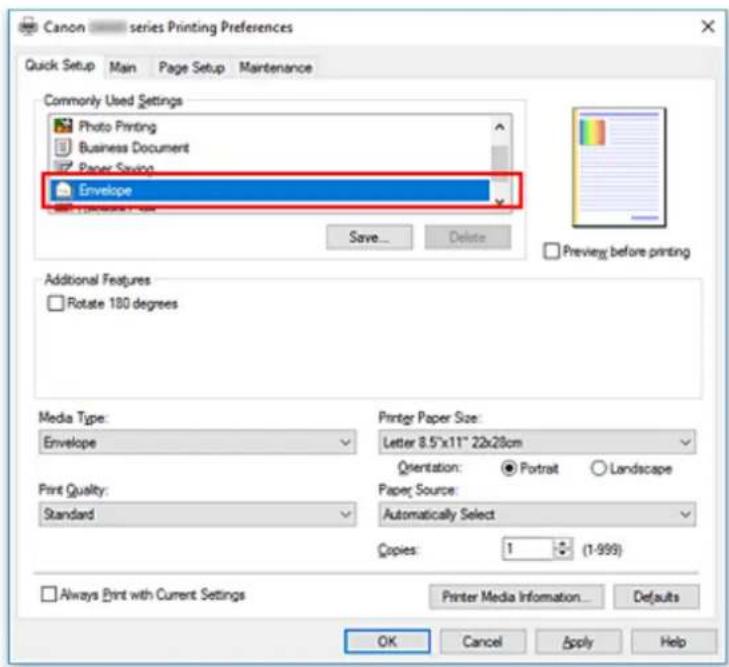
text_image
Canon — series Printing Preferences Quick Setup Main Page Setup Maintenance Commonly Used Settings Photo Printing Business Document Paper Saving Envelope Save... Delete Additional Features Rotate 180 degrees Media Type: Envelope Print Quality: Standard Printer Paper Size: Letter 8.5"x11" 22x28cm Orientation: Portrait Landscape Paper Source: Automatically Select Copies: 1 (1-999) Always Print with Current Settings Printer Media Information... OK Cancel Apply Help- Select the paper size
When the Envelope Size Setting dialog box is displayed, select Envelope Com 10, Envelope DL, Yougata 4 4.13"x9.25", or Yougata 6 3.86"x7.48", and then click OK.
- Set the orientation
To print the addressee horizontally, select Landscape for Orientation.
Note
- If Envelope Com 10, Envelope DL, Yougata 4 4.13"x9.25", or Yougata 6 3.86"x7.48" is selected for Printer Paper Size, the printer rotates the paper 90 degrees to the left to print, regardless of the Rotate 90 degrees left when orientation is [Landscape] setting for Custom Settings in the Canon IJ Printer Assistant Tool.
6. Select the print quality
Select High or Standard that matches your purpose for Print Quality.
7. Click OK
When you execute print, the information is printed on the envelope.
Important
- When you execute envelope printing, guide messages are displayed.
To hide the guide messages, check the Do not show this message again check box.
To show the guide again, click the View Printer Status button on the Maintenance tab, and start the Canon IJ Status Monitor.
Then click Envelope Printing from Display Guide Message of the Option menu to enable the setting.
Note
-
If the paper settings in the printer driver differ from the paper information registered on the printer, an error may occur. For instructions on what to do if an error occurs, see "Paper Settings."
To check the current printer settings or to apply the printer settings to the printer driver, click Printer Media Information... from the Quick Setup tab, and specify the settings in the dialog box that appears.
For details about the paper information to be registered on the printer, see the following:
• Paper Settings on the Printer Driver and the Printer (Media Type)
• Paper Settings on the Printer Driver and the Printer (Paper Size) -
Load postcard on the printer
- Open the printer driver setup window
- Select commonly used settings
Display the Quick Setup tab, and for Commonly Used Settings, select Standard.
- Select the media type
For Media Type, select Ink Jet Hagaki (A), Ink Jet Hagaki, Hagaki K (A), Hagaki K, Hagaki (A), or Hagaki.
Important
- This printer cannot print on postcards that have photos or stickers attached.
- When printing on each side of a postcard separately, you will get cleaner printing if you print the message side first and then print the address side.
- The paper settings on the printer driver are different, depending on whether you are printing on the address side or the message side.
To check the current printer settings or to apply the printer settings to the printer driver, click Printer Media Information... from the Quick Setup tab, and specify the settings in the dialog box that appears.
For details about the paper information to be registered to the printer driver and on the printer, see the following:
• Paper Settings on the Printer Driver and the Printer (Media Type)
• Paper Settings on the Printer Driver and the Printer (Paper Size)
- Select the paper size
For Printer Paper Size, select Hagaki 100x148mm or Hagaki 2 200x148mm.
Important
- Return postcards can be used only when you print them from the computer.
- When printing a return postcard, always set the paper size to Hagaki 2 200x148mm from your application software or the printer driver.
- Do not fold the return postcard. If a crease is formed, the printer will not be able to feed the postcard properly, and this condition will cause line shifts or a paper jam.
-
With return postcards, borderless printing cannot be used.
-
Set the print orientation
To print the address horizontally, set Orientation to Landscape.
- Select the print quality
For Print Quality, select High or Standard, according to your purpose.
8. Click OK
When you execute printing, the data will be printed onto the postcard.
Important
- If you want to display a guide message when performing postcard printing, open the Maintenance tab and click View Printer Status to start the Canon IJ Status Monitor.
On the Option menu, choose Display Guide Message and click Hagaki Printing to enable the setting. To hide these guide messages, select the Do not show this message again check box. - When printing on media other than postcards, load the media according to usage method of that media, and click Start Printing.
Overview of the Printer Driver
Canon IJ Printer Driver
- Opening Printer Driver's Setup Screen
Canon IJ Status Monitor
▶ Instructions for Use (Printer Driver)
Canon IJ Printer Driver
The Canon IJ printer driver (simply called printer driver below) is software that you install onto your computer so that it can communicate with the printer.
The printer driver converts the print data created by your application software into data that your printer can understand, and sends the converted data to the printer.
Because different printers support different data formats, you need a printer driver that supports your printer.
Installing the Printer Driver
To install the printer driver, install the driver from Start Setup on the setup CD-ROM that came with your printer.
Specifying the Printer Driver
To specify the printer driver, open the Print dialog box of the application software you are using, and select "Canon XXX" (where "XXX" is your model name).
Displaying the Manual from the Printer Driver
To display the description of a setup tab from the printer driver's setup screen, click Help on that tab.
Related Topic
→ Opening Printer Driver's Setup Screen
You can display the printer driver's setup screen from your application software or by clicking the printer icon.
Displaying the Printer Driver's Setup Screen from Your Application Software
Perform this procedure to set up the print settings during printing.
- Select print command from application software
The Print command can generally be found in the File menu.
- Select your printer model, and click Preferences (or Properties)
The printer driver's setup screen appears.
Note
- Depending on the application software you are using, the command and menu names, and the number of steps may vary. For details, refer to the operating instructions of your application software.
Displaying the Printer Driver's Setup Screen by Clicking the Printer Icon
From the setup screen you can perform printer maintenance operations such as print head cleaning, or set print settings to be shared by all application software.
-
Select Control Panel -> Hardware and Sound -> Devices and Printers
-
Right-click the icon of your model. When the menu appears, select Printing preferences
The printer driver's setup screen appears.
Important
- Opening the printer driver setup window through Printer properties displays such tabs regarding the Windows functions as the Ports (or Advanced) tab. Those tabs do not appear when opening through Printing preferences or application software. For tabs regarding Windows functions, refer to the user's manual for the Windows.
Canon IJ Status Monitor
The Canon IJ Status Monitor displays the printer status and the printing progress. The printer status is shown by the icons and messages in the status monitor.
Launching the Canon IJ Status Monitor
The Canon IJ Status Monitor launches automatically when print data is sent to the printer. When launched, the Canon IJ Status Monitor appears as a button on the task bar.

text_image
Screenshot of a software toolbar with icons and dropdown menus, highlighting the rightmost icon.Click the button of the status monitor displayed on the task bar. The Canon IJ Status Monitor appears.
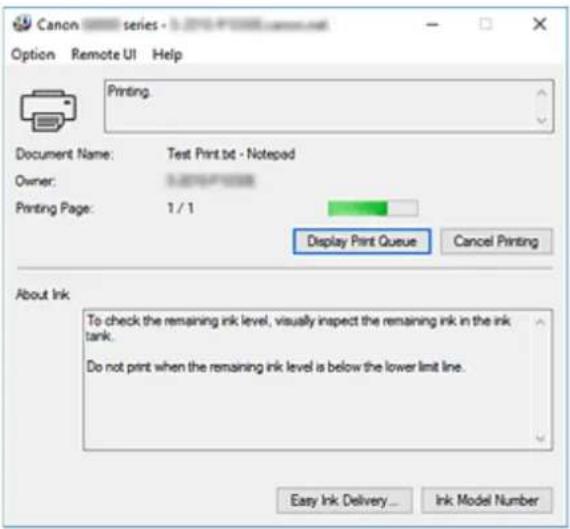
text_image
Canon series Option Remote UI Help Printing Document Name: Test Print bit - Notepad Owner: 0.0000000000 Printing Page: 1 / 1 Display Print Queue Cancel Printing About Ink To check the remaining ink level, visually inspect the remaining ink in the ink tank. Do not print when the remaining ink level is below the lower limit line. Easy Ink Delivery... Ink Model NumberNote
- To open the Canon IJ Status Monitor when the printer is not printing, open the printer driver setup window and click View Printer Status on the Maintenance tab.
- The information displayed on the Canon IJ Status Monitor may differ depending on the country or region where you are using your printer.
When Errors Occur
The Canon IJ Status Monitor is automatically displayed if an error occurs (e.g., if the printer runs out of paper or if the ink is low).
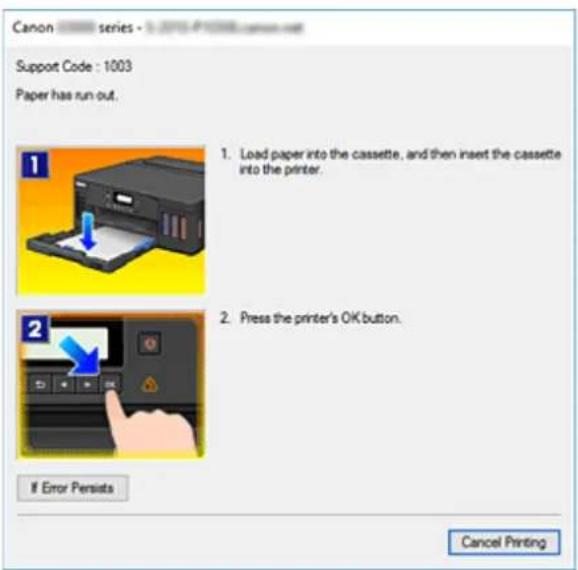
text_image
Canon series Support Code : 1003 Paper has run out. 1. Load paper into the cassette, and then insert the cassette into the printer. 2. Press the printer's OK button. If Error Persists Cancel PrintingIn such cases, take the appropriate action as described.
This printer driver is subject to the following restrictions. Keep the following points in mind when using the printer driver.
Restrictions on the Printer Driver
- Depending on the document type to be printed, the paper feed method specified in the printer driver may not operate correctly.
If this happens, open the printer driver setup window from the Print dialog box of the application software, and check the setting in the Paper Source field on the Main tab.
- With some applications, the Copies setting in the Page Setup tab of the printer driver may not be enabled.
In this case, use the copies setting in the Print dialog box of the application software.
- If the selected Language in the About dialog box of the Maintenance tab does not match the operating system interface language, the printer driver setup window may not be displayed properly.
- Do not change the Advanced tab items of the printer properties. If you change any of the items, you will not be able to use the following functions correctly.
Also, if Print to file is selected in the Print dialog box of the application software and with applications that prohibit EMF spooling, such as Adobe Photoshop LE and MS Photo Editor, the following functions will not operate.
- Preview before printing on the Main tab
• Prevention of Print Data Loss in the Print Options dialog box on the Page Setup tab - Page Layout, Tiling/Poster, Booklet, Duplex Printing, Specify Margin..., Print from Last Page, Collate, and Stamp/Background... on the Page Setup tab
-
Print a pattern for color adjustment on the Color Adjustment tab in the Manual Color Adjustment dialog box
-
Since the resolution in the preview display differs from the printing resolution, text and lines in the preview display may appear different from the actual print result.
- With some applications, the printing is divided into multiple print jobs.
To cancel printing, delete all divided print jobs.
- If image data is not printed correctly, display the Print Options dialog box from the Page Setup tab and change the setting of Disable ICM required from the application software. This may solve the problem.
Points to Note About Applications with Restrictions
- There are following restrictions in Microsoft Word (Microsoft Corporation).
- When Microsoft Word has the same printing functions as the printer driver, use Word to specify them.
- When Fit-to-Page, Scaled, or Page Layout is used for Page Layout on the Page Setup tab of the printer driver, the document may not print normally in certain versions of Word.
- When Page Size in Word is set to "XXX Enlarge/Reduce", the document may not print normally in certain versions of Word.
If this happens, follow the procedure below.
-
Open Word's Print dialog box.
-
Open the printer driver setup window, and on the Page Setup tab, set Page Size to the same paper size that you specified in Word.
- Set the Page Layout that you want, and then click OK to close the window.
- Without starting printing, close the Print dialog box.
- Open Word's Print dialog box again.
- Open the printer driver setup window and click OK.
- Start printing.
- If bitmap printing is enabled in Adobe Illustrator (Adobe Systems Incorporated), printing may take time or some data may not be printed. Print after unchecking the Bitmap Printing check box in the Print dialog box.
Printer Driver Description
Quick Setup Tab Description
▶ Main Tab Description
Page Setup Tab Description
▶ Maintenance Tab Description
Canon IJ Status Monitor Description
Quick Setup Tab Description
The Quick Setup tab is for registering commonly used print settings. When you select a registered setting, the printer automatically switches to the preset items.
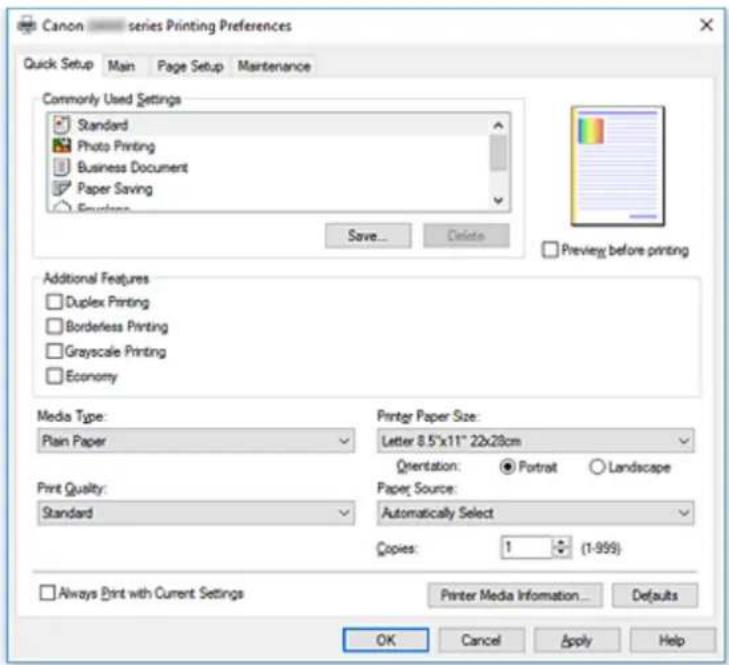
text_image
Canon —— series Printing Preferences Quick Setup Main Page Setup Maintenance Commonly Used Settings Standard Photo Printing Business Document Paper Saving Envelope Save... Delete Preview before printing Additional Features Duplex Printing Borderless Printing Grayscale Printing Economy Media Type: Plain Paper Print Quality: Standard Printer Paper Size: Letter 8.5"x11" 22x28cm Orientation: ● Portrait ○ Landscape Paper Source: Automatically Select Copies: 1 (1-999) Always Print with Current Settings Printer Media Information... Defaults OK Cancel Apply HelpCommonly Used Settings
The names and icons of frequently used printing profiles are registered. When you select a printing profile according to the purpose of the document, settings that match the purpose are applied.
In addition, functions that are thought to be useful for the selected printing profile are displayed in
Additional Features.
You can also change a printing profile and register it under a new name. You can delete the registered printing profile.
You can rearrange the profiles either by dragging the individual profiles or by holding down the Ctrl key and pressing the up or down arrow keys.
Standard
These are the factory settings.
If Page Size, Orientation, and Copies were set from the application software, those settings have priority.
Photo Printing
If you select this setting when printing a photo, the photo paper and photo size generally used are set. The Borderless Printing check box is checked automatically.
If Orientation and Copies were set from the application software, those settings have priority.
Business Document
Select this setting when printing a general document.
If Page Size, Orientation, and Copies were set from the application software, those settings have priority.
Paper Saving
Select this setting to save paper when printing a general document. The 2-on-1 Printing and Duplex Printing check boxes are checked automatically.
If Page Size, Orientation, and Copies were set from the application software, those settings have priority.
Envelope
If you select this setting for printing an envelope, Media Type is set automatically to Envelope. In the Envelope Size Setting dialog box, select the size of the envelope to be used.
Greeting Card
When selected for printing a greeting card, the Media Type is automatically set to Inkjet Greeting Card. The Print Quality is also set to High, and a check-mark is added to Borderless Printing.
Note
- The combination of the Additional Features that was displayed for the printing profile that had been selected when the added printing profile was saved is also displayed when that added printing profile is selected.
Save...
Displays the Save Commonly Used Settings dialog box.
Click this button when you want to save the information that you set on the Quick Setup, Main, and Page Setup tabs to Commonly Used Settings.
Delete
Deletes a registered printing profile.
Select the name of the setting to be deleted from Commonly Used Settings, and click Delete. When a confirmation message is displayed, click OK to delete the specified printing profile.
Note
- Printing profiles that are registered in the initial settings cannot be deleted.
Settings Preview
The paper illustration shows how the original will be laid out on a sheet of paper.
You can check an overall image of the layout.
Preview before printing
Shows what the print result will look like before you actually print the data.
Check this check box to display a preview before printing.
Uncheck this check box if you do not want to display a preview.
Additional Features
Displays the frequently used, convenient functions for the printing profile that you selected for
Commonly Used Settings on the Quick Setup tab.
When you move the mouse pointer near a function that can be changed, a description of that function is displayed.
To enable a function, check the corresponding check box.
For some functions, you can set detailed settings from the Main and Page Setup tabs.
Important
- Depending on the printing profiles, certain function may be grayed out and you will not be able to change them.
2-on-1 Printing
Prints two pages of the document, side by side, on one sheet of paper.
To change the page sequence, click the Page Setup tab, select Page Layout for Page Layout, and click Specify.... Then in the Page Layout Printing dialog box that appears, specify the Page Order.
4-on-1 Printing
Prints four pages of the document, side by side, on one sheet of paper.
To change the page sequence, click the Page Setup tab, select Page Layout for Page Layout, and click Specify.... Then in the Page Layout Printing dialog box that appears, specify the Page Order.
Duplex Printing
Selects whether to print the document on both sides or one side of a sheet of paper.
To change the staple side or the margins, set the new values from the Page Setup tab.
Borderless Printing
Performs borderless printing without any margins on the paper.
With the borderless printing function, the document to be printed is enlarged, so that it extends slightly off the paper. In other words, the document is printed without any margin.
To adjust the amount that the document extends beyond the paper, click the Page Setup tab, choose Borderless, and enter the value in Amount of Extension.
Grayscale Printing
This function converts the data to monochrome data when printing your document.
Economy
Reduces the amount of black ink used when printing.
Note
- Selecting Economy reduces black ink consumption. This means that you can print more than if you have Standard selected.
The Economy setting does not affect the amount of color ink consumed. Economy and
Standard will consume the same amount of color ink.
For details on Economy Mode, see "Economy Mode."
Rotate 180 degrees
Prints the document by rotating it 180 degrees against the paper feed direction.
The width of print area and the amount of extension that are configured in other application software will be reversed vertically and horizontally.
Color/Intensity Manual Adjustment
Select when you set the Color Correction method and individual settings such as Cyan, Magenta, Yellow, Brightness, Intensity, Contrast, etc.
Media Type
Selects a type of printing paper.
Select a media type that matches the paper that is loaded in the printer. This ensures that printing is carried out properly for the specified paper.
Printer Paper Size
Selects the size of paper actually loaded into the printer.
Normally, the paper size is set automatically according to the output paper size setting, and the
document is printed with no scaling.
When you set 2-on-1 Printing or 4-on-1 Printing in Additional Features, you can manually set the paper size with Page Size on the Page Setup tab.
If you select a paper size that is smaller than the Page Size, the document size will be reduced. If you select a paper size that is larger, the document size will be enlarged.
Also if you select Custom..., the Custom Paper Size dialog box opens and allows you to specify any vertical and horizontal dimensions for the paper size.
Orientation
Selects the printing orientation.
If the application used to create your document has a similar function, select the same orientation that you selected in that application.
Portrait
Prints the document so that its top and bottom positions are unchanged relative to the paper feed direction. This is the default setting.
Landscape
Prints the document by rotating it 90 degrees relative to the paper feed direction.
You can change the rotation direction by going to the Canon IJ Printer Assistant Tool, opening the
Custom Settings dialog box, and then using Rotate 90 degrees left when orientation is [Landscape] check box.
To rotate the document 90 degrees to the left when printing, select the Rotate 90 degrees left when orientation is [Landscape] check box.
Print Quality
Selects your desired printing quality.
Select one of the following to set the print quality level that is appropriate for the purpose.
To set the print quality level individually, click the Main tab, and for Print Quality, select Custom. The
Set... becomes enabled. Click Set... to open the Custom dialog box, and then specify the desired settings.
High
Gives priority to print quality over printing speed.
Standard
Prints with average speed and quality.
Economy
Reduces the amount of black ink used when printing.
Note
- Selecting Economy in Print Quality reduces black ink consumption. This means that you can print more than if you have Standard selected.
The Economy setting does not affect the amount of color ink consumed. Economy and
Standard will consume the same amount of color ink.
For details on Economy Mode, see "Economy Mode."
Paper Source
Select the source from which paper is supplied.
Automatically Select
Based on the paper settings in the printer driver and the paper information registered on the printer, the printer automatically determines the paper source and feeds paper.
Rear Tray
Paper is always supplied from the rear tray.
Cassette
Paper is always supplied from the cassette.
Important
- Depending on the media type and size, the Paper Source settings that can be selected may differ.
Copies
Specifies the number of copies you want to print. You can specify a value from 1 to 999.
Important
- When the application software that you used to create the document has the same function, specify the settings on the printer driver. However, if the print results are not acceptable, specify the function settings on the application software.
Always Print with Current Settings
Prints documents with the current settings starting from the next print execution.
When you select this function and then close the printer driver setup window, the information that you set on the Quick Setup, Main, and Page Setup tabs are saved and printing with the same settings is possible starting from the next print execution.
Important
- If you log on with a different user name, the settings that were set when this function was enabled are not reflected in the print settings.
- If a setting was specified on the application software, it has priority.
Printer Media Information...
Displays Printer Media Information dialog box.
You can check the printer settings and apply the checked settings to the printer driver.
Defaults
Restores all the settings you have changed to their default values.
Click this button to return all settings on the Quick Setup, Main, and Page Setup tabs to their default values (factory settings).
Save Commonly Used Settings dialog box
This dialog box allows you to save the information that you set on the Quick Setup, Main, and Page Setup tabs and add the information to the Commonly Used Settings list on the Quick Setup tab.
Name
Enter the name for the printing profile you wish to save.
Up to 255 characters can be entered.
The name appears, with its associated icon, in the Commonly Used Settings list on the Quick Setup tab.
Options...
Opens the Save Commonly Used Settings dialog box.
Changes the details of printing profile to be saved.
Save Commonly Used Settings dialog box
Select the icons of the printing profiles to be registered to Commonly Used Settings, and change the items to be saved in the printing profiles.
Icon
Select the icon for the printing profile you wish to save.
The selected icon appears, with its name, in the Commonly Used Settings list on the Quick Setup tab.
Save the paper size setting
Saves the paper size to the printing profile in Commonly Used Settings.
To apply the saved paper size when the printing profile is selected, check this check box.
If this check box is unchecked, the paper size is not saved, and consequently the paper size setting is not applied when the printing profile is selected. Instead the printer prints with the paper size specified with the application software.
Save the orientation setting
Saves the Orientation to the printing profile in Commonly Used Settings.
To apply the saved print orientation when the printing profile is selected, check this check box.
If this check box is unchecked, the print orientation is not saved, and consequently the Orientation setting is not applied when the printing profile is selected. Instead the printer prints with the print orientation specified with the application software.
Save the copies setting
Saves the Copies setting to the printing profile in Commonly Used Settings.
To apply the saved copies setting when the printing profile is selected, check this check box.
If this check box is unchecked, the copies setting is not saved, and consequently the Copies setting is not applied when the printing profile is selected. Instead the printer prints with the copies setting specified with the application software.
Custom Paper Size dialog box
This dialog box allows you to specify the size (width and height) of the custom paper.
Units
Select the unit for entering a user-defined paper size.
Paper Size
Specifies the Width and the Height of the custom paper. Measurement is shown according to the units specified in Units.
Printer Media Information dialog box
This dialog box allows you to check the printer settings and apply the checked settings to the printer driver.
Paper Source
Check the setting or select a new paper source.
Media Type
Displays the Media Type that is currently set on the printer.
To apply the displayed setting to the printer driver, click Set.
Page Size
Displays the Page Size that is currently set on the printer.
To apply the displayed setting to the printer driver, click Set.
Related Topics
→ Basic Printing Setup
Setting a Page Size and Orientation
Setting the Number of Copies and Printing Order
→ Execute Borderless Printing
→ Duplex Printing
Setting Up Envelope Printing
→ Printing on Postcards
→ Switching the Paper Source to Match the Purpose
→ Displaying the Print Results Before Printing
Setting Paper Dimensions (Custom Size)
→ Printing a Color Document in Monochrome
→ Specifying Color Correction
→ Adjusting Color Balance
Adjusting Color Balance Using Sample Patterns (Printer Driver)
→ Adjusting Brightness
→ Adjusting Intensity
→ Adjusting Contrast
Adjusting Intensity/Contrast Using Sample Patterns (Printer Driver)
Registering a Frequently Used Printing Profile
Main Tab Description
The Main tab allows you to create a basic print setup in accordance with the media type. Unless special printing is required, normal printing can be performed just by setting the items on this tab.
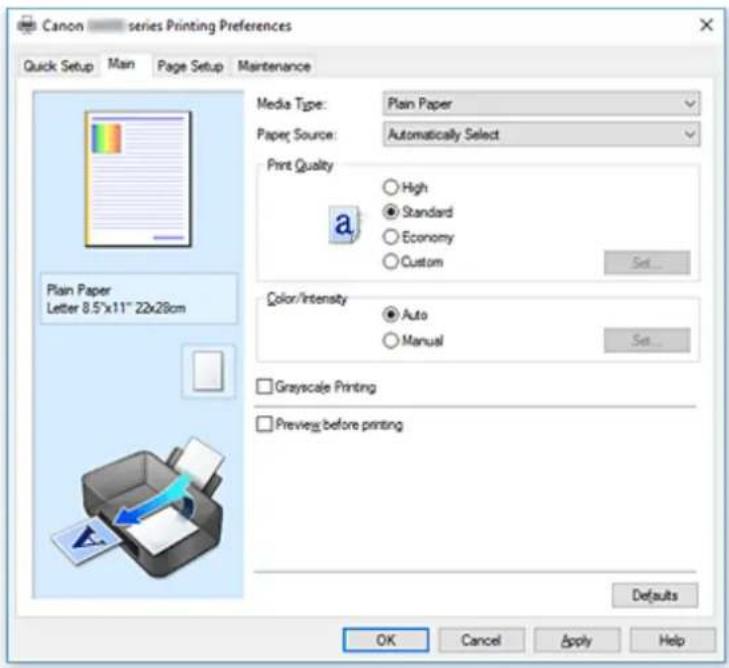
text_image
Canon — series Printing Preferences Quick Setup Main Page Setup Maintenance Media Type: Plain Paper Paper Source: Automatically Select Print Quality High Standard Economy Custom a Set... Plain Paper Letter 8.5"x11" 22x29cm Color/Intensity Auto Manual Set... Grayscale Printing Preview before printing Defaults OK Cancel Apply HelpSettings Preview
The paper illustration shows how the original will be laid out on a sheet of paper.
You can check an overall image of the layout.
The printer illustration shows how to load paper to match the printer driver settings.
Check whether the printer is set up correctly by looking at the illustration before you start printing.
Media Type
Selects a type of printing paper.
Select a media type that matches the paper that is loaded in the printer. This ensures that printing is carried out properly for the specified paper.
Paper Source
Shows the source from which paper is supplied.
You may be able to switch the paper source with the printer driver.
Automatically Select
Based on the paper settings in the printer driver and the paper information registered on the printer, the printer automatically determines the paper source and feeds paper.
Rear Tray
Paper is always supplied from the rear tray.
Cassette
Paper is always supplied from the cassette.
Important
- Depending on the media type and size, the Paper Source settings that can be selected may differ.
Print Quality
Selects your desired printing quality.
Select one of the following to set the print quality level that is appropriate for the purpose.
Important
- Depending on the Media Type settings, the same print results may be produced even if the Print Quality is changed.
High
Gives priority to print quality over printing speed.
Standard
Prints with average speed and quality.
Economy
Reduces the amount of black ink used when printing.
Note
- Selecting Economy in Print Quality reduces black ink consumption. This means that you can print more than if you have Standard selected. The Economy setting does not affect the amount of color ink consumed. Economy and Standard will consume the same amount of color ink. For details on Economy Mode, see "Economy Mode."
Custom
Select this when you want to set the printing quality level individually.
Set...
Select Custom for Print Quality to enable this button.
Open the Custom dialog box. You can then individually set the print quality level.
Color/Intensity
Selects color adjustment method.
Auto
Cyan, Magenta, Yellow, Brightness, Intensity, Contrast, and so on are adjusted automatically.
Manual
Select when you set the individual settings such as Cyan, Magenta, Yellow, Brightness, Intensity, Contrast, etc. and Color Correction method.
Set...
Select Manual for Color/Intensity to enable this button.
In the Manual Color Adjustment dialog box, you can adjust individual color settings such as
Cyan, Magenta, Yellow, Brightness, Intensity, and Contrast on the Color Adjustment tab, and select the Color Correction method on the Matching tab.
Note
- If you want to use an ICC profile to adjust colors, use the Manual Color Adjustment dialog box to set the profile.
Grayscale Printing
This function converts the data to monochrome data when printing your document.
Check this check box to print a color document in monochrome.
Preview before printing
Shows what the print result will look like before you actually print the data.
Check this check box to display a preview before printing.
Defaults
Restores all the settings you have changed to their default values.
Clicking this button restores all the settings on the current screen to their default values (factory settings).
Custom dialog box
Set the quality level, and select the desired print quality.
Quality
You can use the slider bar to adjust the print quality level.
Important
- Certain print quality levels cannot be selected depending on the settings of Media Type.
Note
- The High, Standard, or Economy print quality modes are linked with the slider bar. Therefore when the slider bar is moved, the corresponding quality and value are displayed on the left. This is the same as when the corresponding radio button is selected for Print Quality on the Main tab.
Color Adjustment Tab
This tab allows you to adjust the color balance by changing the settings of the Cyan, Magenta, Yellow, Brightness, Intensity, and Contrast options.
Preview
Shows the effect of color adjustment.
The color and brightness change when each item is adjusted.
Note
- The graphic is in monochrome when the Grayscale Printing check box is checked.
View Color Pattern
Displays a pattern for checking color changes produced by color adjustment.
If you want to display the preview image with a color pattern, check this check box.
Cyan / Magenta / Yellow
Adjusts the strengths of Cyan, Magenta, and Yellow.
Moving the slider to the right makes a color stronger, and moving the slider to the left makes a color weaker.
You can also directly enter a value linked to the slider. Enter a value in the range from -50 to 50.
This adjustment changes the relative amount of ink of each color used, which alters the total color balance of the document. Use your application if you want to change the total color balance significantly. Use the printer driver only if you want to adjust the color balance slightly.
Important
- When Grayscale Printing is checked on the Main tab, Cyan, Magenta, and Yellow appear grayed out and are unavailable.
Brightness
Selects the brightness of your print.
You cannot change the levels of pure white and black. However, the brightness of the colors between white and black can be changed.
Intensity
Adjusts the overall intensity of your print.
Moving the slider to the right increases the intensity, and moving the slider to the left decreases the intensity.
You can also directly enter a value linked to the slider. Enter a value in the range from -50 to 50.
Contrast
Adjusts the contrast between light and dark in the image to be printed.
Moving the slider to the right increases the contrast, moving the slider to the left decreases the contrast.
You can also directly enter a value linked to the slider. Enter a value in the range from -50 to 50.
Print a pattern for color adjustment
When the color balance or intensity/contrast is changed, the pattern printing function prints a list of the adjustment results along with the adjustment values.
Select this function when printing a pattern for color adjustment.
Pattern Print preferences...
Check Print a pattern for color adjustment to enable this button.
The Pattern Print dialog box opens and allows you to set pattern printing settings.
Pattern Print dialog box
Performs the setup for printing of patterns that allow you to check the color balance and intensity/contrast of documents.
Parameters to Adjust
Select the item to be checked by pattern printing.
Cyan/Magenta/Yellow
Prints a pattern that allows you to check the cyan/magenta/yellow balance.
Important
- When Grayscale Printing is checked on the Main tab, Cyan/Magenta/Yellow appear grayed out and are unavailable.
Intensity/Contrast
Prints a pattern that allows you to check the intensity/contrast balance.
Printer Paper Size
Selects the paper size to be used for pattern printing.
This setting is linked to Printer Paper Size on the Page Setup tab.
Note
- Depending on the paper size selected on the Page Setup tab, there may be sizes that cannot be selected.
Amount of Pattern Instances
Sets the number of patterns to be printed.
You can select from Largest, Large, and Small. When you select a pattern size, the number of patterns that can be printed is as follows:
Note
- Largest and Large cannot be selected when certain paper sizes or output paper sizes are selected.
- The setting preview on the Main tab displays an image that allows you to check the overall layout.
Largest
Cyan/Magenta/Yellow 37
Intensity/Contrast 49
Large
Cyan/Magenta/Yellow 19
Intensity/Contrast 25
Small
Cyan/Magenta/Yellow 7
Intensity/Contrast 9
Color Variation Between Instances
Sets the amount of color change between neighboring patterns.
Select from Large, Medium, and Small. Large produces a large amount of change, and Small produces a small amount of change.
Note
- Large is about double the size of Medium, and Small is about half the size of Medium.
Matching Tab
Allows you to select the method for adjusting colors to match the type of document to be printed.
Color Correction
Allows you to select Driver Matching, ICM, or None to match the purpose of the print operation.
Important
- When Grayscale Printing is checked on the Main tab, Color Correction appears grayed out and is unavailable.
Driver Matching
With Canon Digital Photo Color, you can print sRGB data with color tints that most people prefer.
ICM
Adjusts the colors by using an ICC profile when printing.

Important
- If the application software is set so that ICM is disabled, ICM is unavailable for Color Correction and the printer may not be able to print the image data properly.
None
Disables color adjustment with the printer driver.
Related Topics
Setting the Print Quality Level (Custom)
→ Adjusting Color Balance
→ Adjusting Brightness
→ Adjusting Intensity
→ Adjusting Contrast
Adjusting Color Balance Using Sample Patterns (Printer Driver)
Adjusting Intensity/Contrast Using Sample Patterns (Printer Driver)
→ Specifying Color Correction
→ Adjusting Colors with the Printer Driver
→ Printing with ICC Profiles
→ Printing a Color Document in Monochrome
→ Displaying the Print Results Before Printing
Page Setup Tab Description
The Page Setup tab allows you to determine how a document is to be arranged on the paper. Also, this tab allows you to set the number of copies and the order of printing. If the application which created the document has a similar function, set them with the application.
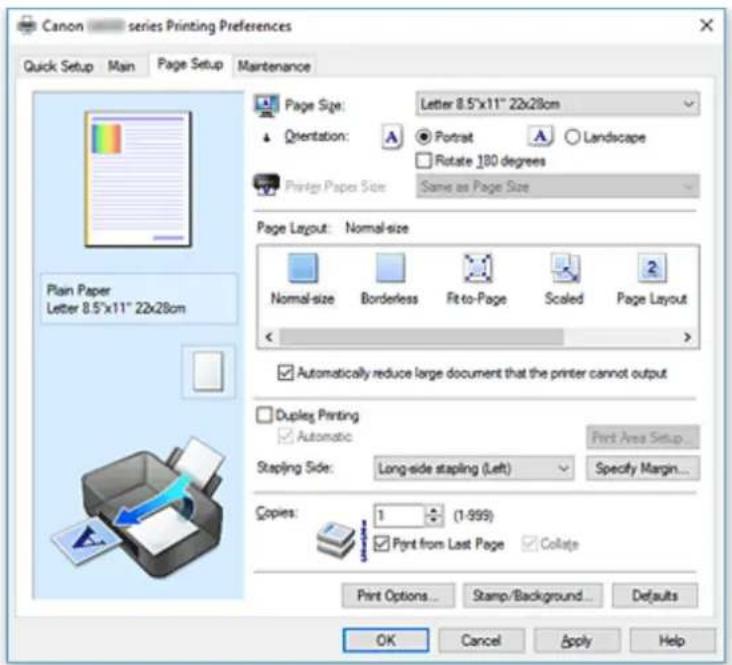
text_image
Canon — series Printing Preferences Quick Setup Man Page Setup Maintenance Page Size: Letter 8.5"x11" 22x28cm Orientation: Rotate 180 degrees Same as Page Size Print Paper Size Page Layout: Normal-size Normal-size Borderless Fit-to-Page Scaled Page Layout Automatically reduce large document that the printer cannot output Duplex Printing Automatic Print Area Setup Stapling Side: Long-side stapling (Left) Specify Margin... Copies: 1 (1-999) Print from Last Page Collate Print Options... Stamp/Background... Defaults OK Cancel Apply HelpSettings Preview
The paper illustration shows how the original will be laid out on a sheet of paper.
You can check an overall image of the layout.
The printer illustration shows how to load paper to match the printer driver settings.
Check whether the printer is set up correctly by looking at the illustration before you start printing.
Page Size
Selects a page size.
Ensure that you select the same page size as you selected within the application.
If you select Custom..., the Custom Paper Size dialog box opens and allows you to specify any vertical and horizontal dimensions for the paper size.
Orientation
Selects the printing orientation.
If the application used to create your document has a similar function, select the same orientation that you selected in that application.
Portrait
Prints the document so that its top and bottom positions are unchanged relative to the paper feed direction. This is the default setting.
Landscape
Prints the document by rotating it 90 degrees relative to the paper feed direction.
You can change the rotation direction by going to the Canon IJ Printer Assistant Tool, opening the Custom Settings dialog box, and then using Rotate 90 degrees left when orientation is [Landscape] check box.
To rotate the document 90 degrees to the left when printing, select the Rotate 90 degrees left when orientation is [Landscape] check box.
Rotate 180 degrees
Prints the document by rotating it 180 degrees against the paper feed direction.
The width of print area and the amount of extension that are configured in other application software will be reversed vertically and horizontally.
Printer Paper Size
Selects the size of paper actually loaded into the printer.
The default setting is Same as Page Size to perform normal-sized printing.
You can select a printer paper size when you select Fit-to-Page, Scaled, Page Layout, Tiling/Poster, or Booklet for Page Layout.
If you select a paper size that is smaller than the Page Size, the document size will be reduced. If you select a paper size that is larger, the document size will be enlarged.
Also if you select Custom..., the Custom Paper Size dialog box opens and allows you to specify any vertical and horizontal dimensions for the paper size.
Page Layout
Selects the size of the document you want to print and the type of printing.
Normal-size
This is the normal printing method. Select this when you do not specify any page layout.
Automatically reduce large document that the printer cannot output
If the printer cannot print the paper size of a document, the printer can automatically reduce the size when it prints the document.
Check this check box to reduce the size when printing the document.
Borderless
Chooses whether you are printing on a full page without any page margins or printing with page margins.
In borderless printing, originals are enlarged to extend slightly off the paper. Thus, printing can be performed without any margins (border).
Use Amount of Extension to adjust how much of the document extends off the paper during borderless printing.
Amount of Extension
Adjusts how much of the document extends off the paper during borderless printing.
Moving the slider to the right increases the amount of extension and allows you to perform borderless printing with no problems.
Moving the slider to the left reduces the amount of extension and expands the range of the document to print.
Fit-to-Page
This function enables you to automatically enlarge or reduce documents to fit to the paper size loaded in the printer without changing the paper size you specified in your application software.
Scaled
Documents can be enlarged or reduced to be printed.
Specify the size in Printer Paper Size, or enter the scaling ratio in the Scaling box.
Scaling
Specifies an enlargement or reduction ratio for the document you want to print.
Page Layout
Multiple pages of document can be printed on one sheet of paper.
Specify...
Opens the Page Layout Printing dialog box.
Click this button to set details on page layout printing.
Tiling/Poster
This function enables you to enlarge the image data and divide the enlarged data into several pages to be printed. You can also glue together these sheets of paper to create large printed matter, such as a poster.
Specify...
Opens the Tiling/Poster Printing dialog box.
Click this button to set details on tiling/poster printing.
Booklet
The booklet printing function allows you to print data for a booklet. Data is printed on both sides of the paper. This type of printing ensures that pages can be collated properly, in page number order, when the printed sheets are folded and stapled at the center.
Specify...
Opens the Booklet Printing dialog box.
Click this button to set details on booklet printing.
Duplex Printing
Selects whether to print the document automatically on both sides or one side of a sheet of paper.
Check this check box to print the document on both sides.
This function can be used only when Plain Paper is selected for Media Type and one of Normal-size,
Fit-to-Page, Scaled, or Page Layout is selected.
Automatic
Selects whether duplex printing is to be performed automatically or manually.
This check box will be enabled if Booklet is selected from the Page Layout list or the Duplex
Printing check box is checked.
To perform duplex printing automatically, check this check box.
To perform duplex printing manually, uncheck this check box.
Print Area Setup...
Opens the Print Area Setup dialog box in which you can configure the print area for automatic duplex printing.
This button will be enabled if automatic duplex printing is set when Borderless is not selected.
Stapling Side
Selects the stapling margin position.
The printer analyzes the Orientation and Page Layout settings, and automatically selects the best stapling margin position. Check Stapling Side, and select from the list to change it.
Specify Margin...
Opens the Specify Margin dialog box.
You can specify the width of the margin.
Copies
Specifies the number of copies you want to print. You can specify a value from 1 to 999.
Important
- If the application used to create your document has a similar function, specify the number of copies with the application without specifying it here.
Print from Last Page
Check this check box when you want to print from the last page in order. If you do this, you do not need to sort the pages into their correct order after printing.
Uncheck this check box to print your document in normal order, starting from the first page.
Collate
Check this check box to group together the pages of each copy when you want to print multiple copies. Uncheck this check box when you want to print with all pages of the same page number grouped together.
Important
- When the application software that you used to create the document has the same function, give priority to the printer driver settings. However, if the print results are not acceptable, specify the function settings on the application software. When you specify the number of copies and the printing order with both the application and this printer driver, the number of copies may be multiplied numbers of the two settings or the specified printing order may not be enabled.
Print Options...
Opens the Print Options dialog box.
Changes detailed printer driver settings for print data that is sent from applications.
Stamp/Background...
Opens the Stamp/Background dialog box.
The Stamp function allows you to print a stamp text or a bitmap over or behind document data. It also allows you to print date, time and user name. The Background function allows you to print a light illustration behind the document data.
Depending on the environment, Stamp and Background may not be available.
Custom Paper Size dialog box
This dialog box allows you to specify the size (width and height) of the custom paper.
Units
Select the unit for entering a user-defined paper size.
Paper Size
Specifies the Width and the Height of the custom paper. Measurement is shown according to the units specified in Units.
Page Layout Printing dialog box
This dialog box allows you to select the number of document pages to be placed on one sheet of paper, the page order, and whether a page border line is to be printed around each document page.
The settings specified in this dialog box can be confirmed in the settings preview on the printer driver.
Preview Icon
Shows the settings made on the Page Layout Printing dialog box.
You can check what the print result will look like before you actually print the data.
Page Layout
Specifies the number of document pages to fit on one sheet.
Page Order
Specifies the document orientation to be printed on a sheet of paper.
Page Border
Prints a page border line around each document page.
Check this check box to print the page border line.
Tiling/Poster Printing dialog box
This dialog box allows you to select the size of the image to be printed. You can also make settings for cut lines and paste markers which are convenient for pasting together the pages into a poster.
The settings specified in this dialog box can be confirmed in the settings preview on the printer driver.
Preview Icon
Shows the settings of the Tiling/Poster Printing dialog box.
You can check what the print result will look like.
Image Divisions
Select the number of divisions (vertical x horizontal).
As the number of divisions increases, the number of sheets used for printing increases. If you are pasting pages together to create a poster, increasing the number of divisions allows you to create a larger poster.
Print "Cut/Paste" in margins
Specifies whether to print the words "Cut" and "Paste" in the margins. These words serve as guidelines for pasting together the pages into a poster.
Check this check box to print the words.
Note
- Depending on the type of printer driver you are using and the environment, this function may not be available.
Print "Cut/Paste" lines in margins
Specifies whether to print cut lines that serve as guidelines for pasting together the pages into a poster.
Check this check box to print the cut lines.
Print page range
Specifies the printing range. Select All under normal circumstances.
Select Pages to specify a specific page or range.
Note
- If some of the pages have not been printed well, specify the pages that do not need to be printed by clicking them in the settings preview of the Page Setup tab. Only the pages shown on the screen will be printed this time.
Booklet Printing dialog box
This dialog box allows you to set how to bind the document as a booklet. Printing only on one side and printing a page border, can also be set in this dialog box.
The settings specified in this dialog box can be confirmed in the settings preview on the printer driver.
Preview Icon
Shows the settings made on the Booklet Printing dialog box.
You can check what the document will look like when printed as a booklet.
Margin for stapling
Specifies which side of the booklet is to be stapled.
Insert blank page
Selects whether to print the document on one side or both sides of the booklet.
Check this check box to print the document on one side of the booklet and select the side to be left blank from the list.
Margin
Specifies the width of the stapling margin.
The specified width becomes the stapling margin from the center of the sheet.
Page Border
Prints a page border line around each document page.
Check this check box to print the page border line.
Print Area Setup dialog box
When you perform duplex printing, the print area of the document becomes slightly narrower than usual. Therefore when a document that has small margins is printed, the document may not fit on one page.
This dialog box allows you to set whether the page is to be reduced when printed so that the document fits in one page.
Use normal-size printing
Prints the document pages without reducing them. This is the default setting.
Use reduced printing
Slightly reduces each document page so that it fits on one sheet of paper during printing.
Select this setting when using automatic duplex printing to print a document with small margins.
Specify Margin dialog box
This dialog box allows you to specify the margin width for the side to be stapled. If a document does not fit on one page, the document is reduced when printed.
Margin
Specifies the width of the stapling margin.
The width of the side specified by Stapling Side becomes the stapling margin.
Print Options dialog box
Makes changes to print data that is sent to the printer.
Depending on the environment, this function may not be available.
Disable ICM required from the application software
Disables the ICM function required from the application software.
When an application software uses Windows ICM to print data, unexpected colors may be produced or the printing speed may decrease. If these problems occur, checking this check box may resolve the problems.
Important
- Uncheck this check box under normal circumstances.
- This function does not work when ICM is selected for Color Correction on the Matching tab of the Manual Color Adjustment dialog box.
Disable the color profile setting of the application software
Checking this check box disables information in the color profile that was set on the application software.
When the information in the color profile set on the application software is output to the printer driver, the print result may contain unexpected colors. If this happens, checking this check box may resolve the problem.
Important
- Even when this check box is checked, only some of the information in the color profile is disabled, and the color profile can still be used for printing.
- Uncheck this check box under normal circumstances.
Disable the paper source setting of the application software
Disables the paper feeding method that is set by the application.
With some applications such as Microsoft Word, the data may be printed with a feeding method that differs from the printer driver setting. In this case, check this function.
Important
- When this function is enabled, normally the paper feeding method cannot be changed from the Canon IJ Preview.
Ungroup Papers
Sets the display method of Media Type, Page Size, and Printer Paper Size.
To display the items separately, select the check box.
To display the items as a group, clear the check box.
Do not allow application software to compress print data
Compression of the application software print data is prohibited.
If the print result has missing image data or unintended colors, selecting this check box may improve the condition.
Important
- Uncheck this check box under normal circumstances.
Print after creating print data by page
The print data is created in page units, and printing starts after the processing of one page of print data is complete.
If a printed document contains unintended results such as streaks, selecting this check box may improve the results.

Important
- Uncheck this check box under normal circumstances.
Prevention of Print Data Loss
You can reduce the size of the print data that was created with the application software and then print the data.
Depending on the application software being used, the image data may be cut off or may not be printed properly. In such cases, select On. If you will not be using this function, select Off.

Important
- When using this function, the print quality may drop depending on the print data.
Unit of Print Data Processing
Selects the processing unit of the print data to be sent to the printer.
Select Recommended under normal circumstances.

Important
- A large amount of memory may be used for certain settings. Do not change the setting if your computer has a small amount of memory.
Print With
Specify the ink to be used when printing.
Select from All Colors (Default) and Black Only.

Important
- When the following settings are specified, Black Only does not function because the printer uses an ink other than black to print documents.
- Other than Plain Paper, Envelope, Ink Jet Hagaki (A), Hagaki K (A), Hagaki (A), or Hagaki is selected for Media Type on the Main tab
- Borderless is selected from the Page Layout list on the Page Setup tab
- Do not detach the print head that is not in use. Printing cannot be performed while either print head is detached.
Stamp/Background dialog box
The Stamp/Background dialog box allows you to print a stamp and/or background over or behind the document pages. In addition to the pre-registered ones, you can register and use your original stamp or background.
Stamp
Stamp printing is a function that prints a stamp over a document.
Check this check box and select a title from the list to print a stamp.
Define Stamp...
Opens the Stamp Settings dialog box.
You can check the details of a selected stamp or save a new stamp.
Place stamp over text
Sets how the stamp is to be printed over the document.
Check the Stamp check box to enable this.
Check this check box to print a stamp over the printed document page. The printed data may be hidden behind the stamp.
Uncheck this check box to print the document data over the stamp. The printed data will not be hidden behind the stamp. However, the sections of the stamp that are overlapped by the document may be hidden.
Stamp first page only
Selects whether the stamp is to be printed on the first page only or on all pages when the document has two or more pages.
Check the Stamp check box to enable this.
Check this check box to print a stamp on the first page only.
Background
Background printing is a function that allows you to print an illustration or a similar object (bitmap) behind the document.
Check this check box to print a background and select a title from the list.
Select Background...
Opens the Background Settings dialog box.
You can register a bitmap as a background, and change layout method and intensity of the selected background.
Background first page only
Selects whether to print the background on the first page only or print on all pages when the document has two or more pages.
Check the Background check box to enable this.
Check this check box to print a background on the first page only.
Stamp Tab
The Stamp tab allows you to set the text and bitmap file (.bmp) to be used for a stamp.
Preview Window
Shows the status of the stamp configured in each tab.
Stamp Type
Specifies the stamp type.
Select Text to create a stamp with characters. Select Bitmap to create with a bitmap file. Select
Date/Time/User Name to display the creation date/time and user name of the printed document.
The setting items in the Stamp tab change depending on the selected type.
When Stamp Type is Text or Date/Time/User Name
Stamp Text
Specifies the stamp text string.
Up to 64 characters can be entered.
For Date/Time/User Name, the creation date/time and user name of the printed object are displayed in Stamp Text.
Important
- Stamp Text appears grayed out and is unavailable if Date/Time/User Name is selected.
TrueType Font
Selects the font for the stamp text string.
Style
Selects the font style for the stamp text string.
Size
Selects the font size for the stamp text string.
Outline
Selects a frame that encloses the stamp text string.
If a large font size is selected for Size, characters may extend outside of the stamp border.
Color/Select Color...
Shows the current color for the stamp.
To select a different color, click Select Color... to open the Color dialog box, and select or create a color you wish to use as a stamp.
When Stamp Type is Bitmap
File
Specifies the name of the bitmap file to be used as the stamp.
Select File...
Opens the dialog box to open a file.
Click this button to select a bitmap file to be used as a stamp.
Size
Adjusts the size of the bitmap file to be used as a stamp.
Moving the slider to the right increases the size, moving the slider to the left decreases the size.
Transparent white area
Specifies whether to make white-filled areas of the bitmap transparent.
Check this check box to make white-filled areas of the bitmap transparent.
Note
- Click Defaults to set Stamp Type to text, Stamp Text to blank, TrueType Font to Arial, Style to Regular, Size to 36 points, Outline unchecked, and Color to gray with the RGB values (192, 192, 192).
Placement Tab
The Placement tab allows you to set the position where the stamp is to be printed.
Preview Window
Shows the status of the stamp configured in each tab.
Position
Specifies the stamp position on the page.
Selecting Custom from the list allows you to enter values for the X-Position and Y-Position coordinates directly.
Rotation
Specifies the angle of rotation for the stamp. The angle can be set by entering the number of degrees.
Negative values rotate the stamp clockwise.
Note
- Rotation is enabled only when Text or Date/Time/User Name is selected for Stamp Type on the Stamp tab.
Note
- Click Defaults to set the stamp position to Center and the rotation to 0.
Save settings Tab
The Save settings tab allows you to register a new stamp or delete an unnecessary stamp.
Title
Enter the title to save the stamp you created.
Up to 64 characters can be entered.
Note
- Spaces, tabs, and returns cannot be entered at the beginning or end of a title.
Stamps
Shows a list of saved stamp titles.
Specify a title to display the corresponding stamp in Title.
Save/Save overwrite
Saves the stamp.
Enter a title in Title, and then click this button.
Delete
Deletes an unnecessary stamp.
Specify the title of an unnecessary stamp from the Stamps list, and click this button.
Background Tab
The Background tab allows you to select a bitmap file (.bmp) to be used as a background or determine how to print the selected background.
Preview Window
Shows the status of the bitmap set on the Background tab.
File
Specifies the name of the bitmap file to be used as the background.
Select File...
Opens the dialog box to open a file.
Click this button to select a bitmap file (.bmp) to be used as the background.
Layout Method
Specifies how the background image is to be placed on the paper.
When Custom is selected, you can set coordinates for X-Position and Y-Position.
Intensity
Adjusts the intensity of the bitmap to be used as a background.
Moving the slider to the right increases the intensity, and moving the slider to the left decreases the intensity. To print the background at the original bitmap intensity, move the slider to the rightmost position.
Note
- Depending on the environment, this function may not be available.
- Click Defaults to set File to blank, Layout Method to Fill page, and the Intensity slider to the middle.
Save settings Tab
The Save settings tab allows you to register a new background or delete an unnecessary background.
Title
Enter the title to save the background image you specified.
Up to 64 characters can be entered.
Note
- Spaces, tabs, and returns cannot be entered at the beginning or end of a title.
Backgrounds
Shows a list of registered background titles.
Specify a title to display the corresponding background in Title.
Save/Save overwrite
Saves the image data as a background.
After inserting the Title, click this button.
Delete
Deletes an unnecessary background.
Specify the title of an unnecessary background from the Backgrounds list, and then click this button.
Maintenance Tab Description
The Maintenance tab allows you to start the Canon IJ Printer Assistant Tool or check the status of the printer.
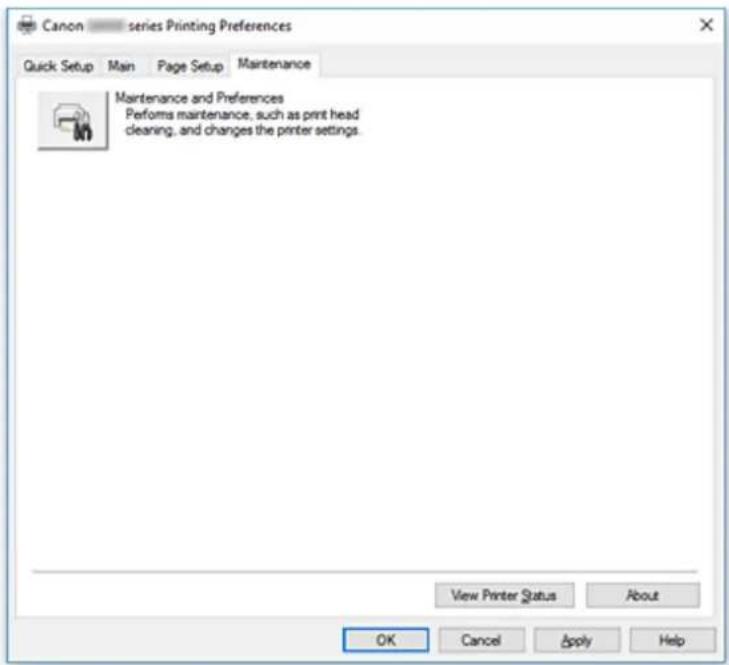
text_image
Canon — series Printing Preferences Quick Setup Main Page Setup Maintenance Maintenance and Preferences Performs maintenance, such as print head clearing, and changes the printer settings. View Printer Status About OK Cancel Apply Help
Maintenance and Preferences
Canon IJ Printer Assistant Tool is started.
You can perform printer maintenance or change the settings of the printer.
View Printer Status
Starts the Canon IJ Status Monitor.
Perform this function when you want to check the printer status and how a print job is proceeding.
About
Opens the About dialog box.
The version of the printer driver, plus a copyright notice, can be checked.
In addition, the language to be used can be switched.
About dialog box
When you click About, the About dialog box is displayed.
This dialog box displays the version, copyright, and module list of the printer driver. You can select the language to be used and switch the language displayed in the setup window.
Modules
Lists the printer driver modules.
Language
Specifies the language you wish to use in the printer driver setup window.
Important
- If the font for displaying the language of your choice is not installed in your system, the characters will be garbled.
Canon IJ Status Monitor Description
The Canon IJ Status Monitor displays the printer status and the printing progress. The printer status is shown by the icons and messages in the status monitor.
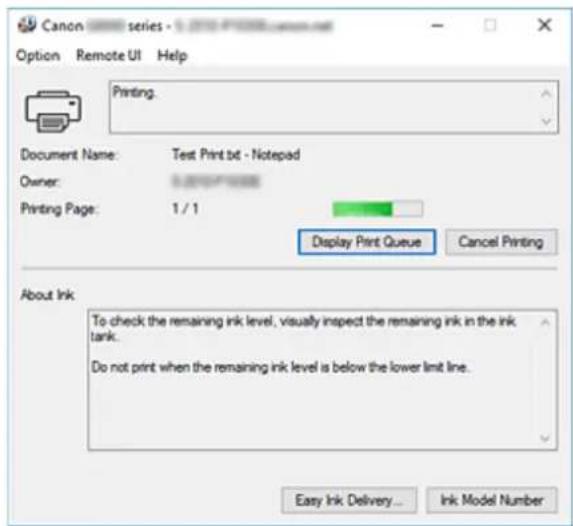
text_image
Canon series - 1.0000000000 Option Remote UI Help Printing. Document Name: Test Print bit - Notepad Owner: 0.0000000000 Printing Page: 1 / 1 Display Print Queue Cancel Printing About Ink To check the remaining ink level, visually inspect the remaining ink in the ink tank. Do not print when the remaining ink level is below the lower limit line. Easy Ink Delivery... Ink Model NumberFeatures of the Canon IJ Status Monitor
The Canon IJ Status Monitor has the following functions:
Onscreen display of printer status
The status monitor displays the printer status in real-time.
You can check the progress of each document to be printed (print job).
Display of error content and correction procedure
The status monitor displays information on any errors that occur on the printer.
You can then immediately check what sort of action to perform.
Overview of the Canon IJ Status Monitor
The Canon IJ Status Monitor uses messages to display the printer status and the ink status.
During printing, you can check information about the document being printed and the print progress.
If an error occurs, the status monitor displays the error content and instructions on how to correct the error. Follow the message instructions.
Printer
Canon IJ Status Monitor shows an icon when a warning or error occurs to the printer.

: There is a warning.

: There has been an operator error.

: There is a notice about something other than a warning or an error.

: There has been an error which requires a service.
Document Name
Name of the document being printed.
Owner
Owner's name of the document being printed.
Printing Page
Page number of current page and the total page count.
Display Print Queue
The print queue, which controls the current document and documents waiting to be printed.
Cancel Printing
Cancels printing.
About Ink
Displays messages about ink.
Ink Model Number
You can look up the correct ink model number for your printer.
Option Menu
If a printer message appears, select Enable Status Monitor to start the Canon IJ Status Monitor.
Select Enable Status Monitor to use the following commands:
Always Display Current Job
Displays the Canon IJ Status Monitor whenever a document is being printed.
Always Display on Top
Displays the Canon IJ Status Monitor in front of other windows.
Display Guide Message
Displays guide messages for complicated paper setting operations.
Envelope Printing
Displays a guide message when envelope printing starts.
To hide this guide message, select the Do not show this message again check box.
To display the guide message again, open the Option menu, select Display Guide
Message, click Envelope Printing, and enable this setting.
Hagaki Printing
Displays a guide message before the printer begins hagaki printing.
To display this guide message, open the Option menu, select Display Guide
Message, click Hagaki Printing, and enable this setting.
To hide the guide message, select the Do not show this message again check box.
Display Warning Automatically
When a Low Ink Warning Occurs
Starts the Canon IJ Status Monitor window automatically and displays it in front of the other windows when a low ink warning occurs.
Start when Windows is Started
Automatically starts the Canon IJ Status Monitor when Windows is started.
Remote UI menu
You are able to open the printer's Remote User Interface.
You are able to check the printer status and run maintenance functions on the printer when connected to and using it through a network.

Note
- When the printer is being used via USB connection Remote UI will not display.
Printer Information
Allows you check detailed information, such as the printer status, the print progress, and remaining ink levels.
Maintenance
Allows you to run printer maintenance and change printer settings.
Download Security Certificate
Displays the For secure communication window.
This window allows you to download the route certificate, register it to the browser, and disable warning displays.
Help Menu
Select this menu to display Help information for the Canon IJ Status Monitor including version and copyright information.
Installing the Printer Driver
You can access our web site through the Internet and download the latest printer driver for your model.
- Turn off the printer
- Start the installer
Double-click the icon of the downloaded file.
The installation program starts.
Important
- A confirmation/warning dialog box may appear when starting, installing or uninstalling software. This dialog box appears when administrative rights are required to perform a task. When you are logged on to an administrator account, click Yes (or Continue, Allow) to continue. Some applications require an administrator account to continue. In such cases, switch to an administrator account, and restart the operation from the beginning.
- Install the printer driver
Take the appropriate action as described on the screen.
- Complete the installation
Click Complete.
Depending on the environment you are using, a message prompting you to restart the computer may be displayed. To complete the installation properly, restart the computer.
Important
- You can download the printer driver for free, but any Internet access charges incurred are your responsibility.
- Before installing the latest printer driver, delete the previously installed version.
Related Topics
→ Obtaining the Latest Printer Driver
→ Deleting the Unnecessary Printer Driver
→ Before Installing the Printer Driver
Printing Using Canon Application Software
Easy-PhotoPrint Editor Guide
Printing from Smartphone/Tablet
▶ Printing from iPhone/iPad/iPod touch (iOS)
▶ Printing from Smartphone/Tablet (Android)
▶ Printing from Windows 10 Mobile Device
▶ Printing with Wireless Direct
Printing with Wireless Direct
You can connect devices (e.g. computer, smartphone, or tablet) to the printer by two methods below.
- Wireless connection (connecting devices via a wireless router)
- Direct wireless connection (connecting devices using Wireless Direct)
This section describes Wireless Direct, which allows you to print by connecting the devices to the printer directly.
Follow the procedure below to use Wireless Direct.
- Preparing the printer.
→ Changing Printer Setting to Use Wireless Direct
- Preparing a device to connect to the printer.
→ Changing Settings of a Device and Connecting It to the Printer
- Printing.
→ Printing with Wireless Direct
Important
- You can connect up to 5 devices to the printer at the same time.
- Check the usage restrictions and switch the printer to the Wireless Direct.
→ Restrictions
Changing Printer Setting to Use Wireless Direct
- Check that printer is turned on.
- Press the Setup button.
The Setup menu screen is displayed. - Select Device settings and then press the OK button.
- Select LAN settings and then press the OK button.
- Select Wireless Direct and then press the OK button.
- Select Switch WL Direct and then press the OK button.
- Select Yes and then press the OK button.
When the setting is completed, the Wireless router info screen is displayed. - Select Done and then press the OK button.
The Wireless Direct is enabled and a device can be connected to the printer wirelessly.
Note
- You can check the following on the Wireless router info screen. Use the button to select an item you want to check and then press the OK button.
• Network name(SSID): Identifier
• Security protocol: Security setting and password
- WL Direct dev. name: Printer name displayed on a Wi-Fi Direct compatible device
The password is required when connecting a device to the printer. Depending on the device you are using, no password is required.
When you connect a Wi-Fi Direct compatible device to the printer, select the printer name from your device.
- For details on how to update the identifier (SSID) and the security setting, refer to the following.
→ Changing Wireless Direct Setting
Changing Settings of a Device and Connecting It to the Printer
- Turn on Wi-Fi function on your device.
Enable "Wi-Fi" on your device's "Setting" menu.
For more on turning on Wi-Fi function, see your device's instruction manual.
- Select "DIRECT-XXXX-G5000series" ("X" represents alphanumeric characters) from list displayed on your device.
Note
- If "DIRECT-XXXX-G5000series" does not appear on the list, Wireless Direct is not enabled. See Changing Printer Setting to Use Wireless Direct to enable Wireless Direct.
- Enter password.
Your device is connected to the printer.
Note
- You can check the password by printing the network settings from the printer.
→ Printing Network Settings
- Depending on the device you are using, no password is required.
- If your Wi-Fi Direct compatible device is set to prioritize using Wi-Fi Direct and it is connecting to the printer, the printer displays a confirmation screen asking if you allow the device to connect to the printer.
Make sure the name on the LCD is the same as that of your wireless communication device and select Yes and press the OK button.
Printing with Wireless Direct
After connecting a device and the printer, start printing from the application of your device.
Note
- For more details on printing from a device, refer to the instruction manual of the device or application.
- You can print from your smartphone or tablet by installing Canon PRINT Inkjet/SELPHY. Download it from App Store and Google Play.
→ For iOS
→ For Android
Changing Wireless Direct Setting
Change the settings for the Wireless Direct following the procedure below.
- Check that printer is turned on.
- Press the Setup button.
The Setup menu screen is displayed.
- Select Device settings and then press the OK button.
- Select LAN settings and then press the OK button.
- Select Wireless Direct and then press the OK button.
- Select a setting item and then press the OK button.
Change name (SSID)
Updates the identifier (SSID) for Wireless Direct or the printer name displayed on a Wi-Fi Direct compatible device.
- Manual setup
- Select Manual setup and then press the OK button.
- Press the OK button.
- Enter new printer name and then hold down the OK button.
- Select whether to decide your entries and then press the OK button.
- Confirm your entries and press the OK button.
- Auto update
- Select Auto update and then press the OK button.
- Select Yes and then press the OK button.
- Select Done and then press the OK button.
If you select Network name(SSID) and press the OK button, you can check the updated identifier (SSID).
Change password
- Manual setup
- Select Manual setup and then press the OK button.
- Enter new password and then hold down the OK button.
The password must be 10 characters long. - Select whether to decide your entries and then press the OK button.
- Auto update
- Select Auto update and then press the OK button.
- Select Yes and then press the OK button.
- Select Done and then press the OK button.
If you select Security protocol instead of Done, you can check the updated password.
Confirm request
To display the confirmation screen when a Wi-Fi Direct compatible device is connecting to the printer, select Yes and press the OK button.
Important
- To prevent an unauthorized access, we recommend you should select the setting to display the confirmation screen.
Note
- If you change the Wireless Direct setting of the printer, also change the wireless router setting of the device.
Paper Settings
By registering the paper size and the media type loaded on the rear tray or in the cassette, you can prevent the printer from misprinting by displaying the message before printing starts when the paper size or the media type of the loaded paper differs from the print settings.
Note
- The default setting is different between when you print from Smartphone/tablet, when you print from Windows, and when you print from macOS.
Default Setting for Displaying the Message which Prevents Misprinting
After loading paper:
- When you close the feed slot cover:
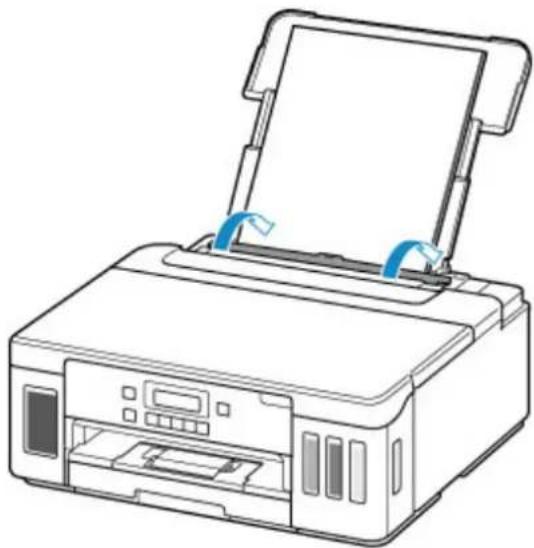
natural_image
Line drawing of a printer with an open lid and paper feed, showing no text or symbolsThe screen to register the rear tray paper information is displayed.
Save the rear tray paper [OK]Next

Size: *A4 Type: *Plain paper
Register the paper size and the media type according to the loaded paper.
- When you insert the cassette:

natural_image
Diagram of a printer with an open lid and a blue arrow indicating the paper's edge (no text or symbols present)The screen to register the cassette paper information is displayed.
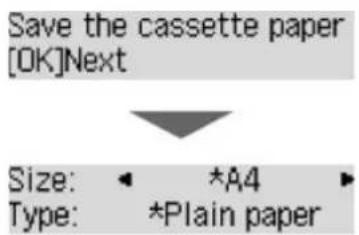
text_image
Save the cassette paper [OK]Next Size: ← *A4 Type: *Plain paperRegister the page size according to the paper loaded in the cassette.
* You can load only plain paper in the cassette.
Important
- For more on the proper combination of paper settings you can specify by the printer driver for Windows and on the LCD:
→ Paper Settings on the Printer Driver and the Printer (Media Type)
→ Paper Settings on the Printer Driver and the Printer (Paper Size)
When the paper settings for printing are different from the paper information registered to the printer:
Ex:
• Paper settings for printing: A5
• Paper information registered to the printer: A4
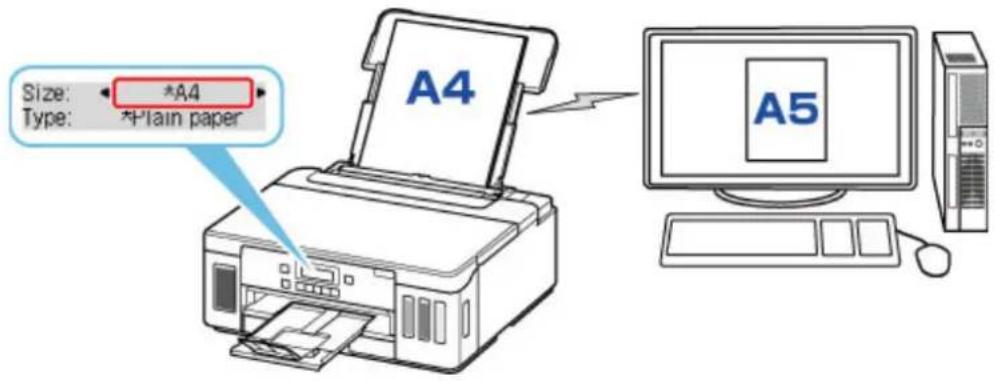
text_image
Size: *A4 Type: *Plain paper A4 A5When you start printing, a message is displayed.
Pressing the OK button displays the paper setting specified for printing under the message.
Please choose one of the following.
Note
- Depending on the setting, the choices below may not be displayed.
Print on set paper
Select if you want to print on the paper loaded without changing the paper settings.
For example, when the paper setting for printing is A5 and the paper information registered to the printer is A4, the printer starts printing on the paper loaded in the rear tray or in the cassette without changing the paper size setting for printing.
Replace the paper
Select if you want to print after replacing the paper of the rear tray or the cassette.
For example, when the paper size setting for printing is A5 and the paper information registered to the printer is A4, you load A5 sized paper in the rear tray or in the cassette before you start printing.
The paper information registration screen is displayed after replacing the paper. Register the paper information according to the paper that you loaded.
Note
- For more on the proper combination of paper settings you can specify by the printer driver for Windows and on the LCD:
→ Paper Settings on the Printer Driver and the Printer (Media Type)
→ Paper Settings on the Printer Driver and the Printer (Paper Size)
Cancel
Cancels printing.
Select when you change the paper settings specified for printing. Change the paper settings and try printing again.
Default Setting for Displaying the Message which Prevents Misprinting
- When you print from smartphone/tablet:
The message which prevents misprinting is enabled by default.
To change the setting:
→ Feed settings
- When you print from Windows:
The message which prevents misprinting is disabled by default.
To change the setting:
→ Changing the Printer Operation Mode
- When you print from macOS:
The message which prevents misprinting is enabled by default.
To change the setting:
→ Changing the Printer Operation Mode
Important
- When the message which prevents misprinting is disabled:
The printer starts printing even though the paper settings for printing and the paper information registered to the printer are different.
Frequently Asked Questions

Network
→ Cannot Find Printer on Network
→ Cannot Find Printer while Using Wi-Fi
→ Network Key (Password) Unknown
→ Cannot Print or Connect
For other questions about network, click here.
Print
Printer Does Not Print
→ Printouts Are Blank/Blurry or Fuzzy/Inaccurate or Bleeding Colors/Streaks or Lines
→ Printout Results Are Unsatisfactory
→ List of Support Code for Error (Paper Jams)
→ Cannot Print or Connect

Installation
→ Failed to Printer Driver Installation (Windows)

Error
Four-Digit Alphanumeric Characters Appear on LCD
→ When Error Occurred
Message (Support Code) Appears
→ Repairing Your Printer
Solve Problems
Printer Does Not Work
Printer Does Not Turn On
→ Printer Turns Off Unexpectedly or Repeatedly
→ Wrong Language Appears in LCD
→ LCD Is Off
→ USB Connection Problems
→ Cannot Communicate with Printer via USB
→ Printer Does Not Print
→ Printing Stops
→ Cannot Print Using AirPrint
→ Printer Prints Slowly
→ Ink Does Not Come Out
→ List of Support Code for Error (Paper Jams)
Printer Does Not Pick up or Feed the Paper/“No Paper” Error
→ Automatic Duplex Printing Problems
→ Paper Does Not Feed from Paper Source Specified in Printer Driver (Windows)
→ Printout Results Are Unsatisfactory
→ Cannot Print from Smartphone/Tablet
Cannot Set Correctly (Network)
→ Cannot Find Printer on Check Printer Settings Screen During Setup (Windows)
→ Cannot Find Printer while Using Wi-Fi
→ Cannot Find Printer while Using Wired LAN
Printer Suddenly Stopped Working for Some Reason
→ Network Key (Password) Unknown
→ Forgot Administrator Password of Printer
Printer Cannot Be Used After Replacing Wireless Router or Changed Router Settings
Message Appears on Computer During Setup
→ Checking Network Information
→ Restoring to Factory Defaults
Cannot Set Correctly (Installation)
→ Failed to Printer Driver Installation (Windows)
→ Updating Printer Driver in Network Environment (Windows)
Error or Message Appears
Four-Digit Alphanumeric Characters Appear on LCD
→ When Error Occurred
Message (Support Code) Appears
→ List of Support Code for Error
Error Message Appears on PictBridge (Wi-Fi) Compliant Device
Operation Problems
→ Network Communication Problems
→ Printing Problems
→ Problems while Printing from Smartphone/Tablet
→ Mechanical Problems
→ Installation and Download Problems
→ Errors and Messages
→ If You Cannot Solve a Problem
→ Repairing Your Printer
→ Check State of Print Head
Network Settings and Common Problems
Here are frequently asked questions on network. Select a connection method you are using, or you want to use.
text_image
Wireless LAN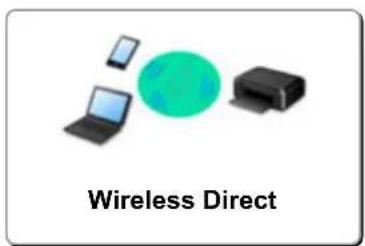
text_image
Wireless Direct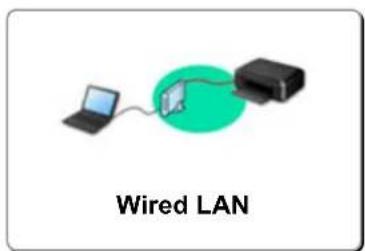
text_image
Wired LANWireless LAN
Cannot Find Printer
→ Cannot Find Printer while Using Wi-Fi
→ Cannot Find Printer on Check Printer Settings Screen During Setup (Windows)
→ Cannot Proceed beyond Printer Connection Screen
Printer is Not Found by Printer Find Screen of Setup
→ Searching Printer by IP Address or Host Name During Setup
→ Error Occurs During Wi-Fi Setup
→ Detect Same Printer Name
Reconfiguration Method of LAN Connection/Reconfiguration Method of Wi-Fi Connection
Cannot Print or Connect
Printer Suddenly Stopped Working for Some Reason
Printer Cannot Be Used After Replacing Wireless Router or Changed Router Settings
→ Cannot Access to Internet on Wi-Fi from Communication Device
Connecting Printer and Wireless Router Using Easy WL connect
→ Cannot Connect Smartphone/Tablet to Wireless Router
→ Error Occurs During Wi-Fi Setup
Connects to Another Computer via LAN/Changes from USB to LAN Connection
→ Cannot Print or Connect
LAN Setting Tips/Changing LAN Settings
→ Network Key (Password) Unknown
→ Forgot Administrator Password of Printer
→ Checking Network Information
→ Restoring to Factory Defaults
→ Checking Wireless Router SSID/Key
→ Checking Wireless Router Network Name (SSID) for Smartphone/Tablet
→ Privacy Separator/SSID Separator/Network Separation Function
→ Default Network Settings
Connects to Another Computer via LAN/Changes from USB to LAN Connection
→ Printing Network Settings
Reconfiguration Method of LAN Connection/Reconfiguration Method of Wi-Fi Connection
→ Checking Status Code
Printing from Smartphone/Tablet
Connecting Printer and Wireless Router Using Easy WL connect
→ Cannot Connect Smartphone/Tablet to Wireless Router
→ Checking Wireless Router Network Name (SSID) for Smartphone/Tablet
Setting Up Using Smartphone/Tablet
→ Cannot Print from Smartphone/Tablet
→ Downloading Canon PRINT Inkjet/SELPHY
Problems while Using Printer
→ Message Appears on Computer During Setup
→ Printer Prints Slowly
Wireless Direct
Cannot Print or Connect
Printer Suddenly Stopped Working for Some Reason
→ Cannot Access to Internet on Wi-Fi from Communication Device
→ Cannot Print or Connect
LAN Setting Tips/Changing LAN Settings
→ Network Key (Password) Unknown
→ Forgot Administrator Password of Printer
→ Checking Network Information
→ Restoring to Factory Defaults
→ Default Network Settings
→ Printing Network Settings
Reconfiguration Method of LAN Connection/Reconfiguration Method of Wi-Fi Connection
→ Checking Status Code
Printing from Smartphone/Tablet
→ Cannot Print from Smartphone/Tablet
→ Downloading Canon PRINT Inkjet/SELPHY
Problems while Using Printer
→ Message Appears on Computer During Setup
→ Printer Prints Slowly
Wired LAN
Cannot Find Printer
→ Printer is Not Found by Printer Find Screen of Setup
→ Searching Printer by IP Address or Host Name During Setup
→ Cannot Find Printer while Using Wired LAN
→ Detect Same Printer Name
Cannot Print or Connect
Printer Suddenly Stopped Working for Some Reason
→ Cannot Print or Connect
LAN Setting Tips/Changing LAN Settings
→ Forgot Administrator Password of Printer
→ Checking Network Information
→ Restoring to Factory Defaults
→ Default Network Settings
Connects to Another Computer via LAN/Changes from USB to LAN Connection
→ Printing Network Settings
Reconfiguration Method of LAN Connection/Reconfiguration Method of Wi-Fi Connection
→ Checking Status Code
Problems while Using Printer
Message Appears on Computer During Setup
→ Printer Prints Slowly
Network Communication Problems
▶ Cannot Find Printer on Network
▶ Network Connection Problems
▶ Other Network Problems
Cannot Find Printer on Network
While performing printer setup:
Cannot Find Printer on Check Printer Settings Screen During Setup (Windows)
Cannot Proceed beyond Printer Connection Screen
While using printer:
Cannot Find Printer while Using Wi-Fi
Note
- You cannot use the wireless LAN and the wired LAN at the same time.
Cannot Find Printer on Check Printer Settings Screen During Setup (Windows)
If the printer cannot be found and the Check Printer Settings screen appears after searching the printer by Automatic search on the Search for Printers screen during driver setup, click Redetect and search for the printer again by the IP address on the Search for Printers screen.
If the printer has not been found after searching it by the IP address, check network settings.
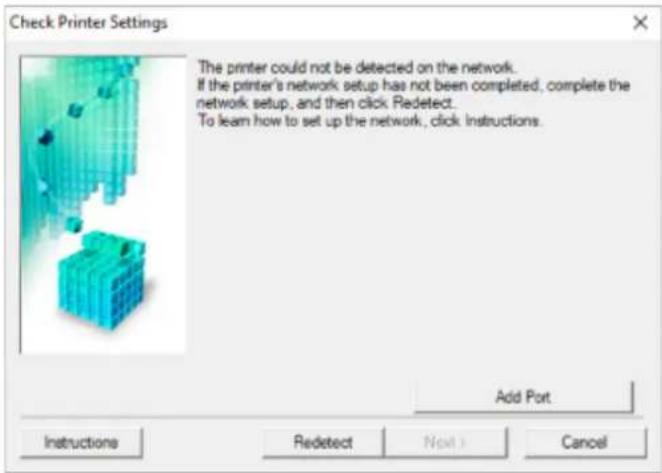
text_image
Check Printer Settings The printer could not be detected on the network. If the printer's network setup has not been completed, complete the network setup, and then click Redetect. To learn how to set up the network, click Instructions. Add Port Instructions Redetect Next Cancel- When using Wi-Fi:
→ Cannot Find Printer on Check Printer Settings Screen During Wi-Fi Setup (Windows)-Checking Power Status
Cannot Find Printer on Check Printer Settings Screen During Wi-Fi Setup (Windows)-Checking PC Network Connection
→ Cannot Find Printer on Check Printer Settings Screen During Wi-Fi Setup (Windows)-Checking Printer's Wi-Fi Settings
→ Cannot Find Printer on Check Printer Settings Screen During Wi-Fi Setup (Windows)-Checking Wi-Fi Environment
→ Cannot Find Printer on Check Printer Settings Screen During Wi-Fi Setup (Windows)-Checking Printer's IP Address
→ Cannot Find Printer on Check Printer Settings Screen During Wi-Fi Setup (Windows)-Checking Security Software Settings
→ Cannot Find Printer on Check Printer Settings Screen During Wi-Fi Setup (Windows)-Checking Wireless Router Settings
- When using wired LAN:
→ Cannot Find Printer on Check Printer Settings Screen During Wired LAN Setup (Windows)-Checking LAN Cable and Router
→ Cannot Find Printer on Check Printer Settings Screen During Wired LAN Setup (Windows)-Checking PC Network Connection
→ Cannot Find Printer on Check Printer Settings Screen During Wired LAN Setup (Windows)-Checking Printer's Wired LAN Settings
→ Cannot Find Printer on Check Printer Settings Screen During Wired LAN Setup (Windows)-Checking Printer's IP Address
→ Cannot Find Printer on Check Printer Settings Screen During Wired LAN Setup (Windows)-Checking Security Software Settings
Cannot Find Printer on Check Printer Settings Screen During Wired LAN Setup (Windows)-Checking Router Settings
Cannot Find Printer on Check Printer Settings Screen During Wi-Fi Setup (Windows)-Checking Power Status
A
Are printer and network device (router, etc.) turned on?
Make sure the printer is turned on.
→ Checking that Power Is On
Make sure network device (router, etc.) is turned on.
If printer or network device is off:
Turn on printer or network device.
It may take a while for the printer and network device to become ready for use once they are turned on. Wait a while after turning on the printer or network device, and then click Redetect on the Check Printer Settings screen to redetect the printer.
If the printer is found, follow the instructions on the screen to continue to set up network communication.
If printer and network device are on:
If the network devices are on, turn them off and on again.
If above does not solve the problem:
Cannot Find Printer on Check Printer Settings Screen During Wi-Fi Setup (Windows)-Checking PC Network Connection
Cannot Find Printer on Check Printer Settings Screen During Wi-Fi Setup (Windows)-Checking PC Network Connection
A
Can you view any web pages on your computer?
Make sure the computer and network device (router, etc.) are configured and the computer is connected to the network.
If you cannot view any web pages:
Click Cancel on the Check Printer Settings screen to cancel to set up the network communication.
After that, configure the computer and network device.
For the procedures, refer to the instruction manuals supplied with the computer and network device, or contact their manufacturers.
If you can view web pages after configuring the computer and network device, try to set up the network communication from the beginning.
If you can view web pages, or if above does not solve the problem:
Cannot Find Printer on Check Printer Settings Screen During Wi-Fi Setup (Windows)-Checking Printer's Wi-Fi Settings

Cannot Find Printer on Check Printer Settings Screen During Wi-Fi Setup (Windows)-Checking Printer's Wi-Fi Settings

Is printer set to allow wireless communication?
Make sure the of icon is displayed on the LCD.
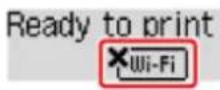
If icon is not displayed:
The printer is not set to allow wireless communication. Turn on wireless communication on the printer.
If icon is displayed:
→ Cannot Find Printer on Check Printer Settings Screen During Wi-Fi Setup (Windows)-Checking Wi-Fi Environment
Cannot Find Printer on Check Printer Settings Screen During Wi-Fi Setup (Windows)-Checking Wi-Fi Environment
A
Is the printer connected to the wireless router?
Use the icon on the LCD to make sure the printer is connected to the wireless router.

If x is displayed:
- Check wireless router configuration.
After checking the wireless router setting, make sure the printer is not placed far away from the wireless router.
The printer can be up to 50 m (164 ft) from the wireless router indoors. Make sure the printer is close enough to the wireless router to be used.
Place the printer and wireless router where there are no obstacles between them. Wireless communication between different rooms or floors is generally poor. Wireless communication can be impeded by building materials containing metal or concrete. If the printer cannot communicate with the computer over a Wi-Fi due to a wall, place the printer and the computer in the same room.
In addition, if a device like a microwave oven that emits radio waves of the same frequency bandwidth as a wireless router is nearby, it may cause interference. Place the wireless router as far away from interference sources as possible.
Note
- Though an antenna is attached to most wireless routers, note that some of them have it inside.
- Check wireless router setting.
The printer and wireless router should be connected using 2.4 GHz bandwidth. Make sure the wireless router for the printer's destination is configured to use 2.4 GHz bandwidth.
Important
- Note that some wireless routers distinguish network names (SSIDs) by the last alphanumeric character according to their bandwidth (2.4 GHz or 5 GHz) or purpose (for computer or game machine).
To check the network name (SSID) of the wireless router the printer is connected to, print the network settings.
→ Printing Network Settings
For details, see the instruction manual supplied with the wireless router or contact the manufacturer.
After taking measures above, click Redetect on the Check Printer Settings screen to redetect the printer.
If the printer is found, follow the instructions on the screen to continue to set up network communication.
If the printer cannot be detected, the printer is not connected to the wireless router. Connect the printer to the wireless router.
After connecting the printer to the wireless router, set up the network communication from the beginning.
If is displayed:
Cannot Find Printer on Check Printer Settings Screen During Wi-Fi Setup (Windows)-Checking Printer's IP Address
Cannot Find Printer on Check Printer Settings Screen During Wi-Fi Setup (Windows)-Checking Printer's IP Address
A
Is printer's IP address specified correctly?
If printer's IP address is not specified correctly, the printer may not be found. Make sure whether printer's IP address is not used for another device.
To check the printer's IP address, print out the network settings information.
→ Printing Network Settings
If the IP address is not specified correctly:
See If an error screen appears: and specify the IP address.
If the IP address is specified correctly:
→ Cannot Find Printer on Check Printer Settings Screen During Wi-Fi Setup (Windows)-Checking Security Software Settings
Cannot Find Printer on Check Printer Settings Screen During Wi-Fi Setup (Windows)-Checking Security Software Settings
A
Disable block in firewall function temporarily.
The firewall of your security software or operation system for computer may limit communication between the printer and your computer. Check the firewall setting of your security software or operation system or the message shown on your computer and disable block temporarily.
If firewall interferes with setup:
- If message appears:
If a message appears warning that Canon software is attempting to access the network, set the security software to allow access.
After allowing the software to access, click Redetect on the Check Printer Settings screen to redetect the printer.
If the printer is found, follow the instructions on the screen to continue to set up network communication.
- If no message appears:
Cancel the setup, and then set the security software to allow Canon software to access the network.
The file SETUP.exe or SETUP64.exe in the win > Driver > DrvSetup folder on the Setup CD-ROM
After setting the security software, redo the network communication setup from the beginning.
After setup is completed, enable firewall.

Note
- For more on firewall settings of your operating system or security software, see instruction manual or contact its manufacturer.
If above does not solve the problem:
Cannot Find Printer on Check Printer Settings Screen During Wi-Fi Setup (Windows)-Checking Wireless Router Settings
Cannot Find Printer on Check Printer Settings Screen During Wi-Fi Setup (Windows)-Checking Wireless Router Settings
A
Check wireless router settings.
Check wireless router network connection settings, such as IP address filtering, MAC address filtering, encryption key, and DHCP function.
Make sure the same radio channel is assigned to the printer and the wireless router.
To check the settings of the wireless router, see the instruction manual supplied with the wireless router or contact the manufacturer.
In addition, make sure the wireless router you are using is configured to use 2.4 GHz bandwidth.

Important
- Depending on the wireless router, note that different network name (SSID) is assigned for a bandwidth (2.4 GHz or 5 GHz) or its usage (for PC or game machine) using alphanumeric characters at the end of network name (SSID).
After checking the wireless router settings, click Redetect on the Check Printer Settings screen to redetect the printer.
If the printer is found, follow the instructions on the screen to continue to set up network communication.
Cannot Find Printer on Check Printer Settings Screen During Wired LAN Setup (Windows)-Checking LAN Cable and Router
A
Is LAN cable connected, and are printer and router on?
Make sure the LAN cable is connected.
Make sure the printer is turned on.
→ Checking that Power Is On
Make sure the router is turned on.
If LAN cable is connected and printer or network device is off:
Turn on printer or network device.
It may take a while for the printer and network device to become ready for use once they are turned on. Wait a while after turning on the printer or network device, and then click Redetect on the Check Printer Settings screen to redetect the printer.
If the printer is found, follow the instructions on the screen to continue to set up the network communication.
If LAN cable is connected and printer and network device are on:
If the printer cannot be found after trying to redetect it, even though the printer and the network device are on:
→ Cannot Find Printer on Check Printer Settings Screen During Wired LAN Setup (Windows)-Checking PC Network Connection
Cannot Find Printer on Check Printer Settings Screen During Wired LAN Setup (Windows)-Checking PC Network Connection
A
Can you view any web pages on your computer?
Make sure the computer and network device (router, etc.) are configured and the computer is connected to the network.
If you cannot view any web pages:
Click Cancel on the Check Printer Settings screen to cancel to set up the network communication.
After that, configure the computer and network device.
For the procedures, refer to the instruction manuals supplied with the computer and network device, or contact their manufacturers.
If you can view web pages after configuring the computer and network device, try to set up the network communication from the beginning.
If you can view web pages:
Cannot Find Printer on Check Printer Settings Screen During Wired LAN Setup (Windows)-Checking Printer's Wired LAN Settings
Cannot Find Printer on Check Printer Settings Screen During Wired LAN Setup (Windows)-Checking Printer's Wired LAN Settings
A
Is printer set to allow wired communication?
Make sure the icon is displayed on the LCD.
If icon is not displayed:
The printer is not set to allow wired communication. Turn on wired communication on the printer.
Once you have turned on wired communication, redo the network communication setup from the beginning.
If icon is displayed:
Cannot Find Printer on Check Printer Settings Screen During Wired LAN Setup (Windows)-Checking Printer's IP Address
Cannot Find Printer on Check Printer Settings Screen During Wired LAN Setup (Windows)-Checking Printer's IP Address
Is printer's IP address specified correctly?
If printer's IP address is not specified correctly, the printer may not be found. Make sure whether printer's IP address is not used for another device.
To check the printer's IP address, print out the network settings information.
Printing Network Settings
If the IP address is not specified correctly:
See If an error screen appears: and specify the IP address.
If the IP address is specified correctly:
Cannot Find Printer on Check Printer Settings Screen During Wired LAN Setup (Windows)-Checking Security Software Settings
Cannot Find Printer on Check Printer Settings Screen During Wired LAN Setup (Windows)-Checking Security Software Settings
A
Disable block in firewall function temporarily.
The firewall of your security software or operation system for computer may limit communication between the printer and your computer. Check the firewall setting of your security software or operation system or the message shown on your computer and disable block temporarily.
If firewall interferes with setup:
- If message appears:
If a message appears warning that Canon software is attempting to access the network, set the security software to allow access.
After allowing the software to access, click Redetect on the Check Printer Settings screen to redetect the printer.
If the printer is found, follow the instructions on the screen to continue to set up the network communication.
- If no message appears:
Cancel the setup, and then set the security software to allow Canon software below to access the network.
The file SETUP.exe or SETUP64.exe in the win > Driver > DrvSetup folder on the Setup CD-ROM
After setting the security software, redo the network communication setup from the beginning.
After setup is completed, enable firewall.

Note
- For more on firewall settings of your operating system or security software, see instruction manual or contact its manufacturer.
If above does not solve the problem:
Cannot Find Printer on Check Printer Settings Screen During Wired LAN Setup (Windows)-Checking Router Settings
Cannot Find Printer on Check Printer Settings Screen During Wired LAN Setup (Windows)-Checking Router Settings

Check router settings.
Check router network connection settings such as IP address filtering, MAC address filtering, and DHCP function.
For more on checking the settings of the router, refer to the instruction manual supplied with the router or contact its manufacturer.
After checking the router settings, click Redetect on the Check Printer Settings screen to redetect the printer.
If the printer is found, follow the instructions on the screen to continue to set up network communication.
Cannot Proceed beyond Printer Connection Screen
A
If you cannot proceed beyond the Printer Connection screen, check the following.
Check1 Make sure USB cable is securely plugged in to printer and computer.
Connect the printer and the computer using a USB cable as the illustration below. The USB port is located at the back of the printer.
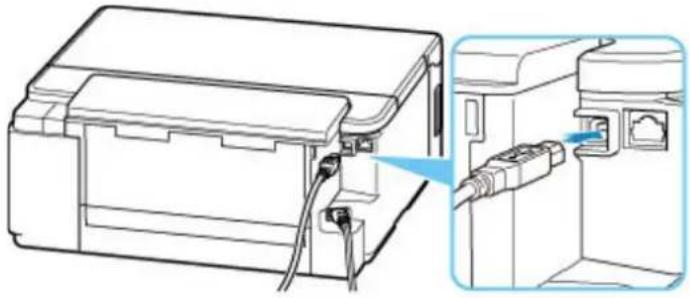
natural_image
Line drawing of a printer with attached cables and connectors, showing internal wiring and a close-up view of the outlet (no text or symbols)Important
- Connect the "Type-B" terminal to the printer with the notched side facing UP. For details, refer to the instruction manual supplied with the USB cable.
Check2 Follow procedure below to connect printer and computer again.
Important
- For macOS, make sure the lock icon is on the lower left of the Printers & Scanners screen.
If the icon (locked) is displayed, click the icon to unlock. (The administrator name and the password are necessary to unlock.)
-
Unplug USB cable from printer and computer and connect it again.
-
Make sure no printer operation is in progress and turn off.
-
Turn on printer.
Check3 If you cannot resolve problem, follow procedure below to reinstall printer driver.
- For Windows:
-
Click Cancel.
-
Click Back to Top on Setup Canceled screen.
- Click Exit on Start Setup screen and finish setup.
- Turn off printer.
- Restart computer.
- Make sure you have no application software running.
- Perform setup on top page of Online Manual.
Note
- You can use the Setup CD-ROM to redo setup.
- For macOS:
- Click Next.
The screen telling you that installation has not been completed appears. - Click No.
The screen to select application software to install appears. - Click Back to Top.
- Click Exit on Start Setup screen.
- Turn off printer.
- Restart computer.
- Make sure you have no application software running.
- Perform setup on top page of Online Manual.
A
Check1 Make sure printer is turned on.
If not, make sure the printer is securely plugged in and press ON button to turn on.
The ON lamp flashes while the printer is initializing. Wait until the ON lamp stops flashing and remains lit.
Check2 Check the icon on LCD.
If the icon is not displayed, from the setup menu select Device settings > LAN settings > Wi-Fi > Wi-Fi enab./disable and then select Enable.
If the ✗ion is displayed, see Check 3 or later checking items to make sure whether printer setup is complete or the settings of wireless router to connect are correct.
Check3 Make sure printer setup is complete on the computer.
If it is not, perform setup from the web page.
For Windows, you can perform setup using the Setup CD-ROM.
Note
- IJ Network Device Setup Utility allows you to diagnose and repair the network status.
Select the link below to download IJ Network Device Setup Utility and install it.
→ Checking Printer Connection Status Using IJ Network Device Setup Utility
See below for starting up IJ Network Device Setup Utility.
- For Windows:
Starting Up IJ Network Device Setup Utility
- For macOS:
Starting Up IJ Network Device Setup Utility
Check4 Make sure printer and wireless router network settings match.
Make sure the network settings of the printer (e.g. network name (SSID) or network key (password), etc.) are identical with those of the wireless router.
To check the settings of the wireless router, refer to the instruction manual provided with it or contact its manufacturer.
Note
- Use 2.4 GHz frequency band to connect to a wireless router. Match the network name (SSID) set for the printer with that for 2.4 GHz frequency band of the wireless router.
To check the network name (SSID) set for the printer, print out the network setting information.
→ Printing Network Settings
Note
- IJ Network Device Setup Utility allows you to diagnose and repair the network status.
Select the link below to download IJ Network Device Setup Utility and install it.
→ Checking Printer Connection Status Using IJ Network Device Setup Utility
See below for starting up IJ Network Device Setup Utility.
- For Windows:
Starting Up IJ Network Device Setup Utility
- For macOS:
Starting Up IJ Network Device Setup Utility
Check5 Make sure the printer is not placed too far away from the wireless router.
If the distance between the printer and wireless router is too far, wireless communication becomes poor. Place the printer and wireless router close to each other.
Note
- Though an antenna is attached to most wireless routers, note that some of them have it inside.
Check6 Make sure wireless signal is strong. Monitor signal strength and move printer and wireless router as necessary.
Place the printer and wireless router where there are no obstacles between them. Wireless communication between different rooms or floors is generally poor. Wireless communication can be impeded by building materials containing metal or concrete. If the printer cannot communicate with the computer over a Wi-Fi due to a wall, place the printer and the computer in the same room.
In addition, if a device like a microwave oven that emits radio waves of the same frequency bandwidth as a wireless router is nearby, it may cause interference. Place the wireless router as far away from interference sources as possible.
Check the signal strength on the LCD.
→ LCD and Operation Panel
Note
- IJ Network Device Setup Utility allows you to diagnose and repair the network status.
Select the link below to download IJ Network Device Setup Utility and install it.
→ Checking Printer Connection Status Using IJ Network Device Setup Utility
See below for starting up IJ Network Device Setup Utility.
- For Windows:
Starting Up IJ Network Device Setup Utility
- For macOS:
Starting Up IJ Network Device Setup Utility
Check7 Make sure the computer is connected to the wireless router.
For more on how to check the computer settings or connection status, see your computer instruction manual or contact its manufacturer.
Note
- If you use a smartphone or tablet, make sure the Wi-Fi is enabled on the device.
Check8 Make sure Enable bidirectional support is selected in the Ports sheet of the Printer properties dialog box. (Windows)
If not, select it to enable bidirectional support.
Check9 Make sure security software's firewall is off.
If your security software's firewall is on, a message may appear warning you that Canon software is attempting to access the network. If this warning message appears, set security software to always allow access.
If you are using any programs that switch between network environments, check their settings. Some programs use a firewall by default.
Check10 If printer is connected to an AirPort Base Station via LAN, make sure you use alphanumeric characters for network name (SSID). (macOS)
If the problem is not resolved, redo setup from the web page.
For Windows, you can redo setup using the Setup CD-ROM.
Network Connection Problems
Printer Suddenly Stopped Working for Some Reason
▶ Network Key (Password) Unknown
Printer Cannot Be Used After Replacing Wireless Router or Changed Router Settings
Printer Suddenly Stopped Working for Some Reason
→ Cannot Connect to a Printer after Network Configuration Changes
→ Cannot Connect to a Printer via Wireless LAN (Wi-Fi)
→ Cannot Connect to a Printer through Wireless Direct
→ Cannot Connect to a Printer via Wired LAN
→ Cannot Print through Network

Cannot Connect to a Printer after Network Configuration Changes

It may take a while for the computer to obtain an IP address, or you may need to restart your computer. Make sure the computer has obtained a valid IP address, and try again to find the printer.

Cannot Connect to a Printer via Wireless LAN (Wi-Fi)

Check1 Check the power status of printer, network devices (e.g. wireless router), and smartphone/tablet.
- Turn on the printer or devices.
- If the power is already turned on, cycle the power switch.
- It may be necessary to resolve wireless router problems (e.g. update interval of a key, problems of DHCP update interval, energy saving mode, etc.) or to update the wireless router firmware.
For details, contact the manufacturer of your wireless router.
Check2 Can you view any web pages on your computer?
Make sure your computer is connected to the wireless router properly.
For more on checking computer settings or connection status, see the instruction manual supplied with the computer or contact the manufacturer.
Check3 Is the printer connected to the wireless router?
Use the icon on the LCD to check the connection status between the printer and wireless router. If the Wi-Fi icon is not displayed, Wi-Fi is disabled. Turn on wireless communication on the printer.
Check4 Make sure the printer and wireless router network settings match.
Make sure the network settings of the printer (e.g. network name (SSID) or network key (password), etc.) are identical with those of the wireless router.
To check the settings of the wireless router, refer to the instruction manual provided with it or contact its manufacturer.
Note
- Use 2.4 GHz frequency band to connect to a wireless router. Match the network name (SSID) set for the printer with that for 2.4 GHz frequency band of the wireless router.
To check the current network settings of the printer, print out the network setting information.
→ Printing Network Settings
Note
- IJ Network Device Setup Utility allows you to diagnose and repair the network status.
Select the link below to download IJ Network Device Setup Utility and install it.
→ Checking Printer Connection Status Using IJ Network Device Setup Utility
See below for starting up IJ Network Device Setup Utility.
- For Windows:
Starting Up IJ Network Device Setup Utility
- For macOS:
Starting Up IJ Network Device Setup Utility
Check5 Make sure the printer is not placed too far away from the wireless router.
If the distance between the printer and wireless router is too far, wireless communication becomes poor. Place the printer and wireless router close to each other.
Note
- Though an antenna is attached to most wireless routers, note that some of them have it inside.
Check6 Make sure wireless signal is strong. Monitor signal status and move printer and wireless router as necessary.
Place the printer and wireless router where there are no obstacles between them. Wireless communication between different rooms or floors is generally poor. Wireless communication can be impeded by building materials containing metal or concrete. If the printer cannot communicate with the computer over a Wi-Fi due to a wall, place the printer and the computer in the same room.
In addition, if a device like a microwave oven that emits radio waves of the same frequency bandwidth as a wireless router is nearby, it may cause interference. Place the wireless router as far away from interference sources as possible.
Check the signal strength on the LCD.
→ LCD and Operation Panel
Note
- IJ Network Device Setup Utility allows you to diagnose and repair the network status.
Select the link below to download IJ Network Device Setup Utility and install it.
→ Checking Printer Connection Status Using IJ Network Device Setup Utility
See below for starting up IJ Network Device Setup Utility.
- For Windows:
Starting Up IJ Network Device Setup Utility
- For macOS:
Starting Up IJ Network Device Setup Utility
Check7 Make sure of the Wi-Fi channel numbers used for your computer.
You need to have the same Wi-Fi channel number that you are using for the wireless router as your computer. It is normally set in the way that you can use all the Wi-Fi channels. However, when the channels that you are using are restricted, the Wi-Fi channels do not match.
See the instruction manual provided with your computer and check the Wi-Fi channel number available for your computer.
Check8 Make sure channel set on wireless router is a usable channel as confirmed in Check 7.
If it is not, change the channel set on the wireless router.
Check9 Make sure security software's firewall is off.
If your security software's firewall is on, a message may appear warning you that Canon software is attempting to access the network. If this warning message appears, set security software to always allow access.
If you are using any programs that switch between network environments, check their settings. Some programs use a firewall by default.
Check10 If printer is connected to an AirPort Base Station via LAN, make sure you use alphanumeric characters for network name (SSID). (macOS)
If the problem is not resolved, redo setup from the web page.
For Windows, you can redo setup using the Setup CD-ROM.
- Positioning:
Place the printer and wireless router where there are no obstacles between them.

Cannot Connect to a Printer through Wireless Direct

Check1 Check the power status of printer and other devices (smartphone or tablet).
Turn on the printer or devices.
If the power is already turned on, cycle the power switch.
Check2 Check printer settings.
Select Device settings > LAN settings > Wireless Direct > Switch WL Direct in this order and select Yes.
Check3 Check the settings of your device (smartphone/tablet).
Make sure Wi-Fi is enabled on your device.
For details, refer to your device's instruction manual.
Check4 Make sure printer is selected as connection for device (e.g. smartphone or tablet).
Select the network name (SSID) for Wireless Direct specified for the printer as the connection destination for devices.
Check the destination on your device.
For details, refer to your device's instruction manual or visit the manufacturer's website.
To check the network name (SSID) for Wireless Direct specified for the printer, display it using the operation panel of the printer or print out the network setting information of the printer.
- Display on the LCD.
→ LAN settings - Print the network settings.
→ Printing Network Settings
Check5 Have you entered the proper password specified for the Wireless Direct?
To check the password specified for the printer, display it using the operation panel of the printer or print out the network setting information of the printer.
- Display on the LCD.
→ LAN settings - Print the network settings.
→ Printing Network Settings
Check6 Make sure the printer is not placed too far away from the device.
If the distance between the printer and device is too far, wireless communication becomes poor. Place the printer and device close to each other.
Check7 Make sure 5 devices are already connected.
Wireless Direct does not allow more than 5 devices to be connected.

Cannot Connect to a Printer via Wired LAN

Check1 Make sure the printer is turned on.
Check2 Make sure the LAN cable is connected properly.
Make sure the printer is connected to the router with the LAN cable. If the LAN cable is loose, connect the cable properly.
If the LAN cable is connected to the WAN side of the router, connect the cable to the LAN side of the router.
If the problem is not resolved, redo setup from the web page.
For Windows, you can redo setup using the Setup CD-ROM.

Cannot Print through Network

Check1 Make sure the computer is connected to the wireless router.
For more on how to check the computer settings or connection status, see your computer instruction manual or contact its manufacturer.
Check2 If Printer Driver is not installed, install it. (Windows)
Install the Printer Driver using the Setup CD-ROM or install it from the Canon website.
Check3 When using Wi-Fi, make sure wireless router does not restrict which computers can access it.
For more on connecting to and setting up your wireless router, see the wireless router instruction manual or contact its manufacturer.

Note
- To check the MAC address or IP address of your computer, see Checking Computer IP Address or MAC Address.
Network Key (Password) Unknown
WPA/WPA2 or WEP Key Set for Wireless Router Unknown, Cannot Connect
Setting an Encryption Key

WPA/WPA2 or WEP Key Set for Wireless Router Unknown, Cannot ect

For more on setting up a wireless router, see the instruction manual provided with the wireless router or contact its manufacturer. Make sure your computer can communicate with the wireless router.

Note
- IJ Network Device Setup Utility allows you to diagnose and repair the network status.
Select the link below to download IJ Network Device Setup Utility and install it.
→ Checking Printer Connection Status Using IJ Network Device Setup Utility
See below for starting up IJ Network Device Setup Utility.
- For Windows:
Starting Up IJ Network Device Setup Utility
- For macOS:
Starting Up IJ Network Device Setup Utility

Setting an Encryption Key

For more on setting up a wireless router, see the instruction manual provided with the wireless router or contact its manufacturer. Make sure your computer can communicate with the wireless router.

Note
- IJ Network Device Setup Utility allows you to diagnose and repair the network status.
Select the link below to download IJ Network Device Setup Utility and install it.
→ Checking Printer Connection Status Using IJ Network Device Setup Utility
See below for starting up IJ Network Device Setup Utility.
- For Windows:
Starting Up IJ Network Device Setup Utility
- For macOS:
Starting Up IJ Network Device Setup Utility
Selecting WPA, WPA2, or WPA/WPA2 is recommended for security reason. If your wireless router is compatible with WPA/WPA2, you can also use WPA2 or WPA.
• Using WPA/WPA2 (Windows)
The authentication method, Wi-Fi password, and dynamic encryption type must be identical among the wireless router, the printer, and your computer.
Enter the Wi-Fi password configured on the wireless router.
Either TKIP (basic encryption) or AES (secure encryption) is selected automatically as the dynamic encryption method.
For details, see If WPA/WPA2 Details Screen Appears.
Note
- This printer supports WPA/WPA2-PSK (WPA/WPA2-Personal) and WPA2-PSK (WPA2-Personal).
- Using WEP
The length or format of the Wi-Fi password and authentication method must be identical among the wireless router, the printer, and your computer.
To communicate with a wireless router that generates a password automatically, you must set the printer to use the password generated by the wireless router.
- For Windows:
When the WEP Details screen appears after you click Search... on the Network Settings (Wi-Fi) screen in IJ Network Device Setup Utility, follow the on-screen instructions to set the password length, format, and the password to use.
For details, see If WEP Details Screen Appears.
Note
- If the printer is connected to an AirPort Base Station via LAN:
If the printer is connected to an AirPort Base Station via a LAN, check the settings in Wireless Security of AirPort Utility.
- Select 64 bit if WEP 40 bit is selected for password length in AirPort Base Station.
- Select 1 for the password to use. Otherwise, computer will not be able to communicate with printer via the wireless router.
Printer Cannot Be Used After Replacing Wireless Router or Changed Router Settings
A
When you replace a wireless router, redo the network setup for the printer according to the replaced one. Perform setup from the web page.
For Windows, you can perform setup using the Setup CD-ROM.
Note
- IJ Network Device Setup Utility allows you to diagnose and repair the network status. Select the link below to download IJ Network Device Setup Utility and install it.
→ Checking Printer Connection Status Using IJ Network Device Setup Utility
See below for starting up IJ Network Device Setup Utility.
- For Windows:
Starting Up IJ Network Device Setup Utility
- For macOS:
→ Starting Up IJ Network Device Setup Utility
If this does not solve the problem, see below.
→ Cannot Communicate with Printer After Enabling MAC/IP Address Filtering or Encryption Key on Wireless Router
With Encryption On, Cannot Communicate with Printer After Changing Encryption Type at Wireless Router

Cannot Communicate with Printer After Enabling MAC/IP Addressing or Encryption Key on Wireless Router
A
Check1 Check wireless router setting.
To check the wireless router setting, see the instruction manual provided with the wireless router or contact its manufacturer. Make sure the computer and the wireless router can communicate with each other under this setting.
Check2 If filtering MAC addresses or IP addresses at wireless router, check that MAC addresses or IP addresses for computer, network device, and printer are registered.
Check3 If using WPA/WPA2 key or a password, make sure encryption key for computer, network device, and printer matches key set for wireless router.
The length or format of the Wi-Fi password and authentication method must be identical among the wireless router, the printer, and your computer.
For details, see Setting an Encryption Key.

With Encryption On, Cannot Communicate with Printer After aging Encryption Type at Wireless Router

If you change the encryption type for the printer and it subsequently cannot communicate with the computer, make sure the encryption type for the computer and the wireless router matches the type set for the printer.
Cannot Communicate with Printer After Enabling MAC/IP Address Filtering or Encryption Key on Wireless Router
Other Network Problems
▶ Checking Network Information
Restoring to Factory Defaults
Checking Network Information
→ Checking Printer IP Address or MAC Address
→ Checking Computer IP Address or MAC Address
→ Checking Communication Between the Computer, the Printer, and the Wireless Router
→ Checking Network Setting Information

Checking Printer IP Address or MAC Address

To check the printer's IP Address or MAC address, print out the network settings information.
→ Printing Network Settings
For Windows, you can check the network setting information on the computer screen.
Canon IJ Network Device Setup Utility Screen

Checking Computer IP Address or MAC Address

To check the IP Address or MAC address of your computer, follow the instructions below.
- For Windows:
- Select Command Prompt as shown below.
In Windows 10, right-click Start and select Command Prompt.
In Windows 8.1, select Command Prompt from the Start screen. If Command Prompt is not displayed on the Start screen, select the Search charm and search for "Command Prompt".
In Windows 7, click Start > All Programs > Accessories > Command Prompt.
- Enter "ipconfig/all" and press Enter.
The IP address and MAC address of your computer appear. If your computer is not connected to a network, the IP address does not appear.
- For macOS:
- Select System Preferences from Apple menu, and then click Network.
- Make sure network interface used by computer is selected, and then click Advanced.
When you are using Wi-Fi on your computer, make sure Wi-Fi is selected as network interface.
When you are using wired LAN, make sure Ethernet is selected.
- Click TCP/IP to check the IP address, or click Hardware to check the MAC address.

Checking Communication Between the Computer, the Printer, and the less Router

Perform a ping test to check if communication is taking place.
- For Windows:
- Select Command Prompt as shown below.
In Windows 10, right-click Start and select Command Prompt.
In Windows 8.1, select Command Prompt from the Start screen. If Command Prompt is not displayed on the Start screen, select the Search charm and search for "Command Prompt".
In Windows 7, click Start > All Programs > Accessories > Command Prompt.
- Type the ping command and press Enter.
The ping command is as follows: ping XXX.XXX.XXX.XXX
"XXX.XXX.XXX.XXX" is the IP address of the target device.
If communication is taking place, a message like the one shown below appears.
Reply from XXX.XXX.XXX.XXX: bytes=32 time=10ms TTL=255
If Request timed out appears, communication is not taking place.
- For macOS:
- Start Network Utility as shown below.
Select Computer from Go menu of Finder, double-click Macintosh HD > System > Library > CoreServices > Applications > Network Utility.
-
Click Ping.
-
Make sure Send only XX pings (XX are numbers) is selected.
-
Enter IP address of target printer or target wireless router in Enter the network address to ping.
-
Click Ping.
"XXX.XXX.XXX.XXX" is the IP address of the target device.
A message such as the following appears.
64 bytes from XXX.XXX.XXX.XXX: icmp_seq=0 ttl=64 time=3.394 ms
64 bytes from XXX.XXX.XXX.XXX: icmp_seq=1 ttl=64 time=1.786 ms
64 bytes from XXX.XXX.XXX.XXX: icmp_seq=2 ttl=64 time=1.739 ms
--- XXX.XXX.XXX.XXX ping statistics ---
3 packets transmitted, 3 packets received, 0% packet loss
If packet loss is 100%, communication is not taking place. Otherwise, computer is communicating with target device.

Checking Network Setting Information

To check the printer's network settings information, print out the network settings information.
→ Printing Network Settings
Restoring to Factory Defaults
A
Important
- Initialization erases all network settings on the printer, making printing operation from a computer over a network impossible. To use the printer over a network again after restoring it to the factory defaults, redo setup from the web page.
For Windows, you can perform setup using the Setup CD-ROM.
Initialize the network setting using the printer's operation panel.
→ Reset setting
Problems while Printing from Smartphone/Tablet
▶ Cannot Print from Smartphone/Tablet
Cannot Print from Smartphone/Tablet
If you cannot print from your smartphone/tablet, it is possible that your smartphone/tablet cannot communicate with the printer.
Check the cause of your problem according to the connection method.
→ Cannot Communicate with Printer over Wireless LAN
→ Cannot Communicate with Printer while It Is in Wireless Direct
Note
- For problems on printing with other connection methods or more on performing settings of each connection method:
→ Using PIXMA/MAXIFY Cloud Link
→ Printing with Google Cloud Print
→ Printing from iOS Device (AirPrint)

Cannot Communicate with Printer over Wireless LAN
A
If your smartphone/tablet cannot communicate with the printer, check the following.
Check1 Check the power status of printer, network devices (e.g. wireless router), and smartphone/tablet.
- Turn on the printer or devices.
- If the power is already turned on, cycle the power switch.
- It may be necessary to resolve wireless router problems (e.g. update interval of a key, problems of DHCP update interval, energy saving mode, etc.) or to update the wireless router firmware.
For details, contact the manufacturer of your wireless router.
Check2 Check the settings of your device (smartphone/tablet).
Make sure Wi-Fi is enabled on your device.
For details, refer to your device's instruction manual.
Check3 Is the printer connected to the wireless router?
Use the icon on the LCD to check the connection status between the printer and wireless router. If the Wi-Fi icon is not displayed, Wi-Fi is disabled. Turn on wireless communication on the printer.
Check4 Are network settings of printer identical with those of wireless router?
Make sure the network settings of the printer (e.g. network name (SSID) or network key (password), etc.) are identical with those of the wireless router.
To check the settings of the wireless router, refer to the instruction manual provided with it or contact its manufacturer.
To check the current network settings of the printer, print out the network setting information.
→ Printing Network Settings
Note
- IJ Network Device Setup Utility allows you to diagnose and repair the network status.
Select the link below to download IJ Network Device Setup Utility and install it.
→ Checking Printer Connection Status Using IJ Network Device Setup Utility
See below for starting up IJ Network Device Setup Utility.
- For Windows:
Starting Up IJ Network Device Setup Utility
- For macOS:
Starting Up IJ Network Device Setup Utility
Check5 Are network settings of your smartphone/tablet identical with those of wireless router?
Make sure the network settings of the printer (e.g. network name (SSID) or network key (password), etc.) are identical with those of the wireless router.
To check the settings of your smartphone/tablet, refer to the instruction manual provided with it.
If the network settings of your smartphone/tablet are not identical with those of the wireless router, change the network settings of it to match with those of the wireless router.
Check6 Make sure the printer is not placed too far away from the wireless router.
If the distance between the printer and wireless router is too far, wireless communication becomes poor. Place the printer and wireless router close to each other.
Note
- Though an antenna is attached to most wireless routers, note that some of them have it inside.
Check7 Make sure wireless signal is strong. Monitor signal status and move printer and wireless router as necessary.
Place the printer and wireless router where there are no obstacles between them. Wireless communication between different rooms or floors is generally poor. Wireless communication can be impeded by building materials containing metal or concrete. If the printer cannot communicate with the computer over a Wi-Fi due to a wall, place the printer and the computer in the same room.
In addition, if a device like a microwave oven that emits radio waves of the same frequency bandwidth as a wireless router is nearby, it may cause interference. Place the wireless router as far away from interference sources as possible.
Check the signal strength on the LCD.
→ LCD and Operation Panel
Note
- IJ Network Device Setup Utility allows you to diagnose and repair the network status.
Select the link below to download IJ Network Device Setup Utility and install it.
→ Checking Printer Connection Status Using IJ Network Device Setup Utility
See below for starting up IJ Network Device Setup Utility.
- For Windows:
Starting Up IJ Network Device Setup Utility
- For macOS:
Starting Up IJ Network Device Setup Utility

Cannot Communicate with Printer while It Is in Wireless Direct

If your smartphone/tablet cannot communicate with the printer in the Wireless Direct, check the following.
Check1 Check the power status of printer and other devices (smartphone or tablet).
Turn on the printer or devices.
If the power is already turned on, cycle the power switch.
Check2 Is Wireless Direct enabled?
From the Setup menu screen, select Device settings > LAN settings > Wireless Direct > Switch WL Direct in this order and select Yes.
Check3 Check the settings of your device (smartphone/tablet).
Make sure Wi-Fi is enabled on your device.
For details, refer to your device's instruction manual.
Check4 Make sure printer is selected as connection for device (e.g. smartphone or tablet).
Select the network name (SSID) for Wireless Direct specified for the printer as the connection destination for devices.
Check the destination on your device.
For details, refer to your device's instruction manual or visit the manufacturer's website.
To check the network name (SSID) for Wireless Direct specified for the printer, display it using the operation panel of the printer or print out the network setting information of the printer.
- Display on the LCD.
→ LAN settings
- Print the network settings.
→ Printing Network Settings
Check5 Have you entered the proper password specified for the Wireless Direct?
To check the password specified for the printer, display it using the operation panel of the printer or print out the network setting information of the printer.
- Display on the LCD.
→ LAN settings - Print the network settings.
→ Printing Network Settings
Check6 Make sure the printer is not placed too far away from the device.
If the distance between the printer and device is too far, wireless communication becomes poor. Place the printer and device close to each other.
Check7 Make sure 5 devices are already connected.
Wireless Direct does not allow more than 5 devices to be connected.
Printing Problems
Printer Does Not Print
Ink Does Not Come Out
Ink Runs Out Fast
Printer Does Not Pick up or Feed the Paper/"No Paper" Error
▶ Printout Results Are Unsatisfactory
A
Check1 Make sure printer is turned on.
If not, make sure the printer is securely plugged in and press ON button to turn on.
The ON lamp flashes while the printer is initializing. Wait until the ON lamp stops flashing and remains lit.

Note
- If you are printing large data such as photos or other graphics, printing may take longer to start. The ON lamp flashes while the computer is processing data and sending it to the printer. Wait until printing starts.
Check2 Make sure printer is properly connected to computer.
If you are using a USB cable, make sure it is securely connected to both the printer and the computer. When the USB cable is securely plugged in, check the following:
- If you are using a relay device such as a USB hub, disconnect it, connect the printer directly to the computer, and retry the printing. If printing starts normally, there is a problem with the relay device. Contact the vendor of the relay device.
- There could also be a problem with the USB cable. Replace the USB cable and retry the printing.
If you use the printer over a LAN, make sure the printer is correctly set up for network use.
→ Cannot Find Printer while Using Wi-Fi
→ Cannot Find Printer while Using Wired LAN

Note
- Using IJ Network Device Setup Utility allows you to diagnose or repair network connection.
Select the link below to download IJ Network Device Setup Utility and install it.
→ Checking Printer Connection Status Using IJ Network Device Setup Utility
See below for starting up IJ Network Device Setup Utility.
- For Windows:
Starting Up IJ Network Device Setup Utility
- For macOS:
Starting Up IJ Network Device Setup Utility
Check3 Make sure paper settings match information set for rear tray or cassette.
If the paper settings do not match the information set for the rear tray or the cassette, an error message appears on the LCD. Follow the instructions on the LCD to solve the problem.
Note
- You can select whether the message which prevents misprinting is displayed.
- To change the message view setting when printing using the printer's operation panel:
→ Feed settings - To change the message view setting when printing using the printer driver:
→ Changing the Printer Operation Mode (Windows)
→ Changing the Printer Operation Mode (macOS)
Check4 If printing from a computer, delete unnecessary print jobs.
- For Windows:
→ Deleting the Undesired Print Job
- For macOS:
→ Deleting the Undesired Print Job
Check5 Is your printer's printer driver selected when printing?
The printer will not print properly if you are using a printer driver for a different printer.
- For Windows:
Make sure "Canon XXX series" (where "XXX" is your printer's name) is selected in the Print dialog box.
Note
- If multiple printers are registered to your computer, select Set as Default Printer for a printer to make the one selected by default.
Check6 Are you trying to print a large data file? (Windows)
If you are trying to print a large file, it takes a long time to start printing.
If the printer does not start printing after a certain period of time, select On for Prevention of Print Data Loss on the Print Options dialog box.
For details, refer to Page Setup Tab Description.
Important
- Selecting On for Prevention of Print Data Loss may reduce print quality.
• After printing is completed, select Off for Prevention of Print Data Loss.
Check7 If printing from your computer, restart the computer.
Restart the computer and try printing again.
A
Although some air may enter the ink tube, it is not a malfunction. No problem if the nozzle check pattern is printed correctly.
Check1 Make sure joint button is not lifted up.
Push the print head locking cover to make sure the print heads are installed properly.
Next, push the joint buttons firmly to the end.
→ Check Installation of Print Head
Important
- Remove the orange label and the protective tape of the print head to install it.
Check2 Check the remaining ink level.
→ Checking Ink Level
Check3 Are the print head nozzles clogged?
Print the nozzle check pattern and make sure that the ink is coming out normally.
For details on printing the nozzle check pattern, print head cleaning, and print head deep cleaning, see If Printing Is Faint or Uneven.
Step1 Print the nozzle check pattern.
After printing the nozzle check pattern, examine the pattern.
- For Windows:
→ Printing a Nozzle Check Pattern
- For macOS:
→ Printing a Nozzle Check Pattern
If the pattern is not printed correctly, go to the next step.
Step2 Clean the print head.
After cleaning the print head, print the nozzle check pattern and check the result.
- For Windows:
→ Clean the print head
- For macOS:
→ Clean the print head
If it does not improve, clean the print head again.
If it still does not improve, go to the next step.
Step3 Clean the print head deeply.
After cleaning the print head deeply, print the nozzle check pattern and check the result.
- For Windows:
→ Clean the print head deeply
- For macOS:
→ Clean the print head deeply
If it does not improve, turn off the printer, wait for more than 24 hours, and go to the next step.
Step4 Clean the print head deeply again.
After cleaning the print head deeply again, print the nozzle check pattern and check the result.
If it still does not improve, go to the next step.
Step5 Perform ink flush.
After performing ink flush, print the nozzle check pattern and check the result.
Ink flush consumes a great amount of ink. Frequent ink flush can rapidly consume ink, so perform it only when necessary.
→ How to Do Ink Flush
If the nozzle check pattern is not printed correctly even after performing ink flush, check the installing condition of the print head.
→ Check Installation of Print Head
A
After you refill the ink tanks, the printer takes in ink from the ink tanks and ink flows into the printer. Ink may seem to run out fast due to this procedure.
A
Check1 Make sure paper is loaded.
Loading Paper
Check2 When loading paper, consider the following.
- When loading two or more sheets of paper, align the edges of the sheets before loading the paper.
- When loading two or more sheets of paper, make sure the paper stack does not exceed the paper load limit.
However, paper may not feed correctly at the maximum capacity, depending on the type of paper or environmental conditions (very high or low temperature and humidity). In such cases, reduce the amount of paper you load at a time to less than half of the paper load limit.
• Always load the paper in portrait orientation, regardless of the printing orientation.
- When you load the paper on the rear tray, place the print side facing UP and align the right and left paper guides with the paper stack.
Loading Paper
• In the cassette, be sure to load only plain paper.
- When you load the paper on the cassette, place the print side facing DOWN and align the right/left/front paper guides with the paper stack.
Loading Paper
Check3 Is paper too thick or curled?
→ Unsupported Media Types
Check4 When loading envelopes, consider the following.
When printing on envelopes, see Loading Envelopes in Rear Tray, and prepare the envelopes before printing.
Once you have prepared the envelopes, load them in portrait orientation. If the envelopes are placed in landscape orientation, they will not feed properly.
Check5 Make sure media type and paper size settings match with loaded paper.
Check6 Make sure that there are not any foreign objects in the rear tray.
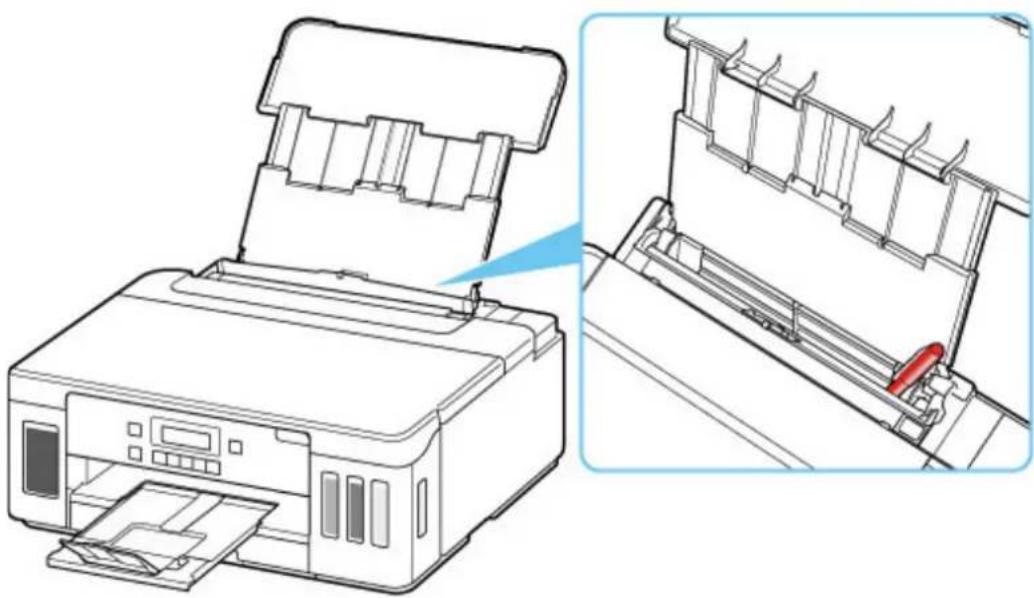
natural_image
Technical line drawing of a printer with open lid and internal structure, showing front and side views (no text or symbols)If the paper tears in the rear tray, see List of Support Code for Error (Paper Jams) to remove it.
If there are any foreign objects in the rear tray, be sure to turn off the printer, unplug it from the power supply, then remove the foreign object.
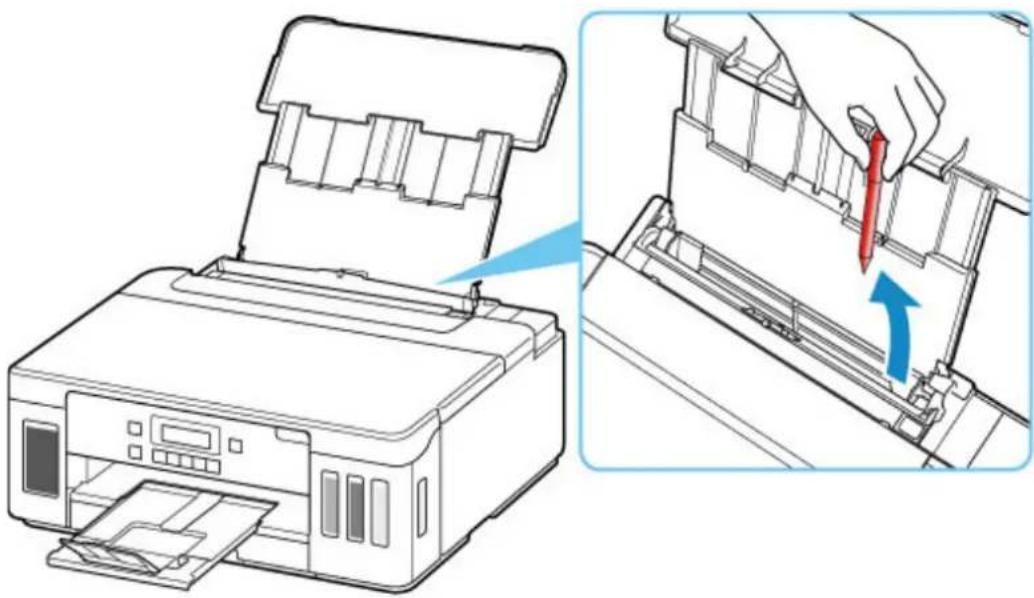
natural_image
Diagram showing a printer being inserted into a paper holder, with no visible text or symbols.Important
- Do not tilt the printer or do not it upside down. Doing so may cause the ink to leak.
Note
- If the feed slot cover is opened, close it slowly.
Check7 Clean paper feed roller.
→ Cleaning Paper Feed Rollers
Note
- Cleaning the paper feed roller abrades it, so do this only when necessary.
Check8 If two or more sheets of paper feed from cassette at once, clean inside of cassette.
→ Cleaning Cassette Pads
Check9 Are transport unit cover and rear cover attached properly?
See Rear View for the positions of the transport unit cover and the rear cover.
If the measures above do not solve the problem, contact your nearest Canon service center to request a repair.
Important
- Do not tilt the printer when moving it since the ink may leak out.
- When transporting the printer for repairing it, see Repairing Your Printer.
A
If the print results are unsatisfactory due to white streaks, misaligned/distorted lines, or uneven colors, check the paper and print quality settings first.
Check1 Do page size and media type settings match size and type of loaded paper?
If these settings do not match, it is not possible to obtain the proper result.
If you are printing a photograph or an illustration, an incorrect paper type setting may reduce the quality of the printout color.
Also, if you print with an incorrect paper type setting, the printed surface may be scratched.
In borderless printing, uneven coloring may occur depending on the combination of the paper type setting and the loaded paper.
The method for checking the paper and print quality settings differs depending on what you are using your printer for.
- Printing from your computer:
Check the settings using the printer driver.
→ Basic Printing Setup
- Printing from a PictBridge (Wi-Fi) compliant device:
Check the settings on your PictBridge (Wi-Fi) compliant device or using the operation panel.
→ PictBridge (Wi-Fi) Print Settings
→ PictBridge settings
- Printing from your smartphone/tablet using Canon PRINT Inkjet/SELPHY:
Check the settings on Canon PRINT Inkjet/SELPHY.
→ Print Photos from Your Smartphone
Check2 Make sure appropriate print quality is selected (see list above).
Select a print quality suited to the paper and to what you are printing. If you notice blurs or uneven colors, increase the print quality setting and retry the printing.
Note
- When printing from a PictBridge (Wi-Fi) compliant device, set the print quality setting using the operation panel.
This setting cannot be made on the PictBridge (Wi-Fi) compliant device.
Check3 If problem is not resolved, check also the sections below.
See also the sections below:
→ Printouts Are Blank/Blurry or Fuzzy/Inaccurate or Bleeding Colors/Streaks or Lines
→ Colors Are Unclear
→ Lines Are Misaligned/Distorted
→ Paper Is Smudged / Printed Surface Is Scratched
→ Vertical Line Next to Image
→ Cannot Complete Printing
→ Part of Page Is Not Printed (Windows)
→ Lines Incomplete or Missing (Windows)
→ Images Incomplete or Missing (Windows)
→ Ink Blots / Paper Curl
→ Back of Paper Is Smudged
→ Uneven or Streaked Colors

Printouts Are Blank/Blurry or Fuzzy/Inaccurate or Bleeding Colors/Streaks or Lines
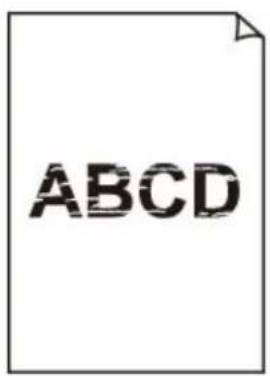
text_image
ABCD
natural_image
Illustration of three pink lotus flowers with green stems against a light blue background (no text or symbols)A
Although some air may enter the ink tube, it is not a malfunction. No problem if the nozzle check pattern is printed correctly.
Check1 Make sure joint button is not lifted up.
Push the print head locking cover to make sure the print heads are installed properly.
Next, push the joint buttons firmly to the end.
→ Check Installation of Print Head

Important
- Remove the orange label and the protective tape of the print head to install it.
Check2 Check paper and print quality settings.
→ Printout Results Are Unsatisfactory
Check3 Are the print head nozzles clogged?
Print the nozzle check pattern and make sure that the ink is coming out normally.
For details on printing the nozzle check pattern, print head cleaning, and print head deep cleaning, see If Printing Is Faint or Uneven.
Step1 Print the nozzle check pattern.
After printing the nozzle check pattern, examine the pattern.
- For Windows:
→ Printing a Nozzle Check Pattern
- For macOS:
→ Printing a Nozzle Check Pattern
If the pattern is not printed correctly, go to the next step.
Step2 Clean the print head.
After cleaning the print head, print the nozzle check pattern and check the result.
- For Windows:
→ Clean the print head
- For macOS:
→ Clean the print head
If it does not improve, clean the print head again.
If it still does not improve, go to the next step.
Step3 Clean the print head deeply.
After cleaning the print head deeply, print the nozzle check pattern and check the result.
- For Windows:
→ Clean the print head deeply
- For macOS:
→ Clean the print head deeply
If it does not improve, turn off the printer, wait for more than 24 hours, and go to the next step.
Step4 Clean the print head deeply again.
After cleaning the print head deeply again, print the nozzle check pattern and check the result.
If it still does not improve, go to the next step.
Step5 Perform ink flush.
After performing ink flush, print the nozzle check pattern and check the result.
Ink flush consumes a great amount of ink. Frequent ink flush can rapidly consume ink, so perform it only when necessary.
→ How to Do Ink Flush
If the nozzle check pattern is not printed correctly even after performing ink flush, check the installing condition of the print head.
→ Check Installation of Print Head
Check4 When an ink tank runs out of ink, refill the ink tank.
If the remaining ink level is below the lower limit line (A), refill the ink tank with the corresponding color of ink.
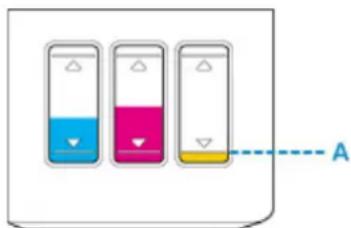
text_image
AIf you use the printer until the ink tank becomes empty, perform ink flush after refilling the ink tank.
→ Refilling Ink Tanks
→ How to Do Ink Flush
Check5 When using paper with one printable surface, check the correct printable side of the paper.
Printing on the wrong side of such paper may cause unclear prints or prints with reduced quality.
When you load paper on the rear tray, load paper with the printable side facing up. When you load paper in the cassette, load paper with the printable side facing down.
Refer to the instruction manual supplied with the paper for detailed information on the printable side.
A
Although some air may enter the ink tube, it is not a malfunction. No problem if the nozzle check pattern is printed correctly.
Check1 Make sure joint button is not lifted up.
Push the print head locking cover to make sure the print heads are installed properly.
Next, push the joint buttons firmly to the end.
→ Check Installation of Print Head
Important
- Remove the orange label and the protective tape of the print head to install it.
Check2 Check the remaining ink level.
When an ink tank runs out of ink, refill the ink tank.
If the remaining ink level is below the lower limit line (A), refill the ink tank with the corresponding color of ink.
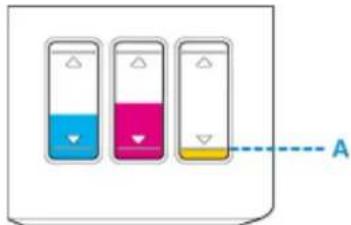
text_image
ANote
- Printed colors may not match screen colors due to basic differences in the methods used to produce colors. Color control settings and environmental differences can also affect how colors appear on the screen. Therefore, colors of printing results may be different from those on the screen.
Check3 Are the print head nozzles clogged?
Print the nozzle check pattern and make sure that the ink is coming out normally.
For details on printing the nozzle check pattern, print head cleaning, and print head deep cleaning, see If Printing Is Faint or Uneven.
Step1 Print the nozzle check pattern.
After printing the nozzle check pattern, examine the pattern.
- For Windows:
→ Printing a Nozzle Check Pattern
- For macOS:
→ Printing a Nozzle Check Pattern
If the pattern is not printed correctly, go to the next step.
Step2 Clean the print head.
After cleaning the print head, print the nozzle check pattern and check the result.
- For Windows:
→ Clean the print head
- For macOS:
→ Clean the print head
If it does not improve, clean the print head again.
If it still does not improve, go to the next step.
Step3 Clean the print head deeply.
After cleaning the print head deeply, print the nozzle check pattern and check the result.
- For Windows:
→ Clean the print head deeply
- For macOS:
→ Clean the print head deeply
If it does not improve, turn off the printer, wait for more than 24 hours, and go to the next step.
Step4 Clean the print head deeply again.
After cleaning the print head deeply again, print the nozzle check pattern and check the result.
If it still does not improve, go to the next step.
Step5 Perform ink flush.
After performing ink flush, print the nozzle check pattern and check the result.
Ink flush consumes a great amount of ink. Frequent ink flush can rapidly consume ink, so perform it only when necessary.
→ How to Do Ink Flush
If the nozzle check pattern is not printed correctly even after performing ink flush, check the installing condition of the print head.
→ Check Installation of Print Head

Lines Are Misaligned/Distorted
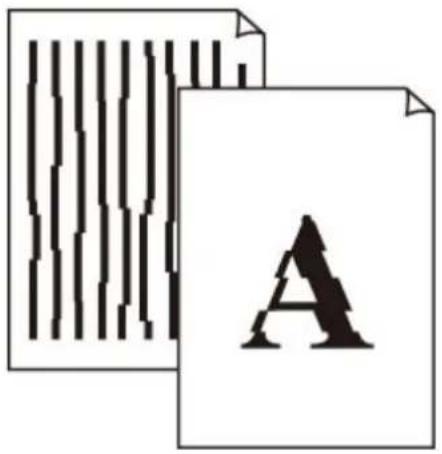
text_image
Image showing a document with vertical lines and a large letter 'A' in the center, likely representing a document or text page.
Check1 Check paper and print quality settings.
→ Printout Results Are Unsatisfactory
Check2 Perform print head alignment.
If printed lines are misaligned/distorted or print results are otherwise unsatisfactory, adjust the print head position.
→ Aligning the Print Head

Note
- If the problem is not resolved after performing the print head alignment, perform print head alignment manually from your computer.
- For Windows:
→ Adjusting Print Head Position Manually
- For macOS:
→ Adjusting Print Head Position
Check3 Increase print quality and try printing again.
Increasing the print quality may improve the print result.

Paper Is Smudged / Printed Surface Is Scratched

Paper Is Smudged
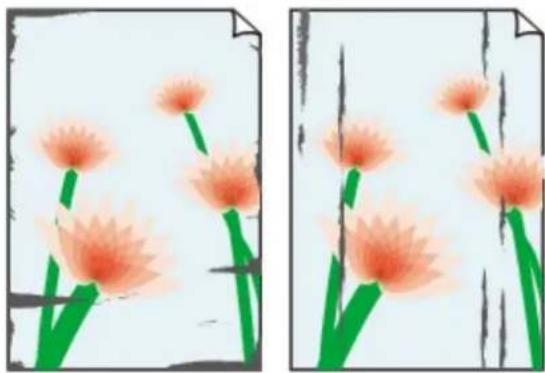
natural_image
Two identical panels showing pink dandelion flowers with green stems against a light background, no text or symbols present.Smudged Edges Smudged Surface


Printed Surface Is Scratched


Check1 Check paper and print quality settings.

Printout Results Are Unsatisfactory

Check2 Check paper type.
Make sure you are using the right paper for what you are printing.

Supported Media Types

Check3 Correct curl before loading paper.
When using Photo Paper Plus Semi-gloss, even if the sheet is curled, load one sheet at a time as it is. Rolling this paper in the opposite direction to flatten it may crack the paper surface and reduce the print quality.
We recommend putting unused paper back into the package and storing it flat.
- Plain Paper
Turn the paper over and reload it to print on the other side.
• Other Paper such as envelope
If the paper corners curl more than 0.1 in. / 3 mm (A) in height, the paper may smudge or may not feed properly. Follow the instructions below to correct the paper curl.
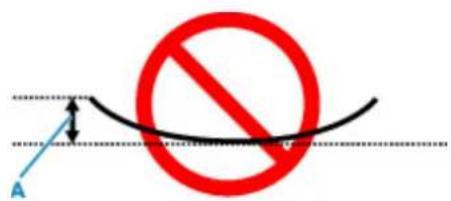
text_image
A- Roll up paper in opposite direction to paper curl as shown below.

natural_image
Diagram showing a document being rotated by blue arrows and a blank sheet, with no text or symbols present.- Check that paper is now flat.
We recommend printing curl-corrected paper one sheet at a time.

Note
- Depending on paper type, the paper may smudge or may not feed properly even if it is not curled inward. Follow the instructions below to curl the paper outward up to 0.1 in. / 3 mm (C) in height before printing. This may improve the print result.
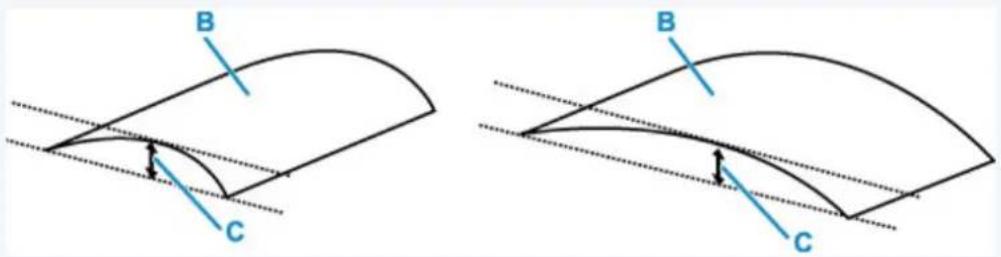
text_image
B C B C(B) Print side
We recommend feeding paper that has been curled outward one sheet at a time.
Check4
Set printer to prevent paper abrasion.
Adjusting the setting to prevent paper abrasion will widen the clearance between the print head and the paper. If you notice abrasion even with the media type set correctly to match the paper, set the printer to prevent paper abrasion using the operation panel or the computer.
This may reduce the print speed.
* Once you have finished printing, undo this setting. Otherwise, it will apply to subsequent print jobs.
- From operation panel:
Press the Setup button and select Device settings > Print settings in this order, and then set Prevent abrasion to ON.

Changing Settings from Operation Panel
• From computer (Windows):
-
Check that printer is turned on.
-
Open Canon IJ Printer Assistant Tool.
→ Opening the Maintenance Tool (Canon IJ Printer Assistant Tool)
-
Select Custom Settings.
-
Select Prevents paper abrasion check box and select OK.
-
Check message and select OK.
- From computer (macOS):
Adjust the setting to prevent paper abrasion from Remote UI.
→ Opening Remote UI for Maintenance
Check5 If intensity is set high, reduce intensity setting and try printing again.
If you are printing with a high intensity setting on plain paper, the paper may absorb too much ink and become wavy, causing paper abrasion.
→ Adjusting Intensity
Check6 Is paper feed roller dirty?
Clean paper feed roller.
→ Cleaning Paper Feed Rollers
Note
- Cleaning the paper feed roller abrades it, so do this only when necessary.
Check7 Is inside of printer dirty?
During duplex printing, ink may stain the inside of the printer, smudging the printout.
Perform bottom plate cleaning to clean inside of printer.
→ Cleaning Inside the Printer (Bottom Plate Cleaning)
Note
- To prevent staining inside the printer, be sure to set the correct paper size.
Check8 Set longer ink drying time.
This allows the printed surface to dry, preventing smudges and scratches.
- For Windows:
-
Check that printer is turned on.
-
Open Canon IJ Printer Assistant Tool.
→ Opening the Maintenance Tool (Canon IJ Printer Assistant Tool)
-
Select Custom Settings.
-
Drag Ink Drying Wait Time slide bar to set the wait time and select OK.
-
Check message and select OK.
- For macOS:
Set the waiting time using Remote UI.
→ Opening Remote UI for Maintenance

Vertical Line Next to Image
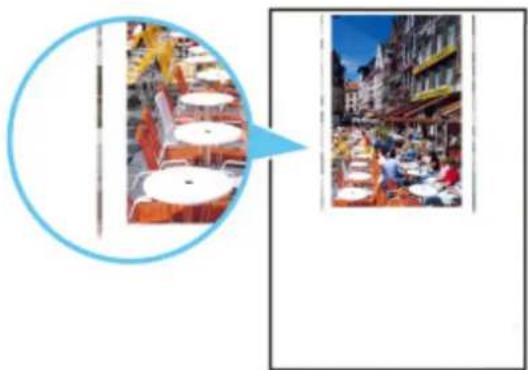
natural_image
Two outdoor café scenes: one with white tables and a blue arrow pointing to a street view, the other showing people dining at tables in a vibrant urban setting (no visible text or signage)
Check Is loaded paper size correct?
If the loaded paper is larger than the size you specified, a vertical line may appear in the margin.
Set the paper size to match the loaded paper.
→ Printout Results Are Unsatisfactory
Note
- The direction of the vertical line pattern may vary depending on the image data or the print setting.
- This printer performs automatic cleaning when necessary to keep printouts clean. A small amount of ink is ejected for cleaning.
Although the ink is normally ejected onto the ink absorber at the outer edge of the paper, it may get onto the paper if the loaded paper is larger than the set size.
Mechanical Problems
Printer Does Not Turn On
Printer Turns Off Unexpectedly or Repeatedly
USB Connection Problems
Cannot Communicate with Printer via USB
▶ Wrong Language Appears in LCD
A
Check1 Press ON button.
Check2 Make sure power plug is securely connected to printer, and then turn on again.
Check3 Unplug printer, leave it for at least 2 minutes, and then plug it back in and turn on again.
If this does not solve the problem, contact your nearest Canon service center to request a repair.
Important
- Do not tilt the printer when moving it since the ink may leak out.
- When transporting the printer for repairing it, see Repairing Your Printer.
A
Check If printer is set to turn off automatically after a certain time, disable this setting.
If you have set the printer to turn off automatically after a specified time, the power will shut off by itself once that time has elapsed.
- To disable the setting from the operation panel:
-
Check that printer is turned on.
-
Press the Setup button, use the ◀▶ button to select ECO settings, and press the OK button.
→ LCD and Operation Panel
-
Make sure that EnergySaveSettings is selected and then press the OK button.
-
Use the ◀▶ button to select Auto power off and then press the OK button.
-
Use the button to select OFF and then press the OK button.
The setting to shut off the power automatically is disabled.
- To disable the setting from the computer:
For Windows, use Canon IJ Printer Assistant Tool or ScanGear (scanner driver) to disable the setting. Follow the procedure below to disable the setting using Canon IJ Printer Assistant Tool.
- Open Canon IJ Printer Assistant Tool.
→ Opening the Maintenance Tool (Canon IJ Printer Assistant Tool)
-
Select Auto Power.
-
Select Disable for Auto Power Off.
-
Select OK.
-
Select OK on the displayed screen.
The setting to shut off the power automatically is disabled.
A
Make sure of the checking item below when you find one of the followings.
- Printing is slow.
- Hi-Speed USB connection does not work.
- A message such as "This device can perform faster" appears. (Windows)

Note
- If your system environment does not support Hi-Speed USB, the printer operates at the slower speed of USB 1.1. In this case, the printer works properly but printing speed may slow down due to the communication speed.
Check Check following to make sure your system environment supports Hi-Speed USB connection.
- Does the USB port on your computer support Hi-Speed USB connection?
- Does the USB cable or the USB hub support Hi-Speed USB connection?
Be sure to use a certified Hi-Speed USB cable. We recommend that the USB cable be no longer than 10 feet / 3 meters or so.
- Is the Hi-Speed USB driver working properly on your computer?
Make sure the latest Hi-Speed USB driver is working properly and obtain and install the latest version of the Hi-Speed USB driver for your computer, if necessary.

Important
- For more information, contact the manufacturer of your computer, USB cable, or USB hub.
Cannot Communicate with Printer via USB
A
Check1 Make sure printer is turned on.
Check2 Connect USB cable properly.
As the illustration below, the USB port is at the back of the printer.
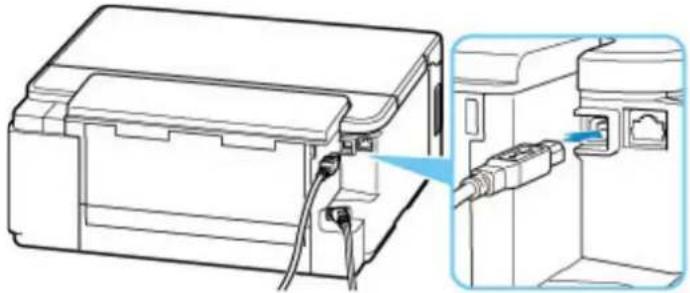
natural_image
Diagram of a printer internal structure with cable and connector, showing no text or symbolsImportant
- Connect the "Type-B" terminal to the printer with the notched side facing UP. For details, refer to the instruction manual supplied with the USB cable.
Check3 Make sure Enable bidirectional support is selected in the Ports sheet of the Printer properties dialog box. (Windows)
If not, select it to enable bidirectional support.
→ Opening Printer Driver's Setup Screen
A
Follow the instructions below to select your language.
- Press Setup button and wait a little.
- Press ▶ button once and press OK button.
- Press ▶ button 4 times and press OK button.
- Use button to select language for LCD and press OK button. The desired language appears on the LCD.
- Press Stop button.
Installation and Download Problems
Failed to Printer Driver Installation (Windows)
▶ Updating Printer Driver in Network Environment (Windows)
A
If installation does not start when you insert Setup CD-ROM:
→ If you cannot get past the Printer Connection screen:
→ Other cases:
If installation does not start when you insert Setup CD-ROM:
Follow the instructions below to start the installation.
1. Make the following settings.
- In Windows 10, click Start > File Explorer, and then click This PC from list on left.
- In Windows 8.1, select Explorer icon in Taskbar on Desktop, and then select This PC from list on left.
- In Windows 7, click Start, and then click Computer.
2. Double-click the CD-ROM icon in the window that appears.
If the contents of the CD-ROM appear, double-click Msetup4.exe.
If you cannot install the Printer Driver with the Setup CD-ROM, install it from the Canon website.
Note
- If the CD-ROM icon does not appear, try the following:
- Remove the CD-ROM from your computer and reinsert it.
- Restart your computer.
If the icon still does not appear, try a different disc and see if it appears. If it does, there is a problem with the Setup CD-ROM. Contact your nearest Canon service center to request a repair.
If you cannot get past the Printer Connection screen:
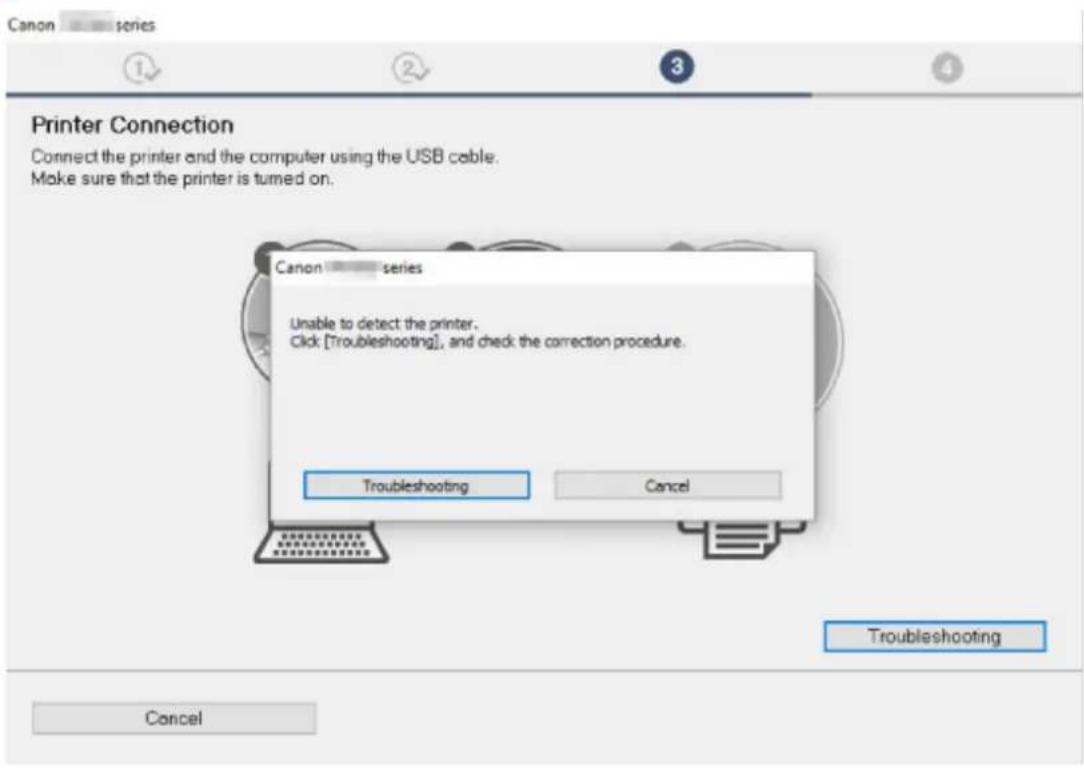
text_image
Canon series Printer Connection Connect the printer and the computer using the USB cable. Make sure that the printer is turned on. Canon series Unable to detect the printer. Click [Troubleshooting], and check the correction procedure. Troubleshooting Cancel Troubleshooting Cancel→ Cannot Proceed beyond Printer Connection Screen
Other cases:
If the Printer Driver was not installed correctly, uninstall the Printer Driver, restart your computer, and then reinstall the Printer Driver.
→ Deleting the Unnecessary Printer Driver
Reinstall the Printer Driver with the Setup CD-ROM or install it from the Canon website.
Note
- If the installer was stopped due to a Windows error, Windows operation may be unstable, and you may not be able to install the drivers. Restart your computer and then reinstall the drivers.
Updating Printer Driver in Network Environment (Windows)
A
Download the latest Printer Driver.
Download the latest Printer Driver for your model on the download page of the Canon website.
Uninstall the existing Printer Driver and follow the installation instructions to install the latest Printer Driver that you downloaded. In the connection method selection screen, select Use the printer with Wi-Fi connection or Use the printer with wired LAN connection according to the connection method you use.
The printer is detected automatically in the network.
Make sure the printer was found, and install the Printer Driver following the on-screen instructions.
Note
- The network settings on the printer are not affected, so the printer can be used on the network without redoing settings.
Errors and Messages
Four-Digit Alphanumeric Characters Appear on LCD
When Error Occurred
Message (Support Code) Appears
Four-Digit Alphanumeric Characters Appear on LCD
A message appears on the LCD or your computer screen.
Depending on an error or message, four-digit alphanumeric characters appear. The characters represent a "support code" (error number).
For details on each support code, see List of Support Code for Error.
When Error Occurred
If an error occurs in printing, for example if the paper runs out or jams, a troubleshooting message appears automatically. Take the appropriate action described in the message.
When an error occurs, a message is displayed on the computer screen or the printer. Depending on the error, a Support Code (error number) is displayed on the computer screen or the LCD.
When a Support Code and a message are displayed on the computer screen (Windows):
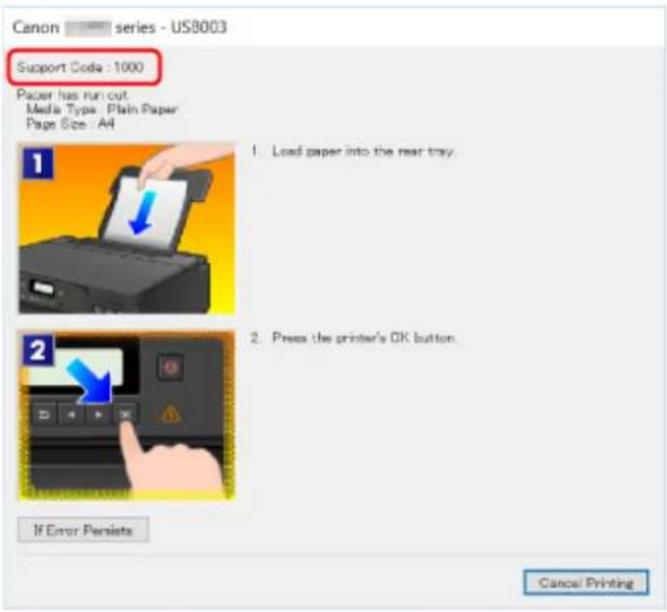
text_image
Canon - series - US8003 Support Code : 1000 Paper has run cut. Media Type: Plain Paper Page Size: All 1. Load paper into the rear tray. 2. Press the printer's OK button. If Error Persists Cancel PrintingWhen a Support Code and a message are displayed on the printer (LCD):
No paper in rear tray Load paper in the n 1000
For details on how to resolve errors with Support Codes, see List of Support Code for Error.
Note
- For details on how to resolve errors without Support Codes, see Message (Support Code) Appears.
Message (Support Code) Appears
This section describes some of the errors and messages that may appear.
Note
- A support code (error number) is displayed on the computer for some errors. For details on errors that have support code, see List of Support Code for Error.
If a message appears on the LCD, see below.
Message Appears on LCD
If a message appears on the computer, see below.
Error Regarding Automatic Duplex Printing Is Displayed
Error Regarding Power Cord Being Unplugged Is Displayed (Windows)
Writing Error/Output Error/Communication Error (Windows)
→ Other Error Messages (Windows)

Message Appears on LCD

Check the message and take an appropriate action.
- Cannot connect to the server; try again
The printer cannot connect to the server due to a communication error.
Press the OK button to dismiss the error and try again after a while.

Error Regarding Automatic Duplex Printing Is Displayed

Check See Automatic Duplex Printing Problems and take the appropriate action.

Error Regarding Power Cord Being Unplugged Is Displayed
(Windows)

The printer may have been unplugged while it was on.
Check the error message that appears on the computer and click OK.
The printer starts printing.

Writing Error/Output Error/Communication Error (Windows)

Check1 If the ON lamp is off, make sure printer is plugged in and turn on.
The ON lamp flashes while the printer is initializing. Wait until the ON lamp stops flashing and remains lit.
Check2 Make sure printer is properly connected to computer.
If you are using a USB cable, make sure it is securely connected to both the printer and the computer. When the USB cable is securely plugged in, check the following:
- If you are using a relay device such as a USB hub, disconnect it, connect the printer directly to the computer, and retry the printing. If printing starts normally, there is a problem with the relay device. Contact the vendor of the relay device.
- There could also be a problem with the USB cable. Replace the USB cable and retry the printing.
If you use the printer over a LAN, make sure the printer is correctly set up for network use.
Check3 Make sure Printer Driver is installed correctly.
Uninstall the Printer Driver following the procedure described in Deleting the Unnecessary Printer Driver and reinstall it from the Setup CD-ROM or the Canon website.
Check4 When printer is connected to your computer with a USB cable, check device status from your computer.
Follow the procedure below to check the device status.
- Select Control Panel > Hardware and Sound > Device Manager.
Note
- If the User Account Control screen appears, select Continue.
- Double-click Universal Serial Bus controllers and USB Printing Support.
If USB Printing Support Properties screen does not appear, make sure the printer is correctly connected to the computer.
→ Check2 Make sure printer is properly connected to computer.
- Click General tab and check for a device problem.
If a device error is shown, see Windows Help to resolve it.
A
Check If an error message appears outside printer status monitor, check the following:
- "Could not spool successfully due to insufficient disk space"
Delete any unnecessary files to increase the amount of free space on the disk.
- "Could not spool successfully due to insufficient memory"
Close other applications to increase the available memory.
If you still cannot print, restart your computer and retry the printing.
- "Printer driver could not be found"
Uninstall the Printer Driver following the procedure described in Deleting the Unnecessary Printer Driver and reinstall it from the Setup CD-ROM or the Canon website.
- "Could not print Application name - File name"
Try printing again once the current job is complete.
List of Support Code for Error
Support code appears on the LCD and your computer screen when errors occur.
A "support code" is an error number, and appears along with an error message.
When an error occurs, check the support code displayed on the LCD and computer screen and take the appropriate action in response.
Support Code Appears on LCD and Computer Screen
• 1000 to 1ZZZ
1000 1003 1200 1215 1270 1300
1303 1304 1309 1310 1313 1365
1366 1367 1431 1432 1470 1471
1472 1473 1476 15A1 1641 1642
1700 1701 1871 1874 1890 1892
• 2000 to 2ZZZ
2110 2113 2114 2120 2123 2500
• 3000 to 3ZZZ
3413 3439 3440 3441 3442 3443
3444 3445 3446 3447 3449
• 4000 to 4ZZZ
4103 4104 495A
• 5000 to 5ZZZ
5100 5200 5205 5206 5400 5700
5B00 5B01 5C02
• 6000 to 6ZZZ
6000 6001 6004 6500 6800 6801
6830 6831 6832 6833 6900 6901
6902 6910 6911 6920 6921 6930
6931 6932 6933 6940 6941 6942
6943 6944 6945 6946 6A80 6A81
6D01
• 7000 to 7ZZZ
7500 7600 7700 7800
• A000 to ZZZZ
C000
For paper jam support codes, see also List of Support Code for Error (Paper Jams).
List of Support Code for Error (Paper Jams)
If paper jams, remove it following the appropriate procedure as shown below.
- If you can see the jammed paper at the paper output slot or the rear tray:
→ 1300
- If you cannot see the jammed paper at the paper output slot or the rear tray:
- If the paper fed from the cassette is jammed:
→ 1303
- If the paper is jammed when performing automatic duplex printing:
→ 1304
- If the paper is jammed as the printer pulled in the printed paper:
→ 1313
- If the paper tears and you cannot remove it from the paper output slot or if the paper is jammed inside the printer:
→ Paper Is Jammed inside Printer
- Cases other than above:
→ Other Cases
Cause
Paper is jammed when feeding paper from rear tray.
What to Do
If the paper fed from the rear tray is jammed, remove the jammed paper from the paper output slot or from the rear tray following the instructions below.
- Slowly pull out paper, either from paper output slot or from rear tray, whichever is easier. Hold the paper with both hands, and pull it out slowly so as not to tear it.
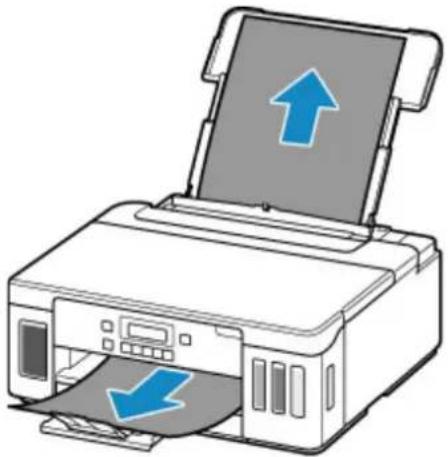
natural_image
Illustration of a printer with an open page and two blue arrows indicating print direction (no text or symbols present)Note
- If you cannot pull out the paper, turn the printer back on without pulling forcibly. The paper may be ejected automatically.
- If paper becomes jammed during printing and you need to turn off the printer to remove it, press the Stop button to stop the printing before you turn off the printer.
- If the paper tears and you cannot remove the jammed paper from the paper output slot or the rear tray, remove the paper from inside the printer.
→ Paper Is Jammed inside Printer
- If you cannot pull the paper out from the paper output slot or from the rear tray, try to pull the paper out from the rear side of the printer.
→ Removing Jammed Paper from Rear Side
- Reload paper and press printer's OK button.
The printer resumes printing. Reprint the page you were printing if it was not printed properly due to the paper jam.
If you turned off the printer in step 1, the print data that was sent to the printer is erased. Redo the printing.
Note
- When reloading the paper, make sure you are using suitable paper and loading it correctly.
- We recommend using paper sizes other than A5 to print documents with photos or graphics. A5 paper may curl and jam as it leaves the printer.
If the measures above do not solve the problem, contact your nearest Canon service center to request a repair.
Important
- Do not tilt the printer when moving it since the ink may leak out.
- When transporting the printer for repairing it, see Repairing Your Printer.
Cause
Paper is jammed when feeding paper from cassette.
What to Do
1. Remove jammed paper.
- If the paper is jammed at the paper output slot:
→ 1300
• If the paper is jammed inside the printer:
→ Paper Is Jammed inside Printer
- If the paper is jammed at the feed slot of the cassette:
After storing the output tray extension and the paper output tray, pull out the cassette and remove the jammed paper slowly with both hands.
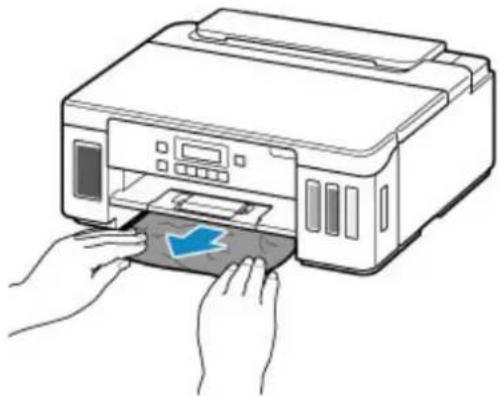
natural_image
Illustration of hands inserting a printer into a slot with a blue arrow indicating the print location (no text or symbols present)Important
- When checking the feed slot of the cassette or removing the jammed paper, do not turn the printer upside down or tilt it. The ink may leak out.
- If none of the above is applied, see Removing Jammed Paper from Rear Side to open the rear cover and to remove the paper.
2. Load paper in cassette properly.
Loading Paper in the Cassette
3. Press printer's OK button.
The printer resumes printing. Reprint the page you were printing if it was not printed properly due to the paper jam.
If the measures above do not solve the problem, contact your nearest Canon service center to request a repair.
Important
- Do not tilt the printer when moving it since the ink may leak out.
- When transporting the printer for repairing it, see Repairing Your Printer.
Cause
Paper is jammed when performing automatic duplex printing.
What to Do
1. Remove jammed paper.
- If the paper is jammed at the paper output slot:
→ 1300
• If the paper is jammed inside the printer:
→ Paper Is Jammed inside Printer
- If the paper is jammed at the feed slot of the cassette:
After storing the output tray extension and the paper output tray, pull out the cassette and remove the jammed paper slowly with both hands.
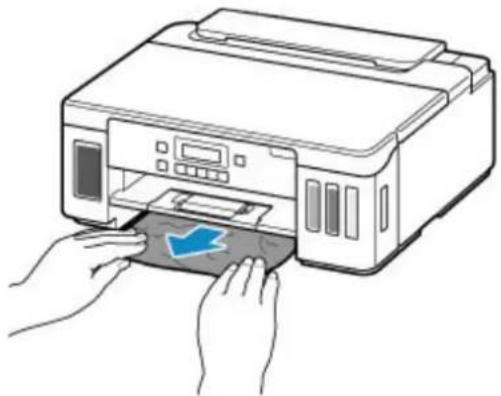
natural_image
Illustration of hands inserting a printer into a digital scanner (no text or symbols visible)Important
- When checking the feed slot of the cassette or removing the jammed paper, do not turn the printer upside down or tilt it. The ink may leak out.
- If none of the above is applied, see Removing Jammed Paper from Rear Side to open the rear cover and to remove the paper.
2. Load paper properly.
Loading Paper in the Cassette
→ Loading Paper in the Rear Tray
3. Press printer's OK button.
The printer resumes printing. Reprint the page you were printing if it was not printed properly due to the paper jam.
If the measures above do not solve the problem, contact your nearest Canon service center to request a repair.
Important
- Do not tilt the printer when moving it since the ink may leak out.
- When transporting the printer for repairing it, see Repairing Your Printer.
Cause
Paper is jammed as printer pulled in printed paper.
What to Do
If the paper is jammed as the printer pulled in the printed paper, try to remove the paper from the following locations.
- Paper output slot
→ 1300
- Inside of the printer
→ Paper Is Jammed inside Printer
- Rear side
→ Removing Jammed Paper from Rear Side
Paper Is Jammed inside Printer
If the jammed paper tears and you cannot remove the paper from the paper output slot / the feed slot of the cassette / the rear tray, or if the jammed paper remains inside the printer, remove the paper following the instructions below.
Note
- If paper becomes jammed during printing and you need to turn off the printer to remove it, press the Stop button to stop the printing before you turn off the printer.
-
Turn off printer and unplug it.
-
Open top cover.
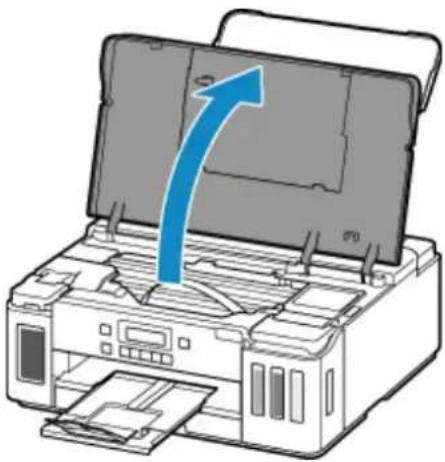
natural_image
Illustration of a printer with an open lid and blue arrow indicating compression or shift (no text or symbols)Important
- Do not touch clear film (A), white belt (B), or tubes (C).
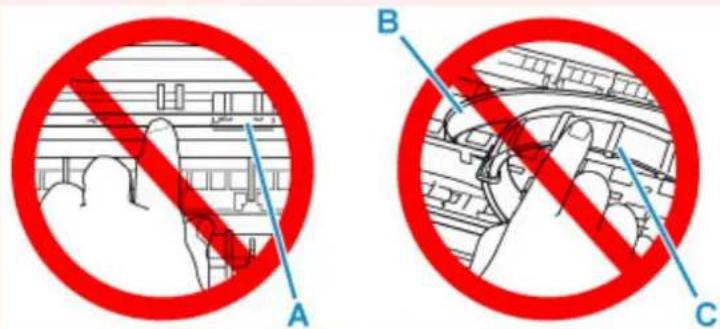
text_image
A B CIf you soil or scratch this part by touching it with paper or your hand, it could damage the printer.
- Check if jammed paper is under print head holder.
If the jammed paper is under the print head holder, move the print head holder to the far right or left, whichever makes it easier to remove the paper.
When moving the print head holder, hold the top of the print head holder and slide it slowly to the far right or left.
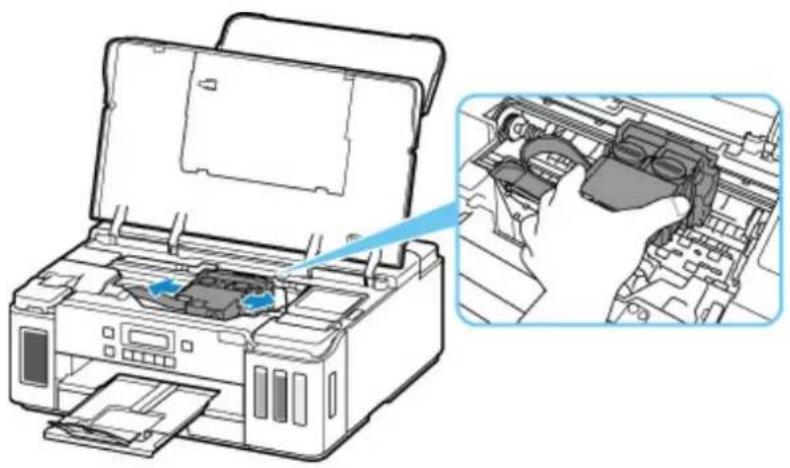
natural_image
Diagram of an open printer with internal components, showing a close-up view of the internal structure (no text or symbols present)- Hold jammed paper firmly in both hands.
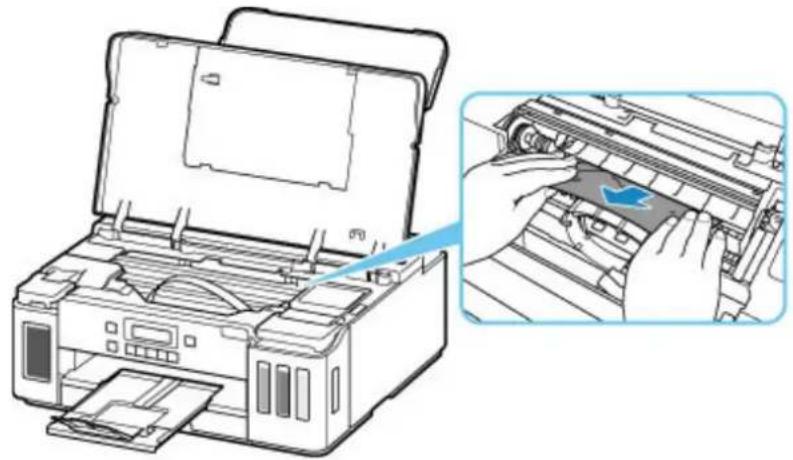
natural_image
Line drawing of a printer with open lid and internal circuitry, showing a close-up of the printer's internal structure (no text or symbols)If the paper is rolled up, pull out it.
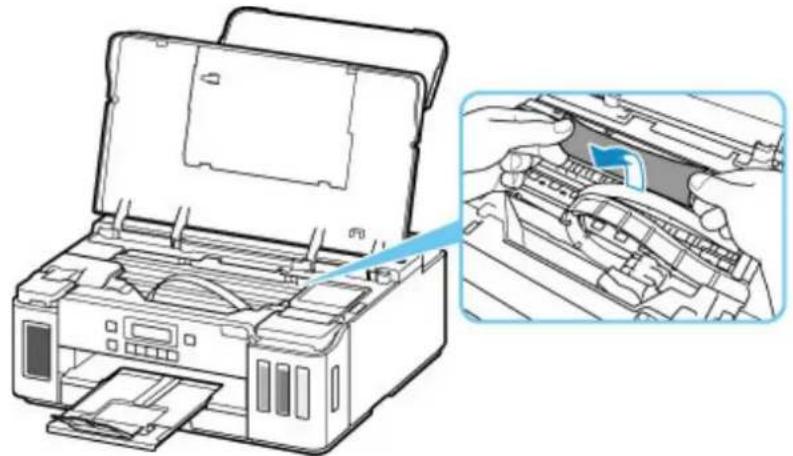
natural_image
Line drawing of a printer with open lid and internal circuitry, showing a close-up of the printer's internal structure (no text or symbols)5.Slowly pull out paper, so as not to tear it.
Pull out the paper at an angle of about 45 degrees.
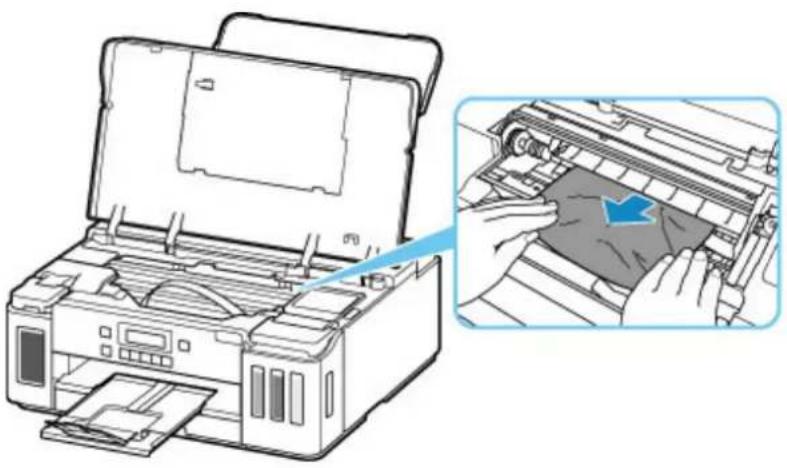
natural_image
Diagram of a printer with open lid and paper feed being inserted, showing internal components (no text or symbols)- Make sure all jammed paper is removed.
If the paper tears when you pull out it, a bit of paper may remain in the printer. Check the following and remove any remaining paper.
• Any paper left under the print head holder?
- Any small bits of paper left in the printer?
- Any paper left in the left and right empty spaces (D) in the printer?
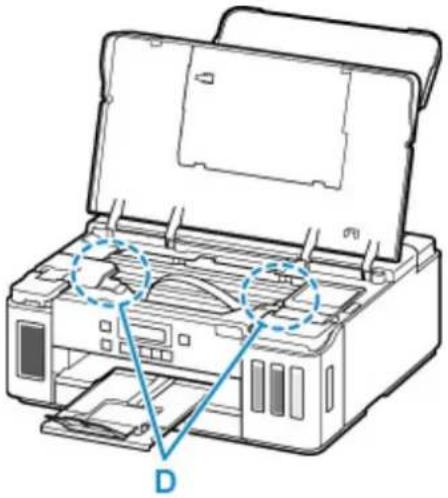
natural_image
Diagram of an open printer with internal components and a blue triangle labeled D (no text or symbols present)7.Close top cover.
All jobs in the print queue are canceled. Redo the printing.
Note
- When reloading the paper, make sure you are using suitable paper and loading it correctly. If a paper jam message appears on the LCD or on your computer screen when you resume printing after removing all the jammed paper, there may be some paper still inside the printer. Check the printer again for any remaining bits of paper.
If the measures above do not solve the problem, contact your nearest Canon service center to request a repair.
Important
- Do not tilt the printer when moving it since the ink may leak out.
- When transporting the printer for repairing it, see Repairing Your Printer.
Removing Jammed Paper from Rear Side

Note
- If paper becomes jammed during printing and you need to turn off the printer to remove it, press the Stop button to stop the printing before you turn off the printer.
-
Make sure you have unplugged the power cord.
-
Rotate printer so that rear side of printer faces toward you.
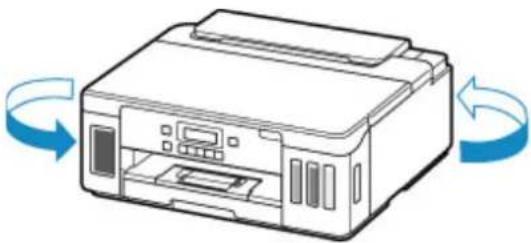
natural_image
Line drawing of a printer with blue circular arrows indicating rotation or circulation (no text or symbols)
Important
- When changing the orientation of the printer, do not turn the printer upside down or tilt it. The ink may leak out.
- Open rear tray cover and then pull up paper support.
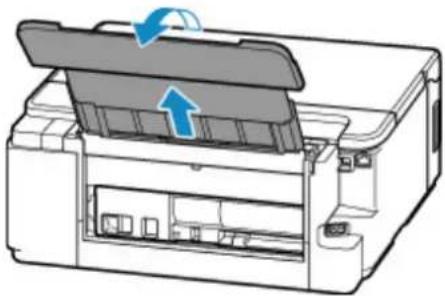
natural_image
Diagram of a printer with a paper lid and scroll, showing internal components and directional arrows (no text or symbols)- Detach rear cover.
Pull out the rear cover.
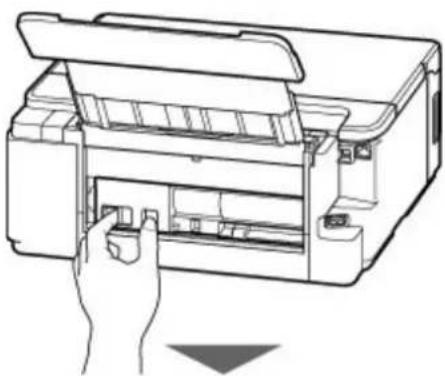
natural_image
Line drawing of a printer with a hand inserting a component (no text or symbols)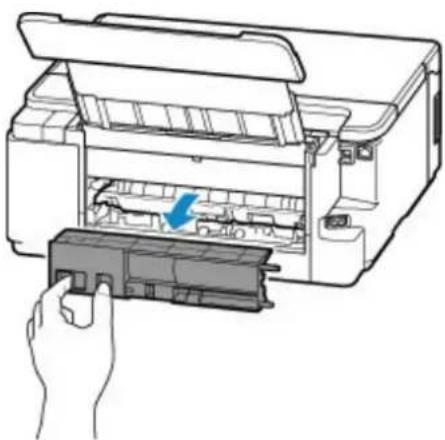
natural_image
Line drawing of a printer with a hand inserting a component into the main body (no text or symbols present)- Slowly pull out paper.
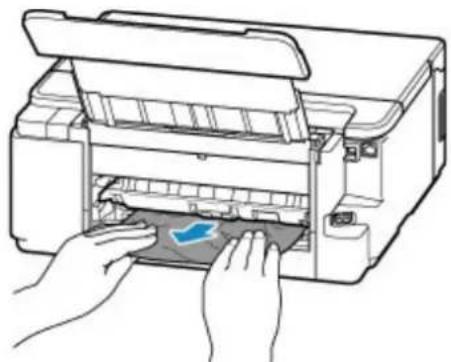
natural_image
Illustration of hands inserting a printer into a paper airplane (no text or symbols visible)Note
- Do not touch the inner parts of the printer.
If you were not able to remove the paper in this step, detach the transport unit cover and remove the paper by following these steps.
- Detach transport unit cover.
Lift up the transport unit cover and pull out it.
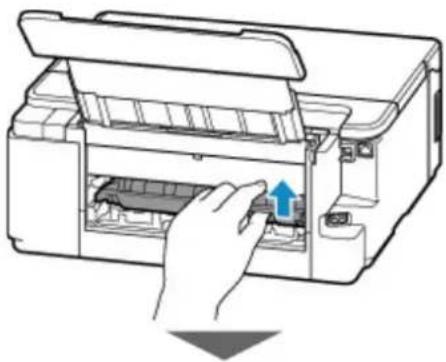
natural_image
Illustration of a printer with a hand inserting a component into the chamber (no text or symbols visible)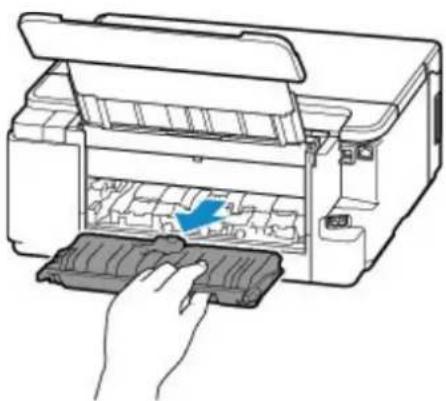
natural_image
Line drawing of a printer with a hand inserting a component (no text or symbols)2.Slowly pull out paper.
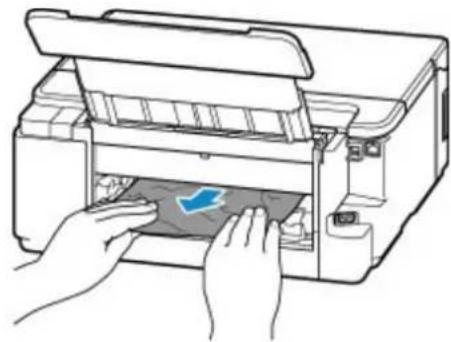
natural_image
Illustration of hands operating a printer with a blue arrow indicating a process (no text or symbols present)
Note
- Do not touch the inner parts of the printer.
- Make sure all jammed paper is removed.
- Attach transport unit cover.
Insert the transport unit cover slowly all the way into printer and take down the transport unit cover.
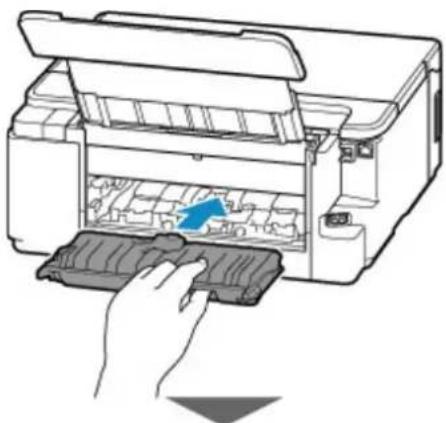
natural_image
Illustration of a printer with a hand inserting a paper into the cover (no text or symbols visible)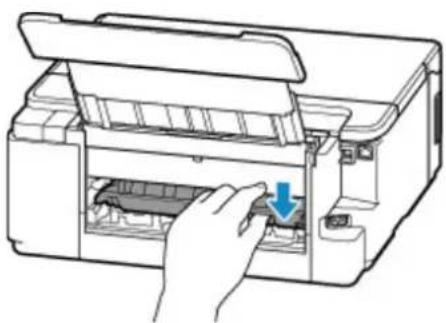
natural_image
Line drawing of a printer with a hand inserting a component, showing no text or symbols.6. Attach rear cover.
Insert the projections of the right side of the rear cover into the printer, and then push the left side of the rear cover until it is closed completely.
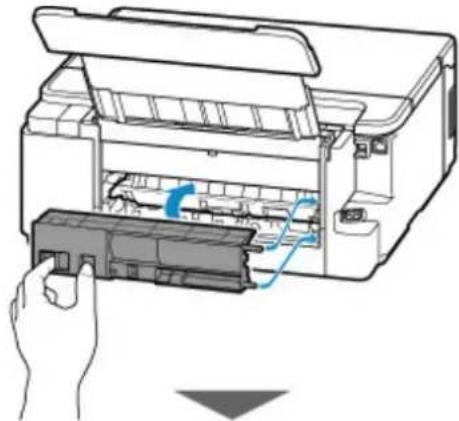
natural_image
Illustration of a printer being inserted into a paper holder, showing internal structure and blue cable (no text or symbols)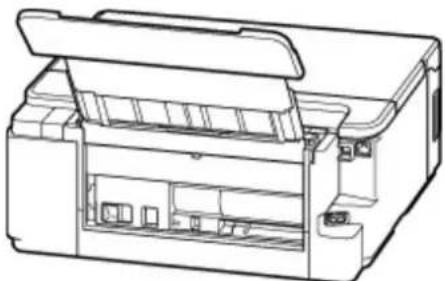
natural_image
Line drawing of a printer internal structure (no text or symbols)The print data that was sent to the printer is erased. Redo the printing.
Note
- When reloading the paper, make sure you are using suitable paper and loading it correctly.
If the measures above do not solve the problem, contact your nearest Canon service center to request a repair.
Important
- Do not tilt the printer when moving it since the ink may leak out.
- When transporting the printer for repairing it, see Repairing Your Printer.
Cause
Possible causes include the following.
• There is no paper in the rear tray.
- Paper is not loaded in the rear tray properly.
What to Do
Take the corresponding actions below.
- Load paper in the rear tray.
→ Loading Paper in the Rear Tray
- Align the paper guides of the rear tray with the both edges of the paper.
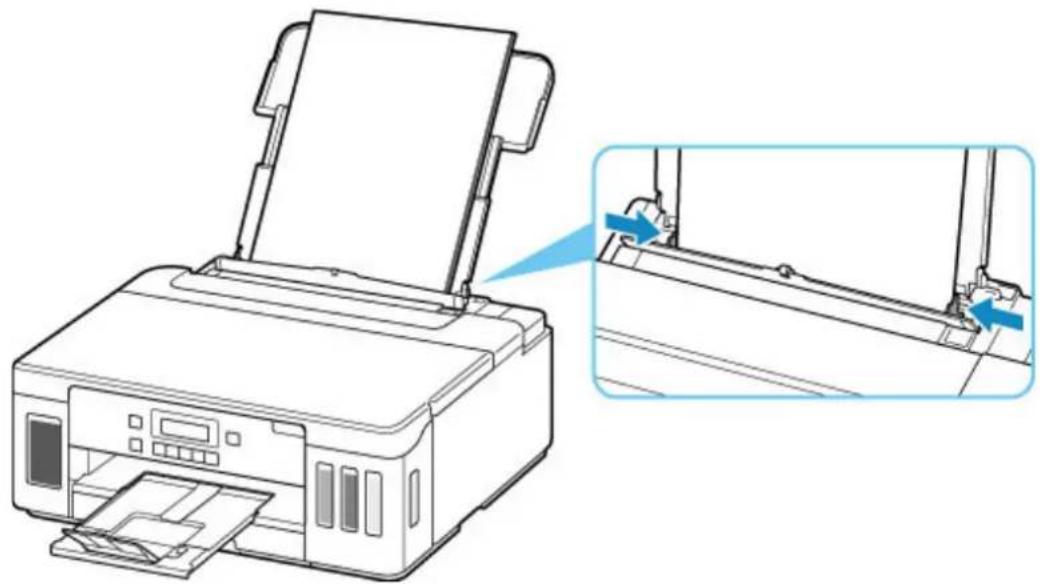
natural_image
Line drawing of a printer with open lid and paper feed, showing internal structure and alignment (no text or symbols)- Set paper information for the paper in the rear tray.
→ Paper Settings
After carrying out the above measures, press the printer's OK button.
Important
- Be sure to close the feed slot cover after loading paper in the rear tray. If the feed slot cover is open, paper cannot be fed.
Note
• After loading paper in the rear tray, the screen for setting rear tray paper information appears. Set paper information for the paper in the rear tray.
• To cancel printing, press the printer's Stop button.
Cause
Possible causes include the following.
• There is no paper in the cassette.
• Paper is not loaded in the cassette properly.
What to Do
Take the corresponding actions below.
- Load paper in the cassette.
→ Loading Paper in the Cassette
- Align the paper guides of the cassette with the edges of the paper.
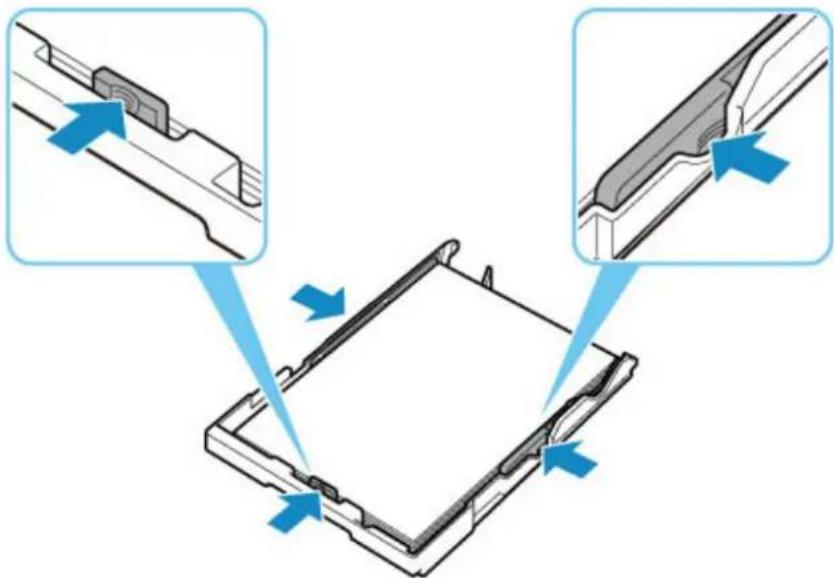
text_image
Technical diagram showing three-step assembly of a mechanical component with blue arrows indicating direction of movement.- Set paper information for the paper in the cassette.
→ Paper Settings
After carrying out the above measures, press the printer's OK button.
Note
- The loadable paper differs depending on the paper source. The loadable paper in the cassette is A4, Letter, A5, or B5 size plain paper.
• To cancel printing, press the printer's Stop button.
1200
Cause
Top cover is open.
What to Do
Close the top cover and wait for a while.
Do not close it while you are refilling an ink tank.
Cause
Print head replacement in progress.
What to Do
Complete print head replacement.

Note
- When you stop replacing the print head, tilt the ink valve lever tightly to the right, then close the top cover.
Cause
Ink valve is open.
What to Do
Keep the ink valve closed while replacing the print head.
Open the top cover and close the ink valve by tilting the ink valve lever tightly to the left.
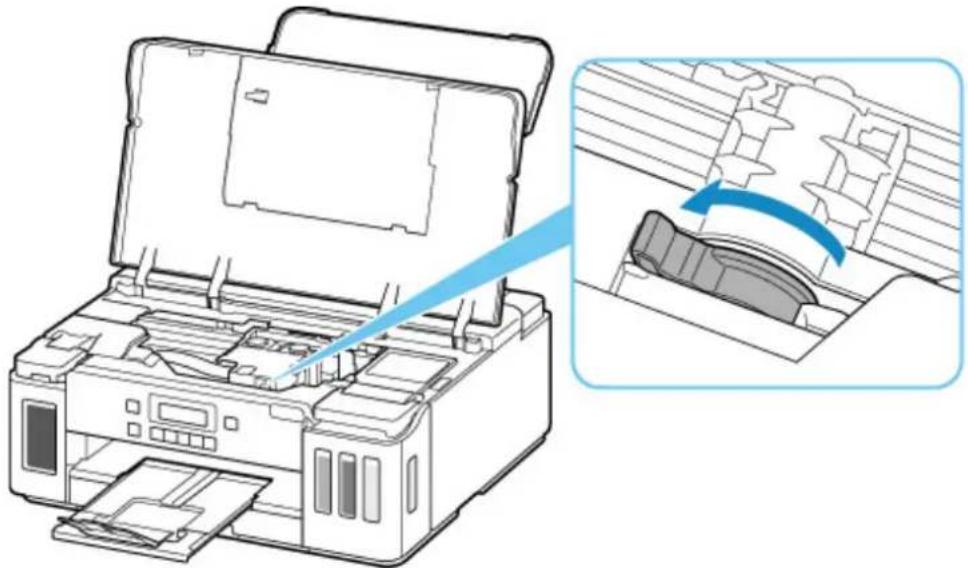
natural_image
Diagram of a printer with open lid and internal structure, showing a blue arrow indicating a process (no text or symbols present)And then, press the printer's OK button to cancel the error.

Note
- When you stop replacing the print head, press the printer's Stop button.
Cause
Ink valve is closed.
What to Do
Open the top cover and open the ink valve by tilting the ink valve lever tightly to the right.
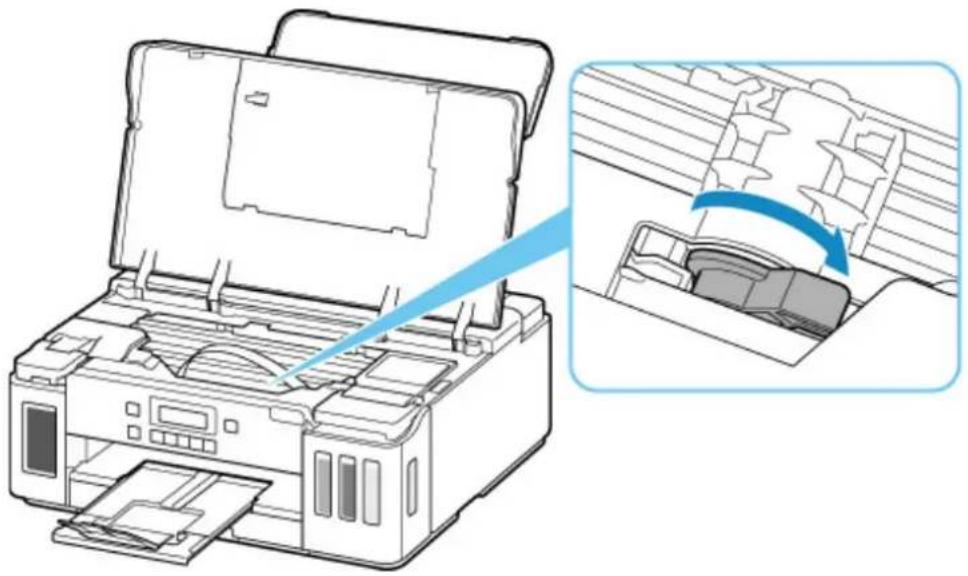
natural_image
Diagram of a printer with open lid and internal structure, showing paper feeding into a printer (no text or symbols present)And then, close the top cover to cancel the error.
Cause
There is not enough ink to perform ink flush.
What to Do
Press the printer's OK button to cancel the error.
Before performing ink flush, refill the ink of each color up to the position above the single dot shown in each ink tank.
→ Refilling Ink Tanks
Note
- Since ink flush consumes a lot of ink, perform it only when necessary.
Cause
Print head cannot be recognized.
What to Do
A print head may not be installed properly or may not be compatible with this printer.
If you are printing, press the printer's Stop button to cancel printing.
Remove the print heads and reinstall them properly following the steps below. This may resolve the error.
- Open top cover.
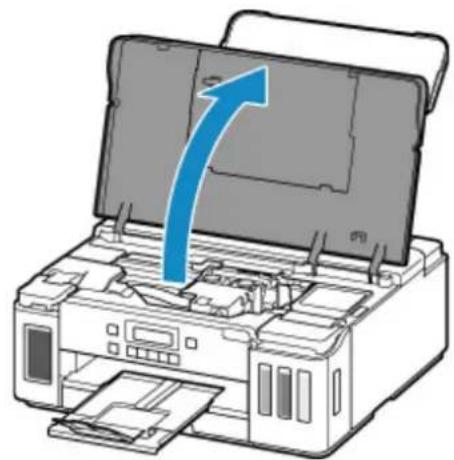
natural_image
Diagram of a printer with an open lid and blue arrow indicating compression or shift (no text or symbols)- Close ink valve.
Tilt the ink valve lever tightly to the left.
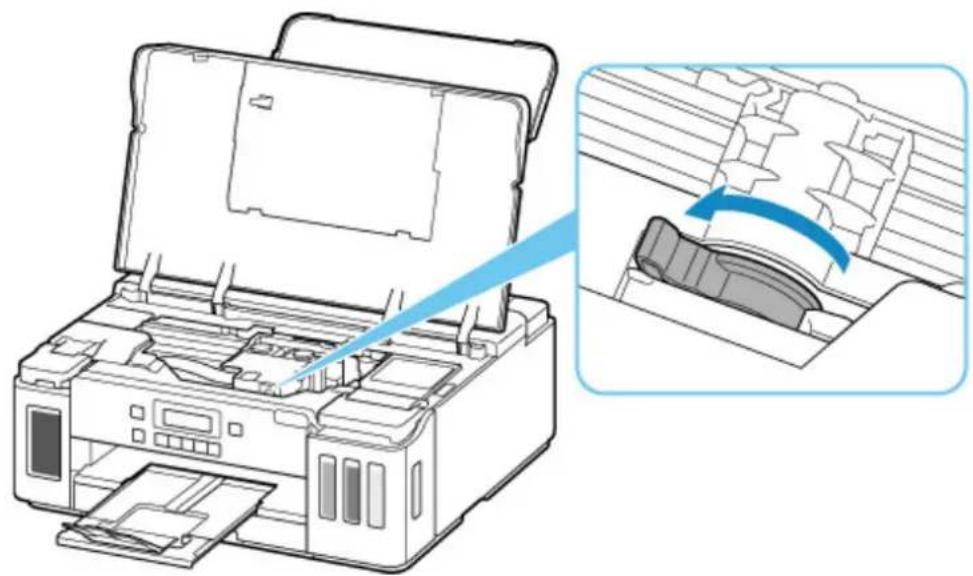
natural_image
Diagram of a printer with open lid and internal structure, showing a blue arrow indicating a process (no text or symbols present)- Grab knob (A) on print head locking cover to open it.
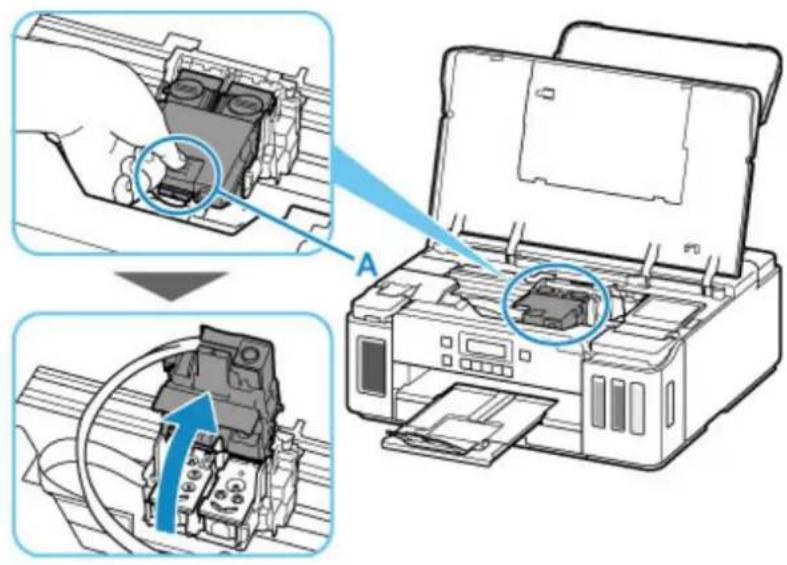
text_image
Diagram showing printer operation with labeled parts and a blue arrow indicating the process.- Remove color and black print heads.
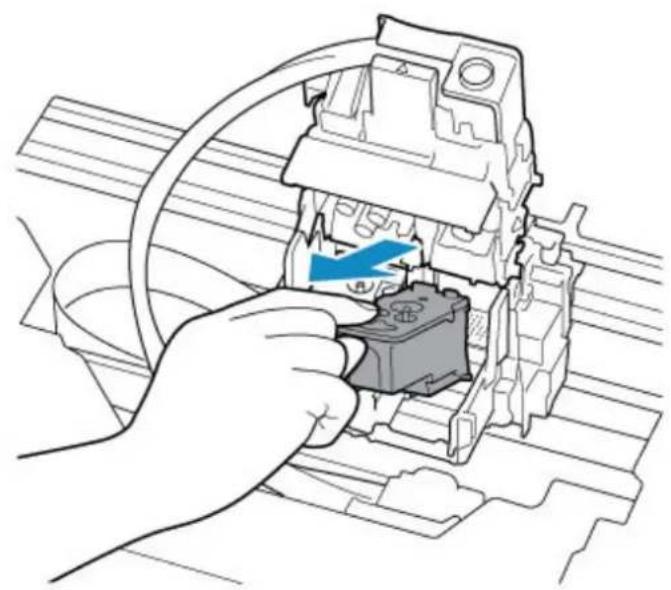
natural_image
Illustration of a hand inserting a component into an electrical enclosure (no text or symbols visible)Important
- When removing the print heads, handle them carefully so that ink does not spatter.
- Do not touch the tube or other parts inside the printer. Touching these parts may cause the printer to malfunction.
- Do not touch the gold terminal (B) or print head nozzles (C) on a print head. The printer may not print properly if you touch them.
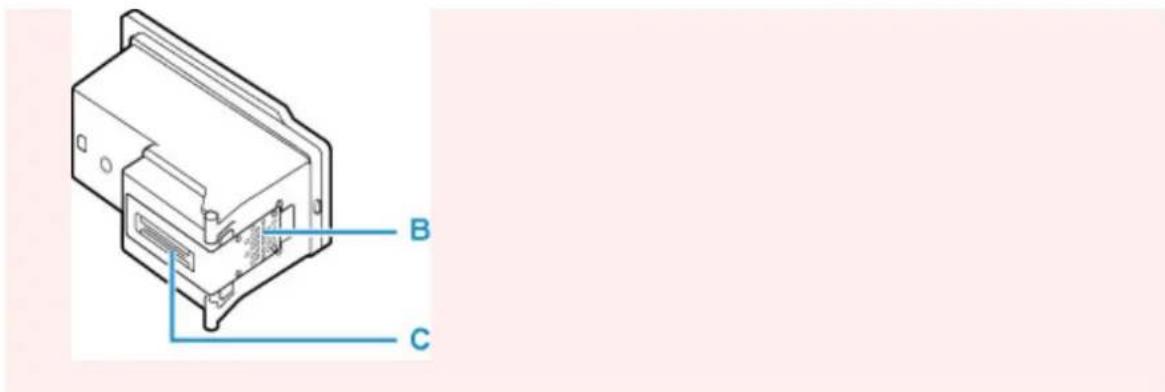
text_image
B C5. Reinstall print heads properly.
Install the color print head in the left holder and the black print head in the right holder.
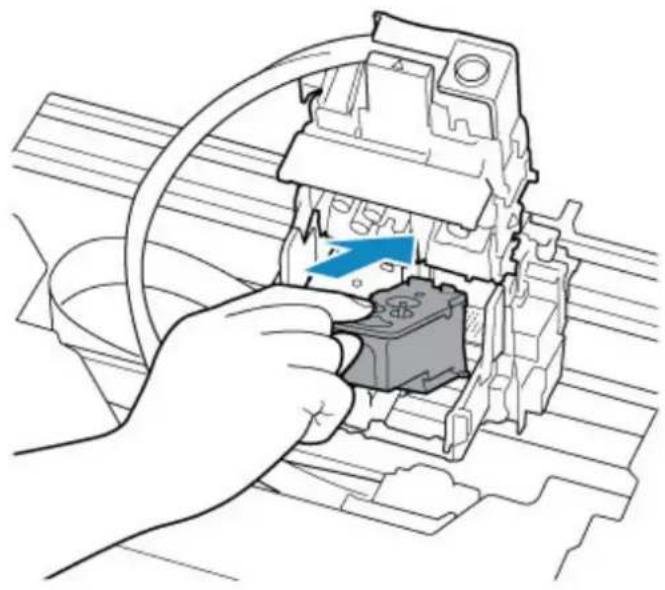
natural_image
Illustration of a hand inserting a component into a mechanical housing (no text or symbols visible)6. Close print head locking cover and push it down.
Press firmly the print head locking cover until it clicks into place.
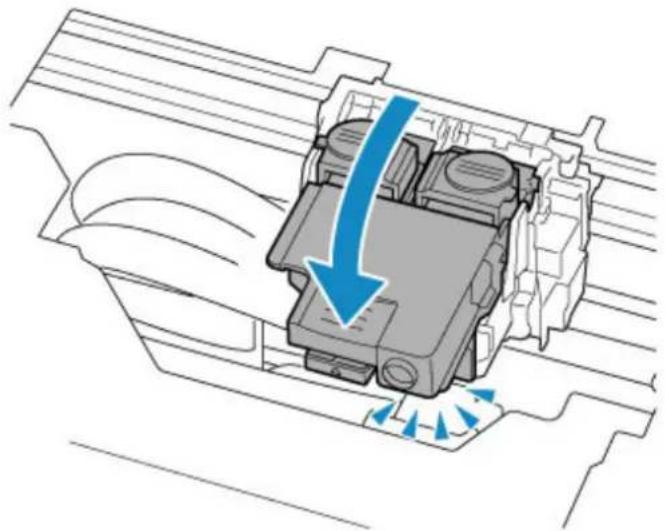
natural_image
Diagram of a mechanical component with airflow arrows indicating fluid flow (no text or symbols)- Press down both joint buttons.
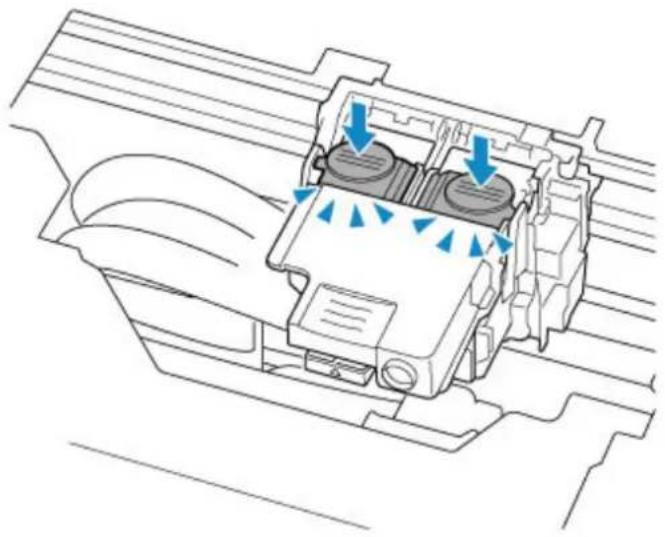
natural_image
Technical diagram of a mechanical device with blue arrows indicating flow or movement, no visible text or symbolsImportant
- Push the joint buttons firmly until they click into place; otherwise, printing may become impossible.
-
Make sure the left and right buttons are pushed in.
-
Open ink valve.
Tilt the ink valve lever tightly to the right.
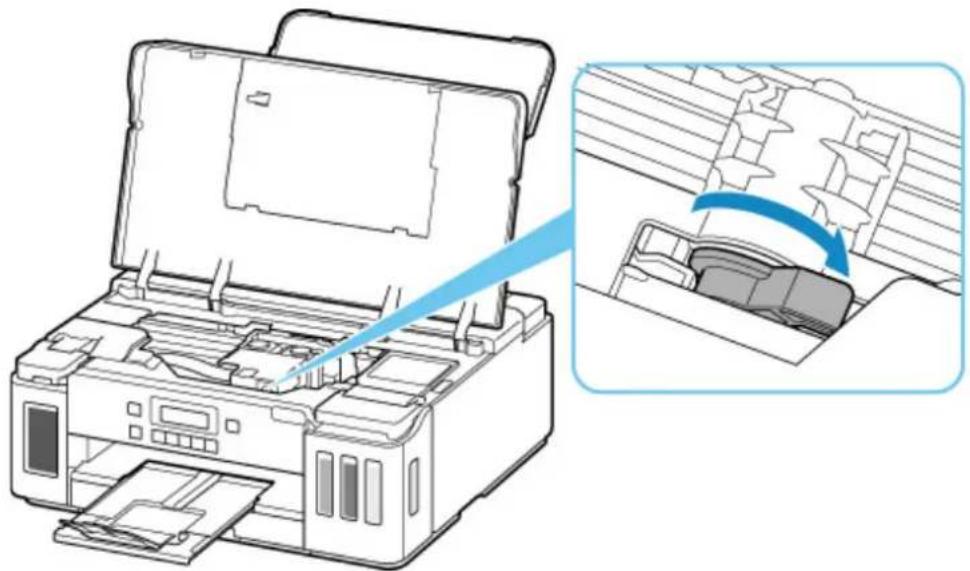
natural_image
Diagram of a printer with open lid and internal structure, showing a blue arrow indicating a process (no text or symbols present)- Close top cover.
If reinstalling the print heads does not solve the problem, it may be necessary to replace the print heads. For details, refer to this page.
Cause
Print head cannot be recognized.
What to Do
A print head may not be installed properly or may not be compatible with this printer.
If you are printing, press the printer's Stop button to cancel printing.
Remove the print heads and reinstall them properly following the steps below. This may resolve the error.
- Open top cover.
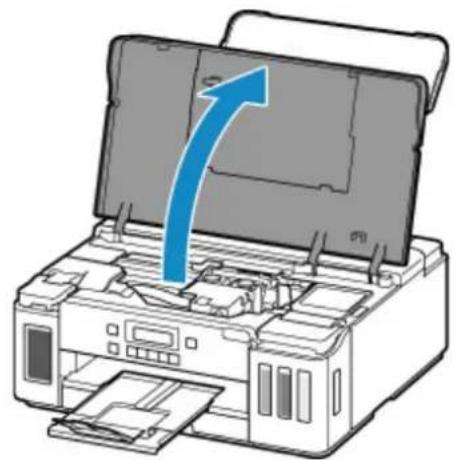
natural_image
Diagram of a printer with an open lid and blue arrow indicating compression or shift (no text or symbols)- Close ink valve.
Tilt the ink valve lever tightly to the left.
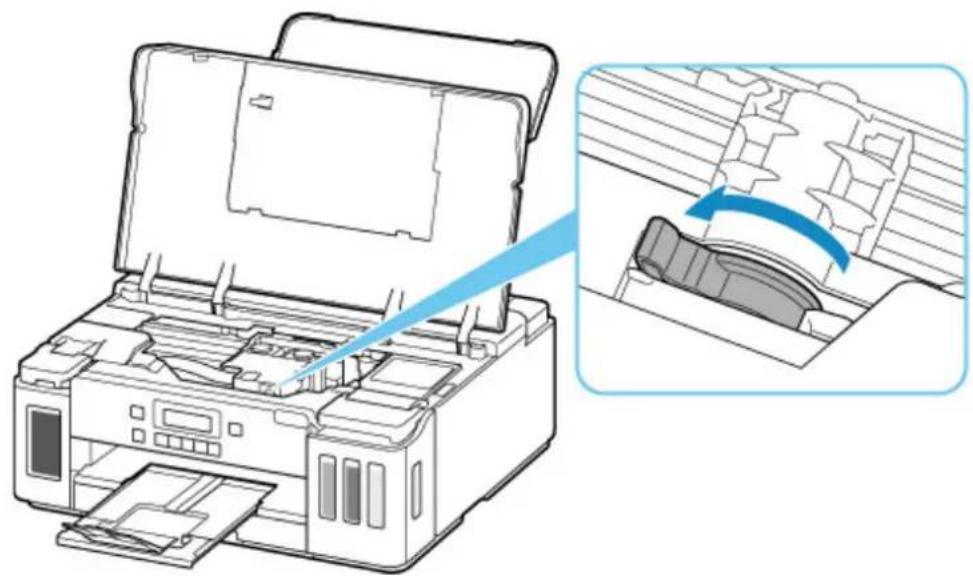
natural_image
Diagram of a printer with open lid and internal structure, showing a blue arrow indicating a process (no text or symbols present)- Grab knob (A) on print head locking cover to open it.
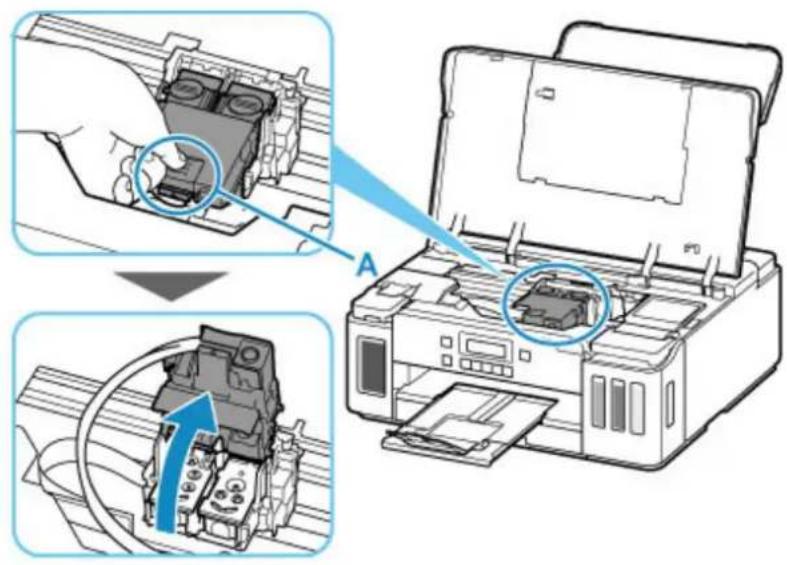
text_image
Diagram illustrating printer operation with labeled parts and a magnified view of the printer's internal structure.- Remove color and black print heads.
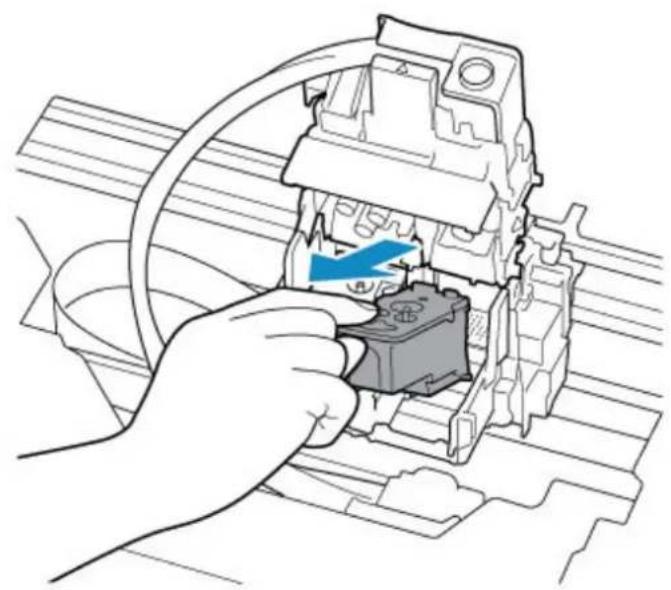
natural_image
Illustration of a hand inserting a component into an electrical enclosure (no text or symbols visible)Important
- When removing the print heads, handle them carefully so that ink does not spatter.
- Do not touch the tube or other parts inside the printer. Touching these parts may cause the printer to malfunction.
- Do not touch the gold terminal (B) or print head nozzles (C) on a print head. The printer may not print properly if you touch them.

text_image
B C5. Reinstall print heads properly.
Install the color print head in the left holder and the black print head in the right holder.

natural_image
Illustration of a hand inserting a component into a mechanical housing (no text or symbols visible)6. Close print head locking cover and push it down.
Press firmly the print head locking cover until it clicks into place.
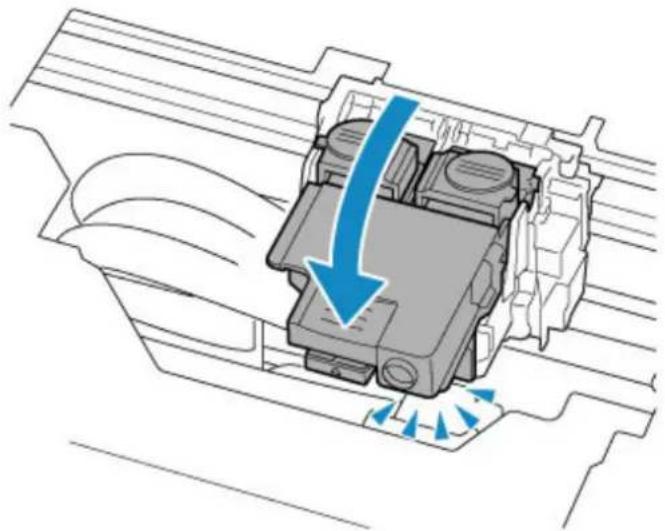
natural_image
Diagram of a mechanical component with airflow arrows indicating fluid flow (no text or symbols)- Press down both joint buttons.

natural_image
Technical diagram of a mechanical device with blue arrows indicating flow or movement, no visible text or symbolsImportant
- Push the joint buttons firmly until they click into place; otherwise, printing may become impossible.
-
Make sure the left and right buttons are pushed in.
-
Open ink valve.
Tilt the ink valve lever tightly to the right.
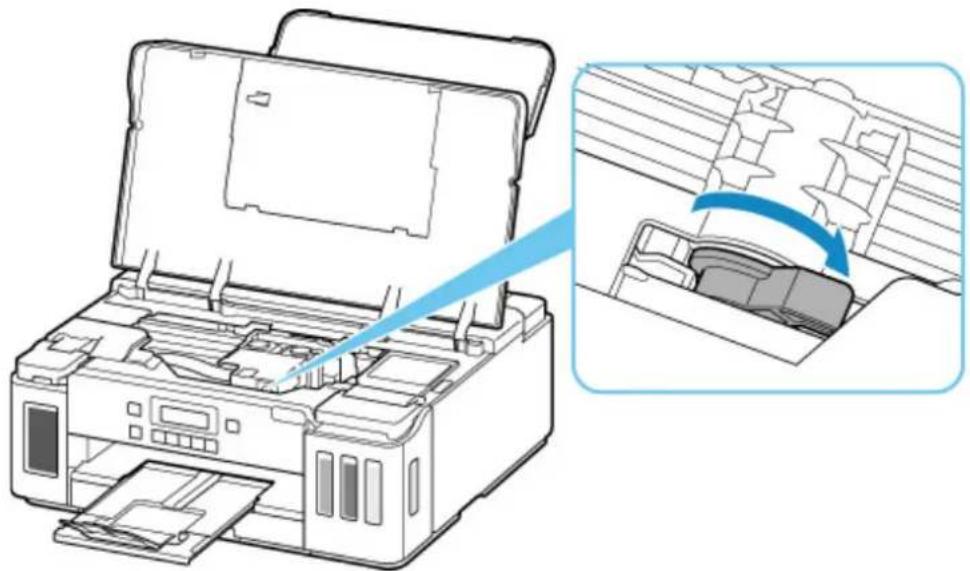
natural_image
Diagram of a printer with open lid and internal structure, showing a blue arrow indicating a process (no text or symbols present)- Close top cover.
If reinstalling the print heads does not solve the problem, it may be necessary to replace the print heads. For details, refer to this page.
Cause
The remaining ink level in one of the ink tanks may have reached the lower limit line shown on the ink tank.
What to Do
To check the remaining ink level, visually inspect the remaining ink in the ink tank.
If the remaining ink level is below the lower limit line, refill the ink tank to above the single dot shown on the ink tank with the corresponding color of ink.
Refilling the ink tank to the upper limit line improves the accuracy of detection of the remaining ink level.
→ Refilling Ink Tanks
If printing is continued when the remaining ink level is below the lower limit line, the printer may consume a certain amount of ink to return to printable status and may also become damaged.
To continue printing, press the printer's OK button.
Cause
There may be insufficient ink.
What to Do
To check the remaining ink level, visually inspect the remaining ink in the ink tank.
Refill each ink tank with entire contents of the corresponding color ink bottle bundled with the printer.
Cause
Ink absorber is almost full.
What to Do
Press the printer's OK button to continue printing. Contact your nearest Canon service center to request a repair.

Important
- Do not tilt the printer when moving it since the ink may leak out.
- When transporting the printer for repairing it, see Repairing Your Printer.

Note
- In the case of warnings or errors caused by remaining ink levels, the printer cannot print.
Cause
Protective material or tape for securing print head holder may still be attached.
What to Do
Open the top cover and make sure the protective material and tape for securing the print head holder have been removed.
If the protective material or tape is still there, remove it and close the top cover.
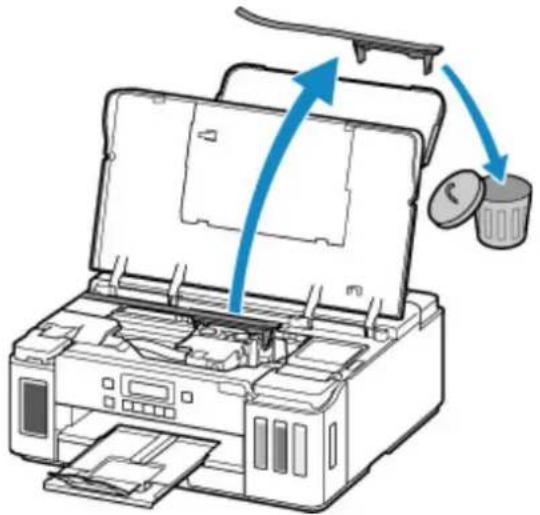
natural_image
Diagram of an open printer with a paper roll and a stack of coins, showing internal components and directional arrows (no text or symbols)If the measures above do not solve the problem, contact your nearest Canon service center to request a repair.
Important
- Do not tilt the printer when moving it since the ink may leak out.
- When transporting the printer for repairing it, see Repairing Your Printer.
Cause
The carriage stopper is still inserted.
What to Do
Open the top cover and pull out the carriage stopper (A) straight up.
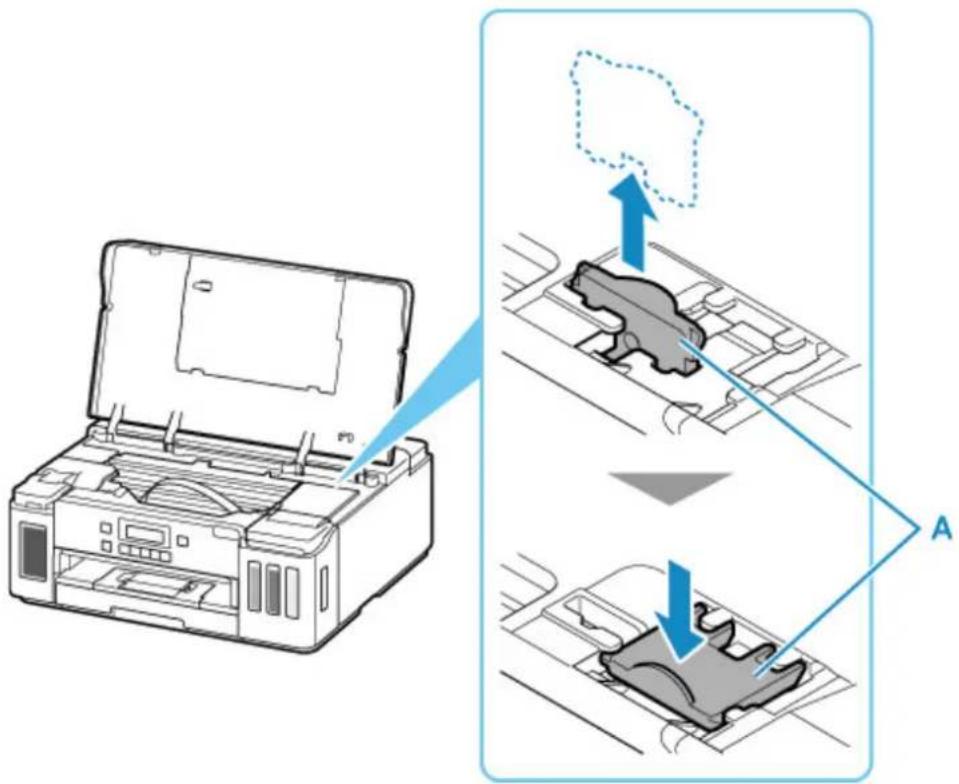
text_image
Diagram illustrating printer operation with labeled parts and directional arrows, showing a printer open to form a gear mechanism.Affix the carriage stopper to the indent next to where it was inserted.
Close the top cover to cancel the error.
Cause
Paper settings for printing do not match cassette paper information set on printer.
Note
- See below for the correct correspondence between paper settings made on the printer driver or on the LCD.
→ Paper Settings on the Printer Driver and the Printer (Media Type) (Windows)
→ Paper Settings on the Printer Driver and the Printer (Paper Size) (Windows)
• See below for details on cassette paper information set on the printer.
→ Paper Settings
If the print paper settings do not match cassette paper information set on the printer, as shown below, a message appears on the LCD.
- Print settings specified on the printer driver:
Paper size: A5
Media type: Plain paper
• Cassette paper information set on the printer:
Paper size: A4
Media type: Plain paper
The size or type of 2110 [OK]Select option
What to Do
Press the printer's OK button to display the screen below.
Select option Replace the paper
Use the ◀ button to select the appropriate action, then press the printer's OK button.
Note
- Depending on settings, some of the options below may not appear.
Print on set paper
Select this option to print onto the paper in the cassette without changing the paper settings.
For example, if the print paper setting is A5, and cassette paper information is set to A4, the A5 size setting is used to print onto the paper in the cassette.
Replace the paper
Select this option to print after changing the paper in the cassette.
For example, if the print paper setting is A5, and cassette paper information is set to A4, change the paper in the cassette to A5 paper and proceed with printing.
Once you have inserted the cassette after changing the paper, the screen for setting cassette paper information appears. Set paper information for the paper in the cassette.
Note
- See below for the correct correspondence between paper settings made on the printer driver or on the LCD.
→ Paper Settings on the Printer Driver and the Printer (Media Type) (Windows)
→ Paper Settings on the Printer Driver and the Printer (Paper Size) (Windows)
Cancel
Cancels printing.
Select this option when you want to change the print paper settings. Change the paper settings and retry printing.
Note
- To suppress the misprint prevention message, change the setting as described below. When you suppress the message, the printer uses the paper settings for printing onto the paper in the cassette regardless of whether or not the paper matches these settings.
- To change the message view setting when printing using the operation panel of the printer:
→ Feed settings
- To change the message view setting when printing using the printer driver:
→ Changing the Printer Operation Mode (Windows)
→ Changing the Printer Operation Mode (macOS)
Cause
Paper settings for printing do not match either rear tray or cassette paper information set on printer.
Note
- See below for the correct correspondence between paper settings made on the printer driver or on the LCD.
→ Paper Settings on the Printer Driver and the Printer (Media Type) (Windows)
→ Paper Settings on the Printer Driver and the Printer (Paper Size) (Windows)
• See below for details on rear tray or cassette paper information set on the printer.
→ Paper Settings
If the paper source is set to automatically switch and the print paper settings do not match either rear tray or cassette paper information set on the printer, as shown below, a message appears on the LCD.
- Print settings specified on the printer driver:
Paper size: A5
Media type: Plain paper - Rear tray and cassette paper information set on the printer:
Paper size: A4
Media type: Plain paper
Size or type of load 2113 [OK]Select option
What to Do
Press the printer's OK button to display the screen below.
Select option Replace the paper
Use the ◀ button to select the appropriate action, then press the printer's OK button.
Note
- Depending on settings, some of the options below may not appear.
Print on set paper
Select this option to print onto the paper in the rear tray or the cassette without changing the paper settings.
For example, if the print paper setting is A5, and rear tray and cassette paper information are set to A4, the A5 size setting is used to print onto the paper in the cassette.
Replace the paper
Select this option to print after changing the paper in the rear tray or the cassette.
For example, if the print paper setting is A5, and rear tray and cassette paper information are set to A4, change the paper in the rear tray or the cassette to A5 paper and proceed with printing.
Once you have changed the paper, the screen for setting rear tray or cassette paper information appears. Set paper information for the paper.
Note
- See below for the correct correspondence between paper settings made on the printer driver or on the LCD.
→ Paper Settings on the Printer Driver and the Printer (Media Type) (Windows)
→ Paper Settings on the Printer Driver and the Printer (Paper Size) (Windows)
Cancel
Cancels printing.
Select this option when you want to change the print paper settings. Change the paper settings and retry printing.
Note
- To suppress the misprint prevention message, change the setting as described below. When you suppress the message, the printer uses the paper settings for printing onto the paper in the rear tray or the cassette regardless of whether or not the paper matches these settings.
- To change the message view setting when printing using the operation panel of the printer:
→ Feed settings
- To change the message view setting when printing using the printer driver:
→ Changing the Printer Operation Mode (Windows)
→ Changing the Printer Operation Mode (macOS)
Cause
Paper settings for printing do not match rear tray paper information set on printer.
Note
- See below for the correct correspondence between paper settings made on the printer driver or on the LCD.
→ Paper Settings on the Printer Driver and the Printer (Media Type) (Windows)
→ Paper Settings on the Printer Driver and the Printer (Paper Size) (Windows)
• See below for details on rear tray paper information set on the printer.
→ Paper Settings
If the print paper settings do not match rear tray paper information set on the printer, as shown below, a message appears on the LCD.
- Print settings specified on the printer driver:
Paper size: A5
Media type: Plain paper
- Rear tray paper information set on the printer:
Paper size: A4
Media type: Plain paper
The size or type of 2114 [OK]Select option
What to Do
Press the printer's OK button to display the screen below.
Select option Replace the paper
Use the ◀ button to select the appropriate action, then press the printer's OK button.
Note
- Depending on settings, some of the options below may not appear.
Print on set paper
Select this option to print onto the paper in the rear tray without changing the paper settings.
For example, if the print paper setting is A5, and rear tray paper information is set to A4, the A5 size setting is used to print onto the paper in the rear tray.
Replace the paper
Select this option to print after changing the paper in the rear tray.
For example, if the print paper setting is A5, and rear tray paper information is set to A4, change the paper in the rear tray to A5 paper and proceed with printing.
Once you have closed the feed slot cover after changing the paper, the screen for setting rear tray paper information appears. Set paper information for the paper in the rear tray.
Note
- See below for the correct correspondence between paper settings made on the printer driver or on the LCD.
→ Paper Settings on the Printer Driver and the Printer (Media Type) (Windows)
→ Paper Settings on the Printer Driver and the Printer (Paper Size) (Windows)
Cancel
Cancels printing.
Select this option when you want to change the print paper settings. Change the paper settings and retry printing.
Note
- To suppress the misprint prevention message, change the setting as described below. When you suppress the message, the printer uses the paper settings for printing onto the paper in the rear tray regardless of whether or not the paper matches these settings.
- To change the message view setting when printing using the operation panel of the printer:
→ Feed settings
- To change the message view setting when printing using the printer driver:
→ Changing the Printer Operation Mode (Windows)
→ Changing the Printer Operation Mode (macOS)
Cause
Cannot perform printing with current print settings.
What to Do
Press the printer's Stop button to cancel printing.
Then change the print settings and retry printing.
Cause
Printer error has occurred.
What to Do
If you are printing, press the printer's Stop button to cancel printing, then turn off the printer.
Check the following:
- Make sure print head holder motion is not impeded by protective material and tape for securing the print head holder, jammed paper, etc.
Remove any impediment.
Important
- When clearing an impediment to print head holder motion, be careful not to touch clear film (A), white belt (B), or tubes (C).
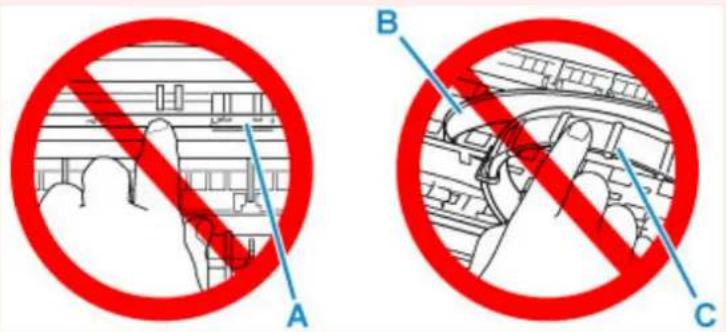
text_image
A B CIf you soil or scratch this part by touching it with paper or your hand, it could damage the printer.
Turn the printer back on.
If this does not solve the problem, contact your nearest Canon service center to request a repair.
Important
- Do not tilt the printer when moving it since the ink may leak out.
- When transporting the printer for repairing it, see Repairing Your Printer.
Cause
Printer error has occurred.
What to Do
Check the remaining ink level, and then refill the ink tank if necessary.
Turn off the printer and unplug it.
Wait about 10 minutes and then plug in the printer again and turn it back on.
If the ink tank is refilled because it runs out of ink, perform ink flush.
- From Windows:
→ Cleaning the Print Heads - From macOS:
→ Cleaning the Print Heads - From the operation panel of the printer:
→ How to Do Ink Flush
If this does not solve the problem, contact your nearest Canon service center to request a repair.
Important
- Do not tilt the printer when moving it since the ink may leak out.
- When transporting the printer for repairing it, see Repairing Your Printer.
Cause
Printer error has occurred.
What to Do
Contact your nearest Canon service center to request a repair.

Important
- Do not tilt the printer when moving it since the ink may leak out.
- When transporting the printer for repairing it, see Repairing Your Printer.

Note
- In the case of warnings or errors caused by remaining ink levels, the printer cannot print.
Cause
Printer error has occurred.
What to Do
If the paper is jammed, remove it depending on the jammed location and cause.
→ List of Support Code for Error (Paper Jams)
Turn off printer and unplug it.
Plug in the printer again and turn it back on.
If this does not solve the problem, contact your nearest Canon service center to request a repair.
Important
- Do not tilt the printer when moving it since the ink may leak out.
- When transporting the printer for repairing it, see Repairing Your Printer.
C000
Cause
Printer error has occurred.
What to Do
Turn off printer and unplug it.
Plug in the printer again and turn it back on.
If this does not solve the problem, contact your nearest Canon service center to request a repair.

Important
- Do not tilt the printer when moving it since the ink may leak out.
- When transporting the printer for repairing it, see Repairing Your Printer.