USER MANUAL ImageCLASS LBP622Cdw CANON
Important Safety Instructions 2
Installation 3
Power Supply 5
Handling 6
Maintenance and Inspections 9
Consumables 10
Setting Up 14
Main Functions 15
Preparations Required Before Use 16
Preventing Unauthorized Access 17
Setting Up Using the Setup Guide 19
Setting the Date/Time 23
Setting Up the Network Environment 25
Selecting Wired LAN or Wireless LAN 27
Connecting to a Wired LAN 28
Connecting to a Wireless LAN 29
Setting Up Connection Using WPS Push Button Mode 31
Setting Up Connection Using WPS PIN Code Mode 33
Setting Up Connection by Selecting a Wireless Router 35
Setting Up Connection by Specifying Detailed Settings 38
Checking the SSID and Network Key 41
Setting IP Addresses 42
Setting IPv4 Address 43
Setting IPv6 Addresses 46
Viewing Network Settings 49
Configuring Settings for Communication with a Computer 52
Configuring Printing Protocols and WSD Functions 53
Configuring Printer Ports 56
Setting Up Print Server 59
Configuring the Machine for Your Network Environment 62
Configuring Ethernet Settings 63
Changing the Maximum Transmission Unit 65
Setting a Wait Time for Connecting to a Network 66
Configuring DNS 67
Configuring SMB 71
Configuring WINS 73
Monitoring and Controlling the Machine with SNMP 75
Other Network Settings 79
Installing Drivers 83
Basic Operations 86
Parts and Their Functions 89
Front Side 90
Back Side 92
Interior 93
Multi-Purpose Tray 94
Paper Drawer 95
Operation Panel 97
Turning ON the Machine 101
Turning OFF the Machine 102
Turning OFF the Machine by Remote Operation 103
Powering OFF at a Fixed Time 104
Restarting the Machine 106
Using the Operation Panel 108
Basic Screens 109
Home Screen 110
Screen 113
Message Display 117
Basic Operation 118
Entering Text 123
Logging in to the Machine 127
Loading Paper 128
Loading Paper In the Paper Drawer 130
Loading Paper in the Multi-Purpose Tray 136
Loading Envelopes 141
Loading Preprinted Paper 144
Specifying Paper Size and Type 146
Specifying Paper Size and Type in the Paper Drawer 147
Specifying Paper Size and Type in the Multi-Purpose Tray 149
Registering Default Paper Settings for the Multi-Purpose Tray 152
Registering a Custom Paper Size 155
Limiting the Paper Sizes Displayed 157
Automatically Selecting an Appropriate Paper Source for Each Function 158
Customizing the Display 160
Customizing the Home Screen 161
Changing the Default Settings for Functions 163
Setting Sounds 164
Entering Sleep Mode 165
Using a USB Memory Device 167
Printing 170
Printing from a Computer 171
Canceling Prints 173
Checking the Printing Status and Log 176
Various Printing Methods 178
Printing a Document Secured by a PIN (Secure Print) 179
Printing via Secure Print 180
Printing from a USB Memory Device (Memory Media Print) 184
Receiving I-Faxes for Printing 198
Linking with Mobile Devices 202
Connecting with Mobile Devices 203
Connecting via a Wireless LAN Router (LAN Connection) 204
Connecting Directly (Access Point Mode) 206
Utilizing the Machine through Applications 211
Using AirPrint 212
Printing with AirPrint 217
If AirPrint Cannot Be Used 220
Using Google Cloud Print 221
Managing the Machine by the Remote Control 223
Managing the Machine 225
Setting Access Privileges 227
Setting the System Manager ID and PIN 228
Setting the Department ID Management 230
Setting a Remote UI PIN 236
Configuring the Network Security Settings 238
Restricting Communication by Using Firewalls 240
Specifying IP Addresses for Firewall Settings 241
Specifying MAC Addresses for Firewall Settings 244
Changing Port Numbers 247
Setting a Proxy 248
Configuring the Key and Certificate for TLS 250
Generating the Key and Certificate for Network Communication 253
Generating a Key and Certificate Signing Request (CSR) 256
Registering the Key and Certificate for Network Communication 259
Configuring IPSec Settings 261
Configuring IEEE 802.1X Authentication Settings 268
Restricting the Machine's Functions 272
Restricting Printing from a Computer 274
Restricting USB Functions 275
Disabling HTTP Communication 277
Disabling Remote UI 278
Restricting Use of the Operation Panel 279
Managing the Machine from a Computer (Remote UI) 280
Starting Remote UI 281
Checking the Status and Logs 285
Setting Up Menu Options from Remote UI 291
Security Policy 294
Importing/Exporting the Setting Data 299
Updating the Firmware 302
Initializing Settings 305
309 310 315 316 321 342 343 346
348 349 363
365 366 370 417 419 429
430 431 433 / 437 439 441
Maintenance 444
Regular Cleaning 446
Cleaning the Exterior 447
Replacing the Toner Cartridge 452
Checking the Remaining Amount of Consumables 458
Relocating the Machine 459
Adjusting Image Quality 461
Adjusting Gradation 462
Viewing the Counter Value 467
Printing Reports and Lists 469
Consumables 473
Troubleshooting (FAQ) 477
Appendix 479
Third Party Software 481
Feature Highlights 482
Going Green and Saving Money 483
Improving Efficiency 484
So Much More 485
Specifications 487
Main Unit 488
Available Paper 491
Cassette Feeding Module-AF 495
Printer Functions 496
Management Functions 499
System Environment 501
Network Environment 502
Options 503
Optional Equipment 504
System Options 505
Manuals and Their Contents 507
Using User's Guide 508
Screen Layout of User's Guide 509
Viewing User's Guide 512
Basic Windows Operations 514
Menu Route Map 521
Notice 522
Important Safety Instructions
Important Safety Instructions 2
Installation 3
Power Supply 5
Handling 6
Maintenance and Inspections 9
Consumables 10
Important Safety Instructions
3S2S-000
The content described in this chapter is for the prevention of damage to property and injury to users of the machine and others. Before using this machine, read this chapter and follow the instructions to properly use this machine. Do not perform any operations not described in this manual. Canon will not be responsible for any damages resulting from use not described in this manual, improper use, or repair/changes not performed by Canon or a third party authorized by Canon.
Installation(P. 3)
3S2S-001
To use this machine safely and comfortably, carefully read the following precautions and install the machine in an appropriate location.
WARNING
Do not install in a location that may result in a fire or electrical shock
A location where the ventilation slots are blocked (too close to walls, beds, sofas, rugs, or similar objects)
Other warnings
Do not connect unapproved cables to this machine. Doing so may result in a fire or electrical shock.
Do not use near medical equipment. Radio waves emitted from this machine may interfere with medical equipment, which may result in malfunctions and accidents.
When installing and removing the optional accessories, be sure to turn OFF the power, unplug the power plug, and then disconnect all the interface cables and power cord from the machine. Otherwise, the power cord or interface cables may be damaged, resulting in a fire or electrical shock.
If any foreign substance falls into this machine, unplug the power plug from the AC power outlet and contact your local authorized Canon dealer.
CAUTION
Do not install in the following locations
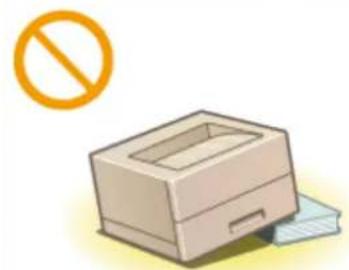
• The machine may dop or fall, resulting in injury.
natural_image
Illustration of a printer with a prohibition symbol above it (no text or symbols on the printer itself)
Other cautions
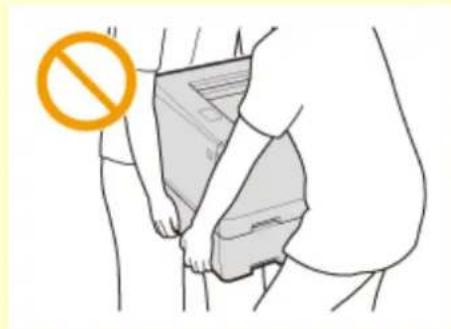
When carrying this machine, follow the instructions in this manual. If carried improperly, it may fall, resulting in injury.
When installing this machine, be careful not to get your hands caught between the machine and the floor or walls. Doing so may result in injury.
CAUTION
Avoid poorly ventilated locations
This machine generates a slight amount of ozone and other emissions during normal use. These emissions are not harmful to health. However, they may be noticeable during extended use or long production runs in poorly ventilated rooms. To maintain a comfortable working environment, it is recommended that the room where the machine operates be appropriately ventilated. Also avoid locations where people would be exposed to emissions from the machine.
IMPORTANT
Do not install in the following locations that may result in damage
A location subject to dramatic changes in temperature or humidity
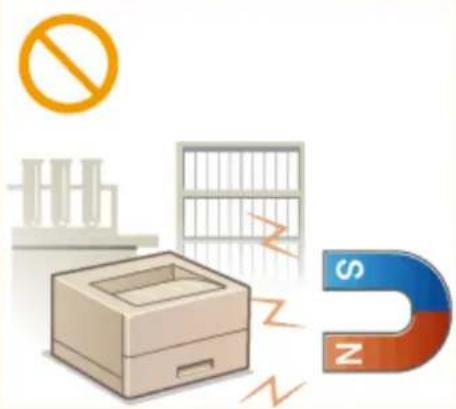
A location near equipment that generates magnetic or electromagnetic waves
A location that may warp from the weight of the machine or where the machine is liable to sink (a carpet, etc.)
natural_image
Illustration of a box office with a prohibition symbol, a grid fence, and a U-shaped magnet with a dollar sign (no text or labels)
Do not install in a location where condensation occurs
- Water droplets (condensation) may form inside the machine when the room where the machine is installed is heated rapidly, and when the machine is moved from a cool or dry location to a hot or humid location. Using the machine under these conditions may result in paper jams, poor print quality, or damage to the machine. Let the machine adjust to the ambient temperature and humidity for at least 2 hours before use.
In altitudes of above sea level 3,000 m or higher
- Machines with a hard disk may not operate properly when used at high altitudes of about 3,000 meters above sea level, or higher.
WARNING
Use only a power supply that meets the specified voltage requirements. Failure to do so may result in a fire or electrical shock.
The machine must be connected to a socket-outlet with grounding connection by the provided power cord.
Do not use power cords other than the one provided, as this may result in a fire or electrical shock.
The provided power cord is intended for use with this machine. Do not connect the power cord to other devices.
Do not modify, pull, forcibly bend, or perform any other act that may damage the power cord. Do not place heavy objects on the power cord. Damaging the power cord may result in a fire or electrical shock.
Do not plug in or unplug the power plug with wet hands, as this may result in an electrical shock.
Do not use extension cords or multi-plug power strips with the machine. Doing so may result in a fire or electrical shock.
Do not wrap the power cord or tie it in a knot, as this may result in a fire or electrical shock.
Insert the power plug completely into the AC power outlet. Failure to do so may result in a fire or electrical shock.
Remove the power plug completely from the AC power outlet during a thunder storm. Failure to do so may result in a fire, electrical shock, or damage to the machine.
CAUTION
• Install this machine near the power outlet and leave sufficient space around the power plug so that it can be unplugged easily in an emergency.
IMPORTANT
When connecting power
Do not connect the power cord to an uninterruptible power source. Doing so may result in malfunction of or damage to the machine at power failure.
Other precautions
• Electrical noise may cause this machine to malfunction or lose data.
WARNING
Immediately unplug the power plug from the AC power outlet and contact an authorized Canon dealer if the machine makes an unusual noise, emits an unusual smell, or emits smoke or excessive heat. Continued use may result in a fire or electrical shock.
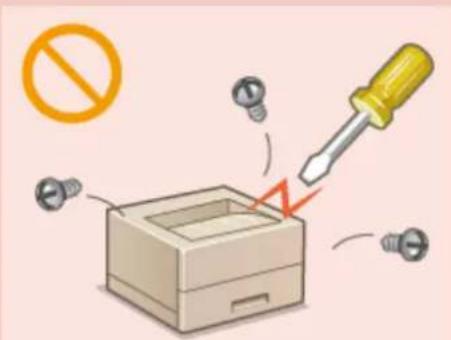
Do not disassemble or modify this machine. There are high-voltage and high-temperature components inside the machine which may result in a fire or electrical shock.
natural_image
Illustration of a screwdriver touching a box with a prohibition symbol nearby (no text or labels)
Place the machine whee children will not come in contact with the power cord and other cables or internal and electrical parts. Failure to do so may result in unexpected accidents.
Do not use flammable sprays near this machine. If flammable substances come into contact with electrical parts inside this machine, it may result in a fire or electrical shock.
When moving this machine, be sure to turn OFF the power of this machine and your computer, and then unplug the power plug and interface cables. Failure to do so may damage the power cord or interface cables, resulting in a fire or electrical shock.
When plugging or unplugging a USB cable when the power plug is plugged into an AC power outlet, do not touch the metal part of the connector, as this may result in an electrical shock.
If you are using a cardiac pacemaker
- This machine generates a low level magnetic flux and ultrasonic waves. If you use a cardiac pacemaker and feel abnormalities, please move away from this machine and consult your physician immediately.
CAUTION
Do not place heavy objects on this machine as they may fall, resulting in injury.
For your safety, please unplug the power cord if the machine will not be used for a long period of time.
Keep hands and clothing away from the rollers in the output area. If the rollers catch your hands or clothing, this may result in personal injury.
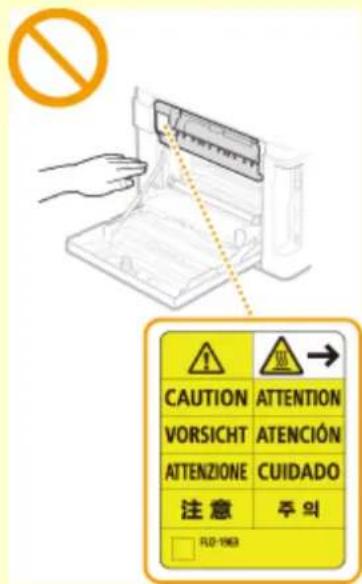
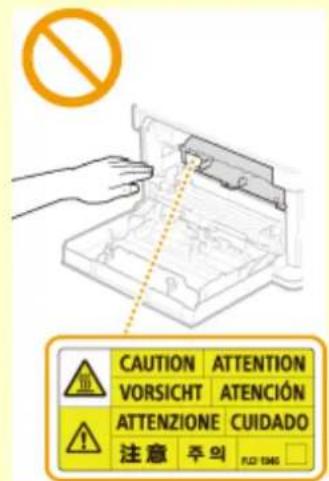
The inside of the machine and the output slot are very hot during and immediately after use. Avoid contact with these areas to prevent burns. Also, printed paper may be hot immediately after being output, so use caution when handling it. Failure to do so may result in burns.
LBP664Cdw LBP623Cdw / LBP622Cdw
CAUTION
text_image
CAUTION
VORSICHT
ATTENZIONE
注意
FLU-1963
ATTENTION
ATENCIÓN
CUIDADO
주의
text_image
CAUTION ATTENTION
VORSICHT ATENCIÓN
ATTENZIONE CUIDADO
注意 주의 FLU: 1946
- Do not carry the machine with any of the paper drawer or optional cassette feeding module installed. Otherwise, they may fall, resulting in injury.
natural_image
Illustration of a person's lower abdomen with a no-smoking symbol (no text or labels)
Laser beam
- If the laser beam should escape and enter your eyes, exposure may cause damage to your eyes.
IMPORTANT
When transporting the machine
- To prevent damage to the machine during transport, perform the following.
- Remove the toner cartridges.
- Securely pack the machine in the original box with packing materials.
If the operating noise concerns you
- Depending on the use environment and operating mode, if the operating noise is of concern, it is recommended that the machine be installed in a place other than the office.
Other precautions
• Follow the caution instructions on labels and the like found on this machine.
- Avoid shaking or applying shock to this machine.
- Do not forcibly open and close doors, covers, and other parts. Doing so may result in damage to the machine.
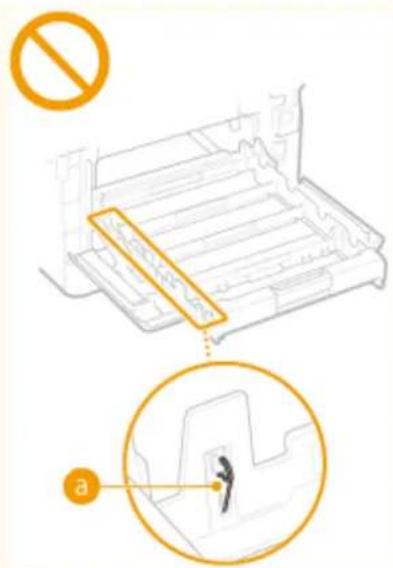
- Do not touch the contacts (a) inside the machine. Doing so may result in damage to the machine.
text_image
Diagram illustrating a printer mechanism with prohibition symbol and magnified detail showing a person climbing a door.
- To prevent a paper jam, do not turn OFF the power, open/close the covers, and load/unload the paper when printing.
Maintenance and Inspections
3S2S-004
Clean this machine periodically. If dust accumulates, the machine may not operate properly. When cleaning, be sure to observe the following. If a problem occurs during operation, see Troubleshooting.
WARNING
Before cleaning, turn OFF the power and unplug the power plug from the AC power outlet. Failure to do so may result in a fire or electrical shock.
Unplug the power plug periodically and clean with a dry cloth to remove dust and grime. Accumulated dust may absorb humidity in the air and may result in a fire if it comes into contact with electricity.
Use a damp, well wrung-out cloth to clean the machine. Dampen cleaning cloths with water only. Do not use alcohol, benzine, paint thinner, or other flammable substances. Do not use tissue paper or paper towels. If these substances come into contact with electrical parts inside the machine, they may generate static electricity or result in a fire or electrical shock.
Check the power cord and plug periodically for damage. Check the machine for rust, dents, scratches, cracks, or excessive heat generation. Use of poorly-maintained equipment may result in a fire or electrical shock.
CAUTION
The inside of the machine has high-temperature and high-voltage components. Touching these components may result in burns. Do not touch any part of the machine that is not indicated in the manual.
When loading paper or removing jammed paper, be careful not to cut your hands with the edges of the paper.
IMPORTANT
- When emoving jammed paper or replacing toner cartridges or the like, be careful not to get any toner on your hands or clothing. If toner gets on your hands or clothing, wash them immediately with cold water.
3S2S-005
WARNING
Do not dispose of used toner cartridges or the lile in open flames. Also, do not store toner cartridges or paper in a location exposed to open flames. This may cause the toner to ignite, and result in burns or fire.
If you accidentally spill or scatter toner, carefully gather the toner particles together or wipe them up with a soft, damp cloth in a way that prevents inhalation. Never use a vacuum cleaner that does not have safeguards against dust explosions to clean up spilled toner. Doing so may cause a malfunction in the vacuum cleaner, or result in a dust explosion due to static discharge.
CAUTION
• Use caution not to inhale any toner. If you should inhale toner, consult a physician immediately.
IMPORTANT
Handling the toner cartridge
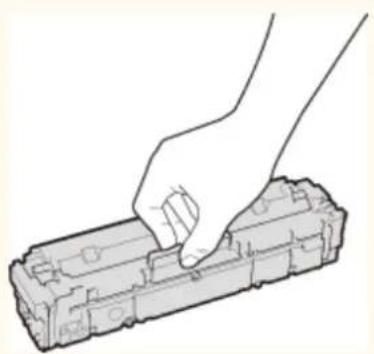
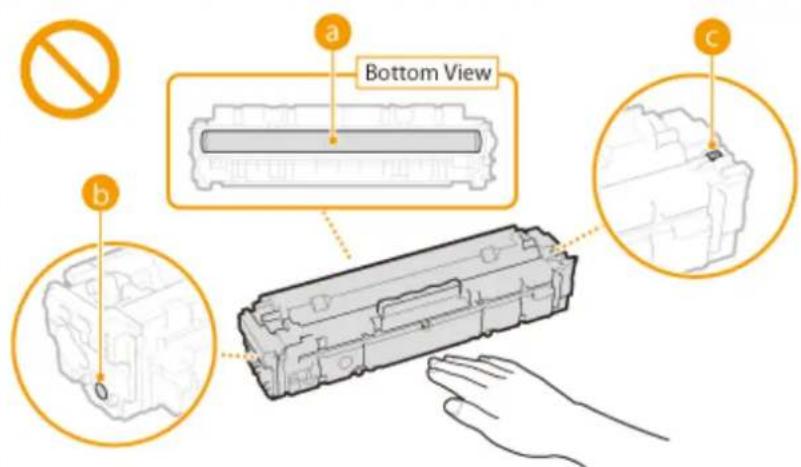
- Be sure to hold the toner cartridge using the handle.
natural_image
Line drawing of a hand pressing down on a mechanical component (no text or symbols)
- To avoid scratching the surface (a) of the drum inside the machine or exposing it to light. Do not touch the electrical contacts ( ) or the toner cartridge memory ( ).
text_image
a
Bottom View
b
c
Except when necessary, do not take out the toner cartridge from the packing material or from this machine.
The toner cartridge is a magnetic product. Do not move it close to products susceptible to magnetism including floppy disks and disk drives. Doing so may result in data corruption.
Storing the toner cartridge
• Store in the following environment to ensure safe and satisfactory use.
• Store without opening until the toner cartridge is to be used.
*Even within the storable humidity range, water droplets (condensation) may develop inside the toner cartridge if there is a difference of temperature inside and outside the toner cartridge. Condensation will adversely affect the print quality of toner cartridges.
Do not store the toner cartridge in the following locations
• Locations exposed to open flames
Be careful of counterfeit toner cartridges
Please be aware that there are counterfeit Canon toner cartridges in the marketplace. Use of counterfeit toner cartridge may result in poor print quality or machine performance. Canon is not responsible for any malfunction, accident or damage caused by the use of counterfeit toner cartridge.
Availability period of repairing parts and toner cartridges and the like
- The repairing parts and toner cartridges and the like for the machine will be available for at least seven (7) years after production of this machine model has been discontinued.
Toner cartridge packing materials
- Save the packing materials for the toner cartridge. They are required when transporting this machine.
The packing materials may be changed in form or placement, or may be added or removed without notice.
After you pull out the sealing tape from the toner cartridge, dispose of it in accordance with the applicable local regulations.
When disposing of a used toner cartridge or the like
- When discarding a toner cartridge or the like, place it in the original packing material to prevent toner from scattering from inside, and dispose of it in accordance with the applicable local regulations.
Setting Up
Setting Up 14
Main Functions 15
Preparations Required Before Use 16
Preventing Unauthorized Access 17
Setting Up Using the Setup Guide 19
Setting the Date/Time 23
Setting Up the Network Environment 25
Selecting Wired LAN or Wireless LAN 27
Connecting to a Wired LAN 28
Connecting to a Wireless LAN 29
Setting Up Connection Using WPS Push Button Mode 31
Setting Up Connection Using WPS PIN Code Mode 33
Setting Up Connection by Selecting a Wireless Router 35
Setting Up Connection by Specifying Detailed Settings 38
Checking the SSID and Network Key 41
Setting IP Addresses 42
Setting IPv4 Address 43
Setting IPv6 Addresses 46
Viewing Network Settings 49
Configuring Settings for Communication with a Computer 52
Configuring Printing Protocols and WSD Functions 53
Configuring Printer Ports 56
Setting Up Print Server 59
Configuring the Machine for Your Network Environment 62
Configuring Ethernet Settings 63
Changing the Maximum Transmission Unit 65
Setting a Wait Time for Connecting to a Network 66
Configuring DNS 67
Configuring SMB 71
Configuring WINS 73
Monitoring and Controlling the Machine with SNMP 75
Other Network Settings 79
Installing Drivers 83
Setting Up
3S2S-006
Before using the functions of the machine, the environmental conditions must be set in advance. To begin with, check the sequences of flow required to complete the setup, and then perform the actual settings. ▶Preparations Required Before Use(P. 16)
NOTE
- The functions installed on the machine vary depending on the model you purchased. Before using the machine, see ▶Main Functions(P. 15) and check the available functions.
Configuring Initial Settings of the Machine (Setup Guide)
- You can easily configure the initial settings required to use the machine, such as date, time, and network settings, by following the on-screen guidance. ▶Setting Up Using the Setup Guide(P. 19)
Main Functions
3S2S-007
This manual covers all the functions of the model series you purchased. Before getting started, check which functions are available on the model you purchased.
: With function : Without function
Function LBP664Cdw LBP623Cdw LBP622Cdw Display Touch panel Black and white LCD 2-sided printing Wireless LAN NFC [D7D6] Default System Manager ID 7654321 Not specified Not specified Default System Manager PIN 7654321 Not specified Not specified Application Library Toner Replenishment Service [50K7] Cassette Feeding Module-AF * Barcode Printing Kit * [2GZ2] [52BW]
*This is an optional item.
NOTE
For the available driver types, see the User Softwae CD-ROM/DVD-ROM supplied with the machine, or see the Canon website (https://global.canon/).
In the User's Guide, when operations differ depending on screens, distinctions are highlighted with the different descriptions: "touch panel model" and "black and white LCD model."
When operations are the same for both models, the screens from the touch panel display will be used for explanation in most cases. The black and white LCD model has screens different from those of the touch panel model. In either case, follow the on-screen terms to perform operations.
LINKS
Viewing User's Guide(P. 512)
Preparations Required Before Use
3S2S-008
Set up the machine following steps 1 to 3 in order. For more information about a particular step, click on the link to go to the corresponding section. In addition, to use the machine safely, also check ▶Preventing Unauthorized Access(P. 17).
Step 1 Setting Up Using the Setup Guide(P. 19)
Step 2 Setting Up the Network Environment(P. 25)
- Configure the network settings that are not covered in the Setup Guide. If you do not need to use the Setup Guide, configure the network settings from here.
Step 3 Installing Drivers(P. 83)
TIPS
Setting from the Remote UI
- When the network environment settings are complete, you can efficiently set the machine from a computer using Remote UI. ▶ Starting Remote UI(P. 281)
Importing data from another machine to save time
- As long as the model is the same, you can save setting data registered on another Canon printer/multifunction machine to a computer (export) and load the setting data to this machine (import). Importing/Exporting the Setting Data(P. 299)
Preventing Unauthorized Access
3S2S-009
This section describes the security measures on how to prevent unauthorized access from the external network. This is a must-read for all users and administrators before using this machine, other printers, and multifunction machines connected to the network. In recent years, a printer/multifunction machine connected to the network can offer you a variety of useful functions, such as printing from a computer, operating from a computer using the remote function, and sending scanned documents via the Internet. On the other hand, it is essential to take security measures to reduce the security risk for information leakage, as a printer/multifunction machine has become more exposed to threats, such as unauthorized access and theft, when it is connected to the network. This section explains necessary settings you need to specify to prevent unauthorized access before using a printer/multifunction machine connected to the network.
Security Measures to Prevent Unauthorized Access from the External Network
Assigning a Private IP Address(P. 17)
Assigning a Private IP Address
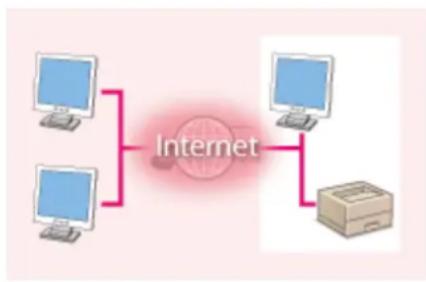
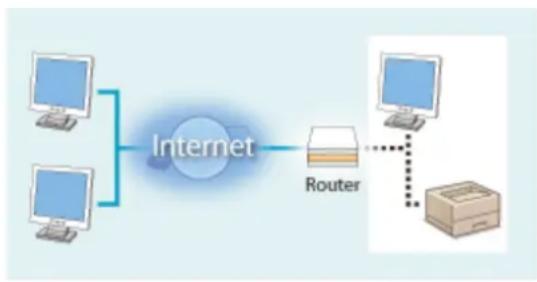
An IP address is a numerical label assigned to each device participating in a computer network. A "global IP address" is used for the communication connecting to the Internet, and a "private IP address" is used for the communication within a local area network, such as a LAN in the company. If a global IP address is assigned, your printer/multifunction machine is open to the public and can be accessed via the Internet. Thus, the risk of information leakage due to unauthorized access from external network increases. On the other hand, if a private IP address is assigned, your printer/multifunction machine is closed to a local area network and can be accessed by only users on your local area network, such as a LAN in the company.
flowchart
graph TD
    A["Computer 1"] --> C["Internet"]
    B["Computer 2"] --> C["Internet"]
    D["Computer 3"] --> C["Internet"]
    E["Computer 4"] --> C["Internet"]
Global IP Address
flowchart
graph LR
    A["Computer 1"] --> C["Internet"]
    B["Computer 2"] --> C["Internet"]
    D["Computer 3"] --> C["Internet"]
    C --> E["Router"]
    E --> F["Computer 4"]
    E --> G["Printer"]
Private IP Address
Basically, assign a private IP address to your printer/multifunction machine. Make sure to confirm the IP address, assigned to the printer/multifunction machine you are using, is a private IP address or not. A private IP address is found in one of the following ranges.
■ Ranges for Private IP addresses
• From 10.0.0.0 to 10.255.255.255
For information on how to confirm the IP address, see ▶Setting IPv4 Address(P. 43) .
NOTE
- If a global IP address is assigned to a printer/multifunction machine, you can create a network environment to reduce the risk of unauthorized access by installing security software, such as a firewall that prevents
access from the external networks. If you want to assign a global IP address to and use a printer/multifunction machine, contact your network administrator.
Using Firewall to Restrict Transmission
A firewall is a system that prevents unauthorized access from the external networks and protects against attacks/intrusions to a local area network. You can use a firewall on your network environment to block access from the external network that appears to be dangerous, by restricting communication from specified IP address of the external network. The function installed to a Canon printer/multifunction machine enables you to set up the IP address filter. For information on how to set up an IP address filter, see ▶Specifying IP Addresses for Firewall Settings(P. 241).
Specifying the TLS Encrypted Communication
For information on the TLS Encrypted Communication, see ▶Configuring the Network Security Settings(P. 238), and on the procedures to specify, see ▶Configuring the Key and Certificate for TLS(P. 250).
If a malicious third party attempts to gain unauthorized access to a printer/multifunction machine, setting PIN to information stored in the machine will reduce the risk of information leakage. Canon printers/multifunction machines enable you to protect various type of information by setting PIN.
■Setting PIN to Each Function
• Setting PIN for Using Remote UI
For more information, see ▶Setting a Remote UI PIN(P. 236) .
- Setting PIN for the System Manager Settings
For more information, see ▶Setting the System Manager ID and PIN(P. 228) .
Listed above are some examples of security measures for preventing unauthorized access. For more information on the other security measures, see ▶Managing the Machine(P. 225) and take necessary security measures for preventing unauthorized access to suit your environment.
Setting Up Using the Setup Guide
3S2S-00A
When the machine is turned on (▶Turning ON the Machine(P. 101)) for the first time, the Setup Guide starts up to assist you to configure the initial settings of the machine by following the on-screen guidance. In the Setup Guide, the setting screens are displayed in the following order.
Step 1 Setting the Display Language and the Country or Region
Set the language to be displayed on the operation panel screen or in reports, as well as the country or region where the machine will be used.
1 Select a language. .
Step 2 Setting the Date and Time
Adjust the machine's date/time.
1 Select a time zone.
NOTE:
What is UTC?
- Coordinated Universal Time (UTC) is the primary time standard by which the world regulates clocks and time. The correct UTC time zone setting is required for Internet communications.
2 Enter the date and time, and press (OK).
■ Touch panel model
- Tap the entry field, and enter the date and time.
■ Black and white LCD model
- Use ◀ or ▶ to move the cursor, and enter the date and time using the numeric keys.
Step 3 Setting the Access Security Measures
Set a PIN to access the Remote UI. If your model is LBP664Cdw, also set the System Manager ID of the system manager account. You can only use the Remote UI if you set a PIN.
For LBP664Cdw
1 Select . , the settings required for using the Remote UI are not configured, and the Setup Guide proceeds to step 4. . , the System Manager ID and PIN are not changed from the default settings, and the Setup Guide proceeds to number 4 in this step.
Setting Up
Specify the ▶ .
Enter numbers for each item, and select .
The Confirm screen is displayed. Enter the PIN once again to confirm.
IMPORTANT:
• Do not forget your PIN.
NOTE:
- You cannot register an ID or PIN that consists only of zeros, such as "00" or "0000000."
4 Select .
- If you select , a Remote UI Access PIN is not set, and the Setup Guide proceeds to step 4.
5 Specify the Remote UI Access PIN.
Enter a PIN, and select .
The Confirm screen is displayed. Enter the PIN once again to confirm.
IMPORTANT:
- Do not forget your PIN.
NOTE:
- You cannot register a PIN that consists only of zeros, such as "00" or "0000000."
For LBP623Cdw / LBP622Cdw
1 Select ▶.
- If you select in any of the screens, the settings required for using the Remote UI are not configured, and the Setup Guide proceeds to step 4.
2 Specify the Remote UI Access PIN.
Enter a PIN, and press OK.
The Confirm screen is displayed. Enter the PIN once again to confirm.
IMPORTANT:
- Do not forget your PIN.
NOTE:
- You cannot register a PIN that consists only of zeros, such as "00" or "0000000."
Step 4 Configuring Automatic Cleaning of the Fixing Assembly
If the model of your machine is LBP664Cdw, configure to automatically clean the fixing assembly. If you are using LBP623Cdw / LBP622Cdw, the Setup Guide proceeds to step 5.
1 Check the message displayed on the screen, and select (OK) .
If you select , automatic cleaning is not set, and the Setup Guide proceeds to step 5.
You can set automatic cleaning of the fixing assembly later.▶(P. 356)
Setting Up
2 Select .
- If you select , automatic cleaning is not set, and the Setup Guide proceeds to step 5.
3 Set available paper sources to .
- When cleaning is performed, paper is fed from the paper source for which you set .
NOTE:
You can use the following paper for cleaning.
Paper sizes: A4/Letter
Paper types: Plain 1 to 3/Recycled 1 or 2
4 Select .
Step 5 Setting the Wireless LAN
Configure the settings to connect to the network using the wireless LAN.
1 Select .
- If you select , wireless LAN is not set, and the Setup Guide proceeds to step 6.
2 Select .
3 Select the setting method.
- For more information about the wireless LAN settings, see Connecting to a Wireless LAN(P. 29) .
Step 6 Configuring Settings for T
oner Replenishment Service
You can configure settings for toner replenishment service. Through toner replenishment service, new toner cartridges are automatically delivered to you before your existing toner cartridges are used up.
NOTE:
Use of the toner replenishment service requires prior registration with select retailers. This service is only available in certain countries/regions and for certain models.
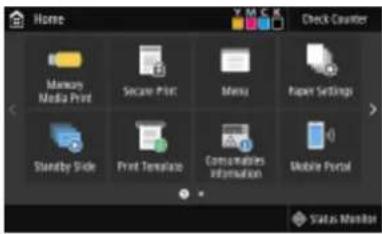
This service can be set up through / displayed on the Home screen. ▶Home Screen(P. 110)
1 Select (OK). (OK)
- If you select (☑), the screen for configuring settings for toner replenishment service is skipped and the Setup Guide proceeds to step 7.
3 Select (OK).
- If connecting to the server fails, try configuring the settings again through in . Home Screen(P. 110)
Step 7 Viewing Application Library
The one-touch button referred to as "Application Library" is provided in the Home screen. You can read the description of each function.
Setting Up
1 To finish the Setup Guide, select .
When the Setup Guide is complete, the Home seen appears.
text_image
Home
Mensory Media Print
Secure Print
Menu
Paper Settings
Stable by Side
Print Template
Communications Information
Mobile Portal
Status Monitor
Setting the Date/Time
3S2S-00C
Set the date and time for the machine. The date and time are used as the reference for the functions specifying the time, therefore, they need to be set accurately.
Setting the Time Zone(P. 23)
Setting the Time Zone
If the time zone setting is changed, the values set in are also changed accordingly.
1 Select
in the Home screen. ▶Home Screen(P. 110) ▶ .
text_image
Time Zone
(UTC 05.00) Eastern Time (US & Canada)
(UTC-04.30) Canicus
(UTC 04.00) Assendon
(UTC-04.00) Cuiaku
(UTC 04.00) Georgetown, La Paz
(UTC 04.00) Maukas, San Juan
NOTE
What is UTC?
- Coordinated Universal Time (UTC) is the primary time standard by which the world regulates clocks and time. Time differences exist depending on the country or area where the machine is used. The correct UTC time zone setting is required for Internet communications.
Setting the Current Date and Time
1 Select
in the Home screen. ▶Home Screen(P. 110) ▶ . ■Touch panel model
- Tap the entry field, and enter the date and time.
■Black and white LCD model
- Use◀ or ▶ to move the cursor, and enter the date and time using the numeric keys.
4 Press (OK).
IMPORTANT
- Set before setting the current date and time. If the setting is changed later, the current date and time are also changed accordingly.
NOTE
- The display format of the date and time can be changed, respectively.
Date Format>(P. 317)
(P. 317)
Setting the Daylight Saving Time
If daylight saving time is enabled, specify the dates from which and to which daylight saving time is in effect.
1 Select
in the Home screen. ▶Home Screen(P. 110)
2 Select ▶ .
3 Select or in .
- When you select , select and , and set the month and day for each item. To set the day, specify "what day of which week."
4 Select .
Setting Up the Network Environment
3S2S-00E
When connecting the machine to a wired or wireless local area network (LAN), you need to set an IP address unique to the selected network. Select "wired" or "wireless" depending on your communication environment and networking devices. For specific IP address settings, contact your Internet service provider or Network Administrator.
flowchart
graph LR
    A["IP-192 168"] --> B["Router"]
    B --> C["Server"]
    style A fill:#f9f,stroke:#333
    style B fill:#ccf,stroke:#333
    style C fill:#cfc,stroke:#333
IMPORTANT
- If the machine is connected to an unsecured network, your personal information might be leaked to a third party.
NOTE
• The machine cannot connect to both wired and wireless LANs at the same time.
■ BefərYou Start
Follow these steps to connect the machine to a network.
1
Check your computer settings.
Male sure that the computer is correctly connected to the network. For more information, see the instruction manuals for the devices you are using, or contact the device manufacturers.
NOTE:
Depending on the network, you may need to change settings for the communication method or the Ethernet type (▶Configuring Ethernet Settings(P. 63)). For more information, contact your Internet service provider or Network Administrator.
Viewing the MAC Address for Wired LAN(P. 49)
Viewing the MAC Address and Information for Wireless LAN(P. 50)
Setting Up
- To connect to an IEEE 802.1X network, see Configuring IEEE 802.1X Authentication Settings(P. 268).
text_image
2
Select wired or wireless LAN.
▶ Selecting Wired LAN or Wireless LAN(P. 27)
Connect to a wired or wireless LAN.
Proceed to the section that corresponds to the setting you selected in step 2.
text_image
4
IP:192.168.
Set the IP address as necessary.
- At the time of purchase, the machine is set to automatically acquire an IP address. Change this setting if you want to use a specific IP address. ●Setting IP Addresses(P. 42)
LINKS
Configuring Settings for Communication with a Computer(P. 52)
Selecting Wired LAN or Wireless LAN
3S2S-00F
After you decide on wired or wireless LAN to connect the machine to the computer, select wired LAN or wireless LAN using the operation panel. Note that if you change the setting from to or vice versa, you will need to uninstall the drivers installed on your computer and then reinstall them. For more information, see the manuals for the relevant drivers on the online manual website.
1 Select
in the Home screen. ▶Home Screen(P. 110) ▶.
If the login screen appears, enter the correct ID and PIN. Logging in to the Machine(P. 127) . or .
LINKS
Setting Up the Network Environment(P. 25)
Connecting to a Wired LAN
3S2S-00H
Connect the machine to a computer via a router. Use a LAN cable to connect the machine to the router.
flowchart
graph LR
    A["Box"] <--> B["Wire"]
    B <--> C["Server"]
    C --> D["Client"]
    style A fill:#f9f,stroke:#333
    style B fill:#ccf,stroke:#333
    style C fill:#cfc,stroke:#333
    style D fill:#fcc,stroke:#333
1 Connect a LAN cable.
Connect the machine to a puter by using a LAN cable.
Push the connector in until it clicks into place.
natural_image
Diagram showing a printer connected to a device via cable, with an orange circle highlighting a connector (no text or symbols present)
2 Wait for several minutes.
The IP address is set automatically.
NOTE:
- You can set the IP address manually. ▶Setting IP Addresses(P. 42)
LINKS
Setting Up the Network Environment(P. 25)
Connecting to a Wireless LAN
3S2S-00J
Wireless routers (or access points) connect the machine to a computer via radio waves. If your wireless router is equipped with Wi-Fi Protected Setup (WPS), configuring your network is automatic and easy. If your networking devices do not support automatic configuration, or if you want to specify authentication and encryption settings in detail, you need to manually set up the connection. Make sure that your computer is correctly connected to the network.
flowchart
graph LR
    A["Printer"] -->|Wireless Signal| B["Router"]
    B -->|Wireless Signal| C["Server"]
    C --> D["Computer"]
    style A fill:#f9f,stroke:#333
    style B fill:#ccf,stroke:#333
    style C fill:#cfc,stroke:#333
    style D fill:#fcc,stroke:#333
Setting Up Connection Using WPS(P. 29)
Manually Setting Up Connection(P. 30)
IMPORTANT
- Use wireless LAN connection at your own discretion and at your own risk. If the machine is connected to an unsecured network, your personal information might be leaked to a third party because radio waves used in wireless communication can go anywhere nearby, even beyond walls.
Wireless LAN security
- The wireless LAN function of this machine supports WEP, WPA-PSK, and WPA2-PSK. For the wireless security compatibility of your wireless router, see the instruction manuals for your networking devices or contact your manufacturer.
NOTE
Required devices for wireless LAN connection
- The machine does not come with a wireless router. Have the router ready as necessary.
Setting Up Connection Using WPS
When using WPS, two modes are available: push button mode and PIN code mode.
Find the WPS mark shown below on the package of your wireless router. Also make sure that there is a WPS button on your networking device. ⚙Setting Up Connection Using WPS Push Button Mode(P. 31)
PIN Code Mode
Some WPS routers do not support the push button mode. If WPS PIN code mode is mentioned on the package or in the instruction manuals of your networking device, set up the connection by entering the PIN code. ▶Setting Up Connection Using WPS PIN Code Mode(P. 33)
NOTE
- If the wireless router is set to use WEP authentication, you may not be able to set up connection using WPS.
Manually Setting Up Connection
When manually setting up a wireless connection, you can either select a wireless router or manually enter the required information. Regardless of the method, make sure that you have the required setup information, including the SSID and network key. ▶Checking the SSID and Network Key(P. 41)
■ Selecting a Wireless Router
Select this setup option if you need to manually set up the connection but want to complete the setup as easily as possible. ▶Setting Up Connection by Selecting a Wireless Router(P. 35)
If you want to specify security settings in detail, such as authentication and encryption settings, manually enter the SSID and network key to set up the connection. ▶Setting Up Connection by Specifying Detailed Settings(P. 38)
LINKS
Setting Up the Network Environment(P. 25)
3S2S-00K
If your wireless router supports WPS push button mode, you can easily set up a connection with a WPS button.
IMPORTANT
- How to operate the wireless router may vary on each device. See the instruction manuals for your networking device for help.
1 Select
in the Home screen. ▶Home Screen(P. 110) ▶ .
- If the login screen appears, enter the correct ID and PIN. Logging in to the Machine(P. 127)
3 Select . message is displayed, select . . . .
The button must be pressed within 2 minutes after selecting in step 6.
Depending on the networking device, you may need to press and hold the button for 2 seconds or longer. See the instruction manuals for your networking device for help.
natural_image
Illustration of a hand pointing at a button next to a device with antenna (no text or symbols)
NOTE:
If an error message is displayed during setup
- Select and return to step 5.
8 Wait until message is displayed.
9 Select .
→ At several minutes until the IP address and other items are set automatically.
IMPORTANT:
Signal strength
- When more than one wireless router is available for connection, the machine connects to the device with the strongest signal. Signal strength is measured using RSSI (Received Signal Strength Indication).
NOTE:
- You can set the IP address manually. ▶Setting IP Addresses(P. 42)
- While the machine is connected to the wireless LAN, the Wi-Fi icon is displayed in the Home screen or the Basic Features screen of each function. ▶Basic Screens(P. 109)
NOTE
Reducing power consumption
- You can set the machine to enter based on signals emitted from the wireless router. ▶
(P. 322)
If the IP address of the machine has changed
- In a DHCP environment, the IP address of the machine may be changed automatically. If this happens, the connection is maintained as long as the machine and the computer belong to the same subnet.
LINKS
Connecting to a Wireless LAN(P. 29)
Setting Up Connection Using WPS PIN Code Mode
3S2S-00L
If your wireless router supports WPS PIN code mode, generate a PIN code with the machine and register the code to the networking device.
IMPORTANT
- How to operate the wireless router may vary on each device. See the instruction manuals for your networking device for help.
From a Computer
1 Access your wireless router from a computer and display the screen for entering a WPS PIN code.
- For more information, see the instruction manuals for your networking device.
From the Operation Panel
2 Select
in the Home screen. Home Screen(P. 110) ▶ .
- If the login screen appears, enter the correct ID and PIN. Logging in to the Machine(P. 127)
4 Select . message is displayed, select . . . .
The PIN code is generated and shown on the display.
From a Computer
8 Register the generated PIN code to the wireless router.
- Register the PIN code on the setup screen displayed in step 1.
- The PIN code must be registered within 10 minutes after selecting in step 7.
NOTE:
If an error message is displayed during setup
- Select and return to step 6.
From the Operation Panel
9 Wait until the message is displayed.
10 Select .
→ 44t several minutes until the IP address and other items are set automatically.
IMPORTANT:
Signal strength
- When more than one wireless router is available for connection, the machine connects to the device with the strongest signal. Signal strength is measured using RSSI (Received Signal Strength Indication).
NOTE:
- You can set the IP address manually. ▶Setting IP Addresses(P. 42)
- While the machine is connected to the wireless LAN, the Wi-Fi icon is displayed in the Home screen or the Basic Features screen of each function. ▶Basic Screens(P. 109)
NOTE
Reducing power consumption
- You can set the machine to enter based on signals emitted from the wireless router. ▶
(P. 322)
If the IP address of the machine has changed
- In a DHCP environment, the IP address of the machine may be changed automatically. If this happens, the connection is maintained as long as the machine and the computer belong to the same subnet.
LINKS
Connecting to a Wireless LAN(P. 29)
Setting Up Connection by Selecting a Wireless Router
3S2S-00R
You can search the wireless routers (or access points) available for connection and select one from the display of the machine. For the network key, enter a WEP key or PSK. Before selecting a wireless router, check and write down the required setup information, including the SSID and network key ( Checking the SSID and Network Key(P. 41)).
NOTE
Security settings
- If the wireless connection is set up by selecting a wireless router, the WEP authentication method is set to or the WPA/WPA2 encryption method is set to (AES-CCMP or TKIP). If you want to select for WEP authentication or for WPA/WPA2 encryption, you need to set up the connection using . ▶Setting Up Connection by Specifying Detailed Settings(P. 38)
1 Select
in the Home screen. Home Screen(P. 110) ▶ .
- If the login screen appears, enter the correct ID and PIN. Logging in to the Machine(P. 127)
3 Select . message is displayed, select . . . .
The machine starts seeking for available wireless routers.
NOTE:
- Ifa message is displayed telling that no access point can be found, check the network settings. For more information, see "Troubleshooting (FAQ)" on the online manual website.
7 Select a wireless LAN router.
■Touch panel model
Select the router whose SSID matches the one that you have written down, and select ▶ .
■Black and white LCD model
Select the router whose SSID matches the one that you have written down, and press OK.
text_image
Select Access Point
AccessPoint_01 WPA - PSK 6
AccessPoint_02 WPA2 - PSK 6
AccessPoint_03 WEP 2
AccessPoint_04 WPA - PSK 1
AccessPoint_05 WPA2 - PSK 2
AccessPoint_06 WEP 10
Details Next
NOTE:
To view details of security settings on the Touch panel model
- Select the wireless LAN router, and select . To return to the original screen, select 📋.
If your wireless router is not found
- Check whether the machine is properly installed and ready to connect to the network. For more information, see "Troubleshooting (FAQ)" on the online manual website.
8 Enter the network key that you have written down.
- Enter the network key, and select .
- On how to enter text, see ▶Entering Text(P. 123) .
9 Select .
NOTE:
If an error message is displayed during setup
- Select , check whether the network key is correct, and return to step 5.
10 Wait until message is displayed.
11 Select .
→ At several minutes until the IP address and other items are set automatically.
IMPORTANT:
Signal strength
- When more than one wireless router is available for connection, the machine connects to the device with the strongest signal. Signal strength is measured using RSSI (Received Signal Strength Indication).
NOTE:
- You can set the IP address manually. ▶Setting IP Addresses(P. 42)
- While the machine is connected to the wireless LAN, the Wi-Fi icon is displayed in the Home screen or the Basic Features screen of each function. ▶Basic Screens(P. 109)
NOTE
Reducing power consumption
- You can set the machine to enter based on signals emitted from the wireless router. ▶
(P. 322)
If the IP address of the machine has changed
- In a DHCP environment, the IP address of the machine may be changed automatically. If this happens, the connection is maintained as long as the machine and the computer belong to the same subnet.
LINKS
Connecting to a Wireless LAN(P. 29)
Setting Up Connection by Specifying Detailed Settings
3S2S-00S
If you want to specify the security settings in detail or cannot establish the wireless connection using the other procedures, manually enter all the required information for the wireless LAN connection. Before specifying detailed settings, check and write down the required information, including the SSID, network key, and wireless security protocols. ▶ Checking the SSID and Network Key(P. 41)
1 Select
in the Home screen. ▶Home Screen(P. 110) ▶.
If the login screen appears, enter the correct ID and PIN. Logging in to the Machine(P. 127) .
If the message is displayed, select . . ▶ .
Enter the SSID and select .
On how to enter text, see ▶Entering Text(P. 123) .
7 Specify the security settings based on the information that you have written down.
- If you do not need to specify the security settings, select .
text_image
Security Settings
None
WEP
WPA/WPA2 PSK
Using WEP
1 Select .
text_image
B02 11 Authentication
Open System
Shared Key
Sets open system authentication, which is also called "open authentication."
Uses the WEP key as a password.
NOTE:
When is selected
- When connecting to a wireless LAN, the machine experiences an authentication error if the shared key authentication is set on the wireless router. If this happens, the machine automatically changes the setting to and retries the connection.
3 Select the WEP key you want to edit.
■ Touch panel model
- Select the WEP key (1 to 4), and select .
■ Black and white LCD model
- Select ▶ WEP key (1 to 4).
• Up to four WEP leys can be registered.
4 Enter the network key that you have written down.
- Enter the network key, and select .
5 Select the desired WEP key.
■ Touch panel model
- Select the WEP key you have edited, and select .
■ Black and white LCD model
- Select ▶ the WEP key you have edited.
■ Using WPA-PSK or WPA2-PSK
1 Select .
2 Select an encryption method.
text_image
WPA-WPA2 Encryption Method
Auto
AES-COMP
Sets the machine to automatically select AES-CCMP or TKIP to match the setting of the wireless router.
Sets AES-CCMP as the encryption method.
3 Enter the network key that you have written down.
- Enter the network key, and select .
8 Select .
NOTE:
If an error message is displayed during setup
- Select , check whether the specified settings are correct, and return to step 5.
9 Wait until message is displayed.
10 Select .
→ 34 several minutes until the IP address and other items are set automatically.
IMPORTANT:
Signal strength
- When more than one wireless router is available for connection, the machine connects to the device with the strongest signal. Signal strength is measured using RSSI (Received Signal Strength Indication).
NOTE:
- You can set the IP address manually. ▶Setting IP Addresses(P. 42)
- While the machine is connected to the wireless LAN, the Wi-Fi icon is displayed in the Home screen or the Basic Features screen of each function. ▶Basic Screens(P. 109)
NOTE
Reducing power consumption
- You can set the machine to enter based on signals emitted from the wireless router. ▶
(P. 322)
If the IP address of the machine has changed
- In a DHCP environment, the IP address of the machine may be changed automatically. If this happens, the connection is maintained as long as the machine and the computer belong to the same subnet.
LINKS
Connecting to a Wireless LAN(P. 29)
Checking the SSID and Network Key
3S2S-00U
When manually setting up a wireless connection, you need to specify the SSID and network key of your wireless router. The SSID and network key may be indicated on these networking devices. Check your devices and write down the necessary information before setting up the connection. For more information, see the instruction manuals for your networking devices or contact your manufacturer.
SSID A name given for identifying a specific wireless LAN. Some other terms used for SSID include "access point name" and "network name." Network Key A keyword or password used for encrypting data or authenticating a network. Some other terms used for network key include "encryption key," "WEP key," "WPA/WPA2 passphrase," and "preshared key (PSK)." Wireless Security Protocols(Authentication/Encryption) When manually setting up a wireless connection by specifying detailed settings, you need to specify security settings. Check the following information:Security types (WEP/WPA-PSK/WPA2-PSK)Authentication method (Open System/Shared Key)Encryption method (TKIP/AES-CCMP)
LINKS
Connecting to a Wireless LAN(P. 29)
Setting IP Addresses
3S2S-00W
Connecting the machine to a network requires a unique network IP address. Two versions of IP addresses are available: IPv4 and IPv6. Configure these settings depending on the network environment. To use IPv6 addresses, you need to properly configure the IPv4 address settings.
flowchart
graph LR
    A["IPv6"] -->|IP: fe80:| B["IPv4"]
    B --> C["Server with multiple PCs"]
    C --> D["Server with one port"]
Setting IPv4 Address(P. 43)
text_image
IP:192.168.
The machine's IPv4 address can be either assigned automatically by a dynamic IP addressing protocol, such as DHCP, or entered manually. When connecting the machine to a wired LAN, make sure that the connectors of the LAN cable are firmly inserted into the ports (Connecting to a Wired LAN(P. 28)). You can test the network connection if necessary.
Setting IPv4 Address(P. 43)
Testing the Network Connection(P. 45)
Setting IPv4 Address
1 Select
in the Home screen. ▶Home Screen(P. 110) ▶.
- If the login screen appears, enter the correct ID and PIN. Logging in to the Machine(P. 127)
3 Select ▶ .
text_image
IP Address Settings
Auto Acquisition : On
Microsoft Acquisition
Check Settings
Select to automatically assign an IP address via DHCP protocol. When is displayed, automatic addressing is enabled.
Select to configure the IP address settings by manually entering an IP address. In order to select this option, the automatic acquirement must be set to .
Select when you want to view the current IP address settings.
■Automatically assigning an IP address
1 Select .
■ Touch panel model
- Select in , and select ▶ .
■ Black and white LCD model
- Select ▶ .
NOTE:
If you do not want to use DHCP/BOOTP/RARP to assign an IP address
- Select . If you select when these services are unavailable, the machine will waste time and communications resources searching the network for these services.
3 Check that is set to .
- If is selected, change the setting to .
4 Select .
NOTE:
• IP addresses assigned via DHCP override the address obtained via Auto IP.
■Manually entering an IP address
■ Touch panel model
- Select , and select in ▶ ▶.
■ Black and white LCD model
- Select , and set both and to .
2 Select .
3 Specify the IP address, subnet mask, and gateway address (or default gateway).
■ Touch panel model
- Enter , , and , and select .
■ Black and white LCD model
- Enter these values in each screen using the numeric keys, and press OK.
5 For the touch panel model, select .
6 Restart the machine. ▶ Restarting the Machine(P. 106)
NOTE
Checking whether the settings are correct
- Male sure that the Remote UI screen can be displayed with your computer ( Starting Remote UI(P. 281) ). If a computer is not available, you can check the connection by using the operation panel ( Testing the Network Connection(P. 45) ).
When you have changed the IP address after installing the printer driver
- You need to add a new port. ▶Configuring Printer Ports(P. 56)
Testing the Network Connection
1 Select
in the Home screen. ▶Home Screen(P. 110) ▶.
- If the login screen appears, enter the correct ID and PIN. ▶ Logging in to the Machine(P. 127)
3 Select ▶ ▶ . (OK)
If a pper connection has been established, is displayed.
LINKS
Setting IPv6 Addresses(P. 46)
Setting IPv6 Addresses
3S2S-00Y
The IPv6 addresses of the machine can be configured via the Remote UI. Before setting IPv6 addresses, check the IPv4 address settings (Viewing IPv4 Settings(P. 49)). You need to set the correct IPv4 settings to use IPv6 addresses. The machine can use the following multiple IPv6 addresses:
Type Description Link-local address An address that is only valid within a subnet or link and cannot be used to communicate with devices beyond a router. A link-local address is automatically set when the IPv6 function of the machine is enabled. Manual address An address that is entered manually. When using this address, specify the prefix length and default router address. Stateless address An address that is generated automatically using the MAC address of the machine and the network prefix that is advertised by the router. Stateless addresses are discarded when the machine is restarted (or turned ON). Stateful address An address obtained from a DHCP server using DHCPv6.
NOTE
- For more information about the basic operations to be performed when setting the machine from the Remote UI, see Setting Up Menu Options from Remote UI(P. 291).
1 Start the Remote UI and log in to System Manager Mode. ▶Starting Remote UI(P. 281)
text_image
Settings/Registration
Edit IPv6 Settings
Change the following settings.
The following changes will be effective after the main power is turned OFF and ONL
- IP Address Settings, DHCP Option Settings, DNS Settings
IP Address Settings
Use IPv6
Link Local Address
Link Local Address: 0000.0000.0000.0000.0000.0000.0000.0000.0000
Prefix Length: 0
Use Dirless Address
Stableness Address 1: 0000.0000.0000.0000.0000.0000.0000.0000
Prefix Length 1: 0
Stableness Address 2: 8000.0000.0000.8000.0000.8888.8888.8888.8888.8888.8888.8888.8888.8888.8888.8888.8888.8888.8888.8888.8888.8888.8888.8888.8888.888
Prefix Length 2: 0
Stableness Address 3: 9000.0000.0499.9999.5333.5333.5333.5333.5333.5333.5333.5333.5333.5333.5333.5333.5333.5333.5333.5333.5333.5333.5333.5333.533
Prefix Length 4: 0
Stableness Address 5: 9000.0000.9999.9999.5333.5333.5333.5333.5333.5333.5333.5333.5333.5333.5333.5333.533
Prefix Length 5: 0
Stableness Address 6: 9000.0000.9999.9999.5333.5333.5333.5333.5333.5333.5333.5333.533
Prefix Length 6: 0
Use Manual Address
IP Address: (1-12)
Prefix Length: 1st (1-12)
Default Router Address: www.dhcpv6.org/222222222222222222222222222222222222222222222222222222222222222222
Use DHCPv6
Startful Address: 9999.9999.9999.9999.9999.9999.9999.9999.9999
Prefix Length: 0
DHCP Option Settings
Acquire DHCP Server Address
[Use IPv6]
Select the check box to enable IPv6 on the machine. When not using IPv6, clear the check box.
[Stateless Address 1]
Select the check box when using a stateless address. When not using a stateless address, clear the check box.
[Use Manual Address]
When you want to manually enter an IPv6 address, select the check box and enter the IP address, prefix length, and default router address in the corresponding text boxes.
[IP Address]
Enter an IPv6 address. Addresses that start with "ff" (or multicast address) cannot be entered.
[Prefix Length]
Enter a number that indicates how many bits are available for the network address.
[Default Router Address]
Specify the IPv6 address of the default router as necessary. Addresses that start with "ff" (or multicast address) cannot be entered.
[Use DHCPv6]
Select the check box when using a stateful address. When not using DHCPv6, clear the check box.
6 Click [OK].
7 Restart the machine. ▶ Restarting the Machine(P. 106)
NOTE
Checking whether the settings are correct
- Make sure that the Remote UI screen can be displayed with your computer by using the IPv6 address of the machine. Starting Remote UI(P. 281)
Selecting settings from the operation panel
IPv6 settings can also be accessed fpm in the Home screen. // (Touch panel model)(P. 325) / (Black and white LCD model)(P. 329)
When you have changed the IP address after installing the printer driver
- You need to add a new port.▶Configuring Printer Ports(P. 56)
LINKS
Setting IPv4 Address(P. 43)
Viewing Network Settings
3S2S-010
Viewing IPv4 Settings(P. 49)
NOTE
The IP address is not correctly configured if it is displayed as "0.0.0.0".
Connecting the machine to a switching hub or bridge may result in a connection failure even when the IP address is correctly configured. This problem can be solved by setting a certain interval before the machine starts communicating. ▶Setting a Wait Time for Connecting to a Network(P. 66)
You can print a list of the current network settings. ▶User Data List/System Manager Data List(P. 470)
Viewing IPv4 Settings
( Select the setting to view Check the settings
Viewing IPv6 Settings
( Select the setting to view Check the settings
Viewing the MAC Address for Wired LAN
1 Select
in the Home screen. ▶Home Screen(P. 110) ▶.
- If the login screen appears, enter the correct ID and PIN. Logging in to the Machine(P. 127)
3 Select .
The MAaddress is displayed.
1 Select
in the Home screen. ▶Home Screen(P. 110) ▶.
If the login screen appears, enter the correct ID and PIN. Logging in to the Machine(P. 127) . . /.
text_image
MAC Address : 80 A5 89 BD 7B 4A
Wireless LAN Status : Good
Latest Error Information
Channel : 11
SSID Settings : 0024A50EBB68
Security Settings : WPA/WPA2-PSK
NOTE:
Viewing security information
- To view WEP and WPA/WPA2-PSK information, use the following procedure.
Touch panel model
Select .
Black and white LCD model
▶ Select the displayed security protocol ▶ Select the setting to view
Viewing from the screen
- and can be viewed from ( ).
Touch panel model
▶ ▶ Select the setting to view
Black and white LCD model
Select the setting to view
LINKS
Connecting to a Wireless LAN(P. 29)
Setting Up
Setting IPv6 Addresses(P. 46)
Configuring Settings for Communication with a Computer
3S2S-011
Specify the protocol and port when operating the machine from a computer via the network. Before configuring the machine for printing from a computer, perform the basic setup procedures. For more information, see the manuals for the relevant drivers on the online manual website.
flowchart
graph LR
    A["Computer"] -->|Data Transfer| B["Printer"]
    B --> C["PDF"]
    D["LPD"] --> B
    E["RAW"] --> B
    F["WSD"] --> B
Configuring Printing Protocols and WSD Functions(P. 53)
NOTE
Pptocols explained here are rules for delivering document data between a computer and the machine, and can be selected according to intended purposes or the network environment.
Ports are gateways for passing data between network devices. If a communication failure occurs in the network connection, the port settings may be the cause of the problem.
Configuring Printing Protocols and WSD Functions
3S2S-012
Configure the protocols that are used for printing documents from a networked computer.
NOTE
- For moe information about the basic operations to be performed when setting the machine from the Remote UI, see ⬆Setting Up Menu Options from Remote UI(P. 291) .
1 Start the Remote UI and log in to System Manager Mode. Starting Remote UI(P. 281)
4 Configure printing protocols.
■Configuring LPD or RAW
1 Select [LPD Settings] or [RAW Settings] ▶ [Edit].
text_image
Settings/Registration
Settings/Registration Preferences Networks Settings = LPD Settings = Edit LPD Settings
Edit LPD Settings
Change the following settings.
Changes will be effective after the male power is turned OFF and O%:
OK Cancel
LPD Settings
Use LPD Printing
RX Taneous: $ min. (1-90)
[Use LPD Printing]
Select the check box to print via LPD. When not using LPD printing, clear the check box.
[Use RAW Printing]
Select the check box to print via RAW. When not using RAW printing, clear the check box.
[RX Timeout]
Set a value as the restart wait time for data reception. If data reception does not resume within the set time, printing is canceled.
3 Click [OK].
Configuring WSD
1 Select [WSD Settings] ▶[Edit].
text_image
Settings/Registration
To Portal
Log User: 7654321 Log Dot
Mail to System Manager
Settings/Registration Preferences Network Settings > WSD Settings > Edit WSD Settings
Edit WSD Settings
Change the following settings.
Changes will be effective after the main power is turned OFF and OK.
Set (Use HTTP) to Use in HTTP Settings to use WSD.
WSD Settings
Use WSD Printing
Use WSD Browsing
Use Multizest Discovery
[Use WSD Printing]
Select the check box to print via WSD. When not using WSD printing, clear the check box.
[Use WSD Browsing]
Select the check box to obtain information about the machine from a computer via WSD. This check box is automatically selected when the [Use WSD Printing] check box is selected.
[Use Multicast Discovery]
Select the check box to set the machine to reply to multicast discovery messages. If the check box is cleared, the machine stays in sleep mode even when multicast discovery messages are flowing on the network.
3 Click [OK].
5 Restart the machine. ▶ Restarting the Machine(P. 106)
NOTE
Selecting settings from the operation panel
- LPD RAW, and WSD settings can also be accessed from
in the Home screen.
(P. 332) (P. 332) (P. 332)
Setting up WSD network devices
- The WSD network devices can be added from the printer folder. Open the printer folder (●Displaying the Printer Folder(P. 514)) ▶ click [Add a device] or [Add a printer] and follow the on-screen instructions. For more information about how to install the driver for the WSD network, see the manuals for the relevant drivers on the online manual website.
To change the port number
- The same port number used for the machine and a computer must be used for printing protocol.
Configuring Printer Ports(P. 56)
LINKS
Configuring Printer Ports(P. 56)
Configuring Printer Ports
3S2S-013
Printing errors can occur when the IP address of the machine has been changed, or when a printer has been added via the Windows printer folder. These errors are typically caused by incorrect printer port settings. For example, an incorrect port number or port type may have been specified. In such situations, your attempt to print fails because the document data cannot reach the machine. To fix this type of problem, configure the printer port settings on the computer.
IMPORTANT
- To perform the following procedure, log in to your computer with an administrator account.
1 Open the printer folder. ▶Displaying the Printer Folder(P. 514)
text_image
Canon Printer Properties
General Shains Pots Advanced Color Management Security Device Settings Profile
Canon Printer
Print to the following port(s). Documents will print to the first free checked port.
Port Description Printer
LPT3 Printer Port
COMB: Serial Port
COMD: Serial Port
COMB: Serial Port
COMN: Serial Port
FILE: Print to File
19C18... Standard TCP/IP Port Camera Printer
Add Port... Delete Port Configure Port...
Enable bidirectional support
Enable printer popfing
■Adding a port
If you have changed the IP address of the machine or you have selected an incorrect port while installing drivers, add a new port.
1 Click [Add Port].
text_image
Add Standard TCP/IP Printer Port Wizard
Add port
For which device do you want to add a port?
Enter the Printer Name or IP address, and a port name for the desired device.
Printer Name or IP Address: 192.168.1.24
Port Name: 192.168.1.24
< Back Next > Cancel
NOTE:
- When the next screen is displayed, follow the instructions on the screen.
text_image
Add Standard TCP/IP Printer Port Wizard
Additional port information required
The device could not be identified.
The device is not found on the network. Be sure that:
1. The device is turned on.
2. The network is connected.
3. The device is properly configured.
4. The address on the previous page is correct.
If you think the address is not correct, click Back to return to the previous page. Then correct the
address and perform another search on the network. If you are sure the address is correct, select the
device type below.
Device Type
Standard Generic Network Card
Custom Settings...
< Back Next > Cancel
*When you select the [Device Type], select [Canon Network Printing Device with P9100] under [Standard].
5 Click [Finish].
■Changing the port type or number
If the printing protocol (LPD or RAW) has been changed on the machine side (▶Configuring Printing Protocols and WSD Functions(P. 53)) or the port number has been changed (▶Changing Port Numbers(P. 247)), the corresponding settings on the computer must also be configured. This operation is not needed for WSD ports.
1 Click [Configure Port].
• If you selected [Raw], change the [Port Number].
3 Click [OK].
4 Click [Close].
LINKS
Setting Up Print Server(P. 59)
Setting Up Print Server
3S2S-014
With a print server, you can reduce the load on the computer that you print from. The print server also makes it possible to install the drivers on each computer over the network, which saves you the trouble of installing the drivers on each computer by using the provided CD-ROM/DVD-ROM. To set up a computer on the network as a print server, configure the settings for sharing the printer.
IMPORTANT
To perform the following procedure, log in to your computer with an administrator account.
You may be unable to install drivers over the network depending on the operating system and the bit architecture (32-bit or 64-bit) of the print server and client computers.
When implementing a print server in a domain environment, consult your Network Administrator.
NOTE
To carry out Department ID Management when using a print server
- "Canon Driver Information Assist Service must be added during the printer driver installation. For more information, see the manuals for the relevant drivers on the online manual website.
1 Open the printer folder. ▶Displaying the Printer Folder(P. 514)
text_image
Canon Printer Properties
General Sharing Tools Advanced Color Management Security Device Settings Profile
If you share this printer, only users on your network with a username
and password for this computer can print to it. The printer will not
be available when the computer sleeps. To change these settings,
use the Network and Sharing Center.
✓ Share this printer
Share name: Allport bhatle
✓ Render print jobs on client computers
NOTE:
- Click the [Change Sharing Options] button if displayed.
4 Install additional drivers as necessary.
- This operation is required if you want to install the drivers in other computers running a different bit architecture via the print server.
1 Click [Additional Drivers].
2 Select the check box for the bit architecture that other computers are running, and click [OK].
text_image
Additional Drivers
You can install additional drivers so that users on the following systems can
download them automatically when they connect.
Processor Type Type 3 - User Mode Installed
□ Basic □ No
✓ d4 □ Type 3 - User Mode No
✓ d6 □ Type 3 - User Mode Yes
OK Cancel
- Select additional drivers from the following, according to the operating system of the print server.
Print server Select the check box for 32-bit operating systems [x64] 64-bit operating systems [x86] under [Processor]
NOTE:
- If you do not know whether your Windows operating system is a 32-bit or 64-bit version, see Checking the Bit Architecture(P. 516).
3 Insert the provided CD-ROM/DVD-ROM into the drive on the computer, click [Browse] to specify the folder that contains the drivers, and then click [OK].
If the print server runs a 32-bit operating system, select [UFRII] ▶ [us_eng] ▶[x64] [Driver] folders on the provided CD-ROM/DVD-ROM.
If the print server runs a 64-bit operating system, select [UFRII] ▶ [us_eng] ▶ [32BIT] [Driver] folders on the provided CD-ROM/DVD-ROM.
4 Follow the on-screen instructions to install additional drivers.
5 Click [OK].
■ Installing the Drivers on a Computer via the Print Server
1 Locate the shared printer in the print server. ▶Displaying Shared Printers in the Print Server(P. 515)
2 Double-click the shared printer.
3 Follow the on-screen instructions to install the drivers.
LINKS
▶ Printing from a Computer(P. 171)
Configuring the Machine for Your Network Environment
3S2S-015
The configuration of a network varies depending on the purpose of the network. The machine has been designed to be compatible with as many network configurations as possible, and it is equipped with a variety of technologies. Consult your Network Administrator and set a configuration to suit your network environment.
flowchart
graph TD
    A["Printer"] --> B["Server"]
    B --> C["Data Bus"]
    B --> D["Server"]
    B --> E["Server"]
    B --> F["Server"]
    B --> G["Server"]
    B --> H["Server"]
    B --> I["Server"]
    B --> J["Server"]
    B --> K["Server"]
    B --> L["Server"]
    B --> M["Server"]
    B --> N["Server"]
    B --> O["Server"]
    B --> P["Server"]
    B --> Q["Server"]
    B --> R["Server"]
    B --> S["Server"]
    B --> T["Server"]
    B --> U["Server"]
    B --> V["Server"]
    B --> W["Server"]
    B --> X["Server"]
    B --> Y["Server"]
    B --> Z["Server"]
    B --> AA["Server"]
    B --> AB["Server"]
    B --> AC["Server"]
    B --> AD["Server"]
    B --> AE["Server"]
    B --> AF["Server"]
    B --> AG["Server"]
    B --> AH["Server"]
    B --> AI["Server"]
    B --> AJ["Server"]
    B --> AK["Server"]
    B --> AL["Server"]
    B --> AM["Server"]
    B --> AN["Server"]
    B --> AO["Server"]
    B --> AP["Server"]
    B --> AQ["Server"]
    B --> AR["Server"]
    B --> AS["Server"]
    B --> AT["Server"]
    B --> AU["Server"]
    B --> AV["Server"]
    B --> AW["Server"]
    B --> AX["Server"]
    B --> AY["Server"]
    B --> AZ["Server"]
    B --> BA["Server"]
    B --> BB["Server"]
    B --> BC["Server"]
    B --> BD["Server"]
    B --> BE["Server"]
    B --> BF["Server"]
    B --> BG["Server"]
    B --> BH["Server"]
    B --> BI["Server"]
    B --> BJ["Server"]
    B --> BK["Server"]
    B --> BL["Server"]
    B --> BM["Server"]
    B --> BN["Server"]
    B --> BO["Server"]
    B --> BP["Server"]
    B --> BQ["Server"]
    B --> BR["Server"]
    B --> BS["Server"]
    B --> BT["Server"]
    B --> BU["Server"]
    B --> BV["Server"]
    B --> BW["Server"]
    B --> BX["Server"]
    B --> BY["Server"]
    B --> BZ["Server"]
    B --> CA["Server"]
    B --> CB["Server"]
    B --> CC["Server"]
    B --> CD["Server"]
    B --> CE["Server"]
    B --> CF["Server"]
    B --> CG["Server"]
    B --> CH["Server"]
    B --> CI["Server"]
    B --> CJ["Server"]
    B --> CK["Server"]
Configuring Ethernet Settings(P. 63)
Configuring Ethernet Settings
3S2S-016
natural_image
Illustration of a beige box and a yellow Ethernet device (no text or symbols on the devices themselves)
Ethernet is a standard for communicating data in a local area network (LAN). You can set the communication mode and the Ethernet type. In general, the machine can be used without changing the defaults (◀(P. 337)), but you can change these settings to suit your network environment.
1 Select
in the Home screen. ▶Home Screen(P. 110) ▶ .
If the login screen appears, enter the correct ID and PIN. Logging in to the Machine(P. 127) .
- If auto-detection is enabled, the machine detects and automatically sets the Ethernet communication mode and the type that can be used.
text_image
Ethernet Driver Settings
Auto Detect Off Up
Communication Mode Full Queue
Wireless Type 1000402-FX
MAC Address : F8-3D-6D-F1-05-3D
Apply
■Configuring Ethernet settings automatically
Touch panel model
Select in .
Black and white LCD model
Select ▶ .
■Configuring Ethernet settings manually
1 Configure a setting to disable Auto Detect. Touch panel model
- Select in .
Black and white LCD model
- Select ▶ .
2 select the communication mode.
Setting Up
text_image
Ethernet Driver Settings
Auto Detect Off Cn
Communication Mode Full Duplex
Ethernet Type 100BASE TX
MAC Address FB-0D-60-E1-05-3D
Communication Mode
Full Duplex
Full Duplex
Apple
Alternately sends and receives communication data. Select when the machine is connected to a networking device using half duplex.
Simultaneously sends and receives communication data. Use this setting for most environments.
3 ▶ select the Ethernet type.
4 Select .
5 For the touch panel model, select .
6 Restart the machine. ▶ Restarting the Machine(P. 106)
LINKS
Changing the Maximum Transmission Unit(P. 65)
Changing the Maximum Transmission Unit
3S2S-017
In most Ethernet networks, the maximum size of a packet that can be sent is 1500 bytes. A packet refers to a chunk of data into which the original data is divided before being sent. The maximum transmission unit (MTU) may vary on each network. Change the settings of the machine as necessary. For more information, contact your Network Administrator.
1 Select
in the Home screen. ▶Home Screen(P. 110) ▶.
- If the login screen appears, enter the correct ID and PIN. Logging in to the Machine(P. 127)
3 Select ▶.
text_image
MTU Size
1300
1400
1500
5 For the touch panel model, select .
LINKS
Configuring Ethernet Settings(P. 63)
Setting a Wait Time for Connecting to a Network
3S2S-018
When a network is designed to enjoy redundant connectivity with multiple switching hubs or bridges, it must have a mechanism to prevent packets from looping. One effective solution is to define the role of each switch port. However, communication may still be disrupted for several tens of seconds immediately after you change the way that network devices are connected, or if you add a new device. If this type of problem occurs, set a wait time for connecting to the network.
1 Select
in the Home screen. ▶Home Screen(P. 110) ▶.
If the login screen appears, enter the correct ID and PIN. Logging in to the Machine(P. 127) /. (OK).
LINKS
Configuring Ethernet Settings(P. 63)
Configuring DNS
3S2S-019
DNS (Domain Name System) provides a service for name resolution that associates a host (or domain) name with an IP address. Configure the DNS, mDNS, or DHCP option settings as necessary. Note that the procedures for configuring DNS are different for IPv4 and IPv6.
text_image
example.com
IP: 192.168.XXX.XXX
NOTE
- For more information about the basic operations to be performed when setting the machine from the Remote UI, see Setting Up Menu Options from Remote UI(P. 291).
1 Start the Remote UI and log in to System Manager Mode. Starting Remote UI(P. 281)
■Configuring IPv4 DNS
1 Select [IPv4 Settings] ▶ [Edit].
text_image
Host Settings
Forward Settings
Common Settings
Printer Settings
RT Settings
Advance Non Settings
Secure Front Settings
Management Settings
User Management
Device Management
License/Other
Data Management
Security Settings
A
B
C
DHCIP Option Settings
Acquire Host Name
DNS Dynamic Update
Acquire DNS Server Address
Acquire Domain Name
Acquire WINS Server Address
Acquire POP Server Address
DNS Settings
Primary DNS Server Address: 192.158.1.5
Secondary DNS Server Address:
Host Name: Canone103.00
Domain Name: sample
DNS Dynamic Update
DNS Dynamic Update Interval: ns (0-48)
mDNS Settings
If you change this mDNS Name, this Printer Name is [MnNnd Settings] will also be changed.
Use mDNS
mDNS Name: www.mnNnd.org
Copyright CARON INC. 2006
[DHCP Option Settings]
[Acquire Host Name]
Select the check box to enable Option 12 to obtain the host name from the DHCP server.
[DNS Dynamic Update]
Select the check box to enable Option 81 to dynamically update the DNS records through the DHCP server.
[Acquire DNS Server Address]
Select the check box to enable Option 6 to obtain a DNS server address from the DHCP server.
[Acquire Domain Name]
Select the check box to enable Option 15 to obtain a domain name from the DHCP server.
[Acquire WINS Server Address]
Select the check box to enable Option 44 to obtain a WINS server address from the DHCP server.
[Acquire POP Server Address]
Select the check box to enable Option 70 to obtain a POP3 server address from the DHCP server.
[DNS Settings]
[Primary DNS Server Address]
Enter the IP address of a DNS server.
[Secondary DNS Server Address]
Enter the IP address of a secondary DNS server, if any.
[Host Name]
Enter alphanumeric characters for the host name of the machine that is to be registered to the DNS server.
[Domain Name]
Enter alphanumeric characters for the name of the domain the machine belongs to, such as "example.com."
[DNS Dynamic Update]
Select the check box to dynamically update the DNS records whenever the machine's IP address is changed. When specifying the interval between updates, enter the time in hours in the [DNS Dynamic Update Interval] text box.
[mDNS Settings]
[Use mDNS]
Setting Up
Adopted by Bonjour, mDNS (multicast DNS) is a protocol for associating a host name with an IP address without using DNS. Select the check box to enable mDNS and enter the mDNS name in the [mDNS Name] text box.
3 Click [OK].
■Configuring IPv6 DNS
1 Select [IPv6 Settings] ▶[Edit].
2 Configure IPv6 DNS settings.
The [Use IPv6] check bα must be selected to configure the settings. ▶Setting IPv6 Addresses(P. 46)
text_image
DHCP Option Settings
Acquire DNS Server Address
Acquire Domain Name
DNS Settings
Primary DNS Server Address: 0800-0000-0000-0000-0000-0000-0000-0000
Secondary DNS Server Address: 0800-0000-0000-0500-0000-0550-0550-0550-0550
User Local Host Name(Domain Name as IPv4)
Host Name: Command268
Domain Name:
DNS Dynamic Update
Register Manual Address
Register Stateful Address
Register Stateless Address
DNS Dynamic Update Interval: 3x fr (D-48)
exDNS Settings
Use exDNS
Use Service exDNS Name as IPv4
exDNS Name:
Copyright ©CASM INC. 2016
a [DHCP Option Settings]
[Acquire DNS Server Address]
Select the check box to enable Option 23 to obtain a DNS server address from the DHCP server.
[Acquire Domain Name]
Select the check box to enable Option 24 to obtain a domain name from the DHCP server.
b [DNS Settings]
[Primary DNS Server Address]
Enter the IP address of a DNS server. Addresses that start with "ff" (or multicast address) cannot be entered.
[Secondary DNS Server Address]
Enter the IP address of a secondary DNS server, if any. Addresses that start with "ff" (or multicast address) cannot be entered.
[Use Same Host Name/Domain Name as IPv4]
Select the check box to use the same host and domain names as in IPv4.
[Host Name]
Enter alphanumeric characters for the host name of the machine that is to be registered to the DNS server.
[Domain Name]
Enter alphanumeric characters for the name of the domain the machine belongs to, such as "example.com."
[DNS Dynamic Update]
Select the check box to dynamically update the DNS records whenever the machine's IP address is changed. To specify the type(s) of addresses you want to register to the DNS server, select the check box for [Register Manual Address], [Register Stateful Address], or [Register Stateless Address]. To specify the interval between updates, enter the time in hours in the [DNS Dynamic Update Interval] text box.
C [mDNS Settings]
[Use mDNS]
Adopted by Bonjour, mDNS (multicast DNS) is a protocol for associating a host name with an IP address without using DNS. Select the check box to enable mDNS.
[Use Same mDNS Name as IPv4]
Select the check box to use the same mDNS name as in IPv4. To set a different name, clear the check box and enter the mDNS name in the [mDNS Name] text box.
3 Click [OK].
5 Restart the machine. ▶ Restarting the Machine(P. 106)
NOTE
Selecting settings from the operation panel
• DNS settings can also be accessed from
in the Home screen.
// (Touch panel model)(P. 325)
/ (Black and white LCD model)(P. 329)
LINKS
Setting IPv4 Address(P. 43)
Configuring SMB
3S2S-01A
natural_image
Illustration of a box and a SMB device (no text or symbols on the devices themselves)
Server Message Block (SMB) is a protocol for sharing resources, such as files and printers, among multiple devices on a network. You need to use it to configure the machine as a shared printer on an SMB network. Depending on your network, you may have to set the NetBIOS name and workgroup name.
NetBIOS Name
In a Windows network that uses NetBIOS, NetBIOS names are used for identifying network-connected computers as well as for file sharing and other network services. Most computers use the computer name as the NetBIOS name.
Workgroup Name
Workgroup name is a name for grouping multiple computers so that basic network functions, such as file sharing, become available in a Windows network. Specify the workgroup name to identify the group that the machine belongs to.
NOTE
- For more information about the basic operations to be performed when setting the machine from the Remote UI, see ⬆Setting Up Menu Options from Remote UI(P. 291).
1 Start the Remote UI and log in to System Manager Mode. ▶Starting Remote UI(P. 281)
text_image
Settings/Registration
Reset Device
Preferences
Paper Settings
Display Settings
Timer Settings
Network Settings
External Interface Settings
Accessibility Settings
Sound Volume Control
Function Settings
Common Settings
To Portal
Log User: 7684321 Log Out
Mail to System Manager
Settings/Registration Professional Network Settings > SMB Settings < Edit SMB Settings
Edit SMB Settings
Change the following settings.
Changes will be effective after the main power is turned OR and ON
OK
Cancel
SMB Settings
hot/box Name Cashort/box
Work group Name WORKGROUP
Setting Up
[NetBIOS Name]
Enter alphanumeric characters for the NetBIOS name of the machine.
[Workgroup Name]
Enter alphanumeric characters for the name of the workgroup that the machine belongs to.
IMPORTANT:
- NetBIOS names or workgroup names that start with an asterisk (*) cannot be registered to a WINS server.
6 Click [OK].
7 Restart the machine. ▶ Restarting the Machine(P. 106)
LINKS
Configuring WINS(P. 73)
Windows Internet Name Service (WINS) is a name resolution service that associates a NetBIOS name (a computer or printer name in an SMB network) with an IP address. To enable WINS, the WINS server must be specified.
IMPORTANT
In order to specify WINS server settings, NetBIOS name and workgroup name are required to be set. Configuring SMB(P. 71)
NOTE
- For more information about the basic operations to be performed when setting the machine from the Remote UI, see Setting Up Menu Options from Remote UI(P. 291).
1 Start the Remote UI and log in to System Manager Mode. ▶Starting Remote UI(P. 281)
text_image
Settings/Registration
To Portal
Login User: 7654321 Log Det
Mail to System Manager
Settings/Registration Preferences Network Settings + WINS Settings + Edit WINS Settings
Edit WINS Settings
Change the following settings
Changes will be effective after the main power is turned OFF and OPL
OK
Cancel
WINS Settings
WINS Resolution
WINS Server Address: 192.168.1.9
[WINS Resolution]
Select the check box to use WINS for name resolution. When not using WINS, clear the check box.
[WINS Server Address]
Enter the IP address of the WINS server.
IMPORTANT:
Setting Up
- If the IP address of the WINS server is obtained from a DHCP server, the obtained IP address overrides the IP address entered in the [WINS Server Address] text box.
6 Click [OK].
7 Restart the machine. ▶ Restarting the Machine(P. 106)
NOTE
Selecting settings from the operation panel
- WINS settings can also be accessed from
in the Home screen. ▶(P. 332)
LINKS
Setting IPv4 Address(P. 43)
Monitoring and Controlling the Machine with SNMP
3S2S-01E
Simple Network Management Protocol (SNMP) is a protocol for monitoring and controlling communication devices in a network by using Management Information Base (MIB). The machine supports SNMPv1 and security-enhanced SNMPv3. You can check the status of the machine from a computer when you print documents or use the Remote UI. You can enable either SNMPv1 or SNMPv3, or both at the same time. Specify the settings for each version to suit your network environment and the purpose of use.
flowchart
graph LR
    A["User"] --> B["SNMP Manager"]
    B --> C["Two Box 1"]
    B --> D["Two Box 2"]
    C <--> D
    style A fill:#f9f,stroke:#333
    style B fill:#ccf,stroke:#333
    style C fill:#cfc,stroke:#333
    style D fill:#fcc,stroke:#333
SNMPv1
SNMPv1 uses information called "community" to define the scope of SNMP communication. Because this information is exposed to the network in plain text, your network will be vulnerable to attacks. If you want to ensure network security, disable SNMPv1 and use SNMPv3.
SNMPv3
With SNMPv3, you can implement network device management that is protected by robust security features. Note that TLS must be enabled for the Remote UI before configuring SNMPv3 (▶Configuring the Key and Certificate for TLS(P. 250)).
NOTE
The machine does not support the tap notification feature of SNMP.
SNMP management software, when installed on a computer on the network, enables you to configure, monitor, and control the machine remotely from the computer. For more information, see the instruction manuals for your management software.
For more information about the basic operations to be performed when setting the machine from the Remote UI, see ▶Setting Up Menu Options from Remote UI(P. 291) .
1 Start the Remote UI and log in to System Manager mode. ▶ Starting Remote UI(P. 281)
2 Click [Settings/Registration] on the Portal page. Remote UI Screen(P. 282)
3 Select [Network Settings] ▶[SNMP Settings].
4 Click [Edit].
5 Specify SNMPv1 settings.
- If you do not need to change SNMPv1 settings, proceed to the next step.
text_image
Settings/Registration
Edit SNMP Settings
Set Community Name 1
Use Community Name 1
Community Name: public
MB Access Permission: Read Only
Set Community Name 2
Use Community Name 2
Community Name:
MB Access Permission: Read Only
Dedicated Community Settings
Use Dedicated Community
MB Access Permission: Read Only
SNMPv3 Settings
Use SNMPv3
User Settings 1
Enable User
User Name:
OK Cancel
[Use SNMPv1]
Select the check box to enable SNMPv1. You can specify the rest of SNMPv1 settings only when this check box is selected.
Select the check box to specify a community name. If you do not need to specify a community name, clear the check box.
Enter alphanumeric characters for the name of the community.
[MIB Access Permission]
For each community, select [Read/Write] or [Read Only] for the access privileges to MIB objects.
[Read/Write] Permits both viewing and changing the values of MIB objects. [Read Only] Permits only viewing the values of MIB objects.
Dedicated Community is a preset community, intended exclusively for Administrators using Canon software, such as imageWARE Enterprise Management Console. Select the check box to use Dedicated Community, and specify [MIB Access Permission]. If you do not need to use Dedicated Community, clear the check box.
6 Specify SNMPv3 settings.
- If you do not need to change SNMPv3 settings, proceed to the next step.
text_image
SNMPv3 Settings
User Settings 1
Enable User
User Name: username
MNI Access Perikaner: SpeedWrite
Security Settings: Authentication On/Encryption On
Authentication Algorithms: MD8
SNAL
Set/Change Password:
Authentication Password:
Confine:
Encryption Algorithms: OK1
AE3
Set/Change Password:
Encryption Password:
Confine:
Set/Change Password:
Authentication Password:
Confine:
Encryption Algorithm: DSS
AE5
Set/Change Password:
Encryption Password:
Confine:
Printer Management Information Acquisition Settings
Acquire Home Information Information from www:
[Use SNMPv3]
Select the check box to enable SNMPv3. You can specify the rest of SNMPv3 settings only when this check box is selected.
[Enable User]
Select the check box to enable [User Settings 1]/[User Settings 2]/[User Settings 3]. To disable user settings, clear the corresponding check box.
[User Name]
Enter alphanumeric characters for the user name.
[MIB Access Permission]
Select [Read/Write] or [Read Only] for the access privileges to MIB objects.
[Read/Write] Permits both viewing and changing the values of MIB objects. [Read Only] Permits only viewing the values of MIB objects.
[Security Settings]
Select [Authentication On/Encryption On], [Authentication On/Encryption Off], or [Authentication Off/Encryption Off] for the desired combination of authentication and encryption settings.
[Authentication Algorithm]
If you have selected [Authentication On/Encryption On] or [Authentication On/Encryption Off] in [Security Settings], select the appropriate authentication algorithm for your network environment.
[Encryption Algorithm]
If you have selected [Authentication On/Encryption On] in [Security Settings], select the appropriate encryption algorithm for your network environment.
[Set/Change Password]
To set or change the password, select the check box and enter alphanumeric characters for the password in the [Authentication Password] or [Encryption Password] text box. For confirmation, enter the same password in the [Confirm] text box. Passwords can be set independently for authentication and encryption algorithms.
Setting Up
- With SNMP, the printer management information, such as printing protocols and printer ports, can be monitored and obtained regularly from a computer on the network.
text_image
Authentication Algorithm:
NET
SALL
Set/Change Password
Authentication Password:
Confins:
Encryption Algorithm:
OBS
ABS
Set/Change Password
Encryption Password:
Confins:
Printer Management Information Acquisition Settings
Acquire Printer Management Information from Host
Copyright CANADA INC 2005
Select the check box to enable monitoring of the printer management information of the machine via SNMP. To disable monitoring of the printer management information, clear the check box.
8 Click [OK].
9 Restart the machine. ▶ Restarting the Machine(P. 106)
NOTE
Disabling SNMPv1
- If SNMPv1 is disabled, some of the functions of the machine become unavailable, such as obtaining machine information via the printer driver.
Using the operation panel
- You can enable or disable the SNMP settings from
.▶(P. 334)
Enabling Both SNMPv1 and SNMPv3
- If both versions of SNMP are enabled, it is recommended that MIB access permission in SNMPv1 be set to [Read Only]. MIB access permission can be set independently in SNMPv1 and SNMPv3 (and for each user in SNMPv3). Selecting [Read/Write] (full access permission) in SNMPv1 negates the robust security features that characterize SNMPv3 because most of the machine settings can then be controlled with SNMPv1.
LINKS
Configuring the Key and Certificate for TLS(P. 250)
Other Network Settings
3S2S-01F
Configure the following items according to your network environment.
Configuring SNTP(P. 79)
Monitoring the Machine from the Device Management Systems(P. 80)
Configuring SNTP
Simple Network Time Protocol (SNTP) enables you to adjust the system clock by using the time server on the network. If SNTP is used, the time server is checked at the specified intervals; therefore, the correct time can always be maintained. The time is adjusted based on Coordinated Universal Time (UTC), so specify the time zone setting before configuring SNTP (Setting the Date/Time(P. 23)). SNTP settings can be specified via the Remote UI.
NOTE
• The SNTP of the machine supports both NTP (version 3) and SNTP (versions 3 and 4) servers.
1 Start the Remote UI and log in to System Manager Mode. Starting Remote UI(P. 281)
text_image
Settings/Registration
To Portal
Login User: 7854321 Log Out
Mail to System Manager
Settings/Registration Preferences Network Settings > SNTP Settings > ISR SNTP Settings.
Edit SNTP Settings
Change the following settings:
Changes will be effective after the main power is turned OFF and ON
SNTP Settings
Use SNTP
NTP Server Name:
Polling Interval: 24 Rx (2-40)
Accessibility Settings
Saturated Volume Control
Functions Settings
Common settings
[Use SNTP]
Select the check box to use SNTP for synchronization. If you do not want to use SNTP, clear the check box.
[NTP Server Name]
Enter the IP address of the NTP or the SNTP server. If DNS is available on the network, you can enter a host name (or FQDN) consisting of alphanumeric characters instead (example: ntp.example.com).
[Polling Interval]
Specify the interval between one synchronization and the next.
6 Click [OK].
7 Restart the machine. ▶ Restarting the Machine(P. 106)
NOTE
Testing communication with the NTP/SNTP server
- You can view communication status with the registered server by clicking [Settings/Registration] ▶ [Network Settings] ▶ [Check NTP Server] in [SNTP Settings]. If a proper connection has been established, the result is displayed as shown below. Note that this operation does not adjust the system clock.
SNTP Settings Use SNTP: On NTP Server Name: ntp.example.com Polling Interval: 24 hr. Check NTP Server Check NTP Server NTP Server Check Result: OK
Monitoring the Machine from the Device Management Systems
You can facilitate the collection and management of various information about networked devices by implementing device management software, such as imageWARE Enterprise Management Console*, into the network. Information such as device settings and error logs is retrieved and distributed via the server computer. If the machine is connected to such a network, imageWARE Enterprise Management Console searches the network for the machine by using protocols such as Service Location Protocol (SLP) to gather information from the machine, such as power supply status information. SLP settings can be specified via the Remote UI. This section also describes the procedure to configure settings for communication between the machine and plug-ins for imageWARE Enterprise Management Console.
*For more information about imageWARE Enterprise Management Console, contact your local authorized Canon dealer.
NOTE
To use imageWARE Enterprise Management Console plug-ins
- You need to enable the settings of the dedicated port and the SNMP settings. As for the SNMP settings, set [MIB Access Permission] to [Read/Write] for both SNMPv1 and SNMPv3.
/(P. 336)
Remote UI Operations
- For more information about the basic operations to be performed when setting the machine from the Remote UI, see ▶Setting Up Menu Options from Remote UI(P. 291) .
■ Configuring SLP Communication with Voice Management Software
1 Start the Remote UI and log in to System Manager Mode. Starting Remote UI(P. 281)
■Specifying multicast device discovery
1 Select [Multicast Discovery Settings] ▶[Edit].
text_image
Settings/Registration
To Portal Login User: 7654321 Log Out
Mail to System Manager
Kearant Device
Preferences
Paper Settings
Display Settings
Time Settings
Network Settings
External Interface Settings
Accessibility Settings
Sound Volume Control
Function Settings
Coverage Settings
Settings/Registration Preferences Network Settings > Multicast Discovery Settings > Edit Multicast Discovery Settings
Edit Multicast Discovery Settings
Change the following settings.
Changes will be effective after the main power is turned OFF and ON.
OK Cancel
Multicast Discovery Settings
✓ Respond to Discovery
Scope Name: default
[Respond to Discovery]
Select the check box to set the machine to respond to device management software multicast discovery packets and enable monitoring by device management software.
NOTE:
- To change the port number for multicast discovery, see Changing Port Numbers(P. 247).
[Scope Name]
To include the machine into a specific scope, enter alphanumeric characters for the scope name.
3 Click [OK].
■Notifying a device management software of the power status of the machine
1 Select [Sleep Mode Notification Settings] ▶ [Edit].
text_image
Settings/Registration
To Portal
Logis User: 7654321
Log Out
Mail to System Manager
Edit Sleep Mode Notification Settings
Change the following settings.
Changes will be effective after the mode power is turned ORP and OPL
OK
Cancel
Sleep Mode Notification Settings
✓ Notify
Port Number: 11,407
Number of Routers to Traverse: 3 (0-754)
Notification Interval: 600
(No: 89-853433)
[Notify]
Select the check box to notify a device management software of the power status of the machine. When [Notify] is selected, you can expect the machine to avoid unnecessary communication during sleep mode and reduce the total power consumption.
[Port Number]
Change the port number for this function according to the network environment.
[Number of Routers to Traverse]
Specify how many routers the notification packets can pass through.
[Notification Interval]
Specify how often the machine notifies a device management software of its power status.
3 Click [OK].
5 Restart the machine. ▶ Restarting the Machine(P. 106)
■ Configuring Settings for Communication between the Machine and Plug-ins
You can specify the settings to enable communication between the machine and imageWARE Enterprise Management Console plug-ins. Use of plug-ins allows you to manage the machine's settings from imageWARE Enterprise Management Console.
/
Install the various drivers and associated software on your computer.
1 Make the necessary preparation before proceeding with the installation.
• Install the optional devices on the main unit in advance. ▶Optional Equipment(P. 504)
- If the machine is supplied with a CD-ROM/DVD-ROM, insert the CD-ROM/DVD-ROM into the drive on the computer.
- You can download drivers and software you are going to use from the Canon website (https://global.canon/).
NOTE:
- Whennew versions of drivers and software become available, they will be uploaded to the Canon website. You can download them as necessary after checking their system requirements.
• Depending on your machine or environmental conditions, some functions may not be available.
- Some of the drivers are not supported depending on the OS. For more information about the supported status of the latest OS, see the Canon website.
2 Proceed with the installation.
\- For more information about the installation procedure, see the manuals for the drivers and software you are going to use.
IMPORTANT
- Installation of drivers is impossible if sending and receiving of the IP address are not permitted in [Firewall Settings]. For more information, see ▶Specifying IP Addresses for Firewall Settings(P. 241) .
- If sending and receiving of the IP address of the computer on which drivers are installed become disabled by [Firewall Settings], it is no longer possible to perform printing from that computer.
Basic Operations
Basic Operations 86
Parts and Their Functions 89
Front Side 90
Back Side 92
Interior 93
Multi-Purpose Tray 94
Paper Drawer 95
Operation Panel 97
Turning ON the Machine 101
Turning OFF the Machine 102
Turning OFF the Machine by Remote Operation 103
Powering OFF at a Fixed Time 104
Restarting the Machine 106
Using the Operation Panel 108
Basic Screens 109
Home Screen 110
Screen 113
Message Display 117
Basic Operation 118
Entering Text 123
Logging in to the Machine 127
Loading Paper 128
Loading Paper in the Paper Drawer 130
Loading Paper in the Multi-Purpose Tray 136
Loading Envelopes 141
Loading Preprinted Paper 144
Specifying Paper Size and Type 146
Specifying Paper Size and Type in the Paper Drawer 147
Specifying Paper Size and Type in the Multi-Purpose Tray 149
Registering Default Paper Settings for the Multi-Purpose Tray 152
Registering a Custom Paper Size 155
Limiting the Paper Sizes Displayed 157
Automatically Selecting an Appropriate Paper Source for Each Function 158
Customizing the Display 160
Customizing the Home Screen 161
Basic Operations
Changing the Default Settings for Functions 163
Setting Sounds 164
Entering Sleep Mode 165
Using a USB Memory Device 167
Basic Operations
3S2S-01J
This chapter describes basic operations, such as how to use the operation panel or how to load the paper, that are frequently performed to use the functions of the machine.
■ Parts and Their Functions
This section describes the exterior and interior parts of the machine and their functions, as well as how to use the keys on the operation panel and how to view the display. ➤Parts and Their Functions(P. 89)

text_image
Illustration showing a box with three speech bubbles containing Chinese text, likely illustrating a process or service concept.
■ uTning ON the Machine
This section describes how to turn the machine ON and OFF. ▶Turning ON the Machine(P. 101)

natural_image
Illustration of a beige box with a power button icon (no text or symbols)
■ Using the Opatiion Panel
This section describes how to use the display for tasks such as selecting items and adjusting settings. Also, it describes how to enter characters and numbers. ▶Using the Operation Panel(P. 108)

natural_image
Hand pressing a button on a digital display screen (no text or symbols visible)
■ Logging in to the Machine
This section describes how to log in when a login screen is displayed. Logging in to the Machine(P. 127)
Basic Operations

text_image
Illustration showing a lock icon interacting with a hand pointing to a box containing an open box, with numbered labels and a thought bubble.
- Loading Paper
This section describes how to load the paper into the paper drawer and multi-purpose tray. Loading Paper(P. 128)

natural_image
Illustration of a cardboard box transforming into a stack of papers (no text or symbols)
■ Customizing the Display
This section describes how to rearrange the displayed items in order to make it easier to use screens shown in the display. Customizing the Display(P. 160)

natural_image
Illustration of a hand interacting with a touchscreen device, featuring a wrench icon and speech bubble (no text or symbols)
■ Changing the Default Settings for Functions
This section describes how to change the setting that is displayed initially when a function is selected. ▶Changing the Default Settings for Functions(P. 163)

natural_image
Illustration of a hand interacting with a touchscreen device, showing a computer screen and gear icon (no text or symbols)
■ Setting Sounds
This section describes how to adjust the volume of various machine sounds, such as those produced when an error occurs. ▶Setting Sounds(P. 164)
Basic Operations

natural_image
Illustration of a box with an orange circle containing sound waves, symbolizing audio or notification (no text present)
■ Entering Sleep Mode
This section describes how to set the sleep mode. ▶Entering Sleep Mode(P. 165)

natural_image
Illustration of a hand pressing a button on an open box, with no visible text or symbols.
■ Using a USB Memory Device
This section describes about the available USB memory devices and how to insert/remove the USB memory device. Using a USB Memory Device(P. 167)

natural_image
Illustration of a USB flash drive interacting with a physical storage unit (no text or symbols)
Parts and Their Functions
3S2S-01K
This section describes the parts of the machine (exterior, front and back side, and interior) and how they function. In addition to describing the parts of the machine used for such basic operations as loading paper and replacing the toner cartridges, this section also describes the keys on the operation panel and display. Read this section for tips on how to use the machine properly.

text_image
Illustration showing a box with three speech bubbles containing Chinese text, likely illustrating a process or service concept.
Front Side(P. 90)
Back Side(P. 92)
Interior(P. 93)
Multi-Purpose Tray(P. 94)
Paper Drawer(P. 95)
Operation Panel(P. 97)
3S2S-01L

text_image
1
2
3
4
5
6
7
9
4
LBP664Cdw
LBP623Cdw / LBP622Cdw
10
LBP664Cdw
LBP623Cdw / LBP622Cdw
1 Output tray
Printed paper is output to the output tray.
2 USB port (for USB device connection)
Use this port to connect a third-party USB memory device or USB keyboard. Connecting a USB memory device allows you to print data from the memory device.
\- Printing from a USB Memory Device (Memory Media Print)(P. 184)
3 Paper stopper
Open the paper stopper when you want to prevent paper from falling out of the output tray.
4 Lift handles
Hold the lift handles when carrying the machine. Relocating the Machine(P. 459)
5 Power switch
Turns the power ON or OFF. To restart the machine, turn OFF the machine, wait for at least 10 seconds, and turn it back ON.
6 Front cover
Open the front cover when replacing toner cartridges.
Procedure for Replacing the Toner Cartridge(P. 454)
7 Paper drawer
Load the type of paper you frequently use into the paper drawer. ▶Loading Paper in the Paper
Drawer(P. 130)
8 Multi-purpose tray/Manual feed slot
Load the paper into the multi-purpose tray when you want to temporarily use a type of paper different from that which is loaded in the paper drawer. ▶Loading Paper in the Multi-Purpose Tray(P. 136)
NOTE:
\- Inthe User's Guide, "manual feed slot," if it does not need to be distinguished from "multi-purpose tray," is collectively referred to as "multi-purpose tray."
9 Ventilation slots
Air from inside the machine is vented out to cool down the inside of the machine. Note that placing objects in front of the ventilation slots prevents ventilation.
10 Operation panel
The operation panel consists of keys such as Home key, Stop key, a display, and status indicators. You can perform all the operations and specify settings from the operation panel.
Operation Panel(P. 97)
Basic Screens(P. 109)
3S2S-01R

text_image
1
2
3
4
5
6
1 Rear cover
Open the rear cover when clearing paper jams. For more information, see "Troubleshooting (FAQ)" on the online manual website.
2 Rating label
The label shows the serial number, which is needed when making inquiries about the machine. For more information, see "Troubleshooting (FAQ)" on the online manual website.
3 Power socket
Connect the power cord.
4 USB port (for USB device connection) (LBP664Cdw)
Use this port to connect devices such as a third-party USB keyboard.
5 USB port (for computer connection)
Connect a USB cable when connecting the machine and a computer.
6 LAN port
Connect a LAN cable when connecting the machine to a wired LAN router, etc. ▶Connecting to a Wired LAN(P. 28)
Interior
3S2S-01S

natural_image
3D rendering of an open printer with internal rack and drive slots (no text or symbols visible)
1 Toner cartridge tray
Install the toner cartridges. Load the Y (yellow), M (magenta), C (cyan), and K (black) toner cartridges in the slots from the rear to the front respectively. ●Procedure for Replacing the Toner Cartridge(P. 454)
LINKS
Replacing the Toner Cartridge(P. 452)
Multi-Purpose Tray
3S2S-01U
LBP664Cdw

text_image
Diagram showing a device with labeled parts and an inset view of a mechanical component being inserted.
LBP623Cdw / LBP622Cdw

natural_image
3D diagram of a wall-mounted air conditioner unit with labeled component (no text or symbols beyond label)
1 Paper guides
Adjust the paper guides to exactly the width of the loaded paper to ensure that paper is fed straight into the machine.
NOTE:
For LBP664Cdw
\- Press the lock release lever that is indicated with an arrow in the illustration to release the lock and slide the paper guides.
2 Paper tray
Pull out the paper tray when loading paper.
LINKS
Loading Paper in the Multi-Purpose Tray(P. 136)
3S2S-01W
LBP664Cdw

text_image
Technical diagram of a mechanical assembly with labeled components and directional arrows indicating assembly steps.
LBP623Cdw / LBP622Cdw

text_image
Technical diagram of a mechanical component with numbered parts and highlighted features, showing internal structure and assembly.
1 Paper guides
Adjust the paper guides to exactly the size of the loaded paper to ensure that paper is fed straight into the machine. Press the lock release levers that are indicated with arrows in the illustrations to release the locks and slide the paper guides.
2 Lock release lever (for extending the paper drawer)
When loading Legal size paper, the paper drawer needs to be extended. Press this lever to release the lock and extend the length of the paper drawer.
NOTE
When loading Legal size paper
\- When the extended paper drawer is inserted, its front side is not flush with the machine. Place the legal dust cover over the open part of the paper drawer.

text_image
LBP664Cdw
LBP623Cdw / LBP622Cdw
LINKS
Loading Paper in the Paper Drawer(P. 130)
Operation Panel
3S2S-01X
Operation Panel of Touch Panel Model(P. 97)
Operation Panel of Black and White LCD Model(P. 98)
Operation Panel of Touch Panel Model

text_image
1
2
3
4
5
6
7
8
NEC
NOTE
\- The angle of the operation panel can be adjusted. Adjust it to an angle that is most comfortable for viewing the panel. ▶Adjusting the Angle(P. 98)
1 Display
You can view the progress of the machine and error statuses. The display is also a touch panel, so you can specify settings by touching the screen directly.
Basic Screens(P. 109)
Basic Operation(P. 118)
2 Sound Volume key
Press to adjust volume. ▶Setting Sounds(P. 164)
3 Energy Saver key
Press to put the machine into the sleep mode. The key lights up green when the machine is in the sleep mode. Press the key again to exit sleep mode. ▶Entering Sleep Mode(P. 165)
4 Data indicator
Blinks while an operation is being performed, such as data transmission or printing. Lights up when there are documents waiting to be processed.
5 Error indicator
Blinks or lights up when an error such as a paper jam occurs.
6 Home key
Press to display the Home screen, which provides access to the setting menu and functions such as Memory Media Print and Secure Print.
Home Screen(P. 110)
Customizing the Home Screen(P. 161)
7 Stop key
Press to cancel printing and other operations.
8 NFC (Near Field Communication) mark
You can also use functions such as printing by waving a mobile device with Canon PRINT Business installed over this mark. ▶ Connecting with Mobile Devices(P. 203)
Adjusting the Angle
When it is difficult to view the touch panel display, adjust the angle of the operation panel.

natural_image
Diagram of a mechanical assembly with directional arrows indicating motion (no text or symbols)
Operation Panel of Black and White LCD Model

text_image
1
2
3
4
5
6
7
Home
Back
OK
Energy Saver
Delta Monitor
Log In/Dbl
ID
OK
Clear
Stop
Darry
Enter
8
9
10
11
12
13
14
15
16
17
18
1 Display
You can view the operation and error statuses of this machine, the amount remaining in the toner cartridges, and other conditions. Basic Screens(P. 109)
2 [Home] key
Press to display the Home screen, which provides access to the setting menu and functions such as Memory Media Print and Secure Print. ▶Home Screen(P. 110)
3 [Back] key
Press to return to the previous screen. If you press this key when specifying settings, for example, the settings are not applied and the display returns to the previous screen.
4 Numeric keys ([0]-[9] keys)
Press to enter numbers and text. ▶Entering Text on the Black and White LCD Model(P. 124)
5 [\*] key
Press to switch the type of text that is entered.
6 [Data] indicator
Blinks while an operation is being performed, such as data transmission or printing. Lights up when there are documents waiting to be processed.
7 [Error] indicator
Blinks or lights up when an error such as a paper jam occurs.
8 [Energy Saver] key
Press to put the machine into sleep mode. The key lights up green when the machine is in sleep mode. Press the key again to exit sleep mode. ▶Entering Sleep Mode(P. 165)
9 [Status Monitor] key
Press to check the printing status, to view the usage history, or to view the network settings such as the IP address of the machine. You can also check the status of the machine, such as the remaining amount of paper and the amount remaining in the toner cartridges, or whether any errors occurred. ▶ Screen of Black and White LCD Model(P. 114)
10 [ID] key
Press after entering the ID and PIN to log on when Department ID Management is enabled. After you finish using the machine, press this key again to log off. ▶Logging in to the Machine(P. 127)
11 [Clear] key
Press to delete the entered numbers and text.
12 [Stop] key
Press to cancel printing and other operations.
13[#]key
Press to enter symbols such as "@" or "/".
14 []key
When specifying settings, press to return to the previous screen. When entering numbers, press to move the cursor to the left.
15 []key
When specifying settings, press to select the item immediately above the currently selected item. When changing setting values, press to increase a value.
16 [▶key
When specifying settings, press to proceed to the next screen. When entering numbers, press to move the cursor to the right.
17 [ ]key
When specifying settings, press to select the item immediately below the currently selected item. When changing setting values, press to decrease a value.
18 [ Dkey
Press to apply settings or specified details.
LINKS
Basic Operation(P. 118)
Turning ON the Machine
3S2S-01Y
This section describes how to turn ON the machine.
1 Make sure that the power plug is firmly inserted into a power outlet.
2 Press the power switch.

natural_image
Diagram of a printer with a power button and magnified view of the switch (no text or symbols)
The Start seen appears. ▶Operation Panel(P. 97)
NOTE
\- You can select the screen that is displayed first after the machine is turned ON. ▶(P. 310)
LINKS
Turning OFF the Machine(P. 102)
Restarting the Machine(P. 106)
Turning OFF the Machine
3S2S-020
This section describes how to turn OFF the machine.
1 Press the power switch.

text_image
Diagram showing a printer with a power button and an orange circle highlighting the button's direction.
NOTE
- It may take some time for the machine to completely shut down. Do not unplug the power cord until the display turns off.
• To restart the machine, wait for at least 10 seconds after the machine is turned OFF.
- You can also turn OFF the machine from a computer. Turning OFF the Machine by Remote Operation(P. 103)
- You can specify the time for each day of the week and configure a setting to automatically turn OFF the machine. ▶Powering OFF at a Fixed Time(P. 104)
Turning OFF the Machine by Remote Operation
3S2S-021
You can turn OFF the machine from a computer on the same network without going to where the machine is installed.
1 Start the Remote UI and log in to System Manager Mode. ▶Starting Remote UI(P. 281)
2 Click [Settings/Registration] on the Portal page. ►Remote UI Screen(P. 282)
3 Select [Device Management] ▶[Remote Shutdown].
4 Check [Device Status] to make sure that no functions are being processed, and click [Execute].
5 Click [OK].
NOTE
Restarting the machine by remote operation
\- You can restart the machine by clicking [Restart Device] on the [Settings/Registration] screen of the Remote UI. Restarting the Machine(P. 106)
Powering OFF at a Fixed Time
3S2S-022
You can make a setting so that the power is automatically tuned OFF at a specified time on each day of the week. This allows you to avoid useless power consumption that may occur due to failure to turn OFF the power. By default, this function is disabled.
NOTE
\- For information about the basic operation to set up the machine from Remote UI, see ⬆Setting Up Menu Options from Remote UI(P. 291) .
1 Start the Remote UI and log in to System Manager Mode. ▶Starting Remote UI(P. 281)
2 Click [Settings/Registration] on the Portal page. Remote UI Screen(P. 282)
3 Select [Timer Settings] ▶[Edit].
4 Select the check box for [Set Auto Shutdown Weekly Timer], and set the time to turn OFF the power.

text_image
Settings/Registration
Settings/Registration: Preferences: Time Settings > Edit Time Settings
Edit Timer Settings
Change the following settings.
OK Cancel
Timer Settings
Date-Format: DO/MM/YYYY
Time Format: 12 Hour (AM/FM)
Current Date (DO/MM/YYYY):
Current Time (Months):
Time Zone: 0/TC) Coordinated Universal Time
Use Daylight Saving Time
Start: March Last Sunday
End: October Last Sunday
Use Auto TAU Time
Set Time: 2 min. (S-4)
Function After Auto Reset: Default Function
Selectrol Function
Use Auto Shutdown Time
Set Time: After 4 hours
Set Auto Shutdown Weekly Timer
Sunday: AM
Monday: AM
Tuesday: AM
Wednesday: AM
Thursday: AM
Friday: AM
Saturday: AM
Auto Sleep Time: 1 MAY (S-40)
Use Auto Sleep Daily Timer
Set Time: 1.7 0.5 PMB
Use Sleep Window Edit Time Settings
[Set Auto Shutdown Weekly Timer]
Selecting the check box allows you to set the time to turn OFF the power on each day of the week.
[Sunday] to [Saturday]
Enter the desired time to turn OFF the power. For any day of the week, leaving the time field blank means that the auto shutdown function is disabled for that day.
5 Click [OK].
NOTE
If the power is not turned OFF automatically at the specified time\*
- When the Data indicator is lit up or blinking
- When the menu screen or Check Counter screen is displayed
- When settings data is being imported/exported
- When the firmware is being updated
\*If the power cannot be turned OFF automatically at the specified time, a retry will be performed up to ten times at intervals of one minute. If the power cannot be turned OFF even after ten retries, auto shutdown will be impossible for that day.
Restarting the Machine
3S2S-08J
Depending on the setting items that have been changed, you may need to make the changes effective by restarting the machine. This section describes how to restart the machine.
Restarting the Machine by an Operation on the Main Unit(P. 106)
Restarting the Machine by Remote Operation(P. 106)
Restarting the Machine by an Operation on the Main Unit
1 Press the power switch.

natural_image
Diagram of a printer with a power button and an orange circle highlighting the electrical outlet (no text or symbols present)
NOTE:
- It may take some time for the machine to completely shut down.
When the machine shuts down, the display or Energy Saver key of the operation panel turns off.
2 Wait at least 10 seconds after the shutdown, then press the power switch again.
The machine starts.
Restarting the Machine by Remote Operation
1 Start the Remote UI and log in to System Manager Mode. ▶Starting Remote UI(P. 281)
2 Click [Settings/Registration] on the Portal page. ►Remote UI Screen(P. 282)
3 Click [Restart Device] in the menu on the left side of the screen.

text_image
Settings/Registration
Restart Device
Preferences
Paper Settings
Display Settings
Tower Settings
Network Settings
External Interface Settings
Accessibility Settings
Sound Volume Control
Services Settings
Common Settings
Settings/Registration: Preferences: Network Settings > IPSec Settings
IPSec Settings
Changes will be effective after the main power is turned OFF and ON.
IPSec Settings
Use IPSec On
Receive Non-Policy Packets Allow
Registered IPSec Policies
Register New Policy...
Priority Policy Name Status
1 PolicyID Enabled Up Down Delete
2 PolicyID Enabled Up Down Delete
3 Default Cancel Apply Down
4 Check [Device Status] to make sure that no functions are being processed, and click [Execute].

text_image
Settings/Registration
To Portal Login Users: 7654821 Log On
Mail to Systems Manager
Settings/Registration: Restart Device
Preferences
Paper Settings
Display Settings
Timer Settings
Network Settings
External Interface Settings
Acceptability Settings
Sound Volume Control
Function Settings
Complete Settings
Restart Device
Click [Execute] to restart the device.
Restarting the device will cancel all current processes.
Make sure that all current processes are complete before performing this operation.
Device Status
Premen Ready to print 1
5 Click [OK].

text_image
Manage from webpage
The device will be installed and all current processes will be cancelled.
Is the OR?
OK Cancel
Astart process begins. Communication remains disconnected until the main unit has restarted.
Using the Operation Panel
3S2S-023
You can use the display and keys of the operation panel to configure machine settings or operate functions. This section describes basic usage of the display and keys.

natural_image
Hand pressing a button on a digital display screen (no text or symbols visible)
Basic Screens(P. 109)
Basic Operation(P. 118)
Entering Text(P. 123)
TIPS
- If you want to invert the light and dark parts of the display: (P. 343)
- If you want to adjust the brightness of the display: ▶(P. 343)
- If you want to adjust the contrast of the display: ▶(P. 344)
LINKS
Operation Panel(P. 97)
Basic Screens
3S2S-024
The Home screen or settings screen appears on the display, allowing you to initiate functions such as Memory Media Print and Secure Print. You can also use the display to check information such as error messages and the machine's operation status. To operate the touch panel model, directly touch the display.
Home Screen(P. 110)
◀ Screen(P. 113)
Message Display(P. 117)
NOTE
\- You can customize the Home screen by rearranging frequently used buttons for easier access to the respective functions. Customizing the Display(P. 160)
To Know How to Operate
\- On some screens, the button allows you to view the descriptions of functions or how to operate.

text_image
Paper Size (Frequently Used Sizes)
Specify When Loading Paper
Custom
Free Size
LTR
LGL
STMT
Other Sizes
3S2S-025
The Home screen is displayed when the power is turned ON or by pressing 📋 on the operation panel. Use this screen to specify settings for and register functions.
Home Screen of Touch Panel Model(P. 110)
Home Screen of Black and White LCD Model(P. 111)
Home Screen of Touch Panel Model

text_image
Home
V N L
Check counter
Log Out
1
2
3
4
Memory
Media Print
Secure Print
Menu
Paper Settings
Standby Slide
Print Template
Constraints Information
Mobile Portal
20/5/2021
0:00 Status Mini
7
6
1 Change page
Use this to view another page in the Home screen. You can also flick sideways to change pages.
2 Amount remaining in the toner cartridges
Displays the amount remaining in the toner cartridges in stages.
3
Displays the totals for black and white and color printouts separately. ▶Viewing the Counter Value(P. 467)
4
Use this button to log out from the machine.
5
Press to check the printing status, to view the usage history, or to view the network settings such as the IP address of the machine. You can also check the status of the machine, such as the remaining amount of paper and the amount remaining in the toner cartridges, or whether any errors that occurred. ▶
Screen(P. 113)
6 Wi-Fi icon
Displayed when the machine is connected to a wireless LAN.
7 User name/ID
The name or ID of the logged in user is displayed.
Basic Operations

text_image
8
9
10
11
Home
Check Counter
Log Out
Memory Media Print
Secure Print
Menu
Paper Settings
Standby Slide
Print Template
Constraints Information
Mobile Portal
2054371
Op0
Status Monitor
12
13
Prints files stored in a USB memory device. Printing from a USB Memory Device (Memory Media Print) (P. 184)
9
Use this function to print a secure document. ▶Printing a Document Secured by a PIN (Secure Print)(P. 179)
, , and many other machine settings start from this button. ▶Setting Menu List(P. 308)
11
This button is used for specifying the size and type of paper loaded in the paper drawer and multi-purpose tray. Specifying Paper Size and Type(P. 146)
You can use these buttons to conveniently perform a function by a one-touch operation. For more information, see the manual for Application Library on the online manual website.
13
Use this to establish a connection to a mobile device. Connecting with Mobile Devices(P. 203)

text_image
14
15
12
Home Screen Settings
Update
Hardware
Language
Application
Library Guide
7654321
Op0
Status Monitor
14
Allows you to change the order that Home screen buttons are displayed in. ▶Customizing the Home Screen(P. 161)
15
Allows you to update the firmware via the Internet. Updating the Firmware(P. 302)
Home Screen of Black and White LCD Model

text_image
Home
Menu
Paper Settings
Y M C K
1 Wi-Fi icon
Displayed when the machine is connected to a wireless LAN.

text_image
Home
Menu
Paper Settings
Memory Media Print
Secure Print
Mobile Portal
Display Order (Home)
Toner Delivery Set.
2 Amount remaining in the toner cartridges
Displays the amount remaining in the toner cartridges in stages. This is hidden while the Home screen is active.
, , and many other machine settings start from this button. ▶Setting Menu List(P. 308)
4
This button is used for specifying the size and type of paper loaded in the paper drawer and multi-purpose tray.
○ Specifying Paper Size and Type(P. 146)
Prints files stored in a USB memory device. Printing from a USB Memory Device (Memory Media Print) (P. 184)
6
Use this function to print a secure document. ▶Printing a Document Secured by a PIN (Secure Print)(P. 179)
7
Use this to establish a connection to a mobile device. Connecting with Mobile Devices(P. 203)
8
Allows you to change the order that Home screen buttons are displayed in. ▶Customizing the Home Screen(P. 161)
9
You can configure settings for toner replenishment service. Use of the toner replenishment service requires prior registration with select retailers. This service is only available in certain countries/regions and for certain models.
LINKS
Customizing the Home Screen(P. 161)
3S2S-026
When you press (☑), a screen appears in which you can check the progress of documents as well as the status of the machine and network setting information.
Status Monitor> Screen of Touch Panel Model(P. 113)
Screen of Black and White LCD Model(P. 114)
Screen of Touch Panel Model
text_image
Status Monitor
Email Information/Notification
Device Information
Print Job
RT Job
Network Information
Rev. Mem. Media
Pass/Rec: 92.581.167
Close
1
2
3
4
5
6
Displays the details of any errors that occurred. For more information, see "Troubleshooting (FAQ)" on the online manual website.

text_image
Error Information/Notification
No Paper
Displays the status of the machine.

text_image
Device Information
Paper Information
Cartilage Information
Secure Print Memory Usage : 0 MB/3D MB
Version Information
Serial Number : AMT31234956
Displays whether paper is loaded in each paper source.
Displays the amount of toner remaining in the toner cartridges. Other internal parts may reach the end of their lifetime before the toner runs out.
Displays the amount of memory currently used for storing secured document data. ▶Printing a Document Secured by a PIN (Secure Print)(P. 179)
Displays firmware version information.
3 Status and logs of printed and received documents
Displays the current status of the selected item. The screen is shown below as an example.

text_image
Print Job
Print Job Status
Print Job Log
Printer 10.00AM Printing
Secure Print 10.00AM Waiting for authentication
Displays the network settings such as the IP address of the machine and status such as the condition of wireless LAN communications. ▶Viewing Network Settings(P. 49)

text_image
Network Information
IPv4
IPv6
Network Connection Type
Direct Connection Information
IEEE 802.1X Error Information
5 IP Address
Displays the IPv4 address of the machine.
NOTE:
\- You can specify whether to display the IP address on the screen by setting . ▶(P. 314)
Used to safely remove a USB memory device. This is only displayed when a USB memory device is connected to the machine. ▶Remove the USB Memory Device(P. 167)
Screen of Black and White LCD Model
text_image
Status Monitor
IPv4: 192.168.1.87
Error Information/Notif
Device Status
Print Job
RX Job
Network Information
1 IP Address
Displays the IPv4 address of the machine.
NOTE:
\- You can specify whether to display the IP address on the screen by setting . ▶(P. 314)
Displays the details of any errors that occurred. For more information, see "Troubleshooting (FAQ)" on the online manual website.

text_image
Error Info./Notif.
Check Recovery Steps
No Paper
3
Displays the status of the machine.

text_image
Device Status
Paper Information
Cartridge Level
Remove Memory Media
Check Counter
Secure Print Memory Usage
Version Information
Serial Number
Displays whether paper is loaded in each paper source.
4 Status and logs of printed and received documents
Displays the current status of the selected item. The screen is shown below as an example.

text_image
Print Job Status
Printer 10:31 Printi
Printer 10:34 waitin
Printer 10:36 waitin
Displays the network settings such as the IP address of the machine and status such as the condition of wireless LAN communications. Viewing Network Settings(P. 49)

text_image
Network Information
IPv4
IPv6
Network Connection Method
Direct Connection Informat
Message Display
3S2S-027
Messages are displayed on the screen in situations such as when paper runs out or when the expiration of the toner cartridge lifetime is reached. For more information, see "Troubleshooting (FAQ)" on the online manual website.
Touch panel model

text_image
Home
Check Counter
Menu Media Print
Secure Print
Menu
Paper Settings
Share Page Side
Print Template
Consumables Information
Mobile Portal
Check Creations. Status Report: Pres/Hold Volume Key
Status Monitor
Home
Check Counter
Menu Media Print
Secure Print
Menu
Paper Settings
Share Page Side
Print Template
Consumables Information
Mobile Portal
Prepare call digit
Status Monitor
Black and white LCD model

text_image
Prepare the cyan
cartridge.
Menu
Paper Settings
Chk Cnsmbl Status Rprt
Press/Hold Clear Key
Menu
Paper Settings
When an Error Occurs
In some cases when an error occurs, instructions on how to respond to the error are displayed. Follow the on-screen instructions to solve the problem. The screen displayed when a paper jam occurs is shown below as an example.
Touch panel model

text_image
Paper unnamed
Press (Next) to display the next step.
Press (Previous), when available, to display the previous step again.
Next
Paper unnamed
Open the back cover.
Previous 1/4
Black and white LCD model

text_image
%Paper jammed.
Press [►] to
display steps.
Remove jammed paper.
1/5
Basic Operation
3S2S-028
Basic Operation of Touch Panel Model(P. 118)
Basic Operation of Black and White LCD Model(P. 120)
Basic Operation of Touch Panel Model
The display is a touch panel, allowing you to operate directly on the screen.
IMPORTANT
Avoid the following actions.
• The display may malfunction or be damaged.
- Pressing forcefully
- Pressing with pointed objects (fingernails, ballpoint pen, pencil, etc.)
- Operating with wet/soiled hands
- Operating the display while an object is placed on it
NOTE
\- Before using the touch panel display, peel off the protective film from the display.
Tap
Touch the screen lightly and quickly. Use for selecting or finalizing items.

natural_image
Illustration of a hand pressing a button on a device screen with a starburst icon (no text or symbols)
Flick
Flick with the finger on the display. The effect of flicking varies depending on the screen. For instance, flicking in the Home screen moves you one page in the direction of the flick.

natural_image
Illustration of a hand interacting with a touchscreen device (no text or symbols visible)
■ Selecting Items
Tap an item name or button to make a selection.

text_image
Status Monitor
Enter Information/Notification
Device Information
Print Job
RT Job
Network Information
Rev. Mina. Media
IP Address: 150.168.1.157
Close

text_image
Device Information
Paper Information
Cartilage Information
Secure First Memory Usage : 0 MB/30 MB
Version information
Serial Number : ANSIPT214958
NOTE
If an item is mistakenly touched
\- Slide your finger away then elease it from the screen to cancel the selection.

natural_image
Illustration of a hand pressing a button on a device screen (no text or symbols visible)
To return to the previous screen
\- Tap 📋 to return to the previous screen.
The scroll bar appears on the screen when there is still information that is undisplayed. If the scroll bar is displayed, flick the screen to scroll in the direction of the flick. Note that the scroll bar only appears while the screen is being touched.

text_image
Default Paper Type
Main 1 (17 lb Bond-19 lb Bond)
Main 2 (20 lb Bond-21 lb Bond)
Main 3 (22 lb Bond-24 lb Bond)
Main 4 (25 lb Bond-28 lb Bond)
Recycled 1 (17 lb Bond-19 lb Bond)
Recycled 2 (28 lb Bond-21 lb Bond)

text_image
Default Paper Type
Plain 3 (22 lb Bond-20 lb Bond)
Plain 4 (25 lb Bond-20 lb Bond)
Recycled 1 (17 lb Bond-19 lb Bond)
Recycled 2 (20 lb Bond-21 lb Bond)
Color (17 lb Bond-19 lb Bond)
Thin 1 (16 lb Bond)
■ Changing the SettingaVue
Tap <+>/<-> to adjust the setting on the scale. You can also adjust a setting by flicking the slider left or right.

text_image
Brightness
Dark (115%)
Light (89%)
-
+
Apply
TIPS
- You can change a variety of display-related settings, such as the display language: ▶(P. 310)
- You can change the screen that is automatically displayed when the machine remains idle for a specified length of time: (P. 319)
- You can change various settings about the operability such as screen brightness: (P. 343)
Basic Operation of Black and White LCD Model
Use the keys shown below to specify settings and adjust values.

text_image
Home
Back
OK
Change
Image Saver
Status Monitor
Log In/Out
1 2 3
0 1 2 3
0 4 5 6
0 7 8 9
0 0 10
Close C
Stop
Data
Enter
Using ▲ ▼
The scroll bar is displayed on the right side of the screen when not all of the information fits on one screen. If the scroll bar is displayed, use ▲ / ▼ to scroll up or down. The text and background colors of an item are inverted when it is selected.

text_image
Preferences
Display Settings
English Keyboard Layout
Timer/Energy Settings
Network
■Changing Setting Values
Use ▲ / ▼ to enter values. If an icon such as below is displayed at the upper left of the screen, you can enter values directly using the numeric keys. ▶Entering Text(P. 123)

text_image
Current Time Set.
02/02/2017 10:00 AM
(0:00-12:59)
NOTE:
Values in ( ) displayed below the entry box are the enterable value range.
Using /
■Proceeding to the Next Screen/Returning to the Previous Screen
Press ▶ to proceed to the next screen. Press ▶ to return to the previous screen.

text_image
IP Address Settings
Auto Acquire: On
Manually Acquire
Check Settings
Auto Acquire
Select Protocol: DHCP
Auto IP: On
NOTE:
\- You can also proceed to the next screen by pressing OK, and return to the previous screen by pressing 📋.
■Changing Setting Values
Use ◀ to adjust the slider scale.

text_image
Contrast
-0000 0000+
■ Moving the Cursor
Use ▶ to enter text and values. Entering Text(P. 123)

text_image
Current Time Set.
10/10/2015 10:26AM
(0:00-12:59)
Using OK
Press 📄 apply a setting.

text_image
Cancel?
Yes No
Using the Numeric Keys
Use the numeric keys to enter text and values. Entering Text(P. 123)

text_image
Password
Entry Mode: A
Symbol
TIPS
- You can change a variety of display-related settings, such as the display language: ▶(P. 310)
- You can change the screen that is automatically displayed when the machine remains idle for a specified length of time: (P. 319)
- You can change a variety of accessibility-related settings, such as the scroll speed: (P. 343)
Entering Text
3S2S-029
Entering Text on the Touch Panel Model(P. 123)
Entering Text on the Black and White LCD Model(P. 124)
Entering Characters Using a USB Keyboard(P. 126)
Entering Text on the Touch Panel Model
When entering text or a number, use the keyboard displayed on the screen. The numeric keys are displayed on the screen to enter only numbers.

text_image
System Manager Name
Administrator1
a 1:00 Space
Apply
Switching the Type of Character
Tap or <1/#> to switch the type of character that is entered.

text_image
System Manager Name
Administrator
a 1/8 Space
Add
NOTE
\- To enter upper case characters, tap ↑.
Deleting Text
One character is deleted each time is tapped. Holding down allows you to delete successive characters.
Moving the Cursor (Entering a Space)
Tap ☑ to move the cursor. To enter a space, move the cursor to the end of the text, and tap .
When the Numeric Keys are Displayed
When you are supposed to enter only a numeric value, the numeric keys are displayed on the screen. Tap numeric keys to enter the numeric value.

text_image
Current DateTime Settings
8 2 (Month Day)
2017 (Year)
10 : 06 (0:00-12:55)
AM PM
1 2 3
4 5 6
7 8 9
C 0
Apply
NOTE
Value range
\- The values in ( ) displayed the entry box are the enterable value range.
\- When <+>/<-> or ▶/▶ are displayed, you can tap the buttons to increase or decrease the numeric value or move the cursor.
Entering Text on the Black and White LCD Model
Use the numeric keys to enter text and values.

text_image
Home
Back
OK
Energy Sensor
Status Monitor
Log Inv/Out
ID
1 2 3
DIN
4 5 6
PCS
7 8 9
M
0
Cone
C
Stop
Data
Enter
Switching the Type of Text
Press ☐ switch the type of text that is entered.

text_image
System Manager Name
Administrator
Entry Mode: A
Symbol
NOTE
\- You can also select and press OK to switch the type of text.
Types of Text That Can Be Entered
Text that can be entered is listed below.
Key A a 12 1 @ . - _ / 1 2 ABC abc 2 3 DEF def 3 4 GHI ghi 4 5 JKL jkl 5 6 MNO mno 6 7 PQRS pqrs 7 8 TUV tuv 8 9 WXYZ wxyz 9 0 (Not available) 0 # (space) -.*#!",;^_=/ | ?$@%&+\-()[]{}<> (Not available)
NOTE
\- Press # or select and press OK when the type of text that is entered is or to display enterable symbols in the screen. Use ▲ / ▼ / ◀/ ▶ to select the symbol you want to enter, and press OK.
Deleting Text
One character is deleted each time C is pressed. Press and hold C to delete all of the entered text.
Moving the Cursor (Entering a Space)
Press ◀ or ▶ to move the cursor. To enter a space, move the cursor to the end of the text, and press ▶.
Example of Entering Text and Numbers
Example: "Canon-1"
1 Press ✦ repeatedly until is selected.
2 Press 2 repeatedly until the letter "C" is selected.
3 Press ✦ repeatedly until is selected.
4 Press 2 repeatedly until the letter "a" is selected.
5 Press 6 repeatedly until the letter "n" is selected.
6 Press 6 repeatedly until the letter "o" is selected.
7 Press 6 repeatedly until the letter "n" is selected.
8 Press 1 repeatedly until the symbol "-" is selected.
9 Press ✦ repeatedly until <12> is selected.
10 Press 1.
11 Select and press

Entering Characters Using a USB Keyboard
You can connect a keyboard to the USB port for USB devices on the ▶Front Side(P. 90) or ▶Back Side(P. 92) and enter text from the keyboard. Even while the keyboard is connected, you can enter text from the operation panel.
NOTE
- Some keys on the USB keyboard, such as the [Backspace], [Home] and [End] keys, cannot be used. When keys that cannot be used are pressed, nothing is entered or changed.
• To delete text, press the [Delete] key.
- Pressing the [RETURN/ENTER] key completes text entry in the same way as selecting .
- You can specify the type of keyboard layout (US layout or UK layout).◀(P. 315)
- You can disconnect the USB keyboard from the machine at any time. No special operation is required to disconnect it.
- Depending on the display language, you may not be able to enter some characters correctly.
- The USB keyboard may not operate correctly depending on its type.
Logging in to the Machine
3S2S-02A
If Department ID Management is enabled or System Manager IDs are enabled, you must log in before using the machine. When the login screen appears, use the procedure below to enter the Department ID and PIN.

text_image
Login
Department ID
FW
Log In
Check Counter
1 2 3
4 5 6
7 8 9
Status Monitor
1 Enter the ID.
1 Select or .
2 Enter the ID.
• If no PIN is registered, proceed to step 3.
2 Enter the PIN.
1 Select .
2 Enter the PIN.
3 Press (ID).
The login seen will be changed to the Home screen.
• After you finish using the machine, press ID) to display the login screen.
LINKS
Setting the Department ID Management(P. 230)
Setting the System Manager ID and PIN(P. 228)
Loading Paper
3S2S-02C
You can load the paper into the paper drawer or multi-purpose tray. Load the paper you usually use into the paper drawer. The paper drawer is convenient when using large amounts of paper. Use the multi-purpose tray when you temporarily use a size or type of paper that is not loaded in the paper drawer. See Available Paper(P. 491) for available paper sizes and types.

natural_image
Illustration of a box with a lid and a stack of papers, showing a yellow arrow pointing from the paper to the lid (no text or symbols present)
About Paper
Precautions for Paper(P. 128)
Storing the Paper Printed with the Machine(P. 129)
How to Load Paper
Loading Paper in the Paper Drawer(P. 130)
Loading Paper in the Multi-Purpose Tray(P. 136)
Loading Envelopes(P. 141)
Loading Preprinted Paper(P. 144)
Configuring the Settings for the Loaded Paper
Specifying Paper Size and Type(P. 146)
Precautions for Paper
IMPORTANT
Do not use the following types of paper:
• A paper jam or printing error may occur.
- Wrinkled or creased paper
- Curled or rolled paper
- Torn paper
- Damp paper
- Very thin paper
- Thin coarse paper
- Paper printed by a thermal transfer printer
- Back side of paper printed by a thermal transfer printer
- Highly textured paper
- Glossy paper
Notes on use of paper
\- Only use paper that has fully acclimatized to the environment in which the machine is installed. Using paper that has been stored under different temperature or humidity conditions may cause paper jams or result in poor print quality.
Paper handling and storage
- It is recommended that you use paper as soon as possible after unwrapping. Paper remaining unused should be covered with the original wrapping paper and stored on a flat surface.
- Keep the paper wrapped in its original package to protect the paper from moisture or dryness.
- Do not store the paper in such a way that may cause it to curl or fold.
- Do not store the paper vertically or do not stack too much paper.
- Do not store the paper in direct sunlight, or in a place subject to high humidity, dryness, or drastic changes in temperature or humidity.
NOTE
When printing on paper that has absorbed moisture
\- Steam may emit from the paper output area, or water droplets may form around the paper output area. There is nothing unusual about any of these occurrences, which occur when the heat generated from fixing toner on the paper causes moisture in the paper to evaporate (most likely to occur at low room temperatures).
Storing the Paper Printed with the Machine
When handling/storing the paper printed with the machine, take the following precautions.
■ How to Store the Printed Paper
- Store on a flat surface.
- Do not store together with articles made of PVC (polyvinyl chloride) such as clear folders. Toner may melt, resulting in the paper's sticking to PVC articles.
Take care that the paper does not get folded or creased. Toner may peel off.
• To store over a long period of time (two years or longer), store in binders or equivalent.
- When the paper is stored over a long period of time, it may become discolored and thus the print may seem to have undergone a change of color.
- Do not store in a place where the temperature is high.
■ Precautions When Applying Adhesive
• Always use insoluble adhesive.
• Before applying adhesive, perform a test using a printout no longer required.
- When putting adhesive-applied paper sheets one over another, make sure that the adhesive is completely dried out.
LINKS
Registering a Custom Paper Size(P. 155)
Loading Paper in the Paper Drawer
3S2S-02E
Load the paper that you usually use in the paper drawer. When you want to print on paper that is not loaded in the paper drawer, load the paper in the multi-purpose tray. Loading Paper in the Multi-Purpose Tray(P. 136)
Loading Regular Size Paper(P. 130)
Loading Custom Size Paper(P. 133)
IMPORTANT
\- When using A5 size paper, see Loading Custom Size Paper(P. 133) and load it in the landscape orientation. When loading paper in the portrait orientation, follow the steps shown in Loading Regular Size Paper(P. 130).

text_image
Landscape orientation

text_image
Portrait orientation
NOTE
\- Follow the procedure below when loading paper into the optional cassette feeding module.
Loading Regular Size Paper
To load paper whose size is found in the paper size markings on the paper drawer, use the following procedure. For paper whose size is not found in the paper size markings, see Loading Custom Size Paper(P. 133).
1 Pull out the paper drawer until it stops, and remove it while lifting the front side.

natural_image
Illustration of hands inserting a plastic into a rack with arrows indicating motion (no text or symbols)
2 Adjust the positions of the paper guides to the paper size you want to use.
\- While pressing the lock release lever, move the paper guide to align the projection to the appropriate paper size marking.
Basic Operations

text_image
Diagram illustrating a mechanical assembly process with labeled components and directional arrows indicating motion or movement.
NOTE:
When loading Legal size paper
\- Press the lock release lever, and extend the paper drawer.

natural_image
Diagram showing a mechanical component being inserted into a housing, with an inset magnified view highlighting the tool (no text or symbols present)
3 Load the paper so that the edge of the paper stack is aligned against the paper guide on the front side of the paper drawer.
- Load the paper with the print side face up.
• Fan the paper stack well, and tap it on a flat surface to align the edges of the paper stack.

natural_image
Diagram showing a yellow arrow pointing downward over a gray document-like shape, with no visible text or symbols.
IMPORTANT:
Do not exceed the load limit line when loading paper
\- Male sure that the paper stack does not exceed the load limit line(). Loading too much paper can cause paper jams.

text_image
Diagram showing a mechanical component with labeled parts and a magnified inset highlighting three triangular features.
NOTE:
\- When loading paper with a logo, see ▶Loading Preprinted Paper(P. 144) .
4 Insert the paper drawer into the machine.
\- When you insert the paper dawer with set to , a confirmation screen is displayed. ▶(P. 435)
NOTE:
When loading Legal size paper
\- When the extended paper drawer is inserted, its front side is not flush with the machine. Place the legal dust cover over the open part of the paper drawer.

text_image
LBP664Cdw
LBP623Cdw / LBP622Cdw
» Continue to ▶ Specifying Paper Size and Type in the Paper Drawer(P. 147)
IMPORTANT:
When changing the paper size or type
\- Thefactory default settings for paper size and type are and , respectively. If you load a different size or type of paper into the machine, make sure to change the settings. If you do not change the settings, the machine cannot print properly.
Printing on the Back Side of Printed Paper (Manual 2-Sided Printing)
\- You can print on the back side of printed paper. Flatten any curls on the printed paper and insert it into the paper drawer or multi-purpose tray (Loading Paper in the Multi-Purpose Tray(P. 136)), with the side to print face up (previously printed side face down).
\- When using the multi-purpose tray, load one sheet of paper each time you print.
\- You can use only the paper printed with this machine.
\- You cannot print on the side that has previously been printed on.
\- If the printouts look faded, set the target paper source to in .
(P. 351)
\- If you are using A5 size paper, the reverse side may not be printed correctly.
Loading Custom Size Paper
To load custom size paper or other paper whose size is not found in the paper size markings on the paper drawer, use the following procedure.
1 Pull out the paper drawer until it stops, and remove it while lifting the front side.

natural_image
Illustration of hands inserting a plastic into a rack with arrows indicating motion (no text or symbols)
2 Spread the paper guides apart.
\- Press the lock release lever to slide the paper guides outward.

text_image
Technical diagram illustrating hand tool application on a mechanical component, with labeled parts A4 and A4/14
NOTE:
When loading longer paper than A4 size
\- Press the lock release lever, and extend the paper drawer.

natural_image
Diagram showing a mechanical component being inserted into a housing, with an inset magnified view highlighting the tool (no text or symbols present)
3 Load the paper so that the edge of the paper stack is aligned against the rear side of the paper drawer.
- Load the paper with the print side face up.
• Fan the paper stack well, and tap it on a flat surface to align the edges of the paper stack.

natural_image
Diagram of a mechanical component with a highlighted section and an orange arrow indicating direction (no text or symbols)
IMPORTANT:
Do not exceed the load limit line when loading paper
\- Make sure that the paper stack does not exceed the load limit line (a). Loading too much paper can cause paper jams.

text_image
Diagram showing a device with labeled components and a magnified view of a tray-like structure with three triangular elements.
NOTE:
\- When loading envelopes or paper with a logo, see Loading Preprinted Paper(P. 144).
4 Align the paper guides against the edges of the paper.
\- Pess the lock release lever and slide the paper guides inward until they are aligned securely against the edges of the paper.

text_image
Diagram illustrating hand tool application on a device, showing step-by-step states of tool movement and rotation.
IMPORTANT:
Align the paper guides securely against the edges of the paper
• Paper guides that are too loose or too tight can cause misfeeds or paper jams.
5 Insert the paper drawer into the machine.
\- When you insert the paper drawer with set to , a confirmation screen is displayed. ▶(P. 435)
NOTE:
When loading longer paper than A4 size
\- When the extended paper drawer is inserted, its front side is not flush with the machine. Place the legal dust cover over the open part of the paper drawer.
LBP664Cdw

natural_image
Diagram of a mechanical component with orange arrows indicating assembly or force direction (no text or symbols)
LBP623Cdw / LBP622Cdw

natural_image
Diagram of a mechanical component with orange arrows indicating assembly or force direction (no text or symbols)
» Continue to ▶ Specifying Paper Size and Type in the Paper Drawer(P. 147)
IMPORTANT:
When changing the paper size or type
\- Thefactory default settings for paper size and type are and , respectively. If you load a different size or type of paper into the machine, make sure to change the settings. If you do not change the settings, the machine cannot print properly.
Printing on the Back Side of Printed Paper (Manual 2-Sided Printing)
- You can print on the back side of printed paper. Flatten any curls on the printed paper and insert it into the paper drawer or multi-purpose tray ( Loading Paper in the Multi-Purpose Tray(P. 136) ), with the side to print face up (previously printed side face down).
- When using the multi-purpose tray, load one sheet of paper each time you print.
- You can use only the paper printed with this machine.
- You cannot print on the side that has previously been printed on.
- If the printouts look faded, set the target paper source to in .
(P. 351)
- If you are using A5 size paper, the reverse side may not be printed correctly.
LINKS
Available Paper(P. 491)
Loading Paper in the Multi-Purpose Tray
3S2S-02F
When you want to print on paper that is not loaded in the paper drawer, load the paper in the multi-purpose tray. Load the paper that you usually use in the paper drawer. ▶Loading Paper in the Paper Drawer(P. 130)
For LBP664Cdw(P. 136)
For LBP623Cdw / LBP622Cdw(P. 138)
For LBP664Cdw
IMPORTANT
Make sure to insert the paper drawer
The machine only prints when the paper drawer is inserted, even if paper is loaded in the multi-purpose tray. An error message is displayed if you attempt to print without inserting the paper drawer.
NOTE
When loading A5 size paper
\- When setting the paper size, male sure the current paper orientation. ▶ Specifying Paper Size and Type in the Multi-Purpose Tray(P. 149)

text_image
Landscape orientation

text_image
Portrait orientation
1 Open the cover.
\- Hold the both sides of the cover to open it.

natural_image
Illustration of hands holding a rectangular object with an orange arrow indicating rotation (no text or symbols)
2 Pull out the paper tray.

natural_image
Pure technical line drawing of a mechanical component or bracket (no text or symbols)
3 Spread the paper guides apart.
\- Pess the lock release lever to slide the paper guides outward.

natural_image
Diagram showing a hand holding a tool with arrows indicating motion, alongside a magnified circular view of the tool tip (no text or symbols present)
4 Insert the paper into the multi-purpose tray until the paper stops.
- Load the paper with the print side face up.
• Fan the paper stack well, and tap it on a flat surface to align the edges of the paper stack.

natural_image
Pure diagram of a mechanical component with an arrow indicating direction (no text or symbols)
IMPORTANT:
Do not exceed the load limit line when loading paper
\- Male sure that the paper stack does not exceed the load limit line(). Loading too much paper can cause paper jams.

text_image
Technical diagram showing a mechanical component with an annotated circular detail and a magnified view of a detail with triangular features.
NOTE:
\- Whenloading envelopes or paper with a logo, see Loading Envelopes(P. 141) or Loading Preprinted Paper(P. 144).
5 Align the paper guides against the edges of the paper.
\- Slide the paper guides inward until they are aligned securely against the edges of the paper.

natural_image
Diagram showing a hand holding a tool with arrows indicating motion, alongside a magnified view of the tool interacting with a device (no text or symbols present)
IMPORTANT:
Align the paper guides securely against the edges of the paper
• Paper guides that are too loose or too tight can cause misfeeds or paper jams.
» Continue to ▶ Specifying Paper Size and Type in the Multi-Purpose Tray(P. 149)
Printing on the Back Side of Printed Paper (Manual 2-Sided Printing)
- You can print on the back side of printed paper. Flatten any curls on the printed paper and insert it into the paper drawer (Loading Paper in the Paper Drawer(P. 130)) or multi-purpose tray, with the side to print face up (previously printed side face down).
- When using the multi-purpose tray, load one sheet of paper each time you print.
- You can use only the paper printed with this machine.
- You cannot print on the side that has previously been printed on.
- If the printouts look faded, set the target paper source to in
(P. 351)
- If you are using A5 size paper, the reverse side may not be printed correctly.
For LBP623Cdw / LBP622Cdw
IMPORTANT
Make sure to insert the paper drawer
\- The machine only prints when the paper drawer is inserted, even if paper is loaded in the manual feed slot. An error message is displayed if you attempt to print without inserting the paper drawer.
Load only one sheet of paper at a time
• Only one sheet of paper can be loaded each time you print.
NOTE
When loading A5 size paper
\- When setting the paper size, male sure the current paper orientation. ☑ Specifying Paper Size and Type in the Multi-Purpose Tray(P. 149)
Landscape orientation

natural_image
Simple line drawing of a rectangular object with a small square base, no text or symbols present.
Portrait orientation

natural_image
Simple line drawing of a printer or printer with a blank cover (no text or symbols)
1 Spread the paper guides apart.
• Slide the paper guides outward.

natural_image
Pure diagram of a mechanical part with orange arrows indicating direction (no text or symbols)
2 Insert the paper and align the paper guides against the width of the paper.
- Load the paper with the print side face up.
- Insert the paper 3/8" to 3/4" (10 mm to 20 mm) into the manual feed slot, and then slide the paper guides inward until they are aligned securely against the edges of the paper.

natural_image
Pure diagram of a printer with paper and arrow indicators, no text or symbols present
IMPORTANT:
Align the paper guides securely against the edges of the paper
• Paper guides that are too loose or too tight can cause misfeeds or paper jams.
3 Insert the paper slowly into the manual feed slot until it reaches the back of the slot.
• The paper is pulled slightly into the machine after it reaches the back of the slot.

natural_image
Illustration of hands inserting a card into a device (no text or symbols visible)
IMPORTANT:
\- 6 ensure that the paper is loaded squarely, hold it with both hands until the pull-in operation is complete.
NOTE:
\- Whenloading envelopes or paper with a logo, see Loading Envelopes(P. 141) or Loading Preprinted Paper(P. 144).
» Continue to ▶ Specifying Paper Size and Type in the Multi-Purpose Tray(P. 149)
Printing on the Back Side of Printed Paper (Manual 2-Sided Printing)
- You can print on the back side of printed paper. Flatten any curls on the printed paper and insert it into the paper drawer ( ▶Loading Paper in the Paper Drawer(P. 130) ) or manual feed slot, with the side to print face up (previously printed side face down).
- You can use only the paper printed with this machine.
- You cannot print on the side that has previously been printed on.
- If the printouts look faded, set the target paper source to in
(P. 351)
- If you are using A5 size paper, the reverse side may not be printed correctly.
LINKS
Available Paper(P. 491)
Loading Envelopes
3S2S-02H
Make sure to flatten any curls on envelopes before loading them. Also pay attention to the orientation of envelopes and which side is face up.
Before Loading Envelopes(P. 141)
In the Paper Drawer(P. 142)
In the Multi-Purpose Tray(P. 142)
NOTE
\- This section describes how to load envelopes in the orientation you want, as well as procedures that you need to complete before loading envelopes. For a description of the general procedure for loading envelopes in the paper drawer or multi-purpose tray, see ▶Loading Paper in the Paper Drawer(P. 130) or ▶Loading Paper in the Multi-Purpose Tray(P. 136).
Before Loading Envelopes
Follow the procedure below to prepare the envelopes before loading.
NOTE
\- On the LBP623Cdw / LBP622Cdwonly one envelope at a time can be loaded in the manual feed slot. Follow steps 1 to 3 in the procedure below to prepare the envelope for loading.
1 Close the flap of each envelope.

natural_image
Pure geometric diagram of a folded envelope with an arrow indicating direction (no text or symbols)
2 Flatten them to release any remaining air, and make sure that the edges are pressed tightly.

natural_image
Illustration of two hands pressing down on a rectangular block with orange arrows indicating force or motion (no text or symbols)
3 Loosen any stiff corners of the envelopes and flatten any curls.

natural_image
Illustration of two hands holding a flat, layered object (no text or symbols)
4 Align the edges of the envelopes on a flat surface.

natural_image
Illustration of hands holding a rectangular object with an orange arrow indicating downward motion (no text or symbols)
In the Paper Drawer
Load the envelopes Monarch, COM10, DL, or ISO-C5 in portrait orientation (with the long edges on either side), with the non-glued side (front side) face up. You cannot print on the reverse side of envelopes.
NOTE
\- Load the envelopes so that the edge with the flap is toward the left side as shown in the illustration.

text_image
Close the flap and load
the envelope.
In the Multi-Purpose Tray
Load the envelopes Monarch, COM10, DL, or ISO-C5 in portrait orientation (with the short edge toward the machine), with the non-glued side (front side) face up. You cannot print on the reverse side of envelopes.
NOTE
\- Load the envelopes so that the edge with the flap is toward the left side as shown in the illustration.
Basic Operations

text_image
Close the flap and load
the envelope.

text_image
Close the flap and load
the envelope.
Loading Preprinted Paper
3S2S-02J
When you use paper that has been preprinted with a logo, pay attention to the orientation of the paper when loading. Load the paper properly so that printing is performed on the correct side of the paper with a logo.

text_image
ABC + → ABC
Making 1-Sided Printouts on Paper with Logos(P. 144)
Making 2-Sided Printouts on Paper with Logos(P. 144)
NOTE
\- This section mainly describes how to load preprinted paper with the proper facing and orientation. For a description of the general procedure for loading paper in the paper drawer or multi-purpose tray, see Loading Paper in the Paper Drawer(P. 130) or Loading Paper in the Multi-Purpose Tray(P. 136).
Making 1-Sided Printouts on Paper with Logos
Load the paper with the logo side (the side to print the document) face up.
Printing on Paper with Logos in Portrait Orientation

flowchart
graph LR
    A["Preprinted Paper ABC"] --> B["Document"]
    B --> C["Print Result ABC"]
    C --> D["Loading Orientation ABC"]
Printing on Paper with Logos in Landscape Orientation

flowchart
graph LR
    A["Preprinted Paper"] --> B["Document"]
    B --> C["Print Result"]
    C --> D["Loading Orientation"]
Making 2-Sided Printouts on Paper with Logos
Load the paper with the front logo side (the side to print the first page of the document) face down.
Printing on Paper with Logos in Portrait Orientation

flowchart
graph LR
    A["Preprinted Paper ABC"] --> B["Document (First Page)"]
    B --> C["Document (Second Page)"]
    C --> D["Print Result ABC"]
    D --> E["Loading Orientation VBC ★★★★ ★ ★ ★ ★ ★ ★ ★ ★ ★ ★ ★ ★ ★ ★ ★ ★ ★ ★ ★ ★ ★ ★ ★ ★ ★ ★ ★ ★ ★ ★ ★ ★ ★ ★ ★ ★ ★ ★ ★ ★ ★ ★ ★ ★ ★ ★ ★ ★ ★ ★ ★ ★ ★ ★ ★ ★ ★ ★ ★ ★ ★ ★ ★ ★ ★ ★ ★ ★ ★ ★ ★ ★ ★ ★ ★ ★ ★ ★ ★ ★ ★ ★ ★ ★ ★ ★ ★ ★ ★ ★ ★ ★ ★ ★ ★ ★ ★ ★ ★ ★ ●"]
Printing on Paper with Logos in Landscape Orientation

flowchart
graph LR
    A["Preprinted Paper ABC"] --> B["Document (First Page)"]
    B --> C["Document (Second Page)"]
    C --> D["Print Result ABC"]
    D --> E["Loading Orientation"]
NOTE
The setting
\- When you print on preprinted paper, you need to change the facing of the paper to load each time you perform 1-sided and 2-sided printing. However, if is set to , the facing that you use for loading preprinted paper for 2-sided printing (logo side face down) can also be used for 1-sided printing. This setting is especially useful if you frequently perform both 1-sided and 2-sided printing. ▶(P. 367)
Specifying Paper Size and Type
3S2S-02K
You must specify the paper size and type settings to match the paper that is loaded. Make sure to change the paper settings when you load the paper that is different from the previously loaded paper.
Specifying Paper Size and Type in the Paper Drawer(P. 147)
Specifying Paper Size and Type in the Multi-Purpose Tray(P. 149)
Registering Default Paper Settings for the Multi-Purpose Tray(P. 152)
Registering a Custom Paper Size(P. 155)
Limiting the Paper Sizes Displayed(P. 157)
Automatically Selecting an Appropriate Paper Source for Each Function(P. 158)
IMPORTANT
\- If the setting does not match the size and type of loaded paper, a paper jam or printing error may occur.
Specifying Paper Size and Type in the Paper Drawer
3S2S-02L
1 Select in the Home screen. ▶Home Screen(P. 110)
2 Select the target paper drawer.
\- When the optional cassette feeding module is installed, its paper drawer is also displayed.
Touch panel model

text_image
Paper Settings
Free Size File
LTK/Plan 2
Register Custom Paper
Select Frequenith Used Paper Sizes
Black and white LCD model

text_image
Paper Settings
Multi-Purpose Tray
Drawer 1
Register Custom Paper
Select Frequently Used Pap
3 Select the paper size.
• If the loaded paper size is not displayed, select .

text_image
Paper Size [Frequently Used Sizes]
Custom
Free Size
LTR
TGL
STMT
EXEC
Other Sizes
■When loading custom size paper (Touch panel model)
1 Select .
2 Specify the length of the side and side.
\- Select or , and enter the length of each side using <+>/<- , with 1/2 to move the cursor between the digits for inputting whole numbers and fractions.

text_image
Custom Size
X 718
(05_718.0.1)
Y 718
(05_718.14)
S1
App
NOTE:
\- If you egister the paper size you use frequently on buttons to , you can call them up with one touch. ▶Registering a Custom Paper Size(P. 155)
3 Select .
NOTE:
When loading A5 size paper
\- In the landscape orientation, select . In the portrait orientation, select .
Landscape orientation

natural_image
Pure architectural line drawing of a rectangular structure with no text or symbols
Portrait orientation

natural_image
Pure architectural line drawing of a rectangular structure with no text or symbols
About
\- If you frequently need to change the paper to be loaded, set to ; this will reduce the number of steps required to change the setting each time. You can also display an error message when the setting in the printer driver is significantly different from the size of the loaded paper. ▶(P. 370)
4 Select the paper type.

text_image
Paper Type
Pla3 (20 lb Bond-21 lb Bond)
Pla3 (22 lb Bond-24 lb Bond)
Pla4 (25 lb Bond-28 lb Bond)
Recycled 1 (17 lb Bond-19 lb Bond)
Recycled 2 (28 lb Bond-27 lb Bond)
Color (17 lb Bond-19 lb Bond)
NOTE:
About
- If you frequently need to change the paper to be loaded, set to ; this will reduce the number of steps required to change the setting each time. However, take note that this setting lets the machine perform printing even if there is mismatch between the paper type setting in the printer driver and the paper type actually loaded in the machine.
- When the paper type setting in the printer driver is [Auto], the machine operates the same way as when the paper type is [Plain 1].
LINKS
Loading Paper in the Paper Drawer(P. 130)
Limiting the Paper Sizes Displayed(P. 157)
Available Paper(P. 491)
(P. 435)
Specifying Paper Size and Type in the Multi-Purpose Tray
3S2S-02R
The screen shown here is displayed when paper is loaded in the multi-purpose tray. Follow the on-screen instructions to specify settings that match the size and type of the loaded paper.

text_image
Paper Size (Frequently Used Sizes)
Custom
Free Size
LTR
IGL
STMT
EXEC
Other Sizes
NOTE
If the screen shown above is not displayed when paper is loaded
\- If you always load the same paper in the multi-purpose tray, you can skip the paper setting operations by registering the paper size and type as the default setting. When the default setting is registered, however, the screen shown above is not displayed. To display the screen, select (▶ Registering Default Paper Settings for the Multi-Purpose Tray(P. 152)).
1 Select the paper size.
\- If the loaded paper size is not displayed, select .

text_image
Paper Size (Frequently Used Sizes)
Custom
Free Size
LTR
IGL
STMT
EXEC
Other Sizes
■When loading custom size paper
1 Select .
2 Specify the length of the side and side.
Touch panel model
\- Select or , and enter the length of each side using <+>/<->, with 📁/ 📁 move the cursor between the digits for inputting whole numbers and fractions.

text_image
Custom Size
X 0/0
(5-14)
Y 05_0/0
(5-14)
S1
Apply
NOTE:
\- If you egister the paper size you use frequently on buttons to , you can call them up with one touch. ▶Registering a Custom Paper Size(P. 155)
Black and white LCD model
\- Execute the following steps in sequence: enter the length of the side using ▲, with ◀/ ▶ to move the cursor between the digits for inputting whole numbers and fractions ▶ OK enter the length of the side ▶ OK

text_image
Specify Size
X: 0 "
Y: 0 "
Set Length for X
5_1/4 "
(3-8_1/2)
3 Select .
NOTE:
When loading A5 size paper
\- In the landscape orientation, select . In the portrait orientation, select .
Example for LBP664Cdw:
Landscape orientation

natural_image
Line drawing of a mechanical component with a rectangular base and housing (no text or symbols)
Portrait orientation

natural_image
Pure technical line drawing of a mechanical component or bracket (no text or symbols)
About
\- If you frequently need to change the paper to be loaded, set to ; this will reduce the number of steps required to change the setting each time. You can also display an error message when the setting in the printer driver is significantly different from the size of the loaded paper. ▶(P. 370)
2 Select the paper type.

text_image
Paper Type
Free
Plan 1 (17 lb Bond-19 lb Bond)
Plan 2 (20 lb Bond-21 lb Bond)
Plan 3 (22 lb Bond-24 lb Bond)
Plan 4 (25 lb Bond-28 lb Bond)
Recycled 1 (17 lb Bond-19 lb Bond)
NOTE:
About
\- If you frequently need to change the paper to be loaded, set to ; this will reduce the number of steps required to change the setting each time. However, take note that this setting lets the machine perform printing even if there is mismatch between the paper type setting in the printer driver and the paper type actually loaded in the machine.
Basic Operations
\- When the paper type setting in the printer driver is [Auto], the machine operates the same way as when the paper type is [Plain 1].
LINKS
Loading Paper in the Multi-Purpose Tray(P. 136)
Limiting the Paper Sizes Displayed(P. 157)
Available Paper(P. 491)
Registering Default Paper Settings for the Multi-Purpose Tray
3S2S-02S
You can register default paper settings for the multi-purpose tray. Registering default settings can save yourself the effort of having to specify the settings each time you load the same paper into the multi-purpose tray.
NOTE
\- After the default paper setting is registered, the paper setting screen is not displayed when paper is loaded, and the same setting is always used. If you load a different paper size or type without changing the paper settings, the machine may not print properly. To avoid this problem, select in step 3, and then load the paper.
1 Select in the Home screen. ▶Home Screen(P. 110)
2 Select multi-purpose tray.
Touch panel model

text_image
Paper Settings
Free Sortfree
LTR1Page 2
Register Custom Paper
Select Frequente Used Paper Sizes
Black and white LCD model

text_image
Paper Settings
Multi-Purpose Tray
Drawer 1
Register Custom Paper
Select Frequently Used Pap
3 Select the paper size.
• If the loaded paper size is not displayed, select .

text_image
Paper Size [Frequently Used Sizes]
Specify When Loading Paper
Custom
Free Size
LTR
IGL
START
Other Sizes
■Registering a custom paper size
1 Select .
2 Specify the length of the side and side.
Touch panel model
\- Select or , and enter the length of each side using <+>/<->, with 📁/ 📅 move the cursor between the digits for inputting whole numbers and fractions.

text_image
Custom Size
X
Y
Z_010
(04_13)
Y
-05_840
(5-14)
S1
+
-
Apple
NOTE:
\- If you register the paper size you use frequently on buttons to , you can call them up with one touch. ▶Registering a Custom Paper Size(P. 155)
Black and white LCD model
\- Execute the following steps in sequence: enter the length of the side using ▲, when ◀/ ▶ to move the cursor between the digits for inputting whole numbers and
fractions ▶ OK:Y> enter the length of the side ▶ OK

text_image
Specify size
X: 0 "
Y: 0 "
Set Length for x
5_1/4 "
(3-8_1/2)
3 Select .
NOTE:
When loading A5 size paper
\- In the landscape orientation, select . In the portrait orientation, select .
Example for LBP664Cdw:
Landscape orientation

natural_image
Line drawing of a printer holder with no text or symbols
Portrait orientation

natural_image
Pure technical line drawing of a mechanical component or bracket (no text or symbols)
About
\- If you frequently need to change the paper to be loaded, set to ; this will reduce the number of steps required to change the setting each time. You can also display an error message when the setting in the printer driver is significantly different from the size of the loaded paper. ▶(P. 370)
4 Select the paper type.

text_image
Paper Type
Plan 2 (20 lb Bond 21 lb Bond)
Plan 3 (22 lb Bond 24 lb Bond)
Plan 4 (25 lb Bond 28 lb Bond)
Recycled 1 (17 lb Bond-19 lb Bond)
Recycled 2 (28 lb Bond 21 lb Bond)
Color (57 lb Bond-19 lb Bond)
NOTE:
Basic Operations
About
\- If you frequently need to change the paper to be loaded, set to ; this will reduce the number of steps required to change the setting each time. However, take note that this setting lets the machine perform printing even if there is mismatch between the paper type setting in the printer driver and the paper type actually loaded in the machine.
\- When the paper type setting in the printer driver is [Auto], the machine operates the same way as when the paper type is [Plain 1].
LINKS
Loading Paper in the Multi-Purpose Tray(P. 136)
Limiting the Paper Sizes Displayed(P. 157)
Available Paper(P. 491)
Registering a Custom Paper Size
3S2S-02U
You can register up to three frequently used custom paper sizes.
1 Select in the Home screen. ▶Home Screen(P. 110)
2 Select .
3 Select the registration number.
\- On the black and white LCD model, if you have selected the registered number, continue on to select .
NOTE:
Deleting a setting
\- Select the registered number, and then select ▶.
4 Specify the length of the side and side.
■ Touch panel model
\- Select or , and enter the length of each side using <+>/<- , with / to move the cursor between the digits for inputting whole numbers and fractions.

text_image
S1
E_010
(04_12)
Y_05_80
(0-14)
+
-
Delete
Name
Apply
■ Black and white LCD model
\- Execute the following steps in sequence: ▶ enter the length of the side using ▲, with / to move the cursor between the digits for inputting whole numbers and fractions ▶ ▶ enter the length of the side ▶OK

text_image
Specify Size
X: 0 "
Y: 0 "
Set Length for X
5_1/4 "
(3-8_1/2)
NOTE:
Changing the display name of a registration number (Touch panel model)
\- Select , enter the display name, and then select .
5 Select .
6 On the black and white LCD model, continue on to select the paper type.

text_image
Paper Type
Plain 2 (19 lb Bond-21)
Plain 3 (22 lb Bond-24)
Plain 4 (25 lb Bond-28)
Recycled 1 (17 lb Bond-1)
NOTE:
About
- If you frequently need to change the paper to be loaded, set to ; this will reduce the number of steps required to change the setting each time. However, take note that this setting lets the machine perform printing even if there is mismatch between the paper type setting in the printer driver and the paper type actually loaded in the machine.
- When the paper type setting in the printer driver is [Auto], the machine operates the same way as when the paper type is [Plain 1].
Setting to the registered custom size
■ Touch panel model
The paper sizes that are registered in the procedure above can be called when is selected on the paper size selection screen for the paper drawer or multi-purpose tray.

text_image
Custom Size
X: 0.00
(0.0_1.0)
Y: 0.00
(0.14)
S3 S2 S3
Apply
■ Black and white LCD model
The paper sizes that are registered in the procedure above are displayed on the paper size selection screen for the paper drawer or multi-purpose tray.
Example for multi-purpose tray:

text_image
Paper Size(Freq. Used)
Specify When Loading Pap
1. 5 1/4 x 10 1/4"
Custom
Free Size
LINKS
Loading Paper in the Paper Drawer(P. 130)
Loading Paper in the Multi-Purpose Tray(P. 136)
Limiting the Paper Sizes Displayed
3S2S-02W
You can ensure that only frequently used paper sizes are shown in the screen for selecting the paper size setting.
1 Select in the Home screen. ▶Home Screen(P. 110)
2 Select .
3 Select the paper source you want to limit the paper sizes to be displayed for.
\- When the optional cassette feeding module is installed, its paper drawer is also displayed.

text_image
Select Frequently Used Paper Sizes
Multi Purpose Tray
Excess 1
4 Clear the check boxes for paper sizes you do not want displayed.
\- Ensue that only the check boxes for frequently used paper sizes are selected.

text_image
Drawer 1
✓ Custom
✓ Free Size
✓ LTR
LGA
STMT
EXEC
Add
NOTE:
\- Papersizes that are not selected can be viewed by selecting in the paper size setting selection screen.
5 Select .
LINKS
Specifying Paper Size and Type in the Paper Drawer(P. 147)
Specifying Paper Size and Type in the Multi-Purpose Tray(P. 149)
Registering Default Paper Settings for the Multi-Purpose Tray(P. 152)
Automatically Selecting an Appropriate Paper Source for Each Function
3S2S-02X
Enable or disable the automatic paper source selection feature for each paper source. If this feature is set to , the machine automatically selects a paper source that is loaded with paper of the appropriate size for each print job. Also, when the paper in the selected paper source runs out, this feature enables continuous printing by switching from that paper source to another that is loaded with the same paper size.
1 Select in the Home screen. ▶Home Screen(P. 110)
2 Select ▶ .
3 Select /.
4 Select the target function.
\- When the taget function is report/list printing or memory media print, select .

text_image
Paper Source Auto Selection
Printer
Receive
Other
5 For each paper source to which you want to apply the automatic paper source selection feature, specify .
\- When the optional cassette feeding module is installed, its paper drawer is also displayed.

text_image
Printer
Multi-Purpose Tray
Off
On
Staver 1
Off
On
Apply
■Touch panel model
For each target paper source, select .
■Black and white LCD model
Select the target paper source ▶ .
NOTE:
\- Alwaysspecify for at least one of the paper drawers. If you select for all the drawers, then you cannot finish the setting procedure.
6 Select .
Customizing the Display
3S2S-02Y
In order to make the Home screen easier to use, you can customize it.

natural_image
Illustration of a hand interacting with a touchscreen device, featuring a wrench icon and speech bubble (no text or symbols)
Customizing the Home Screen
You can rearrange the displayed items and customize the screen to make it easier to select functions. Customizing the Home Screen(P. 161)

text_image
Home
Menu
Paper Settings
Home Screen Settings
Memory Media Print
Print Template
Secure Print
Check Counter
Status Monitor
Customizing the Home Screen
3S2S-030
You can change the item display order to make it easier to access the Home screen, and customize the Home screen.
Changing the Arrangement of Buttons (Touch Panel Model)(P. 161)
Changing the Item Display Order (Black and White LCD Model)(P. 162)
To make the buttons easier to use, you can rearrange the buttons however you like. You can also insert a blank (space) instead of a button to make it easier to view the Home screen.
1 Select in the Home screen. ▶Home Screen(P. 110)
\- If the login screen appears, enter the correct ID and PIN. ▶ Logging in to the Machine(P. 127)
2 Select .
3 Select the button to move.
\- The selected button is highlighted. Tap the selected button again to deselect it.

text_image
Set Display Order
Mailbox
Media Print
Secure Print
Menu
Paper Settings
Mobile Portal
Home Screen
Settings
Print Template
Standby Slide
Insert Blank
Get Blank
Move Left
Move Right
Apply
4 Select or .
• The button moves as many times as you tapped.
- A long touch on or moves the selected button continuously.
■Inserting a blank
- When is selected, a blank is inserted on the left side of the selected button.
- If the button at the end is selected, a blank is inserted even if is selected.
NOTE:
Deleting a blank
\- Select the blank to be deleted, and select .
5 Select .
Changing the Item Display Order (Black and White LCD Model)
To make the buttons easier to use, you can freely change the item display order.
1 Select in the Home screen. ▶Home Screen(P. 110)
2 Use ▲ to select the item to be moved, and press . OK

text_image
Select Button to Move
Memory Media Print
Secure Print
Menu
Paper Settings
3 Use ▲ to move to the target position, and press . OK

text_image
Move with Up/Down Keys
Menu
Memory Media Print
Secure Print
Paper Settings
4 When the buttons are rearranged in the way you want, press 📋.
LINKS
Basic Operation(P. 118)
Changing the Default Settings for Functions
3S2S-031
The default settings are the settings that are displayed when you turn ON the machine. If you change these default settings to match the operations that you perform frequently, you can eliminate the need to specify the same settings every time you perform an action.
For information about changeable setting items, see (P. 419) .

Select the setting Change the default value of the selected item
NOTE
\- If you select on each setting screen, you can restore the default settings.
LINKS
▶ Printing from a USB Memory Device (Memory Media Print)(P. 184)
The machine produces sounds in a variety of situations, such as when a paper jam or error occurs. You can set the volume of each of these sounds individually.
1 Displaying the screen.
■Touch panel model
Press ( ).
■Black and white LCD model
Select .
2 Select a setting.
Setting Description Action ound each time a key on the operation panel or button on the display is pressed Select (produce a tone) or(not produce a tone). produced when an invalid key operation is performed, such as when you enter a number outside the valid setting range Sound produced when a toner cartridge is almost empty modelSound telling that a trouble has occurred on the machine, such as a paper jam or incorrect operationBlack and white LCD modelSound telling that a trouble has occurred on the machine, such as a paper jam, incorrect operation, or press of an inoperable key sed when an operation such as printing is complete produced when the machine enters or exits sleep mode
Entering Sleep Mode
3S2S-033
The sleep mode function reduces the amount of power consumed by the machine by disabling power flow to the operation panel. If no operations will be performed on the machine for a while, such as during a lunch break, you can save power simply by pressing 📄 on the operation panel.

natural_image
Digital camera interface showing a blank screen with control buttons and navigation icons (no readable text or symbols)
NOTE
When in sleep mode
\- When the machine enters sleep mode, lights up yellow green.
Situations in which the machine does not enter sleep mode
- When the machine is in operation
- When the Data indicator is lit up or blinking
- When the machine is performing an operation such as adjustment or cleaning
- When a paper jam occurs
- When the menu screen is displayed
- When the SSID/network key screen for Direct Connection is displayed
- When settings are being imported or exported
\- When an error message is displayed on the screen (There are some exceptions. The machine sometimes enters sleep mode when an error message is displayed.)
Changing the Auto Sleep Time Value
Auto Sleep Time is a function that automatically puts the machine into the sleep mode if it remains idle for a specified length of time. We recommend using the factory default settings (◀(P. 316) ) to reduce power usage. If you want to change the amount of time that elapses before the machine enters the auto sleep mode, perform the procedure below.

Set the amount of time that elapses before the machine automatically enters sleep mode ▶ (OK)
Changing the Sleep Mode Setting to the Specified Time
You can configure a setting so that the machine is placed into the sleep mode at the specified time. You can also configure a setting so that the sleep mode is released at the specified time.
Touch panel model

Select or Select in