
Stereo VideoMic - Microphone RODE - Free user manual and instructions
Find the device manual for free Stereo VideoMic RODE in PDF.


User questions about Stereo VideoMic RODE
0 question about this device. Answer the ones you know or ask your own.
Ask a new question about this device
Download the instructions for your Microphone in PDF format for free! Find your manual Stereo VideoMic - RODE and take your electronic device back in hand. On this page are published all the documents necessary for the use of your device. Stereo VideoMic by RODE.
USER MANUAL Stereo VideoMic RODE
natural_image
Close-up of a black handheld device with mesh grille and adjustable handle (no visible text or symbols)www.rodemic.com
Introduction
Thank you for investing in the RODE VideoMic (SVM).
Those of you who are first time RODE customers, may be interested to know that we are one of the largest and most respected professional microphone companies in the world. Our studio microphones are the 'tone' behind some of the biggest hits of the last decade, and our award winning live performance microphones are on tour throughout the world.
The RODE SVM is a very special product born out of the success of the original VideoMic, now the world's biggest selling on camera shotgun. So why did we design the SVM? It's simple, our customers asked us to give them the same sound quality and performance they were getting from the VideoMic but in a stereo system. We listen to our customers.
This was not an easy project, but as you will soon hear, RODE have done it again! The SVM captures the true ambience of the recording space, and still offers a high level of rear rejection and low noise. You can also use the SVM as a remote mic on a stand or boom pole and have a VideoMic on the camera, or an NTG1/2 on a boom pole. By incorporating a simple mixer you can then create a very professional audio track.
Please take the time to visit www.rodemic.com and register your microphone for a full ten year warranty. While there you can view recording tips and techniques, as well as browse the comprehensive range of accessories for RODE microphones.
Peter Freedman
R∅DE Microphones
Sydney, Australia
Specifications
Acoustic Pressure Gradient
Principle:
Directional Super Cardioid (per capsule)
Pattern: (see graph)
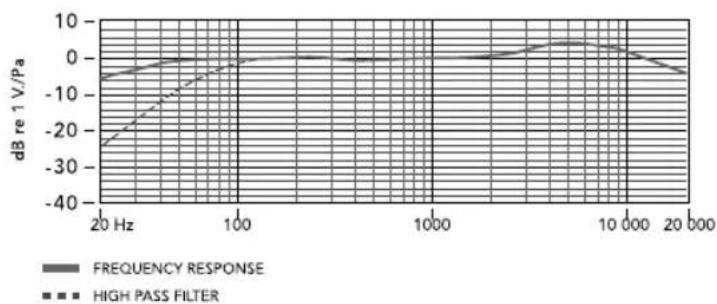
Frequency 40 Hz - 20 kHz
Range: selectable High Pass Filter (HPF)
@ 80 HZ 12 dB/octave
Output 200 Ω
Impedence:
Sensitivity: -38 dB re 1 Volt/Pascal (12.6 mV
@ 94 dB SPL) +/- 2 dB @ 1kHz
Equivalent Noise: 20 dB SPL
(A - weighted per IEC651)
Dynamic Range: 115 dB SPL
(A - weighted per IEC651)
Maximum SPL: 134dB SPL
(@ 1kHz, 1% THD into 1KΩ load)
Signal/Noise: 74 dB SPL
(A - weighted per IEC651)
Power 9V battery powered
Requirement:
Output Stereo mini jack plug - ∅3.5mm.
Connection: Right Channel - Ring
Left Channel - Tip
Net Weight: 288gm
Specifications
Frequency Response
line
| Frequency | FREQUENCY RESPONSE (dB re⁻¹ V/Pa) | HIGH PASS FILTER (dB re⁻¹ V/Pa) | | --------- | ---------------------------------- | ------------------------------- | | 20 Hz | -5 | -25 | | 100 | 0 | -10 | | 1000 | 0 | 0 | | 10000 | 5 | 5 | | 20000 | -5 | 0 |Polar Response
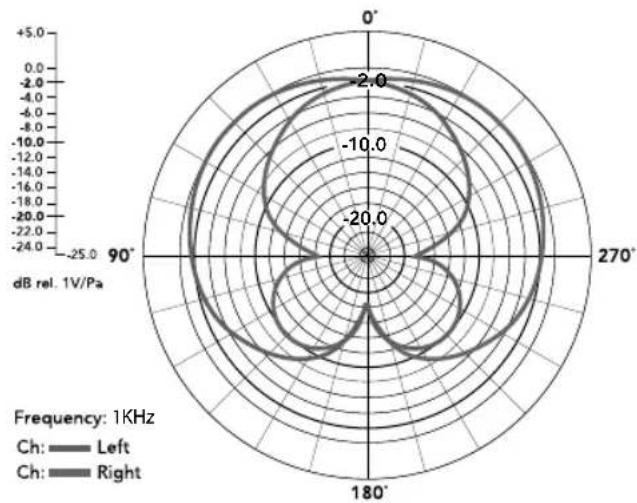
radar
| Angle | Left (dB rel. 1V/Pa) | Right (dB rel. 1V/Pa) | |-------|----------------------|----------------------| | 0° | -2.0 | -2.0 | | 90° | -2.0 | -2.0 | | 180° | -2.0 | -2.0 | | 270° | -2.0 | -2.0 |Accessories
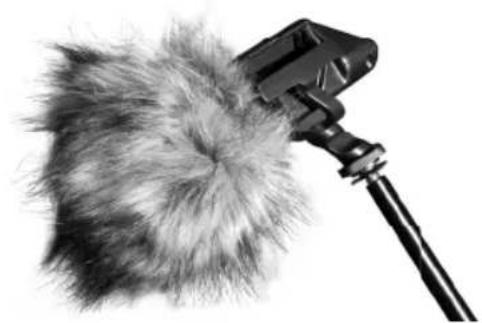
natural_image
Close-up of a black microphone attached to a fluffy white object, no text or symbols visibleDead Kitten Windscreen
Features
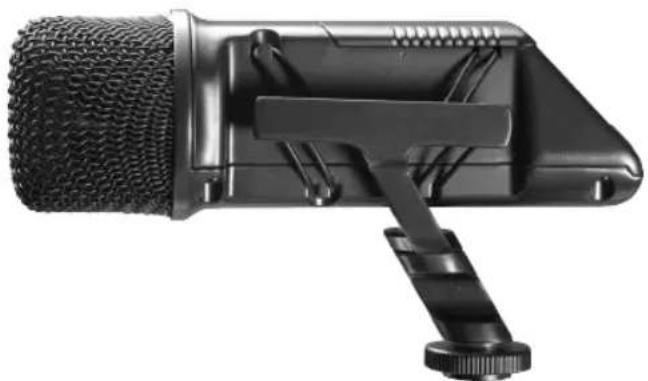
- Stereo X/Y condenser microphone
- Broadcast sound quality
• Rugged cast aluminum body - 9V battery operation
- Two step high-pass filter and PAD
- Low handling noise
• Integral camera-shoe mount - Designed & manufactured in Australia
• Full 10 year warranty*
natural_image
Close-up of a black handheld microphone with textured head and adjustable clamping lever (no text or symbols visible)*Online product registration required.
Battery Installation
- The SVM operates on a standard 9V battery. We recommend you use either Alkaline or Lithium batteries for the longest continuous operating time.
- The SVM will run continuously for over 60 hours with a good quality Alkaline battery. It is however important to understand that battery performance can vary dramatically with ambient temperature and shelf life.
- Actual operation times will vary and we suggest you always carry a spare battery. If the application is critical and where there is no opportunity to re-shoot, we suggest that you use a fresh battery every time.
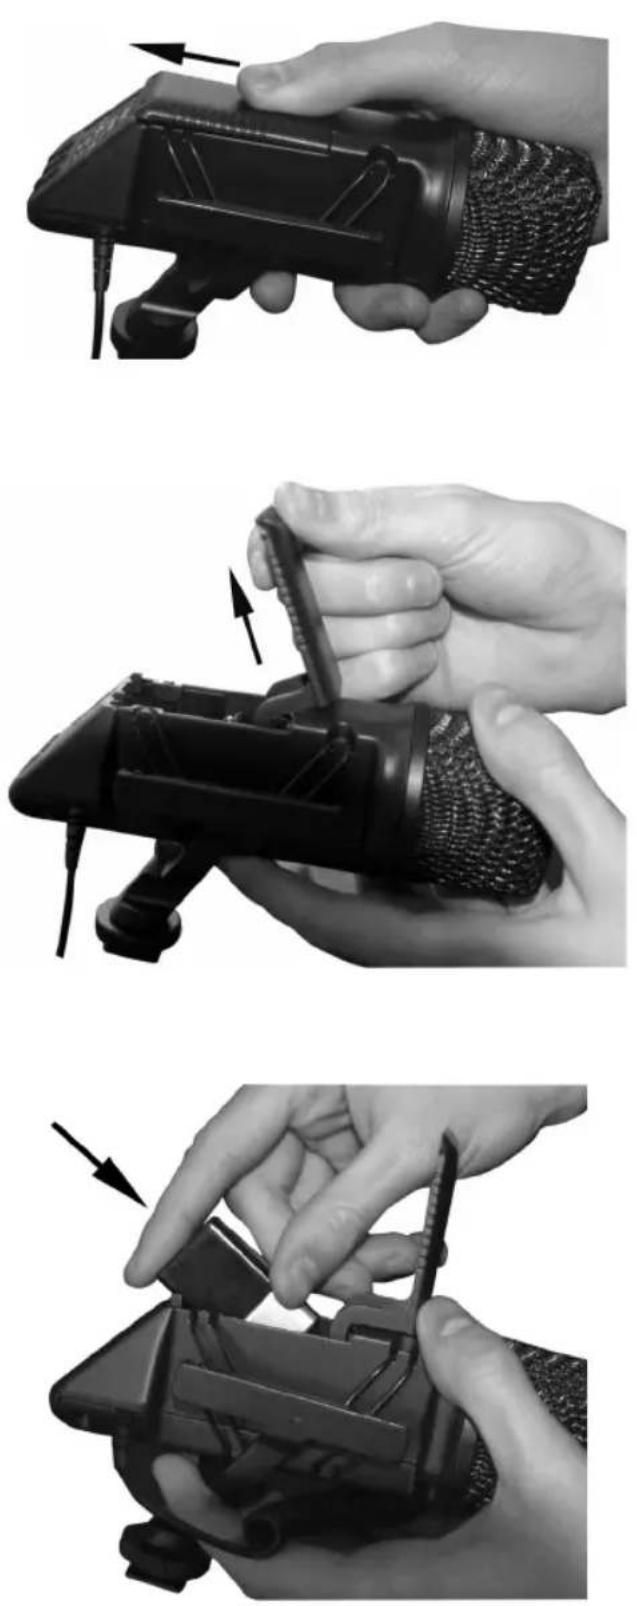
- To install the battery, slide the battery compartment cover (found at the top rear) towards the rear of the microphone and lift up. Insert the 9V battery terminal-side first, ensuring the positive (+) terminal is at the bottom.
- Once you have installed the battery, slide the cover back into position and you are ready to fasten the mic onto the camera. Do not leave the battery in-place if you are going to store the SVM for long periods. Batteries can leak and the chemicals will damage your microphone.
Mounting your SVM
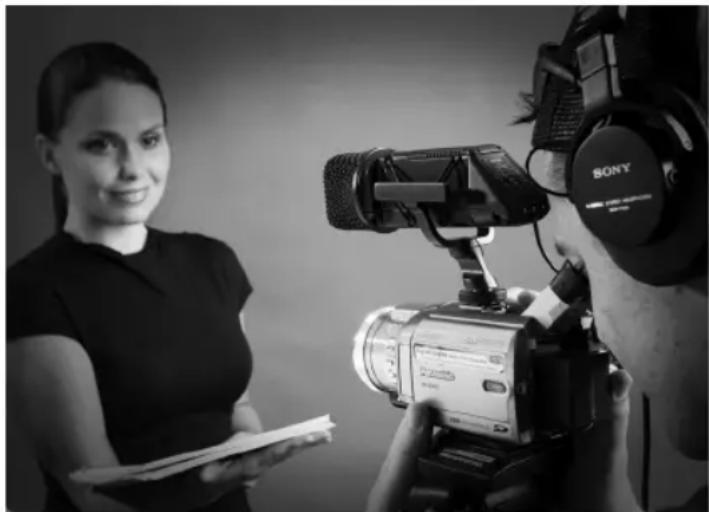
- The SVM incorporates a standard camera-shoe mount on the bottom of the microphone. Designed to reduce motor and handling noise, the shock mount has a 3/8" threaded insert for mounting on tripods and poles. You will find older models and low cost cameras produce more motor noise, which the highly sensitive SVM can pick up. If so, engage the High Pass Filter (HPF) to reduce this noise (see SVM controls).
- Before sliding the camera-shoe into place, turn the knurled tightening ring anti-clockwise which will make sliding the camera-shoe into place much easier. Now turn the knurled ring in a clockwise direction, gently tightening it so the SVM is seated firmly in place. You will notice the SVM may seem slightly loose in its mount. This is due to the shock mount system and is not a fault.
- The SVM delivers a mic level signal to the video camera via a stereo mini jack audio lead. The mini jack should be connected to the camera via the camera's "Audio-In" socket- refer to your video camera user manual.
natural_image
Black-and-white photo of a woman holding documents and a professional video camera with Sony logo (no visible text or symbols on main subject)- Now that you have the SVM securely fastened to your camera and the audio output lead connected, you can switch the mic on.
There are three switches located at the rear of the microphone:
PAD (left switch)
The PAD allows for attenuation of the microphone recording level (either 0dB or -10dB). This is useful in situations where you may be recording a loud sound source that may overload the input levels of your microphone/camera.
Power (middle switch)
This switches the microphone on. The LED above the switch indicates the power status. When first switched on the LED will flash red and then change to a constant green to indicate normal operation and good battery level. If the LED remains red this is indicating low battery level and the battery should be changed immediately. There is approximately one hour of operation time remaining following the first indication of low battery level.
High-Pass Filter (right switch)
The High-Pass Filter can be used to roll off low end frequencies (below 80Hz). This is useful in situations such as nearby traffic noise, or where the camera transmits significant motor or tape noise to the microphone.
- It is now time to set the camera's audio level. To ensure the optimum signal you will need to set the VU meter on the camera to read around "3/4" or "75%" on the sound 'peaks'. Most cameras will
Operating the SVM
allow you to access this setting through the camera menu. You should try and set the level using the sound source you will be recording, or a sound source of similar level before starting to record or you could distort the input of your camera if the level has been set too high. We suggest you read your camera manual, which should cover this topic. The SVM has been optimised for high rejection of radio frequency interference, but we suggest you keep all transmitters, mobile/cell phones, pagers etc. at least 2m away to reduce the possibility of interference ruining your recordings.
- The RODE SVM is not designed for long distance pick up. Of course you can boost the gain level on your camera and you will hear more defined sounds over a longer distance than with conventional microphones, but you will also get a lot of ambient noise and reflections making it sound hollow. For best results you need to be within 6' (2m) of a person talking. If you want very clear dialogue, you will need to have the mic positioned close to the person you are recording and use an extension mic cable. The SVM has a wide pick-up angle and polar response, so can be used to great effect for news gathering, weddings or sporting events. The SVM can be used in any situation where you want to listen to what's in the near field shot and what's at the side, or out of view.
- The best way to get optimum results with the SVM is to use it so you become more familiar with its sound and pick-up characteristics.
Operating the SVM
- The SVM is made from rugged cast aluminum, ensuring impact resistance and a longer life. However care must be taken not to get the SVM wet. Treat the mic the way you should treat your camera and you will have many years of reliable service.
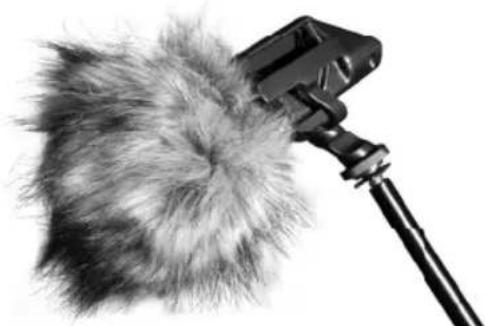
SVM Windshield
- The SVM comes with a custom designed windshield. The windshield should be left on at all times as even the slightest breeze can cause sound interference.
natural_image
Close-up of a black-and-white photo of a microphone attached to a fluffy white object, no text or symbols visible.Warranty
All RODEphones are warranted for one year from date of purchase. You can extend that to a full ten years if you register online at www.rodemic.com.
The warranty covers parts and labour that may be required to repair the microphone during the warranty period. The warranty excludes defects caused by normal wear and tear, modification, shipping damage, or failure to use the microphone as per the instruction guide.
If you experience any problem, or have any questions regarding your RODE microphone, first contact the dealer who sold it to you. If the microphone requires a factory authorised service, return will be organised by that dealer.
We have an extensive distributor/dealer network, but if you have difficulty getting the advice or assistance you require, do not hesitate to contact us directly.
R∅DE® Microphones
International
PO Box 6685
Silverwater NSW 2128 Australia
Ph: +61 2 9648 5855
Fax: +61 2 9648 2455
USA
P.O. Box 4189
Santa Barbara, CA 93140-4189
Ph: 805 566 7777
Fax: 805 566 0071
Technical Support
For information and technical support questions contact: support@rodemic.com
In the United States and Puerto Rico, contact
usasupport@rodemic.com or call 425 398-1910
In Australia, contact ozsupport@rodemic.com or call (02) 9648 5855
Anywhere except Australia, the United States and Puerto Rico, contact support@rodemic.com or call +61 2 9648 5855