
H2next - Dictaphone ZOOM - Free user manual and instructions
Find the device manual for free H2next ZOOM in PDF.


| Product Type | Digital Handy Recorder |
| Dimensions | 67.6 × 113.8 × 42.7 mm |
| Weight | 130 g (without batteries) |
| Power Supply | 2 AA batteries (alkaline or NiMH) or AC adapter (AD-17, sold separately) |
| Battery Life | Up to 20 hours (44.1kHz/16bit WAV recording) |
| Recording Media | SD/SDHC cards (16MB-32GB) and built-in memory (short recording) |
| Recording Modes | MS Stereo, XY Stereo, 2ch Surround, 4ch Surround |
| Microphone Configuration | MS (mid-side) and XY (90° stereo) arrays |
| File Formats | WAV (44.1/48/96kHz, 16/24bit) and MP3 (44.1kHz, 48-320kbps) |
| USB Interface | USB 2.0 High Speed (card reader), USB 1.0 Full Speed (audio interface) |
| Tuner | Chromatic, guitar, bass, alternate tunings with automatic string detection |
| Metronome | Adjustable tempo (40-250 BPM), patterns, pre-count |
| Built-in Speaker | 400 mW, 8Ω, mono |
| Cleaning Instructions | Use a soft cloth; do not use solvents or abrasive cleaners |
| Safety Features | Hold function, auto power-off, low battery warning |
| Included Accessories | SD card (2GB), 2 AA batteries, operation manual, WAVELAB LE CD |
| Warranty | Standard Zoom warranty; specific terms vary by region |
Frequently Asked Questions - H2next ZOOM
User questions about H2next ZOOM
0 question about this device. Answer the ones you know or ask your own.
Ask a new question about this device
Download the instructions for your Dictaphone in PDF format for free! Find your manual H2next - ZOOM and take your electronic device back in hand. On this page are published all the documents necessary for the use of your device. H2next by ZOOM.
USER MANUAL H2next ZOOM
Reproduction or duplication of this manual without permission, in whole or in part, is prohibited.
Usage and safety precautions
H2n Handy Recorder
SAFETY PRECAUTIONS
In this manual, symbols are used to highlight warnings and cautions that you must read to prevent accidents. The meanings of these symbols are as follows:

Something that could cause serious injury or death.

Something that could cause injury or damage to the equipment.
Other symbols

Prohibited actions
Warning
Operation using an AC adapter
Use only a ZOOM AD-17 (sold separately) AC adapter with this unit.
Do not use do anything that could exceed the ratings of outlets and other electrical wiring equipment. Before using the equipment in a foreign country or other region where the electrical voltage differs from that indicated on the AC adapter, always consult with a shop that carries ZOOM products beforehand and use the appropriate AC adapter.
Operation using batteries
Use 2 conventional 1.5-volt AA batteries (alkaline or nickel-metal hydride).
! Read battery warning labels carefully.
Always close the battery compartment cover when using the unit.
Alterations
Never open the case or attempt to modify the product.
Precautions
Product handling
Do not drop, bump or apply excessive force to the unit.
! Be careful not to allow foreign objects or liquids to enter the unit.
Operating environment
Do not use in extremely high or low temperatures.
Do not use near heaters, stoves and other heat sources.
Do not use in very high humidity or near splashing water.
Do not use in places with excessive vibrations.
Do not use in places with excessive dust or sand.
AC adapter handling
When disconnecting the AC adapter from an outlet, always pull the body of the adapter itself.
During lightning storms or when not using the unit for a long time, disconnect the power plug from the AC outlet.
Battery handling
! Install the batteries with the correct +/- orientation.
Use a specified battery type. Do not mix new and old batteries or different brands or types at the same time. When not using the unit for an extended period of time, remove the batteries from the unit.
If a battery leak should occur, wipe the battery compartment and the battery terminals carefully to remove all battery residue.
Connecting cables with input and output jacks
Always turn the power OFF for all equipment before connecting any cables.
Always disconnect all connection cables and the AC adapter before moving the unit.
Volume
Do not use the product at a loud volume for a long time.
Usage Precautions
Interference with other electrical equipment
In consideration of safety, the H2n has been designed to minimize the emission of electromagnetic radiation from the device and to minimize external electromagnetic interference. However, equipment that is very susceptible to interference or that emits powerful electromagnetic waves could result in interference if placed nearby. If this occurs, place the H2n and the other
device farther apart. With any type of electronic device that uses digital control, including the
H2n electromagnetic interference could cause malfunction, corrupt or destroy data and result in other unexpected trouble. Always use caution.
Cleaning
Use a soft cloth to clean the panels of the unit if they become dirty. If necessary, use a damp cloth that has been wrung out wall. Never use abrasive cleansers, wax or solvents, including alcohol, benzene and paint thinner.
Malfunction
If the unit becomes broken or malfunctions, immediately disconnect the AC adapter, turn the power OFF and disconnect other cables. Contact the store where you bought the unit or ZOOM service with the following information: product model, serial number and specific symptoms of failure or malfunction, along with your name, address and telephone number.
Copyrights
- Windows, Windows Vista, Windows XP and Windows 7 are trademarks or registered trademarks of Microsoft Corporation. - Macintosh and Mac OS are trademarks or registered trademarks of Apple Inc. - The SD and SDHC logos are trademarks. - The use of MPEG Layer-3 audio compression technology is licensed from Fraunhofer IIS and Sisvel SpA.
* All other product names, trademarks and company names in this document are the property of their respective owners.
Introduction
H2n Handy Recorder
Thank you very much for purchasing a ZOOM Handy Recorder.
The features of the H2n include the following.
- Four-channel recording captures sound in 360^
The built in microphones are divided into mid-side (MS) mics on the rear side and XY mics on the front side. This independent placement allows you to record sound coming from every direction. This unrestricted range means you can record diverse sound sources in all kinds of conditions.
- New microphone array allows control of stereo width
The MS mic includes a directional mid mic that covers the front and a bidirectional side mic that covers both sides. By controlling the amount of side mic signal, you can freely adjust the stereo width of recordings.
- Stereo recording is clear and three-dimensional
Using the XY mic, you can realize three-dimensional stereo recordings that faithfully capture a sense of depth.
- Uninterrupted long recordings possible at high-quality
Recording is possible without interruption for very long times. You can even fill an entire 32GB SDHC card in one session!
- Runs for a long time on standard batteries
You can record for up to 20 hours (44.1kHz/16bit WAV format) with one set of alkaline batteries. So, even in situations where you must rely on batteries, you can keep recording without worrying about the time.
- Use as an SD card reader and computer audio interface
The built-in USB 2.0 high-speed port allows direct connection with a computer. Use the recorder as an SD card reader with a computer to transfer recordings to your computer for use in DAW software or to burn them to CDs. You can even use the recorder as a computer audio interface at USB 1.0 speed.
- Tuner, metronome and other practice features
In addition to standard chromatic tuning, the tuner also supports seven-string guitar, five-string bass and alternate tunings. The convenient metronome can even provide a count in and the speed and pitch of playback can be adjusted, making it a useful practice companion.
Please read this manual carefully to fully understand the H2n so that you can maximize your use of its features. After reading the manual once, please keep it with the warranty in a safe place.
Contents
Usage and safety precautions 02
Introduction 04
Contents 06 Packets contents 07
Package contents 07 Part name: 08
Display 10
Preparation
Powering the recorder.... 12
Using batteries 12
Using an AC adapter (sold separately) ..... 12
Installing an SD card 13
Turning the power ON and OFF 14 Turning the power ON 14
Turning the power ON 14 Turning the power OFF 14
Taining the power off 14 Using the hold function 15
Using the hold function....15 Connecting an extorrel mix....16
Using plug-in power 16
Setting the date and time 17
Setting the battery type 18
Recording
Recording mode overview 20
Mid-side (MSI) stereo mode 20
XY stereo mode 20 3x and 4x surround mode 91
Zen and 40h surround modes ...... 21
Selecting the recording mode 22 Adjusting the S level / MS process
Adjusting the S level (M/S stored,
2ch/4ch surround modes) 22
Using MS-RAW mode (WAV format only) ... 23
Selecting where recordings are saved 23
Recording manually 24
Recording automatically 20 Pre-seciding 20
Pre-recording 28 Counting in before recording 39
Playback
Playing back recordings 30
Selecting the file to playback from a list ..... 32
Changing the playback speed 33
Loop playback of a set interval (AB REPEAT) .. 34
Changing the play mode 36
Adjusting the playback pitch
(KEY CONTROL) 38
Changing the S level (MS-RAW only) ...... 39 Mixing a tab approved file...... 10
Mixing a rich surround in Checking & Editing Files
Checking & Editing Files
Checking track marks (MIA) (5loc oxt) 42
Checking track marks (WAV files only).... 43 Changing file names (Stereo files only).... 4
Convert WAV files into MP3 files
(Stereo files only) 46
Normalizing WAV files 49
Dividing fi les (Stereo fi les only) 5
Deleting files 52
Deleting all files in a folder 53
Converting MS-RAW fi les into stereo fi les ..... 54
Converting 4ch surround files into
stereo fi les 56
Using USB
Exchanging files with a computer
(Card reader) 58
Audio interface use (MS)XY stereo and
2ch surround modes only) 60
Tuner
Using the tuner 62
Metronome
Using the metronome 64
Various settings
Reducing noise (LO CUT).... 66
Monitoring the input signal 67
Compressing/limiting the input signal 68
Automatically adjusting the input gain ..... 70
Monitoring MS-RAW signals
(IVIS stereo mode only) 71
Setting the recording format 72
Changing automatic recording settings ..... 74
Setting how it is are named
(STEREO FILES ONLY) 70
Pauding recording when pasting marks (HUA) forest only
(MAY format only)....
Changing the display backlight time 78
Adjusting the display contrast 79
Checking the software versions 80
Restoring the unit to its factory settings ..... 81
Checking the open capacity of the SD card .... 82
Formatting an SD card....83
Other functions
Updating the system software 84
Using SD cards from older H series
recorders 85
Using a remote control 86
Troubleshooting 87
Specifications 88
Package contents
Please confirm that the package contains the following items.
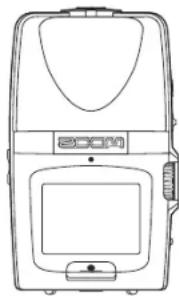
natural_image
Line drawing of a device casing with front panel and display (no text or symbols)H2n recorder

2 AA batteries
(for testing the unit)

Wave Lab LE
Installer CD

SD card
(2GB)
Operation manual
(this document)
H2n Handy Recorder
Part names
Left side Right side TopFront
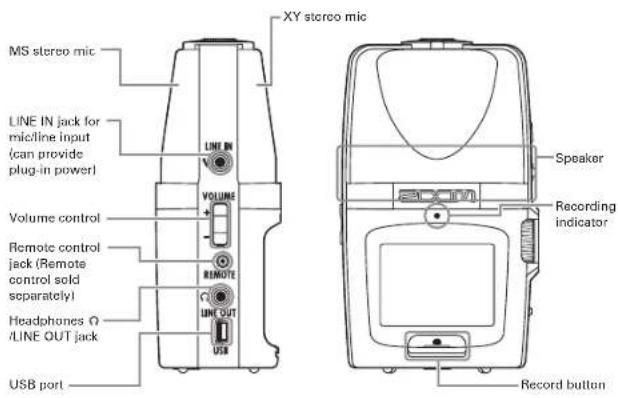
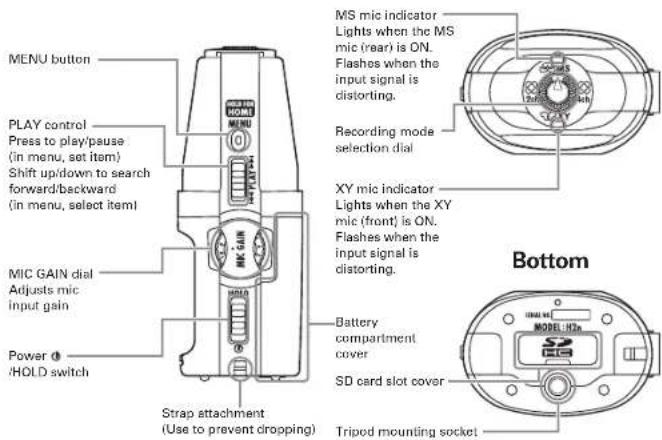
H2n Handy Recorder
Display
Home (recording) screen Playback screen
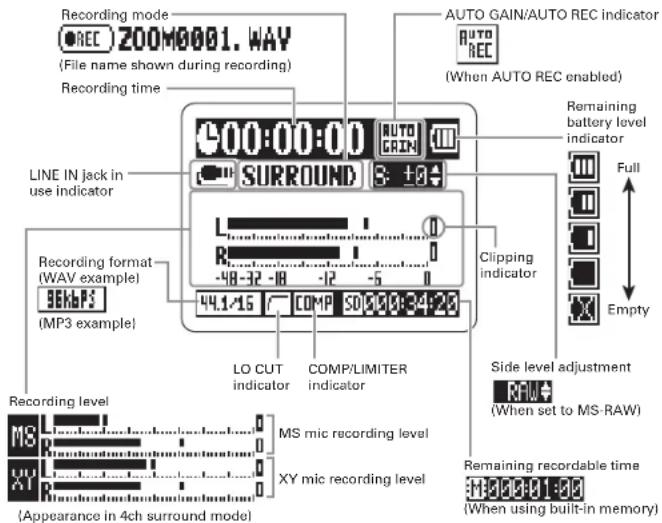
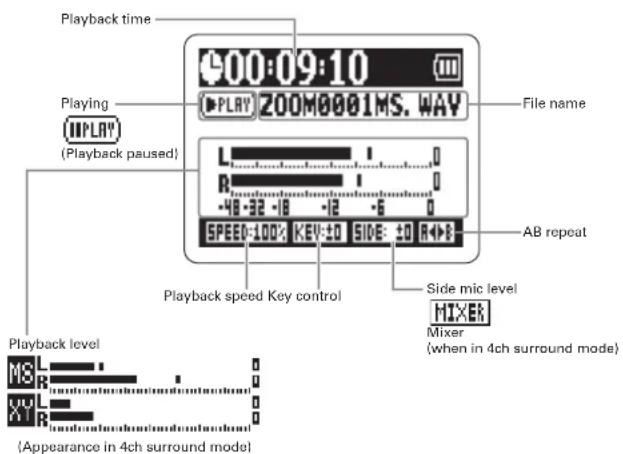
Powering the recorder
Using batteries
- Turn the power OFF, and then remove the battery cover.
- Insert batteries.
- Close the cover.
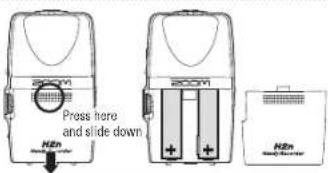
NOTE
Use alkaline or nickel-metal hydride batteries.
If the "Low battery!" warning appears, turn the power OFF
soon and put in new batteries.
Set the type of battery used. (→P.18)
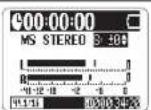
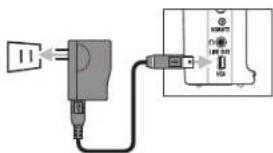
Using an AC adapter (sold separately)
- Connect the cable to the USB port.
- Plug the adapter into a power outlet.
H2n Handy Recorder
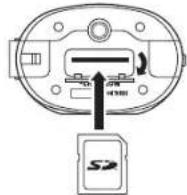
Installing an SD card
- After turning the power OFF, open the SD card slot cover.
- Insert the card into the slot.
To remove a card, push it further into the slot and then pull it out.
NOTE
Always turn the power OFF before inserting or removing an SD card. Doing so when the power is ON could cause data to be lost.
Be sure to insert the SD card correctly, using the cut-off corner illustration next to the slot as a guide.
The built-in memory will be used if no SD card is in the recorder.
Format the SD card if necessary. (▶ P.83)
HINT
Built-in memory
The built-in memory only keeps the most recent recording.
The recording format is fixed at 96kbps MP3.
- It cannot be used to record in 4ch surround or MS-RAW modes.
- Recording time is limited to 1 minute.
- Recordings saved to the built-in memory cannot be copied to an SD card or a computer.
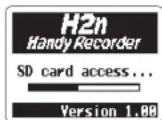
Turning the power ON and OFF
Turning the power ON Using the hold function

NOTE
If "No SD card!" appears, confirm that an SD card is correctly inserted into the recorder.
If "Card Protected" appears, S D card write protection is ON. Turn write protection OFF by sliding the "Lock" switch on the card.
If "Invalid card" appears, the card format is incorrect. Use a different card or format the card. (▶ P.83)
Turning the power OFF
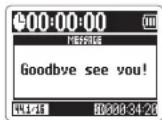
- Slide down and hold it until "Goodbye
see you!" appears on the screen.
In order to prevent accidental operation during recording, the H2n hold function that disables the use of controls other than the MIC GAIN.
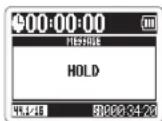
Enabling the hold function
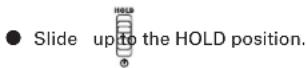
NOTE
Even when the hold function is on, the remote control (sold separately) can still be used.
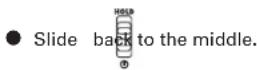
Disabling the hold function
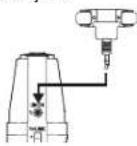
Connecting an external mic
- Connect an external mic (sold separately) to the H2n jack.
NOTE
An external mic can be used instead of the XY stereo mic. An external mic cannot be used with MS Stereo mode.
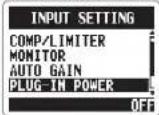
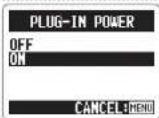
Using plug-in power
Make the following setting before connecting a mic that requires plug-in power.
-
Press . Ⓞ
-
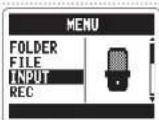
Use to select INPUT, and then
- Use to select PLUG-IN POWER,
- Use to select ON, and then
H2n Handy Recorder
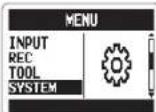
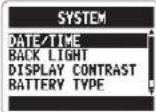
Setting the date and time
The date and time is added to recording files automatically, so set it correctly whenever the batteries are replaced.
-
Press . Ⓞ
-
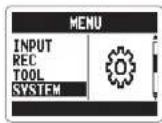
Use to select SYSTEM, and then press .
-
Use to select DATE/TIME, and then press →
-
Adjust the settings. Use Remove the cursor Press Select the item Use Exchange the value Press Confirm the setting
-
Use to select OK, and then press.
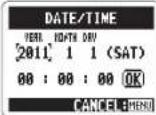

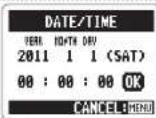
H2n Handy Recorder
Setting the battery type
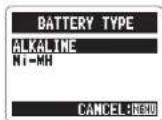
Set the battery type in order to show the remaining battery charge accurately.
-
Press . Ⓞ
-
Use to select SYSTEM, and then press
- Use to select BATTERY TYPE, and then press →
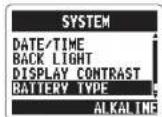
- Use to select the battery type, and then press
Recording mode overview
H2n Handy Recorder
The H2n our recording modes that can be selected according to your purposes.
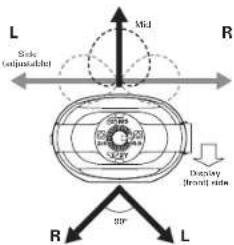
Mid-side (MS) stereo mode 🌐MS
This mode uses a mid mic to capture the sound directly ahead and a bidirectional side mic to capture sound from left and right.
The recording level of the side mic (S level) can be adjusted, allowing the stereo width to be changed. If you record with the S level set to MS-RAW, you can also adjust the S level after recording.
![L Mid R Side [front side] Display (front side)](/content/2026/05/811080/images/cf61d317c57d7872ca582ed66a0180c922ecbbb63b121c0b7cd6e3b49d5d0050.jpg)
MS mics can capture a rich stereo image, so it is ideal for recording sounds in wide and open conditions, including orchestras, live concerts and soundscapes.
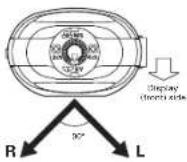
XY stereo mode 🎨 XY
This mode records in stereo with mics at 90° angles. This allows a natural, deep and accurate sound image to be captured, making it optimal for recording sources nearby, including solo performances, chamber music, interviews, live rehearsals and fi eld recordings.
2ch and 4ch surround modes


Sound can be captured in all directions using both MS and XY mics.
You can select 2ch, which mixes the signals from the MS and XY mics, or 4ch, which records the signals from the MS and XY mics separately. With 4ch surround, you can adjust the balance between the MS and XY signals after recording. The S level can be adjusted for both 2ch and 4ch recordings.
These modes are suitable for recording live rehearsals, studio sessions, business meetings and soundscapes, for example.
Selecting the recording mode
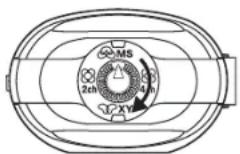
- Turn so that the triangle points to the desired mode.
NOTE
The 4ch surround mode can only be used when an SD card is in the unit. In 4ch surround mode, only WAV formats (44.1/48kHz, 16/24bit) can be used. In 4ch surround mode, two stereo files are created (MS mic recording and XY mic recording).
- Make settings for the recording mode.
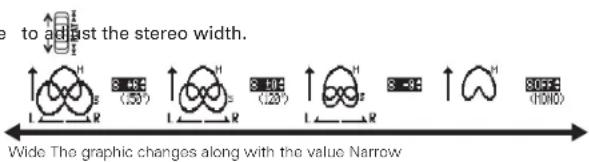
Adjusting the S level (MS stereo, 2ch/4ch surround modes)
You can adjust the stereo width (S level) before recording.
- Use to adjust the stereo width.
NOTE
Set to OFF, RAW or between -24 and +6 dB.
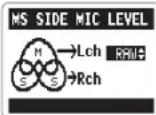
Using MS-RAW mode (WAV format only)
If you want to adjust the stereo width after recording, record using MS-RAW mode.
● Hold down until RAW appears.
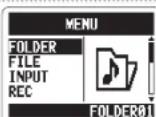
Selecting where recordings are saved
-
Press . MENU
-
Use to select FOLDER, and then press → FLU
- Use to select the folder where you want to save fi les, and then press
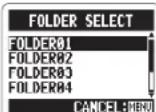
NOTE
Select from among 10 folders. There are separate sets of folders for stereo and 4ch recordings.
Recording manually
H2n Handy Recorder
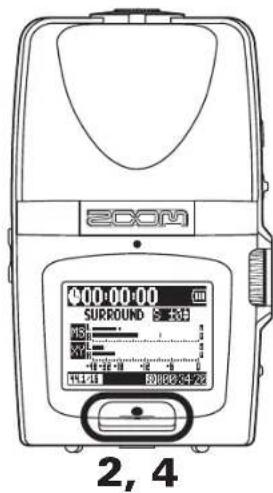
- Turn to adjust the input level.
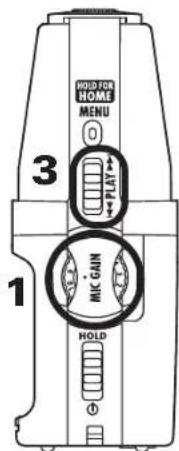
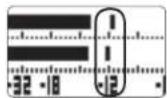
HINT
- Adjust the MIC GAIN so that the peak level stays around -12 dB.
- If an input signal is too strong, the MS/XY indicator on the top will flash immediately.
The recorder can also adjust mic gain automatically. (→ P.70) - You can change the recording format beforehand. (→ P72)
The mic can also be set to cut wind and other unwanted noise. (→ P.66)
2.
Press to start recording.
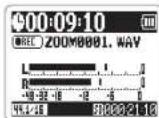
3.
Press to add a mark.
4.
Press to stop recording.
NOTE
One file can have a maximum of 99 marks.
The mic can also be set to pause immediately after adding a mark. (→ P.77)
- During recording, if the size of the file exceeds 2 GB, recording will continue in a new file that will be created automatically.
Recording automatically
The mic can be set to start and stop recording automatically in response to changes in the input level.
1
Press

2.
Use

lect REC, and then press .

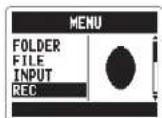
3.
Use

lect AUTO REC, and then
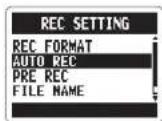
4.
Use

elect ON/OFF, and then
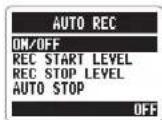
5.
Use

lect ON, and then press

NOTE
Other settings can also be made for automatic recording. (▶ P.74)
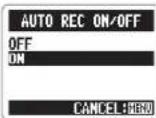
6.
After the home screen reopens, press

to put the recorder in standby.
Recording will start automatically when the input signal exceeds the REC START LEVEL.
Recording will stop automatically when the input signal becomes less than the REC STOP LEVEL.
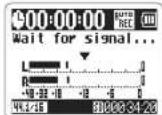
7.
Press

recording standby and
stop recording.
NOTE
Automatic recording can only be used with an SD card.
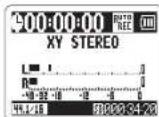
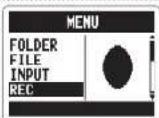
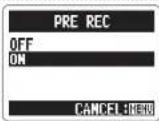
Pre-recording
When pre-recording is on, this recorder can continuously capture two seconds of sound before recording is started manually. When it is pressed, these two seconds are included at the beginning of the recording. This is useful when, for example, performances start suddenly.
1.
Press

2.
Use

3.
Use

4.
Use


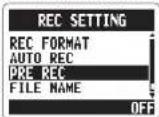
5.
Press


NOTE
PRE REC cannot be used at the same time as the metronome PRE COUNT function. Pre-recording can only be used with an SD card.
H2n Handy Recorder
Counting in before recording
The built-in metronome can play a count-in sound before recording starts. This pre-count sound is output through the LINE OUT jack.
1.
Press

2.


3.


4.


5.


and then press

6.
Pres


screen to start pre-count and recording.
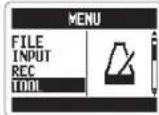
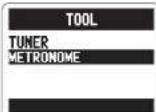
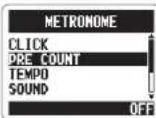
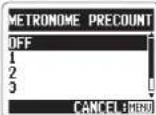
NOTE
PRE COUNT cannot be used at the same time as PRE REC.
Playing back recordings
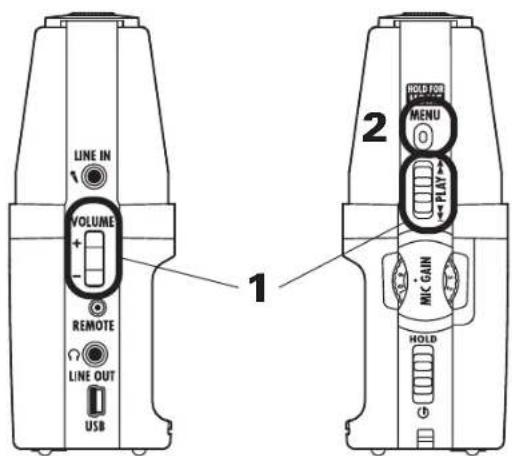
H2n Handy Recorder
You can play files in the current folder. Change the folder to play files in a different folder.
1.
Press

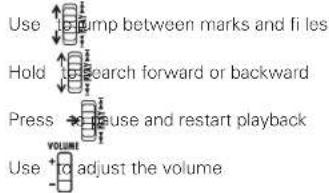
HINT
The longer you hold the PLAY control the faster it will search in that direction.
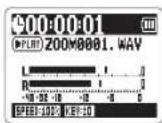
2.
Press and hold

return to the home
screen.
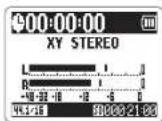
Selecting the fi le to playback from a list
You can select a file in the current folder for playback. Change the folder to select files from a different folder.
-
When the playback screen is open, press .
-
Use to select FILE LIST, and then press →
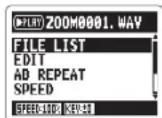
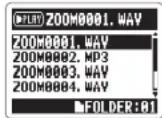
- Use to select a fi le, and then press → to start playback of that fi le.
NOTE
After a file plays once, playback will stop or continue according to the PLAY MODE setting.
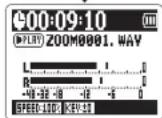
press and hold to return to the home screen.
H2n Handy Recorder
Changing the playback speed
You can change the playback speed to between 50% and 150% of normal speed.
-
When the playback screen is open, press .
-
Use to select SPEED, and then press →
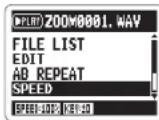
- Use to set the playback speed, and then press →
Files will be played at the set speed.
NOTE
The set value will be saved even when the power is turned OFF.
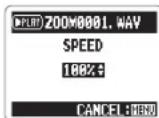
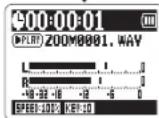
H2n Handy Recorder
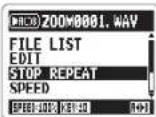
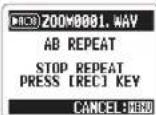
Loop playback of a set interval (AB REPEAT)
You can loop playback between two set points. Select the fi le that you want to play back fi rst.
-
When the playback screen is open, press .
-
Use to select AB REPEAT, and then press
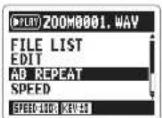
- Press at the point you want to start playback.
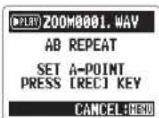
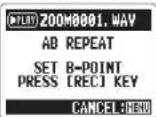
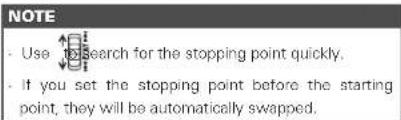
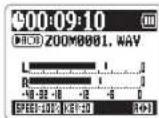
- Press at the point you want to stop playback. Loop playback between the points will start.
-
Press MENU to stop loop playback.
-
Use to select STOP REPEAT, and then press →
-
Press
H2n Handy Recorder
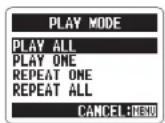
Changing the play mode
-
When the playback screen is open, press .
-
Use to select PLAY MODE, and then
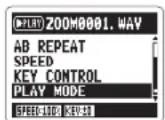
- Use to set the mode, and then
NOTE
PLAY ALL: Play all the files in the current
folder once.
PLAY ONE: Play the current file once.
REPEAT ONE: Play the current file repeatedly.
REPEAT ALL: Play all the files in the current
folder repeatedly.
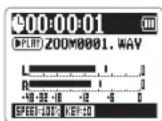
- Press MENU ⑩ start playback in the selected mode.
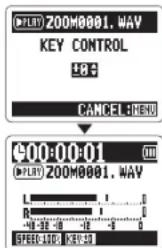
Adjusting the playback pitch (KEY CONTROL)
You can change the pitch without changing the playback speed.
-
When the playback screen is open, press . Ⓞ
-
Use to select KEY CONTROL, and then press →
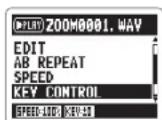
- Use to adjust the playback pitch, and then press to start playback at the adjusted pitch.
NOTE
The pitch can be adjusted by ± 6 semitones. The set value will be saved even when the power is turned OFF. KEY CONTROL cannot be used with 96kHz WAV fi les.
H2n Handy Recorder
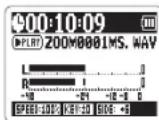
Changing the S level MS-RAW only
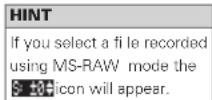
The S level (stereo width) of fi les recorded using MS-RAW mode can be changed. Select a fi le that has been recorded in MS-RAW mode fi rst.
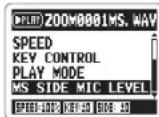
- When the playback screen is open,
press MENU
- Use to select MS SIDE MIC LEVEL, and then press →
- Use to adjust the S level, and then
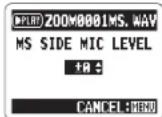
- Press to start playback with the adjusted S level.
Mixing a 4ch surround fi le
You can adjust the levels and panning of the MS and XY recordings made for 4ch surround fi les.
- Set the recorder to 4ch surround mode, select the file you want to mix, and then press →
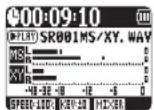
-
Press Ⓞ
-
Use to select SURROUND MIXER, and then press →
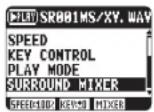
- Change the values of the parameters. Use ▲ move the cursor and change values Push ▲ select a parameter to change
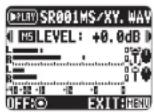
| Parameter setting ranges | Explanation | |
| MS LEVEL MUTE | -48 ~ +12 dB(0.5 dB increments) | Adjusts volume |
| XY LEVEL | ||
| MS PAN | L100 ~ CENTER ~ R100(even values only) | Adjusts left-right balance |
| XY PAN | ||
- Press to turn the mixer ON or OFF.

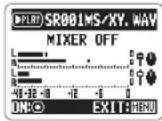
- Press twice to return to the playback screen.
Checking fi le information
You can check various types of information about the current file.
-
Press . Ⓞ
-
Use to select FILE, and then press.

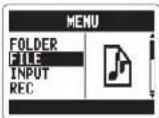
- Select the file that you want to check, and
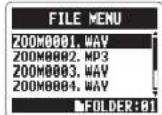
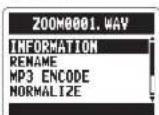
- Use to select INFORMATION, and then
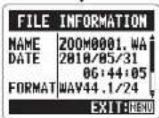
press to show information about the file.
Use to scroll through the screen to see additional information
H2n Handy Recorder
Checking track marks WAV fi les only
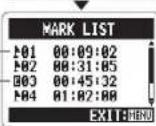
You can view a list of the marks in a WAV file.
-
Press . MENU
-
Use to select FILE, and then press .
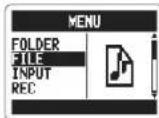
- Select the fi le that you want to check, and
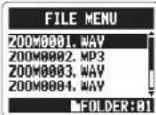
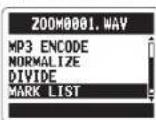
- Use to select MARK LIST, and then
press to open the mark list.
Shows an added mark This mark appears when skipping occurred during recording
H2n Handy Recorder
Changing fi le names Stereo fi les only
-
Press . Ⓞ
-
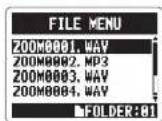
Use to select FILE, and then press

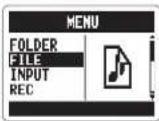
- Use to select the file name that you want to change, and then press →
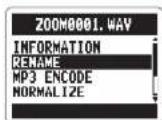
- Use to select RENAME, and then press
- Edit the name.
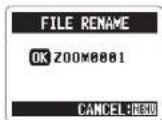
Use → move the cursor and change characters Push → select a character to change and to confirm a change
- Use to select OK, and then press.

NOTE
- The following characters can be used in file names. (Space)!#\$% & ll+,-0123456789;=@ABCDEFGHIJKLMNOPQRSTUVWXYZ|^_ abcdefghijklmnopqrstuvwxyz()- - A file name cannot be only spaces. - If a file with the same name already exists in the same folder, a warning appears and the screen shown in step fi ve automatically reopens.
Convert WAV fi les into MP3 fi les Stereo fi les only
WAV fi les (other than MS-RAW) that have been recorded in any mode other than 4ch surround can be converted to MP3 fi les.
-
Press . Ⓞ
-
Use to select FILE, and then press .
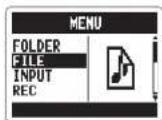
- Use to select the file you want to convert, and then press →
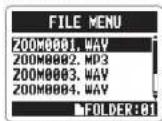
- Use to select MP3 ENCODE, and then press
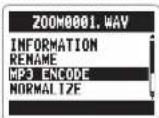
- If you want to change the bit rate, use select BIT RATE, and then press


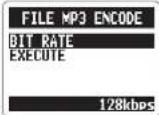
- Use to select the bit rate, and then press →
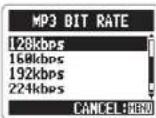
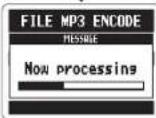
- Use to select EXECUTE, and then press to start encoding.
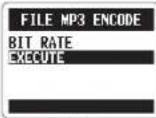
NOTE
- The converted file will be created in the same folder.
- If the SD card lacks open space, the screen shown in step 4 will reopen automatically.
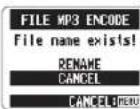
If a fi le already exists with the name that will be given to the converted fi le, the screen at right will appear. Rename the fi le before conversion.
Normalizing WAV fi les
If the volume of a recording is lower than desired, you can raise the level of the recording as a whole.
1.
Press . ①
2.
Use to select FILE, and then press.

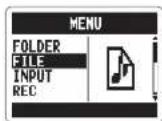
3.
Use to select the file you want to
change, and then press

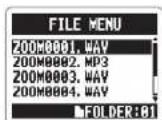
4.
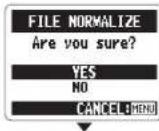
Use to select NORMALIZE, and then
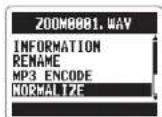
5.
Use to select YES, and then press
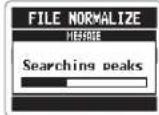
to start normalization.
NOTE
Normalization increases the overall level of the recording so that the maximum level in the file is 0 dB.

H2n Handy Recorder
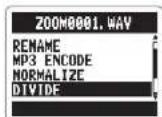
Dividing fi les Stereo fi les only
You can divide a fi le into two at any point.
-
Press . Ⓞ
-
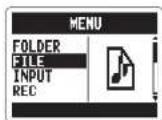
Use to select FILE, and then press .

- Use to select the fi le you want to divide, and then press →
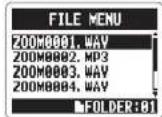
- Use to select DIVIDE, and then press
- Set the dividing point.
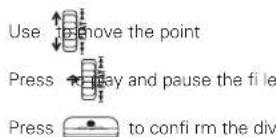
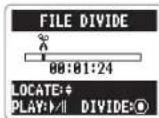
HINT
The longer you hold the PLAY control the faster it will search in that direction.
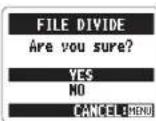
- Use to select YES, and then press .

NOTE
- If a file already exists with the name that will be given to a divided file, rename the file before dividing. - When a file is divided, "A" will be added to the end of the name of the file made from the part before the dividing point, and "B" will be added to the end of the name of the file made from the part after the dividing point.
The original file is deleted.
Deleting fi les
You can delete unwanted files.
-
Press . Ⓞ
-
Use to select FILE, and then press.

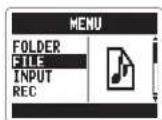
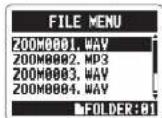
- Use to select the fi le you want to delete, and then press →
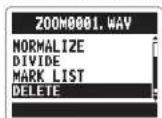
- Use to select DELETE, and then press
- Use to select YES, and then press.


H2n Handy Recorder
Deleting all fi les in a folder
You can delete all the files in the current folder at once.
-
Press . Ⓞ
-
Use to select FILE, and then press .
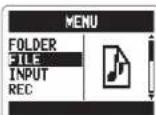
-
Use to select one file you want to delete, and then press →
-
Use to select DELETE ALL, and then press →
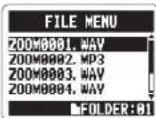
- Use to select YES, and then press .
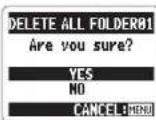
Converting MS-RAW fi les into stereo fi les
You can convert an MS-RAW file into a stereo file. S level (stereo width) adjustments will affect stereo files.
-
Press . Ⓞ
-
Use to select FILE, and then press

- Use to select the file you want to
change, and then press

- Use to select MS-RAW TO STEREO, and
then press

- If you want to adjust the S level, use

select MS SIDE MIC LEVEL, and then press

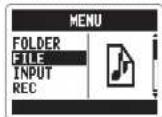
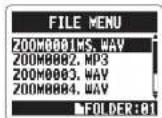
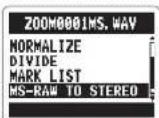
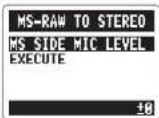
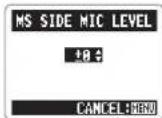
- Use to adjust the S level, and then
NOTE
Set to OFF or between -24 and +6 dB.
- Use to select EXECUTE, and then press
to start conversion.
NOTE
If a file already exists with the name that will be given to the converted file, you will have a chance to change the name to be given to the converted file. When a file is converted, the S level value will be added to the end of the name of the file. The original file is not deleted.
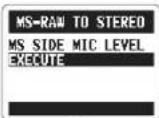
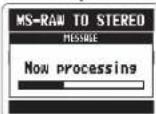
Converting 4ch surround fi les into stereo fi les
-
Press . Ⓞ
-
Use to select FILE, and then press.

- Use to select the file you want to change, and then press →
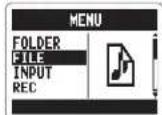
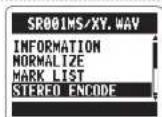
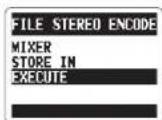
- Use to select STEREO ENCODE, and then press →
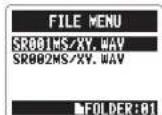
- Use to select MIXER, and then press
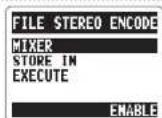
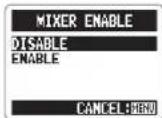
- Use to select ENABLE or DISABLE, and then press →
NOTE For an explanation about how to mix, see P.40.
-
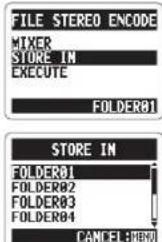
Use to select STORE IN, and then press →
-
Use to select the folder where you want to save the file, and then press →
-
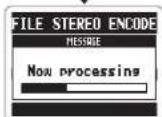
Use to select EXECUTE, and then press to start conversion.
NOTE - If a file already exists with the name that will be given to the converted file, you will be given a chance to change the name to be given to the converted file. - When a file is converted, "MIX" will be added to the end of the name of the file. - The original file is not deleted.
Exchanging files with a computer (Card reader)
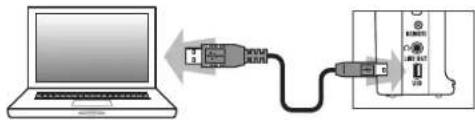
You can connect the recorder to a computer to check and copy data on the SD card.
- After turning the power on, connect the H2n computer by a USB cable.
NOTE
To run the H2n using USB bus power, connect it to a computer by USB while the power is OFF.
The H2n is compatible with the following operating systems. Windows XP, Windows Vista, Windows 7, Macintosh OS X (10.2 or later)
-
Press Ⓞ
-
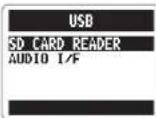
Use ↑↓ to select USB, and then press →
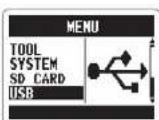
- Use ↑↓ to select SD CARD READER, and
then press →
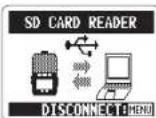
The SD card will appear on the computer as a connected drive where you can check the files on it.
- Unmount the card from the computer before disconnecting the recorder.
Windows: Use "Safely Remove Hardware" to select the H2n
Mac: Drag and drop the icon H2n the Trash
NOTE
Always follow the proper procedures on your computer to unmount the H2n SD card before disconnecting the USB cable.
- Disconnect the cable from the computer and the H2n, and then press MENU ①.
Audio interface use MS/XY stereo and 2ch surround modes only
You can record the signal from the H2n only to a computer, and output the playback signal from a computer through the H2n
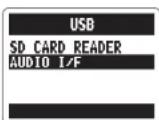
- Follow steps 1–3 in "Exchanging fi les with a computer" on P.58.
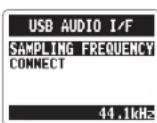
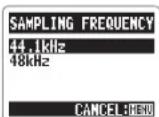
NOTE
Make sure that the sampling frequency settings are the same for both the H2n and the software you are using.
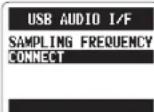
NOTE
- For information about the menu items that can be used see the following.
LO CUT (→P66) PLUG-IN POWER (→P16) AUTO GAIN (→P70)
COMP/LIMITER (→P68) MONITOR (→P67) DISCONNECT
MS-RAW MONITOR (→P.71) TUNER (→P.62) INPUT
If you want to send signals from the recorder to the computer, set INPUT to ON in the USB AUDIO MENU.
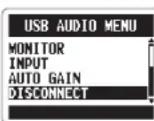


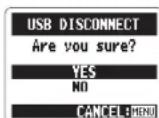
- Disconnect the cable from the computer and the .H2n
Using the tuner
The built-in tuner can help you tune instruments by detecting the pitches of input signals.
1.
Press

2.
Use
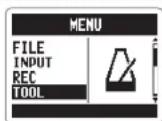
↑toise
elect
TOOL, and then press

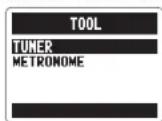
3.
Use

press

4.
If yo
I war
nt to
chan
ge th
e sta
ndar
d pito
ch,
[Non-Text]
1
m = 311
TUNER
use

elect
CAL
IBRA
and
then
pres
s.→
- PLAY
5.
Use

elect
the p
itch
you v
vant
to us
e,
[Non-Text]
14
TUNER 40Hz
CALIB
and
then
pres
s →
1
[Non-Text]
[Non-Text]
[Non-Text]
[Non-Text]
[Non-Text]
[Non-Text]
[Non-Text]
4 4 4
41Hz 42Hz 13Hz
-
[Non-Text]
|
CANCE
EL:HENU
6.
Use

elect the tuner type, and then
press

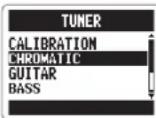
7.
Tune the instrument.
The available tuner types work as follows.
■
Using the chromatic tuner
The input pitch is automatically detected and the nearest pitch is shown along with the amount of discrepancy.
The correct pitch is indicated by the middle circle
■
Using the guitar and bass tuners
The input pitch is automatically detected and the nearest string and pitch are shown along with the amount of discrepancy.
The correct pitch is indicated by the middle circle
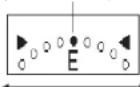
Low
m = 311
m = 311
Hig
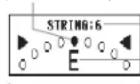
Low
String number Pitch
High
| Tuner type | String number/ptch | ||||||
| 1 | 2 | 3 | 4 | 5 | 6 | 7 | |
| GUITAR | E | B | G | D | |||
| BASS | G | D | A | E | |||
| OPEN A | E | C# | A | E | |||
| OPEN D | D | A | F# | D | |||
| OPEN E | E | B | G# | E | |||
| OPEN G | D | B | G | D | |||
| DADCAD | D | A | G | D | |||
Using the metronome
You can use the metronome to count in before recording and to provide a guide tempo.
-
Press . Ⓞ
-
Use to select TOOL, and then press.
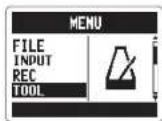
- Use to select METRONOME, and then
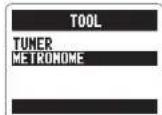
- Use to select the desired menu item,
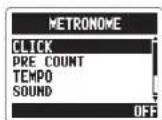
■ Setting the CLICK
Use to select when the click should sound, and then press →.
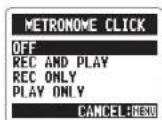
■ Setting the PRE COUNT (→P.29)
■ Setting the TEMPO
Use to adjust the metronome tempo (BPM), and then press →
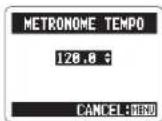
■ Setting the SOUND
Use to select the metronome sound, and then press →
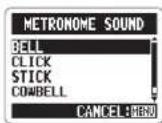
■ Setting the PATTERN
Use to select the metronome pattern, and then press
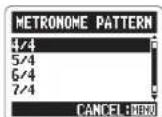
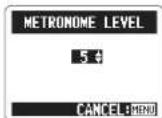
■ Setting the LEVEL
Use to adjust the metronome volume, and then press →
Reducing noise (LO CUT)
The recorder can be set to reduce the sound of wind, vocal pops and other noise.
1.
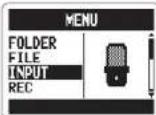
Press . ①
2.
Use to select INPUT, and then
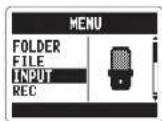
3.
Use to select LO CUT, and then
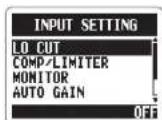
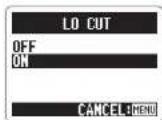
4.
Use to select ON, and then press.

H2n Handy Recorder
Monitoring the input signal
You can listen to the input signal level through headphones.
1.

2.
Use to select INPUT, and then
3.
Use to select MONITOR, and then
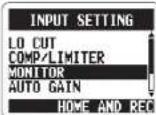
4.
Use to select when monitoring is
enabled, and then press

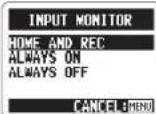
| Setting Explanation | |
| HOME AND REC Monitoring | g enabled when home screen open and when recording |
| ALWAYS ON Monitoring always enabled | |
| ALWAYS OFF | Monitoring disabled |
Compressing/limiting the input signal
The recorder can be set to automatically increase the level of input signals that are too weak and decrease the level of input signals that are too strong for each input.
-
Press . Ⓞ
-
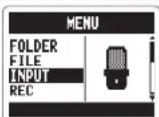
Use to select INPUT, and then press →
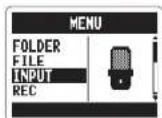
- Use to select COMP/LIMITER, and then press
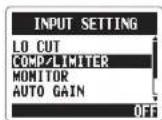
- Use to select the setting you want to use, and then press
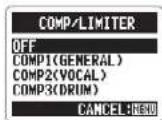
| Setting Explanation | ||
| OFF Compressor/limiter disabled | ||
| COMP1(GENERAL) Standard compressor Compressors de | decreasehigh levels and increaselow levels. | |
| COMP2(VOCAL) Compressor for vocals | ||
| COMP3(DRUM) Compressor for drums andpercussion | ||
| LIMIT1(GENERAL) | Standard limiter | Limiters reduce highlevels that exceed a setthreshold. |
| LIMIT2(CONCERT) | Limiter for live performances | |
| LIMIT3(STUDIO) | Limiter for studio recording | |
NOTE
This cannot be used at the same time as the AUTO GAIN function.
Automatically adjusting the input gain
The recorder can automatically adjust the amount of gain used on signals input through the built-in microphones and the LINE IN input in order to avoid distortion.
1.
Press . Ⓞ
2.
Use to select INPUT, and then
3.
Use to select AUTO GAIN, and then
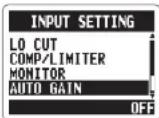
4.
Use to select the setting you want to
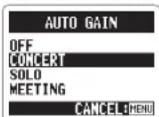
| Setting | Explanation |
| OFF AUTO | GAIN disabled |
| CONCERT | For concerts and other loud sound sources |
| SOLO | For acoustic guitars and other solo performances |
| MEETING | For meetings and other quiet sound sources |
NOTE
When AUTO GAIN is ON, the MIC GAIN dial setting has no effect.
This cannot be used at the same time as the automatic recording function.
H2n Handy Recorder
Monitoring MS-RAW signals
MS stereo mode only
When recording in MS-RAW mode, you can monitor the MID input signal on the left output channel and the SIDE input signal on the right output channel.
1.
Press

2.
Use to select INPUT, and then
press →
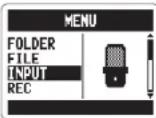
3.
Use to select MS-RAW MONITOR, and
then press →
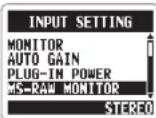
4.
Use to select RAW, and then press.

NOTE
If you want to monitor an ordinary stereo mix of the signals, select STEREO.
Setting the recording format
You can set the recording format according to your sound quality and fi le size needs.
-
Press . MENU
-
Use to select REC, and then press.

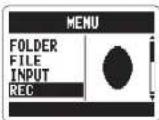
- Use to select REC FORMAT, and then press
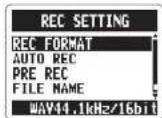
- Use to select the recording format, and then press →
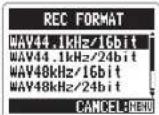
NOTE
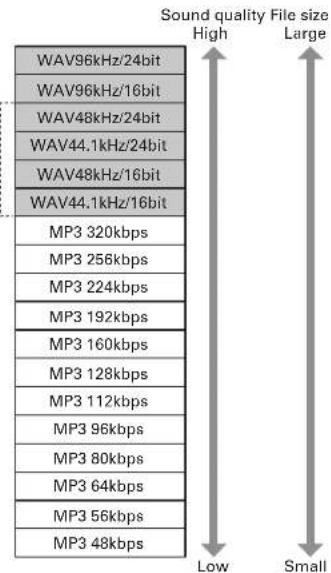
Use WAV formats for higher audio quality. Use MP3 formats, which are compressed and have much smaller file sizes, to save space on the SD card. Beware, however, that MP3 compression reduces audio quality.
Only these formats can be selected when using 4ch recording mode
Changing automatic recording settings
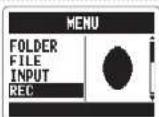
You can change settings related to the input level threshold that causes recording to start and stop automatically, as well as the amount of delay before automatic stopping.
1.
Press

2.
Use


3.
Use

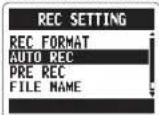
4.
If you want to adjust the recording start
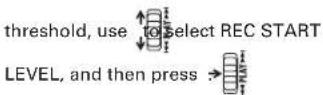
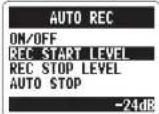
5.
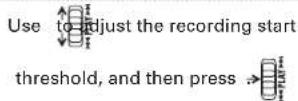
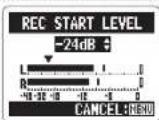
6.
If you want to set the recording stop
threshold, use to select REC STOP LEVEL, and then press
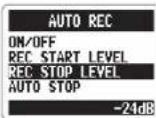
7.
Use to set the recording stop threshold, and then press.

8.
If you want to set the delay before recording
stops, use to select AUTO STOP, and then press →
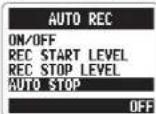
9.
Use to set the time, and then press

NOTE
The AUTO REC STOP time is the delay until recording stops after the input level drops below the REC STOP LEVEL.
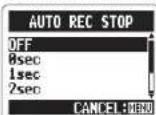
Setting how fi les are named Stereo fi les only
You can change how stereo fi les are automatically named.
-
Press . Ⓞ
-
Use to select REC, and then press.

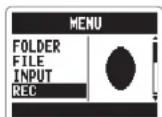
- Use to select FILE NAME, and then
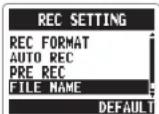
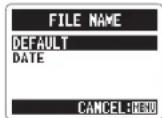
- Use to select, and then press

NOTE
File names are assigned in the following manner.
DEFAULT: ZOOM0001(MSI).wav/mp3 - ZOOM9999(MSI).wav/mp3
DATE: YYMMDD-HHMMSS(MS).wav/mp3
(for example, 110531-130512.wav)
DATE uses the starting time of the recording.
If a file already exists with the same name in the folder, the new file will have a number added to the end of its name. Numbers will be added sequentially in the case of multiple duplicates.
H2n Handy Recorder
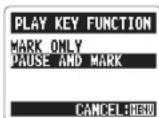
Pausing recording when adding marks WAV format only
You can set the unit to pause when you add a mark during recording.
-
Press . MENU
-
Use to select REC, and then press.

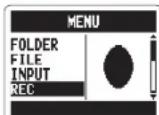
- Use to select PLAY KEY FUNCTION, and
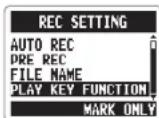
- Use to select PAUSE AND MARK, and
NOTE
Marks cannot be added to MP3 fi les, so this setting has no effect when recording MP3 fi les.
Changing the display backlight time
You can set the amount of time that the display backlight stays lit.
-
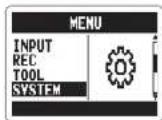
Press . Ⓞ
-
Use to select SYSTEM, and then
- Use to select BACK LIGHT, and then
- Use to select the amount of time, and
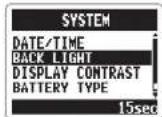
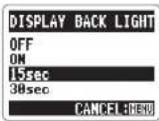
| Setting Explanation | |
| OFF The backlight stays unit. | |
| ON The backlight stays it when the unit is on. | |
| 15sec The backlight stays lit for 15 seconds after the last time that a control (besides MIC GAIN) was used. | |
| 30sec The backlight stays lit for 30 seconds after the last time that a control (besides MIC GAIN) was used. |
H2n Handy Recorder
Adjusting the display contrast
-
Press . MENU
-
Use to select SYSTEM, and then
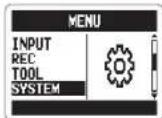
- Use to select DISPLAY CONTRAST, and
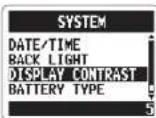
- Use to adjust the contrast, and then
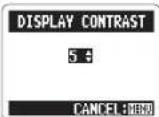
NOTE
- The contrast can be set to a value from 1–8. - The higher the number, the greater the contrast.
Checking the software versions
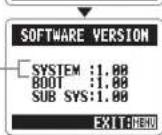
You can view the versions of the system and other software used by the H2n
-
Press . Ⓞ
-
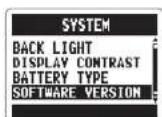
Use to select SYSTEM, and then press
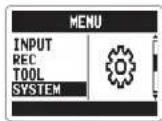
- Use to select SOFTWARE VERSION, and then press to show the software versions in use.
System software version -
H2n Handy Recorder
Restoring the unit to its factory settings
You can restore the recorder to the settings it had when it was shipped from the factory.
-
Press . MENU
-
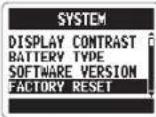
Use to select SYSTEM, and then press

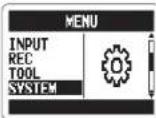
-
Use to select FACTORY RESET, and then press →
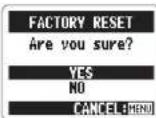
-
Use to select YES, and then press.
NOTE
- The date and time, recording mode and input gain settings are not reset by this.
This also erases any recording in the built-in memory.
Checking the open capacity of the SD card
-
Press . Ⓞ
-
Use to select SD CARD, and then press
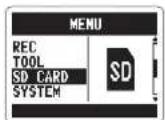
- Use to select REMAIN, and then press → to show the open space on the card.
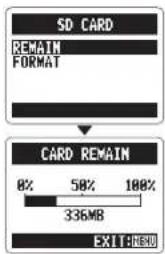
H2n Handy Recorder
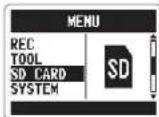
Formatting an SD card
You can format an SD card for use with the H2n.
-
Press . MENU
-
Use to select SD CARD, and then press →
- Use to select FORMAT, and then press →
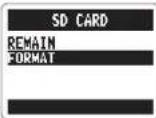
- Use to select YES, and then press.

NOTE
You must format an SD card after purchase or if it has been formatted by a computer or other device before using it with the H2n
- Be aware that when you format an SD card, all data saved on it will be erased.
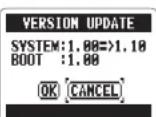
Updating the system software
You can update the system software used by your H2n latest version.
- Copy the updater file to the root directory of the SD card.
NOTE
Download the latest system software at the ZOOM website (http://www.zoom.co.jp).
- With the SD card in the Nen the power
ON while pressing and holding

- Use to select OK, and then press

- After updating completes, turn the power OFF.
NOTE
You cannot update the system software if the battery charge is low. In such a case, install new batteries or use an AC adapter (sold separately).
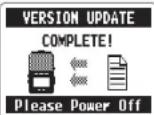
H2n Handy Recorder
Using SD cards from older H series recorders
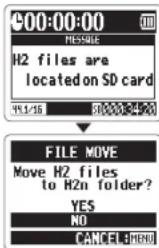
This recorder can read SD cards that have been used in older H series recorders and copy their fi les into folders for use by the H2n
-
With the SD card inserted, turn the power ON.
-
Use to select YES, and then press.

NOTE
A file must be renamed before moving if another file with the same name already exists in the H2n folder.
Using a remote control
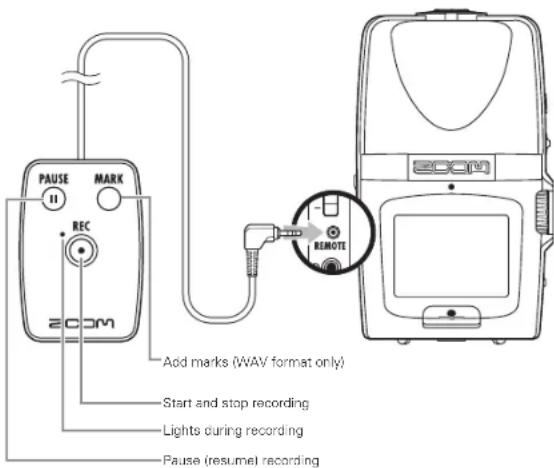
By using a remote control (sold separately) you can operate the distance.

- Connect the remote control to the REMOTE jack on the .

The functions of the buttons on the remote are as follows.
H2n Handy Recorder
Troubleshooting
If you think that the H2n is not operating properly, please check the following first.
Recording/playback trouble
◆ There is no sound or output is very quiet
- Check the connections to your monitoring system and its volume setting.
- Confirm that the volume of the H2n is not too low.
◆ The recorded sound cannot be heard or is very quiet
- If you are using built-in mics, confirm that the active mics are oriented correctly and that the recording mode is suitable. (→ P.20)
- Check the MIC GAIN setting. (→ P.24, 70)
- If you are recording from a CD player or other device connected to the LINE IN jack, raise the output level of the connected device.
◆ Recording is not possible
- Confirm that the SD card has open space. (→P.82)
- If "Hold" appears on the display, the hold function is enabled. Disable the hold function. (→ P.15)
Other trouble
◆ The recorder is not recognized by a computer when connected by USB
- Check that the OS of the computer is compatible. (▶ P.58)
- The H2n operation mode must be selected on the recorder before it will be recognized by a computer. (→ P.58)
H2n Handy Recorder
Specifications
| Recording media 16MB-2GB SD cards, 4GB-32GB SDHC cards ICards that can be used with this recorder are to be verified individually) | |
| Built-in memory | Can be used to record up to 1 minute in 96 kbps MPS format; recording to this memory overwrites any previous recording in it) |
| Recording Mic arrangements MS stereo with adjustable side mic level 90' XY stereo Modes MS, XY, MS+XY (stereo and MS+XY Idch) | |
| Microphones Types | Directional (XY, MS mio mics) Bidirectional (MS side mid) Maximum sound pressure input 120 dB sol bidirectional/122 dB sol bidirectional) |
| File formats | Stereo Uncompressed PCM 44.1/48/96Hz, 16/24bit WAV (BWF) Compressed MP3 44.1kHz, 48/56/64/90/96/112/128/160/192/224/256/320kbps t recording) (Not compatible with MS-RAW recording) Compressed MP3 44.1/48kHz, 32/40/68/56/64/80/99/112/126/160/192/224/256/ ( playback) 320kbps 4ch Uncompressed PCM 44.1/48kHz, 16/24bit WAV (BWF) Two stereo files for each recording |
| Digital processing | AVD conversion 24-bit 128x oversampling DVA conversion 24-bit 128x oversampling Signal processing 32 bit |
| Recording time | 2GB card example 3:08:00 (44.1cHz/16bitWAI) 34:43:00 (128kbps MP3) |
| Features | LO CUT 80Hz high-pass filter COMPLITIMER 3 types of compressors and 3 types of limitors AUTO GAIN Automatic input gain adjustment PRE REC 2 seconds of pre-recording AUTO REC Automatic recording start/stop, continuous standby TUNER Chromatic, guitar, bass and alternate (AVE/G/D/DADGADI) tunings with automatic string detection METRONOME 40-250 BPM range, fi va tones, pre-count: SPEED Playback speed adjustable between 50-150% |
| Features | KEY CONTROL | Playback pitch adjustable ±6 somilones (cannot be used with 90kHz fl les) |
| AB REPEAT | Repeats playback between selected points in a file | |
| FILE DIVIDE | Divides a file into two | |
| FILE NORMALIZE | Maximizes fl is volume (cannot be used with MP3s) | |
| FILE MP3 ENCODE | WAV fl les can be converted to MP3 formats at fl xed bit rates | |
| MARK | Up to 90 marks can be added as desired when recording WAV fl les | |
| SURROUND MIXER | Mix balance can be adjusted when playing back 4ch surround recordings | |
| Display | Graphic LCD H28x64 pixels with backlight | |
| Input gain | 0 to -139 dB | |
| Input jack | Line/mic stereo mini jack can supply slug in power2 kΩ impedance at input levels of 0 to -39 dBm | |
| Output jack | Line/keapphone stereo mini jackRated output level: -10 dBm (output impedance 10 kΩ or more)Headphones: 20 mW + 20 mW (into 32 Ω load) | |
| Built-in speaker | 400mW, 8Q, mono | |
| USB | Mini-B typeCard reader operationUSB 2.0 High SpeedAudio interface operationUSB 1.0 Full SpeedSupports 44.1/48kHz sampling rates and 16 bit rateBus power operation supported | |
| Power | AD-17 USB to AC adapter IDC 5V 1A, operates using two AA batteriesContinuous operation of 20 or more hours when recording 44.1kHz/16 bit WAV fl les using alkaline batteries | |
| Physical features | Tripod mounting socket, strap attachmentDimensions (mm): 67.6 (W) × 113.8b (H) × 42.7 (ID)Weight: 130 g (without batteries) | |
| Included accessories | Operation manual, SD card (2GB), 2 AA batteries, WAVELAB LE CD-ROM | |
* Recording concerts and public performances, for example, without permission from rights holders is prohibited by law.
* Product specifications and appearance might be changed for the purpose of improvement without waiting.
^1 0 dBm = 0.775 Vrms
FCC regulation warning (for U.S.A.)
This equipment has been tested and found to comply with the limits for a Class B digital device, pursuant to Part 15 of the FCC Rules. These limits are designed to provide reasonable protection against harmful interference in a residential installation. This equipment generates uses, and can radiate radio frequency energy and, if not installed and used in accordance with the instructions, may cause harmful interference to radio communications. However, there is no guarantee that interference will not occur in a particular installation. If this equipment does cause harmful interference to radio or television reception, which can be determined by turning the equipment off and on, the user is encouraged to try to correct the interference by one or more of the following measures:
- Reorient or relocate the receiving antenna.
- Increase the separation between the equipment and receiver.
- Connect the equipment to an outlet on a circuit different from that to which the receiver is connected.
- Consult the dealer or an experienced radio/TV technician for help.
For EU Countries

Declaration of Conformity:
This product complies with the requirements of EMC Directive 2004/108/EC, Low Voltage Directive 2006/95/EC and ErP Directive 2009/125/EC
Disposal of Old Electrical & Electronic Equipment
(Applicable in European countries with separate collection systems)
This symbol on the product or on its packaging indicates that this product shall not be treated as household waste. Instead it shall be handled over to the applicable collection point for the recycling of electrical and electronic equipment. By ensuring this product is disposed of correctly, you will help prevent potential negative consequences for the environment and human health, which could otherwise be caused by inappropriate waste handling of this product. The recycling of materials will help to conserve natural resources. For more detailed information about recycling of this product, please contact your local city office, your household waste disposal service or the shop where you purchased the product.
200M
Zoom Corporation
4-4-3 Kanda-Surugadai, Chiyoda-ku, Tokyo 101-0062 Japan
http://www.zoom.co.jp
Installing WAVELAB LE7
In WaveLab LE, you can perform various edits such as recording audio, adjusting the volume of the recorded files, and cutting unwanted sections.
Windows
- Insert the supplied WAVELAB LE7 CD-ROM into the CD drive of your computer.
- On the screen for selecting the way to AutoPlay, click Run WaveLab_LE_7_Start_Center.exe.
If nothing happens when you insert the CD-ROM, select Computer from the Start menu. Click the WaveLab LE7 icon that appears, and select Open Auto Play... on the File tab.

- In the Start Center WaveLab LE7 that appears, select the language you use for the installation.
After the selection, follow the on-screen prompts.
[Minimum System Requirements]
Windows 7
· 2 GHz of CPU
· 1024 MB of RAM
· DVD-ROM drive
· 200 MB of free hard disk space
-1024x768 of monitor resolution
Mac OS
- Insert the supplied WaveLab LE CD-ROM into the CD drive of your Macintosh computer.
- When the contents of the CD-ROM appear, double-click WaveLab LE 7 for Mac OS X.
If the contents do not appear automatically, double-click to open the WaveLab LE 7 icon on the desktop, and double-click WaveLab LE7 for Mac OS X.
- When the contents in the folder appear, use WaveLab LE 7.mpkg to perform the installation.
[Minimum System Requirements]
Mac OS X 10.6
- Intel CPU
· 1024 MB of RAM - DVD-ROM drive
· 200 MB of free hard disk space
-1024x768 of monitor resolution

- Usage and safety precautions
- SAFETY PRECAUTIONS
- Warning
- Operation using an AC adapter
- Operation using batteries
- Alterations
- Precautions
- Product handling
- Operating environment
- AC adapter handling
- Battery handling
- Connecting cables with input and output jacks
- Volume
- Usage Precautions
- Interference with other electrical equipment
- Cleaning
- Malfunction
- Copyrights
- Introduction
- - Four-channel recording captures sound in 360°
- - New microphone array allows control of stereo width
- - Stereo recording is clear and three-dimensional
- - Uninterrupted long recordings possible at high-quality
- - Runs for a long time on standard batteries
- - Use as an SD card reader and computer audio interface
- - Tuner, metronome and other practice features
- Contents
- Preparation
- Recording
- Playback
- Mixing a rich surround in Checking & Editing Files
- Using USB
- Tuner
- Metronome
- Various settings
- Other functions
- Package contents
- Part names
- Display
- Powering the recorder
- Using batteries
- NOTE
- Using an AC adapter (sold separately)
- Installing an SD card
- HINT
- Turning the power ON and OFF
- Turning the power ON Using the hold function
- Turning the power OFF
- Enabling the hold function
- Disabling the hold function
- Connecting an external mic
- Using plug-in power
- Setting the date and time
- Setting the battery type
- Recording mode overview
- Mid-side (MS) stereo mode 🌐MS
- XY stereo mode 🎨 XY
- 2ch and 4ch surround modes
- Selecting the recording mode
- Adjusting the S level (MS stereo, 2ch/4ch surround modes)
- Using MS-RAW mode (WAV format only)
- Selecting where recordings are saved
- Recording manually
- 2.
- 3.
- 4.
- Recording automatically
- Pre-recording
- Counting in before recording
- Playing back recordings
- 1.
- Selecting the fi le to playback from a list
- Changing the playback speed
- Loop playback of a set interval (AB REPEAT)
- Changing the play mode
- Adjusting the playback pitch (KEY CONTROL)
- Changing the S level MS-RAW only
- Mixing a 4ch surround fi le
- Checking fi le information
- Checking track marks WAV fi les only
- Changing fi le names Stereo fi les only
- Convert WAV fi les into MP3 fi les Stereo fi les only
- Normalizing WAV fi les
- Dividing fi les Stereo fi les only
- Deleting fi les
- Deleting all fi les in a folder
- Converting MS-RAW fi les into stereo fi les
- Converting 4ch surround fi les into stereo fi les
- Exchanging files with a computer (Card reader)
- Audio interface use MS/XY stereo and 2ch surround modes only
- Using the tuner
- Using the metronome
- Reducing noise (LO CUT)
- Monitoring the input signal
- Compressing/limiting the input signal
- Automatically adjusting the input gain
- Monitoring MS-RAW signals
- Setting the recording format
- Changing automatic recording settings
- Setting how fi les are named Stereo fi les only
- Pausing recording when adding marks WAV format only
- Changing the display backlight time
- Adjusting the display contrast
- Checking the software versions
- Restoring the unit to its factory settings
- Checking the open capacity of the SD card
- Formatting an SD card
- Updating the system software
- Using SD cards from older H series recorders
- Using a remote control
- Troubleshooting
- Recording/playback trouble
- Other trouble
- FCC regulation warning (for U.S.A.)
- For EU Countries
- Disposal of Old Electrical & Electronic Equipment
- 200M
- Zoom Corporation
- Installing WAVELAB LE7
- Windows
- [Minimum System Requirements]
- Windows 7
- Mac OS
- Mac OS X 10.6
Brand : ZOOM
Model : H2next
Category : Dictaphone