VersaPak VP321 - Vacuum Cleaner BLACK & DECKER - Free user manual and instructions
Find the device manual for free VersaPak VP321 BLACK & DECKER in PDF.


User questions about VersaPak VP321 BLACK & DECKER
0 question about this device. Answer the ones you know or ask your own.
Ask a new question about this device
Download the instructions for your Vacuum Cleaner in PDF format for free! Find your manual VersaPak VP321 - BLACK & DECKER and take your electronic device back in hand. On this page are published all the documents necessary for the use of your device. VersaPak VP321 by BLACK & DECKER.
USER MANUAL VersaPak VP321 BLACK & DECKER
natural_image
Line drawing of a mechanical part with no text or symbolsVersaPak Dustbusters VP321/VP331
Electrical connection (UK user)
Before using your appliance, ensure the voltage on the charger corresponds with your mains supply. Never use a light socket! Do not replace the charger with a 13 amp plug or any other type of charger. If in doubt, seek advice from your nearest electricity board or Black & Decker service centre.
Safety points
- VersaPak sticks are for indoor use only.
- Keep motor draught away from eyes and face during use.
- Keep children and pets at a safe distance away when in use.
- Never use to pick up flammable or combustible liquids.
VersaPak stick
- The VersaPak rechargeable stick is completely safe when handled in the correct manner and has been rigorously tested to the highest standards.
- Care must be taken when handling the stick; it is not a toy and adult supervision is necessary when children are handling the product.
- Do not insert into the mouth.
- Do not immerse the VersaPak stick into water.
- Do not drop the VersaPak stick in areas where other metal parts will contact it (e.g. screws, nails, etc).
Important: Care must be taken not to short circuit the VersaPak stick by metallic objects entering the VersaPak stick terminals. During short circuit the temperature of the VersaPak stick will rise dramatically and may cause serious burns and even fire.
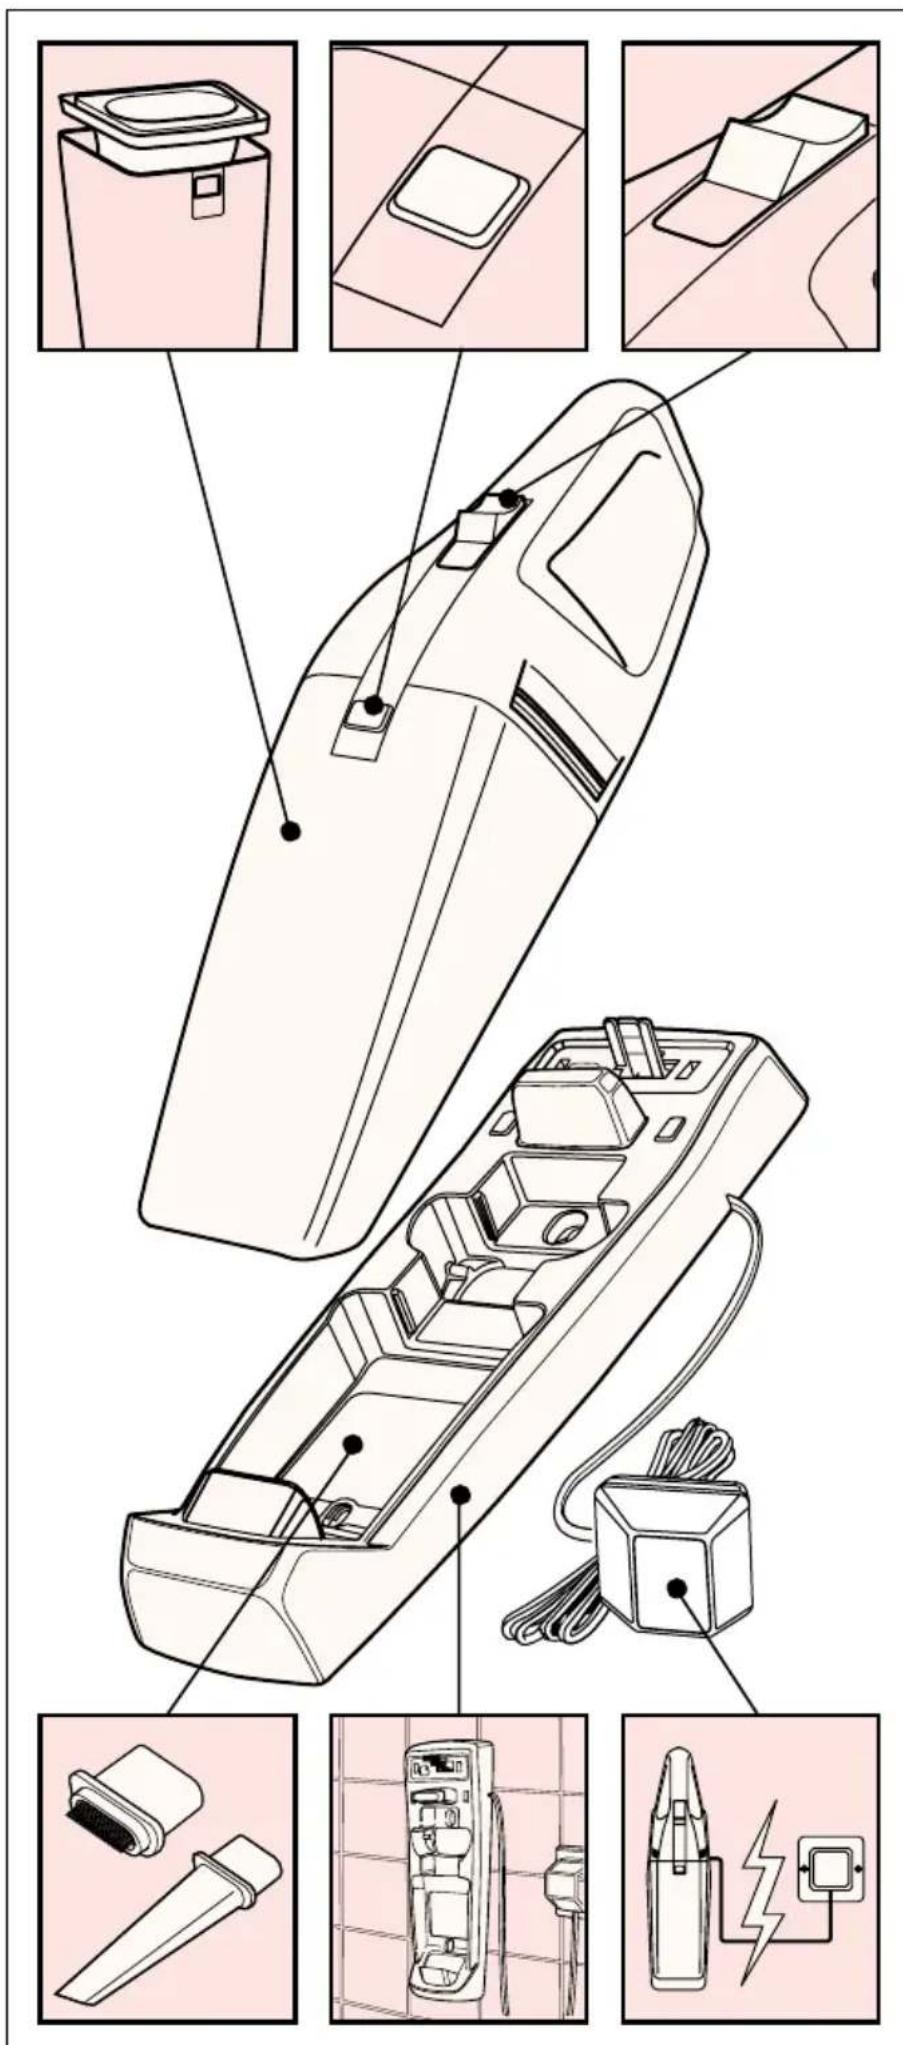
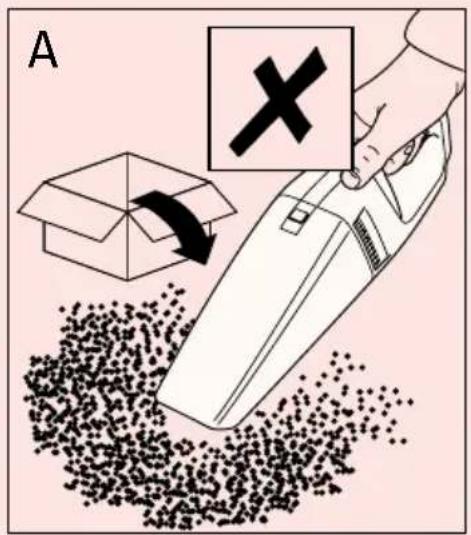
Product features (Fig. A)
A
- On/off slide switch
- Release button
- Dust bowl
- Long wall mountable charging base (VP331)
4a. Short wall mountable charging base (VP321) - VersaPak release button
- VersaPak battery stick(s)
- Charger
ENGLISH
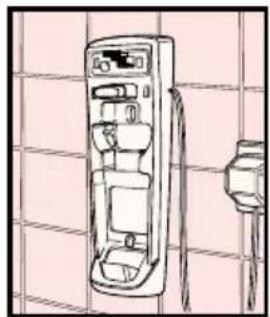
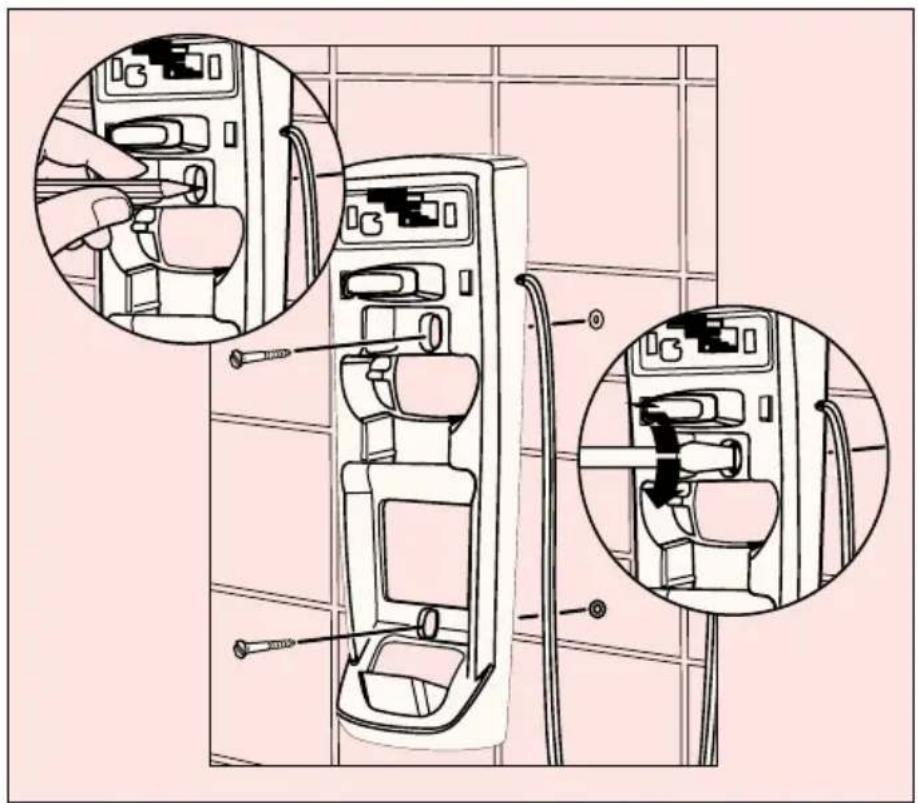
Installation instructions (Fig. B & C)
B
Fix the charging base vertically to the wall using the screws and plugs supplied, as illustrated, and within reach of a power socket. Plug in and place the product into position. The charging base can also be fixed, or simply placed, in a convenient horizontal position.
C
Note: Avoid damaging the cable while fixing the base to the wall by pushing the wire into the wire trap.
Recharging
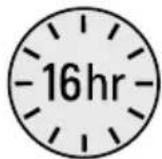
From new, the rechargeable cells of the product need a minimum charge time of 16 hours to ensure full power. We suggest you fully discharge the product when it is used for the first time as this will help the cells recharge faster. The switch must be in the off position; the product will not charge if it is in any other position. Whilst charging, the charger will get warm; this is perfectly normal and safe, and your product can remain on charge indefinitely without damage or danger. It is not possible to “overcharge” the battery cells with the charger provided.
Whilst recharging and discharging the VersaPak stick(s) will become warm, this is perfectly normal and does not effect the unit in any way.
VP321
A VersaPak stick will charge in either the left or right hand ports (or both together if a second stick has been purchased). The charging time is not affected and would still be 16 hours.
VP331
VersaPak sticks will only recharge when both are fitted into the unit. If only one stick is inserted it will not charge.
How to use (Figs. D & E)
D
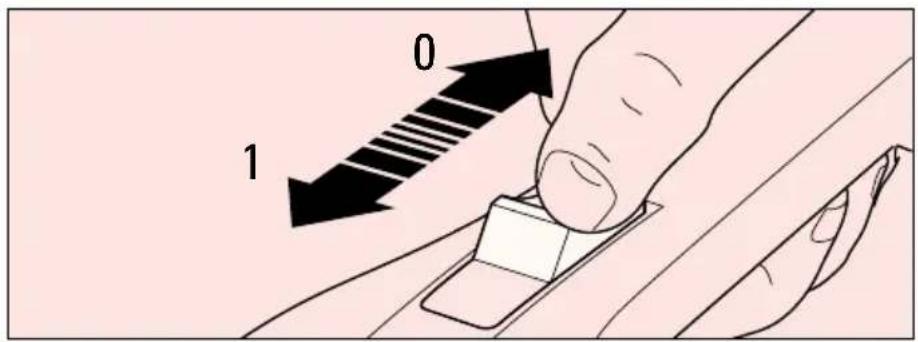
To start, slide the on/off switch forward (i.e. 0 = off, l = on). To stop, slide the switch back.
Burst of power
Where applicable, your product has two power settings; 'I' for normal power and 'MAX' for a burst of additional power to do tougher jobs, activated by sliding the switch forward as far as it will go.
E
Always return the product to its charging base immediately after use so that it will be ready and fully charged for the next job. The switch must be in the off position; the product will not charge if it is in any other position. Ensure that the product is fully engaged on the charging base.
Cleaning the product (Fig. F - J)
Warning! Never use the product without its filter
Note: The filter bag is re-usable; do not confuse it with a disposable dust bag and do not throw it away when the product is emptied. When the filter becomes worn or damaged, you can obtain a replacement from your local Black & Decker service centre.
F
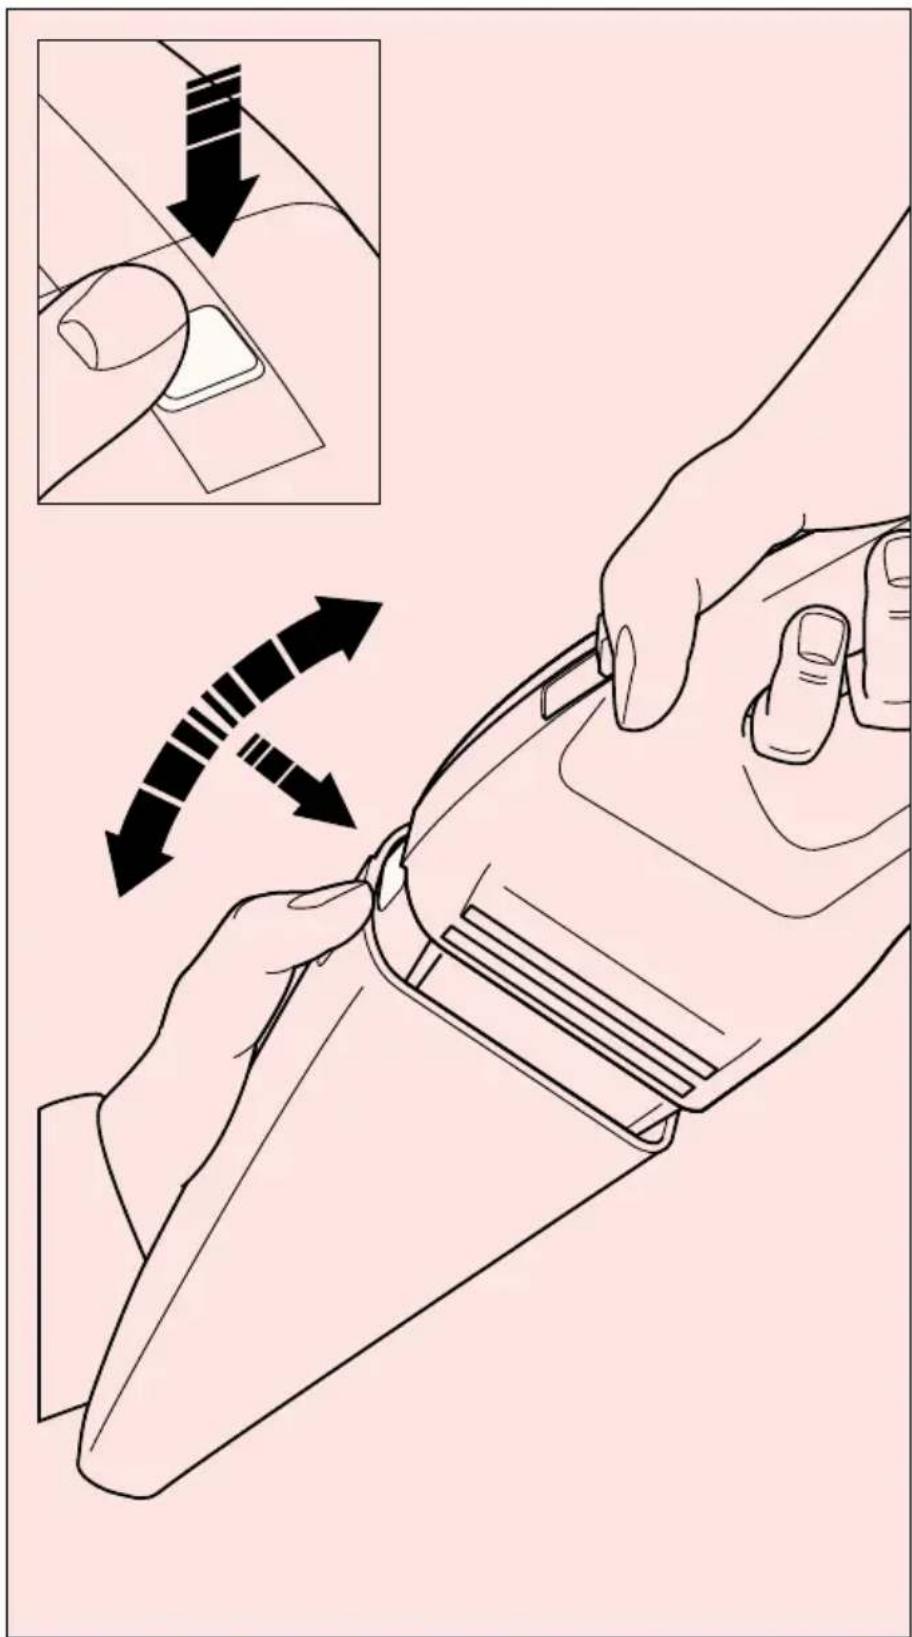
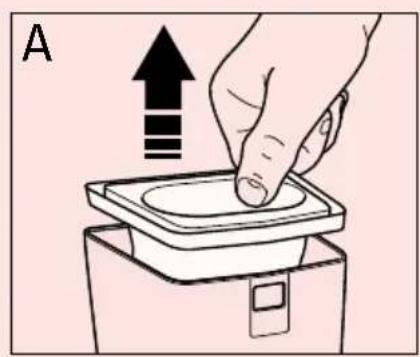
- To clean the filter bag, first remove the dust bowl by pressing the release button and then take out the filter bag using the plastic grip. Shake or brush any loose dust off the filter bag. Wash it regularly using warm, soapy water and ensure it is completely dry before replacement. The cleaner the filter bag, the better the product will perform. It is very important that the filter bag is correctly in position before use.
G
- To clean the dust bowl, remove the filter bag, empty the bowl and wash if necessary.
Important!
Maximum dust collection will only be obtained with a clean filter bag and an empty dust bowl. If dust begins to fall back out of the product after it is switched off, this indicates that the bowl is full and requires emptying.
H
Never immerse the product in water. It is only safe to immerse the detached dust bowl section in water.
J
A damp cloth and soapy water should be used to clean the exterior of the motor section. Always ensure the product is completely dry before re-use or storing.
Economic usage
- Your product is very economical to charge. Whilst it is charging it uses less than half the amount of electricity used by a light bulb.
- When fully charged, the average effective usage times are 10 minutes for the ON position and 8 minutes in the 'boost of power' position. The average effective usage time for the VP321 is 7 minutes.
- It may take several charging before these times can be achieved.
- If a second VersaPak stick has been purchased and is fitted to the second port, the average effective usage time is increased to 14 minutes (VP321 only).
Unit does not work?
If the product does not work, check the following:
- The charger was correctly plugged in for recharge.
- The lead is not damaged and is correctly attached to the base.
- The VersaPak stick(s) is(are) firmly seated into the unit.
• The mains power is working.
If all are satisfactory and the product still does not work, refer to the guarantee or service and repair section of this leaflet.
ENGLISH
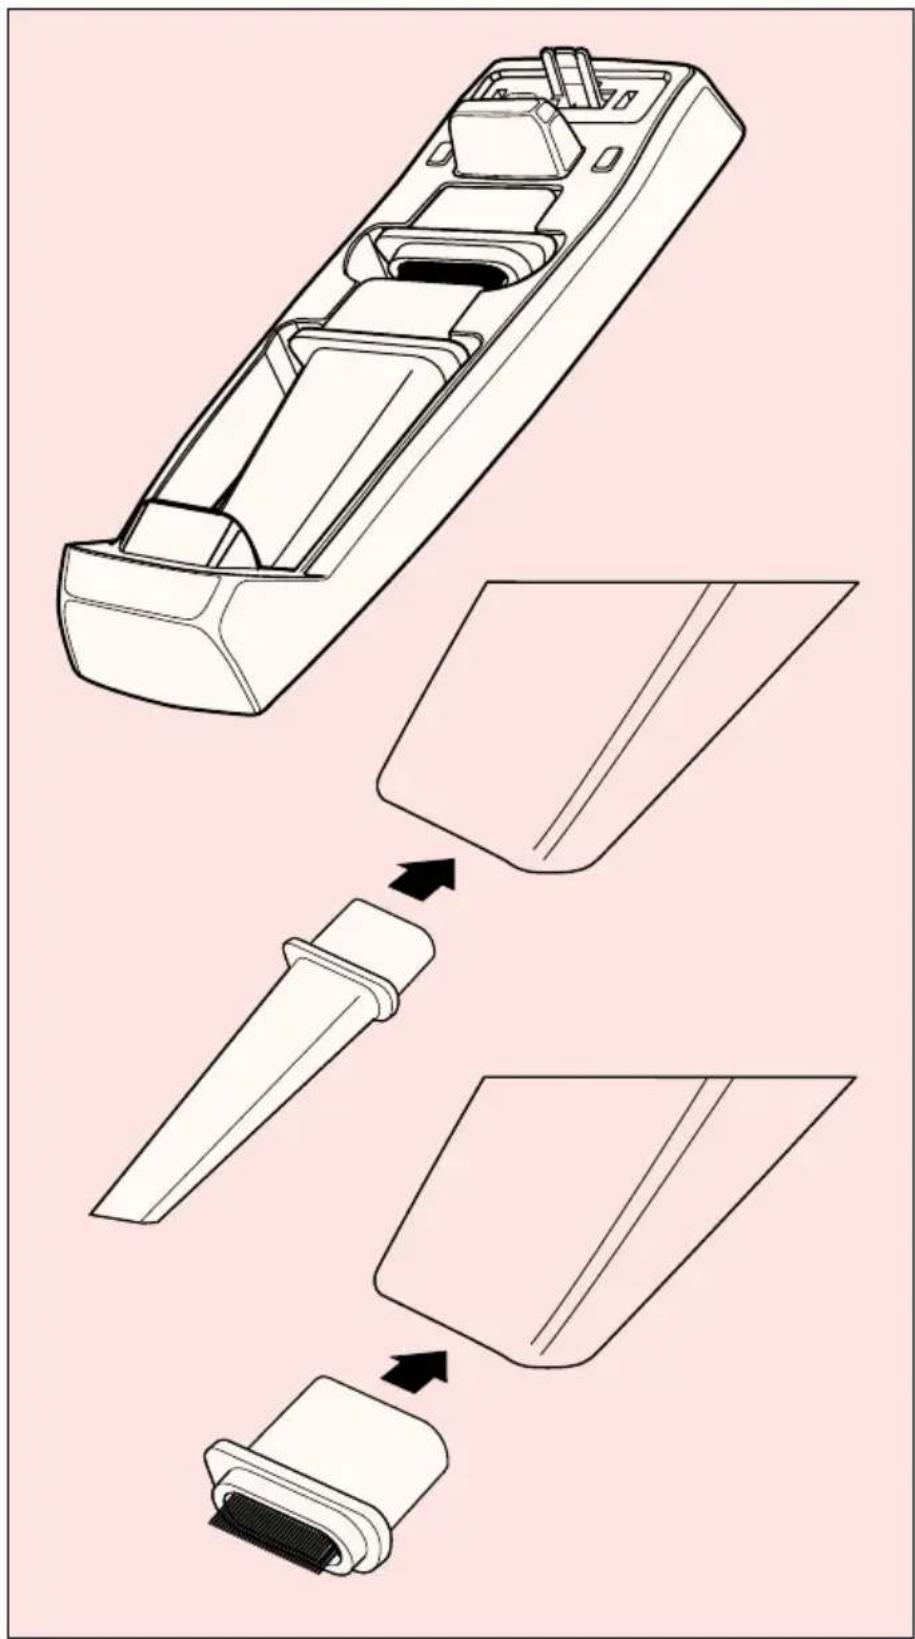
Accessories (Fig. K)
Accessories, such as the crevice tool, upholstery brush and extra VersaPak sticks can be purchased from any Black & Decker service centre, either to fit into the base of your product, or to replace existing worn or damaged accessories.
To extend the effective usage time of your Dustbuster, you can purchase extra VersaPak sticks.

If your unit has a white cap fitted over the left port then use a small flat bladed screwdriver to remove it. An extra VersaPak stick can then be inserted which doubles the usage time.
The VersaPak system
The VersaPak stick(s) you are using with your Dustbuster is(are) totally compatible with all other VersaPak products produced by Black & Decker.
Inserting and removing the VersaPak stick (Fig. L)

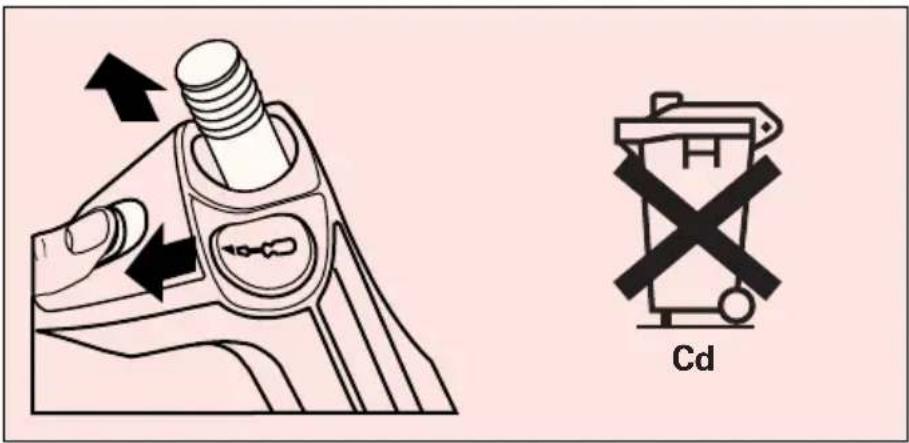
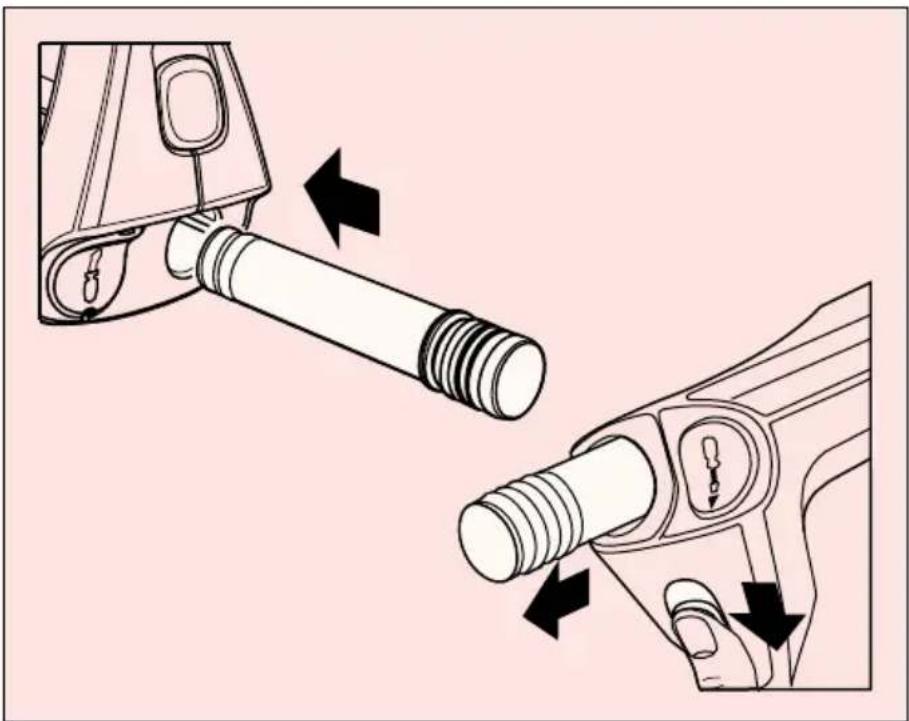
- To remove the VersaPak stick, simply push the release button (6) and pull it out.
- To insert, simply push the VersaPak stick firmly into place until an audible "click" is heard and the VersaPak stick will not travel any further into the unit.
Do not worry, it is impossible to mis-assemble a VersaPak stick into this unit and cause damage.
Rechargeable batteries and the environment

Black & Decker cordless products use nickel cadmium (NiCad) batteries or battery packs which can be charged many times to give long life and repeatedly full power.
This symbol indicates the NiCad batteries contained within this unit must be disposed of properly and not discarded in everyday household waste which may be disposed of in an incinerator or landfill site.
NiCad batteries can be harmful to the environment and can explode when exposed to fire. Do not incinerate.
Therefore, when your product or battery pack needs replacing, think of the protection of our environment.
Black & Decker recommends the following:
- Discharge batteries completely by running the unit until the energy is completely discharged and then remove from the product.
- Take the VersaPak stick to a Black & Decker service centre, your local dealer or your local recycling station. If necessary, contact your local council for disposal information. The collected batteries will be disposed of properly and/or used for recycling purposes whilst protecting the environment.
ENGLISH
Note: You as a customer are responsible for proper disposal or recycling of the battery pack.
Black & Decker after sales service
All Black & Decker products are scrupulously tested before leaving the factory. However, in the case of your product being defective, please take it to your nearest Black & Decker service centre.
2 year guarantee
If a Black & Decker product becomes defective due to faulty materials or workmanship during the guarantee period following purchase, we guarantee to repair it free of charge, provided that:
• The product has not been misused.
- Repairs have not been attempted by persons other than our own service staff or the staff or authorised repairers.
• Proof of purchase date is produced.
This guarantee is offered as an extra benefit and is additional to consumers' statutory rights.
EC Declaration of Conformity
We declare that units:
VP321, VP331
conform to 89/392/EEC, 89/336/EEC, EN55014, EN55104, 73/23/EEC, EN60335
A weighted sound pressure 80dB (A)
A weighted sound power 93dB (A)
Hand/arm weighted vibration <2.5m/s²
Brian Cooke
Director of Engineering
Spennymoor, County Durham DL16 6JG, United Kingdom

natural_image
Pure horizontal black line on white background (no text or symbols)| Australia Black & Decker (A'asia) Pty Ltd Tel: 03 9213 8200286-288 Maroondah Highway Fax: 03 9726 7150North Croydon, Victoria 3136 | ||
| Belgique/België Black & Decker Belgium NV Tel: 02 719 07 11Weihoek 1, Nossegem Fax: 02 721 40 451930 Zaventem-Zuid | ||
| Danmark Black & Decker AB Tlf: 70-20 15 10Hejrevang 26 B, 3450 Allerød Fax: 48-14 13 99 | ||
| Deutschland Black & Decker GmbH Tel: 06126 210Black & Decker Straße 40 Fax: 06126 21243565510 Idstein | ||
| Ελλάς Black & Decker (Ελλάς) AE Τηλ: 01 9242870-75Αεωφ. Συγγρού 154Service: 01 9242876-7Αθήνα 176 71Fax: 01 9242869 | ||
| España | Black & Decker de España SACtra. de Acceso a Roda de Bará,km 0,7, 43883-Roda de Bará, Tarragona | Tel: 977 297110Tlx: 56631 BLADE EFax: 977 802342 |
| France | Black & Decker (France) SarlLe Paisy, 69570 Dardilly, Lyon Tlx: 300 250Fax: 72 20 39 00 | |
| Helvetia | Black & Decker AG ElektrowerkzeugeRütistraße 14, CH-8952 SchlierenSchweiz/Suisse | Tel: 01 730 69 33Tlx: 54462 BDZH CHFax: 01 730 70 67 |
| Italia | Black & Decker Italia SpAViale Elvezia 2, 20052 Monza (Mi) | Tel: 039 23 87 1Fax: 039 23 87 59 3 |
| Nederland | Black & Decker (Nederland) BVFlorijnstraat 10, 4879 AH Etten-Leur | Tel: 076 5082000Fax: 076 5038184 |
| New Zealand | Black & Decker, 483 Great South Rd,Penrose, Auckland | Tel: 09 579 7600Fax: 09 579 8200 |
| Norge | Black & Decker (Norge) A/SStrømsveien 344, 1081 Oslo | Tel: 22-32 46 40Fax: 22-32 46 50 |
| Österreich | Black & DeckerWerkzeugevertriebs GmbHErlaaerstraße 165, Postfach 69,1230 Wien | Tel: 0222 66 116 0Tlx: 13228 BLACK AFax: 0222 66 116 14 |
| Portugal | Black & DeckerRua Egas Moniz 173, Apartado 19S. João do Estoril, 2768 Estoril, Codex | Tel: 4687613/4687513Tlx: 16 607 BLADEC PFax: 467 15 80 |
| South Africa | Powerdek Tool Distributors22 Inglestone Road, Village Deep Fax: Johannesburg, South Africa | Tel: 011 493 4000011 493 6391 |
| Suomi | Black & Decker OyRälssitie 7 C, 01510 Vantaa | Puh: 358-0-825 4540Fax: 358-0-825 45444 |
| Frälsevägen 7 C01510 Vanda | Tel: 358-0-825 4540Fax: 358-0-825 45444 | |
| Sverige | Black & Decker ABBox 603, 421 26 Västra Frölunda Fax: Besöksadr. Ekonomivägen 11 | Tel: 031-68 60 00031-68 60 08 |
| United Kingdom | Black & Decker210 Bath Road, SloughBerkshire SL1 3YD | Tel: 01753 511234Tlx: 848317 BAND MHFax: 01753 551155 |
English
natural_image
Line drawing of a refrigerator interior with no visible text or symbols• Installation instructions
- Istruzioni per l'installazione
• Montageanweisungen
- Instructions d'installation
- Instrukties voor installatie
- Instrucciones de instalación
- Instruções de instalação • Odηγίεσ εγκατάστασησ
• Montering • Asennusohjeet
- Monteringsanvisning • Monteringsanvisning
text_image
Diagram showing two views of a device with labeled parts and hand tool, illustrating electrical or mechanical installation steps.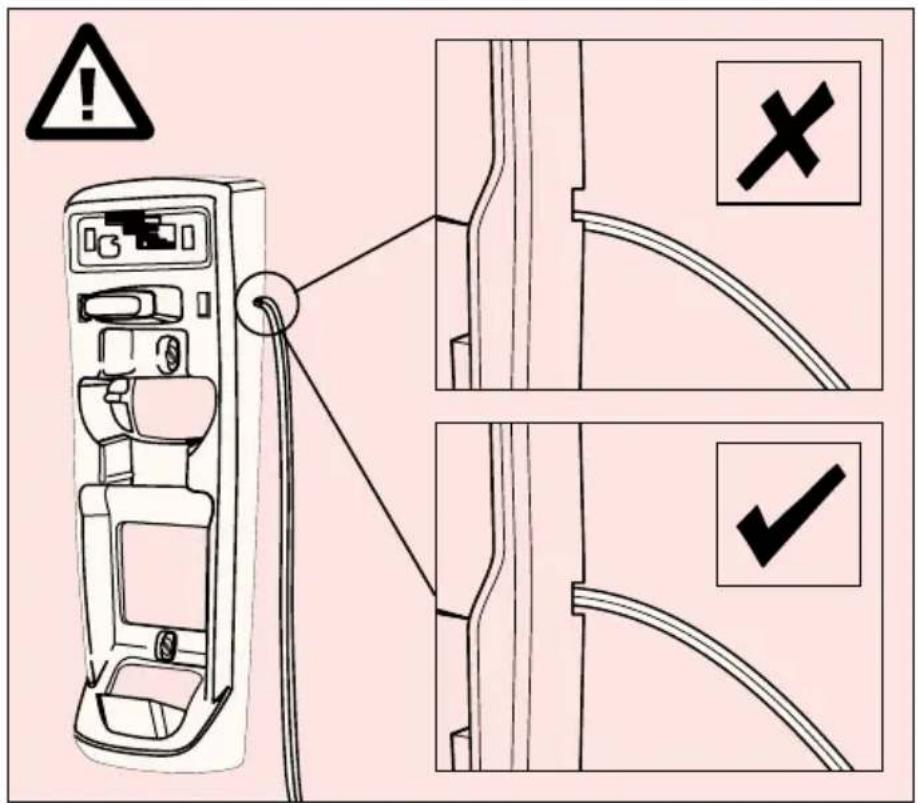
text_image
Diagram showing a car charging station with warning symbols and safety instructions in Chinese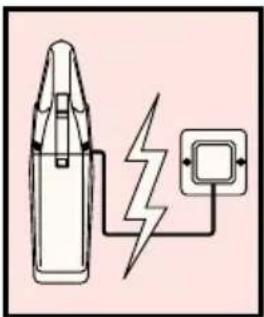
natural_image
Simple line drawing of a battery connected to a power outlet with a lightning bolt (no text or symbols)- Charging • Carica • Zum Aufladen
- Mise en charge • Heropladen • Recarga
• Carregar • φόρτιση • Opladning
• Lataus • Lading • Laddning
- Min. 16 hrs charge time • Ricaricate per un minimo di 16 ore • Aufladezeit Min. 16 Std.
- 16 heures minimum • Minimaal 16 uur opladen • Tiempo mínimo de carga de 16 horas
- Tempo mínimo de carga 16 horas • Πριν από την πρώτη χρήση: ελάχιστη φόρτιση 16 ώρεσ
- Før produktet tages i brug første gang, skal det oplades i 16 timer • Lataa tuotetta 16 tuntia ennen ensimmäistä käyttöä • Før du tar produktet i bruk, skal dette lades i 16 timer
-
Före första användning skall produkten laddas 16 timmar
-
The switch must be in off position
- Ponete l'interruttore sulla posizione "off"
- Der Schalter muß in "off" Position stehen • Assurez-vous que le spir est bien en position arrêt • Kruimeldief schakelaar moet in de "uit" positie staan • El interruptor debe estar en posición de "0" • O interruptor do mini aspirador deve permanecer na posição "off"
- O diakóptno tno oxoúnao Dustbuster prépnei va eïvaí kleiotóo • Sørg for at strømafbryderen er "off" stilling • Varmista, että virrankatkaisija on pois pääitä • Pass på at strømbryteren er, slått av • Se till att strömbrytaren är avstängd
text_image
A ×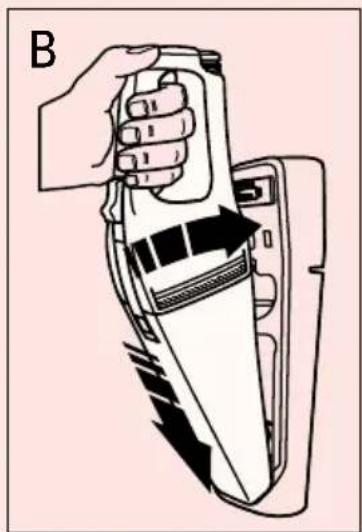
natural_image
Illustration of a hand holding a device with arrows indicating motion or force (no text or symbols)
text_image
C 0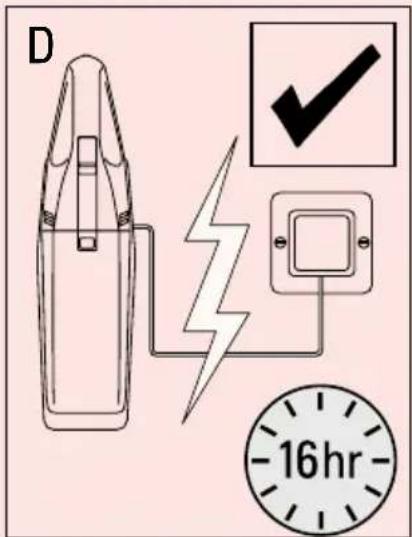
text_image
D -16hr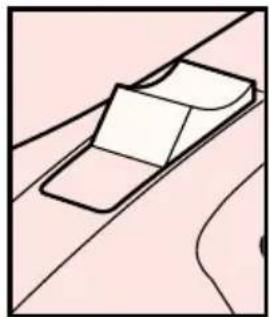
natural_image
Simple line drawing of a car on a road with lane markings (no text or symbols)• How to use • Istruzioni per l'utilizzo
- Inbetriebnahme • Mode d'utilisation
- Gebruik: richtlijnen • Instrucciones de uso
- Utilização • Οδηγίεσ χρήσησ • Anvendelse
• Käyttö • Bruk • Användning
text_image
0 1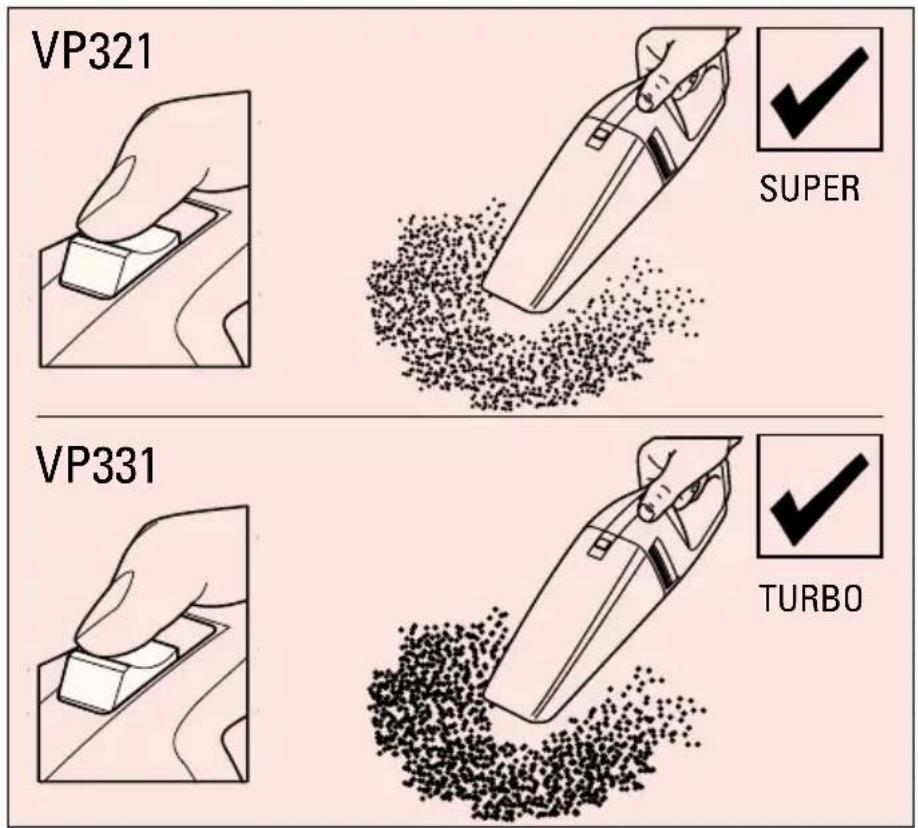
text_image
VP321 SUPER VP331 TURBO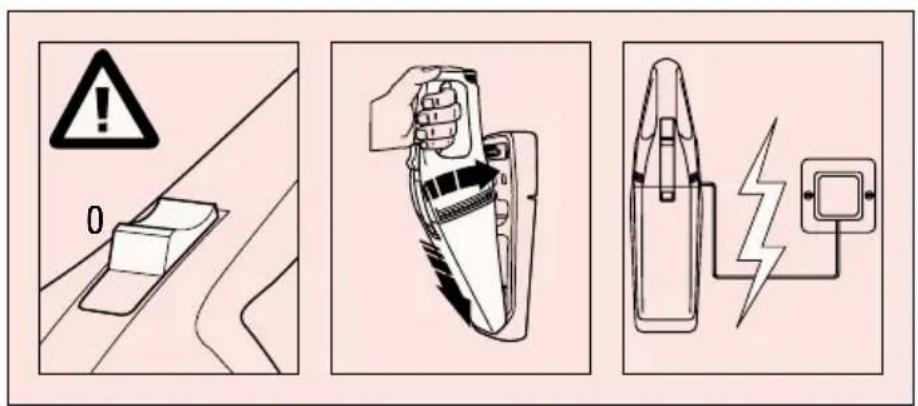
text_image
Safety warning illustration showing hazard, a device with warning symbol, and a plug plug plug plug plug plug plug plug plug plug plug plug plug plug plug plug plug plug plug plug plug plug plug plug plug plug plug plug plug plug plug plug plug plug plug plug plug plug plug plug plug plug plug plug plug plug plug plug plug plug plug plug plug plug plug plug plug plug plug plug plug plug plug plug plug plug plug plug plug plug plug plug plug plug plug plug plug plug plug plug plug plug plug plug plug plug plug plug plug plug plug plug plug plug plug plug plug plug plug plug Plug
natural_image
Simple geometric diagram with a central square and intersecting lines, no text or symbols present.- Removing the dustbowl • Rimozione della vaschetta raccoglipolvere • Entfernen des Staubfangsackes
- Enlever le nez de votre Spir • Verwijder de neus van de kruimeldief • Vaciado del depósito • Remoção do depósito
- Byáčovtao tη σακούλα συλλογήσ σκόνησ • Afmontering av støvbeholder • Pölykasetin irrottaminen • Fjerning av støveholder • Borttagande av dammbehållare
text_image
Diagram illustrating finger adjustment technique with labeled arrows and magnified detail view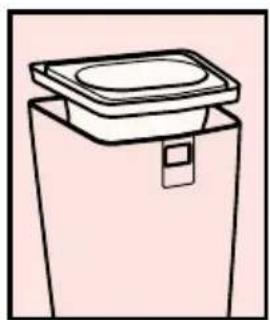
natural_image
Simple line drawing of a container with a lid and handle (no text or symbols)i
- Cleaning the filter and dust bowl
- Pulizia del filtro e della vaschetta raccoglipolvere
- Reinigen des Filters und Staubbehälters
- Nettoyage du filtre et du réservoir à poussière
- Het schoonmaken van het filter en stofreservoir
- Limpieza del filtro y del depósito
- Limpeza do filtro e do depósito do lixo
- Kaθαρίζοντασ το φίλτρο και το δοχείο σκόνησ
- Rengøring af filter og støvbeholder
- Suodattimen ja pölynkerääjän puhdistus
- Rengjøring av filter og støvbeholder
- Rengöring av filtret och dammbehållaren
text_image
A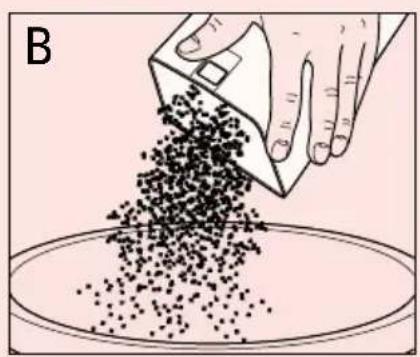
natural_image
Illustration of a hand pouring granular material into a container (no text or symbols)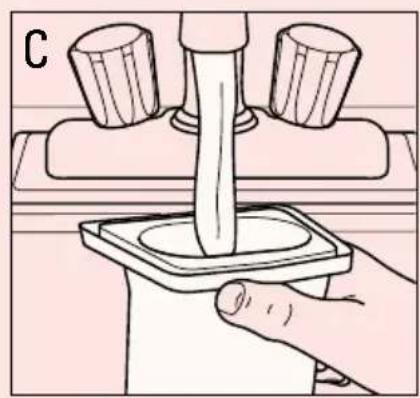
natural_image
Illustration of a hand using a pipette to press a sample into a square tube (no text or symbols present)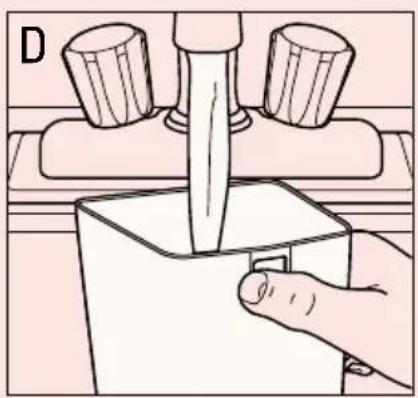
natural_image
Illustration of a hand using a pipette to press a sample into a container (no text or symbols visible)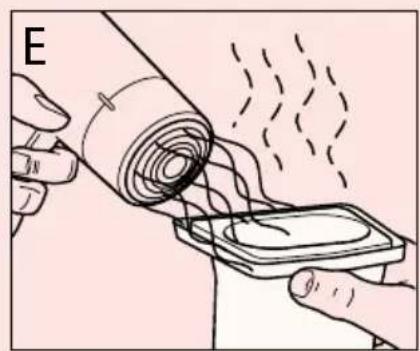
natural_image
Illustration of a hand holding a rolled tube with a magnified view of a small object, no text or symbols present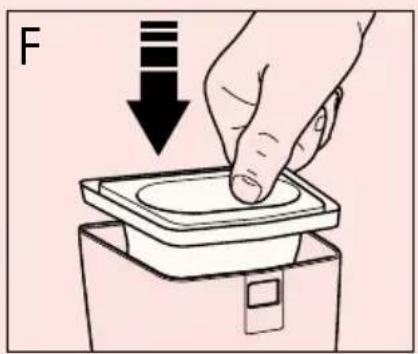
text_image
F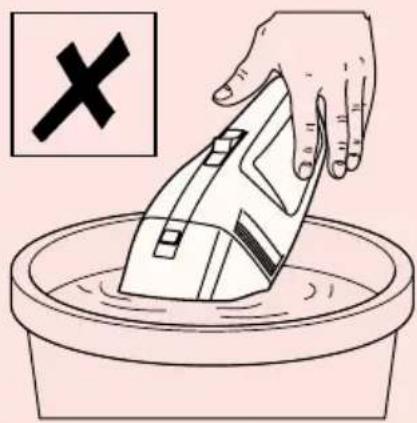
text_image
Diagram showing a hand washing a washing machine in a basin, with a black X symbol indicating cancellation or rejection.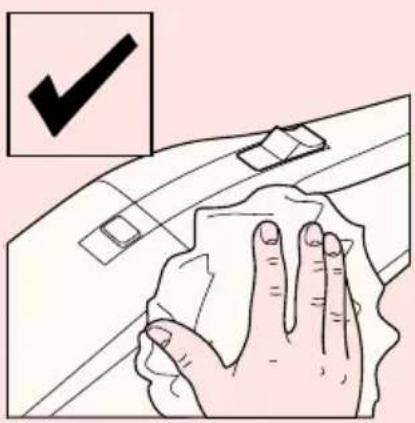
text_image
Illustration showing hand cleaning a car with a checkmark indicating selection or confirmation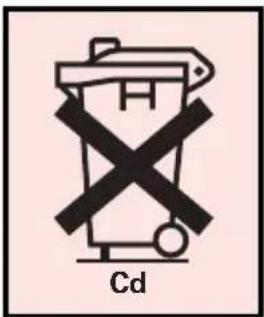
text_image
Cd• To remove the battery pack for disposal
- Per togliere le batterie • Herausnehmen des verbrauchten Akku-Packs • Pour enlever le pack batteries de l'appareil • Om de batterijen te verwijderen • Cuando tenga que tirar la batería
- Para deitar fora o conjunto de pilhas • Για να αφαιρέσετε το πακέτο μπαταρίασ για διάθεση
- For at tage batteripakken ud af produktet • For å ta ut batteripakken • För att ta ur batteripaketet
text_image
Cd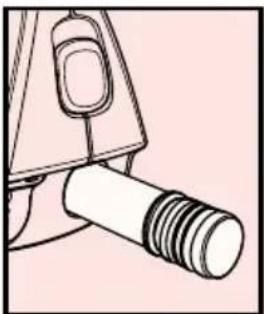
natural_image
Line drawing of a mechanical component with threaded shaft and handle (no text or symbols)- Inserting and removing the Versapak Stick
- Inserimento e rimozione dello stick VersaPak
- Entnehmen/Einsetzen der VersaPak-Patrone
- Insérer et enlever la batterie VersaPak • Plaatsen en verwijderen van de VersaPak batterijen • Cómo poner y quitar las pilas VersaPak • Como colocar e retirar as baterias VersaPak • Τοποθέτηση και αφαίρεση τησ ράβόου VersaPak • Isætning og udtagning af VersaPak batteriet • Akun asennus ja Irroitus • Isetting og uttaking av VersaPak batterier
- Isättning och uttagning av VersaPak batteriet
natural_image
Technical illustration of a mechanical component with two views showing assembly steps (no text or symbols)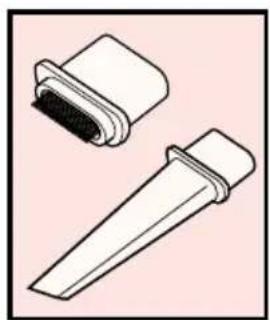
natural_image
Two technical illustrations of mechanical components, one with a curved housing and the other a rectangular tool (no text or symbols)- Accessories • Accessori • Zubehör
- Accessoires • Hulpstukken
- Accesorios - Acessórios
• Ιδιαίτερα εξαρτήματα • Tilbehør
• Tarvikkeet • Tilbehør • Tillbehör