
IronVision PRP2400 001 - Iron HOOVER - Free user manual and instructions
Find the device manual for free IronVision PRP2400 001 HOOVER in PDF.
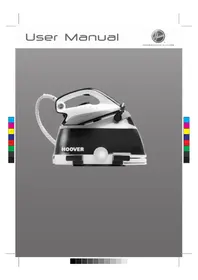


| Product Type | Steam Iron |
| Brand | Hoover |
| Model | IronVision PRP2400 001 |
| Power Rating | 2400 W |
| Water Tank Capacity | 300 ml |
| Soleplate Material | Ceramic |
| Steam Output (Continuous) | 40 g/min |
| Steam Boost | 150 g/min |
| Spray Function | Yes |
| Anti-Drip System | Yes |
| Self-Clean Function | Yes |
| Auto Shut-Off | Yes (8 min vertical, 30 sec horizontal) |
| Variable Temperature Control | Dial with fabric settings |
| Dimensions (L x W x H) | 30 x 12 x 15 cm |
| Weight | 1.3 kg |
| Power Cord Length | 2 m |
| Water Fill Opening | Wide opening for easy filling |
| Cleaning Method | Self-clean and descaling recommended |
| Safety Features | Auto shut-off, heat-resistant handle, stable heel rest |
| Accessories Included | Measuring cup, user manual |
Frequently Asked Questions - IronVision PRP2400 001 HOOVER
User questions about IronVision PRP2400 001 HOOVER
0 question about this device. Answer the ones you know or ask your own.
Ask a new question about this device
Download the instructions for your Iron in PDF format for free! Find your manual IronVision PRP2400 001 - HOOVER and take your electronic device back in hand. On this page are published all the documents necessary for the use of your device. IronVision PRP2400 001 by HOOVER.
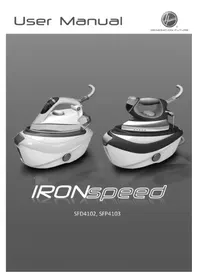
USER MANUAL IronVision PRP2400 001 HOOVER

Parts Description

Fig. 1: Base and Tank Description
| 1 Cord Storage |
| 2 Tank |
| 3 Rear Rubber |
| 4 Iron Tray |
| 5 Rubber Studs |
| 6 Iron Lock System |
| 7 Water Tank Cap |
| 8 Steam Hose Storage |
| 9 Decoration Cover |

Fig. 2: Domestic Iron Description
| 10 Iron Light |
| 11 Steam Trigger |
| 12 Temperature Dial |

Fig. 3: Domestic Iron Control Panel
| 13 | Main Switch |
| 14 | "Water Tank Empty" Light |
| 15 | Steam "Boost" Switch |
Introduction
Dear customer,
First of all, we would like to congratulate you for purchasing this Hoover ironing system and to thank you for the confidence you have in the Hoover brand.
This appliance has been manufactured with great care, respecting all of our quality criteria, and has been tested several times. We hope its use will fulfil your expectations. We are strongly convinced that it will make your ironing much faster and better.
Before using your new Hoover appliance, please read this user's manual carefully. If you need further information or if you encounter any trouble not noted in this manual, please contact the after-sales service or your standard dealer.
Important Safety Instructions
Read this user manual carefully before first use and save it for future reference.
This appliance can be used by children aged from 8 years and above and persons with reduced physical, sensory or mental capabilities or lack of experience and knowledge if they have been given supervision or instruction concerning use of the appliance in a safe way and understand the hazards involved. Children shall not play with the appliance. Cleaning and user maintenance shall not be made by children without supervision.
- This product has been designed for domestic use only. In case of any commercial use, inappropriate use or failure to comply with the instructions, the manufacturer is not responsible and the guarantee will not apply.
- Before connecting your appliance, check if the mains voltage is the same as the voltage indicated on your appliance and that the power outlet is connected to the earth.
- Ensure before each use that the electric cord or any other important part is not damaged.
- Keep the iron and its cord out of reach of children
Important Safety Instructions
less than 8 years of age when it is energized or cooling down.
- Never direct the steam towards persons or animals. Never direct the steam jet towards any other electrical or/and electronic appliances.
- The iron is not to be used if it has been dropped, if there are visible signs of damage or if it is leaking.
- If the appliance shows evidence of breakdown, malfunction, leakages. Please make sure it is checked by an authorized Service Centre to avoid any danger.
• Always make sure the appliance is switched off, unplugged and cooled down before doing any maintenance work.
- The iron must not be left unattended while it is connected to the supply mains and before it has cooled down.
- Do not unplug the appliance by pulling on the cord or on the appliance.
- Never immerse the iron, the stand, the cable or the plugs in water. Never hold them under the water tap.
- The soleplate of the iron can become extremely hot and may cause burns if touched. Never touch the electric cords with the soleplate.
- If the supply cord is damaged, it must be replaced by the manufacturer, service agent or similarly qualified persons in order to avoid a hazard.
Important Safety Instructions
- When placing the iron on its stand, ensure that the surface on which the stand is placed is stable.
- The plug must be removed from the socket-outlet before the water reservoir is filled with water.
- The surfaces are liable to get hot during use.
- To have an electronic copy of the instruction manual, contact the after-sales service indicated on the guarantee card.
- The iron must be used and rested on a stable surface.
Chapter 1: Preparation for Use
Due to the powerful output of steam, Hoover recommends the use of an active ironing board with blowing and vacuuming function which allows escape of any excess steam.
Place the ironing system on a stable and level surface, for example on the hard part of an ironing board or on a heat-resistant surface.
IMPORTANT: Ensure your appliance is unlocked before switching the power on (Fig 4).


Fig. 4: Unlock & Switch on Iron System
Chapter 1.1: What Kind of Water May be Used?
The Hoover ironing system has been designed to be used with tap water only.
There is no need to use distilled or pure distilled water.
Nevertheless, in case you live in a hard water area, you can mix 50% of distilled water with 50% of tap water.
Do not use any other kind of water or do not add other contents to the water tank as it can damage your appliance.
Chapter 1.2: Filling the Water Tank
Switch off the appliance and unplug it.
Open the water tank cap (7) to gain access to the water tank.
Fill the tank with tap water and ensure you do not exceed the MAX mark.
WARNING: Do not add vinegar, hot water, perfume, or any other kind of chemical agents or any other contents in the water tank. It could damage the steam generator and shorten its life use.

Fig. 5: Water Tank Filling
Chapter 1.3 - Switching on the Appliance
Connect the appliance with the mains cord to the earthed socket, the light (13) will flash with red meaning that the appliance is in standby status. Press on the switch, the light will turn green meaning that the appliance is switched on. Turn the temperature dial (12) to your desired setting, the iron light (10) illuminates meaning the soleplate is heating up.
After approximately 3 minutes, the light (13) will stop flashing and remain constant. You can now start ironing and if you require steam press the steam trigger (11).
IMPORTANT:
- The appliance has a "Steam Boost" Function. If you want to increase the amount of Steam you can press the "Steam Boost" Button (15), the green light will illuminate, indicating you have actioned this function.
- When "Water tank empty" light (14) flashes red, this means there is no more water in the tank. Please refill the tank following the instructions of chapter 1.2.
N.B.
The first time the appliance is used, some fumes, dust and a smell can be noted.
It's quite normal and will quickly disappear.
This is due to a treatment applied to the soleplate that improves the steam performance.
Before use, please use the iron as described in Chapter 2.4 Vertical Steam Ironing.
Chapter 2: Using Your Steam Generator
Chapter 2.1: Regulating the Soleplate Temperature
Select the temperature of the soleplate by turning the dial (12) on the iron to the desired position. Wait a few moments until the iron light (10) is off.
This indicates that the soleplate has reached the required temperature.
While ironing, the iron light may switch on and off, this indicates that the temperature is being adjusted automatically to maintain temperature so as not to interrupt your ironing.

Help
To know the best suitable temperature for each textile, check the laundry care label of the article to be ironed. Please note that during use, the temperature light goes on from time to time. It signifies that the iron is heating up to the set temperature.
When ironing material with mixed fabrics, always ensure the temperature is set to the correct setting. If you select a lower temperature while ironing, wait until the iron has cooled down to the set temperature before you continue ironing.
If the temperature is too low, some drops of water could escape from the soleplate. Please raise up the temperature above the 2 dots (••) to avoid this issue.
Chapter 2.2 - Ironing
Dry Ironing
Select the temperature of the soleplate following the indications of chapter
2.1. Start your ironing without pressing the steam trigger (11), when the soleplate reaches the appropriate temperature.
Steam Ironing
Select the temperature of the soleplate following the indications of chapter 2.1. The steam will be ready to be used after iron light (10) disappears. From that time you can begin ironing and use the steam trigger. The steam flow stops when you release the trigger. Fig. 6: Pres:

Fig. 6: Pressing Steam Trigger Graphic
N.B.
During use, it is normal to experience some noise coming from your steam generator. It signifies that a pump injects water into the boiler.
Chapter 2.3 - How to Choose the Correct Soleplate Temperature and Steam?
To obtain the best results, it is really important to set the correct temperature of the soleplate and the steam flow you are using. If correctly used, it will simplify your ironing and provide outstanding results, making ironing easier and faster.
| Textile Soleplate T°C | |
| Jeans ••• | |
| Cotton ••• | |
| Linen ••• | |
| Starched Clothes ••• | |
| Velvet/Alcantara •• | |
| Wool •• | |
| Silk •• | |
| Cashmere •• | |
| Rayon •• | |
| Polyester • | |
| Nylon • | |
| Acrylic • | |
| Lycra • | |
| Polyamid • | |
Help
When steam ironing clothes on which shiny patches may occur, we recommend you to set the soleplate temperature to a lower temperature or iron the garment on the reverse.
Start with the fabrics that needed to be ironed at a lower temperature ( • ) and finish with those that needed to be ironed at the higher temperature ( •••/Max ).
Chapter 2.4 - Vertical Steam Ironing
Set the soleplate temperature (12) to the max temperature.
Hang curtains and clothes (jackets, suits, coats). Hold the iron in a vertical position at a short distance from the fabric to avoid burning it. Press the Steam trigger (11) to release the steam and move the Iron top to bottom.
WARNING: Do not direct the steam jet towards people or animals.

Chapter 2.5 - Refilling the Water Tank During Usage
You can fill the water tank at any time during use.
When the water tank is empty, the "Empty water tank" (14) will flash and alarm.
No more steam is released from the soleplate.
Open the water tank cap (7), refill the water tank ensuring you do not exceed the Max mark level.
Please refer to chapter 1.2 for more detailed instructions.
Chapter 2.6: Auto Shut off Function
The auto shut off function automatically switches off the appliance if the trigger (11) has not been used after 10 minutes.
The main switch (13) will beep and flash with red color to remind you that the appliance starts to go into standby status, you must switch on the appliance again.
Chapter 3: Maintenance and Cleaning
All the maintenance and cleaning operations have to be carried out when the unplugged appliance has cooled down for at least 2 hours, to prevent any risk of burns.
Chapter 3.1 - Cleaning the Appliance
Do not use any detergent or descaling products for cleaning the soleplate. Regularly clean it with a humid and non-metallic pad.
Empty the water tank after each use before storing it. To empty the water tank, press the trigger to release steam until no steam comes out.
To clean the plastic parts of the stand, please use soft clothes.
Chapter 3.2: Lock System
Switch off the appliance and unplug it.
Empty the water tank. To empty the water tank, press the trigger to release steam until no steam comes out.
Put the iron on the heat-resistant iron rubber studs (5). Wait at least 30 minutes allowing the soleplate and the generator to cool down.
Then follow the underneath indications in order to lock correctly your iron.
NOTE:
To lock the iron, you must ensure the soleplate is embedded in the rear rubber (3).
To unlock it, you must press the lock button then recover the hook to normal position.


Fig. 7: Domestic Iron Lock System
Chapter 3.4: Cord Storage
Store the power cord with cord storage holder (1), and store the steam hose in the steam hose storage (8).
Then you can take away your appliance in order to store it safely and easily.

Fig. 8: Cord Storage
Troubleshooting
These are common problems you may encounter when using your appliance. If you are unable to solve any issue please contact your local Hoover Service Office.
| Problem Cause | Solution | |
| The Iron does not heat up. | There is a connection problem.The appliance is not switched on.The soleplate temperature is too low. | Check the mains cord, the plug and the wall socketPress on the on/off switchSet a higher temperature of the soleplate |
| The appliance does not produce steam | The appliance is not switched onThe tank may be emptyYou are not pressing the steam triggerThe soleplate temperature is set to the maximum | Press on the on/off switchRefill the water tankPress the steam triggerIt works but steam is not visible as very hot and dry. |
| The soleplates becomes dirty or brown | There should be chemical or additives in the water used for ironingThe linen is still dirty | Never use any chemical or additives in the water. Contact your after sales service if the linen is still dirtyClean the soleplate with a non-metallic sponge |
| Water stripes appear on the textile | Your ironing board cover is saturated in water | Change the cover or use a mesh ironing board |
| The empty water tank indicator light flash and alarm | There is no more water in the tank Refi | I the water tank with water |

- PARTS DESCRIPTION
- INTRODUCTION
- IMPORTANT SAFETY INSTRUCTIONS
- CHAPTER 1: PREPARATION FOR USE
- CHAPTER 1.1: WHAT KIND OF WATER MAY BE USED
- CHAPTER 1.2: FILLING THE WATER TANK
- CHAPTER 1.3 - SWITCHING ON THE APPLIANCE
- IMPORTANT
- N.B
- CHAPTER 2: USING YOUR STEAM GENERATOR
- CHAPTER 2.1: REGULATING THE SOLEPLATE TEMPERATURE
- HELP
- CHAPTER 2.2 - IRONING
- DRY IRONING
- STEAM IRONING
- CHAPTER 2.3 - HOW TO CHOOSE THE CORRECT SOLEPLATE TEMPERATURE AND STEAM
- CHAPTER 2.4 - VERTICAL STEAM IRONING
- CHAPTER 2.5 - REFILLING THE WATER TANK DURING USAGE
- CHAPTER 2.6: AUTO SHUT OFF FUNCTION
- CHAPTER 3: MAINTENANCE AND CLEANING
- CHAPTER 3.1 - CLEANING THE APPLIANCE
- CHAPTER 3.2: LOCK SYSTEM
- NOTE
- CHAPTER 3.4: CORD STORAGE
- TROUBLESHOOTING
Brand : HOOVER
Model : IronVision PRP2400 001
Category : Iron