800SSC - Fitness Equipment True - Free user manual and instructions
Find the device manual for free 800SSC True in PDF.


User questions about 800SSC True
0 question about this device. Answer the ones you know or ask your own.
Ask a new question about this device
Download the instructions for your Fitness Equipment in PDF format for free! Find your manual 800SSC - True and take your electronic device back in hand. On this page are published all the documents necessary for the use of your device. 800SSC by True.
USER MANUAL 800SSC True
natural_image
Exterior view of a metal cage-like structure with a control panel and display unit (no text or symbols visible)
text_image
QR code image containing encoded data, no visible human-readable textSCAN FOR UP-TO-DATE OWNER'S MANUAL

text_image
QR code image containing encoded data, no visible human-readable textSCAN FOR ASSEMBLY VIDEO
IMPORTANT-PLEASE READ
All products shown are prototype. Actual product delivered may vary. Product specifications, features, and software are subject to change without notice.
For the most up-to-date version of this manual, please see our website: https://truefitness.com/services-support/user-manuals/
CONTACTING OUR SUPPORT TEAM
To contact TRUE for any of your pre or post installation questions, please call our toll-free numbers Monday - Friday 8:30am - 5:00pm (CST):
• Commercial Direct Customers and Corporate Accounts | 800.868.8783
• Retail Customers and Distributors | 800.883.8783
Or email us:
• Commercial Direct Customers and Corporate Accounts | service.direct@truefitness.com
• Retail Customers and Distributors | service@truefitness.com
• Service International | int.service@truefitness.com
When contacting TRUE, please have the following information ready:
- Serial Number of Unit
- Contact Information—Full Name, Email, and Phone Number
- Address of Facility or Residence
- Detailed Description Regarding Symptom of the Unit (along with pictures or video if applicable)
NOTE: Authorized service providers, dealers, and distributors may also use TRUE's online resource | portal.truefitness.com.
CONTACTING OUR SALES TEAM
Interested in owning more TRUE products? Please contact us with any product inquires so that we may direct you to the appropriate sales representative to help answer your questions.
• Phone | 800.426.6570
- Email | sales@truefi tness.com
• Hours | Monday - Friday 8:30am - 5:00pm (CST)
REPORTING FREIGHT CLAIMS OR PARTS DAMAGE
Unfortunately, sometimes materials can be damaged during shipment. If materials are damaged during shipment, please follow the guidelines below to determine the appropriate process for you to follow.
Severe Damage—Obvious damage to external packaging and internal product.
Please refuse the shipment and it will be returned to TRUE by the carrier. Contact TRUE product support by calling 800.883.8783 or sales support by calling 800.426.6570 Monday-Friday during normal business hours to notify us that the shipment has been refused. Once we have received the damaged shipment, a replacement shipment will be sent to you. If the shipment comes in multiple boxes, only refuse boxes with damage.
Slight Damage—Minimal damage to external packaging with unknown internal damage to product.
If the shipment has minimal damages and you are not sure if the actual product is damaged, you must sign the bill of lading as damaged when accepting the shipment. Once you have opened the box and you have determined something is indeed damaged, please gather the serial number, model number, description of damage, and photos of damage. Please make sure the photos include the damaged product as well as the damaged box the product arrived in. Contact TRUE product support (service@truefitness.com | 800.883.8783) or TRUE sales support (sales@truefitness.com | 800.426.6570) Monday-Friday during normal business hours.
Concealed Damage—No damage to external packaging but internal damage to product.
You may receive a shipment that looks intact and discover once the box has been opened that there are hidden damages. Please notify the carrier immediately. TRUE will not be able to file a claim if the carrier is not notified in a timely manner. Once you have called the carrier you will need to gather the serial number, model number, description of damage, and photos of damage. Contact TRUE product support (service@truefitness.com | 800.883.8783) or TRUE sales support (sales@truefitness.com | 800.426.6570) Monday-Friday during normal business hours.
TABLE OF CONTENTS
SAFETY INSTRUCTIONS
IMPORTANT SAFETY INSTRUCTIONS—SAVE THESE INSTRUCTIONS....5
GENERAL CARE AND MAINTENANCE....7
COMMERCIAL MAINTENANCE SCHEDULE....8
COMPLIANCES....8
DIMENSIONS....8
LABEL LOCATIONS....9
WARNING AND INTENDED USE LABELS....9
PROPER USE....11
ASSEMBLY INSTRUCTIONS
PREASSEMBLY CHECKLIST....12
ASSEMBLY STEPS....15
PREVENTATIVE MAINTENANCE
DAILY INSPECTION AND MAINTENANCE....28
WEEKLY INSPECTION AND MAINTENANCE....28
OTHER SCHEDULED PREVENTATIVE MAINTENANCE....28
CLEANING THE EQUIPMENT....28
WARRANTY INFORMATION
COMMERCIAL WARRANTY....29
WARRANTY DETAILS....30
WARRANTY REGISTRATION ....31
SAFETY INSTRUCTIONS
IMPORTANT SAFETY INSTRUCTIONS—SAVE THESE INSTRUCTIONS
! FACILITY AND USER SAFETY PRECAUTIONS
• Review and understand all of the warning labels affixed to this machine and on the facility safety sign.
- Be certain that the machine operation is understood before it is used. Refer to the instructional procedure label affixed to the machine.
- Make sure all users are properly trained on how to use this equipment. If this machine is being used in a commercial setting, end users may not have access to this owners manual. It is the responsibility of the facility to instruct users as to the proper usage of the equipment as well as making them aware of potential hazards. Maximum user weight is 500 lbs / 227 kg.
- Use each machine only for the intended exercise. Do not allow anyone to invent exercises not included on the instructional procedure label or the intended use label.
- Do not modify the machine.
- This equipment meets industry safety standards for stability when used for the intended exercise. Do not allow straps, resistance bands or other means to be attached to the framework of this machine to perform stretching or body weight exercises. This can result in machine instability and lead to serious crushing injuries.
- Keep children away from this equipment. Adults should closely supervise use by teenagers.
- It is recommended that users receive a thorough medical exam before commencing an exercise program. All medical issues should be reviewed to ensure that weight training will not aggravate pre-existing medical conditions.
- If the machine appears damaged or inoperable, contact a facility staff member to place an "OUT OF ORDER, DO NOT USE" sign on the machine until it is repaired. Only use TRUE supplied replacement components to service this machine.
- Instruct users not to wear loose or dangling clothes or have headphone wires hanging when using this equipment.
- Do not attempt to free any jammed assemblies by yourself as this may cause injury.

INSTALLATION SAFETY PRECAUTIONS
- Read this installation manual entirely before assembling this equipment.
- Verify that there is adequate space surrounding this piece of equipment for safe access and operation. Installation must meet ADA requirements for accessibility.
• Install this piece of equipment on a solid level surface that does not deviate more than 1/8" over a 10' distance (or as defined and required by local building and architectural codes.) - DO NOT install any fitness equipment near a pool, hot tub or other damp locations. Corrosion caused by installation in these locations can lead to premature failure of components.
- Be sure all hardware is tight before using this machine.
- Some assembly materials may come preassembled in the carton. Refer to the Assembly Instructions for more information on disassembling any assembly materials before beginning assembly.

MAINTENANCE SAFETY PRECAUTIONS
- Refer to the maintenance schedule table in this manual for when to perform maintenance.
-
Check the function of your machine DAILY by verifying the following:
-
Verify that all adjustments are possible and carried out with ease.
- Verify that the exercise is performed smoothly, free of noise, and/or binding.
- Check the function of your machine WEEKLY by verifying the following:
- Nuts, Bolts, and Fasteners: check tightness weekly. If any hardware has become loose, retighten it, use Loctite® Threadlocker 242, or both.
- Frames and Lifting Arms: Inspect weekly for integrity and function. Replace any component at first signs of wear. Use only TRUE supplied components.
- Replace any warning label at the first sign of wear. Labels and the facility safety sign may be obtained from TRUE.
GENERAL CARE AND MAINTENANCE
! IMPORTANT
Preventative maintenance is crucial to maintaining the function and safety of this equipment. Your facility must establish written guidelines for preventative maintenance and keep written or online records of the maintenance performed on these products. As a minimum, the items presented in the SAFETY section of this document and the items that follow here, should be included in your maintenance program.
- Nuts, bolts, and fasteners—check tightness weekly. If any hardware has become loose, retighten and/or use Loctite brand Threadlocker 242. Be sure all hardware is tight before using the machine.
- Frames—sweat, disinfecting sprays and spills can lead to corrosion which may lead to premature failure of components. Wipe all machines down with a damp cloth and dry completely each day. This includes painted parts and chrome parts.
- Painted and chrome plated parts—use Simple Green with a dilution of 32:1 or similar cleaner for light dirt and grime. Use Turtle Wax Polishing Compound or a good car polish to remove heavier dirt and grease as well as for polishing. DO NOT use solvents, lacquer thinner, acetone or finger nail polish remover. For scuffs and marks that are not removed by the above methods use a soft scrub cleanser. Make sure all parts are dry upon completion.
- Exercise instruction labels—clean with soap and water as needed.
- When replacing any component, use only TRUE supplied parts.
- Be sure all hardware is tight before using the machine.
Retain these instructions for future reference. If you have any questions, do not hesitate to contact your TRUE dealer or TRUE product support (service@truefitness.com | 800.883.8783).
COMMERCIAL MAINTENANCE SCHEDULE
| Commercial Maintenance Schedule | ||||||
| Daily | Weekly | Monthly | 6 Months | Annually | ||
| Inspect all surfaces and replace as needed. X | ||||||
| Inspect all safety and instructional decals. X | ||||||
COMPLIANCES
This equipment complies with all applicable codes and regulations. For a complete list of compliances, please visit www.truefi.tness.com.
DIMENSIONS
• ASSEMBLED DIMENSIONS (W X D X H)
49" x 58" x 87" / 125 cm x 147 cm x 221 cm
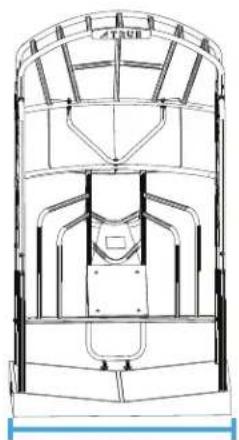
natural_image
Technical line drawing of a mechanical assembly or enclosure with no visible text or symbolsWIDTH
49"
125 cm
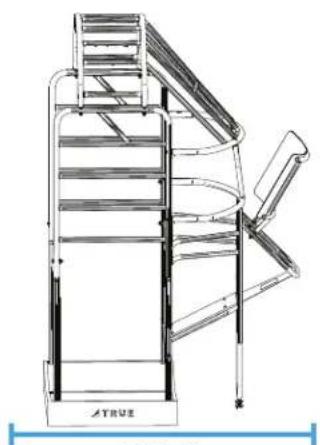
natural_image
Technical line drawing of a mechanical assembly with ladder and curved components (no text or symbols)DEPTH
58"
147 cm
HEIGHT
87"
221 cm
• PRODUCT WEIGHT
180 lbs / 82 kg
• MAXIMUM USER WEIGHT
500 lbs / 227 kg
• MAX FLOOR LOADING
72 lb/ft²(352 kg/m²)
LABEL LOCATIONS
| Item Part# Description Qty | ||
| 1 LBL-LOG-010BK LABEL, TRUE LOGO WHITE 10 IN 1 | ||
| 2 800SSC-WRN-LBL-BK WARNING DECAL 1 | ||
| 3 0357600BK STRETCH PLACARD DECAL 1 | ||
| 4 SERIAL LABEL LABEL, SERIAL NUMBER 1 | ||
| 5 00653000 GOLF STRETCH PLACARD DECAL (OPTION) 1 |
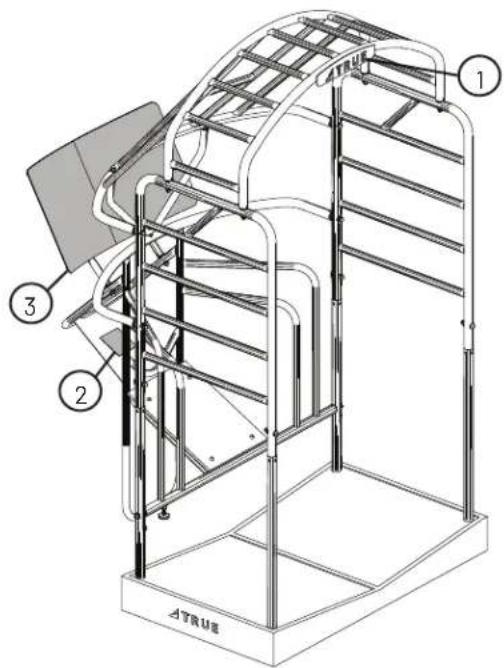
text_image
1 2 3 ΔTRUE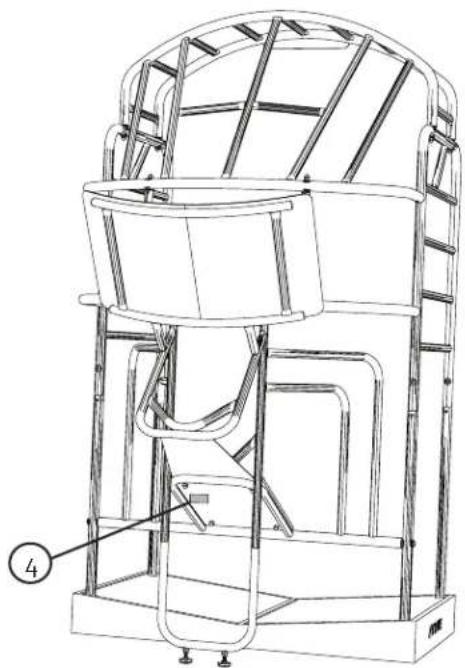
natural_image
Technical line drawing of a mechanical device with no visible text or symbolsWARNING AND INTENDED USE LABELS
WARNING: Replace all labels that may be worn, damaged, or missing.
To replace any worn or missing decals contact TRUE product support (service@truefitness.com | 800.883.8783).
| Part# and Description | Image |
| 0357600BK (TRUE Stretch Placard) | 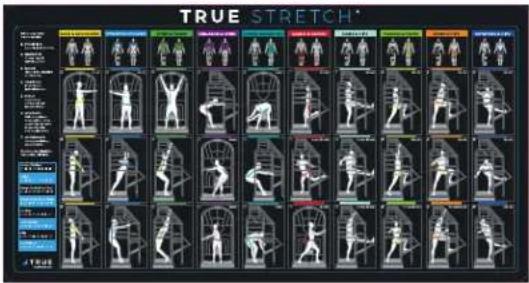 |
| Part# and Description Image | |
| 00653000 (TRUE Stretch Golf Placard) | 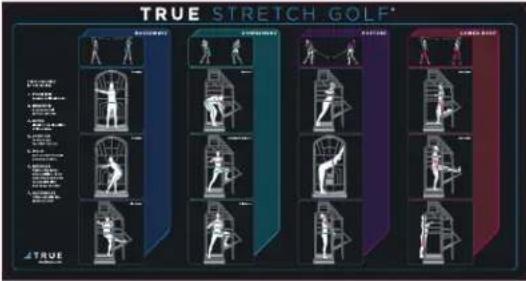 |
| 800SSC-WRN-LBL-BK (Warning Placard) | 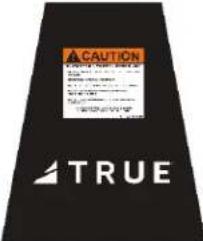 |
| SERIAL LABEL (Serial Number) |  |
| LBL-LOG-010BK (Logo) |  |
PROPER USE
Proper Training Position
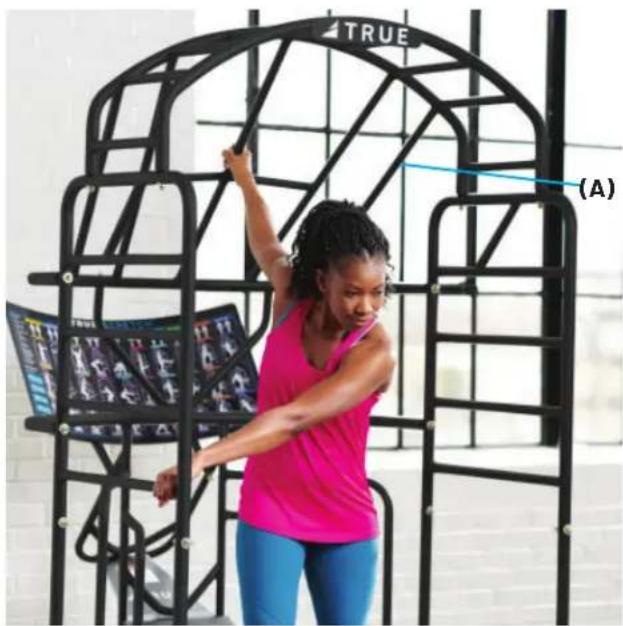
• Always stand inside the unit cage (A) while performing any exercise.
- DO NOT perform any stretches on the exterior of the cage.
- DO NOT swing on or climb on the unit.
- DO NOT use for "chin-ups" or other similar exercises.
- DO NOT use with inversion boots or any other unauthorized devices.
- DO NOT allow unsupervised children to use the unit. It is not a toy.
text_image
TRUE (A)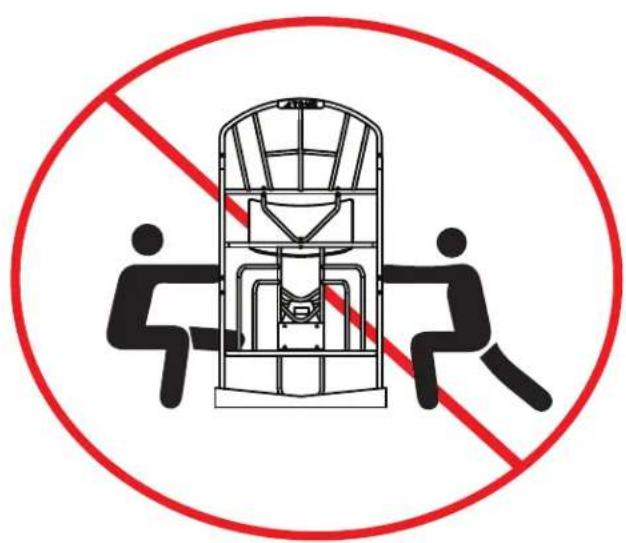
natural_image
Prohibition sign showing two figures assembling a device inside a circle, no text or symbols presentASSEMBLY INSTRUCTIONS

NOTE: Supplemental video available on YouTube: https://www.youtube.com/@TRUEFitnessservicevids
PREASSEMBLY CHECKLIST
CAUTION:
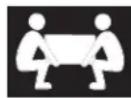
Use caution when assembling this product.
Unpacking and assembling this product requires two or more people.
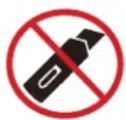
Use caution when unpacking this product. Avoid damage to the product.
DO NOT use a box cutter. DO NOT slice into the packaging.
VERIFY BOX CONTENTS
IMPORTANT! Please verify all box contents. If you have questions, or if there are any missing parts, contact product support (service@truefi tness.com | 800.883.8783).
| TOOLS NEEDED FOR ASSEMBLY | |
| Wire Cutters or Scissors (used in unboxing the machine) | 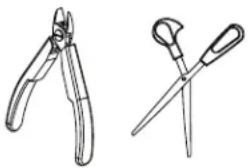 |
| #2 Phillips Screwdriver or Electric Screwdriver (both are optional in unboxing the machine) | 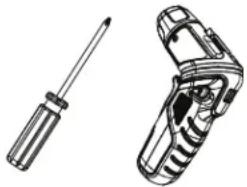 |
| 7/32" Allen Wrench (supplied) (or ratcheting socket wrench with hex bits) | 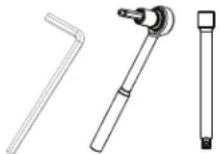 |
| 9/16" Wrench | [0H36] |
| BOX CONTENTS | ||
| Item Image Qty | ||
| Side Ladders 2 | 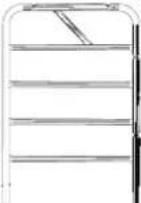 | |
| Upper Rear Tube Assembly | 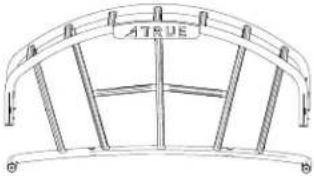 | 1 |
| Lower Rear Tube Assembly | 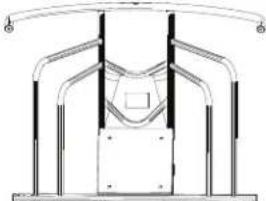 | 1 |
| Rubber Base Mats 2 | 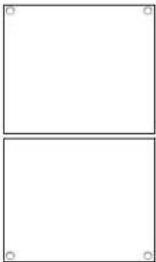 | |
| Front Corner Tubes | 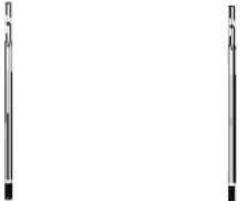 | 2 |
| Rear Corner Tubes | 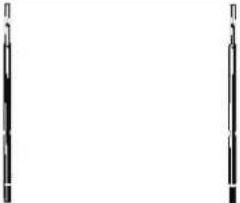 | 2 |
| BOX CONTENTS | ||
| Item Image Qty | ||
| V-Tube Assembly | 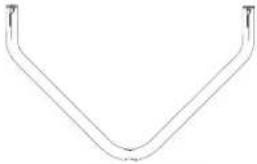 | 1 |
| Rear U-Tube Assembly | 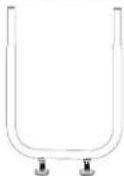 | 1 |
| Stretch Station Base | 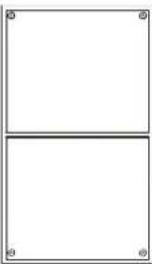 | |
| Placard Support Assembly | 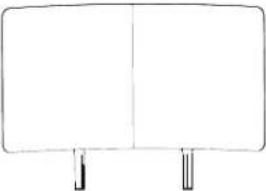 | 1 |
| Workout Placard 2 | 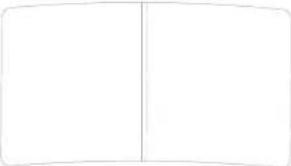 | |
| Hardware pack |  | 1 |
| Manual |  | 1 |
HARDWARE PACK CONTENTS
| 800SSC HARDWARE PACK | ||
| ITEM DESCRIPTION QTY | ||
| S311404 | BHCS, 3/8 X 2-1/2"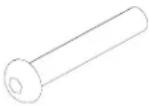 | 7 |
| 800SSC1600 | 3/8" STEEL WASHER, CURVED | 10 |
| C1138 | NYLON WASHER 5/8" ID X 7/8"OD X 1/16" THK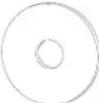 | 28 |
| S311400 | NUT, ACORN 3/8-16 YEL ZINC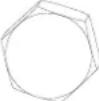 | 17 |
| S311406 | STEEL WASHER, FLAT | 18 |
| S301300 | THREADED STUD, 3/8" X 2-1/2"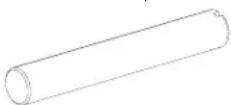 | 12 |
| 800SSC1100 | WASHER, RUBBER 3/8" ID X3/16" THK BLK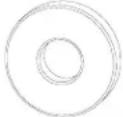 | 15 |
| C1086 | BHCS, 3/8 X 1-3/4"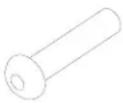 | 10 |
| 800SSC HARDWARE PACK | ||
| ITEM DESCRIPTION QTY | ||
| 800SSC1450 | O-RING, ID 26.5MM | 6 |
| N/A | ALLEN WRENCH 7/32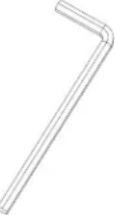 | 1 |
ASSEMBLY STEPS
OPTIONAL STEP-LINKING STRETCH STATION BASES
| Parts Used in this Step | |||
| ITEM P | ART# DESCRIPTION QTY | ||
| 1 S3 | 09700BK STRETCH STATION BASE 2 | ||
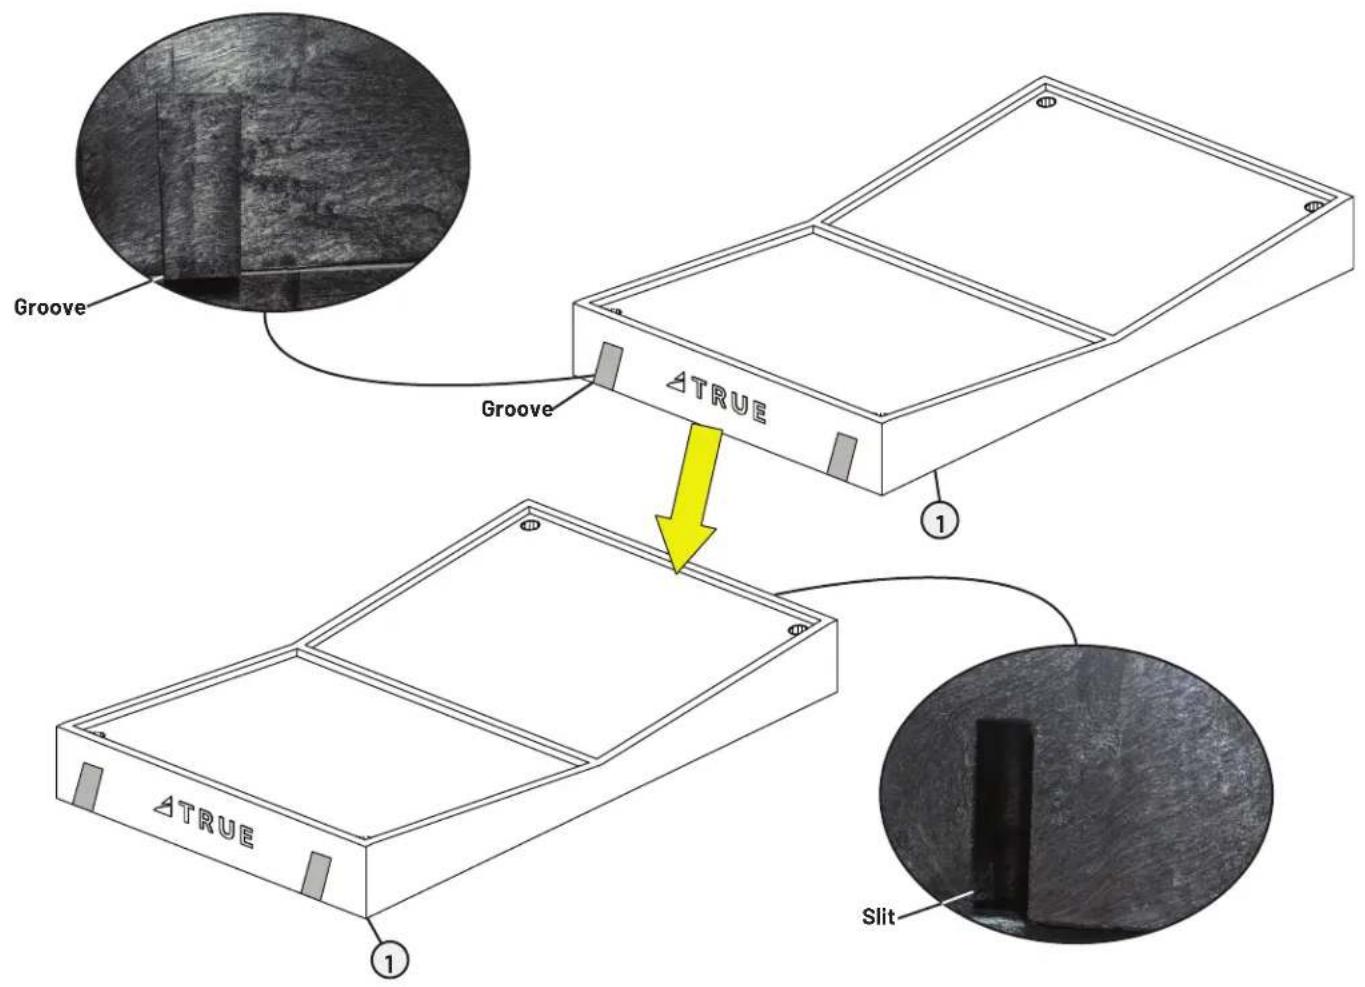
Lines up the grooves with the slits in order to link two or more stretch station bases together for space purposes.
NOTE: The grooves are located on the user's left side while the slits are located on the user's right side.
text_image
Groove Groove ΔTRUE 1 ΔTRUE Slit 1STEP 1—ATTACH FRONT AND CORNER TUBES
| Tools Used in this Step | |
| 7/32" Allen Wrench | 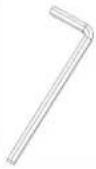 |
| Parts Used in this Step | |||
| ITEM | PART# DESCRIPTION QTY | ||
| 1 S0 | 00700IBK FRONT CORNER TUBE WELDMENT 2 | ||
| 2 S0 | 00800IBK REAR CORNER TUBE WELDMENT 2 | ||
| 3 S3 | 09900 RUBBER BASE MAT 684*580*10 2 | ||
| 4 S3 | 09700BK STRETCH STATION BASE 1 | ||
| 5 S3 | 11404 BHCS, 3/8 X 2-1/2" | 4 | |
Using a 7/32" allen wrench, attach the front and back corner tubes to the rubber base mats and base using 4 hex screws. Note the orientation of each tube for placement into the base.
NOTE: Position the deeper holes on the inside of the rear corner tubes.
IMPORTANT! DO NOT fully tighten hardware from Step 1 (Attach Front and Corner Tubes) to Step 5 (Attach Rear Tube Assembly) until step 6 (Attach V-Tube Assembly).
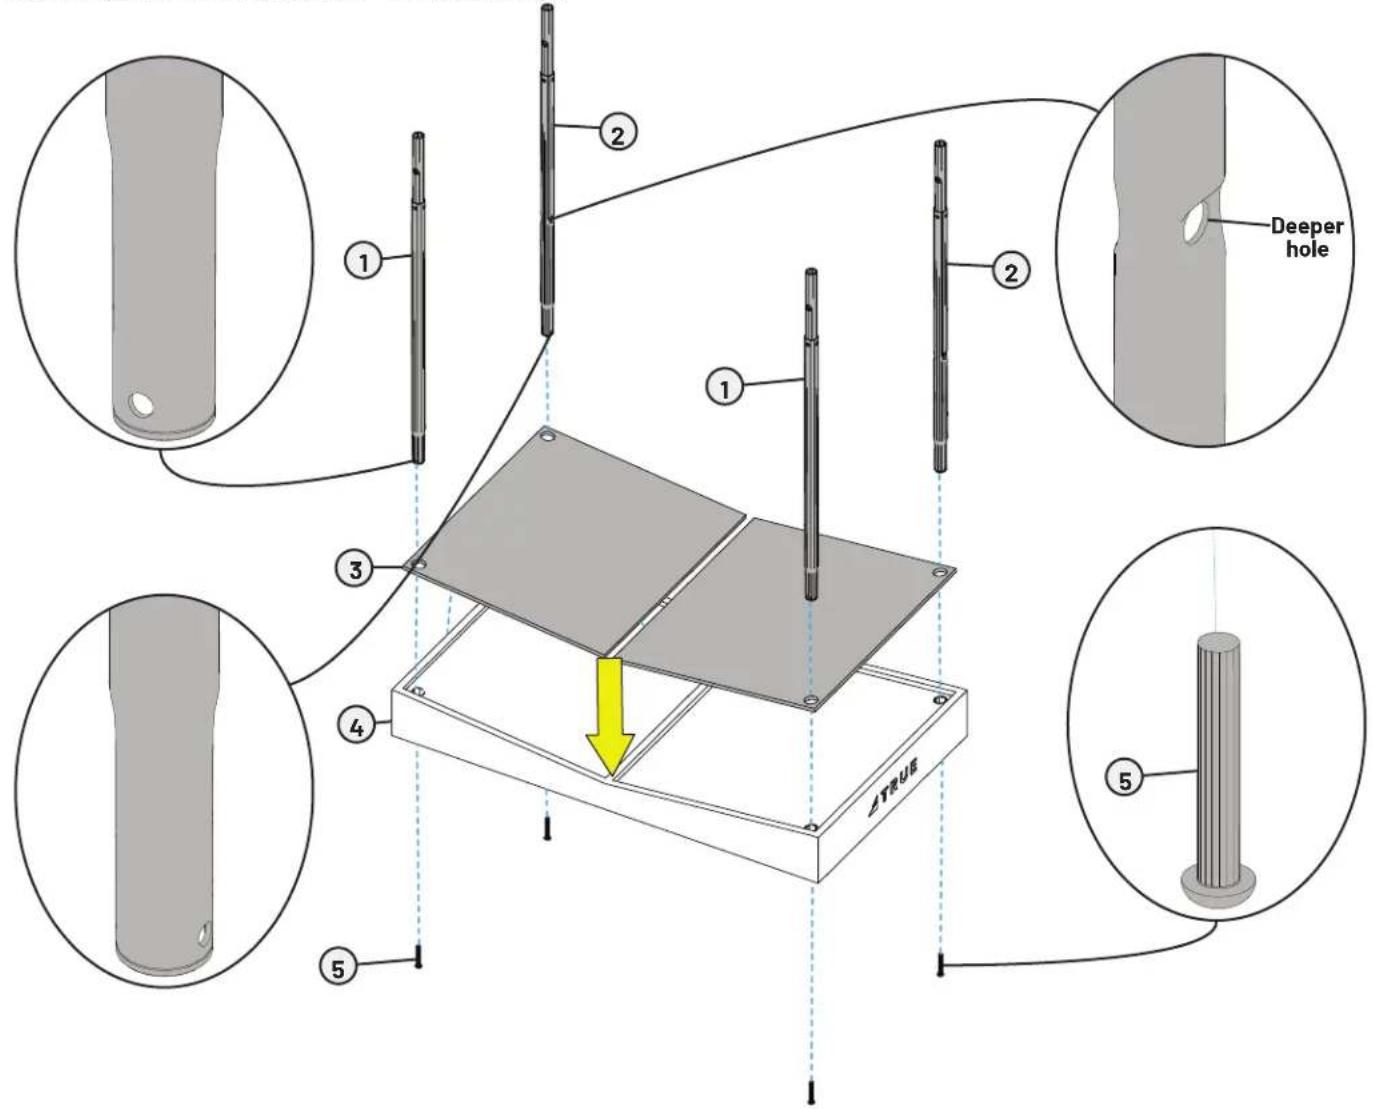
text_image
Deeper hole ▲TRUESTEP 2-ATTACH SIDE LADDERS
| Tools Used in this Step | |
| 7/32" Allen Wrench |  |
| 9/16" Wrench | [SEC8] |
| Parts Used in this Step | |||
| ITEM | PART# DESCRIPTION | QTY | |
| 1 S0 | 00300IBK SIDE LADDER | TUBE WELDMENT 2 | |
| 2 80 | OSSC1450 0-RING, ID 26.5MM 4 | ||
| 3 C10 | 86 BHCS, 3/8 X 1-3/4" | 4 | |
| 4 80 | OSSC1600 3/8" STEEL | WASHER, CURVED 8 | |
| 5 C1 | 38 NYLON WASHER 5/8" ID X 7/8" OD X 1/16" THK 8 | ||
| 6 S3 | 1400 | NUT, ACORN 3/8-16 YEL ZINC | 4 |
A. Position the 40-rings on the front and rear corner tubes as shown below.
B. Position the side tubes over the front and back corner tubes.
C. Using a 7/32" allen wrench and a 9/16" open-end wrench, attach the side tubes to the back corner tubes using 4 hex screws, 8 curved washers, 8 nylon washers, and 4 acorn nuts.
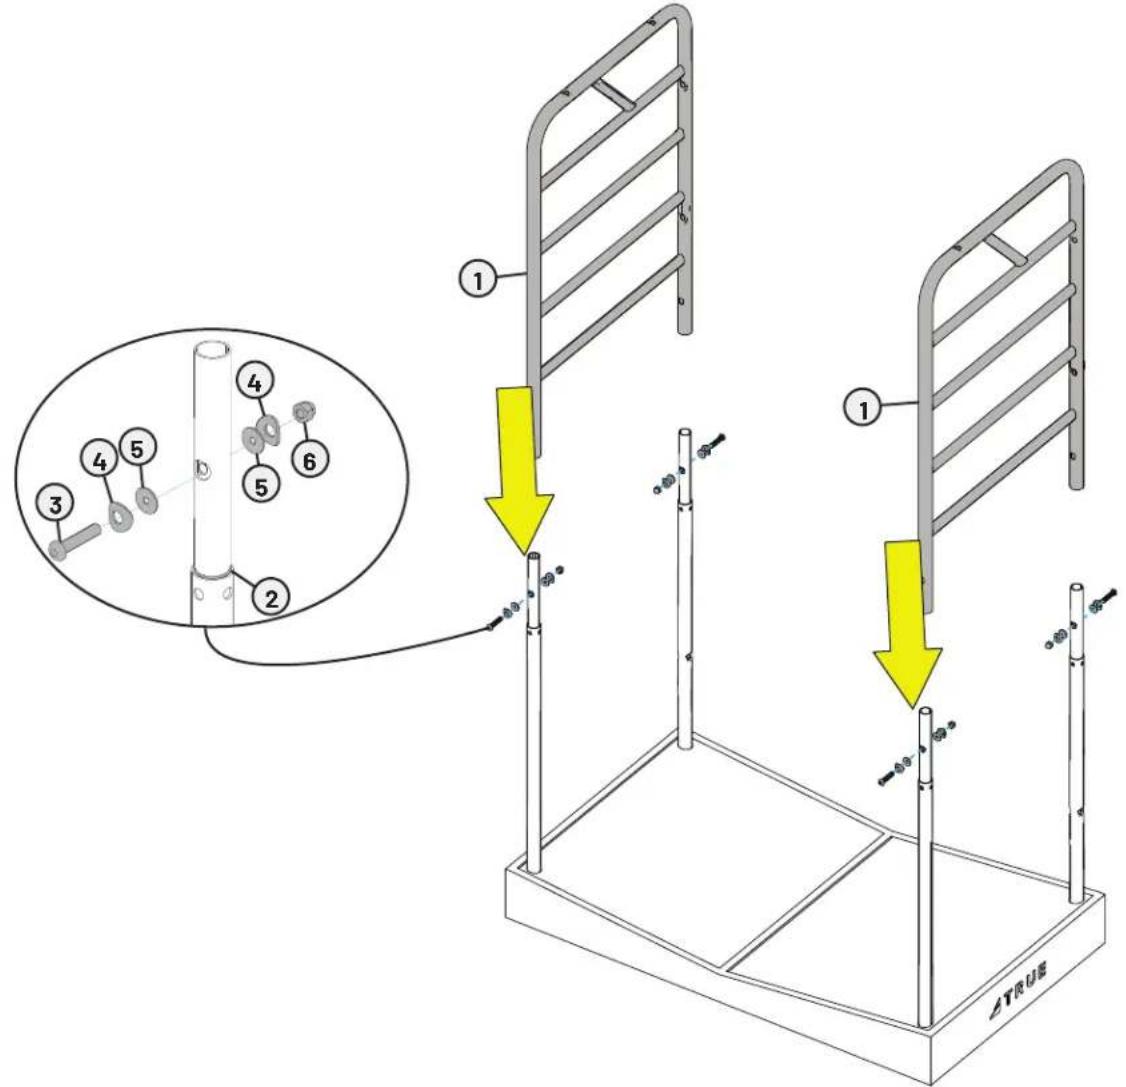
text_image
Technical diagram illustrating a step-by-step assembly of a ladder structure with labeled components and directional arrows indicating motion.STEP 3-INSERT THREADED STUDS
| Parts Used in this Step | |||
| ITEM | PART# DESCRIPTION QTY | ||
| 1 S0 | 00200SBK UPPER REAR TUBE WELDMENT 1 | ||
| 2 S0 | 00500BK V-TUBE WELDMENT 1 | ||
| 3 S0 | 00900BK LOWER REAR TUBE WELDMENT 1 | ||
| 4 S3 | 58400BK PLACARD SUPPORT WELDMENT 1 | ||
| 5 S3 | 01300 THREADED STUD, 3/8" X 2-1/2" 10 | ||
| 6 | C1138 | NYLON WASHER 5/8" ID X 7/8" OD X 1/16" THK | 10 |
Insert the threaded studs into the upper rear tube, v-tube, lower rear tube, and placard support assemblies.
NOTE: Approximately two inches of each threaded stud will remain visible after completing this step.
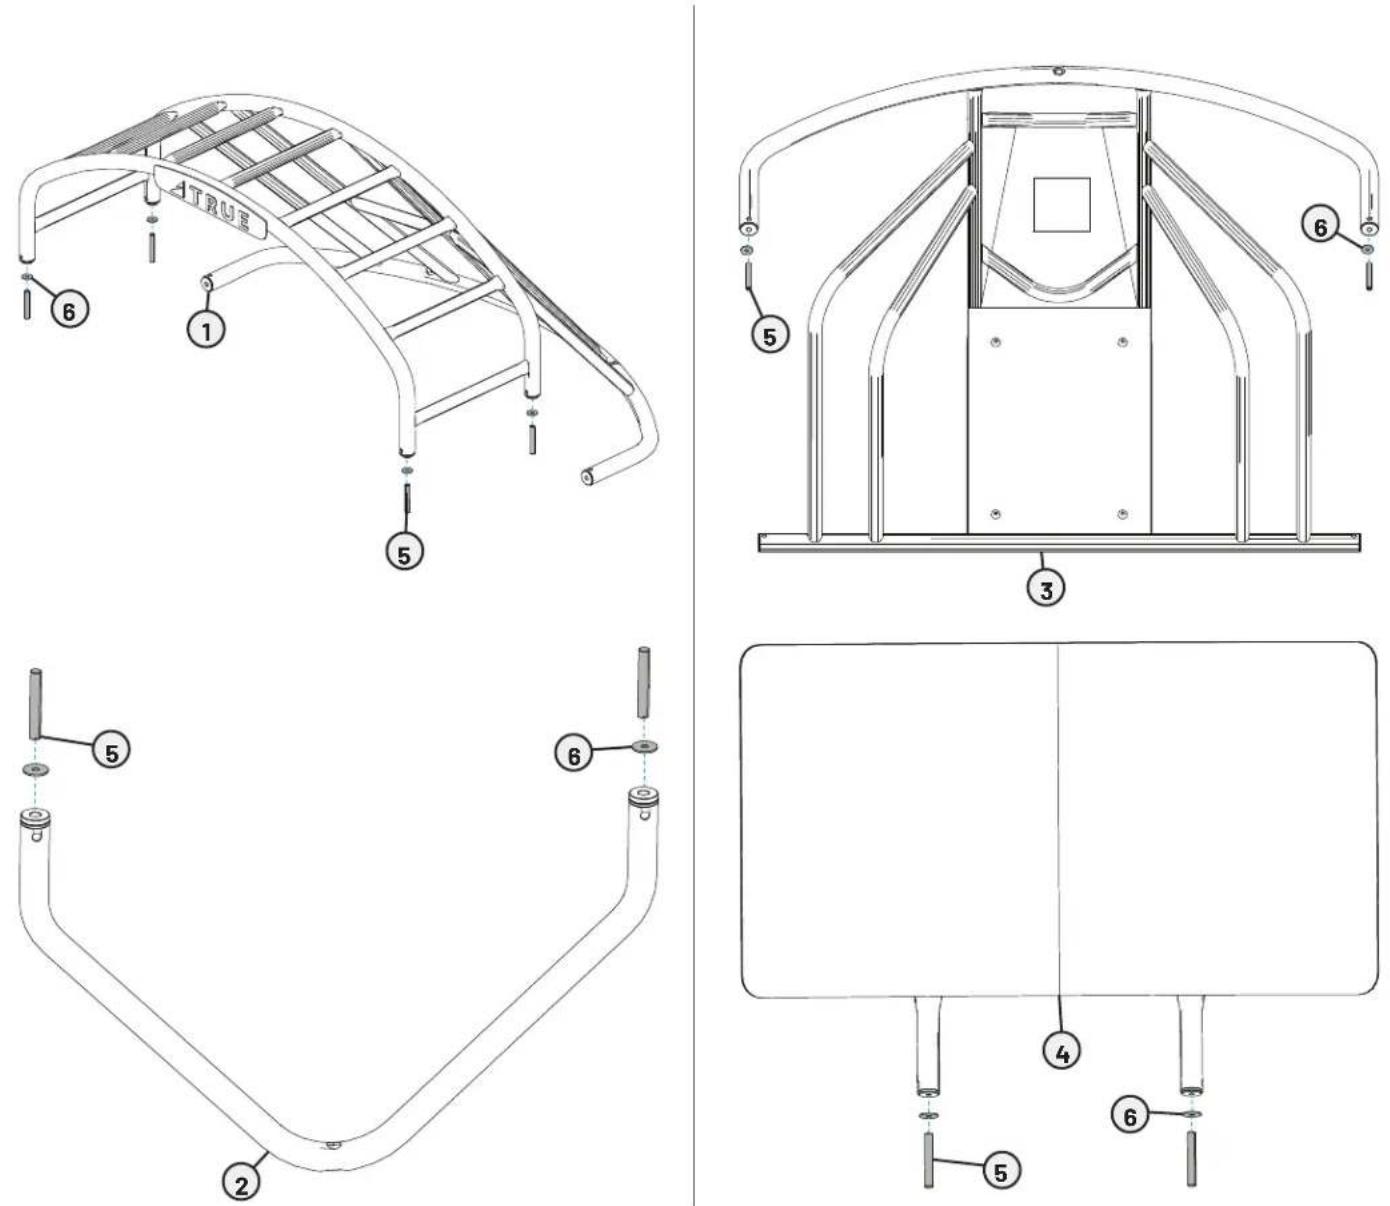
STEP 4-ATTACH UPPER REAR TUBE ASSEMBLY
| Tools Used in this Step | |
| 7/32" Allen Wrench | 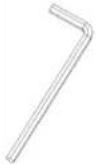 |
| 9/16" Wrench | ### |
| Parts Used in this Step | |||
| ITEM | PART# DESCRIPTION | QTY | |
| 1 S0 | 00200SBK UPPER REAR TUBE WELDMENT 1 | ||
| 2 80 | DSSC1100 WASHER, RUBBER 3/8" ID X 3/16" THK BLK 6 | ||
| 3 C1 | 38 NYLON WASHER 5/8" ID X 7/8" OD X 1/16"THK | 6 | |
| 4 S3 | 11406 STEEL WASHER, FLAT 6 | ||
| 5 S3 | 11400 NUT, ACORN 3/8-16 YEL ZINC | 4 | |
| 6 S3 | 01300 THREADED STUD, 3/8" X 2-1/2" | 4 | |
| 7 | C1086 | BHCS, 3/8 X 1-3/4" | 2 |
A. Tilt and lay the unit down on the floor with the front of the unit facing the floor.
B. Using a 9/16" open end wrench, attach the upper rear tube assembly to the side ladders using 4 acorn nuts, 4 threaded studs, 4 steel washers, 6 rubber washers, and 4 nylon washers.
NOTE: Position the rubber washers between the upper rear tube assembly and side ladder assemblies.
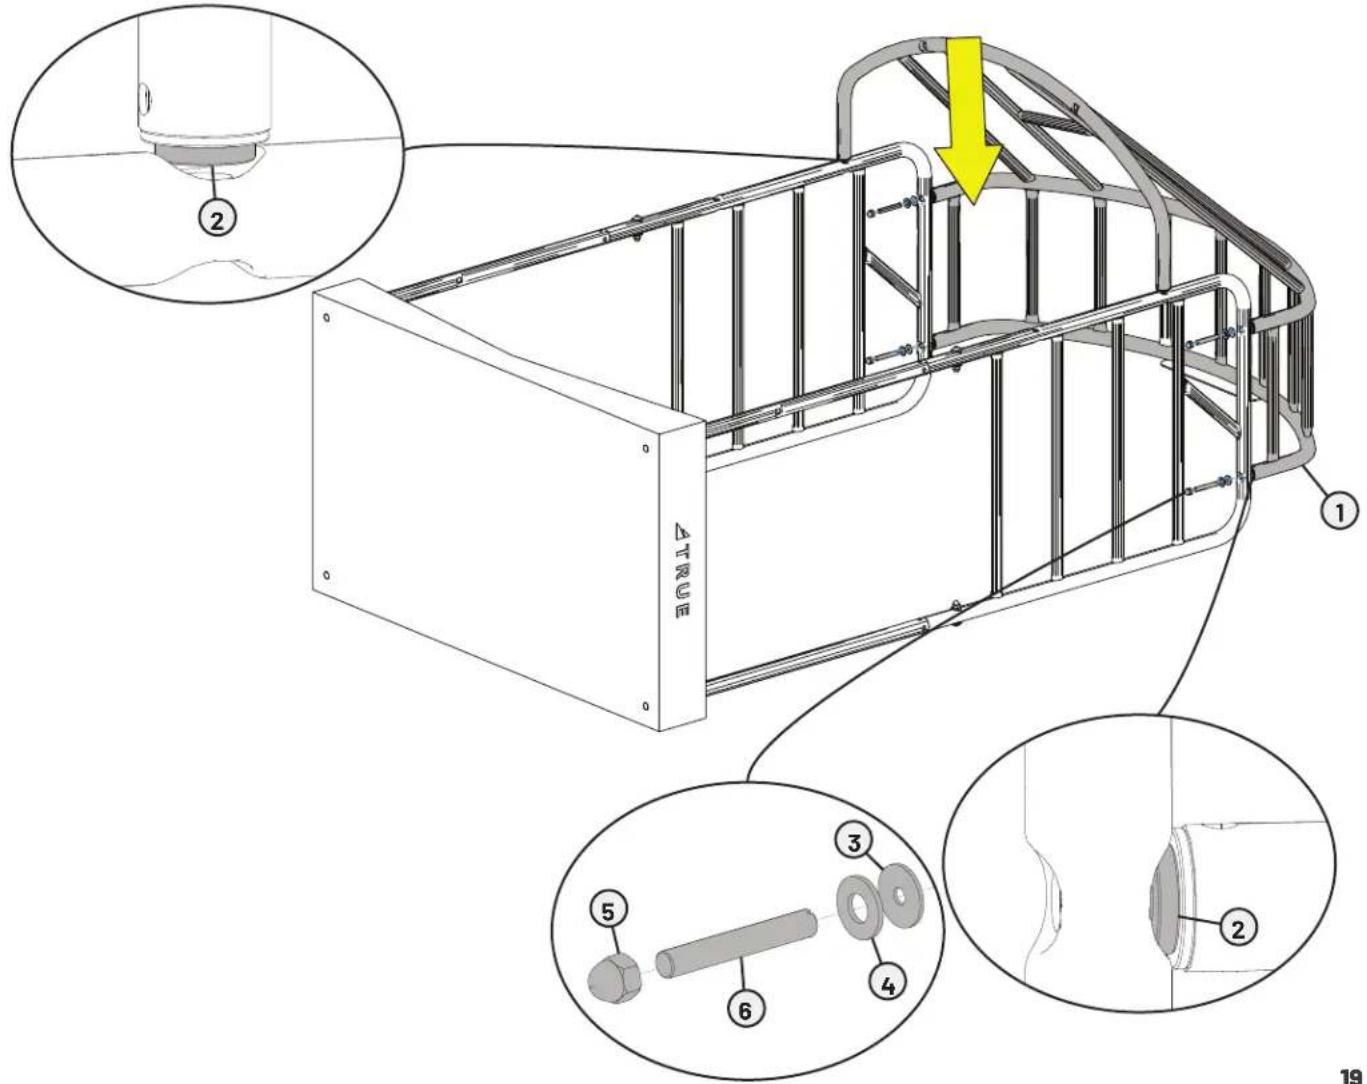
text_image
1 2 3 4 5 6 19STEP 4-ATTACH UPPER REAR TUBE ASSEMBLY CONTINUED
C. Using a 7/32" allen wrench, attach the upper rear tube assembly to the side ladders using 2 hex screws, 2 steel washers, and 2 nylon washers.
D. Tilt and stand the unit back up from the floor.
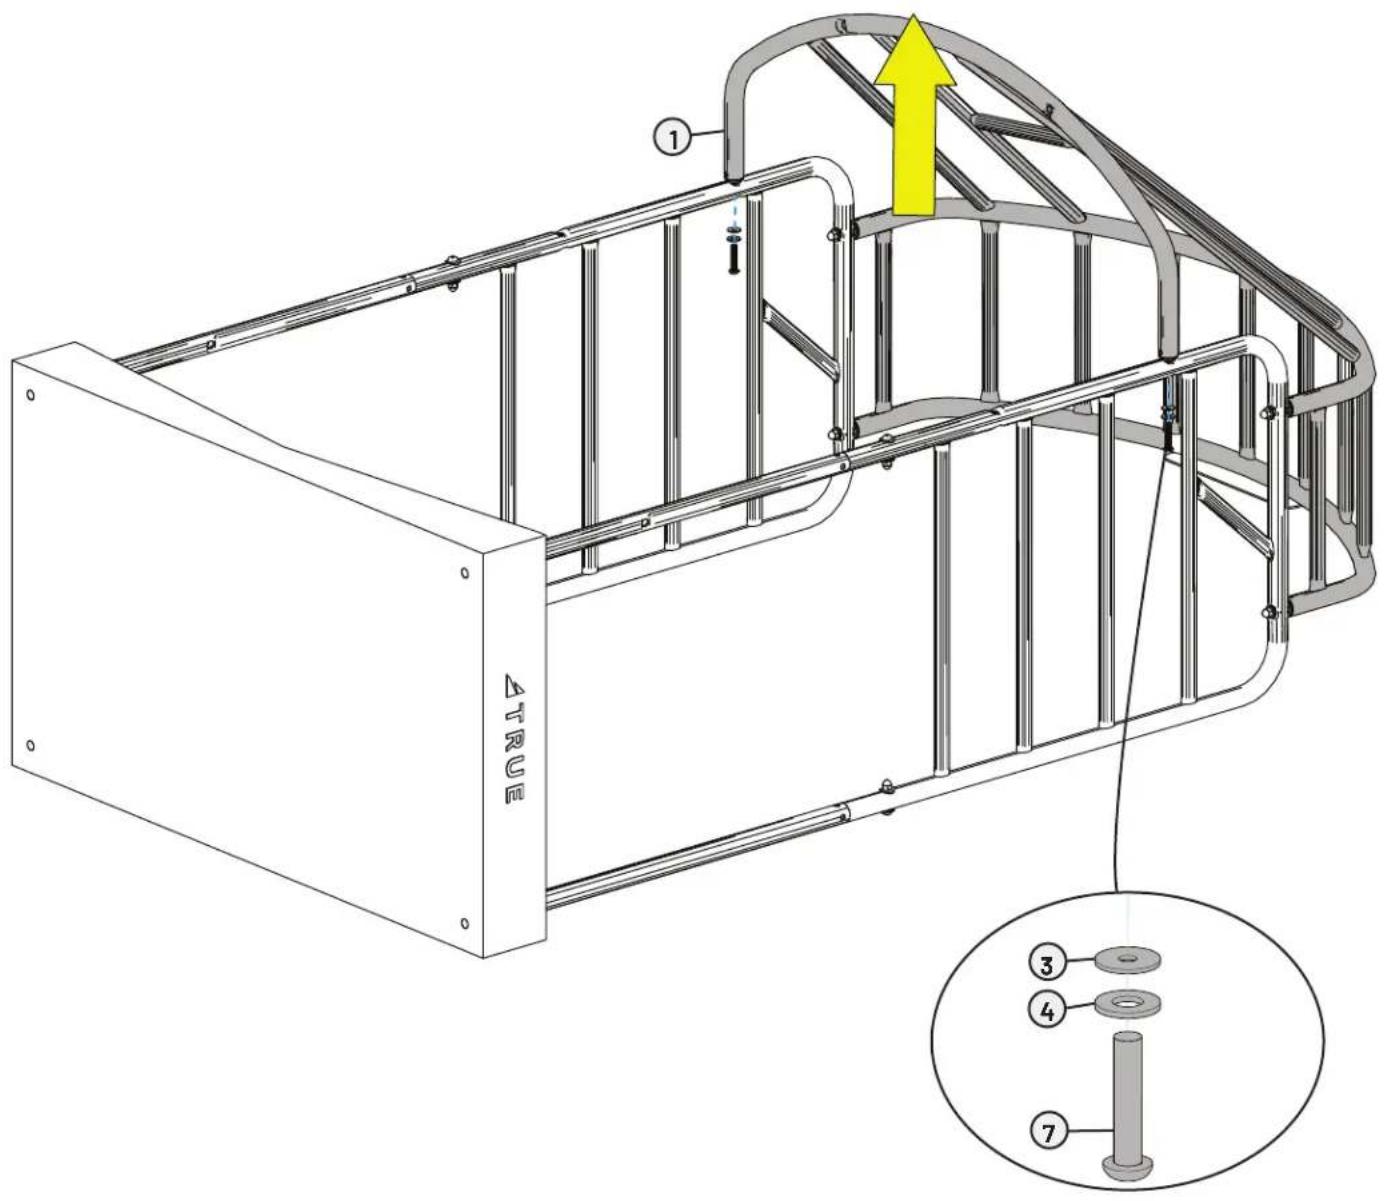
text_image
1 ▲TRUE 3 4 7STEP 5—ATTACH LOWER REAR TUBE ASSEMBLY
| Tools Used in this Step | |
| 7/32" Allen Wrench | 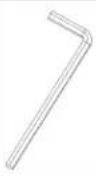 |
| 9/16" Wrench | [2352] |
| Parts Used in this Step | |||
| ITEM | PART# DESCRIPTION QTY | ||
| 1 S0 | 00900BK LOWER REAR | TUBE WELDMENT 1 | |
| 2 C1 | 086 BHCS, 3/8 X 1-3/4" 2 | ||
| 3 S3 | 1406 STEEL WASHER, FLAT 2 | ||
| 4 C1 | 38 NYLON WASHER 5/8" ID X 7/8" OD X 1/16"THK | 4 | |
| 5 80 | DSSC1100 WASHER, RUBBER 3/8" ID X 3/16" THK BLK | 4 | |
| 6 80 | DSSC1600 3/8" STEEL WASHER, CURVED | 2 | |
| 7 | S301300 | THREADED STUD, 3/8" X 2-1/2" | 2 |
| 8 S3 | 1400 NUT, ACORN 3/8-16 YEL ZINC | 2 | |
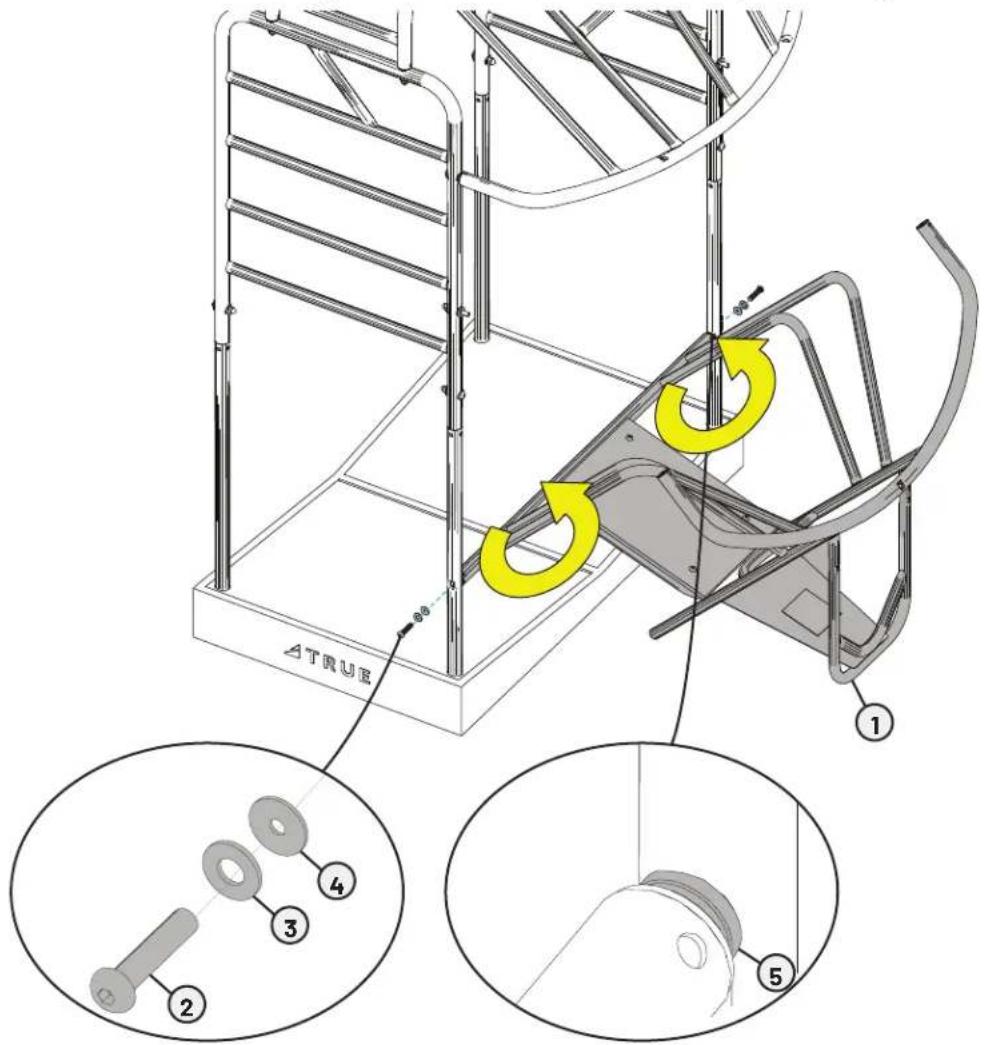
A. Using a 7/32" allen wrench, attach the lower rear tube assembly to the rear corner tubes using 2 hex screws, 2 steel washers, 2 nylon washers, and 2 rubber washers.
NOTE: The rubber washers need to go between the lower rear tube assembly and rear corner tubes.
B. Rotate the lower rear tube assembly around the axis until the connection points are aligned.
text_image
▲TRUE 1 2 3 4 5STEP 5—ATTACH LOWER REAR TUBE ASSEMBLY CONTINUED
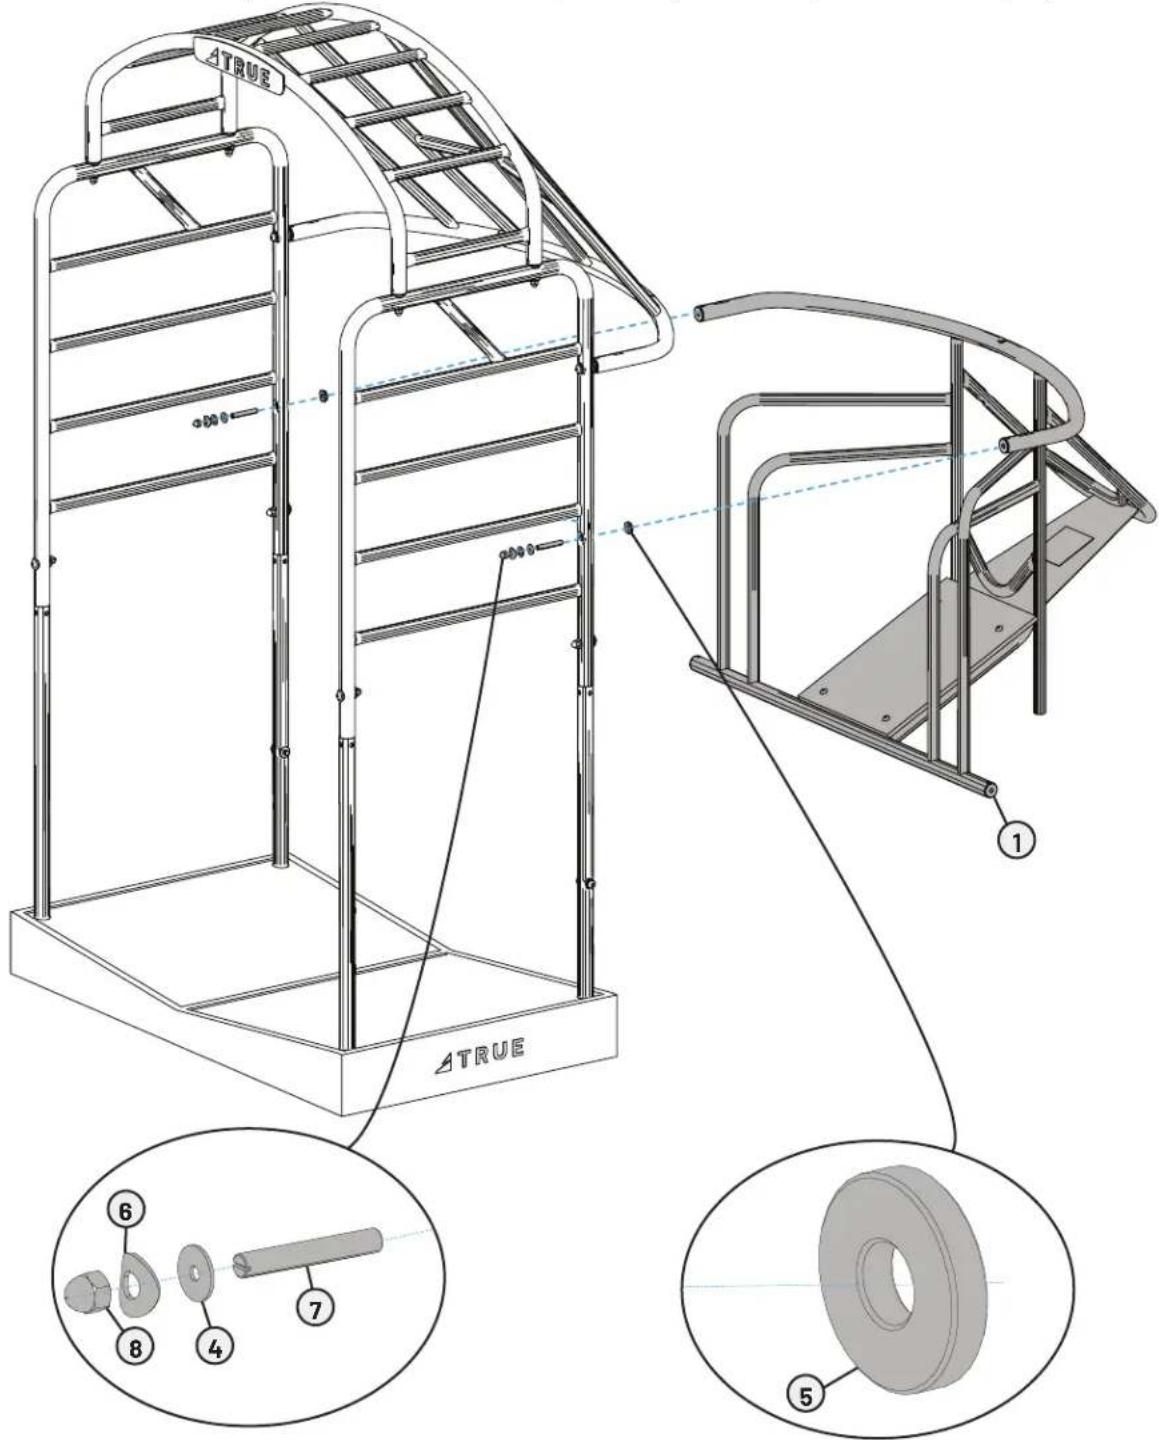
C. Using a 9/16" wrench, attach the lower ear tube assembly to the side ladders using 2 acorn nuts, 2 threaded studs, 2 curved washers, 2 nylon washers, and 2 rubber washers.
NOTE: Lower rear tube assembly shown not attached at the points completed in step A for illustration purposes in this step.
text_image
ATRUE ATRUE ① ⑤ ⑥ ⑧ ④ ⑦STEP 6-ATTACH V-TUBE ASSEMBLY
| Tools Used in this Step | |
| 7/32" Allen Wrench | 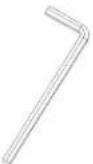 |
| 9/16" Wrench | 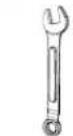 |
| Parts Used in this Step | |||
| ITEM P | PART# DESCRIPTION QTY | ||
| 1 S0 | 00500BK V-TUBE ASSEMBLY 1 | ||
| 2 S3 | 11400 NUT, ACORN 3/8-16 | YEL ZINC 3 | |
| 3 80 | 0SSC1100 WASHER, RUBBER 3/8" ID X 3/16" THK BLK 3 | ||
| 4 C1 | 38 NYLON WASHER 5/8" | D X 7/8" OD X 1/16" THK 3 | |
| 5 S3 | 11406 STEEL WASHER, FLAT | 3 | |
| 6 S3 | 11404 BHCS, 3/8 X 2-1/2" | 1 | |
| 7 | S301300 | THREADED STUD, 3/8" X 2-1/2" | 2 |
A. Using a 7/32" allen wrench and a 9/16" open-end wrench, attach the v-tube assembly to the upper rear tube assembly using 1 hex screw, 3 rubber washers, 3 steel flat washers, 3 nylon washers, 3 acorn nuts, and 2 threaded studs.
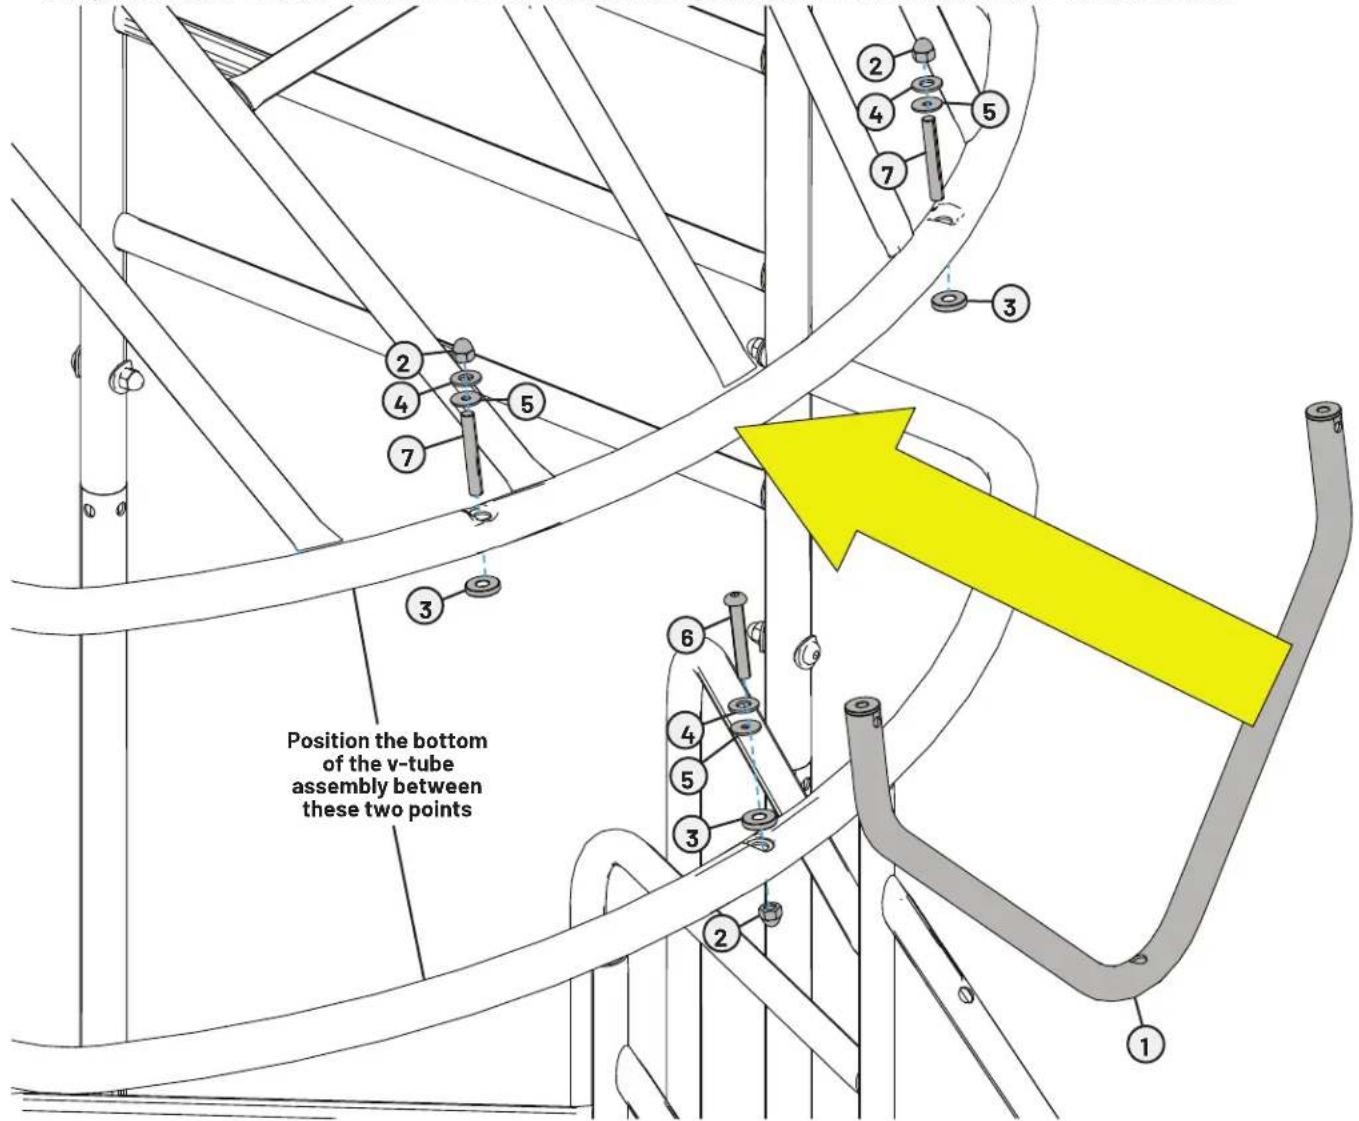
text_image
Position the bottom of the v-tube assembly between these two pointsSTEP 6-ATTACH V-TUBE ASSEMBLY CONTINUED
NOTE: The rubber washers need to go between the top of the v-tube assembly and the upper rear tube assembly, and the bottom of the v-tube and the lower rear tube assembly.
B. Fully tighten all hardware.
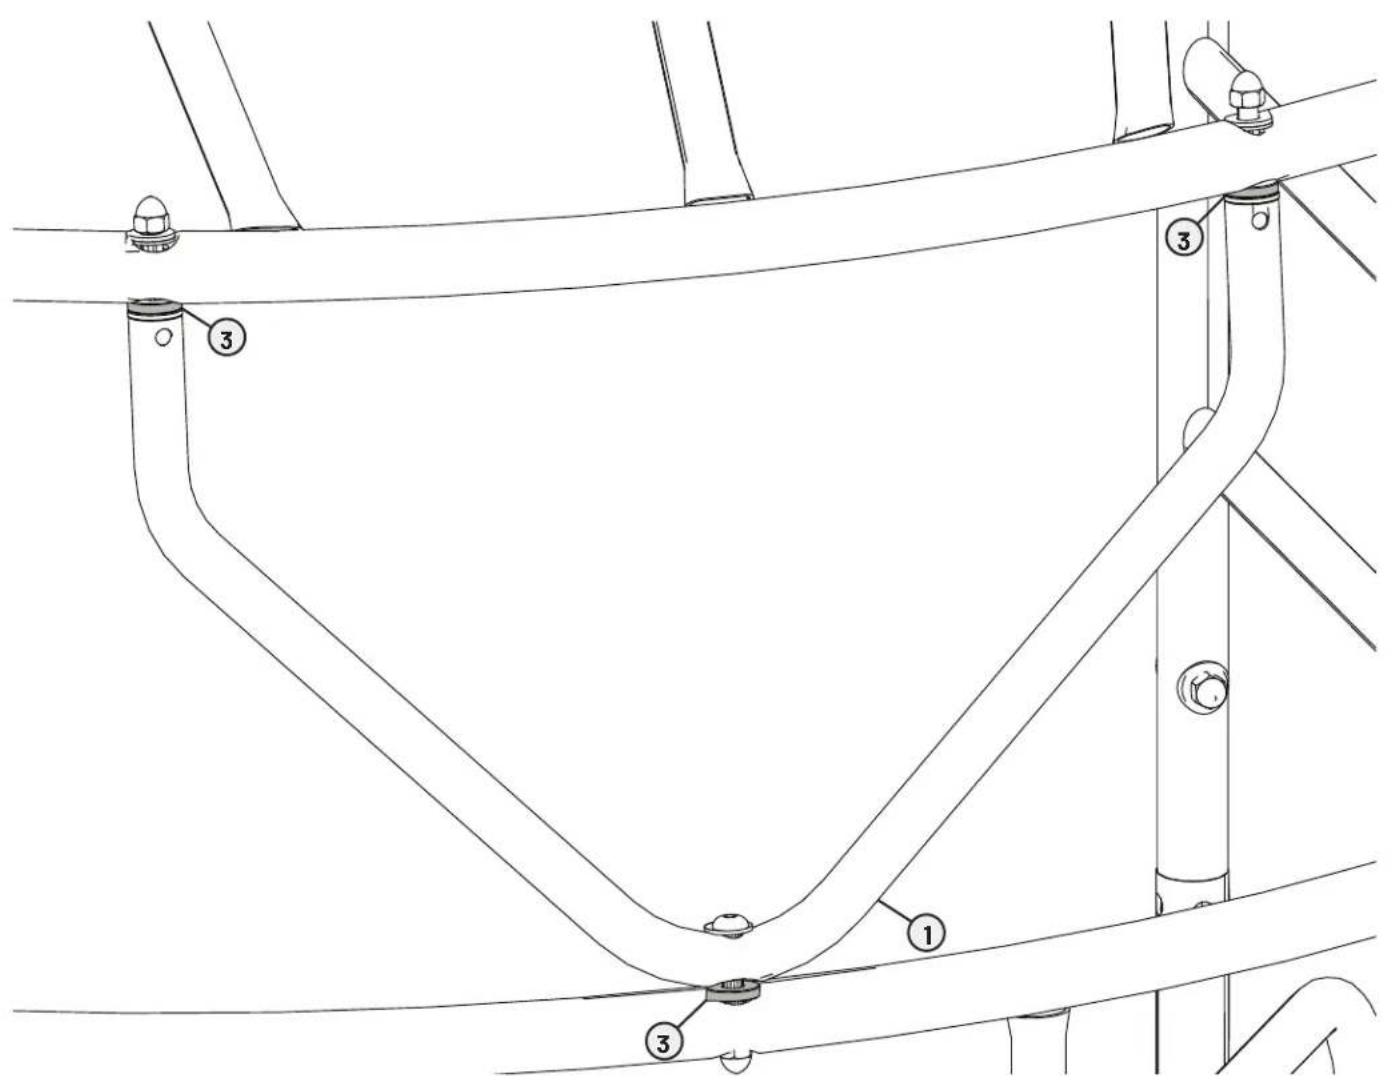
text_image
Technical diagram of a mechanical or structural assembly with numbered components, likely for engineering or manufacturing documentation.STEP 7-ATTACH REAR U-TUBE ASSEMBLY
| Parts Used in this Step | |||
| ITEM | PART# DESCRIPTION | QTY | |
| 1 S0 | 00400BK REAR U-TUBE | W/FOOT PADS 1 | |
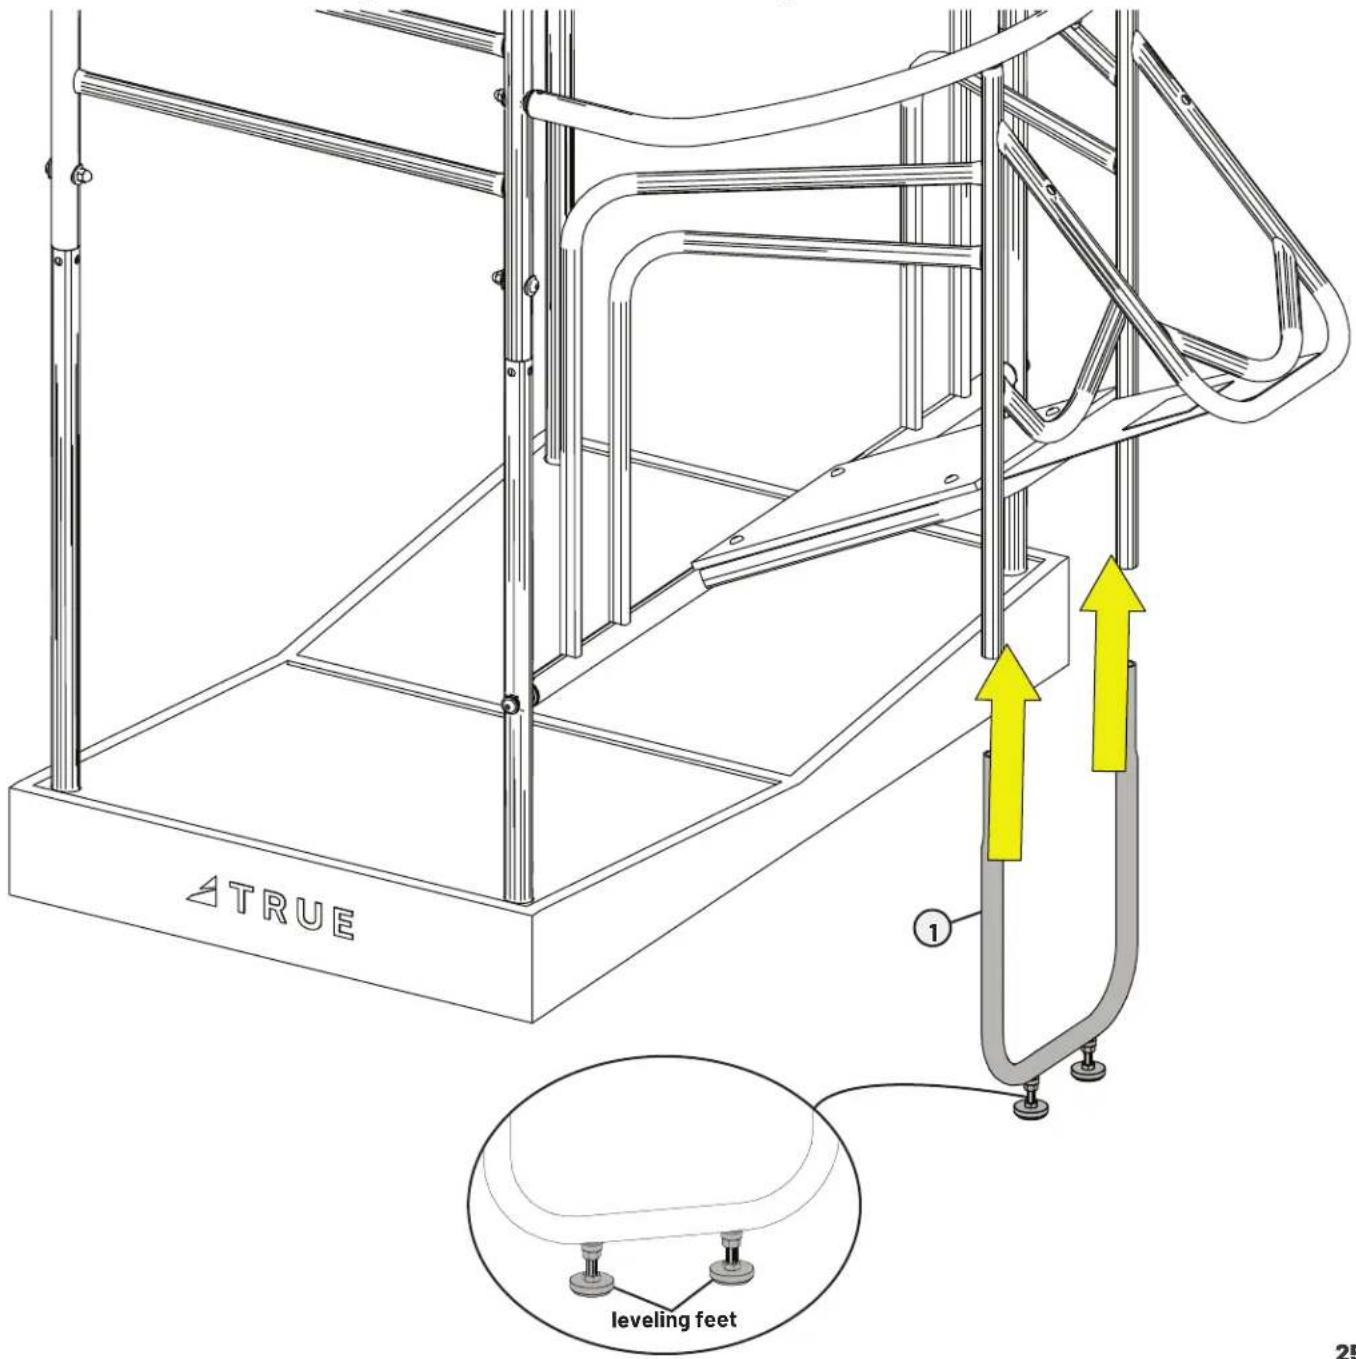
Insert the rear support u-tube assembly into the rear tube assembly.
NOTE: Adjust the leveling feet by hand to ensure proper leveling alignment of the overall TRUE Stretch assembly.
IMPORTANT! The u-tube assembly must be installed or the unit could tip over while in use.
text_image
▲TRUE leveling feet 1 25STEP 8—ATTACH PLACARD SUPPORT
| Tools Used in this Step | |
| 9/16" Wrench | |
| Parts Used in this Step | |||
| ITEM | PART# DESCRIPTION | DTY | |
| 1 S3 | 58400BK PLACARD SUPPORT WELDMENT 1 | ||
| 2 C1 | 38 NYLON WASHER 5 | /8" ID X 7/8"OD X 1/16" THK | 4 |
| 3 S3 | 11406 STEEL WASHER, FLAT 2 | ||
| 4 S3 | 11400 NUT, ACORN 3/8-16 YEL ZINC | 2 | |
| 5 S3 | 01300 | THREADED STUD, 3/8" X 2-1/2" | 2 |
Using a 9/16" open end wrench, attach the placard support to the lower rear tube assembly using 2 acorn nuts, 2 steel washers, 4 nylon washers, and 2 threaded studs.
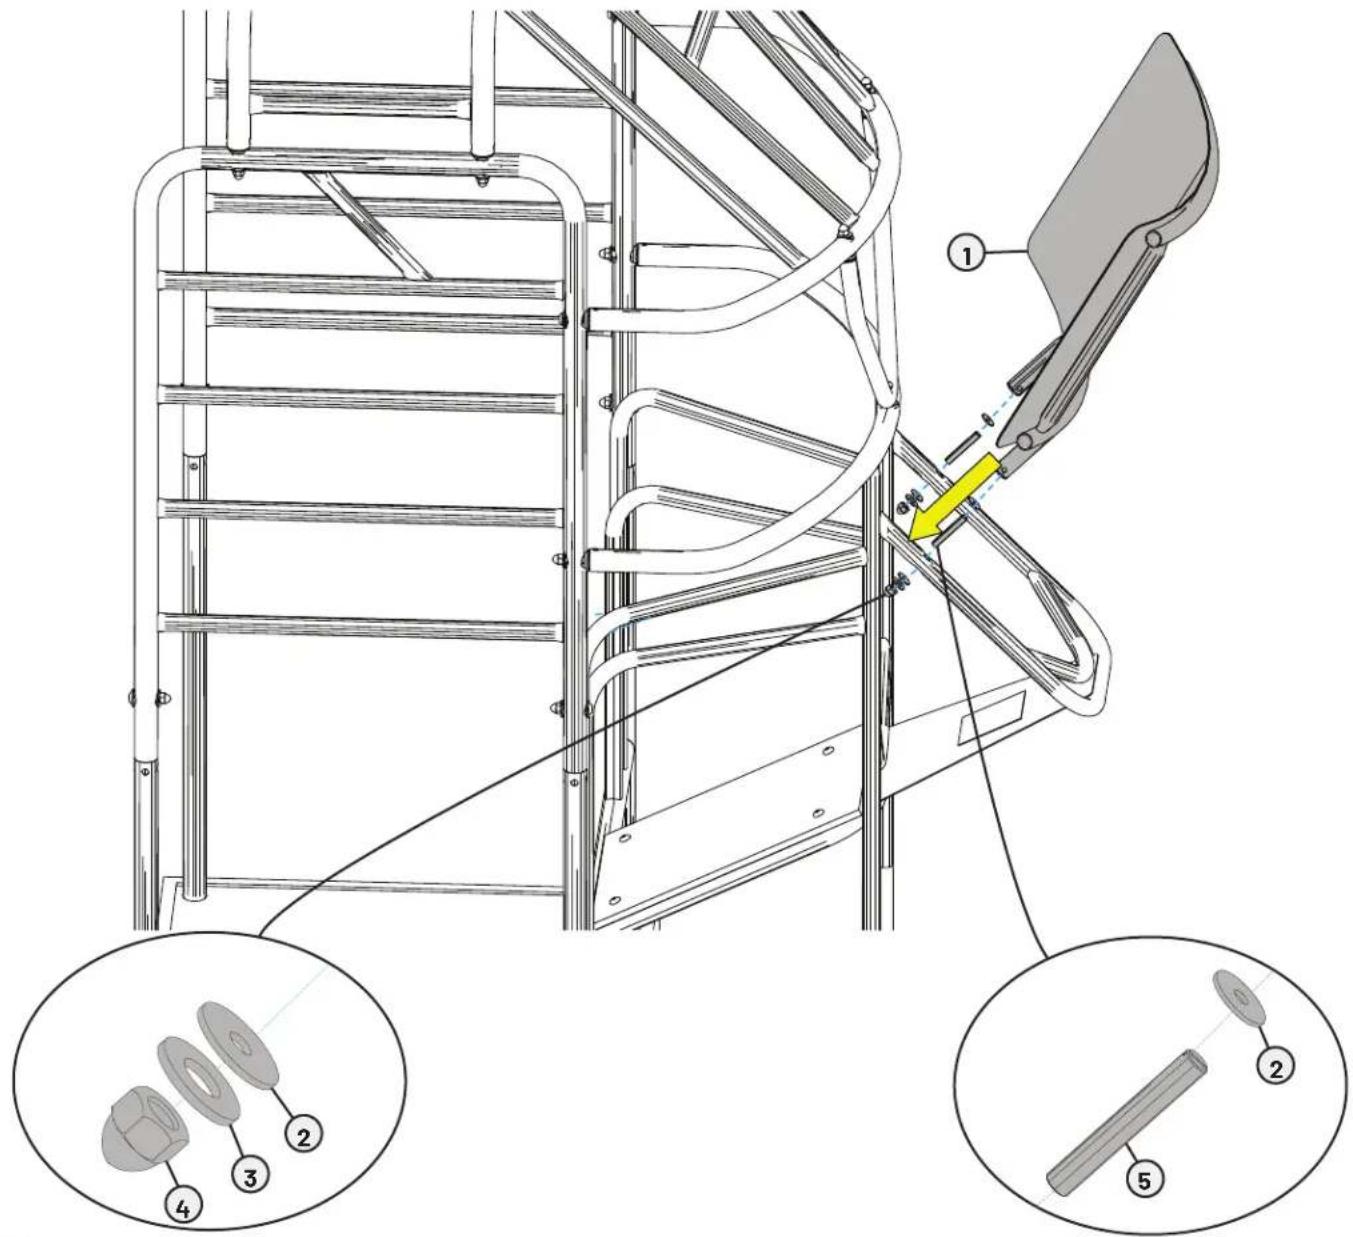
text_image
Technical diagram of a ladder assembly with numbered components and exploded views of partsSTEP 9-ATTACH WORKOUT PLACARD
| Parts Used in this Step | |||
| ITEM | PART# DESCRIPTION | QTY | |
| 1035 | 7600BK STRETCH PL | ACARD DECAL 1 | |
| 200 | 653000 GOLF STRETCH | H PLACARD DECAL(OPTION) | 1 |
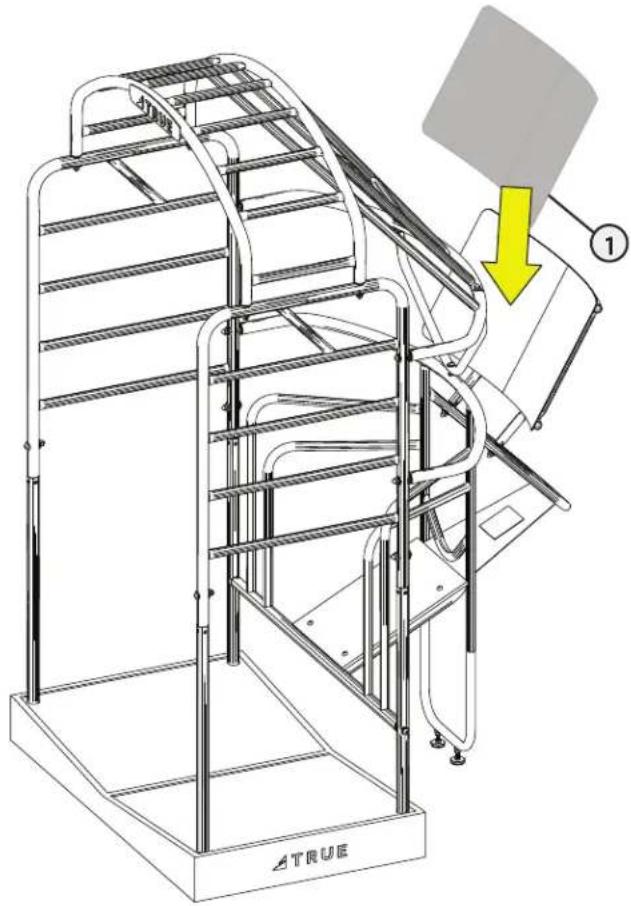
Attach the workout placard to the placard support assembly.
NOTE: Depending on the intended use, the TRUE Stretch or TRUE Stretch Golf workout placard will be used.
natural_image
Technical line drawing of a multi-level metal structure with a yellow arrow pointing to a component labeled '1', no text or symbols present.PREVENTATIVE MAINTENANCE
Preventative maintenance is crucial to maintaining the function and safety of this equipment. Your facility must establish written guidelines for preventative maintenance and keep written or online records of the maintenance performed on these products. As a minimum, the items presented in the Safety Instructions section of this document and the items that follow here, should be included in your maintenance program.
IMPORTANT! Always purchase replacement parts from TRUE. Many parts are tested and manufactured specifically for TRUE equipment. Use of unapproved parts may cause serious injury and/or void the limited warranty.
DAILY INSPECTION AND MAINTENANCE
The following items are critical to the safety of users and maintenance staff as well as ensuring the optimum performance of the machines. These inspections should be performed each day before the equipment is subject to use. TRUE is not responsible for performing or scheduling regular maintenance or inspections.
- Inspect for cleanliness. Wipe and dry the frame and chrome. (See cleaning the equipment.)
- Inspect all safety and instructional decals.
WEEKLY INSPECTION AND MAINTENANCE
The following items are critical to the safety of users and maintenance staff as well as ensuring the optimum performance of the machines. These inspections should be performed each week. TRUE is not responsible for performing or scheduling regular maintenance or inspections.
- Verify that all hardware is tight and that associated frame members are secure. Apply a few small drops of a thread locking compound such as Loctite ^9 on any loose bolts.
• Inspect frame for integrity and function. Replace any components at the first sign of wear with only TRUE supplied parts.
OTHER SCHEDULED PREVENTATIVE MAINTENANCE
TRUE recommends that scheduled maintenance be performed by a qualified service technician. Please contact your dealer or visit www.truefitness.com to contact a local TRUE authorized service technician.
CLEANING THE EQUIPMENT
Daily Cleaning
Wipe all machines with a water dampened cloth and dry completely. This includes painted parts, chrome plated parts, and plastic parts. It is important not to leave parts damp. This will increase the potential for corrosion to occur.
CAUTION: Certain anti-bacterial cleaners and other harsh cleaning agents can induce corrosion on the machine components.
Heavy Duty Cleaning
- Painted Frames—If you have scuff marks, grease or a heavy dirt buildup on frame components, start with a mild soap solution or a diluted solution of a product such as Simple Green with a dilution of 32:1. If you cannot remove the marks using those methods, use a car polish/cleaner. DO NOT use solvents such as lacquer thinner, mineral spirits or acetone. For deeper scuff marks, use an automobile finish rubbing compound.
- Plastic Parts—Use a mild soap solution to clean dirt and grease marks.
- Labels—Use a mild soap solution to clean dirt and grease marks.
CAUTION: Do not use any acidic cleaners. Doing so will weaken the paint or powder coatings and may void the TRUE Warranty. Never pour or spray liquids on any part of the equipment. Allow the equipment to dry completely before using.
⚠️ CAUTION: If you determine that the equipment needs service, make sure that the equipment cannot be used inadvertently and ensure other users know that the machine needs service.
To order parts or to contact a TRUE authorized service representative, please visit www.truefitness.com.
WARRANTY INFORMATION
COMMERCIAL WARRANTY
| CARDIO | ||||
| WARRANTY ITEM | VAPOR, APEX GRA | VITY PLUS GRAVITY | ADX, RO, SURGE | |
| Frame* 7 Years 7 Years | Years 7 Years 5 Years | |||
| Parts 3 Years 3 Years | Years 3 Years 3 Years | |||
| Consoles 3 Years 3 Years | Years 3 Years 2 Years | |||
| Labor** 2 Years 2 Years | Years 1 Year 1 Year | |||
| Wear Items*** | 180 Days | 180 Days | 180 Days | 90 Days |
| STRENGTH | |
| WARRANTY ITEM | PALLADIUM, FUSE XL, FORCE, FITNESS LINE, ATLAS, XFT, XFW, MP, SM, FT, FS |
| Frame* | 10 Years |
| Parts | 5 Years |
| Cables and Linear Bearings | 1 Year |
| Labor** | 1 Year |
| Wear Items*** | 90 Days |
| FLEXIBILITY | |
| WARRANTY ITEM | STRETCH |
| Parts | 1 Year |
| Wear Items*** | 90 Days |
Warranty does not cover damage or equipment failure resulting from or caused by improper assembly/installation, accident, misuse, abuse, unauthorized modification, or failure to provide reasonable and necessary maintenance.
*Frame is the serialized base of the unit and does not include paint or coatings.
**Labor is available for equipment located within United States and Canada.
***Wear Items include: batteries, covers, caps, badges, paint, pedal straps, toe clips, elliptical pedal inserts, foot pads, Coax/TV, HDMI, USB, mirroring or Ethernet connections, and safety key.
See Warranty Details for terms, conditions, and complete coverage details.
WARRANTY DETAILS
All TRUE Fitness products are distributed by TRUE and are warranted to the original registered product purchaser and the parts of the TRUE product (the "Product") listed below, under normal use and service, shall be free of manufacturing defects in workmanship and materials only for the specified period of time.
NOTE:
- Standard shipping is included with warranty part replacement.
• Shipping for warranty frame or replacement is included for the period of three years from the original date of purchase.
All Warranty Items are "LIMITED"
- This limited warranty does not cover damage or equipment failure resulting from or caused by improper assembly/installation, failure to follow instructions and warnings in owner's manual, accident, misuse, abuse, unauthorized modification, failure to provide reasonable and necessary maintenance, software version upgrades, compatibility with third party/aftermarket hardware, software, applications, or websites.
- TRUE's liability shall under no circumstances exceed the actual amount paid by you for the product, nor shall TRUE under any circumstances be liable for any consequential, incidental, special or punitive damages or losses, whether direct or indirect.
- Some states or countries do not allow the exclusion or limitation of incidental or consequential damages, so the above limitation or exclusion may not apply to you.
- TRUE will neither assume nor authorize any person to assure for us any other obligation or liability concerning the sale of this Product. Under no circumstances shall TRUE be liable under this warranty, or otherwise, of any damage to any person or property, including any lost profits or lost savings, for any special, indirect, secondary, incidental, or consequential damages arising out of the use of or inability to use this Product.
- This limited warranty, which is given expressly and in lieu of all other express warranties, constitutes the only warranty made by TRUE.
- The remedies described herein are your sole and exclusive remedies and TRUE's entire liability for any breach of this limited warranty.
- No one is authorized to change, modify, or extend the terms of this limited warranty.
- This limited warranty is in lieu of all other warranties of any kind either expressed or including but not limited to implied warranties of merchant.
- This limited warranty applies to the product only while the product remains in the possession of the original purchaser and is not transferable.
- This limited warranty becomes VALID ONLY if the Product is initially assembled/installed by a TRUE authorized dealer/ technician (if anyone other than a TRUE authorized dealer/technician initially assembles and installs the Product, this limited warranty will be void unless the written authorization of TRUE is first obtained).
- This limited warranty can be processed only if the warranty registration form is completed on-line; or if the form provided with equipment is filled in, signed by the original purchaser, and mailed to TRUE within 30 days of purchaser's receipt of this Product.
- All serial numbers must be intact on the Product for this limited warranty to be valid.
• Installation or download of any 3rd party or after-market products will result in voided warranty. This includes, but is not limited to, electrical and mechanical parts, software, or applications. - TRUE will ship to an authorized service provider any new or rebuilt replacement part or component, or at our option, replace or refund the Product.
- Replacement parts are warranted for the remaining portion of the original warranty period.
• Proof/receipts of necessary maintenance may be required within 30 days of requested warranty part or service. - This limited warranty does not apply to the performance of the heart rate accuracy will not be warranted as performance varies, based on user's physiology, age, method of use, and other external factors.
WARRANTY REGISTRATION
Thank you for purchasing a TRUE product!
For warranty terms and conditions, see the complete owner's manual and assembly guide located at true fitness.com.
To validate your product warranty, you must register your product within 30 days of purchaser's receipt of this product.
To register your product:
- Go online to: https://truefi.tness.com/support/warranty-registration/OR
- Complete the information below and mail to: TRUE Product Support 865 Hoff Road St. Louis, MO 63366
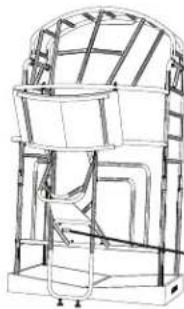
PLEASE RETAIN THIS PORTION FOR YOUR RECORDS BASE SERIAL NUMBER: CONSOLE SERIAL NUMBER:
natural_image
Technical line drawing of a mechanical assembly with no visible text or symbolsbase serial number location
TRUE
TRUE FITNESS TECHNOLOGY INC 865 HOFF RD, ST LOUIS MISSOUR 33056 USA
MODEL NO: 800SSC-35
SERIAL NO: 25-800SSCXX00
Warranty Registration
Base Serial Number
Purchase Date
Company (if applicable)
Customer Name (First and Last)
Email Address
Phone Number
Street Address
City
State
Postal Code Country

TRUE FITNESS
CONTACT US
service@truefi tness.com
1.800.883.8783
865 Hoff Road
St. Louis, MO 63366
TRUEFITNESS.COM


