
NN-CT54JW - Microwaves PANASONIC - Free user manual and instructions
Find the device manual for free NN-CT54JW PANASONIC in PDF.


User questions about NN-CT54JW PANASONIC
0 question about this device. Answer the ones you know or ask your own.
Ask a new question about this device
Download the instructions for your Microwaves in PDF format for free! Find your manual NN-CT54JW - PANASONIC and take your electronic device back in hand. On this page are published all the documents necessary for the use of your device. NN-CT54JW by PANASONIC.
USER MANUAL NN-CT54JW PANASONIC
Operating Instructions and Cookbook Convection/Grill/Microwave Oven
Model No. NN-CT54JW
NN-CT55JW
NN-CT56JB
NN-CT57JM
For domestic use only
natural_image
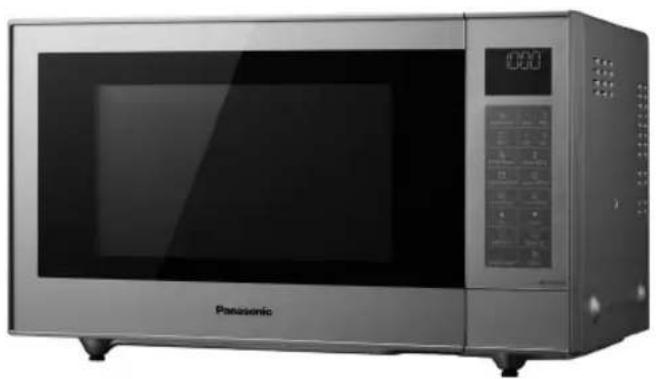
Panasonic microwave oven with digital display and control panel (no visible text or symbols on main body)
text_image
INVERTERImportant safety instructions
Please read carefully and keep for future reference
Important Notice
Weight
| 12 oz | - | 15 g |
| 1 oz | - | 25 g |
| 2 oz | - | 50 g |
| 3 oz | - | 75 g |
| 4 oz | - | 100 g |
| 5 oz | - | 150 g |
| 6 oz | - | 175 g |
| 7 oz | - | 200 g |
| 8 oz | - | 225 g |
| 9 oz | - | 250 g |
| 10 oz | - | 275 g |
| 11 oz | - | 300 g |
| 12 oz | - | 350 g |
| 13 oz | - | 375 g |
| 14 oz | - | 400 g |
| 15 oz | - | 425 g |
| 1 lb/16 oz | - | 450 g |
Capacity
| 12 tsp | - | 3 ml |
| 1 tsp | - | 5 ml |
| 1 tbsp | - | 15 ml |
| 14 pt | - | 150 ml |
| 12 pt | - | 300 ml |
| 34 pt | - | 450 ml |
| 1 pt | - | 600 ml |
| 134 pt | - | 1 litre |
text_image
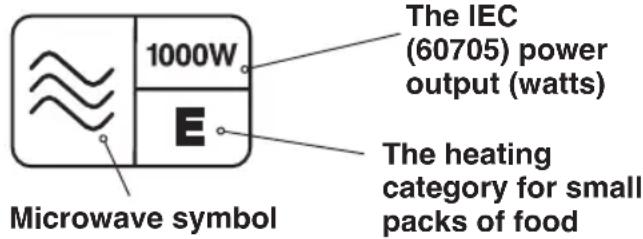
1000W The IEC (60705) power output (watts) E Microwave symbol The heating category for small packs of foodThank you for purchasing a Panasonic Microwave Oven.
Your oven is rated 1000 Watts (IEC). When using other cookbooks remember to adjust cooking times accordingly. The symbol indicates the heating category for your oven when cooking or reheating convenience foods.
Your oven is rated ‘E’, which is very efficient. It is therefore very important that you refer carefully to the packet instructions on convenience foods.
Some packet instructions only display information for B or D rated ovens. We therefore provide additional guidelines for reheating and cooking on pages 65-81 of this book.
Always check the progress of the food as it cooks or reheats by simply opening the door. After checking the progress of the foods, press Start to continue the cooking time.
Failure to follow the instructions given in this Operating Instructions and Cookbook, may affect the recipe result and in some instances may be dangerous.

Customer Communications Centre 0344 844 3899
Selected Spares and Accessories:
Order direct on line at www.panasonic.co.uk or by telephoning the Customer Communications Centre number above.
For Cookery Advice call: 01344 862108
(open Monday to Wednesday 9am - 12pm)
Alternatively visit our web site at www.theideaskitchen.co.uk
Or write to the address below:
Home Appliance Innovation Centre
Panasonic Consumer Electronics U.K.
Willoughby Road
Bracknell
Berks
RG12 8FP
Contents
Safety Instructions 4-8
Important Safety Instructions . . . . 9-10
Disposal of Old Equipment. . . . . . . 10
Before Using your Oven ..... 11
Placement of your Oven 12
Care & Cleaning of your
Oven 12-13
Maintenance of your Oven 14
Parts of your Oven. . . . . . . . . . . . . 15-16
Important Information - Read
Carefully 17-19
Microwaving Principles ..... 20
General Guidelines ..... 21-23
Containers to Use 24-25
Cooking Modes 26-27
Control Panels....28
Let's Start to Use your Oven ..... 29
Setting the Clock 30
Operation Guide Setting ..... 30
Microwave Cooking and
Defrosting 31-32
Auto Weight Defrost
- Chaos Defrost 33-34
Defrosting Guidelines ..... 34
Defrosting Using Defrost
Microwave and Time 35
Defrosting Chart Using Defrost
Microwave and Time ..... 36
Using the Quick 30 Function ..... 37
Using the Add Time Function.....37
Grilling 38-39
Convection Cooking 40-41
Combination Cooking ..... 42-43
Combination 1. Convection and
Microwave 44-45
Combination 2. Grill and
Microwave 46-47
Multi-stage Cooking 48
Using the Timer 49-50
Auto Programs .....51-54
Junior Menu Programs ..... 55-57
Auto Cook Programs 58-59
Auto/Roast Programs 60-62
Cooking and Reheating
Guidelines .....63-64
Reheating Charts 65-70
Cooking Charts 71-81
Recipes
Increasing and Decreasing
Recipes 82
Using Recipes From Other Books..82
Cooking for One 82
Soups and Starters ..... 83-84
Fish 85-87
Meat and Poultry 88-93
Pasta, Rice and Beans ..... 94-95
Cheese and Egg Dishes ..... 96-97
Vegetables and Vegetarian . . . . 98-102
Sauces....103-104
Pastry 105
Baking 106-107
Desserts 108-111
Preserves 112-113
Junior Recipes 114-116
Questions and Answers.....117-118
Technical Specification 119
Safety Instructions
■ Important safety instructions. Before operating this oven, please read these instructions carefully and keep for future reference.
■ This appliance can be used by children aged from 8 years and above and persons with reduced physical, sensory and mental capabilities or lack of experience and knowledge if they have been given supervision or instruction by a person responsible for their safety concerning the use of the appliance in a safe way and understand the hazards involved. Children shall not play with the appliance. Cleaning and user maintenance shall not be made by children without supervision. Keep the appliance and its cord out of reach of children less than 8 years.
■ When this oven is installed, it should be easy to isolate the appliance from the electricity supply by pulling out the plug or operating a circuit breaker.
■ If the supply cord is damaged, it must be replaced by the manufacturer or its service agent or a similarly qualified person in order to avoid a hazard.
■ Warning! The appliance should be inspected for damage to the door seals and door seal areas and if these areas are damaged the appliance should not be operated until it has been repaired by a service technician trained by the manufacturer.
Safety Instructions
■ Warning! Do not attempt to tamper with or make any adjustments or repairs to the door, control panel housing, safety interlock switches or any other part of the oven. Do not remove the outer panel from the oven which gives protection against exposure to microwave energy. Repairs should only be by a qualified service person.
■ Warning! Liquids and other foods must not be heated in sealed containers since they are liable to explode.
■ Warning! Do not place this oven near an electric or gas cooker range.
■ Warning! Only allow children to use the oven without supervision when adequate instructions have been given so that the child is able to use the oven in a safe way and understands the hazards of improper use. Ensure that children do not touch the hot outer casing after operation of the oven.
■ This oven is intended for Counter-top use only. It is not intended for built-in use or for use inside a cupboard.
For Countertop use:
■ Oven must be placed on a flat, stable surface 85 cm / 33 12 inch above floor level, with rear of oven placed against a back wall. For proper operation, the oven must have sufficient air flow. i.e. 5 cm /2 inch at one side, the other being open; 15 cm /6 inch clear over the top; 10 cm /4 inch at the rear.
■ When heating food in plastic or paper containers, check the oven frequently as these types of containers ignite if overheated.
Safety Instructions
■ If smoke is emitted or a fire occurs in the oven, press Stop/Cancel pad and leave the door closed in order to stifle any flames. Disconnect the power cord, or shut off power at fuse or circuit breaker panel.
■ This appliance is intended to be used in household applications only.
■ Microwave heating of beverages can result in delayed eruptive boiling, therefore care must be taken when handling the container.
■ The contents of feeding bottles and baby food jars are to be stirred or shaken. The temperature has to be checked before consumption to avoid burns.
■ Do not cook eggs in their shells and whole hard-boiled eggs by microwave. Pressure may build up and the eggs may explode, even after the microwave heating has ended.
■ The oven should be cleaned regularly and any food deposits removed.
■ Clean the inside of the oven, door seals and door seal areas regularly. When food splatters or spilled liquids adhere to the oven walls, door seals and door seal areas wipe off with a damp cloth. Mild detergent may be used if they get very dirty. The use of harsh detergent or abrasive is not recommended.
■ Do not use commercial oven cleaners.
- When using the grill, convection or combination mode, some foods may inevitably splatter grease on to the oven walls. If the oven is not cleaned occasionally, it may start to “smoke” during use.
Safety Instructions
■ Failure to maintain the oven in a clean condition could lead to deterioration of surfaces that could affect the life of the appliance and possibly result in a hazardous situation.
■ A steam cleaner is not to be used for cleaning the appliance.
■ Warning! The accessible parts may become hot in grill, convection and combination use. Young children should be kept away. Children should only use the oven under adult supervision due to the temperatures generated.
■ Exterior oven surfaces, including air vents on the cabinet and the oven door will get hot during grill, convection, or combination functions, take care when opening or closing the door and when inserting or removing food and accessories.
■ The oven has a heating element situated in the top of the oven. After using either the grill, convection or combination functions, the inside surfaces of the oven will be very hot. Care should be taken to avoid touching any of the inside surfaces near the heating element inside the oven. N.B. After cooking by these functions, the oven accessories will be very hot.
■ This appliance is not intended to be operated by means of an external timer or separate remote-control system.
■ In case of electronic failure, oven can only be turned off at wall socket.
■ Only use utensils that are suitable for use in microwave ovens.
Safety Instructions
■ Do not use harsh, abrasive cleaners or sharp metal scrapers to clean the oven door glass since they can scratch the surface, which may result in shattering of the glass.
■ The microwave oven is intended for heating food and beverages only. Take care when heating foods low in moisture, e.g. bread items, chocolate, biscuits and pastries. These can easily burn, dry out or catch on fire if cooked too long. We do not recommend heating foods low in moisture such as popcorn or poppadoms.
■ Drying of food, newspapers or clothing and heating of warming pads, slippers, sponges, damp cloths, wheat bags, hot water bottles and similar may lead to risk of injury, ignition or fire.
■ The oven lamp must be replaced by a service technician trained by the manufacturer. Do not attempt to remove the outer casing from the oven.
■ Caution! In order to avoid a hazard due to inadvertent resetting of the thermal cut-out, this appliance must not be supplied through an external switching device, such as a timer, or connected to a circuit that is regularly switched on and off by the utility.
Important Safety Instructions
Read carefully and keep for future reference.
This appliance is supplied with a moulded three pin mains plug for your safety and convenience, which may be marked, and rated, 13 amps.
A 13 amp fuse is fitted according to the type of mains plug fitted.
Should the fuse need to be replaced, please ensure that the replacement fuse has the correct rating for the type of mains plug fitted and that it is approved by ASTA or BSI to BS1362.
Check for the ASTA mark 📋 or the BSI mark ♥ on the body of the fuse.

Warning!
If the fuse cover is detachable, never use the plug with the cover omitted. A replacement fuse cover can be purchased from your local Panasonic Dealer.
How to replace the fuse
Open the fuse compartment with a screwdriver and replace the fuse.
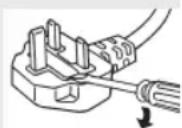
If the fitted moulded plug is unsuitable for the socket outlet in your home then the fuse should be removed and the plug cut off and disposed of safely and an appropriate one fitted. There is a danger of severe electrical shock if the cut off plug is inserted into any 13 amp socket.
If a new plug is to be fitted, please observe the wiring code as shown opposite. If in any doubt, please consult a qualified electrician (For U.K. Models only).

Warning!
This appliance must be earthed.

Important!
The wires in this mains lead are coloured in accordance with the following code: Green-and-yellow: Earth. Blue: Neutral. Brown: Live.
As the colours of the wire in the mains lead of this appliance may not correspond with the coloured markings identifying the terminals in your plug, proceed as follows:
The wire which is coloured green-and-yellow must be connected to the terminal in the plug which is marked with the letter EorbytheEarthsymbol 12 or coloured green or green-and-yellow.
The wire which is coloured blue must be connected to the terminal in the plug which is marked with the letter N or coloured black.
The wire which is coloured brown must be connected to the terminal in the plug which is marked with the letter L or coloured red.
When this oven is installed it should be easy to isolate the appliance from the electricity supply by pulling out the plug or operating a circuit breaker.

Voltage & Power
The voltage used must be the same as specified on this microwave oven. Using a higher voltage than that which is specified is dangerous and may result in a fire or other type of accident causing damage.
Important Safety Instructions
Do not immerse cord, plug or oven in water. Keep cord away from heated surfaces. Do not let cord hang over the edge of table or work top. Do not plug your oven in via an extension cable as this can be dangerous. It is important to plug the oven directly into a wall socket.
The back of the appliance heats up during use. Do not allow the cord to be in contact with the back of the appliance or cabinet surface.
Disposal of Old Equipment
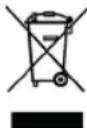
Only for European Union and countries with recycling systems
This symbol on the products, packaging, and/or accompanying documents means that used electrical and electronic products must not be mixed with general household waste.
For proper treatment, recovery and recycling of old products, please take them to applicable collection points in accordance with your national legislation.
By disposing of them correctly, you will help to save valuable resources and prevent any potential negative effects on human health and the environment.
For more information about collection and recycling, please contact your local municipality.
Penalties may be applicable for incorrect disposal of this waste, in accordance with national legislation.
Before Using your Oven
Examine your Oven
- Unpack oven, remove all packing material, and examine the oven for any damage such as dents, broken door latches or cracks in the door. Notify dealer immediately if unit is damaged. Do not install if unit is damaged.
Guarantee
- Your receipt is your guarantee, please keep safely.
Cord
- If the supply cord of this appliance is damaged, it must be replaced by the manufacturer or it's service agent or a similarly qualified person in order to avoid a hazard.

Note
The appliance should be inspected for damage to the door seals and door seal areas. If these areas are damaged the appliance should not be operated until it has been repaired by a service technician trained by the manufacturer.
- Before using grill, convection or combination function for the first time operate the oven without food and accessories (including glass turntable and roller ring) on Convection 220 °C for 5 minutes. This will allow the oil that is used for rust protection to be burned off. This is the only time that the oven is operated empty (except when preheating).

Caution! Hot Surfaces
Exterior oven surfaces, including air vents on the cabinet and the oven door will get hot during Combination/Grill/Convection. Do not operate the oven empty apart from point 4 above and when preheating. The appliance must not be operated by microwave or combination including microwave without food in the oven. Operation when empty will damage the appliance.
During use the appliance becomes hot. Care should be taken to avoid touching heating elements inside the oven. The accessible parts may become hot in combination use. Young children less than 8 years of age should be kept away. Children should only use the oven under adult supervision due to the temperatures generated.
Placement of your Oven
This oven is intended for countertop use only. It is not intended for built-in use or for use inside a cupboard. The microwave oven shall not be placed in a cabinet.
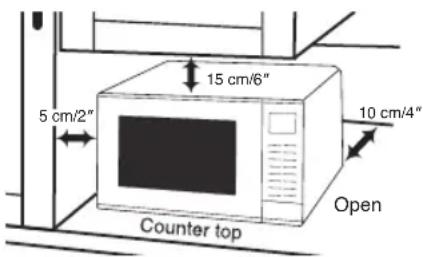
text_image
5 cm/2" 15 cm/6" 10 cm/4" Counter top Open-
Oven must be placed on a flat, stable surface 85 cm / 33 ½ inch above floor level, with rear of oven placed against a back wall. For proper operation, the oven must have sufficient air flow, i.e. 5 cm / 2 inch at one side, the other being open; 15 cm / 6 inch clear over the top; 10 cm / 4 inch at the rear.
-
Do not place the microwave oven on a shelf directly above a gas or electric hob. This may be a safety hazard and the oven may be damaged.
- Do not block the air vents on the sides and back of the oven. If these openings are blocked during operation the oven may overheat. In this case the oven is protected by a thermal safety device and resumes operation only after cooling down. The oven will remain inoperable with a blank display until it has cooled.
- This appliance is intended to be used in household applications only.
Care & Cleaning of your Oven

Important
It is essential for the safe operation of the oven that it is kept clean and wiped out after each use. Failure to maintain the oven in a clean condition could lead to deterioration of a surface that could adversely affect the life of the appliance and possibly result in a hazardous situation.
- Switch the oven off before cleaning and unplug at socket if possible.
- Keep the inside of the oven, door seals and door seal areas clean. When food splatters or spilled liquids adhere to oven walls, door seals and door seal areas wipe off with a damp cloth. Mild detergent
may be used if they get very dirty. The use of harsh detergent or abrasives is not recommended. Take care when cleaning around the waveguide cover.
- After using grill, convection or combination cooking, the walls of the oven should be cleaned with a soft cloth and soapy water. Particular care should be taken to keep the window area clean especially after cooking by grill, convection or combination. Stubborn spots inside the oven can be removed by using a small amount of conventional oven-cleaner sprayed onto a soft damp cloth. Wipe onto problem spots, leave for recommended time and then wipe off. Do not spray directly inside the oven.
Care & Cleaning of your Oven
- After use, the oven interior should be wiped out to remove any remaining water in order to reduce the risk of corrosion to the cavity and door. The cavity and door can be damaged by abrasive cleaners and sharp objects so care must be taken to avoid damage caused in this way. If the cavity or door become damaged the lining may begin to corrode. Providing the above precautions are taken regarding the cleaning and care of your oven the life of the cavity and door may be extended.
- The outside oven surface should be cleaned with a damp cloth. To prevent damage to the operating parts inside the oven, water should not be allowed to seep into the ventilation openings.
- If the control panel becomes dirty, clean with a soft, dry cloth. Do not use harsh detergents or abrasives on the control panel. When cleaning the control panel, leave the oven door open to prevent the oven from accidentally turning on. After cleaning press Stop/Cancel pad to clear display window.
- Do not use harsh abrasive cleaners or sharp metal scrapers to clean the oven door glass since they can scratch the surface, which may result in shattering of the glass.
-
Keep air vents clear at all times Check that no dust or other material is blocking any of the air vents on the top, bottom or rear of the oven. If air vents become blocked this could cause overheating which would affect the operation of the oven and possibly result in a hazardous situation.
-
If steam accumulates inside or around the outside of the oven door, wipe with a soft cloth. This may occur when the microwave oven is operated under high humidity conditions and in no way indicates a malfunction of the unit or microwave leakage.
- It is occasionally necessary to remove the glass turntable for cleaning. Wash the turntable in warm soapy water. Do not place in the dishwasher.
- The roller ring and oven cavity floor should be cleaned regularly to avoid excessive noise. Simply wipe the bottom surface of the oven, particularly the turntable spindle and the area surrounding this, with mild detergent and hot water then dry with a clean cloth. The roller ring may be washed in mild soapy water.
After removing the roller ring from cavity floor for cleaning, be sure to replace it in the proper position.
- When grilling or cooking by convection or combination, some foods may splatter grease onto the oven walls. If the oven is not cleaned to eliminate this grease, it can accumulate and cause the oven to 'smoke' during use. These marks will be more difficult to clean later.
- A steam cleaner is not to be used for cleaning.
- Users are advised to avoid any downward pressure on the microwave door when in the open position. There is a safety risk that the oven will tilt forward.
Maintenance of your Oven
Service
- When your oven requires a service call your local Panasonic engineer (Customer Communications Centre on 0344 844 3899 can recommend an engineer).
Door Seals
- Do not attempt to tamper with or make any adjustments or repairs to door, control panel housing, safety interlock switches or any other part of the oven. Do not remove outer panel from oven. The door seals and door seal areas should always be kept clean – use a damp cloth.
Oven Light
- The oven lamp must be replaced by a service technician trained by the manufacturer. Do not attempt to remove the outer casing from the oven.
Selected Spares and Accessories
- These may be ordered direct; on line at www.panasonic.co.uk or by telephoning the Customer Communications Centre on 0344 844 3899. Most major credit and debit cards accepted. Ensure you quote the correct model number.

Warning!
It is hazardous for anyone other than a competent person to carry out any service or repair operation which involves the removal of a cover which gives protection against exposure to microwave energy.
The appliance should be inspected for damage to the door seals and door seal areas. If these areas are damaged the appliance should not be operated until it has been repaired by a service technician trained by the manufacturer.
Parts of your Oven
- Do not operate the oven without the roller ring and glass turntable in place.
- Only use the glass turntable specifically designed for this oven. Do not substitute with any other glass turntable.
- If glass turntable is hot, allow to cool before cleaning or placing in water.
- Do not cook directly on glass turntable. Always place food in a microwave safe dish. The only exception to this is when cooking jacket potatoes on microwave only.
- If food or utensils on the glass turntable touch the oven walls this will cause the turntable to stop moving. It will then automatically rotate in the opposite direction. This is normal. Open oven door, reposition the food and restart.
- The glass turntable can rotate in either direction. The maximum weight that can be placed on the turntable is 4 Kg (8 lb 14 oz) (this includes total weight of food and dish).
-
While cooking by microwave or combination the turntable may vibrate. This will not affect cooking performance.
-
The metal accessories provided must only be used as directed for grilling convection and combination cooking. Never use them on microwave only. Do not use if operating the oven with less than 200 g (7 oz) of food on a manual combination program. Failure to use accessories correctly could damage your oven.
-
Arcing may occur if the incorrect weight of food is used, a metal container has been used incorrectly, or the accessories have been damaged. If this occurs, stop the machine immediately. You can continue to cook by grill or convection only.
-
Always refer to instructions for correct accessories to use on all programs. The glass turntable and roller ring are the only accessories used for microwave cooking. For convection and combination cooking the enamel tray must always be in place on the glass turntable (unless stated).
Parts of your Oven
1. Door release
Press to open the door. When you open the oven door during cooking, the cooking is stopped temporarily without clearing earlier made settings. The cooking is resumed as soon as the door is closed and Start pad pressed.
- See-through oven window
- Door safety lock system
- Oven lamp
- Waveguide cover (do not remove)
- External oven air vents
- Control panel
- Power supply cord
- Plug
- Identification plate
11. Glass turntable
The glass turntable and roller ring are the only accessories used for microwave cooking.
12. Roller ring
(i). The roller ring and oven floor should be cleaned frequently to prevent excessive noise.
(ii). The roller ring must always be used together with the glass turntable for cooking.
13. Heating elements
14. Caution label (hot surfaces)
15. Menu label
16. Wire rack
17. Enamel tray
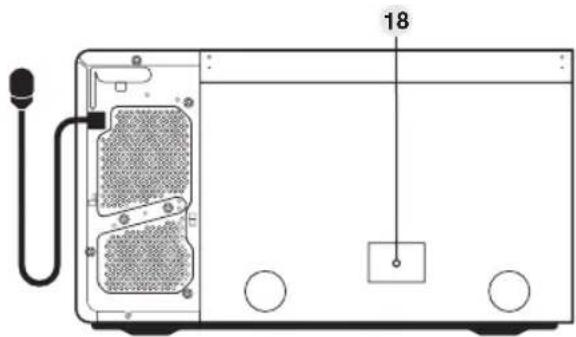
18. Warning label
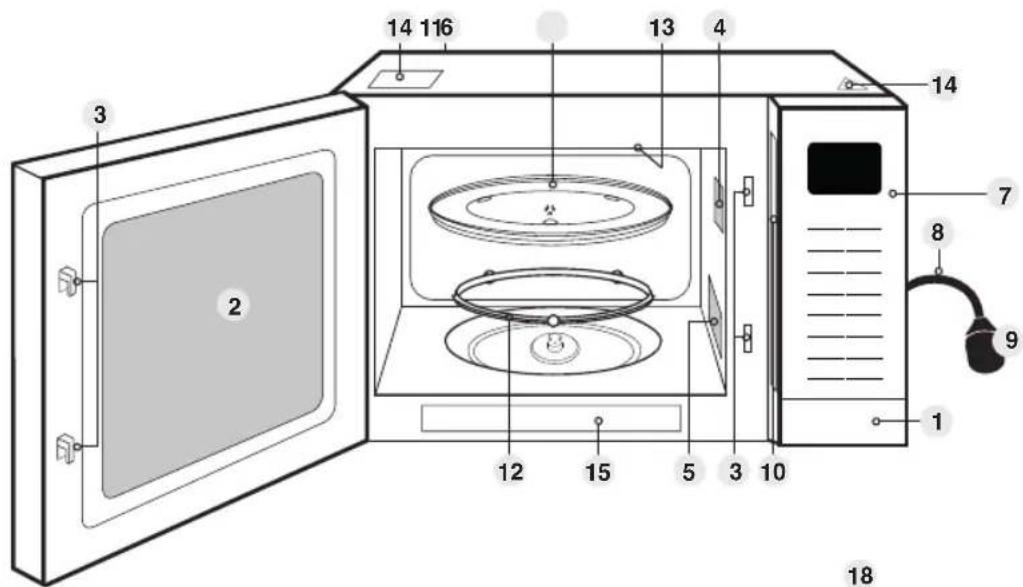
text_image
14 116 13 4 14 3 2 7 8 9 1 12 15 5 3 10 1 18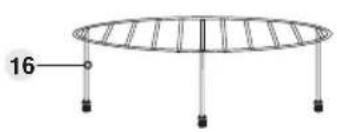
natural_image
Simple diagram of an oval table with four legs and a central vertical bar (no text or symbols)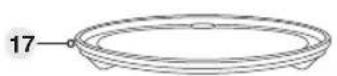
text_image
18
Note
- The illustration is for reference only.
- The glass turntable, wire rack and enamel tray are the only accessories with this oven. All other cooking utensils mentioned in this manual must be purchased separately.
Important Information - Read Carefully
Safety
If smoke is emitted or a fire occurs in the oven, press Stop/Cancel pad and leave the door closed in order to stifle any flames. Disconnect the power cord, or shut off power at fuse or circuit breaker panel.
Short Cooking Times
As microwave cooking times are much shorter than other cooking methods it is essential that recommended cooking times are not exceeded without first checking the food.
Cooking times given in the cookbook are approximate. Factors that may affect cooking times are: preferred degree of cooking, starting temperature, altitude, volume, size and shape of foods and utensils used. As you become familiar with the oven, you will be able to adjust these factors.
It is better to initially undercook rather than overcook foods. If food is undercooked, it can always be returned to the oven for further cooking. If food is overcooked, nothing can be done. Always start with minimum cooking times.

Important If the recommended cooking times are exceeded the food will be spoiled and in extreme circumstances could catch fire and possibly damage the interior of the oven.
Small Quantities of Food
Take care when heating small quantities of food as these can easily burn, dry out or catch fire if cooked too long. Always set short cooking times and check the food frequently.

Note Never operate the oven without food inside (except when preheating).
Foods Low in Moisture
Take care when heating foods low in moisture, e.g. bread items, chocolate, biscuits and pastries. These can easily burn, dry out or catch on fire if cooked too long. We do not recommend heating foods low in moisture such as popcorn or poppadoms. The microwave oven is intended for heating food and beverages only. Drying of food, newspapers or clothing and heating of warming pads, slippers, sponges, damp cloth, wheat bags, hot water bottles and similar may lead to risk of injury, ignition or fire.
Christmas Pudding
Christmas puddings and other foods high in fats or sugar, e.g. jam, mince pies, must not be over heated. These foods must never be left unattended as with over cooking these foods can ignite.
Boiled Eggs
Eggs in their shell and whole hard boiled eggs should not be heated in microwave ovens since they may explode even after microwave heating has ended.
Foods with Skins
Potatoes, apples, egg yolk, whole vegetables and sausages are examples of food with non porous skins. These must be pierced using a fork before cooking to prevent bursting.
Important Information - Read Carefully

Warning!
Liquids and other foods must not be heated in sealed containers since they are liable to explode.
Liquids
When heating liquids, e.g. soup, sauces and beverages in your microwave oven, overheating the liquid beyond boiling point can occur without evidence of bubbling.
This could result in a sudden boil over of the hot liquid. To prevent this possibility the following steps should be taken:
a. Avoid using straight-sided containers with narrow necks.
b. Do not overheat.
c. Stir the liquid before placing the container in the oven and again halfway through the heating time.
d. After heating, allow to stand in the oven for a short time, stirring again before carefully removing the container.
e. Microwave heating of beverages can result in delayed eruptive boiling, therefore care should be taken when handling the container.
Lids
Always remove the lids of jars and containers and takeaway food containers before you microwave them. If you don't then steam and pressure might build up inside and cause an explosion even after the microwave cooking has stopped.
Deep Fat Frying
Do not attempt to deep fat fry in your oven.
Meat Thermometer
Use a meat thermometer to check the degree of cooking of joints and poultry only when meat has been removed from the microwave. If undercooked, return to the oven and cook for a few more minutes at the recommended power level. Do not leave a conventional meat thermometer in the oven when microwaving.
Paper & Plastic
When heating food in plastic or paper containers keep an eye on the oven due to the possibility of ignition. Do not use wire twist-ties with roasting bags as arcing will occur. Do not use recycled paper products, e.g. kitchen roll unless they say they are specifically designed for use in a microwave oven. These products contain impurities which may cause sparks and/or fires when used.
Reheating
It is essential that reheated food is served piping hot. Remove the food from the oven and check that it is piping hot, i.e. steam is being emitted from all parts and any sauce is bubbling. (If you wish you may choose to check the food has reached 75 °C with a food thermometer – but remember do not use this thermometer inside the microwave).
For foods that cannot be stirred, e.g. lasagne, shepherds pie, the centre should be cut with a knife to test it is well heated through. Even if a manufacturer's packet instructions have been followed always check the food is piping hot before serving and if in doubt return your food to the oven for further heating.
Important Information - Read Carefully
Standing Time
Standing time refers to the period at the end of cooking or reheating when food is left before being eaten, i.e. it is a rest time which allows the heat in the food to continue to conduct to the centre, thus eliminating cold spots. See page 21.
Keeping your Oven Clean
It is essential for the safe operation of the oven that it is wiped out regularly. Use warm soapy water, squeeze the cloth out well and use to remove any grease or food from the interior. Pay particular attention to the door seal area and also the areas around the microwave feed guide situated on the right hand side of the cavity wall. The oven should be unplugged when cleaning.
Fan Motor Operation
After using the oven the fan motor may rotate for a few minutes to cool the electric components. This is normal and you can take out food even though the fan motor operates. You can continue using the oven during this time.
Grilling
The oven will only operate on the grill function with the door closed.
Babies Bottles and Food Jars
When reheating babies bottles always remove top and teat. Liquid at the top of the bottle will be much hotter than that at the bottom and must be shaken thoroughly before checking the temperature. The lid must also be removed from babies food jars, the contents must also be stirred or shaken before the temperature is checked. This should be carried out before consumption to avoid burns. See page 64.
Arcing
Arcing may occur if a metal container has been used accidentally or if the incorrect weight of food is used or the accessories have been damaged. Arcing is when blue flashes of light are seen in the microwave oven. If this occurs, stop the machine immediately. If the oven is left unattended and this continues it can damage the machine. You can continue to cook by grill or convection only.
Maximum Weight on Turntable
The maximum weight that can be placed on the turntable is 4 kg (8 lb 14 oz) (this includes total weight of food and dish).
Utensils/Containers
Before use check that utensils / containers are suitable for use in microwave ovens. See pages 24-25.
Storage of Accessories
Do not store any objects other than oven accessories inside the oven in case it is accidentally turned on.

Do not operate the oven empty (except when preheating and when burning off the oil, see point 4 on page 11). The appliance must not be operated by microwave or combination without food in the oven. Operation when empty will damage the appliance.
Microwaving Principles
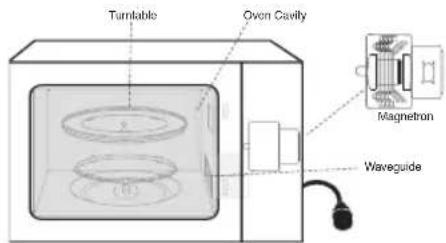
Microwave energy has been used in this country to cook and reheat food since early experiments with radar in World War II. Microwaves are present in the atmosphere all the time, both naturally and from manmade sources.
Manmade sources include radar, radio, television, telecommunication links and mobile phones.
How Microwaves Cook Food
text_image
Turntable Oven Cavity Magnetron WaveguideReflection
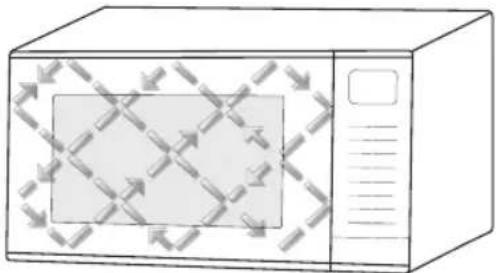
The microwaves bounce off the metal walls and the metal door screen.
natural_image
Line drawing of a microwave oven with directional arrows indicating airflow or flow (no text or symbols)In a microwave oven, electricity is converted into microwaves by the magnetron.
text_image
250 200 150 100 50Transmission
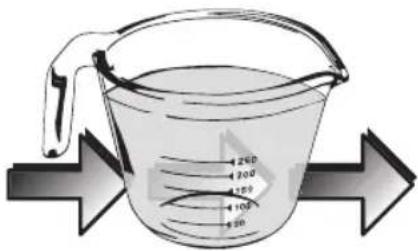
Then they pass through the cooking containers to be absorbed by the water molecules in the food, all foods contain water to a more or lesser extent.
The microwaves cause the water molecules to vibrate which causes friction, i.e. heat. This heat then cooks the food. Microwaves are also attracted to fat and sugar particles, and foods high in these will cook more quickly. Microwaves can only penetrate to a depth of 4-5 cm (1½-2 inch) and as heat spreads through the food by conduction, just as in a traditional oven, the food cooks from the outside inwards.

Note
The dish used to cook or reheat the food will get warm during cooking, as the heat conducts from the food. Even in microwaving, oven gloves are required!
Microwaves cannot pass through metal and therefore metal cooking utensils can never be used in a microwave, for cooking on microwave only.
Foods Not Suitable for Cooking by Microwave Only
Yorkshire puddings, souffles, double crust pastry pies. This is because these foods rely on dry external heat to cook correctly, do not attempt to cook by micro wave. Foods that require deep fat frying cannot be cooked either.
Standing Time
When a microwave oven is switched off, the food will continue to cook by conduction – not by microwave energy. Hence standing time is very important in microwaving, particularly for dense foods i.e. meat, cakes and reheated meals (Refer to page 21).

Boiled Eggs
Do not boil eggs in your microwave. Raw eggs boiled in their shells can explode and cause serious injury.
General Guidelines
Standing Time
Dense foods e.g. meat, jacket potatoes and cakes, require a standing time (inside or outside of the oven) after cooking, to allow heat to finish conducting through the food.
■ Jacket Potatoes
After being cooked in microwave only, remove and wrap in aluminium foil to stand. It is not necessary to stand jacket potatoes cooked in combination mode. Stand for 15 minutes.
Fish
Stand for 2-3 minutes.
■ Egg Dishes
Stand for 1-2 minutes.
■ Precooked Convenience Food
Stand for 1-2 minutes.
■ Meat Joints
Stand 15 minutes wrapped in aluminium foil.
Plated Meals
Stand for 2-3 minutes.
■ Vegetables
Boiled potatoes benefit from standing for 1-2 minutes, however most other types of vegetables can be served immediately.
■ Defrosting
It is essential to allow standing time to complete the process. This can vary from 5 minutes e.g. raspberries, to up to 1 hour for a joint of meat. See pages 34-35.
If food is not cooked after standing time, return to oven and cook for additional time.
Piercing
The skin or membrane on some foods will cause steam to build up during cooking. These foods must be pierced or a strip of skin should be peeled off before cooking to allow the steam to es cape. Eggs, potatoes, apples, sausages etc. will all need to be pierced before cooking. Do not attempt to boil eggs in their shells.
Moisture Content
Many fresh foods e.g. vegetables and fruit, vary in their moisture content throughout the season. Jacket potatoes are a particular example of this. For this reason cooking times may have to be adjusted throughout the year. Dry ingredients e.g. rice, pasta, can dry out further during storage and cooking times may differ from freshly purchased ingredients.
General Guidelines
Cling Film
Cling film helps keep the food moist and the trapped steam assists in speeding up cooking times. Cling film should be pierced before cooking, to allow excess steam to escape. Always take care when removing cling film from a dish as the build-up of steam will be very hot. Always purchase cling film that states on the packet "suitable for microwave cooking" and use as a covering only. Do not line dishes with cling film. Do not cover foods when cooking by grill, convection or combination.
Dish Size
Follow the dish sizes given in the recipes, as these affect the cooking and reheating times. A quan tity of food spread in a bigger dish cooks and reheats more quickly.
Quantity
Small quantities cook faster than large quantities, also small meals will reheat more quickly than large portions.
Spacing
Foods cook more quickly and evenly if spaced apart. Never pile foods on top of each other.
Shape
Even shapes cook evenly. Food cooks better by microwave when in a round container rather than square.
Density
Porous airy foods heat more quickly than dense heavy foods.
Covering
Cover foods with microwave cling film or a self-fitting lid. Cover fish, vegetables, cas seroles, soups. Do not cover cakes, sauces, jacket potatoes, pastry items. Please refer to cooking charts and recipes for more information.
Arranging
Individual foods e.g. chicken portions or chops, should be placed on a dish with the thicker parts to the outside.
Ingredients
Foods containing fat, sugar or salt heat up very quickly. The filling may be much hotter than the pastry. Take care when eating. Do not overheat even if the pastry does not appear to be very hot.
General Guidelines
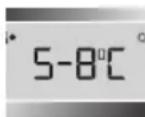
Starting Temperature The colder the food, the longer it takes to heat up. Food from a fridge takes longer to reheat than food at room temperature. Food temperature should be between 5-8 °C before cooking.
Turning and Stirring Some foods require stirring during cooking. Meat and poultry should be turned after half the cooking time.
Liquids All liquids must be stirred before, during and after heating. Water espe cially must be stirred before and during heating, to avoid eruption. Do not heat liquids that have previously been boiled. Do not overheat.
Checking Food It is essential that food is checked during and after a recommended cooking time, even if an auto program has been used (just as you would check food cooked in a conventional oven). Return the food to the oven for further cooking if necessary.
Cleaning As microwaves work on food particles, keep your oven clean at all times. Stubborn spots of food can be removed by using a branded oven cleaner, sprayed onto a soft cloth. Always wipe the oven dry after cleaning. Avoid any plastic parts and door area. Customers should not spray directly into the cavity.
Containers to Use
Choosing the correct container is a very important factor in deciding the success or failure of your cooking.
Testing Dishes for Suitability for Microwave Cooking Only When unsure that a cooking con tainer is suitable for use in your microwave, check by the following test:
- Fill a microwave safe measuring jug with 300 ml ( 12 pt) cold water.
-
Place it on the turntable along side the dish to be tested. If the dish you are testing is a large dish, then stand the measuring jug on top of the empty dish.
-
Heat on High microwave for 1 minute.
Result
If the dish is suitable for micro waving, it will remain cool, whilst the water in the jug will begin to feel warm. If the testing dish feels warm, do not use as it is absorbing microwave energy.

Note
This test does not apply to plastic or metal based containers e.g. Le Creuset® style dishes, which should not be used as they are cast iron covered with enamel.
Quick Check Guide to Cooking Utensils
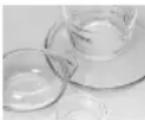
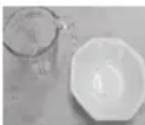
Oven Glass
Everyday glass that is heat resistant e.g. Pyrex ^® , is ideal for microwave, convection or combination cooking. Do not use for grilling on the wire rack. Do not use delicate glass or lead crystal which may crack or arc.
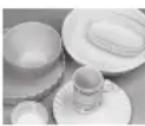
China and Ceramic
Everyday glazed china, porcelain or ceramic plates, bowls, mugs and cups can be used if they are heat resis tant. Fine bone china should only be used for reheating for short periods. Do not use dishes with a metal rim or pattern. Do not use jugs or mugs with glued handles, since the glue can melt. If dishes are heat resistant they may be used on convection and combination but not directly under the grill.
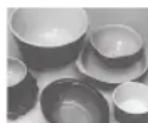
Pottery, Earthenware, Stoneware
If completely glazed, these dishes are suitable. Do not use if partially glazed or unglazed, since they are able to absorb water which in turn absorbs microwave energy, making the container very hot and slows down the cooking of food.
Foil/Metal Containers
Never attempt to cook in foil or metal containers on microwave only as the microwaves cannot pass through and the food will not heat evenly, it may also damage your oven. Foil and metal containers can be used on grill or convection functions and may be used with care during certain combination cooking as long as they are not damaged or dented.
Containers to Use
Plastic
Many plastic containers are designed for microwave use, but do not use for cooking foods high in sugar or fat or for foods that require long cooking times e.g. brown rice. Only use Tupperware® containers if they are designed for microwave use.
Do not use Melamine. Never cook in margarine cartons or yoghurt pots, as these will melt with the heat from the food. If heatproof they can be used for combination cooking. Do not use under the grill.
Paper
Plain white absorbent kitchen paper (kitchen towel) can only be used for microwave cooking e.g. coveringbacon to prevent splattering.
Only use for short cooking times. Never re-use a piece of kitchen towel. Always use a fresh piece of paper for each dish.
Avoid kitchen paper containing manmade fibres.
If you are using branded recycled kitchen towel, check first that it is recommended for microwave use. Do not use waxed or plastic coated cups or plates as the finish may melt.
Greaseproof paper can be used to line the base of dishes and to cover when blind baking pastry cases. White paper plates can be used for shortreheating times, on microwave only.
Wicker, Wood, Straw Baskets
Dishes will crack and could ignite. Do not use wooden dishes in your microwave. Do not use on any cooking mode.
Cling Film
Microwave cling film can only be used for covering food that is reheated by microwave. It is also useful for covering food to be cooked, but care should be taken to avoid the film being in direct contact with the food e.g. Do not line dishes with cling film. Do not use on any other cooking mode.
Roasting Bags
Roasting bags are useful when slit up one side to tent a joint, for roasting by power and time. Do not use the metal twists supplied, when using microwave or combination.
Aluminium Foil
Small amounts of smooth aluminium foil can be used to shield joints of meat during defrosting and cooking by microwave, as the microwaves cannot pass through the foil, this prevents the parts shielded from overcookingor overdefrosting.Takecare that the foil does not touch the sides or roof of the oven, as this may cause arcing and damage your oven. Aluminium foil can be used for convection cooking.
Cooking Modes
The diagrams shown below are examples of the accessories. It may vary depending on recipe/dish used. Further information can be found in the Cookbook.
| Cooking modes Uses | Accessories to use | Containers | |
Microwave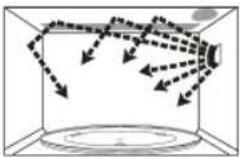 | DefrostingReheatingMelting: butter, chocolate, cheese.Cooking fish, vegetables, fruits, eggs.Preparing: stewed fruits, jam, sauces, custards, choux, pastry, caramel, meat, fish.Baking cakes without colour.No Preheating | - | Use your own Pyrex® dishes, plates or bowls, directly on the glass turntable.No metal. |
Grill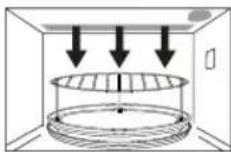 | Grilling of meat or fish.Toast grilling.Colouring of gratin dishes or meringue pies.No preheating | Wire rack on enamel tray | Use your own Pyrex® dishes, heatproof plates or bowls, directly on the wire rack on enamel tray on glass turntable. |
Convection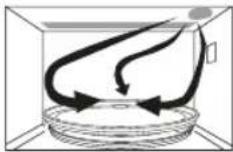 | Baking of small items with short cooking times: puff pastry, cookies, roll cakes.Special baking: bread rolls or brioches, sponge cakes.Baking of pizzas and tarts.Preheating advised | Enamel tray | Heatproof, metal tin can be used on enamel tray.Do not place dishes directly on glass turntable. |
Cooking Modes
| Cooking modes Uses | Accessories to use | Containers | |
Grill + microwave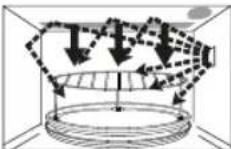 | Cooking lasagne, meat, potatoes or vegetable gratins.No Preheating | Wire rack on enamel tray | Microwaveable and heatproof dishes placed directly on wire rack on enamel tray on, glass turntable.No metal. |
Convection + microwave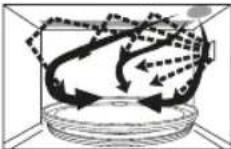 | Baking cakesPuff pastry tartsPreheating if necessary | Enamel tray | Microwaveable and heatproof dishes can be used on the enamel tray.Do not place dishes directly on glass turntable.No metal. |
Control Panels
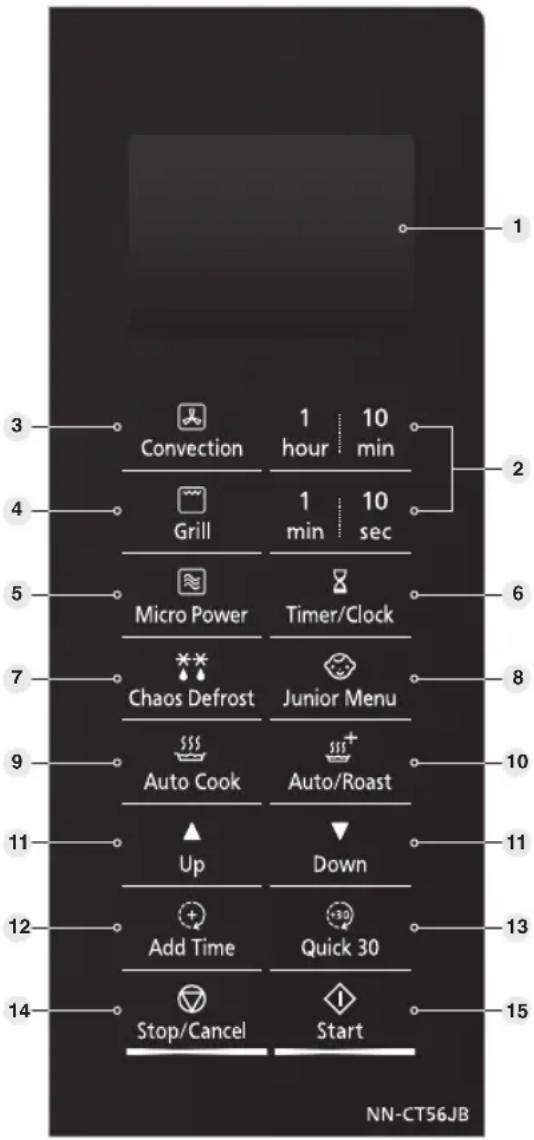
NN-CT54JW, NN-CT55JW, NN-CT56JB, NN-CT57JM *
text_image
1 3 Convection 1 hour 10 min 4 Grill 1 min 10 sec 5 Micro Power Timer/Clock 7 Chaos Defrost Junior Menu 9 Auto Cook Auto/Roast 11 Up Down 12 Add Time Quick 30 14 Stop/Cancel Start NN-CT56JB* The design of your control panel may vary from the panel displayed, but the words on the pads will be the same.

Beep Sound
A beep sounds when a pad is pressed. If this beep does not sound, the setting is incorrect. When the oven changes from one function to another, two beeps sound. After completion of cooking, five beeps sound.
1 Display window
2 Time pads
3 Convection pad (pages 40-41)
4 Grill pad (pages 38-39)
5 Micro Power pad (pages 31-32)
6 Timer/Clock pad (pages 30, 49-50)
7 Auto weight defrost-Chaos Defrost programs (pages 33-34)
8 Junior Menu programs (pages 55-57)
9 Auto Cook programs (pages 58-59)
10 Auto/Roast programs (pages 60-62)
11 Up and Down pads
12 Add Time pad (page 37)
13 Quick 30 pad (page 37)
14 Stop/Cancel pad: Before cooking:
One press clears your instructions
During cooking: one press temporarily stops the cooking program. Another press cancels all your instructions and the time of day will appear in the display.
15 Start pad
Press to start operating the oven. If during cooking the door is opened or Stop/Cancel is pressed once, Start has to be pressed again to continue cooking.
This oven is equipped with an energy saving function.

Note
When in stand-by mode the brightness of the display will be reduced. The oven will enter stand-by mode, when first plugged in and immediately after the last operation has completed.
If an operation is set and Start pad is not pressed, after 6 minutes the oven will automatically cancel the operation. The display will revert back to clock mode.
Let's Start to Use Your Oven
NN-CT54JW, NN-CT55JW, NN-CT56JB, NN-CT57JM *
text_image
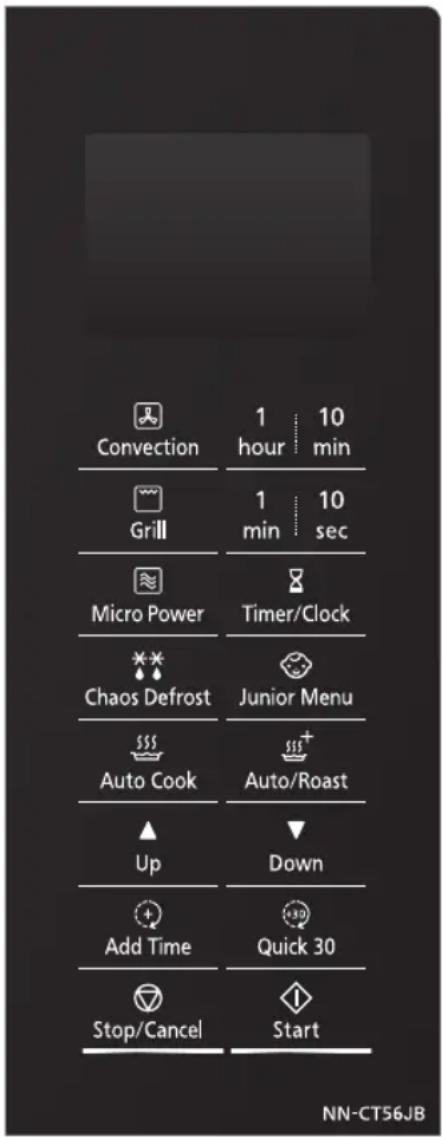
Convection 1 hour 10 min Grill 1 min 10 sec Micro Power Timer/Clock Chaos Defrost Junior Menu Auto Cook Auto/Roast Up Down Add Time Quick 30 Stop/Cancel Start NN-CT56JB* The design of your control panel may vary from the panel displayed, but the words on the pads will be the same.
1 Plug in
Plug into a 13 amp fused electrical socket. You will be reminded to read your operating instructions.
2 Lb/oz Conversion
Default weight is grams. To select weight in pounds and ounces, after first plug in, press Start pad once. Press again to change to grams.
3 Press Timer/Clock pad Twice to Set Clock
Set clock as a 24 hr clock. (See page 30).
4 Press Convection pad
will appear in the display window with the oven temperature. This procedure is to burn off the oil used for rust protection in the oven. Press Convection pad until 220 °C appears in the display window. Remove all accessories from the oven.
5 Press Time pads
Press 1 min pad until 5 minutes is displayed in the window.
6 Press Start
The time will be displayed in the window and count down. The oven will beep at the end of the program. The oven is now ready to use. Caution: heating elements and oven will be hot.
7 Demonstration Mode
This is to enable you to experiment setting various programs. (The letter D will always appear in the display window. This is to confirm that there is no microwave power produced and it is safe to use the oven without any food). To select this mode press the Micro Power pad once and then Stop/Cancel 4 times. "DEMO MODE PRESS ANY KEY" will appear. To cancel press the Micro Power pad once and then Stop/Cancel 4 times.
8 Child Lock
To operate the child lock facility press the Start pad three times, this will make the oven controls inoperable, however, the door can be opened. —will appear in the display and none of the controls will operate. To clear child lock facility press Stop/Cancel three times. To activate or cancel child lock, Start or Stop/Cancel must be pressed 3 times within a 10 second period. Child Lock can be set when a colon or the time of day is displayed.
Setting the Clock
Example of how to set 11:25am.
flowchart
graph LR
    A["Timer/Clock"] -->|Press five times| B["1 hour: 10 min"]
    B -->|Press twice| C["Timer/Clock"]
    B -->|Press twice| D["1 min: 10 sec"]
    D -->|Inoperable| E["Timer/Clock"]
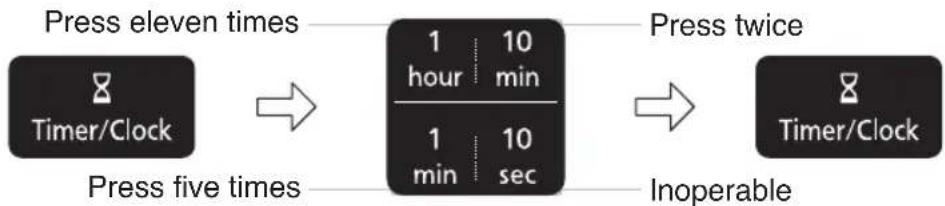
Press Timer/Clock twice
"SET TIME" will appear in the display window, and the colon starts to blink.
Press time pads
Enter time of day by pressing time pads. e.g. 11:25am (24 hr clock). 10 sec pad is inoperable.
Press Timer/Clock
The colon stops blinking. Time of day is now locked into the display.

Note
- To reset time of day, repeat step 1 through to step 3, as above.
- The clock will keep the time of day as long as the oven is plugged in and electricity is supplied.
- This is a 24 hour clock, i.e. 2pm = 14:00 not 2:00.
Operation Guide Setting
To assist you in programming your oven, the following operation will appear in the display window. When you become familiar with your oven, the operation guide can be turned off.
To turn off:

flowchart
graph LR
    A["Timer/Clock"] --> B["OPERATION GUIDE OFF"]
    B --> C["Colon or time of day appears in the display window."]
    D["Press Timer/Clock four times."] --> B
    E["Display window"] --> B

flowchart
graph LR
    A["Timer/Clock"] --> B["OPERATION GUIDE ON"]
    B --> C["Colon or time of day appears in the display window."]
    D["Press Timer/Clock four times."] --> B
    E["Display window"] --> B
Microwave Cooking and Defrosting
There are six different microwave power levels available.
| Press Level Wattage | |
| Once High 1000 W | |
| Twice Defrost 270 W | |
| 3 Times Medium 600 W | |
| 4 Times Low 440 W | |
| 5 Times Simmer 300 W | |
| 6 Times Warm 100 W | |
flowchart
graph LR
    A["Micro Power"] --> B{Inoperable}
    B --> C["1 hour | 10 min"]
    B --> D["1 min | 10 sec"]
    C --> E["Start"]
    D --> E
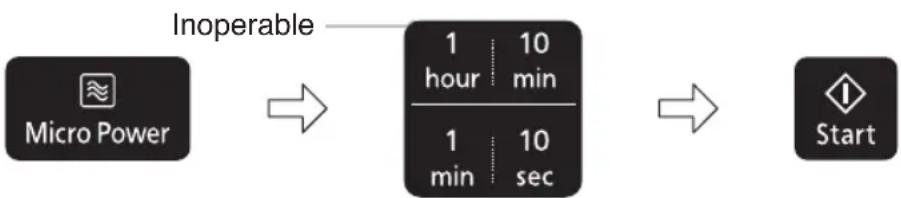
Press Micro Power
Press this pad until the power you require appears in the display window. The microwave symbol 📋 will also appear. When you select Defrost, ** will also appear.
Set time
Select cooking time. Your oven can be programmed for up to 99 minutes 50 seconds on Medium, Low, Simmer, Defrost and Warm microwave. High microwave can be programmed for 30 minutes. The 1 hour pad is inoperable.
Press Start
The cooking program will start and the time in the display will count down.

Note
- Maximum time that can be set on High microwave is 30 minutes.
- On all power levels, except High microwave, the maximum time that can be set is 99 minutes, 50 seconds. The 1 hour pad is inoperable.
- You can increase the cooking time during cooking if required. Time can be increased in 1 minute increments, up to 10 minutes. Press 'Add time' pad once, then press '1 min' pad to a maximum of 10 minutes. After selecting 'Add Time' function, time should be added within a 5 second period. Cooking time can not be decreased during cooking.
Microwave Cooking and Defrosting

Note
- For manual defrosting times, please refer to defrost chart on page 36.
- For multi-stage cooking refer to page 48.
- Stand time can be programmed after microwave power and time setting. Refer to using the timer on pages 49-50.
Accessory to Use
When using your oven on microwave only, the glass turntable provided must always be in position. Do not attempt to use microwave only with any metal accessory in the oven.
Do not place food directly onto the turntable except in the case of jacket potatoes cooked by microwave only.
Foods reheated or cooked by microwave only are normally covered with a lid or cling film, unless otherwise stated.
natural_image
Simple line drawing of a circular object with internal features and small protrusions (no text or symbols)Auto Weight Defrost - Chaos Defrost
With this feature you can defrost frozen foods according to the weight. Select the category and set the weight of the food. The weight can be programmed in grams or pounds and ounces. The weight starts from the minimum weight for each category.

flowchart
graph LR
    A["Chaos Defrost"] --> B["Up"]
    B --> C["Down"]
    C --> D["Start"]
Select the desired program by pressing pad once, twice or three times. The microwave 📋 and defrost ** symbol will also appear.
Enter the weight by pressing the up and down pads. The “up” pad will start with the minimum weight for each food. Default weight is grams. To change weight to pounds and ounces refer to page 29.
Press Start
| Program Weight Range Suitable Food | ||
| 1. Bread | 100 g - 900 g(4 oz - 2 lb) | Bread and rolls. Turn at beep. Standing time 10-15 minutes. |
| 2. Mince/chops | 200 g - 1200 g(7 oz - 2 lb 10 oz) | Small pieces of meat, minced meat, chicken portions, steaks, chops. Turn at beeps and shield. Standing time 15-30 minutes. |
| 3. Meat Joints | 400 g - 2000 g(14 oz - 4 lb 7 oz) | Whole chicken, meat joints. Turn at beeps and shield. Standing time of at least 1 hour. |
This feature allows you to defrost minced meat, chops, chicken portions, meat joints and bread.
The Chaos Defrost pad should be pressed to select the correct category and then enter in the weight of the food in grams or pounds and ounces using the up and down pads.
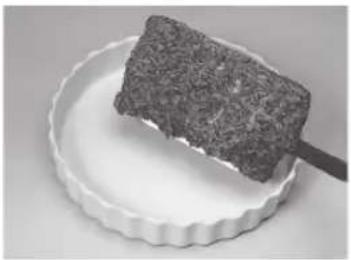
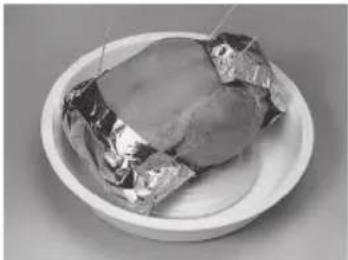
Foods should be placed in a suitable dish, whole chickens and joints of meat should be on an upturned saucer or on a micro-safe rack. Chops, chicken portions and slices of bread should be placed in a single layer. It is not necessary to cover the foods. The Chaos Theory principle is used in Auto Weight defrost programs to give you a quick and more even defrost. The Chaos system uses a random sequence of pulsing microwave energy which speeds up the defrosting process. During the program the oven will beep to remind you to check the food. It is essential that you turn and stir the food frequently and shield if necessary (See pages 34-35). On hearing the first beep you should turn and shield (if possible). On the second beep you should turn the food or break it up.
Auto Weight Defrost - Chaos Defrost
1st Beep Turn
natural_image
Close-up of a textured, irregularly shaped object placed on a white fluted plate (no text or symbols visible)1st Beep Or shield
natural_image
Close-up of a white bowl containing a wrapped food item with metallic foil (no text or symbols visible)2nd Beep Turn or break up
natural_image
Plate of dark, irregularly shaped food items on a white background (no text or symbols visible)Category 1 Bread
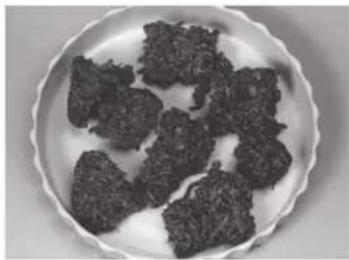
The Bread Program is suitable for defrosting small items e.g. rolls, buns and slices of bread which are required for immediate use. Small items may feel warm immediately after defrosting. Loaves can also be defrosted on this program but these will require standing time to allow the centre to thaw out. Standing time can be shortened if slices are separated and buns and loaves cut in half. Items should be turned halfway during defrosting. This program is not suitable for cream cakes or desserts e.g. cheesecake.
Category 2 Mince / chops (mince/chops/chicken portions)
It is necessary for mince to be broken up frequently during defrosting and this is best carried out in a large shallow dish. Chops and chicken portions should be arranged in a single layer and turned frequently.
Category 3 Meat joints/whole chickens
Meat joints and chickens will require shielding during defrosting especially if they are particularly fatty pieces. This is to prevent over defrosting on the outside edges. Smooth foil secured with cocktail sticks should be used. Do not allow the foil to touch the walls of the oven. Back fat of joints, legs, wings and breast bones need shielding. Standing time of at least 1 hour should be allowed (rolled joints may require longer) before cooking to ensure the centre is fully defrosted.
Defrosting Guidelines
For Best Results:
- Place foods in a suitable container. Meat joints and chickens should be placed on an upturned saucer or on a plastic rack if you have one.
- Check food during defrosting, as foods vary in their defrosting speed.
- It is not necessary to cover the food.
-
Always turn or stir the food especially when the oven "beeps". Shield if necessary (see point 6).
-
Minced meat/chops/chicken portions should be broken up or separated as soon as possible and placed in a single layer.
- Shielding prevents food cooking. It is essential when defrosting chickens and joints of meat. The outside thaws out first, so protect wings/breast and fat with smooth pieces of aluminium foil secured with cocktail sticks.
- Allow standing time so that the centre of the food thaws out. (Minimum of 1 hour for joints of meat and whole chickens).
By selecting the Defrost microwave level from the Micro Power pad, and setting a time, you can defrost food in your microwave. The biggest challenge is getting the inside defrosted before the outside starts to cook.
For this reason a defrost program alternates between a defrost microwave power and a standing time. The name for this type of defrost is
cyclic and during the standing stages there is not any microwave power in the oven, although the light will remain on and the turntable will turn. The automatic stand times ensure a more even defrost but it is still necessary to allow for standing time before use. Place foods in a suitable container. Meat joints and chickens should be placed on an upturned saucer.
Separate chops and small items e.g. bread slices where possible.
Chickens and joints of meat will require shielding during defrosting.
Turn dense foods and meat 2 or 3 times during defrosting.
Break up small items e.g. minced meat, frequently during defrosting.
Defrosting Chart Using Defrost Microwave and Time
Select Defrost microwave. The times given below are a guideline only. Always check the progress of the food by opening the oven door and then re-starting. For larger quantities adjust times accordingly. Food should not be covered during defrosting.
| Food | Defrosting Time | Method | Standing Time |
| Meat | |||
| Beef/Lamb/Pork joint 450 g (1 lb) | 16-18 mins | Place in a suitable dish or on an upturned saucer or use a microwave safe rack. Turn 3-4 times. Shield. | 60 mins |
| Minced beef 450 g (1 lb) | 12 mins | Place in a suitable dish. Break up and turn 3-4 times. | 15 mins |
| Chops 450 g (1 lb) | 12-14 mins | Place in a suitable dish in a single layer. Turn twice. Shield if necessary. | 15 mins |
| Sausages 450 g (1 lb) | 13 mins | Place in a suitable dish in a single layer. Turn twice. Shield if necessary. | 15 mins |
| Bacon rashers 450 g (1 lb) | 7-9 mins | Place in a suitable dish. Turn and separate twice. Shield if necessary. | 10 mins |
| Stewing steak 450 g (1 lb) | 13 mins | Place in a suitable dish. Break up frequently. | 15 mins |
| Whole chicken 450 g (1 lb) | 13-15 mins | Place in a suitable dish on an upturned saucer or use a microwave safe rack. Turn 3-4 times. Shield. | 60 mins |
| Chicken portions 450 g (1 lb) | 11-13 mins | Place in a suitable dish in a single layer. Turn twice. Shield if necessary. | 30 mins |
| Fish | |||
| Whole 450 g (1 lb) | 11-13 mins | Place in a suitable dish. Turn twice. Shield. | 15 mins |
| Fillets/Steak 450 g (1 lb) | 10-12 mins | Place in a suitable dish. Turn twice, separate and shield if necessary. | 15 mins |
| Prawns 450 g (1 lb) | 8-10 mins | Place in a suitable dish. Stir twice during defrosting. | 15 mins |
| General | |||
| Bread sliced 400 g (14 oz) | 6 mins | Place on a plate. Separate and rearrange during defrosting. | 10 mins |
| Slice of bread 30 g (1 oz) | 40 secs - 50 secs | Place on a plate. 1-2 mins | |
| Pastry 500 g (1 lb) | 6 mins 30 secs | Place on a plate. Turn halfway. | 15-30 mins |
| Soft fruit 450 g (1 lb) | 10-11 mins | Place in a suitable dish. Stir twice during defrosting | 15 mins |
Using the Quick 30 Function
This function allows you to quickly set cooking time in 30 second increments.
Press Quick 30 to set the desired cooking time (up to 5 minutes). Each press is 30 seconds. Time appears in the display. Power level is pre-set at High microwave.
Press Start
The cooking will start and the time in the display will count down. At the end of cooking, five beeps will sound.

Note
- This function is only available for Micro Power. If desired, you can use other microwave power levels. Select desired power level before pressing Quick 30.
- After setting the time by Quick 30, you can not use the time pads.
- This function will not operate for 1 minute after manual cooking because of 'Add Time' function.
- If you wish to operate within 1 minute, pressing Stop/Cancel will allow the operation.
Using the Add Time Function
This feature allows you to add cooking time at the end of previous cooking.
After cooking, press Add Time pad
Press time pads to add extra cooking time.
Maximum cooking time: Micro Power: High microwave up to 30 minutes; other microwave powers up to 99 minutes 50 seconds; Grill: 99 minutes 50 seconds, Convection, Combination and timer: 9 hours 59 minutes.
Press Start
Time will be added. The time in the display window will count down.

Note
- This function is only available for Micro Power, Grill, Convection, Combination and Timer functions and it is not available for Auto programs.
- The Add Time function will not operate after 1 minute cooking.
- The Add Time function can be used after the multi-stage cooking and during cooking.
- The power level is the same as the last stage.
Grilling
The Quartz Grill system on the oven gives fast efficient cooking for a wide variety of foods e.g. chops, sausages, steak, toast, oven chips etc.
Do not preheat the grill before use.
The enamel tray must be on the glass turntable when using.
flowchart
graph LR
    A["Inoperable"] --> B["1 hour min"]
    B --> C["1 min sec"]
    C --> D["Start"]
| Press Power Level Wattage | ||
| Once Grill | 1 (High) 1300 W | |
| Twice Grill | 2 (Medium) 950 W | |
| 3 Times Grill | 3 (Low) 700 W | |
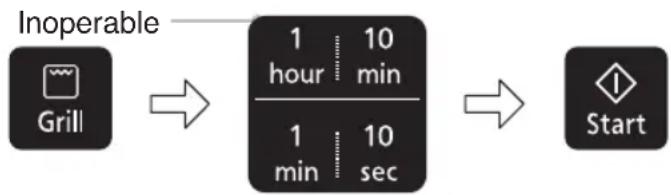
Select Grill power
Press once for Grill 1 (High), twice for Grill 2 (Medium) or three times for Grill 3 (Low). The grill symbol 📋 will also appear.
Press Time pads to enter cooking time.
Maximum time is 99 minutes 50 seconds, 1 hour pad is inoperable.
Press Start
The cooking program will start and the time in the display will count down.

Note
- The Grill will only operate with the oven door closed, and there is no microwave power on the grill only program.
- You can increase the cooking time during cooking if required. Time can be increased in 1 minute increments, up to 10 minutes. Press 'Add time' pad once, then press '1 min' pad to a maximum of 10 minutes. After selecting 'Add Time' function, time should be added within a 5 second period. Cooking time can not be decreased during cooking.
Grilling Times
When using the grill to cook foods, the cooking times will be similar to traditional grilling. Most foods will require turning halfway through the cooking time (see section on oven accessories page 39).
The Grill has three variable settings, Grill 1 (High), Grill 2 (Medium) and Grill 3 (Low). Grill 1 will be the hottest.

Caution!
The accessories and surrounding oven will get very hot. Use oven gloves.
Grilling
Oven Accessories to Use
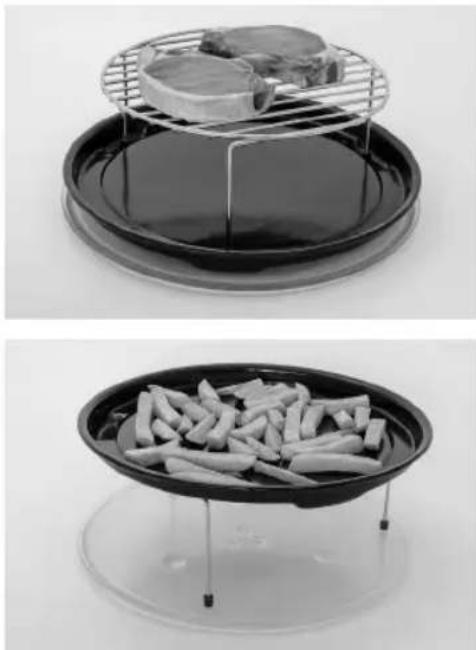
When grilling foods the glass turntable should be in position, with the enamel tray and the wire rack on top.
Place food on wire rack on the enamel tray on the turntable. The wire rack will allow fat to drip through into the enamel tray to reduce excess splatter and smoke when grilling steaks, chops and other fatty foods.
Most foods require turning halfway during cooking. When turning food, open oven door and carefully remove the enamel tray and wire rack by holding the accessories firmly. Use oven gloves when removing accessories as they will be very hot, and so will the roof and walls of the oven.
After turning, return food to the oven, close door and press Start. The oven will continue to count down the remaining cooking time. It is quite safe to open the oven door at any time to check the progress of the food as it is grilling.
If grilling fish or small items, place the enamel tray on top of the wire rack.
natural_image
Two black-and-white photos showing a steamer with meat and food items, one above and one below (no text or symbols visible)Guidelines
-
There is no microwave power on the Grill only program.
-
Use the accessories provided, as explained.
-
The Grill will only operate with the oven door closed.
-
Most meat items e.g. bacon, sausages, chops can be cooked on the hottest setting - Grill 1. This setting is also suitable for toasting bread, muffins and teacakes etc.
-
Grill 2 and Grill 3 are used for more delicate foods or those that require a longer grill time e.g. fish or chicken portions.
-
Do not preheat the grill.
-
Never cover the food when grilling.
-
Always use oven gloves when removing the food and accessories after grilling as the oven and accessories will be very hot.
-
After grilling it is important that the grill accessories are removed for cleaning before reuse and that the oven walls and floor are wiped with a cloth squeezed in hot soapy water to remove any grease. Do not put accessories in dish washer.
Convection Cooking
Your microwave oven can be used in convection mode which incorporates a heating element with a fan. For best results always place food in a preheated oven. The enamel tray must be on the glass turntable when preheating.


Press to select oven temperature. There is a choice of convection temperatures 40 °C and 100 °C - 220 °C.
For quick selection of the most commonly used cooking temperatures, the oven starts at 150 °C and then for each press the temperature will count up in 10 °C stages to 220 °C, then to, 40 °C, 100 °C, 110 °C etc. The convection symbol 📁 will also appear.
Press Start to preheat
A “P” will appear in the display window. When the oven is preheated the oven will beep and the “P” will flash. Then open the door and place the food inside.*
(Skip this step when preheating is not required)
flowchart
graph LR
    A["1 hour | 10 min"] --> B["1 min | 10 sec"]
    B --> C["Start"]
    style B fill:#f9f,stroke:#333
    note right of B: Inoperable
Press time pads to enter cooking time
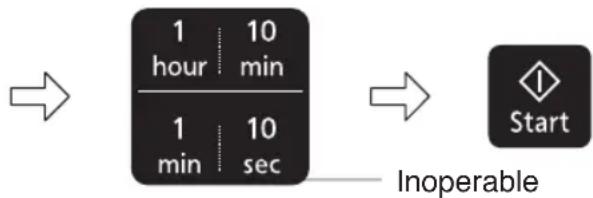
Maximum cooking time is 9 hours, 59 minutes. The 10 sec pad is inoperable.
Press Start
Note: Check that only the convection symbol 📁 is still in the display. If the microwave symbol 📋 is displayed this is incorrect and the program should be cancelled. Reselect the convection setting.

Note
- * Open the door using the door release pad, because if the Stop/Cancel pad is pressed the program may be cancelled.
- The oven will maintain the selected temperature for approximately 30 minutes. If no food has been placed inside the oven, then it will automatically cancel the cooking program "OPEN DOOR" will appear in the display window. If no cooking time is set, oven will revert to time of day after 6 minutes.
- You can increase the cooking time during cooking if required. Time can be increased in 1 minute increments, up to 10 minutes. Press 'Add time' pad once, then press '1 min' pad to a maximum of 10 minutes. After selecting 'Add Time' function, time should be added within a 5 second period. Cooking time can not be decreased during cooking.
Convection Cooking

Note
-
After pressing Start, the selected temperature can be recalled and changed. Press convection pad once to indicate the temperature in the display window. While the temperature is recalled in the display window, you can change the temperature by pressing Convection pad.
-
The oven cannot preheat to 40 °C.

Caution!
The accessories and the surrounding oven will get very hot. Use oven gloves.
Oven Accessories to Use
When using the Convection oven the glass turntable should be in position and must have the enamel tray placed on top.
The food is then placed onto the enamel tray. Follow your individual recipe guidelines.
natural_image
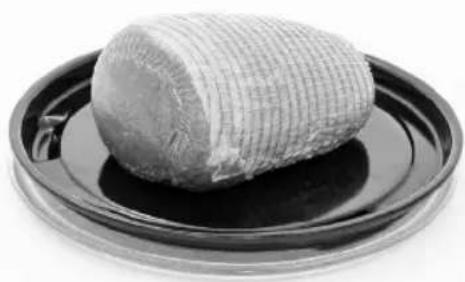
Close-up of a cylindrical food item on a dark plate, possibly a gel or pastry (no text or symbols visible)Roasting meat: glass turntable, enamel tray.
natural_image
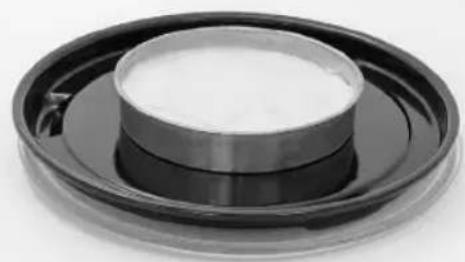
Close-up of a black circular mechanical component with a central metallic ring (no text or symbols visible)Baking: glass turntable, enamel tray.
When using the oven as a convection oven, there is no microwave power, i.e. the oven is operating as a conventional oven and you can use all your standard metal baking tins and ovenware.
It is not recommended to cook on more than one level when using the convection oven. When cooking 2 trays of buns etc, cook in two batches.
Combination Cooking
Your oven has two methods of cooking by Combination.
- Convection and Microwave (with and without preheat)
- Grill and Microwave (preheat is not possible)
Combination cooking is ideal for many foods. The microwave power cooks them quickly, whilst the convection or grill gives the traditional browning and crispness.
All this happens simultaneously resulting in most foods being cooked in 12 - 23 of the conventional cooking time.
There is no need to preheat on combination programs, except when cooking pastry.
It is possible to use smooth seamed metal tins and foil containers on combination but they must be placed directly onto the enamel tray on the glass turntable. They must not be placed directly onto the wire rack, or arcing will occur.
If you experience arcing, which is when you see blue sparks or hear crackling noises, the metal container is unsuitable or you have insufficient food in the oven. You should stop the program immediately and change the container or re-program to convection only.
To cook successfully by combination you should always use a minimum of 200 g (7 oz) food. Small quantities should be cooked by Convection, or Grill.
Preheat if necessary (convection and microwave combination only)

flowchart
graph LR
    A["Convection"] -->|Or| B["Grill"]
    B --> C["Micro Power"]
Select first cooking mode. Select Micro Power.
Options available depend on first cooking mode selected.
flowchart
graph LR
    A["Start"] --> B["1 hour min"]
    B --> C["1 min sec"]
    C --> D["Start"]
    style A fill:#000,stroke:#fff,color:#fff
    style D fill:#000,stroke:#fff,color:#fff
    note right of C: Inoperable
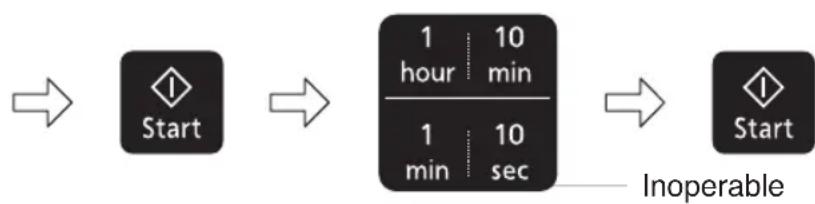
Press if preheating * . Convection only.
Set cooking time. Maximum cooking time is 9 hours, 59 minutes. The 10 sec pad is inoperable.
Press Start
Combination Cooking

Caution!
Take care to use oven gloves when removing dishes from the oven - especially when turning or stirring foods as the oven walls and roof will be very hot.

\* Note
- When placing food in the oven after preheating, just open the door using the door release pad, because if Stop/Cancel pad is pressed the program may be cancelled.
- You can increase the cooking time during cooking if required. Time can be increased in 1 minute increments, up to 10 minutes. Press 'Add time' pad once, then press '1 min' pad to a maximum of 10 minutes. After selecting 'Add Time' function, time should be added within a 5 second period. Cooking time can not be decreased during cooking.
- After pressing Start, the selected temperature can be recalled and changed. Press convection pad once to indicate the temperature in the display window. While the temperature is recalled in the display window, you can change the temperature by pressing Convection pad.
Containers to Use
Do not use plastic microwave containers on Combination programs (unless suitable for combination cooking). Dishes must be able to withstand the heat of the top grill. Do not put dishes on wire rack directly under the grill, place on enamel tray on glass turntable.
Oven Accessories
When using any Combination cooking program the glass turntable should be in position and must have the enamel tray placed on top, unless otherwise stated.
Combination 1. Convection and Microwave
This is the most popular combination mode combining Convection heat with Micro Power. Casseroles, meat joints, jacket potatoes and pastries are very successful using this combination. Unsuitable foods are those which contain whisked eggs, meringues, rich fruit cakes, biscuits and yorkshire puddings.
It is not necessary to preheat on combination except when cooking pastry dishes. For pastry dishes preheat oven to 210 °C on Convection so that the oven is hot, and then select the desired combination program or follow recipe guidelines.

flowchart
graph LR
    A["Convection"] --> B["Micro Power"]
Press to select oven temperature. The oven starts at 150 °C , and then for each press the temperature will count up in 10 °C stages to 220 °C , then to 100 °C , 110 °C etc. 40 °C is not available in combination mode.
Press Micro Power pad to select microwave setting. High & Defrost are not available.
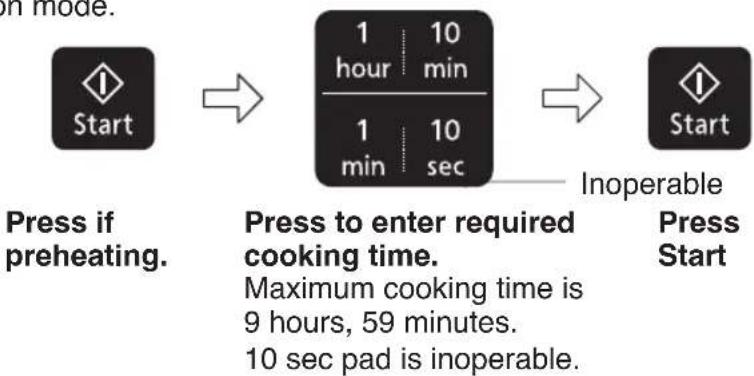
flowchart
graph LR
    A["Start"] --> B["1 hour | 10 min"]
    B --> C["1 min | 10 sec"]
    C --> D["Start"]
    style A fill:#fff,stroke:#333
    style D fill:#fff,stroke:#333
    note1["Press if preheating."] --> A
    note2["Press to enter required cooking time."] --> C
    note3["Maximum cooking time is 9 hours, 59 minutes.<br>10 sec pad is inoperable."] --> D
    note4["Inoperable Press Start"] --> D
Oven Accessories to Use
When using Combination cooking the glass turntable should be in position and must have the enamel tray on top, unless otherwise stated.
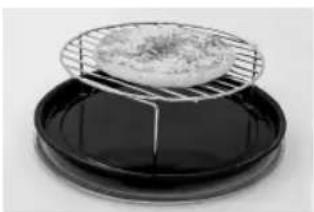
natural_image
Top-down view of a circular object placed on a black tray with a wire mesh, no visible text or symbols.Items of food can be placed onto the wire rack on the enamel tray on the glass turntable. Heatproof dishes of food should be placed directly onto the enamel tray on the glass turntable.
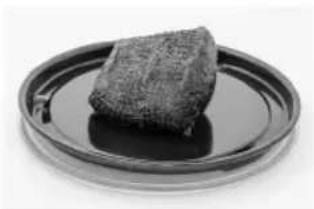
natural_image
Close-up of a dark, irregularly shaped object resting on a black circular plate (no text or symbols visible)Joints and portions of meat should be placed on an upturned saucer on the enamel tray on the glass turntable. Alternatively they can be placed in a heatproof dish on the enamel tray on the glass turntable.
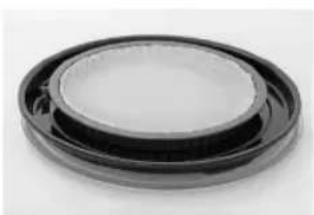
natural_image
Close-up of a black circular mechanical component with a central hole (no text or symbols visible)Recipes using foil or metal containers e.g. cakes and pastries should be placed directly onto the enamel tray on glass turntable.
Combination 1. Convection and Microwave
The chart below gives suggestions for Combination programs. For cooking times refer to cooking charts or a similar recipe in the book. It is not possible to use High or Defrost microwave power in this mode.
| Oven temperature | Microwave Power | Use | Oven accessories to use |
| 220 °C Warm | Nuggets, sausage rolls, apple pie, bread and butter pudding. |  Or Or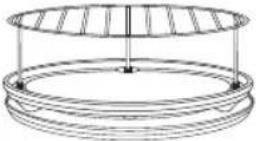 | |
| 220 °C Simmer | Quiche, frozen garlic baguette, part baked rolls, meat pies, cottage pie, fish pie. | ||
| 190 °C Simmer Whole chicken / turkey |  | ||
| 180 °C Simmer Joints lamb | |||
| 170 °C Simmer Joints beef | |||
| 170 °C Low Joints pork | |||
| 160 °C Warm Casseroles | |||

Note
- Food is usually cooked uncovered.
- After cooking it is important that the accessories are removed for cleaning before re-use and that the oven walls and floor are wiped with a cloth squeezed in hot soapy water to remove any grease. Do not put accessories in the dishwasher.
- Foods should always be cooked until browned and piping hot.

Caution!
Always use oven gloves when removing dishes from the oven - Especially when turning or stirring foods, as the accessories and surrounding oven will get very hot.
Combination 2. Grill and Microwave
This combination mode is suitable for foods which are normally grilled and for reheating small savoury items.
Do not use this program with less than 200 g (7 oz) of food.
It is not necessary to preheat when using this combination mode and food should always be cooked uncovered.
The grill will glow on and off during cooking - this is normal.

flowchart
graph LR
    A["Grill"] --> B["Micro Power"]
    B --> C["1 10\nhour min\n1 10\nmin sec"]
    C --> D["Start"]
    style A fill:#000,stroke:#fff,color:#fff
    style B fill:#000,stroke:#fff,color:#fff
    style C fill:#000,stroke:#fff,color:#fff
    style D fill:#000,stroke:#fff,color:#fff
Select Grill power. Press once for Grill 1 (High), twice for Grill 2 (Medium) or three times for Grill 3 (Low).
Select Micro Power. Keep pressing this pad until the power you require appears in the display window. High and Defrost are not available.
Press to enter required cooking time. Maximum cooking time is 9 hours, 59 minutes. 10 sec pad is inoperable.
Press Start
Combination 2. Grill and Microwave
Oven Accessories to Use
When using Combination cooking the glass turntable should be in position and must have the enamel tray on top, unless otherwise stated.
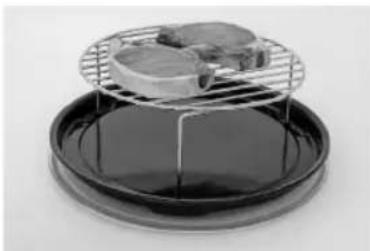
natural_image
Top-down view of a metal rack with two cutlery on top, placed above a black circular base (no text or symbols visible)Food should be placed directly onto the wire rack on the enamel tray. This is then placed on the glass turntable.
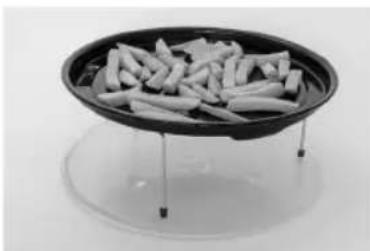
natural_image
Black-and-white photo of a tray holding several small food items, with no visible text or symbols.When cooking fish or small items, food can be placed directly on the enamel tray on top of the wire rack.
Guidelines
- Food is usually cooked uncovered.
- To turn food just press the door release pad, remove the enamel tray and wire rack, turn the food, return to the oven, close the door and press Start pad. The oven will continue to countdown the remaining cooking time.
- After Grilling it is important that the Grill accessories are removed for cleaning before reuse and that the oven walls and floor are wiped with a cloth squeezed in hot soapy water to remove any grease. Do not put accessories in the dishwasher.
For advice on cooking times refer to cooking charts and recipes in this book. Foods should always be cooked until browned and piping hot.

Caution!
Always use oven gloves when removing dishes from the oven - especially when turning or stirring foods, as the accessories and surrounding oven will get very hot.
Containers to Use
Do not use plastic microwave containers on Combination programs (unless suitable for combination cooking). Dishes must be able to withstand the heat of the top grill. Do not put dishes on wire rack directly under the grill, use the enamel tray.
Multi-stage Cooking
2 or 3 Stage Cooking
Example:
To cook on Medium microwave for 2 minutes, cook on 180 °C for 15 minutes and cook on Grill 1 for 10 minutes.
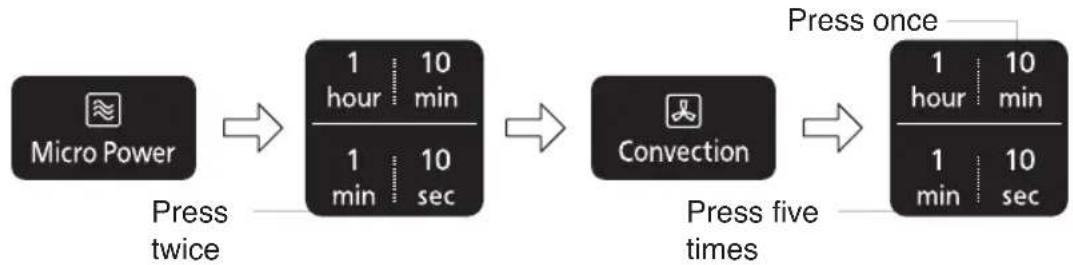
flowchart
graph LR
    A["Micro Power"] --> B["1 hour 10 min"]
    B --> C["1 min 10 sec"]
    C --> D["Convection"]
    D --> E["1 hour 10 min"]
    E --> F["1 min 10 sec"]
    style A fill:#000,stroke:#fff,color:#fff
    style B fill:#f9f,stroke:#333
    style C fill:#f9f,stroke:#333
    style D fill:#ccf,stroke:#333
    style E fill:#ccf,stroke:#333
    style F fill:#ccf,stroke:#333
Press Micro Power 3 times to select Medium microwave.
Set the cooking time to 2 minutes.
Press Convection pad 4 times to select 180 °C.
Set the cooking time to 15 minutes.
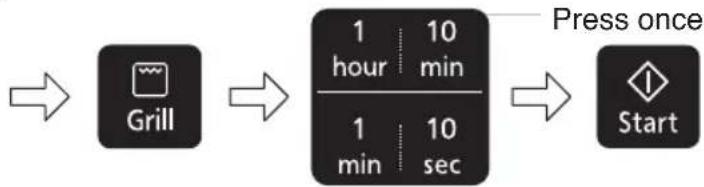
flowchart
graph LR
    A["Grill"] --> B["1 hour min"]
    B --> C["1 min sec"]
    C --> D["Start"]
    note right of B: Press once
Press Grill pad once to select Grill 1.
Set cooking time to 10 minutes.
Press Start
The cooking program will start and the time in the display will count down.

Note
- For 3 stage cooking, enter another cooking program before pressing Start.
- During cooking, one press on Stop/Cancel stops the operation. You can re-start it by pressing Start. A second press of Stop/Cancel will cancel the selected program.
- Whilst not operating, one press of Stop/Cancel cancels the selected program.
- Auto programs and preheating cannot be used with multi-stage cooking.
- Delay/stand feature can be used with multi-stage cooking.
Using the Timer
The timer can be used either before or after a cooking program. This feature can be used to set a standing time after cooking or to delay the start of your cooking.
1. To Set a Standing Time:
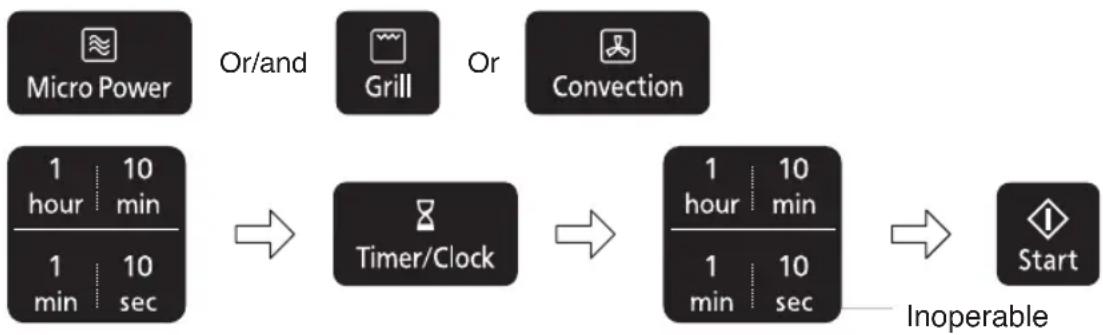
flowchart
graph LR
    A["Micro Power"] -->|Or/and| B["Grill"]
    B -->|Or| C["Convection"]
    D["1 hour | 10 min"] --> E["Timer/Clock"]
    E --> F["1 hour | 10 min"]
    F --> G["1 min | 10 sec"]
    G --> H["Start"]
    style A fill:#f9f,stroke:#333
    style B fill:#f9f,stroke:#333
    style C fill:#f9f,stroke:#333
    style D fill:#ccf,stroke:#333
    style E fill:#cfc,stroke:#333
    style F fill:#cfc,stroke:#333
    style G fill:#cfc,stroke:#333
    style H fill:#fcc,stroke:#333
Set the desired cooking program, by selecting power level and time required.
Press
Timer/Clock
Set desired standing time (max 9 hours 59 minutes) (10 sec pad is inoperable). An “H” will appear in the display to denote hours.
Press Start
Cooking program will commence after which the standing time will count down.

Note
- Three stage cooking can be programmed including standing time.
- If the oven door is opened during the standing time or minute timer, the time in the display window will continue to count down.
- This feature may also be used as a minute timer. In this case press Timer/Clock, set time and press Start.
- Standing time cannot be programmed after an auto program and preheating.
- If the programmed stand time exceeds one hour, the time will count down in units of minutes. If less than one hour, the time will count down in units of seconds.
2. To Set a Kitchen Timer
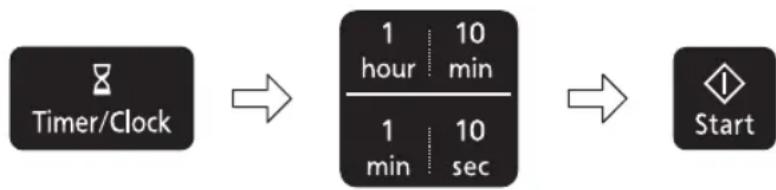
flowchart
graph LR
    A["8 Timer/Clock"] --> B["1 10 hour min"]
    B --> C["1 10 min sec"]
    C --> D["Start"]
Press
Timer/Clock
Set desired kitchen time (max 9 hours 59 minutes) (10 sec pad is inoperable). An “H” will appear in the display to denote hours.
Press Start Time will count down.
Using the Timer
3. To Set a Delay Start:
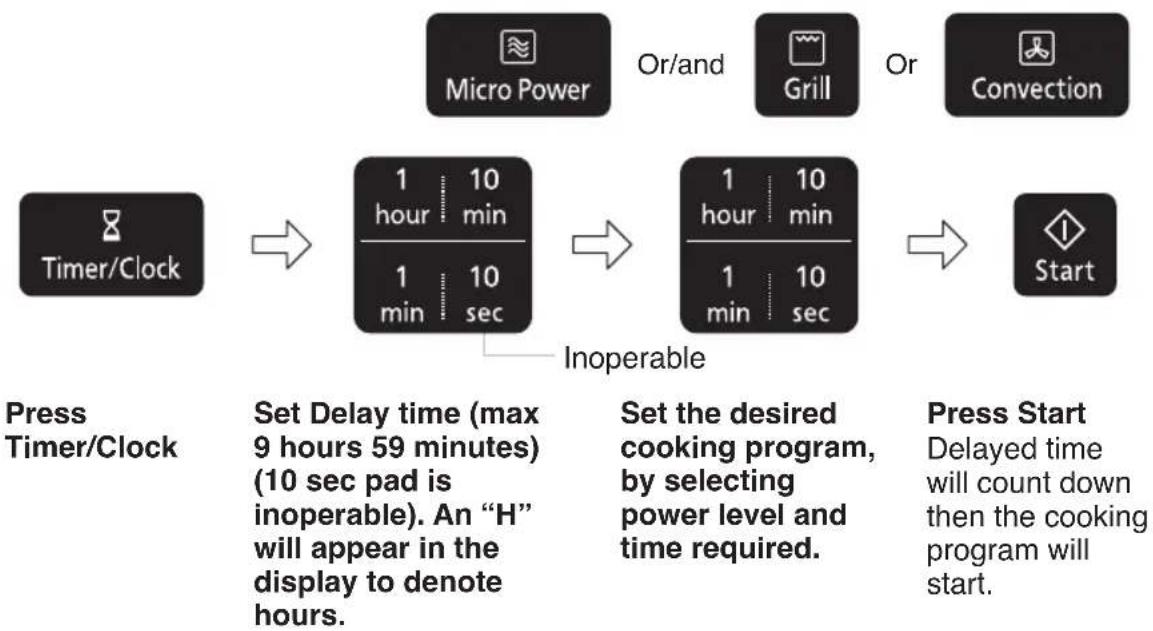
flowchart
graph LR
    A["Press Timer/Clock"] --> B["1 hour 10 min"]
    B --> C["1 min 10 sec"]
    C --> D["Set the desired cooking program, by selecting power level and time required."]
    D --> E["Start"]
    style A fill:#f9f,stroke:#333
    style B fill:#ccf,stroke:#333
    style C fill:#cfc,stroke:#333
    style D fill:#fcc,stroke:#333
    style E fill:#cff,stroke:#333

Note
- Three stage cooking can be programmed including delay start cooking.
- If the programmed delay time exceeds one hour, the time will count down in units of minutes. If less than one hour, the time will count down in units of seconds.
- Delay start cannot be programmed before an auto program and preheating.
- If the oven door is opened during the delay time, the time in the display window will continue to count down.
Auto Programs

text_image
Junior Menu Or Or Auto Cook Auto/RoastThis feature allows you to cook or reheat 26 foods by setting the weight only. The oven determines the Microwave power level and/or Convection and/or Combination setting, then the cooking time automatically. Select the category of food and then just enter the weight. The weight can be entered in grams or pounds and ounces.
Auto Programs with Preheating
It is necessary to preheat the oven for Junior Menu programs 7 (chilled breaded products), 8 (frozen breaded products), 9 (fresh vegetable fries), 10 (frozen vegetable fries); Auto/Roast programs 21 (frozen pizza), 22 (frozen potato products), 23 (fish and chips), 24 (chicken).

flowchart
graph LR
    A["Junior Menu"] -->|Or| B["Auto/Roast"]
    B --> C["Start"]
Select the desired program by pressing the appropriate pad. Refer to pages 56-57 and 60-61.
Press the Start to preheat the oven. Preheat with enamel tray on glass turntable.
flowchart
graph LR
    A["Up"] --> B["Down"]
    B --> C["Start"]
After preheating, beeps sound and 'P' will flash in the display. Then open the door and place the food in the oven and set weight using up and down pads. The default weight is in grams. To change to lb and oz's refer to page 29. Take care when handling the hot enamel tray.
Press Start
Auto Programs
It is not necessary to preheat the oven for the remaining auto programs. Operate as below:
Auto Programs Without Preheating

flowchart
graph LR
    A["Junior Menu"] -->|Or O| B["Auto Cook"]
    B --> C["Auto/Roast"]
Select the desired Auto Weight program, by pressing the appropriate pad. Refer to pages 55-62.
flowchart
graph LR
    A["Up"] --> B["Down"]
    B --> C["Start"]
Enter the weight by pressing the up and down pads. Default weight is g. To change to lb and oz's refer to page 29. To quickly select the weight, hold weight selection pads. For auto program flapjacks, please skip this step.
Press Start
When you select an automatic program symbols will appear in the display to show the cooking mode that will be used and the accessories that are needed, in addition to the glass turntable. These are what they mean:
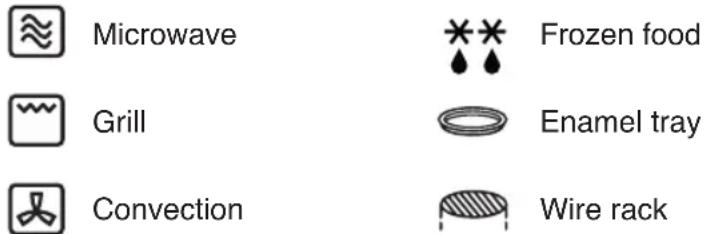
text_image
Microwave Grill Convection Frozen food Enamel tray Wire rack
Note
The auto weight programs are designed to take the guesswork out of cooking or reheating your food. They must only be used for the foods described.
- Only cook foods within the weight ranges described (see pages 53-54).
- Only use the accessories as indicated on pages 55-62.
- Junior programs 4-5 and all Auto Cook programs use Microwave power only. Junior programs 6-11 and Auto/Roast programs 20-24 use a combination of Microwave and Convection or Grill. Auto/Roast programs 25-29 use Convection.
- Do not cover food unless stated, when using a Combination or Convection program, it will prevent the food browning. The heat will also melt any plastic covering.
- Most foods benefit from a standing time after cooking on an auto program, to allow heat to continue conducting to the centre.
- To allow for some variations that occur in food, check that food is thoroughly cooked and piping hot before serving.
- Always weigh the food rather than relying on the package weight information.
Auto Programs
Minimum/Maximum Weights for Auto Weight Programs
| Program Minimum weight | Maximum weight |
| 4. Purée vegetables | 100 g (4 oz) |
| 5. Purée fruits | 100 g (4 oz) |
| 6. Junior pasta bake | 200 g (7 oz) |
| 7. Chilled breaded products | 100 g (4 oz) |
| 8. Frozen breaded products | 100 g (4 oz) |
| 9. Fresh vegetable fries | 100 g (4 oz) |
| 10. Frozen vegetable fries | 100 g (4 oz) |
| 11. Flapjacks | N/A N/A |
| Program Minimum weight Maximum weight | ||
| 12. Reheat curry 300 g (11 oz) 800 g (1 lb 10 oz) | ||
| 13. Reheat Chinese style 300 g (11 oz) 450 g (1 lb) | ||
| 14. Reheat pasta 300 g (11 oz) 1600 g (3 lb 9 oz) | ||
| 15. Reheat casserole 300 g (11 oz) 900 g (2 lb) | ||
| 16. Fresh vegetables 100 g (4 oz) 800 g (1 lb 10 oz) | ||
| 17. Fresh fish 200 g (7 oz) 800 g (1 lb 10 oz) | ||
| 18. Porridge with milk 50 g (2 oz) 200 g (7 oz) | ||
| 19. Porridge with water | 50 g (2 oz) | 200 g (7 oz) |
Auto Programs
Minimum/Maximum Weights for Auto Weight Programs
| Program Minimum weight Maximum weight | ||
| 20. Jacket potatoes 200 g (7 oz) | 1500 g (3 lb 5 oz) | |
| 21. Frozen pizza 130 g (5 oz) 450 g (1 lb) | ||
| 22. Frozen potato products 200 g (7 oz) 500 g (1 lb 2 oz) | ||
| 23. Fish and chips 200 g (7 oz) 500 g (1 lb 2 oz) | ||
| 24. Chicken 900 g (2 lb) 2000 g (4 lb 7 oz) | ||
| 25. Beef-rare 500 g (1 lb 2 oz) 2000 g (4 lb 7 oz) | ||
| 26. Beef-medium 500 g (1 lb 2 oz) 2000 g (4 lb 7 oz) | ||
| 27. Beef-well done 500 g (1 lb 2 oz) 2000 g (4 lb 7 oz) | ||
| 28. Lamb-medium | 1000 g (2 lb 3 oz) | 2000 g (4 lb 7 oz) |
| 29. Lamb-well done | 1000 g (2 lb 3 oz) | 2000 g (4 lb 7 oz) |
Junior Menu Programs
The Junior Menu offers a range of programs catering for babies, toddlers and older children - great for time saving and convenience. The fruit and vegetable purées are ideal first foods for weaning babies. Homemade purées taste like real food and cost less than jars or packets. Extra portions can be frozen in ice cube trays, then defrosted and reheated. Healthy vegetable fries and pasta bakes are perfect for smaller tummies. A healthier flapjack is perfect for lunch box snacks.
| Program Weight Accessory Instructions | |||
4. Purée vegetables 1 Press 1 Press | 100 g - 400 g(4 oz - 14 oz) | - | This program is suitable for cooking parsnips, potatoes, butternut squash, carrots, sweet potato and swede. The cooked vegetables are then puréed and suitable when weaning babies. Peel and chop the vegetables into even sized pieces. Place in a Pyrex® dish. Add the following quantities of water:100 g - 150 g vegetables 75 ml water.155 g - 300 g vegetables 100 ml water.305 g - 400 g vegetables 150 ml water.Cover with lid. Press the Junior Menu pad once. Enter the weight of the vegetables. Press Start. Stir halfway during cooking. After cooking allow to stand for 10 minutes. Purée the vegetables with the cooking liquid using a blender. If necessary adjust the consistency with a little water to thin or baby rice to thicken. Check the temperature before feeding. |
5. Purée fruits 2 Presses 2 Presses | 100 g - 400 g(4 oz - 14 oz) | - | This program is suitable for cooking apples, pears, peaches, papaya and mango. The cooked fruit is then puréed and suitable when weaning babies. Peel and chop the fruit into even sized pieces. Place in a Pyrex® dish. Add the following quantities of water:100 g -150 g fruit 75 ml water.155 g - 300 g fruit 100 ml water.305 g - 400 g fruit 150 ml water.Cover with lid. Press the Junior Menu pad twice. Enter the weight of the fruit. Press Start. Stir halfway during cooking. After cooking allow to stand for 10 minutes. Purée the fruit with the cooking liquid using a blender. If necessary adjust the consistency with a little water to thin or baby rice to thicken. Check the temperature before feeding. |
≈ = Microwave
Junior Menu Programs
| Program Weight Accessory Instructions | |||
6. Junior pasta bake Junior Menu3 Presses Junior Menu3 Presses | 200 g(7 oz)400 g(14 oz)600 g(1 lb5 oz) | - | For cooking fresh pasta bake using fresh pasta (penne, spaghetti, fusilli), cheese or tomato based sauce and grated mild Cheddar cheese. Use a suitable square, shallow Pyrex® container. Use the following quantities:Other ingredients may be added such as ham, tuna and sweetcorn. In this case substitute some of the sauce for the chosen added ingredients. Press Junior Menu three times. Enter the weight - 200 g, 400 g or 600 g. Press Start. |
| 7. Chilled breaded products[DS5D]Junior Menu4 Presses | 100 g - 500 g(4 oz-1 lb2 oz) | 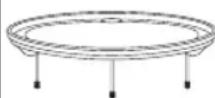 | For preparing chilled breaded products such as breaded chicken strips, fish goujons, popcorn chicken, chicken bites or breaded chicken fillets. Press Junior Menu four times. Press the Start pad to preheat the oven. After preheating, beeps sound and ‘P’ will flash in the display. Remove all packaging and place the chilled breaded products on the enamel tray on the wire rack. Enter weight of food and press Start. Turn halfway during cooking. |
| 8. Frozen breaded products[Junior Menu5 Presses | 100 g - 500 g(4 oz-1 lb2 oz) | 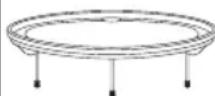 | For preparing frozen breaded products such as frozen popcorn chicken, frozen chicken nuggets, frozen turkey drummers, frozen fish fingers, frozen scampi. Press Junior Menu five times. Press the Start to preheat the oven. After preheating, beeps sound and ‘P’ will flash in the display. Remove all packaging and place the frozen breaded products on the enamel tray on the wire rack. Enter weight of food and press Start. Turn halfway during cooking. |
≈ = Microwave = Convection = G
P = Preheating is required
Junior Menu Programs
| Program Weight Accessory Instructions | |||
| 9. Fresh vegetable fries[IMAGE]6 PressesP + [IMAGE] | 100 g - 500 g(4 oz-1 lb 2 oz) | 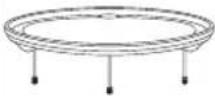 | For preparing fresh vegetable fries such as sweet potato, white potato, carrots, parsnips and courgettes. Peel and cut the vegetables into baton shapes. Toss in a tablespoon of vegetable oil. Press Junior Menu six times. Press the Start pad to preheat the oven. After preheating, beeps sound and ‘P’ will flash in the display. Place the vegetables on the enamel tray on the wire rack. Enter weight of food and press Start. Turn halfway. |
| 10. Frozen vegetable fries[IMAGE]7 PressesP + [IMAGE] | 100 g - 500 g(4 oz-1 lb 2 oz) | 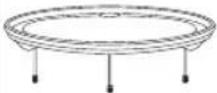 | For preparing frozen pre-purchased vegetable fries such as sweet potato, carrots and parsnips. Press Junior Menu seven times. Press the Start pad to preheat the oven. After preheating, beeps sound and ‘P’ will flash in the display. Remove all packaging and place the frozen vegetable fries on the enamel tray on the wire rack. Enter weight of food and press start. Turn halfway. |
| 11. Flapjacks[IMAGE]8 PressesP + [IMAGE] | - | 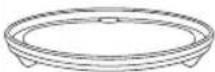 | Prepare the flapjacks as detailed in the recipe below. Place the Pyrex® dish on the enamel tray. Press Junior Menu eight times. Press Start. |
| ingredientsFor 8 servings150 g (5 oz) dates, chopped100 g (4 oz) low-fat spread3 tbsp (45 ml) honey50 g (2 oz) apricots, chopped3 tbsp (45 ml) mixed seeds150 g (5 oz) oatsDish: Large Pyrex® mixing bowlSquare Pyrex® dish 18 cm x18 cm (7 x 7 inch) | 1. Place the chopped dates, low fat margarine and honey in a Pyrex® mixing bowl.2. Put the bowl onto the glass turntable and cook onMediummicrowave for 3-4 minutes.3. Add the remaining ingredients to the date mixture. Stir well until all combined.4. Grease the square Pyrex® dish and line with baking paper.5. Spoon the mixture into the dish and press down firmly with a metal spoon. | ||
≈ = Microwave = Convection = Grill = Preheating is required
Auto Cook Programs
| Program Weight Accessory Instructions | |||
12. Reheat curry 1 Press≈ 1 Press≈ | 300 g - 800 g(11 oz - 1 lb 10 oz) | - | This program is for reheating a chilled curry convenience meal that can be stirred *. Foods must be in a suitable microwaveable container and have the film pierced. Place on glass turntable, press the Auto Cook pad once.Enter the weight then press Start. Stir halfway. Allow to stand for 1 minute. Ensure that the food is piping hot. Stir the food before serving. |
13. Reheat Chinese style 2 Presses≈ 2 Presses≈ | 300 g - 450 g(11 oz - 1 lb) | - | This program is for reheating a chilled Chinese style convenience meal *. Foods must be in a suitable microwaveable container and have the film pierced. Press the Auto Cook pad twice. Enter the weight. Press Start. Stir halfway. Allow to stand for 1 minute. Ensure food is piping hot. Stir again before serving. |
14. Reheat pasta 3 Presses≈ 3 Presses≈ | 300 g - 1600 g(11 oz - 3 lb 9 oz) | - | This program is for reheating a chilled pasta convenience meal that can be stirred *. Foods must be in a suitable microwaveable container and have the film pierced. Place on turntable, press the Auto Cook pad three times.Enter the weight then press Start. Stir halfway. Allow to stand for 1 minute. Ensure that the food is piping hot. Stir the food before serving. |
15. Reheat casserole 4 Presses≈ 4 Presses≈ | 300 g - 900 g(11 oz - 2 lb) | - | This program is for reheating a chilled casserole convenience meal *. Foods must be in a suitable microwaveable container and have the film pierced. Press the Auto Cook pad four times.Enter the weight. Press Start. Stir halfway. Allow to stand for 1 minute. Ensure food is piping hot. Stir again before serving. |

* Note
These programs are not suitable for foods that cannot be stirred e.g. lasagne / shepherds pie.
≈ = Microwave
Auto Cook Programs
| Program Weight Accessory Instructions | |||
16. Fresh vegetables 5 Presses 5 Presses | 100 g -800 g(4 oz -1 lb10 oz) | - | To cook fresh vegetables. Place prepared vegetables into a shallow container on turntable. Add 15 ml (1 tbsp) of water per 100 g vegetables. Cover with pierced cling film or lid. Press the Auto Cook pad five times. Enter the weight. Press Start. Stir halfway. |
17. Fresh fish 6 Presses 6 Presses | 200 g -800 g(7 oz -1 lb10 oz) | - | To cook fresh fish. Shield the thinner portions. Place in a shallow container on glass turntable. Add 15-45 ml (1-3 tbsp) water. Cover with pierced cling film or lid. Press the Auto Cook pad six times. Enter the weight. Press Start. |
18. Porridge with milk 7 Presses 7 Presses | 50 g -200 g(2 oz -7 oz) | - | This program is suitable for cooking porridge using plain oats. Use back of pack instructions for quantity of oats to milk. Use whole or semi-skimmed milk. This program is not suitable for making porridge with water or skimmed milk. Use a large round bowl. Do not cover. Place on the glass turntable. Press the Auto Cook pad seven times. Enter the weight of oats used. Press Start. Stir at beeps. Allow to stand for 2 minutes. Stir before serving. |
19. Porridge with water 8 Presses 8 Presses | 50 g -200 g(2 oz -7 oz) | - | This program is suitable for cooking porridge using plain oats. Use back of pack instructions for quantity of oats to water. This program is not suitable for making porridge with milk. Use a large round bowl. Do not cover. Place on the glass turntable. Press the Auto Cook pad eight times. Enter the weight of oats used. Press Start. Stir at beeps. Allow to stand for 2 minutes. Stir before serving. |
≈ = Microwave
Auto/Roast Programs
| Program Weight Accessory Instructions | |||
20. Jacket potatoes 1 Press 1 Press | 200 g - 1500 g(7 oz - 3 lb 5 oz) | 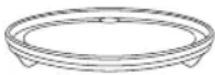 | To cook jacket potatoes with a crisper drier skin. Choose medium sized potatoes 200 g - 250 g (7 oz - 9 oz), for best results. Wash and dry potatoes and prick with a fork several times. Place on enamel tray on glass turntable. Press the Auto/Roast pad once. Enter total weight of potatoes, then press Start. |
21. Frozen pizza 2 Presses 2 Presses | 130 g - 450 g(5 oz - 1 lb) | 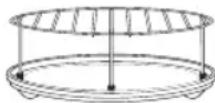 | For reheating and browning frozen, purchased pizza. Press the Auto/Roast pad twice. Press the Start pad to preheat the oven. After preheating, beeps sound and ‘P’ will flash in the display. Remove all packaging and place pizza on wire rack on enamel tray on glass turntable. Enter weight and press Start. |
22. Frozen potato products 3 Presses 3 Presses | 200 g - 500 g(7 oz - 1 lb 2 oz) | 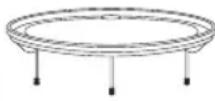 | To cook frozen potato products, e.g. hash browns, croquettes, etc., that are suitable for grilling. Press the Auto/Roast pad three times. Press the Start pad to preheat the oven. After preheating, beeps sound and ‘P’ will flash in the display. Spread potato products out on enamel tray on wire rack on glass turntable. Enter the weight. Press Start. Turn during cooking. For best results cook in a single layer. Note: Potato products vary considerably. We suggest checking a few minutes before the end of cooking to assess levels of browning. |
≈ = Microwave

= Convection = GrP = Preheating is required
Auto/Roast Programs
| Program Weight Accessory Instructions | |||
23. Fish and chips 4 Presses 4 Presses | 200 g - 500 g(7 oz - 1 lb2 oz) | 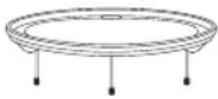 | This program is suitable for pre-purchased frozen battered or breaded fish and pre-purchased frozen oven chips. This program is suitable for 1 portion of fish and chips. The fish must weigh between 100 g - 250 g and the chips must weigh between 100 g - 300 g. Press the Auto/Roast pad four times. Press the Start pad to preheat the oven. After preheating, beeps sound and ‘P’ will flash in the display. Spread the fish and chips out on the enamel tray on wire rack on glass turntable. Enter the weight of the fish and chips. Press Start. Turn fish and chips at the beeps. For best results cook in a single layer. |
24. Chicken 5 Presses 5 Presses | 900 g - 2000 g(2 lb - 4 lb7 oz) |  | To cook whole fresh unstuffed chickens. Cook stuffing separately. Press Auto/Roast pad five times. Press the Start pad to preheat the oven. After preheating, beeps sound and ‘P’ will flash in the display. Place chicken on enamel tray and place on glass turntable. Enter in the weight of the chicken, then press Start. Start cooking breast side down and turn 23 total time, a beep will sound to turn, taking care with hot juices. Stand for 5 minutes. |
25. Beef rare 6 Presses 6 Presses | 500 g - 2000 g(1 lb2 oz - 4 lb7 oz) |  | For cooking rare fresh roast beef (top side, rump or silverside). Place on enamel tray on the glass turntable. Press the Auto/Roast pad six times, enter the weight of the food and press Start. After cooking stand for 10 to 20 minutes. |
≈ = Microwave
[Non-Text]
= Convection = G[PH] = Preheating is required
Auto/Roast Programs
| Program Weight Accessory Instructions | |||
26. Beef medium 7 Presses 7 Presses | 500 g - 2000 g(1 lb 2 oz - 4 lb 7 oz) |  | For cooking medium fresh roast beef (top side, rump or silverside). Place on enamel tray on the glass turntable. Press the Auto/Roast pad seven times, enter the weight of the food and press Start. After cooking stand for 10 to 20 minutes. |
27. Beef well done 8 Presses 8 Presses | 500 g - 2000 g(1 lb 2 oz - 4 lb 7 oz) |  | For cooking well done fresh roast beef (top side, rump or silverside). Place on enamel tray on the glass turntable. Press the Auto/Roast pad eight times, enter the weight of the food and press Start. After cooking stand for 10 to 20 minutes. |
28.Lamb medium 9 Presses 9 Presses | 1000 g - 2000 g(2 lb 3 oz - 4 lb 7 oz) |  | For cooking medium fresh roast leg of lamb with bone. Place on enamel tray on the glass turntable. Press the Auto/Roast pad nine times, enter the weight of the food and press Start. After cooking stand for 10 to 20 minutes. |
29. Lamb well done 10 Presses 10 Presses | 1000 g - 2000 g(2 lb 3 oz - 4 lb 7 oz) |  | For cooking well done fresh roast leg of lamb with bone. Place on enamel tray on the glass turntable. Press the Auto/Roast pad ten times, enter the weight of the food and press Start. After cooking stand for 10 to 20 minutes. |
= Microwave = Convection = GAll = Preheating is required
Cooking and Reheating Guidelines
Most foods reheat very quickly in your oven by High microwave. Meals can be brought back to serving temperature in just minutes and will taste freshly cooked. Always check food is piping hot and return to oven if necessary.
As a general rule, always cover wet foods, e.g. soups, casseroles and plated meals.
Do not cover dry foods e.g. bread rolls, mince pies, sausage rolls etc.
The charts on pages 65-81 show you the best way to cook or reheat your favourite foods. The best method depends on the type of food you are cooking or reheating.
Remember to stir or turn food wherever possible during cooking or reheating. This ensures even cooking or reheating on the outside and in the centre.
When is Food Reheated?
Food that has been reheated or cooked should be served piping hot i.e. steam should be visibly emitted from all parts. As long as good hygiene practices have been followed during the preparation and storage of the food, then cooking or reheating presents no safety risks.
Foods that cannot be stirred should be cut with a knife to test that they are adequately heated throughout. Even if a manufac tur er's instructions or the times in the cookbook have been followed, it is still important to check the food is heated thoroughly. If in doubt, always return to the oven for further reheating. If you cannot find the equivalent food in the chart then choose a similar type and size listed and adjust the cooking time if necessary.
Plated Meals
Everyone's appetite varies and reheat times depend on meal contents. Dense items e.g. mashed potato, should be spread out well. If a lot of gravy is added, extra time may be required. Place denser items to the outside of the plate. An average plated meal will take 4-5 minutes on High microwave to reheat. Do not stack meals.
Canned Foods
Remove foods from can and place in a suitable dish before heating.
Soups
Place soup in a bowl. Stir before heating and at least once during reheat time and again at the end.
Casseroles
Stir halfway through and again at the end of heating.
Cooking and Reheating Guidelines

Caution!
Mince Pies
Remember even if the pastry is cold to the touch, the filling will be piping hot and will warm the pastry through. Take care not to overheat otherwise burning can occur due to the high fat and sugar content of the filling. Check the temperature of the filling before consuming to avoid burning your mouth.
Christmas Puddings and
Liquids
Take great care when reheating these items.
Do not leave unattended. Do not add extra alcohol.
Babies Bottles
Milk or formula must be shaken thoroughly before heating and again at the end and tested carefully before feeding a baby. For 7-8 fl. oz. of milk from fridge temperature, remove top and teat. Heat on High microwave for 25-30 seconds. Check carefully.
For 3 fl. oz. of milk from fridge temperature, remove top and teat. Heat on High microwave for 10-15 seconds. Check carefully.
Liquid at the top of bottle will be much hotter than at the bottom. The bottle must be shaken thoroughly and tested before use.
We do not recommend that you use your microwave to sterilise babies' bottles. If you have a special microwave steriliser we urge extreme caution, due to the low quantity of water involved. It is vital to follow the manufacturers instructions implicitly.
Reheating Charts
The times given in the charts below are a guideline only, and will vary depending on starting temperature, dish size etc.
Heating Category
Your oven is heating Category E. The information on this label will assist you in using new instructions on food packs to enable you to program the best heating time in your oven.
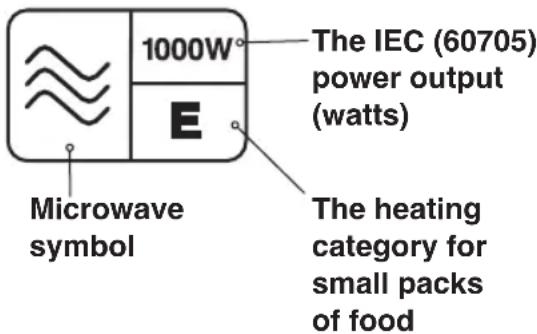
text_image
1000W The IEC (60705) power output (watts) E Microwave symbol The heating category for small packs of food| Food | Weight/Quantity | Power Level | Time to Select (approx) | Instructions/Guidelines |
| Bread – Precooked – Fresh – N.B. Breads reheated by microwave will have a soft base. | ||||
| Croissants | 1 | High 15 | -20 secs | Place on micro-safe plate on turntable. Do not cover. |
| or Grill 1 | 2-3 mins | Place on heatproof plate on turntable. Do not cover. | ||
| 4 | High 30 | -40 secs | Place on micro-safe plate on turntable. Do not cover. | |
| or Grill 1 | 3-5 mins | Place on heatproof plate on turntable. Do not cover | ||
| Rolls | 1 | High 15 | -20 secs | Place on micro-safe plate on turntable. Do not cover. |
| or Grill 1 | 3-4 mins | Place on heatproof plate on turntable. Do not cover. | ||
| 4 | High 30 | -40 secs | Place on micro-safe plate on turntable. Do not cover. | |
| or Grill 1 | 3-4 mins | Place on heatproof plate on turntable. Do not cover. | ||
| Canned beans, pasta | ||||
| Baked beans | 220 g | High | 2 mins | Place in a micro-safe bowl on turntable. Cover. |
| 415 g | High | 3 mins | ||
| Baked beans & sausages/burgers | 415 g High | 3-4 mins | ||

Note
Always check that food is piping hot after reheating in the microwave. If unsure return to oven. Foods will still require a stand time, especially if they cannot be stirred. The denser the food the longer the stand time.
Reheating Charts
| Food | Weight/Quantity | Power Level | Time to Select (approx) | Instructions/Guidelines |
| Canned beans, pasta | ||||
| Ravioli in sauce | 200 g | High | 2 mins 30 secs | Place in a micro-safe bowl on turntable. Cover. |
| 400 g | High | 3-4 mins | ||
| Spaghetti in tomato sauce | 200 g | High | 1 min30 secs -2 mins | |
| Canned meat | ||||
| Hot dogs (drained) | 400 g | High | 2-3 mins | Place in a micro-safe bowl on turntable. Cover. |
| Stewed steak | 400 g | High | 3-4 mins | |
| Canned soups | ||||
| Cream of mushroom | 400 g | High | 3-4 mins | Place in a micro-safe bowl on turntable. Cover. Stir halfway. |
| Minestrone | 400 g | High | 2 mins 30 secs | |
| Canned puddings | ||||
| Custard 400 g | High | 2 mins | Place in a micro-safe bowl on turntable. Cover. Stir halfway. | |
| Sponge pudding | 400 g | High | 2 mins 30 secs | Place in a micro-safe bowl on turntable. Cover. |
| Canned vegetables - Drain where appropriate | ||||
| Carrots, whole | 300 g | High | 2 mins | Place in a micro-safe bowl on turntable. Cover. Stir halfway. |
| Peas, mushy | 300 g | High | 2 mins | |
| Peas, garden | 290 g | High | 2 mins -2 mins 30 secs | Place in a micro-safe bowl on turntable. Cover. |
| Potatoes new | 567 g | High | 4 mins | |
| Sweetcorn | 198 g | High | 1 min 30 secs | Place in a micro-safe bowl on turntable. Cover. Stir halfway. |
| 325 g | High | 2-3 mins | ||
| Tomatoes, whole | 400 g | High | 3 mins 30 secs | Place in a micro-safe bowl on turntable. Cover. |

Note
Always check that food is piping hot after reheating in the microwave. If unsure return to oven. Foods will still require a stand time, especially if they cannot be stirred. The denser the food the longer the stand time.
Reheating Charts
| Food | Weight/Quantity | Power Level | Time to Select (approx) | Instructions/Guidelines |
| Christmas puddings – do not leave unattended as overheating can cause the food to ignite | ||||
| Mini 100 g | High 30 secs | Place in a micro-safe dish on turntable. Cover. | ||
| Small 454 g | High | 2 mins | ||
| Medium 907 g | High | 3 mins | ||
| Large 1.1 kg | High | 3 mins 30 secs | ||
| Drinks — Coffee - at room temperature | ||||
| 1 mug 235 ml | High | 1 min30 secs-2 mins | Place in a micro-safe mug on turntable. | |
| 2 mugs 470 ml | High | 2 mins 30 secs | ||
| Drinks — Milk - from the fridge | ||||
| 1 mug 235 ml Medium | 2 mins-2 mins 30 secs | Place in a micro-safe mug or jug on turntable. | ||
| 1 jug 600 ml Medium | 4-5 mins | |||
| Homemade meat dishes | ||||
| Casserole for 2 | 700 g | High | 6-8 mins | Place in a micro-safe dish on turntable. Cover. Stir halfway. |
| Casserole for 4 | 1 kg | High | 10-15 mins | |
| Bolognese sauce | 250 g | High | 3 mins | |
| 1 kg | High | 8 mins | ||
| Pastry products – precooked – N.B. Pastries reheated by microwave will have a soft base. For combination cooking, if pie comes in foil container place directly onto enamel tray. | ||||
| Cornish pastie | 140 g (1) | High 1-2 mins | Place in micro-safe dish on turntable. Do not cover. | |
| or Combi 200 °C + Warm | 7-9 mins | Place on wire rack on enamel tray on turntable. Do not cover. | ||
| 300 g (2) | High | 2-3 mins | Place in micro-safe dish on turntable. Do not cover. | |
| or Combi 200 °C + Warm | 8-10 mins | Place on wire rack on enamel tray on turntable. Do not cover. | ||

Note
Always check that food is piping hot after reheating in the microwave. If unsure return to oven. Foods will still require a stand time, especially if they cannot be stirred. The denser the food the longer the stand time.
Reheating Charts
| Food | Weight/Quantity | Power Level | Time to Select (approx) | Instructions/Guidelines |
| Pastry products – precooked – N.B. Pastries reheated by microwave will have a soft base. If pie comes in foil container place directly onto enamel tray. | ||||
| Meat pies 300 g (2) | g (2) | Combi 200 °C + Simmer | 6-7 mins | Place on enamel tray on turntable |
| Steak and kidney Shortcrust pie | 210 g (1) | Combi 200 °C + Warm | 12 mins | |
| Quiche 400 g (1) | (1) | High 3-4 mins | Place in micro-safe dish on turntable. Do not cover. | |
| or Combi 220 °C + Simmer | 7-8 mins | Place on wire rack on enamel tray on turntable. Do not cover. | ||
| Sausage roll 330 g (2) | (2) | Combi 220 °C + Warm | 9-10 mins | |
| Xmas mince pies | 110 g (2) | High | 10-20 secs | Place in micro-safe dish on turntable. Do not cover. |
| Plated meals – homemade – chilled | ||||
| Child size 1 High 2-3 mins | Place on a micro-safe plate on turntable. Cover. | |||
| Adult size 1 High 4-5 mins | ||||
| Puddings and desserts- Transfer puddings to a micro-safe/heatproof dish | ||||
| Apple pie (chilled) | 700 g | High 3-4 mins | Place in micro-safe dish on turntable. Do not cover. | |
| or Combi 220 °C + Warm | 13-14 mins | Place on enamel tray on turntable. Do not cover. | ||
| Apple and blackcurrant pies (room temperature) | x 6 | Convection 220°C | 6-7 mins | Place in foil cases on wire rack on enamel tray on turntable. Do not cover. |
| Bread and butter pudding (chilled) | 500 g | High 3-4 mins | Place on turntable. Do not cover. | |
| or 220 °C + Warm | 15-17 mins | Place on enamel tray on turntable. Do not cover. | ||
| Custard (chilled) | 300 ml | High | 2 mins-2 mins30 secs | Place in large jug. Stir during reheating. |

Note
Always check that food is piping hot after reheating in the microwave. If unsure return to oven. Foods will still require a stand time, especially if they cannot be stirred. The denser the food the longer the stand time.
Reheating Charts
| Food | Weight/Quantity | Power Level | Time to Select (approx) | Instructions/Guidelines |
| Puddings and desserts – Transfer puddings to a micro-safe/heatproof dish | ||||
| Fruit crumble (chilled) | 500 g | High | 2 mins-2 mins30 secs | Place on turntable. Do not cover. |
| or Combi 220 °C + Warm | 10-15 mins | Place on enamel tray on turntable. Do not cover. | ||
| Jam roly poly (chilled) | 480 g High | 2-4 mins | Place on turntable. Do not cover. | |
| Purchased convenience foods – chilled N.B. Transfer food from foil container to a similar sized micro-safe/heatproof dish. | ||||
| Breaded mushrooms | 300 g | Convection: 220 °C | 13-15 mins | Place on enamel tray on wire rack on turntable. |
| Cottage pie 400 g | High 4-5 | mins | Place on turntable.Uncovered. | |
| or Combi 220 °C + Simmer | 13-15 mins | Place on enamel tray on turntable. Do not cover. | ||
| Lasagne 400 g | Medium 5-7 | mins | Place on turntable.Uncovered. | |
| or Combi 200 °C + Low | 11-13 mins | Place on enamel tray on turntable. Do not cover. | ||
| Onion bhajis, pakora & felafel | 360 g (12) | Convection: 220 °C | 10-12 mins | Place on enamel tray on wire rack on turntable. Turn halfway. |
| Spring rolls or samosas | 240 g | Convection: 220 °C | 13-15 mins | Place on wire rack on enamel tray on turntable.Turn halfway. |
| Potato wedges | 385 g | Convection: 220 °C | 10-15 mins | Place on enamel tray on wire rack on turntable. Turn halfway. |
| Vegetable bake | 450 g | High 6-8 | mins Place on | turntable. |
| or Combi 200 °C + Simmer | 12-14 mins | Place on enamel tray on turntable. Do not cover. | ||

Note
Always check that food is piping hot after reheating in the microwave. If unsure return to oven. Foods will still require a stand time, especially if they cannot be stirred. The denser the food the longer the stand time.
Reheating Charts
| Food | Weight/ Quantity | Power Level | Time to Select (approx) | Instructions/Guidelines |
| Purchased convenience foods – frozen – N.B. Transfer food from foil container to a similar sized micro-safe/heatproof dish. Plastic dishes designed for microwave and conventional ovens may be used with care. | ||||
| Golden drummers | 340 g (6) | Grill 1 16-18 mins | Place on enamel tray on wire rack on turntable. Turn halfway. | |
| Lasagne 400 g | g | Defrost then High | 8 mins 8-9 mins | Place on turntable. |
| or Combi 220 °C + Simmer | 18-20 mins | Place on enamel tray on turntable. | ||
| Breaded onion rings | 250 g | Grill 1 10-12 mins | Place on enamel tray on wire rack on turntable. Turn halfway. | |
| Fish pie 340 g | g | High 7-8 mins | Place on turntable. | |
| or Combi 220 °C + Simmer | 15-17 mins | Place on enamel tray on turntable. | ||
| Shepherd's pie | 400 g | Defrost then High | 10 mins 6-8 mins | Place on turntable. |
| or Combi 220 °C + Simmer | 20-22 mins | Place on enamel tray on turntable. | ||

Note
Always check that food is piping hot after reheating in the microwave. If unsure return to oven. Foods will still require a stand time, especially if they cannot be stirred. The denser the food the longer the stand time.
Cooking Charts
| Food | Weight/ Quantity | Power Level | Time to Select (approx) | Instructions/Guidelines |
| Bread – Frozen | ||||
| Part-baked rolls | 200 g (4) | Combi 220°C + Simmer | 8-12 mins | Place on enamel tray on turntable. |
| Part-baked garlic baguette | 170 g (1) | Combi 220°C + Simmer | 8-10 mins | |
| Bacon – from raw | ||||
| Rashers 300 g (8) | High | 4-6 mins or 1 min per rasher | Place on micro-safe rack or plate on turntable and cover with kitchen towel to minimise splatter. | |
| or Grill 1 11-13 mins | Place on enamel tray on wire rack on turntable. Turn halfway. | |||
| Steaks 250 g (2) | High 4-5 mins | Place on micro-safe rack or plate on turntable. Cover. | ||
| or Grill 1 28-30 mins | Place on wire rack on enamel tray on turntable. Turn halfway. | |||
| Beans & pulses – should be pre-soaked (except lentils) | ||||
| Black eyed beans | 225 g | High then Simmer | 10 mins 25-30 mins | Use 600 ml (1 pt) boiling water in a large bowl. Cover. |
| Chick peas 225 g | High then Simmer | 10 mins 40 mins | ||
| Lentils 225 g Medium 10-15 mins | ||||
| Red kidney beans | 225 g | High then Simmer | 15 mins 35-40 mins | |
| Beef - Joints from raw – Caution: Hot fat! Remove dish with care. For Guidelines see Meat chapter page 88. | ||||
| Topside, Forerib, Sirloin | - | Combi: 170 °C + Simmer | 14-16 min per 450 g | Place on an upturned saucer on enamel tray on turntable. Turn halfway. |
| Mince 450 g | High then Medium | 10 mins 15 mins | Place in micro-safe dish with stock and seasonings on turntable. Stir halfway. Cover. | |

Note
Always check that food is piping hot after reheating in the microwave. If unsure return to oven. Foods will still require a stand time, especially if they cannot be stirred. The denser the food the longer the stand time.
Cooking Charts
| Food | Weight/Quantity | Power Level | Time to Select (approx) | Instructions/Guidelines |
| Beef - Joints from raw – Caution: Hot fat! Remove dish with care. For Guidelines see Meat chapter page 88. | ||||
| Rump/sirloin | 380 g (2) | Medium 3-5 | mins | Place on micro-safe rack or plate on turntable. Cover. |
| or Grill 1 12 | -14 mins | Place on wire rack on enamel tray on turntable. Turn halfway. | ||
| Stewing steak | 450 g - 675 g | High then Simmer | 10 mins 60 mins | Place in micro-safe dish with stock and vegetables on turntable. Stir halfway. Cover. |
| or Combi: 160 °C + Warm | 1 hr-1 hr 40 mins | Place in casserole dish with stock and vegetables with lid on enamel tray on turntable. Stir halfway. | ||
| Beefburgers – Fresh from raw – Caution: Hot fat! Remove oven accessories with care. | ||||
| - 226 g | (2) | High 3-4 mins | Place on micro-safe rack or plate on turntable. Cover. | |
| or Grill 1 18 | -20 mins | Place on wire rack on enamel tray on turntable. Turn halfway. | ||
| Beefburgers – Frozen from raw – Caution: Hot fat! Remove oven accessories with care. | ||||
| - 227 g | (4) | High 5-7 mins | Place on micro-safe rack or plate on turntable. Cover. | |
| or Grill 1 12 | -16 mins | Place on wire rack on enamel tray on turntable. Turn halfway. | ||
| Chicken from raw – Caution: Hot Fat! Remove oven accessories with care. For Guidelines see meat chapter page 88. | ||||
| Breasts, boneless | 600 g (4) | Medium 12 | -14 mins | Place on micro-safe rack or plate on turntable. Cover. |
| or Grill 1 + Simmer | 16-18 mins | Place on wire rack on enamel tray on turntable. Turn halfway. | ||
| Drumsticks | 800 g (8) | Medium 12 | -14 mins | Place on micro-safe rack or plate on turntable. Cover. |
| or Convection 220 °C | 25-30 mins | Place on wire rack on enamel tray on turntable. Turn halfway. | ||

Note
Always check that food is piping hot after reheating in the microwave. If unsure return to oven. Foods will still require a stand time, especially if they cannot be stirred. The denser the food the longer the stand time.
Cooking Charts
| Food | Weight/ Quantity | Power Level | Time to Select (approx) | Instructions/Guidelines |
| Chicken from raw – Caution: Hot Fat! Remove oven accessories with care. For Guidelines see meat chapter page 88. | ||||
| Kiev (fresh) | 300 g (2) | Convection220 °C +16-18 minsWarm | 14-16 mins | Place on wire rack on enamel tray on turntable. |
| 600 g (4) | ||||
| Nuggets (frozen) | 500 g | Combi:220 °C +Warm | 15-20 mins | Place on enamel tray on wire rack on turntable. |
| or Grill 1 15 | -20 mins | Place on enamel tray on wire rack on turntable. Turn halfway. | ||
| Nuggets (fresh) | 360 g | Combi:220 °C +Warm | 12-14 mins | Place on enamel tray on wire rack on turntable. |
| Chicken legs | 1 kg (4) | Medium 15 | -18 mins | Place on micro-safe rack or plate on turntable. Cover. |
| or Combi:220 °C +Simmer | 25-35 mins | Place on wire rack on enamel tray on turntable. | ||
| Whole - | Medium | 9-11 mins per 450 g | Place in micro-safe dish on turntable. Cover. | |
| or Combi:190 °C +Simmer | 14-16 mins per 450 g | Place on upturned saucer on enamel tray on turntable. Start cooking breast side down. Turn halfway. Do not cover. | ||
| Eggs – Poached | ||||
| Water 45 ml | High 40 secs | Place water in a small bowl and heat for 1st cooking time.Add medium egg (size 3).Pierce yolk and white.Cover.Cook for 2nd cooking time.Then leave to stand for 1 minute. | ||
| Egg 1 Medium | 40 secs | |||
| Water 90 ml | High | 1 min | ||
| Eggs | 2 Medium | 1 min | ||
| Water | 135 ml | High | 1 min30 secs | |
| Eggs | 3 Medium | 1 min10 secs | ||
| Water | 180 ml | High | 2 mins | |
| Eggs | 4 Medium | 1 min30 secs | ||

Note
Always check that food is piping hot after reheating in the microwave. If unsure return to oven. Foods will still require a stand time, especially if they cannot be stirred. The denser the food the longer the stand time.
Cooking Charts
| Food | Weight/Quantity | Power Level | Time to Select (approx) | Instructions/Guidelines |
| Eggs – Scrambled | ||||
| Egg 1 | High 30 | secs | Add 1 tbsp of milk for each egg used.Beat eggs, milk and knob of butter together.Cook for 1st cooking time then stir.Cook for 2nd cooking time then stand for 1 minute. | |
| High 20 | secs | |||
| Eggs 2 | High 50 | secs | ||
| High 30 | secs | |||
| Eggs 3 | High 1 min 20 secs | |||
| High 30 | secs | |||
| Fish – Fresh from raw – For Guidelines see Fish Chapter page 85. | ||||
| Breaded fillets | 235 g (2) | Grill 1 10-15 mins | Place on enamel tray on wire rack on turntable. Turn halfway. | |
| Cakes 280 g (2) | Grill 1 + Warm | 12-14 mins | Place on enamel tray on wire rack on turntable. Turn halfway. | |
| Fillets 260 g (2) | High 3-4 mins | Place in micro-safe dish. Add 30 ml of liquid. Cover. | ||
| or Grill 1 | 12-14 mins | Place on enamel tray on wire rack on turntable. Turn halfway. | ||
| Steaks 220 g (2) | High 3-4 mins | Place in micro-safe dish. Add 30 ml of liquid. Cover. | ||
| or Grill 2 | 12-16 mins | Place on enamel tray on wire rack on turntable. Turn halfway. | ||
| Whole 260 g (1) | High 3-4 mins | Place in micro-safe dish. Add 30 ml of liquid. Cover. | ||
| or Grill 2 | 16 mins | Place on enamel tray on wire rack on turntable. Turn halfway. | ||
| Fish - Frozen from raw - For Guidelines see Fish chapter page 85. | ||||
| Breaded fillets | 260 g (2) | Grill 1 + Warm | 15-17 mins | Place on enamel tray on wire rack on turntable. Turn halfway. |
| or Combi: 200 °C + Warm | 14-16 mins | |||
| Cakes 400 g (4) Grill | 1 18-22 mins | Place on enamel tray on wire rack on turntable. Turn halfway. | ||
| Fish fingers | 230 g (8) | High 3-4 mins | Place on micro-safe dish.Do not cover. | |
| or Grill 1 | 12-14 mins | Place on enamel tray on wire rack on turntable. Turn halfway. | ||

Note
Always check that food is piping hot after reheating in the microwave. If unsure return to oven. Foods will still require a stand time, especially if they cannot be stirred. The denser the food the longer the stand time.
Cooking Charts
| Food | Weight/ Quantity | Power Level | Time to Select (approx) | Instructions/Guidelines |
| Fish - Frozen from raw - For Guidelines see Fish chapter page 85. | ||||
| Haddock fillets | 300 g (3) | High 4-5 mins | Place in micro-safe dish.Add 30 ml of liquid. Cover. | |
| or Grill 1 | 15-20 mins | Place on enamel tray on wire rack on turntable. Turn halfway. | ||
| Scampi 300 g | Grill 1 15 mins | Place on enamel tray on wire rack on turntable. Turn halfway. | ||
| or Combi: 220 °C + Simmer | 9-10 mins | |||
| Whole 500 g (2) High | 12-15 mins | Place in micro-safe dish.Add 30 ml of liquid. Cover. | ||
| Steaks 220 g (2) High 4-6 mins | Place in micro-safe dish.Add 30 ml of liquid. Cover. | |||
| Boil in the bag | 150 g-170 g | Defrost then stand then Medium | 4 mins2 mins4-5 mins | Place bag sauce side down on a plate. Slash top. |
| Fruit – Peel, slice, chop into even sized pieces. Place in shallow heatproof dish on turntable. | ||||
| Apples – poached | 450 g High 6-7 mins | Add 300 ml (1⁄2 pt) of water.Only half fill dish. Cover. | ||
| Apples – stewed | 450 g High 5-6 mins | Only half fill dish. Cover. | ||
| Peaches – poached | 450 g High 5-6 mins | Add 300 ml (1⁄2 pt) of water.Only half fill dish. Cover. | ||
| Pears – poached | 450 g High 6-7 mins | |||
| Plums – poached | 450 g High 4-6 mins | |||
| Plums – stewed | 450 g High 3-4 mins | Add 30 ml (2 tbsp) of water.Only half fill dish. Cover. | ||
| Rhubarb – stewed | 450 g High 4-6 mins | Only half fill dish. Cover. | ||

Note
Always check that food is piping hot after reheating in the microwave. If unsure return to oven. Foods will still require a stand time, especially if they cannot be stirred. The denser the food the longer the stand time.
Cooking Charts
| Food | Weight/Quantity | Power Level | Time to Select (approx) | Instructions/Guidelines |
| Lamb – from raw – Caution: Hot Fat! Remove accessory with care. For Guidelines see Meat chapter page 88. | ||||
| Chops, cutlets | 300 g (4) | Medium 4-6 mins | Place in micro-safe dish or rack on turntable. Cover. | |
| or Grill 1 | 4-16 mins | Place on wire rack on enamel tray on turntable. Turn halfway. | ||
| Chops, loin 500 g (4) | Medium 5-7 mins | Place in micro-safe dish or rack on turntable. Cover. | ||
| or Grill 1 | 22-24 mins | Place on wire rack on enamel tray on turntable. Turn halfway. | ||
| Joints - | Combi: 180 °C + Simmer | 12-15 mins per 450 g | Place on enamel tray on turntable. Turn halfway. | |
| Stewing lamb | 450 g | High then Low | 10 mins 40 mins | Place in micro-safe dish with stock and vegetables on turntable. Stir halfway. Cover. |
| or Combi: 160 °C + Warm | 1 hr | Place in casserole dish, add stock and vegetables, cover with lid on enamel tray on turntable. Stir halfway. | ||
| Casseroling lamb i.e. diced shoulder | 450 g | High then Low | 10 mins 60 mins | Place in micro-safe dish on turntable. Stir halfway. Cover. |
| or Combi: 160 °C + Warm | 1 hr | Place in casserole dish with lid on enamel tray on turntable. Stir halfway. | ||
| Pasta - Place in a large 3 litre (6 pt) microwave safe bowl. | ||||
| Twists 225 g High 8-10 mins Use 1 litre (1 3⁄4 pt) boiling water. Add 15 ml oil. Cover. | ||||
| Macaroni 225 g High 10-12 mins | ||||
| Spaghetti / tagliatelle | 225 g High 8-10 mins | Use 1 1⁄2 litres (2 1⁄2 pts) boiling water. Add 15 ml oil. Cover. Stir halfway. | ||
| Pasta shells - i.e. conchiglie | 225 g High 10-12 mins | |||

Note
Always check that food is piping hot after reheating in the microwave. If unsure return to oven. Foods will still require a stand time, especially if they cannot be stirred. The denser the food the longer the stand time.
Cooking Charts
| Food | Weight/Quantity | Power Level | Time to Select (approx) | Instructions/Guidelines |
| Pastry – uncooked | ||||
| Shortcrust flan case | 23 cm (9 inch) | High 3-4 mins | Prick base of pastry and chill well. Lay piece of kitchen towel in base. Place on turntable. | |
| or Combi: 220 °C + Simmer | 7-8 mins | Prick base of pastry and chill well. Do not cover. Place on enamel tray on turntable. | ||
| All butter croissants | 350 g (6) | Convection: Preheat 200 °C then 200 °C | 8-10 mins | Place on baking sheet on enamel tray on turntable. |
| Pizza – fresh chilled – N.B. Remove all packaging. Pizzas will have a soft base if cooked by microwave only. | ||||
| Deep pan, ham | 410 g | High 4-6 mins | Place on micro-safe plate on turntable. Do not cover. | |
| or Convection: 220 °C | 8-12 mins | Place directly on wire rack on enamel tray on turntable. Do not cover. | ||
| Thin and crispy | 300 g | Combi: 220 °C + Warm | 6-8 mins | Place on wire rack on enamel tray on turntable. Do not cover. |
| or Convection: 220 °C | 8 mins | |||
| Pizza - frozen - N.B. remove all packaging. | ||||
| French bread | 250 g (2) | Combi: 220 °C + Simmer | 7-8 mins | Place on wire rack on enamel tray on turntable. Do not cover. |
| Pepperoni | 340 g | Combi: 220 °C + Simmer | 8-10 mins | Place on wire rack on enamel tray on turntable. Do not cover. |
| Pork – from raw – Caution: Hot Fat! Remove oven accessories with care. For Guidelines see Meat Chapter page 88. | ||||
| Chops 425 | g (5) Grill | 20-25 mins | Place on wire rack on enamel tray on turntable. Turn halfway. | |

Note
Always check that food is piping hot after reheating in the microwave. If unsure return to oven. Foods will still require a stand time, especially if they cannot be stirred. The denser the food the longer the stand time.
Cooking Charts
| Food | Weight/Quantity | Power Level | Time to Select (approx) | Instructions/Guidelines |
| Pork – from raw – Caution: Hot Fat! Remove oven accessories with care. For Guidelines see Meat Chapter page 88. | ||||
| Joints - | Medium | 13-14 mins per 450 g | Place on upturned saucer in micro-safe dish on turntable. Turn joint over halfway during cooking. Drain off fat during cooking. | |
| or Combi 170 °C + Low | 16-18 mins per 450 g | Place on enamel tray. Turn halfway. | ||
| Gammon covered with water | - | High then Medium | 15 mins 25-30 mins per 450 g | Place in large casserole dish with lid and cover with water. |
| Tenderloin, whole | - | Combi: 190 °C + Warm | 25-30 mins per 450 g | Place on upturned saucer on enamel tray on turntable. |
| Porridge – N.B: Use a large bowl. | ||||
| 1 serving | 12 cup of oats | Medium | 3-3 mins 30 secs | Add 1 cup of water or milk. Stir halfway. |
| 2 servings | 1 cup of oats | High 4-5 mins | Add 2 cups of water or milk. Stir halfway. | |
| 4 servings | 2 cups of oats | High 8-9 mins | Add 4 cups of water or milk. Stir halfway. | |
| Potato products part cooked – frozen | ||||
| Croquettes | 300 g Grill | 1 + Simmer 11-13 mins | Place on enamel tray on wire rack on turntable. Turn halfway. | |
| Hash browns | 300 g (7) | Grill 1 12-15 mins | Place on enamel tray on wire rack on turntable. Turn halfway. | |
| Oven chips & associated products | 300 g Grill | 1 10-12 mins | Place on enamel tray on wire rack on turntable. Turn halfway. | |
| 450 g | or Combi: Grill 1 + Medium | 8-9 mins | Place on enamel tray on wire rack on turntable. Turn halfway. | |

Note
Always check that food is piping hot after reheating in the microwave. If unsure return to oven. Foods will still require a stand time, especially if they cannot be stirred. The denser the food the longer the stand time.
Cooking Charts
| Food | Weight/ Quantity | Power Level | Time to Select (approx) | Instructions/Guidelines |
| Rice - Place in a large 3 litre (6 pt) microwave safe bowl | ||||
| Basmati 250 g Medium | 13-16 mins | Use 600 ml (1 pt) cold water. Cover. Stir halfway. | ||
| Easycook white | 250 g High 16-17 mins | |||
| Easycook brown | 250 g High 20-24 mins | |||
| Long grain white | 250 g Medium 14-18 mins | |||
| Brown basmati | 250 g Medium 20-25 mins | |||
| Milk pudding – Use large bowl, cover. Stir halfway. | ||||
| Flaked rice | 50 g Simmer 35-45 mins | Add 600 ml (1 pt) milk and 30 ml sugar. | ||
| Pudding rice | 50 g | High then Simmer | 5 mins 40 mins | Add 450 ml (1 pt) milk and 30 ml sugar. |
| Sausages from raw – caution: Hot Fat! Remove oven accessories with care. For guidelines see Meat Chapter page 88. | ||||
| Thick 454 g | (8) Grill 1 | 7-18 mins | Place on wire rack on enamel tray on turntable. Turn halfway. | |
| Turkey from raw- Caution: Hot fat! Remove oven accessories with care. For guidelines see Meat Chapter page 88. | ||||
| Turkey, crown | - | Combi: 190 °C + Simmer | 13-15 mins per 450 g | Place on enamel tray on turntable. Turn halfway. |
| Fresh vegetables – place in shallow micro-safe dish | ||||
| Asparagus | 450 g High | 5-8 mins | Add 90 ml (6 tbsp) water. Cover. | |
| Broad beans | 450 g High | 5-6 mins | ||
| Runner beans | 450 g High | 7-8 mins | ||
| Beetroot | g Medium | 12-15 mins | ||
| Broccoli | g High 6-8 mins | |||
| Brusselsprouts | 450 g High | 8-9 mins | ||
| Cabbage - sliced | 450 g High | 7-9 mins | ||
| Carrots - sliced | 450 g High | 6-8 mins | ||
| Cauliflower - florets | 450 g High | 10-12 mins | ||

Note
Always check that food is piping hot after reheating in the microwave. If unsure return to oven. Foods will still require a stand time, especially if they cannot be stirred. The denser the food the longer the stand time.
Cooking Charts
| Food | Weight/ Quantity | Power Level | Time to Select (approx) | Instructions/ Guidelines |
| Fresh vegetables – place in shallow micro-safe dish | ||||
| Courgettes | 450 g High | 5 mins | Add 90 ml (6 tbsp) water. Cover. | |
| Corn on the cob | 450 g High | 6-7 mins | ||
| Leeks - sliced | 450 g High | 7-8 mins | ||
| Mushrooms | 450 g High | 5 mins | ||
| Parsnips - sliced | 450 g High | 5-6 mins | ||
| Peas 450 g | High 4-6 mins | |||
| Potatoes - boiled | 450 g High | 7-9 mins | ||
| Potatoes, par-boiled | 450 g High | 5-6 mins | ||
| Potatoes - jacket (225 g) | 1 | High 5 mins | Wash and prick skins several times. Place directly on glass turntable if cooking by microwave. If cooked by combination place directly on enamel tray on turntable. Allow to stand for 5 minutes. Or use Auto program jacket potatoes. | |
| or Combi: 220 °C + Simmer | 15 mins | |||
| 2 | High 8 mins | |||
| or Combi: 220 °C + Simmer | 20 mins | |||
| 4 | High 13 mins | |||
| or Combi: 220 °C + Simmer | 25 mins | |||
| 6 | High | 18-20 mins | ||
| or Combi: 220 °C + Simmer | 30 mins | |||
| Spinach 450 g High 6 mins | Add 90 ml (6 tbsp) water. Cover. | |||
| Swede - cubed | 450 g High | 8-12 mins | ||

Note
Always check that food is piping hot after reheating in the microwave. If unsure return to oven. Foods will still require a stand time, especially if they cannot be stirred. The denser the food the longer the stand time.
Cooking Charts
| Food | Weight/ Quantity | Power Level | Time to Select (approx) | Instructions/ Guidelines |
| Frozen vegetables - place in shallow micro-safe dish. | ||||
| Beans - broad | 450 g High 8 mins | Add 30 ml (2 tbsp) water. Cover. | ||
| Beans - green | 450 g High 8-9 mins | |||
| Brocolli 450 g High 8-9 mins | ||||
| Brussels sprouts | 450 g High 9-10 mins | |||
| Cabbage - shredded | 450 g High 6-7 mins | Add 30 ml (2 tbsp) water. Cover. | ||
| Carrots - sliced | 450 g High 8 mins | |||
| Cauliflower | 450 g High 9-10 mins | |||
| Peas 450 g High 6-7 mins | ||||
| Spinach - nuggets | 450 g High 8-9 mins | |||
| Sweetcorn | 450 g High 7 mins | |||
| Miscellaneous | ||||
| Frozen yorkshire puddings | 370 g | Convection: Preheat 220 °C then 220 °C | 15-20 mins | Place directly onto enamel tray. |

Note
Always check that food is piping hot after reheating in the microwave. If unsure return to oven. Foods will still require a stand time, especially if they cannot be stirred. The denser the food the longer the stand time.
Increasing and Decreasing Recipes
Increasing Recipes
■ To increase a recipe from 4-6 servings, increase each ingredient listed by half. To double the quantity, simply double every ingredient listed.
■ Do not forget that large quantities will require a larger dish. Make sure that it is deep enough to prevent the recipe from boiling over during cooking.
■ Cover as directed in the recipe. Stir or rearrange foods as recommended.
■ Increase the stand times by 5 minutes per 450 g.
■ Always check the recipe during cooking.
■ When increasing the ingredients to 6 servings, add an extra one third of the original cooking time, i.e. 30 minutes on Medium microwave for 4 servings will become 40 minutes on Medium microwave for 6 servings.
■ When doubling a recipe from 4-8, add on half the original cooking time, i.e. 30 minutes on Medium microwave for 4 servings will become 45 minutes on Medium microwave for 8 servings.
Decreasing Recipes
■ To decrease a recipe from 4 servings to 2 servings, halve the ingredients listed.
- Choose a dish that is proportionally smaller than the one recommended in the recipe, however make sure it is deep enough to stop food boiling over.
■ Allow half to two-thirds of the original cooking time, i.e. 30 minutes on Medium microwave for 4 servings will become 15-20 minutes on Medium microwave for 2 servings.
Using Recipes from Other Books
The best way to convert a family favourite dish is to find a similar recipe in a cookery book to give you a guide to the correct method and timings to use.
When using other cookbooks, the 1000 W output power of your oven must be allowed for. Use the same power level suggested e.g. High or Medium microwave and select the same cooking
time suggested, however check the progress of the food during cooking and adjust the time if necessary.
Cooking for One
■ For one serving quarter all ingredients listed.
■ Choose a dish that is proportionally smaller than the one recommended in the recipe.
■ Use the same cooking power recommended in the original recipe.
■ Start by cooking for one quarter of the recommended cooking time, although extra time in most cases will be required.
■ Always check the food during cooking.
■ There is not a great saving for reduced quantities of soups, casseroles, stews and rice, as a minimum time is required to tenderise meats and blend flavours.
■ When cooking for one it often makes sense to cook for two and plate up both meals. Freeze one meal for a later date.
Carrot and Orange Soup
ingredients
Serves 4
25 g (1 oz) butter
1 medium onion,
coarsely chopped
700 g (1 ½ lb) carrots,
thickly sliced
1 litre (1 ¾ pt) vegetable stock
12 orange, grated zest
90 ml (6 tbsp) orange juice
60 ml (4 tbsp) crème fraiche
salt and pepper
15 ml (1 tbsp) fresh ch-,
chopped
Dish: 1 x 3 litre (6 pt) Pyrex®
casserole dish
Accessory: none
- Place the butter and onion into casserole dish. Cover and cook on High microwave for 3-4 minutes or until soft.
- Add the carrots. Cover and cook on High microwave for 8-10 minutes or until the vegetables are softened. Stir halfway.
- Add stock and orange zest. Cover and cook on High microwave for 5 minutes then Low microwave for 15 minutes or until the carrots are soft.
- Place into a liquidiser and purée until smooth.
- Return purée to the bowl and add orange juice. Stir in the crème fraîche and season to taste. Cover and cook on Medium microwave for 3-4 minutes or until piping hot.
- Garnish with fresh chives.
Sweet Potato Soup
ingredients
Serves 4
15 ml (1 tbsp) olive oil
1 medium onion,
coarsely chopped
2 clove of garlic, crushed
700 g (1 ½ lb) sweet
potatoes, peeled and chopped
1 large red pepper,
deseeded and chopped
725 ml (1 ¼ pt)
vegetable stock
150 ml (¼ pt) coconut milk
salt and pepper
Dish: 1 x 3 litre (6 pt) Pyrex®
casserole dish with lid
Accessory: none
- Place the oil, onion and garlic into casserole dish, cover. Cook on Medium microwave for 3 minutes or until soft.
- Add the sweet potato and pepper and cook on Medium microwave for 5 minutes. Add stock, cover and cook on Medium microwave for 15 minutes, or until the potatoes are soft, stirring halfway.
- Cool. Place in a liquidiser and purée until smooth. Stir in the coconut milk and season to taste.
- Cover and cook on Medium microwave for 3 minutes or until piping hot.
Goat's Cheese & Basil Ciabatta
ingredients
Serves 4
2 ciabatta rolls
1 clove of garlic, halved
1 beef tomato, sliced
100 g (4 oz) goats cheese
8 black olives, stoned and quartered
15 ml (1 tbsp) olive oil
fresh basil, chopped
pepper
Dish: none
Accessory: Enamel tray and wire rack
- Halve the rolls and place on the wire rack on enamel tray. Cook on Grill 1 for 3-4 minutes or until lightly toasted. Rub each half with the garlic.
- Top each half with the sliced tomato, crumble over the goats cheese and top with olives. Drizzle with olive oil and place on the wire rack on the enamel tray. Cook on Grill 1 for 5-7 minutes or until the cheese is golden and bubbling.
- Sprinkle with basil and season with pepper. Serve immediately.
Onion and Feta Cheese Tartlets
ingredients
Serves 6
250 g (9 oz) ready made puff pastry
30 ml (2 tbsp) olive oil
300 g (11 oz) onions,
peeled and sliced
25 g (1 oz) pine nuts
100 g (4 oz) feta cheese, crumbled
50 g (2 oz) pitted black olives,
roughly chopped
50 g (2 oz) sun-dried tomatoes
(in oil or rehydrated),
roughly chopped
15 g (½ oz) capers
salt and pepper
fresh oregano sprigs to garnish
Dish: 1 x 3 litre (6 pt) Pyrex®
casserole dish with lid,
1 x 32 x 23 cm (12 ½ x 9 inch)
greased baking sheet
Accessory: Enamel tray
-
Roll out the puff pastry and cut into 6 circles each 7 12 ~cm (3 inch) in diameter. Chill pastry for 30 minutes.
-
Put oil and onions into casserole dish, cover and cook on High microwave for 10-13 minutes or until slightly browned. Cool for 5 minutes.
-
Preheat oven on Convection 200 °C with enamel tray.
-
Stir nuts, cheese, olives, sun-dried tomatoes and capers into onion mixture. Season well.
-
Place pastry circles on the baking sheet and prick with a fork.
-
Divide the onion mixture among the pastry circles.
-
Cook on Convection 220 °C for 10-15 minutes.
-
Garnish with fresh oregano sprigs.
Minestrone Soup
ingredients
Serves 6
30 ml (2 tbsp) olive oil
1 carrot, finely diced
1 celery stick, finely diced
1 red onion, finely diced
1 garlic clove, crushed
400 g (14 fl. oz) canned chopped
tomatoes
900 ml (1 ½ pt) vegetable stock
100 g (4 oz) green cabbage,
finely shredded
6 basil leaves, roughly chopped
50 g (2 oz) small pasta shapes
400 g (14 oz) canned baked beans
salt and pepper
Parmesan
Dish: 1 x large Pyrex ^® casserole
dish with lid
Accessory: none
-
Place the olive oil, carrot, celery, onion and garlic into large casserole dish, cover with a lid and cook on High microwave for 5 minutes.
-
Add the tomatoes, tomato purée and stock and cook on High microwave for 5 minutes then Simmer microwave for 15 minutes.
-
Stir in the cabbage, basil, pasta, baked beans and seasoning and cook on Simmer microwave for 35 minutes. Serve sprinkled with Parmesan
Quinoa Tabbouleh with Mint
ingredients
Serves 6-8
300 g (11 oz) quinoa
2 courgettes, finely chopped
300 g (11 oz) frozen peas
1 bunch mint, chopped
100 ml (3 ½ fl. oz) olive oil
2 lemons, juiced
salt and pepper
Dish: 1 x large Pyrex® bowl,
1 x medium Pyrex® bowl,
1 x small Pyrex® bowl
Accessory: none
-
Place the quinoa and 600 ml (1 pt) of salted hot water in a large bowl, cover and cook on High microwave for 5 minutes then Simmer microwave for 15 minutes. Drain and leave to cool.
-
Place the courgettes and peas in a medium bowl with 30 ml (2 tbsp) cold water and cook on High microwave for approx. 6-7 minutes. Drain well.
-
Mix the mint, olive oil and lemon juice in a small bowl. Add this mixture to the quinoa, courgette and peas. Season and leave to rest for several hours before serving.
Fish
Fish cooks very well by microwave as it stays moist and the lingering fish smells left in conventional ovens are avoided.
When is Fish Cooked?
Fish is cooked when it flakes easily and becomes opaque.
For fish with a strong odour, eliminate the smell after cooking by placing 600 ml (1 pt) of boiling water and 1 sliced lemon in a large bowl, cook on Simmer microwave for 20 minutes. Wipe out oven with a dry cloth.
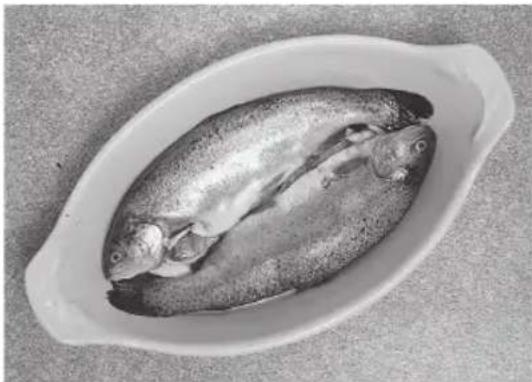
natural_image
Whole fish arranged in a oval-shaped white dish on a textured surface (no text or symbols visible)Whole Fish
If cooking 2 whole fish together, they should be arranged head to tail for even cooking.
Large whole fish must have the tail and head shielded halfway through cooking with smooth pieces of tin foil secured with cocktail sticks.
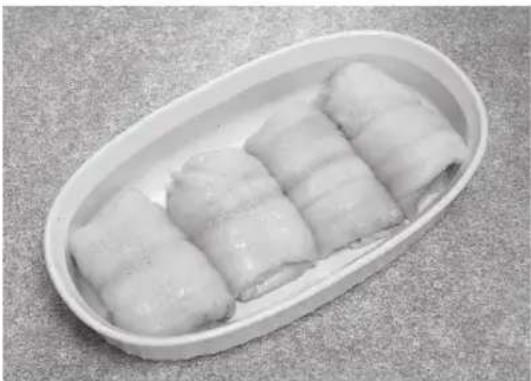
natural_image
White oval plate containing four cylindrical food items, possibly steamed buns or rolls, arranged on a textured surface (no text or symbols visible)Arranging
Thin fillets of fish i.e. plaice, should be rolled up prior to cooking to avoid overcooking on the thinner outside edge and tail.
Fish steaks should be arranged in a circle, thicker part to the outside. Cover with cling film or lid.
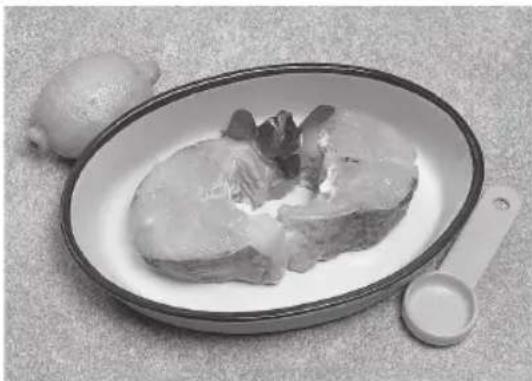
natural_image
Black-and-white photo of a raw meat dish on a plate with a lemon and a small spoon nearby (no text or symbols visible)Liquid
Fresh fish should always be sprinkled with 30 ml (2 tbsp) of lemon juice, white wine or water.
When cooking frozen fish, add liquid as above for even cooking.
Do not sprinkle salt onto fish before cooking as this may make the fish dry.
Noise
During cooking, popping sounds may be heard. This is due to moisture trapped between the flesh, particularly with oily fish such as salmon and mackerel. This can be minimised when cooking if the skin and flesh is pierced several times with a cocktail stick.
Tuna Fish Cakes
ingredients
Serves 4
350 g (12 oz) potatoes, peeled
25 g (1 oz) butter
1 small onion, chopped
200 g (7 oz) canned tuna, drained
1 egg, hard boiled, chopped
30 ml (2 tbsp) fresh parsley, chopped
10 ml (2 tsp) lemon juice
salt and pepper
1 egg, beaten
100 g (4 oz) breadcrumbs
Dish: 1 x large Pyrex ^®
casserole dish
1 x large Pyrex® bowl
Accessory: Enamel tray + wire rack
- Cook potatoes with 45 ml (3 tbsp) water, covered on High microwave for 6-8 minutes or until cooked. Drain.
- Place butter and onion in a bowl, cover and cook on High microwave for 4 minutes or until soft. Add potatoes and mash.
- Stir in tuna, hard boiled egg, parsley and lemon juice, season well.
- Shape into 8 cakes and coat in beaten egg and breadcrumbs.
- Place on enamel tray on wire rack and cook on Combination: Convection 220 °C + Warm microwave for 15-25 minutes or until brown, turning halfway.
Special Occasion Fish Pie
ingredients
Serves 4
450 g (1 lb) white fish
50 g (2 oz) butter
50 g (2 oz) flour
450 ml (¾ pt) milk
300 ml (½ pt) white wine
450 g (1 lb) mixed seafood
6 gherkins, diced
15 ml (1 tbsp) fresh parsley, chopped
10 ml (2 tsp) dill, chopped
salt and pepper
450 g (1 lb) potatoes, peeled
15 ml (1 tbsp) capers
50 g (2 oz) butter, melted
50 g (2 oz) Cheddar cheese, grated
Dish: 1 x large Pyrex® gratin dish
Accessory: Enamel tray
- Place the white fish with 30 ml (2 tbsp) water in a shallow dish. Cover and cook on High microwave for 4-5 minutes or on auto program fresh fish (see page 59). Drain, skin, bone and flake.
- Make the sauce by melting the butter in a large jug on Medium microwave for 1 minute. Add the flour and stir well. Mix in the milk and wine and cook on High microwave for 4-5 minutes. Stir halfway. Mix in the fish, mixed seafood, gherkins and herbs. Season and pour into the dish.
- Grate the potatoes and mix in the capers, melted butter and grated cheese. Place lightly on the fish sauce without pressing firmly to keep the grated form. Place on enamel tray and cook on Combination: Convection 220 °C + Simmer microwave for 35-40 minutes or until piping hot and golden.
Salmon and Vegetable Mornay
ingredients
Serves 4
100 g (4 oz) broccoli
100 g (4 oz) cauliflower
1 medium red pepper, deseeded and diced
198 g (7 oz) canned salmon, drained
25 g (1 oz) butter
30 ml (2 tbsp) plain flour
300 ml (½ pt) milk
50 g (2 oz) Cheddar cheese, grated
150 ml (¼ pt) cream, optional
salt and pepper
15 g (½ oz) butter
75 g (3 oz) fresh white breadcrumbs
15 ml (1 tbsp) fresh parsley, chopped pinch of paprika
Dish: 1 x 20 x 25 cm (8 x 10 inch)
Pyrex® dish
1 x large Pyrex® jug
1 x small Pyrex® bowl
Accessory: Enamel tray
- Break broccoli and cauliflower into florets, add red pepper and 30 ml (2 tbsp) water. Cover and cook on High microwave for 5-6 minutes or until soft. Drain.
- Flake salmon and mix with vegetables.
- Melt butter in jug on High microwave for approx. 20-30 seconds. Stir in flour then milk. Cook on High microwave for 2 minutes or until mixture boils and thickens; stir halfway. Stir in cheese, cream and seasoning. Pour cheese sauce over vegetables and salmon.
- Melt extra butter in a small bowl on High microwave for approx 15-20 seconds. Stir in breadcrumbs, parsley and paprika. Sprinkle over vegetable mixture.
- Place on enamel tray and cook on Combination: 220 °C + Low microwave for 10-12 minutes or until golden brown.
Bouillabaisse
ingredients
Serves 6
225 g (8 oz) tomatoes
125 ml (4 fl. oz) olive oil
1 large leek, sliced
4 garlic cloves, crushed
1.2 ltr (2 pt) fish stock
salt and black pepper
150 ml (¼ pt) dry white wine
4 sprig thyme
small piece orange peel
4 strands saffron
5 ml (1 tsp) chilli sauce
450 g (1 lb) cod, haddock or coley
450 g (1 lb) mixed seafood
4 large fresh prawns
bunch dill, chopped, to garnish
Dish: 1 x 3 litre (6 pt) Pyrex®
casserole dish
Accessory: none
-
Skin the tomatoes and cut into four pieces, removing the cores. Place the oil and tomato purée in a large bowl, heat on High microwave for 1 minute and mix well. Add the onions and leek, cook on High microwave for 3-4 minutes or until soft.
-
Add the garlic, tomatoes, stock, seasoning, wine, thyme, orange peel, saffron and chilli sauce. Heat on High microwave for 3-4 minutes. Skin the fish, cut into chunks and add to the tomato liquid. Cook on High microwave for 3-4 minutes or until the fish is cooked. Add the mixed seafood and prawns and heat again for 2-3 minutes on High microwave or until hot, taking care not to overcook the fish.
-
Serve garnished with dill.
Thai Trout
ingredients
Serves 2
2 trout fillets,
approx 150 g (5 oz) each
2 cloves of garlic, finely chopped
1-2 small red chilli, finely chopped
1 lime, zest and juice
4 spring onions, finely chopped
30 ml (2 tbsp) light soy sauce
Dish: 1 x Pyrex® shallow dish
Accessory: none
- Place fish fillets into a shallow dish, sprinkle the remaining ingredients on the top of the fish. Cover and cook on Medium microwave for 4-5 minutes, or until the fish is cooked through.
Cod and Leek Bake
ingredients
Serves 6
800 g (1 lb 12 oz) cod, fillets
2 large leeks, finely sliced
300 ml (1/2 pt) single cream
500 g (1 lb 2 oz) potatoes, quartered
50 g (2 oz) Cheddar cheese, grated salt and pepper
Dish: 1 x shallow dish,
1 x 27 cm (10 ½ inch) Pyrex®
casserole dish with lid
1 x large Pyrex® dish
1 x 27 cm (10 ½ inch) round dish
Accessory: Enamel tray
-
Place the cod in a shallow dish, add 45 ml (3 tbsp) water. Cover and cook on High microwave for 5-6 minutes. Drain the cod and break into pieces, taking care to remove all the bones and the skin
-
Place leeks in a casserole dish, cover and cook on High microwave for 10 minutes. Mix together the fish pieces, leeks, cream, cheese, salt and pepper
-
Place the potatoes in a large dish, cover and cook on High microwave for 9-10 minutes. Place the potatoes in a round buttered dish, cover with the fish, leeks and cheese mixture.
-
Preheat the oven with the enamel tray on Convection 200 °C. Place the dish in the oven and cook on Convection 200 °C + Low microwave for 10-15 minutes, until it is golden brown on top.
Meat and Poultry
Guidelines
Defrosted Joints
If the meat has previously been frozen, ensure it is properly thawed before cooking by microwave. Defrosted joints of meat must be allowed to Stand for a minimum of 1 hour before cooking to ensure the centre is fully defrosted.
Fat
Large amounts of fat absorb microwave energy and can cause the meat next to it to overcook. Always choose joints that aren't excessively fatty.
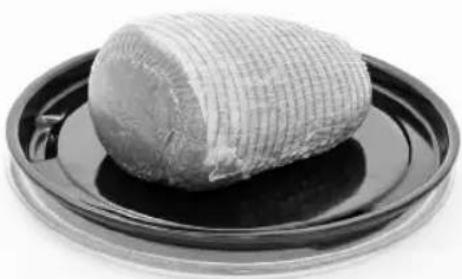
natural_image
Close-up of a textured, cylindrical object placed on a dark plate (no visible text or symbols)Standing Time
Meat and poultry require a minimum of 15 minutes standing time wrapped in aluminium foil after cooking by microwave. Roast meat is always easier to carve after standing and the meat will continue to cook during the stand time.
Bone
Bone tips on legs of lamb and crown roasts may need shielding when cooked by microwave, to prevent overcooking.
Turning
Joints and poultry should be turned over halfway through cooking.
Shielding
Large joints may need shielding with pieces of smooth aluminium foil after half the cooking time to avoid overcooking on the outside edges. Turkeys and large chickens should have their breast meat, legs and wings protected. Secure foil with cocktail sticks and do not allow foil to touch the walls of the oven.
How to Roast a Joint by
Combination
Place the joint on enamel tray and place on glass turntable.
Meat and Poultry
How to Roast a Joint by Microwave
To roast basic joints of meat place the joint onto the rack of a microwave roasting set and cover with a dome lid. Alternatively use a large, shallow dish and place the joint on an upturned saucer and cover with cling film.
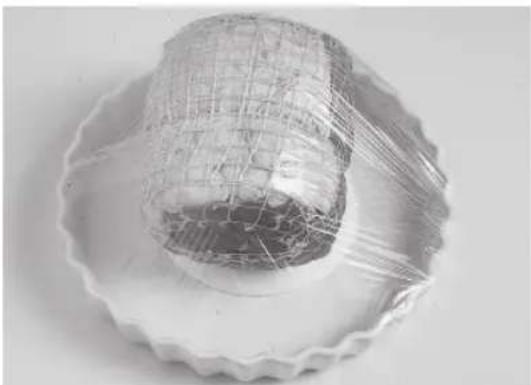
natural_image
Close-up of a white paper cup with a coiled metal wire wrapped around it, placed on a fluted side (no text or symbols visible)Roasting Bags
Roasting bags are useful when split up one side to tent a joint for roasting by power and time.
Do not use the metal twists supplied.
Tips
Braised and stewed meat cooked in a microwave has a slightly firm texture and therefore it is essential to purchase good quality meats.
When cooking a casserole, place a saucer or small upturned plate over the meat to keep it submerged in the juices.
How to Cook Small Cuts of Meat by Microwave
Some cuts of meat can be cooked successfully by microwave although due to their short cooking times and no heat source, they will not crisp and brown.
They should always be cooked on a microwave safe rack to lift them out of their juices.

natural_image
Top-down view of a petri dish containing several small, irregularly shaped food items (no text or symbols visible)Crispy Bacon
Place on a microwave safe rack (optional extra obtainable from cookware shops). Cover with a plain piece of kitchen towel to minimise splatter. Cook on High microwave for approx. 1 minute per rasher, or until desired crispness is achieved.
Coq au Vin
ingredients
Serves 4
1.2 kg (2 ½ lb) chicken portions, approx. 4
5 ml (1 tsp) mixed herbs salt and pepper
100 g (4 oz) streaky bacon
100 g (4 oz) button mushrooms
1 clove of garlic, crushed
450 g (1 lb) whole shallots
30 ml (2 tbsp) brandy
300 ml (½ pt) red wine
300 ml (½ pt) chicken stock
15 ml (1 tbsp) cornflour
Dish: 1 x large Pyrex ^®
casserole dish with lid
Accessory: Enamel tray
-
Place all ingredients, apart from the cornflour, in casserole dish and cover.
-
Place on enamel tray and cook on Combination: Convection 160 °C + Warm microwave for 1 hour 10 minutes or until cooked through. Stir halfway during cooking.
-
Remove skin from chicken pieces and skim off any excess fat. Thicken using a little cornflour mixed with water. Serve sprinkled with chopped parsley.
Chicken Satay
ingredients
Serves 4-6
4 chicken breast fillets, skinned and chopped into small chunks
100 g (4 oz) creamed coconut
45 ml (3 tbsp) lemon juice
30 ml (2 tbsp) soy sauce
30 ml (2 tbsp) vegetable oil
2 garlic cloves, crushed
5 ml (1 tsp) ground turmeric
5 ml (1 tsp) five-spice powder
5 ml (1 tsp) coriander seeds
5 ml (1 tsp) cumin seeds
90 ml (6 tbsp) peanut butter
large pinch chilli powder
Dish: 1 x small mixing bowl,
8 x wooden skewers
Accessory: Enamel tray + wire
rack
-
Place chicken, 50 g (2 oz) creamed coconut, 30 ml (2 tbsp) lemon juice and 15 ml (1 tbsp) soy sauce into a blender or food processor. Add the oil, garlic, turmeric, five spice, coriander and cumin and blend until smooth.
-
Pour over the chicken. Cover and marinate in the fridge for 2-3 hours or overnight.
-
For the serving sauce: Pour 50 g (2 oz) of creamed coconut into a large jug. Add the peanut butter, 15 ml (1 tbsp) of the lemon juice, 15 ml (1 tbsp) of the soy sauce, the chilli powder and 80 ml (5 tbsp) water. Cook on High microwave for 3-4 minutes or until the sauce boils and thickens, stirring frequently. Turn into a serving bowl.
-
Thread the chicken onto wooden skewers. Place on wire rack on enamel tray and cook on Combination: Convection 220 °C + Warm microwave for 26-30 minutes or until cooked through, turning occasionally. Serve hot with sauce for dipping.
Barbeque Spare Ribs
ingredients
Serves 4
675 g (1 ½ lb) pork ribs
30 ml (2 tbsp) white wine vinegar, Sauce:
45 ml (3 tbsp) tomato sauce
45 ml (3 tbsp) soy sauce
45 ml (3 tbsp) honey
5 ml (1 tsp) dry mustard powder
45 ml (3 tbsp) plum jam
Dish:1 x large Pyrex®
casserole dish with lid
1 x Pyrex® bowl
1 x Pyrex ^® shallow dish
Accessory: Enamel tray
-
Place ribs into large casserole dish, cover with water and add the vinegar.
-
Cover and cook on High microwave for 6-8 minutes then Simmer microwave for 20 minutes. Drain.
-
Combine all sauce ingredients together in a Pyrex ^ bowl and heat on Medium microwave for 2 minutes. Mix thoroughly.
-
Toss ribs in sauce. Arrange on the base of shallow dish on the enamel tray and cook on Combination: Convection 190 °C + Simmer microwave for 15-20 minutes or until ribs are dark brown and crispy.
Casserole Pork with Herby Dumplings
ingredients
Serves 4
30 ml (2 tbsp) oil
1 medium onion, chopped
1 green pepper, deseeded and chopped
225 g (8 oz) carrots, sliced
450 g (1 lb) lean pork, cubed
30 ml (2 tbsp) seasoned flour
5 ml (1 tsp) ground bay leaves
5 ml (1 tsp) dried sage
salt and pepper
300 ml (½ pt) dry cider
Dumplings:
175 g (6 oz) self raising flour
75 g (3 oz) suet
pinch of salt
5 ml (1 tsp) mustard powder
15 ml (1 tbsp) fresh parsley, chopped
150 ml (¼ pt) cold water
Dish: 1 x large Pyrex ^®
casserole dish with lid
Accessory: Enamel tray
-
Place oil, onion, green pepper and carrots in casserole dish, cover and cook on High microwave for 5 minutes or until soft.
-
Toss pork in seasoned flour and add to onion mixture. Stir in all other ingredients, cover, place on enamel tray and cook on Combination: Convection 160 °C + Warm microwave for 1 hour or until pork is tender.
-
Whilst cooking make the dumplings by combining the flour, suet, salt, mustard and parsley. Add the water to make a stiff dough. Shape dough into 8 round dumplings.
-
When pork is cooked, uncover and place dumplings around the edge of dish. Cook uncovered on the enamel tray on Combination: Convection 160 °C + Warm microwave for 15 minutes or until dumplings are cooked through.
Toad in the Hole
ingredients
Serves 4
150 g (5 oz) plain flour
3 ml (½ tsp) salt
2 eggs
300 ml (½ pt) milk and water
25 g (1 oz) oil
450 g (1 lb) sausages
Dish: 1 x mixing bowl,
1 x 25 x 18 cm (10 x 7 inch) oblong
rectangular tin
Accessory: Enamel tray
-
Preheat oven with enamel tray on Convection 220 °C.
-
Sift flour and salt in a bowl. Add eggs and half the liquid. Beat until smooth. Gradually stir in remaining liquid.
-
Put oil in tin with sausages on enamel tray. Cook on Convection 220 °C for 15 minutes.
-
Pour in the batter and cook for 15-20 minutes on Convection 220^ or until the batter is well risen and golden brown.
Creamy Chicken Gratin
ingredients
Serves 4
350 g (12 oz) leeks,
trimmed and sliced
25 g (1 oz) butter
30 ml (2 tbsp) plain flour
300 ml (½ pt) milk
225 g (8 oz) cooked chicken, chopped
100 g (4 oz) ham, chopped
175 g (6 oz) Gruyere cheese, grated
4 frozen garlic bread slices
Dish: 1 x large Pyrex® bowl
1 x 26 cm (10 ½ inch) gratin dish
Accessory: Enamel tray
-
Slice the leeks and place in a large bowl with the butter. Cover and soften on High microwave for 3-4 minutes or until softened.
-
Add the flour and mix well. Stir in the milk and heat, uncovered on High microwave for 4-5 minutes or until thickened. Stir halfway. Add the chicken, ham and cheese then season and mix well.
-
Pour into the gratin dish and top with the garlic bread slices. Place on enamel tray and cook on Combination: Convection 220 °C + Low microwave for 10-15 minutes or until piping hot and golden.
Belgian Beef Casserole
ingredients
Serves 4
675 g (1 ½ lb) braising steak, cubed
3 large onions, thinly sliced
1 clove of garlic, crushed
30 ml (2 tbsp) seasoned flour
15 ml (1 tbsp) brown sugar
300 ml (½ pt) hot beef stock
300 ml (1/2 pt) light ale
15 ml (1 tbsp) wine vinegar
5 ml (1 tsp) mixed herbs
2 bay leaves
Topping:
15 ml (1 tbsp) french mustard
60 ml (4 tbsp) butter, softened
1 clove of garlic, crushed
8 × 2.5 cm (1 inch)
french bread, sliced
Dish: 1 x large Pyrex®
casserole dish with lid
1 x mixing bowl
Accessory: Enamel tray
- Combine all the casserole ingredients in dish. Cover with lid and cook on enamel tray on Combination: Convection 160 °C + Warm microwave for 1 hour, or until meat is tender. Remove bay leaves.
- For topping, blend mustard, butter and garlic in a mixing bowl. Spread over one side of each bread slice.
- Uncover casserole and arrange bread on top. Return to oven and cook uncovered on Combination: Convection 160 °C + Warm microwave for a further 10 minutes. The casserole is ready when the bread slices are crisp and golden.
Savoury Mince
ingredients
Serves 4
1 onion, diced
1 clove of garlic, crushed
15 ml (1 tbsp) oil
400 g (14 oz) canned chopped
tomatoes
5 ml (1 tsp) mixed herbs
450 g (1 lb) mince
salt and pepper
Dish: 1 x large Pyrex®
casserole dish with lid
Accessory: none
- Place onion, garlic and oil in casserole dish, cover and cook on High microwave for 2 minutes or until soft.
- Place all other ingredients in casserole dish. Stir well.
- Cover and cook on High microwave for 10 minutes then Medium microwave for 15-20 minutes or until cooked.
Variation: Chilli con carne
Add 400 g (14 oz) canned red kidney beans drained, 5-10 ml (1-2 tsp) chilli powder, 1 diced green pepper to the ingredients above.
Shepherd's Pie
ingredients
Serves 4
1 medium onion, chopped
2 carrots, chopped
25 g (1 oz) butter
350 g (12 oz) lamb or beef mince
300 ml (½ pt) hot lamb or beef stock
3 ml (½ tsp) Worcestershire sauce
15 ml (1 tbsp) cornflour
salt and pepper
675 g (1 ½ lb) potatoes, cubed
135 ml (9 tbsp) water
30 ml (2 tbsp) milk
25 g (1 oz) cheese
Dish: 1 x medium Pyrex®
casserole dish with lid
1 x large Pyrex® casserole dish
with lid
1 x square Pyrex® dish 22 x 22 cm
(8 ½ inch x 8 ½ inch)
Accessory: Enamel tray
- Place onion, carrots and butter in medium casserole dish. Cover and cook on High microwave for 3-5 minutes or until soft.
- Add mince to vegetables and mix well. Mix together stock, Worcestershire sauce and tomato purée, pour over mince and season to taste. Cook on High microwave for 5 minutes. Add cornflour, cook on High microwave for 5-7 minutes or until thickened. Transfer to square Pyrex® dish.
- Cook potatoes with water in large casserole dish, covered on High microwave for 7-8 minutes. Drain and mash well with the milk and spread on top of the meat, using a fork to make a pattern on top.
- Sprinkle with cheese, place on enamel tray and cook on
Combination: Convection 190 °C + Warm microwave for approx. 15-20 minutes or until top is crisp and golden.
Lasagne
ingredients
Serves 4
2 x quantities of white sauce
(refer to page 103)
5 ml (1 tsp) mustard
100 g (4 oz) grated cheese salt and pepper
1 quantity of savoury mince (refer to page 92)
12 sheets pre-cooked lasagne
60 ml (4 tbsp) Parmesan cheese
Dish: 1 x large Pyrex ^®
rectangular dish
Accessory: Enamel tray
- Add mustard, cheese and seasoning to the hot white sauce.
- Cover the base of the dish with a layer of cheese sauce, then a layer of lasagne, followed by a layer of hot meat mixture. Continue with a layer of lasagne then meat, ending with a layer of cheese sauce.
- Sprinkle Parmesan cheese over the top, place on enamel tray and cook on Combination: Convection 190 °C + Simmer microwave for 15-20 minutes or until the pasta is tender and the top is crispy and golden brown.
Hungarian Goulash
ingredients
Serves 4
600 g (1 ¼ lb) braising steak, cubed
45 ml (3 tbsp) seasoned flour
600 ml (1 pt) hot beef stock
60 ml (4 tbsp) soured cream
Dish: 1 x large Pyrex®
casserole dish with lid
Accessory: Enamel tray
- Toss meat in the flour. Combine all ingredients except the soured cream in casserole dish, cover.
- Place on enamel tray and cook on Combination: Convection 160 °C + Warm microwave for 1 hour 15 minutes, or until the meat is tender.
- Remove from oven and immediately stir in the soured cream. Serve with ribbon noodles.
Moussaka
ingredients
Serves 4
30 ml (2 tbsp) olive oil
2 cloves of crushed garlic
1 medium onion, chopped
1 aubergine, sliced
400 g (14 oz) canned chopped
tomatoes
350 g (12 oz) lamb mince
150 ml (¼ pt) single cream
100 g (4 oz) cheese, grated
25 g (1 oz) Parmesan cheese, grated
Dish: 1 x 20 cm (8 inch) shallow dish
Accessory: Enamel tray
- Place oil, garlic, onion and aubergine in dish. Cover and cook on High microwave for 2 minutes or until softened.
- Add tomatoes and lamb mince and purée and cook re-covered on High microwave for 7 minutes. Season and mix well.
- Whisk eggs, cream and cheese together and pour over lamb. Sprinkle with Parmesan cheese, place on enamel tray and cook on Combination: Convection 190 °C + Simmer microwave for 15-20 minutes or until topping is puffed and golden.
Kedgeree
ingredients
Serves 4
175 g (6 oz) easy cook brown rice
450 ml (¾ pt) hot chicken stock
450 g (1 lb) smoked haddock
30 ml (2 tbsp) lemon, juiced
1 medium onion, chopped
15 ml (1 tbsp) oil
150 ml (¼ pt) soured cream
15 ml (1 tbsp) curry paste
100 g (4 oz) frozen peas
30 ml (2 tbsp) parsley, chopped
2 boiled eggs,
chopped into small chunks
Dish: 1 x large Pyrex ^®
casserole dish with lid
1 x Pyrex® shallow dish
1 x small Pyrex® dish
Accessory: none
- Place the rice and chicken stock in casserole dish, cover and cook on High microwave for 15-20 minutes or until tender.
- Place the fish in a shallow dish, sprinkle with lemon juice, cover and cook on High microwave for 5-6 minutes or until cooked. Skin and flake.
- Place onion and oil in a small dish, cover and cook on High microwave for 3-4 minutes or until softened.
- Combine the soured cream with curry paste. Mix into rice then stir in flaked fish, onion, peas, parsley, eggs and seasoning. Cover and cook on High microwave for 5 minutes or until piping hot.
Wild Mushroom and Basil Risotto
ingredients
Serves 4
40 g (1 ½ oz) dried cep mushrooms
50 g (2 oz) butter
1 clove of garlic, finely chopped
1 small onion, finely chopped
freshly ground black pepper
250 g (9 oz) arborio rice
300 ml (½ pt) hot vegetable stock
12 basil leaves, torn
Dish: 1 x Pyrex® shallow dish
1 x large casserole dish with lid
Accessory: none
- In shallow dish, soak mushrooms in 300 ml (½ pt) warm water.
- Place the butter, garlic and onion in a large casserole dish, cover and cook on High microwave for 3 minutes, or until softened. Season with freshly ground black pepper.
- Stir the rice into the butter mixture and add the hot stock and soaking liquid from the mushrooms. Cover and cook for a further 5 minutes on High microwave.
- Stir the mushrooms into the rice mixture. Cover and cook for a further 5 minutes on High microwave.
- Stir and add the basil. Continue to cook for the final 5 minutes on High microwave. Leave to stand for approx. 10 minutes and then stir with a fork.
Vegetable and Chick Pea Casserole
ingredients
Serves 4
1 medium onion, chopped
10 ml (2 tsp) vegetable oil
2 medium courgettes, thickly sliced
1 red pepper, deseeded and chopped
2 medium carrots, peeled and sliced
1 small cauliflower, divided into florets
100 g (4 oz) dried apricots, halved
2 cloves of garlic, crushed
425 g (15 oz) canned chick peas,
drained
3 ml (½ tsp) ground tumeric
3 ml (½ tsp) ground corriander
3 ml (1½ tsp) ground cumin
5 ml (1 tsp) paprika
2.5 cm (1 inch) piece fresh root ginger,
peeled and finely chopped
salt and pepper
450 ml (¾ pt) hot vegetable stock
parsley, chopped
Dish: 1 x large casserole dish with lid
1 x Pyrex ^® shallow dish
Accessory: none
- Place the onion and oil in a large casserole dish. Cover and cook on High microwave for 3 minutes or until starting to soften.
- Add the prepared vegetables, apricots, garlic, chick peas and stir in the spices, salt, pepper and stock.
- Cover and cook on High microwave for 20-25 minutes or until vegetables are soft. Stir two or three times during cooking. Serve with couscous or rice and garnish with parsley.
N.B.
To prepare couscous: Place 300 ml ( 12 pt) vegetable stock in a shallow dish and 1.2 ml ( 14 tsp) turmeric. Cook on High microwave for 4 minutes or until boiling. Add 175 g (6 oz) couscous and allow to stand for 5 minutes. Fluff up with a fork before serving.
Tagliatelle Toscana
ingredients
Serves 4
400 g (14 oz) fresh tagliatelle
1 large onion, chopped
1 clove of garlic, crushed
15 ml (1 tbsp) olive oil
1 large aubergine, cubed
400 g (14 oz) canned chopped tomatoes
5 ml (1 tsp) basil
8-10 black olives, stoned
100 g (4 oz) mozzarella, diced
30 ml (2 tbsp) Parmesan cheese, grated
Dish: 2 x large Pyrex®
casserole dish with lid
Accessory: Enamel tray
-
Cook the pasta in casserole dish with 600 ml (1 pt) boiling water, covered, on High microwave for 4 minutes or until tender. Drain.
-
Place onion, garlic and oil in a casserole dish, cover and cook on High microwave for 2 minutes or until soft. Add the aubergine, chopped tomatoes, basil, tomato purée, butter, seasoning and olives. Cover and cook on High microwave for 6-8 minutes.
-
Mix the drained pasta with the mozzarella. Place in a casserole dish. Pour the sauce over the top. Sprinkle with Parmesan. Place on enamel tray and cook on Combination: Convection 220 °C + Warm microwave for 6-8 minutes or until golden brown and piping hot.
Roast Vegetable and Pasta Gratin
ingredients
Serves 4
1 auberbine, diced
2 leeks, sliced
1 red pepper, chopped
1 green pepper, chopped
1 onion, chopped
1 clove of garlic, crushed
45 ml (3 tbsp) olive oil
225 g (8 oz) pasta shapes
225 g (8 oz) fresh spinach
White sauce:
40 g (1 ½ oz) butter
40 g (1 ½ oz) flour
600 ml (1 pt) milk
15 ml (1 tbsp) mustard
50 g (2 oz) Cheddar cheese, grated
150 g (5 oz) Boursin ^ cheese salt and pepper
Dish: 1 x small roasting dish
1 x large casserole dish with lid
1 x large Pyrex® shallow dish
Accessory: Enamel tray
-
Preheat oven with enamel tray on Convection 220 °C. Chop all the vegetables except spinach into bite sized pieces and put in roasting dish with the oil. Cook on Convection 220 °C 25-30 minutes.
-
Cook the pasta shapes in a casserole dish with 450 ml (¾ pt) boiling water on High microwave for 5-6 minutes or until soft. Drain. Wash the spinach and tear into small pieces.
-
Make the white sauce as per instructions on page 103, add the mustard, Cheddar, Boursin® cheese and stir thoroughly until smooth. Season well.
-
Mix the pasta, spinach and roast vegetables with the sauce and place in a large shallow dish. Sprinkle the top with cheese.
-
Cook on enamel tray on Combination: Convection 220 °C + Low microwave for 10-15 minutes or until golden brown.
Lentil Biryani
ingredients
Serves 4-6
15 ml (1 tbsp) oil
1 large onion, sliced
5 ml (1 tsp) ginger root, grated
1 clove of garlic, crushed
3 ml (½ tsp) tumeric
5 ml (1 tsp) chilli powder
10 ml (2 tsp) curry powder
150 ml (¼ pt) natural yoghurt
100 g (4 oz) mushrooms, sliced
2 tomatoes, peeled and chopped
100 g (4 oz) canned green lentils
300 ml (½ pt) hot water
50 g (2 oz) cashew nuts
450 g (1 lb) cooked basmati rice
Garnish:
1 hard boiled egg, sliced
corriander leaves
Dish: 1 x large Pyrex® casserole
dish with lid
Accessory: none
-
Place the oil and onion in a large casserole dish. Cover and cook on High microwave for 3 minutes or until softened.
-
Add the ginger, garlic, turmeric, chilli and curry powder. Cover and cook on High microwave for 2 minutes.
-
Add the yoghurt, mushrooms, tomatoes, lentils and water. Cover and cook on High microwave for 30-35 minutes or until the lentils are tender and the liquid has evaporated.
-
Add the cooked rice and cashew nuts to the lentil mixture and mix thoroughly. Reheat on High microwave if necessary. Garnish and serve.
Stuffed Croissants
ingredients
Makes 8
100 g (4 oz) Cheddar cheese, grated
100 g (4 oz) smoked ham, diced
1 tomato, deseeded and chopped
60 ml (4 tbsp) sour cream
15 ml (1 tbsp) mayonnaise
10 ml (2 tsp) wholegrain mustard
pepper
8 croissants
Dish: 1 x medium Pyrex® mixing
bowl
Accessory: Enamel tray + wire
rack
- Combine all the filling ingredients in mixing bowl.
- Slice in back of each croissant and fill with mixture.
- Place 4 croissants on enamel tray on wire rack and cook on Combination: Grill 1 + Simmer microwave for 5-6 minutes. Repeat with the remaining 4 croissants.
Muffin Pizzas
ingredients
Serves 4
150 ml (¼ pt) Passata
100 g (4 oz) garlic sausage, cubed
1 clove of garlic, crushed
1 small onion, diced
4 large muffins, halved
100 g (4 oz) cheese, grated
50 g (2 oz) canned anchovy fillets
black olive garnish
Dish: 1 x Pyrex® mixing bowl
Accessory: Enamel tray + wire
rack
- Place Passata, sausage, garlic and onion in a bowl and mix well.
- Arrange muffin halves, 4 at a time on wire rack on enamel tray and toast on Grill 1 for 4-6 minutes or until browned.
- Spread muffins with the mixture. Top with cheese, anchovies and olives.
- Cook on Combination: Grill 1 + Warm microwave for 4-6 minutes or until cheese has melted and is beginning to brown.
Cheese, Onion and Olive Scones
ingredients
Serves 4
1 medium onion, finely chopped
15 ml (1 tbsp) olive oil
175 g (6 oz) self-raising flour
3 ml (½ tsp) salt
3 ml (½ tsp) mustard powder
3 ml (½ tsp) cayenne pepper
salt and pepper
25 g (1 oz) butter
40 g (1 ½ oz) strong Cheddar
cheese, grated
40 g (1 ½ oz) Parmesan cheese
25 g (1 oz) black olives, stoned and
chopped
1 egg, beaten
45 ml (3 tbsp) milk
1 egg for glazing
Dish: 1 x small Pyrex® bowl
1 x Pyrex ^® mixing bowl
small baking sheet
Accessory: Enamel tray
- Place onion and oil in a bowl. Cover and cook on High microwave for 3 minutes or until softened. Drain.
- Preheat oven on Convection 200 °C with enamel tray.
- Sift together the flour, salt, mustard and cayenne with seasoning. Rub in the butter.
- Mix in onion, cheeses and olives. Beat egg and milk together. Pour into flour mixture and bring to a soft dough.
- On a floured surface roll out dough to approx. 2 cm ( 34 inch) thick. Cut out rounds using a 6 cm (2 12 inch) pastry cutter and brush with beaten egg.
- Place the dough rounds on a lightly greased baking sheet. Place on the enamel tray and cook on Convection 200 °C for 16-20 minutes or until cooked and golden brown.
Brie and Cranberry Crostini
ingredients
Serves 4
1 small baguette, cut into 8 slices
60 ml (4 tbsp) cranberry sauce
175 g (6 oz) brie, sliced
sesame seeds
Dish: none
Accessory: Enamel tray + wire rack
- Place the slices of baguette on the wire rack on enamel tray and cook on Grill 1 for 2-3 minutes or until lightly toasted.
- Turn the slices over and spread each slice with cranberry sauce.
- Top with a slice of brie and sprinkle with sesame seeds.
- Cook on wire rack on enamel tray on Combination: Grill 1 + Simmer microwave for 3-4 minutes or until cheese has started to melt and sesame seeds turn golden.
Croque Monsieur
ingredients
Serves 2
4 slices bread, buttered
5 ml (1 tsp) dijon mustard
2 slices smoked ham
100 g (4 oz) sliced cheese
Dish: none
Accessory: Enamel tray + wire rack
- Place the bread, buttered side up on wire rack on enamel tray and cook on Grill 1 for approx. 3-4 minutes or until browning.
- On 2 slices of the bread, spread the untoasted sides with mustard and top with ham and cheese. Cover with the other slices, browned side up.
- Place back on the wire rack on enamel tray and cook on Combination: Grill 1 + Simmer microwave for 1-2 minutes or until the cheese has melted.
Macaroni Cheese
ingredients
Serves 4
175 g (6 oz) quick cooking macaroni
175 g (6 oz) butter
1 small onion, finely chopped
100 g (4 oz) bacon, chopped
40 g (1 ½ oz) flour
600 ml (1 pt) milk
salt and pepper
5 ml (1 tsp) french mustard
150 g (5 oz) red cheese, grated
30 ml (2 tbsp) fresh brown
breadcrumbs
Dish: 1 x large Pyrex®
casserole dish
1 x large Pyrex® jug
1 x large shallow Pyrex® dish
Accessory: Enamel tray
- Cook macaroni in large casserole dish in 450 ml ( 34 pt) boiling water. Cover and cook on High microwave for 5-6 minutes or until soft. Drain.
- Place butter, onion and bacon in a jug. Cover. Cook on High microwave for 5 minutes or until onion is soft. Stir halfway through cooking.
- Stir in flour and cook for 30 seconds on High microwave.
- Gradually add milk, stir well and season. Cook on High microwave for 5-6 minutes or until sauce is thick and bubbling. Stir twice during cooking.
- Add mustard and 100 g (4 oz) grated cheese. Place the macaroni in a large shallow dish. Add sauce and mix well. Sprinkle with breadcrumbs and remaining cheese.
- Place on enamel tray and cook on Combination: Convection 220 °C + Low microwave for 10-12 minutes or until cheese starts to melt.
Vegetables and Vegetarian
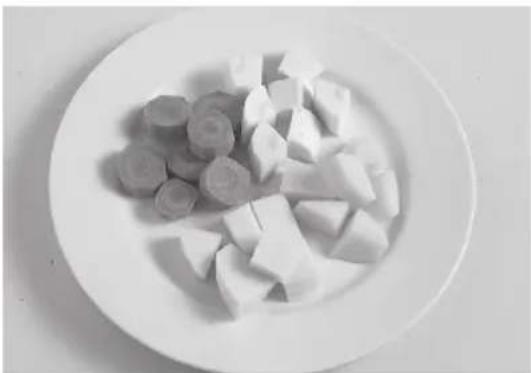
natural_image
Plate of diced white and gray food items on a plain surface (no text or symbols visible)- Root vegetables. i.e. carrots, swede, should be cut into slices, strips or cubes.
- Do not mix fresh and frozen vegetables as the cooking times may be different.
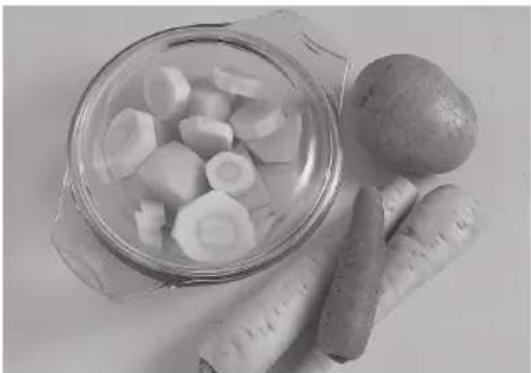
natural_image
Black-and-white photo of sliced radishes in a glass bowl, with whole root and carrot on the side (no text or symbols visible)• If cooking potatoes with other vegetables, only cook with other root vegetables.
- Never add salt to vegetables before microwaving. Remember the flavour of microwaved vegetables is much better than boiled.
natural_image
Plate of shredded food item, possibly a pastry or salad, with no visible text or symbols- Cabbage should be shredded and cooked by High microwave. Approx. 500 g for 12-14 minutes with 75 ml (5 tbsp) water.
- Fresh vegetables require 15 ml (1 tbsp) of water per 100 g vegetables. Cover with pierced cling film or lid and stir halfway.
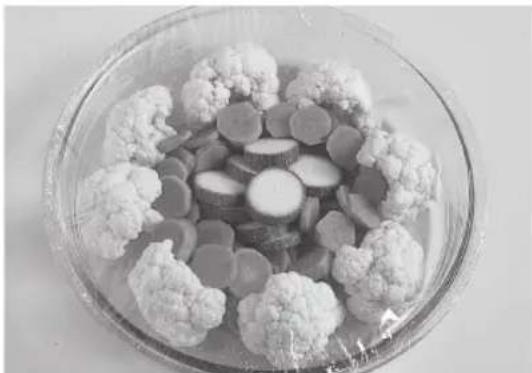
natural_image
Top-down view of a glass bowl containing various types of cauliflower slices (no text or symbols visible)• Always cook vegetables in a dish that is a suitable size. Use flat dishes not basins. Always cover with microwave cling film or a lid.
Vegetables and Vegetarian
natural_image
Top-down view of six broccoli pieces in a clear glass dish (no text or symbols visible)- Certain vegetables i.e. broccoli and asparagus, should be arranged so that the tips are in the centre of the dish as these require less cooking.
natural_image
Close-up of a glass bowl containing a creamy, flower-like dessert with visible toppings and a central flower (no text or symbols)• Whole cauliflower should be cooked upside down on Medium microwave for 10 minutes. approx. with 90 ml (6 tbsp) water.
Jacket Potatoes
Varieties of potatoes vary in their suitability for cooking by microwave. We recommend Maris Piper for consistently good results. The cooking times given may need adjustment for other varieties. The ideal size of potato to be cooked by microwave is 200 g - 250 g (7-9 oz).
Before Cooking
Wash potatoes and prick skins several times. Spread around edge of turntable.
After Cooking
Remove from oven and wrap in aluminium foil to retain the heat. Leave to stand for 5 minutes.
natural_image
Three round potatoes on a petri dish with a fork inserted, one partially submerged in ice (no text or symbols visible)
natural_image
Two wrapped chocolate candies with foil covering them, one open showing a round, textured substance (no text or symbols visible)Vegetable Chilli
ingredients
Serves 4
15 ml (1 tbsp) olive oil
1 onion, finely chopped
1 green pepper, deseeded, chopped
1 chilli, chopped
2 carrots, diced
5 ml (1 tsp) chilli powder
3 ml (½ tsp) cumin
175 g (6 oz) bulgar wheat
400 g (14 oz) canned chopped
tomatoes
400 g (14 oz) canned red kidney
beans, drained
450 ml (¾ pt) water
Dish: 1 x large Pyrex® casserole
dish with lid
Accessory: none
-
Place oil, onion, pepper, chilli and carrots in a large casserole, cover and cook on High microwave for 4-5 minutes or until softened.
-
Add chilli powder and cumin. Stir in bulgar wheat, chopped tomatoes, tomato purée, red kidney beans and water. Cover and cook on High microwave for 10-15 minutes.
Leek and Potato Gratin
ingredients
Serves 4
450 g (1 lb) leeks deseeded,
thinly sliced
450 g (1 lb) potatoes, thinly sliced
150 g (5 oz) blue cheese
225 g (8 oz) Greek yoghurt
75 ml (5 tbsp) double cream
50 g (2 oz) brown breadcrumbs
salt and pepper
Dish: 1 x large Pyrex® bowl
1 x small mixing bowl
1 x 25 cm (10 inch) Pyrex® flan dish
Accessory: Enamel tray
-
Place the vegetables in large bowl. Add 90 ml (6 tbsp) of water, cover and cook on High microwave for 10-12 minutes or until the vegetables are softened.
-
Crumble or finely chop the cheese into a bowl and gradually blend in the yoghurt and the double cream.
-
Drain the vegetables and arrange in a flan dish. Season and pour over the blue cheese cream mixture. Sprinkle with breadcrumbs, place on enamel tray and cook on Combination: Convection 220 °C + Low microwave for 10-12 minutes or until golden brown.
Roast Vegetable Parcels
ingredients
Serves 4
450 g (1 lb) mixed vegetable e.g.
sweet potato, red pepper, leeks,
aubergine, coutgettes, onion,
chopped
1 clove of garlic, crushed
30 ml (2 tbsp) olive oil
200 g (7 oz) canned chopped
tomatoes
50 g (2 oz) Gruyère cheese, grated
100 g (4 oz) Boursin ^3 cheese
15 ml (1 tbsp) single cream
225 g (8 oz) ready made puff pastry
1 egg for glazing
Dish: 1 x large mixing bowl
1 x large Pyrex® bowl
1 x small mixing bowl
Accessory: Enamel tray
- Preheat oven Convection 220 °C with enamel tray. Chop vegetables into 2 ½ cm (1 inch) chunks.
- Add garlic and oil, mix thoroughly with mixed vegetables. Place onto enamel tray.
- Cook on Convection 220 °C for 20-25 minutes until vegetables are browned and al dente.
- Place the chopped tomatoes and purée in a heatproof bowl uncovered and cook on High microwave for 5 minutes then Medium microwave for 5 minutes or until mixture is reduced in volume and thickened.
- Mix the tomato sauce with the cooked vegetables and pine nuts.
- Mix together the Gruyère cheese, Boursin ^® and single cream.
- Roll out pastry until it measures approx 40 cm (16 inch) square. Divide into 4 equal squares.
- Place 14 of the vegetable mixture in the centre of the square and top with 14 of the cheese mixture.
- Bring the corners of the pastry to the centre, pressing the edges together. Seal with water. Glaze with beaten egg.
- Cook in a preheated oven on Convection 220 °C for 15-20 minutes or until golden and cooked through.
Vegetable Lasagne
ingredients
Serves 4-6
1 large onion, chopped
25 g (1 oz) butter
1 clove of garlic, crushed
225 g (8 oz) carrots, diced
225 g (8 oz) leeks, chopped
225 g (8 oz) courgettes, diced
1 green pepper, chopped
150 ml (¼ pt) hot vegetable stock
salt and pepper
300 ml (½ pint) prepared tomato sauce
175 g (6 oz) fresh lasagne sheets
225 g (8 oz) Mozzarella cheese
Dish: 1 x large Pyrex® casserole dish with lid
1 x Pyrex® rectangular dish
Accessory: Enamel tray
-
Place onion and butter in a casserole dish, cover and cook on High microwave for 3 minutes. Add vegetables and stock, cover and cook on High microwave for 8-10 minutes or until vegetables are soft, drain. Season to taste.
-
Cover base of rectangular dish with a thin layer of tomato sauce, then a layer of lasagne on top followed by a layer of vegetable mixture. Thinly slice 175 g (6 oz) of the cheese and layer on top of vegetables. Continue layering until ingredients are all used ending with a tomato sauce layer.
-
Grate remaining cheese and arrange over top. Cook on enamel tray on Combination: Convection 190 °C + Simmer microwave for 20-25 minutes or until the pasta is cooked.
Goat's Cheese Tart with Roasted Vegetables
ingredients
Serves 4
100 g (4 oz) butter
225 g (8 oz) plain flour
50 g (2 oz) Parmesan cheese, grated finely
1 red pepper, diced into 4 cm
(1 ½ inch) pieces
1 yellow pepper, diced into 4 cm
(1 ½ inch) pieces
2 medium courgettes, sliced
100 g (4 oz) auberbine, diced into
4 cm (1 ½ inch) pieces
15 ml (1 tbsp) olive oil
100 g (4 oz) soft goat's cheese
3 eggs, beaten
15 ml (1 tbsp) fresh parsley, chopped
salt and pepper
Dish: 1 x large mixing bowl
1 x 23 cm (9 inch) flan dish
1 x Jug
Accessory: Enamel tray
-
Preheat the oven on Convection 200 °C.
-
Rub the butter into the flour until the mixture resembles fine breadcrumbs. Stir in the parmesan, add 2-3 tbsps (30-45 ml) cold water and mix to a firm dough.
-
Roll out and line the flan dish. Prick the base with a fork and allow to rest for 15 minutes.
-
Cover the pastry with greaseproof, add baking beans and cook on enamel tray on Convection 200 °C for 10 minutes. Remove the paper and beans and cook for a further 5 minutes or until cooked. Allow to cool.
-
Place the prepared vegetables on enamel tray and drizzle with olive oil. Cook on Combination: Grill 1 + Simmer microwave for 10-12 minutes or until lightly browned. Turn halfway during cooking.
-
Place the vegetables in the flan case and dot teaspoons of the goat's cheese around the vegetables.
-
Beat together the eggs and creme fraiche until smooth, add the parsley and seasoning. Pour carefully over the filling.
-
Place on enamel tray and cook on Combination: Convection 190 °C + Warm microwave for 20-23 minutes or until set and lightly browned.
Roast Potatoes
ingredients
Serves 4
450 g (1 lb) potatoes,
25 g (1 oz) butter
30 ml (2 tbsp) oil
Dish: none
Accessory: Enamel tray
-
Peel and cut potatoes into quarters. Par boil and drain (see page 80).
-
Place potatoes, oil and butter on enamel tray.
-
Cook on Combination: Convection 220 °C + Warm microwave for 25 minutes turning and basting potatoes during cooking, or until crisp and brown.
Stuffed Peppers
ingredients
Serves 6
3 red peppers
3 yellow peppers
1 bunch spring onions, thinly sliced
30 ml (2 tbsp) olive oil
50 g (2 oz) pine nuts
2 cloves of garlic, crushed
100 g (4 oz) long grain rice
300 ml (½ pint) hot vegetable stock
100 g (4 oz) cherry tomatoes, halved
100 g (4 oz) mozzarella, diced
100 g (4 oz) gorgonzola or any
blue cheese, diced
1 handful parsley, finely shredded
1 handful basil, finely shredded
Dish: 1 x large Pyrex® casserole dish
1 x large Pyrex® rectangular dish
Accessory: Enamel tray
- Slice the tops off the peppers and put to one side. Remove the seeds and rinse out.
- Place the spring onions, oil, garlic and pine nuts into in a casserole dish and stir together. Cook on High microwave for 2 minutes.
- Add rice and hot stock. Cover and cook on High microwave for 10 minutes.
- Allow to cool slightly and then stir in the cherry tomatoes, mozzarella, gorgonzola, parsley and basil. Season well.
- Spoon the stuffing into the peppers and arrange them closely together in the rectangular dish.
- Place on enamel tray and cook on Combination: Convection 220 °C + Simmer microwave for 10 minutes.
- Place tops back on peppers and cook on Combination: Grill 1 + Simmer microwave for a further 8-10 minutes.
Cauliflower Cheese
ingredients
Serves 4
1 cauliflower
90 ml (6 tbsp) water
25 g (1 oz) butter
25 g (1 oz) flour
3 ml (½ tsp) french mustard
300 ml (½ pt) milk
salt and pepper
Topping:
75 g (3 oz) red cheese, grated
15 ml (1 tbsp) brown breadcrumbs
Dish: 1 x large Pyrex® casserole dish with lid
1 x Pyrex ^® jug
1 x medium Pyrex® gratin dish
Accessory: Enamel tray
- Place cauliflower florets in a bowl. Add water. Cover and cook on Medium microwave for 10 minutes or until tender. Drain.
- Melt butter on High microwave for 30-50 seconds in a Pyrex ^® jug. Stir in flour and mustard. Cook for a further 30 seconds. Add milk gradually. Stir well and season.
- Cook on High microwave for 2-3 minutes or until sauce is thick and bubbling. Stir once halfway during cooking. Stir in 60 g (4 tbsp) grated cheese.
- Place cauliflower in gratin dish and pour over sauce. Top with remaining cheese and breadcrumbs.
- Place on enamel tray and cook on Combination: Convection 220 °C + Warm microwave for 15-17 minutes or until golden brown.
Spicy Potatoes
ingredients
Serves 4
350 g (12 oz) potatoes
45 ml (3 tbsp) natural yoghurt
10 ml (2 tsp) mango chutney
3 ml (½ tsp) cumin
3 ml (½ tsp) corriander
3 ml (½ tsp) tumeric
3 ml (½ tsp) garam marsala
10 ml (2 tsp) fresh corriander
pinch chilli powder
15 g (½ oz) sultanas
salt and pepper
Dish: 1 x 1.5 litre (2 pt) Pyrex® casserole dish with lid
1 x Pyrex® mixing bowl
Accessory: none
- Cut the potatoes into large cubes and place in a large bowl with 6 tbsp (90 ml) water. Cover and cook on High microwave for 6-8 minutes or until soft. Drain and set aside.
- Mix the remaining ingredients together. Add the potatoes and mix well. Serve either hot or cold.
Sauces
Container Size
Always use a container or jug at least twice the capacity of the sauce, to avoid boiling over.
Covering
Do not cover sauces when cooking.

Caution!
Sauces/gravy should be thoroughly stirred before, during and after cooking, to avoid any eruptions and to result in a smooth sauce.
Reheating
Sauces can be made in advance and reheated by microwave. Reheat on High microwave and stir halfway.
Wooden Spoons
Do not leave wooden spoons in the sauce when cooking. The wood may dry out and burn. Never leave metal spoons in the sauce.
White Sauce
ingredients
30 g (1 oz) butter, room temperature
30 g (1 oz) flour
600 ml (1 pt) whole milk
Variations:
parsley, onion, cheese
15 ml lemon juice
Dish: 1 x 1 litre (1 3/4 pt) Pyrex® jug
Accessory: none
- Melt butter in jug on High microwave for 20-40 seconds.
- Stir in the flour to make a roux.
- Add the milk gradually stirring continuously until well combined.
- Cook for 2 minutes on High microwave. Stir and cook for a further 3 minutes. Sauce should be smooth and glossy and coat the back of a spoon.
Variations of White Sauce:
Parsley
Stir 60 ml (4 tbsp) chopped parsley and 15 ml (1 tbsp) lemon juice into sauce halfway through cooking time.
Onion
Cook 1 small onion in the butter for 30 seconds on High microwave before adding the flour and milk.
Cheese
Stir in 75 g (3 oz) grated cheese at the end of cooking time.
Custard
ingredients
30 ml (2 tbsp) custard powder
15 ml (1 tbsp) sugar
600 ml (1 pt) whole milk
Dish: 1 x 1 litre (1 34 pt) Pyrex® jug
Accessory: none
- Mix together the custard powder, sugar and a little milk to form a smooth paste.
- Blend in the remaining milk, whisking well.
- Cook on High microwave for 4-6 minutes. Whisk well halfway through cooking time and again at the end.
Hollandaise Sauce
ingredients
3 egg yolks
30 ml (2 tbsp) white wine vinegar
100 g (4 oz) unsalted butter,
chilled and cubed
pepper
Dish: 1 x 1 litre (1 34 pt) Pyrex® jug
Accessory: none
-
Place egg yolks and vinegar in a jug. Beat well.
-
Drop cubes of butter on top. Cook on High microwave for 20 seconds.
-
Whisk. Cook on High microwave for 10 seconds.
-
Whisk again and cook on High microwave for 10 seconds. Repeat in 10 second stages until sauce is thick and creamy.
-
Season and serve immediately with salmon steaks or asparagus spears.
N.B. This sauce must not boil or eggs will curdle.
Chocolate Sauce
ingredients
25 g (1 oz) butter
75 g (3 oz) caster sugar
75 g (3 oz) soft brown sugar
50 g (2 oz) cocoa powder
3 ml (½ tsp) vanilla essence
300 ml (½ pt) milk
Dish: 1 x 1 litre (1 ¾ pt) Pyrex® jug
Accessory: none
-
Melt butter in a Pyrex ^® jug on High microwave for 30-50 seconds.
-
Stir in sugars, cocoa powder and vanilla essence.
-
Gradually add milk, stirring well.
-
Cook on High microwave for 2 minutes. Stir well. Repeat this again three more times or until you achieve a smooth and glossy consistency that coats the back of a spoon.
Pepper Sauce
ingredients
1 onion, chopped
40 g (1 ½ oz) butter
30 g (1 oz) flour
2 stock cubes
15 ml (1 tbsp) tarragon vinegar
10 ml (2 tsp) white pepper
15 ml (1 tbsp) cognac
Dish: 1 x large Pyrex® bowl
Accessory: none
-
Cook the onion in the bowl with butter for 2-3 minutes on High microwave.
-
Add flours, mix, cook again for 1 minute on High microwave and add 400ml (2/3 pt) of hot water, 2 stock cubes, vinegar and white pepper. Cook uncovered at High microwave for 3 minutes.
-
Remove from the oven and add cognac and crème fraiche. Mix well.
Roquefort Sauce
ingredients
50 g (2 oz) Roquefort cheese
200 ml (1/3 pt) single cream
30 ml (2 tbsp) cornflour
salt and pepper
Dish: 1 x 500 ml Pyrex® bowl
Accessory: none
-
Cut the Roquefort into pieces, place in a bowl and melt using Medium microwave for 1 minute 30 seconds.
-
Add the cream and cornflour mixed with 15 ml (1 tbsp) water. Cook on High microwave for 3-3 minutes 30 seconds, whisk halfway through the cooking time. Check the seasoning before serving.
BakerJainPsthypoly pudding
ingredients
225 g (8 oz) self-raising flour
3 ml ( 12 tsp) salt
100 g (4 oz) shredded suet
105 ml (7 tbsp) cold water
Dish: 1 x large Pyrex ^® mixing bowl
Accessory: none
- In Pyrex ^® mixing bowl, mix together flour, salt and suet.
- Add water and mix to a soft dough. Knead lightly until smooth.
Baked Jam Roly Poly Budding
ingredients
Serves 4
1 quantity of suet pastry (as above)
75 ml (5 tbsp) seedless
raspberry jam
milk to glaze
Dish: 1 x 1 kg (2 lb) Pyrex® loaf dish
Accessory: Enamel tray
- Roll out pastry to approx. 23 x 32 cm (9 x 13 inch).
- Spread the jam over the pastry leaving 1 cm ( 12 inch) border all round. Brush the edges with milk and roll the pastry up evenly, starting at one short side and sealing the edges.
- Brush top with milk and place in loaf dish. Preheat oven with enamel tray on Convection 210 °C. Cook on Combination: Convection 220 °C + Simmer microwave for 15-18 minutes or until golden.
Apple Strudel
ingredients
Serves 4
600 g (1 lb 5 oz) granny smiths
apples, peeled, cored and sliced
12 lemon, juiced
50 g (2 oz) golden caster sugar
50 g (2 oz) walnuts, roughly chopped
50 g (2 oz) sultanas
5 ml (1 tsp) ground cinnamon
50 g (2 oz) ground almonds
6 sheets filo pastry
50 g (2 oz) butter, melted
icing sugar to serve
Dish: 1 x Pyrex® mixing bowl
baking sheet
Accessory: Enamel tray
- Preheat the oven on Convection 180 °C with enamel tray.
- Put the apples and lemon juice into a bowl and toss together.
- Add the sugar, walnuts, sultanas, cinnamon and almonds and mix together.
- Take three sheets of filo pastry and brush with melted butter. Place each one with the shortest edge towards you. Overlap the 2nd sheet onto the 1st sheet by 5-6 cm (2-2 ½ inch) along the long edge and repeat with the 3rd sheet overlapping the second.
- Place three more sheets of filo on top, in the same way as in step 4.
- Spread the apple filling along the front edge of the filo pastry just 2.5 cm (1 inch) from the edge and 2.5 cm (1 inch) from each side.
- Fold the sides in over the filling and brush with butter. Roll up from the long front edge buttering the final long edge to seal the strudel.
- Place on baking sheet, seam-side down. Brush with melted butter.
- Cook on Convection 180 °C for 30-35 minutes. Dust with icing sugar to serve.
Baking Guidelines
Covering
For traditional cakes, with long cooking times, baked on convection mode only, it is necessary to cover the top of the tin with foil 10-15 mins. after the start of baking. This is not applicable to any of the recipes in this section.
Dish Size/Shape
Always use the exact dish size stated in the following recipes, otherwise cooking times and results will be affected.
Mixing/Beating
Cakes cooked by microwave need to be well mixed, but not over beaten. Generally it is unnecessary to cream butter and sugar
or beat eggs in an electric mixer or food processor. Do not attempt to cook whisked/fatless sponges, or any cakes containing whisked egg white.
Eggs
The following recipes have been tested using medium eggs. Using a different size of egg may affect cooking times.
Combination Cooking
Do not use spring form tins, use smooth, and preferably seamless metal cake tins.
Carrot Cake
ingredients
2 eggs, beaten
150 ml (¼ pt) vegetable oil
150 g (5 oz) self raising
wholemeal flour
100 g (4 oz) soft light brown sugar
10 ml (2 tsp) cinnamon
75 g (3 oz) raisins
100 g (4 oz) carrots, grated
Icing:
50 g (2 oz) cream cheese
50 g (2 oz) butter
100 g (4 oz) icing sugar
10 ml (2 tsp) lemon, juiced
50 g (2 oz) walnuts, chopped
Dish: 1 x large mixing bowl
1 x 18 cm (7 inch) souffle dish lined
with greaseproof paper
1 x medium mixing bowl
Accessory: Enamel tray
-
Mix eggs and oil together.
-
Combine flour, sugar, cinnamon, raisins and carrots in a mixing bowl and pour egg mix into flour and stir well.
-
Pour into dish and cook on the enamel tray on Combination: Grill 3 + Low microwave for 8 minutes.
-
For the icing: beat cream cheese and butter together and gradually add icing sugar and lemon juice. Decorate the cake with icing and sprinkle with walnuts.
Ginger Cake
ingredients
100 g (4 oz) butter
100 g (4 oz) golden syrup
100 g (4 oz) black treacle
75 g (3 oz) soft brown sugar
100 g (4 oz) self raising flour
100 g (4 oz) plain flour
5 ml (1 tsp) mixed spice
10 ml (2 tsp) ground ginger
5 ml (1 tsp) bicarbonate of soda
pinch salt
150 ml (¼ pt) milk
2 eggs, beaten
Dish: 1 x small Pyrex® bowl
1 x large mixing bowl
1 x 20 cm (8 inch) square
Pyrex® dish
Accessory: none
-
Place butter, syrup, treacle and sugar in a bowl and heat on High microwave for 1-2 minutes or until fat has melted
-
Place flour, spices, bicarbonate of soda and salt in a large bowl. Stir in treacle mixture and mix well. Stir in milk and eggs and beat until smooth.
-
Pour into square dish and cook on Medium microwave for 8-9 minutes or until set around the edges. The cake will appear slightly wet in the centre, but will continue cooking as it cools.
Chocolate and Almond Cake
ingredients
100 g (4 oz) butter
100 g (4 oz) caster sugar
2 eggs, lightly beaten
100 g (4 oz) self raising flour
50 g (2 oz) cocoa powder
50 g (2 oz) ground almonds
100 ml (3 ½ fl. oz) whole milk
60 ml (4 tbsp) golden syrup
Topping:
50 g (2 oz) butter
25 g (1 oz) cocoa powder, sifted
200 g (7 oz) icing sugar
5 ml (1 tsp) milk
Dish: 1 x 20 cm (8 inch) Pyrex®
souffle dish, greased and lined
2 x large Pyrex® mixing bowls
Accessory: none
-
Cream together butter and sugar. Gradually add egg. Add flour, cocoa powder, ground almond, milk then syrup.
-
Pour into a Pyrex ^ dish. Cook on Medium microwave for 8 minutes.
-
Cream butter until soft and gradually add cocoa powder and icing sugar. Lastly adding milk as required.
Fruit Cake
ingredients
175 g (6 oz) butter
175 g (6 oz) dark brown sugar
1 lemon, grated
3 eggs, beaten
225 g (8 oz) plain flour
10 ml (2 tsp) ground spice
225 g (8 oz) raisins
225 g (8 oz) sultanas
50 g (2 oz) glace cherries
50 g (2 oz) chopped mixed nuts
15 ml (1 tbsp) treacle
45 ml (3 tbsp) brandy
Dish: 1 x Pyrex® mixing bowl
1 x 20 cm (8 inch) soufflé dish
greased and lined
Accessory: none
-
Cream butter and sugar until light and fluffy. Mix in the lemon rind. Beat in the eggs
-
Fold in the flour, spice and the rest of the ingredients. Spoon mixture into souffle dish
-
Cook on Low microwave for 20 minutes.
Pineapple, Cinnamon and Raisin Muffins
ingredients
Makes 12
100 g (4 oz) self raising flour
100 g (4 oz) wholemeal
self-raising flour
3.75 ml (¾ tsp) bicarbonate of soda
pinch salt
5 ml (1 tsp) ground cinnamon
150 ml (¼ pt) sunflower oil
2 eggs
75 g (3 oz) golden caster sugar
125 g (4 ½ oz) carrots, grated
225 g (8 oz) canned pineapple
chunks, crushed
100 g (4 oz) raisins
Dish: 2 x medium Pyrex® bowls
2 x 6 hole muffin tin
12 muffin cases
Accessory: Enamel tray
-
Preheat the oven on Convection 180 °C with enamel tray.
-
Sieve the flours, bicarbonate of soda, salt and cinnamon into a bowl.
-
In a separate bowl, beat together the oil, eggs and sugar. Add the grated carrot, crushed pineapple and raisins.
-
Pour the oil mixture into the flour mixture and stir together until just blended.
-
Put the mixture into the individual muffin tins lined with muffin cases, cook on enamel tray in two separate batches on Convection 180 °C for 20-25 minutes per batch.
Chocolate Saucy Pudding with Toffee Sauce
ingredients
75 g (3 oz) plain chocolate
30 ml (2 tbsp) milk
175 g (6 oz) margarine
175 g (6 oz) light muscovado sugar
2 eggs
150 g (5 oz) fresh white breadcrumbs
30 ml (2 tbsp) cocoa powder
Sauce:
225 g (8 oz) vanilla flavoured toffees
150 ml (¼ pt) milk
15 g (½ oz) butter
Dish: 1 x 1.2 litre (2 pt) pudding basin
1 x small Pyrex® bowl
1 x large mixing bowl
1 large Pyrex® jug
Accessory: none
- Line the base of a 1.2 litre (2 pt) pudding basin with a circle of greaseproof paper.
- Melt the chocolate with the milk in a small Pyrex ^® bowl on Medium microwave for 2-3 minutes and mix until smooth.
- Mix the margarine and sugar together, add the cooled chocolate and eggs.
- Add the breadcrumbs and cocoa powder and mix well. Fill the basin with the mixture and cook on High microwave for 6-7 minutes or until cooked. Leave to stand for 5 minutes before turning out.
- Meanwhile, prepare the sauce by combining all ingredients in a large jug and cook on High microwave for 2-3 minutes or until smooth. Stir vigorously and pour over the pudding.
Plum and Oat Layer
ingredients
Makes 8 slices
100 g (4 oz) butter or margarine
50 g (2 oz) light brown sugar
30 ml (2 tbsp) golden syrup
225 g (8 oz) rolled oats
450 g (1 lb) plums, stoned and
thinly sliced
5 ml (1 tsp) ground cinnamon
Dish: 1 x large Pyrex ^® bowl
1 x 20 cm (8 inch) ceramic flan dish
Accessory: Enamel tray
- Place the butter, sugar and syrup in a bowl. Cook on High microwave for 1-2 minutes or until melted. Stir in the rolled oats.
- Spread half the oat mixture into the dish. Arrange the plums over the top in overlapping rows and sprinkle with cinnamon.
- Sprinkle the remaining oat mixture over the plums and gently press down.
- Cook on enamel tray on Combination: Convection 220 °C + Low microwave for 8-10 minutes or until the mixture is firm and golden brown.
- Cut into slices while hot, then allow to cool in the dish.
Steamed Suet Sponge Pudding
ingredients
Serves 4
150 g (5 oz) self-raising flour
pinch salt
50 g (2 oz) caster sugar
50 g (2 oz) suet
1 egg
150 ml (¼ pt) milk
30 ml (2 tbsp) jam or golden syrup
Optional:
10 ml (2 tsp) sultanas, optional
Dish: 1 x Pyrex® mixing bowl
1 x 1 litre (1 3/4 pt) Pyrex®
pudding basin
Accessory: none
- In a mixing bowl, sift together the flour and salt. Stir in sugar and suet. Add the sultanas if desired.
- Make a well in the centre and add beaten egg and milk. Mix to a soft dropping consistency.
- Put the jam in the base of the greased pudding basin and pour pudding mixture over. Cook on High microwave for 5-5 minutes and 30 seconds or until firm.
Bread and Butter Pudding
ingredients
Serves 4
6 slices bread, buttered and cut in half diagonally
75 g (3 oz) mixed dried fruit
450 ml (¾ pt) milk
3 eggs
25 g (1 oz) caster sugar
3 ml (½ tsp) nutmeg
Dish: 1 x Pyrex® dish 20 x 25 cm
(8 x 10 inch) greased
1 x large Pyrex® bowl
1 x mixing bowl
Accessory: Enamel tray
- Arrange the bread and fruit in the prepared dish.
- Warm the milk for 3 minutes on Medium microwave but do not allow to boil.
- Beat together the eggs and sugar, add the milk, stirring well.
- Pour the mixture over the bread, sprinkle with nutmeg and leave to stand for 15 minutes. Cook on enamel tray on Combination: Convection 190 °C + Simmer microwave for 20-25 minutes or until set and browned.
Christmas Pudding
ingredients
Serves 6-8
1 cooking apple, peeled and grated
1 carrot, peeled and grated
1 orange, juice and grated rind
400 g (14 oz) mixed dried fruit
45 ml (3 tbsp) brandy
15 ml (1 tbsp) black treacle
50 g (2 oz) self-raising flour
pinch salt
15 ml (1 tbsp) cocoa
5 ml (1 tsp) mixed spice
3 ml (½ tsp) nutmeg
100 g (4 oz) shredded suet
150 g (5 oz) fresh breadcrumbs
50 g (2 oz) mixed peel
50 g (2 oz) flaked almonds
2 eggs, beaten
Dish: 1 x large Pyrex® bowl
1 x 1.3 litre (2 ½ pt) Pyrex®
pudding basin lightly greased
Accessory: none
- Place apple and carrot in a large bowl. Cover and cook on High microwave for 5 minutes. Beat well to make a thick purée.
- Stir in juice, rind and mixed fruit. Cook on High microwave for 2 minutes. Stir in brandy and treacle. Stand for 5 minutes. Beat in rest of ingredients.
- Press into a lightly greased pudding basin. Cover with greaseproof paper and cook on High microwave for 4 minutes. Stand for 5 minutes. Cook on High microwave for another 2 minutes or until just firm.
N.B. One of the advantages of using your microwave to make this traditional pudding is that it can be made the week before Christmas and stored in a cool dry place. Do not attempt to make the pudding earlier than this, since the flavour will not improve with keeping, unlike a traditionally steamed pudding.
Baked Apples
ingredients
Serves 4
4 medium sized apples
30 ml (2 tbsp) caster sugar
25-50 g (1-2 oz) mixed dried fruit
25 g (1 oz) butter
Dish: 1 x Pyrex® mixing bowl,
1 x 20 cm (8 inch) Pyrex®
shallow dish
Accessory: none
- Core the apples and score the skin around the middle.
- Mix together the sugar and fruit and fill the centres of the apples.
- Dot the top with butter. Stand the apples in a shallow dish and cook on High microwave for 5 minutes 30 seconds - 7 minutes. Stand for 5 minutes before serving.
N.B. The apples will look quite green when removed from the oven, but they should feel slightly soft when tested with a sharp knife. During the standing time, the colour will become dull and the apples will be tender. The apples will overcook very easily, so take care to undercook slightly. For 1 baked apple cook for 2-3 minutes. For 2 baked apples cook for 3-5 minutes.
Chocolate Brownies
ingredients
Serves 9
125 g (4 ½ oz) butter
200 g (7 oz) dark chocolate
(72 % cocoa solids)
175 g (6 oz) soft brown muscovado
2 eggs, beaten
sugar
a few drops vanilla essence
50 g (2 oz) plain flour
5 ml (1 tsp) baking powder
Dish: 1 x small Pyrex® bowl
1 x Pyrex® mixing bowl
23 cm (9 inch) Pyrex® square dish
Accessory: Enamel tray
- Melt the butter with 50 g (2 oz) of the chocolate in a small bowl on Medium microwave for 2 minutes.
- Put the eggs, sugar and vanilla essence in a bowl, then sift in the flour and baking powder.
- Stir in the melted chocolate and butter mixture and mix well.
- Chop the remaining chocolate into rough chunks and stir into the brownie mixture.
- Spoon into the dish, spread evenly and cook on enamel tray, Combination: Convection 220 °C + Simmer microwave for 9-12 minutes or until firm.
Fruit Scones
ingredients
Serves 10
225 g (8 oz) self-raising flour
pinch salt
5 ml (1 tsp) baking powder
50 g (2 oz) butter
25 g (1 oz) caster sugar
50 g (2 oz) sultanas
100 ml (2 ½ fl. oz) whole milk
1 egg for glazing
Dish: 1 x Pyrex® mixing bowl
1 x small baking sheet
Accessory: Enamel tray
- Preheat oven on Convection 210 °C with enamel tray.
- Sift the flour, salt and baking powder together. Rub in fat until the mixture resembles fine breadcrumbs. Add sugar and sultanas.
- Make a well in the centre and stir in enough milk to form a soft dough.
- Knead lightly. Pat out to 2 cm (3/4 inch) thick and cut into 10 rounds with a 5 cm (2 inch) cutter. Place on baking sheet, brush with beaten egg and cook on Convection 210 °C for 10-15 minutes or until well risen and golden brown.
Red Fruit Compote
ingredients
Serves 4
225 g (8 oz) plums, halved
225 g (8 oz) cherries, stoned
225 g (8 oz) blueberries
225 g (8 oz) strawberries, halved
225 g (8 oz) raspberries, halved
50 g (2 oz) golden caster sugar
Dish: 1 x large Pyrex® shallow dish
Accessory: none
- Place the plums, cherries and blueberries in a shallow dish. Cook on Low microwave for 10 minutes.
- Stir in the strawberries and cook on Low microwave for a further 5-6 minutes.
- Stir the raspberries and sugar into the hot fruit and allow to cool before serving.
Streusel Topped Fruit Muffins
ingredients
Makes 12
Streusel topping:
50 g (2 oz) butter
75 g (3 oz) plain flour
30 ml (2 tbsp) granulated sugar
15 ml (1 tbsp) ground mixed spice Muffins:
225 g (8 oz) plain flour
10 ml (2 tsp) baking powder
150 g (5 oz) caster sugar
2.5 ml (½ tsp) salt
½ lemon, grated zest
175 g (6 oz) fresh or frozen berries, raspberries or blueberries
75 g (3 oz) butter
110 ml (6 fl. oz) buttermilk
1 egg, lightly beaten
2.5 ml (½ tsp) vanilla essence
Dish: 1 x small Pyrex® bowl,
1 x large mixing bowl,
1 x large Pyrex® bowl,
2 x 6 hole muffin tin,
12 paper muffin cases
Accessory: Enamel tray
- Preheat oven on Convection 180 °C with enamel tray.
- Melt the butter on Medium microwave for 1 minute. Combine the streusel topping ingredients to make a soft dough and reserve. Chill.
- Sift together the flour, baking powder, sugar and salt. Add the lemon rind and the fruit.
- Melt the butter on High microwave for 30 second - 1 minute mix in the buttermilk, egg and vanilla essence. Lightly stir in the flour mixture and divide between 12 muffin cases.
- Crumble small amounts of streusel topping over each muffin and cook in two batches on Convection 180 °C for 22 minutes, until browned and well risen.
Rice Pudding
ingredients
Serves 4
100 g (4 oz) short grain rice
1 litre (1 3/4 pt) whole milk
75 g (3 oz) caster sugar
small piece cinnamon stick
1 vanilla pod, split lengthways
Dish: 1 x large Pyrex® casserole dish with lid
Accessory: none
- Place the rice, milk and sugar into the bowl. Add the cinnamon stick and vanilla pod. Do not cover.
- Bring to the boil by heating on High microwave for 11-12 minutes on the base of the oven, paying close attention to ensure that the milk does not boil over.
- Cook covered with a lid on Simmer microwave for 1 hour. Remove the cinnamon stick and vanilla pod. Leave to cool, serve hot or cold.
Apple Crumble
ingredients
Serves 4-6
700 g (1 lb 9 oz) cooking apples, peeled, cored and roughly chopped
2.5 ml (½ tsp) ground cinnamon
75 g (3 oz) ground almonds
75 g (3 oz) caster sugar
75 g (3 oz) butter
75 g (3 oz) plain flour
40 g (1 ½ oz) brown sugar
Dish: 1 x 24 cm (9 ½ inch)
rectangular dish
1 x Pyrex ^® mixing bowl
Accessory: Enamel tray + wire rack
- Place the apples in the dish with brown sugar and cinnamon and cook on High microwave for 6-9 minutes, uncovered, stirring halfway through the cooking time. Leave to cool.
- In a bowl mix ground almonds, butter, flour and caster sugar, until you obtain a mixture that looks like breadcrumbs. Spread this mixture over the pre-cooked apples.
- Place the dish on the wire rack on enamel tray and cook on Combination: Convection 180 °C + Simmer microwave for 5-7 minutes, or until golden.
Preserves
Sterilizing Jars
Jam jars can be sterilized by microwave ready for your jams. Half fill with water and heat them on High microwave until water boils (approx. 3 minutes. for 2 jars). Empty and drain upside down on kitchen paper. The jars should be warm when filled with jam.
If you wish to cook larger quantities than given in the recipes below, revert to the traditional hob method, using a traditional recipe.
Dish Size
Always use a very large Pyrex® bowl. Do not attempt to use jam pans or saucepans in your microwave.
Do not leave jams unattended during cooking because of the high sugar content.
Covering
Do not cover preserves whilst cooking, apart from if recommended in the recipe.
We do not recommend that you use your microwave to sterilise babies' bottles.
(See details on page 64)
Do not seal preserving jars in your microwave.
Setting Point
To determine whether setting point is reached, place a couple of drops of jam or marmalade on a cold saucer (put one in the fridge whilst making the jam). Leave to cool. The jam should wrinkle on the surface when your finger pushes across the top.
Soft Fruit Jam
ingredients
Makes approx. 675 g (1 ½ lbs)
450 g (1 lb) soft fruit, washed
450 g (1 lb) caster sugar
30 ml (2 tbsp) lemon, juiced
5 ml (1 tsp) butter
Dish: 1 x large Pyrex® bowl
Accessory: none
-
Place all ingredients in a large bowl and stir. Cook on High microwave for 5 minutes (10-15 minutes if using frozen fruit), stirring frequently. Continue to cook in one minute intervals until sugar has dissolved.
-
Wash down any sugar crystals from around the bowl.
-
Bring mixture to the boil and continue to cook until setting point is reached – approx. 10-20 minutes. Test regularly for setting point.
Lemon Curd
ingredients
Makes approx. 900 g (2 lb)
4 lemons, juice and grated rind
450 g (1 lb) caster sugar
4 eggs, beaten
100 g (4 oz) butter
Dish: 1 x large Pyrex® bowl
Accessory: none
- Place all ingredients in bowl. Mix well.
- Cook on High microwave for 1 minute. Stir. Continue to cook in 1 minute stages until mixture starts to thicken, then cook for 30 seconds at a time until mixture coats back of spoon. (The eggs will curdle if overcooked).
- The mixture will thicken on cooling. Pot into warm jars. Cover with a circle of waxed paper and a jam pot cover.
Orange Marmalade
ingredients
Makes approx. 675-900 g (1 ½ - 2 lbs)
450 g (1 lb) seville oranges 1 lemon
900 ml (1 ½ pt) water
450 g (1 lb) sugar knob of butter
Dish: 2 x large Pyrex® bowl Accessory: none
- Grate oranges and lemon ensuring all the pith is left on the fruit. Set the rind aside.
- Peel the fruit and put it in a food processor and chop until the pips are broken.
- Place the chopped mixture in a large bowl and pour over boiling water. Cover with pierced cling film and cook on High microwave for 10 minutes.
- Strain the mixture through a sieve into another large bowl pressing the pulp well until all the juice is extracted. Discard the pulp.
- Stir the shredded rind into the hot juice and cook uncovered on High microwave for 10 minutes until rind is tender, stirring occasionally. Stir in the sugar until dissolved.
- Cook on High microwave for 8 minutes covered with pierced cling film. Stir in the butter and cook uncovered until setting point is reached, approx. 18-20 minutes.
- Leave to stand for 10 minutes then pour into warmed sterilized jars.
N.B Do not double this recipe as it will boil over.
Plum Jam
ingredients
Makes approx. 1.5 kg (3 lb 5 oz)
675 g (1 lb 8 oz) plums or damsons, halved, stoned 200 ml (½ pt) cold water 675 g (1 lb 8 oz) jam sugar 30 ml (2 tbsp) lemon juice 5 ml (1 tsp) butter
Dish: 1 x large Pyrex® mixing bowl Accessory: none
- Place plums in a large Pyrex ^® bowl with water.
- CookonMedium microwave for 10 minutes or until fruit is soft.
- Add the remaining ingredients, stir and cook on High microwave for 5 minutes stirring frequently.
- Wash down any sugar crystals from around the bowl.
- Bring mixture to the boil on High microwave, approx. 4-5 minutes.
- Continue to cook on High microwave until setting point is reached approx. 20-25 minutes. Test regularly for setting point.
Junior Menu
This section of recipes are aimed at toddlers and children or may be shared with the whole family. Ideal recipes when little ones are independently feeding themselves, introducing different flavours and textures of food.
Tomato Soup
ingredients
Serves 4
30 ml (2 tbsp) olive oil
1 onion, chopped
1 garlic clove, crushed
200 g (7 oz) carrots, peeled and
chopped
400 g (14 oz) canned chopped tomatoes
200 ml (1/3 pt) passata
400 ml (2/3 pt) vegetable stock
1 bay leaf
1 sprig of fresh thyme
100 ml (4 fl. oz) single cream,
optional
salt and pepper
Dish: 1 x large Pyrex® casserole dish with lid
Accessory: none
-
Place the oil, onion, garlic and carrots in a large casserole dish, cover and cook on High microwave for 5 minutes.
-
Stir in the tomatoes, passata, stock, bay leaf and thyme and cook covered on High microwave for 10 minutes then Simmer microwave for 30 minutes.
-
Remove the bay leaf and thyme, add the cream (if desired) and seasoning, blend in a food processor until smooth.
Frittatta
ingredients
25 g (1 oz) butter
25 g (1 oz) ham, chopped
25 g (1 oz) green pepper,
finely chopped
1 spring onion, sliced
4 eggs, beaten
50 g (2 oz) Cheddar cheese, grated
Dish: 1 x 24 cm (9 ½ inch) flan dish
Accessory: none
-
Place the butter in the flan dish. Melt on Medium microwave for 1 minute.
-
Add the ham, green pepper and spring onions. Cook on High microwave 1-2 minutes.
-
Pour the beaten egg over the top, sprinkle with the cheese.
-
Cook on High microwave for 2 minutes. Leave to stand for 2 minutes before serving
Quesadillas
ingredients
2 flour tortillas
50 g (2 oz) Cheddar cheese, grated
25 g (1 oz) cooked ham, chopped
1 spring onion, sliced
Dish: 1 x dinner plate
Accessory: none
-
Place a tortilla on the plate, place the cheese, ham and onion onto the tortilla. Place the other tortilla on top.
-
Cover with a piece of kitchen roll cook on High microwave for 1-2 minutes.
Individual Fish Pies
ingredients
Serves 6
375 g (13 oz) white potatoes, peeled and chopped
50 g (2 oz) butter
25 ml (1½ tbsp) milk
25 g (1 oz) onion, chopped into small chunks
15 g (1 tbsp) flour
75 g (3 fl. oz) milk
50 g (2 fl. oz) fish stock
125 g (4 ½ oz) white fish fillet, skinned and cut into bite sized pieces
125 g (4 ½ oz) salmon fillet, skinned and cut into bite sized pieces
5 g (1 tsp) fresh parsley, chopped
25 g (1 oz) frozen peas
50 g (2 oz) grated cheese, plus extra for topping
Dish: 2 x medium Pyrex® casserole dish with lid
6 x 8 cm (3 inch) ramekin dishes
Accessory: Enamel tray
-
Place the potatoes into a casserole dish, add 3 tbsp (45 ml) water, cover and cook on High microwave for 7-9 minutes.
-
Drain the potatoes, add half the butter and milk and mash together, leave to one side.
-
Place the remaining butter in a casserole dish with the onion, cover and cook on High microwave for 3 minutes.
-
Mix the flour into the butter and onion. Cook on High microwave for 30 seconds. Gradually stir in the milk and then the stock. Cook on High microwave for 3 minutes.
-
Add the fish and parsley. Cook on Medium microwave for 3 minutes. Stir in the peas and grated cheese.
-
Divide the fish pie mixture between 6 x 8 cm (3 inch) ramekin dishes, top with mashed potato and sprinkle with cheese.
-
Cook the pies on enamel tray on Combination: Grill 1 + Medium microwave for 10-15 minutes or until the cheese is melted and bubbling.
Teryaki Salmon
ingredients
Serves 2-4
200 g (7 oz) salmon fillets, skinned and cut into bite sized pieces
1 cm piece fresh ginger, grated
15 ml (1 tbsp) clear honey
20 ml (1 ½ tbsp) soy sauce
15 ml (1 tbsp) sesame seeds
Dish: 1 x 23 (9 inch) shallow Pyrex® square dish
1 x small Pyrex® mixing bowl
4 bamboo kebab skewers
Accessory: Enamel tray + wire rack
- Thread the salmon onto the wooden skewers, place into a shallow dish.
- Place all the remaining ingredients, except the sesame seeds into a bowl and pour over the salmon, turn the skewers to coat all sides in the sauce.
- Place the dish onto the wire rack on the enamel tray and cook on Grill 1 for 12 minutes. Turn the skewers during cooking.
- Sprinkle the salmon with the sesame seeds once cooked.
Spaghetti Bolognese
ingredients
Serves 6
15 ml (1 tbsp) olive oil
12 onion, chopped
1 small celery, finely diced
1 small courgette, finely diced
1 small carrot, finely diced
1 small apple, grated finely
1 clove of garlic, crushed
225 g (8 oz) lean beef mince
200 g (7 oz) passata
175 g (6 fl. oz) beef or vegetable stock
Dish: 1 x large Pyrex® casserole dish with lid
Accessory: none
- Place the oil, vegetables, apple and garlic into the casserole dish, cover and cook on High microwave for 5 minutes, add the mince, stir and cook on High microwave for another 5 minutes.
- Add the passata, purée and stock to the dish. Mix well and cook on High microwave for 10 minutes then Simmer microwave for a further 10 minutes.
- Purée if necessary to suit the age of the child.
Stuffed Sweet Potatoes
ingredients
Serves 2-4
4 rashers streaky bacon
4 sweet potatoes each
200-250 g (7 oz - 9 oz)
15 ml (1 tbsp) olive oil
3 spring onions, finely sliced
250 g (9 oz) Cheddar cheese, grated
Dish: 1 x microwaveable plate
1 x mixing bowl
Accessory: Enamel tray + wire
rack
- Place the bacon on a microwavable plate, cover with kitchen roll and cook on High microwave for 2 minutes. Leave to one side.
- Cook the sweet potatoes on the auto program jacket potatoes (see page 60). Leave them to cool.
- Slice the sweet potatoes in half lengthways, scoop out the flesh and place into a bowl, add the crème fraiche, spring onions and half the cheese to the bowl, mix together well.
- Spoon the filling back into the potato halves. Chop the bacon and place some on top, followed by the remaining cheese.
- Place the potato halves onto the wire rack on the enamel tray and cook on Grill 1 for 3-6 minutes or until golden brown.
Granola
ingredients
Serves 6-8
175 g (6 oz) oats
120 g (4 ½ oz) soft brown sugar
1.25 ml (¼ tsp) salt
50 g (2 oz) sunflower seeds
25 g (1 oz) desiccated coconut
30 g (2 tbsp) sunflower oil
60 g (4 tbsp) maple syrup
25 g (1 oz) dried cranberries
25 g (1 oz) raisins
25 g (1 oz) dried apricots, finely
chopped
Dish: 1 x medium mixing bowl
Accessory: Enamel tray
-
Preheat the oven on Convection 150 °C with the enamel tray.
-
Mix together the oats, sugar, salt, sunflower seeds and coconut. Mix the oil and maple syrup together and stir thoroughly into the oat mixture.
-
Carefully grease the enamel tray and spread the oat mixture evenly across the tray.
-
Cook on Convection 150 °C for 40-45 minutes, stirring every 10 minutes.
-
Pour the cooked mixture into a bowl and stir in the cranberries, raisins and apricots.
Serving suggestion:
Ideal for breakfast with milk, on its own as a snack or layered with yoghurt, honey and fruit.
Individual Pear, Apple and Raspberry Crumbles
ingredients
Serves 8
Topping
100 g (4 oz) butter,
chilled and cubed
150 g (5 oz) plain flour
75 g (3 oz) golden caster sugar pinch salt
50 g (2 oz) oats
Fruit:
1 apple, peeled and finely chopped
1 pear, peeled and finely chopped
125 g (4 ½ oz) raspberries
30 ml (1 tbsp) caster sugar
Dish: 2 x medium mixing bowl,
8 x 8 cm (3 inch) ramekins
Accessory: Enamel tray
- Make the crumble topping by rubbing the butter into the flour until it resembles fine breadcrumbs. Mix the golden caster sugar, salt and oats into the crumble topping.
- Mix the apple, pear and raspberries with the caster sugar and divide equally between the ramekin dishes and top with the crumble mixture.
- Place the ramekins onto the enamel tray and cook on Combination: 180 °C + Simmer microwave for 15-20 minutes.
Questions and Answers
Q: Why won't my oven turn on?
A: When the oven does not turn on, check the following:
-
Is the oven plugged in securely? Remove the plug from the outlet, wait 10 seconds and reinsert.
-
Check the circuit breaker and the fuse. Reset the circuit breaker or replace the fuse if it is tripped or blown.
-
If the circuit breaker or fuse is all right, plug another appliance into the outlet. If the other appliance works, there probably is a problem with the oven. If the other appliance does not work, there probably is a problem with the outlet.
If it seems that there is a problem with the oven, contact an authorised Service Center.
Q: My microwave oven causes interference with my TV. Is this normal?
A: Some radio, TV, Wi-Fi, cordless telephone, baby monitor, bluetooth or other wireless equipment interference might occur when you cook with the microwave oven. This interference is similar to the interference caused by small appliances such as mixers, vacuums, blow dryers, etc. It does not indicate a problem with your oven.
Q: The oven won't accept my program. Why?
A: The oven is designed not to accept an incorrect program. For example, the oven will not accept a fourth stage of cooking.
Q: Sometimes warm air comes from the oven vents. Why?
A: The heat given off from the food whilst cooking warms the air in the oven cavity. This warmed air is carried out of the oven by the air flow pattern in the oven. There are no microwaves in the air. The oven vents should never be blocked during cooking.
Q: Can I use a conventional oven thermometer in the oven?
A: Only when you are using Grill and Convection cooking mode. The metal in some thermometers may cause arcing in your oven and should not be used on microwave and Combination cooking functions.
Q: There are humming and clicking noises from my oven when I cook by Combination. What is causing these noises?
A: The noises occur as the oven automatically switches from microwave power to Convection/Grill to create the combination setting. This is normal.
Questions and Answers
Q: My oven has an odour and generates smoke when using the Convection, Combination and Grill function. Why?
A: After repeated use, it is recommended to clean the oven and then run the oven without food, glass turntable, and roller ring on grill for 5 minutes. This will burn off any food, residue or oil which may cause an odour and/or smoking.
Q: The oven stops cooking by microwave and 'H97' or 'H98' appears in the display. Why?
A: This display indicates a problem with the microwave generation system. Please contact an authorised Service Centre.
Q: The fan continues to rotate after cooking. Why?
A: After using the oven, the fan motor may rotate to cool the electrical components. This is normal and you can continue using the oven at this time.
Q: "DEMO MODE PRESS ANY KEY" or "D" appears in the display and the oven does not cook. Why?
A: The oven has been programmed in demo mode. This mode is designed for retail store display. Deactivate this mode by pressing Micro Power once and Stop/Cancel 4 times.
Q: Can I check the pre-set oven temperature while cooking or preheating by Convection?
A: Yes. Press Convection pad and the oven temperature will appear in the display window for 2 seconds.
Q: The operation guide has disappeared on my display, I can only see numbers. Why?
A: The operation guide was turned off by pressing Timer/Clock 4 times. When colon or time of day is displayed, press Timer/Clock 4 times to turn the operation guide back on.
Technical Specification
| Manufacturer Panasonic | ||
| Model | NN-CT54JW, NN-CT55JW, NN-CT56JB, NN-CT57JM | |
| Power Supply 230-240 V 50 Hz | ||
| Operating Frequency: 2450 MHz | ||
| Input Power: | Maximum | 2380 W |
| Microwave 1090 W | ||
| Grill | 1370 W | |
| Convection | 1390 W | |
| Output Power: | Microwave 1000 W (IEC-60705) | |
| Grill 1300 W | ||
| Convection 1300 W | ||
| External Dimensions W x D x H (mm) | 520 (W) x 395 (D) x 310 (H) | |
| Interior Dimensions W x D x H (mm) | 359 (W) x 352 (D) x 217 (H) | |
| Uncrated Weight (approx. without accessories) | 13.8 kg | |
| Noise 50 dB | ||
Weight and Dimensions shown are approximate.
This product is an equipment that fulfills the European standard for EMC disturbances
(EMC = Electromagnetic Compatibility) EN 55011. According to this standard this product is an equipment of group 2, class B and is within required limits. Group 2 means that radio-frequency energy is intentionally generated in the form of electromagnetic radiation for purpose of warming or cooking food. Class B means that this product may be used in normal household areas.
Manufactured by: Panasonic Appliances Microwave Oven (Shanghai) Co., Ltd.
888, 898 Longdong Road. Pudong, Shanghai, 201203, China.
Imported by: Panasonic Marketing Europe GmbH
REP. EU: Panasonic Testing Centre
Winsbergring 15, 22525 Hamburg, Germany

Visit Panasonic's The Ideas Kitchen website for Microwave advice, recipes, cooking tips and offers:
www.theideaskitchen.co.uk


PHONE OUR CUSTOMER COMMUNICATIONS CENTRE
0344 844 3899
For service or spares.
Or order spares direct on line at
www.panasonic.co.uk
Panasonic Corporation
http://www.panasonic.com
© Panasonic Corporation 2018
F0003BG70BP
PA0118-0
Printed in P.R.C.