GSI 6551 C-IN - Dishwasher BAUKNECHT - Free user manual and instructions
Find the device manual for free GSI 6551 C-IN BAUKNECHT in PDF.


User questions about GSI 6551 C-IN BAUKNECHT
0 question about this device. Answer the ones you know or ask your own.
Ask a new question about this device
Download the instructions for your Dishwasher in PDF format for free! Find your manual GSI 6551 C-IN - BAUKNECHT and take your electronic device back in hand. On this page are published all the documents necessary for the use of your device. GSI 6551 C-IN by BAUKNECHT.
USER MANUAL GSI 6551 C-IN BAUKNECHT
Instructions for use
Before using the dish washer/Connections
Electrical connection
precautions and general recommendations
How to fill the salt container
How to fill the rinse aid dispenser
How to fill the detergent dispenser
Care and Maintenance
Before using the dish washer/Connections
1. Removing the packaging and controls:
After unpacking, make sure that the dishwasher is undamaged and that the door closes correctly. If in doubt, contact a qualified technician or your local retailer.
- Keep the packaging materials (plastic bags, polystyrene parts, etc.) out of reach of children, as they are potentially dangerous.
2. Water and electrical connections:
All water and electrical connections must be carried out by a qualified technician in compliance with the manufacturer's instructions (refer to the enclosed installation booklet) and current local safety regulations.
The appliance must only be used in the household for the prescribed uses.
Do not use the dishwasher if it has been damaged in transit. Consult your local retailer or our After-Sales Service.
(Refer to the separate installation instructions booklet)
3. Water inlet and drain:
- Observe any special regulations issued by your local Water Board.
Water supply pressure: 0.3 - 10 bar.
• Make sure the inlet and drain hoses are kink-free and are not crushed.
- If the hose length is not sufficient, please contact your local dealer or our After-Sales Service.
- The inlet hose must be securely clamped to the water tap to prevent leaks.
- The inlet water temperature varies according to the model installed. Inlet hose marked "25°C Max": maximum temperature 25°C. All other models: maximum temperature 60°C.
- When installing the appliance, make sure the drain water discharges correctly (if necessary, remove the wire gauze from the sink siphon).
- Fix the drain hose to the spigot with a clamp to prevent it from coming off during operation.
- For appliances with water-stop system only: If the water connections are made correctly, the water-stop system safeguards your home against damage caused by flooding.
- Closely adhere to local Electricity Board regulations. Voltage information is shown on the rating plate mounted inside the door on the right hand side.
• The appliance must be earthed as prescribed by law. - Do not use extension leads or multiple adapters.
• Before carrying out maintenance, disconnect the mains plug. - The power cable must only be replaced by authorized personnel.
4. Electrical connection:
Warning for models provided with LCD display:
The mains plug must be positioned in an easily accessible place.
- For Austria: if the apparatus is series connected to a fault current switch, this must be sensitive to the pulsating current.
Electrical connection
1) For Great Britain only
Warning - this appliance must be earthed
Fuse replacement
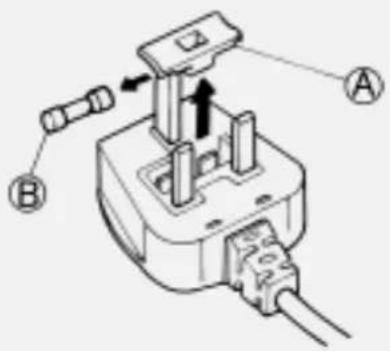
If the mains lead of this appliance is fitted with a BS 1363A 13amp fused plug, to change a fuse in this type of plug use an A.S.T.A. approved fuse to BS 1362 type and proceed as follows:
- Remove the fuse cover (A) and fuse (B).
- Fit replacement 13A fuse into fuse cover.
- Refit both into plug.
Important:
The fuse cover must be refitted when changing a fuse and if the fuse cover is lost the plug must not be used until a correct replacement is fitted.
Correct replacement are identified by the colour insert or the colour embossed in words on the base of the plug.
Replacement fuse covers are available from your local electrical store.
2) For the Republic of Ireland only
The information given in respect of Great Britain will frequently apply, but a third type of plug and socket is also used, the 2-pin, side earth type.
3) Socket outlet / plug (valid for both countries)
If the fitted plug is not suitable for your socket outlet, Please contact Whirlpool Service for further instruction. Please do not attempt to change plug yourself. This procedure needs to be carried out by a qualified Whirlpool technician in compliance with the manufactures instructions and current standard safety regulations.
text_image
Technical diagram of a plug-in socket with labeled components A and B, showing internal wiring and directional arrows.precautions and general recommendations
1. Packing:
- The packing box may be fully recycled as confirmed by the recycling symbol.
2. Energy and water saving tips:
- Do not rinse crockery under running water.
- Always fully load the dishwasher before switching on or set the wash programme to Half Load/Multizone (if available) if one rack only is loaded.
- If ecological energy sources are available such as solar panel heating, heat pumps or centralised heating systems, the appliance may be connected to the hot water mains up to a maximum temperature of 60°C. Make sure the water inlet hose is of the correct type. Refer to the "Connections" chapter in these user instructions.
3. Disposal:
The appliance is built from reusable materials. If you decide to scrap the dishwasher, it must be disposed of in compliance with local waste disposal regulations.
- Before scrapping, cut off the power cable so that the appliance cannot be connected to the mains.
4. Child safety:
• Children must not be allowed to play with the dishwasher.
- Store the detergent, rinse aid and salt in a dry place out of the reach of children.
5. General recommendations:
- The open dishwasher door can only support the weight of the loaded rack when pulled out. Do not rest objects on the open door or sit or stand on it: the appliance may topple over!
- Do not use solvents inside the dishwasher: risk of explosion!
- Only use detergents, rinse aids and regeneration salts specially recommended for use in domestic dishwashers.
- Before cleaning or carrying out maintenance, switch off the appliance, disconnect the mains plug and turn off the water tap.
- If a fault occurs, switch off the appliance and turn off the water tap.
- If necessary, the power cable may be replaced with one the same obtained from our After-Sales Service. The power cable must only be replaced by a qualified technician.
- On completion of the programme switch off the dishwasher and turn off the water tap.
6. For appliances with water stop system:
The water inlet hose and plastic casing contain electrical components. Do not therefore cut the hose or immerse the plastic casing in water. If the hose is damaged switch off the appliance immediately.
EC Declaration of conformity:
This appliance has been designed, constructed and distributed in compliance with the safety requirements of EC Directives:
73/23/EC
89/336/EC
93/68/EC

Load capacity: 12 place settings.
How to fill the salt container
From a water hardness category of 1-2 (medium), before using the dishwasher for the first time, fill the salt container with regeneration salt (to find out the hardness level of water in your area, contact your local Water Board or check the last bill you received). If the water hardness level does not correspond to position 3 on the selector (factory setting) or if the water hardness level changes:
Turn the selector to the correct position (for dishwashers without salt sensor only):
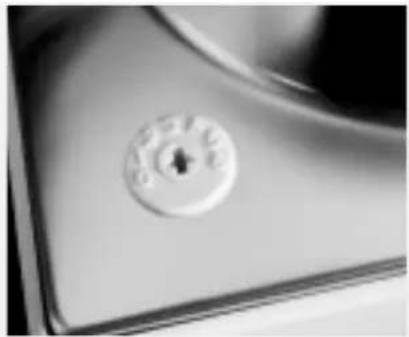
Set the water hardness by turning the selector (if fitted) inside the door (top left) using a screwdriver. Use the table below to set the dial to the correct setting:
natural_image
Close-up of a metallic switch knob on a surface (no text or symbols visible)| Hardness category | German degrees °dH | French degrees °fH | mmol/l | Clarke scale or English degrees °eH | Adjusting the water hardness level selector |
| 1 soft | 0 - 5 | 0 - 9 | 0 - 0.9 | 0 - 6.3 | 0 |
| 1 - 2 medium | 6 - 10 | 10 - 18 | 1.0 - 1.8 | 7 - 12.6 | 1 |
| 2 medium | 11 - 15 | 19 - 27 | 1.9 - 2.7 | 13.3 - 18.9 | 2 |
| 3 medium-hard | 16 - 21 | 28 - 37 | 2.8 - 3.7 | 19.6 - 25.9 | 3 |
| 4 hard | 22 - 28 | 38 - 50 | 3.8 - 5.0 | 26.6 - 35 | 4 |
| 4 very hard | 29 - 35 | 51 - 63 | 5.1 - 6.3 | 35.7 - 44.1 | 5 |
| 4 extremely hard | 36 - 60 | 64 - 107 | 6.4 - 10.7 | 44.8 - 74.9 | 6 |
For dishwashers without salt sensor only! In appliances provided with a salt sensor, the selector automatically turns to the correct position.
If the water hardness level falls within category 1 (soft), no salt is required.
How to fill the salt container:
Warning: Only use regeneration salts for use in domestic dishwashers!
Do not fill the salt container with unsuitable substances, such as detergent, as this will cause irreparable damage to the water softener system.
- Remove the lower rack.
- Unscrew the cap by turning it counter-clockwise.
-
When first using the dishwasher: fill the salt container to the rim with water.
-
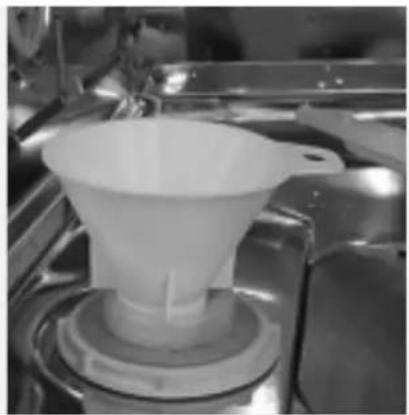
Fill the salt container to the rim with salt (using the filler provided) (when filling for the first time use min. 1.5 kg and max. 2 kg) and stir with a spoon handle.
- Screw the cap back on by turning it clockwise.
- Fit the lower rack.
- If regeneration salt is to be added, immediately start a wash programme (rinsing alone is not sufficient) in order to eliminate any residual saline solution straight away and avoid corrosion.
natural_image
Close-up of a white funnel-shaped object placed on a metal platform (no visible text or symbols)Salt level indicator:
The dishwasher is equipped with an electric or visual salt level indicator (depending on the model installed).
Electric indicator:
The salt level indicator lamp on the control panel lights up when the salt container is empty.
Visual indicator:
The float is clearly visible in the cap window when the salt container is full.
The float lowers and is no longer visible when the salt container is empty.


How to fill the rinse aid dispenser
The rinse aid facilitates drying and prevents the formation of unsightly spots and streaks on crockery. Before using the dishwasher for the first time, fill the rinse aid dispenser.
Only use rinse aids recommended for use in domestic dishwashers.
-
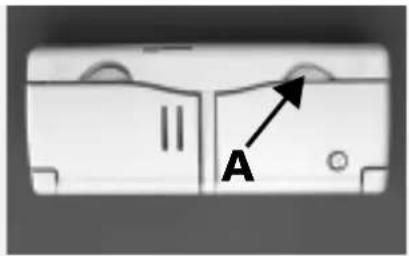
Press button A to open the cover (see drawing).
-
Fill the dispenser with rinse aid up to the dashed line (about 100 ml. maximum).
Immediately wipe away any rinse aid spilt accidentally!
This prevents the formation of excess suds which may spoil washing results.
- Close the cover.
Thereafter, regularly check the rinse aid level.
text_image
A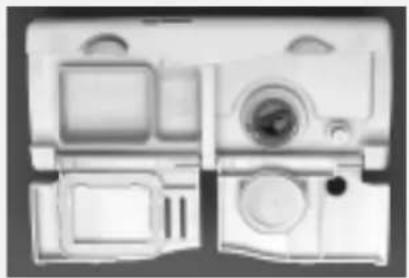
natural_image
Top-down view of a vintage-style office interior with monitor, keyboard, and washing machine (no visible text or symbols)How to adjust the rinse aid dosage regulator:
Factory setting: Position 4. If you are not satisfied with washing or drying results, change the rinse aid dosage setting.
-
Press button A to open the cover (see drawing).
-
If crockery is prone to whitish streaks: reduce the dosage by turning the dial to a lower setting (1-3) using a coin or the like.
If crockery is not perfectly dry: increase the dosage by turning the dial to a higher setting (5-6).
- Close the cover.

text_image
max 654321Rinse aid level indicator:
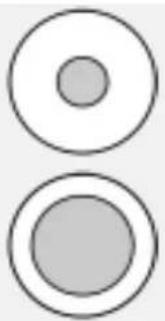
Visual indicator:
light add rinse aid
dark sufficient rinse aid. Do not add any!
natural_image
Two concentric circles with varying shades of gray, no text or symbols presentElectric indicator (if provided):
The indicator lamp on the control panel lights up when more rinse aid needs to be added.
How to fill the detergent dispenser
A small compartment and a large compartment are provided for the detergent. The use of detergent in excess of the recommended dosage may cause pollution. The recommended dosage varies for different brands. If you use detergents in pellet form, follow the manufacturer's directions for use.
“New generation” detergents contain enzymes that give better washing results when Bio programmes are used. However, these programmes are also suitable for all other dishwasher detergents.
How to fill the detergent dispenser:
Only use regeneration salts for use in domestic dishwashers.
Only fill the detergent dispenser prior to starting a wash programme.
-
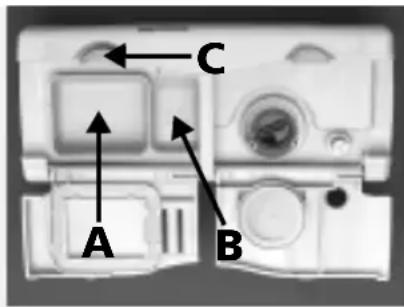
Press button C to open the cover.
-
How to fill the detergent dispenser:
Programmes with pre-rinse:
Pour 2/3 of the dosage recommended by the manufacturer into the large compartment A.
Pour the remaining third in the small compartment B.
Programmes without pre-rinse:
Pour the entire recommended dosage into the large compartment (A). If the recommended dosage on the detergent pack is over 45 ml (maximum capacity of the large compartment), pour the remaining detergent into the small compartment (B).
For programmes with additional "Half load/Multizone" function selected (if provided):
Use a smaller quantity of detergent.
- Close the cover.
text_image
A B CCare and Maintenance
Before cleaning or carrying out maintenance, switch off the appliance, disconnect the mains plug and turn off the water tap.
Cleaning the outside of the appliance:
To clean the outside of the appliance, use a neutral detergent and a damp cloth. Clean the control panel using a damp cloth alone. Do not use abrasive detergents.
Cleaning the inside of the dishwasher:
Regularly wipe the door seal and inside of the door with a damp cloth to remove any food residue.
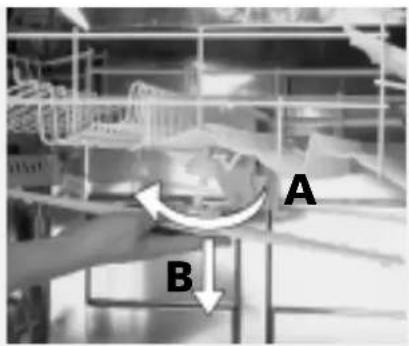
Upper spray arm:
- Slacken the fixing nut (A) (by turning it counter-clockwise) and detach the spray arm (B) by pulling it down).
- Rinse the nozzles.
- To remount the spray arm, align it and then tighten the fixing nut (by turning it clockwise), paying attention not to bend it. The fixing nut must be tightened until it clicks!
Make sure the spray arm rotates freely.
text_image
A BLower spray arm:
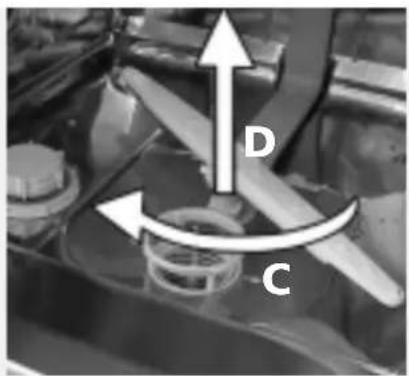
- Slacken the fixing nut (C) (by turning it counter-clockwise) and detach the spray arm (D) by pulling it upwards.
- Rinse the nozzles.
- To remount the spray arm, align it and then tighten the fixing nut (by turning it clockwise), paying attention not to bend it. The fixing nut must be tightened until it clicks!
Make sure the spray arm rotates freely.
natural_image
Mechanical component with labeled parts D and C, showing directional arrows and components (no readable text or symbols)Care and Maintenance
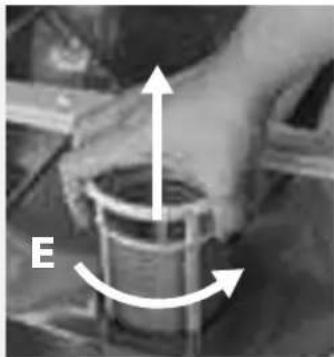
Cleaning the filters: 1.
Rotate the microfilter counter-clockwise (in the direction of the arrow "0") and extract it (E).
-
Place the microfilter/wide-mesh central filter unit on a flat surface and push the handle of the microfilter (F). Extract the wide-mesh filter by pushing it forward (G).
-
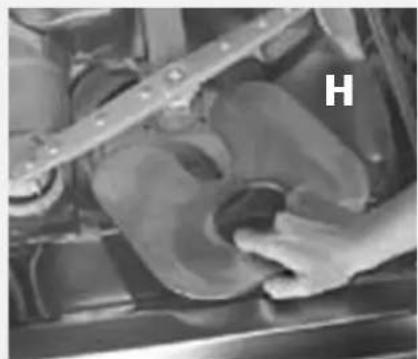
Remove the fine-mesh filter (H).
-
Clean all filters under running water, paying attention not to bend the fine-mesh filter. Check that no impurities are left inside the dishwasher!
-
Remounting: insert the wide-mesh filter in the microfilter (click should be heard!) Insert the fine-mesh filter. The filter must be fitted under both tongues.
Insert the microfilter/wide-mesh central filter unit and turn clockwise to lock (in the direction of arrow "1"), until the dashed lines on the microfilter and fine-mesh filter are aligned.
The filter unit must be correctly assembled to ensure good wash results!
natural_image
Close-up of a mechanical component with directional arrows indicating motion (no text or symbols)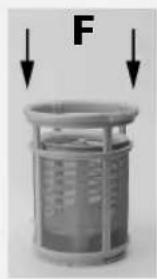
natural_image
Metal trash bin with downward arrows indicating force or direction (no text or symbols)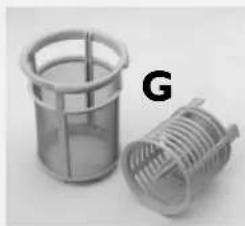
natural_image
Two metallic cylindrical containers with internal structure, one labeled 'G' (no text or symbols on the containers themselves)