
GSIK 6518 BR - Dishwasher BAUKNECHT - Free user manual and instructions
Find the device manual for free GSIK 6518 BR BAUKNECHT in PDF.


| Product Type | Dishwasher |
| Brand | Bauknecht |
| Model | GSIK 6518 BR |
| Capacity | 12 place settings |
| Programmes | 5: Express Rapid 40°C, Bio Normal 50°C, Intensive 70°C, Hygiene+ (antibacterial), Half Load 50°C |
| Energy Label Programme | Bio Normal 50°C: 13.0 L, 1.05 kWh, 165 min (per EN 50242) |
| Extra Functions | Delayed start (1-24 h), Half load option, Rinse aid indicator, Salt indicator |
| Water Hardness Adjustment | 7 levels (soft to extremely hard), factory set at level 3 (medium-hard) |
| Rinse Aid Dosage | Adjustable 1-6, factory set at 4 |
| Salt Container Capacity | Min 1.5 kg, max 2 kg (first fill) |
| Control Panel | Electronic with display, indicator lamps for faults, salt, rinse aid |
| Detergent Types | Powder, gel, tabs, combined action detergents (2-in-1, 3-in-1) |
| Water Connection | Cold or hot water up to 60°C; inlet hose rated 70°C or 90°C |
| Frost Protection | Down to -21°C with at least 1 kg dissolved salt in salt container |
| Safety Features | Child lock (door breakable), anti-flood system, safety warnings |
| Rack Adjustments | Upper rack height adjustable (2 positions), foldable plate holders, cutlery basket with grid |
| Maintenance | Clean filters regularly, check spray arms, descale if needed |
| Energy Saving | Half load function, use Eco programme, connect to solar/heating system |
Frequently Asked Questions - GSIK 6518 BR BAUKNECHT
User questions about GSIK 6518 BR BAUKNECHT
0 question about this device. Answer the ones you know or ask your own.
Ask a new question about this device
Download the instructions for your Dishwasher in PDF format for free! Find your manual GSIK 6518 BR - BAUKNECHT and take your electronic device back in hand. On this page are published all the documents necessary for the use of your device. GSIK 6518 BR by BAUKNECHT.
USER MANUAL GSIK 6518 BR BAUKNECHT
The indicator lights up during operation, flashes when a fault occurs, and goes off at the end of the programme. START button RESET function:
Press this button for at least 2 seconds; the selected programme and options are cancelled. Main failure displays (repeated flashing of the START indicator lamp) can be cancelled by RESETTING. Detailed instructions are given in chapter 5 "What to do, in the event of...".
Solz O Rinse aid level indicator and salt level indicator
Klorspüler ○ They light up when rinse aid or salt need to be added. Add just before starting a wash cycle.
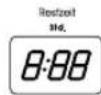

Fault indication and wash time display
In normal operation it indicates the remaining time (h:mm), whereas with "Delayed start" selected it indicates the time remaining until programme start (hh). If "F..." appears on the display, see chapter 5 "What to do, in the event of.
"Delayed start" button
Press the button (repeatedly) to delay the start of the programme. Adjustable from 1 to 24 hours. With each press of the button, the delayed start indicator increases by one hour and after 24 restarts from 00. Then press the START button. The dishwasher will start after the set time.
On / Off button
Table 1.1.
| Table of programmes | Detergent dispenser | Consumption 1) | ||||||
| P | Programmes | Selectable extra functions | Loading instructions | large | small | Litres | kWh | Minutes |
| 1 | Express Rapid 40°C | Slightly soiled crockery,, without dry residuals. | X — | 10.0 0 | 65 30 ± | 1) | ||
| 2 | Bio Normal Bio Normal 2) 50°C | Normally soiled crockery,. Energy-saving programme. | X | X | 13.0 | 1.05 | 165 ± 1) | |
| 3 | Intensiv Intensive 70°C | Recommended programme for heavily soiled crockery, especially suitable for pans and saucepans. | X | X | 14.0 | 1.55 | 155 ± 1) | |
| 4 | Hygiene + Hygienic + 3) | Normally or heavily soiled crockery, with additional antibacterial wash. An interruption of the programme (e.g. due to door opening) can compromise elimination of germs. | X | X | 13.0 | 1.50 | 115 ± 1) | |
| 5 | 1/2 Beladung Half load 50°C | Ideal for washing a half load of lightly or normally soiled crockery. | X | X | 10.0 | 1.04 | 145 ± 1) | |
1) Programme data obtained in conformity with European standard EN 50242. The data may vary, for example, according to different loads, extra functions, sensor settings (only with sensor programmes), water supply temperatures, water hardness and power supply voltage.
2) Energy label programme in compliance with EN 50242. - Information for Test Laboratories; for more detailed information on the EN comparison test and other tests, contact the following address: "nk customer@whirlpool.com".
3) The antibacterial action has been shown in collaboration with the Pasteur Institute, Lille (France), in conformity with. Standard NF EN 13697 - November 2001.
2. QUICK REFERENCE GUIDE
Detailed instructions are given on the following pages; also see section "5. What to do, in case of..."
- Switch on the appliance
Press the ON/OFF button.
- Select a programme
Press the button "Select programme" or the programme selector to display the selected programme. If required, select possible options.
- Select the type of detergent
The detergent selection procedure varies depending on the dishwasher model. Chapter "1. Overview" provides instructions for selecting detergent type.
- Fill in the detergent
4a. Powder/gel/tabs
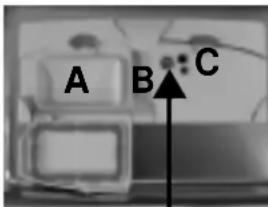
Fill the detergent dispenser compartments in accordance with the wash programme selected. Large compartment A for every wash cycle, additional small compartment B for programmes with pre-wash (see table 1.1.).
4b. Combined action detergents (2 in 1/3 in 1/... etc.) Place the detergent in compartment A or in the cutlery basket, as per the manufacturer's recommendations.
text_image
A B C- Check the rinse aid level

Visual indicator in dispenser C
dark sufficient rinse aid present, clear add rinse aid (approx. 100 ml).

The indicator lamp on the control panel lights up when rinse aid needs to be added. Not all models are equipped with such an indicator.
- Check the salt level
Depending on the model:

window in salt reservoir cap on bottom of appliance inside orange when sufficient salt is present, clear when salt needs to be added.

The indicator lamp on the control panel lights up when salt needs to be added. Even once salt has been added, the indicator lamp only switches off after several wash cycles!
- Load the racks
Make sure that the spray arms can turn freely and are not impeded by crockery or cutlery in the racks.
Detailed instructions on loading the racks are given in chapter "3. How to use the appliance", under "How to load the racks".
- Open the water tap and close the door
Press the START button.
- Start the appliance
If the appliance is switched off during a wash cycle, when switched on again it will resume the cycle from where it was interrupted. Care must be taken when opening the door, as steam will escape!
Changing the programme in progress:
- Keep the START button pressed for about 2 seconds until the START indicator goes off.
- (Water drains for up to 60 seconds).
- Select the programme again.
- Press the Start button.
Wash cycle
10.End of programme
The START indicator lamp switches off at the end of the programme.
11.Switch off the appliance
Press the OFF button. All the indicator lamps switch off.
- Turn off the water tap, unload the racks
Unload the appliance, starting from the lower rack in order to avoid any residual drips of water falling onto crockery below.
3. HOW TO USE THE APPLIANCE
PROGRAMME SELECTION
Press the button "Select programme" or the programme selector to display the selected programme. The appliance must be switched on. If required, select possible options. The corresponding indicator lights up. The correct programme and the selectable functions are given in table 1.1 on page 1.

Programme times stated in the table were obtained under normal conditions and may vary depending on conditions. Differences of up to 20 minutes are possible with sensor programmes as a result of the appliance's automatic calibration system.
HOW TO FILL THE DETERGENT DISPENSER

Only fill the detergent dispenser prior to starting a wash programme. Only use detergents specially recommended for dishwashers, observing the manufacturer's recommended dosage. Observe the manufacturer's safety warnings!
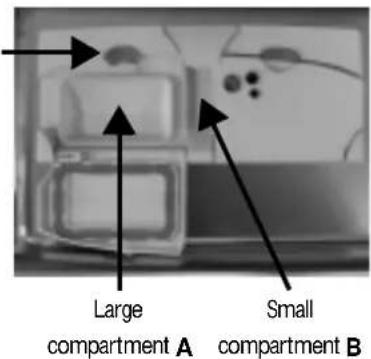
Open the detergent dispenser compartments by pushing the left lever (lever 1) of the dispenser.
a. Powder/gel/tabs
Fill the detergent dispenser compartments in accordance with the wash programme selected (table 1.1).
Programmes without pre-wash:
pour the entire recommended dosage into compartment A.
Programmes with pre-wash:
pour 2/3 of the recommended dosage into the large compartment A and 1/3 into the small compartment B.
Dishwasher tabs should be placed, according to the manufacturer's recommendations, in compartment A or in the cutlery basket.
If the "Half load" option is selected, detergent dosage should be reduced by approximately 1/3.
b. Combined action detergents (2 in 1/3 in 1/... etc.)
Combined action detergents should be placed, according to the manufacturer's recommendations, in compartment A or in the cutlery basket.
Lever 1
text_image
Large compartment A Small compartment BFirmly press the detergent compartment lid shut after filling.

Detergents with rinse aid incorporated may be effective only with longer programmes. In the case of shorter programmes, detergent residue may be a problem (if necessary, use powder detergent). Detergents with rinse aid incorporated tend to form excess suds.

The guarantee is not applicable if faults are caused by the use of these products.
HOW TO CHECK/FILL/ADJUST RINSE AID

Not necessary when using a combined action detergent.
a. How to check the rinse aid level
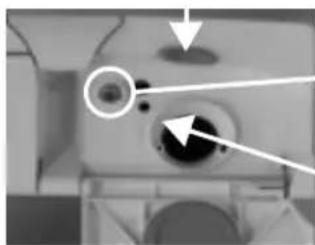
Check the visual indicator C on the rinse aid dispenser: dark = sufficient rinse aid, clear = add rinse aid.
In the case of appliances with an electric indicator on the control panel, the rinse aid indicator lamp lights up red when rinse aid needs to be added.
b. How to fill the rinse aid dispenser
Open the rinse aid dispenser by pressing the right lever (lever 2) of the dispenser.
Fill the dispenser with rinse aid up to the "max" line (approx. 100 ml).
Shut the lid again.
Lever 2
Indicator C
natural_image
Close-up of a medical imaging device with a circular target and arrow indicator (no visible text or symbols)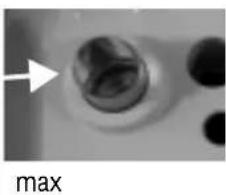
natural_image
Close-up of a mechanical component with a labeled arrow pointing to a circular feature, marked 'max' below (no other text or symbols)
Only use rinse aids recommended for use in domestic dishwashers. Immediately wipe away any rinse aid spilt accidentally. This prevents the formation of excess suds which can cause a fault function of the appliance.
3. HOW TO USE THE APPLIANCE
c. How to adjust the rinse aid dosage regulator
The rinse aid dosage can be adjusted to the detergent used. The lower the setting, the less rinse aid is dispensed (factory setting: position 4).
Press the lever 2 to open the cover.
Using a coin or similar object, turn the arrow to the desired setting.
After adjusting the rinse aid setting, shut the cover again.

text_image
max 654321
If there are streaks: reduce the dosage by turning the dial to a lower setting (1-3). If crockery is not perfectly dry: increase the dosage by turning the dial to a higher setting (5-6). Plastic dishes have more difficulty drying and a higher rinse aid setting will not improve the situation.
HOW TO CHECK/FILL/ADJUST SALT

Only use regeneration salt specifically for dishwashers.
a. How to check the salt level
Depending on the model, check the visual indicator. The window on the salt reservoir cap is clear when salt needs to be added and orange when the salt present is sufficient. In the case of appliances with an electric indicator on the control panel, the salt indicator camp lights up red when salt needs to be added.
b. How to fill the salt container
- Remove the lower rack.
- Turn the salt container cap anti-clockwise to open it.
- When using the dishwasher for the first time, fill the salt container to the rim with water.
- Using the funnel provided, fill with regeneration salt to the rim (the first time, min. 1.5 kg/max. 2 kg).
- Stir with the handle of a wooden spoon to help dissolve the salt.
- Close the cap of the salt container by turning it clockwise.
- Reinsert the lower rack.
natural_image
Close-up of a hand using a tool to cut or press a piece of material, with no visible text or symbols.
Once regeneration salt is added, immediately start a wash programme (the "Pre-wash" programme alone is not sufficient). Residual saline solution or grains of salt can lead to deep-down corrosion, irreparably damaging the stainless steel components. The guarantee is not applicable if faults are caused by such circumstances.

The salt level indicator lamp may remain lit for the duration of several wash cycles. If the water hardness level falls within category 1 (soft), no salt is required.
c. How to set the water hardness level
- Switch on the appliance.
- Select the 2nd programme "P2" - consult the table 1.1 in chapter 1.
- Press the START button for at least 5 seconds until the START indicator lamp flashes.
- The set water hardness level is shown on the display (if present) or the START button flashes.
- With each successive touch of the START button the setting increases and when it reaches 7 it returns to 1 again.
- The appliance must be switched off to memorise the new setting.
| Water hardness German degrees°dH | French degrees°fH | English degrees°eH | Flashing frequencyor display setting | |
| 1 soft 0 - 5 0 - 9 0 - 6.3 1 / 1x | ||||
| 1 - 2 medium 6 - 10 10 - 18 | 7 - 12.6 | 2 / 2x | ||
| 2 medium | 11 - 15 | 19 - 27 | 13.3 - 18.9 | 3 / 3x |
| 3 medium-hard | 16 - 21 | 28 - 37 | 19.6 - 25.9 | 4 / 4x |
| 4 hard 22 - 28 | 38 - 50 | 26.6 - 35 | 5 / 5x | |
| 4 very hard | 29 - 35 | 51 - 63 | 35.7 - 44.1 | 6 / 6x |
| 4 extremely hard | 36 - 60 | 64 - 107 | 44.8 - 74.9 | 7 / 7x |

Water hardness level is factory set at 3 for medium-hard water (display 4 or 4 flashes of the START button).

Water hardness level 4 with combined action detergent Even if you use a combined action detergent which includes salt, you must still add regeneration salt since such detergents are not effective enough at softening hard water. If the appliance is equipped with the function "Select detergent" (see chapter "1. Overview"), set the detergent dispenser system to the "no salt" setting so that the salt indicator lamp remains activated ("Detergent with rinse aid").
3. HOW TO USE THE APPLIANCE
HOW TO LOAD THE RACKS
UPPER RACK - depending on the model
Multifunction support
Crockery holder
Adjustable glass holder
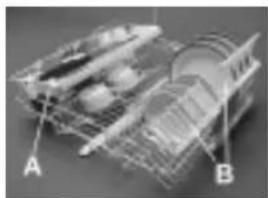
A Three possible positions for long utensils, cups and glasses.
B In horizontal position: cups/long utensils, in raised position for plates and stemware.
C Depending on the position, for small or long-stemmed glasses.

Long-handled utensils (kitchen knives) must be arranged with the sharp end facing in towards the appliance.
Cutlery basket
Rack height adjustment
D It can be placed on the upper rack when the "Half load/Multizone" function is selected.
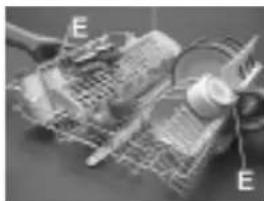
E The upper rack height can be adjusted even when loaded.
Lower adjustment: pull the two handles E outwards and lower the rack.
Upper adjustment: pull the two handles E up until the rack fits in place (standard position).
natural_image
3D wireframe model of a mechanical assembly with labeled components A and B (no text or symbols beyond labels)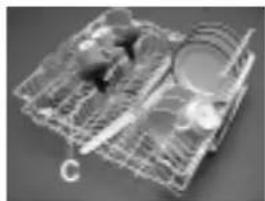
natural_image
3D wireframe model of a mechanical or electronic component with internal components (no visible text or symbols)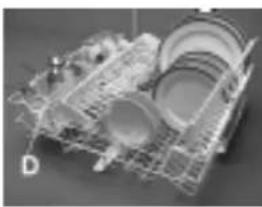
natural_image
3D wireframe model of a mechanical assembly with multiple circular components (no visible text or symbols)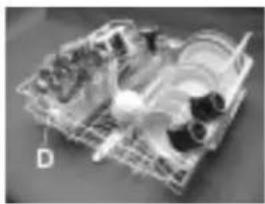
natural_image
3D rendered mechanical assembly with internal components and labeled point D (no readable text or symbols)
The two handles E must be on same level.
Washing without the upper rack
If the appliance is equipped with the adjustable retainers shown in the figure the upper rack can be removed to wash large plates and trays, etc. Open the two retainers F and remove the rack from the guides.

When the upper rack is in place the retainers must always be closed.
natural_image
Close-up of a mechanical device with labeled parts E, showing internal components and wiring (no readable text or symbols)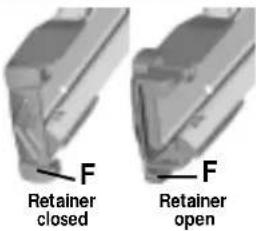
text_image
F Retainer closed F Retainer openLOWER RACK - depending on the model
Plate holder
Cutlery basket Cutlery basket
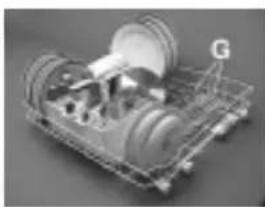
G Fixed or foldable (space-saving for pots and pans).
H or
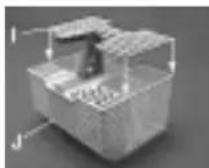
J The grid I supplied can be fitted into the cutlery basket to keep items separate.
natural_image
3D rendered image of a car interior with wheels and a gasket (no text or symbols visible)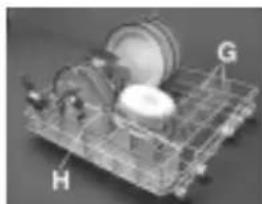
natural_image
3D mechanical assembly diagram showing a grid structure with labeled components H and G (no text or symbols beyond labels)
Sharp utensils that might cause injury must be placed in the cutlery basket with the sharp end facing downwards.
Arrange crockery so that water does not collect in cavities, ensuring that the spray arms turn freely.
Only use dishwasher-proof crockery and dishes. Do not use the dishwasher for washing wooden items, aluminium, tin, silver cutlery or decorated crockery (unglazed).
WASH CYCLE
The dishwasher door must be closed and the water tap open.
To load crockery, open the door with caution:

Beware of hot steam.
Close the door again. The programme resumes the cycle from where it was interrupted.

The wash cycle can be interrupted at any time by pressing RESET.
Changing the programme in progress/Resetting
- Press the START button for about 2 seconds, until the START indicator lamp switches off.
- (Water drains for up to 60 seconds).
- The appliance is now ready to be restarted.
Full integrated models
- Press the START/RESET button (for 2 seconds).
C l o s e t h e d o o r . - (Water drains for up to 60 seconds).
- The appliance is now ready to be restarted.
PROGRAMME END
Exercise caution when opening the door: beware of hot steam.
Only press the OFF button once the START indicator lamp has switched off. All the indicator lamps switch off. Unload the appliance, starting from the lower rack in order to avoid any residual drips of water falling onto crockery below.

For even better drying results, leave the dishwasher door open a little before unloading in order to allow the steam to dissipate, helping the dishes to dry. The underside of the kitchen worktop must be protected (see instructions in "Maintenance and Installation").
4. PRECAUTIONS AND GENERAL RECOMMENDATIONS
1. Packing
The packaging materials are 100% recyclable and marked with the recycling symbol.

2. Removing the packaging and inspecting the contents
After unpacking, make sure that the dishwasher is undamaged and that the door closes correctly. If in doubt, contact a qualified technician or your local retailer.
3. Before using the dishwasher for the first time
- The appliance is designed to operate at ambient temperatures of between 5°C and 45°C.
- This dishwasher has been tested by the manufacturer to ensure it functions correctly. Such testing may leave slight drips/ water marks which will disappear with the first wash.
4. Energy and water savings
- Do not rinse crockery under running water.
- Always fully load the dishwasher before running it or select the "Half load/Multizone" function (if available).
- If ecological energy sources are available such as solar panel heating, heat pumps or centralised heating systems, the appliance may be connected to the hot water mains up to a maximum temperature of 60^ C. Make sure the water inlet hose is of the correct type (“70°C Max” or “90°C Max”).
5. Child safety
- Keep the packaging materials out of the reach of children.
- Children must not be allowed to play with the dishwasher.
- Store the detergent, rinse aid and salt out of the reach of children.
6. Safety warnings
- The appliance is not intended for use by children or physically or mentally impaired persons, unless adequately supervised by a responsible adult capable of guaranteeing safe use of the appliance.
- Do not operate the appliance in the open air.
- Do not store flammable materials in close proximity to the dishwasher.
- The water in the dishwasher is not potable.
- Do not use solvents inside the dishwasher: risk of explosion!
- Be careful when the door is open: risk of tripping!
- The open dishwasher door can only support the weight of the loaded rack when pulled out. Do not rest objects on the open door or sit or stand on it.
- Sharp items that might cause injury (e.g. knives), must be placed in the cutlery basket with the sharp end facing downwards. Long-handled utensils must be arranged horizontally in the upper rack, with the sharp end facing away from the front of the appliance.
- Before cleaning or carrying out maintenance, switch off the appliance and turn off the water tap; also after programme end in the event of any malfunction.
- Repairs and technical modifications must be carried out exclusively by a qualified technician.
7. Resistance to frost
If the appliance is placed in surroundings exposed to the risk of frost, it must be drained completely. Turn off the water tap, remove the inlet and outlet hoses, and let all the water drain away. Make sure there is at least 1 kg of dissolved regeneration salt in the salt container, to protect the appliance from temperatures of up to -21°C. When the programme resumes, an error message may be displayed.
"F1"/START indicator flashes once: pour half a litre of warm water into the bottom of the dishwasher.
“F6”/START indicator flashes 6 times: the appliance must remain at an ambient temperature of min. 5°C for at least 24 hours. After eliminating these faults, RESET the appliance (see chapter “5. What to do if...”).
8. Disposal
- The appliance is manufactured using recyclable materials. If you decide to scrap the dishwasher, it must be disposed of in compliance with local waste disposal regulations. Make it unusable by cutting off the power cord. To prevent situations of potential danger to children (e.g. danger of suffocation), break the lock of the door so that it can no longer be closed.
- This appliance is marked according to the European directive 2002/96/CE on Waste Electrical and Electronic Equipment (WEEE). By ensuring that this appliance is scrapped suitably, you can help prevent potentially damaging consequences for the environment and health. Unsuitable disposal of an appliance of this type as household waste could have detrimental effects on the environment. The symbol 📄 on the appliance, or on documentation enclosed with the appliance, indicates that this product must not be treated as household waste, but must be delivered to the nearest collection centre for the recycling of electrical and electronic appliances. Disposal must be carried out in accordance with local environmental regulations for waste disposal. For further information on the treatment, recovery and recycling of this appliance, contact your competent local authority, the collection service for household waste or the shop where you purchased the appliance.
EC Declaration of conformity
This appliance has been designed, constructed and distributed in compliance with the safety requirements of EC Directives: 2006/95/CE, 89/336/CE, 93/68/CE and 2002/95/CE (RoHS Directive).

Loading Capacity: 12 place settings.
5. WHAT TO DO IF...
If a fault occurs, before contacting the After-sales Service, make the following checks to try and remedy the problem. Most faults can be remedied by taking the following courses of action, quickly restoring normal appliance operation.
| The appliance... Possible causes/solutions | |
| ...is not working/will not start - The appliance must be switched on.- Check the household circuit fuse if there is no power supply.- The dishwasher door must be closed.- Check whether the “Delayed start” function (if available) has been selected. If it has, the appliance will only start once the set time has elapsed. If necessary, set the delayed start to “0” (RESET the appliance). | |
| ... shows “F1” on the display or the START indicator lamp flashes once | - The water supply temperature must be above 3°C. |
| ... shows “F4” on the display or the START indicator lamp flashes 4 times | - The filters must not be dirty or clogged.- The drain hose must not be kinked.- The closure disk of the syphon hose connection must be removed. |
| ... shows “F6” on the display or the START indicator lamp flashes 6 times | - The water tap must be open.- The water inlet hose must not be kinked and the relative inlet filter in the water tap connector must not be clogged. |
| ... shows “F7” on the display or the START indicator lamp flashes 7 times | - The water tap must be fully open during water inlet (minimum capacity: 0.5 litres per minute).- The water inlet hose must not be kinked and the relative inlet filter in the water tap connector must not be dirty. |
| ... shows “F8” on the display or the START indicator lamp flashes 8 times | - The filters must not be dirty or clogged.- Concave items (e.g. bowls, cups) must be arranged facing downwards in the rack.- The drain hose must be fitted correctly (for high built-in appliances, leave min. 200-400 mm from the lower edge of the appliance - see instructions in “Maintenance and Installation”). |
| ... shows other “F” faults on the display or the START indicator lamp flashes Xx times | - Reset the appliance (see below). |
After taking the above course of action, the fault message must be reset. In the majority of cases the fault is thus eliminated.
RESET: Press the START button for approx. 2 seconds until the indicator lamp switches off or press the RESET button (depending on model).
→ Close the door.
→ Water drains automatically for up to 60 seconds.
⇒ The appliance is now ready to be restarted.
| Crockery and cutlery ... Possible causes/solutions | |
| ...are not perfectly clean/have food residues | - Arrange crockery so that items do not touch each other.Concave items (e.g. bowls, cups) must be arranged facing downwards in the rack.- If necessary, use more detergent, observing the manufacturer's indications as regards dosage. Always store detergent in a dry place and do not store it for excessively long periods of time.- For heavily soiled crockery, select a wash programme with a higher temperature (see table 1.1 on the first page).- If you select the “Half load/Multizone” function (if available),remember to loadonlythe upper rack oronlythe lower rack to increase washing power and thus obtain optimum wash results. |
5. WHAT TO DO IF...
| Crockery and cutlery ... Possible causes/solutions | |
| ...are not perfectly clean/have food residues | - In the event of frequent use of the Eco programme 50°C (if available), from time to time select the intensive 70°C programme (if available).- The spray arms must not be clogged, the filters must not be dirty and must be fitted correctly (see the instructions in “Maintenance and installation”).- The spray arms must be able to turn freely and must not be impeded by crockery or cutlery. |
| ...have deposits:- regeneration salt residue | - In areas with very hard water, more regeneration salt needs to be added (see page 4, “How to check/fill/adjust salt”).- Close the salt container lid properly.- If you use a combined action detergent which includes salt, do not add any additional regeneration salt. |
| - rust marks | - Salty or acidic food residues can cause rust marks even on stainless steel cutlery.To avoid this, always use the pre-wash programme if the dishes are to be washed later. |
| - other marks | - In the presence of marks, increase the rinse aid dosage (see page 3, “How to check/fill/adjust rinse aid”).- If you use a combined action detergent, possibly add more rinse aid. |
| - streaks | - In the presence of streaks, reduce the rinse aid dosage (page 3, “How to check/fill/adjust rinse aid”). If you use a combined action detergent which includes rinse aid, do not add any additional rinse aid. |
| - suds | - Only use the amount of detergent/rinse aid required, since excessive amounts can lead to excess suds. |
| - opaque glasses, etc. - Only use dishwasher-proof crockery and dishes. | |
| ...have discoloured plastic parts | Tomato sauce, for example, can lead to discolouring of plastic parts. Powder detergent is recommended as it allows slightly higher doses to be used for improved whitening. Programmes with higher wash temperatures should be used. |
| ...are not dry - Arrange crockery so that w | water does not collect in cavities.- Increase the dosage of rinse aid (see page 3, “How to check/fill/ adjust rinse aid”).- Dishes dry better if the dishwasher door is left open a little before unloading; this allows the steam to dissipate.- With the Rapid 40°C programme (if available), dishes may not be perfectly dry since this is a short programme. If necessary, select a longer programme. |
If, after carrying out the above checks, the fault persists, switch off the appliance and turn off the water tap. Contact the After-sales Service (see warranty).
Before contacting our After-Sales Service, take note of the following:
- the description of the fault,
- the appliance type and model,
- the service code (the number indicated on the adhesive rating plate) inside the door on the right-hand side:

We reserve the right to make technical modifications.