TA Care 6C BK - Tumble drier BAUKNECHT - Free user manual and instructions
Find the device manual for free TA Care 6C BK BAUKNECHT in PDF.


User questions about TA Care 6C BK BAUKNECHT
0 question about this device. Answer the ones you know or ask your own.
Ask a new question about this device
Download the instructions for your Tumble drier in PDF format for free! Find your manual TA Care 6C BK - BAUKNECHT and take your electronic device back in hand. On this page are published all the documents necessary for the use of your device. TA Care 6C BK by BAUKNECHT.
USER MANUAL TA Care 6C BK BAUKNECHT
text_image
ABC TV WBSPROGRAMME CHART
PREPARING THE LAUNDRY
SELECTING A PROGRAMME AND OPTIONS
STARTING AND COMPLETING A PROGRAMME
CHANGING A PROGRAMME
INTERRUPTING A PROGRAMME
DAILY MAINTENANCE AND CLEANING
INSTRUCTIONS FOR USE
text_image
Diagram showing a washing machine with a close-up of its screen, alongside a grid of DNA or protein bands.BOOKLET
SAFETY ADVICES BEFORE USING THE DRYER / CONNECTIONS
PAGE 4
ELECTRICAL CONNECTION
PAGE 5
SAFETY ADVICES AND GENERAL RECOMMENDATIONS
PAGE 6
DESCRIPTION OF THE DRYER
PAGE 8
REMINDER - MAINTENANCE AND CLEANING
PAGE 8
VENT CONNECTION
PAGE 9
DOOR REVERSIBILITY
PAGE 10
TROUBLESHOOTING GUIDE / AFTER-SALES SERVICE
PAGE 11
SAFETY ADVICES BEFORE USING THE DRYER / CONNECTIONS
1. Removing the packaging and check
• After unpacking, make sure that the dryer is undamaged. If in doubt, do not use the dryer. Contact After-Sales Service or your local retailer.
- Keep the packaging materials (plastic bags, polystyrene parts, etc.) out of reach of children, as they are potentially dangerous.
If the appliance was exposed to the cold prior to delivery, keep it at room temperature for a few hours before operating.
2. Electrical Connections
- Electrical connections must be carried out by a qualified technician in compliance with the manufacturer's instructions and current standard safety regulations.
• Electrical connection must comply with local Electricity Board regulations. - Voltage information, power consumption and the required fuse protection is shown on the rating plate mounted at the rear of the dryer.
- The manufacturer cannot accept any liability for personal injury or damage to property resulting from failure to adhere to these instructions.
• The dryer must be earthed as prescribed by law.
• Do not use extension leads or multiple adaptors.
• Do not use electrical portable outlet devices. - Before any maintenance on the dryer disconnect it from the mains supply.
- Do not operate the dryer if it has been damaged during transport. Contact one of our After-Sales Service technicians.
- Mains cable replacement is only to be carried out by After-Sales Service.
- After installation access to the mains plug has to be guaranteed, or the all-pole disconnection has to be possible with a switch.
3. Installation
- Do not install your dryer where it can be subject to extreme conditions, such as: poor ventilation, temperatures below 5°C or above 35°C.
- The appliance must not be installed behind a lockable door, a sliding door or a door with a hinge on the opposite side to that of the tumble dryer, in such a way that a full opening of the tumble dryer door is restricted.
• Take care not to install the dryer on a deep-pile carpet.
• Take care not to trap the mains cable between the dryer and the wall. - The exhaust air must not be discharged into a flue which is used for exhausting fumes from appliances burning gas or other fuels.
• Pay attention that the air-inlet openings are unobstructed.
Stability:
When installing the dryer always carefully level the dryer adjusting the two feet and check the correct levelling with a spirit level.
To built in the dryer
• For security reasons do not remove the worktop.
- Connect the dryer to an external ventilation system in order to prevent steam from damaging your furniture during the years.
Stacking kit
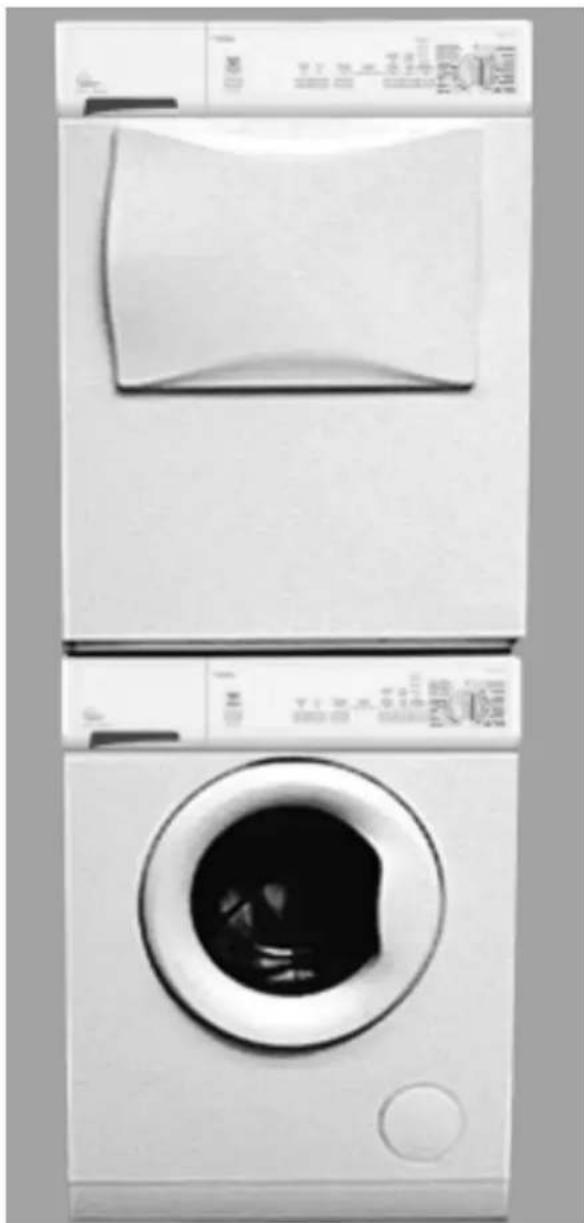
Your dryer can be stacked on top of your front loading washing machine. Please contact your dealer or our After Sales Service.
Minimum housing dimensions:
Width: 600 mm
Height: 855 mm
Depth: 560 mm
natural_image
Exterior view of a white washing machine with a circular vent, showing its backrest and front panel (no visible text or symbols)ELECTRICAL CONNECTION
1) For Great Britain only
Warning - this appliance must be earthed
Fuse replacement
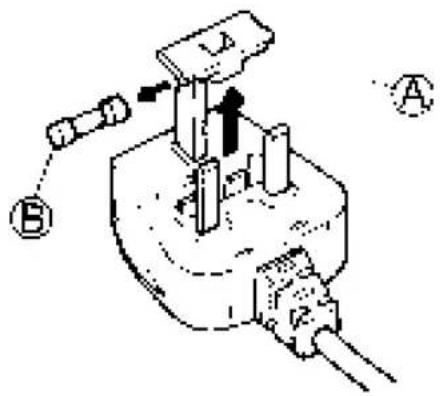
If the mains lead of this appliance is fitted with a BS 1363A 13amp fused plug, to change a fuse in this type of plug use an A.S.T.A. approved fuse to BS 1362 type and proceed as follows:
- Remove the fuse cover (A) and fuse (B).
- Fit replacement 13A fuse into fuse cover.
- Refit both into plug.
Important:
The fuse cover must be refitted when changing a fuse and if the fuse cover is lost the plug must not be used until a correct replacement is fitted.
Correct replacement are identified by the colour insert or the colour embossed in words on the base of the plug.
Replacement fuse covers are available from your local electrical store.
2) For the Republic of Ireland only
The information given in respect of Great Britain will frequently apply, but a third type of plug and socket is also used, the 2-pin, side earth type.
3) Socket outlet / plug (valid for both countries)
If the fitted plug is not suitable for your socket outlet, please contact Whirlpool Service for further instruction. Please do not attempt to change plug yourself. This procedure needs to be carried out by a qualified Whirlpool technician in compliance with the manufactures instructions and current standard safety regulations.
text_image
Technical diagram of a mechanical device with labeled components A and B, showing internal components and directional arrows.SAFETY ADVICES AND GENERAL RECOMMENDATIONS
1. Packing

The packing box may be fully recycled as confirmed by the recycling symbol.

2. Energy saving tips
- Always dry a full load: depending on the type of laundry and the programme/drying time.
- By preference use the maximum spin speed allowed by your washing machine, since draining the water mechanically requires less energy. You will save time and energy when running your drying cycle.
• Do not overdry the laundry.
• Clean the lint filter after every drying cycle. - Place your dryer in a room with a temperature between 15°C and 20°C. In case of higher temperature ventilate the room.
- Always select the correct programme/drying time for the load in order to obtain the desired drying results.
- Select the gentle option only with small loads.
- When drying cotton, for example, dry iron dry and cupboard dry loads together. Start with the iron dry programme/drying time setting, remove the laundry to be ironed at the end of that cycle and dry the remainder of the load on the cupboard dry setting.
3. Disposing of packaging and old Dryer:
The dryer is built from reusable materials. The dryer must be disposed of in compliance with local waste disposal regulations.
- Before scrapping, cut off the power cable so that the dryer cannot be connected to the mains.
4. Child safety:
Children must not be allowed to play with the dryer.
5. General recommendations:
- The tumble dryer is intended only for drying textile material washed in water.
- Always set the programme/time selector knob to the "0" position after use. This prevents the dryer from being switched on accidentally.
- Before cleaning or carrying out maintenance, switch off the dryer and disconnect it from the mains supply.
- To clean the outside of the dryer, use a neutral detergent and a damp cloth.
• Do not use abrasive detergents. -
Wipe away lint from the door seal and the door using a damp cloth.
-
If the lint filter mesh is clogged, clean it with water and a soft brush.
- Since lint can go through the filter it is necessary to clean, from time to time, the complete filter area (including below the filter) with a brush, a damp cloth or with a vacuum cleaner.
- If necessary, the power cable may be replaced with an identical one obtained from our After-Sales Service. The power cable must only be replaced by a qualified technician.
6. To minimize the risk of fire in tumble dryer, the following should be observed:
• Do not use inflammable cleansing agents.
- Do not use the tumble dryer if industrial chemicals have been used for cleaning.
- Garments treated or contaminated with flammable cleaning sprays or liquids such as petrol, cooking oil or aerosol sprays must not be put in this dryer.
- Items that have been soiled with substances such as cooking oil, acetone, alcohol, petrol, kerosene, spot removers, turpentine, waxes and wax removers should be washed in hot water with an extra amount of detergent before being dried in the tumble dryer.
- Oil-affected item can ignite spontaneously, especially when exposed to heat sources such as in a tumble dryer. The items become warm, causing an oxidation reaction in the oil. Oxidation creates heat. If the heat cannot escape, the items can become hot enough to catch fire. Piling, stacking or storing oil-affected items can prevent heat from escaping and so create a fire hazard.
- The appliance is not intended for use by persons (including children) with reduced physical, sensory or mental capabilities, or lack of experience and knowledge, unless they have been given supervision or instruction concerning use of the appliance by a person responsible for their safety. Children should be supervised to ensure that they do not play with the appliance.
- If it is unavoidable that fabrics contain vegetable or cooking oil or have been contaminated by hair care products b placed in a tumble dryer they should first be washed in hot water with extra detergent - this will reduce, but not eliminate, the hazard.
- Do not dry unwashed items in the tumble dryer.
- Items such as foam rubber (latex foam), shower caps, waterproof textiles, rubber backed articles and clothes or pillows fitted with foam rubber pads should not be dried in the tumble dryer.
- Fabric softeners, or similar products, should be used as specified by the fabric softener instructions.
• Lighters must not be left in pockets. - Never use and store flammable materials nearby the dryer.
• Attention rear panel can be hot.
EC Declaration of Conformity
- This dryer has been designed, constructed and distributed in compliance with the safety requirements of EC Directives:
• 2006/95/EG Low Voltage Directive
• 2004/108/EC Electromagnetic Compatibility Directive
CE
This appliance is marked according to the European directive 2002/96/EC on Waste Electrical and Electronic Equipment (WEEE).
By ensuring this product is disposed of correctly, you will help prevent potential negative consequences for the environment and human health, which could otherwise be caused by inappropriate waste handling of this product.
The symbol on the product, or on the documents accompanying the product, indicates that this appliance may not be treated as household waste. Instead it shall be handed over to the applicable collection point for the recycling of electrical and electronic equipment. Disposal must be carried out in accordance with local environmental regulations for waste disposal.
For more detailed information about treatment, recovery and recycling of this product, please contact your local city office, your household waste disposal service or the shop where you purchased the product.
- The dryer must be used in the household for the described uses.

PLEASE READ BOOKLET
INSTRUCTIONS FOR USE!
DESCRIPTION OF THE DRYER
A. Work top
B. Contact pin
C. Door
To open the door: pull the handle To close the door: push gently until closed.
D. Filter
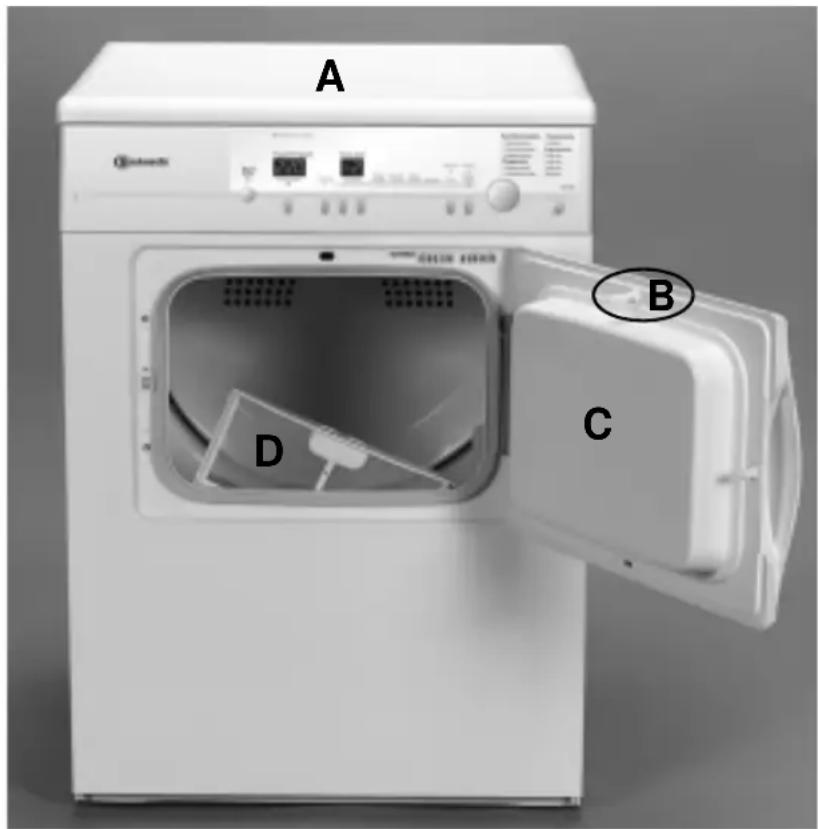
text_image
A B C DREMINDER - MAINTENANCE AND CLEANING
EACH DRYING CYCLE
- Clean the lint filter at the end of every drying cycle.
Open the door.
Pull the filter upwards.
Remove lint using a soft brush or your fingertips.
Push the filter back into place.
EACH THREE MONTHS
- Clean venthose and connection regularly to avoid blockage due to lint or foreign objects.
VENT CONNECTION
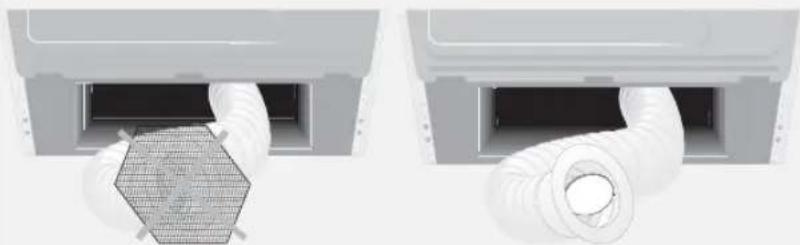
Normally the hose and adaptor are not supplied; the accessory kit, available at your dealer or our After Sales Service, should be used.
Installing the vent hose
A. Place a towel or the packing material on the right-hand side next to the dryer.
B. Place the dryer on its right-hand side (seen from the front) on the towel or the packing material.
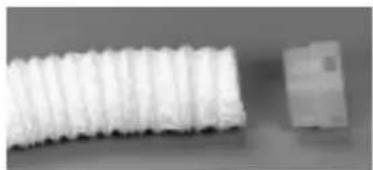
C. Push the adapter into the hose (see illustration). Attach the air vent hose adapter to the connection located under the dryer and lock it by means of the foreseen lugs.
Venting outside
- Without kinking it, lead the vent hose outside (inside diameter 10 cm, maximum length with two bends 3 m).
- Ensure that the vent hose does not sag when stacking the dryer on a washing machine. It should only be placed horizontally or upwards.
- Do not connect to ventilation systems protected by fly nets. These can become clogged and cause malfunctioning of the dryer.
- Do not connect the air vent hose to a chimney or to a mechanical ventilation extractor duct.
- Do not connect the vent hose to the heating system. Only connect the hose to ventilation systems insulated against humidity.
- Please provide adequate ventilation to avoid the back flow of gases into the room from appliances burning other fuels, including open fires.
Dryer operation without vent hose
• Only use the dryer in a large, well-ventilated room.
- Keep the room free of dust and lint.
A minimum distance of 10 cm between rear of appliance and the wall must be observed.
Dryer placed close to the wall; venting to the left or right
Install the dryer by using the bi-directional kit, available at your dealer.
IMPORTANT
natural_image
Two views of a white air conditioner unit showing internal tubing and a meshed vent (no text or symbols visible)For example, alternative to be used.
- Do not connect to ventilation systems protected by fly nets. These can become clogged and cause malfunctioning of the dryer.
natural_image
Close-up of a white corrugated plastic component next to a small rectangular block (no text or symbols visible)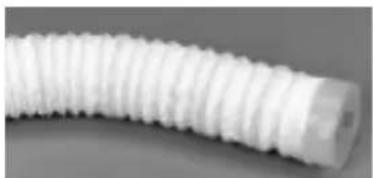
natural_image
Close-up of a white plastic coiled tube with threaded ends (no text or symbols visible)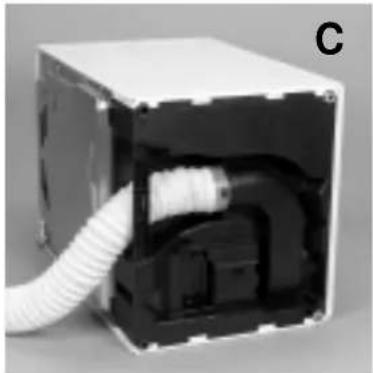
natural_image
Interior view of a white industrial box with visible internal components and a white hose, labeled 'C' in the corner (no text or symbols on the main subject)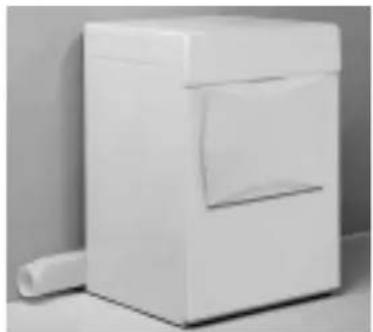
natural_image
White rectangular electronic device with a scroll wheel beside it (no visible text or symbols)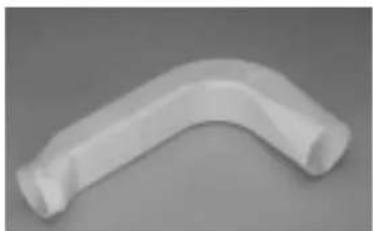
natural_image
White PVC pipe fitting with rounded ends, isolated on neutral background (no text or symbols)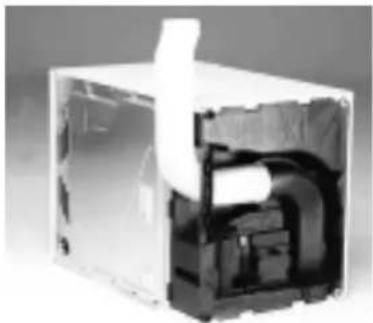
natural_image
Cross-sectional view of a mechanical device showing internal components (no text or symbols visible)DOOR REVERSIBILITY
Door Reversibility
A. Unplug the dryer.
B. Open the door.
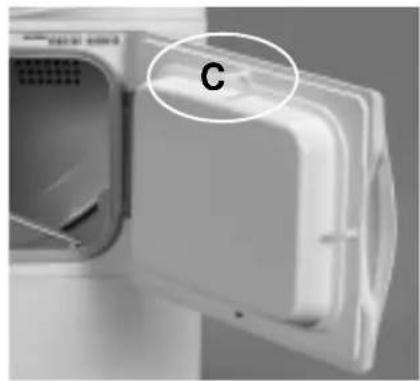
C. Using a spanner, turn the contact pin on the inside of the door (top) through 90° and remove it.
D. Remove the 2 door hinge screws, followed by the door.
E. Unscrew the 2 screws above and below the door lock system.
F. Removing the door lock: using a screwdriver, press down on the small rib in the upper opening and extract the door lock by pulling it towards you.
G. Reverse the door:
H. Fasten the door on the desired side using the 2 screws.
I. Insert the door lock system on the opposite side and lock it securely.
J. Fix the 2 screws above and below the door lock system.
K. Replace the contact pin in the inside of the door (top).
natural_image
Close-up of a white appliance with a labeled component 'C' (no text or symbols on the device itself)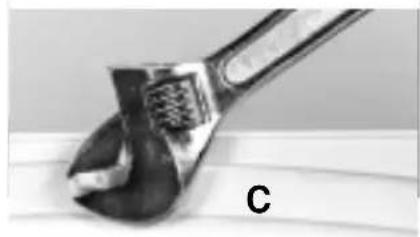
natural_image
Close-up of a metallic wrench with a label 'C' on the handle (no other text or symbols visible)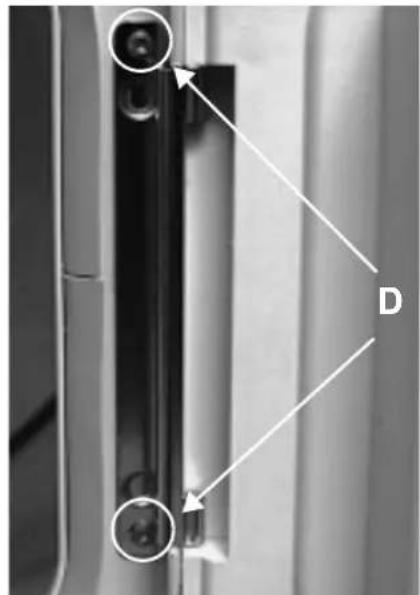
natural_image
Close-up of a door handle with two circular arrows pointing to the lock and a labeled point D (no text or symbols beyond labels)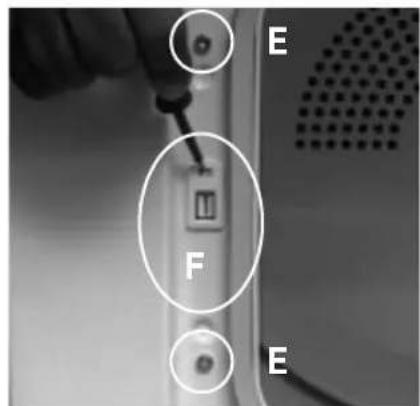
text_image
E F ETROUBLESHOOTING GUIDE / AFTER-SALES SERVICE
Troubleshooting Guide
If a fault occurs, before contacting our After-Sales Service, make the following checks to try and remedy the problem:
Drying takes too long / laundry is not dry enough:
• Was the correct programme selected?
- Was the inserted laundry too wet (Washing machine spin speed less than 800 rpm)?
• Is the lint filter dirty (filter indicator lamp on)?
- Does "END" and "Anti-Crease" LED's are lights up? - The drying cycle is terminated, the laundry can be taken out.
The dryer does not operate:
(following a power failure and/or interruption to the mains supply, always press the Start button).
- Is the plug properly inserted into the mains electricity socket?
• Is there a power failure? - Has the fuse blown?
• Is the door well closed?
• Has the programme been selected?
• Has the start delay option been selected?
• Has the Start (Pause) button been pressed?
Lint filter indicator lamp light on:
• Is the lint filter clean?
• Is the vent hose blocked?
• Is the outside vent hose adaptor blocked?
After-Sales Service
If, after carrying out the above checks the malfunction persists or appears again, turn the dryer off and call our After-Sales Service (refer to guarantee).
Please specify:
• The nature of the fault.
• The dryer type and model.
- The service code (the number after the word Service on the adhesive rating plate) on the right-hand side when the door is open.
- Your full address and phone number.
SERVICE
0000 000 00000