
10032649 - Vacuum Cleaner Klarstein - Free user manual and instructions
Find the device manual for free 10032649 Klarstein in PDF.


| Product type | Vacuum cleaner (cordless stick) |
| Model number | 10032649 |
| Power supply | 220-240 V ~ 50/60 Hz |
| Charger input | 100-240 V ~ 50/60 Hz (if charger is included, but not specified exactly) |
| Battery type | Rechargeable, integrated battery pack |
| Charging indicator | Green flashing (charging), green steady (full), red flashing (low battery) |
| Dust cup capacity | Approximately 0.5 L (estimated from typical size) |
| Filtration system | Cyclone cone, HEPA filter, filter cotton, motor inlet sponge |
| Accessories included | Electric floor brush, aluminum alloy tube, crevice nozzle, round brush, charger, holder |
| Operating time | Not specified (estimated 20-30 minutes typical) |
| Charging time | Not specified (estimated 4-5 hours typical) |
| Safety features | Overheat protection, automatic shutoff if blockage, keep away from heat sources |
| Maintenance | Empty dust cup when dust reaches max line; wash cyclone cone, HEPA, filter cotton, sponge with water; dry completely before reuse |
| Spare parts availability | Manufacturer recommends using only original parts; warranty void if unauthorized parts used |
| Disposal | Do not dispose as household waste; recycle per WEEE directive 2012/19/EU |
| Intended use | Indoor household use only |
| Product dimensions | Not specified |
| Product weight | Not specified |
Frequently Asked Questions - 10032649 Klarstein
User questions about 10032649 Klarstein
0 question about this device. Answer the ones you know or ask your own.
Ask a new question about this device
Download the instructions for your Vacuum Cleaner in PDF format for free! Find your manual 10032649 - Klarstein and take your electronic device back in hand. On this page are published all the documents necessary for the use of your device. 10032649 by Klarstein.
USER MANUAL 10032649 Klarstein
natural_image
Technical line drawing of a mechanical device with an arrow indicating motion or assembly (no text or symbols present)natural_image
Diagram of a vehicle showing engine, transmission line, and internal components (no text or labels)natural_image
Diagram showing a vehicle before and after assembly, with no visible text or symbolsnatural_image
Technical line drawings of a mechanical device with two views (top and side), showing internal components and motion indicators (no text or symbols)natural_image
Technical line drawing of a mechanical device with vertical and horizontal components (no text or symbols)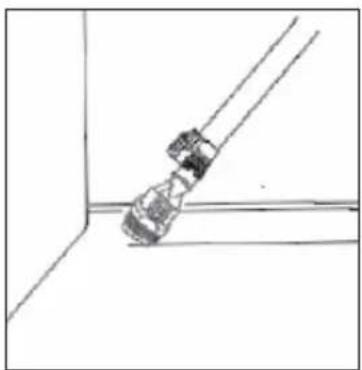
natural_image
Simple line drawing of a mechanical assembly or bracket with no visible text or symbolsnatural_image
Technical line drawing of a mechanical device with a downward arrow indicating motion (no text or symbols)natural_image
Technical line drawing of a mechanical assembly with cross-sectional views (no text or symbols)natural_image
Symbol of a trash bin crossed out by a diagonal line, with no text or labels present.Congratulations on purchasing this equipment. Please read this manual carefully and take care of the following hints to avoid damages. Any failure caused by ignoring the mentioned items and cautions mentioned in the instruction manual are not covered by our warranty and any liability.
CONTENT
Safety Instructions 14
Product Overview 15
Use and Operation 16
Care and Cleaning 19
Hints on Disposal 21
TECHNICAL DATA
| Item number 10032648, 10032649 | |
| Power supply 220-240 V ~ 50/60 Hz |
DECLARATION OF CONFORMITY

Producer:
Chal-Tec GmbH, Wallstraße 16, 10179 Berlin, Germany.
This product is conform to the following European Directives:
2014/30/EU (EMC)
2014/35/EU (LVD)
2011/65/EU (RoHS)
2013/666/EU (ErP)
SAFETY INSTRUCTIONS
This project all the contents are related to safety, please make the user abide it. The project precautions just in order to properly use this product. Note the risk, the magnitude of the hazard, and the possible accidents.
- Do not use other parts without permission from the manufacturer, if thus the machine is in trouble, the warranty will be automatically suspended.
- After dismantling the packing, please check whether the product is damaged, and the parts are complete.
- If the power cord is damaged, in order to avoid danger, it must be replaced by the manufacturer, the maintenance department or similar department.
- Children and incapacitated people use this product under supervision of a guardian.
- If a fault occurs, immediately unplug the power cord, do not have the defective product in working condition.
- Please do not let the vacuum cleaner too close to a heat source and other hot objects, avoid plastic parts deformation, affect the use.
- When using the vacuum cleaner, please note that each filter element installed, do not use a vacuum cleaner in the absence of the filter member.
- Pay attention to check the plug, the power cord must be completely undamaged to avoid the risk of electric shock.
- Make sure that the power supply is secure and the local voltage is consistent with the voltage identified by the product.
- We suggest you cut the power cord before disposing the product. Also suggest you to any possible causing any danger, especially for children in dangerous parts to take the same action.
• This product is just limited to household. Do not use this product in outdoor.
- Please don't use a vacuum cleaner sucking lighted cigarette butts in order to avoid danger. Please do not suck detergent, kerosene, gasoline, paint, sewage and other liquids, in order to avoid the liquid into the motor causing motor failure.
- When using the vacuum cleaner, please don't inhale hair groups, large ball of paper, that are easy to be blocked by the suction port or suction pipe, hose, etc. otherwise may cause motor failure or housing deformation. If inhaled causing blockage, please stop timely and pull the plug off to clean.
- When cleaning the vacuum cleaner, please use wet rag with water or neutral detergent, don't use gasoline, banana oil and so on, otherwise it will cause shell cracking or fade.
- Please don't use a vacuum cleaner to suck the cement, gypsum powder, kalsomine, starch and other tiny particles, otherwise it will cause a vacuum cleaner filter clogging, motor burning out, such as fault, if inhaled small particles above, please clean the filter timely.
- When the factory produces, just do the charging test to the battery. When battery power is low, need to charge before use after receiving the goods.
- Please make sure that the first 3 times charge are full to complete the battery activation protection.
PRODUCT OVERVIEW
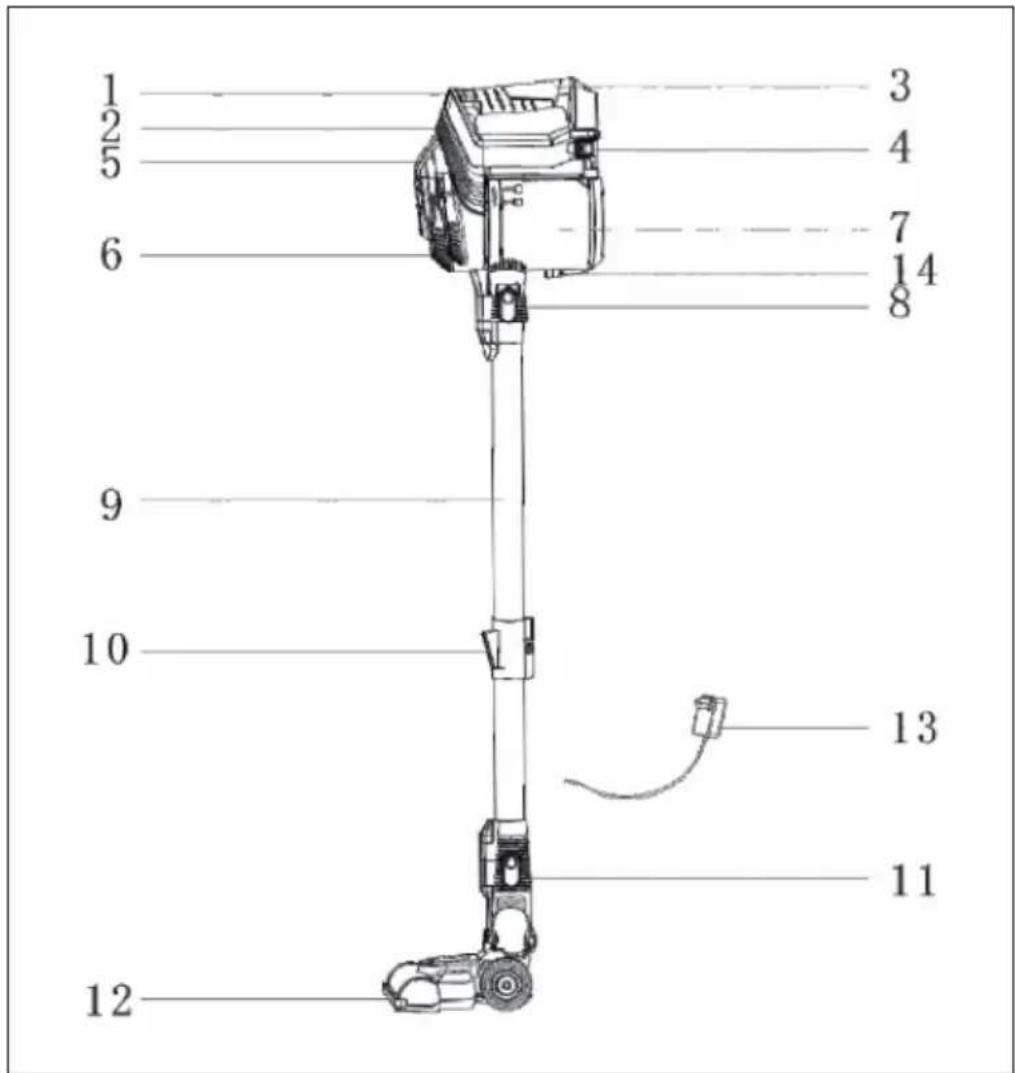
1 On/off button
2 Eco button
3 Handel
4 Battery box
5 Indicator
6 Outlet plate
7 Dust cup
8 Electric tube release button
9 Electric tube
10 Holder
11 Electric floor brush release button
12 Electric floor brush
13 Adaptor
14 Dust cup release button
USE AND OPERATION
Aluminum alloy installation instructions
-
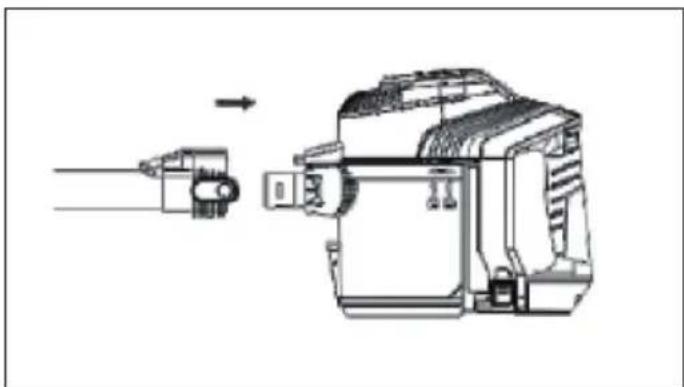
Insert the end of the aluminum alloy pipe into the main engine inlet opening, after hearing the clicks. Aluminum alloy tube installed in place.
-
If you want to remove the aluminum alloy tube, One hand hold the aluminum alloy tube to release button, the other hand hold the aluminum alloy and remove the outward.
natural_image
Technical line drawing of a mechanical device with an arrow indicating motion or assembly (no text or symbols present)Assemble and dis-assemble the brush
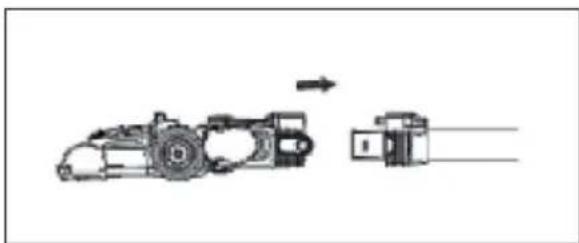
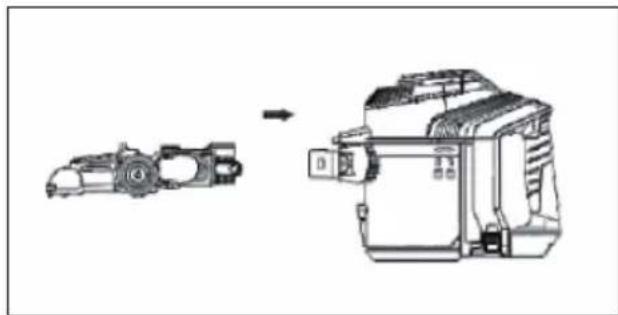
- Push Electric floor brush round mouth side to Aluminium alloy pipe inlet, ensure tight without loose, after hearing the clicks, electric floor brush installed in place.
- If you want to remove the electric floor brush, pls hold the electric floor brush to release button with one hand and the other hand hold the electric floor brush and remove the outward.
natural_image
Diagram of a vehicle with an arrow indicating motion, showing front and side views (no text or symbols)Electric floor brush and unit suction inlet connection
-
Push electric floor brush round mouth into the inlet within the host, ensure tight without loose, after hearing the clicks, electric floor brush installed in place.
-
If you want to remove the electric floor brush, one hand hold the electric floor brush to release button, the other hand hold the electric floor brush and remove the outward.
natural_image
Technical line drawing showing a mechanical assembly transforming into a device (no text or symbols present)Charging the battery
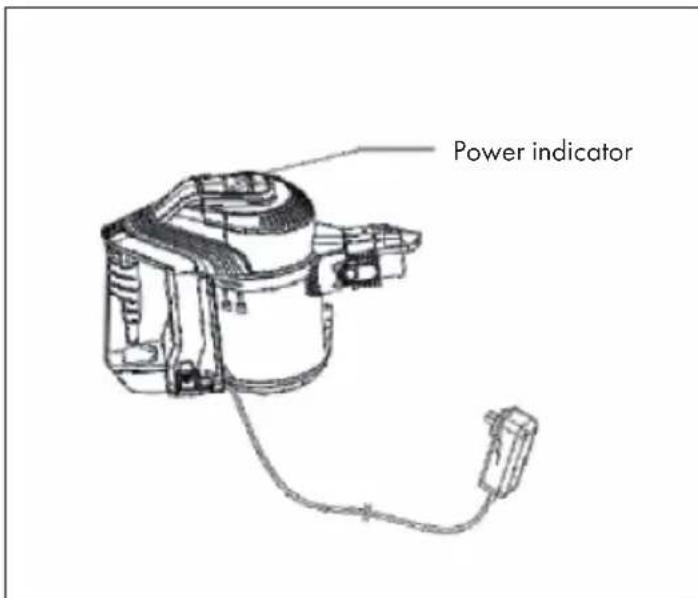
- Connect the charger cable to the unit as shown in the illustration and plug the charger into the wall outlet. The unit will start charging automatically.
- If the charging indicator flashes green, this means that the battery is still charging. If the charging indicator is permanently green, the battery is fully charged. If the green light goes out, this means that the battery status is reduced. This may cause the unit to malfunction. When the charging indicator starts flashing red, the unit must be charged. NOTE: Remove the vacuum cleaner pipe before charging.
Instructions of dust cup installation
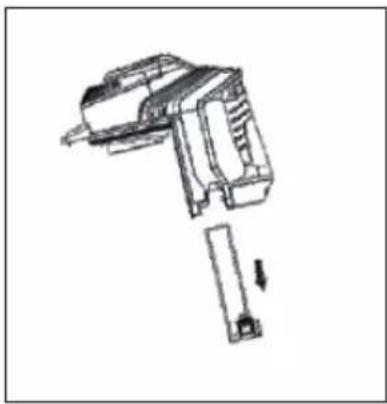
- Align the bottom groove of the dust cup with the front protruding part of the main unit, when firmly press the dust cup until hearing the clicks, the dust cup has been installed.
- When need to remove the dust cup, push the dust cup release button, then you can remove the dust cup.
Accessories installation instructions / Storage function instructions
- Insert the long crevice nozzle, round brush into the unit suction mouth, which is installed. To remove, just pull.
- After cleaning, in order to facilitate subsequent access, the unit and accessories as shown in figure can be placed on the storage.
Product use
- Make sure the battery box been inserted into the main unit before use.
natural_image
Technical line drawing of a mechanical component with an arrow indicating motion (no text or symbols)-
According to the cleaning requirements, select the appropriate accessories to install.
-
Hold the handle of the electric trigger switch, the vacuum cleaner starts working, if need to stop working, release the electric trigger switch.
-
When the vacuum cleaner works, the power indicator light is green for long.
CARE AND CLEANING
Clean up the dust cup
When the dust cup sucks for maximum indicator lines, it should be timely cleaning the dust cup, cyclone cone dust collection system in order to ensure the best cleaning effect.
-
Push the dust cup release button, remove the dust cup after the host stop working.
-
Place the dust cup above the garbage bin, and slowly draw the cyclone dust collecting system out.
-
Gently shake the dust cup, pour the garbage of the dust cup out.
-
When necessary, the cup can be directly washed with water. But after washing must be completely dry before you can re install back to use.
Clean up the cyclone system
-
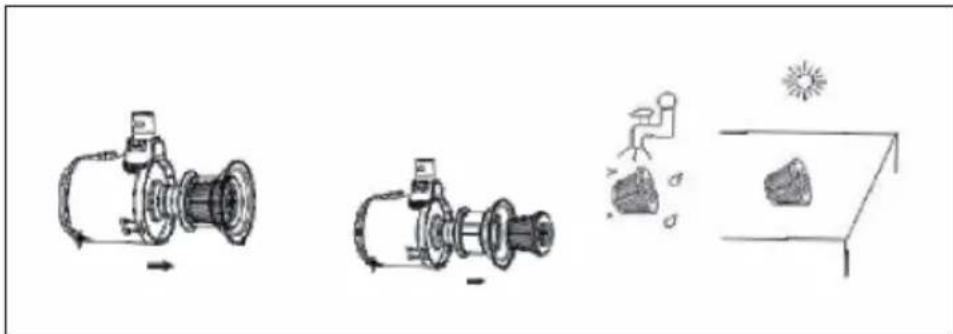
Hold the filter assembly on the lid handle counterclockwise and pull out the filter assembly after rotation in the end to separate the filter components from the cyclone cone.
-
Separate filter cotton and HEPA components within the filter assembly. Knock gently filter cotton, HEPA assembly, cyclone cone on the trash, rough remove dust adhesion, when necessary, can be directly washed with water, but after washing must be completely dry before you can re install back to use.
-
Rotate clockwise in the end after aiming the filtering component on the locking block of the cyclone cone, filter components and cyclone cone are fixed.
-
The locking block on the cyclone dust collection system is aligned and pressed into a locking block of the dust cup, make the cyclone dust collection system back to the dust cup.
-
Remove the motor inlet sponge, gently knock, rough remove dust adhesion. When necessary, can be directly washed with water, but after washing must be completely dry before you can re-install back to use.
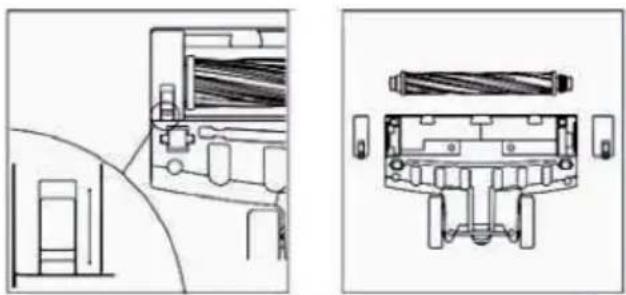
Clean up the electric floor brush
-
Press the electric floor brush release button, remove the electric floor brush. Arbitrary sliding electric brush to the bottom side of the rolling brush locking block, remove the rolling brush. Clean it.
-
After the cleanup completed, install the rolling brush inside the electric floor brush.
natural_image
Technical line drawing of a mechanical assembly with cross-sectional and top views (no text or symbols)HINTS ON DISPOSAL
natural_image
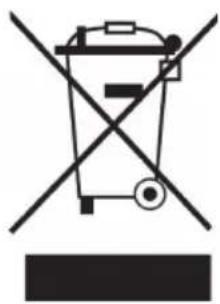
Symbol of a trash bin crossed with a diagonal line, no text or labels presentAccording to the European waste regulation 2012/19/EU this symbol on the product or on its packaging indicates that this product may not be treated as household waste. Instead it should be taken to the appropriate collection point for the recycling of electrical and electronic equipment. By ensuring this product is disposed of correctly, you will help prevent potential negative consequences for the environment and human health, which could otherwise be caused by inappropriate waste handling of this product. For more detailed information about recycling of this product, please contact your local council or your household waste disposal service.

bar
| Category | Value | |---|---| | Bar 1 | 0.0 | | Bar 2 | 0.0 | | Bar 3 | 0.0 | | Bar 4 | 0.0 | | Bar 5 | 0.0 |KLARSTEIN NIEI SRA T EIN NIEI SRA T K LARS KLARSTEIN NIEI SRA T EIN NIEI SRA T K LARS KLARSTEIN NIEI SRA T EIN NIEI SRA T K LARS KLARSTEIN NIEI SRA T
- CONTENT
- TECHNICAL DATA
- DECLARATION OF CONFORMITY
- SAFETY INSTRUCTIONS
- PRODUCT OVERVIEW
- USE AND OPERATION
- Aluminum alloy installation instructions
- Assemble and dis-assemble the brush
- Electric floor brush and unit suction inlet connection
- Charging the battery
- Instructions of dust cup installation
- Accessories installation instructions / Storage function instructions
- Product use
- CARE AND CLEANING
- Clean up the dust cup
- Clean up the cyclone system
- Clean up the electric floor brush
- HINTS ON DISPOSAL
Brand : Klarstein
Model : 10032649
Category : Vacuum Cleaner