Phone L62 - Phone Swyx - Free user manual and instructions
Find the device manual for free Phone L62 Swyx in PDF.


User questions about Phone L62 Swyx
0 question about this device. Answer the ones you know or ask your own.
Ask a new question about this device
Download the instructions for your Phone in PDF format for free! Find your manual Phone L62 - Swyx and take your electronic device back in hand. On this page are published all the documents necessary for the use of your device. Phone L62 by Swyx.
USER MANUAL Phone L62 Swyx
SwyxPhone L6x User Documentation SwyxPhone L62 - SwyxPhone L64 - SwyxPhone L66
As of: November 2017
© 2000-2017 Swyx Solutions AG. All rights reserved.
Legal Information
Whilst we attempt to convey accurate and up-to-date information in this documentation, it may contain typographical or technical errors.
This documentation, including all information contained herein is provided "as is", without any warranty of any kind, whether expressed or implied, including, but not restricted to, any implied warranties of merchantability or fitness for a particular purpose or non-infringement. This documentation, including all information contained herein is provided "as is", without any warranty of any kind, whether express or implied, including, but not restricted to any implied warranties of merchantability or fitness for a particular purpose.
Trademarks: All mentioned trademarks and product names are registered trademarks of Swyx Solutions AG and/or its respective owners. This documentation is proprietary intellectual property of Swyx Solutions AG. Reproduction, adaptation, or translation of this documentation without the express written consent of Swyx is prohibited and will be prosecuted as a violation of intellectual property rights.
Swyx Solutions AG
Emil-Figge-Str. 86
D-44227 Dortmund
www.swyx.com
Contents
The SwyxPhone series L6x 6
How does SwyxPhone L6x work? 10
2.1 SwyxWare - Interaction of the components.... 10
What is meant by...? 12
3.1 Subscriber 12
3.2 Group....12
3.3 Call Signalling.... 12
3.4 Status Signalling.... 12
3.5 Number (phone number) 12
3.6 Call permissions 13
3.7 Line....13
3.8 Trunk and Trunk Groups.... 13
3.9 User....13
3.10 Active Connection.... 14
3.11 Connection on Hold 14
3.12 Call waiting.... 14
3.13 Conference.... 14
3.14 Call Swap.... 14
3.15 Acoustic Signals 15
3.16 Call Routing.... 15
3.17 Voicemail 15
3.18 Remote Inquiry 16
3.19 CTI 16
3.20 Callback request....16
3.21 Wrap Up Time 16
3.22 Intercom Connection 16
3.23 Telephone States....16
Set It Up & Log On....18
4.1 General Safety Advice.... 18
4.2 Intended use.... 18
4.3 Care Instructions 18
4.4 Eco-friendly disposal....18
4.5 Scope of supply.... 18
4.6 System requirements....18
4.7 Connection of the phones....19
4.7.1 Power Supply.... 19
4.7.2 Connect SwyxPhone L6x 19
4.8 Connecting a Key Module 21
4.9 Logging in to SwyxServer 22
4.9.1 Log off....22
4.9.2 Automatic Update 23
Control elements of SwyxPhone L62 24
5.1 Buttons....24
5.1.1 Defined keys....24
5.1.2 Preconfigured function keys 26
5.2 Display and menu navigation 27
Telephoning with SwyxPhone L62 28
6.1 How do I call a subscriber? 28
6.2 Other Options for Dialing a Number 29
6.3 Available options during a call 29
6.4 How do I pick up a call? 29
6.5 How do I pick up a call? 30
6.6 How do I end a call? 31
6.7 How do I telephone with a headset? 31
6.8 How do I start an inquiry call? 32
6.9 How do I switch between lines (Call Swap)? 32
6.10 How do I connect two subscribers to one another?...... 33
6.11 Transfer When Placing Handset on Hook.... 33
Contents
6.12 How do I transfer a call without Inquiry? 33
6.13 How do I forward a call? 34
6.14 The Secondary Call.... 35
6.15 How do I forward a call? 35
6.15.1 Define Call Forwarding Unconditional 35
6.15.2 Define Call Forwarding Busy 36
6.15.3 Define Call Forwarding No Reply.... 36
6.15.4 Signaling a Forwarding 37
6.16 How do I use the Phonebook? 37
6.17 Speaker and Handsfree Telephone 38
6.17.1 Activating/Deactivating the Speaker During a Call 38
6.17.2 Activating/Deactivating the Microphone During a Call.... 38
6.17.3 Activating the Handsfree Facility During a Call 39
6.17.4 Deactivating the Handsfree Facility During a Call 39
6.17.5 Activate Handsfree Facility for outgoing call 39
6.17.6 Activating the Handsfree Facility for an Incoming Call 39
6.17.7 Regulating the Volume 39
6.18 Configuring the Ringing tone 39
6.19 Charging info....40
6.20 Sequence of the Display Entries While Idle 40
SwyxPhone L62 advanced Telephony Functions....41
7.1 Disabling Lines (Wrap-up Time) 41
7.2 Voicemail inquiry 42
7.3 Remote Inquiry 43
7.3.1 Change Forwarding Unconditional.... 45
7.4 Project Codes 46
7.5 Note 46
7.6 Callback request....47
7.6.1 Callback on busy....47
7.6.2 Callback if idle 48
7.7 Conference....51
7.7.1 Starting a Conference 51
7.7.2 Inquiry Calls and Add....51
7.7.3 Leaving or Ending a Conference....52
7.7.4 Conference Rooms 52
7.8 Using a headset....53
7.8.1 Connecting a headset to SwyxPhone L62.... 53
7.9 Call Intrusion....54
7.9.1 Multiple Call Intrusions....54
SwyxPhone L62 Configuration 55
8.1 User Profile 55
8.1.1 Call Forwarding 55
8.1.2 Do not disturb....56
8.1.3 Secondary call 56
8.2 Settings in the Configuration Menu 56
8.2.1 Ring tones....56
8.2.2 Call Signaling....56
8.2.3 Lines....57
8.2.4 Incognito 57
8.2.5 Info 58
8.2.6 Contrast....58
8.2.7 Transfer on Hookon....58
8.3 Lists....58
8.3.5 Lists for Callback Requests, My Callback Requests and Missed Callbacks....63
8.4 Configure function keys....63
8.5 Configure Line buttons 66
8.6 Configuring Speed Dials 67
8.6.1 "Dial immediately", "Successive dial" or "Intercom Connection"? 68
Control elements of SwyxPhone L64....70
9.1 Buttons 70
9.1.1 Defined keys 70
9.1.2 Configurable Function Keys 72
9.2 Display and menu navigation....72
Telephoning with SwyxPhone L64 74
10.1 How do I call a subscriber? 74
10.2 Other Options for Dialling a Number 75
10.3 Available Options During a Call 76
10.4 How do I pick up a call? 76
10.5 How do I pick up a call? 78
10.6 How do I end a call? 78
10.7 How do I telephone with a headset? 79
10.8 How do I start an Inquiry Call? 79
10.9 How do I switch between lines (Call Swap)?...... 80
10.10 How do I connect two subscribers to one another?...... 81
10.11 Transfer when Placing Handset on Hook 81
10.12 How do I transfer a call without Inquiry? 82
10.13 How do I forward a call? 82
10.14 The Secondary Call....83
10.15 How do I forward a call? 83
10.15.1Define Call Forwarding Unconditional.... 84
10.15.2Define Call Forwarding Busy 85
10.15.3Define Call Forwarding No Reply 86
10.15.4 Signaling a Forwarding 86
10.16 How do I use the Phonebook? 87
10.17 Speaker and Handsfree Telephone 88
10.17.1 Activating/Deactivating the Speaker during a call 88
10.17.2 Activating/Deactivating the Microphone During a Call 88
10.17.3 Activating the Handsfree Facility during a call....88
10.17.4 Deactivating the Handsfree Facility during a call 88
10.17.5Activate handsfree facility for outgoing call 88
10.17.6 Activating the Handsfree Facility for an incoming call 88
10.17.7 Regulating the volume....89
10.18 Configuring the ringing tone 89
10.19 Charging info....89
10.20 Sequence of the Display Entries while idle....89
SwyxPhone L64 advanced Telephony Functions....90
11.1 Voicemail inquiry....90
11.2 Remote Inquiry 90
11.2.1 Change Forwarding Unconditional 92
11.3 Project Codes 94
11.4 Note....94
11.5 Callback request 95
11.5.1 Callback on busy 95
11.5.2 Callback if idle 97
11.6 Conference....99
11.6.1 Starting a Conference 99
11.6.2 Inquiry Calls and Add 99
11.6.3 Leaving or Ending a Conference.... 100
11.6.4 Conference Rooms 100
11.7 Using a headset.... 101
11.7.1 Connecting a headset to SwyxPhone L64.... 101
11.8 Call Swap as a substitute for Line buttons 102
11.9 Call Intrusion.... 102
11.9.1 Multiple Call Intrusions 103
SwyxPhone L64 Configuration 104
12.1 User Profile 104
12.1.1 Call Forwarding.... 104
12.1.2 Do Not Disturb.... 105
Contents
12.1.3 Secondary call 105
12.2 Settings in the Configuration Menu 105
12.2.1 Ring tones.... 106
12.2.2 Call Signaling.... 106
12.2.3 Incognito 107
12.2.4 Transfer on Hookon.... 107
12.3 Lists.... 107
12.3.5 Lists for Callback Requests, My Callback Requests and Missed Callbacks.... 112
12.4 Configure function keys.... 113
12.5 Lines 116
12.5.1 Configure Line buttons.... 116
12.6 Disabling Lines (Wrap-up Time) 117
12.7 Configuring Speed Dials 118
12.7.1 "Intercom" 119
Control elements of SwyxPhone L66....121
13.1 Buttons 121
13.1.1 Defined keys 121
13.1.2 Preconfigured function keys in the "Favourites" menu.... 123
13.1.3 Configurable function keys on the key module 124
13.2 Display and menu navigation.... 125
Telephoning with SwyxPhone L66....126
14.1 How do I call a subscriber? 126
14.2 Other Options for Dialing a Number 127
14.3 Available Options during a Call 129
14.4 How do I pick up a call? 129
14.5 How do I pick up a call? 130
14.6 How do I end a call? 131
14.7 How do I telephone with a (Bluetooth) headset? 131
14.8 How do I start an inquiry call? 132
14.9 How do I switch between lines (Call Swap)? 133
14.10 How do I connect two subscribers to one another?...... 134
14.11 Transfer When Placing Handset on Hook.... 134
14.12 How do I transfer a call without Inquiry? 135
14.13 How do I forward a call? 135
14.14 The Secondary Call.... 136
14.15 How do I forward a call? 136
14.15.1Define Call Forwarding Unconditional.... 137
14.15.2Define Call Forwarding Busy 138
14.15.3Define Call Forwarding No Reply.... 139
14.15.4Signaling a Forwarding 140
14.16 How do I use the Phonebook? 141
14.17 Speaker and Handsfree Telephone.... 141
14.17.1 Activating/Deactivating the Speaker During a Call.... 141
14.17.2 Activating/Deactivating the Microphone During a Call.... 142
14.17.3 Activating the Handsfree Facility During a Call 142
14.17.4Deactivating the Handsfree Facility During a Call 142
14.17.5Activate handsfree facility for outgoing call 142
14.17.6Activating the Handsfree Facility for an Incoming Call 142
14.17.7 Regulating the Volume 142
14.18 Configuring the Ringing tone.... 143
14.19 Charging info.... 143
14.20 Sequence of the Display Entries While Idle 143
SwyxPhone L66 advanced Telephony Functions....144
15.1 Voicemail inquiry.... 144
15.2 Remote Inquiry 144
15.2.1 Change Forwarding Unconditional 146
15.3 Project Codes 148
15.4 Note 148
15.5 Callback request.... 149
15.5.1 Callback on busy.... 149
15.5.2 Callback if idle.... 151
15.6 Conference.... 153
15.6.1 Starting a Conference 153
15.6.2 Inquiry Calls and Add 154
15.6.3 Leaving or Ending a Conference 154
15.6.4 Conference Rooms 155
15.7 Using a headset.... 156
15.7.1 Connecting a headset to SwyxPhone L66.... 156
15.7.2 Connecting a Bluetooth Headset 157
15.8 Call Intrusion.... 159
15.8.1 Multiple Call Intrusions 159
SwyxPhone L66 Configuration 160
16.1 User Profile 160
16.1.1 Call Forwarding.... 160
16.1.2 No disturb 161
16.1.3 Secondary call 161
16.2 Settings in the Configuration Menu 161
16.2.1 Ring tones.... 162
16.2.2 Call Signaling.... 162
16.2.3 Incognito 163
16.2.4 Transfer on Hookon.... 163
16.3 Lists.... 163
16.3.5 Lists for Callback Requests, My Callback Requests and Missed Callbacks.... 169
16.4 Configure function keys.... 169
16.5 Lines 172
16.5.1 Configure Line buttons.... 173
16.6 Disabling Lines (Wrap-up Time) 174
16.7 Configuring Speed Dials 175
16.7.1 "Intercom" 176
Interaction with Swyxlt! 178
17.1 Configuration of SwyxPhone in Swyxlt! 178
17.2 Settings which can only be made in Swyxlt! 180
17.2.1 Length of the Caller List and the Redial List 180
17.2.2 Rulebook of the Call Routing Managers 180
17.2.3 Voicemail.... 180
17.2.4 Remote Inquiry.... 180
17.3 Settings Which Are Simultaneously Valid for Swyxlt! and SwyxPhone.... 180
17.3.1 Phonebooks 180
17.3.2 "Mutual Ringing" for SwyxPhone and Swyxlt! 180
17.3.3 Speed dials 181
17.3.4 Lines and Line Buttons.... 181
17.3.5 Call Forwarding 181
17.3.6 Lists.... 181
17.4 Settings Which Are Individually Valid for Swyxlt! and SwyxPhone.... 181
17.5 PC Operation of a SwyxPhone or Swyxlt! (CTI).... 181
Call Management: What do I do, if...? 184
Technical Terms 187
Function codes 193
The SwyxPhone series L6x
The system phones of "L" series are designed to meet the demands and telephony skills of various users. They are equipped with up-to-date performance features.
Beside the ergonomic design, each of the three new models are designed with an intuitive and user-friendly operating concept, freely configurable function keys and high-resolution displays.
The L6x phones take full advantage of the numerous functions of the Swyx software solution.
Beside the encryption of call data via "Secure Real Time Transport Protocol" (SRTP), the "L6x" series phones support the transmission of voice data in HD audio quality.
A brief overview of the various system phones and key modules follows, and subsequent chapters give detailed descriptions
You will find the latest versions of user and administrator manuals in internet under:
https://www.swyx.com/products/support/documentation.html
The SwyxPhone series L6x
SwyxPhone L6x Overview
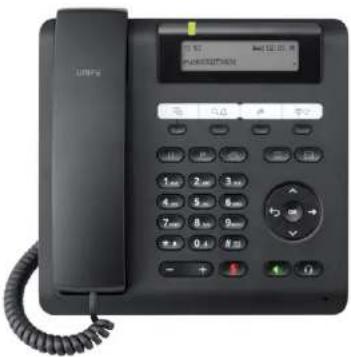
SwyxPhone L62
SwyxPhone L62 is the entry-level variant of the L6x series, easily and optimally integrable by any user into the SwyxWare concept.
The user has four freely configurable function keys with LED. The SwyxPhone L62 also has five defined function keys, three audio keys and five navigation buttons for intuitive operation.
text_image
OPPO 12:32 I am 10:00 PM PANETRAPHEN 电话 电话 电话 电话 1.0x 2.0x 3.0x 4.0x 5.0x 6.0x 7.0x 8.0x 9.0x + - + - + - - - - - - - - - - - - - - - - - - - - - - - - - - - - - - - - - - - - - - - - - - - - - - - - - - - - - - - - - - - - - - - - - - - - - - - - - - - - - - - -SwyxPhone L64
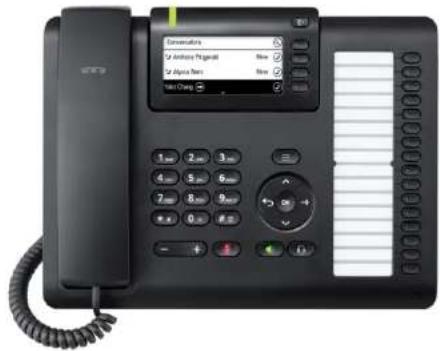
SwyxPhone L64 has four Option keys, two defined function keys and 16 freely configurable function keys. The design of SwyxPhone L64 allows you to connect two Key Modules with additional freely configurable function keys.
text_image
ConversationAlloyou Pregnall
Alloyou Pregnall
Take ChangSwyxPhone L66
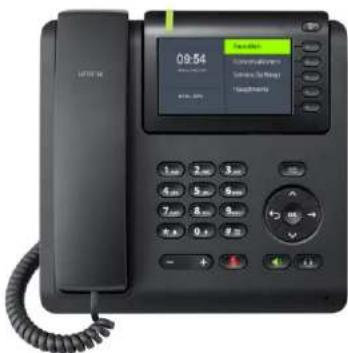
SwyxPhone L66 offers a more extensive functional range along with maximum user-friendliness. The phone has a large swivelling colour HD display, visual call signalling (LED) and five option keys.
text_image
09:54 12:30 1:20 4:20 7:20 12:20 1:20 4:20 7:20 12:20 1:20 4:20 7:20 12:20 1:20 4:20 7:20 12:20 1:20 4:20 7:20 12:20 1:20 4:20 7:2 12:20 1:20 4:20 7:2 12:20 1:20 4:20 7:2 12:20 1:20 4:20 7:2 12:20 1:20 4:20 7:2 12:20 1:20 4:20 7:1 12:1 1:1 4:1 7:1 12:1 1:1 4:1 7:1 12:1 1:1 4:1 7:1 12:1 1:1 4:1 7:1 12:1 1:1 4:1 7:1 12:1 1:1 4:1 7:1 12:1Key modules
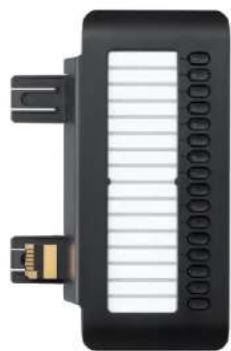
SwyxPhone Key Module 64 for SwyxPhone L64
natural_image
Close-up of a black rectangular electronic component with internal grid lines and a small metallic connector (no visible text or symbols)SwyxPhone Key Module 64 has 16 configurable function keys with LEDs. A paper insert is used for labelling. You can connect up to two SwyxPhone Key Module 64 to a SwyxPhone L64.
SwyxPhone Key Module 66 for SwyxPhone L66
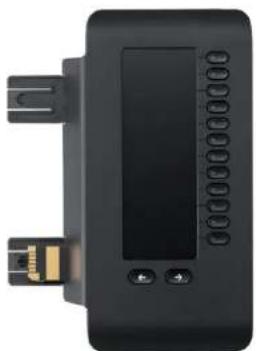
natural_image
Black electronic device with a display and control buttons (no visible text or symbols)SwyxPhone Key Module 66 has 12 configurable function keys with LEDs and in addition two arrow buttons to switch between two levels. The TFT display is used for labelling. You can connect up to four SwyxPhone Key Module 66 to a SwyxPhone L66.
SwyxPhone L6xSeries Phones Compared
| SwyxPhone L62 SwyxPhone L64 SwyxPhone L66 | |||
| Display LCD, monochrome | 2 lines, 192 x 48 pixel | LCD, monochrome, tilting3.7 inch, 240 x 120 pixelBacklight | TFT, tilting4.3 inch, 480 x 272 pixelBacklight |
| Defined Function Keys 5 | 2 | 2 | |
| Free configurable function keys with LEDs | 4 16 - | ||
| Mains power supply optional optional ( from second Key Module mandatory) | |||
| Power over Ethernet IEEE 802.3af | Class 1 Class 2 Class 2 | ||
| Interface for key modules | No | YesUp to two Key ModulesSwyxPhone Key Module 64 | YesUp to four Key Modules SwyxPhone Key Module 66 |
| Headset connection | Yes | Yes | Yes |
| Bluetooth interface | - | - | Bluetooth 2.1 BR/EDRBluetooth 4.1 LE |
| Dimensions: H x W x D (mm) | at 20° 113 x 219 x 165at 45° 173 x 219 x 207 | at 20° 143 x 283 x 165at 45° 189 x 283 x 207 | at 20° 150 x 219 x 207at 45° 193 x 219 x 165 |
| Weight (kg) | 1.0 | 1.2 | 1.0 |
| Wall Mounting | Yes | No | Yes (without Key module SwyxPhone Key Module 66) |
| Audio quality | G.711 (64 kbit/s a/μ-law), G.722 (64 kbit/s), G 729 AB (8 kbit/s) | ||
| Network (LLDP-MED, QoS, IEEE 802.1Q) | 10/100 Mbps Ethernet Switch | 10/100/1000 Mbps Ethernet SwitchEnergy Efficient Ethernet (IEEE 802.3az) | 10/100/1000 Mbps Ethernet SwitchEnergy Efficient Ethernet (IEEE 802.3az) |
| Operating conditions | +5°C to + +40°C | ||
Certification | Declaration of Conformity | ||
2 How does SwyxPhone L6x work?
This chapter introduces the basic technical concepts of SwyxPhone.
SwyxWare - the modern VoIP solution
With SwyxWare you use a software based telephony system which offers extensive advantages.
- Use of a wide range of features, which go far beyond the possibilities of classic telephony systems.
■ Flexibility in Call Forwarding - User Concept your settings are transferred to every SwyxWare device
■ simple configuring of user data
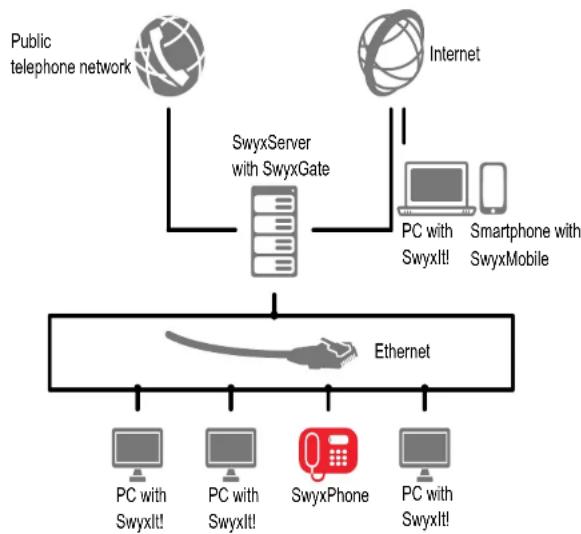
2.1 SwyxWare - Interaction of the components
SwyxWare consists of various components.
SwyxServer
The telephony server SwyxServer acts as a core system, which offers the complete functionality of a sophisticated telephone private branch exchange. The SwyxServer takes care of call handling (e.g. transferring calls to another extension, the public telephone network or to your Voicemail) and manages the devices as well as the users which use it for communication purposes.
SwyxGate
SwyxGate is a supplementary component for SwyxServer and it enables you to make calls in the public telephone network.
flowchart
graph TD
    A["Public telephone network"] --> B["SwyxServer with SwyxGate"]
    C["Internet"] --> B
    B --> D["PC with Swyxlt!"]
    B --> E["Smartphone with SwyxMobile"]
    D --> F["Ethernet"]
    E --> F
    F --> G["PC with Swyxlt!"]
    F --> H["PC with Swyxlt!"]
    F --> I["SwyxPhone"]
    F --> J["PC with Swyxlt!"]
Swyxlt!
Swyxlt! is your telephone on the PC screen. For further information please refer to chapter 17, Interaction with Swyxlt!, page 178.
Voicemail
The SwyxWare telephony solution offers another essential benefit for every subscriber – a high-performance Voicemail functionality. This functionality provides you with an "answering machine" which records those calls which don't reach you, and it allows you to set various announcement texts. The voice messages from your telephone are then found in the form of e-mails in your electronic e-mail inbox.
Remote Inquiry
You can listen to and delete the Voicemails you receive in your electronic e-mail inbox per remote inquiry. Within remote inquiry, you can also use a menu to change the destination of your Call Forwarding Unconditional as well as record a new announcement for your Voicemail.
A User Account for Every User (User Concept)
Every user is provided with an user account. A variety of settings and information are stored there for every SwyxPhone user.
When you start SwyxPhone, it automatically logs on to SwyxServer. You will be asked to enter your PIN for authentication purposes.SwyxServer recognizes the appropriate user data based on the PIN entered and the SwyxPhone is then configured. The advantage of this is that you will find the same configuration and button assignments on any SwyxPhone device or SwyxIt! you log on to with your PIN.
Naturally, the logon procedure also has a security aspect – only those who logon correctly are authorized to place telephone calls.
Two, Four or More Lines for Every User (Line Concept)
Common telephones provide the user with one, sometimes two lines. With SwyxPhone, you have access to two (default setting) or more (a maximum of nine) lines. These line are also known as "virtual lines" because technically they are only implemented as parallel "IP connections" for simultaneous calls on your PC mains connection. The "virtual lines" not only allow you to telephone comfortably, but they also make it easier to use. Just by pressing a button, you can
- select the line you want to speak on, or
- switch between lines, or
- "join" lines in order to connect two subscribers, for example.
Encryption of call data with SRTP
Beside the encryption of call data via "Secure Real Time Transport Protocol" (SRTP), the "L6" series phones support the transmission of voice data in HD audio quality.
The terminals of the SwyxPhone L6x series support this technology, and can also be used for calls via SRT protocol. For further information, please refer to the SwyxWare Administrator documentation.
3 What is meant by...?
This chapter defines in detail the terminology commonly used throughout the SwyxWare documentation.
You will find additional technical terms used in connection with the "Voice-over-IP" technology in App. B: Technical Terms.
3.1 Subscriber
Persons who take part in a phone conversation are called subscribers.
Here we differentiate between
- internal subscribers and
■ external subscribers.
Internal subscribers are subscribers within the company, possibly at different company locations. External subscribers can be reached either via the public telephone network or via the Internet (Internet Telephony).
3.2 Group
Subscribers are combined into a logical unit called a group. The administrator is responsible for creating groups and assigning members to groups. Thus, you can combine all of the company's sales employees into a group called "Sales", for example. The group itself is assigned its own extension number (group extension).
When a group extension call is received, the telephone will ring for all members of the group (group call). The telephone call can then be taken by any group member. However, the administrator can also define groups with a specific call allocation. In this case, according to the definition the call is first forwarded to a specific member of the group - if it is not accepted there, e.g. because the employee is not at his desk or is already on the phone, the call is forwarded to the next member of the group. The administrator can define an order in which the group members are dialed, but can also specify random call allocation.
3.3 Call Signalling
In call signalling, incoming calls for one subscriber (A) are also displayed to another subscriber (B). Subscriber B has the option of picking up
these calls. The system administrator uses the relationships of the subscribers to each other to define signaling.
The calls are displayed for subscriber B in the Windows taskbar. The Pick up button is active. If subscriber B has assigned the destination subscriber's (A) number to a Speed Dial, this will blink. Then, if the call is not picked up within 10 seconds, a single warning tone is produced. The phone call can be picked up by subscriber B immediately or after the warning tone.
Call signaling prevents calls from being "lost" (if, for example, Subscriber A's standard Voicemail or call forwarding have not been activated).
You can enable/disable the warning tone and the taskbar display yourself in your user profile, but the call signalling will continue to be displayed in Swyxlt!.
3.4 Status Signalling
The status of another internal subscriber (e.g. ringing, speaking, logged on, away) is signaled on the Speed Dial which has been assigned his number.
The system administrator uses the relationships of the subscribers to each other to define signaling.
3.5 Number (phone number)
A number is a sequence of digits or a SIP URI. Numbers are differentiated between
- internal and
■ external numbers
Internal numbers are used for calling internal subscribers or groups, who are usually located within your company and are known to Swyx-Server.
External numbers are directed to other subscribers in the public telephone network. They are called using your normal number. The appropriate public line access code must always be dialed (e.g. "0"). External subscribers in a public IP network (Internet) can also be called using their Internet address, SIP URI or domain name (for example, Carol-Jones.company.com).
Examples of Valid Numbers
| Number Meaning | |
| 123 Internal number of a subscriber within a company in which SwyxServer is used. | |
| 09776123 The number of a subscriber who can be reached via the public telephone network (local call, the 0 is the public line access in this example). | |
| 002319776123 The number of a subscriber who can be reached via the public telephone network (long distance call, the first 0 is the public line access in this example). Please note that you must always use the area code in order for the call to be delivered. | |
| 0001324345456 International call (the first 0 is the public line access in this example). | |
| carol.jones@company.com | SIP-URI. This is constructed similarly to an e-mail address, and consists of a user name and the realm (name range, rather like a domain). |
3.6 Call permissions
The administrator has the option of configuring rights for outgoing calls of groups or users. This means that certain phone numbers (e.g. for local, long distance or international calls) are blocked for the indicated user or group. If a blocked number is dialled, an error message will appear. Please contact your administrator for further information.
3.7 Line
In SwyxWare, the term "Line" refers to a potential telephone connection which can be used to place your telephone calls. Due to the fact that SwyxWare uses the IP protocol or SIP protocol to transmit telephone calls, this new IP telephony is not connected to an actual "cable connection" for each telephone call. On the contrary; it enables you to carry out several independent calls simultaneously via your network connection.
SwyxWare continues to use the familiar term "Line" for the "logical" connection option for a telephone call, even though a "physical" line is no longer required for this connection. This concept allows you, on the one hand, to continue to use the practical and simple term "Line" – a subscriber can still "be on hold on the other line" – and, on the other hand, you can profit from the new line flexibility:
It is now possible, for example, to determine in just a few steps how many lines you need at your place of work without actually having to install a new physical line and a new telephone.
3.8 Trunk and Trunk Groups
"Trunk" denotes a connection into another network, e.g. the public telephone network. A connection to another network can be e.g. an "ISDN trunk", a connection to the Internet an "SIP trunk". Connections (trunks) of the same type can be combined to form groups. The trunks of a trunk group then have the same properties - the trunk groups can therefore be seen primarily as capacity expansions.
Different trunk groups can be differently prioritized by the administrator. The result is e.g. that calls are handled with preference given to a cost-efficient connection (e.g. an SIP trunk directly to the Internet). If this is not available, a lower-priority path is chosen, e.g. an ISDN trunk to the normal telephone network.
For further information please refer to the SwyxWare Administrator documentation.
3.9 User
A user is a person, a group or a location (for example, a conference room), for whom/which an account has been set up on the SwyxServer. Each account on the SwyxServer is assigned a user name, a PIN (Personal Identification Number), and usually a Windows user account (even several, if necessary). The PIN is required for remote inquiry and user authentication when using the SwyxPhone, the desk telephone of the SwyxWare product family.
When Swyxlt! is started, your current Windows user account will automatically be used to check your access authorization and to identify your user account on SwyxServer. If SwyxServer does not find a SwyxServer account for your Windows user account, then Swyxlt! will be exited and an error message will appear. If several SwyxServer accounts exist for
your Windows user account, you will be prompted by Swyxlt! to choose one of these accounts.
Each user's individual settings will be stored centrally on SwyxServer (for example, entries in the Personal Phonebook, forwarding definitions, or the assignment of extension numbers to lines). This means that it doesn't matter which PC or which SwyxPhone you logon to, you will always find the same telephone environment!
If you share a SwyxPhone with someone, the system administrator must set up one user account for both of you together. In such a case, you must discuss the password and the settings with your partner so that you are both able to change the configuration.
3.10 Active Connection
An active connection is the period during a telephone call in which you can hear your conversation partner and your partner can hear you.
3.11 Connection on Hold
A connection on hold is a telephone call you have placed but which you have interrupted for a short time.
The subscriber put on hold hears music on hold. The call on hold can be reactivated. If you have a second call on another line at the same time, the connection that was active until now will become a connection on hold.
In this way, you can conveniently take several calls "simultaneously" and easily switch between the individual callers (Call Swap).
Example:
Another call comes in for you while you are having a telephone conversation. The new call is displayed as incoming call. If you take this call, the call which was just active will be put on hold and the incoming call becomes active.
3.12 Call waiting
If you are in the middle of a telephone conversation and another call comes in, this call will be shown and a call waiting tone (not actually ringing) will be played in the active conversation. This procedure is known as Call Waiting. You can now decide whether you would like to put the current call on hold in order to take the second call or whether you would like to continue your call without interruption. If you take this call, the call which was just active will be put on hold and the incoming call becomes active.
3.13 Conference
A conference is a call between at least three subscribers. You can start a conference if you have created at least two connections. Each subscriber can add additional callers to an existing conference.
Alternatively, the system administrator can create a conference room, which the conference participants can call independently of one another.
3.14 Call Swap
Call swapping is when you switch between an active call and one or more calls on hold. When you do this, the currently active call will be put on hold and a call previously on hold will become active. (see Chapter 3.10, Active Connection, page 14 and chapter 3.11, Connection on Hold)
3.15 Acoustic Signals
The following table provides a brief overview of the most important acoustic signals and their meaning.
Signal Sound Meaning
| Ringing This sound is produced for incoming calls. You can choose different ring tones for different calls (e.g. from certain numbers or internal and external calls). |
Idle tone This sound is heard before a connection is made.
| Stuttered Dial Tone | You have a new Voicemail. |
Busy Signal Produced after dialing a subscriber whose line is busy.
| Call Waiting Signal Generated for a subscriber whose line is busy, who is telephoning when a further call is received which can be picked up on another line. However, this requires that the "Disable Secondary Call" function has not been activated. |
Call Signaling This sound is played when the destination subscriber has not picked up the call and the Timer (10 seconds) has expired. Acoustic signaling in the form of an attention tone takes place only once if call signaling is activated.
| Callback Signal | This tone is generated when you leave a "Callback on busy" request. The other subscriber has ended his call. If you confirm the callback, a connection will be initiated. |
Direct Call Signal This tone is produced at the beginning of a direct call. Another internal subscriber, to whom you signal your status, has initiated a direct call connection to you and the telephone activates the speaker. If you would like to answer the subscriber, please lift the handset.
3.16 Call Routing
Call Routing refers to the treatment of incoming calls according to predefined rules, for example, the forwarding of incoming calls to another subscriber.
Call Routing Manager provides you with an extremely powerful instrument in Swyxl! which will significantly improve the availability in your company while greatly reducing the number of "lost calls". The Call Routing Manager is equipped with a Rule Wizard to help you change or redesign rules.

Please remember that the administrator must grant you the right to create rules with the Call Routing Manager.
The Graphical Script Editor provides other options for call handling and it allows you to graphically display even a complex set of rules. Rules created in this manner can only be used if the option pack 'Extended call routing' has been installed on the SwyxServer.For further information please refer to the documentation 'Call Routing Manager'.
3.17 Voicemail
SwyxWare provides its users with a personal answering machine.
The caller's voice messages are listed and forwarded per e-mail to you. This e-mail will be referred to as Voicemail in the following.
The Voicemail functionality goes far beyond the performance of a traditional answering machine. It allows you, for example, to use caller-, time-, and date-specific announcements, to forward voice messages in the form of an e-mail to another address, or even to make them available to an entire distribution list – with just a single click of the mouse.
Alternatively, you can listen to and manage the messages left for you from your Swyxlt!, your SwyxPhone or from another telephone line per remote inquiry.
3.18 Remote Inquiry
Remote Inquiry enables you to listen to your voice mails from any telephone. When you are called at your SwyxWare number, you identify yourself to SwyxWare with your PIN and only then you can listen to, repeat, or delete the new voice mails and afterwards all existing voice mails. In addition, you can change the destination of the Call Forwarding Unconditional or record a new announcement.
3.19 CTI
CTI is the abbreviation for Computer Telephony Integration and implies the combination of telecommunication with electronic data processing. When using Swyxlt! in CTI mode (CTI Swyxlt!), you can dial the number of your conversation partner directly from your (Outlook or Lotus Notes) contacts.
You have the following options here:
- CTI Swyxlt! controls a SwyxPhone
- CTI Swyxlt! on a Terminal Server controls Swyxlt!
- CTI Swyxlt! controls a telephony device (Option CTI+)
- CTI Swyxlt! controls an external phone via its number (Option CTI+)
3.20 Callback request
SwyxWare offers the option of leaving callback requests on other internal subscribers' phones. The subscriber can then call back later. If the subscriber you are calling is busy, you can start a "Callback on busy". In this case a new call is suggested as soon as the subscriber is available again.
3.21 Wrap Up Time
You can specifically block a line for further incoming calls, e.g. in order to have enough time to process a customer inquiry after a call from a customer.
3.22 Intercom Connection
You can directly speak to a colleague, who signals you his status. This means that when selected, the call will be immediately initiated if this colleague is logged on and is not currently on the phone. In the case of SwyxPhone the telephone speaker is activated and in the case of Swyxl! the PC speakers are activated and the caller can immediately give his message. This is only possible if you have assigned a Speed Dial and status signaling is activated for the employee who is to be addressed.
3.23 Telephone States
The following table includes a list of the different states which Swyx-Phone can have and the menu options available to you in each state.
| Telephone State | Meaning | The following options are available: |
| Idle | No line is currently in use | all menu and button functions |
| Idle tone | The handset is off hook, you hear the idle tone. A connection has not yet been made. | Voicemail inquiry, all number lists, Phonebooks, Speed Dials,,, Redial, Function buttons, Speaker button, Headset button |
| Dialing | The handset is off hook, you are dialing | Numeric Keypad |
| Ringing | The handset is off hook, the number has been dialed, and it is ringing | Call Forwarding |
| Active | A connection exists | Note, Phonebook, Call Forwarding, Call Swap, Speaker, Headset, Micro-phone, activate/deactivate Secondary Call, Disconnect will end the connection |
| On hold The connection is set up, the caller hears music on hold | Voicemail inquiry, all number lists, Phonebooks, Speed Dials,:Redial, Function buttons, Speaker button, Headset button | |
| Call The telephone rings. A call waiting signal is produced in the handset when a second call is received | Phonebooks, Call Swap,:Line buttons, Disconnect, Speaker activates the connection | |
| Call Signaling A subscriber, who has defined you in his call signaling, is called | Pick Up Button:: | |
| Wrap Up Time | You have ended an active call. The line is disabled for incoming calls. The LED of the Line Button glows with brief interruptions. | All menu and button functions |
| Callback request | “Callback Requests” appears in the display, meaning that another internal subscriber would like you to call back | All menu and button functionsTo call back, confirm the entry in the “Callback Requests” list. |
| Callback on busy | You have left a callback on busy request because the subscriber called is still on the phone.Once the call is ended, the telephone will generate a callback tone to indicate that you can now call back. | All menu and button functions |
| CTI The telephone is operated from a PC (Swyxlt!) | All menu and button functions are available to you, even on the telephone. | |
4 Set It Up & Log On
This chapter provides information concerning the requirements and settings necessary for initial operation of SwyxPhone.
4.1 General Safety Advice
- Do not open the casing of the phone or the mains power supply.
- Keep the phone and the mains power supply dry.
■ Always disconnect SwyxPhone from the power supply before connecting or disconnecting any cables. - Do not expose the devices to direct sunlight or other heat sources.
- Protect the devices against excessive dust, aggressive fluids and vapours.
- Do no expose the devices to electromagnetic fields. The speech quality could be affected.
- The phone may only be operated in the temperature environment of 5^ to 40^ .
- Only use the original accessories.
4.2 Intended use
SwyxPhone is intended exclusively for use in residential and business premises.
The SwyxPhone L6x phones are only suitable for connection to an IP network and should only be used within the SwyxWare concept under SwyxServer administration.
4.3 Care Instructions
Use a slightly damp cloth, or even better, an anti-static cloth, to wipe off the case of your SwyxPhone. Do not use any detergents or scouring agents.

Do not use a dry cloth because this may cause a static charge which could destroy the electronics.
4.4 Eco-friendly disposal
SwyxPhone cannot go in normal domestic refuse at the end of its lifetime. Leave it at a collection point for the processing of electrical and electronic devices. As some parts or raw materials are recycled from used products, you will make an important contribution toward environmental protection.

Dispose of packaging materials in accordance with local regulations.
4.5 Scope of supply
The following items are included in the package:
SwyxPhone L6x
■ telephone handset and spiral cable
■ Manufacturer's guide.

The SwyxWare DVD includes label templates for SwyxPhone L62, SwyxPhone L64 and SwyxPhone Key Module 64
4.6 System requirements
The following requirements must be fulfilled to be able to make phone calls with SwyxPhone L6x:
■ Power supply (Mains Power Supply or Power over Ethernet)
■ network with TCP/IP protocol
■ operable 10/100 Base-T-Ethernet connection
- Installed and operable SwyxServer
- SwyxWare user account and PIN must be set up on the SwyxServer
To minimize the time and effort spent on configuring SwyxPhone, we recommend using a configured DHCP server.
For further information, please refer to the SwyxWare Administrator documentation.
4.7 Connection of the phones
4.7.1 Power Supply
The power supply for your SwyxPhone L6x can either come directly over the LAN cable or over a mains power supply.
Power Supply Over Mains Power Supply
A mains power supply for power supply is not included in your SwyxPhone L6x package. This device must be ordered separately. A mains power supply can provide power to two SwyxPhones at the same time.

Always disconnect the SwyxPhone from the power supply before connecting or disconnecting any cables.
Power Supply Over LAN
If your network supports power supply over the LAN (Power over Ethernet), you can supply power to your SwyxPhone even without a mains power supply.

Prior to the power supply via LAN (Power over Ethernet), please note the power class of the relevant SwyxPhone model. For further information please refer to section SwyxPhone L6xSeries Phones Compared, page 9.
4.7.2 Connect SwyxPhone L6x
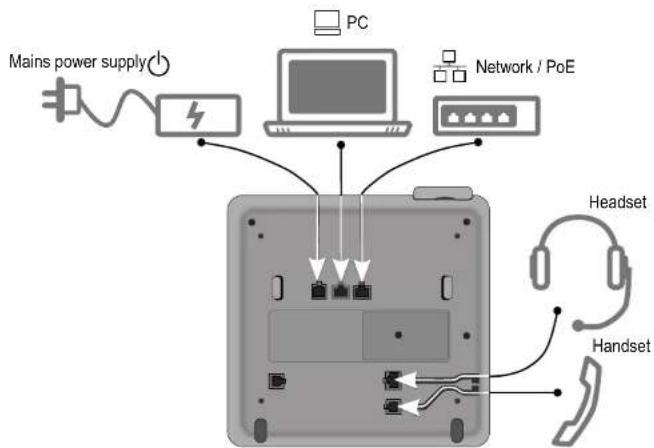
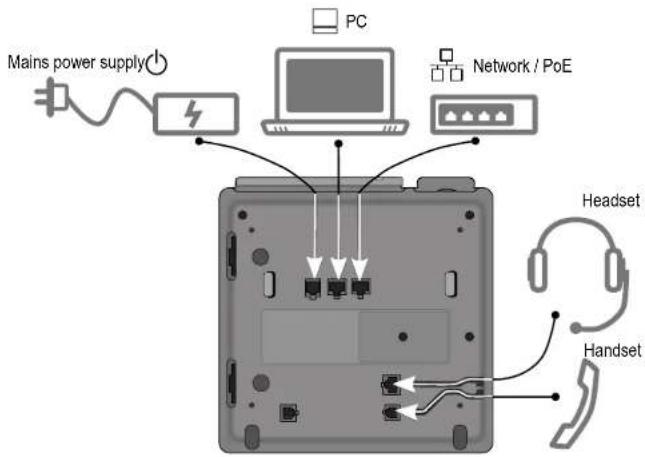
This is how you connect SwyxPhone L62
- Connect the handset cable (short straight end) to the telephone handset. Both ends of the handset cable are equipped with identical four-pole RJ-11 plugs.
-
Plug the long straight end of the spiral cable into the RJ-11 jack on the underside of the telephone.
-
Plug the LAN cable (RJ-45 plug) in the LAN jack on the underside of the telephone to connect your SwyxPhone to the Ethernet data network.
- If necessary, plug the RJ-11 plug of the mains power supply into the jack for the power supply.
- Place the handset cable in the provided guide groove on the underside of the telephone.
text_image
Mains power supply PC Network / PoE Headset HandsetFig. 4-1: Connections on the underside of the SwyxPhone L62
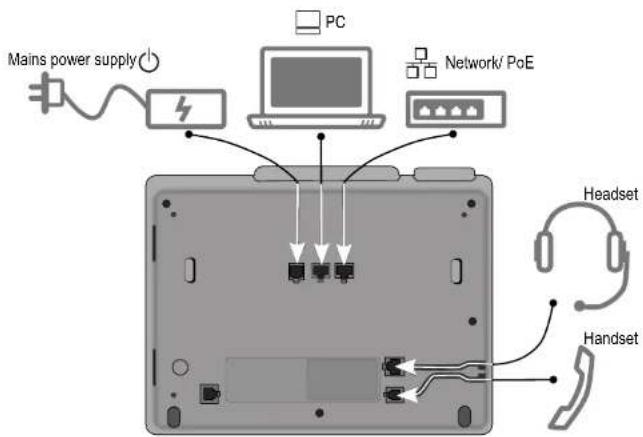
This is how you connect SwyxPhone L64
- Connect the handset cable (short straight end) to the telephone handset. Both ends of the handset cable are equipped with identical four-pole RJ-11 plugs.
- Plug the long straight end of the spiral cable into the RJ-11 jack on the underside of the telephone.
-
Plug the LAN cable (RJ-45 plug) in the LAN jack on the underside of the telephone to connect your SwyxPhone to the Ethernet data network.
-
If necessary, plug the RJ-11 plug of the mains power supply into the jack for the power supply.
- Place the handset cable in the provided guide groove on the underside of the telephone.
text_image
Mains power supply PC Network/ PoE Headset HandsetFig. 4-2: Connections on the underside of the SwyxPhone L64
This is how you connect the SwyxPhone L66
- Connect the handset cable (short straight end) to the telephone handset. Both ends of the handset cable are equipped with identical four-pole RJ-11 plugs.
- Plug the long straight end of the spiral cable into the RJ-11 jack on the underside of the telephone.
- Plug the LAN cable (RJ-45 plug) in the LAN jack on the underside of the telephone to connect your SwyxPhone to the Ethernet data network.
-
If necessary, plug the RJ-11 plug of the mains power supply into the jack for the power supply.
-
Place the handset cable in the provided guide groove on the underside of the telephone.
text_image
Mains power supply PC Network / PoE Headset HandsetFig. 4-3: Connections on the underside of the SwyxPhone L66
Making better use of network connections
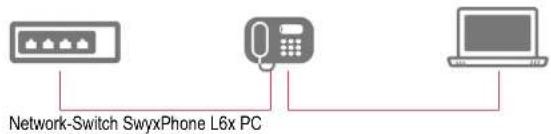
All SwyxPhone L6x models have a built-in 10/100 Mbps Ethernet switch. SwyxPhone L64 and SwyxPhone L66 have also a 1000 Mbps Ethernet switch. This means that you can always connect a further network device (e.g. a PC) to the LAN directly via the telephone.
flowchart
graph LR
    A["Network-Switch SwyxPhone L6x PC"] --> B["Laptop"]
With this mode of connection you save a network connection of the switch you are using, and with the right arrangement you need fewer network cables and/or use shorter cable paths.
4.8 Connecting a Key Module
You can connect Key Modules to the models SwyxPhone L64 and SwyxPhone L66. This provides you with additional keys, which you can configure as speed dials, function keys or line keys.

If SwyxPhone L66 is operated with two key modules in Power-over-Ethernet mode, an external current source (power supply) is needed.
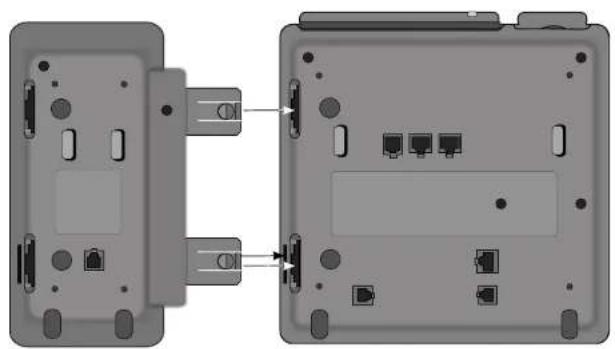
This is how you connect a Key Module
- Separate the telephone from the power supply.
- Attach the Key Module with the help of the plug connections, to the telephone:
natural_image
Two views of a device rear panel showing internal components and connectors (no text or symbols visible)√ The Key Module is then a single unit together with SwyxPhone.
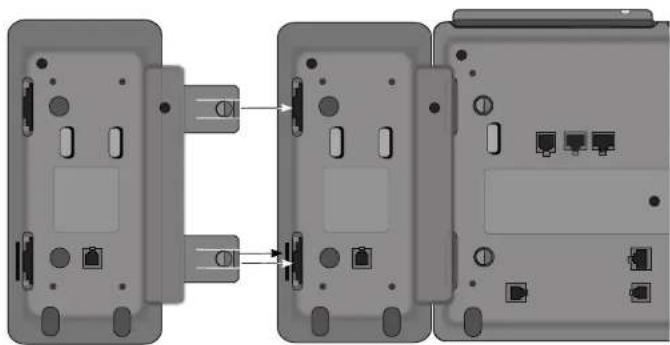
- If a Key Module is already installed, connect its jack to the jack of the new Key Module.
natural_image
Diagram showing two device rear panels with connectors and ports, connected by a connector (no text or symbols present)After the connection of a Key Module you can configure the function keys as described in Chapter 12.4, Configure function keys, page 113 or Chapter 16.4, Configure function keys, page 169.
4.9 Logging in to SwyxServer
When you connect SwyxPhone to the power supply, a restart will automatically be initiated.
This will be followed by information on the display, accompanying the determination of the configuration data.
The IP network configuration and the address of the PhoneManager or the backup PhoneManager are identified during the start. This process may take several seconds in some cases.

A SwyxPhone user must have a PIN for authorized access to SwyxPhone. If you do not yet have a PIN, contact your administrator.

If SwyxPhone or SwyxIt! does not log on properly, please check whether other devices are already logged on under this user. A maximum of four devices (SwyxIt!, SwyxPhone or other telephones) can be logged on simultaneously for one user.

If you have accidentally entered the wrong PIN more than once, you must wait several minutes. Then you can once again enter your PIN.
If you would like to know how to log on and off SwyxPhone, e.g. in a conference room, after installation has taken place, please see Chapter 7.9, Call Intrusion, page 54.
This is how you log in as a SwyxPhone user
If no user is logged on to SwyxPhone you will see the following display:
User ? PIN:
- Enter your PIN on the keypad and press OK.
√ Your user name will appear and your personal settings will be transferred.

If a user is configured for automatic logon for this SwyxPhone, this user can log on again without entering a PIN by confirming the empty entry prompt with the "OK" button.
4.9.1 Log off
You can log off as a SwyxPhone user from the SwyxServer. Then a different user can log on using his PIN (Personal Identification Number), and he will find his own settings on the SwyxPhone.
This is how you log off from SwyxPhone as a user
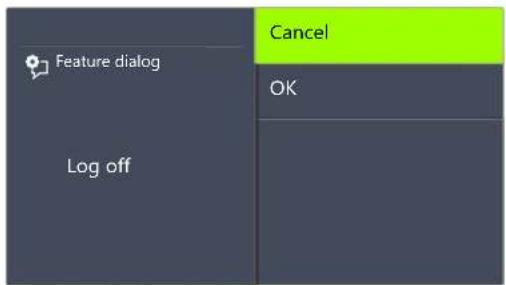
- Choose "Log off" (9) in the main menu, and press the "OK" button. √ The following appears on the display:
Log off
1 >OK
0 >Cancel
or:
text_image
Feature dialog Log off Cancel OK- To terminate the logoff procedure, select "Cancel". If you would like to log off, select "OK" and press the "OK" button √ The following will appear:
User?
PIN:_
A different user can log on to SwyxPhone.
4.9.2 Automatic Update
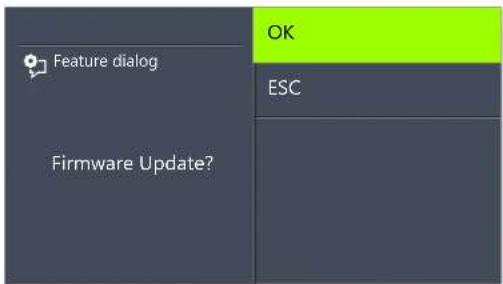
If SwyxPhone logs on to SwyxServer, and if the latter has a newer version of firmware than SwyxPhone has, then the following message will appear on the display:
Firmware Update?
ESC
OK
or
flowchart
graph TD
    A["Feature dialog"] --> B["Firmware Update?"]
    B --> C["OK"]
    B --> D["ESC"]
This is an offer to automatically update the firmware in SwyxPhone. If you confirm this with "OK", the internal SwyxPhone software will be automatically updated and SwyxPhone will then log on to SwyxServer. If you do not wish to update, press "0" and SwyxPhone will log on to SwyxServer once again with an older version of the firmware.

During a software update, the phone must not be disconnected from the power supply unit or the LAN. The update process will appear in the display.
5 Control elements of SwyxPhone L62
This chapter describes the control elements of SwyxPhone L62. The control elements consist of a display, a handset, a hands-free microphone, a speaker and buttons.
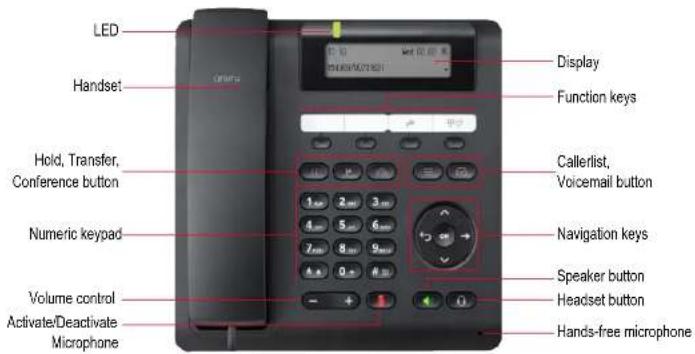
text_image
LED Handset Hold, Transfer, Conference button Numeric keypad Volume control Activate/Deactivate Microphone Display Function keys Callerlist, Voicemail button Navigation keys Speaker button Headset button Hands-free microphone5.1 Buttons
The buttons can be classified in the following groups:
- Defined keys, page 24
■ Preconfigured function keys, page 26
5.1.1 Defined keys
The following SwyxPhone L62 buttons are preset and cannot be assigned to other functions. These buttons are marked with corresponding symbols.
Hold
The Hold button puts the active call on hold or resumes the call.

Transfer
Press the Transfer button if you would like to connect two subscribers, additionally you can transfer a call without inquiry.

For further information please refer to chapter 6.12, How do I transfer a call without Inquiry?, page 33.
Conference
You can use this button to join subscribers (active and on hold) to form a conference.

For further information please refer to chapter 7.7, Conference, page 51.
Voicemail
A Voicemail is a spoken message in the form of a WAV file. If the caller couldn't reach you, he can leave a Voicemail. You can listen to the Voicemail, when you are back at your desk or from another phone using the remote inquiry.

If you have e-mail access, your voice mails will be sent to your e-mail address if this has been entered for your SwyxPhone during installation.
For further information please refer to chapter 7.2, Voicemail inquiry, page 42.
Numeric keypad
The buttons of the numeric keypad (number keys) are used for entering numbers, letters and symbols.
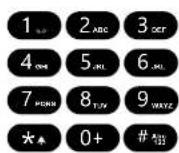
In the idle state, when no calls are being made and no menus are open, you can input the call number directly. If you have opened a menu, you can call up a menu item directly with the numeric button.
You can also use the numeric keypad to enter letters. You can enter text at the relevant points (e.g. the name for a new phonebook entry), or switch directly to an entry in a list. Enter the space with "0". The '*' key is used to switch between upper and lower case letters.
When a letter is entered, a short beep will be produced after one second and you can then enter the next letter.
Example:
To speed up a search in a phonebook with many entries, you can enter the first letter of the name, e.g. for an "F" press the "3" three times, for an "5" press the "7" four times.
Menu navigation
SwyxPhone L62
SwyxPhone L62 is controlled with five navigation buttons.
Control element Function when button is pressed

Arrow button "Down"
If the phone is idle:
- open main menu In lists and menus:
- Scroll down

Arrow button "Up"
In lists and menus:
- Scroll up

Arrow button "Forward"
- Confirm entry
execute action - menu level lower

Arrow button "Back"
- cancel action
- delete a character
- menu level higher

"OK" button
- Open menu option
- Confirm entry
- execute action
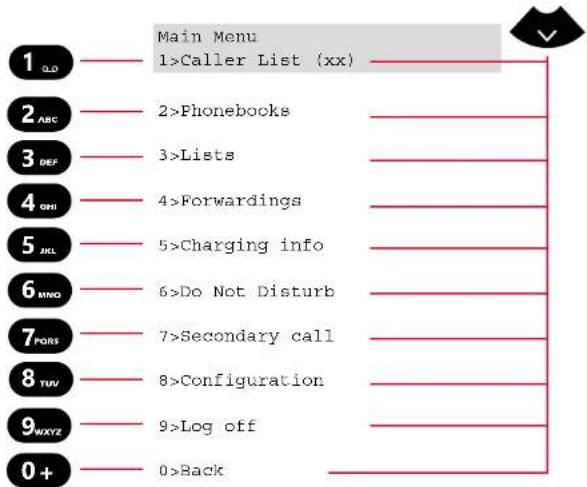
You can open the main menu with the arrow button 📋 all up the required menu items with the corresponding numeric buttons.
text_image
Main Menu 1>Caller List (xx) 1_0D 2_ABC 3_DEF 4_GHI 5_JKL 6_MNO 7_PQRS 8_TUV 9_MXYZ 0+ 2>Phonebooks 3>Lists 4>Forwardings 5>Charging info 6>Do Not Disturb 7>Secondary call 8>Configuration 9>Log off 0>BackVolume button +/-
You can use the +/- buttons to adjust the volume of the speaker and the handset, depending on which one is currently active.

The volume setting will stay at this level for the next call.
You can also use these buttons in the idle state to change the ringing volume (see Chapter 8.2.1, Ring tones, page 56).
Microphone
You can use this button to switch off the handset microphone or handsfree microphone for a while, so that the call partner cannot listen e.g. to an inquiry in the room.

Speaker
When the telephone is in an active state (a conversation is in progress), the Speaker button is used to switch the speaker on or off. This allows other people present in the room to listen to the conversation. You can then turn the speaker off again and continue the conversation on the handset.
In an idles state (if no call is currently being made), pressing the Speaker button has the same effect as picking up the handset; you can immediately dial a number and place your call using the handsfree telephone. The LED of the Speaker button will glow as long as the handsfree telephone is activated. If the handset is on hook, end the call by pressing the Speaker button.
Headset
The Headset button allows you to switch between using the headset or the handset.
For further information please refer to chapter 7.8, Using a headset, page 53.
Call list
The "Caller List" button opens the list of the latest incoming calls.


5.1.2 Preconfigured function keys
All four function keys on SwyxPhone L62 can be individually configured.
The function keys are preconfigured as Line 1, Line 2, Call For-

warding

Redial


You have the option of assigning these keys to other functions, e.g. "Call Swap" or "Phonebook". For further information please refer to chapter 8.4, Configure function keys, page 63.
You can use the paper inserts for SwyxPhone L6x to label these buttons as desired.
LED status of the function keys
| State | Line key | Speed dial | Standard function |
 LED glows green LED glows green | The line is active | Subscriber is logged on and available | This function is activated. |
| Incoming call | - | - | |
 LED blinks green LED blinks green | |||
 LED blinks orange LED blinks orange | Connection is on hold | Subscriber is away | - |
 LED glows red LED glows red | Line disabled for wrap up time | Subscriber is speaking | - |
 LED blinks red LED blinks red | - | Signalled call | - |
5.2 Display and menu navigation
SwyxPhone L62 comes with a monochrome (black and white) LC display. Up to 48 characters can appear in two rows in the display.
In the idle state, when no calls are being made and no menus are open, the following information appears in the display:

When you open the main menu, the title and the first available menu item are displayed:

You can use the arrow buttons or the number keys to page through the menu items. The currently displayed menu item can be opened/activated with the "OK" button. You can also call the menu item you want directly, by pressing the corresponding number key, e.g. "8" for "Configuration" and then "3" for "Lines".
Press the arrow button "Back" ↩ to up a level in the menu struc-
ture.
6 Telephoning with SwyxPhone L62
This chapter describes the following basic telephone functions:
How do I call a subscriber?, page 28
How do I pick up a call?, page 29
How do I pick up a call?, page 30
How do I end a call?, page 31
How do I start an inquiry call?, page 32
- How do I switch between lines (Call Swap)?, page 32
- How do I connect two subscribers to one another?, page 33
- How do I transfer a call without Inquiry?, page 33
How do I forward a call?, page 34
How do I use the Phonebook?, page 37
The Secondary Call, page 35
■ Speaker and Handsfree Telephone, page 38
6.1 How do I call a subscriber?
SwyxPhone L62 is in an inactive state. You will see your user name and the current time and date on the display:
| Jones, John | 10:10 |
| 22/07/2017 |
If there were calls which you did not pick up, or you received call-back requests or voicemails, this will also be shown on the display:
| Jones, John | 10:10 |
| New incoming calls (20) | |
This is how you call a subscriber
- Pick up the handset or press the Speaker button.
√ You will hear the idle tone. The following appears on the display:
L1: Please dial!
>Caller list
- Use the numeric keypad to dial the number you want.
You can correct your entry using the arrow button "Back"

- Press the "OK" button.
√ The participant is called.
With the handset on hook and the speaker deactivated:
- Use the numeric keypad to dial the number you want.
- Pick up the handset or press the Speaker button.
√ The participant is called.
If the connection to the destination subscriber has not yet been made, the line number and "ringing" will appear in the first line of the display. The number or, if available, the name of the destination subscriber will appear in the second line:
L1: ringing
=<Phone number>
If all of the target subscriber's lines are busy, the word "busy" will appear in the first line of the display. The number or the name of the destination subscriber will appear in the second display line.
L1: Busy
= <Phone number>
If the connection is made, then the line number and the number or name of the destination subscriber will appear in the first line of the display. The duration of the call is shown in the second line of the display.
L1: <Phone number>
=Call duration: xx:xx:xx
6.2 Other Options for Dialing a Number

- Select the subscriber you want from the Global or Personal Phonebook, and then confirm your selection by pressing OK twice. The connection will immediately be made. For further information please refer to chapter 8.3.2, Phonebooks, page 59.
- Use the preconfigured "Redial" function key to show the list of the calls you have most recently made. The "Redial" button can be used in two ways.
1. Abbreviated Dialling:
Lift the handset and press the "Redial" function key.
The number of the last call will be dialled immediately.
2. The Redial List:
Leave the handset on the hook and press the "Redial" function key.
A list of the calls you have most recently made will appear. Select the entry you want with the arrow buttons and confirm your selection by pressing OK twice, or by picking up the handset.
The subscriber is then immediately called.
6.3 Available options during a call
During a phone call you can select the following menu items with the arrow buttons, and activate the option of your choice with the "OK" button:
- Callback request
This function is only available to you during a call to an internal subscriber (see Chapter 7.6, Callback request, page 47).
Note
Here you can enter a number and the corresponding name in the Personal Phonebook during a telephone call (see Chapter 7.5, Note, page 46).
Call Transfer
You can transfer a caller directly here. If you have two connections (one active connection and one on hold), these are directly connected to each other. If you only have one call on one line, you must input a further number or select one from the phonebook (see
Chapter 6.10, How do I connect two subscribers to one another?, page 33).
- Disconnect
Disconnects the active connection.
Speaker
This switches the speaker on / off (see Chapter 6.17, Speaker and Handsfree Telephone, page 38).
- Microphone
This switches the microphone on / off (see Chapter 6.17.2, Activating/Deactivating the Microphone During a Call, page 38).
Secondary call
You can either allow or disable a second call during a call (see Chapter 6.14, The Secondary Call, page 35).
Call Swap
If you select this menu item, the active line is put on "Hold", your conversation partner will hear music on hold and SwyxPhone will switch to the next available line (see Chapter 6.9, How do I switch between lines (Call Swap)?, page 32).
Call duration
Shows the length of the call.
Conference
If you have one active line and at least one other line on hold, you can start a conference (see Chapter 7.7, Conference, page 51).
6.4 How do I pick up a call?
If you receive a call, a call is forwarded to you or a call is received for a group of which you are a member,
- the number or the name of the caller will appear on the display,
- a ringing sound will be produced.
L1:
Pick Up
Forward call to
Reject
A call to a group (Group Call) is shown as follows:
L1: <Caller>
=>: <Group name>
>Pick Up
>Reject
If you are a member of a Hunt Group with sequential, rotary or random distribution, the call will first be displayed in Call Signalling, and only put through if no other member has picked up the call. In this case you see the call signalling for the Group Call:
L1:<Caller>
=>: <Group name>
>Pick up call
>Ignore
>Back
A call which has been forwarded from another subscriber to you is shown as follows in the display:
<Caller>
==><Destination subscr.>
>Pick Up
>Forward call to
>Reject

If the number of the caller is known, i.e. if a name in the Global or Personal Phonebook or on a Speed Dial has been assigned to this number, the name will appear in the display. If not, only the number will be displayed.

If "Anonymous" appears in the display, the caller's number was not transmitted, e.g. because the caller has suppressed his number.
This is how you accept a telephone call
- Simply lift the handset.
√ The handset is activated. You can now speak with the caller.
or
- Press the Speaker button.
√ The speaker and hands-free microphone will be activated, so that other people present in the room can also follow the conversation.
or
- Press the Headset button.
√ The headset is activated. You can now speak with the caller.
6.5 How do I pick up a call?
In the case of a signalled call, you will only be shown that another user or a group has received a call. Signalling is set up by the system administrator. You can pick up a signalled call.
If a call is signalled to you, your display will show who the call was originally for:
<Caller name>
=><Destination subscr.>
>Pick up call
>Ignore
If the call is not picked up by the destination subscriber and if you have activated call signalling in the Settings menu, you will hear an additional brief acoustic signal after ten seconds.
This is how you pick up a signalled call
-
Use the arrow buttons to select "Pick up call".
-
Press the "OK" button.
√ The call is picked up. You can now speak with the caller.

Please remember when picking up a call via the menu that you must first confirm the option "Pick up Call" and only then lift the handset. If you lift the handset first, the call signalling will be ignored and a free line will be activated.

If several subscribers, whose calls are signalled to you, receive a call at the same time, only one name will be shown in the display.
This is how you pick up a telephone call if you are currently involved in a different telephone call
- Press the blinking Line button.
√ The active connection is put on hold. The subscriber hears music on hold, and the incoming call is picked up
If you are already on a call, Call Signalling will not be shown in the display, only by a blinking Speed Dial. In other words, in order to pick up the call in this case, you need to have configured a Speed Dial. Also, you cannot see who the caller is.
6.6 How do I end a call?
You have been speaking to a caller and now you would like to end the call.
This is how you end a telephone call
- Simply place the handset on the hook.
or
- Use the arrow buttons to select the menu item "Disconnect".
or
- Activate the handsfree mode, i.e. if the speaker is activated and handset is on the hook, the Speaker button.
or
- Activate the handsfree mode, i.e. if the speaker is activated and handset is on the hook, the Speaker button.
√ The call is ended.

If you end a call and you have a second call on hold, a single telephone ring will be produced after five seconds have passed. Pick up the handset once again in order to directly connect to the caller on hold.

If you have the option „Transfer on Hookon“ activated and you go on hook, a second call that you have initiated will be connected to the first call, which is on hold.(see also Chapter 6.11, Transfer When Placing Handset on Hook, page 33).
This is how you end one of several calls
You can only end the active connection.
- Use the arrow buttons to select "Disconnect". √ The call is ended.
Then you can select one of the remaining inactive lines.
- Confirm the selection with "OK".
√ You can now speak with the subscriber.

If you have created the connection yourself, putting the handset on hook will result in the transfer of this call to the call on hold. If you have several lines on hold, the active line will also switch to the state "On hold".
6.7 How do I telephone with a headset?
SwyxPhone L62 has a headset connection and a preconfigured "Headset" function key, so that you can use the headset to call. To use the headset, connect it to the telephone (see Chapter 7.8, Using a headset, page 53).
This is how you pick up a call with the headset
A headset is connected. You are being called.
- When you receive a call, press the preconfigured "Headset"
function key to pick up the call.
√ You can telephone using the headset.
This is how you end a call with the headset
- Press the "Headset" function key again to end the call. √ The connection is terminated.
This is how you switch between the Handset and the Headset
If you have begun a call using the headset and you would like to use the handset for the rest of the call.
- Take the handset off the hook. √ The handset is active.
- If you would like to switch to the headset, press the "Headset" function key and put the handset back on the hook. √ You can then continue your call on the headset.
For further information please refer to chapter 7.8, Using a headset, page 53.
6.8 How do I start an inquiry call?
You are having a phone conversation and you would like to call another subscriber (Inquiry Call). Then you would like to alternately speak to both subscribers (Call Swap).
Example:
- You are speaking to a customer (subscriberA) and you would like to ask someone in the warehouse (subscriberB), whether a certain article is on stock.
- You begin a second call at the same time with SubscriberB. Then you can alternately speak with Subscriber A and Subscriber B (Call Swap).
- While you are speaking with one subscriber, the other subscriber will hear music on hold.
- When you end the call with one of the subscribers (using the menu item "Disconnect"), the corresponding line becomes free again. You can then switch to the line on hold.

If you were the initiator of the call on the active line and you place the handset on hook, the two subscribers will be connected to each other.
This is how you call an additional subscriber
- During an active call, select the menu item "Call Swap".
√ You will hear the dial tone and you can call a second subscriber. - Dial the number and wait until the connection is made.
√ The first call is put on hold. Your first call partner will hear music on hold.
6.9 How do I switch between lines (Call Swap)?
You are having conversations with several subscribers at the same time. The active connection is the connection to the person you are currently talking to. All other subscribers, who are listening to music on hold while they wait, are on connections on hold. The switch between between the active line and the line on hold is called "Call Swap".
Example:
Several calls are received at the operator desk and you would like to forward these calls to various colleagues, who, however, cannot be reached immediately. You can put the caller on hold. You can switch to these lines on hold at any time in order to inform the callers of the progress of your efforts to connect them to the correct colleagues.
This is how to swap between lines
- Use the arrow buttons to select the option "Call Swap"
- Press the "OK" button.
√ The active line is put on hold, and the other line becomes active.

If you use the "Call Swap" function often, you can also assign this function to one of the configurable buttons. For further information please refer to chapter 8.4, Configure function keys, page 63.
This is how you call swap using the configured "Call Swap" function key
- Press the "Call Swap" function key.
√ You have now activated the next line.
By repeatedly pressing the "Call Swap" button you will switch between the active lines.

You can have as many calls simultaneously as you have lines. This means, however, that you have several calls on hold and one active line at the most.
6.10 How do I connect two subscribers to one another?
You are connected with two subscribers simultaneously. While you are talking to one of the subscribers, the other is on hold. This subscriber will hear music on hold. You can now connect these two subscribers to each other.
Example:
You are talking to SubscriberA on Line1. Line1 has a connection on hold with SubscriberB. You connect SubscriberA with SubscriberB. Line2 has a connection on hold with SubscriberB. You connect SubscriberA with SubscriberB.
This is how you connect two subscribers
- Use the arrow buttons to select "Call transfer". √ The line on hold appears on the display.
- Press the "OK" button. √ The subscribers are connected to one another. Your lines will become free (inactive).

When you directly connect subscribers, you may still charged, even though you are no longer involved in their telephone call. These will only occur on your side if you set up one or both of the connections. If, for example, SubscriberA called you and you called SubscriberB to inquire about something, you will only be charged for the connection to SubscriberB. No costs will be charged if you are called by both SubscriberA and SubscriberB. However, if you have called both subscribers, you will be charged for both connections.
6.11 Transfer When Placing Handset on Hook
You can define whether the subscribers on the active line and the line on hold should be connected when you go on hook. The item "Transfer on Hookon" is available in the "Configuration" menu for this.
Configuration
9>Transfer on Hookon=
- If this option is activated, you can connect the two callers to one another by simply placing the handset on hook. However, this only works if you set up the active call yourself. If you did not initiate the active call (i.e. you received the call), the connection will be terminated by hook on. The second call will remain on hold.
Example:
Subscriber A is called by C. Then subscriber A begins a second call on another line to subscriber B (e.g. Inquiry Call). If A goes on hook, subscribers B and C are then connected to one another.
- If this option is not activated, the active call will be ended and the other one will be kept on hold.
6.12 How do I transfer a call without Inquiry?
Your SwyxPhone can be used to accept incoming calls and then to transfer these calls to another subscriber, without waiting for the new subscriber to answer. This means you can connect two subscribers even though there is not yet an active connection to one of the subscribers.
This is how you transfer a call without inquiry
You are having a telephone conversation with subscriber A.
- Use the arrow buttons to select "Call transfer", or
- Press the "Call transfer" button.

- Select the number of the subscriber, to whom you would like to transfer the call (Subscriber B)
Connect to
1>new number
2>number in phonebook
0>Back
- Press the "OK" button.
- As soon as it rings, hang up.
√ Your caller (Subscriber A) will hear ringing, and "Call Transfer" appears on your display. The line on which you initiated the second call will become free and the first line will change its status from "Hold" to "Transferring". Your previous caller (Subscriber A) hears the phone ring.
The person called (Subscriber B) sees on the display:
L1:
The call can be picked up directly by Subscriber B.
If the call is not picked up within 20 seconds or if the call is forwarded to Voicemail, the connection attempt will be terminated and the caller will once again be put on "Hold" and will hear music on hold.
- To activate the call again, select "Accept" with the arrow buttons and press the "OK" button.

In case the caller to whom the call should be transferred is not available, please remember that the call may be forwarded with some delay (after more than 20 seconds). If the call is forwarded to Voicemail, the call transfer will automatically be interrupted, the caller is once again put on "Hold" and will hear music on hold.
6.13 How do I forward a call?
If you are receiving a call you can transfer this call while it is still ringing to another subscriber or to your Voicemail.
This is how you transfer a call without accepting
You receive a call, it rings.
- Use the arrow buttons to select "Forward call to".
L1:
Pick Up
Forward call to
Reject
-
Select the forwarding destination with the arrow buttons:
-
Your Voicemail(This option is only available if the Voicemail functions are configured),
• a number in the phonebook,
• any number.
Forward call to
Voicemail
number in phonebook
phone number
0>Back
- Press the "OK" button.
√ The call is then immediately transferred.
6.14 The Secondary Call
You can use the "Secondary Call" function to define whether you are available for an additional subscriber. You can set this option in the main menu or during a call.
This is how you switch the Secondary Call function on / off
- From the main menu, select "Secondary Call".
√ You will see in the display the currently valid setting, "on" or "off":
Main menu
7>Second. Call = <on/off>
- Press the "OK" button to activate or deactivate Secondary Call.
6.15 How do I forward a call?
You can forward incoming calls
■ to another telephone number (internal or external) or
■ to your Standard Voicemail.
There are several different methods for forwarding incoming calls:
- Call Forwarding Unconditional: The call is then immediately transferred ("Do not disturb").
- Call Forwarding Busy: You line is busy, which means that you are currently telephoning and you have not allowed a secondary call or you are telephoning on all configured lines.
- Call Forwarding No Reply: The telephone rings several times at your desk but you do not pick up the call.
The type of redirection to be applied to all of your incoming calls is defined in the "Call forwarding" shortcut menu:
Call forwarding
1> Uncondit. = <Status>
2>Busy = <Status>
3>No Reply = <Status>
0>Back
6.15.1 Define Call Forwarding Unconditional
You can enable Call Forwarding Unconditional if you do not wish to receive any calls from this time on. All incoming calls are forwarded immediately to the specified destination.
There are different options for the forwarding of the call:
- no call forwarding,
Voicemail, ,
This is how you define "Call Forwarding Unconditional"
- Select "Forwarding" with the arrow buttons, and press the "OK" button:
Main menu 10:10
4>Call forwarding
√ The following will appear:
Call Forwarding
1>Uncondit. = <Status>
2>Busy = <Status>
3>No Reply = <Status>
0>Back
- Choose "Unconditional" and press the "OK" button. √ The following will appear:
Call Forwarding Uncondit.
= <Status>
1> Activate/Deactivate
2> to voicemail
3> to phone number
4> to number in phonebook
0>Back
- If you choose "Activate", all incoming calls will be forwarded immediately to the specified destination.
- To forward the call to a different destination, use the arrow keys to select the required menu item, and press OK.
This is how you activate "Call Forwarding Unconditional" to voicemail

- Press the "Forwarding" function key, if configured on your SwyxPhone L62.
√ The LED for the Forwarding button will glow. You will see on your display that Forwarding Unconditional has been activated.
Call Forwarding Uncondit.
= Voicemail
To switch off unconditional forwarding, press the "Forwarding" button again. The LED for the Forwarding button will turn off.

Your Voicemail can be configured using Swyxlt!. For further information, please refer to the Swyxlt! documentation. If Remote Inquiry has been configured for you, you can also change your Voicemail announcement and the destination of your (Call) Forwarding Unconditional from the menu of Remote Inquiry (see Chapter 7.3, Remote Inquiry, page 43).
6.15.2 Define Call Forwarding Busy
This is where you specify how incoming calls are redirected if all your lines are busy. If a secondary call is disabled, further incoming calls during a telephone conversation will be handled as for busy lines.
This is how you define "Call Forwarding Busy"
- Choose "Call forwarding" in the main menu, and press the "OK" button.
- Choose "Busy" and press the "OK" button. √ The following will appear:
Forwarding Busy
= < Status >
2> to voicemail
3> to phone number
4> to number in phonebook
0>Back
- Choose the appropriate menu item and press the "OK" button.
- Specify the destination, or enter a number, and press the "OK" button.
Incoming calls will be forwarded to the specified destination, if you are currently telephoning and the option "Secondary Call" is deactivated or all lines are busy.

Your Voicemail can be configured using Swyxlt!. For further information, please refer to the Swyxlt! documentation. If Remote Inquiry has been configured for you, you can also change your Voicemail announcement and the destination of your (Call) Forwarding Unconditional from the menu of Remote Inquiry (see Chapter 7.3, Remote Inquiry, page 43).
6.15.3 Define Call Forwarding No Reply
If Forwarding No Reply is activated, incoming calls are signaled. If the call is not picked up within the defined time limit, it will then be forwarded to another number or to your Voicemail.
This is how you define Call Forwarding No Reply
- Choose "Call forwarding" in the main menu, and confirm with the "OK" button.
Main menu 10:10
4>Call forwarding
√ The following appears on the display:
Call Forwarding
1> Uncondit. = <Status>
2>Busy = <Status>
3>No Reply = <Status>
0>Back
- Choose "No Reply" and confirm with the "OK" button. √ The following will appear:
Call Forwarding No Reply
2> to voicemail
3> to phone number
4> to number in phonebook
0>Back
-
Choose the appropriate destination, and confirm with the "OK" button.
-
Specify the destination, or enter a number, and press the "OK" button.
√ Then the time delay will appear on the display:
Forwarding after
- < 010 seconds >+
Here you can use the arrow buttons to set the time delay (between 5 and 180 seconds) after which the incoming call should be forwarded.
- Press the "OK" button. ✓ Forwarding No Reply is activated.
For further information on the various configuration options see Chapter 8.1.1, Call Forwarding, page 55.

Your Voicemail can be configured using Swyxlt!. For further information, please refer to the Swyxlt! documentation. If Remote Inquiry has been configured for you, you can also change your Voicemail announcement and the destination of your (Call) Forwarding Unconditional from the menu of Remote Inquiry (see Chapter 7.3, Remote Inquiry, page 43).
6.15.4 Signaling a Forwarding
If a call is forwarded to you, the following message will appear on the display:
<Caller>
==><destination subscr.>
The number or the name of the caller will appear in the first line. The second line shows the number or the name of the destination subscriber.
To take the forwarded call, simply lift the handset or select the menu item "Pick Up" with the arrow buttons, and press the "OK" button.
6.16 How do I use the Phonebook?
You have Frequently used numbers are stored in the Phonebook. You can then dial these numbers directly from the Phonebook.
■ the Global Phonebook and
the Personal Phonebook.
The Global Phonebook is available to all users. The system administrator or user with the appropriate authorization can add further phone numbers to this Global Phonebook. The Global Phonebook also contains dial numbers of individual groups.
You can store, edit or delete your personal numbers in the Personal Phonebook.
For further information please refer to chapter 8.3.2, Phonebooks, page 59.
This is how you call a subscriber from the Phonebook
- Use the arrow buttons to select "Phonebooks" and press the "OK" button.
√ The following appears on the display:
Phonebook
1>Global
2>Personal
0>Back
- Select the relevant Phonebook (Global or Personal) and press the "OK" button.
Gl. Phonebook XX/YY
><Subscriber>
><Subscriber>
...
><Subscriber>
0>Back
- In the list, select the subscriber you want to call, and press OK.
√ You will see additional information about the subscriber (phone number, name).
- Press the "OK" button.
The connection will immediately be made.
For more information on editing entries in your Personal Phonebook, please see Chapter 8.3.2, Phonebooks, page 59.

To make it easier to search for an entry in an extensive Phonebook, you can enter the first letter of the subscriber's name. Use the numeric keypad for example, to enter an "F", press the "3" button three times, for an "S", press the "7" button four times. When a letter is entered, a short beep will be produced after one second and you can then enter the next letter. If no further entry is made in the following three seconds, you must once again begin with the first letter for the next search.
6.17 Speaker and Handsfree Telephone
To enable all those present in the room to follow a telephone conversation, you can use the speaker. To allow those present to participate in the conversation too, you also have a complete Handsfree Telephone (speaker and microphone).
6.17.1 Activating/Deactivating the Speaker During a Call
You are telephoning and using the handset.
This is how you activate/deactivate the speaker during a call
- Press the Speaker button.
√ The Speaker button glows. The speaker is active. The call will continue via the microphone in the handset.
- Press the Speaker button again to continue the conversation on the handset.
√ If you hang up while the speaker is active, the call is ended and the Speaker button goes dim.

You can also switch the speaker on or off via the menu during a call.
6.17.2 Activating/Deactivating the Microphone During a Call
You are telephoning and using the handset.
You want to interrupt the call briefly. You don't want your call partner to hear you during the pause.
This is how you activate/deactivate the microphone during a call
-
Press the Microphone button √ The red LED on the "Microphone" button lights up. Your call partner cannot hear you.
-
If you press the "Microphone" button once more, the microphone will be reactivated.

You can also switch the microphone on or off via the menu during a call.
6.17.3 Activating the Handsfree Facility During a Call
You are telephoning and using the handset. The speaker can be either on or off.
This is how you activate the handsfree facility during a call
- Press the Speaker button and keep it pressed while you put the handset on the hook.
- Release the speaker button.
The speaker button LED will light up. The handsfree facility is activated.
6.17.4 Deactivating the Handsfree Facility During a Call
You are telephoning and using the handsfree facility.
This is how you deactivate the handsfree facility during a call
- Simply lift the handset.
The call will be held exclusively via the handset. The Speaker button will go out.

If you press the Speaker button during the call or deactivate the speaker in the shortcut menu, the call will be disconnected.
6.17.5 Activate Handsfree Facility for outgoing call
The handset is on the hook. The line is idle.
This is how you activate the handsfree facility for an outgoing call
- Press the Speaker button
√ The handsfree telephone will be activated. You will hear the idle tone. - Dial the number you want.
√ The call is initiated. As soon as your call is picked up, you can carry on the conversation hansdfree. - To carry on the call with the handset, lift the handset.

6.17.6 Activating the Handsfree Facility for an Incoming Call
It is also possible to pick up a call with the Speaker button. If you have picked up the call in this manner, the handsfree function is activated. You then have the call using the handsfree facility.
6.17.7 Regulating the Volume
You can use the "+" and "-" button to adjust the volume of the speaker and the handset, depending on which one is currently active. The setting will stay at this level for the next call.

If you press the volume control while the speaker is off during a call, the volume of the handset speaker will change.

If you press the volume control while the telephone is inactive, the volume of the ringing tone is adjusted.
6.18 Configuring the Ringing tone
The "+" or "-" buttons can be used to regulate the volume of the ringing tone. If you press the buttons while your SwyxPhone is ringing, the volume is adjusted.
For further information please refer to chapter 8.2.1, Ring tones, page 56.
6.19 Charging info
From the main menu, select "Charging info".
Main menu
5>Charging info
This is how you receive the exact amount of the charges incurred for your last call. This information is retained until the next connection is set up.

The calculation of the charges depends on the data provided by your telephone service provider. Ask your system administrator or your telephone service provider.
6.20 Sequence of the Display Entries While Idle
The entries in the SwyxPhone display are shown a specific sequence one after another:
- Missed Callbacks (XX)
- New Callbacks (XX)
- New incoming calls (XX)
- Voicemail available
- Callback Requests (XX)
- Call Forwarding
Only when there are no more entries in a higher prioritized list will the next entry be shown.
7 SwyxPhone L62 advanced Telephony Functions
This chapter contains information about the use of special functions which go beyond conventional telephoning, such as conference calls or the allocation of project codes, for example.
7.1 Disabling Lines (Wrap-up Time)
You can specifically block a line for further incoming calls, e.g. in order to have enough time to process a customer inquiry after a call from a customer. Your SwyxPhone is then busy for further incoming calls. If you would always like to have a wrap-up time configured for a line, you must define this when configuring the line (see Chapter 8.5, Configure Line buttons, page 66).
How to disable a line
- Take the handset off the hook.
L1: Please dial!
>Voicemail inquiry
>Caller list
>Phonebooks
>Redial
>Incognito now
>Disconnect
>Disable line
>Call Swap
- Select the menu item "Disable Line" with the arrow button, and press the "OK" button:
√ The line is disabled.

If you want to disable a different line, select the relevant line beforehand with the "Call Swap" option.
This is how you enable a disabled line
- Take the handset off the hook.
L1: Please dial:
>Voicemail inquiry
>Caller list
>Phonebooks
>Redial
>Incognito now
>Disconnect
>Enable Line
>Call Swap
- Use the arrow buttons to select "Enable Line" and press the "OK" button.
√ The line is enabled.
This is how you set the wrap-up time
- Select the menu item "8 > Configuration" with the arrow buttons, and press the "OK" button.
Configuration
>Ringing
>Call signalling = <Status>
>Lines
>Function keys
>Speed dials
>Incognito = <Status>
>Enable Line
>Info
>Contrast
>Transf. on Hookon=<Status>
>Back
- Select "Lines".
Lines (amount: XX)
>Line 01
>Line 02
0>Back
- Select the line for which you want to set the wrap-up time, and press OK.
√ The following will appear:
Line XX
1>Incoming calls
2>Outgoing Calls
3>Wrap-Up time = off
0>Back
- Choose "Wrap-Up time" and press the "OK" button. √ The following will appear:
Wrap-Up time = <Status>
1>Enable/Disable
2>Timeout = 120s
0>Back
-
Press OK to switch the wrap-up time on or off.
-
Select "Timeout" to change the wrap-up time.
-
Enter the desired duration in seconds (5 -1800s) and press the "OK" button.
√ The wrap-up time for the line in question is defined and activated.
7.2 Voicemail inquiry
A Voicemail is a spoken message in the form of a WAV file.
If the caller couldn't reach you, he can leave a Voicemail. You can listen to the Voicemail, when you are back at your desk or from another phone using the remote inquiry.
When a new Voicemail has been left for you, this will be signaled by
- the message "Voicemail available" appearing on the SwyxPhone display
■ a briefly interrupted (stuttered) dial tone - the illumination of the Voicemail button.
If you have e-mail access, your voice mails will be sent to your e-mail address if this has been entered for your SwyxPhone during installation.
You can check your voicemails with the SwyxPhone or directly from your e-mail program.
Voicemail Options in your E-mail Program
The voicemail delivery by e-mail offers you several options:
- Message as an e-mail attachment (audio file) You can listen to this comfortably on your PC, and then save or forward the file.
- Direct starting of a callback from the e-mail (only in Swyxlt! or with CTI)
- direct sending of an e-mail to the caller
- Link for listening to Voicemail directly by Remote Inquiry (only in Swyxlt! or with CTI)
This is how you check your new voicemails with SwyxPhone
You have new Voicemails.
The red LED for the Voicemail button will glow.
- Press the Voicemail button.
Or
- lift the handset and select the option "Voicemail inquiry" with the arrow buttons. √ The connection to the SwyxServer for checking the voicemail will be initiated immediately.

If no Voicemail has been configured for you by the administrator, the menu item "Voicemail available" will not be displayed.
7.3 Remote Inquiry
You can also check your Voicemail by Remote Inquiry from any phone connection. To do this, your Standard Voicemail must be configured appropriately.
Remote Inquiry enables you to listen to your voice mails from any telephone. When you are called at your SwyxWare number, you identify yourself to SwyxWare with your PIN and only then you can listen to, repeat, or delete the new voice mails and afterwards all existing voice mails. In addition, you can change the destination of the Call Forwarding Unconditional or record a new announcement.
You will receive a PIN (Personal Identification Number) from your administrator. If, in addition to your SwyxPhone, you also have the option of configuring the standard remote inquiry in SwyxIt!, you can also change the PIN there.

The number of Voicemails available for remote inquiry is limited to the most recent one hundred Voice mails.
This is how you listen to your Voice mails remotely
In order for a received call to be picked up by your Standard Voicemail and in order for you to have the option of Remote Inquiry, you must configure your call forwarding accordingly. This means that an incoming call must reach your Standard Voicemail and may not be redirected. For further information please refer to the Swyxlt! documentation.
- Dial your SwyxWare phone number.
√ The call is picked up and you hear the welcome announcement of your Voicemail. - Press the * key during the welcome announcement.
You will hear the welcome announcement of the Remote Inquiry and will be asked to enter your PIN.

You will not be prompted to enter your PIN if you are calling from your own SwyxWare extension number.
-
Enter your PIN and complete the entry with the # key.
-
If new Voice mails have been received, you will first be given the total number of Voice mails.
Then all of the new Voice mails will be played, beginning with the one most recently recorded. The sender information of each Voicemail is given first.
- Date received
• Time - Caller's number (if available)
- Name of the caller, if this can be determined for internal calls by the system (For further information please refer to the Swyxlt! documentation.)
and finally
• the recorded Voicemail.
You can use the * key to skip the current message (sender information or recorded Voicemail).
The following options are available to you during the output of a Voicemail:
| Button | Effect |
| 0+ | Connects to the caller (if possible) |
| 1GLD | Back to the beginning of the Voicemail |
| 3DEF | Forward to the end of the Voicemail |
| 4GIB | 10 seconds backward |
| 5JKL | Stop/Start Output (Pause) |
| 6MND | 10 seconds forward |
| 7PORS | Switch to the previous Voicemail |
| 8TUV | Switch to the next Voicemail |
| 9WAYZ | Main menu |
Button Effect

Switch to the next information (Date, Time, CallerID, Voicemail content)

Help
If you have no new Voice mails, you will find yourself in the main menu. Here you can listen to all available Voicemails and configure your Call Forwarding Unconditional (see This is how you change the settings for Forwarding Unconditional by Remote Inquiry, page 45).
- After each Voicemail has been played, you have the choice of the following options:
Button Effect

Connects to the caller (if possible)

Repeat the current Voicemail

Delete the current Voicemail. Confirm with


Forward to an internal number

Switch to the previous Voicemail

Switch to the next Voicemail

Main menu

Help
After the new Voice mails have been played, you will be shown the main menu. The following options are available:
Button Effect

End Remote Inquiry (=Hook on)

Inquiry of all Voice mails (most recent first)

Inquiry of all E-mails

Configuration of the Forwarding Unconditional

Record note

Change Voicemail Announcement

Delete all Voicemails. Confirm with

Help
- End Remote Inquiry by going on hook.
If you have finished listening to a Voicemail, the corresponding e-mail in your e-mail folder will be marked as read. If a Voicemail was partially or completely skipped, the "unread" mark will remain in the e-mail folder.
The name announcement, which other internal subscribers hear when listening to a Voicemail you have left, can be recorded using Swyxlt!. Ask your system administrator should you have questions about this.

If you change your Windows password, you must also adjust this in the configuration of the remote enquiry with Swyxlt!, or contact your administrator.

Note that Remote Enquiry only covers voicemail that is present as e-mail in the Outlook folder which you specified in the Remote Enquiry configuration. You can adjust the configuration of the remote inquiry with the help of Swyxlt!, or it will be done by the administrator.

The menus for Remote Inquiry are also available as a print template on the SwyxWare DVD. For more information, please contact your administrator.

If you end Remote Inquiry in the main menu with '0', other actions of the Call Routing Manager can still be applied. For further information please refer to the documentation 'Call Routing Manager'.
7.3.1 Change Forwarding Unconditional
You can also use the Remote Inquiry menu to change the settings for Forwarding Unconditional. You can choose between
- a Forwarding Unconditional to a number,
- a Forwarding Unconditional to standard Voicemail or
■ deactivation of Forwarding Unconditional.
This is how you change the settings for Forwarding Unconditional by Remote Inquiry
In order to take advantage of this, Remote Inquiry must be configured for you:
- Dial your SwyxWare phone number.
The call is picked up and you hear the welcome announcement of your Voicemail. - Press the * key during the welcome announcement.
You will hear the welcome announcement of the Remote Inquiry and will be asked to enter your PIN. - Enter your PIN and complete the entry with the # key.

You will not be prompted to enter your PIN if you are calling from your own SwyxWare extension number.
- If you have received new Voice mails, you will be given the opportunity to listen to them.
- To open the main menu, press '9'. √ The following options are available in the main menu:
Button Effect
| 1 | Inquiry of all Voice mails (most recent first) |
| 3 | Inquiry of all E-mails |
| 4 | Configuration of the Forwarding Unconditional |
| 5 | Record note |
| 6 | Change Voicemail Announcement |
| 7 | Delete all Voicemails. Confirm with *▲ |
| # | Help |
| 0+ | End Remote Inquiry (=Hook on) |
- To change Forwarding Unconditional press the '4'.
The current status of Forwarding Unconditional will be given. You will then have the following options for changing your Forwarding Unconditional:
Button Effect
| 1.0.0 | Activate redirection to the saved numberThe Call Forwarding Unconditional to the saved destination number will be activated. If no destination number is saved, you will be prompted to enter a number. |
| 2.ABC | Activate redirection to VoicemailThe Call Forwarding to your Standard Voicemail will be activated. |
| 3.CDF | Deactivate (Call) ForwardingCall Forwarding Unconditional is switched off. Please note that in this case other rules of the Call Routing Manager can be applied. |
Button Effect

Save a new destination for forwarding Here you can enter a new destination
number and end with # Abc 124 Call Forwarding Unconditional to this number is then activated.

Current status of Call Forwarding The current status of Call Forwarding Unconditional will be given.

Change Voicemail Announcement

Main menu The remote configuration of Call Forwarding Unconditional is ended and you return to the main menu.

Forwarding to the current Caller ID (only possible if the CallerID is available)

Help
7.4 Project Codes
SwyxWare can record the data of individual telephone calls in CDRs (Call Detail Records) and assign different project codes to them. This data can then be evaluated later. For further information, please refer to the SwyxWare Administrator documentation.
To associate a call to a project, you must enter the assigned project code before making the call.
This is how you assign a call to a project
- Enter '*' and then the project code.
- End the entry of the project code with '#'.
- Then immediately dial the destination number as usual.
The project code will now be recorded in the Call Detail Record (CDR) by SwyxWare.

You can also, for example, assign a project code to a Speed Dial (e.g. *123#, Option: activate "Successive dial" and deactivate "Dial immediately") and then activate a corresponding contact partner on a second Speed Dial (e.g. 00123 4567, please do not activate "Successive dial" here). If you would now like to assign a conversation with your contact partner to a project, press the Speed Dial with the code first and then the button with the telephone number.
7.5 Note
You can add entries to your Personal Phonebook during a call.
This is how you create a note during a call
You are making a call.
- Select the menu item "Note" with the arrow buttons, and press the "OK" button.
√ The following appears on the display:
Enter number
- Enter the number of the new entry in the Personal Phonebook, and end your input with the "OK" button.
√ The following appears on the display:
Enter name
- Enter the name for the new entry in the Personal Phonebook, and end your input with the "OK" button.
√ The new entry in the Personal Phonebook is saved.

Enter a letter like editing a SMS: For example press the 7 three times to enter a R. Enter the space with "0". The '*'-key is used to switch between upper and lower case letters.

If while creating a note you enter the number but not the name, the following entry will appear in your personal Phonebook in the first position: "No Name:Number". You can then process this entry in your personal Phonebook.
7.6 Callback request
SwyxWare offers the option of leaving callback requests on other internal subscribers' phones. The subscriber can then call back later. If the subscriber you are calling is busy, you can start a "Callback on busy". In this case a new call is suggested as soon as the subscriber is available again.
The list "My Callback Requests" serves for managing the callback requests you have made. The callback requests directed to you are given in the list "Callback Requests".
If you call another subscriber within your company and the connection is not completed (e.g. speaking, busy, call not picked up, absent), you can make a callback request.
There are two different situations:
- Callback on busy, i.e. the person called is speaking
- Callback (when the line is idle and the call is not picked up or is forwarded to Voicemail)
7.6.1 Callback on busy
You call a subscriber in your company and this person is currently speaking on the phone. You receive the message "Busy" or "Call waiting", depending on whether the person called has allowed a secondary call. (In the Caller List of the person called, an entry appears -as is the case for every call.) If you now select the "Callback" option, the person called will not receive any further signal and the call waiting signal will stop. If the person called has ended his call, this will be signaled by a brief tone and a message on your display. You can start the callback.
This is how you make a callback request if the line is busy
You call an internal subscriber. The other subscriber is currently speaking on the phone.
-
Select the menu item "Callback request" with the arrow buttons, and press the "OK" button. √ Your call will be ended. On your display you will see the message "Terminated - Callback requested". An entry will be created in your "My Callback Requests" list.
If the person called has ended his call, this will be signaled by a brief tone and a message on your display. -
You can start the callback directly by lifting the handset. (see This is how you start Callback on busy, page 47).

Several callback requests on busy to the same user, even at different numbers, will be summarized into one entry in the "My Callback Requests" list.
This is how you start Callback on busy
You have made a Callback on busy request.
The person called ends his call.
A signal tone will be produced. The following appears on the display:
<destination subscriber>
>Pick up Callback
>Reject Callback
- Select the menu item "Pick Up Call" with the arrow buttons, and press the "OK" button. √ The call is initiated.
If you do not confirm the new call within 20 seconds, the "Missed Callbacks" display will appear. The entry in the list "My Callback Requests" will change to "Was free. Retry?".
-
Confirm the message "Missed Callbacks" with the "OK" button. √ The list of missed callbacks is displayed.
-
Select the entry you want.
-
If you would like to call back to the displayed subscriber immediately, lift the receiver or press the Speaker button
- If you would like to see the details for this callback attempt, press the "OK" button.
Details for this callback attempt, such as date and time, will be
displayed.
You can dial this number again or you can delete it.
If a connection is made to the person originally called, the entry in the "My Callback Requests" list will be deleted automatically.
This is how you reject Callback on busy
You have made a Callback on busy request.
- Select the menu item "Reject Call" with the arrow buttons, and press the "OK" button.
<destination subscriber>
>Reject Call
√ The entry in the "My Callback Requests" list will be deleted.
This is how you delete Callback on busy
You have made a Callback on busy request.
- Use the arrow buttons to select the menu item "Lists".
√ The following will appear:
Lists
1>My Callback Requests
2>Callback Requests
3>Redial
0>Back
- Press the "OK" button.
√ The "My Callback Requests" list will open:
My Callback 01/01 <Date>
><Dest.subscriber> <Time>
1>Clear list
0>Back
- Select the entry you want to delete, and press OK.
√ The details for this callback request will be displayed.
<destination subscriber>
1>Callback on busy
2><Date> <Time>
3>Dial
4>Delete
0>Back
- Choose "Delete" and press the "OK" button.
√ The entry will be deleted.
7.6.2 Callback if idle
You call another internal subscriber and this call is not picked up. You receive the message "Ringing" or the Voicemail announcement.
You make a callback request. This request will be entered with "Callback requested" in your "My Callback Requests" list. If the person called edits his Caller list or the Callback list, he can
- start the callback from his Caller List (Swyxlt!) or his "Callback Requests" list (SwyxPhone).
If you then pick up the callback, the callback request in your list will be deleted.
If no connection is made, the callback request will remain unchanged. - ignore the Callback Request.
If the person called ignores the entry in his list, the extension to the entry will change to "Callback obsolete". - delete the callback request in the Caller List.
The complete entry will be deleted in the list of the person called, and in your "Callback Requests" list, the entry will change to "Callback obsolete".
This is how you make a callback request when the line is idle
You call an internal subscriber. The other subscriber does not pick up the call or your call is forwarded to Voicemail.
- Use the arrow buttons to select the menu item "Callback Request".
√ An entry will be created with "Callback requested" in your "My Callback Requests" list. The person called will be signaled your callback request.
Your call will be ended.
This is how you answer a callback request
You have received a callback request and in your display you see the list "New callback requests (XX)".
-
Press the "OK" button. √ The "Callback requests" list will appear.
-
Select the caller and lift the handset. √ The caller will be called back.
If you want to ignore the callback request, select "Ignore" and press the "OK" button.

After you have opened the "New Callback Requests" list, all entries will be transferred to the "Callback Requests" list, even those which have not yet been displayed.

The entry in your "My Callback Requests" list will be deleted in any case if a connection to the person called is successfully made. At the same time, the entry in the Caller List of the person called will change to "Callback obsolete".
"My Callback Requests" List
In the "My Callback Requests" list you will find all callbacks that you have requested.
This is how you open the "My Callback Requests" list
- Select the menu item "Lists" with the arrow buttons, and press the "OK" button.
- Choose "My Callback Requests" and press the "OK" button. √ The "My Callback Requests" list will open.
My Callback 01/01 <Date>
<Dest.subscriber> <Time>
1>Clear list
0>Back
- Choose the appropriate entry and press the "OK" button.
√ Details for this entry will be displayed:
- Callback on busy
You have made a callback request of a subscriber whose line is busy. This subscriber is still telephoning.
- Callback requested
You have made a callback request of a subscriber whose line is idle. No connection was successfully made.
- Callback obsolete
You have made a callback request of a subscriber whose line is idle. After this, the callback has either been ignored by the other subscriber, was answered per e-mail or deleted.
You can select an entry in this list, delete individual entries or the entire list. When deleting, the "Callback requested" entries will be deleted from the list of the other subscriber.
"Callback Requests" List
In the "Callback Requests" list you will find all callbacks that have been directed to you.
This is how you open the "Callback Requests" list
- Select the menu item "Lists" with the arrow buttons, and press the "OK" button.
- Choose "Callback Requests" and press the "OK" button. √ The "Callback Requests" list will open.
Callback 01/01 <Date>
>Dupont, Marie <Time>
1>Clear list
0>Back
- Choose the appropriate entry and press the "OK" button.
You can
• with "Callback" or
- "Ignore".
If you delete the list, the corresponding entry in the caller's list will be marked as "Callback obsolete".
The "Missed Callbacks" List
In the "Missed Callbacks" list you will find all callbacks on busy, which were prompted because the person called had finished his conversation, but were not confirmed by you.
This is how you open the "Missed Callbacks" list
The following will appear:
Missed Callbacks
>Dupont, Marie <Time>
- Press the "OK" button.
√ The "My Callback Requests" list will open.
My Callback 01/01 <Date>
>Schmidt, Eva <Time>
1>Clear list
0>Back
- If you select the required entry in this list, you can start this callback again or delete it.
The "Missed Callbacks" list will remain in the display until it contains no entries.
7.7 Conference
With SwyxWare you can join internal and external subscribers to form a conference. Furthermore, you can add new subscribers to an existing conference. Alternatively, you can also arrange to meet with other subscribers in a conference room. In a conference room you can take an active part in the conversation or only act as a listener.
7.7.1 Starting a Conference
If you have at least one active line and one line on hold, the entry "Conference" appears in the available menu. This provides you with the option of creating a conference between these subscribers and yourself.
How to start a conference call:
You are having conversations with several subscribers at the same time. The active connection is the connection to the person you are currently talking to. All other subscribers, who are listening to music on hold while they wait, are on connections on hold.
- Select the menu item "Conference" with the arrow buttons, and press the "OK" button.
or
- Press the Conference button.
All of the individual calls which you are currently having, both the active and held calls, will be joined into one conference. All lines, except for the conference line, will be free again. A welcome signal will be produced for all participants.
The following appears on the display for all participants:
L1: Conference
= Call duration: xx:xx:xx
Note
Call Transfer
Disconnect
Speaker =
Microphone =
Second. call =
Call Swap

You can only start one conference at a time. However, you can participate in other conferences. provided these conferences have been initiated by other participants.
7.7.2 Inquiry Calls and Add
During a conference you can start an inquiry to another subscriber. After this inquiry you can add the other subscriber to the conference. The other subscriber for his part can create a conference of which you are a member. In this situation, you can then use the "Conference" button to join both conferences into one..
This is how you start an Inquiry Call from a conference
You are a participant in a conference.
-
Use the arrow buttons to select the menu item "Call Swap". √ The line with the conference will be put on "Hold".
-
Dial the number you want.
√ The new connection will be set up.
- If you would like to end the call to the subscriber you made an inquiry call to, put the handset on the hook or press the corresponding Line button.
This is how you add an additional subscriber to a conference
You are a participant of a conference.
-
Use the arrow buttons to select "Call Swap".
-
Dial the number you want.
-
Once you have reached the new participant, select "Conference" with the arrow buttons and press the "OK" button.
√ A welcome signal will be produced for all conference participants. A new subscriber has been added to the conference.

If one conference participant puts his conference line on "Hold" and then returns to the conference, no welcome signal will be produced.
7.7.3 Leaving or Ending a Conference
When going on hook, there are two different situations:
- You started the conference.
In this case, the conference will be ended for all participants if you put the handset on the hook.
■ Another subscriber started the conference.
Only you will leave the conference. A goodbye signal will be produced for all other subscribers and the remaining subscribers can continue to speak to one another.

All those subscribers whom you added to this conference will leave the conference with you. The conference will continue for all other subscribers.
This is how you leave a conference
Another subscriber started the conference.
- Place the handset on the hook. If a subscriber leaves a conference, a goodbye signal will be produced for all other subscribers.
This is how you end a conference
You have started a conference and the conference line has an "active" state, i.e. you can speak to the other conference participants.
- Place the handset on the hook.
√ The conference is ended. The line becomes free again.

If Subscriber A of the original conference added other subscribers, e.g. B and C, to this conference, a second conference between A, B and C will continue to exist until Subscriber A, as initiator of the second conference, terminates the connection and thus ends the conference.
7.7.4 Conference Rooms
Conference rooms are set up by the administrator. A number is assigned with which the conference room can be "entered". All subscribers can dial the Conference Room and participate in a conference with other users, who have dialed this number. All participants can leave the conference independently of one another, without the conference being termi-
nated. You can enter a Conference Room as a member of a conference or purely as a listener.
This is how you reach a Conference Room
-
Dial the number of this Conference Room.
√ You will be connected to the conference. All participants in the conference room will hear a welcome signal. If you are the only conference participant, an appropriate announcement will be played. -
To leave the conference, simply go on hook.
All those present in the Conference Room will hear a goodbye signal. The conference between the other subscribers continues to exist.
You can also start Inquiry Calls from a Conference Room. (see This is how you start an Inquiry Call from a conference, page 51). Furthermore, you can add other subscribers to this Conference Room. (see This is how you add an additional subscriber to a conference, page 51).

If you go on hook, all of the conference participants you have added will also leave the conference.
In addition, you can connect another subscriber to the Conference Room. He/she becomes an independent participant in the conference and must end the connection to this conference personally.
This is how you connect another subscriber to the Conference Room
Requirements:
- You have a connection to the Conference Room and
-
You have a connection to another subscriber.
-
Select "Call Transfer" with the arrow buttons, and press the "OK" button.
√ The other subscriber is connected to the Conference Room and a welcome signal is produced in the conference. Both of your lines are free again.

The party who created the connection will bear the costs.

It is not possible to directly connect conference rooms to one another. If you would like to allow the participants from two different conference rooms to talk to one another, then you should start a conference between the two lines. This 'Conference of the Conference Rooms' will be maintained as long as you, as initiator, participate in this conference, and it will end when you go on hook.
7.7.4.1 Silent conference participation
You can also dial in as a listener to conferences in conference rooms. You can then follow the conference, but not take part in the conversation.
To dial in as a silent conference participant, dial the number of the conference room plus the string '#OWC'; e.g. "219#OWC". However, your administrator can individually adapt this dial-in option with a script. For further information please refer to the SwyxWare Administrator documentation.
Please note that the complete string of digits (number of conference room#OWC) must be dialed as a block number.
The entry / departure of a silent conference participant is also announced by an audio signal. This signal is different from the usual entry/departure signal to indicate that this participant cannot take part in the conference call.
If you want to dial into a conference room as a silent participant, you first have to configure a corresponding Speed Dial with Swyxlt!, since you cannot dial the string "OWC" via SwyxPhone. Since SwyxPhone and Swyxlt! access the same user profile, the Speed Dials configured in Swyxlt! are also available to you in SwyxPhone.

A simple way round the problem is also to dial into the conference as a normal participant, and deactivate the microphone on your telephone.
7.8 Using a headset
If you telephone a great deal, you can connect a headset to SwyxPhone in order to have your hands free while on the phone. Swyx offers several headsets and the necessary connection cable as an accessory.
7.8.1 Connecting a headset to SwyxPhone L62
SwyxPhone L62 has its own connection for the headset. You can connect the headset using an adapter cable with switch (Headset Cable K420). You can choose at any time whether you want to make a call using the headset.
This is how you switch between the handset, headset and handsfree telephoning

- If you hear the subscriber in the headset, you can switch to the handset by picking up the handset.
- If you hear the subscriber in the handset, you can switch to the headset by pressing the "Headset" button. Do not place the handset on the hook, or the call will be ended.
- If you hear the other subscriber in the headset or the handset, press the "Speaker" button to switch the handsfree telephone on or off. If you press the "Speaker" button once again, you will continue your call as before either on the headset or the handset.
7.9 Call Intrusion
The "SwyxMonitor" option pack enables, in addition to permanent call recording (only for the administrator), intrusion into another user's conversation. A supervisor (e.g. in a call center) can listen in on an ongoing conversation ("Listening only" mode), give directions to the speaking agent (e.g. advice on presenting the case) or even actively join in the call (speaking modes).

If the SwyxMonitor option pack is used, it is essential to observe the relevant statutory provisions relating to data protection.
The "SwyxMonitor" option pack must be installed for Call Intrusion, and the SwyxWare administrator must activate this function appropriately for each individual user.
Also, calls can only be listened in on if they are made directly with Swyxlt! (and not in CTI mode). Conversations that are made via a SwyxPhone, cannot be intruded.
This is how you listen in on a call
- Dial the number of the agent whose call you want to hear, followed by the DTMF command *24*1#, and start the call as usual. Please note that you can only start the call set-up with the DTMF command for the "Listening only" mode. However, if another supervisor is already listening in on this call in a speaking mode, you will also be switched immediately into this mode.
The number of the agent will be dialed. There is no call signaling to the agent, the call is accepted directly and coupled with the active call. You are now listening in on the call, but you are not heard by the two call partners.
If the agent is not on an active call at the time, the call set-up is aborted. The agent's call redirections (e.g. forwarding of a second call to voicemail or to a colleague) are ignored, i.e. the call is always accepted. An exception is Unconditional Call Forwarding - in this case even Call Intrusion is redirected.
- Choose the appropriate DTMF command to speak with the agent or both call partners.
- End the listening like a normal call, e.g. by replacing the handset.
If the agent's call partner (e.g. the customer) terminates the conversation, you are automatically connected to the agent, unless you are in "Listening only" mode, in which case the call will be ended.
DTMF command Explanation
*24*1# Listening only.
You hear both call partners.
*24*2# Listen to both sides, speak with agent.
You hear both call partners, and the agent hears you. The other call partner (e.g. the external customer) hears only the agent.
*24*3#
Listen to both sides, speak with both sides.
You can participate directly in the conversation.
7.9.1 Multiple Call Intrusions
A call can also be listened to by several people. These supervisors are always switched into the same mode. Thus if one supervisor switches with a DTMF command from the "Listening only" mode to a speaking mode, the agent also hears all other supervisors who are connected with him. The supervisors can always speak directly to one another, even if they are in "Listening only" mode. Neither the agent nor his call partner can hear them.
8 SwyxPhone L62 Configuration
You can adjust the default settings of SwyxPhone to meet your individual needs:
■ Call Forwarding, page 55
Do not disturb, page 56
■ Secondary call, page 56
Ring tones, page 56
- Call Signaling, page 56
- Lists, page 58
- Phonebooks, page 59
- Configure function keys, page 63
- Configure Line buttons, page 66
■ Configuring Speed Dials, page 67
8.1 User Profile
Your user settings contain user-specific information, that is settings which you have made on the SwyxPhone. The user settings include, for example, all lists (Caller List and Redial List), your individual assignments for function keys and Line buttons, and even ringing. Your user settings are stored on SwyxServer, so you will find your personal settings on any SwyxPhone when you enter your PIN (Personal Identification Number). General settings are always made in the main menu or in the Configuration menu.
The basic telephony behavior of the SwyxPhone and the number of Line buttons and function keys are defined either in the main menu or the Configuration menu. You can check and change the current settings via the menu items.
This chapter provides a description of the individual configuration options.
8.1.1 Call Forwarding
Main menu
4>Call forwarding
The menu item "Forwardings" allows you to define whether telephone calls are
■ forwarded unconditionally or
- forwarded with a delay, i.e. after you have not picked up your call, or
- forwarded if your line is busy (you are presently telephoning).
Call Forwarding
1>Uncondit. =
2>Busy =
3>No Reply =
0>Back
Furthermore, you can define whether incoming calls should be forwarded specifically to another subscriber or to your Standard Voicemail using the "Forwarding" button.
Activate the option "Immediate", if you do not wish to receive any calls starting immediately (this is equivalent to activating the "Redirection" button on the user interface).
When you activate the option "If busy", you must define how a call should be handled if it cannot be delivered to you because you are already on the telephone and no secondary call is permitted. You can either enter the forwarding destination directly, or make a selection from the Phonebook, or activate your Standard Voicemail. When a call is received, SwyxPhone automatically recognizes whether the line is free or busy and it applies the appropriate type of Call Forwarding.
The "Delayed" option is used to set the amount of time which should be spent attempting to transfer the call directly to SwyxPhone, which you have logged on to. The call can then be forwarded to another number or to your Voicemail.
For further information please refer to chapter 6.15, How do I forward a call?, page 35.

Your Voicemail can only be configured using Swyxlt!. For further information please refer to the Swyxlt! documentation.
8.1.2 Do not disturb
Main menu
6>Do Not Disturb = <on/off>
If you activate "No Disturb", calls are signaled visually only. Your environment is not disturbed by any acoustic signals. If you confirm this menu item with the "OK" button, this function will be switched on or off. If you set the status to "Do Not Disturb" while it is ringing, the ringing then falls silent. If you deactivate the status "No Disturb" during an incoming call, there is then also no acoustic signal. The subsequent calls are signaled acoustically (In earlier SwyxWare versions this setting corresponds to an immediate forwarding of the incoming calls to Voicemail.)
8.1.3 Secondary call
Main menu
7>Secondary Call = <on/off>
If you deactivate this option, no further calls will be signaled while you are on the telephone. It is also possible to switch Secondary Call on or off during a call. A subscriber trying to call you will hear the busy signal or his call will be redirected according to your setting for "Redirect if busy". For further information please refer to chapter 6.14, The Secondary Call, page 35.
8.2 Settings in the Configuration Menu
Main menu
8>Configuration
The configuration menu contains the following items:
8.2.1 Ring tones
Configuration
1>Ringing
2>Call signaling = <on/off>
3>Lines
4>Function keys
5>Speed dials
6>Incognito = off
7>Info
8>Contrast Level
9>Transfer on Hookon=<on/off>
0>Back
Ring tones
1>Internal
2>External
0>Back
The telephone ring for incoming calls is selected here. You define the telephone ring for calls from outside the company under "External" and for calls from within the company under "Internal".
Ringing <internal or external>
-< 0x/07 >+
You can choose from seven different ringing tones. You can select the ringing sound you want using the arrow buttons and adjust the volume using the "+/-" buttons.
8.2.2 Call Signaling
The administrator can configure the system in such a way that incoming calls for you are signaled to another subscriber. The incoming calls for this subscriber will also be signaled to you. If such signaling has been defined, then the incoming calls for this subscriber will appear on your display. If the destination subscriber does not pick up the call, you will
hear a single warning tone after 10 seconds. This tone can be turned off here.
Configuration
2>Call Signaling = on
The call signaling will still only be visually indicated.
If several subscribers, whose calls are signaled to you, receive a call at the same time, only one name will be shown in the display. The other calls will only be indicated by the blinking of the corresponding Speed Dials. If you would like to pick up one of these calls, use the corresponding Speed Dial and lift the handset.

Mutual call signaling between subscribers can only be configured by the system administrator.
8.2.3 Lines
Upon delivery, your SwyxPhone L62 has two pre-configured lines; i.e. a maximum of two calls can be received.
You can configure up to a total of nine lines for SwyxPhone. If you reduce the number of Line buttons, at least two lines will still remain available in order, for example, to be able to receive a second call via the shortcut menu. Each individual line can be assigned its own extension and be configured according to its use. For further information please refer to chapter 8.5, Configure Line buttons, page 66.
Examples:
Incoming call (you are being called):
You have assigned the extension number 100 to Line 1 and the extension number 101 to Line 2. Now, if a subscriber dial is the number 101, you will receive the call on Line 2.
Outgoing call (you are calling someone):
You have assigned the extension number 101 to Line 2. If you now call a subscriber using Line 2, extension 101 will be used. The subscriber you have called will see on his display that he is being called by a subscriber with the number 101.

Due to the fact that both SwyxPhone and SwyxIt! access the same user settings, any changes you make on SwyxPhone will always effect the settings in SwyxIt! and vice versa. Above all, you should keep in mind that if you delete lines, the data will be lost! For further information please refer to chapter 17, Interaction with SwyxIt!, page 178.
8.2.4 Incognito
When you activate this option, your telephone number will not be shown to the destination subscriber (number suppression). If you activate number suppression in the Configuration menu, the setting will be retained.
Configuration
6>Incognito = off
You can also use number suppression for a particular call only, by lifting the handset and using the arrow buttons to select the "Incognito now" menu option.
L1: Please dial!
>Incognito now

The numbers of internal calls cannot be suppressed.

Telephone number suppression when making external calls must also be supported by your ISDN line, otherwise only the display of your extension number will be suppressed.
8.2.5 Info
Here you will find technical details of your SwyxPhone.
Info
1>IP address
2>MAC address
3>PBX server
4>PhoneManager
5>Firmware version
6>Restart phone
0>Back
IP-adress
Under this menu item you will find the IP address of SwyxPhone.
MAC address
Under this menu item you will find the MAC address of SwyxPhone.
PBX Server
SwyxPhoneUnder this menu item you will find the name of the to which SwyxServer is logged on.
- PhoneManager
SwyxPhoneUnder this menu item you will find the name of the to which PhoneManager is logged on.
- Firmware version
Under this menu item you will find the version number of the internal telephone software.
- Restart
SwyxPhone can be restarted here.
8.2.6 Contrast
Under this menu item you can alter the display contrast.
Contrast setting
1>Display
0>Back
After calling up the menu item "Display", you can set the contrast for the display using the arrow buttons or the "+/-" buttons.
8.2.7 Transfer on Hookon
Configuration
9>Transfer on Hookon=on
Pressing OK will activate or deactivate the function "Transfer on Hookon".
For further information please refer to chapter 6.11, Transfer When Placing Handset on Hook, page 33.
8.3 Lists
This section provides basic information on the lists, which include:
the Phonebooks,
the Caller List,
the Redial List,
■ the Callback Requests list and
■ the My Callback Requests list.
In general, you will find the same structure for each list. When you call a list, the name of the list will appear in the display. In addition, the current number of the entry in the list and the total number of entries, including the corresponding date, will be given.
In a single entry, the name of the subscriber appears. If you press the "OK" button you can view additional information about the subscriber, or - depending on the list - call the subscriber, edit the entry, save it in the Phonebook, or delete it.
The arrow buttons or the navigation wheel can be used to page through the lists. To display more details for an entry, select the corresponding entry and press OK. You will find yourself in the sub-menu of the entry, where you can scroll through the detailed information or edit the entry.
8.3.2 Phonebooks
Main menu
2>Phonebooks
Frequently used numbers are stored in the Phonebook. You can then dial these numbers directly from the Phonebook. There are two different types of Phonebooks available to you:
■ the Global Phonebook and
■ the Personal Phonebook.
In both Phonebooks, the entries are in alphabetical order of the names. The Global Phonebook is available to all users and contains information about the availability of your company's subscribers, e.g. if they are logged or currently making a call. The system administrator or any user with the appropriate authorization can add further phone numbers in this Global Phonebook, e.g. subscribers of another branch. However, the availability of these phone numbers is not signaled. The Global Phonebook also contains dial numbers of individual groups.
You can store, edit or delete your personal numbers in the Personal Phonebook.
You can directly add, modify, or delete an entry in your Personal Phonebook via SwyxPhone. Alternatively, you can also modify the Personal Phonebook via Swyxlt!. For further information, please refer to the Swyxlt! documentation.
The Structure of the Entries in the Global Phonebook
Gl. Phonebook XX/YY
>Dupont, Marie
The first line of the display shows which phonebook (Personal or Global Phonebook) you are currently in. You also see which entry (XX) of the total number of entries (YY) has been selected.
The names of subscribers in a phonebook are listed in alphabetical order.
This is how you search in a Phonebook
- Press the arrow button

√ The main menu will open.
- Choose "Phonebooks" and press the "OK" button. √ The following will appear:
Phonebook 1>Global 2>Personal 0>Back
- Choose the phonebook you want, and press the "OK" button.
Use the arrow buttons to page through the list of phonebook entries. Confirm the selection of an entry with the "OK" button.
To speed up a search in a large phonebook, you can enter the first letter of the name in the numeric keypad, e.g. for an "F" press the "3" three times, for an "E" press the "3" twice. The letters entered for the search appear in the display:
Gl. Phonebook DU_
>Dupont, Marie
A beep and the insertion mark "-" prompt you to enter the next character.
Within the entry, you can call the subscriber by pressing OK. To exit from an entry or a list, press "0".
Personal Phonebook
You can add, modify or delete entries in your Personal Phonebook. If you have created a note during a call, this will be added as a new entry in your Personal Phonebook. (see Chapter 7.5, Note, page 46). Entries in the Caller List and in the Redial List can also be added to the Personal Phonebook.

Enter a letter like editing a SMS: For example press the 7 three times to enter a R. Enter the space with "0". The '*' key is used to switch between upper and lower case letters.
This is how you add an entry to the Personal Phonebook
- Press the arrow button

√ The main menu will open.
- Choose "Phonebooks" and press the "OK" button.
- Choose "Personal" and press the "OK" button. √ The following appears on the display:
Pers. Phonebook XX/YY
><Subscriber>
, . .
1>Add entry
0>Back
- Choose "Add entry".
√ The following will appear:
Enter number
- Enter here the number of the new entry, and press OK.
√ The following will appear:
Enter name
-
Enter the assigned name, and press OK.
-
Choose "OK" to save the entry.
The Personal Phonebook will appear with the saved entry.
This is how you edit an entry in the Personal Phonebook
You can modify or delete an entry in the Personal Phonebook.
- Press the arrow button

√ The main menu will open.
- Choose "Phonebooks" and press the "OK" button.
- Choose "Personal" and press the "OK" button. √ The following appears on the display:
Pers. Phonebook XX/YY
><Subscriber>
...
1>Add entry
0>Back
- Select the entry you want to edit or delete, and press OK.
√ The selected entry will open:
<Name of the subscriber>
1>Dial
2>Edit entry
3>Delete entry
4>Show number
0>Back
To edit the entry, select "Edit entry". You can now change the name of the entry and then the corresponding telephone number.
For further information please refer to chapter 8.3.2,
Phonebooks, page 59.
Confirm each change with "OK". To save the changes, select "Confirm".
To delete, select "Delete entry".
The selected entry will be deleted.
8.3.3 Caller list
The last calls received for you are automatically saved in the Caller List. The calls are listed in the order in which they were received. You can directly dial the individual entries from the Caller List, edit them, and then save them in the Personal Phonebook. 20 entries will be saved in
the Caller List per default setting. The maximum number of possible entries can be changed via Swyxlt!.
For further information, please refer to the SwyxIt! documentation.
New Calls
If calls have been received for you but you have not picked up these calls, the number of calls received (XX) will appear on the display:
Jones, John 12:45
New incoming calls (XX)
You will be shown as many new calls as the number of entries the Caller List can hold. That is 20 entries in the default setting. The entries of the recent calls will still be available in the Caller List.
Calls XX/YY <Date>
><Number/Subscriber> <Time>
><Number/Subscriber> <Time>
><Number/Subscriber> <Time>
...
><Number/Subscriber> <Time>
1>Clear list
0>Back
This is how you edit an entry in the Caller List
You can edit an entry in the Caller List, save it in the Phonebook, or delete it.
- Press the arrow button

√ The main menu will open.
- Use the arrow buttons to select "Caller List (XX)" and press the "OK" button.
√ The following appears on the display:
Calls XX/YY <Date>
><Number/Subscriber> <Time>
><Number/Subscriber> <Time>
><Number/Subscriber> <Time>
...
><Number/Subscriber> <Time>
1>Clear list
0>Back
- Choose the appropriate entry and press the "OK" button. √ The following will appear:
<Number/Name>
1>Call (not) answered
=<Date/Time of call>
1>Dial
2>Edit and dial
3>Save into phonebook
4>Delete entry
0>Back
- If you select "Dialing" and press OK, the subscriber is called directly.
- "Edit and dial" can be used to edit a telephone number before dialling. When you confirm your changes with OK, the number will be dialled immediately.
- "Save into phonebook" can be used to save the caller's name and number in your Personal Phonebook. If you confirm this option with OK, the number will appear and you can then add the name. If a name already exists, the name will be provided for possible changes.
- You can remove this entry from the list with "Delete entry".
This is how you delete the Caller List
If the list is no longer up-to-date, it can be deleted at any time.
- Press the arrow button

√ The main menu will open.
- Use the arrow buttons to select "Caller List (XX)" and press the "OK" button.
√ The following will appear:
Calls XX/YY <Date>
><Number/Subscriber> <Time>
><Number/Subscriber> <Time>
><Number/Subscriber> <Time>
...
><Number/Subscriber> <Time>
1>Clear list
0>Back
- Choose "Clear List" and press the "OK" button.
The entire list will be deleted.
8.3.4 Redial list
Lists
3>Redial
All dialing procedures are automatically saved in the Redial List. The entries begin with the most recently saved dialing procedure. 20 entries will be saved in the Redial List as default setting. The length of the list can be changed with Swyxlt!. For further information, please refer to the Swyxlt! documentation.

You can also call up the Redial List on SwyxPhone L62 with the "Redial" button.

If the handset is off the hook or if the Speaker button is activated when you press the "Redial" button, the last number dialed will be called again.
This is how you edit the Redial List
You can edit an entry in the Redial List, save it in the Phonebook, or delete it.
- Press the arrow button

√ The main menu will open.
-
Choose "Lists" and press the "OK" button.
-
Choose "Redial" and press the "OK" button.
√ The Redial List opens up.
Redial XX/YY <Date>
><Number/Subscriber> <Time>
><Number/Subscriber> <Time>
><Number/Subscriber> <Time>
...
><Number/Subscriber> <Time>
1>Clear list
0>Back
- Choose the appropriate entry and press the "OK" button.
√ The following will appear:
1>Dial
2>Edit and dial
3>Save into phonebook
4>Delete entry
0>Back
- If you select "Dialing" and press OK, the number is dialed at once.
- "Edit and dial" can be used to edit a telephone number before dialling.
- "Save into phonebook" can be used to save the caller's name and number in your Personal Phonebook. If you confirm this option with OK, the number will appear and you can then add the name. If a name already exists, the name will be provided for possible changes.
- You can remove this entry from the list with "Delete entry".
This is how you delete the Redial List
If the Redial List is no longer up-to-date, it can be deleted at any time.
- Press the arrow button

√ The main menu will open.
- Choose "Lists" and press the "OK" button.
- Choose "Redial" and press the "OK" button.
√ The Redial List opens up. - Choose "Clear List" and press the "OK" button.
| Redial | 00/YY |
| 1>Clear list | |
| 0>Back | |
| ><Subscriber> | |
| ><Subscriber> | |
| ... | |
| ><Subscriber> |
The entire list will be deleted.
If you reopen the Redial List, the message "No entry" will appear.
8.3.5 Lists for Callback Requests, My Callback Requests and Missed Callbacks
Lists
1>My Callback Requests
In the "My Callback Requests" list you will find all callbacks that you have requested.
Lists
2>Callback Requests
In the "Callback Requests" list you will find all callbacks that have been directed to you.
| Jones, John | 12:45 |
| Missed Callbacks (1) |
In the "Missed Callbacks" list you will find all callbacks on busy, which were prompted because the person called had finished his conversation, but were not confirmed by you.
For further information please refer to chapter 7.6, Callback request, page 47.
8.4 Configure function keys
Some function keys on SwyxPhone are configurable. Some function keys are preconfigured at purchase. These buttons are marked with corresponding symbols. You have the option of assigning these keys to other functions, e.g. "Call Swap". You can also configure these buttons as Line buttons or Speed Dials (abbreviated dialing buttons).
A function key can call only one function, dependent on its configuration.
Each function key can be configured with the following functions:
| Function | Description |
| Line button | Activate/deactivate lineFor further information please refer to chapter 8.5, Configure Line buttons, page 66. |
| Speed dial | Call specific numberFor further information please refer to chapter 8.6, Configuring Speed Dials, page 67. |
| Call Transfer | Connect lines to each otherFor further information please refer to chapter 6.10, How do I connect two subscribers to one another?, page 33. |
Do Not Disturb Activate/deactivate acoustic call signaling For further information please refer to chapter 8.1.2, Do not disturb, page 56.
| Function Description | |
| Secondary call Enable or disable secondary callFor further information please refer to chapter 8.1.3, Secondary call, page 56. | |
| Caller list Call up caller listFor further information please refer to chapter 8.3.3, Caller list, page 60. | |
| Hold Put an active line on holdFor further information please refer to chapter 8.3.3, Caller list, page 60. | |
| Phonebook Call up Global PhonebookFor further information please refer to chapter 8.3.2, Phonebooks, page 59. | |
| Redial Call Redial ListFor further information please refer to chapter 8.3.4, Redial list, page 62. | |
| Speaker Switch the speakers or the handsfree telephone on/offFor further information please refer to chapter 6.17, Speaker and Handsfree Telephone, page 38. | |
| Pick up call Picks up an incoming call to a group or a group user. For further information please refer to chapter 6.5, How do I pick up a call?, page 30. | |
| Call Forwarding Enable/Disable Call Forwarding UnconditionalFor further information please refer to chapter 8.1.1, Call Forwarding, page 55. | |
| Call Swap Switch between LinesFor further information please refer to chapter 6.9, How do I switch between lines (Call Swap)?, page 32. | |
| Mute | Switch microphone on/offFor further information please refer to chapter 6.17, Speaker and Handsfree Telephone, page 38. |
| Headset key | Deactivate/Activate Headset |
Disconnect End the active connection
| Function Description | |
| Incognito Before an outgoing call, suppress number displayFor further information please refer to chapter 8.2.4, Incognito, page 57. | |
| Voicemail Call to check voicemailFor further information please refer to chapter 7.2, Voicemail inquiry, page 42. | |
| Conference | Combine lines into a conferenceFor further information please refer to chapter 7.7, Conference, page 51. |
| Callback request | Make a callback requestFor further information please refer to chapter 7.6, Callback request, page 47. |
| User logoff Log off phone user from SwyxServer | |
This is how you configure a function key
- Press the arrow button

√ The main menu will open.
- Use the arrow buttons to select "Configuration" and press the "OK" button.
√ The Settings menu will appear.
| Configuration |
| 1>Ringing |
| 2>Call signaling = <on/off> |
| 3>Lines |
| 4>Function keys |
| 5>Speed dials |
| 6>Incognito = <on/off> |
| 7>Info |
| 8>Contrast Level |
| 9>Transfer on Hookon=<on/off> |
| 0>Back |
- Choose "Function keys" and press the "OK" button.
√ The following will appear:
Function keys
Press a function key!
- Press the configurable function key to which you want to assign a function.
√ The current function of the key is displayed. If the key is not yet assigned a function, this message appears:
Function Key
= No function
1>Change
2>Delete function
0>Back
- Choose "Modify" and press the "OK" button. You can choose from the following functions:
Change function key
>Line key
>Speed dial
>Call Transfer
>Do not disturb
>Secondary call
>Caller list
>Hold
>Phonebook
>Redial
>Speaker
>Pick up call
>Call Forwarding
>Call Swap
>Mute
>Headset key/Handset key
>Disconnect
>Incognito
>Voicemail
>Conference
>Callback request
>User logoff
0>Back
- Choose the function you want, and press the "OK" button. √ The key is set with the chosen function.
The following will appear:
Function keys
Press a function key!
- You can assign an additional function key or return to the main menu with "0".
This is how you delete the function of a function key
- Press the arrow button

√ The main menu will open.
- Use the arrow buttons to select "Configuration" and press the "OK" button.
√ The Settings menu will appear.
Configuration
1>Ringing
2>Call signaling =<on/off>
3>Lines
4>Function keys
5>Speed dials
6 Incognito = on/off
7>Info
8>Contrast Level
9>Transfer on Hookon
0>Back
- Choose "Function keys" and press the "OK" button.
√ The following will appear:
Function keys
Press a function key!
- Press the configurable key whose function you want to delete.
√ The current function of the key is displayed.
Function Key
= Speed dial (X)
1>Change
2>Delete
0>Back
- Choose "Delete" and press the "OK" button.
√ The function of this key is deleted. The following will appear:
Function keys
Press a function key!
- You can edit an additional function key or return to the main menu with "0".
If you press a key with no assigned function, you will hear a brief signal (button signal).
8.5 Configure Line buttons
Every configurable function key can be set with the "Line button" function; see This is how you configure a function key, page 64.
In the default setting, SwyxPhone has two Line buttons and you have therefore been provided with two lines, which means that you can receive a maximum of two calls.

Due to the fact that both SwyxPhone and SwyxIt! access the same user settings, any changes you make on SwyxPhone will always effect the settings in SwyxIt! and vice versa. Above all, you should keep in mind that if you delete lines or Speed Dials, the data will be lost!
The Number of Available Lines
However, the least number of lines is always two, even if you have only one or no configured Line buttons. To increase the number of lines, you must add Line buttons.
To add a Line button, you must configure a configurable function key as a Line button (see This is how you configure a function key, page 64).
Configuration of the Individual Line Buttons
You can define numbers for incoming and outgoing calls for the available lines. This requires that your user account has been assigned at least two numbers (or group numbers).
The option "Incoming calls" shows the telephone number the caller has dialed, when the call comes in on this line. Under the option "Outgoing calls", you can specify the telephone number to be used for making outgoing calls from this line.
For each configured Line, you can define whether this line should be blocked for specific period of time after an incoming call is received. (see Chapter 7.1, Disabling Lines (Wrap-up Time), page 41)

If an outgoing call is started or if the Line button is pressed during this wrap up time, the line will once again be cleared afterwards for incoming calls.
This is how you configure a Line button
- Press the arrow button

√ The main menu will open.
- Use the arrow buttons to select "Configuration" and press the "OK" button.
√ The Settings menu will appear.
- Select "Lines".
√ The following will appear:
Lines (Number: 02)
Line 01
Line 02
0>Back
- Select the line you want to configure, and press OK
√ The following will appear:
Line 02
1>Incoming calls
2>Outgoing Calls
3>Wrap-Up time = on
0>Back
You have the option of entering an extension for outgoing or incoming calls.
- Choose the option you want, and press the "OK" button.
The option you have selected will appear in the first line of the display and the current status will be shown in the second line of the display.
If the system administrator has configured several telephone numbers for you, you can change these numbers as follows:
Incoming calls
1>Change
0>Back
- Choose "Modify" and press the "OK" button.
Incoming calls
All Extensions
...
0>Back
You can define which of your calls should be received on this line.
- "All Calls"
In this case, all calls will be signaled on this line, regardless of whether these calls are directed to your own extension or to a group, of which you are a member.
- "All Extensions"
Choose this option, if all calls directed to you, regardless of the extension dialed, should be received on this line. This option is only available if you have been assigned several extensions numbers.
- "Group Calls Only"
All calls to groups of which you are a member will be received on this line.
- < Number x >
An incoming call will only be received on this line if the caller has specifically dialed this extension. Here you can even select individual group extension numbers.
You have to confirm the telephone number or option you want with the "OK" button.
The Line button is configured. You can configure another function key, or leave the configuration menu.
8.6 Configuring Speed Dials
Every configurable function key can be set with the "Speed Dial" function; see This is how you configure a function key, page 64.
You can use a Speed Dial for one-click dialing of a number you often call. You only need to press the relevant Speed Dial, and the subscriber
whose name is assigned to the Speed Dial will be called at once. Speed Dials can also be utilized for frequently used DTMF commands.
This is how you assign a Speed Dial to the number of your choice
- Press the arrow button
√ The main menu will open.
- Use the arrow buttons to select "Configuration" and press the "OK" button.
√ The Settings menu will appear.
- Choose "Speed Dials".
√ All Speed Dials glow. The following appears on the display:
Speed dial buttons
Press speed dial!
If no key glows, you first have to configure a function key as a Speed Dial (see This is how you configure a function key, page 64).
- Press the Speed Dial you want. √ The following will appear
S02: unassigned
1>Change
0>Back
The current function of the key is displayed. If the key is not yet assigned, this message appears.
- Choose "Modify" and press the "OK" button. √ The following will appear:
S02: Change
1>Number
2>Dial immediately = on
3>Successive dial = on
4>Intercom = off
0>Back
-
Choose "Number" and press the "OK" button.
-
You can select a number from the phonebook or enter one manually using the keypad:
S02: Phone number
1>Phonebook
2>enter manually
0>Back
- Confirm your entry with "OK".
√ The Speed Dial has been assigned a number. You can configure another function key, or leave the configuration menu.

Due to the fact that both SwyxPhone and SwyxIt! access the same user settings, any changes you make on SwyxPhone will always effect the settings in SwyxIt! and vice versa. If you delete Line buttons or Speed Dial buttons, the corresponding data will be removed from your user profile.
8.6.1 "Dial immediately", "Successive dial" or "Intercom Connection"?
The Speed Dials provide you with several options for initiating a connection.
Dial immediately
If the option "Dial immediately" is activated, the subscriber will be called immediately once the Speed Dial has been pressed, even if the handset is on the hook. In this case the handsfree telephone will be activated.
If this function has been deactivated, the subscriber will not be called immediately and, therefore, you have the option of entering additional numbers using the keypad or via the Phonebook.
Successive dial
If the "Successive dial" option is activated, the numbers which have already been dialed (display contents) will be kept when the Speed Dial is pressed and the number stored on the Speed Dial will be added. If this function is deactivated, the numbers already dialed will be deleted and only the stored number will appear on the display.
Both of these functions are especially useful if you frequently use cost-efficient call-by-call numbers. Just assign a call-by-call number to a Speed Dial and you will then be able to save both time and effort when
you dial the telephone number you want. You can also assign a project number to a Speed Dial, and press this before you dial a number if you would like to associate a call to a particular project, see also Project Codes, page 46
Intercom Connection
Intercom connection allows you to directly speak to an internal subscriber, who allows his status to be signaled to you, i.e. without him having to pick up the call. If you press the Speed Dial on which the Intercom connection is activated, the corresponding number will be dialed and an intercom signal is produced for the called subscriber. The telephone or Swyxlt! then immediately activates the line and the speaker. You can begin your intercom connection to this subscriber.
If the called subscriber lifts the handset, you can continue the call as a normal telephone call.

Intercom connection is only possible between the internal subscribers if you are mutually signaled the current status ("Available"/"Speaking").

If the subscriber called is currently on the phone, you cannot begin an intercom connection.
This is how you assign the options "Dial immediately" or "Successive dial" or "Intercom connection" to a Speed Dial
- Follow the steps (1) up to (5) (see "This is how you assign a Speed Dial to the number of your choice").
S02: Change
1>Number
2>Dial immediately = on
3>Successive dial = on
4>Intercom = off
0>Back
-
Use the arrow buttons to select the option of your choice.
-
Press OK to switch the selected option on or off. √ The status of the option changes.
The conditions of the dialling procedure for the Speed Dial have changed. You can configure another function key, or leave the configuration menu.
9 Control elements of SwyxPhone L64
This chapter describes the control elements of SwyxPhone L64. The control elements consist of a display, a handset, a hands-free microphone, a speaker and buttons.
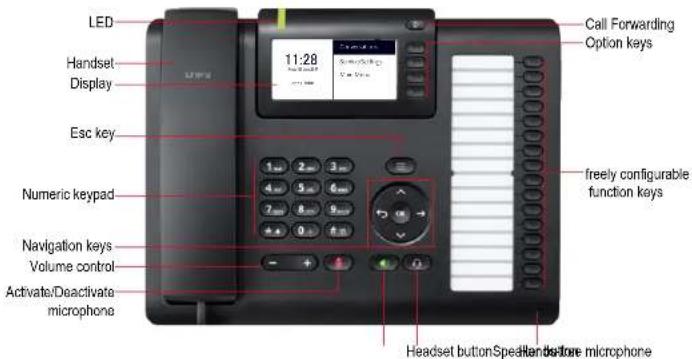
text_image
LED Handset Display Esc key Numeric keypad Navigation keys Volume control Activate/Deactivate microphone Call Forwarding Option keys 11:28 freely configurable function keys Headset button Speaker Handset before microphone9.1 Buttons
The buttons can be classified in the following groups:
■ Defined keys, page 70
- Configurable Function Keys, page 72
9.1.1 Defined keys
The following SwyxPhone L64 buttons are preset and cannot be assigned to other functions. These buttons are marked with corresponding symbols.
Numeric keypad
The buttons of the numeric keypad (number keys) are used for entering numbers, letters and symbols.
In the idle state, when no calls are being made and no menus are open, you can input the call number directly. If you have opened a menu, you can call up a menu item directly with the numeric button.
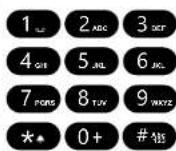
You can also use the numeric keypad to enter letters. You can enter text at the relevant points (e.g. the name for a new phonebook entry), or switch directly to an entry in a list. Enter the space with "0". The '*' key is used to switch between upper and lower case letters. When a letter is entered, a short beep will be produced after one second and you can then enter the next letter.
Example:
To speed up a search in a phonebook with many entries, you can enter the first letter of the name, e.g. for an "F" press the "3" three times, for an "S" press the "7" four times.
Menu navigation
SwyxPhone L64
SwyxPhone L64 is controlled with five navigation buttons.
Control element Function when button is pressed

Arrow button "Down" In lists and menus:
- Scroll down

Arrow button "Up" In lists and menus:
- Scroll up

Arrow button "Forward"
- Menu level lower (only if corresponding menu option is marked with ⚪)


Arrow button "Back"
- cancel action
- delete a character
- menu level higher

"OK" button
- menu level lower
- Confirm entry
■ Activate option
Volume button +/-
You can use the +/- buttons to adjust the volume of the speaker and the handset, depending on which one is currently active.

The volume setting will stay at this level for the next call.
You can also use these buttons in the configuration menu to change the ringing volume (see chapter 12.2.1, Ring tones, page 106).
Microphone
You can use this button to switch off the handset microphone or handsfree microphone for a while, so that the call partner cannot listen e.g. to an inquiry in the room.

Speaker
When the telephone is in an active state (a conversation is in progress), the Speaker button is used to switch the speaker on or off. This allows other people present in the room to listen to the conversation. You can then turn the speaker off again, tinue the conversation on the handset.

In an idles state (if no call is currently being made), pressing the Speaker button has the same effect as picking up the handset; you can immediately dial a number and place your call using the handsfree telephone. The LED of the Speaker button will glow as long as the handsfree telephone is activated. If the handset is on hook, end the call by pressing the Speaker button.
Headset
The Headset button allows you to switch between using the headset or the earpiece.

For further information please refer to chapter 11.7, Using a headset, page 101.
Option keys
The four option keys are right beside the display. Each option key corresponds to one display line. You can invoke the currently displayed option or function.

Call Forwarding Unconditional
With the "Unconditional Forwarding" button you can directly deactivate the unconditional call forwarding, preset in the main menu.

For further information please refer to chapter 10.15.1, Define Call Forwarding Unconditional, page 84.
Ringing off
The "Ringing off" button mutes the acoustic call signaling (ringing) or sets a short signal tone instead. Hold down the key till the required option (ringing off, signal tone) is activated and the corresponding symbol appears in the display. To switch the call signal back on, hold down the key

Esc key
Press the Esc key to leave "Conversations" and "Server/Settings" menus, dialling or active call screen for the main screen.

Furthermore pressing the Esc key wakes up the phone from screen saver mode.

If you dial with the receiver on hook, pressing the Esc key is the only means to cancel the dialling and return to the main screen.
9.1.2 Configurable Function Keys
SwyxPhone L64 has sixteen freely configurable function keys with LEDs. These keys can be assigned to particular functions, e.g. "Call Swap" or "Redial", or used as Line buttons or Speed Dials.
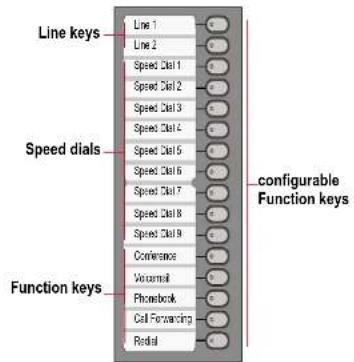
text_image
Line keys Line 1 Line 2 Speed Dial 1 Speed Dial 2 Speed Dial 3 Speed Dial 4 Speed Dial 5 Speed Dial 6 Speed Dial 7 Speed Dial 8 Speed Dial 9 Conference Veromail Phonebook Cell Forwarding Radial Speed dials configurable Function keys Function keysBy default the two upper function keys are configured as Line keys. The next nine are speed dial buttons. The following function keys are "Conference", "Voicemail", "Phonebook", "Call Transfer" und "Redial".
For further information please refer to chapter 12.4, Configure function keys, page 113.
LED status of the function keys
| State | Line key | Speed dial | Standard function |
| The line is active | Subscriber is logged on and available | This function is activated | |
| Incoming call | - | - | |
 LED blinks orange LED blinks orange | Connection is on hold | Subscriber is away | |
 LED glows red LED glows red | Line disabled for wrap up time | Subscriber is speaking | |
 LED blinks red LED blinks red | - | Signalled call |
9.2 Display and menu navigation
SwyxPhone L64 comes with a monochrome (black and white) LC display. It supports you intuitively in operating the telephone. In the idle state, when no calls are being made and no menus are open, the main screen with the following information appears in the display:
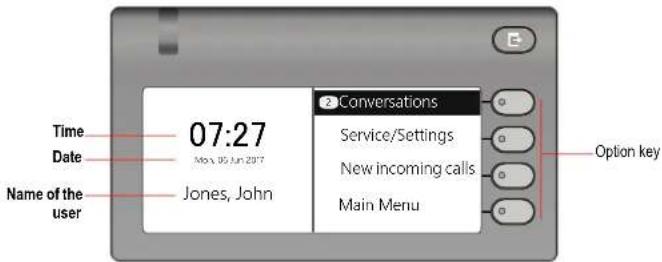
text_image
Time Date Name of the user 07:27 May 16 Jun 2017 Jones, John ② Conversations Service/Settings New incoming calls Main Menu Option keyWhen you open the main menu, the title of each menu list is displayed, with the first four available menu items in each case:
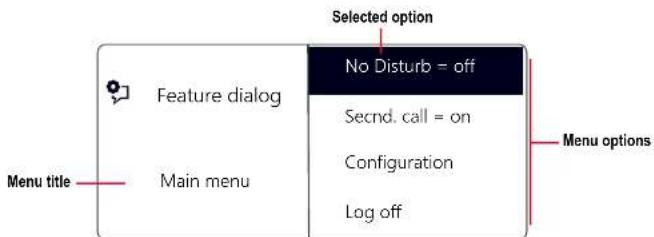
text_image
Selected option No Disturb = off Seend. call = on Configuration Log off Menu title Feature dialog Main menuThe black bar marks the selected menu option. You can choose other menu items with the arrow buttons. The menu item highlighted with the cursor can be opened/activated with the "OK" button. You can also call the required menu item directly, by pressing the corresponding option key, see ,Option keys,page71.
Press the arrow button "Back" to up a level in the menu structure.
Icons on display
| Symbol Explanation | |
| Acoustic call signalling deactivated | |
| Acoustic call signalling with a short signal tone | |
| Call encrypted | |
| Call not encrypted | |

Whether encryption symbols are displayed, depends on the encryption settings in your user profile. For further information please refer to the Swyxlt! documentation.
10 Telephoning with SwyxPhone L64
This chapter describes the following basic telephone functions:
How do I call a subscriber?, page 74
- see How do I pick up a call?, page 76
How do I pick up a call?, page 78
How do I end a call?, page 78
How do I start an Inquiry Call?, page 79
- How do I switch between lines (Call Swap)?, page 80
- How do I connect two subscribers to one another?, page 81
How do I transfer a call without Inquiry?, page 82
How do I forward a call?, page 82
How do I use the Phonebook?, page 87
The Secondary Call, page 83
■ Speaker and Handsfree Telephone, page 88
10.1 How do I call a subscriber?
SwyxPhone L64 is in an inactive state. You will see your user name and the current time and date on the main display:
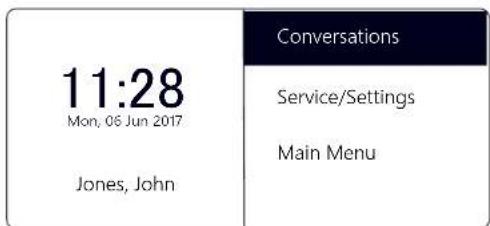
text_image
11:28 Mon, 06 Jun 2017 Jones, John Conversations Service/Settings Main MenuIf there were calls which you did not pick up, or you received call-back requests or voicemails, this will also be shown on the display:
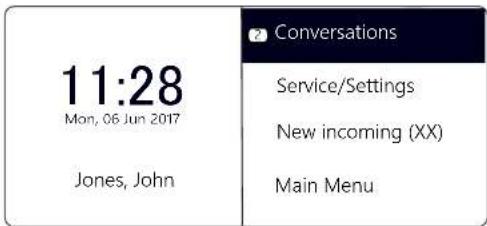
text_image
11:28 Mon, 06 Jun 2017 Jones, JohnConversations
Service/Settings New incoming (XX) Main Menu
If you miss incoming calls, the LED over the display glows in red. The number of missed calls appears next to the "Conversations" menu item.
This is how you call a subscriber
- Pick up the handset or press the Speaker button.
√ You will hear the idle tone. The following will appear:
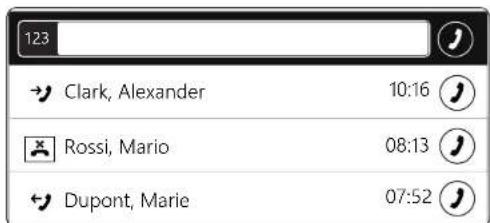
text_image
123 → Clark, Alexander 10:16 ⏰ → Rossi, Mario 08:13 ⏰ → Dupont, Marie 07:52 ⏰- Use the numeric keypad to dial the number you want.
You can correct your entry using the arrow button "Back"

- Press the "OK" button.
or
Wait for six seconds.
√ The participant is called.
With the handset on hook and the speaker deactivated:
- Use the numeric keypad to dial the number you want.
- Simply lift the handset.
√ The participant is called.
or
- Press the "OK" button.
or
Wait for six seconds.
√ The participant is called.

The default delay time (6 seconds) for the automatic block dialling can be adjusted in "Service/Settings | User | Configuration | Outgoing calls | Autodial delay (s)".
If the connection to the destination subscriber has not yet been made "ringing" will appear in the display. The number or, if available, the name of the destination subscriber and the line number will appear in the next line:
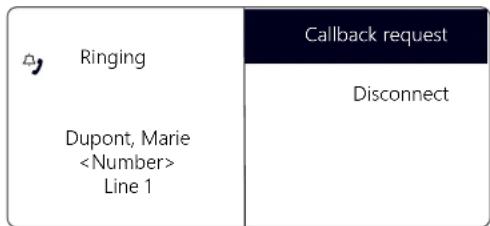
text_image
Ringing Dupont, MarieIf all of the destination subscriber's lines are busy, the word "busy" will appear:
| - Busy | Callback request |
| Disconnect | |
| Dupont, Marie <Number> Line 1 busy |
If the connection is made, the call duration will appear in the first line of the display. The line number and the number or name of the destination subscriber will appear in the next displaylines:
| 00:58 | Callback request |
| Call Transfer | |
| Dupont, Marie <Number> | Swap line |
| Line 1 | Disconnect |
10.2 Other Options for Dialling a Number
This is how you call a subscriber from the "Conversations" list
In the list "Conversations" the active, dialled, received and missed calls are shown.
- Select "Conversations" with the arrow buttons, and press the "OK" button.
√ The "Conversations" list appears:
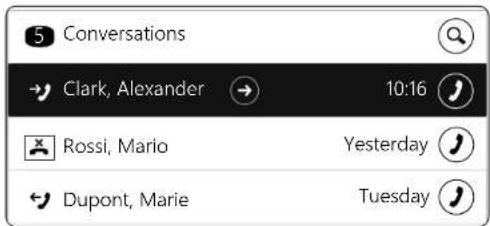
text_image
5 Conversations → Clark, Alexander 10:16 Rossi, Mario Yesterday Dupont, Marie Tuesday-
Choose the appropriate entry and press the "OK" button. or
-
Press the option key in the line of the corresponding status. √ The subscriber is then immediately called.
"Redial" function key
You can configure the "Redial" function key on your SwyxPhone or on the connected Key Module. For further information please refer to chapter 12.4, Configure function keys, page 113.
The "Redial" button can be used in two ways.
- Abbreviated Dialing:
Lift the handset and press the "Redial" function key.
The number of the last call will be dialed immediately.
- The Redial List:
Leave the handset on the hook and press the "Redial" function key.
A list of the calls you have most recently made will appear. Select the entry you want with the arrow buttons and confirm your selection by pressing OK twice, or by picking up the handset.
The subscriber is then immediately called.
10.3 Available Options During a Call
During a phone call you can select the following menu items with the arrow buttons, and activate the option of your choice with the "OK" button:
- Callback request
This function is only available to you during a call to an internal subscriber (see Chapter 11.5, Callback request, page 95).
Call Transfer
You can transfer a caller directly here. If you have two connections (one active connection and one on hold), these are directly connected to each other. If you only have one call on one line, you must input a further number or select one from the phonebook (see Chapter 10.10, How do I connect two subscribers to one another?, page 81).
Call Swap
If you select this menu item, the active line is put on "Hold", your conversation partner will hear music on hold and SwyxPhone will switch to the next available line (see Chapter 10.9, How do I switch between lines (Call Swap)?, page 80).
- Disconnect
Disconnects the active connection.
Note
Here you can enter a number and the corresponding name in the Personal Phonebook during a telephone call (see Chapter 11.4, Note, page 94).
Secondary call
You can either allow or disable a second call during a call (see Chapter 10.14, The Secondary Call, page 83).
Conference
If you have one active line and at least one other line on hold, you can start a conference (see Chapter 11.6, Conference, page 99).
10.4 How do I pick up a call?
If you receive a call, a call is forwarded to you or a call is received for a group of which you are a member,
- the number or the name of the caller will appear on the display,
■ a ringing sound will be produced, - optical call signaling (LED above the display) will blink.
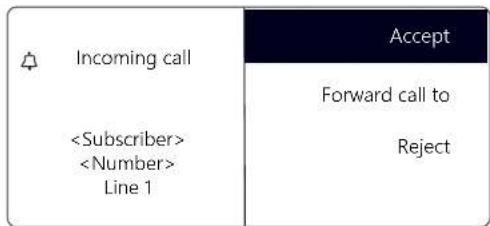
text_image
Incoming callA call to a group (Group Call) is shown as follows:
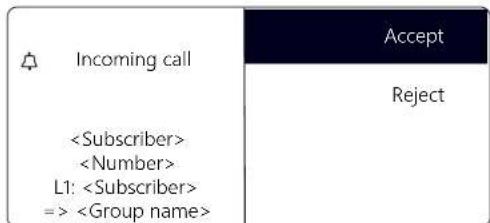
flowchart
graph TD
    A["Incoming call"] --> B["<Subscriber>"]
    A --> C["<Number>"]
    A --> D["L1: <Subscriber> => <Group name>"]
    E["Accept"] --> F["Reject"]
If you are a member of a Hunt Group with sequential, rotary or random distribution, the call will first be displayed in Call Signaling, and only put through if no other member has picked up the call. In this case you see the call signaling for the Group Call:
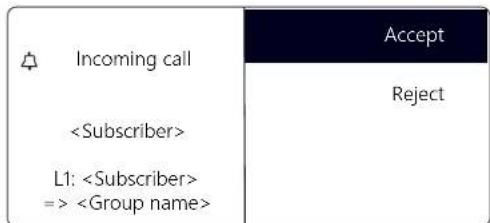
flowchart
graph TD
    A["Incoming call"] --> B["<Subscriber>"]
    B --> C["L1: <Subscriber> => <Group name>"]
    D["Accept"] --> E["Reject"]
A call which has been forwarded from another subscriber to you is shown as follows in the display:
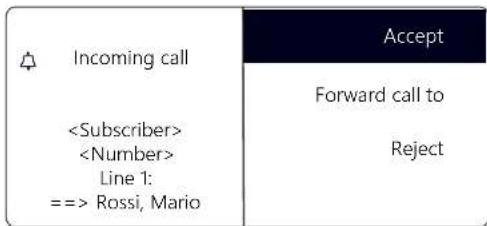
text_image
Incoming callIf the number of the caller is known, i.e. if a name in the Global or Personal Phonebook or on a Speed Dial has been assigned to this number, the name will appear in the display. If not, only the number will be displayed.
If "Anonymous" appears in the display, the caller's number was not transmitted, e.g. because the caller has suppressed his number.
This is how you accept a telephone call
- Simply lift the handset.
√ The handset is activated. You can now speak with the caller.
or
- Press the Speaker button.
√ The speaker and hands-free microphone will be activated, so that other people present in the room can also follow the conversation.
or
- Press the Headset button.
√ The headset is activated. You can now speak with the caller.
10.5 How do I pick up a call?
In the case of a signalled call, you will only be shown that another user or a group has received a call. Signaling is set up by the system administrator. You can pick up a signaled call.
When a call is signaled to you,
- the option "Pick up call" will appear on the display.
- the "Pick Up call" function key will blink, if configured,
■ the Speed Dial assigned to the called number, will blink, - your display will show who the call was originally for:
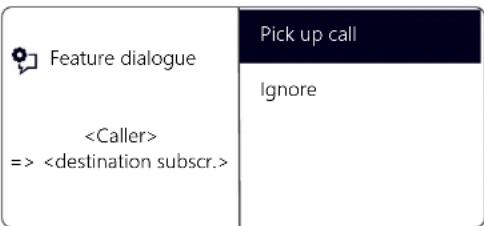
text_image
Feature dialogueIf the call is not picked up by the destination subscriber and if you have activated call signalling in the Settings menu, you will hear an additional brief acoustic signal after ten seconds.
This is how you pick up a signalled call
- Use the arrow buttons to select "Pick up call"
- Press the "OK" button.
√ The call is picked up. You can now speak with the caller.

When picking up a call via the menu you have to confirm the option "Pick up Call" before lifting the handset. If you lift the handset first, the call signalling will be ignored and a free line will be activated.

If several subscribers, whose calls are signalled to you, receive a call at the same time, only one name will be shown in the display.
This is how you pick up a phone call if you are currently involved in a different phone call
- Press the blinking Line button.
√ The active connection is put on hold. The subscriber hears music on hold, and the incoming call is picked up
If you are already on a call, Call Signalling will not be shown in the display, only by a blinking Speed Dial. In other words, in order to pick up the call in this case, you need to have configured a Speed Dial. Also, you cannot see who the caller is.
10.6 How do I end a call?
You have been speaking to a caller and now you would like to end the call.
This is how you end a telephone call
- Place the handset on the hook.
or - Select "Disconnect" with the arrow buttons, and press the "OK" button.
or - Activate the handsfree mode, i.e. if the speaker is activated and handset is on the hook, the Speaker button.
or - Activate the handsfree mode, i.e. if the speaker is activated and handset is on the hook, the Speaker button.
√ The call is ended.

If you end a call and you have a second call on hold, a single telephone ring will be produced after five seconds have passed. Pick up the handset once again in order to directly connect to the caller on hold.

If you have the option „Transfer on Hookon“ activated, then when you go on hook, a second call that you have initiated will be connected to the first call, which is on hold.(see also Chapter 10.11, Transfer when Placing Handset on Hook, page 81).
This is how you end one of several calls
You can only end the active connection.
- Select "Disconnect" with the arrow buttons, and press the "OK" button.
√ The call is ended.
Then you can select one of the remaining inactive lines.
- Confirm the selection with the "OK" button.
√ You can now speak with the subscriber.

If you have created the connection yourself, putting the handset on hook will result in the transfer of this call to the call on hold. If you have several lines on hold, the active line will also switch to the state "On hold".
10.7 How do I telephone with a headset?
SwyxPhone L64 has a headset connection and a preconfigured function key "Headset", so that you can use a headset to telephone. To use the headset, connect it to the telephone (see Chapter 11.7, Using a headset, page 101).
This is how you pick up a call with the headset
A headset is connected. You are being called.
- When you receive a call, press the preconfigured "Headset"
function key your to pick up the call.
√ You can telephone using the headset.
This is how you end a call with the headset
- Press the "Headset" function key again to end the call.
√ The connection is terminated.
This is how you switch between the Handset and the Headset
You have begun a call using the headset and you would like to use the handset for the rest of the call.
- Take the handset off the hook.
√ The handset is active.
- If you would like to switch to the headset, press the "Headset" function key and put the handset back on the hook.
√ You can then continue your call on the headset.
For further information please refer to chapter 11.7, Using a headset, page 101.
10.8 How do I start an Inquiry Call?
You are having a phone conversation and you would like to call another subscriber (Inquiry Call). Then you would like to alternately speak to both subscribers (Call Swap).
Example:
-
You are speaking to a customer (subscriberA) and you would like to ask someone in the warehouse (subscriberB), whether a certain article is on stock.
-
You begin a second call at the same time with SubscriberB. Then you can alternately speak with Subscriber A and Subscriber B (Call Swap).
-
While you are speaking with one subscriber, the other subscriber will hear music on hold
-
When you end the call with one of the subscribers (using the menu item "Disconnect"), the corresponding line becomes free again. You can then switch to the line on hold.

If you were the initiator of the call on the active line and you place the handset on hook, the two subscribers will be connected to each other.
This is how you call an additional subscriber
- Choose during an active call the option "Swap line" and press the "OK" button.
√ The first call is put on hold. Your first call partner will hear music on hold.
√ You will hear the idle tone. The following will appear:

text_image
123 Clark, Alexander 10:16 Rossi, Mario 08:13 Dupont, Marie 07:52- Enter the phone number (or choose with the arrow keys the required subscriber) and press the "OK" button.
√ The second connection is set up.
10.9 How do I switch between lines (Call Swap)?
You are having conversations with several subscribers at the same time. The active connection is the connection to the person you are currently talking to. All other subscribers, who are listening to music on hold while they wait, are on connections on hold. The switch between between the active line and the line on hold is also called "Call Swap".
Example:
Several calls are received at the operator desk and you would like to forward these calls to various colleagues, who, however, cannot be reached immediately. You can put the caller on hold. You can switch to these lines on hold at any time in order to inform the callers of the progress of your efforts to connect them to the correct colleagues.

You can have as many calls simultaneously as you have lines. This means, however, that you have several calls on hold and one active line at the most.
This is how to swap between lines via "Conversations"
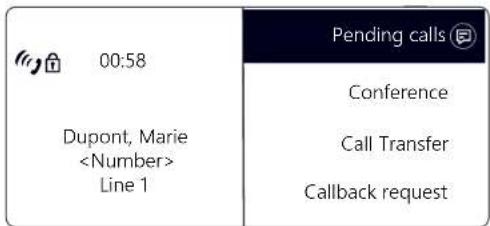
text_image
00:58 Dupont, Marie- Press the "Pending calls" option key.
√ The following will appear:
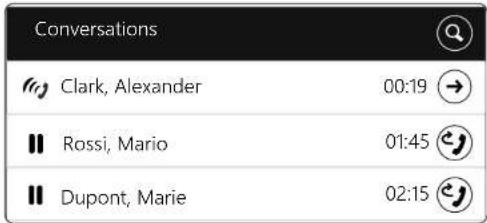
text_image
Conversations Clark, Alexander 00:19 → Rossi, Mario 01:45 📋 Dupont, Marie 02:15 🌐- Select the connection on hold with the arrow keys, and press the "OK" button.
√ The active line is put on hold, and the other line becomes active.
This is how to swap between lines with the "Call swap" function
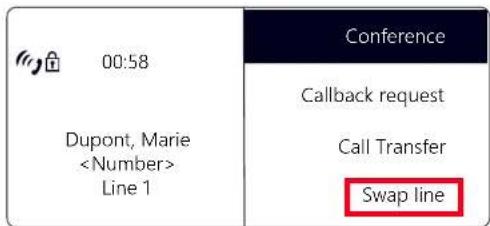
text_image
00:58 Dupont, Marie- Use the arrow buttons to select "Swap line".
- Press the "OK" button.
√ The active line is put on hold, and the other line becomes active. By repeatedly pressing the "Call Swap" button you will switch between the active lines.

If you use the "Call Swap" function often, you can also assign this function to one of the configurable buttons. For further information please refer to chapter 12.4, Configure function keys, page 113.
This is how you call swap using the configured "Call Swap" function key
- Press the "Call Swap" function key.
√ You have now activated the next line.
By repeatedly pressing the "Call Swap" button you will switch between the active lines.
10.10 How do I connect two subscribers to one another?
You are connected with two subscribers simultaneously. While you are talking to one of the subscribers, the other is on hold. This subscriber will hear music on hold. You can now connect these two subscribers to each other.
Example:
You are talking to SubscriberA on Line1. Line1 has a connection on hold with SubscriberB. You connect SubscriberA with SubscriberB. Line2 has a connection on hold with SubscriberB. You connect SubscriberA with SubscriberB.
This is how you connect two subscribers
- Select "Call Transfer" with the arrow buttons, and press the "OK" button.
√ The line on hold appears on the display.
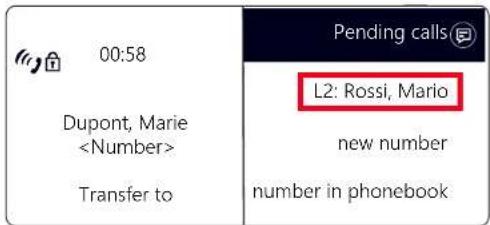
text_image
00:58 Dupont, Marie- Choose the line on hold and press the "OK" button.
√ The subscribers are connected to one another. Your lines will become free (inactive).

When you directly connect subscribers, you may still charged, even though you are no longer involved in their telephone call. These will only occur on your side if you set up one or both of the connections. If, for example, SubscriberA called you and you called SubscriberB to inquire about something, you will only be charged for the connection to SubscriberB. No costs will be charged if you are called by both SubscriberA and SubscriberB. However, if you have called both subscribers, you will be charged for both connections.
10.11 Transfer when Placing Handset on Hook
You can define whether the subscribers on the active line and the line on hold should be connected when you go on hook. The item "Transfer on Hookon" is available in the "Configuration" menu for this.
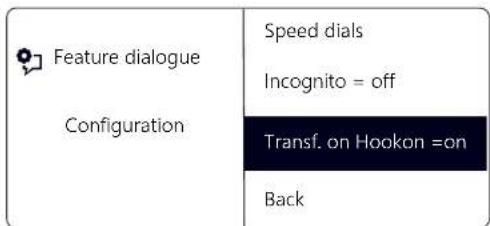
text_image
Feature dialogue Configuration Speed dials Incognito = off Transf. on Hookon =on Back- If this option is activated, you can connect the two callers to one another by placing the handset on hook. However, this only works if you set up the active call yourself. If you did not initiate the active call (i.e. you received the call), the connection will be terminated by hook on. The second call will remain on hold.
Example:
Subscriber A is called by C. Then subscriber A begins a second call on another line to subscriber B (e.g. Inquiry Call). If A goes on hook, subscribers B and C are then connected to one another.
- If the option "Transfer on Hookon" is deactivated, the active call will be ended and the other one will be kept on hold.
10.12 How do I transfer a call without Inquiry?
Your SwyxPhone can be used to accept incoming calls and then to transfer these calls to another subscriber, without waiting for the new subscriber to answer. You can connect two subscribers even though there is not yet an active connection to one of the subscribers.
This is how you transfer a call without inquiry
You are having a telephone conversation with subscriber A.
- Use the arrow buttons to select the option "Call Swap"
- Now select the number of the subscriber to whom you would like to transfer the call (Subscriber B).
- Use the arrow buttons to select "Call transfer".
-
Press the "OK" button.
-
Use the arrow buttons to select the subscriber (here Subscriber A) whom you want to connect to the other subscriber.
- Press the "OK" button.
Your caller (Subscriber A) will hear ringing, and "Call Transfer" appears on your display. The line on which you initiated the second call will become free and the first line will change its status from "Hold" to "Transferring". Your previous caller (Subscriber A) hears the phone ring.
- The person called (Subscriber B) sees the transferred call on his display:
The call can be picked up by Subscriber B.
- To pick up the call again, activate the corresponding Line button.

In case the caller to whom the call should be transferred is not available, please remember that the call may be forwarded with some delay (after more than 20 seconds). If the call is forwarded to Voicemail, the call transfer will automatically be interrupted, the caller is once again put on "Hold" and will hear music on hold.
10.13 How do I forward a call?
If you are receiving a call you can transfer this call while it is still ringing to another subscriber or to your Voicemail.
This is how you transfer a call without accepting
You receive a call, it rings.
- Select "Forward call to" with the arrow buttons, and press the "OK" button.
| Incoming call | Accept |
| Forward call to | |
| Dupont, Marie<Number>Line 1 | Reject |
-
Select the forwarding destination with the arrow buttons:
-
Your Voicemail(This option is only available if the Voicemail functions are configured),
- the number that you have defined as the destination for Call Forwarding Unconditional,
• a number in the phonebook,
• a n y n u m b e r.
| Incoming call | Voicemail |
| Dupont, Marie<Number>Forward call to | number in phonebkphone number |
- Press the "OK" button.
√ The call is then immediately transferred.
10.14 The Secondary Call
You can use the "Secondary Call" function to define whether you are available for an additional subscriber. You can set this option in the main menu or during a call.
This is how you switch the Secondary Call function on / off
- Select "Main menu" with the arrow buttons, and press the "OK" button.
- Scroll with the arrow button "Down" to the end of the list. √ You will see in the display the currently valid secondary call setting, "on" or "off":
| Feature dialogueMain menu | Secnd. call = onConfigurationLog offBack |
- Select "Secnd. call" and press the "OK" button to activate or deactivate Secondary Call.
10.15 How do I forward a call?
You can forward incoming calls
■ to another telephone number (internal or external) or
■ to your Standard Voicemail.
There are several different methods for forwarding incoming calls:
- Call Forwarding Unconditional: The call is then immediately forwarded ("Do not disturb").
- Call Forwarding Busy: You line is busy, which means that you are currently telephoning and you have not allowed a secondary call or you are telephoning on all configured lines.
- Call Forwarding No Reply: The telephone rings several times at your desk but you do not pick up the call.
The type of redirection to be applied to all of your incoming calls is defined in the "Forwarding" shortcut menu:
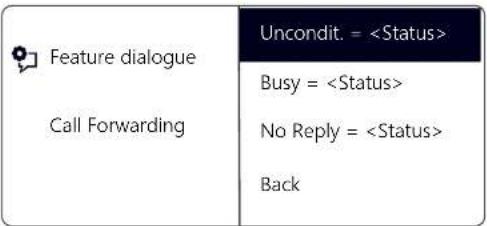
text_image
Feature dialogue Call Forwarding Uncondit. =10.15.1 Define Call Forwarding Unconditional
You can enable Call Forwarding Unconditional if you do not wish to receive any calls from this time on. All incoming calls are forwarded immediately to the specified destination.
There are different options for the forwarding of the call:
- no call forwarding,
Voicemail, ,
This is how you define "Call Forwarding Unconditional"
- Select "Main menu" with the arrow buttons, and press the "OK" button.
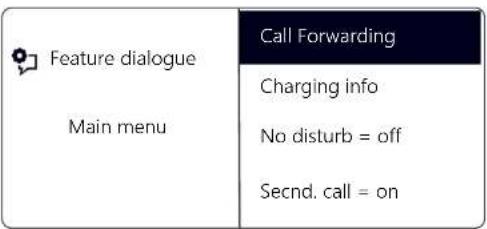
text_image
Feature dialogue Main menu Call Forwarding Charging info No disturb = off Secnd. call = on- Select "Call forwarding" and press the "OK" button:
√ The following will appear:
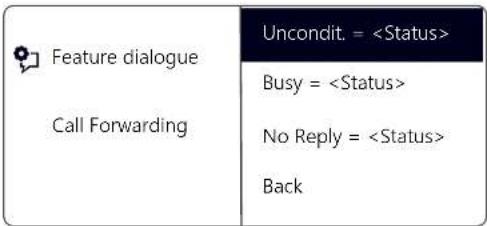
text_image
Feature dialogue Call Forwarding Uncondit. =- Choose "Unconditional" and press the "OK" button. √ The following will appear:
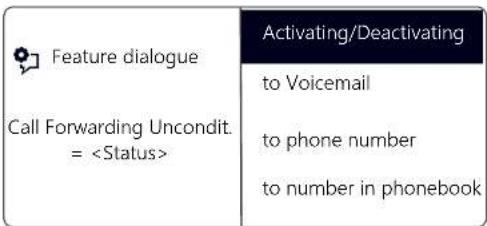
text_image
Feature dialogue Call Forwarding Uncondit. =- Select "Activate" and press the "OK" button.
√ Incoming calls will be forwarded immediately to the specified destination. In this case, calls will be forwarded the same way as in the last activation of (Call) Forwarding Unconditional or according to the default setting.
To forward the call to a different destination, use the arrow keys to select the required menu item (e.g. "Voicemail" or "Phone number") and set the call destination or enter a phone number.
-
Press the "OK" button.
-
Press the arrow button "Back" multiple times to leave the settings menu.
√ The symbol for activated unconditional call forwarding appears in the display:
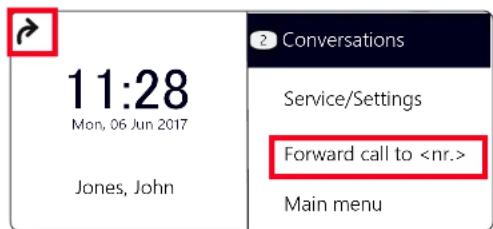
text_image
11:28 Mon, 06 Jun 2017 Jones, John Conversation Service/Settings Forward call to
Your Voicemail can be configured using Swyxlt!. For further information, please refer to the Swyxlt! documentation. If Remote Inquiry has been configured for you, you can also change your Voicemail announcement and the destination of your (Call) Forwarding Unconditional from the menu of Remote Inquiry (see Chapter 11.2, Remote Inquiry, page 90).
This is how you deactivate unconditional call forwarding
Call Forwarding Unconditional is activated, the display shows the icon.

-
Press the "Unconditional Call Forwarding" key.
-
Press the "OK" button.
√ Call Forwarding Unconditional is deactivated.
10.15.2 Define Call Forwarding Busy
This is where you specify how incoming calls are redirected if all your lines are busy. If a secondary call is disabled, further incoming calls during a telephone conversation will be handled as for busy lines.
This is how you define "Call Forwarding Busy"
- Select "Main Menu" with the arrow buttons, and press the "OK" button.
| Feature dialogue Main menu | Call Forwarding |
| Charging info | |
| No disturb = off | |
| Secnd. call = on |
- Select "Call forwarding" and press the "OK" button.
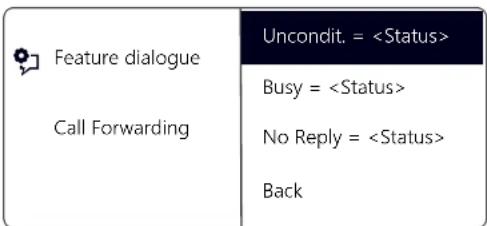
text_image
Feature dialogue Call Forwarding Uncondit. =- Choose "If busy" and press the "OK" button. √ The following will appear:
| Feature dialogue Forwarding Busy Status > | to Voicemail |
| to phone number | |
| to number in phonebook | |
| Back |
- Choose the appropriate menu item and press the "OK" button.
- Specify the destination, or enter a number, and press the "OK" button.
Incoming calls will be forwarded to the specified destination, if you are currently telephoning and the option "Secondary Call" is deactivated or all lines are busy.

Your Voicemail can be configured using SwyxIt!. For further information, please refer to the SwyxIt! documentation. If Remote Inquiry has been configured for you, you can also change your Voicemail announcement and the destination of your (Call) Forwarding Unconditional from the menu of Remote Inquiry (see Chapter 11.2, Remote Inquiry, page 90).
10.15.3 Define Call Forwarding No Reply
If Forwarding No Reply is activated, incoming calls are signaled. If the call is not picked up within the defined time limit, it will then be forwarded to another number or to your Voicemail.
This is how you define Call Forwarding No Reply
- Select "Main Menu" with the arrow buttons, and press the "OK" button.
The main menu will open. - Use the arrow buttons to select "Call forwarding" and press the "OK" button.
- Choose "No Reply" and press the "OK" button.
√ The following will appear:
| Feature dialogue Call Forwarding No Reply |
- Choose the forwarding destination you want, and press the "OK" button.
- Specify the destination, or enter a number, and press the "OK" button.
√ Then the time delay will appear on the display:

text_image
Feature dialogue Forward after = 005 seconds + 1 - 1 Accept BackHere you can use the arrow buttons to set the time delay (between 5 and 180 seconds) after which the incoming call should be forwarded.

By default the step range is set to 1 second. By pressing the corresponding numeric key you can adjust the step range. To set the value to +/-10, press the "0" key.
- Use the arrow buttons to select the positive or negative number to which you would like to set the delay period.
- Press the "OK" button repeatedly, till the expected number is displayed.
- Select the menu item "Accept".
- Press the "OK" button. ✓ Forwarding No Reply is activated.
For further information on the various configuration options see Chapter 12.1.1, Call Forwarding, page 104.

Your Voicemail can be configured using Swyxlt!.For further information, please refer to the Swyxlt! documentation. If Remote Inquiry has been configured for you, you can also change your Voicemail announcement and the destination of your (Call) Forwarding Unconditional from the menu of Remote Inquiry (see Chapter 11.2, Remote Inquiry, page 90).
10.15.4 Signaling a Forwarding
If a call is forwarded to you, the following message will appear on the display:
| Incoming callDupont, Marie<Number>Line 1:==> Dupont, Marie | Accept |
| Forward call toReject |
The number or the name of the caller will appear in the first line. The second line shows the number or the name of the destination subscriber.
To take the forwarded call, simply lift the handset or select the menu item "Pick Up" with the arrow buttons, and press the "OK" button.
10.16 How do I use the Phonebook?
Frequently used numbers are stored in the Phonebook. You can then dial these numbers directly from the Phonebook. You have
■ the Global Phonebook and
■ the Personal Phonebook.
The Global Phonebook is available to all users. The system administrator or user with the appropriate authorization can add further phone numbers to this Global Phonebook. The Global Phonebook also contains dial numbers of individual groups.
You can store, edit or delete your personal numbers in the Personal Phonebook.
For further information please refer to chapter 12.3.2, Phonebooks, page 108.
This is how you call a subscriber from the Phonebook
- Use the arrow buttons to select "Main Menu" and press the "OK" button.
- Choose "Phonebooks" and press the "OK" button.
√ The following will appear:
| Feature dialogue | Global |
| Phonebook | Personal |
| Back |
- Select the relevant Phonebook (Global or Personal) and press the "OK" button.
| Feature dialogueGlobal Phonebook | |
| Back |
- Select the subscriber you want to call, and press OK.
√ You will see additional information about the subscriber (phone number, name).
- Press the "OK" button.
√ The connection will be made immediately.
For more information on editing entries in your Personal Phonebook, please see Chapter 12.3.2, Phonebooks, page 108.

To make it easier to search for an entry in an extensive Phonebook, you can enter the first letter of the subscriber's name. Use the numeric keypad for example, to enter an "F", press the "3" button three times, for an "S", press the "7" button four times. When a letter is entered, a short beep will be produced after one second and you can then enter the next letter. If no further entry is made in the following three seconds, you must once again begin with the first letter for the next search.
10.17 Speaker and Handsfree Telephone
To enable all those present in the room to follow a telephone conversation, you can use the speaker. To allow those present to participate in the conversation too, you also have a complete Handsfree Telephone (speaker and microphone).
10.17.1 Activating/Deactivating the Speaker during a call
You are telephoning and using the handset.
This is how you activate/deactivate the speaker during a call
- Press the Speaker button
√ The Speaker button glows. The speaker is active. The call will continue via the microphone in the handset. - Press the Speaker button again to continue the conversation on the handset and deactivate the speaker.
√ If you hang up while the speaker is active, the call is ended and the Speaker button goes dim.

10.17.2 Activating/Deactivating the Microphone During a Call
You are telephoning and using the handset.
You want to interrupt the call briefly. You don't want your call partner to hear you during the pause.
This is how you activate/deactivate the microphone during a call
- Press the "Microphone" button
√ The red LED on the "Microphone" button lights up. Your call partner can no longer hear you. - If you press the "Microphone" button once more, the microphone will be reactivated.

10.17.3 Activating the Handsfree Facility during a call
You are telephoning and using the handset. The speaker can be either on or off.
This is how you activate the handsfree facility during a call
- Press the Speaker button the handset on the hook
a dipep it pressed while you put - Release the speaker button.
√ The Speaker button glows. The handsfree facility is activated.
10.17.4 Deactivating the Handsfree Facility during a call
You are telephoning and using the handsfree facility.
This is how you deactivate the handsfree facility during a call
- Simply lift the handset.
√ The call will be held exclusively via the handset. The Speaker button will go out.

If you press the Speaker button instead of lifting the handset during an active call, the call will be disconnected.
10.17.5 Activate handsfree facility for outgoing call
The handset is on the hook. The line is idle.
This is how you activate the handsfree facility for an outgoing call
- Press the Speaker button
√ The handsfree telephone will be activated. You will hear the idle tone. - Choose the number you want, and press the "OK" button.
√ The call is initiated. As soon as your call is picked up, you can carry on the conversation hansdfree. - To carry on the call with the handset, lift the handset.

10.17.6 Activating the Handsfree Facility for an incoming call
It is also possible to pick up a call with the Speaker button. If you have picked up the call in this manner, the handsfree function is activated. You then have the call using the handsfree facility.
10.17.7 Regulating the volume
You can use the "+" and "-" button to adjust the volume of the speaker and the handset, depending on which one is currently active. The setting will stay at this level for the next call.
If you press the volume control while the speaker is off during a call, the volume of the handset speaker will change.

If you press the volume control while the telephone is inactive, the volume of the ringing tone is adjusted.
10.18 Configuring the ringing tone
The "+" or "-" buttons can be used to regulate the volume of the ringing tone. If you press the buttons while your SwyxPhone is ringing, the volume is adjusted.
For further information please refer to chapter 12.2.1, Ring tones, page 106.
10.19 Charging info
From the main menu, select "Charging info".
| Feature dialogue Main menu | Charging info |
| No Disturb = <Status> Second. call = <Status> Configuration |
This is how you receive the exact amount of the charges incurred for your last call. This information is retained until the next connection is set up.
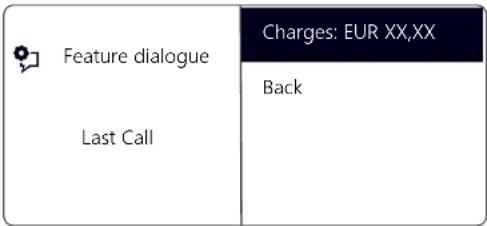
text_image
Feature dialogue Last Call Charges: EUR XX,XX Back
The calculation of the charges depends on the data provided by your telephone service provider. Ask your system administrator or your telephone service provider.
10.20 Sequence of the Display Entries while idle
The entries in the SwyxPhone display are shown a specific sequence one after another:
- Missed Callbacks (xx)
- Missed Callbacks (xx)
- New incoming calls (xx)
- Voicemail available
- Callback Requests (xx)
- Call Forwarding
Only when there are no more entries in a higher prioritized list the next entry will be shown.
11 SwyxPhone L64 advanced Telephony Functions
This chapter contains information about the use of special functions which go beyond conventional telephoning, such as conference calls or the allocation of project codes, for example.
11.1 Voicemail inquiry
A Voicemail is a spoken message in the form of a WAV file.
If the caller couldn't reach you, he can leave a Voicemail. You can listen to the Voicemail, when you are back at your desk or from another phone using the remote inquiry.
When a new Voicemail has been left for you, this will be signaled by
- the message "Voicemail available" appearing on the SwyxPhone display
■ a briefly interrupted (stuttered) dial tone
■ the illumination of the Voicemail function key, if configured
If you have e-mail access, your voice mails will be sent to your e-mail address if this has been entered for your SwyxPhone during installation.
You can check your voicemails with the SwyxPhone or directly from your e-mail program.
Voicemail Options in your E-mail Program
The voicemail delivery by e-mail offers you several options:
- Message as an e-mail attachment (audio file) You can listen to this comfortably on your PC, and then save or forward the file.
- Direct starting of a callback from the e-mail (only in Swyxlt! or with CTI)
■ Direct sending of an e-mail to the caller - Link for listening to Voicemail directly by Remote Inquiry (only in Swyxlt! or with CTI).
This is how you check your voicemails with SwyxPhone
You have new Voicemails:
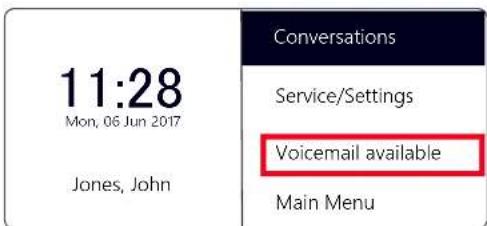
text_image
11:28 Mon, 06 Jun 2017 Jones, John Conversations Service/Settings Voicemail available Main Menu- Select the menu item "Voicemail available" with the arrow buttons, and press the "OK" button.
or
- Press, if configured, the "Voicemail" function key. √ The connection to the SwyxServer for checking the voicemail will be initiated immediately.

If no Voicemail has been configured for you by the administrator, the menu item "Voicemail available" will not be displayed.
11.2 Remote Inquiry
You can also check your Voicemail by Remote Inquiry from any phone connection. To do this, your Standard Voicemail must be configured appropriately.
Remote Inquiry enables you to listen to your voice mails from any telephone. When you are called at your SwyxWare number, you identify yourself to SwyxWare with your PIN and only then you can listen to, repeat, or delete the new voice mails and afterwards all existing voice mails. In addition, you can change the destination of the Call Forwarding Unconditional or record a new announcement.
You will receive a PIN (Personal Identification Number) from your administrator. If, in addition to your SwyxPhone, you also have the option of configuring the standard remote inquiry in SwyxIt!, you can also change the PIN there.

The number of Voicemails available for remote inquiry is limited to the most recent one hundred Voice mails.
This is how you listen to your voice mails remotely
In order for a received call to be picked up by your Standard Voicemail and in order for you to have the option of Remote Inquiry, you must configure your call forwarding accordingly. This means that an incoming call must reach your Standard Voicemail and may not be redirected. For further information please refer to the Swyxlt! documentation.
- Dial your number.
√ The call is picked up and you hear the welcome announcement of your Voicemail.
- Press the * key during the welcome announcement.
You will hear the welcome announcement of the Remote Inquiry and will be asked to enter your PIN.

You will not be prompted to enter your PIN if you are calling from your own SwyxWare extension number.
-
Enter your PIN and complete the entry with the # key.
-
If new Voice mails have been received, you will first be given the total number of Voice mails.
Then all of the new Voice mails will be played, beginning with the one most recently recorded. The sender information of each Voicemail is given first.
- Date received
- Time
- Caller's number (if available)
- Name of the caller, if this can be determined for internal calls by the system (For further information please refer to the Swyxlt! documentation.)
and finally
• the recorded Voicemail.
You can use the * key to skip the current message (sender information or recorded Voicemail).
The following options are available to you during the output of a Voicemail:
Button Effect
0+
Connects to the caller (if possible)
1
Back to the beginning of the Voicemail
3
Forward to the end of the Voicemail
4 CHI
10 seconds backward
5 JKL
Stop/Start Output (Pause)
6 MNO
10 seconds forward
7 PORS
Switch to the previous Voicemail
8 TUV
Switch to the next Voicemail
9wxyz
Main Menu
*
Switch to the next information (Date, Time, CallerID, Voicemail content)
#
Help
If you have no new Voice mails, you will find yourself in the main menu. Here you can listen to all available Voice mails and configure your Call Forwarding Unconditional (see This is how you change the settings for Forwarding Unconditional by Remote Inquiry, page 93).
- After each Voicemail has been played, you have the choice of the following options:
Button Effect
0+
Connects to the caller (if possible)
Button Effect
| 1 | Repeat the current Voicemail |
| 3 | Delete the current Voicemail. Confirm with * * |
| 4 | Answer per Voicemail (only possible for internal use) |
| 6 | Forward to an internal number |
| 7 | Switch to the previous Voicemail |
| 8 | Switch to the next Voicemail |
| 9 | Main Menu |
| # | Help |
After the new Voice mails have been played, you will be shown the main menu. The following options are available:
Button Effect
| 0+ | End Remote Inquiry (=Hook on) |
| 1### | Inquiry of all Voice mails (most recent first) |
| 3### | Inquiry of all E-mails |
| 4### | Configuration of the Forwarding Unconditional |
| 5### | Record note |
| 6### | Change Voicemail Announcement |
Button Effect
| 7 PARS | Delete all Voicemails. Confirm with |
| Help |
- End Remote Inquiry by going on hook.
If you have finished listening to a Voicemail, the corresponding e-mail in your e-mail folder will be marked as read. If a Voicemail was partially or completely skipped, the "unread" mark will remain in the e-mail folder.
The name announcement, which other internal subscribers hear when listening to a Voicemail you have left, can be recorded using Swyxlt!. Ask your system administrator should you have questions about this.

If you change your Windows password, you must also adjust this in the configuration of the remote inquiry with SwyxIt!, or contact your administrator.

Note that Remote Inquiry only covers voicemail that is present as e-mail in the Outlook folder which you specified in the Remote Inquiry configuration. You can adjust the configuration of the remote inquiry with the help of Swyxlt!, or it will be done by the administrator.

The menus for Remote Inquiry are also available as a print template on the SwyxWare DVD. For more information, please contact your administrator.

If you end Remote Inquiry in the main menu with '0', other actions of the Call Routing Manager can still be applied. For further information please refer to the documentation 'Call Routing Manager'.
11.2.1 Change Forwarding Unconditional
You can also use the Remote Inquiry menu to change the settings for Forwarding Unconditional. You can choose between
■ a Forwarding Unconditional to a number,
■ a Forwarding Unconditional to standard Voicemail or
■ deactivation of Forwarding Unconditional.
This is how you change the settings for Forwarding Unconditional by Remote Inquiry
In order to take advantage of this, Remote Inquiry must be configured for you.
- Dial your number.
The call is picked up and you hear the welcome announcement of your Voicemail. - Press the * key during the welcome announcement.
You will hear the welcome announcement of the Remote Inquiry and will be asked to enter your PIN. - Enter your PIN and complete the entry with the # key.

You will not be prompted to enter your PIN if you are calling from your own SwyxWare extension number.
- If you have received new Voice mails, you will be given the opportunity to listen to them.
- To open the main menu, press '9'.
The following options are available in the main menu:
Button Effect
| 1a.o | Inquiry of all Voice mails (most recent first) |
| 3DEP | Inquiry of all E-mails |
| 4GHI | Configuration of the Forwarding Unconditional |
| 5JKL | Record note |
| 6NNO | Change Voicemail Announcement |
| 7FGR | Delete all Voicemails. Confirm with |
| #ABK122 | Help |
Button Effect

End Remote Inquiry (=Hook on)
- To change Forwarding Unconditional press the '4'.
The current status of Forwarding Unconditional will be given. You will then have the following options for changing your Forwarding Unconditional:
Button Effect

Activate redirection to the saved number The Call Forwarding Unconditional to the saved destination number will be activated. If no destination number is saved, you will be prompted to enter a number.

Activate redirection to Voicemail The Call Forwarding to your Standard Voicemail will be activated.

Deactivate (Call) Forwarding Call Forwarding Unconditional is switched off. Please note that in this case other rules of theCall Routing Manager can be applied.

Save a new destination for forwarding Here you can enter a new destination
number and end with #衡 forwarding Unconditional to this number is then activated.

Current status of Call Forwarding The current status of Call Forwarding Unconditional will be given.

Change Voicemail Announcement

Main Menu The remote configuration of Call Forwarding Unconditional is ended and you return to the main menu.
Button Effect

Forwarding to the current Caller ID (only possible if the CallerID is available)

Help
11.3 Project Codes
SwyxWare can record the data of individual telephone calls in CDRs (Call Detail Records) and assign different project codes to them. This data can then be evaluated later. For further information, please refer to the SwyxWare Administrator documentation.
To associate a call to a project, you must enter the assigned project code before making the call.
This is how you assign a call to a project
- Enter '*' and then the project code.
- End the entry of the project code with '#'.
- Then immediately dial the destination number as usual.
√ The project code will now be recorded in the Call Detail Record (CDR) by SwyxWare.
11.4 Note
You can add entries to your Personal Phonebook during a call.
This is how you create a note during a call
You are making a call.
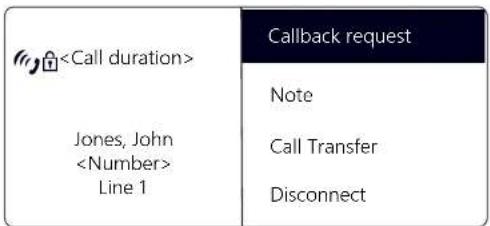
text_image
- Select the menu item "Note" with the arrow buttons, and press the "OK" button.
√ The following appears on the display:
text_image
- Enter the number of the new entry in the Personal Phonebook, and end your input with the "OK" button.
√ The following will appear:
text_image
- Enter the name for the new entry in the Personal Phonebook, and end your input with the "OK" button. √ The new entry in the Personal Phonebook is saved.

Enter a letter like editing a SMS: For example press the 7 three times to enter a R. Enter the space with "0". The '*'-key is used to switch between upper and lower case letters

If while creating a note you enter the number but not the name, the following entry will appear in your personal Phonebook in the first position: "No Name:Number". You can then process this entry in your personal Phonebook.
11.5 Callback request
SwyxWare offers the option of leaving callback requests on other internal subscribers' phones. The subscriber can then call back later. If the subscriber you are calling is busy, you can start a "Callback on busy". In this case a new call is suggested as soon as the subscriber is available again.
The list "My Callback Requests" serves for managing the callback requests you have made. The callback requests directed to you are given in the list "Callback Requests".
If you call another subscriber within your company and the connection is not completed (e.g. speaking, busy, call not picked up, absent), you can make a callback request.
There are two different situations:
- Callback on busy, i.e. the person called is speaking
- Callback (when the line is idle and the call is not picked up or is forwarded to Voicemail)
11.5.1 Callback on busy
You call a subscriber in your company and this person is currently speaking on the phone. You receive the message "Busy" or "Call waiting", depending on whether the person called has allowed a secondary call. (In the Caller List of the person called, an entry appears -as is the case for every call.) If you now select the "Callback" option, the person called will not receive any further signal and the call waiting signal will stop. If the
person called has ended his call, this will be signaled by a brief tone and a message on your display. You can start the callback.
This is how you make a callback request if the line is busy
You call an internal subscriber. The other subscriber is currently speaking on the phone.
- Select the menu item "Callback request" with the arrow buttons, and press the "OK" button. √ Your call will be ended. On your display you will see the message "Terminated - Callback requested". An entry will be created in your "My Callback Requests" list.
If the person called has ended his call, this will be signaled by a brief tone and a message on your display.
- You can start the callback directly by lifting the handset (see This is how you start Callback on busy, page 95).

Several callback requests on busy to the same user, even at different numbers, will be summarized into one entry in the "My Callback Requests" list.
This is how you start Callback on busy
You have made a Callback on busy request.
The person called ends his call.
√ A signal tone will be produced. The following appears on the display:
11:28
Mon, 06 Jun 2017
Pick up Callback
Reject Callback
Back
- Select the menu item "Pick Up Callback" with the arrow buttons, and press the "OK" button.
√ The subscriber is then immediately called.
If you do not confirm the new call within 20 seconds, the "Missed Callbacks" display will appear. The entry in the list "My Callback Requests" will change to "Was free. Retry?".
-
Confirm the message "Missed Callbacks" with the "OK" button. √ The list of missed callbacks is displayed.
-
Select the entry you want.
- If you would like to call back to the displayed subscriber immediately, lift the receiver or press the Speaker button.
- If you would like to see the details for this callback attempt, press the "OK" button.
Details for this callback attempt, such as date and time, will be displayed.
You can dial this number again or you can delete it.
If a connection is made to the person originally called, the entry in the "My Callback Requests" list will be deleted automatically.
This is how you reject Callback on busy
You have made a Callback on busy request.
The person called ends his call.
A signal tone will be produced. The following appears on the display:
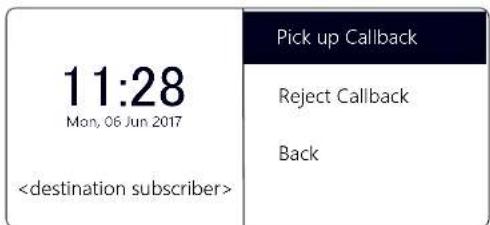
text_image
11:28 Mon, 06 Jun 2017- Select the menu item "Reject Callback" with the arrow buttons, and press the "OK" button.
√ The entry in the "My Callback Requests" list will be deleted.
This is how you delete Callback on busy
You have made a Callback on busy request.
-
Select the menu item "Main menu" with the arrow buttons, and press the "OK" button.
-
Choose "Lists" and press the "OK" button. √ The following will appear:
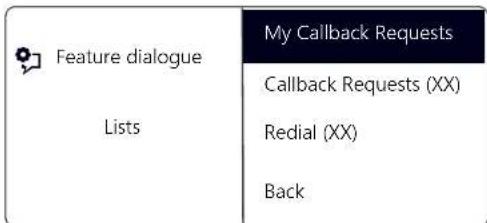
text_image
Feature dialogue Lists My Callback Requests Callback Requests (XX) Redial (XX) Back- Press the "OK" button.
√ The "My Callback Requests" list will open:

text_image
Feature dialogue My CallbReq- Select the entry you want to delete, and press the "OK" button. √ The details for this callback request will be displayed.
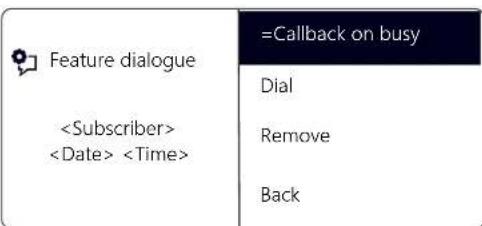
text_image
Feature dialogue- Choose "Delete" and press the "OK" button.
√ The entry will be deleted.
11.5.2 Callback if idle
You call another internal subscriber and this call is not picked up. You receive the message "Ringing" or the Voicemail announcement.
You make a callback request. This request will be entered with "Callback requested" in your "My Callback Requests" list. If the person called edits his Caller list or the Callback list, he can
-
start the callback from his Caller List (Swyxlt!) or his "Callback Requests" list (SwyxPhone).
If you then pick up the callback, the callback request in your list will be deleted.
If no connection is made, the callback request will remain unchanged. -
ignore the Callback Request.
If the person called ignores the entry in his list, the extension to the entry will change to "Callback obsolete". - delete the callback request in the Caller List.
The complete entry will be deleted in the list of the person called, and in your "Callback Requests" list, the entry will change to "Callback obsolete".
This is how you make a callback request when the line is idle
You call an internal subscriber. The other subscriber does not pick up the call or your call is forwarded to Voicemail.
- Select "Callback request" with the arrow buttons, and press the "OK" button.
√ An entry will be created with "Callback requested" in your "My Callback Requests" list. The person called will be signaled your callback request.
Your call will be ended.
This is how you answer a callback request
You have received a callback request and in your display you see the list "New callback requests (XX)".
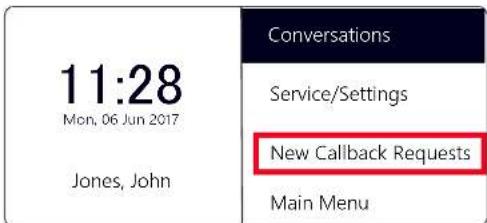
text_image
11:28 Mon, 06 Jun 2017 Jones, John Conversations Service/Settings New Callback Requests Main Menu- Select "New callb req" with the arrow buttons, and press the "OK" button.
√ The "Callback requests" list will appear.
- Select the caller and lift the handset.
√ The caller will be called back.
If you want to ignore the callback request, select "Ignore" and press the "OK" button.

After you have opened the "New Callback Requests" list, all entries will be transferred to the "Callback Requests" list, even those which have not yet been displayed.

The entry in your "My Callback Requests" list will be deleted in any case if a connection to the person called is successfully made. At the same time, the entry in the Caller List of the person called will change to "Callback obsolete".
"My Callback Requests" List
In the "My Callback Requests" list you will find all callbacks that you have requested.
This is how you open the "My Callback Requests" list
- Select "Main menu" with the arrow buttons, and press the "OK" button.
- Choose "Lists" and press the "OK" button.
- Choose "My Callback Requests" and press the "OK" button. √ The "My Callback Requests" list will open.
| Feature dialogue MCallbReq XX/YY Date> | <Time> <Subscriber> |
| <Time> <Subscriber> | |
| Clear list | |
| Back |
-
Choose the appropriate entry and press the "OK" button. √ Details for this entry will be displayed:
-
Callback on busy
You have made a callback request of a subscriber whose line is busy. This subscriber is still telephoning. - Callback requested
You have made a callback request of a subscriber whose line is idle. No connection was successfully made. - Callback obsolete
You have made a callback request of a subscriber whose line is idle. After this, the callback has either been ignored by the other subscriber, was answered per e-mail or deleted.
You can select an entry in this list, delete individual entries or the entire list. When deleting, the "Callback requested" entries will be deleted from the list of the other subscriber.
"Callback Requests" List
In the "Callback Requests" list you will find all callbacks that have been directed to you.
This is how you open the "Callback Requests" list
- Select "Main menu" with the arrow buttons, and press the "OK" button.
The main menu will open. - Choose "Lists" and press the "OK" button.
- Choose "Callback Requests" and press the "OK" button. √ The "Callback Requests" list will open.
| Feature dialogue Callback XX/YY <Date> | <Time> <Subscriber> |
| <Time> <Subscriber> | |
| Clear list | |
| Back |
-
Choose the appropriate entry and press the "OK" button. You can
-
with "Callback" or
- " I g n o r e".
If you delete the list, the corresponding entry in the caller's list will be marked as "Callback obsolete".
The "Missed Callbacks" List
In the "Missed Callbacks" list you will find all callbacks on busy, which were prompted because the person called had finished his conversation, but were not confirmed by you.
This is how you open the "Missed Callbacks" list
The following appears on the display:
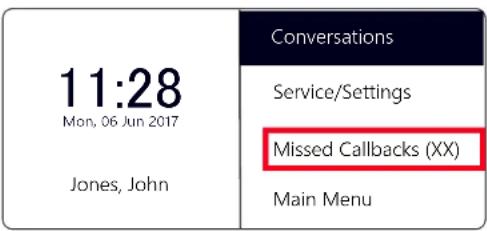
text_image
11:28 Mon, 06 Jun 2017 Jones, John Conversations Service/Settings Missed Callbacks (XX) Main Menu- Select "Missed Callbacks (XX)" and press the "OK" button.
√ The "My Callback Requests" list will open.
- If you select the required entry in this list, you can start this callback again or delete it.
The "Missed Callbacks" list will remain in the display until it contains no entries.
11.6 Conference
With SwyxWare you can join internal and external subscribers to form a conference. Furthermore, you can add new subscribers to an existing conference. Alternatively, you can also arrange to meet with other subscribers in a conference room. In a conference room you can take an active part in the conversation or only act as a listener.
11.6.1 Starting a Conference
If you have at least one active line and one line on hold, the entry "Conference" appears in the available menu. This provides you with the option of creating a conference between these subscribers and yourself.
How to start a conference call:
You are having conversations with several subscribers at the same time. The active connection is the connection to the person you are currently talking to. All other subscribers, who are listening to music on hold while they wait, are on connections on hold.
- Select the menu item "Conference" with the arrow buttons, and press the "OK" button. All of the individual calls which you are currently having, both the active and held calls, will be joined into one conference. All lines, except for the conference line, will be free again. A welcome signal will be produced for all participants.
√ The following appears on the display for all participants:
| 00:58 Conference Line 1 | Note |
| Call Swap Disconnect |

You can only start one conference at a time. However, you can participate in other conferences. provided these conferences have been initiated by other participants.
11.6.2 Inquiry Calls and Add
During a conference you can start an inquiry to another subscriber. After this inquiry you can add the other subscriber to the conference. The other subscriber for his part can create a conference of which you are a member. In this situation, you can then use the "Conference" button to join both conferences into one.
This is how you start an Inquiry Call from a conference
You are a participant in a conference.
-
Use the arrow buttons to select "Call Swap".
√ The line with the conference will be put on "Hold". -
Dial the number you want.
√ The new connection will be set up.
- If you would like to end the call to the subscriber you made an inquiry call to, put the handset on the hook or press the corresponding Line button.
This is how you add an additional subscriber to a conference
You are a participant in a conference.
- Use the arrow buttons to select "Call Swap".
- Dial the number you want.
- Once you have reached the new participant, select "Conference" with the arrow buttons and press the "OK" button. √ A welcome signal will be produced for all conference participants. A new subscriber has been added to the conference.

If one conference participant puts his conference line on "Hold" and then returns to the conference, no welcome signal will be produced.
11.6.3 Leaving or Ending a Conference
To leave the conference, put the handset on the hook.
When going on hook, there are two different situations:
- You started the conference.
In this case, the conference will be ended for all participants if you put the handset on the hook.
■ Another subscriber started the conference.
Only you will leave the conference. A goodbye signal will be produced for all other subscribers and the remaining subscribers can continue to speak to one another.

All those subscribers whom you added to this conference will leave the conference with you. The conference will continue for all other subscribers.
This is how you leave a conference
Another subscriber started the conference.
- Place the handset on the hook.
If a subscriber leaves a conference, a goodbye signal will be produced for all other subscribers.
This is how you end a conference
You have started a conference and the conference line has an "active" state, i.e. you can speak to the other conference participants.
- Place the handset on the hook.
√ The conference is ended. The line becomes free again.

If Subscriber A of the original conference added other subscribers, e.g. B and C, to this conference, a second conference between A, B and C will continue to exist until Subscriber A, as initiator of the second conference, terminates the connection and thus ends the conference.
11.6.4 Conference Rooms
Conference rooms are set up by the administrator. A number is assigned with which the conference room can be "entered". All subscribers can dial the Conference Room and participate in a conference with other users, who have dialed this number. All participants can leave the conference independently of one another, without the conference being terminated. You can enter a Conference Room as a member of a conference or purely as a listener.
This is how you reach a Conference Room
-
Dial the number of this Conference Room.
√ You will be connected to the conference. All participants in the conference room will hear a welcome signal.
If you are the only conference participant, an appropriate announcement will be played. -
To leave the conference, simply go on hook.
All those present in the Conference Room will hear a goodbye signal. The conference between the other subscribers continues to exist.
You can also start Inquiry Calls from a Conference Room (see This is how you start an Inquiry Call from a conference, page 99).
Furthermore, you can add other subscribers to this Conference Room (see This is how you add an additional subscriber to a conference, page 100).

If you go on hook, all of the conference participants you have added will also leave the conference.
In addition, you can connect another subscriber to the Conference Room. He/she becomes an independent participant in the conference and must end the connection to this conference personally.
This is how you connect another subscriber to the Conference Room
Requirements:
- You have a connection to the Conference Room and
-
you have a connection to another subscriber.
-
Select "Call Transfer" with the arrow buttons, and press the "OK" button.
√ The other subscriber is connected to the Conference Room and a welcome signal is produced in the conference. Both of your lines are free again.

The party who created the connection will bear the costs.

It is not possible to directly connect conference rooms to one another. If you would like to allow the participants from two different conference rooms to talk to one another, then you should start a conference between the two lines. This 'Conference of the Conference Rooms' will be maintained as long as you, as initiator, participate in this conference, and it will end when you go on hook.
11.6.4.1 Silent conference participation
You can also dial in as a listener to conferences in conference rooms. You can then follow the conference, but not take part in the conversation.
To dial in as a silent conference participant, dial the number of the conference room plus the string '#OWC'; e.g. "219#OWC". However, your administrator can individually adapt this dial-in option with a script. For further information please refer to the SwyxWare Administrator documentation.
Please note that the complete string of digits (
The entry / departure of a silent conference participant is also announced by an audio signal. This signal is different from the usual entry/departure signal to indicate that this participant cannot take part in the conference call.
If you want to dial into a conference room as a silent participant, you first have to configure a corresponding Speed Dial with Swyxlt!, since you cannot dial the string "OWC" via SwyxPhone. Since SwyxPhone and Swyxlt! access the same user profile, the Speed Dials configured in Swyxlt! are also available to you in SwyxPhone.

A simple way round the problem is also to dial into the conference as a normal participant, and deactivate the microphone on your telephone.
11.7 Using a headset
If you telephone a great deal, you can connect a headset to SwyxPhone in order to have your hands free while on the phone. Swyx offers several headsets and the necessary connection cable as an accessory.
11.7.1 Connecting a headset to SwyxPhone L64
SwyxPhone L64 has a headset connection on the underside.
This is how you connect a headset to SwyxPhone
- Insert the end of the adapter cable which is wrapped in the blue banderole into the jack with the Headset symbol on the underside of the telephone (see Connections on the underside of the SwyxPhone 164, page 20).
- Plug the split end of the adapter cable into the base station of the headset. Insert the RJ10 plug into the jack with the telephone symbol and the RJ45 plug into the jack marked "AUX" on the base station.
- Switch the into "DHSG" mode (see chapter 2.4.6 in the supplied Headset Guide).
For more information, see the accompanying Headset Guide.
"Headset" Button
SwyxPhone L66 has a Headset button. If this button is pressed, the call will be forwarded to the headset output or a free line will be selected. The Headset button will glow. Pressing the Headset button again will end the connection. During a call you can switch between the handset, handsfree telephone and the headset:
| You are having a telephone conversation on... | Action New Status | |
| The Handset Press the Speaker button The speaker will be activated. It is possible for others in the room to listen to the call. | ||

In order to execute hook on and hook off with the talk button on the headset, the headset button on the SwyxPhonecannot be assigned to other functions.
11.8 Call Swap as a substitute for Line buttons
You can freely configure the function keys on your SwyxPhone L64 (see Chapter 12.4, Configure function keys, page 113). Therefore, you could have only one or even no Line buttons on your SwyxPhone L64. However, there are always at least two lines provided with the SwyxPhone L64.
In this case, you telephone as usual by lifting the handset or by pressing the Speaker button. Switch to the second line by selecting the option "Call Swap" in the shortcut menu or by pressing the "Call Swap" button.
11.9 Call Intrusion
The "SwyxMonitor" option pack enables, in addition to permanent call recording (only for the administrator), intrusion into another user's conversation. A supervisor (e.g. in a call center) can listen in on an ongoing conversation ("Listening only" mode), give directions to the speaking agent (e.g. advice on presenting the case) or even actively join in the call (speaking modes).

If the "SwyxMonitor" option pack is used, it is essential to observe the relevant statutory provisions relating to data protection.
The "SwyxMonitor" option pack must be installed for Call Intrusion, and the SwyxWare administrator must activate this function appropriately for each individual user.
Also, calls can only be listened in on if they are made directly with Swyxlt! (and not in CTI mode). Conversations that are made via a SwyxPhone, cannot be intruded.
This is how you listen in on a call
- Dial the number of the agent whose call you want to hear, followed by the DTMF command *24*1#, and start the call as usual. Please note that you can only start the call set-up with the DTMF command for the "Listening only" mode. However, if another supervisor is already listening in on this call in a speaking mode, you will also be switched immediately into this mode.
The number of the agent will be dialed. There is no call signaling to the agent, the call is accepted directly and coupled with the active
call. You are now listening in on the call, but you are not heard by the two call partners.
If the agent is not on an active call at the time, the call set-up is aborted. The agent's call redirections (e.g. forwarding of a second call to voicemail or to a colleague) are ignored, i.e. the call is always accepted. An exception is Unconditional Call Forwarding - in this case even Call Intrusion is redirected.
- Choose the appropriate DTMF command to speak with the agent or both call partners.
- End the listening like a normal call, e.g. by replacing the handset. If the agent's call partner (e.g. the customer) terminates the conversation, you are automatically connected to the agent, unless you are in "Listening only" mode, in which case the call will be ended.
| DTMF command | Explanation |
| *24*1# Listening only.You hear both call partners. | |
| *24*2# Listen to both sides, speak with agent.You hear both call partners, and the agent hears you. The other call partner (e.g. the external customer) hears only the agent. | |
| *24*3# | Listen to both sides, speak with both sides.You can participate directly in the conversation. |
11.9.1 Multiple Call Intrusions
A call can also be listened to by several people. These supervisors are always switched into the same mode. Thus if one supervisor switches with a DTMF command from the "Listening only" mode to a speaking mode, the agent also hears all other supervisors who are connected with him. The supervisors can always speak directly to one another, even if they are in "Listening only" mode. Neither the agent nor his call partner can hear them.
12 SwyxPhone L64 Configuration
You can adjust the default settings of SwyxPhone L64 to meet your individual needs.
The following states can be manually configured:
■ Call Forwarding, page 104
■ Do Not Disturb, page 105
■ Secondary call, page 105
Ring tones, page 106
- Call Signaling, page 106
- Lists, page 107
■ Phonebooks, page 108
■ Configure function keys, page 113
■ Lines, page 116
■ Configuring Speed Dials, page 118
12.1 User Profile
Your user settings contain user-specific information, that is settings which you have made on the SwyxPhone. The user settings include, for example, all lists (Caller List and Redial List), your individual assignments for function keys and Line buttons, and even ringing. Your user settings are stored on SwyxServer, so you will find your personal settings on any SwyxPhone when you enter your PIN (Personal Identification Number). General settings are always made in the main menu or in the Configuration menu.
The basic telephony behavior of the SwyxPhone and the number of Line buttons and function keys are defined either in the main menu or the Configuration menu. You can check and change the current settings via the menu items.
This chapter provides a description of the individual configuration options.
12.1.1 Call Forwarding

Feature dialogue
Main menu
Call forwarding
Charging info
No Disturb = off
Secnd. call = on
The menu item "Call forwarding" allows you to define whether telephone calls are
- forwarded unconditionally or
- forwarded with a delay, i.e. after you have not picked up your call, or
- forwarded if your line is busy (you are presently telephoning).

Feature dialogue
Call Forwarding
Uncondit. =
Busy =
No Reply = Status
Back
Activate the option "Unconditional", if you do not wish to receive any calls starting immediately.
When you activate the option "If busy", you must define how a call should be handled if it cannot be delivered to you because you are already on the telephone and no secondary call is permitted. You can either enter the forwarding destination directly, or make a selection from the Phonebook, or activate your Standard Voicemail. When a call is received, SwyxPhone automatically recognizes whether the line is free or busy and it applies the appropriate type of Call Forwarding.
The "Delayed" option is used to set the amount of time which should be spent attempting to transfer the call directly to SwyxPhone, which you
have logged on to. The call can then be forwarded to another number or to your Voicemail.
For further information please refer to chapter 10.15, How do I forward a call?, page 83.

Your Voicemail can only be configured using Swyxlt!. For further information please refer to the Swyxlt! documentation.
12.1.2 Do Not Disturb
| Feature dialogue Main menu | No Disturb = on |
| Secnd. call = on | |
| Configuration | |
| Log off |
If you activate "No Disturb", calls are signaled visually only. Your environment is not disturbed by any acoustic signals. If you confirm this menu item with the "OK" button, this function will be switched on or off. If you set the status to "Do Not Disturb" while it is ringing, the ringing then falls silent. If you deactivate the status "No Disturb" during an incoming call, there is then also no acoustic signal. The subsequent calls are signaled acoustically.
12.1.3 Secondary call
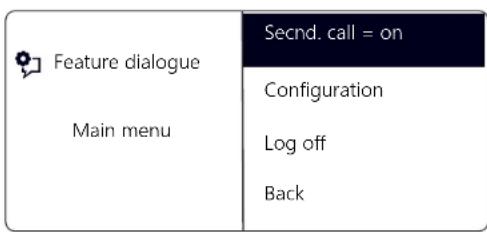
text_image
Feature dialogue Main menu Secnd. call = on Configuration Log off BackIf you deactivate this option, no further calls will be signaled while you are on the telephone. It is also possible to switch Secondary Call on or off during a call. A subscriber trying to call you will hear the busy signal or his call will be redirected according to your setting for "Redirect if busy". For further information please refer to chapter 10.14, The Secondary Call, page 83.
12.2 Settings in the Configuration Menu
The configuration menu is in the main menu. You can select the corresponding menu item with the arrow buttons.
| Feature dialogue Main menu | No Disturb = off Secnd. call = on |
| Configuration | |
| Log off |
The configuration menu contains the following items:
| Feature dialogue Configuration | Ring tones |
| Call Signaling | |
| Lines | |
| Function keys | |
| Speed dials | |
| Incognito = off | |
| Transf. on Hookon = on | |
| Back |
12.2.1 Ring tones
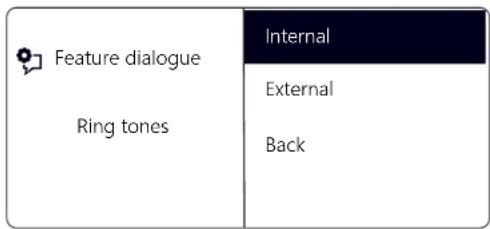
text_image
Feature dialogue Ring tones Internal External BackThe telephone ring for incoming calls is selected here. You define the telephone ring for calls from outside the company under "External" and for calls from within the company under "Internal".
| Feature dialogue | 01/07 |
| 02/07 | |
| Ringing internal 01/07 | 03/07 |
| 04/07 |
You can choose from seven different ringing tones. You can select the ringing sound you want using the arrow buttons and adjust the volume using the "+/-" buttons.
12.2.2 Call Signaling
The administrator can configure the system in such a way that incoming calls for you are signaled to another subscriber. The incoming calls for this subscriber will also be signaled to you. If such signaling has been defined, then the incoming calls for this subscriber will appear on your display. If the destination subscriber does not pick up the call, you will hear a single warning tone after 10 seconds. This tone can be turned off here.
| Feature dialogue Configuration | Ring tones |
| Call Signaling =on | |
| Lines | |
| Function keys |
The call signaling will still only be visually indicated.
If several subscribers, whose calls are signaled to you, receive a call at the same time, only one name will be shown in the display. The other calls will only be indicated by the blinking of the corresponding Speed
Dials. If you would like to pick up one of these calls, use the corresponding Speed Dial and lift the handset.

Mutual call signaling between subscribers can only be configured by the system administrator.

Due to the fact that both SwyxPhone and SwyxIt! access the same user settings, any changes you make on SwyxPhone will always effect the settings in SwyxIt! and vice versa. Above all, you should keep in mind that if you delete lines, the data will be lost! For further information please refer to chapter 17, Interaction with SwyxIt!, page 178.
12.2.3 Incognito
When you activate this option, your telephone number will not be shown to the destination subscriber (number suppression). If you activate number suppression in the Configuration menu, the setting will be retained.
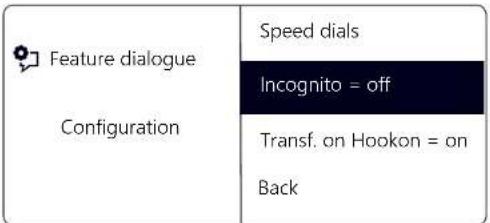
text_image
Feature dialogue Configuration Speed dials Incognito = off Transf. on Hookon = on Back
The numbers of internal calls cannot be suppressed.

Telephone number suppression when making external calls must also be supported by your ISDN line, otherwise only the display of your extension number will be suppressed.
12.2.4 Transfer on Hookon
If "Transfer on Hookon" is activated, then when you go on hook, a second call that you have initiated will be connected to the first call, which is on hold. If "Transfer on Hookon" is deactivated, then when you go on hook a second call will be ended. The line with the first call on hold will become active again.
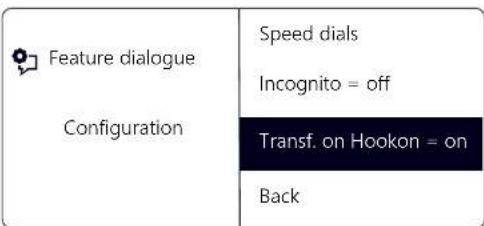
text_image
Feature dialogue Configuration Speed dials Incognito = off Transf. on Hookon = on BackPressing OK will activate or deactivate the function "Transfer on Hookon".
For further information please refer to chapter 10.11, Transfer when Placing I handset on I look, page 81.
12.3 Lists
This section provides basic information on the lists, which include:
■ the Phonebooks,
the Caller List,
the Redial List,
■ the Callback Requests list and
■ the My Callback Requests list.
In general, you will find the same structure for each list. When you call a list, the name of the list will appear in the display. In addition, the current number of the entry in the list and the total number of entries, including the corresponding date, will be given.
In a single entry, the name of the subscriber appears. If you press the "OK" button you can view additional information about the subscriber, or - depending on the list - call the subscriber, edit the entry, save it in the Phonebook, or delete it.
The arrow buttons can be used to page through the lists. To display more details for an entry, select the corresponding entry and press OK. You will find yourself in the sub-menu of the entry, where you can scroll through the detailed information or edit the entry.
12.3.2 Phonebooks
Frequently used numbers are stored in the Phonebook. You can then dial these numbers directly from the Phonebook. There are two different types of Phonebooks available to you:
■ the Global Phonebook and
■ the Personal Phonebook.
In both Phonebooks, the entries are in alphabetical order of the names. The Global Phonebook is available to all users and contains information about the availability of your company's subscribers, e.g. if they are logged or currently making a call. The system administrator or any user with the appropriate authorization can add further phone numbers in this Global Phonebook, e.g. subscribers of another branch. However, the availability of these phone numbers is not signaled. The Global Phonebook also contains dial numbers of individual groups.
You can store, edit or delete your personal numbers in the Personal Phonebook.
You can directly add, modify, or delete an entry in your Personal Phonebook via SwyxPhone . Alternatively, you can also modify the Personal Phonebook via Swyxlt!. For further information, please refer to the Swyxlt! documentation.
The Structure of the Entries in the Global Phonebook
| Feature dialogueGlobal Phonebook XX/YY | |
The left part of the display shows which phonebook (Personal or Global Phonebook) you are currently in. You also see which entry (XX) of the total number of entries (YY) has been selected.
The names of subscribers in a phonebook are listed in alphabetical order.
This is how you search in a Phonebook
- Select "Main menu" with the arrow buttons, and press the "OK" button.
- Choose "Phonebooks" and press the "OK" button. √ The following will appear:
| Feature dialoguePhonebook | Global |
| Personal | |
| Back |
- Choose a phonebook and press the "OK" button.
Use the arrow buttons to page through the list of phonebook entries. Confirm the selection of an entry with the "OK" button.
To speed up a search in a large phonebook, you can enter the first letter of the name in the numeric keypad, e.g. for a "V" press the "8" three times, for an "E" press the "3" twice. The letters entered for the search appear in the display:
| Feature dialogueGlobal Phonebook11/21 DU_ | Dupont, Marie |
A beep and the insertion mark “_” prompt you to enter the next character.
- In order to display more details, e.g. to display the status for an entry, select the corresponding entry and press OK.
√ The following will appear:
| Feature dialogueDupont, Marie | <Number> |
| Back |
Within the entry, you can call the subscriber by pressing OK. To exit from an entry or a list, press the arrow button "Back".
Personal Phonebook
You can add, modify or delete entries in your Personal Phonebook. If you have created a note during a call, this will be added as a new entry in your Personal Phonebook. (see Chapter 11.4, Note, page 94). Entries in the Caller List and in the Redial List can also be added to the Personal Phonebook.

Enter a letter like editing a SMS: For example press the 7 three times to enter a R. Enter the space with "0". The '*' key is used to switch between upper and lower case letters.
This is how you add an entry to the Personal Phonebook
- Select "Main menu" with the arrow buttons, and press the "OK" button.
- Choose "Phonebooks" and press the "OK" button.
- Choose "Personal" and press the "OK" button. √ The following will appear:
| Feature dialoguePersonal Phonebook XX/YY | |
| Add entry | |
| Back |
- Choose "Add entry".
√ The following will appear:
| Feature dialogueEnter destination number | - |
- Enter here the number of the new entry, and press OK. √ The following will appear:
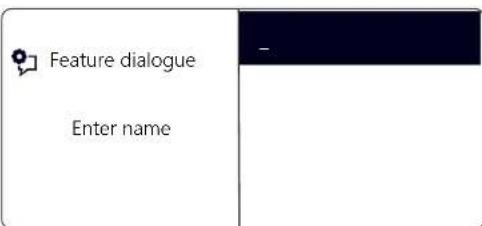
text_image
Feature dialogue Enter name- Enter the assigned name, and press OK.
- Choose "OK" to save the entry.
√ The Personal Phonebook will appear with the saved entry.
This is how you edit an entry in the Personal Phonebook
You can modify or delete an entry in the Personal Phonebook.
- Select "Main menu" with the arrow buttons, and press the "OK" button.
- Choose "Phonebooks" and press the "OK" button.
- Choose "Personal" and press the "OK" button.
- Select the entry you want to edit or delete, and press OK. √ The selected entry will open:
| Feature dialogue <Name of a subscriber> | Dialing |
| Edit entry | |
| Delete entry | |
| Show number |
To edit the entry, select "Edit entry". You can now change the name of the entry and then the corresponding telephone number.
For further information please refer to chapter 12.3.2, Phonebooks, page 108.
Confirm each change with "OK". To save the changes, select "Confirm".
To delete, select "Delete entry".
The selected entry will be deleted.
12.3.3 Caller list
The last calls received for you are automatically saved in the Caller List. The calls are listed in the order in which they were received. You can directly dial the individual entries from the Caller List, edit them, and then save them in the Personal Phonebook. 20 entries will be saved in the Caller List per default setting. The maximum number of possible entries can be changed via Swyxlt!.
For further information, please refer to the Swyxlt! documentation.
This is how you edit an entry in the Caller List
You can edit an entry in the Caller List, save it in the Phonebook, or delete it.
- Select "Main menu" with the arrow buttons, and press the "OK" button.
- Select "Caller List (XX)" and press the "OK" button. √ The following will appear:
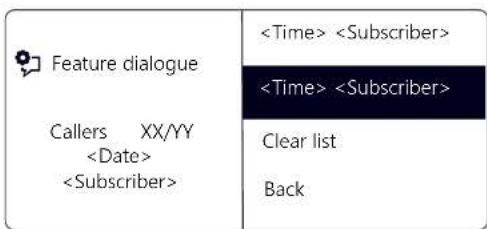
text_image
Feature dialogue- Choose the appropriate entry and press the "OK" button. √ The following will appear:

Feature dialogue
=Call (not) answered
Dial
Edit and dial
Save into phonebook
- If you select "Dialing" and press OK, the subscriber is called directly.
- "Edit and dial" can be used to edit a telephone number before dialing. When you confirm your changes with OK, the number will be dialed immediately.
- "Save into phonebook" can be used to save the caller's name and number in your Personal Phonebook. If you confirm this option with OK, the number will appear and you can then add the name. If a name already exists, the name will be provided for possible changes.
- You can remove this entry from the list with "Delete entry".
This is how you delete the Caller List
If the list is no longer up-to-date, it can be deleted at any time.
- Select "Main menu" with the arrow buttons, and press the "OK" button.
- Select "Caller List (XX)" and press the "OK" button.
- Scroll with the arrow button "Down" to the end of the list. √ The following will appear:
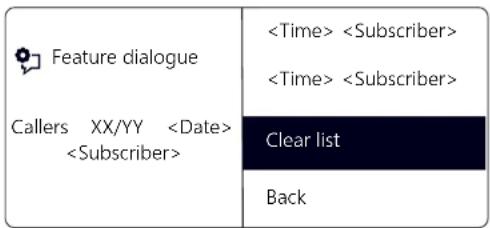
text_image
Feature dialogue Callers XX/YY- Choose "Clear List" and press the "OK" button. The entire list will be deleted.
12.3.4 Redial list
All dialing procedures are automatically saved in the Redial List. The entries begin with the most recently saved dialing procedure. 20 entries will be saved in the Redial List as default setting. The length of the list can be changed with Swyxlt!. For further information, please refer to the Swyxlt! documentation.

If the handset is off the hook or if the Speaker button is activated when you press the "Redial" button, the last number dialed will be called again.
This is how you edit the Redial List
You can edit an entry in the Redial List, save it in the Phonebook, or delete it.
1. Select "Main menu" with the arrow buttons, and press the "OK" button.
2. Choose "Lists" and press the "OK" button.
3. Choose "Redial List" and press the "OK" button.
√ The following will appear:
| Feature dialogue Redial XX/YY <Date><Subscriber> | <Time> <Number> |
| <Time> <Subscriber> | |
| Clear list | |
| Back |
- Choose the appropriate entry and press the "OK" button.
√ The following will appear:
| Feature dialogue | Dial |
| Edit and dial | |
| <Number dialed/Subscriber><Date><Time> | Save into phonebook |
| Delete entry |
- If you select "Dialing" and press OK, the number is dialed at once.
- "Edit and dial" can be used to edit a telephone number before dialing.
- "Save into phonebook" can be used to save the caller's name and number in your Personal Phonebook. If you confirm this option with OK, the number will appear and you can then add the name. If a name already exists, the name will be provided for possible changes.
- You can remove this entry from the list with "Delete entry".
This is how you delete the Redial List
If the Redial List is no longer up-to-date, it can be deleted at any time.
-
Select "Main menu" with the arrow buttons, and press the "OK" button.
-
Choose "Lists" and press the "OK" button.
- Choose "Redial List" and press the "OK" button. √ The Redial List opens up.
- Scroll with the arrow button "Down" to the end of the list. √ The following will appear:
| Feature dialogue | < Time > < Subscriber > |
| < Time > < Subscriber > | |
| Callers XX/YY < Date > | Clear list |
| < Number dialed/Subscriber> | Back |
- Choose "Clear List" and press the "OK" button.
The entire list will be deleted.
If you reopen the Redial List, the message "No entry" will appear.
12.3.5 Lists for Callback Requests, My Callback Requests and Missed Callbacks
| Feature dialogue Lists | My callback requests |
| Callback requests (XX) | |
| Redial list | |
| Back |
In the "My Callback Requests" list you will find all callbacks that you have requested.
In the "Callback Requests" list you will find all callbacks that have been directed to you.
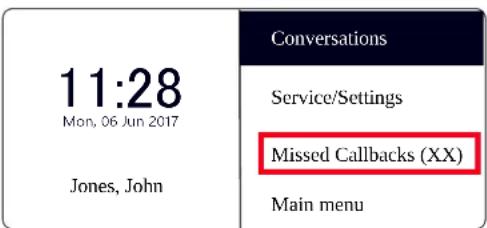
text_image
11:28 Mon, 06 Jun 2017 Jones, John Conversations Service/Settings Missed Callbacks (XX) Main menuIn the "Missed Callbacks" list you will find all callbacks on busy, which were prompted because the person called had finished his conversation, but were not confirmed by you.
For further information please refer to chapter 11.5, Callback request, page 95.
12.4 Configure function keys
Some function keys on SwyxPhone are configurable. Some function keys are preconfigured at purchase. You have the option of assigning these keys to other functions, e.g. "Call Swap" or "Hold".
SwyxPhone L64 has 16 freely configurable function keys with LEDs. These keys can also be configured as Line buttons or Speed Dials. At delivery, the two upper freely configurable function keys are preconfigured as Line buttons.
A function key can call only one function, dependent on its configuration.
Each function key can be configured with the following functions:
Function Description
| Line button Activate/deactivate lineFor further information please refer to chapter 12.5, Lines, page 116. |
Speed dial Call specific number For further information please refer to chapter 12.7, Configuring Speed Dials, page 118.
| Function Description | |
| Call Transfer Connect lines to each otherFor further information please refer to chapter 10.10, How do I connect two subscribers to one another?, page 81. | |
| Do Not Disturb | Activate/deactivate acoustic call signaling For further information please refer to chapter 12.1.2, Do Not Disturb, page 105. |
| Secondary call | Enable or disable secondary callFor further information please refer to chapter 12.1.3, Secondary call, page 105. |
| Caller list Call up caller listFor further information please refer to chapter 12.3.3, Caller list, page 110. | |
| Hold | Put an active line on holdFor further information please refer to chapter 12.3.3, Caller list, page 110. |
| Phonebook | Call up Global PhonebookFor further information please refer to chapter 12.3.2, Phonebooks, page 108. |
| Redial | Call Redial ListFor further information please refer to chapter 12.3.4, Redial list, page 111. |
| Speaker | Switch the speakers or the handsfree telephone on/offFor further information please refer to chapter 10.17, Speaker and Handsfree Telephone, page 88. |
| Pick up call | Picks up an incoming call to a group or a group user. For further information please refer to chapter 10.5, How do I pick up a call?, page 78. |
| Call Forwarding | Enable/Disable Call Forwarding Unconditional For further information please refer to chapter 12.1.1, Call forwarding, page 104. |
| Call Swap | Switch between LinesFor further information please refer to chapter 10.9, How do I switch between lines (Call Swap)?, page 80. |
Function Description
| Mute | Switch microphone on/offFor further information please refer to chapter 10.17,Speaker and Handsfree Telephone, page 88. |
| Disconnect End the active connection | |
| Headset Deactivate/Activate HeadsetFor further information please refer to chapter 10.7,How do I telephone with a headset?, page 79. | |
| Incognito Before an outgoing call, suppress number displayFor further information please refer to chapter 12.2.3,Incognito, page 107. | |
| Voicemail Call to check voicemailFor further information please refer to chapter 11.1,Voicemail inquiry, page 90. | |
| Conference Combine lines into a conferenceFor further information please refer to chapter 11.6,Conference, page 99. | |
| Callbackrequest | Make a callback requestFor further information please refer to chapter 11.5,Callback request, page 95. |
| User logoff Log off phone user from SwyxServer | |
This is how you configure a function key
- Select "Main Menu" with the arrow buttons, and press the "OK" button.
- Choose "Configuration" and press the "OK" button. √ The Settings menu will appear.
| Feature dialogueConfiguration | Function keys |
| Speed dial buttons | |
| Incognito = off | |
| Transf. on Hookon= |
- Choose "Function keys" and press the "OK" button.
√ The following will appear:
| Feature dialogueFunction keys | Press a function keyBack |
- Press the configurable function key to which you want to assign a function.
√ The current function of the key is displayed. If the key is not yet assigned a function, this message appears:
| Feature dialogueFunction Key= No function | ModifyDelete functionBack |
- Choose "Modify" and press the "OK" button.
You can choose from the following functions:
- Line button
- Speed dial
- Call Transfer
- Do Not Disturb
- Secondary call
- Caller list
- Hold
- Phonebook
- Redial
- Speaker
- Pick up call
- Call Forwarding
- Call Swap
- M u t e
- Disconnect
- Headset
- Incognito
- Conference
- Callback request
-
User logo f
-
Choose the function you want, and press the "OK" button.
√ The key is set with the chosen function.
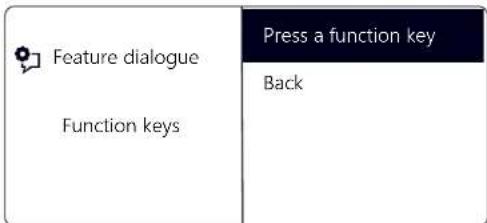
text_image
Feature dialogue Function keys Press a function key Back- You can assign an additional function key or return to the main menu with the arrow button "Back".
This is how you delete the function of a function key
- Select "Main menu" with the arrow buttons, and press the "OK" button.
- Choose "Configuration" and press the "OK" button. √ The Settings menu will appear.
- Choose "Function keys" and press the "OK" button. √ The following will appear:
text_image
Feature dialogue Function keys Press a function key Back- Press the configurable key whose function you want to delete. √ The current function of the key is displayed.
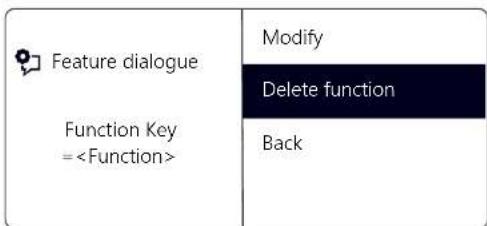
text_image
Feature dialogue Function Key =- Choose "Delete function" and press the "OK" button. √ The function of this key is deleted.
If you press a key with no assigned function, you will hear a brief signal (button signal).
12.5 Lines
The Number of Available Lines
The least number of lines is always two, even if you have only one or no configured Line buttons; i. e. you can recieve at least two incoming calls. To increase the number of lines, you must add Line buttons. You can configure up to a total of nine lines (line keys) for SwyxPhone.
To add a Line button, you must configure a configurable function key as a Line button (see This is how you configure a function key, page 114).

Due to the fact that both SwyxPhone and Swyxlt! access the same user settings, any changes you make on SwyxPhone will always effect the settings in Swyxlt! and vice versa. Above all, you should keep in mind that if you delete lines or Speed Dials, the data will be lost!
Configuration of the Individual Line Buttons
You can define numbers for incoming and outgoing calls for the available lines. This requires that your user account has been assigned at least two numbers (or group numbers).
The option "Incoming calls" shows the telephone number the caller has dialed, when the call comes in on this line. Under the option "Outgoing calls", you can specify the telephone number to be used for making outgoing calls from this line.
Examples:
Incoming call (you are being called):
You have assigned the extension number 100 to Line 1 and the extension number 101 to Line 2. Now, if a subscriber dials the number 101, you will receive the call on Line 2.
Outgoing call (you are calling someone):
You have assigned the extension number 101 to Line 2. If you now call a subscriber using Line 2, extension 101 will be used. The subscriber you have called will see on his display that he is being called by a subscriber with the number 101.
For each configured Line, you can define whether this line should be blocked for specific period of time after an incoming call is received. (see Chapter 12.6, Disabling Lines (Wrap-up Time), page 117)

If an outgoing call is started or if the Line button is pressed during this wrap up time, the line will once again be cleared afterwards for incoming calls.
12.5.1 Configure Line buttons
Every configurable function key can be set with the "Line key" function (see This is how you configure a function key, page 114).
This is how you configure a Line button
- Select "Main menu" with the arrow buttons, and press the "OK" button.
- Choose "Configuration" and press the "OK" button. √ The Settings menu will appear.
- Select "Lines". √ The following will appear:
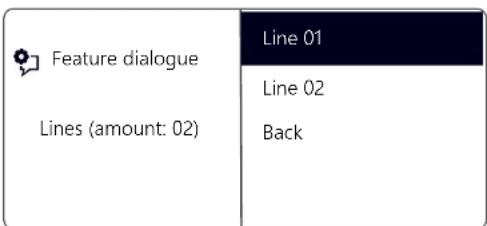
text_image
Feature dialogue Lines (amount: 02) Line 01 Line 02 Back- Select the line you want to configure, and press OK √ The following will appear:
| Feature dialogue Line 01 | Incoming calls |
| Outgoing calls | |
| Wrap-up time =off | |
| Back |
You have the option of entering an extension for outgoing or incoming calls.
- Choose the option you want, and press the "OK" button. √ The following will appear:
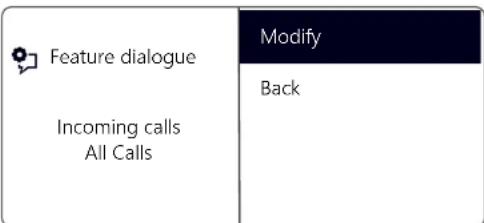
text_image
Feature dialogue Incoming calls All Calls Modify BackIf the system administrator has configured several telephone numbers for you, you can change these numbers.
- Choose "Modify" and press the "OK" button.
| Feature dialogue Incoming calls | All Calls |
| All Extensions | |
| Group Calls Only | |
You can define which of your calls should be received on this line.
- "All Calls"
In this case, all calls will be signaled on this line, regardless of whether these calls are directed to your own extension or to a group, of which you are a member.
- "All Extensions"
Choose this option, if all calls directed to you, regardless of the extension dialed, should be received on this line. This option is only available if you have been assigned several extensions numbers.
- "Group Calls Only"
All calls to groups of which you are a member will be received on this line.
• < Number >
An incoming call will only be received on this line if the caller has specifically dialed this extension. Here you can even select individual group extension numbers.
You have to confirm the telephone number or option with the "OK" button.
12.6 Disabling Lines (Wrap-up Time)
You can specifically block a line for further incoming calls, e.g. in order to have enough time to process a customer inquiry after a call from a customer. Your SwyxPhone is then busy for further incoming calls.
This is how you set the wrap-up time
- Select "Main menu" with the arrow buttons, and press the "OK" button.
- Choose "Configuration" and press the "OK" button.
- Select "Lines".
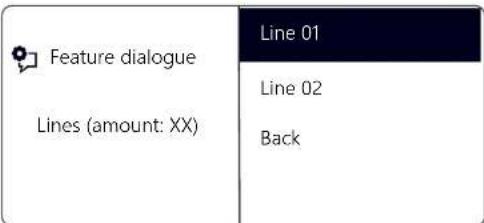
text_image
Feature dialogue Lines (amount: XX) Line 01 Line 02 Back- Select the line for which you want to set the wrap-up time, and press OK.
√ The following will appear:
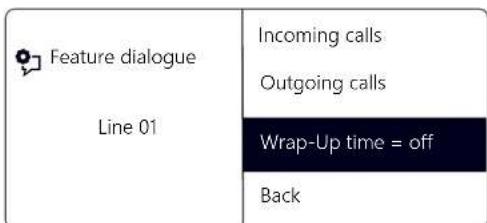
text_image
Feature dialogue Line 01 Incoming calls Outgoing calls Wrap-Up time = off Back- Choose "Wrap-Up time" and press the "OK" button.
√ The following will appear:
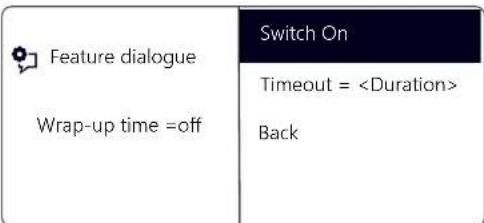
text_image
Feature dialogue Wrap-up time =off Switch On Timeout =- Press OK to switch the wrap-up time on or off.
-
Select "Timeout" to change the wrap-up time.
-
Enter the desired duration in seconds (5-1800s) and press OK.
√ The wrap-up time for the line in question is defined and activated.
12.7 Configuring Speed Dials
Every configurable function key can be set with the "Speed Dial" function; see This is how you configure a function key, page 114.
You can use a Speed Dial for one-click dialing of a number you often call. You only need to press the relevant Speed Dial, and the subscriber whose name is assigned to the Speed Dial will be called at once. Speed Dials can also be utilized for frequently used DTMF commands.

Due to the fact that both SwyxPhone and SwyxIt! access the same user settings, any changes you make on SwyxPhone will always effect the settings in SwyxIt! and vice versa. If you delete Line buttons or Speed Dial buttons, the corresponding data will be removed from your user profile.
This is how you assign a Speed Dial to the number of your choice
- Select "Main Menu" with the arrow buttons, and press the "OK" button.
- Choose "Configuration" and press the "OK" button. √ The Settings menu will appear.
- Choose "Speed Dials".
√ All Speed Dials glow. The following appears on the display:
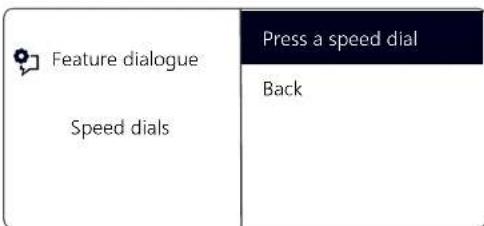
text_image
Feature dialogue Speed dials Press a speed dial BackIf no key glows, you first have to configure a function key as a Speed Dial (see This is how you configure a function key, page 114).
- Press the Speed Dial you want. √ The following will appear:
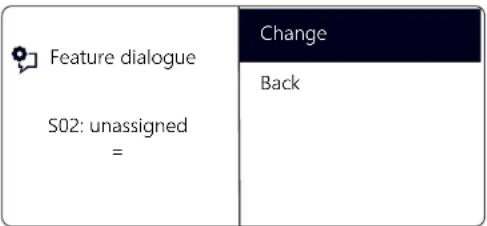
text_image
Feature dialogue S02: unassigned = Change BackThe current function of the key is displayed. If the key is not yet assigned, this message appears.
- Choose "Modify" and press the "OK" button. √ The following will appear:
| Feature dialogue S02: Change | Phone number |
| Dial immediately = on Successive dial = off Intercom = off |

The option "Dial immediately" must be activated and "Successive dial" deactivated to use a Speed Dial.
- Choose "Number" and press the "OK" button.
- You can select a number from the phonebook or enter one manually using the keypad:
| Feature dialogue S02: Phone number | Phonebook |
| Enter manually Back |
- Confirm your entry with "OK".
√ The Speed Dial has been assigned a number. You can configure another function key, or leave the configuration menu.
12.7.1 "Intercom"
Intercom Connection
Intercom connection allows you to directly speak to an internal subscriber, who allows his status to be signaled to you, i.e. without him having to pick up the call. If you press the Speed Dial on which the Intercom connection is activated, the corresponding number will be dialed and an intercom signal is produced for the called subscriber. The telephone or Swyxlt! then immediately activates the line and the speaker. You can begin your intercom connection to this subscriber.
If the called subscriber lifts the handset, you can continue the call as a normal telephone call.

Intercom connection is only possible between the internal subscribers if you are mutually signaled the current status ("Available"/"Speaking").

If the subscriber called is currently on the phone, you cannot begin an intercom connection.
This is how you assign a Speed Dial to the option "Intercom"
- Follow the steps (1) to (5) (see This is how you assign a Speed Dial to the number of your choice, page 118).
| Feature dialogue S04: Change | Phone number |
| Dial immediately = on Successive dial = off Intercom = off |
- Use the arrow buttons to select the option "Intercom".
- Press OK to switch the selected option on or off.
The status of the option changes.
The conditions of the dialling procedure for the Speed Dial have changed. You can configure another function key, or leave the configuration menu.
13 Control elements of SwyxPhone L66
This chapter describes the control elements of SwyxPhone L66. The control elements consist of a display, a handset, a hands-free microphone, a speaker and buttons.
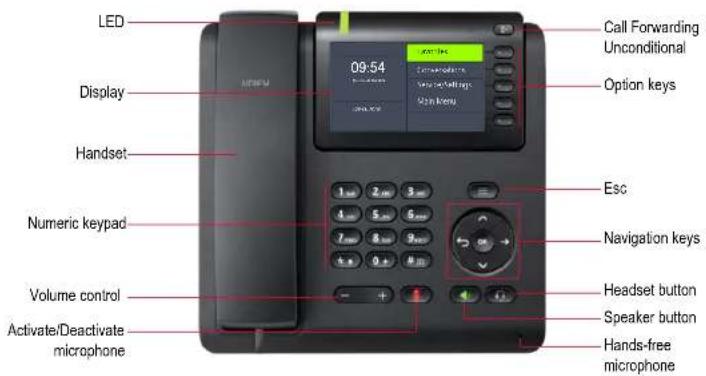
text_image
LED Display Handset Numeric keypad Volume control Activate/Deactivate microphone 09:54 Call Forwarding Unconditional Option keys Esc Navigation keys Headset button Speaker button Hands-free microphone13.1 Buttons
The buttons can be classified in the following groups:
- Defined keys, page 121
■ Preconfigured function keys in the „Favourites“, page 123 - Configurable function keys on the key module, page 124
13.1.1 Defined keys
The following SwyxPhone L66 buttons are preset and cannot be assigned to other functions. These buttons are marked with corresponding symbols.
Numeric keypad
The buttons of the numeric keypad (number keys) are used for entering numbers, letters and symbols.
In the idle state, when no calls are being made and no menus are open, you can input the call number directly. If you have opened a menu, you can call up a menu item directly with the numeric button.
You can also use the numeric keypad to enter letters. You can enter text at the relevant points (e.g. the name for a new phonebook entry), or switch directly to an entry in a list. Enter the space with "0". The '*' key is used to switch between upper and lower case letters. When a letter is entered, a short beep will be produced after one second and you can then enter the next letter.
Example:
To speed up a search in a phonebook with many entries, you can enter the first letter of the name, e.g. for an "F" press the "3" three times, for an "S" press the "7" four times.
Menu navigation
SwyxPhone L66
SwyxPhone L66 is controlled with five navigation buttons.
Control element Function when button is pressed

Arrow button "Down"
In lists and menus:
- Scroll down

Arrow button "Up"
In lists and menus:
- Scroll up

Arrow button "Forward"
- Menu level lower (only if corresponding menu option is marked with .)


Arrow button "Back"
- cancel action
- delete a character
- menu level higher

"OK" button
- menu level lower
- Confirm entry
- Activate option
Volume button +/-
You can use the +/- buttons to adjust the volume of the speaker and the handset, depending on which one is currently active.

The volume setting will stay at this level for the next call.
You can also use these buttons in the configuration menu to change the ringing volume (see chapter 16.2.1, Ring tones, page 162).
Microphone
You can use this button to switch off the handset microphone or handsfree microphone for a while, so that the call partner cannot listen e.g. to an inquiry in the room.

Speaker
When the telephone is in an active state (a conversation is in progress), the Speaker button is used to switch the speaker on or off. This allows other people present in the room to listen to the conversation. You can then turn the speaker off again and continue the conversation on the handset.

In an idles state (if no call is currently being made), pressing the Speaker button has the same effect as picking up the handset; you can immediately dial a number and place your call using the handsfree telephone. The LED of the Speaker button will glow as long as the handsfree telephone is activated. If the handset is on hook, end the call by pressing the Speaker button.
Headset
The Headset button allows you to switch between using the headset or the handset.

For further information please refer to chapter 15.7, Using a headset, page 156.
Option keys
The five option keys are right beside the display. Each option key corresponds to one display line. You can invoke the currently displayed option or function.

Call Forwarding Unconditional
With the "Unconditional Forwarding" button you can directly deactivate the unconditional call forwarding, preset in the main menu.

For further information please refer to chapter 14.15.1, Define Call Forwarding Unconditional, page 137.
Ringing off
The "Ringing off" button mutes the acoustic call signalling (ringing) or sets a short signal tone instead. Hold down the key till the required option (Ringing off, signal tone) is activated and the corresponding symbol appears in the display. To switch the call signal back on, hold down the key

Esc key
Press the Esc key to leave "Favourites", "Conversations" and "Server/Settings" menus, dialling or active call screen for the main screen.

Furthermore pressing the Esc key wakes up the phone from screen saver mode.

If you dial with the receiver on hook, pressing the Esc key is the only means to cancel the dialling and return to the main screen.
13.1.2 Preconfigured function keys in the „Favourites“
The "Favourites" menu comprises the functions, which you configured in Swyxlt! for your SwyxPhone L66:
| Favourites (1/2) | Page 1 |
| Line 1 | |
| Line 2 | |
| Jones,Tom | |
| Do Not Disturb |
For more information on how to configure function keys for "Favourites", please see Configuration of SwyxPhone in SwyxIt!, page 178.
Pressing the upper option key ▼or the arrow key "Down"

allows you to scroll through the pages and display all the pre-d function keys. There are four pages with four function keys page are available.

All function keys in "Favourites" menu are configured as Speed Dials by default. The speed dial buttons are automatically assigned according to the data from your SwyxWare user profile. If there is an unassigned Speed Dial in your SwyxIt!, you can configure it via SwyxPhone as a new Speed Dial and assign a phone number to it.
You can also configure a function key as a Line button (see also This is how you configure a function key, page 170) or assign a standard function to it. For a list of all functions available please refer to Configure function keys, page 169.
To open "Favourites" during an active call, press the arrow button
"Back"

finally the option key "Favourites".
13.1.3 Configurable function keys on the key module
SwyxPhone Key Module 66 has 12 freely configurable function keys with LEDs. These keys can be assigned to particular functions, e.g. "Call Swap" or "Redial", or used as Line buttons or Speed Dials.
For further information please refer to chapter 16.4, Configure function keys, page 169.
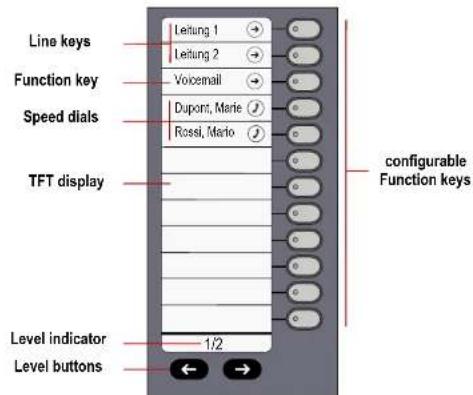
text_image
Line keys Function key Speed dials TFT display level indicator level buttons Leitung 1 Leitung 2 Voicemail Dupont, Marie Rossi, Mario configurable Function keys 1/2Fig. 13-1: SwyxPhone Key Module 66: Sample configuration
There are two levels available for the key module. The level buttons switch between the levels. The assignment of a configurable function key switches correspondingly. That means you can assign two functions to one configurable function key.
LED status of the function keys in the "Favorites" menu and on the Key Module.
| State | Line key | Speed dial | Standard function |
 LED glows green LED glows green | The line is active | Subscriber is logged on and available | This function is activated |
| Incoming call - - | |||
 LED blinks green LED blinks green | |||
 LED blinks orange LED blinks orange | Connection is on hold | Subscriber is away - | |
 LED glows red LED glows red | Line disabled for wrap up time | Subscriber is speaking | - |
 LED blinks red LED blinks red | - Signalled call - | ||
13.2 Display and menu navigation
The colour display of SwyxPhone L66 supports you intuitively as you use the telephone. In the idle state, when no calls are being made and no menus are open, the main screen with the following information appears in the display:
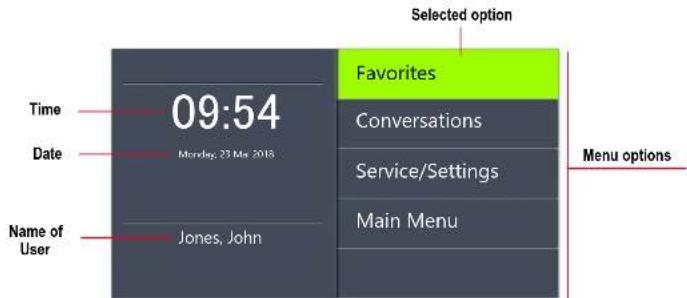
bar_stacked
| Category | Time (hours) | Date (Monday, 23 Mar 2018) | Name of User | | :--- | :--- | :--- | :--- | | Selected option | 09:54 | | Jones, John | | Favorites | 0 | | Conversations | | Menu options | | | Service/Settings | | Menu options | | | Main Menu |When you open the main menu, the title of each menu list is displayed, with the first five available menu items in each case:
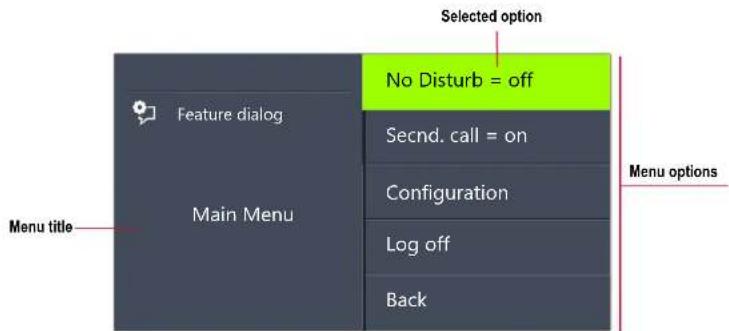
text_image
Selected option No Disturb = off Feature dialog Main Menu Secnd. call = on Configuration Log off Back Menu options Menu titleThe green bar marks the selected menu option. You can choose others menu items with the arrow buttons. The menu item highlighted with the cursor can be opened/activated with the "OK" button. You can also call
the required menu item directly, by pressing the corresponding option key, see Option keys, page 122.
Press the arrow button "Back" to up a level in the menu structure.
Icons on display
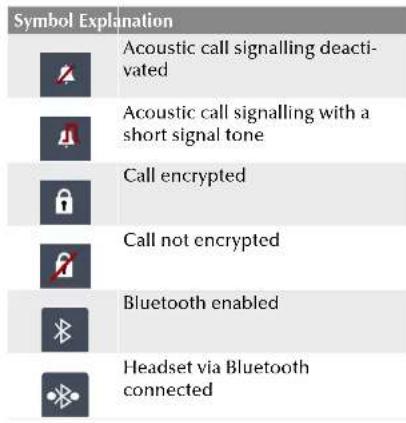
text_image
Symbol Explanation Acoustic call signalling deactivated Acoustic call signalling with a short signal tone Call encrypted Call not encrypted Bluetooth enabled Headset via Bluetooth connected
Whether encryption symbols are displayed, depends on the encryption settings in your user profile. For further information please refer to the Swyxlt! documentation.
14 Telephoning with SwyxPhone L66
This chapter describes the following basic telephony functions:
How do I call a subscriber?, page 126
How do I pick up a call?, page 129
■ How do I pick up a call?, page 130
How do I end a call?, page 131
How do I start an inquiry call?, page 132
How do I switch between lines (Call Swap)?, page 133
- How do I connect two subscribers to one another?, page 134
■ How do I transfer a call without Inquiry?, page 135
How do I forward a call?, page 135
How do I forward a call?, page 136
How do I use the Phonebook?, page 141
The Secondary Call, page 136
■ Speaker and Handsfree Telephone, page 141
14.1 How do I call a subscriber?
SwyxPhone L66 is in an inactive state. You will see your user name and the current time and date on the main display:
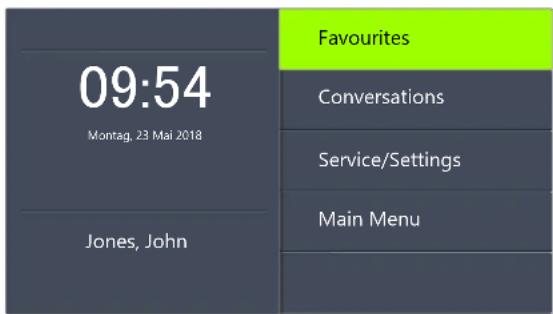
text_image
09:54 Montag, 23 Mai 2018 Jones, John Favourites Conversations Service/Settings Main MenuIf there were calls which you did not pick up, or you received call-back requests or voicemails, this will also be shown on the display:
| 09:54 Montag, 23 Mai 2018 Jones, John | Favourites |
| 3 Conversations | |
| Service/Settings | |
| New Calls | |
| Main menu |

If you miss incoming calls, the LED over the display glows in red. The number of missed calls appears next to the "Conversations" menu item.
This is how you call a subscriber
- Pick up the handset or press the Speaker button. √ You will hear the idle tone. The following will appear:
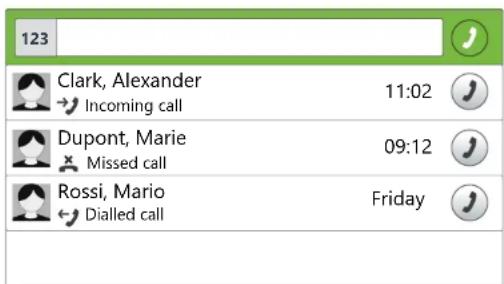
text_image
123 Clark, Alexander Incoming call 11:02 Dupont, Marie Missed call 09:12 Rossi, Mario Dialled call Friday- Use the numeric keypad to dial the number you want.
You can correct your entry using the arrow button "Back"

- Press the "OK" button.
or
Wait for six seconds.
The participant is called.
With the handset on hook and the speaker deactivated:
- Use the numeric keypad to dial the number you want.
- Pick up the handset or press the Speaker button.
- Press the "OK" button.
or
Wait for six seconds.
√ The participant is called.

The default delay time (6 seconds) for the automatic block dialling can be adjusted in "Service/Settings | User | Configuration | Outgoing calls | Autodial delay (s)".
If the connection to the destination subscriber has not yet been made, "ringing" will appear in the display. The number or, if available, the name of the destination subscriber and the line number will appear in the next line:

text_image
ringingIf all of the destination subscriber's lines are busy, the word "busy" will appear:
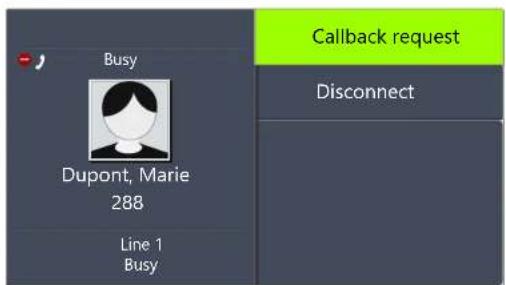
text_image
Busy Dupont, Marie 288 Line 1 Busy Callback request DisconnectIf the connection is made, the call duration will appear in the first line of the display. The line number and the number or name of the destination subscriber will appear in the next displaylines:
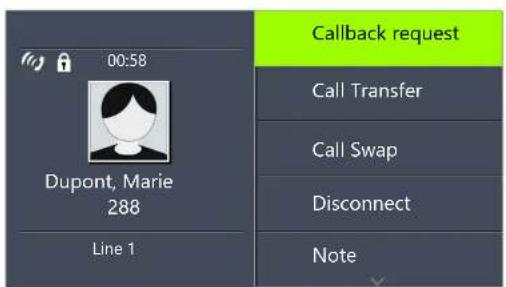
text_image
00:58 Dupont, Marie 288 Line 1 Callback request Call Transfer Call Swap Disconnect Note14.2 Other Options for Dialing a Number
This is how you call a subscriber from "Favourites"
- Press the upper "Favourites" option key.
√ The function key list appears:
| Favourites (1/4) | Page 1 |
| Line 1 | |
| Line 2 | |
| Jones,Tom | |
| Lee, Max |
- Press the upper option key to scroll through the pages. √ The required subscriber is displayed.
- Press the option key next to the line of the desired subscriber. √ The subscriber is then immediately called. For further information please refer to chapter 13.1.2, Preconfigured function keys in the "Favourites" menu., page 123.
This is how you call a subscriber from the "Conversations" list
In the list "Conversations" the active, dialled, recieved and missed calls are shown.
1. Select "Conversations" with the arrow buttons, and press the "OK" button.
√ The "Conversations" list appears:
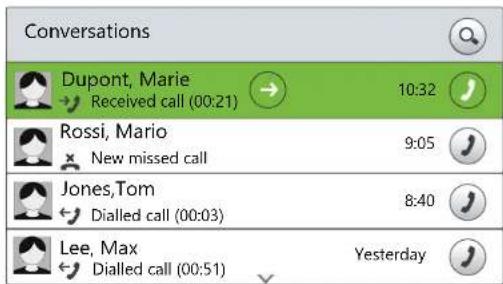
text_image
Conversations Dupont, Marie Received call (00:21) 10:32 Rossi, Mario New missed call 9:05 Jones,Tom Dialled call (00:03) 8:40 Lee, Max Dialled call (00:51) Yesterday- Choose the appropriate entry and press the "OK" button. or
- Press the option key in the line of the corresponding status. √ The subscriber is then immediately called.
"Redial" function key
You can configure the "Redial" function key on the connected Key Module. For further information please refer to chapter 16.4, Configure function keys, page 169.
The "Redial" button can be used in two ways.
- Abbreviated Dialling: Lift the handset and press the "Redial" function key. The number of the last call will be dialled immediately.
- The Redial List: Leave the handset on the hook and press the "Redial" function key. A list of the calls you have most recently made will appear. Select the entry you want with the arrow buttons and confirm your selection by pressing OK twice, or by lifting the handset. The subscriber is then immediately called.
14.3 Available Options during a Call
During a phone call you can select the following menu items with the arrow buttons, and activate the option of your choice with the "OK" button:
- Callback request
This function is only available to you during a call to an internal subscriber (see Chapter 15.5, Callback request, page 149).
Call Transfer
You can transfer a caller directly here. If you have two connections (one active connection and one on hold), these are directly connected to each other. If you only have one call on one line, you must input a further number or select one from the phonebook (see Chapter 14.10, How do I connect two subscribers to one another?, page 134).
Call Swap
If you select this menu item, the active line is put on "Hold", your conversation partner will hear music on hold and SwyxPhone will switch to the next available line (see Chapter 14.9, How do I switch between lines (Call Swap)?, page 133).
- Disconnect
Disconnects the active connection.
Note
Here you can enter a number and the corresponding name in the Personal Phonebook during a telephone call (see Chapter 15.4, Note, page 148).
Secondary call
You can either allow or disable a second call during a call (see Chapter 14.14, The Secondary Call, page 136).
Conference
If you have one active line and at least one other line on hold, you can start a conference (see Chapter 15.6, Conference, page 153).
14.4 How do I pick up a call?
If you receive a call, a call is forwarded to you or a call is received for a group of which you are a member,
- the number or the name of the caller will appear on the display,
- a ringing sound will be produced.
- optical call signaling (LED above the display) will blink.
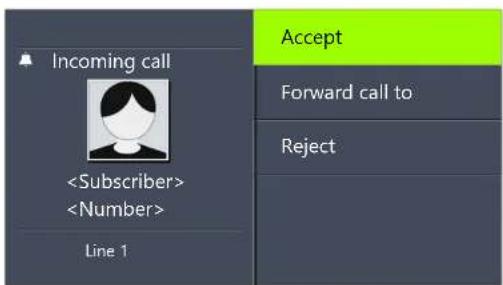
text_image
Incoming callA call to a group (Group Call) is shown as follows:
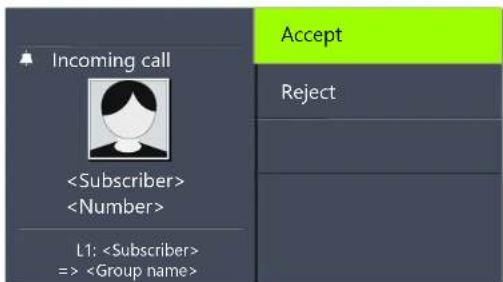
text_image
Incoming callIf you are a member of a Hunt Group with sequential, rotary or random distribution, the call will first be displayed in Call Signalling, and only put through if no other member has picked up the call. In this case you see the call signalling for the Group Call:
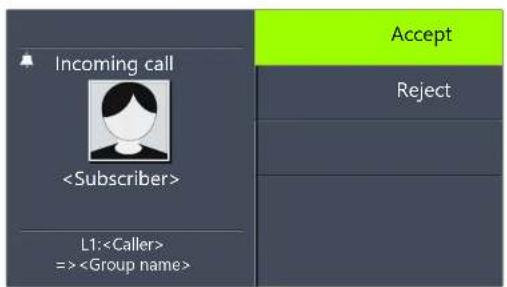
flowchart
graph TD
    A["Incoming call"] --> B["<Subscriber>"]
    B --> C["L1: <Caller> => <Group name>"]
    D["Accept"] --> E["Reject"]
A call which has been forwarded from another subscriber to you is shown as follows in the display:
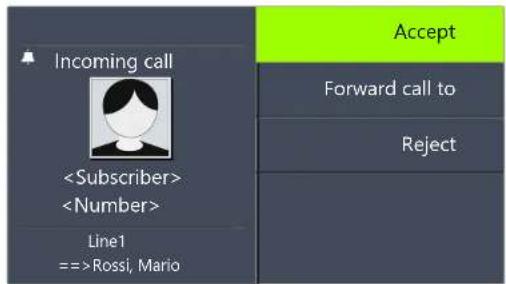
text_image
Incoming call
If the number of the caller is known, i.e. if a name in the Global or Personal Phonebook or on a Speed Dial has been assigned to this number, the name will appear in the display. If not, only the number will be displayed.

If "Anonymous" appears in the display, the caller's number was not transmitted, e.g. because the caller has suppressed his number.
This is how you accept a telephone call
- Simply lift the handset.
√ The handset is activated. You can now speak with the caller.
or
- Press the Speaker button.
√ The speaker and hands-free microphone will be activated, so that other people present in the room can also follow the conversation.
or
- Press the Headset button.
√ The headset is activated. You can now speak with the caller.
14.5 How do I pick up a call?
In the case of a signaled call, you will only be shown that another user or a group has received a call. Signaling is set up by the system administrator. You can pick up a signaled call.
When a call is signaled to you,
- the option "Pick up call" will appear on the display.
- the Speed Dial assigned to the called number, if configured, will blink,
- your display will show who the call was originally for:
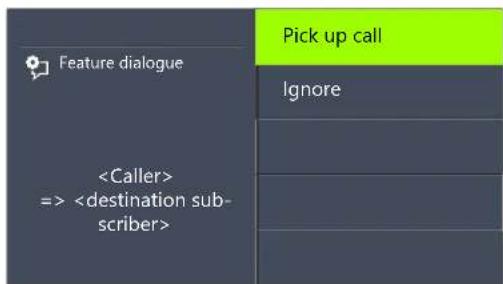
flowchart
graph TD
    A["Feature dialogue"] --> B["<Caller>>"]
    B --> C["<destination subscriber>"]
    D["Pick up call"] --> E["Ignore"]
If the call is not picked up by the destination subscriber and if you have activated call signaling in the Settings menu, you will hear an additional brief acoustic signal after ten seconds.
This is how you pick up a signaled call
- Use the arrow buttons to select "Pick up call".
- Press the "OK" button.
√ The call is picked up. You can now speak with the caller.

Please remember when picking up a call via the menu that you must first confirm the option "Pick up Call" and only then lift the handset. If you lift the handset first, the call signaling will be ignored and a free line will be activated.

If several subscribers, whose calls are signaled to you, receive a call at the same time, only one name will be shown in the display.
This is how you pick up a phone call if you are currently involved in a different phone call
- Press the blinking Line button.
√ The active connection is put on hold. The subscriber hears music on hold, and the incoming call is picked up
If you are already on a call, Call Signaling will not be shown in the display, only by a blinking Speed Dial. In order to pick up the call in this case, you need to have configured a Speed Dial. Also, you cannot see who the caller is.
14.6 How do I end a call?
You have been speaking to a caller and now you would like to end the call.
This is how you end a telephone call
- Simply place the handset on the hook.
or
- Select "Disconnect" with the arrow buttons, and press the "OK" button.
or
- Activate the handsfree mode, i.e. if the speaker is activated and handset is on the hook, the Speaker button.
or
- Activate the handsfree mode, i.e. if a headset is connected and the handset is on the hook, the Headset button.
√ The call is ended.

If you end a call and you have a second call on hold, a single telephone ring will be produced after five seconds have passed. Pick up the handset once again in order to directly connect to the caller on hold.

If you have the option „Transfer on Hookon“ activated, then when you go on hook, a second call that you have initiated will be connected to the first call, which is on hold.(see also Chapter 14.11, Transfer When Placing Handset on Hook, page 134).
This is how you end one of several calls
You can only end the active connection.
- Select "Disconnect" with the arrow buttons, and press the "OK" button.
√ The call is ended.
Then you can select one of the remaining inactive lines.
- Confirm the selection with the "OK" button.
√ You can now speak with the subscriber.

If you have created the connection yourself, putting the handset on hook will result in the transfer of this call to the call on hold. If you have several lines on hold, the active line will also switch to the state "On hold".
14.7 How do I telephone with a (Bluetooth) headset?
SwyxPhone L66 has a headset connection and a preconfigured function key "Headset", so that you can use a headset to telephone. To use the headset, connect it to the telephone (see Chapter 15.7, Using a headset, page 156).
A Bluetooth headset can also be directly connected to SwyxPhone L66 via the Bluetooth interface. For further information please refer to chapter 15.7.2, Connecting a Bluetooth Headset, page 157.
This is how you pick up a call with the headset
A (Bluetooth) headset is connected. You are being called.
- When you receive a call, press the "Headset" button

the "Hook off" button on your Bluetooth headset) in order to pick up the call.
√ You can telephone using the headset.
This is how you end a call with the headset
- Press the "Headset" button ("Hook on" button on your Bluetooth headset) to end the call.
√ The connection is terminated.
This is how you switch between the Handset and the Headset
If you have begun a call using the headset and you would like to use the handset for the rest of the call.
-
Take the handset off the hook. √ The handset is active.
-
If you would like to switch to the headset, press the "Headset" function key and put the handset back on the hook.
√ You can then continue your call on the headset.

If you initiated the call, you can also press the "Hook off" button on your headset to switch the voice output to it.
For further information please refer to chapter 15.7, Using a headset, page 156.

Invoking of optional functions, which the headset manufacturer may eventually support (e.g. redial), switches the voice output to the speaker. To keep the voice output over the Bluetooth headset, you must set in your SwyxIt! the audio mode "Headset" as "Default Audio Mode". For further information, please refer to the SwyxIt! documentation.
14.8 How do I start an inquiry call?
You are having a phone conversation and you would like to call another subscriber (Inquiry Call). Then you would like to alternately speak to both subscribers (Call Swap).
Example:
- You are speaking to a customer (subscriberA) and you would like to ask someone in the warehouse (subscriberB), whether a certain article is on stock.
- You begin a second call at the same time with SubscriberB. Then you can alternately speak with Subscriber A and Subscriber B (Call Swap).
- While you are speaking with one subscriber, the other subscriber will hear music on hold.
- When you end the call with one of the subscribers (using the menu item "Disconnect"), the corresponding line becomes free again. You can then switch to the line on hold.

If you were the initiator of the call on the active line and you place the handset on hook, the two subscribers will be connected to each other.
This is how you call an additional subscriber
- Choose during an active call the option "Swap line" and press the "OK" button.
√ The first call is put on hold. Your first call partner will hear music on hold.
√ You will hear the idle tone. The following will appear:
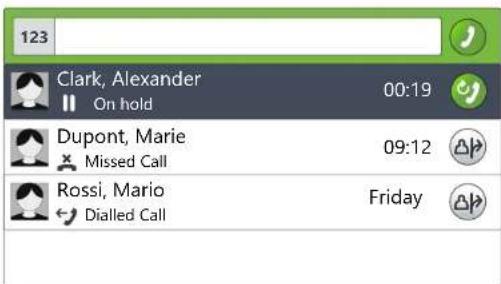
text_image
123 Clark, Alexander On hold 00:19 Dupont, Marie Missed Call 09:12 Rossi, Mario Dialled Call Friday- Enter the phone number (or choose with the arrow keys the required subscriber) and press the "OK" button.
√ The second connection is set up.
14.9 How do I switch between lines (Call Swap)?
You are having conversations with several subscribers at the same time. The active connection is the connection to the person you are currently talking to. All other subscribers, who are listening to music on hold while they wait, are on connections on hold. The switch between between the active line and the line on hold is called "Call Swap".
Example:
Several calls are received at the operator desk and you would like to forward these calls to various colleagues, who, however, cannot be reached immediately. You can put the caller on hold. You can switch to these lines on hold at any time in order to inform the callers of the progress of your efforts to connect them to the correct colleagues.

You can have as many calls simultaneously as you have lines. This means, however, that you have several calls on hold and one active line at the most.
This is how to swap between lines via "Conversations"
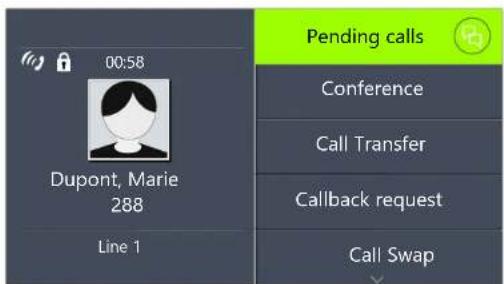
text_image
00:58 Dupont, Marie 288 Line 1 Pending calls Conference Call Transfer Callback request Call Swap- Press the "Pending calls" option key. √ The following will appear:
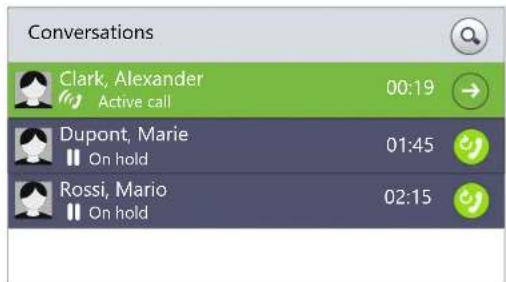
text_image
Conversations Clark, Alexander Active call 00:19 Dupont, Marie On hold 01:45 Rossi, Mario On hold 02:15- Select the connection on hold with the arrow keys, and press the "OK" button. √ The active line is put on hold, and the other line becomes active.
This is how to swap between lines with the "Call Swap" function
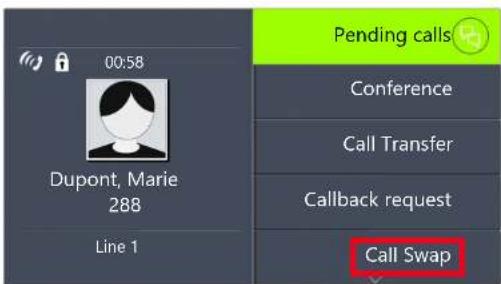
text_image
00:58 Dupont, Marie 288 Line 1 Pending calls Conference Call Transfer Callback request Call Swap- Use the arrow buttons to select "Call Swap"
- Press the "OK" button.
√ The active line is put on hold, and the other line becomes active.

If you use the "Call Swap" function often, you can also assign this function to one of the configurable buttons on the kkey module. For further information please refer to chapter 16.4, Configure function keys, page 169.
This is how you call swap using the configured "Call Swap" function key
- Press the "Call Swap" function key.
You have now activated the next line.
By repeatedly pressing the "Call Swap" button you will switch between the active lines.
14.10 How do I connect two subscribers to one another?
You are connected with two subscribers simultaneously. While you are talking to one of the subscribers, the other is on hold. This subscriber will hear music on hold. You can now connect these two subscribers to each other.
Example:
You are talking to SubscriberA on Line1. Line1 has a connection on hold with SubscriberB. You connect SubscriberA with SubscriberB. Line2 has a connection on hold with SubscriberB. You connect SubscriberA with SubscriberB.
This is how you connect two subscribers
- Select "Call Transfer" with the arrow buttons, and press the "OK" button.
√ The line on hold appears on the display.
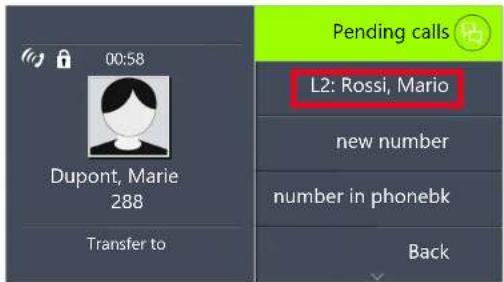
text_image
00:58 Dupont, Marie 288 Transfer to Pending calls L2: Rossi, Mario new number number in phonebk Back- Choose the line on hold and press the "OK" button.
√ The subscribers are connected to one another. Your lines will become free (inactive).

When you directly connect subscribers, you may still charged, even though you are no longer involved in their telephone call. These will only occur on your side if you set up one or both of the connections. If, for example, SubscriberA called you and you called SubscriberB to inquire about something, you will only be charged for the connection to SubscriberB. No costs will be charged if you are called by both SubscriberA and SubscriberB. However, if you have called both subscribers, you will be charged for both connections.
14.11 Transfer When Placing Handset on Hook
You can define whether the subscribers on the active line and the line on hold should be connected when you go on hook. The item "Transfer on Hookon" is available in the "Configuration" menu for this.
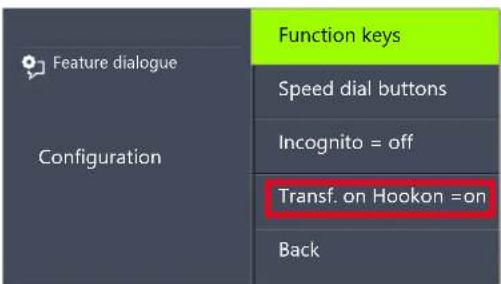
text_image
Feature dialogue Configuration Function keys Speed dial buttons Incognito = off Transf. on Hookon =on Back- If this option is activated, you can connect the two callers to one another by simply placing the handset on hook. However, this only works if you set up the active call yourself. If you did not initiate the active call (i.e. you received the call), the connection will be terminated by hook on. The second call will remain on hold.
Example:
Subscriber A is called by C. Then subscriber A begins a second call on another line to subscriber B (e.g. Inquiry Call). If A goes on hook, subscribers B and C are then connected to one another.
- If the option "Transfer on Hookon" is deactivated, the active call will be ended and the other one will be kept on hold.
14.12 How do I transfer a call without Inquiry?
Your SwyxPhone can be used to accept incoming calls and then to transfer these calls to another subscriber, without waiting for the new subscriber to answer. You can connect two subscribers even though there is not yet an active connection to one of the subscribers.
This is how you transfer a call without inquiry
You are having a telephone conversation with subscriber A.
- Use the arrow buttons to select the "Call Swap" option.
-
Now select the number of the subscriber to whom you would like to transfer the call (Subscriber B).
-
Use the arrow buttons to select "Call transfer".
- Press the "OK" button.
- Use the arrow buttons to select the subscriber (Subscriber A) whom you want to connect to the other subscriber.
- Press the "OK" button.
Your caller (Subscriber A) will hear ringing, and "Call Transfer" appears on your display.
The line on which you initiated the second call will become free and the first line will change its status from "Hold" to "Transferring". Your previous caller (Subscriber A) hears the phone ring.
- The person called (Subscriber B) sees the transferred call on his display:
==>
The call can be picked up by Subscriber B.
- To pick up the call again, activate the corresponding Line button.

In case the caller to whom the call should be transferred is not available, please remember that the call may be forwarded with some delay (after more than 20 seconds). If the call is forwarded to Voicemail, the call transfer will automatically be interrupted, the caller is once again put on "Hold" and will hear music on hold.
14.13 How do I forward a call?
If you are receiving a call you can transfer this call while it is still ringing to another subscriber or to your Voicemail.
This is how you transfer a call without accepting
You receive a call, it rings.
- Use the arrow buttons to select "Forward call to" and press the "OK" button.
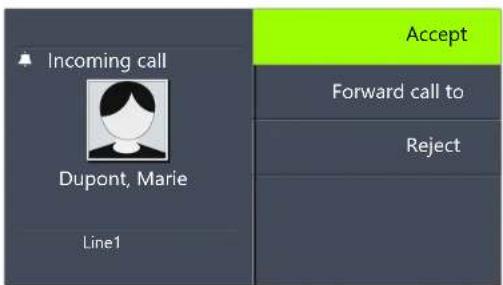
text_image
Incoming call Dupont, Marie Line1 Accept Forward call to Reject-
Select the forwarding destination with the arrow buttons:
-
Your Voicemail (This option is only available if the Voicemail functions are configured),
- the number that you have defined as the destination for Call Forwarding Unconditional,
• a number in the phonebook,
• any number.
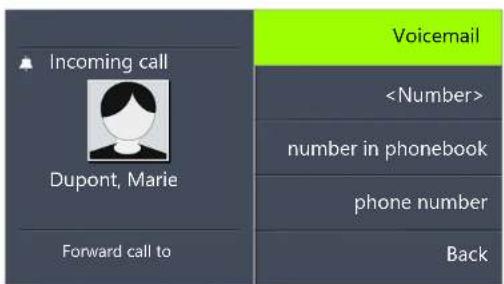
text_image
Incoming call Dupont, Marie Forward call to Voicemail- Press the "OK" button.
√ The call is then immediately transferred.
14.14 The Secondary Call
You can use the "Secondary Call" function to define whether you are available for an additional subscriber. You can set this option in the main menu or during a call.
This is how you switch the Secondary Call function on / off
- Select "Main menu" with the arrow buttons, and press the "OK" button.
- Scroll with the arrow button "Down" to the end of the list.
√ You will see in the display the currently valid Secondary call setting: "on" or "off":
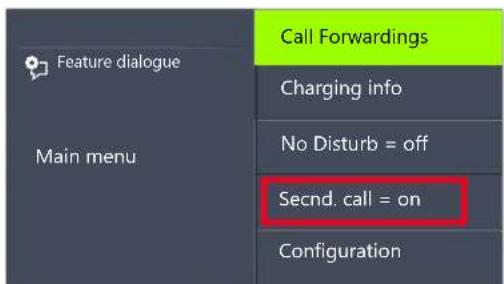
text_image
Feature dialogue Main menu Call Forwardings Charging info No Disturb = off Secnd. call = on Configuration- Select "Secondary Call" and press the "OK" button to activate or deactivate Secondary Call.
14.15 How do I forward a call?
You can forward incoming calls
■ to another telephone number (internal or external) or
■ to your Standard Voicemail.
There are several different methods for forwarding incoming calls:
- Call Forwarding Unconditional: The call is then immediately forwarded ("Do not disturb").
- Call Forwarding Busy: You line is busy, which means that you are currently telephoning and you have not allowed a secondary call or you are telephoning on all configured lines.
- Call Forwarding No Reply: The telephone rings several times at your desk but you do not pick up the call.
The type of redirection to be applied to all of your incoming calls is defined in the "Forwarding" shortcut menu:
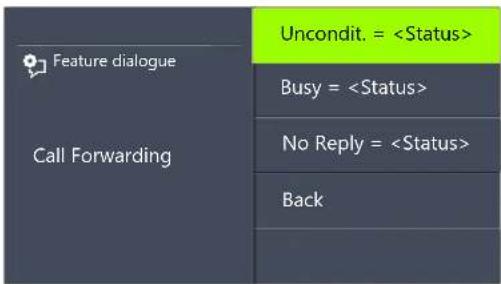
text_image
Feature dialogue Call Forwarding Uncondit. =14.15.1 Define Call Forwarding Unconditional
You can enable Call Forwarding Unconditional if you do not wish to receive any calls from this time on. All incoming calls are forwarded immediately to the specified destination.
There are different options for the forwarding of the call:
- no call forwarding,
Voicemail, ,
This is how you define "Call Forwarding Unconditional"
- Select "Main menu" with the arrow buttons, and press the "OK" button.
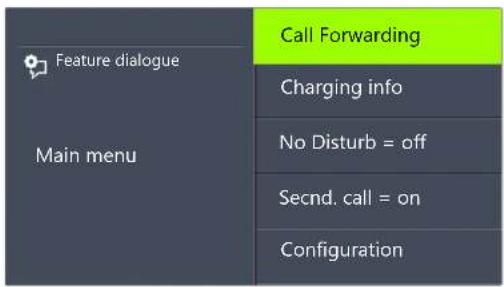
text_image
Feature dialogue Main menu Call Forwarding Charging info No Disturb = off Secnd. call = on Configuration- Select "Call forwarding" and press the "OK" button: √ The following will appear:
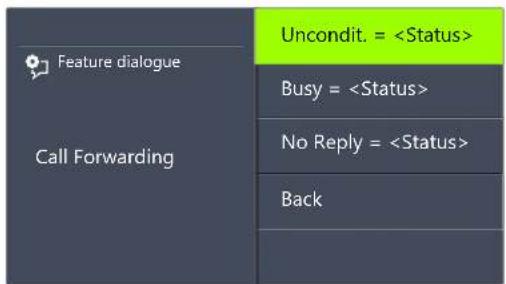
text_image
Feature dialogue Call Forwarding Uncondit. =- Choose "Unconditional" and press the "OK" button. √ The following will appear:
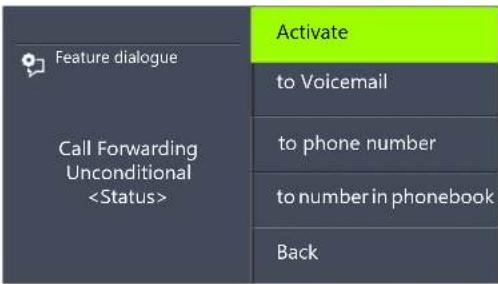
text_image
Feature dialogue Call Forwarding Unconditional- Select "Activate" and press the "OK" button.
√ Incoming calls will be forwarded immediately to the specified destination. In this case, calls will be forwarded the same way as in the last activation of (Call) Forwarding Unconditional or according to the default setting.
To forward the call to a different destination, use the arrow keys to select the required menu item (e.g. "Voicemail" or "Phone number") and set the call destination or enter a phone number.
-
Press the "OK" button.
-
Press die Arrow button "Back" multiple times to leave the settings menu.
√ The symbol for activated unconditional call forwarding appears in the display:
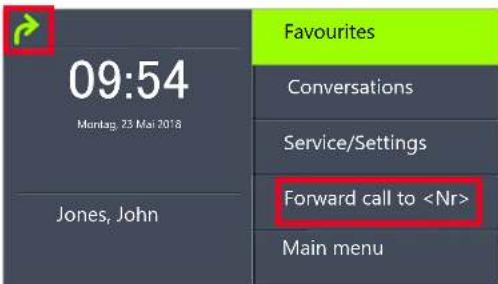
text_image
09:54 Monlag, 23 Mai 2018 Jones, John Favourites Conversations Service/Settings Forward call to
Your Voicemail can be configured using SwyxIt!. For further information, please refer to the SwyxIt! documentation. If Remote Inquiry has been configured for you, you can also change your Voicemail announcement and the destination of your (Call) Forwarding Unconditional from the menu of Remote Inquiry (see Chapter 15.2, Remote Inquiry, page 144).
This is how you deactivate "Call Forwarding Unconditional"
Call Forwarding Unconditional is activated, the display shows the icon.


-
Press the "Unconditional Forwarding" key.
-
Press the "OK" button.
√ Call Forwarding Unconditional is deactivated.
14.15.2 Define Call Forwarding Busy
This is where you specify how incoming calls are redirected if all your lines are busy. If a secondary call is disabled, further incoming calls during a telephone conversation will be handled as for busy lines.
This is how you define "Call Forwarding Busy"
- Select "Main menu" with the arrow buttons, and press the "OK" button.
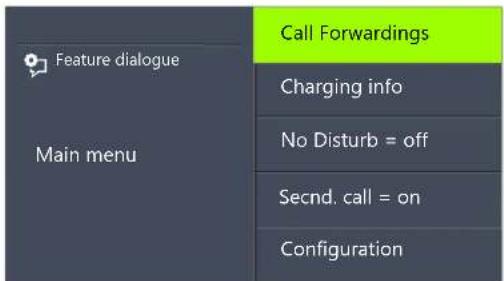
text_image
Feature dialogue Main menu Call Forwardings Charging info No Disturb = off Secnd. call = on Configuration- Select "Call forwarding" and press the "OK" button:
√ The following will appear:
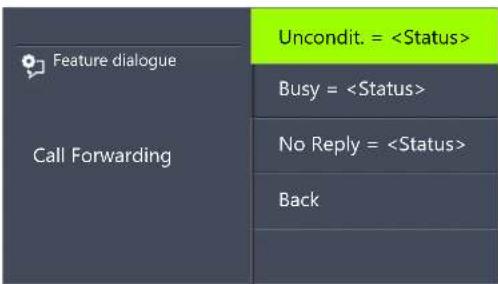
text_image
Feature dialogue Call Forwarding Uncondit. =- Choose "If busy" and press the "OK" button. √ The following will appear:
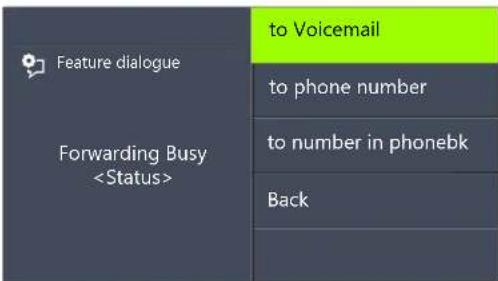
text_image
Feature dialogue Forwarding Busy- Choose the appropriate menu item and press the "OK" button.
- Specify the destination, or enter a number, and press the "OK" button.
Incoming calls will be forwarded to the specified destination, if you are currently telephoning and the option "Secondary Call" is deactivated or all lines are busy.

Your Voicemail can be configured using SwyxIt!. For further information, please refer to the SwyxIt! documentation. If Remote Inquiry has been configured for you, you can also change your Voicemail announcement and the destination of your (Call) Forwarding Unconditional from the menu of Remote Inquiry (see Chapter 15.2, Remote Inquiry, page 144).
14.15.3 Define Call Forwarding No Reply
If Forwarding No Reply is activated, incoming calls are signaled. If the call is not picked up within the defined time limit, it will then be forwarded to another number or to your Voicemail.
This is how you define Call Forwarding No Reply
- Select "Main menu" with the arrow buttons, and press the "OK" button.
√ The following will appear:
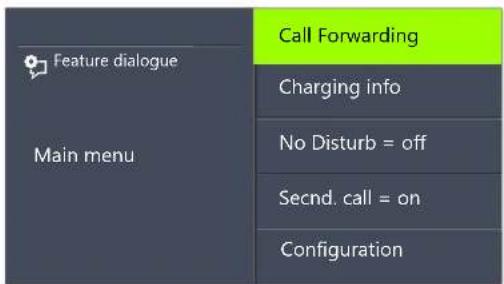
text_image
Feature dialogue Main menu Call Forwarding Charging info No Disturb = off Secnd. call = on Configuration- Select "Call forwarding" and press the "OK" button.
√ The following will appear:
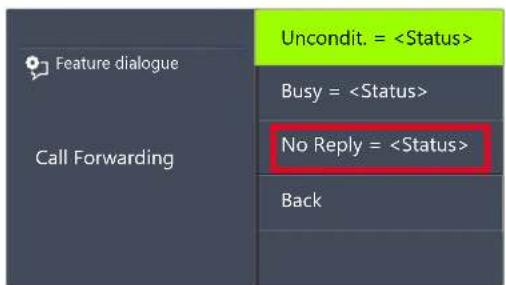
text_image
Feature dialogue Call Forwarding Uncondit. =- Choose "No Reply" and press the "OK" button.
√ The following will appear:
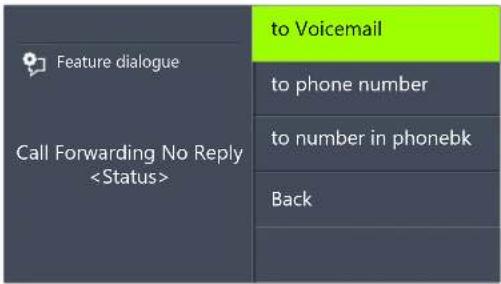
text_image
Feature dialogue Call Forwarding No Reply-
Choose the appropriate destination, and confirm with the "OK" button.
-
Specify the destination, or enter a number, and press the "OK" button.
√ Then the time delay will appear on the display:
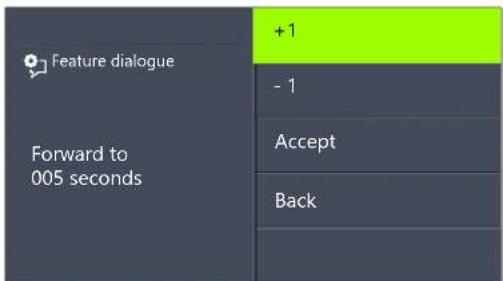
text_image
Feature dialogue Forward to 005 seconds +1 - 1 Accept BackHere you can use the arrow buttons to set the time delay (between 5 and 180 seconds) after which the incoming call should be forwarded.

By default the step range is set to 1 second. By pressing the corresponding numeric key, you can adjust the step range. To set the value to +/-10, press the "0" key.
- Use the arrow buttons to select the value of the delay period.
- Press the "OK" button repeatedly, till the expected number is displayed.
- Select the menu item "Accept".
- Press the "OK" button. √ Forwarding No Reply is activated.
For further information on the various configuration options see Chapter 16.1.1, Call Forwarding, page 160.

Your Voicemail can be configured using SwyxIt!. For further information, please refer to the SwyxIt! documentation. If Remote Inquiry has been configured for you, you can also change your Voicemail announcement and the destination of your Call Forwarding Unconditional from the menu of Remote Inquiry (see Chapter 15.2, Remote Inquiry, page 144).
14.15.4 Signaling a Forwarding
If a call is forwarded to you, the following message will appear on the display:
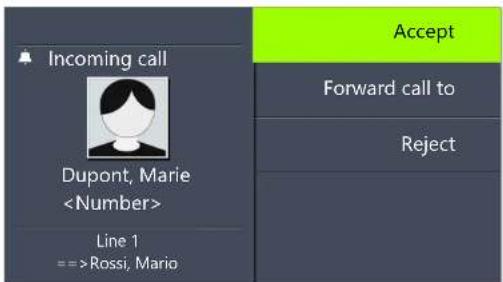
text_image
Incoming call Dupont, MarieThe number or the name of the caller will appear in the first line. The second line shows the number or the name of the destination subscriber.
To take the forwarded call, simply lift the handset or select the menu item "Pick Up" with the arrow buttons, and press the "OK" button.
14.16 How do I use the Phonebook?
You have Frequently used numbers are stored in the Phonebook. You can then dial these numbers directly from the Phonebook.
the Global Phonebook and
the Personal Phonebook.
The Global Phonebook is available to all users. The system administrator or user with the appropriate authorization can add further phone numbers to this Global Phonebook. The Global Phonebook also contains dial numbers of individual groups.
You can store, edit or delete your personal numbers in the Personal Phonebook.
For further information please refer to chapter 16.3.2, Phonebooks, page 164.
This is how you call a subscriber from the Phonebook
- Use the arrow buttons to select "Main Menu" and press the "OK" button.
- Choose "Phonebooks" and press the "OK" button. √ The following will appear:
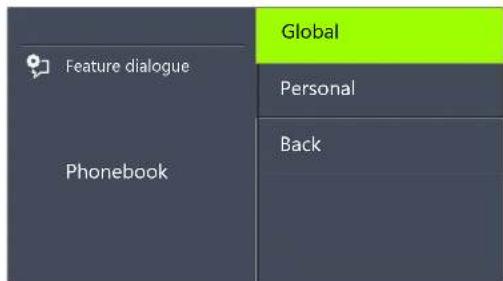
text_image
Feature dialogue Phonebook Global Personal Back- Select the relevant Phonebook (Global or Personal) and press the "OK" button.
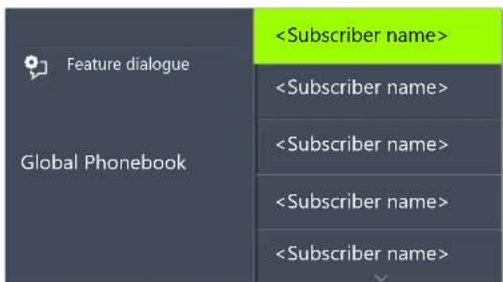
text_image
Feature dialogue Global Phonebook- In the list, select the subscriber you want to call, and press OK. √ You will see additional information about the subscriber (phone number, name).
- Press the "OK" button. √ The connection will immediately be made.
For more information on editing entries in your Personal Phonebook, please see Chapter 16.3.2, Phonebooks, page 164.

To make it easier to search for an entry in an extensive Phonebook, you can enter the first letter of the subscriber's name. Use the numeric keypad for example, to enter an "F", press the "3" button three times, for an "S", press the "7" button four times. When a letter is entered, a short beep will be produced after one second and you can then enter the next letter. If no further entry is made in the following three seconds, you must once again begin with the first letter for the next search.
14.17 Speaker and Handsfree Telephone
To enable all those present in the room to follow a telephone conversation, you can use the speaker. To allow those present to participate in the conversation too, you also have a complete Handsfree Telephone (speaker and microphone).
14.17.1 Activating/Deactivating the Speaker During a Call
You are telephoning and using the handset.
This is how you activate/deactivate the speaker during a call
- Press the Speaker button
√ The Speaker button glows. The speaker is active. The call will continue via the microphone in the handset. - Press the Speaker button again to continue the conversation on the handset and deactivate the speaker.
√ If you hang up while the speaker is active, the call is ended and the Speaker button goes dim.

14.17.2 Activating/Deactivating the Microphone During a Call
You are telephoning and using the handset.
You want to interrupt the call briefly. You don't want your call partner to hear you during the pause.
This is how you activate/deactivate the microphone during a call
- Press the Microphone button
√ The red LED on the "Microphone" button lights up. Your call partner cannot hear you. - If you press the "Microphone" button once more, the microphone will be reactivated.

14.17.3 Activating the Handsfree Facility During a Call
You are telephoning and using the handset. The speaker can be either on or off.
This is how you activate the handsfree facility during a call
- Press the Speaker button the handset on the hook
- Release the speaker button.
√ The Speaker button glows. The handsfree facility is activated.

14.17.4 Deactivating the Handsfree Facility During a Call
You are telephoning and using the handsfree facility.
This is how you deactivate the handsfree facility during a call
- Simply lift the handset.
√ The call will be held exclusively via the handset. The Speaker button will go out.

If you press the Speaker button during the call, the call will be disconnected.
14.17.5 Activate handsfree facility for outgoing call
The handset is on the hook. The line is idle.
This is how you activate the handsfree facility for an outgoing call
- Press the Speaker button
√ The handsfree telephone will be activated. You will hear the idle tone. - Choose the number you want, and press the "OK" button.
√ The call is initiated. As soon as your call is picked up, you can carry on the conversation hansdfree. - To carry on the call with the handset, lift the handset.

14.17.6 Activating the Handsfree Facility for an Incoming Call
It is also possible to pick up a call with the Speaker button. If you have picked up the call in this manner, the handsfree function is activated. You then have the call using the handsfree facility.
14.17.7 Regulating the Volume
You can use the "+" and "-" button to adjust the volume of the speaker and the handset, depending on which one is currently active. The setting will stay at this level for the next call.

If you press the volume control while the speaker is off during a call, the volume of the handset speaker will change.

If you press the volume control while the telephone is inactive, the volume of the ringing tone is adjusted.
14.18 Configuring the Ringing tone
The "+" or "-" buttons can be used to regulate the volume of the ringing tone. If you press the buttons while your SwyxPhone is ringing, the volume is adjusted.
For further information please refer to chapter 16.2.1, Ring tones, page 162.
14.19 Charging info
From the main menu, select "Charging info".
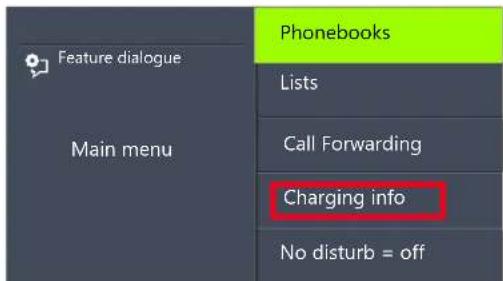
text_image
Feature dialogue Main menu Phonebooks Lists Call Forwarding Charging info No disturb = offThis is how you receive the exact amount of the charges incurred for your last call. This information is retained until the next connection is set up.

The calculation of the charges depends on the data provided by your telephone service provider. Ask your system administrator or your telephone service provider.
14.20 Sequence of the Display Entries While Idle
The entries in the SwyxPhone display are shown a specific sequence one after another:
-
Missed Callbacks (XX)
-
New Callbacks (XX)
-
New incoming calls (XX)
-
Voicemail available
-
Callback Requests (XX)
-
Call Forwarding
Only when there are no more entries in a higher prioritized list will the next entry be shown.
15 SwyxPhone L66 advanced Telephony Functions
This chapter contains information about the use of special functions which go beyond conventional telephoning, such as conference calls or the allocation of project codes, for example.
15.1 Voicemail inquiry
A Voicemail is a spoken message in the form of a WAV file.
If the caller couldn't reach you, he can leave a Voicemail. You can listen to the Voicemail, when you are back at your desk or from another phone using the remote inquiry.
When a new Voicemail has been left for you, this will be signaled by
- the message "Voicemail available" appearing on the SwyxPhone display
■ a briefly interrupted (stuttered) dial tone
If you have e-mail access, your voice mails will be sent to your e-mail address if this has been entered for your SwyxPhone during installation.
You can check your voicemails with the SwyxPhone or directly from your e-mail program.
Voicemail Options in your E-mail Program
The voicemail delivery by e-mail offers you several options:
- Message as an e-mail attachment (audio file) You can listen to this comfortably on your PC, and then save or forward the file.
- Direct starting of a callback from the e-mail (only in Swyxlt! or with CTI)
■ Direct sending of an e-mail to the caller - Link for listening to Voicemail directly by Remote Inquiry (only in Swyxlt! or with CTI)
This is how you check your new voicemails with SwyxPhone
You have new Voicemails.
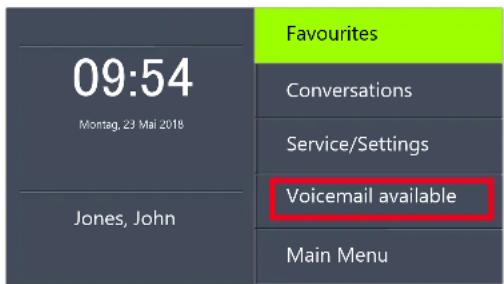
text_image
09:54 Montag, 23 Mai 2018 Jones, John Favourites Conversations Service/Settings Voicemail available Main Menu- Select "Voicemail available" with the arrow buttons and press the "OK" button.
or
- Press the "Voicemail" function key, if configured.
√ The connection to the SwyxServer for checking the voicemail will be initiated immediately.

If no Voicemail has been configured for you by the administrator, the menu item "Voicemail available" will not be displayed.
15.2 Remote Inquiry
You can also check your Voicemail by Remote Inquiry from any phone connection. To do this, your Standard Voicemail must be configured appropriately.
Remote Inquiry enables you to listen to your voice mails from any telephone. When you are called at your SwyxWare number, you identify yourself to SwyxWare with your PIN and only then you can listen to, repeat, or delete the new voice mails and afterwards all existing voice mails. In addition, you can change the destination of the Call Forwarding Unconditional or record a new announcement.
You will receive a PIN (Personal Identification Number) from your administrator. If, in addition to your SwyxPhone, you also have the
option of configuring the standard remote inquiry in Swyxlt!, you can also change the PIN there.

The number of Voicemails available for remote inquiry is limited to the most recent one hundred voice mails.
This is how you listen to your voice mails remotely
In order for a received call to be picked up by your Standard Voicemail and in order for you to have the option of Remote Inquiry, you must configure your call forwarding accordingly. This means that an incoming call must reach your Standard Voicemail and may not be redirected. For further information please refer to the Swyxlt! documentation.
- Dial your SwyxWare phone number.
√ The call is picked up and you hear the welcome announcement of your Voicemail.
- Press the * key during the welcome announcement.
You will hear the welcome announcement of the Remote Inquiry and will be asked to enter your PIN.

You will not be prompted to enter your PIN if you are calling from your own SwyxWare extension number.
-
Enter your PIN and complete the entry with the # key.
-
If new Voice mails have been received, you will first be given the total number of Voice mails.
Then all of the new Voice mails will be played, beginning with the one most recently recorded. The sender information of each Voicemail is given first.
- Date received
- Time
- Caller's number (if available)
- Name of the caller, if this can be determined for internal calls by the system (For further information please refer to the Swyxlt! documentation.)
and finally
• the recorded Voicemail.
You can use the * key to skip the current message (sender information or recorded Voicemail).
The following options are available to you during the output of a Voicemail:
Button Effect
 | Connects to the caller (if possible) |
 | Back to the beginning of the Voicemail |
 | Forward to the end of the Voicemail |
 | 10 seconds backward |
 | Stop/Start Output (Pause) |
 | 10 seconds forward |
 | Switch to the previous Voicemail |
 | Switch to the next Voicemail |
 | Main menu |
 | Switch to the next information(Dale, Time, CallerID, Voicemail content) |
 | Help |
If you have no new Voice mails, you will find yourself in the main menu. Here you can listen to all available Voicemails and configure your Call Forwarding Unconditional (see This is how you change the settings for Forwarding Unconditional by Remote Inquiry, page 147).
- After each Voicemail has been played, you have the choice of the following options:
Button Effect
| 0+ | Connects to the caller (if possible) |
| 1GLO | Repeat the current Voicemail |
| 3GSF | Delete the current Voicemail. Confirm with *▲ |
| 4GHI | Answer per Voicemail (only possible for internal use) |
| 6MNO | Forward to an internal number |
| 7PANS | Switch to the previous Voicemail |
| 8TUV | Switch to the next Voicemail |
| 9WXYZ | Main menu |
| #123 | Help |
After the new Voice mails have been played, you will be shown the main menu. The following options are available:
Button Effect
| 0+ | End Remote Inquiry (=Hook on) |
| 1 | Inquiry of all Voice mails (most recent first) |
| 3 | Inquiry of all E-mails |
| 4 | Configuration of the Forwarding Unconditional |
| 5 | Record note |
Button Effect

Change Voicemail Announcement

Delete all Voicemails. Confirm with


Help
- End Remote Inquiry by going on hook.
If you have finished listening to a Voicemail, the corresponding e-mail in your e-mail folder will be marked as read. If a Voicemail was partially or completely skipped, the "unread" mark will remain in the e-mail folder.
The name announcement, which other internal subscribers hear when listening to a Voicemail you have left, can be recorded using SwyxIt!. Ask your system administrator should you have questions about this.

If you change your Windows password, you must also adjust this in the configuration of the remote enquiry with SwyxIt!, or contact your administrator.

Note that Remote Enquiry only covers voicemail that is present as e-mail in the Outlook folder which you specified in the Remote Enquiry configuration. You can adjust the configuration of the remote inquiry with the help of Swyxlt!, or it will be done by the administrator.

The menus for Remote Inquiry are also available as a print template on the SwyxWare DVD. For more information, please contact your administrator.

If you end Remote Inquiry in the main menu with '0', other actions of the Call Routing Manager can still be applied. For further information please refer to the documentation 'Call Routing Manager'.
15.2.1 Change Forwarding Unconditional
You can also use the Remote Inquiry menu to change the settings for Forwarding Unconditional. You can choose between
■ a Forwarding Unconditional to a number,
- a Forwarding Unconditional to standard Voicemail or
■ deactivation of Forwarding Unconditional.
This is how you change the settings for Forwarding Unconditional by Remote Inquiry
In order to take advantage of this, Remote Inquiry must be configured for you:
- Dial your SwyxWare phone number. The call is picked up and you hear the welcome announcement of your Voicemail.
- Press the * key during the welcome announcement. You will hear the welcome announcement of the Remote Inquiry and will be asked to enter your PIN.
- Enter your PIN and complete the entry with the # key.

You will not be prompted to enter your PIN if you are calling from your own SwyxWare extension number.
- If you have received new Voice mails, you will be given the opportunity to listen to them.
- To open the main menu, press '9'. √ The following options are available in the main menu:
Button Effect
| 1.0 | Inquiry of all Voice mails (most recent first) |
| 3.0 | Inquiry of all E-mails |
| 4.0 | Configuration of the Forwarding Unconditional |
| 5.0 | Record note |
| 6.0 | Change Voicemail Announcement |
Button Effect
| 7 PDBs | Delete all Voicemails. Confirm with *▲ |
| # 伤 | Help |
| 0 + | End Remote Inquiry (=Hook on) |
- To change Forwarding Unconditional press the '4'. The current status of Forwarding Unconditional will be given. You will then have the following options for changing your Forwarding Unconditional:
Button Effect
| 1 a.p | Activate redirection to the saved numberThe Call Forwarding Unconditional to the saved destination number will be activated. If no destination number is saved, you will be prompted to enter a number. |
| 2 ABC | Activate redirection to VoicemailThe Call Forwarding to your Standard Voicemail will be activated. |
| 3 ccr | Deactivate (Call) ForwardingCall Forwarding Unconditional is switched off. Please note that in this case other rules of the Call Routing Manager can be applied. |
| 4 cfr | Save a new destination for forwardingHere you can enter a new destinationnumber and end with # Atr 125 nate .Call Forwarding Unconditional to this number is then activated. |
| 5 jnl | Current status of Call ForwardingThe current status of Call Forwarding Unconditional will be given. |
| 6 sno | Change Voicemail Announcement |
| Button Effect | |
| 9 wxyz | Main menu The remote configuration of Call Forwarding Unconditional is ended and you return to the main menu. |
| 0 + | Forwarding to the current Caller ID (only possible if the CallerID is available) |
| # 智 | Help |
15.3 Project Codes
SwyxWare can record the data of individual telephone calls in CDRs (Call Detail Records) and assign different project codes to them. This data can then be evaluated later. For further information, please refer to the SwyxWare Administrator documentation.
To associate a call to a project, you must enter the assigned project code before making the call.
This is how you assign a call to a project
- Enter '*' and then the project code.
- End the entry of the project code with '#'.
- Then immediately dial the destination number as usual.
The project code will now be recorded in the Call Detail Record (CDR) by SwyxWare.
15.4 Note
You can add entries to your Personal Phonebook during a call.
This is how you create a note during a call
You are making a call.
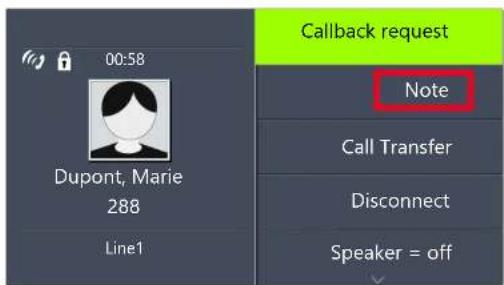
text_image
00:58 Dupont, Marie 288 Line1 Callback request Note Call Transfer Disconnect Speaker = off- Select the menu item "Note" with the arrow buttons, and press the "OK" button.
√ The following appears on the display:
text_image
00:58 Dupont, Marie 288 Enter number- Enter the number of the new entry in the Personal Phonebook, and end your input with the "OK" button.
√ The following appears on the display:
text_image
00:58 Dupont, Marie 288 Enter name- Enter the name for the new entry in the Personal Phonebook, and end your input with the "OK" button.
√ The new entry in the Personal Phonebook is saved.

Enter a letter like editing a SMS: For example press the 7 three times to enter a R. Enter the space with "0". The '*' key is used to switch between upper and lower case letters.

If while creating a note you enter the number but not the name, the following entry will appear in your personal Phonebook in the first position: "No Name:Number". You can then process this entry in your personal Phonebook.
15.5 Callback request
SwyxWare offers the option of leaving callback requests on other internal subscribers' phones. The subscriber can then call back later. If the subscriber you are calling is busy, you can start a "Callback on busy". In this case a new call is suggested as soon as the subscriber is available again.
The list "My Callback Requests" serves for managing the callback requests you have made. The callback requests directed to you are given in the list "Callback Requests".
If you call another subscriber within your company and the connection is not completed (e.g. speaking, busy, call not picked up, absent), you can make a callback request.
There are two different situations:
- Callback on busy, i.e. the person called is speaking
- Callback (when the line is idle and the call is not picked up or is forwarded to Voicemail)
15.5.1 Callback on busy
You call a subscriber in your company and this person is currently speaking on the phone. You receive the message "Busy" or "Call waiting", depending on whether the person called has allowed a secondary call. (In the Caller List of the person called, an entry appears -as is the case for every call.) If you now select the "Callback" option, the person called will not receive any further signal and the call waiting signal will stop. If the person called has ended his call, this will be signaled by a brief tone and a message on your display. You can start the callback.
This is how you make a callback request if the line is busy
You call an internal subscriber. The other subscriber is currently speaking on the phone.
-
Select the menu item "Callback request" with the arrow buttons, and press the "OK" button.
√ Your call will be ended. On your display you will see the message "Terminated - Callback requested". An entry will be created in your "My Callback Requests" list.
If the person called has ended his call, this will be signaled by a brief tone and a message on your display. -
You can start the callback directly by lifting the handset. (see This is how you start Callback on busy, page 149).

Several callback requests on busy to the same user, even at different numbers, will be summarized into one entry in the "My Callback Requests" list.
This is how you start Callback on busy
You have made a Callback on busy request.
The person called ends his call.
√ A signal tone will be produced. The following appears on the display:
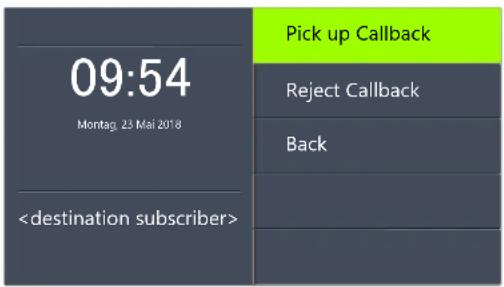
text_image
09:54 Montag. 23 Mai 2018- Select the menu item "Pick Up Callback" with the arrow buttons, and press the "OK" button.
√ The subscriber is then immediately called.
If you do not confirm the new call within 20 seconds, the "Missed Callbacks" display will appear. The entry in the list "My Callback Requests" will change to "Was free. Retry?".
-
Confirm the message "Missed Callbacks" with the "OK" button. √ The list of missed callbacks is displayed.
-
Select the entry you want.
- If you would like to call back to the displayed subscriber immediately, lift the receiver or press the Speaker button.
- If you would like to see the details for this callback attempt, press the "OK" button. Details for this callback attempt, such as date and time, will be displayed.
You can dial this number again or you can delete it.
If a connection is made to the person originally called, the entry in the "My Callback Requests" list will be deleted automatically.
This is how you reject Callback on busy
You have made a Callback on busy request.
The person called ends his call.
√ A signal tone will be produced. The following appears on the display:
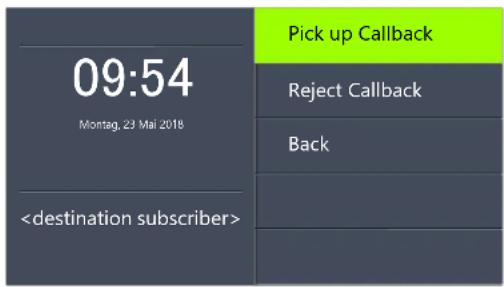
text_image
09:54 Montag, 23 Mai 2018- Select the menu item "Reject Callback" with the arrow buttons and press the "OK" button. √ The entry in the "My Callback Requests" list will be deleted.
This is how you delete Callback on busy
You have made a Callback on busy request.
- Select "Main menu" with the arrow buttons, and press the "OK" button.
- Choose "Lists" and press the "OK" button. √ The following will appear:
| Feature dialogue Lists | My Callback Requests |
| Callback Requests | |
| Redial | |
| Back | |
- Press the "OK" button.
√ The "My Callback Requests" list will open:
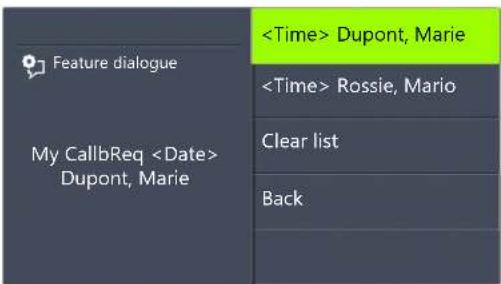
text_image
Feature dialogue My CallbReq- Select the entry you want to delete, and press the "OK" button. √ The details for this callback request will be displayed.
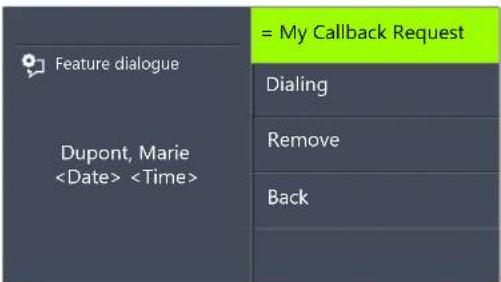
text_image
Feature dialogue Dupont, Marie- Choose "Delete" and press the "OK" button. √ The entry will be deleted.
15.5.2 Callback if idle
You call another internal subscriber and this call is not picked up. You receive the message "Ringing" or the Voicemail announcement.
You make a callback request. This request will be entered with "Callback requested" in your "My Callback Requests" list. If the person called edits his Caller list or the Callback list, he can
- start the callback from his Caller List (Swyxlt!) or his "Callback Requests" list (SwyxPhone).
If you then pick up the callback, the callback request in your list will be deleted.
If no connection is made, the callback request will remain unchanged. - ignore the Callback Request.
If the person called ignores the entry in his list, the extension to the entry will change to "Callback obsolete". - delete the callback request in the Caller List.
The complete entry will be deleted in the list of the person called, and in your "Callback Requests" list, the entry will change to "Callback obsolete".
This is how you make a callback request when the line is idle
You call an internal subscriber. The other subscriber does not pick up the call or your call is forwarded to Voicemail.
- Select "Callback request" with the arrow buttons, and press the "OK" button.
√ An entry will be created with "Callback requested" in your "My Callback Requests" list. The person called will be signaled your callback request.
Your call will be ended.
This is how you answer a callback request
You have received a callback request and in your display you see the list "New callback requests (XX)".
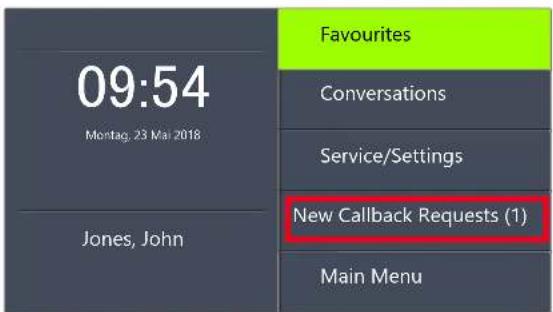
text_image
09:54 Montag, 23 Mai 2018 Jones, John Favourites Conversations Service/Settings New Callback Requests (1) Main Menu- Select "New callb req" with the arrow buttons, and press the "OK" button.
√ The "Callback requests" list will appear.
- Select the caller and lift the handset.
√ The caller will be called back.
If you want to ignore the callback request, select "Ignore" and press the "OK" button.

After you have opened the "New Callback Requests" list, all entries will be transferred to the "Callback Requests" list, even those which have not yet been displayed.

The entry in your "My Callback Requests" list will be deleted in any case if a connection to the person called is successfully made. At the same time, the entry in the Caller List of the person called will change to "Callback obsolete".
"My Callback Requests" List
In the "My Callback Requests" list you will find all callbacks that you have requested.
This is how you open the "My Callback Requests" list
- Select "Main menu" with the arrow buttons, and press the "OK" button.
- Choose "Lists" and press the "OK" button.
- Choose "My Callback Requests" and press the "OK" button. √ The "My Callback Requests" list will open.
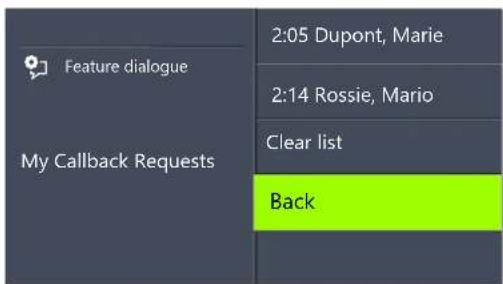
text_image
Feature dialogue My Callback Requests 2:05 Dupont, Marie 2:14 Rossie, Mario Clear list Back-
Choose the appropriate entry and press the "OK" button. √ Details for this entry will be displayed:
-
Callback on busy
You have made a callback request of a subscriber whose line is busy. This subscriber is still telephoning. - Callback requested
You have made a callback request of a subscriber whose line is idle. No connection was successfully made. - Callback obsolete
You have made a callback request of a subscriber whose line is idle. After this, the callback has either been ignored by the other subscriber, was answered per e-mail or deleted.
You can select an entry in this list, delete individual entries or the entire list. When deleting, the "Callback requested" entries will be deleted from the list of the other subscriber.
"Callback Requests" List
In the "Callback Requests" list you will find all callbacks that have been directed to you.
This is how you open the "Callback Requests" list
- Select "Main menu" with the arrow buttons, and press the "OK" button.
- Choose "Lists" and press the "OK" button.
- Choose "Callback Requests" and press the "OK" button. √ The "Callback Requests" list will open.
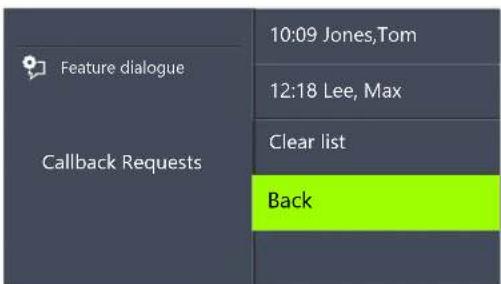
text_image
Feature dialogue 10:09 Jones,Tom 12:18 Lee, Max Clear list Back- Choose the appropriate entry and press the "OK" button.
You can
• with "Callback" or
- "Ignore".
If you delete the list, the corresponding entry in the caller's list will be marked as "Callback obsolete".
The "Missed Callbacks" List
In the "Missed Callbacks" list you will find all callbacks on busy, which were prompted because the person called had finished his conversation, but were not confirmed by you.
This is how you open the "Missed Callbacks" list
The following appears on the display:
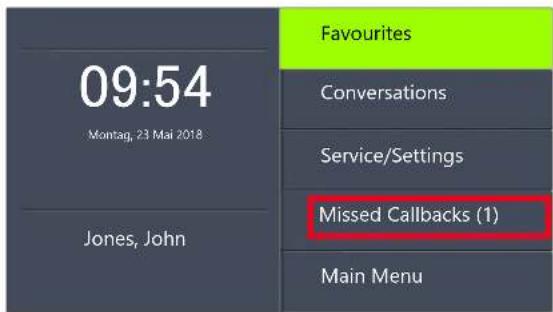
text_image
09:54 Montag, 23 Mai 2018 Jones, John Favourites Conversations Service/Settings Missed Callbacks (1) Main Menu- Choose "Missed Callbacks" and press the "OK" button. √ The "My Callback Requests" list will open.
- If you select the required entry in this list, you can start this callback again or delete it.
The "Missed Callbacks" list will remain in the display until it contains no entries.
15.6 Conference
With SwyxWare you can join internal and external subscribers to form a conference. Furthermore, you can add new subscribers to an existing conference. Alternatively, you can also arrange to meet with other subscribers in a conference room. In a conference room you can take an active part in the conversation or only act as a listener.
15.6.1 Starting a Conference
If you have at least one active line and one line on hold, the entry "Conference" appears in the available menu. This provides you with the option of creating a conference between these subscribers and yourself.
This is how you start a conference call
You are having conversations with several subscribers at the same time. The active connection is the connection to the person you are currently talking to. All other subscribers, who are listening to music on hold while they wait, are on connections on hold.
- Select "Conference" with the arrow buttons, and press the "OK" button.
√ All of the individual calls which you are currently having, both the active and held calls, will be joined into one conference. All lines, except for the conference line, will be free again. A welcome signal will be produced for all participants.
√ The following appears on the display for all participants:
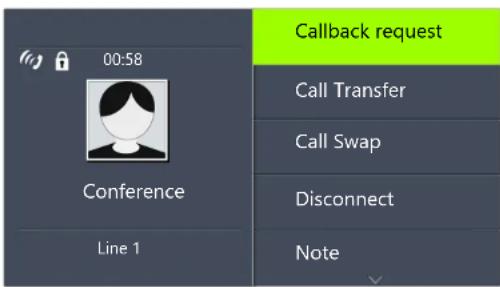
text_image
00:58 Conference Line 1 Callback request Call Transfer Call Swap Disconnect Note
You can only start one conference at a time. However, you can participate in other conferences. provided these conferences have been initiated by other participants.
15.6.2 Inquiry Calls and Add
During a conference you can start an inquiry to another subscriber. After this inquiry you can add the other subscriber to the conference. The other subscriber for his part can create a conference of which you are a member. In this situation, you can then use the "Conference" button to join both conferences into one..
This is how you start an Inquiry Call from a conference
You are a participant in a conference.
- Use the arrow buttons to select "Call Swap" √ The line with the conference will be put on "Hold".
- Dial the number you want. √ The new connection will be set up.
- If you would like to end the call to the subscriber you made an inquiry call to, put the handset on the hook or press the corresponding Line button.
This is how you add an additional subscriber to a conference
You are a participant in a conference.
- Use the arrow buttons to select "Call Swap".
- Dial the number you want.
- Once you have reached the new participant, select "Conference" with the arrow buttons and press the "OK" button.
√ A welcome signal will be produced for all conference participants. A new subscriber has been added to the conference.

If one conference participant puts his conference line on "Hold" and then returns to the conference, no welcome signal will be produced.
15.6.3 Leaving or Ending a Conference
When going on hook, there are two different situations:
- You started the conference.
In this case, the conference will be ended for all participants if you put the handset on the hook.
■ Another subscriber started the conference.
Only you will leave the conference. A goodbye signal will be produced for all other subscribers and the remaining subscribers can continue to speak to one another.

All those subscribers whom you added to this conference will leave the conference with you. The conference will continue for all other subscribers.
This is how you leave a conference
Another subscriber started the conference.
- Place the handset on the hook.
If a subscriber leaves a conference, a goodbye signal will be produced for all other subscribers.
This is how you end a conference
You have started a conference and the conference line has an "active" state, i.e. you can speak to the other conference participants.
- Place the handset on the hook.
√ The conference is ended. The line becomes free again.

If Subscriber A of the original conference added other subscribers, e.g. B and C, to this conference, a second conference between A, B and C will continue to exist until Subscriber A, as initiator of the second conference, terminates the connection and thus ends the conference.
15.6.4 Conference Rooms
Conference rooms are set up by the administrator. A number is assigned with which the conference room can be "entered". All subscribers can dial the Conference Room and participate in a conference with other users, who have dialed this number. All participants can leave the conference independently of one another, without the conference being terminated. You can enter a Conference Room as a member of a conference or purely as a listener.
This is how you reach a Conference Room
- Dial the number of this Conference Room.
√ You will be connected to the conference. All participants in the conference room will hear a welcome signal.
If you are the only conference participant, an appropriate announcement will be played.
- To leave the conference, simply go on hook.
All those present in the Conference Room will hear a goodbye signal. The conference between the other subscribers continues to exist.
You can also start Inquiry Calls from a Conference Room. (see This is how you start an Inquiry Call from a conference, page 154).
Furthermore, you can add other subscribers to this Conference Room. (see This is how you add an additional subscriber to a conference, page 154).

If you go on hook, all of the conference participants you have added will also leave the conference.
In addition, you can connect another subscriber to the Conference Room. He/she becomes an independent participant in the conference and must end the connection to this conference personally.
This is how you connect another subscriber to the Conference Room
Requirements:
- You have a connection to the Conference Room and
-
You have a connection to another subscriber.
-
Select "Call Transfer" with the arrow buttons, and press the "OK" button.
√ The other subscriber is connected to the Conference Room and a welcome signal is produced in the conference. Both of your lines are free again.

The party who created the connection will bear the costs.

It is not possible to directly connect conference rooms to one another. If you would like to allow the participants from two different conference rooms to talk to one another, then you should start a conference between the two lines. This 'Conference of the Conference Rooms' will be maintained as long as you, as initiator, participate in this conference, and it will end when you go on hook.
15.6.4.1 Silent conference participation
You can also dial in as a listener to conferences in conference rooms. You can then follow the conference, but not take part in the conversation.
To dial in as a silent conference participant, dial the number of the conference room plus the string '#OWC'; e.g. "219#OWC". However, your administrator can individually adapt this dial-in option with a script. For further information please refer to the SwyxWare Administrator documentation.
Please note that the complete string of digits (number of conference room#OWC) must be dialed as a block number.
The entry / departure of a silent conference participant is also announced by an audio signal. This signal is different from the usual entry/departure signal to indicate that this participant cannot take part in the conference call.
If you want to dial into a conference room as a silent participant, you first have to configure a corresponding Speed Dial with Swyxlt!, since you cannot dial the string "OWC" via SwyxPhone. Since SwyxPhone and Swyxlt! access the same user profile, the Speed Dials configured in Swyxlt! are also available to you in SwyxPhone.

A simple way round the problem is also to dial into the conference as a normal participant, and deactivate the microphone on your telephone.
15.7 Using a headset
If you telephone a great deal, you can connect a headset to SwyxPhone in order to have your hands free while on the phone. Swyx offers several headsets and the necessary connection cable as an accessory.
15.7.1 Connecting a headset to SwyxPhone L66
SwyxPhone L66 has a headset connection on the underside.
This is how you connect a wireless headset to SwyxPhone
- Insert the end of the adapter cable which is wrapped in the blue banderole into the jack with the Headset symbol on the underside of the telephone. (see Fig. 4-3:, page 20).
-
Plug the split end of the adapter cable into the base station of the headset. Insert the RJ10 plug into the jack with the telephone symbol and the RJ45 plug into the jack marked "AUX" on the base station.
-
Switch the headset into "DHSG" mode (see in the supplied Headset Guide).
For information on the use of the headset, see chapter 4 in the accompanying Headset Guide.
"Headset" Button
SwyxPhone L66 has a Headset button. If this button is pressed, the call will be forwarded to the headset output or a free line will be selected. The Headset button will glow. Pressing the Headset button again will end the connection. During a call you can switch between the handset, handsfree telephone and the headset:
| You are having a telephone conversation on... | Action New Status | |
| The Handset Press the Speaker button The speaker will be activated. It is possible for others in the room to listen to the call. | ||
| The Headset | Hook off | You are telephoning with the handset. |
| Press the Speaker button The speaker will be activated. It is possible for others in the room to listen to the call. | ||
| The Handsfree Telephone | Hook off | You are telephoning with the handset. |
| Press the Headset button You will then telephone using the headset. | ||

In order to execute hook on and hook off with the talk button on the headset, the headset button on the SwyxPhonecannot be assigned to other functions.
15.7.2 Connecting a Bluetooth Headset
You can connect a Bluetooth headset to your SwyxPhone L66.
This is how you enable the Bluetooth function on your SwyxPhone L66
- Select "Service/Settings" with the arrow buttons, and press the "OK" button.
- Choose "User" and press the "OK" button.
- Choose "Bluetooth" and press the "OK" button. √ The following will appear:
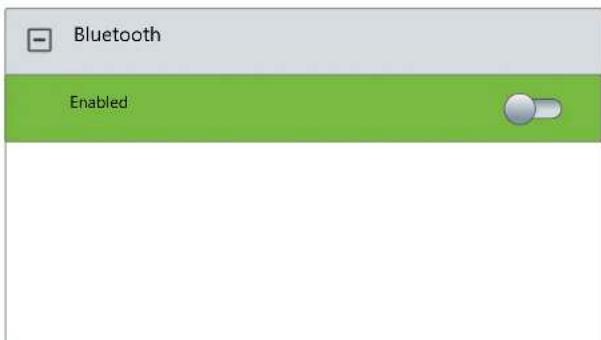
text_image
Bluetooth Enabled- Press the "OK" button.
√ Bluetooth is enabled the following will appear:
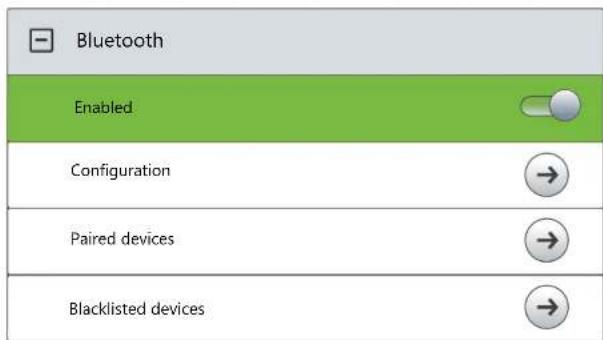
text_image
Bluetooth Enabled Configuration Paired devices Blacklisted devicesThe Bluetooth function is activated and thus detectable for other devices which have not yet been connected to your SwyxPhone L66. The display shows the Bluetooth symbol.
This is how you connect a Bluetooth Headset
Requirement: The Bluetooth function of your SwyxPhone L66 is enabled.
- Select "Service/Settings" with the arrow buttons, and press the "OK" button.
- Choose "User" and press the "OK" button.
- Choose "Bluetooth" and press the "OK" button.
- Choose "Paired devices" and press the "OK" button. √ The following will appear:
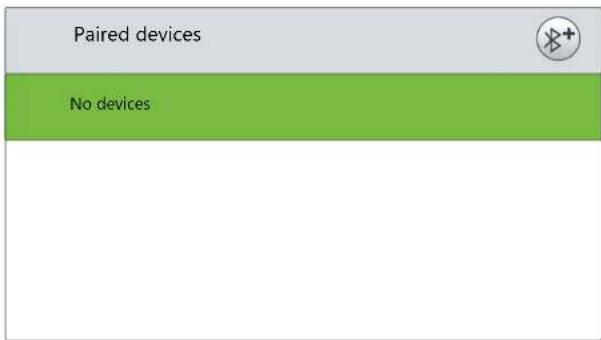
text_image
Paired devices No devices- Now switch your Bluetooth headset into pairing mode.
- Press the upper Option key (next to the "Bluetooth+" symbol).
√ The search for devices begins. - Select the located Bluetooth headset and press the "OK" button. √ The message "Pairing,..." appears. If the search is successful, the corresponding device will appear:
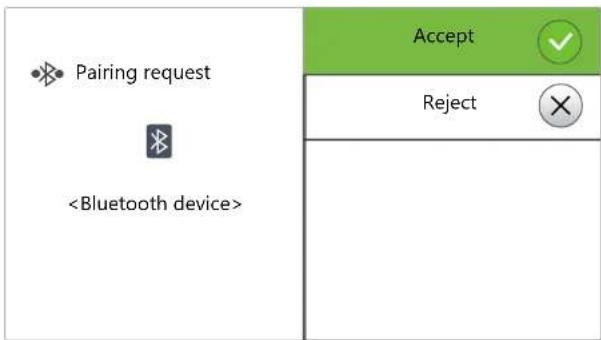
text_image
Pairing request- Press "OK" button to confirm the connection.
√ The connection will be created immediately and the headset will be ready for operation:
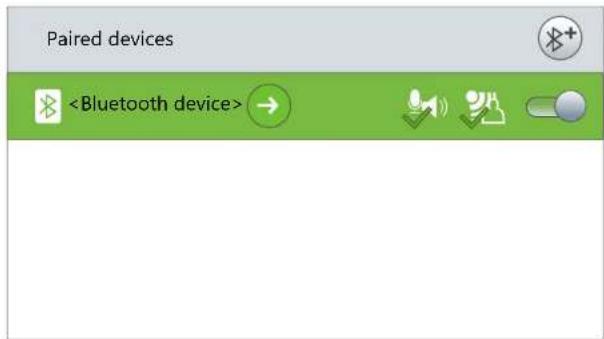
text_image
Paired devicesPress the arrow button "Forward" to the navigation wheel, to make further settings:
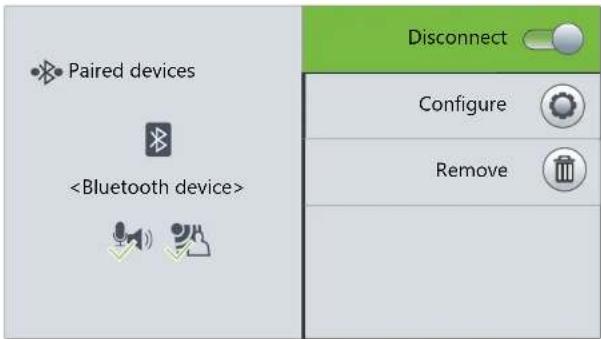
text_image
Paired devices- Press die arrow button "Back"

settings menu.
√ The status of Bluetooth connections is shown at the top of the screen with the following symbols:
Symbol Explanation

Bluetooth enabled

Headset via Bluetooth connected
15.8 Call Intrusion
The "SwyxMonitor" option pack enables, in addition to permanent call recording (only for the administrator), intrusion into another user's conversation. A supervisor (e.g. in a call center) can listen in on an ongoing conversation ("Listening only" mode), give directions to the speaking agent (e.g. advice on presenting the case) or even actively join in the call (speaking modes).

If the SwyxMonitor option pack is used, it is essential to observe the relevant statutory provisions relating to data protection.
The "SwyxMonitor" option pack must be installed for Call Intrusion, and the SwyxWare administrator must activate this function appropriately for each individual user.
Also, calls can only be listened in on if they are made directly with Swyxlt! (and not in CTI mode). Conversations that are made via a SwyxPhone, cannot be intruded.
This is how you listen in on a call
- Dial the number of the agent whose call you want to hear, followed by the DTMF command +24*1#, and start the call as usual. Please note that you can only start the call set-up with the DTMF command for the "Listening only" mode. However, if another supervisor is
already listening in on this call in a speaking mode, you will also be switched immediately into this mode.
√ The number of the agent will be dialed. There is no call signaling to the agent, the call is accepted directly and coupled with the active call. You are now listening in on the call, but you are not heard by the two call partners.
If the agent is not on an active call at the time, the call set-up is aborted. The agent's call redirections (e.g. forwarding of a second call to voicemail or to a colleague) are ignored, i.e. the call is always accepted. An exception is Unconditional Call Forwarding - in this case even Call Intrusion is redirected.
-
Choose the appropriate DTMF command to speak with the agent or both call partners.
-
End the listening like a normal call, e.g. by replacing the handset. If the agent's call partner (e.g. the customer) terminates the conversation, you are automatically connected to the agent, unless you are in "Listening only" mode, in which case the call will be ended.
| DTMF command | Explanation |
| *24*1# | Listening only.You hear both call partners. |
| *24*2# | Listen to both sides, speak with agent.You hear both call partners, and the agent hears you. The other call partner (e.g. the external customer) hears only the agent. |
| *24*3# | Listen to both sides, speak with both sides.You can participate directly in the conversation. |
15.8.1 Multiple Call Intrusions
A call can also be listened to by several people. These supervisors are always switched into the same mode. Thus if one supervisor switches with a DTMF command from the "Listening only" mode to a speaking mode, the agent also hears all other supervisors who are connected with him. The supervisors can always speak directly to one another, even if they are in "Listening only" mode. Neither the agent nor his call partner can hear them.
16 SwyxPhone L66 Configuration
You can adjust the default settings of SwyxPhone to meet your individual needs:
- Call Forwarding, page 160
No disturb, page 161
■ Secondary call, page 161
Ring tones, page 162 - Call Signaling, page 162
- Lists, page 163
- Phonebooks, page 164
- Configure function keys, page 169
Lines, page 172 - Configuring Speed Dials, page 175
16.1 User Profile
Your user settings contain user-specific information, that is settings which you have made on the SwyxPhone. The user settings include, for example, all lists (Caller List and Redial List), your individual assignments for function keys and Line buttons, and even ringing. Your user settings are stored on SwyxServer, so you will find your personal settings on any SwyxPhone when you enter your PIN (Personal Identification Number). General settings are always made in the main menu or in the Configuration menu.
The basic telephony behavior of the SwyxPhone and the number of Line buttons and function keys are defined either in the main menu or the Configuration menu. You can check and change the current settings via the menu items.
This chapter provides a description of the individual configuration options.
16.1.1 Call Forwarding
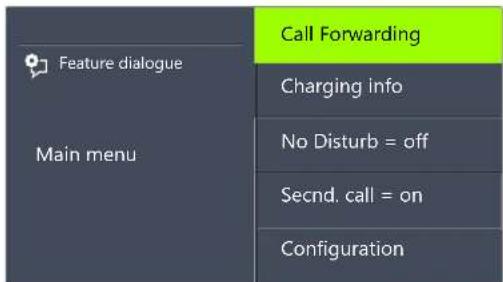
text_image
Feature dialogue Main menu Call Forwarding Charging info No Disturb = off Secnd. call = on ConfigurationThe menu item "Call forwarding" allows you to define whether telephone calls are
■ forwarded unconditionally or
- forwarded with a delay, i.e. after you have not picked up your call, or
- forwarded if your line is busy (you are presently telephoning).
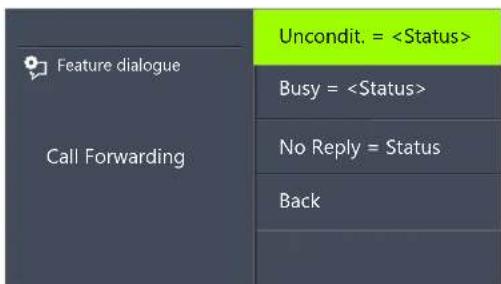
text_image
Feature dialogue Call Forwarding Uncondit. =Activate the option "Unconditional", if you do not wish to receive any calls starting immediately.
When you activate the option "If busy", you must define how a call should be handled if it cannot be delivered to you because you are already on the telephone and no secondary call is permitted. You can either enter the forwarding destination directly, or make a selection from the Phonebook, or activate your Standard Voicemail. When a call is
received, SwyxPhone automatically recognizes whether the line is free or busy and it applies the appropriate type of Call Forwarding.
The "Delayed" option is used to set the amount of time which should be spent attempting to transfer the call directly to SwyxPhone, which you have logged on to. The call can then be forwarded to another number or to your Voicemail.
For further information please refer to chapter 14.15, How do I forward a call?, page 136.

Your Voicemail can only be configured using Swyxlt!. For further information please refer to the Swyxlt! documentation.
16.1.2 No disturb
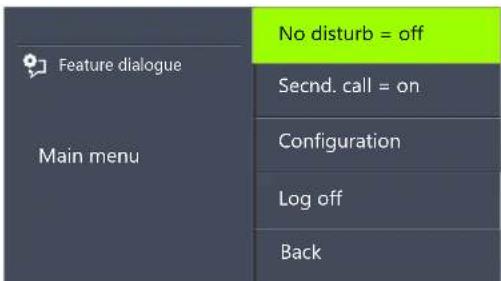
text_image
Feature dialogue Main menu No disturb = off Secnd. call = on Configuration Log off BackIf you activate "No Disturb", calls are signaled visually only. Your environment is not disturbed by any acoustic signals. If you confirm this menu item with the "OK" button, this function will be switched on or off. If you set the status to "No disturb" while it is ringing, the ringing then falls silent. If you deactivate the status "No disturb" during an incoming call, there is then also no acoustic signal. The subsequent calls are signaled acoustically.
16.1.3 Secondary call
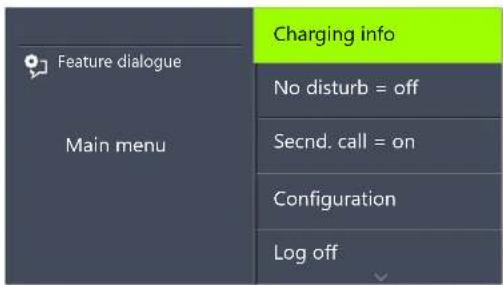
text_image
Feature dialogue Main menu Charging info No disturb = off Secnd. call = on Configuration Log offIf you deactivate this option, no further calls will be signaled while you are on the telephone. It is also possible to switch Secondary Call on or off during a call. A subscriber trying to call you will hear the busy signal or his call will be redirected according to your setting for "Redirect if busy". For further information please refer to chapter 14.14, The Secondary Call, page 136.
16.2 Settings in the Configuration Menu
The configuration menu is in the main menu. You can select the corresponding menu item with the arrow buttons.
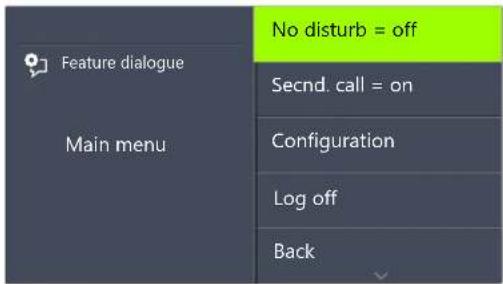
text_image
Feature dialogue Main menu No disturb = off Secnd. call = on Configuration Log off BackThe configuration menu contains the following items:
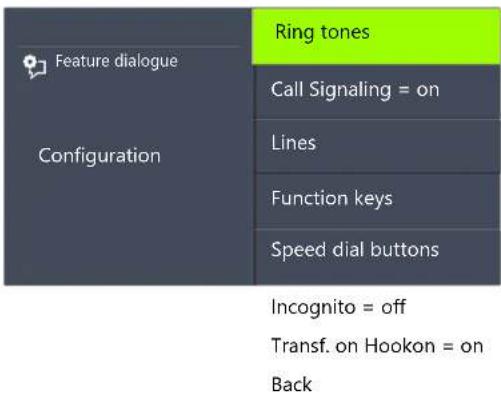
text_image
Feature dialogue Configuration Ring tones Call Signaling = on Lines Function keys Speed dial buttons Incognito = off Transf. on Hookon = on Back16.2.1 Ring tones
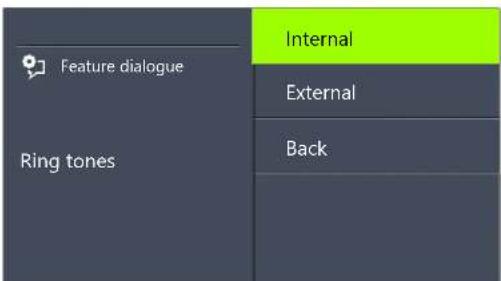
text_image
Feature dialogue Ring tones Internal External BackThe telephone ring for incoming calls is selected here. You define the telephone ring for calls from outside the company under "External" and for calls from within the company under "Internal".
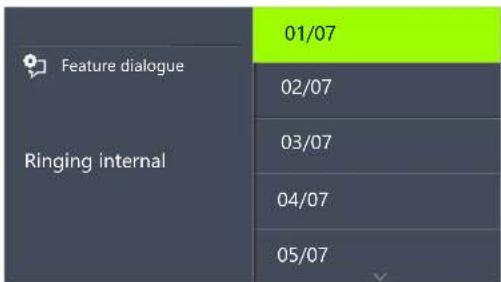
text_image
Feature dialogue Ringing internal 01/07 02/07 03/07 04/07 05/07You can choose from seven different ringing tones. You can select the ringing sound you want using the arrow buttons and adjust the volume using the "+/-" buttons.
16.2.2 Call Signaling
The administrator can configure the system in such a way that incoming calls for you are signaled to another subscriber. The incoming calls for this subscriber will also be signaled to you. If such signaling has been defined, then the incoming calls for this subscriber will appear on your display. If the destination subscriber does not pick up the call, you will hear a single warning tone after 10 seconds. This tone can be turned off here.
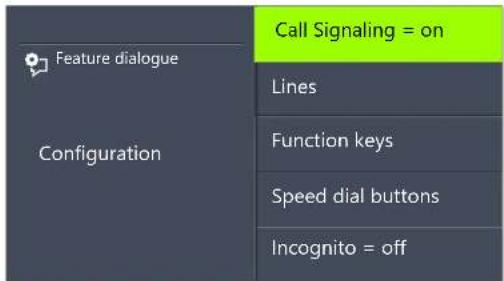
text_image
Feature dialogue Configuration Call Signaling = on Lines Function keys Speed dial buttons Incognito = offThe call signaling will still only be visually indicated.
If several subscribers, whose calls are signaled to you, receive a call at the same time, only one name will be shown in the display. The other calls will only be indicated by the blinking of the corresponding Speed Dials. If you would like to pick up one of these calls, use the corresponding Speed Dial and lift the handset.

Mutual call signaling between subscribers can only be configured by the system administrator.

Due to the fact that both SwyxPhone and SwyxIt! access the same user settings, any changes you make on SwyxPhone will always effect the settings in SwyxIt! and vice versa. Above all, you should keep in mind that if you delete lines, the data will be lost! For further information please refer to chapter 17, Interaction with SwyxIt!, page 178.
16.2.3 Incognito
When you activate this option, your telephone number will not be shown to the destination subscriber (number suppression). If you activate number suppression in the Configuration menu, the setting will be retained.
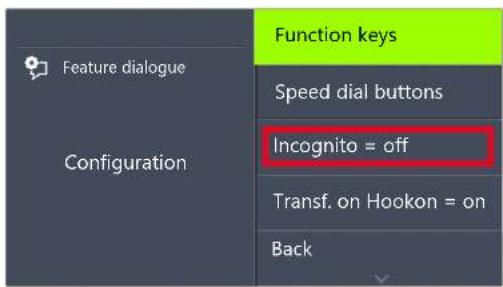
text_image
Feature dialogue Configuration Function keys Speed dial buttons Incognito = off Transf. on Hookon = on Back
The numbers of internal calls cannot be suppressed.

Telephone number suppression when making external calls must also be supported by your ISDN line, otherwise only the display of your extension number will be suppressed.
16.2.4 Transfer on Hookon
If "Transfer on Hookon" is activated, then when you go on hook, a second call that you have initiated will be connected to the first call, which is on hold. If "Transfer on Hookon" is deactivated, then when you go on hook a second call will be ended. The line with the first call on hold will become active again.
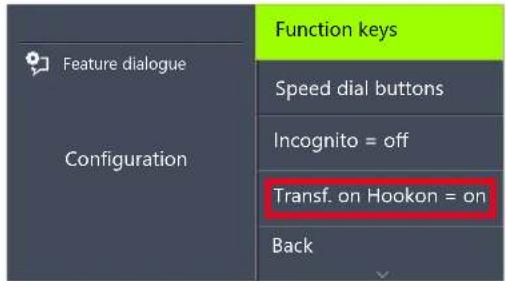
text_image
Feature dialogue Configuration Function keys Speed dial buttons Incognito = off Transf. on Hookon = on BackPressing OK will activate or deactivate the function "Transfer on Hookon".
For further information please refer to chapter 14.11, Transfer When Placing Handset on Hook, page 134.
16.3 Lists
This section provides basic information on the lists, which include:
the Phonebooks,
the Caller List,
the Redial List,
■ the Callback Requests list and
■ the My Callback Requests list.
In general, you will find the same structure for each list. When you call a list, the name of the list will appear in the display. In addition, the current number of the entry in the list and the total number of entries, including the corresponding date, will be given.
In a single entry, the name of the subscriber appears. If you press the "OK" button you can view additional information about the subscriber, or - depending on the list - call the subscriber, edit the entry, save it in the Phonebook, or delete it.
The arrow buttons can be used to page through the lists. To display more details for an entry, select the corresponding entry and press OK. You will find yourself in the sub-menu of the entry, where you can scroll through the detailed information or edit the entry.
16.3.2 Phonebooks
Frequently used numbers are stored in the Phonebook. You can then dial these numbers directly from the Phonebook. There are two different types of Phonebooks available to you:
■ the Global Phonebook and
the Personal Phonebook.
In both Phonebooks, the entries are in alphabetical order of the names. The Global Phonebook is available to all users and contains information about the availability of your company's subscribers, e.g. if they are logged or currently making a call. The system administrator or any user with the appropriate authorization can add further phone numbers in this Global Phonebook, e.g. subscribers of another branch. However, the availability of these phone numbers is not signaled. The Global Phonebook also contains dial numbers of individual groups.
You can store, edit or delete your personal numbers in the Personal Phonebook.
You can directly add, modify, or delete an entry in your Personal Phonebook via SwyxPhone . Alternatively, you can also modify the Personal Phonebook via SwyxIt!. For further information, please refer to the SwyxIt! documentation.
The Structure of the Entries in the Global Phonebook
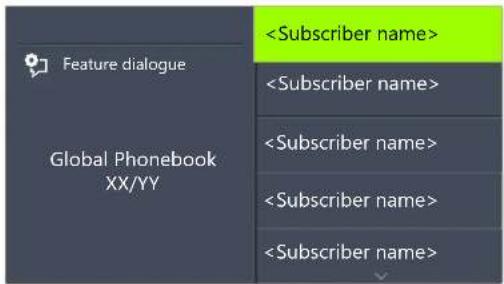
text_image
Feature dialogue Global Phonebook XX/YYThe left part of the display shows which phonebook (Personal or Global Phonebook) you are currently in. You also see which entry (XX) of the total number of entries (YY) has been selected.
The names of subscribers in a phonebook are listed in alphabetical order.
This is how you search in a Phonebook
- Use the arrow buttons to select "Main Menu" and press the "OK" button.
- Choose "Phonebooks" and press the "OK" button. √ The following will appear:
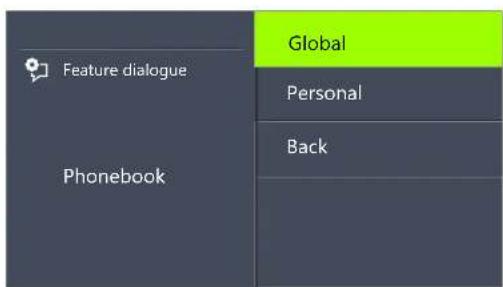
text_image
Feature dialogue Phonebook Global Personal Back- Choose the phonebook you want, and press the "OK" button.
Use the arrow buttons to page through the list of phonebook entries. Confirm the selection of an entry with the "OK" button.
To speed up a search in a large phonebook, you can enter the first letter of the name in the numeric keypad, e.g. for an "F" press the "3" three times, for an "E" press the "3" twice. The letters entered for the search appear in the display:
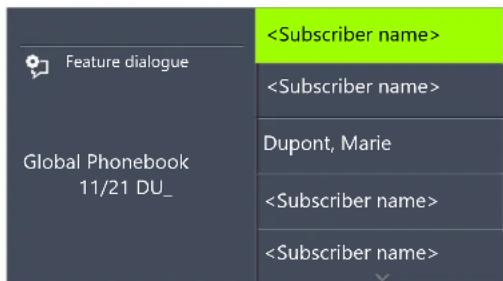
text_image
Feature dialogue Global Phonebook 11/21 DU_A beep and the insertion mark “_” prompt you to enter the next character.
- In order to display more details, e.g. to display the status for an entry, select the corresponding entry and press OK.
√ The following will appear:
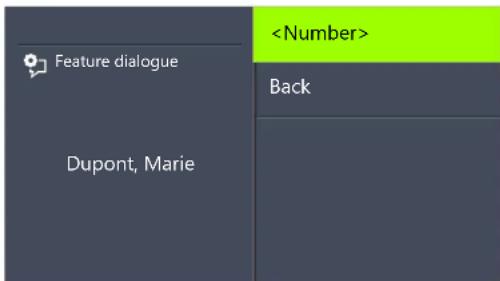
text_image
Feature dialogue Dupont, MarieWithin the entry, you can call the subscriber by pressing OK.
To exit from an entry or a list, press the arrow button "Back".
Personal Phonebook
You can add, modify or delete entries in your Personal Phonebook. If you have created a note during a call, this will be added as a new entry in your Personal Phonebook. (see Chapter 15.4, Note, page 148). Entries in the Caller List and in the Redial List can also be added to the Personal Phonebook.

Enter a letter like editing a SMS: For example press the 7 three times to enter a R. Enter the space with "0". The '*' key is used to switch between upper and lower case letters.
This is how you add an entry to the Personal Phonebook
- Use the arrow buttons to select "Main Menu" and press the "OK" button.
- Choose "Phonebooks" and press the "OK" button.
- Choose "Personal" and press the "OK" button. √ The following will appear:

text_image
Feature dialogue Personal Phonebook Dupont, Marie Rossi, Mario Add entry Back- Choose "Add entry".
√ The following will appear:
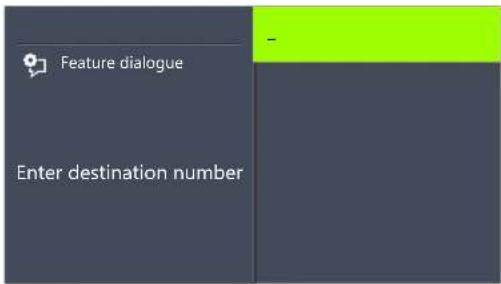
text_image
Feature dialogue Enter destination number -- Enter here the number of the new entry, and press OK. √ The following will appear:
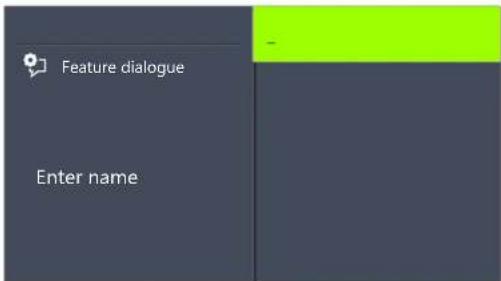
text_image
Feature dialogue Enter name- Enter the assigned name, and press OK.
- Choose "OK" to save the entry.
√ The Personal Phonebook will appear with the saved entry.
This is how you edit an entry in the Personal Phonebook
You can modify or delete an entry in the Personal Phonebook.
- Use the arrow buttons to select "Main Menu" and press the "OK" button.
- Choose "Phonebooks" and press the "OK" button.
-
Choose "Personal" and press the "OK" button.
-
Select the entry you want to edit or delete, and press OK. √ The selected entry will open:
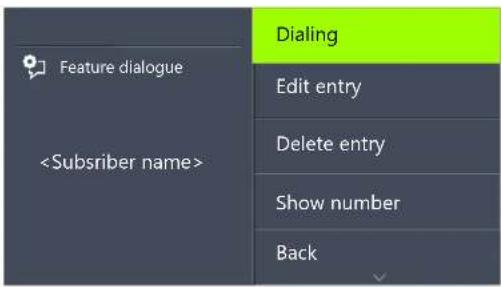
text_image
Feature dialogueTo edit the entry, select "Edit entry". You can now change the name of the entry and then the corresponding telephone number.
For further information please refer to chapter 16.3.2, Phonebooks, page 164.
Confirm each change with "OK". To save the changes, select "Confirm".
To delete, select "Delete entry".
The selected entry will be deleted.
16.3.3 Caller list
The last calls received for you are automatically saved in the Caller List. The calls are listed in the order in which they were received. You can directly dial the individual entries from the Caller List, edit them, and then save them in the Personal Phonebook. 20 entries will be saved in the Caller List per default setting. The maximum number of possible entries can be changed via Swyxlt!.
For further information, please refer to the Swyxlt! documentation.
This is how you edit an entry in the Caller List
You can edit an entry in the Caller List, save it in the Phonebook, or delete it.
-
Use the arrow buttons to select "Main Menu" and press the "OK" button.
-
Select "Caller List (XX)" and press the "OK" button.
√ The following will appear:
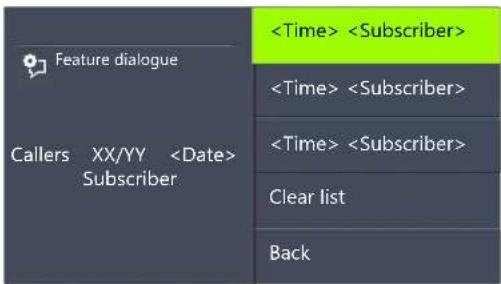
text_image
Feature dialogue Callers XX/YY- Choose the appropriate entry and press the "OK" button.
√ The following will appear:
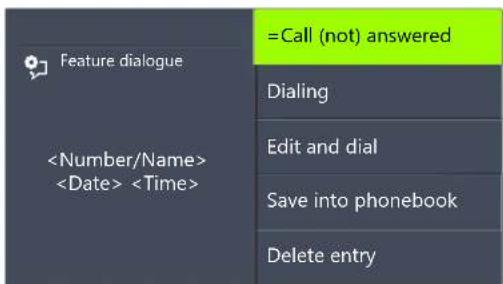
text_image
Feature dialogue- If you select "Dialing" and press OK, the subscriber is called directly.
- "Edit and dial" can be used to edit a telephone number before dialing. When you confirm your changes with OK, the number will be dialed immediately.
- "Save into phonebook" can be used to save the caller's name and number in your Personal Phonebook. If you confirm this option with OK, the number will appear and you can then add the name. If a name already exists, the name will be provided for possible
changes.
- You can remove this entry from the list with "Delete entry".
This is how you delete the Caller List
If the list is no longer up-to-date, it can be deleted at any time.
- Use the arrow buttons to select "Main Menu" and press the "OK" button.
- Select "Caller List (XX)" and press the "OK" button.
- Scroll with the arrow button "Down" to the end of the list. √ The following will appear:

text_image
Feature dialogue Caller (XX/YY)- Choose "Clear List" and press the "OK" button. √ The entire list will be deleted.
16.3.4 Redial list
All dialing procedures are automatically saved in the Redial List. The entries begin with the most recently saved dialing procedure. 20 entries will be saved in the Redial List as default setting. The length of the list can be changed with Swyxlt!. For further information, please refer to the Swyxlt! documentation.

If the handset is off the hook or if the Speaker button is activated when you press the "Redial" button, the last number dialed will be called again.
This is how you edit the Redial List
You can edit an entry in the Redial List, save it in the Phonebook, or delete it.
- Use the arrow buttons to select "Main Menu" and press the "OK" button.
- Choose "Lists" and press the "OK" button.
- Choose "Redial List" and press the "OK" button.
√ The following will appear:
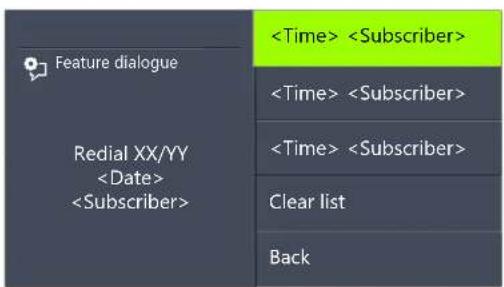
text_image
Feature dialogue Redial XX/YY Date>- Choose the appropriate entry and press the "OK" button.
√ The following will appear:
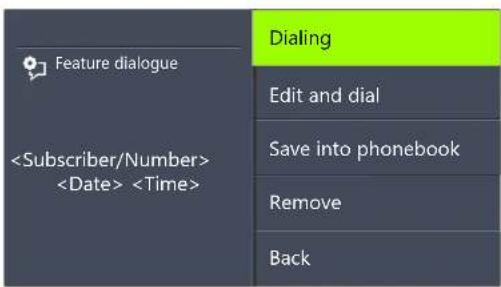
text_image
Feature dialogue- If you select "Dialing" and press OK, the number is dialed at once.
- "Edit and dial" can be used to edit a telephone number before dialing.
- "Save into phonebook" can be used to save the caller's name and number in your Personal Phonebook. If you confirm this option with OK, the number will appear and you can then add the name. If a name already exists, the name will be provided for possible changes.
- You can remove this entry from the list with "Delete entry".
This is how you delete the Redial List
If the Redial List is no longer up-to-date, it can be deleted at any time.
- Use the arrow buttons to select "Main Menu" and press the "OK"
button. - Choose "Lists" and press the "OK" button.
- Choose "Redial List" and press the "OK" button.
√ The Redial List opens up.
- Scroll with the arrow button "Down" to the end of the list.
√ The following will appear:
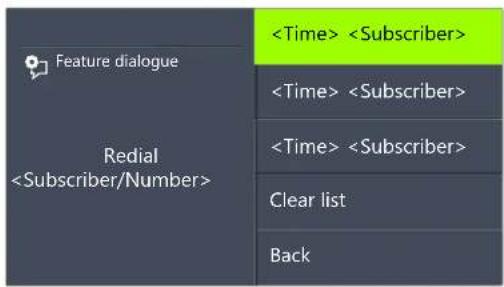
flowchart
graph TD
    A["Feature dialogue"] --> B["Redial"]
    B --> C["<Subscriber/Number>"]
    C --> D["<Time> <Subscriber>"]
    D --> E["<Subscriber>"]
    E --> F["Clear list"]
    F --> G["Back"]
- Choose "Clear List" and press the "OK" button.
The entire list will be deleted.
If you reopen the Redial List, the message "No entry" will appear.
16.3.5 Lists for Callback Requests, My Callback Requests and Missed Callbacks
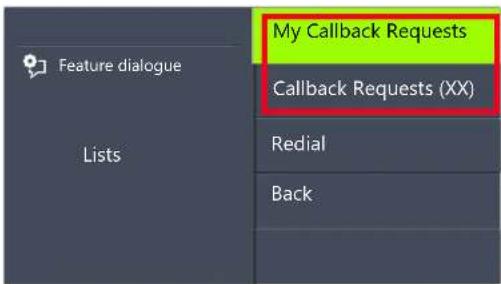
text_image
My Callback Requests Callback Requests (XX) Redial BackIn the "My Callback Requests" list you will find all callbacks that you have requested.
In the "Callback Requests" list you will find all callbacks that have been directed to you.
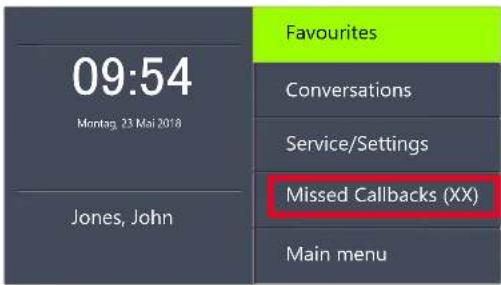
text_image
09:54 Montag, 23 Mai 2018 Jones, John Favourites Conversations Service/Settings Missed Callbacks (XX) Main menuIn the "Missed Callbacks" list you will find all callbacks on busy, which were prompted because the person called had finished his conversation, but were not confirmed by you.
For further information please refer to chapter 15.5, Callback request, page 149.
16.4 Configure function keys
You can configure function keys on the key module SwyxPhone Key Module 66, see also Chapter 13.1.3, Configurable function keys on the key module, page 124.
You can access preconfigured function keys via "Favourites" menu, see also Chapter 13.1.2, Preconfigured function keys in the "Favourites" menu., page 123.
You can also configure these buttons as Line buttons or Speed Dials (abbreviated dialing buttons).
A function key can call only one function, dependent on its configuration.
Each function key can be configured with the following functions:
| Function Description | |
| Line button Activate/deactivate lineFor further information please refer to chapter 16.5, Lines, page 172. | |
| Speed dial Call specific numberFor further information please refer to chapter 16.7, Configuring Speed Dials, page 175. | |
| Call Transfer Connect lines to each otherFor further information please refer to chapter 14.10, How do I connect two subscribers to one another?, page 134. | |
| Do Not Disturb | Activate/deactivate acoustic call signalingFor further information please refer to chapter 16.1.2, No disturb, page 161. |
| Secondary call | Enable or disable secondary callFor further information please refer to chapter 16.1.3, Secondary call, page 161. |
| Caller list | Call up caller listFor further information please refer to chapter 16.3.3, Caller list, page 166. |
| Hold | Put an active line on holdFor further information please refer to chapter 16.3.3, Caller list, page 166. |
Function Description
| Phonebook Call up Global PhonebookFor further information please refer to chapter 16.3.2, Phonebooks, page 164. | |
| Redial Call Redial ListFor further information please refer to chapter 16.3.4, Redial list, page 167. | |
| Speaker Switch the speakers or the handsfree telephone on/offFor further information please refer to chapter 14.17, Speaker and Handsfree Telephone, page 141. | |
| Pick up call Picks up an incoming call to a group or a group user.For further information please refer to chapter 14.5, How do I pick up a call?, page 130. | |
| Call Forwarding Enable/Disable Call Forwarding Unconditional For further information please refer to chapter 16.1.1, Call Forwarding, page 160. | |
| Call Swap Switch between LinesFor further information please refer to chapter 14.9, How do I switch between lines (Call Swap)?, page 133. | |
| Mute | Switch microphone on/offFor further information please refer to chapter 14.17, Speaker and Handsfree Telephone, page 141. |
| Headset | Deactivate/Activate HeadsetFor further information please refer to chapter 14.7, How do I telephone with a (Bluetooth) headset?, page 131. |
| Disconnect End the active connection | |
| Incognito Before | an outgoing call, suppress number displayFor further information please refer to chapter 16.2.3, Incognito, page 163. |
Voicemail Call to check voicemail For further information please refer to chapter 15.1, Voicemail inquiry, page 144.
Function Description
| Conference Combine lines into a conference | |
| For further information please refer to chapter 15.6, Conference, page 153. | |
| Callback request | Make a callback requestFor further information please refer to chapter 15.5, Callback request, page 149. |
| User logoff Log off phone user from SwyxServer | |
This is how you configure a function key
- Use the arrow buttons to select "Main Menu" and press the "OK" button.
- Choose "Configuration" and press the "OK" button. √ The Settings menu will appear.
| Feature dialogueConfiguration | Call signaling = on |
| Lines | |
| Function keys | |
| Speed dials | |
| Incognito = off |
- Choose "Function keys" and press the "OK" button. √ The following will appear:
text_image
Feature dialogue Function keys Press a function key Back- Press the configurable function key to which you want to assign a function.
√ The current function of the key is displayed. If the key is not yet assigned a function, this message appears:
text_image
Feature dialogue Function Key = No function Modify Remove Back- Choose "Modify" and press the "OK" button.
You can choose from the following functions:
- Line button
- Speed dial
- Call Transfer
- Do Not Disturb
- Secondary call
-
Caller list
-
Hold
- Phonebook
- Redial
- Speaker
- Pick up call
- Call Forwarding
- Call Swap
- M u t e
- Disconnect
- Headset
- Incognito
• Conference - Callback request
-
User logo off
-
Choose the function you want, and press the "OK" button. √ The key is set with the chosen function.
text_image
Feature dialogue Function keys Press a function key Back- You can assign an additional function key or return to the main menu with the arrow button "Back".
This is how you delete the function of a function key
- Use the arrow buttons to select "Main Menu" and press the "OK" button.
-
Choose "Configuration" and press the "OK" button. √ The Settings menu will appear.
-
Choose "Function keys" and press the "OK" button. √ The following will appear:
text_image
Feature dialogue Function keys Press a function key Back- Press the configurable key whose function you want to delete. √ The current function of the key is displayed.
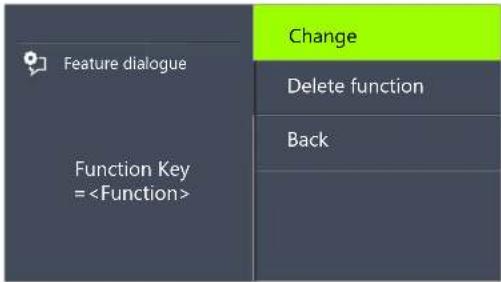
flowchart
graph TD
    A["Feature dialogue"] --> B["Function Key = <Function>"]
    C["Change"] --> D["Delete function"]
    D --> E["Back"]
    E --> F[" "]
- Choose "Delete function" and press the "OK" button. √ The function of this key is deleted.
If you press a key with no assigned function, you will hear a brief signal (button signal).
16.5 Lines
The Number of Available Lines
The least number of lines is always two, even if you have only one or no configured Line buttons; i. e. you can recieve at least two incoming calls. To increase the number of lines, you must add Line buttons. You can configure up to a total of nine lines (line keys) for SwyxPhone.
To add a Line button, you must configure a configurable function key as a Line button (see This is how you configure a function key, page 170).

Due to the fact that both SwyxPhone and SwyxIt! access the same user settings, any changes you make on SwyxPhone will always effect the settings in SwyxIt! and vice versa. Above all, you should keep in mind that if you delete lines or Speed Dials, the data will be lost!
Configuration of the Individual Line Buttons
You can define numbers for incoming and outgoing calls for the available lines. This requires that your user account has been assigned at least two numbers (or group numbers).
The option "Incoming calls" shows the telephone number the caller has dialed, when the call comes in on this line. Under the option "Outgoing calls", you can specify the telephone number to be used for making outgoing calls from this line.
Examples:
Incoming call (you are being called):
You have assigned the extension number 100 to Line 1 and the extension number 101 to Line 2. Now, if a subscriber dials the number 101, you will receive the call on Line 2.
Outgoing call (you are calling someone):
You have assigned the extension number 101 to Line 2. If you now call a subscriber using Line 2, extension 101 will be used. The subscriber you have called will see on his display that he is being called by a subscriber with the number 101.
For each configured Line, you can define whether this line should be blocked for specific period of time after an incoming call is received. (see Chapter 16.6, Disabling Lines (Wrap-up Time), page 174)

If an outgoing call is started or if the Line button is pressed during this wrap up time, the line will once again be cleared afterwards for incoming calls.
16.5.1 Configure Line buttons
Every configurable function key can be set with the "Line key" function (see This is how you configure a function key, page 170).
This is how you configure a Line button
- Use the arrow buttons to select "Main Menu" and press the "OK" button.
- Choose "Configuration" and press the "OK" button. √ The Settings menu will appear.
- Select "Lines". √ The following will appear:
| Feature dialogue Lines (amount: 02) | Line 01 |
| Line 02 | |
| Back | |
- Select the line you want to configure, and press OK √ The following will appear:
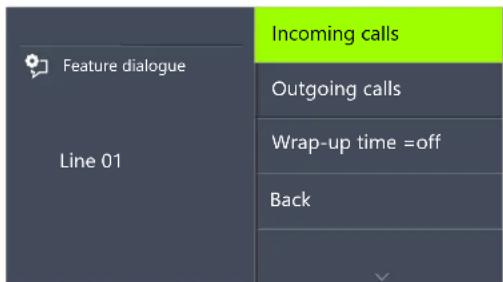
text_image
Feature dialogue Line 01 Incoming calls Outgoing calls Wrap-up time =off BackYou have the option of entering an extension for outgoing or incoming calls.
- Choose the option you want, and press the "OK" button. √ The following will appear:
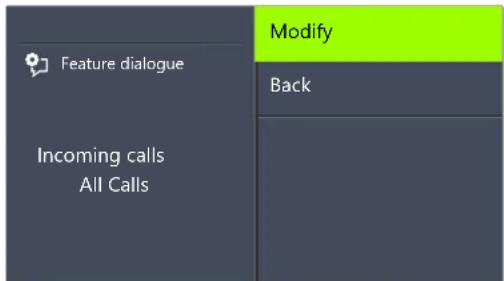
flowchart
graph TD
    A["Feature dialogue"] --> B["Incoming calls All Calls"]
    C["Modify"] --> D["Back"]
If the system administrator has configured several telephone numbers for you, you can change these numbers as follows:
- Choose "Modify" and press the "OK" button.
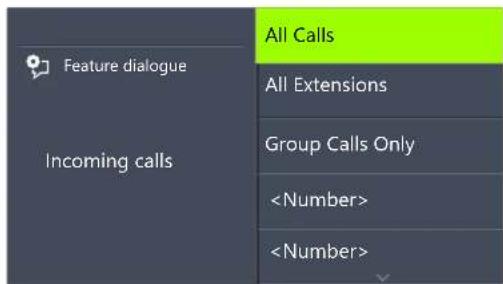
text_image
Feature dialogue Incoming calls All Calls All Extensions Group Calls OnlyYou can define which of your calls should be received on this line.
- "All Calls"
In this case, all calls will be signaled on this line, regardless of whether these calls are directed to your own extension or to a group, of which you are a member. - "All Extensions"
Choose this option, if all calls directed to you, regardless of the extension dialed, should be received on this line. This option is only available if you have been assigned several extensions numbers. - "Group Calls Only"
All calls to groups of which you are a member will be received on this line.
• < Number >
An incoming call will only be received on this line if the caller has specifically dialed this extension. Here you can even select individual group extension numbers.
You have to confirm the telephone number or option with the "OK" button.
16.6 Disabling Lines (Wrap-up Time)
You can specifically block a line for further incoming calls, e.g. in order to have enough time to process a customer inquiry after a call from a customer. Your SwyxPhone is then busy for further incoming calls.
This is how you set the wrap-up time
- Select "Main menu" with the arrow buttons, and press the "OK" button.
- Choose "Configuration" and press the "OK" button. √ The following will appear:
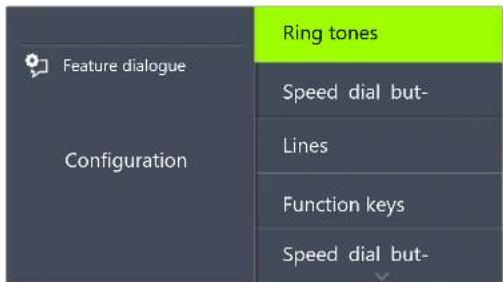
text_image
Feature dialogue Configuration Ring tones Speed dial but- Lines Function keys Speed dial but-- Select "Lines".
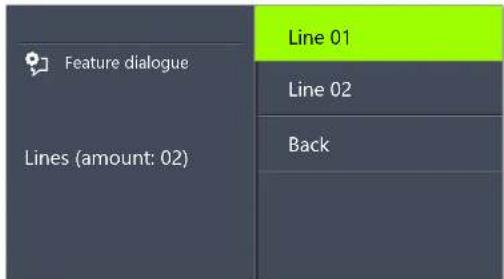
text_image
Feature dialogue Lines (amount: 02) Line 01 Line 02 Back- Select the line for which you want to set the wrap-up time, and press OK.
√ The following will appear:

text_image
Feature dialogue Line 01 Incoming calls Outgoing calls Wrap-up time =off Back- Choose "Wrap-Up time" and press the "OK" button. √ The following will appear:
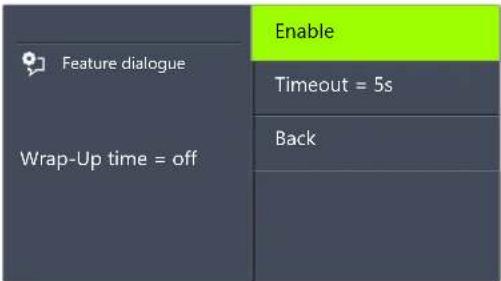
text_image
Feature dialogue Wrap-Up time = off Enable Timeout = 5s Back- Press OK to switch the wrap-up time on or off.
- Select "Timeout" to change the wrap-up time.
- Enter the desired duration in seconds (5 -1800s) and press the "OK" button.
√ The wrap-up time for the line in question is defined and activated.
16.7 Configuring Speed Dials
Every configurable function key can be set with the "Speed Dial" function (see This is how you configure a function key, page 170.
You can use a Speed Dial for one-click dialling of a number you often call. You only need to press the relevant Speed Dial, and the subscriber whose name is assigned to the Speed Dial will be called at once. Speed Dials can also be utilized for frequently used DTMF commands.

Due to the fact that both SwyxPhone and SwyxIt! access the same user settings, any changes you make on SwyxPhone will always effect the settings in SwyxIt! and vice versa. If you delete Line buttons or Speed dial buttons, the corresponding data will be removed from your user profile.
This is how you assign a Speed Dial to the number of your choice
- Use the arrow buttons to select "Main Menu" and press the "OK" button.
- Choose "Configuration" and press the "OK" button. √ The Settings menu will appear.
- Choose "Speed Dials". √ All Speed Dials glow. The following appears on the display:

text_image
Feature dialogue Speed dials Press speed dial! BackIf no key glows, you first have to configure a function key as a Speed Dial (see This is how you configure a function key, page 170).
- Press the Speed Dial you want.
√ The following will appear:
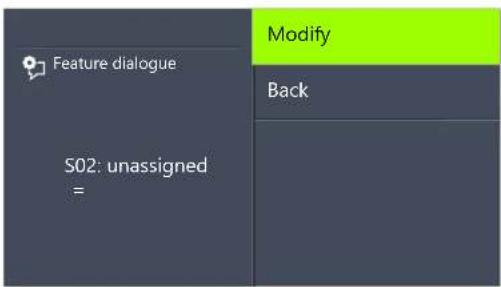
text_image
Feature dialogue S02: unassigned = Modify BackThe current function of the key is displayed. If the key is not yet assigned, this message appears.
- Choose "Modify" and press the "OK" button.
√ The following will appear:
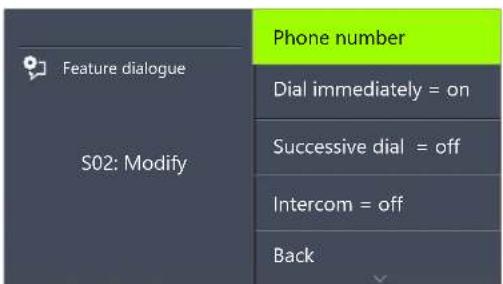
text_image
Feature dialogue S02: Modify Phone number Dial immediately = on Successive dial = off Intercom = off Back
The option "Dial immediately" must be activated and "Successive dial" deactivated to use a Speed Dial.
- Choose "Number" and press the "OK" button.
- You can select a number from the phonebook or enter one manually using the keypad:
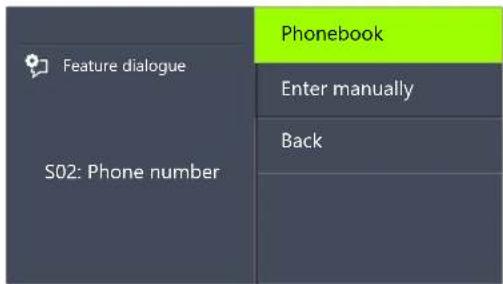
text_image
Feature dialogue S02: Phone number Phonebook Enter manually Back- Confirm your entry with "OK".
√ The Speed Dial has been assigned a number. You can configure another function key, or leave the configuration menu.
16.7.1 "Intercom"
Intercom connection allows you to directly speak to an internal subscriber, who allows his status to be signaled to you, i.e. without him having to pick up the call. If you press the Speed Dial on which the Intercom connection is activated, the corresponding number will be dialled and an intercom signal is produced for the called subscriber. The telephone or Swyxlt! then immediately activates the line and the speaker. You can begin your intercom connection to this subscriber.
If the called subscriber lifts the handset, you can continue the call as a normal telephone call.

Intercom connection is only possible between the internal subscribers if you are mutually signaled the current status ("Available"/"Speaking").

If the subscriber called is currently on the phone, you cannot begin an intercom connection.
This is how you assign a Speed Dial to the option "Intercom"
- Follow the steps (1) to (5) (see This is how you assign a Speed Dial to the number of your choice, page 175).
Phone number
- Use the arrow buttons to select the option "Intercom".
- Press OK to switch the selected option on or off.
√ The status of the option changes.
The conditions of the dialling procedure for the Speed Dial have changed. You can configure another function key, or leave the configuration menu.
17 Interaction with SwyxIt!
Swyxlt! is a telephony application which can be installed on your PC. Swyxlt! uses Internet Protocol and interacts with Microsoft Outlook and Microsoft Exchange.
SwyxPhone applies many of the telephony settings you have created in SwyxIt!, as long as they are not dependent on the terminal (e.g. the Personal Phonebook, the definition of call forwardings, the assignment of Speed Dials, or Remote Inquiry). SwyxPhone is not dependent on your PC, i.e. if your PC is switched off, you can still be reached on the SwyxPhone.
Furthermore, you can control a SwyxPhone remotely with CTI. In this way, you can use the extensive features of SwyxIt!, and in addition benefit from the advantages of the telephone, which is e.g. still available when your computer is switched off. For further information please refer to chapter 17.5, PC Operation of a SwyxPhone or SwyxIt! (CTI), page 181.

If SwyxPhone or SwyxIt! does not log on properly, please check whether other devices are already logged on under this user. A maximum of four devices (SwyxIt!, SwyxPhone or other telephones) can be logged on simultaneously for one user.

If you only have a SwyxPhone available, the settings you would have otherwise made using Swyxlt! can be carried out by the system administrator for you.

If several devices are logged on under one user, the administrator can define which device (Swyxlt!, SwyxPhone, H.323- or SIP-telephone) should signal the user's status (Logged on, speaking, etc.).
17.1 Configuration of SwyxPhone in Swyxlt!
In Swyxlt! you can easily configure the SwyxPhone keys and a Key Module, if available. For the configuration in Swyxlt! you must use the same user account as for SwyxPhone.

Due to the fact that both SwyxPhone and SwyxIt! access the same user settings, any changes you make on SwyxPhone will always effect the settings in SwyxIt! and vice versa. Above all, you should keep in mind that if you delete lines or Speed Dials, the data will be lost!
This is how you configure the buttons for SwyxPhone in SwyxIt!
- Start Swyxlt! under your user account.
- In the menu bar of Swyxlt!, open the tab "SwyxPhone" under "Settings | User Profile...".
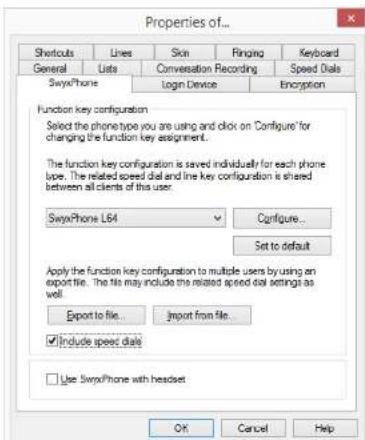
text_image
Properties of... Shortcuts Lines Skin Finging Keyboard General Lists Conversation Recording Speed Dial Swxx/Phone Login Device Encryption Function key configuration Select the phonetype you are using and click on 'Configure' for changing the function key assignment. The function key configuration is saved individually for each phone type. The related speed dial and line key configuration is shared between all clients of this user. Swxx/Phone L64 Configure... Set to default Apply the function key configuration to multiple users by using an export file. The file may include the related speed dial settings as well. Export to file. Import from file. Include speed dial Use Swxx/Phone with headset OK Cancel HelpHere you can assign the buttons of the telephone and import or export this assignment.
- Select the type of terminal you would like to configure from the dropdown list, and then click on "Configure...".
The dialog window with the properties of the selected telephone will open.
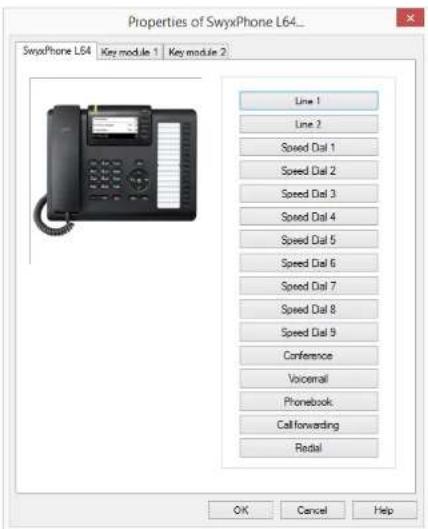
text_image
Properties of SwyxPhone L64_* SwyxPhone L64 Key module 1 Key module 2 Line 1 Line 2 Speed Dial 1 Speed Dial 2 Speed Dial 3 Speed Dial 4 Speed Dial 5 Speed Dial 6 Speed Dial 7 Speed Dial 8 Speed Dial 9 Conference Vocemail Phonebook Callforwarding Radial OK Cancel HelpYou will see a picture of the selected phone and the buttons, which are assigned to the keys on this phone.
- Click on a button to configure the corresponding key. The following will appear:
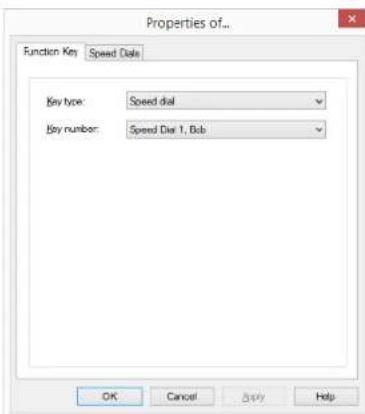
text_image
Properties of... Function Key Speed Date Key type: Speed dial Key number: Speed Die 1, Bob OK Cancel Apply HelpDepending on the selected function of the key, there is another tab provided for defining the properties of this key in more detail.
- Use this method to configure all keys of the selected phone. If you use different telephone types, you can configure all keys for these telephone types here. Depending on the selected telephone type, you can configure additional key modules.
17.2 Settings which can only be made in Swyxlt!
There are settings, which can only be made using SwyxIt!, and these settings also have an effect on the behavior of your SwyxPhone:
■ Length of the Caller List and the Redial List
■ Rulebook of the Call Routing Manager
Voicemail
- Remote Inquiry
17.2.1 Length of the Caller List and the Redial List
The Caller List and the Redial List are valid for both Swyxlt! and SwyxPhone. The length of these lists (default setting: 20 entries) can only be changed in Swyxlt!.
17.2.2 Rulebook of the Call Routing Managers
An extensive set of rules is available for call handling in SwyxIt!. This is known as the Call Routing Manager. If you activate rules in the Call Routing Manager, these will also be valid for your SwyxPhone. From your SwyxPhone you have no direct access to the Call Routing Manager.
17.2.3 Voicemail
In Swyxlt! you can define parameters for your standard Voicemail, e.g. the announcement or the e-mail address to which the Voicemails received should be sent. If you activate the forwarding to your Voicemail, the standard Voicemail configured in Swyxlt! will be used.
17.2.4 Remote Inquiry
In Swyxlt! you can also define the access conditions for the remote inquiry of your Voicemails, e.g. the PIN and the access to the mail server on which the Voicemails are stored.
17.3 Settings Which Are Simultaneously Valid for SwyxIt! and SwyxPhone
There are also properties, which affect both Swyxlt! and SwyxPhone in the same way, i.e. changes to Swyxlt! are also valid for SwyxPhone. These include:
Personal Phonebook
Mutual ringing
■ Speed dial buttons
Lines
■ Forwardings (Unconditional, Busy, No Reply)
Content of the lists
Do Not Disturb
- Acoustic call signaling
Secondary call
■ Telephone number suppression
17.3.1 Phonebooks
Your Personal Phonebook is available both in SwyxIt! and in SwyxPhone. Changes which are made on one of the two are valid for both.
The Global Phonebook receives the entries of all employees, which have internal extensions, from SwyxServer. In addition, the Outlook - Contacts are also available to Swyxlt! users. These are altered accordingly within Outlook.
17.3.2 "Mutual Ringing" for SwyxPhone and SwyxIt!
If you are registered as a user for both SwyxPhone and SwyxIt! under one user account on SwyxServer, you can pick up all of your incoming calls either on SwyxPhone or on SwyxIt!. You will find more detailed information, for example, in Chapter 6.4, How do I pick up a call?, page 29.
17.3.3 Speed dials
The assignment of the Speed Dials in SwyxPhone corresponds to the assignment of the Speed Dials in SwyxIt!. The Speed Dials have an index so that the button S01 on the SwyxPhone corresponds to Speed Dial 1 on the SwyxIt!. If you make changes in one of these applications, this will also directly affect the other application.
Example:
Swyxlt! and SwyxPhone are registered under the same user account on SwyxServer. On Swyxlt! you have assigned the telephone number 234 to Speed Dial 1. If you now change Speed Dial S01 on your SwyxPhone, e.g. to the telephone number 789, then the Speed Dial assignment will also be changed in Swyxlt!.
17.3.4 Lines and Line Buttons
The lines on SwyxPhone are represented by different Line buttons. If you change the configuration of these lines, the changes will affect both -SwyxIt! as well as SwyxPhone.
Example:
If you configure in Swyxlt! Line1 in such a way that only calls to extension 246 are received, this configuration will also be valid for Line button L01 on your SwyxPhone.

If you have more lines configured on your SwyxIt! than existing lines on your SwyxPhone, calls that are received on the lines which have no assignment on your SwyxPhone will be connected on your SwyxPhone on Line 1. This ensures that none of your calls is lost.
17.3.5 Call Forwarding
The settings for Forwarding Unconditional, Forwarding Busy, and Forwarding No Reply can be changed in Swyxlt! and in SwyxPhone. Changes are then valid for both.
If you activate one of these forwarding options, it will be valid simultaneously for both Swyxlt! and SwyxPhone.
17.3.6 Lists
The Caller List and the Redial List are valid for both Swyxlt! and SwyxPhone. The length of these lists (default setting: 20 entries) can only be changed in Swyxlt!. If you have picked up a call with SwyxPhone, this call will also appear as picked up in the Caller List of your Swyxlt!.
17.4 Settings Which Are Individually Valid for Swyxlt! and SwyxPhone
Some settings are valid either for Swyxltl or for SwyxPhone. Any changes are not apply to the other device:
Ring tones
Volume
■ Function assignment of the buttons on SwyxPhone
17.5 PC Operation of a SwyxPhone or Swyxlt! (CTI)
With the CTI functionality you can dial the person you wish to speak to on your PC (Swyxlt!), e.g. from Outlook or Lotus Notes Contacts but the call will be made as usual via the telephone device. Even if SwyxPhone is controlled from a CTI Swyxlt!, all telephony functions are available to you at any time directly on SwyxPhone.

A SwyxPhone user must have a PIN for authorized access to a SwyxPhone. If you do not yet have a PIN, contact your administrator.
Swyxlt! can only operate a SwyxPhone, which is logged on under the same user on SwyxServer. To do this, the Swyxlt! used for operation switches to CTI mode. If only one other SwyxPhone is logged on under the same user on SwyxServer the link will take place automatically. If several telephony terminals are logged on under the same user, the PC operation from one of the telephony terminals must be accepted.
You are provided with the following options on the CTI-Swyxlt! for the PC operated telephony client:
Dial
You can dial from Outlook or from another application, via the Caller List or Redial List and from the phonebooks. In this case, highlight
the telephone number and click on the handset (block dialing). Alternatively, you can click on the handset icon first (the line becomes active) and enter individual digits on the PC.
Telephony functions such as Hold, Call Swap, Transfer, Start Conference, Callback or Callback on busy
Settings
Button assignments (Speed Dials and Shortcuts), signaling (call and status signaling), Forwarding, Voicemail and Call Routing Manager or Skin (only for SwyxIt!), are assigned to the user account and are therefore the same for the operated telephone and the CTI SwyxIt!.

You can only pick up or end calls using a CTI Swyxlt! via the Swyxlt! interface per mouse click. Picking up a handset which is connected to the CTI Swyxlt! will not result in this case in the activation of a line. If you lift the handset of the PC operated SwyxPhone, this will activate the line.
This is how you configure Swyxlt! as CTI Swyxlt!
- Click on "Settings | CTI..." in the menu bar.
- Mark the checkbox "Use CTI to control a device".
- Then, click on "Start pairing".
Swyxlt! will once again search for a SwyxPhone which is logged on to this SwyxServer under the same user. A query is started in the list of all possible devices.
- Confirm the query of the desired SwyxPhone by clicking "OK". If only one SwyxPhone has been found, the CTI pairing accepts this device automatically after a few seconds.
- Click on "OK".
√ You can now execute all SwyxPhone functions within CTI SwyxIt!.

SwyxWareFor every user account, only one SwyxIt! can be operated in CTI mode at the same time.

A CTI SwyxIt! cannot log on if there are not sufficient CTI licenses on SwyxServer. Ask your system administrator should you have questions about this.

If a SwyxPhone is PC operated, there will only be as many available lines as offered on the interface of the CTI SwyxIt! during the PC operation.

If during installation of Swyxlt! the CTI functionality is already activated, this will be valid for all users who start Swyxlt! on this PC. Regardless of this, each user of this PC can use the "Run as CTI Swyxlt!" checkbox to deactivate the CTI functionality.
This is how you end the PC operation with CTI SwyxIt!
Swyxlt! is in CTI mode, i.e. Swyxlt! is operating another SwyxPhone remotely.
- Click in the menu bar of the CTI Swyxlt! on "Settings | CTI ...".
- Deactivate the check box "Use CTI to control a device" and click on "OK". The connection between the CTI Swyxlt! and the operated SwyxPhone is released. Swyxlt! remains in CTI mode.
Configuring the Ringing
If you use a CTI Swyxlt! to operate a SwyxPhone or another Swyxlt! remotely, you can indicate which of these telephony clients will ring.
This is how you configure the ringing in CTI mode
- Go to the menu bar and click on "Settings | User Profile...". The "Properties of..." dialog window will appear.
Interaction with Swyxlt! PC Operation of a SwyxPhone or Swyxlt! (CTI)
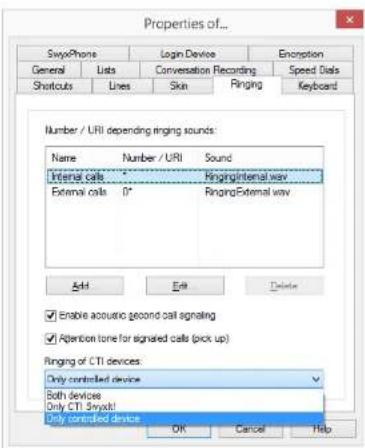
text_image
Properties of... Sway/Phone Login Device Encroption General Lists Conversation Recording Speed Data Shortcuts Lines Skin Ringing Keyboard Number / URI depending ringing sounds: Name Number / URI Sound Internal calls -Ringing/Internal way External calls 0° Ringing/External way Add Edit Delete Enable acoustic second call signaling Attention tone for signated calls (pick up) Ringing of CTI devices Only controlled device Both devices Only CTI (Start) Only controlled device OK Cancel Help- Select the "Ringing" tab.
- You have several options:
- Only controlled device
In this case, only the operated SwyxPhone or Swyxlt! will ring.
- Only CTI Swyxlt!
Only the CTI Swyxlt! will ring. Here you can vary the ringing accordingly within Swyxlt!.
- Both devices
Both the CTI Swyxlt! and the operated SwyxPhone or Swyxlt! will ring.
- Select the required option and click on the "OK" button.
The ringing of CTI devices is configured.
App. A: Call Management: What do I do, if...?
SwyxPhone provides an optimal environment for professionally organizing incoming and outgoing calls.
You are provided with functions such as "Conference", "Call swap", "Call transfer", "Forwarding", "Call signaling", and much more. Using the configurable function keys, you can customize SwyxPhone to your telephoning behavior.
You will find an explanation of the terms used in Chapter 3, What is meant by...?, page 12.
The following chapter lists a variety of situations and your reaction options in each case. This overview will help you to handle several calls at the same time.

Please remember that for some of the examples given the corresponding function keys must be configured and you must have at least three lines available (default setting: two lines). For further information please refer to chapter 16.5, Lines, page 172.
| What do I do, if... Signaling Tip | ||
| another call is received while I am on the telephone and I would like to pick up the second call? | the LED of the corresponding Line button blinks very quickly. | • Press the corresponding Line button. The line is put on hold. |
| I would like to switch to a call on hold? | The LED of the call on hold blinks slowly. | • Press the corresponding Line button. |
| I would like to connect two callers and I have several calls on hold? | After the connection has been completed, the corresponding LEDs will be switched off. | • Press the “Call transfer” function key and select the second caller in the menu. The callers will be connected to each other and your lines will be free again. |
| What do I do, if... Signaling Tip | ||
| I want to forward a call without an Inquiry Call? | If the transfer was successful, the LED will go out, otherwise the call will be returned to you. | Press a free Line button and select a new destination phone number. Then press the "Call Transfer" function key or simply go on hook. |
| I do not wish to pick up another call? | The LED for the line blinks. | Select the menu item "Reject second. call" in the display with the arrow buttons, and press the "OK" button. |
| I want to disable another call during a telephone conversation? | Select the menu item "Secondary call" with the arrow buttons, and deactivate the option by pressing the "OK" button. | |
| I would like to pick up a signaled call? | Call signaling on the display and after 10 seconds a single acoustic signal. The phone of the called subscriber is ringing.If a Speed Dial is assigned to the caller, it blinks. | Select the menu item "Pick Up" with the arrow buttons, and press the "OK" button.Press the Speed Dial. |
| I would like to reject a signaled call? | Call signaling on the display and after 10 seconds a single acoustic signal. The phone of the called subscriber is ringing. | Use the arrow buttons to select the menu item "Ignore".Ignore the call. |
| I would like to make a group call? | Select the appropriate extension from the global Phonebook or dial the extension on the keypad. | |
| I would like to disable Call Signaling? | The optical display of call signaling on the display remains but the warning tone is disabled. | Select the menu item "Call signaling" in the "Configuration" menu, and deactivate the option by pressing the "OK" button. |
| I would like to hide my telephone number for the following call? | With SwyxPhone off hook, select the menu item "Incognito now" with the arrow buttons, and press the "OK" button. (Only SwyxPhone L62)Press the "Incognito" function key. | |
| I would like to put the active connection on hold? | The LED of the Line button with the active connection glows. | Press another Line button or, in the display, select the option "Call Swap" and press the "OK" button.Press the "Hold" function key. |
| I want to create a conference between the active line and the line on hold? | All of the lines on hold will be combined on the active line to create a conference. The LEDs of the lines on hold will go out. | Select the menu item "Conference" with the arrow buttons, and press the "OK" button.Press the "Conference" function key. |
| I am in a conference and I want to start an Inquiry Call? | The LED of the conference line on hold blinks slowly. The LED for the Inquiry Call line glows. | Press a different line button, or select the menu item "Call Swap" with the arrow buttons, and press the "OK" button. You can dial another subscriber. |
| What do I do, if... Signaling Tip | ||
| I want to add another subscriber to a conference? | The LED of the conference line blinks slowly (Hold), the LED of the second line glows.The LED of the second line goes out, the LED of the conference line glows (active). | Press a different line button, or select the menu item "Call Swap" with the arrow buttons, and press the "OK" button.Call the other subscriber.Select the menu item "Conference" with the arrow buttons, and press the "OK" button. |
| I would like to end a conference? | The LED of the conference line goes out. | Place the handset on the hook. |
| I would like to connect a subscriber to the Conference Room? | The LED of the conference line glows.The LED of the conference line blinks slowly, the LED of the second line glows.Both LEDs go out, the lines are free again. | Call the Conference Room. Press a different line button, or select the menu item "Call Swap" with the arrow buttons, and press the "OK" button. You can dial the subscriber.Select the menu item "Call Transfer" with the arrow buttons, and press the "OK" button. |
| I no longer want to be called on a line? | The LED of the line glows with brief interruptions. | Press the corresponding Line button and confirm "Disable line" with the "OK" button. |
| I want to enable a line that was disabled in the wrap up time? | The LED glows. | Press the Line button. |
| I want to be called back by an internal subscriber who cannot be reached? | The line of the subscriber called is busy, the subscriber called does not pick up or his Voicemail picks up the call. | Select the menu item "Call-back request" with the arrow buttons, and press the "OK" button or press the "Call-back Request" function key.Once the called subscriber can be reached again, your telephone will suggest a new attempt. |
| I would like to answer a callback? | In the display you will see the "New Callbacks (XX)" list. | Open the "Callback Requests" list with the "OK" button, and select the entry in the list that you would like to call back. Then take the handset off the hook. |
| if a Callback on busy is suggested? | The LED of the "Callback" function key blinks quickly, "Accept Callback" is shown in the display | Take the handset off the hook. The number will be redialed. |
| if I have missed a Callback on busy? | In the display you will see "Missed Callbacks (XX)". | Open the "Missed Call-backs" list with the "OK" button, and select the entry in the list that you would like to call back. Then take the handset off the hook. |
App. B: Technical Terms
Here you will find more detailed explanations of technical terms used in connection to the "Voice over IP" technology.
These terms are included to help you understand the technical background, but they are not necessarily required to operate the phone itself. However, we also recommend technical "laymen" to briefly browse through these terms. Some of them are easy to understand, while others are more aimed at technically interested readers.
| Term Explanation | |
| Line ISDN line for operating a single ISDN terminal. This is usually a telecommunications system with the option of dialing to an extension. In comparison to the multiple connection, the line has the advantage that the number of extension numbers is not limited. | |
| AES Advanced Encryption Standard Data encryption algorithm | |
| ACD Automatic Call Distribution Automatic call distribution | |
| API Application Programming Interface Interface for application programs | |
| Block Dialing All numbers of the destination phone number are entered before the handset has been lifted. In this case, it is still possible to change the phone number after it has been entered. The phone number will be dialed completely (as a block) when the handset is lifted. The opposite of this is ‘Overlap Sending’. | |
| CAPI | Common ISDN Application Programmable Interface CAPI is the software interface, which regulates the data transfer between the ISDN card and the applications. The CAPI is a standard, which also supports the D-channel protocol of the Euro-ISDN (DSS1) in the CAPI Version 2.0. |
| Term Explanation | |
| CCITT | Comité Consultatif International Télégraphique et TéléphoniqueInternational consulting committee for telegraph and telephone service; known as ITU-T today |
| CDR Call Detail RecordA call detail record provides statistical information, such as caller, duration and cost of the connection. | |
| Client PC | The client PC is an single workstation computer (PC). Many client PCs are connected to a server via the network. |
| CMI | Cordless Multicell IntegrationMulticellular wireless network for cordless equipment |
| CorNet ^ | A protocol created by Siemens, which is used by SwyxPhone to communicate with SwyxServer.This connection is only used to transmit information to the server, e.g. via an activated button, and to send display information from the server to SwyxPhone. The actual telephony functions are carried out in SwyxServer. |
| CTI | Computer Telephony IntegrationTerm used for the connection of telecommunications systems and computer systems (e.g. databases) using a special interface. This enables the user to use telephony services from a PC. |
| DECT | Digital Enhanced Cordless Telecommunication European Standard for the digital cordless communication between a base station and a transportable device for the range of a few hundred meters. |
Term Explanation
| DHCP Dynamic Host Configuration ProtocolInstead of permanently assigning an IP address to a computer in a LAN, DHCP makes it possible to assign IP addresses dynamically and variably. Applications, which depend on an IP address, are immediately assigned one upon request. | |
| DDI Direct Dial InDDI refers to the direct dial from a telephone network to a subscriber. Direct dial allows you to dial specific extensions directly via this number. | |
| DMZ Demilitarized ZoneIn the context of firewalls, a DMZ is a protected logical network segment which contains the publicly accessible services of a company. Thus, a DMZ prevents external access to internal IT structures. | |
| DNS Domain Name ServerA server, which translates the symbolic name (e.g. www.microsoft.com) into an IP address. | |
| DTMF Dual Tone Multi FrequencySeven different frequencies and additional mixture frequencies are transmitted in the telephone line in order to clearly communicate the activated button. | |
| DSP Digital Signal Processor | |
| DirectDialing-Inline | ISDN line, to which a telecommunications system with so-called extension numbers is connected, which can be used to directly contact a subscriber. In the case of the number “(0231) 4777-227, “227” is the extension number within a telecommunications system. An extension number allows you to dial a specific extension of a telecommunications system directly via this defined number. |
| E.164 ITU-T standard for global telephone numbering (country code, local area code and subscriber number, e.g.+49 (231) 123456-789. | |
Tem Explanation
| ENUM 1Elephone NUmber Mapping | |
| ENUM is an application of the Domain Name System for converting telephone numbers (in the E.164 format) to Internet addresses. An ENUM registration of a VoIP number allows calls to be placed directly via the Internet, for example. | |
| Ethernet Network for limited local operation (10 m to 10 km) in the LAN. The individual PCs are connected via a cable network. Data is transferred within this network at a rate of 10Mbit/s, 100Mbit/s or 1Gbit/s. | |
| FD Full Duplex (DX, sometimes also FDX, permits simultaneous transmission of information in both direction, e.g. in telephony) | |
| FTP File Transfer Protocol (Network protocol for file transmission) | |
| G.711 | ITU standard for compression, here: Audicodec 64 kbit/s |
| G.722 | ITU standard for compression, here: Audicodec 64 kbit/s |
| G.723.1 | ITU standard for compression, here: Audicodec 5.3 kbit/s and 6.3 kbit/s |
| G.729 | ITU standard for compression, here: Audicodec 8 kbit/s |
| GAP | Generic Access Protocol Standard for DECT Handsets, which allows the communication between handsets and basis stations of different manufacturers. |
| Gateway | A gateway is a system, which connects two different networks and which can transfer the data in one network to the other network and vice versa. This means that the physical networks can be different and the protocols used (e.g. IP network and ISDN) can also be different. |
Term Explanation
| GSM Global System for Mobile CommunicationGlobal system for mobile communication | |
| H.323 A collection of international specifications (ITU),which define the transmission of multimedia data topacket-oriented data connections. | |
| H.323 Alias Name | A symbolic name (e.g. TOMMY), which can be usedas the address of an H.323 terminal instead of an IPaddress. |
| H.450 Standard for additional performance specificationsin H.323, such as Conference, Call Forwarding, Hold,Call Swap, etc. | |
| HTTP Hypertext Transfer Protocol. A protocol for trans-mission of data over a network. It is mainly used forloading websites and other data from the WorldWide Web (WWW) into a Web browser. | |
| Hub A hub creates a network node in a star-shaped LANand it connects several clients to the network. | |
| ID Identification | |
| IEEE | Institute of Electrical and Electronics EngineersInternational standardization committee |
| Instant Messaging | (Immediate message transfer). A service that usesthe Instant Messenger software (client) to enablereal-time communication (chat) with other subscribers. Short text messages are sent using pushtechnology via a network (server) to the recipient(usually via the Internet), who can respond to themimmediately. Files can usually also be exchanged bythis means. In addition, many messaging programsoffer video or telephone conferences. |
| IPEI Hardware address (12 digits) of a DECT handsetwhich allows an unique identification. | |
| Term | Explanation |
| IP Internet Protocol | |
| Fundamental protocol of the Internet, which combines packet-oriented networks with different technical bases to one large network. Thus this protocol (on layer 3 of the OSI layer model) is used for addressing and distributing data into packets. | |
| IP-adress An IP address is a 32-bit number, which is usually shown as a four-part number, e.g. 192.177.65.4, and which is assigned to every computer connected to the Internet. Domain names, which are unambiguously assigned to IP addresses using a DNS server, were introduced in order to make these addresses simpler and clearer for users. | |
| IP PBX IP Private Branch Exchange | |
| A telephone private branch exchange (PBX) which is created by a software application. It uses Voice-over-IP (VoIP) technology for voice transmission. | |
| ISDN Integrated Services Digital Network | |
| Service integrating digital network | |
| ITSP Internet Telephony Service Provider. | |
| An Internet telephony service provider offers an interface via a gateway between Internet telephony and the classic telephone network. Thus via an ITSP, VoIP users can also reach subscribers in the classic telephone network, and vice versa. | |
| IVR | Interactive Voice Response Interactive Call handling |
| LAN | Local Area NetworkA local network, which is made up of numerous, interconnected computer terminals within one company location and which is used to transfer data. |
| Term Explanation | |
| LDAP Lightweight Directory Access ProtocolA network protocol that allows querying and modification of information of a directory service (a distributed hierarchical database in the network).The current version is specified in RFC 4511. | |
| LED Light Emitting DiodeLight emitting diode (small light) for displaying status information, e.g. for SwyxPhone. | |
| MAC-adress Medium Access Control AddressEach network card identifies itself with the MAC address. This address is an 8-byte address, which is uniquely defined worldwide. | |
| MAPI Mail Application Programming InterfaceThis Microsoft interface can be used by applications to send E-mails. | |
| Multiple connection | Basic Rate Interface for operating up to eight ISDN terminals (ISDN telephones etc.) on a S0 bus. It is possible to operate ISDN telephones, ISDN PC cards or ISDN telecommunications systems on a multiple connection. The devices are addressed via MSNs. |
| MSN Multiple Subscriber NumberA non-direct dialing-in line can have several numbers (MSNs). The assignment of these MSNs to the terminals takes place in the terminals themselves. | |
| Name Resolu-tion | Automatic association of a name to a phone number.Example: You receive a call from the public telephone network and the caller's phone number is transmitted. SwyxWare then searches, e.g. in Micro-soft Outlook Contacts and in the Personal Phone-book, for a contact matching this phone number. If a contact is found, Swyxlt! will show the name of the caller in addition to the phone number in the display. |
| Term | Explanation |
| NAT Network Address Translation is a method for replacing an IP address by another within a data package. This method is frequently used to map private IP addresses to public IP addresses. | |
| NT mode Network TerminatorFor ISDN (and other protocols) a different behavior is often required, depending on functionality. For ISDN, the exchange operates in NT mode and the telephones (terminals) operate in TE mode. An example of different behavior is the transfer of charging information, which of course is only possible from NT to TE, and not the other way round. | |
| NetBIOS Name | A symbolic name (e.g. WS-SJONES), which is used for addressing a PC, if this PC should be contacted using the Microsoft NetBIOS protocol. |
| Overlap Sending | The numbers entered are dialed immediately. The destination phone number can no longer be edited. The opposite of this is ‘Block dialing’. |
| P2P see Peer-to-Peer | |
| PABX Private Automatic Branch ExchangePrivate branch exchange | |
| PBX Private Branch ExchangePrivate branch exchange, i.e. a system for regulating telephone systems in what is usually a smaller telephone network with an interface to the public telephone network. | |
| PDA | Personal Digital Assistant. Small portable computer, usually equipped with a quick start operating system, and used along with many other programs mainly for personal calendar, address and task management. |
| PIN | Personal Identification NumberThis number is linked to the user name, and is used for user authentication. |
Term Explanation
| Peer-to-Peer Network principle in which the data exchange occurs decentrally, directly between the individual computers. In the VoIP field, this means that the connection exists directly between the two subscribers, without server or provider. | |
| POTS Plain Old Telephony SystemThis is the classic analog telephone. | |
| Power over Ethernet | Power over Ethernet is used to identify a property of devices with Ethernet connection, e.g. IP telephones. Thus, the power supply is provided via the Ethernet connection line and not via a power mains plug, as usual. In this case, the Switch or the Hub to which this device is connected per Ethernet must be able to guarantee the power supply via the Ethernet line. |
| PSTN Public Switched Telephone NetworkUmbrella term for analog telephone networks, which usually use digital switches. | |
| QoS Quality of ServiceThe quality in communication networks. Depending on the standard or protocol, different parameters are used for evaluating the properties, such as loss rate, availability, transfer rate and delay. | |
| Router A router connects different kinds of networks to each other. It recognizes the bordering networks and neighboring routers and it determines the path of the data packet. This connection can be created by using either a software or a hardware solution. | |
| RSVP Resource Reservation ProtocolIETF standard to guarantee a certain transmission qualities, such as bandwidth and priority via TCP/IP. | |
Servers The workstation computers are connected (e.g. via Ethernet) to the server, which is the "central computer".
Term Explanation
| SIP Session Initiation Protocol | |
| A network protocol which establishes a communication session between two or more subscribers. | |
| Smartphone A smartphone unites the functional scope of a mobile phone with that of a PDA. You can use a full keypad or touch screen and speak from a PDA phone. Digital cameras are sometimes also incorporated, as in many mobile phones. | |
| SNMP Simple Network Management Protocol | |
| Network protocol developed by the IETF - an open international voluntary association of network engineers, manufacturers and users, which is responsible for proposals for Internet standardization -, to enable network elements (e.g. routers, servers, switches, printers, computers etc.) to be monitored and controlled from a central station. | |
| SNTP Simple Network Time Protocol | |
| Standard for synchronizing clocks in computer systems over packet-based communication networks. Although mostly handled via UDP, can also be transported using other layer 4 protocols such as TCP. Specifically developed to enable reliable timing over networks with variable packet propagation time (ping). | |
| Voice Compression | The voice data are compressed and sent via the network. This reduces the amount of data to be transmitted. This is especially important for the Home Office connection and the coupling of several branch offices via the Internet. |
| STUN | STUN is a simple network protocol that recognizes the existence and type of firewalls and NAT routers and uses this information to bypass them. |
| Term Explanation | |
| Subnet A network can be divided into several subnets. For example, it is possible to use the IP address 192.177.65.xxx to address all computers, which have the number 192.177.65. in common and which only differ from one another in terms of the last three digits (xxx). The subnet mask indicates which positions should be used for differentiation within the subnet. In a subnet, two subscribers communicate directly with each other. The IP packets only have to pass through the router if subscribers communicate outside of the subnet. | |
| Switch A Switch is an active hub, which functions as a kind of exchange. In contrast to the hub, the switch does not forward the incoming data packets to all lines, but rather only to that line which leads to the destination of the packet. | |
| TA Terminal Adapter | |
| TAPI Terminal Application Programming Interface Interface for programming terminal applications | |
| TE mode Terminal Endpoint see NT mode, page 190 | |
| TEI Terminal Endpoint Identifier With the help of the TEI, different terminals are addressed to an ISDN bus on Layer 2. | |
| TCP/IP Transmission Control Protocol / Internet Protocol Two commonly used protocols for the transfer of data and for Internet connection, which can be implemented on different types of transport media. | |
| TSP TAPI Service Provider, driver for TAPI devices | |
| Unified Messaging | Message management system developed in 1989. It denotes a method of bringing incoming and outgoing messages of any kind (e.g. voicemail, email, fax, SMS, MMS, etc) into a standardized form, and granting the user access to this via a wide range of clients (fixed network or mobile phone, email client). |
| Term | Explanation |
| USB Universal Serial Bus. Bus system for connecting a computer to ancillary equipment. A USB port takes little space, and can supply power to simple devices such as a mouse, a phone or a keyboard. Devices equipped with USB can be connected to each other during active operation (hot plugging), and their properties can be detected automatically. | |
| VLAN Virtual LAN. Virtual local network within a physical network. A widespread technical implementation of VLANs is partially defined in the standard IEEE 802.1Q. | |
| VoIP | Voice over IPCollective term for all techniques for transmitting voice over IP networks. |
| WAP | Wireless Application Protocol. The Wireless Application Protocol denotes a collection of technologies and protocols, whose aim is to make Internet content available for the slower transmission rates and the longer response times in mobile radio, as well as for the small displays of mobile telephones. WAP is thus in direct competition with the i-mode services. |
| WAV | A file format used for recording voice or music, for example, announcement texts, music on hold, or Voicemail. 16KB of memory are required for each recorded second. |
App. C: Function codes
This appendix provides an overview of the available function codes. This gives you quick access to certain functions by pressing the corresponding keys.
Within SwyxWare, certain functions can also be started by entering a function code. The character string is interpreted and executed as a command by SwyxServer.
A differentiation is made between
- Template Script Code
These character strings are detected and interpreted by the user's script template.
Note that these codes can only be used within SwyxWare, and not externally.
CTI+ Code
These DTMF strings are being used in connection with CTI+ (control of telephony devices and control of phones via your phone number). Certain SwyxWare functions can be executed via DTMF function codes, independently of SwyxIt!, directly at the connected devices.
■ MobileExtensionManager Code
These DTMF character strings are detected and interpreted by the MobileExtensionManager. They are thus only relevant when connected to the MobileExtensionManager.
- Call Intrusion
These function codes are only used in the context of intrusion on external calls (SwyxMonitor option pack required). They are only possible in block dialing, i.e. before the handset is lifted (e.g. with an abbreviated dialing button).
Feature Codes
These character strings relate to remote inquiries of external voicemails. They are only possible in block dialing, i.e. before the handset is lifted (e.g. with an abbreviated dialing button).
The following function codes are available:
Template Script Code (internal only)
| Code Function | Description | |
| ## - Initial sequence, which routes a call directly to the user. Additional characters are processed by the user's script (template.vbs). | ||
| ##10 Remote Inquiry The remote inquiry for the user is activated; the PIN is not queried since the user himself is calling (from his own device)! Sub-menus of the remote inquiry can be reached directly by suffix. | ||
| ##20nnn# Call Forwarding Unconditional to nnn | Enable Call Forwarding Unconditional to nnn*.If * is entered instead of nnn, Call Forwarding Unconditional to Voicemail is activated.Without nnn, Call Forwarding Unconditional is deactivated. | |
| ##21nnn# Call Forwarding Busy to nnn | Enable Call Forwarding Busy to nnn*.If * is entered instead of nnn, Call Forwarding Busy to Voicemail is activated.Without nnn, Call Forwarding Busy is deactivated. | |
| ##22nnn# Call Forwarding No Reply to nnn | Enable Call Forwarding No Reply to nnn*.If * is entered instead of nnn, Call Forwarding No Reply to Voicemail is activated.Without nnn, Call Forwarding No Reply is deactivated. | |
| ##23 Deactivate Call Forwarding Unconditional | Deactivate Call Forwarding Unconditional | |
| ##24 Deactivate Call Forwarding Busy | Deactivate Call Forwarding Busy | |
| ##25 Deactivate Call Forwarding No Reply | Deactivate Call Forwarding No Reply | |
| Code Function | Description | |
| ##70* | Call All Devices | Regardless of the redirection rules, all logged-on terminal devices of the calling user will ring. |
| ##71* | Connect to Voicemail | Regardless of all forwarding settings, the calling user will be connected to his own voicemail. He can then leave himself a voice message. |
| ##8nnn*ppp# | Call Forwarding Unconditional from nnn | For the user with the number nnn, Call Forwarding Unconditional to the calling line is activated. The given PIN ppp is checked. |
| ##9nnn# | Remote Inquiry from nnn | The remote inquiry of the user with the number nnn is called. The PIN is queried in the Remote Inquiry menu. |
*.
CTI+
| Code Function Description | ||
| *0 Disable | DTMF recognition | The DTMF recognition is disabled. This can be necessary in order to send DTMF signals to the call partner. Please use the sequence ## for # here. |
| #0 Enable | DTMF recognition | The DTMF recognition is enabled. |
| ## | Send single # | Sends a # as a DTMF code to the caller (transparent), when the DTMF recognition is disabled. |
| *3 Starting a conference | A conference is started with active callers and those put on hold. | |
| *7 Hold/Call Swap/Activate | The active call is put on hold. A switch is made to a free line or to another line on hold. If a call has already been put on hold, it can be re-activated by pressing *7. | |
*8 Exit The currently active call is terminated.
| *9 | Call Transfer | The active call is connected to the call on hold. |
| *9nnn# Blind Call Transfer | The active call will be connected to nnn without inquiry. Requirement: You have only one call. If the connection with the destination subscriber cannot be established within 20 seconds, the originally received call will be displayed in your Swyxlt! as a call on hold. By pressing *7, the call on hold can be re-activated. | |
| *0 Disable DTMF recognition | The DTMF recognition is disabled. This can be necessary in order to send DTMF signals to the call partner. Please use the sequence ## for # here. | |
| #0 Enable DTMF recognition | The DTMF recognition is enabled. | |

In order to use DTMF in connection with SwyxCTI+, the SIP terminal devices must support DTMF via SIP-INFO.

The following applies for using DTMF in connection with : SwyxCTI+ If there is an active call on hold and a second call needs to be aborted before being connected, then the DTMF code cannot be used. In this case, hang up on the controlled device. You'll now receive a call back for the line still on hold, and a second call can be initialized again by entering *7.

ForSwyxDECT 500 in CTI mode function keys replace the function codes for "Starting a conference", "Hold/Call Swap/Activate" and "Transfer". The "Blind Call Transfer" feature is only available via function codes.
MobileExtensionManager
| Code Function Description | ||
| ** + Replacement Replaces the + in a canonical number | ||
| *0 Disable DTMF recognition | The MobileExtensionManager's DTMF recognition is disabled. This can be necessary in order to send DTMF signals to the call partner. Please use the sequence ## for # here. | |
| #0 Reactivate DTMF recogni- tion | The MobileExtensionManager's DTMF recognition is reactivated. | |
| ## Send single # Sends a # as a DTMF tone to the call partner (transpar-ently) | ||
| *1 Remote Inquiry | Starts personal remote inquiry | |
| *20nnn # *20*# *20# | Call Forward- ing Uncondi- tional to nnn | Enable Call Forwarding Unconditional to nnn*.If * is entered instead of nnn, Call Forwarding Uncon- ditional to Voicemail is activated.Without nnn, Call Forwarding Unconditional is deac- tivated. |
| *21nnn # *21*# *21# | Call Forward- ing Busy to nnn | Enable Call Forwarding Busy to nnn*.If * is entered instead of nnn, Call Forwarding Busy to Voicemail is activated.Without nnn, Call Forwarding Busy is deactivated. |
| *22nnn # *22*# *22# | Call Forward- ing No Reply to nnn | Enable Call Forwarding No Reply to nnn*.If * is entered instead of nnn, Call Forwarding No Reply to Voicemail is activated.Without nnn, Call Forwarding No Reply is deacti- vated. |
| *3 Three-way Conference | A three-way conference is opened with the active call partner and the one on hold. | |
| *4 Activate Conversation Recording | The recording of conversations is activated. Note that all conversations of the mobile subscriber are recorded. | |
| Code Function Description | ||
| *5 End Conversation Recording | The recording of all conversations is ended. | |
| *6xxnn n# | Initiates the function code xx | The function code xx (always two characters) is passed on. The transfer of nnn is optional. If another parameter is needed, this can be input separated by *. The command is ended with #. The mobile user can thus act as though he is entering the function code ##xxnnn# within SwyxWare. |
| *600# Start Remote Inquiry | Starts personal remote inquiry | |
| *6002dd d# | Access to personal Voicemail | Starts playback of the voicemail with the ID ddd, without date and time |
| *7 Hold/Call Swap | The current call is put on hold. A switch is made to a free line, or to the line previously on hold. | |
| *8 Exit The currently active call is terminated. | ||
| *9 | Call Transfer | The active call is connected to the call on hold. |
| *9nnn# Blind Call Transfer | The active call will be connected to nnn without inquiry. You have only one call. | |
| *9*# | Connect to the office device | The active call is interrupted, and then put through again to the user's devices (excluding the mobile phone). |
| # | Call Pick Up | Answers an incoming call on a mobile phone, after the call has been accepted bySwyxlt! Mobile. I.e. Mobile-ExtensionManager transmits the call , after it has - mostly by Swyxlt! Mobile- received a #. |
*.
Call Intrusion (only possible as block dialing)
| Code Function | Description | |
| nnn*24*1# | Call Intrusion (listening only) | A call that the agent is making with the number nnn is intruded in 'listening only' mode. |
| nnn*24*2# | Call Intrusion (speak with agent) | A call that the agent is making with the number nnn is intruded on; the agent can hear the intruder. |
| nnn*24*3# | Call Intrusion (Conference) | The call that the agent is making with the number nnn becomes a conference. |
Feature Code (only possible as block dialing)
| Code Function Description | ||
| nnn*71* | Voicemail Calls the voicemail of user nnn, regardless of the selected call forwarding. You can leave a voice message directly. | |
| nnn*72* Direct Call Calls the user nnn as a direct call (Intercom), i.e. a device of the called person is switched at once to output. | ||
| nnn*ppp*8* | Call Forward-ing Uncondi-tional from nnn | For the user with the number nnn, Call Forwarding Unconditional to the calling line is activated. The given PIN ppp is checked. |
| nnn*9* Remote Inquiry from nnn | The remote inquiry of the user with the number nnn is called. The PIN is queried in the Remote Inquiry menu. | |
*.
**49231123456
Index Index
Index
A
Accept
a call 29, 76, 129
Access Authorization 13
Account 13
User 13
Windows 13
ACD
(Definition) 187
Acoustic Signals 15
Active Connection 14
AES
(Definition) 187
Anmelden
Am SwyxServer 22
Announcement 16, 68, 119
Voicemail 44, 92, 146
Answering machine
Voicemail 10
API
(Definition) 187
B
Bedienelemente
SwyxPhone L615 24
SwyxPhone L640 70
SwyxPhone L660/L680 121
Block Dialing 187
Busy Signal 15
Button
Callback request 95
Number keys 24
Numeric Keypad 70, 121
C
Call
Accept 29, 76, 129, 184
do not pick up 184
Do not receive any 55, 104, 160
Forward 35, 55, 83, 104, 136, 161
Forward All 35, 83, 136
Forwarded 30, 77, 130
Forwarding 55, 104, 161
Group 30, 77, 129
Pick up call 30, 78, 130
several at the same time 184
Terminate 31, 78, 131
Transfer (without Inquiry) 33, 82, 135
Call allocation
Group calls 12
Call Charges 40, 89, 143
Call Forwarding 35, 55, 83, 104, 136, 160
Call Routing 15
Change from another line 43, 90, 144
Delayed 36, 86, 139
If busy 36, 85, 138
Immediate 35, 84, 137
Signaling 37, 86, 140
Call Forwarding No Reply 36, 86, 139
Call Forwarding Unconditional 35, 83, 84, 136, 137
Change from another line 43, 90, 144
Call Intrusion 54, 159
Call Management 184
Call Routing 15
Call Signaling 15
Accept 184
Disable 185
Multiple calls 184
Reject 184
Switch Off 56, 106, 162
Switch On 56, 106, 162
Call Swap 14, 32, 80, 133
Call Transfer 33, 81, 134
by going on hook 33, 81, 134
Call waiting 14
Call Waiting Signal 15
Callback on busy
Accept 186
miss 186
Callback request 47, 95, 149
Answer 186
Definition 16
If busy 47, 95, 149
Remove 48, 96, 150
Index Index
Starting 186
Callback Requests
If in a call
make 47, 95, 149
if line is idle
make 48, 97, 151
My 49, 50, 98, 152, 153
Callback Signal 15
Callbacks
Missed (List) 50, 98, 153
Caller
connect to each other 184
Caller list 60, 110, 166
Remove 61, 111, 167
Use 110
Calling
Subscriber 28, 74, 126
CAPI
(Definition) 187
Care Instructions 18
CDR
(Call Detail Records) 46, 94, 148
(Definition) 187
Charges 40, 89, 143
Charging info 40, 89, 143
Client PC
(Definition) 187
CMI
(Definition) 187
Compression
Language 191
Conference 51, 99, 153
(Definition) 14
Add Subscriber 185
Inquiry Calls 185
Listening only 53, 101, 155
Starting 185
Terminate 185
Conference Room
Connecting Subscribers 185
Configuration Menu
Basic Settings 56, 105, 162
Connection
Direct Dialing-In 187
Direct dialing-in 188
Multiple subscribers 190
Connection on Hold 14
Connectivity
Active 14
Conference Line on hold 14
Hold 185
switch between 32, 80, 133
CorNet
(Definition) 187
CTI 181
(Definition) 16, 187
Beenden 182
Einrichten 182
Klingeleinstellung 182
D
DDI (Direct Dial In) 188
DECT
(Definition) 187
delay period 37, 86, 140
DHCP
(Definition) 188
Dial immediately 68, 69, 119, 120, 177
Dial Tone
Interrupted 15
Direct Call Signal 15
Direct Dialing-In line 188
DMZ (Demilitarized Zone) 188
DNS
Definition 188
Do Not Disturb 56, 105, 161
DSP
(Definition) 188
DTMF
(Definition) 188
E
E.164
(Definition) 188
Encryption 11
ENUM 188
Index Index
Ethernet
(Definition) 188
Extension 12, 66, 116
Group 12
external subscribers 12
external telephone ring 56, 106, 162
F
FD 188
(Definition) 188
Forwarded Call 30, 77, 130
Forwarding 34, 82, 135
FTP
(Definition) 188
Function Key 63, 113, 169
configuring 64, 65, 114, 115, 170, 171
Overview 63, 113, 169
Remove 65, 115, 171
Voicemail 42, 90, 144
G
G.711
(Definition) 188
G.722
(Definition) 188
G.723.1 188
G.729
(Definition) 188
GAP
(Definition) 188
Gateway
(Definition) 188
Group Call 12, 30, 77, 129
make 184
Group Extension 12
Group of Persons 12
GSM
(Definition) 189
H
H.323
(Definition) 189
Alias Name 189
Log 189
H.450
(Definition) 189
Handsfree phone 38, 88, 141
Headset 53, 79, 156
Connection 53, 101, 156
HTTP
(Definition) 189
Hub
(Definition) 189
I
ID
(Definition) 189
Idle tone 15
IEEE
(Definition) 189
Incognito 185
Info 58
Inquiry 79
Inquiry Calls 32, 79, 132
Instant Messaging
(Definition) 189
Intercom 16, 68, 119
Intercom Connection 16, 68, 69, 119
Definition 16
internal subscribers 12
internal telephone ring 56, 106, 162
International Call 13
IP
(Definition) 189
IP (Internet Protocol) 189
IP PBX
(Definition) 189
IP-adress
(Definition) 189
IPEI
(Definition) 189
Index Index
ISDN
(Definition) 189
ITSP
(Definition) 189
IVR
(Definition) 189
K
Key module 21
Klingeln
connect to each other 184
List 58, 107, 163
Missed Callbacks 50, 98, 153
My Callback Requests 49, 50, 98, 152, 153
Local Call 13
Local network 189
Log out 54, 102, 159
Long Distance Call 13
M
MAC-adress
(Definition) 190
MAPI
(Definition) 190
Menu
during a call 29, 76, 129
Message
leave as Voicemail 42, 90, 144
Missed Callbacks (List) 50, 98, 153
MSN
(Definition) 190
Multiple connection 190
My Callback Requests
List 49, 50, 98, 152, 153
Z
N06-N10 63, 113, 169
Name Announcement 44, 92, 146
Name Resolution 30, 77, 130, 190
NAT (Network Address Translation) 190
NetBIOS Name
(Definition) 190
Network
Local 189
NT mode
(Definition) 190
Number keys 24, 70, 121
0
Outlook Contact 180
Overlap Sending
(Definition) 190
OWC 53, 101, 155
P
PABX
(Definition) 190
PBX
(Definition) 190
PDA 190
Personal Phonebook 59, 108, 164
Change 180
Phone
Reaction Option 184
Phone Number 12
external subscribers 12
internal subscribers 12
Index Index
Phone number 12
external subscribers 12
Hide 185
internal subscribers 12
Phonebook 59, 108, 164
Global 59, 108, 164
Structure of the entries 59, 164
Navigation 59, 108, 164
Personal 59, 108, 164
Change 180
Structure of the entries 109
Structure 59, 108, 164
Pick up call
Call 30,78,130
PIN 13
(Definition) 190
POTS
Definition 191
Power over LAN 191
Power Supply 19
Project Codes 46, 94, 148
PSTN
(Definition) 191
Q
QoS
(Definition) 191
R
Reaction Option 184
Redial list 62, 111, 167
Remove 63, 112, 168
Remote Inquiry 43, 90, 144
(Definition) 16
Restart 58
Ring tones 56, 162
Ringing 15, 39, 56, 106, 143
External 56, 106, 162
for calls from within the company 56, 106, 162
for external calls 56, 106, 162
Internal 56, 106, 162
Router
(Definition) 191
RSVP
(Definition) 191
\$
Scope of supply 18
Secondary call 35, 83, 136
Disable 184
Server
(Definition) 191
Set Up 18
several calls at the same time 184
Signal
Acoustic 15
Signal Sound 14, 15
Signaling
Status - 12
Silent conference participation 53, 101, 155
Simultaneous Logon
Status Signaling 23, 178
SIP (Definition) 191
SIP-URI 13
Smartphone
(Definition) 191
SNMP
(Definition) 191
SNTP
(Definition) 191
Speaker 38, 88, 141
Speed dial
configuring 118
Dial immediately 68, 69, 119, 120, 177
Intercom Connection 68, 119
Successive dial 68, 69, 119, 120, 177
Standard Remote Inquiry 43, 90, 144
Status Signaling 12
In the case of multiple logon 23, 178
STUN 191
Stuttered Dial Tone 15
Subnet
(Definition) 192
Subnet Mask 192
Subscriber 12
call swap between 32, 80, 133
Call Transfer 33, 81, 134
Index Index
Calling 28, 74, 126
External 12
Internal 12
Successive dial 68, 69, 119, 120, 177
Switch
(Definition) 192
switch
between several connections 32, 80, 133
SwyxGate 10, 12
Swyxlt! 178
System requirements 18
T
TA
(Definition) 192
TAPI
(Definition) 192
TCP/IP
(Definition) 192
TE mode
(Definition) 192
Technical Terms 187
TEI
(Definition) 192
Telefonieren
Mit SwyxPhone 28, 74, 126
Telephone Call
Forward 55, 104, 161
Forwarding 55, 104, 161
See also Call 30, 78, 130
Telephony Behavior
Define 55, 104, 160
Terminating a call 31, 78, 131
to no longer receive calls 55, 104, 160
Transfer 55, 104, 161
transfer
Call 33, 82, 135
Transfer spontaneously 34, 82, 135
TSP
(Definition) 192
U
Unified Messaging
(Definition) 192
USB
(Definition) 192
User 13
Clear 54, 102, 159
Log out 54, 102, 159
switch 54, 102, 159
User account 13
User Authentication 13
User name 13
User Profile 55, 104, 160
user-specific information 55, 104, 160
V
virtual line 11
VLAN
(Definition) 192
Voicemail 15, 42, 90, 144
leave 42, 90, 144
listen in 42, 90, 144
record 42, 90, 144
Remote Inquiry 43, 90, 144
remote inquiry 43, 91
Send 42, 90, 144
Welcome Announcement 44, 92, 146
Voicemail inquiry 42, 90, 144
VoIP (Voice over IP)
(Definition) 192
Volume 39, 142
Speaker 89
Volume regulation (Button) 26, 71, 122
W
WAP
(Definition) 192
Warning Tone 12, 56, 106, 162
WAV
Index Index
(Definition) 192
Windows User Account 13
Wrap Up Time 41, 66, 90, 116, 172, 185
Definition 16
X
XXX
in the display 30, 77, 130