
DVP320 - DVD player PHILIPS - Free user manual and instructions
Find the device manual for free DVP320 PHILIPS in PDF.


| Product Type | DVD Player |
| Brand | Philips |
| Model | DVP320 |
| Dimensions (W x D x H) | 216 x 216 x 45 mm |
| Weight | Approximately 0.8 kg |
| Power Consumption (Standby) | < 1.2 W |
| Playback Disc Types | DVD Video, Video CD & SVCD, CD, Picture CD, MP3-CD, CD-R/RW, DVD+R/RW |
| Video Outputs | CVBS (1 Vpp, 75 Ω), Component (Y: 1.0 Vpp, Pr/Pb: 0.7 Vpp, 75 Ω) |
| Audio Outputs | Analog Stereo (L/R), Digital Coaxial (IEC958 for CDDA/LPCM/MPEG1, IEC1937 for MPEG2/Dolby Digital/DTS) |
| D/A Converter | 24-bit |
| Signal-to-Noise Ratio (1 kHz) | 90 dB |
| Dynamic Range (1 kHz) | > 85 dB |
| Frequency Response | DVD (fs 96 kHz): 4 Hz–44 kHz; DVD (fs 48 kHz): 4 Hz–22 kHz; SVCD (fs 48 kHz): 4 Hz–22 kHz; CD/VCD (fs 44.1 kHz): 4 Hz–20 kHz |
| TV System Compatibility | PAL/50Hz, NTSC/60Hz, Multi-standard |
| Laser Type | Semiconductor GaAlAs, Class 1 |
| Laser Wavelength | 650 nm (DVD), 780 nm (VCD/CD) |
| Laser Output Power | 7 mW (DVD), 10 mW (VCD/CD) |
| Safety Features | Laser radiation warning; avoid exposure when open; only qualified service personnel should service |
| Maintenance | Clean exterior with soft, slightly damp cloth; clean disc lens with Philips CD Lens Cleaner; self-lubricating bearings – do not oil |
| Special Features | Smart Power On/Off (auto standby), 5-disc resume, parental control, disc lock, screen saver, MP3/JPEG playback with slideshow, zoom, multi-angle, subtitle/audio language selection |
| Package Contents | DVD player, Audio/Video cable, Audio/Video-Scart adaptor, Remote control with battery (CR2025), Owner's manual |
| Spare Parts & Reparability | No user-serviceable parts inside; refer to qualified service personnel for repairs |
Frequently Asked Questions - DVP320 PHILIPS
User questions about DVP320 PHILIPS
0 question about this device. Answer the ones you know or ask your own.
Ask a new question about this device
Download the instructions for your DVD player in PDF format for free! Find your manual DVP320 - PHILIPS and take your electronic device back in hand. On this page are published all the documents necessary for the use of your device. DVP320 by PHILIPS.
USER MANUAL DVP320 PHILIPS
Read this manual first!
Congratulations on purchasing this Philips product. We've included everything you need to get started. If you have any problems, Philips Representatives can help you get the most from your new product by explaining:
- Hookups,
- First Time Setup, and
- Feature Operation. Before you return this product to the store,
For fast help, call us first! Tel: see back page of your manual
Thank you for making Philips a part of your home!
Warning:
VISIBLE AND INVISIBLE LASER RADIATION
WHEN OPEN.
AVOID EXPOSURE TO BEAM.
RADIATION
WARNING
VISIBLE AND INVISIBLE LASER RADIATION
WHEN THIS PART IS OPEN, DO NOT
LOOK AT THE BEAM
WARNING!
WHEN OPEN, YOU ARE EXPOSED TO VISIBLE
AND INVISIBLE LASER RADIATION.
DO NOT LOOK AT THE BEAM
CAUTION
DANGER OF VISIBLE AND
Since it is usual for DVD movies to be released at different times in different regions of the world, all players have region codes and discs can have an optional region code. If you load a disc of a different region code to your player, you will see the region code notice on the screen. The disc will not playback, and should be unloaded.


Laser safety
This unit employs a laser. Due to the risk of eye injury, only a qualified service person should remove the cover or attempt to service this device.
USE OF CONTROLS OR ADJUSTMENTS OR PERFORMANCE OF PROCEDURES OTHER THAN THOSE SPECIFIED HEREIN MAY RESULT IN HAZARDOUS RADIATION EXPOSURE.
Manufactured under license from Dolby Laboratories. "Dolby" and the double-D symbol are trademarks of Dolby Laboratories.

The DVD VIDEO player is in conformity with the EMC directive and low-voltage directive.
CAUTION (WARNING LOCATION: ON THE BACKPLATE OF SET)
NEVER MAKE OR CHANGE CONNECTIONS WITH THE POWER SWITCHED ON.
For Customer Use:
Read carefully the information located at the rear panel of your DVD VIDEO player and enter below the Serial No. Retain this information for future reference.
Model No. DVD VIDEO Serial No.
LASER
Type: Semiconductor laser GaAlAs Wave length: 650 nm (DVD) 780 nm (VCD/CD) Output Power: 7 mW (DVD) 10 mW (VCD/CD) Beam divergence: 60 degrees
CAUTION
VISIBLE AND INVISIBLE LASER RADIATION WHEN OPEN. AVOID EXPOSURE TO BEAM.
Important Note:
Due to the numerous versions of new CD-Audio copy protection or enhanced CD-Audio protection recently available on certain discs, Philips is unable to guarantee that this DVD player is fully compatible with such new discs. Should you have difficulty playing any such CD-Audio discs, kindly refer them to your CD-Audio disc retailer.
CLASS 1 LASER PRODUCT
Introduction
Environmental Information 6
Package Content 6
Safety Information 6
Symbols Used in this Booklet 6
Functional overview
Top and Rear Panel 7
Remote Control 8
Preparation
Before you begin 9
Connecting to a TV with audio and video cables directly....9
Connecting to a TV with Scart connector 9
Connecting to a TV with audio cable and component video cable....9
Connecting to TV and a 2-channel stereo 10
Connecting to TV and a receiver....10
Inserting batteries into the Remote Control ..11
Using the Remote Control ....11
Connecting the Power Supply ....11
Switching On 11
Smart Power On/Off....11
Operation
Basic Playback ....12
General Operation ......12
Video control during playback 12
Audio control during playback 12
Repeat 13
Repeat A-B 13
5 disc Resume ....13
OSD (On-Screen Display)....13
Zoom 13
Special DVD Features ....14
Playing a Title 14
Playing a Chapter 14
Camera Angle 14
Changing the Audio Language ....14
Subtitles 14
Special VCD & SVCD Features .....14-15
Playback Control (PBC) 14
Preview Function 15
Picture CD & MP3 CD Playback
General Operation....16
MP3 & JPEG Navigator....16
Play Mode....16
Special JPEG Features....17
Function Introduction......17
Preview Function....17
Zoom picture 17
Playback with multi-angles ....17
Wipe Modes....17
Special MP3 Features....17
Function Introduction......17
Playback Speed Control 17
JPEG and MP3 Simultaneous
Playback....17
Setup menu
Basic operation ....19
General Setup menu ......19
OSD language 19
Program 19-20
Disc Lock 20
Screen Saver 20
Analog Audio Setup menu ......21
DOWNMIX....21
D.R.C 21
3D Sound....21
Digital Audio Setup menu......21
Digital Output....22
LPCM Output....22
Video Setup menu.... 22
TV Type 23
TV Display 23
Smart Picture 24
Color Setting....24-25
Preference Setup menu ......25
Audio language 25
Subtitle language ......26
Disc Menu language ......26
Password 26
Parental Control 26
Default Setup....26
MP3/JPEG Navigator 26
Specifications
Specifications 27
Maintenance
Maintenance 27
Troubleshooting
Troubleshooting 28
Thank you for purchasing this Philips DVD player. This Owner's Manual explains the basic operation of this DVD player.
Environmental Information
All unnecessary packaging has been omitted. We have tried to make the packaging easy to separate into three materials: cardboard (box), polystyrene foam (buffer) and polyethylene (bags, protective foam sheet).
Your DVD player consists of materials which can be recycled and reused if disassembled by a specialized company. Please observe the local regulations regarding the disposal of packaging materials, exhausted batteries and old equipment.
Package Content
- DVD-Video player
- Audio/Video cable
- Audio/Video-Scart adaptor – Remote control with Battery
- Owner's Manual
Safety Information
- Before operating the DVD player, check that the operating voltage indicated on the typeplate is identical with the voltage of your local power supply. If not, please consult your dealer.
- Place the DVD player on a flat, hard and stable surface.
- There must be sufficient room in front of the player for the drawer to be opened.
- In a cabinet, allow about 2.5cm (1 inch) of free space all around the player for adequate ventilation.
- Do not expose your player to extremes of temperature or humidity.
- If the DVD player is brought directly from a cold to a warm location, or is placed in a very damp room, moisture may condense on the lens of the disc unit inside the DVD player. Should this occur, the DVD player would not operate normally. Leave the power on for about one hour with no disc in the DVD player until normal playback is possible.
disc unit inside the DVD player. Should this occur, the DVD player would not operate normally. Leave the power on for about one hour with no disc in the DVD player until normal playback is possible.
- The mechanical parts of the set contain self-lubricating bearings and must not be oiled or lubricated.
- When the DVD player is switched to Standby mode, it still consumes some power. To disconnect the system from the power supply completely, remove the AC power plug from the wall socket.
Symbols Used in this Booklet
The below symbols appear in some headings and notes with the following meanings:

Helpful Hints!
- Some discs limit certain functions during playback (e.g., fast forward is not working at the beginning of certain discs). This is normal behavior because the disc determines the way in which you can interact with its content.
Top and Rear Panels
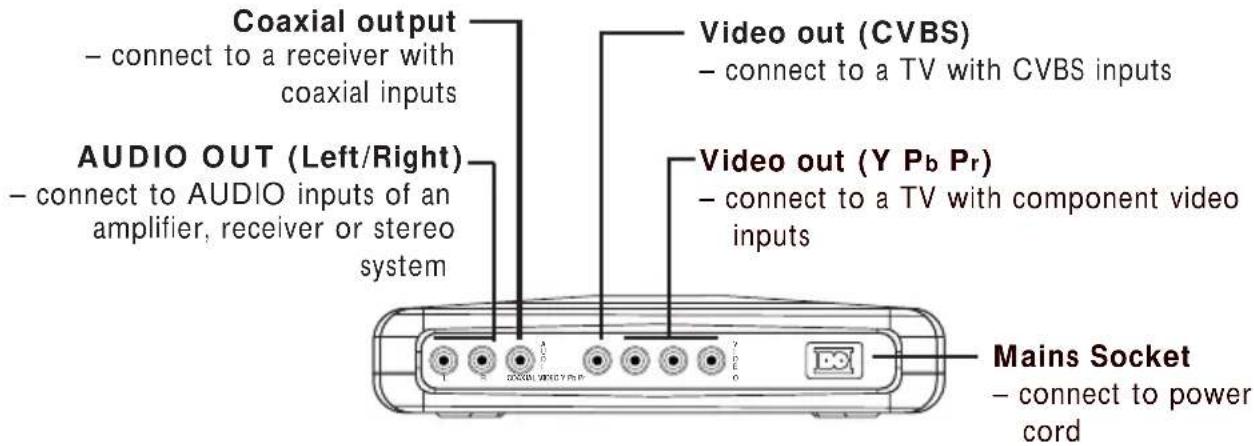

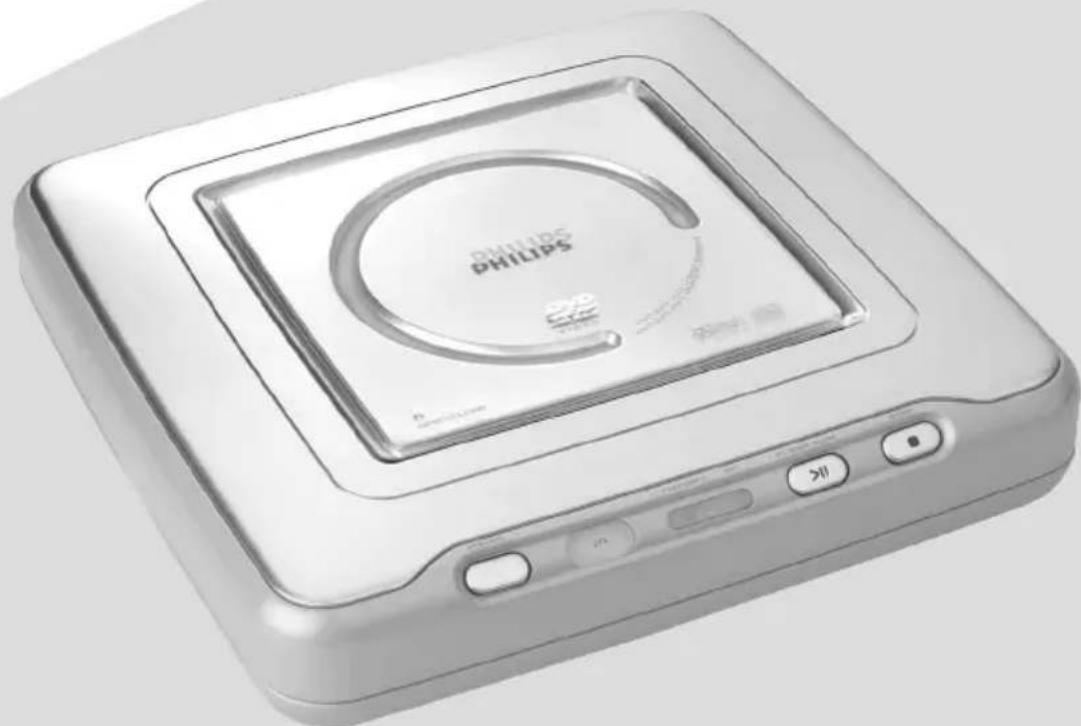
Caution:
- Do not touch the inner pins of the sockets on the rear panel. Electrostatic discharge may cause permanent damage to the unit.
- Do not touch the lens inside the Player's Disc compartment. A damaged lens could hinder Disc playability. Electrostatic discharge could damage the unit permanently.
Remote Control

Before you begin...
- Refer to the instructions of your TV, VCR, Stereo, or other devices. Note the style of jacks and connectors on the other equipment. Determine how to choose different Audio and Video In channels/sources on your other equipment.
- Disconnect all equipment from the power outlets. Connect equipment to power only after hooking up everything. Never make or change connections with equipment connected to power.
- Please refer to the below choices we introduce to you and select either one of them.
Connecting to a TV with audio and video cables directly

- Connect the VIDEO jack on the DVD player to the corresponding CVBS VIDEO IN jack on your TV (cable supplied).
- Connect the AUDIO OUT (Left/Right) on the DVD player to the corresponding AUDIO IN jacks on TV by using audio cable (supplied). Match the cable colors to the jack colors.
Connecting to a TV with Scart connector

- If your TV set has scart connectors for video inputing, connect the VIDEO jack on the DVD player to the corresponding CVBS VIDEO IN jack on Audio/Video-Scart adaptor by using the video cable (supplied).
- Connect the AUDIO OUT (Left/Right) on the DVD player to the corresponding AUDIO IN jacks on Audio/Video-Scart adaptor by using audio cable (supplied). Match the cable colors to the jack colors.
- Connect Audio/Video-Scart adapter to your TV set.
- Be sure to set your TV to receive CVBS video signal instead of RGB video.
Connecting to a TV with audio cable and component video cable

- Connect the Y/Pb/Pr VIDEO OUT on the DVD player to the corresponding jack on your TV by using component video cable (not supplied). Match the cable colors to the jack colors.
- Connect the AUDIO OUT (Left/Right) on the DVD player to the corresponding AUDIO IN jacks on TV by using audio cables (supplied). Match the cables color to the jack colors.
Connecting to a TV and a two-channel Stereo

- Connect the AUDIO OUT (Left/Right) on the DVD player to the corresponding AUDIO IN jacks on stereo system by using audio cables (supplied). Match the cable colors to the jack colors.
- Connect the VIDEO jack on the DVD player to the corresponding CVBS VIDEO IN jack on your TV (cable supplied).
Or If your TV set has scart connectors for video inputing, connect the VIDEO jack on the DVD player to the corresponding CVBS VIDEO IN jack on Audio/Video-Scart adaptor by using the video cable (supplied).
- Connect Audio/Video-Scart adapter to your TV set.
- Be sure to set your TV to receive CVBS video signal instead of RGB video.
Connecting to a TV and a receiver
![graph TD A["AV Receiver"] --> B["Sound waves"] A --> C["CD4000/CD4001 microcontroller"] A --> D["Sound waves"] A --> E["CD4000/CD4001 transformer"] B --> F["Sound waves"] C --> G["CD4000/CD4001 microcontroller"] D --> H["Sound waves"] E --> I["CD4000/CD4001 transformer"] F --> J["Rock of TV (example…](/content/2026/05/807783/images/697309dcbd8de300734f2060cc62dcb641c6518318c2fc42b447fe4a7be43e92.jpg)
- Connect the COAXIAL jack of the DVD player to the corresponding DIGITAL AUDIO IN jack on your AV Receiver (cable not supplied). In this case, do not use the player's audio left and right output.
- Connect the VIDEO OUT jack on the DVD player to the corresponding VIDEO IN jack on your TV using the composite video cable (cable supplied). Or, if your TV set has SCART connectors for video input, connect the VIDEO jack on the DVD player to the corresponding CVBS VIDEO IN jack on an Audio/Video-SCART adapter using the video cable (supplied).
- Connect the Audio/Video-SCART adapter to your TV set.
- Be sure to set your TV to receive CVBS video signal instead of RGB video.
Warning!
- Connect the DVD player directly to your TV, instead of e.g. a VCR, to avoid distortion because DVD video discs are copy protected.
- Do not connect the DVD player AUDIO OUT to PHONO IN of your receiver.
- Set DIGITAL OUTPUT correctly. The stereo must support MPEG2 or Dolby Digital™. Check the stereo's manual to be sure.
Replacing battery (lithium CR2025) into the remote control
1. Pull out the lithium battery compartment. 2. Replace with a new battery and fully insert the battery compartment back to its original position.

CAUTION!
- Insert the plastic protective sheet if they are not to be used for a long time.
- Batteries contain chemical substances, so they should be disposed of properly and kept away from children.
Using the Remote Control
- Pull out the plastic protective sheet which is used to keep the lithium battery fresh.
- Direct the remote control at the remote sensor of the DVD player.
- Do not drop or give the remote control a shock.
- Do not leave the remote control in extremely hot or humid places.
- Do not spill water or put anything wet on the remote control.

Connecting the Power Supply
1. Plug the female end of the power cable supplied into the power connector on the rear of the player. 2. Plug the male end of the cord into an AC outlet.
Note: When the DVD player is switched to Standby mode, it is still consuming some power. If you wish to disconnect your player completely from the mains, withdraw the plug from the AC outlet.
Switching On
1. Be sure that the DVD player has been correctly connected to the TV and audio equipment. 2. Switch on the TV and DVD player. 3. Set the TV to the correct Video In channel (e.g., EXT1, EXT2, AV1, AV2, AUDIO/VIDEO, etc.). Please refer to your TV owner's manual for details.
→ The player display lights and the default screen appears on the TV.
4. If you are using external equipment (e.g., audio system or receiver), turn it on and select the appropriate input source for the DVD player output. Refer to the equipment owner's manual for details.
Smart Power On/Off
When in STOP or NO DISC mode, the DVD player will switch to standby mode after 15 minutes without any operations for saving energy. It is easily reactivated by pressing the POWER or PLAY key on the remote control or the PLAY/PAUSE button on the front panel.
Basic Playback
1 Press POWER on the front panel to turn on the DVD player. 2 Press OPEN/CLOSE on the top panel to open the disc compartment. 3 Place the Disc on the Disc hub, with the label facing up and then press the lid down. → After recognizing the disc, the player will start to playback automatically. 4 Wait for the Disc to stop spinning completely before you reach to remove the Disc or touch the Disc.

Notes:
- DVDs may have a region code. Your player will not play discs that have a region code different from the region code of your player. - If 'Disc Lock' is set to LOCK and the disc inserted is not authorized, the 6-digit code must be entered and/or the disc must be authorized (see 'Disc Lock').
General Operation
Note: All instructions set out below refer to the remote control, unless otherwise stated.
Video control during playback
STOP/PLAY DVD VCD CD SVCD
1 If you press the STOP key once, you can later resume from the point at which you stopped by pressing the PLAY key. The player will start from the beginning of the disc if you pressed the STOP key twice.
PAUSE/STEP DVD VCD CD SVCD
1 To get a still picture, press PAUSE key during playback. 2 To step forward to the next frame picture, press PAUSE key again. 3 To resume normal playback, press PLAY.
SEARCH DVD VCD CD SVCD
1 To search the contents in fast speed, press the ▶ or ◀ for fast forward/backward searching. 2 Press the ◀ or ▶ again to increase the speed for searching. 3 Press PLAY to return to normal playback.
Slow Motion
DVD
1 To get a slow motion effect during playback, press ▲ or ▼. 2 Press ▲ or ▼ again, you can get different playback forward/backward speeds. 3 Press PLAY to return to normal play back.
VCD SVCD
1. To get a slow motion effect during playback, press ▼. 2. Press ▼ again to get different playback forward speeds. 3. Press the PLAY key to return to normal playback. NOTE:
- The SLOW BACKWARD function is not available for Super VCD/VCD/CD discs.
Audio control during playback
MUTE DVD VCD CD SVCD
1. Press the MUTE key to disable the sound output. 2. Press the MUTE key again to deactivate mute.
Audio channel selection
VCD CD SVCD
1. Super VCD has two stereo audio channels which are used for playing karaoke or audio language selection. (For instance, you can choose one channel for only the music background of the song while you play karaoke.) 2. Press the AUDIO key on the remote control to select the audio channels you want. 3. VCD has only one stereo audio channel. You can select STEREO, LEFT MONO, RIGHT MONO, or MIX-MONO by pressing the AUDIO key on the remote control.
→ STEREO: Output the left and right audio channels of the disc through the left and right audio sockets accordingly. → LEFT MONO: Output the left audio channel of the disc through the left and right audio sockets. → RIGHT MONO: Output the right audio channel of the disc through the left and right audio sockets. → MIX-MONO: Each of the audio sockets can output the same audio effect as stereo.
Note: If you choose digital audio output and set DIGITAL OUTPUT to ALL, you cannot select LEFT MONO and RIGHT MONO with the AUDIO key.
Repeat

Repeat chapter/title/disc
- To repeat the current chapter, press REPEAT.
- To repeat the current title, press REPEAT a second time.
- To repeat the whole disc, press REPEAT a third time.
- To exit REPEAT mode, press REPEAT again.

Repeat track/disc
With PBC OFF,
- To repeat the current track, press REPEAT.
- To repeat the entire disc, press REPEAT a second time.
- To exit Repeat mode, press REPEAT again.
Repeat A-B
DVD
VCD

DVD-Video Discs: repeat a sequence in a title
Video and Audio CDs: repeat a sequence in a track
1 Press REPEAT A-B at your chosen starting point. 2 Press REPEAT A-B again at your chosen end point. → The repeat sequence begins.
3 To exit the sequence, press REPEAT A-B.
5 Disc Resume
DVD
SVCD
VCD
CD
This player can resume playback of the last 5 discs, even if the disc was ejected or the power switched off.
1. Load one disc, which is one of the last 5 discs. 2. Press PLAY when the DVD player is recognizing the disc. If the information of this disc has been stored in the memory of the DVD player, it will be played back from the stop point last time.
OSD (On-Screen Display)
DVD VCD SVCD
This function will provide some information about your playing disc on the screen.
● Press the DISPLAY key on the remote control.
Title Selection
1. Press ◀▶ to highlight the option Title number. 2. Press ▲▼ to change the title number. → DVD player will playback the selected title.
Chapter Selection
1. Press ◀▶ to highlight the option chapter number. 2. Press ▲▼ to change the chapter number. → DVD player will playback the selected chapter.
Time Search
- Press ◀▶ to highlight the time display area. For DVD discs:
→ CC refers to the elapsed time of the current chapter. CR refers to the remaining time of the current chapter. TC refers to the elapsed time of the current title. TR refers to the remaining time of the current title.
For Super VCD or VCD discs:
→ DC refers to the elapsed time of the current disc. DR refers to the remaining time of the current disc. TC refers to the elapsed time of the current track. TR refers to the remaining time of the current track.
Press ▲ to make the selection.
- Press the ◀▶ keys to highlight the item TIME and you can play from any point of the disc. → Enter hours, minutes and seconds from left to right in the time edit box using the remote control numerical keypad (e.g., 0:34:27). → Press the OK key to confirm.
Zoom
DVD
VCD
SVCD
The Zoom function allows you to change the image size.
1. Press the ZOOM key to activate the function. → Use the ▲▼◀▶ keys to view other parts of the zoomed picture. → Playback will continue.
2. Press the ZOOM key repeatedly to return to the original size.
NOTE: This function is NOT available for some DVD discs.
Special DVD Features
Playing a Title DVD
A DVD disc may have one or more titles. This depends on the content (a movie, video clips, a drama series, etc.) on the disc.
● After you load a disc, information about the content shows on the screen waiting for your selection. You can also press the TITLE key on the remote control to turn back to the title menu during playback.
→ Press the appropriate numerical key or ▲▼◀ ▶ keys on the remote control to highlight your selection. → Press the OK key to confirm.
Playing a Chapter DVD
When you have selected a title, it may include one or more chapters.
- Any time you want to watch another chapter during playback, press DISC MENU key to turn back to the chapter menu (If disc has chapter menu).
→ Press the appropriate numerical key or ▲▼◀ ▶ keys on the remote control to highlight your selection. → Press the OK key to confirm. → After a chapter has been selected, you also can press the ◀◀◀ or ▶▶▶l key to make a change.
Camera Angle DVD
Some discs contain scenes which have been shot simultaneously from various angles.
This DVD player allows you to select the desired camera angle.
● Press the ANGLE key on your remote control.
NOTE: The function is available only for the DVD discs which have several angles recorded.
Changing the Audio Language DVD
- Press AUDIO repeatedly to select the different languages.
NOTE: The function will be activated only if the DVD is recorded with multi-language audio tracks.
Subtitles DVD SVCD
- Press SUBTITLE repeatedly to select the different subtitles.
- Press SUBTITLE for about 2 seconds to switch subtitle on or off.
NOTE: The function will be activated only if the DVD or Super VCD is recorded with multi-subtitles.
Special VCD & SVCD Features
Playback Control (PBC)
PBC function allows you to enter the index menu which is used to select a track after loading the VCD & SVCD disc.
If you want to activate the function during the playback or after pressing the STOP key twice,
1 press the DISC MENU key on the remote control to set the PBC On.
→ Pay attention to the hint on the screen.
2 Use the ◀◀ or ▶▶| key to select the page you like.
→ If the items of the index menus are numbered, press the appropriate numerical key on the remote control. → press the OK key to confirm.
3 Press the RETURN key to enter the index menu during the playback.
NOTE:
- The content of the index menu depends on the disc. Please refer to the disc's instructions for details.
- If the disc doesn't include the PBC information, this function will have no effect.
If you want to skip the index menu and playback directly from the beginning,
press the DISC MENU key on the remote control to switch off the function.
Preview Function
- Press the PREVIEW key to enter the previewing menu. ● Press ▲▼ key to highlight TRACK DIGEST, DISC INTERVAL, or TRACK INTERVAL. ● Press OK key to open one option.

● After you enter the menu of any digest type,
→ To quit preview function: Press ▲▼◀▶ to highlight EXIT and press OK to confirm. → To return to the previewing menu for selecting the other digest type: Press ▲▼◀▶ to highlight MENU and press OK to confirm.
1 Track Digest
This function will minimize the picture of every track in order to display every six of these tracks on the screen to help you know the content of every track on the disc.

- To choose the desired track, please press ▲▼◀▶ to highlight the second line and input your selected track number next to "SELECT".
→ Select the others from the current six by pressing the ◀◀◀ or ▶▶▶ key to open the previous or next page.
- Press the OK key to confirm.
2 Disc Interval
This function is used to divide a disc into six parts by regular intervals and display them on one page to help you preview the whole disc.

- To choose the desired track, press ▲▼◀▶ to highlight the second line and input your numerical selection next to "SELECT".
- Press the OK key to confirm.
3 Track Interval
This function is used to divide a single track into six parts by regular intervals and display them on one page to help you preview the selected track.

- To choose the desired track, press ▲▼◀▶ to highlight the second line and input your numerical selection next to "SELECT".
- Press the OK key to confirm.
This player can playback JPEG format pictures and MP3 files on a personally recorded CD-R/RW disc or commercial CD, and is compatible with Kodak Picture CD.
● Playback pictures or songs one by one automatically. ● Album and track selection. - Repeat (disc / album / track / picture). - Select any music or pictures from the disc to playback them together. ● Maximum number of files within one folder is 500 ● Maximum files Programmable is 100. ● MP3: Maximum supported Bitrate is 256kbits or 48kHz in Variable Bitrate mode - JPEG: Maximum supported resolution is 3072 x 2048 (for baseline JPG pictures), or 2000 x 1500 (for progressive JPG pictures).
General Operation
- If you choose WITH MENU in the Setup Menu (Please refer to the MP3 & JPEG navigator below), the Picture CD/MP3 CD menu will be shown on the screen before playback.

- At any time during playback, press DISC MENU to return to the menu for Selection/Repeat / Shuffle / Single playback.
- Both columns on every page of the menu contain six files or folders, you can press ◀▶ to highlight either of the column and then press ▶▶| or ◀◀ to open the next or previous six files or folders.
MP3 & JPEG Navigator
To select a different playback method, follow the steps below.
1 At STOP mode, press the SYSTEM MENU key to open the setup menu. 2 Press the ▲▼ key to highlight PREFERENCE. 3 Press OK to open the PREFERENCE menu. 4 Press the ▲▼ key to highlight the MP3/JPEG NAV menu. 5 Press the ▶ key to enter the menu. 6 Press the ▲▼ key to highlight the WITHOUT MENU or WITH MENU item. → WITHOUT MENU: automatically playback all files in according date sequence. → WITH MENU: playback files in the selected folder. 8 Press the OK key to confirm your selection.
Play Mode
Auto Playback
If you choose WITHOUT MENU, the DVD player will automatically play Picture CD/MP3 CD in sequence when it is loaded.
Playback Selection
● One way is to press the number of your favorite file at any time during playback. ● Another way is to select via the menu (after pressing STOP). 1 Press DISC MENU to open the Picture CD/MP3 CD menu. 2 When the menu appears on the screen, press the ▲▼ key to select the folder you want and press OK to open it. 3 Press ▶ to enter the file list.
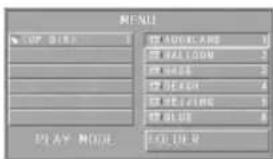
4 Press the ▲▼ key to highlight one option, or press its number.
→ You can also press ▶▶| or |◀◀ to go to the next or previous page.
5 Press OK key to confirm.
→ The playback will start from this selected file to the last in this folder.
Repeat / Shuffle / Single Playback
- When the Picture CD/MP3 CD menu is shown on the screen, press REPEAT key repeatedly; the button beside PLAY MODE will display different options.
→ SINGLE: The file plays once. → REPEAT ONE: For JPEG files, the current picture remains on the screen. For MP3 music, the selected song plays repeatedly. → REPEAT FOLDER: All files in the folder play repeatedly. → SHUFFLE: All files are played randomly.
- If you press REPEAT key during playback, the option will be displayed on the screen accordingly.
Program Playback
1 When the Picture CD/MP3 CD menu is shown on the screen, press DISC MENU key. → The left column is the original files and the right one is the programmed files.

2 Press the ▲ ▼ buttons to select one file.
→ You can also press ▶▶| or ◀◀◀ to open the next six files to choose.
3 Press OK or PLAY key to add the selected file from the left column to the right column. → The maximum is 100 files. 4 Press STOP key to remove the programmed file from the right column. 5 Highlight one file of the right column and press OK key, then the programmed files will start playing back.
Special JPEG Features
Function Introduction
Picture CD is a disc with a collection of JPEG format pictures, and all extension filenames should end with 'JPG'. The CD can be recorded on any computer, and pictures may be from digital camera or scanner. If the customers prefer, they can make this CD become a Digital Album.
You can choose any general function introduced in GENERAL OPERATION, besides, you also can,
● Display the thumbnails of 12 pictures.
- Zoom the picture.
- Rotate the picture.
● Flip the picture vertically or horizontally.
- Scan pictures by different effects.
Preview Function
This function shows the content of the current folder or the whole disc.
1 Press the STOP key during playback of JPEG pictures. You will see the thumbnails of 12 pictures on the screen.

2 Press the ▶▶ or ◀◀ key to display the other pictures on the next or the previous page.
3 Press the ◀▶ ▲▼ key to highlight one of them and press OK to playback, or,
2 Press the ▶▶| or ◀◀ key to display the other pictures on the next or the previous page. 3 Press the ◀▶ ▲▼ key to highlight one of them and press OK to playback, or,
Move the cursor to highlight SLIDE SHOW on the bottom of the page to start playback from the first picture on the current page.
4 Press DISC MENU to go to the Picture CD/MP3 CD menu.
Zoom picture
● During playback, press the ZOOM key to display the picture with different scales.
- Press the ◀▶▲▼ key to view the rest of the zoomed picture.
- During playback, press the ZOOM key to display the picture with different scales. - Press the ◀▶▲▼ key to view the rest of the zoomed picture.
Playback with multi-angles
When displaying one picture on TV screen
● Press the ▲ ▼ ◀ ▶ key to get different effects.
▲ key: Flip the picture vertically.
▼ key: Flip the picture horizontally.
◀ key: Rotate the picture anti-clockwise.
▶ key: rotate the picture clockwise.
▲ key: Flip the picture vertically. ▼ key: Flip the picture horizontally. ◀ key: rotate the picture anti-clockwise. ▶ key: rotate the picture clockwise.
Wipe Modes
- Press ANGLE key repeatedly to choose different wiping mode.
Special MP3 Features
Function Introduction
"MP3" stands for "MPEG Audio Layer-3". and is a part of the MPEG standard. A CD can store up to 10 hours of MP3 audio, which is nearly 10 times as much as an Audio CD. Each song is recorded as a file. You can choose any general function introduced in GENERAL OPERATION. You can also choose different playback speeds.
Playback Speed Control
Press RETURN/TITLE key to switch to MP3+NAV mode,
- Press ◀▶, you can get different playback backward/forward speeds.
- You also can press ▶▶| or |◀◀ to change the tracks.
- Press ◀▶, you can get different playback backward/forward speeds. - You also can press ▶▶| or ◀◀◀ to change the tracks.
JPEG and MP3 simultaneous playback
1 Firstly playback MP3 music according to the instructions introduced in playback Selection.
2 Please switch to MP3+JPEG+NAV by pressing RETURN/TITLE.
3 Then select a picture to playback. Please refer to the instructions introduced in playback Selection.
1 Firstly playback MP3 music according to the instructions introduced in playback Selection. 2 Please switch to MP3+JPEG+NAV by pressing RETURN/TITLE. 3 Then select a picture to playback. Please refer to the instructions introduced in playback Selection.
→ Now the pictures will be played back in sequence together with MP3 music.
4 To quit simultaneous playback, press DISC MENU key to return to the Picture CD/MP3 CD menu, then pictures will be stopped. After that, press STOP key, then MP3 music will be stopped as well.
Note: In the function of JPEG and MP3
Simultaneous Playback, ▶▶| and |◀◀ keys are invalid for MP3.
Basic Operation
Press SYSTEM MENU at the STOP mode to enter the Setup Menu. 2 Press the OK key to go to the next level submenu or confirm your selection. 3 Press the ◀▶ keys to enter the submenu or return to the previous menu. 4 Press the ▲▼ keys to highlight the desired menu. 5 Press SYSTEM MENU to quit the setup menu. → When you quit the setup menu, the settings will be stored in the player's memory even if the player is switched to power off.
General Setup menu
Some settings need to be made in this menu.
They are: DISC LOCK, PROGRAM, OSD LANGUAGE and SCREEN SAVER.
Follow the steps below:

1 Press the SYSTEM MENU key to enter the setup menu. 2 Press the ▲▼ keys to choose the GENERAL SETUP. 3 Press the OK key to confirm selection.
OSD language
This option is to select a language for information displayed on TV screen.

1 Press the ▲▼ keys to highlight OSD LANGUAGE in the GENERAL SETUP menu. 2 Enter its submenu by pressing the ▶ key. 3 Move the cursor by pressing the ▲▼ keys to highlight the selected language. 4 Press the OK key to confirm. 5 Press the ◀ key to return to the GENERAL SETUP menu.
Program (not for Picture CD/MP3)
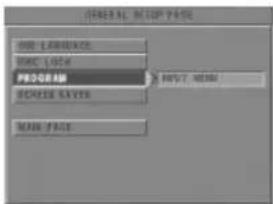
1 To choose PROGRAM, press ▲▼ keys. 2 Press the ▶ key to move the cursor to the field of the submenu to choose the item INPUT MENU. → INPUT MENU: Enter the PROGRAM item. 3 Press OK to enter the program page.

Input your favorite track
1 Input valid track number by pressing the numerical keys. 2 Press the ◀▶▲▼ keys to move the cursor to the next selected position.
→ If the track number is more than ten, press ▶▶ to open the next page and go on programing, or press ◀▶▲▼ to highlight NEXT button, and then press OK. 3 Repeat this steps to input another track number until the whole program is completed.
Remove a track
1 Press the ◀▶▲▼ keys to move the cursor to the track you want to remove. 2 Press OK or PLAY key to remove this track from the program menu.
Playback tracks
When programing is completed,
1 Press the ◀▶▲▼ keys to move the cursor to the START button. 2 Press OK. → DVD player will playback the selected tracks under the programmed sequence.
Quit the program playback
In the PROGRAM menu,
1 Press the ◀▶▲▼ keys to move the cursor to the EXIT button. 2 Press the OK key to quit this menu.
Stop the program playback
● During playback of the programmed tracks, press the STOP key. Then, after you press the PLAY key, the DVD player will resume normal playback.
Repeat the program playback
● During playback of the programmed tracks, press the REPEAT key. The programmed tracks can be played again.
Disc Lock
When the disc is locked, the player will store its specific code into the memory for future identification. For the next playback, the DVD player will prompt you to enter the password. Then, press OK to load the disc.

1 Press the ▲▼ keys to highlight DISC LOCK in the GENERAL SETUP menu. 2 Enter its submenu by pressing the ▶ key.
→ LOCK: Lock the disc being played.
→ UNLOCK: Unlock the disc.
3 Press the ◀ key to return to the GENERAL SETUP menu.
NOTE:
- When a locked disc is loading, the DVD player will prompt you to enter your password (842100 is the default password).
- To change the password, refer to the option PASSWORD in the PREFERENCE SETUP menu.
Screen Saver
This function is used to turn the screen saver on or off.

1 Press the ▲▼ keys to highlight SCREEN SAVER in the GENERAL SETUP menu. 2 Enter its submenu by pressing the ▶ key. 3 Move the cursor by pressing the ▲▼ keys to highlight the selected item.
→ ON: In STOP or No DISC mode, if no actions are performed within 5~6 minutes, the screen saver will be activated.
→ OFF: Screen saver is disabled.
4 Press OK to confirm. 5 Press the ◀ key to return to the GENERAL SETUP menu.
Analog Audio Setup menu
This menu contains setup options for your analog audio output, such as DOWNMIX, D.R.C. (Dynamic Range Compression), 3D etc. which makes the DVD player reproduce high quality surround sound.

1 Press SYSTEM MENU. 2 Press the ▲▼ keys to highlight the ANALOG OUTPUT SETUP. 3 Press OK to confirm.
DOWNMIX
1 Press the ▲▼ keys to highlight the DOWNMIX. 2 Enter its submenu by pressing the ▶ key. 3 Move the cursor by pressing the ▲▼ keys to highlight the selected item. LT/RT
→ This option should be used only if your DVD player is connected to a Dolby Prologic decoder.
• STEREO → This option will downmix Dolby Digital signals directly into analogue stereo from L/R sockets. 4 Press OK. 5 Press the ◀ key to return to the ANALOG OUTPUT SETUP menu.
D.R.C. (Dynamic Range
Compression)
The DVD player will compress the dynamic range of its sound output for late-night listening.
1 Press the ▲▼ keys to highlight D.R.C.. 2 Enter its submenu by pressing the ▶ key.
3 Move the cursor by pressing the ▲▼ keys to highlight the selected item.
→ ON: Enable D.R.C. → OFF: Disable D.R.C.
4 Press OK.
5 Press the ◀ key to return to the ANALOG OUTPUT SETUP menu.
3D Sound
The 3D SOUND can simulate the echoes and frequencies that may be available in a particular environment.
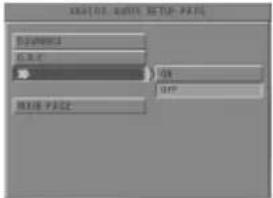
1 Press the ▲▼ keys to highlight the 3D. 2 Enter its submenu by pressing the ▶ key. 3 Move the cursor by pressing the ▲▼ keys to highlight the selected item.
→ ON: Enable 3D sound effect. → OFF: Playback the disc with original sound effects.
4 Press OK.
Digital Audio Setup menu
In this menu, you can set up the digital audio output signal from the digital terminals, such as coaxial etc.

1 Press SYSTEM MENU to enter the SETUP menu. 2 Press the ▲▼ keys to choose the DIGITAL OUTPUT SETUP. 3 Press OK.
Digital Output

1 Press the ▲▼ keys to highlight DIGITAL OUTPUT. 2 Enter its submenu by pressing the ▶ key. 3 Press the ▲▼ keys to highlight the selected item.
→ ALL: Original digital signal is output.
→ PCM ONLY: If your receiver is PCM-compatible, or your receiver can not decode
MPEG-2, Dolby Digital, or DTS audio, choose this option.
4 Press OK. 5 Press the ◀ key and return to the DIGITAL OUTPUT SETUP menu.
Note: If DIGITAL OUTPUT is set to ALL, all audio settings except MUTE are invalid.
LPCM Output
If you connect the DVD player to a PCM compatible receiver via the digital terminals, such as coaxial etc, you may need to select LPCM OUTPUT.
Discs are recorded at a certain sampling rate. The higher the sampling rate, the better the sound quality.

1 Press the ▲▼ keys to highlight the LPCM OUTPUT. 2 Enter its submenu by pressing the ▶ key. 3 Move the cursor by pressing the ▲▼ keys to highlight the selected item.
→ 48K: Playback a disc recorded at the sampling rate of 48kHz. → 96K: Playback a disc recorded at the sampling rate of 96kHz.
4 Press OK. 5 Press the ◀ key to return to the DIGITAL OUTPUT SETUP menu.
Video Setup menu
There are items included in VIDEO SETUP menu such as TV TYPE, TV DISPLAY, SMART PICTURE, COLOR SETTING.

1 Press STOP. 2 Press SYSTEM MENU to enter the menu. 3 Highlight VIDEO SETUP by pressing the ▲▼ keys. 4 Press OK.
TV Type
Before viewing the DVD or VCD, ensure that the PAL or NTSC setting of the system matches your TV set.

1 Press the ▲▼ keys to highlight TV TYPE in the VIDEO SETUP menu. 2 Enter its submenu by pressing the ▶ key. 3 Move the cursor by pressing the ▲▼ keys to highlight one option. 4 Press OK. 5 Press the ◀ key to return to the VIDEO SETUP menu.
NTSC/PAL Conversion
This player is equipped with an NTSC/PAL conversion feature to convert the video output of the disc to match your TV system. The conversions supported are as below:
| Disc Output format | ||||
| Type | Format | Selected mode | ||
| NTSC | PAL | MULTI | ||
| DVD | NTSC | NTSC | PAL | NTSC |
| PAL | NTSC | PAL | PAL | |
| VCD | NTSC | NTSC | PAL | NTSC |
| PAL | NTSC | PAL | PAL | |
Notes:
- MULTI can only be selected when using a TV that has both the NTSC and PAL systems.
- If you have a multi-standard TV (PAL/NTSC), use the MULTI setting to obtain the best picture quality.
TV Display
16:9

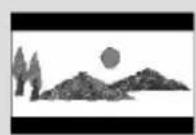
4:3 Letter Box
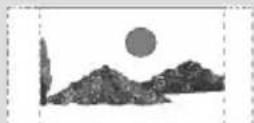
4:3 Pan Scan
Select the aspect ratio of the TV to be connected.
16:9 → when you connect a wide-screen TV to the DVD player. 4:3 LETTER BOX → when you connect a normal TV to the DVD player. Displays a wide picture with bands displayed on the upper and lower portions of the TV screen. 4:3 PAN SCAN → when you connect a normal TV to the DVD player. Displays the wide picture on the whole TV screen with a portion automatically cut off.

Setup the item as follows:
1 Press the ▲▼ keys to highlight the TV DISPLAY option in the VIDEO SETUP menu. 2 Enter its submenu by pressing the ▶ key. 3 Move the cursor by pressing the ▲▼ keys to highlight the selected item. 4 Press OK. 5 Press the ◀ key to return to the VIDEO SETUP menu.
Note: PanScan output is not available on all discs.
Smart Picture
In this menu, you can choose a picture setting from a fixed set of ideal predefined picture settings.

1 Press the ▲▼ keys to highlight SMART PICTURE in the VIDEO SETUP menu. 2 Press the ▶ key to highlight the item of the submenu. 3 Press the ▲▼ keys to choose an item. → STANDARD: select a standard picture setting. → BRIGHT: make the TV picture brighter. → SOFT: make the TV picture softer. → PERSONAL: achieve the color effect set in the COLOR SETTING menu. 4 Press OK. 5 Press ◀ key to return to the VIDEO SETUP menu.
Color Setting
In this menu you can personalize the picture color by adjusting brightness, contrast, hue and saturation.
1 Press the ▲▼ keys to highlight COLOR SETTING in the VIDEO SETUP menu. 2 Press OK to open its submenu.
Brightness
1 Press the ▲▼ keys to highlight BRIGHTNESS in the COLOR SETTING menu. 2 Press the ▶ key to open the level bar. → Display at the bottom of the screen.

3 Press the ▶◀ keys to increase and decrease the brightness level. 4 Press the ▲▼ or OK key to return to the COLOR SETTING menu.
Contrast
1 Press the ▲▼ keys to highlight CONTRAST in the COLOR SETTING menu. 2 Press the ▶ key to open the level bar. → Display at the bottom of the screen. 3 Press the ▶◀ keys to increase and decrease the contrast level. 4 Press the ▲▼ or OK key to return to the COLOR SETTING menu.
Hue
1 Press the ▲▼ keys to highlight HUE in the COLOR SETTING menu. 2 Press the ▶ key to open the level bar. → Display at the bottom of the screen. 3 Press the ▶◀ keys to increase and decrease the hue level. 4 Press the ▲▼ or OK key to return to the COLOR SETTING menu.
Saturation
1 Press the ▲▼ keys to highlight SATURATION in the COLOR SETTING menu. 2 Press the ▶ key to open the level bar. → Display at the bottom of the screen. 3 Press the ▶◀ keys to increase and decrease the saturation level. 4 Press the ▲▼ or OK key to return to the COLOR SETTING menu.
Preference Setup menu
There are options included in the PREFERENCE menu such as AUDIO, SUBTITLE, DISC MENU, PARENTAL, PASSWORD, DEFAULT, and MP3/JPEG NAV.

1 Press the STOP key twice. 2 Press SYSTEM MENU to enter the menu. 3 Highlight the PREFERENCE SETUP by pressing the ▲▼ keys. 4 Press OK to confirm your selection.
Audio language
DVD discs are available with multiple audio languages. Use this option to select the preferred default audio language.
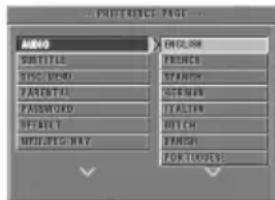
1 Press the ▲▼ keys to highlight AUDIO. 2 Enter the submenu by pressing the ▶ key. 3 Move the cursor by pressing the ▲▼ keys to highlight the selected option. 4 Press OK. 5 Press the ◀ key to return to the PREFERENCE menu.
NOTE: Your DVD disc may not include the audio language which you set in the AUDIO menu. If so, the player will use another audio language instead.
Subtitle language
DVD discs are available with multi-subtitle languages. Use this option to select the preferred default subtitle language.

1 Press the ▲▼ keys to highlight SUBTITLE. 2 Enter the submenu by pressing the ▶ key. 3 Move the cursor by pressing the ▲▼ keys to highlight the selected option. 4 Press OK. 5 Press the ◀ key to return to the PREFERENCE menu.
NOTE: Your DVD disc may not include the subtitle which you set in the SUBTITLE menu. If so, the player will use another subtitle language instead.
Disc Menu language
DVD discs are available with multiple disc menu languages. This option is used to select the default disc menu language.

1 Press the ▲▼ keys to highlight DISC MENU. 2 Enter the submenu by pressing the ▶ key. 3 Move the cursor by pressing the ▲▼ keys to highlight the selected item. 4 Press OK. 5 Press the ◀ key to return to the PREFERENCE menu.
NOTE: If your DVD disc doesn't include the disc menu language you have set, the player will use another recorded language instead.
If you choose OTHERS in the AUDIO, SUBTITLE, or DISC MENU menu,
You can select other languages. Please do as follows,
1 Move the cursor by pressing the ▲▼ keys to highlight OTHERS. 2 Press OK.
→ The DVD player will prompt you to enter a language code (Four digits).
3 Input a language code by pressing numerical keys.
→ Please look up the preferred language code in the chapter LANGUAGE CODE, which can be found at the end of this manual.
4 Press OK.
Password
This item is used for the parental control and disc lock. Enter your six digit password when a hint is displayed on the screen.
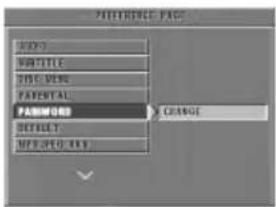
1 Press the ▲▼ keys to highlight the PASSWORD option. 2 Enter the submenu by pressing the ▶ key. 3 Press OK key to open the PASSWORD CHANGE page.

4 Enter the current 6 digit code. 5 If successful, the player will prompt for a new one. 6 After that, enter the new password again to reconfirm. 7 Press the OK key to return to the PREFERENCE menu.
→ The new 6 digit code will take effect.
NOTE:
- You can change the setup of parental control and load a locked disc with a valid password being entered.
- If you forget your password, you can enter the default password 842100.
Parental Control DVD
Movies on DVDs may contain scenes which are not suitable for children. Therefore, discs may contain 'Parental Control' information which applies to the complete disc or to certain scenes on the disc. These scenes are rated from 1 to 8, and alternative, more suitable scenes are available on the disc. Ratings are country dependent. The 'Parental Control' feature allows you to prevent discs from being played by your children or to have certain discs played with alternative scenes.
● VCD, SVCD, CD have no level indication, so parental control function has no effect on those kinds of discs. This applies to most illegal DVD discs. - You can follow the steps below to setup the parental control:

1 Press the ▲▼ keys to highlight PARENTAL. 2 Move to its submenu by pressing the ▶ key. 3 Then use the ▲/▼ keys to highlight a rating for the disc inserted. 4 Press OK to confirm, then press the ◀ key to return to the PREFERENCE menu.
No Parental Control
Parental Control is not activated. The Disc will be played in full.
1 Select ADULT item. 2 Press OK.
Ratings 1 to 7:
Some discs contain scenes which are not suitable for children. All scenes with a rating higher than you set will be skipped during playback. However if the disc contains alternate scenes, these will play automatically. If not, the playback will stop and the six digits code will need to be entered again.
Default Setup
If problems occur while setting up the DVD player, the DEFAULT function can be used to reset all options to the factory defaults and all your personal settings will be erased.

1 Press ▲▼ to highlight DEFAULT. 2 Highlight RESET by pressing the ▶ key. 3 Press OK.
CAUTION: When this function is activated, all setups will be reset to factory defaults.
MP3/JPEG Navigator
This menu allows you to select alternate settings when you playback picture CD and MP3 CD.

1 Press ▲ ▼ to highlight MP3/JPEG NAV. 2 Press ▶ to enter the submenu. 3 Press ▲ ▼ to highlight WITHOUT MENU or WITH MENU.
→ WITHOUT MENU: playback all pictures or MP3 music in sequence automatically. → WITH MENU: playback pictures or MP3 music in the selected folder.
5 Press OK key to confirm your selection.
PLAYBACK SYSTEM
| DVD Video |
| Video CD & SVCD |
| CD |
| PICTURE CD |
| MP3-CD |
| CD-R, CD-RW |
| DVD+R, DVD+RW |
VIDEO PERFORMANCE
| CVBS | 1Vpp --- 75Ω |
| Component video | Y: 1.00Vpp --- 75ΩPr: 0.7Vpp --- 75ΩPb: 0.7Vpp --- 75Ω |
AUDIO FORMAT
| Digital | Mpeg/ AC-3/ DTS PCM | compressed Digital 16, 20, 24 bits fs, 44.1, 48, 96 kHz |
| MP3(ISO 9660) | 24, 32, 56, 64, 96, 128, 256 kbps & variable bit rate fs, 16, 22.05, 24, 32, 44.1, 48 kHz | |
| Analog Sound Stereo | ||
Specifications subject to change without prior notice
AUDIO PERFORMANCE
| DA Converter 24bit | ||
| Signal-Noise (1KHz) 90dB | ||
| Dynamic range(1KHz) >85dB | ||
| DVD | fs 96 kHz | 4Hz- 44kHz |
| fs 48 kHz | 4Hz- 22kHz | |
| SVCD | fs 48 kHz | 4Hz- 22kHz |
| fs 44.1kHz | 4Hz- 20kHz | |
| CD/VCD | fs 44.1kHz | 4Hz- 20kHz |
TV STANDARD (PAL/50Hz) (NTSC/60Hz)
| Number of lines 625 525 |
| Playback Multistandard (PAL/NTSC) |
CONNECTIONS
| Component Video Output Cinch | |
| Video Output Cinch | |
| Audio Output(L+R) Cinch | |
| Digital Output 1 coaxial | |
| IEC958 for CDDA / LPCM/ MPEG1 | |
| IEC1937 for MPEG 2, Dolby | |
| Digital and DTS | |
CABINET
Dimensions (w x d x h) 216 x 216 x 45 mm Weight Approximately 0.8 Kg
POWER CONSUMPTION
Power consumption in Standby mode <1.2W
Maintenance
- Use a soft cloth slightly moistened with a mild detergent solution. Do not use a solution containing alcohol, spirits, ammonia or abrasives.
Cleaning Discs
- When a disc becomes dirty, clean it with a cleaning cloth. Wipe the disc from the center out. Do not wipe in a circular motion.
- Do not use solvents such as benzine, thinner, commercially available cleaners, or antistatic spray intended for analog records.
Cleaning the disc lens
- After prolonged use, dirt or dust may accumulate at the disc lens. To ensure good playback quality, clean the disc lens with Philips CD Lens Cleaner or any commercially available cleaner. Follow the instructions supplied with cleaner.

WARNING
Under no circumstances should you try to repair the system yourself, as this will invalidate the warranty. Do not open the system as there is a risk of electric shock.
If a fault occurs, first check the points listed below before taking the system for repair. If you are unable to remedy a problem by following these hints, consult your dealer or service center.
Problem Solution
| No power – Check if the AC power cord is properly connected. | |
| No picture – Check if the TV is switched on. | – Check the video connection. |
| Distorted picture – The disc is badly scratched or dirty. | – Sometimes a small amount of picture distortion may appear .This is not a malfunction. |
| Completely distorted picture or – Make sure the NTSC/PAL setting at the DVD black/white picture with DVD player matches the video signal of your television. or Video CD (See NTSC/PAL CONVERSION) | – If the picture becomes distorted after switching between PAL and NTSC, please set the SMART PICTURE to STANDARD. |
| No sound or distorted sound – Adjust the volume. | – Check that the speakers are connected correctly. |
| No audio at digital output – Check the digital connections. | – Check if your receiver can decode MPEG-2 or DTS and if not, please make sure the digital output is set to PCM. |
| – Check if the audio format of the selected audio language matches your receiver capabilities. | |
| Disc can’t be played | – The DVD+R/DVD+RW/CD-R must be finalized. |
| – Ensure the disc label is facing up. | |
| – Check if the disc is defective by trying another disc. | |
| – If you record a Picture CD or MP3 CD yourself, ensure that your disc contains at least 10 pictures or 5 MP3 tracks. | |
| No return to start-up screen when disc is removed | – Reset the unit by switching the player off, then on again. |
| The player does not respond to the remote control | – Aim the remote control directly at the sensor on the front of the player. |
| – Reduce the distance to the player. | |
| – Replace the batteries in the remote control. | |
| – Insert the batteries with their polarities (+/- signs) as indicated. | |
| Buttons do not work | – In order to completely reset the player, unplug the AC cord from the AC outlet. |
| Player does not respond to some operating commands during playback | – Operations may not be permitted by the disc. Refer to the instructions of the disc. |
| DVD Video player cannot read CDs/DVDs | – Use a commonly available cleaning CD/DVD to clean the lens before sending the DVD Video player for repair. |
| Any setup changes can’t be stored. | – Remove the Setup Menu after make the setup, and then press POWER key to switch into the Standby mode. |
The following codes can be used to select languages other than those available in the AUDIO, SUBTITLE or DISC MENU. (see Setup menu)
| Abkhazian | 6566 | German | 6869 |
| Afar | 6565 | Gikuyu; Kikuyu | 7573 |
| Afrikaans | 6570 | Greek, | 6976 |
| Albanian | 8381 | Guarani | 7178 |
| Amharic | 6577 | Gujarati | 7185 |
| Arabic | 6582 | Hausa | 7265 |
| Armenian | 7289 | Hebrew | 7269 |
| Assamese | 6583 | Herero | 7290 |
| Avestan | 6569 | Hindi | 7273 |
| Aymara | 6589 | Hiri Motu | 7279 |
| Azerbaijani | 6590 | Hungarian | 7285 |
| Bashkir | 6665 | Icelandic | 7383 |
| Basque | 6985 | Ido | 7379 |
| Belarusian | 6669 | Indonesian | 7368 |
| Bengali | 6678 | Interlingua (International | 7365 |
| Bihari | 6672 | Interlingue | 7369 |
| Bislama | 6673 | Inuktitut | 7385 |
| Bokmål, Norwegian | 7866 | Inupiaq | 7375 |
| Bosnian | 6683 | Irish | 7165 |
| Breton | 6682 | Italian | 7384 |
| Bulgarian | 6671 | Japanese | 7465 |
| Burmese | 7789 | Javanese | 7486 |
| Castilian; Spanish | 6983 | Kalaallisut | 7576 |
| Catalan | 6765 | Kannada | 7578 |
| Chamorro | 6772 | Kashmiri | 7583 |
| Chechen | 6769 | Kazakh | 7575 |
| Chewa; Chichewa; Nyanja | 7889 | Khmer | 7577 |
| Chichewa; Chewa; Nyanja | 7889 | Kikuyu; Gikuyu | 7573 |
| Chinese | 9072 | Kinyarwanda | 8287 |
| Chuang; Zhuang | 9065 | Kirghiz | 7589 |
| Church Slavic; Slavonic; | 6785 | Komi | 7586 |
| Church Slavonic; Church | 6785 | Korean | 7579 |
| Chuvash | 6786 | Kuanyama; Kwanyama | 7574 |
| Cornish | 7587 | Kurdish | 7585 |
| Corsican | 6779 | Kwanyama, Kuanyama | 7574 |
| Croatian | 7282 | Lao | 7679 |
| Czech | 6783 | Latin | 7665 |
| Danish | 6865 | Latvian | 7686 |
| Dutch | 7876 | Letzeburgesch; | 7666 |
| Dzongkha | 6890 | Limburgan; Limburger; | 7673 |
| English | 6978 | Limburger; Limburgan; | 7673 |
| Esperanto | 6979 | Limburgish; Limburger; | 7673 |
| Estonian | 6984 | Lingala | 7678 |
| Faroese | 7079 | Lithuanian | 7684 |
| Fijian | 7074 | Luxembourgish; | 7666 |
| Finnish | 7073 | Macedonian | 7775 |
| French | 7082 | Malagasy | 7771 |
| Frisian | 7089 | Malay | 7783 |
| Gaelic; Scottish Gaelic | 7168 | Malayalam | 7776 |
| Gallegan | 7176 | Maltese | 7784 |
| Georgian | 7565 | Manx | 7186 |
The following codes can be used to select languages other than those available in the AUDIO, SUBTITLE or DISC MENU. (see Setup menu)
| Maori | 7773 | Sotho, Southern | 8384 |
| Marathi | 7782 | South Ndebele | 7882 |
| Marshallese | 7772 | Spanish; Castilian | 6983 |
| Moldavian | 7779 | Sundanese | 8385 |
| Mongolian | 7778 | Swahili | 8387 |
| Nauru | 7865 | Swati | 8383 |
| Navaho, Navajo | 7886 | Swedish | 8386 |
| Navajo; Navaho | 7886 | Tagalog | 8476 |
| Ndebele, North | 7868 | Tahitian | 8489 |
| Ndebele, South | 7882 | Tajik | 8471 |
| Ndonga | 7871 | Tamil | 8465 |
| Nepali | 7869 | Tatar | 8484 |
| Northern Sami | 8369 | Telugu | 8469 |
| North Ndebele | 7868 | Thai | 8472 |
| Norwegian | 7879 | Tibetan | 6679 |
| Norwegian Bokmål; Bokmål, | 7866 | Tigrinya | 8473 |
| Norwegian Nynorsk; | 7878 | Tonga (Tonga Islands) | 8479 |
| Nyanja; Chichewa; Chewa | 7889 | Tsonga | 8483 |
| Nynorsk, Norwegian; | 7878 | Tswana | 8478 |
| Occitan (post 1500); Proven | 7967 | Turkish | 8482 |
| Old Bulgarian; Old Slavonic; | 6785 | Turkmen | 8475 |
| Old Church Slavonic; Old | 6785 | Twi | 8487 |
| Old Slavonic; Church | 6785 | Uighur | 8571 |
| Oriya | 7982 | Ukrainian | 8575 |
| Oromo | 7977 | Urdu | 8582 |
| Ossetian; Ossetic | 7983 | Uzbek | 8590 |
| Ossetic; Ossetian | 7983 | Vietnamese | 8673 |
| Pali | 8073 | Volapük | 8679 |
| Panjabi | 8065 | Walloon | 8765 |
| Persian | 7065 | Welsh | 6789 |
| Polish | 8076 | Wolof | 8779 |
| Portuguese | 8084 | Xhosa | 8872 |
| Provençal; Occitan (post | 7967 | Yiddish | 8973 |
| Pushto | 8083 | Yoruba | 8979 |
| Quechua | 8185 | Zhuang; Chuang | 9065 |
| Raeto-Romance | 8277 | Zulu | 9085 |
| Romanian | 8279 | ||
| Rundi | 8278 | ||
| Russian | 8285 | ||
| Samoan | 8377 | ||
| Sango | 8371 | ||
| Sanskrit | 8365 | ||
| Sardinian | 8367 | ||
| Scottish Gaelic; Gaelic | 7168 | ||
| Serbian | 8382 | ||
| Shona | 8378 | ||
| Sindhi | 8368 | ||
| Sinhalese | 8373 | ||
| Slovak | 8375 | ||
| Slovenian | 8376 | ||
| Somali | 8379 |
PHILIPS NORGE AS
Sandstuveien 70,
PO Box 1, Manglerud
N-0612 Oslo
NORWAY
Phone: 2274 8250
OY PHILIPS AB
Sinikalliontie 3,
02630 Espoo
Helsinki
FINLAND
puh. 09 615 80 250
PHILIPS KUNDTJÄNST
Kollbygatan 7,
Akalla,
16485 Stockholm
SWEDEN
Phone: 08-598 52 250
PHILIPS POLSKA
AL. Jerozolimskie 195B
02-222 Warszawa
POLAND
Tel.: (022)-571-0-571
PHILIPS SERVICE
V Mezihori 2
180 00 Prague
CZECH REPUBLIC
Phone: (02)-3309 9240
PHILIPS Iberia, S.A.
C/Martinez Villergas, 49
28027 MADRID
SPAIN
Phone: 902-11 33 84
PHILIPS HELLAS AEBE
25ΗΣ ΜΑΡΤΙΟΥ 15
177 78 TAYPOΣ
AΘHNA
Tηλ. 00800 3|22 |280
PHILIPS
420 - 430 London Road,
Croydon, Surrey
CR9 3QR
UNITED KINGDOM
Phone: 0208-665-6350
CONSUMER SERVICES
Prags Boulevard 80. PO Box 1919,
DK-2300 Copenhagen S
DANMARK
Tlf: 32 88 32 00
PHILIPS
REPRESENTATION OFFICE
Ul. Usacheva 35a
119048 MOSCOW
RUSSIA
Phone: 095-937 9300
PHILIPS INFO CENTER
Fegistrasse 5
8957 Spreitenbach
SWITZERLAND
Tel.: 0844-800 544
PHILIPS CUSTOMER CARE CENTER
Twee Stationsstraat 80/
Meet Philips at the Internet
http://www.philips.com
The products and services described herein
are not necessarily available in all countries
Due to continuous product improvements this document is subject to change without notice.
- READ THIS MANUAL FIRST
- FOR FAST HELP, CALL US FIRST! TEL: SEE BACK PAGE OF YOUR MANUAL
- LASER SAFETY
- LASER
- CAUTION
- INTRODUCTION
- FUNCTIONAL OVERVIEW
- PREPARATION
- OPERATION
- PICTURE CD & MP3 CD PLAYBACK
- SETUP MENU
- SPECIFICATIONS
- MAINTENANCE
- TROUBLESHOOTING
- ENVIRONMENTAL INFORMATION
- PACKAGE CONTENT
- SAFETY INFORMATION
- SYMBOLS USED IN THIS BOOKLET
- HELPFUL HINTS
- TOP AND REAR PANELS
- REMOTE CONTROL
- BEFORE YOU BEGIN
- CONNECTING TO A TV WITH AUDIO AND VIDEO CABLES DIRECTLY
- CONNECTING TO A TV WITH SCART CONNECTOR
- CONNECTING TO A TV WITH AUDIO CABLE AND COMPONENT VIDEO CABLE
- CONNECTING TO A TV AND A TWO-CHANNEL STEREO
- CONNECTING TO A TV AND A RECEIVER
- WARNING
- REPLACING BATTERY (LITHIUM CR2025) INTO THE REMOTE CONTROL
- USING THE REMOTE CONTROL
- CONNECTING THE POWER SUPPLY
- SWITCHING ON
- SMART POWER ON/OFF
- BASIC PLAYBACK
- GENERAL OPERATION
- VIDEO CONTROL DURING PLAYBACK
- STOP/PLAY DVD VCD CD SVCD
- PAUSE/STEP DVD VCD CD SVCD
- SEARCH DVD VCD CD SVCD
- SLOW MOTION
- DVD
- VCD SVCD
- AUDIO CONTROL DURING PLAYBACK
- MUTE DVD VCD CD SVCD
- AUDIO CHANNEL SELECTION
- VCD CD SVCD
- REPEAT
- REPEAT CHAPTER/TITLE/DISC
- REPEAT TRACK/DISC
- REPEAT A-B
- DVD-VIDEO DISCS: REPEAT A SEQUENCE IN A TITLE
- DISC RESUME
- OSD (ON-SCREEN DISPLAY)
- TITLE SELECTION
- CHAPTER SELECTION
- TIME SEARCH
- ZOOM
- SPECIAL DVD FEATURES
- PLAYING A TITLE DVD
- PLAYING A CHAPTER DVD
- CAMERA ANGLE DVD
- CHANGING THE AUDIO LANGUAGE DVD
- SUBTITLES DVD SVCD
- SPECIAL VCD & SVCD FEATURES
- PLAYBACK CONTROL (PBC)
- NOTE
- IF YOU WANT TO SKIP THE INDEX MENU AND PLAYBACK DIRECTLY FROM THE BEGINNING
- PREVIEW FUNCTION
- TRACK DIGEST
- DISC INTERVAL
- TRACK INTERVAL
- MP3 & JPEG NAVIGATOR
- PLAY MODE
- AUTO PLAYBACK
- PLAYBACK SELECTION
- REPEAT / SHUFFLE / SINGLE PLAYBACK
- PROGRAM PLAYBACK
- SPECIAL JPEG FEATURES
- FUNCTION INTRODUCTION
- ZOOM PICTURE
- PLAYBACK WITH MULTI-ANGLES
- WIPE MODES
- SPECIAL MP3 FEATURES
- PLAYBACK SPEED CONTROL
- JPEG AND MP3 SIMULTANEOUS PLAYBACK
- BASIC OPERATION
- GENERAL SETUP MENU
- OSD LANGUAGE
- PROGRAM (NOT FOR PICTURE CD/MP3)
- INPUT YOUR FAVORITE TRACK
- REMOVE A TRACK
- PLAYBACK TRACKS
- QUIT THE PROGRAM PLAYBACK
- STOP THE PROGRAM PLAYBACK
- REPEAT THE PROGRAM PLAYBACK
- DISC LOCK
- SCREEN SAVER
- ANALOG AUDIO SETUP MENU
- D.R.C. (DYNAMIC RANGE
- D SOUND
- DIGITAL AUDIO SETUP MENU
- DIGITAL OUTPUT
- LPCM OUTPUT
- VIDEO SETUP MENU
- TV TYPE
- NTSC/PAL CONVERSION
- TV DISPLAY
- SETUP THE ITEM AS FOLLOWS
- SMART PICTURE
- COLOR SETTING
- CONTRAST
- HUE
- SATURATION
- PREFERENCE SETUP MENU
- AUDIO LANGUAGE
- SUBTITLE LANGUAGE
- DISC MENU LANGUAGE
- IF YOU CHOOSE OTHERS IN THE AUDIO, SUBTITLE, OR DISC MENU MENU
- PASSWORD
- PARENTAL CONTROL DVD
- NO PARENTAL CONTROL
- RATINGS 1 TO
- DEFAULT SETUP
- MP3/JPEG NAVIGATOR
- CABINET
- POWER CONSUMPTION
- CLEANING DISCS
- CLEANING THE DISC LENS
- PHILIPS NORGE AS
- OY PHILIPS AB
- PHILIPS KUNDTJÄNST
- PHILIPS POLSKA
- PHILIPS SERVICE
- PHILIPS IBERIA, S.A
- PHILIPS HELLAS AEBE
- PHILIPS
- CONSUMER SERVICES
- REPRESENTATION OFFICE
- PHILIPS INFO CENTER
- PHILIPS CUSTOMER CARE CENTER
Brand : PHILIPS
Model : DVP320
Category : DVD player