Wego - Scooter TVS - Free user manual and instructions
Find the device manual for free Wego TVS in PDF.


| Product Type | Scooter |
| Brand / Model | TVS Wego |
| Engine Type | Single cylinder, 4-stroke, air-cooled, spark ignition |
| Displacement | 109.7 cc |
| Max Power | 5.88 kW @ 7500 rpm |
| Max Torque | 8.4 Nm @ 5500 rpm |
| Transmission | CVT (Continuous Variomatic Transmission) with dry centrifugal clutch |
| Starting System | Electric starter and kick starter |
| Fuel System | Carburettor (UCAL VM 16 SH), unleaded petrol |
| Fuel Tank Capacity | 5.0 liters (including reserve) |
| Overall Dimensions (L x W x H) | 1834 mm x 640 mm x 1115 mm |
| Wheelbase | 1275 mm |
| Ground Clearance | 132 mm |
| Kerb Weight | 108 kg (with tool kit and 90% fuel) |
| Payload Capacity | 130 kg |
| Tyre Pressure (Cold) - Front | 1.69 kg/cm² (24 PSI) |
| Tyre Pressure (Cold) - Rear Solo | 2.00 kg/cm² (28 PSI) |
| Tyre Pressure (Cold) - Rear with Pillion | 2.25 kg/cm² (32 PSI) |
| Battery | 12V, 5Ah |
| Headlamp | 12V, 35/35W |
| Brake Front | 220 mm disc or 130 mm drum (hand operated) |
| Brake Rear | 130 mm drum (hand operated) with Synchronised Braking System (SBS) |
| Key Features | Body Balance design, full digital speedometer, patented E-Z centre stand, tubeless tyres, intelligent TCI, trip meter, fuel gauge, service reminder, low fuel/battery indicators |
| Maintenance Schedule | First free service at 500-750 km, then every 3000 km or 3 months |
| Warranty | 24 months or 24,000 km (whichever earlier) |
Frequently Asked Questions - Wego TVS
User questions about Wego TVS
0 question about this device. Answer the ones you know or ask your own.
Ask a new question about this device
Download the instructions for your Scooter in PDF format for free! Find your manual Wego - TVS and take your electronic device back in hand. On this page are published all the documents necessary for the use of your device. Wego by TVS.
USER MANUAL Wego TVS
In case you need any Clarification or Service Assistance, please contact our Dealer
Dealer code, name ....
Address ....
Contact person name and mobile no. (Sales)
Contact person name and mobile no. (Service)
Email id ....
Or
TVS Motor Company's Area Offices (flip over for addresses)
Or
Toll Free Number : 18004252077
Email : Service.Support@tvsmotor.com
-|-
CONTACT AT OUR AREA OFFICES
TAMILNADU-1
1. TVS Motor Company Limited
SPL - Sriram Nivas, 1st Floor, No. 38, Venkatakrishna Road, Mandaveli, Chennai - 600 028. Phone : 044-24951652/24950018 Email : AO.Chennai@tvsmotor.com
TAMILNADU-2
2. TVS Motor Company Limited
No.10, 2nd floor, Shree Shanmugapriya Towers, Kannuswamy Street, Behind Hotel Annapoorna, R S Puram, Coimbatore - 641 002. Phone : 0422-4350060/2541035 Email : AO.Coimbatore@tvsmotor.com
TAMILNADU-3
3. TVS Motor Company Limited
D-09, Srinidhi Block, Agrini Apartments, Andalpuram, TPK Road, Madurai - 625 003. Phone : 0452-4208690 Email : AO.Madurai@tvsmotor.com
TAMILNADU-4 & PONDICHERRY
4. TVS Motor Company Limited
No. 37, 1st Floor, West Brindavanam, Near Le Royal Park Hotel, Puducherry - 605 013. Email : AO.Pondicherry@tvsomtor.com
KERALA
5. TVS Motor Company Limited
Ambady Towers, Second Floor, Door No. 27/631, A6, Edappally-Pookkattupady Road, Edappally PO., Cochin - 682 024. Phone : 0484-2544578/2556938 Email : AO.Cochin@tvsmotor.com
ANDHRA PRADESH-1
6. TVS Motor Company Limited
D-19, 302-3rd floor, Gayathri Arcade, Vikrampuri, Secunderabad - 500 003. Phone : 040-27840590/27844419 Email : AO.Hyderabad@tvsmotor.com
ANDHRA PRADESH-2
7. TVS Motor Company Limited
Door No. 58-2-35, NCK Plaza, NTR Circle, Patamata, Vijayawada - 520 010. Phone : 0866-6575100 Email : AO.Vijayawada@tvsmotor.com
KARNATAKA-1
8. TVS Motor Company Limited
600, Anand Surya, 2nd Floor, 5th Cross,
6th Phase, JP Nagar, BMTC Stop, Bangalore - 560 078. Phone : 080-42455000/25118000 Email : AO.Bangalore@tvsmotor.com
KARNATAKA-2 & GOA
9. TVS Motor Company Limited
BDP Plaza, 3rd floor, New Cotton Market, Karnataka Bank Road, Hubli - 580 029. Phone : 0836-4250617/4250618 Email : AO.Hubli@tvsmotor.com
CONTACT AT OUR AREA OFFICES
MAHARASHTRA-1 & 2
10. TVS Motor Company Limited
401, 4th floor,
The Chambers, Plot No. 4/12/3,
Near Ganpati Chowk,
Viman Nagar, Pune - 411 014.
Email: Service.pune@tvsmotor.com
MAHARASHTRA-3
11. TVS Motor Company Limited
Plot No. 206, House No. 241,
Ward No. 73, 1st floor,
West High Court Road,
Dharampeth, Nagpur - 400 010.
Phone:0712-2569932
Email: AO.Raipur@tvsmotor.com
Service.Nagpur@tvsmotor.com
CHATTISGARH
12. TVS Motor Company Limited
Magneto the Mall, Offizo 6th floor,
Office No. 627-628, Labhandi,
GE Road, Raipur - 492 010.
Phone:0771-4260006
Email: AO.Raipur@tvsmotor.com
MADHYA PRADESH-1
13. TVS Motor Company Limited
211-212, 2nd floor,
Chinar Incube Business centre,
Chinar Fortune City,
Near Brindavan Dhaba,
Hoshangabad Road, Bhopal - 462 026.
Phone:0755-2499406/2499306
Email: AO.Bhopal@tvsmotor.com
MADHYA PRADESH-2
14. TVS Motor Company Limited
301, 3rd floor,
Shagun Arcade, Vijay Nagar,
Indore - 452 010.
Phone:9826388896
Email: AO.Indore@tvsmotor.com
GUJARAT
15. TVS Motor Company Limited
109, Ayana Complex,
Opp : Suvarna Villa Bungalows,
100 ft Thaltej Hebatpur road,
Off : S.G. highway, Thaltej,
Ahmedabad - 380 054
Phone:079-65443748
Email: AO.Ahmedabad@tvsmotor.com
UTTAR PRADESH-EAST & CENTRAL
16. TVS Motor Company Limited
1st floor, Cyber Tower, TC-34/V-2,
Vibhuti Khand, Gomti Nagar,
Lucknow - 226 010.
Phone:0522-4918300
Email: AO.Upe@tvsmotor.com
AO.upc@tvsmotor.com
UTTAR PRADESH-WEST & UTTARAKHAND
17. TVS Motor Company Limited
K-23, 1st floor, Lajpat nagar, Part II,
New Delhi - 110 024.
Phone:011-29834773/29834640
Email: AO.Upw@tvsmotor.com
DELHI & HARYANA
18. TVS Motor Company Limited
K-23, 1st floor, Lajpat nagar, Part II,
New Delhi - 110 024.
Phone:011-29834773/29834640
Email: AO.Delhi@tvsmotor.com
AO.Haryana@tvsmotor.com
CONTACT AT OUR AREA OFFICES
PUNJAB, HIMACHAL PRADESH, JAMMU & KASHMIR
19. TVS Motor Company Limited
SCF-10-11, Kalghaidhar Enclave, Baltana Road, Zirakpur, District Mohali - 140 603. Phone : 01762-653477/653480 Email : AO.Chandigarh@tvsmotor
RAJASTHAN-1
20. TVS Motor Company Limited
Plot No. 16-17, Top floor of National Motors, Jhotwara Industrial Area, Jaipur - 302 012. Phone : 0141-5150900/5150901 Email : AO.Jaipur@tvsmotor.com
RAJASTHAN-2
21. TVS Motor Company Limited
204, 2nd floor, Daulet Chambers, 4-D, Sardarpura, Udaipur - 313 004. Phone : 9001897485 Email : AO.Udaipur@tvsmotor.com
BIHAR
22. TVS Motor Company Limited
N-Plaza, Jamal Road, P.S. Kotwali, Patna - 800 001. Phone : 0612-2200068/2200069 Email : AO.BNJ@tvsmotor.com
JHARKHAND
23. TVS Motor Company Limited
2nd floor, Lucas Building, Argora Bypass Road, Ranchi - 834 002. Phone : 0651-2244715 Email : AO.Ranchi@tvsmotor.com
ODISHA
24. TVS Motor Company Limited
303, 3rd floor,
Creative Plaza, Rasulgarh, Bhubaneshwar - 751 010. Phone : 0674-2580018/2580019 Email : AO.Bhubaneswar@tvsmotor.com
WEST BENGAL
25. TVS Motor Company Limited
9/2, Dover lane, Ground floor, Gariahat, Kolkata - 700 029. Phone : 033-24617092/24617096 Email : AO.kolkata@tvsmotor.com
NORTH EAST STATES
26. TVS Motor Company Limited
147, Udayan, Ganesh Guri, Opp. Punjab National Bank, R G B. Road, Guwahati - 781 005. Phone : 0361-2202030/2202031 Email : AO.Guwahati@tvsmotor.com
TVS WEGO is equipped with a unique design technology, Body Balance, that suits him and her easily and also offers a great ride experience.
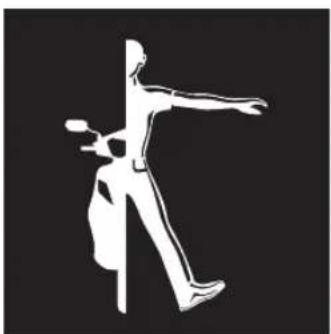
natural_image
Silhouette of a person in motion, possibly dancing or walking, against a black background (no text or symbols)BODY BALANCE
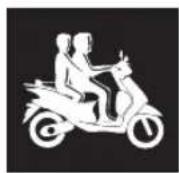
DESIGNED FOR
EVERYBODY
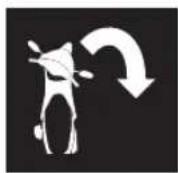
TURNS EASILY IN THE TIGHTEST CORNERS
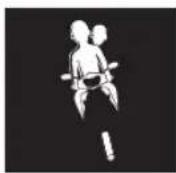
MANEUVERS WITH
EASY IN HEAVY TRAFFIC

TAKES TWO
WITHOUT A WOBBLE
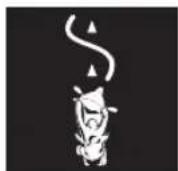
BODY WEIGHT
WELL DISTRIBUTED
Synchronised Brake system reduces the stopping distance, while keeping the stability intact.
TUBELESS TYRES
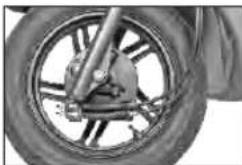
Another important unique feature in your scooter is "Tubeless Tyres". Tubeless tyres reduce the chances of getting punctured. Even if there is a puncture, sudden leakage of air is avoided, thereby provide better safety and convenience. It is also very easy to repair the punctured tyres.
natural_image
Close-up of a car wheel with visible suspension components and tire (no text or symbols)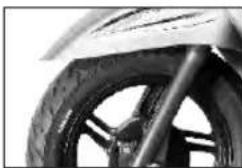
natural_image
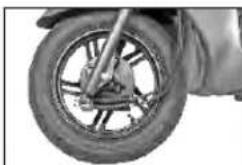
Close-up of a motorcycle wheel rim and tire (no visible text or symbols)DISC BRAKE \*
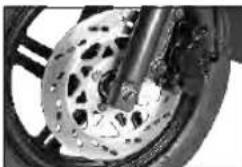
Your scooter fitted with "220 mm Disc" at the front for 'effective braking and safe riding' even at higher speeds.
natural_image
Close-up of a motorcycle brake caliper and wheel assembly (no visible text or symbols)ALL BLACK LARGER ALLOY WHEELS
All "Black Larger Black Alloy Wheels" with high mechanical advantage gives progressive braking of your scooter, results in best-in-class 'shortest distance' braking. It also provide superior comfort in bad road conditions.
"Parking Brake" protects your scooter from falling, while parked with the side stand on a slope. It also helps you relax while waiting in a long traffic signal (or) a slope. Refer page 17 for details.
BODY COLOURED PILLION GRAB RAIL
The grab rail now comes in your chosen colour of the body enhancing the style and ensuring the safety of the pillion rider.
natural_image
Close-up of a bicycle's wheel rim and suspension mechanism (no text or symbols visible)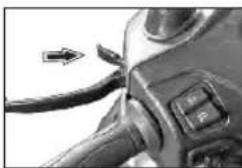
natural_image
Close-up of a car's wheel and lever mechanism with a directional arrow (no text or symbols visible)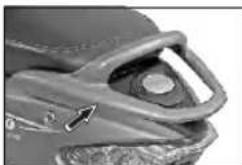
natural_image
Close-up of a mechanical component with a metallic bracket and textured surface (no visible text or symbols)INTELLIGENT TCI
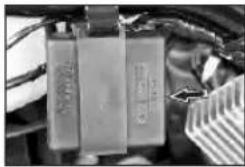
Your scooter's fuel efficient engine uses "Intelligent TCI" Inbuilt with variable timing modes, makes sure that you get the best from your engine.
VISCOUS PAPER FILTER
Your scooter's fuel efficient engine uses "Viscous Paper Filter", makes sure that you get the best from your engine.
PATENTED E-Z CENTRE STAND
Your scooter is fitted with a unique feature of "Patented E-Z Centre Stand" which can be used as convenient as side stand.
natural_image
Close-up of a mechanical component with visible wiring and a metallic bracket (no text or symbols)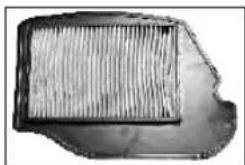
natural_image
Close-up of a textured, rectangular object with vertical ridges, possibly a mechanical or electronic component (no visible text or symbols)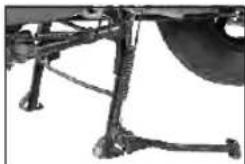
natural_image
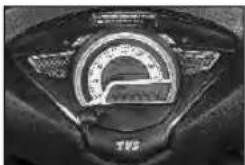
Mechanical assembly with articulated legs and a circular component (no visible text or symbols)FULL DIGITAL SPEEDOMETER
Your TVS WEGO is fitted with "Full Digital Speedometer" which is inspired by international automotive trends. This first-in-class speedometer housed perfectly in the headlamp housing of your scooter. Refer page no. 13 for details.
ECONOMETER®
Your speedometer has "ECONOMETER®" which indicates whether you are riding in Economy Mode or Power mode. This is unique feature of your scooter which guides you to ride your scooter fuel efficiently. Refer page 13 for details.
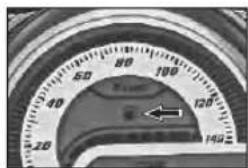
LOW FUEL INDICATOR
"Low Fuel Indicator"- is yet another unique feature of your scooter which indicates you to refill the fuel, when the fuel in the tank goes below minimum safe level. Refer page no. 16 for details.
natural_image
Close-up of a car's gauge or speedometer on a dark surface, no visible text or symbols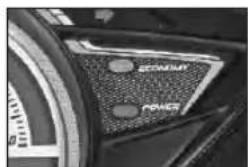
LOW BATTERY INDICATION
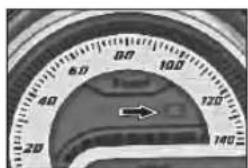
"Low Battery Indication"- is yet another unique feature of your scooter which indicates when the battery voltage is too low. Refer page no. 16 for details.
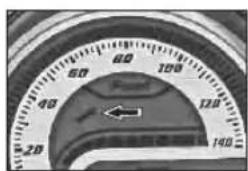
SERVICE REMINDER
"Service Reminder"- is yet another unique feature of your scooter which indicates when it is time to give the vehicle for service based on the km schedule as mentioned in page no. 16.
TRIP METER
"Trip Meter"- is yet another unique feature of your scooter using which you can measure the exact trip distance. Refer page no. 14 for details.
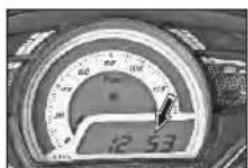
DIGITAL CLOCK
"DIGITAL CLOCK"- is yet another unique feature of your scooter. Refer page no. 15 for details.

ACCESSORIES FOR YOUR SCOOTER
MOBILE CHARGER SOCKET\*
"Mobile Charger Socket" is supplied as an optional accessory for your scooter. Location for the socket is provided inside the utility box.
Contact nearest TVS Motor Company Authorised Main Dealer or Authorised Dealer for fixing the socket. Refer page no. 23 for usage details.
INDICATOR BUZZER\*
Your scooter has an "Electronic Buzzer" which alerts you that the turn signal indicators are 'ON'. This buzzer comes as a mandatory accessory.
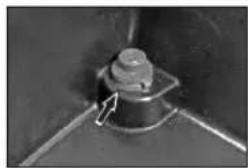
natural_image
Close-up of a mechanical component with a bolt and curved shaft (no visible text or symbols)* Mandatory and optional accessories will be charged extra
Dear WEGO Owner,
Thank you for choosing TVS WEGO, a Multi-User friendly, scooter with Body Balance Technology, Full Digital Speedometer, new CVT-i Engine & many class-leading features. With its aerodynamic stance, unrivaled comfort and best in class mileage, Wego represents a new direction in the class of scooters. Hand-crafted for dual usage and urban mobility, Wego is the luxury scooter that adapts to your needs and personality.
It's more than a scooter. It is a statement, an intelligent choice. As a proud owner of TVS WEGO, you are now part of a family of millions of satisfied TVS customers.
This manual explains the features and operations of your TVS WEGO. Kindly read it carefully and follow the instructions to enjoy years of safe riding. To ensure reliable performance, we urge you to get your TVS WEGO serviced only at TVS Motor Company Authorised Main Dealers / Authorised Dealers at specified regular periodic intervals.
We welcome you once more to a world of comfortable and easy riding!
TVS MOTOR COMPANY LIMITED
-IX-
This manual should be considered as a permanent part of the scooter and should remain with the scooter when resold or transferred to a new owner.
All information, illustrations, photographs and specifications contained in this owner's manual are based on the latest product information available at the time of this publication. TVS Motor Company Limited may, however, incorporate modifications or improvements on its vehicles at any time without notice, and therefore, in such events it is possible that the relevant part of the owner's manual does not apply to your vehicle.
Prior permission of TVS Motor Company Limited is required for quoting, copying or reproducing any part of this owner's manual.

Note
Accessories shown in the picture may not be part of the standard equipment.
Pictures shown in this manual are of TVS WEGO SBS Drum Brake model until it is specified
Part Number :- K6210040
Revision 6, July 2015
-X-
Operating this vehicle safely is an important responsibility of the rider. To help you make decisions about safety, we have provided operating procedure and other information in this manual. This information alerts you on potential hazards that could hurt you or others. Since it is not possible to warn you about all hazards associated with operating or maintaining the vehicle, you must use your own judgement.
You will find important safety information in following form in this manual. These words carry the following connotations:

Warning
Disregarding this message might result in injury to the rider.

Caution
This message indicates special procedures or precautions to be followed to avoid damage to the vehicle.

Note
This message provides further clarification for clearer understanding of any particular information.
Running-in information 01
Safe riding tips 02
Know your TVS WEGO 06
Riding your TVS WEGO 24
Maintenance 28
Warranty and services 48
Technical specifications 59
General information 61
-XII-
The first 1000 km is a crucial part of your scooter. Proper running-in operation during this period helps in ensuring maximum life and smooth performance of your scooter.
The reliability and performance of your scooter depends on the special care and restraint exercised during the running-in period. It is especially important that you avoid operating the engine in high speed (RPM), which could expose the engine parts to excessive stress. Maximum recommended speed during the running-in is:
Maximum 50 kmph speed upto 1000 km (vary the engine speed for better mating of parts).
The first free service at 500 \~ 750 km is most important. During running-in period all the engine components and other parts will have set in. All adjustments to be restored, all fasteners to be tightened. Engine and transmission oil to be replaced. Timely performance of the first free service will ensure optimum service life and performance from the engine.

Caution
Replacing the engine and transmission oil during first free service is most important for better life of engine. Always use TVS TRU4 PREMIUM, 4T oil (10W30) for better performance and life.
SAFE RIDING RECOMMENDATIONS
Any two wheeler riding requires some precautions to be taken to ensure the safety of the rider, pillion and other road users. These precautions are:
Familiarise yourself with new TVS WEGO
Riding skill and your mechanical knowledge form the foundation of safe riding practices. We suggest you to practice riding TVS WEGO in a low-traffic condition until you are thoroughly familiar with your vehicle and its controls. Remember practice makes you perfect.
Riding apparel
Loose, fancy clothing can be uncomfortable and unsafe when riding a two-wheeler. Choose good quality two wheeler riding apparel.
Know your limits
Ride within the boundaries of your own skill at all times. Knowing these limits and staying within the limits will help you avoid accidents.

Warning
Two wheeler safety equipment starts with a safety helmet of good quality. One of the most serious injuries that can happen is a head injury. Always wear ISI approved helmet. You should also have good suitable eye protection.
Posture
Proper vehicle riding starts with proper posture.
- Keep your elbows inside close to the body and flexible.
- Hold your arms at an angle of about 120^ .
- Hips should be in a position so that arms and shoulders are relaxed.
- Look widely instead of gazing at one point.
- Relax to guard against a sudden impact.
- Point the toes straight ahead.
Cornering
When cornering, centrifugal force works in a direction perpendicular to the direction in which the vehicle is moving. Centrifugal force increases in proportion with speed and the radius of the corner.
During cornering, reduce speed so as to lessen the effects of centrifugal force. By all means, avoid abrupt application of brake or sudden steering.
Slow down to a safe speed before negotiating a corner. If this is the first time that you are riding a vehicle of this type, we suggest that you practice on a safe, open area to become thoroughly familiar with the operation of the vehicle.

Warning
One-hand riding is dangerous. Keep both hands firmly on the handle bar and both feet securely on the floor board. Under no circumstances should both the hands be removed from the handle bar, as it is very dangerous.
Avoid use of mobile phones while riding as it could lead to fatal accident.
Braking
For safe riding, it is very important to master the braking techniques.
- Close/release the throttle.
- Hold the vehicle upright as you apply the brake.
- Progressive application of brake is safer.
- Apply both the brakes. 'SBS' provides additional braking even when 'Only Rear brake' is applied. But applying 'Both the brakes' helps you use the full potential of the brakes.
- Riding down hills, while cornering and wet roads close throttle and come to a slower speed to avoid the loss of control over the vehicle due to skidding.
Causes for poor braking
-
If the brake shoes/pads or drum/disc are worn out or if there is water or oil on them, sufficient friction does not develop and brakes do not work well.
-
Even when the brake works normally, if the road surface is wet or the tyre surface is worn-out, tyres do not take a firm hold on the surface, increasing the stopping distance.
- Approximately 60% braking effect is from front brake. Non-usage of front brake causes poor braking. SBS provides additional braking when Rear brake is applied, but the full brake power can be harnessed when Both brakes applied.

Warning
As the vehicle speed increases, the stopping distance also increases progressively. Be sure that, you have sufficient distance between you and the vehicle or obstruction ahead of you.
Using only the front or rear brake too much is dangerous and can cause skidding and loss of control. Apply both the brakes together and with great care on a wet road or other slippery surfaces. Any abrupt braking on slippery or irregular roads can cause loss of rider control.
ACCESSORY INSTALLATION AND SAFETY TIPS
Use extreme caution while selecting and installing the accessories for your scooter.
The addition of unsuitable accessories can lead to unsafe operating conditions. Your friendly Dealer will assist you in selecting quality accessories and installing them correctly.
While selecting the accessories, make sure the accessories should not obstruct lighting, steerability, suspension level and ground clearance.
Additional electrical equipments and controls should not exceed the specified electrical system load of the vehicle (capacity of battery and magneto).
EMISSION CONTROL
All the TVS vehicles are tested in the factory for optimum fuel efficiency and lowest possible CO levels.
Do not disturb the Carburettor settings as this may lead to higher fuel consumption and also higher CO levels.
If the vehicle needs any adjustments, please consult nearest TVS Motor Company Authorised Main Dealer or Authorised Dealer.
While adequate care is exercised at the factory to ensure that the emissions are within the limits, it is essential for the owner to always maintain the scooter in good condition by getting it periodically checked and serviced by TVS Motor Company Authorised Main Dealer or Authorised Dealer so that the emission and fuel consumption levels are maintained as per norms.

Note
Get your vehicle certified by the Government authorised emission testing stations at specified intervals.
VEHICLE IDENTIFICATION NUMBER
Serial numbers of both frame and engine are required for vehicle identification. They are also required to assist your Dealer for operating parts or referring to special information.
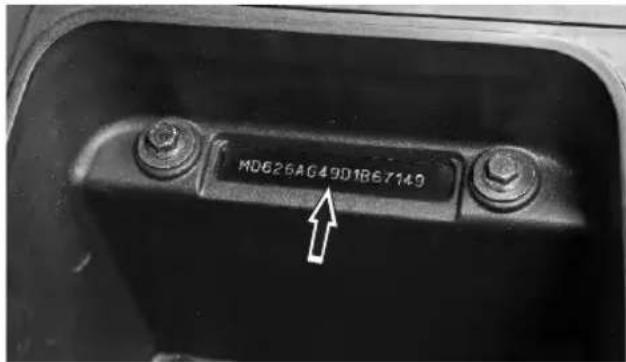
The frame serial number is stamped on the frame, at the rear end below the seat assembly. Open the seat assembly to read the frame number.
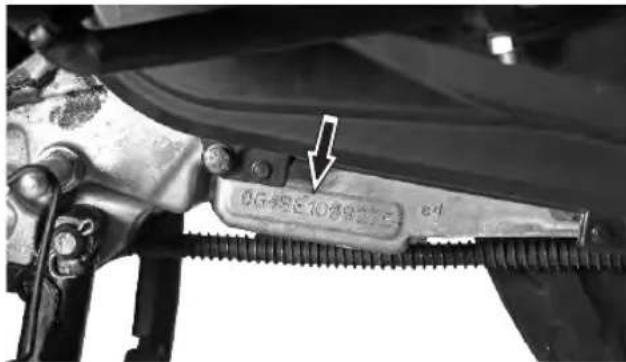
The engine serial number is stamped on the left side of the engine, at bottom, near centre stand mounting. See bottom to read serial number.
Frame number
Engine number
Control key number
Please fill the above box now for future reference
LOCATION OF PARTS - HANDLE BAR
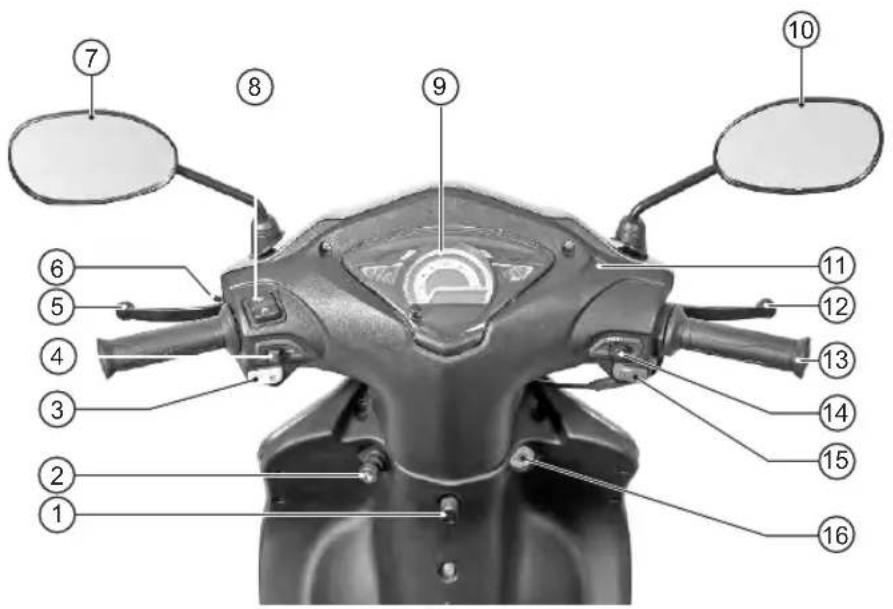
- Bag hook (front)
- Choke knob
- Horn switch
- Turn signal lamp switch
- Left hand brake lever (SBS brake lever)
- Parking brake (brake lock)
- Rear view mirror L
- High / low beam switch
- Full digital speedometer
- Rear view mirror R
- Brake fluid inspection window*
- Right hand brake lever (front brake lever)
- Throttle grip
- Lights switch (ON/OFF)
- Electric starter switch
- Ignition cum steering lock
Vehicle shown of drum brake version
- Rear brake adjusting nut
- Lady foot rest - foldable
- Kickstarter lever
- Patented E-Z centre stand
- Side stand*
- Pillion foot rest L
- Floor mat
- Front brake cables
- Brake adjusting nuts
- Seat cum fuel tank cap lock
- Pillion handle
* Mandatory accessory will be charged extra
Vehicle shown of drum brake version
- Front wheel axle nut
- Cover front
- Pillion foot rest R
- Gauge oil level
- Muffler assembly
- Rear fender
- Fuel tank cap
- Seat assembly
CONTROL KEY
TVS WEGO comes with a pair of identical control keys. These keys are to operate ignition cum steering lock, seat lock, fuel tank cap and glove box(optional).
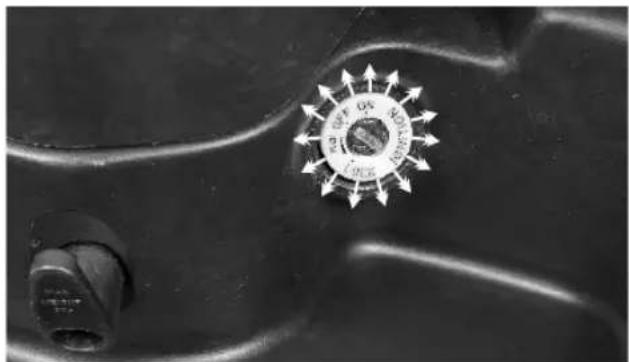
IGNITION CUM STEERING LOCK
TVS WEGO is provided with an self illuminating ring (glow ring) around the ignition cum steering lock, for better visibility of lock location in darkness.
There are three positions in the ignition cum steering lock. They are:
natural_image
Close-up of a mechanical component with a circular emblem and radial arrows, no visible text or symbols.1. 'OFF' position
All the electrical circuits are turned 'OFF' in this position. Engine will not start. Key can be taken out.
2. 'ON' position
In this position, all the electrical circuits are turned 'ON' and the engine can be started now. Key cannot be removed in this position.
3. 'LOCK' position
TVS WEGO steering can be locked in both 'left' and 'right' directions.
To lock the steering, turn the handle bar all the way to the 'left' or 'right'. Push the key in and turn it to the 'LOCK' position and take out. All the electrical circuits are turned 'OFF' in this position. Insert the key into the lock and turn it to 'OFF' or 'ON' position to unlock the steering.

Caution
Leaving the ignition cum steering lock in 'ON' position will drain the battery when the vehicle is not in use. So "Switch Off" and take the key out when the vehicle is not in use.

Warning
Never attempt to move the vehicle when the steering is locked, you may lose balance.

Note
When the ignition lock is turned 'ON', the speedometer performs self test and the back light of the speedometer glows continuously. Wait till the self test cycle of speedometer gets over.
FULL DIGITAL SPEEDOMETER
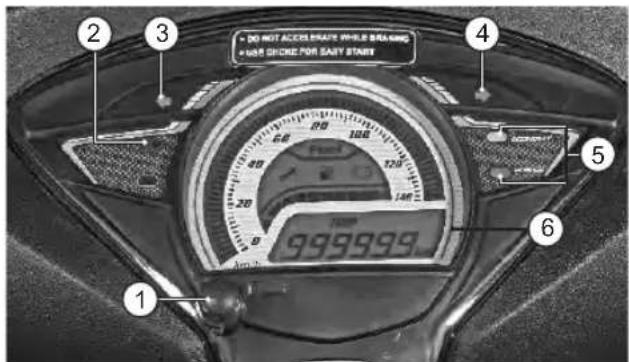
- Mode switch
Press the switch to change the display mode ('ODO' or 'TRIP' or 'CLOCK').
- High beam indicator lamp
Glows when the head lamp high beam is activated.
- Turn signal indicator lamp left
Flashes when the left side turn signal indication is activated.
- Turn signal indicator lamp right
Flashes when the right side turn signal indication is activated.
- Economy and power indicators
Economy indicator (green lamp) indicates that the vehicle is running in economy mode which gives better fuel economy.
Power indicator (amber lamp) indicates that the vehicle is running in power mode which results in reduced fuel economy.

Note
Always ride the vehicle in economy mode for better fuel efficiency.

Note
Whenever the vehicle is switched 'OFF' and started again, if the engine is kept running in idle mode for more than 110 seconds approx, the power mode indicator blinks and informs you that the fuel is getting wasted and the engine needs to be switched 'OFF' to save the fuel.
Similarly, during running, if the vehicle is kept more than 20 seconds in idling mode, the power mode indicator blinks and warns again.
If the battery voltage is very low, power mode lamp will glow once you switch 'ON' the ignition key till you start the vehicle. Electric starter will not work in this condition. Use kick starter only. Contact TVS Motor Company Authorised Main Dealer or Authorised Dealer for assistance.
6. Multi functional digital display
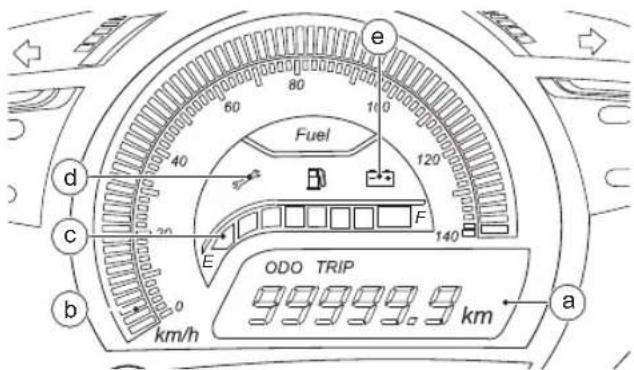
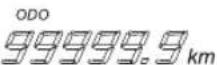
a. Odometer/Trip meter/Digital clock
Odometer registers and displays the total distance covered by the vehicle in kilometers. The digit after the dot mark denotes one tenth of a kilometer. Set the display in 'ODO' mode to know the reading.
Trip meter registers and displays the partial distance covered in kilometers. The digit after the dot mark denotes one tenth of a kilometer. Set the display in 'TRIP' mode to know the reading. Press the mode switch for a few seconds (in 'TRIP' mode) to reset trip meter whenever required.
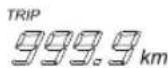
Digital clock displays the time only in 24 hours format. Set the display in 'CLOCK' mode to display the time by pressing the mode switch.
$$ 1 0 - 1 0 $$
Digital clock setting
Digital clock can be set in 'CLOCK' mode only. Set the digital clock time in the following manner.
-
Change the meter to 'CLOCK' mode by pressing the mode switch button.
-
Press the mode switch till the hour digits of the clock starts blinking.
- Once the hour digits started blinking, press the mode switch again to increase the hours.
- Press the mode switch till the minute digits of the clock starts blinking.
- Once the minute digits started blinking, press the mode switch again to increase the minutes.
- Long press of the mode switch again exits the clock setting.
b. Speedometer
Digital bars displays the driving speed in kilometer per hour (km/h) in real time. Each bar indicates 2 km/h.
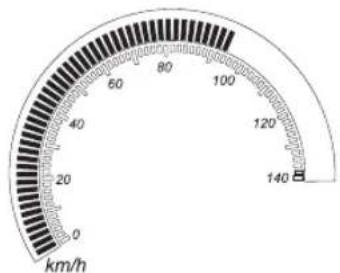
gauge
| Value | |---| | 0 | | 20 | | 40 | | 60 | | 80 | | 100 | | 120 | | 140 |c. Fuel gauge
Digital bars indicates the approximate fuel quantity available in fuel tank. There are eight bars to indicate the fuel quantity available in the tank. All the eight bars will be displayed when the fuel in the tank reaches 4.8 liters approx (full tank).
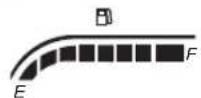
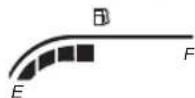
When the fuel reaches half tank (2.5 liters approx.) the fuel gauge displays only four bars as shown.
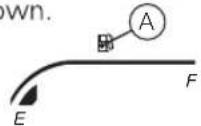
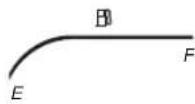
The fuel gauge shows only single bar when the fuel reaches reserve level (1.0 liter approx.) At the same time a fuel tank symbol (A) starts blinking and indicating that the fuel reached to reserve level. Refill the fuel immediately. Once the fuel level reaches 0.5 liter (empty), no bar will be visible and the fuel tank symbol (A) keeps blinking.
Please note that, the fuel gauge is not a mileage calculating medium and it should not be used for calculating the mileage.
d. Service reminder
If the service is due, whenever the ignition switch is turned 'ON', an icon with spanner symbol 'blinks for 10 seconds after the self-test cycle of speedometer and continues to glow till the vehicle is serviced and reset. Get the vehicle serviced at TVS Motor Company Authorised Main Dealer/Authorised Dealer.
e.Low battery indicator
An icon with battery symbol ' - * ' glows when the battery charge is too low. Contact your nearest TVS Motor Company Authorised Main Dealer/Authorised Dealer.

Note
Service reminder indicator lamp works only based on the distance (km) covered by the vehicle. This is only a reminder indicator. Customers are advised to keep track and follow the service schedule.
HANDLE BAR LEFT SIDE
- Horn switch
Press the switch '→' to operate the horn.
- Turn signal lamp switch
Slide the turn signal lamp switch to left ' ⇌ ' or right side ' ⇒ ' to operate respective turn signal lamps (LH/RH). Press the switch to turn 'OFF'.
- Left hand brake lever (SBS brake lever)
Synchronised Braking System (SBS) can be operated by pressing the left hand brake lever gently towards the handle grip.
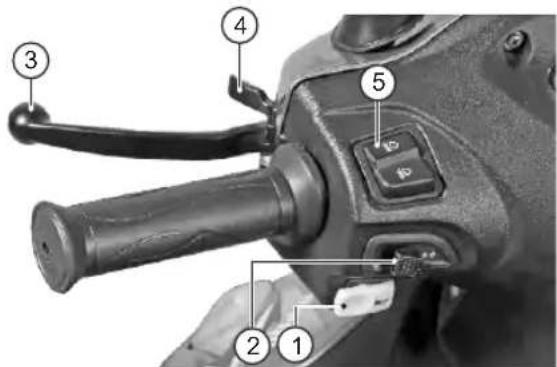
SBS technology helps to operate both front and rear brakes by distributing the force optimally between the two braking system.
- Parking brake (brake lock)
Brake lock protects your Wego from rolling-off, when parked on side stand (or) helps you relax while waiting in a long traffic signal (or) a slope.
To activate brake lock, press the brake lever almost half towards the grip and hold, then press the parking brake lever to maximum and release the brake lever slowly. Ensure the brake is locked properly. Pressing the brake lever further releases the brake lock automatically.
Warning
Since your vehicle is fitted with SBS brake system it is essential to maintain the brake system in good condition. Adjust the brakes system at regular intervals for the proper working of SBS.
Ensure brake lock is released before riding the vehicle.
5. Head lamp high / low beam switch
With the lights switch in 'ON' condition, press the high/low beam switch towards 'D≡' to operate the high beam of head lamp and towards 'D≡' to operate the low beam of head lamp.

Warning
Always use the appropriate turn signal lamps when you intend to change lanes or take turns. Be sure to switch 'OFF' the turn signal lamps after negotiating the lanes or turns.
Similarly, use appropriate head lamp beam 'high / low' as per the traffic and road conditions for your safety and to avoid inconvenience to other riders.
HANDLE BAR RIGHT SIDE
1. Right hand brake lever
Front brake system can be operated by pressing the right hand brake lever gently towards the throttle grip. The brake lamp glows on application of either right hand or left hand brake lever.
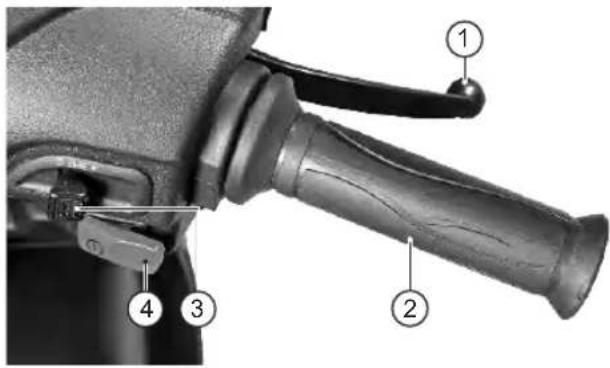
2. Throttle grip
Engine speed is controlled by the rotation of the throttle grip. Twist it towards you to increase the engine speed and twist it away from you or release it to decrease the engine speed.
3. Lights switch
Lights switch has the following positions. Working of switch at various positions are as follows:
OFF: All the lamps are turned 'OFF' (except speedo back light) when the switch is positioned at '●' even though the engine is running.
PO: Position lamps, tail lamp and license plate lamp glows when the switch is positioned at 'ID' and engine is running.
ON: Head lamp also glows along with the above mentioned lamps when the switch is positioned at 'B' and engine is running.
4. Electric starter switch
Press the starter switch '③' to start the engine electrically along with the application of either front or rear brake.
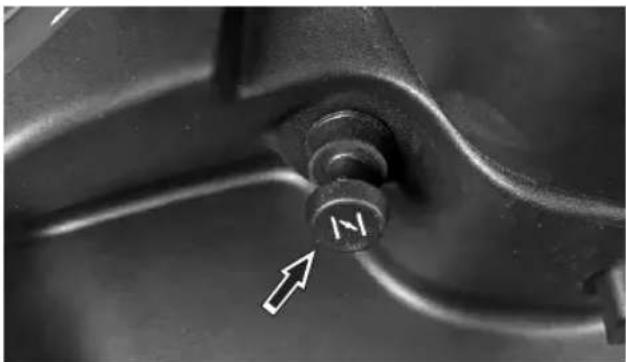
CHOKE KNOB
natural_image
Close-up of a mechanical component with a knob and arrow indicator (no readable text or symbols)Pull the choke knob fully to operate the choke. During cold start, pull the choke knob and start the vehicle using electric starter or kicklever without opening / with less opening of throttle.
Once the engine is started and running in stable RPM, release the choke by pushing choke knob to its original position and ride the vehicle.

Caution
Always use choke for starting the cold engine. Never open the throttle fully when the choke is applied. It may lead to flooding of fuel and difficulty in starting the vehicle.
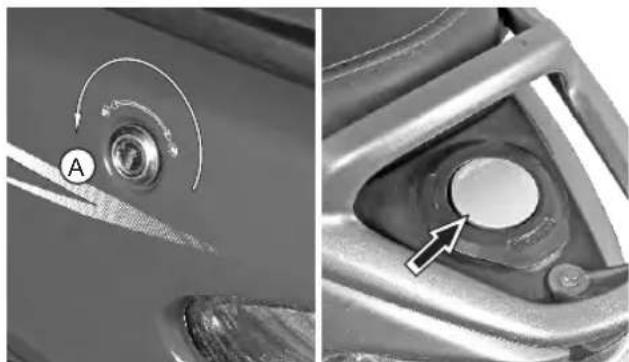
FUEL TANK\* CAP
natural_image
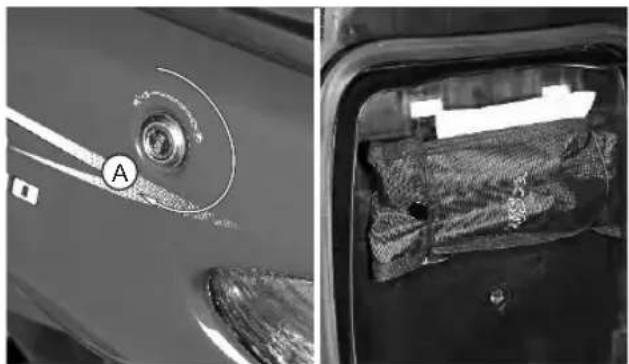
Close-up of mechanical components with circular features and an arrow indicator (no text or symbols)Fuel tank is located at the rear end of the vehicle below the pillion holder. To open the fuel tank cap, insert the control key into the 'seat / fuel tank cap lock' (A) and turn it in anti-clockwise direction. The fuel tank cap opens automatically.
To close the cap, gently press the cap in its position and ensure locking by hearing 'click' sound.
* The fuel tank is not a measuring instrument and the capacity of the fuel tank may slightly vary from the indicated capacity.

Warning
Never refill fuel near open flame. Do not smoke while refueling. Do not use cell phones while refueling.

Caution
Ensure that the fuel gun is inserted fully in the tank neck while refueling.
Whenever refueling, fill up to the bottom of neck portion (insert level) of the fuel tank. Filling above the neck may result in improper breathing of fuel tank and seepage of fuel.
While refueling, avoid spillage of petrol on the tyre. Ensure to close fuel tank cap without fail to avoid fuel spillage.
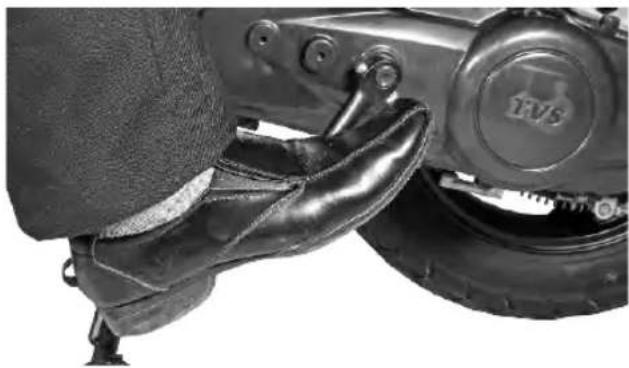
KICKSTARTER LEVER
Kickstarter lever is located on the left side of the vehicle. To start the vehicle, keep the ignition in 'ON' condition and apply the rear brake as a safety precaution to prevent the rear wheel rotation.
Keep your foot on the lever extension as shown in the figure. Kick the lever from top and stroke to bottom with rapid motion.
natural_image
Close-up of a leather hand and foot assembly on a vehicle (no visible text or symbols)PATENTED E-Z CENTRE STAND
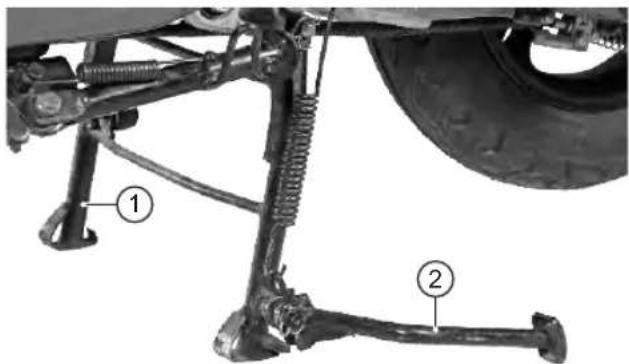
TVS WEGO is equipped with a patented E-Z centre stand.
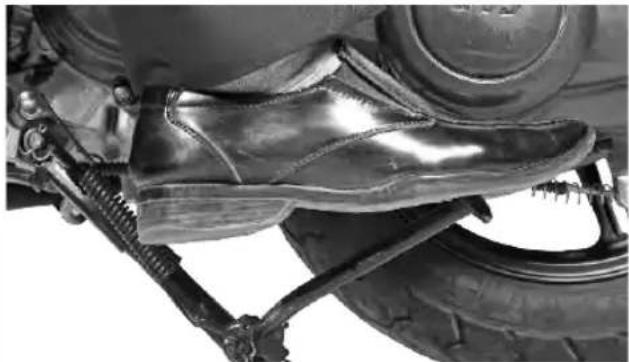
The centre stand (1) has a pivoted flexible spring loaded lever arm (stand extension) (2) to increase the lever ratio, which enables parking on centre stand effortlessly and very conveniently.

Caution
Never sit on vehicle when it is supported by stand. Always park the vehicle on a flat, firm surface.
KNOW YOUR TVS WEGO
TVS
To place the vehicle on centre stand, hold the handle bar left grip with left hand. Place your foot firmly on the centre stand extension (2) and press.
natural_image
Close-up of a leather foot pressing down on a vehicle tire, with a hand crank and footrest (no visible text or symbols)SIDE STAND\*
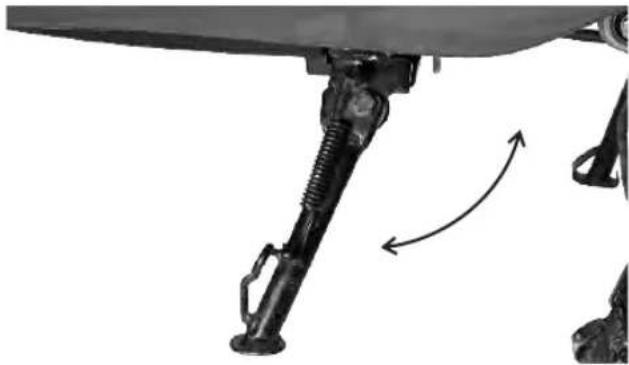
Side stand (*mandatory accessory will be charged extra) can be operated by sitting on the vehicle with your left foot by pushing it away from the vehicle till it stops.

Warning
Always release the side stand to its full up position before moving the vehicle.
natural_image
Close-up of a mechanical assembly with a bipedal and directional arrow indicating motion (no text or symbols)TOOL KIT AND FIRST AID KIT
natural_image
Side-by-side comparison of a car interior showing a circular component labeled 'A' and a close-up of a textured fabric inside a vehicle (no text or symbols visible)To assist you in performing certain aspects of periodic maintenance and emergency repairs, a tool kit is supplied along with the vehicle.
This tool kit is located below the seat base. A first aid kit is available in the utility box.
To access the tool kit, insert the control key into seat lock and rotate it in clockwise direction. Lift and open the seat. The tool kit consists one number each of the following. Ensure the contents of the tool kit.
- 10x12 mm spanner
- Combination screw driver bit
- Screw driver handle
- Tool bag

Caution
It is recommended to use the tool kit in case of any emergency only. It is always advisable to take your vehicle to TVS Motor Company Authorised Main Dealer / Authorised Dealer.
UTILITY BOX
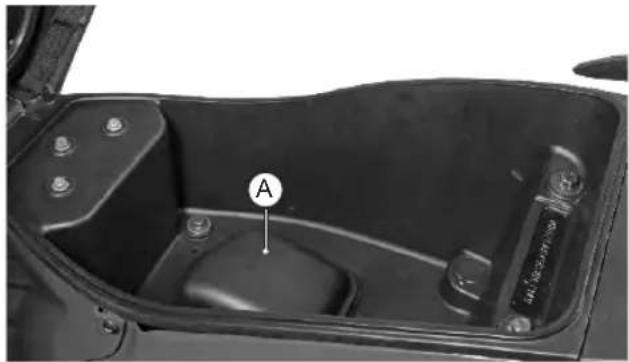
Utility box is located below the seat. Lift the seat by unlocking the seat lock as explained earlier, to access utility box. A separate cover (A) is provided inside the utility box. Remove this cover to access the carburettor for servicing purpose.
natural_image
Interior view of a vehicle battery pack with labeled component A (no text or symbols beyond label)
Warning
Operating TVS WEGO overloaded will hamper riding stability and may lead to loss of control. Hence, it is advisable to carry the recommended amount of load only.

Caution
Utility box can be used to carry a load of 10 kg maximum. Do not carry perishable items inside the utility box. It is not fully sealed. Do not allow / spray water to get inside the utility box. Take care not to spill petrol or oil into the utility box. Do not keep heat-sensitive items inside as it may get hot on long rides. Do not keep valuable items inside the utility box when leaving the vehicle unattended.
HELMETHOOKS
natural_image
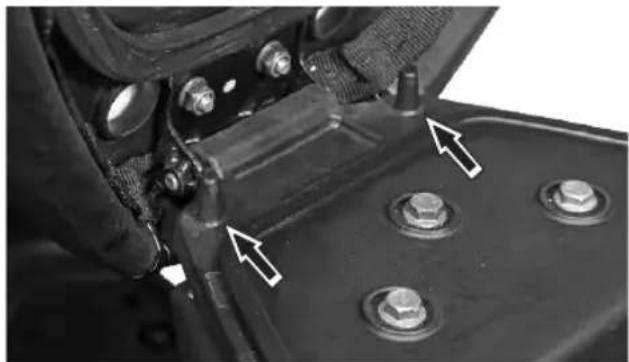
Close-up of a mechanical assembly with bolts and nuts, no visible text or symbolsTwo helmet hooks are provided under the seat assembly at front end near the seat hinge to secure your helmet. Open the seat assembly (refer page no. 20) to access the helmet hooks. Hook the helmet strap in the helmet hook properly and close the seat assembly.
SOCKET MOBILE CHARGER\*
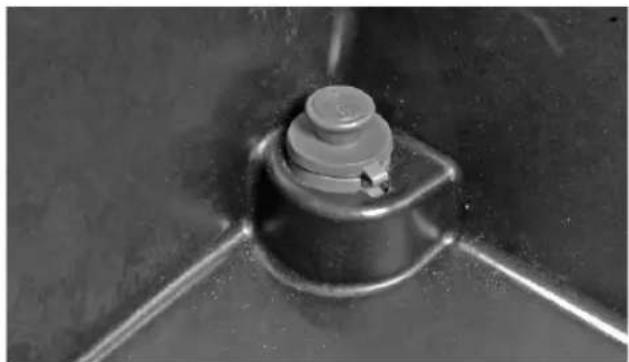
This socket enables you to charge the mobile phone when you are traveling. Open the seat assembly (refer page no. 20) to access the socket mobile charger.
natural_image
Close-up of a metallic mechanical component with a central bolt and flange (no visible text or symbols)* Optional accessory will be charged extra
The mobile can be kept inside the utility box during charging.
Please go through the operating manual of the mobile and use a suitable adaptor for the battery operation recommended by the mobile manufacturer for that particular model.
Also follow the instructions given below:
- Use this socket only for charging the mobile phone, do not connect any other accessories (cigarette lighter, walkman, torch light etc.).
- We recommend to use this socket for charging during engine running only.
- Do not use this socket with engine in 'OFF' condition which can lead to battery discharge.
- Use of wrong adapter may cause damage to the mobile phones. TVS Motor Company will not be responsible for damages caused due to the use of non standard adaptor.
-
Close the socket mobile charger using the cap provided with it when it is not in use to avoid dust/water entry.
-
Ensure that the socket is in closed condition during water wash. Also do not direct water jet towards the socket to avoid short circuit.
- Do not apply any grease, oil, soap solution etc., inside the socket mobile charger.

Caution
Secure your mobile phone properly during charging and protect it from any liquid, dust etc. Take the mobile phone and the adapter along with you while the vehicle is parked or unattended.
PRE RIDE INSPECTION
Check the following items before riding.
| ITEM WHAT TO CHECK FOR | |
| Engine oil Availability of oil upto the level (page no. 35) | |
| Transmission oil Availability of oil upto the level (page no. 35) | |
| Fuel Enough fuel for the planned distance of running | |
| Tyres Correct pressure (page no. 42)Adequate tread depthNo cracks or cuts. | |
| Battery Proper working of electric starter, horn, fuel gauge, brake lamp and turn signal lamps.Electrolyte level (page no. 32) | |
| Lighting Proper working of head lamp high / low beam, high beam indicator, position lamp,speedometer lamp, tail lamp and number plate lamp. | |
| Steering Smooth movementNo play or looseness | |
| Throttle Correct free play of cableSmooth operation | |
| Brakes Correct front and rear brake lever play incase of drum brake (page no. 36 to 39)Brake fluid level / pad wear in front and correct lever play in rear incase of disc brake(page no. 40 & 41) | |
| Wheels Free rotation |
Starting the engine
Ensure availability of fuel in the fuel tank. Insert the control key into the ignition cum steering lock and turn it to the 'ON' position.
Apply any one of the brake and press the electric starter switch to start electrically or kick start the engine.
When the engine is cold
☐ Pull the choke knob to fully and start the engine using electrical start / kick starter with no opening / very less opening of throttle.
☐ Once the engine is started and running stable, release the choke by pushing choke knob to its original position and ride the vehicle (when the engine is warm/hot do not use choke).
Setting the vehicle in motion
- Twist the throttle grip slowly towards you and simultaneously release the brake lever gently and smoothly. The vehicle starts moving forward.
- As the vehicle picks up speed, increase the throttle slowly.

Warning
Do not run the engine indoors where little or no ventilation available. Exhaust gas is extremely poisonous.
Do not raise the throttle rapidly so the vehicle will move forward suddenly and lead to loss of control.

Caution
Do not keep the engine in idling rpm for long and do not open excessive throttle when engine is idling, it leads to overheating of the engine and damage to internal components.
Stopping and parking
- Close the throttle completely and apply both the brakes simultaneously.
- Turn 'OFF' the ignition.
- Park the vehicle on a firm, flat surface.
- Lock the steering and take out the control key.

Warning
Reduce speed to a safe limit before turning / cornering. It is not advisable to apply brakes while turning / cornering.
FUEL RECOMMENDATION
Use unleaded petrol only.
The petrol should be 85 to 95 octane by research method. Use recommended fuel additives for longer life of engine components and lower maintenance. Petrol mixed with ethanol will have impact on engine components. Contact your TVS Motor Company Authorised Main Dealer / Authorised Dealer for usage.

Caution
Never mix oil in petrol in the fuel tank. Always fill fuel from the reputed and reliable fuel stations.

Note
Use fuel additives in petrol as recommended by the respective manufacturer for low carbon deposition.
CHECKS AND TIPS FOR IMPROVING FUEL ECONOMY
Regular checks
Carry out the periodic maintenance checks as specified in this manual (page no. 29 and 30).
Regular maintenance checks will save fuel and assure trouble-free, enjoyable and safe riding besides keeping environment clean.
Spark plug
A dirty or defective spark plug leads to wastage of fuel due to incomplete combustion. Clean and adjust the spark plug gap only if necessary.
Replace the spark plug every 12000 km (1 year). Always use recommended spark plug only.
Air cleaner element
A dirty air cleaner element restricts airflow and increases fuel consumption. Replace the element every 12000 km.
Engine oil and transmission oil
Dirty or less engine oil increases friction between various parts of the engine and reduces the engine life, thereby increases fuel consumption.
Running with low transmission oil will cause damage to the gears and bearings.
Regularly inspect the engine oil and the transmission oil for correct level and top-up if necessary. Get it replaced at regular intervals as per the maintenance schedule.
Fuel leak
Check and arrest fuel leaks if any from tank, carburettor and fuel lines. Loss of fuel due to leak may drain the fuel tank completely.
Evaporation
Vehicle parked in the hot sun leads to wastage of fuel through evaporation. Also lower fuel levels in the tank will have increased evaporation and condensation of moisture inside.
Ensure to close the fuel tank cap after every filling. If the fuel tank cap kept open for long time, it leads to safety and fuel loss.
Tyres
Low tyre pressure has adverse effect on the vehicle. The drag on the vehicle increases resulting decreased fuel economy. Further more, handling may be adversely affected.
Inspect the tyre pressure regularly (weekly) and inflate it to the recommended pressure (refer page no. 42). Never use tyres which are worn beyond the permissible limit.
Wheel freeness
Inspect and ensure the wheel freeness by rotating the wheel at least once in a week to avoid wastage of fuel.
Avoid unnecessary idling
While waiting for someone or stopping in signals for long time, if the engine is kept running at idle speed, it causes unnecessary wastage of fuel.
Avoid frequent braking
Anticipate corners and slops as well as the traffic conditions. Unnecessary and frequent braking will reduce the fuel economy. Never accelerate and apply brake simultaneously. It leads clutch shoes wear and wastage of fuel.
MAINTENANCE SCHEDULE
The maintenance schedule indicates the intervals between periodic services. At the end of each interval, be sure to inspect, check, replace, adjust, lubricate and service as instructed. If the maintenance is not done periodically, it will result in rapid wear and severe damage to the vehicle. If the vehicle is used under high stress conditions such as continuous full throttle operation or if used / operated in dusty climate, certain jobs should be performed more often to ensure reliability of the vehicle. Cylinder head, steering components, suspension and wheel components etc., are key items and require very special and careful servicing. TVS Motor Company Limited strongly recommends that the jobs as per the maintenance schedule be performed by your TVS Motor Company Authorised Main Dealer / Authorised Dealer.
Periodic inspections may reveal one or more parts that may need replacement. Whenever replacing parts on TVS WEGO, it is recommended to use only the TVS Motor Company Genuine parts.

Caution
Proper running-in and maintenance are mandatory to ensure that your vehicle is reliable and gives optimum performance at all times. Be sure that the periodic maintenance is performed thoroughly in accordance with the instructions given in this owner's manual.
In more dusty areas, the air cleaner element may required early replacement than the mentioned kilometers to avoid costly damage to the engine.
PERIODIC MAINTENANCE SCHEDULE (months or km whichever occurs earlier)
| Item In free service After Service 1st 2nd 3rd 4th 5th km Period from the date of sale | After free service | |||||||
| th Remarks | Every 3000 km | Every 6000 km | ||||||
| 500-750 1 month | 2500-3000 3 months | 5000-6000 6 months | 8500-9000 9 months | 11500-12000 12 months | ||||
| Engine oil | R | I & T | R | I & T | R | I & T | R | |
| Oil filter (strainer) | C | - | C | - | C | - | C | |
| Transmission oil | R | I & T | R | I & T | R | I & T | R | |
| Spark plug | C & A | - | - | - | R | - | - | Replace every 12000 km |
| Air cleaner element | - | - | - | - | R | - | - | Replace every 12000 km |
| Air cleaner oil collection tubes | - | I & DR | I & DR | I & DR | I & DR | I & DR | - | Drain oil if necessary |
| SAI filter element | - | - | - | - | R | - | - | Replace every 12000 km |
| CVT filter element ^1 | - | - | I & C | - | R | - | I & C | Replace every 12000 km |
| Tappet clearance | I & A | - | I & A | - | I & A | - | I & A | |
| Carburettor assembly ^2 | C & A | - | - | - | C & A | - | - | C & A every 12000 km |
| Carburettor breather hose | I | I | I | I | I | I | - | Inspect for routing & blockage |
| Drive belt and CVT rollers | - | - | - | - | - | - | - | Replace every 24000 km |
| Cover variator ^3 | - | - | I, C & L | - | I, C & L | - | I, C & L | |
| Clutch shoe | - | - | - | - | - | - | - | Replace every 24000 km |
| Hose fuel | I | I | I | I | I | I | - | Replace every 3 years |
| Front and rear suspension | I | I | I | I | I | I | - | Inspect for proper functioning |
| All control cables ^4 | I, A & L | I, A & L | I, A & L | I, A & L | I, A & L | I, A & L | - | |
| Choke operation | I | I | I | I | I | I | - | |
| Throttle grip | - | - | L | - | L | - | L | Lubricate using grease |
| Steering smooth operation / play | I & A | I & A | I & A | I & A | C, L & A | I & A | - | C & L with fresh grease every 12000 km |
| Front fork oil | - | - | - | - | - | - | - | Replace every 24000 km |
| Item In free service After free service Service 1st 2nd 3rd 4th 5th km Period from the date of sale | Remarks | |||||||
| 500-750 1 month | 2500-3000 3 months | 5000-6000 6 months | 8500-9000 9 months | 11500-12000 12 months | Every 3000 km | Every 6000 km | ||
| All fasteners | I & TI | I & TI | I & TI | I & TI | I & TI | I & TI | - | |
| All bulbs, horn and switches | I | I | I | I | I | I | - | Inspect for proper functioning |
| Head lamp beam | I & A | I & A | I & A | I & A | I & A | I & A | - | |
| Battery electrolyte level | I & T | I & T | I & T | I & T | I & T | I & T | - | |
| Specific gravity and voltage^5 | I | I | I | I | I | I | - | |
| Brake effectiveness / play | I & A | I & A | I & A | I & A | I & A | I & A | - | |
| Brake cam | - | - | L | - | L | - | L | Lubricate using grease |
| Brake pad wear (only in disc brake) | I | I | I | I | I | I | - | Replace if necessary |
| Brake fluid (only in disc brake) | I & T | I & T | I & T | I & T | I & T | I & T | - | Replace every 21000 km |
| Brake hose (only in disc brake) | I | I | I | I | I | I | - | Replace every three years |
| Master cylinder cups (only in disc brake) | - | - | - | - | - | - | - | Replace every 21000 km |
| Wheel freeness | I | I | I | I | I | I | - | |
| Front wheel bearing | - | - | - | - | C & L | - | - | C & L using grease every 12000 km |
| Tyre pressure at cold condition | I & S | I & S | I & S | I & S | I & S | I & S | - | |
| Engine idling RPM | I & S | I & S | I & S | I & S | I & S | I & S | - | |
| Idling CO% ^6 | I & S | - | - | - | - | - | - | |
| Centre / side stand pivot | L | L | L | L | L | L | - | Lubricate using TRU4 oil |
| Kick starter pedal pivot | L | L | L | L | L | L | - | Lubricate using TRU4 oil |
R - Replace; I - Inspect; T - Top up; C - Clean; A - Adjust; DR - Drain; L - Lubricate; TI - Tighten; S - Set
^1 Inspect for damage ^2 Clean and adjust every 12000 km after first service ^3 Clean the cover with air. Lubricate kick starter with grease
^4 Inspect for proper operation and adjust play. Lubricate ends using grease ^5 Recharge if necessary
^6 Idling CO% should be set with the help of exhaust gas analyser and tachometer only
RECOMMENDED LUBRICANTS
| Application Qty Manufacturer Brand | ||
| Engine oil 750 ml (during regular service) TVS Motor Company TVS TRU4 PREMIUM, 4T oil800 ml (incase of disassembly) | ||
| Transmission oil 100 ml (during regular service) -do- -do-120 ml (incase of disassembly) | ||
| Front fork oil 58 ± 1 ml / leg (drum brake model) IOC Gabriel Premium front fork oil84 ± 1 ml / leg (disc brake model) | ||
| Disk brake fluid | - | TVS Girling DOT3 / DOT4 |
| Grease | - | Bharat petroleum MP Grease no. 3IOC Servo Gem no. 3Bechem Bechem premiumKluber Lubrication Kluber Centoplex 2 |
| Fuel additives | As recommended | IFTEX |
SELF-MAINTENANCE PROCEDURES BATTERY
Battery is located at the front end of utility box below the seat and covered by the cover front. The cover front must be removed to access the battery. Follow the procedure for removal:
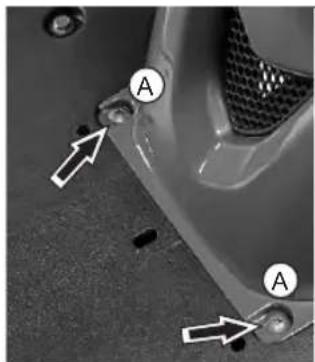
- Take out the floor mat. Remove the bottom mounting screws (A) of cover front.
- Open the seat and remove the top mounting screws (B) from both the sides of cover front.
- Gently pull out the cover front by dislocating its lugs.
natural_image
Close-up of a car's front wheel and side-mounted sensors, marked with arrows indicating alignment or damage points (no text or symbols present)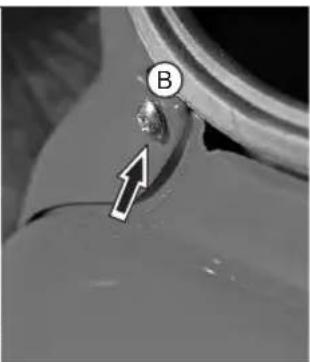
natural_image
Close-up of a mechanical component with a labeled feature (B) and an arrow pointing to a small object, no readable text or symbols present.- Inspect the battery electrolyte level. It should be between minimum and maximum level.
- If the electrolyte level is below minimum level, add only distilled water upto the maximum level by removing the filler caps.
- Reinstall the filler caps and clean the battery thoroughly, apply petroleum jelly to the battery terminals to protect it from corrosion.
Incase of any abnormality or for removal of battery from the vehicle, contact TVS Motor Company Authorised Main Dealer / Authorised Dealer.
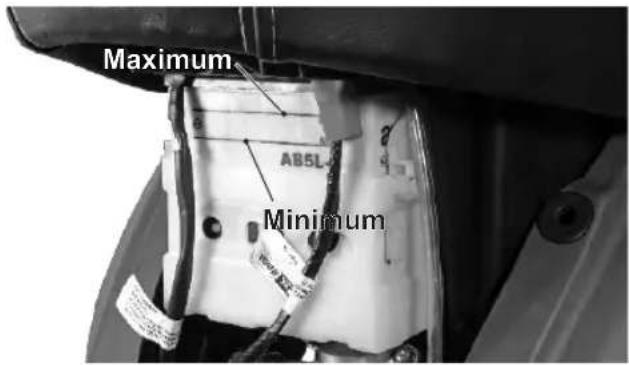

Caution
Once the battery is charged initially, never add diluted sulphuric acid. Use only distilled water for topping up. Never add tap water. Never check the battery charge by shorting terminals. Always connect the positive terminals first and the negative to avoid sparking. Do not obstruct, bend or change the routing of the battery air vent tube. Make sure that the vent tube is firmly attached to the battery and the other end is open and clear.
FUSE
Non-working of electrical systems may be due to safety fuse failure. Short circuit or overload in the electrical system are the main cause for fuse failure. Follow the procedure given below for inspecting and replacing the fuse.
- Open the cover front as explained earlier.
- Fuse case fitted on the battery band contains a 10A fuse. Pull out the fuse case from battery band. Open the fuse case and pull out the fuse.
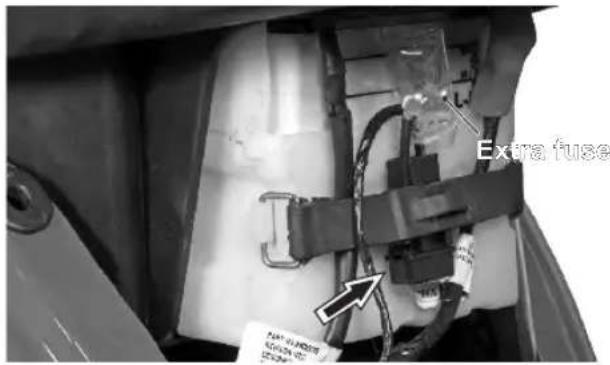
- Inspect the fuse for failure. If found defective, replace the fuse (extra fuse is provided in the wiring harness itself).
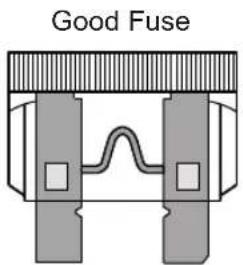
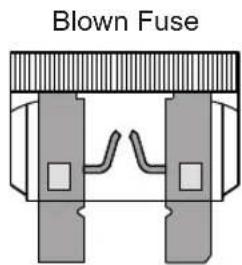
- Close the fuse case and re-fix it into the battery band.
- Turn 'ON' the ignition switch and check for proper functioning of electrical systems. Incase the fuse fails again, consult the nearest TVS Motor Company Authorised Main Dealer / Authorised Dealer.

Caution
Do not use vehicle by shorting the wires without a fuse. This may result in overheating of electrical / wiring and may result in fire. Do not use fuse of higher amperage than specified for the safety of electrical system.
SPARK PLUG
- Open the cover front as explained earlier.
- Clean the dust and mud around the spark plug mounting to avoid falling inside the cylinder.
- Pull out the suppressor cap from spark plug. Using the spark plug spanner, remove the spark plug.
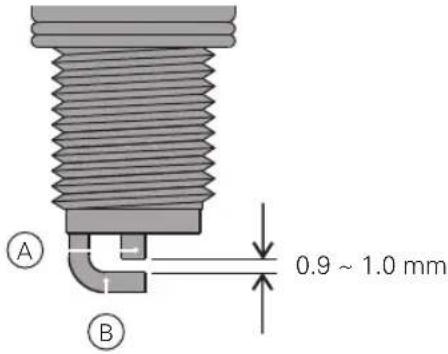
A spark plug with heavy carbon deposits will not produce strong sparks. Hence, only if necessary, clean the carbon deposits from the spark plug with a small wire brush or spark plug cleaning tool.
Inspect the spark plug electrodes (A) and (B) for any corrosion. If found any replace the sparkplug with new. Inspect the spark plug gap with a wire gauge / feeler gauge. Readjust the sparkplug gap to 0.9 \~ 1.0 mm if required.
After cleaning and adjusting the gap, reinstall the spark plug and tighten by hand to avoid cross threading. Finally tighten using spark plug spanner.

Caution
Always use only recommended make and type of spark plug. Replace the spark plug every 12000 km. Cover the spark plug hole with cloth when the plug is removed to prevent dust / water entry. It is advisable to tighten the new spark plug by hand till the end and then loose and again re-tight the spark plug by 1/8 of rotation after sealing by using the only the hand tool.
ENGINE OIL - LEVEL
Check the engine oil level periodically.
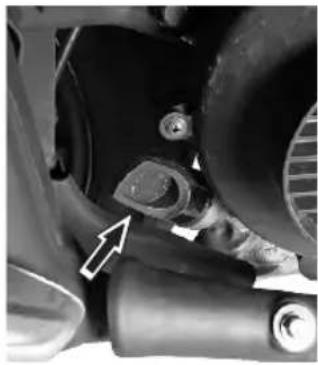
- Place the vehicle on centre stand on a flat surface. Wipe-off the surroundings of gauge oil level.
- Remove the gauge and wipe it clean.
- Fix the gauge back to its mounting hole. Do not thread in.
- Take out the gauge and check the oil level. The level should be between minimum and maximum level marks of the gauge (shown in the figure).
natural_image
Close-up of a mechanical component with a white arrow pointing to a detail (no visible text or symbols)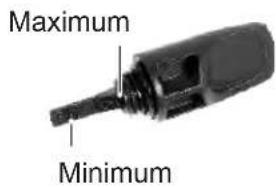
- If the oil is less than the minimum level, add 'TVS TRU4 PREMIUM' 4T oil upto the maximum level mark.
- Wipe out the oil traces with a clean cloth to prevent dust accumulations.
- Assemble back the gauge oil level.
TRANSMISSION OIL - LEVEL
Check the transmission oil level periodically.
- Place the vehicle on centre stand on a flat surface. Wipe-off the surroundings of oil level screw.
natural_image
Close-up of a mechanical component with a warning label and arrow pointing to a damaged part (no readable text or symbols)- Remove the transmission oil level screw along with a gasket from the rear end of crankcase L.
- Check for the flow of oil from oil level hole.
- If the level is less (if there is no oil flow), top-up with 'TVS TRU4 PREMIUM' 4T oil till the oil just starts to flow out from the level hole.
- Wipe out the oil traces with a clean cloth to prevent dust accumulation.
- Replace the fibre washer while reassembling the oil level screw.

Caution
If the vehicle is driven with less engine oil and transmission oil, the engine components will be severely damaged.
Check the oil level as per the schedule to avoid costly damage. Do not fill excess oil may cause oil leak. Always use 'TVS TRU4 PREMIUM' 4T oil only.
BRAKES
Front brake (drum type)
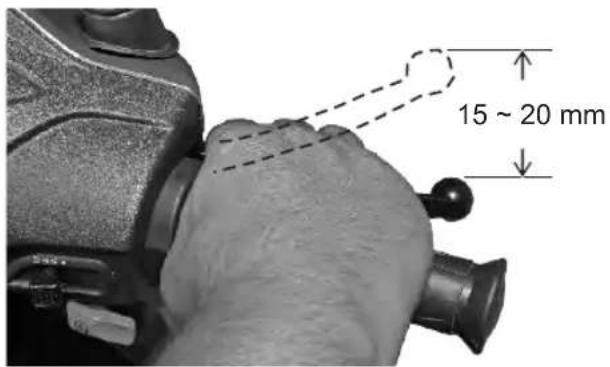
MAINTENANCE

- Measure the free play of the front brake lever at lever end as shown in the figure.
- The free play of the brake lever before the engagement of brake should be between 15\~20 mm.
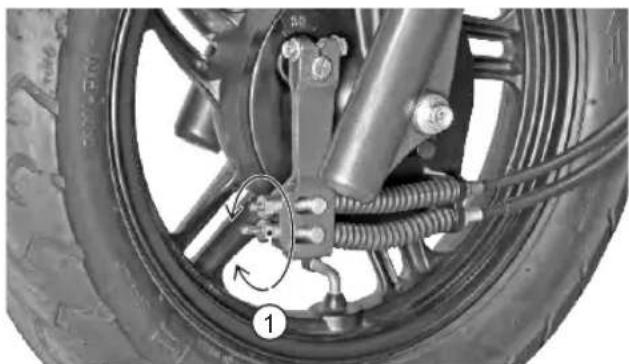
- Turn the adjuster nut at the bottom side (1) in the slot marked as "I" in clockwise direction for reducing the free play or in anti-clockwise direction for increasing the free play.
- After obtaining the necessary free play at the lever, inspect for the clearance between the bullet (3) and slot end (4) marked as "S" as shown in the figure.
natural_image
Close-up of a motorcycle wheel assembly with visible springs and levers, no text or symbols present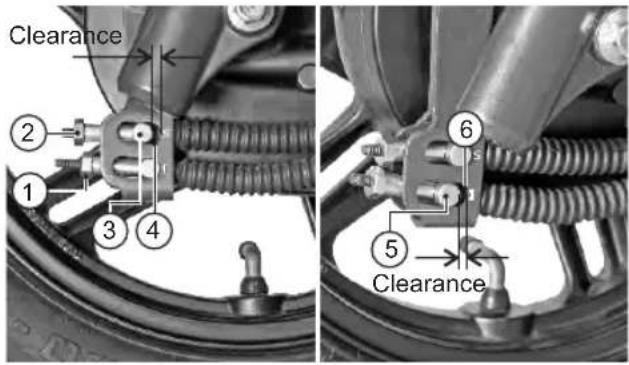
- If any clearance is found, turn the adjuster nut at the top side (2) in the slot marked as "S" in clockwise direction until there is no clearance between the bullet top (3) and the slot top (4).
- After adjusting the adjuster nut top, If any clearance is observed in between the bullet bottom (5) and the slot bottom (6) marked as "1" as shown, then turn the adjuster nut (2) in anti-clockwise until there is no clearance.
- Once again check and confirm the brake play at the lever end.

Warning
Since the vehicle is fitted with Synchronised Braking System (SBS) adjust the brakes with additional care. If not it may result in brakes not working properly. Please contact TVS Motor Company Authorised Main Dealer or Authorised Dealer for any further assistance.

Note
Please remember that the rear brake lever free play adjustment to be done only after adjusting the front brake lever play.
Rear brake
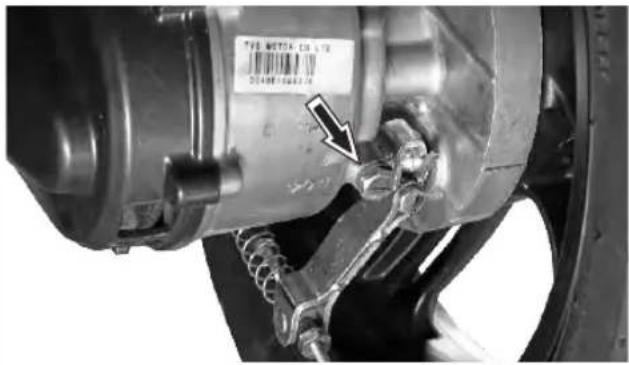
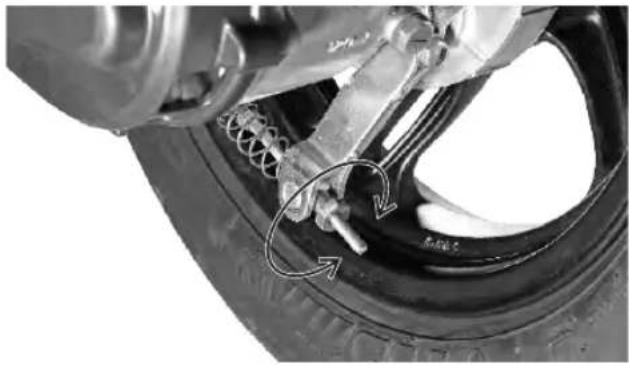
- Measure the free play of the rear brake lever at the lever end as shown in the figure.
- The free play of the brake lever before the engagement of brake should be between 10\~15mm.
- If the measured distance is more than the limit, adjust the nut provided at the rear wheel end to obtain the correct play.
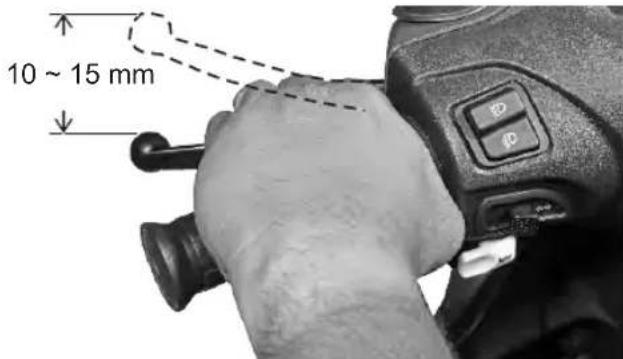
- Turn the adjuster nut in clockwise direction for reducing free play or in anti-clockwise direction for increasing the free play.
natural_image
Close-up of a car tire assembly with mechanical components and a curved arrow indicating motion (no text or symbols)Brake shoe wear indicator front (drum type)
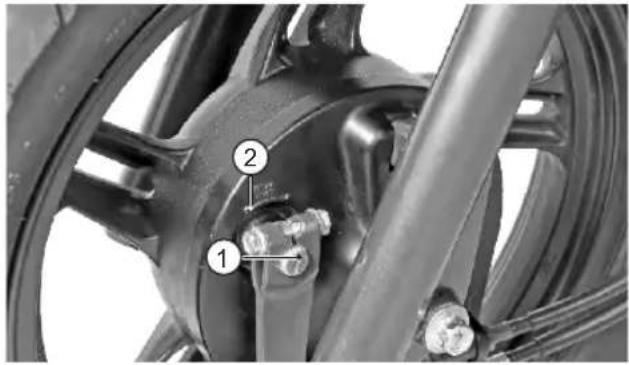
When brake is applied, wear limit index mark (1) on the front brake cam should be within the wear limit indicator (2) on the front brake panel.
In case the wear limit index mark is going beyond wear limit indicator, index the lever to next slot with the help of Dealer to extend the shoe life.
natural_image
Close-up of a bicycle wheel assembly with numbered components (1 and 2), no visible text or symbols beyond labelsBrake shoe wear indicator rear
natural_image
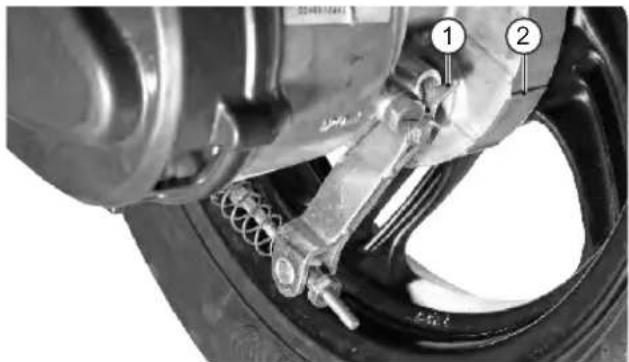
Close-up of a car brake system with labeled components (no readable text or symbols)When brake is applied, wear limit index mark (1) on the rear brake cam should be within the wear limit indicator (2) on the crankcase LH.
Incase the wear limit index mark is going beyond wear limit indicator, index the lever to next slot with the help of Dealer to extend the shoe life.

Warning
Check both the brake play periodically (drum brake). However the brake play needs to be adjusted more frequently depending upon the usage. Brakes are items of personal safety and should always be maintained in proper condition.

Caution
Replace the brake shoes as a set, if the wear limit indicator shows beyond the wear limit even after indexing the lever.
Front brake (disc type)
You can observe a master cylinder (1) on the right side of the handle bar under the head lamp housing.
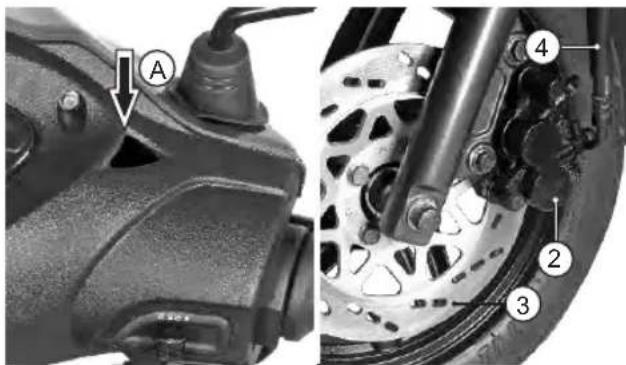
A caliper assembly (2) fitted to the fork leg L, a disc (3) on the front wheel and a high pressure hose (4) connecting the master cylinder and the caliper assembly. A window (A) is provided in the housing head lamp rear for inspecting the brake fluid level.
- Check the master cylinder fluid level through the view piece glass (B) through inspection window (A).
- Brake fluid level always should be above the 'LOWER' mark (C) provided on the master cylinder when the master cylinder is parallel to the ground.
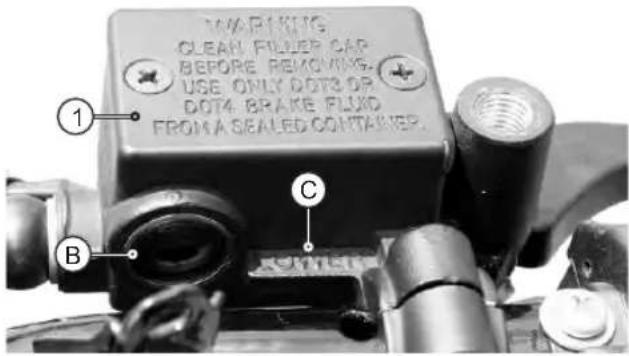
- If the brake fluid level is below the mark or while applying brake if you feel the brake is more spongy or ineffective due to air entry, contact TVS Motor Company Authorised Main Dealer or Authorised Dealer for topping-up the brake fluid, air bleeding and other brake related inspections.

Note
Check the brake fluid level only when the master cylinder is parallel to the ground.

Note
Use suitable torch to have a clear vision while checking the brake fluid level through inspection window.
Brake pad wear indicator (disc type)
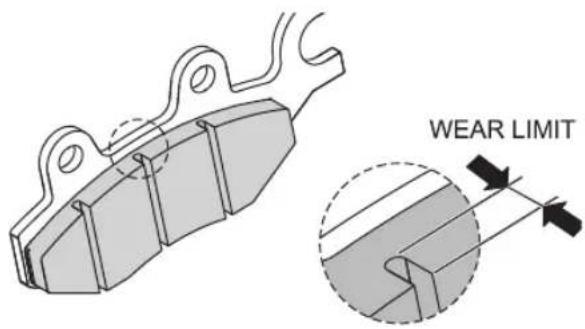
Check for the wear of brake pads visually. if found beyond the wear indicator groove as shown in the figure then, replace the brake pads as a set with a new one.
TYRES
Tyre pressure:
Check the tyre pressure atleast once in a week if not more frequently. Insufficient air pressure in the tyres not only hasten the tyre wear, but also seriously affects the stability of the vehicle.
Under inflated tyres make smooth cornering difficult and over inflated tyres decreases the tyre contact with the ground which can lead to skidding and loss of control. Be sure that the tyre pressure is within the specified limit at all times.
Tyre pressure in cold condition:
| Solo | Dual | |
| Front | 1.69 kg/cm2(24 PSI) | 1.69 kg/cm2(24 PSI) |
| Rear | 2.00 kg/cm2(28 PSI) | 2.25 kg/cm2(32 PSI) |
Tyre tread condition
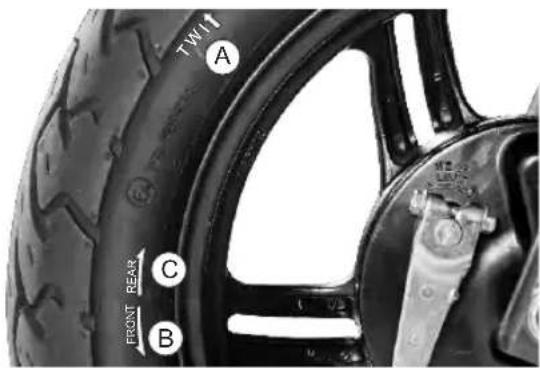
Operating the vehicle with excessively worn tyres decreases the riding stability and can lead to loss of control. It is recommended to replace the tyre when the tyre wears off to the tyre wear indicator level (indicated by TWI (A) on the tyre).
Tyre rotation direction
While reassembling the tyres, after removing from the wheel rim, ensure that the arrow mark 'FRONT' facing the direction of wheel rotation while fixing the tyre on the front wheel rim. Similarly, arrow mark 'REAR' on the tyre facing the direction of wheel rotation while fixing the tyre on the rear wheel rim.

Warning
The tyre inflation pressure in cold condition and the tyre tread condition are extremely important for the performance and safety of the rider. Check tyres frequently for inflation pressure as well as the wear pattern on it. Use of a tyre other than the standard may cause instability.
Tyre puncture
Your scooter is fitted with a tubeless tyre on both front and rear wheel. Incase of any puncture / tyre damage, it is advised to visit the nearest tyre manufacturer Dealer or the tyre repair shops who knows the repairing method of tubeless tyre.
It is not necessary to remove the tyre from wheel rim always to attend a puncture. Even though, if there is need of tyre removal, it is strongly recommended to use a tyre removal / fitment machine. If at all tyre levers needs to be used, the levers should be free from sharp edges. Care should be taken not to damage the tyres and rims.

Caution
Side walls of the tubeless tyre which in contact with the wheel rim are only seals the air inside the wheel assembly. Hence care should be taken not to damage the side walls of the tyres during removal/reassembly.
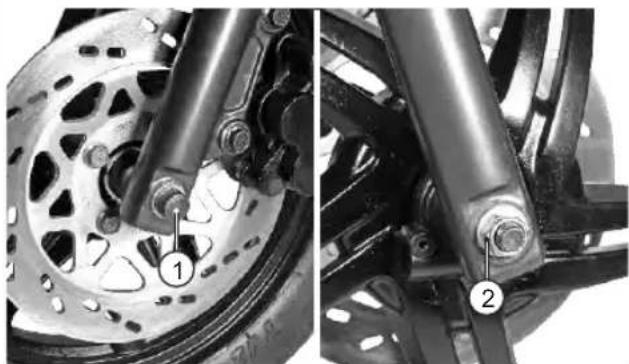
FRONTWHEEL REMOVAL
Drum brake type
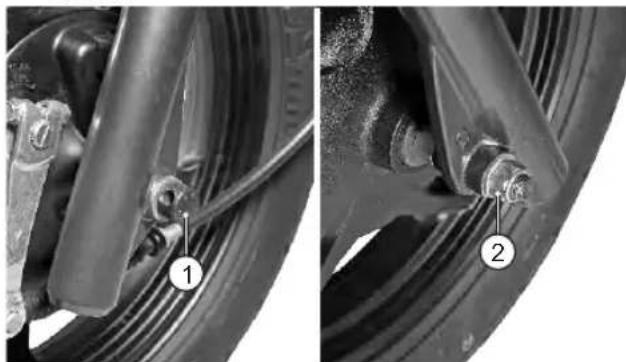
- Remove the axle nut (1) along with a washer.
- Pull out the axle (2) along with a washer and take out a spacer from the right side of the wheel.
natural_image
Close-up of mechanical components with numbered annotations (1 and 2), no readable text or symbols present.- Place a support below the foot board to prevent vehicle from falling and lift the vehicle up.
- Dislocate the wheel assembly along with brake panel from the front fork. Separate the brake panel from the wheel and take out the wheel.
- Reverse the procedure for reassembling. While reassembling ensure to locate the lug on the fork leg L to the slot in the brake panel.
Disc brake type
- Remove the axle nut (1) along with a washer.
- Pull out the axle (2) along with a washer and take out a spacer from the left side of the wheel.
natural_image
Close-up of two mechanical components showing brake calipers and suspension brackets (no text or symbols visible)- Place a support below the foot board to prevent vehicle from falling and lift the vehicle up.
- Remove the wheel assembly along with the hub drive while dislocating the wheel disc from the caliper assembly.
- Dislocate the hub drive from the wheel assembly and take out the wheel.
- Reverse the procedure for reassembling while ensuring the proper seating of wheel disc in the caliper assembly and lug on fork leg R to the slot in the hub drive.

Caution
In disc brake vehicle, care should be taken not to disconnect, twist or damage the brake hose while removing the wheel assembly.
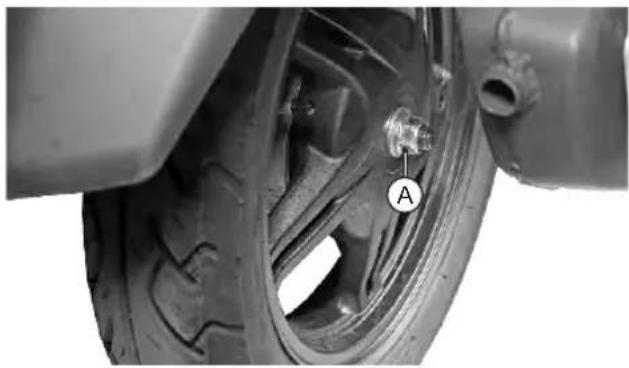
REAR WHEEL REMOVAL
- Place the vehicle on the centre stand.
- Hold the rear brake firmly and remove the wheel mounting nut (A) along with a washer.
- Slightly tilt the vehicle and take out the wheel from the rear axle.
natural_image
Close-up of a car wheel and tire assembly with a labeled component 'A' (no text or symbols beyond label)- Reassemble the wheel in the reverse order of removal. Hold the rear brake firmly while re-tightening the mounting nut for easy locking of wheel.

Warning
Always make sure that whenever the wheel is removed, axle nut is properly re-tightened to the specified torque.
STORAGE PROCEDURES
For storage of your scooter for longer periods of over a month and above, we recommend to carry out the following steps:
- Clean the vehicle thoroughly. Park the vehicle on centre stand.
- Warm up the engine and drain engine oil and transmission oil. Store the oil, if new, in a dust free container.

Warning
The exhaust system becomes hot after a run. Park the vehicle in a place where pedestrians or children are not likely to touch the vehicle.

Caution
Do not park the vehicle on a slope or soft ground or else it may fall down. During storage, the battery must be recharged at recommended charger if stored more than a month.
- Empty the fuel tank.
- Drain the petrol from carburettor.
- Remove the spark plug and feed in several drops of engine oil through spark plug hole. Crank the engine few times and reinstall the spark plug.
- Remove the battery, store it away from direct sunlight and freezing temperatures.
- Place a suitable support at the bottom of the foot board so that both the tyres are off the ground. This will ensure better tyre life.
- Cover up the vehicle completely with a clean tarpaulin or any other suitable cover. Store the vehicle inside a garage or similar area to avoid damage due to dust and rain. Make sure that the storage area is well ventilated and free from any source of flame of spark.
TAKING THE VEHICLE OUT OF STORAGE FOR REGULAR USE
-
Take the vehicle out of the garage and clean it thoroughly.
-
Remount the battery after bench charging if required.
- Fill the engine oil (TVS TRU4 PREMIUM, 4T oil) and check the oil level using gauge oil level.
- Fill the transmission oil (TVS TRU4 PREMIUM, 4T oil) and check the oil level at the oil level inspection screw.
- Lubricate the parts as instructed in the periodic maintenance schedule.
- Fill up fresh petrol in the fuel tank.
- Check and inflate the tyres to the specified tyre pressure.
- Check and correct the points mentioned in page no. 24.
- Turn the ignition switch to 'ON' position. Start the engine with choke 'ON' for a few minutes and ride out.

Caution
Avoid using alkaline solution like detergent soaps for washing. This may damage head lamp and other lamp assemblies.
RECOMMENDED TIPS WHEN TAKING A LONG TRIP OF MORE THAN 500 KM:
A) Please keep the following items for use in case of emergency:
- Tool kit complete.
- Recommended spark plug one number.
- Head lamp and turn signal lamp bulb each one.
- Throttle, front and rear brake each one.
- First aid kit.
B) Precautions to be taken for the journey:
- Ensure engine oil, transmission oil and brake fluid level* are up to the level.
- Adequate fuel in fuel tank.
C) Check your scooter for the following:
- Tightness of all bolts and nuts with correct torque value.
- Fitness of tyres and tubes / tyre pressure / tread depth.
- All bulbs, indicator lamps and horn functioning.
*Applicable only for Disc brake model
- Smooth functioning of all cables and their free play.
- Smoothness of steering operation.
- Front / rear brake function and rear brake lamp working.
- Front fork for any abnormality.
- Spark plug gap and condition of spark plug.
- Air filter element cleanliness.
- Correct idling speed.
- Lubrication of all items mentioned in the periodic maintenance schedule.
- Any other job as necessary.
- Have your vehicle checked at any TVS Motor Company Authorised Main Dealer or Authorised Dealer.

Warning
Long journey are to be taken only after the running-in period of 1000 km.
TVS Motor Company Limited ('the Company') gives this warranty with respect to the TVS WEGO scooter manufactured by the Company.
The Company has taken every care to maintain quality in the manufacture of the TVS WEGO, subject to other terms of warranty:
During 24 months from the date of purchase or during the first 24,000 km of run for the vehicle in the hands of original retail purchaser, whichever is earlier, all parts of the vehicle which prove to the satisfaction of the Company to have a manufacturing defect will be repaired or replaced free of cost.
The Company's obligation under this warranty is limited to repairing or replacing, free of cost, those parts of the vehicle which upon examination by the Company may prove to the Company's satisfaction to have a manufacturing defect, and in such cases the Company's decision either to repair or replace the affected parts will be final. In the event of replacement of parts, the Company also reserves the right to use parts of the same brand as the affected parts or any other brand which is used by the Company in the course of manufacture. All parts replaced under this warranty will become the property of the Company and must be returned to the Company.
Limitations of Warranty:
-
This warranty shall not apply to:
-
Normal maintenance operations such as engine tune-up, decarbonising, fuel system cleaning, oil changes, head light focusing, fastener retightening, adjustments of carburettor and brakes as well as other normal adjustments.
- Insignificant factors which do not affect the function of the vehicle, including without limitation, sound, vibration and fluid seep.
-
Replacement of normal service items or wear and tear items, including without limitation, bulbs, electrical wiring, socket for mobile charger, all filters, spark plugs, drive belt, clutch and brake linings/pads, fasteners, shims, washers, oil seals, gaskets, rubber, plastic and rexine components (including hoses / pipes) etc..
-
Proprietary parts such as tyres, tubes and battery etc..
- Any natural wear and tear, including without limitation, aging.
- Parts suffering damage or resultant damage by accident, misuse, negligent treatment, use of bad quality lubricants or impure fuel or by omission to follow the guidance and instructions contained in this owner's manual.
- Parts which are used in conjunction with parts not made or recommended by the Company.
- Parts of the vehicle which have been tampered with, altered, repaired or replaced by persons not authorised by the Company and which in the sole judgement of the Company affect the performance of the vehicle.
- Parts of the vehicle getting affected due to atmospheric effect/environmental factors.
-
Vehicles, on which engine number or chassis number is deleted, defaced or altered.
-
Vehicles on which any warranty (periodic) service is not availed when it falls due.
- Vehicles sold or transferred by original retail purchaser.
-
Vehicles used for racing or any competition or used otherwise than for ordinary personal transportation. Vehicles attached with side cars etc.
• Vehicles which have been taken out of India. -
Warranty claims on proprietary items such as tyres, tubes and battery etc., should be preferred by the user directly on the respective manufacturer, as per their warranty terms and the Company shall not be liable in any manner in respect to the same.
Following Toll Free numbers can be contacted for battery related queries if any.
Incase of EXIDE battery, call :- 1800 103 5454
Incase of AMCO battery, call :- 1800 425 0096
- Parts repaired or replaced under this warranty are warranted only throughout the remainder of the original warranty period.
- The Company is not liable for any delay in servicing due to reasons beyond the control of the Company or any of its Authorised Main Dealer/Authorised Dealer.
- In any event, the Company is not liable for indirect, remote, incidental or consequential damages.
-
The Company may make any modification or improvement to vehicles in future production at any time without prior notice and without any obligation to install the same on vehicles previously despatched for sale.
-
Any claim under this warranty will lie only when the customer:
(I) takes his vehicle to an Authorised Main Dealer / Authorised Dealer of the Company and reports the problem he / she felt in the vehicle to enable the Authorised Main Dealer / Authorised Dealer to inspect the same and assess the cause for the reported problems.
(ii) produces to such Authorised Main Dealer / Authorised Dealer the owner's manual for the concerned vehicle for verification of relevant details.
- This is the only warranty given by the Company for the TVS WEGO scooter. No employee, Dealer or other person is authorised to extend or enlarge this warranty.

Warning
Modifications to this vehicle not approved by the TVS Motor Company may cause loss of performance and render it unsafe for use and disqualifies for warranty coverage also.
Customer's Name and address
Frame number.
Engine number.
Key number.
Service coupon no....
Colour.
Date of sale.
Km.
Registration number.
Selling dealer's code, name, address and phone number:
SERVICE INFORMATION
There are nine services for TVS WEGO during warranty period. Of these, first five services are free services for which labour charges are free. In addition to these five free services, we have a scheme of four pay services. Coupons for these free services are attached with this owner's manual. For keeping the maintenance track of your vehicle, a pay service record sheet is also attached. Please have the record sheet filled by the Dealer who is carrying out the maintenance service.
Before you avail your first free service, please enter the particulars of your vehicle on the left side of this page. This will be useful for any reference.
For availing any of the nine warranty services, please take your vehicle and your owner's manual to any of our Authorised Main Dealer or any of our Authorised Dealer. After effecting the service the Authorised Main Dealer or the Authorised Dealer will take out the detachable portion of the relevant service coupon from your owner's manual for their records and will obtain your acknowledgment on the same for having the service done to your satisfaction. For your record, the Authorised Main Dealer or the Authorised Dealer will affix their stamp on the stub of the relevant service coupon or the last column of the record sheet whenever they carry out any service.
Periodic maintenance always helps in good performance of an automobile and our services are planned to keep your TVS WEGO performing good. Please note that carrying out the services for your vehicle at scheduled intervals is necessary for availing of warranty. And please also remember that, after the services are over periodic servicing of your vehicle at appropriate intervals, depending upon its extent of use, will keep your vehicle at its best level of performance.
In case you need any clarification or assistance, please feel free to write to us mentioning the frame number, engine number and date of purchase of your vehicle also mention the name and place of the Authorised Main Dealer / Authorised Dealer from whom you bought the vehicle and getting it serviced.
Service Department
TVS MOTOR COMPANY LIMITED
P.O. Box No. 4, Harita, Hosur - 635 109,
TAMILNADU, INDIA.
Toll free no:- 18004252077
PART (B) DELIVERY CERTIFICATE
(To be given by the customer to TVS Motor Company Authorised Dealer at the time of taking possession of new vehicle)
Certified that I have taken possession of the TVS WEGO bearing engine no. and frame no. as mentioned along side from M/s....to day in good condition.
I have understood operations, controls and general maintenance instructions including wheel removal and engine oil specifications. The terms of warranty have been explained to me and I agree to abide by the same.
I have also received the following items along with my TVS WEGO without extra charge.
Tool kit and first aid kit☐
Mirror (2 nos)□
Owners manual □
Set of two keys□
The location of the tool kit in the vehicle has been shown to me.
TO BE FILLED IN BY THE MAIN DEALER / AD
Engine No.:
Frame No.:
Dealer code :
Dealer stamp : ____
Date of delivery :
Colour :
Mode of purchase by customer
Show room - cash sales□
□ Show room - hire purchase sales
□ Institutional sales
Dealer to get the Customer information coupon filled by the customer and hand it over to Market Research, TVS Motor Company Limited, Hosur.
Dealer's signature :
Customer signature :
Date :
Extended Assurance. Guaranteed Smiles.
★ Peace of mind for 5 years
★ Trouble free ownership experience
★ Valid at all India TVSM Authorized network
★ TVSM Genuine Parts Guaranteed
★ Higher Resale Value of Vehicle.
★ Optional feature, can be availed at nominal charges.
Contact your nearest Dealership for details*
*Terms and conditions apply

Drive In.
Drive Out.
Say bye-bye to waiting time for servicing your bike.
Get your vehicle serviced in 1 hour at no additional cost. Contact your nearest Dealership for details.*
*Facility available at selected Dealerships only. Terms and conditions apply

Busy Life? Easy Servicing!
Now, service your bike anywhere, anytime.
★ Service the vehicle at your door step.
★ Available for regular maintenance or breakdown service only.
★ Offered at nominal convenience charges.
Contact your nearest Dealership for details.*
*Facility available at selected Dealership only. Terms and conditions apply

Busy Life? Easy Servicing!
Now, Avail Pickup & Drop of your vehicle for service.
★ Vehicle picked up & delivered from/to your office or residence at prefixed appointed time.
★ Offered at nominal convenience charges.
Contact your nearest Dealership for details.*
*Facility available at selected Dealership only. Terms and conditions apply
MANUFACTURER : TVS MOTOR COMPANY LIMITED
P.B. No 4, Harita, Hosur - 635 109, India.
ENGINE
Type : Single cylinder, 4 stroke, air cooled, spark ignition engine
Cylinder bore : 53.5 mm
Stroke : 48.8 mm
Piston displacement : 109.7 cc
Compression ratio : 9.5 : 1
Carburettor : UCAL VM 16 SH
Air filter : Viscous paper filter
Lubrication system : Forced wet sump
Maximum power in kW : 5.88 @ 7500 rpm
Maximum torque in Nm : 8.4 @ 5500 rpm
Maximum speed : Around 78 km / hr
Engine idling rpm* : 1600 + 100 rpm
Starting system : Electric starter / kick starter
TRANSMISSION
Clutch : Dry - Centrifugal clutch
Primary transmission : CVT (Continuous Variomatic Transmission)
Primary reduction : 2.38 to 0.82
Final reduction : 10.47
* Under warm condition
CHASSIS
Dimensions and weights
Overall length : 1834 mm
Overall width : 640 mm
Overall height : 1115 mm
Ground clearance : 132 mm
Wheel base : 1275 mm
Steering angle : 90°
Caster angle : 25°
Kerb weight
(with tool kit & 90% of fuel) : 108 kg
Pay load : 130 kg
Maximum laden weight : 238 kg
Frame : Duplex tubular frame
Front suspension : Telescopic hydraulic
Rear suspension : Toggle link, gas filled hydraulic dampers
Trail length : 93 mm
BRAKES
Front Disc : 220 mm dia (hand operated) Drum : 130 mm dia (hand operated)
Rear : 130 mm dia (hand operated)
TYRE
Tyre pressure (cold condition)
Front : 1.69 kg/cm (24 PSI) ^2
Rear - Solo : 2.00 kg/cm (28 PSI) ^2
Rear - Pillion : 2.25 kg/cm (32 PSI) ^2
ELECTRICAL
Ignition system : IDI ignition
Spark plug : BOSCH UR4KCW
Spark plug gap : 0.9 \~ 1.0 mm
Battery : 12V, 5Ah
Generator : Fly wheel magneto, 12V, 80W
Head lamp : 12V, 35/35W
Tail / brake lamp : 12V, LED
Turn signal lamps : 12V, 10W x 4
Position lamp : 12V, 3W x 2
Number plate lamp : 12V, 4W x 1
Speedometer : LCD / LED indicators
Horn : 12V, DC x 1
Fuse : 12V, 10A x 1 (Blade type)
CAPACITIES
| Fuel tank capacity | : 5.0 litres* (including reserve) |
| Fuel | : Unleaded Petrol |
| Engine oil and transmission oil grade | : TVS TRU4 PREMIUM, 4T oil |
| Engine oil capacity | : 750 ml during regular service and 800 ml incase of disassembly. |
| Transmission oil capacity | : 100 ml during regular service and 120 ml incase of disassembly. |
| Front fork oil grade | : Gabriel Premium front fork oil |
| Front fork oil capacity | : 58 ± 1 ml per leg (for drum brake model) |
| : 84 ± 1 ml per leg (for disc brake model) | |
| Disc brake fluid | : TVS Girling DOT3 / DOT4 |

Note
Specifications are subject to change without notice.
* The fuel tank is not a measuring instrument and the capacity of fuel tank may slightly vary from the indicated capacity.
Dear Customer,
It is mandatory under the Motor Vehicles Act to insure all motor vehicles. No motor vehicle can be used in a pu place without a valid policy of insurance issued by an authorised insurer. Driving a motor vehicle without any su insurance is an offense under Motor Vehicles Act.
To assist our customers on their insurance requirements such as the prompt issue and renewal of policies as w as expeditious settlement of claims if any, our preferred insurers are :




- In case you need any Clarification or Service Assistance, please contact our Dealer
- CONTACT AT OUR AREA OFFICES
- TAMILNADU-1
- TVS Motor Company Limited
- TAMILNADU-2
- TVS Motor Company Limited
- TAMILNADU-3
- TVS Motor Company Limited
- TAMILNADU-4 & PONDICHERRY
- TVS Motor Company Limited
- KERALA
- TVS Motor Company Limited
- ANDHRA PRADESH-1
- TVS Motor Company Limited
- ANDHRA PRADESH-2
- TVS Motor Company Limited
- KARNATAKA-1
- TVS Motor Company Limited
- 600, Anand Surya, 2nd Floor, 5th Cross,
- KARNATAKA-2 & GOA
- TVS Motor Company Limited
- MAHARASHTRA-1 & 2
- TVS Motor Company Limited
- 401, 4th floor,
- MAHARASHTRA-3
- TVS Motor Company Limited
- CHATTISGARH
- TVS Motor Company Limited
- MADHYA PRADESH-1
- TVS Motor Company Limited
- MADHYA PRADESH-2
- TVS Motor Company Limited
- GUJARAT
- TVS Motor Company Limited
- UTTAR PRADESH-EAST & CENTRAL
- TVS Motor Company Limited
- UTTAR PRADESH-WEST & UTTARAKHAND
- TVS Motor Company Limited
- DELHI & HARYANA
- TVS Motor Company Limited
- PUNJAB, HIMACHAL PRADESH, JAMMU & KASHMIR
- TVS Motor Company Limited
- RAJASTHAN-1
- TVS Motor Company Limited
- RAJASTHAN-2
- TVS Motor Company Limited
- BIHAR
- TVS Motor Company Limited
- JHARKHAND
- TVS Motor Company Limited
- ODISHA
- TVS Motor Company Limited
- 303, 3rd floor,
- WEST BENGAL
- TVS Motor Company Limited
- NORTH EAST STATES
- TVS Motor Company Limited
- TUBELESS TYRES
- DISC BRAKE \*
- ALL BLACK LARGER ALLOY WHEELS
- BODY COLOURED PILLION GRAB RAIL
- INTELLIGENT TCI
- VISCOUS PAPER FILTER
- PATENTED E-Z CENTRE STAND
- FULL DIGITAL SPEEDOMETER
- ECONOMETER®
- LOW FUEL INDICATOR
- LOW BATTERY INDICATION
- SERVICE REMINDER
- TRIP METER
- DIGITAL CLOCK
- ACCESSORIES FOR YOUR SCOOTER
- MOBILE CHARGER SOCKET\*
- INDICATOR BUZZER\*
- TVS MOTOR COMPANY LIMITED
- Note
- Warning
- Caution
- SAFE RIDING RECOMMENDATIONS
- Familiarise yourself with new TVS WEGO
- Riding apparel
- Know your limits
- Posture
- Cornering
- Braking
- Causes for poor braking
- ACCESSORY INSTALLATION AND SAFETY TIPS
- EMISSION CONTROL
- VEHICLE IDENTIFICATION NUMBER
- LOCATION OF PARTS - HANDLE BAR
- CONTROL KEY
- IGNITION CUM STEERING LOCK
- 'OFF' position
- 'ON' position
- 'LOCK' position
- Multi functional digital display
- a. Odometer/Trip meter/Digital clock
- Digital clock setting
- HANDLE BAR LEFT SIDE
- Head lamp high / low beam switch
- HANDLE BAR RIGHT SIDE
- Right hand brake lever
- Throttle grip
- Lights switch
- Electric starter switch
- FUEL TANK\* CAP
- KICKSTARTER LEVER
- KNOW YOUR TVS WEGO
- TVS
- SIDE STAND\*
- UTILITY BOX
- SOCKET MOBILE CHARGER\*
- PRE RIDE INSPECTION
- Starting the engine
- When the engine is cold
- Setting the vehicle in motion
- Stopping and parking
- FUEL RECOMMENDATION
- CHECKS AND TIPS FOR IMPROVING FUEL ECONOMY
- Regular checks
- Spark plug
- Replace the spark plug every 12000 km (1 year). Always use recommended spark plug only.
- Air cleaner element
- Engine oil and transmission oil
- Regularly inspect the engine oil and the transmission oil for correct level and top-up if necessary. Get it replaced at regular intervals as per the maintenance schedule.
- Fuel leak
- Evaporation
- Tyres
- Wheel freeness
- Avoid unnecessary idling
- Avoid frequent braking
- MAINTENANCE SCHEDULE
- SELF-MAINTENANCE PROCEDURES BATTERY
- FUSE
- ENGINE OIL - LEVEL
- TRANSMISSION OIL - LEVEL
- BRAKES
- Front brake (drum type)
- MAINTENANCE
- Rear brake
- Front brake (disc type)
- Brake pad wear indicator (disc type)
- Tyre pressure:
- Tyre tread condition
- Tyre rotation direction
- Tyre puncture
- FRONTWHEEL REMOVAL
- Drum brake type
- Disc brake type
- REAR WHEEL REMOVAL
- STORAGE PROCEDURES
- TAKING THE VEHICLE OUT OF STORAGE FOR REGULAR USE
- RECOMMENDED TIPS WHEN TAKING A LONG TRIP OF MORE THAN 500 KM:
- TVS Motor Company Limited ('the Company') gives this warranty with respect to the TVS WEGO scooter manufactured by the Company.
- Limitations of Warranty:
- SERVICE INFORMATION
- PART (B) DELIVERY CERTIFICATE
- TO BE FILLED IN BY THE MAIN DEALER / AD
- Extended Assurance. Guaranteed Smiles.
- Busy Life? Easy Servicing!
- ENGINE
- TRANSMISSION
- CHASSIS
- TYRE
- ELECTRICAL
- CAPACITIES
Brand : TVS
Model : Wego
Category : Scooter