
WM1062Y - Washing machine VOX - Free user manual and instructions
Find the device manual for free WM1062Y VOX in PDF.


| Product Type | Washing Machine |
| Brand | VOX |
| Model | WM1062Y |
| Loading Type | Front Load |
| Capacity | 10.5 kg |
| Spin Speed | 1200 rpm |
| Energy Class | A+++ |
| Dimensions (H x W x D) | 85 cm x 59.5 cm x 58.5 cm |
| Weight | 70 kg |
| Power Supply | 220-240 V, 50 Hz |
| Water Consumption per Cycle | 50 L |
| Annual Energy Consumption | 200 kWh |
| Noise Level (Wash) | 76 dB(A) |
| Noise Level (Spin) | 72 dB(A) |
| Display Type | LED |
| Control Type | Electronic |
| Drum Volume | 65 L |
| Programs | Cotton, Synthetic, Delicate, Quick 15', Rinse & Spin, Drum Clean |
| Safety Features | Child Lock, Overflow Protection, Unbalanced Load Detection |
| Maintenance | Clean detergent drawer, pump filter regularly; descale periodically |
| Spare Parts Availability | Via VOX service centers and online |
| Repairability Index | 8.5 / 10 |
Frequently Asked Questions - WM1062Y VOX
User questions about WM1062Y VOX
0 question about this device. Answer the ones you know or ask your own.
Ask a new question about this device
Download the instructions for your Washing machine in PDF format for free! Find your manual WM1062Y - VOX and take your electronic device back in hand. On this page are published all the documents necessary for the use of your device. WM1062Y by VOX.
USER MANUAL WM1062Y VOX
WM1062 - 1062Y
OPERATING INSTRUCTIONS WASHING MACHINE UPUTSTVO ZA UPOTREBU MAŠINA ZA PRANJE VEŠA УПАТСТВА ЗА РАКУВАНЬЕ МАШИНА ЗА ПЕРЕЊЕ NAVODILA ZA UPORABO PRALNI STROJ UPUTE ZA UPORABU PERILICA RUBLJA ΕΓΧΕΙΡΙΔΙΟ ΧΡΗΣΤΗ ΠΛΥΝΤΗΡΙΟ ΡΟΥΧΩΝ

WM1062Y
OPERATING INSTRUCTIONS WASHING MACHINE
CHAPTER-1: BEFORE USING THE APPLIANCE
- Correct .... Usage.... 6-7
• General warnings 8-9-10-11
• Safety warnings 12-13-14-15-16-17
• Packaging and Environment 18
• Savings Information 19
CHAPTER-2: OVERVIEW OF YOUR DEVICE
• General Appearance 20-21......
- Specifications 22
CHAPTER-3: INSTALLATION
- Removing transportation safety screws 23......
• Adjusting Adjustable Stays 25-26-27
• Electrical connection 28
• Water inlet hose connection 29-30
• Water discharge connection .....31.....
CHAPTER-4: INTRODUCTION OF CONTROL PANEL .... 32
• Detergent drawer 33-34
• Programme knob ....35....
Electronic display 36-37
CHAPTER-5: PRELIMINARY PREPARATION FOR LAUNDERING
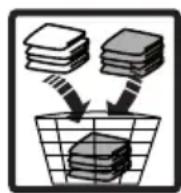
• Separating laundries 38-39
- Putting laundries in the machine 40
- Adding detergent into machine 41
• Operating your machine 42-43-44
• Auxiliary Functions 45-46-47-48-49-50-51
• Child lock 52
- Cancelling programme 53
• Finishing programme 54
CHAPTER-6: PROGRAM TABLE .....55-56-57-58-59-60-61-62
CHAPTER-7: MAINTENANCE AND CLEANING OF YOUR MACHINE
- Warning 63
• Water inlet filters 64 - Pump filter 65-66
• Detergent drawer 67
CHAPTER-8: FLUSH STOPPER / BODY / DRUM....68
CHAPTER-9: TROUBLESHOOTING 69-70-71-72-73
CHAPTER-10: AUTOMATIC FAULT WARNINGS AND WHAT TO BE DONE...74
CHAPTER-11: PRACTICAL INFORMATION 75-76-77-78
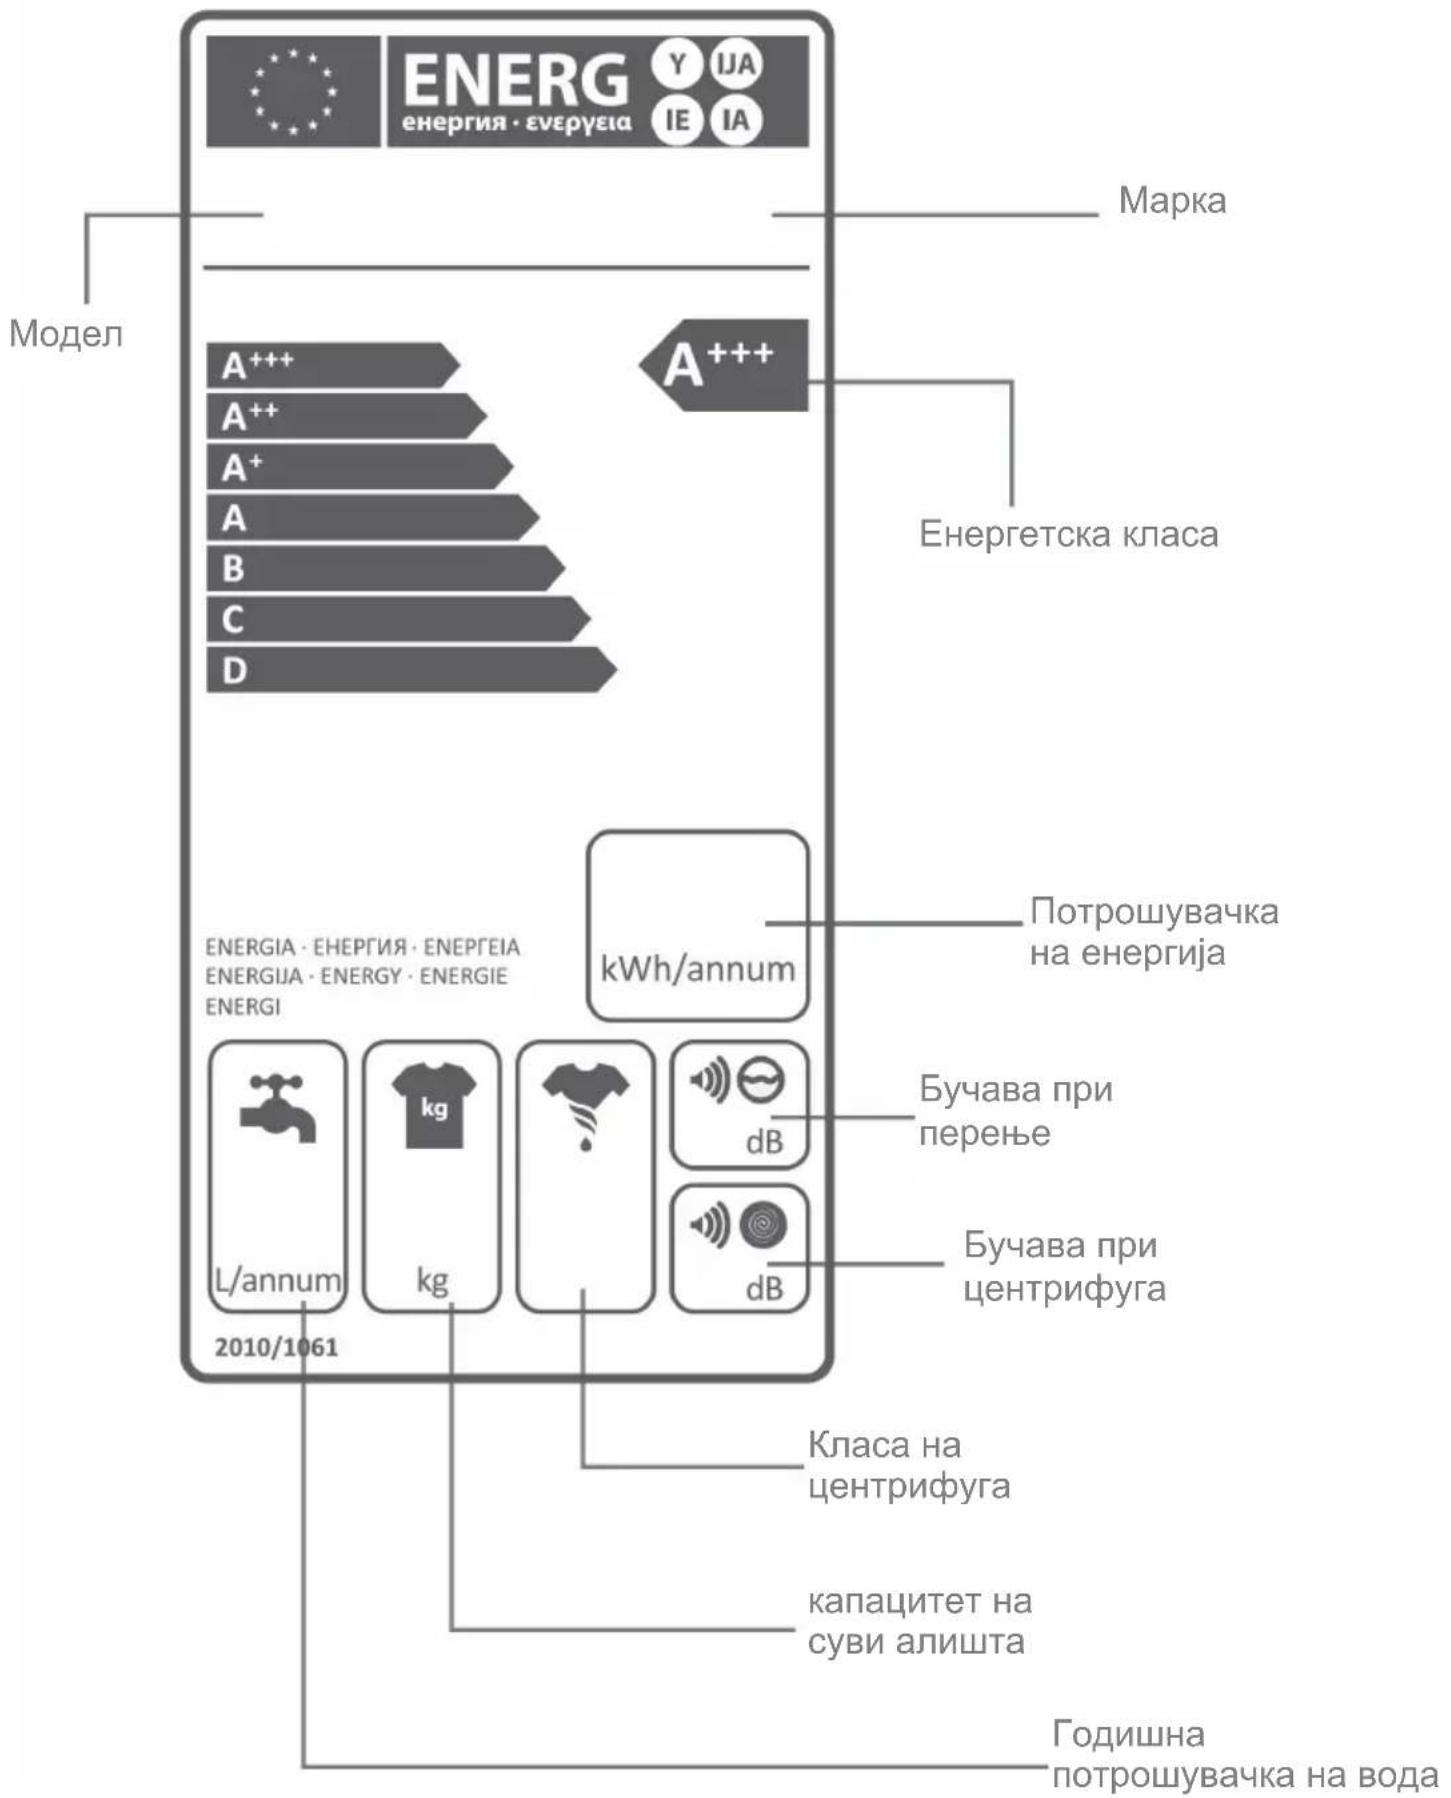
• How to read the energy label and saving energy .....79-80
• Disposal of your old machine 81
- Definitely read the user's manual.
- Your machine is designed to be used domestically. Commercial use will cause your warranty to be cancelled.
natural_image
Simple line drawing of an open book with no text or symbols visible- Keep your pets away from your machine.
- Please check the packaging of your machine before installation, and the outer surface after the package is opened. Do not operate damaged machines or machines with opened package.
- Have your machine installed only by authorized service. Any interference to your machine by anyone other than authorized services shall cause your warranty to be void.
- The appliance is not intended for use by people (including children) with reduced physical, sensory or mental capabilities, or lack of experience and knowledge unless they have been given supervision or instruction concerning use of the appliance by a person responsible for their safety. Children should be supervised to ensure that they do not play with the appliance.
CHAPTER -1: BEFORE USING THE APPLIANCE (CORRECT USAGE)
- Use your machine only for laundries that have been specified as suitable for washing by the manufacturer.
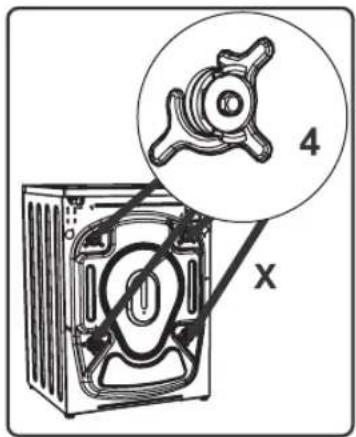
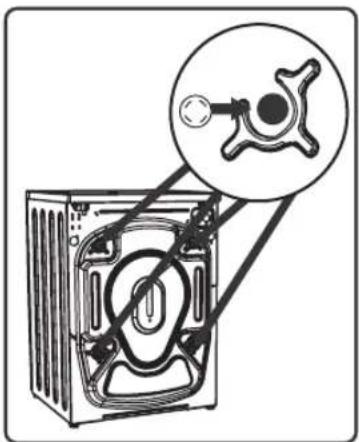
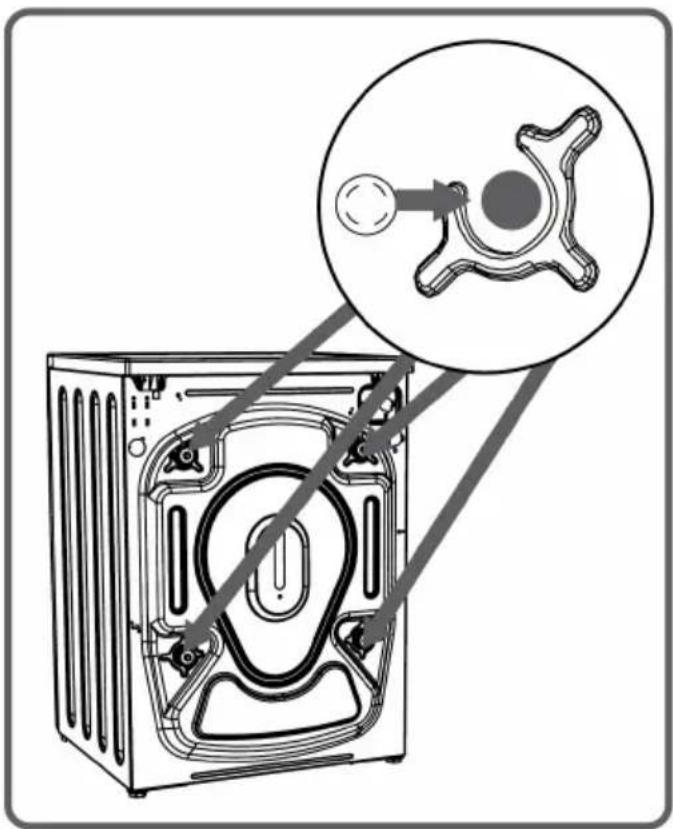
- Before operating the washing machine, remove the 4 transportation screws and rubber spacers from the back of the machine. If the screws are not removed, it may cause heavy vibration, noise and product malfunction, (voiding the guarantee).
- Your machine is not covered under warranty for faults caused by any kind of external factors (pesticides, fire, etc.).
- Please do not throw away this user manual; keep it for future reference. You or somebody else might need it in the future.
Note: Machinery specifications may vary depending on the product purchased.
- The necessary ambient temperature for your machine’s ideal operation is 15-25°.
- Frozen hoses can tear and explode. In regions where temperature is below zero, ambient temperature might endanger the safe operation of electronic card.
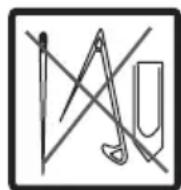
- Please ensure that the clothes you will place in your machine do not contain any foreign substances (nail, needle, coins, lighter, matches, clip etc.) in their pockets. These foreign substances can damage your machine.
- Before starting to use your machine, you may call the nearest authorized service and request free-of-charge help for installation, operation and use of your machine.
-
It is recommended to perform the first washing operation in 90° Cotton programme and without laundry by inserting 12 scale of detergent in 2nd compartment of the detergent drawer.
-
As detergent or softener exposed to air for a long time may cause residues, put your detergent or softener in the detergent drawer at the beginning of every washing.
- It is advised that you unplug your machine and close the water inlet tap if you will not use your machine for a long time.
Also, leaving the door of your machine will prevent the formation of bad odors due to humidity.
- Some water might be left in your machine after the trials and tests conducted due to Quality Control procedures.
This will not damage your machine.
- Remember that packaging materials of your machine may be dangerous for children. Keep the packaging materials in a place where children cannot reach or dispose of them appropriately.
- Keep the small parts found in the document part away from the reach of children and babies.
-
Use pre-wash programs only for very dirty laundry.
-
Never open the detergent compartment when the appliance is running.
- In case of any breakdown, unplug the appliance first and then turn the tap off. Do not attempt to repair by yourself, always contact for authorized service advice.
- The amount of laundry you put in your washing machine should not exceed the maximum amount indicated.
- Never force the door to open when the machine is running.
- Washing floury clothes in your machine damages the machine. Do not wash floury clothes in your machine.
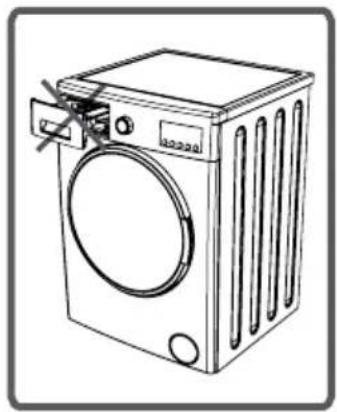
natural_image
Line drawing of a washing machine with a door and front panel (no text or symbols)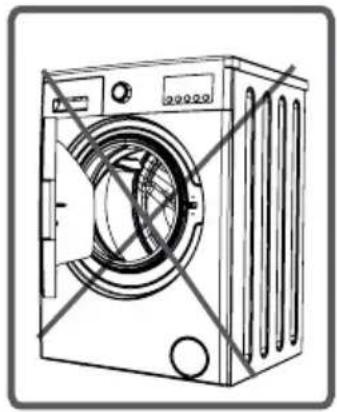
natural_image
Line drawing of a washing machine with no text or symbols- Please adhere to detergent/fabric conditioner manufacturers' advice regarding the use of fabric conditioner or similar products in your machine.
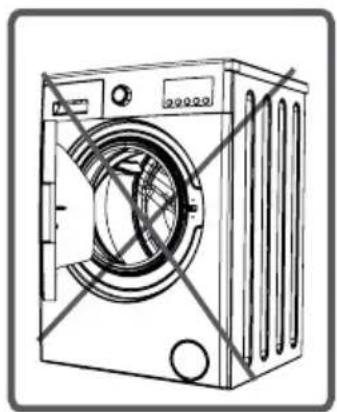
- Set up your machine in a place where its door can be completely opened. (Do not set up your machine in places where its door cannot be fully opened.)
- Set up your machine at locations that can be fully ventilated and could have constant air circulation.
You must read these warnings. You can thus protect yourself and your beloved ones against fatal injuries and risks.

DANGER OF GETTING BURNT!

Do not touch discharging hose and water during discharging as the appliance may reach high temperatures when running.
DEATH RISK DUE TO ELECTRICAL CURRENT!
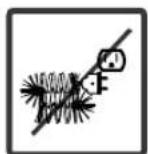
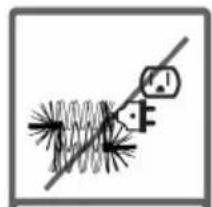
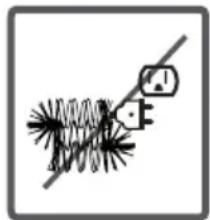
- Do not use multiple receptacles or extension cord.
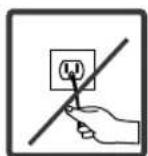
- Do not plug in damaged plug sockets
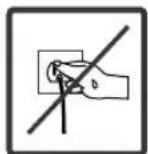
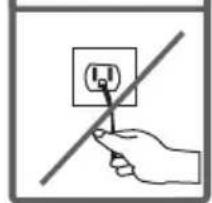
- Never pull the cable when unplugging – always grip the plug itself.
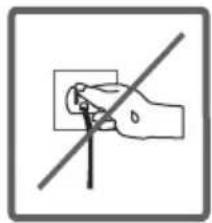
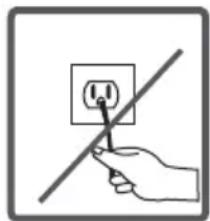
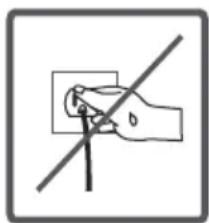
- Do not plug-in or out the plug from the receptacle with wet hands to prevent electrocution!
- Never touch the machine with wet hands or feet.
- Call the nearest authorized service for a replacement if the power cord malfunctions.


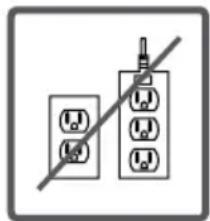
natural_image
Two electrical socket symbols with a diagonal line crossing them, no text or labels present.
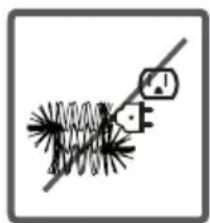
natural_image
Simple line drawing of a mechanical or electrical component with no text or symbols
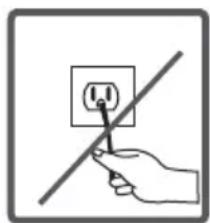
natural_image
Hand holding a power outlet with a diagonal line crossing it (no text or symbols)
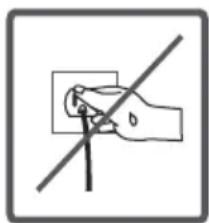
natural_image
Simple line drawing of a hand holding a tool with a diagonal line crossing through it (no text or symbols)
Flooding risk!

- Check whether the water runs fast or not before placing the discharge hose on the sink.
• Take necessary measures to prevent the slipping of your hose. - The backfiring force of a hose that is not placed appropriately can displace the hose. Prevent the stopper inside your sink from blocking the sink hole.
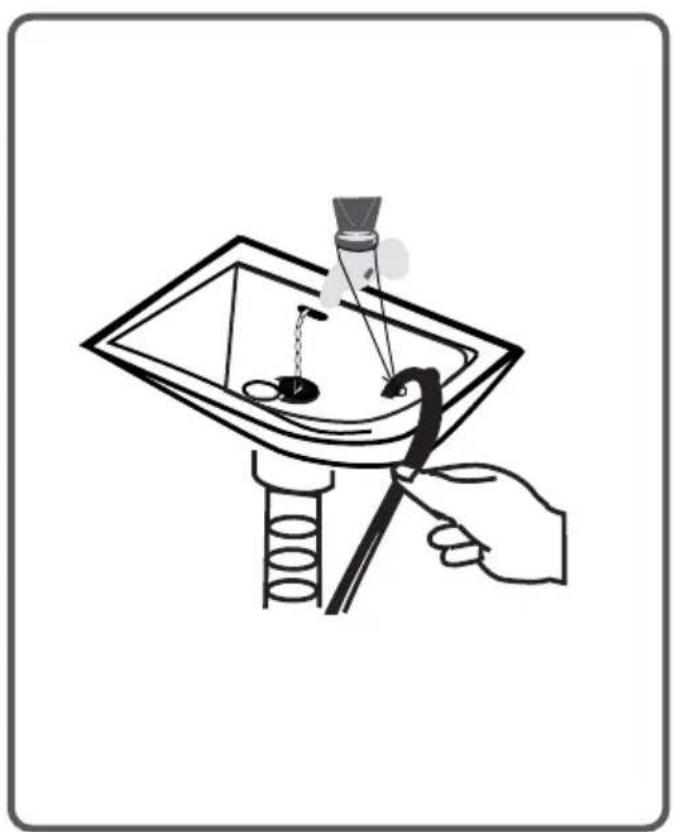
natural_image
Illustration of a hand using a tool to clean or inspect a funnel-shaped object (no text or symbols present)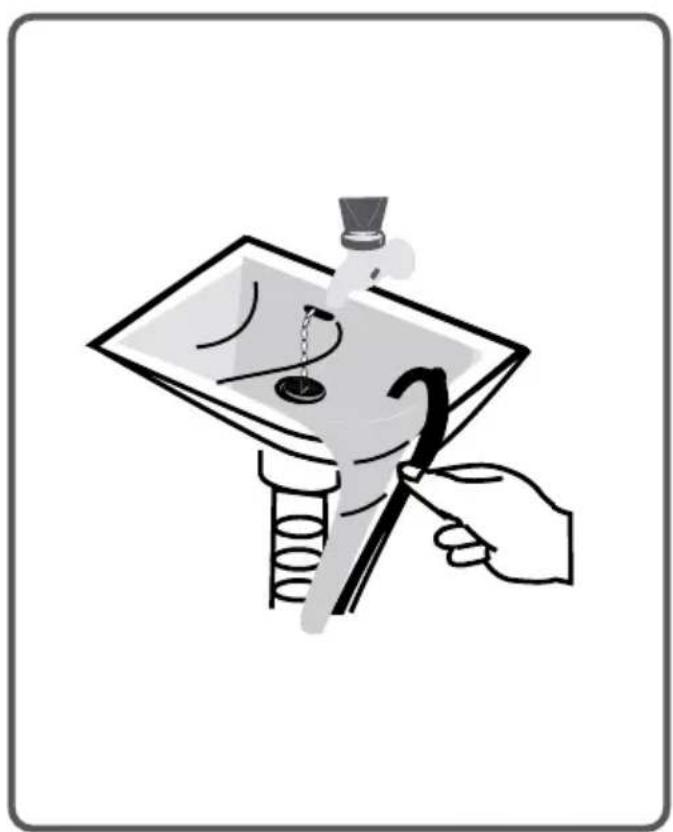
natural_image
Illustration of a hand using a tool to clean or inspect a surface with a funnel and spiral (no text or symbols)Danger of Fire!

- Do not keep inflammable liquids near your machine.
- The sulphure content of paint removers might cause corrosion. For this reason, never use paint-removing materials in your machine.
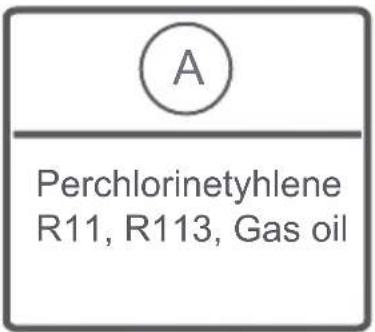
- Never use products that contain solvent material (like washing gas) in your machine.
- Remove all the objects in the pockets of your laundries (needle, paperclip, lighter, matches etc.) when placing them your machine.

Fire and Explosion risk may occur.
Fall and injury hazard!

- Do not climb on your machine. The upper table of your machine may break and you might get injured.
- Tidy the hose, cable and packaging of your machine during installation. You might trip over and fall.
- Do not turn your machine upside down, or on its side.
- Do not lift your machine by holding it from extruding parts (detergent drawer, door). These parts might break and cause you to get injured.
- There’s the risk of tripping and injury if the materials like hose and cables are not properly stored after your machine is installed.
Machine must be carried by 2 people or more.

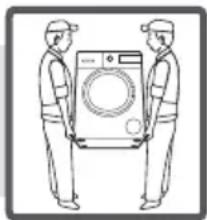
natural_image
Line drawing of two workers standing beside a large washing machine (no text or symbols)Child safety!

- Do not leave children unattended near the machine. Children might lock themselves up into the machine and death risk might occur.
- Door glass and surface might be extremely hot while your machine operates. Thus, especially touching the machine might give damage to the skins of children.
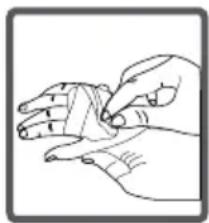
natural_image
Line drawing of a hand holding a piece of paper or tape (no text or symbols)- Keep packaging material away from children.
- Poisoning might occur if the detergent and maintenance materials are consumed, and eyes or the skin might be irritated if they come into contact with the skin. Keep the cleaning materials away from the reach of children.
Removal of packaging materials
Packaging materials protect your machine from any damage that might occur during transportation. Packaging materials are environment friendly as they are recyclable. Recycling material provides both raw material savings and decreases waste production.
Disposal of old machine
Electrical or electronical old devices might still contain salvagable parts. So, never throw away your old devices that you do not use into the waste.
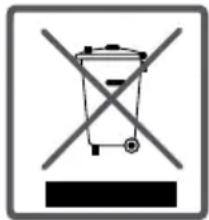
Ensure that the parts of your old electronic or electrical devices are reused by giving them to the gathering centres foreseen by related authorities.
Please ensure your old appliances are kept in an appropriate place for the safety of children until they are taken outside the house.
Some important information to get more efficiency out of your machine:
- The amount of laundry you put in your washing machine should not exceed the maximum amount indicated.
By this way, your machine shall run in saving mode.
- Not using the pre-wash feature for little and normal-dirty laundry shall save electricity and water.
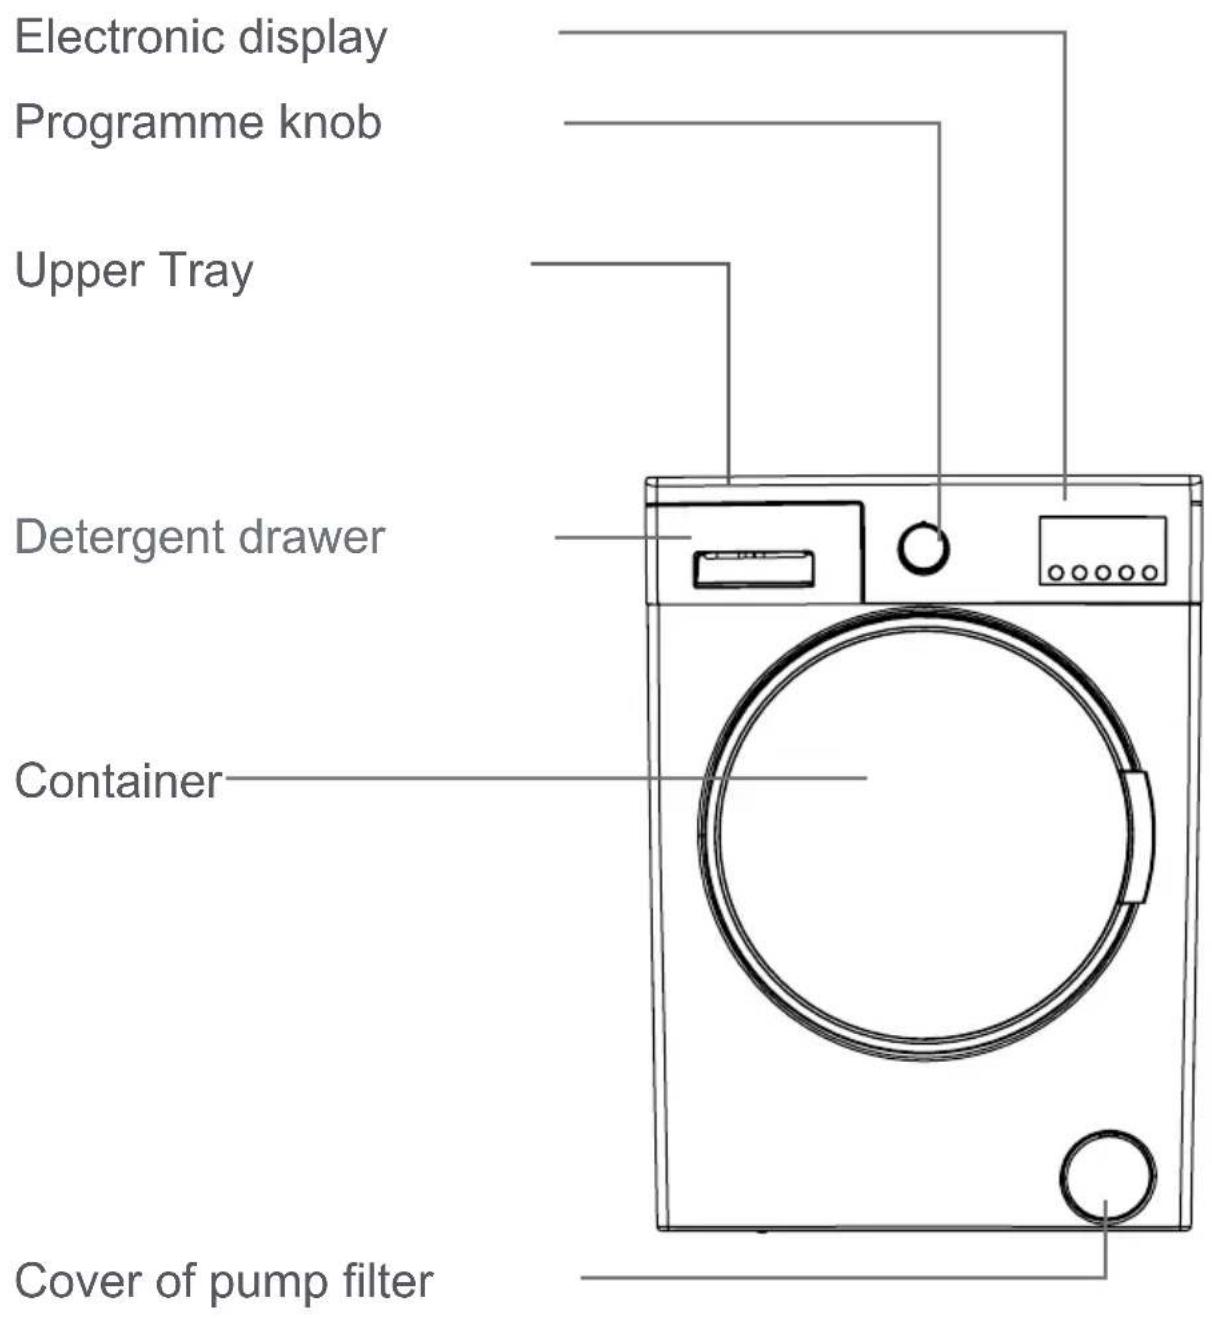
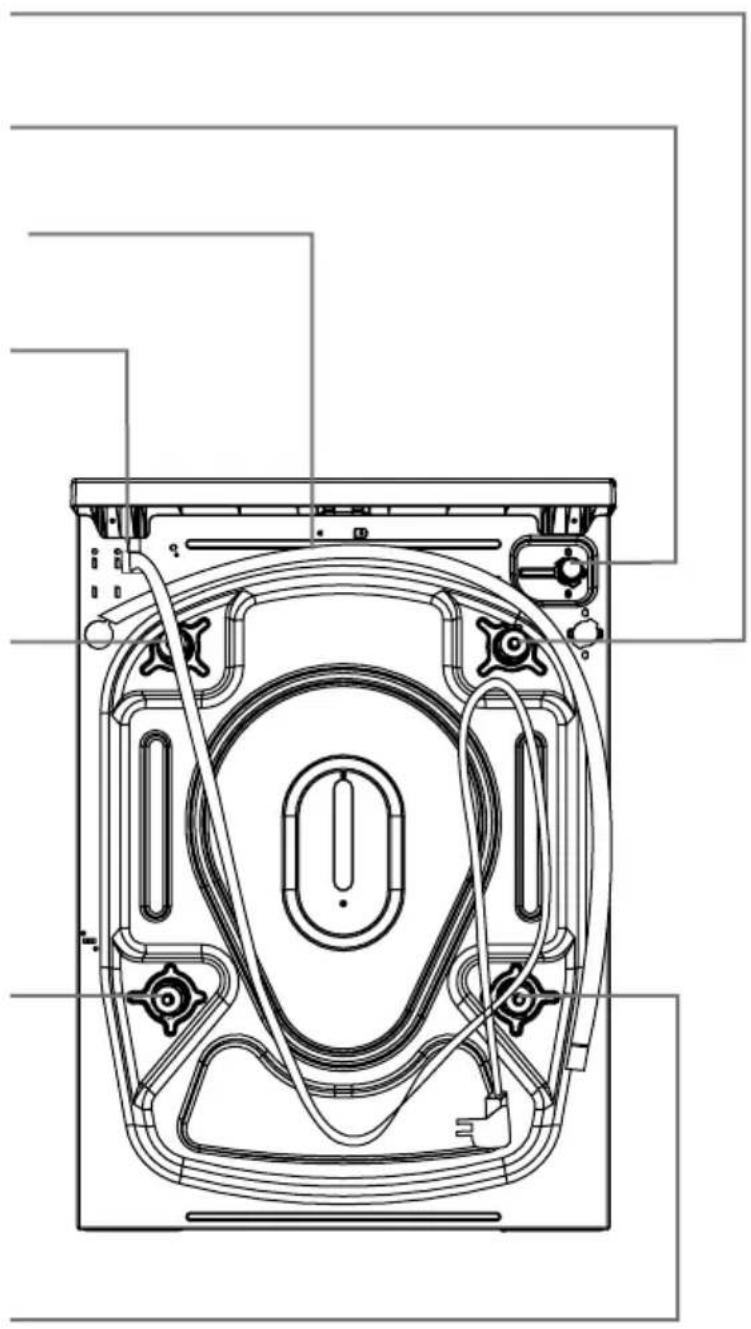
Transportation Safety Screw
Water Inlet Valve
Discharging Hose
Power Cable
Transportation Safety Screw
Transportation Safety Screw
Transportation Safety Screw
natural_image
Technical line drawing of a washing machine interior with internal components and wiring (no text or labels)CHAPTER -2: OVERVIEW OF YOUR DEVICE TECHNICAL SPECIFICATIONS
| Operating voltage / frequency (V/Hz) | (220-240) V~/50Hz |
| Total current (A) | 10 |
| Water pressure | Maximum: 1 MpaMinimum : 0.1 Mpa |
| Total power (W) | 2100 |
| Maximum dry laundry capacity (kg) | 6 |
| Spinning revolution (rev / min) | 1000 |
| Programme number | 15 |
| Dimensions (Height x Width x Depth) (mm) | 845 x 597 x 497 |
Before operating the washing machine, remove the 4 transportation screws and rubber spacers from the back of the machine. If the screws are not removed, it may cause heavy vibration, noise and product malfunction, (voiding the guarantee).

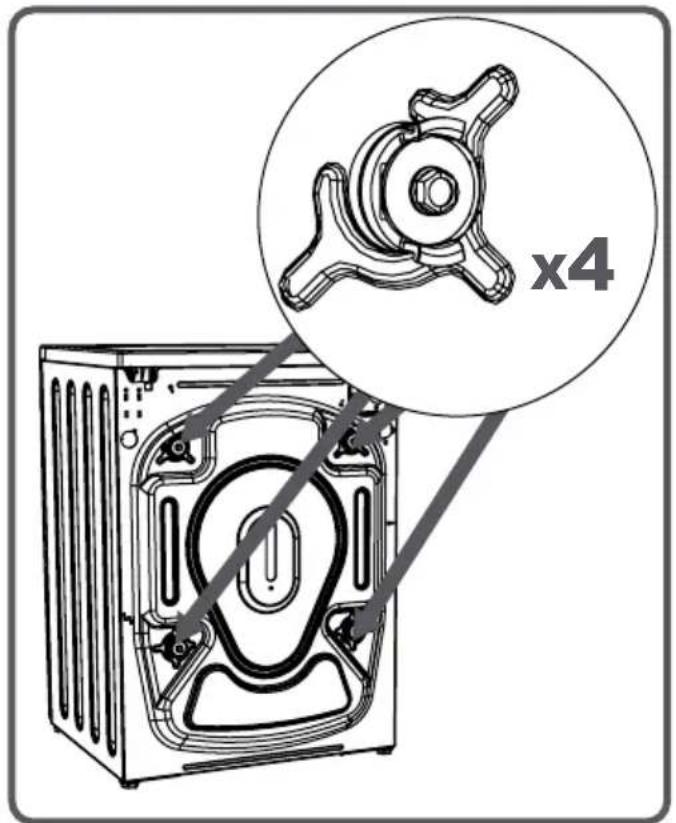
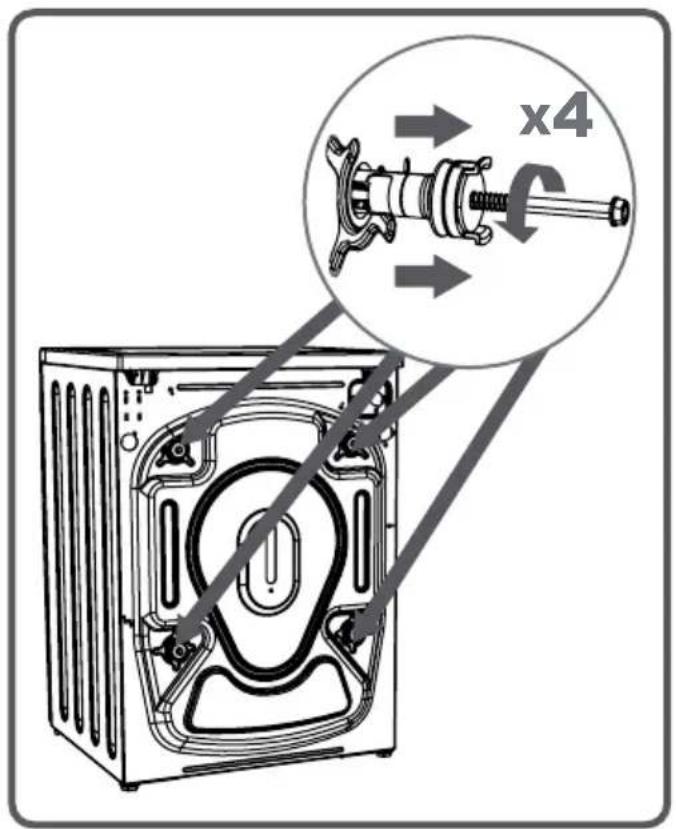
For this reason, transportation safety screws shall be loosened by being rotated in counter-clockwise using an appropriate wrench.
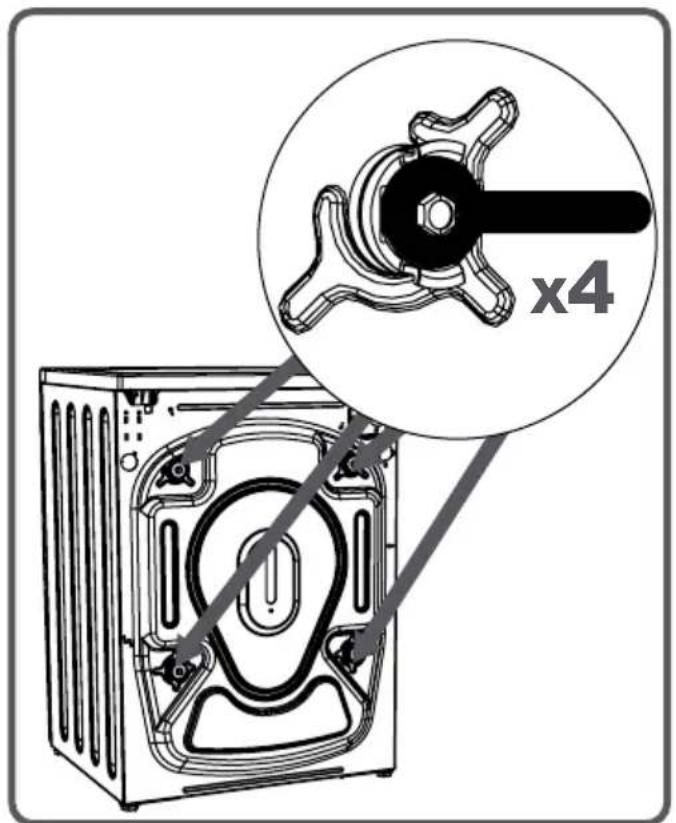
Transportation screws shall be removed by pulling out.
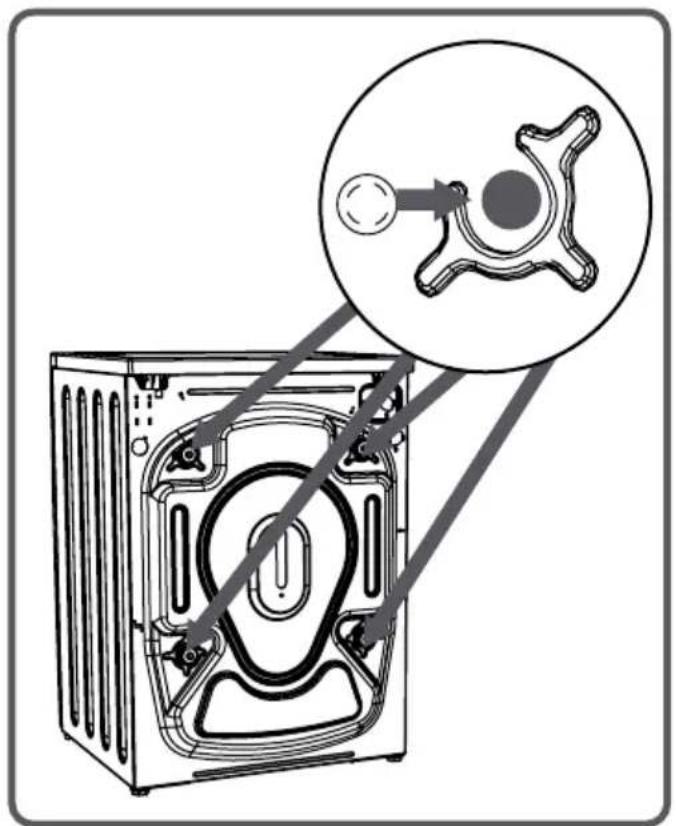
Fit the plastic transportation screw taps delivered in accessories bag to the palces where transportation screws have been removed.
The transportation safety screws should be stored to be used in case of transportation.
NOTE: You should absolutely remove the transportation screws of your machine before the first usage. Faults occurring in the machines operated with transportation screw fitted shall be out of scope of warranty.
natural_image
Diagram of a washing machine showing internal components and a close-up view of the internal structure (no text or symbols present)Adjusting Adjustable Stays
- Do not install your machine on a carpet or such grounds that would prevent the ventilation of its base.
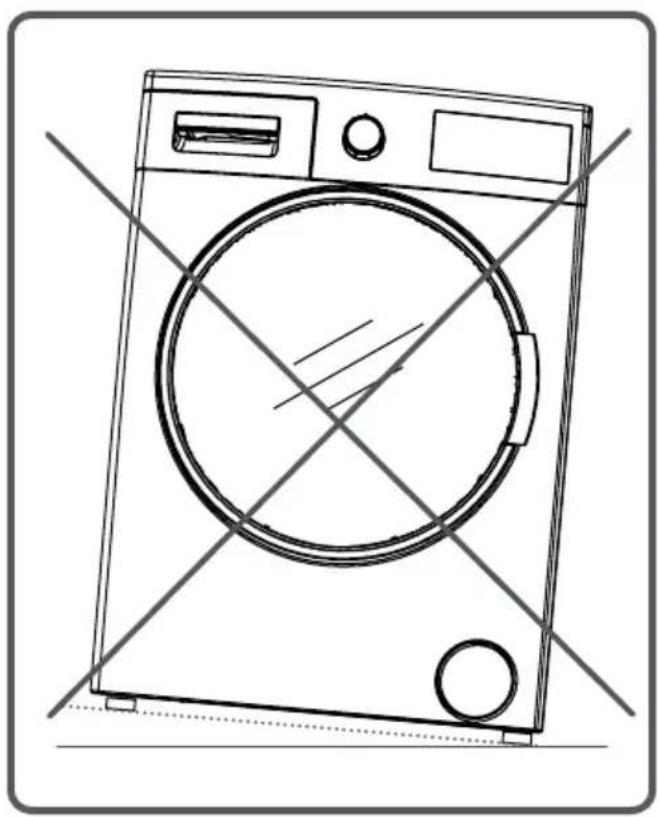
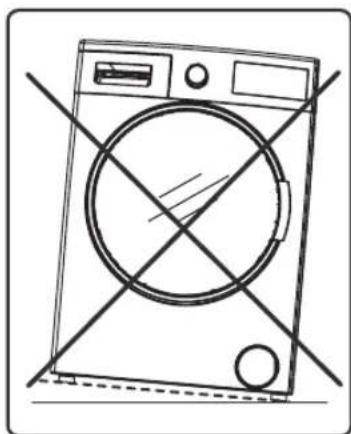
- To ensure silent and vibration-free operation of your machine, it should be deployed on a non-sliding and firm ground.
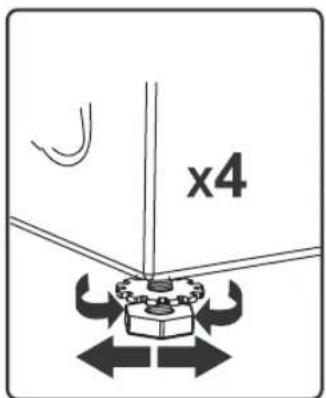
- You can adjust the balance of your machine through the stays.
- Loosen the plastic adjustment nut.
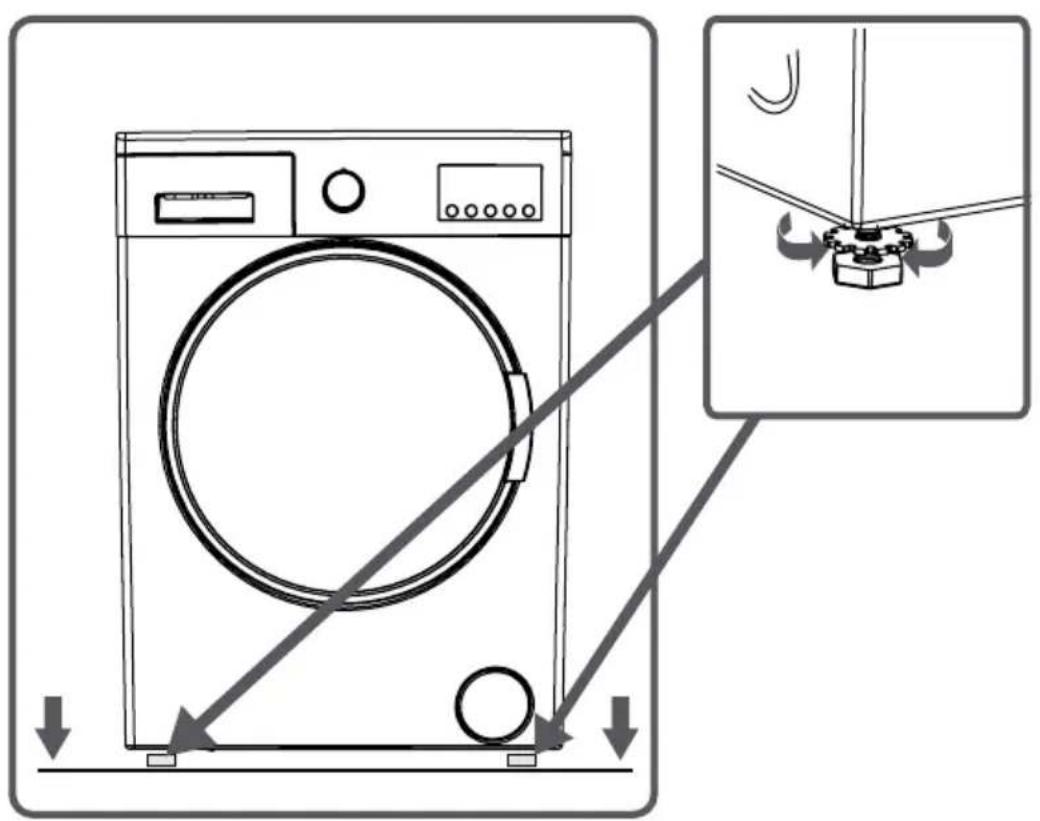
- Adjust the stays upward and downward by rotating them.
• After maintaining the balance, compress the plastic adjustment nut upward again.
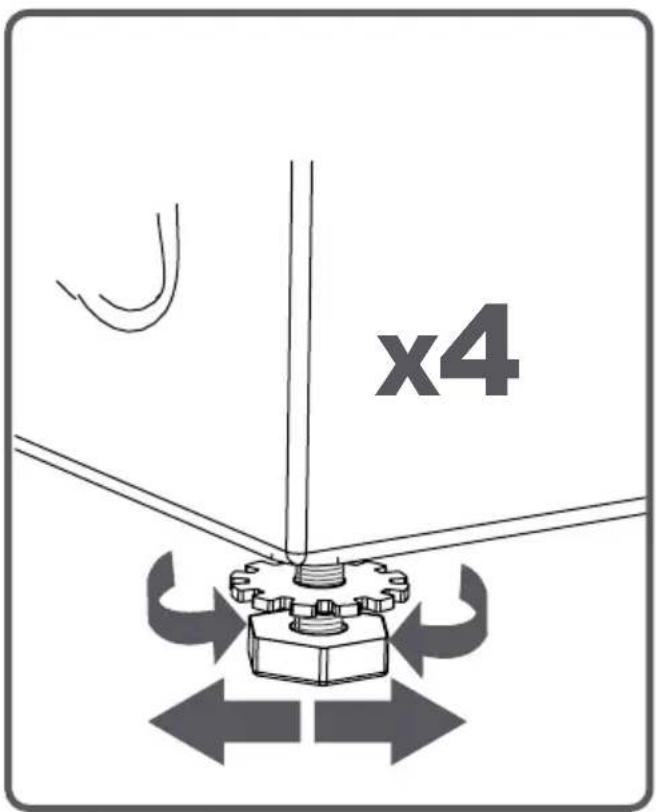
CHAPTER -3: INSTALLATION OF THE MACHINE (ADJUSTING ADJUSTABLE STAYS)
- Never put cardboard, wood or suchlike materials under your machine if you are intending to stabilize the distortions on the ground.

- When cleaning the ground, on which your machine rests, be careful not to disorder stays stabilization.

natural_image
Line drawing of a front-loading washing machine with no text or symbols- Your washing machine is set to 220-240V and 50Hz.
- The mains cord of your washing machine is equipped with a specific earthed plug. This plug should always be inserted to a earthed socket of 10 amps. The current value of the fuse should be 10 amps.
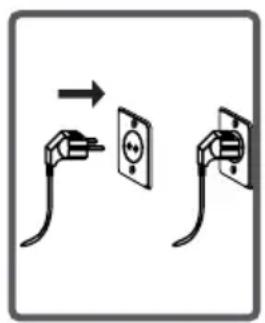
Fuse current value of the power line connected to this plug should also be 10 amperes. If you don't have such a receptacle and fuse confirming with this, please have it done by a qualified electrician.
- We do not take the responsibility of the damages that occur due to ungrounded usage.
NOTE: Operating your machine under low voltage will cause the life cycle of your machine to be reduced and its performance to be restricted.
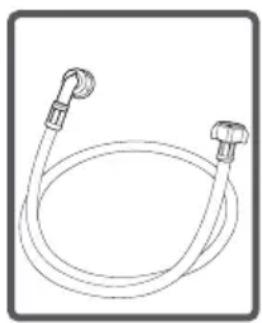
- Your machine may have either a single inlet (cold) or double water inlets (cold/hot) based on its specifications.
White-capped hose should be connected to cold water inlet and red-capped hose to hot water inlet (applicable for machines with double water inlets).
- To eliminate water leakages in points of contact, 1 or 2 nuts are provided in the hose package (applicable for machines with double water inlets). Fit these nuts to the ends of new water inlet hoses on the side of faucet.
- Mount new water inlet hoses to a 34 ", threaded faucet.
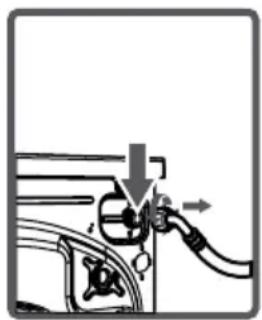
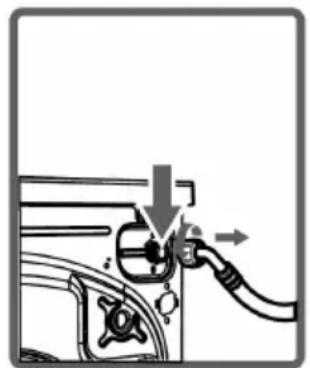
- Connect the white-elbow end of the water inlet hoses to the white-filtered water inlet valve on the rear side of the machine and the red-elbow end to red-filtered one (applicable for machines with double water inlets). Tighten plastic parts of the junctions using your hand.
In uncertain conditions, have the connection works be done by a qualified plumber.
- Flow of water with pressure of 0,1-1 Mpa will allow your machine to operate more efficiently.) (0,1 Mpa pressure means that more than 8 litres of water will flow through a fully-tapped faucet per one minute.)
- Ensure that points of contact do not leak by tapping the faucet completely after carrying making the connections.
natural_image
Line drawing of a coiled hose with two connectors (no text or symbols)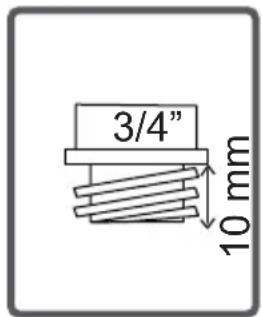
natural_image
Diagram of a car fuel pump with valve and valve components (no text or labels)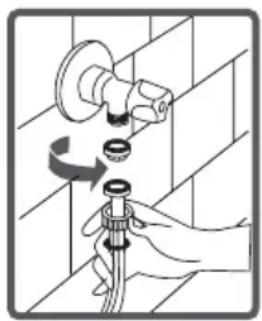
natural_image
Illustration of a hand holding a pipe fitting with a valve inserted, showing mechanical components (no text or symbols)CHAPTER -3: INSTALLATION OF THE MACHINE (WATER INLET HOSE CONNECTION)
- Ensure that the new water inlet hoses are not bent, broken, crushed and resized.
- If your machine has double hot water inlets, the temperature of hot water inlet should be maximum 70^ .
Note: Use only the new water inlet hose coming with your machine while making water inlet connections of your machine. Never use old, used or damaged water inlet hoses.
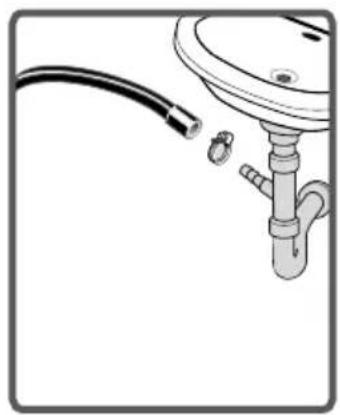
- The end of water discharge hose can be fitted to a specific apparatus directly attached to dirty water discharge hole or outlet joint of the basin elbow.
- Never attempt to extend the water discharge hose by jointing.
- Do not put discharging hose of your machine in a vessel, bucket or sink.
- Make sure that the water discharge hose does not bend, buckle, be crushed or extended. Please note:
- The water drain hose should be mounted at a height of minimum 60 cm, maximum 100 cm from the ground.
natural_image
Diagram of a pipe fitting with a bulb attached, showing fluid flow (no text or symbols)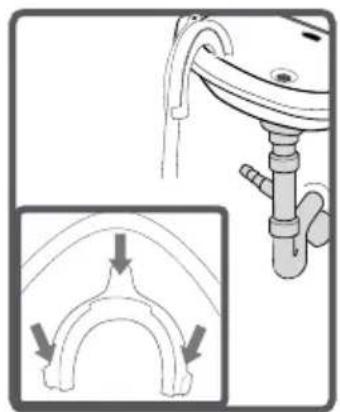
natural_image
Diagram showing a pipe installation with an inset illustrating the curved structure (no text or symbols present)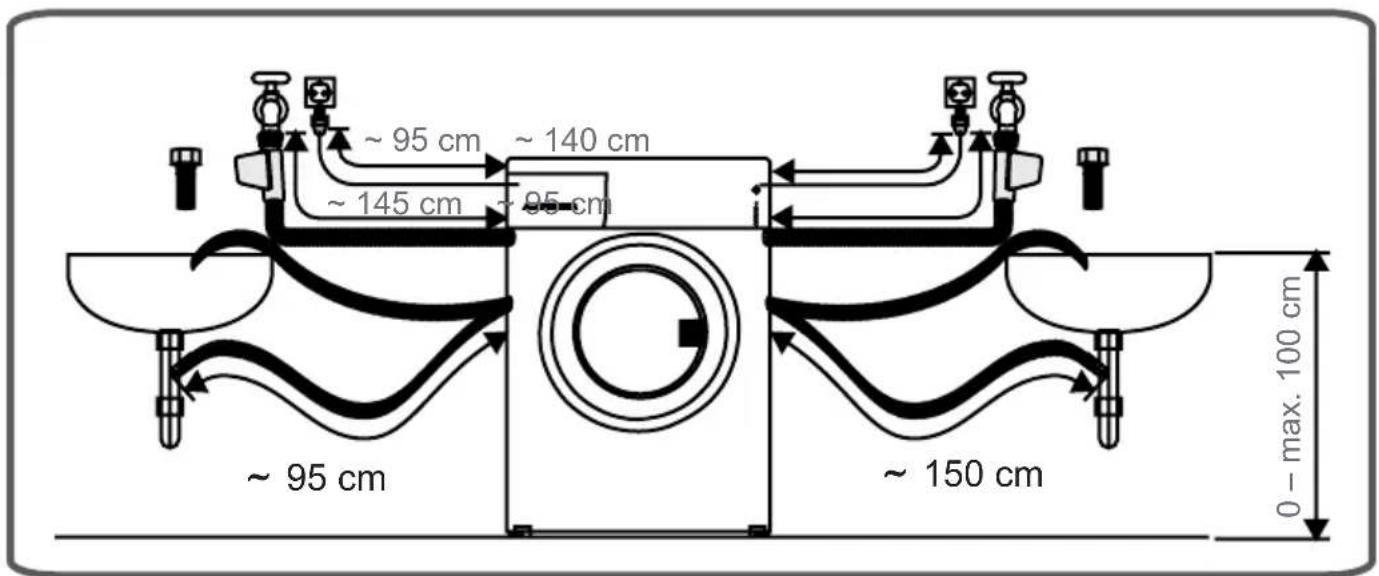
CHAPTER -4: INTRODUCTION OF CONTROL PANEL (DETERGENT DRAWER)
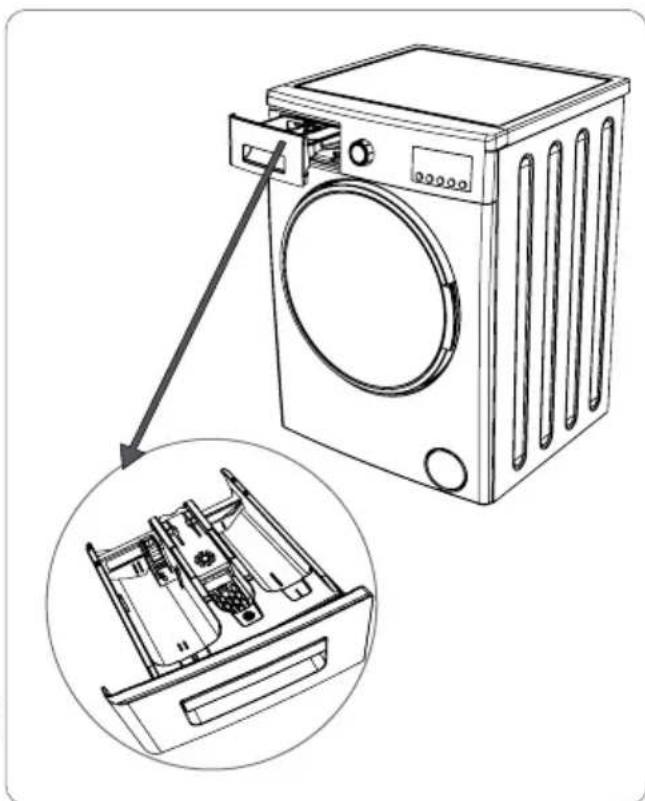
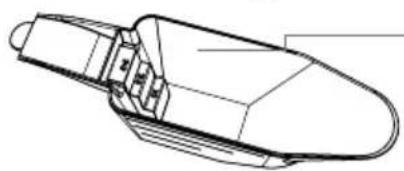
You can use the liquid level determination plate when you want to wash your laundry with liquid detergent. You can use your liquid detergents in all programs without prewashing. Place the liquid detergent aparatus in the second compartment (which is available inside the machine) of the detergent drawer (*) and set the detergent amount. (Use the recommended amount of liquid detergent by detergent producers).
Do not exceed the MAX level, use only for liquid detergent, do not use this aparatus for powder detergent and take it out.)
natural_image
Line drawing of a washing machine with a close-up inset showing internal components (no text or symbols)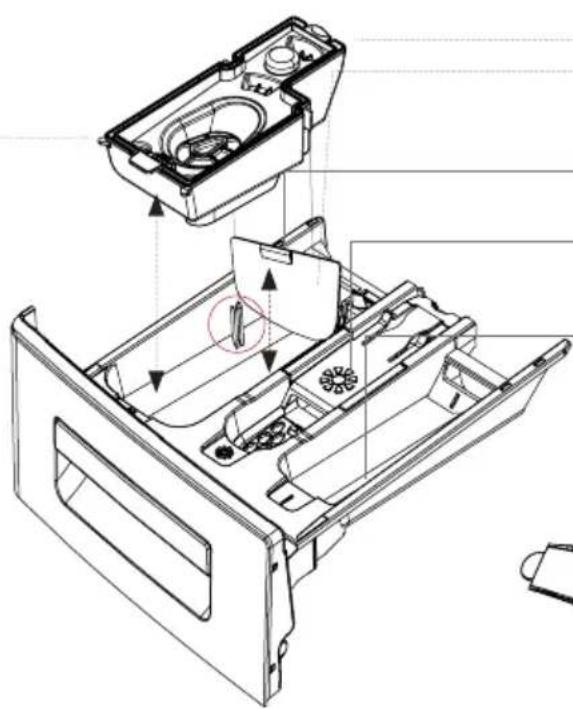
natural_image
Technical line drawing of a mechanical device interior showing internal components and assembly (no text or symbols)▶ Liquid Detergent Apparatus
Main wash detergent compartment
Softener
Compartment
Pre-wash detergent compartment
Powder detergent level stages
natural_image
Technical line drawing of a mechanical component or connector (no text or symbols)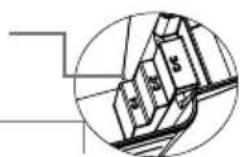
Powder detergent spade (*)
(*) Machinery specifications may vary depending on the product purchased.
SECTIONS
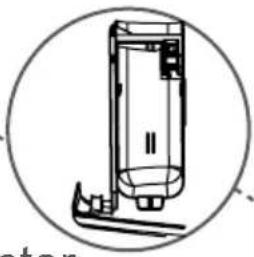
Main wash detergent compartment:
In this compartment, only materials like detergent (liquid or powder), lime preventer and such can be used.
You can find the liquid detergent apparatus inside your machine at first installation. (*)
natural_image
Technical line drawing of a cylindrical device with a base and handle, enclosed in a circle (no text or symbols)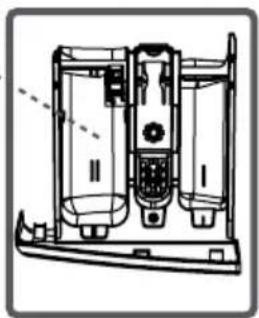
natural_image
Technical line drawing of a mechanical device with internal components and mounting base (no text or symbols)Fabric conditioner, starch, detergent compartment:
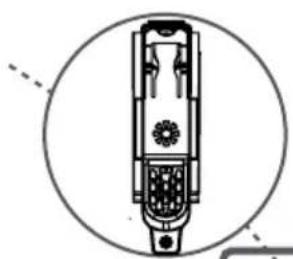
You can use softener for your laundry (recommended amount and type by the producer is recommended). Sometimes the fabric conditioners you use for your laundry mar remain in this compartment. The reason for this is that the conditioner is not viscous. To prevent this situation, more viscous liquid softeners are recommended to be used or the softener could be thinned and then used.
natural_image
Technical line drawing of a mechanical device with no visible text or symbols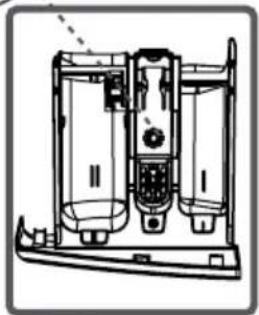
natural_image
Technical line drawing of a mechanical device with internal components (no text or symbols)Pre-wash detergent compartment:
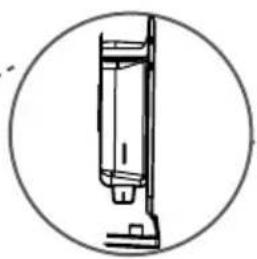
This compartment must only be used when
the pre-wash feature is selected.
Pre-wash feature is recommended for very dirty laundry.
natural_image
Technical line drawing of a mechanical component inside a circular frame (no text or symbols)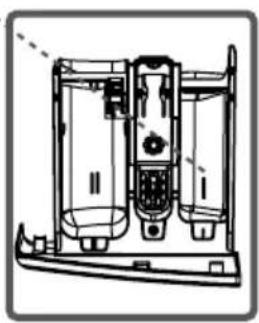
natural_image
Technical line drawing of a mechanical device with internal components (no text or symbols)(*) Machinery specifications may vary depending on the product purchased.
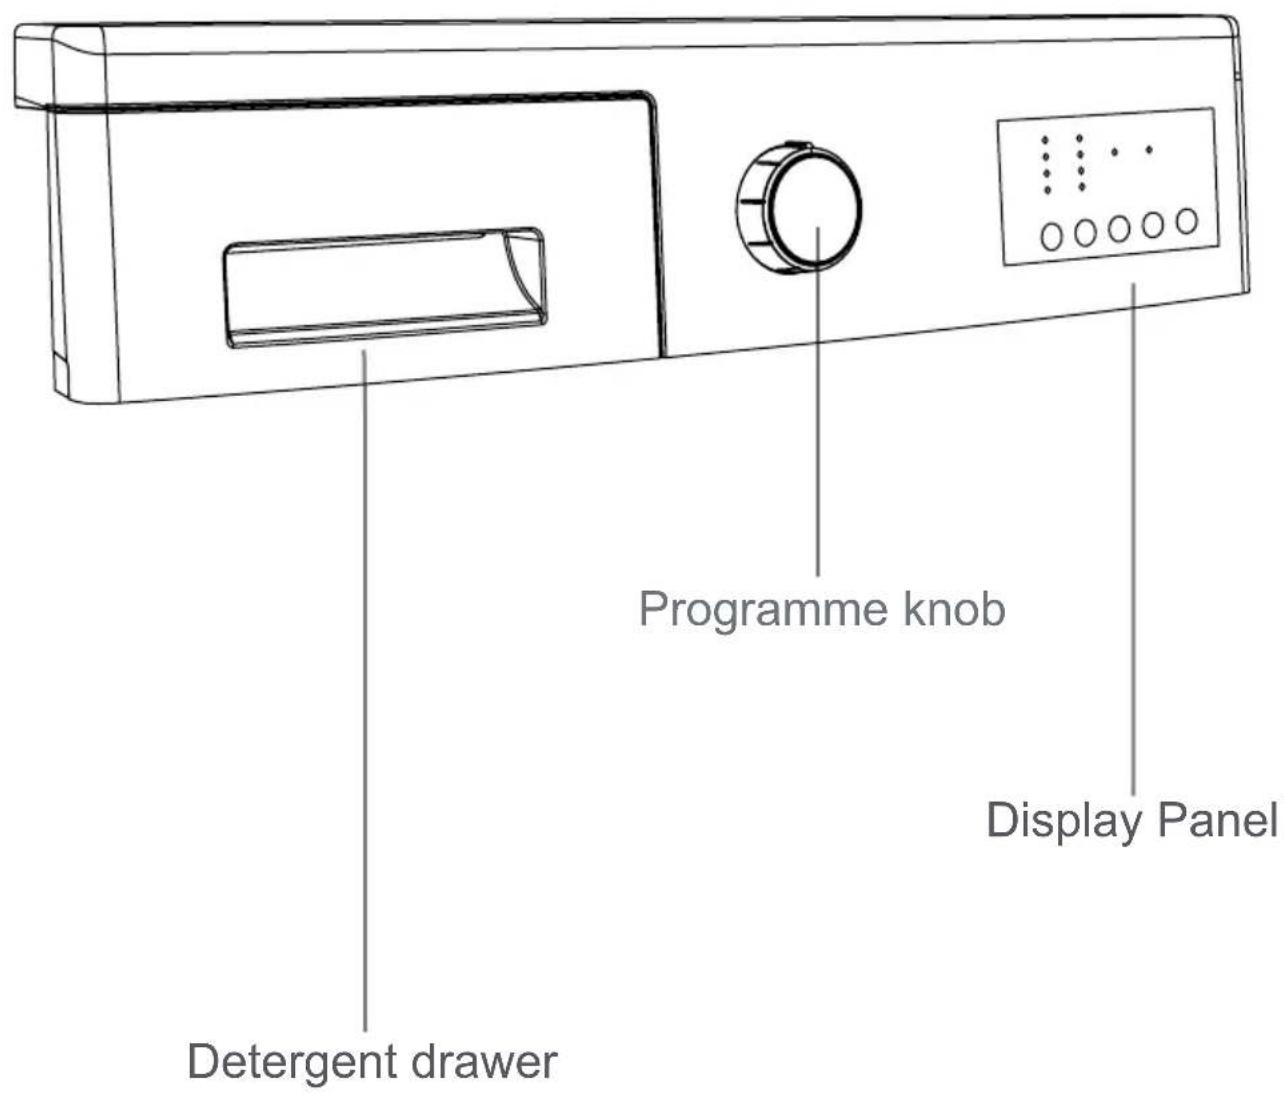
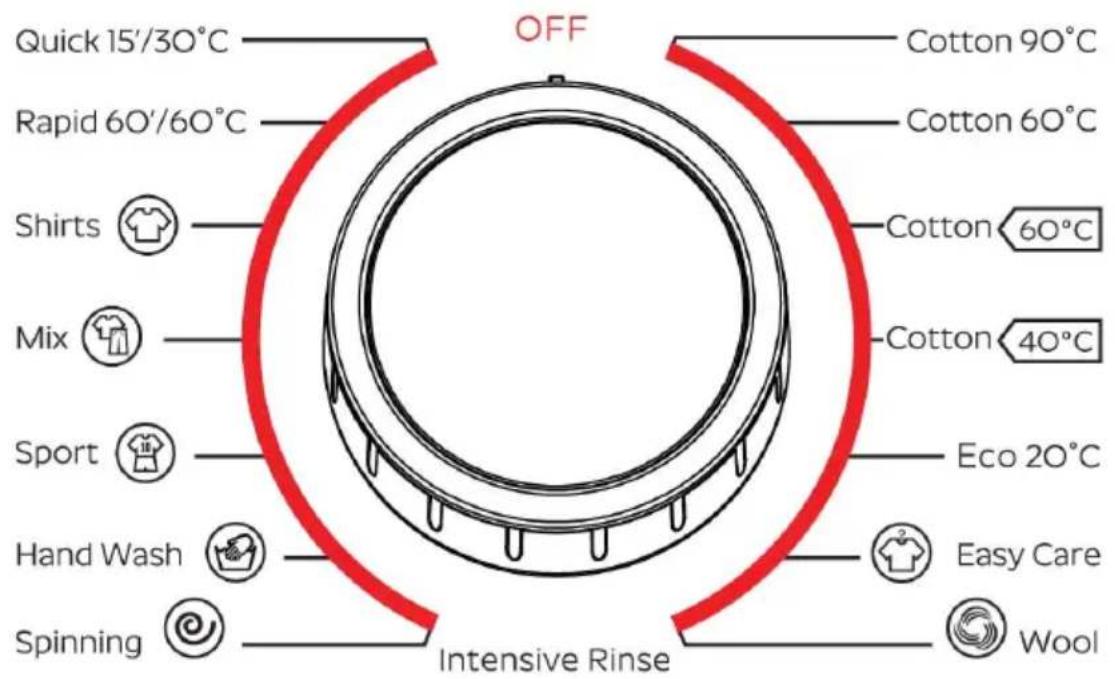
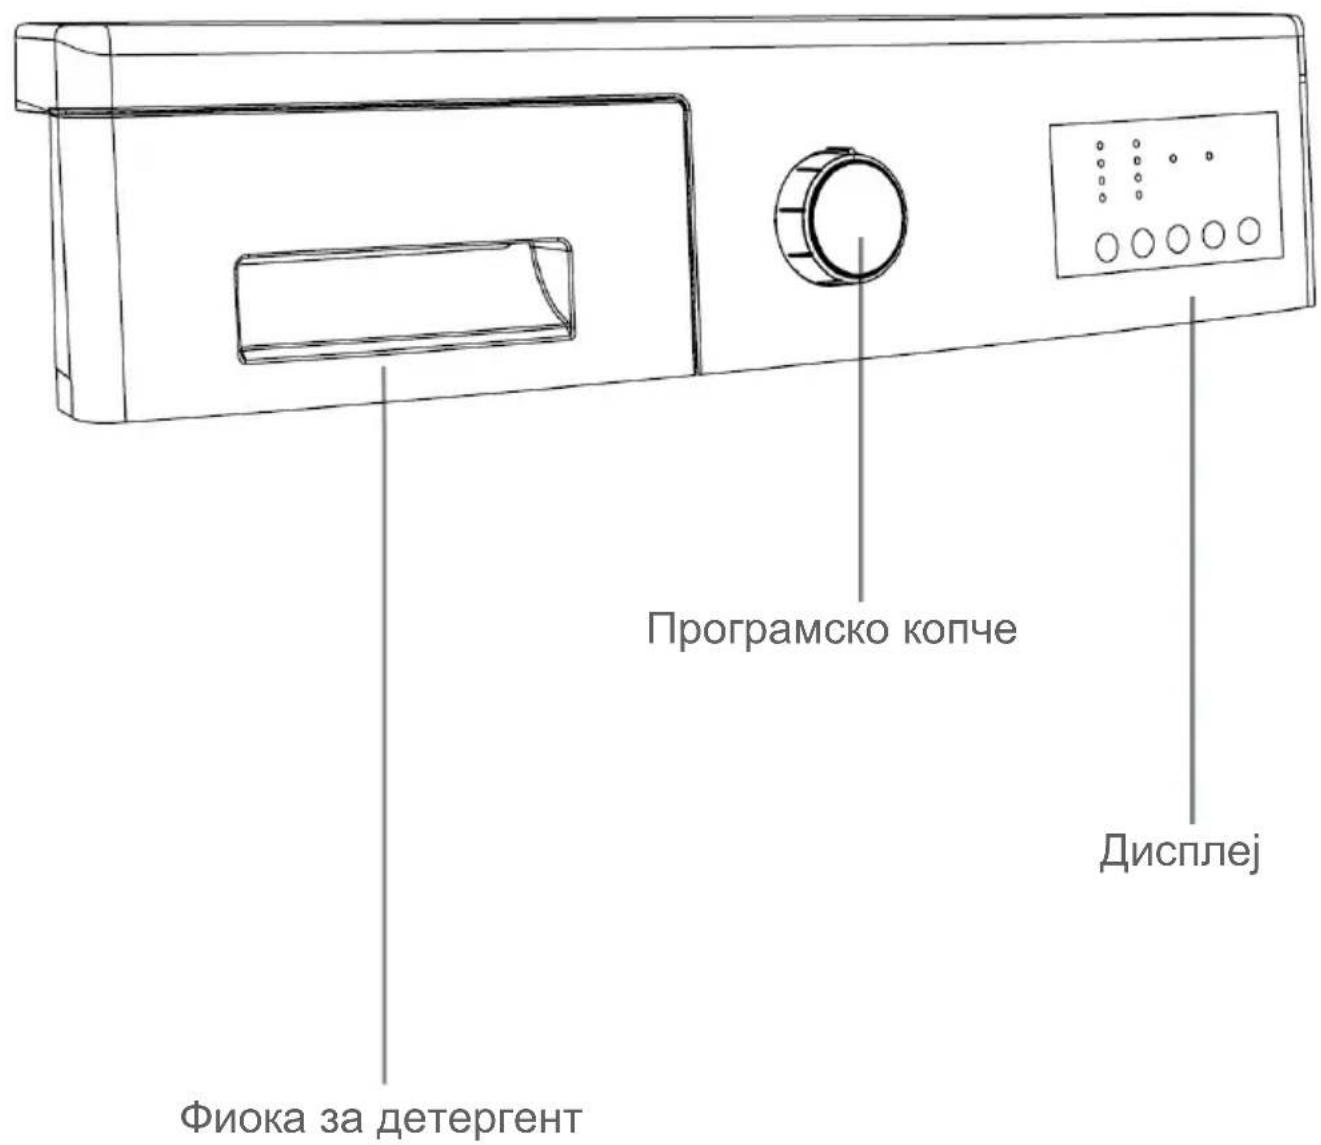
- You can select the programme you want to wash your laundry in through programme knob.
- You may set the programme selection operation by rotating the programme knob in both directions.
- Ensure that the programme knob is exactly on the programme you want to select.
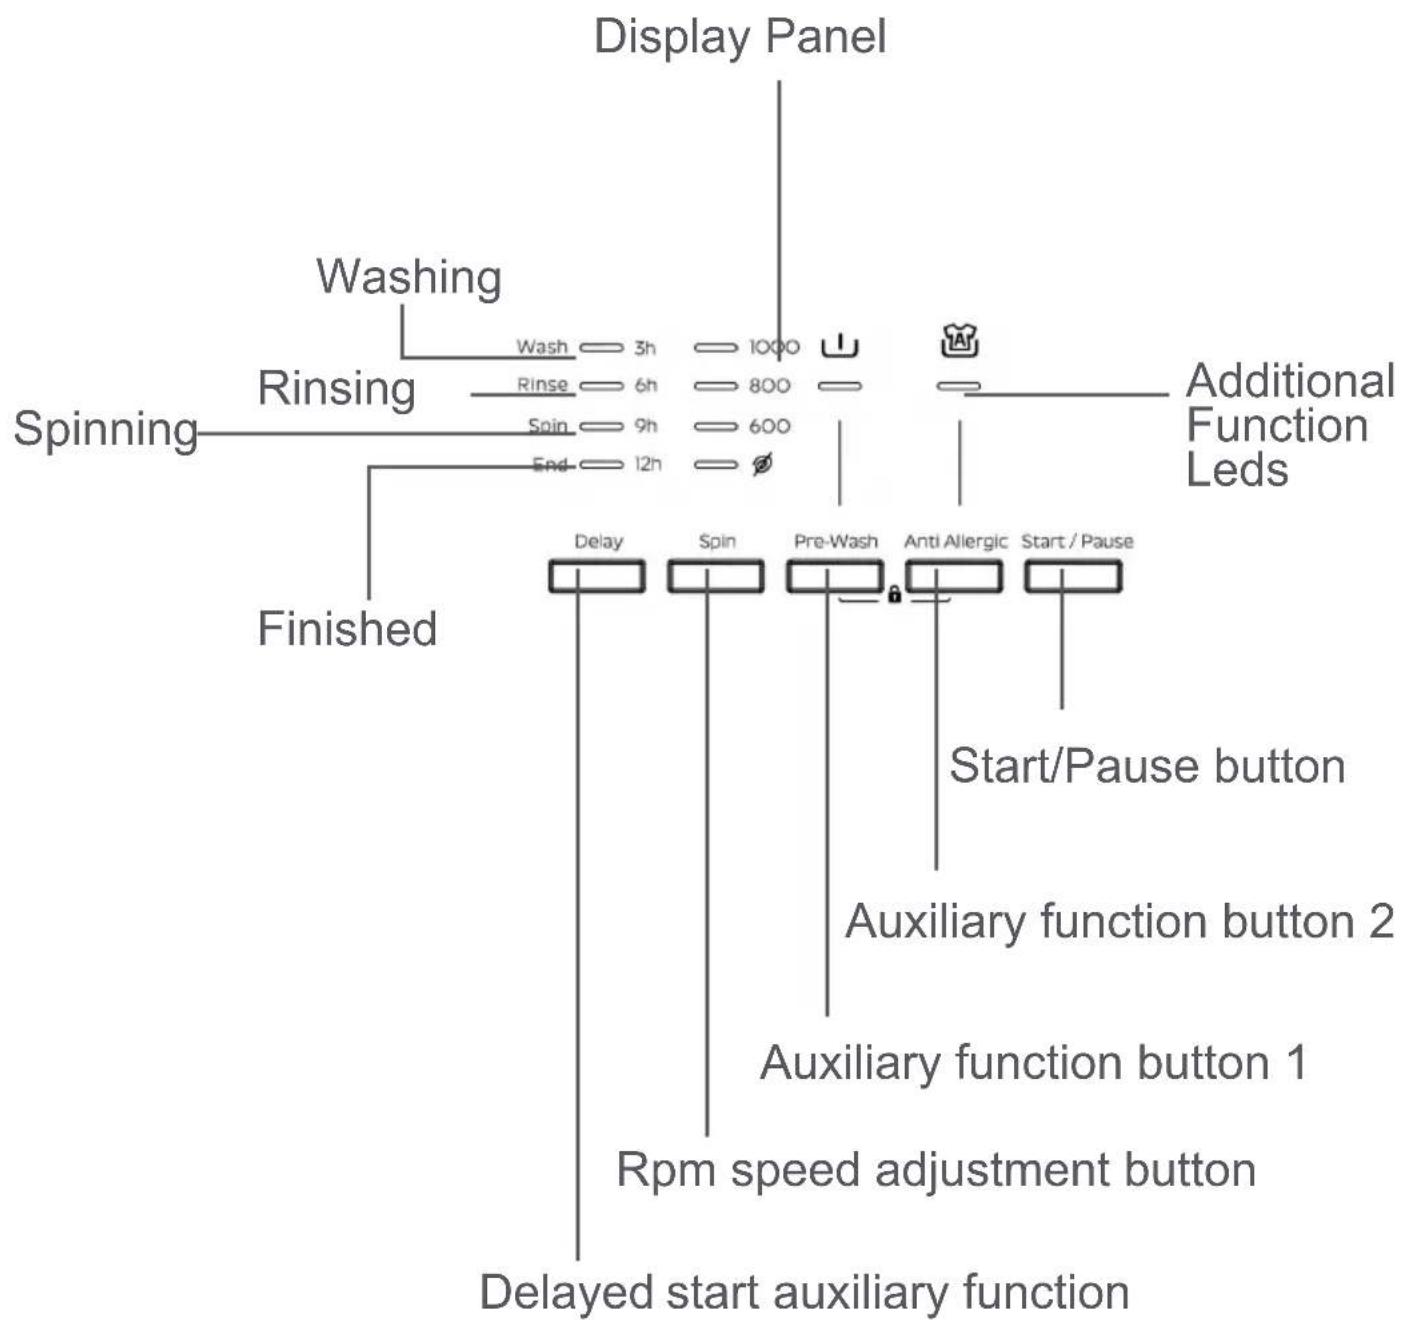
On the display panel, you can see the washing delay timer of your machine, speed setting of your machine, the auxiliary functions you have selected and the stage of the programme you are running on your machine (pre wash/wash state, rinsing stage, spinning stage).
Furthermore, electronic display will warn you by means of led combinations that will turn on its display when a fault occurs on your machine and notify you of the completion of the washing programme by revealing expression of “Finished” on the display as soon as the washing programme you have selected has finished as well.
- Your laundry has product labels on them that specify their specifications. Wash or dry your laundry according to the specifications on the product label.
- Separate your laundries according to their types (cotton, synthetic, sensitive, wool etc.), their temperatures (cold, 30^ , 40^ , 60^ , 90^ ) and degree of contamination (slightly stained, stained, highly stained).
- Never wash your coloured and white laundry together.
- Wash your coloured laundries separately in the first washing as they may bleed.
- Ensure that there are no metallic materials on your laundries or in the pockets; if so, take them up.
CAUTION: WARNING: Faults that will emerge in case of penetration of foreign substances into your machine are not included within the scope of warranty.
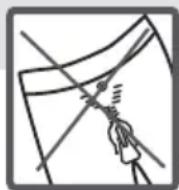
- Zip up and button up your laundries.
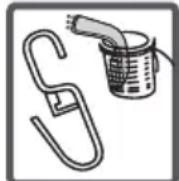
- Remove the metallic or plastic hooks of tulle curtains or curtains or place them in a washing net or bag and then muzzle them.
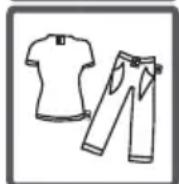
- Reverse textiles such as pants, knitwear, t-shirt and sweat suit.
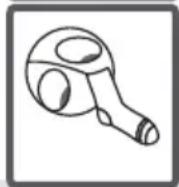
- Wash socks, handkerchief and suchlike small laundries in a washing net.

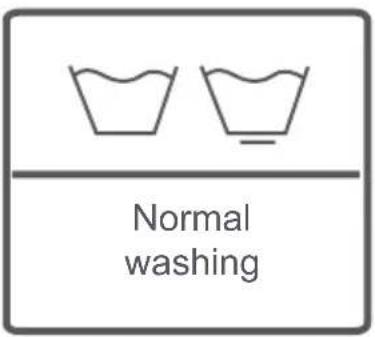
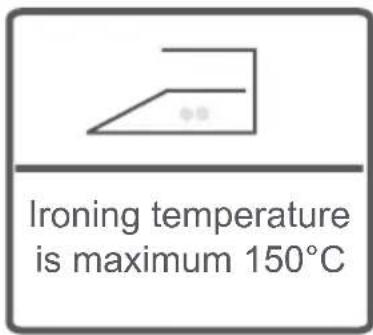
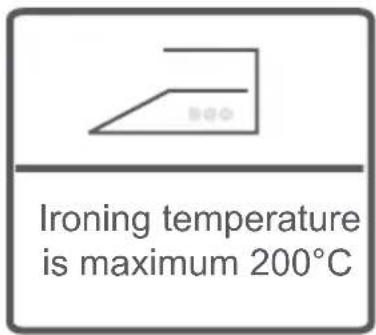
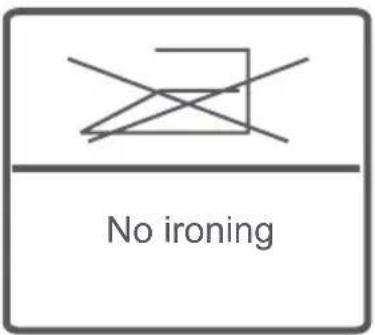
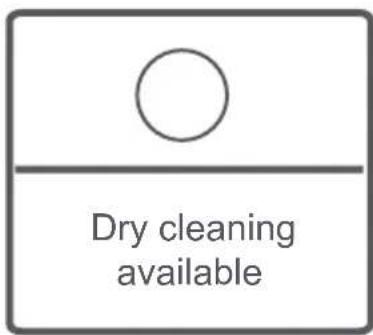
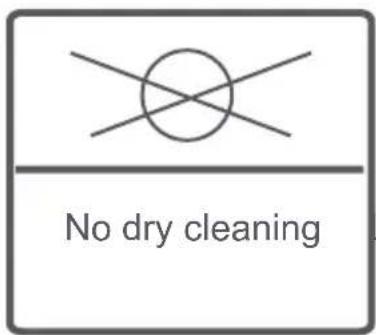
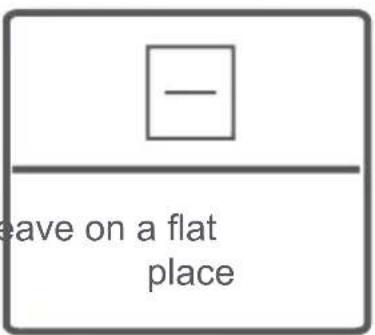
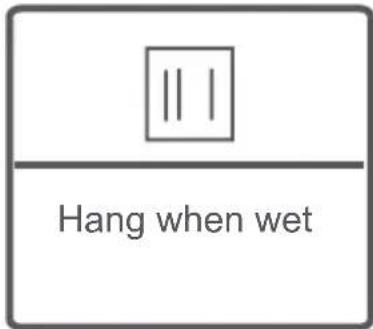
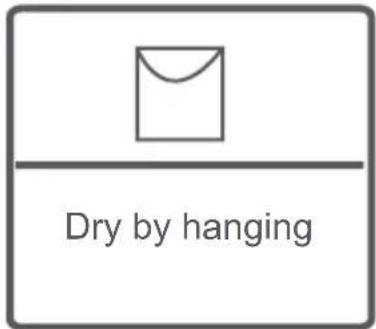
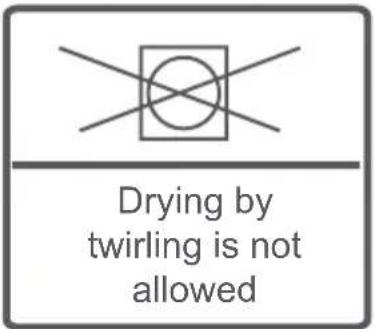
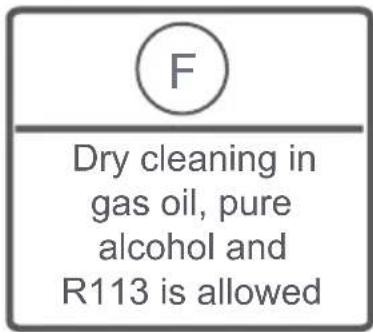
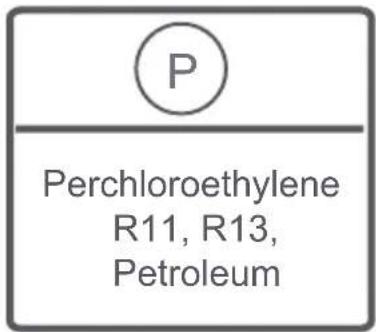
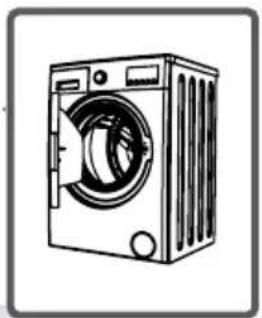
- Open the door of your machine.
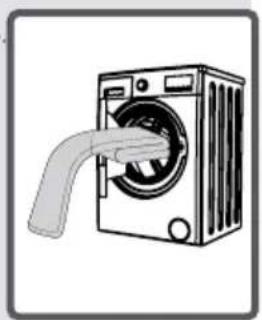
- Spread your laundries in your machine.
natural_image
Line drawing of a washing machine with front panel and side door (no text or symbols)NOTE: Note: Maximum loading capacity may vary based on the laundry type you will wash, degree of contamination and the programme you have chosen. Do not exceed maximum dry loading capacity indicated in the programme table for washing programmes.
natural_image
Illustration of a washing machine with a handle inserting into it (no text or symbols)You can take the following table of weights as an example.
| LAUNDRY TYPE WEIGHT (gr) | |
| Towel | 200 |
| Linen | 500 |
| Bathrobe | 1200 |
| Quilt cover | 700 |
| Pillow slip | 200 |
| Underwear | 100 |
| Tablecloth | 250 |
- Put each item of laundry separately.
- Ensure that no laundry is stuck between the cover and bellow seal when closing the door of your machine.
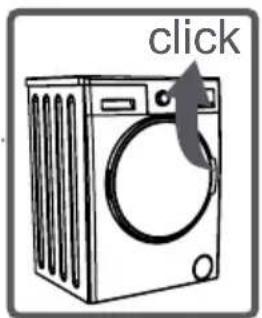
- Push the door of your machine until hearing the locking sound to close it.
- Close the door of your machine properly, otherwise your machine will not start the washing operation.
natural_image
Line drawing of a washing machine with a circular button and 'click' label (no other text or symbols)The amount of detergent you will put in your machine will depend on the following criteria:
- Your detergent utilization will be based on the degree of contamination of your laundries. Do not prewash your less stained laundries and put your slight amount of detergent in the 2nd compartment of the detergent drawer.
- For your much stained laundries, select a programme including prewashing, and put 14 of the detergent you will put in the detergent drawer in the 1st compartment of the detergent drawer while putting the remaining 34 of it into 2nd compartment.
- Use detergents produced for automatic washing machine in your machine. The amount of detergent you will use for your laundries is printed on the detergent package.
- The higher the degree of hardness of the water the more detergent you will use.
- The amount of the detergent you will use will increase as the amount of your laundries increase.
- Put the softener in the softener compartment in the detergent drawer. Do not exceed the MAX level. Otherwise, softener will flow into washing water through flushing.
- Softeners with high density are required to be thinned to a degree before being put in the drawer. Because high-density softener will clog the flush and avoid the flow of the softener.
- You can use your liquid detergents in all programs without prewashing. For this, fit liquid detergent level plate in the accessories bag or the liquid detergent apparatus (*) into 2nd compartment of the detergent drawer and set the amount of liquid detergent according to the levels on this plate. Remember to detach the liquid detergent plate.
(*)Machinery specifications may vary depending on the product purchased.
CHAPTER -5: PRELIMINARY PREPARATION FOR LAUNDERING (OPERATING YOUR MACHINE)
- Plug your machine in.
- Open the water faucet.
- Open the machine door.
- Spread your laundries in your machine.
- Push the door of your machine until hearing the locking sound to close it.
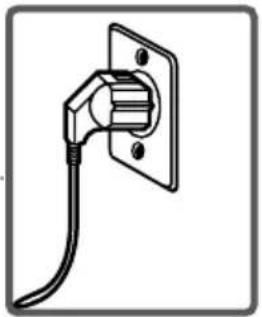
natural_image
Simple line drawing of an electric plug with a socket and cable (no text or symbols)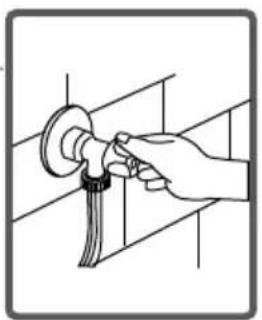
natural_image
Illustration of a hand using a tool to adjust or install a mechanical component (no text or symbols visible)Selecting programme
Select the convenient programme for your laundries on the programme table.
AUXILIARY FUNCTIONS
Before starting the programme, you can optionally select an auxiliary function.
- Press on the button of auxiliary function you would like to select.
- If auxiliary function symbol on electronic display flashes continuously, the auxiliary function you have selected will be activated.
- If auxiliary function symbol on electronic display blinks, the auxiliary function you have selected will not be activated.
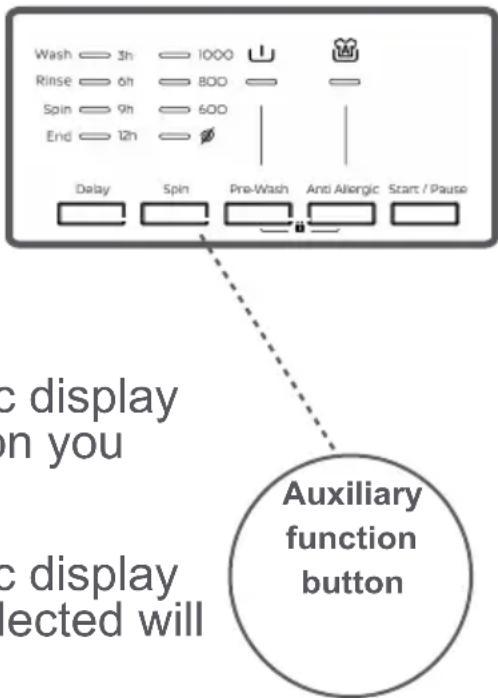
Reason for non-activation:
- The auxiliary function you want to use in the washing programme you have selected is not applicable.
- Your machine has passed over the stage, during which the auxiliary function you would like to select would be implemented.
- It is not compatible with an auxiliary function you have selected previously.
HALF-LOAD DETECTION SYSTEM
Your machine features a half-load detection system.
In case you put approximately half or less amount of launderies of maximum laundry capacity in your machine, your machine will run so as to save washing time, water consumption and energy in some programmes. When the half-load function is active, the machine can complete the programme you have set in a shorter time.
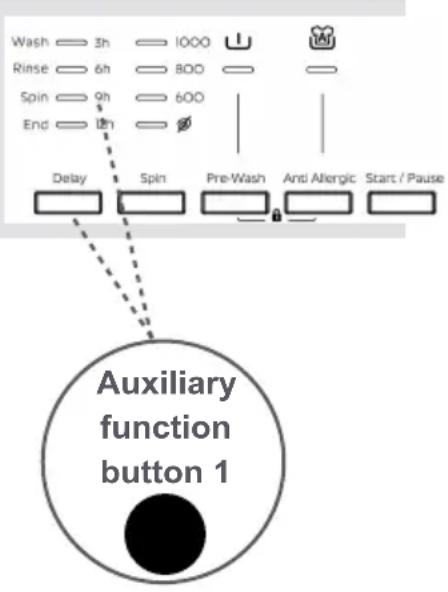
1- Auxiliary function for delay timer
By using this auxiliary function, you can make your machine to start the washing operation with delays between “3h, 6h, 9h, 12h”.
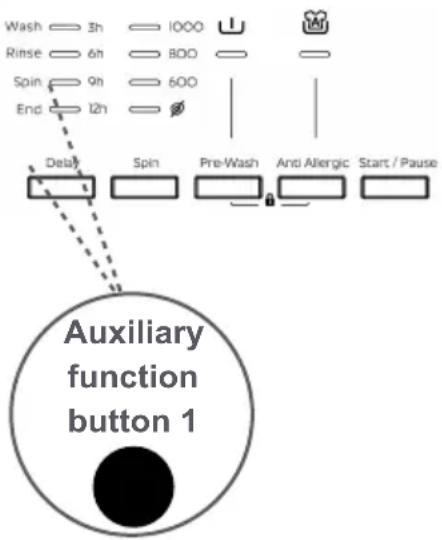
To use auxiliary function of delayed start:
- Press the delayed start button once.
- “3 h” led shall appear.
- Press on delayed start button until the time, on which you want washing operation to be started.
- To activate the time delay you have selected in the programme, you may press on any auxiliary function button you like except "Start/Pause" button.
If you have skipped the time delay you want to set, you can go back to the time desired by keeping pressed on time delay button.
If you want to cancel the time delay, you just have to press the time delay button until all of the time adjustment leds on the display panel turn off.
To run time delay function, your machine is required to be operated by pressing on Start/Standby button.
flowchart
graph TD
    A["Wash 3h"] --> B["Rinse 6h"]
    B --> C["Spin 9h"]
    C --> D["End 12h"]
    D --> E["Delay"]
    E --> F["Spin"]
    F --> G["Pre-Wash"]
    G --> H["And Allergic"]
    H --> I["Start / Pause"]
    J["Auxiliary function button 1"] --> K["●"]
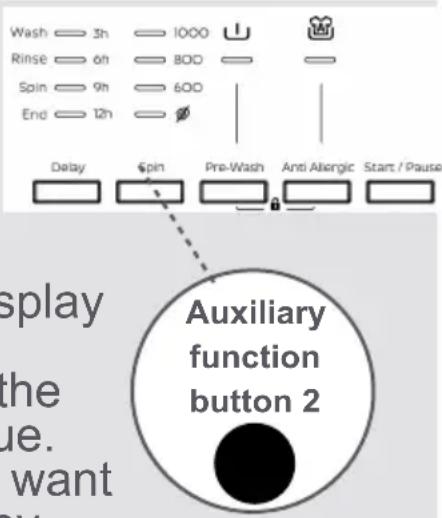
2- Spin Speed Selection
You can adjust the spin speed of your laundry with the spin speed setting button.
When you select a new programme, the max. spin speed of the programme you have selected shall be displayed on the display panel. By pressing the spin speed setting button, you can change the spin speed of the selected programme between its max. value. If you have 🔒 skipped the spin speed you want to set, you can re-switch to the revolution by keeping the speed setting button pressed.
3- Extra Rinse(\*)
You can make additional rinse operation on your laundry by using this additional function.
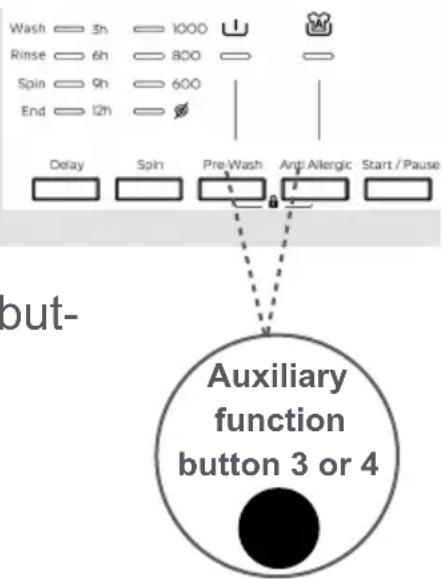
You may make the programme active by pressing the extra rinsing auxiliary function button when the led light of the 🎨 symbol turns on.
4- Pre-wash(\*)
You can expose your very dirty laundries to prewashing operation prior to main washing by using this additional function. When using this function, you should put detergent in front washing compartment of the detergent drawer.
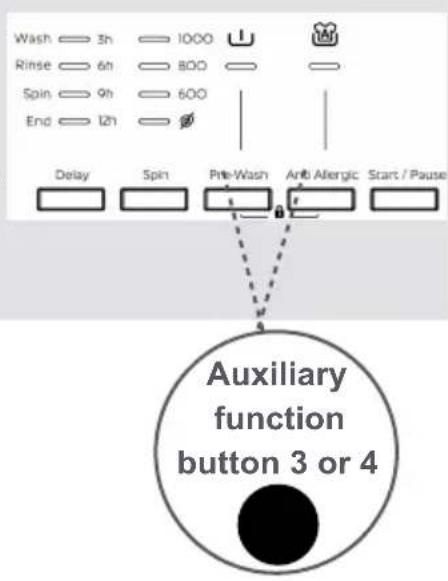
You may make the programme active by pressing the pre-wash button on the display panel when the led light of the symbol turns on.
5- Anti-Allergic(\*)
In the programmes where this auxiliary function is active, you may have your machine perform an extra rinsing operation on your laundries prior to latest rinsing operation.
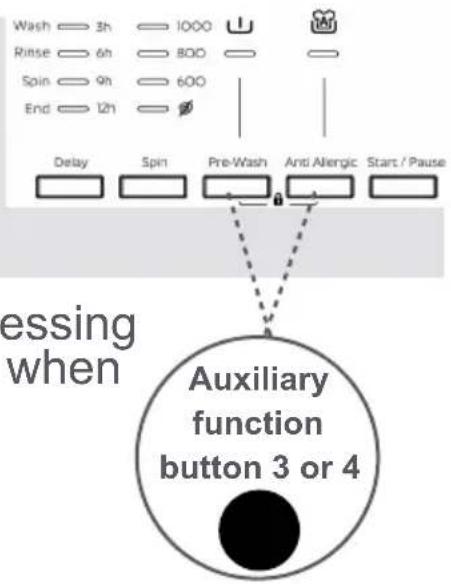
You may make the programme active by pressing the anti-allergic button on the display panel when the led light of the 🔒 symbol turns on.
6- Rapid wash(\*)
By using this auxiliary function, you can wash your laundry in a shorter time and spending less energy and water. ( It is advised that laundry that is less than half the capacity of the selected washing programme is placed.)
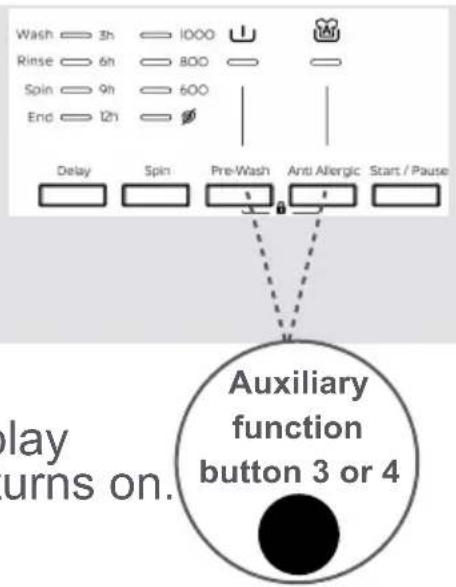
You may make the programme active by pressing the rapid wash button on the display panel when the led light of the 📋 symbol turns on.
NOTE: In case you put half or less than half of the laundry capacity of the washing programme you have selected in your machine, your machine will detect this thanks to automotive half-load detection system and the programme you have selected will wash your laundries in a shorter time to consume less energy and water. If your machine detects half load, the led of the 📋 symbol will automatically flash on display panel.
7- Cold Wash(\*)
You can use this auxiliary function when you want to wash your laundry with cold water (tap water).
You may make the programme active by pressing the cold washing button on the display panel when the led light of the * symbol turns on.
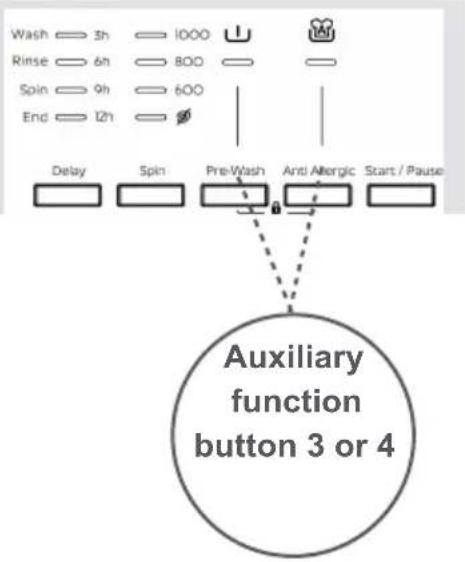
8- Easy ironing(\*)
You can enable your laundries to be taken out less wrinkled as the washing operation is completed by employing this auxiliary function.
You may make the programme active by pressing the easy ironing auxiliary function button when the led light of the symbol turns on.
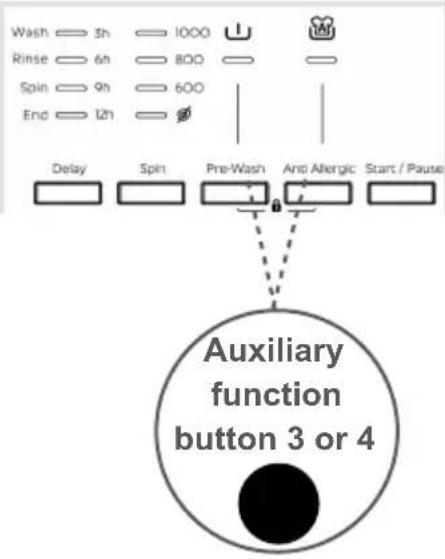
9- No Spin Button(\*)
If you don't want to perform wringing on your laundry, you can use this auxiliary function.
You may make the programme active by pressing the wringing cancel button on the display panel when the led light of the 🔒 symbol turns on.
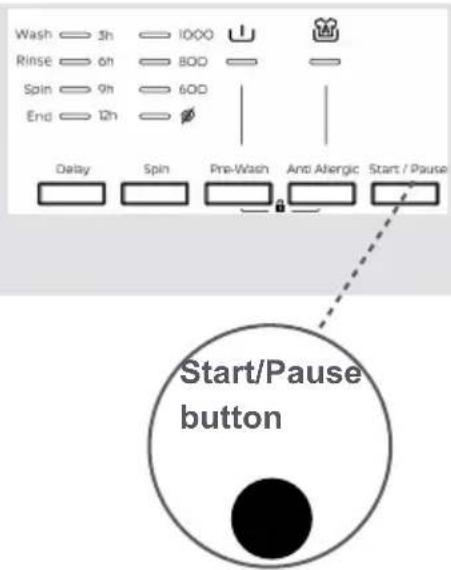
Start/Pause button
By pressing on the Start/Pause button, you may start the programme you have selected or suspend a running programme. If you switch your machine to the standby mode, the Start/Pause led on the electronic display will blink.
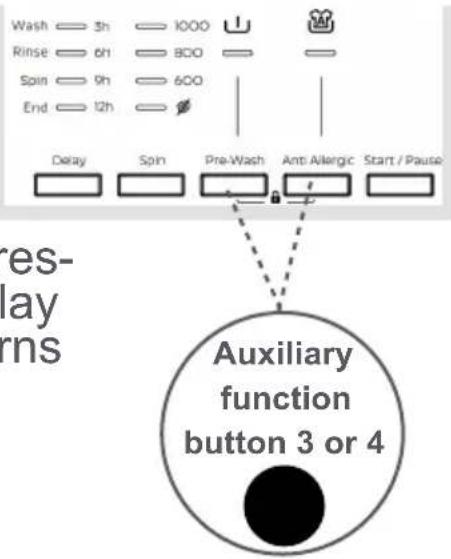
To avoid programme flow from being affected if programme buttons are pressed or programme button is turned when performing washing operation in your machine, child lock is available.
Child lock will be activated in case pressed on both auxiliary functions 3 and 4 at the same time for more than 3 seconds. You can see the auxiliary function leds on the display when activated.
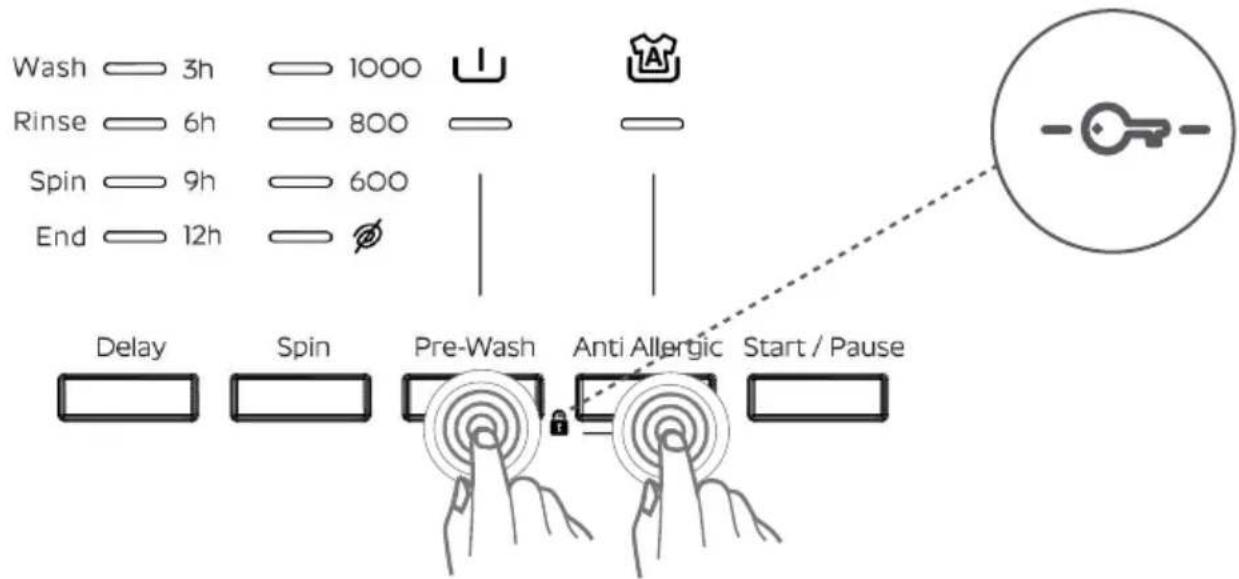
If pressed any button while child lock is active, the Additional Function Leds will blink on the display.
If while the child lock is engaged and any programme is running, the programme knob is switched to the CANCEL position and another programme is selected, the programme previously selected continues from where it left.
To deactivate it, it will be sufficient to press on the same buttons for more than 3 seconds. When the child lock is deactivated, the Additional Function Leds will blink on the display.
If you want to cancel any programme running:
1- Switch the programme knob to "CANCEL" position.
2- Your machine will stop the washing operation and the programme will be cancelled.
3- To get rid of the water accumulated in the machine switch the programme knob to any programme.
4- Your machine will perform the necessary discharge operation and cancel the programme.
5- You can run your machine by selecting a new programme.
Your machine will stop by itself as soon as the programme you have selected finishes.
- End led will blink on the display panel.
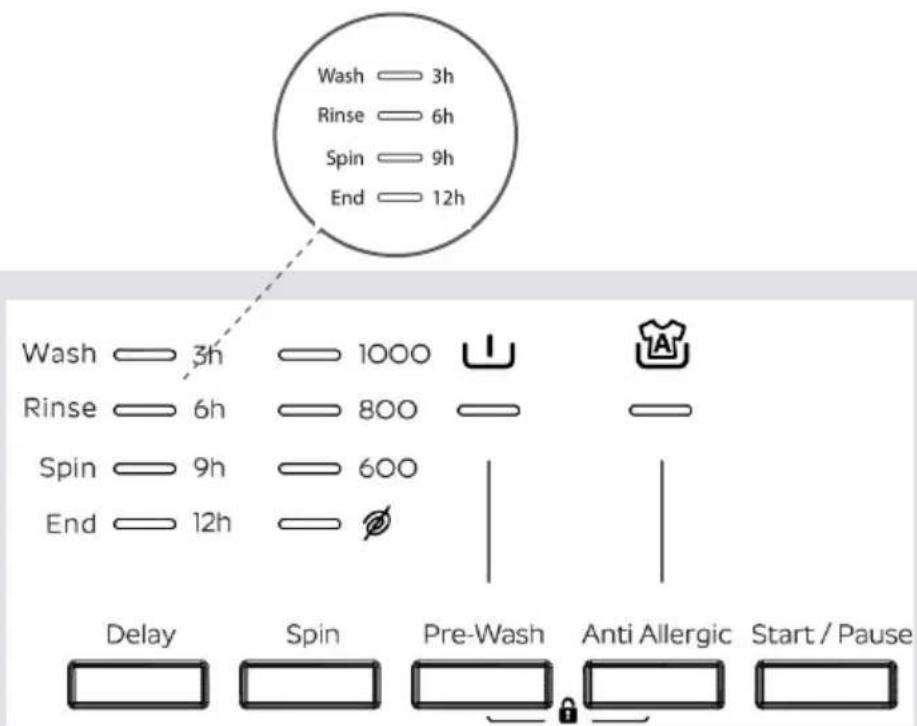
- You can open the machine's door and remove the laundry.
- Leave the door of your machine open to allow the inner part of your machine to dry after removing your laundries.
- Switch the programme knob to CANCEL position.
- Unplug your machine.
- Turn the water faucet off.
COTTON 90°
| Washing temperature (°C) | 90° |
| Maximum dry laundry amount (kg) | 6,0 |
| Detergent compartment | 2 |
| Programme duration (Min.) | 179 |
| Laundry type / Descriptions | Very dirty, cotton and flax textiles. (Underwears, linen, tablecloth, towel (maximum 3,0 kg), bedclothes, etc. |
Pre-Wash Cotton
| Washing temperature (°C) | 60° |
| Maximum dry laundry amount (kg) | 6,0 |
| Detergent compartment | 1&2 |
| Programme duration (Min.) | 164 |
| Laundry type / Descriptions | Dirty cotton and flax textiles. (Underwears, linen, tablecloth, towel (maximum 3,0 kg), bedclothes, etc. |
NOTE: PROGRAM DURATION MIGHT CHANGE ACCORDING TO THE AMOUNT OF LAUNDRY, TAP WATER, AMBIENT TEMPERATURE AND SELECTED ADDITIONAL FUNCTIONS.
| COTTON ECO 60 C° | |
| Washing temperature (°C) | 60° |
| Maximum dry laundry amount (kg) | 6,0 |
| Detergent compartment | 2 |
| Programme duration (Min.) | 200 |
| Laundry type / Descriptions | Dirty cotton and flax textiles. (Underwears, linen, tablecloth, towel (maximum 3,0 kg), bedclothes, etc. |
| COTTON 40 C° | |
| Washing temperature (°C) | 40° |
| Maximum dry laundry amount (kg) | 6,0 |
| Detergent compartment | 2 |
| Programme duration (Min.) | 195 |
| Laundry type / Descriptions | Dirty cotton and flax textiles. (Underwears, linen, tablecloth, towel (maximum 3,0 kg), bedclothes, etc. |
NOTE: PROGRAM DURATION MIGHT CHANGE ACCORDING TO THE AMOUNT OF LAUNDRY, TAP WATER, AMBIENT TEMPERATURE AND SELECTED ADDITIONAL FUNCTIONS.
ECO 20°
| Washing temperature (°C) | 20° |
| Maximum dry laundry amount (kg) | 3,0 |
| Detergent compartment | 2 |
| Programme duration (Min.) | 96 |
| Laundry type / Descriptions | Less dirty, cotton and linen textiles. (Underwear, bedsheet, tablecloth, towel (max. 2 kg) bedcloth, etc. |
EASY CARE
| Washing temperature (°C) | 40° |
| Maximum dry laundry amount (kg) | 3,0 |
| Detergent compartment | 2 |
| Programme duration (Min.) | 110 |
| Laundry type / Descriptions | Very dirty or synthetic-mixed textiles. (Nylon socks, shirts, blouses, synthetic-including trousers etc.) |
WOOL
| Washing temperature (°C) | 30° |
| Maximum dry laundry amount (kg) | 2,0 |
| Detergent compartment | 2 |
| Programme duration (Min.) | 39 |
| Laundry type / Descriptions | Woollen laundries with machine wash labels. |
RINSE
| Washing temperature (°C) | - |
| Maximum dry laundry amount (kg) | 6,0 |
| Detergent compartment | - |
| Programme duration (Min.) | 36 |
| Laundry type / Descriptions | If you want to additionally rinse your laundries upon completion of washing operation, you may use this programme for any kind of laundries. |
NOTE: PROGRAM DURATION MIGHT CHANGE ACCORDING TO THE AMOUNT OF LAUNDRY, TAP WATER, AMBIENT TEMPERATURE AND SELECTED ADDITIONAL FUNCTIONS.
SPIN
| Washing temperature (°C) | - |
| Maximum dry laundry amount (kg) | 6,0 |
| Detergent compartment | - |
| Programme duration | 15 |
| Laundry type / Descriptions | If you want to additionally wring your laundries upon completion of washing operation, you may use this programme for any kind of laundries. |
HAND WASH/DELICATE
| Washing temperature (°C) | 30° |
| Maximum dry laundry amount (kg) | 2,0 |
| Detergent compartment | 2 |
| Programme duration (Min.) | 90 |
| Laundry type / Descriptions | Laundry recommended for hand wash or sensitive laundry. |
SPORTS WEAR
| Washing temperature (°C) | 30° |
| Maximum dry laundry amount (kg) | 3,0 |
| Detergent compartment | 2 |
| Programme duration (Min.) | 80 |
| Laundry type / Descriptions | Sportswear. |
MIXED
| Washing temperature (°C) | 30° |
| Maximum dry laundry amount (kg) | 3,0 |
| Detergent compartment | 2 |
| Programme duration (Min.) | 79 |
| Laundry type / Descriptions | Dirty cotton, synthetics, colour and flax textiles can be washed together. |
NOTE: PROGRAM DURATION MIGHT CHANGE ACCORDING TO THE AMOUNT OF LAUNDRY, TAP WATER, AMBIENT TEMPERATURE AND SELECTED ADDITIONAL FUNCTIONS.
BLOUSES / SHIRTS
| Washing temperature (°C) | 60° |
| Maximum dry laundry amount (kg) | 3,0 |
| Detergent compartment | 2 |
| Programme duration (Min.) | 105 |
| Laundry type / Descriptions | Dirty cotton, synthetic and synthetic-mixed shirts and blouses can be washed together. |
DAILY 60 min.
| Washing temperature (°C) | 60° |
| Maximum dry laundry amount (kg) | 3,0 |
| Detergent compartment | 2 |
| Programme duration (Min.) | 60 |
| Laundry type / Descriptions | You can wash your dirty cotton, colour and flax textiles at 60°C in 60 minutes. |
If you have the rapid washing auxiliary function in your machine, then if you put 2 kg or less laundry in your machine, your machine will automatically wash for laundry for 30 minutes.
NOTE: PROGRAM DURATION MIGHT CHANGE ACCORDING TO THE AMOUNT OF LAUNDRY, TAP WATER, AMBIENT TEMPERATURE AND SELECTED ADDITIONAL FUNCTIONS.
RAPID 15 min.
| Washing temperature (°C) | 30° |
| Maximum dry laundry amount (kg) | 2,0 |
| Detergent compartment | 2 |
| Programme duration (Min.) | 15 |
| Laundry type / Descriptions | You can wash your slightly stained, cotton, colured and flax textile within only 15 minutes. |
NOTE: As the washing period is short, less amount of detergent is required to be used compared to other programmes. The programme period will increase if your machine detects instable loading. You can open the door of your machine 2 minutes after the completion of washing operation. (The duration of 2 minutes required to open the door of your machine is not included in the washing period.)
NOTE: PROGRAM DURATION MIGHT CHANGE ACCORDING TO THE AMOUNT OF LAUNDRY, TAP WATER, AMBIENT TEMPERATURE AND SELECTED ADDITIONAL FUNCTIONS.
Unplug your machine before starting the maintenance and cleaning of your machine.
Turn the tap water off before starting the maintenance cand cleaning of your machine.
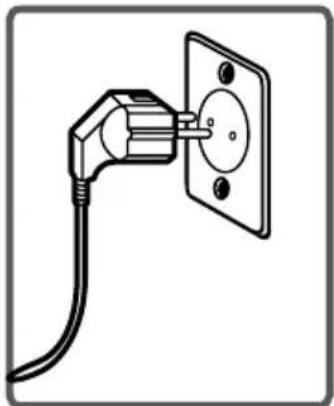
natural_image
Simple line drawing of an electrical outlet with a plug and socket (no text or symbols)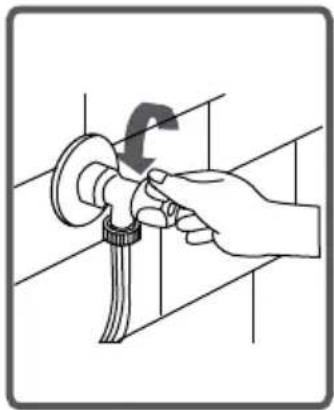
natural_image
Illustration of a hand using a tool to adjust or install a mechanical component (no text or symbols visible)CAUTION: Your machine's parts might be damaged if cleaners with solvent agents are used.
Do not use cleaning materials with solvent agents.
Filters to avoid dirt and foreign substances in the water from penetrating into the machine are available both on the side of faucet and on the ends of water valves along the water inlet
hose of your machine.
If your machine cannot intake sufficient amount of water despite water faucet being open, these filters should be cleaned.
(It is recommended that you clean your pump filter once in 2 months.)
- Detach the water inlet hoses.
- Remove the filters on water inlet valves using pliers and then clean it with a brush in water.
- Disassemble the filters on the side of faucet side of water inlet hoses manually and clean it.
• Having the filters cleaned, you can fit them in the same way reversely.
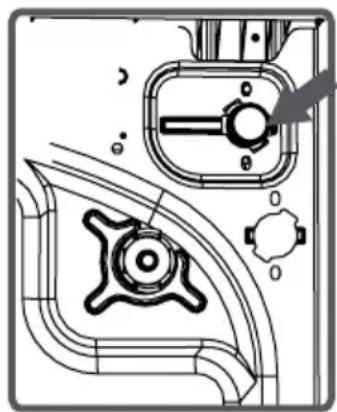
natural_image
Technical line drawing of a mechanical component with no visible text or symbols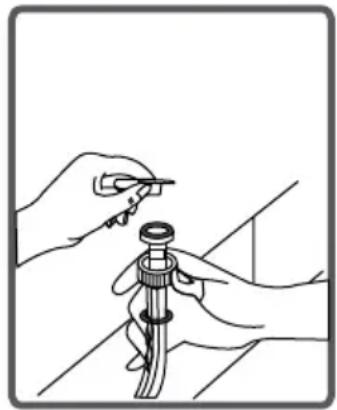
natural_image
Illustration of hands using a tool to adjust or install a mechanical component (no text or symbols visible)CAUTION:

Filters of water inlet valves may be clogged due to contaminated water faucet or lack of necessary maintenance or valves may be broken down, causing water leaking into your machine continuously.
The breakdowns that may arise due to these reasons are out of the scope of warranty.
A filter system which avoids threads remaining from your laundries and tiny materials from entering into the pump during water discharging operation carried out by your machine after completing washing so prolonging the lifecycle of your pump is available. It is recommended that you clean your pump filter once in 2 months. To clean pump filter:
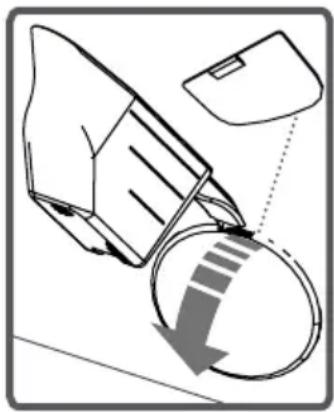
- To open the pump cover, you can use the powder detergent spade (*) or liquid detergent level plate coming out of your machine.
- Fit the end point of the plastic part to the gap of the pump cover and push it back. This will open the cover.
- Before opening the filter cover, settle a vessel in front of the filter cover to prevent the water remained in the machine from flowing on the ground.
- Loosen the filter cover in counter-clockwise and then empty water.
Note: You may have to empty the water collection vessel several times according to the amount of water in the machine.
natural_image
Diagram showing a mechanical component with a circular arrow indicating direction, no text or symbols present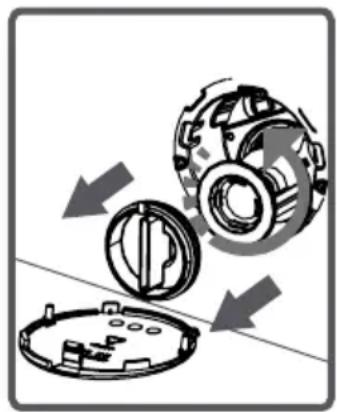
natural_image
Mechanical assembly diagram showing a disassembled component with arrows indicating motion (no text or symbols)(*) Machinery specifications may vary depending on the product purchased.
CHAPTER -7: MAINTENANCE AND CLEANING OF YOUR MACHINE (PUMP FILTER)
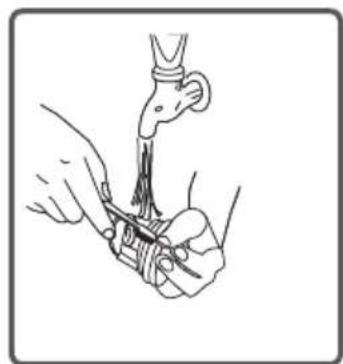
- Clean the foreign materials in the filter with a brush.
• After cleaning the filter, fit the filter cover and tighten it by rotating it in clockwise direction.
- While closing the pump cover, ensure that the parts on the inner side of the cover to match the holes on the front panel side.
- You can reattach the pump cover in the reverse order that you removed it.
natural_image
Illustration of a medical procedure showing hand placement on a surgical instrument (no text or symbols present)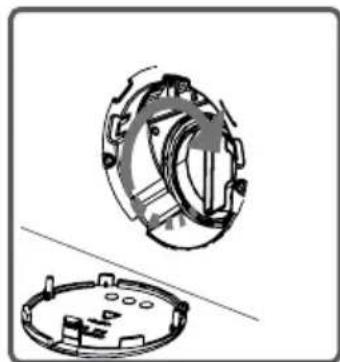
natural_image
Technical illustration of a mechanical component with two views: top shows internal gear assembly, bottom shows circular housing (no text or symbols)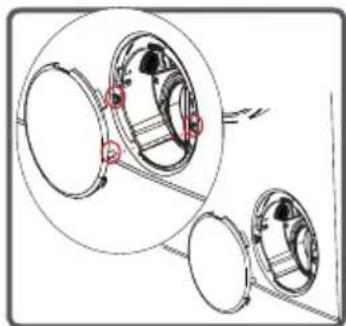
natural_image
Mechanical assembly diagram showing two circular components with red fasteners and a connecting rod (no text or labels)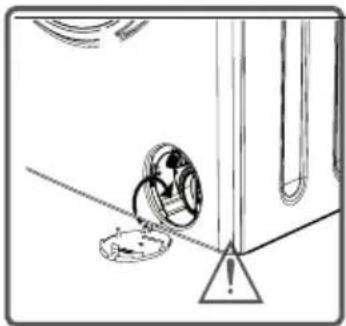
natural_image
Simple line drawing of a mechanical component with a triangular base and circular opening, no text or symbols present.WARNING!
As water in the pump may be hot, wait un-til it cools down.
Your detergents may deposit residue in detergent drawer and housing of detergent drawer over time.
To clean the residue formed, disassemble the detergent drawer in particular periods. It is recommended that you clean your pump filter every 2 months.
To eject the detergent drawer:
- Pull the detergent drawer up to the end
- Keep on pulling by depressing on the section shown below in the detergent drawer and keep pulling and then unsettle the detergent drawer.
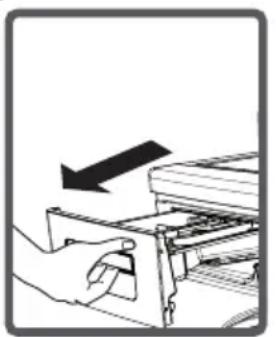
natural_image
Illustration of a hand inserting a device into a rack with an arrow indicating the process (no text or symbols present)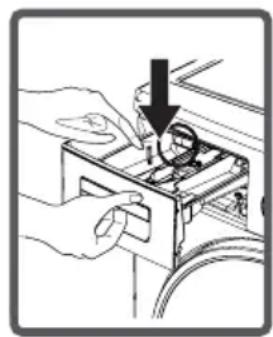
natural_image
Illustration of hands installing or adjusting a mechanical component with a downward arrow (no text or symbols)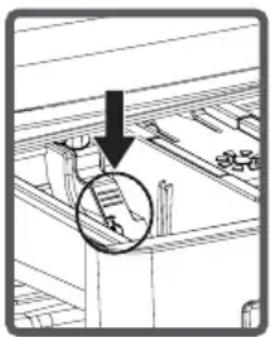
natural_image
Diagram showing a mechanical assembly with a downward arrow and a circled detail (no text or symbols)- Flush it using a brush.
- Collect residues in the housing of the detergent drawer without dropping them inside the machine.
- Assemble the detergent drawer after drying it using a towel or dry cloth.
- Do not wash your detergent drawer in dishwasher.

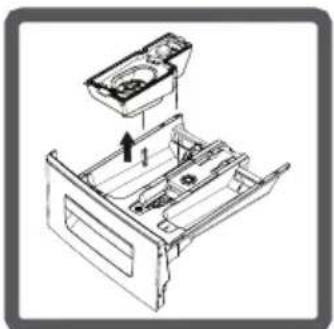
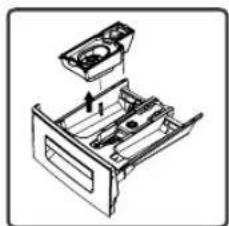
Liquid Detergent Apparatus (\*)
Take out the liquid detergent level apparatus for cleaning and maintenance purposes as shown in the picture and clean well detergent residues. Put the apparatus back into its place. Make sure no residues are left inside.
(*) Machinery specifications may vary depending on the product purchased.
natural_image
Technical line drawing of a mechanical device with an upward arrow indicating assembly or operation (no text or symbols present)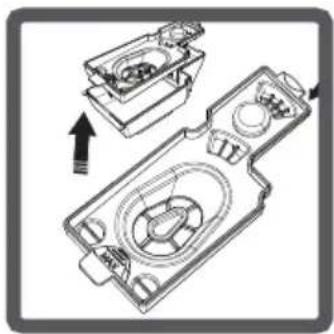
natural_image
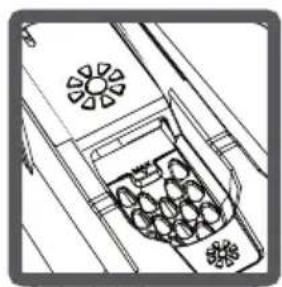
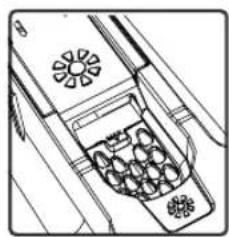
Technical line drawing of a mechanical device with internal components and an arrow indicating assembly (no text or symbols)Flush stopper
Disassemble the detergent drawer. Disassemble the flush stopper and clean the softener residues completely. Refit the flush stopper after cleaning it. Check whether it has settled properly.
natural_image
Technical line drawing of a cabinet or appliance with internal compartments and fan-shaped elements (no text or symbols)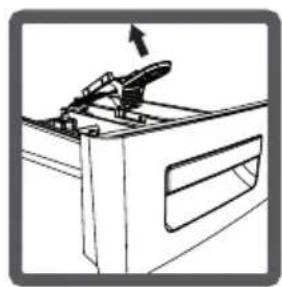
natural_image
Line drawing of a mechanical device with an arrow indicating upward motion (no text or symbols)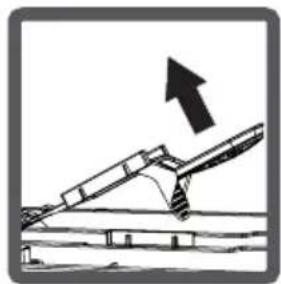
natural_image
Diagram of an inclined plane with an upward arrow indicating motion or force (no text or symbols present)Body
Clean the outer body of your machine with warm water and a non-inflammable cleaning agent that will not abrade the body of your machine. After rinsing with some water, dry it using a soft and dry cloth.
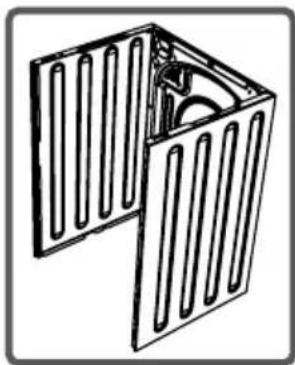
natural_image
Technical line drawing of a mechanical component with slats and a central housing (no text or symbols)Drum
Do not leave metallic objects such as needles, paper clips, coins etc. in your machine. This objects lead to formation of rust stains in the drum. To clean such rust stains, use a non-chlorine cleaning agent and follow the instructions of manufacturers of the cleaning agent. Never use wire wool or similar hard objects for cleaning rust stains.
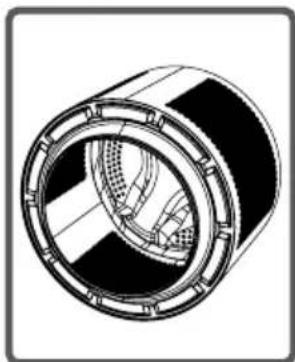
natural_image
Cross-sectional diagram of a cylindrical mechanical component with internal structural details (no text or symbols)All repairing operations required for your machine should be carried out by our authorised service. If your machine requires a repair or if you cannot remove the fault by the help of the information provided as follows:
• Unplug your machine.
• Turn the water faucet off.
| FAULT | POSSIBLE CAUSE | TROUBLE-SHOOTING |
| Your machine does not start. | It is not plugged. Plug it. | |
| Fuse blown. | Replace the fuses. | |
| Electricity cut-off. | Check mains power. | |
| Start/pause button not pressed. | Press on Start/Pause button. | |
| Programme dial ‘stop’ position. | Switch the programme button to the desired position. | |
| The machine door is not completely closed. | Close the machine door. | |
| Your machine does not intake water. | Water tap is turned off. | Turn your faucet on. |
| Water inlet hose may be twisted. | Check water inlet hose and untwist. | |
| Water inlet hose clogged. | Clean water inlet hose filters. (*) | |
| Valve inlet filter clogged. | Clean the valve inlet filters. (*) | |
| The machine door is not completely closed.. | Close the machine door. |
(*) See the chapter regarding maintenance and cleaning of your machine.
| FAULT | POSSIBLE CAUSE | TROUBLE-SHOOTING |
| Your machine does not discharge water. | Discharging hose clogged or twisted. | Check the discharging hose, then either clean or untwist. |
| Pump filter clogged. | Clean the pump filter. (*) | |
| Laundry settled in the machine unevenly | Spread your laundry in the machine evenly. | |
| Your machine vibrates. | The feet of your machine have not been adjusted. | Adjust the feet on your machine. (**) |
| Safety stays fitted for transportation not disassembled. | Disassemble the safety stays of your machine. (**) | |
| Less amount of laundry in the appliance. | This will not block operation of your machine. | |
| Your machine is overloaded with laundry or laundry settled unevenly.. | Prevent your machine from resting on hard surfaces. | |
| Your machine rests on a hard surface. | Prevent your machine from resting on hard surfaces. |
(*) See the chapter regarding maintenance and cleaning of your machine.
(**) See the chapter regarding installation of your machine.
| FAULT | POSSIBLE CAUSE | TROUBLE-SHOOTING |
| Excessive foam is formed in the detergent drawer. | Excessive amount of detergent used. | Press on Start/Pause button. To eliminate foam formation, mix a spoon of softener with half litres of water, and pour the mixture in the detergent drawer. After 5-10 minutes, press on Start/Pause button again. In your next washing operation, Adjust the detergent dose accordingly. |
| Wrong deter-gent used. | Use detergents produced only for automatic washing machines in your machine. | |
| Unsatisfactory washing result. | The contamination degree of your laundries does not match the programme you have chosen. | Select the programme appropriate for the contamination degree of your laundries. (See programme table) |
| Amount of detergent used insufficient. | Adjust the amount of detergent based on the amount and contami-nation degree of your laundries. | |
| Laundries in ex-cess of maximum capacity put in your machine. | Load your machine with laundries, amount of which will not exceed maximum laundry ca-pacity. | |
| Unsatisfactory washing result. | Water being hard. (Contaminated, lime water etc.) | Adjust the amount of detergent based on the instruction of detergent manufacturer. |
| Laundries distributed in your machine non-homogenously. | Spread your laun-dries in the ma-chine properly and homogeneously. | |
| As soon as the ma-chine is loaded with water, water dis-charges. | The end of water discharging hose is too low for the machine. | Set the water dis-charging hose on ap-propriate height. (**) |
| No water appears in the drum during washing. | No fault. Water is in the unseen part of the drum. | — |
| Laundries have detergent residues on them. | Non-dissolving particles of some detergents may stick to your laundries as white spots. | Perform an extra rinsing by setting your machine to “Rinsing” programme, or clean the spots using a brush after your laun-dries dry. |
| Grey spots appear on the laundries. | The reason for such spots may be oil, cream or ointment. | Apply the maximum amount of detergent instructed by the deter-gent manufacturer in the next washing operation. |
(**) See the chapter regarding installation of your machine.
| FAULT | POSSIBLE CAUSE | TROUBLE-SHOOTING |
| Spinning operation is not performed or runs late. | No fault. Unbalanced load control system has been activated. | Unbalanced load control system will try to spread your laundries homogeneously.Wringling operation will begin after your laundry is spread. Place the laundry in the machine in a balanced fashion the next time. |
Your machine is equipped with the systems which are capable of both taking necessary precautions and warning you in case of any breakdown by means of continuous self-checking during washing operations.
| TROUBLE CODE | POSSIBLE FAULT | WHAT TO DO | |
| EC | 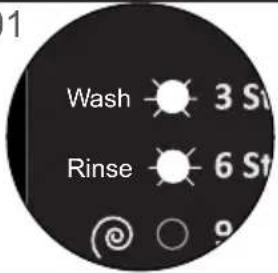 | The door of your machine is left open. | Close the machine door. If your machine persists to indicate fault, turn off your machine, unplug it and contact the nearest authorised service immediately. |
| E1 | 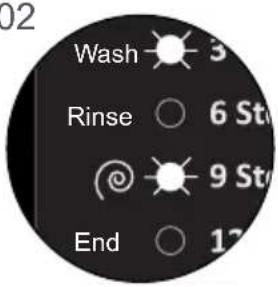 | The water pressure or the water level inside the machine is low. | Turn on the faucet. Mains water may be cut-off. If the problem still continues, your machine will stop after a while automatically. Unplug the machine, turn off your faucet and contact the nearest authorised service. |
| EC | 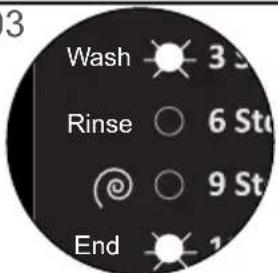 | The pump is faulty or pump filter is clogged or electrical connection of the pump is faulty. | Clean the pump filter. If the problem persists, contact the nearest authorised service. (*) |
| EC | 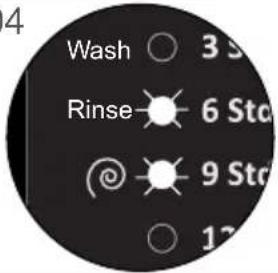 | Your machine has excessive amount of water. | Your machine will discharge water by itself. Pursuant to discharging operation, turn off your machine and unplug it. Turn off your faucet and contact the nearest authorised service. |
(*) See the chapter regarding maintenance and cleaning of your machine.
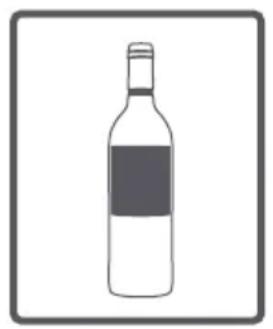
Alcoholic drinks: Spotted area should initially be washed using cold water, and then be wiped with glycerine and water and rinsed with vinegar-mixed water.
Shoe shine: Spot should be rubbed out gently without damaging the cloth and be scrubbed and rinsed with detergent. If not removed, it should be scrubbed using the mixture obtained by adding 1 scale of alcohol (96°) into 2 scales of water, and then be washed with warm water.
Tea and coffee: Stretch the spotted area of your laundry throughout the opening of a vessel, and pour hot water as much as the type of your laundry can resist.
In case the type of your laundry permits, wash with bleacher.
Chocolate and cocoa: After submerging your laundries in cold water and rubbing it using soap or detergent, wash it in temperature that fabric type of your laundry can resist. In case the oil stain is still visible, wipe with oxygen water (3%).
natural_image
Simple line drawing of a wine bottle with a label (no text or symbols on the bottle itself)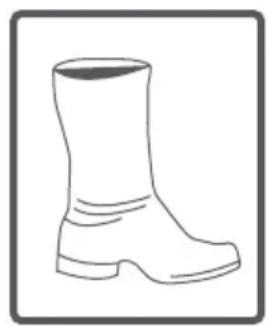
natural_image
Simple line drawing of a boots (no text or symbols)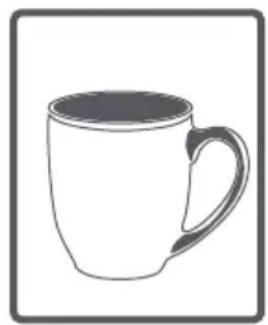
natural_image
Simple line drawing of a mug with handle and side rim, no text or symbols present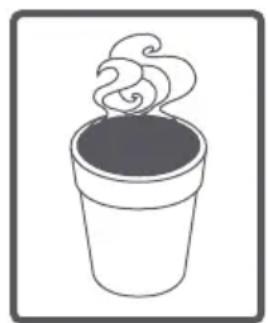
natural_image
Simple line drawing of a steaming cup (no text or symbols)Tomato paste: After rubbing out the dried substances without damaging your laundry, submerge it in water for 30 minutes, and then scrub and wash it with detergent.
Bouillon-Egg: Remove dried spot residues on your laundry, and then wipe it with a sponge or soft cloth submerged in cold water previously. Scrub with detergent, wash with diluted bleacher.
Grease and oil stains: Firstly, wie the residues. Scrub the spot with detergent and wash it with warm soapy water.
Mustard: Apply glycerine on spotted area. Scrub with detergent and wash. If the spot cannot be removed, wipe with alcohol. (For synthetic and colour fabrics, a mixture of 1 scale of alcohol and 2 scales of water should be used)
natural_image
Simple line drawing of a tomato (no text or symbols)
natural_image
Simple line drawing of an egg with a gear inside, no text or symbols present
natural_image
Simple line drawing of a pitcher with liquid and handle (no text or symbols)
natural_image
Simple icon of a trash bin with a lid, no text or symbols presentFruit: Stretch the spotted area of your laundry throughout the opening of a vessel, and pour cold water on it. Do not pour hot water on the spot. Wipe with cold water and apply glycerine. Allow 1-2 hours, wipe with a few drops of white vinegar, and rinse it.
Grass stain: Wipe the stained part with detergent. If the type of your cloth permits bleacher using, wash with bleacher. Wipe your woollen laundries with alcohol. (For colour fabrics, a mixture of 1 scale of pure alcohol and 2 scales of water)
Oil paint: Spot should be removed by applying thinner before drying. Then it should be wiped with detergent and washed.
Burn stain: If your laundry is suitable for applying bleacher, you can add bleacher into washing water. For wool fabric, a cloth previously submerged in oxygen water should be covered over the stain and it should be ironed after putting a dry cloth on this cloth. It should be washed after being rinsed properly.

natural_image
Simple line drawing of a peach with a leaf, enclosed in a square frame (no text or symbols)
natural_image
Simple line drawing of two curved lines inside a square frame (no text or symbols)
natural_image
Line drawing of a paintbrush with bristles and handle (no text or symbols)
natural_image
Simple flame icon illustration inside a square frame (no text or symbols)Blood stain: Submerge your laundries in cold water for 30 minutes. If the stain is not removed, then submerge in a mixture of water and ammoniac (3 spoons of ammoniac in 4 litres of water) for 30 minutes.
Crema, ice cream and milk: Submerge your laundries in cold water and scrub the spotted area with detergent. If the spot is not removed, apply bleacher to the extent suitable for your laundries. (Do not use bleacher for colour laundries.)
Mould: Mould stains should be cleaned as soon as possible. Stain should be washed with detergent water, nevertheless if it cannot be removed, it should be wiped with oxygen water (3%).
Ink: Subject the spotted area to running water and wait until the flow of inked water ends. Then wipe it with lemon-added water and detergent, and wash it after allowing 5 minutes.
natural_image
Abstract black ink splatter or splash design on white background (no text or symbols)
natural_image
Illustration of a waffle ice cream cone with swirl frosting (no text or symbols)
natural_image
Simple line drawing of a mushroom with a leafy base (no text or symbols)
natural_image
Line drawing of a pen with a handle and eraser, enclosed in a square frame (no text or symbols)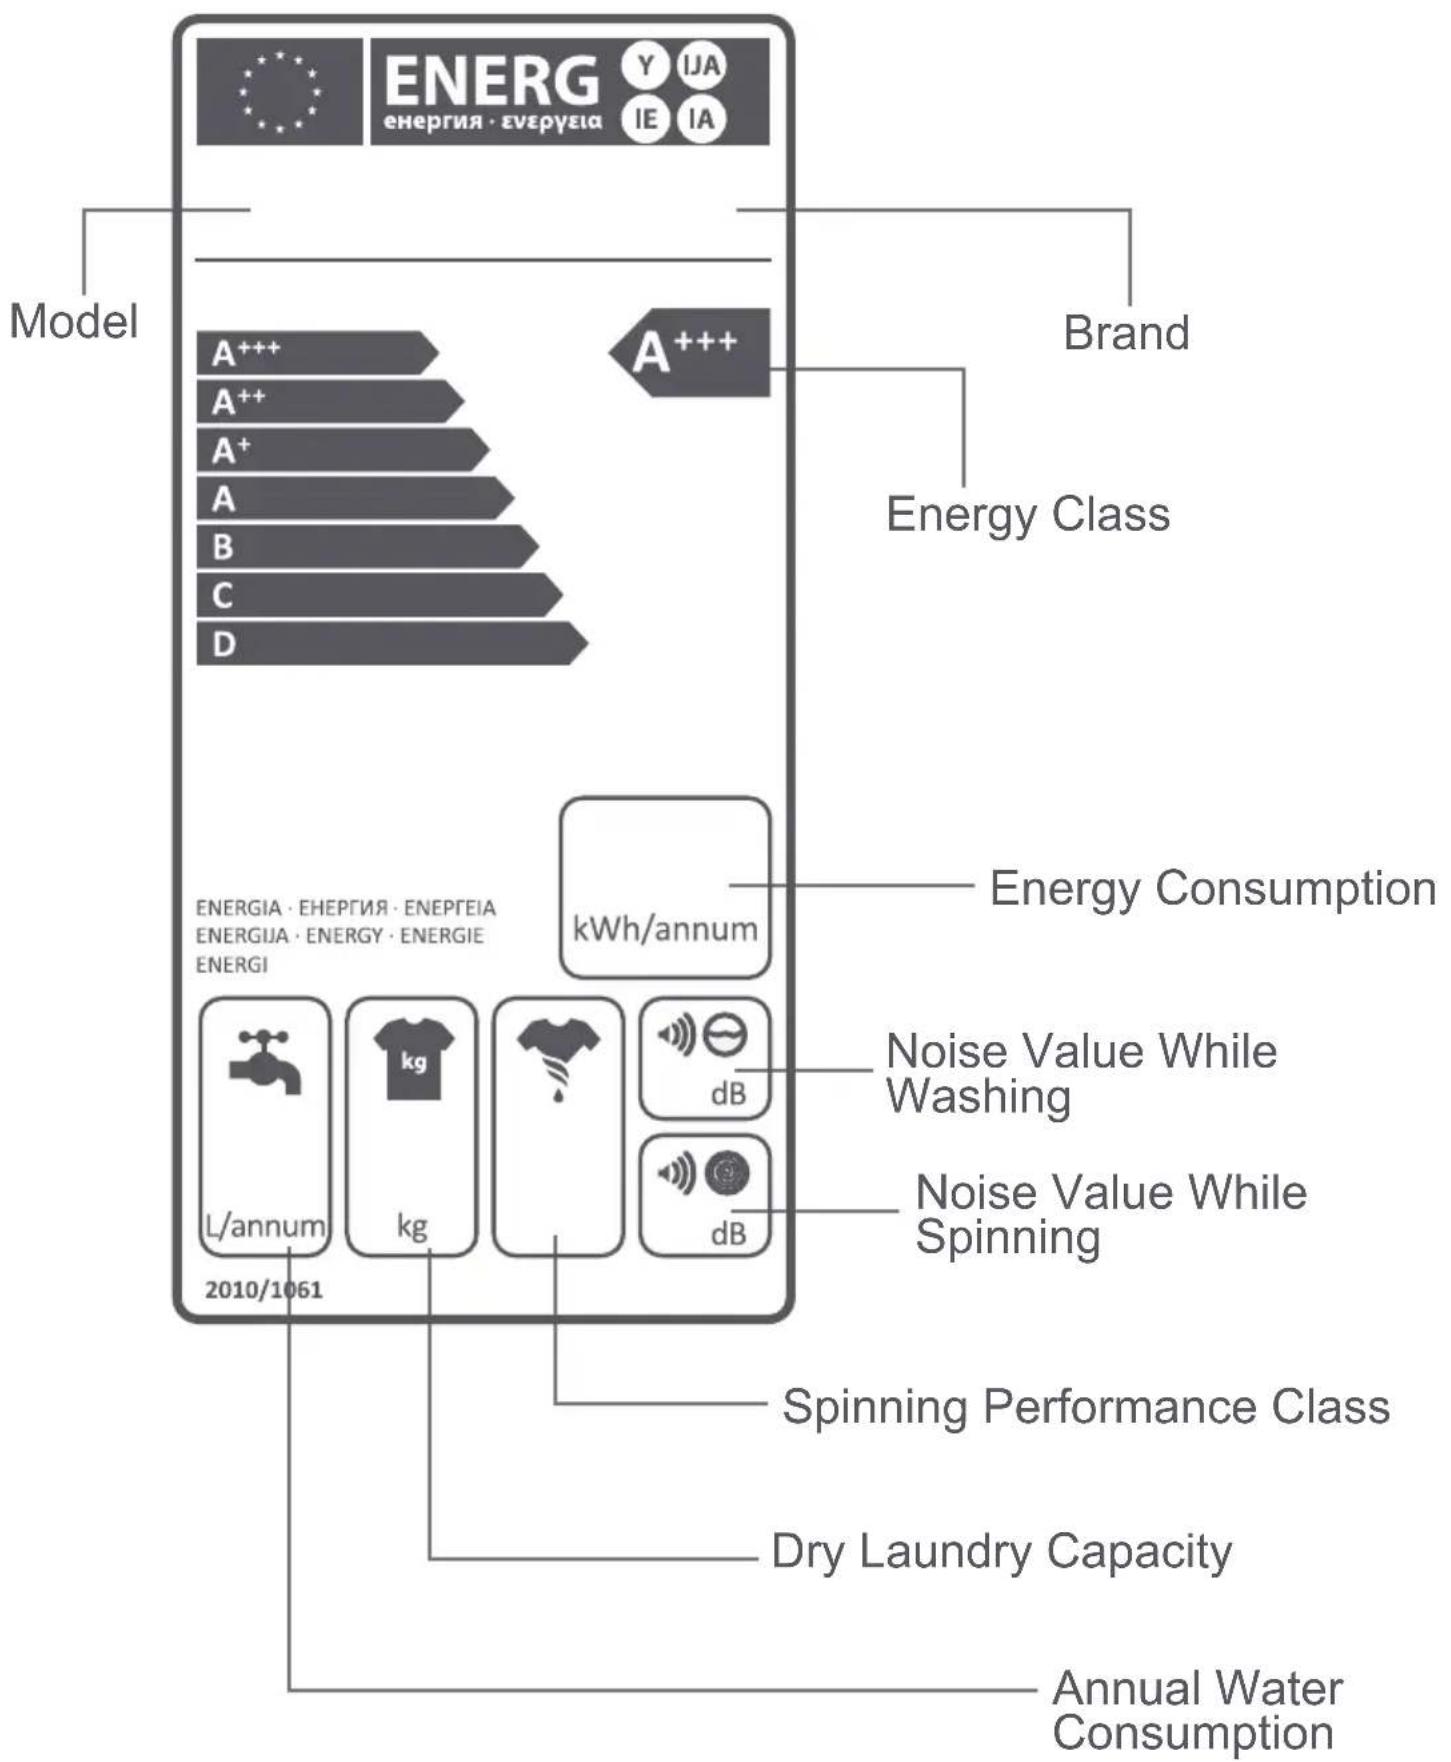
flowchart
graph TD
    A["Model"] --> B["A+++"]
    B --> C["A++"]
    C --> D["A+"]
    D --> E["A"]
    E --> F["B"]
    F --> G["C"]
    G --> H["D"]
    H --> I["A+++"]
    I --> J["Brand"]
    J --> K["Energy Class"]
    K --> L["Energy Consumption"]
    L --> M["kWh/annum"]
    M --> N["L/annum 2010/1061"]
    M --> O["kg"]
    M --> P["dB"]
    P --> Q["Noise Value While Washing"]
    Q --> R["Noise Value While Spinning"]
    R --> S["dB"]
    S --> T["Spinning Performance Class"]
    T --> U["Dry Laundry Capacity"]
    U --> V["Annual Water Consumption"]
Energy and water consumption may vary based on water pressure, water hardness, water temperature, ambient temperature, laundry amount, additional function selection, voltage fluctuations. It will reduce energy and water consumption to use your machine with the laundry capacity proposed for the selected programme, wash your laundries less dirty or daily laundries in short programmes, carry out cleaning and maintenance periodically, use your machine in convenient time intervals specified by electricity vendor.
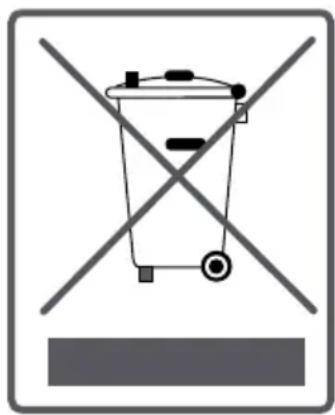
This symbol on the product or package implies that the product should not be treated as domestic waste. Instead, it should be delivered to applicable waste collection places recycling electrical and electronic equipment.
You will contribute to avoid potential negative results regarding environment and human health, which will arise due to wrong waste procedure for the product by ensuring that this product is annihilated properly.
Recycling materials will help natural resources be preserved.
For more detailed information regarding recycling of this product, please contact local municipality, domestic waste annihilation service or the shop you have purchased the product.
CE
52243446

SRB
WM1062Y
UPUTSTVO ZA UPOTREBU MAŠINA ZA PRANJE VEŠA
SRPSKI
PRIJATELJSKI ODNOS PREMA OKOLINI 3
POGLAVLJE 1: PRE UPOTREBE UREĐAJA 4
natural_image
Illustration of a hand using a tool to clean or inspect a surface with a funnel (no text or symbols)
natural_image
Illustration of a hand holding a pen and a small object, no text or symbols present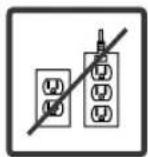
OPASNOST OD POŽARA!
- Ne držite pored mašine zapaljive tekućine.
- Hemijska sredstva za uklanjanje boja koja sadrže sumpor mogu da uzrokuju koroziju. Ne koristite takva hemijska sredstva.
- Ne koristite sredstva koja sadrže otapala.
- Pre stavljanja odeće u mašinu proverite odeću jer predmeti zaostali u odeći (šibice, upaljači, spojnice za papir... itd.) mogu da oštete uređaj.
SRPSKI
OPASNOST OD OZLEDA!
- Ne penjite se na gornju ploču mašine. U slučaju lomljenja gornje ploče možete da se ozledite.
- Za vreme postavljanja (instalacije) mašine posložite kablove, creva i pospremite pakovanje proizvoda da za vreme instalacije ne bi pali preko njih.
Maknite šarafe izvlačenjem prema van. U rupe sa kojih ste skinuli transportne šarafe postavite plastične čepiće koji su priloženi zajedno s uputstvima i garantnim listom. Sačuvajte transportne šarafe koje ste maknuli sa mašine za slučaj ponovnog transporta.
Oslobodite šarafe odvrtanjem u smeru suprotnom od smera kazaljke na času pomoću odgovarajućeg ključa ili šarafcigera.
natural_image
Diagram of a refrigerator with internal components and a magnified view showing a valve or connector (no text or symbols present)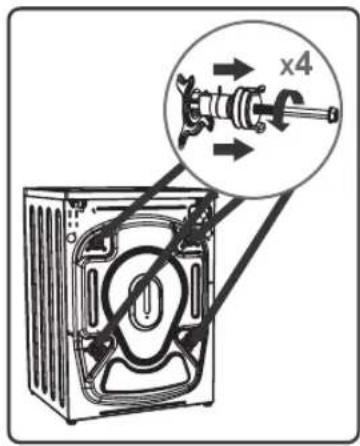
- Nameštajte nožicu okrećući je levo ili desno.
-
Nakon što ste postigli stabilnost mašine, pričvrstite plastični šaraf zavrtanjem prema gore
-
Za podešavanje stabilnosti mašine, nikada pod nogice ne postavljajte papir ili slične materijale da bi izravnali neravnine na podu.
- Pripazite da prilikom čišćenja poda ispod mašine ne promenite stabilnost mašine za njen daljni rad.
natural_image
Line drawing of a washing machine with crossed-out circular components (no text or symbols)POGLAVLJE 3: INSTALACIJA MAŠINE Električno povezivanje
natural_image
Line drawing of a washing machine with a close-up inset showing internal components (no text or symbols)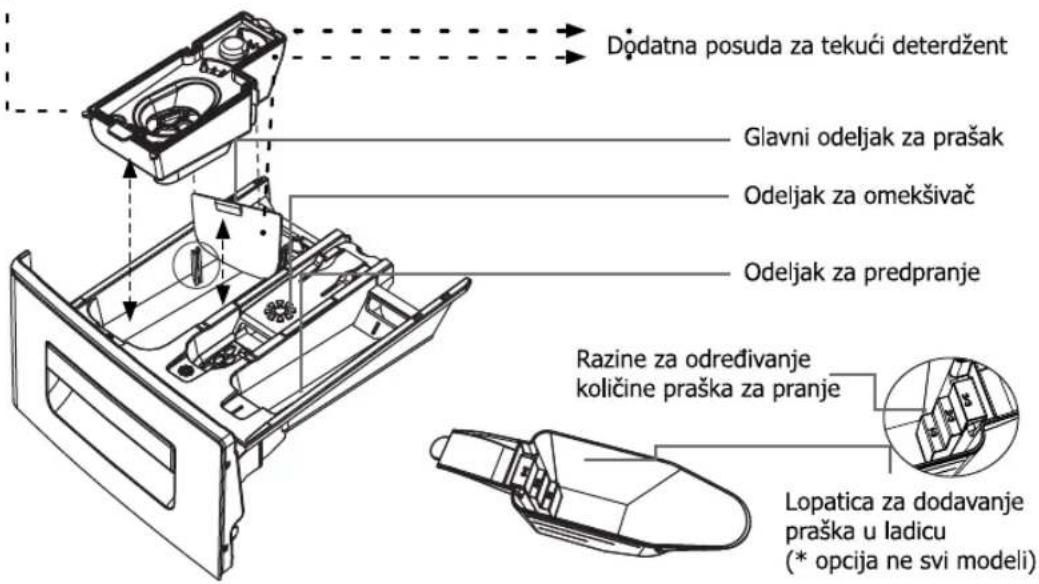
ODELJCI PRETINCA ZA PRAŠAK
natural_image
Technical line drawing of a mechanical device with two views: top shows internal components, bottom shows external housing (no text or symbols)Odeljak za omekšivač
Ovaj odjeljak ladice koristite isključivo za omekšivač. Sledite preporuke proizvođača omekšivača dane na pakovanju proizvoda o količini koju ćete da koristite za pranje rublja. Omekšivač stavljajte do oznake unutar odeljka. Gušći omekšivači trebali bi da se pomešaju i s malo vode pre sipanja omekšivača u odeljak. To je zato što gušći omekšivači mogu da začepe sifon i spreče otecanje omekšivača.
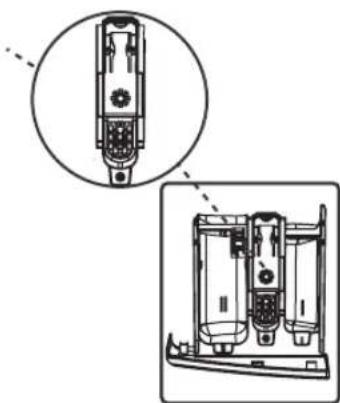
natural_image
Technical line drawing of a mechanical device with two views: top shows internal components, bottom shows assembly (no text or symbols)natural_image
Technical line drawing of a mechanical device with cross-sectional view and exploded view (no text or symbols)POGLAVLJE 4: UPRAVLJAČKA PLOČA Programator
- Pomoću programatora možete da odaberete program kojim želite da perete rublje. Možete podešavati i birati program okretanjem programatora levo ili desno. Pripazite kod podešavanja da se znak na programatoru točno poklapa sa izabranim programom. Ako za vreme rada mašine okrenete taster programatora na "STOP" (isključeno), podešeni program završava s pranjem kao nepotpun.
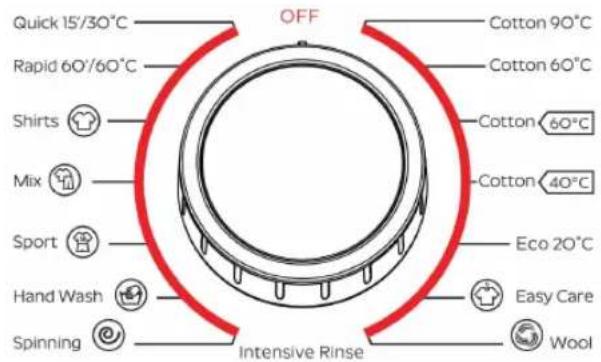
Upravljačka ploča
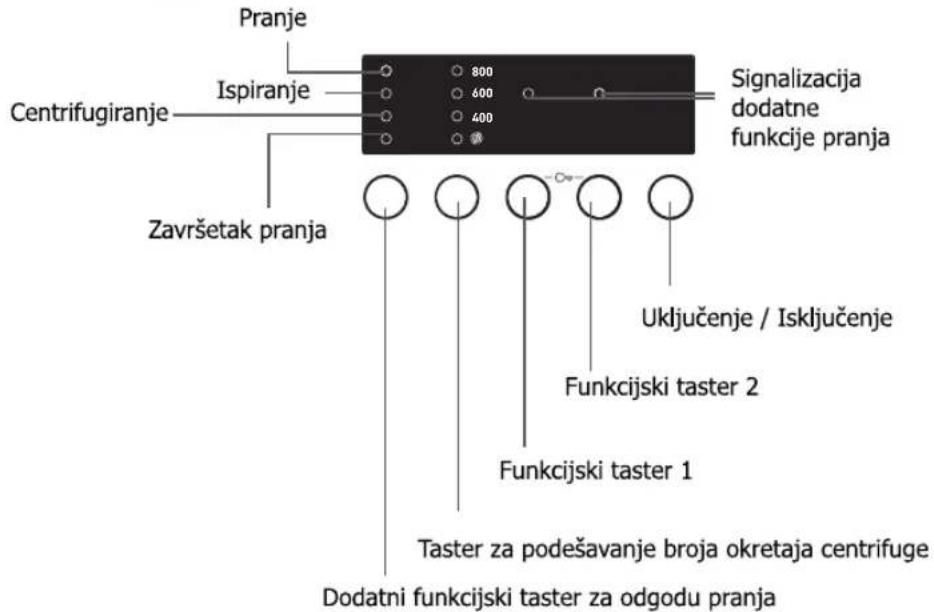
Na elektronskom ekranu možete da vidite temperaturu vode, odabranu brzinu centrifuge, preostalo vreme do kraja programa pranja, koje su dodatne funkcije odabrane i da li su vrata mašine zaključana ili ih je moguće otvoriti. U slučaju zastoja i problema u radu, na ekranu možete da vidite određene poruke i simbole koji ukazuju na mogući problem. Kada je odabrani program pranja završen, na ekranu će da bude prikazana poruka "Finished".
natural_image
Line drawing of a washing machine with ventilation slots and a circular button (no text or symbols)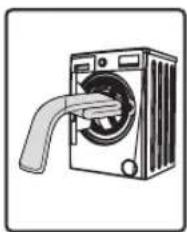
natural_image
Illustration of a washing machine with a handle inserting into it (no text or symbols)| VRSTA VEŠA: | Težina (gr) |
| Peškiri | 200 |
| Posteljina | 500 |
| Kućni ogrtači | 1200 |
| Pokrivači | 700 |
| Jastučnice | 200 |
| Donji veš | 100 |
| Stoljnjaci | 250 |
natural_image
Diagram of a hand inserting a device into a rack, with an arrow indicating direction (no text or symbols present)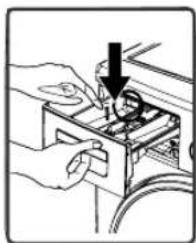
natural_image
Illustration of hands installing or adjusting a mechanical component with a downward arrow (no text or symbols)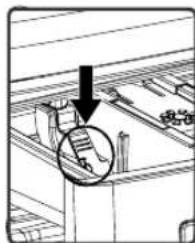
- Pretinac dobro operite starom četkicom za zube u obilnoj količini vode.
- Višak deterdženta uklonite da bi se izbeglo rasipanje unutar mašine.
- Nakon što se pretinac za deterdžent osušio, vratite pretinac na isti način natrag u mašinu.
NAPOMENA: nemojte prati pretinac za prašak u sudomašini.
DODATNA POSUDA ZA TEKUĆI DETERDŽENT (\*opcija, ne svi modeli)
Izvadite dodatni nastavak za tekući deterdžent kao što je prikazano na slici i očistiti ostatke deterdženta. Nakon čišćenja vratite nastavak u pretinac za deterdžent.
natural_image
Line drawing of a mechanical device with an open lid and internal compartments (no text or symbols)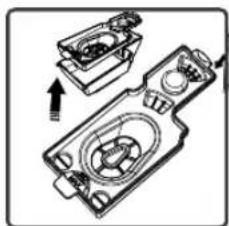
natural_image
Technical line drawing of a mechanical assembly with no visible text or symbolsSIFON ZA DOZIRANJE OMEKŠIVAČA ZA VEŠ
Izvucite pretinac za deterdžent. Maknite sifon (odvojiva plastika) i temeljito očistite ostatake omekšivača. Vratite očišćeni sifon na svoje mesto. Proverite da li je pravilno postavljen.
natural_image
Line drawing of a mechanical device with internal components and fan-like elements (no text or symbols)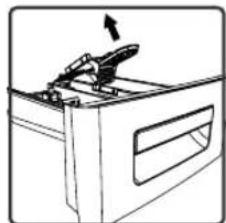
natural_image
Line drawing of a cabinet with an arrow indicating motion (no text or symbols)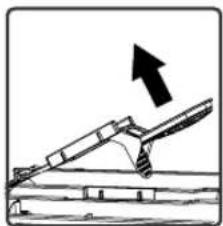
natural_image
Diagram of a mechanical lever system with an upward arrow indicating motion (no text or symbols present)SRPSKI
KUĆIŠTE MAŠINE
Kućište mašine obrišite mekom krpom navlaženoj u mlakoj vodi. Nakon ispiranja sa čistom vodom, obrišite kućište mekanom i suvom krpom.
BUBANJ
Ne ostavljajte metalne dijelove poput spajalica ili kovanica u mašinu. Ovi delovi stvaraju mrlje hrđe na bubnju. Kako bi sprečili stvaranje hrđe, koristite sredstva za čišćenje bez hlora i sledite uputstva proizvođača. Za čišćenje hrđe, nikad ne koristite žičane četke i slična sredstva.
ODSTRANJIVANJE KAMENCA
natural_image
Abstract black-and-white geometric pattern with diagonal stripes (no text or symbols)VOX
ELECTRONICS
MKD
WM1062Y
natural_image
Abstract black and white geometric pattern with diagonal stripes (no text or symbols)VOX
ELECTRONICS
MAK
natural_image
Simple line drawing of an open book with no text or symbols visiblenatural_image
Line drawing of a washing machine with front panel and side buttons (no text or symbols)natural_image
Line drawing of a washing machine with no text or symbolsnatural_image
Two electrical socket symbols with a diagonal line crossing through them (no text or labels)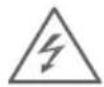
natural_image
Pure electrical circuit lines without any symbols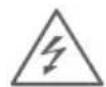
natural_image
Hand holding a power outlet with a diagonal line crossing through it (no text or symbols)
natural_image
Simple line drawing of a hand holding a square with a diagonal line crossing through it (no text or symbols)
natural_image
Illustration of a hand using a tool to clean or inspect a funnel-shaped object (no text or symbols present)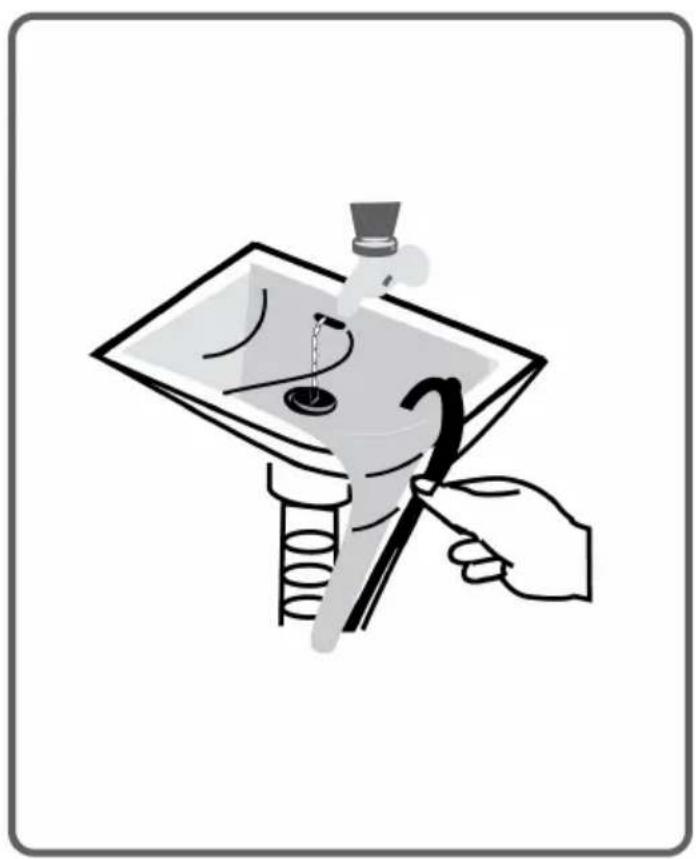
natural_image
Illustration of a hand using a tool to clean or wash a surface with a funnel and pipe (no text or symbols)Опасност од пожар!

natural_image
Line drawing of two workers holding a large washing machine (no text or symbols)Заштита на деца!

natural_image
Line drawing of a hand holding a piece of paper or tape (no text or symbols)natural_image
Line drawing of a front-loading washing machine with control panel and buttons (no text or symbols)Транспортна
natural_image
Technical line drawing of a mechanical device interior with no visible text or symbolsГЛАВА -2: ПРЕГЛЕД НА ВАШИОТ АПАРАТ ТЕХНИЧКИ СПЕЦИФИКАЦИИ
| Оперативен напон(волтажа)/ фреквенција(V / Hz) | (220-240) V ~ / 50Hz |
| Вкупно електрична струја (А) | 10 |
| Притисок на водата | Максимален: 1 МраМинимален: 0.1 Мра |
| Вкупна моćност (W) | 2100 |
| Максималенкапацитет на сувиалишта (kg) | 6 |
| Вртежи/центрифуга(вртежи/ минута) | 1000 |
| Број на програми | 15 |
| Димензии(висина х ширина хдлабочина) (мм) | 845 x 597 x 497 |
ГЛАВА -3: ИНСТАЛИРАЊЕ НА МАШИНАТА (ОТСТРАНУВАЊЕ НА БЕЗБЕДНОСНИТЕ ТРАНСПОРТНИ ЗАВРТКИ)

natural_image
Diagram of a washing machine showing internal components and a close-up view of the dial indicator (no text or symbols present)natural_image
Line drawing of a washing machine with no text or symbolsnatural_image
Two electrical plugs with a fuse, one open and one inserted, showing wiring connection (no text or symbols)natural_image
Line drawing of a coiled hose with two connectors (no text or symbols)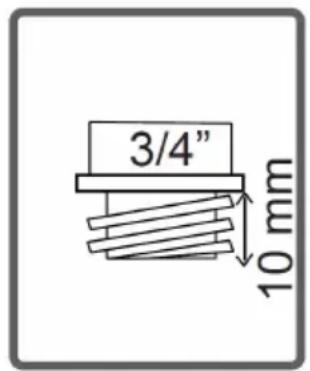
natural_image
Diagram of a car charging plug with cable and valve, no text or symbols present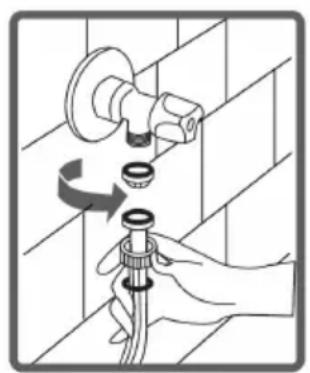
natural_image
Illustration of a hand adjusting a faucet with a valve, showing mechanical components and a rotation arrow (no text or symbols)natural_image
Diagram of a plumbing sink with a pipe fitting and valve (no text or symbols)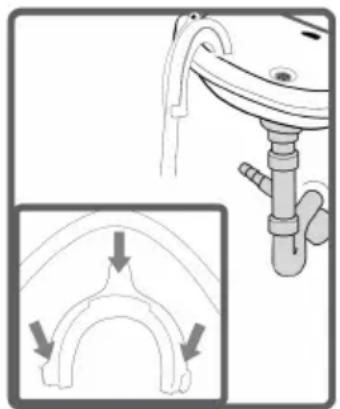
natural_image
Diagram showing a mechanical component with an inset view of a curved bracket and directional arrows (no text or symbols)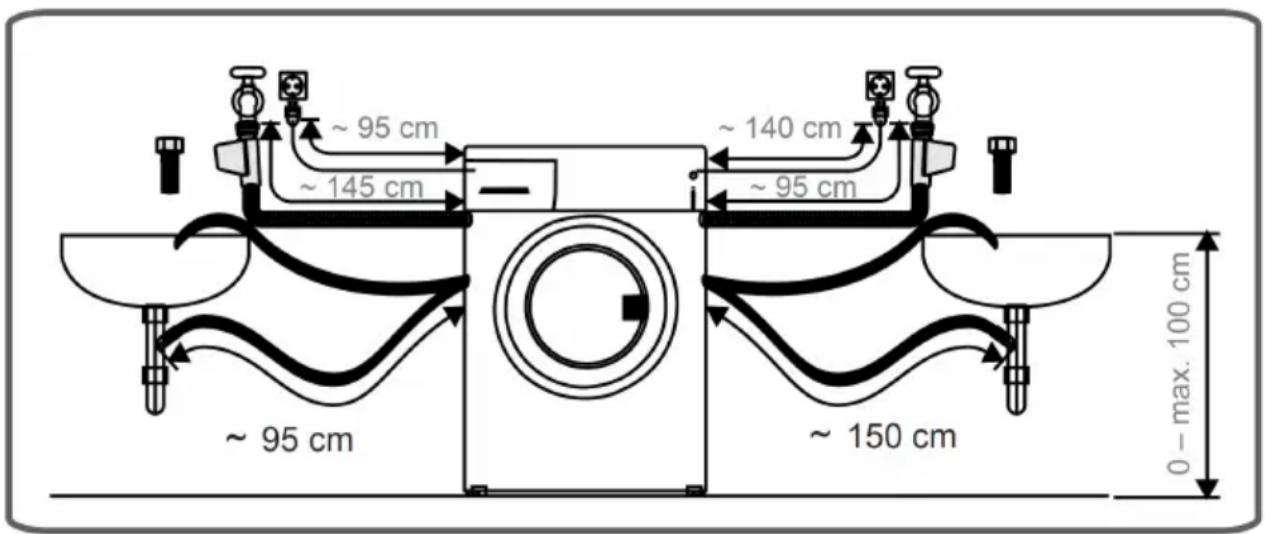
natural_image
Line drawing of a washing machine with an inset showing internal compartments (no text or symbols)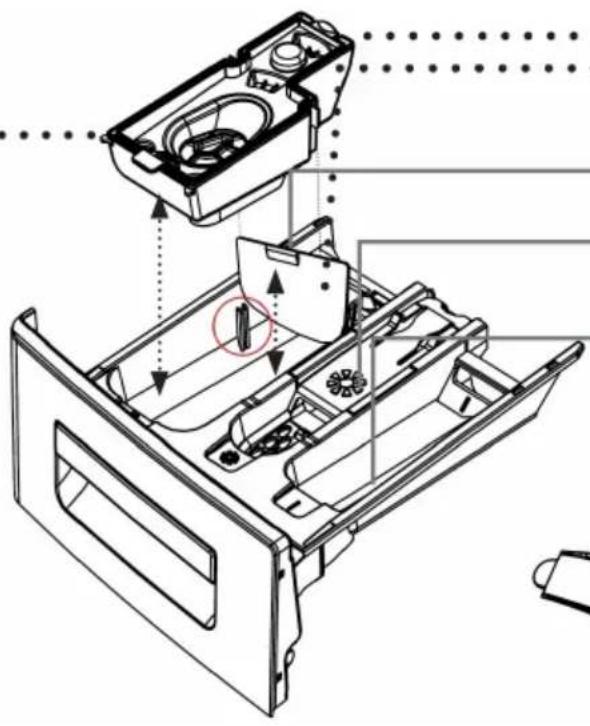
natural_image
Technical line drawing of an open refrigerator internal compartments with no visible text or symbolsnatural_image
Technical line drawing of a mechanical component or device (no text or symbols)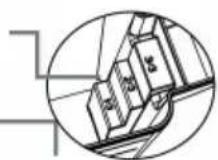
Лопатка за прашкаст детергент
natural_image
Technical line drawing of a device with internal components and a magnified inset showing a close-up view (no text or symbols)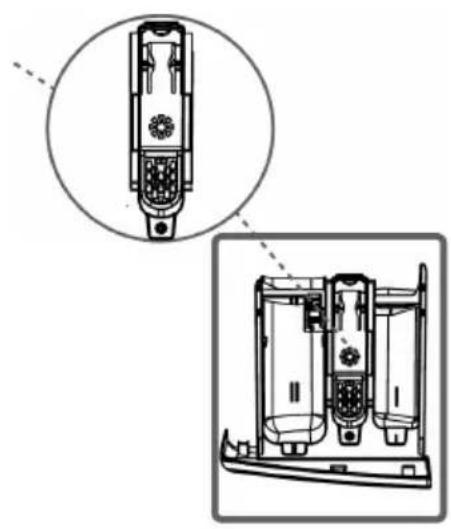
natural_image
Technical line drawing of a mechanical device with internal components and a magnified inset (no text or symbols)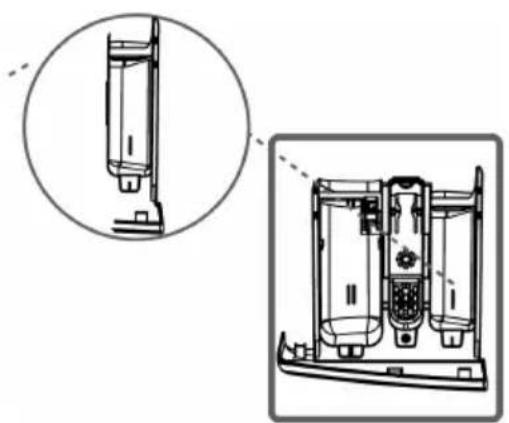
natural_image
Technical line drawing of a mechanical device with cross-sectional and top views (no text or symbols)natural_image
Simple geometric diagram with intersecting lines and a triangle, no text or symbols present
natural_image
Line drawing of a washing machine with front panel and side buttons (no text or symbols)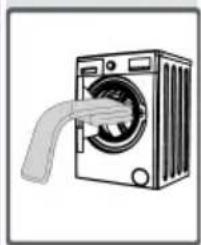
natural_image
Illustration of a washing machine with a hand inserting a pipe into the air (no text or symbols)natural_image
Illustration of a washing machine with a circular dial and a pointer labeled 'click' (no text or symbols on the machine itself)natural_image
Simple line drawing of an electric plug with a socket, no text or symbols present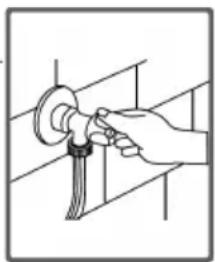
natural_image
Illustration of a hand using a power tool to clean or adjust a circular component (no text or symbols visible)Избор на програма
natural_image
Simple line drawing of an electrical outlet with a plug and cable (no text or symbols)natural_image
Illustration of a hand using a tool to adjust or install a mechanical component (no text or symbols visible)natural_image
Technical line drawing of a mechanical component with no visible text or symbolsnatural_image
Line drawing of hands using a tool to adjust or install a mechanical component (no text or symbols present)ВНИМАНИЕ:

natural_image
Diagram showing a mechanical component with a circular arrow indicating direction, no text or symbols present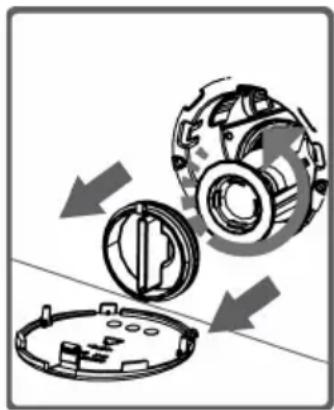
natural_image
Mechanical assembly diagram showing a disassembled component with arrows indicating motion (no text or symbols present)natural_image
Line drawing of a hand holding a tool near a small object, possibly a device or tool, with no visible text or symbols.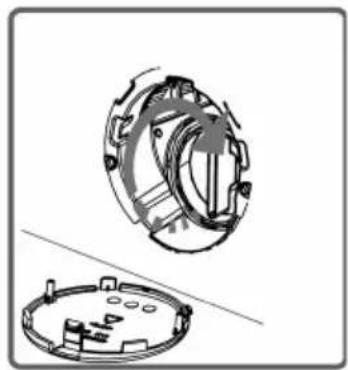
natural_image
Technical illustration of a mechanical component with cross-sectional view (no text or symbols)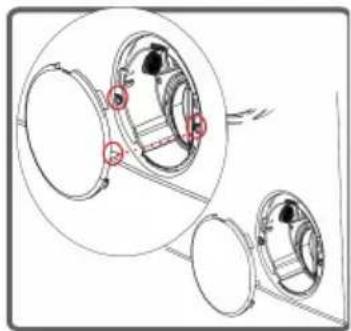
natural_image
Diagram of mechanical components with red highlighted parts, showing no text or symbols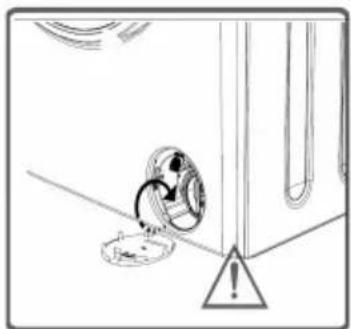
natural_image
Simple line drawing of a ceiling fixture with a circular component and warning triangle (no text or symbols)ПРЕДУПРЕДУВАЊЕ!
natural_image
Illustration of a hand inserting a device into a machine, with an arrow indicating the process (no text or symbols present)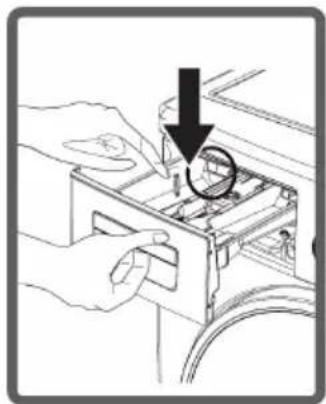
natural_image
Illustration of hands installing or adjusting a device into a rack with a magnifying glass (no text or symbols)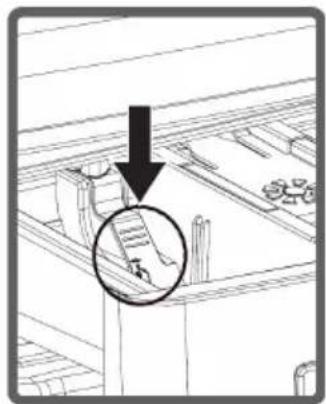
natural_image
Line drawing of a room interior with a magnified inset showing a staircase and furniture (no text or symbols)natural_image
Technical line drawing of a mechanical device with internal components and an upward arrow indicating motion (no text or symbols)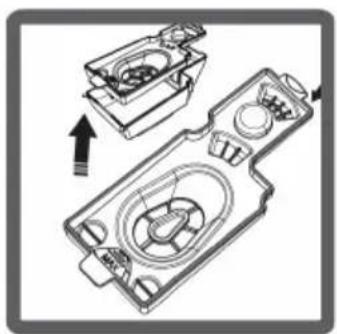
natural_image
Technical line drawing of a mechanical device with internal components and an arrow indicating assembly (no text or symbols)natural_image
Line drawing of a refrigerator interior with air conditioner and fan (no text or symbols)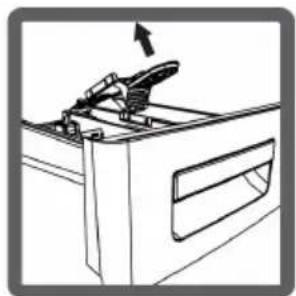
natural_image
Line drawing of a cabinet with an arrow indicating upward motion (no text or symbols)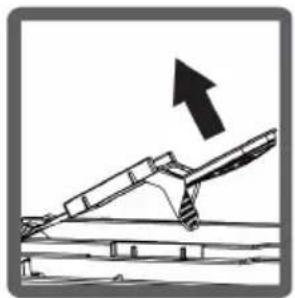
natural_image
Diagram of an inclined ramp with an upward arrow indicating motion (no text or symbols)Ку́киште
natural_image
Technical line drawings of two mechanical components: a 3D panel with internal slots and a cylindrical housing with internal structure (no text or symbols)natural_image
Simple line drawing of a wine bottle with no text or symbolsnatural_image
Simple line drawing of a boots with no text or symbolsnatural_image
Simple line drawing of a mug with handle and side rim (no text or symbols)natural_image
Simple line drawing of a steaming cup (no text or symbols)natural_image
Simple line drawing of a tomato (no text or symbols)natural_image
Simple line drawing of a gear and egg (no text or symbols)natural_image
Simple line drawing of a pitcher with a handle and spout (no text or symbols)natural_image
Simple icon of a bottle with a lid, no text or symbols presentnatural_image
Simple line drawing of a peach with a leaf on top, enclosed in a square frame (no text or symbols)
natural_image
Abstract line drawing with three curved strokes inside a square frame (no text or symbols)
natural_image
Line drawing of a paintbrush with a handle and bristles (no text or symbols)
natural_image
Simple flame icon illustration (no text or symbols)natural_image
Abstract black-and-white graphic of a splatter or splash with droplets, no text or symbols present.
natural_image
Illustration of a waffle ice cream cone with chocolate swirls on top (no text or symbols)
natural_image
Simple line drawing of a mushroom with a leafy base (no text or symbols)
natural_image
Line drawing of a pen with a handle and spout (no text or symbols)ОПИС НА ЕТИКЕТАТА СО ЕНЕРГЕТСКИ ПОДАТОЦИ И ЗАШТЕДА НА ЕНЕРГИЈА
CE
52243448

natural_image
Abstract black-and-white geometric pattern with diagonal stripes (no text or symbols)VOX
ELECTRONICS
SVN
WM1062Y
NAVODILA ZA UPORABO PRALNI STROJ
1. POGLAVJE: PRED UPORABO NAPRAVE
• Pravilna uporaba.... 4-5
natural_image
Simple line drawing of an open book with blank pages (no text or symbols)natural_image
Line drawing of a washing machine with a door and front panel (no text or symbols)
natural_image
Line drawing of a washing machine with no visible text or symbols1. POGLAVJE: PRED UPORABO NAPRAVE (SPLOŠNA OPOZORILA)
natural_image
Two electrical socket symbols with a diagonal line crossing them, no text or labels present.
natural_image
Simple line drawing of a mechanical or electrical component with no text or symbols
natural_image
Hand holding a power outlet with a diagonal line crossing through it (no text or symbols)
natural_image
Simple line drawing of a hand holding a square with a diagonal line crossing through it (no text or symbols)
Nevarnost poplave!

natural_image
Illustration of a hand using a tool to clean or inspect a funnel-shaped object (no text or symbols present)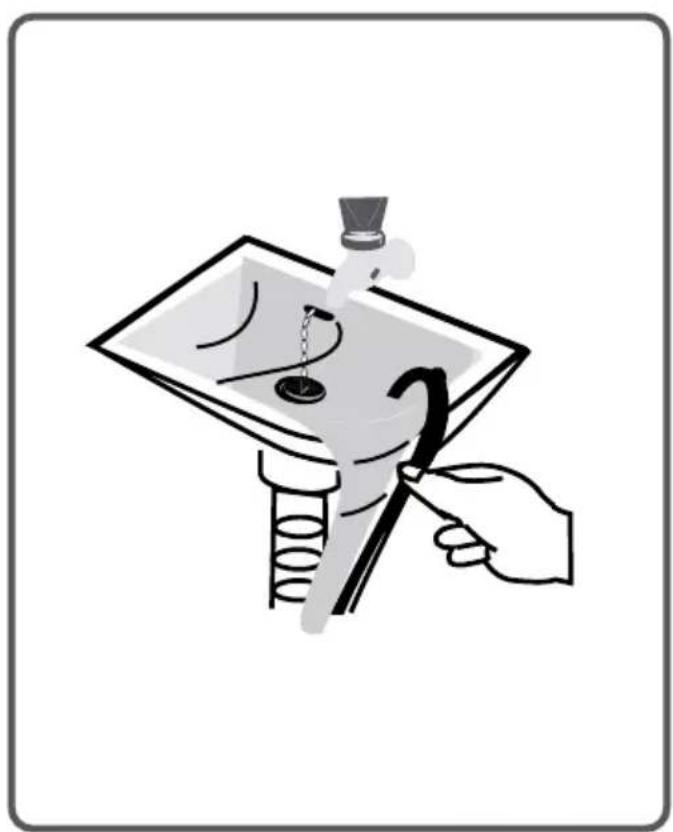
natural_image
Illustration of a hand using a tool to clean or inspect a surface with a funnel and spiral tube (no text or symbols)Nevarnost ognja!

natural_image
Line drawing of two workers holding a large washing machine (no text or symbols)Varnost otrok!

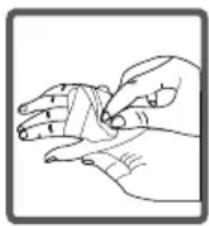
natural_image
Line drawing of a hand holding a wrist bandage (no text or symbols)Dele teh naprav odnesite v ustrezne zbirne centre, kjer jih bodo pripravili za ponovno uporabo.
Zaradi varnosti otrok zagotovite, da bodo stare naprave hranjene na ustreznih me-stih, dokler jih ne odnesete iz hiše.
natural_image
Diagram of a washing machine showing internal components and a close-up view of the internal structure (no text or symbols present)3. POGLAVJE: NAMESTITEV (NASTAVITEV PRILAGODLJIVIH NOGIC)
• Z obračanjem prilagodite nogice.
- Ko vzpostavite ravnotežje, znova stisnite plastično prilago-ditveno matico navzgor.
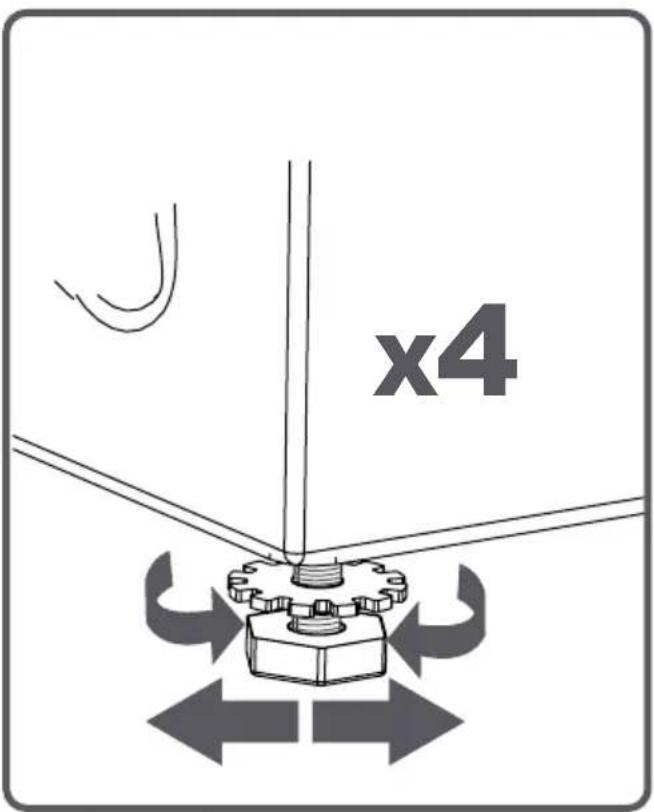
3. POGLAVJE: NAMESTITEV (NASTAVITEV PRILAGODLJIVIH NOGIC)
natural_image
Line drawing of a front-loading washing machine with no text or symbolsnatural_image
Diagram showing two electrical plugs with a power outlet, one being inserted and the other holding a socket (no text or symbols present)Trenutna vrednost varovalke za povezano napajanje mora biti prav tako 10 amperov. Če nimate tovrstnega vtiča in varovalke, naj vam to uredi usposobljen električar.
- Ne prevzemamo odgovornosti za škodo zaradi neozemljene uporabe.
natural_image
Line drawing of a coiled hose with two connectors (no text or symbols)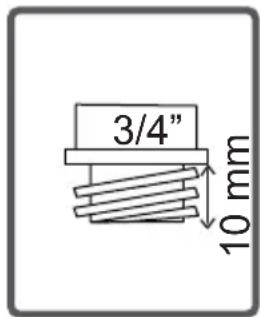
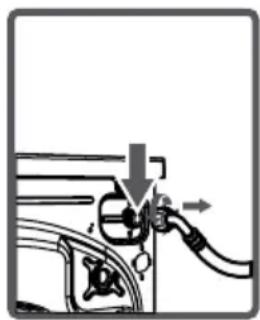
natural_image
Diagram of a car fuel pump with valve and valve assembly (no text or labels)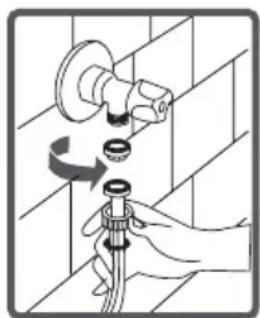
natural_image
Illustration of a hand using a tool to adjust or install a wall-mounted component, no text or symbols present3. POGLAVJE: NAMESTITEV (PRIKLJUČITEV NA DOVOD VODE)
natural_image
Diagram of a pipe fitting with a bulb attached, showing fluid flow (no text or symbols)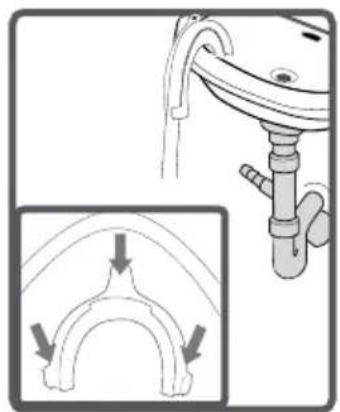
natural_image
Diagram showing a pipe installation with an inset illustrating the curved structure (no text or symbols present)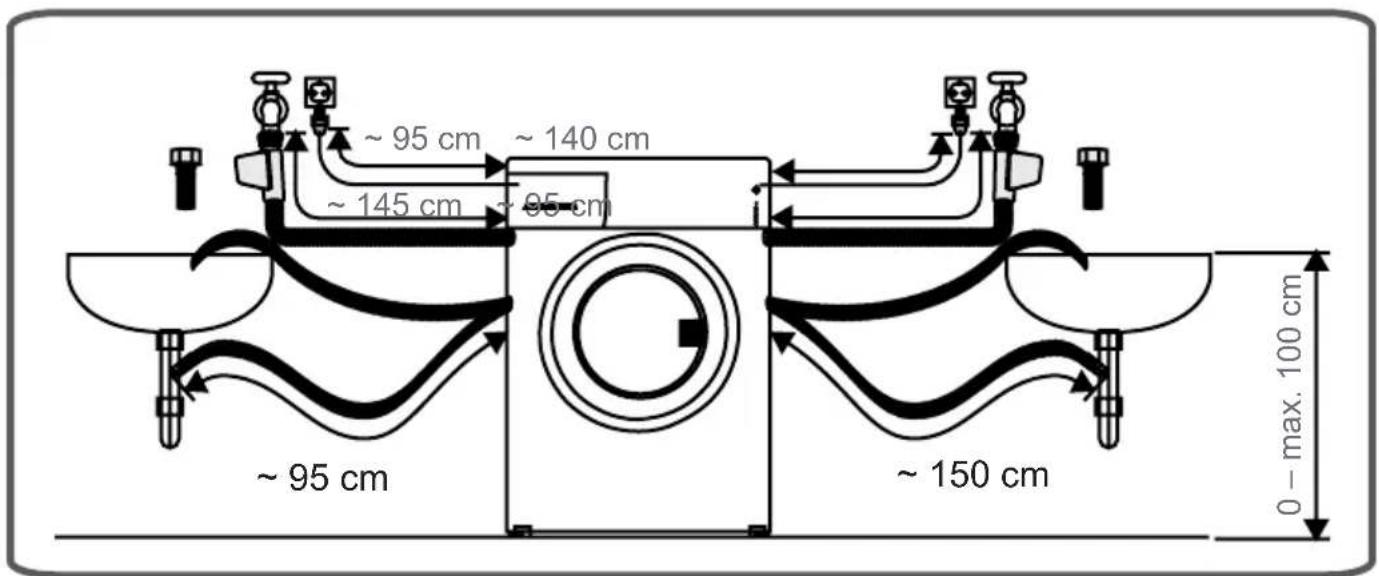
4. POGLAVJE: PREDSTAVITEV UPRAVLJALNE PLOŠČE
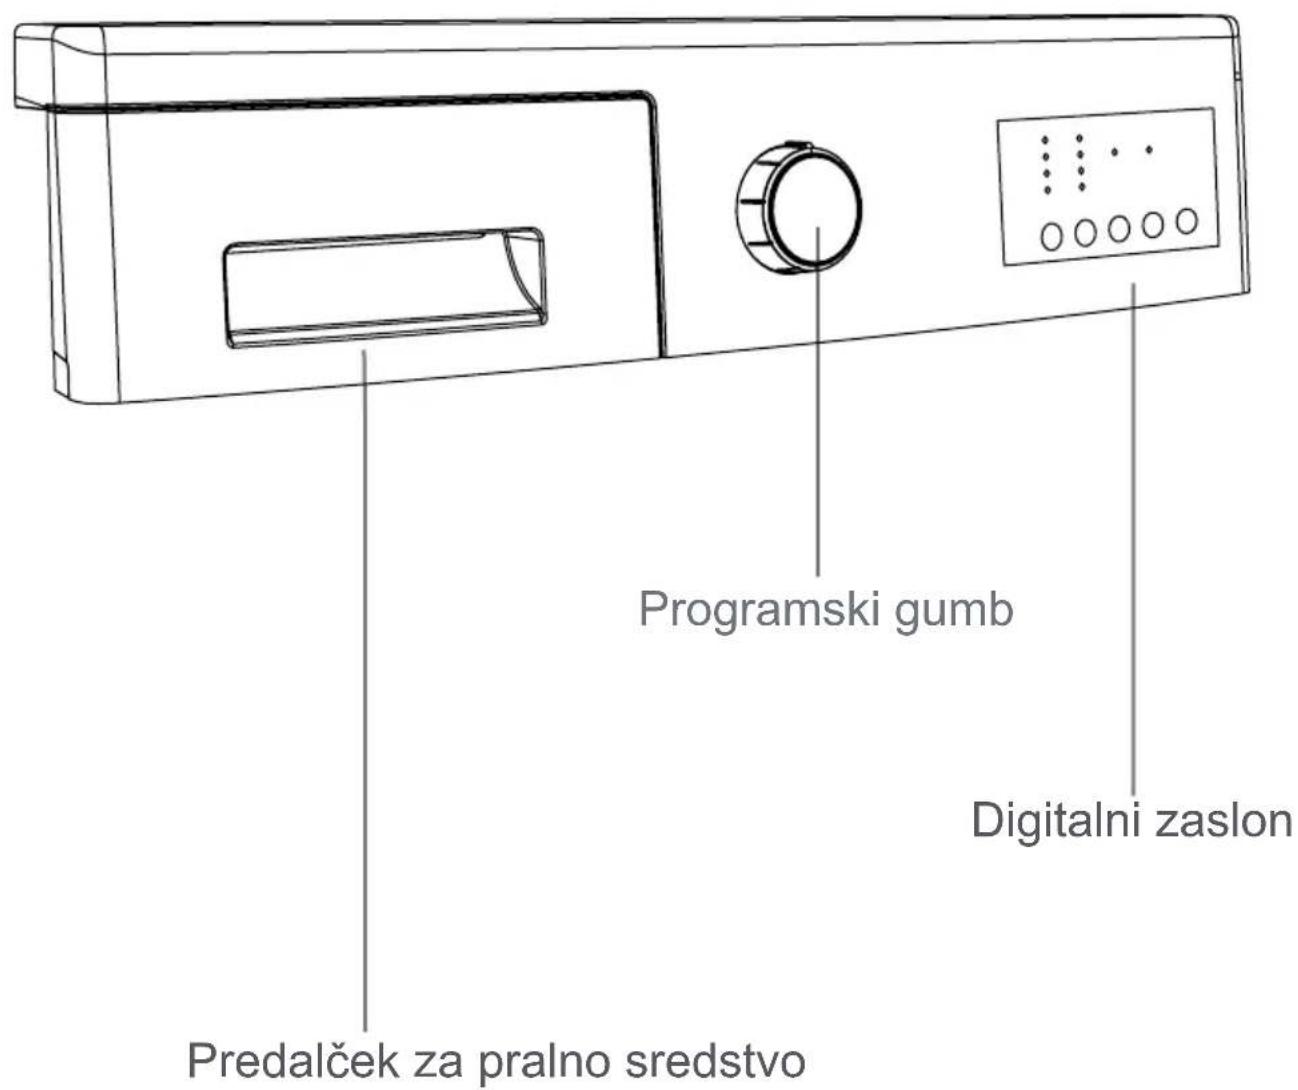
4. POGLAVJE: PREDSTAVITEV UPRAVLJALNE PLOŠČE (PREDALČEK ZA PRALNO SREDSTVO)
natural_image
Line drawing of a washing machine with an inset showing internal components (no text or symbols)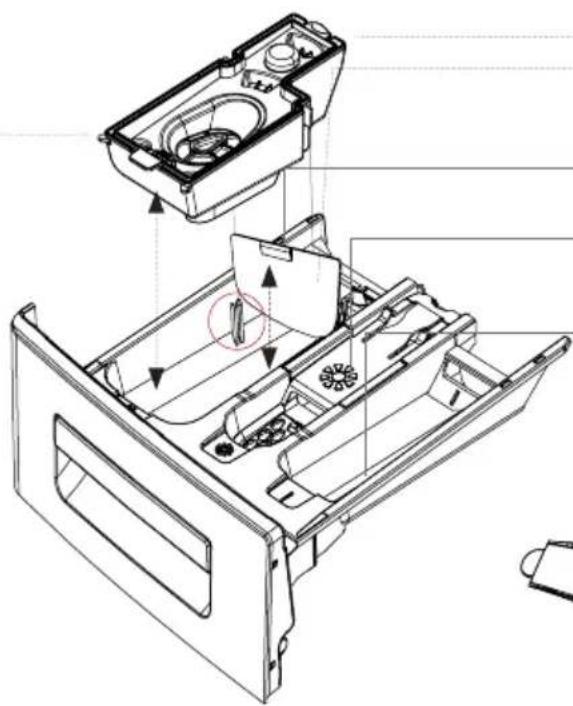
natural_image
Technical line drawing of a mechanical device interior showing internal components and assembly (no text or symbols)▶ Priprava za tekoče pralno sredstvo
natural_image
Technical line drawing of a mechanical component or connector (no text or symbols)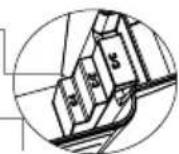
Lopatica za pralno sredstvo v prahu (*)
natural_image
Technical line drawing of a cylindrical device with a base and clamped components, enclosed in a circle (no text or symbols)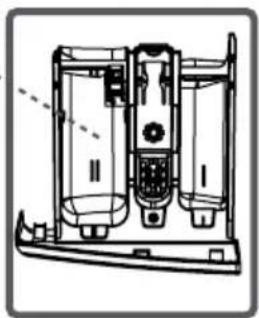
natural_image
Technical line drawing of a mechanical device with internal components and mounting base (no text or symbols)natural_image
Technical line drawing of a mechanical device with a flower-like symbol on the handle (no text or labels)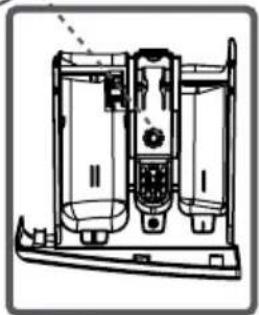
natural_image
Technical line drawing of a mechanical device with internal components (no text or symbols)natural_image
Technical line drawing of a mechanical component inside a circular frame (no text or symbols)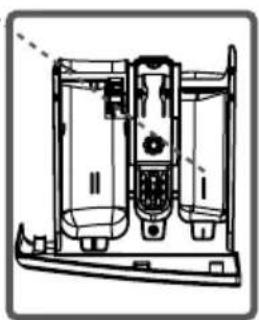
natural_image
Technical line drawing of a mechanical device with internal components and mounting base (no text or symbols)
natural_image
Line drawing of a washing machine with front panel and side door (no text or symbols)OPOMBA: Največja kapaciteta perila je odvisna od vrste perila za pranje, stopnje umazanosti in izbra-nega programa. Kapaciteta suhega perila ne sme presegati navedene v programski tabeli za programe pra-nja.
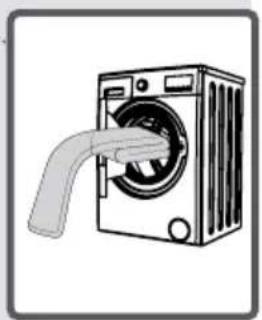
natural_image
Illustration of a washing machine with a pipe inserted, no text or symbols presentnatural_image
Line drawing of a washing machine with a circular door and label 'klik' (no other text or symbols)natural_image
Simple line drawing of an electrical outlet with a plug and cable (no text or symbols)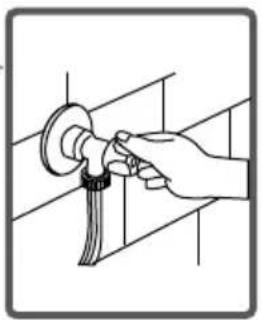
natural_image
Illustration of a hand using a tool to clean or adjust a circular component (no text or symbols visible)Izbira programa
Iz programske tabele izberite ustrezen program za vaše perilo.
DODATNE FUNKCIJE
natural_image
Simple line drawing of an electrical outlet with a plug and socket (no text or symbols)natural_image
Illustration of a hand using a tool to adjust or install a mechanical component (no text or symbols visible)natural_image
Technical line drawing of a mechanical component with no visible text or symbols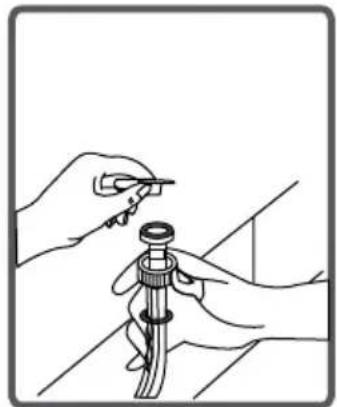
natural_image
Illustration of hands using a tool to adjust or install a mechanical component (no text or symbols visible)POZOR:

natural_image
Diagram showing a mechanical component with a circular arrow indicating direction, no text or symbols present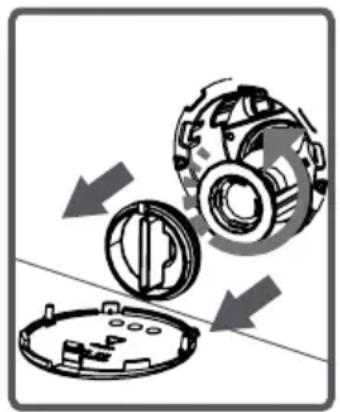
natural_image
Mechanical assembly diagram showing gear and housing components with directional arrows (no text or symbols)natural_image
Illustration of a medical procedure showing hand placement on a surgical instrument (no text or symbols present)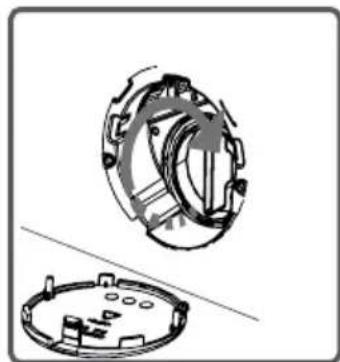
natural_image
Technical illustration of a mechanical component with two views: top shows a circular housing with internal components, bottom shows a circular base with mounting holes (no text or symbols)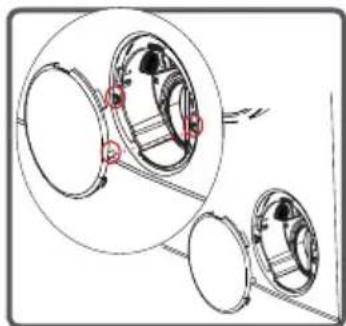
natural_image
Mechanical assembly diagram showing two circular components with red fasteners and a connecting rod (no text or labels)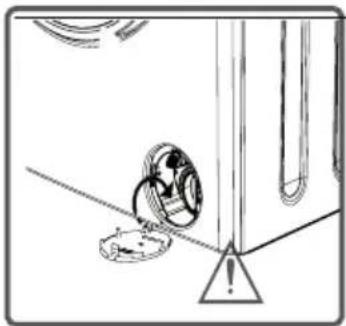
natural_image
Simple line drawing of a mechanical component with a circular inset showing a ring and a triangular base (no text or symbols)OPOZORILO!
natural_image
Illustration of a hand inserting a device into a file into a machine (no text or symbols visible)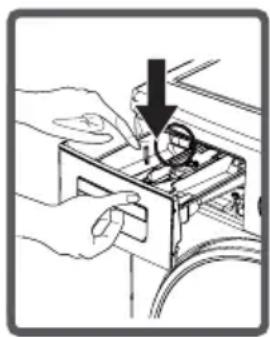
natural_image
Illustration of hands installing or adjusting a mechanical component with a downward arrow (no text or symbols)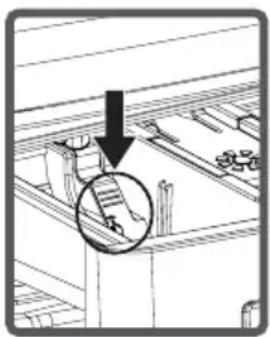
natural_image
Diagram showing a mechanical assembly with a downward arrow and a circled detail (no text or symbols)- Očistite ga s krtačko.
natural_image
Technical line drawing of a mechanical device with an upward arrow indicating assembly or operation (no text or symbols present)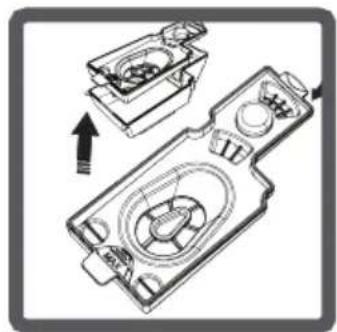
natural_image
Technical line drawing of a mechanical device with internal components and an arrow indicating assembly (no text or symbols)natural_image
Technical line drawing of a cabinet interior with fan and drawer (no text or symbols)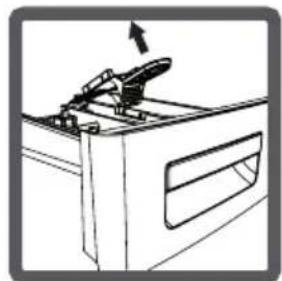
natural_image
Line drawing of a washing machine with a handle and arrow indicator (no text or symbols)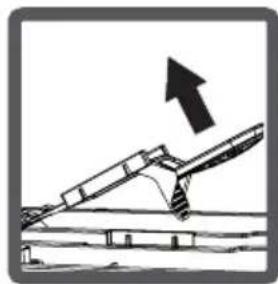
natural_image
Diagram of an inclined ramp with an upward arrow indicating motion (no text or symbols)Ohišje
natural_image
Technical line drawing of a structural frame with vertical slats and a central circular component (no text or symbols)Boben
natural_image
Cross-sectional diagram of a cylindrical mechanical component with internal layered structure (no text or symbols)natural_image
Simple line drawing of a wine bottle with a label (no text or symbols on the bottle itself)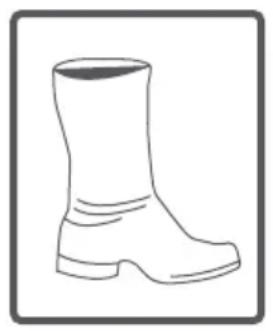
natural_image
Simple line drawing of a boots (no text or symbols)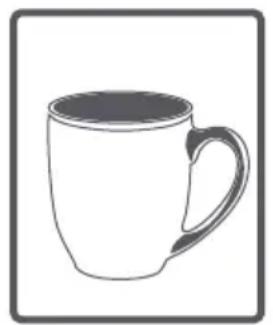
natural_image
Simple line drawing of a mug with handle and lid, enclosed in a square frame (no text or symbols)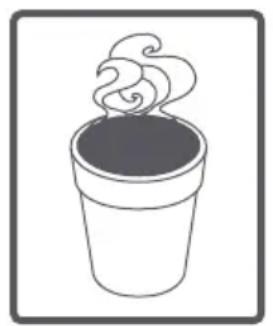
natural_image
Simple line drawing of a steaming cup with swirling smoke (no text or symbols)natural_image
Simple line drawing of a tomato (no text or symbols)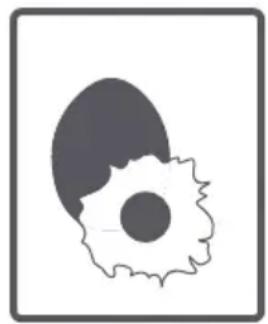
natural_image
Simple line drawing of an egg with a gear-like shape beside it, enclosed in a square frame (no text or symbols)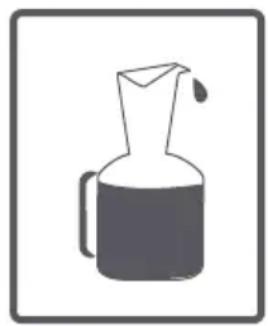
natural_image
Simple line drawing of a pitcher with liquid and handle (no text or symbols)
natural_image
Simple icon of a trash bin with a lid, no text or symbols presentSadje: Razgrnite tkanino z madežem nad posodo in jo prelijte s hladno vodo. Na ma-dež ne zlivajte vroče vode. Obrišite madež s krpo, namočeno v hladno vodo in nanesite glicerin. Počakajte 1-2 uri, obrišite tkanino s krpo, namočeno v vodo z nekaj kapljicami belega kisa in sperite z vodo.
natural_image
Simple line drawing of a peach with a leaf, enclosed in a square frame (no text or symbols)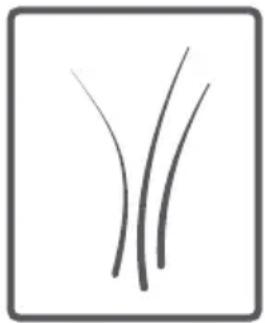
natural_image
Simple line drawing of three curved lines inside a square frame (no text or symbols)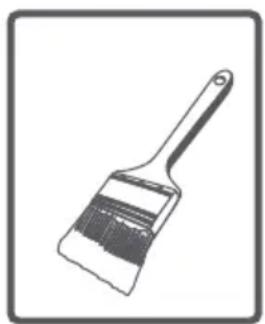
natural_image
Line drawing of a paintbrush with bristles and handle (no text or symbols)
natural_image
Simple flame icon illustration with no text or symbolsnatural_image
Abstract black-and-white illustration of a splatter or droplet with droplets, no text or symbols present.
natural_image
Illustration of a waffle ice cream cone with swirl frosting (no text or symbols)
natural_image
Simple line drawing of a mushroom with a leafy base (no text or symbols)
natural_image
Line drawing of a pen with a handle and eraser, enclosed in a square frame (no text or symbols)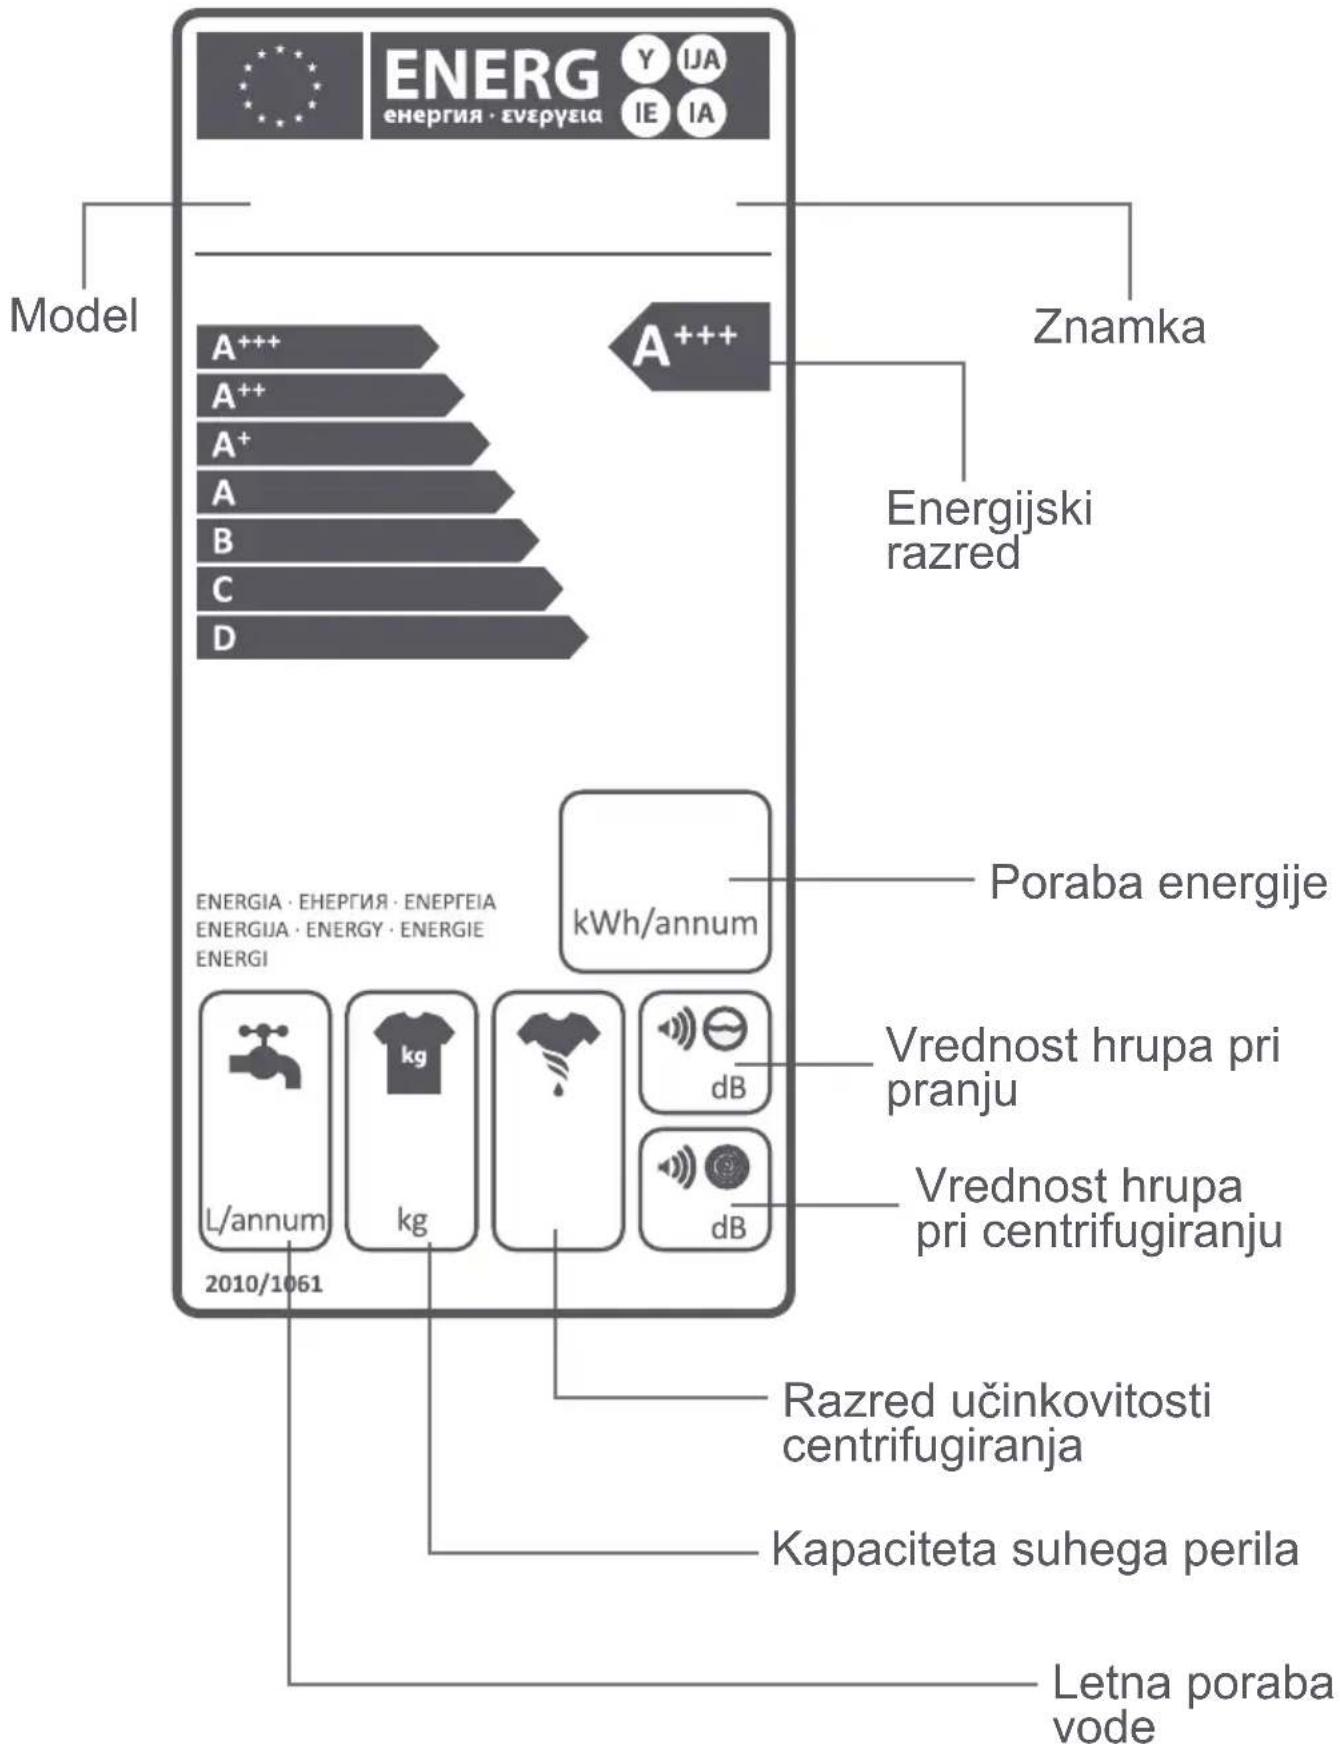
CE
52243449

HRV
WM1062Y
UPUTE ZA UPORABU PERILICA RUBLJA
POGLAVLJE-1: PRIJE UPORABE PERILICE
• Upute za sigurnu uporabu 4-5
• Pravilna uporaba 6-7
• Opća upozorenja 8-9-10-11
• Upute za sigurnu uporabu 12-13-14-15-16-17
• Pakovanje i okoliš 18
• Podaci o uštedi 19
POGLAVLJE-2: IZGLED PERILICE RUBLJA
- lzgled 20-21
• Tehničke karakteristike 22
POGLAVLJE-3: POSTAVLJANJE
• Uklanjanje transportnih vijaka 23-24
- Podešavanje nožica 25-26-27
- Priključenje na električnu instalaciju 28
• Priključenje na vodovodnu instalaciju 29-30
• Priključak za odvod vode 31
POGLAVLJE-4 UPRAVLJAČKA PLOČA 32
• Ladica za deterdžent 33-34
• Držak programatora 35
• Elektronski prikaz funkcija 36-37
POGLAVLJE -5: PRIPRIJEMANJE ZA PRANJE RUBLJA
• Razvrstavanje rublja 38-39 ^HR-2-
SADRŽAJ
• Stavljanje rublja u perilicu rublja 40
• Stavljanje deterdženta u perilicu rublja 41
• Uključivanje perilice rublja 42-43-44
• Pomoćne funkcije 45-46-47-48-49-50-51-52-53-54
• Zaključavanje zbog djece 55
• Prekid programa 56
• Kraj programa 57
POGLAVLJE - 6: TABLICA PROGRAMA 58-59-60-61-62-63-64-65
POGLAVLJE - 7: ODRŽAVANJE I ČIŠĆENJE PERILICE RUBLJA
natural_image
Line drawing of a washing machine with front panel and side buttons (no text or symbols)
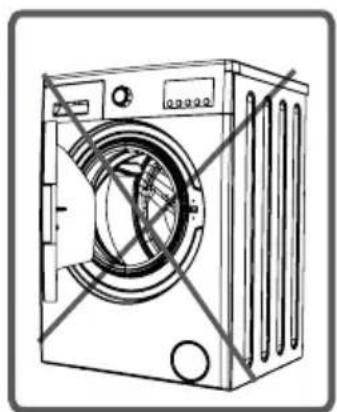
natural_image
Line drawing of a washing machine with no visible text or symbolsPOGLAVLJE-1: PRIJE UPORABE PERILICE RUBLJA (OPĆA UPOZORENJA)
- Molimo vas pridržavajte se savjeta proizvođača u vezi uporabe deterdženta/tkanina odnosno uporabe omekšivača i sličnih proizvoda za vašu perilicu rublja.
- Postavite vašu perilicu rublja na mjesto gde se vrata mogu potpuno otvoriti. (Nemojte postaviljati perilicu rublja na mjes-tima na kojima je potpuno otvaranje vrata onemogućeno.).
- Postavite vašu perilicu rublja na prozračno mjesto gdje postoji stalno kruženje zraka.
natural_image
Two electrical socket symbols with a diagonal line crossing them, no text or labels present.
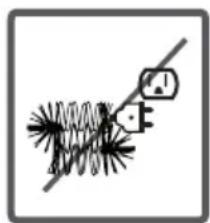
natural_image
Simple line drawing of a mechanical or electrical component with no text or symbols
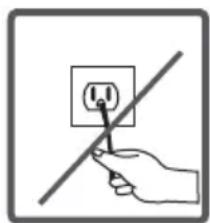
natural_image
Hand holding a wall-mounted electrical socket with a diagonal line crossing (no text or symbols)
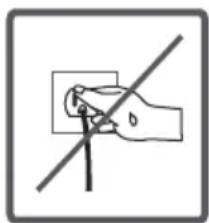
natural_image
Simple line drawing of a hand holding a rectangular object with a diagonal line crossing through it (no text or symbols)
Opasnost od poplave!

• Proverite da li voda iz cijevi za odvod teče brzo ili sporo prije postavljanja cijevi na odvod (umivaonik).
- Poduzmite odgovarajuće mjere za sprječavanje proklizavanja cijevi.
- Snaga vode koja prolazi kroz cijev koja nije postavljena na odgovarajući način može pomaknuti cijev. Postavite čep umivaonika tako da ne zatvara odvod umivaonika.
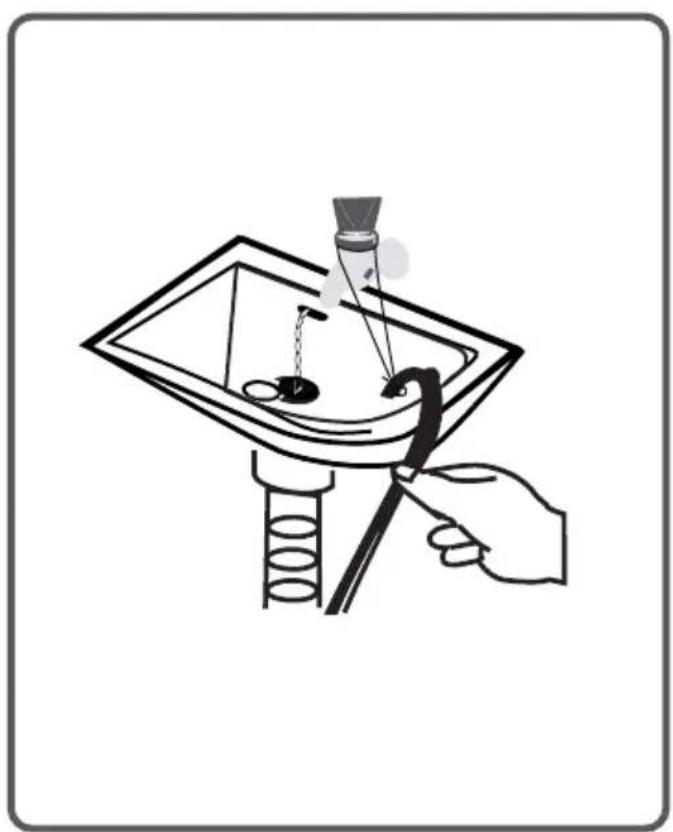
natural_image
Illustration of a hand using a tool to clean or inspect a tray with a funnel and test tube (no text or symbols)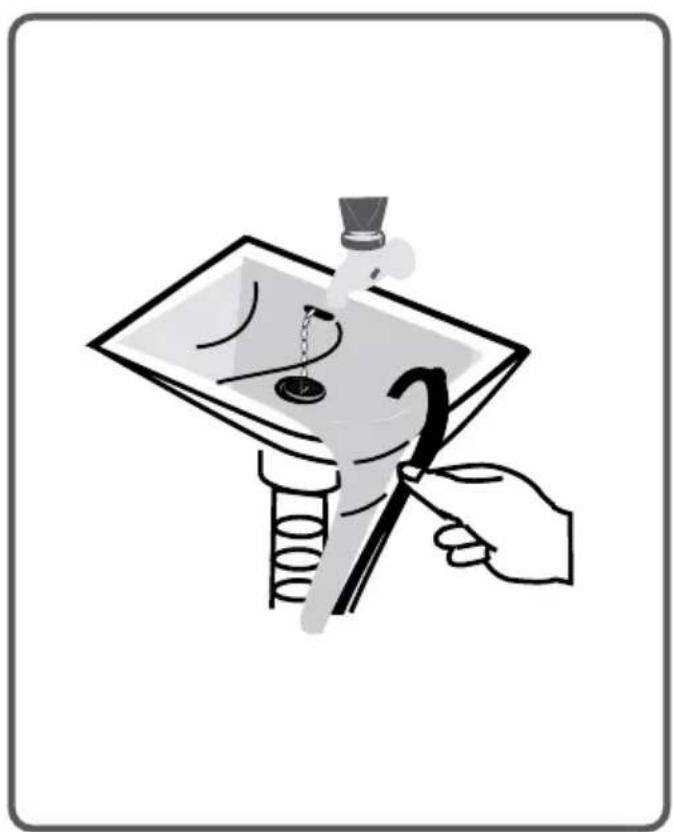
natural_image
Illustration of a hand using a tool to clean or inspect a surface with a funnel and spiral coil (no text or symbols)Opasnost od požara!

- Ne držite zapaljive tekućine blizu vaše perilice rublja.
- Sadržaj sumpora u sredstvima za uklanjanje boje može uzrokovati koroziju. Zbog toga, nikada ne koristite sredstva za uklanjanje boje u perilici rublja.
- Nikada ne koristite proizvode koji sadrže! otapala u vašoj perilici rublja.
- Uklonite sve prijedmete iz džepova rublja koji perete (igle, spajalice, upaljače, šibice itd.) prije stavljanja u perilicu rublja.
Može postojati opasnost od požara i eksplozije.
natural_image
Illustration of two workers carrying a large washing machine (no text or symbols present)Sigurnost djece!

natural_image
Line drawing of a hand holding a small object, possibly a tool or device, with no visible text or symbols.- Držite ambalažu perilice daleko od doh-vata djece.
- U slučaju konzumacije deterdženta i sredstava za održavanja može doći do trovanja, a ako dođu u kontakt s kožom i očima izazvati iritaciju. Držite sredstva za čišćenje daleko od dohvata djece.
Uklanjanje materijala ambalaže.
Molimo vas da vaše stare uređaje čuvate na odgovarajućem mjestu prije zbrinjavanja zbog sigurnosti djece.
Neki bitni podaci na osnovi kojih možete povećati efikasnost vaše perilice rublja:
natural_image
Technical line drawing of a washing machine casing with internal components and wiring (no text or labels)POGLAVLJE-2: IZGLED PERILICE RUBLJA
TEHNIČKE KARAKTERISTIKE
| Nazivni napon/frekvencija (V/Hz) | (220-240) V~/50Hz |
| Ukupna struja | 10 |
| Pritisak vode Maksimum | Maximum: 1 MpaMinimum : 0.1 Mpa |
| Ukupna snaga (W) | 2100 |
| Maksimalni kapacitetsuhog rublja za pranje (kg) | 6 |
| Brzina vrtnje(okretaja /min) | 1000 |
| Broj programa | 15 |
| Dimenzije(Visina x Širina x Dubina) | 845 x 597 x 497 |

Prije rada perilice rublja, uklonite 4 transportna vijka i gumene odstojnike iz zadnjeg dijela perilice rublja. Ako vijci nisu uklonjeni može doći do velikih vibracija, buke i kvara proizvoda (čime se poništava jamstvo za perilicu rublja).
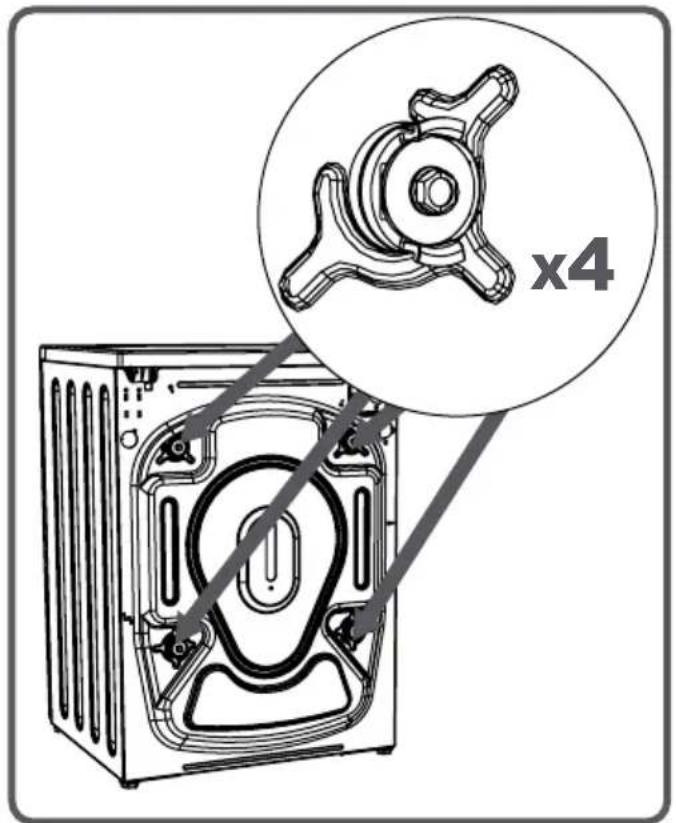
natural_image
Diagram of a washing machine showing internal components and a close-up view of the handle (no text or labels)Nameštanje podesivih nožica
- Ne postavljate perilicu rublja na tepih ili sličnu površinu koja bi mogla da spriječiti prozračivanje donje površine.
- Kako bi vaša perilica rublja radila tiho i bez vibracija, mora biti postavljena na površini na kojoj nema klizanja i koja je čvrsta.
- Ravnost perilice podešava se pomoću zakretne nožice.
- Najprije otpustite plastičnu maticu za podešavanje.
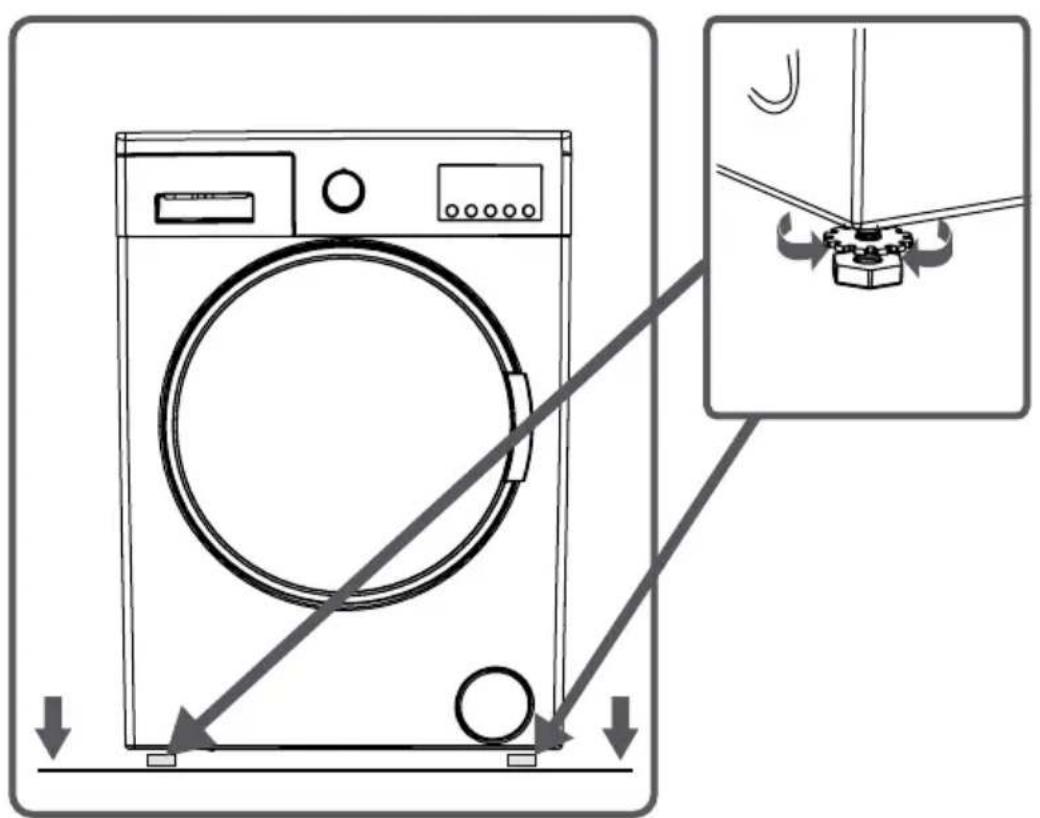
POGLAVLJE -3: POSTAVLJANJE (NAMEŠTANJE PODESIVIH NOŽICA)
natural_image
Line drawing of a front-loading washing machine with no text or symbols- Vaša perilica rublja je podešena za rad na 220-240V i 50Hz.
- Perilica se priključuje na električnu instalaciju preko utikača i propisno instalirane zidne priključnice s uzemljenjem i osiguračem od 10 A. Električna instalacija mora biti izvedena tako da izdrži potrebnu struju.
- Ako nemate takvú utičnicu i osigurač koji odgovara ovom opisu, neka ju postavi kvalificirani električar.
- Proizvođač otklanja svaku odgovornost za ozljede i štete prouzročene uporabom aparata bez uzemljenja ili nepoštivanja ovih uputa za uporabu.
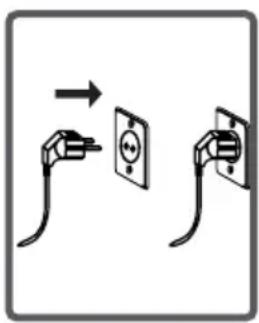
NAPOMENA: Rad vaše perilice rublja pri slabijem naponu može umanjiti karakteristike perilice i skratiti njen radni vijek.
POGLAVLJE-3: POSTAVLJANJE (PRIKLJUČAK CIJEVI ZA DOVOD VODE)
- Perilica je izvedena za priključenje na vodovodnu instalaciju preko jednog priključka (hladna voda).
natural_image
Line drawing of a coiled hose with two connectors (no text or symbols)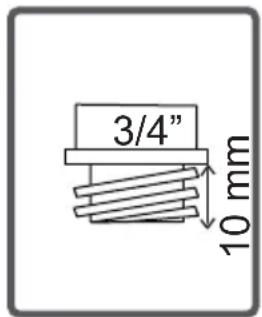
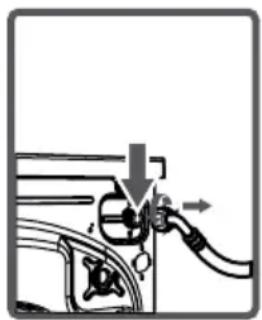
natural_image
Diagram of a car fuel pump with valve and valve components (no text or labels)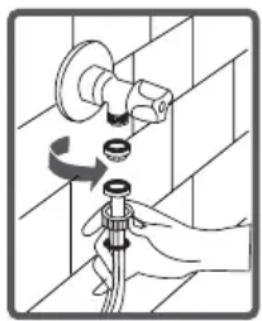
natural_image
Illustration of a hand using a tool to lift a wall-mounted pipe fitting (no text or symbols present)POGLAVLJE-3: POSTAVLJANJE (PRIKLJUČAK CIJEVI ZA DOVOD VODE)
natural_image
Diagram of a pipe fitting with a bulb attached to a sink (no text or symbols)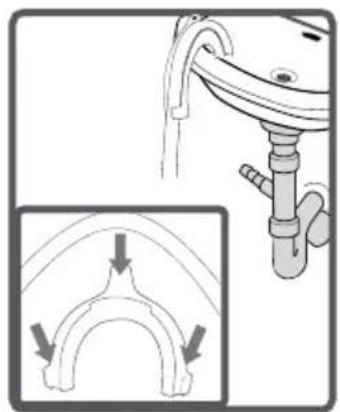
natural_image
Diagram showing a mechanical component with an inset view of a curved pipe or arch structure (no text or symbols present)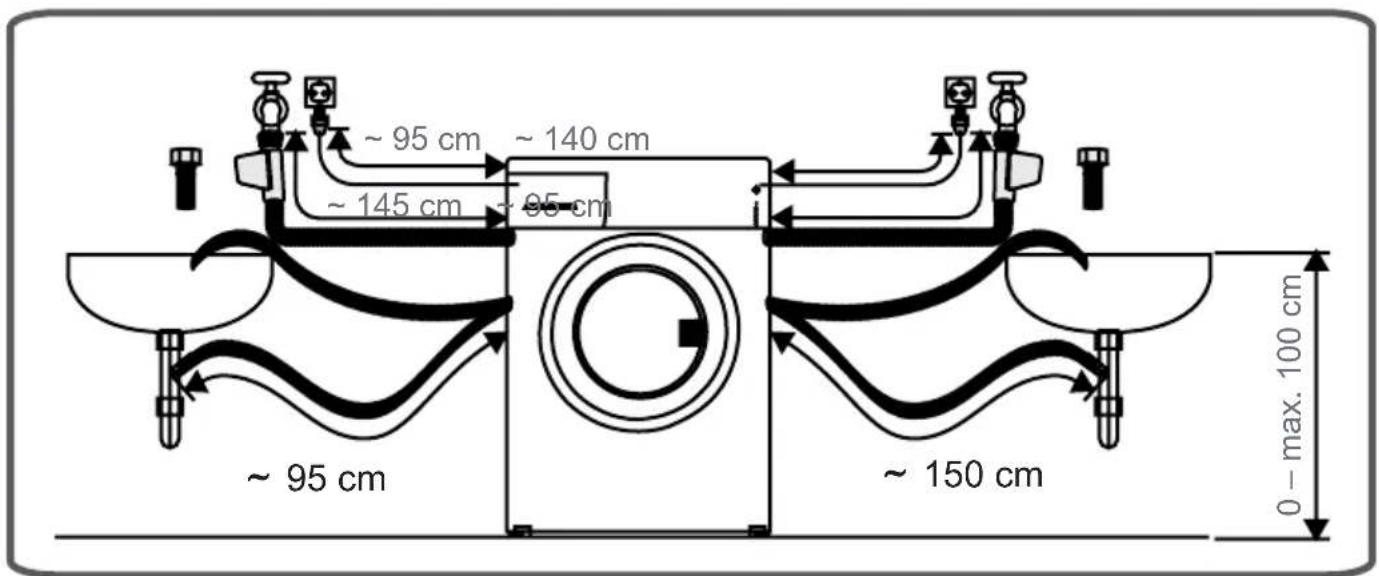
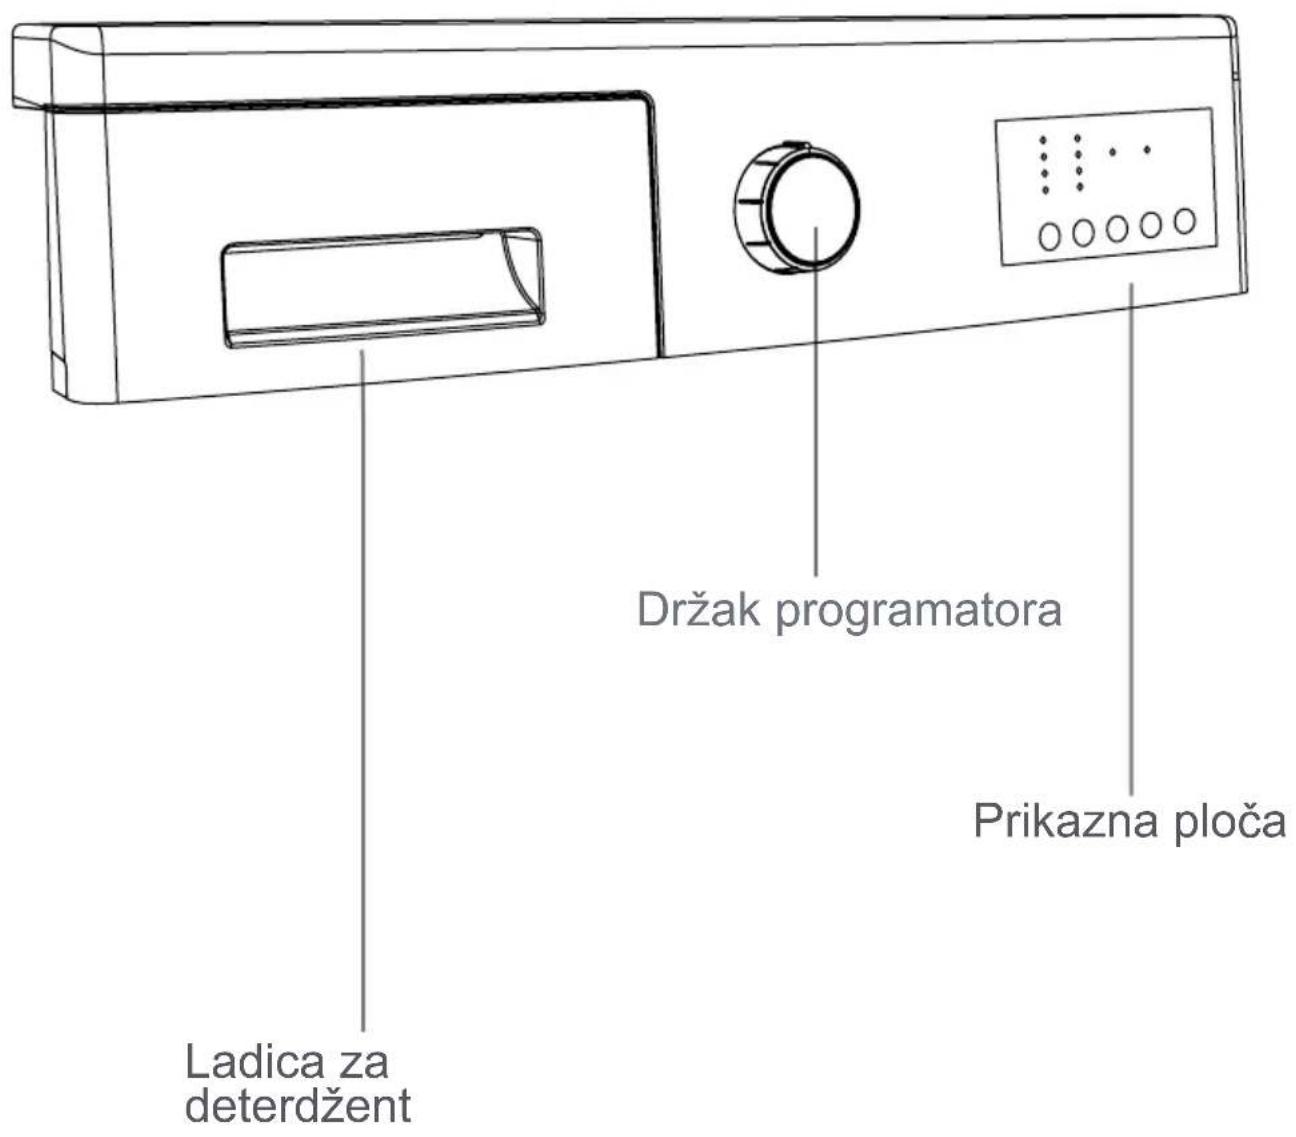
POGLAVLJE-4: UPRAVLJAČKA PLOČA (LADICA ZA DETERDŽENT)
- Tekući deterdžent možete koristiti u svim programima bez pretpranja. Za uporabu tekućeg deterdženta postavite pregradnu pločicu u drugi odjeljak ladice za deterdžent i ulijte deterdžent do ra-zine naznačene na pločici. Ne prel-azite MAX i umetak koristite samo za tekući deterdžent, a pri uporabi deterdženta u prahu pločicu uklonite.
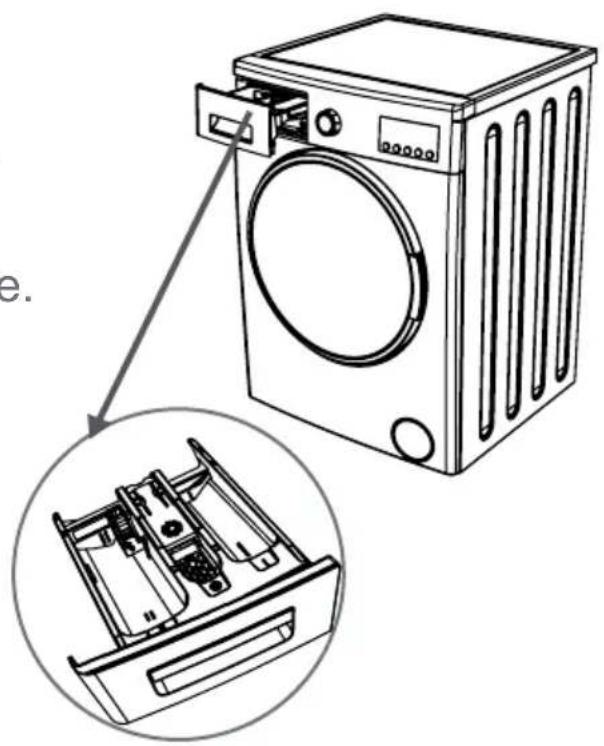
natural_image
Line drawing of a washing machine with an inset showing internal components (no text or symbols)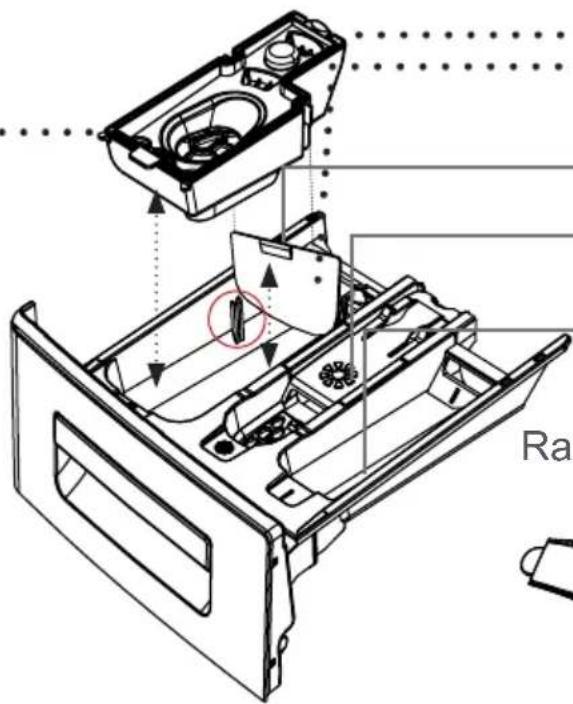

natural_image
Technical line drawing of a mechanical component or tool (no text or symbols visible)Žlica za deterdžent u prahu (*)
(*) Specifikacije perilice rublja za pranje rublja mogu odstupati ovisno o modelu aparata. HR -33-
POGLAVLJE-4: UPRAVLJAČKA PLOČA (LADICA ZA DETERDŽENT)
DIJELOVI
natural_image
Technical line drawing of a cylindrical device with attached components, enclosed in a circle (no text or symbols)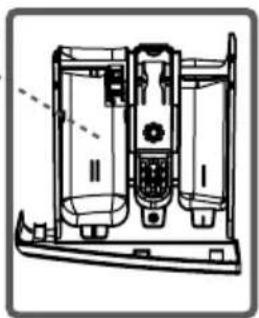
natural_image
Technical line drawing of a mechanical device with internal components and mounting base (no text or symbols)natural_image
Technical line drawing of a mechanical device with a flower-like symbol on the central body, enclosed in a circle (no text or labels)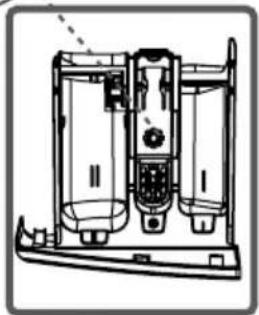
natural_image
Technical line drawing of a device with internal components (no text or symbols)natural_image
Technical line drawing of a mechanical component inside a circular boundary (no text or symbols)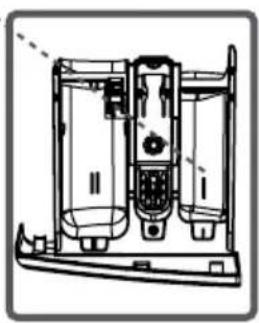
natural_image
Technical line drawing of a mechanical device with internal components (no text or symbols)- Drškom programatora odabirete željeni program.
- Odabir programa možete obaviti zakretanjem drška u oba smjera.
- Provjerite da je oznaka na dršku postavljena točno na željeni program.
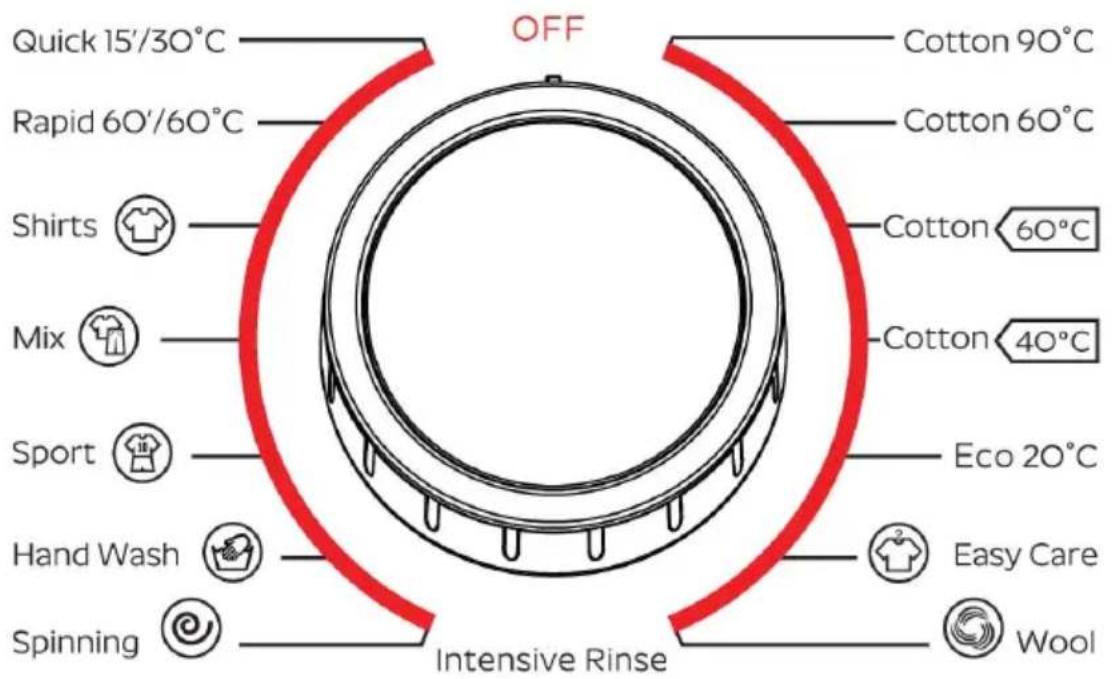
POGLAVLJE-4: UPRAVLJAČKA PLOČA (ELEKTRONSKI PRIKAZ FUNKCIJA)
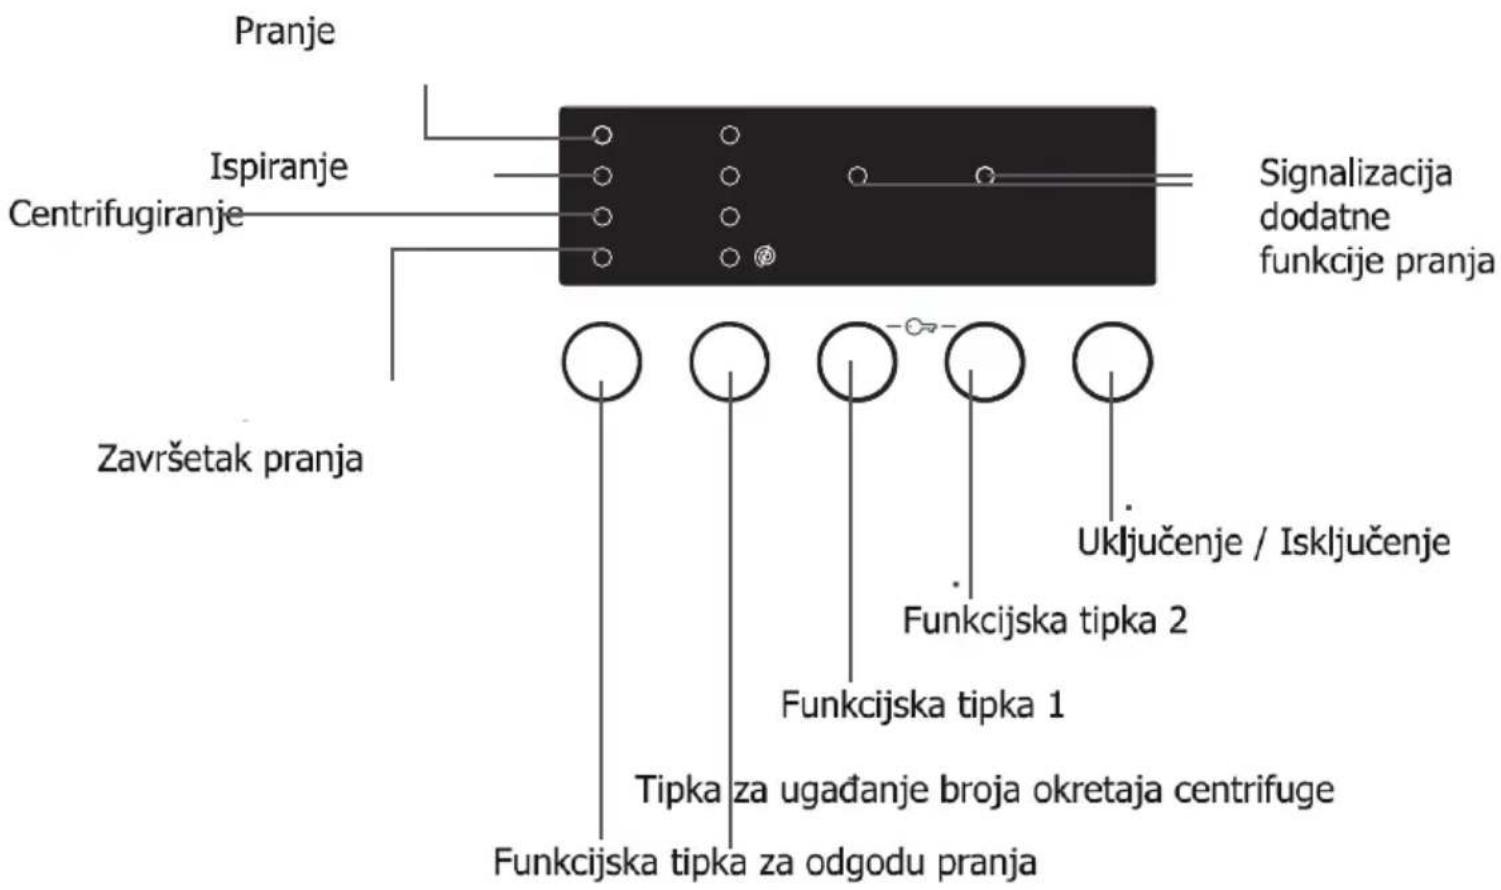
Na elektronskom zaslonu možete vidjeti status i ugađati Odgodu pranja, odabranu brzinu centrifuge, postaviti dodatnu funkciju programa pranja i vidjeti stanje programa pranja (痹 predpranje, ☐ ispiranje, © centrifuga).
natural_image
Line drawing of a washing machine with front panel and side door (no text or symbols)NAPOMENA: Napomena: Maksimalna količina rublja koji odgovara kapacitetu perilice rublja zavisi od vrste rublja koji perete, razini zaprljanja i program koji ćete odabrati. Ne prijekoračujte preporučeni maksimalni kapacitet suhog rublja za željeni program.
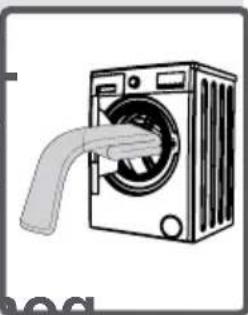
natural_image
Illustration of a washing machine with a pipe inserted, no text or symbols presentnatural_image
Line drawing of a washing machine with a circular vent and handle (no text or symbols)POGLAVLJE-5: PRIPREMANJE ZA PRANJE RUBLJA (STAVLJANJE DETERDŽENTA U PERILICU RUBLJA)
Količina deterdženta koji ćete staviti u vašu perilicu rublja zavisi od sljedećih uvjeta:
- Količina deterdženta koji ćete koristiti ovisi o razini zaprljanja rublja. Ne rabite funkciju pretpranja za manje zaprljano rublje i stavite malu količinu deterdženta u 2. odjeljak ladice za deterdžent.
- Za vaše jako prljavo rublje, izaberite program koji uključuje i pretpranje i stavite 14 deterdženta u 1. odjeljak ladice za deterdžent dok ostatak od 34 stavite u 2. odjeljak.
- Koristite deterdžente koji su proizvedeni za automatsko pranje rublja u perilici. Količina deterdženta koji ćete koristiti za vaš rublje je označena na pakovanju deterdženta.
- Što je voda tvrđa to ćete trebati više deterdženta.
- Količina deterdženta koji ćete koristiti će se povećati kako se povećava količina rublja koje ćete prati.
- Stavite omekšivač u odjeljak za omekšivač u ladici za deterdžent. Nemojte prekoračiti maksimalnu količinu. U su protnom, omekšivač će isteći u vodu za pranje.
- Omekšivači veće gustoće trebaju se razrijediti do određenog stupnja prije nego što ih stavite u ladicu za deterdžent. Gusti omekšivači mogu blokirati dotok vode i onemogućiti istjecanje omekšivača.
- Tekući deterdžent možete koristiti za sve programe bez pretpranja. Za uporabu tekućeg deterdženta postavite u 2 odjeljak ladice za deterdžent umetak ili pločicu za tekući deterdžent (*), koji se nalazi u priboru perilice. Razinu deterddenta odredite prema oznakama na pločici ili umetku. Prije uporabe deterddenta u prahu uklonite umetak za tekući deterdžent ili pločicu.
(*) Specifikacije perilice rublja mogu odstupati ovisno o modelu perilice.
POGLAVLJE-5: PRIPREMANJE ZA PRANJE RUBLJA (UKLJUČIVANJE PERILICE RUBLJA)
- Uključite perilicu rublja u električnu instalaciju.
- Otvorite slavinu za vodu.
- Otvorite vrata perilice rublja.
• Stavite rublje u perilicu rublja.
• Gurnite vrata perilice rublja kako biste ih zatvorili dok čujete zvuk zaključavanja.
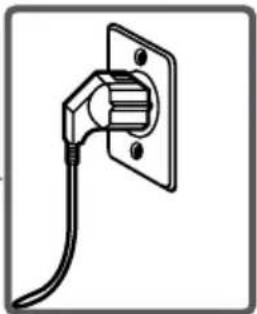
natural_image
Simple line drawing of an electric plug with a socket, no text or symbols present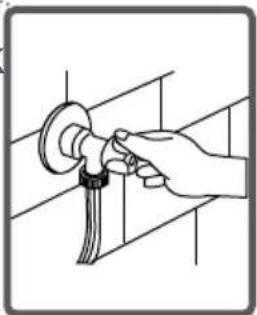
natural_image
Hand using a power tool to clean or adjust a circular component on a metal surface (no text or symbols visible)Odabir programa
Odaberite odgovarajući program za vaše rublje na programskoj ploči pomoću drška programatora.
POMOĆNE FUNKCIJE
Prije pokretanja programa, možete po želji odaberati pomoćnu funkciju.
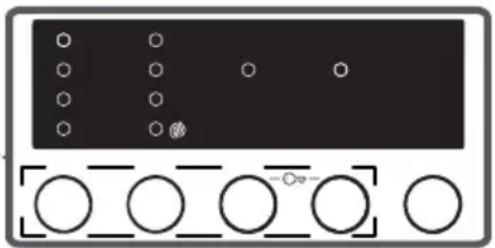
natural_image
Front panel of a control panel with five circular buttons and a black display (no text or symbols visible)natural_image
Pure electrical circuit lines without any symbolsnatural_image
Pure electrical circuit lines without any symbols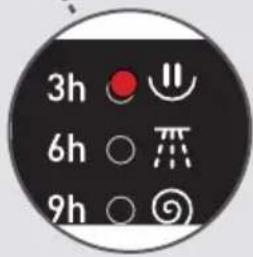
POGLAVLJE-5: PRIPREMANJE ZA PRANJE RUBLJA POMOĆNE FUNKCIJE
natural_image
Simple line drawing of an electrical outlet with a plug and socket (no text or symbols)natural_image
Technical line drawing of a mechanical component with no visible text or symbols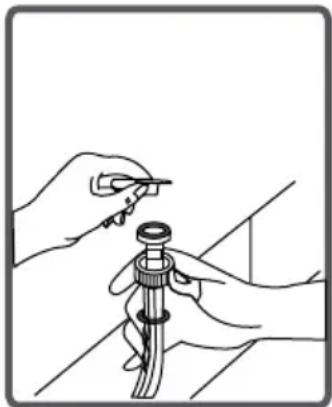
natural_image
Illustration of hands using a tool to adjust or install a mechanical component (no text or symbols visible)OPREZ:

Filtri ventila za dovod vode mogu biti začepljeni zbog zagađenja vode u slavini ili nedostatka održavanja ili zbog oštećenja ventila, što izaziva neprestano curenje vode u vašu perilicu rublja.
Kvarovi koji mogu nastati zbog ovih razloga nisu pokriveni jamstvom.
POGLAVLJE -7: ODRŽAVANJE I ČIŠĆENJE PERILICE RU-BLJA (FILTAR PUMPE)
natural_image
Diagram showing a mechanical component with a circular arrow and dashed line indicating direction (no text or symbols)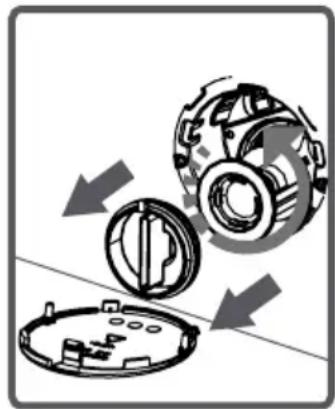
natural_image
Mechanical assembly diagram showing a gear and rotor components with directional arrows indicating motion (no text or symbols)(*) Specifičnosti perilice rublja mogu biti različite zavisno od kupljenog modela perilice.
POGLAVLJE -7: ODRŽAVANJE I ČIŠĆENJE PERILICE RU-BLJA (FILTAR PUMPE)
- Očistite strane materijale u filtru pomoću četke.
- Nakon čišćenja filtra, postavite poklopac filtra i zategnite ga okretanjem u smjeru kazaljke na satu.
- Pri zatvaranju poklopca filtra pumpe pazite da uskočnici na poklopcu uđu u rupe na kućištu aparata.
• Vratite poklopac pumpe na njegovo mjesto na isti način na koji ste ga izvadili.
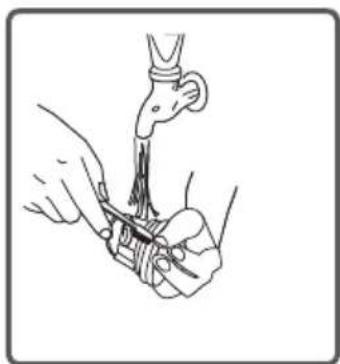
natural_image
Illustration of a medical procedure showing hand placement on a surgical instrument (no text or symbols present)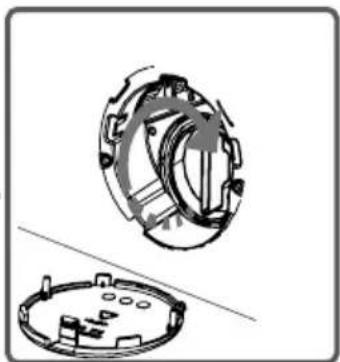
natural_image
Technical illustration of a mechanical component with two views: top shows a circular housing with internal gear-like structure, bottom shows a circular housing with internal components and mounting holes (no text or symbols)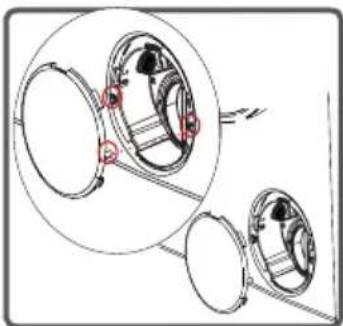
natural_image
Mechanical assembly diagram showing two circular components with red fasteners and a dashed line indicating motion (no text or symbols)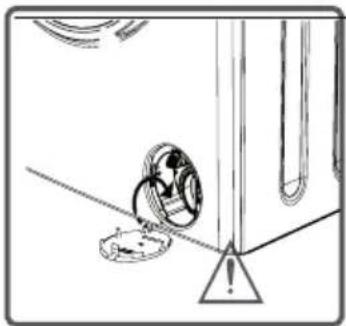
natural_image
Simple line drawing of a mechanical component with a circular feature and triangular base (no text or symbols)natural_image
Illustration of a hand inserting a device into a rack with an arrow indicating direction (no text or symbols)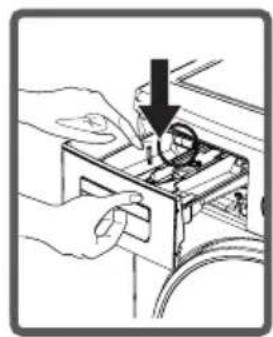
natural_image
Illustration of hands operating a mechanical device with a downward arrow indicating rotation (no text or symbols present)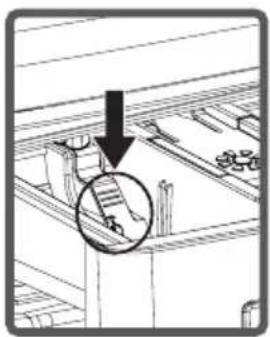
natural_image
Diagram showing a mechanical assembly with a downward arrow and a circled detail (no text or symbols)- Isperite ladicu s puno vode i očistite četkom.
- Ostatke deterdženta pažljivo očistite pazeći da ne upadaju u unutrašnjost aparata.
- Obrišite ladicu suhom krpom i vratite je na njeno mjesto.
natural_image
Technical line drawing of a mechanical device with an upward arrow indicating assembly or operation (no text or symbols present)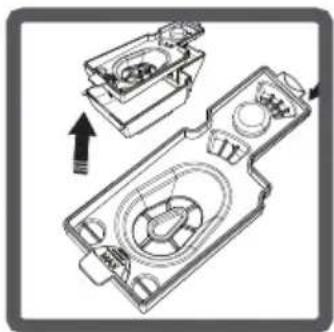
natural_image
Technical line drawing of a mechanical device with internal components and an arrow indicating assembly (no text or symbols)Čep (Sifon) ladice za deterdžent
Izvađite ladću za deterdžent iz njenog položaja. Rastavite sifon za odvod i u dobro očistite ostatke omekšivača. Vratite sifon za odvod nakon čišćenja. Proverite da li ste ga namjestili pravilno.
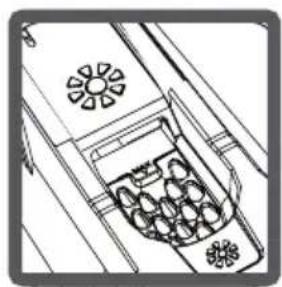
natural_image
Technical line drawing of a mechanical or electrical component with no visible text or symbols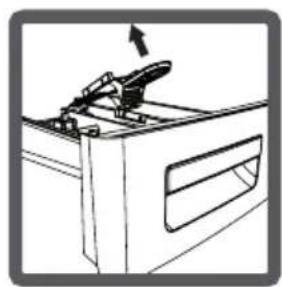
natural_image
Line drawing of a mechanical device with a lever and handle (no text or symbols)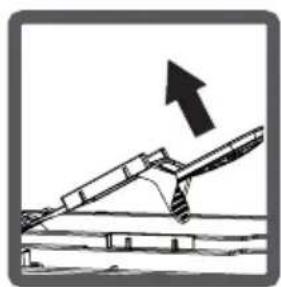
natural_image
Diagram of an inclined ramp with an upward arrow indicating motion (no text or symbols)Čišćenje kućišta
Kućište očistite blagim sredstvom za čišćenje, koje neće izazvati koroziju. Nakon čišćenja, kućište isperite čistom vodom i obrišite suhom krpom.
Čišćenje bubnja
Ne ostavljajte u perilici-sušilici metalne dijelove poput igle, spajalice,kovanica. Oni mogu uzrokovati nastanak hrđe unutar bubnja.Za uklanjanje hrđe koristite sredstva za čišćenje bez klorida i prema preporukama proizvođača sredstva za čišćenje. Nikako nemojte koristiti žičane četke ili oštre predmete za čišćenje bubnja.
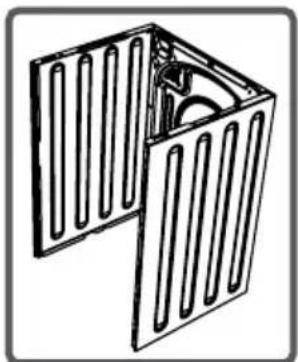
natural_image
Technical line drawing of a 3D panel or enclosure with vertical slats and a central circular component (no text or symbols)
natural_image
Technical illustration of a cylindrical mechanical component with internal threading and fasteners (no text or symbols)natural_image
Simple line drawing of a wine bottle with no text or symbols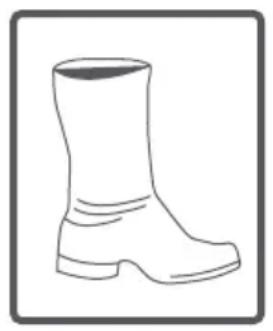
natural_image
Simple line drawing of a boots (no text or symbols)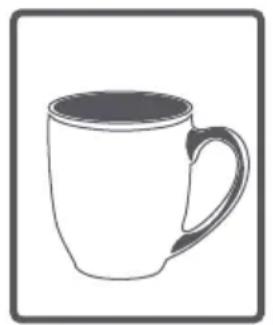
natural_image
Simple line drawing of a mug with handle and side rim, enclosed in a square frame (no text or symbols)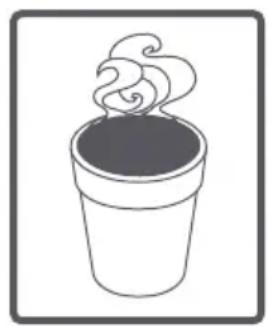
natural_image
Simple line drawing of a steaming cup with swirling smoke (no text or symbols)Rajčica: nakon uklanjanja krutih dijelova hrane, natopite rublje u hladnu vodu na 30 minuta, a zatim operite trljajući deterdžentom.
Jaja: Uklonite krute ostatke hrane. Mrlju izbrišite spužvom ili mekom krpom natopljenom u hladnoj void. Istrljajte deterdžentomi operite u razrijeňenoj lužini.
Mrlje od masti i ulja: Najprije uklonite ostatke ulja. Istrljajte mrlju deterdžentomm, a zatim operite sapunom u mlakoj vodi.
Senf: Na mrlju nanesite glicerin. Istrljajte deterdžentom i zatim operite. U slučaju da ne uklonite mrlju, istrljajte je mješavinom alkohola i vode o omjeru 1:2 i zatim operite u mlakoj vodi. (Za sintetičke i obojene tkanine, mora se koristiti mješavina alkohola i vode o omjeru 1:2)
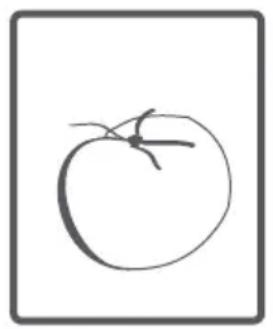
natural_image
Simple line drawing of a tomato (no text or symbols)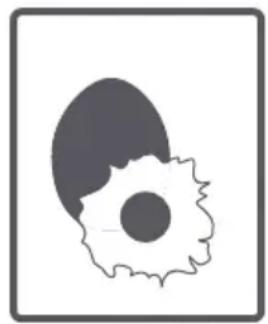
natural_image
Simple line drawing of an egg with a gear-like shape beside it, enclosed in a square frame (no text or symbols)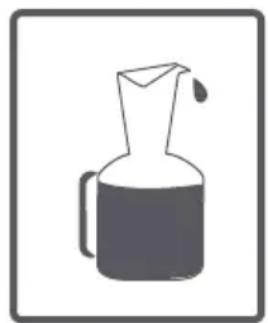
natural_image
Simple line drawing of a pitcher with a handle and spout (no text or symbols)
natural_image
Simple icon of a trash bin with a lid, no text or symbols presentnatural_image
Simple line drawing of a peach with a leaf, enclosed in a square frame (no text or symbols)
natural_image
Abstract line drawing with three curved strokes inside a square frame (no text or symbols)
natural_image
Line drawing of a paintbrush with bristles and handle (no text or symbols)
natural_image
Simple flame icon illustration (no text or symbols)Mrlja od krvi : Stavite rublje u hladnu vodu 30 minuta, a zatim isperite. Ukoliko mrlje nisu nestale, stavite rublje u mješavinu vode i amonijaka (3 žlice amonijaka u 4 litre vode) na 30 minuta.
Krema, sladoled i mleko: Natopite ru- blje u hladnu vodu, a zatim mrlju istrljajte deterdžentom. Ukoliko mrlje i dalje nisu nestale, koristite sredstva za čišćenje pazeći na pravilan omjer. (Nemojte koristiti izbeljivač za rublje u boji).
natural_image
Abstract black ink splatter on white background, no text or symbols present
natural_image
Illustration of a waffle ice cream in a connet with chocolate swirls (no text or symbols)
natural_image
Simple line drawing of a mushroom with a leafy base (no text or symbols)
natural_image
Simple line drawing of a pen with a droplet on the tip (no text or symbols)OPIS OZNAKE ENERGETSKE UČINKOVITOSTI I UŠTEDA ENERGIJE
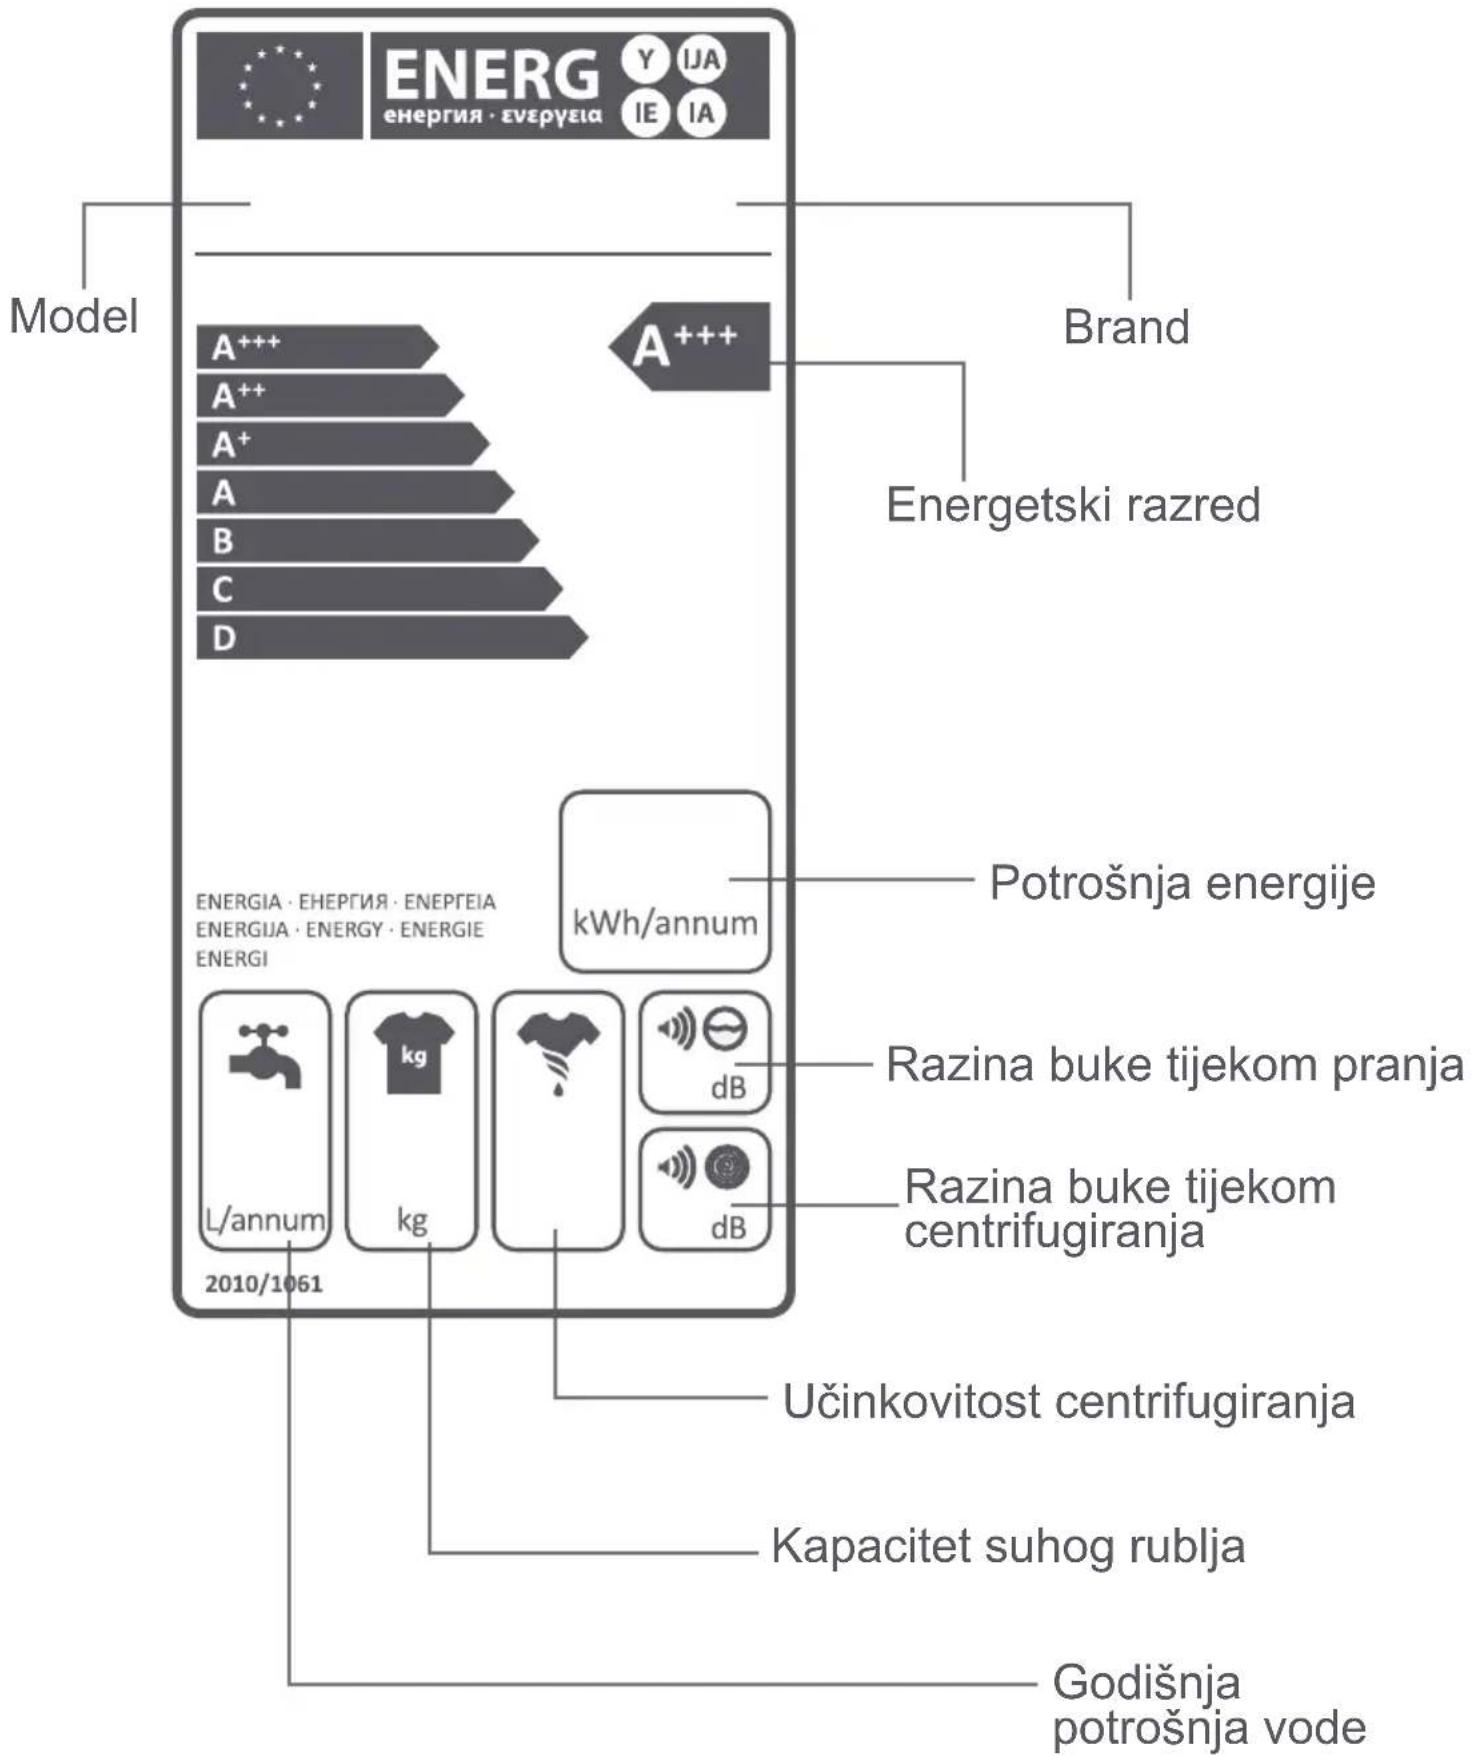
Potrošnja energije i vode može varirati ovisno o pritisku vode, tvrdoći vode, temperaturi vode, temperaturi prostorije, količini rublja, izabranim dodatnim funkcijama, odstupanju napona.
Uporaba perilice rublja u vremenskim intervalima kada je električna energija jeftinija, pravilan odabir programa pranja prema količini i razini zaprljanosti rublja, redovito čišcenje perilice rezultirat će većom energetskom učinkovitošću perilice rublja.
Prema Pravilniku o gospodarenju otpadnim električnim i elektroničkim uređajima i opremom i EU Directive: 2002/96/ECza proizvode uz koji je prikazan znak prekrižene kante za otpatke, skrećemo pozornost da se taj proizvod ne smije tretirati kao standardni kućni otpad. Ispravnim postupanjem, zbrinjavanjem i recikliranjem proizvoda, sprječavate potencijalne negativne posljedice na ljudsko zdravlje i okoliš, koji mogu nastati zbog neadekvatnog zbrinjavanja ili bacanja ovog proizvoda.
natural_image
Simple line drawing of an open book with no text or symbols visiblenatural_image
Line drawing of a washing machine with ventilation slots and a handle (no text or symbols)
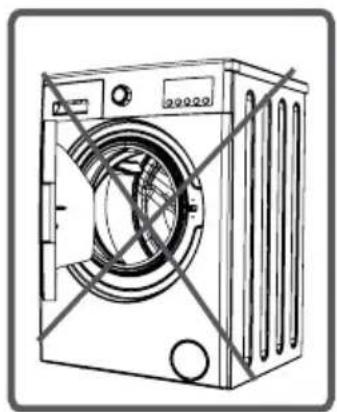
natural_image
Line drawing of a washing machine with no visible text or symbolsnatural_image
Two electrical socket symbols with a diagonal line crossing them, no text or labels present.
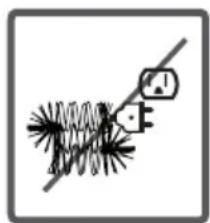
natural_image
Simple line drawing of a mechanical or electrical component with no text or symbols
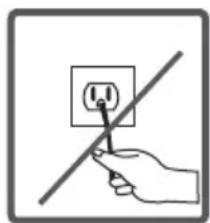
natural_image
Hand holding a power outlet with a diagonal line crossing through it (no text or symbols)
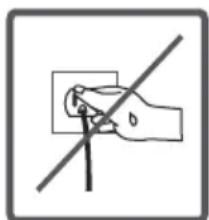
natural_image
Simple line drawing of a hand holding a square with a diagonal line crossing through it (no text or symbols)
Κίνδυνος πλημμύρας!

natural_image
Illustration of a hand using a tool to clean or inspect a funnel-shaped object (no text or symbols present)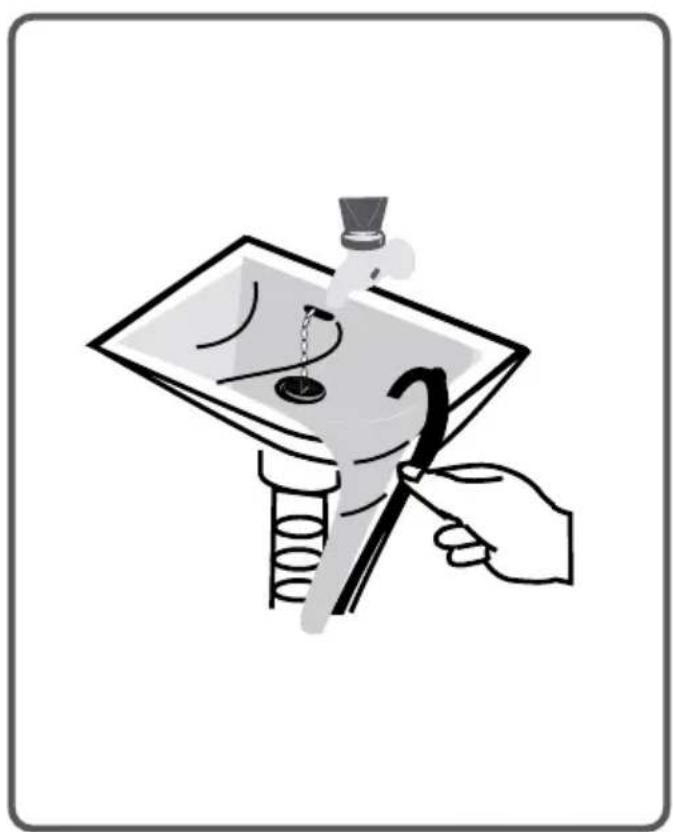
natural_image
Illustration of a hand using a tool to clean or inspect a surface with a funnel and spiral tube (no text or symbols)Κίνδυνος φωτιάς!

natural_image
Illustration of two workers carrying a large washing machine (no text or symbols present)natural_image
Line drawing of a hand holding a bandage or tape, no text or symbols presentnatural_image
Line drawing of a front-loading washing machine with control panel and buttons (no text or labels)natural_image
Technical line drawing of a washing machine casing with internal components and wiring (no text or labels)natural_image
Diagram of a washing machine showing internal components and a close-up view of the internal structure (no text or symbols present)natural_image
Line drawing of a front-loading washing machine with no text or symbolsnatural_image
Diagram showing two electrical plugs with a power outlet, one being inserted and the other holding a socket (no text or symbols present)natural_image
Line drawing of a coiled hose with two connectors (no text or symbols)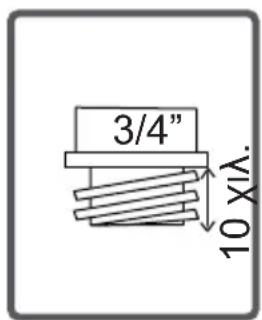
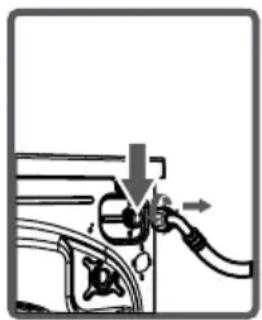
natural_image
Diagram of a car fuel pump with valve and valve components (no text or labels)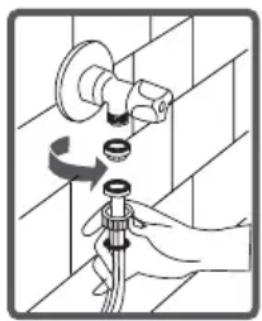
natural_image
Illustration of a hand holding a pipe fitting with a valve inserted, showing mechanical components (no text or symbols)natural_image
Diagram of a pipe fitting with a bulb attached, showing fluid flow (no text or symbols)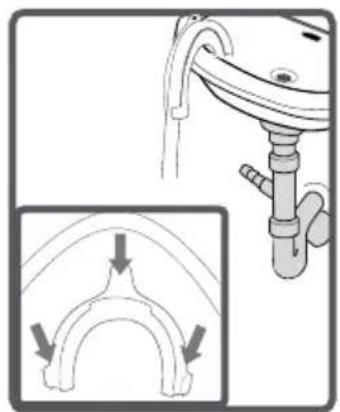
natural_image
Diagram showing a pipe installation with an inset illustrating the curved structure (no text or symbols present)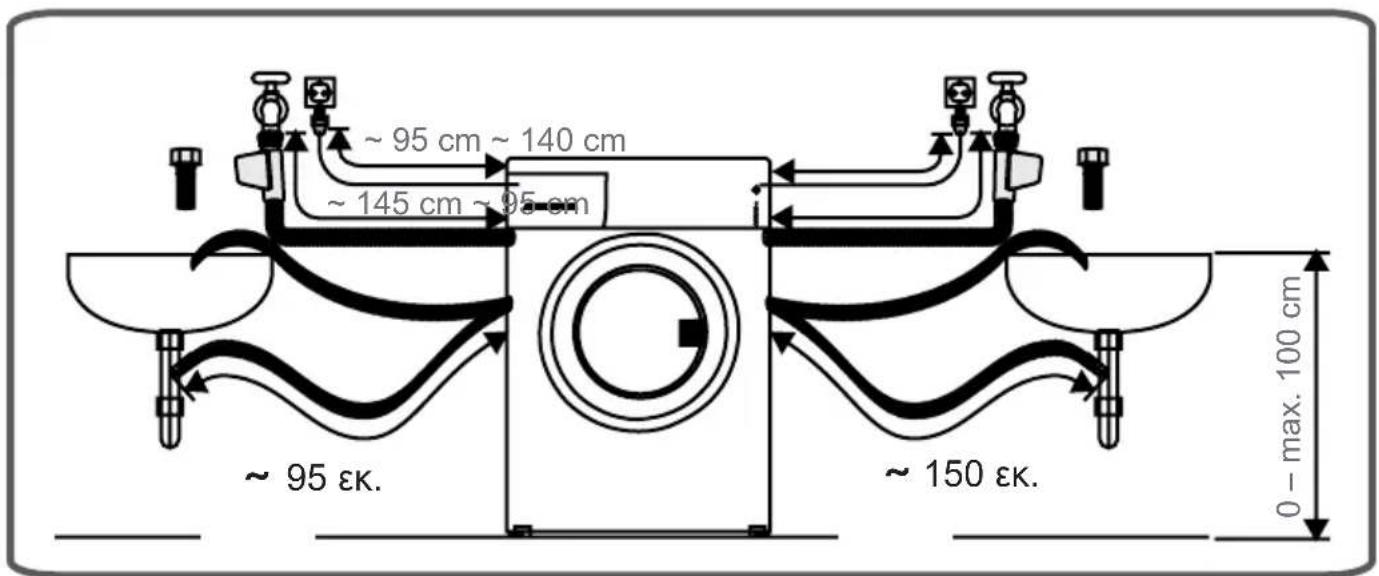
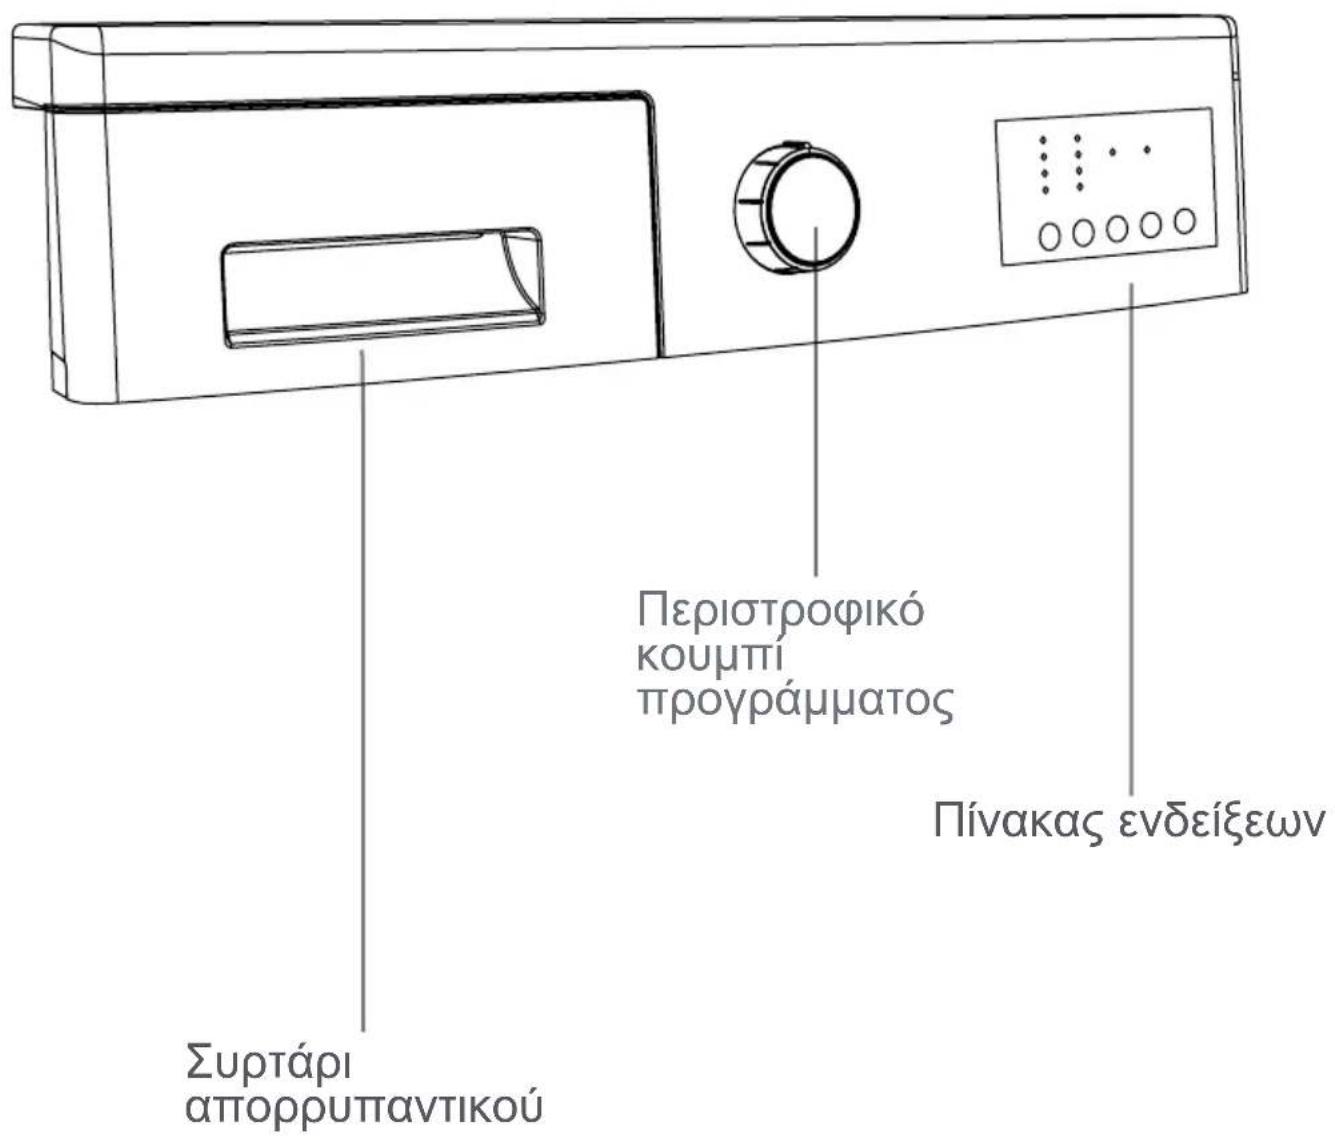
natural_image
Line drawing of a washing machine with a close-up inset showing internal components (no text or symbols)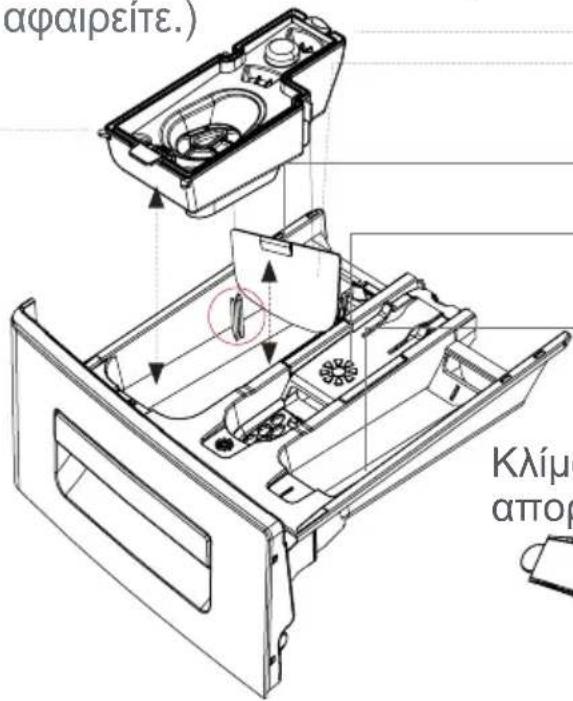
natural_image
Technical line drawing of a mechanical component or tool (no text or symbols visible)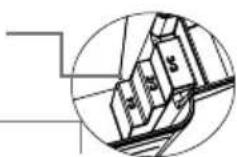
natural_image
Technical line drawing of a device with two views: top shows internal components, bottom shows exterior view (no text or symbols)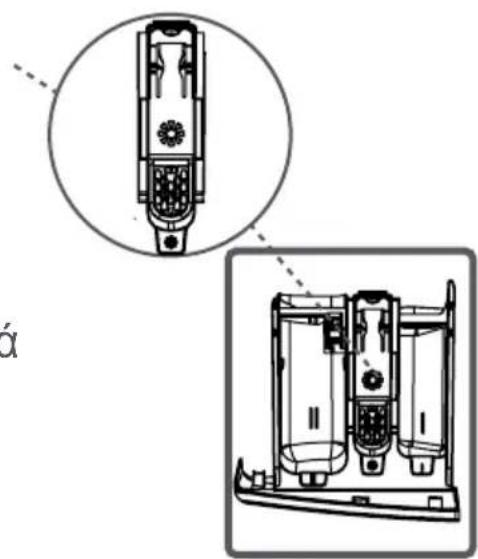
natural_image
Technical line drawing of a mechanical device with internal components and a magnified inset (no text or symbols)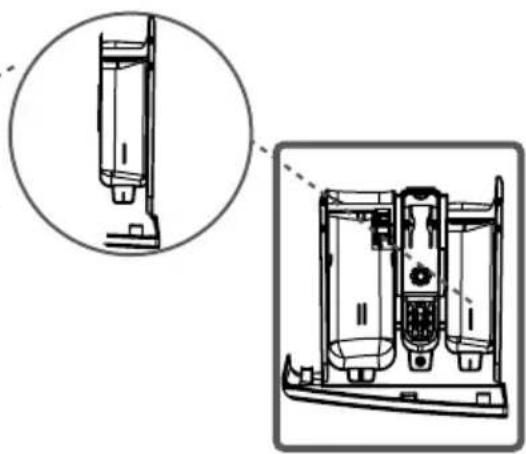
natural_image
Technical line drawing of a mechanical device with cross-sectional view and exploded view (no text or symbols)natural_image
Line drawing of a washing machine with front panel and side door (no text or symbols)natural_image
Line drawing of a washing machine with a handle and ventilation slots (no text or symbols)natural_image
Line drawing of a washing machine with a circular button, no text or symbols presentnatural_image
Simple line drawing of an electric plug with a socket and cable (no text or symbols)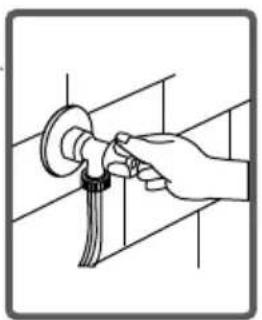
natural_image
Illustration of a hand using a tool to adjust or install a mechanical component (no text or symbols visible)natural_image
Simple line drawing of an electrical outlet with a plug and socket (no text or symbols)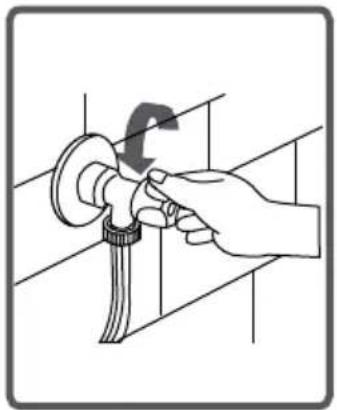
natural_image
Illustration of a hand using a tool to adjust or install a mechanical component (no text or symbols present)natural_image
Technical line drawing of a mechanical component with no visible text or symbols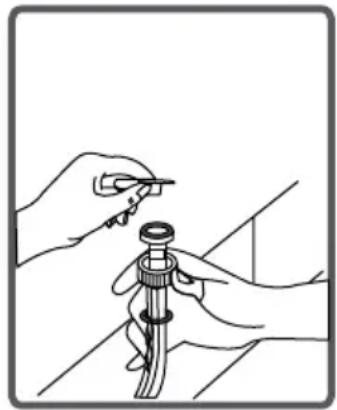
natural_image
Illustration of hands using a tool to adjust or install a mechanical component (no text or symbols visible)ΠΡΟΣΟΧΗ:

natural_image
Diagram showing a mechanical component with a circular arrow and dashed line indicating direction (no text or symbols)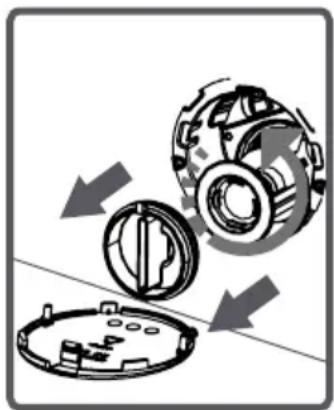
natural_image
Mechanical assembly diagram showing a gear and rotor components with directional arrows indicating motion (no text or symbols)natural_image
Illustration of a hand holding a small object with tassels, possibly a medical or laboratory procedure (no text or symbols present)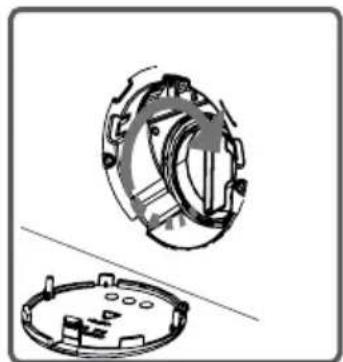
natural_image
Technical illustration of a mechanical component with two views: top shows internal gear assembly, bottom shows circular housing (no text or symbols)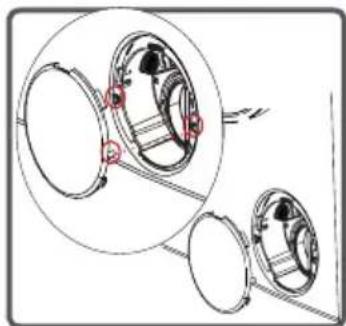
natural_image
Mechanical assembly diagram showing two circular components with red fasteners and a connecting rod (no text or labels)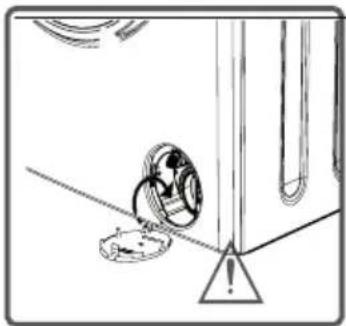
natural_image
Simple line drawing of a mechanical component with a circular inset showing a ring and a triangular base (no text or symbols)natural_image
Illustration of a hand inserting a card into a printer (no text or symbols visible)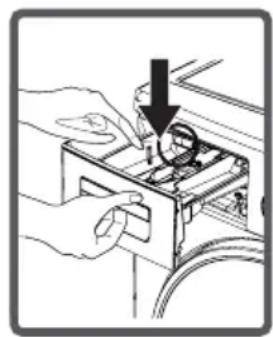
natural_image
Illustration of hands operating a mechanical device with a downward arrow indicating rotation (no text or symbols present)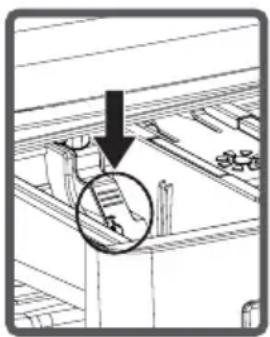
natural_image
Diagram showing a mechanical assembly with a downward arrow and a circled detail (no text or symbols)natural_image
Technical line drawing of a mechanical device with an upward arrow indicating assembly or operation (no text or symbols present)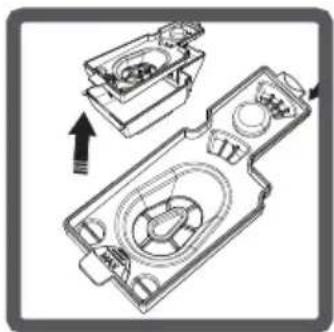
natural_image
Technical line drawing of a mechanical device with internal components and an arrow indicating assembly (no text or symbols)Σιφώνιο
natural_image
Technical line drawing of a cabinet or appliance with internal compartments and fan-like elements (no text or symbols)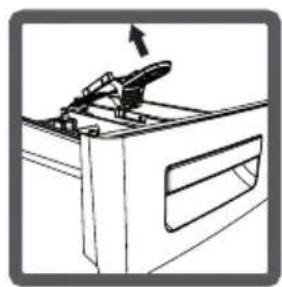
natural_image
Line drawing of a mechanical device with an arrow indicating upward motion (no text or symbols)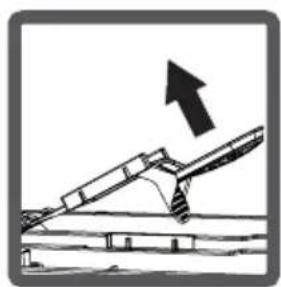
natural_image
Diagram of an inclined ramp with an upward arrow indicating motion (no text or symbols)Κορμός
natural_image
Technical line drawing of a 3D rectangular frame with internal slots and a curved cutout (no text or symbols)Τύμπανο
natural_image
Technical illustration of a cylindrical mechanical component with internal cross-section (no text or symbols)natural_image
Simple line drawing of a wine bottle with no text or symbols
natural_image
Simple line drawing of a boots with no text or symbols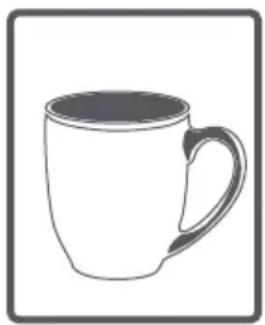
natural_image
Simple line drawing of a mug with handle and side rim, no text or symbols present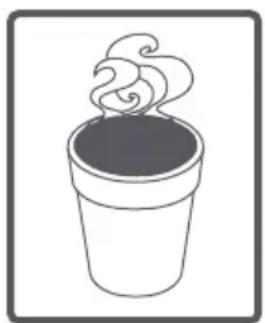
natural_image
Simple line drawing of a steaming cup (no text or symbols)natural_image
Simple line drawing of a tomato (no text or symbols)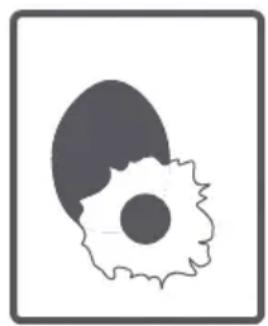
natural_image
Simple line drawing of an egg with a gear inside, no text or symbols present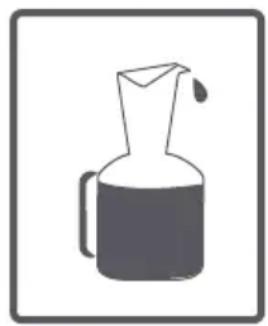
natural_image
Simple line drawing of a pitcher with liquid and handle (no text or symbols)
natural_image
Simple icon of a trash bin with a lid, no text or symbols presentnatural_image
Simple line drawing of a peach with a leaf, enclosed in a square frame (no text or symbols)
natural_image
Simple line drawing of two curved lines inside a square frame (no text or symbols)
natural_image
Line drawing of a paintbrush with a handle and bristles (no text or symbols)
natural_image
Simple flame icon illustration inside a square frame (no text or symbols)natural_image
Abstract black-and-white illustration of a splatter or droplet with multiple droplets and spikes, enclosed in a rounded square frame (no text or symbols)
natural_image
Illustration of a waffle cone with whipped cream swirls (no text or symbols)
natural_image
Simple line drawing of a mushroom with a leafy base (no text or symbols)
natural_image
Line drawing of a pen with a droplet on the tip, enclosed in a square frame (no text or symbols)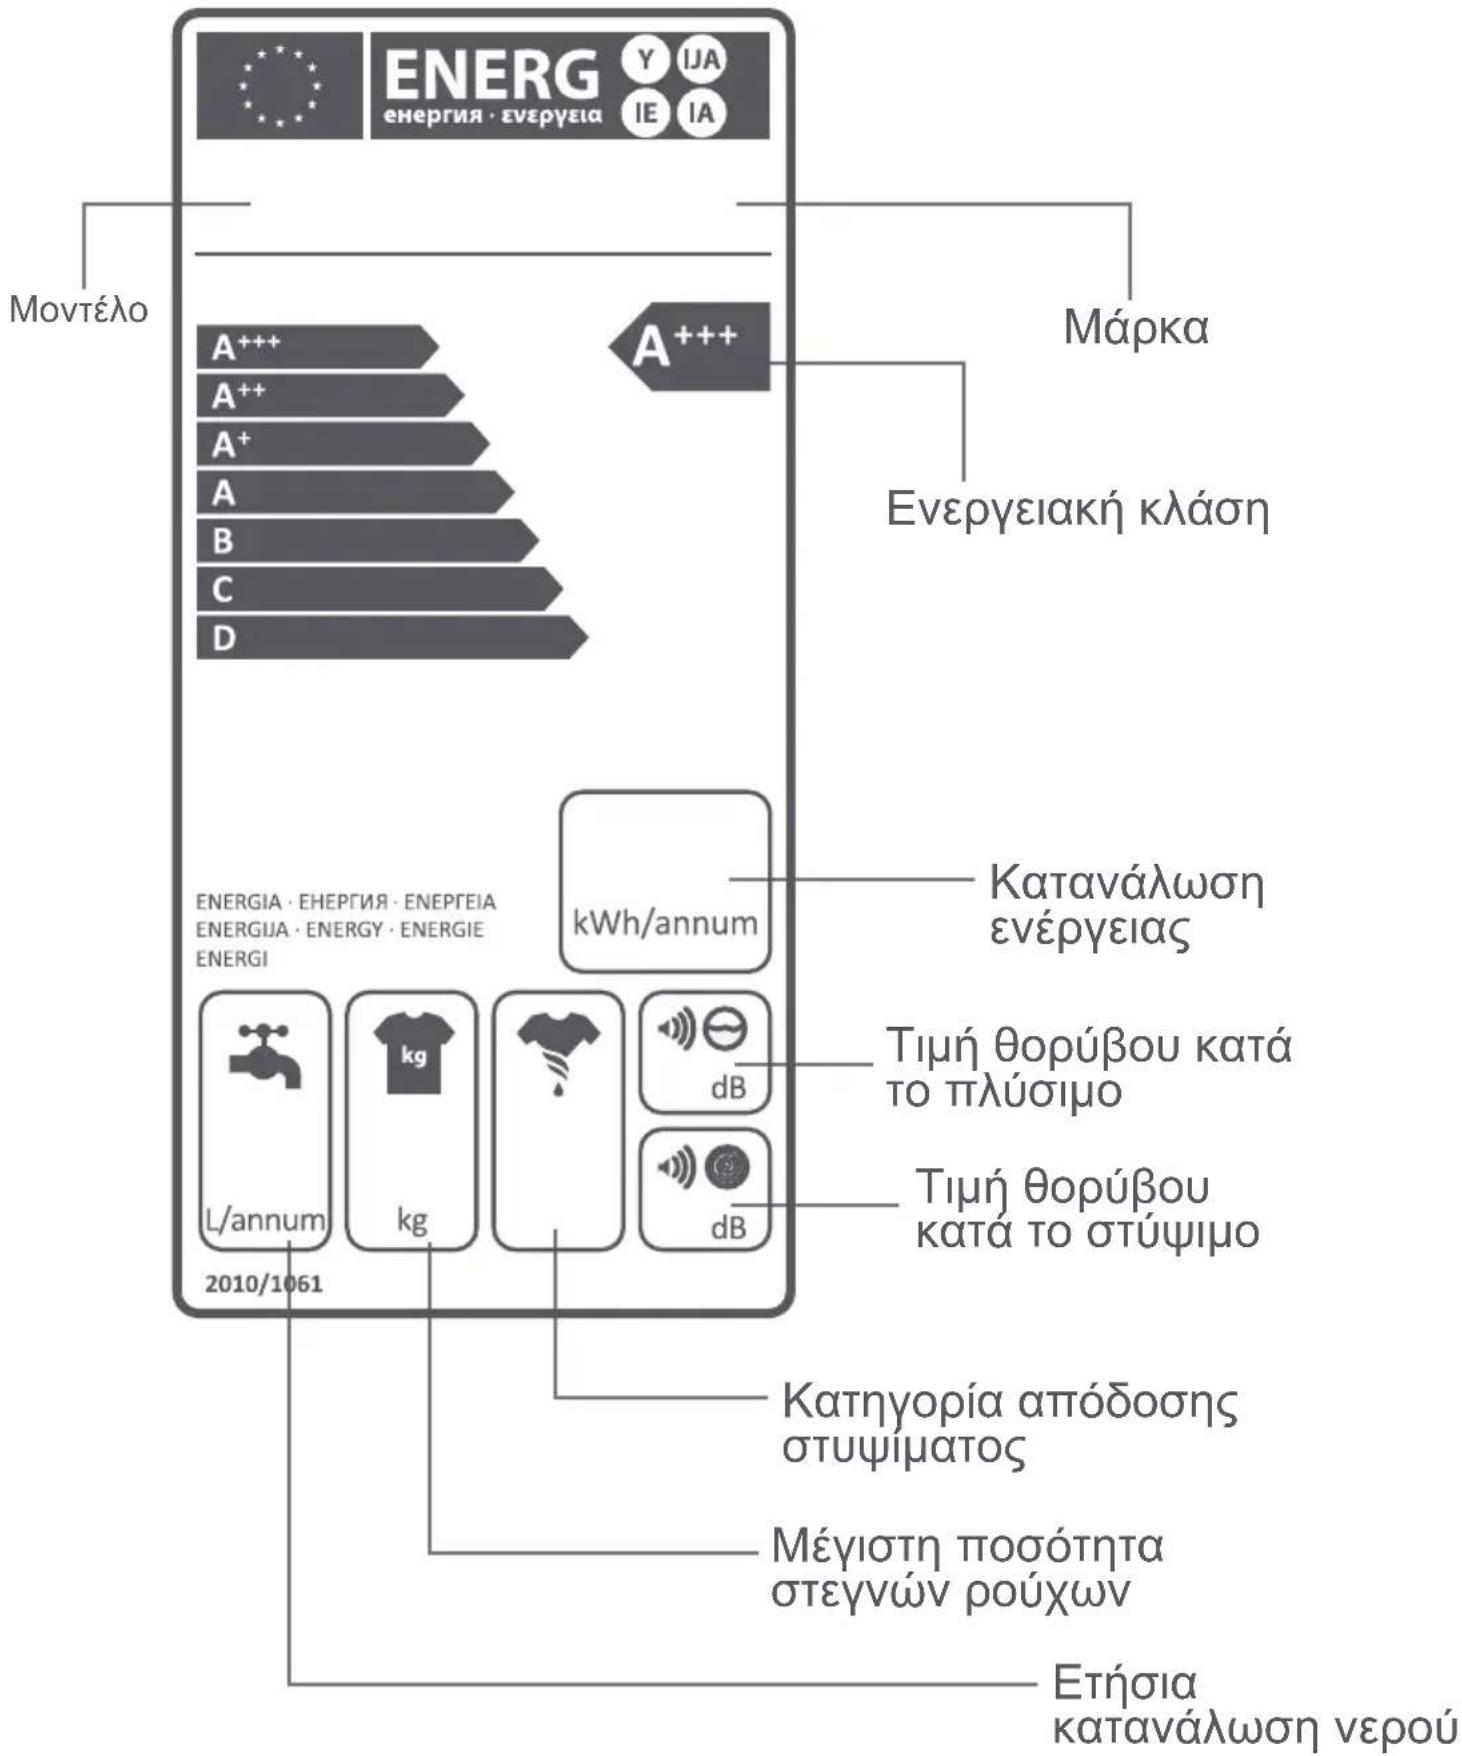
CE
- WM1062 - 1062Y
- CHAPTER-1: BEFORE USING THE APPLIANCE
- CHAPTER-2: OVERVIEW OF YOUR DEVICE
- CHAPTER-3: INSTALLATION
- CHAPTER-4: INTRODUCTION OF CONTROL PANEL .... 32
- CHAPTER-5: PRELIMINARY PREPARATION FOR LAUNDERING
- CHAPTER-7: MAINTENANCE AND CLEANING OF YOUR MACHINE
- CHAPTER -1: BEFORE USING THE APPLIANCE (CORRECT USAGE)
- DANGER OF GETTING BURNT!
- DEATH RISK DUE TO ELECTRICAL CURRENT!
- Flooding risk!
- Danger of Fire!
- Fall and injury hazard!
- Child safety!
- Removal of packaging materials
- Disposal of old machine
- Adjusting Adjustable Stays
- CHAPTER -3: INSTALLATION OF THE MACHINE (ADJUSTING ADJUSTABLE STAYS)
- CHAPTER -3: INSTALLATION OF THE MACHINE (WATER INLET HOSE CONNECTION)
- CHAPTER -4: INTRODUCTION OF CONTROL PANEL (DETERGENT DRAWER)
- SECTIONS
- Main wash detergent compartment:
- Fabric conditioner, starch, detergent compartment:
- Pre-wash detergent compartment:
- CAUTION: WARNING: Faults that will emerge in case of penetration of foreign substances into your machine are not included within the scope of warranty.
- NOTE: Note: Maximum loading capacity may vary based on the laundry type you will wash, degree of contamination and the programme you have chosen. Do not exceed maximum dry loading capacity indicated in the programme table for washing programmes.
- CHAPTER -5: PRELIMINARY PREPARATION FOR LAUNDERING (OPERATING YOUR MACHINE)
- Selecting programme
- AUXILIARY FUNCTIONS
- Reason for non-activation:
- HALF-LOAD DETECTION SYSTEM
- 1- Auxiliary function for delay timer
- To use auxiliary function of delayed start:
- 2- Spin Speed Selection
- 3- Extra Rinse(\*)
- 4- Pre-wash(\*)
- 5- Anti-Allergic(\*)
- 6- Rapid wash(\*)
- 7- Cold Wash(\*)
- 8- Easy ironing(\*)
- 9- No Spin Button(\*)
- Start/Pause button
- If you want to cancel any programme running:
- CAUTION:
- CHAPTER -7: MAINTENANCE AND CLEANING OF YOUR MACHINE (PUMP FILTER)
- WARNING!
- Liquid Detergent Apparatus (\*)
- Flush stopper
- Body
- Drum
- SRPSKI
- PRIJATELJSKI ODNOS PREMA OKOLINI 3
- POGLAVLJE 1: PRE UPOTREBE UREĐAJA 4
- OPASNOST OD POŽARA!
- OPASNOST OD OZLEDA!
- POGLAVLJE 3: INSTALACIJA MAŠINE Električno povezivanje
- ODELJCI PRETINCA ZA PRAŠAK
- Odeljak za omekšivač
- POGLAVLJE 4: UPRAVLJAČKA PLOČA Programator
- DODATNA POSUDA ZA TEKUĆI DETERDŽENT (\*opcija, ne svi modeli)
- SIFON ZA DOZIRANJE OMEKŠIVAČA ZA VEŠ
- KUĆIŠTE MAŠINE
- BUBANJ
- ODSTRANJIVANJE KAMENCA
- VOX
- ELECTRONICS
- Опасност од пожар!
- Заштита на деца!
- ГЛАВА -3: ИНСТАЛИРАЊЕ НА МАШИНАТА (ОТСТРАНУВАЊЕ НА БЕЗБЕДНОСНИТЕ ТРАНСПОРТНИ ЗАВРТКИ)
- Избор на програма
- ВНИМАНИЕ:
- ПРЕДУПРЕДУВАЊЕ!
- Ку́киште
- ОПИС НА ЕТИКЕТАТА СО ЕНЕРГЕТСКИ ПОДАТОЦИ И ЗАШТЕДА НА ЕНЕРГИЈА
- POGLAVJE: PRED UPORABO NAPRAVE
- POGLAVJE: PRED UPORABO NAPRAVE (SPLOŠNA OPOZORILA)
- Nevarnost poplave!
- Nevarnost ognja!
- Varnost otrok!
- POGLAVJE: NAMESTITEV (NASTAVITEV PRILAGODLJIVIH NOGIC)
- POGLAVJE: NAMESTITEV (PRIKLJUČITEV NA DOVOD VODE)
- POGLAVJE: PREDSTAVITEV UPRAVLJALNE PLOŠČE
- POGLAVJE: PREDSTAVITEV UPRAVLJALNE PLOŠČE (PREDALČEK ZA PRALNO SREDSTVO)
- OPOMBA: Največja kapaciteta perila je odvisna od vrste perila za pranje, stopnje umazanosti in izbra-nega programa. Kapaciteta suhega perila ne sme presegati navedene v programski tabeli za programe pra-nja.
- Izbira programa
- DODATNE FUNKCIJE
- POZOR:
- OPOZORILO!
- Ohišje
- Boben
- POGLAVLJE-1: PRIJE UPORABE PERILICE
- POGLAVLJE-2: IZGLED PERILICE RUBLJA
- POGLAVLJE-3: POSTAVLJANJE
- POGLAVLJE-4 UPRAVLJAČKA PLOČA 32
- POGLAVLJE -5: PRIPRIJEMANJE ZA PRANJE RUBLJA
- SADRŽAJ
- POGLAVLJE-1: PRIJE UPORABE PERILICE RUBLJA (OPĆA UPOZORENJA)
- Opasnost od poplave!
- Sigurnost djece!
- Uklanjanje materijala ambalaže.
- TEHNIČKE KARAKTERISTIKE
- Nameštanje podesivih nožica
- POGLAVLJE -3: POSTAVLJANJE (NAMEŠTANJE PODESIVIH NOŽICA)
- NAPOMENA: Rad vaše perilice rublja pri slabijem naponu može umanjiti karakteristike perilice i skratiti njen radni vijek.
- POGLAVLJE-3: POSTAVLJANJE (PRIKLJUČAK CIJEVI ZA DOVOD VODE)
- POGLAVLJE-4: UPRAVLJAČKA PLOČA (LADICA ZA DETERDŽENT)
- DIJELOVI
- POGLAVLJE-4: UPRAVLJAČKA PLOČA (ELEKTRONSKI PRIKAZ FUNKCIJA)
- NAPOMENA: Napomena: Maksimalna količina rublja koji odgovara kapacitetu perilice rublja zavisi od vrste rublja koji perete, razini zaprljanja i program koji ćete odabrati. Ne prijekoračujte preporučeni maksimalni kapacitet suhog rublja za željeni program.
- POGLAVLJE-5: PRIPREMANJE ZA PRANJE RUBLJA (STAVLJANJE DETERDŽENTA U PERILICU RUBLJA)
- POGLAVLJE-5: PRIPREMANJE ZA PRANJE RUBLJA (UKLJUČIVANJE PERILICE RUBLJA)
- Odabir programa
- POMOĆNE FUNKCIJE
- POGLAVLJE-5: PRIPREMANJE ZA PRANJE RUBLJA POMOĆNE FUNKCIJE
- OPREZ:
- POGLAVLJE -7: ODRŽAVANJE I ČIŠĆENJE PERILICE RU-BLJA (FILTAR PUMPE)
- Čep (Sifon) ladice za deterdžent
- Čišćenje kućišta
- Čišćenje bubnja
- OPIS OZNAKE ENERGETSKE UČINKOVITOSTI I UŠTEDA ENERGIJE
- Κίνδυνος πλημμύρας!
- Κίνδυνος φωτιάς!
- ΠΡΟΣΟΧΗ:
- Σιφώνιο
- Κορμός
- Τύμπανο
Brand : VOX
Model : WM1062Y
Category : Washing machine