
Farmhouse 60G - Cooker BELLING - Free user manual and instructions
Find the device manual for free Farmhouse 60G BELLING in PDF.


| Product Type | Freestanding Gas Cooker (Double Oven) |
| Brand | Belling |
| Model | Farmhouse 60G |
| Dimensions (approx.) | Height: 900 mm, Width: 600 mm, Depth: 600 mm |
| Weight (approx.) | 60 kg |
| Electrical Supply | 220-240 V ~ 50 Hz (for ignition and lighting) |
| Gas Connection | Rear right, ISO7 Rp1/2" (1/2" BSP) |
| Gas Categories | Natural Gas I2H (G20 @ 20 mbar), LPG I3+ (G31 @ 37 mbar, G30 @ 28-30 mbar) |
| Total Heat Input (Max, Double oven without wok) | 12.20 kW (Nat Gas) / 12.10 kW (LPG) |
| Total Heat Input (Max, Double oven with wok) | 13.20 kW (Nat Gas) / 13.10 kW (LPG) |
| Hob Burners | 4 gas burners: 1 rapid/wok (3.0-4.0 kW), 2 medium (2.0 kW), 1 small (1.0 kW) |
| Main Oven Type | Gas oven with multiple functions: Conventional, Fanned, Base Heat, etc. |
| Top Oven / Grill | Electric grill with dual/ single settings, plus top oven functions |
| Oven Capacity (approx.) | Main oven: 65 L, Top oven: 35 L |
| Clock / Programmer | Digital touch control with minute minder, cooking duration, end time, key lock |
| Safety Features | Flame failure device on hob, lid safety switch, child lock (key lock), automatic shut-off if lid closed |
| Cleaning | Warm soapy water, soft cloth; do not use abrasive cleaners, steam cleaners, or wire wool |
| Accessories Included | Grill pan with trivet, shelves, optional wok ring, griddle, plate rack (may vary) |
| Warranty | 12 months manufacturer's guarantee (extended warranty available) |
| Country of Destination | GB, IE (others may vary) |
Frequently Asked Questions - Farmhouse 60G BELLING
User questions about Farmhouse 60G BELLING
0 question about this device. Answer the ones you know or ask your own.
Ask a new question about this device
Download the instructions for your Cooker in PDF format for free! Find your manual Farmhouse 60G - BELLING and take your electronic device back in hand. On this page are published all the documents necessary for the use of your device. Farmhouse 60G by BELLING.
USER MANUAL Farmhouse 60G BELLING
natural_image
Black-and-white photo of a plated dish with textured food, dipping sauce, and a halved vegetable slice (no text or symbols visible)
text_image
bellingCountries of destination:
GB - Great Britain ☑
IE - Ireland ☑
DE - Germany
ES - Spain
FR - France
IT - Italy
PL - Poland
NL - Netherlands
SE - Sweden
CN - China
NZ - New Zealand
AU - Australia
To contact Belling about your appliance, please call:

Customer Care Helpline
0344 815 3746
In case of difficulty within the UK

Warranty Registration
0800 952 1068
*Please call our Customer Care team for extended warranty

Spares Store
0344 815 3745

To register your appliance online:
www.belling.co.uk

To contact us by email:
gdhainfo@gdha.com

To register your appliance by mail:
Please complete the warranty card and return to the address supplied

Alternatively general, spares and service information is available from our website at: www.belling.co.uk
Calls are charged at the basic rate, please check with your telephone service provider for exact charges
Your new appliance comes with our 12-month guarantee, protecting you against electrical and mechanical breakdown. To register, please complete the registration form included, register online or by phone. For full terms & conditions of the manufacturer's guarantee, please refer to the website above. In addition, you may wish to purchase an extended warranty. A leaflet explaining how to do this is included with your appliance.
Our policy is one of constant development and improvement, therefore we cannot guarantee the strict accuracy of all of our illustrations and specifications. Changes may have been made subsequent to publishing.
Thank you for buying this British-built appliance from us.
This user guide book is designed to help you through each step of owning your new product.
Please read it carefully before you start using your appliance, as we have endeavored to answer as many questions as possible, and provide you with as much support as we can.
General information, spares and service information is available from our website.
If you should find something missing from your product or have any questions that are not covered in this user guide, please contact us (see contact information inside the front cover).
European Directives
As a producer and a supplier of cooking appliances we are committed to the protection of the environment and are in the compliance with the WEEE directive. All our electric products are labelled accordingly with the crossed out wheeled bin symbol. This indicates, for disposal purposes at end of life, that these products must be taken to a recognized collection points, such as local authority sites/local recycling centres.
This appliance Complies with European Community Directives (CE) for household and similar electrical appliances and Gas appliances where applicable.
This appliance conforms to European Directive regarding Eco design requirements for energy-related products. Our policy is one of constant development and improvement, therefore we cannot guarantee the strict accuracy of all of our illustrations and specifications - changes may have been made subsequent to publishing.
Disposal of Packaging Material
The packaging materials used with this appliance can be recycled. Please dispose of the packaging materials in the appropriate container at your local waste disposal facilities.
WARNING
- During use the appliance becomes hot. Care should be taken to avoid touching heating elements.
- The appliance and its accessible parts become hot during use. Care should be taken to avoid touching heating elements. Children less than 8 years of age shall be kept away unless continuously supervised. This appliance can be used by children aged from 8 years and above and persons with reduced physical sensory or mental capabilities or lack of experience and knowledge if they have been given supervision or instruction concerning the use of the appliance in a safe way and understand the hazards involved. Children shall not play with the appliance. Cleaning and user maintenance shall not be made by children without supervision.
- Do not use harsh abrasive cleaners or sharp metal scrapers to clean the oven door glass since they can scratch the surface, which may result in shattering of the glass.
- Do not use a steam cleaner on any cooking range, hob or oven appliance.
- If your appliance is fitted with a lid, any spillage should be removed from the lid before opening. The hob surface should be allowed to cool before closing the lid.
- Ensure that the appliance is switched off before replacing the lamp to avoid electric shock.
- The appliance is not intended to be operated by means of an external timer or separate control system.
- Unattended cooking on a hob with fat or oil can be dangerous and may result in fire.
- NEVER try to extinguish a fire with water, but switch off the appliance and then cover the flame with a lid or damp cloth.
- Danger of fire: Do not store items on the cooking surfaces.
- Only use hob guards designed by the manufacturer of the cooking appliance or indicated by the manufacturer of the appliance in the instructions for use as suitable or hob guards incorporated in the appliance. The use of inappropriate hob guards can cause accidents.
- Accessible parts may become hot when the grill is in use. Children should be kept away.
- If the cooker is placed on a base, measures have to be taken to prevent the appliance slipping from the base.
CAUTION
- This appliance must not be installed behind a decorative door in order to avoid overheating.
- The cooking process has to be supervised. A short term cooking process has to be supervised continuously.
- The use of a gas cooking appliance results in the production of heat, moisture and products of combustion in the room in which it is installed. Ensure that the kitchen is well ventilated especially when the appliance is in use: keep natural ventilation holes open or install a mechanical ventilation device (mechanical extractor hood). Prolonged intensive use of the appliance may call for additional ventilation, for example opening of a window, or more effective ventilation, for example increasing the level of mechanical ventilation where present.
- This appliance is for cooking purposes only. It must not be used for other purposes, for example room heating.
- (Gas through glass models only) In case of hotplate glass breakage, immediately shut off all burners and any electrical heating element and isolate the appliance from the power supply, do not touch the appliance surface, do not use the appliance.
- Fire Safety Advice
If you do have a fire in the kitchen, don't take any risks - get everyone out of your home and call the Fire Brigade.
If you have an electrical fire in the kitchen and you consider it safe to do so:
- Pull the plug out, or switch off the power at the fuse box - this may be enough to stop the fire immediately
- Smother the fire with a fire blanket, or use a dry powder or carbon dioxide extinguisher
- Remember: never use water on an electrical or cooking oil fire.
• Other Safety Advice
- Servicing should be carried out only by authorised personnel.
- Do not operate the appliance without the glass panel correctly fitted.
- There is a risk of electric shock, so always make sure you have turned off and unplugged your appliance before starting. Always allow the product to cool down before you change a bulb.
-
Do not modify the outer panels of this appliance in any way.
• This appliance must be earthed. -
The appliance must never be disconnected from the mains supply during use, as this will seriously affect the safety and performance, particularly in relation to surface temperatures becoming hot and gas operated parts not working efficiently. The cooling fan (if fitted) is designed to run on after the control knob has been switched off.
- GAS WARNING! - If you smell gas: Do not try to light any appliance, Do not touch any electrical switch. Contact your local gas supplier immediately.
Getting to know your product
Note: Your appliance layout may differ depending on the model.
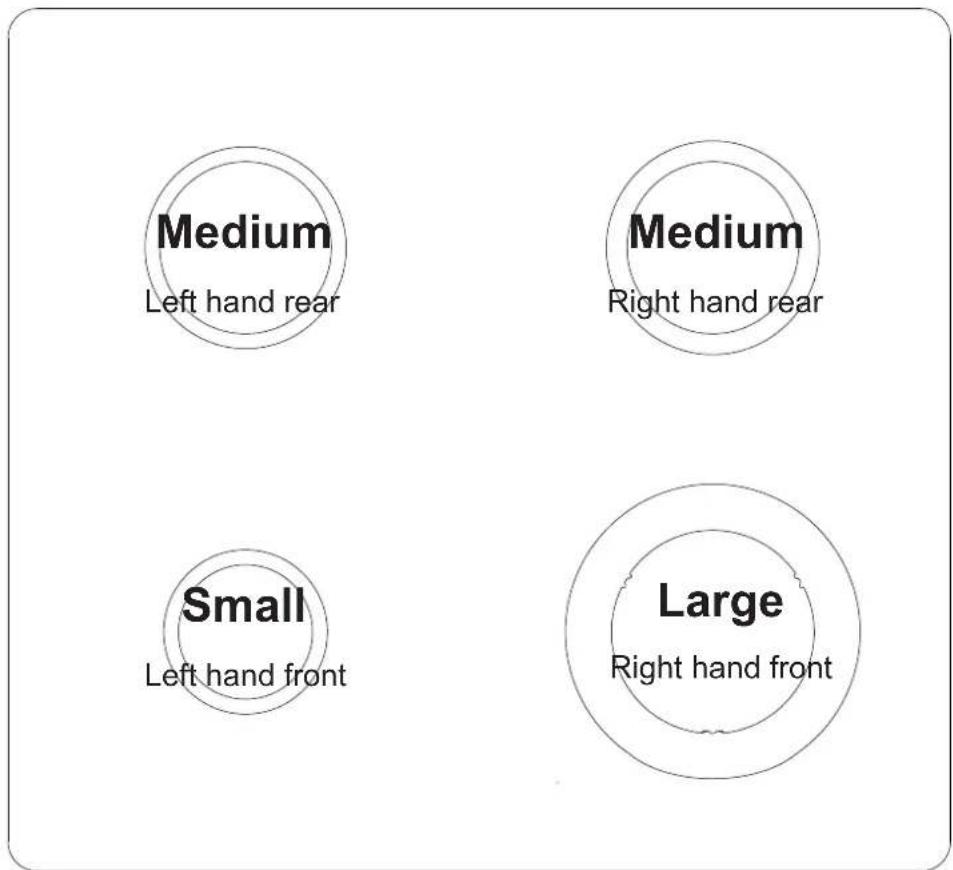
Hob
text_image
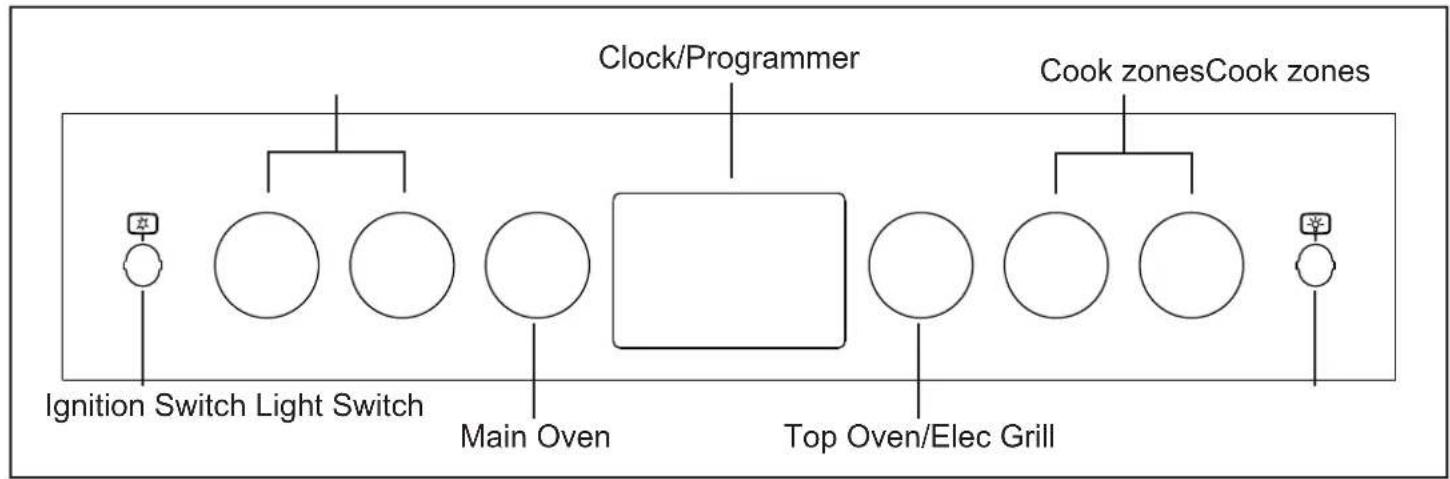
Medium Left hand rear Medium Right hand rear Small Left hand front Large Right hand frontControl Panel
flowchart
graph TD
    A["Ignition Switch Light Switch"] --> B["Main Oven"]
    C["Clock/Programmer"] --> D["Top Oven/Elec Grill"]
    E["Cook zones Cook zones"] --> F["Main Oven"]
    G["Top Oven/Elec Grill"] --> H["Main Oven"]
    I["Main Oven"] --> J["Main Oven"]
    K["Main Oven"] --> L["Main Oven"]
Appliance functions
Note: Your oven may not have all of the functions shown here. We recommend for best cooking results, please preheat your oven for 15 minutes and 3-5 minutes for grilling.
Do not try to slow cook using any of the other oven functions.

Intense Baking

Defrost

Base Heat with fan

Conventional Oven

Slow Cook

Fanned Oven

Fanned Grill

Low Grill

Oven Selector Control

Single Grill

Conventional Grill

Dual Grill

Top Heat

Base Heat

Lights only
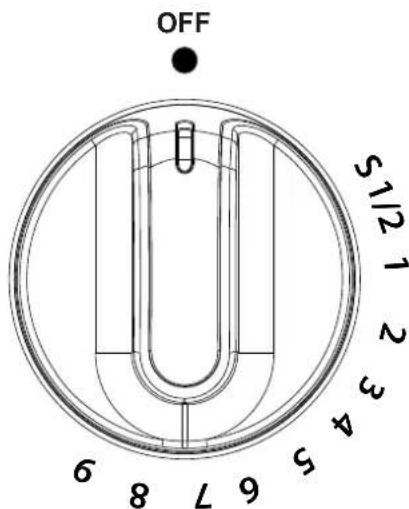
Gas Oven
text_image
OFF 5 6 7 8 9 4 5 6 7 8 9 S1/2 1 2 3 4Top Oven / Electric Grill
text_image
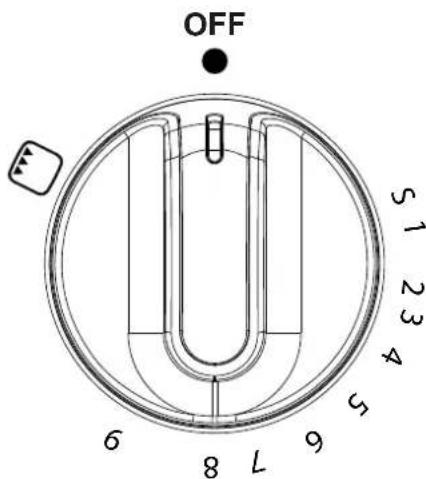
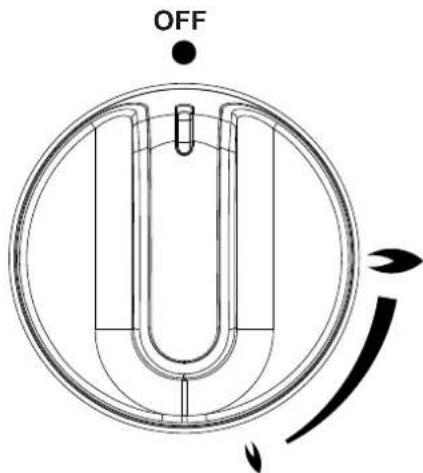
OFF 5 1 2 3 4 6 8 L 9 5Hob/Grill
text_image
OFFOven/Grill
Some appliances are automatic ignition and do not have an ignition switch fitted.
When the grill is switched on, the cooling fans switch on after a few minutes to keep the fascia and control knobs cool during cooking/grilling. The cooling fans may operate when the main ovens are in use, depending on the temperature setting. The fans may continue to operate for a period after the oven/grill has been switched off. During use the fan may cycle on and off, this is normal.

If you find that over a period of time, the oven becomes hotter when used at a certain gas mark, the thermostat may need to be replaced.
Important: The supplied grill pan should only be used with the grill. It should not be used with either of the ovens
Important: Never put items directly on the base of the oven, or cover the oven base with foil. Always position items on the shelf.
Grill
THE DOOR MUST BE OPEN WHEN THE GRILL IS USED FOR CONVENTIONAL GRILLING.
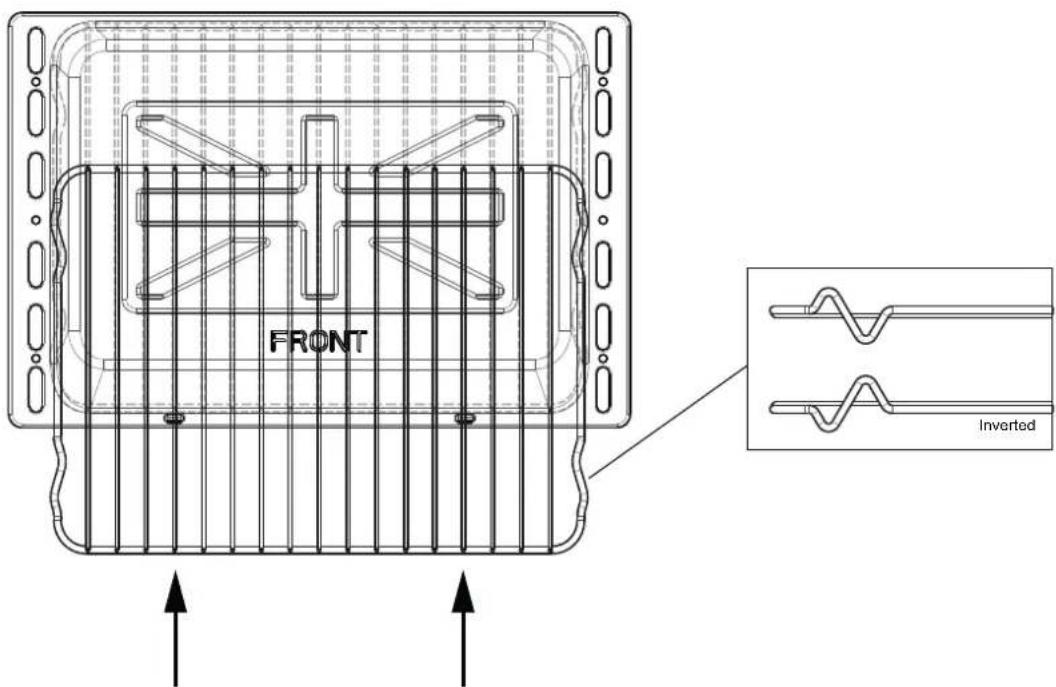
Grill pan and trivet
The grill trivet (inside the grill pan) can be inverted to give a high or low position, or it may be removed. The speed of grilling can be controlled by selecting a higher or lower shelf position, or adjusting the grill setting.
text_image
FRONT InvertedHob
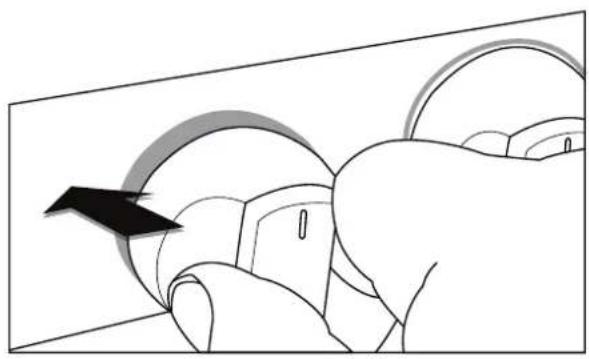
- Hold the control knob and press the ignition in for up to 15 seconds then release. For the wok (if fitted), please allow the burner to warm up for a few minutes.
- Once lit, turn the control knob to the required setting.
If the burner fails to ignite within this time, release the control knob and wait 1 minute before attempting to re-ignite.
natural_image
Illustration of a hand pressing down on a curved mechanical component with an arrow indicating motion (no text or symbols)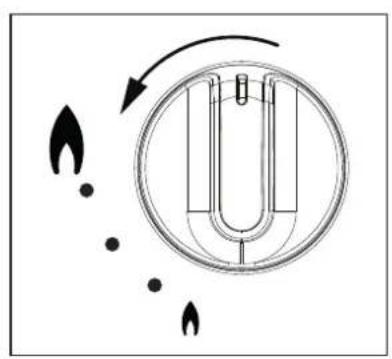
natural_image
Diagram of a U-shaped tube with arrows indicating flow or movement, surrounded by dots and flame-like symbols (no text or labels)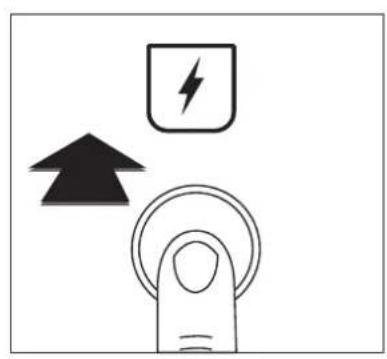
natural_image
Simple line drawing of a finger pressing a button with an upward arrow and a lightning bolt symbol (no text or labels)Fitting burner caps and heads (Gas Hobs)
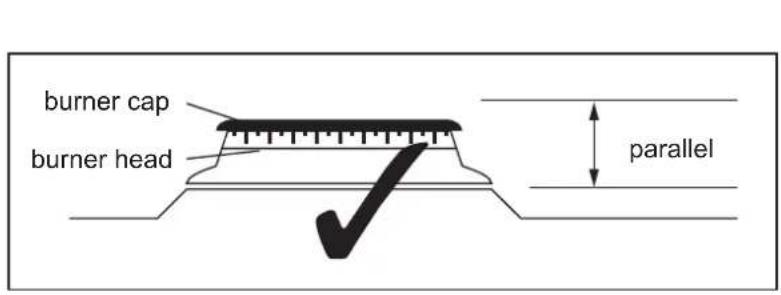
text_image
burner cap burner head parallel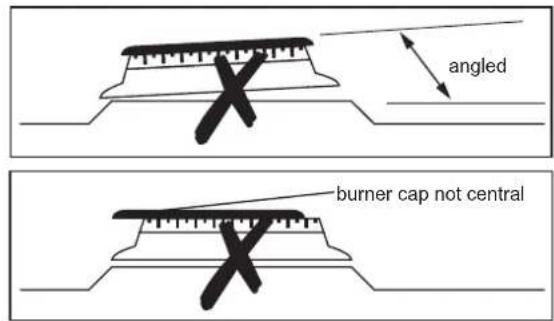
text_image
angled burner cap not centralPan placement
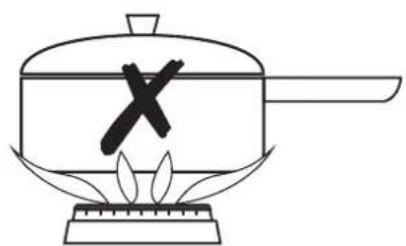
Always make sure that your pans are placed centrally on the burners and do not allow the flame to extend over the base of the pan.
natural_image
Simple line drawing of a cooking pot with a cross mark and flame, no text or symbols present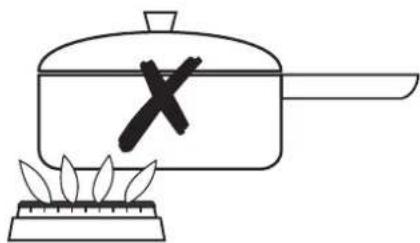
natural_image
Simple line drawing of a cooking pot with a crossed X mark and a flame on the stove (no text or symbols)
natural_image
Simple line drawing of a cooking pot with a checkmark inside, placed on a stove (no text or symbols)Pan sizes required
| Cook Zones | Minimum Pan Sizes (mm) | Maximum Pan Sizes (mm) |
| Rapid & Wok | 100 | 250 |
| All other cook zones 250 |
Warning: Do not allow cooking vessels to overlap cooking zones
Please be aware that only the main oven is controlled by the programmer.
Clock / Programmer
Note: Your clock / programmer may not have all these functions
text_image
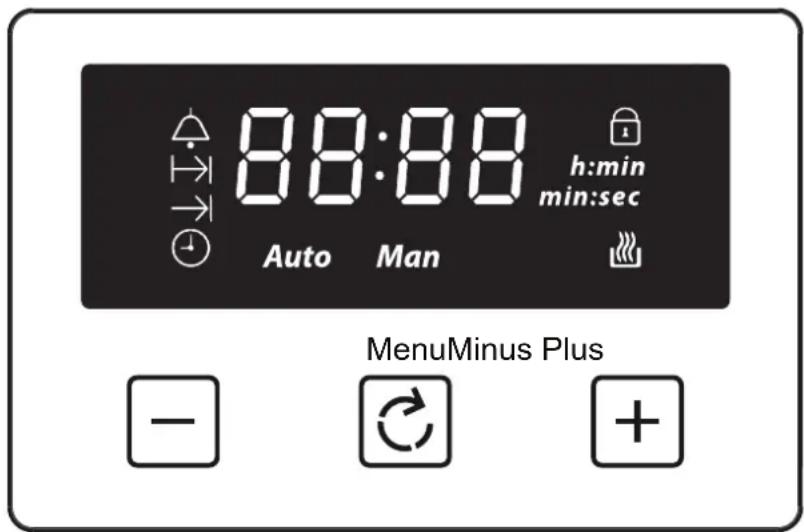
88:88 h:min min:sec Auto Man MenuMinus Plus -| Minute minder | Man | Manual mode | |
| → | Cooking time / Duration | L 1,L2,L3 | Volume level |
| → | End of cooking time | 23:59 | 7-segment display |
| Time of day | 99:00 | Max. adjustable minute minder | |
| Keylock | 23:59 | Max. adjustable cooking time | |
| Auto cooking | h:min | Display hours:minutes | |
| Auto | Automatic mode | min:sec | Display minutes:seconds |
Using the touch controls
Menu - Scroll through to select a function
Plus - Increase time or volume
Minus - Decrease time or volume
When a function is selected and the time or volume is set, the chosen function will automatically start seven seconds after setting.
Manual Mode
If the programmer is not in semi-automatic or full-automatic mode you can use oven functions manually. The manual icon is also on the display.
Setting the time of day
By pressing menu, scroll through the functions until you reach 'time of day'.
1 Press the function button until the 'time of day' symbol appears
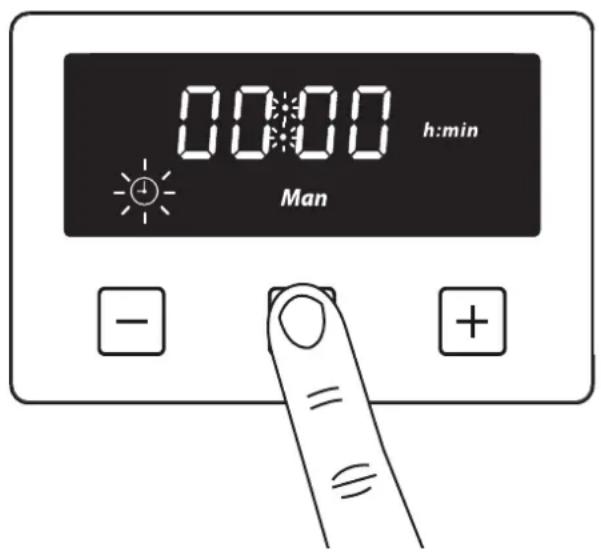
text_image
00:00 h:min Man - + ≡2 Press the plus or minus buttons to set a time
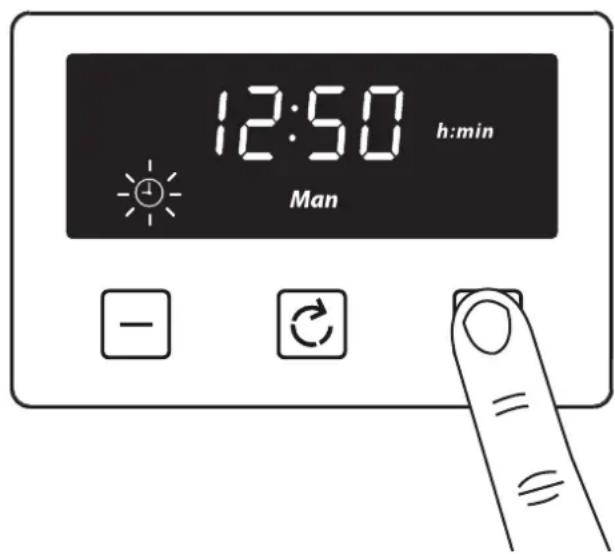
text_image
12:50 h:min Man - C =Setting the minute minder
The maximum cooking time that can be set is 99 minutes.
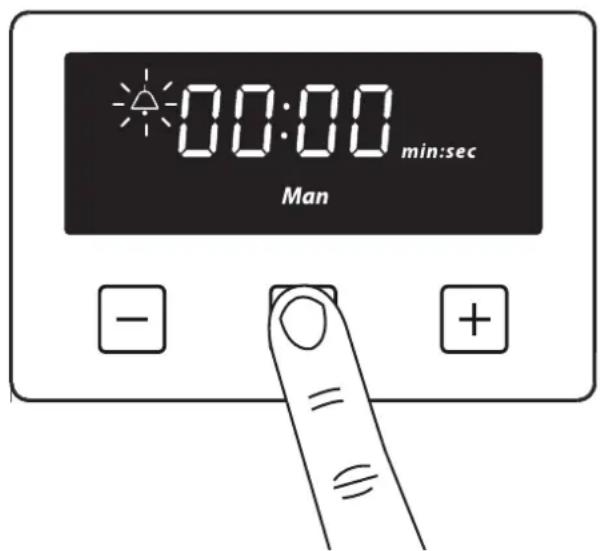
1 Press the function button until the 'minute minder' symbol appears
text_image
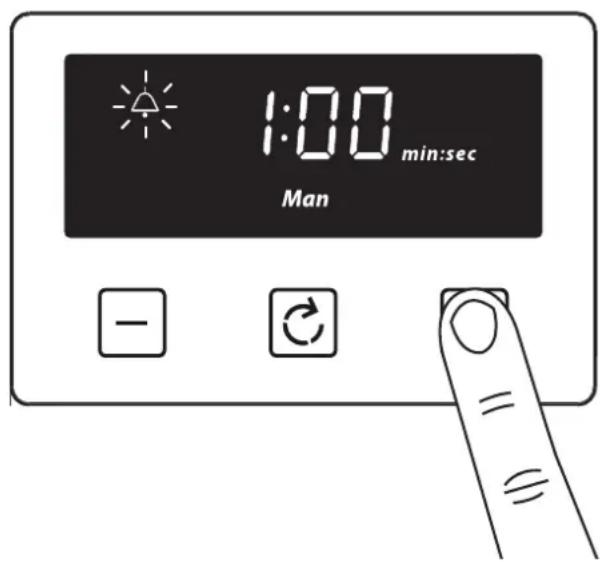
00:00 min:sec Man - + ≡2 Press the plus or minus buttons to set a time
text_image
1:00 min:sec Man - C =Once set, the minute minder will start to countdown in steps of seconds. The display will show the minute minder symbol and the remaining time. The countdown will continue in the background, if other functions are being set.
When the set time for the minute minder has completed, an alarm is heard and the minute minder symbol will flash on the display. Press any button to stop the alarm and the time of day is displayed.
To modify or cancel the minute minder
Return to the minute minder function and use either the plus or minus buttons to adjust the time. By setting the time to '0.00', this will cancel the countdown.
Setting the cooking time (the duration of time the oven will operate for) Semi Automatic cooking
The maximum cooking time that can be set is 23 hours and 59 minutes.
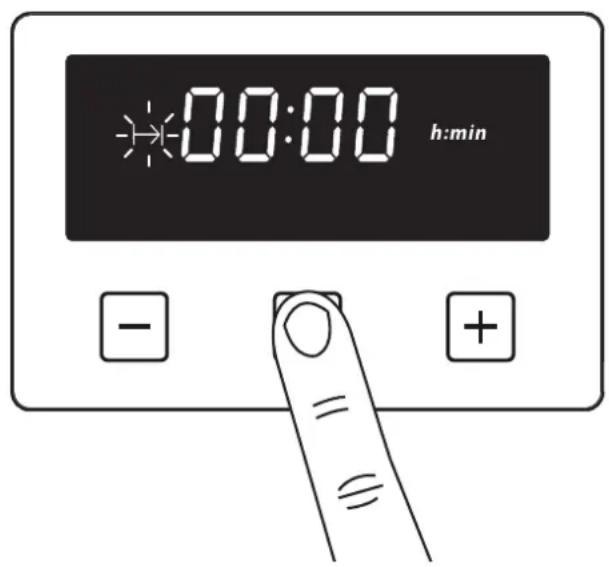
1 Press the function button until the ‘cooking time’ symbol appears
2 Press the plus or minus buttons to set a time
text_image
00:00 h:min - +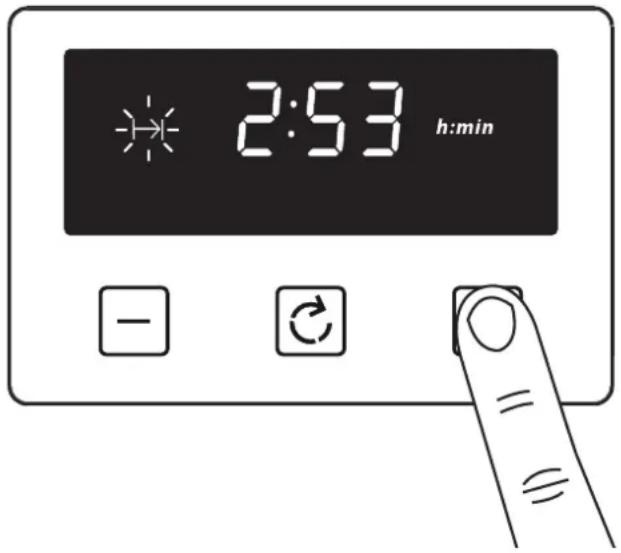
text_image
2:53 h:min - ② ③ = ≡Once set, the automatic mode, auto cooking symbol and the time of day is displayed.
When cooking is completed, an alarm is heard and the manual mode symbol flashes on the display. Press the Menu button to stop the alarm and then the 'time of day' will then be displayed. Pressing the Menu button again will return to manual mode.
To modify or cancel the cooking time
Return to the ‘cooking time’ function and use either the plus or minus buttons to set the time. By setting the time to ‘0.00’, this will cancel the countdown.
Setting the volume
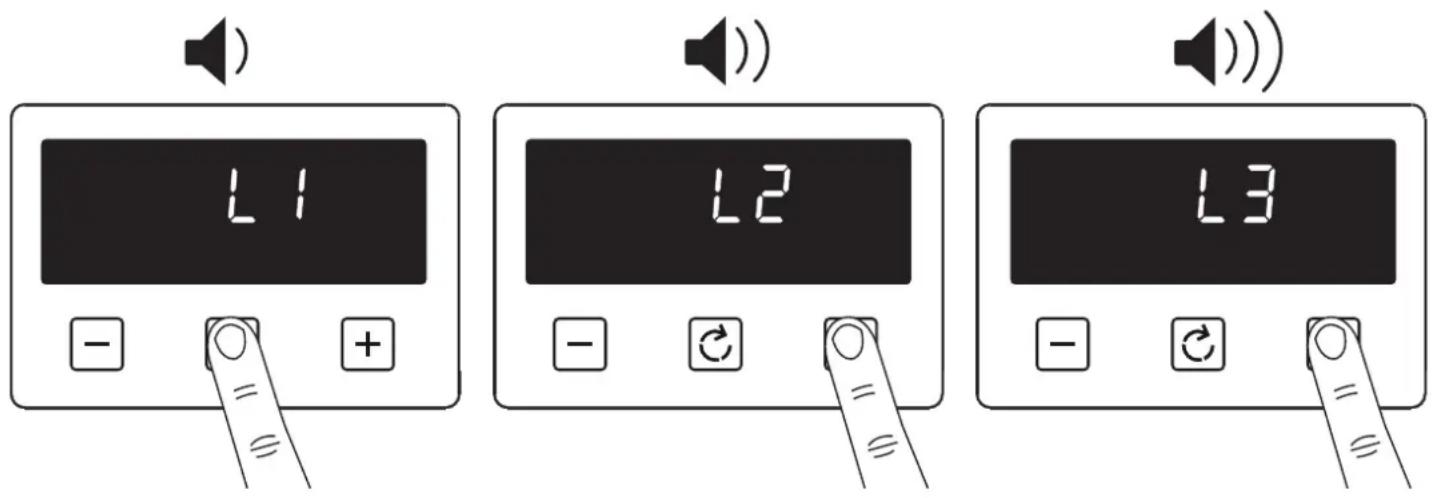
Press the menu button until "LX" (X = 1, 2 or 3) flashes on the display. Use the plus or minus buttons to select a tone.
text_image
L1 L2 L3Note: Default tone is L3
Activating / deactivating Key lock
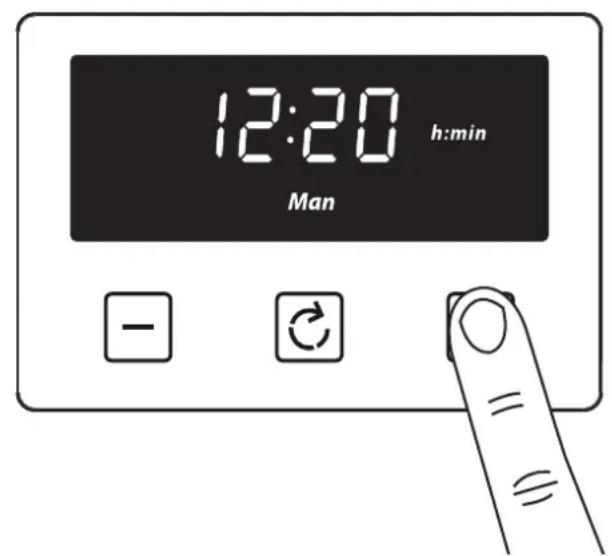
1 Press and hold the plus button for 3-5 seconds
text_image
12:20 h:min Man - ○ =2
text_image
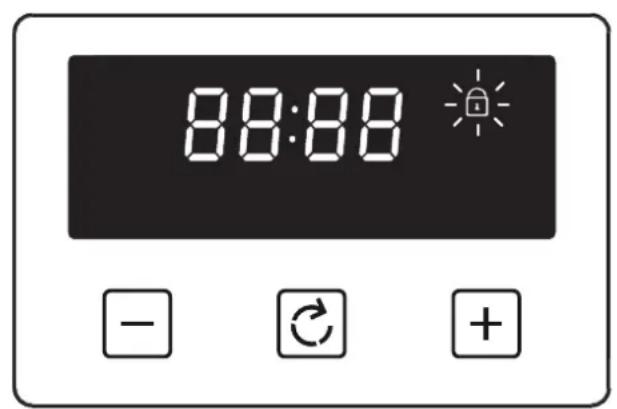
88:88 - + +Once the Key lock is active, the buttons will be inactive. A two beep signal will be heard if the buttons are pressed.
To deactivate the Key lock
Press and hold the plus button for 3-5 seconds. The Key lock symbol will disappear and the appliance can continue to be used.
Note: In case of main power loss for a short time (about 1.5 minutes), timer maintains its status. Key lock status and buzzer tone are memorized independent of the power loss duration.
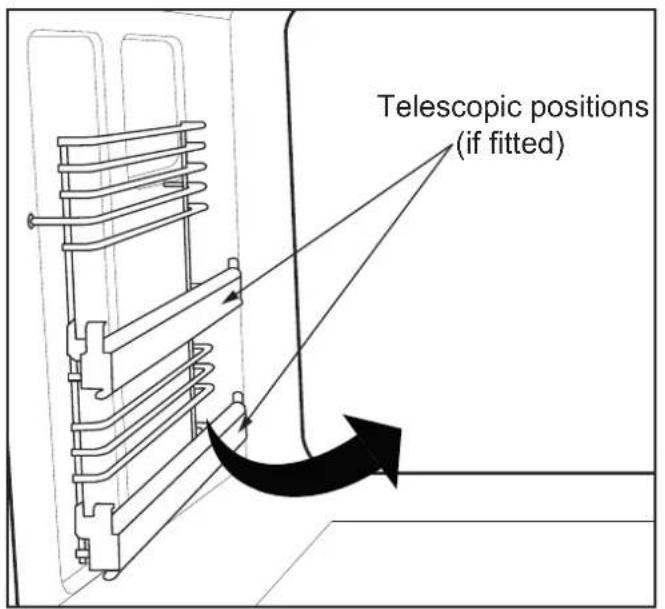
Removing Shelf Runners
text_image
Telescopic positions (if fitted)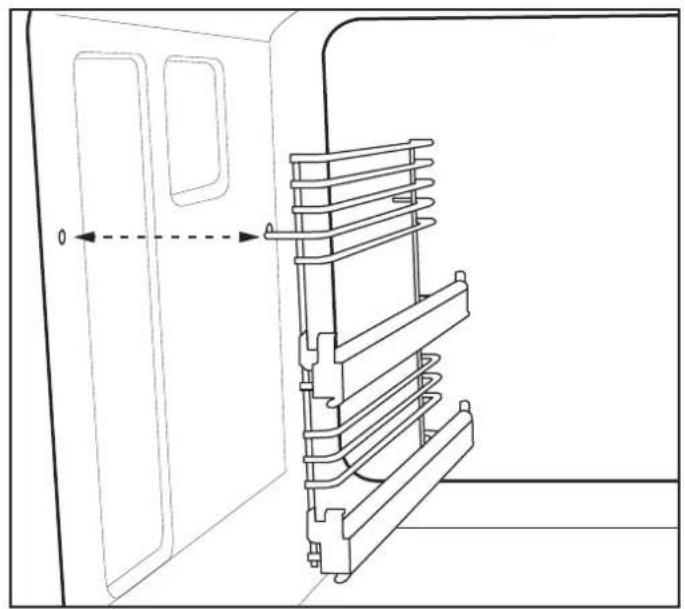
natural_image
Technical line drawing of a door with a spring-loaded frame and a dashed arrow indicating direction (no text or symbols)Standard shelves
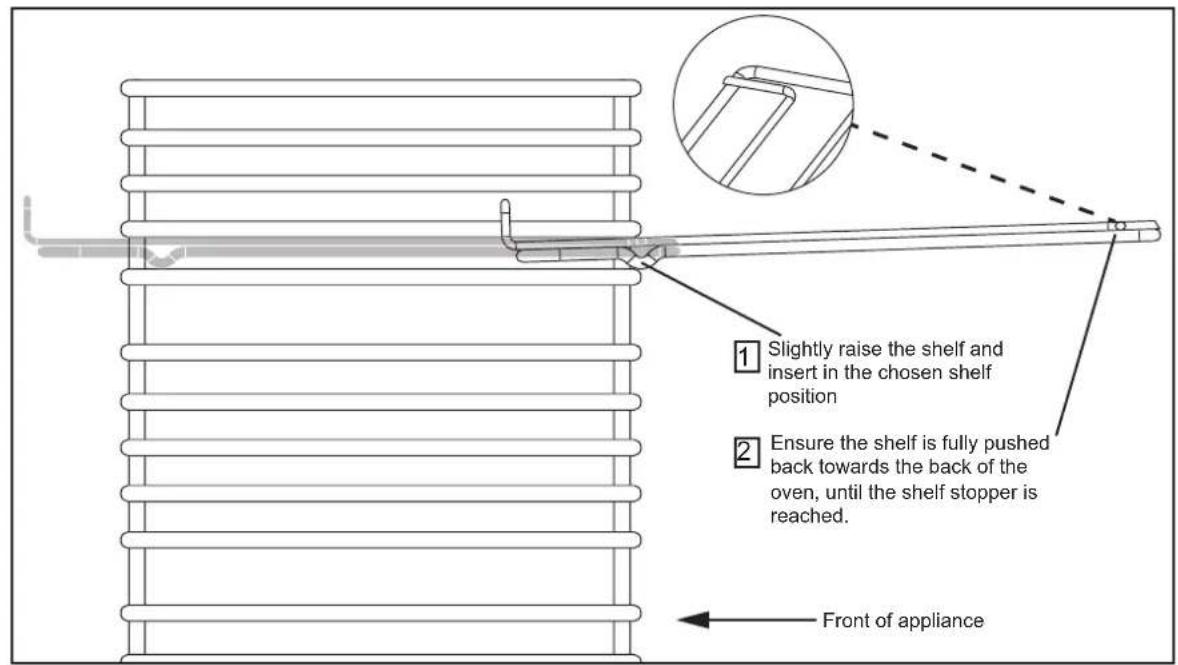
text_image
Slightly raise the shelf and insert in the chosen shelf position Ensure the shelf is fully pushed back towards the back of the oven, until the shelf stopper is reached. Front of applianceRemoving Telescopic shelves (if fitted)
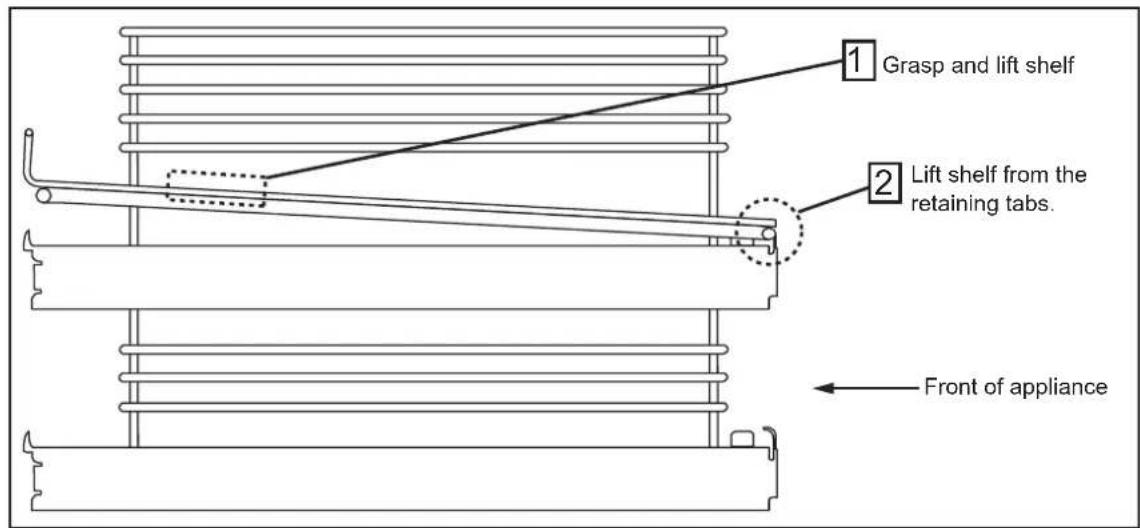
text_image
1 Grasp and lift shelf 2 Lift shelf from the retaining tabs. Front of applianceBefore removing the shelves completely, please make sure that the shelf is unclipped from the retaining tabs.
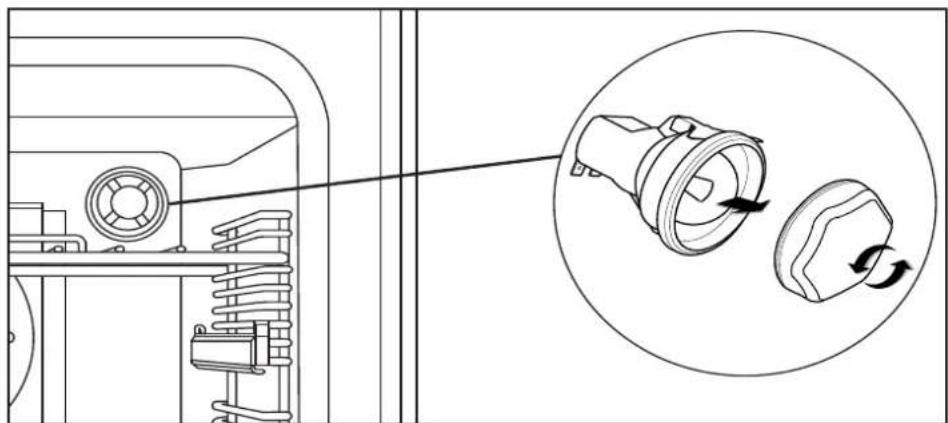
Changing the light bulb
natural_image
Technical line drawing of a mechanical assembly with a magnified inset showing a component being turned into a housing (no text or symbols present)Not all appliances have the same number and type of bulbs. Before you replace your bulb, check to see what type you have. Please remember that bulbs are not covered by your warranty.
Additional features
Fold Down Lid (if fitted)
Caution: Glass lids may shatter when heated. Turn off all the burners before shutting the lid.
• The lid must be opened fully, so there is no danger of it closing while the hob is being used.
- The appliance is fitted with a safety system, which will automatically turn off the hotplate burners if they are inadvertently left on as the lid is closed.
- The lid is not intended to be used as a work surface, as it becomes hot when any part of the cooker is in use. The surface may be scratched if items with rough or sharp surfaces are placed on it.
• Always allow the hob surface to cool before closing the lid.
Wok Ring (if supplied)
The wok ring should only be used with a wok. No other style of pan is suitable for use with this accessory.
If required, the wok ring should be located on top of the pan supports. The locating cutouts on the bottom of the wok ring engage with the four fingers of the pan supports around the centre burner location.
Ensure the wok ring is located correctly, is fully engaged with the pan support fingers and is not able to rotate or slide across the pan supports before use. Always locate the wok ring before lighting the burner.
Note: Due to the temperatures the wok ring will operate under during use, discolouration will occur.
Plate rack (if supplied)
- Pull the shelf out of the cavity.
- Tilt the plate warmer towards you and make sure that it hooks underneath the shelf bars at the front.
- Drop the plate warmer carefully into position.
The plate warmer is now secure and you can place your plates into it.
Always make sure that you use oven gloves if you are putting the plate warmer into a hot, or recently used oven to prevent burns.
Always make sure that your plates are suitable for warming - some plates may shatter or crack when exposed to heat.
The Griddle (if fitted)
Only use the griddle which has been approved for use on this appliance. Do not use any other griddle, as this may be hazardous.
- Place the griddle carefully on the pan support over the left hand side hotplate burners, using the locating feet on the underside of the griddle. Take care to avoid damage to the surface of the pan supports. The griddle should be positioned front-to-back over the burners. Do not place griddle over the right hand side burners.
- Heat the griddle on full rate for 3 minutes. The griddle plate is now ready for use.
Do's
Note: Always switch off your appliance and allow it to cool down before you clean any part of it.
Note: Please take extra care when cleaning over the symbols on the control panel, as this can lead to them fading.
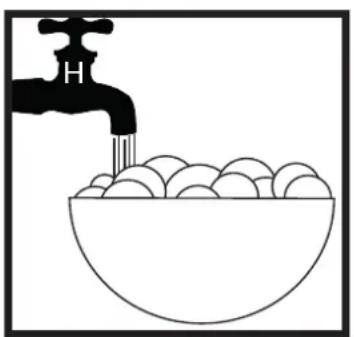
natural_image
Simple line drawing of a faucet pouring liquid into a bowl filled with eggs (no text or symbols)- Warm, soapy water • Wipe with damp cloth wring out cloth
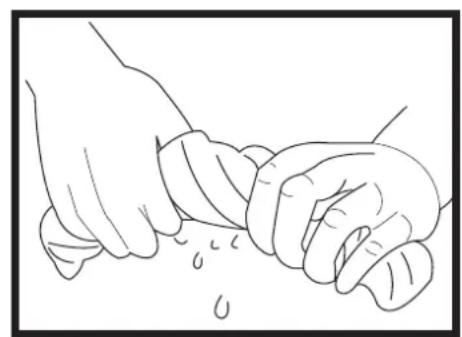
natural_image
Line drawing of two hands performing a gentle manual manipulation or cleaning operation (no text or symbols)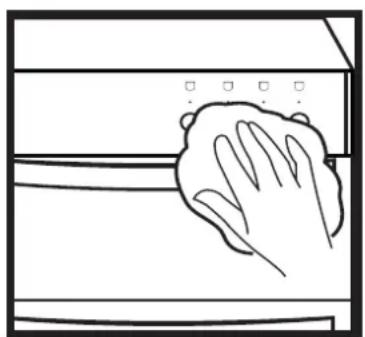
natural_image
Line drawing of a hand cleaning a window with a cloth (no text or symbols)- Dry with a soft cloth
Tips: Some foods can mark or damage the metal or paint work e.g.; Vinegar, fruit juices and salt. Always clean food spillages as soon as possible.
Dont's
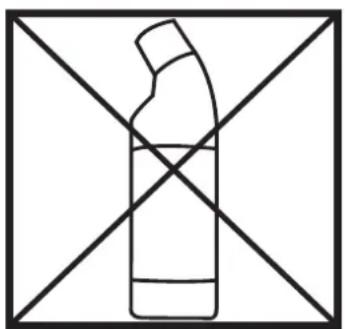
natural_image
Simple line drawing of a bottle with a handle crossed out by two diagonal lines (no text or symbols)- Undiluted bleaches
- Chloride products
natural_image
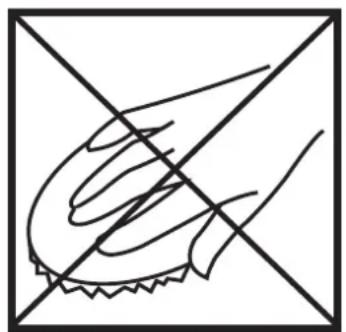
Simple line drawing of a hand holding a small object, crossed out by two diagonal lines (no text or symbols)- Wire Wool
- Abrasive cleaners
- Nylon pads
- Steam cleaners
natural_image
Pure electrical circuit lines without any symbolsDo not place in the dishwasher:
- Cast iron griddle
- Pan supports
IT IS IMPORTANT TO CLEAN YOUR APPLIANCE REGULARLY AS A BUILD UP OF FAT CAN AFFECT IT'S PERFORMANCE OR DAMAGE IT AND MAY INVALIDATE YOUR GUARANTEE.
IN ADDITION TO THE ABOVE, DO NOT USE METAL SCRAPERS TO CLEAN THE OVEN DOOR GLASS.
Gas freestanding
| Databadge Lower part of the front frame | |
| Electric supply 220V - 240V ~ 50Hz (models with ignition) | |
| Gas connection The inlet connection is at the rear right-hand side - ISO7 - Rp1/2” (1/2” BSP) | |
| Appliance class Class 1 freestanding | |
| Gas category Natural Gas I2H LPG only I3+ | |
| Gas pressure settings G20 Natural gas @ 20 mbarG31 Propane gas @ 37 mbarG30 Butane gas @ 28 - 30 mbar | |
| Pressure test point Use the oven injector | |
| Aeration Fixed | |
| Burner Nat Gas LPG | ||||
| Nominal rate Qn (kW) | Injector N | Nominal rate Qn (kW) | Injector | |
| Double oven appliance without a wok (load W) - 1600 - 1900 | ||||
| Left hand front 1.00 77 1.00 50 | ||||
| Left hand rear 2.00 104 2.00 70 | ||||
| Right hand front (rapid) 3.00 129 3.00 87 | ||||
| Right hand rear 2.00 104 2.00 70 | ||||
| Main oven 2.50 180 Amal 2.40 70 Amal | ||||
| Top oven | 1.70 | 110 Amal | 1.70 | 50 Amal |
| Total heat input (kW) | 12.20 | N/A | 12.10 | N/A |
| Double oven appliance with a wok (load W) - 1600 - 1900 | ||||
| Left hand front 1.00 77 1.00 50 | ||||
| Left hand rear 2.00 104 2.00 70 | ||||
| Right hand front (wok) | 4.00 152 4.00 | 100 | ||
| Right hand rear 2.00 104 2.00 70 | ||||
| Main oven 2.50 180 Amal 2.40 70 Amal | ||||
| Top oven | 1.70 | 110 Amal | 1.70 | 50 Amal |
| Total heat input (kW) | 13.20 | N/A | 13.10 | N/A |