Anti Hair Wrap & DuoClean ICZ160UK - Vacuum Cleaner SHARK - Free user manual and instructions
Find the device manual for free Anti Hair Wrap & DuoClean ICZ160UK SHARK in PDF.


User questions about Anti Hair Wrap & DuoClean ICZ160UK SHARK
0 question about this device. Answer the ones you know or ask your own.
Ask a new question about this device
Download the instructions for your Vacuum Cleaner in PDF format for free! Find your manual Anti Hair Wrap & DuoClean ICZ160UK - SHARK and take your electronic device back in hand. On this page are published all the documents necessary for the use of your device. Anti Hair Wrap & DuoClean ICZ160UK by SHARK.
USER MANUAL Anti Hair Wrap & DuoClean ICZ160UK SHARK
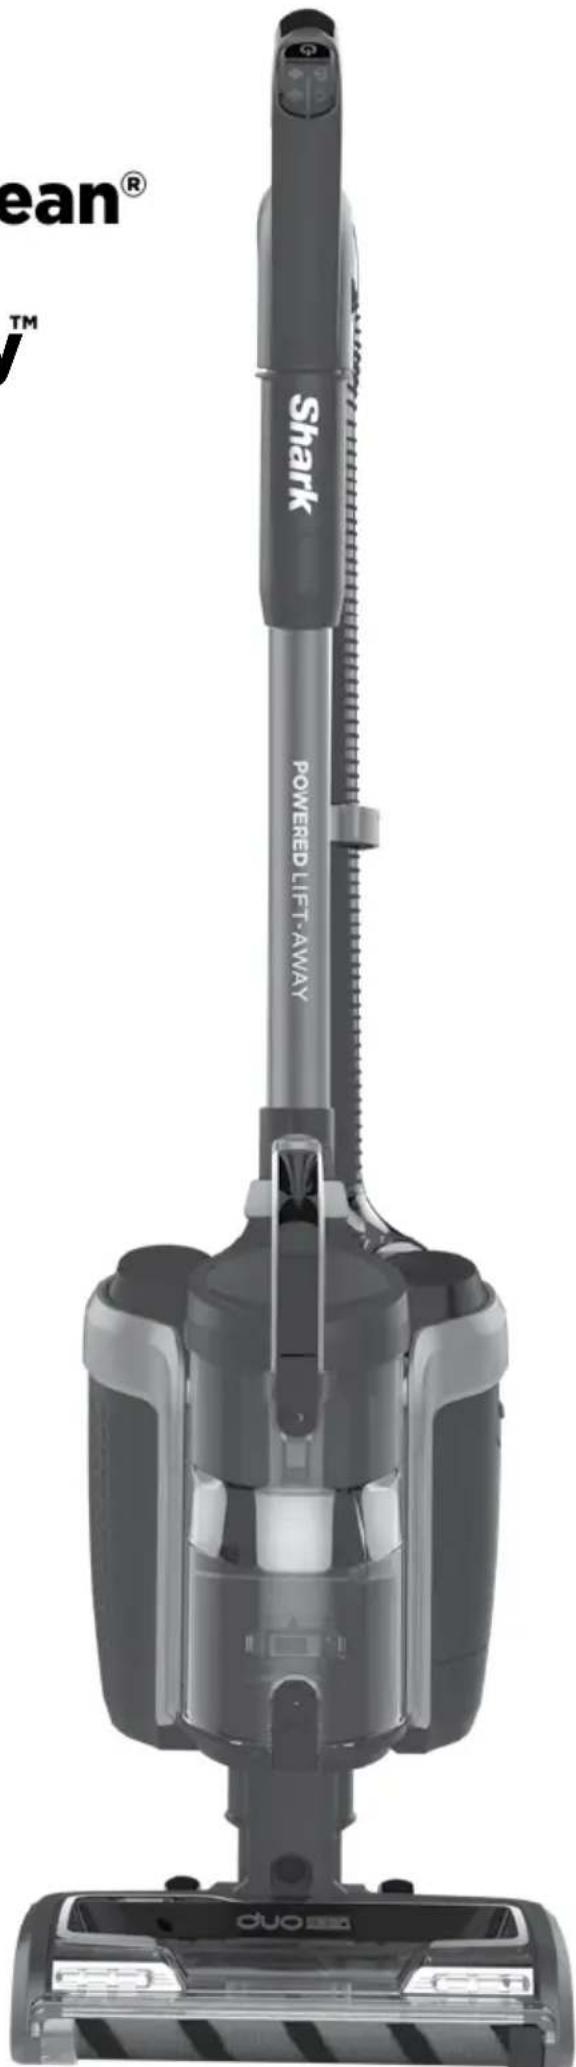
Anti Hair Wrap & DuoClean® Cordless Upright with Powered Lift-Away™
ICZ160UK
ICZ260UK
Series
INSTRUCTIONS
text_image
ean® TM Shark POWERED LIFT-AWAY duoTHANK YOU FOR PURCHASING
the Shark Anti Hair Wrap & DuoClean Cordless Upright with Powered Lift-Away

TIP: You can find the model and serial numbers on the QR code label which is located on the back of the unit and the battery.

REGISTER YOUR PURCHASE

registermyshark.co.uk

0 862 0453

n QR code using mobile device
RECORD THIS INFORMATION
Model Number:
Date of Purchase (Keep receipt):
Store of Purchase:
TECHNICAL SPECIFICATIONS
Voltage: 28.8V
Watts: 260W
Amps: 9A
PLEASE READ CAREFULLY AND KEEP FOR FUTURE REFERENCE.
This instruction manual is designed to help you get a complete understanding of your new Shark Anti Hair Wrap & DuoClean Cordless Upright with Powered Lift-Away.
If you have any questions, please call the Customer Service line on 0800 862 0453.
CONTENTS
Product Registration 2
Important Safety Instructions....4
Getting To Know Your Shark Anti Hair Wrap & DuoClean Cordless Upright with Powered Lift-Away 6
Assembly 6
Charging Your Lithium ION Power Pack Battery 7
Charge Indicator Lights....8
Operating the Vacuum 8
Maintaining Your Vacuum Cleaner.... 11
Emptying the Dust Cup....11
Cleaning the Filters....12
Maintaining the Brush-roll....14
Maintaining the Soft Roller 14
Checking for Blockages....15
Accessories....16
Troubleshooting Guide....18
Guarantee 20
Battery Guarantee....21

This marking indicates that this product should not be disposed with other household wastes throughout the EU. To prevent possible harm to the environment or human health from uncontrolled waste disposal, recycle it responsibly to promote the sustainable reuse of material sources. To return your used device, please use the return and collection systems or contact the retailer where this product was purchased. They can take this product for environmental safe recycling.
IMPORTANT SAFETY INSTRUCTIONS
FOR HOUSEHOLD USE ONLY • PLEASE READ CAREFULLY BEFORE USE
If the charger plug does not fit fully into the outlet, reverse the plug. If it still does not fit, contact a qualified electrician. DO NOT force into outlet or try to modify to fit.
▲WARNING
To reduce the risk of fire, electric shock, injury, or property damage:
THE DUOCLEAN FLOOR NOZZLE, WAND, POD, HANDLE, AND HOSE CONTAIN ELECTRICAL CONNECTIONS:
- This vacuum consists of a motorised nozzle, wand, vacuum pod, handle, and hose. These components contain electrical connections, electrical wiring, and moving parts that potentially present risk to the user.
- Before each use, carefully inspect all parts for any damage. If a part is damaged, discontinue use.
- Use only identical replacement parts.
- This vacuum contains no serviceable parts.
- Use only as described in this manual. DO NOT use the vacuum for any purpose other than those described in this manual.
- With the exception of filters, DO NOT expose any parts of the vacuum to water or other liquids.
GENERAL USE
- This vacuum is not intended for use by anyone with reduced physical, sensory or mental capabilities, or lack of experience and knowledge, unless they have been given supervision or instruction concerning use of the appliance by a person responsible for their safety. Children should be supervised to ensure that they DO NOT play with the vacuum.
- Always turn off the vacuum before connecting or disconnecting any current carrying hoses, motorised nozzles, chargers, batteries, or other electrical or mechanical parts.
- DO NOT handle plug or vacuum with wet hands.
-
DO NOT use without dust cup, filters, and brush-rolls in place.
-
Only use Shark branded filters and accessories. Failure to do so will void the warranty.
- DO NOT put any objects into nozzle or accessory openings. DO NOT use with any opening blocked; keep free of dust, lint, hair, and anything that may reduce airflow.
- DO NOT use if nozzle or accessory airflow is restricted. If the air paths or the motorised floor nozzle become blocked, turn the vacuum off and remove the battery. Remove all obstructions before you reinsert the battery and turn on the unit again.
- Keep nozzle and all vacuum openings away from hair, face, fingers, uncovered feet, or loose clothing.
- DO NOT use if vacuum is not working as it should, or has been dropped, damaged, left outdoors, or dropped into water.
- Use extra care when cleaning on stairs.
- DO NOT leave the vacuum unattended while powered on.
- When powered on, keep the vacuum moving over the carpet surface at all times to avoid damaging the carpet fibres.
- DO NOT place vacuum on unstable surfaces such as chairs or tables.
-
DO NOT use to pick up:
a) Liquids
b) Large objects
c) Hard or sharp objects (glass, nails, screws, or coins)
d) Large quantities of dust (including drywall, fireplace ash, or embers). DO NOT use as an attachment to power tools for dust collection.
e) Smoking or burning objects (hot coals, cigarette butts, or matches)
f) Flammable or combustible materials (lighter fluid, gasoline, or kerosene)
g) Toxic materials (chlorine bleach, ammonia, or drain cleaner) -
DO NOT use in the following areas:
a) Poorly lit areas
b) Wet or damp surfaces
c) Outdoor areas
d) Spaces that are enclosed and may contain explosive or toxic fumes or vapours (lighter fluid, gasoline, kerosene, paint, paint thinners, mothproofing substances, or flammable dust) - Turn off the vacuum before inserting or removing the battery, as well as before plugging in or unplugging the charger.
- Turn off the vacuum and remove the battery before any adjustment, cleaning, maintenance, or troubleshooting. Such preventative safety measures reduce the risk of starting the appliance accidentally.
- During cleaning or routine maintenance, DO NOT cut anything other than hair, fibres, or string wrapped around the brush-roll.
- Allow all filters to air-dry completely before replacing in the vacuum to prevent liquid from being drawn into electric parts.
- DO NOT modify or attempt to repair the vacuum or the battery yourself, except as indicated in this manual. DO NOT use the battery or vacuum if it has been modified or damaged. Damaged or modified batteries may exhibit unpredictable behaviour resulting in fire, explosion, or risk of injury.
BATTERY PACK
-
The battery is the power source for the vacuum. Carefully read and follow all charging instructions.
-
To prevent unintentional starting, ensure the vacuum is powered off before picking up or carrying the vacuum. DO NOT carry the appliance with your finger on the power switch.
-
Use only the recommended battery pack and charger combination. When using Model XBAT 250EU, use charger YLS0244A-E332096 or YLS0244A-U332096. When using battery 3685FBL160UK use charger DK33-332096H-B or DK33-332096H-V. Use of batteries or battery chargers other than those indicated may create a risk of fire.
-
Keep the battery away from all metal objects such as paper clips, coins, keys, nails, or screws. Shorting the battery terminals increases the risk of fire or burns.
- Under abusive conditions, liquid may be ejected from the battery. Avoid contact with this liquid, as it may cause irritation or burns. If contact occurs, flush with water. If liquid contacts eyes, seek medical help.
- Battery should not be stored at temperatures below 37.4^ F ( 3^ C) or above 104^ F ( 40^ C) to maintain long-term battery life.
- DO NOT charge battery at temperatures below 50°F (10°C) or above 104°F (40°C).
- Store the appliance indoors. DO NOT use or store it below 37.4°F (3°C). Ensure the appliance is at room temperature before operating.
- DO NOT expose the battery to fire or temperatures above 265°F (130°C) as it may cause explosion.
- Follow all charging instructions. DO NOT charge the battery at temperatures below 50°F (10°C) or above 104°F (40°C). Charging improperly or at temperatures not in the specified range may damage the battery and increase the risk of fire.
SAVE THESE INSTRUCTIONS
ASSEMBLY
1
2
text_image
(Click)3
text_image
(Click) (Click)4
5
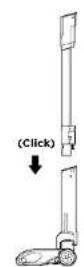
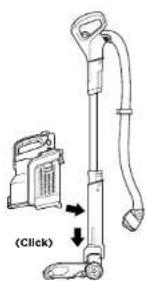
- Insert wand into floor nozzle.
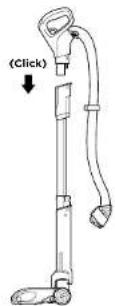
- Insert handle into wand.
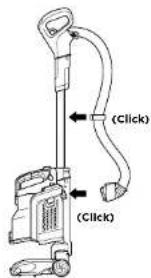
- Align the bottom of pod onto the rails on the front of the neck of the floor nozzle.
Slide pod down the rails until it clicks into place. - Connect hose to back of pod, and attach hose clip onto wand.
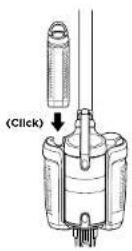
- Insert charged battery into pod with the handle toward the back until it clicks. To ensure proper insertion, the handle on battery must be down.
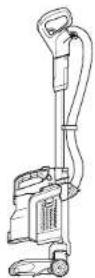
IMPORTANT: For proper operation, ensure all connections are securely clicked into place.
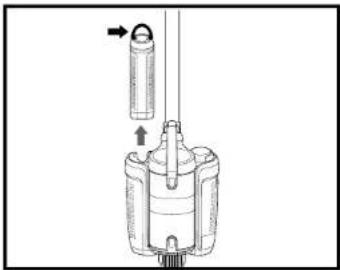
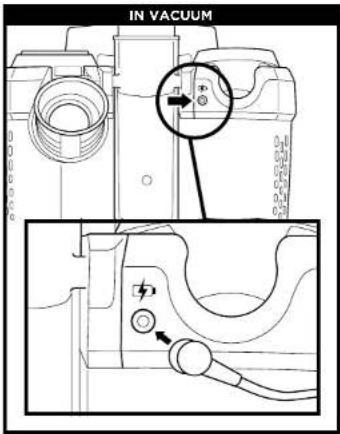
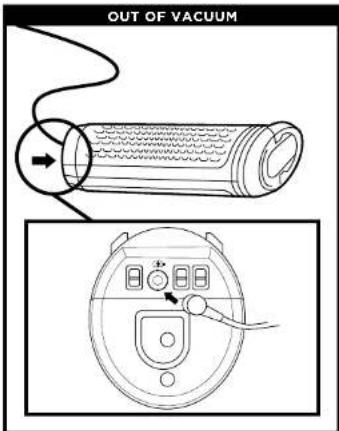
3 WAYS TO CHARGE THE LITHIUM-ION BATTERY
natural_image
Technical diagram of a mechanical device with no visible text or symbolsTo remove the battery for charging, lift the handle on top of the battery and pull up. The battery must be charged before first use.
A complete charge takes approximately 3.5 hours.
IMPORTANT: When charging, connect the charger to the port first, then plug the charger into plug socket.
text_image
IN VACUUMNOTE: only one charger is provided.
NOTE: When using the cradle, insert the charger plug into the port and rotate to lock into place
The battery will not charge unless the charger is locked into place.
text_image
OUT OF VACUUM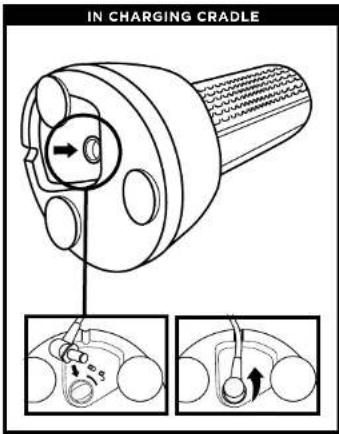
text_image
IN CHARGING CRADLECHARGE INDICATOR LIGHTS
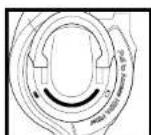
TOP OF BATTERY
Charge Indicator Light
In Use: Lights illuminate steadily

Charging: One light flashes

TEMPERATURE ISSUE: FIRST AND THIRD INDICATOR LIGHTS FLASHING ALTERNATELY
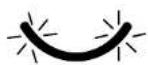
If the first and third indicator lights are flashing alternately, the battery temperature is not optimal. If this happens when charging, leave the battery plugged in and charging will resume once temperature reaches optimal level.
NOTE: The battery must be charged before first use. A complete charge takes approximately 3.5 hours. NOTE: The indicator light will shut off 5 minutes after reaching full charge.
Press icon to turn power on or off.
Power
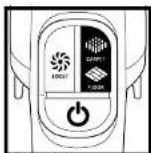
ON LEVEL
Press icon to select surface setting:
Carpet For carpets.
Floor
For hard floors and rugs.
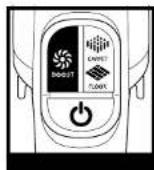
Press icon to boost power:
When in Lift-Away mode, press BOOST icon to turn on or off.
The default power setting on floors and carpets is ION Power mode. For an additional boost of suction power, press and hold the BOOST icon.
IMPORTANT: Your unit will default to BOOST when using in Lift-Away mode. BOOST shortens runtimes. NOTE: Select Carpet mode for stuck-on dust and debris
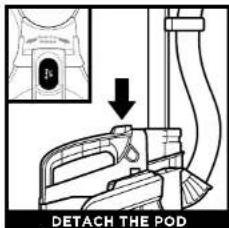
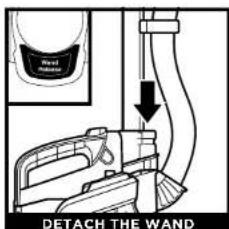
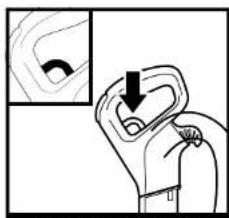
POD, HANDLE AND WAND ARE DETACHABLE
text_image
DETACH THE PODPress LIFT-AWAY button on handle and lift pod off floor nozzle.
text_image
DETACH THE WANDPress the Wand Release button until it clicks, then pull up on wand to detach from the floor nozzle.

TIP: See next page for all the different ways you can use your vacuum.
text_image
DETAIL THE HANDLEPull the Handle Release trigger to detach the handle from the wand.
natural_image
Line drawing of a hand holding a device with a small object above, labeled 'UPRIGHT' at the bottom (no other text or symbols)For cleaning carpets and hard floors. To activate brush-roll, step on floor nozzle and tilt handle back.
natural_image
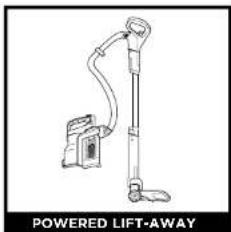
Line drawing of a powered lift-away device with a vertical pole and attached housing (no text or symbols)Use Powered Lift-Away to reach under furniture to clean carpets and hard floors.
text_image
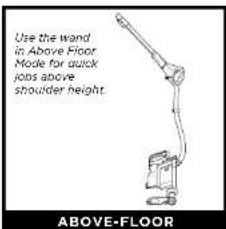
Use the wand in Above Floor Mode for quick joints above shoulder height. ABOVE-FLOORWith pod attached, detach the wand from the floor nozzle.
text_image
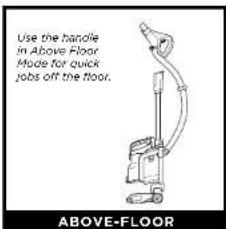
Use the handle in Above Floor Mode for quick jobs off the floor. ABOVE-FLOORWith pod attached, detach the handle from the wand.
natural_image
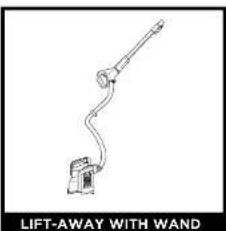
Line drawing of a mechanical device with a curved arm and base, labeled 'LIFT-AWAY WITH WAND' below (no other text or symbols)Use the wand in Lift-Away mode for more reach when cleaning above-floor areas like coving or skirting boards.
natural_image
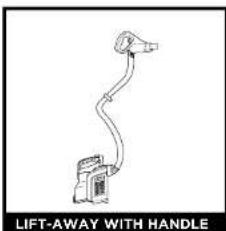
Simple line drawing of a lift-away with handle, showing a curved object and a small vehicle (no text or symbols)Use the handle in Lift-Away mode for more detailed cleaning of above-floor areas like upholstery, window sills or stairs.
NOTE: See previous page for instructions on how to detach the pod, wand and handle.
MAINTENANCE
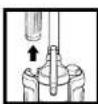
IMPORTANT: Remove the battery before performing any maintenance. To remove, lift the handle on top of the battery and pull up.
text_image
Diagram showing a vacuum cleaner with labeled parts and directional arrows indicating motion or assembly.To remove Dust Cup, pinch and pull side tabs. Tilt dust cup away from the vacuum cleaner, then lift to remove.
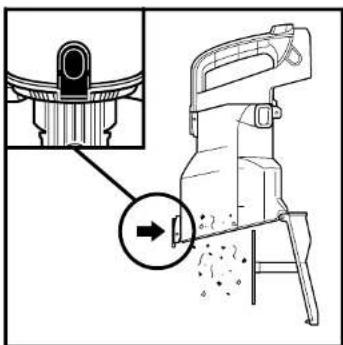
text_image
Technical diagram showing a mechanical device with an inset close-up of a component detail, highlighting a circular feature.Press lower button to open bottom of dust cup.
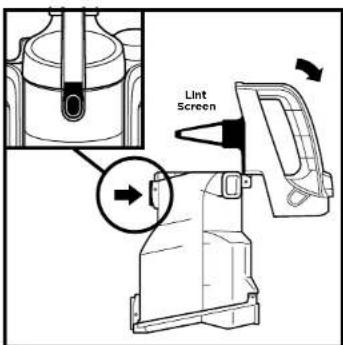
text_image
Lint ScreenTo remove collected debris from Lint Screen, press top button and lift handle to open top of dust cup.
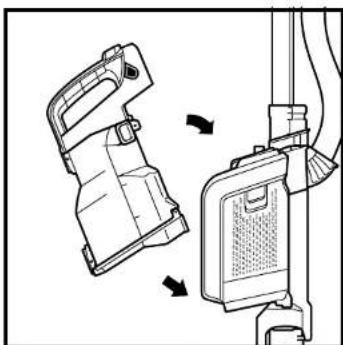
natural_image
Technical line drawing of a mechanical device with two components and directional arrows indicating assembly or movement (no text or symbols)To reinstall dust cup, place bottom into pod and then tilt dust cup toward the wand until it clicks into place.
MAINTENANCE
Your vacuum comes equipped with three filters located on the vacuum pod: two Pre-Motor Filters (one is a filter frame) and one Post-Motor Filter to capture and trap dust and debris.
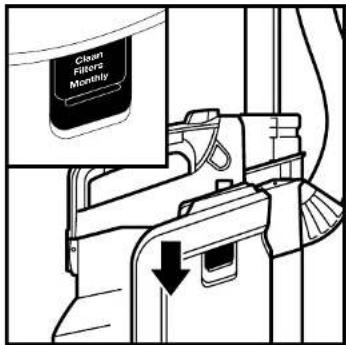
CLEANING PRE-MOTOR FILTER (ONCE A MONTH)
Perform regular maintenance on your filters to keep your vacuum's suction power optimal.
IMPORTANT: To prevent damage, rinse filters with lukewarm water ONLY. DO NOT use soap. Allow filters to air-dry for at least 24 hours before replacing them in the vacuum to prevent liquid from being drawn into electric parts.
text_image
Clean Filters Monthly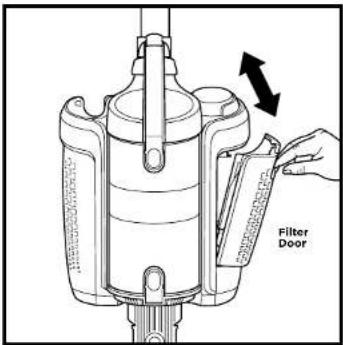
text_image
Filter Door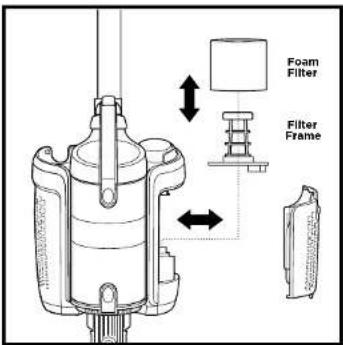
text_image
Foam Filter Filter Frame- Slide down filter door release button.
- Tilt filter door and lift off.
- Remove filter from pod. Pull off foam filter.
- Rinse foam filter and filter frame with lukewarm water ON LY and leave to air-dry for at least 24 hours before reinstalling.
- Once completely dry, reinsert foam filter on filter frame.
- Holding the pull tabs, push the filter back into the pod.
- Reinsert bottom of filter door into slots on pod. Tilt door to close, pressing until it clicks into place.
text_image
Post-Motor Filter Post-Motor FilterMAINTENANCE
CLEANING POST-MOTOR FILTER (ONCE A YEAR)
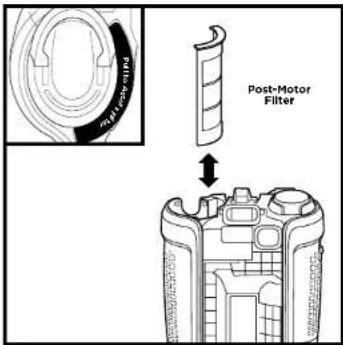
Perform maintenance on your Post-Motor Filter once a year to keep your vacuum's suction power optimal. IMPORTANT: Rinse Post-Motor Filter with lukewarm water ONLY. DO NOT use soap. Allow to air-dry for at least 24 hours before reinstalling. DO NOT scrub Post-Motor Filter.
- Pull up on Post-Motor Filter access tab to remove.
- Rinse filter with lukewarm water ONLY and leave to air-dry at least 24 hours before reinstalling.
- When dry, reinsert Post-Motor Filter and press down until it clicks into place.
Note: Battery must be removed before Post-Motor Filter can be removed.
REPLACING FILTERS
Follow the previous instructions for removing filters. The Foam Filter should be replaced every 2.5 years, and the Post-Motor Filter should be replaced every 3 years, subject to frequency of use.
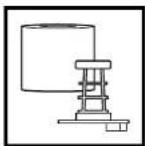
Replacement Pre-Motor Filter and Frame
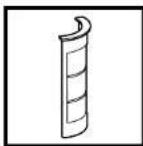
Replacement Post-Motor filter
NOTE: To order replacement parts and filters, visit sharkclean.eu.
natural_image
Technical line drawing of a mechanical device with internal components and a directional arrow (no text or symbols)If you run over a hard or sharp object or notice a noise change while vacuuming, check for blockages or objects caught in the brush-roll.
1. Turn off the vacuum.
2. Using a coin, turn locks counterclockwise to open, then lift off cover to access brush-roll.
3. Clear airway of blockages.
4. Replace cover by sliding inserts into slots, then pressing down firmly on all sides before turning locks clockwise to close. There will be an audible click once the locks are secured.
natural_image
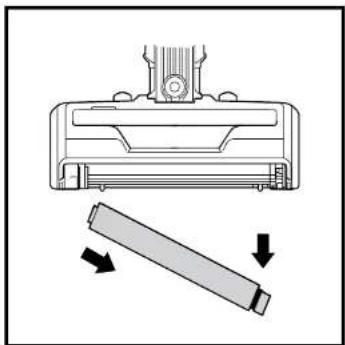
Diagram showing a mechanical component with a cylindrical shaft and directional arrows indicating motion (no text or symbols)- Slide Eject Roller button forward
- To remove Soft Roller, pull the tab on the right.
- Tap loose debris off the Soft Roller. Use a dry towel to wipe clean, or to remove any hair or fibres caught in the teeth behind the Soft Roller.
- Rinse as needed. Use ONLY lukewarm water, and leave to air-dry completely for at least 24 hours.
- When dry, insert the left end of the roller first, then push the right end into place with the word Front facing forward.
IMPORTANT: DO NOT use sharp or metal objects to clear blockages.
natural_image
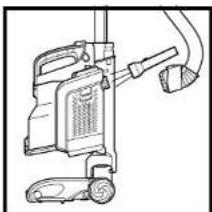
Line drawing of a vacuum cleaner with attached hose and wheels (no text or symbols)Detach hose from vacuum pod, and check opening on back of pod for blockages.
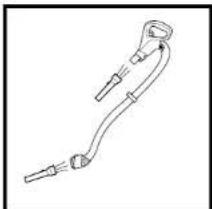
natural_image
Line drawing of a medical or laboratory device with a curved tube and connector (no text or symbols)Dotach handle from wand and hose from the vacuum pod, and check openings for blockages.
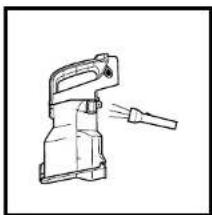
natural_image
Technical line drawing of a mechanical device with a lever and handle (no text or symbols)Dotach dust cup from vacuum pod. Empty dust cup, remove debris from lint screen, and check for blockages.
natural_image
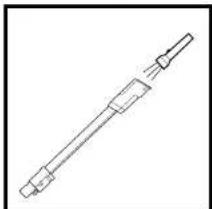
Simple line drawing of a cylindrical mechanical component with a protruding rod (no text or symbols)Detach wand from floor nozzle and handle, and check both ends of wand for blockages.
natural_image
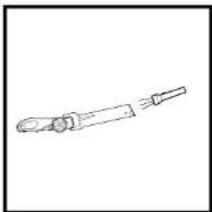
Simple line drawing of a mechanical component or tool (no text or symbols)Detach wand from floor nozzle. Tilt nozzle neck back to straighten the airway, and remove any blockages.
NOTE: To order replacement parts and filters, visit sharkclean.eu.
NOTE: Turn off vacuum and remove battery before checking for blockages
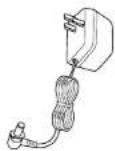
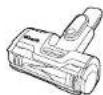
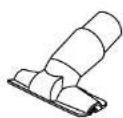
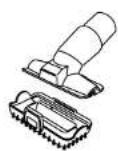
ACCESSORIES INCLUDED
Crevice Tool
③ Dusting Brush
© Wide Upholstery Tool
© Motorised Pet Tool (certain models only)
E Accessory Bag
F Lithium-Ion Battery
© Charging Cord
Battery Charging Cradle
AED
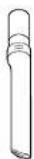

B
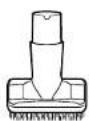
1
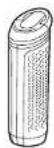
C
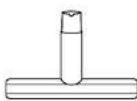
G
D
H

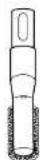
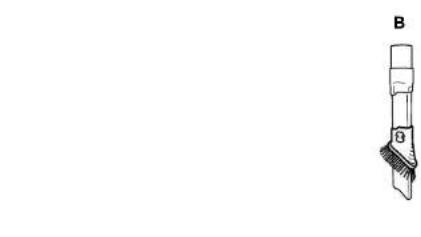
ADDITIONAL ACCESSORIES
Flexi Crevice Tool
⑧ 2in1 Duster Crevice Tool
© Pet Multi-Tool
© Anti-Allergen Dust Brush
E Upholstery Tool
F Under Appliance Wand
A

E
C
F
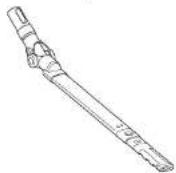
NOTE: Not all accessories come with all units. Please see the top flap of your box for your unit's configuration.
To order additional accessories, visit sharkclean.eu.
TROUBLESHOOTING
| LIGHT INDICATOR WHAT IT MEANS | ||
 | FLOOR and CARPET LEDs flash together | Blockage detected. Turn off unit and remove blockage. |
 | BOOST LED flashes | Unit temperature is high. Turn off vacuum and wait for approx. 45 minutes. While unit is cooling, look for blockages and remove any that are found. Filters may also need to be cleaned. See Maintenance Section. |
 | FIRST and THIRD BATTERY INDICATOR LEDS flash alternately | Battery temperature is not optimal, so charging is temporarily paused. Leave battery plugged in and charging will resume soon. |
BATTERY REMOVAL AND DISPOSAL
This product uses a lithium-ion rechargeable and recyclable battery. When the battery no longer holds a charge, it should be removed from the vacuum and recycled. DO NOT incinerate or compost the battery.
When your lithium-ion battery needs to be replaced, dispose of it or recycle it in accordance with local ordinances or regulations. In some areas, it is illegal to place spent lithium-ion batteries in the bin or in a municipal solid waste stream. Return spent battery to an authorised recycling centre or to retailer for recycling. Contact your local recycling centre for information on where to drop off the spent battery.
TROUBLESHOOTING
Vacuum is not picking up debris.
No suction or light suction.
- Ensure handle, hose, dust cup, and wand are all securely connected onto the unit.
- Check filters to see if they need cleaning. Follow instructions for rinsing and completely air-drying the filters before reinserting them in the vacuum.
• Dust cup may be full; empty dust cup. - Check wand, hose, hose connections, nozzle and accessories for blockages; clear blockages if required.
- Check floor nozzle for blockages; clear blockages if required.
- Remove any string, carpet fibres, or hair that may be wrapped around the brush-roll and Soft Roller or trapped behind the Soft Roller.
Vacuum lifts rugs.
- Turn off vacuum, and move it away from any obstruction. Turn on vacuum and tilt handle back to activate brush-roll.
- Check that vacuum is in Extended Runtime mode and/or try Floor mode.
- Turn off the unit to disengage the brush-roll and restart with the Power button.
Brush-roll/Soft Roller does not spin.
- If Brush-roll Indicator Light on the floor nozzle turns red, the brush-roll and/or Soft Roller have stopped spinning. Immediately turn off and remove battery from vacuum pod and remove blockage before reconnecting and turning vacuum back on. If light turns green, the blockage has been successfully cleared.
- If headlights are not illuminated, there is a connection issue between the hose, pod, wand, and nozzle. Try disconnecting the pieces and then reconnecting them, sliding in each one until it clicks securely into place.
Vacuum turns off on its own or
will not turn on.
There are several possible reasons for the vacuum cleaner turning off on its own, including blockages, battery issues, and overheating. If the vacuum cleaner turns off on its own, perform the following steps:
- Check battery indicator lights to see if battery needs to be recharged. If it does not need charging, turn off the vacuum cleaner and remove battery.
- Empty dust cup and clean filters.
- Check wand, accessories, and inlet openings and remove any blockages.
- Allow unit and battery to cool for at least 45 minutes, until it returns to room temperature.
- Return battery to vacuum and press Power button.
Dust cup will not latch onto unit:
- The dust cup will not latch if the pod is not inserted properly onto the unit. Align the bottom of pod onto the rails on the front of the neck of the floor nozzle. Slide pod down the rails until it clicks into place.
Battery not charging.
- Batteries outside of optimal temperature range may not begin charging immediately. Move to room temperature area and/or allow battery to cool before charging.
- Please review battery runtimes in the Operating the Vacuum section.
- When charging with the cradle, ensure battery is pressed all the way down onto cradle and that charge indicator lights illuminate.
- Battery life expectancy is at least two years and comes with a two-year limited guarantee. New battery packs can be purchased at sharkclean.eu
- When charging with the cradle ensure the charger is inserted and then rotated to lock it into place. Battery will not charge unless the charger is locked into place.
Battery not inserting into vacuum.
- Make sure handle is down before pushing battery securely into place.
- Make sure Post-Motor Filter filter is securely clicked into place prior to inserting the battery.
Shark NINJA
FIVE (5) YEAR LIMITED GUARANTEE
When a consumer buys a product in the UK, they get the benefit of legal rights relating to the quality of the product (your "statutory rights"). You can enforce these rights against your retailer. However, at Shark we are so confident about the quality of our products that we give the original product owner an additional manufacturer's warranty of up to five years. (1 year as standard plus 4 years when you register) These terms and conditions relate to our manufacturer's warranty only - your statutory rights are unaffected. Please note that the 5 year guarantee is available in all EU countries and in the UK if it stops being an EU country during the guarantee term. The conditions below describe the prerequisites and scope of our warranty. They do not affect your statutory rights or the obligations of your retailer and your contract with them.
The lithium ion power pack is not covered by the 5 year guarantee (see battery warranty on next page)
Shark ^® Guarantees
A household appliance like a vacuum cleaner constitutes a sizeable investment. Your new machine needs to work properly for as long as possible. The guarantee it comes with is an important consideration - and reflects how much confidence the manufacturer has in its product and manufacturing quality.
Every Shark machine comes with a free parts and labour guarantee. Our customer service helpline
(0800 862 0453) is open from 9.00am to 6.00pm Monday - Friday. It's free to call, and you'll be put
straight through to a shark representative. You'll also find online support at www.sharkclean.eu/uk.
How do I register my extended Shark guarantee?
You can register your guarantee online within 28 days of purchase. To save time, you'll need the following information about your machine:
- Date you purchased the machine (receipt or delivery note)
• To register online, please visit www.sharkclean.eu/uk/register-guarantee
IMPORTANT
- Both the 12 months and the extended 4 years guarantee will only cover your product from the date of purchase.
- Please keep your receipt at all times. Should you need to use your extended guarantee we will need your receipt to verify the information you have supplied to us is correct. The inability to produce a valid receipt may invalidate your guarantee.
What are the benefits of registering my free Shark guarantee?
When you register your guarantee we'll have your details to hand if we ever need to get in touch. If you further agree to receive communications from us, you can also receive tips and advice on how to get the best out of your Shark vacuum and hear the latest news about new Shark technology and launches.
If you register your guarantee online, you'll get instant confirmation that we've received your details.
How long are new Shark machines guaranteed for?
Our confidence in our design and quality control means that your new Shark vacuum cleaner is guaranteed for a total of up to five years for the original owner (12 months plus an extended warranty of 4 years). What is covered by the free Shark guarantee?
Repair or replacement of your Shark machine (at Shark's discretion), including all parts and labour. A Shark guarantee is in addition to your legal rights as a consumer.
What is not covered by the free Shark guarantee?
-
Blockages - For details of how to unblock your vacuum cleaner, please refer to the Operating Manual.
-
Normal wear and tear such as brush bar, fuse, belt, batteries, hose etc.
-
Accidental damage, faults caused by negligent use or care, misuse, neglect, careless operation or handling of the vacuum cleaner which is not in accordance with the Shark Operating Manual supplied with your machine.
-
Use of the vacuum cleaner for anything other than normal domestic household purposes.
-
Use of parts not assembled or installed in accordance with the operating instructions.
-
Use of parts and accessories which are not Shark Genuine Components.
-
Faulty installation (except where installed by Shark)
-
Repairs or alterations carried out by parties other than Shark or its agents.
-
The Lithium ION power pack battery. Please see next pa for battery warranty.
-
Claims for repairs made under the extended manufacturer's guarantee by anyone other than the original owner who registered the product.
What happens when my guarantee runs out?
Shark does not design products to last for a limited time. We do appreciate that there may be a desire for our customers to want to repair their vacuum cleaners after the warranty has elapsed or the product has been sold to a new owner. In this case please contact our free phone customer service help line and ask about our out warranty program, on 0800 862 0453.
Where can I buy genuine Shark spares and accessories?
Shark spares and accessories are developed by the same engineers who developed your Shark vacuum. You'll find a full range of Shark spares, replacement parts and accessories for all Shark machines at www.sharkclean.eu.
Please remember that using non-Shark spares invalidates your guarantee.
TWO (2) YEAR LIMITED BATTERY GUARANTEE
When a consumer buys a product in the UK, they get the benefit of legal rights relating to the quality of the product (your "statutory rights"). You can enforce these rights against your retailer. However, at Shark we are so confident about the quality of our products that we give the original product owner an additional manufacturer's warranty of up to two years. (1 year as standard plus 1 year when you register) These terms and conditions relate to our manufacturer's warranty only - your statutory rights are unaffected. Please note that the 2 year guarantee is available in all EU countries and in the UK if it stops being an EU country during the guarantee term. The conditions below describe the prerequisites and scope of our warranty. They do not affect your statutory rights or the obligations of your retailer and your contract with them.
Shark® Guarantees
A household appliance like a vacuum cleaner constitutes a sizeable investment. Your new machine needs to work properly for as long as possible. The guarantee it comes with is an important consideration - and reflects how much confidence the manufacturer has in its product and manufacturing quality.
Every Shark machine comes with a free parts and labour guarantee. Our customer service helpline is 0800 862 0453. It's free to call, and you'll be put straight through to a Shark representative. You'll also find online support at www.sharkclean.eu/uk.
How do I register my extended Shark guarantee?
You can register your guarantee online within 28 days of purchase. To save time, you'll need the following information about your machine:
- Date you purchased the machine (receipt or delivery note)
• To register online, please visit www.sharkclean.eu/uk/register-guarantee
IMPORTANT
- Both the 12 months and the extended 1 year guarantee will only cover your product from the date of purchase.
- Please keep your receipt at all times. Should you need to use your extended guarantee we will need your receipt to verify the information you have supplied to us is correct. The inability to produce a valid receipt may invalidate your guarantee.
What are the benefits of registering my free Shark guarantee?
When you register your guarantee we'll have your details to hand if we ever need to get in touch. If you further agree to receive communications from us, you can also receive tips and advice on how to get the best out of your Shark vacuum and hear the latest news about new Shark technology and launches.
If you register your guarantee online, you'll get instant confirmation that we've received your details.
How long are new Shark machines guaranteed for?
Our confidence in our design and quality control means that your new Shark vacuum cleaner is guaranteed for a total of up to five years for the original owner (12 months plus an extended warranty of 1 year).
What is covered by the free Shark guarantee?
Repair or replacement of your Shark machine (at Shark's discretion), including all parts and labour. A Shark guarantee is in addition to your legal rights as a consumer.
What is not covered by the free Shark guarantee?
-
Blockages - For details of how to unblock your vacuum cleaner, please refer to the Operating Manual.
-
Normal wear and tear such as brush bar, fuse, belt, batteries, hose etc.
-
Accidental damage, faults caused by negligent use or care, misuse, neglect, careless operation or handling of the vacuum cleaner which is not in accordance with the Shark Operating Manual supplied with your machine.
-
Use of the vacuum cleaner for anything other than normal domestic household purposes.
-
Use of parts not assembled or installed in accordance with the operating instructions.
-
Use of parts and accessories which are not Shark Genuine Components.
-
Faulty installation (except where installed by Shark).
-
Repairs or alterations carried out by parties other than Shark or its agents.
-
Claims for repairs made under the extended manufacturer's guarantee by anyone other than the original owner who registered the product.
What happens when my guarantee runs out?
Shark does not design products to last for a limited time. We do appreciate that there may be a desire for our customers to want to repair their vacuum cleaners after the warranty has elapsed or the product has been sold to a new owner. In this case please contact our free phone customer service help line and ask about our out warranty program, on 0800 862 0453.
Where can I buy genuine Shark spares and accessories?
Shark spares and accessories are developed by the same engineers who developed your Shark vacuum. You'll find a full range of Shark spares, replacement parts and accessories for all Shark machines at www.sharkclean.eu.
Please remember that using non-Shark spares invalidates your guarantee.
Shark | NINJA
NOTES NOTES
Shark | NINJA
Euro-Pro Europe Limited
3150 Century Way
Thorpe Park
Leeds
LS15 8ZB
0800 862 0453
ninjakitchen.eu
Illustrations may differ from actual product. We are constantly striving to improve our products; therefore the specifications contained herein are subject to change without notice.
© 2019 SharkNinja Operating LLC.
SHARK and DUOCLEAN are registered trademark of SharkNinja Operating LLC.
POWERED LIFT-AWAY and LIFT-AWAY are trademarks of SharkNinja Operating LLC.
ICZ160UK_Series_IB_MP_190819_Mv1 PRINTED IN CHINA
f @sharkcleaninguk
@sharkcleanuk
@sharkcleanuk