
MIM-B13D - Air-conditioner SAMSUNG - Free user manual and instructions
Find the device manual for free MIM-B13D SAMSUNG in PDF.


User questions about MIM-B13D SAMSUNG
0 question about this device. Answer the ones you know or ask your own.
Ask a new question about this device
Download the instructions for your Air-conditioner in PDF format for free! Find your manual MIM-B13D - SAMSUNG and take your electronic device back in hand. On this page are published all the documents necessary for the use of your device. MIM-B13D by SAMSUNG.
USER MANUAL MIM-B13D SAMSUNG
• Thank you for purchasing this Samsung air conditioner.
- Before operating this unit, please read this user manual carefully and retain it for future reference.
text_image
SAMSUNGContents
Safety Information 3
Safety Information 3
At a Glance 6
Preparation 6
Checking the package contents • Inserting batteries • Installing the remote control holder
Remote Control Overview 7
Remote Control Operation 8
Controlling temperature • Controlling fan speed • Controlling air flow direction
Power Smart Features 9
Cooling Operation 9
Cool mode
Dehumidifying Operation 10
Dry mode
Air Purifying Operation 11
Purify function (optional)
Heating Operation 12
Heat mode
Quick Smart Features 13
Auto mode • Fan mode • Controlling the air flow direction individually • Sleep function •
Display indications • Beep sound function • Clearing the filter-cleaning reminder •
Controlling the indoor units individually
Energy-Saving Features 18
Energy-Saving Operation 18
Timed on/Timed off function

Correct disposal of batteries in this product
(Applicable in countries with separate collection systems)
This marking on the battery, manual or packaging indicates that the batteries in this product should not be disposed of with other household waste at the end of their working life. Where marked, the chemical symbols Hg, Cd or Pb indicate that the battery contains mercury, cadmium or lead above the reference levels in EC Directive 2006/66. If batteries are not properly disposed of, these substances can cause harm to human health or the environment. To protect natural resources and to promote material reuse, please separate batteries from other types of waste and recycle them through your local, free battery return system.
2 English

Safety Information
This content is intended to protect the user's safety and prevent property damage. Please read it carefully for correct use of the product.
WARNING
Hazards or unsafe practices that may result in severe personal injury or death.
CAUTION
Hazards or unsafe practices that may result in minor personal injury or property damage.
! Follow directions.
Do NOT attempt.
Make sure the machine is grounded to prevent electric shock.
Unplug the appliance.
Do NOT disassemble.
FOR INSTALLATION
WARNING
The installation of this product must be performed by a qualified technician.
- Failing to do so may result in electric shock, fire, product malfunction, explosion, or injury.
Do not install this product near a heater, or inflammable material. Do not install this product in a humid, oily or dusty location, in a location exposed to direct sunlight and water (rain drops). Do not install this product in a location where gas may leak.
- Failing to do so may result in electric shock or fire.

Safety Information
CAUTION
Install the product on a hard and level place that can support its weight.
- If the place cannot support its weight, the product may fall down and it may cause product damage.
FOR OPERATION
WARNING
If the product generates a strange noise, a burning smell or smoke, unplug the product immediately and contact your nearest service centre.
- Failing to do so may result in electric shock or fire.
Do not attempt to repair, disassemble, or modify the product yourself.
- Failing to do so may result in electric shock, fire, product malfunction, or injury.
CAUTION
Do not allow water to enter the product.
- Failing to do so may result in fire or explosion.
Do not operate the product with wet hands.
- Failing to do so may result in electric shock.
Do not spray volatile material such as insecticide onto the surface of the product.
- As well as being harmful to humans, it may also result in electric shock, fire, or product malfunction.
4 English
Do not give a strong impact to the product and do not disassemble the product.
Do not use this product for other purposes.
- This product is designed to be used only for a system air conditioner.
Do not press the buttons with any sharp objects.
- Failing to do so may result in electric shock or part damage.
Do not clean the product by spraying water directly onto it. Do not use benzene, thinner, alcohol or acetone to clean the product.
- Failing to do so may result in discoloration, deformation, damage, electric shock, or fire.
Preparation
Checking the package contents
| Item | Wireless remote control | Battery (AAA 1.5V) | M4 x L16 screw | Remote control holder | User manual |
| Quantity | 1 2 2 1 1 | ||||
| Shape | 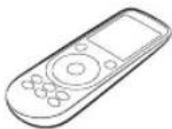 | 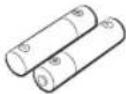 | 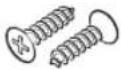 | 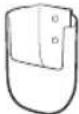 |  |
Inserting batteries
- If the ☑ (Low battery) indicator appears on the remote control display, replace the batteries with two new AAA 1.5V batteries.
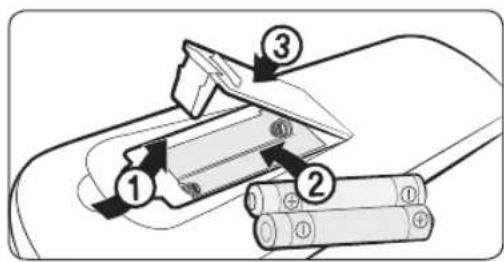
text_image
Diagram showing battery charging process with labeled components: plug, switch, battery pack, and batteriesInstalling the remote control holder
1 Choose a location on the wall where to install the remote control holder.
2 Mark the two spots for fastening the two M4 x L16 screws. Then drill the two holes.
3 Fasten the screws through the holes to fix the remote control holder in place.
NOTE
• Installation location requirements:
- Avoid locations exposed to direct sunlight.
- Avoid locations where the holder is covered by objects such as curtains.
- Choose a location that is at least 1 m away from a TV or stereo system.
- If the remote control will not be used for an extended period of time remove the batteries and store them separately.
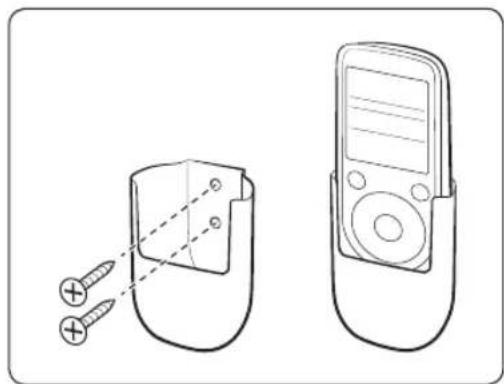
natural_image
Line drawing of a remote control device with screwdriver and two screws, no text or symbols present6 English
Remote Control Overview
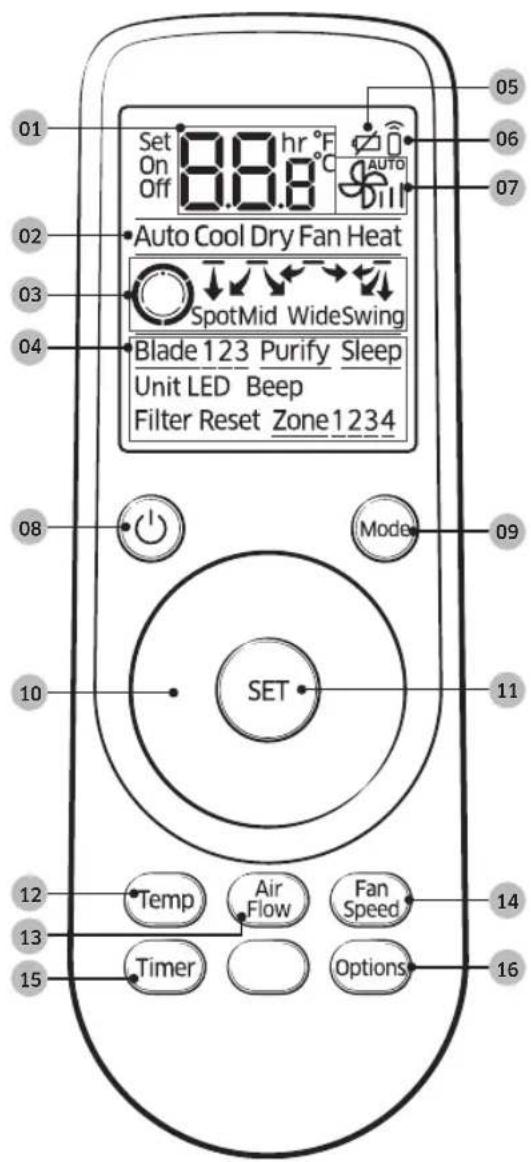
text_image
Set On Off 8.8 hr °C AUTO Auto Cool Dry Fan Heat SpotMid WideSwing Blade 123 Purify Sleep Unit LED Beep Filter Reset Zone1234 SET Mode 01 02 03 04 05 06 07 08 09 10 11 12 13 14 15 Temp Air Flow Fan Speed Timer Options
NOTE
- To select a function, point the remote control to the remote control sensor on an indoor unit. Then select the function by using the Wheel or by pressing the SET button within 5 seconds.
- If you do not press another button within 7 seconds after pressing the Timer or Options button, these button functions are deselected.
- If you turn off and then turn on the remote control, the settings of the Timed on/off, Purify, and Sleep functions that you set previously are cancelled.
01 Set temperature/Timer indicator

NOTE
- For the AR-KH00U model, the temperature is shown in degrees Fahrenheit (°F) on the display.
02 Operation mode indicator
03 Air flow direction indicator
04 Options indicator
05 Low battery indicator
06 Signal transmission indicator
07 Fan speed indicator
08 Power button
09 Mode button

NOTE
- For air conditioners that do not provide the heating function, Heat may appear on the remote control display when you press the Mode button, but heating is not available.
10 Wheel

NOTE
- You can control the set temperature, fan speed, and air flow direction by rotating the Wheel.
11 SET button
12 Temperature button
13 Air flow direction button
14 Fan speed button
15 Timer button
16 Options button
- If the indoor unit number (Zone 1 to Zone 4) that you select on the remote control display does not match the indoor unit (default: Indoor Unit 1) pointed by the remote control, the indoor unit will not operate.
- If you press a button on the remote control near a strong light such as a compact fluorescent lamp or neon sign, the air conditioner may not operate. In this case, move close to the indoor unit, and then operate the remote control.
- If other appliances respond to the remote control, contact a service center.

Remote Control Operation
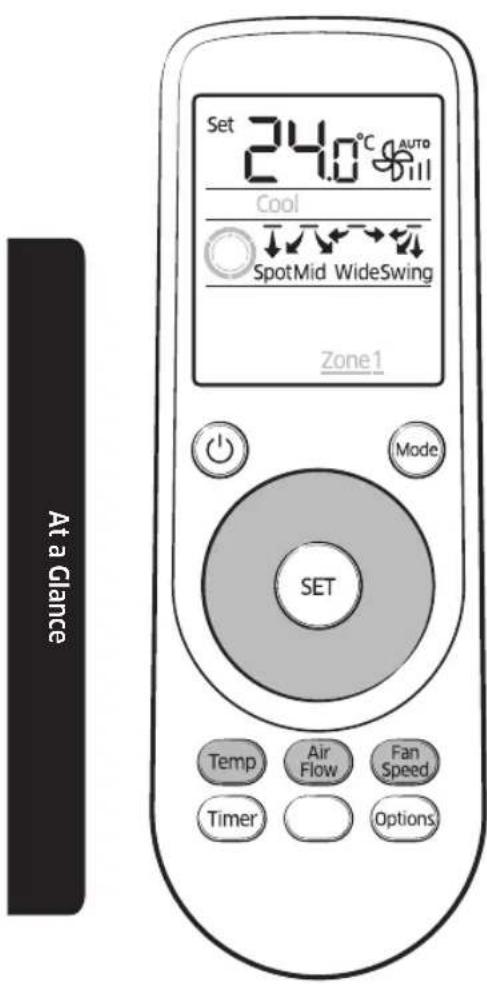
You can use the air conditioner easily by selecting a function and then by controlling the temperature, fan speed, and air flow direction with the Wheel.
text_image
Set 24.0°C AUTO Cool SpotMid WideSwing Zone1 At a Glance SET Temp Air Fan Flow Speed Timer OptionsControlling temperature
You can control the temperature in each mode as follows:
| Mode Temperature control | |
| Auto/Cool/Dry | You can adjust by 0.5°C (1°F) between 18°C (65°F) and 30°C (86°F). |
| Fan You cannot control the temperature. | |
| Heat | You can adjust by 0.5°C (1°F) between 16°C (61°F) and 30°C (86°F). |

NOTE
- You can increase the set temperature by 0.5°C (1°F) by pressing the Temp button, too.
You can select the following fan speeds in each mode:
| Mode Available fan speeds | |
| Auto/Dry | (Auto) |
| Cool/Heat | (Auto), (Low), (Med), (High) |
| Fan | (Low), (Med), (High) |

NOTE
- You can change the fan speed by pressing the Fan Speed button, too.
Controlling air flow direction
You can select the following air flow directions:
| Spot Mid | Wide Swing | ||

NOTE
- You can change the air flow direction by pressing the button, too.
- The current air flow direction persists even if you change the current mode, or turn off and then turn on the remote control.
- For more information on how to control the air flow direction individually, see Controlling the air flow direction individually on page 14.
8 English

Cooling Operation
The smart and powerful cooling functions of the Samsung air conditioner keep an enclosed space cool and comfortable.
text_image
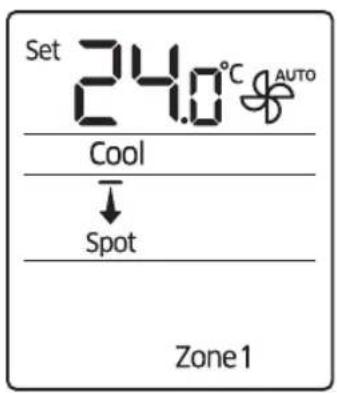
Set 24.0°C AUTO Cool Spot Zone1Cool mode
Use the Cool mode to stay cool in hot weather.

flowchart
graph LR
    A["Power"] --> B["Mode"]
    B --> C["Rotate the Wheel."]
    C --> D["Select Cool."]
    D --> E["SET"]
NOTE
- You can also select the mode that you want to use by pressing the Mode button repeatedly until it appears on the remote control display.
- For comfort, keep the temperature difference between the indoor and outdoor air within 5°C (9°F) in the Cool mode.
• To cool your room quickly, select a low temperature and a high fan speed. - To save energy, select a high temperature and a low fan speed.
- As the indoor temperature approaches the set temperature, the compressor will operate at a low speed to save energy.
Dehumidifying Operation
The dehumidifying function of the Samsung air conditioner keeps an enclosed space fresh and comfortable.
text_image
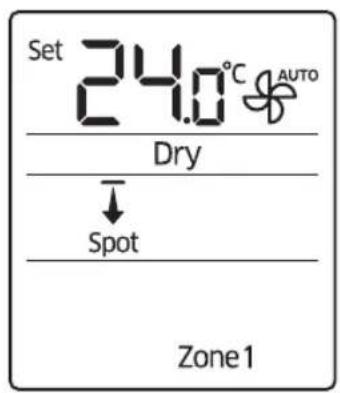
Set 24.0°C AUTO Dry Spot Zone1Dry mode
Use the Dry mode in rainy or humid weather.

flowchart
graph LR
    A["Power"] --> B["Mode"]
    B --> C["Rotate the Wheel."]
    C --> D["Select Dry."]
    D --> E["SET"]
NOTE
- You can also select the mode that you want to use by pressing the Mode button repeatedly until it appears on the remote control display.
- You cannot change the fan speed in the Dry mode.
- The greater the difference between the set temperature and the current temperature is, the greater the amount of air that is dehumidified is.
Air Purifying Operation
The air purification function of the Samsung air conditioner keeps the air in an enclosed space purified.
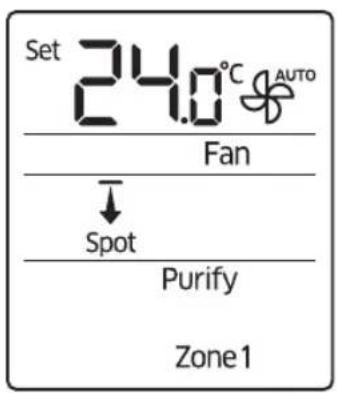
text_image
Set 24.0°C AUTO Fan Spot Purify Zone1Purify function (optional)
Use the Purify function to purify your room with positive ions produced by the air conditioner. This function is available in the Auto, Cool, Dry, Fan, and Heat modes.
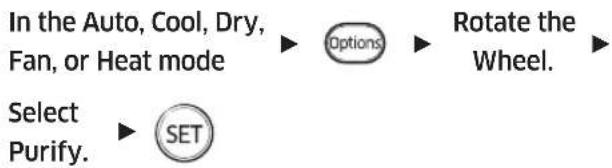
flowchart
graph TD
    A["In the Auto, Cool, Dry, Fan, or Heat mode"] --> B["Options"]
    B --> C["Rotate the Wheel."]
    D["Select Purify."] --> E["SET"]
NOTE
- You can also select the function that you want to use by pressing the Options button repeatedly until it appears on the remote control display.
- To use the Purify function, you must install the Virus doctor, which is a hardware component. It is optional to install the Virus doctor.
- To cancel the Purify function, press Options ▶ (again.
- When the Purify function is additionally selected in the Fan mode, you cannot change the set temperature.
- When the Purify function is additionally selected while a specific mode is running, there is little difference in electricity consumption and operating noise.
Heating Operation
The heating functions of the Samsung air conditioner keep an enclosed space warm and comfortable.
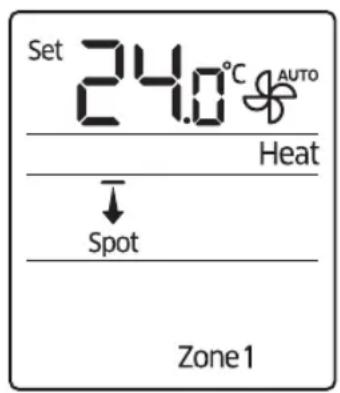
text_image
Set 24.0°C AUTO Heat Spot Zone1Heat mode
Use the Heat mode to stay warm.

flowchart
graph LR
    A["Power"] --> B["Mode"]
    B --> C["Rotate the Wheel."]
    C --> D["Select Heat."]
    D --> E["SET"]
NOTE
- You can also select the mode that you want to use by pressing the Mode button repeatedly until it appears on the remote control display.
- While the air conditioner warms up, the fan may not operate for a while at the beginning to prevent cold wind.
- If the outdoor temperature is low and the humidity is high while the Heat mode is running, the heating performance of the air conditioner may decrease due to frost and ice that formed on the outdoor heat exchanger. When this condition happens, the air conditioner runs the defrost function for about 5 to 12 minutes to remove the frost and ice, and water steam is released from the outdoor unit.
- While the defrost function is running, the indoor unit provides no breeze to prevent cold wind.
- The operation time of the defrost function varies depending on the amount of the frost and ice and the humidity.
- While the defrost function is running, none of other functions will work, even if you select them on the remote control.
Quick Smart Features
There is a variety of useful functionality provided by the Samsung air conditioner.
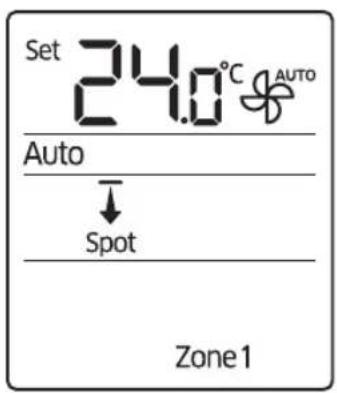
text_image
Set 24.0°C AUTO Auto ↓ Spot Zone1Auto mode
Use the Auto mode when you want the air conditioner to automatically control the mode (Heat or Cool). The air conditioner will provide the most comfortable atmosphere that it can.

flowchart
graph LR
    A["Power"] --> B["Mode"]
    B --> C["Rotate the Wheel."]
    C --> D["Select Auto."]
    D --> E["SET"]
NOTE
- You can also select the mode that you want to use by pressing the Mode button repeatedly until it appears on the remote control display.
• You cannot change the fan speed. - While the Cool mode is running, the air conditioner produces a strong cold air if there is a large difference between the set temperature and the current temperature. When the temperature difference becomes small, the air conditioner automatically changes the air flow direction to Wide (→) and keeps the room at a comfortable temperature.
text_image
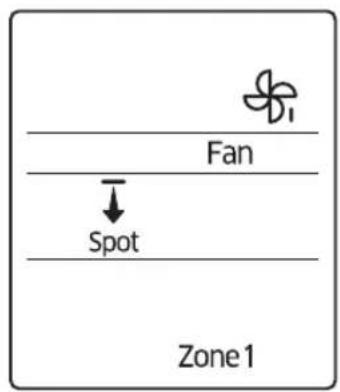
Fan Spot Zone1Fan mode
Use the Fan mode to run the air conditioner like a common fan. The air conditioner provides a natural breeze.

flowchart
graph LR
    A["Power"] --> B["Mode"]
    B --> C["Rotate the Wheel."]
    C --> D["Select Fan."]
    D --> E["SET"]
NOTE
- You can also select the mode that you want to use by pressing the Mode button repeatedly until it appears on the remote control display.
- If the air conditioner will not be used for an extended period of time, dry the air conditioner by running it in the Fan mode for 3 or 4 hours.
English 13
Quick Smart Features
text_image
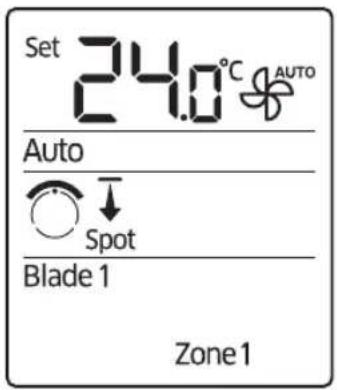
Set 24.0°C AUTO Auto Spot Blade 1 Zone1Controlling the air flow direction individually
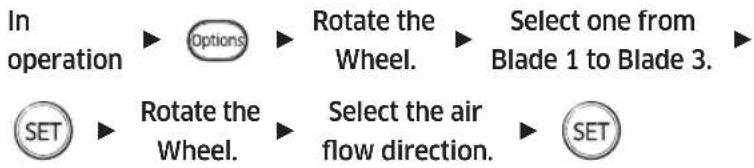
Use the individual air-flow-direction control function to individually control the air flow directions of the air outlets.
flowchart
graph LR
    A["In operation"] --> B["Options"]
    B --> C["Rotate the Wheel."]
    C --> D["Select one from Blade 1 to Blade 3."]
    E["SET"] --> F["Rotate the Wheel."]
    F --> G["Select the air flow direction."]
    G --> H["SET"]
NOTE
- You can also select the function that you want to use by pressing the Options button repeatedly until it appears on the remote control display.
- When you take the steps above to run the individual air-flow-direction control function, you cannot select Swing (☑) as the air flow direction.
- Blade 1 is given to the air outlet that is close to the indoor unit display. Blade 2 and Blade 3 are given to the remaining two air outlets in the clockwise direction.
- The current settings of the individual air-flow-direction control function persist even if you change the current mode or you turn off and then turn on the air conditioner with the remote control.
• To cancel the selected air flow direction, press the button.
text_image
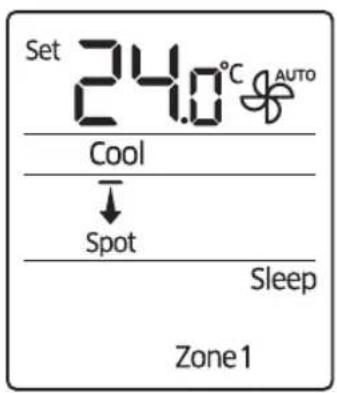
Set 24.0°C AUTO Cool Spot Sleep Zone1Sleep function
Use the Sleep function to get a good sleep at night and to save energy. The air conditioner automatically controls the temperature and the fan speed to produce conditions for a good sleep.
In the Cool or Heat mode
Rotate the Wheel.
▶ Select Sleep.
NOTE
- You can also select the function that you want to use by pressing the Options button repeatedly until it appears on the remote control display.
- You can select the Sleep function both in the Cool and Heat modes.
- The air conditioner automatically turns off after 6 hours from the moment you start the Sleep function.
text_image
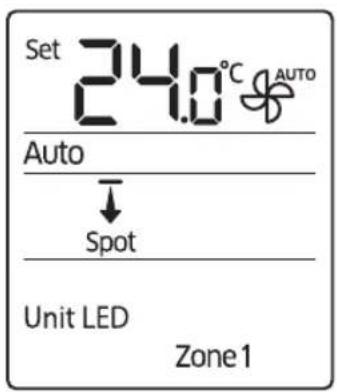
Set 24.0°C AUTO Auto ↓ Spot Unit LED Zone1Display indications
Use the Unit LED function to change the indications that appear on the indoor unit display.
In operation
Rotate the Wheel.
▶ Select Unit LED.
NOTE
- You can also select the function that you want to use by pressing the options button repeatedly until it appears on the remote control display.
- When the indoor unit is turned off, you cannot use the Unit LED function.
- When you run the Unit LED function to change the indications that appear on the indoor unit display, Unit LED appears on the remote control display for three seconds and then disappears.
English 15
Quick Smart Features
text_image
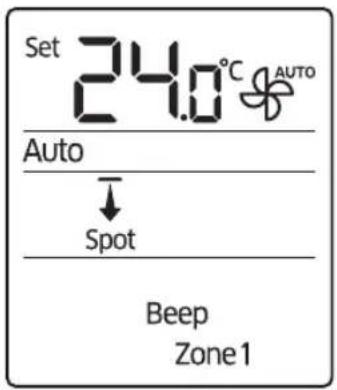
Set 24.0°C AUTO Auto ↓ Spot Beep Zone1Beep sound function
Use the Beep sound function to turn on or off the beep sound from the indoor unit when you press a button on the remote control.

flowchart
graph LR
    A["In operation"] --> B["Options"]
    B --> C["Rotate the Wheel."]
    C --> D["Select Beep."]
    D --> E["SET"]
NOTE
- You can also select the function that you want to use by pressing the Options button repeatedly until it appears on the remote control display.
- When you run the Beep sound function to turn on or off the beep sound from the indoor unit, Beep appears on the remote control display for three seconds and then disappears.

text_image
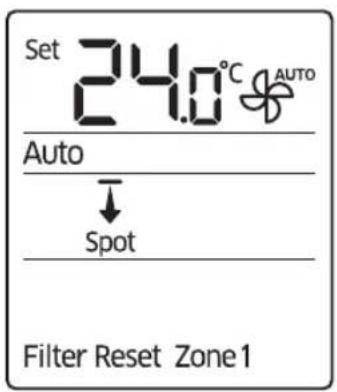
Set 24.0°C AUTO Auto ↓ Spot Filter Reset Zone1Clearing the filter-cleaning reminder
Use the Filter Reset function to reset the filter-cleaning reminder after cleaning or replacing the filter.


Rotate the Wheel.

Select Filter Reset.


NOTE
- You can also select the function that you want to use by pressing the Options button repeatedly until it appears on the remote control display.
- When the Filter Reset function is run, Filter Reset appears on the remote control display for three seconds and then disappears.
text_image
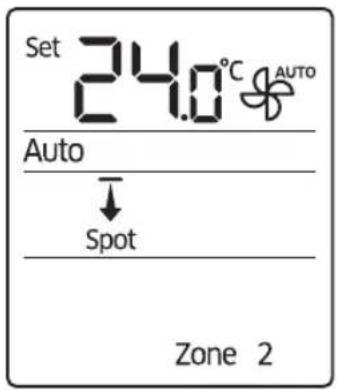
Set 24.0°C AUTO Auto ↓ Spot Zone 2Controlling the indoor units individually
Use the Zone function to choose the indoor unit you want to operate individually. For example, select Zone 1 to control only the indoor unit 1.

flowchart
graph LR
    A["Options"] --> B["Rotate the Wheel."]
    B --> C["Select one from Zone 1 to Zone 4."]
    C --> D["SET"]
NOTE
- You can also select the function that you want to use by pressing the Options button repeatedly until it appears on the remote control display.
- The indoor unit numbers must be set by the installer: the installer sets a number on each indoor unit. To change the existing indoor unit numbers, contact a service centre.
- The current Zone function settings persist even if you change the current mode or you turn off and then turn on the remote control.
- You can select either one or all of Zone 1 to Zone 4.

Energy-Saving Operation
The Samsung air conditioner provides functions that allow you to reduce electricity consumption.
text_image
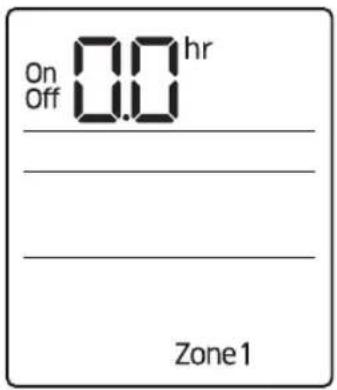
On Off 0.0 hr Zone1Timed on/Timed off function
Use the Timed on/Timed off to turn on or off the air conditioner after the time that you set.

flowchart
graph LR
    A["Timer"] --> B["Select On or Off."]
    B --> C["Rotate the Wheel"]
    C --> D["Set the on/off time."]
    D --> E["SET"]
NOTE
- You can set a time between 0.5 and 24 hours. Set the time interval to 0.0 to cancel the Timed on/off function.
• After starting the Timed on function, you can change the mode and the set temperature. When you apply the Timed on/off function to the Fan mode, you cannot change the set temperature. - You cannot set the same time for both of the Timed on and Timed off functions.
- If you press the Timer button when the remote control is off, On is displayed first on the remote control display; if you press the Timer button when the remote control is on, Off is displayed first.
| Combining Timed on and Timed off | |
| When the air conditioner is off | Example) Timed on: 3 hours, Timed off: 5 hoursThe air conditioner turns on after 3 hours from the moment you start Timed on/off, remains on for 2 hours, then turns off automatically. |
| When the air conditioner is on | Example) Timed on: 3 hours, Timed off: 1 hourThe air conditioner turns off after 1 hour from the moment you start Timed on/off, then turns on after 2 hours from the moment it is turned off. |



MEMO


English 19
