REV6P-LCR.1 - Pregnant TruAudio - Free user manual and instructions
Find the device manual for free REV6P-LCR.1 TruAudio in PDF.


User questions about REV6P-LCR.1 TruAudio
0 question about this device. Answer the ones you know or ask your own.
Ask a new question about this device
Download the instructions for your Pregnant in PDF format for free! Find your manual REV6P-LCR.1 - TruAudio and take your electronic device back in hand. On this page are published all the documents necessary for the use of your device. REV6P-LCR.1 by TruAudio.
USER MANUAL REV6P-LCR.1 TruAudio
This model is a High Performance 6.," Home Theater loudspeaker designed to exclusively for in-ceiling installations, this series also uses the last version of the EZFrame. The EZFrame is a TruAudio exclusive design that will make the installation of the grill go from minutes to seconds. The Revolve LCRs can be used for the center channel, right or left channels or for all front three channels (LCR). They are acoustically matched with the REV6- SUR. I models to act as the perfect in-ceiling Home Theater speaker system. All the Revolve series speakers are also matched with many of TruAudio architectural and freestanding speakers so it's easy to design a custom home theater to fit any room. Multiple pairs of the SUR.1 models mar be needed for 7.1 and 9.1 systems.
The LCR models feature a full range design so it can also be used for the from two channels for audio listening. When using these models for Horne Theater, we recommend completing the system with any TruAudio subwoofers.
Choosing the Speaker Location
The Revolve series do NOT fit in the typical 2x4 wall depth of 3.5". Because they were designed exclusively for ceiling use and most ceiling depth is usually 8", these models require 5.5" mounting depth. Please keep this in mind while deciding on the final installation location of the speakers.
The biggest determination of any speaker's sound quality, is the room and the location of the speaker in that room. Since you have chosen these models, the installation requires you to mount one or more of the REV speakers in the ceiling. The unique baffle and tweeter bridge allows the frequencies to radiate toward the listening area and down, away from the ceiling. With the woofer mounted at the designed angle, even the lower
frequencies will be more pronounce and less forgotten like most in\~ceiling home theater speakers. The movable tweeter bridge makes it easy to adjust the high frequencies to the perfect degree once the speaker and furniture are in their final location.
Today's home theater systems require 6 or more speakers for true, life like home cinema listening. These speakers are front right and left, the center channel. right and left surround , and a subwoofer.
Some systems also require additional surround speakers or rear centers to enhance the theater sound. The placement for these speakers is critical to having your home theater experience the best it can be.
LCR Location: The front center speaker should be installed directly above the video picture or screen. The front right and left speakers should be mounted to both sides of the center channel. Try to keep these all aligned if possible. At least make sure the front left and right speakers are aligned the same. While installing these speakers, note the angle of the woofer. The woofer should be facing the listening area. If necessary, turn the entire speaker frame to face the woofer angle properly. Adjust the tweeter bridge so that high frequencies are also directed toward the listening area. On
Model LCR.1, the tweeter adjusts separately from the midrange to give added flexibility.
Surround location: The SUR.1 is a bi-pole speaker which means the tweeters are aimed and fire away from the listener. This causes a more "surround" effect. This actual model is deigned to be mounted into the ceiling. The typical installation would put these speakers directly above the listeners about 6-8 feet apart. Other installations could put these speakers in from or in back of the listener. In any of these cases, the tweeters should be facing away from the listener meaning one tweeter facing the front wall and the other face the rear of the room. The woofer can be directed toward the listener or toward the wall. This would depend on the installation and the
desired sound. In 7.1 and 9.1 systems multiple pairs of the SUR.1 could be used for additional side or rear effects
Prep surface for Speaker Installation
If the speakers were pre-wired at construction time, your dealer might have used TruAudio's Rough-in kits (RC-S series) prior to drywall at each speaker location. (There should also be speaker cable at this location). After the drywall is installed and the hole is cut the speaker is then easily installed. Move on to the "Setting Level Controls" section.
If no rough-in ring has been used and the drywall has not been cut out, move on to the next section:
Note: Speaker cable should be run to each speaker location prior to speaker installation. If the speaker pre-wire took place before insulation and drywall, the cable should be somewhere behind the drywall in the selected location for each speaker.
Locate the desired location for the speaker to be mounted. Check the area for obstructions such as plumbing, heating ducts or electrical wiring. Also locate the wood/metal studs or joists nearest the desired location. Use the supplied speaker cutout to get the recommended hole dimension. Position the cutout in the desired location and outline the speaker opening. If you are not sure of possible obstructions. Cut a small hole in the center of your outline. This will allow you to check for obstructions. If there are no problems with your mounting location, proceed and cutout the outlined hole. If the ceiling is not already insulated and you are not using any kind of enclosures or back boxes we suggest adding some kind of sound dampening material. TruAudio's Acoustic Foam will work great and is designed specifically for use with in-wall and in-ceiling speakers. Dacron or insulation will also work fine for sound dampening material. If insulation is used and the material has a foil layer. Position the foil away from the speaker magnet.
Speaker Installation
Remove the speaker from the box and inspect for any damage. If your model offers any adjustments that are located on the back of the speaker (most of the time located on the crossover) now is the time to adjust them properly.
Locate the speaker cable and prep it for connection; strip back the outside insulation so that the individual conductors are showing (usually 2 or 4). Then strip back the insulation on each conductor to show the bare copper wire. We suggest stripping enough so that 3/8" of copper wire is showing. Push down each post and insert the speaker cable. Make sure that only BARE wire is touching the speaker post once it slides back into place. All TruAudio products feature gold push binding posts which are quick and simple to use but also are great for conducting speaker signal.
Caution: make sure to observe polarity. R+ (positive) from the amp or volume control to speaker R+ and R- (negative) to R-. Make sure to do the same for the left channel.
When connecting the other end of the speaker cable to the amplifier or receiver make sure to observe the same polarity as you did at the speaker connection.
To prepare the speaker for the actual installation, turn all the mounting toggles (dog ears) in toward the speaker frame. This will allow the speaker to easily fit into the precut hole. Place the speaker into the hole (the speaker cable should be connected) and make sure the speaker cable stays connected to the speaker. Hold it in place with one hand and with your other hand carefully tighten the mounting screws evenly to secure the speaker. As you tighten the screws, the dog ears will flip into position to grip into
the drywall. DO NOT over tighten the mounting screws. This can cause damage to the speaker plus the lip on the outside of the frame.
Adjust the Tweeters: Most TruAudio in-ceiling speakers feature swivel tweeters so they are more versatile for different applications. After the location of the speaker is determined and the speaker is installed and just the tweeter toward the listening area. Sometimes, depending on the installation, it might be necessary to
reflect the sound off a wall or ceiling.
Adjust the Level Control: This model might offer level control for the tweeter. The switch is located on the front face of the speaker. You can adjust this control to get more or less high frequency. Adjust the switch to each setting until you get the desired amount of high frequency. The adjustments are -3dB, 0dB and +3dB.
Some models also might offer level control for the woofer. The switch is located on the front face of the speaker. You can ad just this control to get more or less low frequency. Adjust the switch to each setting until you get the desired amount of low frequency. The adjustments are -3dB, 0dB and +3dB.
Remove the grill from the box and install it onto the speaker. Align the grills edges to the grooves on the speaker and carefully push the grill on. Make sure to check all the way around the grill to ensure its sitting on the speaker evenly. Some speakers will offer the typical in-ceding speaker grill and some will feature the TruAudio EZGrill so the grill will be pulled into place with the magnets imbedded into the speaker frame. No matter what grill is offered, they go on to the speaker in the same way.
Painting the Speaker
If you are going to paint your speakers, we suggest painting them prior to the installation. If you must paint them while they art still in the wall, remove the grill and replace it with the provided paint guards. Then you may proceed and paint the frame of the speakers. When painting the grills, paint them lightly and be careful not to clog the holes. Do nor paint the grill while it's still on the speaker, paint them separately.
SoundVision Technologies dba TRUAUDIO
SPEAKER PRODUCT WARRANTY
All in-ceiling, in-wall, in-room speakers and volume controls have a limited lifetime warranty. This warranty includes lifetime parts and repair labor on all components. The warranty extends only to the original purchaser of the product and not to any subsequent owner. TRUAUDIO's obligation under these warranties is limited to repairing or replacing any component found defective in material or workmanship under normal conditions of use with an equal and/or current product. These warranties shall not apply to products which have been abused, modified, or disassembled. Products to be repaired or returned under this warranty must be returned to the factory through an authorized TruAudio dealer with all transportation and insurance charges prepaid.
It is the policy of TRUAUDIO to continuously incorporate improvements into our products. All specifications are subject to change without notice. If you have any questions regarding this or any other TRUAUDIO products, please call 1-888-858-1555, Monday – Friday, 7:00 am – 6:00 pm MST.
TRUAUDIO Speaker Systems, St. George, Utah, 84790
Office: 435.986.1574 Fax: 435.251.9815
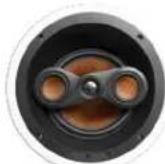
ghost heard but not seen
Speaker Type: : In-ceiling home theater, LCR
Wcofer
Midrange:
The Ground Truth image displays a single, solid horizontal line. According to Rule 2 (UNDERSCORE & LINE RULES), this is a stylistic or background line, not a placeholder underscore. Therefore, the OCR result must ignore it. The provided OCR content is "____", which consists of four underscores. This is an incorrect interpretation of the line as a placeholder, violating the rule that stylistic lines must be ignored. The OCR has hallucinated text (underscores) where none should exist, violating the rule to ignore such lines. Hence, the OCR result is inconsistent with the Ground Truth.
Tweeter
Power
Impedance:
Frequency Response
Sensitivity
EQ Adjustments:
Grill:
Finish Dimensions
[Non-Text]
Cutout Dimension
6 1/2" woven carbon fiber
Daul 2" woven carbon fiber,
swivel bridge
Tweeter
Power
pedance:
37 - 22kHz
92 dB (2.83 volts @ 1 meter)
ghost
heard but not seen
GHT-CSUR-P
Speaker Type: : In-ceiling Surround
Woofer
Tweeter
Power
Impedance:
Frequency Response
Sens
EQ Adjustments:
Grill:
Finish Dimensions:
6 1/2" black polypropylene
3/4" silk dome
Power:
dance:
60 - 20k Hz
89 dB
ments:
Crill
Tweeter 0,-3,-6
Frameless steel and EZframe
11" (276.3 mm) diameter,
5 1/2" (141 mm) deep
9 1/2" (242.4 mm) diameter


Patent No. US 7,543,681 B2
ghost
heard but not seen
GHT-CSUR-G
Speaker Type: : In-ceiling Surround
Woofer:
Tweeter:
Power:
Impedance:
Frequency Response:
Sensitivity:
EQ Adjustments
Grill:
Finish Dimensions:
广力云智慧零售收银系统
Cutout Dimension:
Patent No. US 7,543,681 B2


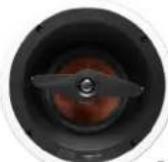
ghost heard but not seen
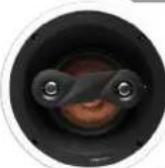
REV6-LCR.2REV6-LCR.1
Speaker Type: : In-ceiling home theater, LCR
Woofer: : 6 1/2" woven carbon fiber
Tweeter: : 3/4" titanium, swivel
Power: 5 - 100 watts
Impedance: : 8 Ω
Frequency Response: : 39 - 20k Hz
Sensitivity: 91 dB (2.83 volts @ 1 meter)
EQ Adjustments: : Tweeter & woofer 0,-3,-6
Grill: : EZFrame, aluminum
Finish Dimensions: 11" (276.3 mm) diameter,
: 5 1/2" (141 mm) deep
Cutout Dimension: 9 1/2" (242.4 mm) diameter


ghost
heard but not seen
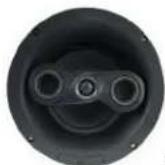
REV6-SUR.1
Speaker Type: : In-ceiling bipole, surround
Woofer: : 6 1/2" woven carbon fiber
Tweeter: : Dual 3/4" titanium, swivel
Power: 5 - 125 watts
Impedance: 8 Ω
Frequency Response: : 39 - 20k Hz
Sensitivity: : 91 dB (2.83 volts @ 1 meter)
EQ Adjustments: : Tweeter 0,-3,-6
Grill: : EZFrame, aluminum
Finish Dimensions: 11" (276.3 mm) diameter,
: 5 1/2" (141 mm) deep
Cutout Dimension: 9 1/2" (242.4 mm) diameter


ghost heard but not seen
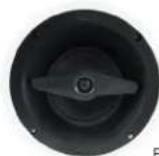
REV6P-LCR.1
Speaker Type: : In-ceiling home theater, LCR
Woofer: 6.5° injected polypropylene
Tweeter: .75" silk soft dome, swivel
Power: 5 - 100 watts
Impedance: 8Ω
Frequency Response: : 39 - 22kHz. (+/-3dB)
Sensitivity: 89 dB (2.83 volts / 1 meter, +/-3 dB)
Grill: Ghost black and white
Finish Dimensions: 11" (280 mm) dia,
: 5.5" (140 mm) deep
Cutout Dimension: 9.5" (242 mm) dia


ghost
heard but not seen
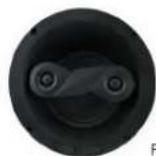
REV6P-LCR.2
Speaker Type: : In-ceiling bipole, surround
Woofer: : 6.5" injected polypropylene
Tweeter: : .75" soft silk dome
Power: 5 - 75 watts
Impedance: 8 Ω
Frequency Response: 40 - 20kHz (+/-3 dB)
Sensitivity: 89 dB (2.83 volts @ 1 meter, +/-3 dB)
EQ Adjustments: : NA
Grill: Ghost black and white
Finish Dimensions: 11" (280 mm) diameter,
5.5" (140 mm) deep
Cutout Dimension: 9.5" (242.4 mm) diameter


REV6P-SUR.1
Speaker Type: : In-ceiling Surround
Woofer: 6.5" injected polypropylene
Tweeter: : (2) ".75" soft silk dome
Power: 5 - 100 walls
Impedance: : 8 Ω
Frequency Response: 45 - 22k Hz (+/-3 dB)
Sensitivity: 89 dB (2.83 volts / 1 meter, +/-3 dB)
EQ Adjustments: : NA
Grill:
Finish Dimensions: 11" (280 mm) diameter,
5.5" (140 mm) deep
Cutout Dimension: 9.5 (242 mm) diameter


ghost
heard but not seen
HARD BARTER
Sensitivity: 89 dB (2.83 volts / 1 me
EQ Adjustments: : NA
Grill: Ghost black and white
Finish Dimensions: 11" (280 mm) diameter,
: 5.5" (140 mm) deep
Cutout Dimension: 9.5 (242 mm) diameter