95-8242G - Kit voiture Metra - Free user manual and instructions
Find the device manual for free 95-8242G Metra in PDF.


User questions about 95-8242G Metra
0 question about this device. Answer the ones you know or ask your own.
Ask a new question about this device
Download the instructions for your Kit voiture in PDF format for free! Find your manual 95-8242G - Metra and take your electronic device back in hand. On this page are published all the documents necessary for the use of your device. 95-8242G by Metra.
USER MANUAL 95-8242G Metra
INSTALLATION INSTRUCTIONS FOR PART 95-82426
APPLICATIONS
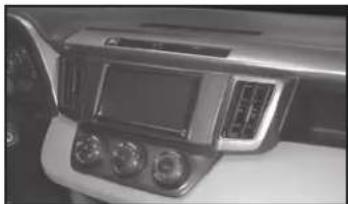
Toyota Rav4 2013-up 95-8242G
KIT FEATURES
• Double DIN radio provision
- Painted gray to match factory finish
natural_image
Interior view of a car dashboard with air vent and control panel (no visible text or symbols)KIT COMPONENTS
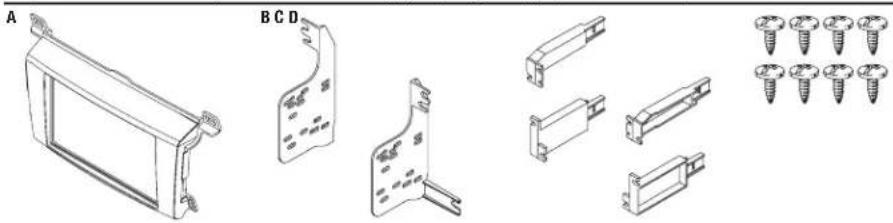
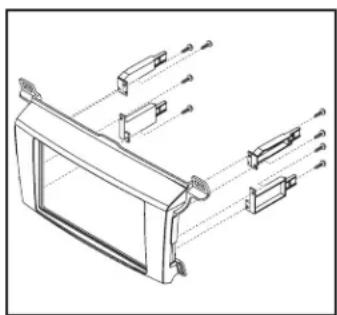
• A) Radio Trim Panel • B) Radio Brackets • C) (4) Clip legs • D) (8) #4 x 3/8" Phillips screws
WIRING & ANTENNA CONNECTIONS (sold separately)
Wiring Harness: • 70-1761 Toyota Harness • TYTO-01 premium sound interface
Antenna Adapter: • 40-LX11
Table of Contents
Dash Disassembly
• Panel removal tool • Phillips screwdriver
- Socket Wrench
CAUTION: Metra recommends disconnecting the negative battery terminal before beginning any installation. All accessories, switches, and especially air bag indicator lights must be plugged in before reconnecting the battery or cycling the ignition.
NOTE: Refer to the instructions included with the aftermarket radio.

95-82426
Dash Disassembly
Note: This vehicle is equipped with a vehicle customization menu in the radio. Use the factory radio screen to set these vehicle settings as desired prior to radio removal and they will stay as they were set.
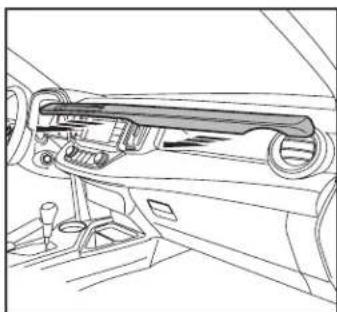
- Unclip and remove the trim panel above the radio across the passenger side. (Figure A)
- Unsnap and remove the vents from either side of the factory radio. (Figure B)
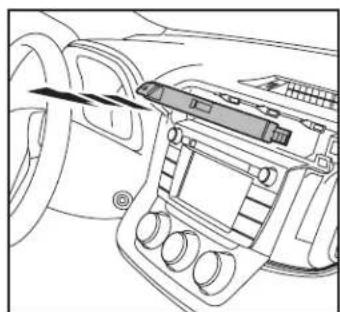
- Unsnap the hazard/screen assembly above the factory radio and move aside (not necessary to unplug) (Figure C)
- Remove (4) 10 mm bolts securing the factory radio.
- Remove (4) clips from factory radio trim panel and save for kit assembly.
Continue to kit assembly
natural_image
Line drawing of a car interior showing dashboard, steering wheel, and gear shift (no text or symbols)(Figure A)

natural_image
Diagram of a car interior showing dashboard, steering wheel, and internal components (no text or labels)(Figure B)
natural_image
Interior view of a car dashboard with air vent and control panel (no text or symbols visible)(Figure C)

95-82426
Kit Assembly
Double DIN radio provision
- Mount the (4) panel clip legs to the radio trim panel with the provided (8) #4 Phillips screws. Attach the (4) factory panel clips to the legs. (Figure A)
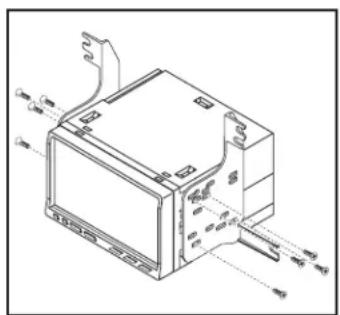
- Mount the aftermarket radio to the radio brackets using the screws supplied with the radio. (Figure B)
- Locate the factory wiring harness in the dash. Metra recommends using the proper mating adapter from Metra or AXXESS. Test the unit for proper operation.
- Mount the radio/bracket/trim panel assembly into the dash.
- Snap the radio trim panel over the new radio and reassemble dash in reverse order of disassembly.
natural_image
Technical line drawing of a device rear panel with multiple adjustment knobs and control buttons (no text or symbols)(Figure A) (Figure B)
natural_image
Technical line drawing of a device housing with mounting brackets and wiring (no text or symbols)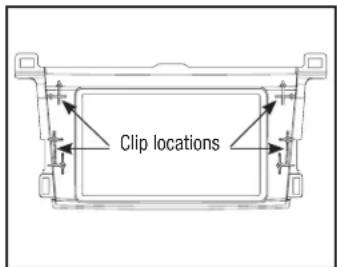
text_image
Clip locations
INSTALLATION INSTRUCTIONS FOR PART 95-82426

KNOWLEDGE IS POWER
Enhance your installation and fabrication skills by enrolling in the most recognized and repurposed.
enrolling in the most recognized and resp. mobile electronics school in our industry.
Log onto www.installerinstitute.com or call
800-354-6782 for more information and take steps toward a better tomorrow.

Metra recommends MECP
certified technicians