
Hanns.G HL 326 UPB - Monitor HANNSPREE - Free user manual and instructions
Find the device manual for free Hanns.G HL 326 UPB HANNSPREE in PDF.


User questions about Hanns.G HL 326 UPB HANNSPREE
0 question about this device. Answer the ones you know or ask your own.
Ask a new question about this device
Download the instructions for your Monitor in PDF format for free! Find your manual Hanns.G HL 326 UPB - HANNSPREE and take your electronic device back in hand. On this page are published all the documents necessary for the use of your device. Hanns.G HL 326 UPB by HANNSPREE.
USER MANUAL Hanns.G HL 326 UPB HANNSPREE
HL326UPB (HSG1347) LCD Monitor
TABLE OF CONTENTS
SAFETY NOTICE 5
PRECAUTIONS....5
SPECIAL NOTES ON LCD MONITORS 6
Q & A FOR GENERAL PROBLEMS 17
ERROR MESSAGE & POSSIBLE SOLUTIONS 19
APPENDIX 21
SPECIFICATIONS 21
Before operating the monitor, please read this manual thoroughly. This manual should be retained for future reference.
FCC Class B Radio Frequency Interference Statement
This equipment has been tested and found to comply with the limits for a Class B digital device, pursuant to Part 15 of the FCC Rules. These limits are designed to provide reasonable protection against harmful interference in a residential installation. This equipment generates, uses and can radiate radio frequency energy, and if not installed and used in accordance with the instructions, may cause harmful interference to radio communications. However, there is no guarantee that interference will not occur in a particular installation. If this equipment does cause harmful interference to radio or television reception, which can be determined by turning the equipment off and on, the user is encouraged to try to correct the interference by one or more of the following measures:
■ Reorient or relocate the receiving antenna.
■ Increase the separation between the equipment and receiver.
- Connect the equipment into an outlet on a circuit different from that to which the receiver is connected.
- Consult the dealer or an experienced radio/TV technician for help.
The device complies with Parts 15 of the FCC Rule. Operation is subject to the following two conditions: (1) this device may not cause harmful interference; and (2) this device must accept any interference received, including interference that may cause undesired operations.
CANADA
This Class B digital apparatus meets all requirements of the Canadian Interference-Causing Equipment Regulation.
【Optional, depend on selected model】

This device complies with requirement of EMC directive 2014/30/EU with regard to Electromagnetic Compatibility, and 2014/35/EU and 93/68/EEC with regard to Low Voltage directive.
【Optional, depend on selected model】
Socket-outlet shall be near the equipment and shall be accessible.
Trademark Notice:

HANNspree products incorporate High-Definition Multimedia Interface (HDMI ^TM ) technology.
The terms HDMI and HDMI High-Definition Multimedia Interface, and the HDMI Logo are trademarks or registered trademarks of HDMI Licensing LLC in the United States and other countries.
RECYCLING INFORMATION
We, the HANNspree care very much about our environment protection strategy and firmly believe that it helps us have healthier earth via appropriate treatment and recycling of industrial technology devices at the end-of-life.
These devices contain recyclable materials, which can be re-decomposed and re-integrated into brand-new marvels. On the contrary, other material can be classified to hazardous and poisoned substances. We strongly encourage you to contact the provided information to recycle this product.
For more information, please visit
http://www.hannspree.eu/
SAFETY NOTICE
- The changes or modifications not expressly approved by the party responsible for compliance could void the user's authority to operate the equipment.
- Shielded interface cables and AC power cord, if any, must be used in order to comply with the emission limits.
- The manufacturer is not responsible for any radio or TV interference caused by unauthorized modification to this equipment. It is the responsibilities of the user to correct such interference.
- Only use attachments/accesories specified by the manufacturer.
WARNING:
To prevent fire or shock hazard, do not expose the monitor to rain or moisture. Dangerously high voltages are present inside the monitor. Do not open the cabinet. Refer servicing to qualified personnel only.
PRECAUTIONS
- Do not use the monitor near water, e.g. near a bathtub, washbowl, kitchen sink, laundry tub, swimming pool or in a wet basement.
- Do not place the monitor on an unstable cart, stand, or table. If the monitor falls, it can injure a person and cause serious damage to the appliance. Use only a cart or stand recommended by the manufacturer or sold with the monitor. If you mount the monitor on a wall or shelf, use a mounting kit approved by the manufacturer and follow the kit instructions.
- Slots and openings in the back and bottom of the cabinet are provided for ventilation. To ensure reliable operation of the monitor and to protect it from overheating, be sure these openings are not blocked or covered. Do not place the monitor on a bed, sofa, rug, or similar surface. Do not place the monitor near or over a radiator or heat register. Do not place the monitor in a bookcase or cabinet unless proper ventilation is provided.
- The monitor should be operated only from the type of power source indicated on the label. If you are not sure of the type of power supplied to your home, consult your dealer or local power company.
- Unplug the unit during a lighting storm or when it will not be used for long period of time. This will protect the monitor from damage due to power surges.
- Do not overload power strips and extension cords. Overloading can result in fire or electric shock.
- Never push any object into the slot on the monitor cabinet. It could short circuit parts causing a fire or electric shock. Never spill liquids on the monitor.
- Do not attempt to service the monitor by yourself; opening or removing covers can expose you to dangerous voltages and other hazards. Please refer all servicing to qualified service personnel.
- The wall socket shall be installed near the equipment and shall be easily accessible.
SPECIAL NOTES ON LCD MONITORS
The following symptoms are normal with LCD monitor and do not indicate a problem.
- Due to the nature of the fluorescent light, the screen may flicker during initial use. Turn off the Power Switch and then turn it on again to make sure the flicker disappears.
- You may find slightly uneven brightness on the screen depending on the desktop pattern you use.
- The LCD screen has effective pixels of 99.99% or more. It may include blemishes of 0.01% or less such as a missing pixel or a pixel lit all of the time.
- Due to the nature of the LCD screen, an afterimage of the previous screen may remain after switching the image, when the same image is displayed for hours. In this case, the screen is recovered slowly by changing the image or turning off the Power Switch for hours.
- If the screen suddenly flashes erratically or the backlighting fails, please contact your dealer or service center for repair. Do not attempt to repair the monitor yourself.
Space Saving, Compact Case Design
CHECKING THE CONTENTS OF THE PACKAGE
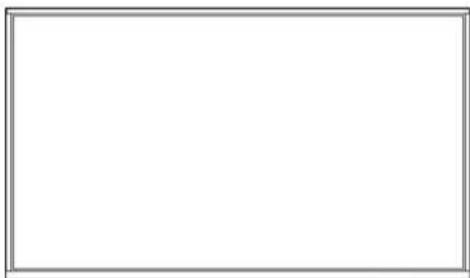
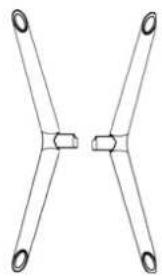
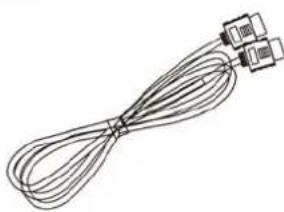
The product package should include the following items:
LCD Monitor
natural_image
Empty white rectangle with a thin gray border (no text or symbols)Screen
natural_image
Pure mechanical linkage diagram with two arms and mounting holes (no text or symbols)Base
Cables and User manual
natural_image
Line drawing of a coiled cable with three connectors (no text or symbols)
text_image
EUR Energy Label
text_image
Warranty
text_image
Quick GuideHDMI Cable EUR Energy Label Warranty Card Quick Start Guide
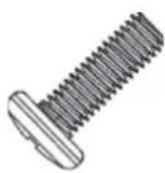
X4
Screws
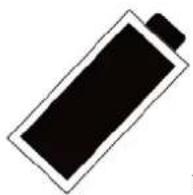
X2
Battery
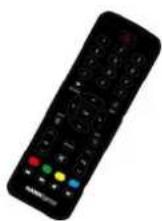
Remote
INSTALLATION INSTRUCTIONS
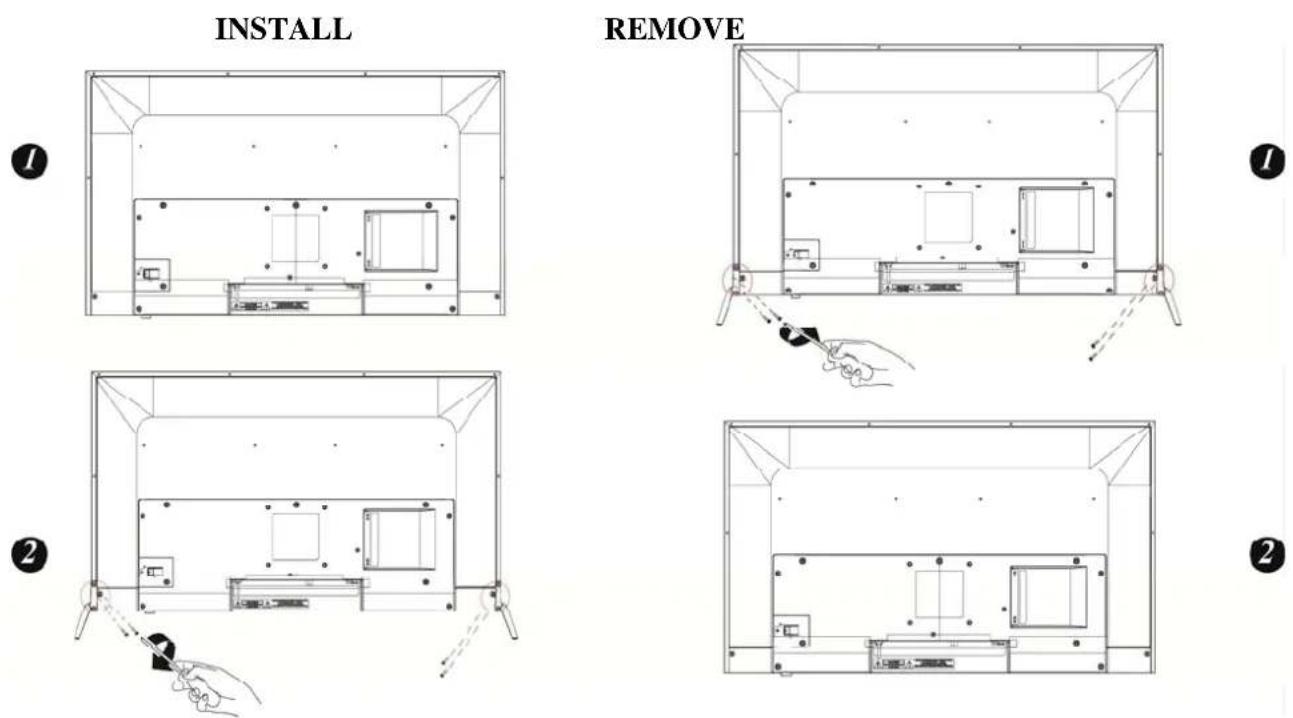
Figure.1. Installing and Removing the Base
INSTALLATION:
- Align the monitor with the opening in the base.
- Note that the longer section of the base points forward.
- Snap the monitor into its base. A clear click sound will affirm that the base is connected correctly.
- Verify that the monitor is securely attached to the base by looking at the bottom of the base and making sure that the clips are fully engaged in the base.
REMOVAL:
- Flip over the monitor so that it is upside down.
- Press the button on the arm that holds the monitor in place.
- Gently pull the base from the monitor until they are unattached.
POWER
POWER SOURCE:
- Make sure that the power cord is the correct type required in your area.
- This LCD monitor has an Internal universal power supply that allows operation in either 100/120V AC or 220/240V AC voltage area (No user adjustment is required.)
SETTING THE MONITOR ON THE WALL
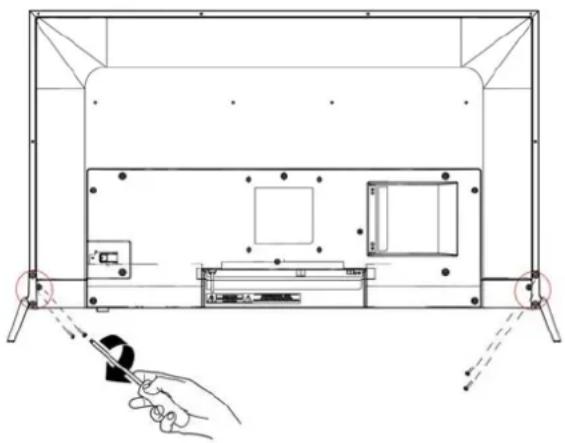
DISSEMBLING THE STAND BASE:
- Disconnect all the cables and cords from the Monitor to prevent breakage.
- Carefully place the Monitor face down on a soft and flat surface (blanket, foam, cloth, etc) to prevent any damage to the Monitor.
- Remove the screws so that the stand base can be removed.
- Gently remove the stand base.
natural_image
Technical line drawing of a device frame with mounting holes and a hand holding a tool, no text or symbols present(For reference only)
WALL MOUNTING THE MONITOR:
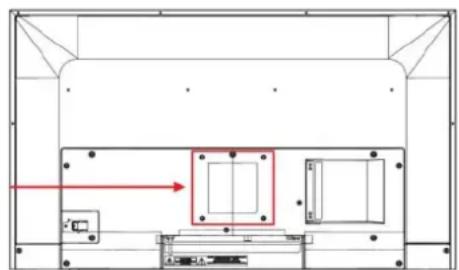
- Purchase a VESA compatible wall bracket: VESA 100×100, 4 holes, M4, 8mm, 8kg.
- Locate your ideal Monitor position on the wall.
- Fix the wall bracket firmly on the wall.
- Secure the Monitor to the bracket using the 4 mount holes on the back and center of the Monitor.
natural_image
Architectural floor plan showing room layout with furniture and a red arrow indicating direction (no text or symbols)Note:
- Please read the instructions of your specific wall bracket to properly wall mount the Monitor.
- The pitch of the mounting holes is 100mm horizontally and 100mm vertically.
- The screws type required is metric: M4, 10mm length.
- The Monitor stand base can be screwed on a table or a hard surface using the hole on the back of the stand base.
- For use only with UL listed wall mount bracket.
*Installing the LCD Monitor requires special skill that should only be performed by qualified service personnel. Customers should not attempt to do the work themselves. HANNspree bears no responsibility for improper mounting or mounting that results in accident or injury. You can ask a qualified service personnel about using an optional bracket to mount the Monitor to the wall.
MAKING CONNECTIONS
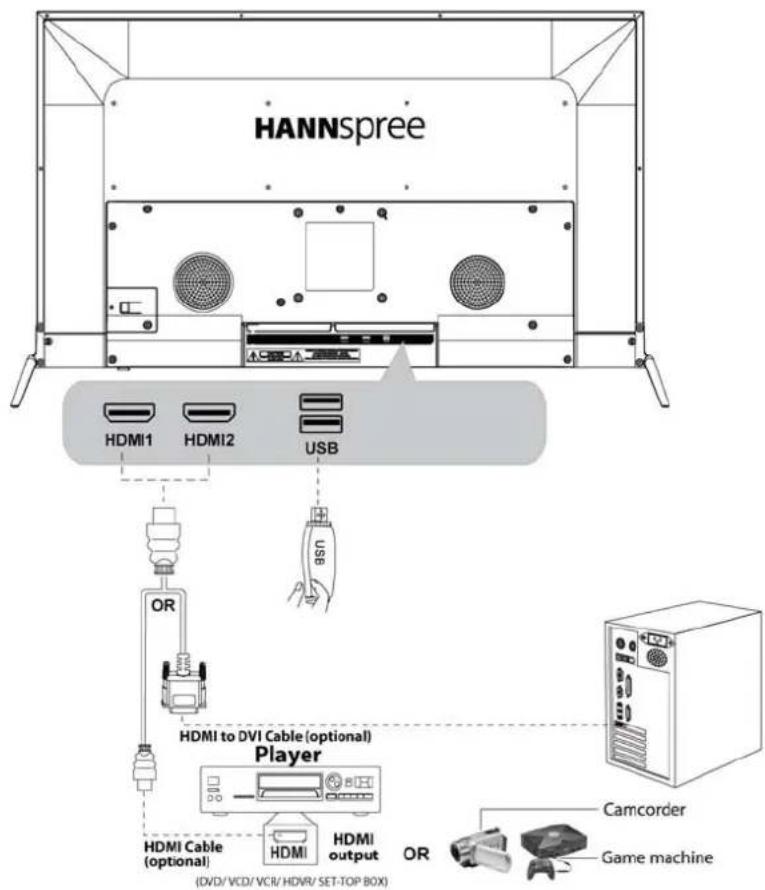
CONNECTING TO A PC
Turn off your computer before performing the procedure below.
text_image
HANNSpree HDMI1 HDMI2 USB OR HDMI to DVI Cable (optional) Player HDMI Cable (optional) HDMI HDMI output OR Camcorder Game machine (DVD/VCD/VCR/HDWR/SET-TOP BOX)【Optional, depend on selected model】
OPERATING INSTRUCTIONS
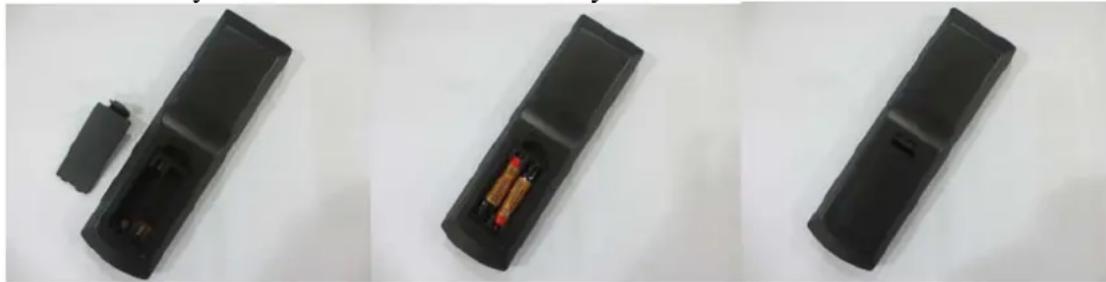
INSERTING REMOTE CONTROL BATTERIES
- Remove the battery cover by pulling then lifting the knob on the cover.
- Insert the batteries, corresponding to the (+) and (-) markings on the battery compartment.
- Reattach the battery cover.
Note: Pictures are only for reference. Actual items may differ.
natural_image
Three black remote control cases with visible internal components, placed on a plain white surface (no text or symbols)CAUTION
- Only use the specified AAA batteries.
- Do not mix new and old batteries. This may result in creaking or leakage, which may pose a risk of fire or lead to personal injury.
- Insert batteries according to (+) and (-) markings. Inserting the batteries incorrectly may result in leakage, which may pose a risk of fire or lead to personal injury.
- Dispose of the battery in accordance with local laws and regulations.
- Keep the batteries away from children or pets.
- When the remote control will not be used for an extended period, remove the batteries.
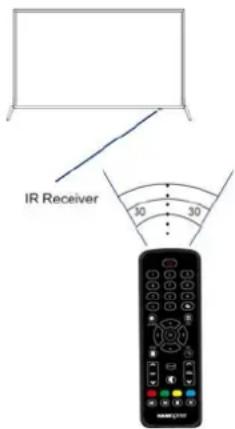
- Aim Remote Control directly at the Remote Control Sensor on the right down corner of the TV set.
- Remote Control range is at approx. 16 feet with angles of approx. 30 degree.
- Avoid obstructions between the Remote Control and the sensor.
- If you do not intent to use the remote control for a long time, remove the batteries.
- If the remote control does not operate correctly, or if the operating range reduced, replace both batteries with new ones.
NOTES:
text_image
IR Receiver 30 30- Do not install the monitor in a location near heat sources such as radiators or air dusts, or in a place subject to direct sunlight, or excessive dust or mechanical vibration or shock.
- Save the original shipping box and packing materials, as they will come in handy if you ever have to ship your monitor.
- For maximum protection, repackage your monitor as it was originally packed at the factory.
- To keep the monitor looking new, periodically clean it with a soft cloth. Stubborn stains may be removed with a cloth lightly dampened with a mild detergent solution. Never use strong solvents such as thinner, benzene, or abrasive cleaners, since these will damage the cabinet. As a safety precaution, always unplug the monitor before cleaning it.
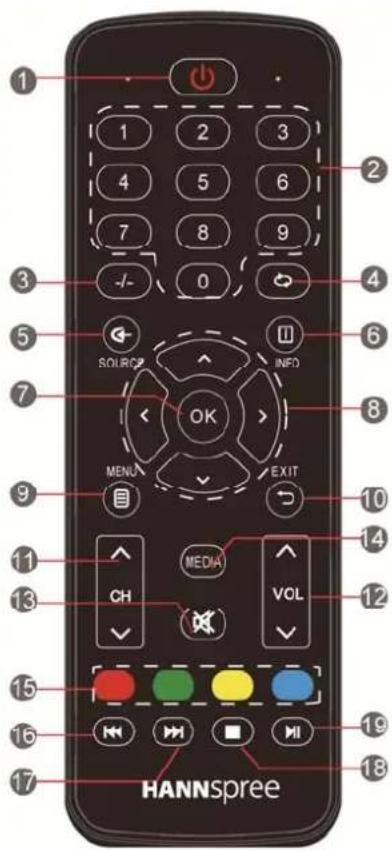
REMOTE CONTROL FUNCTION BUTTONS
| 1. POWER | Press to enter or exit standby mode. |
| 2. 0-9 | In USB mode: control the progress bar of video / audio |
| 3. -/-- | Not available |
| 4. ➕ | Not available |
| 5. SOU RCE | Press to display and select the available video sources. |
| 6. INFO | Show the current information. |
| 7. OK | Confirmation button, select the OSD menu option. |
| 8. ^∨<> | Press the direction buttons to select menu options or settings. |
| 9. Menu | This button turns on the on screen display menu (OSD). |
| 10. EXIT | This button allows you to quit from the OSD menu. |
| 11. CH(^/V) | Not available |
| 12. VOL(^/V) | These two buttons increase or decrease the volume of the TV. |
| 13. ➗ | Press to turn on or off the audio sound. |
| 14. MEDIA(USB) | MEDIA keyboard shortcuts. |
| 15. Color | Red button: delete files in USB mode;Other button: Not available |
| 16. ➕ | To play the previous chapter, title or track. |
| 17. ➕ | To play the next chapter, title or track. |
| 18. ■ | Press the botton to stop the current program. |
| 19. ➕II | Press to play or pause the current program. |
text_image
1 2 3 4 5 6 7 8 9 -/- 0 4 5 6 7 SOURCES INFO OK MENU EXIT 9 10 11 MEDIA VOL CH VOL 12 15 16 17 HANNSpree 18HOW TO ADJUST A SETTINGS
Press "MENU" key on the remote control or on the control panel, then the monitor will display the main menu.
- Press "◀ / ▶" key on the remote control or "▲/▼"key on the control panel to select the adjustment sort menu, which includes 4 sorts: PICTURE, SOUND, TIME, OPTION.
- Press "▲/▼" key on the remote control or "▲/▼" key on the control panel to select what is needed to adjust in sort menu.
- Press "◀/▶" key on the remote control or "Vol+/Vol-" key on the control panel to adjust the value or setting.
- When the main menu appears on the screen, press "MENU" key to exit; when submenu appears on the screen, press "Exit" key to return to previous menu; press "SOURCE" key to show the signal source selection menu, and press it again to exit from the menu.
- In the process of menu operation, the unavailable options in current state will be in gray. Note: "◀", "▶", "▲" and "▼" in this Manual stand for the direction cursor keys on the remote control unless specifically defined. The operating instructions in the text below are all based on keys on the remote control. Please understand the keys on the panel by yourself.
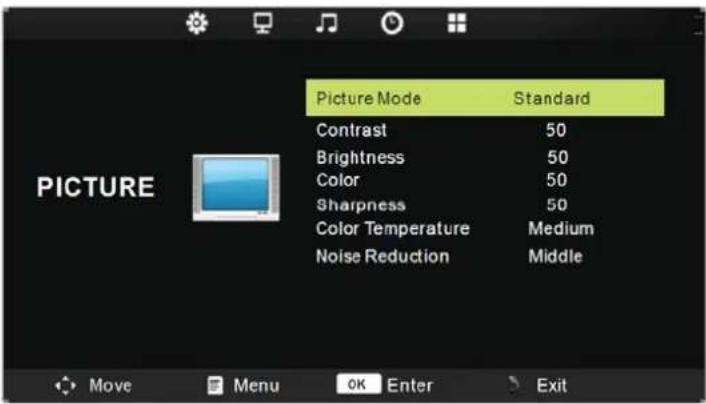
PICTURE
| Item | Function | Operation | Range |
| Picture mode | Select your viewing preference from 4 options. | Press▲ or ▼ to highlight an item, press OK or ▶ button to enter submen. | • Dynamic• Standard• Mild• User |
| Contrast | Adjust the highlight intensity of the picture, but the shadow of the picture is invariable. | 0-100 | |
| Brightness | Adjust the visual perception output of the entire picture, it will effect the luminousness of the picture. | 0-100 | |
| Color | Control the colour. | 0-100 | |
| Sharpness | Increase this setting to see crisp edges in the picture; decrease it for soft edges. | 0-100 | |
| Color Temperature | Cycle among color temperature display modes: Cool/Medium/Warm. | • Cool• Medium• Warm | |
| Noise Reduction | Enter the Noise Reduction to select :Off/Low/Middle/High. | • Off• Low• Middle• High |
text_image
Picture Mode Standard Contrast 50 Brightness 50 Color 50 Sharpness 50 Color Temperature Medium Noise Reduction Middle PICTURE Move Menu OK Enter Exit
SOUND
| Item | Function | Operation Range | |
| Sound mode | Selects a sound type when viewing programs or videos that support multiple sounds. | Press ▲ or ▼ to highlight an item, press OK or ▶ button to enter submen. | StandardMusicMovieSportsUser |
| Treble | Increase or decrease the level of the higher-pitched sounds. | 0~100 | |
| Bass | Increase or decrease the level of the lower-pitched sounds. | 0~100 | |
| Balance | Adjust the audio output between the left and the right speakers. | 0~±50 | |
| Auto Volume | Allow to select the Auto Volume: On, Off. | On / Off |
TIME
| Item | Function | Operation | Range |
| Clock | The user to set the date | off timeon time | |
| Sleep Timer | Use ◀/► buttons to select a period of time after which the HE326UPB automatically switches to standby mode:off,10,20,30,60,90,120,180,240(min) | Press▲ or ▼ to highlight an item, press OK or◄► button to entc r submenu. | off,10,20,30,60,90,120,180,240 |
| Auto Sleep | Enter the Auto Sleep to select :Off/3H/4H/5H. | • Off• 3H• 4H• 5H | |
| OSD Timer | Allow selection of the display time of the on-screen menu. | 5s,10s,15s,20s,25s,30s | |
| OPTION | |||
| Item | Function | Operation | Range |
| OSD Language | Select an OSD menu language can be displayed. | Press▲or▼to highlightan item, press OK or ▶button to enter submen. | |
| Aspect Ratio | Allow to select the option of Aspect Ratio: 4:3, 16:9, Zoom1, Zoom2, Justscan. | • 4:3• 16:9• Zoom1• Zoom2• Just Scan | |
| Key Lock | Allow to select the key lock: On, Off. | On / Off | |
| Reset | Allow you to restore the factory settings. | ||
| Software Update(USB) | Allow you to update software using USB. | ||
| HDMI CEC | Allow to select HDMI CEC settings. | ||
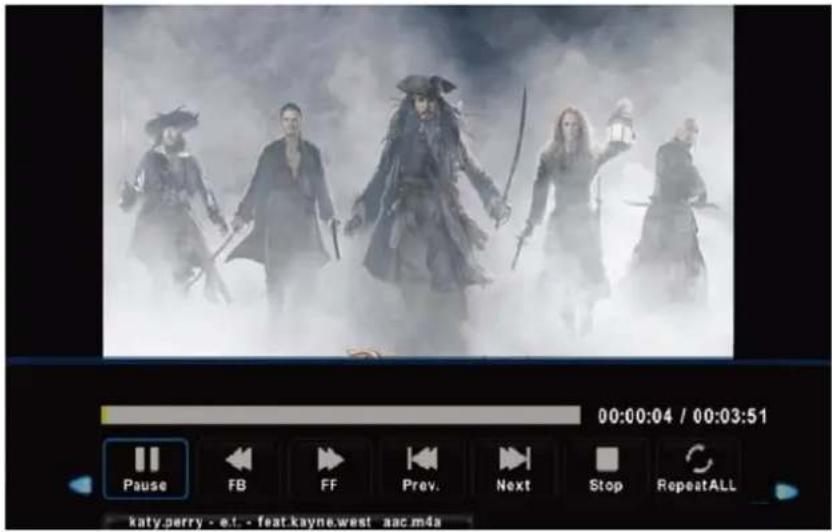
MEDIA PLAY - USB DEVICE
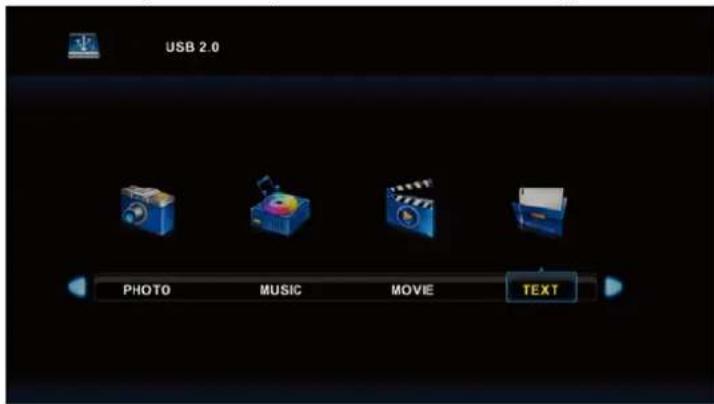
First press SOURCE into multimedia channel, plug in Media storage device, the following picture mark color, if blue say television has to recognize the Media, gray has said no to recognize.
text_image
USB 2.0 PHOTO MUSIC MOVE TEXTAfter confirmed television to recognize Media storage devices, press ◀ or ▶ button to select photo/music/movie/text, and press OK button to enter photo/music/movie/text operation basic same.
text_image
00:00:04 / 00:03:51 Pause FB FF Prev. Next Stop RepeatALL katy.perry - e.t. - feat.kayne.west .aac.m4a- Press ◀ or ▶ to choose the sub-folder if necessary, then press OK to enter the folder. Press OK button to play, press the exit button to return back. Press OK button to select the up folder, and return to the previous level menu, press ◀ or ▶ buttons to turn pages
- Press ▶ II button to start playback or pause. Press ■ button to stop playback.
- press ◀ button to play to the previous item. Press ➤ button to play to the next item
PLUG AND PLAY
Plug & Play DDC2B Feature
This monitor is equipped with VESA DDC2B capabilities according to the VESA DDC STANDARD. It allows the monitor to inform the host system of its identity and, depending on the level of DDC used, communicate additional information about its display capabilities. The DDC2B is a bidirectional data channel based on the I²C protocol. The host can request EDID information over the DDC2B channel.
THIS MONITOR WILL APPEAR TO BE NON-FUNCTIONAL IF THERE IS NO VIDEO INPUT SIGNAL. IN ORDER FOR THIS MONITOR TO OPERATE PROPERLY, THERE MUST BE A VIDEO INPUT SIGNAL.
TECHNICAL SUPPORT (FAQ)
Q & A FOR GENERAL PROBLEMS
| Problem | Reason | Solution |
| screen display, no sound, indicator is off. | Power plug is loose, or power supply isn't connected. | Check if the power cord is connected properly. |
| Image has no color. 1. Saturation is | too low.2. Color system is improper. | 1. Enter "PICTURE" setting to increase the saturation. |
| Monitor doesn't have sound. 1. Volume | is too low.2. Sound is turned off.3. Sound system is improper. | 1. Adjust the volume properly.2. Press the Mute key on the remote control to turn on the sound.3. Enter "Auto Volume" setting change the sound system. |
| PC doesn't have display, no signal input. | Signal cable is loose or falls off. | Check whether the signal cable is loose or falls off and reconnect the cable. |
| Remote control distance becomes short, out of control. | 1. The receiver window is blocked.2. Battery voltage of the remote control is too low. | 1. Move the object to avoid blocking the receiver window.2. Replace the battery. |
| PC display is blurry. 1. Adjustment is improper. | is improper.2. Display mode is improper | 1. Use automatic adjustment.2. Use recommended mode. |
| PC image offset, can't fit the screen or beyond the screen. | 1. Adjustment is improper.2. Display mode is improper. | 1. Use automatic adjustment.2. Use recommended mode. |
| Can't operate the device. | External factors, such as lightning and ESD, may interfere with the normal operation. | Disconnect the power supply first, and connect the power supply after about 1-2 minutes, then turn on the Monitor again. |
Addendum related to Windows 7/ Windows 8
When you encounter display problem under Windows 7/ Windows 8, you need to do the following:
- Make sure your PC computer (Hardware requirement) can support Windows 7/ Windows 8.
- Make sure your video card can run Windows 7/ Windows 8.
- If your video card can support Windows 7/ Windows 8, need to install the latest Windows 7/ Windows 8 driver of your video card.
Suggest to do the following:
- Install the latest Windows 7/ Windows 8 video driver of your video card.
- Try to use the recommended display resolution that is supported by the monitor.
- If the recommended display resolution is not working, try the second recommended display resolution.
| 1 2 | ||
| 35,56cm / 14” (16:9) 13 | 66×768@60Hz 1366× | 768@50Hz |
| 39,6cm / 15.6” (16:9) 13 | 66×768@60Hz 1366× | 768@75Hz |
| 40,64cm / 16” (16:9) 13 | 66×768@60Hz 1366× | 768@50Hz |
| 43,2cm / 17” (16:10) 14 | 40×900@60Hz 1440× | 900@75Hz |
| 47cm / 18.5” (16:9) 136 | 6×768@60Hz 1366×7 | 68@75Hz |
| 48,3cm / 19” (5:4) 1280 | ×1024@60Hz 1280×1 | 024@75Hz |
| 48,3cm / 19” (16:10) 14 | 40×900@60Hz 1440× | 900@75Hz |
| 51cm / 20” (16:9) 1600 | ×900@60Hz 1600×900 | @50Hz |
| 56cm / 22” (16:10) 168 | 0×1050@60Hz 1680× | 1050@50Hz |
| 54,6cm / 21.5” (16:9)58,4cm / 23” (16:9)60cm / 23.6” (16:9)62,5cm / 24.6 (16:9) | 1920×1080@60Hz | 1920×1080@50Hz |
| 70cm / 27.5” (16:10) 19 | 20×1200@60Hz 1920 | ×1200@50Hz |
| 80cm / 31.5” (16:9) 192 | 0×1080@60Hz |
And if you still have display problem after doing the above procedure, please visit HannsG support and Service Website: http://www.hannspree.eu/en/monitors.
Windows is a registered trademark of Microsoft Corporation.
ERROR MESSAGE & POSSIBLE SOLUTIONS
- CABLE NOT CONNECTED:
- Check that the signal-cable is properly connected, if the connector is loose, tighten the connector's screws.
- Check the signal-cable's connection pins for damage.
- INPUT NOT SUPPORT:
Your computer has been set to unsuitable display mode, set the computer to display mode given in the following table.
FACTORY PRESET TIMING TABLE:
| MODE | RESOLUTION | HORIZONTAL FREQUENCY (KHz) | VERTICAL FREQUENCY (Hz) |
| 1 | 640×480 @60Hz 31.469 | 59.940 | |
| 2 | 640×480 @72Hz 37.861 | 72.809 | |
| 3 | 640×480 @75Hz 37.500 | 75.000 | |
| 4 | 800×600 @56Hz 35.156 | 56.250 | |
| 5 | 800×600 @60Hz 37.879 | 60.317 | |
| 6 | 800×600 @72Hz 48.077 | 72.188 | |
| 7 | 800×600 @75Hz 46.875 | 75.000 | |
| 8 | 832×624 @75Hz 49.725 | 75.000 | |
| 9 | 1024×768 @60Hz 48.363 | 60.004 | |
| 10 | 1024×768 @70Hz 56.476 | 70.069 | |
| 11 | 1024×768 @75Hz 60.023 | 75.029 | |
| 12 | 1152×870 @75Hz 68.681 | 75.062 | |
| 13 | 1152×864 @75Hz 67.500 | 75.000 | |
| 14 | 1280×1024 @60Hz 63.981 | 60.020 | |
| 15 | 1280×1024 @75Hz 79.976 | 75.025 | |
| 16 | 1680×1050 @60Hz 65.290 | 59.954 | |
| 17 | 1920×1080 @60Hz 67.500 | 60.000 |
(Video mode)
| MODE RESOLUTION |
| 1 720×480i@60Hz |
| 2 720×480p@60Hz |
| 3 720×576i@50Hz |
| 4 720×576p@50Hz |
| 5 1280×720p@50Hz |
| 6 1280×720p@60Hz |
| 7 1920×1080i@50Hz |
| 8 1920×1080i@60Hz |
9 1920×1080p@50Hz
10 1920×1080p@60Hz
** We ensure that the monitor can be lighted under interlace signal mode, but we can not guarantee the image quality.
APPENDIX
SPECIFICATIONS
| Driving system TFT Color LCD | |
| LCD Panel | Size 80cm / 31.5” Diagonal |
| Pixel pitch 0.121mm(H) × 0.364mm(V) | |
| Video | H-Frequency 24KHz - 83KHz |
| V-Frequency 55Hz - 76Hz | |
| Display Colors 16.7M Colors | |
| Max. Resolution 1920 × 1080 @60Hz | |
| Plug & Play | |
| Power consumption | ON Mode 50W (Typical) |
| Power Saving Mode ≤0.5W | |
| OFF Mode ≤0.3W | |
| Input Terminal | |
| Maximum Screen Size | |
| Power Source | |
| Environmental Considerations | |
| Dimensions | |
| Weight (NW) 4.2 kg (9.2 lb) | |
*** The above specification is subject to actual product specification and is subject to change without prior notice.
NOTES:
The Maximum Resolution will depends on the display card supporting. Related issue can refer to http://www.hannspree.eu/en/monitors FAQ section.