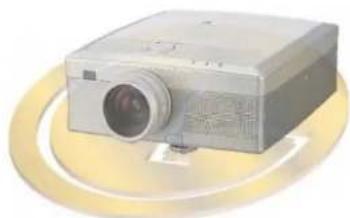
LP-XG22 - Video projector LG - Free user manual and instructions
Find the device manual for free LP-XG22 LG in PDF.


User questions about LP-XG22 LG
0 question about this device. Answer the ones you know or ask your own.
Ask a new question about this device
Download the instructions for your Video projector in PDF format for free! Find your manual LP-XG22 - LG and take your electronic device back in hand. On this page are published all the documents necessary for the use of your device. LP-XG22 by LG.
USER MANUAL LP-XG22 LG
Please read this manual carefully before operating your set.
Retain it for future reference.
Record model number and serial number of the set.
See the label attached on the bottom of the set and
quote this information to your dealer when you
require service.
Model number
Serial number :
LG LCD PROJECTOR

natural_image
Solid blue background with no visible text, symbols, or objects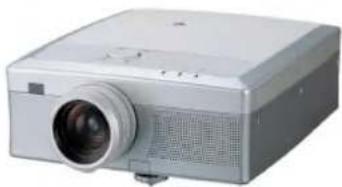
natural_image
Exterior view of a silver projector with a circular lens (no visible text or symbols)
natural_image
Solid blue background with a small red circular highlight in the top-left corner (no text or symbols)LCD PROJECTOR
CONTENTS
INDEX
Before operating the unit, please read this manual carefully.
| 1 | Safety InstructionsNames of parts | 37 | INTRO-DUCTION |
| 2 | Installation InstructionsCompositionTurning on the ProjectorTurning off the ProjectorOperating the ProjectorSelecting source mode | 131517181920 | INSTALLATION AND COMPOSITION |
| 3 | Connecting to a Desktop PCConnecting to a Notebook PCConnecting to a Macintosh Desktop PCConnecting to a Macintosh PowerBookConnecting to a Video SourceConnecting to a D-TV Settop Box | 212223262728 | CONNECTION |
| 4 | Function checkingUsing Still function | 2930 | BASIC FUN-CTIONS |
| 5 | Selecting languageChecking lamp timeUsing Blank functionUsing Flip Horizontal / Vertical functionSelecting PC screen size input signal | 3132333537 | SPECIAL FUNCTIONS |
| 6 | Using Resize functionAdjusting screen display | 3839 | POS-TIONING |
| 7 | Using Tracking function | 41 | TRACKING |
| 8 | Adjusting Video | 43 | VIDEO |
| 9 | Supported Monitor DisplayMaintenanceSpecifications | 444546 | FORMATION |
▶ Always keep the safety instructions to prevent any potential accident or misuse of the projector.
▶ Safety Instructions have two kinds of information, and each meaning of it is as below.

WARNING
The violation of this instruction may cause serious injuries and even death.

NOTES
The violation of this instruction may cause light injuries or damage of the projector.
* The meanings of symbols in the manual and the unit are as below.
▶ Take care of danger that may happen under specific condition.
▶ Take care of electric shock that may happen under specific condition.
▶ After reading this manual, keep it in the place that the user always can contact easily.
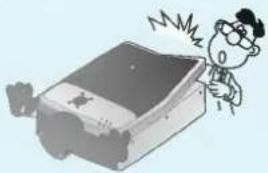
Do not attempt to repair or adjust this equipment. Contact your dealer or Service center. High risk of electric shock!
natural_image
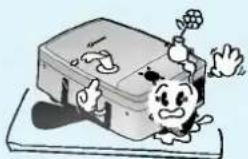
Cartoon illustration of a person reacting to a phone screen (no text or symbols present)Do not place anything containing liquid on top of the projector. High risk of Electric Shock or damage to the projector.
This may cause a fire or could give an electric shock.
natural_image
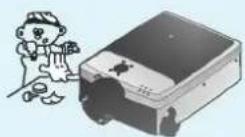
Cartoon illustration of a smiling computer case with a flower on top (no text or symbols)Don't insert any object into the exhaust vent.
This may cause a fire or could give an electric shock.
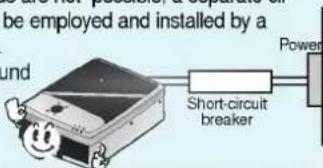
Earth wire should be connected.
- If the earth wire is not connected, there is possible a danger of electric shock caused by the current leakage.
- If grounding methods are not possible, a separate circuit breaker should be employed and installed by a qualified electrician.
- Do not connect ground to telephone wires, lightning rods or gas pipe.
text_image
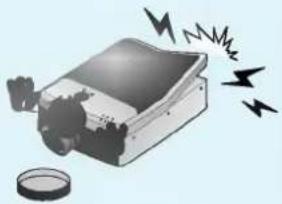
be employed and installed by a sound Short-circuit breaker PowerDon't remove any covers (except lens cover). High risk of Electric Shock!
natural_image
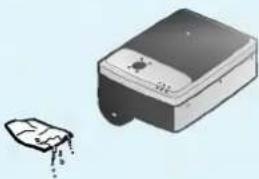
Illustration of a device emitting smoke or heat lines, with no visible text or symbolsUse an air spray or soft cloth that is wet with a neutral detergent and water for removing dust or stains on the projection lens.
natural_image
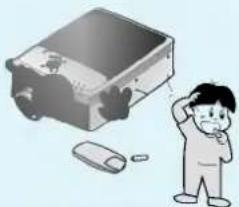
Illustration of a device with a lid and a separate sketch of a container (no text or symbols)Only use the correct type of batteries for the remote control. Dispose of used batteries carefully.
This may cause a fire or could give an electric shock.
natural_image
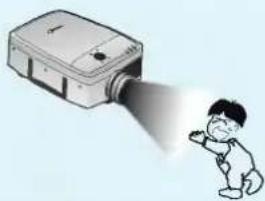
Illustration of a child standing beside a large electronic device and scattered devices (no text or symbols)Don't look directly onto the lens when the projector is in use. Eye damage may occur!
natural_image
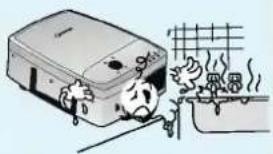
Illustration of a child looking at a projector with light beam (no text or symbols)Don't use the projector in damp place such as a bathroom or any place where it is likely to get wet. Serious damage could occur or risk of Electric Shock!
natural_image
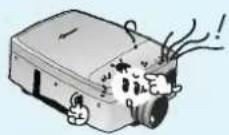
Illustration of a firecracker emitting smoke from a stove (no text or symbols)Don't use the projector if there is smoke or unusual smell from the projector. Disconnect from the mains and contact the service center. Risk of fire!
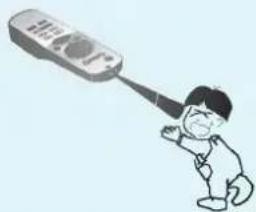
Don't look at laser beam directly as it may cause eye damage.
natural_image
Illustration of a person using a handheld device to lift a large screen (no text or symbols visible)Don't clog the opening(absorption tube/exhaust pipe) of the projector.
It makes internal temperature increase and causes a fire.
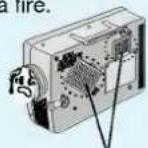
absorption tube
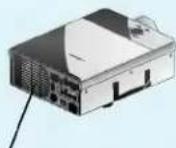
exhaust pipe
No impact on the lens while moved.
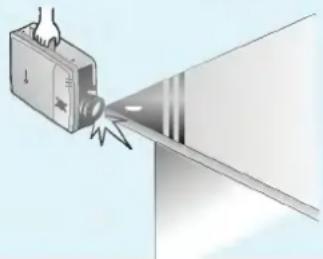
natural_image
Illustration of a device emitting sound waves from a screen (no text or symbols)No contact while working, or right after the lamp is off since the exhaust port and the lamp lid generate heat.
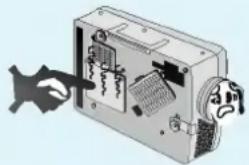
natural_image
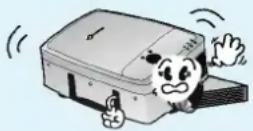
Illustration of a device internal structure with a hand pointing to a component (no text or symbols visible)Only use the projector on a level and stable surface.
It may fall down or be upset.
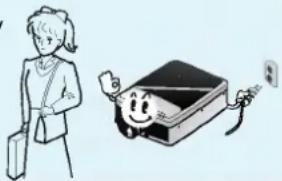
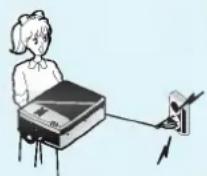
Be sure to unplug when you don't use the projector for a long period or you are absent.
Accumulated dust may cause a fire, electric shock from deterioration, or electric leakage.
natural_image
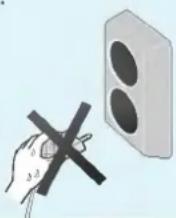
Illustration of a person holding a briefcase and a smiling computer with a power cord (no text or symbols)Never touch the power plug with wet hand.
It may cause electric shock.
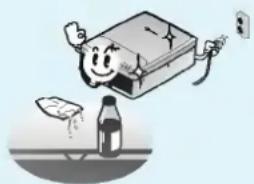
Don't use alcohol, benzene, or thinners to clean any plastic parts of the projector. Never use industrial chemicals or detergents.
natural_image
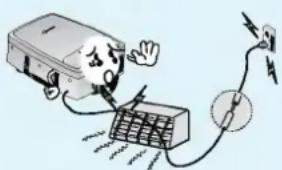
Cartoon illustration of a smiling book character holding a bottle, with a small bowl and a droplet on the floor (no text or symbols)Ensure the power lead doesn't trail across any hot objects like a heater.
It may cause a fire or electric shock.
text_image
Illustration showing a warning about electrical hazard, with a warning box and cable labeled 'No Concern' and 'No Hazard'Disconnect from the mains and remove all connections before moving.
Damage of cords may cause a fire or electric shock.
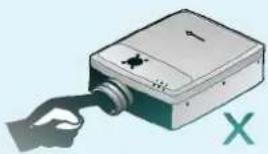
Don't touch the lens of the projector. It may cause damage of it.
natural_image
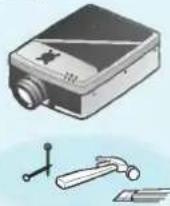
Illustration of a handheld device emitting a light beam, with a hand and a green X symbol indicating cancellation or failure (no text or labels present)Don't use any sharp tools on the projector as this will damage the casing.
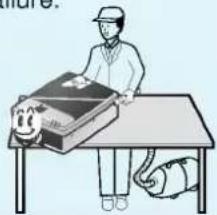
If the projector requires cleaning inside contact the service centre. Accumulated dust can cause mechanical failure.
natural_image
Illustration of a person standing at a desk with a large book and a small figure lying on the floor (no text or symbols visible)Place the projector where people will not trip or tread on the power lead.
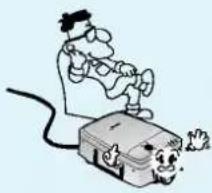
natural_image
Cartoon illustration of a person using a megaphone to interact with a briefcase (no text or symbols present)Use the indicated type of power source on the projector. If you are not sure of the type of power available, consult your dealer or customer service center.
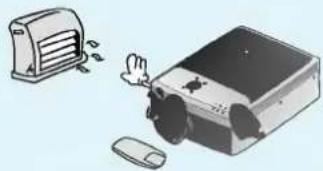
Don't place the projector or the remote control on a heater or use in a heated car.
natural_image
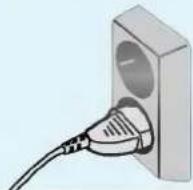
Illustration of a toaster emitting exhaust smoke next to a computer monitor (no text or symbols)Don't use the projector when the power cord or the plug is damaged or the connecting part of wall socket is loose.
It may cause electric shock or a fire.
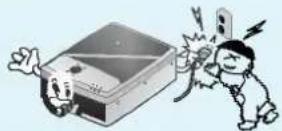
Contact your dealer for replacing a new lamp.
natural_image
Illustration of three cartoon figures: a person holding a phone, a person in a cap, and a person holding a smartphone (no text or symbols present)Main Body
* The LCD projector is manufactured using high-precision technology. You may, however, see tiny black points and/or bright points(red, blue, or green) that continuously appear on the LCD projector. This is a normal result of the manufacturing process and does not indicate a malfunction.
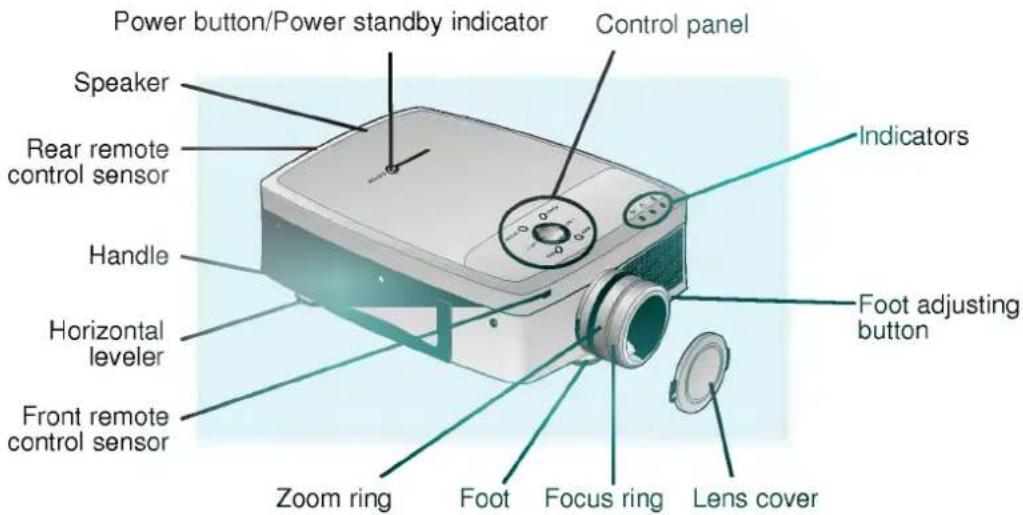
text_image
Power button/Power standby indicator Control panel Speaker Rear remote control sensor Handle Horizontal leveler Front remote control sensor Zoom ring Foot Focus ring Lens cover Indicators Foot adjusting buttonRear Connecting Part
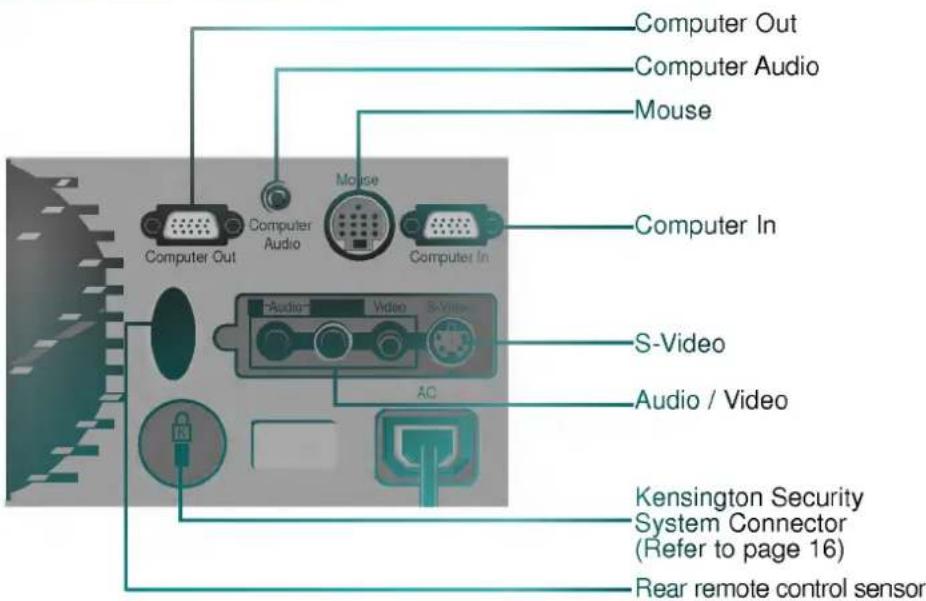
text_image
Computer Out Computer Audio Mouse Computer In Computer Out Computer Audio Computer In Audio Video S-Video Audio / Video Kensington Security System Connector (Refer to page 16) Rear remote control sensorControl Panel
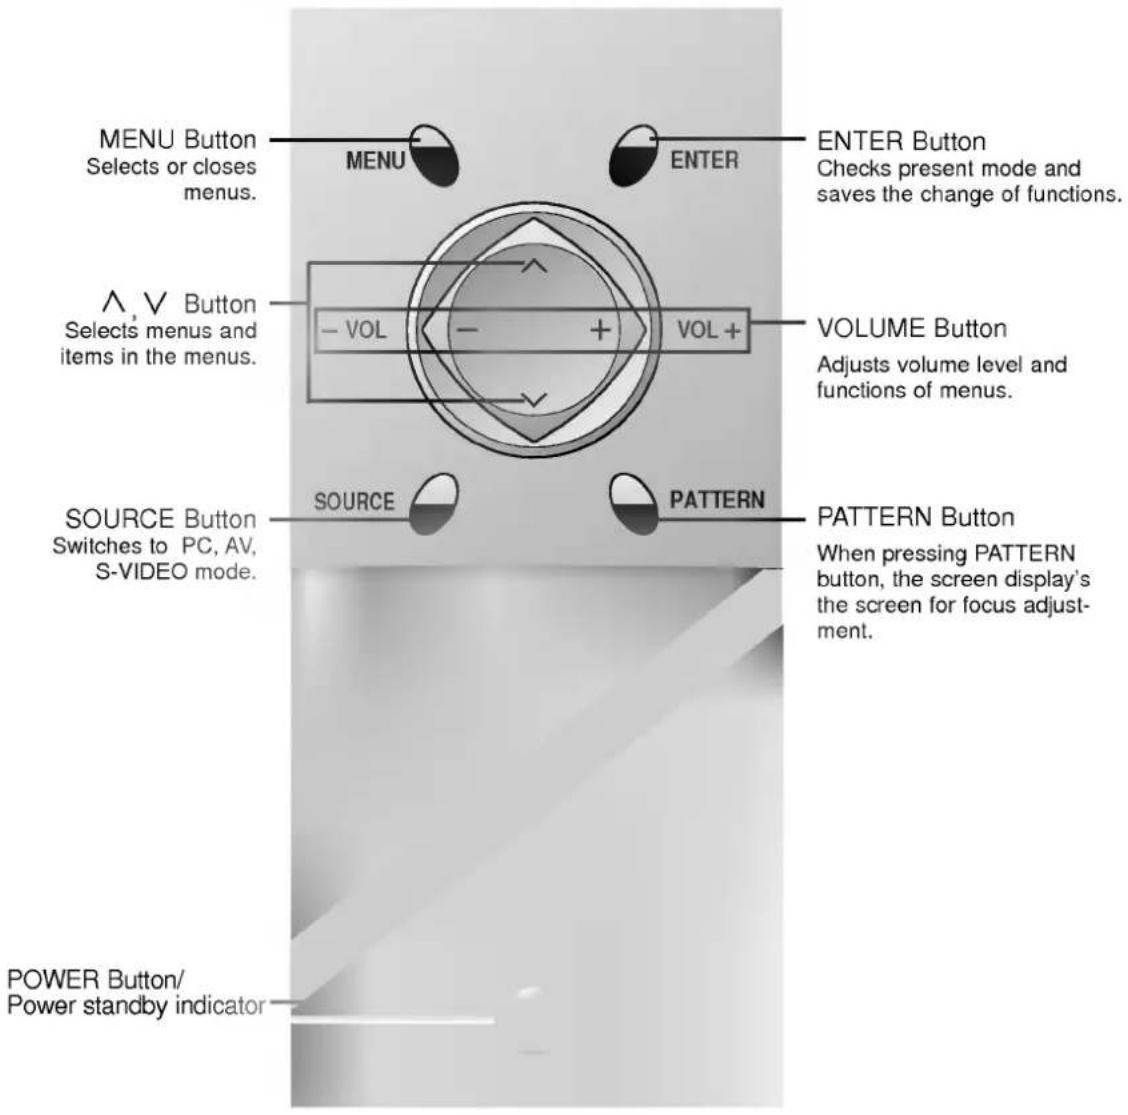
text_image
MENU Button Selects or closes menus. MENU ENTER ENTER Button Checks present mode and saves the change of functions. Λ, V Button Selects menus and items in the menus. - VOL + VOL+ VOLUME Button Adjusts volume level and functions of menus. SOURCE Button Switches to PC, AV, S-VIDEO mode. SOURCE PATTERN PATTERN Button When pressing PATTERN button, the screen display's the screen for focus adjustment. POWER Button/ Power standby indicatorRemote Control
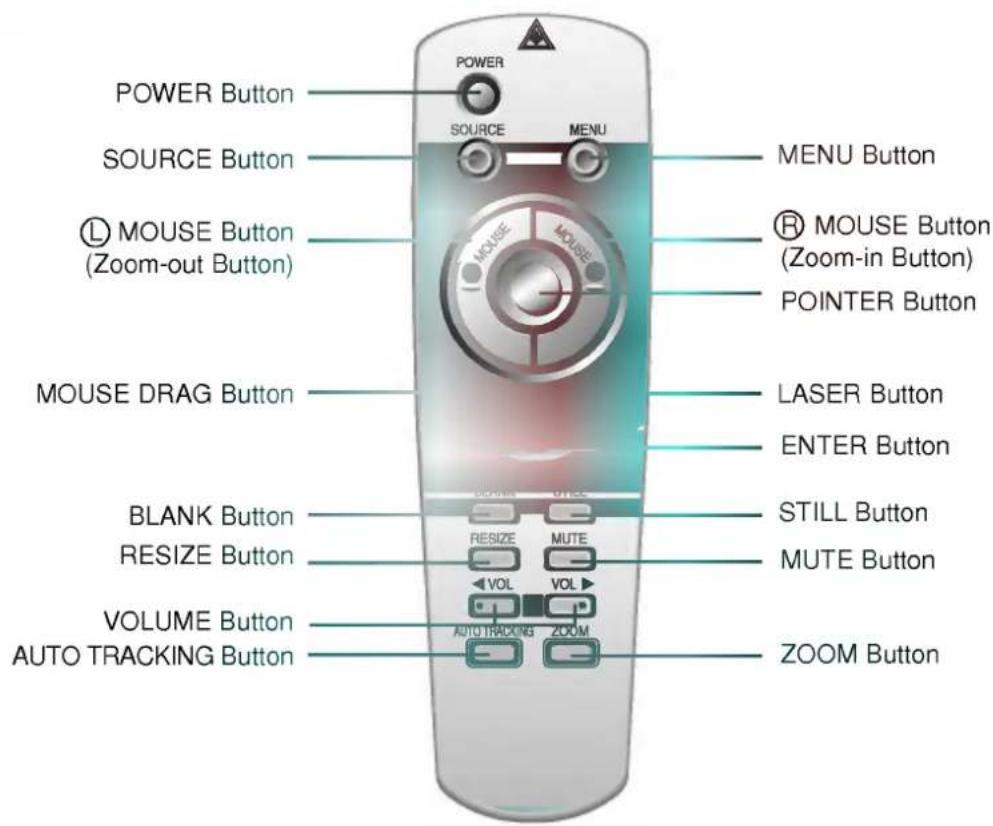
text_image
POWER Button SOURCE Button © MOUSE Button (Zoom-out Button) MOUSE DRAG Button BLANK Button RESIZE Button VOLUME Button AUTO TRACKING Button SOURCE MENU MUTE AUTO TRACKING ZOOM LISER Button ENTER Button STILL Button MUTE Button ZOOM ButtonInserting the batteries
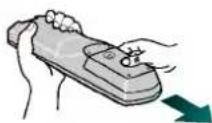
1 Slide the battery cover in the direction of the arrow to remove.
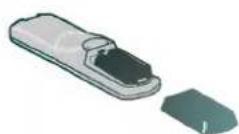
2 Insert the batteries with correct polarity.
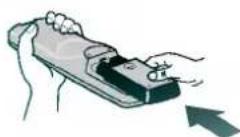
3 Replace the battery compartment cover to the arrow direction.
Functions on the Remote Control
| Button | Function |
| POWER Button | Selects ON/OFF of power. |
| SOURCE Button | Switches to PC, AV, S-VIDEO mode. |
| MENU Button | Displays or hides the menu. |
| Ⓛ MOUSE Button(Zoom-out Button) | * Corresponds to the Left - Click of PC Mouse. This button registers a menu selection and selects other custom functions.* Downsizes the screen on the zoom function. |
| Ⓡ MOUSE Button(Zoom-in Button) | * Corresponds to the Right - Click of PC Mouse. This button registers a menu selection and selects other custom functions.* Enlarges the screen size on zoom function. |
| POINTER Button | * After selecting menus, controls selecting and adjusting functions with the direction of up, down, left, right.* Moves the screen with the direction of up, down, left, right on zoom function.* Moves and releases the selected icon on PC screen. |
| MOUSE DRAG Button | Uses to select and drag an icon in PC mode. |
| ENTER Button | Checks the present mode and saves the change of functions. |
| ZOOM Button | Refer to page 40. |
| RESIZE Button | Refer to page 38. |
| AUTO TRACKING Button | Refer to page 41~42. |
| BLANK Button | Refer to page 33~34. |
| STILL Button | Refer to page 30. |
| MUTE Button | Cuts off audio. |
| VOLUME Button | Adjusts volume level. |
| LASER Button | Makes a bright red laser point on the screen for attention.(Don't look at laser beam directly as it causes eye damage.) |
Projector Status Indicators
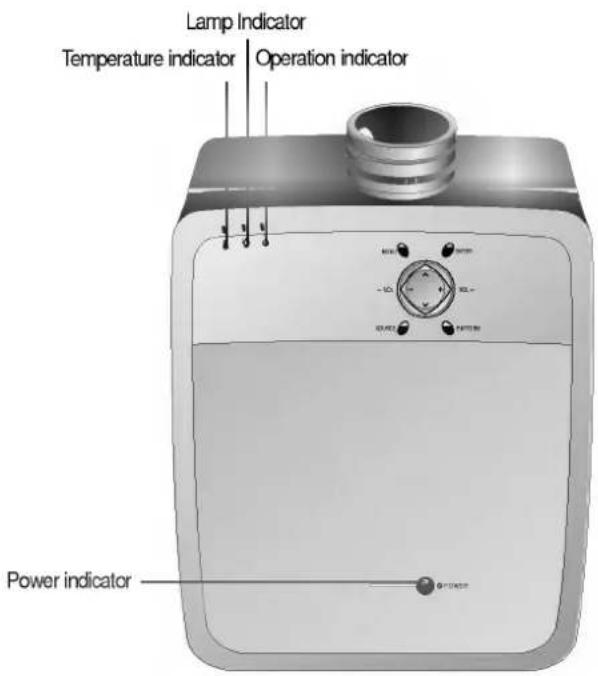
* Power Indicator, lamp Indicator, operation indicator and temperature indicator at the top of the projector show the user the operating status of the projector.
text_image
Lamp Indicator Temperature indicator Operation indicator Power indicator| Power Indicator | Orange | Standby. |
| Green | On operation. | |
| Operation Indicator | Orange | Standby. |
| Green | On operation.(Turn on the lamp) | |
| Red | Projector lamp is cooling as power out(2 minutes) | |
| Off | Power off. | |
| Lamp Indicator | Red | Projection lamp is reaching the end of its life and needs to be replaced with a new lamp.(over 1900 hours) "Replace the Lamp" |
| Red(flashing) | The projector has trouble in the lamp or around it. Contact the service center. | |
| Green(flashing) | The lamp cover is not closed. | |
| Temperature Indicator | Orange | This projector is in high temperature. If you don't turn off the projector, it'll be turned off automatically. "Temperature is Too High" |
| Red | The projector is turned off as its high temperature. | |
| Red (flashing) | Power has turned off due to problem with the internal cooling fan. Contact your service center. |
" " is the warning message on screen.
Accessories
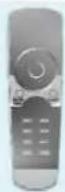
Remote Control
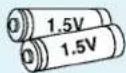
Batteries 2 (size AA)
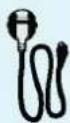
Power Cord
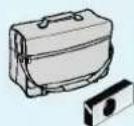
Portable Bag
/Sponge for lens protection
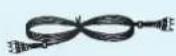
Audio/Video Cable
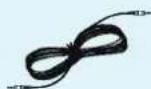
Audio Cable
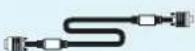
Computer Cable
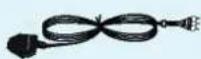
SCART to RCA jack (option)
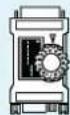
MAC Desktop Adaptor
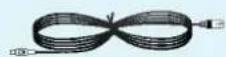
PS/2 Mouse Cable (IBM PC or Compatible)
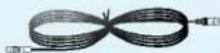
MAC Serial Mouse Cable
Optional Extras
* Contact your dealer for buying these items.
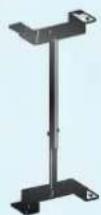
* When applying a ceiling installer, use only the ceiling installer for LCD projector.
* Contact your dealer for replacing a new lamp.
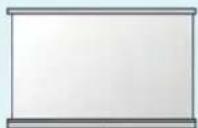

Screen for projecting
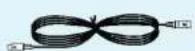
S-Video Cable
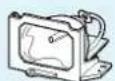
Lamp
Ceiling installer for LCD projector
* Don't place the projector in the following conditions. It may cause malfunction or product damage.

Provide proper ventilation for this projector.
● The projector is equipped with ventilation holes(intake) on the bottom and ventilation holes(exhaust) on the front. do not block or place anything near these holes, or internal heat build-up may occur, causing picture degradation or damage to the projector.
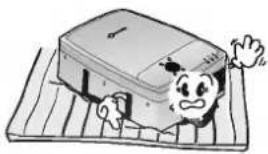
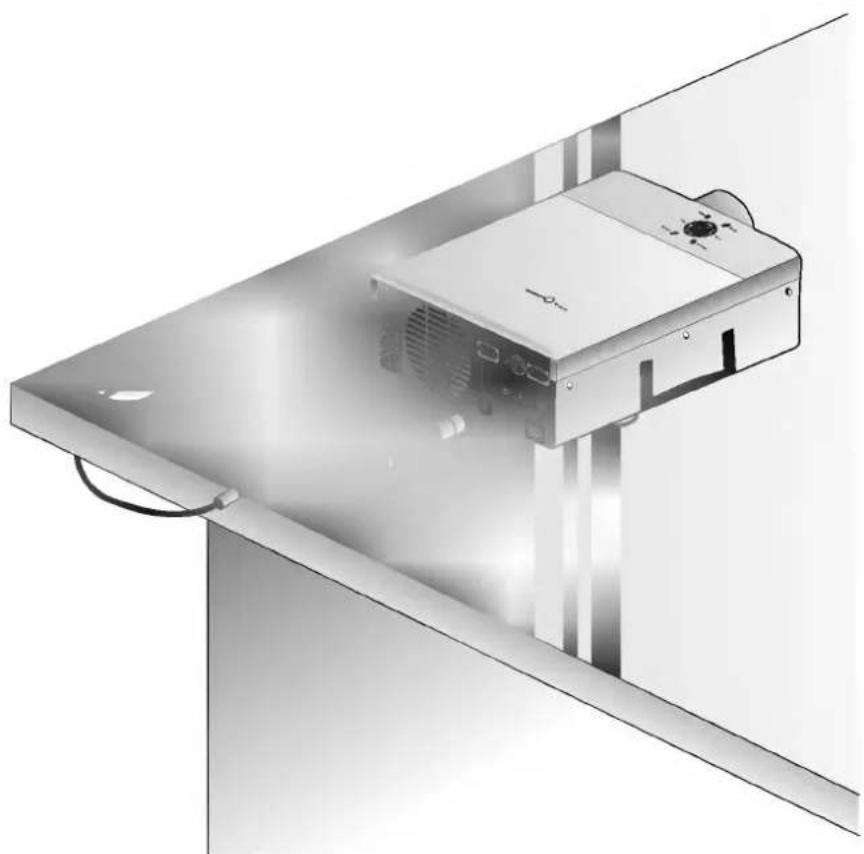
- Do not place the projector on a carpet, rug or other similar surface. It may prevent a adequate ventilation of the projector bottom. This product should be mounted to a wall or ceiling only.
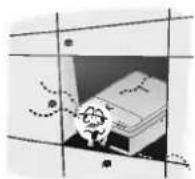
● Never push projector or spill liquid of any kind into the projector.
natural_image
Cartoon illustration of a smiling man waving while standing on a tray (no text or symbols)- Leave an adequate distance(30cm or more) around the projector.
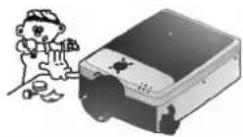
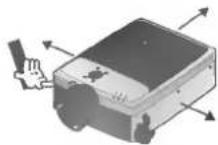

Place this projector in adequate temperature and humidity conditions.
- Install this projector only in a location where adequate temperature and humidity is available. (refer p.46)
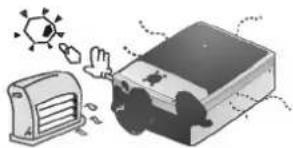
natural_image
Illustration of a solar collector emitting exhaust smoke from a refrigerator (no text or symbols)
Don't place the projector where it can be covered with dust.
● This may cause overheating of the projector. Clean the Air filter periodically.
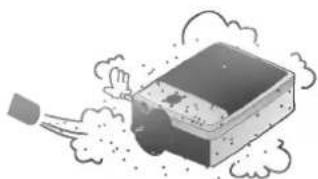
natural_image
Illustration of a computer monitor with smoke clouds around it (no text or symbols)
Do not clog the slots and openings of the projector. It may cause overheating.
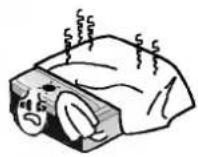

The LCD projector is manufactured using high-precision technology.
You may, however, see tiny black points and/or bright points(red, blue, or green) that continuously appear on the LCD projector. This is a normal result of the manufacturing process and does not indicate a malfunction.

This product should be used adequate length bolt(within 5mm) when installing it.

When applying a ceiling installer, use only the fixing bolt and ceiling installer for LCD projector. Contact your dealer for purchase or installation.
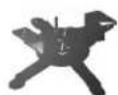
TP-ML2
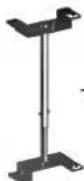
TP-MH2

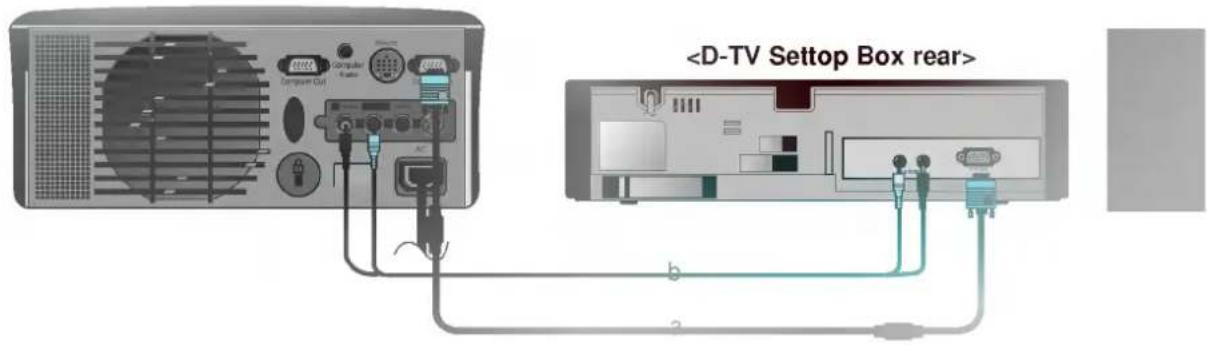
To receive the DTV program, it is necessary to purchase DTV receiver (Settop Box) and connect it to the projector.

If there is no input signal, Menu will not display on screen.
Basic Operation of the Projector
natural_image
3D rendering of a small electronic device with a lid and control panel, placed on a rectangular base (no visible text or symbols)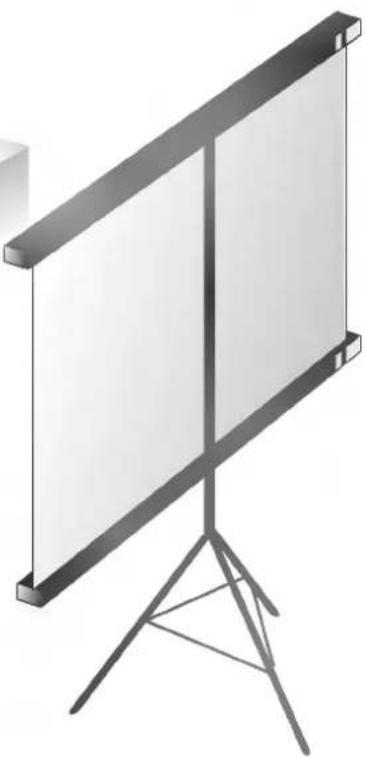
natural_image
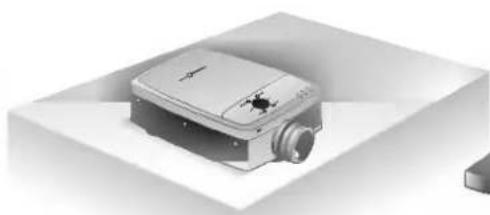
Illustration of a flat-screen projector on a stand (no text or symbols visible)- Place the projector on a sturdy and horizontal surface with the PC or AV source.
- Place the projector the correct distance from the screen. The distance between the projector and the screen determines the actual size of the image.
| Screen size | Horizontal distance from projector to screen |
| 610x460cm(300inch) | 12.55m~16.35m |
| 410x300cm(200inch) | 8.35m~10.87m |
| 200x150cm(100inch) | 4.16m~5.42m |
| 160x120cm(70inch) | 2.90m~3.78m |
| 120x90cm(50inch) | 2.06m~2.69m |
| 81x61cm(40inch) | 1.64m~2.15m |
-
Turn the projector so that the lens can be at a right angle to the screen. If the projector is not at a right angle, the screen image will be crooked. At this time perform keystone function. (Refer to page 39.)
-
Connect the cables of the projector to a wall power socket and other connected sources.
Using Kensington Security System
● The projector has Kensington Security System Connector on the back panel. Connect the Kensington Security system cable as below.
- For the detailed installation and use of the Kensington Security System, refer to the user's guide attached to the Kensington Security System set.
And for further information, contact http://www.kensington.com, the internet homepage of the Kensington company that deals with expensive electronic equipments such as notebook PCs or LCD projectors.
● Kensington Security System is an optional item.
natural_image
Exterior view of a modern office building (no signage)1 Remove the lens cover of the projector.
2 Press the POWER button on the remote control or top cover.(Green operation indicator flashes during warming up of the lamp.)
- It will take about 1 minute to display the picture after power on because the lamp of the projector needs cooling.
● An image will appear after the operation indicator has flashed green for some time. - Select the source mode with the SOURCE button.
- Leave the projector plugged in for at least 2 minutes after switching off the projector screen, as this will allow the lamp cooling to continue which will speed up the lamp switch on time if required.
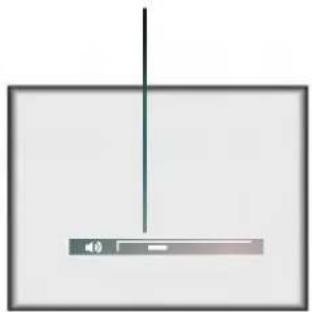
3 Adjust volume level.
- If you press VOLUME ▶ button, sound and volume level number are increased.
- If you press VOLUME ◀ button, sound and volume level number are decreased.
natural_image
Simple diagram with a vertical line and a horizontal bar, no text or symbols present
* Don't turn main power off and don't unplug the power cord while the ventilation fan(inlet/outlet) is working.
1 Press the POWER button on the top cover or remote control.
natural_image
A solid maroon horizontal bar on a white background, no text or symbols present.2 Press the POWER button on the top cover or remote control again to cut off the power.
3 If operation indicator is flashing(red), leave the power cord plugged into the outlet. Do not pull out from the outlet until operation indicator is flashing(orange).
- If operation indicator is flashing(red), the power button on the top cover or remote control may not operate.
Focusing and Positioning the Screen Image

When an image appears on the screen, check if it is in focus and fits well to the screen.
natural_image
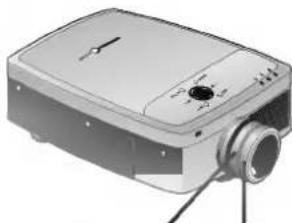
Illustration of a projector with control panel and spool (no text or symbols)Zoom ring Focus ring
● To adjust the focus of the image, rotate the focus ring which is the outer ring on the lens.
● To adjust the size of the image, rotate the zoom ring which is the inner ring on the lens.

to raise or lower the image on the screen, extend or retract the foot at the bottom of the projector by pushing foot adjuster button as below.

natural_image
3D rendering of a mechanical device with a labeled push button (no text or symbols on the object itself)- Press the foot adjuster button while you support the other side of the projector. This unlocks the foot and can make it move freely. Take care not to drop the projector.
- While pressing the foot adjuster button, raise or lower the projector to place the screen image in the proper position.
- Release the button to lock the foot in its new position.
- To fine-tune the height of the projector, rotate the front foot to raise or lower it. After raising the front foot, do not press down on the projector.

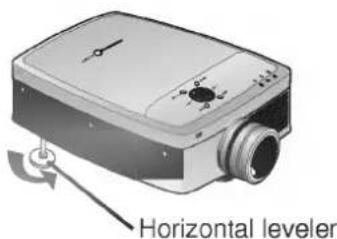
the projector is installed on a place that is not stable or horizontal, the projected screen shape will be distorted.
text_image
Horizontal leveler- Adjust the screen shape to be horizontal and rectangular with horizontal leveler as above.
1 Press the SOURCE button
2 Each press of the SOURCE button changes the display as below.

flowchart
graph LR
    PC --> AV --> S-VIDEO
    S-VIDEO --> PC
* You can connect the projector to a computer of VGA, SVGA, XGA and SXGA output.
* You can use resize function for VGA, SVGA output.
* Refer to page 44 for the projector supported monitor display.
natural_image
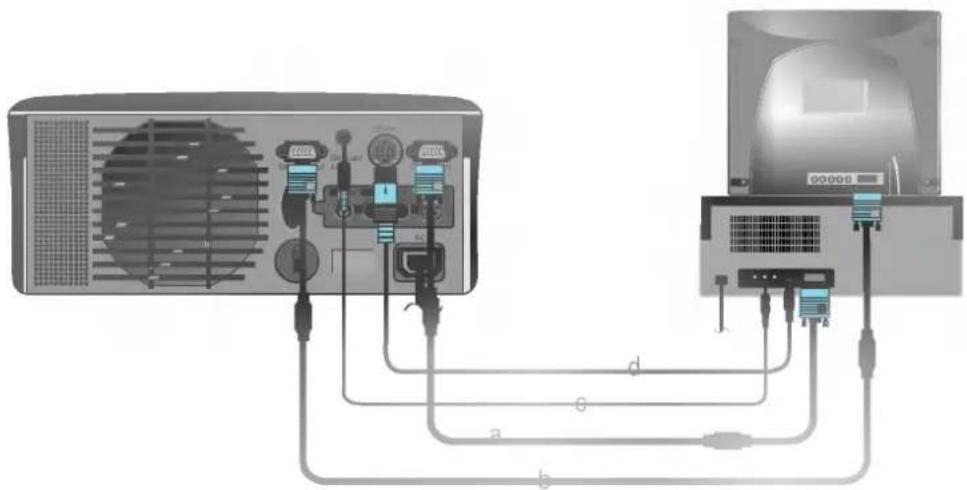
Diagram showing connections between a server rack and a computer monitor, with labeled ports (no text or symbols present)< How to connect >
a. Connect either end of the computer cable to Computer In of the projector.
b. Connect the monitor cable from the PC monitor to Computer Out of the projector if you want to see the projected image on PC monitor.
c. Connect the audio cable from the PC (LINE OUT sound port) to Computer Audio of the projector.
* If the PC has two audio out ports of SPEAKER OUT and LINE OUT, connect the LINE OUT port to get better sound quality.
d. Connect the PS/2 mouse(for IBM PC or compatible) cable(6 pin) to the Mouse of the projector.

natural_image
Gradient gray bar with a teal vertical stripe on the left (no text or symbols)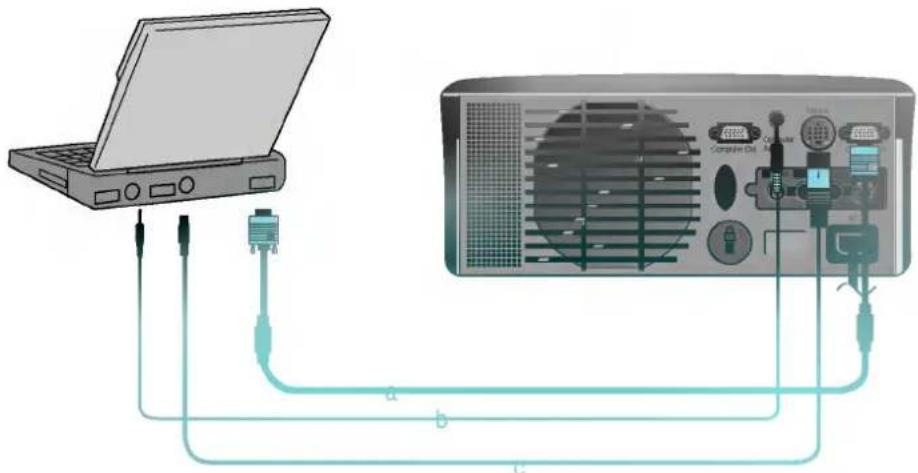
text_image
Diagram showing connections between a laptop and an air conditioner unit with labeled components
< How to connect >
a. Connect either end of the computer cable to Computer In of the projector.
* If you set your computer, such as a notebook type IBM PC/AT compatible, to output the signal to both the display of your computer and the external monitor, the picture of the external monitor may not appear properly. IN such cases, set the output mode of your computer to output the signal only to the external monitor. For details, refer to the operating instructions supplied with your computer.
b. Connect the audio cable from the PC to Computer Audio of the projector.
c. Connect the PS/2 mouse(for IBM PC or compatible) cable(6 pin) to the Mouse of the projector.
* You must use the Macintosh desktop adaptor to connect the projector to a Macintosh PC.
text_image
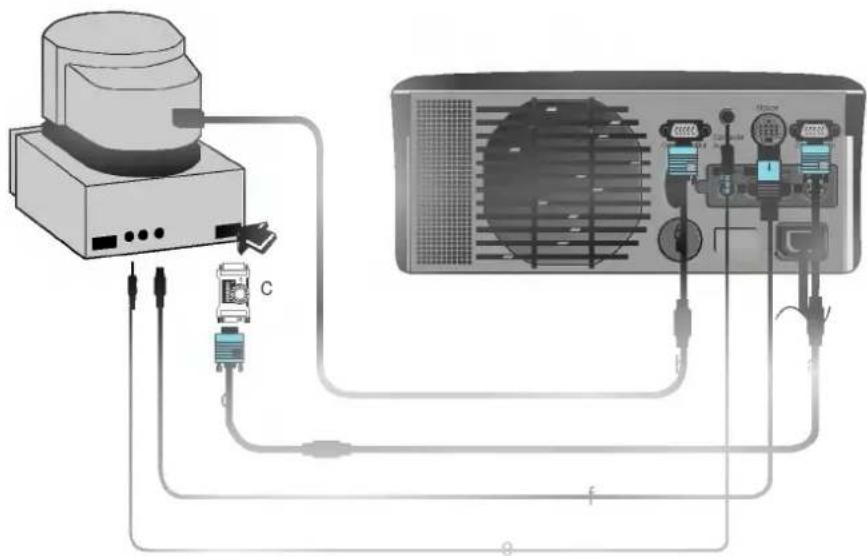
Diagram showing connections between a computer and a server with labeled components and cable routing< How to connect >
a. Connect either end of the computer cable to Computer In of the projector.
b. Connect the monitor cable from the Macintosh monitor to Computer Out of the projector if you want to see the projected image on Macintosh monitor.
c. Set the adjusting number and letter of the Macintosh desktop adaptor in accordance with the resolution you want to use and connect the adaptor to the Macintosh. (Refer to page 24 \~ 25)
d. Connect the computer cable to the Macintosh desktop adaptor.
e. Connect the audio cable from the PC to Computer Audio of the projector.
f. Connect the mouse cable(4 pin) from the Macintosh mouse port to the Mouse of the projector.
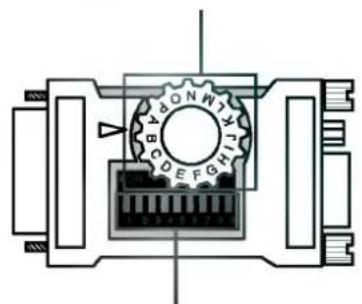
How to use the Macintosh desktop adaptor
Adjusting letter
text_image
Technical diagram of a mechanical or electrical component with labeled terminals and internal gear mechanismAdjusting number

a. How to use
Usually set 1 \~ 6 to OFF status and 7 \~ 9 to ON status of the adjusting numbers. And select the adjusting letter which is correct to the Macintosh and the monitor. (Refer to page 25.)
b. Notes for Connecting to the Macintosh PowerBook
If you get problems when connecting it to the projector, set the adjusting number 9 to OFF status and restart the Macintosh PowerBook.
Adjusting letters of MAC desktop adaptor in accordance with kinds of MAC and output spec.
| MACS\output spec | output resolutionhorizontal frequency(KHz)vertical frequency(Hz) | 12xR03513x8424.560 | 12x14xR03640x4803566 | 15xFormat640x67068.875 | VGA640x4803160 | SVGA800x6003556 | SVGA800x60056or 72 | 16xColor832x8245075 | 19xColor1024x7686075 | 19xColor1024x76860 or 70 | 2Page Mono1160x87068.775 | 21xColor1162x87068.775 | NTSCNTSO15.760 | PALPAL1650 |
| adjusting letter | N | J | O | G | G | G | F | D | G | M | P | L | H | |
| MACIs,Isi | N | J | O | |||||||||||
| MACIN,Inx | N | J | G | |||||||||||
| LC | N | J | M | |||||||||||
| LCI | N | J | G | |||||||||||
| LCII | N | J | O | G | F | |||||||||
| LC-475,LC-550 | N | J | O | G | G | F | ||||||||
| LC-575 | N | J | O | G | G | F | D | M | P | L | H | |||
| Performa | ||||||||||||||
| 400,405,410,420,600,600CD | N | J | G | |||||||||||
| 450 | N | J | O | G | F | |||||||||
| Quadra | ||||||||||||||
| 700,000 | N | J | O | G | G | F | M | P | L | H | ||||
| 605,610,650,800,950 | N | J | O | G | G | F | D | M | P | L | H | |||
| 940kV | N | J | O | G | G | G | F | D | G | M | P | L | H | |
| Centis | ||||||||||||||
| 610,650 | N | J | O | G | G | F | D | M | P | L | H | |||
| 660kV | N | J | O | G | G | G | F | D | G | M | P | L | H | |
| PowerBook | ||||||||||||||
| 100,100C,100,100C | N | J | O | G | G | F | ||||||||
| DUO DOC,MIN DOC | N | J | O | G | G | F | ||||||||
| 8.24 BOARD | N | J | O | F | M | P | L | H |

natural_image
Gradient gray bar transitioning from teal to white (no text or symbols)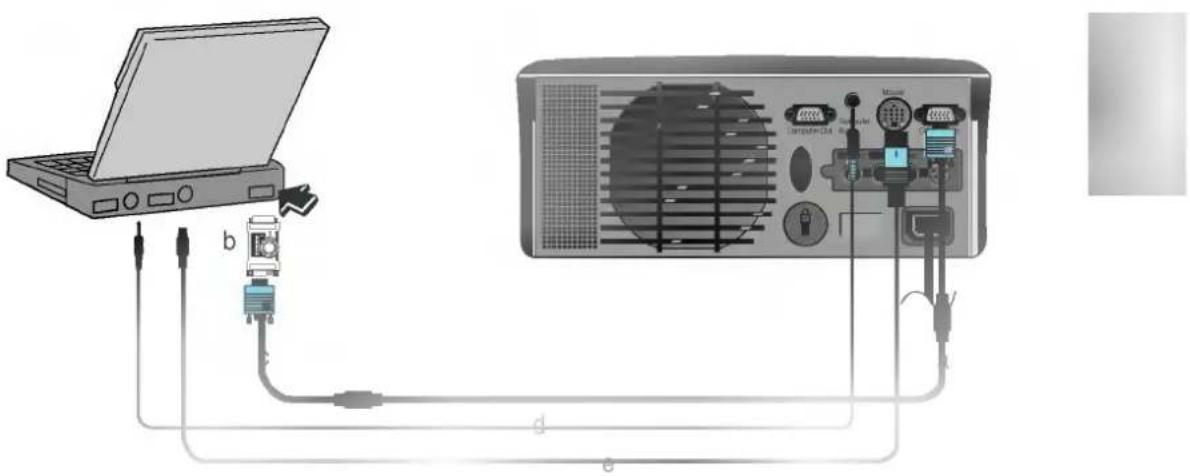
text_image
Diagram showing connections between a laptop, computer panel, and connected devices labeled b, d, e< How to connect >
a. Connect either end of the computer cable to Computer In of the projector.
b. Set the adjusting number and letter of the Macintosh desktop adaptor in accordance with the resolution you want to use and connect the adaptor to the Macintosh PowerBook.(Refer to page 24 \~ 25)
c. Connect the other end of the computer cable to the Macintosh desktop adaptor.
d. Connect the audio cable from the PC to Computer Audio of the projector.
e. Connect the mouse cable from the Macintosh mouse port to the Mouse of the projector.
* In AV input mode, if the auto video system recognition fails to detect a correct video system type, please press the AUTO TRACKING button on the remocon. Then the projector executes the fine auto video system recognition.
* You can connect a VTR, a camcorder, a LDP or any other compatible video image source to the projector.
text_image
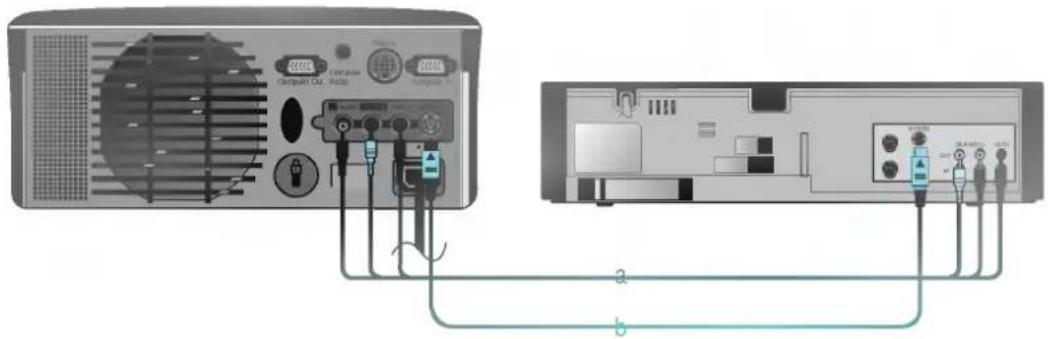
Diagram showing connection between a computer drive and a CD-ROM with labeled ports and cable routing< How to connect 1 >
a. When connecting the projector to an A/V source, connect the A/V input ports of the projector to the output ports of the A/V source with A/V cables of the same color. The video cable is yellow and the left audio is white and right audio is red.
< How to connect 2 >
b. Connect S-Video input port of the projector to S-Video output port of A/V source with S-Video cable. * You can get better picture quality when connecting S-Video source to the projector.


natural_image
Blank gray gradient image with no visible text, symbols, or objects* To receive the DTV program, it is necessary to purchase DTV receiver (Settop Box) and connect it to the projector.
* Please refer to the owner's manual of the DTV Settop Box for the connection between LCD projector and DTV Settop Box.
text_image
< How to connect >
a. Connect the Computer In of the projector to DTV OUT of the D-TV Settop Box.
b. Connect the Audio input ports (R, L/Mono) of the projector to the Audio output ports (R, L) of the D-TV Settop Box.
* If there is no input signal, Menu will not display on screen.
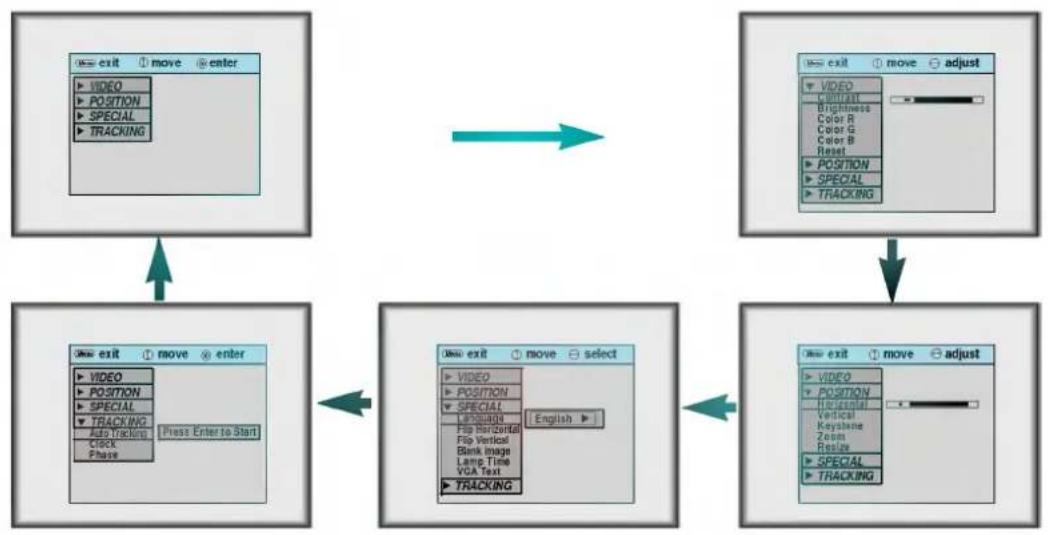
1 Press the MENU button.
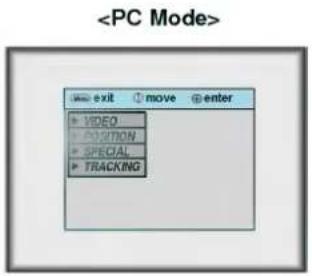
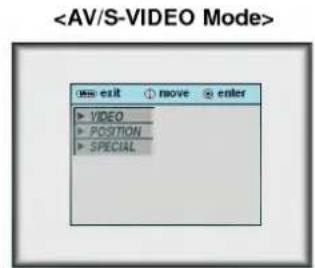
2 Move the POINTER button up or down to select a menu and press the ENTER button. Each time you press the button you can see menus as below.
flowchart
graph TD
    A["exit"] --> B["move"]
    B --> C["enter"]
    C --> D["exit"]
    D --> E["move"]
    E --> F["enter"]
    F --> G["exit"]
    G --> H["move"]
    H --> I["enter"]
    I --> J["exit"]
    J --> K["move"]
    K --> L["enter"]
    L --> M["exit"]
    M --> N["move"]
    N --> O["enter"]
    O --> P["exit"]
    P --> Q["move"]
    Q --> R["enter"]
    R --> S["exit"]
2 Move the POINTER button up or down to select a function that you want to use or adjust.
● To finish the menu display, press the MENU button.
* In AV and S-VIDEO mode, [Horizontal] / [Vertical] in POSITION menu, [VGA Text] in SPECIAL menu and TRACKING menu are not displayed.
* The sub menus of VIDEO menu in AV and S-VIDEO mode are different from those in the PC mode. (Refer to page 43).
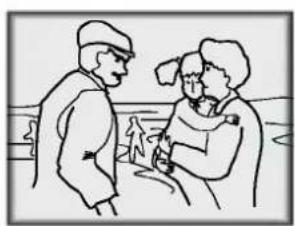
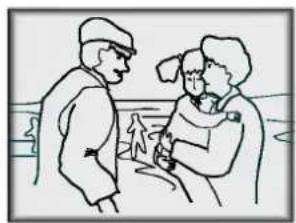
1 Press the STILL button.
* You can freeze the input image.
* This function doesn't work in following resolution UXGA(1600X1200, 60Hz).
natural_image
Illustration of two people in conversation, one wearing a cap and the other in a coat (no text or symbols)
natural_image
Line drawing of two people in conversation, one holding a device (no text or symbols)
2 To finish this function, press the STILL button again.
1 Press the MENU button and move the POINTER button up or down to select the SPECIAL menu as below.
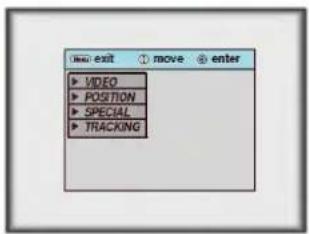
text_image
move exit ↑ VIDEO ↑ POSITION ↑ SPECIAL ↑ TRACKING2 Press the ENTER button and move the POINTER button up or down to select [Language] item.
3 Move the POINTER button left or right to select the language you want to use.
- On-Screen-Display(OSD) is marked in the selected language from this point.
● To finish menu display, press the MENU button.
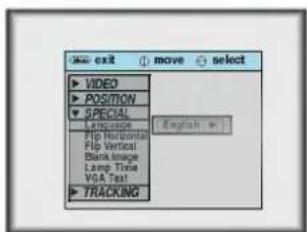
text_image
mov exit move select VIDEO POSITION SPECIAL Language Flip Horizontal Flip Vertical Bank Image Lamp Time VGA Text TRACKING Explicitly in1 Press the MENU button and move the POINTER button up or down to select the SPECIAL menu as below.
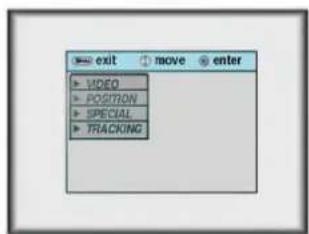
text_image
exit move enter VIDEO POSITION SPECIAL TRACKING2 Press the ENTER button and move the POINTER button up or down to select the [Lamp Time] item.
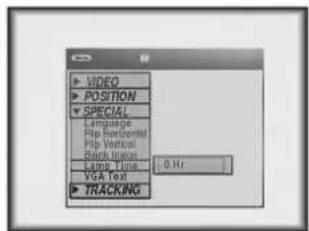
text_image
VIDEO POSITION SPECIAL Language Flip Horizontal Flip Vertical Back Linear Lamp Time VGA Text TRACKING 0.0 Hz● You can see the used lamp time.
- When projector lamp is reaching the end of its life(over 1900 hours), the lamp indicator will flash(red) and the projector will display "Replace the Lamp" on screen.
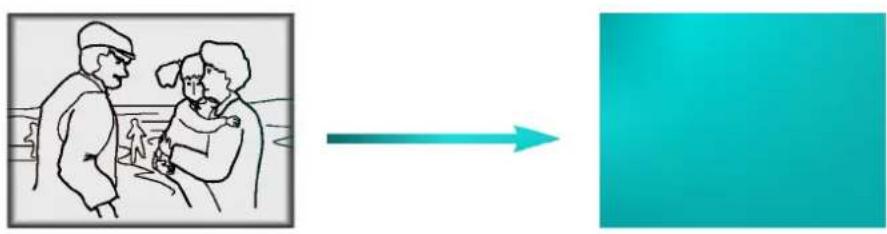
* This function may be effective if you need to get attention of the attendants in meetings or briefings.
1 Press the BLANK button.
* The screen turns of to a background color and sound turns off.
* You can choose the background color. Refer to page 34.
natural_image
Illustration of two people interacting with a device, connected by an arrow to a solid teal background (no text or symbols)2 To exit the blank status, press any button(Except POWER button).
* If exiting the blank status sound also comes on.
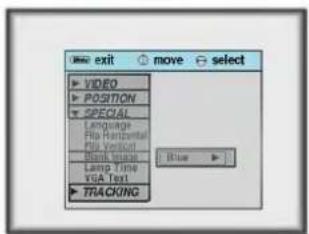
Selecting Blank Image color
1 Press the MENU button and move the POINTER button up or down to select the SPECIAL menu.

text_image
exit move enter VIDEO POSITION SPECIAL TRACKING2 Press the ENTER button and move the POINTER button up or down to select the [Blank Image] item.

3 Move the POINTER button left or right to select the color you want to use.
● Background color will be changed to the selected color from this point.
● To exit menu display, press the MENU button.
text_image
exit move select VIDEO POSITION SPECIAL Language Flip Horizontal Flip Vertical Block Image Lamp Time vGA Text TRACKING BlueFlip Horizontal Function
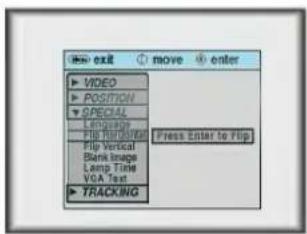
* This function reverses the left and the right side of the projected image. Use this function when projecting from behind onto a transparent screen being viewed from the opposite side.
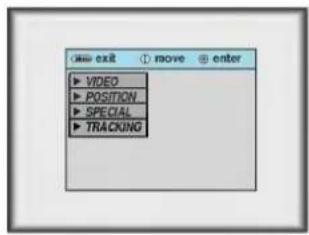
1 Press the MENU button and move the POINTER button up or down to select the SPECIAL menu.
text_image
→ exit ↑ move ← enter ► VIDEO ► POSITION ► SPECIAL ► TRACKING2 Press the ENTER button and move the POINTER button up or down to select [Flip Horizontal] item.
text_image
Movie exit move enter VIDEO POSITION SPECIAL Language File Image File Vertical Bank Image Lamp Time VGA Text TRACKING Press Enter to Flip3 Press the ENTER button to see reversed image.
● Each time you press the button, the image will be reversed.
● To finish menu display, press the MENU button.
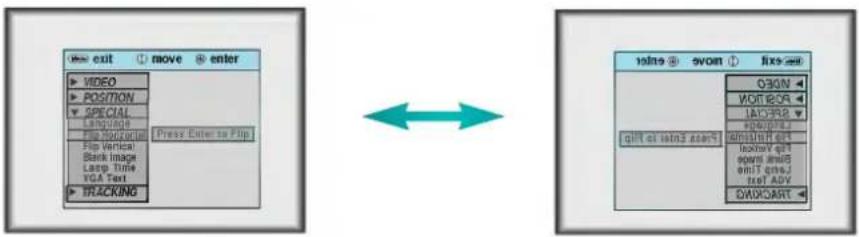
flowchart
graph LR
    A["video exit"] --> B["VIDEO"]
    A --> C["SPECIAL Language"]
    A --> D["Tracking"]
    B --> E["Position"]
    C --> F["Play Vector"]
    D --> G["Black Image Lamp Time VGA Text"]
    E --> H["Press Enter to Flip"]
    F --> I["Press Event to Flip"]
    G --> J["Press Event to Flip"]
    K["video exit"] --> L["OKIN"]
    K --> M["VOTOR"]
    K --> N["LADSOR"]
    K --> O["POSTOR"]
    K --> P["START OR"]
    K --> Q["DOWN OR"]
    K --> R["END ON"]
Flip Vertical Function
* This function reverses the upper and the lower side of the projected image.
* When you hang the projector upside down from the ceiling for using, you need to reverse all the sides(left, right, upper; lower) of the image.
1 Press the MENU button and move the POINTER button up or down to select the SPECIAL menu.
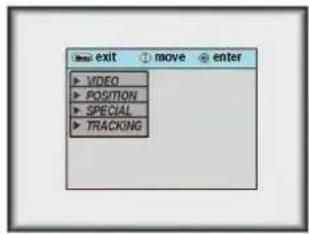
text_image
exit move enter VIDEO POSITION SPECIAL TRACKING2 Press the ENTER button and move the POINTER button up or down to select [Flip Vertical] item.
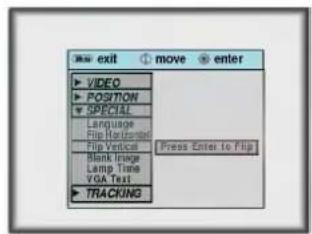
text_image
exit move enter VIDEO POSITION SPECIAL Language File Hardware Tip Vertical Blank Image Lamp Time VGA Text TRACKING Press Enter to Flip
3 Press the ENTER button to see reversed image.
● Each time you press the button, the image will be reversed.
● To finish menu display, press the MENU button.
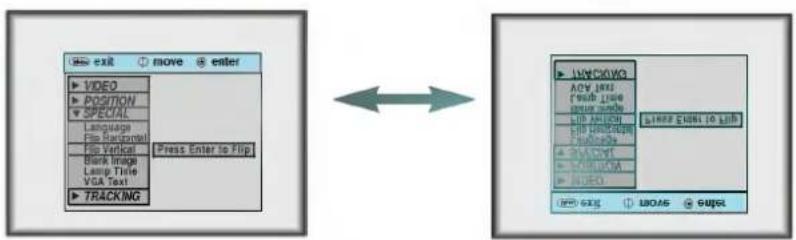
text_image
move exit move enter VIDEO POSITION SPECIAL Language File Document File Wizard Blank Image Lamp Title VGA Text TRACKING Press Enter to Flip LIVECKWO ACV LIME F#W T#E F#W T#E ADD ANION ADD ANION ADD ANION ADD ANION ADD ANION ADD ANION ADD ANION ADD ANION ADD ANION ADD ANION ADD ANION ADD ANION ADD ANION ADD ANION ADD ANION ADD ANION ADD ANION ADD ANION ADD ANION ADD ANION ADD ANION ADD ANION ADD ANION ADD ANION ADD ANION ADD ANIO ADD ANIO ADD ANIO ADD ANIO ADD ANIO ADD ANIO ADD ANIO ADD ANIO ADD ANIO ADD ANIO ADD ANIO ADD ANIO ADD ANIO ADD ANIO ADD ANIO ADD ANIO ADD ANIO ADD ANIO ADD ANIO ADD ANIO ADD ANIO ADD ANIO ADD ANIO ADD ANIO ADD ANIO ADD AN IOA ADD AN IOA ADD AN IOA ADD AN IOA ADD AN IOA ADD AN IOA ADD AN IOA ADD AN IOA ADD AN IOA ADD AN IOA ADD AN IOA ADD AN IOA ADD AN IOA* When PC input mode, select the appropriate screen size in SPECIAL menu as below before turning on the PC to get the image size of PC on DOS mode to fit on the projected screen.
* In other screen size signals except 640X400 70Hz and 720X400 70Hz, the projected screen sizes are adjusted automatically.
1 Press the MENU button and move the POINTER button up or down to select the SPECIAL menu as below.
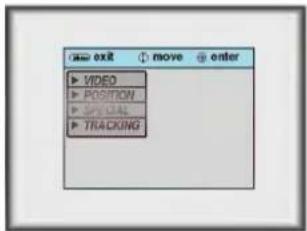
text_image
exit move enter VIDEO POSITION SPECIAL TRACKING2 Press the ENTER button and move the POINTER button up or down to select the [VGA Text] item.
3 Move the POINTER button left or right to select the screen size you want to use.
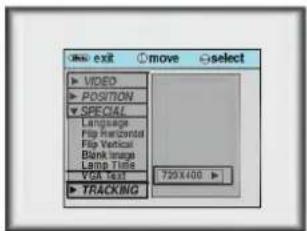
text_image
exit move select VIDEO POSITION SPECIAL Language Flip Horizontal Flip Vertical Blank Image Lamp Time YOU Text 720X400 TRACKINGa. Selecting 720X400
: When input signals are 720X400 70Hz or 640X400 70Hz, the projected screen size is always adjusted to the format of 720X400 70Hz.
b. Selecting 640X400
: When input signals are 720X400 70Hz or 640X400 70Hz, the projected screen size is always adjusted to the format of 640X400 70Hz.
● To exit menu display, press the MENU button.
* You can use this function only under SVGA (800x600) mode in case of LP-XG22/XG24 model.
1 Press the RESIZE button. Each press of the button changes the display as below.
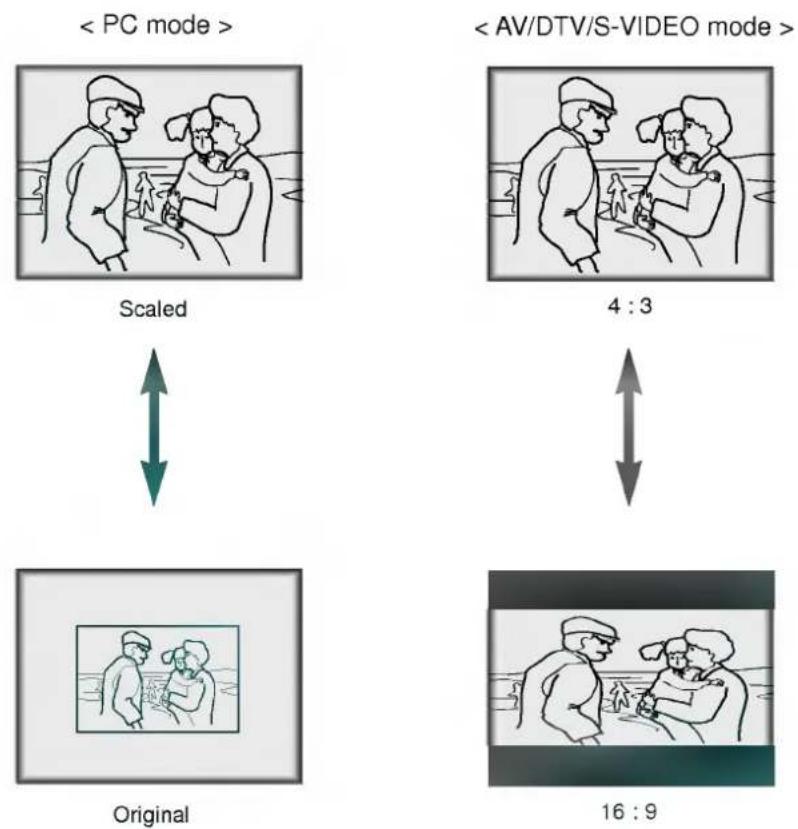

* You can also use this function by using the MENU button.
Positioning
* If the image size does not fit the screen in accordance with the input source, set the position of the image by selecting Horizontal / Vertical position.
* Keystone function adjusts the upper and lower width of the projected image to prevent the image shape from being a trapezoid shape. Use this function when the screen or the projector is slanted and cannot make a rectangular projection angle.
1 Press the MENU button and move the POINTER button up or down to select the POSITION menu.
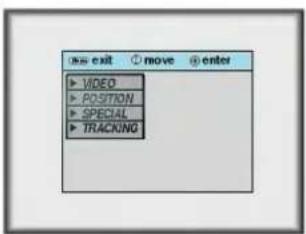
text_image
exit move enter VIDEO POSITION SPECIAL TRACKING2 Press the ENTER button and move the POINTER button up or down to select (Horizontal), (Vertical) or (Keystone) item.
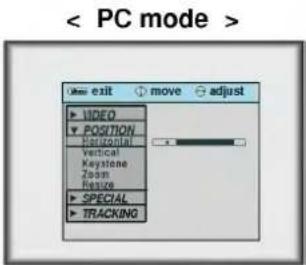
text_image
< PC mode > Movie exit move adjust VIDEO POSITION Horizontal Vertical Keystone Zoom Rescue SPECIAL TRACKING3 Press the POINTER button and move the button left or right or press the VOLUME (◀,▶) button to adjust the screen condition as you want.
● (Horizontal), (Vertical), (Keystone) are adjusted from -50 to +50.
● To exit the menu display, press the MENU button.
Zoom Function
1 Press the ZOOM button.
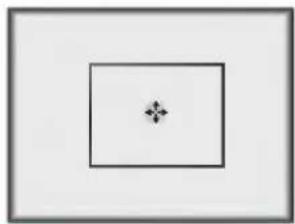
natural_image
Simple geometric diagram with a central cross and a small diamond shape inside a square (no text or symbols)2 Move the POINTER button to move the rectangular zooming area and press the ENTER button to zoom into the target area.
3 Press the Ⓗ MOUSE or Ⓡ MOUSE button to adjust the zoom level.
* Ⓛ MOUSE button makes the image look smaller.
* ⓇMOUSE button makes the image look larger.
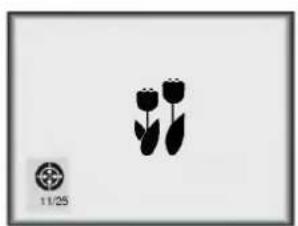
natural_image
Black silhouette of two tulips with leaves, no text or symbols present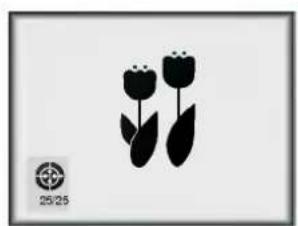
natural_image
Black silhouette of two tulips with leaves, no text or symbols present
4 Move to the position you want to see the enlarged display by moving the POINTER button left, right, up, or down.
5 Press the ZOOM button again to finish the zoom function.
* You can use this function by using the MENU button.
* In the zoom mode, you can adjust horizontal / vertical position with the POINTER button.
Auto Tracking Function
\* Auto Tracking Function
This function assures you of getting the best video quality by automatically adjusting the difference of horizontal width and tremor of the image. This difference is caused by disaccord of the internal signal of the projector and diverse graphic signals of PC.
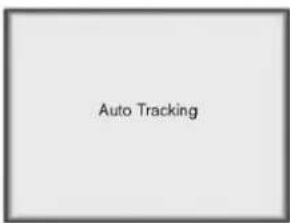
1 Press the AUTO TRACKING button.
text_image
Auto Tracking* Image positioning and tremor adjusting are automatically performed.
2 Adjust [Clock] or [Phase] in TRACKING menu after operation of [Auto Tracking] if you want to get better picture quality in accordance with diverse PC input modes. (Refer to page 42.)
![LG LP-XG22 - Adjust [Clock] or [Phase] in TRACKING menu after operation of [Auto Tracking] if you want to get better picture quality in accordance with diverse PC input modes. (Refer to page 42.) - 1](/content/2026/05/804451/images/6dfa6a7470af4ff557ff99a417f4e18299ef61adc53ccb261e19eabe6e901c92.jpg)
* You can also use this function by using the MENU button.(PC mode)
* Perform this function while on stopped image because you may not get the best video quality on a moving image of PC graphic signal.
Clock / Phase Function
* Clock Function
This function adjusts the horizontal width of the projected image to get the image to fit on the screen size.
* Phase Function
This function is for the detailed adjustment of the clock function.
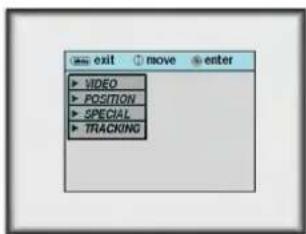
1 Press the MENU button and move the POINTER button up or down to select the TRACKING menu.
text_image
exit move enter VIDEO POSITION SPECIAL TRACKING2 Press the ENTER button and move the POINTER button up or down to select the (Clock) or (Phase) item.

text_image
exit move adjust VIDEO POSITION SPECIAL TRACKING Auto Tracking Clock Phase3 Move the POINTER button left or right or press the VOLUME (◀,▶) button to adjust the screen condition.
● To exit the menu display, press the MENU button.
1 Press the MENU button and move the POINTER button up or down to select each VIDEO menu.
text_image
text_image
2 Press the ENTER button.
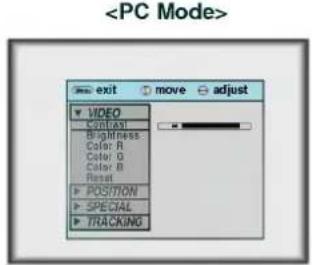
text_image
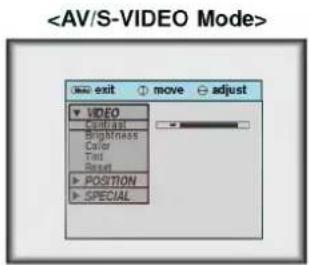
text_image
3 Move the POINTER button up or down to select a video item you want to adjust.
4 Move the POINTER button left or right or press the VOLUME (◄,►) button to adjust the selected video item as you want.
- To restore the original image condition after changing it, press ENTER button after selecting (Reset) item. - To finish menu display, press the MENU button.
Supported Monitor Display
* The projector displays images at a resolution of 1024x768 pixels. To display higher resolution images(1152x864mode, 1280x1024mode), the projector compresses it to 1024x768. The following table lists the display formats supported by the projector.
| Sources | Format | Vertical Freq. (Hz) | Horizontal Freq. (kHz) | |
| VGAEGA | 640X350 | 70.090Hz | 31.468kHz | |
| 640X350 | 85.080Hz | 37.861kHz | ||
| PC98 / VGA text | 640X400 | 85.080Hz | 37.861kHz | |
| 720X400 | 70.082Hz | 31.469kHz | ||
| 720X400 | 85.039Hz | 37.927kHz | ||
| VGA | 640X480 | 59.940Hz | 31.469kHz | |
| 640X480 | 66.667Hz | 35.00kHz | ||
| 640X480 | 72.800Hz | 37.861kHz | ||
| 640X480 | 75.00Hz | 37.500kHz | ||
| 640X480 | 85.008Hz | 43.269kHz | ||
| 640X480 | 100.040Hz | 53.011kHz | ||
| 640X480 | 120.00Hz | 64.062kHz | ||
| SVGA | 800X600 | 56.250Hz | 35.156kHz | |
| 800X600 | 60.317Hz | 37.879kHz | ||
| 800X600 | 72.188Hz | 48.077kHz | ||
| 800X600 | 75.00Hz | 46.875kHz | ||
| 800X600 | 85.061Hz | 53.674kHz | ||
| 800X600 | 90.00Hz | 56.00kHz | ||
| 800X600 | 100.00Hz | 64.016kHz | ||
| XGA | 1024X768 | 43.479Hz (interlace) | 35.522kHz | |
| 1024X768 | 60.004Hz | 48.363kHz | ||
| 1024X768 | 70.069Hz | 56.476kHz | ||
| 1024X768 | 75.029Hz | 60.023kHz | ||
| 1024X768 | 84.997Hz | 68.677kHz | ||
| SXGA | 1152X864 | 60.053Hz | 54.348kHz | |
| 1152X864 | 70.016Hz | 63.995kHz | ||
| 1152X864 | 75.00Hz | 67.500kHz | ||
| 1152X864 | 85.057Hz | 77.487kHz | ||
| 1280X960 | 60.00Hz | 60.00kHz | ||
| 1280X960 | 75.00Hz | 75.00kHz | ||
| 1280X960 | 85.002Hz | 85.938kHz | ||
| 1280X1024 | 60.020Hz | 63.981kHz | ||
| 1280X1024 | 75.025Hz | 79.976kHz | ||
| 1280X1024 | 85.024Hz | 91.146kHz | ||
| UXGA | 1600X1200 | 60.00Hz | 75.00kHz | |
| MAC | 16¥ | 832X624 | 74.550Hz | 49.725kHz |
| 19¥ | 1024X768 | 60.004Hz | 48.363kHz | |
| 1024X768 | 75.029Hz | 60.023kHz | ||
| 20¥ | 1152X870 | 75.062Hz | 68.681kHz | |
| HD | 1920X1080i | 60.00Hz | 33.750kHz | |
| 1280X720p | 60.00Hz | 45.00kHz | ||
* If the projector does not support the input signal, "CHECK INPUT SIGNAL" message appears on the screen.
* The projector supports DDC1/2B type as Plug & Play function.(Auto recognition of PC monitor)
Maintenance
* The projector needs little maintenance. You should keep the lens clean because any dirt or stains may appear on the screen. You will also need to clean the air filter attached at the bottom of the projector periodically because a clogged air filter prevents proper ventilation that is necessary to cool the projector and prevents it from overheating. If any parts need to be replaced, contact your dealer. When cleaning any part of the projector, always turn the power off and unplug the projector first.
Cleaning the lens
Clean the lens whenever you notice dirt or dust on the surface of it. Wipe the lens surface gently with an air spray or a soft, dry lint-free cloth.
To remove dirt or stains on the lens, moisten a soft cloth with water and a neutral detergent and wipe the lens surface gently.
Cleaning the Projector Case
To clean the projector case, first unplug the power cable. To remove dirt or dust, wipe the casing with a soft, dry, lint-free cloth. To remove stubborn dirt or stains, moisten a soft cloth with water and a neutral detergent and then wipe the casing.
Do not use alcohol, benzene, thinners or other chemical detergents as these can cause the casing to be warped.
Cleaning the Air Filter
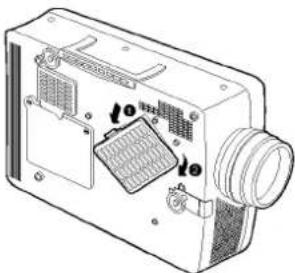
The air filter, which is located at the bottom of the projector, should be cleaned after every 100 hours' use. If it is not cleaned periodically, it can become clogged with dust and prevent the projector from being ventilated properly. This may cause overheating and damage of the projector.
To clean the air filter :
- Switch the projector off and unplug the power cable from the wall socket.
- Stand the projector on it's side so that the handle can be at the top, and you can easily access the air filter.
- Push the opening tip of the air filter cover and remove the cover.
natural_image
Technical line drawing of a device with internal components and mounting holes (no text or symbols)- The air filter is inside the cover. To clean the filter, use a small vacuum cleaner designed for computers or other office equipment. If not, you may use a dry, lint-free cloth. If it is difficult to remove dirt or the filter is torn, contact your dealer or the service center to replace it.
- Close the filter cover after cleaning.
- Plug the power cable back into the wall socket.
LP-XG22/XG24
22.9mm(0.9 inches)
1024(Horizontal) x 768(Vertical|pixel
1.01-7.6m(40-300 inches)
1.64-16.35m(5.03-54.08 feet)
12m
1W
4:3(horizontal:vertical)
1:1.3
NTSC/PAL/SECAM/NTSC4.43/PAL-M/PAL-N
AC 110 - 240V\~50/60Hz
98.5mm(including front foot)
238mm
329.5mm(including lens)
3.4kg
Warning
This is a class A product. In a
domestic environment this
interference, in which case the
user may be required to take
adequate measures.

natural_image
Solid blue background with no visible text, symbols, or objectsOperating Condition

In operation : 32\~95°F(0°C\~35°C)
In storage and transit: -4\~140°F(-20°C\~60°C)
Projection Lamp
AJ-LA20

In operation : 20 \~ 80% relative humidity by dry hygrometer
Not in operation : 10 - 90% relative humidity by dry hygrometer
150W
natural_image
Solid blue background with a small magenta oval in the top-left corner (no text or symbols)P/NO:3628VA0281B(373-026F)