
FP71W - Screen BENQ - Free user manual and instructions
Find the device manual for free FP71W BENQ in PDF.


User questions about FP71W BENQ
0 question about this device. Answer the ones you know or ask your own.
Ask a new question about this device
Download the instructions for your Screen in PDF format for free! Find your manual FP71W - BENQ and take your electronic device back in hand. On this page are published all the documents necessary for the use of your device. FP71W by BENQ.
USER MANUAL FP71W BENQ
17.0" LCD Panel Size
User's Manual
Welcome
Copyright
Copyright © 2005 by BenQ Corporation. All rights reserved. No part of this publication may be reproduced, transmitted, transcribed, stored in a retrieval system or translated into any language or computer language, in any form or by any means, electronic, mechanical, magnetic, optical, chemical, manual or otherwise, without the prior written permission of BenQ Corporation.
ii Disclaimer
BenQ Corporation makes no representations or warranties, either expressed or implied, with respect to the contents hereof and specifically disclaims any warranties, merchantability or fitness for any particular purpose. Further, BenQ Corporation reserves the right to revise this publication and to make changes from time to time in the contents hereof without obligation of BenQ Corporation to notify any person of such revision or changes.
Please follow these safety instructions for best performance, and long life for your monitor
Power Safety
- The AC plug isolates this equipment from the AC supply.
- The power supply cord serves as a power disconnect device for pluggable equipment. The socket outlet should be installed near the equipment and be easily accessible.
- This product should be operated from the type of power indicated on the marked label. If you are not sure of the type of power available, consult your dealer or local power company.
Care And Cleaning
- Cleaning. Always unplug your monitor from the wall outlet before cleaning. Clean the LCD monitor surface with a lint-free, non-abrasive cloth. Avoid using any liquid, aerosol or glass cleaners.
- Slots and openings on the back or top of the cabinet are for ventilation. They must not be blocked or covered. Your monitor should never be placed near or over a radiator or heat source, or in a built-in installation unless proper ventilation is provided.
- Never push objects or spill liquid of any kind into this product.
Servicing
- Do not attempt to service this product yourself, as opening or removing covers may expose you to dangerous voltages or other risks. If any of the above mentioned misuse or other accident such as dropping or mishandling occurs, contact qualified service personnel for servicing.
i Table of Contents
Getting started 5
Getting to know your Monitor 7
Front View 7
Back View (1) 7
Back View (2): Locations of plugs & sockets 8
Side View 8
How to install your monitor hardware 9
Adjusting the viewing angle 12
Getting the most from your BenQ monitor 13
How to install the monitor on a new computer ....14
How to upgrade the monitor on an existing computer 15
How to install on Windows XP systems ....16
How to install on Windows 2000, ME, & 98 systems ....17
How to complete the Windows Upgrade Device Driver Wizard 18
How to adjust the screen resolution 20
How to adjust the screen refresh rate 21
How to set the picture optimization 22
How to adjust your Monitor 23
A Look at the Control Panel 23
Hot Key Mode 24
Troubleshooting 33
Frequently Asked Questions (FAQ) 33
Need More Help? 34
Supported operating modes 35
Specifications 36
① Getting started
When unpacking please check you have the following items. If they are missing or are damaged, please immediately contact the dealer at which you purchased the goods.
| BenQ LCD Monitor | 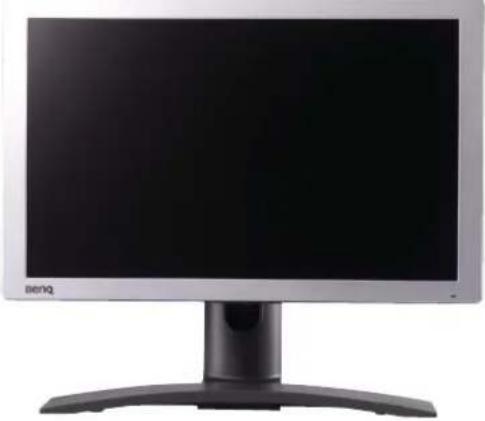 |
| Quick Start Guide |  |
| CD-ROM Disk |  |
| Power Cord | 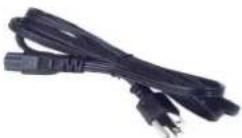 |
| Power Adapter | 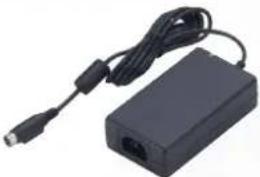 |
| Signal Cable: D-Sub | 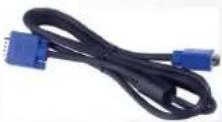 |
| Signal Cable: DVI-D | 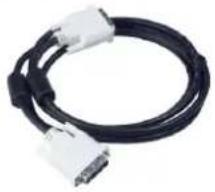 |
| USB Cable | 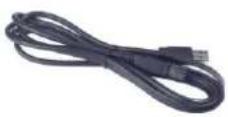 |
| Audio Cable (Optional) |  |
| Speaker Unit: SRS (optional) |  |
| Web Camera Unit (optional) | 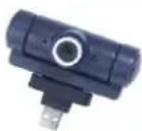 |
② Getting to know your Monitor
Front View
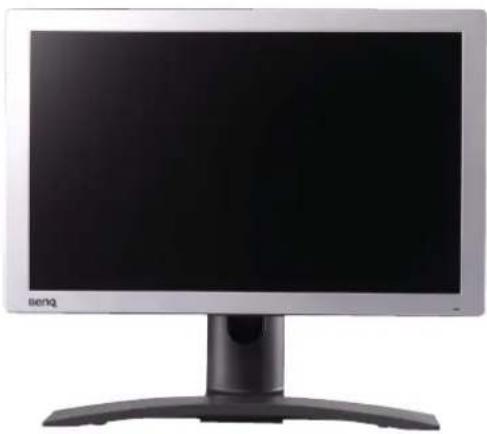
natural_image
Front view of a modern computer monitor with a black screen and curved base (no visible text or symbols)Back View (1)
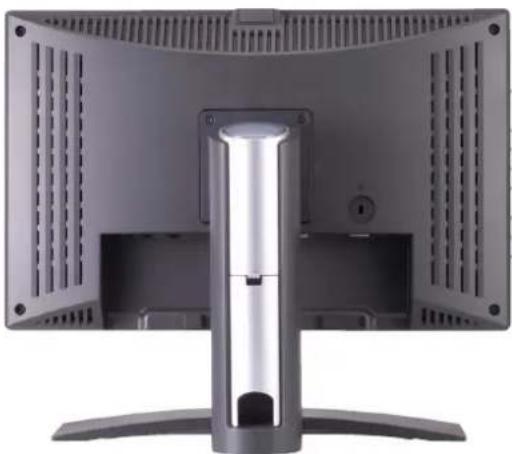
natural_image
Computer monitor with a vertical metallic stand and ventilation slots, shown from front and back angles (no text or symbols visible)Back View (2): Locations of plugs & sockets
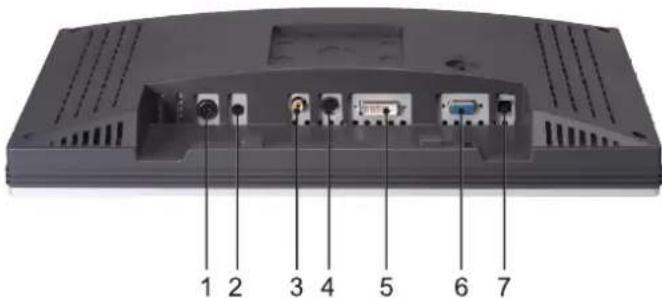
text_image
1 2 3 4 5 6 7- Power AC Input Jack
- Audio Connector
- Composite Video Input
- S-Video Input
- DVI-D Connector
- D-Sub Connector
- USB Connectors
Side View
text_image
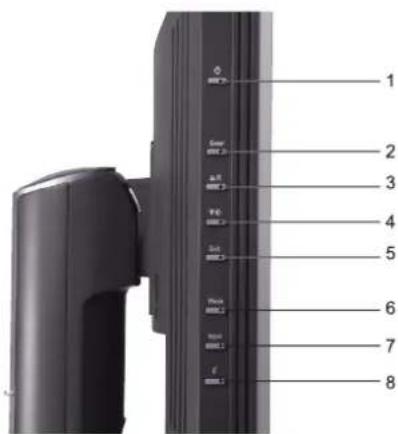
1 2 3 4 5 6 7 8- "Power"
- "Enter" key
- ▲ (Up) key
- ▼ (Down) key
- "Exit" key
- "Mode" key
- "Input" key
- "iKey"
③ How to install your monitor hardware
Make sure that the computer and monitor's power are both turned off. Please go along with the following steps to install your LCD monitor.
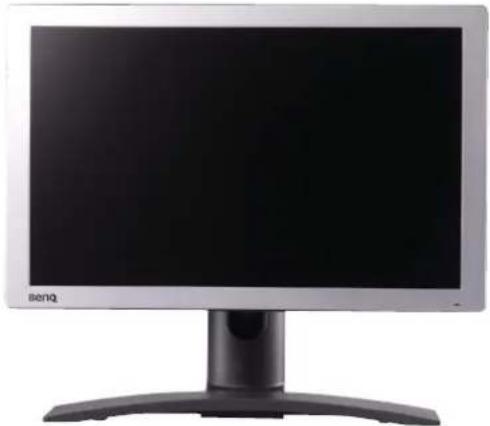
- Unpack the monitor and place it on a stable surface.
natural_image
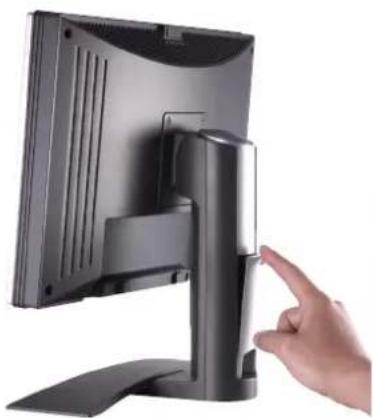
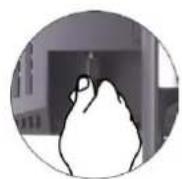
Front view of a modern computer monitor with a black screen and a curved base (no visible text or symbols)- Press the locking tab of the cable cover (as shown) to release the cover.
natural_image
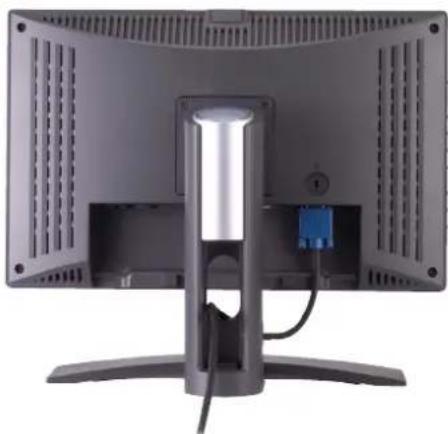
Hand pointing at a black desktop monitor with a stand (no visible text or symbols)- Connect the signal cable (D-Sub or DVI-D) to the monitor as shown.
natural_image
Back view of a computer monitor with a central vertical display and cable, showing no visible text or symbols.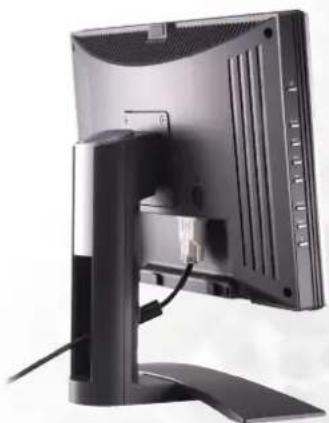
natural_image
Back view of a computer monitor with visible ports and cables (no text or symbols)-
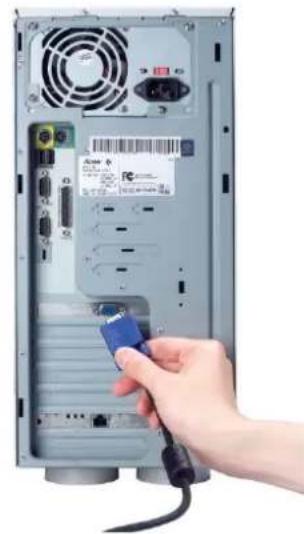
Connect the other end of the signal cable to your computer as shown.
-
Connect the USB cable from your monitor (as shown) to your computer.
-
Connect the power adaptor plug to your monitor as shown.
To disconnect the power, always pull from the plug, not the cord.
natural_image
Hand inserting a USB into a server rack with ports and connectors (no visible text or symbols)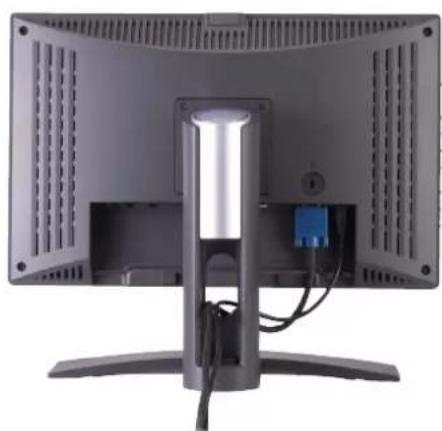
natural_image
Back view of a computer monitor with a central vertical light fixture and cable, showing ventilation grilles and a blue indicator lights (no text or symbols visible)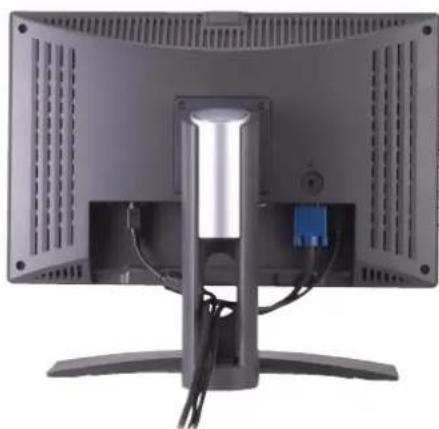
natural_image
Back view of a computer monitor with visible stand and cable, no text or symbols present- Route the cables in order then replace the cable cover as shown.
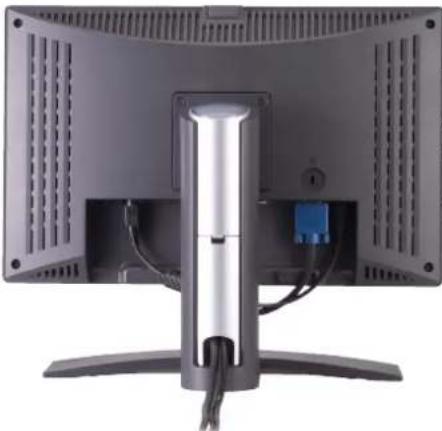
natural_image
Back view of a computer monitor with a vertical stand and cable, showing ventilation grilles and a blue USB port (no text or symbols visible)- Connect the Power Cord to the power adaptor then plug the other end into a nearby wall socket. (Use only power supplies listed in the user's manual)
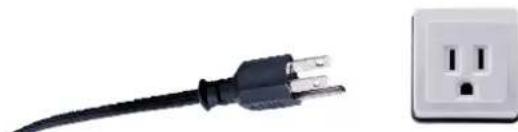
natural_image
Close-up of a black cable with three leads next to a white electrical outlet (no text or symbols visible)- Press the Power button on the side panel of the monitor. The power indicator will light up.
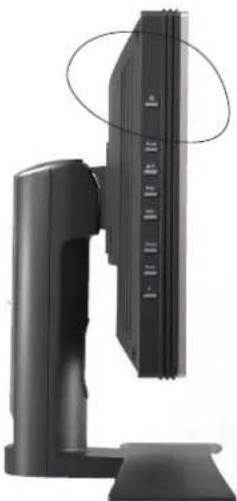
natural_image
Exterior view of a black computer monitor with a stand and a close-up circular annotation (no text or symbols visible)Note: The USB port on the top panel of your monitor is specifically designed for the attachment of your WebCam.
Adjusting the viewing angle
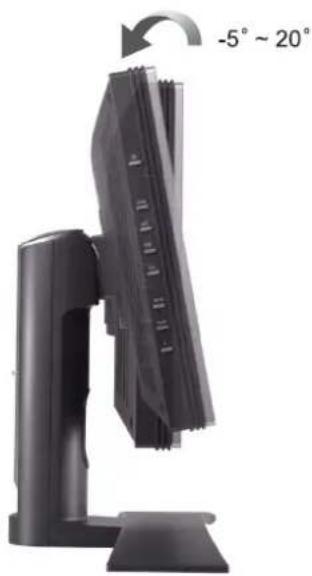
Your LCD monitor is designed with a tilt feature that allows you to achieve your optimal viewing angle.
natural_image
Black office chair with a curved arrow indicating 5°–20° rotation (no text or symbols on the chair itself)④ Getting the most from your BenQ monitor
Monitors and USB hubs
Your BenQ FP783 LCD Monitor is a modern state-of-the-art device. It not only utilizes the latest LCD display technology currently available – it contains a built-in 3 port USB 2.0 hub. Using only one USB 2.0 port on your computer (freeing the others up for other uses), the built-in hub provides close, handy, easy-to-use access for your USB devices.
You could use the USB hub to plug-in your USB keyboard, USB mouse, and USB web camera all at the same time if you wish. Or if you connect your keyboard and mouse directly to your computer, you could use the USB ports on the monitor for connection to your digital camera, digital video camera, USB reader, USB printer, USB memory stick, or any other USB device.
What do I have to do?
All you have to do, is connect the monitor cables as instructed in How to install your monitor hardware of this User's Manual, turn the computer and monitor on, then you're ready to Plug-and-Play with USB, Windows, and your BenQ LCD Monitor's USB hub.
Windows 2000 and later comes with integrated USB support. It will automatically detect and identify your USB devices, and install the necessary drivers for them to work. If your USB device was accompanied by the manufacturer's driver or custom software for the device, you need only point Windows in the direction of that driver, and Windows will install it for you.
How do I gain the most benefit from my new monitor?
To gain the most benefit from your new BenQ color LCD flat screen monitor, you should install the custom BenQ LCD Monitor driver software as provided on the BenQ LCD Monitor CD-ROM.
The circumstances under which you connect and install your BenQ LCD Monitor will determine which process you need to follow to successfully install the BenQ LCD Monitor driver software. These circumstances relate to which version of Microsoft Windows you are using, and whether you are connecting the monitor and installing the software onto a new computer (without existing monitor driver software), or whether you are upgrading an existing installation (which already has existing monitor driver software) with a newer monitor.
In either case however, the very next time you turn on your computer (after connecting the monitor to your computer), Windows will automatically recognise the new (or different) hardware, and will launch its Found New Hardware wizard.
Follow the wizard instructions until it asks you to select a monitor model. At that point, click the Have Disk button, insert the BenQ LCD Monitor CD-ROM and select the appropriate monitor model. Further details and step-by-step instructions for both an automatic (new) or upgrade (existing) installation follow. See:
- How to install the monitor on a new computer.
- How to upgrade the monitor on an existing computer
If you require a User Name and Password to login to your Windows computer, you must be logged on as an Administrator or as a member of the Administrators group in order to install the monitor driver software. Furthermore, if your computer is connected to a network which has security access requirements, network policy settings may prevent you from installing software on your computer.
How to install the monitor on a new computer
This instruction details the procedure for selecting and installing the BenQ LCD Monitor driver software on a new computer which has never had a monitor driver installed before. This instruction is only suitable for a computer which has never been used before, and for which the BenQ LCD Monitor is the first ever monitor to be connected to it.
If you are adding the BenQ LCD Monitor to an existing computer that has already had another monitor connected to it (and has monitor driver software installed), you should not be following these instructions. You should instead be following the instructions for How to upgrade the monitor on an existing computer.
- Follow the instructions in How to install your monitor hardware.
When Windows (2000 or later) starts, it will automatically detect the new monitor and launch the Found New Hardware Wizard. Follow the prompts until it displays the option to Install Hardware Device drivers.
-
Insert the BenQ LCD Monitor CD-ROM into a CD drive on the computer.
-
Check Search for a suitable driver for my device option, and click Next.
-
Check the option for CD-ROM drives (unchecked all others) and click Next.
-
Look to confirm that the wizard has selected the correct name of your monitor as "BenQ FP71W" and click Next.
-
Click Finish.
Windows will continue installing other devices it finds. If you connected the USB 2.0 hub cable to a suitable USB 2.0 port on the computer, Windows will automatically detect it and install the appropriate drivers for it. You need not do anything more to get the hub to work for you.
- Restart the computer.
How to upgrade the monitor on an existing computer
This instruction details the procedure for manually updating the existing monitor driver software on your Microsoft Windows computer. It is currently tested as compatible (and recommended only) for Windows 98, Windows ME, Windows 2000, and Windows XP Operating System (OS).

The BenQ LCD Monitor driver for your model may well function perfectly with other versions of Windows, however, as at the time of writing, BenQ has done no testing of this driver on other versions of Windows and cannot guarantee its operation on those systems.
Installing monitor driver software involves selecting an appropriate information file (.inf) on the BenQ LCD Monitor CD-ROM for the particular model monitor you have connected, and letting Windows install the corresponding driver files from the CD. You need only steer it in the right direction. Windows has an Upgrade Device Driver Wizard to automate the task and guide you through the file selection and installation process.
See:
- How to install on Windows XP systems.
• How to install on Windows 2000, ME, & 98 systems.
How to install on Windows XP systems
1. Open Display Properties.
The quickest shortcut to Display Properties is through the Windows desktop.
Right-click the desktop and select Properties from the popup menu.
Alternatively, the Windows menu to Display Properties is located in Control Panel.
In Windows XP version, Control Panel is located directly under the main Start menu item.
The menu options displayed will depend upon which type of view is selected for your system.
• Under the Classic view, click Start | Control Panel | Display.
- Under the Category view, click Start | Control Panel | Appearance and Themes | Change the screen resolution.
The Display Properties window will display.
2. Click the Settings tab and the Advanced button.
The Advanced Display Properties window will display.
3. Click the Monitor tab and select the 'Plug and Play Monitor' from the list.
If there is only one monitor in the list, it will already be selected for you.
4. Click the Properties button.
The Monitor Properties window will display.
If the driver provider is listed as BenQ, and the model matches that of your new monitor, the proper drivers are already installed, and you need do nothing further. Cancel out of these property windows.
However, if BenQ is not listed as the manufacturer, or the correct model is not currently shown, you will need to continue with these instructions.
5. Click the Driver tab and the Update Driver button.
The Hardware Update Wizard will display. Follow the wizard instructions noting the steps below:
6. Insert the BenQ LCD Monitor CD-ROM into a CD drive on the computer you attached the monitor to.
7. Check the option 'Install from a list or specific location' and click Next.
8. Check the option 'Search for the best driver in these locations' and also check 'Search removable media', then click Next.
Please wait while the wizard searches for drives and the BenQ LCD Monitor CD inserted in step 6. When complete, the wizard should have found and selected the BenQ driver on the CD appropriate to your monitor model, in this case 'BenQ FP71W' in the location 'd:\driver\FP71W.inf' or similar.
The drive letter for your CD drive may differ from the example above depending upon your system – it may be 'D:' or 'E:' or 'F:' etc.
9. Select (single-click) the file named 'BenQ FP71W' on the CD, and click the Next button.
This will copy and install the appropriate monitor driver files to your computer.
10. Click Finish.
This will close the wizard and return you to the Monitor Properties window, now renamed BenQ FP71W Properties.
11. Click Close, OK, and OK.
This will close the Display Properties windows. You do not need to restart Windows XP, as the BenQ LCD monitor drivers will operate immediately with no further action required by you.
How to install on Windows 2000, ME, & 98 systems

You do not need to follow this instruction if you are installing onto a computer which has a Windows XP (or later) version system. In that case, see the instructions at How to install on Windows XP systems.
- Open Display Properties.
The quickest shortcut to Display Properties is through the Windows desktop.
Right-click the desktop and select Properties from the popup menu.
Alternatively, the Windows menu to Display Properties is located in Control Panel.
In Windows 2000, ME, & 98 versions, Control Panel is located under the Settings menu item.
Click Start | Settings | Control Panel | Display.
The Display Properties window will display.
- Click the Settings tab and the Advanced button.
The Advanced Display Properties window will display.
- In Windows 2000, click the Monitor tab and the Properties button.
The Monitor Properties window will display.
Alternatively, on Windows ME or 98, click the Monitor tab and the Change button.
This will jump you directly to the Upgrade Device Driver Wizard, skipping the next step.
- In Windows 2000, click the Driver tab and the Update Driver button.
The Upgrade Device Driver Wizard will display.
See How to complete the Windows Upgrade Device Driver Wizard.
How to complete the Windows Upgrade Device Driver Wizard
-
Load the BenQ LCD Monitor CD-ROM which came with your monitor.
Insert the CD-ROM into a CD drive on the computer you attached the monitor to.
The autorun User's Guide language selection page will display in your web browser.
You can select a language and view the online version of this manual from the next window.
You could then print it out for reference if you wish to work off-line. When you're ready, Cancel the browser as it is not required for the Windows Upgrade Device Driver Wizard. -
Launch the Windows Upgrade Device Driver Wizard and click Next.
For instructions, see How to install on Windows 2000, ME, & 98 systems.
-
Check the option 'Display a list of known drivers ...' and click Next.
-
Click the Have Disk button.
The Install From Disk window will display.
- Click the Browse button and navigate to the BenQ LCD Monitor CD-ROM.
This is the CD you loaded in step 1 above. The CD Drive will have a Windows designated drive letter (like D: or E: or F:). Select the drive letter corresponding to the drive you put the CD into.
- Double-click the folder labelled 'Driver'.
The contents of the 'Driver' folder will display.
- Click the Open button.
This will return you to the Install from Disk window, and it will have entered the address to the BenQ LCD Monitor CD 'Driver' folder into the field titled 'Copy manufacturer's files from:'.
The field will contain something like "D:\Driver", or "E:\Driver", or "F:\Driver".
- Click the OK button.
This will return you to the Upgrade Device Driver Wizard.
-
Select (single-click) the file named BenQ FP71W, and click the Next button.
-
Click Next.
This will copy the appropriate monitor driver files to your computer.
- Click Finish.
On Windows 2000, this will close the wizard and return you to the Monitor Properties window, now renamed 'BenQ FP71W Properties'.
Alternatively, on Windows ME and 98, this will return you to the Advanced Display Properties window, skipping the next step.
Should you wish to do so, this is where you can change the screen refresh rate and other monitor properties to suit your needs. See How to adjust the screen refresh rate for details.
- In Windows 2000, click Close.
This will close the BenQ FP71W Properties window and return you to the Advanced Display Properties window.
Should you wish to do so, this is where you can change the screen refresh rate and other monitor properties to suit your needs. See How to adjust the screen refresh rate for details.
- In Windows 2000, click OK, or in Windows 98 or ME, click Close.
This will close the Advanced Display Properties window, and return you to the Display Properties window.
Should you wish to do so, this is where you can change the screen resolution (area and color).
See How to adjust the screen resolution for details.
14. Click OK.
This will close the Display Properties window, and if you made any changes to the screen resolution, Windows 2000 will prompt you for confirmation to effect the changes, and further confirmation to accept the changes. Click OK and Yes respectively.
Alternatively, Windows ME or 98 will ask you if want to make the changes and reboot or not reboot. You should select the reboot option as this causes Windows to load the new drivers when it next restarts.
⑤ How to adjust the screen resolution
Due to the nature of liquid crystal display (LCD) technology, the picture resolution is always fixed. The best possible picture for your FP71W is achieved with a resolution of 1280x768. This is called “Native Resolution” or maximal resolution – that is, the clearest picture. Lower resolutions are displayed on a full screen through an interpolation circuit. However flaws do occur with the interpolated resolution.

To take full advantage of LCD technology you should select the native resolution setting of 1280x768.
- Open Display Properties and select the Settings tab. You can open Display Properties by right-clicking on the Windows desktop and selecting Properties from the pop-up menu.
- Use the slider in the 'Screen area' section to adjust the screen resolution. Select the recommended resolution of 1280x768 then click Apply.

If you select some other resolution, be aware that this other resolution is interpolated and may not accurately display the screen image as well as it could do at the native resolution setting.
- Click OK then Yes.
- Close the Display Properties window.
⑥ How to adjust the screen refresh rate
You don't have to choose the highest possible refresh rate on an LCD display, because it is not technically possible for an LCD display to flicker. The best results are obtained by using the factory modes already set in your computer. There is a table with the factory modes in the specification section of this User's Manual.

You can choose 60, 70 and 75 Hertz, (but not 72Hz) for the native resolution of 1280x768.
- Double click the Display icon in Control Panel.
- From the Display Properties window, select the Settings tab and click the Advanced button.
- Select the Adapter tab, and select an appropriate refresh rate to match one of the applicable factory modes as listed in the specification table.
- Click Change, OK, then Yes.
- Close the Display Properties window.
⑦ How to set the picture optimization
The easiest way to obtain an optimal display is to use the i key function. Press the i key to optimize and adjust the screen settings automatically for you. Refer to How to adjust your Monitor for button locations and functionality.
If you wish to, you can always adjust the screen settings manually using the buttons on the monitor panel. To assist you in this endeavour, BenQ has provided a screen test image utility which you can use to check for screen color, grayscale and line gradient display.
- Run the test program auto.exe from CD-ROM. You could also use any other image, such as the desktop of your operating system. However, we recommend that you use auto.exe. As you run auto.exe, a test pattern displays.
- Press the Enter key to access the monitor On-Screen Display (OSD) menu.
- If you notice a vertical noise, press the ▲ or ▼ keys to select Geometry and press the Enter key. Then press the ▲ or ▼ keys to select Pixel Clock and press the Enter key again. Then, press the ▲ or ▼ key to adjust the monitor until the noise disappears.
- If you notice a horizontal noise, press the ▲ or ▼ keys to select Geometry and press the Enter key. Then press the ▲ or ▼ keys to select Phase and press the Enter key again. Then, press ▲ or ▼ keys to adjust the monitor until the noise disappears.
To make sure the ikey function performs well, you have to select one of the supported modes. If the ikey does not work properly and the NON PRESET MODE message is on the OSD, it means you are not using one of the supported modes. Please set your monitor to use one of the supported modes as listed at the end of this manual.
⑧ How to adjust your Monitor
A Look at the Control Panel
text_image
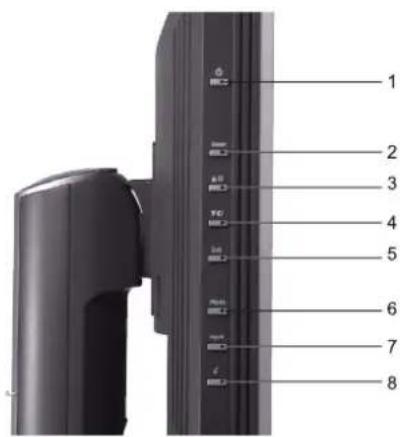
1 2 3 4 5 6 7 8There are 8 keys for user's control including "Enter", "▲", "▼", "Exit", "Mode", "Input", "iKey" and a power switch. The following descriptions are the introduction of these keys & switch.
-
"Power": Turn the power on or off.
-
"Enter" key: Activate OSD, enter sub menu, select items, confirm selection.
-
(Up) key: For Up/Increase adjustment. The key is also the hot key for Brightness.
-
▼ (Down) key: For Down/Decrease adjustment. The key is also the hot key for Contrast.
-
"Exit" key: Back to previous menu or exit OSD.
-
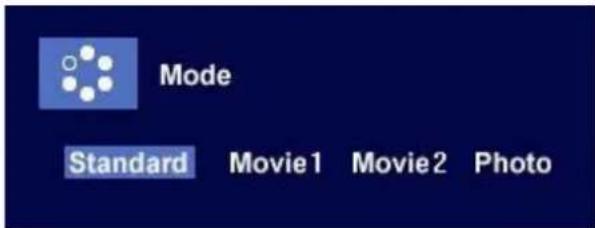
"Mode" key: Switch between different modes, including Standard, Movie 1, Movie 2, and Photo.
-
"Input" key: Switch the input signal.
-
"iKey": Adjust vertical position, phase, horizontal position and pixel clock automatically.
Hot Key Mode
Brightness and Contrast hot key
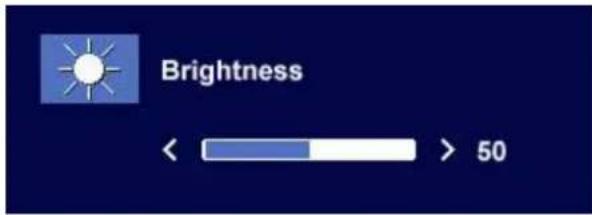
Press ▲ to enter Brightness menu, press ▲ or ▼ key to adjust the degree of brightness and press “Exit” to exit OSD.
Press ▼ to enter Contrast menu, press ▲ or ▼ key to adjust the degree of Contrast and press “Exit” to leave the OSD.
text_image
Brightness << > 50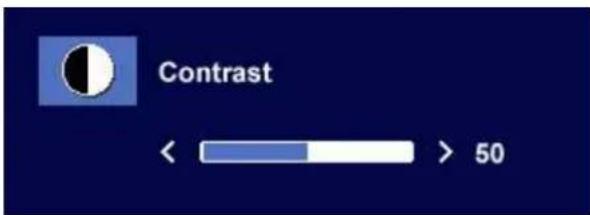
text_image
Contrast << 50Input hot key
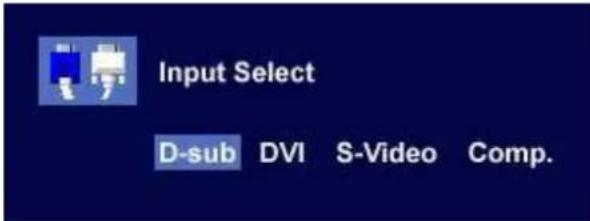
Press the "Input" key to enter Input menu, and press ▲ or ▼ key to indicate the input source and press "Enter." When done, press "Exit" to leave the OSD.
text_image
Input Select D-sub DVI S-Video Comp.Mode hot key
Main Menu Mode
Press the Exit key to enter the Mode menu. Keep pressing the key to switch between these four options: Standard, Movie 1, Movie 2, and Photo. The specified mode will optimise the image properties to best suit the image type. Standard mode is suggested for basic PC application; Movie 1, enhancing color and contrast level, is for viewing videos, while the Movie 2 mode best suits landscape-specific videos; Photo is designed for viewing still images. The newly defined settings will be activated spontaneously.
When the adjustment is done, the Mode menu will disappear in 2 to 3 seconds.
text_image
Mode Standard Movie1 Movie2 PhotoControl Functions Available in Main Menu
Main Menu
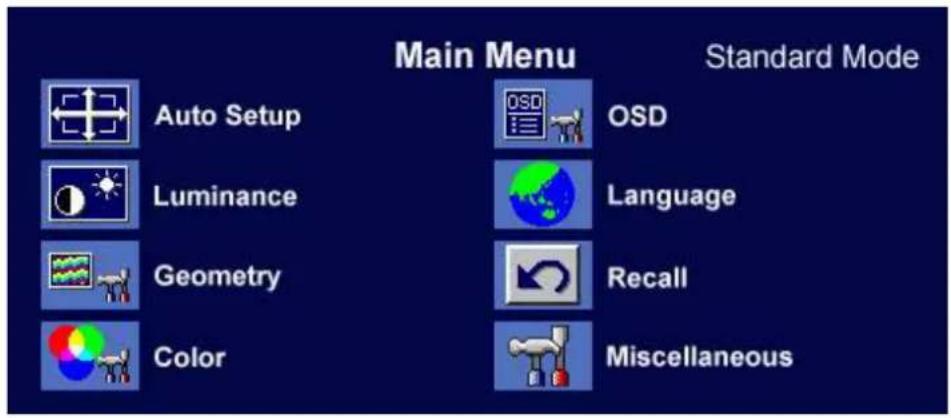
The operation mode is displayed in the top right corner of the main menu.
text_image
Main Menu Standard Mode Auto Setup Luminance Geometry Color OSD Language Recall MiscellaneousLuminance sub menu
text_image
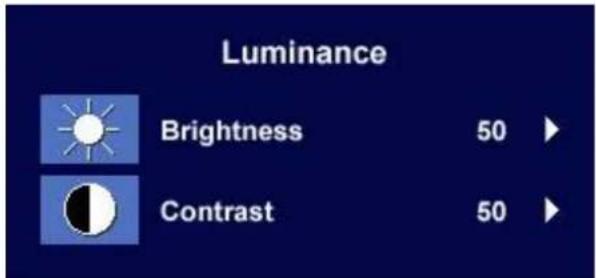
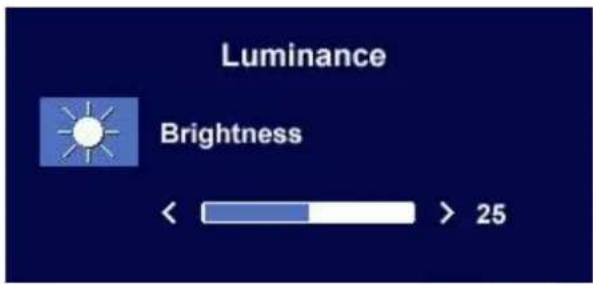
Luminance Brightness 50 ▶ Contrast 50 ▶Press ▲ or ▼ key to adjust the degree of Brightness, press “Exit” to return to the previous menu.
Press ▲ or ▼ key to adjust the degree of Contrast, press “Exit” to return to the previous menu.
text_image
Luminance Brightness << > 25
text_image
Luminance Contrast << 50 >Geometry sub menu
text_image
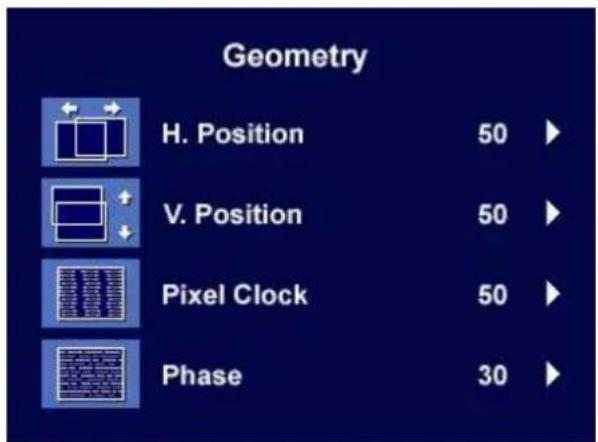
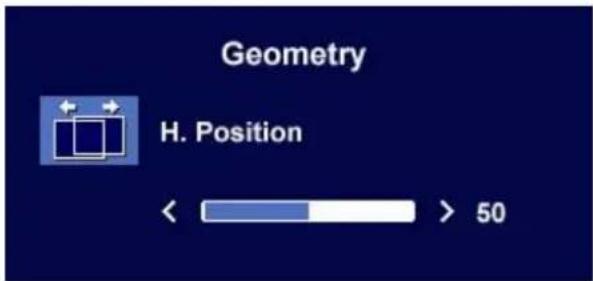
Geometry H. Position 50 ▶ V. Position 50 ▶ Pixel Clock 50 ▶ Phase 30 ▶Press ▲ or ▼ key to adjust the Horizontal Position, press "Exit" to return to previous menu.
Press ▲ or ▼ key to adjust the Vertical Position, press "Exit" key to return to previous menu.
Press ▲ or ▼ key to adjust the value of the Pixel Clock, press “Exit” to return to previous menu.
Press ▲ or ▼ key to adjust the degree of Phase, press “Exit” to return to previous menu.
text_image
Geometry H. Position < > 50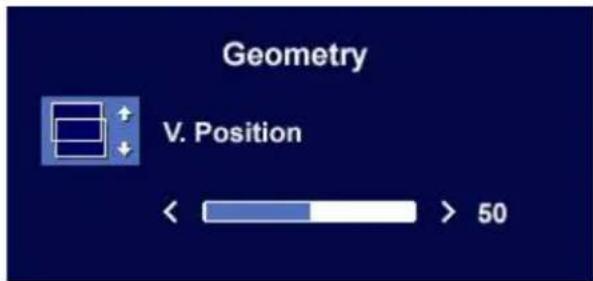
text_image
Geometry V. Position << > 50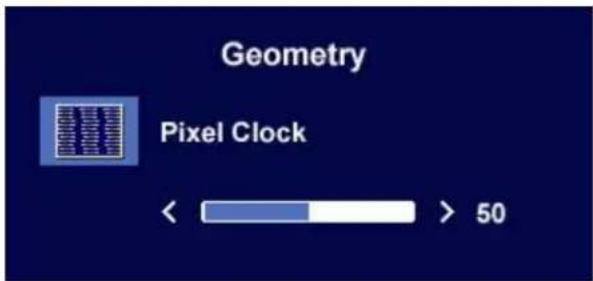
text_image
Geometry Pixel Clock < > 50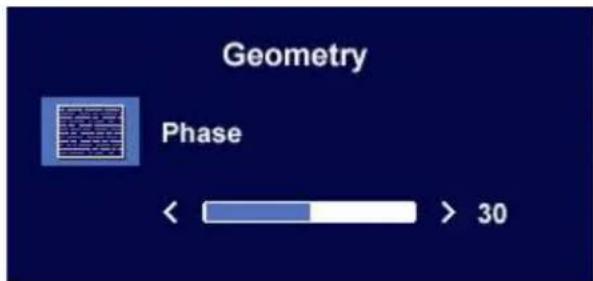
text_image
Geometry Phase << > 30Color sub menu
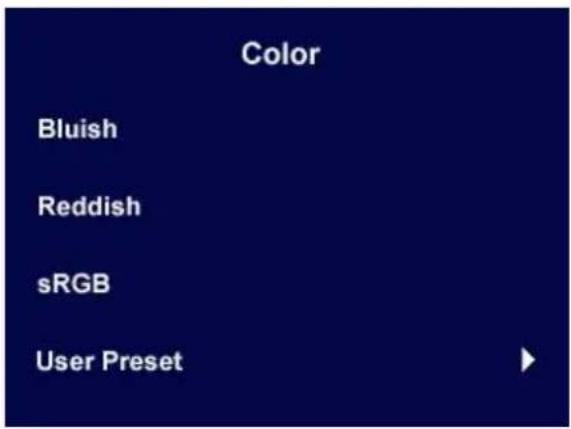
text_image
Color Bluish Reddish sRGB User PresetUser Preset:
User may set the color balance of Red, Green and Blue.
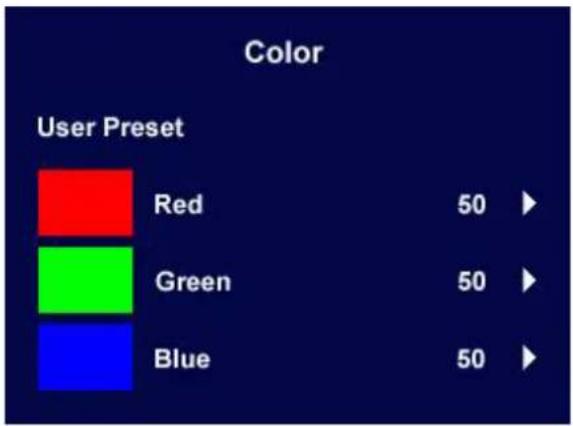
text_image
Color User Preset Red 50 ▶ Green 50 ▶ Blue 50 ▶OSD sub menu
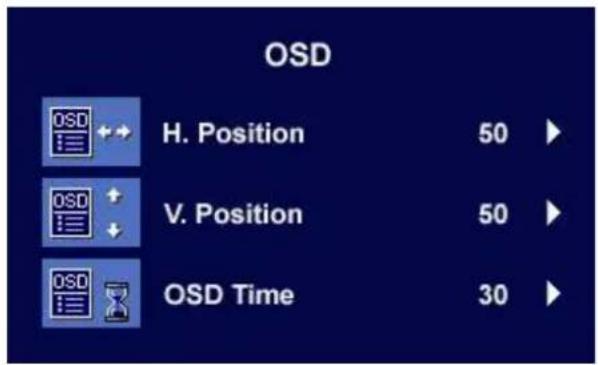
text_image
OSD H. Position 50 V. Position 50 OSD Time 30Press ▲ or ▼ key to adjust the Horizontal Position of the OSD, press “Exit” to return to previous menu.
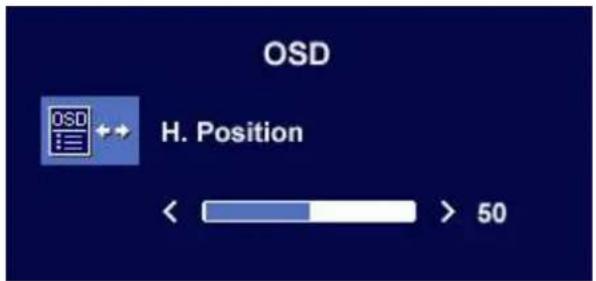
text_image
OSD H. Position << 50 >Press ▲ or ▼ key to adjust the Vertical Position of the OSD, press “Exit” to return to previous menu.
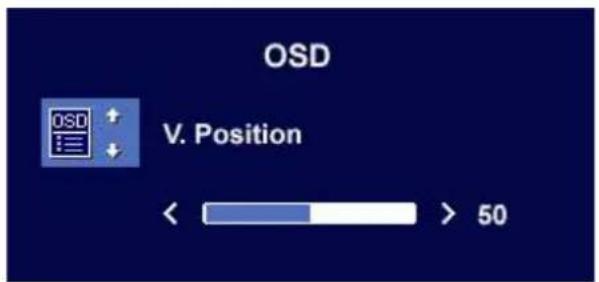
text_image
OSD V. Position << 50Press ▲ or ▼ key to adjust the display time of the OSD, press “Exit” to return to previous menu.
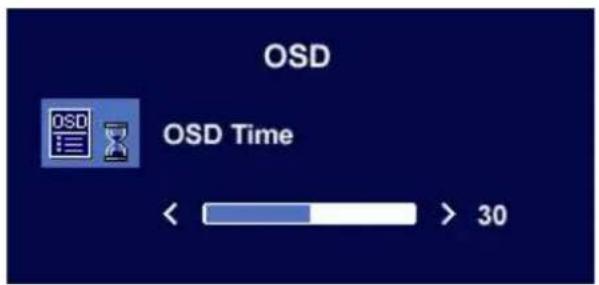
text_image
OSD OSD Time << > 30Language sub menu
| Language | |
| English | Espanol |
| Francais | 日本語 |
| Deutsch | 繁體中文 |
| Italiano | 简体中文 |
Recall sub menu
text_image
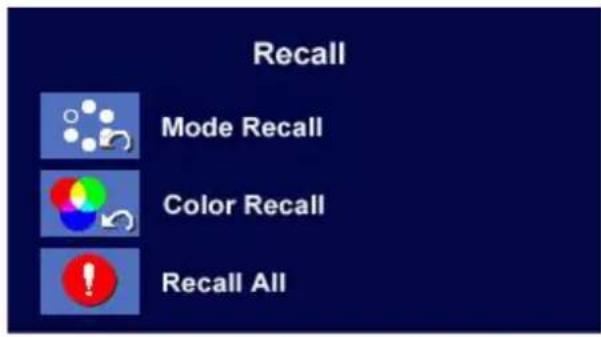
Recall Mode Recall Color Recall Recall AllPress ▲ or ▼ key to confirm Mode Recall.
When you choose "Yes", it will recall the current mode to default settings.
Press "Exit" will return to previous menu.
text_image
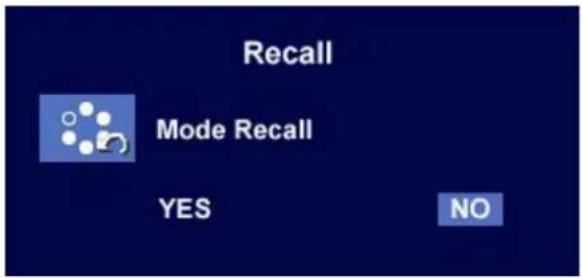
Recall Mode Recall YES NOPress ▲ or ▼ key to confirm Color Recall.
When you choose "Yes", it will recall the current color settings to default settings.
Press "Exit" will return to previous menu.
text_image
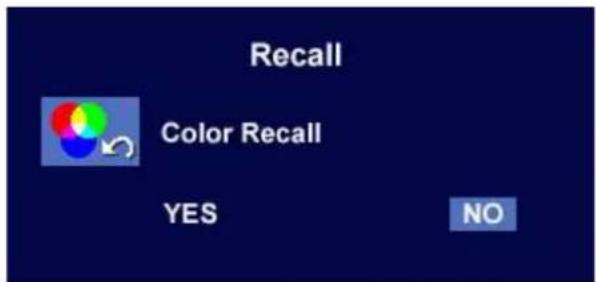
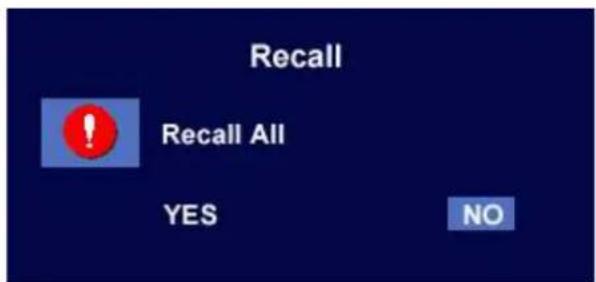
Recall Color Recall YES NOPress ▲ or ▼ key to confirm Recall All. When you choose "Yes", it will recall all the current settings to default settings.
Press "Exit" will return to previous menu.
text_image
Recall ! Recall All YES NOMiscellaneous sub menu
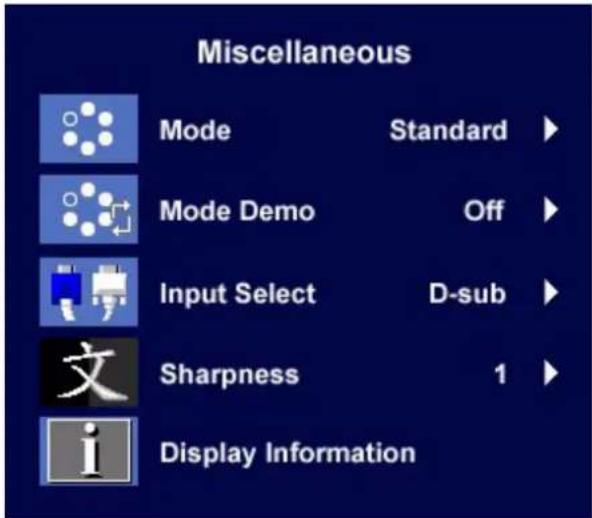
text_image
Miscellaneous Mode Standard Mode Demo Off Input Select D-sub Sharpness 1 Display InformationMode:
Select your desired mode from these four options: Standard, Movie 1, Movie 2, and Photo. The specified mode will optimise the image properties to best suit the image type. Standard mode is suggested for basic PC application; Movie 1, enhancing color and contrast level, is for viewing videos, while the Movie 2 mode best suits landscape-specific videos; Photo is designed for viewing still images.
When done, press "Enter" to activate the settings. To return to previous menu, press "Exit."
Mode Demo:
Mode Demo allows you to preview the effects of the selected Mode from Mode menu.
When you choose "On" and press "Enter" to activate Mode Demo, the display will be divided into two windows; the left window demonstrates images of Standard mode, while the right window presents the images under the specified mode.
To return to previous menu, press "Exit."
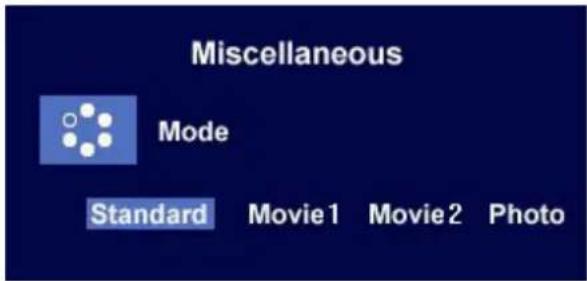
text_image
Miscellaneous Mode Standard Movie 1 Movie 2 Photo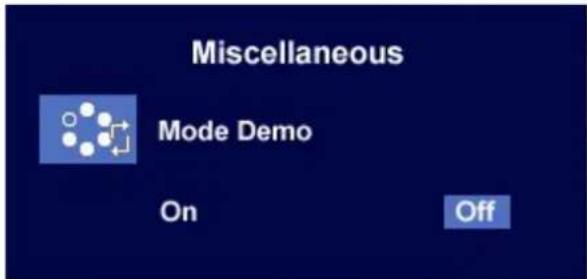
text_image
Miscellaneous Mode Demo On OffInput Select:
Select D-sub (analog), DVI (digital), S-Video, or Composite input to activate the new settings.
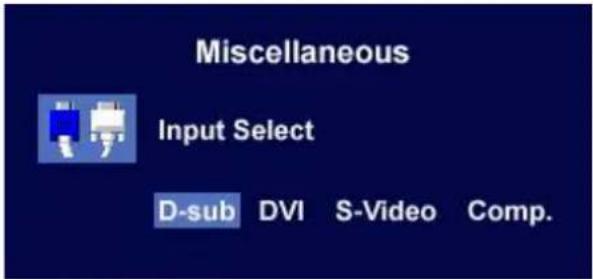
text_image
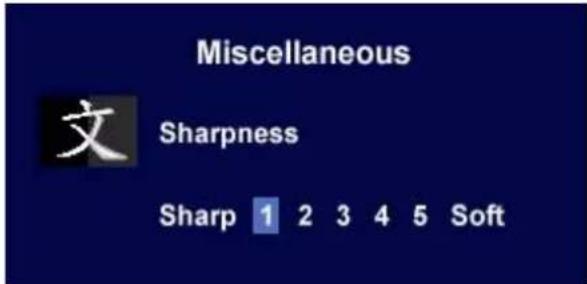
Miscellaneous Input Select D-sub DVI S-Video Comp.Sharpness:
Press ▲ or ▼ key to adjust the degree of Sharpness and activate the new settings.
text_image
Miscellaneous 文 Sharpness Sharp 1 2 3 4 5 SoftDisplay Information.
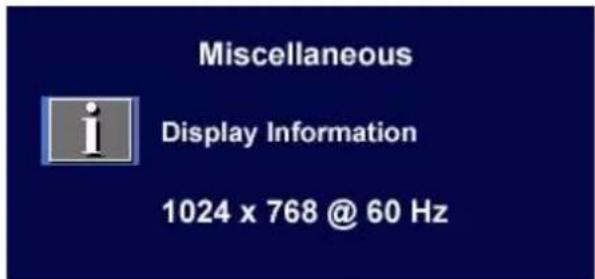
text_image
Miscellaneous Display Information 1024 x 768 @ 60 Hz
Troubleshooting
Frequently Asked Questions (FAQ)
⑦ The image is blurred:
Read the How to adjust the screen resolution section, and then select the correct resolution, refresh rate and make adjustments based on these instructions.
How do you use a VGA extension cable?
Remove the extension cable for the test. Is the image now in focus? If not, optimize the image by working through the instructions in the How to adjust the screen refresh rate section It is normal for blurring to occur due to conduction losses in extension cables. You can minimize these losses by using an extension cable with better conduction quality or with a built-in booster.
Does the blurring only occur at resolutions lower than the native (maximum) resolution?
Read the How to adjust the screen resolution section. Select the native resolution.
⑦ Pixel errors can be seen:
One of several pixels are permanently black, one or more pixels are permanently white, one or more pixels are permanently red, green, blue or another color.
- Clean the LCD screen.
•Cycle power on-off.
- These are pixels that are permanently on or off and is a natural defect that occurs in LCD technology.
⑦ The image has a faulty coloration:
It has a yellow, blue or pink appearance.
On the monitor, press “Enter” key and press ▲ or ▼ key to move to the “Recall” icon and press “Enter” key to enter “Recall” sub menu. Press ▲ or ▼ key to select “Color Recall” and select “Yes” in “Color Recall” sub menu, then press “Enter” key to recall to factory settings. If the image is still not correct and the OSD also has faulty coloration, this means one of the three primary colors is missing in the signal input. Now check the signal cable connectors. If any pin is bent or broken off, please contact your dealer to get necessary support.
⑦ No image can be seen:
Is the prompt on the display illuminated in green?
If the LED is illuminated in green and there is a message “Out of Range” on the screen, this means you are using a display mode that this monitor does not support, please change the setting to one of the supported mode. Please read “Supported operating modes” section.
Is the prompt on the display illuminated in orange?
If the LED is illuminated in orange, the power management mode is active. Press any button on the computer keyboard or move the mouse. If that does not help, check the signal cable connectors. If any pin is bent or broken off, please contact your dealer to get necessary support.
Is the prompt on the display not illuminated at all?
Check the power supply mains socket, the external power supply and the mains switch.
⑦ The image is distorted, flashes or flickers:
Read the How to adjust the screen resolution section and then select the correct resolution, refresh rate and make adjustments based on these instructions.
⑦ The image is displaced in one direction:
Read the How to adjust the screen resolution section and then select the correct resolution, refresh rate and make adjustments based on these instructions.
Need More Help?
If your problems remain after checking this manual, please contact your place of purchase or e-mail us at: Support@BenQ.com
10 Supported operating modes
| Incoming display mode (Input timing) | Multi-scan operation | ||||
| Resolution | Horizontal Frequency (KHz) | Vertical Frequency (Hz) | Pixel Frequency (MHz) | Comment | Actual dis-play resolu-tion |
| 640x350 31. | 47 70.08 25.17 | DOS | full screen 1280 x 768 | ||
| 720x400 31. | 47 70.08 28.32 | DOS | |||
| 640x480 31. | 47 60.00 25.18 | DOS | |||
| 640x480 35. | 00 67.00 30.24 | Macintosh | |||
| 640x480 37. | 86 72.80 31.50 | VESA | |||
| 640x480 37. | 50 75.00 31.50 | VESA | |||
| 800x600 37. | 88 60.32 40.00 | VESA | |||
| 800x600 48. | 08 72.19 50.00 | VESA | |||
| 800x600 46. | 87 75.00 49.50 | VESA | |||
| 832x624 49. | 72 74.55 57.29 | Macintosh | |||
| 1024x768 48. | 36 60.00 65.00 | VESA | |||
| 1024x768 56. | 48 70.10 75.00 | VESA | |||
| 1024x768 60. | 02 75.00 78.75 | VESA | |||
| 1024x768 60. | 24 74.93 80.00 | Macintosh | |||
| 1280x768 48. | 36 60.00 65.00 | VESA | |||
| 1280x768 56. | 48 70.10 75.00 | VESA | |||
| 1280x768 60. | 02 75.00 78.75 | VESA | |||
| 1280x768 60. | 24 74.93 80.00 | Macintosh | |||
- Modes not listed in the table may not be supported. For an optimal picture, we recommended you choose a mode listed in the table above.
- There are 18 available modes that are compatible with Windows.
- Image disruption may occur as a result of signal frequency differences from VGA cards which do not correspond with the usual standard. This is not, however, an error. You may improve this situation by altering an automatic setting or by manually changing the phase setting and the pixel frequency from the “Geometry” menu.
- If you switch off the monitor, interference lines can occur on your screen. But do not be concerned about this, as it is normal.
- To extend the service life of the product, we recommend that you use your computer's power management function.
⑪ Specifications
| Model FP71W | |
| Display type | 17.0", active, TFT |
| Viewable diagonal | 43.2 cm |
| Native (maximum) resolution | 1280 x 768 |
| Colors | 16.2 million |
| Contrast / Brightness | 800:1 / 450 cd/m2 |
| Response time | 25 ms |
| Viewing angle(left/right, up/down) | 170/170, 170/170 (CR=10) |
| Line frequency | 30 - 83 kHz Multi- frequency monitor |
| Image frequency | 50 - 76 Hz modes within these parameters |
| Image checks | Digital, Screen OSD Technology, iKey(automatic image setting) |
| Controls | 7 buttons and iKey. |
| Functions | Contrast, brightness, vert. & hor. image position, phase, pixel clock, color balance, color palette, choice of language (8 language OSD), OSD position, status indicator, display-mode availability |
| Power Adapter | BenQ LSE0202C2090 |
| Power Management | VESA DPMS, EPA |
| Max. power consumption | 70 Watt Max (without speaker) |
| 90 Watt Max (with speaker) | |
| DC input voltage | 20 V |
| DC input current | 4.5 A |
| Power saving mode | 2 W |
 This product comply with ENERGY STAR®Program Requirements Computer Monitors.Version 4.0 This product comply with ENERGY STAR®Program Requirements Computer Monitors.Version 4.0 | |
| Input signalPCVideoSynchronisation | RGB analog 0.7 Vpp/75 Ohm positiveDigital: DVI-DS-VideoCompositeTTL separate signal connection 15-pin miniD-sub cable |
| Temperature (operating)Air humidity (operating) | 0 °C - 40 °C10% - 90% |
| Certifications TCO 99, TÜV/Ergonomics, TÜV/ GS, FCCClass B, ISO 13406-2, VCCI, UL, CB Report, CE, C-Tick, BSMI, Fimko, GOST | |
| Operating voltageDimensions (W x H x D)Weight | Automatic switched mode power supply, 90-264 V, 47-63Hz417 x 357 x 136.5 mm5.0 kg |