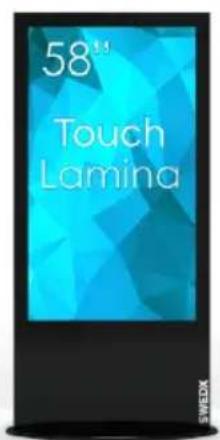
SS-28K1 - Screen Swedx - Free user manual and instructions
Find the device manual for free SS-28K1 Swedx in PDF.


User questions about SS-28K1 Swedx
0 question about this device. Answer the ones you know or ask your own.
Ask a new question about this device
Download the instructions for your Screen in PDF format for free! Find your manual SS-28K1 - Swedx and take your electronic device back in hand. On this page are published all the documents necessary for the use of your device. SS-28K1 by Swedx.
USER MANUAL SS-28K1 Swedx
text_image
40" Super Slim LED-TV
text_image
49" Super Slim LED-TV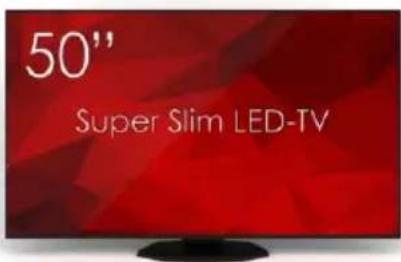
text_image
50" Super Slim LED-TV
text_image
58" Super Slim LED-TV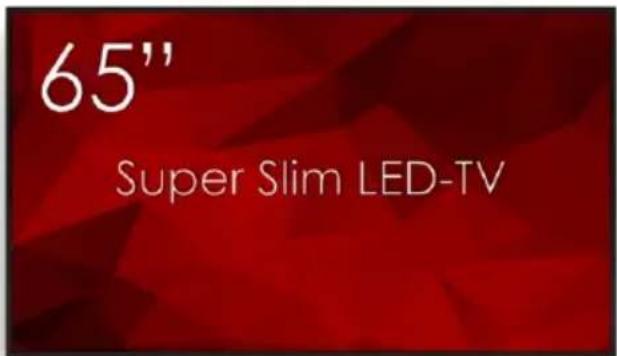
text_image
65" Super Slim LED-TV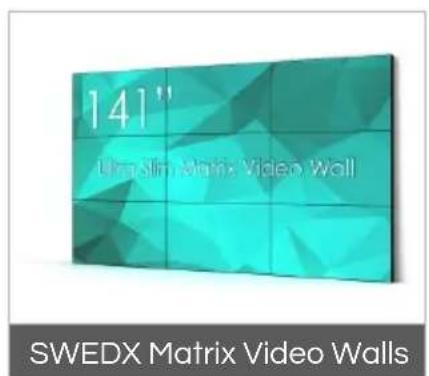
text_image
141" Ultralim Matrix Video Wall SWEDX Matrix Video Walls
text_image
58" Direct SWEDX Direct
text_image
58" Lamina SWEDX Lamina
text_image
75" Digital Signage Screen Digital Signage Screens
text_image
SWEDX offers a wide range of LED-TVs and digital signage products and its accessories. For more information please visit www.swedx.com
text_image
50" v SWEDX v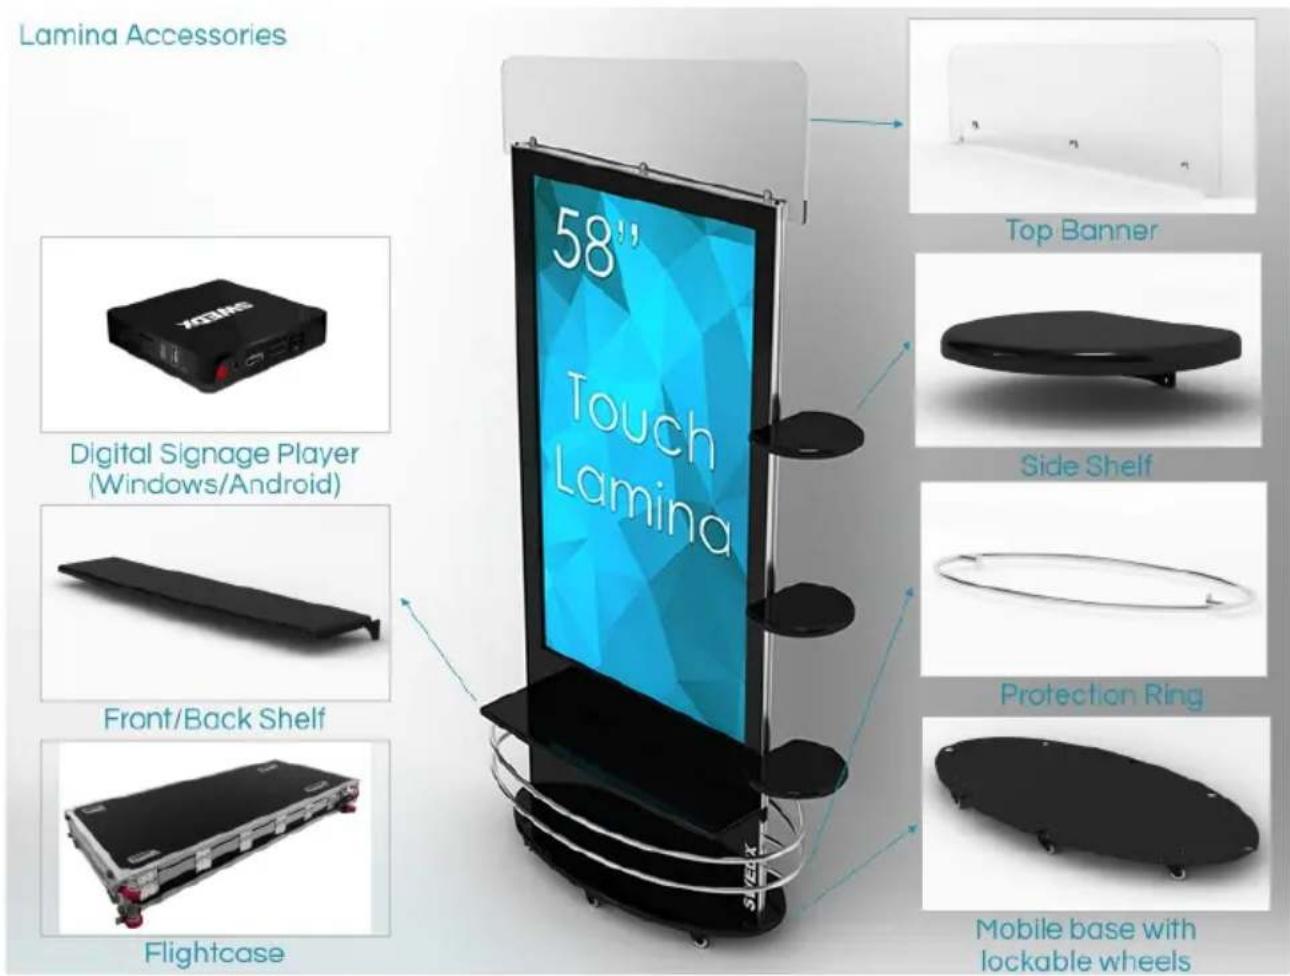
text_image
Lamina Accessories 58" Touch Lamina Top Banner Digital Signage Player (Windows/Android) Side Shelf Front/Back Shelf Protection Ring Flightcase Mobile base with lockable wheelsINDEX Page
Introduction 4
Safety precaution 4
Basic operation 5
Contents 6
Inputs 6
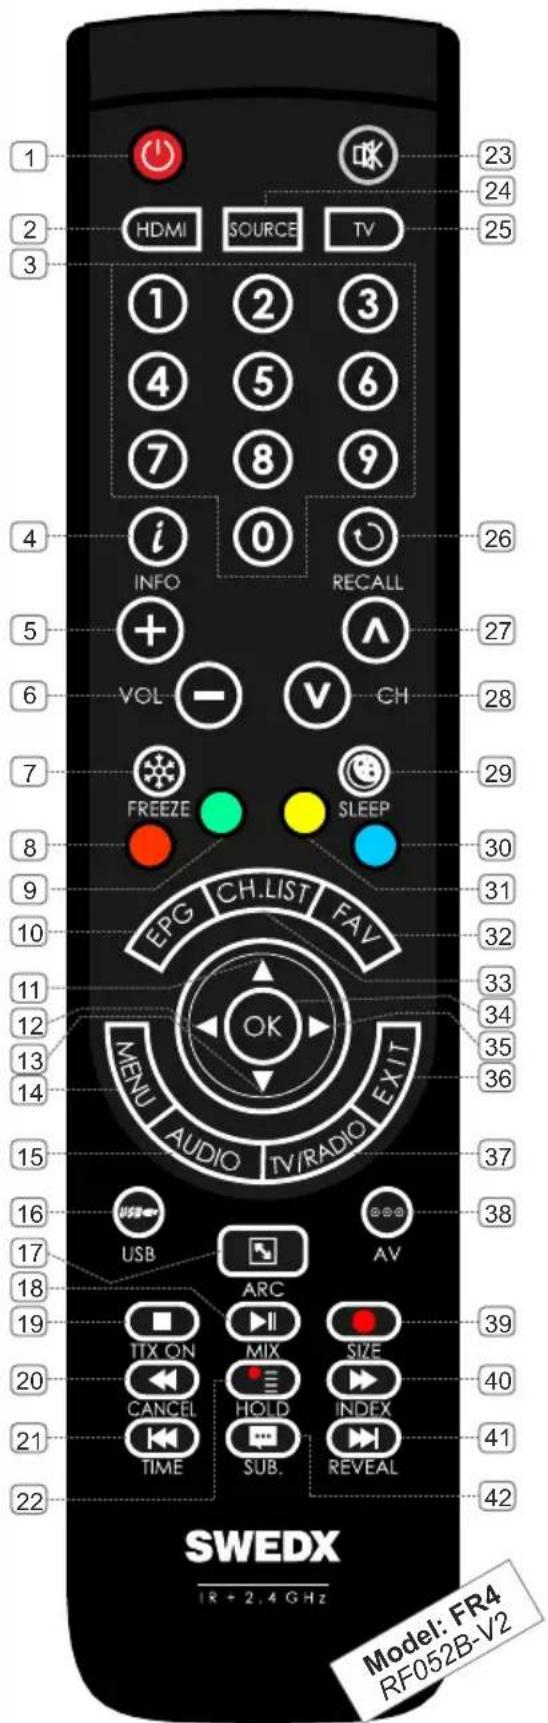
Remote Control (FR4) 7
Remote Control Buttons (FR4) 8
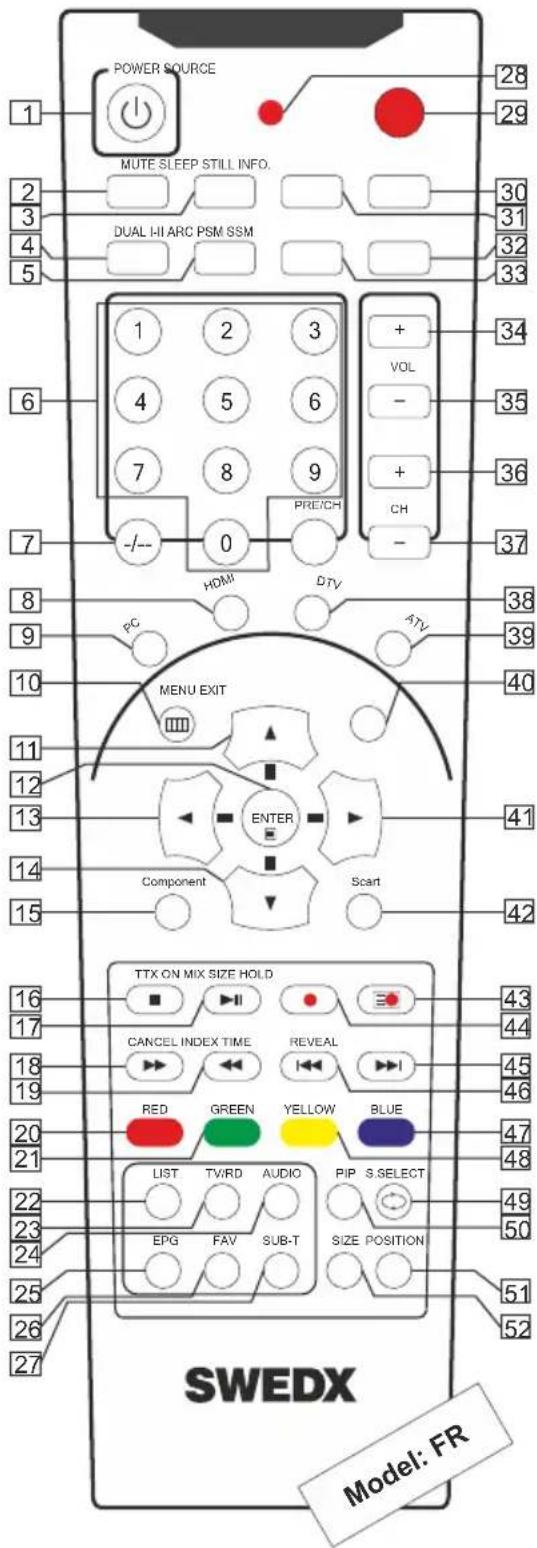
Remote Control Buttons (FR) 9
Main Operations 10
Volume Control 10
OSD Menu Operations 10
OSD Menu Structure: 10
First Time Installation 11
Menu > Channel (ATV) 12
Menu > Picture Menu 13
Menu > Sound Menu 14
Menu > Time Menu 15
Menu > Settings Menu 16
USB Media Player 17
Supported Formats and Codecs 18
Wall mount assembly 19
Troubleshooting 20
Warranty and Service 21
How to get service 22
Limitation of liability 22
Design and specifications are subject to change without notice.
Introduction
Thank you for choosing SWEDX products. Please read this manual thoroughly before operating the product. Make sure the display was not damaged in transit. Should the product be damaged, please contact your dealer and do not install it. Check that you have all the accessories according to the model.
Safety precaution
- Do not place the product on unstable places, from which it may fell off
- Do not expose the product to extreme temperature and humid environment
- Avoid subjecting the product to direct sunlit or other heat sources
- Do not put the product into any liquid
- Do not put anything inside the product, or place water container on top of the it
- In thunder rainy days (especially with lightening), please unplug the power and antenna cables
- Do not step on the power cable, or tangle them together
- Avoid overload of the exterior electric outlet to prevent fire hazard of electric shock
- Clean the product with dry and soft fabric
- If your product is broken, do not repair it by yourself, but contact the maintenance personnel
- If the remote control is left unused for a longtime, please take the batteries out and store them in dry places
- Avoid dropping the remote control
- If the product is installed for exhibition purpose, please do not place the overheated part on the ground or carpet to prevent accident
- The apparatus shall not be exposed to dripping or splashing and that no object filled with liquids, such as vases, shall be placed on the apparatus
- Where the MAINS plug or an appliance coupler is used as a disconnect device, the disconnect device shall remain readily operable
- Battery shall not be exposed to excessive heat such as sunshine, fire or the like
- Excessive sound pressure from earphones and headphone can cause hearing loss
Please install the product at proper position, such as wall or ceiling. Please install it under the guidance of professional staff.
This device complies with Part 15 of the FCC Rules. Operation is subject to the following two conditions:
-
This device may not cause harmful interference
-
This device must accept any interference received, including interference that may cause undesired operation
Please disconnect the power cord if this equipment will not be used for a long time.
Precautions When Displaying a Still Image
A still image may cause permanent damage to the screen
- Do not display a still image on the screen for more than 2 hours as it can cause screen image retention. This image retention is also known as "screen burn". To avoid such image retention, reduce the degree of brightness and contrast of the screen when displaying a still image
- Watching the screen in 4:3 format for a long period of time may leave traces of borders displayed on the left, right and center of the screen caused by the difference of light emission on the screen. Playing a DVD or a game console may cause a similar effect to the screen. Damages caused by the above effect are not covered by the Warranty.
- Displaying still images from Video games and PC for longer than a certain period of time may produce partial after-images. To prevent this effect, reduce the ‘brightness’ and ‘contrast’ when displaying still images

text_image
Prohibition sign with a candle and crossed-out circle, indicating no lighting or toxicityWARNING
To prevent the spread of fire, keep candles or other open flames away from this product at all times
Basic operation
- Use AC 100-240V 50\~60 Hz power outlet for the product power supply
- If the screen of the product is not on, please press the power button on the remote control or on the product
- If you want to shut off the product temporary, please press the power button on the remote control or on the product
- If you want to shut off the product completely, please disconnect the power cable
- In Component and AV modes the product will shut off if there is no signal input for 30 minutes
- In PC-RGB and HDMI modes the product will enter idle state if there is no signal input after 30 seconds
- In Media Player 1/2 modes the product will remain On if there is no signal input
- The setting and tuning of picture and sound will be saved when the product is shut off, which will be working in the pre-shut off state when the product is turned on again
- If PC signal source is used, please first set the resolution of the PC display card as the following modes:
For HDMI 1/2/3 (3840x2160 @ 60Hz)
For PC (1920 x 1080 @ 60Hz) - If there is progressive output of the signal used by the user, signal source with progressive output is recommended
- Put the product on a stable surface
- Do not fix the product with others fixations than those provided or suggested by the manufacturer
- If you have a wall mount, check that it is steady.
- Do not place any material on the product.
- Do not block or cover the ventilation openings on the product
- The product must be plugged with a tension source of 110-240 volts and 50\~60 Hz
- Power cord and cables must be properly routed and protected to prevent from stepping on them
- Keep the power cord away from any heat source. Possible fire hazard
Preparation
Heating sources and humidity
- Keep the product dry and away from humidity
- Keep the product away from heat sources Cleaning and maintenance
- Unplug the product before cleaning it. Do not use solvents or liquids to clean the product
- Only clean the product with a soft and dry fabric
- In case of troubleshooting, do not use spare parts other than those suggested by the manufacturer. Using inadequate spare parts can lead to electric shocks, short-circuits fire
or others incidents. Please contact a technical authorized by SWEDX
Departure in holidays
- Unplug the product during lightning storms or when unused for long periods of time

WARNING
RISK OF ELECTRIC SHOCK DO NOT OPEN

CAUTION:
TO REDUCE THE RISK OF ELECTRIC SHOCK, DO NOT REMOVE COVER(OR BACK). REFER SERVICING TO QUALIFIED SERVICE PERSONNEL
WARNING:
TO REDUCE THE RISK OF FIRE OR ELECTRIC SHOCK, DO NOT EXPOSE THIS APPARATUS TO RAIN OR MOISTURE
Contents
Included items:
2 x AAA Battery
Notice
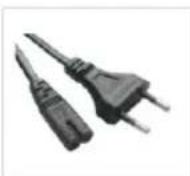
AC Cable
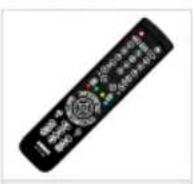
Remote Control
LED Screen
CAUTION
Danger of explosion if battery is incorrectly replaced. Replace only with the same or equivalent type
AAA Battery
CAUTION
The batteries shall not be exposed to excessive heat such as sunshine, fire or the like ! AAA Battery
Inputs
1. PC
Input for PC (VGA) sources
2. PC AUDIO
Input for PC audio when PC (Personal Computer) is connected
3. COMPONENT
Input for Component (YPBPR) sources.
Supports maximum resolution 1080p @ 60 Hz *Component/YPBPR and AV shares the same audio input
4. AV
Input for AV (Audio/Video) sources
5. On/OFF
Key to power the product On/Off
6. Remote Pairing
Key to pair the remote control with the product
7. POWER INPUT
Input for 100-240 V power 50\~60Hz
8. ATV
Input for analog TV channels
9. MEDIA PLAYER 1
Input for USB Media Player 1/Firmware upgrade
10. MEDIA PLAYER 2
Input for USB Media Player 2
11. HDMI1
Input for HDMI1 (Ver. 2.0). Supports maximum resolution 3840x2160 @ 60 Hz
12. HDMI2 (ARC)
Input for HDMI2 (Ver. 2.0). Supports maximum resolution 3840x2160 @ 60 Hz HDMI2 supports ARC (Audio Return Channel)
13. HDMI3 / MHL
Input for HDMI3 (Ver. 2.0). Supports maximum resolution 3840x2160 @ 60 Hz. HDMI3 supports MHL (Mobile High-definition Link)
14. COAXIAL
Output for digital audio signal (Coaxial)

text_image
PC 1 2 3 4 PC AUDIO COMPONENT AV 2.4GHz REMOTE ON/OFFPAIRING POWER INPUT AC 100-240 V - 50/60 Hz 5 6 7
text_image
USB MEDIA PLAYER HDMI ATV 1 2 1 2 / ARC 3 / MHL COAXIAL 8 9 10 13 1411 12Remote Control (FR4)
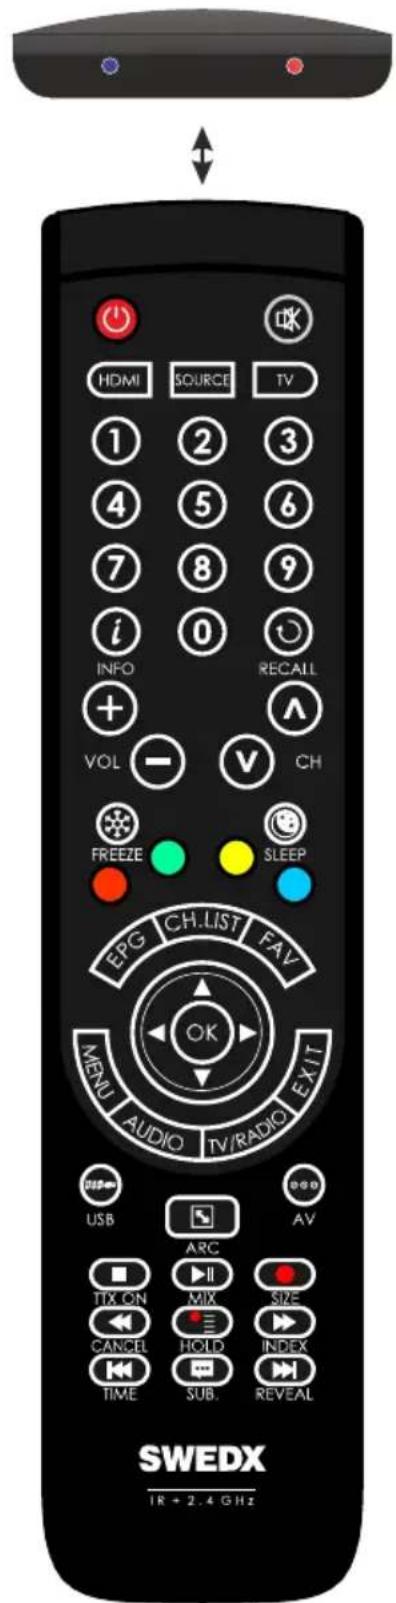
The remote control is based on both 2.4 GHz and Infrared.
The remote control is equipped with LED indicators. The RED indicator states that the remote is in Infrared mode and the BLUE indicator is for 2.4 GHz mode. Recent products from SWEDX uses 2.4 GHz receivers.
The 2.4 GHz technology allows the remote to control the TV without targeting it because the receiver is built inside the TV. Each SWEDX TV has a pre-configured remote control meaning that if you have several SWEDX TVs then the remote control for one of the TVs will function only with that particular TV and not with the other TVs.
To switch between Infrared and 2.4 GHz mode press and hold the

buttons for 5 seconds. The Red LED will flash 3 times and switch from the current mode to the other one.
To pair the remote with the TV follow the steps below
- Connect the product (e.g screen) to power outlet
- Make sure that the remote is in 2.4 GHz mode
- Press and hold the

buttons on the remote control simultaneously for about 5 seconds. The BLUE LED will flash 5 times indicating that the remote is now paired with the TV.
Recent 2.4 GHz based products from SWEDX are equipped with a pairing key in order to avoid pairing more than one product when more than one SWEDX products is close by. A On/Off key is also available in recent SWEDX products.
If your product is equipped with paring key please press and hold the paring key for 2 second when the Blue LED light is flashing after pressing
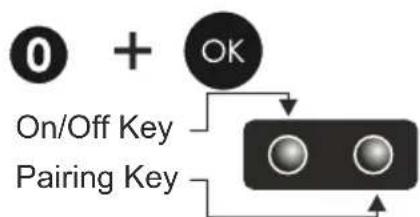
flowchart
graph TD
    A["0"] --> B["+"]
    C["OK"] --> D["Off Key"]
    E["On/Off Key"] --> F["Pairing Key"]
    G["●"] --> H["●"]
    I["●"] --> J["●"]
text_image
HDMI SOURCE TV 1 2 3 4 5 6 7 8 9 i 0 INFO RECALL + VOL - V CH FREEZE SLEEP EPG CH.LIST FAV MENU AUDIO TV/RADIO EXIT USB AV ARC TIX ON II SIZE CANCEL HOLD INDEX TIME SUB REVEAL SWEDX IR + 2.4 GHz
text_image
AC AUDIO COMPONENT 6V I/O R200 MHz/2 OUT 2.40Hz POWER INPUT AC 05280 V - 00232PcRemote control buttons (FR4)
This remote control model is included in all models except SS28K1 and SM28K1 models
- On/Off button
- Shortcut to HDMI1,2,3
- Number buttons for direct channel access
- Display additional information
- Volume increase
- Volume decrease
- Picture freeze
- RED
- GREEN
- Not applicable for this product
- Navigation button UP
- Navigation/adjust button LEFT
- Navigation button DOWN
- Menu display. In OSD sub-menu press to access previous menu
- Not applicable for this product
- Shortcut to Media Player 1,2
- Aspect Ratio toggling
- Start/Pause play
- Stop play
- Fast backward
- Previous Title
- Not applicable for this product
- Mute the built-in speakers
- Available sources selection
- Not applicable for this product
- Not applicable for this product
- Not applicable for this product
- Not applicable for this product
- Enter sleep mode in certain chosen time
- Blue
- Yellow
- Not applicable for this product
- Not applicable for this product
- Confirm/activate button
- Navigation/adjust button RIGHT
-
Exit the OSD
-
Not applicable for this product
- Shortcut to AV
- Not applicable for this product
- Fast forward
- Next Title
- Not applicable for this product
text_image
1 2 3 HDMI SOURCE TV 1 2 3 4 5 6 7 8 9 i INFO RECALL 5 + VOL CH 7 FREEZE SLEEP 8 EPG CH.LIST FAV 9 30 10 31 11 32 12 33 13 34 14 MENU AUDIO EXIT 15 TV/RADIO 16 USB AV 17 ARC 18 TIX ON MIX SIZE 19 CANCEL HOLD INDEX 20 TIME SUB. REVEAL 21 SWEDX 1R + 2.4 GHz Model: FR4 RF052B-V2Remote control (FR) buttons
This remote control model is included in SS28K1 and SM28K1 models
- On/Off button
- Mute the built-in speakers
- Enter sleep mode in certain chosen time
- Not applicable for this product
- Aspect Ratio toggling
- Number buttons for direct channel access
- Not applicable for this product
- Shortcut to HDMI 1,2,3
- Shortcut to PC input
- Menu display. In OSD sub-menu press to access previous menu
- Navigation button UP
- Confirm/activate button
- Navigation/adjust button LEFT
- Navigation button DOWN
- Shortcut to Component
- Stop play
- Start/Pause play
- Fast forward
- Fast backward
- RED
- GREEN
- Not applicable for this product
- Not applicable for this product
- Not applicable for this product
- Not applicable for this product
-
Not applicable for this product
-
Not applicable for this product
- LED indicator
- Available sources selection
- Display additional information
- Picture freeze
- Alter sound mode
- Alter picture mode
- Volume increase
- Volume decrease
- Not applicable for this product
- Not applicable for this product
- Not applicable for this product
- Not applicable for this product
- Exit the OSD
- Navigation/adjust button RIGHT
- Not applicable for this product
- Not applicable for this product
- Not applicable for this product
- Next Title
- Previous Title
- Blue
- Yellow
- Not applicable for this product
- Not applicable for this product
- Not applicable for this product
- Not applicable for this product
text_image
POWER SOURCE MUTE SLEEP STILL INFO. DUAL I-II ARC PSM SSM 1 2 3 + VOL - + 34 7 8 9 + CH -/-- 0 PRE/CH HOMI DTV PC ATV MENU EXIT ENTER Component Scart 40 41 42 16 TTX ON MIX SIZE HOLD CANCEL INDEX TIME REVEAL RED GREEN YELLOW BLUE LIST TV/RD AUDIO PIP S SELECT EPG FAV SUB-T SIZE POSITION SWEDX Model: FRMain Operations
Turning On And Off

The product turns on automatically when it is connected to power. When the product is in Stand-by mode press POWER on the remote control or the On/Off button on the control buttons. The product will turn on and will be ready to be used.
Select Source
SOURCE
Press SOURCE on the remote control. The source list menu will appear. Navigate the list with

Up/Down on the remote control to select the source and confirm by pressing OK.
Input Source
ATV
COMPONENT
PC-RGB
HDMI 1
HDMI 2
HDMI 3
AV
MEDIA PLAYER

OK
Volume Control

Press VOL+ / VOL- on the remote control to adjust the volume level.

Press the MUTE on the remote control to mute the sound.


OSD Menu Operation

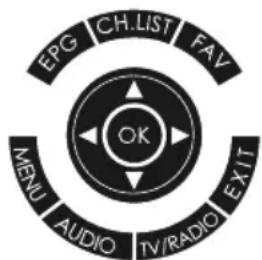
- Press MENU on the remote control to access the OSD Menu. Pressing the same button again will move you backward in the OSD structure.
- Press OK button to confirm/select.
- Use LEFT & RIGHT buttons to navigate or change the parameters of the current sub-menu.
- Use UP & DOWN buttons to navigate in the OSD Menu.
- Press EXIT button to exit the OSD Menu.
OSD Menu Structure
- OSD (On Screen Display) allows users to control or adjust various features and settings in accordance with desired preferences.
- Press the MENU button on the remote control to see the main OSD menu.
text_image
EPG CH.LIST FAV OK MENU AUDIO TV/RADIO EXITOSD Menu Operation:
- Main Menu: Press MENU on the remote control to enter the main OSD menu. First, choose Main menu item you need with the buttons ◀ & ▶. To select a Main menu items, just press OK.
- Sub Menu: Each menu item has its own sub menu items to set.
- Sub Menu items:
A: If there is no value to adjust it means there is a sub menu which you can access by pressing OK and modify the menu values.
B: If there is no ▶ part, the item has adjustable values. Use ◀ & ▶ to adjust the values.
C: If the sub-menu item is grey colored, it means this item is not available in the particular mode.

text_image
Auto Tuning ATV Manual Tuning Programme Edit CHANNEL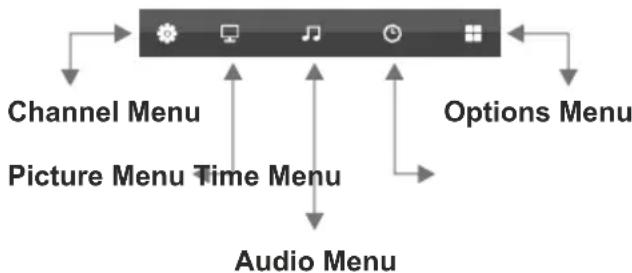
flowchart
graph TD
    A["Audio Menu"] --> B["Channel Menu"]
    A --> C["Picture Menu Time Menu"]
    A --> D["Options Menu"]
    B --> E["Monitor Icon"]
    C --> F["Play Icon"]
    D --> G["Screen Icon"]
First Time Installation
The first time the TV is turned on an installation
| First Time Installation | |
| OSD Language | English |
| Energy Mode | Home Mode |
guide will be presented. Chose the desired OSD language.
In the energy mode you can choose between Home and Dynamic mode. The home mode will reduce the back light intensity in order to save energy while the Dynamic mode will increase the back light intensity to the maximum.
This Menu is available in the following models only
SS-28K1
SS-40K1
SS-49K1
SS-50K1
SS-58K1
ME-65K1
Menu > Channel (ATV)
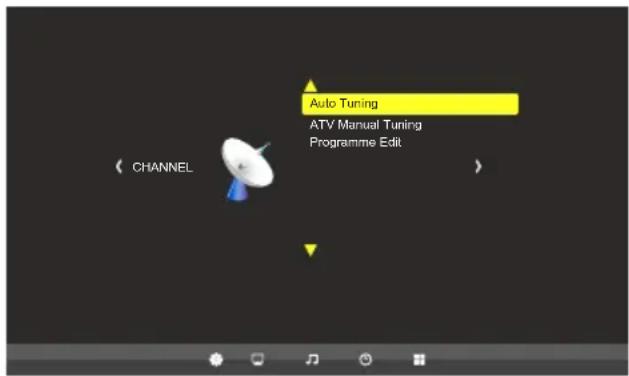
text_image
Auto Tuning ATV Manual Tuning Programme Edit CHANNELThis Menu is available in the following models only
SS-28K1
SS-40K1
SS-49K1
SS-50K1
SS-58K1
ME-65K1
In this Menu you can search for TV-channels manually or automatically, manage the TV channels such as deleting, adding to favorites, skipping and locking. You can also use the PVR function which allows to record or time shift TV-programs
The TV model of this product is equipped with the following Tuners
Analog TV Tuner, supports Pal and Secam
Auto Tuning
Use the Auto Tuning menu to search for TV-channels. The found channels will be saved in
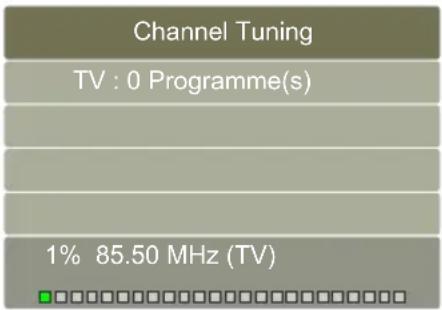
text_image
Channel Tuning TV : 0 Programme(s) 1% 85.50 MHz (TV)the channel lists.
To access the channel list, press Channel List button on the remote.
ATV Manual Tuning
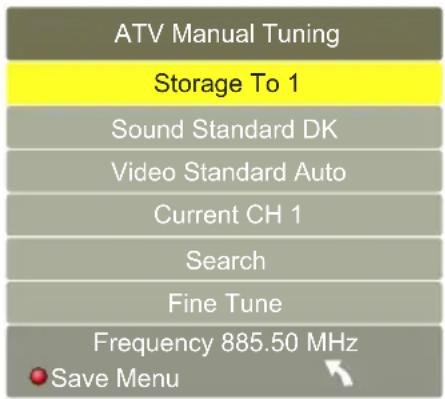
text_image
ATV Manual Tuning Storage To 1 Sound Standard DK Video Standard Auto Current CH 1 Search Fine Tune Frequency 885.50 MHz Save MenuYou can perform a manual channel search for analog channels (ATV). You can choose the channel you want to save to and also use Fine Tune to adjust the tuning for the channel to get better picture. You can also change the Sound system (BG, DK, I, L, L') for the channel
Programme Edit
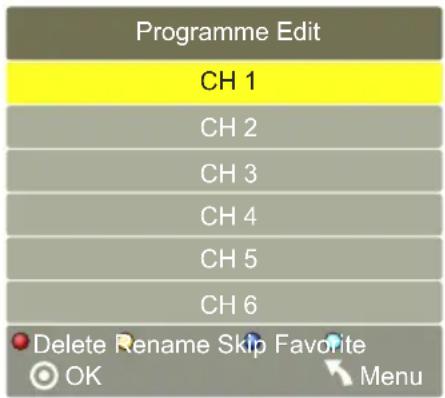
text_image
Programme Edit CH 1 CH 2 CH 3 CH 4 CH 5 CH 6 Delete Rename Skip Favorite OK MenuIn this menu you can:
Delete a channel (press Red button)
Rename a channel (press Yellow button)
Skip a channel (press Blue button)
Add a channel to favorites list (press FAV button)
Menu > Picture
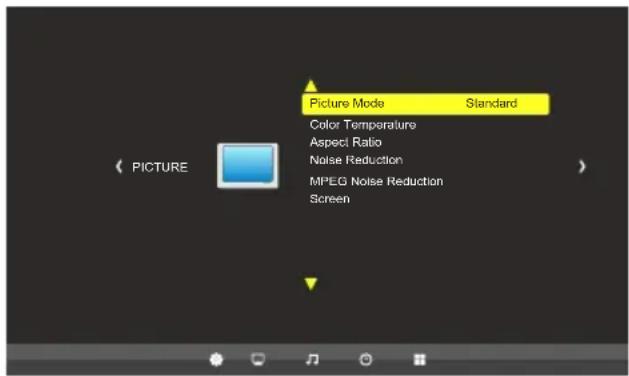
text_image
Picture Mode Standard Color Temperature Aspec Ratio Noise Reduction MPEG Noise Reduction ScreenUse the Picture menu to adjust the picture settings to meet your requirements:
Picture mode
Standard: Suitable for a normal room
Mild: Suitable for a dark room
User: In User mode you can adjust the Contrast, Brightness, Color, Sharpness to meet your requirements
Dynamic: Suitable for a bright room
Color Temperature
Choose between predefined settings User, Warm, Medium and Cold). In User mode you can adjust the Red, Green and Blue color temperature.
Aspect Ratio
Set the various picture options such as picture size and aspect ratio.
Depending on the input source, the picture size options may vary.
The connected device to the controller may have its own set of screen sizes as well. However, it is highly recommended to use PointToPoint / Just Scan mode.
Auto
Automatically adjusts the picture size to the signal
Zoom1&2
Magnifies the picture size.
4:3
Sets the picture to basic (4:3) mode.
Do not watch in 4:3 format for a long time. Traces of borders displayed on the left, right and center of the screen may cause image retention (screen burn) which are not covered by the warranty.
PointToPoint
Displays the signal without any cut-off when HDMI (720p / 1080i / 1080p / 2160p) signals. The PointToPoint mode will display without scaling which means if the signal resolution is lower than 3840x2160 then the picture will be shown according to its original size.
Just Scan
Just Scan mode will display crispier picture with
scaling to fill the entire screen.
Noise Reduction/MPEG Noise Reduction
Choose to activate noise reduction. Available options are Off, Low, Middle and High.
If the signal received by the input controller is weak, you can activate the Noise Reduction feature to help reduce any static and ghosting that may appear on the screen.
Screen (only in PC mode)
When the TV is in PC-Mode additional settings are available for PC-Setup.
H-Offset: Adjust the PC's screen positioning horizontally
V-Offset: Adjust the PC's screen positioning vertically
Size: Adjust the screen size
Phase: Adjust the signal phase
Menu > Sound
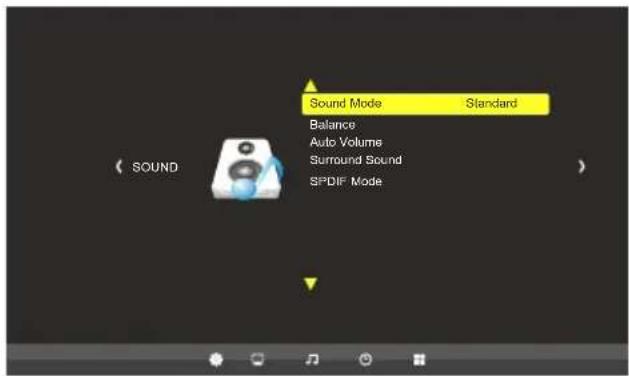
text_image
Sound Mode Standard Balance Auto Volume Surround Sound SPDIF ModeUse the Sound menu to adjust the sound settings to meet desired requirements:
Sound Mode
Choose between predefined settings:
Standard: Suitable for normal programs
Music: Suitable for music program
Movie: Suitable for movies
Sports: Suitable for sport programs
User: In User mode you can adjust the Treble and Bass to meet desired requirements.
Balance
Adjust the sound output balance between left and right speaker.
Auto Volume
Each broadcasting station has its own signal conditions, and so it is not easy to adjust the volume every time the channel is changed. This feature lets you automatically adjust the volume of the desired channel by lowering the sound output when the modulation signal is high or by raising the sound output when the modulation signal is low.
Surround Sound
In TrueSurround or SRS TrueSurround mode the screen delivers a compelling, virtual surround sound experience through the internal television speakers. It is fully compatible with all multichannel formats.
SPDIF Mode
Choose the output mode for the SPDIF signal. Choose between Auto or PCM.
Menu > Time
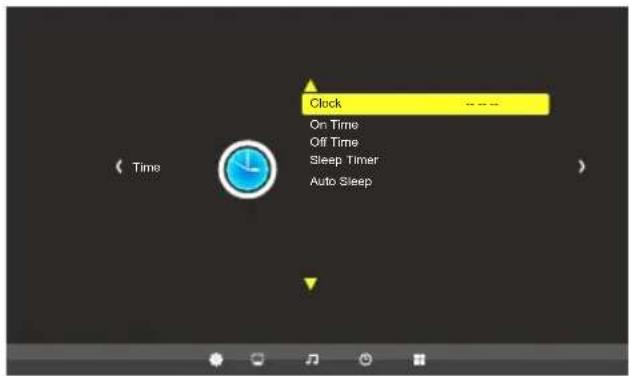
text_image
Clock On Time Off Time Sleep Timer Auto SleepClock
Use the Time menu to set the date and time for the product. The date and time are important for usage of the timer function.
Set the date and time under the Clock option by choosing the clock option and pressing the ▶ button. Change the values to the correct time by pressing the ◀ & ▶ buttons. Press Menu to exit and save the new date and time settings.
Off Time
Set a certain time to turn off the TV automatically. The available time intervals are Once, Everyday, Mon-Fri, Mon-Sat, Mon-Sun and Sunday.
On Time
Set a certain time to turn On the TV automatically. The available time intervals are Once, Everyday, Mon-Fri, Mon-Sat, Mon-Sun and Sunday.
When the Time On function is activated you can choose the following parameters
Source: Which source to be activated when the LED-TV turns on
Volume: Audio volume level when the LED-TV turns on
Sleep Timer
Set the TV to turn off after a certain time. The time intervals are 240, 180, 120, 90, 60, 30, 20 and 10 min.
Auto Sleep
When set to ON the TV will turn off automatically if no input signal is detected otherwise the TV will remain ON even if no input signal is detected.
Menu > OPTION
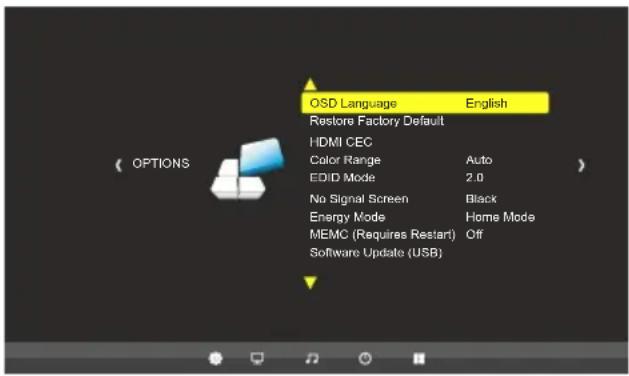
text_image
OSD Language English Restore Factory Default HDMI CEC Color Range Auto EDID Mode 2.0 No Signal Screen Break Energy Mode Home Mode MEMC (Requires Restart) Off Software Update (USB)OSD Language:
Choose the OSD language. Available languages are English, Deutsch, Spanish, French, Italian, German, Japanese, Swedish, Arabic, Simplified Chinese.
This function will restore the product to the factory defaults and will erase any customized settings.
HDMI CEC
Activate the HDMI CEC function.
HDMI ARC
Activate HDMI ARC (Audio Return Channel) function.
Auto Standby
When activated the product will be put into standby mode when a HDMI CEC compatible device is connected and turned off.
Auto On
When activated the product will be put into On mode when a HDMI CEC compatible device is connected and turned on.
Device Control
When activated the HDMI CEC compatible device can be controlled using the product's remote control.
Device List
Displays connected HDMI CEC compatible devices.
Color Range
Choose the scope of the color range. Available options are Auto, 0\~255 and 16\~255.
EDID Mode
Products with support for HDMI 2.0 are recommended to take full advantage of the 4K feature in Swedx product by setting the EDID Mode to EDID 2.0. Available options are Auto, EDID 1.4 and EDID 2.0.
No Signal Screen
Change the background color of the display when no signal is detected. Available options are black
or blue.
MEMC (Motion Estimation/Motion Compensation)
Enhancement to compensate the difference between the screens refresh rate and signal frame rate. Active for smoother motion and deactivate for shorter input lag.
USB Media Player
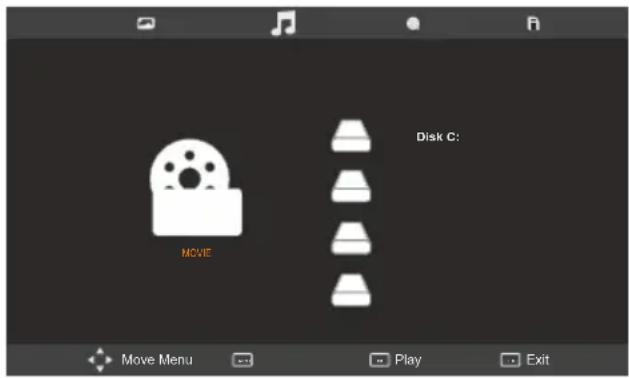
text_image
Disk C: MOVE Move Menu Play ExitThis product is equipped with high end USB Media Player. It is capable of playing music, movies (up to 1080p and with subtitle support), and display photos or text documents.
To Enter USB mode
Press Source
Choose USB
Press Enter
In USB mode you can choose between:
Photos: Enables you to display several formats of photos and images
Music: Enables you to play several formats of music and audio files
Movie: Enables you to play several formats of movies and video files
Text: Enables you to display TXT files
Remote Control Keys used in USB Mode
The INFO button will display available controllers where it is possible to i.e. rotate an image. The controllers may vary depending on the USB mode.
Navigation Key to navigate in the different position of the menu and press enter to activate the function.
The AUDIO button will alter audio track (if several audio tracks are available in the played file).
The SUB-T button will alter the subtitles or turn it off (if several subtitles languages are available in the played file).
The subtitle file should be saved in UNICODE In order to display the correct characters.
Functions

Repeat the file

Go to defined time position in the file

Repeat the file. Choose between ALWAYS, ONCE or NO REPEAT

Play audio files while displaying images

Display the Playlist

Display current file's information

Press to rotate 90 degrees CW

Press to rotate 90 degrees CW

Press to Zoom IN

Press to Zoom OUT

Press to MOVE in ZOOM mode

Define a part of a video to be repeated

Change aspect ratio

Play step forward in a video

Play slowly forward in a video
Supported Formats and Codecs
| Format | Video Codec | Audio Codec | Resolution | Frame Rate | Mbit/s | |
| Video | AVI | MJPEG | MP3, WMA, AAC, MP2, PCM | 640x480 | 23,976~30≤16Mbps | ≤ 10Mbps |
| DIVX.311/DIVX4/DIVX5 | 720x576 | ≤ 10Mbps | ||||
| XVID/MPEG-2/MPEG4/H.264 | 1920x1080 | ≤ 20Mbps | ||||
| MP4 | MPEG-2/MPEG-4/H.264 | |||||
| TS | MPEG-2 | ≤ 40Mbps | ||||
| TRP | ||||||
| MPG | MPEG-1/MPEG-2 | ≤ 20Mbps | ||||
| NOV | MPEG-4/H.264 | |||||
| MKV | ||||||
| DAT | MPEG1 | MP2 | 352X288 | ≤ 16Mbps | ||
| VOB | MPEG2 | 720x576 | ||||
| Format | Max resolution | Colors | ||||
| Picture | BMP | 1000 x 1000 pixels | 16, 256, 16 bit, 24 bit och 32 bit. | |||
| JPEG | 3840x2160 / Recommended resolution is 3840x2160 pixels | |||||
| PNG | 1000x1000 pixels | |||||
| Audio | MP3 | 8K-48K. 32K+320K | ||||
| WAV | 32K-48KHz 32K-320Kbps | |||||
| M4A, AAC | 16K-48K. 32K+192K | |||||
Information:
The Media Player inputs supports:
USB Flash Drive and Hard disks are supported. Supported formatting formats are, NTSF, FAT32,
FAT16. NTSF Compressed is not supported.
The files must be saved in the root folder. Folder structure is not supported.
Max 5000 files.
Wall mount assembly
SWEDX offers several wall mount devices which can be purchased from your dealer or www.swedx.com
See the Wall mounting parameters in the illustrations
40/42 inch
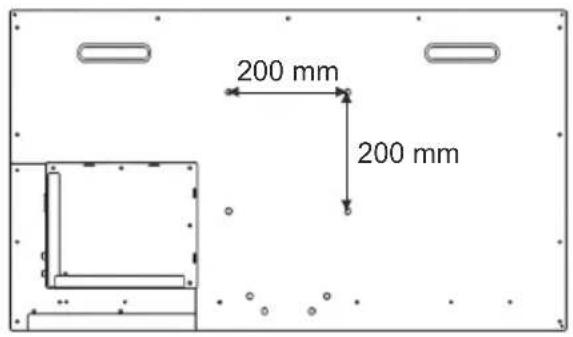
text_image
200 mm 200 mm65 inch
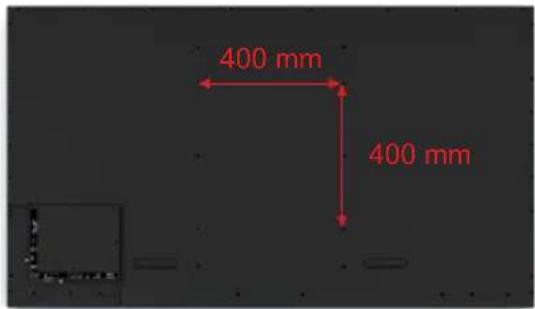
text_image
400 mm 400 mm75 inch
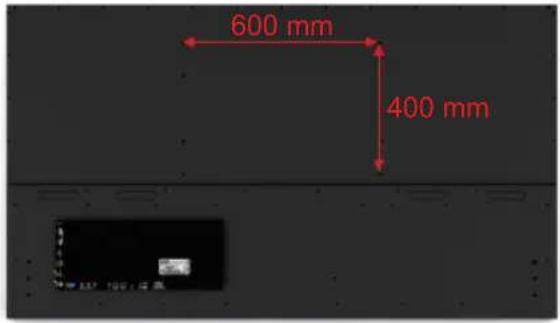
text_image
600 mm 400 mm50 inch
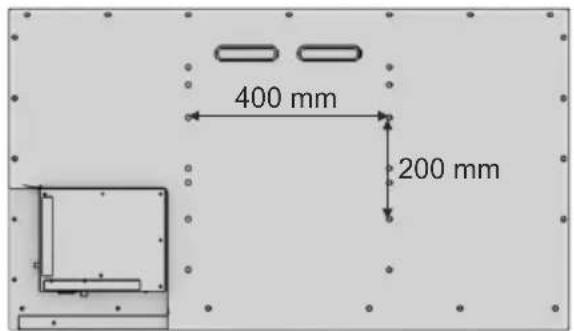
text_image
400 mm 200 mm58 inch
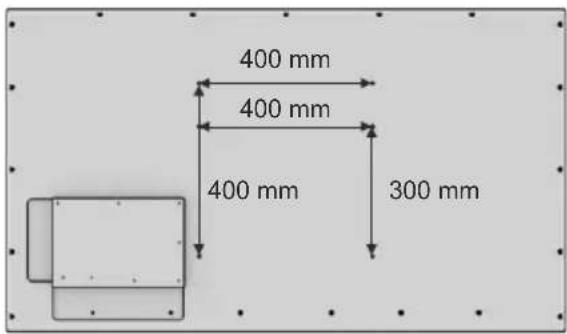
text_image
400 mm 400 mm 400 mm 300 mmTroubleshooting
Before contacting SWEDX service or your dealer, perform the following simple checks. If you cannot solve the problem using the instructions below, note the model and serial number of your product and contact your local dealer
No sound or picture
- Check that the mains lead has been connected to a wall socket
- Check the picture contrast and brightness settings
- Check the volume
Normal picture but no sound
- Check the volume
- Check whether the MUTE button has been pressed on the remote control
No picture or black and white picture
- Adjust the color settings
- Check that the broadcast system selected is correct
Sound and picture interference
- Try to identify the electrical appliance that is affecting the set and move it further away.
- Plug your set into a different mains socket
Blurred or snowy picture, distorted sound
- Check the direction, location and connections of your aerial
- This interference is often due to the use of an indoor aerial
Remote control malfunctions
- Ensure that the remote is in correct mode
- Replace the remote control batteries
- Clean the upper edge of the remote control (transmission window)
- Check the battery terminals
- Turn off the product and unplug the AC cable from the wall socket and then plug the AC cable and turn on the product
“No signal” message is displayed
- Check that the signal cable is firmly connected to the source input
- Check that the source is turned on
On PC mode, "Not Supported Mode" message is displayed
- Check the maximum resolution and the frequency of the video adapter. For HD models the recommended resolution is 1366x768 and for Full HD models the recommended resolution is 1920x1080 (for PC mode). In HDMI mode the
recommended resolution is 3840x2160@60Hz
The image is too light or too dark
- Adjust the Brightness and Contrast
Pixel Mapping
- It is recommended to choose aspect ratio PointToPoint or JUST SCAN to achieve pixel mapping in HDMI modes
The screen does not accept 4K 60Hz
- Change the EDID Mode in Option menu to EDID 2.0
Warranty and Service
The following terms apply only to new "in the original carton" SWEDX products marketed and distributed by SWEDX, which are purchased and used by the original consumer purchaser.
Depending on the model, your terms and conditions may be different from those shown below, and this information is subject to change without prior notice. Unless specifically stated otherwise, used and reconditioned products that are resold have no warranty from SWEDX and are considered sold "AS-IS", however, the selling dealer may offer additional service options.
Warranty for SWEDX products:
The warranty period is 12 months from purchase date.
When the products are used commercially the warranty period is 3 months
What the warranty covers:
SWEDX warrants your SWEDX display(s) against defects in material and workmanship during the warranty period from SWEDX factory delivery date shown in the shipping documents. If a product proves to be defective in material or workmanship during the warranty period, SWEDX will, at its sole option repair or replace the product with a similar product, provided the purchaser adheres to certain return authorization procedures and guidelines. SWEDX reserves the right to charge customer in case of warranty conditions not are fulfilled.
Who the warranty protects:
This warranty is valid only for the first purchaser.
What the warranty does not cover:
- Any product which the serial number has been defaced, modified or removed.
- Damage, deterioration or malfunction resulting from:
A. Accident, misuse, neglect, fire, water, lightning, or other acts of nature, unauthorized product modification, or failure to follow instructions supplied with the product.
B. Repair or attempted repair by anyone not authorized by SWEDX.
C. Any damage of the product due to shipment.
D. Removal or installation of the product.
E. Causes external to the product, such as electric power fluctuations or failure.
F. Use of supplies or parts not meeting SWEDX specifications.
G. Normal wear and tear.
H. Any other cause which does not relate to a product defect.
- Cosmetic damage by purchaser, such as markings, discoloration, scratches, dents, anti-theft devices markings, gouges or any other defacement.
- Physically damaged products by purchaser, such as broken PCB, Housing, damaged LCD Module.
- No Defect Found (product returned to SWEDX as defective but failure is not duplicated by SWEDX's test method.)
- The product is not in accordance with the fault in the application
- Timber is a lifelike natural material which can cause some little changes in the precision of the produced product such as small openings line beside the connecting point and some other small changes which are out of SWEDX control and don't make any effect for the product functionality.
Dead on Arrival (DOA)
If the product fails within the manufacturer's DOA period, a replacement product will be offered.
Before contacting us:
In many cases, your product may not need repair. Before you contact us, please consult the troubleshooting section in your user's manual or SWEDX's FAQ web pages at http://www.swedx.com to see if you can easily remedy the problem yourself.
How to get service:
For information on obtaining warranty service, contact SWEDX dealer (the place where you bought your product) in first choice. If for any reason you can not contact your dealer, please contact SWEDX Customer Service by visiting http://www.swedx.com.
SWEDX technical support services:
During the period of product warranty, we support your basic configuration, setup and troubleshooting questions, and when required, we provide you with all instructions on how to return your product for repair. For support inquiries, please visit http://www.swedx.com.
SWEDX reserves the right to make final decisions regarding problem determination and the appropriate service option. Exchange units assume the remaining warranty of the original product. Please refer to your SWEDX Limited Warranty Statement for complete terms and conditions, as some models have other terms and conditions. Some limitations and restrictions apply and these programs are subject to change without prior notice.
Limitation of liability
If your SWEDX product fails to work as warranted above, your sole and exclusive remedy shall be repaired or replaced. SWEDX's maximum liability under this limited warranty is expressly limited to the lesser of the price you have paid for the product or the cost of repairing or replacement of any hardware components that malfunction in conditions of normal use. SWEDX is not liable for any damages caused by the product or the failure of the product to perform, including any lost profits or savings or special, incidental, or consequential damages. SWEDX is not liable for any claim made by a third party or made by you for a third party.
This limitation of liability applies whether damages are sought, or a claim made, under this limited warranty or as a tort claim (including negligence and strict product liability), a contract claim, or any other claim. This limitation of liability cannot be waived or amended by any person. This limitation of liability will be effective even if you have advised SWEDX.
SWEDX
Your Digital Signage Partner
Other products from SWEDX
text_image
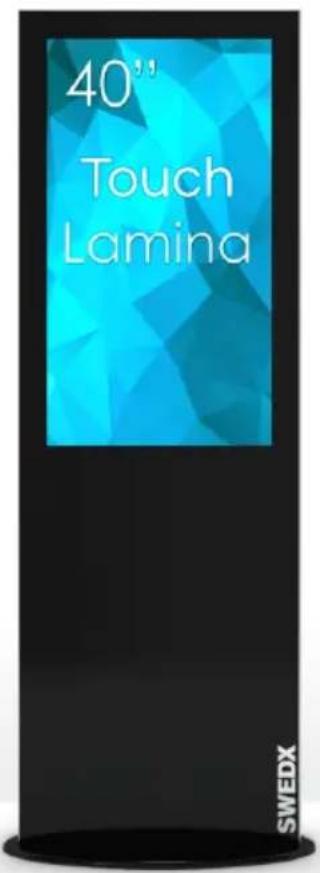
40" Touch Lamina SWEDX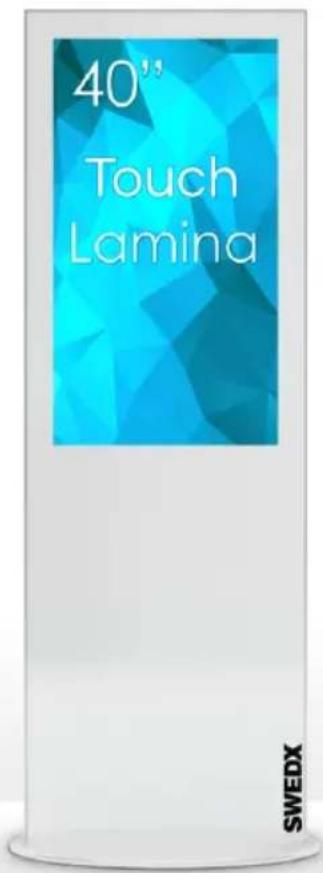
text_image
40" Touch Lamina SWEDX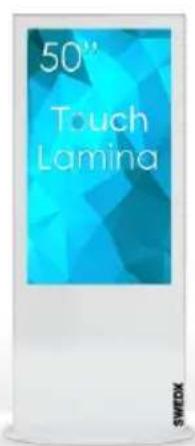
text_image
50" Touch Lamina SWEDX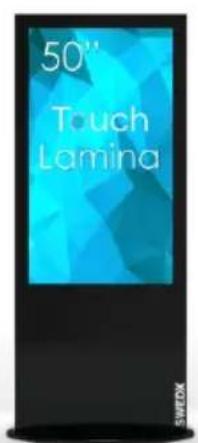
text_image
50" Touch Lamina SWEDX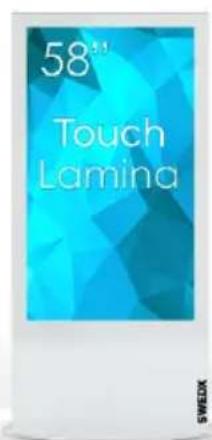
text_image
58" Touch Lamina SWEDX