
HR925C - Blu-ray player LG - Free user manual and instructions
Find the device manual for free HR925C LG in PDF.


User questions about HR925C LG
0 question about this device. Answer the ones you know or ask your own.
Ask a new question about this device
Download the instructions for your Blu-ray player in PDF format for free! Find your manual HR925C - LG and take your electronic device back in hand. On this page are published all the documents necessary for the use of your device. HR925C by LG.
USER MANUAL HR925C LG
Blu-ray Disc™/DVD Player with built-in HDD & HD Tuner
Please read this manual carefully before operating your set and retain it for future reference.
HR922C/HR923C/HR925C/HR929C
Safety Information

text_image
CAUTION RISK OF ELECTRIC SHOCK DO NOT OPENCAUTION: TO REDUCE THE RISK OF ELECTRIC SHOCK DO NOT REMOVE COVER (OR BACK) NO USER-SERVICEABLE PARTS INSIDE REFER SERVICING TO QUALIFIED SERVICE PERSONNEL.

This lightning flash with arrowhead symbol within an equilateral triangle is intended to alert the user to the presence of uninsulated dangerous voltage within the product's enclosure that may be of sufficient magnitude to constitute a risk of electric shock to persons.

The exclamation point within an equilateral triangle is intended to alert the user to the presence of important operating and maintenance (servicing) instructions in the literature accompanying the product.
WARNING: TO PREVENT FIRE OR ELECTRIC SHOCK HAZARD, DO NOT EXPOSE THIS PRODUCT TO RAIN OR MOISTURE.
WARNING: Do not install this equipment in a confined space such as a book case or similar unit.
CAUTION: Do not block any ventilation openings. Install in accordance with the manufacturer's instructions.
Slots and openings in the cabinet are provided for ventilation and to ensure reliable operation of the product and to protect it from over heating. The openings shall be never be blocked by placing the product on a bed, sofa, rug or other similar surface. This product shall not be placed in a built-in installation such as a bookcase or rack unless proper ventilation is provided or the manufacturer's instruction has been adhered to.
CAUTION: This product employs a Laser System. To ensure proper use of this product, please read this owner's manual carefully and retain it for future reference. Shall the unit require maintenance, contact an authorized service centre. Use of controls, adjustments or the performance of procedures other than those specified herein may result in hazardous radiation exposure.
To prevent direct exposure to laser beam, do not try to open the enclosure.
CAUTION concerning the Power Cord
Most appliances recommend they be placed upon a dedicated circuit;
That is, a single outlet circuit which powers only that appliance and has no additional outlets or branch circuits. Check the specification page of this owner's manual to be certain. Do not overload wall outlets. Overloaded wall outlets, loose or damaged wall outlets, extension cords, frayed power cords, or damaged or cracked wire insulation are dangerous. Any of these conditions could result in electric shock or fire. Periodically examine the cord of your appliance, and if its appearance indicates damage or deterioration, unplug it, discontinue use of the appliance, and have the cord replaced with an exact replacement part by an authorized service centre. Protect the power cord from physical or mechanical abuse, such as being twisted, kinked, pinched, closed in a door, or walked upon. Pay particular attention to plugs, wall outlets, and the point where the cord exits the appliance. To disconnect power from the mains, pull out the mains cord plug. When installing the product, ensure that the plug is easily accessible.
This device is equipped with a portable battery or accumulator.
Safety way to remove the battery or the battery from the equipment: Remove the old battery or battery pack, follow the steps in reverse order than the assembly. To prevent contamination of the environment and bring on possible threat to human and animal health, the old battery or the battery put it in the appropriate container at designated collection points. Do not dispose of batteries or battery together with other waste. It is recommended that you use local, free reimbursement systems batteries and accumulators. The battery shall not be exposed to excessive heat such as sunshine, fire or the like.
CAUTION: The apparatus shall not be exposed to water (dripping or splashing) and no objects filled with liquids, such as vases, shall be placed on the apparatus.
Disposal of your old appliance
- When this crossed-out wheeled bin symbol is attached to a product it means the product is covered by the European Directive 2002/96/EC.
- All electrical and electronic products shall be disposed of separately from the municipal waste stream via designated collection facilities appointed by the government or the local authorities.
- The correct disposal of your old appliance will help prevent potential negative consequences for the environment and human health.
- For more detailed information about disposal of your old appliance, please contact your city office, waste disposal service or the shop where you purchased the product.
Disposal of waste batteries/accumulators
-
When this crossed-out wheeled bin symbol is attached to batteries/accumulators of Your product it means they are covered by European Directive 2006/66/EC.
-
This symbol may be combined with chemical symbols for mercury(Hg), cadmium(Cd) or lead(Pb) if the battery Contains more that 0.0005% of mercury, 0.002% of cadmium or 0.004% of lead.
- All batteries/accumulators should be disposed separately from the municipal waste stream via designated collection facilities appointed by the government or the local authorities.
- The correct disposal of Your old batteries/ accumulators will help to prevent potential negative consequences for the environment, animal and human health.
- For more detailed information about disposal of Your old batteries/ accumulators, please contact Your city office, waste disposal service or the shop where You purchased the product.
For Wireless product European Union Notice
C€0984①
LG Electronics hereby declares that this/these product(s) is/are in compliance with the essential requirements and other relevant provisions of Directive 1999/5/EC, 2004/108/EC, 2006/95/EC and 2009/125/EC.
Please contact to the following address for obtaining a copy of the DoC (Declaration of Conformity).
European Standards Centre:
Krijgsman 1, 1186 DM Amstelveen The Netherlands Indoor use only.
RF Radiation Exposure Statement
This equipment should be installed and operated with minimum distance 20cm between the radiator and your body.
Notes on Copyrights
- Recording equipment should be used only for lawful copying and you are advised to check carefully what is lawful copying in the area in which you are making a copy. Copying of copyright material such as films or music is unlawful unless permitted by a legal exception or consented to by the rights owner.
- This product incorporates copyright protection technology that is protected by U.S. patents and other intellectual property rights. Use of this copyright protection technology must be authorized by Rovi Corporation, and is intended for home and other limited viewing uses only unless otherwise authorized by Rovi Corporation. Reverse engineering or disassembly is prohibited.
- CONSUMERS SHOULD NOTE THAT NOT ALL HIGH DEFINITION TELEVISION SETS ARE FULLY COMPATIBLE WITH THIS PRODUCT AND MAY CAUSE ARTIFACTS TO BE DISPLAYED IN THE PICTURE. IN CASE OF 625 PROGRESSIVE SCAN PICTURE PROBLEMS, IT IS RECOMMENDED THAT THE USER SWITCH THE CONNECTION TO THE 'STANDARD DEFINITION' OUTPUT. IF THERE ARE QUESTIONS REGARDING OUR TV SET COMPATIBILITY WITH THIS MODEL 625p UNIT PLEASE CONTACT OUR CUSTOMER SERVICE CENTRE.
- Because AACS (Advanced Access Content System) is approved as content protection system for BD format, similar to use of CSS (Content Scramble System) for DVD format, certain restrictions are imposed on playback, analogue signal output, etc., of AACS protected contents. The operation of this product and restrictions on this product may vary depending on your time of purchase as those restrictions may be adopted and/or changed by AACS after the production of this product.
- Furthermore, BD-ROM Mark and BD+ are additionally used as content protection systems for BD format, which imposes certain restrictions including playback restrictions for BD-ROM Mark and/or BD+ protected contents. To obtain additional information on AACS, BD-ROM Mark, BD+, or this product, please contact an authorized Customer Service Centre.
- Many BD-ROM/DVD discs are encoded with copy protection. Because of this, you should only connect your player directly to your TV, not to a VCR. Connecting to a VCR results in a distorted picture from copy-protected discs.
- Under the U.S. Copyright laws and Copyright laws of other countries, unauthorized recording, use, display, distribution, or revision of television programs, videotapes, BD-ROM discs, DVDs, CDs and other materials may subject you to civil and/or criminal liability.
Caution
- Watching a 3D content for a long period time may cause dizziness or tiredness.
- It is not recommended to watch a movie in 3D mode for infirm, child and pregnant woman.
- If you are experiencing headache, tiredness or dizziness while viewing content in 3D, it is strongly recommended to stop the playback and rest until you feel normal.
Important Notice for TV colour system
The colour system of this player differs according to currently playing discs.
For example, when the player plays the disc recorded in the NTSC colour system, the image is output as an NTSC signal.
Only the multi system colour TV can receive all signals output from the player.
- If you have a PAL colour system TV, you will see just distorted images when using discs or video contents recorded in NTSC.
- The multi system colour TV changes the colour system automatically according to input signals. In case that the colour system is not changed automatically, turn it off and then on to see normal images on screen.
- Even if the disc recorded in NTSC colour system are well displayed on your TV, these may not be recorded correctly on your recorder.
Table of Contents
1 Getting Started
3 Safety Information
8 Introduction
8 - Playable discs and symbols used in this manual
9 - About the "∅" symbol display
9 - Compatibility notes
10 - File compatibility
11 - Regional Code
11 - AVCHD (Advanced Video Codec High Definition)
11 - System Requirements
11 - Compatibility Notes
11 - What is SIMPLINK?
12 Remote control
13 Main Unit
2 Connecting
14 Connections to Your TV
14 - Antenna connection to your TV and this unit
15 - HDMI Connection
16 - Component Video Connection
16 - Composite connection
17 - Resolution Setting
18 Connecting to an Amplifier
18 - Connecting to an Amplifier via HDMI Output
19 - Connecting to an Amplifier via Digital Audio Output
19 - Connecting to an Amplifier via 2 Channel Audio Output
20 Connecting to your Home Network
20 - Wired network connection
21 - Wired Network Setup
22 - Wireless network connection
22 - Wireless Network Setup
25 USB device connection
25 - Playback content in the USB device
3 System Setting
26 Auto Set UP
27 Home Menu Overview
27 - Basic button operations
27 Settings
27 - Adjust the Setup Settings
28 - Settings for Digital TV
28 - Cable Setting (Auto Tuning)
29 - Cable Setting (Manual Tuning)
29 - Scanning programmes automatically for Terrestrial Antenna (Auto Tuning)
30 - Scanning programmes manually for Terrestrial Antenna (Manual Tuning)
30 - Editing Programme List (Channel Edit)
31 - Setting the DTV Lock
31 - Setting the antenna power
31 - Adjusting DTV Rating
31 - Setting the Timeshift
32 - [DTV] Menu
33 - [DISPLAY] Menu
34 - [LANGUAGE] Menu
35 - [AUDIO] Menu
36 - [LOCK] Menu
37 - [NETWORK] Menu
38 - [OTHERS] Menu
4 Operating
40 Using the Digital TV functions
40 - Viewing the Digital TV
40 - Changing Digital TV programmes
40 - Setting favourite programmes
41 - Viewing the programme information
41 - Selecting DTV audio language
41 - Selecting DTV subtitle language
42 - Programme Guide (Digital program only)
43 - Using the timeshift function manually
43 - Using the timeshift function automatically
44 - Using the teletext (Viewing Teletext)
44 Recording TV programmes
44 - Normal Recording
45 - Timer Recording (Manual)
46 - Timer Recording (EPG)
46 - Canceling a timer recording
46 - Editing a timer recording
47 - Instant Timer Recording
47 General Playback
47 - Playing Discs
48 - Using the disc menu
48 - Resume playback
49 - Playing the recorded titles
49 - Searching the recorded titles
49 - Sorting the recorded titles
50 - Playing content contained in the internal hard disk drive
50 - Searching content in the hard disk drive by entering file name
51 - Playing Blu-ray 3D disc
52 Advanced Playback
52 - Repeat Playback
52 - Repeating a specific portion
53 - Changing content list view
53 - Viewing content information
53 - Selecting a subtitle file
54 - Last Scene Memory
54 On-Screen display
54 - Displaying content information on-screen
55 - Playing from selected time
56 - Hearing different audio
56 - Selecting a subtitle language
56 - Watching from a different angle
56 - Changing the TV Aspect Ratio
57 - Changing the Picture Mode
57 Copying
57 - Copying file(s)/folder(s) to the internal hard disk drive
59 - Copying file(s)/folder(s) from the internal hard disk drive to a USB storage device
60 - Deleting a file(s)/folder(s)
61 - Naming a file/folder
61 Enjoying BD-LIVE
62 - Playing a file on a network server
63 - Wi-Fi Direct™ Connection
65 Playing movie file and VR discs
65 - Selecting a subtitle file
66 - Changing subtitle code page
66 Viewing a photo
67 - Options while viewing a photo
68 - Listening to music during a slide show
69 Listening to music
69 - Audio CD Recording
70 - Viewing information from Gracenote Media Database
71 - Using the Music Library
73 - Using the Photo Library
74 Using the Premium
74 Using the LG Apps
75 - Signing in
75 - Managing my Apps
5 Troubleshooting
76 Troubleshooting
76 - General
76 - Picture
77 - Sound
77 - Network
78 - Recording
78 - Customer Support
78 - Open source software notice
6 Appendix
79 Controlling a TV with the Supplied Remote Control
79 - Setting up the remote to control your TV
80 Area Code List
81 Language code List
82 Trademarks and Licenses
84 Network Software Update
84 - Network update notification
85 - Software Update
86 MediaHome 4 Essentials
86 - System requirements
86 - Installing Nero MediaHome 4 Essentials
87 - Sharing files and folders
88 Audio Output Specifications
89 About the internal hard disk drive
90 Video Output Resolution
91 Specifications
92 Maintenance
92 - Notes on Discs
92 - Handling the Unit
93 Important Information Relating to Network Services
Introduction
Playable discs and symbols used in this manual
| Media/Term Logo Symbol Description | |||
| Blu-ray |  |  | Discs such as movies that can be purchased or rented."Blu-ray 3D" discs and "Blu-ray 3D ONLY" discs.BD-R/RE discs that are recorded in BDAV format. |
  |   | ||
| DVD-ROM DVD-R DVD-RW DVD+R DVD+RW (12 cm) |      |  | BD-R/RE discs that contain Video, Audio or Photo files.ISO 9660+JOLIET, UDF and UDF Bridge format |
 | Finalized AVCHD format | ||
  | DVD±R/RW discs that contain Video, Audio or Photo files.ISO 9660+JOLIET, UDF and UDF Bridge format | ||
| DVD-RW (VR) (12 cm) |  |  | VR mode and finalized only |
| Audio CD (12 cm) |  |  | Audio CD |
| CD-R/RW (12 cm) |  |   | CD-R/RW discs that contain Video, Audio or Photo files.ISO 9660+JOLIET, UDF and UDF Bridge format |
| HDD - |   | Movie, Music, Photo files contained in the HDD | |
| REC | Titles recorded via this unit | ||
| Note - | [ctttr] | Indicates special notes and operating features. | |
| Caution - | [wyyv] | Indicates cautions for preventing possible damages from abuse. | |
Note
- Depending on the conditions of the recording equipment or the CD-R/RW (or DVD-R/RW) disc itself, some CD-R/RW (or DVD±R/RW) discs cannot be played on the unit.
- Depending on the recording software & the finalization, some of recorded discs (CD-R/RW or DVD±R/RW) may not be playable.
- BD-R/RE, DVD±R/RW and CD-R/RW discs recorded using a personal computer or a DVD or CD Recorder may not play if the disc is damaged or dirty, or if there is dirt or condensation on the player's lens.
- If you record a disc using a personal computer, even if it is recorded in a compatible format, there are cases in which it may not play because of the settings of the application software used to create the disc. (Check with the software publisher for more detailed information.)
- This unit requires discs and recordings to meet certain technical standards in order to achieve optimal playback quality.
- Pre-recorded DVDs are automatically set to these standards. There are many different types of recordable disc formats (including CD-R containing MP3 or WMA files) and these require certain pre-existing conditions to ensure compatible playback.
- Customers should note that permission is required in order to download MP3 / WMA files and music from the Internet. Our company has no right to grant such permission. Permission should always be obtained from / guaranteed by the copyright owner.
- You have to set the disc format option to [Mastered] in order to make the discs compatible with the LG players when formatting rewritable discs. If you set the option to "Live System", the disc cannot be played on LG player. (Mastered/Live File System : Disc format system for windows Vista)
- The drive is slot looking you should insert only round 77 or 120 mm disc. The drive does not work with irregularly shaped discs, which could damage the drive if inserted.
About the "∅" symbol display
"∅" may appear on your TV display during operation and indicates that the function explained in this owner's manual is not available on that specific media.
Compatibility notes
- Because BD-ROM is a new format, certain disc, digital connection and other compatibility issues are possible. If you experience compatibility problems, please contact an authorized Customer Service Center.
- This unit allows you to enjoy functions such as picture-in-picture, secondary audio and Virtual packages, etc., with BD-ROM supporting BONUSVIEW (BD-ROM version 2 Profile 1 version 1.1). Secondary video and audio can be played from a disc compatible with the picture-in-picture function. For the playback method, refer to the instructions in the disc.
- Viewing high-definition content and up-converting standard DVD content may require a HDMI-capable input or HDCP-capable DVI input on your display device.
- Some BD-ROM and DVD discs may restrict the use of some operation commands or features.
- Dolby TrueHD, Dolby Digital Plus and DTS-HD are supported with maximum 7.1 channels if you use HDMI connection for the audio output of the unit.
- You can use a USB device to store some disc related information, including downloaded online content. The disc you are using will control how long this information is retained.
For CI+ CAM, It takes more than 3 minutes to authenticate at the first time.
If you are using more 2 CI+ CAM, there could be a failure in authentication when you change CI+ CAM, (It is a normal operation).
Please insert CAM again when the failure is occurred.
File compatibility
Overall
Available File extensions: ".jpg", ".jpeg", ".png", ".avi", ".divx", ".mpg", ".mpeg", ".mkv", ".mp4", ".mp3", ".wav", ".wma", ".ts"
- There could be a variance on the available file extensions depending on DLNA server.
- The file name is limited to 180 characters.
- Depending on the size and number of the files, it may take several minutes to read the contents on the media.
Maximum Files/Folder: Less than 2000 (total number of files and folders)
CD-R/RW, DVD±R/RW, BD-R/RE Format:
ISO 9660+JOLIET, UDF and UDF Bridge format
MOVIE
Available resolution: 1920 x 1080 (W x H) pixels
\\ SubRip (.srt/.txt), SAMI (.smi), SubStation Alpha (.ssa/.txt), MicroDVD (.sub/.txt), VobSub (.sub), SubViewer 1.0 (.sub), SubViewer 2.0 (.sub/.txt), DVD Subtitle System (.txt), TMPlayer (.txt)
Playable Codec format: "DIVX3.xx", "DIVX4.xx", "DIVX5.xx", "XVID", "DIVX6.xx" (Standard playback only), H.264/MPEG-4 AVC, DIVX-HD, MPEG1 SS, MPEG2 PS, MPEG2 TS
Playable Audio format: "Dolby Digital", "DTS", "MP3", "WMA", "AAC", "AC3"
- Not all the WMA and AAC Audio formats are compatible with this unit.
Sampling frequency: within 32-48 kHz (WMA), within 16-48 kHz (MP3)
Bit rate: within 20-320 kbps (WMA), within 32-320 kbps (MP3)
Note
- HD movie files contained on the CD or USB 1.0/1.1 may not be played properly. BD, DVD or USB 2.0 are recommended to play back HD movie files.
- This player supports H.264/MPEG-4 AVC profile Main, High at Level 4.1. For a file with higher level, there will be an warning message on the screen.
- This player does not support the file that are recorded with GMC ^1 or Qpel ^2 . Those are video encoding techniques in MPEG4 standard, like DivX or XVID.
*1 GMC – Global Motion Compensation *2 Qpel – Quarter pixel - HD movie files that need high performance playback could react slowly.
- The total playback time indicated on the screen may not be correct for .ts files.
MUSIC
Sampling frequency: between 8 - 48 kHz (WMA), within 11 - 48 kHz (MP3), 44.1 and 48 kHz (LPCM)
Bit rate: between 8 - 320 kbps (WMA, MP3), 768 kbps and 1.536 Mbps (LPCM)
Note
- This unit cannot support the ID3 Tag embedded MP3 file.
- The total playback time indicated on the screen may not be correct for VBR files.
PHOTO
Recommended size:
Less than 4,000 x 3,000 x 24 bit/pixel Less than 3,000 x 3,000 x 32 bit/pixel
- Progressive and lossless compression photo image files are not supported.
- Depending on the size and number of the photo files, it may take several minutes to read the contents of the media.
- This player can not display thumbnail image in some files.
Regional Code
This unit has a regional code printed on the rear of the unit. This unit can play only BD-ROM or DVD discs labelled same as the rear of the unit or "ALL".
AVCHD (Advanced Video Codec High Definition)
- This player can playback AVCHD format discs. These discs are normally recorded and used in camcorders.
- The AVCHD format is a high definition digital video camera format.
- The MPEG-4 AVC/H.264 format is capable of compressing images at higher efficiency than the conventional image compressing format.
- Some AVCHD discs use the "x.v.Color" format.
- This player can playback AVCHD discs using "x.v.Color" format.
- Some AVCHD format discs may not be played, depending on the recording condition.
• AVCHD format discs need to be finalized. - "x.v.Color" offers a wider colour range than normal DVD camcorder discs.
System Requirements
For high definition video playback:
- High definition display that has COMPONENT or HDMI input jacks.
• BD-ROM disc with high definition content. - HDMI or HDCP capable DVI input on your display device is required for some content (as specified by disc authors).
- For up-conversion of standard definition DVD, a HDMI or HDCP capable DVI input on your display device is required for copy-protected content.
For Dolby® Digital Plus, Dolby TrueHD and DTS-HD multi-channel audio playback:
- An amplifier/receiver with a built-in (Dolby Digital, Dolby Digital Plus, Dolby TrueHD, DTS or DTS-HD) decoder.
- Main, centre, surround speakers and subwoofer as necessary for chosen format.
Compatibility Notes
- Because BD-ROM is a new format, the can be issues regarding certain disc, digital connection and other compatibility issues. If you experience compatibility problems, please contact an authorized Customer Service Center.
- Viewing high-definition content and up-converting standard DVD content may require a HDMI-capable input or HDCP-capable DVI input on your display device.
- Some BD-ROM and DVD discs may restrict the use of some operation commands or features.
- Dolby TrueHD, Dolby Digital Plus and DTS-HD are supported with maximum 7.1 channels if you use HDMI connection as the audio output.
- You can use a USB device that is used to store some disc related information, including downloaded on-line content. The disc you are using will control how long this information is retained.
- While watching 3D contents, on-screen displayed may not be displayed properly. To display proper on-screen display, turn off 3D mode on TV.
What is SIMPLINK?
SIMPLINK
Some functions of this unit are controlled by the TV's remote control when this unit and LG TV's with SIMPLINK are connected through HDMI connection.
Controllable functions by LG TV's remote control; Play, Pause, Scan, Skip, Stop, Power Off, etc.
Refer to the TV owner's manual for the details of SIMPLINK function.
LG TV's with SIMPLINK function has the logo as shown above.
Note
Depending on the disc type or playing status, some SIMPLINK operation may differ from your purpose or not work.
Remote control
text_image
OPEN/ CLOSE MUTE EXIT SUBTITLE TEXT 1 2 3 4 5 6 7 8 9 CLEAR 0 REPEAT TV/RADIO- I II VOL REC. CH LIST CH - TIMER REC. HOME GUIDE / MUSIC ID INFO/ MENU ENTER BACK TITLE/ POPUP DOC MENU/ REC. LIST R G Y B VOL+ PR/CH~ AV/ INPUT VOL- PR/CH~ TVBattery Installation
natural_image
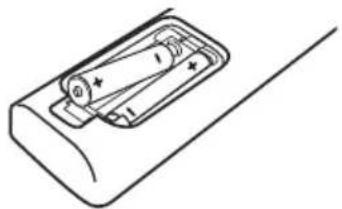
Simple line drawing of a battery pack with a handle and internal components (no text or symbols)Remove the battery cover on the rear of the Remote Control, and insert two R03 (size AAA) batteries with + and - matched correctly.
1
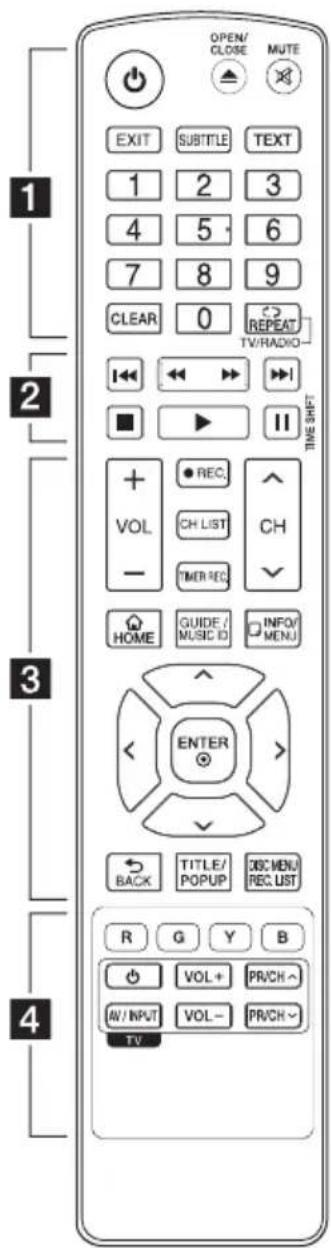
(POWER): Switches the player ON or OFF.
▲ (OPEN/CLOSE): Opens and closes the disc tray.
MUTE (☒): Mutes the sound.
EXIT: Exits a menu or hides on-screen information.
SUBTITLE: Selects a subtitle language.
TEXT: Switches between teletext mode and normal TV viewing.
0-9 numerical buttons: Selects numbered options in a menu.
CLEAR: Removes a mark on the search menu or a number when setting the password.
REPEAT (C) : Repeats a desired section or sequence.
TV/RADIO: Switches between TV and radio modes.
2
◀◀/▶▶ (SCAN): Searches backward or forward.
I◄◄/►►I (SKIP): Goes to the next or previous chapter / track / file.
■ (STOP): Stops playback.
▶ (PLAY): Starts playback.
II (PAUSE): Pauses playback.
TIME SHIFT: Activates pause live TV/playback (timeshift) for a live TV programme.
3
VOL (-/+): Adjusts the sound level of the unit.
REC. (●): Starts recording.
CH LIST: Displays the Channel list.
TIMER REC.: Displays [Timer Recording] menu.
CH ( / V ): Scans up or down through memorized programmes.
HOME ( ): Displays or exits the [Home Menu].
GUIDE: Displays the EPG menu.
MUSIC ID: When connected to the network, can provide information about the current song while video playback.
INFO/MENU (☐): Displays or exits On-Screen Display.
Direction buttons: Selects an option in the menu.
ENTER (◎): Acknowledges menu selection.
BACK (→): Exits the menu or returns to the previous screen.
TITLE/POP UP: Displays the DVD title menu or BD-ROM's pop-up menu, if available.
DISC MENU/REC.LIST: Accesses menu on a disc or switches between recording list menu.
4
Coloured (R, G, Y, B) buttons: Use to navigate BD-ROM menus. They are also used for [MOVIE], [PHOTO], [MUSIC], [Premium], [LG Apps] and [DTV] menu.
TV Control Buttons: See page 79
Main Unit

text_image
1 2 3 4 5 6 7 81 Disc Slot
2 Display window
3 Remote Sensor
4 ▲ (Open/Close)
5 >|| (Play/Pause)
6 □ (Stop)
7 ⏻ (Power)
8 USB Port
text_image
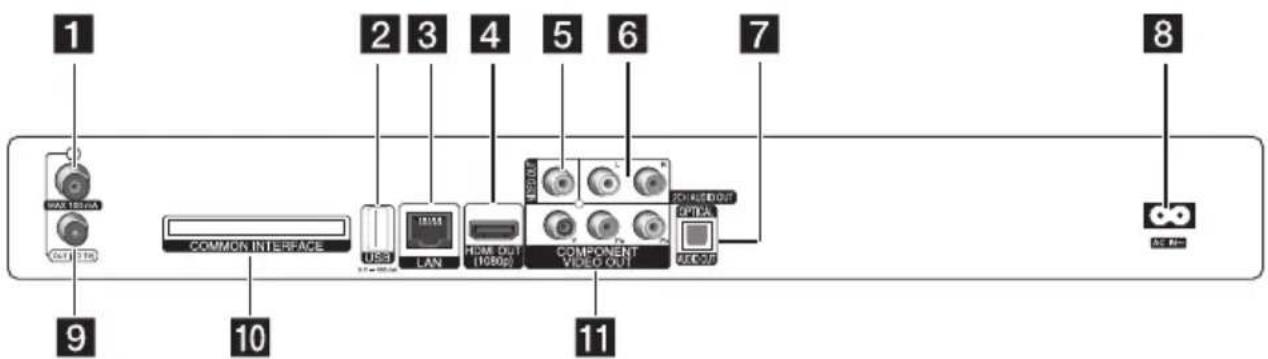
1 MAX 1800A OUT 3TB 2 3 4 5 6 7 8 COMMON INTERFACE USB LAN HDMI OUT (1080p) COMPONENT VIDEO OUT EXTRA UCCOFT 9 10 111 ANTENNA IN
2 USB Port
If you want to record on external HDD, connect external HDD to unit.
3 LAN port
4 HDMI OUT (1080p)
5 VIDEO OUT
6 2CH AUDIO OUT (Left/Right)
7 DIGITAL AUDIO OUT (OPTICAL)
8 AC IN connector
Connect the supplied power cord.
9 ANTENNA OUT (TO TV)
10 COMMON INTERFACE
Slot for external Conditional Access (CA)-module and smart card used to decode scrambled channels. This device works with CI or CI+ CAM.
11 COMPONENT VIDEO OUT (Y P B P R)
Connections to Your TV
Make one of the following connections, depending on the capabilities of your existing equipment.
• Antenna connection (page 14)
• HDMI connection (page 15)
• Component Video connection (page 16)
• Composite connection (page 16)
Note
- Depending on your TV and other equipment you wish to connect, there are various ways you could connect the unit. Use only one of the connections described in this manual.
- Please refer to the manuals of your TV, Stereo System or other devices as necessary to make the best connections.
- Make sure the player is connected directly to the TV. Tune the TV to the correct video input channel.
- Do not connect the player's AUDIO OUT jack to the phono in jack (record player) of your audio system.
- Do not connect your player via your VCR. The image could be distorted by the copy protection system.
Antenna connection to your TV and this unit
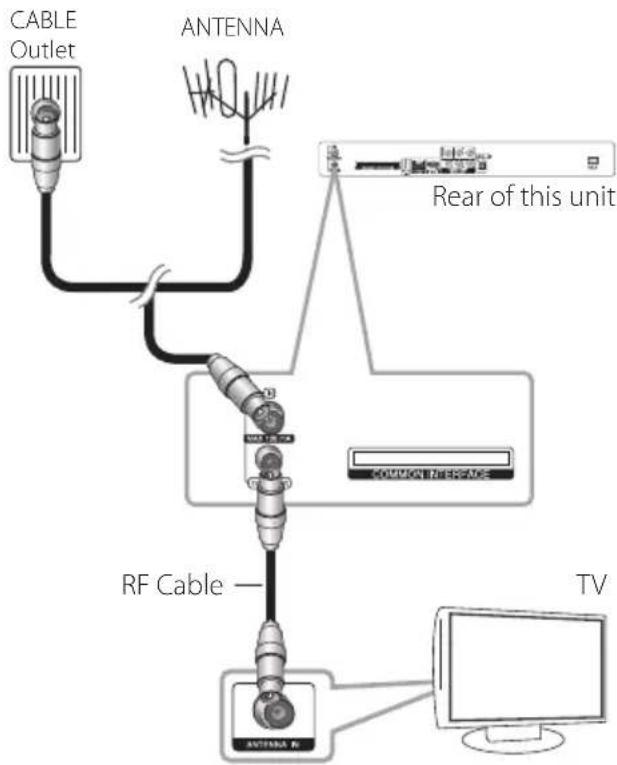
Connect one end of the RF cable to ANTENNA OUT(TO TV) jack on the unit and other end to ANTENNA IN jack on your TV. Passes the signal from the ANTENNA IN jack to your TV/monitor.
Connect the CATV line or Terrestrial TV antenna to the ANTENNA IN jack on the unit. If you want to use an indoor antenna, use one with a signal amplifier rated at 5V, 100mA and set [Antenna 5V] to [ON] in the setup menu (See page 31).
flowchart
graph TD
    A["CABLE Outlet"] --> B["Antenna"]
    B --> C["Rear of this unit"]
    C --> D["Common Interface"]
    D --> E["RF Cable"]
    E --> F["TV"]
    E --> G["Antenna R"]
HDMI Connection
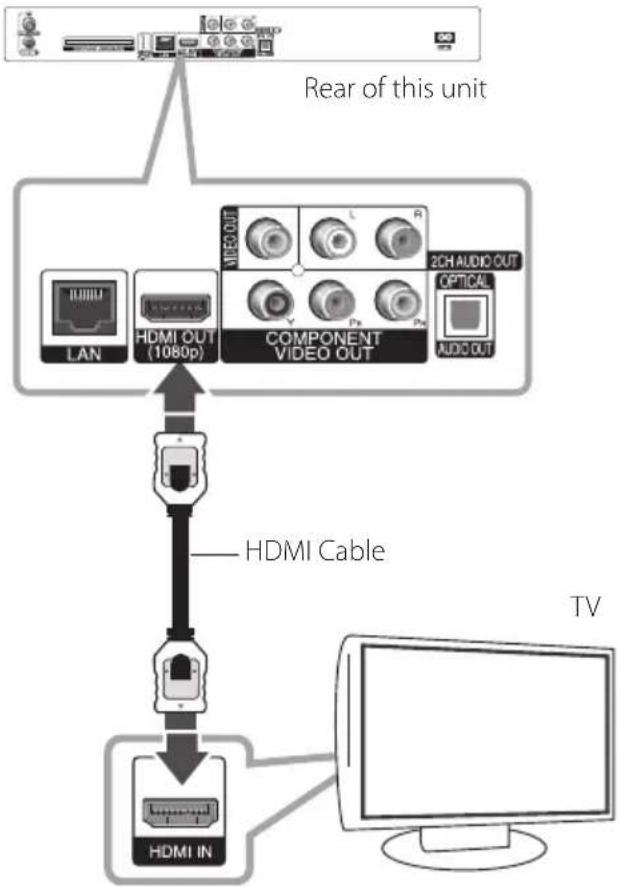
If you have a HDMI TV or monitor, you can connect it to this unit using a HDMI cable (Type A, High Speed HDMI™ Cable). Connect the HDMI jack on the unit to the HDMI jack on a HDMI compatible TV or monitor.
flowchart
graph TD
    A["Rear of this unit"] --> B["LAN"]
    A --> C["HDMI OUT (1080p)"]
    A --> D["MEO OUT"]
    A --> E["COMPONENT VIDEO OUT"]
    A --> F["2CH AUDIO OUT"]
    A --> G["AUDC OUT"]
    B --> H["HDMI Cable"]
    C --> H
    D --> H
    E --> H
    F --> I["TV"]
    G --> I
    H --> J["HDMI IN"]
    I --> J
Set the TV's source to HDMI (refer to TV's Owner's manual).
Note
- If a connected HDMI device does not accept the audio output of the unit, the HDMI device's audio sound may be distorted or may not output.
- When you use HDMI connection, you can change the resolution for the HDMI output. (Refer to "Resolution Setting" on page 17.)
- Select the type of video output from the HDMI OUT jack using [HDMI Color Setting] option on the [Setup] menu (see page 33).
- Changing the resolution when the connection has already been established may result in malfunctions. To solve the problem, turn off the player and then turn it on again.
- When the HDMI connection with HDCP is not verified, TV screen is changed to black screen. In this case, check the the HDMI connection, or disconnect the HDMI cable.
- If there is noise or lines on the screen, please check the HDMI cable (length is generally limited to 4.5m).
Additional Information for HDMI
- When you connect a HDMI or DVI compatible device make sure of the following:
- Try switching off the HDMI/DVI device and this player. Next, switch on the HDMI/DVI device and leave it for around 30 seconds, then switch on this player.
- The connected device's video input is set correctly for this unit.
- The connected device is compatible with 720x576p, 1280x720p, 1920x1080i or 1920x1080p video input.
- Not all HDCP-compatible HDMI or DVI devices will work with this player.
- The picture will not be displayed properly with non-HDCP device.
- This player does not playback and TV screen is changed to black screen.
Component Video Connection
Connect the COMPONENT VIDEO OUT jacks on the unit to the corresponding input jacks on the TV using Y PB PR cables. Connect the left and right AUDIO OUT jacks of the unit to the audio left and right IN jacks on the TV using the audio cables.
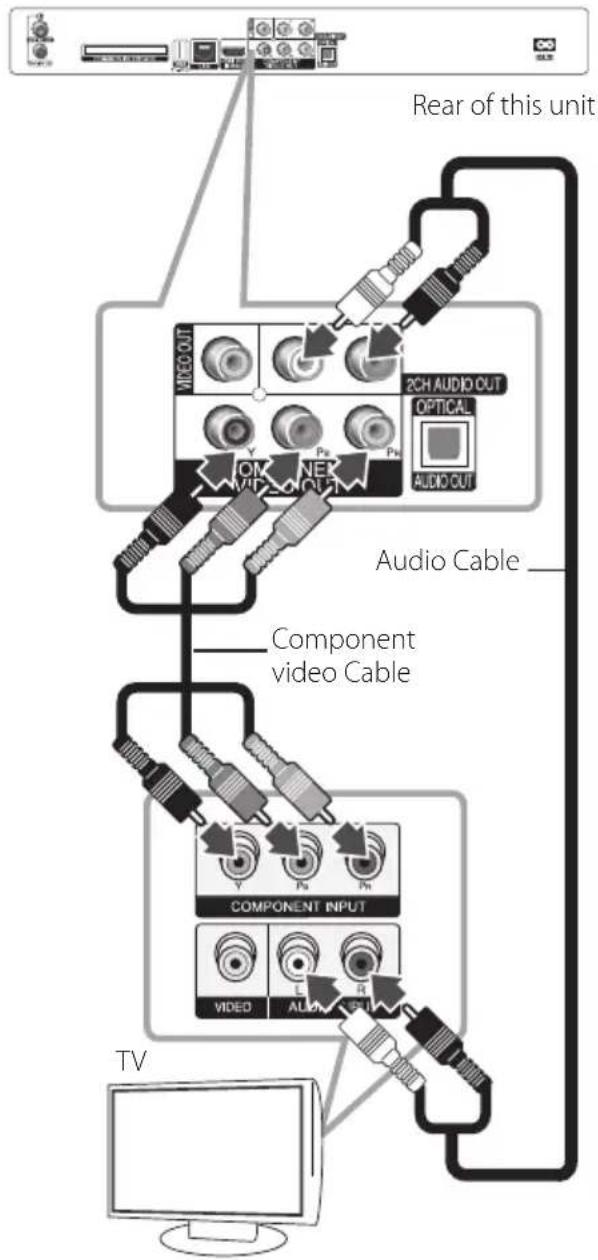
flowchart
graph TD
    A["TV"] --> B["Component video Cable"]
    B --> C["Audio Cable"]
    C --> D["2CH AUDIO OUT"]
    D --> E["VIDEO OUT"]
    D --> F["Pu"]
    D --> G["Pu"]
    D --> H["OPTICAL"]
    D --> I["AUDIO OUT"]
    B --> J["COMPONENT INPUT"]
    J --> K["VIDEO"]
    J --> L["E"]
    J --> M["R"]
    J --> N["ALPA"]
    J --> O["SU"]
    style A fill:#f9f,stroke:#333
    style B fill:#ccf,stroke:#333
    style C fill:#cfc,stroke:#333
    style D fill:#fcc,stroke:#333
    style E fill:#cff,stroke:#333
    style F fill:#ffc,stroke:#333
    style G fill:#ffc,stroke:#333
    style H fill:#ffc,stroke:#333
    style I fill:#ffc,stroke:#333
    style J fill:#cfc,stroke:#333
    style K fill:#fcc,stroke:#333
    style L fill:#ffc,stroke:#333
    style M fill:#ffc,stroke:#333
    style N fill:#cfc,stroke:#333
    style O fill:#cfc,stroke:#333
Note
When you use COMPONENT VIDEO OUT connection, you can change the resolution for the output. (Refer to "Resolution setting" on page 18.)
Composite connection
Connect the VIDEO OUT jack on the Recorder to the video in jack on the TV using the video cable supplied. Connect the Left and Right AUDIO OUT jacks on the Recorder to the audio left/right in jacks on the TV using the supplied audio cables.
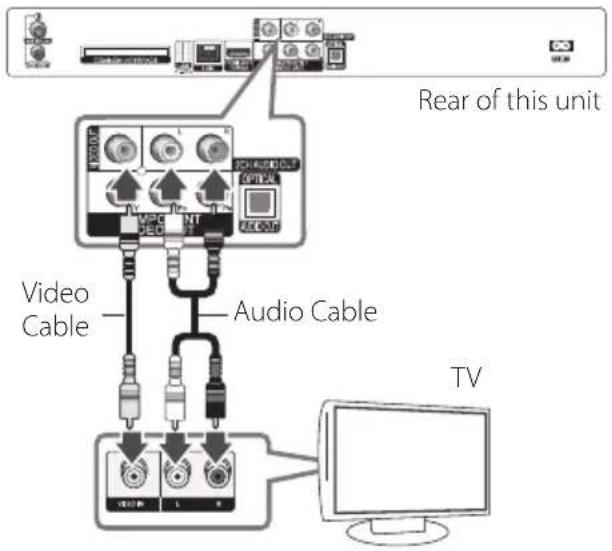
text_image
Rear of this unit Video Cable Audio Cable TVResolution Setting
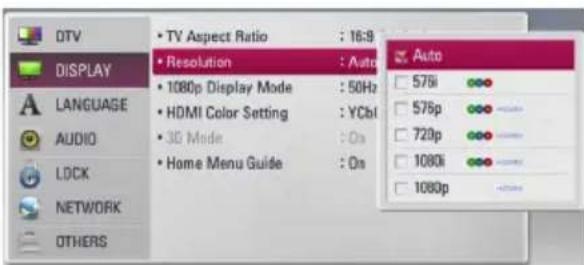
The player provides several output resolutions for HDMI OUT and COMPONENT VIDEO OUT jacks. You can change the resolution using [Setup] menu.
- Press HOME ( ▲ ).
- Use to select the [Setup] and press ENTER (◎). The [Setup] menu appears.
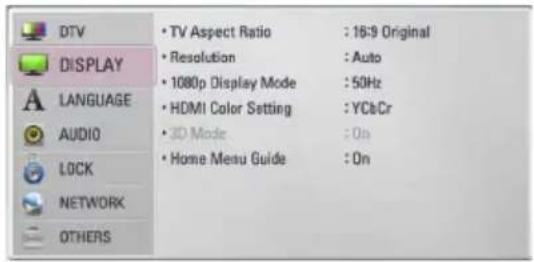
text_image
DTV DISPLAY LANGUAGE AUDIO LOCK NETWORK OTHERS • TV Aspect Ratio : 16:9 Original • Resolution : Auto • 1080p Display Mode : 50Hz • HDMI Color Setting : YCbCr • 3D Mode : On • Home Menu Guide : On- Use /V to select [DISPLAY] option then press > to move to the second level.
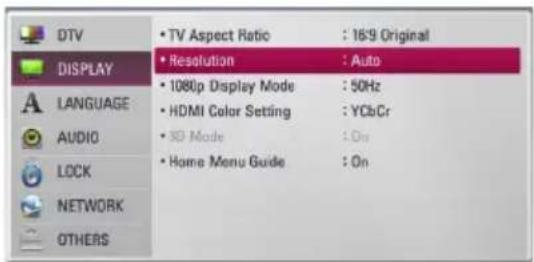
text_image
DTV DISPLAY LANGUAGE AUDIO LOCK NETWORK OTHERS • TV Aspect Ratio : 16:9 Original • Resolution : Auto • 1080p Display Mode : 50Hz • HDMI Color Setting : YCbCr • 3D Mode : On • Home Menu Guide : On- Use < / > to select the [Resolution] option then press ENTER () to move to the third level.
text_image
DTV DISPLAY LANGUAGE AUDIO LOCK NETWORK OTHERS • TV Aspect Ratio : 16:9 • Resolution : Auto • 1080p Display Mode : 50Hz • HDMI Color Setting : YCbI • 3G Mode : On • Home Menu Guide : On Auto 576i 576p 720p 1080i 1080p- Use / V to select the desired resolution then press ENTER (●) to confirm your selection.
Connecting to an Amplifier
Make one of the following connections, depending on the capabilities of your existing equipment.
• HDMI Audio connection (page 18)
• Digital Audio connection (page 19)
• 2CH Analogue Audio connection (page 19)
Since many factors affect the type of audio output, see "Audio Output Specifications" for details (pages 88-89).
About Digital Multi-channel sound
A digital multi-channel connection provides the best sound quality. For this, you need a multi-channel Audio/Video Receiver that supports one or more of the audio formats supported by your unit. Check the receiver manual and the logos on the front of the receiver. (PCM Stereo, PCM Multi-Ch, Dolby Digital, Dolby Digital Plus, Dolby TrueHD, DTS and/or DTS-HD)
Connecting to an Amplifier via HDMI Output
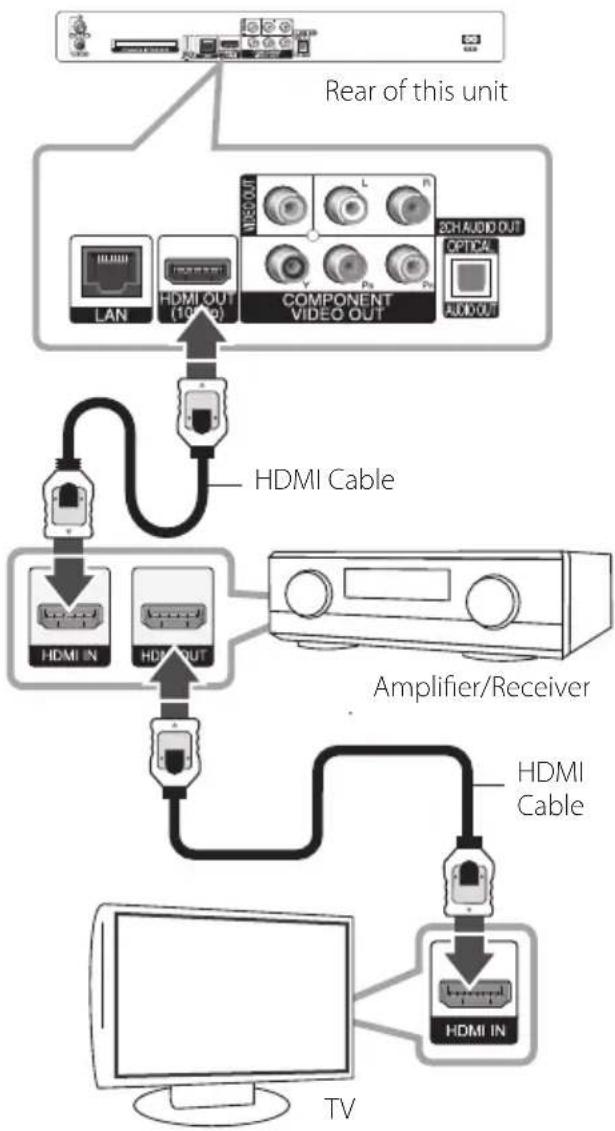
Connect the player's HDMI OUT jack to the corresponding in jack on your amplifier using a HDMI cable. You will need to activate the player's digital output. (See "[AUDIO] Menu" on pages 35-36.)
flowchart
graph TD
    A["Rear of this unit"] --> B["LAN"]
    A --> C["HDMI OUT (10Ω)"]
    A --> D["COMPONENT VIDEO OUT"]
    A --> E["AMISO/OUT"]
    A --> F["AUD OUT"]
    B --> G["HDMI Cable"]
    C --> G
    D --> G
    E --> G
    F --> G
    G --> H["HDMI IN"]
    G --> I["HDMI OUT"]
    H --> J["Amplifier/Receiver"]
    I --> J
    J --> K["HDMI Cable"]
    K --> L["HDMI IN"]
    L --> M["TV"]
Connect the amplifier's HDMI output jack to HDMI input jack on your TV using a HDMI cable if your amplifier has HDMI output jack.
Connecting to an Amplifier via Digital Audio Output
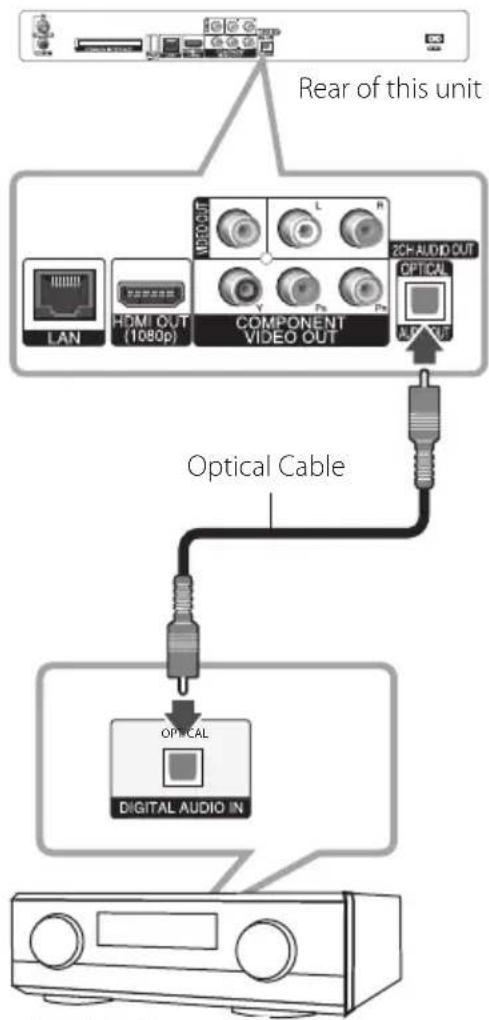
Connect the player's DIGITAL AUDIO OUT (OPTICAL) jack to the corresponding in jack (OPTICAL) on your amplifier.
Use an optional digital (optical) audio cable. You will need to activate the unit's digital output. (See "[AUDIO] Menu" on pages 35-36.)
flowchart
graph TD
    A["Rear of this unit"] --> B["Component Video Out"]
    B --> C["Optical Cable"]
    C --> D["DIGITAL AUDIO IN"]
    B --> E["LAN"]
    B --> F["HDMI OUT (1080p)"]
    B --> G["L"]
    B --> H["R"]
    B --> I["OPTICAL"]
    B --> J["2CH AUDIO OUT"]
Amplifier/Receiver
Connecting to an Amplifier via 2 Channel Audio Output
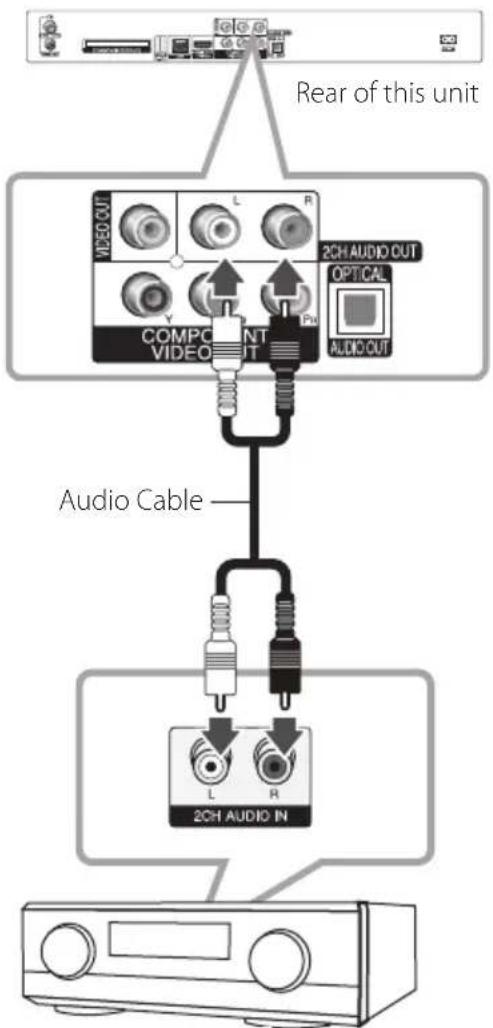
Connect the Left and Right 2CH AUDIO OUT jacks on the unit to the audio left and right in jacks on your amplifier, receiver, or stereo system, using audio cables.
flowchart
graph TD
    A["Rear of this unit"] --> B["Audio Cable"]
    B --> C["2CH AUDIO OUT"]
    B --> D["L"]
    B --> E["R"]
    B --> F["OPTICAL"]
    B --> G["VIDEO OUT"]
    B --> H["COMPONENT"]
    B --> I["VIDEO OUT"]
Amplifier/Receiver
Connecting to your Home Network
This unit can be connected to a local area network (LAN) via the LAN port on the rear panel or the internal wireless module.
By connecting the unit to a broadband home network, you have access to services such as software updates, BD-Live interactivity and streaming services.
Wired network connection
Using a wired network provides the best performance, because the attached devices connect directly to the network and are not subject to radio frequency interference.
Please refer to the documentation for your network device for further instructions.
Connect the player's LAN port to the corresponding port on your Modem or Router using a commercially available LAN or Ethernet cable.
Note
- When plugging or unplugging the LAN cable, hold the plug portion of the cable. When unplugging, do not pull on the LAN cable but unplug while pressing down on the lock.
- Do not connect a modular phone cable to the LAN port.
- Since there are various connection configurations, please follow the specifications of your telecommunication carrier or internet service provider.
- If you want to access content from PCs or DLNA servers, this unit must be connected to the same local area network with them via a router.
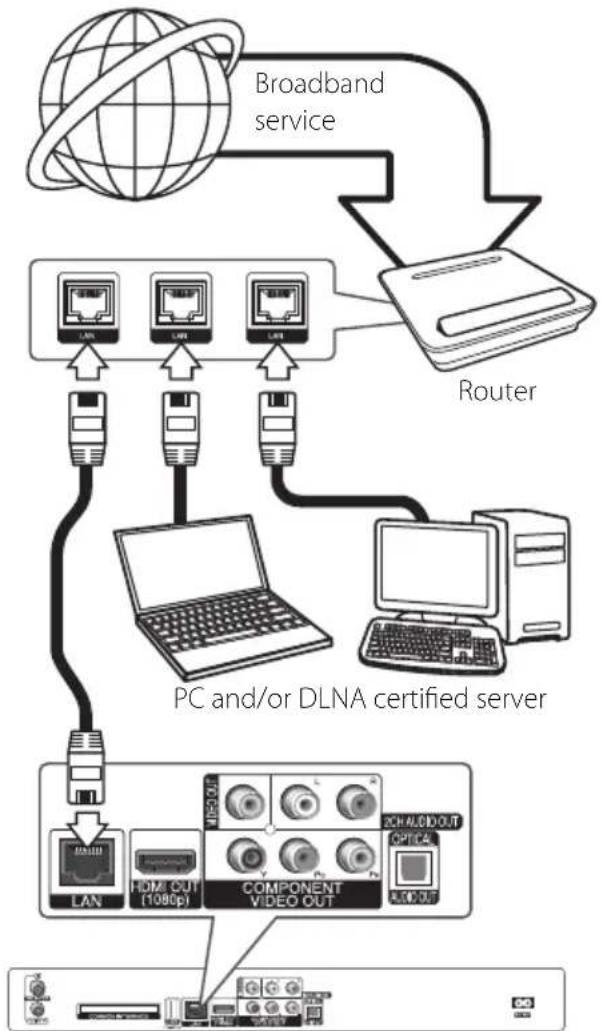
flowchart
graph TD
    A["Broadband service"] --> B["Router"]
    B --> C["PC and/or DLNA certified server"]
    C --> D["LAN"]
    C --> E["LAN Out"]
    C --> F["COMPONENT VIDEO OUT"]
    D --> G["LAN"]
    E --> H["LAN Out"]
    F --> I["LAN Out"]
Rear of this unit
Wired Network Setup
If there is a DHCP server on the local area network (LAN) via wired connection, this player will automatically be allocated an IP address. After making the physical connection, a small number of home networks may require the player's network setting to be adjusted. Adjust the [NETWORK] setting as follow.
Preparation
Before setting the wired network, you need to connect the broadband internet to your home network.
- Select [Connection Setting] option in the [Setup] menu then press ENTER (●).
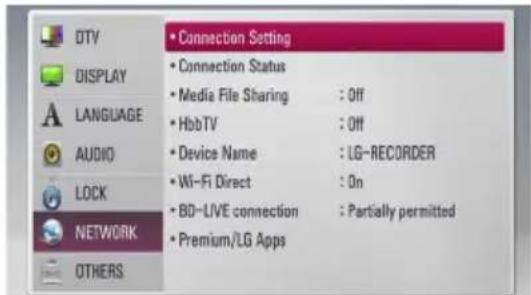
text_image
DTV DISPLAY LANGUAGE AUDIO LOCK NETWORK OTHERS • Connection Setting • Connection Status • Media File Sharing : Off • HbbTV : Off • Device Name : LG-RECORDER • Wi-Fi Direct : On • BD-LIVE connection : Partially permitted • Premium/LG Apps- The [Connection Setting] menu will appear on the screen. Use /V to select the [Wired] and press ENTER (◎).
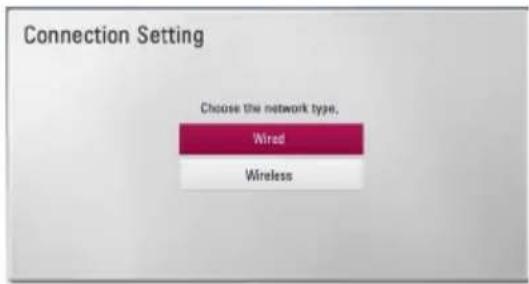
text_image
Connection Setting Choose the network type, Wired Wireless- Select [Yes] and press ENTER ( ) to continue. The new connection settings reset the current network settings.
- Use / / < / > to select the IP mode between [Dynamic] and [Static]. Normally, select [Dynamic] to allocate an IP address automatically.
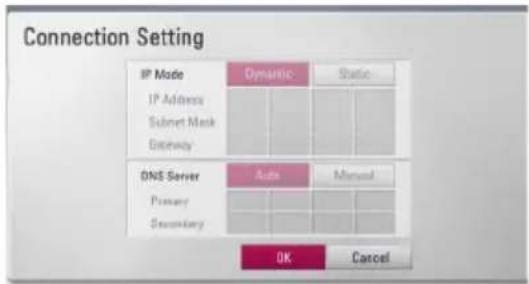
text_image
Connection Setting IP Mode IP Address Subnet Mask Gateway DNS Server Primary Secondary Dynamic Static Auto Manual OK CancelNote
If there is no DHCP server on the network and you want to set the IP address manually, select [Static] then set [IP Address], [Subnet Mask], [Gateway] and [DNS Server] using ∧/∨/ </> and numerical buttons. If you make a mistake while entering a number, press CLEAR to clear the highlighted part.
- Select [OK] and press ENTER ( Ⓞ) to apply network settings.
- The player will ask you to test the network connection. Select [OK] and press ENTER (●) to complete the network connection.
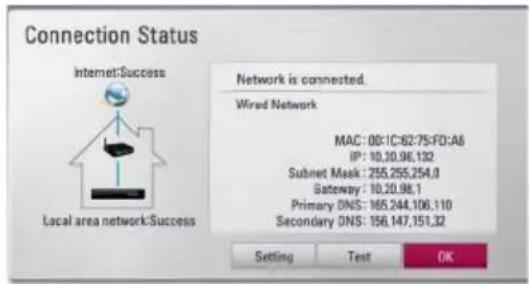
- If you select [Test] and press ENTER (◎) at step 5 above, the network connection status is displayed on the screen. You can also test it on the [Connection Status] in the [Setup] menu.
text_image
Connection Status Internet:Success Local area network:Success Network is connected. Wired Network MAC: 00:IC:62:75:FD:A6 IP: 10.20.96.132 Subnet Mask: 255.255.254.0 Gateway: 10.20.98.1 Primary DNS: 165.244.106.110 Secondary DNS: 156.147.151.32 Setting Test OKWireless network connection
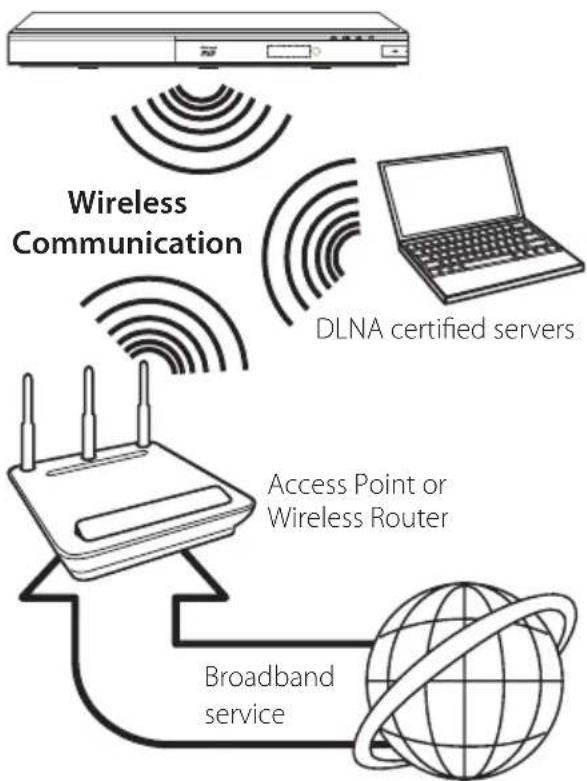
Another connection option is to use an Access Point or a wireless router. The network configuration and connection method may vary depending on the equipment in use and the network environment.
flowchart
graph TD
    A["Server"] --> B["Wireless Communication"]
    B --> C["DLNA certified servers"]
    C --> D["Access Point or Wireless Router"]
    D --> E["Broadband service"]
    E --> D
Refer to the setup instructions supplied with your access point or wireless router for detailed connection steps and network settings.
For best performance, a direct wired connection from this player to your home network's router or cable/DSL modem is always the best option. If you do chose to use the wireless option, note that performance can sometimes be affected by other electronic devices in the home.
Wireless Network Setup
For the wireless network connection, the player needs to be set up for network communication. This adjustment can be done from the [Setup] menu. Adjust the [NETWORK] setting as follows. Setting up the access point or the wireless router is required before connecting the player to the network.
Preparation
Before setting the wireless network, you need to:
-
connect the broadband internet to the wireless home network.
• set the access point or wireless router.
• note the SSID and security code of the network. -
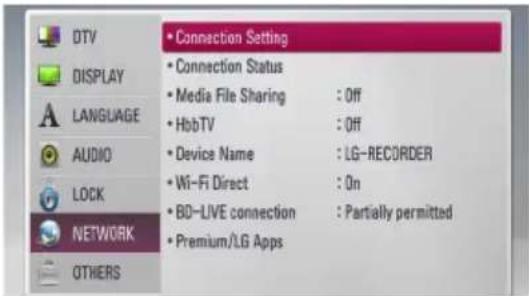
Select [Connection Setting] option in the [Setup] menu then press ENTER (●).
text_image
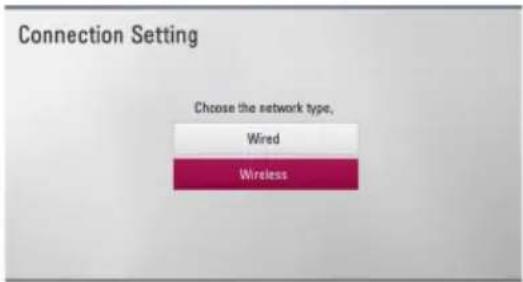
DTV DISPLAY LANGUAGE AUDIO LOCK NETWORK OTHERS • Connection Setting • Connection Status • Media File Sharing : Off • HbbTV : Off • Device Name : LG-RECORDER • Wi-Fi Direct : On • BD-LIVE connection : Partially permitted • Premium/LG Apps- The [Connection Setting] menu appears on the screen. Use ∧/∨ to select [Wireless] and press ENTER (◎).
text_image
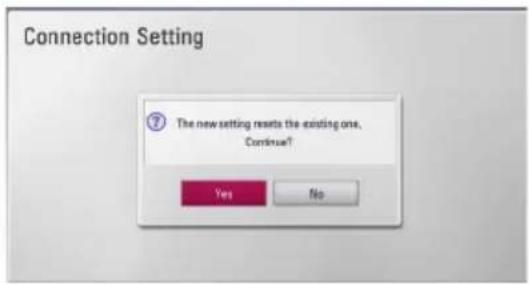
Connection Setting Choose the network type, Wired Wireless- Select [Yes] and press ENTER ( Ⓞ) to continue. The new connection settings reset the current network settings.
text_image
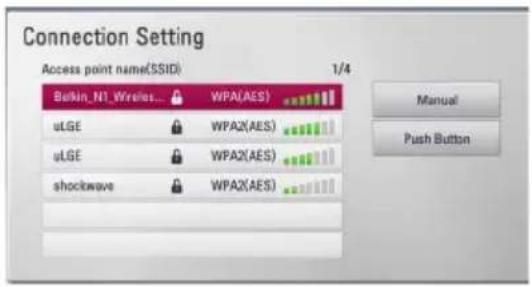
Connection Setting The new setting resets the existing one, Continue?- The player scans all available access points or wireless routers within range and displays them as a list. Use / V to select an access point or wireless router on the list, and then press ENTER (◎).
text_image
Connection Setting Access point name(SSID) 1/4 Bulkin_N1_Wireles_ WPA(AES) uLGE WPA2(AES) uLGE WPA2(AES) shockwave WPA2(AES) Manual Push ButtonIf you have security on your access point or wireless router, verify that the WEP or WPA key that was entered into the player matches the router's information exactly. You need to input the security code as necessary.
Note
- WEP security mode generally have 4 keys available on an access point or wireless router's setting. If your access point or wireless router uses WEP security, enter the security code of the key "No.1" to connect on your home network.
- An Access Point is a device that allows you to connect to your home network wirelessly.
[Manual] – Your access point may not be broadcasting its access point name (SSID). Check your router settings through your computer and either set your router to broadcast SSID, or manually enter the access point name (SSID) in [Manual].
[Push Button] – If your access point or wireless router supports the Push Button Configuration method, select this option and press the Push Button on your access point or wireless router within 120 counts. You do not need to know the access point name (SSID) and security code of your access point or wireless router.
- Use /V/</> to select the IP mode between [Dynamic] and [Static]. Normally, select [Dynamic] to allocate an IP address automatically.
Note
If there is no DHCP server on the network and you want to set the IP address manually, select [Static] then set [IP Address], [Subnet Mask], [Gateway] and [DNS Server] using ∧/∨/ </> and numerical buttons. If you make a mistake while entering a number, press CLEAR to clear the highlighted part.
- Select [OK] and press ENTER ( ) to apply network settings.
- The player will ask you to test the network connection. Select [OK] and press ENTER (◎) to complete the network connection.
- If you select [Test] and press ENTER ( Ⓞ) at step 7 above, the network connection status is displayed on the screen. You can also test it on the [Connection Status] in the [Setup] menu.
Notes on Network Connection:
- Many network connection problems during set up can often be fixed by re-setting the router or modem. After connecting the player to the home network, quickly power off and/or disconnect the power cable of the home network router or cable modem. Then power on and/or connect the power cable again.
- Depending on the internet service provider (ISP), the number of devices that can receive internet service may be limited by the applicable terms of service. For details, contact your ISP.
- Our company is not responsible for any malfunction of the player and/or the internet connection feature due to communication errors/malfunctions associated with your broadband internet connection, or other connected equipment.
- The features of BD-ROM discs made available through the Internet Connection feature are not created or provided by our company, and our company is not responsible for their functionality or continued availability. Some disc related material available by the Internet Connection may not be compatible with this player. If you have questions about such content, please contact the producer of the disc.
-
Some internet content may require a higher bandwidth connection.
-
Even if the player is properly connect and configured, some internet content may not operate properly because of internet congestion, the quality or bandwidth of your internet service, or problems at the provider of the content.
- Some internet connection operations may not be possible due to certain restrictions set by the Internet service provider (ISP) supplying your broadband Internet connection.
- Any fees charged by an ISP including, without limitation, connection charges are your responsibility.
- A 10 Base-T or 100 Base-TX LAN port is required for wired connection to this player. If your internet service does not allow for such a connection, you will not be able to connect the player.
- You must use a Router to use xDSL service.
- A DSL modem is required to use DSL service and a cable modem is required to use cable modem service. Depending on the access method of and subscriber agreement with your ISP, you may not be able to use the internet connection feature contained in this player or you may be limited to the number of devices you can connect at the same time. (If your ISP limits subscription to one device, this player may not be allowed to connect when a PC is already connected.)
- The use of a "Router" may not be allowed or its usage may be limited depending on the policies and restrictions of your ISP. For details, contact your ISP directly.
- The wireless network operate at 2.4GHz radio frequencies that are also used by other household devices such as cordless telephone, Bluetooth® devices, microwave oven, and can be affected by interference from them.
- Turn off all unused network equipment in your local home network. Some devices may generate network traffic.
- For the purpose of the better reception place the player as close as possible to the access point.
- In some instances, placing the access point or wireless router at least 0.45 m above the floor may improve the reception.
-
Move closer to the access point if possible or reorient the player so there is nothing between it and the access point.
-
The reception quality over wireless depends on many factors such as type of the access point, distance between the player and access point, and the location of the player.
- Set your access point or wireless router to Infrastructure mode. Ad-hoc mode is not supported.
USB device connection
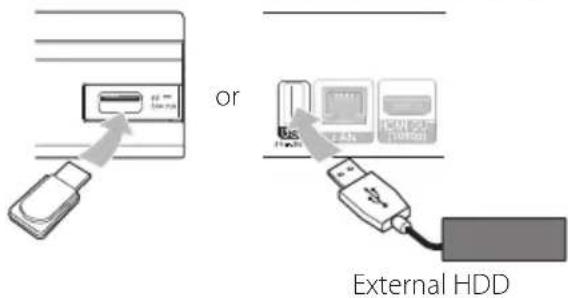
This unit can play movie, music and photo files contained on a USB device.
Playback content in the USB device
- Insert a USB device into the USB port until it fits into place.
Rear of this unitFront of the unit
text_image
or External HDD-
Press HOME ( ▲ ).
-
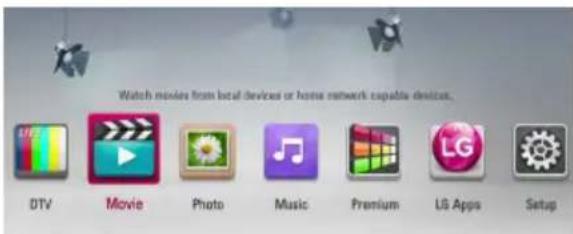
Select [Movie], [Photo] or [Music] using , and press ENTER (☐).
text_image
Watch movies from local devices or home network capable devices. DTV Movie Photo Music Premium LG Apps Setup- Select the [USB] option using /V , and press ENTER (◎).
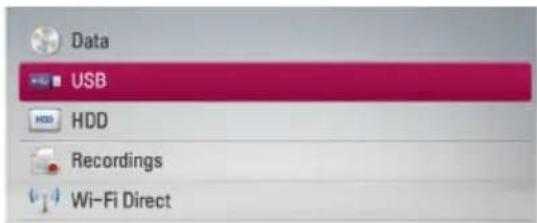
text_image
Data USB HDD Recordings Wi-Fi Direct- Select a file using ∧/∨/</>, and press ▶ (PLAY) or ENTER (◎) to play the file.
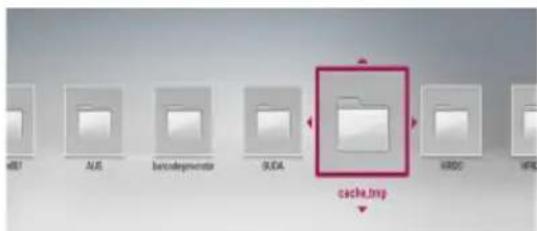
text_image
MBT AUS berodeproventa BUDA cache.bmp- Withdraw the USB device carefully after exiting the USB model.
Note
- This unit supports USB flash memory/external HDD formatted in FAT16, FAT32 and
NTFS when accessing files (music, photo, movie). However, for BD-Live, only FAT16 and FAT32 formats are supported. The USB device can be used for local storage for enjoying BD-Live discs from the Internet.
- Please use the Internal HDD or USB flash memory/external HDD formatted in either FAT16 or FAT32 when using BD-Live.
- This unit can support up to 4 partitions of the USB device.
- Do not extract the USB device during operation (play, recording, etc.).
- A USB device which requires additional programme installation when you have connected it to a computer, is not supported.
• USB device: USB device that supports USB1.1 and USB2.0.
- Movie, Music and photo files can be played. For details of operations on each file, refer to relevant pages.
- Regular back up is recommended to prevent data loss.
- If you use a USB extension cable or USB HUB or USB multi card reader, the USB device may not be recognized.
- Some USB device may not work with this unit.
• Digital camera and mobile phone are not supported.
- The USB Port on this unit cannot be connected to a PC. The unit cannot be used as a storage device.
- Unformatted media cannot be used. Please format before using.
- If USB HDD cannot be recognized, try another different USB cable.
- Some USB cables may not supply enough current for normal USB operation.
- Files over 4GB are supported with NTFS format.
- In case of recording to external HDD, connect to USB port on rear panel. Only external HDD that supports NTFS can be available.
Auto Set UP
You can reset the recorder to all its factory settings. Some options cannot be reset (Rating and Password). The [Auto Setup] menu appears on the screen after the factory settings.
Step 1. Language Setting
- Use / / < / > to select a language for the on-screen display, and press ENTER (◎).
| English | Deutsch | Française |
| Italiano | Español | Magyar |
| Svenska | Dansk | Norsk |
Step 2. Channel Setting
-
Input the new password using numerical buttons. Enter it again to verify.
-
Use / V to select the [Cable] or [Terrestrial] and press ENTER (●).
-
Use / / < / > to select a country, and press ENTER (○).
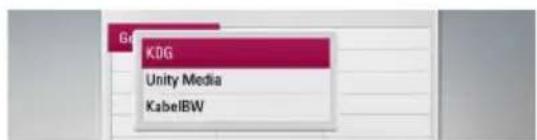
text_image
KDG Unity Media KabelBW- Use / to select the cable operator and press ENTER ( ).
If you want to set the additional Auto Tuning, use / V to select the [Frequency], [Symbol Rate] and [Network ID], and then < / > to adjust setting.
- While the Start option is selected, and press ENTER (●) to begin the channel search.
If you want to search channels in numerical order, uncheck the box [Automatic Numbering] by using ENTER (◎)
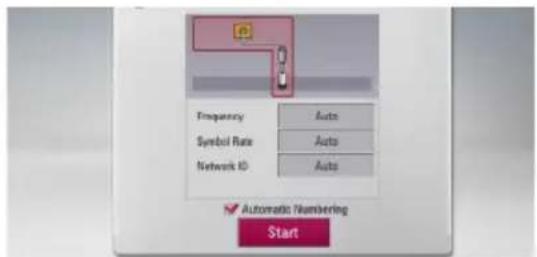
text_image
Frequency Symbol Rate Network ID Auto Auto Auto Automatic Numbering StartThe recorder automatically searches for and saves the programmes.
If you select [Stop], the [Channel Setting] function will be skipped.
- Press ENTER ( Ⓞ ).
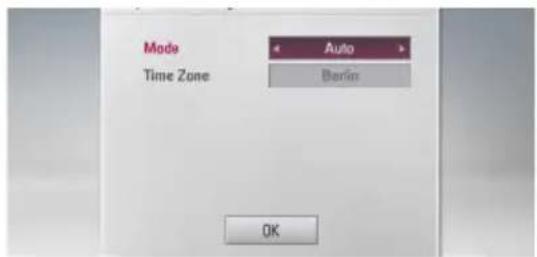
Step 3. Time Setting
- Use < / > to select an option among [Manual] or [Auto], and press ENTER (●).
text_image
Mode Time Zone Auto Berlin OKAuto: Set the programme that broadcasts a clock signal and the clock will be set automatically.
If the time that has automatically set is not correct comparing your local time, you can set additional time option.
Manual: If there is no channel that broadcasts a clock signal in your area, you can set the time and date manyally. Use / to select each field, and input correct time and date using < /> . You can use numerical buttons.
- Press ENTER ( Ⓞ ) to complete the time setting.
Step 4. Network Setting
- Refer to "Wired network connection" on pages 20-21 to complete the [Wired] setup option, and press ENTER (●).
Select [No] and press ENTER ( ⊙) to cancel.
- Refer to "Wireless network connection" on pages 22-24 to complete the [Wireless] option, and press ENTER (●).
Select [Cancel] and press ENTER ( Ⓞ) to cancel. This recorder can apply only one network setup between [Wired] and [Wireless]. If you already set the [Wired] at step 6, you do not need to set [Wireless] setting.
Home Menu Overview
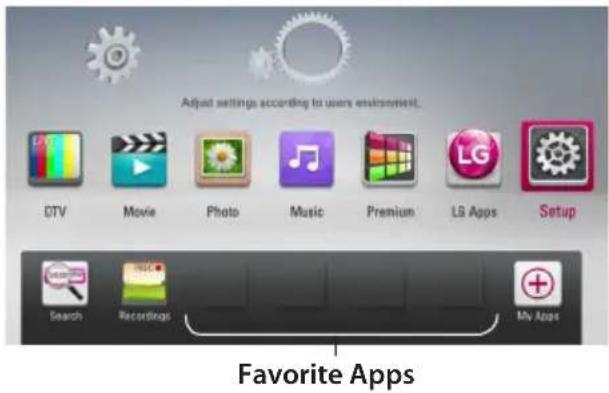
To access numerous functions of the unit, press HOME on the remote.
Basic button operations
HOME ( ): Accesses or removes the Home Menu. ∧/∨/</>: Used to navigate on-screen displays. ENTER ( ): Acknowledges menu selection. BACK ( ): Exits the menu.
text_image
Adjusted settings according to users environment. DTV Movie Photo Music Premium LG Apps Setup Search Recordings My Apps Favorite Apps[DTV] - You can watch digital broadcasts. (pages 40-47)
[Movie] - Plays video contents.
[Photo] - Plays photo contents.
[Music] - Plays audio contents.
[Premium] - Displays the Premium Home screen.
[ LG Apps] - Displays the [LG Apps] screen.
[Setup] - Adjusts the system settings.
[Search] - Searches an hard disk drive by inputting a keyword on the search menu.
[Recordings] - Displays [Recordings] menu.
[Favorite Apps] - Shortcut for user's favorite Apps.
[My Apps] - Displays the [My Apps] screen.
Settings
Adjust the Setup Settings
You can change the settings of the player in the [Setup] menu.
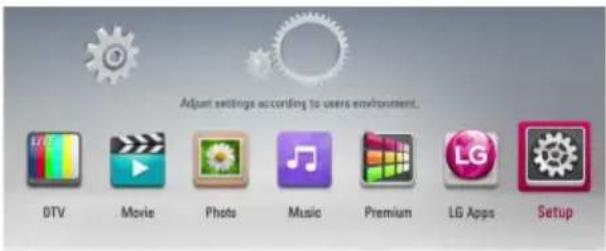
- Press HOME ( ▲).
text_image
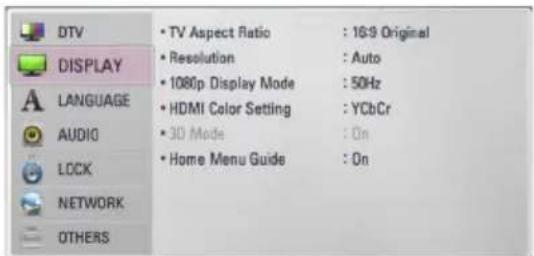
Adjust settings according to users environment. DTV Movie Photo Music Premium LG Apps Setup- Use <//> to select [Setup] and press ENTER (◎). The [Setup] menu appears.
text_image
DTV DISPLAY LANGUAGE AUDIO LOCK NETWORK OTHERS • TV Aspect Ratio : 16:9 Original • Resolution : Auto • 1080p Display Mode : 50Hz • HDMI Color Setting : YCbCr • 3D Mode : On • Home Menu Guide : On- Use /V to select the first setup option, and press > to move to the second level.
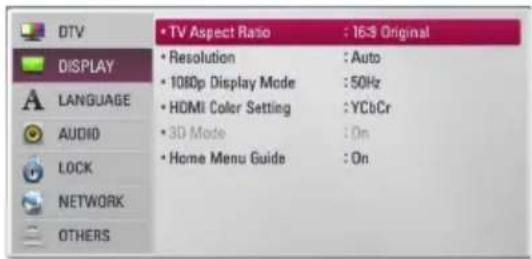
text_image
DTV DISPLAY LANGUAGE AUDIO LOCK NETWORK OTHERS • TV Aspect Ratio : 16:3 Original • Resolution : Auto • 1080p Display Mode : 50Hz • HDMI Color Setting : YCbCr • 3D Mode : On • Home Menu Guide : On- Use / V to select a second setup option, and press ENTER (●) or > to move to the third level.
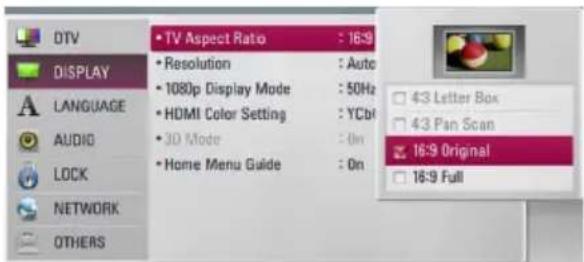
text_image
DTV DISPLAY LANGUAGE AUDIO LOCK NETWORK OTHERS • TV Aspect Ratio : 16:9 • Resolution : Auto • 1080p Display Mode : 50Hz • HDMI Color Setting : YCb • 3D Mode : On • Home Menu Guide : On 43 Letter Box 43 Pan Scan 16:9 Original 16:9 Full- Use / V to select a desired setting, and press ENTER (○) or > to confirm your selection.
Settings for Digital TV
To use DTV functions, this recorder needs some settings in advance.
Cable Setting (Auto Tuning)
- Press HOME ( ▲).
- Use < / > to select [Setup], and press ENTER (◎).
- Use / V to select [DTV], and press ENTER (◎).
- Use / to select [Cable Setting], and press ENTER ( ).
- Input the password using numerical buttons. If you have not set your password yet, input "1111" and press ENTER (◎).
- Use /V to select the [Auto Tuning] and press ENTER ( ).
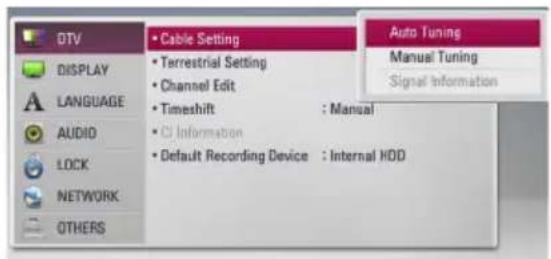
text_image
DTV DISPLAY LANGUAGE AUDIO LOCK NETWORK OTHERS Cable Setting Terrestrial Setting Channel Edit Timeshift : Manual CI Information Default Recording Device : Internal HDD Auto Tuning Manual Tuning Signal Information- Use / V to select a country or automatic numbering option and then use / V / < I> to select [Automatic Numbering]. Then press ENTER (●).
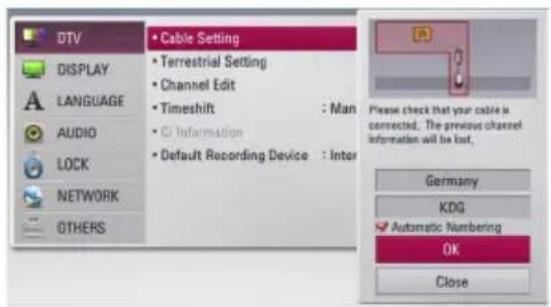
text_image
DTV DISPLAY LANGUAGE AUDIO LOCK NETWORK OTHERS Cable Setting Terrestrial Setting Channel Edit Timeshift : Man CI Information Default Recording Device : Inter Please check that your cable is connected. The previous channel information will be lost. Germany KDG Automatic Numbering OK Close- Use < / > to select an option among [Network Tuning] or [Full Tuning]], and press ENTER (●).
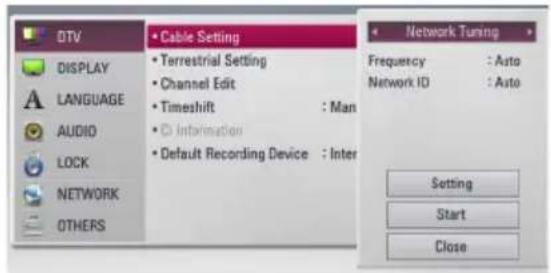
text_image
DTV DISPLAY LANGUAGE AUDIO LOCK NETWORK OTHERS Cable Setting Terrestrial Setting Channel Edit Timeshift : Man Information Default Recording Device : Inter Network Tuning Frequency : Auto Network ID : Auto Setting Start CloseSelect the [Setting], and press ENTER ( ●).
Unlike typical Tuning, Network Tuning has Network ID setup function in Frequency, so you can search a Channel quickly and easily.
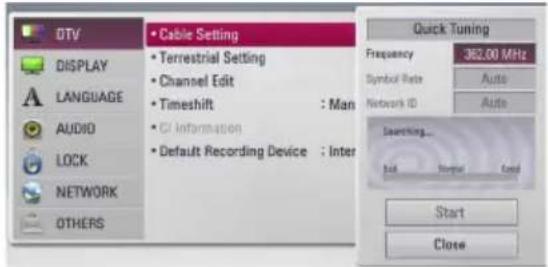
text_image
DTV DISPLAY LANGUAGE AUDIO LOCK NETWORK OTHERS Cable Setting Terrestrial Setting Channel Edit Timeshift : Man CI Information Default Recording Device : Inter Quick Tuning Frequency 362.00 MHz Symbol Rate Auto Network ID Auto Searching... Start Normal End Start Close[Frequency]
Frequency including All of the information channels. Frequency matches the Network ID.
[Symbol rate]
Function to match Operator's service bit rate. Depending on Demod performance, This function is unavailable.
[Network ID]
Essential information to getting entire channel Frequency and TS ID. Essential information for comprising entire Cable channel.
Select [Close] and press ENTER ( Ⓞ) to stop the scanning programmes.
- Use / V to select [Start], and press ENTER (●)to begin the channel search.
Cable Setting (Manual Tuning)
Scans programmes and adds the found programmes to the programme list.
- Display [Setup] menu.
- Use /V to select [DTV], and press ENTER (◎).
- Use / to select [Cable Setting], and press ENTER (●).
- Use /V to select [Manual Tuning] and press ENTER (◎) to display the [Manual Tuning] menu.
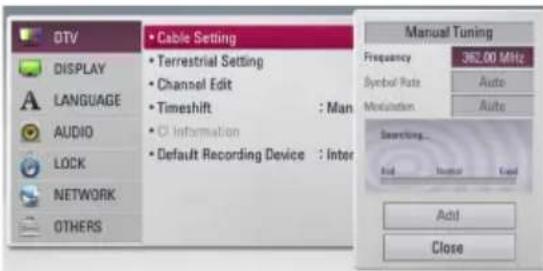
text_image
DTV DISPLAY LANGUAGE AUDIO LOCK NETWORK OTHERS Cable Setting Terrestrial Setting Channel Edit Timeshift : Man CI Information Default Recording Device : Inter Manual Tuning Frequency 362.00 MHz Symbol Rate Auto Modulation Auto Searching... Add Increase Load Add Close-
[Manual Tuning] If you want to set up, Use the ∧/∨/<> and numerical button to set up the desired option.
-
Use V to select the [Add] and press ENTER (☐) to add the programme the unit scans automatically.
Note
If the [DTV Lock] option is set to [Lock], this function is available when you enter the password correctly. (see page 31.)
Scanning programmes automatically for Terrestrial Antenna (Auto Tuning)
All available digital TV or radio programmes are searched for and stored automatically based on the selected country.
- Press HOME ( ▲).
- Use <//> to select [Setup], and press ENTER (◎).
- Use /V to select [DTV], and press ENTER (◎).
- Use /V to select [Terrestrial Setting] and press ENTER (☐).
- Use /V to select the [Auto Tuning] and press ENTER (◎).
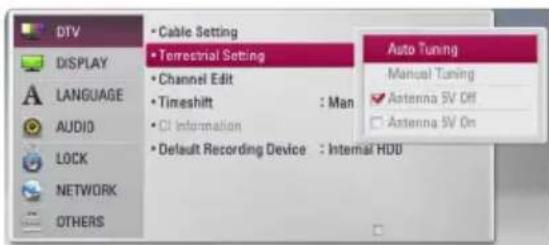
text_image
DTV DISPLAY LANGUAGE AUDIO LOCK NETWORK OTHERS • Cable Setting • Terrestrial Setting • Channel Edit • Timeshift : Man • Information • Default Recording Device : Internal HDD Auto Tuning Manual Tuning ✓ Antenna SV Off □ Antenna SV On- Use V to select [Start], and press ENTER (◎) to begin the channel search.
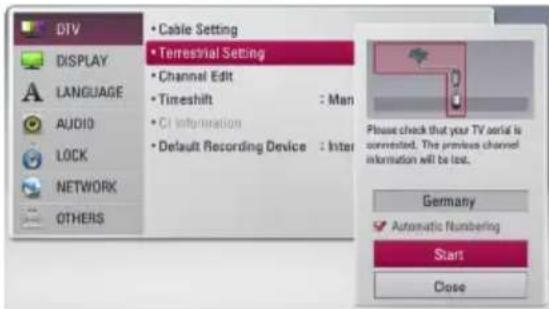
text_image
DTV DISPLAY LANGUAGE AUDIO LOCK NETWORK OTHERS • Cable Setting • Terrestrial Setting • Channel Edit • Timeshift : Man • CI Information • Default Recording Device : Inter Please check that your TV serial is connected. The previous channel information will be lost. Germany ✓ Automatic Numbering Start CloseSelect [Stop] and press ENTER ( ⊙) to stop the scanning programmes.
Note
If the [DTV Lock] option is set to [Lock], this function is available when you enter the password correctly. (see page 31.)
Scanning programmes manually for Terrestrial Antenna (Manual Tuning)
Scans digital TV or radio programmes and adds the detected programmes to the programme list.
- Display [Setup] menu.
- Use / to select [DTV], and press ENTER ( ).
- Use / V to select [Manual Tuning] and press ENTER (●) to display the [Manual Tuning] menu.
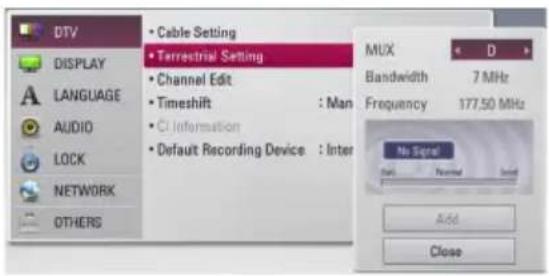
text_image
DTV DISPLAY LANGUAGE AUDIO LOCK NETWORK OTHERS • Cable Setting • Terrestrial Setting • Channel Edit • Timeshift : Man • CI Information • Default Recording Device : Inter MUX Bandwidth 7 MHz Frequency 177.50 MHz No Signal Add Close-
Use / / < / > to select the desired multiplexer (MUX), and the unit starts scanning automatically.
-
Use V to select the [Add] and press ENTER (◎) to add the programme the unit scans automatically.

Note
If the [DTV Lock] option is set to [Lock], this function is available when you enter the password correctly. (see page 31.)
Editing Programme List (Channel Edit)
You can remove any digital TV or radio programs stored on this recorder using the [Channel Edit] menu.
- Display [Setup] menu.
- Use / V to select [DTV], and press ENTER (◎).
- Use ∧/∨/</> to select [Channel Edit] and press ENTER (◎).
- Press ∧ to select [DTV] and use </> to select [DTV] or [Radio] programme list.
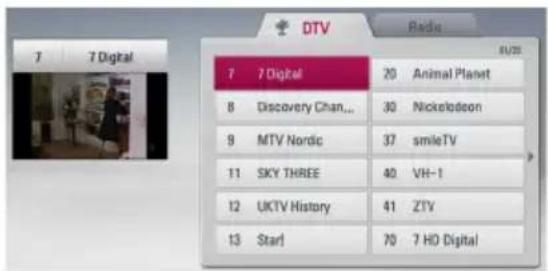
text_image
7 Digital 7 Digital 20 Animal Planet 8 Discovery Chan... 30 Nickslodeon 9 MTV Nordic 37 smileTV 11 SKY THREE 40 VH-1 12 UKTV History 41 ZTV 13 Star! 70 7 HD Digital- Use /V/</> to select a programme you want to skip from the list, and press red (R) coloured button.
If you do not want to skip the programme, select the programme and press red (R) coloured button again.
Use ∧/∨/<> to select a programme you want to lock from the list, and press blue (B) coloured button.
If you do not want to lock the programme, select the programme and press blue (B) coloured button again.
- Press BACK ( ↻) to return to the previous step.
Skip: If the programme is assigned to skip, you can't select that programme with CH button in Remote control.
Edit (It appears when unchecking the box Automatic Numbering): Choose a channel you want. Press green (G) coloured button and then change the location of channel by using ∧/∨/ </>
Block : If the programme is assigned to block and [DTV Lock] in the [Setup] menu is set to [Lock], you should enter the password to watch the programme.
Setting the DTV Lock
Allows you to activate or deactivate all of the lock schemes previously set. When the [DTV Lock] is set to [Unlock].
- Display [Setup] menu.
- Use ∧/∨/<> to select [LOCK] and press ENTER (◎).
- Use /V to select [DTV Lock] and press ENTER ( ).
- Input the password using numerical buttons. If you have not set your password yet, input "1111" and press ENTER (◎).
- Use / V to select [Lock] and press ENTER (○) to activate the DTV Lock.
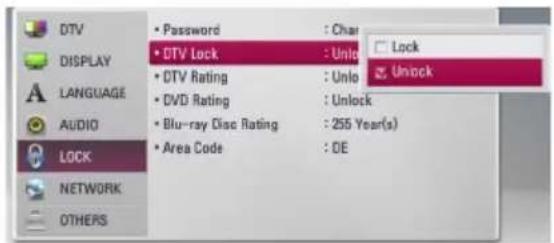
text_image
DTV DISPLAY LANGUAGE AUDIO LOCK NETWORK OTHERS • Password : Char • DTV Lock : Unlock • DTV Rating : Unlock • DVD Rating : Unlock • Blu-ray Disc Rating : 255 Year(s) • Area Code : DESetting the antenna power
If you are using indoor antenna with a signal amplifier rated at DC 5V, 100mA, the recorder can supply power through ANTENNA IN jack.
- Display [Setup] menu.
- Use /V to select the [DTV], and press ENTER ( ).
- Use / V to select the [Terrestrial Setting], and press ENTER (●).
- Use /V to select the [Antenna 5V On] and press ENTER (●) to supply antenna power.

Note
The [Antenna 5V] option must be set to [Off] when your indoor antenna is supplied the power from the mains. If you set the [Antenna 5V] option to [On] for the indoor antenna which is supplied power from the mains, it may cause serious defect to this unit.
Adjusting DTV Rating
Viewing of some digital TV programmes can be limited according to the age limit you set.
- Display [Setup] menu.
- Use /V to select [LOCK] and press ENTER (◎).
- Use /V to select [DTV Rating] and press ENTER (◎).
- Input the password using numerical buttons. If you have not set your password yet, input and press ENTER (☐).
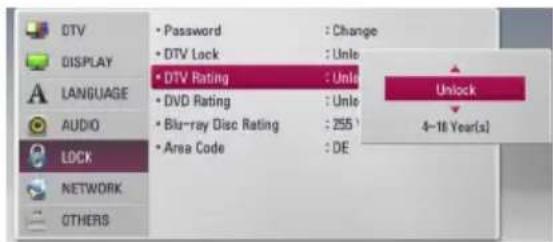
text_image
DTV DISPLAY LANGUAGE AUDIO LOCK NETWORK OTHERS • Password : Change • DTV Lock : Unle • DTV Rating : Unle • DVD Rating : Unle • Blu-ray Disc Rating : 255¹ • Area Code : DE Unlock 4-16 Year(s)- Use /V to set the limitation level and press ENTER (◎).
Unlock
You can view all programs.
4 (Kids) - 18 (Adult)
Rating [4 (Kids)] has the most restrictions and [18 (Adult)] is the least restrictive.
Setting the Timeshift
You can set the Time Shift function automatically without pressing TIME SHIFT button. The timeshift will start after Digital TV tuner mode is started.
- Display [Setup] menu.
- Use / V to select [DTV], and press ENTER (◎).
- Use /V to select [Timeshift] and press ENTER (◎).
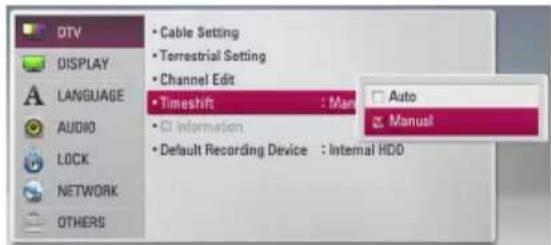
text_image
DTV DISPLAY LANGUAGE AUDIO LOCK NETWORK OTHERS • Cable Setting • Terrestrial Setting • Channel Edit • Timeshift : Manual • Information • Default Recording Device : Internal HDD Auto Manual- Use /V to select [Auto] or [Manual] to apply timeshift.
[DTV] Menu
Cable Setting
[Auto Tuning]
Once you have completed setting the digital receiver to your individual preferences, you can proceed, if necessary, to adjust the unit settings to your antenna. Refer to page 28 for more information.
[Manual Tuning]
Scans a programmes and adds the found programmes to the programme list. Refer to page 29 for more information.
[Signal Information]
Displays the current signal information.
Terrestrial Setting
[Auto Tuning]
This option scans a programme and sets the available programmes. Refer to page 29 for more information.
[Manual Tuning]
Scans digital TV or radio programmes and adds the found programmes to the programme list. Refer to page 30 for more information.
[Signal Information]
Displays the current signal information.
[Antenna 5V Off/On]
If you are using an indoor antenna, use one with a signal amplifier rated at DC 5V, 100mA and set this option to [Antenna 5V On]. Refer to page 31 for more information.
Channel Edit
This option allows you to edit the TV or Radio programmes. Refer to page 30 for more information.
Timeshift
Set this option to [Auto] to use the Time Shift function automatically without pressing TIME SHIFT button. The timeshift will start after TV viewing is started. Refer to page 31 for more information.
CI Information
You can enjoy not only scramble services using the Conditional Access Module (CAM), but also Free-To-Air services. Different CAM supports different encryption system. Contact your service provider or distributor to obtain the right kind of CAM. Only Free-To-Air services are available without CAM. This option displays a menu of CI card functions. Consult your service provider for more information on the functions available. You must obtain a "CI or CI+ CAM" from your service provider.
Default Recording Device
This option sets the storage where your TV recording will be stored. Select an option between [USB HDD] or [Internal HDD].
Note
- Even though [USB HDD] is selected TV recording will be stored on internal HDD, if there is not proper external storage.
- Additionally default Rec.List storage is also applied by this menu option, so if you want to enter alternate Rec.List storage for selected option, then you can do it by entering [HOME] ->[Movie] device menu.
[DISPLAY] Menu
TV Aspect Ratio
Select a TV aspect ratio option according to your TV type.
[4:3 Letter Box]
Select when a standard 4:3 TV is connected. Displays theatrical images with masking bars above and below the picture.
[4:3 Pan Scan]
Select when a standard 4:3 TV is connected. Displays pictures cropped to fill your TV screen. Both sides of the picture are cut off.
[16:9 Original]
Select when a 16:9 wide TV is connected. The 4:3 picture is displayed with an original 4:3 aspect ratio, with black bars appearing at the left and right sides.
[16:9 Full]
Select when a 16:9 wide TV is connected. The 4:3 picture is adjusted horizontally (in a linear proportion) to fill the entire screen.
![LG HR925C - [16:9 Full] - 1](/content/2026/05/802429/images/7eb6ea09adfb556367f374dac03db146fff62bdeedf6c1988bb49c212745c6ed.jpg)
Note
You cannot select [4:3 Letter Box] and [4:3 Pan Scan] option when the resolution is set to higher than 720p.
Resolution
Sets the output resolution of the Component and HDMI video signal. Refer to page 17 and 90 for details about the resolution setting.
[Auto]
If the HDMI OUT jack is connected to TVs providing display information (EDID), this automatically selects the resolution best suited to the connected TV. If the COMPONENT VIDEO OUT only is connected, this changes the resolution to 1080i as default resolution.
[1080p]
Outputs 1080 lines of progressive video.
[1080i]
Outputs 1080 lines of interlaced video.
[720p]
Outputs 720 lines of progressive video.
[576p]
Outputs 576 lines of progressive video.
[576i]
Outputs 576 lines of interlaced video.
1080p Display Mode
When the resolution is set to 1080p, select [24 Hz] for smooth presentation of film material (1080p/24 Hz) with a HDMI-equipped display compatible with 1080p/24 Hz input.

Note
- When you select [24 Hz], you may experience some picture disturbance when the video switches video and film material. In this case, select [50 Hz].
- Even when [1080p Display Mode] is set to [24 Hz], if your TV is not compatible with 1080p/24 Hz, the actual frame frequency of the video output will be 50 Hz or 60 Hz to match the video source format.
HDMI Color Setting
Select the type of output from the HDMI OUT jack. For this setting, please refer to the manuals of your display device.
[YCbCr]
Select when connecting to a HDMI display device.
[RGB]
Select when connecting to a DVI display device.
3D Mode
Select the type of output mode for Blu-ray 3D disc playback. Refer to page 51 for more information about Blu-ray 3D disc.
[Off]
Blu-ray 3D disc playback will output as 2D mode like a normal BD-ROM disc playback.
[On]
Blu-ray 3D disc playback will output as 3D mode.
Home Menu Guide
This function allows you to display or delete the guide bubble on the Home Menu. Set this option to [On] for displaying guide.
[LANGUAGE] Menu
Display Menu
Select a language for the [Setup] menu and on-screen display.
DTV Audio
Digital channels sometimes provide multiple audio tracks, often in a different language or format (Dolby Digital, Dolby Digital+, AAC, Mpeg, etc.). You can set a default audio language with this setting. If provided by the broadcaster, you can also select a different audio language while viewing TV by pressing AUDIO repeatedly. (See "Selecting DTV audio language" on page 41.)
DTV Subtitle
Digital channels sometimes provide subtitles, often in a different language. You can set a preferred subtitle language with this setting, if DTV subtitles are provided by the broadcaster. Press SUBTITLE repeatedly to select a subtitle language while viewing digital TV. (See "Selecting DTV subtitle language" on page 41.)
Disc Menu/Disc Audio/Disc Subtitle
Select the language you prefer for the audio track (disc audio), subtitles, and the disc menu.
[Original]
Refers to the original language in which the disc was recorded.
[Other]
Press ENTER (☑) to select another language. Use number buttons then press ENTER (☑) to enter the corresponding 4-digit number according to the language code list on page 81.
[Off] (Disc Subtitle only)
Turn off Subtitle.
![LG HR925C - [Off] (Disc Subtitle only) - 1](/content/2026/05/802429/images/6b7a6c096dd4738bc0827cee11104ab9bd1a1bbef34d9f19f6aee0f79cff8626.jpg)
Note
Depending on the disc, your language setting may not work.
[AUDIO] Menu
Each disc has a variety of audio output options. Set the player's Audio options according to the type of audio system you use.
Note
Since many factors affect the type of audio output, see "Audio Output Specifications" on pages 88-89 for details.
HDMI / Digital Output
Select the output sound format when a device equipped with a HDMI or Digital Audio input jack is connected to the HDMI OUT or DIGITAL AUDIO OUT jack on this unit.
[PCM Stereo]
Select if you connect this unit's HDMI OUT or DIGITAL AUDIO OUT jack to a device with two-channel digital stereo decoder.
[PCM Multi-Ch] (HDMI only)
Select if you connect this unit's HDMI OUT jack to a device with multi-channel digital decoder.
[DTS Re-Encode]
Select if you connect this unit's HDMI OUT or DIGITAL AUDIO OUT jack to a device with a DTS decoder.
[Primary Pass-Thru]
Select if you connect this unit's DIGITAL AUDIO OUT and HDMI OUT jack to a device with LPCM, Dolby Digital, Dolby Digital Plus, Dolby TrueHD, DTS and DTS-HD decoder.
Note
- When [HDMI] option is set to [PCM Multi-Ch], the audio may output as PCM Stereo if the PCM Multi-Ch information is not detected from HDMI device with EDID.
- If the [HDMI] or [Digital Output] option is set to [DTS re-encode], the DTS Re-encode audio is output for BD-ROM discs with secondary audio and the original audio is output for the other discs (like [Primary Pass-Thru]).
Sampling Freq. (Digital Audio Output)
[192 kHz]
Select this if your A/V Receiver or Amplifier is capable of handling 192 kHz signals.
[96 kHz]
Select this if your A/V Receiver or Amplifier is not capable of handling 192 kHz signals. When this choice is made, this unit automatically converts any 192 kHz signals to 96 kHz so your system can decode them.
[48 kHz]
Select this if your A/V Receiver or Amplifier is not capable of handling 192 kHz and 96 kHz signal. When this choice is made, this unit automatically converts any 192 kHz and 96 kHz signals to 48 kHz so your system can decode them.
Check the documentation for your A/V Receiver or Amplifier to verify its capabilities.
DRC (Dynamic Range Control)
This function allows you to listen to a movie at a lower volume without losing clarity of sound.
[Off]
Turns off this function.
[On]
Compress the dynamic range of the Dolby Digital, Dolby Digital Plus or Dolby TrueHD audio output.
[Auto]
The dynamic range of the Dolby TrueHD audio output is specified by itself. And the dynamic range of the Dolby Digital and Dolby Digital Plus are operated as same as the [On] mode.
Note
The DRC setting can be changed only when a disc is not inserted or the unit is in complete stop mode.
DTS Neo:6
If the player is connected to the multi-channel Audio Receiver by HDMI connection, set this option to enjoy the multi-channel surround sound with the 2-channel audio source.
[Off]
Outputs the stereo sound via front speakers.
[Music]
Outputs the multi-channel sounds that are optimized for listening to music.
[Cinema]
Outputs the multi-channel sounds that are optimized for watching movie.
Note
- This function is not available on an on-line service.
- Only the audio source with less than 48 kHz sampling frequency is available for this function.
- This function is available only when [HDMI] option is set to [PCM Multi-Ch].
[LOCK] Menu
To access any features in the [LOCK] settings, you must enter the 4-digit security code you have created.
If you have not entered a password yet, you are prompted to do so. Enter a 4-digit password twice, and press ENTER (◎) to create a new password.
Password
You can create, or change the password.
[None]
Enter a 4-digit password twice, and press ENTER (◎) to create a new password.
[Change]
Enter the current password and press ENTER (●). Enter a 4-digit password twice, and press ENTER (●) to create a new password.
If you forget your password
If you forget your password, you can clear it using the following steps:
- Remove any disc that might be in the player.
- Select [Password] option in the [Setup] menu.
- Use Number buttons to enter "210499". The password is cleared.
Note
If you make a mistake before pressing ENTER (◎), press CLEAR. Then input the correct password.
DTV Lock
Allows you to set up specific programs and through blocking schemes. Also allows you to activate or disable all of the lock schemes previously set up. A password is required to gain access to the lock menu options. When the DTV Lock is set to [unlock]. (See "Setting the DTV Lock" on page 31.)
DTV Rating
You can set the rating to block out all the programs with rating above a specified level. (See "Adjusting DTV Rating" on pages 31.)
DVD Rating
Blocks playback of rated DVD based on their content. (Not all discs are rated.)
[Rating 1-8]
Rating one (1) has the most restrictions and rating eight (8) is the least restrictive.
[Unlock]
If you select [Unlock], parental control is not active and the disc plays in full.
Blu-ray Disc Rating
Sets an age limit for BD-ROM playback. Use number buttons to input an age limit for BD-ROM viewing.
[255]
All BD-ROM can be played.
[0-254]
Prohibits play of BD-ROM with corresponding ratings recorded on them.
Note
The [BD rating] will be applied only for the Blura disc that containing the Advanced Rating Control.
Area Code
Enter the code of the area whose standards were used to rate the DVD video disc, based on the list on page 80.
[NETWORK] Menu
The [NETWORK] settings are needed to use the software update, BD-Live and online content services.
Connection Setting
If your home network environment is ready to be connected to the player, the player needs to be set to the wired or wireless network connection for network communication. (See "Connecting to your Home Network" on pages 20-24.)
Connection Status
If you want to check the network status on this player, select the [Connection Status] option and press ENTER (◎) to check whether a connection to the network and the internet has been established.
Media File Sharing
If you want to share files in the internal hard disk drive to your PC or DLNA client device on your home network, set this option to [On].
[Media Share (DLNA) Allowance]
You can allow or deny DLNA devices to access share files. Select a device from the device list, and use / / < / > to select [Allow] or [Deny] to control the access.
Note
- For best performance, we recommend LESS than 3 client devices access this player at any one time simultaneously.
- Playback performance from your client device may be affected by the network condition and file specifications.
- Wireless network connection may result in improper access speed by interference from household devices that are using radio frequencies.
HbbTV
If you do not want to HbbTV function while watching broadcast programmes, please set it [Off].
Device Name
You can enter a network name using virtual keyboard. This player will not be recognized by the same name you are entering on your home network.
Wi-Fi Direct
This player is a Wi-Fi Direct ^™ certified device. Wi-Fi Direct ^™ is the technology that devices to connect each other without connecting to an Access point or a router. Set this option to [On] for activating the Wi-Fi Direct ^™ mode. Refer to pages 63 for the device connection.
BD-LIVE connection
You can restrict Internet access when BD-LIVE functions are used.
[Permitted]
Internet access is permitted for all BD-LIVE contents.
[Partially permitted]
Internet access is permitted only for BD-LIVE contents which have content owner certificates. Internet access and AACS Online functions are prohibited for all BD-LIVE contents without a certificate.
[Prohibited]
Internet access is prohibited for all BD-LIVE contents.
Premium/LG Apps
[Country Setting]
Select your area for displaying proper services and contents on the [Premium] and [LG Apps] feature.
[ID Management]
Displays the [ID Management] menu. You can manage IDs that ever logged-in on this unit.
[Registration Code]
Display the unique code of this player for servicing [Premium] and [LG Apps] feature.
[OTHERS] Menu
Time Setting
The clock must be set in order to use timer recording.
[Auto]
Select a programme that broadcasts a clock signal and the clock will be set automatically. If the time that has been automatically set is not correct when compared your local time, you can set additional time option.
[Manual]
If there is no channel that broadcasts a clock signal in your area, you can set the time and date manually. Use < / > to select each field, and input correct time and date using / V , and press ENTER (◎).
Blu-ray Storage Select
This player can store some BD-ROM disc related information, including downloaded on-line content such as movie trailers and special features into the internal hard disk drive or an USB device.
[Built-In Storage]
Store the downloaded Blu-ray disc content on the internal hard disk drive.
[USB Storage]
Store the downloaded Blu-ray disc content on the connected USB device.
Blu-ray Storage Clear
Removes the BD contents from the built-in storage or the connected USB storage.
[Built-In Storage]
Delete all the downloaded contents from the built-in storage.
[USB Storage]
Delete all the downloaded contents from the connected USB storage.
Note
If you select USB Storage, playback, copying and recording on the USB device is disabled.
DivX® VOD
ABOUT DIVX VIDEO: DivX® is a digital video format created by DivX, LLC, a subsidiary of Rovi Corporation. This is an official DivX Certified® device that plays DivX video. Visit divx.com for more information and software tools to convert your files into DivX videos.
ABOUT DIVX VIDEO-ON-DEMAND: This DivX Certified® device must be registered in order to play purchased DivX Video-on-Demand (VOD) movies. To obtain your registration code, locate the DivX VOD section in your device setup menu. Go to vod. divx.com for more information on how to complete your registration.
[Register]
Displays the registration code of your player.
[Deregister]
Deactivate your player and display the deactivation code.
Note
All the downloaded videos from DivX VOD with this player's registration code can only be played back on this unit.
Network Play
This function allows you to control the playback of media streamed from DLNA media server by a DLNA certified smartphone. Most DLNA certified smartphone has a function to control the playback media on your home network. Set this option to [On] for allowing your smartphone to control this unit. Refer to instructions of your DLNA certified smartphone or the application for more detailed information.
Initialize
[Factory Set]
You can reset the recorder to all its factory settings. The [Factory Set] menu appears on the screen after the factory settings.
Note
- If you reset the unit to its original factory settings using [Factory Set] option, you have to set the network settings activation again.
- The [Initialization] option is not available while recording or [Lock] in the [Setup] menu is set to [On].
- If you select [Factory Set] in the Setup menu, All the channels will be deleted.
[Internal HDD Format]
Everything recorded on the HDD will be erased.
- Press HOME ( 🔺).
- Use ∧/∨/<> to select [Setup] in the [Home] menu, and press ENTER (●).
- Use /V to select [OTHERS] option from the [Setup] menu, and press ENTER (◎).
- Use /V to select [Initialize], and press ENTER (◎) to display the sub-options.
- Use /V to select [Internal HDD Format], and press ENTER (○). Select [No] and press ENTER (○) to cancel.
- Use </> to select [Yes], and press ENTER (◎) to start the HDD format. Select [OK] and press ENTER (◎) to return to the previous step.
Software
[Information]
Displays the current software version.
[Update]
You can update the software by connecting the unit directly to the software update server (see pages 84-85).
Disclaimer Notice
Press ENTER (●) to view the notice of Network Service Disclaimer.
Auto Power Off
The screen saver appears when you do not control the player in Stop mode for about 10 minutes. If you set to [On], the unit automatically turns off within 20 minutes since the screen saver appears. If you set to [Off], the screen saver mode lasts until operated by the user.
Using the Digital TV functions
You can watch and record the digital TV programmes or playback the recorded TV programmes you want to watch using this unit.
Viewing the Digital TV
Viewing the Digital TV broadcasting on the TV screen.

Note
- DTV antenna connection is required. (page 14)
-
DTV settings such as [Auto Tuning] in the [Setup] menu may be required. (page 28, 29)
-
Press ⏻(POWER) to turn on the recorder.
- Use ∧/∨/<> to select [DTV] on the HOME menu and press ENTER (◎).
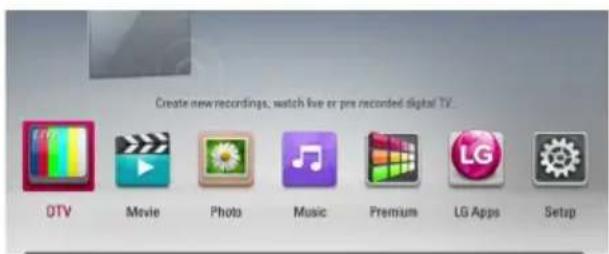
text_image
Create new recordings, watch live or pre recorded digital TV... DTV Movie Photo Music Premium LG Apps SetupChanging Digital TV programmes
Generally, press CH ( /V ) to select the programme position, or entering a programme number using numerical buttons. If you want to change the programme on the channel list, follow the instruction as below.
- While watching DTV, press CH LIST.
text_image
Programme List 0007 7 Digital 0008 Discovery Channel 0009 MTV Nordic 0011 SKY THREE 0012 UKTV History 0013 Star1 0023 Animal Planet 0030 Nickelodeon 0057 unileTV 0040 VH-1- Use /V to select a desired programme, and press ENTER (◎).
Press red (R) coloured button to sort the programmes into alphabetical order. Press green (G) coloured button to sort the programmes into FTA - CAS Press yellow (Y) coloured button to sort the programmes into number order.
- Press BACK ( ↻) to exit the channel list.
Setting favourite programmes
You can set the storage location where you want to store the DTV recordings.
- While watching DTV, press CH LIST.
- Use / to select a programme you want to add on the Favourite List.
-
Press blue (B) coloured button to display [Select Favorite Group] menu.
-
Use / V to select a group and press ENTER (◎) to add the programme on the selected group.
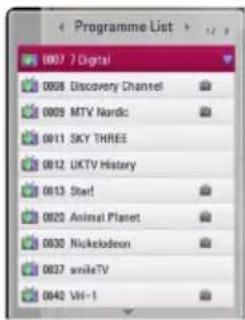
text_image
Programme List 0007 7 Digital 0008 Discovery Channel 0009 MTV Nordic 0011 SKY THREE 0012 UKTV History 0013 Star! 0020 Animal Planet 0030 Nickelodeon 0037 amiteTV 0040 Vti-1- On the channel list menu, use <//> to move to the Favorite List menu.
The ▼ mark appears for the favourite programmes on the Favorite List.
To cancel the favourite programmes from the Favorite List, select a programme with ▼mark, and press blue coloured (B) button.
Viewing the programme information
You can view a description of the programme being broadcast.
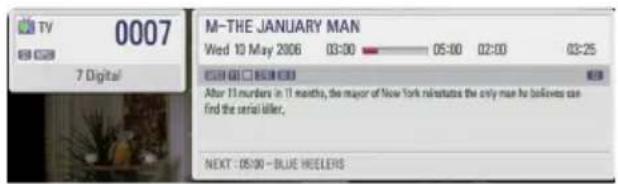
text_image
TV 0007 7 Digital M-THE JANUARY MAN Wed 10 May 2006 03:00 05:00 02:00 03:25 After 11 murders in 11 months, the mayor of New York reinstates the only man he believes can find the serial letter. NEXT : 05:00 - BLUE HEDLERS- While watching DTV, press TITLE/POPUP to display the programme information.
- Press TITLE/POPUP or (BACK or EXIT) again to close the programme information.
Note
This function informs you of related broadcasting information on current channel.
Selecting DTV audio language
Some digital programmes may broadcast several audio languages or encoding methods. You can select an audio languages or an encoding method when it is available.
- While watching DTV, press INFO/MENU (☐).
text_image
1. English MPEG- Use </> to select an audio language or an encoding method, and press INFO/MENU (☐).
Selecting DTV subtitle language
Some digital programmes may broadcast several subtitle languages. You can select a subtitle language when it is available.
- While watching DTV, press SUBTITLE.

- Use <//> to select a subtitle language, and press ENTER (◎).
Note
You can find a programme that supports subtitle language on the programme information.
For the programmes with subtitle, SUB icon appears on the programme information.
Programme Guide (Digital program only)
The Program Guide contains schedule and program information for digital programs. They also provide local over-the-air programs information including conventional digital programs. Use the Program Guide to find programs easily and conveniently and to view schedule and descriptive program information for the programs.
To Display the Program Guide
Press the GUIDE button on your remote control.
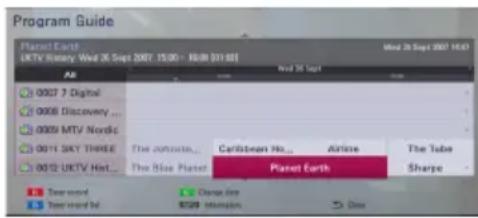
text_image
Program Guide Planet Earth UKTV History: Wed 26 Sept 2007 15:00 - RUBI 331.88 All 0007 7 Digital 0008 Discovery ... 0009 MTV Nordic 0011 SKY THREE 0012 UKTV Hot... The orbitals... Caribbean Ho... Airline The Tube The Blue Planet Planet Earth Sharpe To record To record No... Dance line To record Shawn, MountainTo Exit the Program Guide
Press the BACK (→) button to return to the last program you tuned to.
To navigate through programs on the Guides
Use ∧/∨/<> on your remote control to navigate the guide screen.
You can move faster through programs by scrolling page-by-page with the CH ∧/∨ buttons on the remote control. Each button stroke scrolls one page up or down.
To tune to another current channel
Use ∧/∨/</> to select a current channel then press ENTER (◎). You can watch the channel.
To display the Full Information window
You can view the detail information for the highlighted program. Press INFO/MENU (☐) to display detail information window. To exit the detail information window, press ENTER (☑) again.
To change date
When the Program Guide with 8 days is displayed, you can also change the date of the Program Guide by pressing the green colour button then use </to select a date.
After setting favorite channels from the CH list, you can use the yellow button to toggle between [All] and [Favorite] channel list.
Timer Recording with Program Guide
You can set a timer record using program guide with 8 days.
- Display Program Guide with 8 days.
- Select a program then press red (R) coloured button.
The red timer icon will be displayed and the program will be memorized by the recorder. You can check the programming on the Timer Record List menu (see pages 45-46). - To release the timer recording, move the position and red (R) coloured button. The red timer icon disappears
Using the timeshift function manually
You can pause a Live TV broadcast, then continue watching the programme at a later time. This is useful when you receive an unexpected call or visitor while watching TV.
The following are operating steps when the [Timeshift] option is set to [Manual].
-
Press TIME SHIFT while watching a TV broadcast. The recorder starts recording the current TV programme to the HDD.
-
Press Ⅱ to pause the programme you're watching the just now.
-
Press ▶ to resume watching the programme.

text_image
LiveTV 12.25 Exit ClosePress TIME SHIFT to display the progress of timeshift.
Press ◀◀◀/▶▶▶ to move the starting point or the ending point of timeshift.
Press ◀◀/▶▶ to playback of timeshift fast forward or fast reverse.
- Press ■ to cancel the timeshift.
Timeshift cannot be saved as a recorded title.
Using the timeshift function automatically
If you set the timeshift option to [Auto], live TV broadcast will automatically be recorded to the HDD without pressing the TIME SHIFT button. The timeshift will start automatically when the Digital TV tuner mode is started.
Refer to "Setting the Timeshift" on page 31 to set the [Timeshift] option.
-
Press ⏻ (POWER) to turn on the unit.
-
Use ∧/∨/<> to select [DTV] and press ENTER (●).
The timeshift function will automatically start.
Press ◀◀◀/▶▶▶ to move the starting point or the ending point of timeshift.
Press ◀◀/▶▶ to playback of timeshift fast forward or fast reverse.
-
Press HOME ( 🔍 ) to exit from the DTV viewing.
-
Press ■, it's not turning off the timeshift function but going back to the DTV in realtime.
Note
- Without changing a channel, the timeshift function will go on.
- When you exit from the DTV mode, timeshift function automatically will be stopped. Ex) Home menu, Power off, Record etc.
- If you change the channel during the timeshift function, the unit will switch to Live TV automatically.
- If the timeshift data exceeds the capacity, the data will be deleted automatically from the oldest one.
- Timeshift Mode is not supported for Audio Only Channel.
- Timeshift can not start if clock is not set correctly.
Using the teletext (Viewing Teletext)
Many Digital TV programmes broadcast information via their text service, and this recorder has access to dedicated text programmes transmitted by the broadcasters.
- Press TEXT while watching TV.
- Use coloured (R/G/Y/B) button to select a page.
You can also select a page by entering a three-digit number with the numerical buttons. - Press TEXT or EXIT to exit the teletext screen.

Note
Additionally, you now have four coloured buttons to navigate through the content of the page. The use of these coloured buttons will be displayed on the screen.
Recording TV programmes
You can record Digital TV programmes and store them on the HDD.
Normal Recording
- Use CH(Λ/V) to select a programme you want to record.
-
Press ● REC to start recording. Press || to pause recording, press || again to resume recording.
-
Press ■ to stop recording.

Note
- The TV screen turns black with stop mark caused by no signal, Scramble, rating lock recording is not available.
- Pay channel can not be recorded correctly if you don't insert CI or CI+ CAM.
- You should unlock parental rating of CI CAM if you want to use timer record correctly.
- When you record pay channel, recorded title can be divided in to several titles according to CAM authentication.
- Some of title can not be played well if title is recorded when CAM is not authenticated by this recorder.
- If you want to record the USB HDD, Connect an USB HDD to the USB Port on the rear panel and then select the [USB HDD] on [Default Recording Device] in the setup menu.
- You can not record two scrambled programme at the same time.
Timer Recording (Manual)
You can set the timer for a total of 32 programmes, up to 22-28 days in advance.
- While watching TV, press TIMER REC.
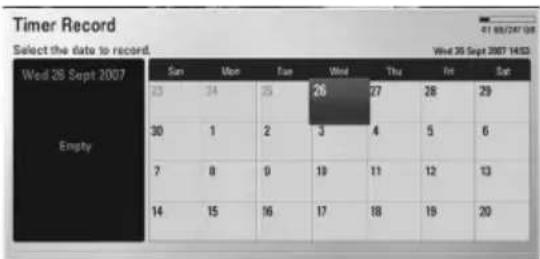
text_image
Timer Record Select the date to record. Wed 26 Sept 2007 Empty Sun Mon Fan Wed Thu Fri Sat 23 34 25 26 27 28 29 30 1 2 3 4 5 6 7 8 9 10 11 12 13 14 15 16 17 18 19 20- Use ∧/∨/<> to select the date to record, and press ENTER (◎).
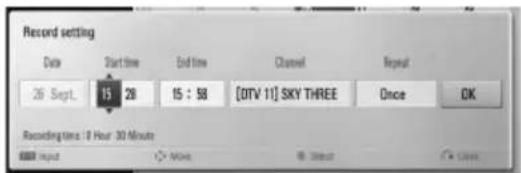
text_image
Record setting Date Start time End time Channel Repeat 26 Sept. 15 28 15 : 58 [DTV 11] SKY THREE Once OK Recording Time: 0 Hour 30 Minutes OK Input Move Up Start Close- Select an item using < / > and adjust it using / V . You can use numbered buttons to change the setting.
The adjustable items are listed below.
Start time Sets the start time.
End time Sets the end time.
Channel Sets the programme position. (If you want to display more channels, press CH LIST)
Repeat Choose a desired repeat mode. (Once, Daily, Weekly or Mon-Fri)
Note
- The timer recording can be set from 3 minutes after the current time.
-
You should unlock parental rating of CI or CAM if you want to use timer record correctly.
-
Press ENTER ( Ⓞ ).
-
Select [OK] then press ENTER ( Ⓞ).
If you input the wrong information, an error message will appear and the timer recording cannot be made.
Timer Recording (EPG)
You can also set the timer based on the information provided by the EPG.
- While watching TV, press GUIDE.

text_image
The Blue Planet UKTV History: West 25 Sept 2007 14:40 - 15:00 [07:00] All 0007 7 Digital 0008 Discovery ... 0009 MTV Nordic 0011 SKY THREE 0012 UKTV Hist... The Blue ... Caribbean Ho... Airline The Tube Planet Earth Sharpe Record Change from New record list Information Close- Use < / > to select date field, and select the date of recording schedule using / V .
- Use < / > to select programme field, and set the programme using / .
- Use </> to select the programme list, and select a programme you want to record using ∧/∨.
5 Press the red (R) coloured button.
For the successfully scheduled programme, a red bullet mark appears.
A red bullet mark may not appear for inavailable programme to record.
- Press BACK ( ↻) to return to the TV viewing.
- Press TIMER REC, and check whether the schedule is registered properly or not.
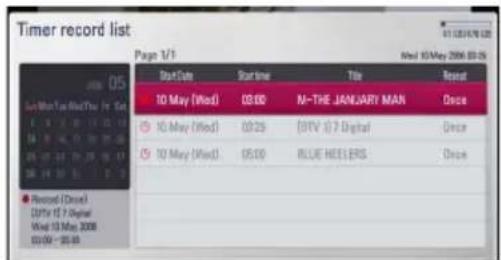
text_image
Timer record list Page 1/1 Wed 15 May 2006 03:26 Start Date Start Time Title Repeat 10 May (Wed) 03:00 N-THE JANUARY MAN Once 10 May (Wed) 03:29 (OTV 1)7 Digital Once 10 May (Wed) 05:00 BLUE HEELERS Once Record (Close) (Off to 12 Digital) Wed 15 May 2006 03:00 - 25:00Canceling a timer recording
You can cancel a timer recording before the timer recording actually starts.
- While watching TV, press TIMER REC.
- Press the red (R) coloured button.
- Use < / > / V to select a schedule you want to cancel.
- Use / V to select [Timer Record List], and press the green (G) coloured button.
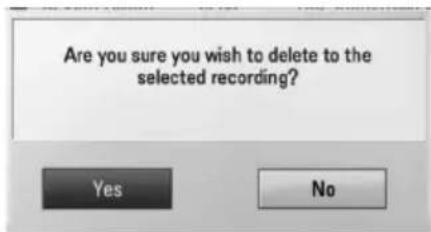
text_image
Are you sure you wish to delete to the selected recording? Yes NoSelect [No] and press ENTER ( Ⓞ ) to cancel.
Select [Yes] and press ENTER ( Ⓞ) to delete selected schedules (selected recording).
Editing a timer recording
You can edit a pre-scheduled timer recording before the timer recording actually starts.
- While watching TV, press TIMER REC.
- Press the red (R) coloured button.
- Press ENTER ( Ⓞ) to display the [Record setting] menu.
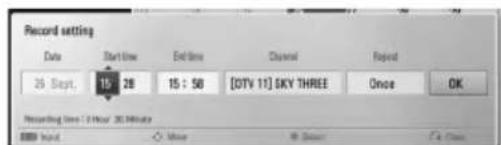
text_image
Record setting Date Start Time End Time Channel Rpeat 25 Sept. 15:28 15:50 [QTY 11] SKY THREE Once OK Recording Time: 14 Hour 30 Minutes OK Input More Select Close- Follow the steps 3-5 from "Timer Recording (Manual)" on page 45 to complete the editing.
Instant Timer Recording
You can set the recording time instantly to stop the recording automatically.
- Use CH(Λ/V) to select a programme you want to record.
- Press ● REC. to start recording.
- While recording, press repeatedly to set the recording duration
- Press ENTER ( Ⓞ ).
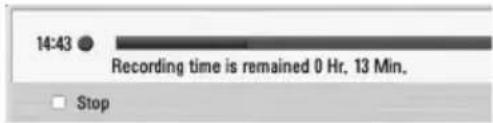
text_image
14:43 Recording time is remained 0 Hr. 13 Min. □ Stop- Press ■ to stop recording.
Note
- The standard recording time is 3 hours (MAX=6 hours). Depending on the remaining capacity of HDD, the recording time is somewhat flexible.
- If the unit cannot catch the signal, the recording will be pause, actual recording time can be less than the time set on timer.
- You cannot record radio or blocked channels.
- The quality of recording can be different on the status of the broadcast signal.
- During the recording, turning off by force can cause a serious problem on hard disk drive.
- Recording can be restarted when contents status is changed and it'll separate recording title into two individual title consequently.
General Playback
Playing Discs
-
Insert a disc in the disc slot. For most Audio CD, BD-ROM and DVD-ROM discs, playback starts automatically.
-
Press HOME ( ▲).
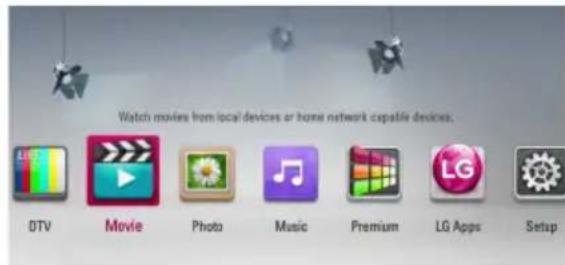
text_image
Watch movies from local devices or home network capable devices. DTV Movie Photo Music Premium LG Apps Setup- Select [Movie], [Photo] or [Music] using <//>, and press ENTER (◎).
- Select the [Disc] using /V , and press ENTER (◎).
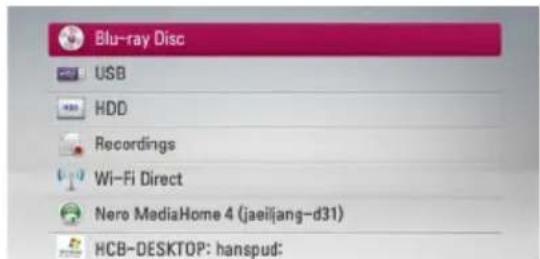
text_image
Blu-ray Disc USB HDD Recordings Wi-Fi Direct Nero MediaHome 4 (jaeiljang-d31) HCB-DESKTOP: hanspud:While navigating [Movie], [Photo] or [Music] menu, press green (G) colored button to change the device. (DISC, USB or HDD)
- Select a file using ∧/∨/</>, and press ▶ (PLAY) or ENTER (◎) to play the file.
Note
- Playback functions described in this manual are not always available in every files and media. Some functions can be restricted depending on many factors.
- Depending on the BD-ROM titles, a USB device connection may be needed for proper playback.
To stop playback
Press ■ (STOP) during playback.
To pause playback
Press II (PAUSE) during playback.
Press ▶ (PLAY) to resume playback.
To play frame-by-frame
Press III (PAUSE) while movie playback.
Press Ⅲ (PAUSE) repeatedly to playback Frame-by-Frame.
To scan forward or backward
Press ◀◀ or ▶▶ to play fast forward or fast reverse during playback.
You can change the various playback speeds by pressing ◀◀ or ▶▶ repeatedly.
To slow down the playing speed
While the playback is paused, press ▶▶ repeatedly to play various speeds of slow motion.
To skip to the next/previous chapter/track/file
During playback, press ◀◀◀ or ▶▶▶ to go to the next chapter/track/file or to return to the beginning of the current chapter/track/file.
Press ◀◀ twice briefly to step back to the previous chapter/track/file.
In the file list menu of a server, there may have many types of contents in a folder together. In this case, press ◀◀◀ or ▶▶▶ to go to the previous or next content with same type.
Using the disc menu
BD
DVD
AVCHD
To display the disc menu
The menu screen may be displayed first after loading a disc which contains a menu. If you want to display the disc menu during playback, press DISC MENU.
Use ∧/∨/<> buttons to navigate through menu items.
To display the Pop-up menu
Some BD-ROM discs contain a Pop-up menu that appears during playback.
Press TITLE/POPUP during playback, and use ∧/V/<> buttons to navigate through menu items.
Resume playback
BD
DVD
AVCHD
MOVIE
MOVIE-N
ACD
MUSIC
MUSIC-N
REC
This unit remembers the point where you pressed the ■ (STOP) depending on the disc.
If "■■ (Resume Stop)" appears on the screen briefly, press ▶ (PLAY) to resume playback (from the scene point).
If you press ■ (STOP) twice or unload the disc, "■ (Complete Stop)" appears on the screen. The unit will clear the stopped point.

Note
- The resume point may be cleared when a button is pressed (for example; ⏻ (POWER), ▲ (OPEN/CLOSE), etc).
- On BD-Video discs with BD-J, the resume playback function does not work.
- If you press ■ (STOP) once during BD-ROM interactive title playback, the unit will be in Complete Stop mode.
Playing the recorded titles
REC
- While watching TV, press REC LIST to display the options menu or press REC LIST in Home menu.
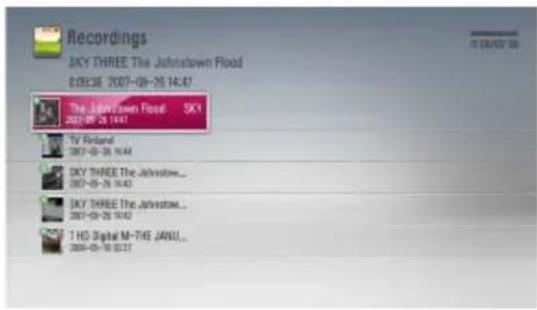
text_image
Recordings SKY THREE The Johnstown Flood 05/03/ 2007-09-26 14:47 The Johnstown Flood ... SKY 2007-09-26 14:47 TV Roland 08/7-09-26 14:44 SKY THREE The Johnstown... 08/7-09-26 14:43 SKY THREE The Johnstown... 08/7-09-26 14:42 T HD Digital M-THE JAWU... 08/8-09-10 14:37-
Use ∧/∨/<> to select recording title.
-
Press ▶ (PLAY) or ENTER (◎) to play the recording title.

Note
- N Mark is displayed next to recorded files that have not been viewed yet.
- Some Cl+ channel cannot be played because of retention limit.
Searching the recorded titles
REC
You can search for videos by entering search words of up to 60 characters.
- While watching TV, press REC LIST to display the options menu.
- Press yellow (Y) colored button.
- Use ∧/∨/</> to select a character then press ENTER (◎) to confirm your selection on the virtual keyboard.
To enter a letter with an accent mark, select the letter from extended character set.
text_image
Search a b c d e 1 2 3 f g h i j 4 5 6 k l m n o 7 8 9 p q r s t . @ 0 u v w x y z ABC Space OK Clear[Clear] - Clear all entered characters.
[Space] – Inserts a space at the cursor position.
[<-] – Deletes the previous character at the cursor position.
[ABC / #\$%& / abc] – Change the keyboard menu settings to capital letters, small letters or symbols.

Note
To enter a letter with an accent mark:
- Select a letter using ∧/∨/<> on the keyboard menu.
- Press INFO/MENU (☐) to display the extended character set.
-
character set. Use < / > to select a character then press ENTER (●).
-
When you finish entering the search words, Select [OK] and press ENTER ( ⊙) to display the related videos list.
Sorting the recorded titles
REC
- While watching TV, press REC LIST to display the options menu.
- Press blue (B) coloured button repeatedly to sorted by recorded time in recent order or title name in alphabetical order.
[ABC order] – by title name in alphabetical order.
[Recent order] – sorted by recorded date.
Playing content contained in the internal hard disk drive
- Press HOME ( ▲).
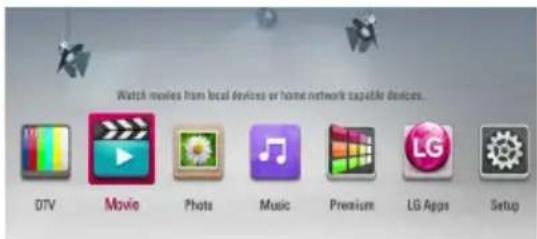
text_image
Watch movies from local devices or home network capable devices. DTV Movie Photo Music Premium LG Apps Setup- Select [Movie], [Photo] or [Music] using <//>, and press ENTER (◎).
- Select the [HDD] option using /V , and press ENTER (◎).
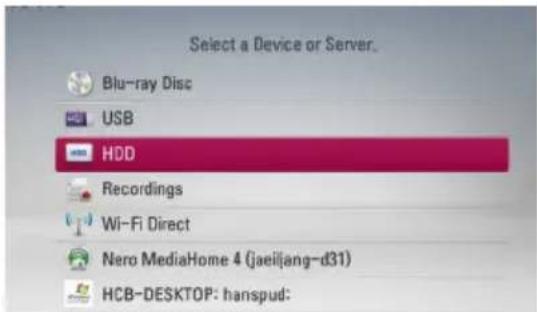
text_image
Select a Device or Server. Blu-ray Disc USB HDD Recordings Wi-Fi Direct Nero MediaHome 4 (jaeiljang-d31) HCB-DESKTOP: hanspud:This step is needed only when a disc or a USB device is connected on this unit.
While navigating [Movie], [Photo] or [Music] menu, press green (G) colored button to change the device. (DISC, USB or HDD)
- Select a file using < / > / V , and press PLAY or ENTER (●) to play the file.
Note
- The file requirements are described on page 10.
- You can use various playback functions. Refer to pages 47-57.
- Recorded files are searchable only by searching on the [REC. LIST].
Searching content in the hard disk drive by entering file
name
If you are having difficulties finding content in the hard disk drive, you can search for the content by entering keyword with the virtual keyboard
- On the [Movie], [Photo], [Music] or Home menu, press yellow (Y) coloured button to display the virtual keyboard.
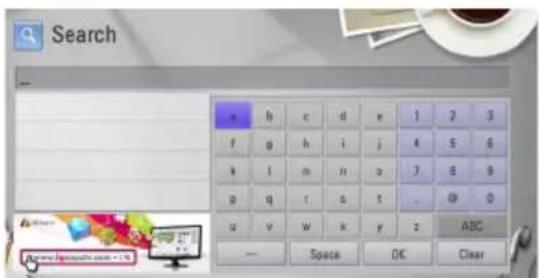
text_image
Search x b c d e 1 2 3 f g h i j 4 5 6 k l m n o 7 8 9 g q r s t . @ 0 u v w x y z ABC Space OK Clear- Use < / > / to select letters then press ENTER (①) to confirm your selection on the virtual keyboard.
- When you finish entering the keyword, select [OK] and press ENTER (●) to display search result.
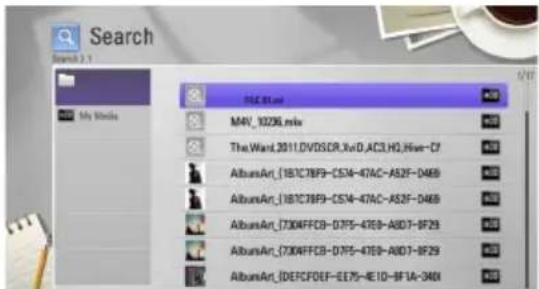
text_image
Search My Books NAV_10206.mix The.Ward_2011.DVDSOR.VxD_AC3.H2.Hive-CF AlbumArt_(1817C78P3-CSM4-47AC-A52F-D469) AlbumArt_(1817C78P3-CSM4-47AC-A52F-D469) AlbumArt_(2304FFCD3-D75-F47B-A8D7-BF29) AlbumArt_(2304FFCD3-D75-F47B-A8D7-BF29) AlbumArt_(IDEFCDEE-EE75-E1D-BF1A-C40)- Press < / > repeatedly until the search result is selected, and use / to select a desired content.
- Press ENTER ( Ⓞ) to play the content.
Note
It will show search result from latest list REC. LIST storage if you don't enter any REC.LIST storage then it will search contents from default recording storage option. If you don't enter stored recording list it will search recorded contents of default storage option.
Playing Blu-ray 3D disc
This player can play the Blu-ray 3D discs which contains separate views for the left and right eyes.
Preparation
In order to playback Blu-ray 3D title in stereoscopic 3D mode, you need to:
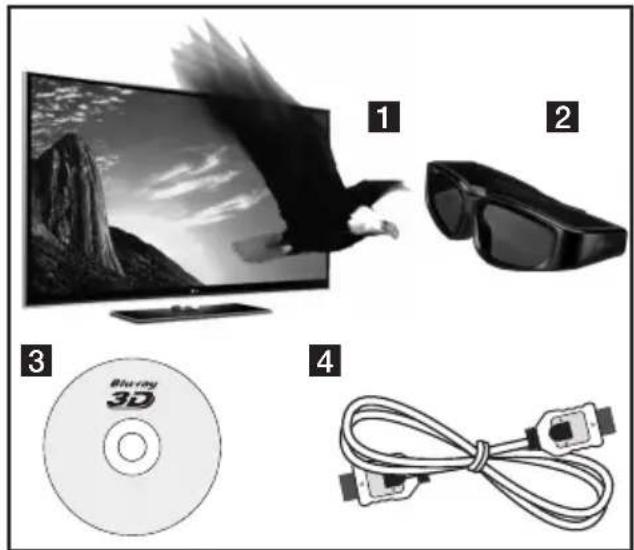
natural_image
Product collage showing a monitor, earpieces, CD, and cable (no text or symbols)1 Check if your TV is 3D capable and has HDMI input(s).
2 Wear 3D glasses to enjoy the 3D experience if it is necessary.
If you want to purchase additional 3D-ready glasses, contact the dealer that you purchased the 3D-ready TV from.
3 check whether the BD-ROM title is the Blu-ray 3D disc or not.
4 connect an HDMI cable (Type A, High Speed HDMI™ Cable) between the player's HDMI output and TV's HDMI input.
-
Press HOME ( 🔒 ), and set the [3D Mode] option on the [Setup] menu to [On] (page 33).
-
Insert a disc in the disc slot.
The playback starts automatically.

The 3D icon appears on the screen when 3D content is in playback.
- Refer to the owner's manual of your 3D-ready TV for the further instruction.
You may need to adjust the display settings and focus on your TV's setting for the improved 3D effect.
Caution
- Watching a 3D content for a long period time may cause dizziness or tiredness.
- It is not recommended to watch a movie in 3D mode for infirm, child and pregnant woman.
- If you are experiencing headache, tiredness or dizziness while viewing contents in 3D, it is strongly recommended to stop the playback and rest until you feel normal.
3D available Blu-ray 3D Discs

The "Blu-ray 3D" logo labeled BD-ROM disc can be played on this player with 3D mode output. If your TV is not the Blu-ray 3D-ready TV*, 2D mode output is available.

The "Blu-ray 3D ONLY" logo labeled BD-ROM disc can be played on this player with 3D mode output. The Blu-ray 3D ONLY disc playback is not available, if your TV or player are not the Blu-ray 3D-ready device.
* 3D-ready TV refers to TVs that are compliant with "HDMI 1.4 3D mandatory format" standard.
Note
The "Blu-ray 3D" and "Blu-ray 3D ONLY" may not be printed on your BD-ROM disc, even if the disc contains 3D contents.
Advanced Playback
Repeat Playback
BD
DVD
AVCHD
ACD
MUSIC
MUSIC-N
During playback, press REPEAT repeatedly to select a desired repeat mode.
BDs/DVDs
A- - Selected portion will be repeated continually.
Chapter – The current chapter will be played back repeatedly.
2 Title – The current title will be played back repeatedly.
To return to normal playback, press REPEAT repeatedly to select [Off].
Audio CDs/Music files
Track – The current track or file will be played back repeatedly.
All – All the tracks or files will be played back repeatedly.
✗ – The tracks or files will be played back in random order.
✗ All – All the tracks or files will be played back repeatedly in random order.
A-B – Selected portion will be repeated continually. (Audio CD only)
To return to normal playback, press CLEAR.

Note
- If you press ▶▶▶ once during Repeat Chapter/Track playback, the repeat playback cancels.
- This function may not work on some disc or title.
Repeating a specific portion
BD
DVD
AVCHD
ACD
This player can repeat a portion you have selected.
- During playback, press REPEAT to select [A-] at the beginning of the portion you wish to repeat.
- Press ENTER ( ) at the end of the portion. Your selected portion will be repeated continually.
- To return to normal playback, press REPEAT repeatedly to select [Off].

Note
- You cannot select a portion less than 3 seconds.
- This function may not work on some disc or title.
Changing content list view

text_image
MOVIE MOVIE-N MUSIC MUSIC-N PHOTO RECOn the [Movie], [Music] or [Photo] menu, you can change the content list view.
Method 1
Press red (R) coloured button repeatedly.
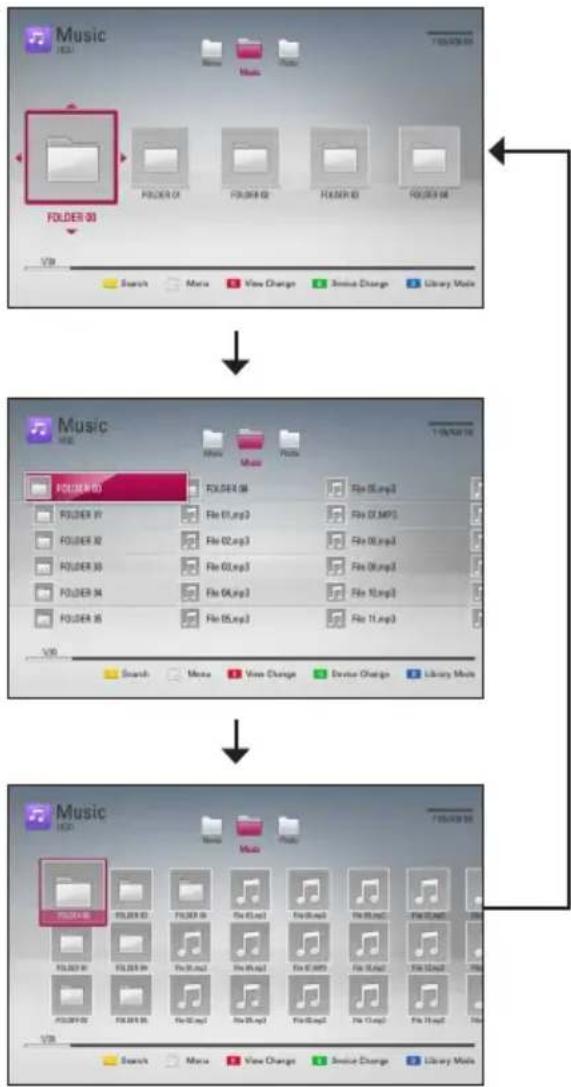
flowchart
graph TD
    A["Folder 03"] --> B["File Selection"]
    B --> C{File Change}
    C -->|Yes| D["Save Change"]
    C -->|No| E["Remove Change"]
    D --> F["Library Mode"]
    E --> G["Search"]
    F --> H["Menu"]
    G --> I["View Change"]
    H --> J["Show Change"]
    I --> K["Library Mode"]
Method 2
- On the content list, press INFO/MENU (☐) to display the option menu.
- Use / V to select the [View Change] option.
- Press ENTER ( Ⓞ) to change the content list view.
Viewing content information

The player can display the content information.
- Select a file using ∧/∨/</>.
- Press INFO/MENU (☐) to display the option menu.
- Select the [Information] option using /V , and press ENTER (◎).
The file information appears on the screen During movie playback, you can display the file information by pressing TITLE/POPUP.

The information displayed on the screen may not be correct compared to the actual content information.
Selecting a subtitle file

If the subtitle file name is different from the movie file name, you need to select the subtitle file on the [Movie] menu before playing the movie.
- Use ∧/∨/<> to select the subtitle file you wish to play in the [Movie] menu.
- Press ENTER(●).
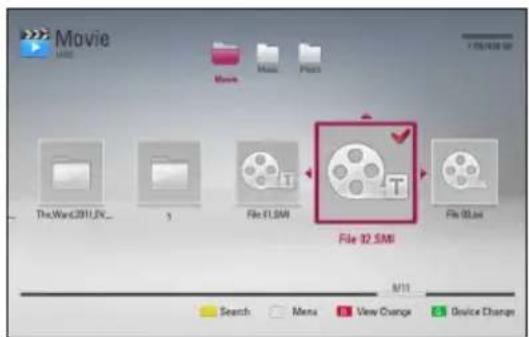
text_image
Movie MOS Movie MOS Plots The.Wan.0311.SN_ 5 File 11.SMI File 12.SMI M11 Search Menu View Change Device ChangePress ENTER (●) again to deselect the subtitle file. Selected subtitle file will be displayed when you play the movie file.

This function is not available for playing file on a server via home network.
Last Scene Memory
BD
DVD
This unit memorizes the last scene from the last disc that is viewed. The last scene remains in memory even if you remove the disc from the unit or switch off the unit. If you load a disc that has the scene memorized, the scene is automatically recalled.

Note
- Last Scene Memory function for a previous disc is erased once a different disc is played.
- This function may not work depending on the disc.
- On BD-Video discs with BD-J, the last scene memory function does not work.
- This unit does not memorize settings of a disc if you switch off the unit before commencing to play it.
On-Screen display
You can display and adjust various information and settings concerning the content.
Displaying content information on-screen
BD
DVD
AVCHD
MOVIE
MOVIE-N
REC
- During playback, press INFO/MENU (☐) to show various playback information.
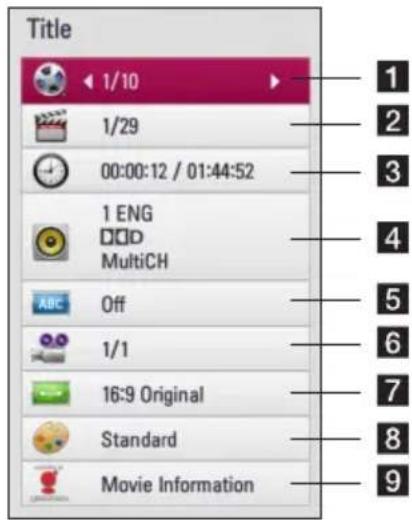
text_image
Title 1/10 1/29 00:00:12 / 01:44:52 1 ENG MultiCH ABC Off 1/1 16:9 Original Standard Movie Information1 Title – current title number/total number of titles
2 Chapter – current chapter number/total number of chapters
3 Time – elapsed playing time/total playback time
4 Audio – selected audio language or channel
5 Subtitle – selected subtitle
6 Angle - selected angle/total number of angles
7 TV Aspect Ratio – selected TV aspect Ratio
8 Picture Mode – selected picture mode
9 Movie Information – Select this option and press ENTER (◎) to display movie information from Gracenote Media Database (Blu-ray Disc/DVD only).
- Select an option using / .
- Use <//> to adjust the selected option value.
- Press BACK ( ↻) to exit the On-Screen display.
Note
- If no button is pressed for a few seconds, the on-screen display disappears.
- A title number cannot be selected on some discs.
• Available items may differ depending on discs or titles. - If BD interactive title is playing back, some setting information is displayed on the screen but prohibited to be changed.
- To use the [Movie Information] option, the player must be connected to the broadband internet for accessing the Gracenote Media Database.
- If the information from the Gracenote Media Database is either not correct or does not exist, please contact www.gracenote.com for support.
- LG is a licensee of Gracenote technology and is not responsible or reliable for information from the Gracenote Media Database.
- The unit may not be able to display the music information depending on the network condition.
Playing from selected time
BD
DVD
AVCHD
MOVIE
MOVIE-N
REC
- Press INFO/MENU (☐) during playback. The time search box shows the elapsed= playing time.
- Select the [Time] option and then input the required start time in hours, minutes, and seconds from left to right.
For example, to find a scene at 2 hours, 10 minutes, and 20 seconds, enter "21020".
Press < / > to skip the playback 60 seconds forward or backward.
- Press ENTER ( Ⓞ) to start playback from selected time.
!
- This function may not work on some disc or titles.
- This function may not work depending on the file type and ability of the DLNA server.
• This function is not accurate in recordings.
Hearing different audio
BD
DVD
AVCHD
MOVIE
MOVIE-N
REC
- During playback, press INFO/MENU (☐) to display the On-Screen display.
- Use /V to select the [Audio] option.
- Use <//> to select desired audio language, audio track or audio channel.

Note
- Some discs allow you to change audio selections only via the disc menu. In this case, press TITLE/POPUP or DISC MENU button and choose the appropriate audio from the selections on the disc menu.
- Immediately after you have switched sound, there may be a temporary discrepancy between the display and actual sound.
- On BD-ROM disc, the multi audio format (5.1CH or 7.1CH) is displayed with [MultiCH] in the on-screen display.
Selecting a subtitle language
BD
DVD
AVCHD
MOVIE
MOVIE-N
REC
- During playback, press INFO/MENU (☐) to display the On-Screen display.
- Use /V to select the [Subtitle] option.
- Use <//> to select the desired subtitle language.
- Press BACK ( ↻) to exit the On-Screen display.

Note
Some discs allow you to change subtitle selections only via the disc menu. If this is the case, press TITLE/POPUP or DISC MENU button and choose the appropriate subtitle from the selections on the disc menu.
Watching from a different angle
BD
DVD
If the disc contains scenes recorded at different camera angles, you can change to a different camera angle during playback.
- During playback, press INFO/MENU (☐) to display the On-Screen display.
- Use /V to select the [Angle] option.
- Use to select the desired angle.
- Press BACK ( ↩) to exit the On-Screen display.
Changing the TV Aspect Ratio
BD
AVCHD
MOVIE
MOVIE-N
REC
You can change the TV aspect ratio setting during playback.
- During playback, press INFO/MENU (☐) to display the On-Screen display.
- Use /V to select the [TV Aspect Ratio] option.
- Use <//> to select desired option.
- Press BACK ( ↩) to exit the On-Screen display.

Note
Even if you change the value of the [TV Aspect Ratio] option in On-Screen display, the [TV Aspect Ratio] option in the [Setup] menu is not changed.
Changing the Picture Mode
BD
DVD
AVCHD
MOVIE
MOVIE-N
REC
You can change the [Picture mode] option during playback.
- During playback, press INFO/MENU (☐) to display the On-Screen display.
- Use /V to select the [Picture Mode] option.
- Use to select desired option.
- Press BACK ( ↻) to exit the On-Screen display.
Setting the [User setting] option
- During playback, press INFO/MENU (☐) to display the On-Screen display.
- Use /V to select the [Picture Mode] option.
- Use to select the [User setting] option, and press ENTER (●).
![LG HR925C - Setting the [User setting] option - 1](/content/2026/05/802429/images/e34ec288a612ba1aef50b62baae397b7c429e8cdf598dfa131cf919ee0d83b5e.jpg)
text_image
Picture Mode Contrast 0 Brightness 0 Color 0 Sharpness 0 Noise Reduction 0 Default Close- Use ∧/∨/<> to adjust the [Picture Mode] options.
Select [Default] option then press ENTER ( Ⓞ ) to reset the all video adjustments.
- Use ∧/∨/<> to select the [Close] option, and press ENTER (◎) to finish setting.
Copying
Copying file(s)/folder(s) to the internal hard disk drive
You can copy music, photo, video file(s)/folder(s) from disc/USB storage device to the internal hard disk drive.
- Press HOME ( ▲).
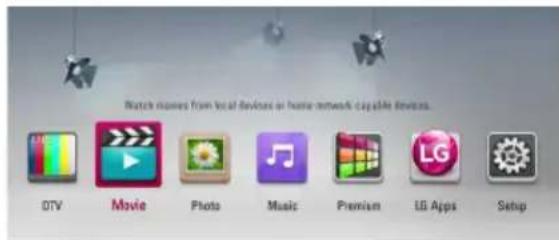
text_image
Watch movies from local devices or home network capable devices. DTV Movie Photo Music Premium LG Apps Setup-
Select [Movie], [Photo] or [Music] using <//>, and press ENTER (○).
-
Select the [Disc] or [USB] option using /V , and press ENTER (○).
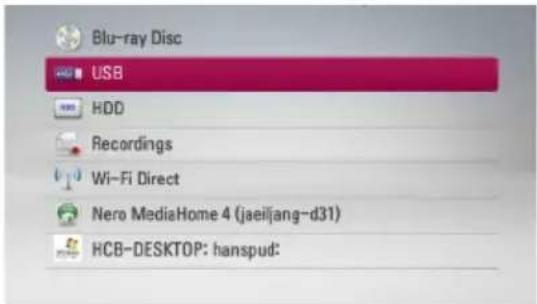
text_image
Blu-ray Disc USB HDD Recordings Wi-Fi Direct Nero MediaHome 4 (jaeiljang-d31) HCB-DESKTOP: hanspud:- Use / / < / > to select a directory that files or folders you want to copy are located.
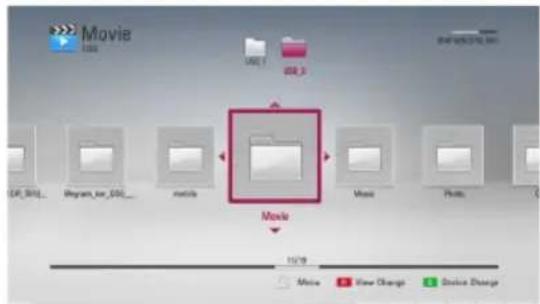
text_image
Movie 100% USE 1 DR_3 File_800... Myram_far_550_ movie Movie Music Photo 10/19 Movie View Change Device Change-
Press INFO/MENU (☐) to display the option menu.
-
Use /V to select [Copy] option, and press ENTER (●) to display the [Copy] menu.
-
Use / V to select a file or a folder you wish to copy on the menu, and press ENTER (◎).
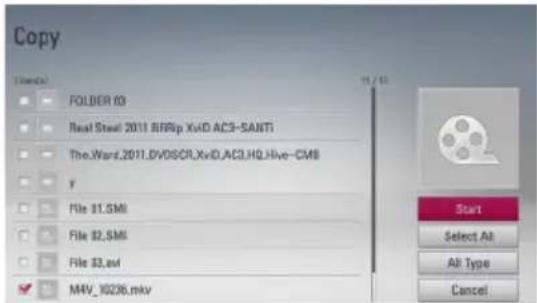
text_image
Copy (Units) FOLDER 03 Real Steel 2011 SRRip XvID AC3-SANTI The.Ward.2011.DVDSCR.XvID.AC3.HQ.Hive-CMS y File $1.SMI File $2.SMI File $3.xvl M4V_10226.mkv 15 / 15 Start Select Alt All Type CancelRepeat this step to select files and folders as many as you can.
| Select All | Select all the files and folders on the current directory. |
| All Type | Shows all type of files on the screen. (Movie, Photo and Music) |
| Cancel | Cancels the copying and returns to the previous screen. |
- Use ∧/∨/</> to select [Start], and press ENTER (◎).
- Use / / < / > to select the destination folder to be copied.
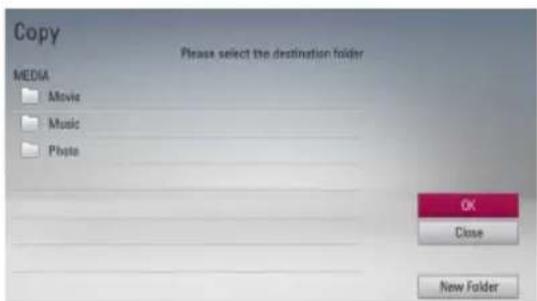
text_image
Copy Please select the destination folder MEDIA Movie Music Photo OK Close New Folder- (Option)
If you want to create a new folder, use ∧/∨/</> to select [New Folder] and press ENTER (◎).
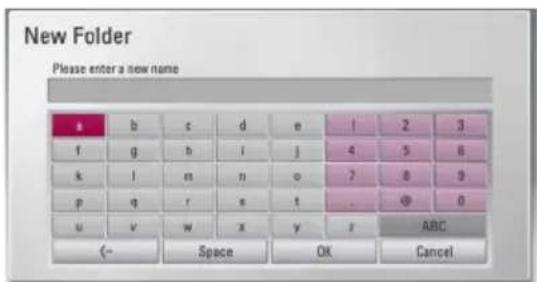
text_image
New Folder Please enter a new name a b c d e 1 2 3 f g h l j 4 5 6 k l n n{o 7 8 9 p(q r s t . Ø 0 u v w x y z ABC <- Space OK CancelEnter folder name using virtual keyboard, and press ENTER (●) while [OK] is selected.
- Use ∧/∨/</> to select [OK], and press ENTER (◎) to start copying.
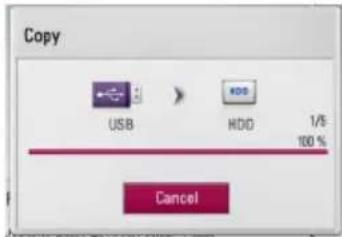
text_image
Copy USB HDD 1/8 100 % Cancel
Note
Copying speed may vary depending on the file size and number of files.
Copying file(s)/folder(s) from the internal hard disk drive to a USB storage device
You can copy music, photo, video file(s)/folder(s) from the internal hard disk drive to a USB storage device.
- Insert a USB device to the USB port until it fits into place.
- Press HOME ( ▲ ).
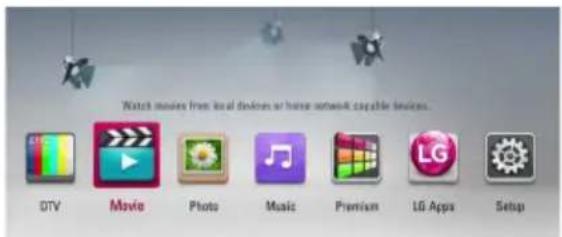
text_image
Watch movies from local devices or home network capable devices. DTV Movie Photo Music Premium LG Apps Setup- Select [Movie], [Photo] or [Music] using <//>, and press ENTER (◎).
- Select [HDD] using /V , and press ENTER (◎).
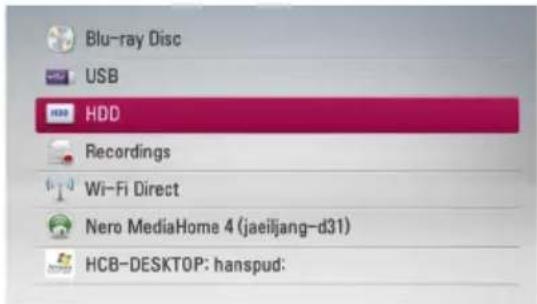
text_image
Blu-ray Disc USB HDD Recordings Wi-Fi Direct Nero MediaHome 4 (jaeiljang-d31) HCB-DESKTOP: hanspud:- Use ∧/∨/</> to select a directory that files or folders you want to copy are located.
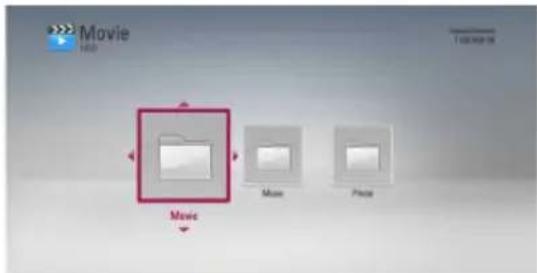
text_image
Movie Movie Movie Piece- Press INFO/MENU (☐) to display the option menu.
-
Use /V to select [Copy] option, and press ENTER (◎) to display the [Copy] menu.
-
Use / V to select a file or a folder you wish to copy on the menu, and press ENTER (●).
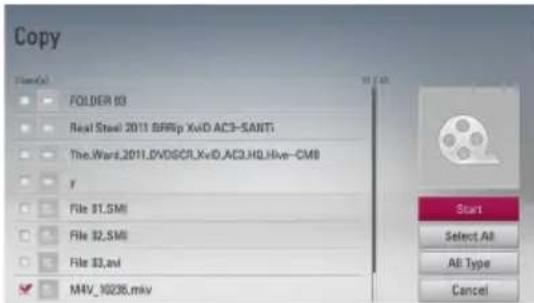
text_image
Copy File(F) FOLDER 10 Real Steel 2011 BRRip XviD AC3-SANT The.Wari.2011.DVDSCR.XviD_AC3.HQ.Hive-CM8 y File $1.SMI File $2.SMI File $3.avi MAY_10236.mky Start Select All All Type CancelRepeat this step to select files and folders as many as you can.
| Select All | Select all the files and folders on the current directory. |
| All Type | Shows all type of files on the screen. (Movie, Photo and Music) |
| Cancel | Cancels the copying and returns to the previous screen. |
- Use /V/</> to select [Start], and press ENTER (☐).
- Use //</> to select the destination folder to be copied.
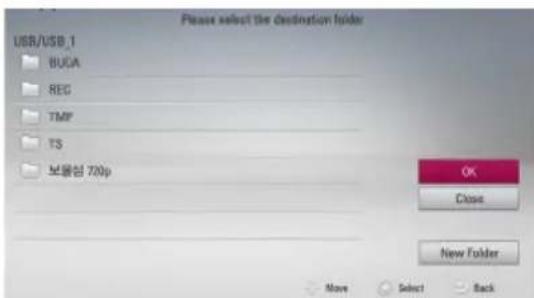
text_image
Please select the destination folder USB/USB_1 BUCA REC TMP TS 보름임 720p OK Close New Folder More Select Back- (Option)
If you want to create a new folder, use ∧/∨/</> to select [New Folder] and press ENTER (◎).
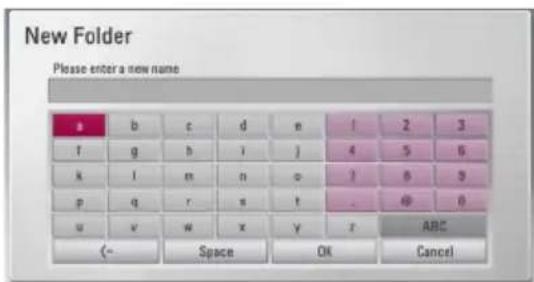
text_image
New Folder Please enter a new name a b c d e 1 2 3 f g h ImpJS 4 5 6 k l m n{o 7 8 9 p(q r s t _. @ 0 w v w x y z ABC ← Space OK CancelEnter folder name using virtual keyboard, and press ENTER (◎) while [OK] is selected.
- Use / / < / > to select [OK], and press ENTER (●) to start copying.
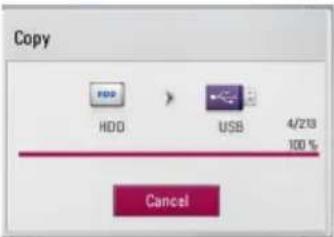
text_image
Copy HDD > USB 4/218 100 % CancelNote
- Copying speed may vary depending on the file size, number of files.
- It is unable to do copy during the recording.
- If a reserved recording is started during taking a copy, the recording is discontinued then a notification pops up.
- The name of copied files can be different from that of original files.
- It might not be copied if it is copy-protected contents.
- Successful copying contents also depend on USB storage's capability.
Deleting a file(s)/folder(s)
You can delete file(s)/folder(s) from the internal hard disk drive.
- Use / / < / > to select a directory that files or a folders you want to delete are located.
- Press INFO/MENU (☐) to display the option menu.
- Use /V to select [Delete] option, and press ENTER (◎) to display the [Delete] menu.
- Use / V to select a file or a folder you wish to copy on the menu, and press ENTER (◎).
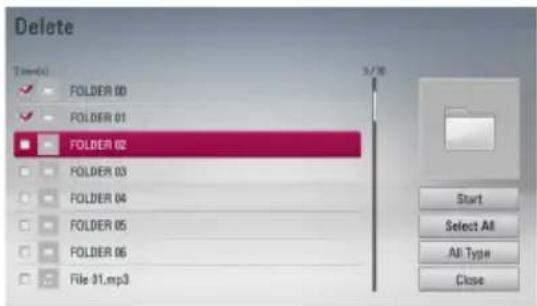
text_image
Delete Time(s) FOLDER 00 FOLDER 01 FOLDER 02 FOLDER 03 FOLDER 04 FOLDER 05 FOLDER 06 File $1.mp3 3/70 Start Select All All Type CloseRepeat this step to select files and folders as many as you can.
| Select All | Select all the files and folders on the current directory. |
| All Type | Shows all type of files on the screen. (Movie, Photo and Music) |
| Cancel | Cancels the copying and returns to the previous screen. |
- Use ∧/∨/</> to select [Start], and press ENTER (◎).
- Use to select [OK], and press ENTER (☐) to delete the selected files and folders.
Note
- If a reserved recording is started during taking a copy, the recording is discontinued then a notification pops up.
- It is unable to do delete during the recording.
Naming a file/folder
You can re-name a file or a folder in the internal hard disk drive.
- Select a file or a folder contained in the internal hard disk drive.
- Press INFO/MENU (☐) to display the option menu.
- Use / V to select [Rename] option, and press ENTER (◎) to display the virtual keyboard.
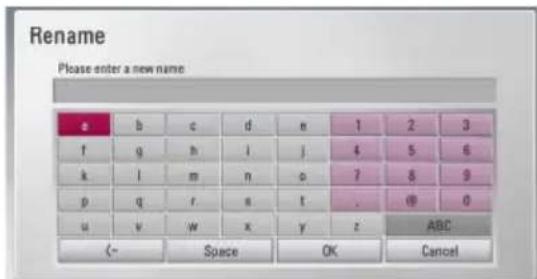
text_image
Rename Please enter a new name a b c d e 1 2 3 f g h l j 4 5 6 k l m n{o ? 8 9 p(q r s t . @ 0 u v w x y z ABC <- Space OK CancelEnter a new name using virtual keyboard, and press ENTER (◎) while [OK] is selected.

Note
A just archived audio file(s) from an audio CD may be unable to be renamed for a while.
Enjoying BD-LIVE
This unit allows you to enjoy functions such as picture-in-picture, secondary audio and Virtual packages, etc., with BD-Video supporting BONUSVIEW (BD-ROM version 2 Profile 1 version 1.1/ Final Standard Profile). Secondary video and audio can be played from a disc compatible with the picture-in-picture function. For the playback method, refer to the instructions in the disc.
In addition to the BONUSVIEW function, BD-Video supporting BD-LIVE (BD-ROM version 2 Profile 2) that has a network extension function allows you to enjoy more functions such as downloading new movie trailers by connecting this unit to the internet.
-
Check the network connection and settings (pages 20-24).
-
Set the [Blu-ray Storage Select] setting in the [Setup] menu (page 38).
If the [Blu-ray Storage Select] option in the [Setup] menu is set to [USB Storage], a USB storage device connection is needed to download bonus content.
- Press HOME ( 🔒), and set the [BD-LIVE connection] option on the [Setup] menu (page 38).
Depending on the disc, the BD-LIVE function may not operate if [BD-LIVE connection] option is set to [Partially Permitted].
- Insert a BD-ROM with BD-LIVE.
The operations may different depending on the disc. Refer to the manual supplied with the disc.
Caution
Do not extract the connected USB device while content is being downloaded or a Blu-ray disc is still in the disc slot. Doing so may damage the connected USB device and BD-LIVE features may not operate properly with the damaged USB device anymore. If the connected USB device seems damaged from such an action, you can format the connected USB device from the PC and reuse it with this unit.

Note
- Some BD-LIVE contents may be restrictively accessed in some territories by contents provider's own decision.
- It may take up to several minutes to load and start enjoying BD-LIVE contents.
Playing a file on a network server
MOVIE MUSIC PHOTO
This player can play movie, music and photo files located in a PC or a DLNA server through your home network.
- Check the network connection and settings (page 20).
- Press HOME).
- Select [Movie], [Photo] or [Music] using , and press ENTER (◎).
- Select a DLNA media server or a share folder on your PC on the list using ∧/∨, and press ENTER (◎).
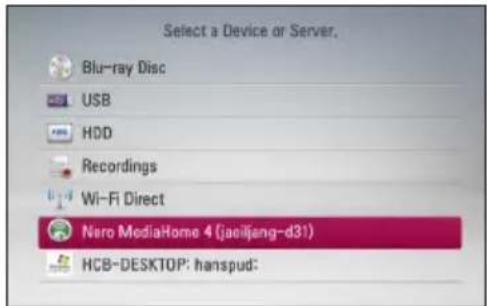
text_image
Select a Device or Server. Blu-ray Disc USB HDD Recordings Wi-Fi Direct Nero MediaHome 4 (jaoljeng-d31) HCB-DESKTOP: hanspud:If you want to rescan available media server, press the green (G) coloured button.
- Select a file using ∧/∨/</>, and press ENTER (●) to play the file.

Note
- The file requirements are described on page 10.
- The thumbnail of the unplayable files can be displayed, but those cannot be played on this unit.
- The subtitle file name and movie file name have to be the same and located at the same folder.
- The playback and operating quality may be affected by your home network condition.
- You may experience connection problems depending on your server's environment.
Wi-Fi Direct™ Connection
Connecting to a Wi-Fi Direct™ certified device
MOVIE MUSIC PHOTO
This player can play movie, music and photo files located in a Wi-Fi Direct™ certified device. The Wi-Fi Direct™ technology make the player to be directly connected to a Wi-Fi Direct™ certified device without connecting to a network device such as an access point.
- Set the [Wi-Fi Direct] option on the [Setup] menu to [On] (page 38).
- Press HOME(☐).
- Select [Movie], [Photo] or [Music] using <//>, and press ENTER (●).
- Select [Wi-Fi Direct] option using / , and press ENTER (●).
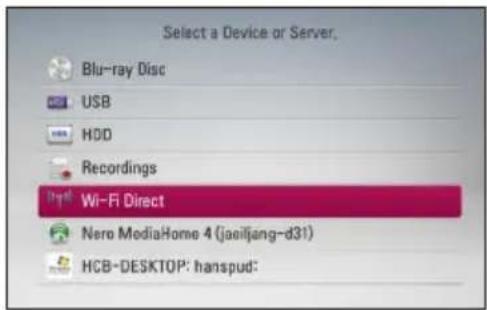
text_image
Select a Device or Server. Blu-ray Disc USB HDD Recordings Wi-Fi Direct Nero MediaHome 4 (jaeiljang-d31) HCB-DESKTOP: hanspud:- Select a Wi-Fi Direct™ device on the list using /V , and press ENTER (◎).
Wi-Fi Direct™ connection will be automatically proceeded.
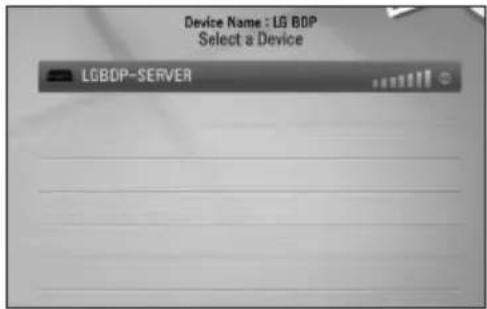
text_image
Device Name : LG BDP Select a Device LGBOP-SERVERIf the Wi-Fi Direct™ device supports the PIN Code configuration method based on WPS(Wi-Fi Protected Setup), select a device on the list and press yellow (Y) coloured button. Note the PIN number on the screen. And then, enter the PIN number on a setting menu of the device to connect.
If you want to rescan available Wi-Fi Direct™ device, press the green (G) coloured button.
- Select a server that shared from the connected Wi-Fi Direct™ device using /V , and press ENTER (◎) to navigate the server.
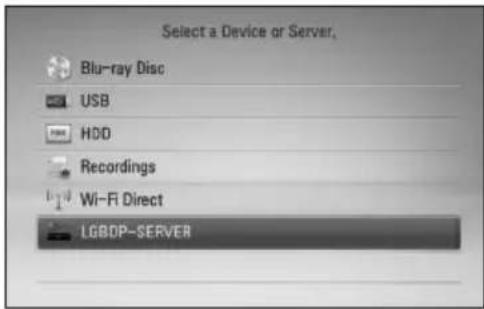
text_image
Select a Device or Server. Blu-ray Disc USB HDD Recordings Wi-Fi Direct LGBDP-SERVERTo select a server from the device list, files or folders must be shared by DLNA server from the connected Wi-Fi Direct™ device.
- Select a file using ∧/∨/</>, and press ENTER (◎) to play the file.
Note
- For the purpose of the better transmission, placing the player from the Wi-Fi Direct™ certified server as close as possible.
- This unit can connect only 1 device at a time. Multiple connection is not available.
- If you try to connect wireless network while a device is connected by Wi-Fi Direct™ function, Wi-Fi Direct™ connection will be force disconnected.
- If this player and a Wi-Fi Direct™ device are connected to the different local area network, Wi-Fi Direct™ connection may not available.
- If you try to connect Wi-Fi Direct while a device is connected by wireless network, Wi-Fi connection may be force disconnected.
Connecting to a Wi-Fi available devices
MOVIE MUSIC PHOTO
This player can connect to a general Wi-Fi device using Wi-Fi Direct™ function.
- Set the [Wi-Fi Direct] option on the [Setup] menu to [On] (page 38).
- Press HOME☐).
- Select [Movie], [Photo] or [Music] using <//>, and press ENTER (◎).
- Select [Wi-Fi Direct] option using /V , and press ENTER (●).
text_image
Select a Device or Server, Blu-ray Disc USB HDD Recordings Wi-Fi Direct Naro MediaHome 4 (jaeiljang-d31) HCB-DESKTOP: hanspud:- Press red (R) coloured button to display the [SSID], [Security Option] and [Encryption] of the player.
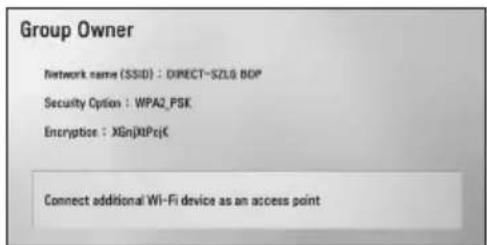
text_image
Group Owner Network name (SSID) : DIRECT-SZLB0 BDP Security Option : WPA2_PSK Encryption : XGn|XIPc|K Connect additional Wi-Fi device as an access point-
On your Wi-Fi device, make a network connection to this player, using [Network name (SSID)], [Security Option] and [Encryption] at step 5 above.
-
Press BACK ( ↻) twice to display the device list.
-
Select a server that shared from the connected Wi-Fi device using / , and press ENTER (◎) to navigate the server.
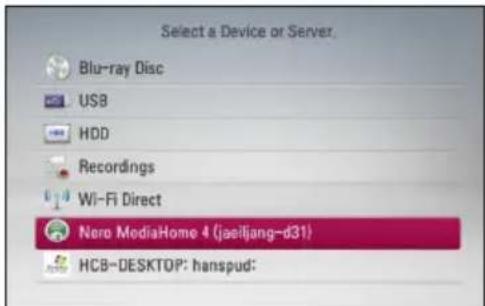
text_image
Select a Device or Server. Blu-ray Disc USB HDD Recordings Wi-Fi Direct Nero MediaHome 4 (jaeiljang-d31) HCB-DESKTOP: hanspud:To select a server from the device list, files or folders must be shared by DLNA server from the connected device.
- Select a file using ∧/∨/</>, and press ENTER (◎) to play the file.
Playing movie file and VR discs
You can play DVD-RW discs that are recorded in Video Recording (VR) format and movie files contained on a disc/HDD/USB device.
- Press HOME ( ▲ ).
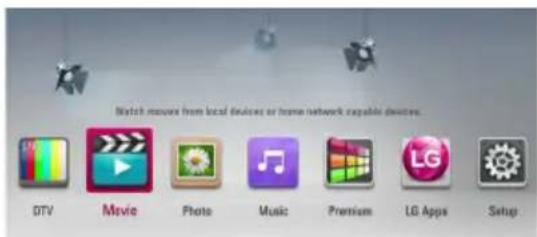
text_image
Watch moves from local devices or home network capable devices. DTV Movie Photo Music Premium LG Apps Setup-
Select [Movie] using <//>, and press ENTER (◎).
-
Select [Disc], [USB] or [HDD] option using /V , and press ENTER (◎).
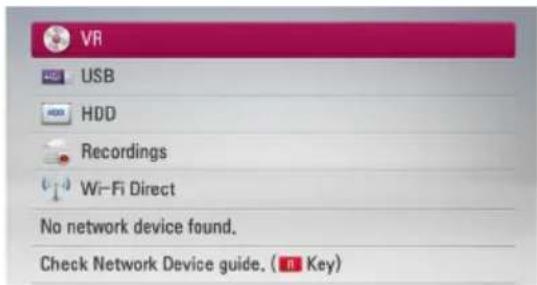
text_image
VR USB HDD Recordings Wi-Fi Direct No network device found. Check Network Device guide. (■ Key)This step is needed only when a disc or a USB device is connected on this unit.
While navigating [Movie], [Photo] or [Music] menu, press green (G) coloured button to change the device. (DISC, USB, HDD or Recordings)
- Select a file using ∧/∨/</>, and press ▶ (PLAY) or ENTER (◎) to play the file.
Note
- The file requirements are described on page 10.
- You can use various playback functions. Refer to pages 47-57.
- Unfinalized DVD VR format discs may not be played in this player.
- Some DVD-VR discs are made with CPRM data by DVD RECORDER. This unit cannot support these kinds of discs.
What is CPRM?
CPRM is a copy protection system (with scramble system) only allowing the recording of 'copy once' broadcast programs. CPRM stands for Content Protection for Recordable Media.
Selecting a subtitle file
MOVIE
If a movie file name and the subtitle file name are the same, subtitle file is played automatically when playing the movie file.
If the subtitle file name is different from the movie file name, you need to select the subtitle file on the [Movie] menu before playing the movie.
- Use ∧/∨/<> to select the subtitle file you wish to play in the [Movie] menu.
- Press ENTER ( Ⓞ ).
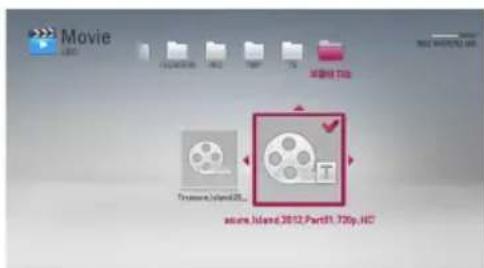
text_image
Movie Treasure Island 2012 acure Island 3012 Part 51, 720p, HCT- Press ENTER ( Ⓞ) again to deselect the subtitle file. Selected subtitle file will be displayed when you play the movie file.
Changing subtitle code page
MOVIE | MOVIE-N
If the subtitle is not displayed properly, you can change the subtitle code page to view the subtitle file properly.
- During playback, press INFO/MENU (☐) to display the On-Screen display.
- Use / V to select the [Code Page] option.
- Use to select desired code option.
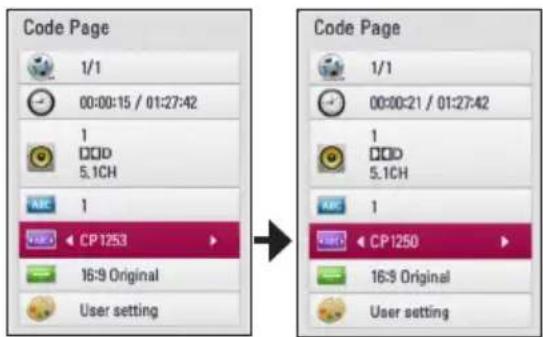
text_image
Code Page 1/1 00:00:15 / 01:27:42 1 DDD 5.1CH ABC 1 CP1253 16:9 Original User setting Code Page 1/1 00:00:21 / 01:27:42 1 DDD 5.1CH ABC 1 CP1250 16:9 Original User setting- Press BACK ( ↻) to exit the On-Screen display.
Viewing a photo
You can view photo files using this player.
- Press HOME ( ▲ ).
text_image
View photos from local devices or home network capable devices. DTV Movie Photo Music Premium LG Apps Setup- Select [Photo] using <//>, and press ENTER (◎).
- Select [Disc], [USB] or [HDD] option using /V , and press ENTER (●).
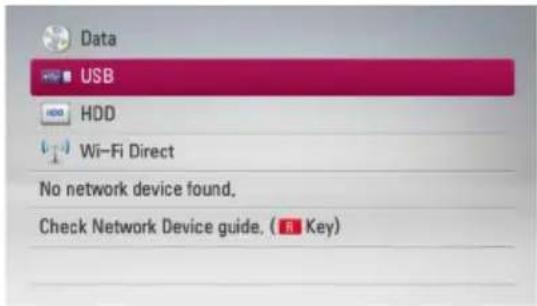
text_image
Data USB HDD Wi-Fi Direct No network device found. Check Network Device guide. ( 8 Key)This step is needed only when a disc or a USB device is connected on this unit.
While navigating [Movie], [Photo] or [Music] menu, press green (G) coloured button to change the device. (DISC, USB or HDD)
- Select a file using ∧/∨/</>, and press ENTER (◎) to view the photo in full screen.
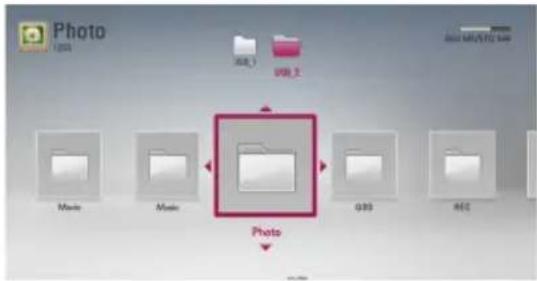
flowchart
graph TD
    A["Photo"] --> B["Video"]
    B --> C["Image"]
    C --> D["Video"]
    D --> E["Image"]
    E --> F["Video"]
    F --> G["Image"]
    G --> H["Video"]
    H --> I["Image"]
    I --> J["Video"]
    J --> K["Video"]
    K --> L["Video"]
    L --> M["Video"]
    M --> N["Video"]
    N --> O["Video"]
    O --> P["Video"]
    P --> Q["Video"]
    Q --> R["Video"]
    R --> S["Video"]
    S --> T["Video"]
    T --> U["Video"]
    U --> V["Video"]
    V --> W["Video"]
    W --> X["Video"]
    X --> Y["Video"]
    Y --> Z["Video"]
To play a slide show
Press ▶ (PLAY) to start the slide show.
To stop a slide show
Press ■(STOP) during slide show.
To pause a slide show
Press II (PAUSE) during slide show.
Press ▶ (PLAY) to re-start the slide show.
To skip to the next/previous photo
While viewing a photo in full screen, press < or > to go to the previous or next photo.
Note
The file requirements are described on page 10.
Options while viewing a photo
You can use various options while viewing a photo in full screen.
-
While viewing a photo in full screen, press INFO/MENU (☐) to display the option menu.
-
Select an option using ∧/V.
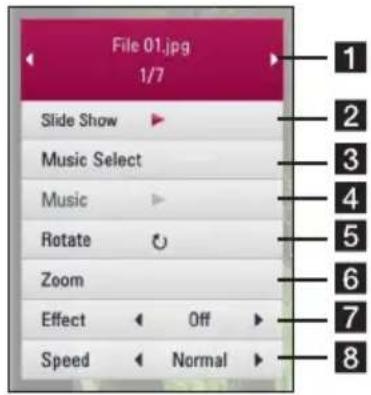
text_image
File 01.jpg 1/7 Slide Show Music Select Music Rotate Zoom Effect Off Speed Normal 1 2 3 4 5 6 7 81 Current photo/Total number of photos – Use <//> to view previous/next photo.
2 Slide Show – Press ENTER (◎) to start or pause slide show.
3 Music Select – Select the background music for the slide show (page 68).
4 Music –Press ENTER (◎) to start or pause background music.
5 Rotate – Press ENTER (◎) to rotate the photo clockwise.
6 Zoom – Press ENTER (◎) to display the [Zoom] menu.
7 Effect – Use <//> to select a transition effect between photos in a slide show.
8 Speed – Use <//> to select a delaying speed between photos in a slide show.
- Press BACK ( ↻) to exit the option menu.
Listening to music during a slide show
You can display photo files while listening to music files.
- Press HOME ( )
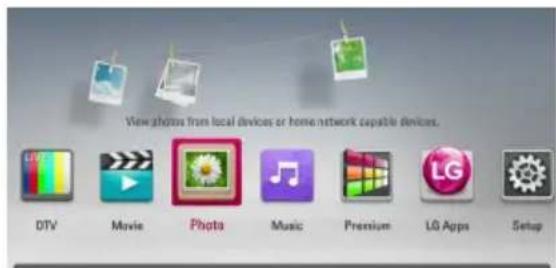
text_image
View photos from local devices or home network capable devices. DTV Movie Photo Music Premium LG Apps Setup- Select [Photo] using <//>, and press ENTER (◎).
- Select [Disc], [USB] or [HDD] option using /V , and press ENTER (◎).
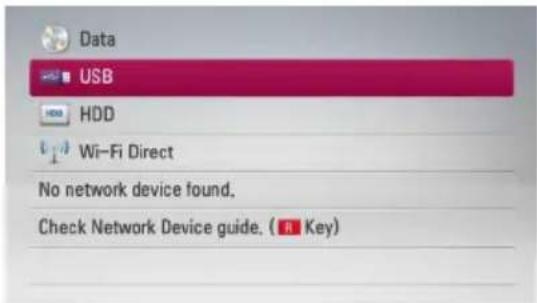
text_image
Data USB HDD Wi-Fi Direct No network device found. Check Network Device guide. ( R Key )- Select a file using ∧/∨/</>, and press ENTER (◎) to view the photo.
- Press INFO/MENU (☐) to display the option menu.
- Use / V to select [Music Select] option, and press ENTER (●) to display the [Music Select] menu.
- Use / V to select a device, and press ENTER (◎).
Devices that you can select may differ depending on the location of the photo file you are displaying in full screen.
| Photo location Available Device | |
| Disc, USB, HDD Disc, | USB, HDD |
| DLNA server DLNA server | |
- Use / V to select a file or a folder you wish to play.
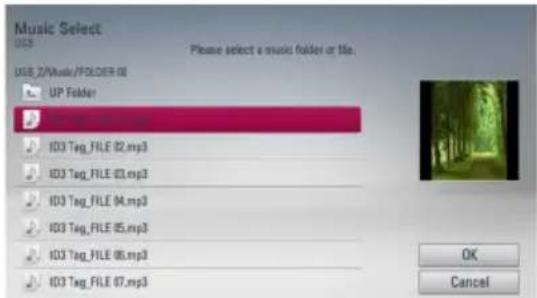
text_image
Music Select USB 2/Music/FOLDER 08 UP Folder 103 Tag_FILE 02.mp3 103 Tag_FILE 03.mp3 103 Tag_FILE 04.mp3 103 Tag_FILE 05.mp3 103 Tag_FILE 06.mp3 103 Tag_FILE 07.mp3 Please select a music folder or file. OK CancelSelect a folder and press ENTER (◎) to display the lower directory.
Select 📋 and press ENTER (●) to display the upper directory.
Note
When selecting music file from a server, folder selection is not available. Only file selection is available.
- Use > to select [OK], and press ENTER ( ) to complete music selection.
Listening to music
This player can play Audio CDs and music files.
- Press HOME ( ▶ ).
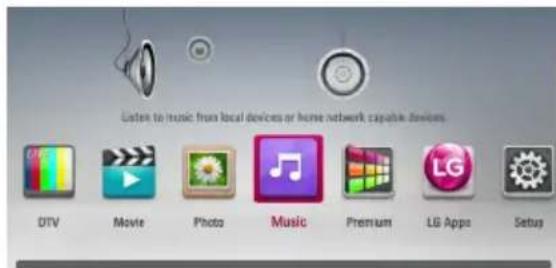
text_image
Listen to music from local devices or home network capable devices DTV Movie Photo Music Premium LG Apps Setup-
Select [Music] using <//>, and press ENTER (◎).
-
Select the [Disc], [USB] or [HDD] option using / V , and press ENTER (◎).
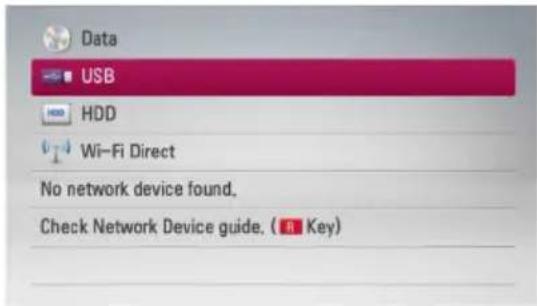
text_image
Data USB HDD Wi-Fi Direct No network device found. Check Network Device guide. ( R Key )This step is needed only when a disc or a USB device is connected on this unit.
While navigating [Movie], [Photo] or [Music] menu, press green (G) colored button to change the device. (DISC, USB or HDD)
- Select a music file or audio track using / / < / > , and press ENTER (●) to play the music.
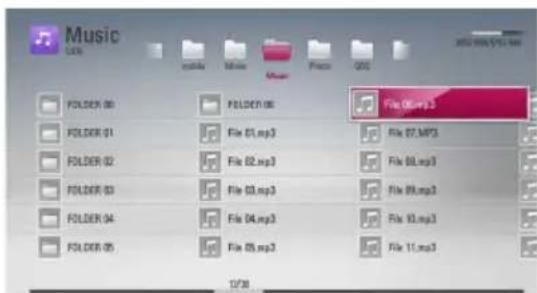
text_image
Music LPG File 01.mp3 File 02.mp3 File 03.mp3 File 04.mp3 File 05.mp3 File 06.mp3 File 07.mp3 File 08.mp3 File 09.mp3 File 10.mp3 File 11.mp3 12/30Note
The file requirements are described on page 10.
Audio CD Recording
You can record one desired track or all of the tracks in Audio CD to the internal hard disk drive or a USB storage device.
- Insert a disc in the disc slot.
The playback starts automatically. - Press INFO/MENU (☐) to display the option menu.
- Use /V to select [CD Recording] option, and press ENTER (◎) to display the [CD Recording] menu.
- Use /V to select a track you wish to copy on the menu, and press ENTER (◎).
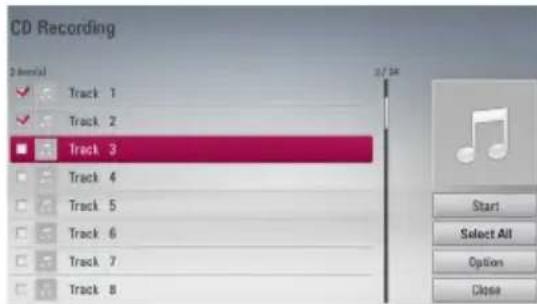
text_image
CD Recording Start Select All Option CloseRepeat this step to select tracks as many as you can.
| Select All | Select all the tracks on an Audio CD. |
| Option | Selects an encoding option from the pop-up menu (128 kbps, 192 kbps, 320 kbps or Lossless). |
| Close | Cancels the recording and returns to the previous screen. |
- Use // I to select [Start], and press ENTER (○).
- Select the [USB] or [HDD] option using , and press ENTER (●).
This step is needed only when a USB storage device is connected.
- Use /// to select a destination folder to be copied, and press ENTER (●).
If you want to create a new folder, use ∧/∨/</> to select [New Folder] and press ENTER (◎).
Enter folder name using virtual keyboard, and press ENTER (●) while [OK] is selected.
- Use / / < / > to select [OK], and press ENTER (○) to start Audio CD archiving.
If you want to stop in progressing Audio CD archiving, press ENTER (●) while [Cancel] is highlighted.
- A message appears when Audio CD archiving is completed.
Press ENTER (●) to check the audio file created in the destination folder.

Note
- The table below shows the average recording time from an audio track with 4 minutes of playback time to an audio file with 192kbps as an example
| Device\Status | stop mode | while playback |
| Internal HDD 15 sec. | 23 sec. | |
| USB 1.4 min. 2 min. |
- All times in the above table are approximate.
- Actual recording time for USB storage device varies depending on the USB storage device's ability.
- Make sure that there is minimum of 50MB free space is needed when recording into the USB storage device.
- The length of the music should be longer than 20 seconds for the proper recording.
- Do not turn off this player or extract the connected USB storage device during Audio CD recording.
Caution
The making of unauthorized copies of copy-protected material, including computer programs, files, broadcasts and sound recordings, may be an infringement of copyrights and constitute a criminal offense. This equipment should not be used for such purposes.
Be responsible Respect copyrights
Viewing information from Gracenote Media Database
The player can access the Gracenote Media Database and loads the music information so that Track name, Artist Name, Genre and other text information can be displayed on the list.
Audio CD
When you insert an Audio CD, the player starts playback automatically and load the music title from the Gracenote Media Database.
If there is no music information in the database, music titles will not be displayed on the screen.
Music file
- Select a music file using ∧/∨/</>.
- Press INFO/MENU (☐) to display the option menu.
- Select the [Information] option using /V , and press ENTER ( ).
The player accesses Gracenote Media Database for the music information.
Blu-ray Disc/DVD/Video file
While listening to a music from the movie being played, press MUSIC ID to start loading the music information from the Gracenote Media Database.
Note
- The player must be connected to the broadband internet for accessing the Gracenote Media Database.
- If the music information is not in the Gracenote Media Database, message appears on the screen.
- If the information from the Gracenote Media Database is either not correct or does not exist, please contact www.gracenote.com for support.
- Depending on the cases, it will takes a few minutes to load music information from the Gracenote Media Database.
• Information may be displayed in broken letters, if the language you selected is not available on the Gracenote Media Database. - This function is not available for NetCast online content and content in DLNA servers.
- LG is a licensee of Gracenote technology and is not responsible or reliable for information from the Gracenote Media Database.
- Audio CDs that users made for their only private purposes cannot be supported in this feature because they are not in the Gracenote Media Database.
• Supported audio file extensions : mp3, wma, m4a
Using the Music Library
The player offers Music Library menu for the music contents stored in the internal hard disk drive. The player accesses the Gracenote Media Database and loads the music information for all of the music contents in the internal hard disk drive. You can also manage the music contents by various categories from the Music Library menu.
- Press HOME ( ▲).
-
Select [Music] using <//>, and press ENTER (◎).
-
Select the [HDD] using / V , and press ENTER (◎).
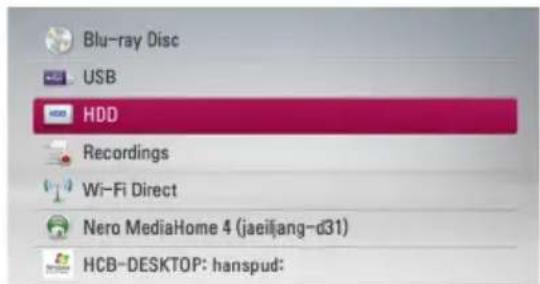
text_image
Blu-ray Disc USB HDD Recordings Wi-Fi Direct Nero MediaHome 4 (jaeiljang-d31) HCB-DESKTOP: hanspud:-
Press INFO/MENU (☐) to display the option menu.
-
Use / V to select [Library mode] option, and press ENTER (◎) to display the [Library] menu.
If you want to return to the directory mode, press INFO/MENU (☐) and select [Directory mode] and press ENTER (☑).
- All the audio files stored in the internal hard disk drive are sorted by categories with the music information loaded from Gracenote Media Database. Use / V to select a category.
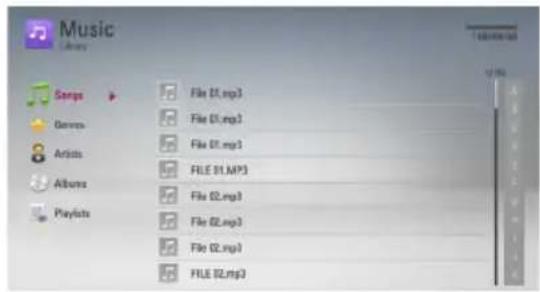
text_image
Music Library Songs Genres Artists Albums Playlists File 01.mp3 File 01.mp3 File 01.mp3 FILE 01.MP3 File 02.mp3 File 02.mp3 File 02.mp3 FILE 02.mp3Songs – All audio files stored in the internal hard disk drive are sorted by name in alphabetical order.
Genres – Audio files stored in the internal hard disk drive are sorted by genre information from Gracenote Media Database.
Artists – Music stored in the internal hard disk drive are sorted by artist name from Gracenote Media Database in alphabetical order.
Albums - All music stored in the internal hard disk drive are sorted by album title from Gracenote Media Database in alphabetical order.
PlayLists – Displays audio files you have added to your playlist or displays audio files using several filter options.
You can search easily a content using power scroll bar. Use > repeatedly to select the power scroll bar on the right side of the screen.
Use ∧/∨ to select a letter, and press ENTER (○) to move the cursor to the music title which start with the letter you were selected.

Note
The player must be connected to the Internet in order to use the Music Library.
Adding an audio file to your playlist
- Use ∧/∨/<> to select a directory that files you want to add to the playlist are located.
- Press INFO/MENU (☐) to display the option menu.
- Use / V to select [Add to playlist] option, and press ENTER (●) to display the [Add to playlist] menu.
- Use / V to select a file you wish to add to the playlist, and press ENTER (◎).
Repeat this step to select files as many as you can.
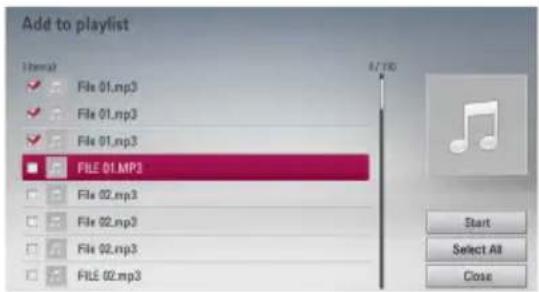
text_image
Add to playlist Normal File 01.mp3 File 01.mp3 File 01.mp3 FILE 01.MP3 File 02.mp3 File 02.mp3 File 02.mp3 FILE 02.mp3 8/19 Start Select All Close
Select all the files in the current directory.
Cancels and returns to the previous screen.
- Use ∧/∨/</> to select [Start], and press ENTER (◎).
Deleting an audio file from your playlist
- On the Music Library menu, use /V to select [PlayList], and press ENTER (●).
- Use ∧/∨ to select [My Playlist] option, and press ENTER (●) to display your playlist.
- Press INFO/MENU (☐) to display the option menu.
- Use / V to select [Delete from playlist] option, and press ENTER (◎) to display the [Delete from Playlist] menu.
- Use / V to select a file you wish to add to the playlist, and press ENTER (◎).
Repeat this step to select files as many as you can.
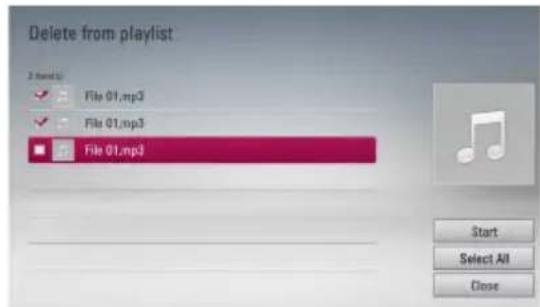
text_image
Delete from playlist 2 items up ✓ File 01.mp3 ✓ File 01.mp3 File 01.mp3 Start Select All Close| Select All | Select all the files in the current directory. |
| Close | Cancels and returns to the previous screen. |
- Use ∧/∨/<> to select [Start], and press ENTER (○).
Using the Photo Library
The player offers Photo Library menu for the photos stored in the internal hard disk drive.
- Press HOME ( ▲).
- Select [Photo] using <//>, and press ENTER (◎).
- Select the [HDD] using /V , and press ENTER (◎).
- Press INFO/MENU (☐) to display the option menu.
- Use ∧/∨ to select [Library mode] option, and press ENTER (◎) to display the [Library] menu. If you want to return to the directory mode, press INFO/MENU (☐) and select [Directory mode] and press ENTER (◎).
- Photo files stored in the internal hard disk drive are sorted by the date when original image was taken and displayed in the calendar.
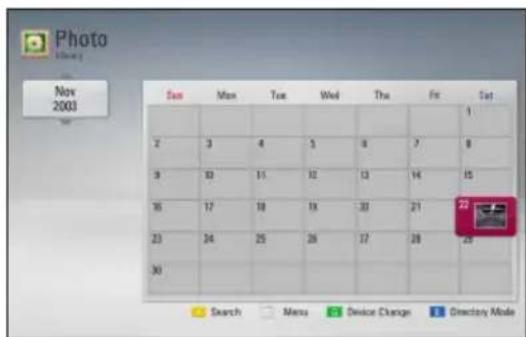
text_image
Photo Library Nov 2003 Sun Men Tue Wed Thu Fri Sat 1 2 3 4 5 6 7 8 9 10 11 12 13 14 15 16 17 18 19 20 21 22 23 24 25 26 27 28 29 30 Search Menu Device Change Directory Mode- Use /V/</> to select a date, and press ENTER (●) to display photos created in that date.
- Use ∧/∨/</> to select a photo file, and press ENTER (◎) to display the photo in full screen.
Note
A photo file may not be displayed in photo library mode, if the photo file does not have the information of taken date.
Using the Premium
You can use various content services via Internet with the Premium feature.
- Check the network connection and settings (page 20).
- Press HOME).
- Select the [Premium] using <//>, and press ENTER (○).
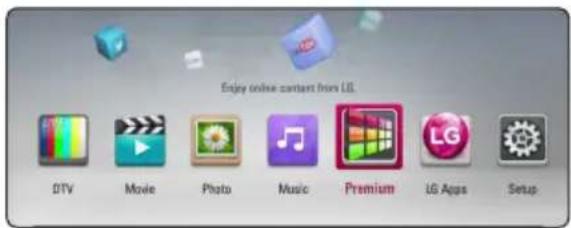
text_image
Enjoy online content from LG.- Select an online service using ∧/∨/</>, and press ENTER (◎).

Note
- Detailed information of each service, contact to the content provider or visit support link of the service.
- The content of Premium services and service related information, including user interface, is subject to changes. Please refer to the web site of each service for most up-to-date information.
- Using Premium features with wireless network connection may result in improper streaming speed by interference from household devices that are using radio frequencies.
- When you are first time to access [Premium] or [LG Apps] feature, current country setting appears. If you want to change the country setting, select [Edit] and press ENTER (◎).
Using the LG Apps
You can use the LG application services on this player via Internet. You can easily find and download various applications from LG App store.
Depending on the region, the LG Apps service may not be available at the moment. The service will become available in these regions through at software update.
- Check the network connection and settings (page 20).
- Press HOME).
- Select the [LG Apps] using <//>, and press ENTER (●).
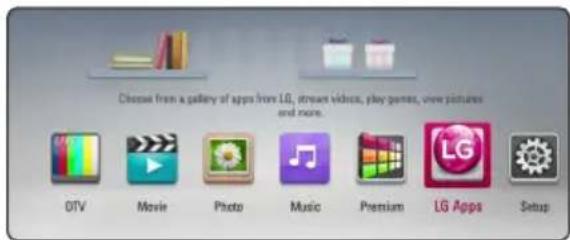
text_image
Choose from a gallery of apps from LG, stream videos, play games, view pictures and more. DTV Movie Photo Music Premium LG Apps Setup- Select a category using <//>, and press ENTER (◎).
- Use / / < / > to select an application, and press ENTER (●) to display the information.
- Press ENTER ( Ⓞ ) while [Install] icon is highlighted. The application will be installed to the player.
To install an application to the player, user needs to sign in. Refer to page 75 for more information of signing in.
- Press yellow (Y) coloured button to display the [My Apps] screen.
- Select the installed application and press ENTER (◎) to excute it.

Note
To install a paid application, you need to be a paid member. Visit www.lgappstv.com for more information.
Signing in
To use the [LG Apps] feature, you need to sign in with your account.
- On the [LG Apps] or [My Apps] screen, press red (R) colored button.
- Fill the [ID] and [Password] field using the virtual keyboard.
If you do not have an account, press red (R) coloured button to register.
- Use / / < / > to select [OK], and press ENTER (○) to sign in with your account.
If you select the [Auto Sign In] check box, your ID and password are remembered and automatically signed in without entering them.
Note
- If you want to sign in with other account, press red (R) colouredbutton on [LG Apps] or [My Apps] screen, and select [Change User] option.
- To view the information of your account and applications, press red (R) colored button on [LG Apps] or [My Apps] screen, and select [Account Setting] option.
Managing my Apps
You can move or delete an installed application in the [My Apps] menu.
Move an application
- Select an application, and press green (G) colored button to display the options.
- Use / V to select [Move], and press ENTER(○).
- Use /// to select a position you want to move to, and press ENTER (●).
Delete an application
- Select an application, and press green (G) colored button to display the options.
- Use /V to select [Delete], and press ENTER(●).
- Use < / > to select [Yes], and press ENTER (◎) to confirm.
Troubleshooting
General
| Symptoms Cause & Solution | |
| The Power does not turn on. | Plug the power cord into the wall outlet securely. |
| The unit does not start playback. | Insert a playable disc. (Check the disc type, color system, and regional code.)Insert the disc with the playback side down.Clean the disc.Cancel the Rating function or change the rating level. |
| The angle cannot be changed. | Multi-angles are not recorded on the DVD Video being played. |
| Cannot play movie, photo or audio files. | The files are not recorded in a format that the unit can play.The unit does not support the codec of the movie file. |
| The remote control does not work properly. | The remote control is not pointed at the remote sensor of the unit.The remote control is too far from the unit.There is an obstacle in the path between the remote control and the unit.The batteries in the remote control are exhausted. |
Picture
| Symptom Cause & Solution | |
| There is no picture. | Select the appropriate video input mode on the TV so the picture from the unit appears on the TV screen.Connect the video connection securely.Check the [HDMI Color Setting] in the [Setup] menu is set to the appropriate item that conforms to your video connection.Your TV may not support the resolution you have set on the unit. Change the resolution to one that your TV accepts.The player's HDMI OUT jack is connected to a DVI device that does not support copyright protection. |
| Picture noise appears | You are playing a disc recorded in a colour system that is different from your TV.Set the resolution to one that your TV accepts. |
Sound
| Symptom Cause & Solution | |
| There is no sound or the sound is distorted. | Connect the audio connection securely.The input source setting on the amplifier or the connection to the amplifier is incorrect.The unit is in scan, slow motion, or pause mode.The sound volume is low.Check that the connected amplifier is compatible with the audio format output from the player.The player's HDMI OUT jack is connected to a DVI device. The DVI jack does not accept audio signal.Check the device connected to the player's HDMI OUT jack is compatible with the audio format output from the unit. |
Network
| Symptom Cause & Solution | |
| BD-LIVE feature does not work. | The connected USB storage may not have enough space. Connect the USB storage with at least 1GB free space.Ensure that the unit is correctly connected to the local area network and can access the internet (see pages 20-24).Your broadband speed may not be fast enough to use the BD-Live features. Contact your Internet Service Provider (ISP) and increase the broadband speed to suit the unit's requirements.The [BD-LIVE connection] option in the [Setup] menu is set to [Prohibited]. Set the option to [Permitted]. |
| Streaming video services (such as YouTubeTM, etc.) are often stop or "buffer" during playback. | Your broadband service speed may not be fast enough to stream video services. Contact your Internet Service Provider (ISP) and increase the broadband speed is recommended. |
| Media servers are not displayed on the device list. | The firewall or anti-virus software on your media server is running. Turn off the firewall or anti-virus software running on your media server.The player is not connected to the local area network that your media server is connected. |
| Cannot connect the player to the access point or wireless LAN router. | The wireless communication may be interrupted from household devices that are using radio frequencies. Move the player away from them. |
| Access point is not displayed on the "Access point name" list. | The access point or wireless LAN router may not broadcast its SSID. Set your access point to broadcast its SSID through your computer. |
Recording
| Symptom Cause & Solution | |
| Cannot record or does not record successfully. | Check the remaining space on the HDD.If your source is copy-protected, you cannot record it using this recorder.If you set a DTV rating for the recorder and higher rated digital programs are received, the programme cannot be recorded. Change the DTV rating level in order to record it. |
| Timer record does not record successfully. | Clock is not set to correct time.The start time of the timer recording is past.When setting the recording programme, make sure you set the recorder's built-in tuner, not the TV's built-in tuner.If the HDD is damaged, the recording may not complete successfully. |
| You cannot enter a timer programme when. | In the case that one channels is recording.The time you're trying to set has already passed.There are already 32 timer programs set. |
| If one or more timer programs overlap. | The earlier programme takes priority.In the case a reserved recording is started during recording and a user uses another menu, the reserved recording cannot be operated. |
| The USB HDD recording does not functioning. | Check the [Default Recording Device] whether setting to the [USB HDD] in the [Setup] menu. |
Customer Support
You can update the Player using the latest software to enhance the products operation and/or add new features. To obtain the latest software for this player (if updates have been made), please visit http://lgservice.com or contact LG Electronics customer care centre.
Open source software notice
To obtain the corresponding source code under GPL, LGPL and other open source licenses, please visit http://opensource.lge.com. All referred license terms, warranty disclaimers and copyright notices are available to download with the source code.
Controlling a TV with the Supplied Remote Control
You can control your TV using the buttons below.
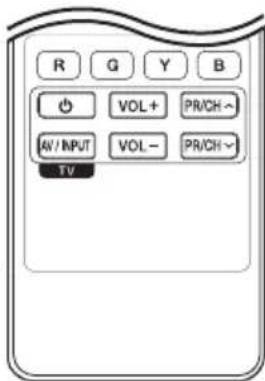
text_image
R G Y B VOL+ PR/CH~ AV / INPUT VOL - PR/CH~ TV| By pressing You can | |
| (TV POWER) | Turn the TV on or off. |
| AV/INPUT | Switch the TV's input source between the TV and other input sources. |
| PR/CH ∧ / V | Scan up or down through memorized channels. |
| VOL +/- | Adjust the volume of the TV |

Note
Depending on the unit being connected, you may not be able to control your TV using some of the buttons.
Setting up the remote to control your TV
You can operate your TV with the supplied remote control.
If your TV is listed in the table below, set the appropriate manufacturer code.
- While holding down ⏻ (TV POWER) button, press the manufacturer code for your TV with the numerical buttons (see the table below).
| Manufacturer Code Number | |
| LG 1(Default), 2 | |
| Zenith 1, 3, 4 | |
| GoldStar 1, 2 | |
| Samsung 6, 7 | |
| Sony 8, 9 | |
| Hitachi 4 | |
- Release the ⏻ (TV POWER) button to complete setting.
Depending on your TV, some or all buttons may not function on the TV, even after entering the correct manufacturer code. When you replace the batteries in the remote, the code number you have set may be reset to the default setting. Set the appropriate code number again.
Area Code List
Choose an area code from this list.
| Area | Code | Area | Code | Area | Code | |
| Afghanistan AF | Fiji | FJ | Monaco | MC | Singapore SG | |
| Argentina AR | Finland | FI | Mongolia | MN | Slovak Republic SK | |
| Australia AU | France | FR | Morocco | MA | Slovenia SI | |
| Austria AT | Germany | DE | Nepal | NP | South Africa ZA | |
| Belgium BE | Great Britain | GB | Netherlands | NL | South Korea KR | |
| Bhutan BT | Greece | GR | Antilles AN | Spain ES | ||
| Bolivia BO | Greenland GL | New Zealand | NZ | Sri Lanka LK | ||
| Brazil BR | Hong Kong | HK | Nigeria | NG | Sweden SE | |
| Cambodia KH | Hungary | HU | Norway | NO | Switzerland CH | |
| Canada CA | India | IN | Oman | OM | Taiwan TW | |
| Chile CL | Indonesia | ID | Pakistan PK | Thailand TH | ||
| China CN | Israel | IL | Panama | PA | Turkey TR | |
| Colombia CO | Italy | IT | Paraguay | PY | Uganda UG | |
| Congo CG | Jamaica JM | Philippines | PH | Ukraine UA | ||
| Costa Rica | CR | Japan | JP | Poland PL | United States US | |
| Croatia | HR | Kenya | KE | Portugal | PT | Uruguay UY |
| Czech Republic | CZ | Kuwait | KW | Romania | RO | Uzbekistan UZ |
| Denmark | DK | Libya | LY | Russian | Vietnam VN | |
| Ecuador EC | Luxembourg | LU | Federation | RU | Zimbabwe ZW | |
| Egypt | EG | Malaysia | MY | Saudi Arabia | SA | |
| El Salvador SV | Maldives | MV | Senegal SN | |||
| Ethiopia | ET | Mexico | MX | |||
Language code List
Use this list to input your desired language for the following initial settings: [Disc Audio], [Disc Subtitle] and [Disc Menu].
| Language | Code | Language | Code | Language | Code | Language |
| Afar 6565 | French | 7082 | Lithuanian | 7684 | Sindhi 8368 | |
| Afrikaans 6570 | Frisian 7089 | Macedonian | 7775 | Singhalese 8373 | ||
| Albanian 8381 | Galician | 7176 | Malagasy | 7771 | Slovak 8375 | |
| Ameharic 6577 | Georgian | 7565 | Malay | 7783 | Slovenian 8376 | |
| Arabic 6582 | German | 6869 | Malayalam | 7776 | Spanish 6983 | |
| Armenian 7289 | Greek | 6976 | Maori | 7773 | Sudanese 8385 | |
| Assamese 6583 | Greenlandic | 7576 | Marathi 7782 | Swahili 8387 | ||
| Aymara 6588 | Guarani 7178 | Moldavian | 7779 | Swedish 8386 | ||
| Azerbaijani 6590 | Gujarati 7185 | Mongolian | 7778 | Tagalog 8476 | ||
| Bashkir 6665 | Hausa | 7265 | Nauru | 7865 | Language Code | |
| Basque 6985 | Hebrew | 7387 | Nepali 7869 | Tajik 8471 | ||
| Bengali; Bangla 6678 | Hindi | 7273 | Norwegian 7879 | Tamil 8465 | ||
| Bhutani 6890 | Hungarian | 7285 | Oriya | 7982 | Telugu 8469 | |
| Bihari 6672 | Icelandic 7383 | Panjabi 8065 | Thai 8472 | |||
| Breton 6682 | Indonesian 7378 | Pashto, Pushto | 8083 | Tonga 8479 | ||
| Bulgarian | 6671 | Interlingua | 7365 | Persian | 7065 | Turkish 8482 |
| Burmese | 7789 | Irish 7165 | Polish | 8076 | Turkmen 8475 | |
| Byelorussian | 6669 | Italian | 7384 | Portuguese | 8084 | Twi 8487 |
| Chinese | 9072 | Japanese | 7465 | Quechua | 8185 | Ukrainian 8575 |
| Croatian | 7282 | Kannada | 7578 | Rhaeto-Romance | 8277 | Urdu 8582 |
| Czech | 6783 | Kashmiri | 7583 | Rumanian | 8279 | Uzbek 8590 |
| Danish | 6865 | Kazakh 7575 | Russian | 8285 | Vietnamese 8673 | |
| Dutch | 7876 | Kirghiz | 7589 | Samoan | 8377 | Volapük 8679 |
| English 6978 | Korean 7579 | Sanskrit 8365 | Welsh 6789 | |||
| Esperanto | 6979 | Kurdish | 7585 | Scots Gaelic | 7168 | Wolof 8779 |
| Estonian | 6984 | Laothian | 7679 | Serbian | 8382 | Xhosa 8872 |
| Faroese | 7079 | Latin | 7665 | Serbo-Croatian | 8372 | Yiddish 7473 |
| Fiji | 7074 | Latvian, Lettish | 7686 | Shona 8378 | Yoruba 8979 | |
| Finnish | 7073 | Lingala | 7678 | Zulu 9085 |
Trademarks and Licenses


Blu-ray Disc™, Blu-ray™, Blu-ray 3D™, BD-Live™, BONUSVIEW™ and the logos are trademarks of the Blu-ray Disc Association.

Java is a trademark of Oracle and/or its affiliates.
text_image
DOLBY. TRUE HD DIGITAL PLUSManufactured under license from Dolby Laboratories. Dolby and the double-D symbol are trademarks of Dolby Laboratories

HDMI, the HDMI logo and High-Definition Multimedia Interface are trademarks or registered trademarks of HDMI Licensing LLC in the United States and other countries.

"DVD Logo" is a trademark of DVD Format/Logo Licensing Corporation.

DLNA ^® , the DLNA Logo and DLNA CERTIFIED ^® are trademarks, service marks, or certification marks of the Digital Living Network Alliance.
AVCHD TM
"AVCHD" and the "AVCHD" logo are trademarks of Panasonic Corporation and Sony Corporation.
text_image
dts-HD® Master AudioManufactured under license under U.S. Patent #'s: 5,451,942; 5,956,674; 5,974,380; 5,978,762; 6,226,616; 6,487,535; 7,212,872; 7,333,929; 7,392,195; 7,272,567 & other U.S. and worldwide patents issued & pending. DTS is a registered trademark and the DTS logos, Symbol, DTS-HD and DTS-HD Master Audio are trademarks of DTS, Inc. © 1996-2008 DTS, Inc. All Rights Reserved.

text_image
DIVX HD™DivX ^® , DivX Certified ^® and associated logos are trademarks of Rovi Corporation or its subsidiaries, and are used under license.

The Wi-Fi CERTIFIED Logo is a certification mark of the Wi-Fi Alliance.
"x.v.Colour" is a trademark of Sony Corporation.
consumption system in stand-by mode is built. There fore, the small amounts of electricity are consumed even though the power plug is inserted.

gracenote.
Gracenote®, Gracenote logo and logotype, and the "Powered by Gracenote" logo are either registered trademarks or trademarks of Gracenote, Inc. in the United States and/or other countries.
Music recognition technology and related data are provided by Gracenote®.
Portions of the content is copyright © Gracenote or its providers.
Gracenote® End User License Agreement
This application or device contains software from Gracenote, Inc. of Emeryville, California ("Gracenote"). The software from Gracenote (the "Gracenote Software") enables this application to perform disc and/or file identification and obtain music-related information, including name, artist, track, and title information ("Gracenote Data") from online servers or embedded databases (collectively, "Gracenote Servers") and to perform other functions. You may use Gracenote Data only by means of the intended End-User functions of this application or device.
You agree that you will use Gracenote Data, the Gracenote Software, and Gracenote Servers for your own personal non-commercial use only. You agree not to assign, copy, transfer or transmit the Gracenote Software or any Gracenote Data to any third party. YOU AGREE NOT TO USE OR EXPLOIT GRACENOTE DATA, THE GRACENOTE SOFTWARE, OR GRACENOTE SERVERS, EXCEPT AS EXPRESSLY PERMITTED HEREIN.
You agree that your non-exclusive license to use the Gracenote Data, the Gracenote Software, and Gracenote Servers will terminate if you violate these restrictions. If your license terminates, you agree to cease any and all use of the Gracenote Data, the Gracenote Software, and Gracenote Servers. Gracenote reserves all rights in Gracenote Data, the Gracenote Software, and the Gracenote Servers, including all ownership rights. Under no circumstances will Gracenote become liable for any payment to you for any information that you provide. You agree that Gracenote, Inc. may enforce its rights under this Agreement against you directly in its own name.
The Gracenote service uses a unique identifier to track queries for statistical purposes. The purpose of a randomly assigned numeric identifier is to allow the Gracenote service to count queries without knowing anything about who you are. For more information, see the web page for the Gracenote Privacy Policy for the Gracenote service.
The Gracenote Software and each item of Gracenote Data are licensed to you "AS IS." Gracenote makes no representations or warranties, express or implied, regarding the accuracy of any Gracenote Data from in the Gracenote Servers. Gracenote reserves the right to delete data from the Gracenote Servers or to change data categories for any cause that Gracenote deems sufficient. No warranty is made that the Gracenote Software or Gracenote Servers are error-free or that functioning of Gracenote Software or Gracenote Servers will be uninterrupted. Gracenote is not obligated to provide you with new enhanced or additional data types or categories that Gracenote may provide in the future and is free to discontinue its services at any time.
GRACENOTE DISCLAIMS ALL WARRANTIES EXPRESS OR IMPLIED, INCLUDING, BUT NOT LIMITED TO, IMPLIED WARRANTIES OF MERCHANTABILITY, FITNESS FOR A PARTICULAR PURPOSE, TITLE, AND NON-INFRINGEMENT. GRACENOTE DOES NOT WARRANT THE RESULTS THAT WILL BE OBTAINED BY YOUR USE OF THE GRACENOTE SOFTWARE OR ANY GRACENOTE SERVER. IN NO CASE WILL GRACENOTE BE LIABLE FOR ANY CONSEQUENTIAL OR INCIDENTAL DAMAGES OR FOR ANY LOST PROFITS OR LOST REVENUES.
© Gracenote, Inc. 2009
Cinavia Notice
This product uses Cinavia technology to limit the use of unauthorized copies of some commercially-produced film and videos and their soundtracks. When a prohibited use of an unauthorized copy is detected, a message will be displayed and playback or copying will be interrupted.
More information about Cinavia technology is provided at the Cinavia Online Consumer Information Center at http://www.cinavia.com. To request additional information about Cinavia by mail, send a postcard with your mailing address to: Cinavia Consumer Information Center, P.O. Box 86851, San Diego, CA, 92138, USA.
This product incorporates proprietary technology under license from Verance Corporation and is protected by U.S. Patent 7,369,677 and other U.S. and worldwide patents issued and pending as well as copyright and trade secret protection for certain aspects of such technology. Cinavia is a trademark of Verance Corporation. Copyright 2004-2010 Verance Corporation. All rights reserved by Verance. Reverse engineering or disassembly is prohibited.
Network Software Update
Network update notification
From time to time, performance improvements and/or additional features or services may be made available to units that are connected to a broadband home network. If there is new software available and the unit is connected to a broadband home network, the player will inform you about the update as follows.
Option 1:
- The update menu will appear on the screen when you turn on the player.
- Use <//> to select a desired option and then press ENTER (◎).
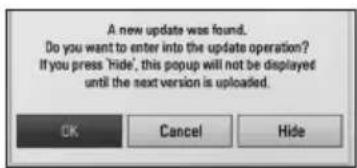
text_image
A new update was found. Do you want to enter into the update operation? If you press 'hide', this popup will not be displayed until the next version is uploaded.| [OK] Starts the software update. | |
| [Cancel] Exits the update menu and displays it next booting. | |
| [Hide] Exits the update menu and it does not appear until next software is uploaded in the update server. |
Option 2:
If the software update is available from the update server, the "Update" icon appears in the Home menu. Press blue (B) coloured button to start the update procedure.
Software Update
You can update the player using the latest software to enhance the products operation and/or add new features. You can update the software by connecting the unit directly to the software update server.
Note
- Before updating the software in your player, remove any disc and USB Device from the unit.
- Before updating the software in your player, turn the player off and then turn it back on.
- During the software update procedure, do not turn off the player or disconnect AC power, or do not press any button.
- If you cancel the update, turn off the power and turn it on for stable performance.
-
This unit cannot be updated to previous software version.
-
Check the network connection and settings (pages 20-24).
- Select [Software] option in the [Setup] menu then press ENTER (◎).
- Select [Update] option, and press ENTER ( Ⓞ ).
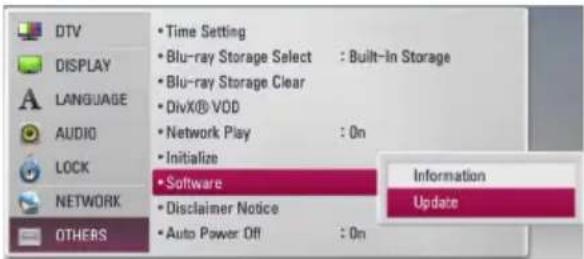
text_image
DTV DISPLAY LANGUAGE AUDIO LOCK NETWORK OTHERS • Time Setting • Blu-ray Storage Select : Built-In Storage • Blu-ray Storage Clear • DivX® VDD • Network Play : On • Initialize • Software • Disclaimer Notice • Auto Power Off : On Information UpdateThe unit will check for the newest update.
Note
- Pressing ENTER (◎) while checking for the update will end the process.
-
If there is no update available, the Message, "No update is found." appears. Press ENTER (◎) to return to the [Home Menu].
-
If newer version exists, the message "Do you want to update?" appears.
-
Select [OK] to start update. (Selecting [Cancel] will end the update.)
Caution
Do not turn off the power during the software update.
Note
If the software includes the driver update, disc tray may open during the process.
-
When update is completed, the message, "Update is complete." will appear, and then power will turn off automatically after 5 seconds.
-
Turn the power back on. The system now operates with the new version.
Note
The Software Update function may not work properly depending on your internet environment. In this case, you can obtain the latest software from the authorized LG Electronics Service Centre then update your player. Refer to "Customer Support" on page 78.
MediaHome 4 Essentials
Nero MediaHome 4 Essentials is a software for sharing video, audio and photo files stored on your computer to this player as a DLNA-compatible digital media server.

Note
- The Nero MediaHome 4 Essentials CD-ROM is designed for PCs and should not be inserted in this player or in any product other than a PC.
- The supplied Nero MediaHome 4 Essentials CD-ROM is a customized software edition only for sharing files and folders to this player.
- The supplied Nero MediaHome 4 Essentials software does not support following functions: Transcoding, Remote UI, TV control, Internet services and Apple iTunes.
- The supplied Nero MediaHome 4 Essentials software can be downloaded at http://www.lg.com/global/support. Find the download link on the web page of this product.
- This manual explains operations with the English version of Nero MediaHome 4 Essentials as examples. Follow the explanation referring to the actual operations of your language version.
System requirements
Windows PC
- Windows® XP (Service Pack 2 or higher), Windows Vista® (no Service Pack required), Windows® 7 (no Service Pack required), Windows® XP Media Center Edition 2005 (Service Pack 2 or higher), Windows Server® 2003
- Windows Vista® 64-bit edition (application runs in 32-bit mode)
- Windows® 7 64-bit edition (application runs in 32-bit mode)
- Hard drive space: 200 MB hard drive space for a typical installation of Nero MediaHome stand-alone
- 1.2 GHz Intel® Pentium® III or AMD Sempron™ 2200+ processors
• Memory: 256 MB RAM
- Graphics card with at least 32 MB video memory, minimum resolution of 800 x 600 pixels, and 16-bit color settings
- Windows® Internet Explorer® 6.0 or higher
- DirectX® 9.0c revision 30 (August 2006) or higher
• Network environment: 100 Mb Ethernet, WLAN
Macintosh
• Mac OS X 10.5 (Leopard) or 10.6 (Snow Leopard)
• Macintosh computer with an Intel x86 processor
- Hard drive space: 200 MB hard drive space for a typical installation of Nero MediaHome stand-alone
• Memory: 256 MB RAM
Installing Nero MediaHome 4 Essentials
Windows
Start up your computer, and insert the supplied CD-ROM disc into your computer's CD-ROM drive. An installation wizard will walk you through the quick and uncomplicated installation process. To install Nero MediaHome 4 Essentials, proceed as follows:
- Close all Microsoft Windows programs and exit any anti-virus software that may be running.
- Insert the supplied CD-ROM disc into your computer's CD-ROM drive.
- Click [Nero MediaHome 4 Essentials].
- Click [Run] to start installation.
- Click [Nero MediaHome 4 Essentials]. The installation is prepared and the installation wizard appears.
- Click the [Next] button to display the serial number input screen. Click [Next] to go to the next step.
- If you accept all conditions, click [I accept the License Conditions] check box and click [Next]. Installation is not possible without this agreement.
-
Click [Typical] and click [Next]. The installation process is started.
-
If you want to take part in the anonymous collection of data, select the check box and click the [Next] button.
- Click the [Exit] button to complete the installation.
MAC OS X
- Start up your computer, and insert the supplied CD-ROM disc into your computer's CD-ROM drive.
- Browse the CD-ROM drive and open the "MediaHome_4_Essentials_MAC" folder.
- Double-click the "Nero MediaHome.dmg" image file. The Nero MediaHome window is opened.
- In the Nero MediaHome window, drag the Nero MediaHome icon either to the Applications folder within the window or to any other desired location.
- You can now start the application by double-clicking the Nero MediaHome icon in the location you dragged it to.
Sharing files and folders
On your computer, you must share the folder contained video, audio and/or photo content to play them on this player.
This parts explains the procedure for selecting the shared folders on your computer.
- Double-click the "Nero MediaHome 4 Essentials" icon.
- Click [Network] icon on the left and define your network name in the [Network name] field. The Network name you enter will be recognized by your player.
- Click [Shares] icon on the left.
- Click [Local Folders] tab on the [Shares] screen.
- Click [Add] icon to open the [Browse Folder] window.
-
Select the folder containing the files you want to share. The selected folder is added to the list of shared folders.
-
Click [Start Server] icon to start the server.
Note
- If the shared folders or files are not displayed on the player, click the folder on the [Local Folders] tab and click [Rescan Folder] at the [More] button.
- Visit www.nero.com for more information and software tools.
Audio Output Specifications
| Source\Jack/Setting | Analog2CH Output | Digital Output (SPDIF) (DIGITAL AUDIO OUT) ^*4 | ||
| PCM Stereo | DTS Re-encode ^*3 * ^5 | Primary Pass-Thru | ||
| Dolby Digital PCM | 2ch PCM 2ch DTS Dolby Digital | |||
| Dolby Digital Plus | PCM 2ch | PCM 2ch DTS | Dolby Digital | |
| Dolby TrueHD PCM | 2ch PCM 2ch DTS Dolby Digital | |||
| DTS PCM 2ch PCM 2ch DTS DTS | ||||
| DTS-HD PCM 2ch PCM 2ch DTS DTS | ||||
| Linear PCM 2ch PCM 2ch PCM 2ch | DTS PCM 2ch | |||
| Linear PCM 5.1ch PCM 2ch PCM 2ch DTS PCM 2ch | ||||
| Linear PCM 7.1ch PCM 2ch PCM 2ch DTS PCM 2ch | ||||
| Source\Jack/Setting | HDMI OUT | |||
| PCM Stereo | PCM Multi-Ch *3 | DTS Re-encode*3*5 | Primary Pass-Thru*1*2*3 | |
| Dolby Digital | PCM 2ch | PCM 5.1ch | DTS | Dolby Digital |
| Dolby Digital Plus | PCM 2ch | PCM 7.1ch | DTS | Dolby Digital Plus |
| Dolby TrueHD | PCM 2ch | PCM 7.1ch | DTS | Dolby Tr ueHD |
| DTS PCM 2ch | PCM 5.1ch DTS | DTS | ||
| DTS-HD | PCM 2ch PCM | 7.1ch DTS DTS-HD | ||
| Linear PCM 2ch | PCM 2ch | PCM 2ch | DTS | Linear PCM 2ch |
| Linear PCM 5.1ch | PCM 2ch | PCM 5.1ch | DTS | Linear PCM 5.1ch |
| Linear PCM 7.1ch | PCM 2ch | PCM 7.1ch | DTS | Linear PCM 7.1ch |
*1 The secondary and interactive audio may not be included in the output bitstream if [Digital Output] or [HDMI] option is set to [Primary Pass-Thru]. (Except LPCM Codec : the output always includes interactive and secondary audio.)
*2 This player automatically selects the HDMI audio according to the decoding capability of the connected HDMI device even though [HDMI] option is set to [Primary Pass-Thru].
*3 The [PCM Multi-CH]/[Primary Pass-Thru] setting of the [HDMI] option and [DTS re-encode] setting of the [Digital Output] option cannot be set together. If you set them together, the [HDMI] or [Digital Output] option is set to [PCM Stereo] automatically.
*4 On the PCM audio output, the sampling frequency of DIGITAL AUDIO OUT is limited to 96 kHz.
*5 If the [HDMI] or [Digital Output] option is set to [DTS re-encode], the audio output is limited to 48 kHz and 5.1Ch. If the [HDMI] or [Digital Output] option is set to [DTS re-encode], the DTS Re-encode audio is output for BD-ROM discs, and the original audio is output for the other discs (like [Primary Pass-Thru]).
- If [HDMI] option is set to [PCM Multi-CH] and [Digital Output] option is set to [Primary Pass-Thru] while playback Dolby Digital Plus or TrueHD audio, DIGITAL AUDIO OUT is limited to "PCM 2ch".
- If the HDMI connection is version 1.3 and Dolby Digital Plus/Dolby TrueHD is output from HDMI OUT jack, DIGITAL AUDIO OUT jack is limited to "PCM 2ch" (When the HDMI and DIGITAL AUDIO OUT are connected simultaneously).
- The audio is outputted as PCM 48 kHz/16 bit for MP3/WMA file and PCM 44.1 kHz/16 bit for Audio CD while playback.
- The Dolby TrueHD audio recorded on some Blu-ray discs consists of Dolby Digital and TrueHD audio. Dolby Digital audio is output through DIGITAL AUDIO OUT jacks and "DD" displays on the screen if TrueHD audio is not output (for example, when [HDMI] is set to [PCM Stereo] and [Digital Output] is set to [Primary Pass-Thru]).
- You must select a digital audio output and a maximum sampling frequency that your Amplifier (or AV receiver) accepts using [Digital Output], [HDMI] and [Sampling Freq.] options on the [Setup] menu (see page 35).
- With digital audio connection (DIGITAL AUDIO OUT or HDMI), Disc Menu button sounds of BD-ROM may not be heard if the [Digital Output] or [HDMI] option is set to [Primary Pass-Thru].
- If the audio format of the digital output does not match the capabilities of your receiver, the receiver will produce a strong, distorted sound or no sound at all.
- Multi-channel Digital Surround Sound via digital connection can only be obtained if your receiver is equipped with a Digital Multi-channel decoder.
About the internal hard disk drive
The internal hard disk drive (HDD) is a fragile piece of equipment. Please use the player following the guidelines below to protect against possible HDD failure.
- Do not move the player while it is on.
- Install and use a player on a stable, levelled surface.
- Do not use the player in excessively hot or humid places, or in places that may be subject to sudden changes in temperature. Sudden changes in temperature can cause condensation to form inside the player. This can be a cause of HDD failure.
- While the player is powered on, do not unplug from the wall socket or switch the electricity off from the breaker switch.
-
Do not move the player immediately after switching it off. If you need to move the player, please follow the steps below:
-
After the message "OFF" is shown in the display, wait at least two minutes.
- Unplug from the wall socket.
-
Move the player.
-
If there's a power failure while the player is on, there is a chance that some data on the HDD will be lost.
- The HDD is very delicate. If used improperly or in an unsuitable environment, it is possible that the HDD will fail after a few years of use. Signs of problems include playback unexpectedly freezing and noticeable block noise (mosaic) in the picture.
• However, sometimes there will be no warning signs of HDD failure. - If the HDD fails, playback of content will not be possible. In this case, contact the LG service center by following methods.
Web: http://lgservice.com
- The manufacturer disclaims responsibility for loss of data contained in internal HDD.
- There are some capacities in HDD reserved for the file system and timeshift.
Video Output Resolution
When the non-copy protected media is playing back
| Resolution\Video Out | HDMI OUT | COMPONENT VIDEO OUT | |
| HDMI connected HDMI | disconnected | ||
| 576i 576p 576i | |||
| 576p 576p 576p | |||
| 720p 720p 720p | |||
| 1080i 1080i 1080i | |||
| 1080p/24 Hz 1080p / 24 Hz 576i 1080i | |||
| 1080p / 50 Hz 1080p / 50 Hz 576i 1080i | |||
When the copy protected media is playing back
| Resolution\Video Out | HDMI OUT | COMPONENT VIDEO OUT | |
| HDMI connected HDMI | disconnected | ||
| 576i 576p | 576i | ||
| 576p 576p | 576p | ||
| 720p 720p | 576i 576p | ||
| 1080i 1080i | 576i 576p | ||
| 1080p/24 Hz 1080p / 24 Hz | 576i 576p | ||
| 1080p / 50 Hz 1080p / 50 Hz | 576i 576p | ||
- This unit supports simultaneous output of all video out jacks.
HDMI OUT connection
- For the 576i resolution setting, real output resolution of HDMI OUT will change to 576p.
- If you select a resolution manually and then connect the HDMI jack to TV and your TV does not accept it, the resolution setting is set to [Auto].
- If you select a resolution that your TV does not accept, the warning message will appear. After resolution change, if you cannot see the screen, please wait 20 seconds and the resolution will automatically revert back to the previous resolution.
- The 1080p video output frame rate may be automatically set to either 24Hz or 50Hz depending both on the capability and preference of the connected TV and based on the native video frame rate of the content on the BD-ROM disc.
COMPONENT VIDEO OUT Connection
Blu-ray Disc, DVD could prevent up-scaling on analogue output.
VIDEO OUT connection
The resolution of the VIDEO OUT jack is always outputted at 576i resolution.
Specifications
| General | |
| Power requirements AC 200-240 V, | 50/60 Hz |
| Power consumption 40 W | |
| Dimensions (W x H x D) Approx. 430 x 50 x 299 mm without foot | |
| Net Weight (Approx.) 3.23 kg | |
| Operating temperature 5 °C to 35 °C | |
| Operating humidity 5 % to 90 % | |
| Television system: DVB-T/C Standard Compliant | |
| TV Recording | |
| Recording format TS (Transport Stream format) | |
| Recordable media Hard Disk Drive | (250 GB/320 GB/500 GB/1 TB), USB 2.0 HDD |
| Connectors | |
| VIDEO OUT: 1.0 V (p-p), 75 Ω, sync negative, RCA jack x 1 | |
| COMPONENT VIDEO OUT | (Y) 1.0 V (p-p), 75 Ω, sync negative, RCA jack x 1, (Pb)/(Pr) 0.7 V (p-p), 75 Ω, RCA jack x 2 |
| HDMI OUT (video/audio) 19 pin (HDMI standard, Type A) | |
| ANALOGUE AUDIO OUT 2.0 Vrms (1 kHz, 0 dB), 600 Ω, RCA jack (L, R) x 1 | |
| DIGITAL OUT (OPTICAL) 3 V (p-p), Optical jack x 1 | |
| ANTENNA IN Antenna input, 75 Ω | |
| USB Port 4 pin (USB 2.0 standard) x 2 | |
| System | |
| Laser | Semiconductor laser |
| wavelength | 405 nm / 650 nm |
| Signal system | Standard PAL/NTSC colour TV system |
| Frequency response 20 Hz to 20 kHz (48 kHz, 96 kHz, 192 kHz sampling) | |
| Signal-to-noise ratio More than 100 dB (Analogue OUT connectors only) | |
| Harmonic distortion | Less than 0.008% |
| Dynamic range | More than 95 dB |
| LAN port | Ethernet jack x 1, 10BASE-T/100BASE-TX |
| Wireless LAN (internal antenna) | Integrated IEEE 802.11n (Draft 2.0) wireless networking access, compatible with 802.11b/g Wi-Fi networks. |
| Bus Power Supply (USB) | DC 5 V--- 500 mA |
- Design and specifications are subject to change without notice.
Maintenance
Notes on Discs
Handling Discs
Do not touch the playback side of the disc. Hold the disc by the edges so that fingerprints do not get on the surface. Never stick paper or tape on the disc.
Storing Discs
After playing, store the disc in its case. Do not expose the disc to direct sunlight or sources of heat and never leave it in a parked car exposed to direct sunlight.
Cleaning Discs
Fingerprints and dust on the disc can cause poor picture quality and sound distortion. Before playing, clean the disc with a clean cloth. Wipe the disc from the centre to out.
Do not use strong solvents such as alcohol, benzine, thinner, commercially available cleaners, or anti-static spray intended for older vinyl records.
Handling the Unit
When shipping the unit
Please save the original shipping carton and packing materials. If you need to ship the unit, for maximum protection, re-pack the unit as it was originally packed at the factory.
Keeping the exterior surfaces clean
- Do not use volatile liquids such as insecticide spray near the unit.
- Wiping with strong pressure may damage the surface.
- Do not leave rubber or plastic products in contact with the unit for a long period of time.
Cleaning the unit
To clean the player, use a soft, dry cloth. If the surfaces are extremely dirty, use a soft cloth lightly moistened with a mild detergent solution. Do not use strong solvents such as alcohol, benzine, or thinner, as these might damage the surface of the unit.
Maintaining the Unit
The unit is a high-tech, precision device. If the optical pick-up lens and disc drive parts are dirty or worn, the picture quality could be diminished. For details, please contact your nearest authorized service centre.
Important Information Relating to Network Services
All information, data, documents, communications, downloads, files, text, images, photographs, graphics, videos, webcasts, publications, tools, resources, software, code, programs, applets, widgets, applications, products and other content ("Content") and all services and offerings ("Services") provided or made available by or through any third party (each a "Service Provider") is the sole responsibility of the Service Provider from whom it originated.
The availability of and access to Content and Services furnished by the Service Provider through the LGE Device are subject to change at any time, without prior notice, including, but not limited to the suspension, removal or cessation of all or any part of the Content or Services.
Should you have any inquiry or problem related to the Content or Services, you may refer to the Service Provider's website for the most up-to-date information. LGE is neither responsible nor liable for customer service related to the Content and Services. Any question or request for service relating to the Content or Services should be made directly to the respective Content and Service Providers.
Please note that LGE is not responsible for any Content or Services provided by the Service Provider or any changes to, removal of, or cessation of such Content or Services and does not warrant or guaranty the availability of or access to such Content or Services.

LG
Life's Good