
DHT73LES - Tumble dryer SMEG - Free user manual and instructions
Find the device manual for free DHT73LES SMEG in PDF.


| Product Type | Tumble Dryer |
| Brand | Smeg |
| Model | DHT73LES |
| Height (min/max) | 84.6 cm / 86.6 cm |
| Width | 59.5 cm |
| Depth | 60.9 cm |
| Net Weight (plastic door) | 50.5 kg |
| Net Weight (glass door) | 52.5 kg |
| Maximum Capacity | 7 kg |
| Voltage | See type label (typically 230 V) |
| Rated Power | See type label |
| Energy Consumption (cotton cupboard dry full load) | 1.25 kWh |
| Programs | Cottons, Synthetics, Jeans, Mix, WoolProtect, Night, Xpress, BabyProtect, Daily, Shirts 30', Delicates, Freshen Up, Timer (10-160 min) |
| Dryness Levels | Extra Dry, Cupboard Dry, Iron Dry |
| Auxiliary Functions | Audio Warning, Dryness Level Adjustment, Anti-creasing, End Time (max 24 h), Favourite, Child Lock |
| Filter System | Lint filter (clean each cycle), Filter drawer (clean every 3 cycles) |
| Condensation System | Water tank (manual drain) or direct drain hose |
| Refrigerant | R134a (0.520 kg) |
| Installation | Freestanding or stackable on washing machine (max 180 kg total) |
| Safety Features | Child lock, door open warning, water full indicator, filter cleaning reminders |
| Maintenance | Clean lint filter, filter drawer, sensors (4x/year), evaporator fins |
| Service Life | 10 years (original spare parts available) |
| Warranty | Refer to warranty card; void if instructions not followed |
Frequently Asked Questions - DHT73LES SMEG
User questions about DHT73LES SMEG
0 question about this device. Answer the ones you know or ask your own.
Ask a new question about this device
Download the instructions for your Tumble dryer in PDF format for free! Find your manual DHT73LES - SMEG and take your electronic device back in hand. On this page are published all the documents necessary for the use of your device. DHT73LES by SMEG.
USER MANUAL DHT73LES SMEG
2960311021_EN/090215.1024
Please read this user manual first!
Dear Customer,
Thank you for preferring a Smeg product. We hope that your product, which has been manufactured with high quality and technology, will give you the best results. We advise you to read through this manual and the other accompanying documentation carefully before using your product and keep it for future reference. If you transfer the product to someone else, give its manual as well. Pay attention to all details and warnings specified in the user manual and follow the instructions given therein.
Use this user manual for the model indicated on the cover page.
Explanation of symbols
Throughout this user manual the following symbols are used:
| Important information or useful hints about usage. | |
| Warning for hazardous situations with regard to life and property. | |
| Warning against electric shock. | |
| Warning against hot surfaces. | |
| Warning against fire hazard. |
| Packaging materials of the product are manufactured from recyclable materials in accordance with our National Environment Regulations. |
Do not dispose of the packaging wastes with the domestic waste or other wastes, discard them to the dedicated collection points designated by the local authorities.
1 Important instructions for safety and environment
This section contains safety instructions that will help protect from risk of personal injury or property damage. Failure to follow these instructions shall void any warranty.
This section contains safety instructions that will help protect from risk of personal injury or property damage. Failure to follow these instructions shall void any warranty.
The dryer can be used by children at and above 8 years old and by persons whose physical, sensory or mental capabilities were not fully developed or who lack experience and knowledge provided that they are supervised or trained on the safe usage of the product and the risks it brings out. Children should not play with the product. Cleaning and maintenance works should not be performed by children unless they are supervised by someone.
- The dryer can be used by children aged 8 and above, and by persons with reduced physical, sensory, or mental capabilities, or lack of experience and knowledge, provided they are supervised or instructed on the safe use of the product and the risks involved. Children should not play with the product. Cleaning and maintenance should not be performed by children unless supervised.
- Children of less than 3 years should be kept away unless continuously supervised.
- Adjustable feet should not be removed. The gap between the dryer and the floor should not be reduced with materials such as carpet, wood, or tape. This will cause problems with the dryer.
- Always have installation and repair procedures carried out by the Authorized Service. The manufacturer shall not be held liable for damages that may arise from procedures carried out by unauthorized persons.
- Never wash the dryer by spraying or pouring water onto it! There is a risk of electric shock!
Important instructions for safety and environment
1.1.1 Electrical safety

Electrical safety instructions should be followed while making the electrical connection during installation.
- Connect the dryer to a grounded outlet protected by a fuse with the value specified on the type label. Have the grounding installation performed by a qualified electrician. Our company shall not be liable for any damages that will arise when the dryer is used without grounding in accordance with local regulations.
- The voltage and allowed fuse protection are stated on the type label plate.
- The voltage specified on the type label must be equal to your mains voltage.
- Unplug the dryer when it is not in use.
- Unplug the dryer from the mains during installation, maintenance, cleaning, and repair works.
- Do not touch the plug with wet hands! Never unplug by pulling on the cable; always pull out by grabbing the plug.
- Do not use extension cords, multi-plugs, or adaptors to connect the dryer to the power supply in order to decrease the risk of fire and electric shock.
- The power cable plug must be easily accessible after installation.

A damaged mains cable should be changed by notifying the Authorized Service.
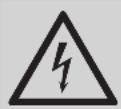
If the dryer is faulty, it must not be operated unless it is repaired by an authorized service agent! There is a risk of electric shock!
Important instructions for safety and environment
1.1.2 Product safety
 | Points to be taken into consideration for fire hazard:Below specified laundry or items must not be dried in the dryer considering fire hazard.Unwashed laundry itemsItems soiled with oil, acetone, alcohol, fuel oil, kerosene, stain removers, turpentine, paraffin or paraffin removers must be washed in hot water with plenty of detergent before being dried in the dryer.For this reason especially the items containing the above specifiedstains must be washed very well, to do thisuse adequate detergent and choose a high washing temperature. |
 | Below specified laundry or items must not be dried in the dryer due to the fire hazard:Garments or pillows bolstered with rubber foam (latex foam), shower bonnets, water resistant textiles, materials with rubber reinforcement and rubber foam pads.Clothing cleaned with industrial chemicals.Items such as lighter, match, coins, metal parts, needle etc.may damage the drum set or may lead to functional problems.Therefore check all the laundry that you will load into your dryer.Never stop your dryer beforethe programme completes. If you must do this, remove all laundryquickly and lay them out to dissipate the heat. |
 | Clothes that are washed inadequately may ignite on their own and even may ignite after drying ends. |
Important instructions for safety and environment
- Provide adequate ventilation to prevent gases from appliances operating with other fuels, including naked flames, from accumulating in the room due to backdraft.
 | Underwear that contains metal reinforcements should not be driedin the dryer. Dryer may be damaged if metal reinforcements come loose and break off during drying. |
 | Use softeners and similar products in accordance with the instructions of their manufacturers. |
 | Always clean the lint filter before or after each loading. Never operate the dryer without the lint filter installed. |
- Never attempt to repair the dryer yourself. Do not perform any repair or replacement procedures on the product even if you know how or are able to do so, unless it is clearly stated in the operating instructions or the published service manual. Otherwise, you put your life and the lives of others at risk.
- There must not be a lockable, sliding, or hinged door that could block the opening of the loading door in the location where the dryer is installed.
- Install the dryer in a location suitable for home use (e.g., bathroom, enclosed balcony, garage).
- Make sure pets do not enter the dryer. Check the inside of the dryer before operating it.
- Do not lean on the loading door when it is open, as the dryer may tip over.
- Do not allow lint to accumulate around the tumble dryer.
Important instructions for safety and environment
1.2 Mounting over a washing machine
- Use a fixing device between the two machines when installing the dryer above a washing machine. The fixing device must be installed by an authorized service agent.
- The total weight of the washing machine and dryer (with full load) when stacked can reach approximately 180 kg. Place the products on a solid floor with sufficient load-bearing capacity.

Do not place the washing machine on top of the dryer. Pay attention to the above warnings during installation on your washing machine.
| Installation Table for Washing Machine and Dryer | |||||||
| Dryer Depth | Washing Machine Depth | ||||||
| 62cm | 60 cm 54 | cm 50 | cm 49 | cm 45 | cm 40 cm | ||
| 54 cm | Can be installed | Can be installed | Can be installed | Can be installed | Can be installed | Can be installed | Cannot be installed |
| 60 cm | Can be installed | Can be installed | Can be installed | Can be installed | Can be installed | Cannot be installed | Cannot be installed |
Important instructions for safety and environment
1.3 Intended use
- The dryer has been designed for domestic use. It is not suitable for commercial use and must not be used outside its intended purpose.
- Use the dryer only for drying laundry that is marked as suitable for drying.
- The manufacturer accepts no responsibility for incorrect use or transportation.
- The service life of the dryer you purchased is 10 years. During this period, original spare parts will be available to ensure the dryer operates properly.
1.4 Child safety
- Packaging materials are dangerous for children. Keep packaging materials away from children.
- Electrical products are dangerous for children. Keep children away from the product when it is operating. Do not let them tamper with the dryer. Use the child-proof lock to prevent children from tampering with the dryer.

The child-proof lock is on the control panel. (See Child lock)
- Keep the loading door closed even when the dryer is not in use.
Important instructions for safety and environment
1.5 Compliance with the WEEE regulation and disposing of the waste product

This product complies with EU WEEE Directive (2012/19/EU). This product bears a classification symbol for waste electrical and electronic equipment (WEEE).
This product has been manufactured with high quality parts and materials that can be reused and are suitable for recycling. Do not dispose of the waste product with normal domestic and other
wastes at the end of its service life. Take it to the collection center for the recycling of electrical and electronic equipment. Please consult your local authorities to learn about these collection centers.
1.6 Compliance with RoHS Directive:
The product you have purchased complies with EU RoHS Directive (2011/65/EU). It does not contain harmful and prohibited materials specified in the Directive.
1.7 Package information
Packaging materials of the product are manufactured from recyclable materials in accordance with our National Environment Regulations. Do not dispose of the packaging materials together with the domestic or other wastes. Take them to the packaging material collection points designated by the local authorities.
Important instructions for safety and environment
1.8 Technical Specifications
EN
| Height (min. / max.) 84,6 cm / 86,6 cm* | |
| Width 59,5 cm | |
| Depth 60,9 cm | |
| Capacity (max.) 7 kg** | |
| Net weight (plastic front door usage) 50,5 kg | |
| Net weight (glass front door usage) 52,5 kg | |
| Voltage | See type label***Rated power ir |
| Model code | |
* Min. height: Height with adjustable feet are closed. Max. height: Height with adjustable feet are opened maximum. ** Dry laundry weight before washing. *** Type label is located behind the loading door.
 | Technical specifications of the dryer are subject to specification without notice to improve the quality of the product. |
 | Figures in this manual are schematic and may not match the product exactly. |
 | Values stated on markers on the dryer or in the other published documentation accompanying with the dryer are obtained in laboratory in accordance with the relevant standards. Depending on operational and environmental conditions of the dryer, these values may vary. |
2 Your Dryer
2.1 Package Contents

- Water drain hose *
- Filter drawer spare sponge*
- User Manual
- Drying basket*
- Drying basket user manual
It can be supplied with your machine depending on its model.
3 Installation
Before calling the nearest Authorized Service for the installation of the dryer, ensure that the electrical installation and water drain are appropriate, referring to the user's manual (see 3.3 Connecting to the drain and 3.5 Electrical connection). If they are not suitable, contact a qualified electrician and technician to make necessary arrangements.

Preparation of the dryer's location as well as the electrical and waste water installations is under the customer's responsibility.

Prior to installation, visually check if the dryer has any defects. If the dryer is damaged, do not have it installed. Damaged products cause risks for your safety.

Let your dryer wait for 12 hours before starting to use it.
3.1 Appropriate installation location
Install the dryer on a stable and level surface.
The dryer is heavy. Do not move it by yourself.
- Operate your dryer in a well-ventilated, dust-free environment.
- The gap between the dryer and the surface should not be reduced by materials such as carpet, wood, and tape.
- Do not cover the ventilation grills of the dryer.
- There must not be a lockable, sliding, or hinged door that may block the opening of the loading door in the place where your dryer is to be installed.
- Once the dryer is installed, it should stay in the same place where its connections have been made. When installing the dryer, make sure that its rear wall does not touch anything (tap, socket, etc.).
- Place the dryer at least 1 cm away from the edges of other furniture.
- Your dryer can be operated at temperatures between +5°C and +35°C. If the operating conditions fall outside of this range, operation of the dryer will be adversely affected and it can get damaged.
- The rear surface of the tumble dryer shall be placed against a wall.

Do not place the dryer on the power cable.
3.2 Removing the transportation safety assembly

Remove the transportation safety assembly before using the dryer for the first time.
- Open the loading door.
- There is a nylon bag inside the drum that contains a piece of styrofoam. Hold it from its section marked with XX XX.
- Pull the nylon towards yourself and remove the transportation safety assembly.


Check that no part of the transportation safety assembly remains inside the drum.
3.3 Connecting to the drain
In products equipped with condenser unit, water accumulates in the water tank during the drying cycle. You should drain accumulated water after each drying cycle.
You can directly drain accumulated water through the water drain hose supplied with the product instead of periodically draining the water collected in the water tank.
Connecting the water drain hose
1-2 Pull hose at the behind of the dryer by hand in order to disconnect it from where it is connected. Do not use any tools to remove the hose. 3 Connect one end of the drain hose supplied with the dryer to the connection point from where you removed the hose of the product in previous step. 4 Connect the other end of the drain hose directly to the wastewater drain or to the washbasin.
Installation


 | Hose connection should be made in a safe manner. Your drain house will be flooded if the hose comes out of its housing during water discharge. |
 | Water drain hose should be attached to a height of maximum 80 cm. |
 | Make sure that the water drain hose is not stepped on and it is not folded between the drain and the machine. |
3.4 Adjusting the feet
- In order to ensure that the dryer operates more silently and vibration-free, it must stand level and balanced on its feet. Balance the machine by adjusting the feet.
- Turn the feet to left or right until the dryer stands level and firmly.


Never unscrew the adjustable feet from their housings.
3.5 Electrical connection
For specific instructions for electrical connection required during installation (see 1.1.1 Electrical Safety)
3.6 Transportation of the dryer
Unplug the dryer before transporting it. Drain all water that has remained in the dryer. If direct water drain connection is made, then remove the hose connections.

We recommend carrying the dryer in upright position. If it is not possible to carry the machine in the upright position, we recommend carrying it by tilting towards the right side when looked from the front.
3.7 Warnings about sounds

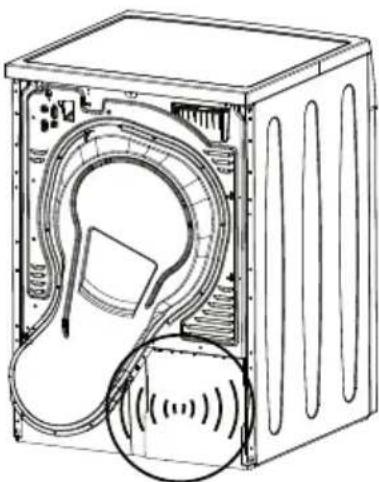
It is normal to hear a metallic noise from the compressor sometimes during operation.
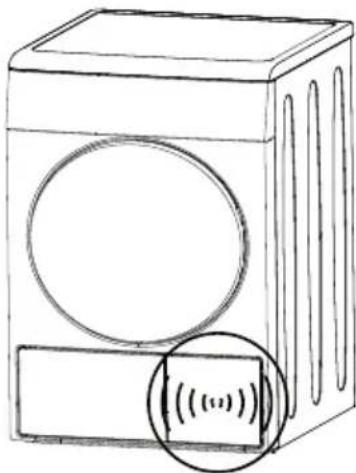

Water collected during operation is pumped to water tank. It is normal to hear pumping noise during this process.
3.8 Changing the illumination lamp
In case an illumination lamp is used in your laundry dryer
To change the bulb/LED used for illumination of your tumble dryer, call your Authorized Service.
The lamp(s) used in this appliance are not suitable for household room illumination. The intended purpose of this lamp is to assist the user in placing laundry in the tumble dryer in a comfortable way.
4 Preparation
4.1 Laundry suitable for drying in the dryer
Always obey the instructions given on the garment tags. Dry only the laundry having a label stating that they are suitable for drying in a dryer and make sure that you select the appropriate programme.
| LAUNDRY DRYING SYMBOLS | ||||||||||||
 | Drying Symbols |  Suitable for dryer Suitable for dryer |  No Iron No Iron |  Sensitive / Delicate dry Sensitive / Delicate dry |  Do not dry with dryer Do not dry with dryer |  Do not dry Do not dry |  Do not dry-clean Do not dry-clean | |||||
| Drying Settings | At any temperature | At high temperature | At medium temperature | At low temperature | Without heating | Hang to dry | Lay to dry | Hang wet to dry | Lay in shadow to dry | Dry-cleanable | ||
| IRON | Iron - | |||||||||||
| Dry or Steam | Iron at high temperature | Iron at medium temperature | Iron at low temperature | Do not iron | Iron without steam | |||||||
| Maximum temperature | 200 °C 150 | °C 110 | °C | |||||||||
 | Drying Settings |  |  |  |  |  |  |  |  |  |  |
| At any temperature | At high temperature | At medium temperature | At low temperature | Without heating | Hang to dry | Lay to dry | Hang wet to dry | Lay in shadow to dry | Dry-cleanable |
 | Iron - |  |  |  |  |  |
| IRON | Dry or Steam | Iron at high temperature | Iron at medium temperature | Iron at low temperature | Do not iron | Iron without steam |
| Maximum temperature | 200 °C 150 | °C 110 | °C |
4.2 Laundry not suitable for drying in the dryer

Delicate embroidered fabrics, woolen, silk garments, delicate and valuable fabrics, airtight items and tulle curtains are not suitable for machine drying.
4.3 Preparing laundry for drying
- Laundry may be tangled with each other after washing. Separate the laundry items before placing them into the dryer.
- Dry garments having metal accessories such as zippers, inside out.
- Fasten the zippers, hooks and buckles and button sheets.
4.4 Things to be done for energy saving
Following information will help you use the dryer in an ecological and energy-efficient manner.
- Spin your laundry at the highest speed possible when washing them. Thus, the drying time is shortened and energy consumption is reduced.
- Sort out the laundry depending on their type and thickness. Dry the same type of laundry together. For example thin kitchen towels and table clothes dry earlier than thick bathroom towels.
- Follow the instructions in the user manual for programme selection.
- Do not open the loading door of the machine during drying unless necessary. If you must open the loading door, do not keep it open for a long time.
- Do not add wet laundry while the dryer is in operation.
- Clean the lint filter before or after each drying cycle. (See 6 Maintenance and cleaning)
Preparation
- Clean the filter drawer regularly either when the Filter Drawer Cleaning warning symbol appears or after every 3 drying cycles. (See 6 Maintenance and cleaning)
- Ventilate the room where the dryer is located well during drying.
4.5 Correct load capacity
Follow the instructions in the "Programme selection and consumption table". Do not load more than the capacity values stated in the table.


It is not recommended to load the dryer with laundry exceeding the level indicated in the figure. Drying performance will degrade when the machine is overloaded. Furthermore, the dryer and the laundry can get damaged.
The following weights are given as examples.
| Laundry | Approximate weights (g)* |
| Cotton quit covers (double) 1500 | |
| Cotton quit covers (single) 1000 | |
| Bed sheets (double) 500 | |
| Bed sheets (single) 350 | |
| Large tablecloths 700 | |
| Small tablecloths 250 | |
| Tea napkins 100 | |
| Bath towels 700 | |
| Hand towels 350 | |
| Blouses 150 | |
| Cotton shirts 300 | |
| Shirts 200 | |
| Cotton dresses | 500 |
| Dresses | 350 |
| Jeans | 700 |
| Handkerchiefs (10 pieces) | 100 |
| T-Shirts | 125 |
*Dry laundry weight before washing.
5 Operating the product
5.1 Control panel

- Programme Selection knob
- Dryness Level Adjustment button
- Audio Warning Level button
- Display
- On/Off/Cancel button
- Start/Pause button
- End Time button
- Favourite button
- Timer Programmes Selection button
- Anti-creasing button
5.2 Display symbols
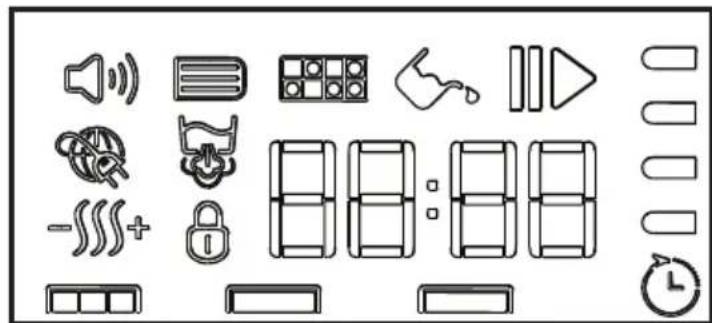
Audio warning symbol, Filter drawer cleaning warning symbol, Filter cleaning warning symbol, Water tank warning symbol, Start/Pause symbol, Smart grid symbol, Steam tank warning symbol
-SSS+ Dryness level


Child lock warning symbol
End time symbol
8:13 Remaining time indicator*

Programme progress bar
*Time that appears on display indicates the remaining time until the end of the programme and changes according to the dampness level of the laundry and model of the dryer.
Anti-Creasing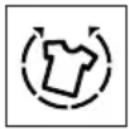
Child-proof lock
5.3 Preparing the machine
- Plug in your machine.
- Place the laundry in the machine.
- Press the On/Off/Cancel button for 1 second (long).
- When your machine is operated for the first time, it starts with the declaration programme (wardrobe dryness for cottons.) Pressing the On/Off/Cancel button does not mean that the programme has started. Press Start / Pause button to start the program.

5.4 Programme selection
- Decide the appropriate programme from the table below which includes drying levels.
- Select the desired programme with the Programme Selection knob.
| Extra Dry | Only the cotton laundry is dried at normal temperature. Thick and multi layered laundry (towels, linens, jeans and etc.) are dried in a way that they do not require ironing before being placed in the wardrobe. |
| Cupboard Dry | Normal laundry (tablecloths, underwear and etc.) are dried in a way that they do not require ironing before being placed in the wardrobe. |
| Iron Dry | Normal laundry (shirts, dresses and etc.) are dried ready to be ironed. |

For further programme details, see "Programme selection and consumption table".
5.5 Main programmes
Depending on the fabric type, the following main programmes are available.
- Cottons
Dry durable laundry with this programme. Dries at normal temperature. It is recommended to use for your cotton items (bed sheets, quilt covers, towels, bathrobes, etc.).
- Synthetics
Dry less durable laundry with this programme. Recommended for synthetics.
5.6 Additional programmes
For special cases, following additional programmes are available in the machine.

Additional programs may differ according to the features of your machine.

To obtain better results from your dryer, your laundry must be washed at suitable programmes and spun at the recommended spin speeds in the washing machine.
- Jeans
Use this programme to dry your jeans that are spun at high speeds in the washing machine.
Mix
Use this programme to dry non-pigmenting synthetic and cotton laundry items together.
- WoolProtect
Use this programme to dry woolen garments such as jumpers that are washed according to the instructions. It is recommended that garments would be removed at the end of the programme.
Operating the product

WOOLMARK APPAREL CARE
The wool drying cycle of this machine has been approved by The Woolmark Company for the drying of machine washable wool products provided that the products are washed and dried according to the instructions on the garment label and those issued by the manufacturer of this machine. (M14166). In UK, Eire, Hong Kong and India the Woolmark trade mark is a Certification trade mark.
- Night
In this programme the level of noise emitted to the environment will be the lowest. Volume level will be fifty percent lower with respect to the 'wardrobe dry for cottons' programme.
- Xpress
You can use this programme to dry your cotton laundry that you have spun at high speeds in your washing machine. This programme dries 1 kg cotton laundry (3 Shirts / 3 T-shirts) in 49 minutes.
- BabyProtect
This programme is used for baby clothes that bear machine dryable approval on its label.
• Daily
This programme is used to dry cottons and synthetics daily, and lasts for 100 minutes.
- Shirts 30'
Use this programme to make 2 shirts ready for ironing in 30 minutes.

There may be a little moisture on the shirts at the end of the programme. We recommend you not to leave the shirts in the dryer.
- Delicates
You can dry your highly delicate laundry (silk blouses, fine underwear, etc.) that are suitable for drying or laundry which is advised to be hand-washed at a lower temperature.

It is recommended to use a cloth bag to avoid certain delicate garments and laundry from getting creased or damaged. Take your laundry immediately out of the dryer and hang them after the programme ends in order to prevent them being creased.
- Freshen Up
Only ventilation is performed for 10 minutes without blowing hot air. You can air the clothes that have been kept at closed environments for a long time and deodorize unpleasant odors thanks to this programme.
- Timer programmes
You can select one of the 10 min., 20 min., 30 min., 40 min., 50 min., 60 min., 80 min., 100 min., 120 min., 140 min. and 160 min. timer programmes to achieve the desired final drying level at low temperatures.

With this programme, the machine dries for the time selected regardless of the dryness level.
5.7 Programme selection and consumption table
| Programs Capacity (kg) | Spin speed in washing machine (rpm) | Approximate amount of remaining humidity | Drying time (minutes) | ||
| Cottons / Coloreds | |||||
 | Extra dry | 7 1000 % 60 | 165 | ||
 | Cupboard dry | 7 1000 % 60 | 155 | ||
 | Iron dry | 7 1000 % 60 | 125 | ||
| Night (silent) | 7 1000 % 60 | 240 | |||
| BabyProtect | 3 1000 % 60 | 95 | |||
| Shirt 30' | 0.5 1200 % 60 | 30 | |||
| Jeans | 4 1200 % 50 | 117 | |||
| Daily | 4 1200 % 50 | 100 | |||
| Mix | 4 1000 % 60 | 110 | |||
| Xpress | 1 1200 % 50 | 49 | |||
| Delicates | 2 600 % 40 | 50 | |||
| WoolProtect | 1.5 600 % 50 | 146 | |||
| Synthetics | |||||
 | Cupboard dry | 3.5 800 % 40 | 67 | ||
| [4XST] | Iron dry | 3.5 800 % 40 | 53 | ||
| Energy consumption values | |||||
| Programs Capacity (kg) | Spin speed in washing machine (rpm) | Approximate amount of remaining humidity | Energy consumption value kWh | ||
| Cupboard dry for cottons* | 7 1000 % 60 | 1.25 | |||
| Iron dry for cottons | 7 1000 % 60 | 1,05 | |||
| Cupboard dry for synthetics | 3.5 800 % 40 | 0,51 | |||
| Power consumption of the off-mode for the standart cotton programme at full load, PO (W) | 0,5 | ||||
| Power consumption of the left-on mode for the standart cotton programme at full load, PL (W) | 1,0 | ||||
| Contains fluorinated greenhouse gases covered by the Kyoto Protocol. Hermetically sealed.R134a / 0,520kg | |||||
„Cotton cupboard dry programme“ used at full and partial load is the standard drying programme to which the information in the label and the fiche relates, that this programme is suitable for drying normal wet cotton laundry and that it is the most efficient programme in terms of energy consumption for cotton.
* : Energy Label standard program (EN 61121:2012)
All values given in the table have been fixed according to EN 61121:2012 Standard. These values may deviate from the values in the table according to the laundry type, laundry spin speed, environmental conditions and voltage fluctuations.
Operating the product
5.8 Auxiliary functions
Audio Warning
The machine will give an audio warning when the programme comes to an end. Use the Audio Warning Level button to adjust the sound level.

You can change the sound level either before the programme starts or while the programme is in progress.

Volume level low

Volume level high
Dryness level adjustment selection
### The dryness level adjustment button is used to adjust the required dryness level. The programme duration can change depending on the selection.

You can activate this function only before the programme has started.

Drying level: damp
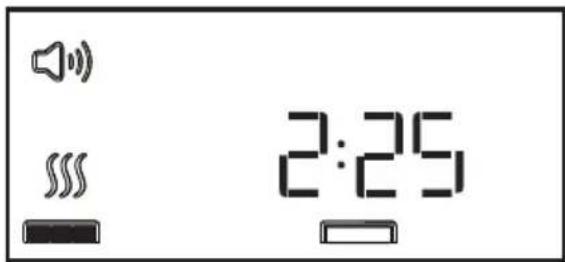
Drying level: normal
Drying level: extra
Operating the product
Anti-creasing
The anti-creasing programme duration may be changed with the anti-creasing selection button. You can use the anti-creasing function to prevent laundry from creasing if you will not take the laundry out after the programme has come to an end. This programme rotates the laundry every 240 seconds for the selected time to prevent creasing. The following images identify the level changes.

Anti-creasing: 0 minutes
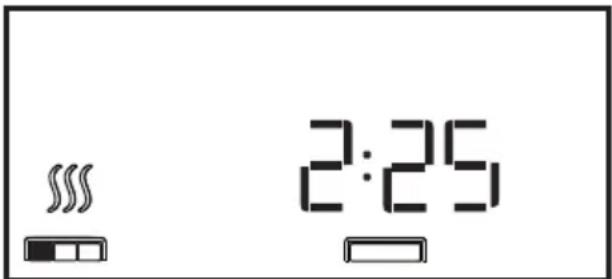
Anti-creasing: 30 minutes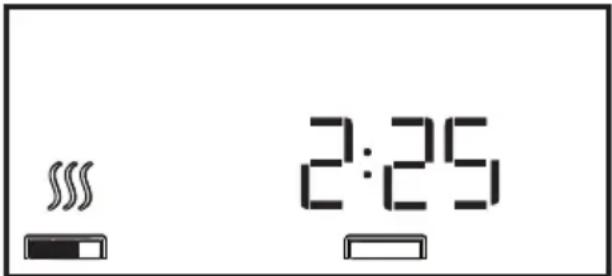
Anti-creasing: 60 minutes
Anti-creasing 120 minute
 | Press Anti-creasing button to activate this function. |
 | Anti-creasing symbol will illuminate at the end of the programme if Anti-creasing function is activated. |
Favourite selection button
A programme with the set auxiliary function is saved with the Favourite selection button. When the product is switched on and off, features of the saved programme are displayed by means of the Favourite selection button.
- Select the programme with the programme button; select the auxiliary functions such as Anti-creasing, Dryness Level, etc.
- Press and hold the Favourite selection button for about 3 seconds. Features of the set programme will be saved.

End time
With the End Time function, the end time of the programme may be delayed up to 24 hours. The time on the display is the total of normal drying time and end time.
- Open the loading door and put the laundry in.
- Select the drying program.
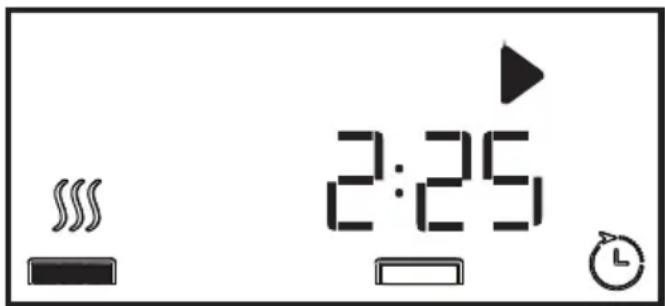
Press the End Time button to set the desired time delay.
- Press the Start/Pause button. The time delay starts countdown and the time delay symbol lights up on the display. The ":" in the middle of the displayed delay time will flash.
- Additional laundry may be loaded or taken out during the End Time period. At the end of the End Time countdown process, the End Time symbol
Operating the product
disappears, the drying process starts, and the programme duration is displayed.

If the loading door is opened and closed during the End Time duration, the programme will switch to pause mode. The End Time function should be resumed by pressing the Start/Pause button.

Changing the End time
If you want to change the time during countdown:
- End Time is deactivated when the dryer is switched off and on with the On/Off/Cancel button. Restart the dryer and repeat the End Time procedure for the desired time.
- When your dryer is operated for the first time, it starts with the declaration programme (wardrobe dryness for cottons).
Canceling End time function
If you want to cancel the End Time countdown and start the programme immediately:
- End Time is deactivated when the dryer is switched off and on with the On/Off/Cancel button.
- Press the Start/Pause button to start the programme you have previously selected.
5.9 Warning symbols

Warning symbols may differ according to the model of your machine.
Lint filter cleaning
When the programme is completed, a warning symbol will appear continuously indicating that the filter needs to be cleaned.

For detailed information, see 6 Maintenance and cleaning.

If the filter cleaning symbol flashes continuously, see 7 Troubleshooting.

Draining the water tank
When the programme is completed, a warning symbol will appear continuously to remind that the water tank needs to be drained.

For detailed information, see 6 Maintenance and cleaning.
If the water tank becomes full while the programme is running, the warning symbol will start to flash and the dryer will pause. Drain the water in the water tank and press Start / Pause button to resume the programme. The warning symbol turns off and the programme resumes operating.

Cleaning the filter drawer
Warning symbol flashes to remind that the filter drawer needs to be cleaned.

For detailed information, see 6 Maintenance and cleaning.

Loading door open
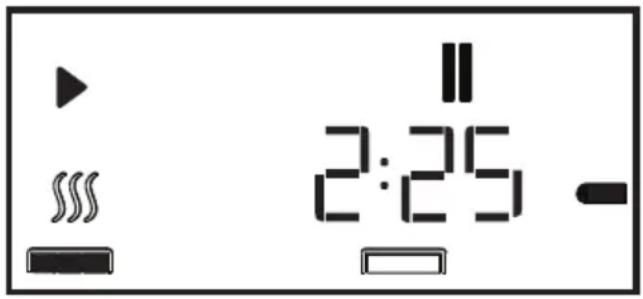
This warning symbol Pause appears and programme progress symbol flashes when the loading door of the dryer is open.
Operating the product
5.10 Starting the programme
Press the Start/Pause button to start the program. Start ▶ symbol will light up to indicate that the programme has started and “:” symbol in the middle of the remaining time will keep flashing. Drying and programme progress bar will be displayed alternately.
5.11. Progress of programme

5.12 Child Lock
Machine is equipped with a Child Lock which prevents interfering with the current programme flow by pressing any button.
To activate the Child Lock:
- Press and hold Childproof Lock button for 3 seconds.
- Child Lock symbol will appear on the display when the Child Lock is activated.

- All buttons except the On/Off/Cancel and Child Lock button on the control panel are deactivated when the Child Lock is active.
- Display symbols will not change even if the position of Programme Selection knob is changed while the child lock button is active.
- When the programme selection knob is turned and function buttons are pressed Child Lock warning will be displayed.
- To start a new programme after the current programme is over or to interrupt the current programme, the Child Lock should be deactivated.
To deactivate the childproof lock:
- Press and hold Child Lock button for 3 seconds.
- Child Lock is deactivated when the dryer is switched off and on with On/Off/Cancel button.
5.13 Changing the programme after it has started
- After the dryer starts operation, you can change the selected programme and dry your laundry in a different programme.
- Press and hold Start / Pause button for 1 seconds to pause the programme.
- Select desired programme by turning the Programme Selection knob.
- Press the Start/Pause button to start the program.
Adding / removing laundry while the dryer is in operation
- In order to add or take out laundry after the drying programme has started:
- Press the Start/Pause button to switch the dryer to Pause mode. The drying process will pause.
- While in Pause mode, open the loading door, add or take out laundry, and close the loading door.
- Press the Start/Pause button to resume the programme.

Any laundry added after the drying process has started may cause the clothes that are already dried in the machine to intermingle with wet clothes, and the result will be wet laundry after the drying process is over.
Operating the product
 | You may repeat laundry adding or removing process as many times as you desire during drying. However, this process will increase the programme time and energy consumption since the drying process will be interrupted repeatedly. Therefore, it is recommended to add laundry before the drying programme has started. |
 | If you select a new programme by turning the Programme Selection knob while your drier is in Pause mode, then the current program is aborted and new programme information is displayed. |
 | Do not touch the inner surface of the drum when adding or taking out laundry while a programme is running. Drum surface and dryer air within is hot. |
5.14 Cancelling the programme
To cancel the programme after the dryer is started:
- Press and hold the Start/Pause button for 1 second to pause the programme and turn the programme selection knob.
- Press and hold the On/Off/Cancel button for 3 seconds and the programme will be cancelled.

As the dried laundry will be excessively hot when you cancel the programme while the dryer is running, activate the Refresh programme to cool it down.
5.15 End of programme
When the programme comes to an end, the Lint filter cleaning and Water tank warning symbols light up in the programme follow-up indicator. To turn off the dryer, press the On/Off/Cancel button.

 | 2-hour Anti-creasing program will be activated if the laundry is not taken out after the program has come to an end. |
 | Clean the lint filter after each drying.See 6.1 Cleaning lint filter and loading door inner surface. |
 | Drain the water tank after each drying cycle.See 6.3 Draining the water tank. |
6 Maintenance and cleaning
The service life of the product extends and frequently experienced problems will be reduced if it is cleaned at regular intervals.
6.1 Cleaning Lint Filter / Loading Door Inner Surface
Lint and fiber released from the laundry into the air during the drying cycle are collected in the lint filter.
 | Such fiber and lint are generally formed during wearing and washing. |
 | Always clean the lint filter and the inner surfaces of the loading door after each drying process. |
 | You can clean the lint filter housing with a vacuum cleaner. |
To clean the lint filter:
- Open the loading door.
- Remove the lint filter by pulling it up and open the lint filter.
- Clean lint, fiber, and cotton raveling by hand or with a soft piece of cloth.
- Close the lint filter and place it back into its housing.


- A layer can build up on the filter pores that can cause clogging of the filter after using the dryer for a while. Wash the lint filter with warm water to remove the layer that builds up on the lint filter surface. Dry the lint filter completely before reinstalling it.

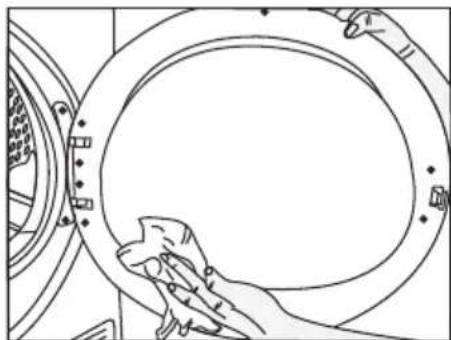
- Clean the entire inner surface of the loading door and loading door gasket with a soft damp cloth.

6.2 Cleaning the sensor
There are dampness sensors in the dryer that detect whether the laundry is dry or not.
To clean the sensors:
- Open the loading door of the dryer.
- Allow the machine to cool down if it is still hot due to the drying process.
- Wipe the metal surfaces of the sensor with a soft cloth, dampened with vinegar, and dry them.
 | Clean metal surfaces of the sensors 4 times a year. |
 | Do not use metal tools when cleaning metal surfaces of the sensors. |
Maintenance and cleaning

Never use solvents, cleaning agents or similar substances for cleaning due to the risk of fire and explosion!

6.3 Draining the water tank
Dampness of the laundry is removed and condensed during the drying process, and the water that arises accumulates in the water tank. Drain the water tank after each drying cycle.

Condensed water is not drinkable!

Never remove the water tank when the program is running!
If you forget to drain the water tank, the machine will stop during subsequent drying cycles when the water tank is full, and the Water Tank warning symbol will flash. If this is the case, drain the water tank and press the Start / Pause button to resume the drying cycle. To drain the water tank: Pull the drawer and remove the water tank carefully.

- Drain the water in the tank.

- If there is lint accumulation in the funnel of the water tank, clean it under running water.
- Place the water tank into its seat.

If the direct water draining is used as an option, there is no need to empty the water tank.
6.4 Cleaning the filter drawer
Lint and fiber that could not be captured by the lint filter are blocked in the filter drawer behind the kick plate. The Filter Drawer Cleaning warning light will light up at most every 3 drying cycles as a reminder. There is a two-level filter in the filter drawer. The first level is the filter drawer sponge and the second level is the filter cloth.
To clean the filter drawer:
- Press the kick plate button to open the kick plate.

- Remove the filter drawer cover by turning it in the direction of the arrow.

Maintenance and cleaning
• Pull out the filter drawer.

- Open the filter drawer by pressing the red button.

• Take out the filter drawer sponge.
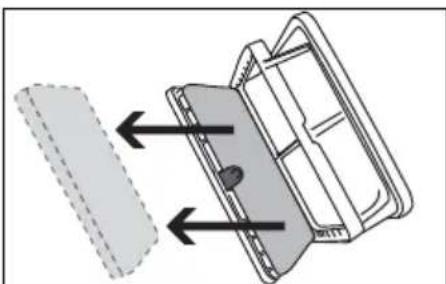
- Clean lint, fiber, and cotton raveling on the filter cloth by hand or with a soft piece of cloth.
- When you notice a layer that may lead to clogging on the filter cloth, clean the layer by washing in warm water. Let the filter cloth dry thoroughly before installing the filter drawer back.

- Wash the filter drawer sponge by hand to remove the fiber and lint on the surface. After washing the sponge, squeeze it by hand and remove the excess water. Dry the sponge well before storing it.

It is not necessary to clean the sponge if lint and fiber accumulation on it is not significant.
- Place the sponge back into its place.

- Close the filter drawer to lock the red button.

- Place the filter drawer back into its place, turn the filter drawer cover in the arrow direction, and close it securely.

Maintenance and cleaning
- Close the kick plate cover.

| Drying without the filter drawer sponge in place will damage the machine! | |
| A dirty lint filter and filter drawer will cause longer drying periods and higher energy consumption. |
6.5 Cleaning the evaporator
Clean the lint accumulated on the fins of the evaporator located behind the filter drawer with a vacuum cleaner.

| You can also clean by hand provided that you wear protective gloves. Do not attempt to clean with bare hands. Evaporator fins can harm your hand. |
7 Troubleshooting
Drying process takes too much time.
- Pores of the lint filter are clogged. >>> Wash the lint filter with warm water.
- Filter drawer is clogged. >>> Clean the sponge and the filter cloth in the filter drawer.
- Ventilation grids on the front side of the machine are blocked. >>> Remove the objects (if any) that block ventilation in front of the ventilation grids.
- Ventilation is not sufficient since the room where the machine is installed is very small. >>> Open the door and window of the room to avoid the room temperature increase too much.
- Lime deposit has built up on the dampness sensor. >>> Clean the dampness sensor.
- Excessive laundry is loaded. >>> Do not load the dryer in excess.
- Laundry is not spun sufficiently. >>> Spin your laundry at a higher speed in your washing machine.
Laundry comes out wet at the end of drying.

After drying, the hot clothes feel damper than their actual dampness level.
- It is likely that the selected programme did not suit the laundry type. >>> Checking the care labels on clothes, select appropriate programme for the laundry type or use timer programmes in addition.
- Pores of the lint filter are clogged. >>> Wash the lint filter with warm water.
- Filter drawer is clogged. >>> Clean the sponge and the filter cloth in the filter drawer.
- Excessive laundry is loaded. >>> Do not overload the dryer.
- Laundry is not spun sufficiently. >>> Spin your laundry at a higher speed in your washing machine.
Dryer does not switch on or the programme does not start. Dryer does not start when it is set.
- It is not plugged in. >>> Make sure that the machine is plugged in. • The loading door is ajar. >>> Make sure that the loading door is closed securely.
- Programme is not selected or the Start / Pause / Cancel button is not pressed. >>> Make sure that the programme is selected and the machine is not in Pause mode.
- Childproof Lock is activated. >>> Deactivate the Childproof Lock.
Programme is interrupted without any cause.
- Loading door is ajar. >>> Make sure that the loading door is closed securely. • There was a power failure. >>> Press Start / Pause / Cancel button to start the programme. • Water tank is full. >>> Drain the water tank.
Laundry has shrunk, become felted or deteriorated.
- A programme suitable for the laundry type is not used. >>> Check the garment tag and select a programme suitable for the fabric type.
Drum lighting does not turn on. (On models with lamp)
- Dryer is not switched on with the On / Off button. >>> Make sure that the dryer is switched on.
- Lamp is defective. >>> Call Authorized Service Agent to have the lamp replaced.
End/Anti-creasing symbol is on.
- Anti-releasing programme is activated in order to prevent laundry that has remained in the machine from creasing. >>> Turn off the dryer and take out the laundry.
Troubleshooting
| End symbol is on. |
| • Programme is over. Turn off the dryer and take out the laundry. |
| Lint Filter Cleaning symbol is on. |
| • Lint filter is not cleaned. >>> Clean the lint filter. |
| Lint Filter Cleaning symbol is flashing. |
| • Filter housing is clogged with lints. >>> Clean the lint filter housing.• A deposit has built up on the lint filter pores that may cause clogging. >>> Wash the lint filter with warm water.• Filter drawer is clogged. >>> Clean the sponge and the filter cloth in the filter drawer. |
| Water leaks from the loading door |
| • Lint has accumulated on the inner surfaces of the loading door and on the surfaces of the loading door gasket. >>> Clean the inner surfaces of the loading door and the surfaces of the loading door gasket. |
| Loading door opens spontaneously. |
| • Loading door is ajar. >>> Push the loading door to close until you hear a locking sound. |
| Water Tank warning symbol is on/flashing. |
| • Water tank is full. >>> Drain the water tank.• Water draining hose is bent. >>> If the product is connected directly to a wastewater drain, check the water drain hose. |
| Filter Drawer Cleaning warning symbol is flashing. |
| • Filter drawer is not cleaned. >>> Clean the sponge and the filter cloth in the filter drawer. |

If you cannot eliminate the problem although you follow the instructions in this section, consult your dealer or the Authorized Service Agent. Never try to repair a nonfunctional product yourself.
- PLEASE READ THIS USER MANUAL FIRST
- EXPLANATION OF SYMBOLS
- IMPORTANT INSTRUCTIONS FOR SAFETY AND ENVIRONMENT
- THIS SECTION CONTAINS SAFETY INSTRUCTIONS THAT WILL HELP PROTECT FROM RISK OF PERSONAL INJURY OR PROPERTY DAMAGE. FAILURE TO FOLLOW THESE INSTRUCTIONS SHALL VOID ANY WARRANTY
- THE DRYER CAN BE USED BY CHILDREN AT AND ABOVE 8 YEARS OLD AND BY PERSONS WHOSE PHYSICAL, SENSORY OR MENTAL CAPABILITIES WERE NOT FULLY DEVELOPED OR WHO LACK EXPERIENCE AND KNOWLEDGE PROVIDED THAT THEY ARE SUPERVISED OR TRAINED ON THE SAFE USAGE OF THE PRODUCT AND THE RISKS IT BRINGS OUT. CHILDREN SHOULD NOT PLAY WITH THE PRODUCT. CLEANING AND MAINTENANCE WORKS SHOULD NOT BE PERFORMED BY CHILDREN UNLESS THEY ARE SUPERVISED BY SOMEONE
- ELECTRICAL SAFETY
- PRODUCT SAFETY
- MOUNTING OVER A WASHING MACHINE
- INTENDED USE
- CHILD SAFETY
- COMPLIANCE WITH THE WEEE REGULATION AND DISPOSING OF THE WASTE PRODUCT
- COMPLIANCE WITH ROHS DIRECTIVE
- PACKAGE INFORMATION
- TECHNICAL SPECIFICATIONS
- YOUR DRYER
- PACKAGE CONTENTS
- INSTALLATION
- APPROPRIATE INSTALLATION LOCATION
- REMOVING THE TRANSPORTATION SAFETY ASSEMBLY
- CONNECTING TO THE DRAIN
- CONNECTING THE WATER DRAIN HOSE
- ADJUSTING THE FEET
- ELECTRICAL CONNECTION
- TRANSPORTATION OF THE DRYER
- WARNINGS ABOUT SOUNDS
- CHANGING THE ILLUMINATION LAMP
- PREPARATION
- LAUNDRY SUITABLE FOR DRYING IN THE DRYER
- LAUNDRY NOT SUITABLE FOR DRYING IN THE DRYER
- PREPARING LAUNDRY FOR DRYING
- THINGS TO BE DONE FOR ENERGY SAVING
- CORRECT LOAD CAPACITY
- OPERATING THE PRODUCT
- CONTROL PANEL
- DISPLAY SYMBOLS
- PREPARING THE MACHINE
- PROGRAMME SELECTION
- MAIN PROGRAMMES
- COTTONS
- SYNTHETICS
- ADDITIONAL PROGRAMMES
- JEANS
- MIX
- WOOLPROTECT
- NIGHT
- XPRESS
- BABYPROTECT
- DAILY
- SHIRTS
- DELICATES
- FRESHEN UP
- TIMER PROGRAMMES
- PROGRAMME SELECTION AND CONSUMPTION TABLE
- AUXILIARY FUNCTIONS
- AUDIO WARNING
- DRYNESS LEVEL ADJUSTMENT SELECTION
- ANTI-CREASING
- FAVOURITE SELECTION BUTTON
- END TIME
- CHANGING THE END TIME
- CANCELING END TIME FUNCTION
- WARNING SYMBOLS
- LINT FILTER CLEANING
- DRAINING THE WATER TANK
- CLEANING THE FILTER DRAWER
- LOADING DOOR OPEN
- STARTING THE PROGRAMME
- PROGRESS OF PROGRAMME
- CHILD LOCK
- TO ACTIVATE THE CHILD LOCK
- TO DEACTIVATE THE CHILDPROOF LOCK
- CHANGING THE PROGRAMME AFTER IT HAS STARTED
- ADDING / REMOVING LAUNDRY WHILE THE DRYER IS IN OPERATION
- CANCELLING THE PROGRAMME
- END OF PROGRAMME
- MAINTENANCE AND CLEANING
- CLEANING LINT FILTER / LOADING DOOR INNER SURFACE
- CLEANING THE SENSOR
- CLEANING THE EVAPORATOR
- TROUBLESHOOTING
- DRYING PROCESS TAKES TOO MUCH TIME
- LAUNDRY COMES OUT WET AT THE END OF DRYING
- DRYER DOES NOT SWITCH ON OR THE PROGRAMME DOES NOT START. DRYER DOES NOT START WHEN IT IS SET
- PROGRAMME IS INTERRUPTED WITHOUT ANY CAUSE
- LAUNDRY HAS SHRUNK, BECOME FELTED OR DETERIORATED
- DRUM LIGHTING DOES NOT TURN ON. (ON MODELS WITH LAMP)
- END/ANTI-CREASING SYMBOL IS ON
Brand : SMEG
Model : DHT73LES
Category : Tumble dryer