
L3020A - Screen LG - Free user manual and instructions
Find the device manual for free L3020A LG in PDF.


| Product Type | 30-inch TFT LCD Monitor |
| Model | L3020A |
| Brand | LG |
| Display Size (Diagonal) | 75.0062 cm (30 inches) |
| Pixel Pitch | 0.5025 mm |
| Maximum Resolution | D-SUB: 1280 x 1024 @60Hz DVI-D: 1280 x 1024 @60Hz |
| Recommended Resolution | WXGA 1280 x 768 @60Hz |
| Horizontal Frequency | 30 - 66 kHz |
| Vertical Frequency | 56 - 85 Hz |
| Input Connectors | 15-pin D-Sub, DVI-D, S-Video, Composite, HDTV, DVD, PC Audio, Headphone |
| Power Consumption (Normal) | 160 W |
| Power Consumption (Standby) | ≤5 W |
| Power Supply | AC 100-240V ~ 50/60Hz 1.8A |
| Dimensions (W x H x D) | 733.8 mm x 538.0 mm x 107.0 mm |
| Weight (Net) | 17.0 kg |
| Key Features | PIP/POP/PBP, Spectacle Mode, SRS WOW, OSD Lock, Auto Adjustment, RS-232C Control, VESA Mount Compatible |
| Cleaning Instructions | Unplug power, use soft cloth with authorized detergent; avoid benzene, thinner, alcohol. |
| Safety | Keep away from heat, moisture; use grounded outlet; do not disassemble; keep ventilation clear. |
| Spare Parts & Repairability | Contact LG service center for repairs; use only authorized parts. |
| General Information | Remote controller included, user manual on CD-ROM, 2x AAA batteries, various signal cables. |
Frequently Asked Questions - L3020A LG
User questions about L3020A LG
0 question about this device. Answer the ones you know or ask your own.
Ask a new question about this device
Download the instructions for your Screen in PDF format for free! Find your manual L3020A - LG and take your electronic device back in hand. On this page are published all the documents necessary for the use of your device. L3020A by LG.
USER MANUAL L3020A LG
Make sure to read the Safety Precautions before using the product. Keep the User's Guide(CD) in an accessible place for furture reference.
See the label attached on the back cover and quote this information to your dealer when you require service.
Table of Contents
Installation and Connection
| Safety Precautions | A1 |
| Accessories | A4 |
| Important Monitor Features | A5 |
| Name and Function of the Parts | A6 |
| Connecting to External Devices | A11 |
| Connecting to your PC | A11 |
| Watching Video/DVD | A13 |
| Watching DVD (576i) | A14 |
| Watching HDTV (576i) | A15 |
Input Selection and Tracking
| Name of the Buttons in the screen Adjustment Unit | A16 |
| OSD (On Screen Display) Screen Tracking Order | A15 |
| When Connected to your PCAdjusting Screen ColorAdjusting Screen CLOCK/PHASE and PositionAdjusting the audio functionAdjusting Options | A20A20A20A21A22 |
| Adjusting PIP/POP/PBP Mode Functions | A23 |
| When Watching Video/DVD/HDTVAdjusting Screen ImageAdjusting the audio functionAdjusting Options | A26A26A27A28 |
| Adjusting PIP/POP/PBP Mode Functions | A29 |
| Adjusting Functions using your PC | A32 |
Miscellaneous
| Troubleshooting | A35 |
| Product Specifications | A38 |
is a trademark of SRS Labs, Inc. technology is incorporated under license from SRS Labs, Inc.
Safety Precautions
Please read these safety precautions carefully before using the monitor.

Warning
If you ignore the warning message, you may be seriously injured or there is a possibility of accident or death.

Caution
If you ignore the caution message, you may be slightly injured or the product may be damaged

Precautions in installing the Monitor

Warning
- Keep away from heat sources like electrical heaters.
- Electrical shock, fire, malfunction or deformation may occur.
- Keep the packing anti-moisture material or vinyl packing out of the reach of children.
- Anti-moisture material is harmful if swallowed. If swallowed by mistake, force the patient to vomit and visit the nearest hospital. Additionally, vinyl packing can cause suffocation. Keep it out of the reach of children.
■ Do not put heavy objects on the monitor or sit upon it.
- If the monitor collapses or is dropped, you may be injured. Children must pay particular attention.
■ Do not leave the power or signal cable unattended on the pathway.
- The passerby can falter, which can cause electrical shock, fire, product breakdown or injury.
■ Install the monitor in a neat and dry place.
- Dust or moisture can cause electrical shock, fire or product damage.
■ If you can smell smoke or other odors or hear a strange sound unplug the power cord and contact the service center.
- If you continue to use without taking proper measures, electrical shock or fire can occur.
■ If you dropped the monitor or the case is broken, turn off the monitor and unplug the power cord.
- If you continue to use without taking proper measures, electrical shock or fire can occur. Contact the service center.
■ Do not drop metallic objects such as coins, hair pins, chopsticks or wire into the monitor, or inflammable objects such as paper and matches. Children must pay particular attention.
- Electrical shock, fire or injury can occur. If a foreign object is dropped into the monitor, unplug the power cord and contact the service center.

Caution
■ Make sure the monitor ventilation hole is not blocked. Install the monitor in a suitably wide place (more than 10cm from the wall)
- If you install the monitor too close to the wall, it may be deformed or fire can break out due to internal heat.
■ Do not block the ventilation hole of the monitor by a tablecloth or curtain.
- The monitor can be deformed or fire can break out due to overheating inside the monitor.
■ Install the monitor on a flat and stable place that has no risk of dropping the monitor.
- If the monitor is dropped, you may be injured or the monitor may be broken.
■ Install the monitor where no EMI occurs.
- Keep the monitor away from direct sunlight.
- The monitor can be damaged.

Electrical Power Related Precautions

Warning
■ Make sure to connect the power cable to the grounded current.
- You may be electrocuted or injured.
■ Use the rated voltage only.
- The monitor can be damaged, or you may be electrocuted.
■ During a thunder or lightning storm, unplug the power cable or signal cable.
- You may be electrocuted or a fire can break out.
■ Do not connect several extension cords, electrical appliances or electrical heaters to a single outlet. Use a power bar with a grounding terminal designed for exclusive use with the computer.
- A fire can break out due to overheating.
■ Do not touch the power plug with wet hands. Additionally, it the cord pin is wet or covered with dust, dry the power plug completely or wipe dust off.
- You may be electrocuted due to excess moisture.
If you don't intend to use the monitor for a long time, unplug the power cable from the monitor.
- Covering dust can cause a fire, or insulation deterioration can cause electric leakage, electric shock or fire.
■ Fix the power cable completely.
- If the power cable is not fixed completely, a fire can break out.
■ Hold the plug when pulling out the power cable. Do not bend the power cord with excessive force or put heavy objects on the power cord.
- The power line can be damaged, which may cause electric shock or fire.
■ Do not insert a conductor (like a metal chopstick) into one end of the power cable while the other end is connected to the input terminal on the wall. Additionally, do not touch the power cable right after plugging into the wall input terminal.
- You may be electrocuted.

Caution
■ Do not unplug the power cord while the monitor is in use.
- Electrical shock can damage the monitor.

Precautions in Moving the Monitor

Warning
■ Make sure to turn off the monitor.
- You may be electrocuted or the monitor can be damaged.
■ Make sure to remove all cables before moving the monitor.
- You may be electrocuted or the monitor can be damaged.
Safety Precautions
Caution
■ Do not shock the monitor when moving it.
- You may be electrocuted or the monitor can be damaged
■ Do not dispose the product-packing box. Use it when you move.
■ Make the panel face forward and hold it with both hands to move.
- If you drop the monitor, the damaged monitor can cause electric shock or fire. Contact with the service center for repair.
Precautions in Using the Monitor
Warning
■ Do not disassemble, repair or modify the monitor at your own discretion.
- Fire or electric shock accident can occur.
- Contact the service center for check, calibration or repair.
■ Do not spray water on the monitor or scrub with an inflammable substance (thinner or benzene). Fire or electric shock accident can occur
- Keep the monitor away from water.
- Fire or electric shock accident can occur.
Caution
■ Do not put or store inflammable substances near the monitor.
- There is a danger of explosion or fire due careless handling of the inflammable substances.
■ When cleaning the brown tube surface, unplug the power cord and scrub with soft cloth to prevent scratching. Do not clean with a wet cloth.
- The water can sink into the monitor, which can cause electric shock or serious malfunction.
■ Take a rest from time to time to protect your vision.
- Keep the monitor clean at all times.
■ Take a comfortable and natural position when working with a monitor to relax the muscles.
■ Take a regular break when working with a monitor for a long time.
■ Do not press strongly upon the panel with a hand or sharp object such as nail, pencil or pen, or make a scratch on it.
- Keep the proper distance from the monitor.
- Your vision may be impaired if you look at the monitor too closely.
■ Set the appropriate resolution and clock by referring to the User's Manual.
- Your vision can be impaired.
■ Use authorized detergent only when cleaning the monitor. (Do not use benzene, thinner or alcohol.)
- Monitor can be deformed.
Accessories
Please check the accessories in the product package.
* The monitor and the accessories can be different from the figures shown here.
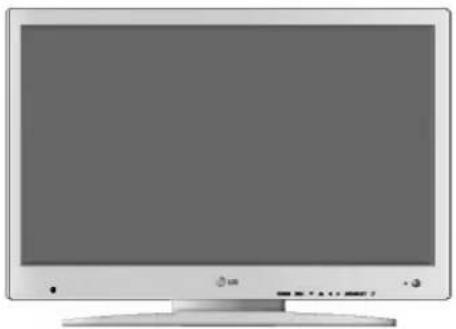
natural_image
Front view of a flat-screen computer monitor with no visible text or symbols on the screen.Monitor
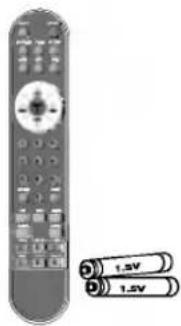
natural_image
Retro television remote with two batteries (1.5V and 2.0V) shown beside it (no text or symbols on the device itself)Remote Controller/Batteries (AAA x 2)
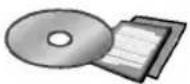
CD-ROM/Cards
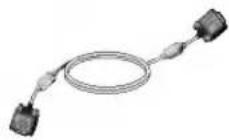
15-pin D-Sub Signal Cable
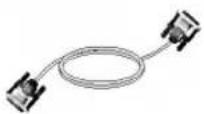
DVI-D Signal Cable
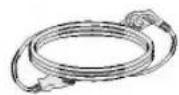
Power Cord
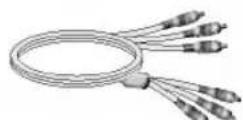
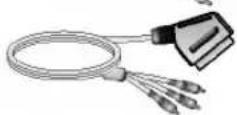
RCA Cable and SCART Cable -It varies from country/region to country/region.
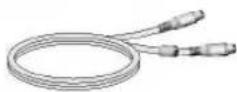
S-Video Cable
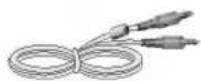
Audio Cable (PC)
natural_image
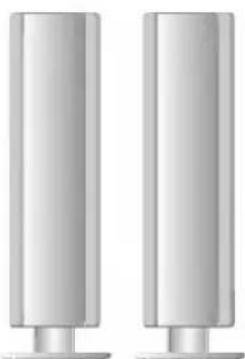
Two identical cylindrical metallic objects with flanking base (no text or symbols visible)Speaker
Refer to the manual in the speaker box for more details on speaker accessories.
Important Monitor Features

Swapping Function
You can swap the main screen and the sub-screen when the PIP/POP/PBP function is used.

Spectacle Function
The screen center area is close to a 4:3 ratio and the outskirt area is expanded by more than 16:9. Therefore, the different screen ratio is applied for each area. Because most ordinary people concentrate their focus on the screen center, a non-linear ratio increase at the outskirt area is not recognized, which makes it possible to watch 4:3 screen with a wide screen.
However, the spectacle function is useful in watching motion pictures but is not suitable for the PC environment in which you perform graphic or document work.

Sleep Function
When watching AV/DVD/HDTV – The monitor will be automatically turned off after a certain period of time.
Press this button repetitively to select an appropriate time duration.
Name and Function of the Parts

Name of the Remote Controller Buttons
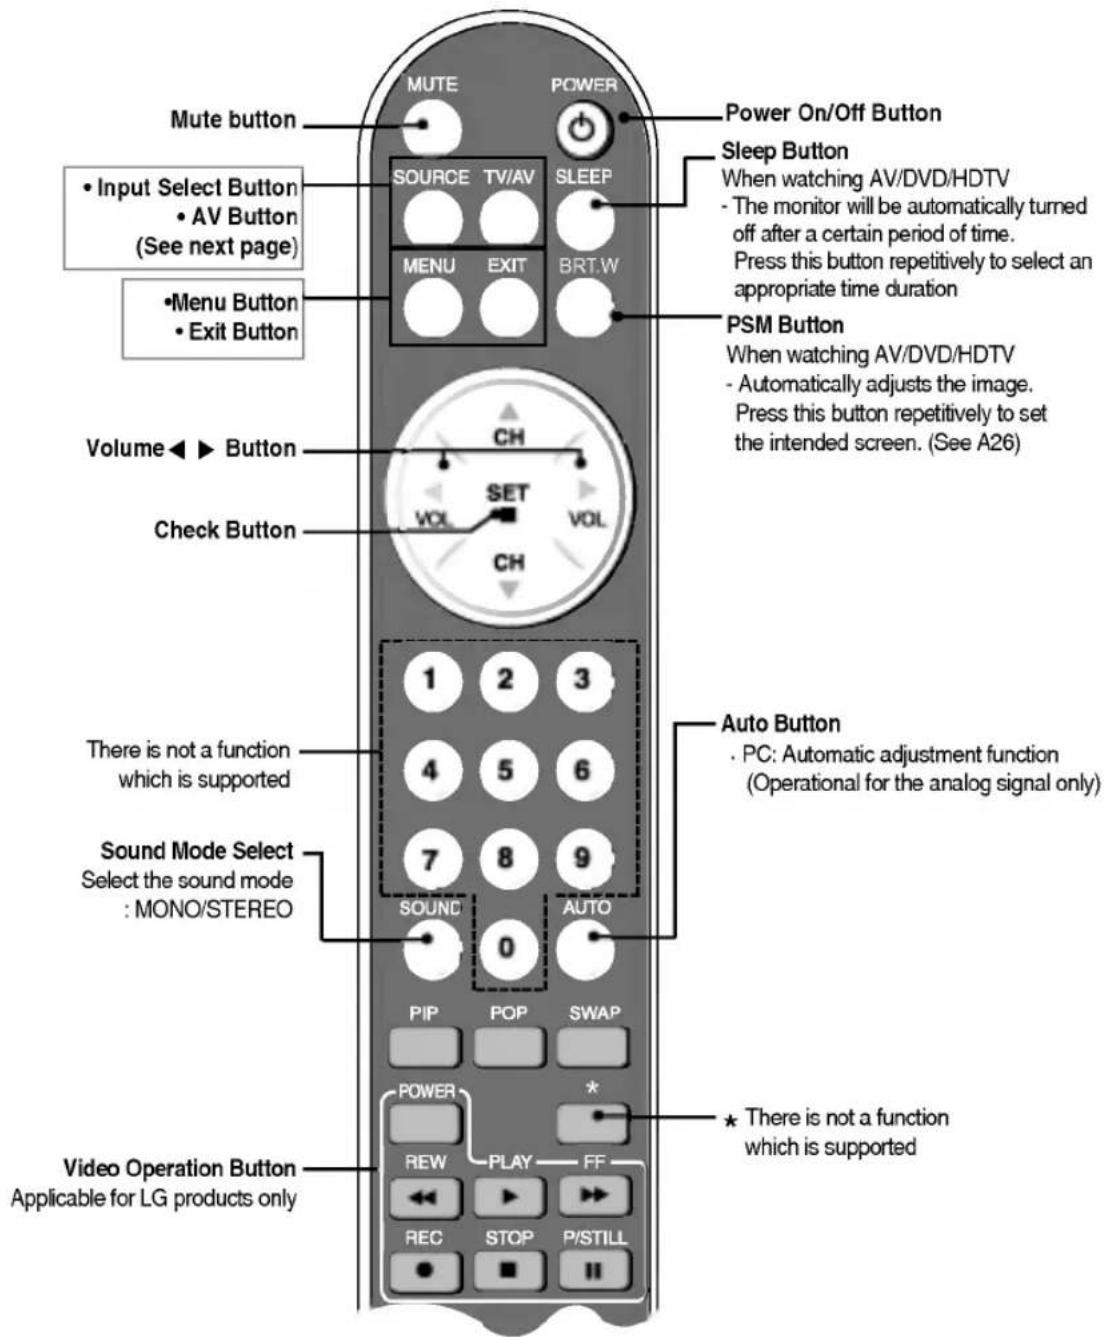
text_image
Mute button • Input Select Button • AV Button (See next page) • Menu Button • Exit Button Volume ▶ Button Check Button There is not a function which is supported Sound Mode Select Select the sound mode : MONO/STEREO Video Operation Button Applicable for LG products only MUTE SOURCE TV/AV MENU EXIT CH SET VOL CH POWER SLEEP BRT.W Power On/Off Button Sleep Button When watching AV/DVD/HDTV - The monitor will be automatically turned off after a certain period of time. Press this button repetitively to select an appropriate time duration PSM Button When watching AV/DVD/HDTV - Automatically adjusts the image. Press this button repetitively to set the intended screen. (See A26) 1 2 3 4 5 6 7 8 9 SOUND AUTO 0 PIP POP SWAP POWER * REW PLAY FF REC STOP P/STILL * There is not a function which is supportedName and Function of the Parts
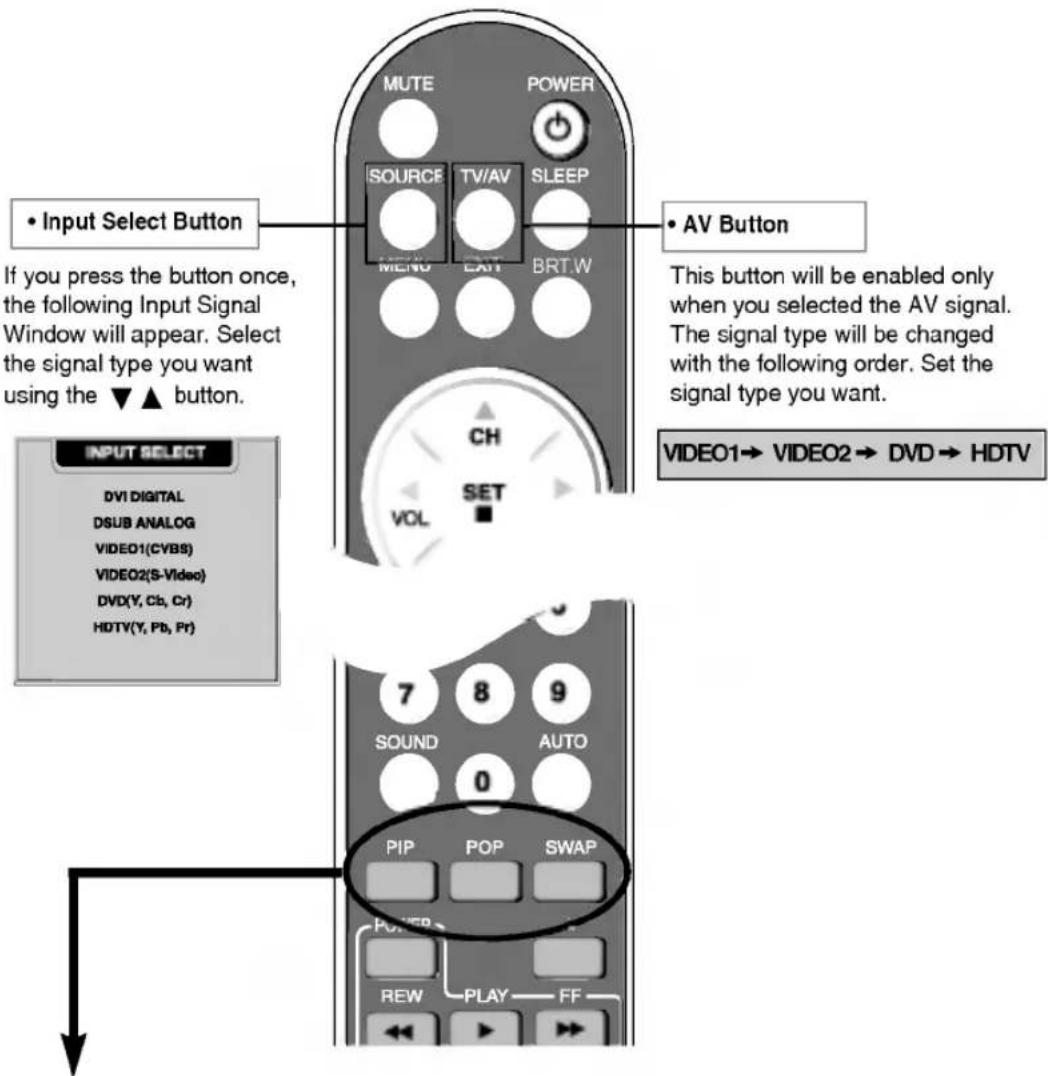
text_image
• Input Select Button If you press the button once, the following Input Signal Window will appear. Select the signal type you want using the ▼▲ button. • AV Button This button will be enabled only when you selected the AV signal. The signal type will be changed with the following order. Set the signal type you want. INPUT SELECT DVI DIGITAL DSUB ANALOG VIDEO1(CVBS) VIDEO2(S-Video) DVD(Y, Cb, Cr) HDTV(Y, Pb, Pr) 7 8 9 SOUND AUTO 0 PIP POP SWAP POWER REW PLAY FF- PIP (Picture in Picture) Button
The sub-screen moves to the next mode whenever you press this button.
:SMALL -> LARGE -> OFF
- POP (Picture out Picture) Button
The sub-screen moves to the next mode whenever you press this button.
: POP ON -> PBP(FULL) -> PBP(4:3) -> OFF

flowchart
graph LR
    A["POP ON"] --> B["PBP (FULL)"]
    B --> C["PBP (4:3)"]
3. Swap Button
You can swap the main screen and the sub-screen when the PIP/POP/PBP function is used..
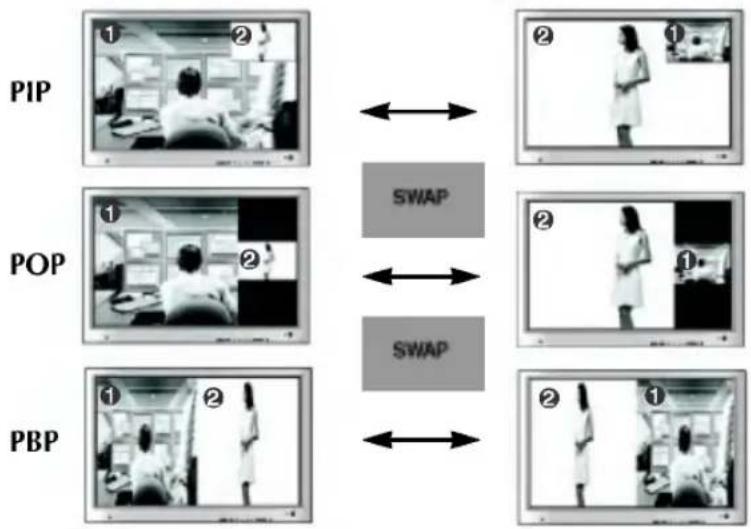
flowchart
graph TD
    A["PIP"] --> B["1"]
    A --> C["2"]
    D["POP"] --> E["1"]
    D --> F["2"]
    G["PBP"] --> H["1"]
    G --> I["2"]
    B <--> G
    C <--> D
    E <--> G
    F <--> D
    H <--> G
    I <--> G
    B <--> H
    C <--> I
    D <--> H
    E <--> I
    F <--> H
    G <--> I
    style A fill:#f9f,stroke:#333
    style D fill:#f9f,stroke:#333
    style G fill:#f9f,stroke:#333
When 'Input Signal 1' comes on in the main screen, only 'Input Signal 2' can be displayed on the sub-screen. On the contrary, if the main screen displays 'Input Signal 2', the sub-screen can display 'Input Signal 1' only. You can swap 'Input Signal 1' and 'Input Signal 2' using the SWAP button.
| Sub-Screen\Main Screen | DVI-D | D-SUB | VIDEO1 | VIDEO2 | DVD | HDTV |
| DVI-D | X | ● | ● | ● | ● | ● |
| D-SUB | ● | X | ● | ● | ● | X |
| VIDEO1 | ● | ● | X | X | X | ● |
| VIDEO2 | ● | ● | X | X | X | ● |
| DVD | ● | ● | X | X | X | ● |
| HDTV | ● | X | ● | ● | ● | X |
Inserting batteries into remote controller.
 1. Take out the battery cap. 2. Insert the battery with correct polarity (+/-). 3. Close the battery cap. - You can use a remote controller 7 meter distance and 30 degree (left/right) within the receiving unit scope. - Dispose of used batteries in the recycle bin to prevent environmental pollution.Name and Function of the Parts
Rear View
text_image
Back Cap - Open the back cap before you install the monitor. Theft prevention locking device Theft prevention locking device RS-232C 1 2 3 4 5Side View
text_image
PC Audio Input Terminal - Connect the audio cable to the LINE OUT jack in the PC sound card. Headphone/Earphone Connection Terminal S-Video Input Terminal AV Input Terminal(Audio) AV Output Terminal(Audio) AV Input Terminal(Video) AV Output Terminal(Video) HDTV Input Terminal DVD Input Terminal HDTV DVDAV Output Terminal
Connect to the external device if you record the broadcasting. ■ When you set the input signal of the main screen as 'VIDEO1 (CVBS)', you can transmit the signal that you're watching to the AV output terminal. If you set other signals than 'VIDEO1 (CVBS)', as the main screen, the signal type you set in the PIP input signal would be displayed. (However, it is supported when the PIP input signal is 'VIDEO1 (CVBS)') text_image
PC-IN S-Video AV-IN AV-OUT Red White Yellow RCA Cable R W Y AUDIO S-VIDEO OUTConnecting the sound card output terminal
- Make sure to check the sound card connection terminal in the PC before connecting to the monitor. If the PC sound card supports both Speaker Out and Line Out, change it to Line Out by setting the jumper or the PC application. (For more details, refer to the sound card user's manual.) - Speaker Out: The terminal connected to the speaker that is not equipped with an amplifier. - \*Line Out : The terminal connected to the speaker equipped with an amplifier. If Audio Out in the PC sound card has only Speaker Out, reduce the PC volume. This monitor is integrated with an amplifier.Connecting to External Devices
When Connecting to your PC
1 First of all, see if the computer, monitor and the peripherals are turned off. Then, connect the signal input cable.
(A) When connecting with the DVI signal input cable. B When connecting with the DSub signal input cable. (IBM compatible PC) C When connecting with the DSub signal input cable. (Macintosh) text_image
Rear side of the monitor. RS-230C PC ← A PC ← B MAC ← C Macintosh Adapter (Optional) Use the standard Macintosh adapter since an incompatible adaptor is available in the market. (Different signaling system)② Connect the power cord.
text_image
Rear side of the monitor. * When connecting to a wall outlet. A11text_image
Main Power Switch Power buttonSOURCE → ▼▲ → SET
A When connecting with a DVI-D signal input cable. - Select DVI DIGITAL: DVI-D digital signal. B When connecting with a D-Sub signal input cable. • Select DSUB ANALOG: 15-pin D-Sub analog signal text_image
SOURCE VIEW SLEEP EXIT BRTW CH SET VOL VOL CHtext_image
INPUT SELECT DVI DIGITAL DSUB ANALOG VIDEO1(CVBS) VIDEO2(S-Video) DVD(Y, Cb, Cr) HDTV(Y, Pb, Pr)Connecting to External Devices
When watching Video/DVD
 Connect the video cable as shown in the below figure and then connect the power cord (See page A11). (A) When connecting with an RCA cable. \- Connect the input terminal with a proper color match. (Video – Yellow, Sound (left) – White, Sound (right) – Red) (B) When connecting with an S-Video cable. \- Connect to the S-Video input terminal to watch high image quality movies. text_image
VCR/DVD S-Video Cable Red White Yellow RCA Cable R W YSOURCE → ▼▲ → SET
(A) When connecting with a RCA cable. \- Select VIDEO 1 (CVBS). B When connecting with a S-Video cable. \- Select VIDEO 2 (S-Video). text_image
INPUT SELECT DVI DIGITAL DSUB ANALOG VIDEO1(CYBS) VIDEO2(S-Video) DVD(Y, Cb, Cr) HDTV(Y, Pb, Pr)text_image
SOURCE TV/AV SLEEP EXIT BRT.W CH SET VOL VOL CHWhen watching DVD (576i)
1 Connect the video/audio cable as shown in the below figure and then, connect the power cord (See page A11).
\- Connect the input terminal with a proper color match. text_image
PC-IN S-Vdoc Audio Cable (optional) Red White Audio Cable (optional) R W R L Red Blue Green DVD Cable (optional) R B Pr Pb G② Select an input signal. Press the Input Select button on the remote controller to select the input signal. Or, press the SOURCE button at the front side of the monitor.
SOURCE → ▼▲ → SET
When connecting with a DVD/audio cable. \- Select DVD (Y, Cb, Cr) text_image
DVI DIGITAL DSUB ANALOG VIDEO1(CVBS) VIDEO2(S-Video) DVD(Y, Cb, Cr) HDTV(Y, Pb, Pr)text_image
SOURCE TV/W SLEEP EXIT DRTW CH SET VOL VOL CH 1 2 3Connecting to External Devices
When watching HDTV (576i)
1 Connect the video/audio cable as shown in the below figure and then, connect the power cord (See page A11).
\- Connect the input terminal with a proper color match. text_image
S-Video Audio AV-IN AV-OUT Audio White Red Red Blue Green HDTV Cable (optional) Audio Cable (optional) R W R L Pr B G Pb Y② Select an input signal. Press the Input Select button on the remote controller to select the input signal. Or, press the SOURCE button at the front side of the monitor.
SOURCE → ▼▲ → SET
When connecting with an HDTV/audio cable. \- Select HDTV (Y, Pb, Pr) text_image
INPUT SELECT DVI DIGITAL DSUB ANALOG VIDEO1(CVBS) VIDEO2(S-Video) DVD(Y, Cb, Cr) HDTV(Y, Pb, Pr)text_image
SOURCE VIEW SLEEP EXIT BRT/W CH VOL SET VOL CH 1 2 3Selecting and Adjusting the Screen
 Name of the Buttons in the Screen Adjustment Unit text_image
L0 2 7text_image
1 0 ⑧text_image
SOURCE MOV MOTORLIST ⑥ ③ ④ ⑤ ①Power Button
\- Press the button to turn on the power. Press the button again to turn it off. Power LED
\- This Indicator lights up green when the display operates normally. If the display is in DPM (Energy Saving) mode, this indicator color changes to amber. MENU Button
\- Use this button to show/hide the OSD (On Screen Display) menu screen. OSD Select Adjust Button
\- Use the button to select an icon or adjust the setting in the OSD screen.  \- Use this button to directly control brightness and contrast of the PC signal (DSUB/DVI).   \- Adjust the volume.  Selecting and Adjusting the Screen
Name of the Buttons in the Screen Adjustment Unit
5
AUTO/SELECT Button
[For DSUB signal]
- Select the icon to adjust on the OSD screen. - If you press the [AUTO/SELECT] button, automatic screen adjustment will be started.AUTO IN PROGRESS
[Other signals that DSUB] • The current signal and mode information will be displayed.6
SOURCE Button
SOURCE → ▼▲ → AUTO/SELECT
\- Select the input signal DVI DIGITAL DVI digital signal DSUB ANALOG 15-pin D-Sub analog signal VIDEO1(CVBS) Composite video VIDEO2(S-Video) S-Video DVD(Y, Cb, Cr) DVD HDTV(Y, Pb, Pr) HD televisionINPUT SELECT
DVI DIGITAL DSUB ANALOG VIDEO1(CVBS) VIDEO2(S-Video) DVD(Y, Cb, Cr) HDTV(Y, Pb, Pr)7
\- The unit that receives the signal from the remote controller.8
Main Power Switch
\- Use this button to turn on/off the monitor.OSD Lock/Unlock Button
Menu button + ▶ ■ Use this button to lock/unlock OSD screen adjustment. (Activated when pressed together longer than 5 seconds.)CONTROLS LOCKED
\- OSD is lockedCONTROLS UNLOCKED
\- OSD is unlocked. OSD Menu – When Connected to Your PC
| Icon | Function Description |
 Adjustment Adjustment | Adjusts screen brightness, contrast and color that you prefer. |
 Tracking Tracking | Adjusts position of the screen, clock or phase. |
 Audio Audio | Adjusts the audio function. |
 Setup Setup | Adjusts the screen status according to the circumstances. |
 PIP/POP/PBP PIP/POP/PBP | Adjusts PIP/POP/PBP mode function. |
OSD Menu – When Watching Video/DVD/HDTV
| Icon | Function Description |
 Video Video | Adjusts the screen video. |
 Audio Audio | Adjusts the audio function. |
 Setup Setup | Adjusts the screen status according to the circumstances. |
 PIP/POP/PBP PIP/POP/PBP | Adjusts PIP/POP/PBP mode function. |
Selecting and Adjusting the Screen
How to adjust the OSD (On Screen Display) screen.
flowchart
graph LR
    A["MENU"] --> B["Select a menu icon"]
    B --> C["Select a menu icon"]
    C --> D["Adjust the status"]
    D --> E["Save adjustment"]
    E --> F["Exit from the menu screen."]
    style A fill:#f9f,stroke:#333
    style F fill:#f9f,stroke:#333
| 1 | Press the MENU Button, then the main menu of the OSD appears. |
| 2 | To access a control, use the ▼▲ Buttons. |
| 3 | When the icon you want becomes highlighted, press the SET Button. |
| 4 | Use the ▼▲◀▶ Buttons to adjust the item to the desired level. |
| 5 | Accept the changes by pressing the SET Button. |
| 6 | Exit the OSD by Pressing the EXIT Button. |
How to adjust the screen automatically.
You need to adjust the screen display when connecting the monitor to a new computer or changing the mode. Refer to the following section to set an optimal monitor screen. Press the AUTO/SELECT button (AUTO button in a remote controller) in the PC analog signal. Then, an optimal screen status will be selected that fits into the current mode. If adjustment is not satisfactory, you need to adjust screen position, clock and phase in the OSD menu. AUTO IN PROGRESSSelecting and Adjusting the Screen
 OSD Menu - When Connected to Your PC Adjusting Screen Color
text_image
ADJUSTMENT CONTRAST 100 BRIGHTNESS 64 COLOR UP / DOWN SELECTtext_image
ADJUSTMENT USER 900K 450K RED 100 GREEN 100 BLUE 100 UP/DOWS SELECT EXITUSER 9300K/6500K
Selecting a factory setting color set. • 9300K: Slightly bluish white. • 6500K: Slightly reddish white.RED
GREEN Set your own color levels. BLUE Adjusting Screen CLOCK/PHASE and Position
text_image
TRACKING AUTO > OFF CLOCK 50 PHASE 0 H POSITION 50 V POSITION 47 UP/DOWN SELECTAUTO
This function is suitable for analog signal input only. This button is for the automatic adjustment of the screen position, clock and phase.CLOCK
To minimize any vertical bars or stripes visible on the screen background. The horizontal screen size will also change.PHASE
To adjust the focus of the display. This item allows you to remove any horizontal noise and clear or sharpen the image of characters. H POSITION To move image left or right. V POSITION To move image up or down.  When connected to your computer and the digital input signal (DVI-DIGITAL), only ADJUSTMENT, AUDIO, SETUP and PIP/POP/PBP menu are enabled. Other menu items will be automatically adjusted.Selecting and Adjusting the Screen
Adjusting the audio function
text_image
AUDIO SSM ▶ USER AVL ▶ OFF MUTE ▶ OFF SRS WOW ▶ OFF BALANCE ← [ ] → 0 BASS ← [ ] → 50 TREBLE ← [ ] → 50 ▲ UP / DOWN ■ SELECTSSM
The best sound tone quality will be selected automatically depending on the video type that you're currently watching. - USER : Select this option to use the user-defined audio settings. - FLAT: The most commanding and natural audio. • MOVIE : Select this option to enjoy sublime sound. - MUSIC : Select this option to enjoy the original sound when listening to the music. - SPORTS: Select this option to watch sports broadcasting.AVL
To adjust uneven sound volumes across all channels or signals automatically to the most appropriate level. To use this feature, select ON.MUTE
Used to select mute ON(means sound off) and mute OFF(means sound on).SRS WOW
Set the SRS WOW menu on. The SRS WOW function plays back the mono or stereo sound input with the dynamic surround effects. It will provide rich and profound sound tone. If you set the SRS WOW on, bass/treble will be automatically adjusted.BALANCE
Use this function to balance sound from the left and right speakers.BASS
To raises or lowers Bass level.TREBLE
To raises or lowers Treble level.  When connected to your computer and the 'SSM' setting in the audio menu is one of FLAT, MOVIE, MUSIC or SPORTS, the available menus are AVL, MUTE and BALANCE. Selecting the options
text_image
SETUP LANGUAGE ▶ ENGLISH IMAGE SIZE ▶ FULL OSD POSITION ▶ TRANSPARENCY ←——— > 20 ZOOM ▶ RESET ▶ OFF 1280x1024 @60Hz ▲ UP / DOWN ■ SELECTtext_image
SETUP 50 50 UP / DOWN ← LEFT/RIGHT → INSERTtext_image
ZOOM ← 0 H POSITION ← 50 V POSITION ← 50 AV UP / DOWN ← SELECT → NEXTSelecting and Adjusting the Screen
Adjusting PIP/POP/PBP Mode (Multiple Screen) Functions
To adjust the PIP(PICTURE IN PICTURE) of the screen text_image
PIP/POP/POP PIP MODE PIP PIP PIP/POP/POP PIP ON/OFF OFF PIP SOURCE DVI DIGITAL PIP SIZE LARGE PIP IMAGE PIP SOUND OFF PIP SWAP OFF UP / DOWN SELECT EXITnatural_image
Interior view of a control room with multiple monitors and a person seated at the front (no visible text or symbols)text_image
PIP POSITION PIP CONTRAST 1 > 82 PIP BURITNESS 1 > 63 PIP BURITNESS 1 > 0 PIP COLOR 1 > 88 UP/DOWN ← SELECT NextAdjusting PIP/POP/PBP Mode (Multiple Screen) Functions
To adjust the POP(PICTURE OUT PICTURE) of the screen
text_image
PIP/POP/POP PIP MODE POP MODE PIP MODE PIP/POP/POP POP ON/OFF > OFF POP SOURCE > DVI DIGITAL POP IMAGE > POP SOUND > OFF POP SWAP > OFF ▲ UP / DOWN ▶ SELECT □ EXITnatural_image
Person sitting at a desk in an office with multiple monitors and a person standing nearby (no visible text or symbols)text_image
POP CONTRAST 4 POP BRIGHTNESS 4 POP SHAPNESS 4 POP COLOR 4 a# UP / DOWN 4# SELECT 5# ExitSelecting and Adjusting the Screen
Adjusting PIP/POP/PBP Mode (Multiple Screen) Functions
To adjust the PBP(PICTURE BY PICTURE) of the screen
text_image
PIP/POP/POP PIP MODE > POP MODE > PBP MODE > PIP/POP/POP PBP ON/OFF OFF PBP SOURCE DVI DIGITAL PBP SIZE FULL PBP IMAGE PBP SOUND OFF PBP SWAP OFF UP / DOWN SELECT EXITnatural_image
Black-and-white photo of two people standing in a room with bookshelves (no visible text or symbols)text_image
PBP CONTRAST PBP BRIGHTNESS PBP SHAPNESS PBP COLOR Any UP / DOWN <> SELECT ☑ EXITOSD Menu – When Watching Video/DVD/HDTV
Adjusting Screen Image
text_image
VIDEO PSM ▶ USER CONTRAST ▶ 50 BRIGHTNESS ▶ 50 SHARPNESS ▶ 50 COLOR ▶ 50 ▲ UP / DOWN ■ SELECTPSM
The PSM function automatically adjusts the screen image quality depending on the AV usage environment. - USER : Select this option to use the user-defined settings. - GAME : Select this option to enjoy dynamic image when playing a game. • STANDARD : The most general and natural screen display status. • DYNAMIC : Select this option to display with a sharp image. • MILD : Select this option to display with a mild image. CONTRAST To adjust the contrast of the screen. BRIGHTNESS To adjust the brightness of the screen. SHARPNESS To adjust the clearness of the screen. COLOR To adjust the color to desired level.  If the 'PSM' setting in the Video menu is set to GAME, STANDARD, DYNAMIC or MILD the subsequent menus will be automatically set.Selecting and Adjusting the Screen
Adjusting the audio function
text_image
AUDIO SSM ▶ USER AVL ▶ OFF SRS WOW ▶ OFF SOUND ▶ MONO MUTE ▶ OFF BALANCE ▶ 50 BASS ▶ 50 TREBLE ▶ 50 ▲ UP / DOWN ■ SELECTSSM
The best sound tone quality will be selected automatically depending on the video type that you're currently watching. - USER : Select this option to use the user-defined audio settings. - FLAT: The most commanding and natural audio. • MOVIE : Select this option to enjoy sublime sound. - MUSIC : Select this option to enjoy the original sound when listening to the music. • SPORTS : Select this option to watch sports broadcasting.AVL
To adjust uneven sound volumes across all channels or signals automatically to the most appropriate level. To use this feature, select ON. SRS WOW Set the SRS WOW menu on. The SRS WOW function plays back the mono or stereo sound input with the dynamic surround effects. It will provide rich and profound sound tone. If you set the SRS WOW on, bass/treble will be automatically adjusted. SOUND To select the audio mode. : MONO/STEREO MUTE Used to select mute ON(means sound off) and mute OFF(means sound on). BALANCE Use this function to balance sound from the left and right speakers. BASS To raises or lowers Bass level. TREBLE To raises or lowers Treble level.  If the 'SSM' setting in the audio menu is one of FLAT, MOVIE, MUSIC or SPORTS, the available menus are AVL, SOUND, MUTE and BALANCE. Other menu items will be automatically adjusted. Selecting the options
text_image
SETUP LANGUAGE ▶ ENGLISH IMAGE SIZE ▶ FULL OSD POSITION ▶ TRANSPARENCY ← 20 ZOOM ▶ RESET ▶ OFF ▲ UP / DOWN ■ SELECTtext_image
SETUP 40 50 up / DOWN 43 LEFTRIGHT a FCTtext_image
SETUP ZOOM ← 0 H POSITION ← 50 V POSITION ← 50 up/down ← SELECT → EXTSelecting and Adjusting the Screen
Adjusting PIP/POP/PBP Mode (Multiple Screen) Functions
To adjust the PIP(PICTURE IN PICTURE) of the screen
text_image
PIP/POP/PIP PIP MODE PIP MODE PIP/POP/PIP PIP ON/OFF OFF PIP SOURCE DVI DIGITAL PIP SIZE LARGE PIP IMAGE PIP SOUND OFF PIP SWAP OFF UP / DOWN SELECT EXITnatural_image
Interior view of a control room with multiple monitors and a person working at a desk (no visible text or symbols)text_image
PIP POSITION PIP CONTRAST PIP BUSINESS UP / DOWN SELECT EXITAdjusting PIP/POP/PBP Mode (Multiple Screen) Functions
To adjust the POP(PICTURE OUT PICTURE) of the screen
text_image
PIP/POP/PBP PIP MODE POP MODE PBP MODE PIP/POP/PBP POP ON/OFF OFF POP SOURCE DVI DIGITAL POP IMAGE POP SOUND OFF POP SWAP OFF UP / DOWN SELECT EXITnatural_image
Black-and-white photo of a person working at a computer with multiple monitors (no visible text or symbols)text_image
POP COMTRAST POP BRETTER UP / DOWN SELECT EXITSelecting and Adjusting the Screen
Adjusting PIP/POP/PBP Mode (Multiple Screen) Functions
To adjust the PBP(PICTURE BY PICTURE) of the screen
text_image
PBP/POP/PBP PBP MODE ▶ POP MODE ▶ PBP MODE ▶ PBP/POP/PBP PBP ON/OFF ▶ OFF PBP SOURCE ▶ DVI DIGITAL PBP SIZE ▶ FULL PBP IMAGE ▶ PBP SOUND ▶ OFF PBP SWAP ▶ OFF UP / DOWN ▶ SELECT ▶ EXITnatural_image
Black-and-white photo of two people standing in a train or office environment, viewed from behind (no visible text or symbols)text_image
PDF CONTRAST PDF BROTTHUS UP/DOWN SELECT EXITAdjusting Functions using your PC
\* The RS-232C protocol is used for communication between the PC and monitor. You can turn the monitor on/off, select an input source or adjust the OSD menu from your PC. Connecting the cable
- Connect the PC RS-232C (serial connector) terminal to the RS-232C terminal at the rear side of the monitor. - The cable for RS-232C terminal connection is not an accessory included in the product. Please purchase the cable. text_image
RS-232C Rear side of the monitor.Communication Parameter
▶ Raud Rate : 115200bps ▶ Data Length : 8bits ▶ Parity Bit : NONE ▶ Stop Bit : 1bit ▶ Flow Control : NONEAdjusting Functions using your PC
 Commands Related with User Control| Function | Command (HEX) | Parameter#3 (HEX) | Parameter#4 (HEX) | |
| POWER | ON | 01h | 01h | - |
| OFF | 00h | - | ||
| MAIN INPUT | DVI DIGITAL | 0Fh | 00h | - |
| DSUB ANALOG | 01h | - | ||
| VIDEO1(CVBS) | 02h | - | ||
| VIDEO2(S-Video) | 03h | - | ||
| DVD | 04h | - | ||
| HDTV | 05h | - | ||
| SUB INPUT | DVI DIGITAL | 10h | 00h | - |
| DSUB ANALOG | 01h | - | ||
| VIDEO1(CVBS) | 02h | - | ||
| VIDEO2(S-Video) | 03h | - | ||
| DVD | 04h | - | ||
| HDTV | 05h | - | ||
| CONTRAST | 03h | 00h ~64h | - | |
| BRIGHTNESS | 04h | 00h ~64h | - | |
| SHARPENESS | 05h | 00h ~64h | - | |
| COLOR | 06h | 00h ~64h | - | |
| 9300K | 08h | - | - | |
| 6500K | 09h | - | - | |
| USER | 0Ah | - | - | |
| USER | RED | 0Bh | 00h | 00h ~ FFh |
| GREEN | 01h | 00h ~ FFh | ||
| BLUE | 02h | 00h ~ FFh | ||
Adjust Command/Protocol
Parameter #1 (8 Byte length) : Device selection| 0 | 1 | 2 | 3 | 4 | 5 | 6 | 7 |
| Length : 08h | 11h | Param ID : 01h | 00h | 00h | 00h | Device ID (00h~63h) | Check sum |
| 0 | 1 | 2 | 3 | 4 | 5 | 6 | 7 |
| Length : 08h | 11h | Param ID : 02h | 00h | 00h | 00h | Write : 01h | Check sum |
| 0 | 1 | 2 | 3 4 5 6 | 7 | |
| Length : 08h | 11h | Param ID : 03h | Parameter value (4 Byte : DWORD) | Check sum | |
| High 2Byte | Low 2Byte | ||||
| 0 | 1 | 2 | 3 |
| Length = 04h | AAh | Function Command | Check sum |
Troubleshooting
No image is displayed
● Is the monitor power cord connected? - Does the power LED is turned on? ● Power is on, power LED is green but the screen appears extremely dark. - Does the power LED look yellow? - Does the 'OUT OF RANGE' message appear? - Does the 'CHECK SIGNAL CABLE' message appear? • See if the power cord is properly connected to the outlet. • See if the power switch is turned on. - Adjust brightness (♀) and contrast (○) again. - If the monitor is in power saving mode, move the mouse or press any key. - The signal from the PC (video card) is out of the vertical or horizontal frequency range of the monitor. Adjust the frequency range by referring to the Specifications in this manual. D-Sub: 1280x1024 @60Hz DVI-D:1280x1024@60Hz - The signal cable between PC and monitor is not connected. Check the signal cable. - Press the 'SOURCE' menu in the remote controller to check the input signal.\* Maximum resolution
'Unknown Monitor' message appears when the monitor is connected.
Did you install the driver? • Install the monitor driver, which is provided with the monitor, or download it from the web site. (http://www.lge.com) \- See if the plug&play function is supported by referring to the video card user manual.'CONTROLS LOCKED' message appears.
The 'CONTROLS LOCKED' message appears when pressing the Menu button. \- The control locking function prevents unintentional OSD setting change due to careless usage. To unlock the controls, simultaneously press the Menu button and ▶ button for 5 seconds. (You cannot set this function using the remote controller buttons. You can set this function in the monitor only.)  \* Vertical frequency: To enable the user to watch the monitor display, screen image should be changed tens of times every second like a fluorescent lamp. The vertical frequency or refresh rate is the times of image display per second. The unit is Hz. \* Horizontal frequency: The horizontal interval is the time to display one vertical line. When 1 is divided by the horizontal interval, the number of horizontal lines displayed every second can be tabulated as the horizontal frequency. The unit is kHz.The screen image looks abnormal.
● Is the screen position wrong? Do thin lines appear on the background screen? ● Horizontal noise appears or the characters look blurred. - Unable to adjust the horizontal/vertical position in the Zoom menu. - Screen size is automatically adjusted when connected to the PC. ● Brightness differs in the main and sub screen when connected to the PC. - D-Sub analog signal – Press the "AUTO" button in the remote controller to automatically select the optimal screen status that fits into the current mode. If adjustment is not satisfactory, use the Position OSD menu. - See if the video card resolution and frequency are supported by the monitor. If the frequency is out of range, set to the recommended resolution in the Control Panel – Display – Setting menu. - D-Sub analog signal – Press the "AUTO" button in the remote controller to automatically select an optimal screen status that fits into the current mode. If adjustment is not satisfactory, use the Clock OSD menu. - D-Sub analog signal – Press the "AUTO" button in the remote controller to automatically select an optimal screen status that fits into the current mode. If adjustment is not satisfactory, use the Phase OSD menu. • See if the Zoom value is set to 0. If it is, you cannot adjust the H/V Position value. - If the screen size is not full when connected to the PC, execute the PIP/POP/PBP to change to full screen mode. - You cannot adjust brightness and tint in the PIP/POP/PBP Screen menu for the sub-screen among PIP/POP/PBP menus. Therefore, brightness can be different for the sub-screen.After-image appears on the monitor.
\- After-image appears when the monitor is turned off. \- If you use a fixed image for a long time, the pixels may be damaged quickly. Use the screensaver function.Troubleshooting
The audio function does not work.
No sound? - No sound is available when the PIP/POP/PBP mode is engaged. Sound is too dull. Sound is too low. • See if the audio cable is connected properly. - Adjust the volume. • See if the sound is set properly. - See if the Sound is set to On in the PIP/POP/PBP menu. - Select the appropriate treble sound. - Select the appropriate bass sound. - Adjust the volume.The screen size function in the OSD menu does not work.
\- The screen size function in the OSD menu does not work. • See if the PIP/POP/PBP function is in use. If the PIP/POP/PBP function is in use, the screen size function may not work.Screen color is abnormal.
- Screen has poor color resolution (16 colors). - Screen color is unstable or monocolored. Do black spots appear on the screen? \- Set the number of colors to more than 24 bits (true color) Select Control Panel – Display – Settings – Color Table menu in Windows. - Check the connection status of the signal cable. Or, re-insert the PC video card. - Several pixels (red, green, white or black color) may appear on the screen, which can be attributable to the unique characteristics of the LCD panel. It is not a malfunction of the LCD.Specifications
The product specifications can change without prior notice for product improvement.| LCD Panel | Screen Type | 30 inches (75.0062cm) TFT (Thin Film Transistor)LCD (Liquid Crystal Display) PanelVisible diagonal size: 75.0062cm |
| Pixel Pitch | 0.5025mm | |
| Video Signal | Max. Resolution | D-SUB : 1280 X 1024 @60HzDVI-D : 1280 X 1024 @60Hz |
| Recommended Resolution | D-SUB : WXGA 1280 X 768 @60HzDVI-D : WXGA 1280 X 768 @60Hz | |
| Horizontal Frequency | D-SUB : 30 - 66 kHzDVI-D : 30 - 66 kHz | |
| Vertical Frequency | 56 - 85 Hz | |
| Synchronization Type | Separate/Composite/SOG (Sync On Green)/Digital | |
| Input Connector | 15-pin D-Sub type, DVI-D (digital), S-Video,Composite video, HDTV, DVD | |
| Power | Rated VoltagePower Consumption | AC 100-240V~ 50/60Hz 1.8ANormal operation: 160WPower saving preparation state: ≤5WPower saving state: ≤5WPower switch on: ≤5WPower cut-off, switch off: ≤1W |
| Dimension/Weight | Size (WxLxH)Weight (excl. package) | 733.8mm x 538.0 mm x 107.0mm17.0 kg |
| Environmental Conditions | Operational ConditionStorage Condition | Temperature: 10°C ~ 35°C , Humidity: 10% ~ 80%Temperature: -20°C ~ 60°C , Humidity: 5% ~ 95% |
Specifications
 PC Mode – Preset Mode| Preset mode | Horizontal Frequency (kHz) | Vertical Frequency (Hz) | Preset mode | Horizontal Frequency (kHz) | Vertical Frequency (Hz) | ||
| 1 | VGA 640 x 350 | 31.469 | 70 | 8 | VESA 800 x 600 | 53.674 | 85 |
| 2 | VGA 720 x 400 | 31.468 | 70 | 9 | MAC 832 x 624 | 49.725 | 75 |
| 3 | VGA 640 x 480 | 31.469 | 60 | 10 | VESA 1024 x 768 | 48.363 | 60 |
| 4 | VESA 640 x 480 | 37.500 | 75 | 11 | VESA 1024 x 768 | 60.123 | 75 |
| 5 | VESA 640 x 480 | 43.269 | 85 | 12 | VESA 1280 x 1024 | 63.981 | 60 |
| 6 | VESA 800 x 600 | 37.879 | 60 | 13 | VESA 1280 x 768 | 47.7 | 60 |
| 7 | VESA 800 x 600 | 46.875 | 75 | ||||
| Mode | Monitor |
| Normal Operation | Green |
| Pre-power Saving State | Amber |
| Power Saving State | Amber |
| Power Switch Off | - |
| Power Cut-off Switch Off | - |
VESA wall mounting
Connected to another object (stand type and wall-mounted type. This monitor accepts a VESA-compliant mounting interface pad.-optional) For further information, refer to the VESA Wall Mounting Instruction Guide. text_image
100 100 100 +25mm 100natural_image
Close-up of a handheld pressure sensor with a circular dial and coiled cable (no visible text or symbols)Locking Device
Use this locking cable (optional) to prevent theft.  DVI-D   | No. | Signal |
| 1 | T. M. D. S. Data 2- |
| 2 | T. M. D. S. Data 2+ |
| 3 | T. M. D. S. Data 2/4 Shield |
| 4 | T. M. D. S. Data 4- |
| 5 | T. M. D. S. Data 4+ |
| 6 | DDC Clock |
| 7 | DDC Data |
| 8 | Analog Vertical Synchronization |
| 9 | T. M. D. S. Data 1- |
| 10 | T. M. D. S. Data 1+ |
| 11 | T. M. D. S. Data 1/3 Shield |
| 12 | T. M. D. S. Data 3- |
| 13 | T. M. D. S. Data 3+ |
| 14 | +5V Power |
| 15 | Grounding (return for +5V, horizontal sync and vertical sync) |
| 16 | Hot Plug Detect |
| 17 | T. M. D. S. Data 0- |
| 18 | T. M. D. S. Data 0+ |
| 19 | T. M. D. S. Data 0/5 Shield |
| 20 | T. M. D. S. Data 5- |
| 21 | T. M. D. S. Data 5+ |
| 22 | T. M. D. S. Clock Shield |
| 23 | T. M. D. S. Clock+ |
| 24 | T. M. D. S. Clock |