
37LF66.AEU - TV LG - Free user manual and instructions
Find the device manual for free 37LF66.AEU LG in PDF.


User questions about 37LF66.AEU LG
0 question about this device. Answer the ones you know or ask your own.
Ask a new question about this device
Download the instructions for your TV in PDF format for free! Find your manual 37LF66.AEU - LG and take your electronic device back in hand. On this page are published all the documents necessary for the use of your device. 37LF66.AEU by LG.
USER MANUAL 37LF66.AEU LG
LCD TV PLASMA TV OWNER'S MANUAL
LCD TV MODELS
PLASMA TV MODELS
37LF6*
37LY9**
50PF9**
42LF6*
42LY9**
60PF9**
47LF6*
47LY9**
52LF6**
52LY9**
Please read this manual carefully before operating your set.
Retain it for future reference.
Record model number and serial number of the set.
See the label attached on the back cover and quote this information to your dealer when you require service.
DVB
Digital Video Broadcasting
Trade Mark of the DVB Digital Video
Broadcasting Project (1991 to 1996)
| ID Number(s): | 4560: 37LY95 | 4551: 60PF95 |
| 4534: 42LY95 | 4535: 37LF65 | |
| 4558: 47LY95 | 4536: 47LF65 | |
| 4537: 42LF65 | 4604: 37LY96 | |
| 4605: 42LY96 | 4606: 47LY96 | |
| 4607: 52LY96 | 4608: 37LF66 | |
| 4609: 42LF66 | 4610: 47LF66 | |
| 4611: 52LF65 | 4612: 52LF66 | |
| 4613: 50PF95 | 4614: 50PF96 | |
| 4615: 60PF96 |
ACCESSORIES
Ensure that the following accessories are included with your TV. If an accessory is missing, please contact the dealer where you purchased the product.

Owner's Manual

Power Cord

Cable Management
Polishing Cloth
Polish the screen with the cloth.
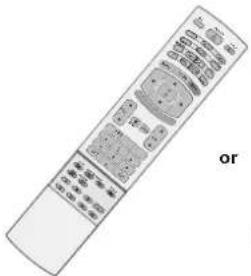
text_image
or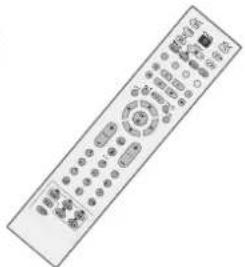
text_image
Image of a remote control device with Chinese labels and function buttons
Batteries
Slightly wipe stained spot on the exterior only with the cleansing cloths for the product exterior if there is stain or fingerprint on surface of the exterior.
Do not wipe roughly when removing stain. Please be cautious of that excessive power may cause scratch or discoloration.
Remote Control
50PF9\*\* only

2-Wall brackets

2-eye-bolts
60PF9\*\*only
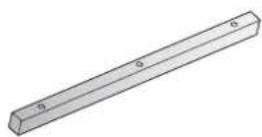
One desk-type stand fixture protection cover Refer to p. 14

2- TV Brackets
2- Wall Brackets

2-bolts

Two rubber caps Refer to p. 13

3-bolts Refer to p. 14
LCD TV models

2- TV Brackets
2- Wall Brackets

2-bolts

Twister Holder Arrange the wires with the twister holder.
37" only

4-bolts for stand assembly Refer to p. 9
CONTENTS
ACCESSORIES 1
PREPARATION
Front Panel Controls 4
Back Panel Information 7
Stand installation 9
Attaching the TV to a wall 10
Back Cover for Wire Arrangement ..... 11
Desktop Pedestal Installation 13
Wall Mount: Horizontal installation ..... 14
Antenna Connection 15
EXTERNAL EQUIPMENT SETUP
HD Receiver Setup....16
DVD Setup 18
Insertion of CI module 20
VCR Setup 21
Digital Audio Out Setup 23
Other A/V Source Setup 24
PC Setup 25
- Screen Setup for PC Mode 28
WATCHING TV / PROGRAMME CONTROL
Remote Control Key Functions 32
Turning on the TV 36
Programme Selection 37
Volume Adjustment 37
On Screen Menus Selection and Adjustment .... 38
Auto Programme Tuning (In Digital Mode) ..... 39
Manual Programme Tuning (In Digital Mode) ... 40
Programme Edit (In Digital Mode) 41
5V antenna Power (In Digital Mode only) ..... 43
Software Update (In Digital Mode only) ..... 44
Diagnostics (In Digital Mode only) 45
CI Information (In Digital Mode only) ..... 46
Auto Programme Tuning (In Analogue Mode) .... 47
Manual Programme Tuning (In Analogue Mode) ..... 48
Fine Tuning (In Analogue Mode) 49
Assigning a Station Name (In Analogue Mode) ..... 49
Programme Edit (In Analogue Mode) 50
Calling the Programme Table 52
Input Source Selection 53
SIMPLINK 54
PICTURE CONTROL
EPG (Electronic programme guide) (In Digital Mode)
- Switch on/off EPG 56
- Select a programme 56
- Button function in NOW/NEXT guide mode .... 57
- Button function in 8 days guide mode ..... 57
- Button function in date change mode ..... 57
- Button function in extended description box .... 58
- Button function in record/remind setting mode .. 58
- Button function in timer list mode ..... 58
Picture Size (Aspect Ratio) Control ..... 59
Preset Picture Settings
- Picture Mode-Preset....61
- Auto Colour Tone Control (Warm/Medium/Cool) ... 62
Manual Picture Adjustment
- Picture Mode-User option 63
- Colour Tone - User option ....64
XD - Picture Improvement Technology ..... 65
XD Demo 66
Advanced - Cinema 67
Advanced - Black(Darkness) Level 68
Picture Reset 69
Image Sticking Minimization(ISM) Method .....70
Low-Power Picture Mode 71
SOUND & LANGUAGE CONTROL
Auto Volume Leveler 72
Preset Sound Settings - Sound Mode .....73
Sound Setting Adjustment - User Mode .....74
Balance 75
TV Speakers On/ Off Setup 76
Selecting digital audio out 77
I/II
- Stereo/Dual Reception (In Analogue Mode Only) ... 78
- NICAM Reception (In Analogue Mode Only) ..... 79
- Speaker Sound Output Selection ..... 79
On-Screen Menu Language/Country Selection ..... 80
Language selection (In Digital Mode only) ..... 81
TIME SETTING
Clock Setup 82
Auto On/ Off Timer Setting 83
Auto Shut-off Setting 84
Time Zone Setup 85
Sleep Timer Setting 85
PARENTAL CONTROL / RATINGS
Set Password & Lock System 86
Parental Control 87
TELETEXT
Switch on/off 88
SIMPLE Text 88
TOP Text 88
FASTEXT 89
Special Teletext Functions 89
DIGITAL TELETEXT
Teletext within Digital Service ..... 90
Teletext in Digital Service....90
APPENDIX
Troubleshooting 91
Maintenance 93
Product Specifications 94
Programming the Remote Control ..... 95
IR Codes 100
External Control Device Setup 102
PREPARATION
FRONT PANEL CONTROLS
■ This is a simplified representation of the front panel. Here shown may be somewhat different from your TV.
If your product has a protection film attached, remove the film and then wipe the product with a polishing cloth.
Plasma TV Models: 50PF9*, 60PF9*
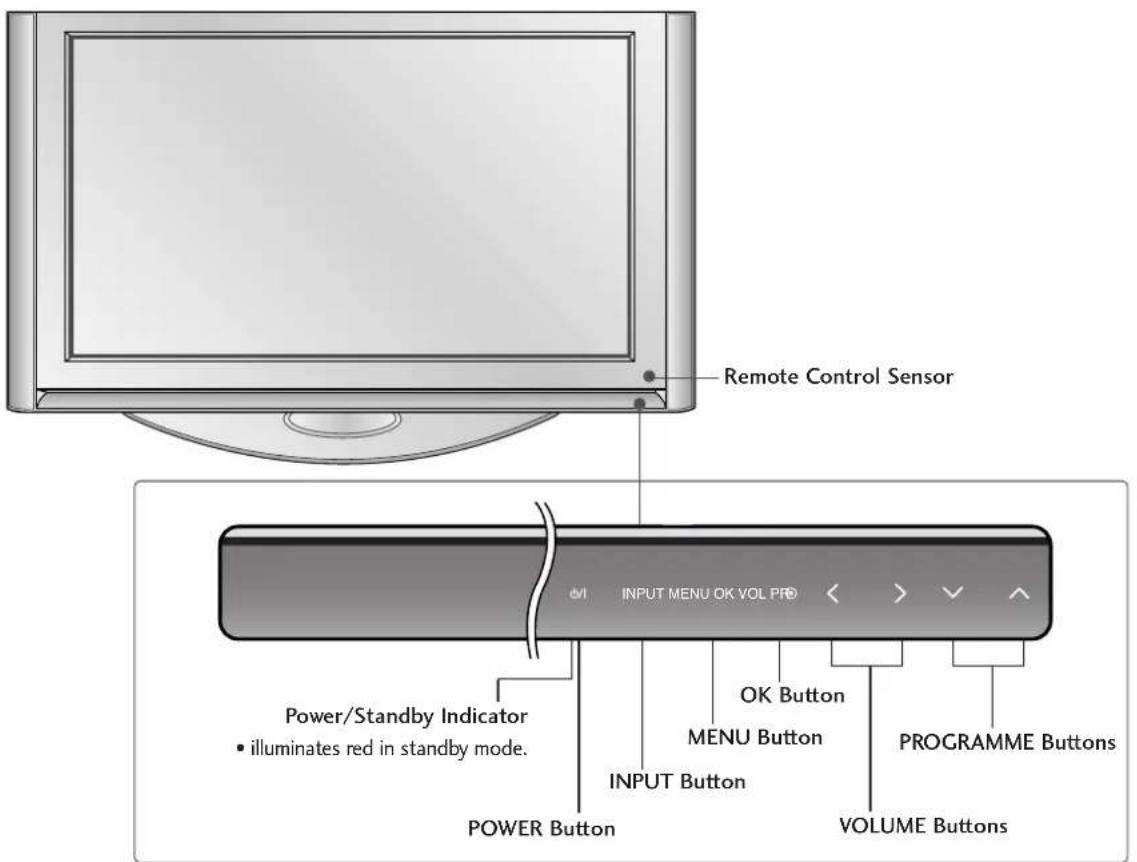
text_image
Remote Control Sensor INPUT MENU OK VOL PRO Power/Standby Indicator • illuminates red in standby mode. POWER Button OK Button MENU Button INPUT Button VOLUME Buttons PROGRAMME ButtonsSWIVEL STAND (Only 60PF9\*)
After installing the TV, you can adjust the TV set manually to the left or right direction by 20 degrees to suit your viewing position.
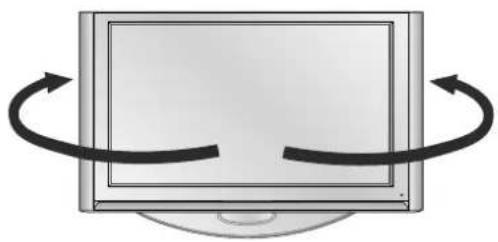
natural_image
Illustration of a computer monitor with two curved arrows indicating rotational or bidirectional motion (no text or symbols)NOTE
Before adjusting the angle, you must remove the cable management and loosen (to the left) the shaft bolt on the middle of stand's back. And when stand be level with TV, you must close (to the right) the shaft bolt to set the hole.
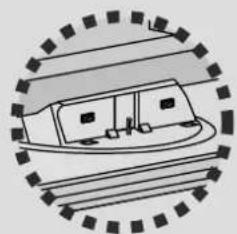
natural_image
Simple line drawing of a boat on a circular platform with no text or symbols
text_image
PR VOLUME Buttons OK Button MENU Button INPUT Button POWER Button Intelligent Eye Remote Control Sensor Power/Standby Indicator • illuminates red in standby mode. • illuminates green when the set is switched on.LCD TV Models: 37LY9*, 42LY9*, 47LY9*, 52LY9*
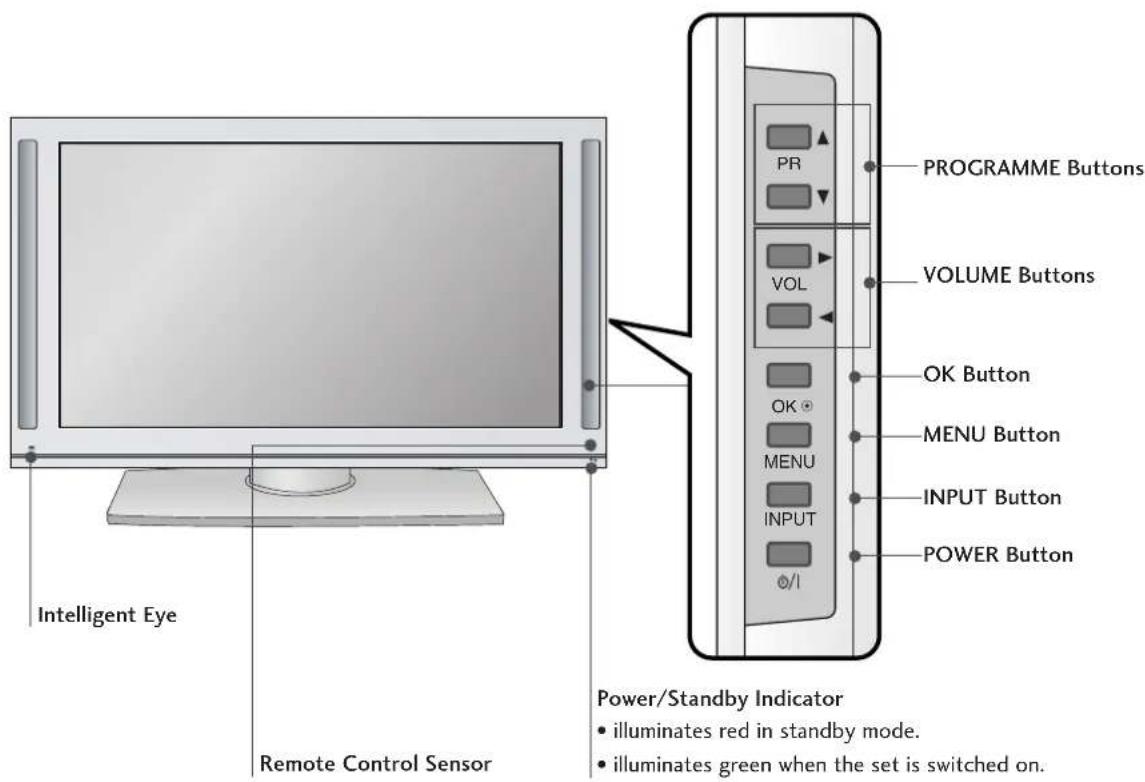
text_image
Intelligent Eye Remote Control Sensor PROGRAMME Buttons VOLUME Buttons OK Button MENU Button INPUT Button POWER Button Power/Standby Indicator • illuminates red in standby mode. • illuminates green when the set is switched on.BACK PANEL INFORMATION
This is a simplified representation of the back panel. Here shown may be somewhat different from your TV.
Plasma TV Models
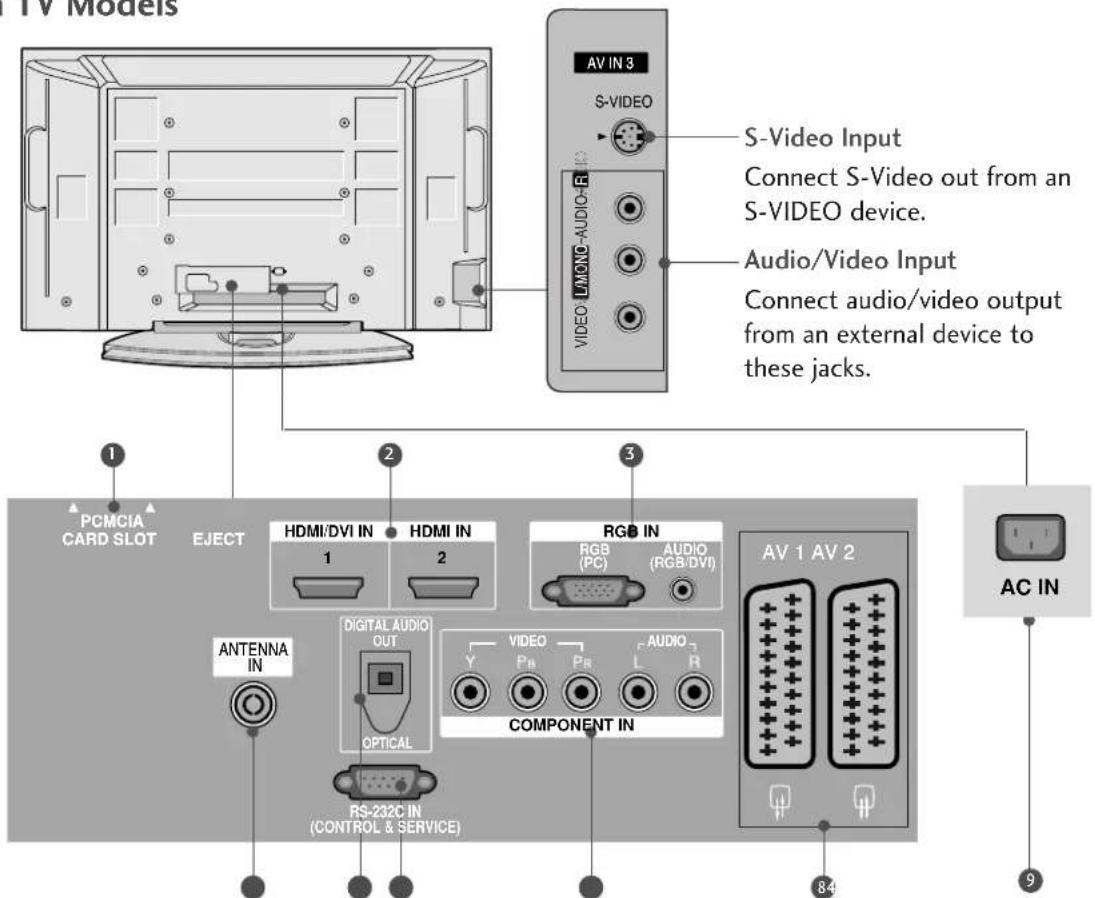
text_image
TV Models AV IN 3 S-VIDEO Connect S-Video out from an S-VIDEO device. Audio/Video Input Connect audio/video output from an external device to these jacks. 1 PCMCIA CARD SLOT EJECT HDMI/DVI IN HDMI IN RGB IN 1 2 (RGB (PC) AUDIO (RGB/DVI)) DIGITAL AUDIO OUT OPTICAL COMPONENT IN ANTENNA IN Y VIDEO PR PR L R RS-232C IN (CONTROL & SERVICE) AV 1 AV 2 AC IN 84① PCMCIA (Personal Computer Memory Card International Association) Card Slot (This feature is not available in all countries.)
② HDMI Input
Connect a HDMI signal to HDMI IN.
Or DVI(VIDEO)signal to HDMI/DVI port with DVI to HDMI cable.
3 RGB/DVI Audio Input
Connect the monitor output from a PC to the appropriate input port.
4 Antenna Input
Connect over-the-air signals to this jack.
5 DIGITAL AUDIO OUT OPTICAL
Connect digital audio from various types of equipment.
Note: In standby mode, these ports do not work.
6 RS-232C IN (CONTROL & SERVICE) PORT Connect to the RS-232C port on a PC.
⑦ Component Input
Connect a component video/audio device to these jacks.
8 Euro Scart Socket (AV1/AV2)
Connect scart socket input or output from an external device to these jacks.
9 Power Cord Socket
This TV operates on an AC power. The voltage is indicated on the Specifications page. Never attempt to operate the TV on DC power.
LCD TV Models
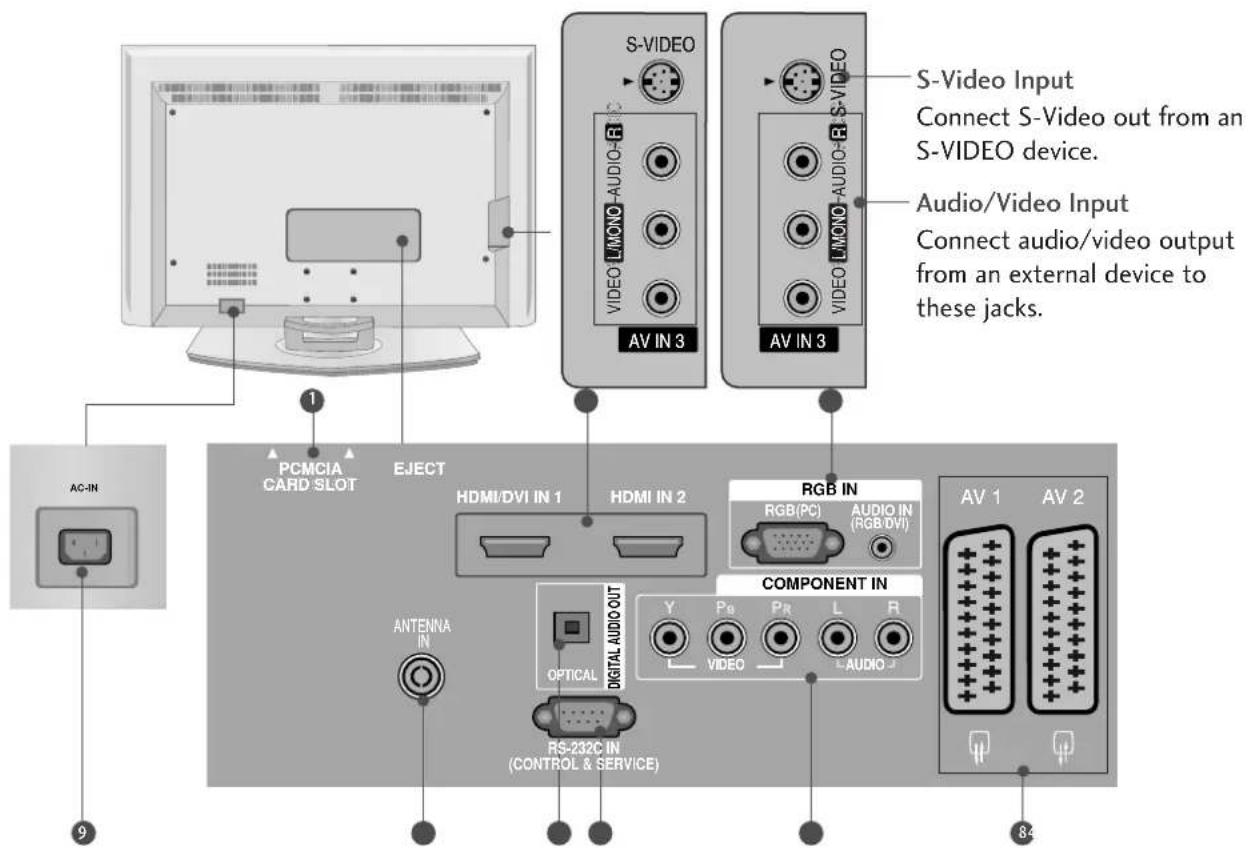
text_image
S-Video Connect S-Video out from an S-VIDEO device. Audio/Video Input Connect audio/video output from an external device to these jacks. S-Video Input AC-IN PCMCIA CARD-SLOT EJECT HDMI/DVI IN 1 HDMI IN 2 RGB IN RGB(PC) AUDIO IN (RGB/DVI) COMPONENT IN Y P0 P2 L R VIDEO AUDIO ANTENNA IN OPTICAL RS-232C IN (CONTROL & SERVICE) AV IN 3 AV IN 3 AV 1 AV 21 PCMCIA (Personal Computer Memory Card International Association) Card Slot (This feature is not available in all countries.)
② HDMI Input
Connect a HDMI signal to HDMI IN.
Or DVI(VIDEO)signal to HDMI/DVI port with DVI to HDMI cable.
3 RGB/DVI Audio Input
Connect the monitor output from a PC to the appropriate input port.
4 Antenna Input
Connect over-the-air signals to this jack.
5 DIGITAL AUDIO OUT OPTICAL
Connect digital audio from various types of equipment.
Note: In standby mode, these ports do not work.
6 RS-232C IN (CONTROL & SERVICE) PORT Connect to the RS-232C port on a PC.
⑦ Component Input
Connect a component video/audio device to these jacks.
⑧ Euro Scart Socket (AV1/AV2)
Connect scart socket input or output from an external device to these jacks.
9 Power Cord Socket
This TV operates on an AC power. The voltage is indicated on the Specifications page. Never attempt to operate the TV on DC power.
STAND INSTALLATION (Only 37 inch LCD TV Models)
1 Carefully place the product screen side down on a cushioned surface that will protect product and screen from damage.
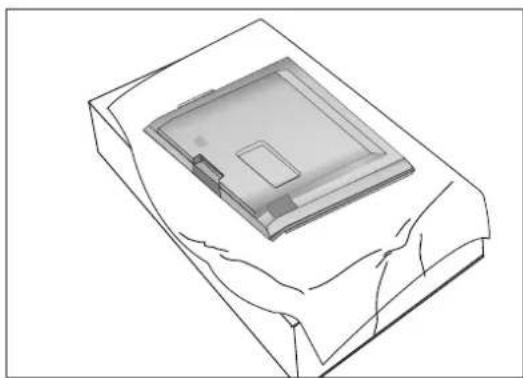
natural_image
3D technical line drawing of a rectangular electronic component with a central square and internal slot (no text or symbols)2 Assemble the product stand with the product as shown.
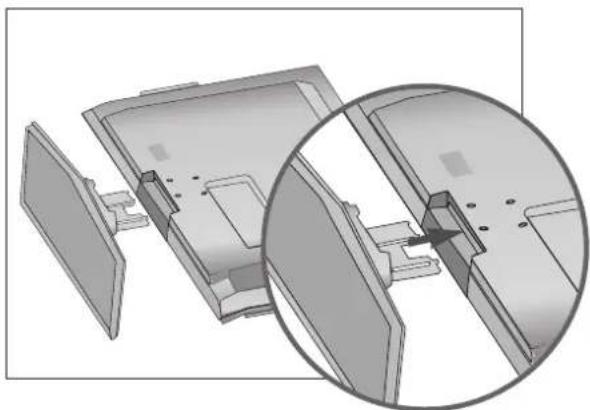
natural_image
Technical illustration of a mechanical assembly with a magnified inset showing internal components (no text or symbols)3 Install the 4 bolts securely, in the back of the product in the holes provided.
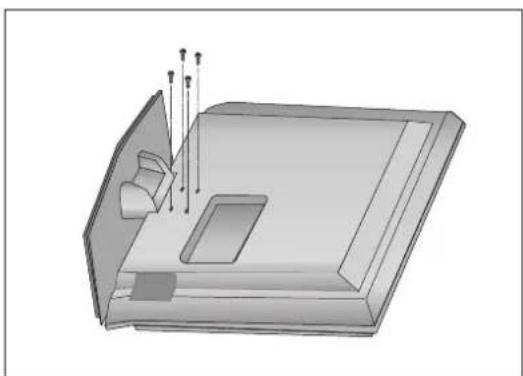
natural_image
3D rendering of a mechanical component with a rectangular base and protruding pins (no text or symbols)ATTACHING THE TV TO A WALL
- Set it up close to the wall so the product doesn't fall over when it is pushed backwards.
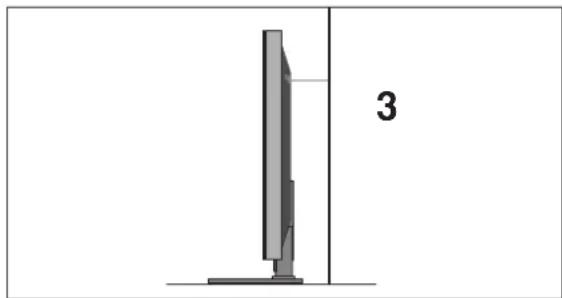
The instructions shown below is a safer way to set up the product, which is to fix it on the wall so the product doesn't fall over when it is pulled in the forward direction. It will prevent the product from falling forward and hurting people. It will also prevent the product from damage caused by fall. Please make sure that children don't climb on or hang from the product.
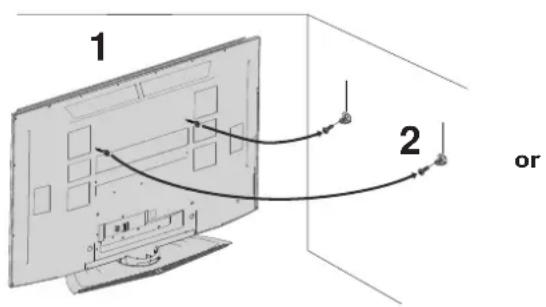
text_image
1 2 or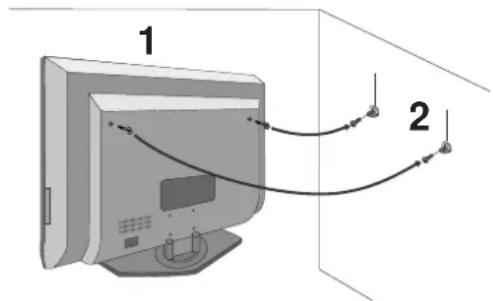
text_image
1 21 Use the eye-bolts or TV brackets/bolts to fix the product to the wall as shown in the picture. (If your product has the bolts in the eye-bolts position before inserting the eye-bolts, loosen the bolts.) * Insert the eye-bolts or TV brackets/bolts and tighten them securely in the upper holes.
2 Secure the wall brackets with the bolts (not provided as parts of the product, must purchase separately) on the wall. Match the height of the bracket that is mounted on the wall.
natural_image
Diagram of a vertical computer monitor with a side panel and label '3' (no text or symbols on the device itself)3 Use a sturdy rope (not provided as parts of the product, must purchase separately) to tie the product. It is safer to tie the rope so it becomes horizontal between the wall and the product.
NOTE
When moving the product to another place undo the ropes first.
▶ Use a product holder or a cabinet that is big and strong enough for the size and weight of the product.
▶ To use the product safely make sure that the height of the bracket that is mounted on the wall is same as that of the product.
BACK COVER FOR WIRE ARRANGEMENT
Plasma TV models
1 Hold the CABLE MANAGEMENT with both hands and pull it as shown.
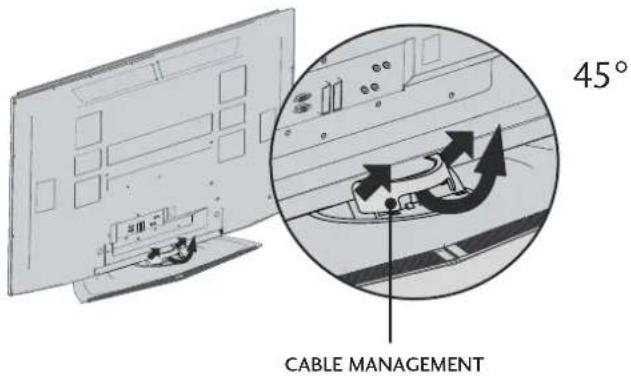
text_image
45° CABLE MANAGEMENT2 Connect the cables as necessary. To connect an additional equipment, see the External equipment Connections section.
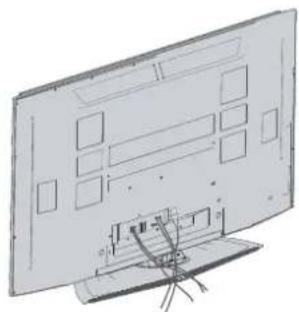
natural_image
Line drawing of a flat-screen TV with visible screen layout and stand (no text or symbols)3 Reinstall the CABLE MANAGEMENT as shown.
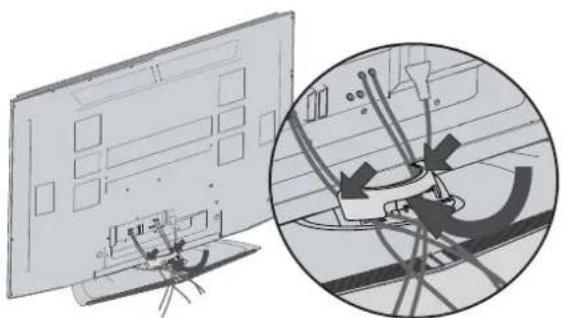
natural_image
Illustration of a monitor mounted on a stand with cables, showing a close-up of cable routing (no text or symbols present)LCD TV models
1 Connect the cables as necessary.
To connect an additional equipment, see the External equipment Connections section.
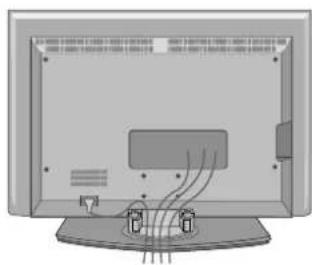
natural_image
Diagram of a flat-screen monitor with cable routing and ventilation slots (no text or symbols)2 Install the CABLE MANAGEMENT as shown.
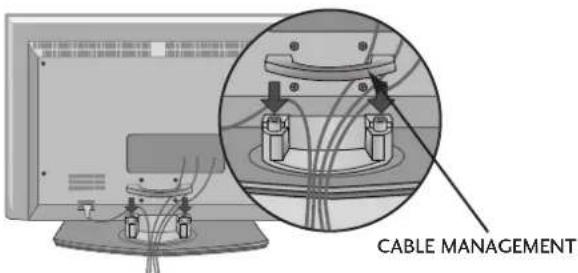
text_image
CABLE MANAGEMENT3 Bundle the cables using the supplied twister holder.
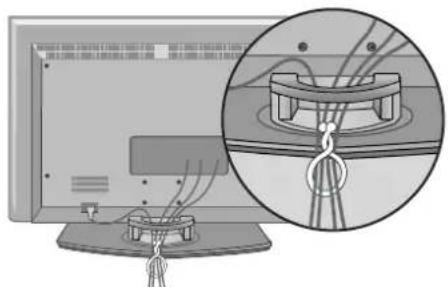
natural_image
Illustration of a person using a device to interact with a mechanical device, shown in two views: one with cable routing and another with a hanging hook (no text or symbols present)How to remove the cable management
Hold the CABLE MANAGEMENT with both hands and pull it upward.
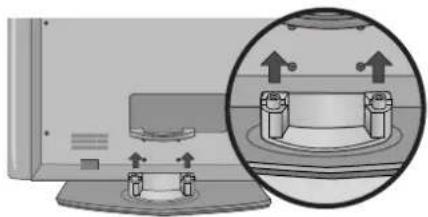
natural_image
Diagram showing a device with directional arrows and a magnified inset of a mechanical component (no text or symbols)NOTE
▶ Do not hold the CABLE MANAGEMENT when moving the product.
- If the product is dropped, you may be injured or the product may be broken.
- The set can be installed in various ways such as on a wall, or on a desktop etc.
■ The set is designed to be mounted horizontally.
GROUNDING
Ensure that you connect the earth ground wire to prevent possible electric shock. If grounding methods are not possible, have a qualified electrician install a separate circuit breaker. Do not try to ground the unit by connecting it to telephone wires, lightening rods, or gas pipes.
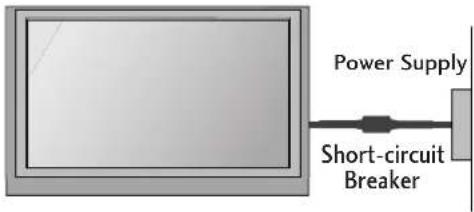
text_image
Power Supply Short-circuit BreakerDESKTOP PEDESTAL INSTALLATION
For proper ventilation, allow a clearance of 4" on each side and from the wall.
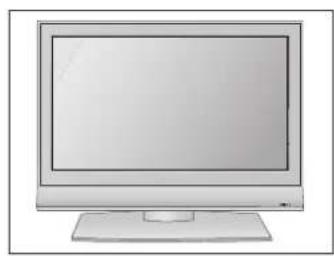
natural_image
Illustration of a flat-screen computer monitor with blank screen and stand (no text or symbols)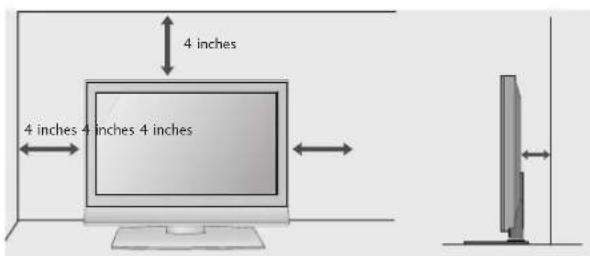
text_image
4 inches 4 inches 4 inches 4 inchesWhen not using the desk-type stand (60PF9* only)
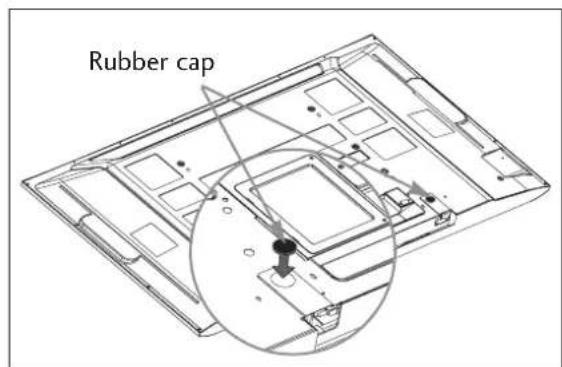
text_image
Rubber capWhen not using the desk-type stand, install the supplied rubber caps for protecting the desk-type stand fixture as shown at the figure.
WALL MOUNT: HORIZONTAL INSTALLATION
For proper ventilation, allow a clearance of 4" on each side and from the wall. Detailed installation instructions are available from your dealer, see the optional Tilt Wall Mounting Bracket Installation and Setup Guide.
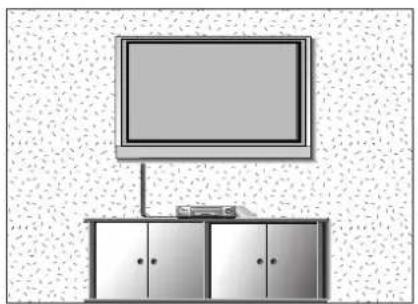
natural_image
Illustration of a TV setup with a monitor, cabinet, and cable (no text or symbols)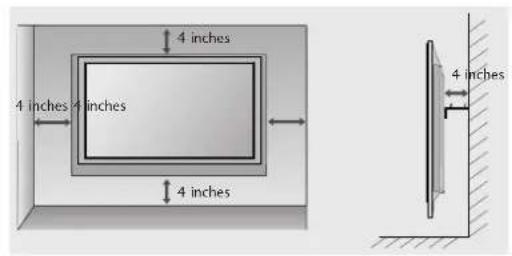
text_image
4 inches 4 inches 4 inches 4 inches 4 inches 4 inchesIf you want to install the desk-type stand fixture protection cover (60PF9 only)
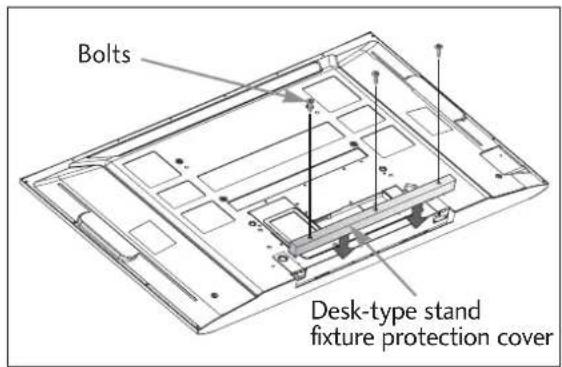
text_image
Bolts Desk-type stand fixture protection coverTo prevent the foreign materials from entering the desk-type stand fixture, fix the desk-type stand fixture protection cover by using the supplied bolts as shown at the figure.
- To prevent the equipment damage, never plug in any power cords until you have finished connecting all equipment.
ANTENNA CONNECTION
■ For optimum picture quality, adjust antenna direction.
■ An antenna cable and converter are not supplied.

flowchart
graph LR
    A["Wall Antenna Socket"] --> B["Multi-family Dwellings/Apartments (Connect to wall antenna socket)"]
    C["Outdoor Antenna (VHF, UHF)"] --> D["Single-family Dwellings / Houses (Connect to wall jack for outdoor antenna)"]
    B --> E["RF Coaxial Wire (75 ohm)"]
    D --> E
    E --> F["Antenna In"]
- Be careful not to bend the bronze wire when connecting to an antenna port.
- 5V antenna power works In Digital mode only. (Refer to p. 43)

flowchart
graph LR
    A["Antenna"] --> B["UHF"]
    A --> C["VHF"]
    B --> D["Signal Amplifier"]
    C --> D
    D --> E["Antenna IN"]
- In poor signal areas, to get better picture quality, install a signal amplifier to the antenna as shown to the right.
- If signal needs to be split for two TVs, use an antenna signal splitter for connection.
EXTERNAL EQUIPMENT SETUP
- To prevent the equipment damage, never plug in any power cords until you have finished connecting all equipment.
This part of EXTERNAL EQUIPMENT SETUP mainly use pictures for the LCD TV models.
HD RECEIVER SETUP
- This TV can receive Digital Over-the-air/Cable signals without an external digital set-top box. However, if you do receive Digital signals from a digital set-top box or other digital external device, refer to the figure as shown below.
When connecting with a component cable
1 Connect the video outputs (Y, PB, PR) of the digital set top box to the COMPONENT IN VIDEO jacks on the set.
2 Connect the audio output of the digital set-top box to the COMPONENT IN AUDIO jacks on the set.
3 Turn on the digital set-top box. (Refer to the owner's manual for the digital set-top box)
4 Select COMPONENT input source with using the INPUT button on the remote control.
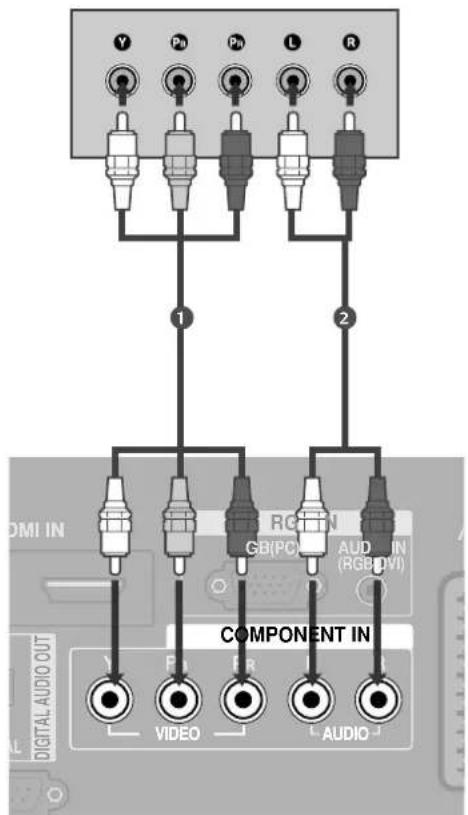
text_image
Y Px Px L R 1 2 COMPONENT IN OMI IN RGB(PC) AUDIN (RGB(DVI)) VIDEO FR AUDIO| Signal | Component | HDMI1/2 |
| 480i/576i | Yes | No |
| 480p/576p | Yes | Yes |
| 720p/1080i | Yes | Yes |
| 1080p | Yes(60Hz only) | Yes(24Hz/50Hz/60Hz) |
When connecting with a HDMI cable
1 Connect the digital set-top box to HDMI/DVI IN 1 or HDMI IN 2 jack on the set.
2 Turn on the digital set-top box. (Refer to the owner's manual for the digital set-top box)
3 Select HDMI1 or HDMI2 input source with using the INPUT button on the remote control.
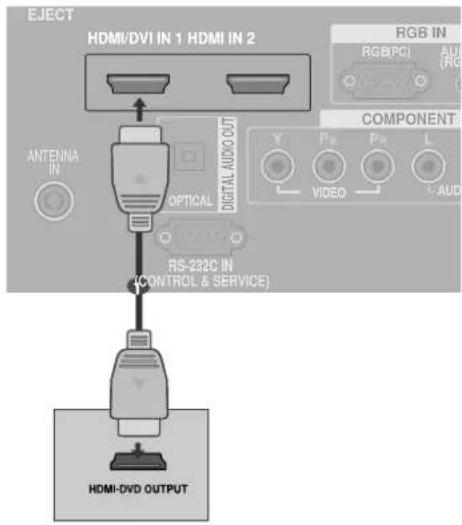
text_image
EJECT HDMI/DVI IN 1 HDMI IN 2 ANTENNA IN OPTICAL DIGITAL AUDIO OUT RS-232C IN (CONTROL & SERVICE) COMPONENT RGB IPC AUDIO VIDEO AUDIO HDMI-DVD OUTPUTWhen connecting with a HDMI to DVI cable
1 Connect the digital set-top box to HDMI/DVI IN 1 jack on the set.
2 Connect the audio output of the digital set-top box to the AUDIO IN (RGB/DVI) jack on the set.
3 Turn on the digital set-top box. (Refer to the owner's manual for the digital set-top box.)
4 Select HDMI1 input source with using the INPUT button on the remote control.
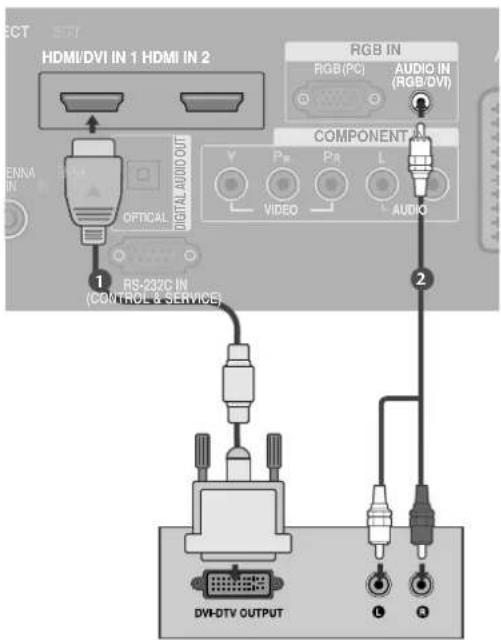
text_image
HDMI/DVI IN 1 HDMI IN 2 RGB IN RGB(PC) AUDIO IN (RGB/DVI) OPTICAL VIDEO COMPONENT RS-232C IN (CONTROL & SERVICE) DVD-DTV OUTPUT ① ②EXTERNAL EQUIPMENT SETUP
DVD SETUP
When connecting with a component cable
1 Connect the video outputs (Y, PB, PR) of the DVD to the COMPONENT IN VIDEO jacks on the set.
2 Connect the audio outputs of the DVD to the COMPONENT IN AUDIO jacks on the set.
3 Turn on the DVD player, insert a DVD.
4 Select COMPONENT input source with using the INPUT button on the remote control.
5 Refer to the DVD player's manual for operating instructions.
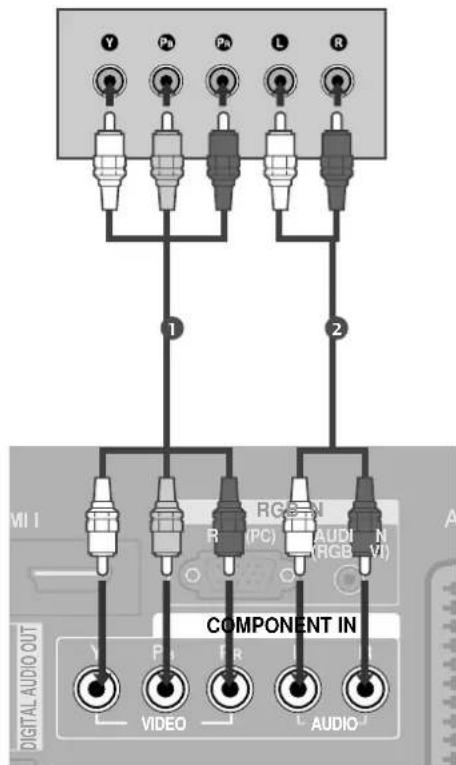
text_image
Y P4 P4 L R 1 2 M I RGB PC AUDIO (RGB-VI) COMPONENT IN VIDEO AUDIOComponent Input ports
To get better picture quality, connect a DVD player to the component input ports as shown below.
| Component ports on the TV | Y | P_B | P_R |
| Video output ports on DVD player | Y | P_B | P_R |
| Y | B-Y | R-Y | |
| Y | Cb | Cr | |
| Y | Pb | Pr |
When connecting with a Euro Scart
1 Connect the Euro scart socket of the DVD to the AV1 Euro scart socket on the set.
2 Turn on the DVD player, insert a DVD.
3 Select AV1 input source with using the INPUT button on the remote control.
If connected to AV2Euro scart socket, select AV2 input source.
4 Refer to the DVD player's manual for operating instructions.
NOTE
▶ If you want to use the EURO scart cable, you have to use the signal shielded Euro scart cable.
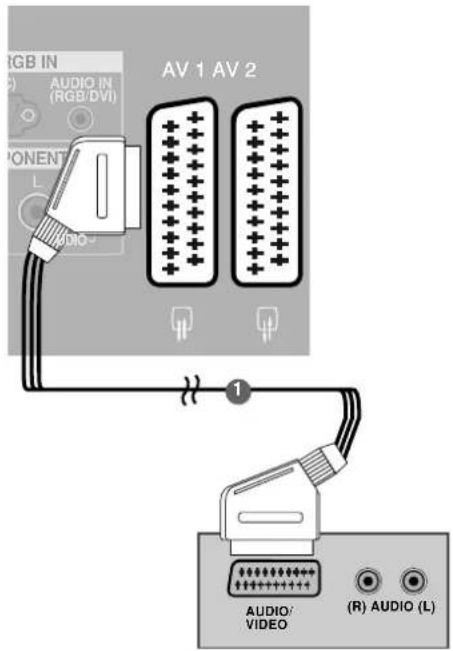
text_image
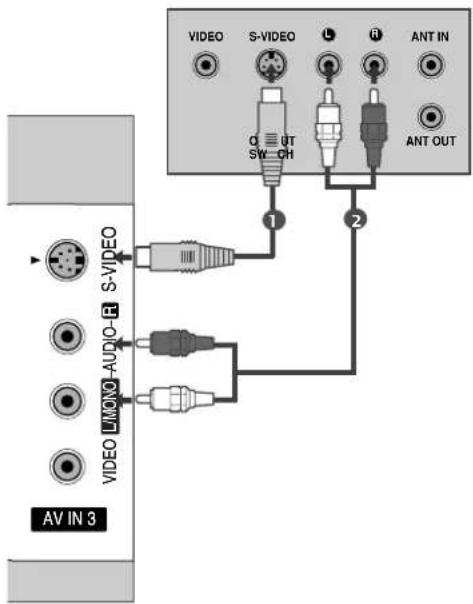
RGB IN AUDIO IN (RGB/DVI) AV 1 AV 2 1 AUDIO/ VIDEO (R) AUDIO (L)When connecting with an S-Video cable
1 Connect the S-VIDEO output of the DVD to the S-VIDEO input on the set.
2 Connect the audio outputs of the DVD to the AUDIO input jacks on the set.
3 Turn on the DVD player, insert a DVD.
4 Select AV3 input source with using the INPUT button on the remote control.
5 Refer to the DVD player's manual for operating instructions.
text_image
AV IN 3 VIDEO LUNO-AUDIO-R S-VIDEO VIDEO 1 2 VIDEO S-VIDEO L H ANT IN OUT SW-CH ANT OUTEXTERNAL EQUIPMENT SETUP
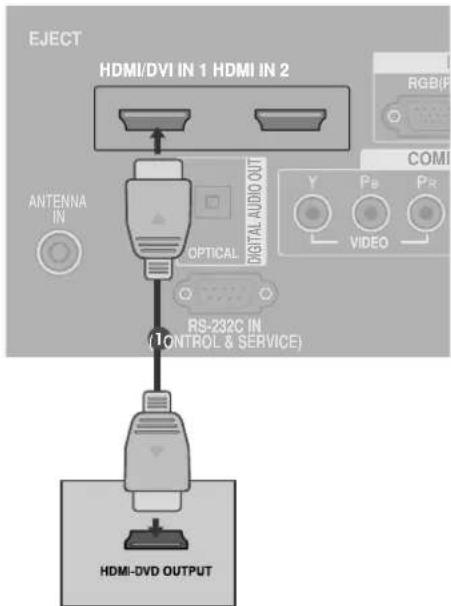
When connecting HDMI cable
1 Connect the HDMI output of the DVD to the HDMI/DVI IN 1 or HDMI IN 2 jack on the set.
2 Select HDMI1 or HDMI2 input source with using the INPUT button on the remote control.
3 Refer to the DVD player's manual for operating instructions.
NOTE
▶ TV can receive the video and audio signal simultaneously with using a HDMI cable.
If the DVD does not support Auto HDMI, you need to set the output resolution appropriately.
INSERTION OF CI MODULE
(This feature is not available in all countries.)
- To view the scrambled (pay) services in digital TV mode.
1 Insert the CI Module to PCMCIA (Personal Computer Memory Card International Association) CARD SLOT of TV as shown.
For further information, see p.46.
text_image
EJECT HDMI/DVI IN 1 HDMI IN 2 ANTENNA IN OPTICAL DIGITAL AUDIO OUT Y Pe Pr VIDEO COMI RS-232C IN (1CONTROL & SERVICE) HDMI-DVD OUTPUT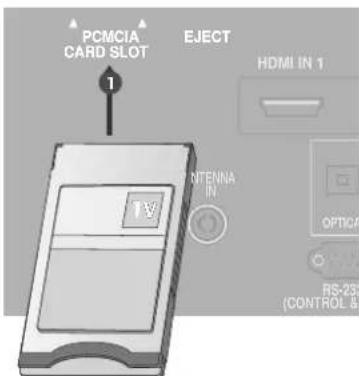
text_image
PCMCIA CARD SLOT EJECT HDMI IN 1 INTENNA IN RS-232 (CONTROL &VCR SETUP
- To avoid picture noise (interference), leave an adequate distance between the VCR and TV.
- Typically a frozen still picture from a VCR. If the 4:3 picture format is used; the fixed images on the sides of the screen may remain visible on the screen.
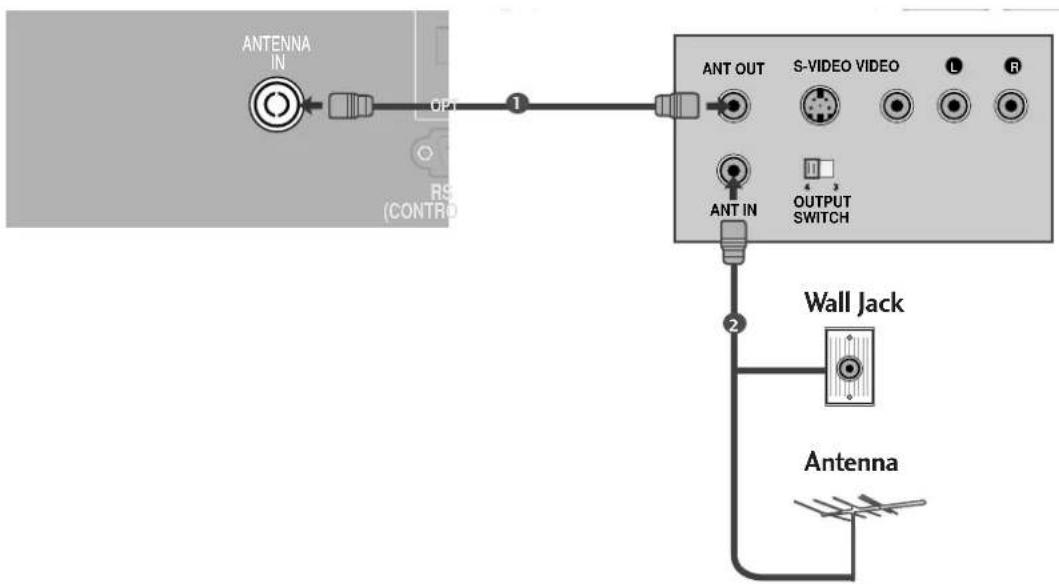
When connecting with an antenna
flowchart
graph TD
    A["Antenna IN"] --> B["Switch"]
    B --> C["1"]
    C --> D["ANT OUT"]
    D --> E["S-VIDEO VIDEO"]
    E --> F["L"]
    E --> G["R"]
    D --> H["ANT IN"]
    H --> I["OUTPUT SWITCH"]
    I --> J["2"]
    J --> K["Wall Jack"]
    K --> L["Antenna"]
1 Connect the ANT OUT socket of the VCR to the ANTENNA IN socket on the set.
2 Connect the antenna cable to the ANT IN socket of the VCR.
3 Press the PLAY button on the VCR and match the appropriate programme between the TV and VCR for viewing.
EXTERNAL EQUIPMENT SETUP
When connecting with a Euro Scart
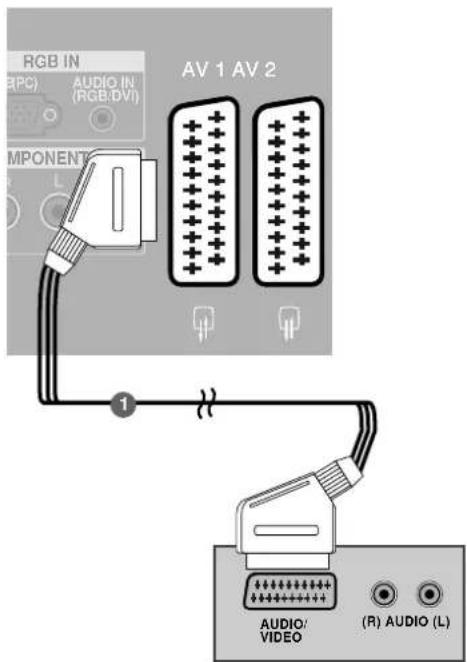
1 Connect the Euro scart socket of the VCR to the AV1 Euro scart socket on the set.
2 Insert a video tape into the VCR and press PLAY on the VCR. (Refer to the VCR owner's manual.)
3 Select AV1input source with using the INPUT button on the remote control.
4 If connected to AV2 Euro scart socket, select AV2 input source.
text_image
RGB IN (RPC) AUDIO IN (RGB/DVI) AV 1 AV 2 COMPONENT L 1 AUDIO/ VIDEO (R) AUDIO (L)NOTE
▶ If you want to use the EURO scart cable, you have to use the signal shielded Euro scart cable.
When connecting with a RCA cable
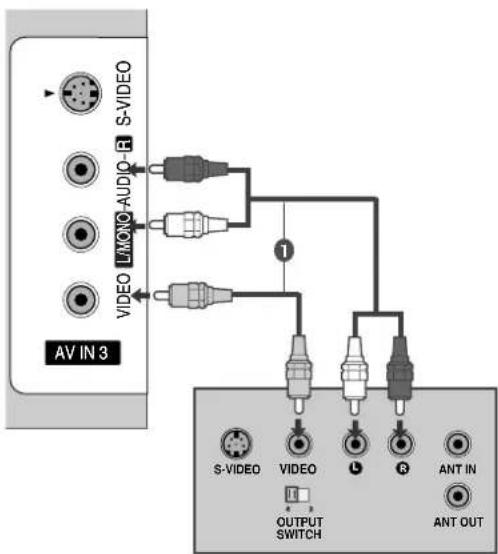
1 Connect the AUDIO/VIDEO jacks between TV and VCR. Match the jack colors (Video = yellow, Audio Left = white, and Audio Right = red)
2 Insert a video tape into the VCR and press PLAY on the VCR. (Refer to the VCR owner's manual.)
3 Select AV3 input source using the INPUT button on the remote control.
NOTE
If you have a mono VCR, connect the audio cable from the VCR to the AUDIO L/MONO jack of the set.
text_image
S-VIDEO LAMONG-AUDIO VIDEO AV IN 3 1 S-VIDEO VIDEO OUTPUT SWITCH R ANT IN ANT OUTWhen connecting with an S-Video cable
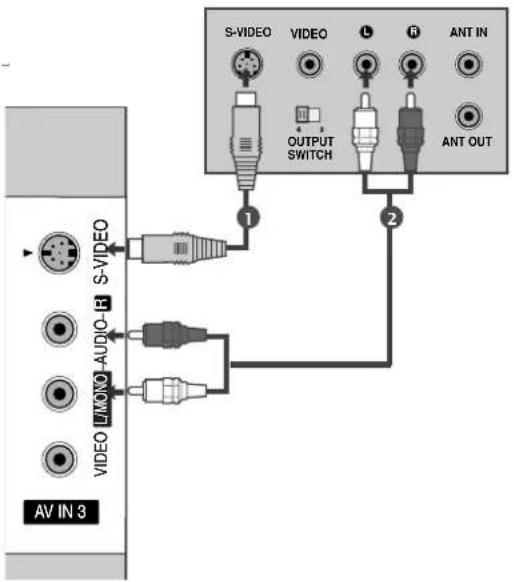
1 Connect the S-VIDEO output of the VCR to the S--VIDEO input on the set. The picture quality is improved; compared to normal composite (RCA cable) input.
2 Connect the audio outputs of the VCR to the AUDIO input jacks on the set.
3 Insert a video tape into the VCR and press PLAY on the VCR. (Refer to the VCR owner's manual.)
4 Select AV3 input source with using the INPUT button on the remote control.
NOTE
If both S-VIDEO and VIDEO sockets have been connected to the S-VHS VCR simultaneously, only the S-VIDEO can be received.
text_image
S-VIDEO VIDEO OUTPUT SWITCH ANT IN ANT OUT AV IN 3 1 2 S-MON-AUDIO-R VIDEODIGITAL AUDIO OUT SETUP
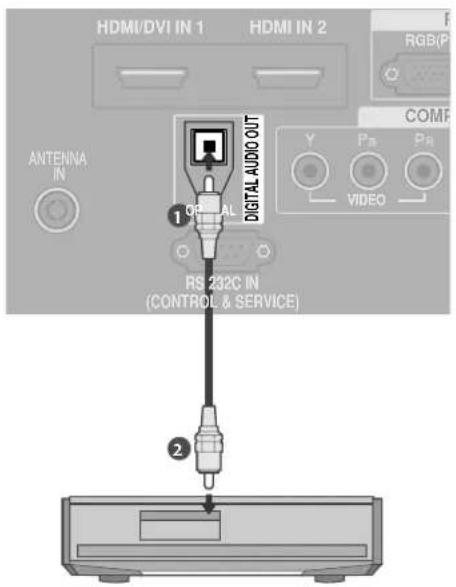
Send the TV's audio to external audio equipment via the Digital Audio Output (Optical) port.
1 Connect one end of an optical cable to the TV Digital Audio (Optical) Output port.
2 Connect the other end of the optical cable to the digital audio (optical) input on the audio equipment.
3 Set the "TV Speaker option - Off" in the AUDIO menu. (▶p.76). See the external audio equipment instruction manual for operation.
CAUTION
▶ Do not look into the optical output port. Looking at the laser beam may damage your vision.
text_image
HDMI/DVI IN 1 HDMI IN 2 ANTENNA IN DIGITAL AUDIO OUT 1 Y P_B P_B VIDEO COMF RS 232C IN (CONTROLE & SERVICE) 2EXTERNAL EQUIPMENT SETUP
OTHER A/V SOURCE SETUP
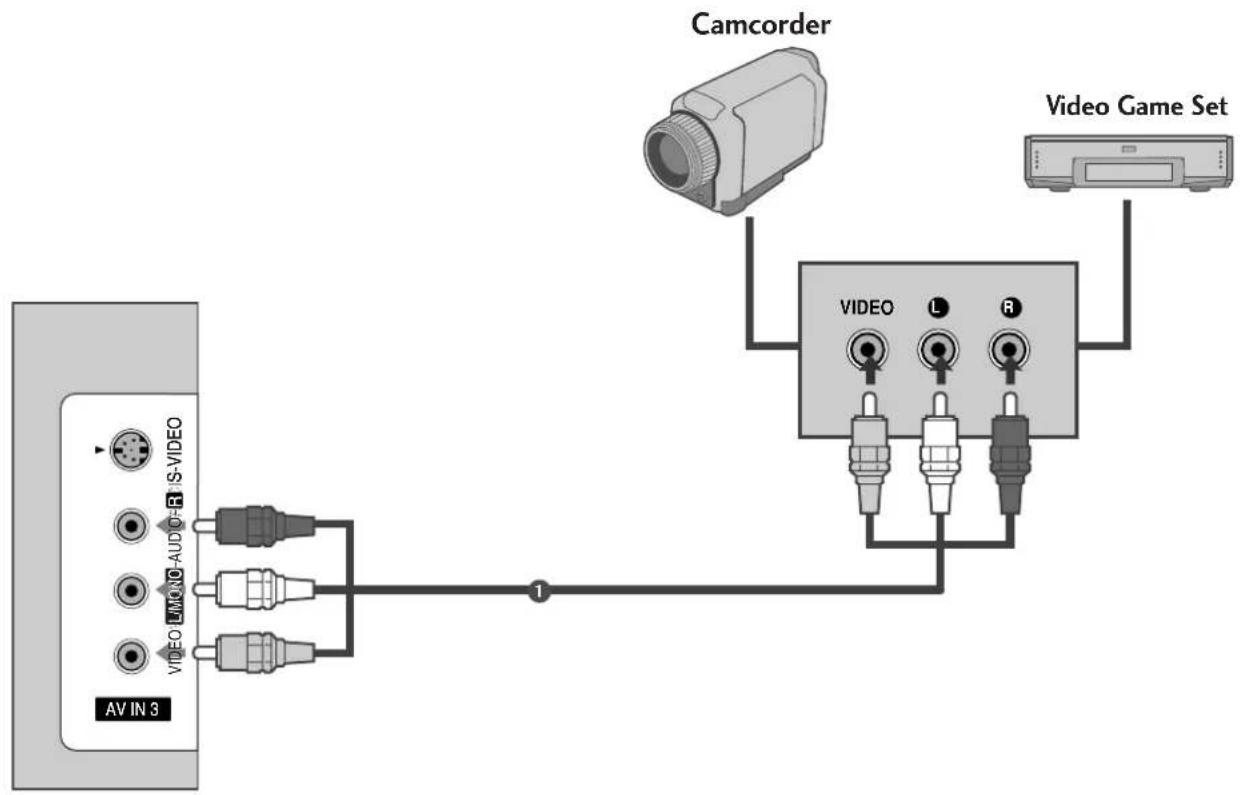
flowchart
graph TD
    A["AV IN 3"] --> B["VIDEO LMONO-AUDIO-R-S-VIDEO"]
    B --> C["Camcorder"]
    C --> D["VIDEO"]
    D --> E["Video Game Set"]
    style A fill:#f9f,stroke:#333
    style B fill:#ccf,stroke:#333
    style C fill:#cfc,stroke:#333
    style D fill:#fcc,stroke:#333
    style E fill:#cff,stroke:#333
1 Connect the AUDIO/VIDEO jacks between TV and external equipment. Match the jack colors (Video = yellow, Audio Left = white, and Audio Right = red)
2 Select AV3 input source with using the INPUT button on the remote control.
3 Operate the corresponding external equipment. Refer to external equipment operating guide.
PC SETUP
This TV provides Plug and Play capability, meaning that the PC adjusts automatically to the TV's settings.
When connecting with a D-sub 15 pin cable
1 Connect the RGB output of the PC to the RGB (PP)C jack on the set.
2 Connect the PC audio output to the AUDIO IN (RGB/DVI) jack on the set.
3 Turn on the PC and the set.
4 Select RGB input source with using the INPUT button on the remote control.
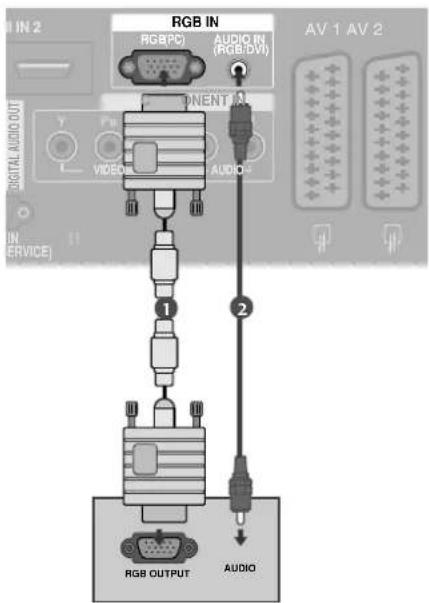
text_image
RGB IN RGBPC1 AUDIO IN (RGB/DVI) ONENT VIDEO AUDIO 1 2 AV 1 AV 2 IN SERVICE RGB OUTPUT AUDIOWhen connecting with a HDMI to DVI cable
1 Connect the DVI output of the PC to the HDMI/DVI IN 1 jack on the set.
2 Connect the PC audio output to the AUDIO IN (RGB/DVI) jack on the set.
3 Turn on the PC and the set
4 Select HDMI1 input source with using the INPUT button on the remote control.
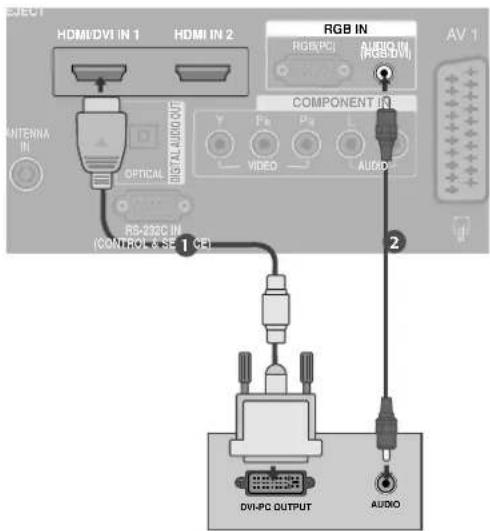
text_image
HDMI/DVI IN 1 HDMI IN 2 RGB IN RGB(PCI) AUDIO IN (RGB/DVI) AV 1 COMPONENT IQ Y Fe Pd VIDEO AUDIO R8-232C IN (CONTROL & SECE) 1 2 DVI-PC OUTPUT AUDIONOTE
If the PC has a DVI output and no HDMI output, a separated audio connection is necessary.
If the PC does not support Auto DVI, you need to set the output resolution appropriately.
NOTE
▶ To enjoy vivid picture and sound, connect a PC to the set.
- Avoid keeping a fixed image on the set's screen for a long period of time. The fixed image may become permanently imprinted on the screen; use a screen saver when possible.
▶ Connect PC to the RGB (PC) or HDMI IN (or HDMI/DVI IN) port of the set; change the resolution output of PC accordingly.
There might be noise according to some resolution, vertical pattern, contrast or brightness in PC mode. Change the PC mode into another resolution or change the refresh rate into another rate or adjust the brightness and contrast on the menu until the picture is clean. If the refresh rate of the PC graphic card can not be changed, change the PC graphic card or consult it to the manufacturer of the PC graphic card.
▶ The synchronization input waveform for Horizontal and Vertical frequencies are separate.
▶ We recommend using 1920x1080 (Reduced Blanking Timing), 60Hz for the PC mode, they provide the best picture quality.
In Plasma TV models, we recommend using 1024x768, 60Hz for the PC mode, they provide the best picture quality.
▶ Connect the signal cable from the monitor output port of the PC to the RGB (PC) port of the set or the signal cable from the HDMI output port of the
PC to the HDMI IN (or HDMI/DVI IN) port on the set.
▶ Connect the audio cable from the PC to the Audio input on the set. (Audio cables are not included with the set).
▶ If using a sound card, adjust PC sound as required.
This set uses a VESA Plug and Play Solution. The set provides EDID data to the PC system with a DDC protocol. The PC adjusts automatically when using this set.
▶DDC protocol is preset for RGB (Analog RGB), HDMI (Digital RGB) mode.
▶ If required, adjust the settings for Plug and Play functionally.
▶ If graphic card on the PC does not output analog and digital RGB simultaneously, connect only one of either RGB or HDMI IN (or HDMI/DVI IN) to display the PC on the set.
▶ If graphic card on the PC does output analog and digital RGB simultaneously, set the set to either RGB or HDMI; (the other mode is set to Plug and Play automatically by the set.)
▶ DOS mode may not work depending on video card if you use a HDMI to DVI cable.
▶ When you use too long RGB-PC cable, there might be a noise on the screen. We recommend using under 5m of the cable. It provides the best picture quality.
Supported Display Resolution
RGB[PC] / HDMI[PC] mode
| Resolution | Horizontal Frequency(KHz) | Vertical Frequency(Hz) |
| 720x400 | 31.468 | 70.08 |
| 640x480 | 31.469 | 59.94 |
| 37.500 | 75.00 | |
| 800x600 | 37.879 | 60.31 |
| 46.875 | 75.00 | |
| 832x624 | 49.725 | 74.55 |
| 1024x768 | 48.363 | 60.00 |
| 56.476 | 70.00 | |
| 60.023 | 75.03 | |
| 1280x768 | 47.693 | 59.99 |
| 1360x768 | 47.649 | 59.94 |
| 1366x768 | 47.649 | 59.94 |
| 1280x1024 | 63.595 | 60.00 |
| 1400x1050 | 65.160 | 60.00 |
| 1600x1200 | 74.077 | 60.00 |
| 1920x1080 | 66.647 | 59.99 |
HDMI[DTV] mode
| Resolution | Horizontal Frequency(KHz) | Vertical Frequency(Hz) |
| 640x480 | 31.469 | 59.94 |
| 31.469 | 60.00 | |
| 720x480 | 31.47 | 59.94 |
| 31.50 | 60.00 | |
| 720x576 | 31.25 | 50.00 |
| 1280x720 | 37.50 | 50.00 |
| 44.96 | 59.94 | |
| 45.00 | 60.00 | |
| 1920x1080i | 33.72 | 59.94 |
| 33.75 | 60.00 | |
| 28.125 | 50.00 | |
| 1920x1080p | 27.00 | 24.00 |
| 56.25 | 50.00 | |
| 67.433 | 59.94 | |
| 67.500 | 60.00 |
: HDMI[PC] mode only
NOTE
▶ Reduced Blanking Timing is applied with 1600x1200, 1920x1080 in RGB[PC] / HDMI[PC] mode.
▶ 60PF9* isn't supported to 800x600, 75.00Hz in RGB[PC] mode.
EXTERNAL EQUIPMENT SETUP
Screen Setup for PC mode
Auto Configure (RGB [PC] mode only)
Automatically adjusts picture position and minimizes image shaking. After adjustment, if the image is still not correct, your set is functioning properly but needs further adjustment.
Auto configure
This function is for the automatic adjustment of the screen position, clock, and phase. The displayed image will unstable for a few seconds while the auto configuration is in progress.
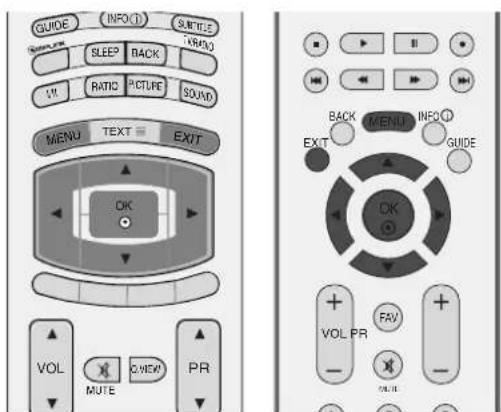
1 Press the MENU button and then use ▲ or ▼ button to select the SCREEN menu.
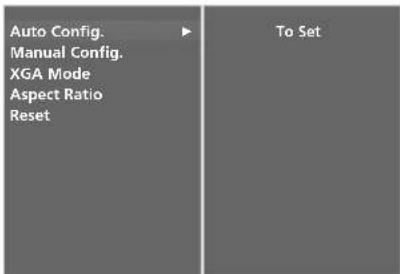
2 Press the ▶ button and then use ▲ or ▼ button to select Auto Config..
3 Press the ▶ button to start Auto Config..
- When Auto Config. has finished, OK will be shown on screen.
- If the position of the image is still not correct, try Auto adjustment again.
- If picture needs to be adjusted more after Auto adjustment in RGB (PC), you can adjust the Manual Config..
4 Press the EXIT button to return to normal TV viewing.
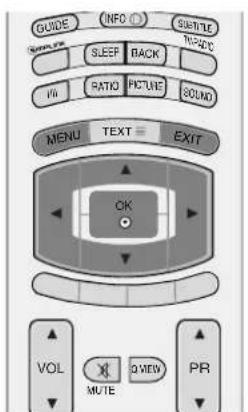
text_image
GUIDE INFO SUBTITLE SERVICE SLEEP BACK R/R RATIO PICTURE SOUND MENU TEXT EXIT OK VOL MUTE 2VIEW PR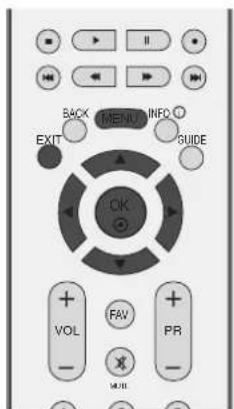
text_image
BACK MENU INFO EXIT GUIDE OK VOL FAV PR MINI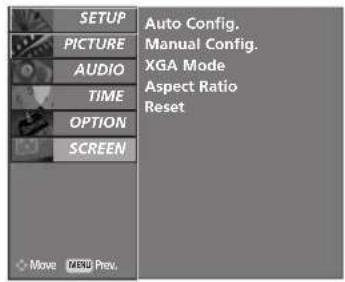
text_image
SETUP PICTURE AUDIO TIME OPTION SCREEN Auto Config. Manual Config. XGA Mode Aspect Ratio Reset Move MENU Prev.1
text_image
Auto Config. Manual Config. XGA Mode Aspect Ratio Reset To Set23
Adjustment for screen Phase, Clock, Position
If the picture isn't clear after auto adjustment and especially if characters are still trembling, adjust the picture phase manually.
It's not available to use this function in 1:1 Pixel mode.
To correct the screen size, adjust Clock.
This function works in the following mode : RGB[PC].
Clock This function is to minimize any vertical bars or stripes visible on the screen background. And the horizontal screen size will also change.
Phase This function allows you to remove any horizontal noise and clear or sharpen the image of characters.
text_image
GUIDE INFO① SUTTLE SLEEP BACK V1 RATIO PICTURE SOUND MENU TEXT EXIT OK VOL MUTE CVIEW PR BACK MENU INFO① EXIT GUIDE OK VOL PR FAV - - -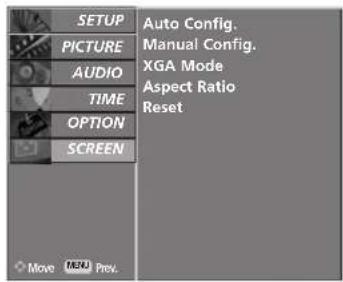
text_image
SETUP PICTURE AUDIO TIME OPTION SCREEN Auto Config. Manual Config. XGA Mode Aspect Ratio Reset Move MENU Prev.1
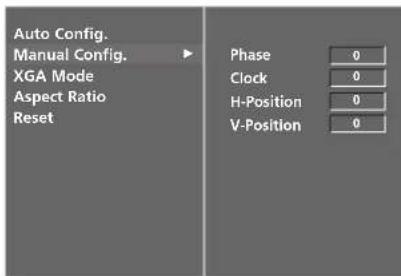
1 Press the MENU button and then use ▲ or ▼ button to select the SCREEN menu.
2 Press the ▶ button and then ▲ or ▼ button to select Manual Config..
3 Press the ▶ button and then ▲ or ▼ button to select Phase, Clock, H-Position or V-Position.
4 Press the ◀ or ▶ button to make appropriate adjustments.
5 Press the EXIT button to return to normal TV viewing.
text_image
Auto Config. Manual Config. XGA Mode Aspect Ratio Reset Phase 0 Clock 0 H-Position 0 V-Position 02 3 4
EXTERNAL EQUIPMENT SETUP
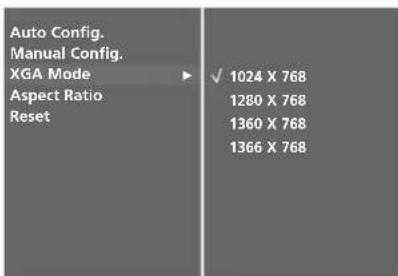
Selecting Wide XGA mode
To see a normal picture, match the resolution of RGB mode and selection of XGA mode.
This function works in the following mode: RGB[PC] mode
text_image
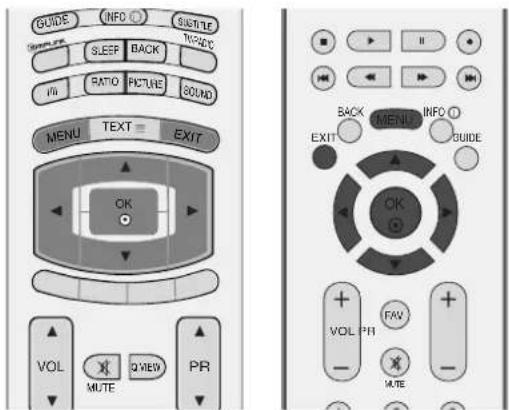
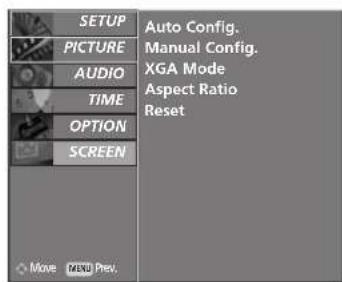
GUIDE INFO SISTLE SLEEP BACK RATIO PICTURE SOUND MENU TEXT EXIT OK VOL MUTE Q VIEW PR BACK MENU INFO GUIDE EXIT OK VOL FAV MUTE1 Press the MENU button and then use ▲ or ▼ button to select the SCREEN menu.
2 Press the ▶ button and then use ▲ or ▼ button to select XGA Mode.
3 Press the ▶ button and then use ▲ or ▼ button to select the desired XGA resolution.
4 Press the EXIT button to return to normal TV viewing.
text_image
SETUP PICTURE AUDIO TIME OPTION SCREEN Auto Config. Manual Config. XGA Mode Aspect Ratio Reset Move MENU Prev.1
text_image
Auto Config. Manual Config. XGA Mode Aspect Ratio Reset ✓ 1024 X 768 1280 X 768 1360 X 768 1366 X 76823
Initializing
(Reset to original factory settings)
This function operates in current mode.
To initialize the adjusted value
It's not available to use ISM Method and Low power in LCD TV models.
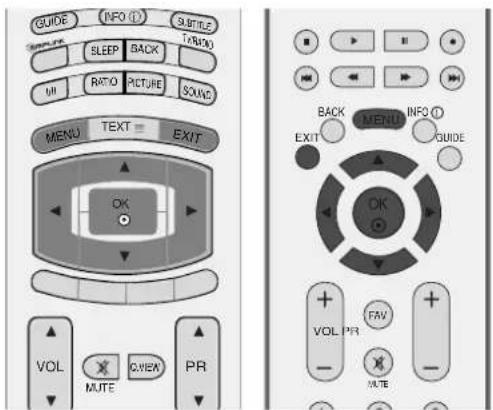
1 Press the MENU button and then ▲ or ▼ button to select the OPTION menu.
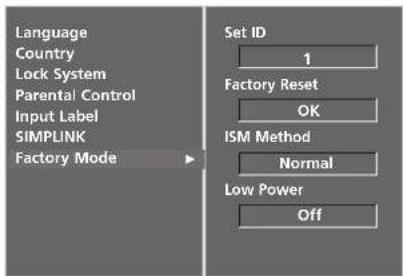
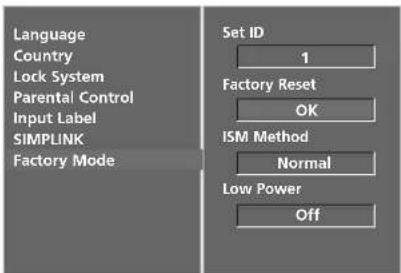
2 Press the ▶ button and then ▲ or ▼ button to select Factory Mode.
3 Press the ▶ button and then ▲ or ▼ button to select Factory Reset.
4 Press the ▶ button.
The message "If you enter a password, all user setting will be reset" will appear.
5 Use NUMBER buttons to input a 4-digit password.
text_image
GUIDE INFO (I) SUBTITLE SLEEP BACK RATIO PICTURE SOUND MENU TEXT EXIT OK VOL MUTE VIEW PR BACK MENU INFO (I) EXIT GUIDE OK VOL PR FAV - RATE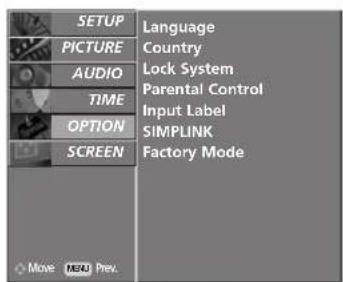
text_image
SETUP PICTURE AUDIO TIME OPTION SCREEN Language Country Lock System Parental Control Input Label SIMPLINK Factory Mode Move MBM Prev.1
text_image
Language Country Lock System Parental Control Input Label SIMPLINK Factory Mode Set ID 1 Factory Reset OK ISM Method Normal Low Power Off2
text_image
Language Country Lock System Parental Control Input Label SIMPLINK Factory Mode Set ID 1 Factory Reset OK ISM Method Normal Low Power Off34
WATCHING TV /PROGRAMME CONTROL
REMOTE CONTROL KEY FUNCTIONS
(Only 37/42/47/52LY9, 50/60PF9*)
When using the remote control, aim it at the remote control sensor on the TV.
text_image
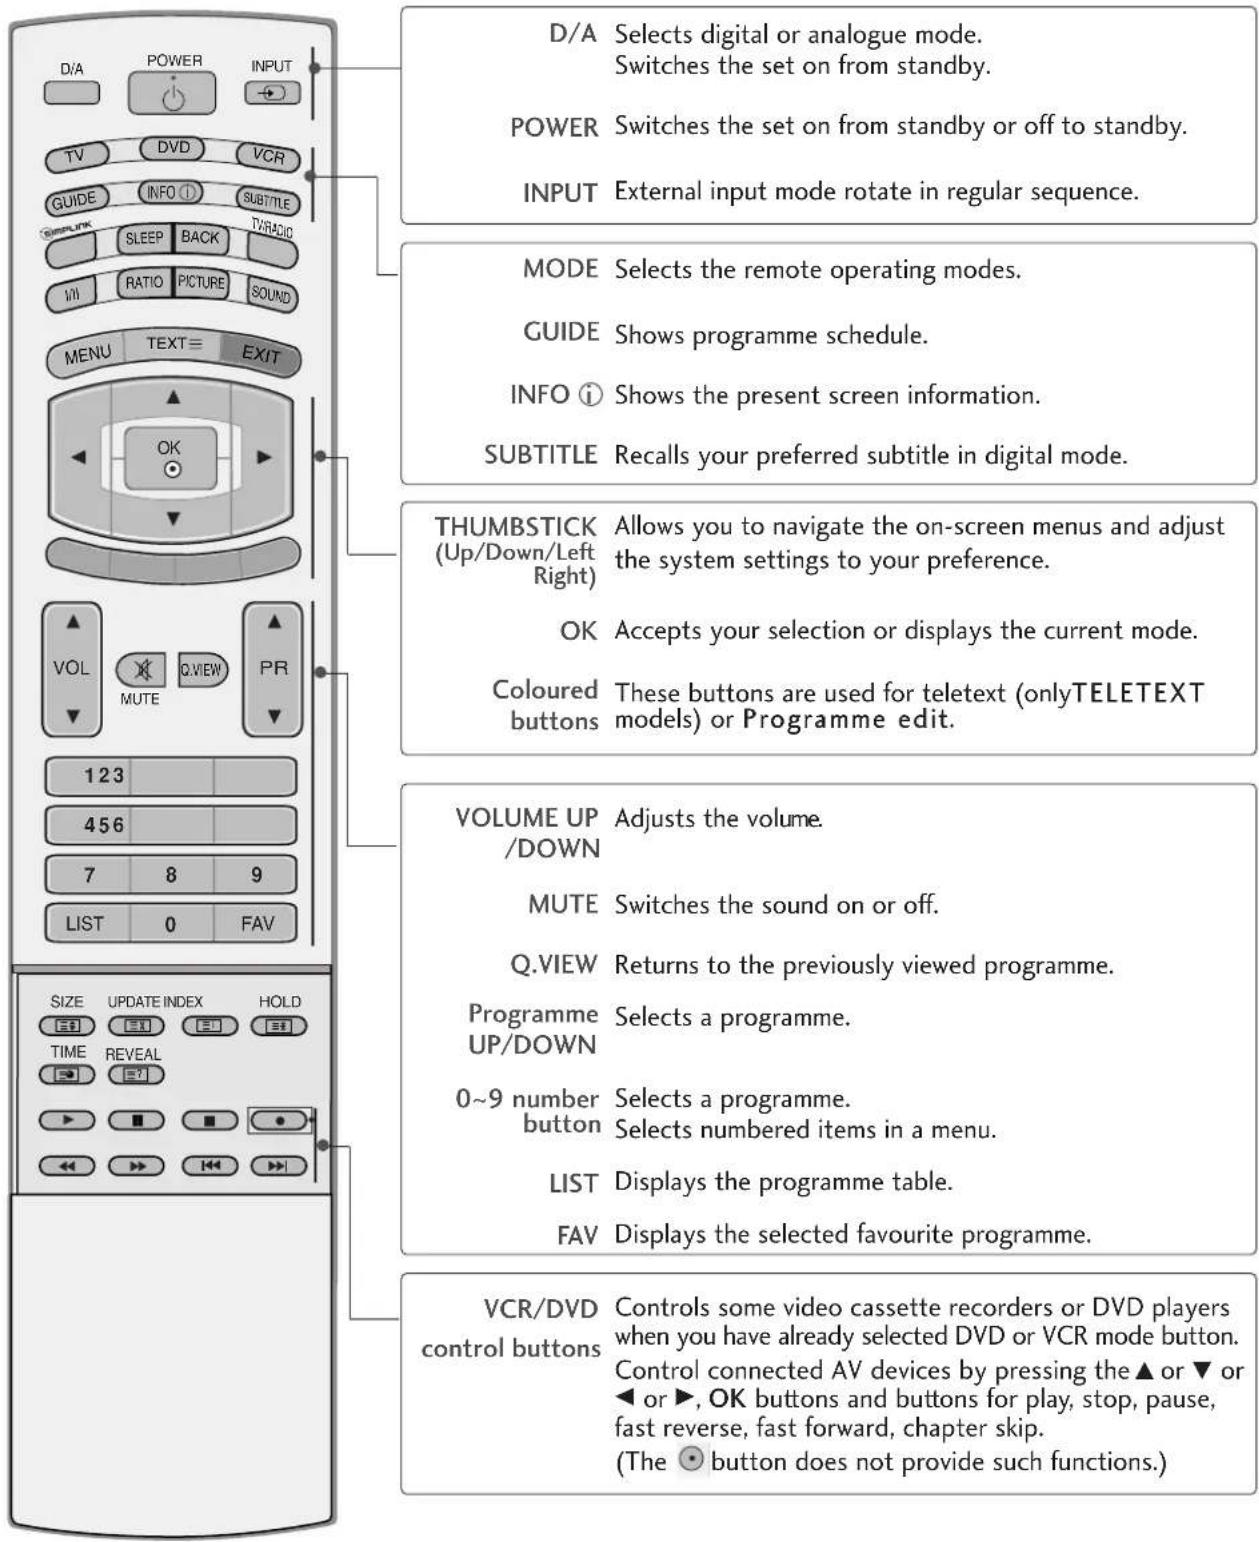
D/A POWER INPUT TV DVD VCR GUIDE INFO ① SUBTITLE SLEEP BACK VIN RATIO PICTURE SOUND MENU TEXT= EXIT OK VOL MUTE Q.VIEW PR 123 456 7 8 9 LIST 0 FAV SIZE UPDATE INDEX HOLD TIME REVEAL ▶ ▶ ▶ ▶ ▶ ▶ ▶ ▶ ▶ ▶ ▶ ▶ ▶ ▶ ▶ ▶ ▶ ▶ ▶ ▶ ▶ ▶ ▶ ▶ ▶ ▶ ▶ ▶ ▶ ▶ ▶ ▶ ▶ ▶ ▶ ▶ ▶ ▶ ▶ ▶ ▶ ▶ ▶ ▶ ▶ ▶ ▶ ▶ ▶ ▶ VCR/DVD control buttons Controls some video cassette recorders or DVD players when you have already selected DVD or VCR mode button. Control connected AV devices by pressing the ▲ or ▼ or ◀ or ▶, OK buttons and buttons for play, stop, pause, fast reverse, fast forward, chapter skip. (The ○ button does not provide such functions.)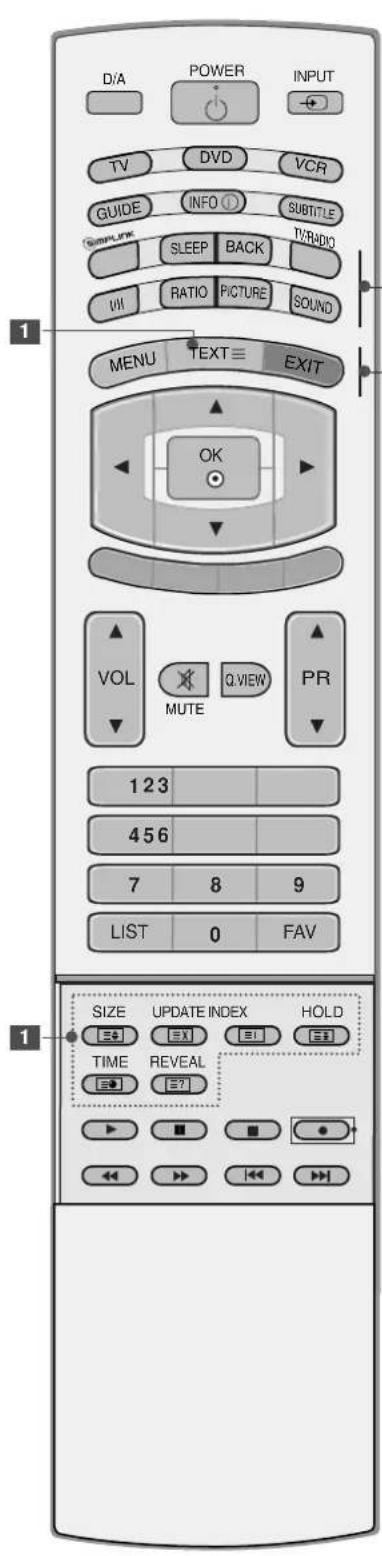
text_image
D/A POWER INPUT TV DVD VCR GUIDE INFO SUBTITLE SIMPULSE SLEEP BACK TV/RADIO UV RATIO PICTURE SOUND MENU TEXT EXIT OK VOL MUTE Q.WIEW PR 1 2 3 4 5 6 7 8 9 LIST 0 FAV SIZE UPDATE INDEX HOLD E+ EX E+ E+ E+ TIME REVEAL E+ E+ E- ▶ ▼ ▼ ▼ ▼ ▼ ◀ ▶ ▶ ▶ ▶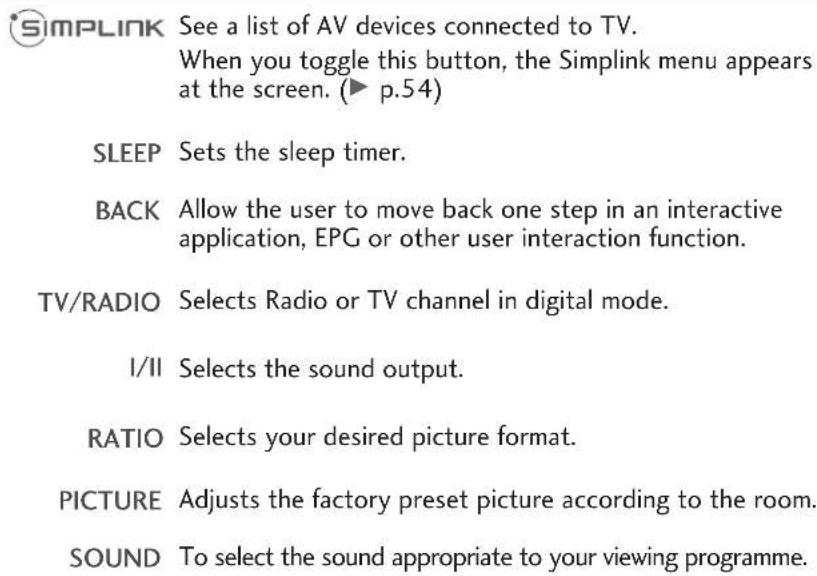
text_image
SIMPLINK See a list of AV devices connected to TV. When you toggle this button, the Simplink menu appears at the screen. (▶ p.54) SLEEP Sets the sleep timer. BACK Allow the user to move back one step in an interactive application, EPG or other user interaction function. TV/RADIO Selects Radio or TV channel in digital mode. I/II Selects the sound output. RATIO Selects your desired picture format. PICTURE Adjusts the factory preset picture according to the room. SOUND To select the sound appropriate to your viewing programme.MENU Selects a menu.
1 TELETEXT Buttons These buttons are used for teletext. For further details, see the 'Teletext' section.
EXIT Clears all on-screen displays and returns to TV viewing from any menu.
Installing Batteries
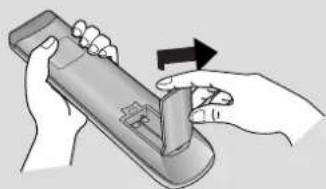
natural_image
Illustration of hands holding a remote control device with an arrow indicating rotation (no text or symbols)- Open the battery compartment cover on the back side and install the batteries matching correct polarity (+with +,-with -).
- Install two 1.5V AA batteries. Don't mix old or used batteries with new ones.
- Close cover.
WATCHING TV /PROGRAMME CONTROL
REMOTE CONTROL KEY FUNCTIONS (Only 37/42/47/52LF6)
When using the remote control, aim it at the remote control sensor on the TV.
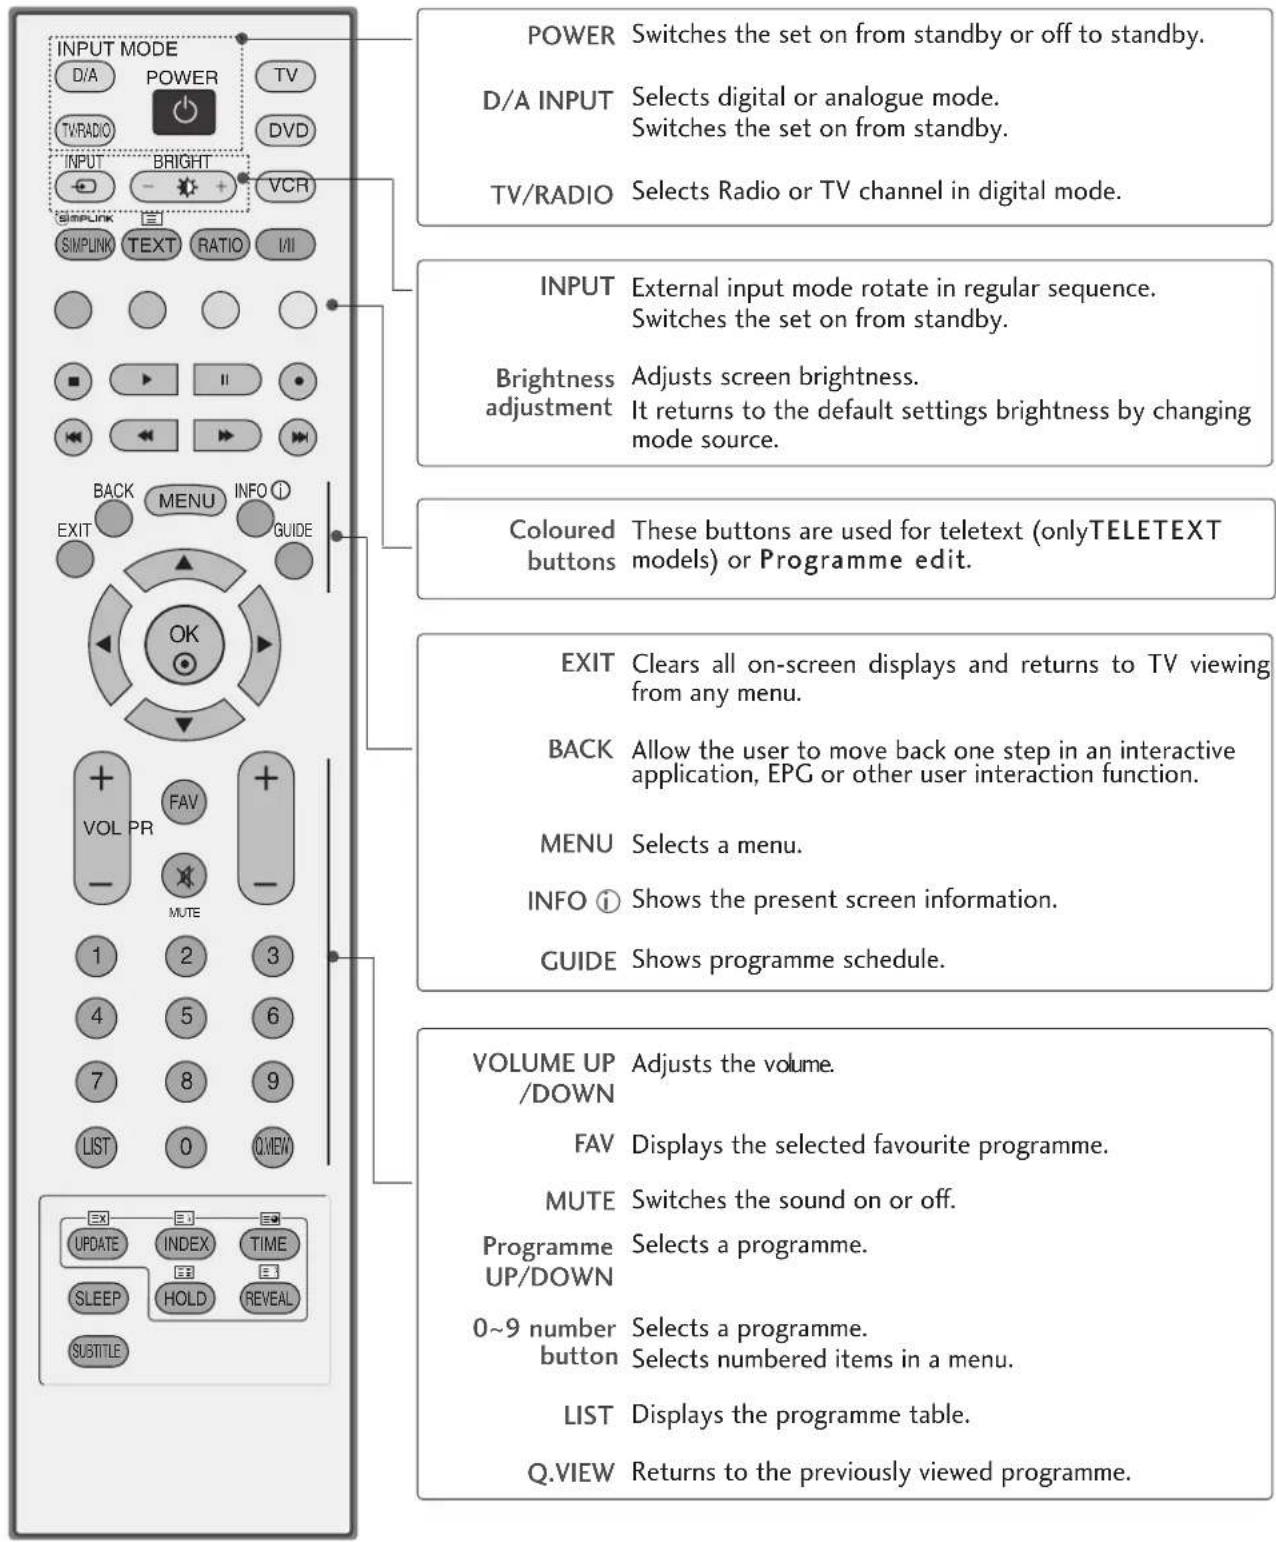
text_image
INPUT MODE D/A POWER TV TV/RADIO DVD INPUT BRIGHT VCR SIMPLINK TEXT RATIO VII BACK MENU INFO GUIDE EXIT VOL PR FAV MUTE 1 2 3 4 5 6 7 8 9 LIST 0 QVIEW EX E EQ UPDATE INDEX TIME SLEEP HOLD REVEAL SUBTITLE POWER Switches the set on from standby or off to standby. D/A INPUT Selects digital or analogue mode. Switches the set on from standby. TV/RADIO Selects Radio or TV channel in digital mode. INPUT External input mode rotate in regular sequence. Switches the set on from standby. Brightness Adjusts screen brightness. adjustment It returns to the default settings brightness by changing mode source. Coloured These buttons are used for teletext (onlyTELETEXT buttons) or Programme edit. EXIT Clears all on-screen displays and returns to TV viewing from any menu. BACK Allow the user to move back one step in an interactive application, EPG or other user interaction function. MENU Selects a menu. INFO i Shows the present screen information. GUIDE Shows programme schedule. VOLUME UP Adjusts the volume. /DOWN FAV Displays the selected favourite programme. MUTE Switches the sound on or off. Programme Selects a programme. UP/DOWN 0~9 number Selects a programme. button Selects numbered items in a menu. LIST Displays the programme table. Q.VIEW Returns to the previously viewed programme.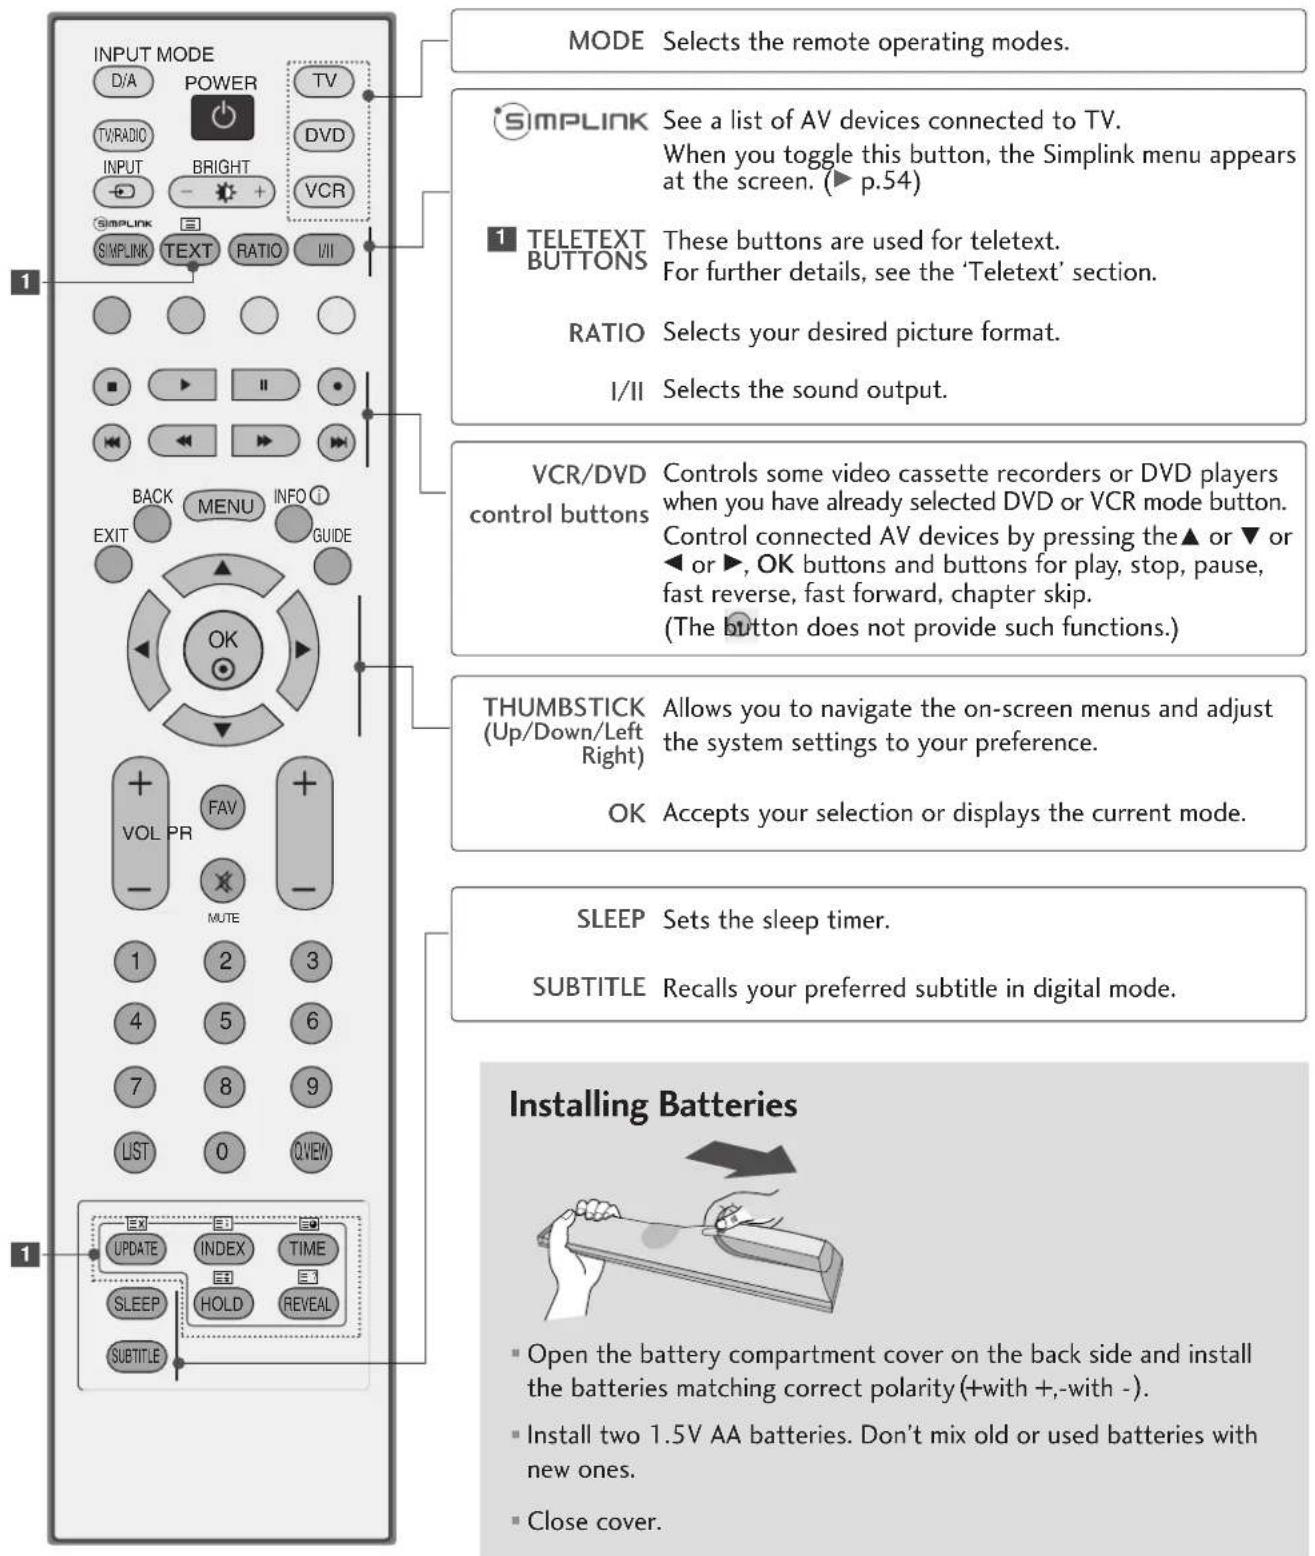
text_image
INPUT MODE D/A POWER TV TV/RADIO DVD INPUT BRIGHT VCR SIMPLINK TEXT RATIO VII MODE Selects the remote operating modes. S MPLINK See a list of AV devices connected to TV. When you toggle this button, the Simplink menu appears at the screen. (▶ p.54) 1 TELETEXT BUTTONS These buttons are used for teletext. For further details, see the 'Teletext' section. RATIO Selects your desired picture format. I/II Selects the sound output. VCR/DVD control buttons Controls some video cassette recorders or DVD players when you have already selected DVD or VCR mode button. Control connected AV devices by pressing the▲ or ▼ or ◀ or ▶, OK buttons and buttons for play, stop, pause, fast reverse, fast forward, chapter skip. (The button does not provide such functions.) THUMBSTICK (Up/Down/Left Right) Allows you to navigate the on-screen menus and adjust the system settings to your preference. OK Accepts your selection or displays the current mode. SLEEP Sets the sleep timer. SUBTITLE Recalls your preferred subtitle in digital mode. Installing Batteries ■ Open the battery compartment cover on the back side and install the batteries matching correct polarity (+with +,-with -). ■ Install two 1.5V AA batteries. Don't mix old or used batteries with new ones. ■ Close cover.WATCHING TV /PROGRAMME CONTROL
TURNING ON THE TV
- If your TV will be turned on, you will be able to use its features.
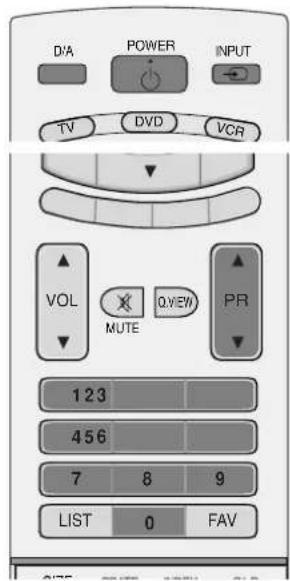
1 First, connect power cord correctly. At this moment, the TV switches to standby mode.
2 In standby mode to turn TV on, press the ⏻/ I, INPUT or PR ▲ or ▼ button on the TV or press the POWER, INPUT, D/A, PR ▲ or ▼ (or PR + or -) or NUMBER button on the remote control and then the TV will switch on.
Initializing setup
If the OSD (On Screen Display) is displayed on the screen as figure after turning on the set, you can adjust the Language, Country, Time Zone, Auto programme tuning.
Note:
a. It will automatically disappear after approx. 40 seconds unless a button is pressed.
b. Press the BACK button to change current OSD into previous OSD.
text_image
DVA POWER INPUT TV DVD VCR VOL MUTE QVIEW PR 123 456 7 8 9 LIST 0 FAV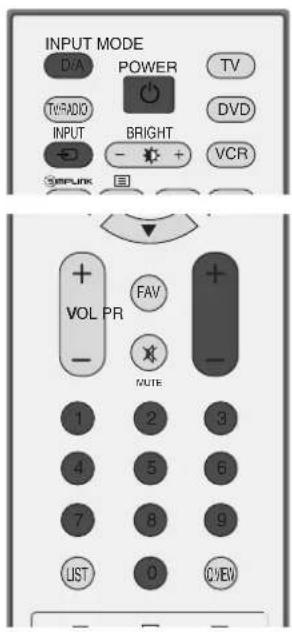
text_image
INPUT MODE DNA POWER TV TVPADIO INPUT BRIGHT DVD VCR SPINK + VOL PR - FAV - WRITE 1 2 3 4 5 6 7 8 9 LIST 0 OVEVPROGRAMME SELECTION

Press the PR ▲ or ▼ (or PR + or -) or NUMBER buttons to select a programme number.
VOLUME ADJUSTMENT

Press the VOL ▲ or ▼ (or VOL + or -) button to adjust the volume.
If you want to switch the sound off, press the MUTE button.
You can cancel this function by pressing the MUTE, VOL ▲ or ▼ (or VOL + or -), or I/II button.

text_image
GUIDE (INFO) SLEEP BACK M/I RATIO PICTURE SOUND MENU TEXT EXIT OK VOL MUTE C VIEW PR 123 456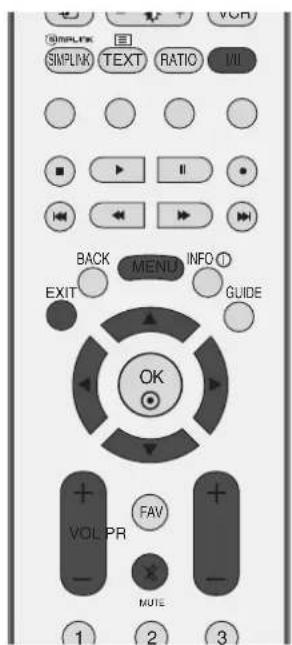
text_image
SNPLINK SNPLINK TEXT RATIO VIO BACK MENO INFO EXIT GUIDE OK VOL PR FAV MUTE 1 2 3WATCHING TV /PROGRAMME CONTROL
ON SCREEN MENUS SELECTION AND ADJUSTMENT
Your TV's OSD (On Screen Display) may differ slightly from what is shown in this manual.
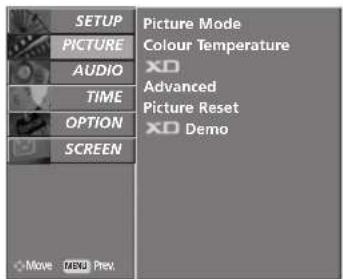
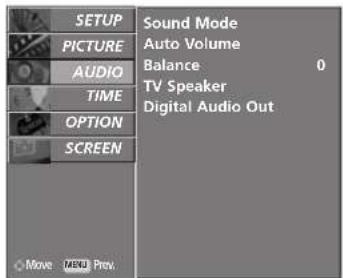
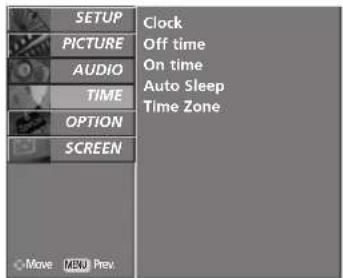
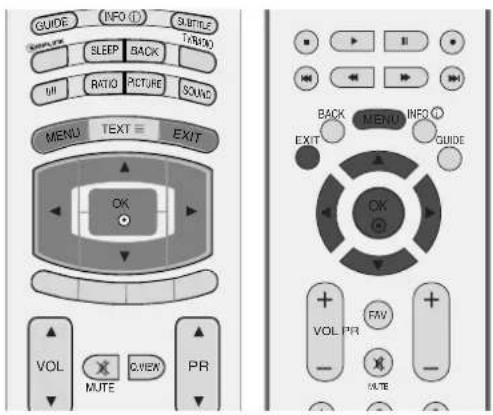
1 Press the MENU button and then ▲ or ▼ button to display each menu.
2 Press the ▶ button and then ▲ or ▼ button to select a menu item.
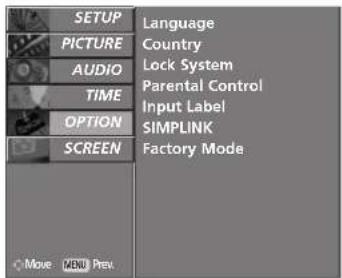
3 Change the setting of an item in the sub or pull-down menu with ◀ or ▶ button. You can move to the higher level menu by pressing theO○&KMENU button.
text_image
SETUP PICTURE AUDIO TIME OPTION SCREEN Auto Tuning Manual Tuning Programme Edit 5V Antenna Power Software Update Diagnostics CI Information Move MENU Prev


text_image
SETUP PICTURE AUDIO TIME OPTION SCREEN Auto Config. Manual Config. XGA Mode Aspect Ratio Reset Move MENU Prov.
text_image
SETUP Language PICTURE Country AUDIO Lock System Parental Control Input Label TIME SIMPLINK OPTION SIMPLINK SCREEN Factory Mode Move MENU Prev
text_image
SETUP PICTURE AUDIO TIME OPTION SCREEN Picture Mode Colour Temperature XO Advanced Picture Reset XO Demo Move Match Prev
text_image
SETUP PICTURE AUDIO TIME OPTION SCREEN Sound Mode Auto Volume Balance 0 TV Speaker Digital Audio Out Move MENU Prev.
text_image
SETUP PICTURE AUDIO TIME OPTION SCREEN Clock Off time On time Auto Sleep Time Zone Move MENU PrevNOTE
It's not available to use ISM Method and Low power in LCD TV models.
▶ In Analogue mode, 5V Antenna Power, CI Information, Software Update and Diagnostics will not display.
AUTO PROGRAMME TUNING (IN DIGITAL MODE)
Use it to automatically find and store all of the programmes.
When you start auto programming in digital mode, all the stored service information will be deleted.
text_image
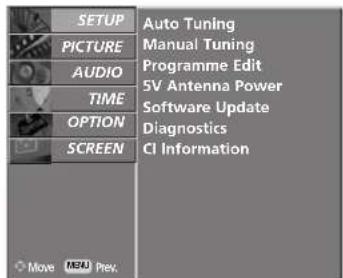
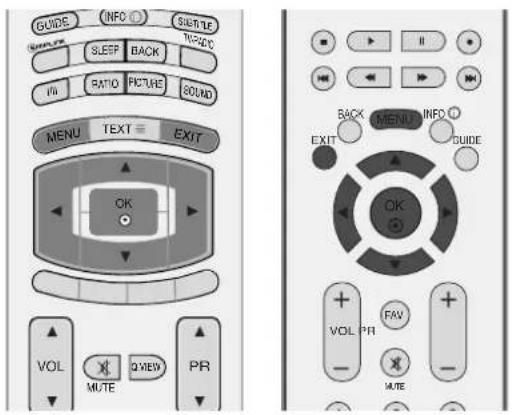
GUIDE INFO (I) SUBTITLE SAMPLES SLEEP BACK UI RATIO PICTURE SOUND MENU TEXT EXIT OK VOL MUTE CVIEW PR BACK MENU INFO (I) EXIT GUIDE OK VOL PR FW MUTE1 Press the MENU button and then ▲ or ▼ button to select the SETUP menu.
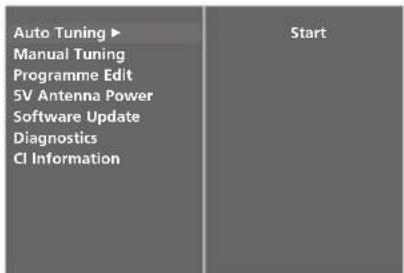
2 Press the ▶ button and then ▲ or ▼ button to select Auto Tuning.
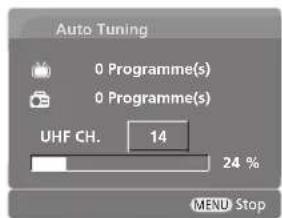
3 Press the ▶ button to begin auto tuning.
Use NUMBER buttons to input a 4-digit password in Lock System 'On'.
The message "All service-information will be updated. Continue?" will appear.
If you want to keep on auto tuning select YES with using the ◀ or ▶ button. Then, press the OK button. Otherwise select NO.
To stop auto tuning, press the MENU button.
4 Press the EXIT button to return to normal TV viewing.
text_image
SETUP PICTURE AUDIO TIME OPTION SCREEN Auto Tuning Manual Tuning Programme Edit 5V Antenna Power Software Update Diagnostics CI Information Move MPAI Prev.1
text_image
Auto Tuning ▶ Manual Tuning Programme Edit 5V Antenna Power Software Update Diagnostics CI Information Start2
text_image
Auto Tuning 0 Programme(s) 0 Programme(s) UHF CH. 14 24 % MENU Stop3
WATCHING TV /PROGRAMME CONTROL
MANUAL PROGRAMME TUNING (IN DIGITAL MODE)
Manual Tuning lets you manually add a programme to your programme list.
text_image
GUIDE INFO SUTTER SERVICE TIME SLEEP BACK VIN RATIO FIGURE SOUND MENU TEXT EXIT OK VOL X Q VIEW PR MUTE MUTE BACK MENU INFO EXIT GUIDE OK VOL PR FAY - MTE1 Press the MENU button and then ▲ or ▼ button to select the SETUP menu.
2 Press the ▶ button and then ▲ or ▼ button to select Manual Tuning.
3 Press the ▶ button and then ▲ or ▼ button or NUM-BER buttons to select the desired channel number. Use NUMBER buttons to input a 4-digit password in Lock System 'On'.
4 Press the OK button to save.
When the channel number you want to add is already added in programme list, the massage "Setup information for the channel will be updated. Continue?" will appear.
If you want to keep on manual tuning, select YES with using the ◀ or ▶ button.
Then, press the OK button. Otherwise select NO.
5 Press the EXIT button to return to normal TV viewing.
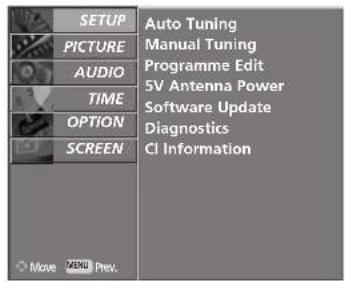
text_image
SETUP PICTURE AUDIO TIME OPTION SCREEN Auto Tuning Manual Tuning Programme Edit 5V Antenna Power Software Update Diagnostics CI information Move MENU Prev.1
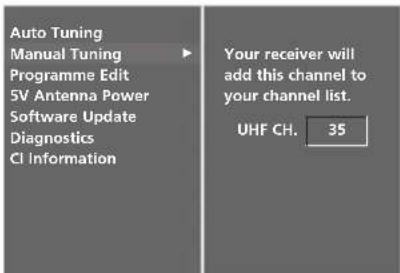
text_image
Auto Tuning Manual Tuning Programme Edit 5V Antenna Power Software Update Diagnostics CI Information Your receiver will add this channel to your channel list. UHF CH. 352
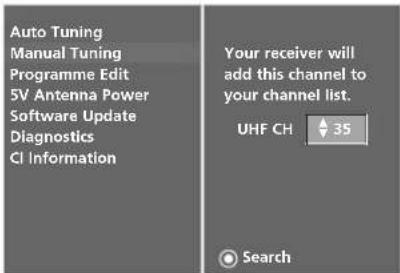
text_image
Auto Tuning Manual Tuning Programme Edit 5V Antenna Power Software Update Diagnostics CI Information Your receiver will add this channel to your channel list. UHF CH 35 Search3 4
PROGRAMME EDIT (IN DIGITAL MODE)
When a programme number is skipped, it means that you will be unable to select it using PR ▲ or ▼ (or PR + or -) button during TV viewing.
If you want to select the skipped programme, directly enter the programme number with the NUMBER buttons or select it in the Programme edit menu.
This function enables you to skip the stored programmes.
It's available in some countries only to move a programme number by YELLOW button.

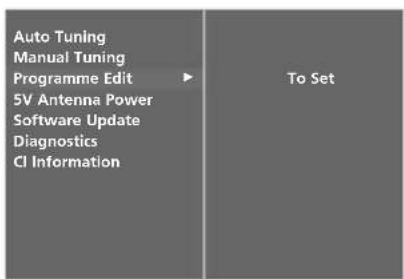
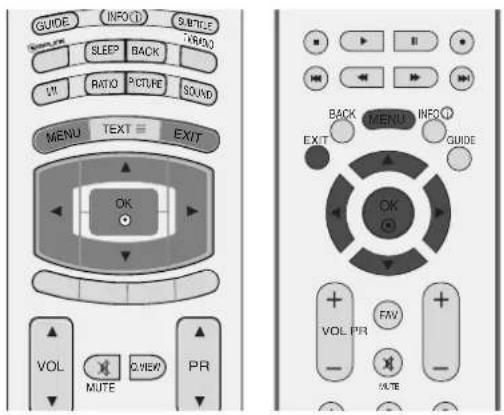
Press the MENU button and then ▲ or ▼ button to select the SETUP menu.

Press the ▶ button and then ▲ or ▼ button to select Programme Edit menu.

Press the ▶ button to enter the Programme Edit menu.
Use NUMBER buttons to input a 4-digit password in Lock System 'On'.

Select a programme to be stored or skipped with the ▲ or ▼ or ◀ or ▶ button.

Press the BLUE button repeatedly to have the programme skipped or stored.
In case of programmes to be skipped, skipped programme shows in blue colour and these programmes will not be selected by the PR ▲ or ▼ (or PR + or -) buttons during TV viewing.

Press the EXIT button to return to normal TV viewing.
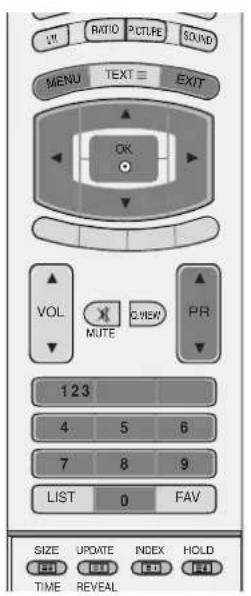
text_image
LVI RATIO PCTURE SOUND MENU TEXT EXIT OK VOL MUTE 2.WEK PR 123 4 5 6 7 8 9 LIST 0 FAV SIZE UPDATE INDEX HOLD TIME REVEAL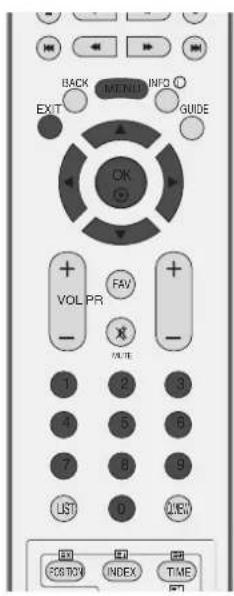
text_image
BACK EXIT NEXT INFO GUIDE OK VOL PR FAV X LIST 0 OPEN POST/TIME INDEX TIME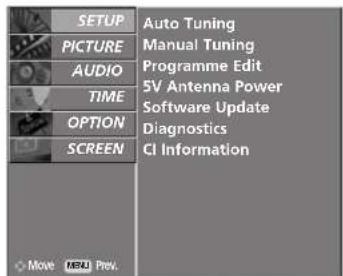
text_image
SETUP PICTURE AUDIO TIME OPTION SCREEN Auto Tuning Manual Tuning Programme Edit 5V Antenna Power Software Update Diagnostics CI Information Move Microsoft Prev.
text_image
Auto Tuning Manual Tuning Programme Edit 5V Antenna Power Software Update Diagnostics CI Information To Set
WATCHING TV /PROGRAMME CONTROL
Mini Glossary

Displayed when the DTV Programme.

Displayed when the Favourite Programme.

Displayed when the Locked Programme.

Displayed when the Radio Programme.

Displayed when the MHEG Programme.

Displayed when the Teletext Programme.

Displayed when the Subtitle Programme.

Displayed when the Scramble Programme.

Displayed when the Dolby Programme.
■ Skipping a programme number
1 Select a programme number to be skipped with the ▲ or ▼ or ◀ or ▶ button.
2 Press the BLUE button. The skipped programme number turns to blue.
3 Press the BLUE button again to release the skipped programme.
When a programme number is skipped it means that you will be unable to select it using the PR ▲ or ▼ (or PR + or -) button during normal TV viewing.
If you want to select the skipped programme, directly enter the programme number with the NUMBER buttons or select it in the programme edit or EPG.
4 Press the EXIT button to return to TV viewing.
■ Locking a programme (In Lock System On mode only)
1 Select a programme to be locked with the ▲ or ▼ or ◀ or ▶ button.
2 Press the GREEN button. The lock mark will appear in front of that programme number.
3 Press the GREEN button again to release this function.
Note :
▶ To watch a locked programme, input a 4-digit password in Lock system. Be sure to remember this number!
▶ If you forgot your password, press '7', '7', '7', '7' on the remote control handset.
If you select other programme after releasing a locked programme and then return to the locked programme within 1 minute, you needn't input a password to select the locked programme.
■ Selecting favourite programme
1 Select your favourite programme number by pressing▲ or ▼ or ◀ or ▶ button and then press the FAV button on your remote control handset.
It will automatically include the selected programme into your favourite programme list and heart-mark will appear in front of that programme number.
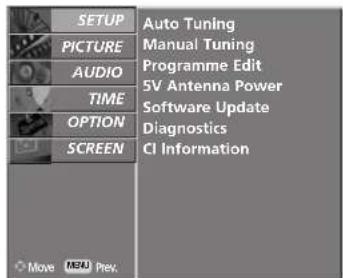
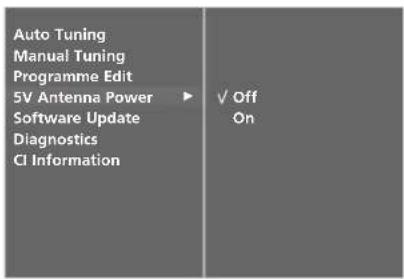
Even if there isn't a special 5V adapter power in the external antenna, this function can output 5V in the set.
text_image
GUIDE INFO① S/BTCE SLEEP BACK V1 RATIO PICTURE SOUND MENU TEXT EXIT OK VOL MUTE VIEW PR BACK MENU INFO ① EXIT GUIDE OK VOL PR FAV - RATE1 Press the MENU button and then ▲ or ▼ button to select the SETUP menu.
2 Press the ▶ button and then use ▲ or ▼ button to select 5V Antenna Power.
3 Press the ▶ button and then use ▲ or ▼ button to select On or Off.
In 5V Antenna Power On, if the set is short-circuit, it will automatically return to Off.
The message "Antenna feed overloaded. Automatically switched off." will appear.
4 Press the EXIT button to return to normal TV viewing.
text_image
SETUP PICTURE AUDIO TIME OPTION SCREEN Auto Tuning Manual Tuning Programme Edit 5V Antenna Power Software Update Diagnostics CI Information Move M7A1 Prev.1
text_image
Auto Tuning Manual Tuning Programme Edit 5V Antenna Power ▶ √ Off Software Update Diagnostics CI Information On23
WATCHING TV /PROGRAMME CONTROL
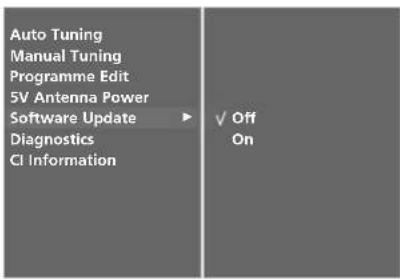
SOFTWARE UPDATE (IN DIGITAL MODE ONLY)
Software Update, means software can be downloaded through the digital terrestrial broadcasting system.
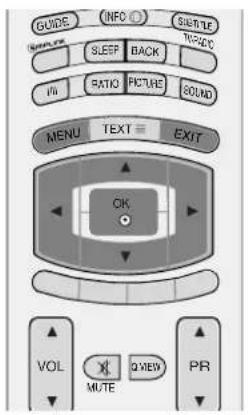
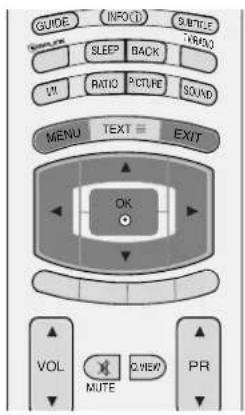
1 Press the MENU button and then ▲ or ▼ button to select the SETUP menu.
2 Press the ▶ button and then ▲ or ▼ button to select Software update.
3 Press the ▶ button and then ▲ or ▼ button to select Off or On.
- If you select On, a user confirm message box will be displayed to notify that new software is found.
4 Press the EXIT button to return to normal TV viewing.
text_image
GUIDE INFO SUBTLE SERVICE SLEEP BACK TIME RATIO PICTURE SOUND MENU TEXT EXIT OK VOL MUTE QVIEW PR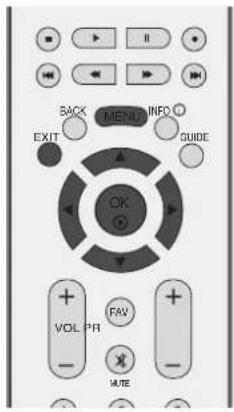
text_image
BACK MENT INFO EXIT GUIDE OK VOL PR FAV MATE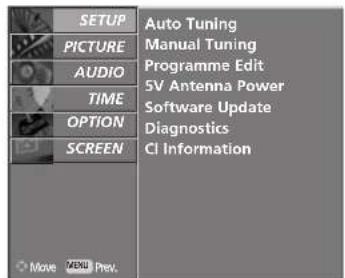
text_image
SETUP PICTURE AUDIO TIME OPTION SCREEN Auto Tuning Manual Tuning Programme Edit 5V Antenna Power Software Update Diagnostics CI Information Move MENU Prev.1
* When setting "Software Update"
text_image
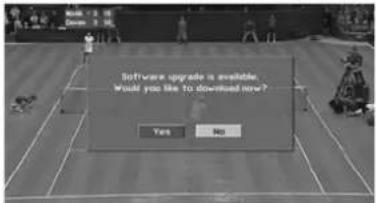
Software upgrade is available. Would you like to download now? Yes NoOccasionally, a transmission of updated digital software information will result in the following menu on the TV screen.
text_image
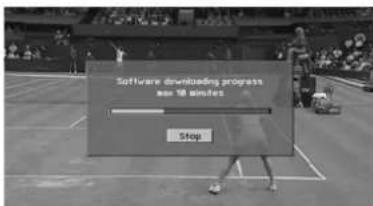
Software downloading progress as 10 minutes StopSelect the YES using the ◀ or ▶ button and when you see the following picture.
text_image
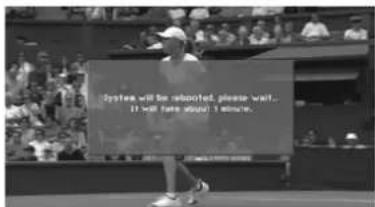
System will be reported, please wait. It will take about 1 minute.After Software Update is completed, the System takes about one minute to restart.
text_image
Auto Tuning Manual Tuning Programme Edit 5V Antenna Power Software Update ▶ √ Off Diagnostics CI Information On23
- During Progress of Software Update, please note the following:
• The power of the set must not be interrupted.
• The set must not be switched off.
- The antenna must not be disconnected.
- During this time, you should not switch off the power to the set.
- At this time, you should not work power On/Off.
• After Software Update, you can confirm the updated software version in Diagnostics menu.
DIAGNOSTICS (IN DIGITAL MODE ONLY)
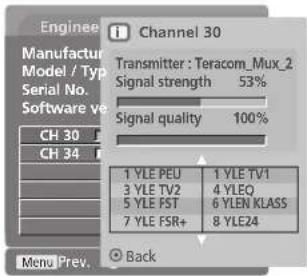
This function enables you to watch Manufacturer, Model/Type, Serial Number and Software Version.
It's displayed the information and signal strength of the turned MUX.
It's displayed the signal information and service name of the selected MUX.
1 Press the MENU button and then ▲ or ▼ button to select the SETUP menu.
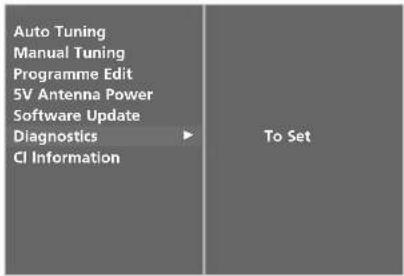
2 Press the ▶ button and then use ▲ or ▼ button to select Diagnostics.
3 Press the ▶ button to display Manufacturer, Model/Type, Serial Number and Software Version.
4 Press the EXIT button to return to normal TV viewing.
text_image
GUIDE INFO C 9.8TICE SLEEP BACK 10.600 VI RATIO PICTURE SOUND MENU TEXT EXIT OK VOL MUTE Q.NEW PR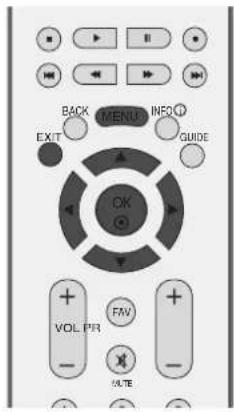
text_image
BACK MENU INFO EXIT GUIDE OK VOL PR FNV TIME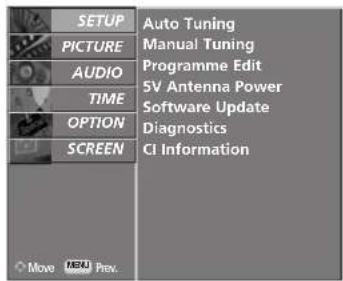
text_image
SETUP PICTURE AUDIO TIME OPTION SCREEN Auto Tuning Manual Tuning Programme Edit 5V Antenna Power Software Update Diagnostics CI Information Move MENA Prev.1
text_image
Auto Tuning Manual Tuning Programme Edit 5V Antenna Power Software Update Diagnostics CI Information To Set2
text_image
Engine Manufacturer Model / Typ Serial No. Software ve CH 30 CH 34 Channel 30 Transmitter : Teracom_Mux_2 Signal strength 53% Signal quality 100% 1 YLE PEU 1 YLE TV1 3 YLE TV2 4 YLEQ 5 YLE FST 6 YLEN Klass 7 YLE FSR+ 8 YLE24 Menu Prev. Back3
WATCHING TV /PROGRAMME CONTROL
CI [COMMON INTERFACE] INFORMATION (IN DIGITAL MODE ONLY)
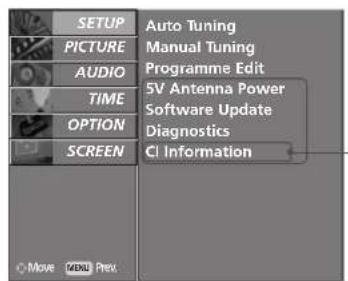
This function enables you to watch some scrambled services (pay services). If you remove the CI Module, you can't watch the pay services. When the module is inserted to CI slot, you can access the module menu.
To purchase a module and smart card, contact your supplying dealer. Do not often insert or remove a CAM module from the set. It may cause a trouble. When the set turned on after inserting the CI Module, you often can't hear the sound.
![LG 37LF66.AEU - CI [COMMON INTERFACE] INFORMATION (IN DIGITAL MODE ONLY) - 1](/content/2026/05/800416/images/84b169d10affc226f0bc2e568c6e06d31c628ab4b075f1da2d6c6e837c6cd917.jpg)
text_image
GUIDE INFO SUBTLE SERVICE SLEEP BACK TIME RATIO PICTURE SOUND MENU TEXT EXIT OK VOL MUTE QVIEW PR![LG 37LF66.AEU - CI [COMMON INTERFACE] INFORMATION (IN DIGITAL MODE ONLY) - 2](/content/2026/05/800416/images/eea95900f93e1e95260653c5d0821b6d597e307c48a383d03cb898a68435ea6a.jpg)
text_image
BACK MENU INFO EXIT GUIDE OK VOL PR FAV MTEThere might be unnatural picture according to CI module and smart card.
CI (Common Interface) function may not be applied based on country broadcasting circumstance.
1 Press the MENU button and then ▲ or ▼ button to select the SETUP menu.
2 Press the ▶ button and then ▲ or ▼ button to select CI Information.
3 Press the ▶ button and then OK button.
4 Press the ▲ or ▼ button to select the desired item: Module information, smart card information, language, or software download etc.
5 Press the OK button.
6 Press the EXIT button to return to normal TV viewing.
![LG 37LF66.AEU - CI [COMMON INTERFACE] INFORMATION (IN DIGITAL MODE ONLY) - 3](/content/2026/05/800416/images/6f51ebc24c0ed5c513fd11793ae04467291b62a8ef4e356e0616a3a461d0c755.jpg)
text_image
SETUP PICTURE AUDIO TIME OPTION SCREEN Auto Tuning Manual Tuning Programme Edit 5V Antenna Power Software Update Diagnostics CI Information Move MP4 Prev.1
![LG 37LF66.AEU - CI [COMMON INTERFACE] INFORMATION (IN DIGITAL MODE ONLY) - 4](/content/2026/05/800416/images/98a8ffdeca5b401702800d55fa20939ae8319603c3cc0a96d1e5456aba8399ba.jpg)
text_image
Auto Tuning Manual Tuning Programme Edit 5V Antenna Power Software Update Diagnostics CI Information Module23
- This OSD is only for illustration and the menu options and screen format will vary according to the Digital pay services provider.
- It's possible for you to change CI (Common Interface) menu screen and service by your dealer.
![LG 37LF66.AEU - CI [COMMON INTERFACE] INFORMATION (IN DIGITAL MODE ONLY) - 5](/content/2026/05/800416/images/f225e0e281cae61f51f6a9d7027a101569e1ac78458b2824fe9ed795bad31962.jpg)
text_image
Viaccess Module Consultations Authorizations Module information Select the item4 5
AUTO PROGRAMME TUNING (IN ANALOGUE MODE)
All stations that can be received are stored by this method. It is recommended that you use Auto tuning during installation of this set.
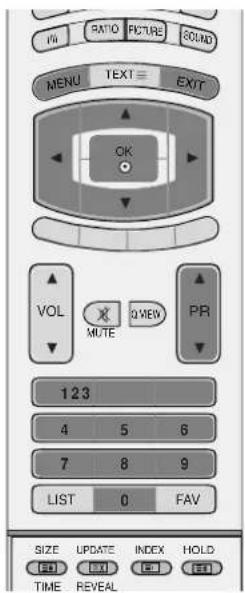
1 Press the MENU button and then ▲ or ▼ button to select the SETUP menu.
2 Press the ▶ button and then ▲ or ▼ button to select Auto Tuning.
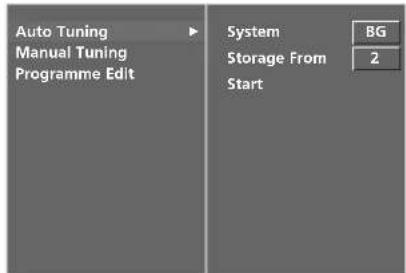
3 Press the ▶ button to select System. Select a TV system with the ◀ or ▶ button;
L : SECAM L/L' (France)
BG : PAL B/G, SECAM B/G (Europe / East Europe / Asia / New Zealand / M.East / Africa / Australia) I : PAL I/II (U.K. / Ireland / Hong Kong / South Africa)
DK : PAL D/K, SECAM D/K (East Europe / China / Africa / CIS)
4 Press the ▼ button to select Storage From.
Select the beginning programme number with the ◀ or ▶ button or NUMBER buttons on the Storage From menu.
5 Press the ▼ button to select Start.
The station name is stored for stations which broadcast VPS (Video Programme Service), PDC (Programme Delivery Control) or TELETEXT data.
If no station name can be assigned to a station, the channel number is assigned and stored as C (V/UHF 01-69) or S (Cable 01-47), followed by a number.
To stop auto tuning, press the MENU button.
When auto tuning is completed, the Programme Edit menu appears on the screen.
See the 'Programme Edit' section to edit the stored programme.
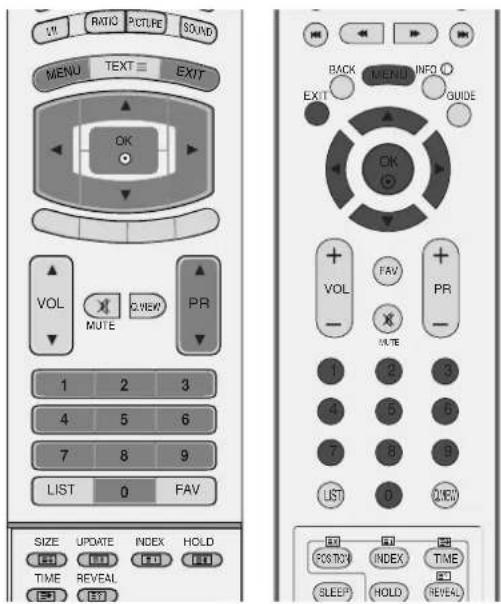
text_image
LVI RATIO PICTURE SOUND MENU TEXT EXIT OK VOL MUTE 2.WEV PR 1 2 3 4 5 6 7 8 9 LIST 0 FAV SIZE UPDATE INDEX HOLD TIME REVEAL E E BACK MEND INFO EXIT GUIDE OK FAV PR - NOTE 1 2 3 4 5 6 7 8 9 LIST 0 2.WEV POSTOX INDEX TIME SLEEP HOLD REVEAL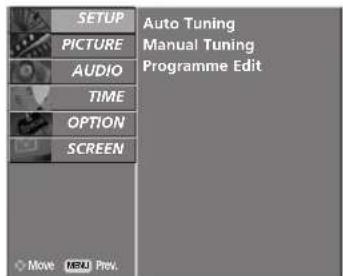
text_image
SETUP PICTURE AUDIO TIME OPTION SCREEN Auto Tuning Manual Tuning Programme Edit Move MSU Prev.1
text_image
Auto Tuning Manual Tuning Programme Edit System Storage From Start BG 22 3 4 5
WATCHING TV /PROGRAMME CONTROL
MANUAL PROGRAMME TUNING (IN ANALOGUE MODE)
Manual Tuning lets you manually tune and arrange the stations in whatever order you desire.
1 Press the MENU button and then ▲ or ▼ button to select the SETUP menu.
2 Press the ▶ button and then ▲ or ▼ button to select Manual Tuning.
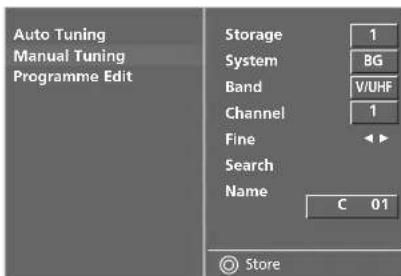
3 Press the ▶ button to select Storage.
Select the desired programme number with the◀ or ▶ button or NUMBER buttons on the Storage menu.
4 Press the ▼ button to select System. Select a TV system with the ◀ or ▶ button;
L : SECAM L/L' (France)
BG : PAL B/G, SECAM B/G (Europe / East Europe / Asia / New Zealand / M.East / Africa / Australia)
I : PAL I/II (U.K. / Ireland / Hong Kong / South Africa)
DK : PAL D/K, SECAM D/K (East Europe / China / Africa / CIS)
5 Press the ▼ button to select Bond. Press the ◀ or ▶ button to select V/UHF or Cable as required.
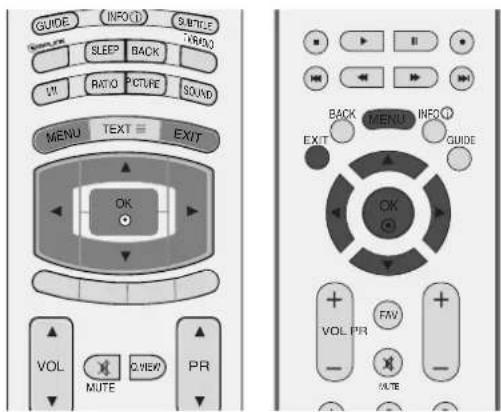
6 Press the ▼ button to select Channel. You can select the desired channel number with the ◀ or ▶ button or NUMBER buttons.
If possible, select the channel number directly with the NUMBER buttons.
7 Press the ▼ button to select Search. Press the◀ or ▶ button to commence searching. If a station is found the search will stop.
8 Press the OK button to store it.
9 To store another station, repeat steps 3 to 8.
10 Press the EXIT button to return to normal TV viewing.
text_image
V RATIO PICTURE SOUND MENU TEXT EXIT OK VOL MUTE Q VIEW PR 123 4 5 6 7 8 9 LIST 0 FAV SIZE UPDATE INDEX HOLD TIME REVEAL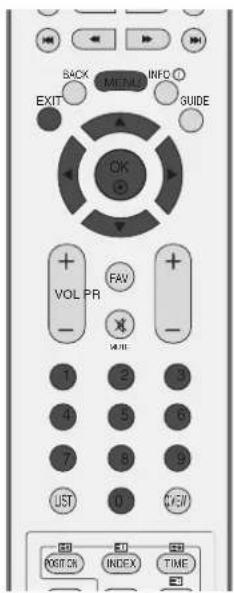
text_image
BACK MENU INFO EXIT GUIDE OK VOL PR FAV - MINI 1 2 3 4 5 6 7 8 9 UST 0 VIEW POSTCK INDEX TIME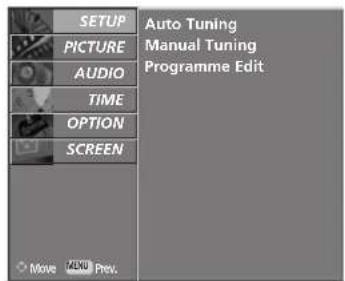
text_image
SETUP PICTURE AUDIO TIME OPTION SCREEN Auto Tuning Manual Tuning Programme Edit Move Manual Prev.1

text_image
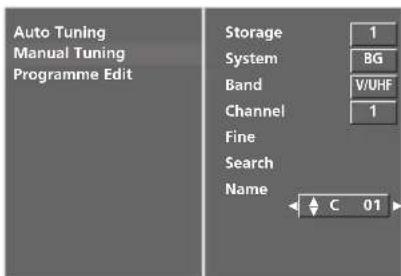
Auto Tuning Manual Tuning Programme Edit Storage 1 System BG Band V/UHF Channel 1 Fine Search Name C 01
FINE TUNING (IN ANALOGUE MODE)
Normally fine tuning is only necessary if reception is poor.
1 Press the MENU button and then ▲ or ▼ button to select the SETUP menu.
2 Press the ▶ button and then ▲ or ▼ button to select Manual Tuning.
3 Press the ▶ button and then ▲ or ▼ button to select Fine.
4 Press the ▶ button and then ◀ or ▶ button to fine tune for the best picture and sound.
5 Press the OK button to store it.
6 Press the EXIT button to return to normal TV viewing.
ASSIGNING A STATION NAME (IN ANALOGUE MODE)
You can assign a station name with five characters to each programme number.
1 Press the MENU button and then ▲ or ▼ button to select the SETUP menu.
2 Press the ▶ button and then ▲ or ▼ button to select Manual Tuning.
3 Press the ▶ button and then ▲ or ▼ button to select Name.
4 Press the ▶ button and then ▲ or ▼ button. You can use a the alphabet A to Z, the number 0 to 9, +/-, and blank.
5 Press the ◀ or ▶ button to select the position and make your choice of the second character, and so on.
6 Press the OK button to store it.
7 Press the EXIT button to return to normal TV viewing.
text_image
GUIDE INFO(1) S/BTFLE SLEEP BACK LTI RATIO PICTURE SOUND MENU TEXT EXIT OK VOL MUTE VIEW PR BACK MENU INFO(1) EXIT GUIDE OK VOL PR FAV - NOTE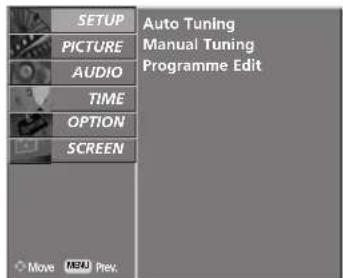
text_image
SETUP PICTURE AUDIO TIME OPTION SCREEN Auto Tuning Manual Tuning Programme Edit Move MPAT Prev.1
text_image
Auto Tuning Manual Tuning Programme Edit Storage 1 System BG Band V/UHF Channel 1 Fine Search Name C 01 Store2 3 4 5
text_image
Auto Tuning Manual Tuning Programme Edit Storage 1 System BG Band V/UHF Channel 1 Fine Search Name C 014万
WATCHING TV /PROGRAMME CONTROL
PROGRAMME EDIT (IN ANALOGUE MODE)
This function enables you to delete or skip the stored programmes. Also you can move some stations to other programme numbers or copy a blank station data into the selected programme number.
text_image
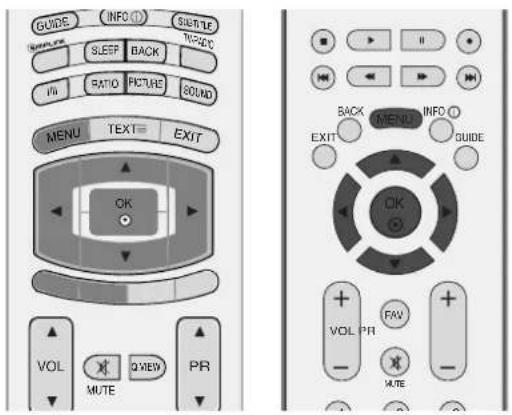
GUIDE INFO (I) SUBTUE SERVICE TIME SLEEP BACK V/ RATIO FIGURE SOUND MENU TEXT EXIT OK VOL Q VIEW PR MUTE1 Press the MENU button and then ▲ or ▼ button to select the SETUP menu.
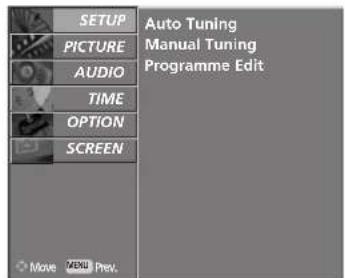
2 Press the ▶ button and then ▲ or ▼ button to select Programme Edit.
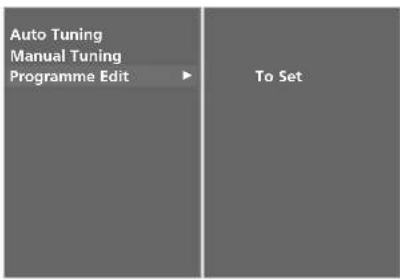
3 Press the ▶ button to display the Programme Edit menu.
■ Deleting a programme
a Select a programme to be deleted with the ▲ or ▼ or ◀ or ▶ button.
b Press the RED button twice. The selected programme is deleted, all the following programmes are shifted up one position.
■ Copying a programme
a Select a programme to be copied with the ▲ or ▼ or ◀ or ▶ button.
b Press the GREEN button. All the following programmes are shifted down one position.
text_image
SETUP PICTURE AUDIO TIME OPTION SCREEN Auto Tuning Manual Tuning Programme Edit Move MENU Prev.1
text_image
Auto Tuning Manual Tuning Programme Edit To Set2
■ Moving a programme
a Select a programme to be moved with ▲ or ▼ or ◀ or ▶ button.
b Press the YELLOW button.
Move the programme to the desired programme number with the▲ or ▼ or ◀ or ▶ button.
d Press the YELLOW button again to release this function.
■ Skipping a programme number
a Select a programme number to be skipped with ▲ or ▼ or ◀ or ▶ button.
b Press the BLUE button. The skipped programme number turns to blue.
C Press the BLUE button to release the skipped programme.
d When a programme number is skipped it means that you will be unable to select it using the PR ▲ or ▼ (or PR + or -) button during normal TV viewing.
If you want to select the skipped programme, directly enter the programme number with the NUMBER buttons or select it in the programme edit or table menu.
■ Selecting Favourite Programme
a Select your favourite programme number with ▲ or ▼ or ◀ or ▶ button.
b Press the FAVbutton.
The selected programme will be added to the favourite programme list and heart-mark will appear in front of that programme number.
WATCHING TV /PROGRAMME CONTROL
CALLING THE PROGRAMME TABLE
You can check the programmes stored in the memory by displaying the programme table.
■ Displaying programme LIST
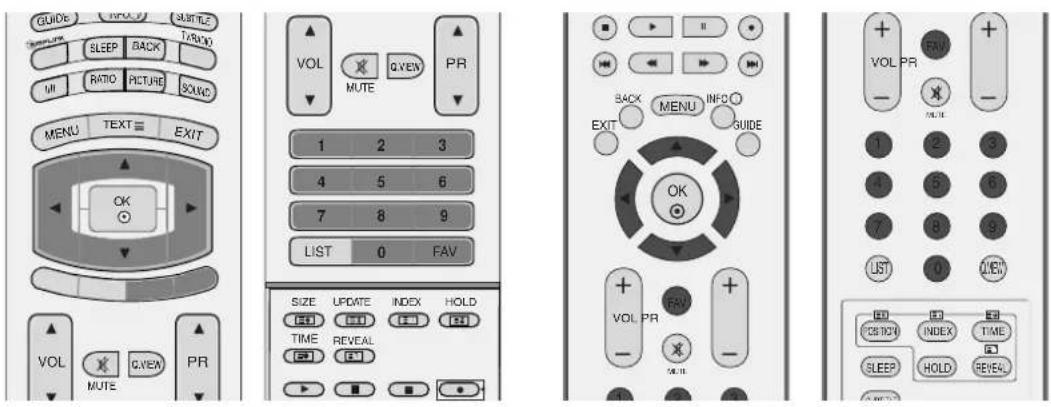
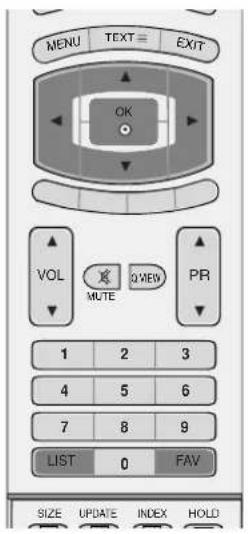
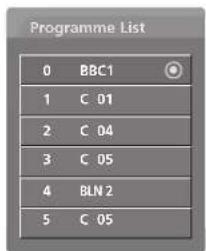
1 Press the LIST button to display the PROGRAMME LIST menu.
The programme list appears on the screen.
- You may find some blue programmes. They have been set up to be skipped by auto programming or in the programme edit mode.
- Some programmes with the channel number shown in the programme LIST indicate there is no station name assigned.
■ Selecting a programme in the programme list
1 Select a programme with the ▲ or ▼ or ◀ or ▶ button.
2 Press the OK button. The set switches to the chosen programme number.
■ Paging through a programme list
There are programme LIST pages which total contain 100 programmes.
1 Press the ▲ or ▼ or ◀ or ▶ button repeatedly to turns the pages.
2 Press the LIST button to return to normal TV viewing.
■ Displaying favourite programme table
Press the FAV button to display the Favourite Programme table menu.
text_image
MENU TEXT = EXIT OK VOL MUTE Q VIEW PR 1 2 3 4 5 6 7 8 9 LIST 0 FAV SIZE UPDATE INDEX HOLD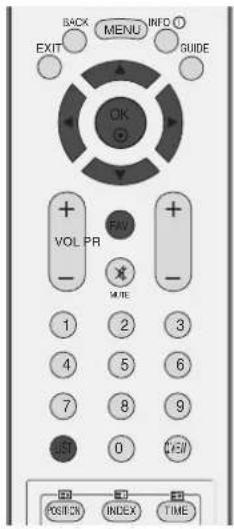
text_image
BACK MENU INFO EXIT GUIDE OK VOL PR MTE 1 2 3 4 5 6 7 8 9 BSP 0 CSP POS/EX INDEX TIME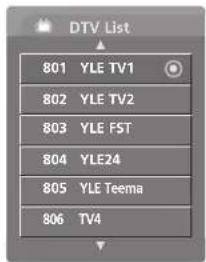
text_image
DTV List 801 YLE TV1 802 YLE TV2 803 YLE FST 804 YLE24 805 YLE Teema 806 TV4< In Digital Mode >
text_image
Programme List 0 BBC1 1 C 01 2 C 04 3 C 05 4 BLN 2 5 C 05< In Analogue Mode >
Mini Glossary

Displayed when the Favourite Programme.

Displayed when the Locked Programme.
INPUT SOURCE SELECTION
Sets a label to each input source which is not in use.
text_image
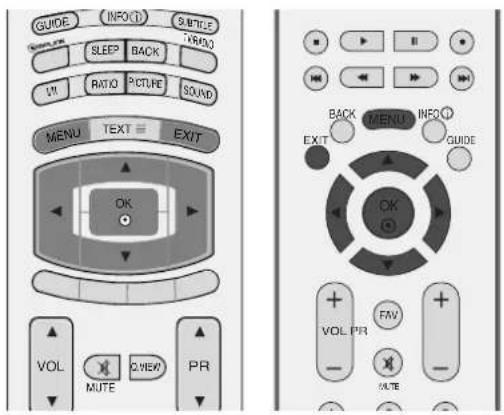
GUIDE INFO (1) S/BTFC SLEEP BACK LTI RATIO PICTURE SOUND MENU TEXT EXIT OK VOL MUTE Q/VER PR BACK MENU INFO (2) EXIT GUIDE OK VOL PR FAV - RATE1 Press the MENU button and then use ▲ or ▼ button to select the OPTION menu.
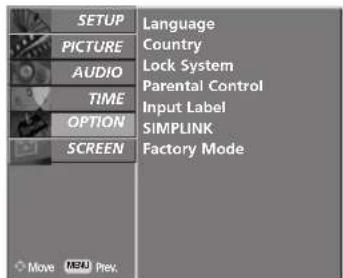
2 Press the ▶ button and then use ▲ or ▼ button to select Input Label.
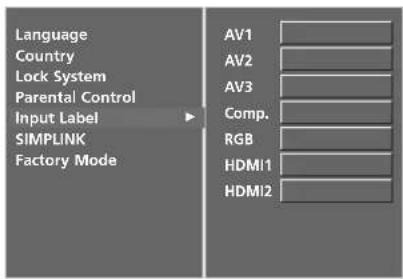
3 Press the ▶ button and then use ▲ or ▼ button to select the source: AV1, AV2, Comp., RGB, HDMI1 or HDMI2.
4 Press the ◀ or ▶ button to select the label.
5 Press EXIT button to return to normal TV viewing.
text_image
SETUP PICTURE AUDIO TIME OPTION SCREEN Language Country Lock System Parental Control Input Label SIMPLINK Factory Mode Move MENA Prev.1
text_image
Language Country Lock System Parental Control Input Label SIMPLINK Factory Mode AV1 AV2 AV3 Comp. RGB HDMI1 HDMI2234
WATCHING TV /PROGRAMME CONTROL

MPLINK
This operates only for the devices with the SIMPLINK logo. Please check the SIMPLINK logo.
This allows you to control and play other AV devices connected to the display through HDMI cable without additional cables and settings.
If you do not want SIMPLINK menu, select "Off".
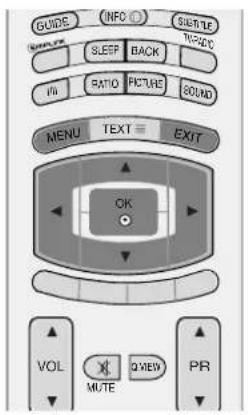
text_image
GUIDE INFO SUBTLE SERVICE SLEEP BACK IN RATIO PICTURE SOUND MENU TEXT EXIT OK VOL MUTE QVIEW PR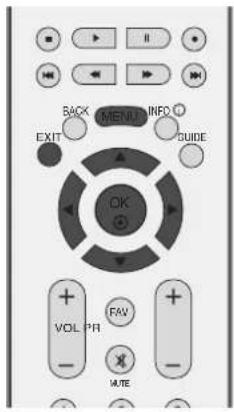
text_image
BACK MENU INFO EXIT GUIDE OK VOL PR FAV MATE1 Press the MENU button and then ▲ or ▼ button to select the OPTION menu.
2 Press the ▶ button and then ▲ or ▼ button to select SIMPLINK.
3 Press the ▶ button and then ▲ or ▼ button to select Off or On.
4 Press the EXIT button to return to normal TV viewing.
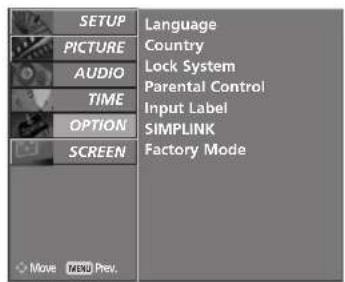
text_image
SETUP PICTURE AUDIO TIME OPTION SCREEN Language Country Lock System Parental Control Input Label SIMPLINK Factory Mode Move Microsoft Prev.1
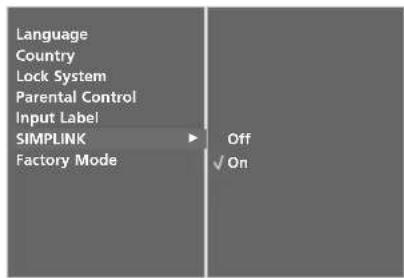
text_image
Language Country Lock System Parental Control Input Label SIMPLINK Factory Mode Off ✓ On23
SIMPLINK Functions
Disc playback
Control connected AV devices by pressing the ▲ or ▼ or ◀ or ▶, OK, ○, ○, ■, ◀, ◀, ▶, ● and ● buttons.
Direct Play
After connecting AV devices to TV, you can directly control the devices and play media without additional settings.
Select AV device
Enables you to select one of AV devices connected to TV and play it.
Power off all devices
When you power off TV, all connected devices are turned off.
Switch audio-out
Offers an easy way to switch audio-out.
* A device, which is connected to TV through HDMI cable but does not support Simplink, does not provide this function.
SIMPLINK Menu
Press the ▲ or ▼ or ◀ or ▶ button and then OK button to select the desired SIMPLINK source.
TV viewing : Switch to the previous TV programme regardless of the current mode.
2 DISC playback : Select and play connected discs. When multiple discs are available, the titles of discs are conveniently displayed at the bottom of the screen.
③ VCR playback : Play and control the connected VCR.
4 HDD Recordings playback : Play and control recordings stored in HDD.
5 Audio Out to Home theatre/Audio Out to TV: Select Home theatre or TV speaker for Audio Out.
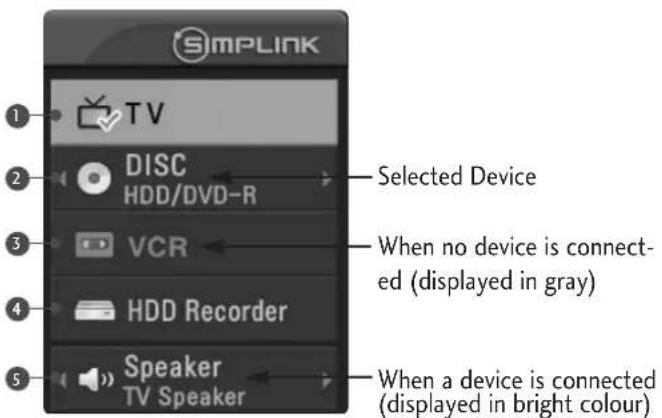
text_image
SimplINK ① TV ② DISC HDD/DVD-R Selected Device ③ VCR When no device is connected (displayed in gray) ④ HDD Recorder ⑤ Speaker TV Speaker When a device is connected (displayed in bright colour)NOTE
Connect the HDMI/DVI IN or HDMI IN terminal of the TV to the rear terminal (HDMI terminal) of the SIMPLINK device with the HDMI cable.
▶ After connecting the HDMI terminal for the home theater with SIMPLINK function in the above method, connect the DIGITAL AUDIO OUT terminal on the back of the TV to the DIGITAL AUDIO IN terminal on the back of the SIMPLINK device with the OPTICAL cable.
▶ When operating the external device with SIMPLINK, press the TV button among the MODE button on the remote controller.
▶ When you switch the Input source with the INPUT button on the remote controller, you can stop the operation of device controlled by SIMPLINK.
When you select or operate the media device with home theater function, the speaker automatically switches to home theater speaker (HT speaker).
PICTURE CONTROL
EPG (ELECTRONIC PROGRAMME GUIDE) (IN DIGITAL MODE)
This system has an Electronic Programme Guide (EPG) to help your navigation through all the possible viewing options.
The EPG supplies information such as programme listings, start and end times for all available services. In addition, detailed information about the programme is often available in the EPG (the availability and amount of these programme details will vary, depending on the particular broadcaster).
This function can be used only when the EPG information is broadcasted by broadcasting companies.
The EPG displays the programme description for next 8 days.
Switch on/off EPG
1 Press the GUIDE button to switch on EPG.
2 Press the GUIDE or EXIT button again to switch off EPG and return to normal TV viewing.
Select a programme
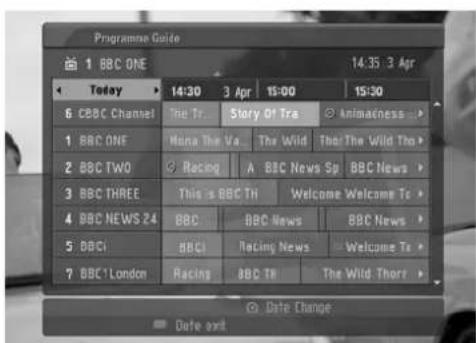
1 Press the ▲ or ▼, ◀ or ▶, PR ▲ or ▼ (or PR + or -) button to select desired programme, then press the OK button to display the selected programme.
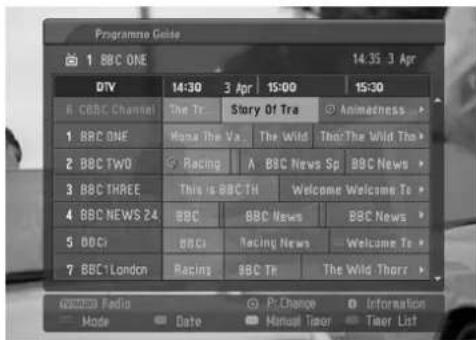
text_image
Programme Guide 1 BBC ONE 14:35 3 Apr DTV 14:30 3 Apr 15:00 15:30 E CBC Channel The Tr Story Of Tre Animatedness 1 BBC ONE Name The Va The Wild The Wild The 2 BBC TWO Racing A BBC News Sp BBC News 3 BBC THREE.This is BBC TH Welcome Welcome To 4 BBC NEWS 24 BBC BBC News BBC News 5 BBCi BBCI Racing News Welcome To 7 BBC1 London Racing BBC Tr The Wild Thorr www.Fadio C.P.Chome Information Mode Date Manual Timer Timer ListButton Function in NOW/NEXT Guide Mode
| Remote Control Buttons | Function |
| RED Change EPG mode | |
| YELLOW Enter Timer Record/Remind setting mode | |
| BLUE Enter Timer Record/Remind list mode | |
| ○ | Change to the selected channel |
| ◀ or ▶ | Select NOW or NEXT Programme |
| ▲ or ▼ | Select the Broadcasting Programme |
| PR Page Up/Down | |
| GUIDE/EXIT Switch off EPG | |
| TV/RADIO Select TV or RADIO Programme | |
| INFO 1The detail information on or off | |
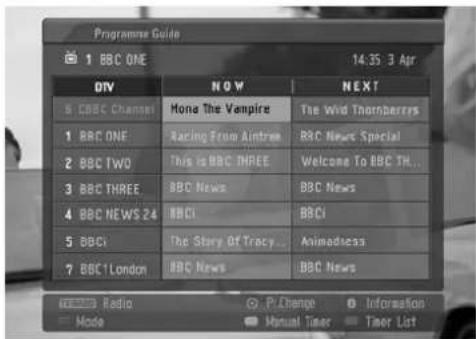
text_image
Programme Guide 1 BBC ONE 14:35:3 Apr DIV NOW NEXT 5 BBC Channel None The Vampire The Wild Thornberries 1 BBC ONE Racing From Aintree BBC News Special 2 BBC TWO This is BBC THREE Welcome To BBC TH... 3 BBC THREE BBC News BBC News 4 BBC NEWS 24 BBCI BBCI 5 BBCI The Story Of Tracy... Animadness 7 BBC1 London BBC News BBC News Radio P Change Information Mode Manual Timer Timer ListButton Function in 8 Days Guide Mode
| Remote Control Buttons | Function |
| RED Change EPG mode | |
| GREEN Enter Date setting mode | |
| YELLOW Enter Timer Record/Remind setting mode | |
| BLUE Enter Timer Record/Remind list mode | |
| ● | Change to the selected channel |
| ◀ or ▶ | Select NOW or NEXT Programme |
| ▲ or ▼ | Select the Broadcasting Programme |
| PR Page Up/Down | |
| GUIDE/EXIT Switch off EPG | |
| TV/RADIO Select TV or RADIO Programme | |
| INFO 1The detail information on or off | |
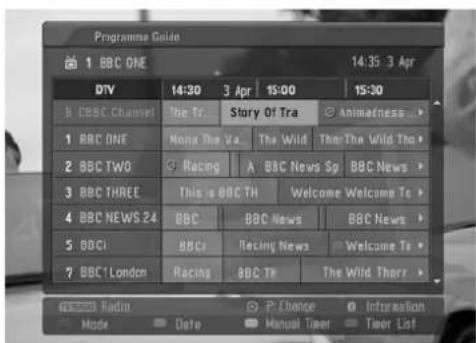
text_image
Programme Guide 1 BBC ONE 14:35 3 Apr D/TV 14:30 3 Apr 15:00 15:30 B CBSC Channel The Tr... Story Of Tra Animateness 1 BBC ONE Manga The Va The Wild The The Wild To 2 BBC TWO Racing A BBC News Sp BBC News 3 BBC THREE This is BBCTH Welcome Welcome To 4 BBC NEWS 24 BBC BBC News BBC News 5 BBCI BBCi Racing News Welcome To 7 BBC1 London Racing BBC Te The Wild Thary NVIDIA Radio P Change Information Mode Date Manual Timer Timer ListButton Function in Date Change Mode
| Remote Control Buttons | Function |
| GREEN Switch off | Date setting mode |
| ○ | Change to the selected date |
| ◀ or ▶ | Select a date |
| ▼ | Switch off Date setting mode |
| GUIDE/EXIT Switch off EPG | |
text_image
Programme Guide 1 BBC ONE 14:35:3 Apr Today 14:30 3 Apr 15:00 15:30 6 CBC Channel The Tr Story Of Tra Animateness 1 BBC ONE Mana The Va The Wild The Wild Tho 2 BBC TWO Racing A BBC News Sp BBC News 3 BBC THREE This is BBC TH Welcome Welcome To 4 BBC NEWS 24 BBC BBC News BBC News 5 BBCI BBCI Racing News Welcome To 7 BBC 1 London Racing BBC TR The Wild Thorr Date change Date exitPICTURE CONTROL
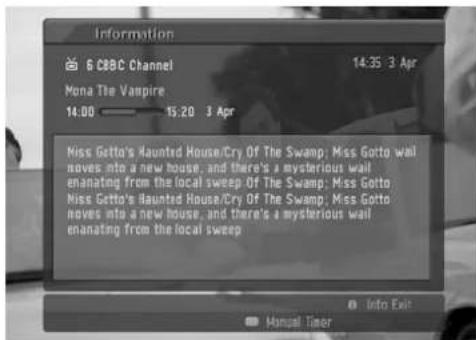
Button Function in Extended Description Box
| Remote Control Buttons | Function |
| ▲ or ▼ | Text Up/Down |
| YELLOW Enter Timer Record/Remind setting mode | |
| INFO 1The detail information on or off | |
| GUIDE/EXIT Switch off EPG | |
text_image
Information 6 CIBC Channel 14:35 3 Apr Mona The Vampire 14:00 15:20 3 Apr Miss Getto's Haunted House/Cry Of The Swamp; Miss Gotto wall noves into a new house, and there's a mysterious wall enating from the local sweep Of The Swamp; Miss Gotto Miss Getto's Haunted House/Cry Of The Swamp; Miss Gotto noves into a new house, and there's a mysterious wall enating from the local sweep Info Exit Manual TimerButton Function in Record/Remind Setting Mode
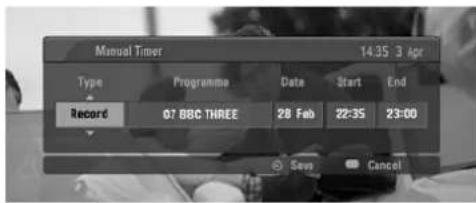
- This function is available only when recording equipment that use pin8 recording signalling has been connected to the DTV-OUT terminal, using a SCART cable.
| Remote Control Buttons | Function |
| YELLOW Change | to Guide or Timer list mode |
| Save Timer Record/Remind | |
| ◀ or ▶ | Select Type, Service, Date or Start/End time |
| ▲ or ▼ | Function setting |
text_image
Manual Timer 14:35 3 Apr Type Programme Date Start End Record 07 BBC THREE 28 Feb 22:35 23:00 Says CancelButton Function in Timer List Mode
| Remote Control Buttons | Function |
| YELLOW Add new | Manual Timer setting mode |
| GREEN Enter Timer list editing mode | |
| RED Delete the selected item | |
| BLUE Change to Guide mode | |
| ▲ or ▼ | Select Timer list |
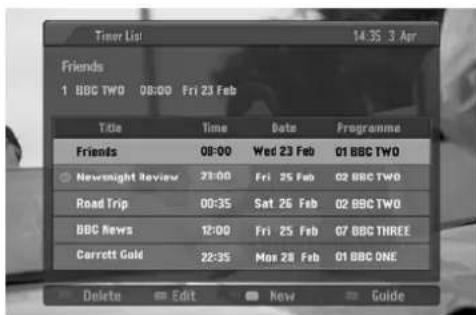
text_image
Timer List 14:35 3 Apr Friends 1 BBC TWO 08:00 Fri 23 Feb Title Time Date Programme Friends 08:00 Wed 23 Feb 01 BBC TWO Newsnight Review 23:00 Fri 25 Feb 02 BBC TWO Road Trip 00:35 Sat 26 Feb 02 BBC TWO BBC News 12:00 Fri 25 Feb 07 BBC THREE Carrett Gold 22:35 Mon 28 Feb 01 BBC ONE Delete Edit New GuidePICTURE SIZE (ASPECT RATIO) CONTROL
You can watch the screen in various picture formats; Spectacle, Full, Original, 4:3, 16:9, 14:9, Zoom1/2 and 1:1 Pixel.
If a fixed image is displayed on the screen for a long time, that fixed image may become imprinted on the screen and remain visible.
There might be uncomfortable in full mode. Then change into other mode.
You can adjust the enlarge proportion using ▲ or ▼ button.
This function works in the following signal.
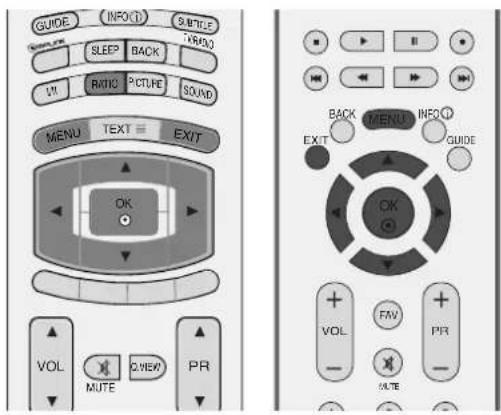
text_image
GUIDE INFO(1) S/BTCE SLEEP BACK VII RXTIC PICTURE SOUND MENU TEXT EXIT OK VOL MUTE VIEW PR BACK MENU INFO(1) EXIT GUIDE OK VOL FAV PFR OUTHE1 Press the RATIO button repeatedly to select the desired picture format. You can also adjust Aspect Ratio in the SCREEN menu.
- Spectacle
When your TV receives the wide screen signal, when selected it will adjust the picture horizontally, in non-linear proportion, to fill the entire screen.
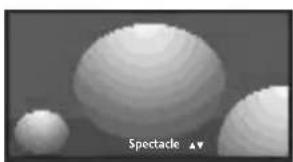
natural_image
Close-up of three spherical objects with textured surfaces, labeled 'Spectacle' in the corner (no other text or symbols)• Full
When your TV receives the wide screen signal, when selected it will adjust the picture horizontally or vertically, in a linear proportion, to fill the entire screen fully.
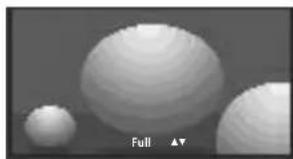
natural_image
Three spherical objects with textured surfaces, labeled 'Full' and '▲▼' at bottom (no other text or symbols)• Original
When your TV receives the wide screen signal, it will be automatically changed to the picture format to be sent.

natural_image
Three spherical objects with textured surfaces, labeled 'Original' at bottom (no other text or symbols)• 4:3
Following selection will lead you to view a picture with an original 4:3 aspect ratio, with gray bars appearing at both the left and right sides..
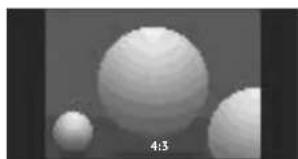
natural_image
Three spherical objects with textured surfaces, labeled '4:3' at bottom (no other text or symbols)PICTURE CONTROL
• 16:9
Following selection will lead you to adjust the picture horizontally, in a linear proportion, to fill the entire screen (useful for viewing 4:3 formatted DVDs).
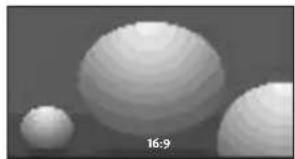
natural_image
Three spherical objects with textured surfaces, labeled '16:9' at bottom (no other text or symbols)• 14:9
You can enjoy the picture format of 14:9 or general TV programme through the 14:9 mode. The screen 14:9 is viewed just like that the screen 4:3 is magnified to the left / right.
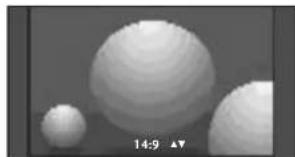
natural_image
Close-up of three spherical objects with textured surfaces, no visible text or symbols- Zoom1
Following selection will lead you to view the picture without any alternation, while filling the entire screen. However, the top and bottom portions of the picture will be cropped.
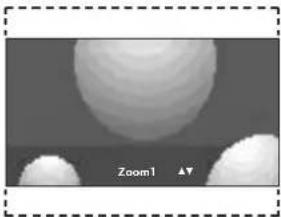
natural_image
Grayscale abstract image with circular shapes and a central textured surface, no visible text or symbols- Zoom2
Choose Zoom2 when you want the picture to be altered, both horizontally extended and vertically cropped. The picture taking a halfway trade off between alteration and screen coverage.
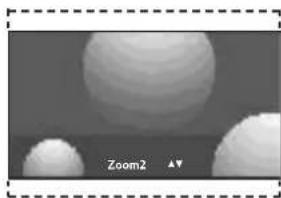
natural_image
Microscopic view of spherical particles with no visible text or symbols (labeled Zoom2 and ▲), no readable content or symbols beyond labels.- 1:1 Pixel
Following Selection will lead to you view the picture of best quality without loss of original picture in high resolution image.
NOTE
▶ You can only select 4:3, 16:9 (Wide), Zoom 1/2 in Component, HDMI mode.
▶ You can only select 4:3, 16:9 (Wide) in RGB mode only.
In HDMI (1080i 50Hz/60Hz, 1080p 24Hz/50Hz/60Hz) mode, 1:1 Pixel is available.
PRESET PICTURE SETTINGS
Picture Mode-Preset
| Dynamic | Select this option to display with a sharp image. |
| Standard | The most general and natural screen display status. |
| Mild | Select this option to display with a mild image. |
| User 1/2 | Select this option to use the user-defined setting. |
1 Press the MENU button and then ▲ or ▼ button to select the PICTURE menu.
2 Press the ▶ button and then ▲ or ▼ button to select Picture Mode.
3 Press the ▶ button and then ▲ or ▼ button to select Intelligent Eye (except 50/60PF9-), Dynamic, Standard, Mild, User 1, or User 2.
4 Press the EXIT button to return to normal TV viewing.
Picture Mode adjusts the set for the best picture appearance. Select the preset value in the Picture Mode menu based on the programme category.
Intelligent Eye (except 50/60PF9*), Dynamic, Standard and Mild are programmed for optimum picture reproduction at the factory and cannot be changed.
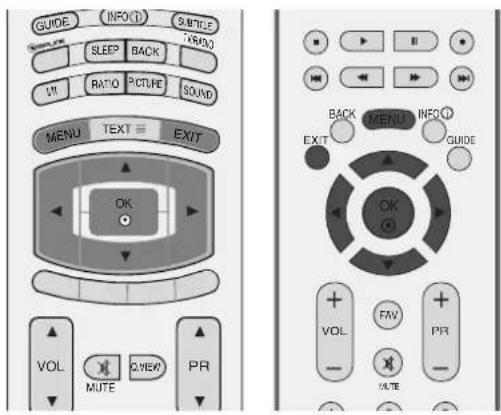
text_image
GUIDE INFO(1) S/BTCE SLEEP BACK L/V RATIO PICTURE SOUND MENU TEXT EXIT OK VOL MUTE VIEW PR BACK MENU INFO(1) EXIT GUIDE OK VOL FAV PIR NOTE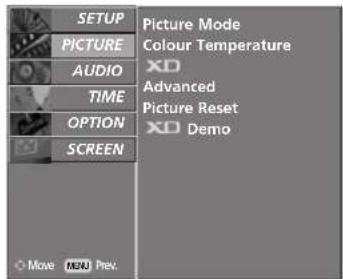
text_image
SETUP PICTURE AUDIO TIME OPTION SCREEN Picture Mode Colour Temperature XD Advanced Picture Reset XD Demo Move Format Prev.1
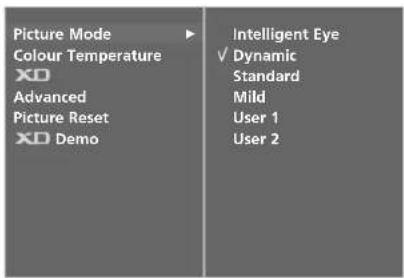
text_image
Picture Mode Colour Temperature XD Advanced Picture Reset XD Demo Intelligent Eye ✓ Dynamic Standard Mild User 1 User 223
PICTURE CONTROL
Auto Colour Tone Control (Warm/Medium/Cool)
To initialize values (reset to default settings), select the Cool option.
Choose one of three automatic colour adjustments. Set to warm to enhance hotter colours such as red, or set to cool to see less intense colours with more blue.
It's available to use this function in User mode.
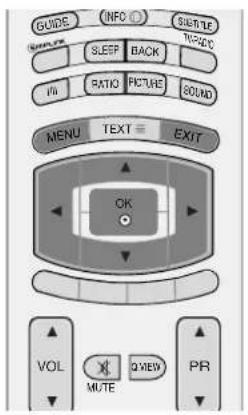
text_image
GUIDE INFO SUSTLE SERVICE Sleep BACK TIME TIME RATIO PICTURE SOUND MENU TEXT EXIT OK VOL MUTE QVIEW PR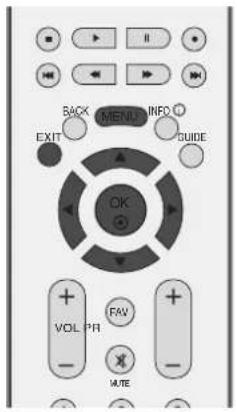
text_image
BACK MENU INFO EXIT GUIDE OK VOL PR FAV MTE1 Press the MENU button and then ▲ or ▼ button to select the PICTURE menu.
2 Press the ▶ button and then ▲ or ▼ button to select Colour Temperature.
3 Press the ▶ button and then ▲ or ▼ button to select either Cool, Medium, Warm, or User.
4 Press the EXIT button to return to normal TV viewing.
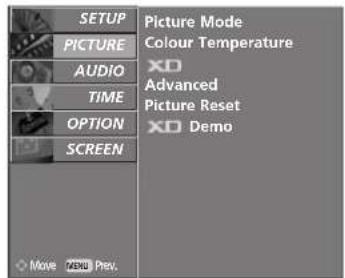
text_image
SETUP Picture Mode Picture Temperature PICTURE AUDIO XO Advanced TIME Picture Reset OPTION XO Demo SCREEN Move MOV Prev.1
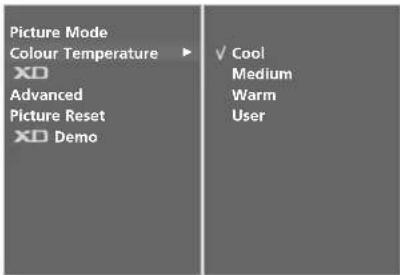
text_image
Picture Mode Colour Temperature ▶ X0 Advanced Picture Reset X0 Demo ✓ Cool Medium Warm User23
MANUAL PICTURE ADJUSTMENT
Picture Mode-User option
Contrast Adjusts the difference between the light and dark levels in the picture.
Brightness Increases or decreases amount of white in the your picture.
Colour Adjusts intensity of all colours.
Sharpness Adjusts the level of crispness in the edges between the light and dark areas of the picture. The lower the level, the softer the image.
Tint Adjusts the balance between red and green levels.
1 Press the MENU button and then ▲ or ▼ button to select the PICTURE menu.
2 Press the ▶ button and then ▲ or ▼ button to select Picture Mode.
3 Press the ▶ button and then ▲ or ▼ button to select User 1 or User 2.
4 Press the ▶ button and then ▲ or ▼ button to select the desired picture option (Contrast, Brightness, Colour, Sharpness and Tint).
5 Press the ◀ or ▶ button to make appropriate adjustments.
6 Press the EXIT button to return to normal TV viewing.
NOTE
▶ You can't adjust colour, sharpness and tint in the RGB-PC mode to the levels you prefer.
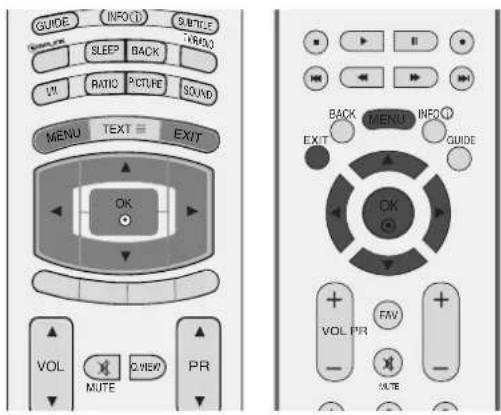
text_image
GUIDE INFO(1) SERVICE SLEEP BACK LVI RATIO PICTURE SOUND MENU TEXT EXIT OK VOL MUTE VIEW PR BACK MENU INFO(1) EXIT GUIDE OK VOL PR FAV + - DRIVE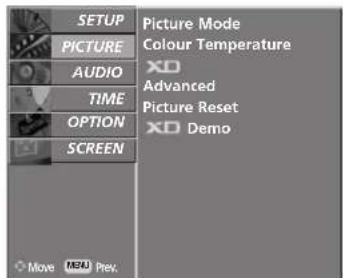
text_image
SETUP PICTURE AUDIO TIME OPTION SCREEN Picture Mode Colour Temperature XD Advanced Picture Reset XD Demo Move Prev.1
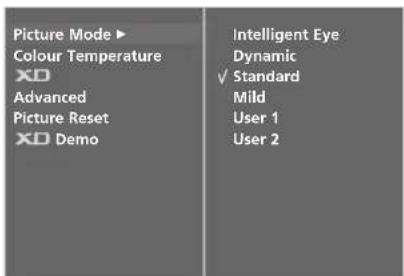
text_image
Picture Mode ▶ Colour Temperature XD Advanced Picture Reset XD Demo Intelligent Eye Dynamic ✓ Standard Mild User 1 User 223

text_image
User 1 Contrast 100 ▶ Brightness 45 Colour 50 Sharpness 50 Tint 04 5
PICTURE CONTROL
Colour Tone - User option
To adjust red, green, blue to any colour temperature you prefer.
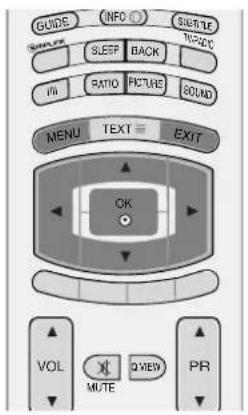
text_image
GUIDE INFO SUBTLE SLEEP BACK TIME RATIO PICTURE SOUND MENU TEXT EXIT OK VOL MUTE QVIEW PR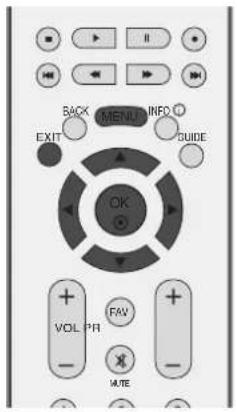
text_image
BACK MENU INFO EXIT DUIDE OK VOL PR FAV MTE1 Press the MENU button and then ▲ or ▼ button to select the PICTURE menu.
2 Press the ▶ button and then ▲ or ▼ button to select Colour Temperature.
3 Press the ▶ button and then ▲ or ▼ button to select User.
4 Press the ▶ button and then ▲ or ▼ button to select Red, Green or Blue.
5 Press the ◀ or ▶ button to make appropriate adjustments.
6 Press the EXIT button to return to normal TV viewing.
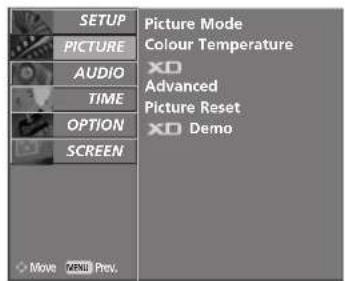
text_image
SETUP Picture Mode Picture Temperature PICTURE AUDIO XO Advanced TIME Picture Reset XO Demo OPTION SCREEN Move MENU Prev.1
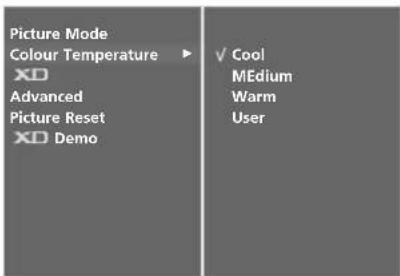
text_image
Picture Mode Colour Temperature ▶ XD Advanced Picture Reset XD Demo √ Cool MEdium Warm User23
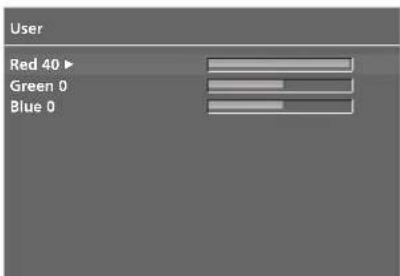
text_image
User Red 40 ▶ Green 0 Blue 04 5
XD - PICTURE IMPROVEMENT TECHNOLOGY
XD is LG electronic's unique picture improving technology to display a real HD source through an advanced digital signal processing algorithm.
It's not available to use this function in PC[RGB/HDMI] mode.
1 Press the MENU button and then ▲ or ▼ button to select the PICTURE menu.
2 Press the ▶ button and then ▲ or ▼ button to select XD.
3 Press the ▶ button and then ▲ or ▼ button to select Auto or Manual.
4 Press the EXIT button to return to normal TV viewing.
\* Selecting the Manual
This menu is activated after selecting the User1 or User2 of Picture Mode.
1 Press the ▶ button and then ▲ or ▼ button to select XD Contrast, XD Colour, XD NR or MPEG NR.
2 Press the ▶ button and then ▲ or ▼ button to select On or Off.
3 Press the EXIT button to return to normal TV viewing.
■ XD Contrast : Optimizing the contrast automatically according to the brightness of the reflection.
■ XD Colour : Adjusting the colors of the reflection automatically to reproduce as closely as possible to the natural colors.
■ XD NR: Removing the noise up to the point where it does not damage the original picture.
■ MPEG NR : To reduce the picture noise which may appear on the screen during watching the TV.
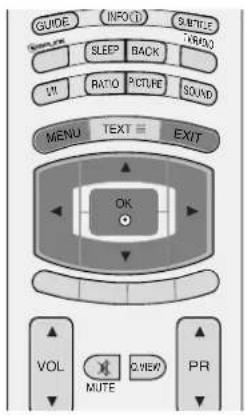
text_image
GUIDE INFOID 9.8"TIME SLEEP BACK TIME LVI RATIO PICTURE SOUND MENU TEXT EXIT OK VOL MUTE Q.NEW PR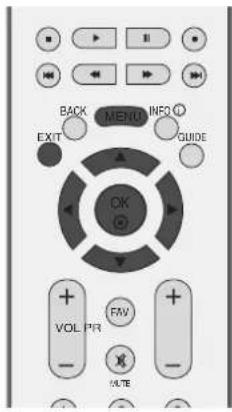
text_image
BACK MENU INFO EXIT GUIDE OK VOLPR FNV VUTE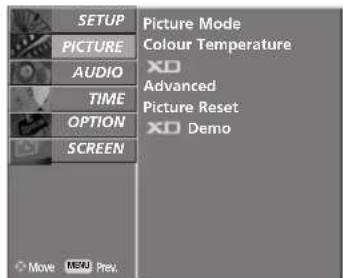
text_image
SETUP PICTURE AUDIO TIME OPTION SCREEN Picture Mode Colour Temperature XD Advanced Picture Reset XD Demo Move Prev.1
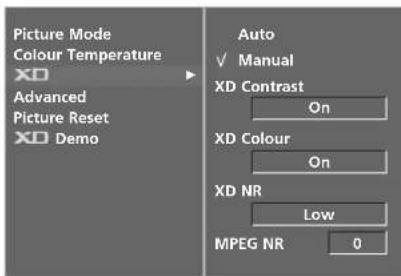
text_image
Picture Mode Colour Temperature XD Advanced Picture Reset XD Demo Auto ✓ Manual XD Contrast On XD Colour On XD NR Low MPEG NR 02
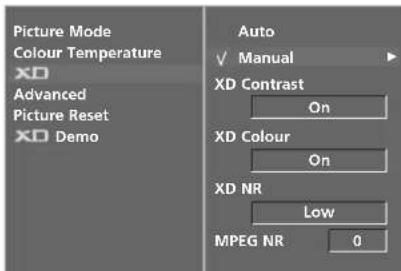
text_image
Picture Mode Colour Temperature XD Advanced Picture Reset XD Demo Auto ✓ Manual XD Contrast On XD Colour On XD NR Low MPEG NR 03
PICTURE CONTROL
XD DEMO
Use it to see the difference between XD Demo on and XD Demo off.
It's not available to use this function in RGB[PC], HDMI[PC] mode.
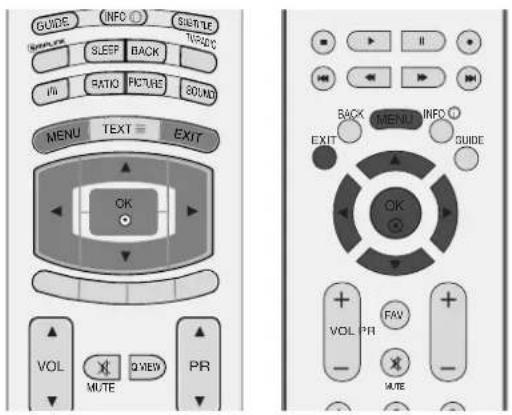
text_image
GUIDE INFO SUTTER SERVICE TURSDIC SLEEP BACK IN RATIO FIGURE SOUND MENU TEXT EXIT OK VOL X Q VIEW PR MUTE1 Press the MENU button and then ▲ or ▼ Button to select the PICTURE menu.
2 Press the MENU button and then ▲ or ▼ button to select XD Demo.
3 Press the ▶ button to begin XD Demo.
4 To stop XD Demo, press the MENU or EXIT button.
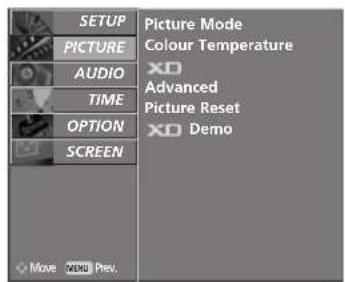
text_image
SETUP Picture Mode Picture Temperature AUDIO XO Advanced TIME Picture Reset XO Demo OPTION SCREEN Move More Prev.1
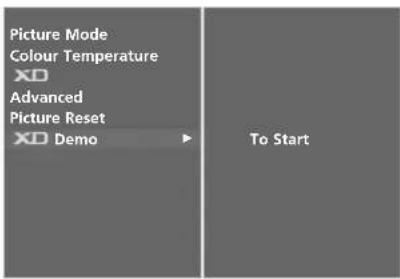
text_image
Picture Mode Colour Temperature XD Advanced Picture Reset XD Demo To Start23
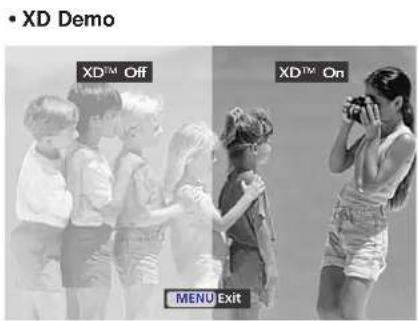
text_image
• XD Demo XDTM Off XDTM On MENU ExitADVANCED - CINEMA
Set up the TV for the best picture appearance for viewing movies.
This feature operates only in TV, AV, S-Video and Component 480i/576i mode.
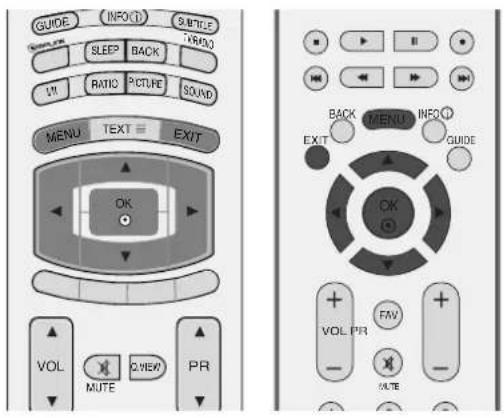
text_image
GUIDE INFO C1 S/BTCE SLEEP BACK V1 RATIO PICTURE SOUND MENU TEXT EXIT OK VOL MUTE VIEW PR BACK MENU INFO C1 EXIT GUIDE OK + FAV + VOL PR - + -1 Press the MENU button and then ▲ or ▼ button to select the PICTURE menu.
2 Press the ▶ button and then ▲ or ▼ button to select Advanced.
3 Press the ▶ button and then ▲ or ▼ button to select Cinema.
4 Press the ▶ button and then ◀ or ▶ button to select On or Off.
5 Press the EXIT button to return to normal TV viewing.
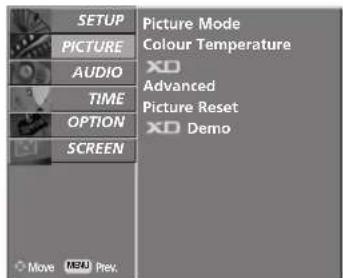
text_image
SETUP PICTURE AUDIO TIME OPTION SCREEN Picture Mode Colour Temperature XD Advanced Picture Reset XD Demo Move Prev.1
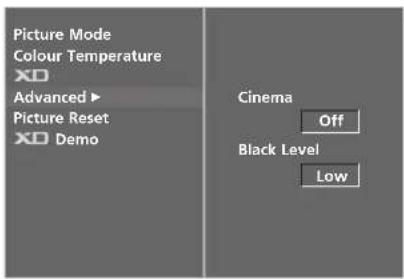
text_image
Picture Mode Colour Temperature XD Advanced ▶ Picture Reset XD Demo Cinema Off Black Level Low2
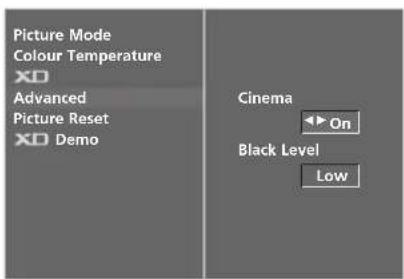
text_image
Picture Mode Colour Temperature XD Advanced Picture Reset XD Demo Cinema On Black Level Low3
PICTURE CONTROL
When you watch the movie, this function adjusts the set to the best picture appearance. Adjusting the contrast and the brightness of the screen using the black level of the screen.
This function works in the following mode: AV (NTSC-M), S-Video (NTSC-M) or HDMI.
1 Press the MENU button and then ▲ or ▼ button to select the PICTURE menu.
2 Press the ▶ button and then ▲ or ▼ button to select Advanced.
3 Press the ▶ button and then ▲ or ▼ button to select Black Level.
4 Press the ▶ button and then ◀ or ▶ button to select Low or High.
■ Low : The reflection of the screen gets darker.
■ High : The reflection of the screen gets brighter.
5 Press the EXIT button to return to normal TV viewing.
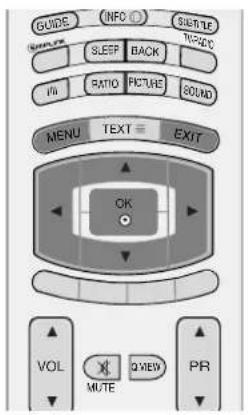
text_image
GUIDE INFO SUSTLE SERVICE Sleep BACK TIME TIME RATIO PICTURE SOUND MENU TEXT EXIT OK VOL MUTE QVIEW PR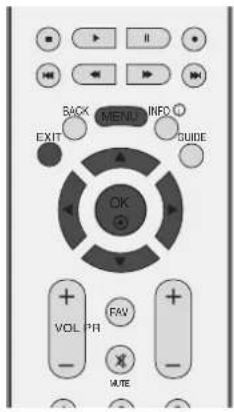
text_image
BACK MENU INFO EXIT GUIDE OK VOL PR FAV MATE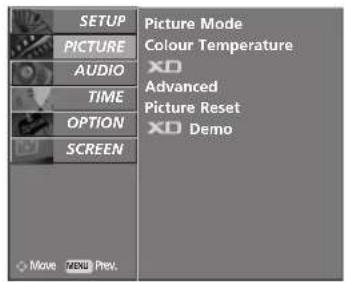
text_image
SETUP Picture Mode PICTURE Colour Temperature AUDIO XO Advanced TIME Picture Reset OPTION XO Demo SCREEN Move MENU Prev.1
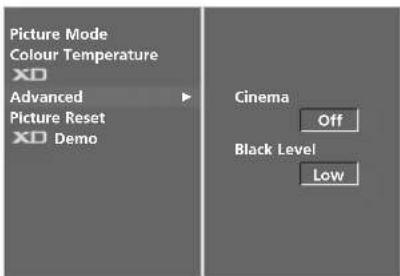
text_image
Picture Mode Colour Temperature XD Advanced Picture Reset XD Demo Cinema Off Black Level Low2
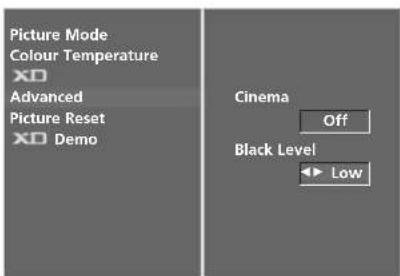
text_image
Picture Mode Colour Temperature XD Advanced Picture Reset XD Demo Cinema Off Black Level Low34
PICTURE RESET
Returns to the default settings Picture Mode, Colour Temperature, XD, Advanced at the factory.
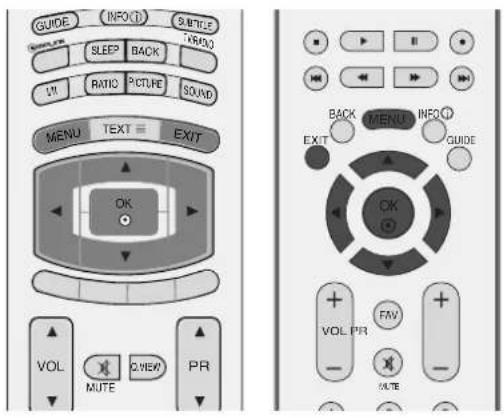
text_image
GUIDE INFO C1 S/BTFC SLEEP BACK L1 RATIO PICTURE SOUND MENU TEXT EXIT OK VOL MUTE VIEW PR BACK MENU INFO C1 EXIT GUIDE OK + FAV + - RATE -1 Press the MENU button and then ▲ or ▼ button to select the PICTURE menu.
2 Press the ▶ button and then ▲ or ▼ button to select Picture Reset.
3 Press the ▶ button to initialize the adjusted value.
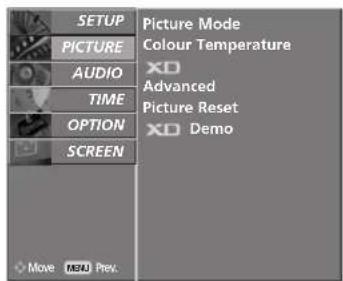
text_image
SETUP PICTURE AUDIO TIME OPTION SCREEN Picture Mode Colour Temperature XD Advanced Picture Reset XD Demo Move MOV Prev.1
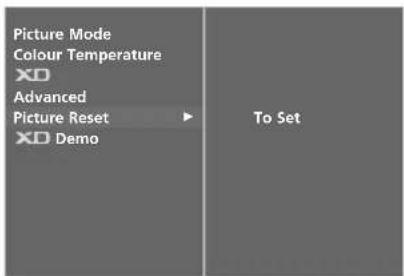
text_image
Picture Mode Colour Temperature XD Advanced Picture Reset XD Demo To Set23
PICTURE CONTROL
IMAGE STICKING MINIMIZATION (ISM) METHOD
A frozen of still picture from a PC/video game displayed on the screen for prolonged periods will result in a ghost image remaining even when you change the image. Avoid allowing a fixed image to remain on the set's screen for a long period of time.
It's not available to use this function in LCD models.
White wash
White wash removes permanent images from the screen.
Note: An excessive permanent image may be impossible to clear entirely with White Wash.
Orbiter
Orbiter may help prevent ghost images. However, it is best not to allow any fixed image to remain on the screen. To avoid a permanent image on the screen, the screen will move every 2 minutes.
Inversion
This is the function to invert the panel colour of the screen. The panel colour is automatically inverted every 30 minutes.
1 Press the MENU button and then ▲ or ▼ button to select the OPTION menu.
2 Press the ▶ button and then ▲ or ▼ button to select Factory Mode.
3 Press the ▶ button and then ▲ or ▼ button to select ISM Method.
4 Press the ▶ button and then ▲ or ▼ button to select either Normal, White wash, Orbiter or Inversion. If you unnecessary to set this function, set Normal.
5 Press the EXIT button to return to normal TV viewing.
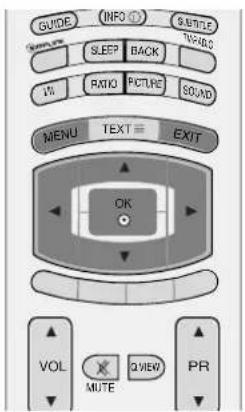
text_image
GUIDE INFO SUTTER SLEEP BACK TV-ARC TV RATIO PICTURE SOUND MENU TEXT EXIT OK VOL MUTE QVIEW PR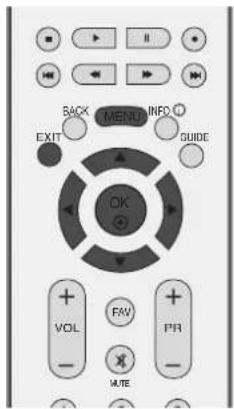
text_image
BACK MENU INFO EXIT GUIDE OK VOL FAX PIR M/TE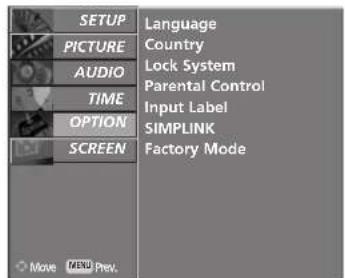
text_image
SETUP PICTURE AUDIO TIME OPTION SCREEN Language Country Lock System Parental Control Input Label SIMPLINK Factory Mode Move MENU Prev.1
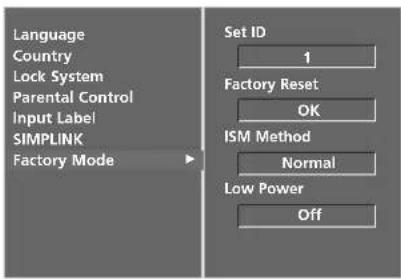
text_image
Language Country Lock System Parental Control Input Label SIMPLINK Factory Mode Set ID 1 Factory Reset OK ISM Method Normal Low Power Off2
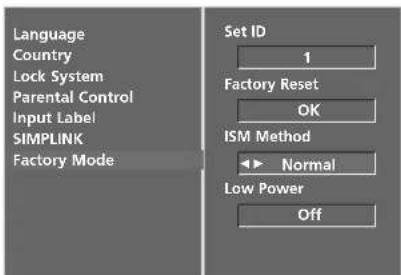
text_image
Language Country Lock System Parental Control Input Label SIMPLINK Factory Mode Set ID 1 Factory Reset OK ISM Method Normal Low Power Off3 4
LOW-POWER PICTURE MODE
This is the function to reduce the power consumption of the set.
It's not available to use this function in LCD TV models.
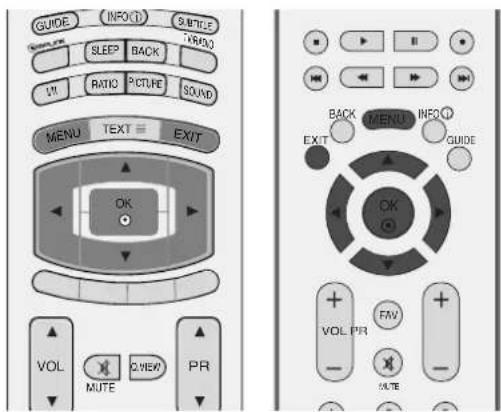
text_image
GUIDE INFO(1) S/BTLE SLEEP BACK LVI RATIO PICTURE SOUND MENU TEXT EXIT OK VOL MUTE VIEW PR BACK MENU INFO(1) EXIT GUIDE OK VOL PR FAV - NOTE1 Press the MENU button and then ▲ or ▼ button to select the OPTION menu.
2 Press the ▶ button and then ▲ or ▼ button to select Factory Mode.
3 Press the ▶ button and then ▲ or ▼ button to select Low power.
4 Press the ▶ button and then ▲ or ▼ button to select Off or On.
5 Press the EXIT button to return to normal TV viewing.
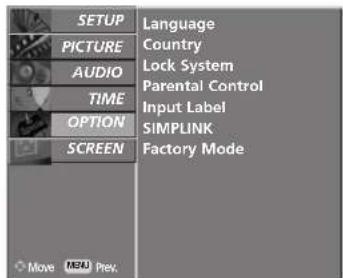
text_image
SETUP PICTURE AUDIO TIME OPTION SCREEN Language Country Lock System Parental Control Input Label SIMPLINK Factory Mode Move MENA Prev.1
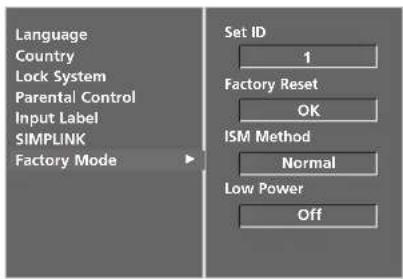
text_image
Language Country Lock System Parental Control Input Label SIMPLINK Factory Mode Set ID 1 Factory Reset OK ISM Method Normal Low Power Off2
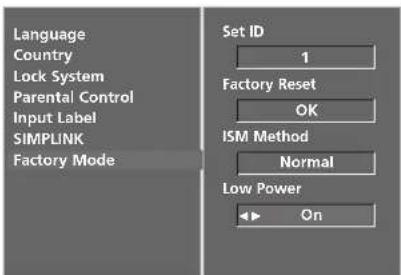
text_image
Language Country Lock System Parental Control Input Label SIMPLINK Factory Mode Set ID 1 Factory Reset OK ISM Method Normal Low Power On34
SOUND & LANGUAGE CONTROL
AUTO VOLUME LEVELER
AVL automatically keeps on an equal volume level even if you change programmes.
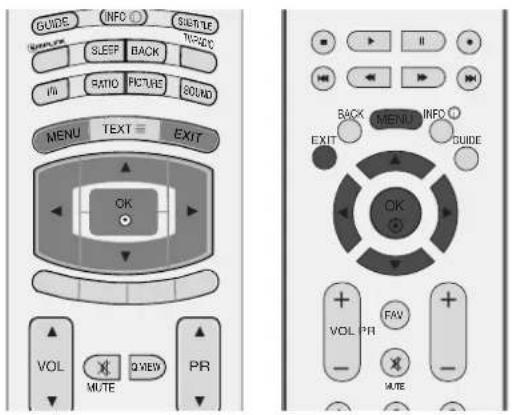
text_image
GUIDE INFO SUTTER SERVICE SLEEP BACK VIN RATIO FIGURE SOUND MENU TEXT EXIT OK VOL X Q VIEW PR MUTE MUTE BACK MENU INFO EXIT GUIDE OK VOL PR FAY - MTE1 Press the MENU button and then ▲ or ▼ button to select the AUDIO menu.
2 Press the ▶ button and then ▲ or ▼ button to select Auto Volume.
3 Press the ▶ button and then ▲ or ▼ button to select Off or On.
4 Press the EXIT button to return to normal TV viewing.
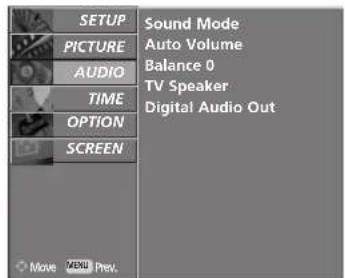
text_image
SETUP PICTURE AUDIO TIME OPTION SCREEN Sound Mode Auto Volume Balance 0 TV Speaker Digital Audio Out Move MENU Prev.1
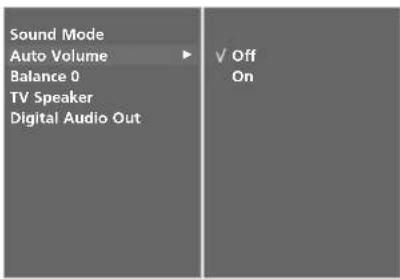
text_image
Sound Mode Auto Volume Balance 0 TV Speaker Digital Audio Out ✓ Off On23
PRESET SOUND SETTINGS- SOUND MODE
You can select your preferred sound setting; Surround MAX, Standard, Music, Movie or Sports and you can also adjust the sound frequency of the equalizer.
Sound Mode lets you enjoy the best sound without any Special adjustment because the TV sets the appropriate sound options based on the programme content.
Surround MAX, Standard, Music, Movie, and Sports are preset for good sound quality at the factory and are not adjustable.
Surround MAX Select this option to sound realistic.
Standard The most commanding and natural audio.
Music Select this option to enjoy the original sound when listening to the music.
Movie Select this option to enjoy sublime sound.
Sports Select this option to watch sports broadcasting.
User Select this option to use the user-defined audio settings.
1 Press the MENU button and then ▲ or ▼ button to select the AUDIO menu.
2 Press the ▶ button and then ▲ or ▼ button to select Sound Mode.
3 Press the ▶ button and then ▲ or ▼ button to select Surround MAX, Standard, Music, Movie, Sports or User.
4 Press the EXIT button to return to normal TV viewing.
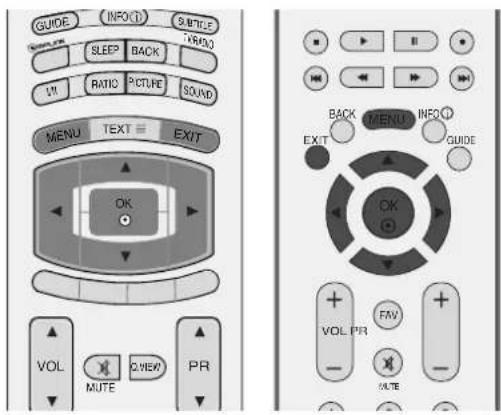
text_image
GUIDE INFO(1) S/BTFLE SLEEP BACK L/I RATIO PICTURE SOUND MENU TEXT EXIT OK VOL MUTE VIEW PR BACK MENU INFO(1) EXIT GUIDE OK VOL PR FAV - WRITE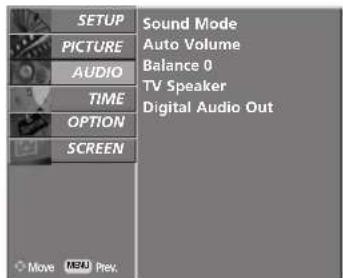
text_image
SETUP PICTURE AUDIO TIME OPTION SCREEN Sound Mode Auto Volume Balance 0 TV Speaker Digital Audio Out Move MENA Prev.1
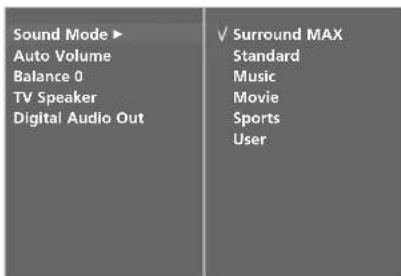
text_image
Sound Mode ▶ Auto Volume Balance 0 TV Speaker Digital Audio Out ✓ Surround MAX Standard Music Movie Sports User23
SOUND & LANGUAGE CONTROL
SOUND SETTING ADJUSTMENT -USER MODE
Adjust the sound equalizer.
1 Press the MENU button and then ▲ or ▼ button to select the AUDIO menu.
2 Press the ▶ button and then ▲ or ▼ button to select Sound Mode.
3 Press the ▶ button and then ▲ or ▼ button to select User.
4 Press the ▶ button.
5 Select a sound band by pressing the ◀ or ▶ button. Make appropriate sound level with the ▲ or ▼ button.
6 Press the EXIT button to return to normal TV viewing.
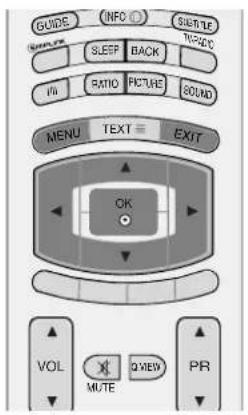
text_image
GUIDE INFO SUBTLE SERVICE Sleep BACK TIME TIME RATIO PICTURE SOUND MENU TEXT EXIT OK VOL MUTE QVIEW PR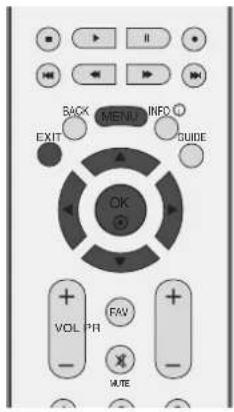
text_image
BACK MENU INFO EXIT GUIDE OK VOL PR FAV MATE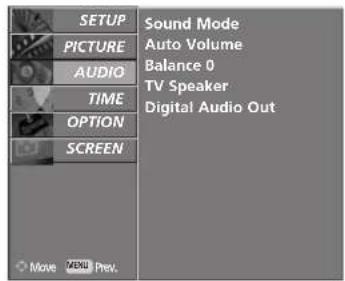
text_image
SETUP PICTURE AUDIO TIME OPTION SCREEN Sound Mode Auto Volume Balance 0 TV Speaker Digital Audio Out Move MENU Prev.1
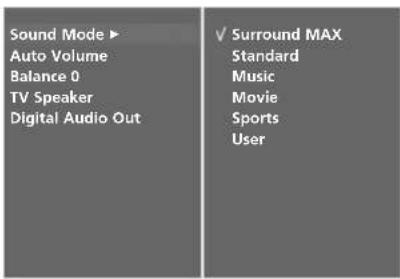
text_image
Sound Mode ▶ Auto Volume Balance 0 TV Speaker Digital Audio Out ✓ Surround MAX Standard Music Movie Sports User23
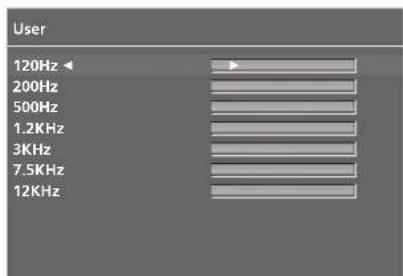
text_image
User 120Hz 200Hz 500Hz 1.2KHz 3KHz 7.5KHz 12KHz4 5
BALANCE
You can adjust the sound balance of speaker to the levels you prefer.
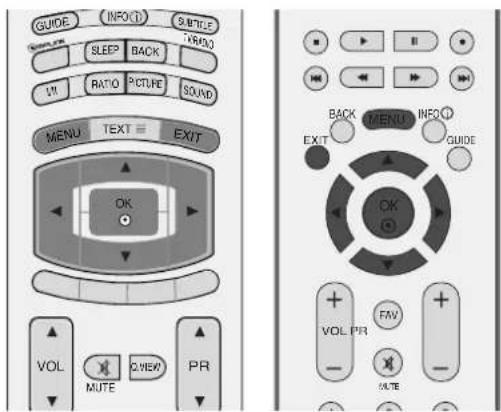
text_image
GUIDE INFO(1) S/BTFLE SLEEP BACK LVI RATIO PICTURE SOUND MENU TEXT EXIT OK VOL MUTE VIEW PR BACK MENU INFO(1) EXIT GUIDE OK VOL PR FAV - BASE1 Press the MENU button and then ▲ or ▼ button to select the AUDIO menu.
2 Press the ▶ button and then ▲ or ▼ button to select Balance.
3 Press the ▶ button and then ◀ or ▶ button to make desired adjustment.
4 Press the EXIT button to return to normal TV viewing.
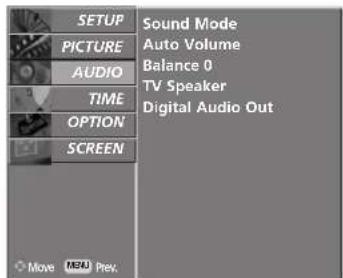
text_image
SETUP PICTURE AUDIO TIME OPTION SCREEN Sound Mode Auto Volume Balance 0 TV Speaker Digital Audio Out Move MENA Prev.1
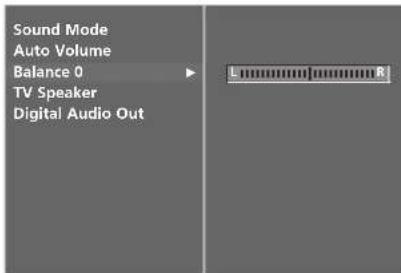
text_image
Sound Mode Auto Volume Balance 0 TV Speaker Digital Audio Out23
SOUND & LANGUAGE CONTROL
You can adjust the internal speaker status.
In AV1, AV2, AV3, COMPONENT, RGB and HDMI1 with HDMI to DVI cable, TV speaker can be outputted even though there is no video signal.
If you want to use your external hi-fi stereo system, turn off the internal speakers of the set.
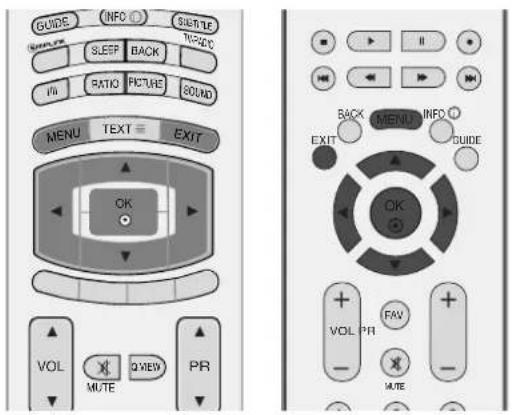
text_image
GUIDE INFO SUTTER SERVICE TIME SLEEP BACK TIME RATIO FIGURE SOUND MENU TEXT EXIT OK VOL Q VIEW PR MUTE MUTE BACK MENU INFO EXIT GUIDE OK VOL PR FAY - MTE1 Press the MENU button and then ▲ or ▼ button to select the AUDIO menu.
2 Press the ▶ button and then ▲ or ▼ button to select TV Speaker.
3 Press the ▶ button and then ▲ or ▼ button to select Off or On.
4 Press the EXIT button to return to normal TV viewing.
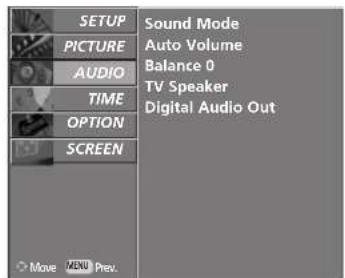
text_image
SETUP PICTURE AUDIO TIME OPTION SCREEN Sound Mode Auto Volume Balance 0 TV Speaker Digital Audio Out Move MENU Prev.1
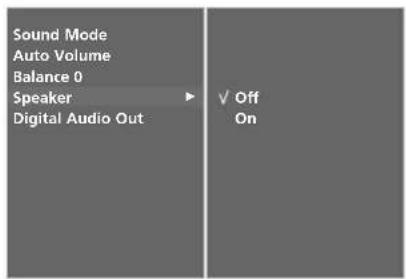
text_image
Sound Mode Auto Volume Balance 0 Speaker Digital Audio Out Off On23
SELECTING DIGITAL AUDIO OUT
This function lets you select your preferred Digital Audio Output. The set can output Dolby Digital in a channel only which broadcast Dolby Digital Audio.
When it's applied the Dolby Digital format, if you select Dolby Digital on Digital audio out menu, SPDIF Output will be outputted Dolby Digital.
Even if it's selected Dolby Digital, when it doesn't apply Dolby Digital format, SPDIF Output will be outputted PCM. Even if both Dolby Digital and Audio language have been set in a channel which broadcast Dolby Digital Audio, only Dolby Digital will be played.

Manufactured under license from Dolby Laboratories. "Dolby "and the double-D symbol are trademarks of Dolby Laboratories.
1 Press the MENU button and then ▲ or ▼ button to select the AUDIO menu.
2 Press the ▶ button and then ▲ or ▼ button to select Digital Audio Out.
3 Press the ▶ button and then ▲ or ▼ button to select Dolby Digital or PCM.
4 Press the EXIT button to return to normal TV viewing.
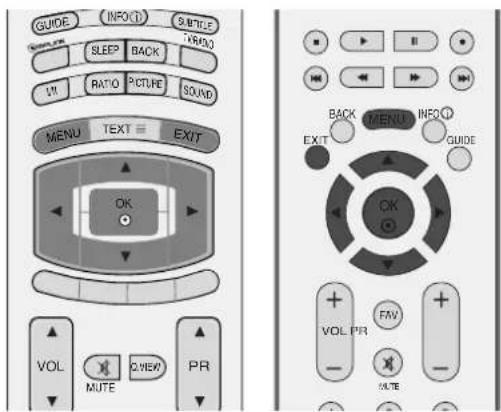
text_image
GUIDE INFO(1) S/BTLE SLEEP BACK LVI RATIO PICTURE SOUND MENU TEXT EXIT OK VOL MUTE VIEW PR BACK MENU INFO(1) EXIT GUIDE OK VOL PR FAV - NOTE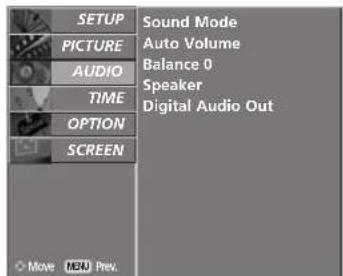
text_image
SETUP PICTURE AUDIO TIME OPTION SCREEN Sound Mode Auto Volume Balance 0 Speaker Digital Audio Out More MEM Prev.1
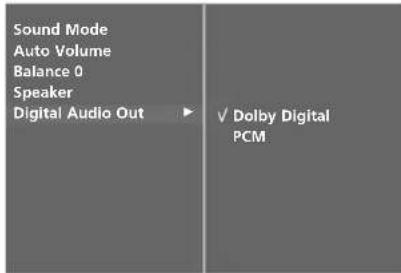
text_image
Sound Mode Auto Volume Balance 0 Speaker Digital Audio Out ✓ Dolby Digital PCM23
SOUND & LANGUAGE CONTROL
I/II
Stereo/Dual Reception (In Analogue Mode Only)
When a programme is selected, the sound information for the station appears after the programme number and station name disappear.
| Broadcast | On Screen Display |
| Mono | MONO |
| Stereo | STEREO |
| Dual | DUAL I |
■ Mono sound selection
If the stereo signal is weak in stereo reception, you can switch to mono by pressing the I/II button twice. In mono reception, the depth of sound is improved. To switch back to stereo, press the I/II button twice again.
■Language selection for dual language broadcast
If a programme received two languages (dual language), you can switch to DUAL I, DUAL II or DUAL I+II by pressing the I/II button repeatedly.
DUAL I Sends the primary broadcast language to the loudspeakers.
DUAL II Sends the secondary broadcast language to the loudspeakers.
DUAL I+II Sends a separate language to each loudspeaker.
NICAM Reception (In Analogue Mode Only)
If the set is equipped with the receiver for NICAM reception, the high quality NICAM (Near Instantaneous Companding Audio Multiplex) digital sound can be received.
Sound output can be selected according to the type of received broadcast as follows by pressing the I/II button repeatedly.
1 When NICAM mono is received, you can select NICAM MONO or FM MONO.
2 When NICAM stereo is received, you can select NICAM STEREO or FM MONO. If the stereo signal is weak, switch to FM mono.
3 When NICAM dual is received, you can select NICAM DUAL I, NICAM DUAL II or NICAM DUAL I+II or MONO.
Speaker Sound Output Selection
In AV, S-Video, Component, RGB and HDMI mode, you can select output sound for the left and right loudspeakers.
Repeatedly press the I/II button to select the sound output.
L+R: Audio signal from audio L input is sent to the left loud speaker and audio signal from audio R input is sent to the right loud speaker.
L+L: Audio signal from audio L input is sent to left and right loud speakers.
R+R: Audio signal from audio R input is sent to left and right loud speakers.
SOUND & LANGUAGE CONTROL
ON-SCREEN MENU LANGUAGE / COUNTRY SELECTION
Installation guide menu appears on TV screen when it is turned on for the first time.
1 Press the ▲/or ▼/or ◀ or ▶ button and then, OK button to select your desired language.
2 Press the ▲ or ▼ button and then, OK button to select your country.
* If you want to change Language/ Country selection
1 Press the MENU button and then use ▲ or ▼ button to select the OPTION menu.
2 Press the ▶ button and then use▲/or ▼ button to select Language. The menus can be shown on the screen in the selected language.
Or, Press the▶ button and then use▲/or ▼ button to select Country.
3 Press the ▶ button and then use◀ or ▶ button to select your desired language or country.
4 Press the OK button.
5 Press the EXIT button to return to normal TV viewing.
NOTE
If you don't finish set up Installation Guide by pressing EXIT button or time out of OSD (On Screen Display) display, it will continuously appear until completing set up whenever the set is turned on.
▶ If you select wrong local country, the teletext may not appear correctly on the screen and some problem may happen during teletext operation.
▶ CI (Common Interface) function may not be applied based on country broadcasting circumstance.
▶ DTV mode control buttons may not be working based on country broadcasting circumstance.
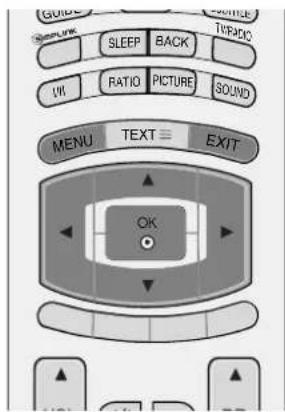
text_image
GUIDE SLEEP BACK TIRADC VW RATIO PICTURE SOUND MENU TEXT EXIT OK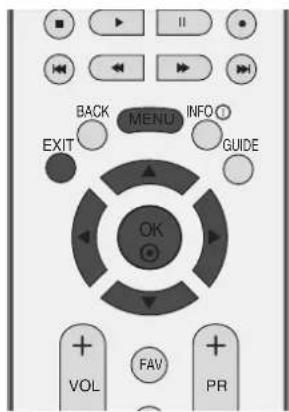
text_image
BACK MENU INFO EXIT GUIDE OK VOL FAV PRLANGUAGE SELECTION (IN DIGITAL MODE ONLY)
Audio function lets you select your preferred language for audio. If the audio data in selected language is not broadcasted, default language audio will be played.
Use Subtitle function when two or more subtitle languages are broadcasted. If the subtitle data in selected language is not broadcasted, default language subtitle will be displayed.
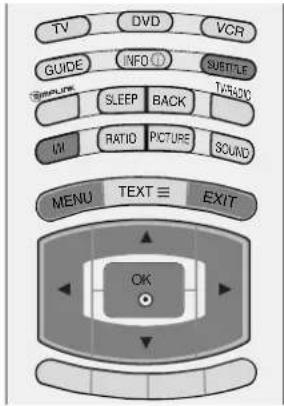
text_image
TV DVD VCR GUIDE INFO SUEFLE SLEEP BACK TAWAYO M/I RATIO PICTURE SOUND MENU TEXT ≡ EXIT OK1 Press the MENU button and then use ▲ or ▼ button to select the OPTION menu.
2 Press the ▶ button and then use▲ or ▼ button to select Language.
3 Press the ▶ button and then use▲ or ▼ button to select Audio, Subtitle or Subtitle Hard of hearing.
4 Press the ▶ button and then use◀ or ▶ button to select your desired language.
5 Press the EXIT button to return to normal TV viewing.

text_image
SIMPLINK TEXT RATIO I/II BACK MENU INFO EXIT GUIDE OK SLEEP HOLD REVEAL SUITUPNOTE
< Audio Language Selection >
When two or more audio languages are broadcasted, you can select audio language with the I/II button on the remote control.
▶ Press the ▲ or ▼ button to select an audio language.
▶ Press the ◀ or ▶ button to select L+R, L+L or R+R.
< Subtitle Language Selection >
When two or more subtitle languages are broadcasted, you can select subtitle language with the SUBTITLE button on the remote control.
▶ Press the ▲ or ▼ button to select a subtitle language.
- The audio/subtitle can be displayed simpler form with 1 to 3 characters which is broadcast by service provider. - When you select supplementary Audio (Audio for "Visual/Hearing Impaired") it may speak out a part of Main audio.
| Display | Status |
| N.A | Not Available |
| MPEG | MPEG Audio |
| DLD | Dolby Digital Audio |
| Audio for “Visual Impaired” | |
| ABC | Audio for “Hearing Impaired” |
Subtitle Language OSD Information
| Display | Status |
| N.A | Not Available |
| TEXT | Teletext Subtitle |
| ABC | Subtitle for “Hard of Hearing” |
TIME SETTING
CLOCK SETUP
The clock is set automatically when receiving the digital signal. (You can set the clock if the TV has no DTV signal.)
You must set to the time correctly before using on/off time function.
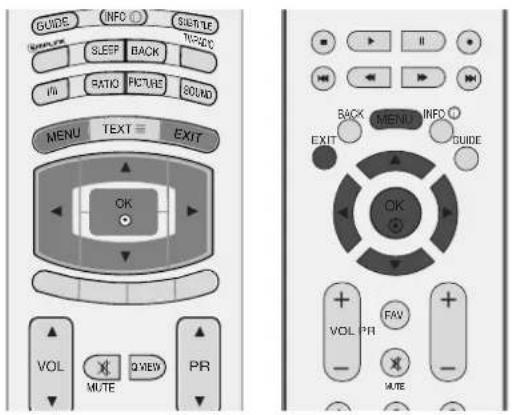
text_image
GUIDE INFO SUTTER SLEEP BACK RATIO FIGURE SOUND MENU TEXT EXIT OK VOL Q VIEW PR MUTE MUTE BACK MENU INFO EXIT GUIDE OK VOL PR FAY - MTE1 Press the MENU button and then ▲ or ▼ button to select the TIME menu.
2 Press the ▶ button and then ▲ or ▼ button to select Clock.
3 Press the ▶ button and then ◀ or ▶ button to select either the year, date, or time option.
Once selected, use the ▲ or ▼ button to set the year, date, and time options.
4 Press the EXIT button to return to normal TV viewing.
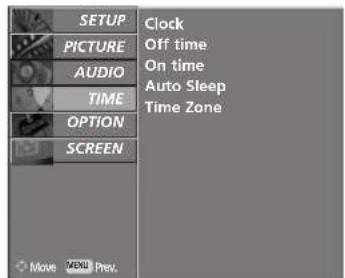
text_image
SETUP PICTURE AUDIO TIME OPTION SCREEN Clock Off time On time Auto Sleep Time Zone Move MENU Prev.1
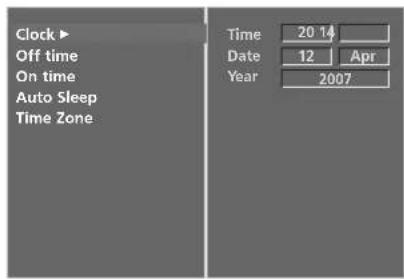
text_image
Clock Off time On time Auto Sleep Time Zone Time 20 14 Date 12 Apr Year 200723
AUTO ON/OFF TIMER SETTING
The Off time automatically switches the set to standby at the preset time.
Two hours after the set is switched on by the on time function it will automatically switch back to standby mode unless a button has been pressed.
Once the on time/off time is set, these functions operate daily at the preset time.
Off time function overrides On timer function if they are set both to the same time.
The set must be in standby mode for the On timer to work.
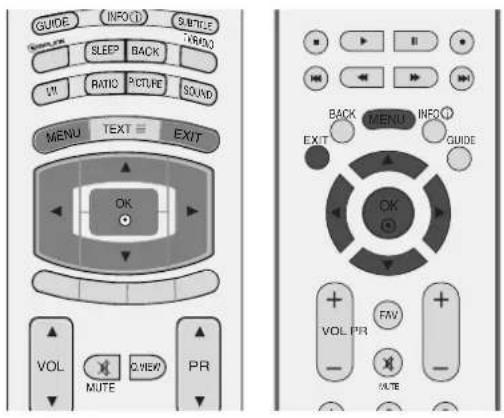
text_image
GUIDE INFO C1 S/BTCE SLEEP BACK V1 RATIO PICTURE SOUND MENU TEXT EXIT OK VOL MUTE VIEW PR BACK MENU INFO C1 EXIT GUIDE OK + FAV + VOL PR - + -1 Press the MENU button and then ▲ or ▼ button to select the TIME menu.
2 Press the ▶ button and then ▲ or ▼ button to select Off time/On time.
3 Press the ▶ button and then ▲ or ▼ button to select On.
- To cancel On/Off time function, select Off.
4 Press the ▶ button and then ▲ or ▼ button to set the hour.
5 Press the ▶ button and then ▲ or ▼ button to set the minutes.
6 For only On time function
- Programme: Press the ▶ button and then ▲ or ▼ button to select TV, DTV or Radio in the Mode menu. And then, Press the ▶ button and then ▲ or ▼ button to select the programme.
- Volume: Press the ▶ button and then▲ or ▼ button to adjust volume level at turn-on.
7 Press the EXIT button to return to normal TV viewing.
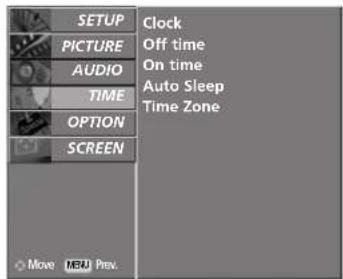
text_image
SETUP PICTURE AUDIO TIME OPTION SCREEN Clock Off time On time Auto Sleep Time Zone Move MEAU Prev.1
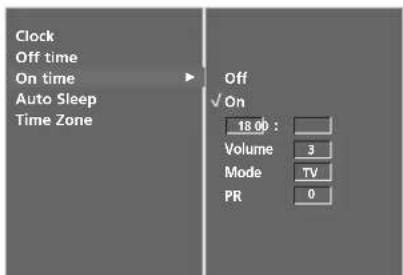
text_image
Clock Off time On time Auto Sleep Time Zone Off ✓ On 18.00 : Volume 3 Mode TV PR 0
TIME SETTING
AUTO SHUT-OFF SETTING
If set to on and there is no input signal, the set turns off automatically after 10 minutes.
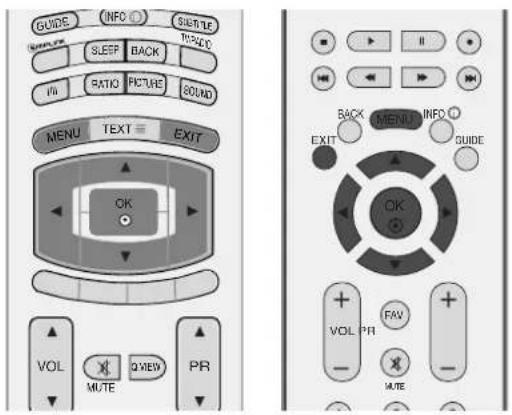
text_image
GUIDE INFO SUTTER SERVICE SLEEP BACK VIN RATIO FIGURE SOUND MENU TEXT EXIT OK VOL Q VIEW PR MUTE MUTE BACK MENU INFO GUIDE EXIT1 Press the MENU button and then ▲ or ▼ button to select the TIME menu.
2 Press the ▶ button and then ▲ or ▼ button to select Auto Sleep.
3 Press the ▶ button and then ▲ or ▼ button to select Off or On.
4 Press the EXIT button to return to normal TV viewing.

text_image
SETUP PICTURE AUDIO TIME OPTION SCREEN Clock Off time On time Auto Sleep Time Zone Move Cancel Prev.1
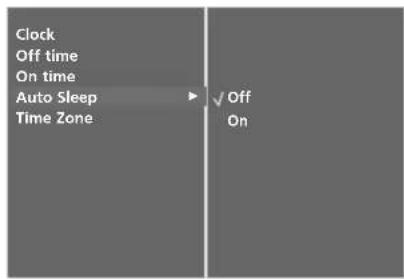
text_image
Clock Off time On time Auto Sleep Time Zone Off On23
TIME ZONE SETUP
When you select a Time Zone city, TV time is set by the time offset information based on Time Zone and GMT (Greenwich Mean Time) information which is received to broadcasting signal when time is set automatically by a digital signal.
1 Press the MENU button and then ▲ or ▼ button to select the TIME menu.
2 Press the ▶ button and then ▲ or ▼ button to select Time Zone.
3 Press the ▶ button and then ◀ or ▶ button to select your viewing area time zone.
4 Press the EXIT button to return to normal TV viewing.
SLEEP TIMER SETTING
You don't have to remember to switch the set off before you go to sleep.
The sleep timer automatically switches the set to standby after the preset time has elapsed.
a Press the SLEEP button repeatedly to select the number of minutes.
The display '---Min.' will appear on the screen, followed by 10, 20, 30, 60, 90, 120, 180 and 240.
b When the number of minutes you want is displayed on the screen, the timer begins to count down from the number of minutes selected.
C To view the remaining sleep time, press the SLEEP button once.
d To cancel the sleep time, repeatedly press the SLEEP button until the display '---Min.' appears.
When you switch the set off, the set releases the pre-set sleep time.
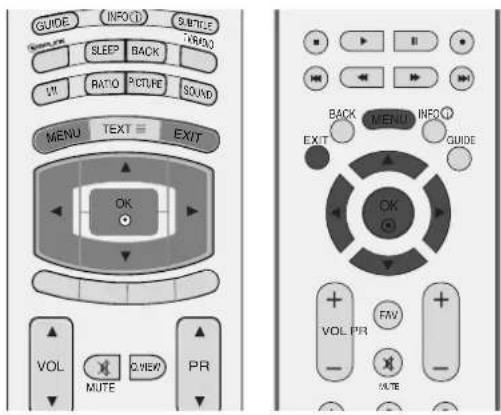
text_image
GUIDE INFO(1) SERVICE SLEEP BACK LVI RATIO PICTURE SOUND MENU TEXT EXIT OK VOL MUTE VIEW PR BACK MENU INFO(1) EXIT GUIDE OK VOL PR FAV - DRIVE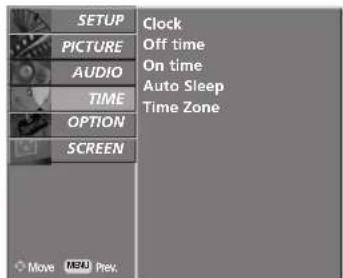
text_image
SETUP PICTURE AUDIO TIME OPTION SCREEN Clock Off time On time Auto Sleep Time Zone Move MP31 Prev.1
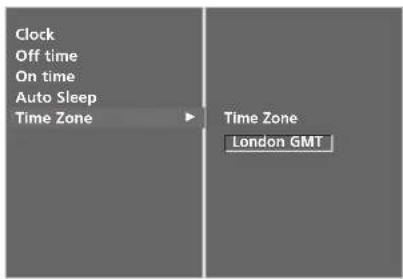
text_image
Clock Off time On time Auto Sleep Time Zone Time Zone London GMT23
PARENTAL CONTROL / RATINGS
SET PASSWORD & LOCK SYSTEM
If you first enter the password, press '0', '0', '0', '0' on the remote control handset.
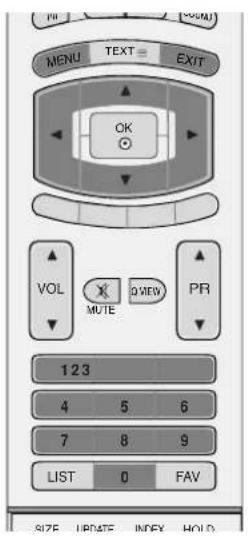
text_image
MENU TEXT EXIT OK VOL MUTE QVIEW PR 123 4 5 6 7 8 9 LIST 0 FAV SIZE UPDATE INDEX HOLD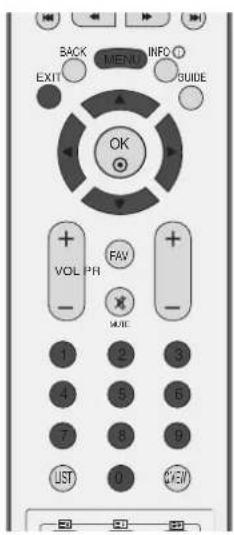
text_image
BACK EXIT MENU INFO GUIDE OK VOL PH FAV MUTE LIST OK1 Press the MENU button and then ▲ or ▼ button to select the OPTION menu.
2 Press the ▶ button and then ▲ or ▼ button to select Lock System.
3 Press the ▶ button and then ◀ or ▶ button to select On.
To set the password
Press the ▶ button and then use NUMBER buttons to input a 4-digit password.
Be sure to remember this number!
Re-enter new password for confirm.
If you forgot your password, press '7', '7', '7', '7' on the remote control handset.
4 Press the EXIT button to return to normal TV viewing.
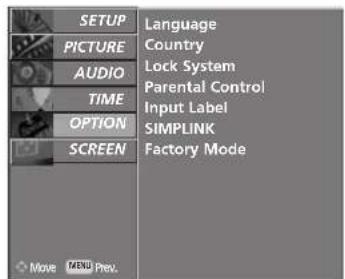
text_image
SETUP PICTURE AUDIO TIME OPTION SCREEN Language Country Lock System Parental Control Input Label SIMPLINK Factory Mode Move MENU Prev.1
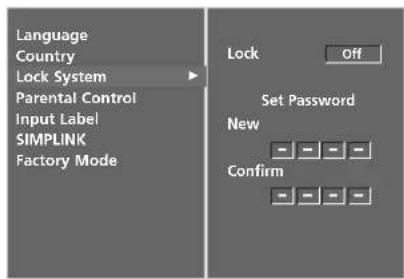
text_image
Language Country Lock System Parental Control Input Label SIMPLINK Factory Mode Lock Off Set Password New Confirm23
PARENTAL CONTROL
This function operates according to information from the broadcasting station. Therefore if the signal has wrong information, this function dose not operates.
Lets you set up blocking schemes to block specific channels, ratings, and external viewing sources.
A password is required to gain access to this menu.
This set is programmed to remember which option it was last set to even if you turn the set off.
1 Press the MENU button and then ▲ or ▼ button to select the OPTION menu.
2 Press the ▶ button and then ▲ or ▼ button to select Parental Control.
Then, press the ▶ button to enter the password as requested.
The TV is set up with the initial password "0-0-0-0".
3 Press the ▶ button and then ◀ or ▶ button to select Parental Guidance or Key Lock.
Parental Guidance (In Digital mode only)
Prevents children from watching certain adult's TV programmes, according to the ratings limit set.
Key Lock
The set can be set so that the remote control is needed to control it. This feature can be used to prevent unauthorized viewing.
4 Press the ▲ or ▼ button to make appropriate adjustments.
5 Press the EXIT button to return to normal TV viewing.
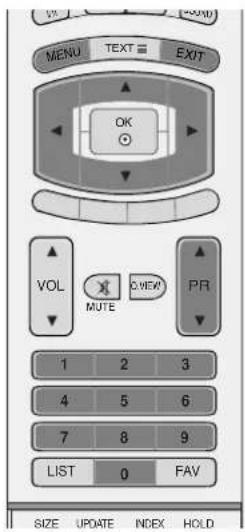
text_image
MENU TEXT EXIT OK VOL MUTE VIEW PR 1 2 3 4 5 6 7 8 9 LIST 0 FAV SIZE UPDATE INDEX HOLD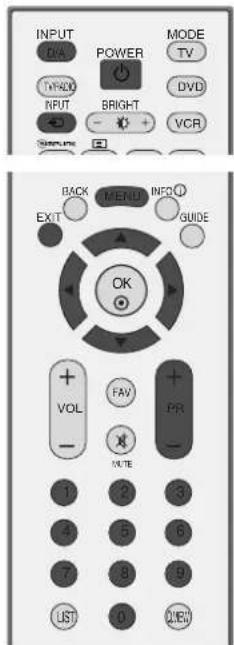
text_image
INPUT DVA POWER MODE TV TYPK ROUTPUT BRIGHT DVD VCR Security BACK MENI INFO EXIT GUIDE OK VOL FAV PR INTE LIST OPEN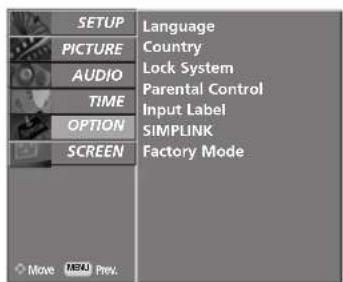
text_image
SETUP PICTURE AUDIO TIME OPTION SCREEN Language Country Lock System Parental Control Input Label SIMPLINK Factory Mode Move MERA Prev.1
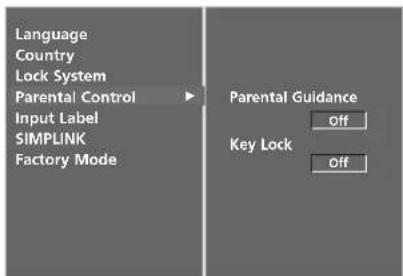
text_image
Language Country Lock System Parental Control Input Label SIMPLINK Factory Mode Parental Guidance Off Key Lock Off2 3 4
In Key Lock 'On', if the set is turned off, press the ⏻ / I, INPUT, PR ▲ or ▼ button on the set or POWER, INPUT, D/A, PR ▲ or ▼ (or PR + or -) or NUM-BER buttons on the remote control.
With the Key Lock On, the display 'Key Lock On' appears on the screen if any button on the front panel is pressed while viewing the set.
TELETEXT
This feature is not available in all countries.
Teletext is a free service broadcast by most TV stations which gives up-to-the-minute information on news, weather, television programmes, share prices and many other topics.
The teletext decoder of this TV can support the SIMPLE, TOP and FASTEXT systems. SIMPLE (standard tele-text) consists of a number of pages which are selected by directly entering the corresponding page number. TOP and FASTEXT are more modern methods allowing quick and easy selection of teletext information.
SWITCH ON/OFF
Press the TEXT button to switch to teletext. The initial page or last page appears on the screen.
Two page numbers, TV station name, date and time are displayed on the screen headline. The first page number indicates your selection, while the second shows the current page displayed.
Press the TEXT or EXIT button to switch off teletext. The previous mode reappears.
SIMPLE TEXT
■Page selection
① Enter the desired page number as a three digit number with the NUMBER buttons. If during selection you press a wrong number, you must complete the three digit number and then re-enter the correct page number.
2 The PR ▲ or ▼ (or PR + or -) button can be used to select the preceding or following page.
TOP TEXT
The user guide displays four fields-red, green, yellow and blue at the bottom of the screen. The yellow field denotes the next group and the blue field indicates the next block.
■ Block / group / page selection
① With the blue button you can progress from block to block.
2 Use the yellow button to proceed to the next group with automatic overflow to the next block.
③ With the green button you can proceed to the next existing page with automatic overflow to the next group. Alternatively the PR ▲ (or PR +) button can be used.
4 The red button permits to return to previous selection. Alternatively the PR▼ (or PR -) button can be used.
■ Direct page selection
Corresponding to the SIMPLE teletext mode, you can select a page by entering it as a three digit number using the NUMBER buttons in TOP mode.
FASTEXT
The teletext pages are colour coded along the bottom of the screen and are selected by pressing the corresponding coloured button.
Page selection
① Press the □i button to select the index page.
2 You can select the pages which are colour coded along the bottom line with the same coloured buttons.
3 Corresponding to the SIMPLE teletext mode, you can select a page by entering its three digit page number with the NUMBER buttons in FASTEXT mode.
④ The PR ▲ or ▼ (or PR + or -) button can be used to select the preceding or following page.
SPECIAL TELETEXT FUNCTIONS

REVEAL
Press this button to display concealed information, such as solutions of riddles or puzzles.
Press this button again to remove the information from the display.

UPDATE
Displays the TV picture on the screen while waiting for the new teletext page. The display will appear at the top left hand corner of the screen. When the updated page is available then display will change to the page number. Press this button to view the updated teletext page.

TIME
When viewing a TV programme, press this button to display the time at the top right hand corner of the screen. Press this button again to remove the display. In the teletext mode, press this button to select a sub page number. The sub page number is displayed at the bottom of the screen. To hold or change the sub page, press the RED/GREEN, PR ▲ or ▼ (or PR + or -) or NUMBER buttons.
Press again to exit this function.

HOLD
Stops the automatic page change which will occur if a teletext page consists of 2 or more sub pages. The number of sub pages and the sub page displayed is, usually, shown on the screen below the time. When this button is pressed the stop symbol is displayed at the top left-hand corner of the screen and the automatic page change is inhibited. To continue press this button again.
DIGITAL TELETEXT
*This function works in UK only.
The set gives you access to a digital teletext which is greatly improved in various aspects such as text, graphics and so on.
This digital teletext can be accessed by special digital teletext services and specific services which broadcast digital teletext.
You should select off from the subtitle language to display teletext by pressing SUBTITLE button.
TELETEXT WITHIN DIGITAL SERVICE
1 Press the numeric or PR▲ or ▼ (or PR + or -) button to select a digital service which broadcasts digital teletext. To know which are digital teletext services, refer to the EPG service list.
2 Follow the indications on digital teletext and move onto the next step by pressing TEXT, OK, ▲ or ▼, ◀ or ▶, RED, GREEN, YELLOW, BLUE or NUMBER buttons and so on.
3 To change digital teletext service, just select a different service by the numeric or PR ▲ or ▼ (or PR + or -) button.
If pressing the MENU, GUIDE or INFO ⓘ button, the teletext service disappear temporarily. When pressing these buttons again, the teletext service is appeared.
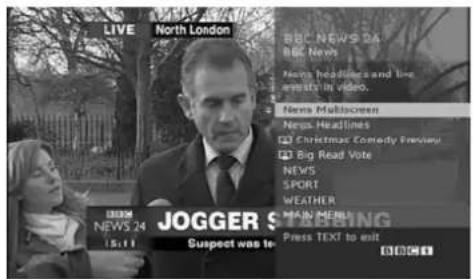
text_image
LIVE North London BBC NEWS DA BBC News News headlines and live events in video. News Multiscreen News Headlines Christmas Comedy Preview Big Read Vote NEWS SPORT WEATHER MAIN MERRITING Press TEXT to exit 15:11 JOGGER S Suspect was to exitTELETEXT IN DIGITAL SERVICE
1 Press the numeric or PR▲ or ▼ (or PR + or -) button to select a certain service which broadcasts digital teletext.
2 Press the TEXT or colour button to switch on teletext.
3 Follow the indications on digital teletext and move onto the next step by pressing OK, ▲ or ▼, ◀ or ▶, RED, GREEN, YELLOW, BLUE or NUMBER buttons and so on.
4 Press the TEXT or colour button to switch off digital tele-text and return to TV viewing.
Some services may allow you to access text services by pressing the RED button.
If pressing the MENU, GUIDE or INFO ⓘ button, the teletext service disappear temporarily. When pressing these buttons again, the teletext service is appeared.
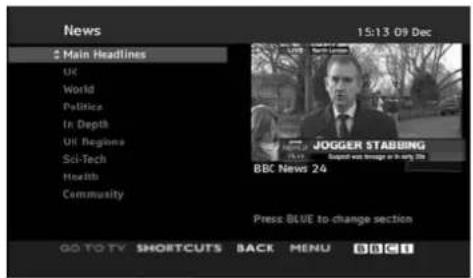
text_image
News 2 Main Headlines UK World Politics In Depth UK Begins Sci-Tech Health Community 15:13 09 Dec JOGGER STABBING BBC News 24 Press BLUE to change section GO TO TV SHORTCUTS BACK MENU BBC C1TROUBLESHOOTING
The operation does not work normally.
| The remote control doesn’t work | Check to see if there is any object between the product and the remote control causing obstruction. Ensure you are pointing the remote control directly at the TV.Ensure that the batteries are installed with correct polarity (+ to +, - to -).Ensure that the correct remote operating mode is set: TV, VCR etc.Install new batteries. |
| Power is suddenly turned off | Is the sleep timer set?Check the power control settings. Power interrupted.No broadcast on station tuned withAuto sleepactivated. |
The video function does not work.
| No picture &No sound | Check whether the product is turned on.Try another channel. The problem may be with the broadcast.Is the power cord inserted into wall power outlet?Check your antenna direction and/or location.Test the wall power outlet, plug another product's power cord into the outlet where the product's power cord was plugged in. |
| Picture appears slowly after switching on | This is normal, the image is muted during the product startup process. Please contact your service centre, if the picture has not appeared after five minutes. |
| No or poor colour or poor picture | Adjust Colour in menu option.Keep a sufficient distance between the product and the VCR.Try another channel. The problem may be with the broadcast.Are the video cables installed properly?Activate any function to restore the brightness of the picture. |
| Horizontal/vertical bars or picture shaking | Check for local interference such as an electrical appliance or power tool. |
| Poor reception on some channels | Station or cable product experiencing problems, tune to another station.Station signal is weak, reorient antenna to receive weaker station.Check for sources of possible interference. |
| Lines or streaks in pictures | Check antenna (Change the direction of the antenna). |
APPENDIX
| The audio function does not work. | |
| Picture OK & No sound | Press the VOL button.Sound muted? Press MUTE button.Try another channel. The problem may be with the broadcast.Are the audio cables installed properly? |
| No output from one of the speakers | Adjust Balance in menu option. |
| Unusual sound from inside the product | A change in ambient humidity or temperature may result in an unusual noise when the product is turned on or off and does not indicate a fault with the product. |
| There is a problem in PC mode. (Only PC mode applied) | |
| The signal is out of range (Invalid format) | ■ Adjust resolution, horizontal frequency, or vertical frequency.■ Check the input source. |
| Vertical bar or stripe on background & Horizontal Noise & Incorrect position | ■ Work the Auto configure or adjust clock, phase, or H/V position. (Option) |
| Screen colour is unstable or single colour | ■ Check the signal cable.■ Reinstall the PC video card. |
MAINTENANCE
Early malfunctions can be prevented. Careful and regular cleaning can extend the amount of time you can enjoy your new TV.
Caution: Be sure to turn the power off and unplug the power cord before you begin any cleaning.
Cleaning the Screen
Here's a great way to keep the dust off your screen for a while. Wet a soft cloth in a mixture of lukewarm water and a little fabric softener or dish washing detergent. Wring the cloth until it's almost dry, and then use it to wipe the screen.
2 Make sure the excess water is off the screen, and then let it air-dry before you turn on your TV.
Cleaning the Cabinet
■ To remove dirt or dust, wipe the cabinet with a soft, dry, lint-free cloth.
■ Please be sure not to use a wet cloth.
Extended Absence
CAUTION
If you expect to leave your TV dormant for a long time (such as a vacation), it's a good idea to unplug the power cord to protect against possible damage from lightning or power surges.
PRODUCT SPECIFICATIONS
| MODELS | 37LF6* | 42LF6* | 47LF6* | 52LF6* | |
| 37LF65-ZC37LF66-ZE | 42LF65-ZC42LF66-ZE | 47LF65-ZC47LF66-ZE | 52LF65-ZC52LF66-ZE | ||
| Dimensions(Width x Height x Depth) | with stand | 927.0 x 692.8 x 280.5 mm36.5 x 27.3 x 11.0 inches | 1033.1 x 750.0 x 300.0 mm40.7 x 29.6 x 11.9 inches | 1144.5 x 825.6 x 331.0 mm45.1 x 32.5 x 13.1 inches | 1032.7 x 750.0 x 287.6 mm40.7x 29.5 x 11.3 inches |
| without stand | 927.0 x 630.0 x 88.0 mm36.5 x 24.8 x 3.5 inches | 1033.1 x 686.5 x 88.5 mm40.7 x 27.1 x 3.5 inches | 1144.5 x 754.9 x 103.0 mm45.1 x 29.8 x 4.1 inches | 1032.7 x 685.5 x 88.5 mm40.7 x 27.0 x 3.5 inches | |
| Weight | with stand | 20.0 kg / 44.0 lbs | 27.5 kg / 60.7 lbs | 37.46 kg / 82.6 lbs | 24.5 kg / 54.0 lbs |
| without stand | 16.0 kg / 35.3 lbs | 23.0 kg / 50.8 lbs | 31.4 kg / 69.3 lbs | 20 kg / 44.1 lbs | |
| Power requirementPower Consumption | AC100-240V~ 50/60Hz 1.8A180W | AC100-240V~ 50/60Hz 2.5A240W | AC100-240V~ 50/60Hz 3.2A310W | AC100-240V~ 50/60Hz 2.2A200W | |
| MODELS | 37LY9 * | 42LY9 * | 47LY9 * | 52LY9 * | |
| 37LY95-ZA37LY96-ZB | 42LY95-ZA42LY96-ZB | 47LY95-ZA47LY96-ZB | 52LY95-ZA52LY96-ZB | ||
| Dimensions(Width x Height x Depth) | with stand | 1005.0 x 653.0 x 267.0 mm39.6 x 25.8 x 10.6 inches | 1113.3 x 722.5 x 294.3 mm43.9 x 28.5 x 11.6 inches | 1236.8 x 795.5 x 325.6 mm48.7 x 31.4 x 12.9 inches | 1033.1 x 749.5 x 287.6 mm40.7x 29.5 x 11.3 inches |
| without stand | 1005.0 x 594.4 x 88.0 mm39.6 x 23.5 x 3.5 inches | 1113.3 x 656.5 x 88.5 mm43.9 x 25.9 x 3.5 inches | 1236.8 x 725.4 x 103.0 mm48.7 x 28.6 x 4.1 inches | 1033.4 x 686.8 x 88.5mm40.7 x 27.0x 3.5inches | |
| Weight | with stand | 23.0 kg / 50.8 lbs | 30.5 kg / 67.3 lbs | 39.5 kg / 87.1 lbs | 24.5 kg / 54.1 lbs |
| without stand | 18.8 kg / 41.5 lbs | 24.3 kg / 53.6 lbs | 33.0 kg / 72.8 lbs | 20.4 kg / 45.0 lbs | |
| Power requirementPower Consumption | AC100-240V~ 50/60Hz 1.8A180W | AC100-240V~ 50/60Hz 2.6A260W | AC100-240V~ 50/60Hz 3.2A310W | AC100-240V~ 50/60Hz 2.2A200W | |
| Television SystemProgram CoverageExternal Antenna Impedance | PAL/SECAM B/G/D/K, PAL I/II, SECAM L/L'VHF: E2 ~ E12, UHF: E21 ~ E69, CATV: S1 ~ S20, HYPER: S21 ~ S4775 Ω | ||||
| Environment condition | Operating Temperature | 0 ~ 40°C / 32 ~ 104°FLess than 80% | |||
| Operating Humidity | |||||
| Storage Temperature | -20 ~ 60°C / -4 ~ 140°FLess than 85% | ||||
- The specifications shown above may be changed without prior notice for quality improvement.
| MODELS | 50PF9* | 60PF9* | |
| 50PF95-ZA50PF96-ZB | 60PF95-ZA60PF96-ZB | ||
| Dimensions(Width x Height x Depth) | with stand | 1048.0 x 766.0 x 310.0 mm41.3 x 30.2 x 12.2 inches | 1613.6 x 1036.8 x 452.0 mm63.5 x 40.9 x 17.8 inches |
| without stand | 1048.0 x 713.0 x 83.5 mm41.3 x 28.1 x 3.3 inches | 1613.6 x 970.0 x 98.5 mm63.5 x 38.2 x 3.9 inches | |
| Weight | with stand | 28.0 kg / 61.7 lbs | 81.0 kg / 178.6 lbs |
| without stand | 24.6kg / 54.2 lbs | 65.0 kg / 143.3 lbs | |
| Power requirement | AC100-240V~ 50/60Hz 3.5A | AC100-240V~ 50/60Hz 6.5A | |
| Power Consumption | 310W | 650W | |
| Television SystemProgram Coverage | PAL/SECAM B/G/D/K, PAL I/II, SECAM L/L'VHF: E2 ~ E12, UHF: E21 ~ E69, CATV: S1 ~ S20, HYPER: S21 ~ S47 | ||
| External Antenna Impedance | 75 Ω | ||
| Environment condition | Operating Temperature | 0 ~ 40°C / 32 ~ 104°F | |
| Operating Humidity | Less than 80% | ||
| Storage Temperature | -20 ~ 60°C / -4 ~ 140°F | ||
| Storage Humidity | Less than 85% | ||
- The specifications shown above may be changed without prior notice for quality improvement.
PROGRAMMING THE REMOTE CONTROL
(Only 37/42/47/52LY9, 50/60PF9*)
The remote is a multi-brand or a universal remote. It can be programmed to operate most remote-controllable devices of other manufacturers.
Note that the remote may not control all models of other brands.
To find out whether your remote can operate the device without programming, turn on the device such as a VCR and press the corresponding mode button on the remote.
After that, press the POWER button. If the device is turned off then it responds properly and the remote need not to be programmed.
If not, the remote should be programmed to operate the device. The programming procedures are explained below.
2 Press the MENU and MUTE button continuously at the same time for 2 seconds, the current selected device button will be illuminated.
If you don't press any button for 20 seconds, the light on the mode button will be turned off. In that case, you have to repeat from step 2.
3 Enter code numbers using the number button on the remote by referring the code table on the following pages. When pressing the button, the light blinks at a time.
If the device turned off, the programming is successful.
4 Press the MENU button to store the code. After blinking twice, this code is stored.
5 Test the remote functions to see if the device responds properly. If not, repeat from step 2.
VCRs
| Brand Codes Brand Codes | Brand Codes | Brand Codes | |||||
| AIWA 034AKAI 016 043 046 124125 146AMPRO 072ANAM 031 033 103AUDIO DYNAMICS 012 023 039 043BROKSONIC 035 037 129CANON 028 031 033CAPEHART 108CRAIG 003 040 135CURTIS MATHES 031 033 041DAEWOO 005 007 010 064065 108 110 111112 116 117 119DAYTRON 108DBX 012 023 039 043DYNATECH 034 053ELECTROHOME 059EMERSON 006 017 025 027029 031 034 035036 037 046 101129 131 138 153FISHER 003 008 009 010FUNAI 034GE 031 033 063 072107 109 144 147GO VIDEO 132 136HARMAN KARDON 012 045HITACHI 004 018 026 034043 063 137 150INSTANTREPLAY 031 033JCL 031 033JCPENNY 012 013 015 033040 066 101JENSEN 043JVC 012 031 033 043048 050 055 060130 150 152 | KENWOODLG (GOLDSTAR)LLOYDLXIAGINMAGNAVOXMARANTZ 012 031 MARTA MATSUI 027 030MEIMEMOREXMITSUBISHI | 014 034 039 043047 048001 012 013 020101 106 114 123034003 009 013 014017 034 101 106040031 033 034 041067 068033 067069101031 033003 010 014 031033 034 053 072101 102 134 139MGA 045 046 059MINOLTA013 020013 020 045 046049 051 059 061151MTC034 040MULTITECH024 034NEC012 023 039 043048NORDMENDE043OPTONICA053 054066 070 074 083133 140 145PENTAX013 020 031 033063PHILCO031 034 067PHILIPS031 033 034 054067 071 101PILOT 101PIONEER013 021 048 | PORTLAND PULSARPQUARTZQUASARRCA145 147REALISTIC003 008 010 014031 033 034 040053 054 101RICO058RUNCO 148SALORASAMSUNGSANSUISANYO003 007 010 014102 134SCOTT131SEARS003 008 009 010013 014 017 020031 042 073 081101SHARP031 054 149SHINTOM024SONY003 009 031 052056 057 058 076077 078 149SOUNDESIGNSTS013SYLVANIA067SYMPHONICTANDY010 034 | TATUNGTEACTECHNICSTEKNIKATHOMASTMKTMOTESHIBATOMOS TOTEVISIONUNITECHVECTOR RESEARCHVICTORVIDEO CONCEPTSVIDEOSONICWARDS031 033 034 040053 054 131YAMAHA ZENITH 034 048 056 058072 080 101 | 039 043034 039 043031 033 070019 031 033 034101034006008 013 042 047059 082 112 131040 101040012048012 034 046040003 013 017 024031 033 034 040053 054 131012 034 039 043072 080 101 | 039 043034 039 043031 033 070019 031 033 034101034 042 047059 082 112 131040 101040012048 056 058072 080 101 | |
DVD
| Brand Codes Brand Codes | Brand Codes | Brand Codes | |||||
| APEX DIGITAL | 022 | MAGNAVOX | 013 | PHILIPS | 013 | SONY | 007 |
| DENON 020 014 | MARANTZ 024 | PIONEER | 004 026 | THOMPSON | 005 006 | ||
| GE | 005 006 | MITSUBISHI | 002 | PROCEED | 021 | TOSHIBA | 019 008 |
| HARMAN KARDON | 027 | NAD | 023 | PROSCAN | 005 006 | YAMAHA | 009 018 |
| JVC | 012 | ONKYO 008 017 | RCA | 005 006 | ZENITH 010 016 025 | ||
| LG | 001 010 016 025 | PANASONIC | 003 009 | SAMSUNG | 011 015 | ||
PROGRAMMING THE REMOTE CONTROL(Only 37/42/47/52LF6)
The remote is a multi-brand or a universal remote. It can be programmed to operate most remote-controllable devices of other manufacturers.
Note that the remote may not control all models of other brands.
Programming a code into a remote mode
1 Test your remote control.
To find out whether your remote control can operate the component without programming, turn on the component such as a VCR and press the corresponding mode button (such as a DVD or VCR) on the remote control, while pointing at the component. Test the POWER and PR + / - buttons to see if the component responds properly. If not, the remote requires programming to operate the device.
2 Turn on the component to be programmed, then press the corresponding mode button (such as aDVD or VCR) on the remote control. The remote control button of desired device is lighted.
3 Press the MENU and MUTE buttons simultaneously, the remote control is ready to be programmed for the code.
4 Enter a code number using the number buttons on the remote control. Programming code numbers for the corresponding component can be found on the following pages. Again, if the code is correct, the device will turn off.
5 Press the MENU button to store the code.
6 Test the remote control functions to see if the component responds properly. If not, repeat from step 2.
DVD
| Brand | Codes | Brand | Codes | Brand | Codes | |||||||
| APEX DIGITAL | 022 | MITSUBISHI | 002 | RCA | 005 | 006 | ||||||
| DENON | 020 | 014 | NAD | 023 | SAMSUNG | 011 | 015 | |||||
| GE | 005 | 006 | ONKYO | 008 | 017 | SONY | 007 | |||||
| HARMAN KARDON | 027 | PANASONIC | 003 | 009 | THOMPSON | 005 | 006 | |||||
| JVC | 012 | PHILIPS | 013 | TOSHIBA | 019 | 008 | ||||||
| LG | 001 | 010 | 016 | 025 | PIONEER | 004 | 026 | YAMAHA | 009 | 018 | ||
| MAGNAVOX | 013 | PROCEED | 021 | ZENITH | 010 | 016 | 025 | |||||
| MARANTZ | 024 | PROSCAN | 005 | 006 | ||||||||
VCR
Brand Codes Brand Codes Brand Codes
| AIWA 034 | MAGNAVOX | 031 033 034 041 | SAMSUNG | 032 040 102 104 | |||||||||
| AKAI 016 043 046 124 | 067 068 | 105 107 109 112 | |||||||||||
| 125146 | MARANTZ | 012 031 033 067 | 113 115 120 122 | ||||||||||
| AMPRO 072 | 069 | 125 | |||||||||||
| ANAM 031 033 | 103 | MARTA 101 | SANSUI | 022 043 048 135 | |||||||||
| AUDIO DYNAMICS | 012 023 039 043 | MATSUI | 027 030 | SANYO | 003 007 010 014 | ||||||||
| BROKSONIC | 035 037 129 | MEI | 031 033 | 102 134 | |||||||||
| CANON | 028 031 033 | MEMOREX | 003 010 014 031 | SCOTT | 017 037 112 129 | ||||||||
| CAPEHART | 108 | 033 034 053 072 | 131 | ||||||||||
| CRAIG | 003 040 135 | 101 102 134 139 | SEARS | 003 008 009 010 | |||||||||
| CURTIS MATHES | 031 033 041 | MGA | 045 046 059 | 013 014 017 020 | |||||||||
| DAEWOO | 005 007 010 064 | MINOLTA | 013 020 | 031 042 073 081 | |||||||||
| 065 108 110 111 | MITSUBISHI | 013 020 045 046 | 101 | ||||||||||
| 112 116 117 119 | 049 051 059 061 | SHARP | 031 054 149 | ||||||||||
| DAYTRON | 108 | 151 | SHINTOM | 024 | |||||||||
| DBX | 012 023 039 043 | MTC | 034 040 | SONY | 003 009 031 052 | ||||||||
| DYNATECH | 034 053 | MULTITECH | 024 034 | 056 057 058 076 | |||||||||
| ELECTROHOME | 059 | NEC | 012 023 039 043 | 077 078 149 | |||||||||
| EMERSON | 006 017 025 027 | 048 | SOUNDESIGN | 034 | |||||||||
| 029 031 034 035 | NORDMENDE | 043 | STS | 013 | |||||||||
| 036 037 046 101 | OPTONICA | 053 054 | SYLVANIA | 031 033 034 059 | |||||||||
| 129131 138153 | PANASONIC | 066 070 074 083 | 067 | ||||||||||
| FISHER | 003 008 009 010 | 133140 145 | SYMPHONIC | 034 | |||||||||
| FUNAI 034 | TANDY 010 034 | ||||||||||||
| GE | 031 033 063 072 | PENTAX | 013 020 031 033 | TATUNG | 039 043 | ||||||||
| 107 109 144 147 | 063 | TEAC | 034 039 043 | ||||||||||
| GO VIDEO | 132 136 | PHILCO | 031 034 067 | TECHNICS | 031 033 070 | ||||||||
| HARMAN KARDON | 012 045 | PHILIPS 031 033 | 034 054 | TEKNIKA | 019 031 033 034 | ||||||||
| HITACHI | 004 018 026 034 | 067 071 101 | 101 | ||||||||||
| 043 063 137 150 | PILOT | 101 | THOMAS | 034 | |||||||||
| INSTANTREPLAY | 031 033 | PIONEER | 013 021 048 | TMK | 006 | ||||||||
| JCL | 031 033 | PORTLAND | 108 | TOSHIBA | 008 013 042 047 | ||||||||
| JCPENNY | 012 013 015 033 | PULSAR | 072 | 059 082 112 131 | |||||||||
| 040 066 101 | QUARTZ | 011 014 | TOTEVISION | 040 101 | |||||||||
| JENSEN 043 | QUASAR | 033 066 075 145 | UNITECH | 040 | |||||||||
| JVC | 012 031 033 043 | RCA | 013 020 033 034 | VECTOR RESEARCH | 012 | ||||||||
| 048 050 055 060 | 040 041 062 063 | VICTOR | 048 | ||||||||||
| 130150152 | 107 109 140 144 | VIDEO CONCEPTS | 012 034 046 | ||||||||||
| KENWOOD | 014 034 039 043 | 145 147 | VIDEOSONIC | 040 | |||||||||
| 047 048 | REALISTIC | 003 008 010 014 | WARDS 003 013 017 024 | ||||||||||
| LG (GOLDSTAR) | 001 012 013 020 | 031 033 034 040 | 031 033 034 040 | ||||||||||
| 101 106 114 123 | 053 054 101 | 053 054 131 | |||||||||||
| LLOYD | 034 | RICO 058 | YAMAHA | 012 034 039 043 | |||||||||
| LXI | 003 009 013 014 | RUNCO | 148 | ZENITH | 034 048 056 | ||||||||
| 017 034 101 106 | SALORA | 014 | 058 072 080 101 | ||||||||||
| MAGIN | 040 | ||||||||||||
APPENDIX
IR CODES
1. How to Connect
■ Connect your wired remote control to the Remote Control port on the TV.
2. Remote Control IR Codes
■ Output waveform
Single pulse, modulated with 37.917KHz signal at 455KHz
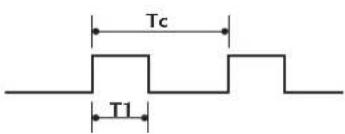
text_image
Tc T1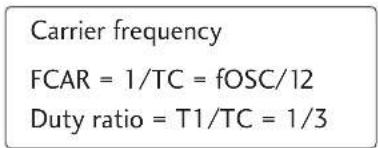
text_image
Carrier frequency FCAR = 1/TC = fOSC/12 Duty ratio = T1/TC = 1/3■ Configuration of frame
1st frame

flowchart
graph LR
    A["Lead code"] --> B["C0"]
    A --> C["C1"]
    A --> D["C2"]
    A --> E["C3"]
    A --> F["C4"]
    A --> G["C5"]
    A --> H["C6"]
    A --> I["C7"]
    A --> J["High custom code"]
    J --> K["C0"]
    J --> L["C1"]
    J --> M["C2"]
    J --> N["C3"]
    J --> O["C4"]
    J --> P["C5"]
    J --> Q["C6"]
    J --> R["C7"]
    J --> S["D0"]
    J --> T["D1"]
    J --> U["D2"]
    J --> V["D3"]
    J --> W["D4"]
    J --> X["D5"]
    J --> Y["D6"]
    J --> Z["D7"]
    K --> AA["Data code"]
    AA --> AB["D0"]
    AA --> AC["D1"]
    AA --> AD["D2"]
    AA --> AE["D3"]
    AA --> AF["D4"]
    AA --> AG["D5"]
    AA --> AH["D6"]
    AA --> AI["D7"]
Repeat frame

text_image
Repeat code TfLead code

text_image
9 ms 4.5 ms- Repeat code

text_image
0.55 ms 9 ms 2.25 ms■ Bit description
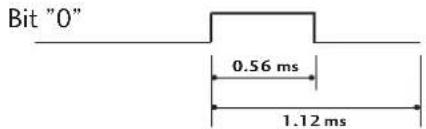
text_image
Bit "0" 0.56 ms 1.12 ms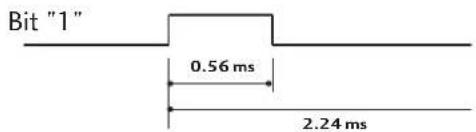
text_image
Bit "1" 0.56 ms 2.24 ms■ Frame interval: Tf
The waveform is transmitted as long as a key is depressed.

text_image
Tf Tf Tf=108ms @455KHz| Code (Hexa) | Function | Note |
| 00 | PR (▲) or PR ++ | R/C BUTTON |
| 01 | PR (▼) or PR -- | R/C BUTTON |
| 02 | VOL (▲) or VOL ++ | R/C BUTTON |
| 03 | VOL (▼) or VOL -- | R/C BUTTON |
| 40 | Up (▲) | R/C BUTTON |
| 41 | Down (▼) | R/C BUTTON |
| 06 | Right (▶) | R/C BUTTON |
| 07 | Left (◀) | R/C BUTTON |
| 08 | POWER | R/C BUTTON (POWER ON/OFF) |
| 09 | MUTE | R/C BUTTON |
| 10 | Number Key 0 | R/C BUTTON |
| 11 | Number Key 1 | R/C BUTTON |
| 12 | Number Key 2 | R/C BUTTON |
| 13 | Number Key 3 | R/C BUTTON |
| 14 | Number Key 4 | R/C BUTTON |
| 15 | Number Key 5 | R/C BUTTON |
| 16 | Number Key 6 | R/C BUTTON |
| 17 | Number Key 7 | R/C BUTTON |
| 18 | Number Key 8 | R/C BUTTON |
| 19 | Number Key 9 | R/C BUTTON |
| 0B | INPUT | R/C BUTTON |
| AA | INFO 1 | R/C BUTTON |
| AB | GUIDE | R/C BUTTON |
| 56 | SUBTITLE | R/C BUTTON |
| 5B | EXIT | R/C BUTTON |
| 1E | FAV | R/C BUTTON |
| 1A | Q.VIEW | R/C BUTTON |
| 50 | D/A | R/C BUTTON |
| F0 | TV/RADIO | R/C BUTTON |
| 7E | SIMPLINK | R/C BUTTON |
| E0 | BRIGHT + | R/C BUTTON |
| E1 | BRIGHT - | R/C BUTTON |
| 0A | I/II | R/C BUTTON |
| 0E | SLEEP | R/C BUTTON |
| 43 | MENU | R/C BUTTON |
| 44 | OK(◎) | R/C BUTTON |
| 53 | LIST | R/C BUTTON |
| 20 | TEXT | R/C BUTTON |
| 2A | REVEAL | R/C BUTTON |
| 26 | TIME | R/C BUTTON |
| 28 | BACK | R/C BUTTON |
| 62 | UPDATE | R/C BUTTON |
| 70 | INDEX | R/C BUTTON |
| 65 | HOLD | R/C BUTTON |
| 61 | BLUE Key | R/C BUTTON |
| 63 | YELLOW Key | R/C BUTTON |
| 71 | GREEN Key | R/C BUTTON |
| 72 | RED Key | R/C BUTTON |
| 79 | RATIO | R/C BUTTON |
| B0 | ▶ | R/C BUTTON |
| BA | II | R/C BUTTON |
| B2 | |◀◀ | R/C BUTTON |
| B3 | |▶▶ | R/C BUTTON |
| 8F | ◀◀ | R/C BUTTON |
| 8E | ▶▶ | R/C BUTTON |
| B1 | ■ | R/C BUTTON |
| BD | ● | R/C BUTTON |
| 4D | PICTURE | R/C BUTTON (Only 37/42/47/52LY9*, 50/60PF9*) |
| 52 | SOUND | R/C BUTTON (Only 37/42/47/52LY9*, 50/60PF9*) |
EXTERNAL CONTROL DEVICE SETUP
RS-232C Setup
Connect the RS-232C (serial port) input jack to an external control device (such as a computer or an A/V control system) to control the product's functions externally.
Connect the serial port of the control device to the RS-232C jack on the product back panel.
Note: RS-232C connection cables are not supplied with the product.
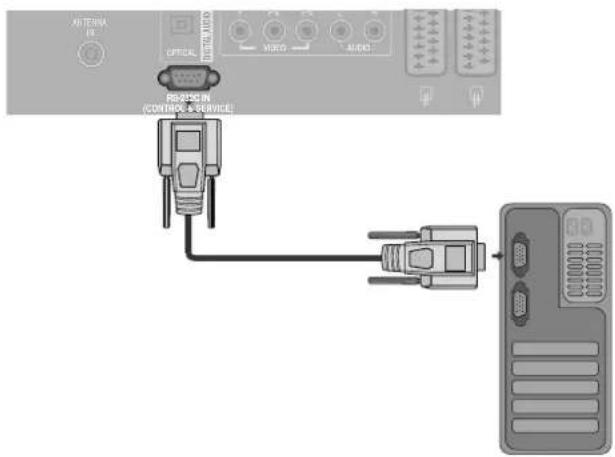
text_image
AUTO TENS OFFICE PROFESSION (CONTROLS & SERVICE) USB VIPS AUDIOType of Connector; D-Sub 9-Pin Male
| No. | Pin | Name |
| 1 | No | connection |
| 2 RXD | (Receive data) | |
| 3 TXD | (Transmit data) | |
| 4 DTR | (DTE side ready) | |
| 5 GND | ||
| 6 DSR | (DCE side ready) | |
| 7 RTS | (Ready to send) | |
| 8 CTS | (Clear to send) | |
| 9 No Connection | ||
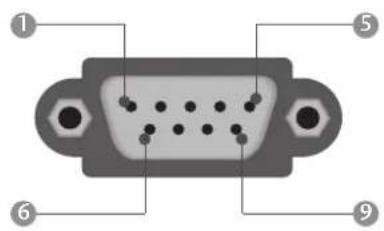
text_image
Diagram of a 16-pin VGA connector with numbered pins pointing to each pin.RS-232C Configurations
7-Wire Configurations (Standard RS-232C cable)
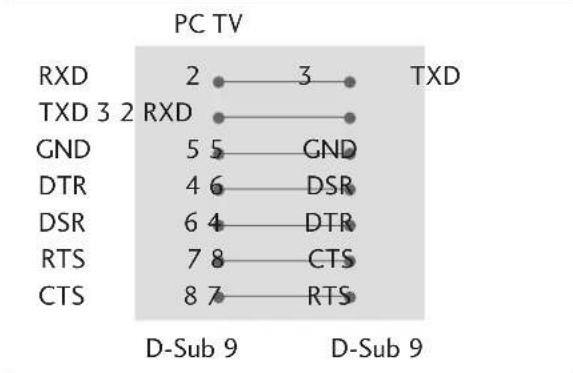
line
PC TV | Category | PC TV | | :--- | :--- | | RXD | 2 | | TXD 3 | 3 | | RXD | 3 | | GND | 5 | | DTR | 4 | | DSR | 6 | | RTS | 7 | | CTS | 8 | TXD | | D-Sub 9 D-Sub 93-Wire Configurations(Not standard)
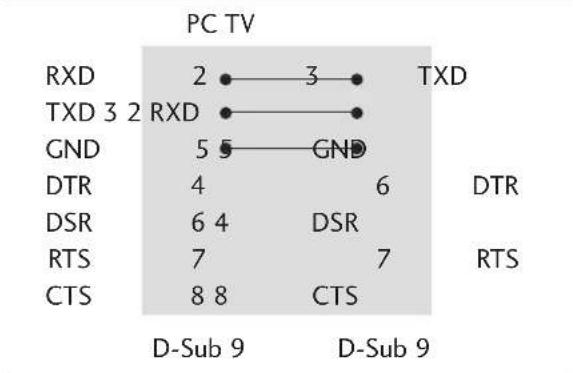
other
PC TV | Category | PC TV | D-Sub 9 | D-Sub 9 | | :--- | :--- | :--- | :--- | | RXD | 2 | 3 | TXD | | TXD 3 2 RXD | 3 | | | | GND | 5 | 5 | GND | | DTR | 4 | | 6 | | DSR | 6 4 | DSR | | | RTS | 7 | | 7 | | CTS | 8 8 | CTS | | The values in the table are explicitly labeled as 'TXD' above the bars. The numbers inside the bars represent the count of connections.Set ID
Use this function to specify a set ID number.
1 Press the MENU button and then use ▲ or ▼ button to select the OPTION menu.
2 Press the ▶ button and then use ▲ or ▼ button to select Factory Mode.
3 Press the ▶ button and then use ▲ or ▼ button to select Set ID.
4 Press the ▶ button and then use ◀ or ▶ button to adjust Set ID to choose the desired TV ID number. The adjustment range of SET ID is 1\~99.
5 Press EXIT button to return to normal TV viewing.
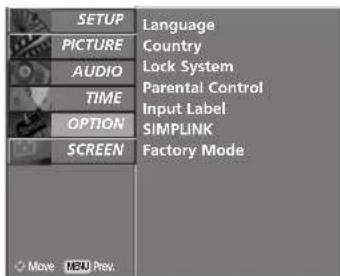
text_image
SETUP Language PICTURE Country AUDIO Lock System TIME Parental Control Input Label OPTION SIMPLINK SCREEN Factory Mode Move MBN Prev.1
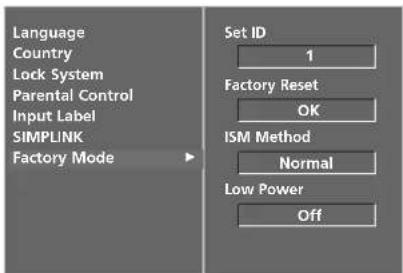
text_image
Language Country Lock System Parental Control Input Label SIMPLINK Factory Mode Set ID 1 Factory Reset OK ISM Method Normal Low Power Off2
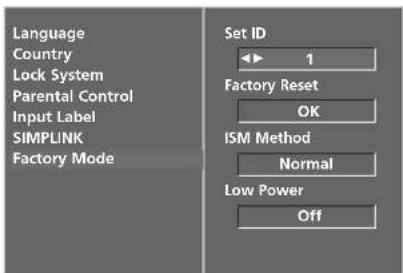
text_image
Language Country Lock System Parental Control Input Label SIMPLINK Factory Mode Set ID 1 Factory Reset OK ISM Method Normal Low Power Off34
APPENDIX
Communication Parameters
■ Baud rate : 9600 bps (UART)
■ Data length : 8 bits
■ Parity : None
■ Stop bit : 1 bit
■ Communication code : ASCII code
■ Use a crossed (reverse) cable.
Command Reference List
| COMMAND1 | COMMAND2 | DATA(Hexadecimal) | |
| 01. Power k a 0 ~ 1 | |||
| 02. Input Select k b Refer to p. 105 | |||
| 03. Aspect Ratio k c Refer to p. 105 | |||
| 04. Screen Mute k d 0 ~ 1 | |||
| 05. Volume Mute k e 0 ~ 1 | |||
| 06. Volume Control k f 0 ~ 64 | |||
| 07. Contrast k g 0 ~ 64 | |||
| 08. Brightness k h 0 ~ 64 | |||
| 09. Colour k i 0 ~ 64 | |||
| 10. Tint k j 0 ~ 64 | |||
| 11. Sharpness k k 0 ~ 64 | |||
| 12. OSD Select k l 0 ~ 1 | |||
| 13. Remote control lock mode k m 0 ~ 1 | |||
| 14. Balance k t 0 ~ 64 | |||
| 15. Colour Temperature k u 0 ~ 3 | |||
| 16. Red Adjustment k v 0 ~ 50 | |||
| 17. Green Adjustment k w 0 ~ 50 | |||
| 18. Blue Adjustment k $ 0 ~ 50 | |||
| 19. Abnormal Status k z 0 ~ 9 | |||
| 20. ISM Method j p Refer to p. 107 | |||
| 21. Low Power j q 0 ~ 1 | |||
| 22. Auto Configure j u 1 | |||
| 23. Channel Select Command m a Refer to p. 108 | |||
| 24. Send IR Code m c Key Code | |||
| 25. Input select (Main) x b Refer to p. 108 | |||
* When setting the 19 \~ 25, a menu doesn't display on screen.
Transmission / Receiving Protocol
Transmission
[Command1][Command2][ ][Set ID][ ][Data][Cr]
* [Command 1] : First command to control the set.
(j, k, m or x)
* [Command 2] : Second command to control the set.
* [Set ID] : You can adjust the set ID to choose desired monitor ID number in option menu.
Adjustment range is 1 \~ 99.
When selecting Set ID '0', every connected the set is controlled.
Set ID is indicated as decimal (1\~99) on menu and as Hexa decimal (0x0\~0x63) on transmission/receiving protocol.
* [DATA] : To transmit command data.
Transmit 'FF' data to read status of command.
* [Cr] : Carriage Return ASCII code '0x0D'
* [ ] : ASCII code 'space (0x20)'
OK Acknowledgement
[Command2][ ][Set ID][ ][OK][Data][x]
* The set transmits ACK (acknowledgement) based on this format when receiving normal data. At this time, if the data is data read mode, it indicates present status data. If the data is data write mode, it returns the data of the PC computer.
Error Acknowledgement
[Command2][ ][Set ID][ ][NG][Data][x]
* The set transmits ACK (acknowledgement) based on this format when receiving abnormal data from non-viable functions or communication errors.
Data 1: Illegal Code
2: not support function
3: Wait more time
01. Power (Command 2 : a)
▶ To control Power On/Off of the set.
Transmission
$$ [ k ] [ a ] [ ] [ \text { Set ID } ] [ ] [ \text { Data } ] [ C r ] $$
Data 0 : Power Off 1 : Power On
Ack
$$ [ a ] [ ] [ \text { Set ID } ] [ ] [ \text { OK } ] [ \text { Data } ] [ x ] $$
▶ To show Power On/Off.
Transmission
$$ [ k ] [ a ] [ ] [ \text { Set ID } ] [ ] [ F F ] [ C r ] $$
Ack
$$ [ a ] [ ] [ \text { Set ID } ] [ ] [ \text { OK } ] [ \text { Data } ] [ x ] $$
* In like manner, if other functions transmit 'OxFF' data based on this format, Acknowledgement data feed back presents status about each function.
02. Input Select (Command 2 : b)
▶ To select input source for the set.
You can also select an input source using the INPUT button on the set's remote control.
Transmission
$$ [ k ] [ b ] [ ] [ \text { Set ID } ] [ ] [ \text { Data } ] [ C r ] $$
You can also adjust the screen format using the ARC (Aspect Ratio Control) button on remote control or in the SCREEN menu.
Transmission
$$ [ k ] [ c ] [ ] [ \text { Set ID } ] [ ] [ \text { Data } ] [ C r ] $$
04. Screen Mute (Command 2 : d)
▶ To select screen mute on/off.
Transmission
$$ [ k ] [ d ] [ ] [ \text { Set ID } ] [ ] [ \text { Data } ] [ C r ] $$
Data 0 : Screen mute off (Picture on) 1 : Screen mute on (Picture off)
Ack
$$ [ d ] [ ] [ \text { Set ID } ] [ ] [ \text { OK } ] [ \text { Data } ] [ x ] $$
05. Volume Mute (Command 2 : e)
▶ To control volume mute on/off. You can also adjust mute using the MUTE button on remote control.
Transmission
$$ [ k ] [ e ] [ ] [ \text { Set ID } ] [ ] [ \text { Data } ] [ C r ] $$
Data 0 : Volume mute on (Volume off) 1 : Volume mute off (Volume on)
Ack
$$ [ e ] [ ] [ \text { Set ID } ] [ ] [ \text { OK } ] [ \text { Data } ] [ x ] $$
06. Volume Control (Command 2 : f)
▶ To adjust volume. You can also adjust volume with the VOLUME buttons on remote control.
Transmission
$$ [ k ] [ f ] [ ] [ \text { Set ID } ] [ ] [ \text { Data } ] [ C r ] $$
Data Min: 0 \~ Max: 64 * Refer to 'Real data mapping 1'. See page 107.
Ack
$$ [ f ] [ ] [ \text {Set ID} ] [ ] [ \text {OK} ] [ \text {Data} ] [ x ] $$
07. Contrast (Command 2 : g)
▶ To adjust screen contrast. You can also adjust contrast in the PICTURE menu.
Transmission
$$ [ k ] [ g ] [ ] [ \text { Set ID } ] [ ] [ \text { Data } ] [ C r ] $$
Data Min : 0 \~ Max : 64 * Refer to 'Real data mapping 1'. See page 107.
Ack
$$ [ g ] [ ] [ \text { Set ID } ] [ ] [ \text { OK } ] [ \text { Data } ] [ x ] $$
08. Brightness (Command 2 : h)
▶ To adjust screen brightness. You can also adjust brightness in the PICTURE menu.
Transmission
$$ [ k ] [ h ] [ ] [ \text { Set ID } ] [ ] [ \text { Data } ] [ C r ] $$
Data Min : 0 \~ Max : 64 * Refer to 'Real data mapping 1'. See page 107.
Ack
$$ [ h ] [ ] [ \text { Set ID } ] [ ] [ \text { OK } ] [ \text { Data } ] [ x ] $$
APPENDIX
09. Colour (Command 2 : i)
▶ To adjust the screen colour. You can also adjust colour in the PICTURE menu.
Transmission
[k][i][ ][Set ID][ ][Data][Cr]
Data Min : 0 \~ Max : 64 * Refer to 'Real data mapping 1'. See page 107.
Ack
[i][ ] [Set ID][ ] [OK][Data][x]
▶ To adjust the screen tint. You can also adjust tint in the PICTURE menu.
Transmission
[k][j][ ][Set ID][ ][Data][Cr]
Data Red : 0 \~ Green : 64 * Refer to 'Real data mapping 1'. See page 107.
Ack
[j][ ] [Set ID][ ] [OK][Data][x]
11. Sharpness (Command 2 : k)
▶ To adjust the screen sharpness. You can also adjust sharpness in the PICTURE menu.
Transmission
[k][k][ ][Set ID][ ][Data][Cr]
Data Min : 0 \~ Max : 64 * Refer to 'Real data mapping 1'. See page 107.
Ack
[k][ ][Set ID][ ][OK][Data][x]
12. OSD Select (Command 2 : l)
▶ To select OSD (On Screen Display) on/off when controlling remotely.
Transmission
[k][l][ ][Set ID][ ][Data][Cr] Data 0 : OSD off 1 : OSD on
Ack
[1][ ][Set ID][ ][OK][Data][x]
13. Remote control lock mode (Command 2 : m)
▶ To lock the front panel controls on the monitor and remote control.
Transmission
[k][m][ ][Set ID][ ][Data][Cr] Data 0 : Lock off 1 : Lock on
Ack
[m][ ] [Set ID][ ] [OK] [Data][x]
* If you're not using the remote control, use this mode. When main power is on/off, external control lock is released.
14. Balance (Command 2 : t)
▶ To adjust balance. You can also adjust balance in the AUDIO menu.
Transmission
[k][t][ ][Set ID][ ][Data][Cr]
Data Min: 0 \~ Max: 64 * Refer to 'Real data mapping 1'. See page 107.
Ack
[t][ ] [Set ID][ ] [OK] [Data] [x]
15. Colour Temperature (Command 2 : u)
▶ To adjust colour temperature. You can also adjust Colour Temperature in the PICTURE menu.
Transmission
[k][u][ ][Set ID][ ][Data][Cr]
Data 0: Cool 1: Medium 2: Warm 3: User Ack
[u][ ][Set ID][ ][OK][Data][x]
16. Red Adjustment (Command 2 : v)
▶ To adjust red in colour temperature.
Transmission
[k][v][ ][Set ID][ ][Data][Cr]
Data Min : 0 \~ Max : 50 * Refer to 'Real data mapping 2'. See page 107.
Ack
[v][ ][Set ID][ ][OK][Data][x]
17. Green Adjustment (Command 2 : w)
▶ To adjust green in colour temperature.
Transmission
[k][w][ ][Set ID][ ][Data][Cr]
Data Min: 0 \~ Max: 50 * Refer to 'Real data mapping 2'. See page 107.
Ack
[w][ ] [Set ID][ ][OK][Data][x]
18. Blue Adjustment (Command 2 : \$)
▶ To adjust blue in colour temperature. Transmission
[k][\$][ ][Set ID][ ][Data][Cr]
Data Min : 0 \~ Max : 50 * Refer to 'Real data mapping 2'. See page 107. Ack
[\$][ ][Set ID][ ][OK][Data][x]
19. Abnormal State (Command 2: z)
▶ To recognize an abnormal state.
Transmission
[k][z][ ][Set ID][ ][FF][ ][Cr]
Data FF : Read
Ack
[z][ ][Set ID][ ][OK][Data][x]
Data 0: Normal (Power on and signal exist)
1: No signal (Power on)
2: Turn the monitor off by remote control
3: Turn the monitor off by sleep time function
4: Turn the monitor off by RS-232C function
5: 5V down
6: AC down
7: Turn the monitor off by Fan Alarm function
8: Turn the monitor off by Off time function
9: Turn the monitor off by Auto sleep function
* This function is "read only".
20. ISM Method
▶ To control the ISM method. You can also adjust ISM Method in OPTION menu.
It's not available to use this function in LCD TV models.
Transmission
Data 0: Normal
2: Orbiter
1: White wash
3: Inversion
Ack
[p][ ][Set ID][ ][OK/NG][Data][x]
21. Low Power
(Command 1 : j, Command 2 : q)
▶ To reduce the power consumption of the set. You can also adjust Low Power in OPTION menu. It's not available to use this function in LCD TV models.
Transmission
[j][q][ ][Set ID][ ][Data][ ][Cr]
Data 0 : Off
1 : On
Ack
[q][ ][Set ID][ ][OK/NG][Data][x]
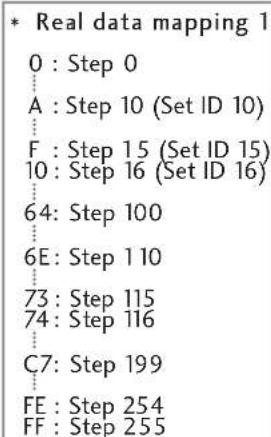
text_image
* Real data mapping 1 0 : Step 0 A : Step 10 (Set ID 10) F : Step 15 (Set ID 15) 10 : Step 16 (Set ID 16) 64: Step 100 6E: Step 110 73: Step 115 74: Step 116 C7: Step 199 FE : Step 254 FF : Step 255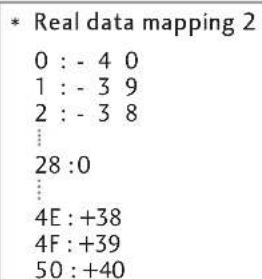
▶ To adjust picture position and minimize image shaking automatically. It works only in RGB (PC) mode.
Transmission
[j][u][ ][Set ID][ ][Data][Cr]
Data 1: To set
Ack
[u][ ][Set ID][ ][OK/NG][Data][x]
23. Channel Select Command
▶ Select channel to following physical number.
Transmission
[m][a][ ][Set ID][ ][Data0][ ][Data1][ ][Data2][Cr]
Data0 :High channel data
Data1 :Low channel data
ex. No. 47 -> 00 2F (2FH) No. 394 -> 01 88 (188H), DTV No. 0 -> Don't care
Data2 0x00 : ATV Main 0x10 : DTV Main
Channel data range
Analogue - Min: 00 \~ Max: 63 (0\~99) Digital - Min: 00 \~ Max: 3E7 (0\~999)
Ack
[a][ ] [Set ID][ ] [OK/NG] [Data] [x]
Data Min: 00 \~ Max: FF
24. Send IR Code
▶ To send IR remote key code.
Transmission
[m][c][ ][Set ID][ ][Data][Cr]
Data Key code - Refer to page 101.
Ack
[c][ ][Set ID][ ][OK/NG][Data][x]
- Input select (Command 1 : x, Command 2 : b) (Main Picture Input)
▶ To select input source for main picture.
Transmission
[x][b][ ][Set ID][ ][Data][Cr]
Data Structure
MSB
LSB
| 0 | 0 | 0 | 0 | 0 | 0 | 0 | 0 |
| External Input | Input Number | ||||||
| External Input | Data | |||
| 0 | 0 | 0 | 0 | DTV |
| 0 | 0 | 0 | 1 | Analogue |
| 0 | 0 | 1 | 0 | AV |
| 0 | 0 | 1 | 1 | Component |
| 0 | 1 | 0 | 0 | RGB |
| 0 | 1 | 0 | 1 | HDMI |
| Input Number | Data | |||
| 0 | 0 | 0 | 0 | Input1 |
| 0 | 0 | 0 | 1 | Input2 |
| 0 | 0 | 1 | 0 | Input3 |
| 0 | 0 | 1 | 1 | Input4 |
Ack
[b][ ][Set ID][ ][OK/NG][Data][x]